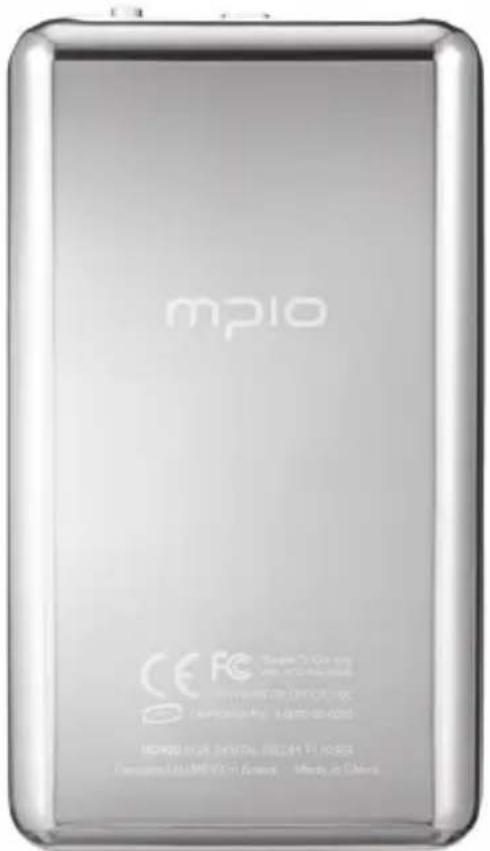
HD400 - Media player Mpio - Free user manual and instructions
Find the device manual for free HD400 Mpio in PDF.


User questions about HD400 Mpio
0 question about this device. Answer the ones you know or ask your own.
Ask a new question about this device
Download the instructions for your Media player in PDF format for free! Find your manual HD400 - Mpio and take your electronic device back in hand. On this page are published all the documents necessary for the use of your device. HD400 by Mpio.
USER MANUAL HD400 Mpio
Digital Media Player
MPIO SOLID
mpio
Thank you for purchasing MPIO SOLID. MPIO SOLID is a digital audio player that enables users to play back music conveniently and utilize it for various purposes. To use this product properly, make sure to read through this manually before using it.
http://www.mpio.com
For more information on the MPIO products, visit our web site on the Internet. You can find many answers to the customer's various enquiries, or upgrade the product performance through firmware upgrade (system software) that operates this product.
▶ Copyright
- MPIO holds patent, trademark, and other intellectual property right about this User's Manual. Imitating all or part of software of this product, and duplication, reproduction, or interpretation without a prior consent with MPIO is prohibited. Making the electronic media version and the mechanical abridgement of the contents are also prohibited.
▶ Trademark
- Microsoft, Windows, Windows Explorer, and Windows logo are the trademark or registered trademark of Microsoft Corporation.
- Intel and Pentium are the registered trademark of Intel Corporation.
● Macintosh and Macintosh are the registered trademark of Apple Computer, Inc. - Products and products described in this manual are the trademark or registered trademark of the corresponding company or organization, and ^TM or ^® mark not always displayed explicitly.
▶ Disclaimer
● Manufacturer and sales office do not bear any responsibility over the accidental damage that accompanies the injury to the user, which is caused by improper usage of this product. The contents of this manual are based on the product status at the time of sales and can be changed without a prior notice for continuous performance improvement and additional function supplementation in the future.

Safety Precautions
The following information is for protecting the user's safety and any property damages.
Please read the following information and use the product accordingly
Do not use in high temperature(near heating device or heat generators).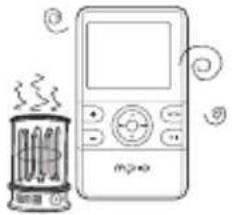 | Do not use in minus zero temperatures or outdoors during winter (operating temperature 5°C~40°C).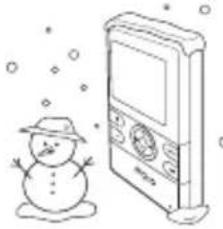 | Do not leave in humid areas or frequently flooding areas.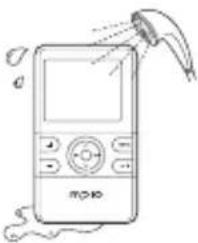 |
Do not leave in dusty areas. Do not leave inside vehicles or under direct sunlight.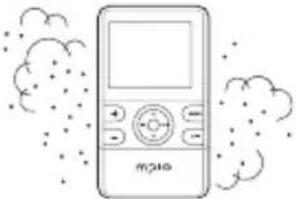 | 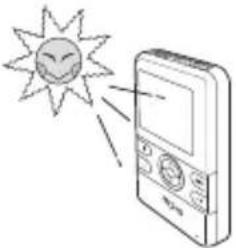 | Avoid shaky areas.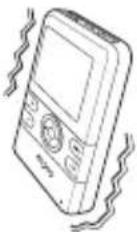 |
Avoid magnetic objects. Avoid strong impact to prevent disassemble or data loss.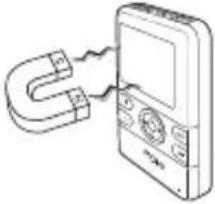 | 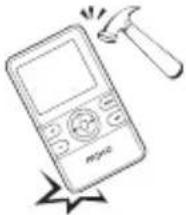 | Never disassemble, repair or reorganize. |
Be careful of foreign substances entering the product interior.E.g.) Paper clips, paper, water, drinks, etc.
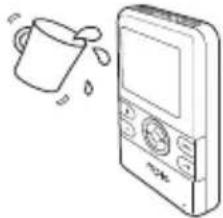
natural_image
Illustration of a mug pouring liquid into a digital audio recording device (no text or symbols)When removing foreign substances from the product surface, always use a soft cloth or a towel. Do not use chemical solvents.
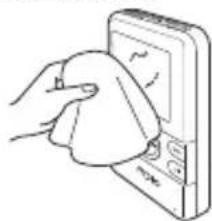
natural_image
Illustration of a hand cleaning a circular object next to a handheld device (no text or symbols visible)User Safety
1 Traffic safety
- Do not listen to music using headphones or earphones when riding a bicycle, motorcycle, or driving a vehicle. It is dangerous and it may be against the law in some regions.
- Reduce the headset or earphone volume when listening to music or FM while you're walking. There is a risk of an accident.
2 Hearing Protection
- Do not use headphones or earphones for a long period of time. Professionals suggest that long use of all portable audio devices may have a possibility of causing hearing loss.
Data Storage
1 MPIO Co., Ltd. will not be responsible for data loss or damages occurred while transferring data between the product and a PC.
2 When storing important data, please make a back-up copy. The data may be damaged due to malfunction or other elements such as outer impact or lack of battery. Please note that in case of data loss, MPIO Co., Ltd. will not be responsible for the lost data.
3 When inserting/removing the USB cable into a computer, please do so by holding the plug.
4 When the product is connected to a computer, please do not cause impact or shake the connector.
5 You should back up the data saved in the product before requesting the after service. MPIO will consider that the customers have backed up their data before sending it to MPIO for after service. MPIO will not back up your data upon receiving the after service request. Additionally, MPIO will bear no responsibility over data loss during the service.
Getting Started
Introduction of m210 2
Safety Precautions 4
Product Features 8
Components 9
Name of Parts 10
LCD Screen 11
Recharging 12
Usage
Basic Operation 14
Listening to the Music 14
Turning the Power ON 14
Turning the Power OFF 14
Playing the Music 14
To Pause 15
Changing the Mode 15
Adjusting the Volume/Using the Lock Function ... 16
Adjusting the Volume 16
Using the Lock Function 16
Music Mode 17
Playing the Music File 17
Screen Information 17
Fast Forwarding/Rewinding during
Playback(Search Songs) 17
Finding Other Music File during Playback ... 18
Setting the Repeat Mode 18
Playing a Certain Section Repeatedly:
A-B Section Repeat Playback 18
Finding Files with Navigation Mode ..... 19
Setting the Music 20
Going to the Music Setting Mode ..... 20
Setting the Repeat Mode 20
Setting EQ (Equalizer) Mode 21
Setting the User EQ (Equalizer) ...... 22
Setting the Lyrics 22
Setting WOW 23
Setting the File Info 24
Video Mode 25
Playing Video Files.... 25
Screen Information 25
Fast Forwarding/Rewinding during Playback
(Finding the desired scene during playback) 25
Finding Other Video File during Playback ... 26
Finding Files with Navigation Mode ...... 26
Radio Mode 27
Listening to the FM Radio 27
Screen Information 27
Automatically Scanning and Saving Channels .. 27
Listening to the Radio Channel You Saved .. 28
Searching and Saving a Channel ..... 28
Changing Sound Mode 28
Recording the Channel 29
Finding Channels in Navigation Mode ..... 30
Deleting Channels in Navigation Mode ..... 30
Setting the Radio 31
Going to the Radio Setting Mode ..... 31
Setting the Sound 31
Setting the FM Band 32
Setting the Seek Step 33
Running the Auto Preset 33
Setting the Reception 34
Record Mode 35
Voice Recording/Line-in Recording(Direct Encoding) 35
Screen Information 35
Recording the Voice 36
Recording an External Audio Device (Direct Encoding) 36
Finding Files in Navigation Mode 38
Record Setting 38
Going to the Record Setting Mode ..... 38
Setting the Input 39
Setting Quality 39
Viewer Mode 41
Viewing Photo/Text File 41
Screen Information 41
Using Button to Display Photo Files .... 42
Using Button to Display Text Files ..... 42
Finding Files with Navigation Mode 43
Setting Viewer 43
Going to Viewer Setting Mode 43
Setting Slide Speed 44
Setting Book Mark 45
Game Mode 46
Playing Games 46
Browser Mode 47
Entering Browser Mode 47
Screen Information 47
Using Button in Brower Mode 47
Deleting Files with Navigation Mode ...... 48
Viewing File Info with Navigation Mode .... 48
Setting Mode 49
Setting Music 49
Setting Radio 49
Setting Record 49
Setting Viewer 49
Setting System 50
Going to System Setting Mode 50
Setting Language 50
Setting Scroll Speed 51
Setting BackLight Time 52
Setting Bright 53
Setting Sleep 53
Setting Auto Power Off 54
Setting Resume 55
Setting Beep 55
Setting Time & Date 56
Setting USB Mode 57
Folder Structure 58
Confirming Information 59
Menu Structure 60
Connection
Connecting to a PC 62
Installing USB Driver Manually ..... 67
Downloading in MTP Mode 69
Using a Removable Disk 70
Before installing the Transcoder...... 73
Installing the Transcoder 74
Using the Transcoder 76
Customer Support
Formatting 83
Storing Default Settings 86
Upgrading Firmware 87
Troubleshooting 90
Product Specifications.... 91
Product Features
☐ High Quality Sound with WOW Surround 3D Sound Effect
Experience clear high tones and rich bass sounds with WOW's unique high quality 3D sound effects.
MPIO SOLID takes pride in its outstanding quality sound during MP3 playback.
□ Enjoy realistic videos!
1.8 in. QCIF TFT-LCD screen enables you to enjoy a vivid, high-quality videos. You may enjoy vivid and clear music videos and movies.
☐ Save photos and documents, and view them whenever and wherever.
Also save photos of loved ones, friends, and any others you like. Photos in JPEG and BMP format can be viewed and e-Book function is also supported.
□ Playing games with an MP3 player?
You can enjoy fun games at any time while you are listening to music.
Experience live games with 65,000 color screen quality.
☐ Basic radio function provided! Radio sound quality is also superb!
Experience the ultimate convenience and benefits of various functions including Auto Preset, Auto Scan, Save Frequency, Radio Recording, Receipt Sensitivity Control and more.
□ Outstanding recording function
MPIO SOLID enables clear voice recording through its built-in, high performance microphone, and easy conversion of sound signals from external devices to digital signal (MP3 format) using the Direct Encoding function.
Components

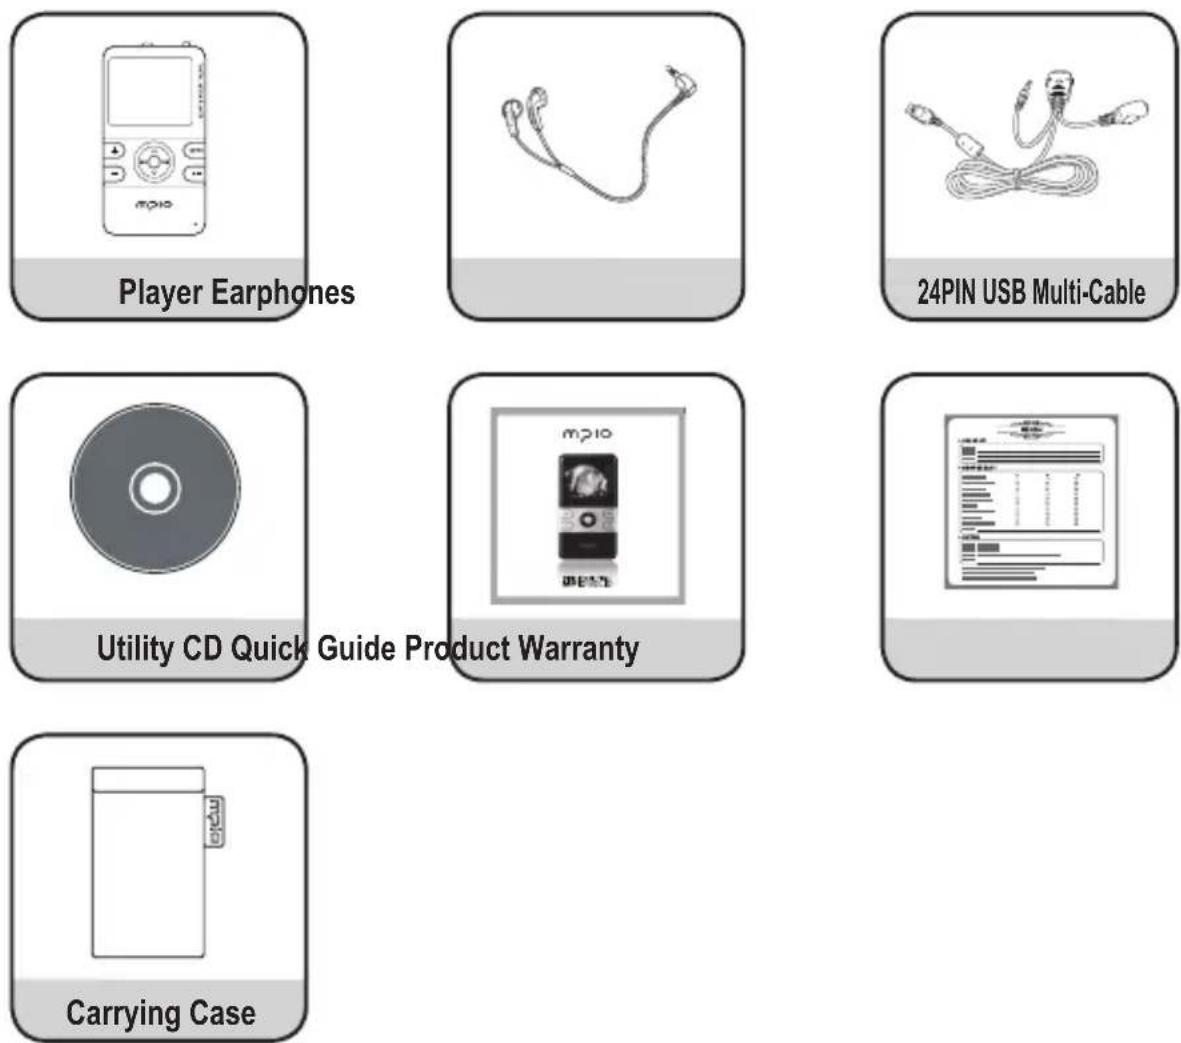
Note
● Actual player components may vary slightly from images shown, and subject to change without notice.
● Broken accessories may be purchased separately at MPIO Service Center.
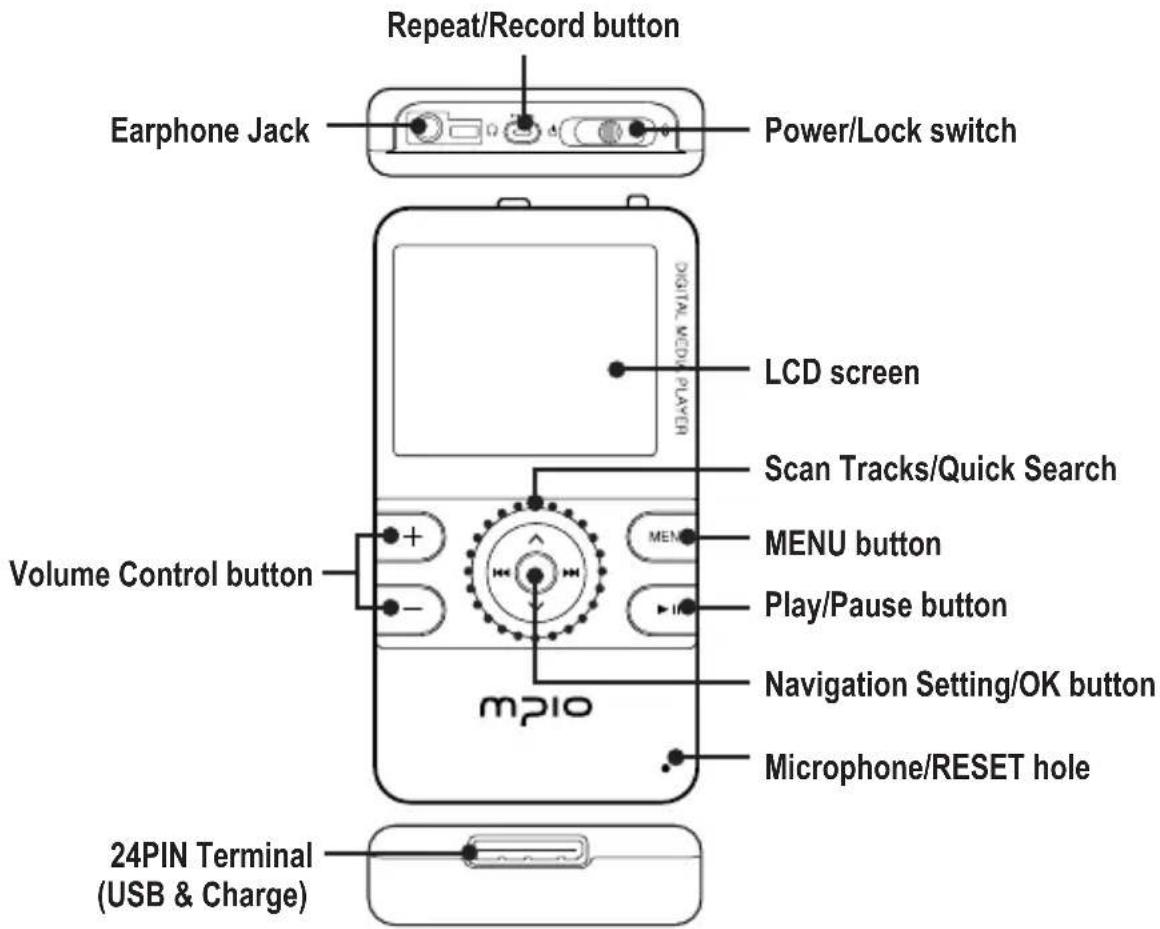
text_image
Repeat/Record button Earphone Jack Power/Lock switch LCD screen Scan Tracks/Quick Search MENU button Play/Pause button Navigation Setting/OK button Microphone/RESET hole Volume Control button mp10 24PIN Terminal (USB & Charge)Note
- If the player does not work properly, press the RESET hole on the player with a small pin. The player will then operate normally.
Main Menu Screen
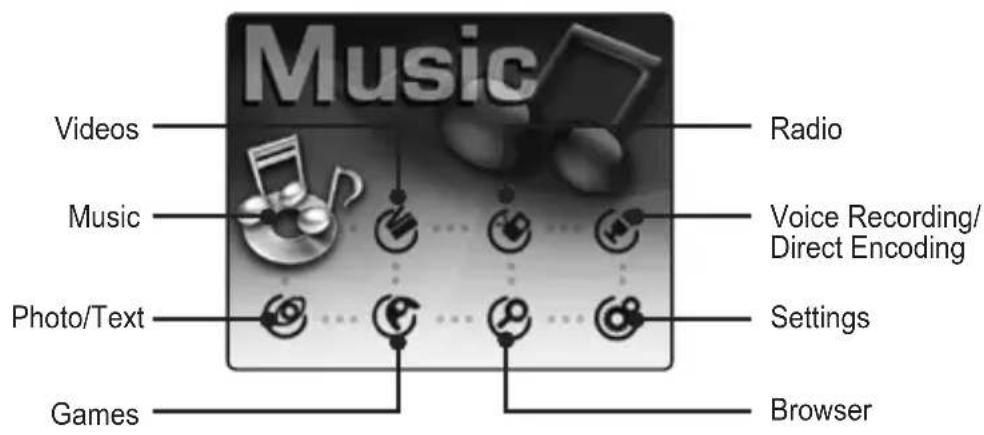
text_image
Music Videos Music Photo/Text Games Radio Voice Recording/ Direct Encoding Settings BrowserCharging while the power is off
1 When the power is off, connect the player to the USB connection terminal of a computer with the 24PIN USB Multi-Cable.
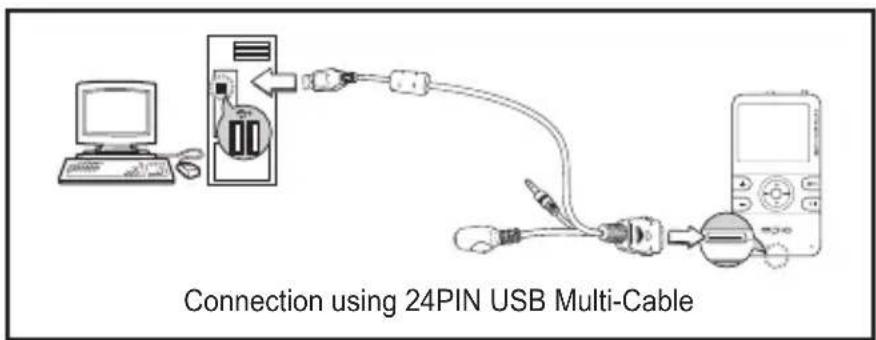
flowchart
graph TD
    A["Computer"] --> B["Device"]
    B --> C["USB Multi-Cable"]
    C --> D["Electronic Device"]
2 USB cable connection status screen appears in the LCD screen.
Charging time is based on the power off status.
- Charging time with 24PIN USB Multi-Cable:
About 4 hours (When charging from the USB terminal of a PC)
- Charging time with an adaptor (sold separately):
About 2 hours and 30 minutes
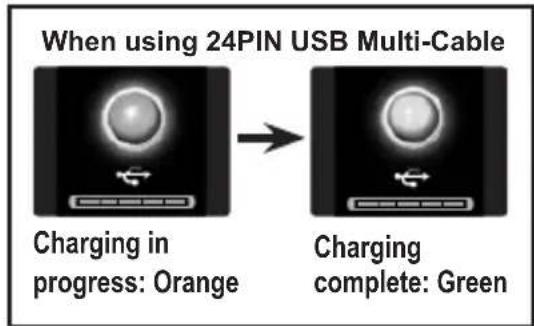
text_image
When using 24PIN USB Multi-Cable Charging in progress: Orange Charging complete: GreenAbout the Internal Rechargeable Battery
● Battery can be charged at any time but we recommend the battery to be fully charged before use.
- If the battery usage time is shorter compared to the charging time, this means the battery must be changed.
- Please fully charge the battery at initial use or after it has not been used for a long period of time.
- The built-in battery is expendable, therefore the battery usage time will gradually reduce after purchase.
● Always charge and store the produce at room temperature.
● The battery is not fully charged when the product is purchased. Please fully charge the product before use.
- The battery usage time will differ depending on how the product is used and how long, usage temperature, and other environmental matters.
Note
- Contact MPIO Service Center for replacing the internal battery.
Listening to the Music
Turning the Power ON
Push Power/Lock Switch(☐) to (☐) and then release. The power will turn on.
Turning the Power OFF
Push Power/Lock Switch(4) to (2), and then release after seconds. The power will turn off.
Playing the Music
Select Music using ∧ ∨ / ◀◀ ▶▶I button from Main Menu screen, and then press OK button. The music will be played.
text_image
mpio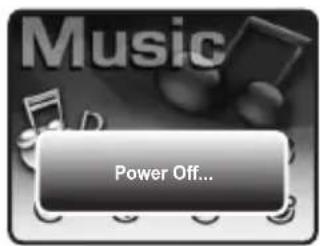
text_image
Music Power Off...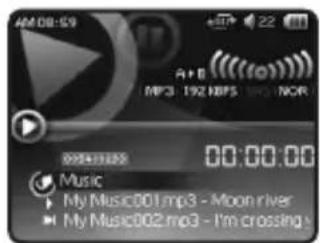
text_image
AM:08:59 MP3 192 MBPS MP3 NOR 00:00:00 Music My Music001.mp3 - Moon river My Music002.mp3 - I'm crossingTo Pause
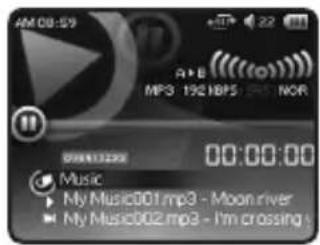
Press ▶II button while the music is played.
The music will be paused.
Press ▶II button once more, then the music will be played again.
text_image
AM 08:59 MP3 192 HPS NOR 00:00:00 Music My Music001.mp3 - Moon river My Music002.mp3 - I'm crossingChanging the Mode
1 Press MENU button during playback or pause.
The main menu screen appears
2 Select the desired mode using ∧ ∨/|◀◀ ▶▶I button, and then press OK button.
Mode: Music, Video, Radio, Record, Viewer, Game, Browser, Setting.

text_image
VideoAdjusting the Volume/Using the Lock Function
Adjusting the Volume
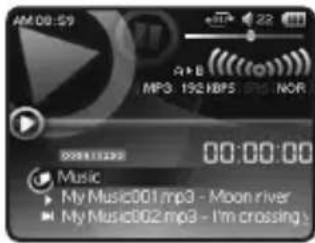
Press +-button during playback or pause. The volume will be adjusted.
Note
● The volume can be adjusted from 0 to 40.
text_image
AM:00:59 MP3: 192 HBP5 JP6 NOR 00:00:00 Music My Music001.mp3 - Moon river My Music002.mp3 - I'm crossingUsing the Lock Function
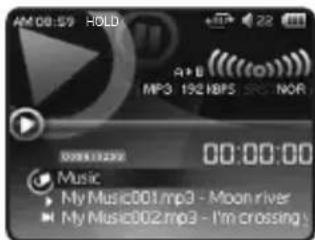
If you set the lock function, other buttons will not operate when they are pressed during playback.
- To set the lock function, push Power/Lock Switch(4) to (2) direction.
HOLD will appear on top of the screen. - To release the lock function, push Power/Lock Switch( ) to ( ) opposite direction.
text_image
AM:08:59 HOLD MP3 192 HBP5 SPC NOR 00:00:00 Music My Music001.mp3 - Moon river My Music002.mp3 - I'm crossingYou can listen to music files.
Playing the Music File
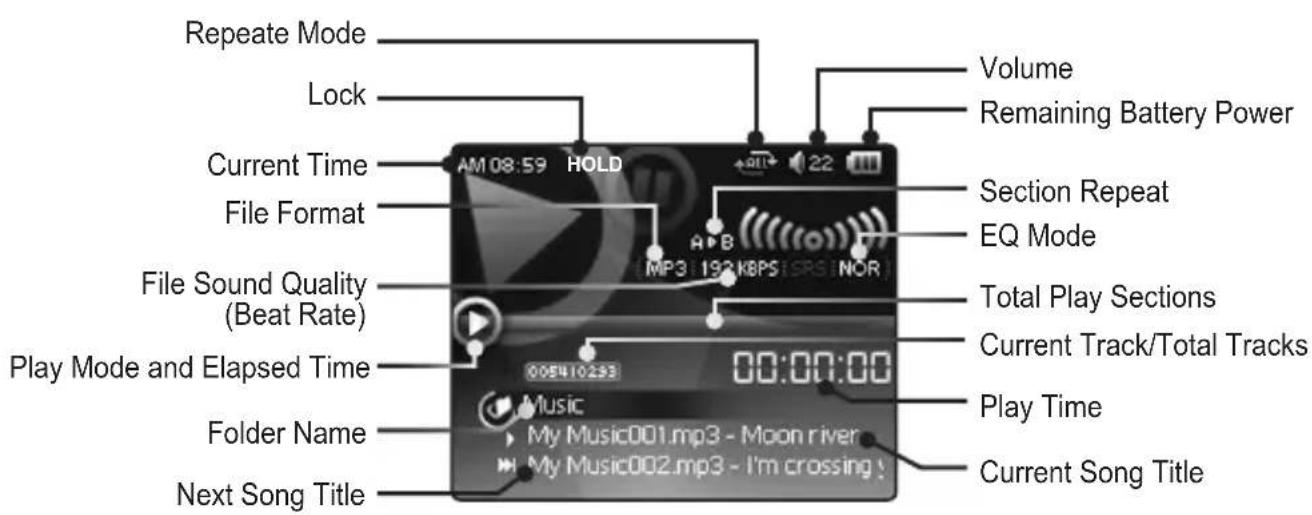
- Select Music using ∧ ∨ / ◀◀◀ ▶▶ button from Main Menu screen, and then press OK button. The music file will be played.
Screen Information
text_image
Repeat Mode Lock Current Time File Format File Sound Quality (Beat Rate) Play Mode and Elapsed Time Folder Name Next Song Title AM 08:59 HOLD Volume Remaining Battery Power Section Repeat EQ Mode Total Play Sections Current Track/Total Tracks Play Time Current Song TitleFast Forwarding/Rewinding during Playback(Search Songs)
To fast forward or rewind during playback, keep pressing ◀◀ or ▶▶. When you let go of the button, normal play will resume.
■ Finding Other Music File during Playback
- Pressing ▶▶ button during playback will play next song.
- Pressing ◀◀ button within 5 seconds after playback starts will play the previous song.
- Pressing ◀◀ button 5 seconds after playback starts will play the song from its very beginning.
Note
- Files created in MP2 or MP1 format cannot be played even if the extension was changed to MP3.
Setting the Repeat Mode
You can listen to songs repeatedly. There are four repeat modes.
Whenever you press ^ button during playback or pause, the repeat mode will change.
● Mode Change Sequence: N → 1 → ALL → R → N
- :Play all music files in the HD400 folder according to their sequence.
- :Play one song repeatedly.
- Play all music files in the HD400 folder repeatedly.
- :Play all music files in the HD400 folder randomly.
Playing a Certain Section Repeatedly: A-B Section Repeat Playback
You can set a random section and play it repeatedly.
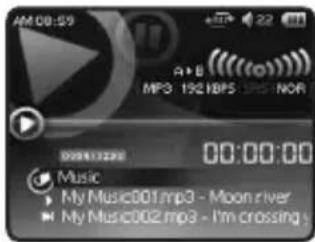
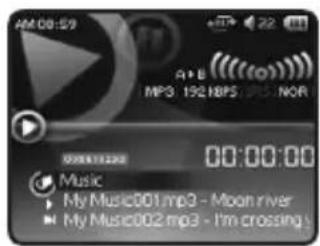
1 Press A-B•REC button shortly at the start of the section you want to listen repeatedly during playback.
A ▷ appears on the screen.
text_image
AM:00:59 A+B MP3 192 HBP5 GPS NOR 00:00:00 Music My Music001.mp3 - Moon river My Music002.mp3 - I'm crossing2 Press A-B•REC button shortly at the end of the section you want to listen repeatedly. A ▷ B appears on the screen and the selected section will play repeatedly.
Note
- Pressing A-B•REC button during A-B section repeat playback will release the repeat playback.
- Pressing ◄◀◀ ▶▶ button during A-B section repeat playback will release the repeat playback and start song search.
Finding Files with Navigation Mode
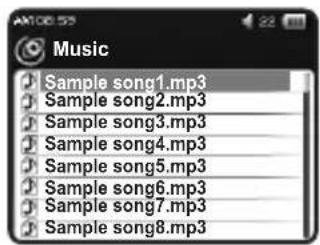
You can easily find any desired file and play it in Navigation mode.
1 Press OK button during playback or pause to enter Navigation mode. The list of files in the folder where the file being played is saved appears.
Note
● Refer to the MTP mode & MSC mode in page 58(setting mode)
- In MSC mode, you must download music to Music folder of ROOT.
- In MTP mode, Windows media player synchronize music files in your PC to Music folder of HD400
text_image
Music Sample song1.mp3 Sample song2.mp3 Sample song3.mp3 Sample song4.mp3 Sample song5.mp3 Sample song6.mp3 Sample song7.mp3 Sample song8.mp32 Select the file you want to play using ∧ ∨ button, and then press OK button.
● The file will be played.
- To move to the upper folder, press ◀◀ button. To enter the folder, press ▶▶ button.
text_image
AM:00:59 A+B MP3 192H8F5 JPS/NOR 00:00:00 Music My Music001.mp3 - Moon river My Music002.mp3 - I'm crossingSetting the Music
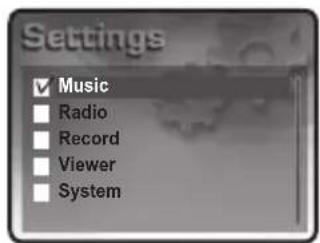
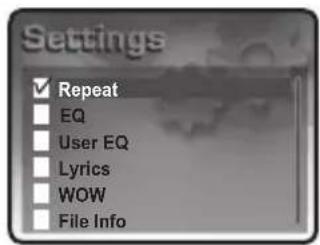
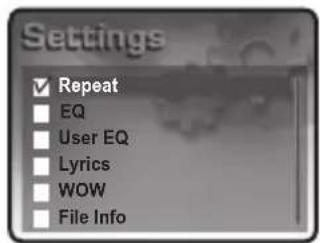
Set items related to music file playback. The items are Repeat, EQ, User EQ, Lyrics, WOW, and File Info.
■ Going to the Music Setting Mode
1 Select Setting using ∧ ∨ / ◀◀ ▶▶ button from Main Menu screen, and then press OK button.
2 Select Music using ∧ ∨ button, and then press OK button.
Setting the Repeat Mode
text_image
Settings ✓ Music □ Radio □ Record □ Viewer □ SystemYou can play one music file or several music files in the Music folder repeatedly or randomly.
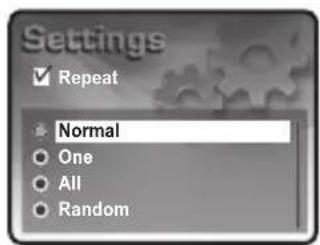
1 Select Repeat using ∧ ∨ button, and then press OK button.
text_image
Settings ✓ Repeat EQ User EQ Lyrics WOW File Info2 Select the repeat mode you want using ∧ ∨ button, and then press OK button.
● Normal: Play all music files in the Music folder according to their sequence.
• One: Play one song repeatedly.
● All: Play all music files in the Music folder repeatedly.
- Random: Play all music files in the Music folder randomly.
text_image
Settings ✓ Repeat Normal One All RandomSetting EQ (Equalizer) Mode
You can select EQ mode to enjoy various sound effects.
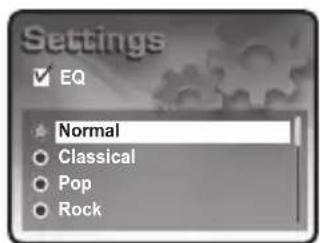
EQ Mode: Normal, Classical, Pop, Rock, Jazz, User EQ, SRS, TruBass, WOW.
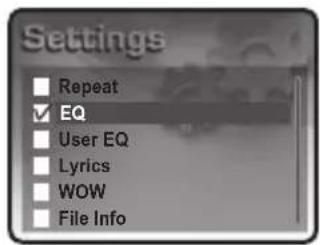
1 Select EQ using ∧ ∨ button, and then press OK button.
text_image
Settings Repeat EQ User EQ Lyrics WOW File Info
2 Select the desired EQ mode using ∧ ∨ button, and then press OK button.
● Normal: Does not use EQ.
- Classical, Pop, Rock, Jazz: Select EQ mode appropriate for each music genre.
- User EQ: Select the EQ set by the user. Adjust EQ in theUser EQ menu.
- SRS: You can listen to the music in surround sound effect. Adjust SRS level in the WOW menu.
text_image
Settings ✓ EQ Normal ○ Classical ○ Pop ○ Rock- TruBass: You can listen to the music with dynamic sound effect that the bass is enhanced. Adjust the TruBass level in WOW menu.
- WOW: You can enjoy the music in WOW mode. When you set the music in WOW mode, you can listen to the music with enhanced bass and surround sound effect. When you select WOW mode, the levels of SRS, TruBass, and Focusthat are set in the WOW menu will be reflected.
Setting the User EQ (Equalizer)
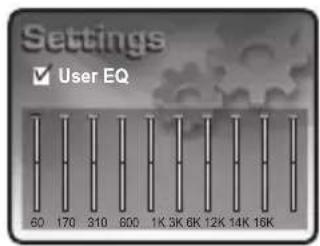
The user can adjust the EQ with the desired tone quality to create a unique EQ mode.
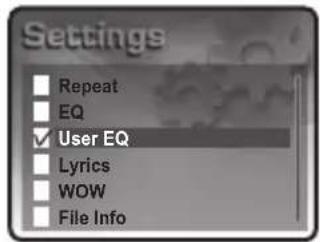
1 Select User EQ using ∧ ∨ button, and then press OK button.
text_image
Settings Repeat EQ User EQ Lyrics WOW File Info2 Adjust the EQ level using ∧ ∨/◄◄►► button, and then press OK button.
- I◄►►I: Select the EQ Frequency Select the low frequency to adjust low tone, and select the high frequency to adjust high tone.
EQ Frequency: You can select one from 60, 170, 310, 600, 1K, 3K, 6K, 12K, 14K, and 16K.
- ∧ ∨: Adjusting the EQ Level
text_image
Settings ✓ User EQ 60 170 310 600 1K 3K 6K 12K 14K 16KSetting the Lyrics
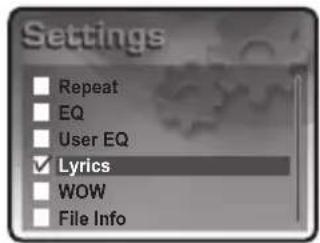
Show lyrics when there is lyrics information in the music file.
1 Select Lyrics using ∧ ∨ button, and then press OK button.
text_image
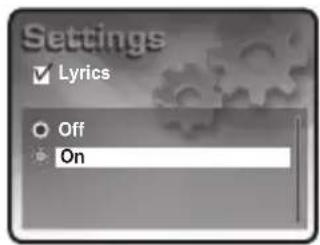
Settings Repeat EQ User EQ Lyrics WOW File Info2 Select On or Off using ∧ ∨ button, and then press OK button.
On: Will show the lyrics of current music file if they are available.
Off: Will not show the lyrics of current music file.
Note
● Lyrics in Korean, English, Chinese, and Japanese are supported.
text_image
Settings ✓ Lyrics ○ Off ● OnSetting WOW
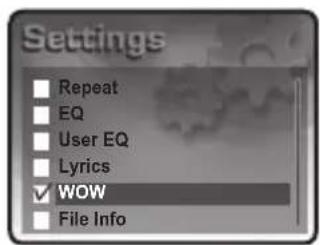
You can enjoy dynamic and rich sound with the improved 3D surround sound effect.
1 Select WOW using ∧ ∨ button, and then press OK button.
text_image
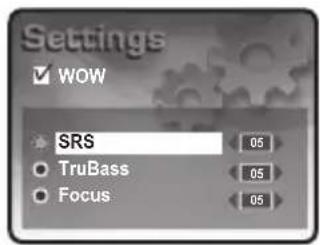
Settings Repeat EQ User EQ Lyrics WOW File Info2 Adjust the WOW items using ∧ ∨ / ◀◀ ▶▶ button, and then press OK button.
- ∧ ∨: Select WOW Items
- SRS: Select it when you want to adjust SRS 3D surround sound effect.
● TruBass: Select it when you want to enhance the bass.
● Focus: Select it when you want to adjust the clarity of high tone. - I◄◄ ►►I: Adjust the level for each item. The adjustment range for each item is from 0 to 10.
text_image
Settings WOW SRS TruBass Focus
Music Mode
Setting the File Info
You can set the music file info to display on the LCD screen.
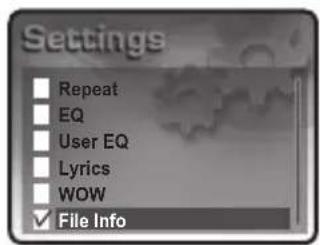
1 Select File Info using ∧ ∨ button, and then press OK button.
2 Select the desired item using ∧ ∨ button, and then press OK button.
File Name: Show the file name only even if the file had tag information.
ID3 Tag: Show ID3 Tag when the file has tag information.
Show the file name when there is no tag information.
Note
● All 55 languages in the Language Setting support ID3 tag information.
- For all tracks without Tag information, the file name will be displayed
- When ID3 tag does not display, check the language you set.
text_image
Settings Repeat EQ User EQ Lyrics WOW File Info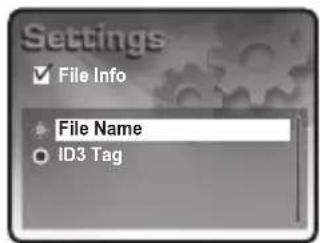
text_image
Settings ✓ File Info File Name ID3 TagVideo Mode

You can view video files. You can play video files converted with the Transcoder program. (See page 73.)
Playing Video Files
- Select Video using ∧ ∨/|◀◀▶▶ button from Main Menu screen, and then press OK button. The video file will be played.
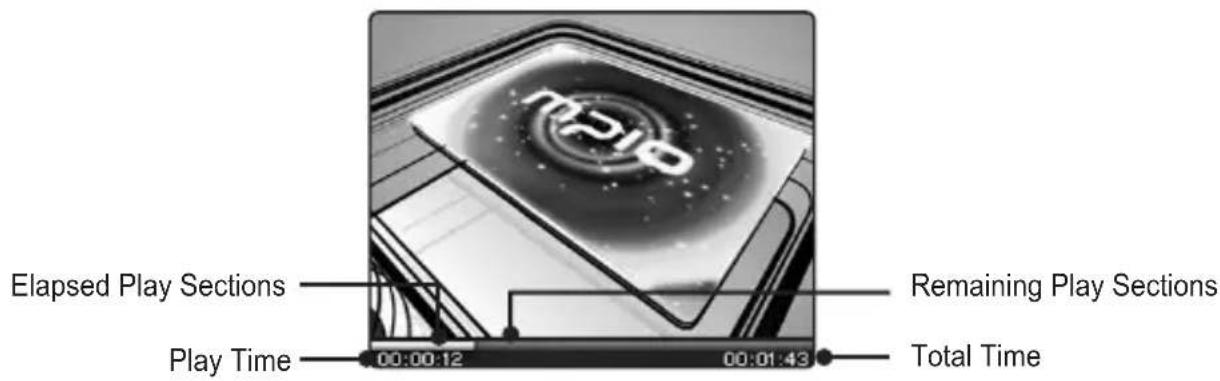
Screen Information
text_image
Elapsed Play Sections Play Time 00:00:12 00:01:43 Remaining Play Sections Total TimeFast Forwarding/Rewinding during Playback(Finding the desired scene during playback)
To fast forward or rewind during playback, press and hold ◀◀ or ▶▶ button. When you let go of the button, normal play will resume.
Finding Other Video File during Playback
- Press the ▶▶1 button during playback, then next video file will be played.
- Press the ◀◀ button during playback, then previous video file will be played.
Note
● The skip function starts from the video file currently being played.
Finding Files with Navigation Mode
You can easily find any desired file and play it in Navigation mode.
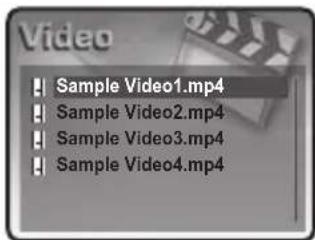
1 Press OK button during playback or pause to enter Navigation mode. The list of video files saved in the Video folder will be displayed.
text_image
Video Sample Video1.mp4 Sample Video2.mp4 Sample Video3.mp4 Sample Video4.mp42 Select the file you want to play using ∧ ∨ button, and then press OK button. The file will be played.
natural_image
Close-up of a stylized electronic device with 'nP10' logo on top, no readable text or symbols beyond the logo designRadio Mode

You can listen to the FM radio.
Listening to the FM Radio
- Select Radio using ∧ ∨/|◀◀▶▶ button from Main Menu screen, and then press OK button. The FM Radio play mode appears.
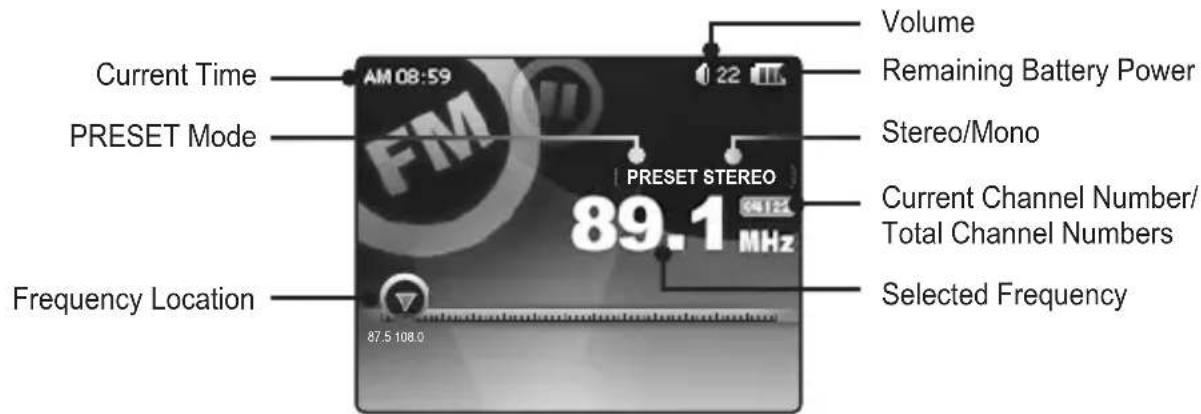
Screen Information
text_image
Current Time AM 08:59 PRESET Mode 89.1 MHz Frequency Location Volume Remaining Battery Power Stereo/Mono Current Channel Number/ Total Channel Numbers Selected Frequency 87.5 108.0Automatically Scanning and Saving Channels
Press ▶II button in PRESET mode. Scan and save all channels that can be received.
Note
● Earphone works as an antenna. Wear the earphone before scanning radio channels.
- You can set or release the PRESET mode using ^ button.
- You can save up to 30 channels.
Listening to the Radio Channel You Saved
You can select and listen to the channel you saved by pressing ◀◀▶▶I button in PRESET mode.
■ Searching and Saving a Channel
- Press ◀◀▶▶ button shortly after releasing PRESET mode.
You can find the channel by increasing or decreasing the frequency. - Press and hold ◀◀◀ ▶▶▶ button to scan the radio channel automatically.
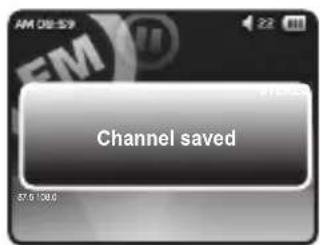
The frequency will increase or decrease until a channel is found, and then stops when it is found. - Press ▶II button after a channel is found.
The scanned channel will be saved.
text_image
AM 08:59 Channel saved 57.6 100.0Note
- You can set or release the PRESET mode using ^ button.
- You can set the frequency scan range in the Radio item of the Setting.
- Channels are aligned and saved according to the frequency sequence, and the order of saving cannot be changed randomly.
● Channels cannot be saved repeatedly. The maximum number of saving is 30.
Changing Sound Mode
You can change the sound mode when there is too much noise in the sound received.
- Every time you press ∨ button, it toggles between STEREO and MONO. Change to mono when it is difficult to receive signals in stereo.
Recording the Channel
You can record a radio channel.
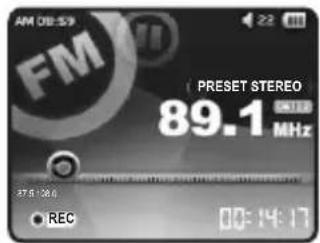
1 Press A-B•REC button 1\~3 second while listening to radio, then recording will start.
REC will appear on the screen.
2 Press A-B•REC button shortly to stop recording. The recorded file will be saved in My Recordings folder.
REC disappears from the screen.
text_image
AM 08:59 FM PRESET STEREO 89.1 MHz 37.8/26.6 REC 00:14:17Note
- File name of the saved radio channel will be created based on the date and time of the recording, like Radio-YYMMDD-HHMMSS.mp3. (For example, when the recording starts at 7:30:25 PM on October 21, 2005, the file name will be Radio-051021-193025.mp3.)
Finding Channels in Navigation Mode
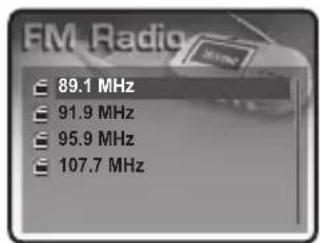
You can easily find any desired channel and play it in Navigation mode. Navigation mode works only in PRESET mode.
1 Press OK button to enter Navigation mode. The list of saved channels appears.
2 Select the desired channel using ∧ ∨ button, and then press OK button. The channel will be changed.
Note
- You can set or release the PRESET mode using ^ button.
text_image
FM Radio 89.1 MHz 91.9 MHz 95.9 MHz 107.7 MHzDeleting Channels in Navigation Mode
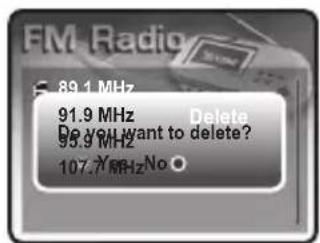
You can delete channels in Navigation mode.
1 Select the channel to delete using ∧ ∨ button from the channel list, and then press ▶▶ button.
The popup menu appears.
2 Use ◀◀▶▶I button to select Yes, and then press OK button. The channel will be deleted.
text_image
FM Radio 89.1 MHz 91.9 MHz Delete Do you want to delete? 95.9 MHz 107.7 MHz No.Setting the Radio
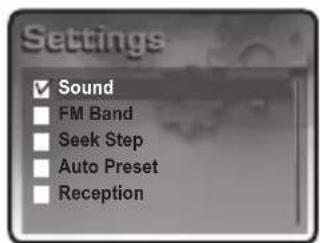
Set items related to the radio. The items are Sound, FM Band, Seek Step, Auto Preset, and Reception.
■ Going to the Radio Setting Mode
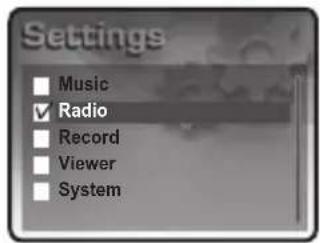
1 Select Setting using ∧ ∨/◀◀ ▶▶ button from Main Menu screen, and then press OK button.
2 Select Radio using ∧ ∨ button, and then press OK button.
Setting the Sound
Select the sound mode (Stereo or Mono) of the radio.
1 Select Sound using ∧ ∨ button, and then press OK button.
text_image
Settings Music Radio Record Viewer System
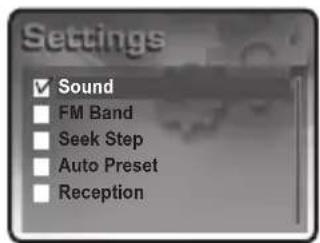
text_image
Settings ✓ Sound ■ FM Band ■ Seek Step ■ Auto Preset ■ Reception2 Select the desired sound mode (Stereo or Mono) using ∧ ∨ button, and then press OK button.
Note
- Set to Mono when there is noise due to a weak radio wave.
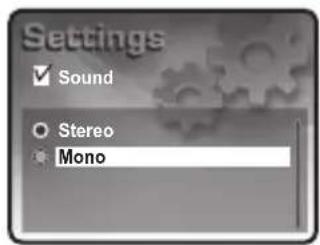
text_image
Settings ✓ Sound ○ Stereo ● MonoSetting the FM Band
You can set the region or country for FM radio frequency channel receiving.
1 Select FM Band using ∧ ∨ button, and then press OK button.
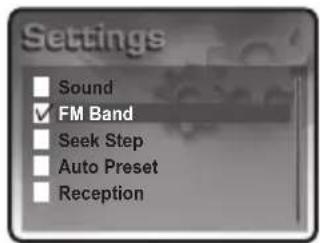
text_image
Settings Sound FM Band Seek Step Auto Preset Reception2 Select the desired country or region using ∧ ∨ button, and then press OK button.
FM Frequencies by Region
| US/EU/KR/CN | 87.5MHz~108MHz |
| Japan | 76MHz~ 92MHz |
| Worldwide | 76MHz~ 108MHz |
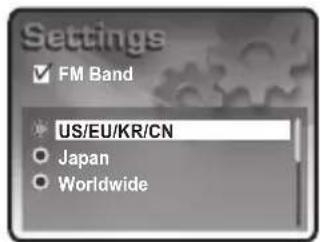
text_image
Settings ✓ FM Band US/EU/KR/CN Japan WorldwideSetting the Seek Step
You can set the frequency scan range during FM radio frequency channel scanning.
1 Select Seek Step using ∧ ∨ button, and then press OK button.
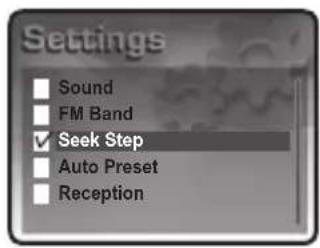
text_image
Settings Sound FM Band ✓ Seek Step Auto Preset Reception2 Select the desired scan range (50KHz or 100KHz) using ∧ ∨ button, and then press OK button.
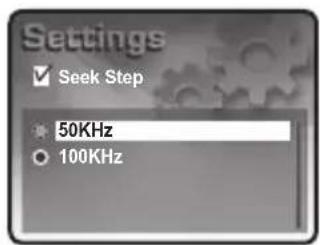
text_image
Settings ✓ Seek Step * 50KHz ○ 100KHzRunning the Auto Preset
You can find and save channels automatically. However, this function runs in Radio mode only.
- Select Auto Preset using button, and then press OK button. Auto Preset function will start.
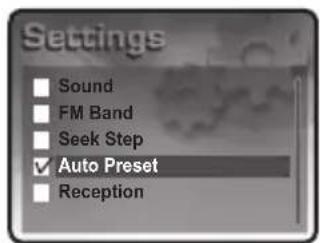
text_image
Settings Sound FM Band Seek Step ✓ Auto Preset ReceptionNote
● Earphone works as an antenna. Wear the earphone before running the Auto Preset function.
Setting the Reception
You can adjust the radio reception sensitivity.
1 Select Reception using ∧ ∨ button, and then press OK button.
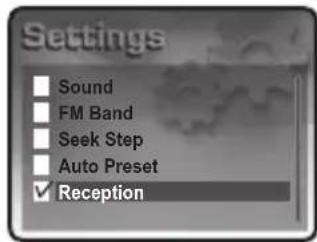
text_image
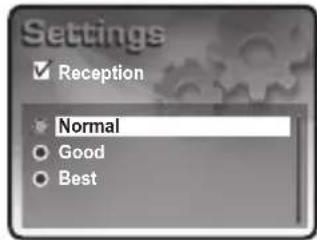
Settings Sound FM Band Seek Step Auto Preset ✓ Reception2 Select the Reception sensitivity (Normal, Good, Best) using ∧ ∨ button, and then press OK button.
Note
- The noise may increase when the Reception sensitivity is set high. Adjust accordingly while listening to the radio channel.
text_image
Settings ✓ Reception Normal Good BestRecord Mode

Analog sound signals including voice recording from external devices can be converted to digital signals in MP3 format.
Voice Recording/Line-in Recording(Direct Encoding)
- Select Record using ∧ ∨ / ◀◀ ▶▶ button from Main Menu screen, and then press OK button. The Record mode appears.
Note
- To record voice, set Input to Voice from the Record Setting menu. To record an external audio device, set Input to Line-in.
Screen Information
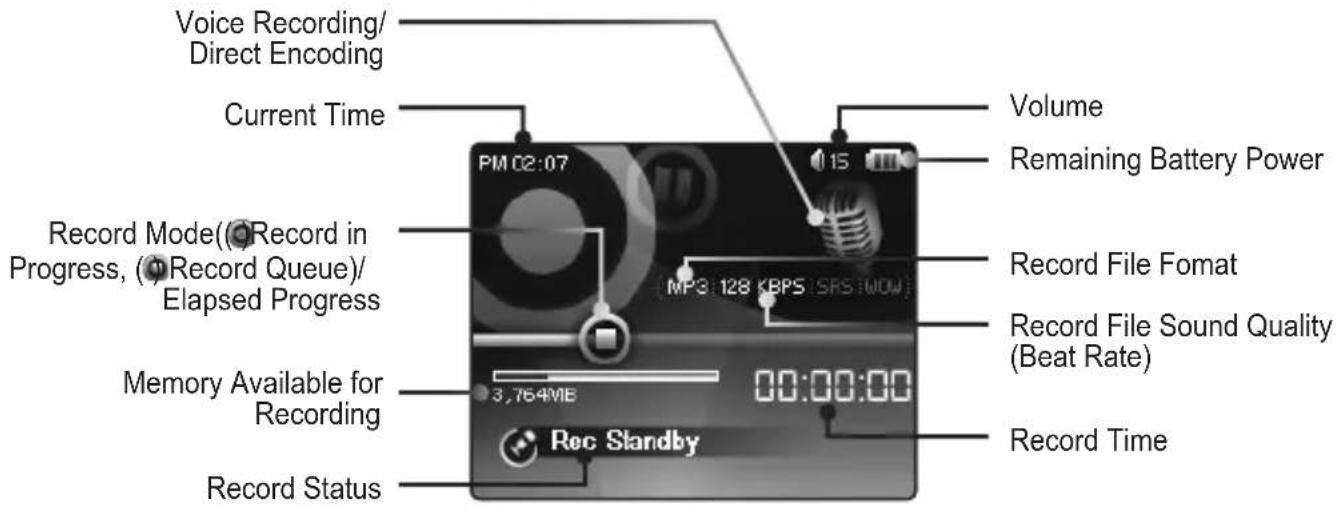
text_image
Voice Recording/ Direct Encoding Current Time PM 02:07 Volume Remaining Battery Power Record Mode(○Record in Progress, (●Record Queue)/ Elapsed Progress MP3: 128 KBPS SRS:WOW Record File Fomat Record File Sound Quality (Beat Rate) Memory Available for Recording 3,764VIE 00:00:00 Record Status Rec Standby Record TimeRecording the Voice
Confirm if the Input is set to Voice in the Record Setting menu before recording.
1 Select Record using ∧ ∨ / ◀◀ ▶▶I button from Main Menu screen, and then press OK button. Voice Record mode appears.
2 To start voice recording, press ▶II button. Elapsed recording time is displayed.
3 To end recording, press ▶II button.
The recording ends, and the recorded file will be saved in the My Recordings folder.
Recording an External Audio Device (Direct Encoding)
Confirm if the Input is set to Line-in in the Record Setting menu before recording.
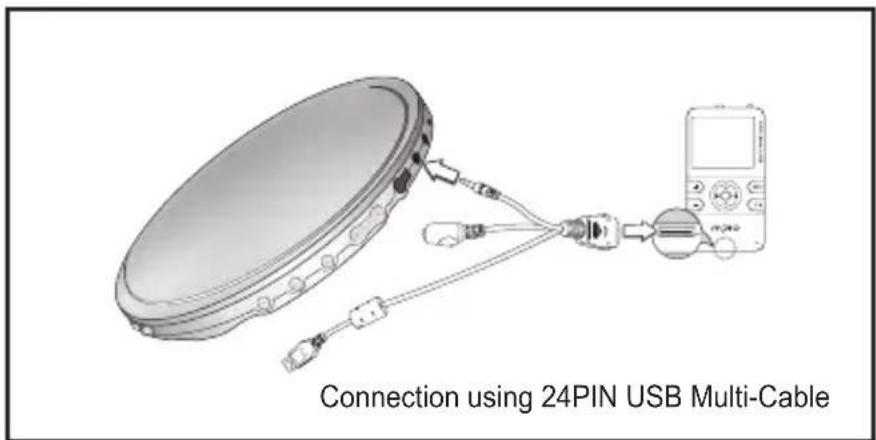
1 Connect the external audio device's output (or Line Out jack) and 24PIN USB port of the player with the 24PIN USB Multi-Cable.
text_image
Connection using 24PIN USB Multi-Cable2 Select Record using ∧ ∨/|◀◀▶▶| button from Main Menu screen, and then press OK button. Line-in Record mode appears.
3 To start the Line-in record, press ▶II button, and then play with an external audio device. Elapsed recording time is displayed.
4 To end recording, press ▶II button. The recording ends, and the recored file will be saved in the My Recordings folder.
Note
- When the memory is full, recording stops automatically.
- When the remaining battery power is too low, recording is not possible.
- For external audio device encoding, the 24PIN USB Multi-Cable comes with the player must be used.
- Be sure to set the external audio device's volume on an appropriate level before encoding. The encoded sound quality will be poor if the volume is too high or too low.
● The volume of the player cannot be adjusted during recording. - File name of the voice record will be created based on the date and time of the recording, like Voice-YYMMDD-HHMMSS.mp3. (For example, Voice-050912-174536.mp3)
- File name of the Line-in record will be created based on the date and time of the recording, like Music-YYMMDD-HHMMSS.mp3. (For example, Music-050912-135045.mp3)
Finding Files in Navigation Mode
You can easily find any desired file and play it in Navigation mode.
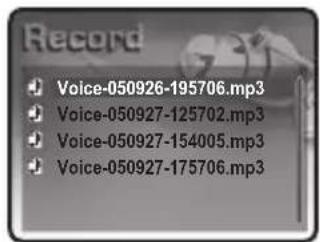
1 Press OK button during playback or pause to enter Navigation mode. The list of recorded files saved in the My Recordings folder will be displayed.
2 Select the file you want to play using ∧ ∨ button, and then press OK button.
The file will be played.
text_image
Record Voice-050926-195706.mp3 Voice-050927-125702.mp3 Voice-050927-154005.mp3 Voice-050927-175706.mp3Record Setting
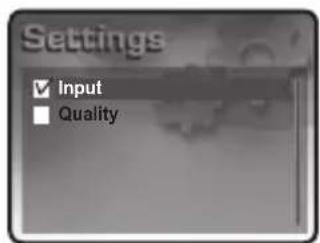
Set items related to the recording. The items are Input and Quality.
■ Going to the Record Setting Mode
1 Select Setting using ∧ ∨ / ◀◀ ▶▶ button from Main Menu screen, and then press OK button.
2 Select Record using ∧ ∨ button, and then press OK button.
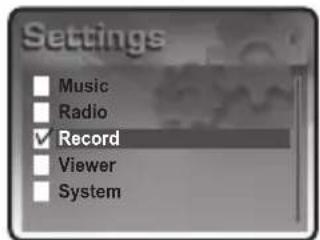
text_image
Settings Music Radio Record Viewer System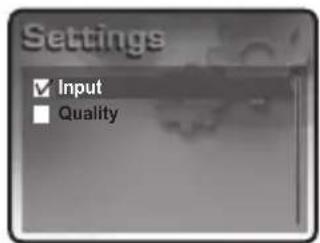
text_image
Settings ✓ Input ■ QualitySetting the Input
Set the input mode of the recording. There are two input modes: Voice mode to record voice, and Line-in mode to record the music played in an audio device.
1 Select Input using ∧ ∨ button, and then press OK button.
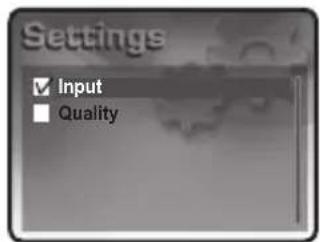
text_image
Settings ✓ Input ■ Quality2 Select the desired input source (Voice or Line-in) using ^ ∨ button, and then press OK button.
Voice: Set to record voice through a built-in microphone.
Line-in: Set to record output sound from an external audio device such as CD, MP3, cassette tape, and DVD player.
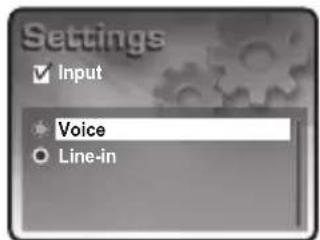
text_image
Settings ✓ Input ✓ Voice ○ Line-inSetting Quality
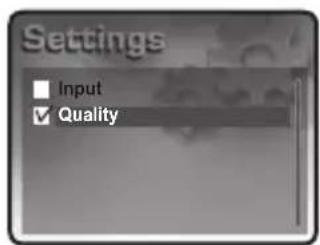
You can set the recording quality of Voice or Line-in record. The lower the recording quality is set, the longer the recording time will be. Please set accordingly.
1 Select Quality using ∧ ∨ button, and then press OK button.
text_image
Settings Input Quality
Record Mode
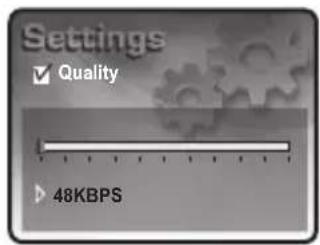
2 Adjust the recording quality using ◀◀▶▶I button, and then press OK button.
◀◀ ▶▶: Set the beat rate.
Beat rate can be selected from 48KBPS, 56KBPS, 64KBPS, 80KBPS, 96KBPS, 112KBPS, 128KBPS, 160KBPS, 192KBPS, 224KBPS, and 256KBPS.
text_image
Settings ✓ Quality 48KBPSNote
- The higher the beat rate is set, the better the recording quality. However, the size of recorded file will also be larger. Set the beat rate based on the recording sound quality and the size of memory available for recording.
Viewer Mode

You can view photo or text file.
Viewing Photo/Text File
- Select Viewer using ∧ ∨/|◀◀ ▶▶ button in Main Menu screen, and then press OK button. The files saved will be displayed.
Screen Information
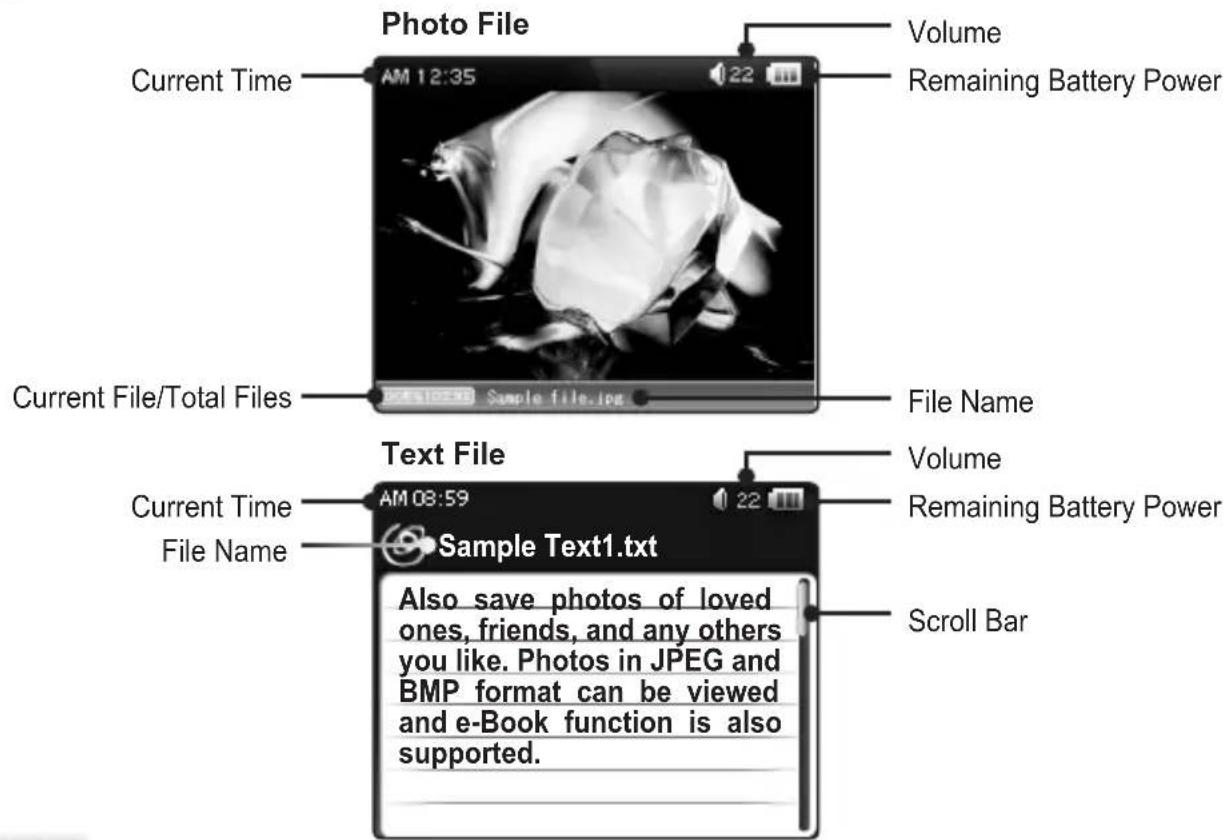
text_image
Photo File Volume Remaining Battery Power Current Time AM 12:35 Current File/Total Files Sample file.jpg File Name Text File Volume Remaining Battery Power Current Time File Name AM 08:59 Sample Text1.txt Also save photos of loved ones, friends, and any others you like. Photos in JPEG and BMP format can be viewed and e-Book function is also supported. Scroll BarNote
● Photo or text files will be displayed according to the sequence they were saved.
Using Button to Display Photo Files
• ◀◀: Show previous photo file.
● ▶▶I: Show next photo file.
Note
- If Slide Speed is set in the Setting mode, the player runs in Slideshow mode in which the screen changes automatically. To stop the slideshow, press▶|| button.
- Do not create any random folder in the Viewer folder. If a file saved in a randomly created folder, the file cannot be displayed in Navigation mode.
● Files in JPEG and BMP format can be displayed.
Using Button to Display Text Files
- ∧ ∨: Up/Down scroll page by page.
- |◀◀▶▶| ∧ ∨ : Up/Down scroll line by line.
- : Move to the first page with a press longer than 1 second.
- ▶▶: Move to the last page with a press longer than 1 second.
Note
- Do not create any random folder in the Viewer folder. If a file saved in a randomly created folder, the file cannot be displayed in Navigation mode.
- Only TXT files can be displayed.
Finding Files with Navigation Mode
You can easily find any desired file and play it in Navigation mode.
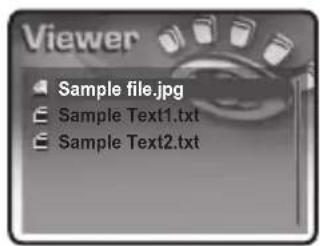
1 Press OK button during display to enter Navigation mode. The file list appears.
2 Select the desired file using ∧ ∨ button, and then press OK button. Photo or text file will be displayed.
Note
● The list of files saved in the Viewer folder appears.
● Text files will not be displayed in the Slideshow mode.
text_image
Viewer Sample file.jpg Sample Text1.txt Sample Text2.txtSetting Viewer
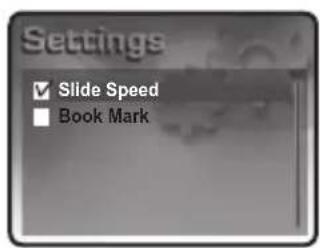
Set items related to viewer display, such as photo files, and text files. The items are Slide Speed and Book Mark.
■ Going to Viewer Setting Mode
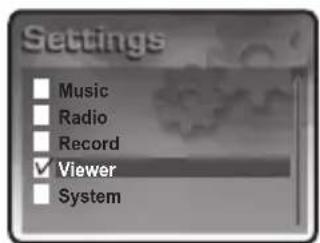
1 Select Setting using ∧∨/ ◀◀▶▶I button from Main Menu screen, and then press OK button.
2 Select Viewer using ∧ ∨ button, and then press OK button.
text_image
Settings Music Radio Record Viewer System
Viewer Mode
Setting Slide Speed
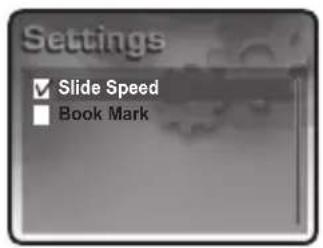
Set the Slideshow interval of the photo files saved.
1 Select Slide Speed using ∧ ∨ button, and then press OK button.
text_image
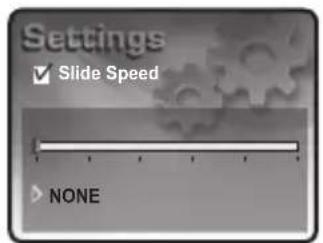
Settings ✓ Slide Speed ■ Book Mark2 Adjust the Slideshow speed using ◀◀▶▶I button, and then press OK button.
When Slide Speed is set, photo files will change according to the set time interval.
Slide Speed: Select one from NONE, 1 SEC, 3 SEC, 5 SEC, 10 SEC, 15 SEC.
text_image
Settings ✓ Slide Speed NONENote
- About the Slideshow display of photo files: If photo files are displayed in Slideshow and when the set time elapses, next photo file will be displayed.
- Even if the Slide Speed was set to NONE or a certain time, you could change photo files using ◀◀◀◀◀ button.
Setting Book Mark
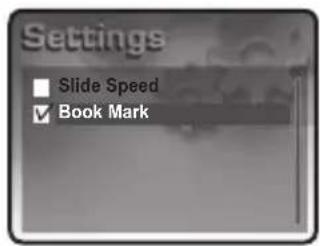
Set to view from the page of previously viewed text file when the Viewer is run after the power is on.
1 Select Book Mark using ∧ ∨ button, and then press OK button.
2 Select On or Off using ∧ ∨ button, and then press OK button.
On: Set the Book Mark function.
Off: Release the Book Mark function.
text_image
Settings Slide Speed Book Mark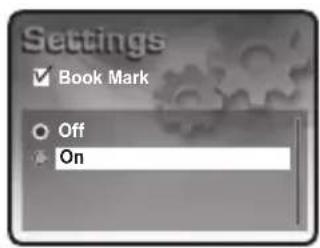
text_image
Settings ✓ Book Mark ○ Off ● On

Game Mode
You can play various games.
Playing Games
- Select Game using ∧ ∨ /|◀◀ ▶▶▶ button from Main Menu screen, and then press OK button. The game screen appears. ▶▶▶ Press the button to stop the game.
Excellion Game

text_image
EXCELION
Firing a Missile

Dropping a Bomb

Opening the Menu

Ending the Game

Moving Up/Down/Left/Right
Pang-yo Pang-yo Game

text_image
PANGYO RANGIO! Press Any Key
Using Items

Ending the Game

^ v |◀◀ ▶▶| : UpDownLeftRightMove
○: Select
Browser Mode

You can view folders such as Music, My Recordings, Game, Viewer, Video and files in the folders. You can also easily find files to play.
- Select Browser using ∧ ∨/◄◄►►I button from Main Menu screen, and then press OK button. The folders according to file types appear.
Screen Information
text_image
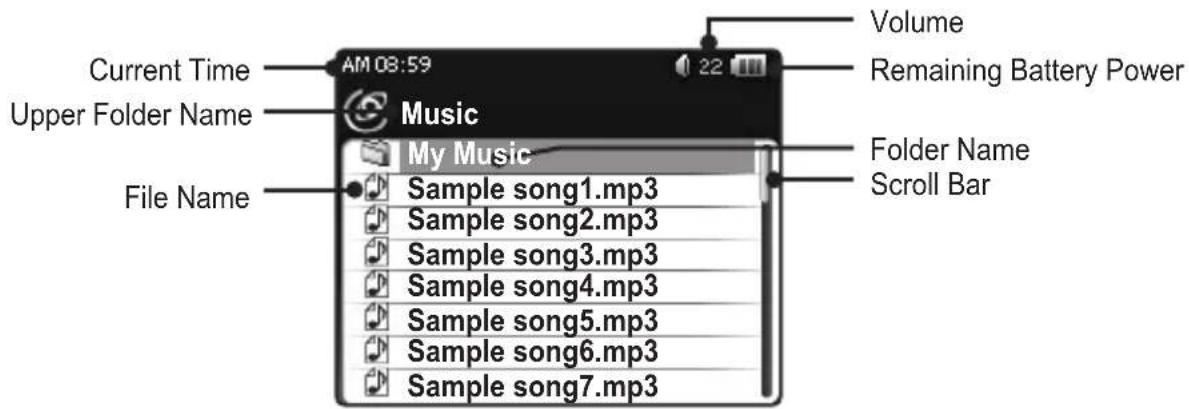
Current Time Upper Folder Name File Name Music My Music Sample song1.mp3 Sample song2.mp3 Sample song3.mp3 Sample song4.mp3 Sample song5.mp3 Sample song6.mp3 Sample song7.mp3 Volume Remaining Battery Power Folder Name Scroll BarUsing Button in Brower Mode
Select file or folder easily with Browser mode.
- ∧ ∨: Selecting file or folder
- ▶▶I: Entering the Folder/Opening POP UP Menu
● ◀◀: Moving to Upper Folder/Closing POP UP Menu - OK: Playing the File or Entering the Folder
- MENU: Moving to Upper Folder or Previous Menu
Deleting Files with Navigation Mode
You can delete files in Navigation mode.
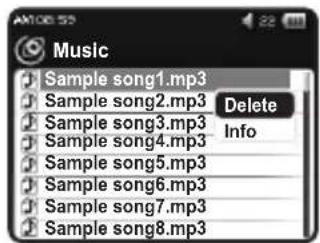
1 Select the file to delete using ∧ ∨ button from the file list, and then press ▶▶I button. The popup menu appears.
2 Select Delete using ^ ∨ button, and then press OK button. Deletes the selected file.
text_image
Music Sample song1.mp3 Sample song2.mp3 Delete Sample song3.mp3 Info Sample song4.mp3 Sample song5.mp3 Sample song6.mp3 Sample song7.mp3 Sample song8.mp3Viewing File Info with Navigation Mode
You can view file info in Navigation mode.
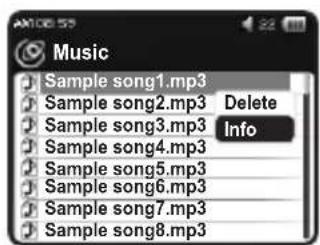
1 Select the file to view using button from the file list, and then press button. The popup menu appears.
2 Select Info using ^ ∨ button, and then press OK button. View information such as the size of a file size, or date it is created.
text_image
Music Sample song1.mp3 Sample song2.mp3 Delete Sample song3.mp3 Info Sample song4.mp3 Sample song5.mp3 Sample song6.mp3 Sample song7.mp3 Sample song8.mp3Setting Mode

Set items related to Music, Radio, Record, Viewer, and System.
Setting Music
Set items related to music file playback. The items are Lyrics, WOW, and File Info. (See page 20.)
Repeat, EQ, User EQ,
text_image
Settings ✓ Repeat ■ EQ ■ User EQ ■ Lyrics ■ WOW ■ File InfoSetting Radio
Set items related to radio. The items are Sound, FM Band, Seek Step, Auto Preset, and Reception. (See page 31.)
text_image
Settings ✓ Sound ■ FM Band ■ Seek Step ■ Auto Preset ■ ReceptionSetting Record
Set items related to recording. The items are Input and Quality. (See page 38.)
text_image
Settings ✓ Input ■ QualitySetting Viewer
Set items related to viewer display, such as photo files, and text files. The items are Slide Speed and Book Mark. (See page 43.)
text_image
Settings ✓ Slide Speed ■ Book MarkSetting System
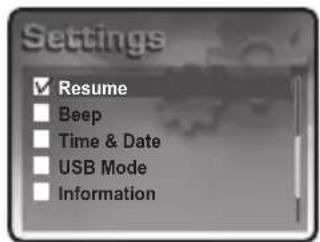
Set items related to System. The items are Language, Scroll Speed, BackLight Time, Bright, Sleep, Auto Power Off, Resume, Beep, Time & Date, USB Mode, and Information.
■ Going to System Setting Mode
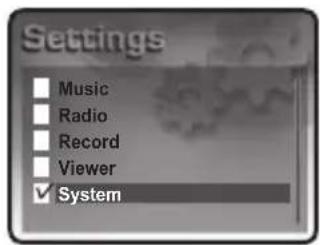
1 Select Setting using ∧ ∨ / ◀◀ ▶▶I button from Main Menu screen, and then press OK button.
2 Select System using ∧ ∨ button, and then press OK button.
Setting Language
You can set menu language and ID3 tag language.
1 Select Language using ∧ ∨ button, and then press OK button.
Note
- Changing the Language setting requires restarting the system to take its effect. So we recommend to turn it on again.
- HD400 provide English setting as a default-setting. In English, the other language(file name) data does not operate. If you want to listen to French song, there are two ways to rename the song in english or to select language setting in French.
2 Select the desired language using ^ ∨ button, and then press OK button Menu Languages: English, Korean, Japanese, Simplified Chinese, Traditional Chinese, German, French, Spanish, Russian ID3 Tag Languages: 55 languages supported
text_image
Settings Music Radio Record Viewer System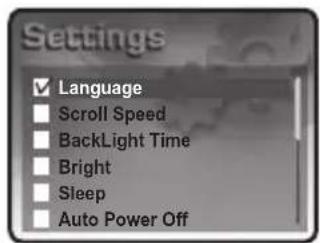
text_image
Settings ✓ Language ■ Scroll Speed ■ BackLight Time ■ Bright ■ Sleep ■ Auto Power Off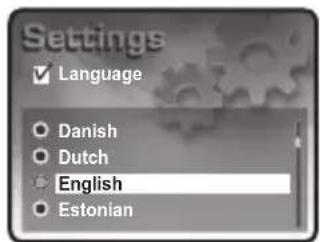
text_image
Settings ✓ Language Danish Dutch English EstonianNote
- When you select a language that is not supported, the menu language will be set in English.
- ID3 tag means the information about a song, and it displays the title, player or singer, name of the album, released year, and genre. The information will not be displayed if there is no ID3 tag info in the music file.
- 55 languages support ID3 tag. Among the 55 languages, English, Korean, Japanese, Simplified Chinese, Traditional Chinese, German, French, Spanish and Russian support both ID3 tag and menu language.
Setting Scroll Speed
When there are too many characters in a file name or ID3 tag to display in a line, you can view them by scrolling, and you can also set the scroll speed.
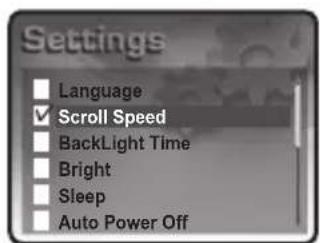
1 Select Scroll Speed using ∧ ∨ button, and then press OK button.
text_image
Settings Language ✓ Scroll Speed BackLight Time Bright Sleep Auto Power Off2 Select the desired scroll speed using ◀◀▶▶ button, and then press OK button. Scroll Speed: You can select one from NONE, 2 PIXEL, 4 PIXEL, 6 PIXEL, 8 PIXEL, 16 PIXEL. Select NONE if you do not want to scroll.
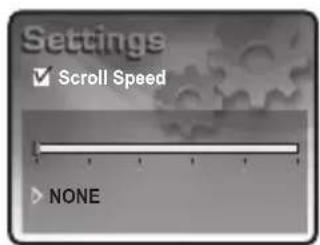
text_image
Settings ✓ Scroll Speed > NONESetting BackLight Time
You can set to automatically turn off the backlight when the set time elapses to reduce the built-in battery consumption.
1 Select BackLight Time using ∧ ∨ button, and then press OK button.
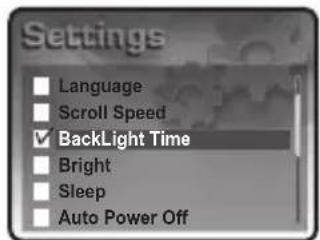
text_image
Settings Language Scroll Speed BackLight Time Bright Sleep Auto Power Off2 Adjust the backlight time using ◀◀◀▶▶I button, and then press OK button. BackLight Time: You can select one from 5 SEC, 10 SEC, 15 SEC, 20 SEC, and ALWAYS. Select ALWAYS to keep the screen always on.
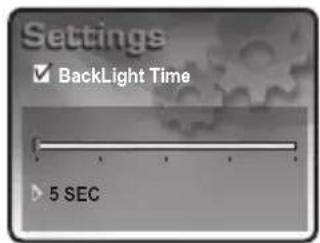
text_image
Settings ✓ BackLight Time > 5 SECNote
● To turn on the backlight, press any button when it is off. The backlight turns off again the the set time is elapsed.
- For files that are played in screen such as video, photo, and text, the backlight does not turn off.
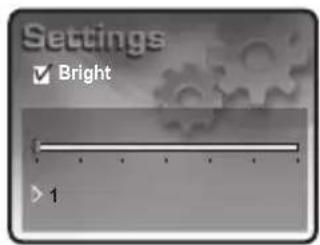
Setting Bright
You can adjust the brightness of the LCD screen.
1 Select Bright using ∧ ∨ button, and then press OK button.
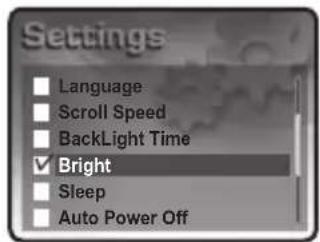
text_image
Settings Language Scroll Speed BackLight Time Bright Sleep Auto Power Off2 Adjust the desired brightness using ◀◀▶▶ button, and then press OK button.
The brightness adjustment level is from 1 to 7.
text_image
Settings ✓ Bright > 1Note
- The brighter the adjustment is, the more the built-in battery is consumed. Adjust according the time you use the player.
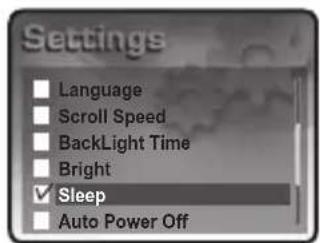
Setting Sleep
You can set to turn off the power automatically when a certain period of time elapses.
1 Select Sleep using ∧ ∨ button, and then press OK button.
text_image
Settings Language Scroll Speed BackLight Time Bright Sleep Auto Power Off
Setting Mode
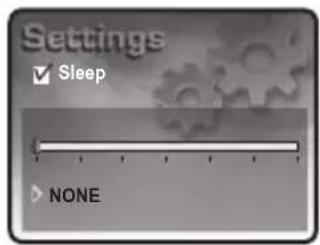
2 Adjust the desired Sleep time using ◀◀▶▶ button, and then press OK button.
Sleep: You can select one from NONE, AFTER 10 MIN, AFTER 20 MIN, AFTER 30 MIN, AFTER 40 MIN, AFTER 50 MIN, and AFTER 60 MIN.
Select NONE if you do not want an automatic turn off.
text_image
Settings ✓ Sleep NONESetting Auto Power Off
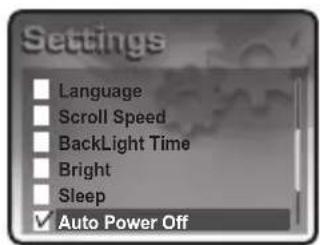
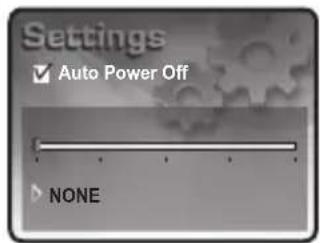
You can set to turn off the power automatically when there is no button operation for a certain period of time.
1 Select Auto Power Off using ∧ ∨ button, and then press OK button.
text_image
Settings Language Scroll Speed BackLight Time Bright Sleep ✓ Auto Power Off2 Adjust the desired Auto Power Off time using ◀◀▶▶I button, and then press OK button.
Auto Power Off: You can select one from NONE, AFTER 3 MIN, AFTER 9 MIN, AFTER 12 MIN, and AFTER 15 MIN.
Select NONE if you do not want an automatic turn off.
text_image
Settings ✓ Auto Power Off NONESetting Resume
You can set to play from the part previously viewed when the power resumes.
1 Select Resume using ∧ ∨ button, and then press OK button.
2 Select On or Off using ∧ ∨ button, and then press OK button. On: Select Music to play the file that was played last when entering the play screen. Off: The Main Menu screen appears when the power is turned on.
Setting Beep
You can set the Beep sound on or off during button operation.
1 Select Beep using ∧ ∨ button, and then press OK button.
2 Select On or Off using ^ ∨ button, and then press OK button.
On: Beep sound is on.
Off: Beep sound is off.
text_image
Settings ✓ Resume Beep Time & Date USB Mode Information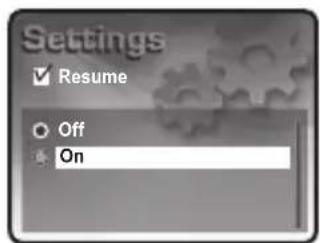
text_image
Settings ✓ Resume ○ Off On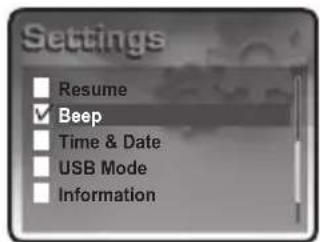
text_image
Settings Resume Beep Time & Date USB Mode Information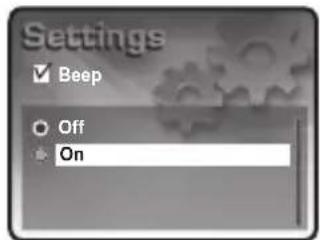
text_image
Settings ✓ Beep ○ Off ● OnSetting Time & Date
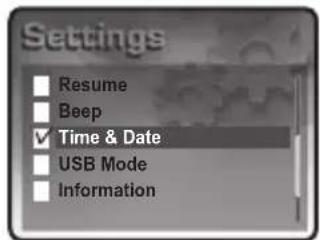
You can select a city name and set the time.
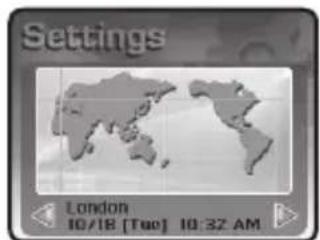
1 Select Time & Date using ∧ ∨ button, and then press OK button. City names, time, and date appear according to the longitude of the world map.
Note
● You can set the current time by PC(Windows XP) connected to Internet
(1) Connect the MP3 Player in MTP Mode with PC by USB Cable
(2) Please Open Control Panel - Date and Time
(3) Choose the Internet time Tab and check the “Automatically synchronize with Internet time server
with an Internet time server"
(4) And Clik "Update Now" button to set the current time.
text_image
Settings Resume Beep ✓ Time & Date USB Mode Information2 Select the desired city name using ◀◀▶▶ button, and then press OK button.
Current time and date are automatically set.
Note
text_image
Settings London 10/18 [Two] 10:32 AM● City names displayed by the longitude are as follows:
London, Lisbon, Madrid, Paris, Amsterdam, Berlin, Stockholm, Rome, Vienna, Wien, Cape Town, Helsinki, Athens, Cairo, Ankara, Jerusalem, Moscow, Baghdad, Riyadh, Teheran, Abu Dhabi, Muscat, Tashkent, Ashkhabad, New Delhi, Calcutta, Almaata, Katmandu, Yangon, Bangkok, Hanoi, Jakarta, Singapore, Beijing, Hongkong, Taipei, Manila, Seoul, Tokyo, Pyongyang, Melbourne, Guam, Sydney, Sea of Okhotsk, Auckland, Wellington, Fiji, Samoa, Honolulu, Tahiti, Anchorage, Alaska, Vancouver, Seattle, San Francisco, Los Angeles, Phoenix, Denver, Salt Lake City, Mexico City, Dallas, Houston, Chicago, Detroit, Miami, Washington D.C., New York, Boston, Montreal, Caracas, La Paz, Santiago, Buenos Aires, Brasilia, Rio de Janeiro, Sao Paulo, Atlantic, Cape Verde
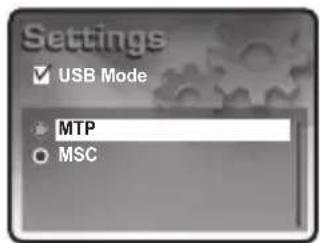
Setting USB Mode
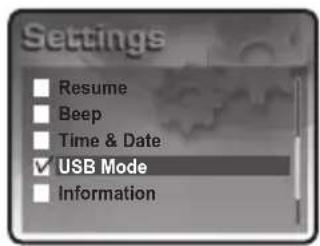
You can set the USB mode when connecting to PC. This player supports both MTP and MSC modes.
1 Select USB Mode using ∧ ∨ button, and then press OK button.
text_image
Settings Resume Beep Time & Date USB Mode Information2 Select the desired USB mode using ∧ ∨ button, and then press OK button.
MTP (Media Transfer Protocol): Select it when you want to transfer files using Windows Media Player.
MSC (Mass Storage Class): Select it when you want to use the player as a portable storage device.
text_image
Settings ✓ USB Mode MTP MSCNote
● To use in MTP mode, Microsoft Windows Media Player 10 must be installed in Windows XP environment.
Connecting to MTP (Media Transfer Protocol)
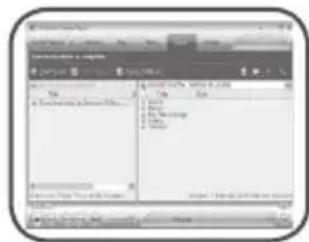
Used to connect to your PC with Window Media Player. To connect to MTP mode, Windows Media Player 10 or later must be installed in a Windows XP environment, and the player must be set to MTP mode.
This player can be recognized as a removable disk and download music files only in this environment.
When connected in MTP mode, Windows Media Player will run automatically, and files stored in the library can be automatically or manually synchronized to the player. Music files with Microsoft's Janus DRM (Digital Rights Management) can also be downloaded. These music files will be automatically sorted by artist and album as they are downloaded.
If connected in MTP mode
text_image
Name Address Phone in Functioning to Document Files... Name Address Phone in Functioning to Document Files... Name Address Phone
Setting Mode
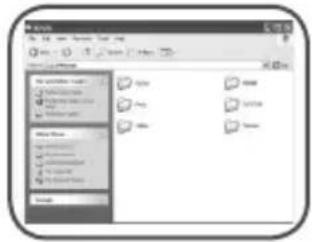
Connecting to MSC (Mass Storage Class) mode
Used to connect as USB Mass Storage mode that enables the product to be used as a removable disk, regardless of the operating system, such as Windows98/ME/2000/XP & Mac or others. This feature is the same as our other products. For Windows 98/SE, please see the user's manual in the CD to install the "Windows 98 Device Driver" first.
If connected in MSC mode
text_image
File Edit View Insert Tools Help Name: 12.1.2007 (Windows XP) Importing Web Services My Documents My Documents List My Documents List My Documents List My Documents List My Documents List My Documents List My Documents List My Documents List My Documents List My Documents List My Documents List My Documents List My Documents List My Documents List My Documents List My Documents List My Documents List My Documents List My Documents List My Documents List My Documents List My Documents List My Documents List My Documents List My Documents List My Documents list My Documents list My Documents list My Documents list My Documents list My Documents list My Documents list My Documents list My Documents list My Documents list My Documents list My Documents list My Documents list My Documents list My Documents list My Documents list My Documents list My Documents list My Documents list My Documents list My Documents list My Documents list My Documents list My Documents list My Documents list My Documents lists My Documents lists My Documents lists My Documents lists My Documents lists My Documents lists My Documents lists My Documents lists My Documents lists My Documents lists My Documents lists My Documents lists My Documents lists My Documents lists My Documents lists My Documents lists My Documents lists My Documents lists My Documents lists My Documents lists My Documents lists My Documents lists My Documents lists My Documents lists My Documents lists My Documents listWhat is MS Janus DRM?
MS Janus DRM is a next-generation Digital Rights Management solution developed by Microsoft and its official name is Windows Media DRM 10 for Portable Devices. Portable devices with MTP (Media Transfer Protocol) such as MPIO SOLID can download and play music files from online sites that provide music files protected by MS DRM. Current site that offers music download services with Janus DRM is Napster To Go (US). This site provides music download for rent services with a certain fixed fee each month.
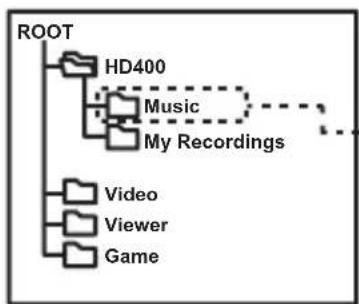
Folder Structure
flowchart
graph TD
    A["ROOT"] --> B["HD400"]
    B --> C["Music"]
    C --> D["My Recordings"]
    D --> E["Video"]
    D --> F["Viewer"]
    D --> G["Game"]
When downloading files to the Windows Media Player after selecting MTP Mode in the USB Connection Settings
Music files are automatically downloaded to the HD400\Music folder and automatically sorted.
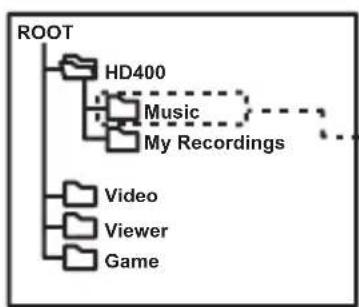
flowchart
graph TD
    A["ROOT"] --> B["HD400"]
    B --> C["Music"]
    C --> D["My Recordings"]
    D -.-> E["Video"]
    D --> F["Viewer"]
    D --> G["Game"]
When downloading files after selecting MSC Mode in the USB Connection Settings
Save music files to the HD400\Music folder.
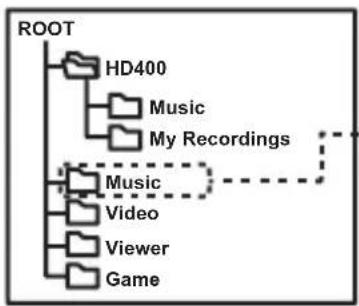
flowchart
graph TD
    A["ROOT"] --> B["HD400"]
    A --> C["Music"]
    A --> D["My Recordings"]
    A --> E["Music"]
    E --> F["Video"]
    E --> G["Viewer"]
    E --> H["Game"]
When downloading files by running Windows Media Player after selecting MSC Mode in the USB Connection Settings
- The Music folder is automatically created and the downloaded music files are automatically downloaded and sorted in the folder.
Caution
- When changing or deleting the files in the Prop and SYSTEM folders, the product will not work normally. Take care to not change or delete the files in these folders.
● Format the disk using the supplied utility program.
■ Confirming Information
You can view the information such as model name, firmware version, HDD capacity, and currently available capacity, etc.
1 Select Information using ∧ ∨ button, and then press OK button. Information about the product appears.
2 To exit, press OK or MENU button.
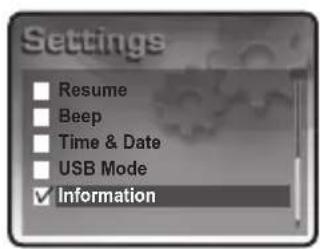
text_image
Settings Resume Beep Time & Date USB Mode Information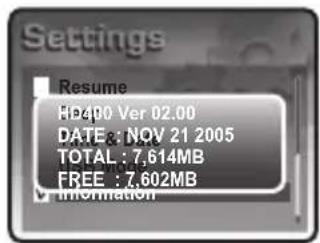
text_image
Settings Resume HP400 Ver 02.00 DATE: NOV 21 2005 TOTAL : 7,614MB FREE : 7,602MB Information
Menu Structure
The menu structure is subject to change in the future with firmware upgrades in order to improve and make the usage more convenient.
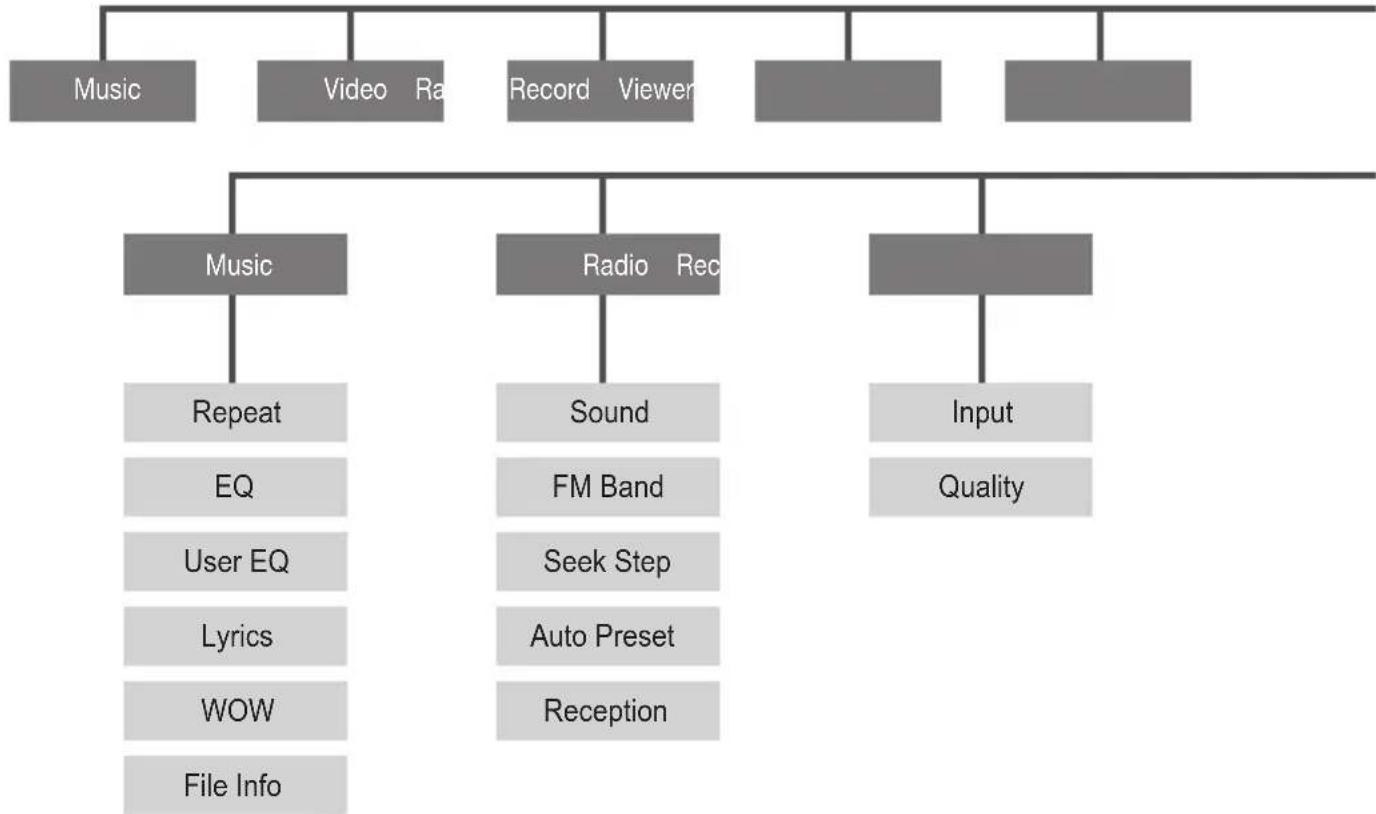
flowchart
graph TD
    A["Music"] --> B["Music"]
    C["Video"] --> B
    D["Radio"] --> E["Radio Rec"]
    F["Record"] --> E
    G["Viewer"] --> E
    H["..."] --> I["..."]
    J["..."] --> I
    B --> K["Repeat"]
    B --> L["EQ"]
    B --> M["User EQ"]
    B --> N["Lyrics"]
    B --> O["WOW"]
    B --> P["File Info"]
    E --> Q["Sound"]
    E --> R["FM Band"]
    E --> S["Seek Step"]
    E --> T["Auto Preset"]
    E --> U["Reception"]
    I --> V["Input"]
    I --> W["Quality"]
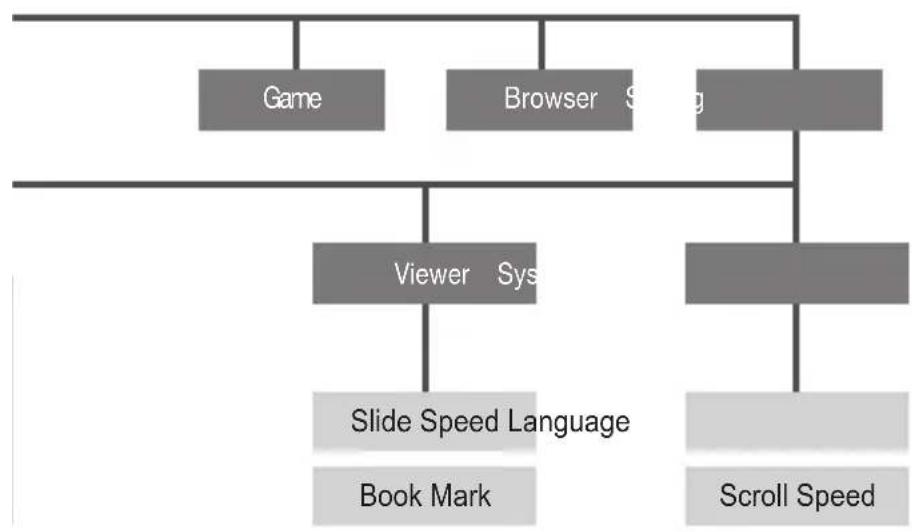
flowchart
graph TD
    A["Game"] --> B["Viewer Sys"]
    C["Browser"] --> B
    D["Search"] --> B
    B --> E["Slide Speed Language"]
    B --> F["Book Mark"]
    B --> G["Scroll Speed"]
System Requirement
IBM PC
System: USB Interface 2.0, Standard device and a CD-ROM Drive equipped
CPU: Pentium 133MHz or faster
Memory: 64MB or more
Hard disk space: 20MB or more
Supported Operating Systems: Windows 98 / 98SE / ME / 2000 / XP
Macintosh
System: USB Interface 2.0, Standard device and a CD-ROM Drive equipped
Ex.) Power Mac G3 (Blue & White) / G4 / G4 Cube, iMac / iBook, PowerBook, PowerBook G4
Memory: 64MB or more
Hard disk space: 20MB or more
Supported Operating Systems: Mac OS version 9.2 or later
Caution
- Connection using USB Hubs or extension cables is not guaranteed.
Note
- In Windows 98 / 98SE, the program must be installed to use HD400 as a removable disk. Please install the USB drivers before use.
- In Windows ME, 2000, XP, HD400 may be used as a Removable Disk without any separate programs. HD400 is accessible though the Windows Explorer.
- To format, or upgrade the firmware of HD400 in Windows 98, 98SE, ME, 2000 or XP, please install the MPIO Utility.
Installing the Software
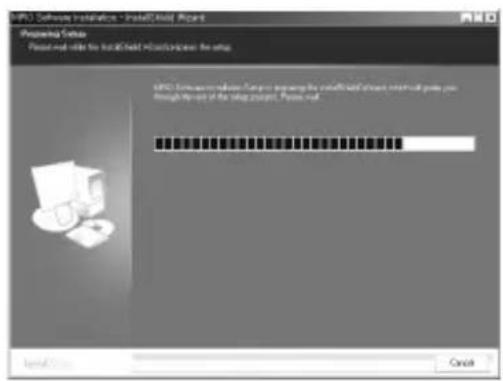
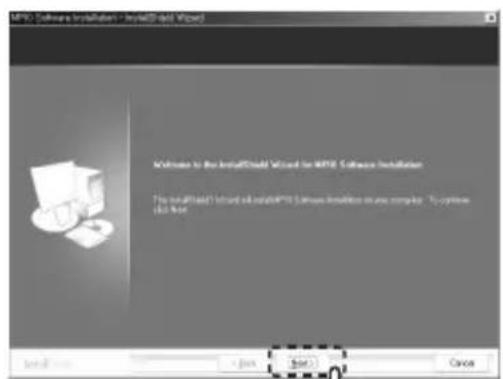
1 Insert the Installation CD into the CD-ROM Drive. The installation will auto-start and the installation will begin as shown in right. If the installation doesn't auto-start, double-click the CD-ROM icon in Windows Explorer.
2 Click the Next button.
text_image
IPO Software Installations - Install/Build Reports Preparing Setup Please wait until the Install/Build Installation when the setup is closed. IPO Software installed. Comp you prepare the install/Build steps to check call points, you through http://www.iptp.com/ Please wait.
text_image
APPRO Software Installation - Install-Add Wizard Welcome to the InstallShield Wizard for APPRO Software Installation The InstallShield Wizard will install APPRO Software Installation on the computer. To choose this file. Install... + Back Sort... Cancel

Connecting to a PC
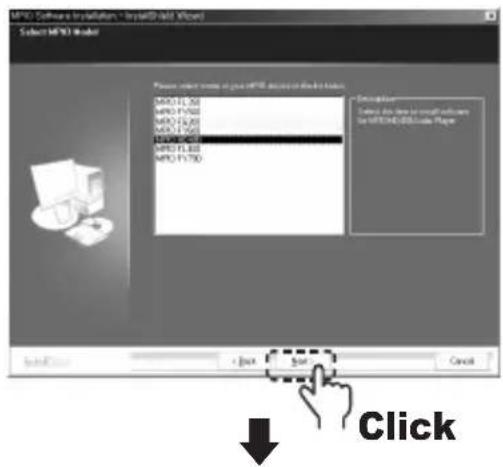
3 After selecting [HD400], click the Next button.
4 Click the Next buton.
All the utility programs will be installed. The user can select the programs needed to install. But, the following items must be installed.
- Windows 98 Device Driver (For Windows 98/98SE user's only)
- MPIO Utility
● Windows Media Player Plug-in
text_image
MPX Software Installation - Microsoft Award (AMD) Select MPX3 Model Please click any name of your MPX3 model to select this model. MPX3 FL1.00 MPX3 FL2.00 MPX3 FL3.00 MPX3 FL4.00 MPX3 FL5.00 MPX3 FL6.00 MPX3 FL7.00 Description: Select this model to create software for MPX3.00 is selected by MPX3. Click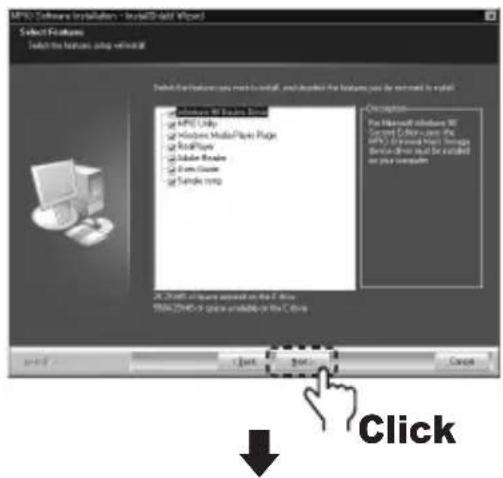
text_image
MP3C Software Installation - Project-Edit Wizard Select Features Select the features using network Switch to Network Access via network, and selected the features used for network to install Microsoft MP3C Server MP3C Help Windows Media Player Package RealPlayer Module Player System Course Sample comp Description For Microsoft Windows MP Current Windows 1.0.1.1.1.1.1.1.1.1.1.1.1.1.1.1.1.1.1.1.1.1.1.1.1.1.1.1.1.1.1.1.1.1.1.1.1.1.1.1.1.1.1.1.1.1.1.1.1.1.1.1.2 A: 24-bit / 8bit reserved on the E-Drive USB: ZMOS-9 (this available on the C-Drive) Start Next > Cancel Click5 Click the Install button to install the selected utilities in order.
6 Click the Finish button to finish the installation. Check the MPIO Utility icon on the desktop to confirm installation.

text_image
MPIO Utility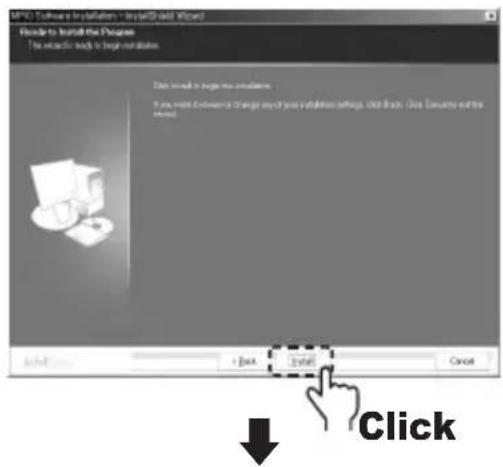
text_image
File1: Software Installation - Version3 (Add Wizard) Header to Install the Programs The optional ready to begin updates. Click to install a program solution. * You must choose to change any of your existing settings, click Back, Close Security and this Note + Back + Save Cancel Click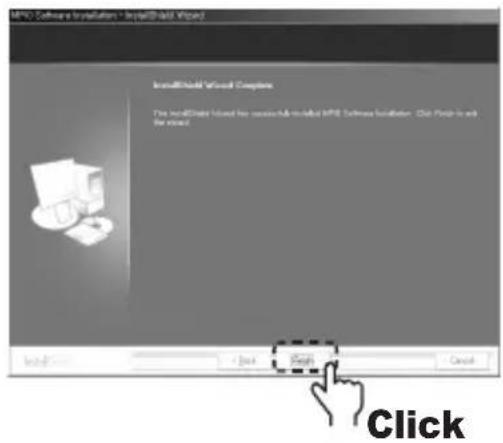
text_image
PNG Software Installation - Installed Privacy Installed Software Complete The installed software version has recently installed PNG Software Installation. Click Finish is on the screen. Install + Back Cancel ClickConnect with a 24PIN USB Multi-Cable
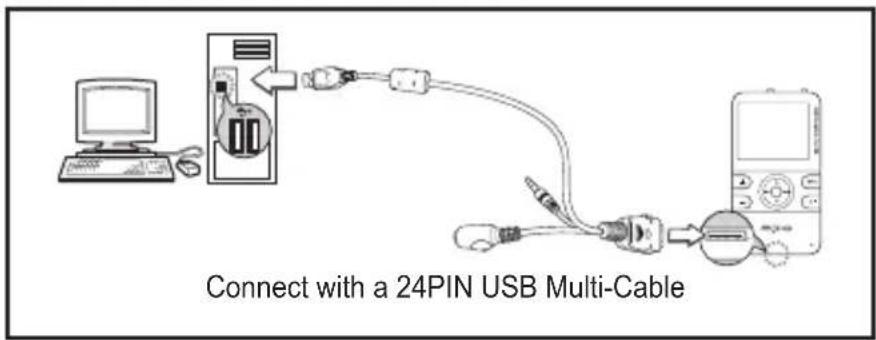
text_image
Connect with a 24PIN USB Multi-Cable1 As in the figure, connect the product to the USB connection port on the computer with the 24PIN USB Multi-Cable.
Removing 24PIN USB Multi-Cable while initializing when you install the USB driver or executing a command may cause malfunctioning of the computer.
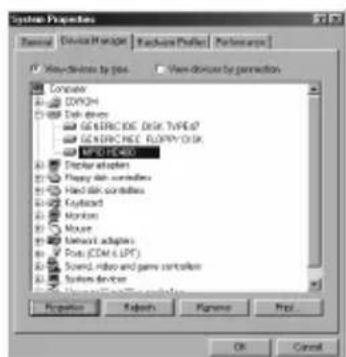
2 The USB Driver will be installed with a message indicating "Looking for a New Device". The installation screen may not appear. Check the Device Manager to confirm the installation.
Confirming USB Installation
- Windows 98/ME: [Control Panel] → [Systems] → [Device Manager] → [Hard Disk Controllers] → MPIO HD400 USB Device
- Windows 2000/XP: [Control Panel] → [Systems] → [Hardware] → [Device Manager] → [Disk Drives] → MPIO HD400 USB Device
text_image
System Properties General Device Manager Hardware Profile Parameters New-Drive to press View-Drive by permission Concrete CDPK3 Disk drive GO GENERANCE DISK TYPE GENERANCE COPY/DOCK MPC16400 Display adapter Playoff disk components Hand disk components Keyboard Mockers Mouse Network adapters Ports (CDK1.1.PC) Scene, video and game components System devices Properties Refresh Customize Print OK CancelNote
- If the system operating under Windows 98/98SE don't connect with HD400 automatically, install the USBDriver manually by referring to "Installing USB Driver Manually".
Installing USB Driver Manually

Please refer to the below only if the device is not plugged with Windows 98/98SE.
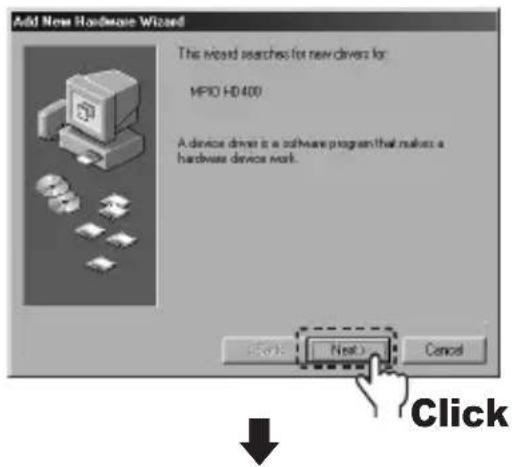
1 Connect HD400 with a computer with the 24PIN USB Multi-Cable. When Add New Hardware Wizard window appears on the screen as shown in right, click the Next button.
text_image
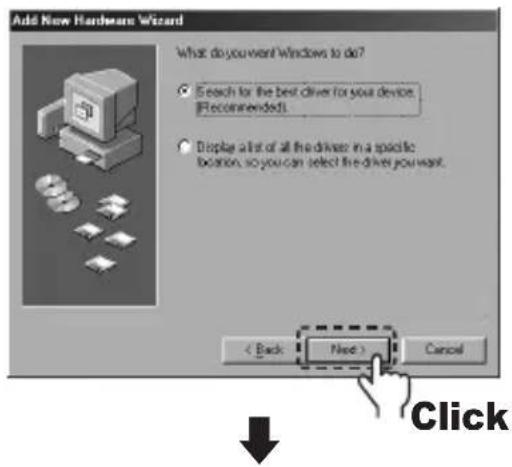
Add New Hardware Wizard The world searches for new drivers for MPIO HD400 A device driver is a software program that makes a hardware device mark. Next Cancel Click2 Check Search for the driver for your device, click the Next button.
text_image
Add New Hardware Wizard What do you want Windows to do? • Search for the best driver for your device. [Recommended] • Display a list of all the drivers in a specific location, so you can select the driver you want. < Back Next > Cancel Click
Installing USB Driver Manually
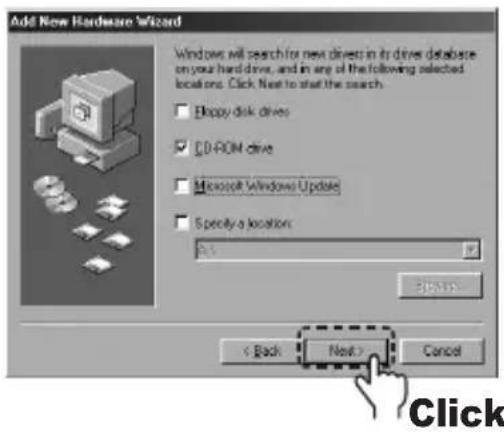
3 Insert the CD included in the package into the CD-ROM, check CD-ROM DRIVE and click the Next button.
4 When the driver installation is completed, an Installation complete window will appear on the screen. Then, click the Finish button.
text_image
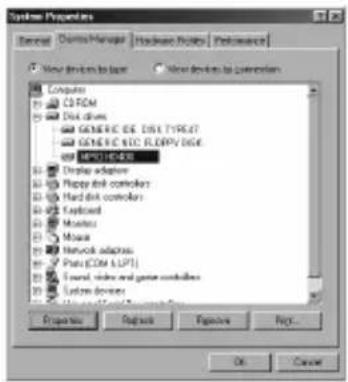
Add New Hardware Wizard Windows will search for next drive in its driver database on your hard drive, and in any of the following selected locations. Click Next to start the search. ■ EPS drive ■ D-ROM drive ■ Microsoft Windows Update ■ Specify a location: OK Cancel < Back Next > CancelGo to the following destination to confirm that the installation was completed successfully.
- Windows 98/ME: [ Control Panel ] → [ Systems ] → [ Device Manager ] → [ Hard Disk Controllers ] → MPIO HD400 USB Device
text_image
Systems Properties General Demsi-Manager Hardware Tools Performance Your devices to log: Computer CD-ROM Disk drives GENERIC DRK DRK TYPE1 GENERIC DRK FLOPPY DRK MPD140000 Display adapter Flippy disk controllers Hard disk controllers Keyboard Muster Mouse Network adapters Plats (COM LIFT) Sound, video and game controllers System devices Properties Finish Positive Help... OK CancelNote
- In Windows 98 / 98SE, the program must be installed to use HD400 as a removable disk. Please install the USB drivers before use.
Downloading in MTP Mode

This is a downloading method using Windows Media Player 10.
1 Set USB Mode as MTP in the System Setup Menu. (See page 57.)
2 Connect the product to a PC using the 24PIN USB Multi-Cable.
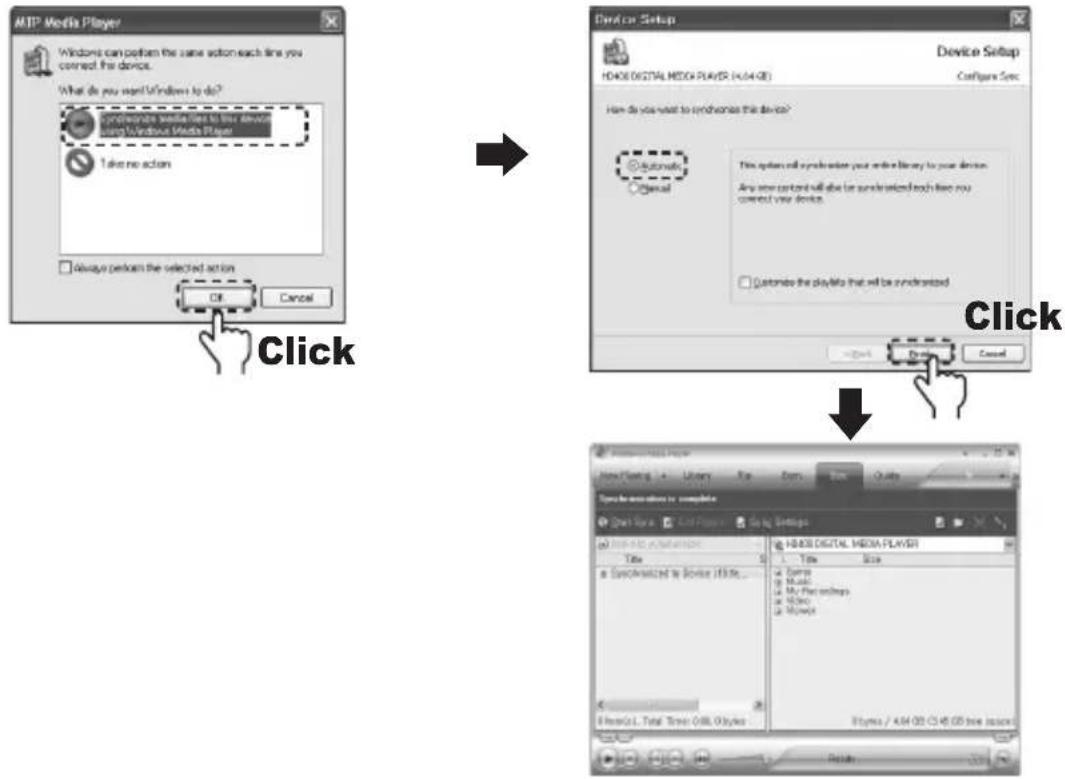
3 The connection screen appears when the connection is correct. Select the steps as shown in the following figures, and then click OK button.
4 Select the synchronization method, and then click Finish button. Synchronization completes.
Automatic: All music files saved in the PC will be downloaded. Manual: You may select music files saved in the PC and download them.
text_image
MTP Media Player Windows can perform the same action each line you connect the device. What do you want Windows to do? synchronous wireless files to show devices using Windows Media Player Take no action □ always perform the selected action OK Cancel Click Device Setup HKEYE DIGITAL MEDIA PLAYER (HKEYE GE) Configure Sec How do you want to synchronize this device? Automatic General This option will synthesize your entire library to your device. Any new content will also be synchronized through these you correct your device. Customize the playlists that will be synchronized Click Add Cancel Arrow from left to right to bottom How/Playing 1+ Library File Edit Start Quick Apply Open for any other to complete Start Page Add Page Copy Settings HKEYE DIGITAL MEDIA PLAYER Title Title Size □ Syncrnlzed to Device ID: 0368 □ NewCCL Total Time OSB Optics Playsys / A/H 025 C45 GB free access ResultsFile Download / Upload / Delete
1 You can connect the product to the PC with the 24PIN USB Multi-Cable while the product is on or off.
If connected, a connection icon will appear in the LCD screen.
2 Run Windows Explorer on the PC
A Removable Disk Drive Icon will be created in Windows Explorer.
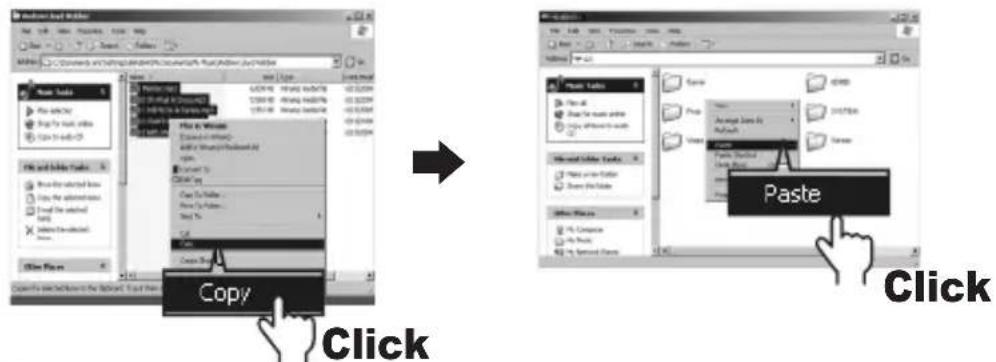
3 The user can store, delete data and create a folder in the same way as a hard drive. Copy & Paste, Drag & Drop commands can be used in the same way to store data.
Copy & Paste: Select the data to store, click on right mouse button. Select Copy and then Paste in the Removable Disk drive.
text_image
Microsoft Word File Edit View Tools Help Help View All About Paste Copy Click Paste ClickNote
● The actual available memory capacity can be reduced depending on the logical file system regardless the memory capacity of the product.
- Data transmission speed may vary depending on the user's computer specifications.
● PC connection using extension cord such as USB hub is not guaranteed.
- The above content is subject to change without a prior notice for product functionality improvement and supplementation.
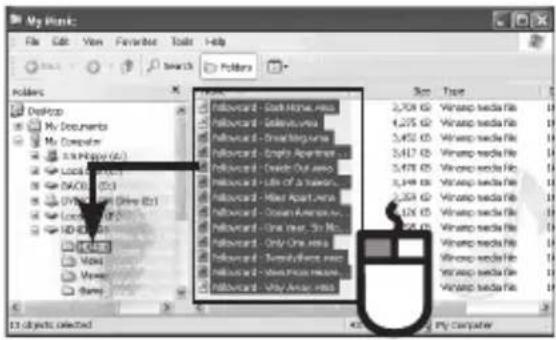
Drag & Drop: Select the data store, click and hold down the left mouse button to drag the files into the Removable Disk drive, and then release the left mouse button.
text_image
My Music File Edit View Favorites Tools Help Search Polders Desktop My Documents My Computer S.D. Play (C:) Local Office BACO (C:) DVD (D:) Local Office (D:) HD (D:) Video Movie Games Hillvica - Gob Home, News Hillvica - Selena, News Hillvica - Smadagame, News Hillvica - Engle Apartment, News Hillvica - Credit Out News Hillvica - Life of a Trainee, News Hillvica - Wind Apartment, News Hillvica - Ocean Avenue, News Hillvica - One Tree, The Music Hillvica - Only One News Hillvica - Tumahyone News Hillvica - Miss From Home, News Hillvica - Vidy Airer News Size Tree 2,709 KB Vinewp media file 4,275 KB Vinewp media file 3,452 KB Vinewp media file 3,417 KB Vinewp media file 3,478 KB Vinewp media file 3,149 KB Vinewp media file 2,361 KB Vinewp media file 426 KB Vinewp media file 364 KB Vinewp media file Vinewp media file Vinewp media file Vinewp media file Vinewp media file Vinewp media file Vinewp media file 13 objects selectedFile Deletion: After selecting the data you want to delete, click the mouse to select Delete. The selected file or folder is deleted.

text_image
My Music File Edit View Favorites Tools Help <|vision_start|> Dominant Desktop My Documents My Computer 3.5 Happy (A:) Local Disk (L:) OAD/UP (D:) DVD/CN-Pot Drive (D:) Local Disk (V:) HD/DVD (W:) HOME 100% 100% Newer Games None Refreshed - Back HomeWorks Refreshed - Down Area Refreshed - Straining area Refreshed - Deep Apartments Refreshed - Store Del Name Refreshed - Live Of A Series Refreshed - New Apartment Refreshed - Screen Articles Refreshed - New Year - 24 Weeks Refreshed - New Company Refreshed - Exporting Services Refreshed - New In All Markets Refreshed - New Applications Find Connect To: EOR TND Add to New Microsofts Add to New... Add to New... Add to New... Add to New... Add to New... Add to New... Add to New... Add to New... Add to New... Add to New... Add to New... Add to New... Add to New... Add to New... Add to New... Add to New... Add to New... Add to New... Add to New... Add to New... Add to New... Add to New... Add to New... Add to New... Add to New... Add to New...Note
- If the 24PIN USB Multi-Cable is disconnected while a file is being uploaded or downloaded, the device may malfunction.
- The music file display order in Windows Explorer when you select a removable disc can be different from the actual playback order. Files are played according to the order they are copied.
Disconnecting the USB Connection
It is recommended that you follow these directions for separating the device from the PC safely. If these instructions are not followed, it may result in data damage or product malfunction.
Windows 98 / 98SE Users
There is no Safely Remove Hardware command in Windows 98 / 98SE. The user must wait until the file/data transfer is complete, and then disconnect the 24PIN USB Multi-Cable.
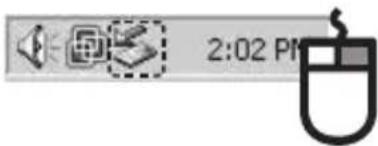
1 Place mouse cursor on Stop a Hardware Device icon in the system tray, and click right mouse button.
2 Select Stop USB Mass Storage Device.
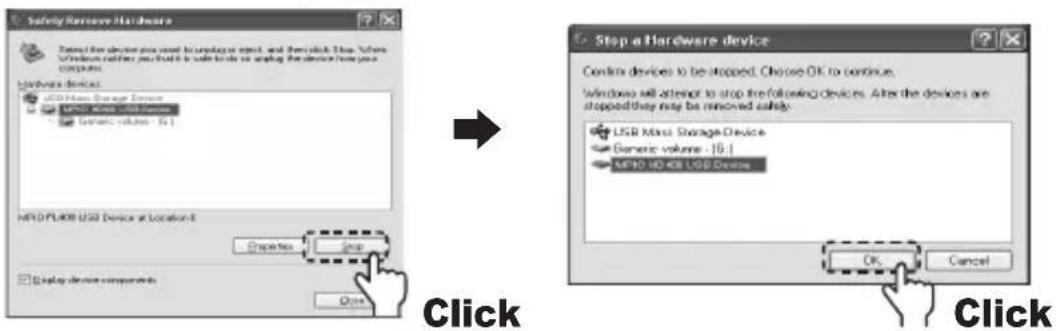
3 Select USB Mass Storage Device from the list of hardware, and click the Stop button. When the Stop a Hardware Device window appears, select MPIO HD400 USB Device. Then, click the OK button and disconnect the 24PIN USB Multi-Cable.
text_image
2:02 PM
text_image
Stop USB Mass Storage Device - Drive(E:) 2:0G PM ClickNote
- In Windows 2000, disconnect the 24PIN USB Multi-Cable by clicking the [OK] button after the “Safely Remove Hardware” message appears. In Windows XP, disconnect the 24PIN USB Multi-Cable after the “Safely Remove Hardware” message appears.
text_image
Safety Remove Hardware Enter the device you need to update or expand it, and then click this. When Windows will add you to build a safe tool or any other device to your computer. Hardware devices: L35B Max Storage Device L35B Max USB Devices Generic volume: 16.1 MIF0 PL408 USB Device at Location 8 Properties Stop Display device components Close Step a Hardware device Continue devices to be stopped. Choose OK to continue. Windows will attempt to stop the following devices. After the devices are stopped they may be removed safely. L35B Max Storage Device Generic volume: 16.1 MIF0 PL408 USB Device OK Cancel Click ClickBefore installing the Transcoder

To use the movie playback function appropriately, use the included PMP Transcoder to convert the file into the required format.
All convertible files types may be converted and tested using the Transcoder.
About Transcoder...
MP4 PMP Transcoder is a program that converts the WMV, ASF, MPEG4, DivX, AVI file formats use in desktop PC environment into MP4 file format, which can be played by the PMP Player HD400.
● Supported File Types: AVI, MPEG4, WMV, DivX
The following hardware, software requirements must be met for the Transcoder to operate.
H/W Requirements
● CPU: Intel Pentium4 1 GHz or higher
- HDD: 20 MB or more
S/W Requirements
● Microsoft DirectX 9.0 or later (required)
● Microsoft Media Player 9.0
● Unified Codec Pack (K-Lite Codec Pack) (http://www.k-litecodecpack.com)
● OS : Windows98 SE / Windows ME / Windows 2000 / Windows XP
- Please check the hardware specification of the PC to make sure it supports the Transcoder. The software specifications may be checked by downloading the required programs from the internet.
Note
- Pixtree Transcoder, the video conversion program used in MPIO SOLID does not support Macintosh. Therefore, Transcoder cannot be used in Macintosh.
- Even if K-Lite codec was installed, the video file conversion with Transcoder may not be performed depending on the user's PC environment. In such case, please download and use other combined codec from the Internet.
Software installation
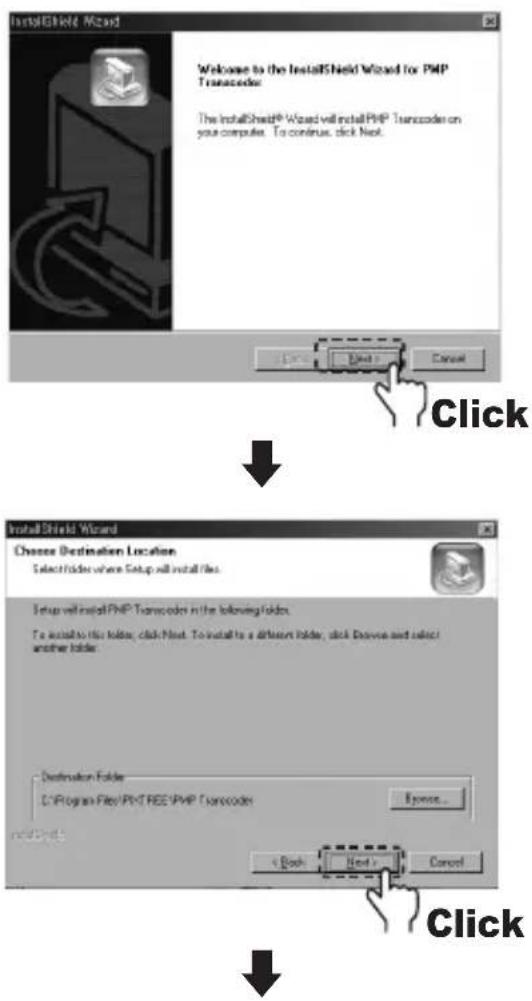
1 Select the PMP Transcoder included in the installation CD and run it.
2 Click the Next button.
3 Use the Browse button to select the target installation directory and then, click the Next button.
text_image
InstallShield Wizard Welcome to the InstallShield Wizard for PHP Transcoder The InstallShield® Wizard will install PHP Transcoder on your computer. To continue, click Next. Click Cancel InstallShield Wizard Choose Destination Location Select Folder where Setup will install files. Setup will install PHP Transcoder in the following folders. To install to this folder, click Next. To install to a different folder, click Expense and select another folder. Destination Folder CPU/Program Files/PKT FREE PHP Transcoder By access... < Back Next > Cancel Click4 Click the Next button.
5 When the installation is complete, click the Finish button. The Transcoder icon will appear on the desktop.
text_image
PMP Transcoder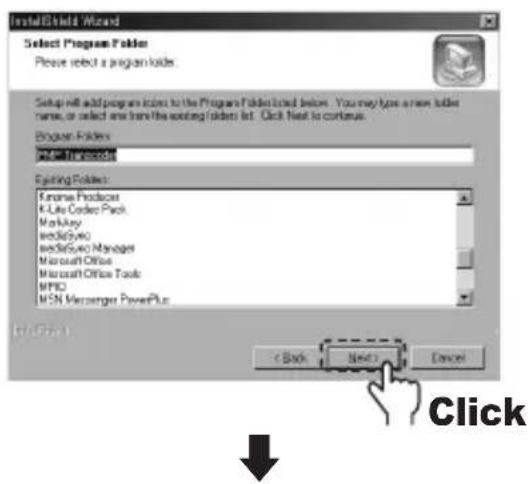
text_image
InstallShield Wizard Select Program Folder Please select a program folder. Setup will add programs to the Program Folder based below. You may type a new folder name, or select any from the viewing/folder list. Click Next to continue. Browse Folders: New Textcode Existing Folders: Rename Products K-Like Code Pack WorkUp MediaView MediaSvio Manager Microsoft Office Microsoft Office Tools MFID MSN Messenger PowerPoint Next > < Back Next > Cancel Click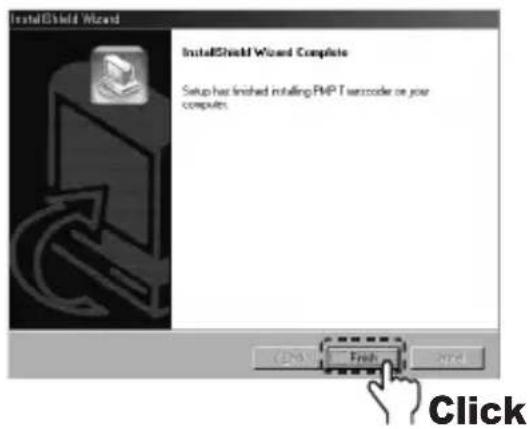
text_image
InstallShield Wizard InstallShield Wizard Complete Setup has finished installing PHP Textcode or your computer. C:\Users\1\Finish\MPP\ClickTranscoding
1 Double-click the Transcoder icon.
2 Press the ( ) button to select the Input File.
The file name of the output file is as same as the input file besides the changed extension, MP4.
3 Press the () button to save the output file as a different file name and then, select the file name to be created.
4 Press the () button to transcode the whole Input File.
5 Press the () button to stop trans-coding.
The Transcoding Complete will appear when transcoding is finished.

text_image
Transcode w1.1 Input File c:\Sample\W2004 the institution\win.drip.cdr3.cdr3.exe Output File c:\Sample files\W2004 the institution\drrip.cdr3.cdr3.exe Output Date Start Time 01:01:00 End Time 02:51:23 Run Time 03:51:29 Total Time 03:51:28 Setup Click In Start Pro End Pro Select Options Dampake Input File Output File Start Time Run Time Total Time c:\Sample\W2004 the institution c:\Sample files\W2004 the institution 03:00:08 01:51:29 10:51:29 C:\New drip (New)... mpioTranscoding certain parts
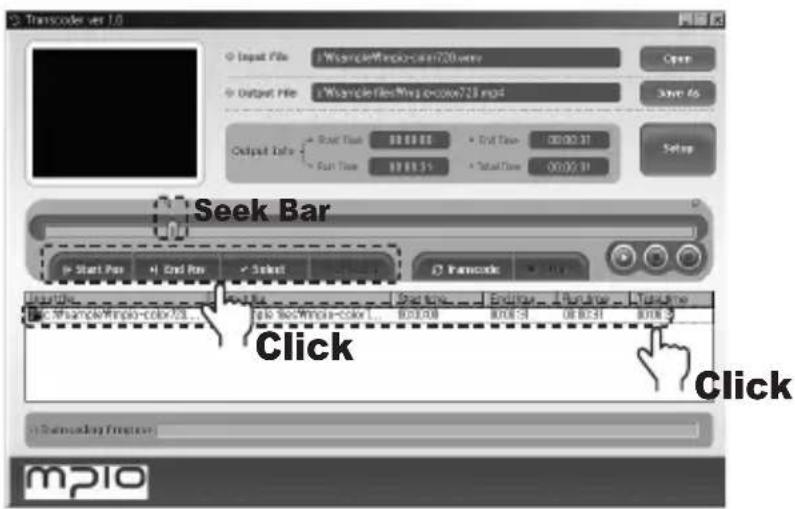
1 Select 1 file from the list box.
2 Press the ( ) button to play back the selected file.
3 Move the seek bar to the intended starting position.
4 Press the ( ) position to set the start position. The ( ) mark will appear at the start position.
5 Move the seek bar to the intended ending position.
8 Press the () Deselect button to cancel the selection.
6 Press the End Pos ( ) button to set the end position. The ( ) mark will appear at the end position like the start position marker.
7 Press the () button to confirm the selected section. The selected section will turn blue to indicate that it has been selected.

Using the Transcoder
9 Press the Transcode button to start conversion, and the Transcoding Complete will appear when transcoding is finished.
text_image
Transcoder set 1.0 Input File: j:\Sample\Mimplo-color\720.wyy Output File: j:\Sample files\Mimplo color\723.mp4 Output Info: Root Time 10:00:00 End Time 00:00:31 Start Time 00:00:31 Setup Seek Bar Start Post End Run Select Framecode Click Starts: j:\Sample\Mimplo-color\723... End Time End Time Purchase TurnTime j:\Sample\Mimplo-color\723... End Time End Time Purchase TurnTime Click mpi0 ClickNote
● Depending on the format of the input file, transcoding may not be supported.
Transcoding registered files
1 Select the files by clicking the ( ) button several times or drag & drop the files to transcode in the list box.
2 To cancel the selection of files to transcode, select the file to cancel, and click right mouse button and a pop-up window will appear. Choose Delete Selected List to deselect selected files, or choose Delete All List to cancel all files.
3 Click the (O Vascode) button to convert all files. The file currently being converted will be highlighted in the list box.
4 Click the( ) button to skip the current file and convert the next file on the list.

text_image
Transcoder_W1.0 Input File WwampMP2002 the inverties, drip wtd-042 wtd Output File WwampFile Ww304 the inverties,drip wtd-wtd Output Info Start Time 00:00:00 → Start Time 01:37:43 Run Time 01:02:43 → Total Time 01:23:43 Start Pos End Pos Select Connect Start No Output Fig Start Time End Time Run Time Total Time c:\W004 the inverties.dvl... c:\winstruments and settings\ft... 80.08.80 01 01:25 01:25:43 c:\winoscence_004.dvl.g.x... c:\winstruments and settings\ft... 80.08.80 01 01:25 01:25:43 Click Unloading Program mpi0
Using the Transcoder
Checking File Information
Select one of the files in the registered file list and double-click or click right mouse button and select View File Information to view the file information. The file information dialogue box will disappear when the ESC key is pressed or the mouse is clicked on top of the dialogue box.
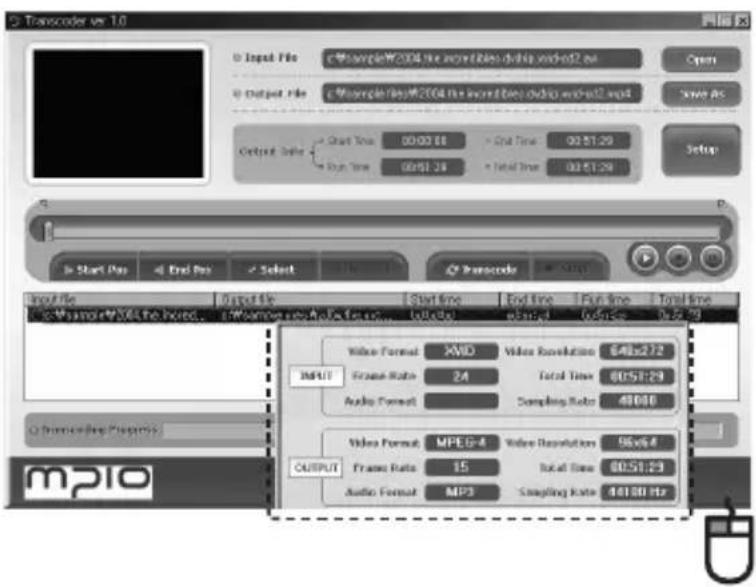
text_image
Transcoder vs 1.0 Input File c:\Sample\2004 the inored files.dashp.wed-in2.sw Output File c:\Sample\2004 the inored files.dashp.wed-in2.swd Output Rate Start Time 00:03:08 Run Time 00:51:29 Total Time 00:51:29 Setup Start Post End Post Select Transcode Input file Output file Start time End time Run time Total time Start time Start time End time Run time Total time Start time Start time Value Format AVD Video Revolution 648x272 INPUT Frame Rate 24 Total Time 00:51:29 Audio Format Sampling Rate 48000 Video Format MPEG-4 Video Revolution 96x64 OUTPUT Frame Rate 15 Total Time 00:51:29 Audio Format MP3 Sampling Rate 48180 HzSetting Directory
Set the video options, and set the directory for storing the Output File.
1 Click the ( ) button to see the tab dialogue for Video and Directory Settings.
2 Select the tab to setup, and choose the options.
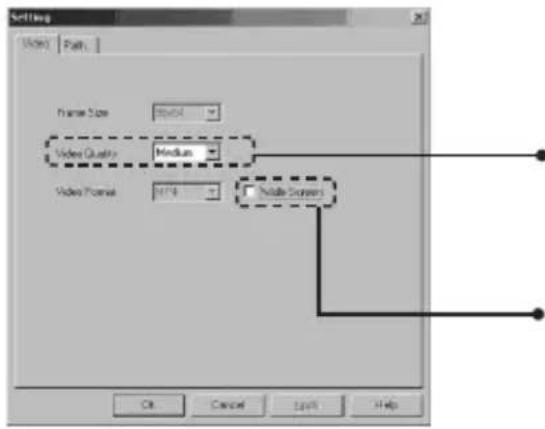
text_image
Setting Video Path Frame Size: 500 Video Quality: Medium Video Format: JPEG Middle Screen OK Cancel Help HelpVideo Quality
Select the quality of the video by choosing desired quality in the Video Quality box.
Wide Screen
Many of DivX movies are made in 720x480 wide screen format. Choosing this option will show the movie in the original screen ratio.
3 Select the Path tab.
- Designated the directory for the converted files to be saved in.
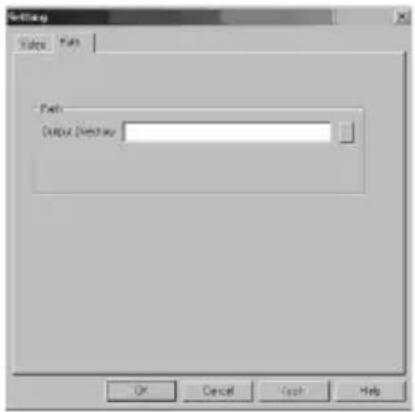
text_image
Settings Files Paths Path: Output Pathway OK Cancel Cash Help
Using the Transcoder
1 Double-click the PMP Transcoder Icon ( ).
2 Click the ( ) button to select the file to play. The file format is selected as a MP4.
3 Click the ()button to play the file.
4 Fast-forward or rewind by clicking the ( ) or ( ) button.
5 Click the ( ) button to pause the video, and click the ( ) button to stop the video.
6 Click the (☐)button to minimize the window, and click the (☒)button to close it.
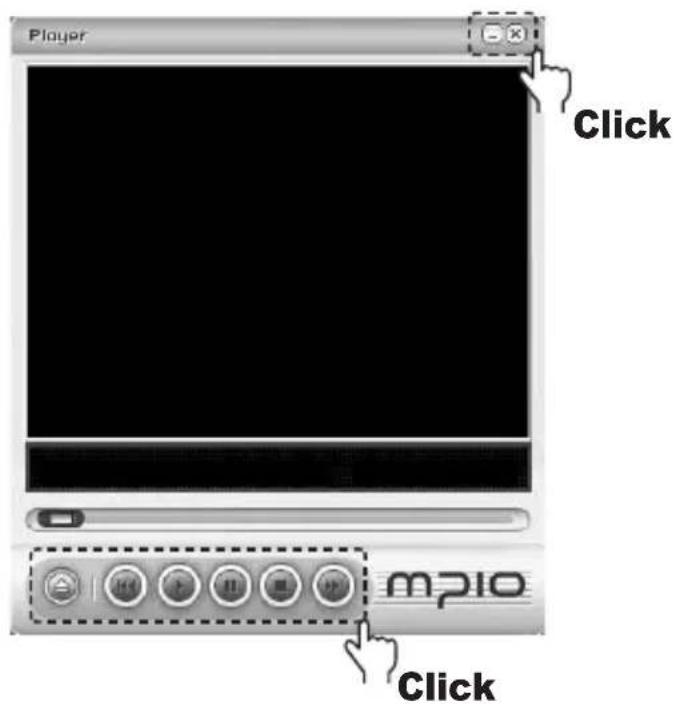
text_image
Player Click mPIO ClickFormatting

You can format HD400 from a Windows PC using MPIO Utility.
1 Turn on the device and connect the device to the computer with the 24PIN USB Multi-Cable.
2 Double-click MPIO Utility icon in your desktop.
3 Click the Format & Config button.
4 Click the OK button.
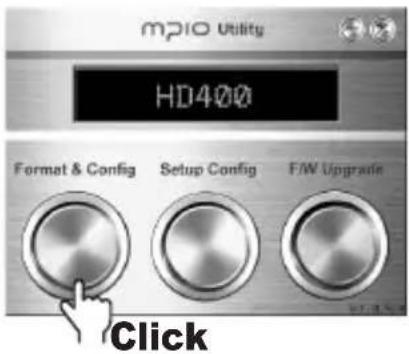
text_image
mp10 Utility HD400 Format & Config Setup Config F/W Upgrade Click5 Click the Start button.
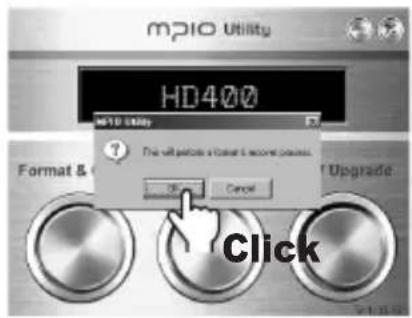
text_image
MP10 Utility HD400 This will prefer a format & more pressure. OK Cancel Click6 Click the OK button.
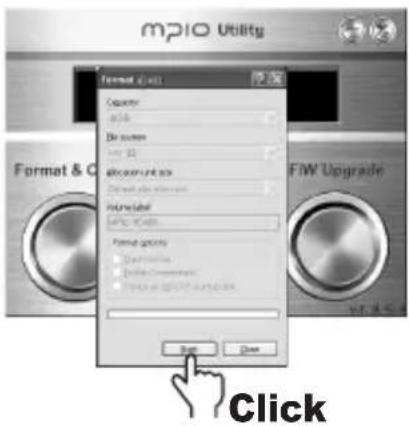
text_image
mp10 Utility Format & C Capacity 3.5% Dir screen my 12 account unit box Default after window Internal label MP10 Utility Format settings □ Default settings □ Default CMOS/CMOS/CMOS/CMOS/CMOS/CMOS/CMOS/CMOS/CMOS/CMOS/CMOS/CMOS/CMOS/CMOS/CMOS/CMOS/CMOS/CMOS/CMOS/CMOS/CMOS/CMOS/CMOS/CMOS/CMOS/CMOS/CMOS/CMOS/CMOS/CMOS/CMOS/CMOS/CMOS/CMOS/CMCS OK Close F/W Upgrade Click
text_image
MP10 Utility Format MP10 (HDD) Capacity: HDD File size: Format MP10 (HDD) OK Cancel Microsoft Prompting will continue ALL data on Web Disk. To format the disk, click Off. to exit, click CMOS. Start Cancel Click
Formatting
7 When formatting is complete, click the OK button.
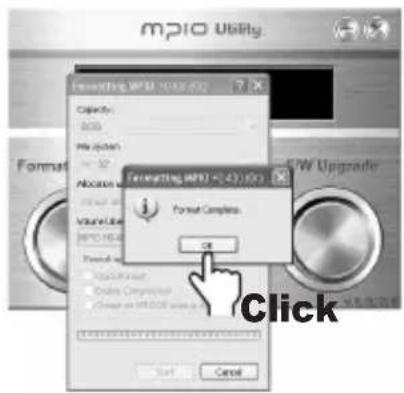
text_image
MP10 Utility Forwarding MP10 (43.00) C:\Users\MP10 File icon - 52 Allocation - 52 Volume Units MP10 HDL Forwarding MP10 (43.00) Format Complex OK Click9 Click the OK button after the Safely Remove Hardware message appears as shown.
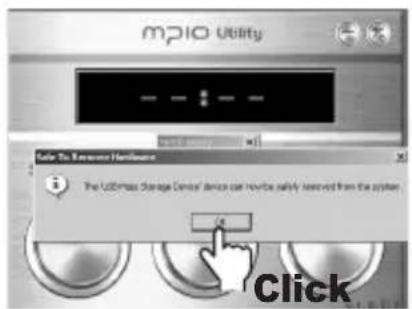
text_image
MP10 Utility Make New Home Make To Resource Hardware The USB/Pass Storage Device device can return safely removed from the system OK Click8 Click the Close button.
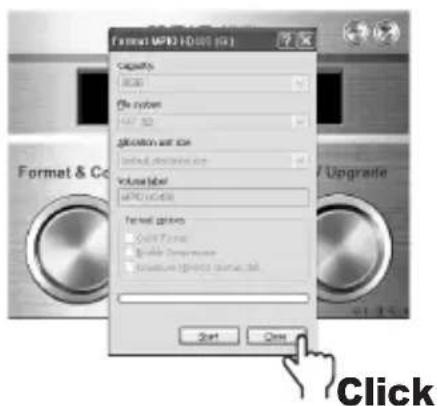
text_image
Format MPB (10.001 GB) Capacity 80.00 Display system HAT 325 Glatation set size Initial display size Volume label MPB v4.006 Format buttons Solid Format Enable Compression Remove Printout format.sh Start Close Click10 After clicking the OK button, Format & Config (Default Setting Restoration) is complete. You may separate the device from the PC.
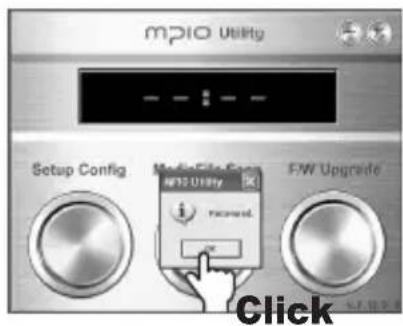
text_image
mp10 Utility Setup Config MediaFile Setup MP10.01897 F/W Upgrade ClickNote
- The captured screens of MPIO Utility may vary for the user's PC environment.
- MPIO Utility does not support Macintosh. Therefore, MPIO Utility cannot be used in Macintosh.
- For information regarding MPIO Utility installation, refer to [Installing the software] on page 63.
Follow the instructions when formatting HD400 using a Windows PC without MPIO Utility. Using MPIO Utility is recommended for formatting the device.
1 Select the Removable Disc icon. Click your right mouse button and select Format. Click the Start button.
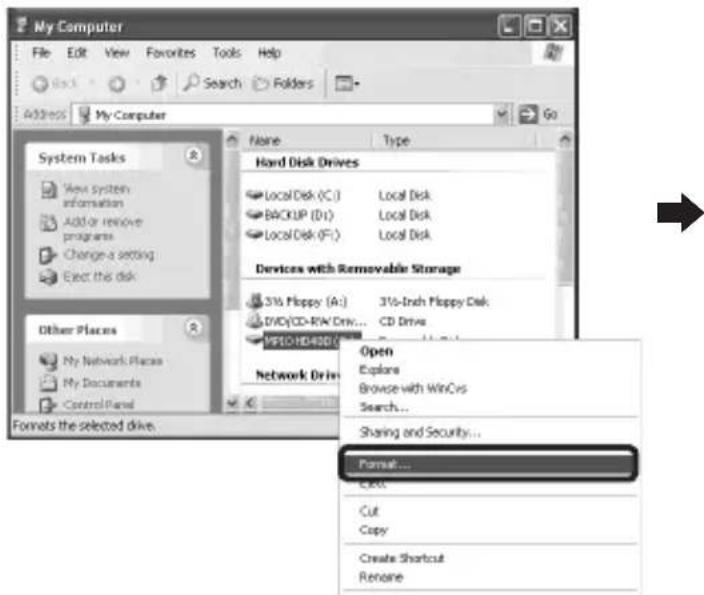
text_image
My Computer File Edit View Favorites Tools Help Back Search Folders Address My Computer System Tasks View system information Add or remove programs Change a setting Eject this disk Other Places My Network Places My Documents Control Panel Formats the selected drive. Name Type Hard Disk Drives Local Disk (C:) Local Disk BACKUP (D:) Local Disk Local Disk Devices with Removable Storage 3½ Floppy (A:) 3½-Inch Floppy Disk DVD/CD-RW Drive... CD Drive HSTO HD400/ Network Drive Open Explore Browse with WinCys Search... Sharing and Security... Format... Edit Cut Copy Create Shortcut Rename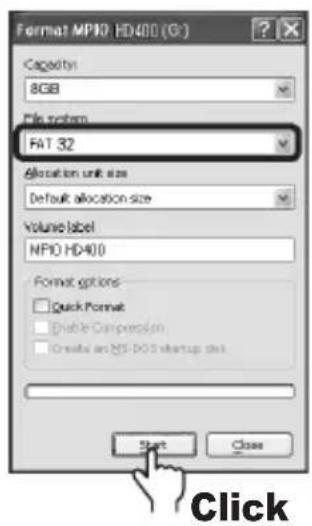
text_image
Format MP10 HD400 (G:) Capacity 8GB File system FAT 32 Allocation unit size Default allocation size Volume label MP10 HD400 Format options: Quick Format Disable Compression Create as MP10 HD400 startup stick Start Close ClickNote
- When formatting the device using the Windows FORMAT Command, it must be formatted in FAT32. To use the device after it has been formatted, the default settings must be restored using MPIO Utility. See page 86 [Storing Default Settings] for more information.
- The captured screens of MPIO Utility may vary for the user's PC environment.
Caution
● The files in HD400 WILL BE LOST after formatting.
- Disconnect the 24PIN USB Multi-Cable after formatting. Turn the power off, and then turn it on again to restart. The System folders are created. Connect the 24PIN USB Multi-Cable again to download the music files.

Storing Default Settings
When HD400 has been formatted using the Windows FORMAT Command (FAT32), the default settings must be restored using MPIO Utility's Setup Config function.
1 Turn the power of HD400 ON and connect it to a computer using a 24PIN USB Multi-Cable.
2 Double-click MPIO Utility icon in your desktop.
3 Click the Setup Config button.
4 Click the OK button.
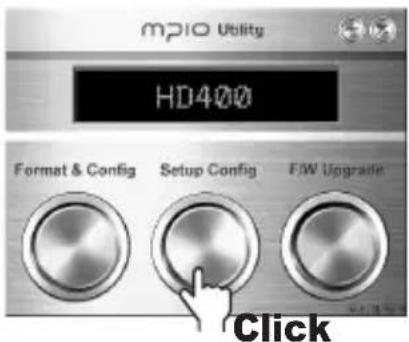
text_image
mp10 Utility HD400 Format & Config Setup Config F/W Upgrade Click5 Click the OK button after the Safely Remove Hardware message appears as shown.

text_image
mp10 Utility Safe To Er容器 Hardware The USB/Pass Storage Device device can now be safely saved from the system OK Click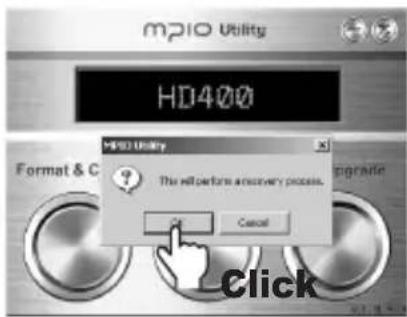
text_image
mp30 Utility HD400 MP3 Utility This will perform a recovery process. OK Cancel Upgrade Click6 After clicking the OK button, Setup Config (Default Setting Restoration) is complete. You can unplug the device from the PC.
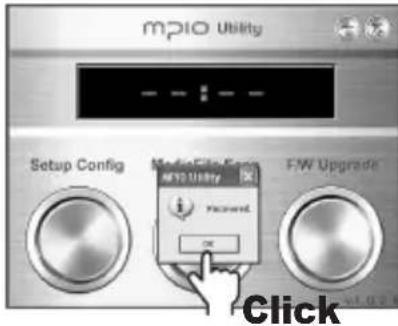
text_image
mp10 Utility Setup Config Media Film Error MP10 Utility F/W Upgrade ClickNote
- MPIO Utility does not support Macintosh. Therefore, MPIO Utility cannot be used in Macintosh.
- Only supports FAT32.
Upgrading Firmware

See page 63 [Installing the software] for information on how to install MPIO Utility.
1 Download the firmware from MPIO web site and save it on the PC. (www.mpio.com)
2 Turn the power of HD400 ON and connect it to a computer using a 24PIN USB Multi-Cable.
3 Double-click MPIO Utility icon in your desktop.
4 Click the F/W Upgrade button.
5 Click the OK button.
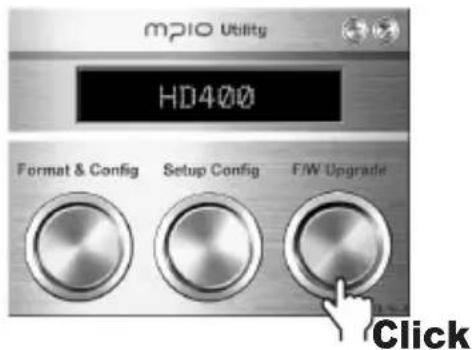
text_image
mp10 Utility HD400 Format & Config Setup Config F/W Upgrade Click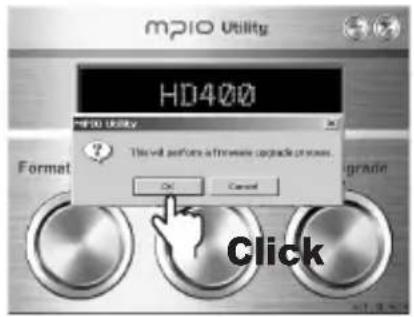
text_image
MP10 Utility HD400 MP10 Utility This will perform a firmware upgrade process. OK Cancel Click6 Select the downloaded Upgrade.HD400.dwu file in the Browse window and then, click the Open button.
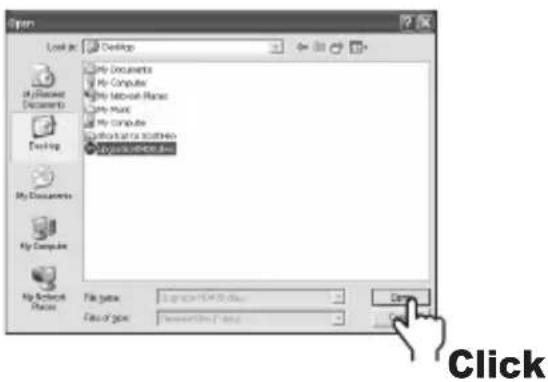
text_image
Open Look in: Desktop My Documents My Computer My Network Files My Music My Computer My Network Software My Music / Home files My Documents My Computer My Network Files File type: Fins or files: Edit ClickNote
- The firmware upgrade file downloaded from the MPIO web site is a compressed file, and you can upgrade the device through the MPIO Utility. Please use the utility when upgrading the firmware.
- MPIO Utility does not support Macintosh. Therefore, MPIO Utility cannot be used in Macintosh.

Upgrading Firmware
7 Click the OK button after the Hardware Safely Removed message appears as shown.
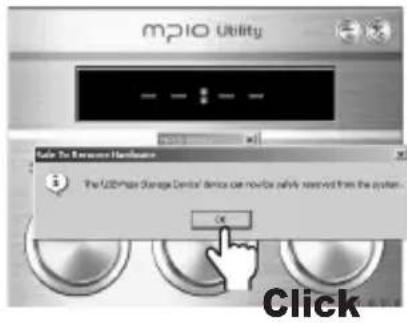
text_image
mp10 Utility Make To Resource Hardware The USB Price Storage Device device can now be safely reserved from the system... OK Click8 After clicking the OK button, the first part of firmware upgrade is complete.
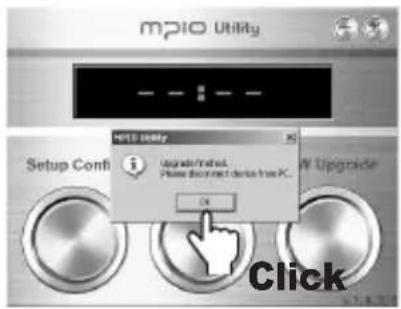
text_image
MP10 Utility Setup Conf. Upgrade/Imported Please disconnect device from PC. OK W Upgrade Click9 Firmware is automatically upgraded when the device is unplugged from your PC. When the firmware upgrade is complete, HD400 will be turned OFF automatically.
Note
- Disconnecting the 24PIN USB Multi-Cable while upgrading firmware may cause fatal damage to the product. Make sure the 24PIN USB Multi-Cable does not get disconnected.
- Please be aware if you apply external shock or the battery is low while the player is upgrading the firmware, it can cause product breakdown or malfunction.
Upgrading Firmware in Macintosh
1 Download the firmware upgrade for Macintosh at MPIO web site, uncompress it and save it on the computer. (www.mpio.com)
2 Turn the power of HD400 ON and connect it to a computer using a 24PIN USB Multi-Cable.
3 Save the firmware upgrade file (Image.dat, Player.rom, and Upgrade.axf) in HD400.
4 Separate HD400 from the computer.
5 Firmware is automatically upgraded when the device is unplugged from your PC. When the firmware upgrade is complete, HD400 will be turned OFF automatically.
Note
- To upgrade the firmware, there must be 10MB of free memory space in HD400's memory.
- Formatting HD400's memory using Macintosh PC is not recommended. To format HD400, please contact the customer support center.
- The firmware upgrade file for Macintoshes is compressed using stuffit. When you extract the compressed file, you can confirm the firmware upgrade files and read me files (.txt).
- Causing outer impact on HD400 or lack of battery during firmware upgrade may cause a malfunction.
Player does not turn on.
- If the player is completely discharged, use the 24PIN USB Multi-Cable to recharge.
- It takes about 4 hours to complete recharging.
Cannot download from PC.
- If the player is set to MTP (Media Transfer Protocol), you must have Windows Media Player 10 or later installed in a Windows XP environment.
Cannot play movies.
- To play movies, convert movie files after installing the Transcoder program included in your CD. For more information, please refer to the user's manual in the CD.
Cannot view images.
- Check to see if there are any image files saved in the Viewer folder.
- Only image files in JPEG and BMP format can be viewed.
Player does not operate properly.
- If the player does not work properly, press the RESET hole on the player with a small pin. The player will then operate normally.
No radio frequency is received.
- Earphones must be connected to the player when searching for radio frequencies. Reception may be poor depending on location or environment. In this case, try increasing the frequency sensitivity from the Radio Setting menu.
Product Specifications

| Dimensions | 52 (W) × 93 (H) × 15 (D)/mm | |
| Weight | 108.5g | |
| Display (LCD) | Full Color QCIF TFT LCD (1.8", 220 × 176) | |
| Memory(HDD) | 8GB | |
| Decoding | MP3, WMA(WMA DRM), OGG | |
| Encoding | MP3 | |
| Voice Recording | MP3 | |
| Plug In | WMP (Janus DRM & PD DRM) | |
| Audio | Frequency Range | 20Hz ~ 20kHz |
| S/N ratio | 90dB | |
| Output Power | 18mW/Channel(Europe: 6mW/Channel) | |
| Format | mp3, wma, ogg(Q1~Q10) | |
| Video | Color | 65K Full Color |
| Playable Format | MP4 | |
| Convertible Format | mpeg4, WMA, AVI, DivX(by PC Converting) | |
| Viewer | Photo | JPEG, BMP |
| Text | TXT | |
| FM Radio | Frequency Band | 76 ~ 108MHz |
| S/N ratio | 50dB | |
| FM Recording | MP3 | |
| Languages | Menu Languages | English, Korean, Japanese, Chinese(simplified), Chinese(traditional), German, French, Spanish, Russian |
| Supported Languages (ID 3 Tag Languages) | 55 Languages supported | |
| PC Interface | PC Interface | USB 2.0 (High Speed) |
| Transfer Speed | 56 Mbps | |
| Supported OS | Windows 98 / SE / ME / 2000 / XP | |
| Macintosh: Mac OS Version 9.2 or Higher | ||
| Mass Strange | Supported | |
| Battery | Type | Lithium Polymer Rechargeable Battery |
| Battery life | Up to 15 hours | |
| Operating Temperature | 5°C ~ 40°C | |