
My Book Duo WDBLWE0160JCH - External Storage WESTERN DIGITAL - Free user manual and instructions
Find the device manual for free My Book Duo WDBLWE0160JCH WESTERN DIGITAL in PDF.


User questions about My Book Duo WDBLWE0160JCH WESTERN DIGITAL
0 question about this device. Answer the ones you know or ask your own.
Ask a new question about this device
Download the instructions for your External Storage in PDF format for free! Find your manual My Book Duo WDBLWE0160JCH - WESTERN DIGITAL and take your electronic device back in hand. On this page are published all the documents necessary for the use of your device. My Book Duo WDBLWE0160JCH by WESTERN DIGITAL.
USER MANUAL My Book Duo WDBLWE0160JCH WESTERN DIGITAL
text_image
WD My Book Duo 1 2WD Service and Support
Should you encounter any problem, please give us an opportunity to address it before returning this product. Most technical support questions can be answered through our knowledge base or email support service at http://support.wd.com. If the answer is not available or if you prefer, please contact WD ^® at the best telephone number shown below.
Your product includes 30 days of free telephone support during the warranty period. This 30-day period starts on the date of your first telephone contact with WD Technical Support. Email support is free for the entire warranty period and our extensive knowledge base is available 24/7. To help us keep you informed of new features and services, remember to register your product online at http://register.wd.com.
Accessing Online Support
Visit our product support website at http://support.wd.com and choose from these topics:
■ Downloads—Download drivers, software, and updates for your WD product.
■ Registration—Register your WD product to get the latest updates and special offers.
- Warranty & RMA Services—Get warranty, product replacement (RMA), RMA status, and data recovery information.
■ Knowledge Base—Search by keyword, phrase, or answer ID.
■ Installation—Get online installation help for your WD product or software.
■ WD Community—Share your thoughts and connect with other WD users.
Contacting WD Technical Support
When contacting WD for support, have your WD product serial number, system hardware, and system software versions available.
| North America | Europe (toll free)* | 00800 ASK4 WDEU | |
| English 800.ASK.4WDC | (00800 27549338) | ||
| (800.275.4932) Europe | +31 880062100 | ||
| Spanish 800.832.4778 Middle East | +31 880062100 | ||
| Africa | +31 880062100 | ||
| Mexico | 001 8002754932 Russia | 8 10 8002 335 5011 | |
| South America | Asia Pacific | ||
| Chile 1230 020 5871 Australia 1800 429 861 / 0011 800 2275 4932 | |||
| Colombia 009 800 83247788 China 800 820 6682 / 400 627 6682 | |||
| Venezuela 0800 100 2855 Hong Kong 3057 9031 | |||
| Peru | 0800 54003 | India | 1800 200 5789 / 1800 419 5591 |
| Uruguay 000 413 598 3787 | Indonesia 001 803 852 3993 | ||
| Argentina | 0800 4440839 | Japan | 0800 805 7293 |
| Brazil | 0800 7704932 Korea | 02 2120 3415 | |
| 0021 800 83247788 | Malaysia | 1800 817 477 | |
| New Zealand | 0508 555 639 / 00800 2275 4932 | ||
| Philippines | 1800 1855 0277 | ||
| Singapore | 1800 608 6008 | ||
| Taiwan | 0800 225 593 | ||
| Thailand | 00 1800 852 5913 | ||
| Other countries | +86 21 2603 7560 | ||
* Toll free number available in the following countries: Austria, Belgium, Czech Republic, Denmark, France, Germany, Ireland, Italy, Netherlands, Norway, Poland, Slovakia, Spain, Sweden, Switzerland, United Kingdom.
Table of Contents
WD Service and Support .... ii
Accessing Online Support .... ii
Contacting WD Technical Support....ii
1 About Your WD Storage Device .... 1
Features 1
Kit Contents 3
Optional Accessories 3
Operating System Compatibility....3
Device Drive Format 4
Physical Description 4
Device Power/Activity LED....5
Drive Status LEDs. 5
USB 3.0 Interface....6
USB Hub Connectors....6
Reset Button....6
Kensington Security Slot 6
Registering Your Device 6
Handling Precautions....6
2 Connecting the Device and Getting Started 7
Connecting the Device 7
Getting Started with the WD Software 8
3 WD SmartWare Software Functional Overview 17
Home Tab Display 18
Backup Tab Displays 25
Retrieve Tab Displays....28
Settings Tab Display.... 30
Help Tab Display.... 31
4 Backing Up Files 33
How the Backup Function Works.... 33
Backing Up Files....33
5 Retrieving Files 42
How the Retrieve Function Works 42
Retrieving Files 42
6 Locking and Unlocking the Device 47
Password Protecting the Device 47
Unlocking the Device 49
With the WD Security or WD Drive Utilities Software....49
With the WD SmartWare Software....50
With the WD Drive Unlock Utility 50
Changing Your Password....51
Turning Off the Device Lock Feature 53
7 Managing and Customizing the Device 54
Checking Device Health 54
Erasing the Device Drives....55
Using the Drive Erase Function 56
Using Five Invalid Passwords....57
Managing the Device Configuration 60
Checking the Device Status....60
Changing the Device Configuration 61
Registering the Device 64
Restoring the WD Software and Disk Image 65
Setting the Device Sleep Timer 65
Upgrading the Device Capacity 65
Using the WD Quick View Icon.... 66
Opening the WD SmartWare Software....66
Checking Device Status....67
Monitoring Icon Alerts 67
Safely Disconnecting the Device 67
8 Managing and Customizing the Software 68
Checking for Software Updates 68
Configuring a Remote Dropbox Account 68
Specifying a Different Retrieved Content Folder 69
Specifying the Number of Backup Versions 70
Uninstalling the WD Software....71
Uninstalling on Windows Vista or Windows 7 71
Uninstalling on Windows 8....71
9 Replacing a Drive 72
Determining Which Drive Failed 72
Obtaining a Replacement Drive 72
Removing and Replacing the Drive 73
10 Using the Device with a Mac 81
Reformatting the Device Drives 81
Restoring the WD Software and Disk Image 81
11 Troubleshooting 82
Installing, Partitioning, and Formatting the Drive 82
Frequently Asked Questions....82
A Installing the SES Driver.... 84
Installing on Windows Vista Computers 84
Installing the Driver Automatically 84
Installing the Driver Manually 85
Installing on Windows 7 and Windows 8 Computers....87
B Compliance and Warranty Information 90
Regulatory Compliance 90
FCC Class B Information 90
ICES-003/NMB-003 Statement 90
Safety Compliance....90
CE Compliance For Europe 91
KC Notice (Republic of Korea only) 91
Environmental Compliance (China). 91
Warranty Information (All Regions Except Australia/New Zealand) 91
Obtaining Service....91
Limited Warranty 92
Warranty Information (Australia/New Zealand) 92
Obtaining Service....93
Warranty....93
GNU General Public License ("GPL") 94
Index....95
About Your WD Storage Device
My Book® Duo premium RAID storage provides the quickest way to transfer, save and protect your photos, videos, music and other massive files to free up valuable space on your computers. This dual-drive device features blazing-fast transfer speeds, encrypted hardware RAID, and comprehensive local and cloud backup options. My Book Duo is the ultimate storage solution offering the capacity and security you need.
This introductory chapter includes the following topics:
Features
Kit Contents
Optional Accessories
Operating System Compatibility
Device Drive Format
Physical Description
Registering Your Device
Handling Precautions
Features
My Book Duo is the ultimate dual-drive storage solution offering the capacity and security you need, with blazing-fast transfer speeds, hardware-configured RAID, and comprehensive local and cloud backup options.
Quickly save and organize your files—Free up valuable space on all your computers. Save and organize your entire media collection on your My Book Duo device with ultra-fast data transfer speeds up to 290 MB/s for HD video files on 4- to 12-TB devices. (Performance may vary based on your operating system and hardware configuration.)
Massive capacity—The My Book Duo device is your storage vault. With up to 12 TB of capacity, you can save and protect all your photos, videos, music, and important documents in one safe place.
Speed and security with hardware-configured RAID—True hardware RAID uses an independent processor to manage RAID volumes, maximize bandwidth, and sustain performance and reliability.
Multiple data management options—Use the default performance mode (RAID 0) for faster data transfers and maximum capacity. With safe mode (RAID 1) half the capacity is used to store your data and the other half is used for a duplicate copy, offering twice the data protection. You can also reconfigure to JBOD mode and use the drives individually. And with the 256-bit AES hardware encryption feature, you have peace of mind knowing that your files are secure.
Complete backup solutions to secure your data from loss—Your My Book Duo device offers a comprehensive backup solution to help protect your media collection and important files.
■ Integrated backup software—The WD SmartWare Pro software works quietly in the background to help protect your data using minimal computer resources. Select continuous backup mode to automatically back up your files as they change, or
select the scheduled backup option to automatically back up your files at specified intervals.
- Cloud backup with Dropbox™—Easily save a second copy of your files to your Dropbox cloud account using the WD SmartWare Pro software. Then open, view, and share the files you have backed up using Dropbox. And for more ways to protect your important content, you can also back up your Dropbox account to your My Book Duo device.
Note: A Dropbox account is required for cloud backup. Cloud services, features, and applications can be changed, terminated, or interrupted at any time, and may vary by country.
- System-level backup—Acronis True Image WD Edition software backs up your computer’s hard drive at the system level for total data protection. With a system-level backup to your My Book Duo device, you can restore your computer’s hard drive after a system crash or restore selected system files that have been corrupted or accidentally deleted.
For Acronis True Image (ATI) WD Edition software and user guide downloads, go to:
■ ATI WD Edition software free download: http://products.wd.com/wdacronis
■ ATI WD Edition user guide free download: http://products.wd.com/wdacronis/um
Ultimate security with password protection—Gain peace of mind knowing that your data is protected from unauthorized access with password protection for your privacy.
Flexible connectivity with two USB expansion ports—Expand your storage capacity and clear your workspace with two additional USB 3.0 ports on the back of your My Book Duo device. Connect additional drives to expand as your storage needs increase. Or use them to charge your smartphones or tablets to create the ultimate organized workspace.
Configure, manage, and diagnose your device with the WD Drive Utilities™ software—You are in complete control. With this software you can run drive diagnostics, manage RAID configurations, erase and format your device drives, register your device, and more.
Easy to set up, easy to use—Ready to use right out of the box with preformatted NTFS drive partitions for supported Windows operating systems. The device drives can also be easily reformatted for supported Mac OS X operating systems.
Ultra-reliable with WD Red™ drives—Your My Book Duo device has WD Red drives inside. These drives are designed and tested for reliability and optimal performance in small RAID environments.
User serviceable enclosure—Ready to upgrade your drives to expand storage capacity? With the simple push of a button, pop open the enclosure and insert new drives with ease. No special tools required.
Important: For the latest WD product information and news, visit our website at http://www.wd.com. For the latest software, firmware, and product documentation and information, go to http://support.wd.com/downloads.
Kit Contents
As shown in Figure 1, your My Book Duo device kit includes the following:
■ My Book Duo device, with WD SmartWare Pro, WD Drive Utilities, and WD Security™ software
USB 3.0 cable
■ AC adapter
■ Quick install guide
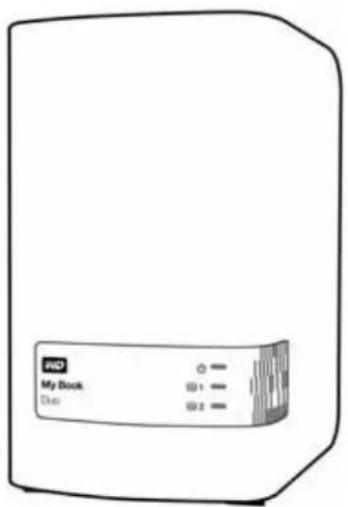
text_image
RND My Book DateMy Book Duo Device
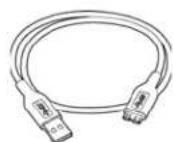
USB 3.0 Cable
Quick Install Guide
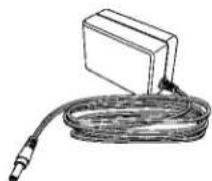
AC Adapter
Figure 1. My Book Duo Kit Contents
Optional Accessories
For information about optional accessories for WD products, visit:
| US | http://www.shopwd.com or http://www.wdstore.com |
| Canada | http://www.shopwd.ca or http://www.wdstore.ca |
| Europe | http://www.shopwd.eu or http://www.wdstore.eu |
| All others Contact WD Technical Support in your region. For a list of Technical Support contacts, visit http://support.wd.com and see Knowledge Base answer ID 1048. | |
Operating System Compatibility
Your My Book Duo device and the WD Drive Utilities and WD Security software are compatible with the following operating systems:
Windows Mac OS X
Windows Vista®
■ Snow Leopard
Windows 7
■ Lion
Windows 8
■ Mountain Lion
■ Mavericks
The WD SmartWare Pro software is compatible with the following operating systems:
Windows
■ Windows Vista
Windows 7
Windows 8
Compatibility can vary, depending on hardware configuration and operating system.
For highest performance and reliability, always install the latest updates and service pack (SP). For Windows computers, go to the Start menu and select Windows Update. For Mac computers, go to the Apple menu and select Software Update.
Device Drive Format
Your My Book Duo device drives are preformatted as a single NTFS partition for compatibility with all supported Windows operating systems. If you want to use the device with a Mac computer, see “Reformatting the Device Drives” on page 81 and “Troubleshooting” on page 82.
Physical Description
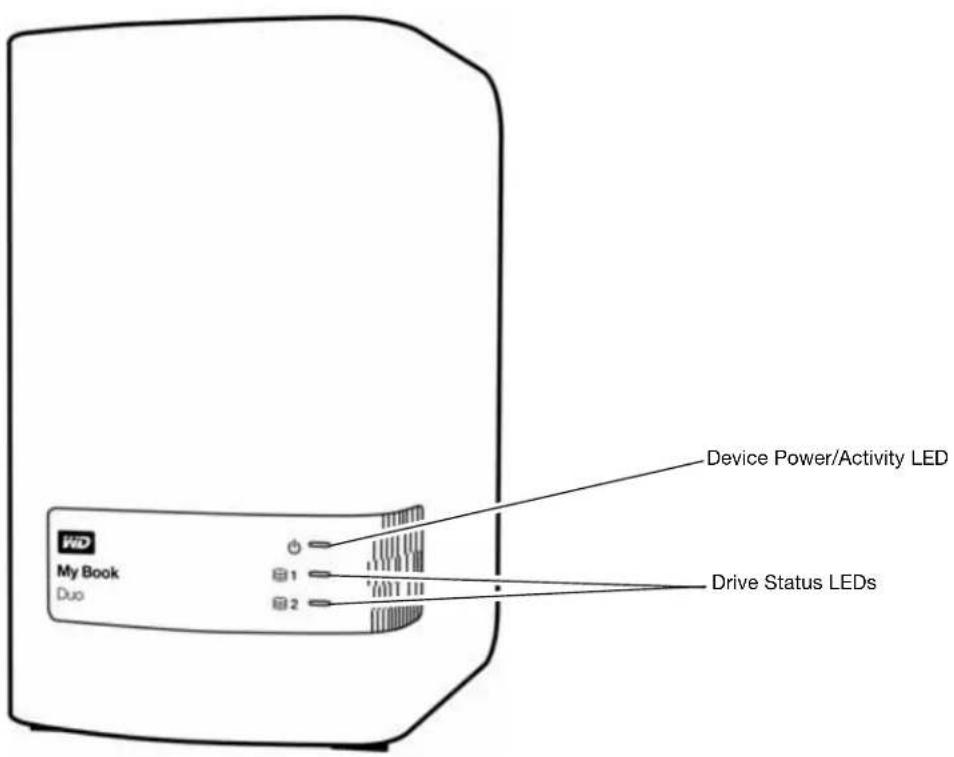
As shown in Figure 2, the My Book Duo device has the device power/activity LED indicator and a status indicator for each drive on the front.
text_image
Device Power/Activity LED Drive Status LEDs WD My Book DuoFigure 2. Front of the My Book Duo Device
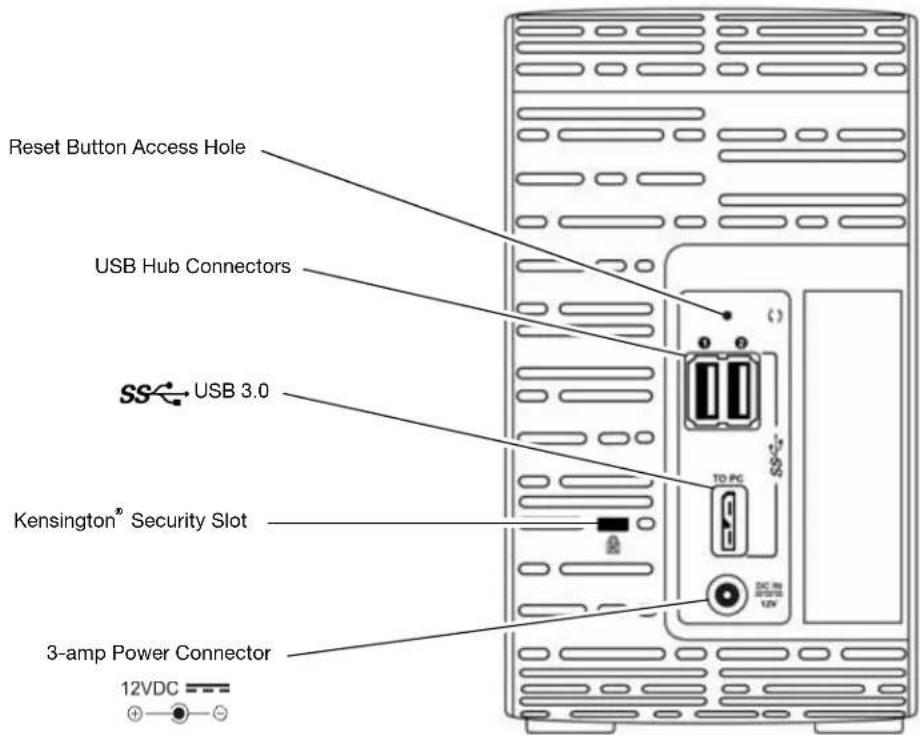
As shown in Figure 3, the My Book Duo device has the power connector, reset button, interface port, two USB 3.0 hub connectors, and a security slot on the back.
text_image
Reset Button Access Hole USB Hub Connectors SS USB 3.0 Kensington® Security Slot 3-amp Power Connector 12VDCFigure 3. Back of the My Book Duo Device
Device Power/Activity LED
The device power/activity LED shows the condition of the device as follows:
| LED Appearance Device Condition | |
| Black (off) Powered down or not connected to a computer | |
| White, steady Powered up, connected, and idle | |
| White, blinking slowly Standby—initiated by the device sleep timer setting | |
| White, blinking rapidly Read or write activity or rebuilding a RAID 1 array | |
| Red, blinking slowly RAID fault status condition | |
| Red, blinking rapidly Overheated |
Drive Status LEDs
The drive status LEDs show the drive status as follows:
| LED Appearance Drive Status | |
| Black (off) Normal, no fault | |
| Red, steady Drive has a RAID fault condition or is rebuilding | |
USB 3.0 Interface
USB 3.0 supports data transfer rates up to 5 Gb/s. USB 3.0 is backward compatible with USB 2.0. Connection to a USB 2.0 port transfers data at the port speed—up to 480 Mb/s.
USB Hub Connectors
Provide USB 3.0 ports for two additional devices.
Reset Button
Use the reset button to resume the rebuild of a RAID 1 mirror array offline after disconnecting the My Book Duo device from your computer.
Kensington Security Slot
For device security, the Kensington security slot accepts a standard Kensington security cable (sold separately). For more information about the Kensington security slot and available products, visit www.kensington.com.
Registering Your Device
Always register your My Book Duo device to get the latest updates and special offers. You can easily register your device using the WD Drive Utilities software, as described in "Registering the Device" on page 64. Another way is to register online at http://register.wd.com.
Handling Precautions
WD products are precision instruments and must be handled with care during unpacking and installation. Device drives may be damaged by rough handling, shock, or vibration. Always observe the following precautions when unpacking and installing your external storage product:
■ Do not drop or jolt the device.
■ Do not move the device during activity.
■ Do not use this product as a portable device.
■ To allow proper ventilation, do not block any of the device enclosure's air slots.
2
Connecting the Device and Getting Started
This chapter provides instructions for connecting the device and installing the WD Drive Utilities, WD Security, and WD SmartWare software on your computer. It includes the following topics:
Connecting the Device Getting Started with the WD Software
Connecting the Device
- Turn on your computer.
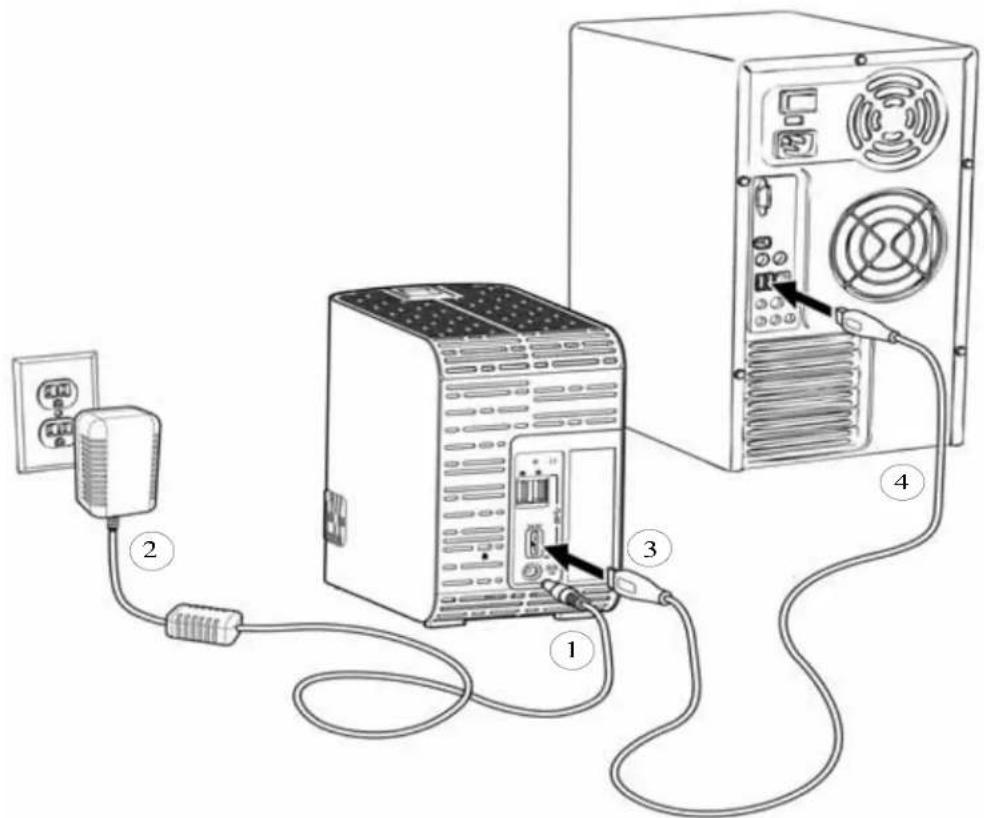
- Connect the My Book Duo device as shown in Figure 4.
- If a Found New Hardware screen appears, click Cancel to close it. The WD software installs the proper driver for your device.
- Verify that the device appears in your computer's file management utility listing.
Your My Book Duo device is now ready to use as an external storage device. You can enhance its capabilities by installing the WD software that is on the device:
■ WD Drive Utilities
■ WD Security
■ WD SmartWare
text_image
Diagram showing connections between a power outlet, server rack, and computer tower with labeled componentsFigure 4. Connecting the My Book Duo Device
Getting Started with the WD Software
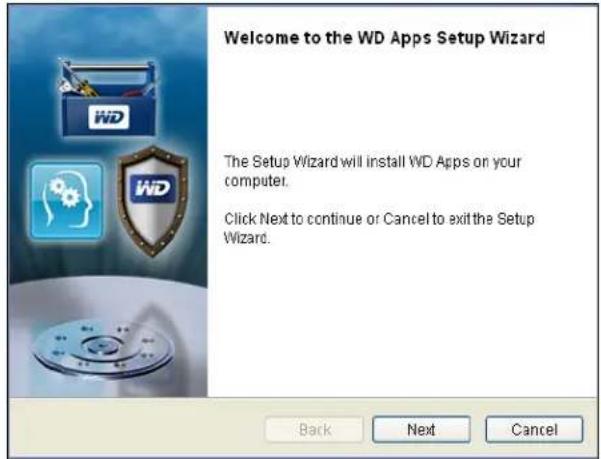
- Double-click the WD Apps Setup file that appears in the listing for the device in your computer's file management utility to display the WD Apps Setup Wizard:
text_image
Welcome to the WD Apps Setup Wizard The Setup Wizard will install WD Apps on your computer. Click Next to continue or Cancel to exit the Setup Wizard.- Click Next to display the End User License Agreement.
- Read the license agreement and privacy policy and select the I have read and agree... check box to accept the agreement and activate the Next button.
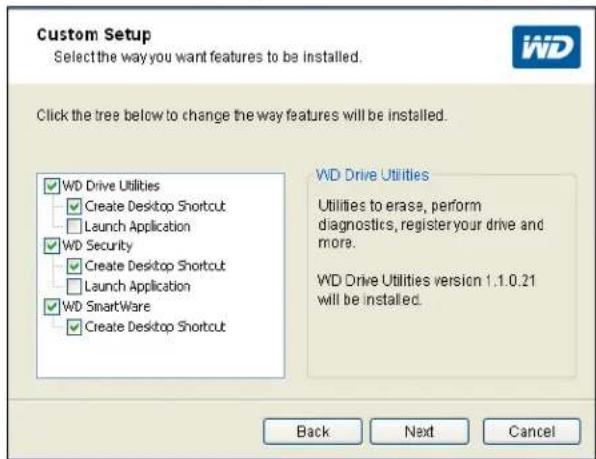
- Click Next to display the Custom Setup dialog:
text_image
Custom Setup Select the way you want features to be installed. Click the tree below to change the way features will be installed. WD Drive Utilities Create Desktop Shortcut Launch Application WD Security Create Desktop Shortcut Launch Application WD SmartWare Create Desktop Shortcut WD Drive Utilities Utilities to erase, perform diagnostics, register your drive and more. WD Drive Utilities version 1.1.0.21 will be installed. Back Next Cancel- On the Custom Setup dialog:
a. Select an application name to see a brief description of the application:
■ WD Drive Utilities
■ WD Security
■ WD SmartWare
b. Clear the check box for any application that you do not want to install.
c. Select or clear the installation option check boxes for each application:
■ Create Desktop Shortcut
■ Launch Application
d. Click Next to install the selected applications and options.
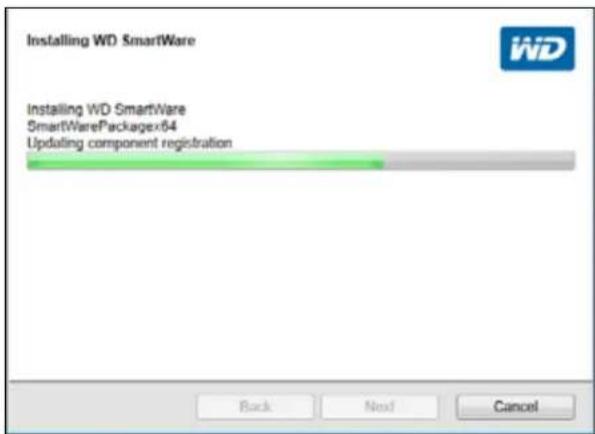
- Wait for the installation to complete:
text_image
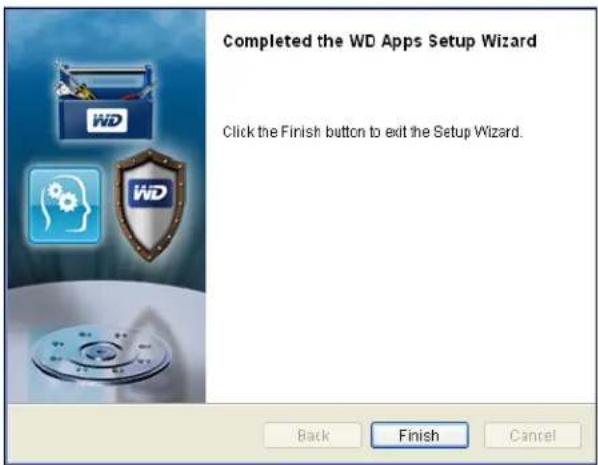
Installing WD SmartWare Installing WD SmartWare SmartWarePackagex54 Updating component registration Back Next Cancel- When the installation completes, click Finish to exit the WD Apps Setup Wizard:
text_image
Completed the WD Apps Setup Wizard Click the Finish button to exit the Setup Wizard.-
Depending on your selections:
-
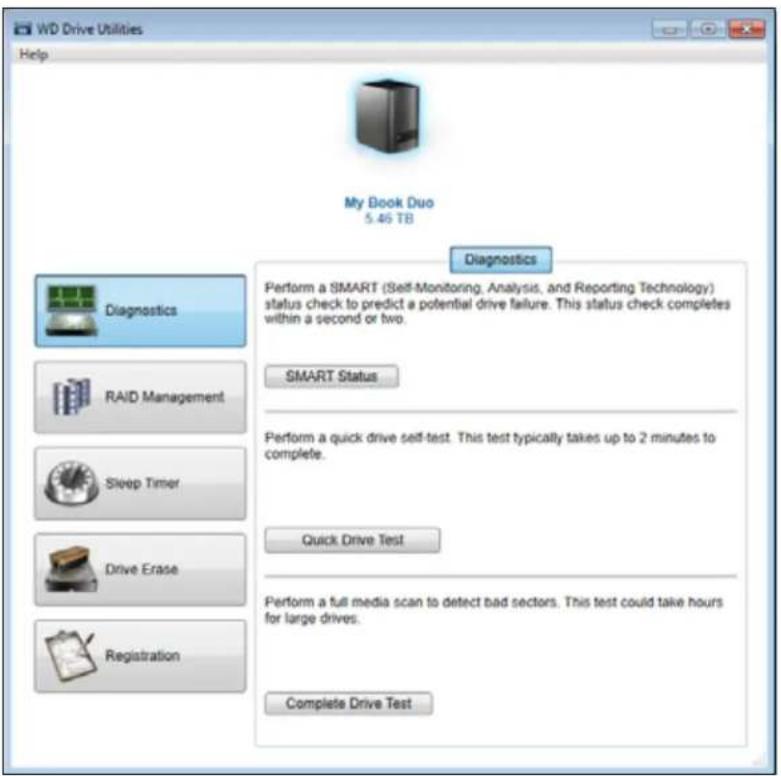
Installing the WD Drive Utilities software with the Launch Application option displays the WD Drive Utilities screen (see Figure 5 on page 10 and “Managing and Customizing the Device” on page 54).
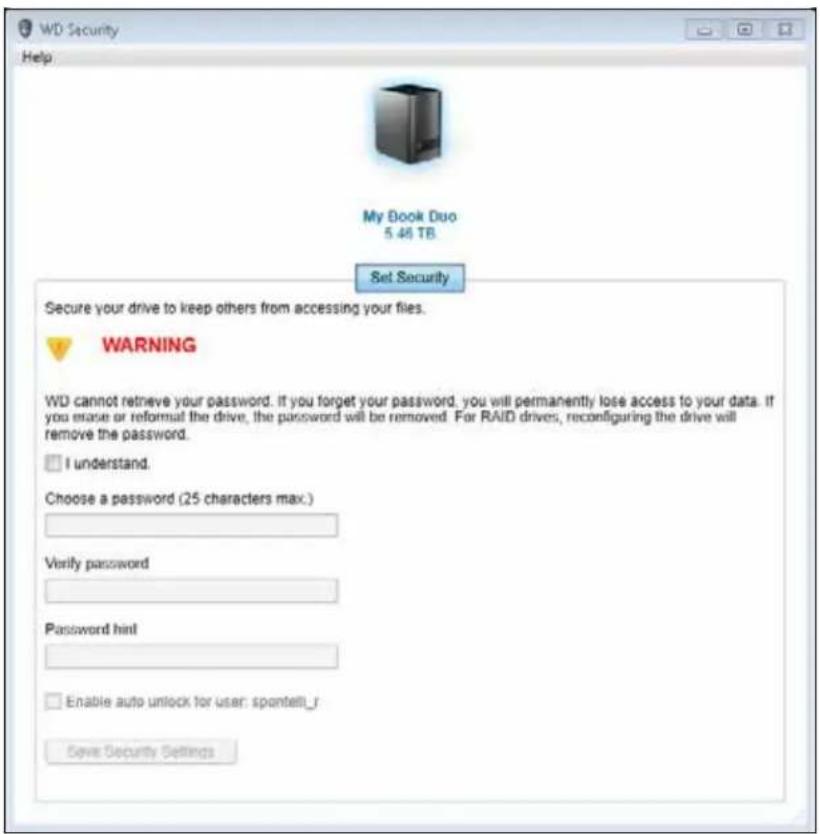
- Installing the WD Security software with the Launch Application option displays the WD Security screen (see Figure 6 on page 10 and “Locking and Unlocking the Device” on page 47).
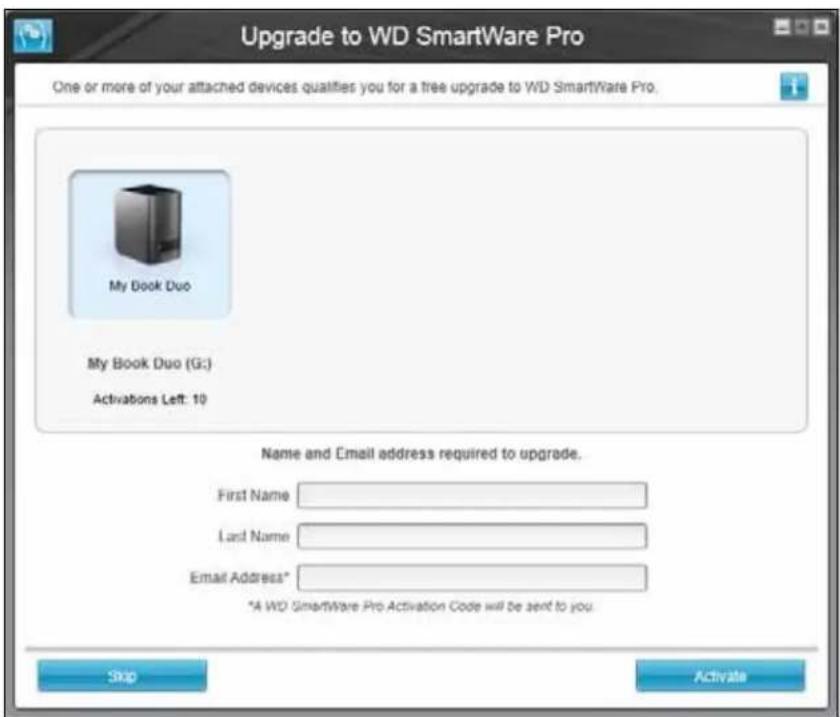
If your computer is connected to the Internet, installing the WD SmartWare software displays the Upgrade to WD SmartWare Pro screen for activating your free software upgrade (see Figure 7 on page 11 and proceed to step 9 on page 11).
text_image
WD Drive Utilities Help My Book Duo 5.46 TB Diagnostics Perform a SMART (Self-Monitoring, Analysis, and Reporting Technology) status check to predict a potential drive failure. This status check completes within a second or two. SMART Status Perform a quick drive self-test. This test typically takes up to 2 minutes to complete. Quick Drive Test Perform a full media scan to detect bad sectors. This test could take hours for large drives. Complete Drive TestFigure 5. WD Drive Utilities Screen
text_image
WD Security Help My Book Duo 5.46 TB. Set Security Secure your drive to keep others from accessing your files. WARNING WD cannot retrieve your password. If you forget your password, you will permanently lose access to your data. If you erase or reformat the drive, the password will be removed. For RAID drives, reconfiguring the drive will remove the password. I understand. Choose a password (25 characters max.) Verify password Password hint Enable auto unlock for user: spontell_f Save Security SettingsFigure 6. WD Security Screen
text_image
Upgrade to WD SmartWare Pro One or more of your attached devices qualifies you for a tree upgrade to WD SmartWare Pro. My Book Duo My Book Duo (G:) Activations Left: 10 Name and Email address required to upgrade. First Name Last Name Email Address* *A WD SmartWare Pro Activation Code will be sent to you. Skip ActivateFigure 7. Upgrade to WD SmartWare Pro Screen
- The WD SmartWare Pro software upgrade extends the backup function to non-WD drives, unsupported WD drives, and a remote Dropbox folder. Activating your free upgrade installs the WD SmartWare Pro software on this computer and provides email delivery of an activation code that you can use to install it on nine other computers.
a. Type your first name in the First Name box.
b. Type your last name in the Last Name box.
c. Type your email address in the Email Address box.
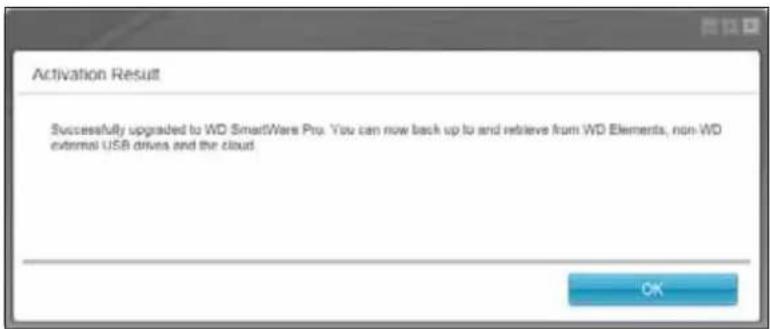
d. Click Activate to complete the upgrade and display the Activation Result message:
text_image
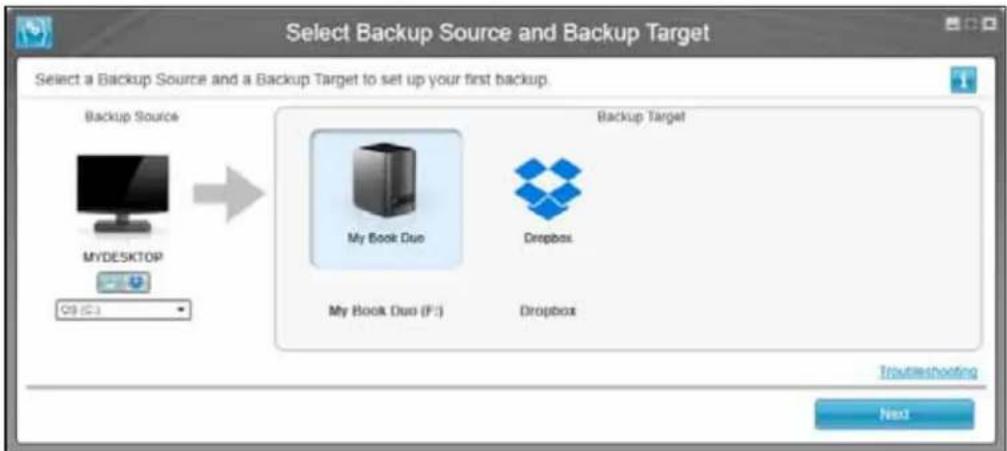
Activation Result Successfully upgraded to WD SmartWare Pro. You can now back up to and retrieve from WD Elements, non-WD external USB drives and the cloud. OKe. Click OK to display the Select Backup Source and Backup Target screen:
text_image
Select Backup Source and Backup Target Select a Backup Source and a Backup Target to set up your first backup. Backup Source MYDESKTOP C9 (C3) Backup Target My Book Duo Dropbox My Book Duo (F:) Dropbox Troubleshooting NextAt this point, the WD SmartWare Pro software is installed. If you want to skip the setup procedure for your initial backup for now, click the X close window icon in the upper-right corner of the Select Backup Source and Backup Target screen. Otherwise proceed to step 10.
- In the Backup Source area of the Select Backup Source and Backup Target screen, select the device that has the files you want to back up:
a. Use the backup source selector to specify whether you want to back up files from a local hard drive or from a remote Dropbox folder:
- By default, the computer option is selected and the computer icon signifies that the backup source device will be either an internal hard drive or drive partition, or a local direct-attached external hard drive:
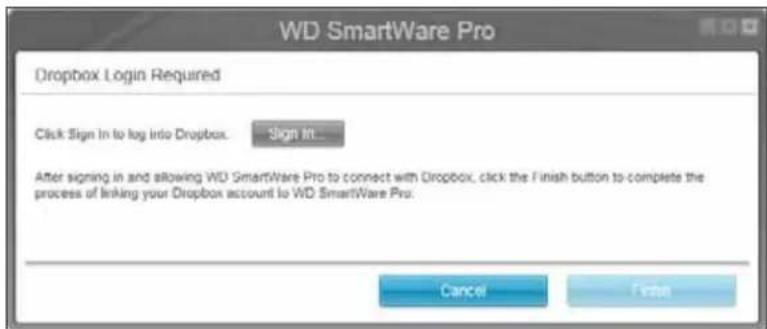
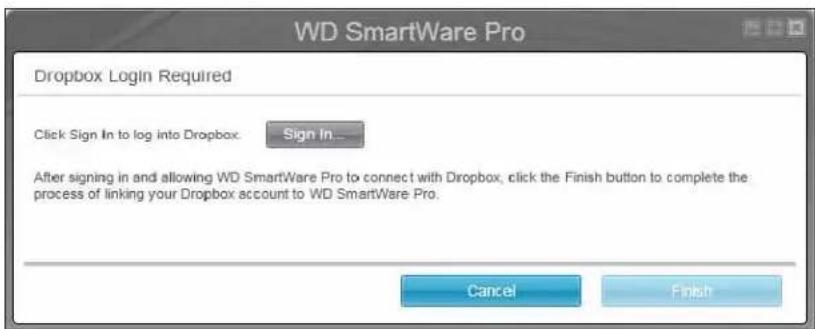
■ Selecting the Dropbox option displays the Dropbox Login Required dialog for configuring your Dropbox account for access by the WD SmartWare Pro software:
text_image
WD SmartWare Pro Dropbox Login Required Click Sign In to log into Dropbox. Sign In... After signing in and allowing WD SmartWare Pro to connect with Dropbox, click the Finish button to complete the process of linking your Dropbox account to WD SmartWare Pro. Cancel FinishYou must configure your Dropbox account for access by the WD SmartWare Pro software before you can use it as a backup source device. See step 4 of "Configuring a Remote Dropbox Account" on page 69.
■ After configuring your Dropbox account for access by the WD SmartWare Pro software, the Dropbox icon signifies that the backup source device will be your remote Dropbox folder:

b. If the selected backup source has more than one internal hard drive or drive partition, or external hard drives, use the backup source device selector to select the one that you want to back up:

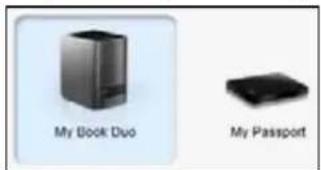
- In the Backup Target area of the Select Backup Source and Backup Target screen:
a. If you have more than one backup target device connected to your computer, click the icon of the one that you want to back up files to.
b. Verify that a light-blue highlight surrounds the selected device:
text_image
My Book Duo My Passportc. If you select Dropbox as your backup target device, use the Dropbox Login Required dialog for configuring your Dropbox account for access by the WD SmartWare Pro software:
text_image
WD SmartWare Pro Dropbox Login Required Click Sign In to log into Dropbox. Sign In... After signing in and allowing WD SmartWare Pro to connect with Dropbox, click the Finish button to complete the process of linking your Dropbox account to WD SmartWare Pro. Cancel FinishYou must configure your Dropbox account for access by the WD SmartWare Pro software before you can use it as a backup target device. See step 4 of "Configuring a Remote Dropbox Account" on page 69.
d. If the selected backup target device has more than one drive partition or network share, use the backup target device selector under the device icon to select the one that you want to use:

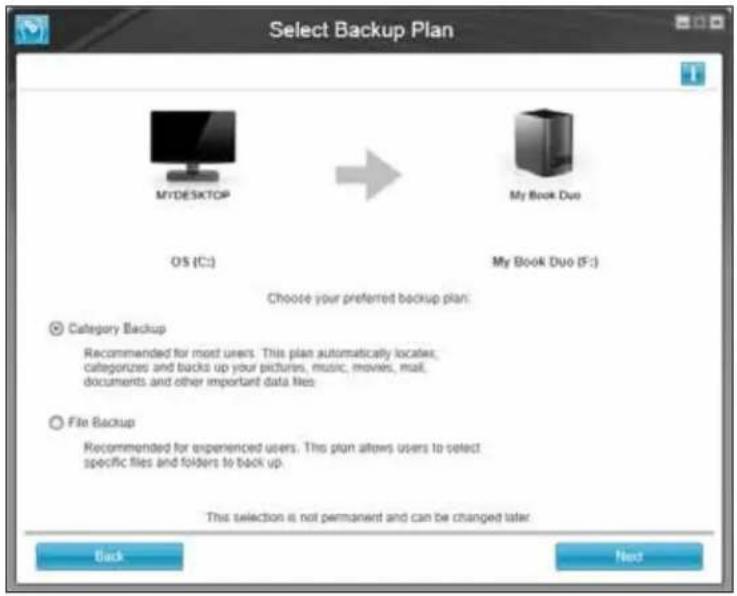
- Click Next on the Select Backup Source and Backup Target screen to display the Select Backup Plan screen:
text_image
Select Backup Plan MYDESKTOP OS (C:) My Book Duo My Book Duo (F:) Choose your preferred backup plan: Category Backup Recommended for most users. This plan automatically locates, categorizes and backs up your pictures, music, movies, mail, documents and other important data files. File Backup Recommended for experienced users. This plan allows users to select specific files and folders to back up. This selection is not permanent and can be changed later. Back Next- On the Select Backup Plan screen:
a. Select the option for the type of backup that you want to run:
- Category Backup—Finds and backs up all of the files of the selected categories on the backup source device.
- File Backup—Backs up files or folders that you select from a folder view of the backup source device.
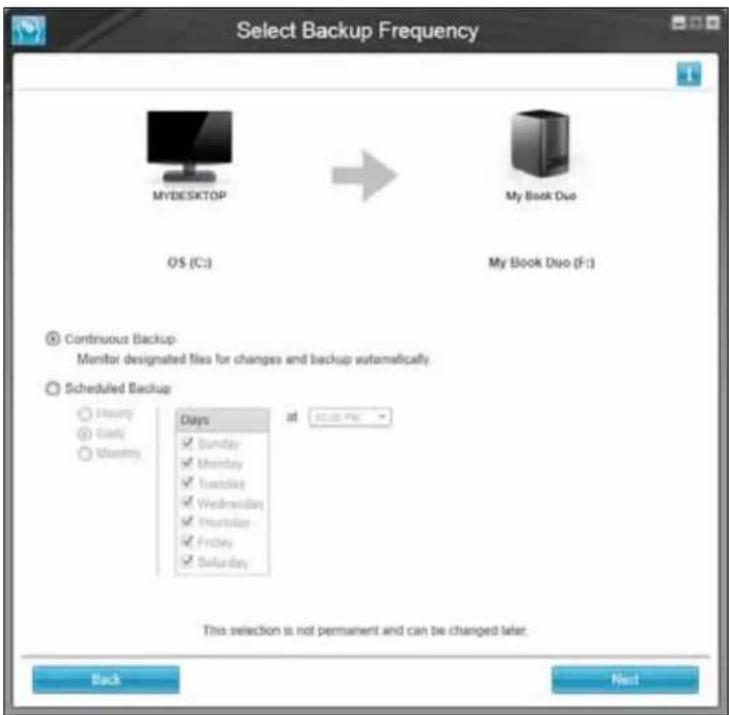
b. Click Next to display the initial Select Backup Frequency screen:
text_image
Select Backup Frequency MYDESKTOP OS (C:) My Book Duo My Book Duo (F:) Continuous Backup Monitor designated files for changes and backup automatically. Scheduled Backup Hours Daily Monday Days at 00:00 PM This selection is not permanent and can be changed later. Back Next- On the initial Select Backup Frequency screen:
a. Select the option for when you want to scan the backup source device and automatically back up any existing file that is changed or new file that is added:
■ Continuous Backup—Runs all the time
■ Scheduled Backup—Runs only on specified days at specified times
b. If you selected the Scheduled Backup option, select the Hourly, Daily, or Monthly option and use the check boxes and selection boxes to schedule your backups:
| Selecting . . . | Performs a backup . . . |
| Hourly Every hour, on the hour. | |
| Daily On the selected days of the week, at the selected time: | |
| a. Select or clear the Days check boxes to specify the days of the week that you want to run your backup.b. Use the at selection box to specify the time of day that you want to run your backup. | |
| Monthly On the selected day of the month, at the selected time: | |
| a. Use the Every selection box to specify which occurrence of the day that you want to run your backup—First, Second, Third, Fourth, or Last.b. Use the Day selection box to specify the day of the week that you want to run your backup.c. Use the at selection box to specify time of day that you want to run your backup. | |
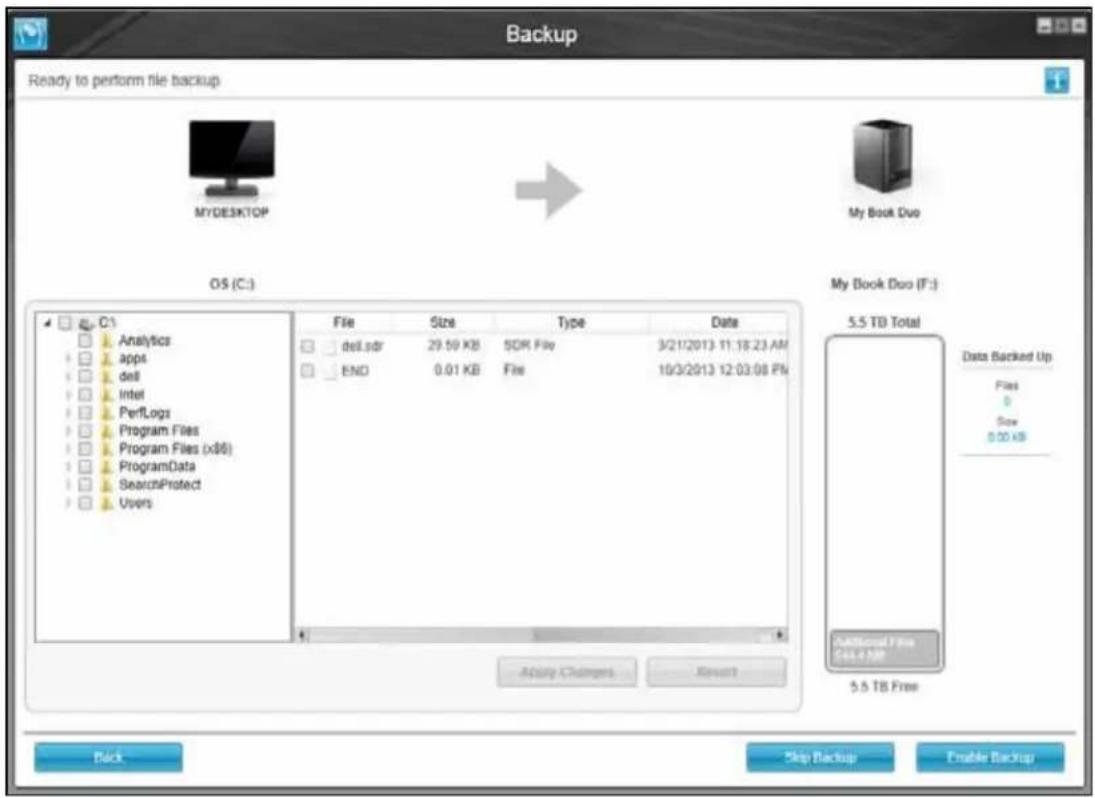
c. Click Next to display the initial Backup screen. The initial Backup screen displays depends on the type of backup you selected at step 13 on page 14. (See Figure 8 on page 16.)
-
On the initial Backup screen you can either:
-
Run your first backup—See “Backing Up Files” on page 33 before clicking Enable Backup.
■ Click Skip Backup to skip the backup. -
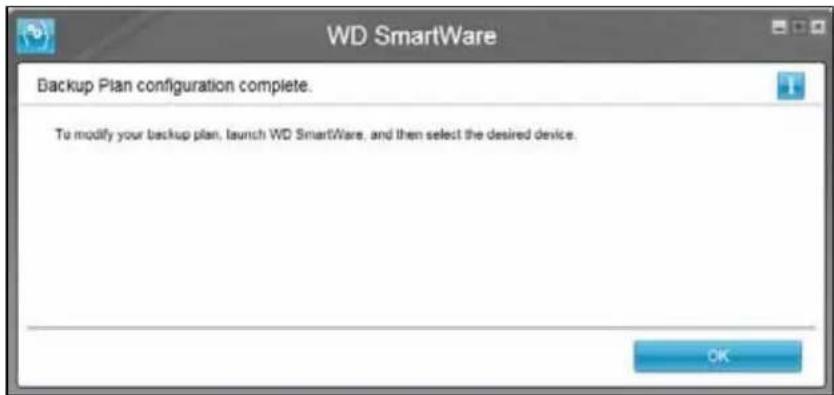
Click OK to close the Backup Plan configuration complete message:
text_image
WD SmartWare Backup Plan configuration complete. To modify your backup plan, launch WD SmartWare, and then select the desired device. OK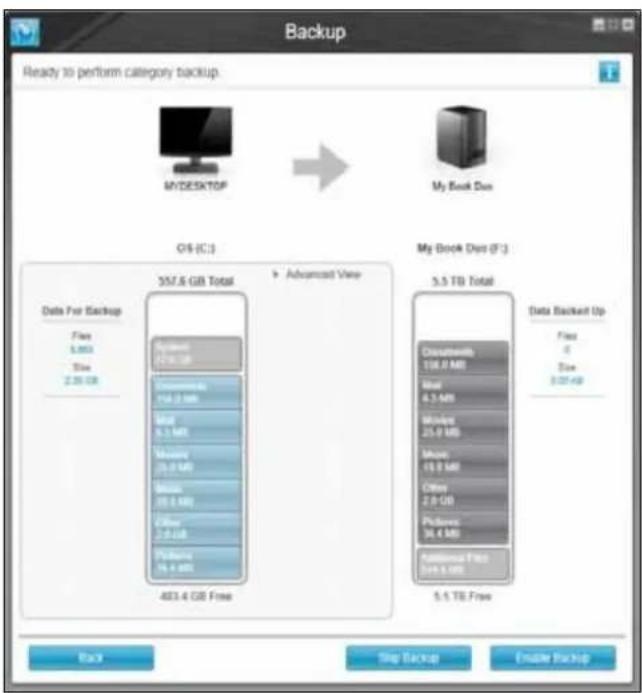
text_image
Backup Ready to perform category backup. MYDESKTOP My Book Data OS (C:) 557.6 GB Total Advanced View Data Per Backup Files 1.003 Size 2.00 GB Systems (2.0 MB) Documents 14.2 MB Mint 6.3 MB Memory (5.0 MB) Mines (5.0 MB) Other 2.0 GB Platforms (4.4 MB) 483.4 GB Free My Book Data (F:) 3.5 TB Total Data Backout Up Files 0 Size 3.00 GB Clearments 108.9 MB Mail 4.3 MB Movies 25.9 MB Music 15.0 MB Other 2.0 GB Platforms 34.4 MB Accessible Files 249.6 MB 5.5 TB Free Back Stop Backup Enable BackupInitial Category Backup Screen
Note: The initial Backup screens only appear one time—when you install the WD SmartWare software on your computer. After that, launching the software displays the Home screen so you can choose what you want to do.
text_image
Backup Ready to perform file backup MYDESKTOP OS (C:) My Book Duo C:\ Analytics appt del Intel PerfLogs Program Files Program Files (x86) ProgramData SearchProtect Users File Size Type Date del.sdr 29.59 KB SDR File 3/21/2013 11:18:23 AM END 0.01 KB File 10/3/2013 12:03:08 PM 5.5 TB Total Data Backed Up Files 0 Size 0.00 KB Back Skip Backup Enable BackupInitial File Backup Screen
Figure 8. Initial Backup Screens
3
WD SmartWare Software Functional Overview
This chapter provides a brief functional overview of the WD SmartWare software. It includes the following topics:
Home Tab Display
Backup Tab Displays
Retrieve Tab Displays
Settings Tab Display
Help Tab Display
All operational features and capabilities of the WD SmartWare software are presented in five tab-selected screen displays where:
| The . . . tab display Provides . . . | |
| Home Device icons and content gauges showing the total capacity and category structure of the selected backup source device and each available backup target device.If the selected backup source device has more than one internal hard drive or multiple hard drive partitions, or if an available backup target device has multiple partitions or network shares, the WD SmartWare software displays a selector box that you can use to specify the one you want to work with.See “Home Tab Display” on page 18. | |
| Backup One of two backup dialogs, depending on the backup mode that you select:The by-category dialog provides content gauges showing the total capacity and category structure of the selected backup source and backup target devices.The by-file dialog provides a folder view of the selected backup source device for selecting the files and folders that you want to back up.See “Backup Tab Displays” on page 25. | |
| Retrieve Three full-screen dialogs for selecting the:Backed up volume that you want to retrieve files fromDestination where you want to copy the retrieved filesFiles that you want to retrieveSee “Retrieve Tab Displays” on page 28. |
(Continued)
The ... tab display Provides ...
| Settings Buttons for opening dialogs to: | |
| Specify the number of backup versions that you want to keep for each fileSpecify a different destination folder for retrieved filesAutomatically check for WD SmartWare software updatesConfigure a remote Dropbox account for access by the WD SmartWare Pro softwareSee “Settings Tab Display” on page 30. | |
| Help Instant access to: | Detailed information about backing up and retrieving files and making your software setup selectionsWD Customer Support and software update servicesSee “Help Tab Display” on page 31. |
| In each display, the WD SmartWare software changes the names and graphic images to match the hardware configuration of the connected devices. | |
Note: In addition to the detailed Help tab information, each WD SmartWare display provides easy access to abbreviated online help to quickly guide you through your backup, retrieve, and settings tasks. Whenever you are uncertain about what to do, just click the info/online help icon in the upper-right corner of the display:

To close the info/online help screen after reading the online help, click the X icon in the upper-right corner of the help screen.
Home Tab Display
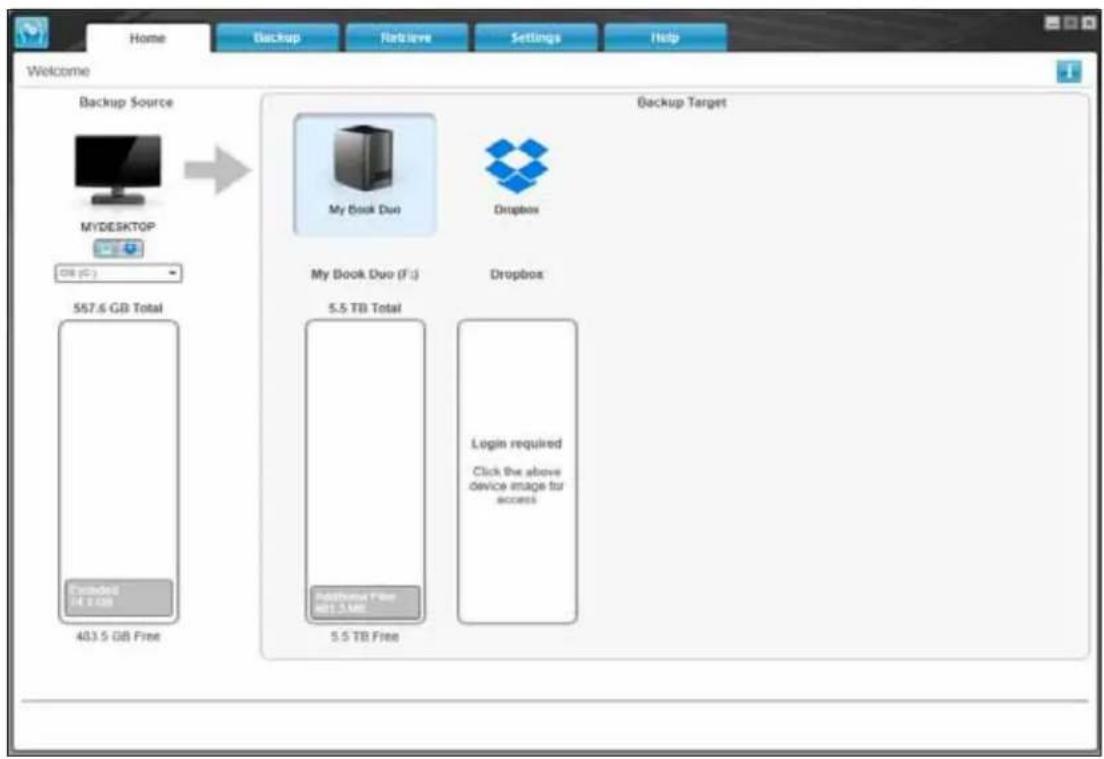
Use the Home tab display to view device content gauges and select:
■ The source device or drive partition that has the files you want to back up
■ The target device or device partition/network share that you want to back up files to or retrieve files from
See Figure 9 on page 19 and Table 1 on page 20 for a brief functional description of the Home tab display.
text_image
Home Backup Net Belize Settings Help Welcome Backup Source MyDESKTOP GB (C:) 557.6 GB Total Extended 14.2 GB 483.5 GB Free Backup Target My Book Duo Dropbox My Book Duo (F:) Dropbox 5.5 TB Total Login required Click the above device image for access Access Free MBT 3 MB 5.5 TB Free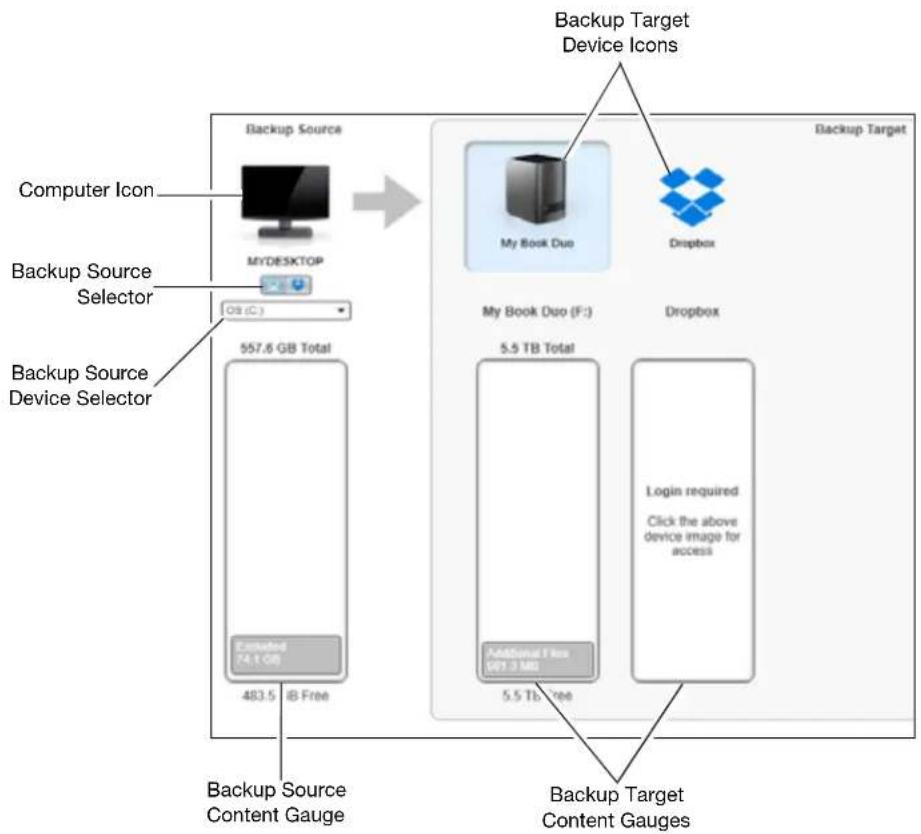
flowchart
graph TD
    A["Computer Icon"] --> B["MYDESKTOP"]
    B --> C["Backup Source Selector"]
    C --> D["Backup Source Device Selector"]
    D --> E["557.6 GB Total"]
    E --> F["Backup Source Content Gauge"]
    G["My Book Duo"] --> H["Backup Target Device Icons"]
    I["Dropbox"] --> J["Backup Target Device Icons"]
    K["Additional Fees 801.3 MB"] --> L["Backup Source Content Gauge"]
    M["Login required"] --> N["Backup Target Content Gauges"]
    O["5.5 TB Total"] --> P["Backup Source Content Gauge"]
    Q["5.5 TB Total"] --> R["Backup Source Content Gauge"]
    S["Additional Fees 801.3 MB"] --> T["Backup Source Content Gauge"]
Figure 9. Home Tab Display
Table 1. Home Tab Functional Description
| Display Component Description | |
| Activation code required icon | Not shown in Figure 9 on page 19: Signifies that the device is either a non-WD device or an unsupported WD device that requires a valid activation code and upgrade to the WD SmartWare Pro software for access. Signifies that the device is either a non-WD device or an unsupported WD device that requires a valid activation code and upgrade to the WD SmartWare Pro software for access. |
| Backup source Dropbox icon | Not shown in Figure 9 on page 19: Signifies that you have selected the Dropbox option for backup operations.Right-clicking the icon and selecting Select Account displays the Login Required dialog for configuring the account for access by the WD SmartWare Pro software. Signifies that you have selected the Dropbox option for backup operations.Right-clicking the icon and selecting Select Account displays the Login Required dialog for configuring the account for access by the WD SmartWare Pro software. |
| Backup source computer icon | Signifies that you have selected the computer option for backup operations and provides the name of the selected drive or drive partition.Right-clicking the icon displays a menu with the following options:■ Open-To displays the computer's file management utility listing.■ Properties-To displays the Windows System Properties dialog for the selected drive or drive partition. |
(Continued)
Table 1. Home Tab Functional Description (Continued)
| Display Component Description | |
| Backup source content gauge | The content gauge for the selected backup source device shows all of the files that are available for a category-type backup against a blue background in six categories where:This file category Includes files with these extensionsDocuments .doc, .txt, .htm, .html, .ppt, .xls, .xml, and other document extensionsMail .mail, .msg, .pst., and other mail extensionsMusic .mp3, .wav, .wma, and other music extensionsMovies .avi, .mov, .mp4, and other movie extensionsPictures .gif, .jpg, .png, and other picture extensionsOther Others that do not belong in the five main categoriesFor a complete list of all included file extensions, search for answer ID 3644 in the WD Knowledge Base athttp://support.wd.com.Note that:The System category, shown against a dark gray background, includes all of your operating system files that are not available for a category-type backup, including: system files, program files, applications, working files like .tmp and .log files, and any files that are stored in a Temp folder.When you select and run a file-type backup, the name of the System category changes to Excluded and it then includes all of the files that werenot includedin your file backup.The Retrieved category, also shown against a dark gray background, includes the files that you have retrieved from a prior backup. They, too, are not available for a category-type backup.The Additional Files category on the content gauge for your backup target device shows the system files and hidden files that your operating system put there when you installed the device.Because they change so frequently, Outlook .pst files are only backed up once every 24 hours for a continuous backup. This exclusion does not apply to other mail application files. For a scheduled backup, Outlook .pst files are backed up according to the schedule.Hovering the pointer over a category displays the number of files in the category. |
(Continued)
Table 1. Home Tab Functional Description (Continued)
| Display Component Description | |
| Backup source device selector | When the computer option is selected, lists all of your computer's internal hard drives, hard drive partitions, and direct-attached drives that are available as a backup source device. |
| Backup source selector Provides options for selecting the type of source device you want to back up:Selecting the computer option displays your computer icon and lists all of your computer's internal hard drives, hard drive partitions, and direct-attached drives in the device selector.Selecting the Dropbox option displays the Dropbox icon and hides the device selector. | |
| Backup target content gauge | After installing the WD SmartWare software—before running your first backup or copying any files to the device—the backup target content gauge shows only a small number of files in the Additional Files category. These are the system files and hidden files that your computer's operating system put there when you installed the device.After running a backup or copying files to the device, the backup target content gauge shows:All of the files that have been backed up in the same categories as the content gauge for the backup source device (see “Backup source content gauge” on page 21)Any other files that you have copied or saved to the device in the Additional Files category |
Backup target device icon Provides the name of the backup target device connected to your computer.If you have more than one supported device connected to your computer, left-click the one that you want to use for backup and retrieve functions. The WD SmartWare software highlights your selection with a light-blue background:Selected Device 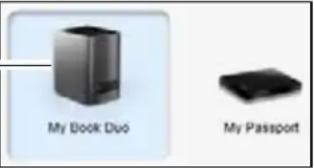 | |
(Continued)
Table 1. Home Tab Functional Description (Continued)
| Display Component Description | |
| Backup target device icon (continued) | Right-clicking a direct-attached device icon displays a menu with the following options:■Open—Displays the device listing in your computer's file management utility■Properties—Displays the Windows Drive Properties dialog■Safely remove—Prepares your system to disconnect the driveNote:The Safely remove option is not available for non-WD drives.Right-clicking a network-attached device icon displays a menu with the following options:■Open—To display the device listing in your computer's file management utility■Dashboard—To display the Web interface for configuring the device■Map—To display the Windows Map Network Drive dialog■Create Shortcut—To add a shortcut to the device to your desktop display■Alerts—To display the WD SmartWare WD Alerts reports■Properties—To display the Device Details and Troubleshooting information for the deviceRight-clicking the Dropbox folder icon displays a link to the Dropbox Login Required dialog for configuring your Dropbox account for access by the WD SmartWare Pro software. |
| Backup target device selector | Not shown in Figure 9 on page 19: The backup target device selector appears under the icon for each supported backup target device that has more than one drive partition or network share. The drive partition or network share that you select is the target for subsequent backup operations and the source for subsequent retrieve operations. The backup target device selector appears under the icon for each supported backup target device that has more than one drive partition or network share. The drive partition or network share that you select is the target for subsequent backup operations and the source for subsequent retrieve operations. |
| Device display scroll pointers | Not shown in Figure 9 on page 19:  One installation of the WD SmartWare software supports as many external devices as you system can handle. When the number of connected devices exceeds the display capacity, the WD SmartWare software displays left/right device display scroll pointers so you can see them all. One installation of the WD SmartWare software supports as many external devices as you system can handle. When the number of connected devices exceeds the display capacity, the WD SmartWare software displays left/right device display scroll pointers so you can see them all. |
(Continued)
Table 1. Home Tab Functional Description (Continued)
| Display Component Description | |
| Device locked icon Not shown in Figure 9 on page 19: | |
 Signifies that the device is password protected and locked. Signifies that the device is password protected and locked. | |
| Free trial countdown icon Not shown in Figure 9 on page 19: | |
 Signifies that non-WD devices, unsupported devices, and Dropbox account folders are being accessed by a 30-day free trial of the WD SmartWare Pro software upgrade. Signifies that non-WD devices, unsupported devices, and Dropbox account folders are being accessed by a 30-day free trial of the WD SmartWare Pro software upgrade. | |
| Login required icon Not shown in Figure 9 on page 19: | |
 Signifies that a valid login user name and password are required to access secured network-attached storage devices. Signifies that a valid login user name and password are required to access secured network-attached storage devices. | |
| No writable partition icon Not shown in Figure 9 on page 19: | |
 Appears when the WD SmartWare software cannot find a valid volume or share on the device. You must configure the device before you can select it for WD SmartWare backup and retrieve functions. Appears when the WD SmartWare software cannot find a valid volume or share on the device. You must configure the device before you can select it for WD SmartWare backup and retrieve functions. | |
Backup Tab Displays
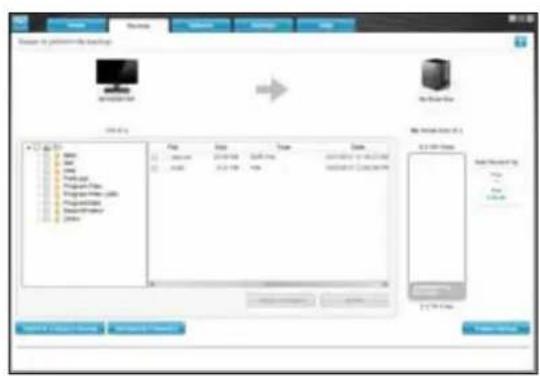
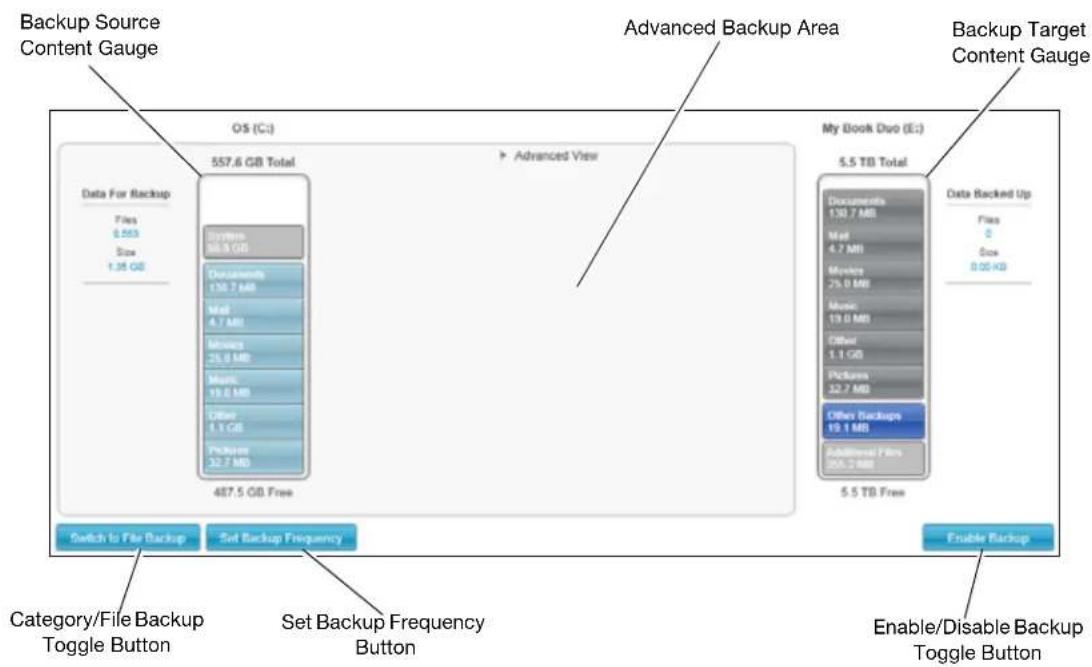
The WD SmartWare software provides one of two different Backup tab displays, depending on how you want to select files to back up:
■ By category—As shown in the content gauges
- By file—As shown in the folder structure of your computer's internal hard drive
Use the WD SmartWare Backup tab displays to select the files or categories of files that you want to back up and control the backup operation.
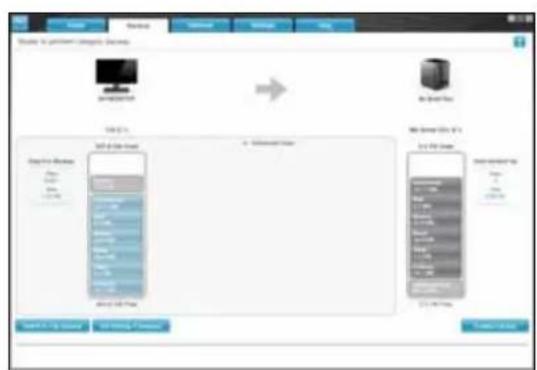
See Figure 10 below and Table 2 on page 26 for a brief functional description of the Backup tab displays.
flowchart
graph TD
    A["Server"] --> B["Start Menu"]
    B --> C["To-Set Menu"]
    C --> D["File Path"]
    D --> E["End Menu"]
Backup by Category Display
text_image
Windows File Edit View Help Browse... Save As... Add As... Remove As... Edit As... Delete As... Edit As... Save As... Add As... Remove As... Edit As... Save As... Delete As... Edit As... Save As... Add As... Remove As... Edit As... Save As... Add As... Remove As... Edit As... Save As... Add As... Remove As... Edit As... Save As... Add As... Remove As... Edit As... Save As... Add As... Remove As... Edit As... Save As... Add As... Remove As... Edit As... Save As... Add As... Remove As... Edit As... Save As... Add As... Remove As... Edit As... Save As... Add As... Remove As... EditAs... Save As... Add As... Remove As... EditAs... Save As... Add As... Remove As... EditAs... Save As... Add As... Remove As... EditAs... Save As... Add As... Remove As... EditAs... Save As... Add As... Remove As... EditAs... Save As... Add As... Remove As... EditAs... Save As... Add As... Remove As... EditAs... Save As... Add As... Remove As... EditAs... Save As Add As Remove As EditAs Save As Add As Remove As EditAs Save As Add As Remove As EditAs Save As Add As Remove As EditAs Save As Add As Remove As EditAs Save As Add As Remove As EditAs Save As Add As Remove As EditAs Save As Add As Remove As EditAs Save As Add As Remove As EditAs Save As Set as: Set as: Set as: Set as: Set as: Set as: Set as: Set as: Set as: Set as: Set as: Set as: Set as: Set as: Set as: Set as: Set as: Set as: Set as: Set as: Set as: Set as: Set as: Set as: Set as: Set as: Set as: Set as: Set as: Set as: Set as: Set as: Set as: Set as: End Subs: End Subs: End Subs: End Subs: End Subs: End Subs: End Subs: End Subs: End Subs: End Subs: End Subs: End Subs: End Subs: End Subs: End Subs: End Subs: End Subs: End Subs: End Subs: End Subs: End Subs: End Subs: End Subs: End Subs: End Subs: End SubS End SubS End SubS End SubS End SubS End SubS End SubS End SubS End SubS End SubS End SubS End SubS End SubS End SubS End SubS End SubS End SubS End SubS End SubS End SubS End SubS End SubS End SubS End SubS End SubS End SubSBackup by Files Display
text_image
Backup Source Content Gauge OS (C:) 557.6 GB Total Advanced View Data For Backup Files 0.553 Size 1.25 GB Documents 15.7 MB Intel 4.7 MB Music 25.0 MB Music 19.0 MB Other 1.1 GB Prelease 32.7 MB 487.5 GB Free Switch to File Backup Set Backup Frequency Category/File Backup Toggle Button Set Backup Frequency Button Advanced Backup Area My Book Duo (E:) 5.5 TB Total Documents 130.7 MB Intel 4.7 MB Music 25.0 MB Music 19.0 MB Other 1.1 GB Pictures 32.7 MB Other Backups 19.1 MB Additional Files 308.2 MB 5.5 TB Free Data Backed Up Files 0 Size 0.00 KB Enable/Disable Backup Toggle Button Backup Target Content GaugeFigure 10. Backup Tab Displays
Table 2. Backup Tab Functional Description
| Display Component Description | |
| Advanced backup area In category mode, the initial/default configuration of the WD SmartWare software is to back up all categories of your files. In this configuration, the advanced backup area is blank.Clicking Advanced View displays a backup files selection box that you can use to specify the categories of files that you want to back up: | |
(Continued)
Table 2. Backup Tab Functional Description (Continued)
| Display Component Description | |
| Advanced backup area (continued) | In file mode, the initial/default configuration of the WD SmartWare software is withnoneof the files/folders selected for backup. After selecting the files or folders that you want to back up, clicking:ApplyChangescreates a custom backup plan using your recent selectionsRevertclears your recent selections and redisplays the prior applied configuration |
| Backup schedule reminder button | Not shown in Figure 10 on page 25:[xK7c]For scheduled backups, clicking the button displays a status dialog that:Shows the date and time of your next scheduled backup, the last backup that might have been missed, and the last completed backupProvides a Backup Nowbutton for bypassing the schedule and running the backup now |
| Backup source content gauge | Same as the content gauge for the backup source device on the Home tab display. (See “Backup source content gauge” on page 21.) |
| Backup target content gauge | Same as the content gauge for the backup target device on the Home tab display. (See “Backup target content gauge” on page 22.) |
| Category/File Backup toggle button | Switches the backup mode between categories and files:Category mode—Backs up files according to their categories, as shown in the content gauges.The button name isSwitch to File Backupwhen the backup mode is category.File mode—Backs up files according to their folder structure on the selected backup source drive.The button name isSwitch to Category Backupwhen the backup mode is file. |
| Enable/Disable Backup toggle button | Starts and stops the backup. |
| Set Backup Frequency button | Opens the Set Backup Frequency dialog for selecting either continuous or scheduled backups. A continuous backup runs all the time. A scheduled backup runs only on specified days at specified times. |
Retrieve Tab Displays
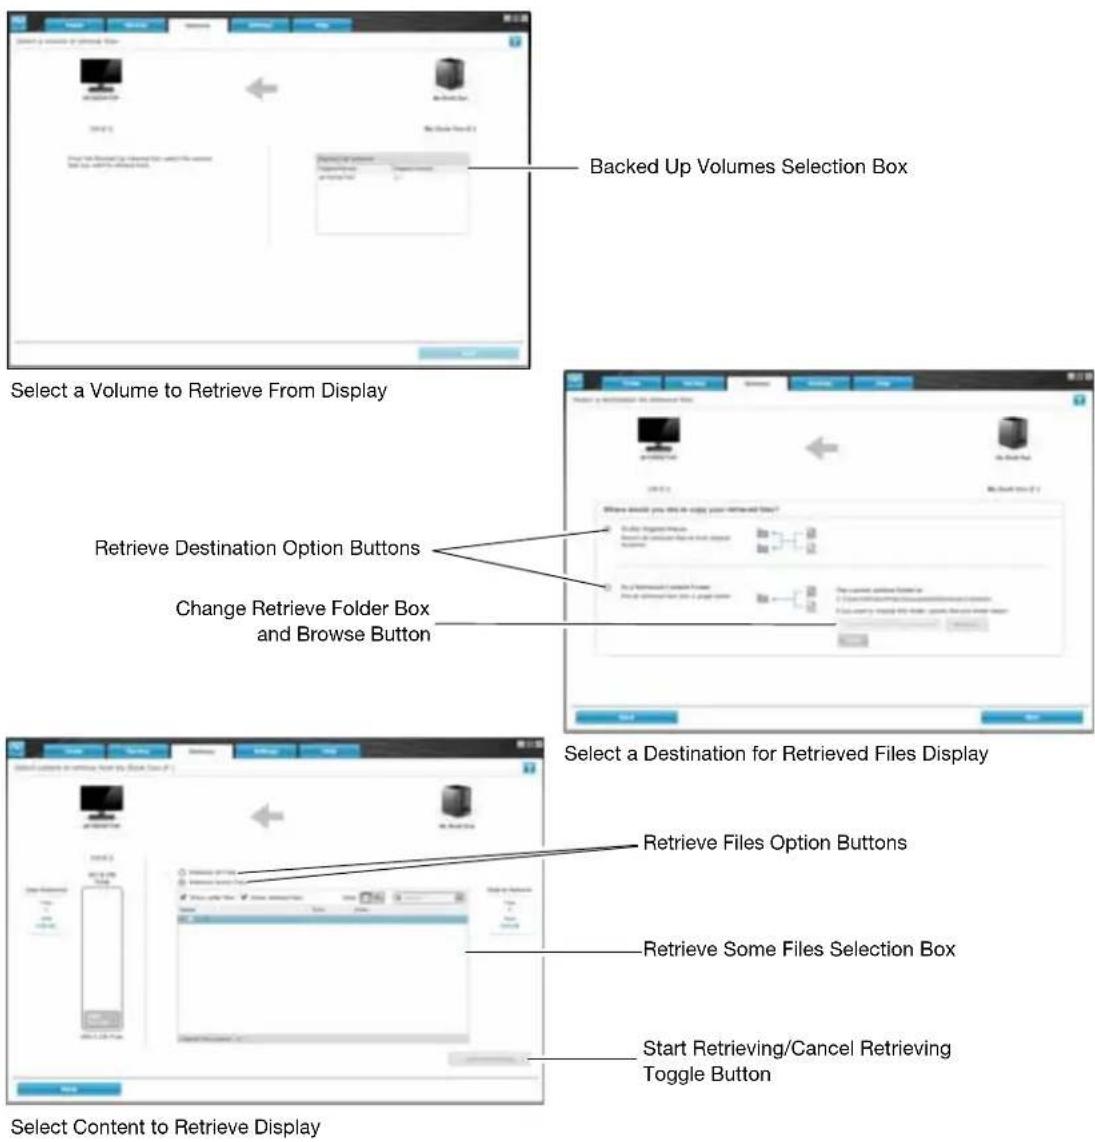
Three WD SmartWare software Retrieve tab displays guide you through the tasks for finding backup files and copying them to the selected backup source device:
■ Selecting the backup volume to retrieve from
■ Selecting the destination for retrieved files
■ Selecting the files to retrieve from the selected backup target device
See Figure 11 below and Table 3 on page 29 for a brief functional description of the Retrieve tab displays.
text_image
Backed Up Volumes Selection Box Select a Volume to Retrieve From Display Retrieve Destination Option Buttons Change Retrieve Folder Box and Browse Button Select a Destination for Retrieved Files Display Retrieve Files Option Buttons Retrieve Some Files Selection Box Start Retrieving/Cancel Retrieving Toggle Button Select Content to Retrieve DisplayFigure 11. Retrieve Tab Displays
Table 3. Retrieve Tab Functional Description
| Display Component Description | |
| Backed Up Volumes selection box | Lists the backed up volumes that are available to retrieve files from on the selected backup target device.You must select a backup volume before you can click Next to continue with the retrieve operation. |
| Change retrieve folder box and Browse button | By default, the WD SmartWare software creates and uses a folder named Retrieved Contents in the My Documents folder for your user name. If you want to specify a different folder, use the Browse function and click Apply. |
| Retrieve destination option buttons | Specify where you want to copy the files retrieved from the selected backup target device:To the Original Places copies the retrieved files to the same location that they were backed up from.To a Retrieved Content Folder copies all of the retrieved files to a single folder. |
| Retrieve files option buttons | By default, the Retrieve Some Files option is selected and the WD SmartWare software displays the Retrieve Some Files selection box that you can use to find and retrieve only selected files or folders.Selecting the Retrieve All Files option closes the Retrieve Some Files selection box and the WD SmartWare software retrieves all of the files from the selected backup volume on the selected backup target device. |
| Retrieve some files selection box | Displays all of the files from the selected backed up volume in a folder structure with check boxes for selecting individual files or folders: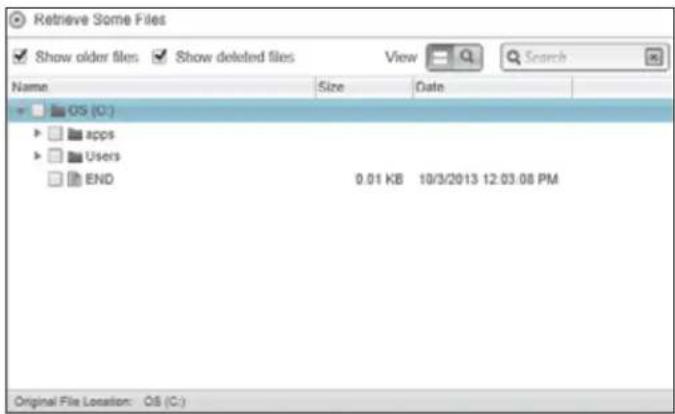 |
| Start/Cancel Retrieving toggle button | Controls retrieve operations by starting and canceling the retrieve. |
Settings Tab Display
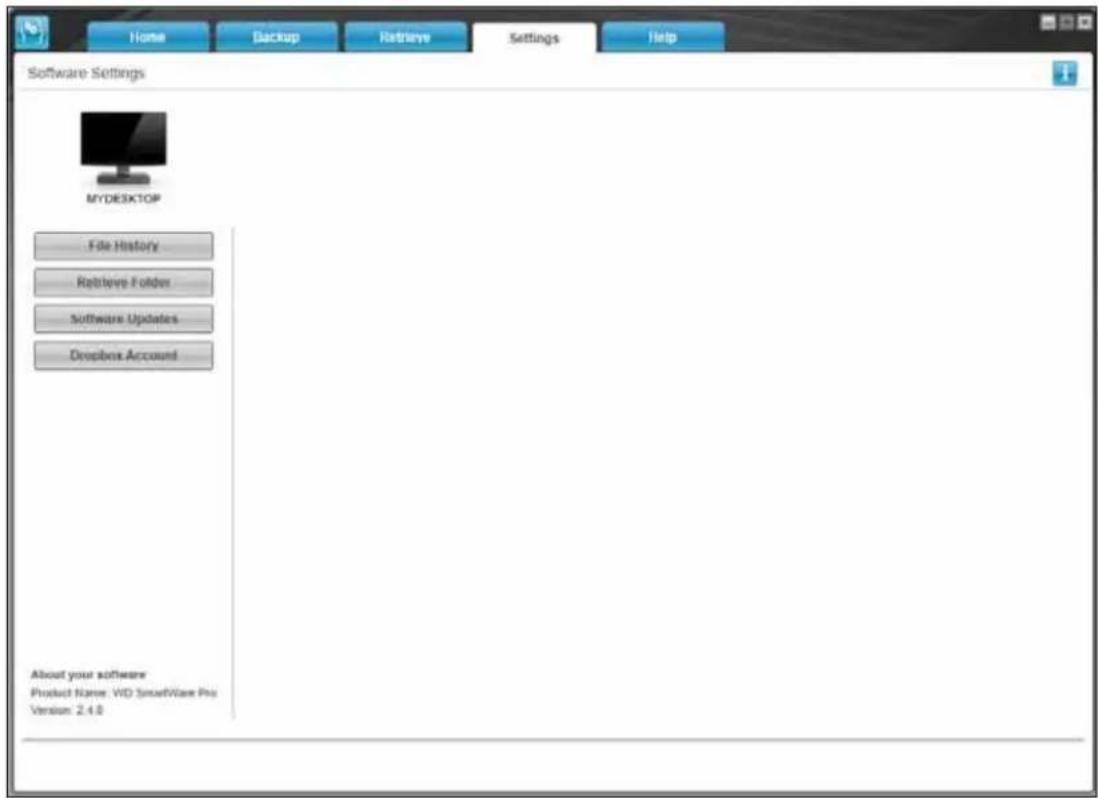
See Figure 12 and Table 4 for a brief functional description of the Settings tab display.
text_image
Home Backup Retrieve Settings Help Software Settings MYDESKTOP File History Retrieve Folder Software Updates Dropbox Account About your software Product Name: VID SmartWare Pro Version: 2.4.0Figure 12. Settings Tab Display
Table 4. Settings Tab Functional Description
| Display Component Description | |
| Dropbox Account button D | splays the Dropbox Account dialog for configuring a remote Dropbox folder for access by the WD SmartWare Pro software. |
| File History button Displays | the Set File History dialog for specifying the number of backup versions that you want to keep for each file. |
| Retrieve Folder button Dis | plays the Set Retrieve Folder dialog for specifying a different destination folder for retrieved files. |
| Software Updates button D | displays the Software Updates dialog for enabling/disabling the option that automatically checks for software updates. |
Help Tab Display
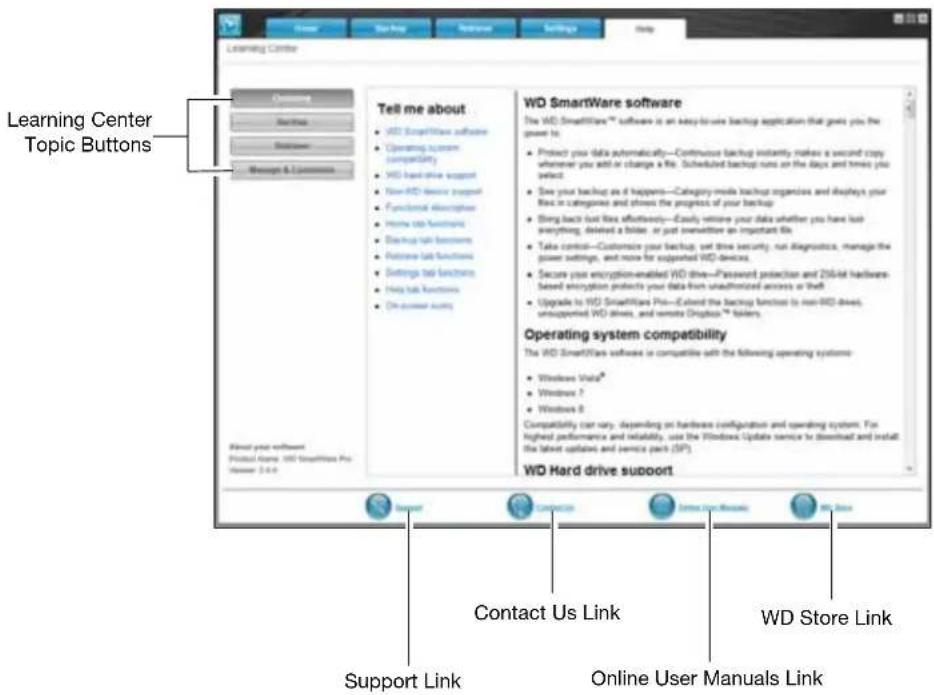
The WD SmartWare Help tab display provides quick access to Learning Center topics and links to online support services.
See Figure 13 and Table 5 for a brief functional description of the Help tab display.
text_image
Learning Center Topic Buttons Tell me about • WD SmartWare software • Operating System compatibility • WD hard drive support • New IWD device support • Functional description • Home tab functionality • Display tab functions • Software tab functions • Settings tab functions • Help tab functions • On-power Audio WD SmartWare software The WD SmartWare™ software is an easy-to-use backup application that gets you the power to: • Protect your data automatically—Continuous backup instantly makes a second copy whenever you add or change a file. Scheduled backup runs on the days and times you select. • See your backup as it happens—Category media backup organizes and displays your files in categories and shows the progress of your backup. • String back test files effectively—Exactly welcome your data whether you have look everything, deleted a folder, or just overnight an important file. • Take controls—Customize your backup, set time security, run diagnosis, manage the power settings, and move for supported WD devices. • Secure your encryption-enabled WD drive—Password protection and ZM-64 hardware-based encryption products your data from unauthorized access or theft. • Upgrade to WD SmartWare Pro—Extend the backup functions to new IWD drives, unsupported WD drives, and remote Graphics™ folders. Operating system compatibility The WD SmartWare software is compatible with the following operating systems: • Windows Vials® • Windows 7 • Windows 8 Compatibility can vary: depending on hardware configuration and operating system. For highest performance and reliability, use the Windows Update service to download and install the latest updates and service pack (SP). WD Hard drive support Support Link Contact Us Link Online User Manuals Link WD Store LinkFigure 13. Help Tab Display
Table 5. Help Tab Functional Description
| Display Component Description | |
| Contact Us link Uses your Web browser to connect to the WD Service & Support Contact Us page at http://support.wd.com/contact. | |
| Learning Center topic buttons | Provide links to display the main Learning Center help topics:OverviewBackupRetrieveManage & Customize |
| Online User Manuals link Uses your Web browser to connect to the user manual page for WD SmartWare manuals at:http://www.wd.com/wdproducts/wdsmartware/um.asp.There, you can select and open the online version of the user manual for your WD device. | |
(Continued)
Table 5. Help Tab Functional Description (Continued)
| Display Component Description | |
| Support link Uses your Web browser to connect to the WD Service & Support Home page athttp://support.wd.com. | |
| WD Store link Uses your Web browser to connect to the WD online store at:http://store.westerndigital.com/store/wdus. |
4
Backing Up Files
This chapter includes the following topics:
How the Backup Function Works Backing Up Files
How the Backup Function Works
The WD SmartWare software automatically backs up all your important files to the selected backup target device—music, movies, photos, documents, email, and other files. Continuous backup instantly makes a second copy whenever you add or change a file on the selected backup source device. Scheduled backups run on the days and times you select.
After the WD SmartWare software categorizes the different types of files on the selected backup source device, clicking the Enable Backup button backs all of them up to the selected backup target device. Or you can select specific files, folders, or categories of files to back up.
After performing a backup, the WD SmartWare software protects your files by backing up any:
■ New file that is created on or copied to the selected backup source device
■ Existing file that is changed in any way
This protection is automatic—the WD SmartWare software does it for you without any action on your part—just leave the backup source and target devices connected to your computer.
Note: Backup protection is automatic for as long as the backup source and target devices are connected to your computer. Then, whenever you disconnect and reconnect either device, the WD SmartWare software rescans the backup source device for new or changed files and resumes automatic backup protection.
Backing Up Files
- In the Backup Source area of the Home screen, select the device that has the files you want to back up:
a. Use the backup source selector to specify whether you want to back up files from a local hard drive or from a remote Dropbox folder:
- By default, the computer option is selected and the computer icon signifies that the backup source device will be either an internal hard drive or drive partition, or a local direct-attached external hard drive:
- Selecting the Dropbox option displays the Dropbox icon to signify that the backup source device will be a remote Dropbox folder:

b. If the selected backup source device has more than one internal hard drive, multiple drive partitions, or external hard drives, use the backup source device selector to select the one that you want to back up:

- In the Backup Target area of the Home screen:
a. If you have more than one backup target device connected to your computer, click the icon of the one that you want to back up files to:
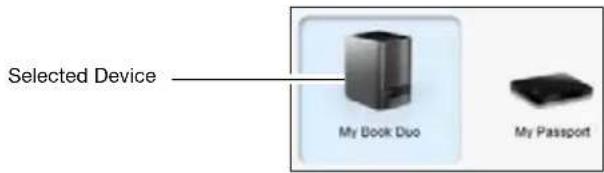
text_image
Selected Device My Book Duo My Passportb. Verify that a light-blue background highlights the selected device.
c. If the selected backup target device has more than one drive partition or network share, use the backup target device selector under the device icon to select the one that you want to use:

-
Click the Backup tab to display the Backup screen (see Figure 10 on page 25).
-
The initial/default configuration of the WD SmartWare software is for continuous backups. If you want to configure scheduled backups, click Set Backup Frequency to display the Set Backup Frequency dialog:
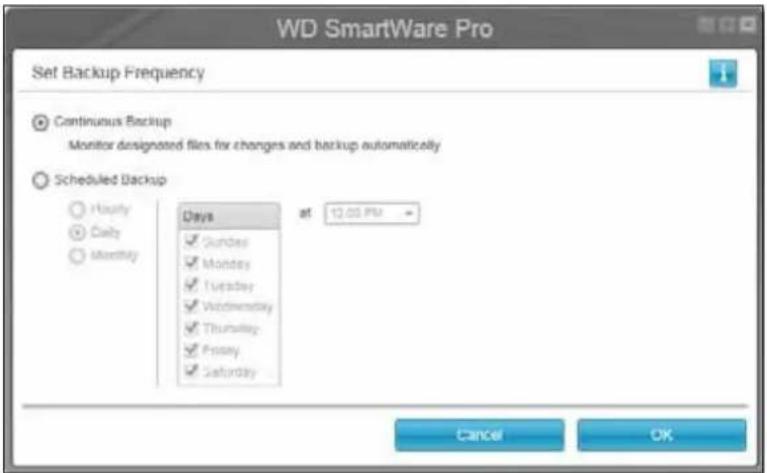
text_image
WD SmartWare Pro Set Backup Frequency Continuous Backup Monitor designated files for changes and backup automatically Scheduled Backup Hourly Daily Monthly Days at 12.03 PM ✓ Stunden ✓ Monday ✓ Tuesday ✓ Wednesday ✓ Thursday ✓ Primary ✓ Saturday Cancel OK- On the Set Backup Frequency dialog:
a. Select the Scheduled Backup option.
b. Select the Hourly, Daily, or Monthly option and use the check boxes and selection boxes to schedule your backups:
| Selecting . . . | Performs a backup . . . |
| Hourly Every hour, on the hour. | |
| Daily On the selected days of the week, at the selected time:a. Select or clear the Days check boxes to specify the days of the week that you want to run your backup.b. Use the at selection box to specify the time of day that you want to run your backup. | |
| Monthly On the selected day of the month, at the selected time:a. Use the Every selection box to specify which occurrence of the day that you want to run your backup—First, Second, Third, Fourth, or Last.b. Use the Day selection box to specify the day of the week that you want to run your backup.c. Use the at selection box to specify time of day that you want to run your backup. | |
c. Click OK to save your schedule and close the Set Backup Frequency dialog.
- On the Backup screen:
| IF you want to back up . . . on the selected backup source device, | THEN . . . |
| All of the categories of files Proceed to step 7. | |
| Selected categories of files | Skip to step 8 on page 37. |
| All of the files and folders Skip to step 9 on page 38. | |
| Selected files and folders | Skip to step 10 on page 39. |
- To back up all of the categories of files on the selected backup source device:
a. Verify that the backup mode is category and that Ready to perform category backup appears at the upper-left corner of the Backup screen.
If the backup mode is file and Ready to perform file backup appears there, click the Switch to Category Backup button and OK at the Switching Backup Plan prompt.
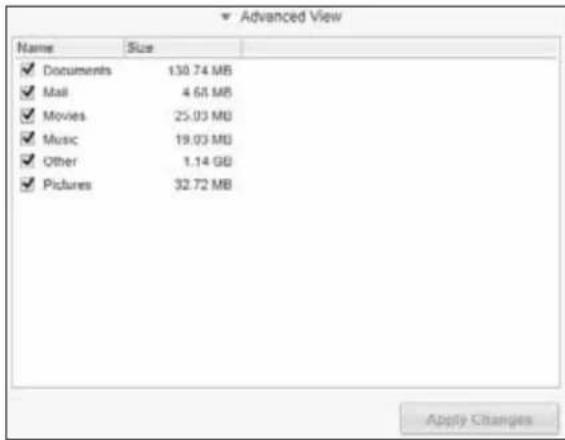
b. Click Advanced View to open the backup by categories selection box and verify that the check boxes for all six categories are selected:
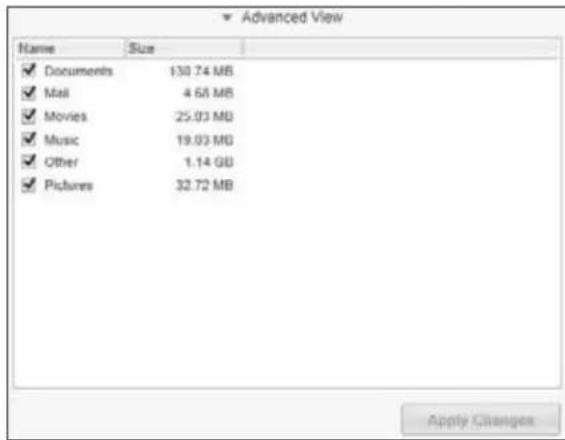
text_image
Advanced View Name Size Documents 130.74 MB Mail 4.68 MB Movies 25.03 MB Music 19.03 MB Other 1.14 GB Pictures 32.72 MB Apply Changesc. Select any cleared check boxes and then click Apply Changes to create a custom backup plan and refresh the content gauges.
d. Click Enable Backup to begin backing up all categories of files on the backup source device, at the specified backup frequency, and skip to step 11 on page 40.
Note: If you configured a scheduled backup at step 5 on page 34, the WD SmartWare software adds a backup schedule reminder button to the Backup screen:

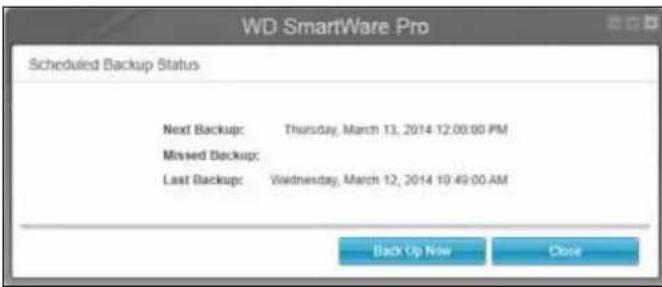
Clicking the reminder button displays the Scheduled Backup Status dialog that shows the date and time of your next scheduled backup, the last backup that might have been missed, and the last completed backup:
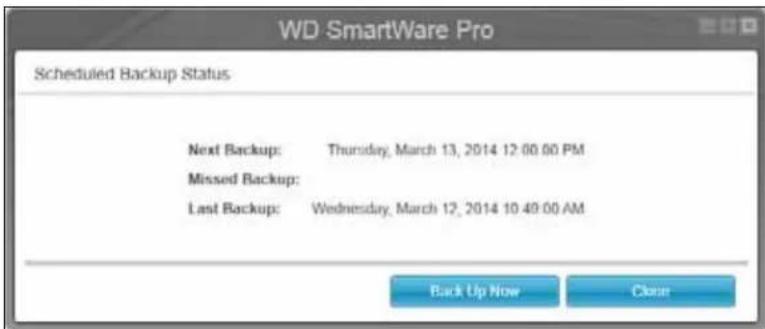
text_image
WD SmartWare Pro Scheduled Backup Status Next Backup: Thursday, March 13, 2014 12:00:00 PM Missed Backup: Last Backup: Wednesday, March 12, 2014 10:49:00 AM Back Up Now CloseClick Back Up Now if you want to bypass the schedule and run the backup now.
- To backup selected categories of files on the selected backup source device:
a. Verify that the backup mode is category and that Ready to perform category backup appears at the upper-left corner of the Backup screen.
If the backup mode is file and Ready to perform file backup appears there, then click the Switch to Category Backup button and OK at the Switching Backup Plan prompt.
b. Click Advanced View to open the backup by categories selection box:
text_image
Advanced View Name Size ✓ Documents 130.74 MB ✓ Mail 4.61 MB ✓ Movies 25.03 MB ✓ Music 19.03 MB ✓ Other 1.14 GB ✓ Pictures 32.72 MB Apply Changesc. In the backup by categories selection box:
- Clear the check boxes for the categories of files that you want to exclude from the backup.
■ Select the check boxes for the categories of files that you want to include in the backup.
d. Click Apply Changes to create a custom backup plan and refresh the content gauges.
e. Click Enable Backup to begin backing up the selected categories of files on the selected backup source device, at the specified backup frequency, and skip to step 11 on page 40.
Note: If you configured a scheduled backup at step 5 on page 34, the WD SmartWare software adds a backup schedule reminder button to the Backup screen:

Clicking the reminder button displays the Scheduled Backup Status dialog that shows the date and time of your next scheduled backup, the last backup that might have been missed, and the last
completed backup:
text_image
WD SmartWare Pro Scheduled Backup Status Next Backup: Thursday, March 13, 2014 12:00:00 PM Missed Backup: Last Backup: Wednesday, March 12, 2014 10:49:00 AM Back Up Now CloseClick Back Up Now if you want to bypass the schedule and run the backup now.
- To back up all of the files and folders on the selected backup source device:
a. Verify that the backup mode is file and that Ready to perform file backup appears at the upper-left corner of the Backup screen.
If the backup mode is category and Ready to perform category backup appears there, then click the Switch to File Backup button and OK at the Switching Backup Plan prompt.
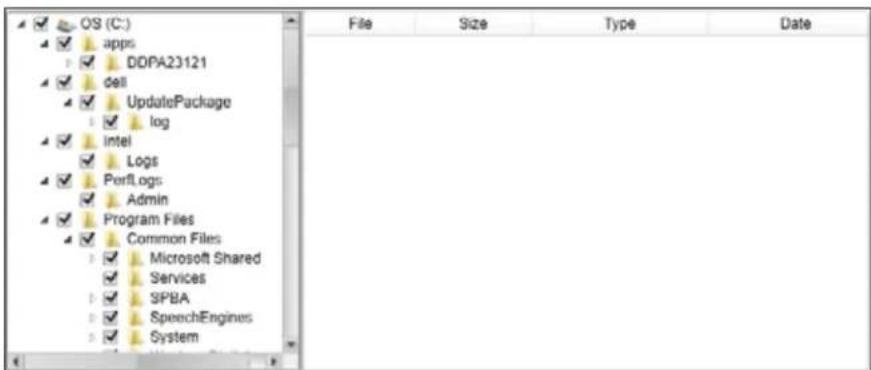
b. In the backup by files selection box, select the check box for the backup source device:

c. Open the folder structure and verify that selecting the check box for the backup source device automatically selected the check boxes for all of the files and folders on the device:.
text_image
OS (C:) apps DDPA23121 dell UpdatePackage log Intel Logs PerfLogs Admin Program Files Common Files Microsoft Shared Services SPBA SpeechEngines Systemd. Click Apply Changes to create a custom backup plan using your selections.
Note: Clicking Revert clears your recent selections and redisplays the prior applied configuration.
e. Click Enable Backup to begin backing up all of files and folders on the selected backup source devices, at the specified backup frequency, and skip to step 11 on page 40.
Note: If you configured a scheduled backup at step 5 on page 34, the WD SmartWare software adds a backup schedule reminder button to the Backup screen:

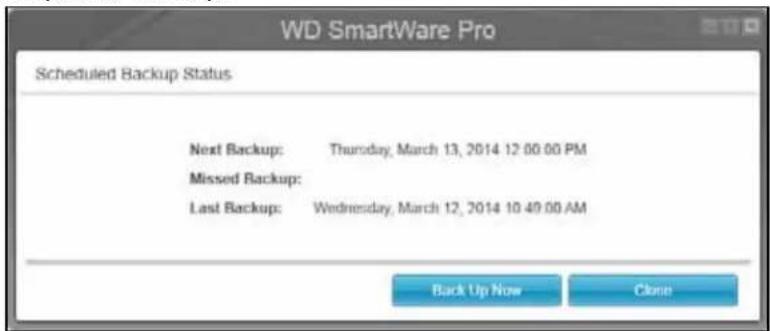
Clicking the reminder button displays the Scheduled Backup Status dialog that shows the date and time of your next scheduled backup, the last backup that might have been missed, and the last completed backup:
text_image
WD SmartWare Pro Scheduled Backup Status Next Backup: Thursday, March 13, 2014 12 00:00 PM Missed Backup: Last Backup: Wednesday, March 12, 2014 10 40:00 AM Back Up Now CloseClick Back Up Now if you want to bypass the schedule and run the backup now.
- To backup selected files or folders from selected backup source device:
a. Verify that the backup mode is file and that Ready to perform file backup appears at the upper-left corner of the Backup screen.
If the backup mode is category and Ready to perform category backup appears there, then click the Switch to File Backup button and OK at the Switching Backup Plan prompt.
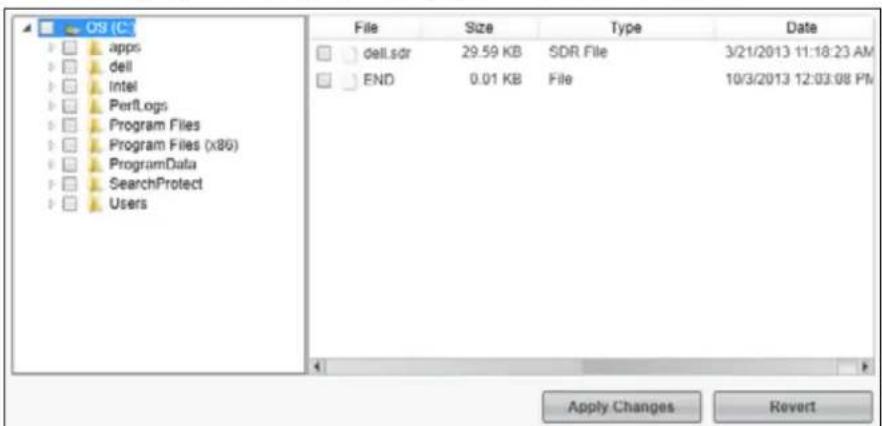
b. In the backup by files selection box, open the folder structure:
text_image
OSI (C:) apps dell Intel PerfLogs Program Files Program Files (x86) ProgramData SearchProtect Users File Size Type Date dell.sdr 29.59 KB SDR File 3/21/2013 11:18:23 AM END 0.01 KB File 10/3/2013 12:03:08 PM Apply Changes Revertc. Select the check boxes for the individual files or folders that you want to back up. Note that selecting a folder check box automatically selects all of the subfolders and files in the folder.
d. Click Apply Changes to create a custom backup plan using your selections.
Note: Clicking Revert clears your recent selections and redispplays the prior applied configuration.
e. Click Enable Backup to begin backing up the selected files or folders on the selected backup source device, at the specified backup frequency, and proceed to step 11 on page 40.
Note: If you configured a scheduled backup at step 5 on page 34, the WD SmartWare software adds a backup schedule reminder button to the Backup screen:

Clicking the reminder button displays the Scheduled Backup Status dialog that shows the date and time of your next scheduled backup, the last backup that might have been missed, and the last completed backup:

text_image
WD SmartWare Pro Scheduled Backup Status Next Backup: Thursday, March 13, 2014 12 00 00 PM Missed Backup: Last Backup: Wednesday, March 12, 2014 10 49 00 AM Back Up Now CloseClick Back Up Now if you want to bypass the schedule and run the backup now.
- During the backup:
■ A progress bar and message indicate the amount of data that has been backed up.
■ For a category backup:
- The blue background for categories of files in the content gauge for the backup source device changes to yellow/amber for all of the files that have not yet been backed up.
- The gray background for categories of files in the content gauge for the backup target device changes to blue as the backup completes.
■ You can do other things with your computer, as the WD SmartWare software backs up your files in the background.
■ The Enable Backup toggle button changes to Disable Backup for disabling the backup.
- Appearance of a backup successfully finished message means that the backup completed normally.
If any files could not be backed up, the WD SmartWare software displays a:
■ Caution message indicating the number of files involved
■ View link that you can click to see a list of the files and the reasons they were not backed up
Some applications and running processes can keep files from being backed up. If you cannot determine why some of your files were not backed up, try:
■ Saving and closing all of your open files
■ Closing all running applications—including your email program and Web browser
Important:
Appearance of a Caution message indicating that the backup target device is full means that there is not enough free space on the device to complete the backup. The best long-term solution would be to relegate the device to long-term archive storage and:
a. Click the Help tab.
b. Click the WD Store link to view the Western Digital Online Store website.
c. Click External Hard Drives and select the best drive to suit your future requirements.
- If you clicked Disable Backup at step 11, the disable backup confirmation prompt reminds you that the WD SmartWare software runs your backup job in the background so you can continue using your computer for other things during the backup.
To continue, click either:
■ No to disregard your request and do not disable the backup
■ Yes to follow through with your request and disable the backup
- If you backed up files by category and the backup source device has more than one internal hard drive or multiple drive partitions, repeat the backup procedure for each one.
Retrieving Files
This chapter includes the following topics:
How the Retrieve Function Works Retrieving Files
How the Retrieve Function Works
The WD SmartWare software makes it easy for you to retrieve backed up files from your backup target device and copy them to either:
■ Their original locations on the backup source device
■ A special retrieve content folder
Retrieve is generally a five-step process:
- On the Home screen, select:
■ The retrieve destination device—the backup source device that you want to copy retrieved files to
■ The retrieve source device—the backup target device that has the files you want to retrieve
- Select the backed up volume on the retrieve source device that you want to retrieve files from.
- Specify the destination where you want to copy the retrieved files—either their original locations on the backup source device or a special retrieve content folder.
- Specify what you want to retrieve—either individual files and folders, or everything.
- Retrieve the files.
Retrieving Files
- In the Backup Source area of the Home screen, select the retrieve destination (backup source) device that you want to copy retrieved files to:
a. Use the backup source selector to specify whether you want to copy retrieved files to a local hard drive or to a remote Dropbox folder:

- By default, the computer option is selected and the computer icon signifies that the retrieve destination will be either an internal hard drive or drive partition, or a local direct-attached external hard drive:
- Selecting the Dropbox option displays the Dropbox icon to signify that the retrieve destination will be a remote Dropbox folder:

b. If the selected retrieve destination device has more than one internal hard drive or drive partition, or multiple external hard drives, use the backup source device selector to specify the one that you want to copy retrieved files to:

- In the Backup Target area of the Home screen:
a. If you have more than one backup target device connected to your computer, click the icon of the one that you want to retrieve files from.
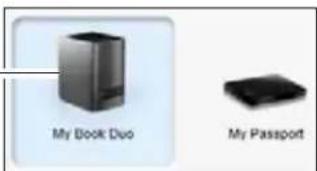
b. Verify that a light-blue background highlights the selected device:
Selected Device
text_image
My Book Duo My Passportc. If the selected device has more than one drive partition or network share, use the backup target device selector under the device icon to specify the one that you want to use:

- Click the Retrieve tab to display either the:
■ Select a destination for retrieved files dialog
■ Select a volume to retrieve from dialog
(See Figure 11 on page 28.)
IF you have ... THEN the WD SmartWare software displays the ...
Created a single backup on the selected retrieve source (backup target) device from the selected retrieve destination (backup source) device,
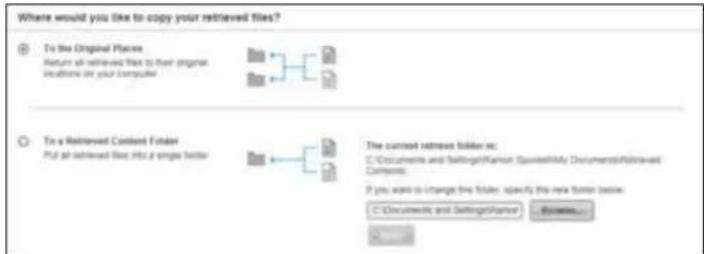
Select a destination for retrieved files dialog:
text_image
Where would you like to copy your retrieved files? To the Original Places Return all retrieved files to final original locations for your computer To a Retrieved Content Folder Put an retrieved file into a single folder The current retrieve folder is: C:\Documents and Settings\Famor\Spreads\My Documents\Retrieved Components If you want to change this folder, specify this new folder below: C:\Documents and Settings\Famor\Schweds...Proceed to step 4 on page 44.
(Continued)
IF you have . . . THEN the WD SmartWare software displays the . . .
| Created multiple backup volumes on the selected retrieve source (backup target) device from either:■ Different internal hard drives or hard drive partitions on the backup source device■ Different backup source devices | Select a volume to retrieve from dialog with the available volumes listed in the Backed Up Volumes selection box: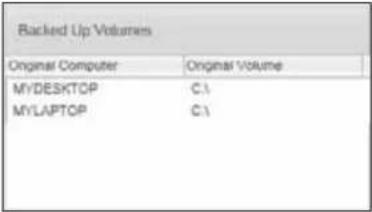 In this case:a. In the Backed Up Volumes selection box, select the volume that you want to retrieve files from.b. Click Next to display the Select a destination for retrieved files dialog.c. Proceed to step 4. In this case:a. In the Backed Up Volumes selection box, select the volume that you want to retrieve files from.b. Click Next to display the Select a destination for retrieved files dialog.c. Proceed to step 4. |
| Not run a backup on the selected retrieve source (backup target) device, | The Select a volume to retrieve from dialog with nothing listed in the Backed Up Volumes selection box: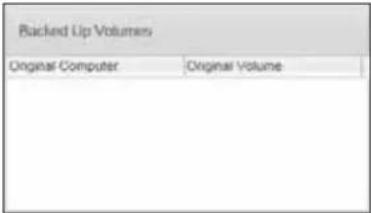 You cannot retrieve files from a device that does not have a backup volume. Click the Home tab and return to step 2 on page 42 to select the device that has the files you want to retrieve. You cannot retrieve files from a device that does not have a backup volume. Click the Home tab and return to step 2 on page 42 to select the device that has the files you want to retrieve. |
- On the Select a destination for retrieved files dialog:
| IF you want to copy your retrieved files to . . . | THEN select the . . . option. |
| Their original locations on the selected retrieve destination (backup source) device, | To the Original PlacesNote: The To the Original Places option is not available if you selected a backup volume from a different backup source device or a remote Dropbox folder at step 3 on page 43. |
| A retrieved content folder, To a | Retrieved Content FolderThe default folder is Retrieved Contents in the My Documents folder for your user name.If you want to specify a different folder:a. Click Browse and use the browse function to identify the new folder.b. Click Apply. |
- Click Next to display the Select content to retrieve... dialog.
| IF you want to retrieve . . . from the selected backed up volume | THEN select the . . . |
| All of the files | Retrieve All Files option and skip to step 7 on page 45. |
| Selected files or folders | Retrieve Some Files option to open the Retrieve Some Files selection box and proceed to step 6. |
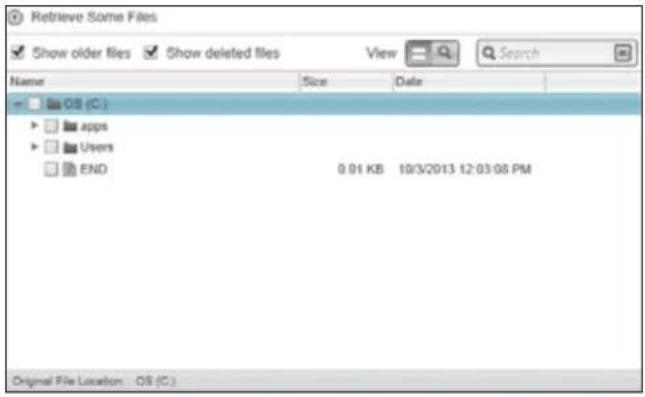 |
- In the Retrieve Some Files selection box, navigate through the folder structure to find the files you want. You can also use the search box by typing the name (or partial name) of the file or folder:
■ Select the Show older files check box to display the different backed up versions of your files:
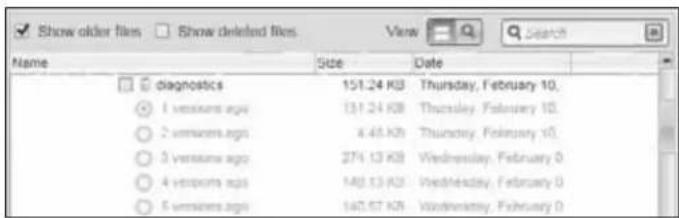
text_image
Show older files Show deleted files View Search Name Size Date diagnostics 151.24 KB Thursday, February 10. 1 version ago 131.24 KB Thursday, February 10. 2 version ago 4.45 KB Thursday, February 10. 3 version ago 274.13 KB Wednesday, February 0 4 version ago 149.13 KB Wednesday, February 0 5 version ago 147.67 KB Wednesday, February 0■ Select the Show deleted files check box to display backed up files that have been deleted:
text_image
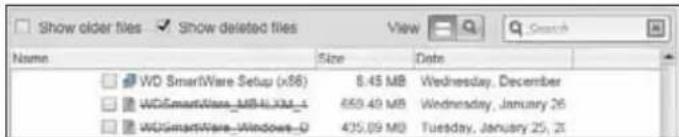
Show elder files ✓ Show deleted files View Name Size Date WD SmartWare Setup (x86) 8.45 MB Wednesday, December UCSmartWare_100.000-1 659.40 MB Wednesday, January 26 UCSmartWare_Windows-D 435.09 MB Tuesday, January 25, 21■ Select the View icon to list individual files.
■ To find a file, type all or part of the file name in the search box and press the Enter key to initiate the search.
To eliminate the search filter, delete all of the text in the search box and press Enter.
■ Select the check boxes for the files or folders that you want to retrieve.
-
Click Start Retrieving.
-
During the retrieve:
■ The Retrieve screen displays a progress bar and a message indicating the amount of data that has been copied to the specified retrieve location.
■ A Cancel Retrieving button is available for stopping the retrieve.
- A Retrieval accomplished message signifies completion of the retrieve.
A Partial retrieve accomplished message means that all of the files you selected for the retrieve were not copied to the specified retrieve location. In this case, either a:
■ Files Not Retrieved message provides the number of files that were not retrieved and a link to a failed-to-retrieve information screen. Click the View files link to see the list of files and the reasons they were not retrieved.
■ Destination is full message means that the selected retrieve destination (backup source) device does not have sufficient disk space to complete the retrieve.
Locking and Unlocking the Device
This chapter includes the following topics:
Password Protecting the Device
Unlocking the Device
Changing Your Password
Turning Off the Device Lock Feature
Password Protecting the Device
You should password protect your device if you are worried that someone else will gain access to it and you do not want them to see your files.
CAUTION! The WD Security software uses your password to electronically lock and unlock your device. If you forget your password, you will not be able to access the data that is on your device or write new data to it. You will have to erase the device drives before you can use it again.
Note: The password protection feature is not available for Individual Drives (JBOD) configurations.
- Open the Set Security dialog by clicking either:
■ The WD Security desktop shortcut icon if you created one when you installed the application
■ Start > All Programs > Western Digital > WD Apps > WD Security

text_image
WD Security Help My Book Duo 5.48 TB Set Security Secure your drive to keep others from accessing your files. WARNING WD cannot retrieve your password. If you forget your password, you will permanently lose access to your data. If you erase or reformat the drive, the password will be removed. For RAID drives, reconfiguring the drive will remove the password. I understand. Choose a password (25 characters max.) Verify password Password hint Enable auto unlock for user: spontell_r Save Security Settings- If you have more than one supported device connected to your computer, click the icon of the one that you want to create a password for.
- Read the warning about the possibility of data loss if you forget your password.
- Click the I understand check box to signify that you accept the risk.
- Type your password in the Choose a password box, using up to 25 characters.
- Retype your password in the Verify password box.
- Type a hint to help remember your password in the Password hint box.
- Select the Enable auto unlock for user: check box if you want the WD Security software to remember your password for the selected drive on this computer.
- Click Save Security Settings to save your password and enable hardware encryption for your device.
- Click OK to close the Security has been enabled message.
CAUTION! After creating a password, the device remains unlocked for as long as you continue your current work session. Then the WD Security software:
- Locks the device when you shut down your computer, disconnect your device, or your computer goes into the sleep mode
- Requires you to type your password to unlock the device when you restart your computer or reconnect your device, UNLESS you selected the Enable auto unlock for user: check box when you created your password
Note: When you create a password, the WD Security software saves your password in firmware on the My Book Duo device and displays the WD Unlocker utility virtual CD (VCD) as a device in your computer's file management utility listing:

text_image
Devices with Removable Storage (2) DVD RW Drive (D:) CD Drive CD Drive (E:) WD Unlocker CD DriveThis listing appears:
■ The next time you shut down and restart your computer
■ When you remove and reconnect or power cycle the My Book Duo device
■ Your computer exits the sleep mode, depending on its configuration
The listing appears regardless of whether the device is locked or not, or whether you selected the Enable auto unlock for user: check box when you created your password. It remains as long as you have password protection enabled for the device.
Unlocking the Device
After you have created a password to keep others from accessing the files on your device, unless you selected the Enable auto unlock for user: check box, you will have to type your password to unlock the device whenever:
■ You shut down and restart your computer
■ You disconnect and reconnect the device to your computer
■ Your computer exits the sleep mode, depending on its configuration
You will have to do this even if you do not have the WD Security software installed on your computer.
Depending on the software configuration of your computer, there are three ways to unlock the drive, using either the:
■ WD Security or WD Drive Utilities software
■ WD SmartWare software
■ WD Drive Unlock utility
With the WD Security or WD Drive Utilities Software
Whenever you shut down and restart your computer or disconnect and reconnect the device to your computer, starting either the WD Security or WD Drive Utilities software displays the Unlock Drive dialog:
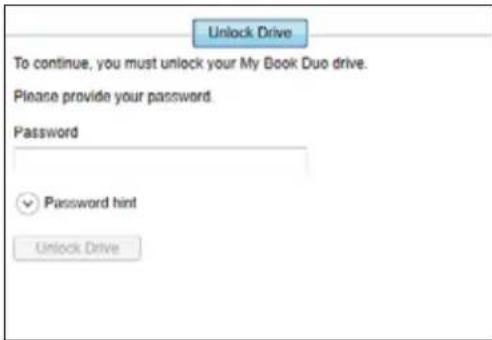
text_image
Unlock Drive To continue, you must unlock your My Book Duo drive. Please provide your password. Password ✓ Password hint Unlock Drive- To display the Unlock Drive dialog, click either:
■ The WD Security desktop shortcut icon if you created one when you installed the application or Start > All Programs > Western Digital > WD Apps > WD Security
■ The WD Drive Utilities desktop shortcut icon if you created one when you installed the application or Start > All Programs > Western Digital > WD Apps > WD Drive Utilities
-
If you have more than one supported device connected to your computer, click the icon of the one that is locked to display the Unlock Drive dialog.
-
On the Unlock Drive dialog:
a. Type your password in the Password box.
b. Click Unlock Drive.
With the WD SmartWare Software
Whenever you shut down and restart your computer, or disconnect and reconnect the device to your computer, unless you selected the Enable auto unlock for user: check box when you created your password, the WD SmartWare Pro software displays a Drive is locked message in place of the content gauge for your device:
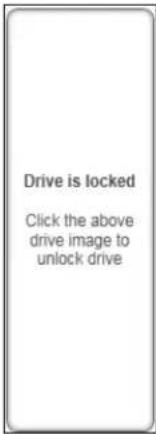
text_image
Drive is locked Click the above drive image to unlock drive- If the WD SmartWare Pro Unlock your drive dialog does not appear automatically, click the drive image above the Drive is locked message to display it:
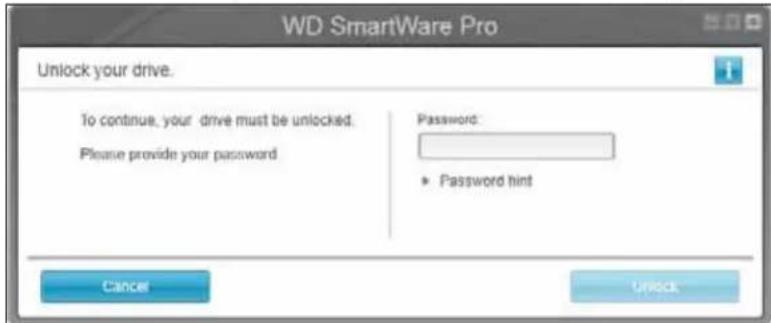
text_image
WD SmartWare Pro Unlock your drive. To continue, your drive must be unlocked. Please provide your password Password: • Password hint Cancel Unlock-
Type your password in the Password box.
-
Click Unlock.
With the WD Drive Unlock Utility
Whenever you connect your password-protected device to a computer that does not have the WD software installed, you can use the WD Drive Unlock utility to unlock the device there. The WD Drive Unlock utility is on a virtual CD drive that appears in your computer's file management utility display.
- Start the WD Drive Unlock utility by either:
- Using your computer's file management utility to open the WD Unlocker virtual CD and double-clicking the WD Drive Unlock.exe file
- Clicking Start > My Computer and double-clicking the WD Unlocker virtual CD icon under Devices with Removable Storage
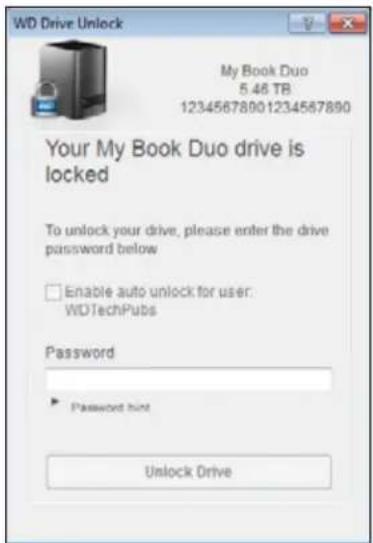
text_image
WD Drive Unlock My Book Duo 5.46 TB 12345678901234567890 Your My Book Duo drive is locked To unlock your drive, please enter the drive password below Enable auto unlock for user: WDTechPubs Password Password hint Unlock Drive- On the WD Drive Unlock utility screen:
a. Type your password in the Password box.
b. Select the Enable auto unlock for user: check box if you want the WD Drive Unlock utility to remember your password on this computer.
c. Click Unlock Drive.
d. At the Your drive is now unlocked message, click Exit to close the WD Drive Unlock utility screen.
Changing Your Password
- Open the Change Security dialog by clicking either:
■ The WD Security desktop shortcut icon if you created one when you installed the application
■ Start > All Programs > Western Digital > WD Apps > WD Security
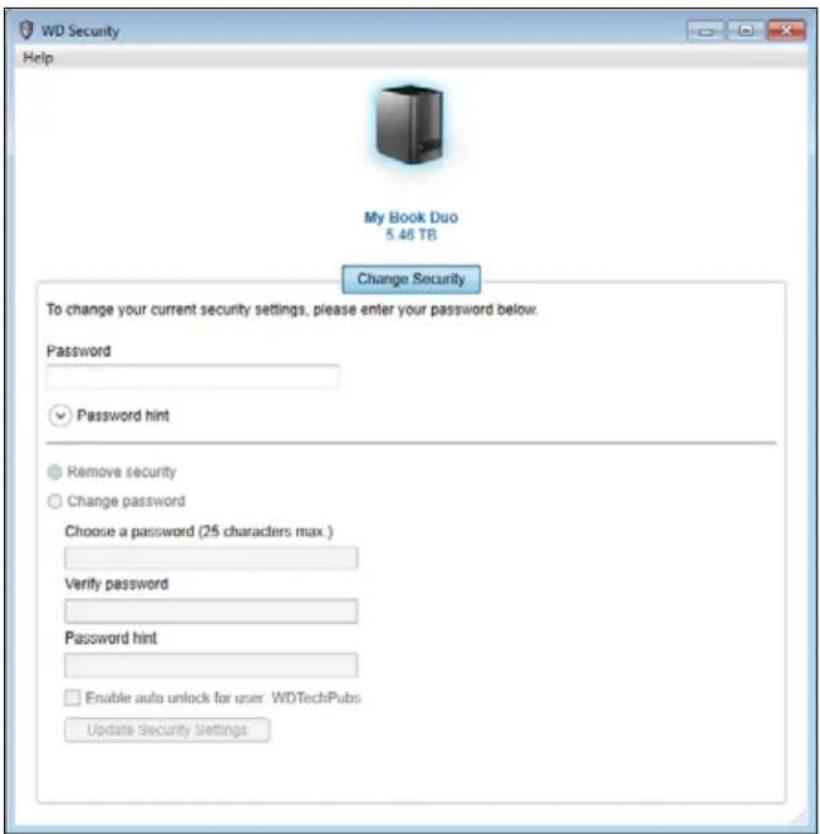
text_image
WD Security Help My Book Duo 5.46 TB Change Security To change your current security settings, please enter your password below. Password ✓ Password hint Remove security Change password Choose a password (25 characters max.) Verify password Password hint Enable auto unlock for user: WDTechPubs Update Security Settings- If you have more than one supported device connected to your computer, click the icon of the one with the password that you want to change.
- Type your current password in the Password box.
- Select the Change password option.
- Type your new password in the Choose a password box, using up to 25 characters.
- Retype your new password in the Verify password box.
- Type a hint to help remember your new password in the Password hint box.
- Select or clear the Enable auto unlock for user: check box to signify whether you want the WD Security software to remember your new password for the selected device on this computer.
- Click Update Security Settings.
- Click OK to close the Security has been enabled message.
CAUTION! After changing a password, the device remains unlocked for as long as you continue your current work session. Then the WD Security software:
- Locks the device when you shut down your computer, disconnect your device, or your computer goes into the sleep mode
- Requires you to type your password to unlock the device when you restart your computer or reconnect your device, UNLESS you selected the Enable auto unlock for user: check box when you changed your password
Turning Off the Device Lock Feature
- Open the Change Security dialog by clicking either:
■ The WD Security desktop shortcut icon if you created one when you installed the application
■ Start > All Programs > Western Digital > WD Apps > WD Security
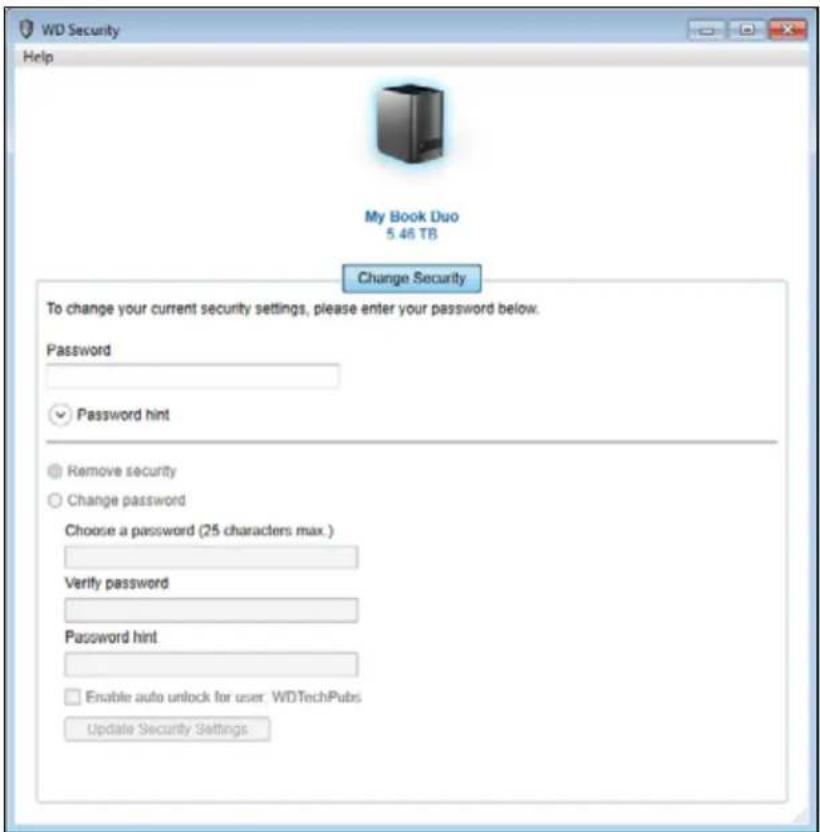
text_image
WD Security Help My Book Duo 5.46 TB Change Security To change your current security settings, please enter your password below. Password ✓ Password hint Remove security Change password Choose a password (25 characters max.) Verify password Password hint Enable auto unlock for user: WDTechPubs Update Security Settings- If you have more than one supported device connected to your computer, click the icon of the one that you want to remove password protection from.
- Type your password in the Password box.
- Select the Remove security option.
- Click Update Security Settings to remove password protection and display the Set Security dialog.
Managing and Customizing the Device
This chapter includes the following topics:
Checking Device Health Erasing the Device Drives Managing the Device Configuration Registering the Device Restoring the WD Software and Disk Image Setting the Device Sleep Timer Upgrading the Device Capacity Using the WD Quick View Icon Checking Device Status Monitoring Icon Alerts Opening the WD SmartWare Software Safely Disconnecting the Device
Checking Device Health
The WD Drive Utilities software provides three diagnostic tools to help make sure that your device is performing well. Run the following tests if you are concerned that your device is not operating properly:
■ SMART Status Check
SMART is a failure-prediction function that continuously monitors key internal performance attributes of the device drives. A detected increase in drive temperature, noise, or read/write errors, for example, can provide an indication that the drive is approaching a serious failure condition. With advanced warning, you could take precautionary measures, like moving your data to another device, before a failure occurs.
The result of a SMART status check is a pass or fail evaluation of the drives' condition.
■ Quick Drive Test
Each device drive has a built-in Data Lifeguard™ diagnostic utility that tests the drive for error conditions. The quick drive test checks the drives for major performance problems.
The result of a quick drive test is a pass or fail evaluation of the drives' condition.
■ Complete Drive Test
The most comprehensive device diagnostic is the complete drive test. It checks every sector of each device drive for error conditions, and inserts bad sector markers as required.
The best time to run the drive diagnostics and status checks is on a regular basis, before you encounter any problems with your device. And, because they are so fast, running the SMART status check and the quick drive test provides a high level of assurance with minimal inconvenience. Then, run all three whenever you encounter disk error conditions when writing or accessing files.
- Open the WD Drive Utilities software by clicking either:
■ The WD Drive Utilities desktop shortcut icon if you created one when you installed the application
■ Start > All Programs > Western Digital > WD Apps > WD Drive Utilities
See Figure 5 on page 10.
- If you have more than one supported device connected to your computer, click the icon of the one that you want to check.
- Click Diagnostics to display the Diagnostics dialog:
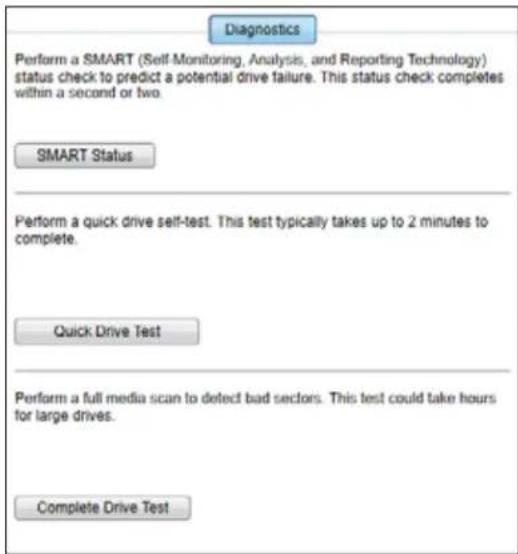
text_image
Diagnostics Perform a SMART (Self-Monitoring, Analysis, and Reporting Technology) status check to predict a potential drive failure. This status check completes within a second or two. SMART Status Perform a quick drive self-test. This test typically takes up to 2 minutes to complete. Quick Drive Test Perform a full media scan to detect bad sectors. This test could take hours for large drives. Complete Drive Test- On the Diagnostics dialog, click the button for the test that you want to run:
■ SMART Status
■ Quick Drive Test
■ Complete Drive Test
Erasing the Device Drives
CAUTION! Erasing the device drives permanently deletes all of the data on both drives in RAID array configurations, and on the selected drive in JBOD configurations. Always back up the data on the device drives before erasing them.
Note: Erasing your device drives also deletes the WD software and all of the support files, utilities, and user manual files. You can download these to restore your device to its original configuration after erasing the drives. (See Knowledge Base answer ID 7 at http://support.wd.com for information about downloading and restoring the WD software and disk image.)
The WD Drive Utilities software provides two ways to erase your device drives, depending on whether your device is locked or not:
| IF your device is . . . AND you . . . THEN see . . . | |
| Not locked, | Want to erase the drive, |
| Locked Have forgotten or lost your password and must erase the drive, | “Using the Drive Erase Function” in the next section. |
| “Using Five Invalid Passwords” on page 57. |
Using the Drive Erase Function
- Open the WD Drive Utilities software by clicking either:
■ The WD Drive Utilities desktop shortcut icon if you created one when you installed the application
■ Start > All Programs > Western Digital > WD Apps > WD Drive Utilities
See Figure 4 on page 9.
- If you have more than one supported device connected to your computer, click the icon of the one that you want to erase.
- Click Drive Erase to display the Drive Erase dialog:
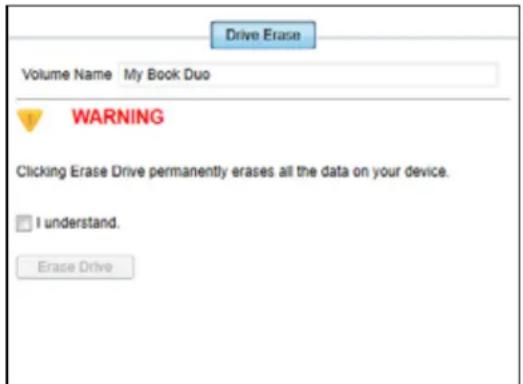
text_image
Drive Erase Volume Name My Book Duo WARNING Clicking Erase Drive permanently erases all the data on your device. I understand. Erase DriveFor RAID Array Configurations
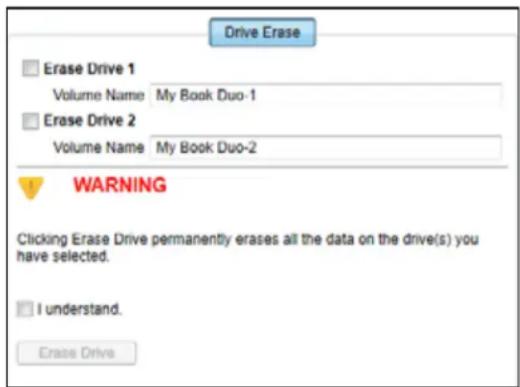
text_image
Drive Erase Erase Drive 1 Volume Name My Book Duo-1 Erase Drive 2 Volume Name My Book Duo-2 WARNING Clicking Erase Drive permanently erases all the data on the drive(s) you have selected. I understand. Erase DriveFor Individual Drives
- On the Drive Erase dialog:
a. For individual drives, select the check box for each drive that you want to erase:
■ Erase Drive 1
■ Erase Drive 2
b. If you want to change the name of a volume, type over the name in the Volume Name box.
c. Read the warning about the loss of data if you erase your device or a drive.
Important: If you want to save any of the data that is on the device drives, back it up to another device before continuing with the drive erase.
d. Select the I understand check box to signify that you accept the risk and activate the Erase Drive button.
e. Click Erase Drive.
After the drive erase operation completes, go to http://support.wd.com and see Knowledge Base answer ID 7 for information about downloading and restoring the WD software and disk image on your device.
Note: Erasing your device drives also removes your password. If you used a password to protect your device, you will need to re-create it. See "Password Protecting the Device" on page 47.
Using Five Invalid Passwords
When your have forgotten or lost your password, you can erase the device drives by entering five invalid passwords on the Unlock Drive dialog. See:
■ "With the WD Security or WD Drive Utilities Software" on page 49
■ "With the WD SmartWare Software" on page 50
■ "With the WD Drive Unlock Utility" on page 50
- On the Unlock Drive dialog, enter five invalid passwords:
a. Type a password in the Password box
b. Click Unlock Drive or Unlock.
c. Click OK to close the Authentication Failed message from the WD Security or WD Drive Utilities software.
- Entering the fifth invalid password displays a too many password attempts dialog, depending on the application you used to open the Unlock Drive dialog:
■ Using the WD Security or WD Drive Utilities software:
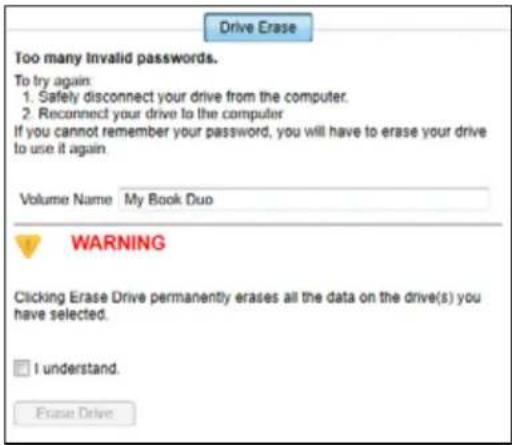
text_image
Drive Erase Too many Invalid passwords. To try again: 1. Safely disconnect your drive from the computer. 2. Reconnect your drive to the computer If you cannot remember your password, you will have to erase your drive to use it again. Volume Name My Book Duo WARNING Clicking Erase Drive permanently erases all the data on the drive(s) you have selected. I understand. Erase Drive■ Using the WD SmartWare Pro software:
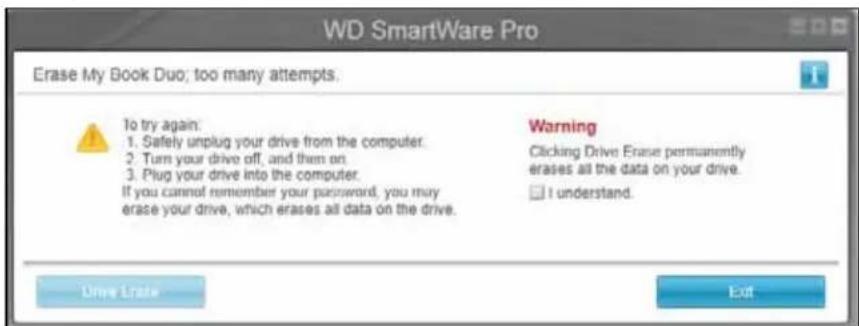
text_image
WD SmartWare Pro Erase My Book Duo; too many attempts. To try again: 1. Safely unplug your drive from the computer. 2. Turn your drive off, and then on. 3. Plug your drive into the computer. If you cannot remember your password, you may erase your drive, which erases all data on the drive. Warning Clicking Drive Erase permanently erases all the data on your drive. I understand. Drive Erase Exit■ Using the WD Drive Unlock utility:
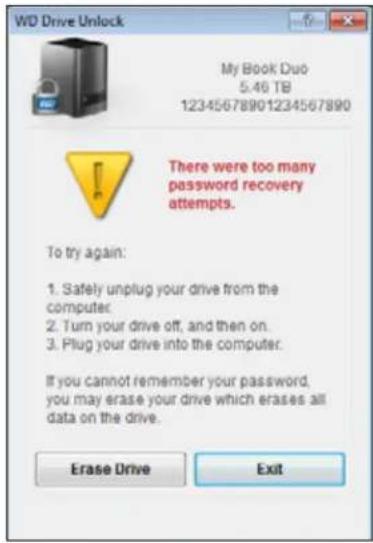
text_image
WD Drive Unlock My Book Duo 5:46 TB 12345678901234567890 There were too many password recovery attempts. To try again: 1. Safely unplug your drive from the computer. 2. Turn your drive off, and then on. 3. Plug your drive into the computer. If you cannot remember your password, you may erase your drive which erases all data on the drive. Erase Drive Exit- To erase your device drives:
■ Using the WD Security, WD Drive Utilities, or WD SmartWare software:
a. Read the warning about erasing all of the data on the device drives.
b. Select the I understand check box to indicate that you accept the risk and activate the Erase Drive or Drive Erase button.
c. Click Erase Drive or Drive Erase.
d. When the drive erase completes, click OK or Exit to close the drive is erased message:
■ For WD Security and WD Drive Utilities:
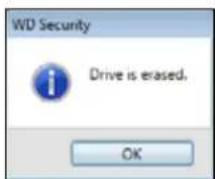
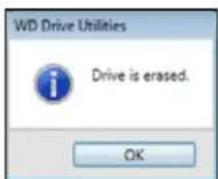
■ For WD SmartWare:
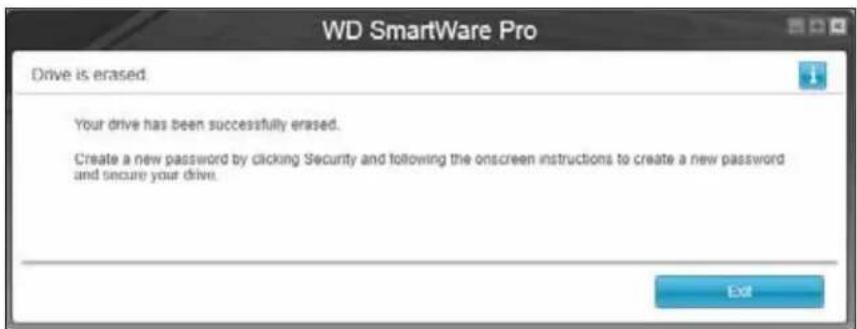
text_image
WD SmartWare Pro Drive is erased. Your drive has been successfully erased. Create a new password by clicking Security and following the onscreen instructions to create a new password and secure your drive. Exit■ Using the WD Drive Unlock utility:
a. Click Erase Drive to display a warning about erasing all of the data on the device drives:
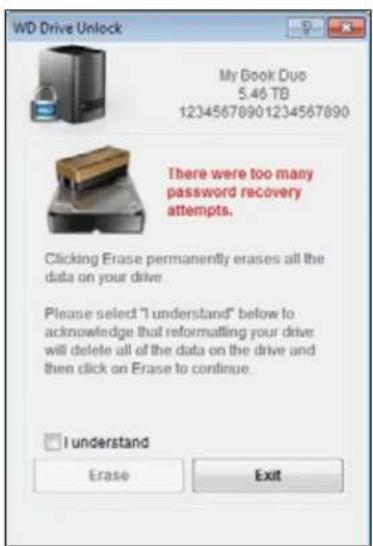
text_image
WD Drive Unlock My Book Duo 5.46 TB 12345678901234567890 There were too many password recovery attempts. Clicking Erase permanently erases all the data on your drive. Please select "I understand" below to acknowledge that reformalling your drive will delete all of the data on the drive and then click on Erase to continue. I understand Erase Exitb. Read the warning and select the I understand check box to signify that you accept the risk and activate the Erase button.
c. Click Erase.
d. After the erase operation completes, click Exit to close the WD Drive Unlock utility screen:
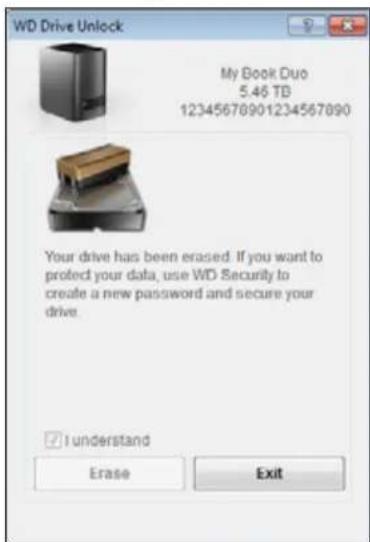
text_image
WD Drive Unlock My Book Duo 5.46 TB 12345678901234567890 Your drive has been erased. If you want to protect your data, use WD Security to create a new password and secure your drive. I understand Erase ExitGo to http://support.wd.com and see Knowledge Base answer ID 7 for information about downloading and restoring the WD software and disk image on your drive.
Note: Erasing your device drives also removes your password. If you still want to use a password to protect your device, you will need to recreate it. See "Password Protecting the Device" on page 47.
Managing the Device Configuration
The initial/default configuration of your My Book Duo device is as a striped RAID 0 disk array for high-speed/maximum-storage performance. You can reconfigure the device as either:
■ A mirrored RAID 1 disk array for maximum-protection/reduced-storage performance
■ JBOD individual drives that can be accessed independently for enhanced flexibility
Checking the Device Status
The WD Drive Utilities software provides a status indication of the device configuration and each device drive.
- Open the WD Drive Utilities software by clicking either:
■ The WD Drive Utilities desktop shortcut icon if you created one when you installed the application
■ Start > All Programs > Western Digital > WD Apps > WD Drive Utilities
See Figure 5 on page 10.
-
If you have more than one supported device connected to your computer, click the icon of the one that you want to check.
-
Click RAID Management > RAID Status:
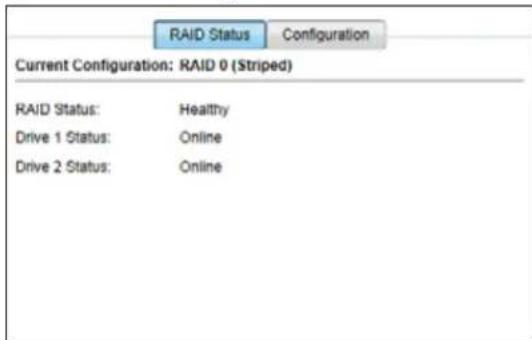
text_image
RAID Status Configuration Current Configuration: RAID 0 (Striped) RAID Status: Healthy Drive 1 Status: Online Drive 2 Status: Online- The status display shows:
■ Current Configuration as either:
- RAID 0 (Striped)
- RAID 1 (Mirrored)
- JBOD (Individual Drives)
■ RAID Status where:
| This status indication . . . Signifies that . . . | |
| Cannot Access Data The RAID disk | array has errors and your data is not accessible. |
| Data Lost Detected The RAID disk | array contains errors and the drives have corrupted data. |
| Degraded The RAID disk array is degraded but your data is still accessible. Install a supported WD drive and rebuild the RAID disk array. | |
(Continued)
This status indication ... Signifies that ...
| Healthy The RAID disk array is healthy. Your data is accessible. | |
| Not Configured No RAID disk array has been created. Either one or both device are new. | |
| Rebuild Failed The RAID disk array could not be rebuilt but your data is still accessible. Try rebuilding the array again. | |
| Rebuilding (x%) | The RAID disk array is rebuilding but your data is still accessible. |
| Unknown The RAID configuration is unknown. Click Configure to create a new RAID disk array or reinstall the original drives. | |
■ Drive 1 and Drive 2 Status where:
| This status indication . . . Signifies that . . . | |
| Drive Not Supported The drive model is not supported. Replace the drive with a supported WD drive. | |
| Empty There is no drive installed, but none was expected. | |
| Failed The drive has failed. Replace this drive immediately. | |
| ID Mismatch The drive metadata information does not match its serial number. | |
| Insufficient Capacity The drive you installed has insufficient capacity to be part of the mirrored RAID disk array. You could use it to create a new RAID disk array of smaller capacity by performing a new RAID configuration, but that would erase all of your data. | |
| Missing | The expected drive is not installed. |
| New Drive | The installed drive has not been configured. Click Configuration and reconfigure the RAID disk array. |
| Online The drive is healthy and part of the RAID disk array. | |
| Rebuilding | The drive is the target disk of the rebuild operation and that rebuild operation is still in progress. |
Changing the Device Configuration
CAUTION! Changing the device configuration reformats both drives, which erases all of the data on them. If you have been using the device in one mode and want to switch to a different mode, back up your files to another storage device before changing the configuration.
Changing the device configuration also removes your password. If you use a password to protect your device, you will need to re-create it after changing the device configuration. See “Password Protecting the Device” on page 47.
Note: Changing the device configuration also deletes the WD software and all of the support files, utilities, and user manual files. You can download these to restore the device to its original configuration after the change. (See Knowledge Base answer ID 7 at http://support.wd.com for information about downloading and restoring the WD software and disk image.)
- Open the WD Drive Utilities software by clicking either:
■ The WD Drive Utilities desktop shortcut icon if you created one when you installed the application
■ Start > All Programs > Western Digital > WD Apps > WD Drive Utilities
See Figure 5 on page 10.
- If you have more than one supported device connected to your computer, click the icon of the one that you want to configure.
- Click RAID Management > Configuration to display the Configuration dialog:
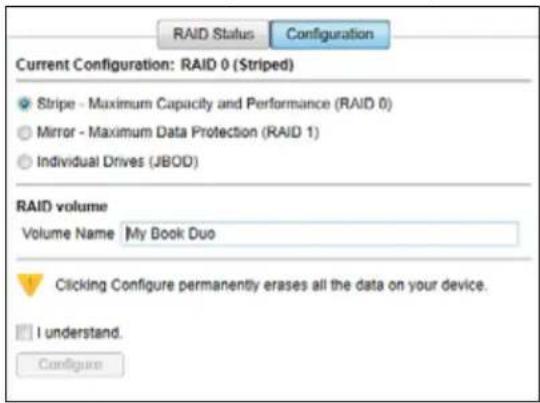
text_image
RAID Status Configuration Current Configuration: RAID 0 (Striped) Stripe - Maximum Capacity and Performance (RAID 0) Mirror - Maximum Data Protection (RAID 1) Individual Drives (JBOD) RAID volume Volume Name My Book Duo Clicking Configure permanently erases all the data on your device. I understand. Configure- Select the option for the mode that you want to change to:
■ Stripe - Maximum Capacity and Performance (RAID 0)
■ Mirror - Maximum Data Protection (RAID 1)
■ Individual Drives (JBOD)
Selecting the ... option Displays a volume dialog for specifying the ...
Stripe or Mirror Volume name for the new RAID array:
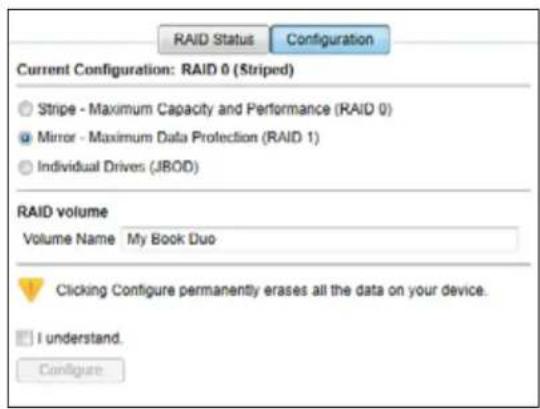
text_image
RAID Status Configuration Current Configuration: RAID 0 (Striped) Stripe - Maximum Capacity and Performance (RAID 0) Mirror - Maximum Data Protection (RAID 1) Individual Drivers (JBOD) RAID volume Volume Name My Book Duo Clicking Configure permanently erases all the data on your device. I understand. Configure(Continued)
Selecting the ... option Displays a volume dialog for specifying the ...
Individual Drives Volume name for each drive:
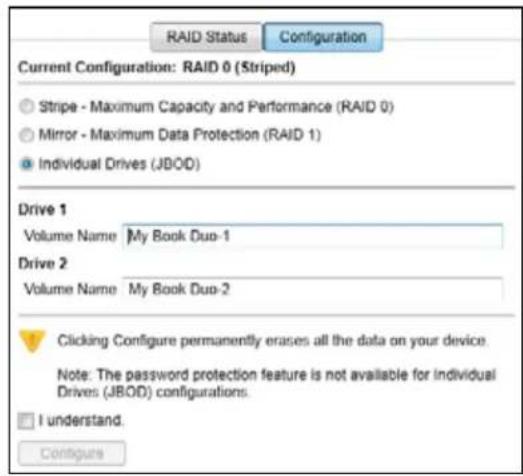
text_image
RAID Status Configuration Current Configuration: RAID 0 (Striped) Stripe - Maximum Capacity and Performance (RAID 0) Mirror - Maximum Data Protection (RAID 1) Individual Drives (JBOD) Drive 1 Volume Name My Book Duo-1 Drive 2 Volume Name My Book Duo-2 Clicking Configure permanently erases all the data on your device. Note: The password protection feature is not available for individual Drives (JBOD) configurations. I understand. Configure- On the volume dialog:
a. If you want to change the name of a volume, type over the name in the Volume Name box.
b. Read the warning about the loss of data when you change the device configuration and select the I understand check box to signify that you accept the risk and activate the Configure button.
Important: If you want to save any of the data that is on the device drives, back it up to another device before continuing with the configuration.
c. Click Configure to begin the configuration change.
- After the configuration change completes, click OK to close the configuration message display:
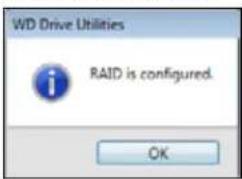
text_image
WD Drive Utilities RAID is configured. OK- Go to http://support.wd.com and see Knowledge Base answer ID 7 for information about downloading and restoring the WD software and disk image.
Registering the Device
The WD Drive Utilities software uses your computer's Internet connection to register your device. Registering the device provides free technical support during the warranty period and keeps you up-to-date on the latest WD products.
- Make sure that your computer is connected to the Internet.
- Open the WD Drive Utilities software by clicking either:
■ The WD Drive Utilities desktop shortcut icon if you created one when you installed the application
■ Start > All Programs > Western Digital > WD Apps > WD Drive Utilities
See Figure 5 on page 10.
- If you have more than one supported device connected to your computer, click the icon of the one that you want to register.
- Click Registration to display the Registration dialog:
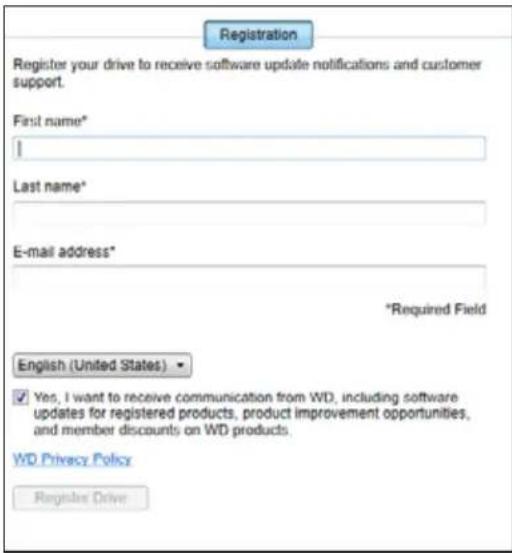
text_image
Registration Register your drive to receive software update notifications and customer support. First name* | Last name* E-mail address* *Required Field English (United States) ▼ ✓ Yes, I want to receive communication from WD, including software updates for registered products, product improvement opportunities, and member discounts on WD products. WD Privacy Policy Regulate Drive- On the Registration dialog:
a. Type your first name in the First name box.
b. Type your last name in the Last name box.
c. Type your email address in the E-mail address box.
d. Select your language in the language box.
e. Select or clear the Yes, I want to receive communication... check box to specify whether you want to receive email notifications about software updates, product enhancements, and price discount opportunities.
f. Click Register Drive.
Restoring the WD Software and Disk Image
In addition to deleting all of the data on your device, erasing or reformatting the device drives also removes the WD software and all of the support files, utilities, and user manual files.
If you ever need to remove and reinstall the WD software on your computer, or move the device to another computer and install the software there, you will need to restore the WD software and disk image on your device drives. To do this, after you have erased or reformatted the drives, go to http://support.wdc.com and see Knowledge Base answer ID 7.
Setting the Device Sleep Timer
The sleep timer turns off the power to your device after a certain period of inactivity to conserve power and minimize long-term wear on the device drives.
- Open the WD Drive Utilities software by clicking either:
■ The WD Drive Utilities desktop shortcut icon if you created one when you installed the application
■ Start > All Programs > Western Digital > WD Apps > WD Drive Utilities
See Figure 5 on page 10.
-
If you have more than one supported device connected to your computer, click the icon of the one that you want to set.
-
Click Sleep Timer to display the Sleep Timer dialog:
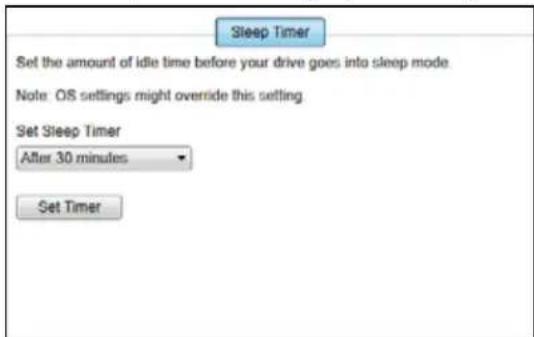
text_image
Sleep Timer Set the amount of idle time before your drive goes into sleep mode. Note: OS settings might override this setting. Set Sleep Timer After 30 minutes Set Timer- On the Sleep Timer dialog:
a. In the Set Sleep Timer box, select the inactivity time interval at which you want to turn off the device.
b. Click Set Timer.
Upgrading the Device Capacity
Increasing the capacity of your My Book Duo device by installing higher capacity drives is as easy as one-two-three:
- Use steps 1 through 9 of "Removing and Replacing the Drive" on page 73 to remove both drives.
-
Use steps 10 through 16 to install the new drives.
-
Use the WD Drive Utilities software to confirm the New Drive status indication and reconfigure the device. (See “Changing the Device Configuration” on page 61.)
Important: Only use WD Red™ or WD Green™ hard drives to upgrade the capacity of your My Book Duo device. Also, both drives must be new, and have the same capacity for RAID configurations. Using any other hard drive or mixed drive capacities voids the warranty for your My Book Duo device.
Using the WD Quick View Icon
After you have installed the WD SmartWare software, the WD Quick View icon displays in the system tray portion of the Windows taskbar:
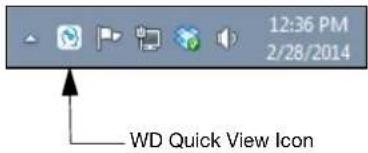
text_image
12:36 PM 2/28/2014 WD Quick View IconYou can use the icon to:
■ Open the WD SmartWare software
■ Check the device status
■ Safely disconnect the device
■ Monitor icon alerts
The following sections describe how to use the icon and other ways to do these things.
Opening the WD SmartWare Software
You can start the WD SmartWare software by:
■ Left- or right-clicking the WD Quick View icon in the taskbar and selecting WD SmartWare:
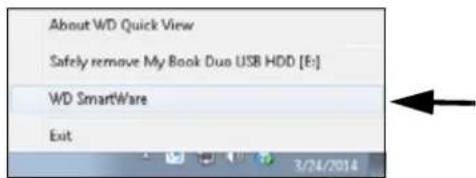
text_image
About WD Quick View Safely remove My Book Duo USB HDD [E:] WD SmartWare Exit- Clicking:
Start > All Programs > Western Digital > WD SmartWare > WD SmartWare
- Clicking the WD SmartWare desktop shortcut icon if you created one when you installed the software:
Checking Device Status
You can see the device capacity used, temperature and RAID status, and find out if the device is locked by hovering the pointer over the WD Quick View icon in the taskbar:
| WD Quick View- Drive discovering ... | ||||
| Drive Name [Volumes] | Used | Locked | Temperature | RAID Status |
| My Book Duo USB HDD | 0% | No | OK | RAIDO - Healthy |
Monitoring Icon Alerts
The WD Quick View icon in the taskbar flashes to indicate device status:
| IF the WD Quick View icon flashes . . . THEN the device might be . . . | |
| Green and white, Locked or in a format that the | WD SmartWare software does not understand (non-Windows format in a Windows environment). |
| White, Degraded. | |
| Red, Either: | Overheated.Power down the device and let it cool for 60 minutes. Power it back on, and if the problem persists, contact WD Support.In some other RAID error condition. |
Hover the pointer over the WD Quick View icon to find out which device is causing the icon alert. (See "Checking Device Status" on page 67.)
Safely Disconnecting the Device
CAUTION! To prevent data loss, close all active windows and applications before shutting down or disconnecting the device.
You can safely disconnect the device by either:
■ Right-clicking the WD Quick View icon in the taskbar and selecting the Safely remove option for your device:
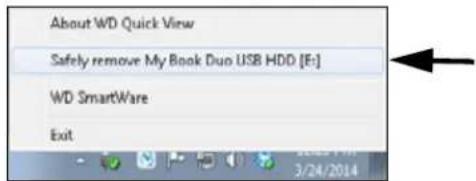
text_image
About WD Quick View Safely remove My Book Duo USB HDD [E:] WD SmartWare Exit■ Right-clicking the device icon on the WD SmartWare Home screen and selecting the Safely remove option.
■ Right-clicking the device icon on either the WD Security or WD Drive Utilities screen and selecting the Eject Disk option.
Wait for the power/activity LED to turn off before disconnecting the device from the computer.
Managing and Customizing the Software
This chapter includes the following topics:
Checking for Software Updates Configuring a Remote Dropbox Account Specifying a Different Retrieved Content Folder Specifying the Number of Backup Versions Uninstalling the WD Software
Checking for Software Updates
When enabled, the Software Updates option automatically checks for WD SmartWare software updates. This ensures that you are always using the most-recent software version. To enable or disable the Software Updates option:
- Click the Settings tab to display the Software Settings screen (see Figure 12 on page 30).
- On the Software Settings screen, click Software Updates to display the Software Updates dialog:
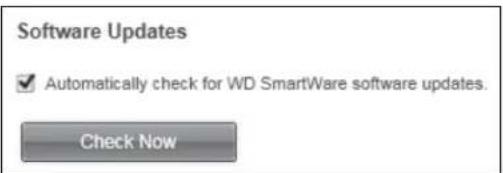
text_image
Software Updates ✓ Automatically check for WD SmartWare software updates. Check Now- On the Software Updates dialog:
a. Select or clear the Automatically check for WD SmartWare software updates check box.
b. Click Check Now if you want to check for software updates now.
Configuring a Remote Dropbox Account
Before you can use a remote Dropbox folder as a backup source or target device, you must configure your Dropbox account for access by the WD SmartWare Pro software.
- Click the Settings tab to display the Software Settings screen (see Figure 12 on page 30).
- On the Software Settings screen, click Dropbox Account to display the Dropbox Account dialog:
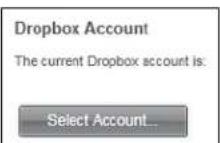
- Click Select Account to display the Dropbox Login Required dialog:
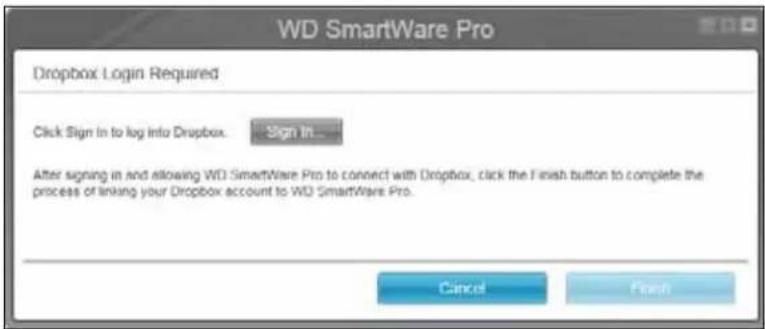
text_image
WD SmartWare Pro Dropbox Login Required Click Sign In to log into Dropbox. Sign In... After signing in and allowing WD SmartWare Pro to connect with Dropbox, click the Finish button to complete the process of linking your Dropbox account to WD SmartWare Pro. Cancel Finish- On the login required dialog:
a. Click Sign In.
The WD SmartWare Pro software initiates a Dropbox connection request on your behalf and uses your Web browser to access the Dropbox website at https://www.dropbox.com/.
b. On the Dropbox website, if you have not configured your account to remember your login credentials, type your email address and password and click Sign in to see the connection request from the WD SmartWare Pro software.
c. Click Allow to accept the connection request.
d. The Success! indication signifies that the WD SmartWare Pro software has been granted access to your remote Dropbox folder.
e. Click Finish to finalize the connection, close the Dropbox Login Required dialog, and update the Current dropbox account display.
Note: The procedure is the same if you later want to change to a different remote Dropbox folder. In that case, the WD SmartWare Pro software displays the Switch to a Different Dropbox Account dialog advising you that changing your Dropbox account invalidates any backups you have configured using the current account as a backup source or target device:
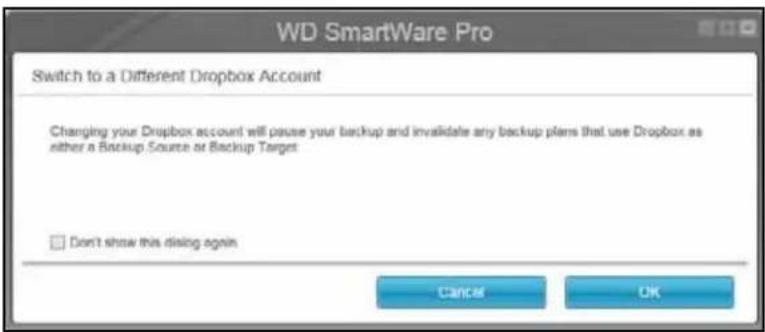
text_image
WD SmartWare Pro Switch to a Different Dropbox Account Changing your Dropbox account will pause your backup and invalidate any backup plans that use Dropbox as either a Backup Source or Backup Target Don't show this closing again Cancel OKSpecifying a Different Retrieved Content Folder
When you start a retrieve, you can choose whether you want to store the retrieved files in either:
■ Their original locations on your computer
■ A Retrieved Content folder
By default, the WD SmartWare software creates and uses a Retrieved Contents subfolder in your My Documents folder.
- Either create a new folder or determine which existing folder you want to use.
- Click the Settings tab to display the Software Settings screen (see Figure 12 on page 30).
- On the Software Settings screen, click Retrieve Folder to display the Set Retrieve Folder dialog:
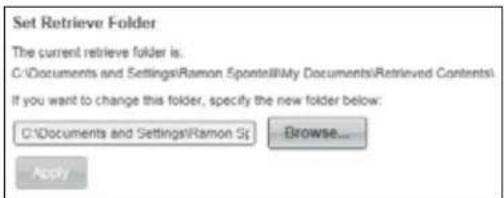
text_image
Set Retrieve Folder The current retrieve folder is: C:\Documents and Settings\Ramon 5point\My Documents\Retrieved Contents\ If you want to change this folder, specify the new folder below: C:\Documents and Settings\Ramon S:\Browse... Apply- On the Set Retrieve Folder dialog:
a. Click Browse and use the browse function to identify the new retrieve folder. b. Click Apply.
Specifying the Number of Backup Versions
The WD SmartWare software can keep up to 25 older versions of each file. If you overwrite or delete a file by mistake, or want to see the file a couple of versions ago, the WD SmartWare software has a copy for you. You always have the most-recent specified number of versions of each file available for retrieves, and you can choose to keep from 1 to 25 versions.
Keeping more versions:
■ Improves your ability to retrieve files from a longer back-in-time period
■ Consumes more disk space
1. Click the Settings tab to display the Software Settings screen (see Figure 12 on page 30).
2. On the Software Settings screen, click File History to display the Set File History dialog:
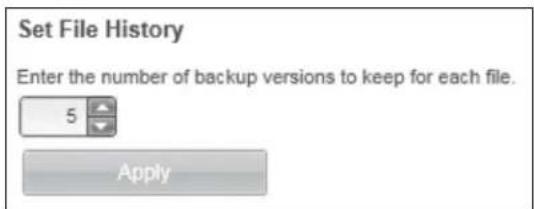
text_image
Set File History Enter the number of backup versions to keep for each file. 5 Apply- On the Set File History dialog:
a. Use the selection box to specify the number of backup versions that you want to keep for each file, from 1 to 25.
b. Click Apply.
Uninstalling the WD Software
Important: Uninstalling the WD SmartWare software deletes all existing backup job configurations. Your backup files will still be there, but you will have to manually re-enable each backup after reinstalling the WD SmartWare software. (See "Backing Up Files" on page 33.)
Use your operating system's Add or Remove Programs function to uninstall the WD software from your computer.
Uninstalling on Windows Vista or Windows 7
- Click Start > Control Panel.
- Double-click Programs and Features.
-
Click Uninstall a program and select the application or the icon for the WD software that you want to uninstall:
■ WD SmartWare
■ WD Security
■ WD Drive Utilities -
Click Uninstall/Change and Yes at the Do you wish to proceed... prompt.
Uninstalling on Windows 8
- Right-click the tile for the WD Software that you want to uninstall on the Start screen:
■ WD SmartWare
■ WD Security
■ WD Drive Utilities
-
Select Uninstall in the Windows taskbar.
-
Click Yes at the Are you sure... prompt.
Replacing a Drive
This chapter includes the following topics:
Determining Which Drive Failed Obtaining a Replacement Drive Removing and Replacing the Drive
Determining Which Drive Failed
Whether the application is running or not, the WD Drive Utilities software continuously monitors the operational condition of your My Book Duo drives. When a drive fails, the utility displays a warning message:
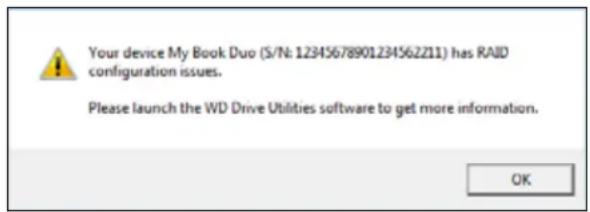
text_image
Your device My Book Duo (S/N: 12345678901234562211) has RAID configuration issues. Please launch the WD Drive Utilities software to get more information. OKClick OK to close the warning message and:
- Check the drive status indicators on the front of the device. If one of the indicators is on steady red, then that one is the failed drive.
-
Open the WD Drive Utilities software by clicking either:
-
The WD Drive Utilities desktop shortcut icon if you created one when you installed the application
■ Start > All Programs > Western Digital > WD Apps > WD Drive Utilities
See Figure 5 on page 10.
- If you have more than one supported device connected to your computer, click the icon of the one that has configuration issues.
- Click RAID Management > RAID Status and check the status indications:
■ If the status of one of the drives is not Online then that drive is the failed drive.
- If the RAID Status is Unknown and the status of both drives is Online, then remove and replace either drive because the two are not compatible.
Returning the drives to their original configuration should clear the Unknown RAID Status.
Obtaining a Replacement Drive
After you have determined which drive has failed, go to http://support.wd.com and see Knowledge Base answer ID 8644 for information about obtaining a replacement drive. When contacting Technical Support, have the following information ready:
■ The serial number of your My Book Duo device
■ Date of purchase
■ The serial number of each internal hard drive you need to replace
See steps 1 through 9 of the following procedure for removing the drive to get the serial number.
Important: Only use WD Red™ or WD Green™ hard drives to replace the drives in your My Book Duo device enclosure. Also, replacement drives must be new, and the same capacity as the drive that failed. The RAID configurations require both drives to be the same capacity. Using any other hard drive or capacity voids the warranty for your My Book Duo device.
Removing and Replacing the Drive
Your My Book Duo dual-drive storage device is a limited user-serviceable device. You can easily replace the hard drives inside the enclosure.
After receiving the replacement drive, replace the failed drive as follows:
- If the device is password protected, remove your password to avoid conflicts with the replacement drive. (See "Turning Off the Device Lock Feature" on page 53.)
- Safely dismount the device from your computer.
- Important: To avoid electrostatic discharge (ESD) damage, ground yourself by touching a grounded metal object before handling the device.
- Disconnect the USB cables from the USB ports on the back of the device enclosure.
- Disconnect the AC adapter cable from the power connector.
- Place the device on a clean and stable surface.
- Firmly push down on the top cover button to release the latch and open the top cover:
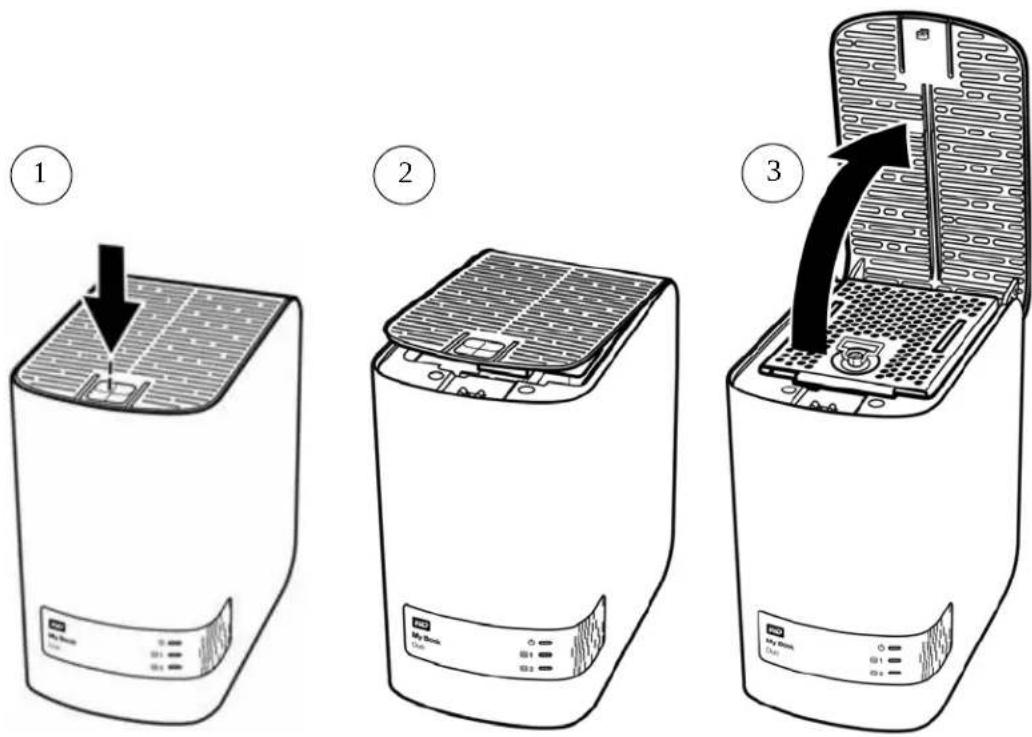
text_image
Diagram showing three steps of a device's internal structure: front panel, top panel with solar panels, and back panel with ventilation system.- Lift and loosen the thumbscrew that secures the drive hold-down plate and remove the plate:
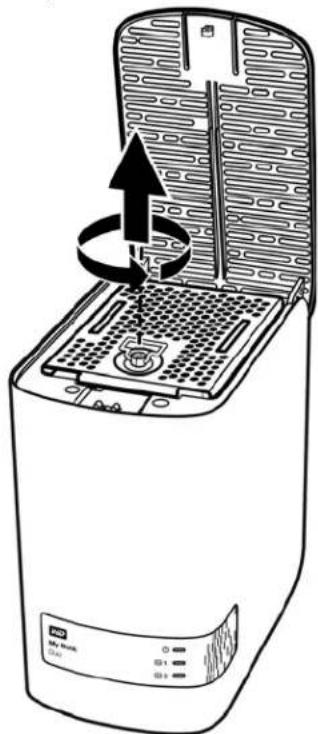
natural_image
Line drawing of a device with an upward arrow indicating rotation or expansion, no text or symbols present.- Using the pull tab, carefully lift the faulty drive out of the enclosure:
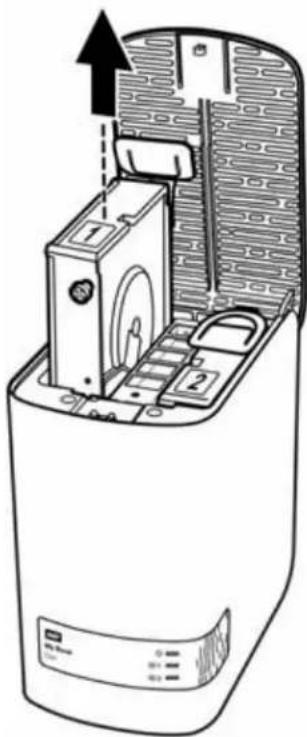
natural_image
Diagram of a device interior showing internal components and an upward arrow indicating motion (no text or symbols present)Note: Though the drives are labeled 1 and 2, it is their enclosure locations that determine the drive designations used by the WD Drive Utilities software. As you view them from the front of the enclosure:
| The drive in the . . . enclosure slot Is drive . . . | |
| Left 1 | |
| Right 2 | |
Switching the drives from one enclosure slot to the other would have no impact on the operation of your My Book Duo device or the WD Drive Utilities software. If you do that, just remember that regardless of the label on the drive, the status and configuration of:
- “Drive 1” refers to the drive in the left enclosure slot
- “Drive 2” refers to the drive in the right enclosure slot
- Using a Phillips screwdriver, loosen and remove the two guide screws and the pull tab from the drive you removed and install them on the new drive:
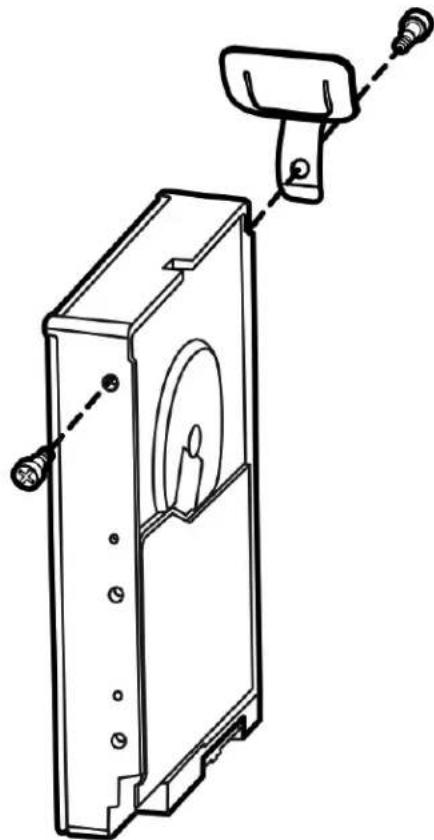
natural_image
Technical line drawing of a mechanical device with a handle and mounting bracket (no text or symbols)- Apply a new drive label to the replacement drive:
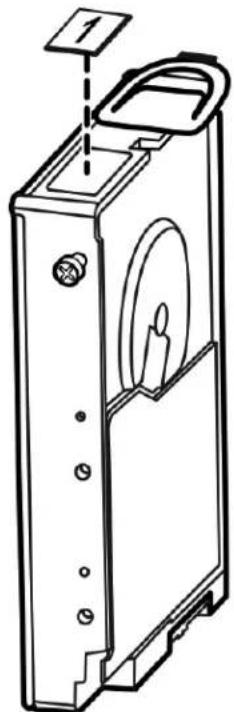
natural_image
Technical line drawing of a mechanical device with mounting holes and a circular component (no text or symbols)- Gently slide the replacement drive assembly into the enclosure until it is fully inserted:
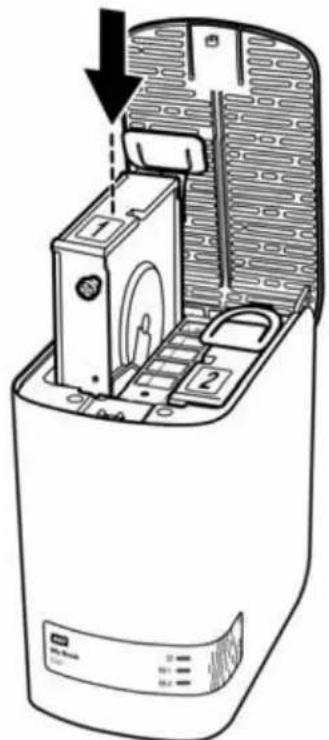
natural_image
Diagram of a device interior showing internal components and a downward arrow indicating a process (no text or symbols present)- Engage the alignment tab on the back of the drive hold-down plate with the alignment slot on the enclosure chassis, lower the cover into place and secure it with the thumbscrew:
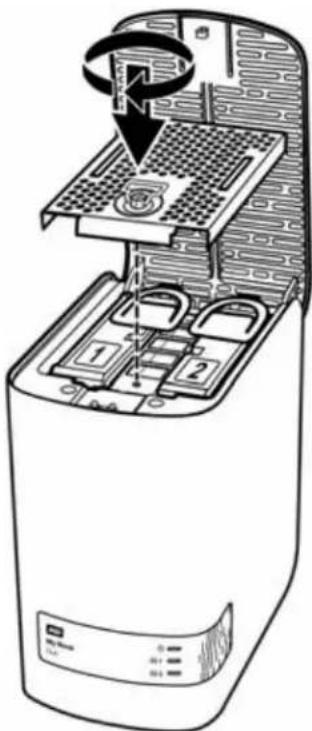
text_image
Diagram of a device's internal structure showing a switch, battery pack, and labeled components with numbered parts.Note: Do not overtighten the thumbscrew.
- Close the top cover and firmly push down on the top cover button until it snaps into place:
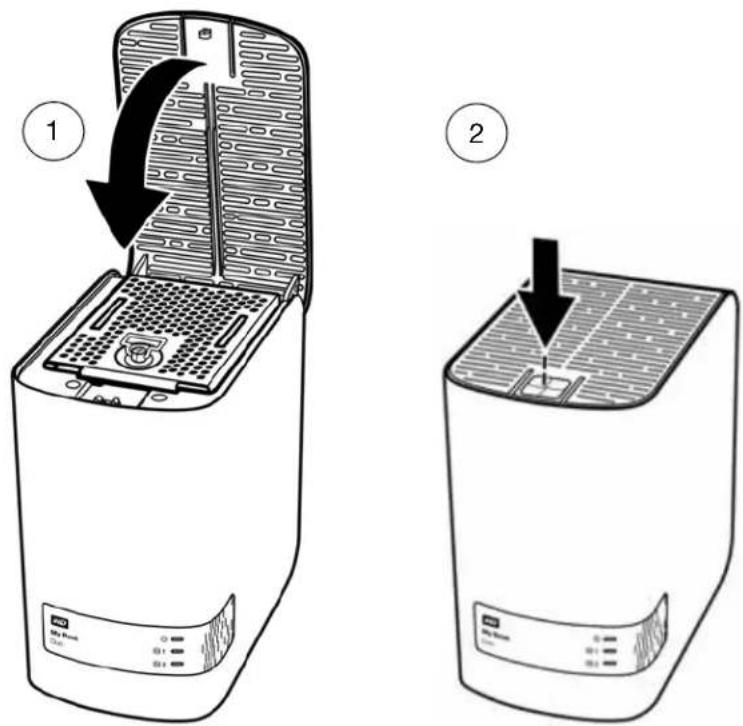
text_image
Diagram showing two views of a server rack with labeled ports and a close-up of the interior panel, illustrating device status change.- Reconnect the AC adapter cable to the power connector on the back of the device enclosure.
- Reconnect the USB cables.
- If the WD Drive Utilities software is not already running, start it by clicking either:
■ The WD Drive Utilities desktop shortcut icon if you created one when you installed the application
■ Start > All Programs > Western Digital > WD Apps > WD Drive Utilities
See Figure 5 on page 10.
- Depending on the configuration of your device:
| If your device is configured as . . . THEN . . . | |
| A striped RAID 0 disk array | The My Book Duo device does not reappear in your computer's file management utility listing. In this case:a. If you have more than one supported device connected to your computer, click the icon of the one with the drive you replaced on the WD Drive Utilities screen and clickRAID Management > RAID Statusto display the device status.b. Verify that the status display shows:Current Configuration: RAID 0 (Striped)RAID Status: OfflineDrive 1 Status and Drive 2 Status:Unknown for the drive that you replaced and Online for the other driveThis indication means that you must reconfigure your striped RAID 0 disk array. ClickConfigurationto display the volume dialog for reconfiguring the RAID array.d. Use the device configuration procedure in “Changing the Device Configuration,” starting at step 5 on page 63 to reconfigure the striped RAID 0 disk array.When the reconfiguration completes, the file management utility listing for your My Book Duo device reappears.ClickRAID Statusand verify that the status display shows:Current Configuration: RAID 0 (Striped)RAID Status: HealthyDrive 1 Status: OnlineDrive 2 Status: OnlineYour device is ready to use. |
(Continued)
If your device is configured as ... THEN ...
A mirrored RAID 1 disk array a. Verify tha
the My Book Duo device
reappears in your computer's file management utility listing.
b. If you have more than one supported device connected to your computer, click the icon of the one with the drive you replaced on the WD Drive Utilities screen and click RAID Management > RAID Status.
c. Verify that the RAID Status display shows:
■ Current Configuration: RAID 1 (Mirrored)
■ RAID Status: Degraded
■ Drive 1 Status and Drive 2 Status - Online
■ A Rebuild button for launching the RAID array rebuild:
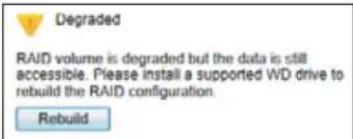
text_image
Degraded RAID volume is degraded but the data is still accessible. Please install a supported WD drive to rebuild the RAID configuration. Rebuildd. Click Rebuild and note that:
■ The RAID Status changes to Rebuilding (x%).
■ Drive Status for the drive you replaced changes to Rebuilding.
You do not need to wait for the rebuild operation to complete, which could take several hours. As indicated, your data is available on the other drive and you can still access the device.
e. Optionally, if you want to disconnect the device from your computer and continue rebuilding the array offline, safely remove the device, disconnect the USB interface cable, and watch the device power/activity indicator.
f. If the power/activity indicator:
■ Continues blinking rapidly—The RAID 1 rebuild will automatically continue offline.
- Stops blinking and goes off— Restart the rebuild offline by using a stiff wire or straightened paper clip to momentarily press the device reset button through the rear access hole (see Figure 3 on page 5).
Note: Do not press and hold the reset button. If you press and hold it for four seconds or more, you will power down the device.
(Continued)
If your device is configured as ... THEN ...
| A mirrored RAID 1 disk array (continued) | g. When the rebuild operation completes, the device status display shows: · Current Configuration: RAID 1 (Mirrored) · RAID Status: Healthy · Drive 1 Status: Online · Drive 2 Status: OnlineYour device is ready to use. |
| JBOD individual drives a. Verify that the My Book Duo drive that you did not replace reappears in your computer's file management utility listing.b. The listing for the new/replacement drive does not appear because you have to format it using WD Drive Utilities RAID Management Configuration function (see “Changing the Device Configuration” on page 61).c. When the erase/reformat operation completes, verify that the file management utility listing for the replacement drive reappears.Your replacement drive is ready to use. | |
- Go to http://support.wd.com and see Knowledge Base answer ID:
■ 7 for information about downloading and restoring the WD software and disk image
■ 8644 for information about returning the defective drive.
- If you removed your password before replacing the drive, use the WD Security software to re-create it. (See "Password Protecting the Device" on page 47.)
10
Using the Device with a Mac
The My Book Duo device drives are formatted as single NTFS partitions for compatibility with updated Windows operating systems. To use the device on Mac OS X operating systems, and to use Time Machine, if you want, you must reformat the device drives to single HFS+J partitions.
This chapter includes the following topics:
Reformatting the Device Drives
Restoring the WD Software and Disk Image
Reformatting the Device Drives
CAUTION! Reformatting the device drives erases all their contents. If you have already saved files on the device, be sure to back them up before reformatting it.
Go to http://support.wd.com and refer to Knowledge Base answer ID 3865 for information about reformatting the device drives.
See "Troubleshooting" on page 82 for more information about reformatting the device drives.
Restoring the WD Software and Disk Image
After you have reformatted your device drives for use on Mac computers, go to http://support.wd.com and see Knowledge Base answer ID 7 for information about downloading and restoring the Mac versions of the WD Drive Utilities and WD Security software and disk image.
The WD SmartWare software is not available for Mac computers with this device.
Troubleshooting
This chapter includes the following topics:
Installing, Partitioning, and Formatting the Drive Frequently Asked Questions
If you have problems installing or using this product, refer to this troubleshooting section or visit our support website at http://support.wd.com and search our knowledge base for more help.
Installing, Partitioning, and Formatting the Drive
How to Answer ID
■ Recover from a “Password Mismatch” error condition after replacing drive 11439
■ Recover from “Insufficient Capacity” or “Not Supported” error 11440 conditions after installing a used drive as a replacement
■ Recover from an “Unknown” configuration error after installing 11441 mismatched drives
■ Partition, and format a WD drive on Windows (8, 7, Vista) and Mac OS X 3865
■ Convert a Mac OS X GPT partition to an NTFS partition in Windows 7 3647 or Vista
■ Download software, utilities, firmware updates, and drivers for WD 1425 products (from the Downloads Library)
■ Format a WD external hard drive in FAT32* (to use Windows or Mac OS X) 291
*The FAT32 file system has a maximum individual file size of 4 GB and cannot create partitions larger than 32 GB in Windows. To create partitions larger than 32 GB in FAT32 when reformatting the drive, download the External USB/FireWire FAT32 Formatting Utility from http://support.wd.com/product/download.
Windows users can avoid these size limitation by formatting the drive to NTFS using either the Windows Disk Management utility or similar third-party software. For further details, see:
■ Answer ID 291 at http://support.wd.com
■ Article IDs 314463 and # 184006 at support.microsoft.com
■ The appropriate third-party software documentation or support organization
Frequently Asked Questions
Q: Why is the drive not recognized under My Computer or on the computer desktop?
A: If your system has a USB 3.0 or USB 2.0 PCI adapter card, be sure that its drivers are installed before connecting your WD USB 3.0 external storage product. The drive is not recognized correctly unless USB 3.0 or USB 2.0 root hub and host controller drivers are installed. Contact the adapter card manufacturer for installation procedures.
Q: Why won't my computer boot when I connect my USB drive to the computer before booting?
A: Depending on your system configuration, your computer might try to boot from your WD external USB drive. Refer to your system's motherboard BIOS setting documentation to disable this feature or visit http://support.wd.com and see Knowledge Base answer ID 1201. For more information about booting from external drives, refer to your system documentation or contact your system manufacturer.
Q: Why is the data transfer rate slow?
A: Your system may be operating at USB 1.1 speeds due to an incorrect driver installation of the USB 3.0 or USB 2.0 adapter card or a system that does not support USB 3.0 or USB 2.0.
Q: How do I determine whether or not my system supports USB 3.0 or USB 2.0?
A: Refer to your USB card documentation or contact your USB card manufacturer.
Note: If your USB 3.0 or USB 2.0 controller is built in to the system motherboard, be sure to install the appropriate chipset support for your motherboard. Refer to your motherboard or system manual for more information.
Q: What happens when a USB 3.0 or USB 2.0 device is plugged into a USB 1.1 port or hub?
A: USB 3.0 and USB 2.0 are backward-compatible with USB 1.1. When connected to a USB 1.1 port or hub, a USB 3.0 or USB 2.0 device operates at the USB 1.1 full speed of up to 12 Mbps.
If your system includes a PCI Express slot, you can achieve USB transfer rates by installing a PCI Express adapter card. Contact the card manufacturer for installation procedures and more information.
A
Installing the SES Driver
If you do not install the WD software, you should install the SCSI Enclosure Services (SES) driver on Windows computers to keep the hardware popup wizard from displaying every time you connect the device to your computer.
Note: The SES Driver is installed automatically when you install the WD software.
This appendix includes the following topics:
Installing on Windows Vista Computers Installing on Windows 7 and Windows 8 Computers
Installing on Windows Vista Computers
After connecting the device as shown in Figure 4 on page 8, the Found New Hardware screen displays.
Note: If Autoplay is enabled, two additional screens might appear at the same time as the Found New Hardware screen. If they appear, close them.
You can use the Found New Hardware screen to install the SES driver either:
■ Automatically, if your computer is connected to the Internet
■ Manually, whether your computer is connected to the Internet or not
Installing the Driver Automatically
To install the SES driver automatically, your computer must be connected to the Internet:
- Verify that your computer is connected to the Internet.
- On the Found New Hardware wizard screen, click Locate and install driver software:
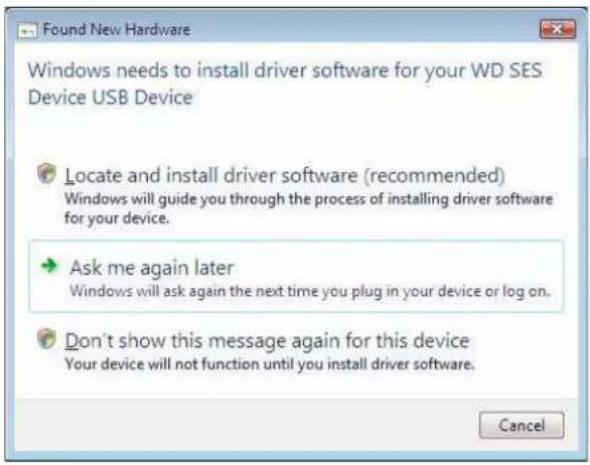
text_image
Found New Hardware Windows needs to install driver software for your WD SES Device USB Device Locate and install driver software (recommended) Windows will guide you through the process of installing driver software for your device. Ask me again later Windows will ask again the next time you plug in your device or log on. Don't show this message again for this device Your device will not function until you install driver software. Cancel- On the Found New Hardware - WD SES Device wizard screen, click Yes, search online this time only to allow Windows Vista to connect to Windows Update:
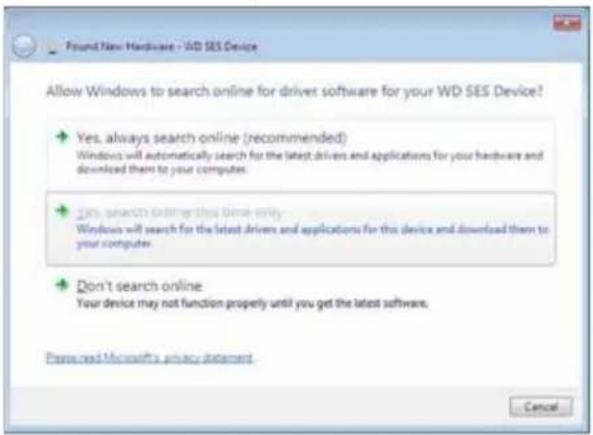
text_image
Found New Hardware - WD SES Device Allow Windows to search online for driver software for your WD SES Device? • Yes, always search online (recommended) Windows will automatically search for the latest drivers and applications for your hardware and download them to your computers. • No, search online this time only Windows will search for the latest drivers and applications for this device and download them to your computer. • Don't search online Your device may not function properly until you get the latest software. Personal Microsoft's privacy statement CancelWindows Vista automatically:
■ Connects to Windows Update
■ Finds, downloads, and installs the SES driver
Installing the Driver Manually
If your computer is not connected to the Internet, install the driver manually:
- On the Found New Hardware wizard screen, click Locate and install driver software:
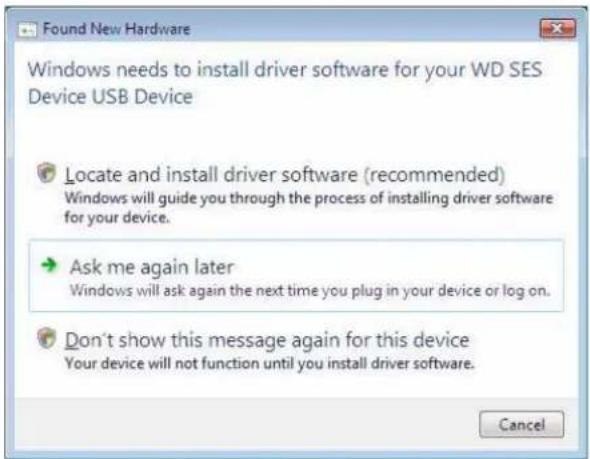
text_image
Found New Hardware Windows needs to install driver software for your WD SES Device USB Device Locate and install driver software (recommended) Windows will guide you through the process of installing driver software for your device. Ask me again later Windows will ask again the next time you plug in your device or log on. Don't show this message again for this device Your device will not function until you install driver software. Cancel- On the Found New Hardware - WD SES Device wizard screen, click Don't search online:
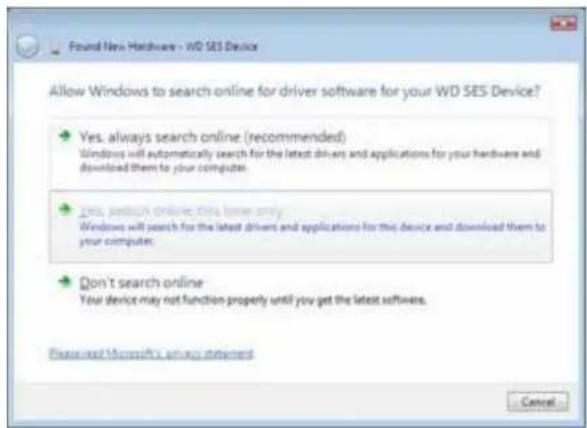
text_image
Found New Hardware - WD SES Device Allow Windows to search online for driver software for your WD SES Device? • Yes, always search online (recommended) Windows will automatically search for the latest drivers and applications for your hardware and download them to your computer. • No, search online this letter only Windows will search for the latest drivers and applications for this device and download them to your computer. • Don't search online Your device may not function properly until you get the latest software. Please check Microsoft's always statements Cancel- At the Install the disc that came with your WD SES Device prompt, click I don't have the disc. Show me other options:
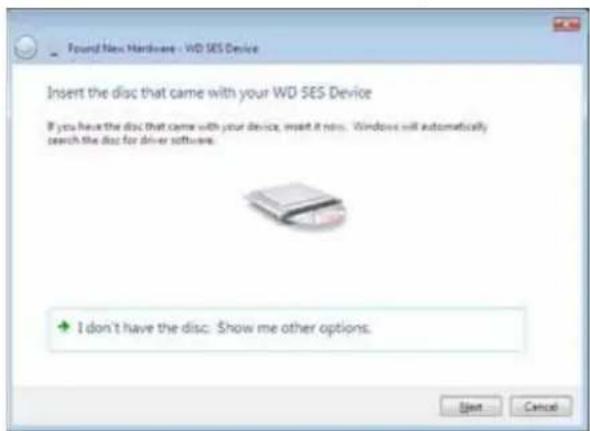
text_image
Found New Hardware - WD SES Device Insert the disc that came with your WD SES Device If you have the disc that came with your device, insert it now. Windows will automatically search the disc for driver software. + I don't have the disc. Show me other options. Start Cancel- Browse to Computer and:
a. Double-click the My Book Duo device.
b. Double-click the Extras folder.
c. Select WD SES Device Driver.
d. Click Next:
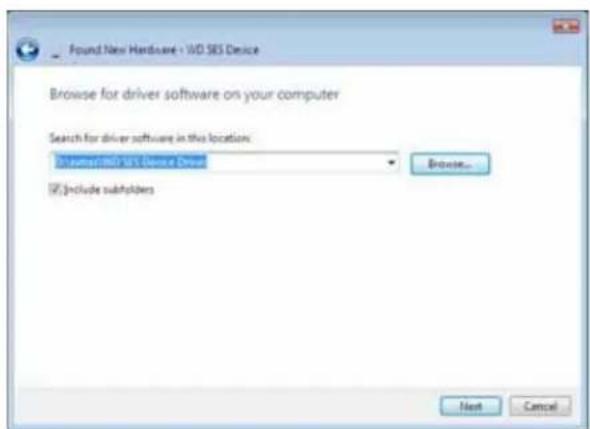
text_image
Found New Hardware - WD SES Device Browse for driver software on your computer Search for driver software in this location: D:\Documents vs Common Drive Browse... ✓ Include subfolders Next Cancel- When the installation completes, click Close:
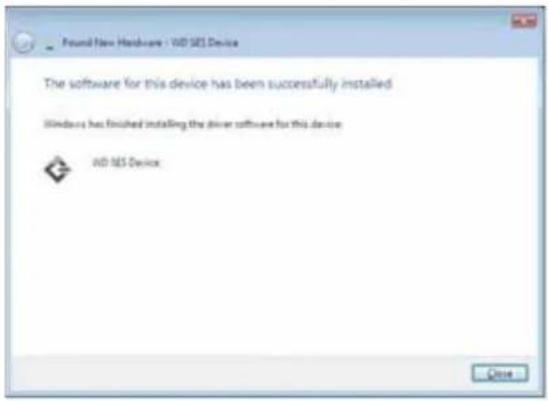
text_image
Found New Hardware - WD SES Device The software for this device has been successfully installed Windows has finished installing the driver software for this device WD SES Device CloseInstalling on Windows 7 and Windows 8 Computers
After connecting the device as shown in Figure 4 on page 8, use the Windows Computer Management utility to install the SES driver:
- Open All Programs and click Computer > Manage:
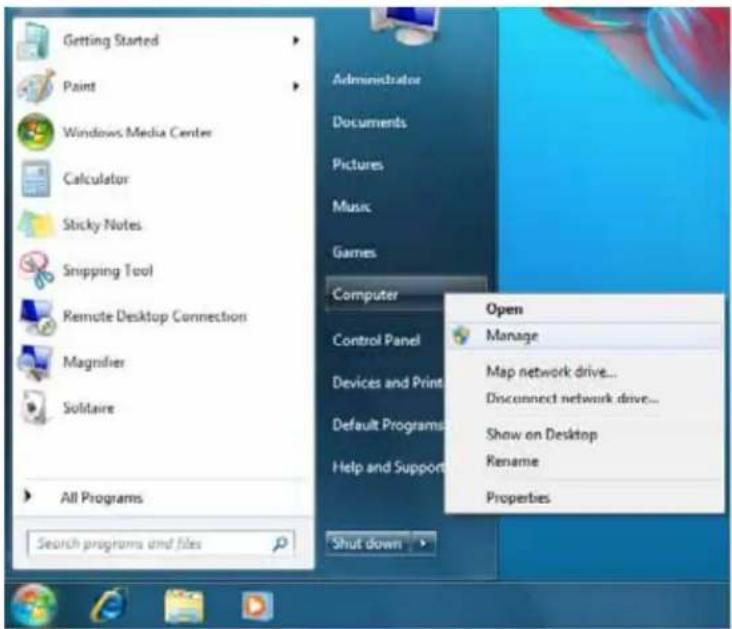
text_image
Getting Started Paint Windows Media Center Calculator Sticky Notes Snipping Tool Remote Desktop Connection Magnifier Solitaire All Programs Search programs and files Administrator Documents Pictures Music Games Computer Control Panel Devices and Print Default Programs Help and Support Open Manage Map network drive... Disconnect network drive... Show on Desktop Rename Properties Shut down- Under Computer Management (Local), click Device Manager > Unknown Device and right-click Update driver software:
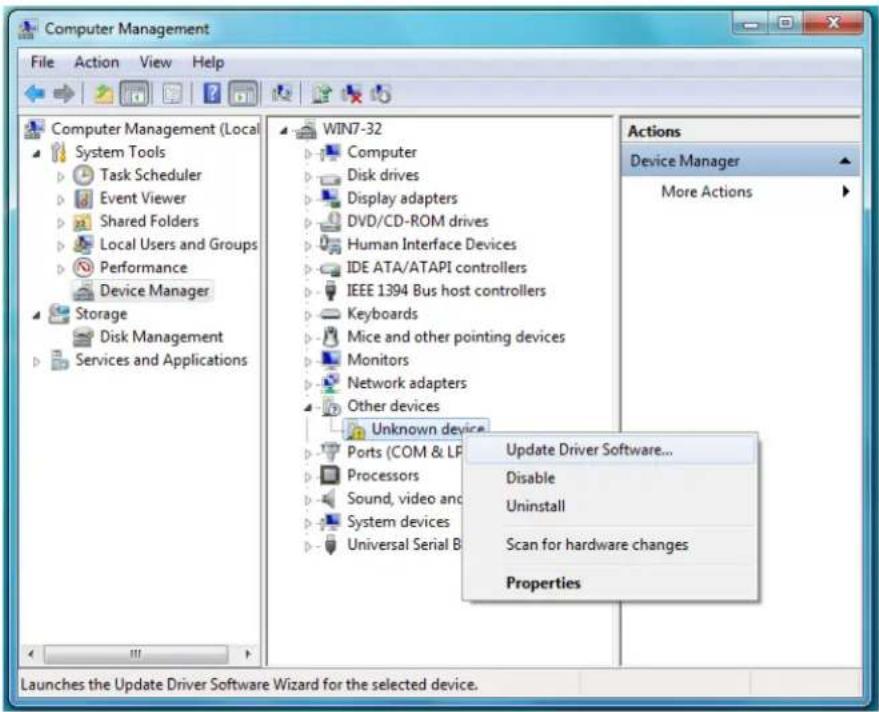
text_image
Computer Management File Action View Help Computer Management (Local System Tools Task Scheduler Event Viewer Shared Folders Local Users and Groups Performance Device Manager Storage Disk Management Services and Applications WIN7-32 Computer Disk drives Display adapters DVD/CD-ROM drives Human Interface Devices IDE ATA/ATAPI controllers IEEE 1394 Bus host controllers Keyboards Mice and other pointing devices Monitors Network adapters Other devices Unknown device Ports (COM & LP) Processors Sound, video and System devices Universal Serial B Update Driver Software... Disable Uninstall Scan for hardware changes Properties Actions Device Manager More Actions Launches the Update Driver Software Wizard for the selected device.- Click Browse my computer for driver software.
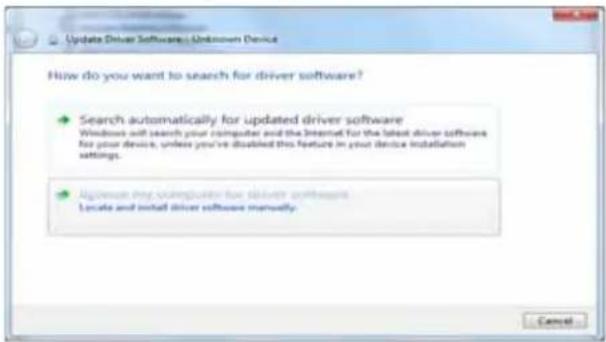
text_image
Update Driver Software: Unknown Device How do you want to search for driver software? Search automatically for updated driver software Windows will search your computer and the Internet for the latest driver software for your device, unless you've disabled this feature in your device installation settings. Configure the components for driver software Locate and install driver software manually. Cancel- Browse to Computer, double-click the My Book Duo device, double-click the Extras folder, and select WD SES Device Driver:
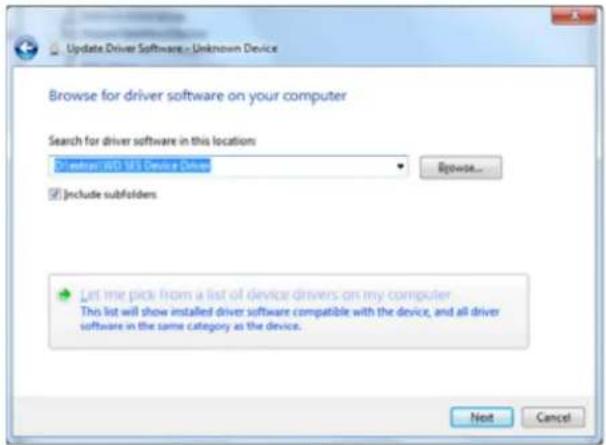
text_image
Update Driver Software - Unknown Device Browse for driver software on your computer Search for driver software in this location: Change in U.S. Device Drive Browse... Include subfolders Let me pick from a list of device drivers on my computer. This list will show installed driver software compatible with the device, and all driver software in the same category as the device. Next Cancel- Click Next.
- When the installation completes, click Close:
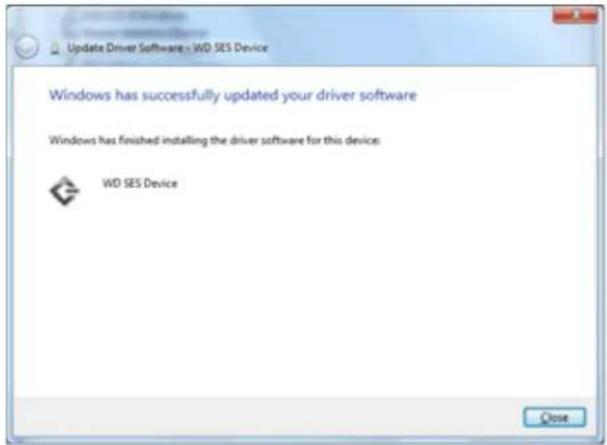
text_image
Update Driver Software - WD SES Device Windows has successfully updated your driver software Windows has finished installing the driver software for this device: WD SES Device CloseCompliance and Warranty Information
This appendix includes the following topics:
Regulatory Compliance
Environmental Compliance (China)
Warranty Information (All Regions Except Australia/New Zealand)
Warranty Information (Australia/New Zealand)
Regulatory Compliance
FCC Class B Information
Operation of this device is subject to the following conditions:
■ This device may not cause harmful interference.
■ This device must accept any interference received, including interference that may cause undesired operation.
This device has been tested and found to comply with the limits for a Class B digital device, pursuant to Part 15 of the FCC Rules. These limits are designed to provide reasonable protection against harmful interference in a residential installation. This device generates, uses, and can radiate radio frequency energy and, if not installed and used in accordance with the instructions, may cause harmful interference to radio or television reception. However, there is no guarantee that interference will not occur in a particular installation. If this equipment does cause harmful interference to radio or television reception, which can be determined by turning the equipment off and on, you are encouraged to try to correct the interference by one or more of the following measures:
■ Reorient or relocate the receiving antenna.
■ Increase the separation between the equipment and the receiver.
■ Connect the equipment into an outlet on a circuit different from that to which the receiver is connected.
■ Consult the dealer or an experienced radio/television technician for help.
Any changes or modifications not expressly approved by WD could void your authority to operate this device.
ICES-003/NMB-003 Statement
This device complies with Canadian ICES-003 Class B.
Safety Compliance
Approved for US and Canada. CAN/CSA-C22.2 No. 60950-1, UL 60950-1: Safety of Information Technology Equipment.
CE Compliance For Europe
Marking by the CE symbol indicates compliance of this system to the applicable Council Directives of the European Union, including the EMC Directive (2004/108/EC) and the Low Voltage Directive (2006/95/EC). A “Declaration of Conformity” in accordance with the applicable directives has been made and is on file at Western Digital Europe.
KC Notice (Republic of Korea only)
Environmental Compliance (China)
有毒有害物质或元素
Warranty Information (All Regions Except Australia/New Zealand)
Obtaining Service
WD values your business and always attempts to provide you the very best of service. If this Product requires maintenance, either contact the dealer from whom you originally purchased the Product or visit our product support website at
http://support.wd.com/warranty/policy.asp for information on how to obtain service or a Return Material Authorization (RMA). If it is determined that the Product may be defective, you will be given an RMA number and instructions for Product return. An unauthorized return (i.e., one for which an RMA number has not been issued) will be returned to you at your expense. Authorized returns must be shipped in an approved shipping container, prepaid and insured, to the address provided on your return paperwork. Your original box and packaging materials should be kept for storing or shipping your WD product. To conclusively establish the period of warranty, check the warranty expiration (serial number required) via
http://support.wd.com/warranty/policy.asp. WD shall have no liability for lost data regardless of the cause, recovery of lost data, or data contained in any Product placed in its possession.
Limited Warranty
WD warrants that the Product, in the course of its normal use, will for the term defined below, be free from defects in material and workmanship and will conform to WD's specification therefor. The term of your limited warranty depends on the country in which your Product was purchased. The term of your limited warranty is for 2 years in the North, South and Central America region, 2 years in the Europe, the Middle East and Africa region, and 3 years in the Asia Pacific region, unless otherwise required by law. The term of your limited warranty period shall commence on the purchase date appearing on your purchase receipt. WD shall have no liability for any Product returned if WD determines that the Product was stolen from WD or that the asserted defect a) is not present, b) cannot reasonably be rectified because of damage occurring before WD receives the Product, or c) is attributable to misuse, improper installation, alteration (including removing or obliterating labels and opening or removing external enclosures, unless the product is on the list of limited user-serviceable products and the specific alteration is within the scope of the applicable instructions, as found at http://support.wd.com/warranty/policy.asp), accident or mishandling while in the possession of someone other than WD. Subject to the limitations specified above, your sole and exclusive warranty shall be, during the period of warranty specified above and at WD's option, the repair or replacement of the Product.
The foregoing limited warranty is WD's sole warranty and is applicable only to products sold as new. The remedies provided herein are in lieu of a) any and all other remedies and warranties, whether expressed, implied or statutory, including but not limited to, any implied warranty of merchantability or fitness for a particular purpose, and b) any and all obligations and liabilities of WD for damages including, but not limited to accidental, consequential, or special damages, or any financial loss, lost profits or expenses, or lost data arising out of or in connection with the purchase, use, or performance of the Product, even if WD has been advised of the possibility of such damages. In the United States, some states do not allow exclusion or limitations of incidental or consequential damages, so the limitations above may not apply to you. This warranty gives you specific legal rights, and you may also have other rights which vary from state to state.
Warranty Information (Australia/New Zealand)
Nothing in this warranty modifies or excludes your legal rights under the Australian Competition and Consumer Act or the New Zealand Consumer Guarantees Act. This warranty identifies WD's preferred approach to resolving warranty claims which is likely to be quick and simple for all parties.
No other warranties either express or implied by law, including but not limited to those contained in the Sale of Goods Act, are made with respect to the Product. If you purchased your Product in New Zealand for the purposes of a business, you acknowledge and agree that the New Zealand Consumer Guarantees Act does not apply. In Australia, our goods come with guarantees that cannot be excluded under the Australian Consumer Law. You are entitled to a replacement or refund for a major failure and compensation for any other reasonably foreseeable loss or damage. You are also entitled to have the goods repaired or replaced if goods fail to be of acceptable quality and the failure does not amount to a major failure. What constitutes a major failure is set out in the Australian Consumer Law.
Obtaining Service
WD values your business and always attempts to provide you the very best of service. Should you encounter any problem, please give us an opportunity to address it before returning this Product. Most technical support questions can be answered through our knowledge base or email support service at http://support.wd.com. If the answer is not available or, if you prefer, please contact WD at the applicable telephone number shown in the front of this document.
If you wish to make a claim, you should initially contact the dealer from whom you originally purchased the Product. If you are unable to contact the dealer from whom you originally purchased the Product, please visit our product support website at http://support.wd.com for information on how to obtain service or a Return Material Authorization (RMA). If it is determined that the Product may be defective, you will be given an RMA number and instructions for Product return. An unauthorized return (i.e., one for which an RMA number has not been issued) will be returned to you at your expense. Authorized returns must be shipped in an approved shipping container, prepaid and insured, to the address provided with your RMA number. If following receipt of a qualifying claim under this warranty, WD or the dealer from whom you originally purchased the Product determines that your claim is valid, WD or such dealer shall, at its discretion, either repair or replace the Product with an equivalent or better Product or refund the cost of the Product to you. You are responsible for any expenses associated with a claim under this warranty. The benefits provided to you under this warranty are in addition to other rights and remedies available to you under the Australian Competition and Consumer Act or the New Zealand Consumer Guarantees Act.
Your original box and packaging materials should be kept for storing or shipping your WD product. To conclusively establish the period of warranty, check the warranty expiration (serial number required) via http://support.wd.com.
Western Digital Technologies, Inc. 3355 Michelson Drive, Suite 100 Irvine, California 92612 Email: support@wd.com
Warranty
WD warrants that the Product, in the course of its normal use, will for the term defined below, be free from defects in material and workmanship and will conform to WD's specifications. The term of your warranty is 3 year in Australia and New Zealand, unless otherwise required by law. The term of your warranty period shall commence on the purchase date appearing on your purchase receipt from an authorized distributor or authorized reseller. Proof of purchase shall be required to be eligible for this warranty and to establish the commencement date of this warranty. Warranty service will not be provided unless the Product is returned to an authorized distributor, authorized reseller or regional WD return center where the Product was first shipped by WD. WD may at its discretion make extended warranties available for purchase. WD shall have no liability for any Product returned if WD determines that the Product was (i) not purchased from an authorized distributor or authorized reseller, (ii) not used in accordance with WD specifications and instructions, (iii) not used for its intended function, or (iv) stolen from WD, or that the asserted defect a) is not present, b) cannot reasonably be rectified because of damage occurring before WD receives the Product, or c) is attributable to misuse, improper installation, alteration (including removing or obliterating labels and opening or removing external enclosures, including the mounting frame, unless the
product is on the list of limited user-serviceable products and the specific alteration is within the scope of the applicable instructions, as found at http://support.wd.com), accident or mishandling while in the possession of someone other than WD.
PRODUCTS ARE COMPLEX AND FRAGILE ITEMS THAT MAY OCCASSIONALY FAIL DUE TO (A) EXTERNAL CAUSES, INCLUDING WITHOUT LIMITATION, MISHANDLING, EXPOSURE TO HEAT, COLD, AND HUMIDITY, AND POWER FAILURES, OR (B) INTERNAL FAULTS. SUCH FAILURES CAN RESULT IN THE LOSS, CORRUPTION, DELETION OR ALTERATION OF DATA. NOTE THAT YOU SHALL BE RESPONSIBLE FOR THE LOSS, CORRUPTION, DELETION OR ALTERATION OF DATA HOWSOEVER CAUSED, AND FOR BACKING UP AND PROTECTING DATA AGAINST LOSS, CORRUPTION, DELETION OR ALTERATION. YOU AGREE TO CONTINUALLY BACK UP ALL DATA ON THE PRODUCT, AND TO COMPLETE A BACKUP PRIOR TO SEEKING ANY GENERAL SERVICE AND TECHNICAL SUPPORT FROM WD.
In Australia, if the Product is not of a kind ordinarily acquired for personal, domestic or household use or consumption, provided it is fair and reasonable to do so, WD limits its liability to replacement of the Product or supply of equivalent or better Product.
This warranty shall extend to repaired or replaced Products for the balance of the applicable period of the original warranty or ninety (90) days from the date of shipment of a repaired or replaced Product, whichever is longer. This warranty is WD's sole manufacturer's warranty and is applicable only to Products sold as new.
GNU General Public License ("GPL")
Firmware incorporated into this product may include third party copyrighted software licensed under the GPL or Lesser General Public License (“LGPL”) (collectively, “GPL Software”) and not Western Digital’s End User License Agreement. In accordance with the GPL, if applicable: 1) the source code for the GPL Software may be downloaded at no charge from http://support.wd.com/download/gpl or obtained on CD for a nominal charge from http://support.wd.com/download/gpl or by calling Customer Support within three years of the date of purchase; 2) you may re-use, re-distribute, and modify the GPL Software; 3) with respect solely to the GPL Software, no warranty is provided, to the extent permitted by applicable law; and 4) a copy of the GPL is included herewith, may be obtained at http://www.gnu.org, and may also be found at http://support.wd.com/download/gpl.
Modification of or tampering with the Software, including but not limited to any Open Source Software, is solely at your own risk. Western Digital is not responsible for any such modification or tampering. Western Digital will not support any product in which you have or have attempted to modify the Software supplied by Western Digital.
Index
A
Accessories, optional 4
Acronis True Image WD Edition software 2 software download 2 user guide download 2
Activation code required icon 20
Advanced backup area, Backup tab displays 25, 26, 27 Alerts, flashing icon 67
B
Backed Up Volumes selection box 29
Backup
about backing up files 33
files content box 36, 37, 39
procedure 33
schedule reminder button 27
screens 25
initial 16
Backup source
computer icon 19, 20
content gauge
Backup tab displays 25, 27
Home tab display 19, 21
device selector 19, 22
Dropbox icon 20
selector 19, 22
Backup tab displays
advanced backup area 25, 26, 27
backup source content gauge 27
backup target content gauge 27
description 18, 25
Enable/Disable Backup toggle button 25, 27
functional overview 17
Set Backup Frequency button 25
Set Backup Frequency buttons 27
Switch to Category/File Backup toggle button 25, 27
Backup target
content gauge
Backup tab displays 25, 27
Home tab display 19, 22
device icons, Home tab display 19, 22, 23
device selector 23
Box contents 3
Browse button, Retrieve tab displays 29
C
CAUTION
about erasing the drives 55, 56, 61, 63
CAUTION about
lost passwords 47
preventing data loss when disconnecting 67
your unlocked drive 48, 52
Change retrieve folder box, Retrieve tab displays 29
China RoHS, environmental compliance 91
Compatibility with operating systems 3, 4
Compliance, regulatory 90
Contact Us link 31
Content gauge
backup source device
Backup tab displays 25, 27
Home tab display 19, 21
backup target device
Backup tab displays 25, 27
Home tab display 19, 22
Converting drive format 82
Creating a password 47
D
Device
drive diagnostics and status checks 54
drive erase function 65
Device display scroll pointers 23
Device locked icon 24
Diagnostics dialog 55
Disconnecting the drive 67
Disk image, downloading and restoring 65, 81
Drive
capacity used, WD Quick View icon 67
disconnecting 67
formats, converting 4
handling precautions 6
sleep timer 65
status check, WD Quick View icon 67
Drive Erase dialog 56
Drive replacement procedure 72
Drive Utilities
device registration function 64
Drive Erase dialog 56
drive erase function 55
RAID management function 60
Sleep Timer dialog 65
Dropbox Account button 30, 68
E
Enable/Disable Backup toggle button 25, 27
Environmental compliance, China RoHS 91
Erase Drive dialog 56
Erasing the drives 55
CAUTION about erasing the drives 55
F
FCC Class B information 90
File History button 30
Flashing icon alerts 67
Free trial countdown icon 24
Full media scan 54
G
GNU general public license 94
GPL software 94
H
Handling precautions 6
Hardware 3
Help tab display
Contact Us link 31
description 31
functional overview 18
Learning Center topic buttons 31
Online User Manuals link 31
Support link 32
WD Store link 32
Home tab display
backup source computer icon 20
backup source content gauge 21
backup target content gauge 22
backup target device icon 22, 23
description 18
functional overview 17
|
ICES-003/NMB-003 compliance 90
Icons
activation code required 20
alerts, flashing 67
backup target device 19
computer 19, 20
device locked 24
Dropbox 20
free trial countdown 24
login credentials required 24
no writable partition 24
WD Quick View 66
Initial Backup screens 16
K
Kensington security slot 6
Kit contents 3
L
Launching WD SmartWare software 66
Learning Center topic buttons 31
Limited warranty information 92
Login required icon 24
N
No writable partition icon 24
0
Obtaining service 91, 93
Online User Manuals link 31
Opening WD SmartWare software 66
Operating systems 3, 4
Optional accessories 4
P
Password protecting your drive 47
CAUTION about lost passwords 47
Physical description 4
Precautions for handling 6
Product features 1
Q
Quick drive test 54
R
RAID Management
Configuration dialog 62
Status display 60
RAID modes
status, checking 60
Reformatting the drive 81, 82
Registering the device 64
Registration dialog 64
Regulatory compliance 90
Remote Dropbox account, configuring 71
Replacing a drive 72
Reset button 6
Restoring the software disk image65, 81
Retrieve
about retrieving files 42
destination option buttons 29
files option button 29
folder, specifying 69
procedure 42
Retrieve Folder button 30
Retrieve some files selection box 29
Retrieve tab displays
Backed Up Volumes selection box 29
Browse button 29
Change retrieve folder box 29
description 28
functional overview 17
Retrieve destination option buttons 29
Retrieve files option buttons 29
Retrieve some files selection box 29
Start/Cancel Retrieving toggle button 29
S
S.M.A.R.T. status check 54
Safety compliance 90
Schedule backups, Select Backup Frequency screen 14
Security
Change Security dialog 51, 53
Set Security dialog 10, 47
Select
Backup Frequency screen 14, 34
Backup Plan screen 14
Select Backup Device screen 12
Set
Backup Frequency button 25, 27, 34
File History dialog 70
Retrieve Folder dialog 70
Sleep Timer dialog 65
Settings tab display
description 30
Dropbox Account button 30
File History button 30
functional overview 18
Retrieve Folder button 30
Software Updates button 30
Software Settings
Dropbox Account 71
File History 70
Retrieve Folder 69
Software Updates 68
Software Updates
button 30
option, setting 68
Software, GPL 94
Start/Cancel Retrieving toggle button 29
Starting WD SmartWare software 66
Status check 67
Support, link 32
Switch to Category/File Backup toggle
button 25, 27
System compatibility 3
System file category, defined 21
T
Temperature status, WD Quick View icon 67
U
Uninstalling WD software 71
Unlocking the drive 49
from the virtual CD 50, 67
with the WD Security software 49
without the WD Security software 50
Upgrade to WD SmartWare Pro screen 11
W
Warranty information 91, 92, 93
WD
service 91, 93
Store, link 32
WD Apps Setup Wizard 8
WD Drive Utilities software
Drive Erase dialog 56
screen 10
Sleep Timer dialog 65
WD Quick View icon 66
WD Security software
Change Security dialog 51, 53
screen 10
Set Security dialog 10, 47
WD SmartWare Pro upgrade screen 11
WD SmartWare software
Backup tab displays 17, 25
functional overview 17
Help tab display 18, 31
Home tab display 17, 18
operating system compatibility 4
Retrieve tab displays 17, 28
Settings tab display 18, 30
Windows
uninstalling WD software 71
Information furnished by WD is believed to be accurate and reliable; however, no responsibility is assumed by WD for its use nor for any infringement of patents or other rights of third parties which may result from its use. No license is granted by implication or otherwise under any patent or patent rights of WD. WD reserves the right to change specifications at any time without notice.
Western Digital, WD, the WD logo, My Book, and My Passport are registered trademarks of Western Digital Technologies, Inc. in the U.S. and other countries; WD SmartWare, WD Drive Utilities, WD Security, and Data Lifeguard are trademarks of Western Digital Technologies, Inc. in the U.S. and other countries. Apple, Mac, OS X, and Time Machine are trademarks of Apple, Inc., registered in the U.S. and other countries. Other marks may be mentioned herein that belong to other companies. Picture shown may vary from actual product.
© 2014 Western Digital Technologies, Inc. All rights reserved.
Western Digital
3355 Michelson Drive, Suite 100
Irvine, California 92612 U.S.A. 4779-705120-A01 Jul 2014