My Cloud Mirror WDBZVM0120JWT - Server WESTERN DIGITAL - Free user manual and instructions
Find the device manual for free My Cloud Mirror WDBZVM0120JWT WESTERN DIGITAL in PDF.


| Product Type | Network Attached Storage (NAS) Server |
| Brand | Western Digital |
| Model | My Cloud Mirror WDBZVM0120JWT |
| Drive Bays | 2 (3.5" SATA HDD) |
| Storage Capacity | 12 TB (2 x 6 TB) pre-installed |
| RAID Support | RAID 0, RAID 1 (Mirroring), JBOD |
| Processor | Marvell ARMADA 388 dual-core 1.6 GHz |
| Memory | 1 GB DDR3 |
| Networking | 1 x Gigabit Ethernet |
| USB Ports | 2 x USB 3.0 (back) |
| Dimensions (H x W x D) | 170.6 x 139.3 x 99.1 mm |
| Weight | 1.2 kg (without drives), 2.2 kg (with drives) |
| Power Supply | External, 12V DC, 3A |
| Power Consumption | 21 W (typical), 7 W (sleep) |
| Noise Level | ~25 dB (idle) |
| Operating Temperature | 5°C to 35°C |
| Humidity | 20% to 80% non-condensing |
| File System Supported | NTFS, FAT32, HFS+, ext3, ext4 |
| Security | Password protection, AES 256-bit encryption |
| Remote Access | WD My Cloud mobile app, personal cloud |
| Backup Solution | Automatic backup for PCs, Macs, mobile devices |
| Media Streaming | DLNA, Plex Media Server (optional) |
| Maintenance & Cleaning | Clean with a soft, dry cloth; avoid liquids |
| Repairability & Spare Parts | User-replaceable hard drives; external power adapter available |
Frequently Asked Questions - My Cloud Mirror WDBZVM0120JWT WESTERN DIGITAL
User questions about My Cloud Mirror WDBZVM0120JWT WESTERN DIGITAL
0 question about this device. Answer the ones you know or ask your own.
Ask a new question about this device
Download the instructions for your Server in PDF format for free! Find your manual My Cloud Mirror WDBZVM0120JWT - WESTERN DIGITAL and take your electronic device back in hand. On this page are published all the documents necessary for the use of your device. My Cloud Mirror WDBZVM0120JWT by WESTERN DIGITAL.
USER MANUAL My Cloud Mirror WDBZVM0120JWT WESTERN DIGITAL
Personal Cloud Storage
User Manual
WD Service and Support
Should you encounter any problem, please give us an opportunity to address it before returning this product. Most technical support questions can be answered through our knowledge base or email support service at http://support.wd.com. If the answer is not available or if you prefer, please contact WD at the best telephone number shown below.
Your product includes 30 days of free telephone support during the warranty period. This 30-day period starts on the date of your first telephone contact with WD Technical Support. Email support is free for the entire warranty period and our extensive knowledge base is available 24/7. To help us keep you informed of new features and services, remember to register your product online at http://register.wd.com.
Accessing Online Support
Visit our product support website at http://support.wd.com and choose from these topics:
■ Downloads—Download drivers, software, and updates for your WD product.
■ Registration—Register your WD product to get the latest updates and special offers.
- Warranty & RMA Services—Get warranty, product replacement (RMA), RMA status, and data recovery information.
■ Knowledge Base—Search by keyword, phrase, or answer ID.
■ Installation—Get online installation help for your WD product or software.
■ WD Community—Share your thoughts and connect with other WD users.
■ Online Learning Center — Start here to get the most out of your personal cloud storage device (http://www.wd.com/setup).
Contacting WD Technical Support
When contacting WD for support have your WD product serial number, system hardware, and system software versions available.
North America Asia Pacific
| English | 800.ASK.4wd | Australia | 1 800 42 9861 |
| 855 556-5117 | China | 800 820 6682 / +65 62430496 | |
| Spanish | 800.832.4778 | Hong Kong | +800 6008 6008 |
| India | 1 800 11 9393 (MNTL) / 1 800 200 5789 (Reliance) 011 26384700 (Pilot Line) | ||
| Europe (toll free)* | 00800 ASK4 WDEU(00800 27549338) | Indonesia | +803 852 9439 |
| Japan | 0120-994-120 / 00531-65-0442 | ||
| Korea | 02 703 6550 | ||
| Europe +31 880062100 | Malaysia | +800 6008 6008 / 1 800 88 1908/+65 6243 0496 | |
| Middle East +31 880062100 | Philippines | 1 800 1441 0159 | |
| Africa +31 880062100 | Singapore | +800 6008 6008 / +800 608 6008/+65 6243 0496 | |
| Taiwan | +800 6008 6008/+65 62430496 | ||
* Toll free number is available in the following countries: Austria, Belgium, Denmark, France, Germany, Ireland, Italy, Netherlands, Norway, Spain, Sweden, Switzerland, United Kingdom.
Registering Your WD Product
Register your WD product to get the latest updates and special offers. You can easily register your drive online at http://register.wd.com or by using WD My Cloud Mirror personal cloud storage software.
Table of Contents
WD Service and Support ....... ii
Registering Your WD Product .... ii
1 Important User Information .... 1
Important Safety Instructions....1
Recording Your WD Product Information....2
2 Product Overview .... 3
About the System .... 3
Features 3
About the Online Learning Center 4
Package Contents 4
Requirements 5
Product Components 6
Pre-installation Instructions 9
Handling Precautions 9
3 Getting Started ....10
Physically Connecting the Device 10
Getting Started Using Online Setup Software .... 11
Getting Started Without Online Setup Software....17
Accessing Content 20
4 Accessing Your Cloud Remotely ..... 22
Enabling Cloud Access for the WD My Cloud Mirror Device . . . 22
Configuring Cloud Access for a User 22
Mobilizing Your Files with iOS and Android Mobile Apps. . . . . . 24
5 Managing Users, Groups, and Shares .....39
About Users 39
About Groups 46
About Shares 49
6 The Dashboard at a Glance .....55
Launching the Dashboard 55
The Dashboard Home Page 57
Obtaining Customer Support 67
Common Tasks. 68
7 Backing Up and Retrieving Files 69
About Backups....69
Managing a USB Device and USB Backups 69
Remote Backups 72
Internal Backups. 76
Cloud Backups....78
8 Managing Apps on WD My Cloud Mirror ..... 83
About Apps 83
Managing Apps. 83
9 Managing Storage on WD My Cloud Mirror ..... 87
About Storage 87
RAID Storage 87
Disk Status 92
10 Playing/Streaming Videos, Photos, & Music 94
Media Servers....94
Media Storage 96
Enabling DLNA and iTunes 96
Accessing Your Personal Cloud Using Media Players ..... 100
Accessing Your Personal Cloud Using iTunes ..... 101
11 Configuring Settings ..... 102
General 102
Network 110
Media 118
Utilities 118
Notifications 125
Firmware Update 128
12 Replacing a Drive 130
Identifying a Faulty Hard Drive 130
Replacing a Drive 131
Rebuilding the Drive 133
Returning a WD Drive 133
13 Regulatory and Warranty Information ..... 134
Regulatory Compliance 134
Warranty Information (All Regions Except Australia/New Zealand)135
Warranty Information (Australia/New Zealand only) ..... 136
Appendices 138
Appendix A: WD My Cloud Mirror Quick User Guide. . . . . . . . 138
Appendix B: Joomla!® Setup Guide 142
Appendix C: phpBB Setup Guide.... 145
Appendix D: Supported RAID Modes. 150
Appendix E: RAID Migrations ..... 150
Appendix F: Safe Mode Firmware Update Procedures ..... 150
Appendix G: Technical Specifications ..... 151
Index 153
1
Important User Information
Important Safety Instructions
Recording Your WD Product Information
Important Safety Instructions
This device is designed and manufactured to assure personal safety. Improper use can result in electric shock or fire hazard. The safeguards incorporated into this unit will protect you if you observe the following procedures for installation, use, and servicing.
■ Follow all warnings and instructions marked on the product.
- Unplug this product from the wall outlet before cleaning. Do not use liquid cleaners or aerosol cleaners. Use a damp cloth for cleaning.
■ Do not use this product near any liquids.
- Do not place this product on an unstable surface. The product may fall, causing serious damage to the product.
■ Do not drop the product.
- Do not block the slots and openings on the top and bottom of the chassis; to ensure proper ventilation and reliable operation of the product and to protect it from overheating, these openings must not be blocked or covered. Making sure the drive is standing upright also helps prevent overheating.
- Operate this product only from the type of power indicated on the marking label. If you are not sure of the type of power available, consult your dealer or local power company.
- Do not allow anything to rest on the power cord. Do not locate this product where persons will walk on the cord.
If an extension cord is used with this product, make sure that the total ampere rating of the equipment plugged into the extension cord does not exceed the extension cord ampere rating. Also, make sure that the total rating of all products plugged into the wall outlet does not exceed the fuse rating.
- Never push objects of any kind into this product through the chassis slots as they may touch dangerous voltage points or short out parts that could result in a fire or electric shock.
- Unplug this product from the wall outlet and refer servicing to qualified service personnel under the following conditions:
- When the power cord or plug is damaged or frayed.
- If liquid has been spilled on the product.
- If the product has been exposed to rain or water.
- If the product does not operate normally when the operating instructions are followed. Adjust only those controls that are covered by the operating instructions since improper adjustment may result in damage and require extensive work by a qualified technician to the product to normal condition.
- If the product has been dropped or the chassis has been damaged.
- If the product exhibits a distinct change in performance, contact WD Customer Support at http://support.wd.com.
Recording Your WD Product Information
Remember to write down the following WD product information, which is used for setup and technical support. Your WD product information is found on the label on the back of the device.
- Serial Number
- Model Number
- Purchase Date
- System and Software Notes
Product Overview
About the System
Features
About the Online Learning Center
Package Contents
Product Components
Requirements
Product Components
Handling Precautions
About the System
Finally, a cloud of your own. Save everything in one place with twice the data protection and access it anywhere from computers, tablets and smartphones. My Cloud™ Mirror™ personal cloud storage works concurrently with multiple operating systems such as Mac OS, Win 8, iOS and Android with mobile apps.
Features
Your media and files on your own personal cloud – Unlike a public cloud, My Cloud Mirror allows you to keep all your content in one safe place on your home network instead of a remote server. No mysterious location of your data. No monthly fees. No limits. Just blazing-fast, dual-drive performance for your high-speed digital life.
Centralized, dual-drive storage of your family's media collection – Store and organize all your family's photos, videos, music, and important documents in one secure place on your home network.
Access from anywhere – Enjoy your photos, videos, music, and more from anywhere on your PC, Mac ^® , tablet, or smartphone. With WD’s free apps, your personal cloud is always with you.
Mirrored data protection - With Mirror Mode (RAID 1) as the default setting, one drive is used to store your data and the other is used for a duplicate copy. Your data is twice as safe, giving you twice the peace of mind.
Automatic file backup for all your computers – Easily back up the files from all the PC and Mac computers in your home. PC users, WD SmartWare™ Pro offers options for how, when, and where you back up your files. Mac users, utilize all the features of Apple® Time Machine® backup software to protect your data.
Remote backup – Protect your data with remote backup to another My Cloud Mirror, integrated cloud backup or local LAN/WAN backup.
Expand your tablet and phone storage – Upload photos and videos directly to your personal cloud from anywhere.
Connect to Dropbox™ and more – Easily transfer files between your personal cloud, Dropbox, and other public cloud accounts using WD's free My Cloud apps.
Increase your personal cloud capacity -- Simply attach a compatible USB 3.0 hard drive directly to one of the two USB expansion ports on the My Cloud Mirror drive and instantly expand your storage capacity.
Transfer and stream faster – Gigabit Ethernet and 1.2 GHz processor deliver faster file transfers and high-speed streaming.
Unleash your media – Seamlessly stream your videos, photos, and music to your connected TVs, media players, gaming consoles, and other DLNA® – certified devices. With My Cloud Mirror's iTunes® server, you can easily stream your music collection to any PC or Mac computer with iTunes.
Password protection for privacy – Your data is always safe and completely under your control. Protect your personal cloud from unauthorized access with password protection available for every user.
Set up in minutes – Get up and running in minutes with WD's rich web-based user interface for seamless web-guided setup. WD's software will auto-detect your drive to make it easy. Need extra help? Visit wd.com/setup/wdmycloudmirror for help with the installation of My Cloud Mirror and WD's free apps for your computers and mobile devices.
About the Online Learning Center
WD's online Learning Center provides the latest information, instructions, and software to help users get the most out of their personal cloud storage. This web-based guide offers step-by-step help with setting up remote access, backing up data, monitoring device status and more. It's an interactive resource to walk users through installing and using their WD My Cloud Mirror device. The online Learning Center allows you to:
- Learn about your new personal cloud storage product.
■ Download the latest software for your product.
Find in-depth, interactive information on how to explore each of your product's features. - Update your product whenever new features become available.
- Access an always-available resource online, without a manual or CD.
Package Contents
■ WD My Cloud Mirror Personal Cloud Storage device
- Ethernet cable
■ AC power adapter
■ Quick Install Guide
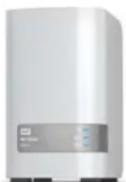
WD My Cloud Mirror Personal Cloud Storage Device
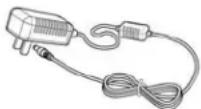
AC adapter*
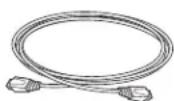
Ethernet cable
Quick Install Guide
For information on additional accessories for this product, visit:
| US | www.shopwd.com or www.wdstore.com |
| Canada | www.shopwd.ca or www.wdstore.ca |
| Europe | www.shopwd.eu or www.wdstore.eu |
| All others | Contact WD Technical Support in your region. For a list of Technical Support contacts, visit http://support.wd.com and see Knowledge Base Answer ID 1048. |
Requirements
Operating System
Windows®
Windows 8.1 or earlier
Windows 7
Windows Vista®
■ Windows XP (32 bit) SP3 or later
Mac OS X®
■ Mavericks (Mac OS 10.9)
■ Mountain Lion (Mac OS 10.8)
■ Lion (Mac OS 10.7)
■ Snow Leopard (Mac OS 10.6)
Note: Compatibility may vary depending on your computer's hardware configuration and operating system.
Web Browsers
■ Internet Explorer 8.0 and later on supported Windows computers
■ Safari 6.0 and later on supported Mac computers
■ Firefox 21 and later on supported Windows and Mac computers
■ Google Chrome 27 and later on supported Windows and Mac computers
Local Network
- Router/switch (Gigabit recommended to maximize performance.)
Internet
- Broadband Internet connection is required for initial setup and software downloads, as well as for remote access and mobile apps.
Product Components
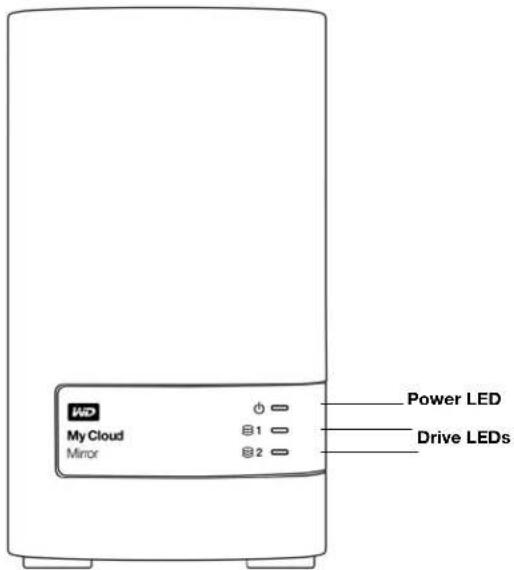
Front View
Back View
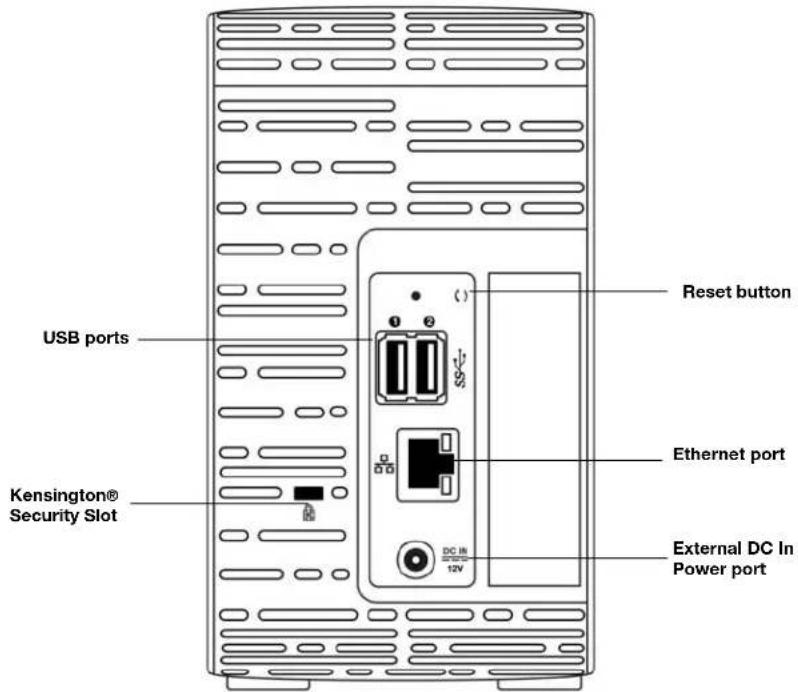
| Component Icon Description | ||
Ethernet port Connects the  | device to a local network. | |
| USB 3.0 port Connects to | a USB hard drive for additional storage. | |
| Reset button | () | Restores settings such as the administrator user name and password for the device. |
Power port Connects the  | device to an AC adapter and the power outlet. | |
| Kensington security slot |  | For device security, the device is equipped with a security slot that supports a standard Kensington security cable.Visit http://www.kensington.com/ for more information. |
LEDs
Front Panel Power LED
The following table describes the front panel power LED behavior.
| State Color Appearance State Description | |||
| Power Down | Not lit | N/A | Drive is off. |
| Standby | Blue | Pulsing | Drive is in standby mode. |
| Powering Up | Yellow | Flashing | Device is powering on or in the process of updating the firmware. |
| Power Up | Blue | Solid | Device is in a powered up state. |
| Power Up (degraded) | Red | Flashing | Device is powered up but the storage is degraded. See Knowledge Base Answer ID 87607. |
| Action required | Yellow | Flashing | A condition, such as a network cable having become unplugged, which requires you to act. |
Note: For non-compatible drives, the power LED blinks yellow during power up.
Front Panel Hard Drive (HDD) LEDs
The following table describes the front panel hard drive LED behavior.
| Function | Color | Appearance | Function Description |
| No drive | Not lit | N/A | Drive is not present. |
| Drive present, no activity | Blue | Solid | Drive is present but there is no activity. |
| Active drive | Blue | Flashing | Drive is present and showing drive activity. |
| Hard drive error | Red | Flashing | Drive is present but has a hard drive error or failure. |
| Hard drive in standby | Not lit | N/A | Drive is inactive. |
Note: For incompatible drives, the hard drive LEDs blink red rapidly as the unit powers up.
Back Panel Ethernet (Network) LEDs
The following table describes the network and activity LEDs:
Note: Looking at the Ethernet port, the LED on the top right is the Activity LED, and the one on the bottom right is the Link LED.
| State | LED | Appearance | State Description |
| Link down | Link | Off | Cable or device is not plugged in, or other end of link is not operational. |
| Link up – 100 Mb connection | Link Yellow Cable is plugged in, and both ends of the link have successfully established communications. 100 Mb network connection. | ||
| Link up – 1000 Mb connection | Link Green Cable is plugged in, and both ends of the link have successfully established communications. 1000 network connection. | ||
| Link idle | Activity | Solid | Active communication is not in progress. |
| Link busy | Activity | Green - Blinks | Active communication is in progress. |
Pre-installation Instructions
Before beginning installation, select a suitable location for your device to obtain maximum efficiency. Place it in a location that is:
■ Near a grounded power outlet
■ Clean and dust free
■ On a stable surface free from vibration
- Well ventilated, with nothing blocking or covering the slots and openings on the top and bottom of the device, and in fields from electrical devices such as air conditioners, radio and television receivers.
Handling Precautions
WD products are precision instruments and must be handled with care during unpacking and installation. Rough handling, shock, or vibration can damage the device drives. Observe the following precautions when unpacking and installing your external storage product:
■ Do not drop or jolt the device.
- Do not move the device while it is powered on.
- Do not use this product as a portable device.
- Do not remove both data drives at the same time. This will cause your device to become unresponsive.
Getting Started
Physically Connecting the Device
Getting Started Using Online Setup Software
Getting Started Without Online Setup Software
Accessing Content
It's easy to set up the WD My Cloud Mirror Personal Cloud Storage device -- all you have to do is unpack your device, connect it, and wait for the Power LED on the front of your device to turn a solid blue. Then, download and run the quick setup software, available at http://www.wd.com/setup.
Note: For information about safely shutting down and disconnecting the device, see "Utilities" on page 120
Physically Connecting the Device
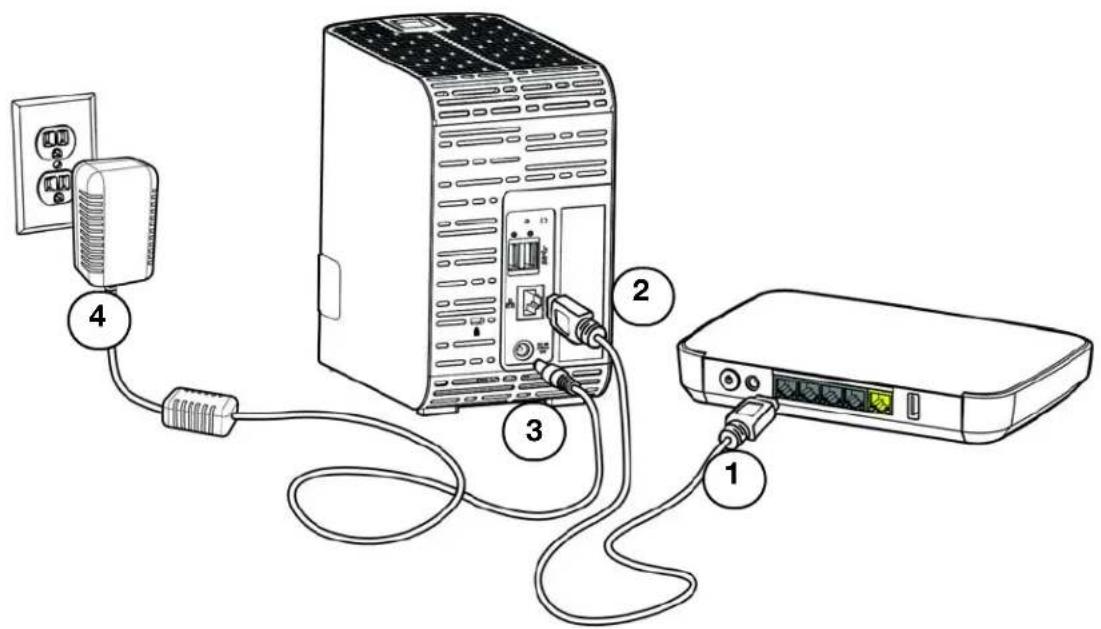
Follow the steps below to connect the WD My Cloud Mirror Personal Cloud Storage device to a home or small office network.
Important: To avoid overheating, make sure the device is upright as shown in the illustration above and nothing is blocking or covering the slots and openings on the top and bottom of the device. In the event of overheating, the device will perform a safe shutdown, interrupting all processes currently being performed. If this occurs, data may be lost.
Important: We recommend that you use the enclosed Ethernet cable for optimal performance.
- Using the provided Ethernet cable, connect one end of the Ethernet cable to the Ethernet port located on the back of the device.
- Connect the other end of the Ethernet cable directly into a router or network switch port.
- Connect one end of the power adapter into the power supply socket on the back of the device.
- Plug the other end of the power adapter into a power outlet. The unit powers up automatically.
Important: Wait for the WD My Cloud Mirror device to finish powering up (approximately three minutes) before configuring it. You will know it is ready when the power LED stops flashing and turns blue.
- When the power LED on your device turns a solid blue, continue to "Getting Started Using Online Setup Software" on page 11.
Getting Started Using Online Setup Software
The online setup software walks you through the steps to easily connect your device to your home or small office network. Use the following steps to download and run the online setup software, discover the device, and get started using it. The online setup software is available from WD's Online Learning Center at http://wd.com/setup/wdmycloudmirror
Downloading and Installing the Online Setup Software
After connecting your device:
- Open a web browser. (For browser requirements, see "Web Browsers" on page 6.)
- In the address field, type http://wd.com/setup/wdmycloudmirror to display the Welcome to the Learning Center page:
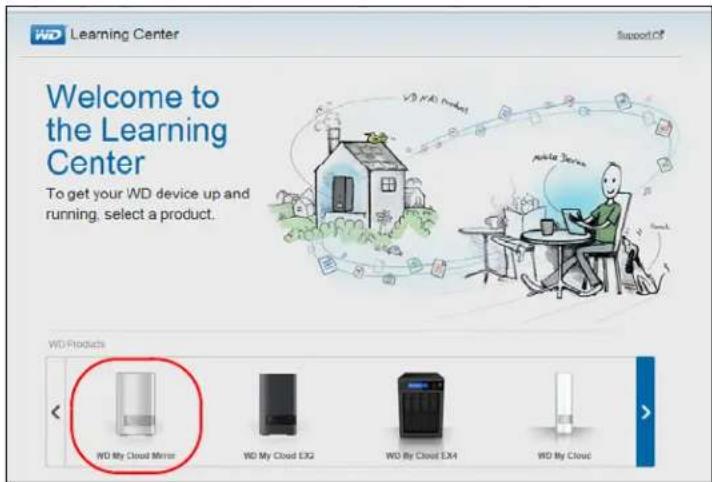
- Click WD My Cloud Mirror to display the Download Setup Software page:
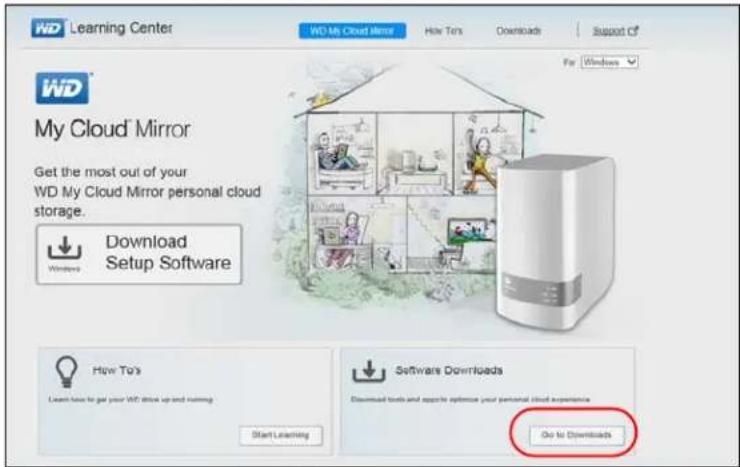
Note: The online Learning Center automatically detects your operating system (OS). If you'd like to download setup software for a different operating system, select your OS from the drop-down menu at the top of the page before clicking the Download Setup Software button.
- Click the Download Setup Software button. The Downloads page displays.
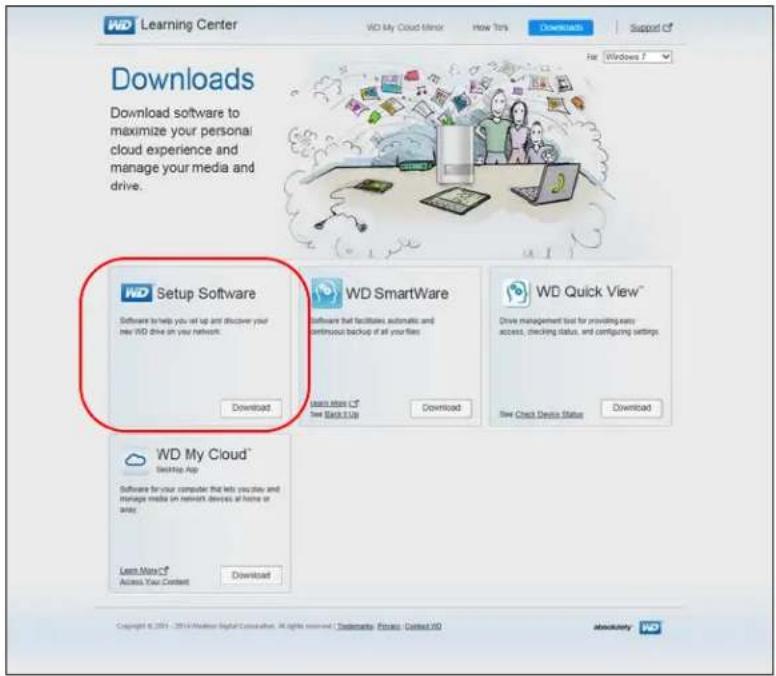
-
Click the Setup Software Download button.
-
Access the downloaded files and double-click Setup.exe (Windows) or WD My Cloud Mirror Personal Cloud Storage Setup.dmg (Mac) to open the setup software. The Getting Started window displays.
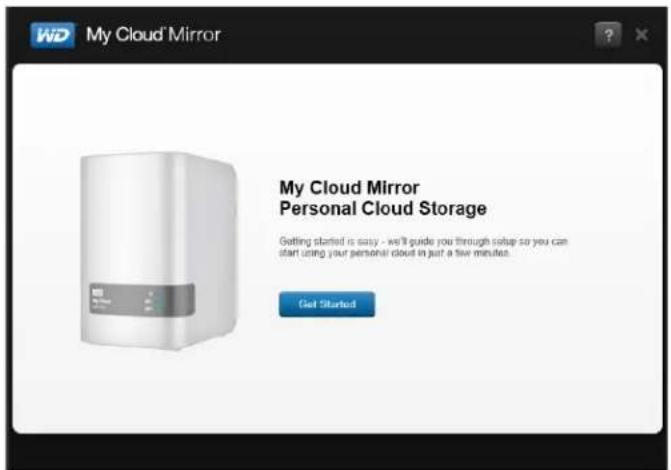
- Continue to "Connecting to the Network and Creating a Personal Cloud," below.
Connecting to the Network and Creating a Personal Cloud
- On the Getting Started window (above), click Get Started to display the Western Digital End User License Agreement:
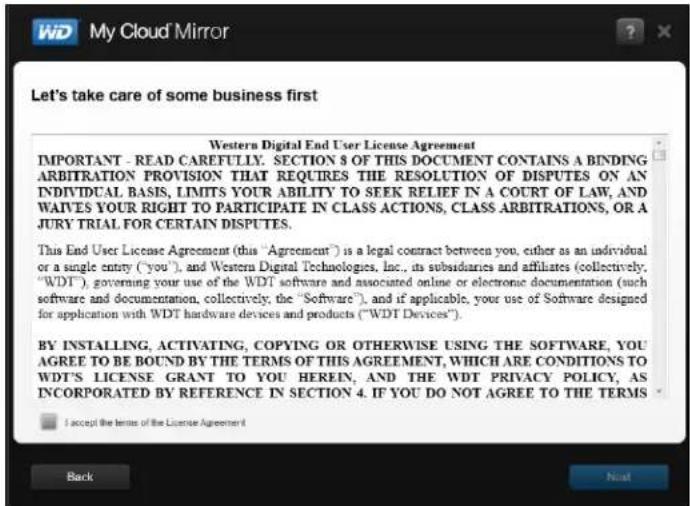
-
Read the agreement and select the "I accept the terms of the License Agreement" check box.
-
Click Next to display the Getting powered up and connected screen.
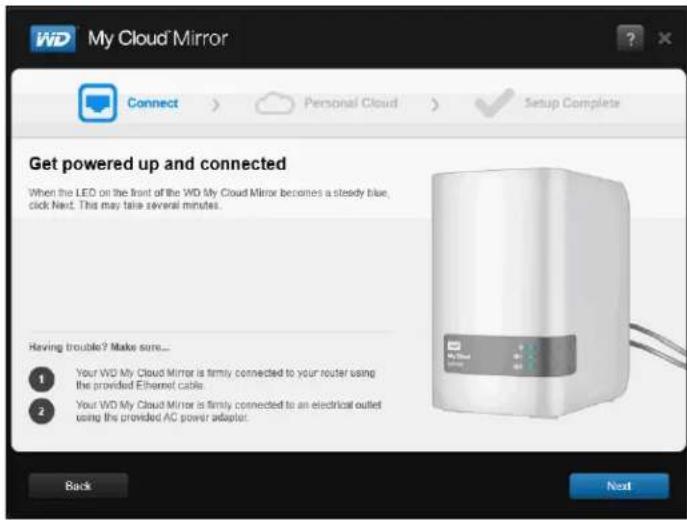
- Review the information on the screen, and when the power LED on your WD My Cloud Mirror device is solid blue, click Next. The software discovers your device and displays it on the Select your WD My Cloud Mirror screen.
Note: If your device is not detected, follow the on-screen directions.
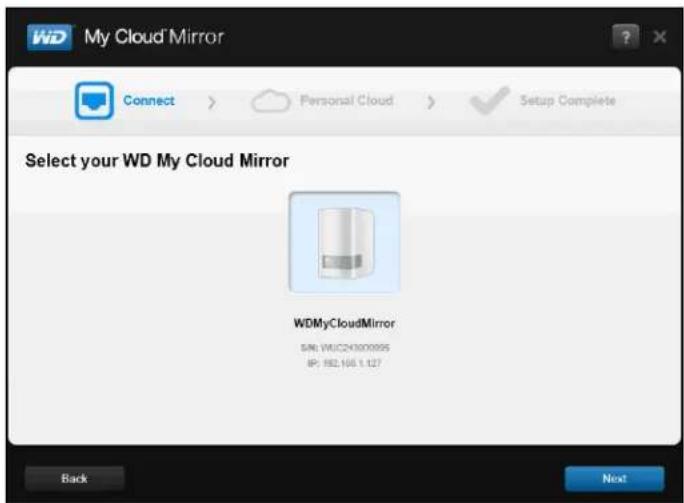
- Select your WD My Cloud Mirror device and click Next. The Set up your personal cloud screen displays.
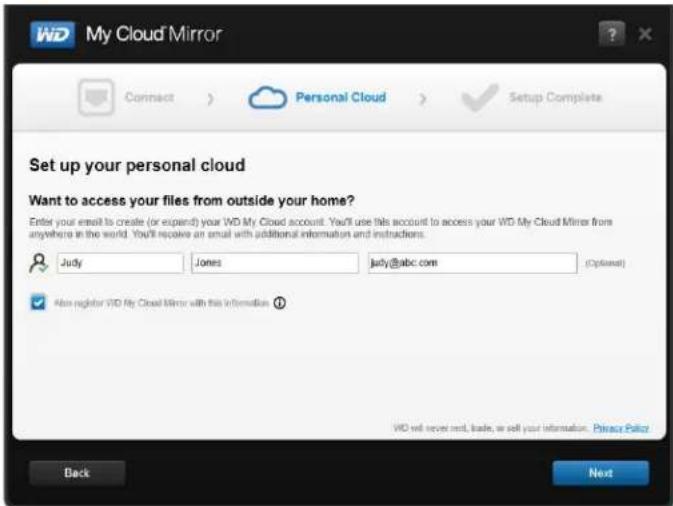
Note: WD My Cloud Mirror provides fee-free remote access to your personal cloud device. Once you create your account, you can access your device using your mobile devices with Internet access and from the WD My Cloud desktop app.
-
Enter your first and last name and, optionally, your email address. The email address is needed if you want to create an account with remote access capability. Make sure the check box for Also register WD My Cloud Mirror with this information is selected.
-
Click Next. The Your account screen displays.
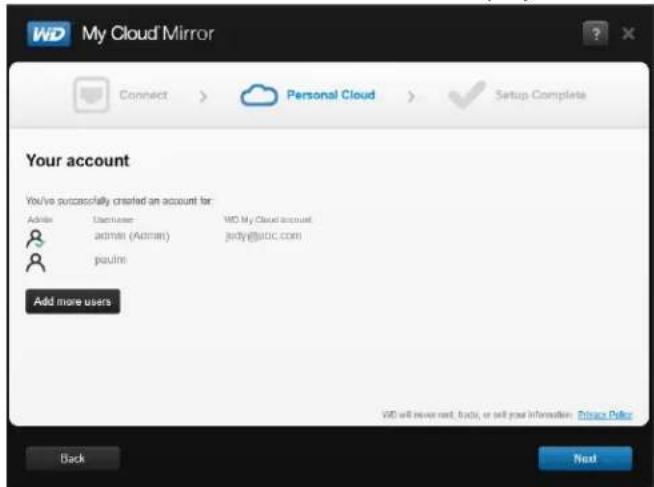
- If you'd like to add users, click Add more users, enter the user information and click the plus sign (+).
If you'd like to skip the add an account step, click Next. You'll have the opportunity to create a personal cloud when you create a user account (see "Adding a Single User" on page 42.)
Note: It may take a few minutes for your email inbox to receive instructions on accessing the WD My Cloud Mirror device remotely.
- Check your email to confirm your new account and click Next to display the Setup Complete screen.
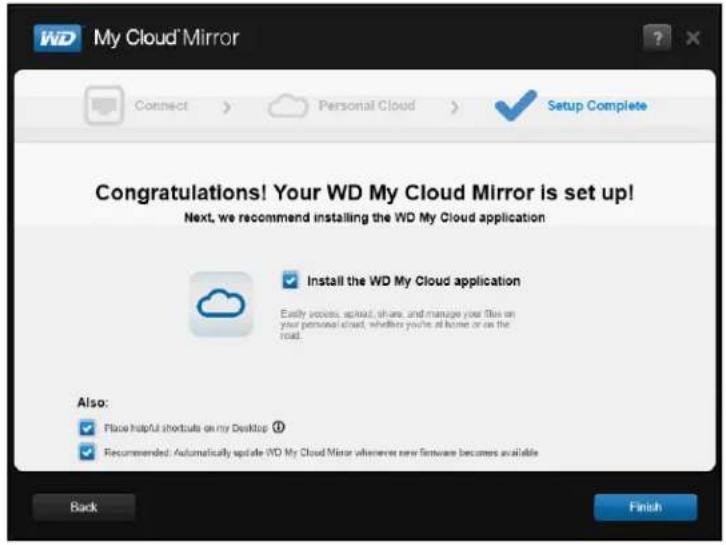
Note: You may need to check your email spam folder if your spam filter does not allow email from WD. The Congratulations! screen displays. You've successfully set up your WD My Cloud Mirror device. Now you can select the options provided on the screen.
Selecting Options
All options on the Congratulations! screen (above) are enabled by default. The table below explains what happens when the options are enabled or disabled.
- Select your desired options, clearing the check box for any option you want to disable:
| Option Result | |
| Install the WD My Cloud app | If the option is enabled: An installation wizard launches automatically.S e e “Launching the WD M Cloud Desktop App” on page 37 for instructions.WD My Cloud app icon displays on the Desktop. An installation wizard launches automatically.S e e “Launching the WD M Cloud Desktop App” on page 37 for instructions.WD My Cloud app icon displays on the Desktop. |
| If the option is disabled:The online Learning Center Welcome page displays.The Public share displays in Explorer (Windows) or Finder (Mac). | |
| Place helpful shortcuts on my Desktop (Setup software required) | 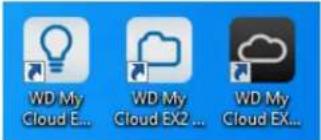 The online Learning Center Welcome page.The Public share in Explorer (Windows) or Finder (Mac).The WD My Cloud dashboard for configuring your WD My Cloud Mirror device. The online Learning Center Welcome page.The Public share in Explorer (Windows) or Finder (Mac).The WD My Cloud dashboard for configuring your WD My Cloud Mirror device. |
| Recommended: Automatically update WD My Cloud whenever new firmware becomes available | The online Learning Center Welcome page displays.The Public share displays in Explorer (Windows) or Finder (Mac).If the option is enabled, the firmware turns on automatic updates at 3:00 AM daily. To change settings for automatic updates, see “Firmware Update” on page 130. |
2. Click Finish to close the setup wizard.
Getting Started Without Online Setup Software
If you don't want to use the setup software to get started, you can use a browser instead. If you don't want to use either, you can still:
- Use your WD My Cloud Mirror personal cloud storage device as an external hard drive, dragging and dropping files to and from it.
- Configure the device using the WD My Cloud Mirror device's dashboard. (See "The Dashboard at a Glance" on page 57.)
- Back up files using USB, Remote, Internal, and Cloud backup (see "Backing Up and Retrieving Files" on page 71).
Setting up the Device Using a Browser
To set up the WD My Cloud Mirror device:
- Open a browser and enter http://wdmycloudmirror for Windows or http://wdmycloudmirror.local for a Mac and press Enter. The login page appears:
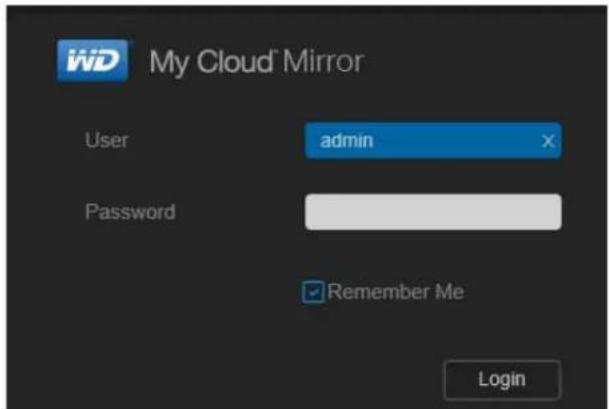
- Click Login. You do not need to enter a password because you haven't set one up yet. The Choose your language screen appears:
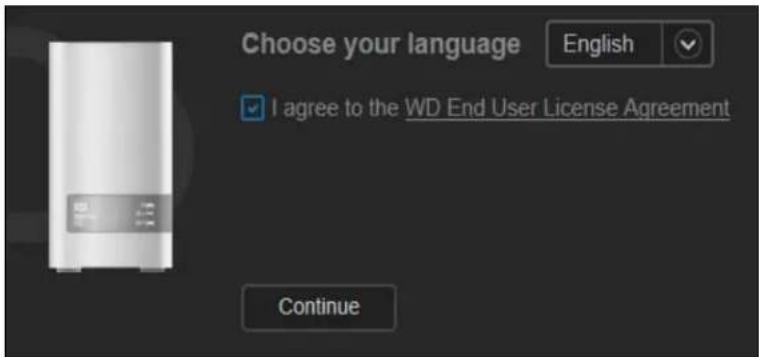
- From the drop-down list, select the language of the user interface.
- Click the link to read the Western Digital End User License Agreement. if you agree, click I accept or return to the previous page and click the I agree check box.
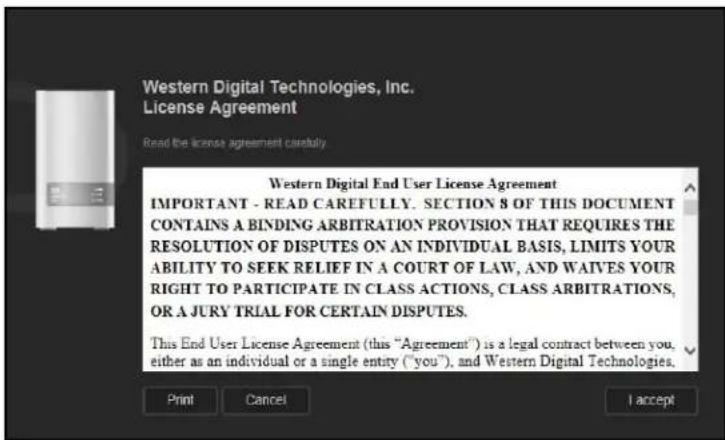
- Click Continue. The Getting Started Setup for WDMyCloud.com login screen appears.
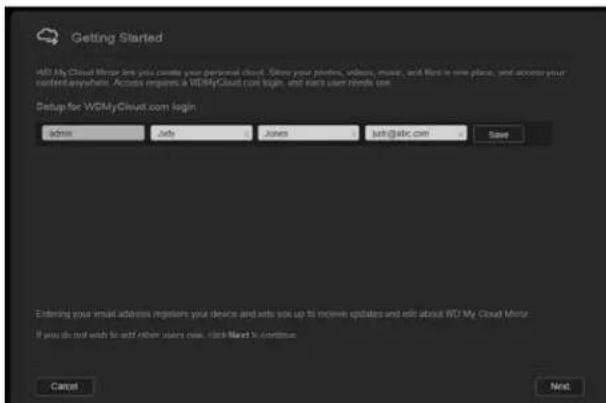
- Enter your first and last name and optionally, your email address. The email address is needed if you want to create an account with remote access capability. Make sure the check box for Also register WD My Cloud Mirror with this information is selected.
Note: WD My Cloud Mirror provides fee-free remote access to your personal cloud device. Once you create your account, you can access your device using your mobile devices with Internet access and from the WD My Cloud desktop app.
-
Click Save.
-
If you want to add users here, just repeat steps 6 and 7 for each user.
-
Click Next. The next Getting Started screen appears:
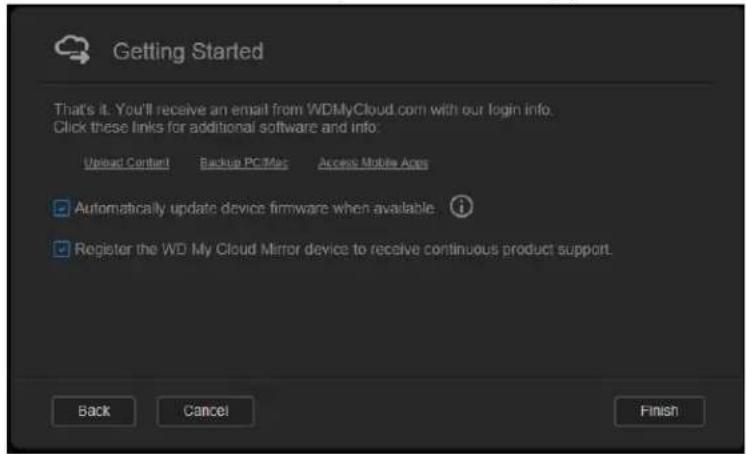
The screen provides three links to important processes, which are discussed in later chapters:
- Upload Content: See "Accessing Content" on page 20.
- Backup PC/Mac: See "Backing Up and Retrieving Files" on page 71.
"Access Mobile App: See "Mobilizing Your Files with iOS and Android Mobile Apps" on page 24.
- Do the following (optional):
- To have your device's firmware up dated automatically, click the Automatically update device firmware when available check box.
■To register your device, click the Register the WD My Cloud Mirror device to receive continuous product support check box.
- Click Finish to display the WD My Cloud Mirror dashboard. For instructions on using the dashboard, see "The Dashboard Home Page" on page 59.
Accessing Content
Note: This manual uses the term shares and folders interchangeably.
The WD My Cloud Mirror device's Public folder contains Shared Music, Shared Pictures, and Shared Videos subfolders. The existing content of the subfolders are files that you dragged and dropped or files that have been backed up from your computer or an attached USB drive.
Note: Any of the folders can hold any type file.
Once you've physically connected your WD My Cloud Mirror device (see "Physically Connecting the Device" on page 10), use the following steps to access the contents of your device.
| If your operating systems is... Then... | |
| Windows 8 or 8.1 | 1. On the Start page, typeComputer2. ClickComputer.3. In the left pane, clickNetwork.4. Double-clickWDMYCloudMirrorand locate the device's Public folder.5. Double-click the Public folder to display the Shared Music, Shared Pictures, and Shared Videos subfolders. You can now drag and drop files into (and from) the shared media folders using Windows Explorer. |
| Windows XP/Vista/Windows 7 | 1. ClickorStart > Computer > Network > WDMYCloudMirrorand, if required, enter your network (router) credentials. The device's Public and private folders (shares) display.2. Double-click the Public folder to display the Shared Music, Shared Pictures, and Shared Videos subfolders. You can now drag and drop files into (and from) the shared media folders using Windows Explorer. |
| Mac OS X(Snow Leopard, Lion, Mountain Lion,Mavericks) | 1. In a Finder window, clickWDMyCloudMirrorunder the shared items in the side bar.2. If presented with an authorization page, selectGuestand clickConnectto display the Public share:3. Double-click the Public folder to display the subfolders: Shared Music, Shared Pictures, and Shared Videos. You can now drag and drop files into the shared folders using Finder.4. If you want to create a shared drive icon permanently on your desktop, create an alias. Following are two ways to do this:Note: Before creating an alias, clickFinder > Preferences > General and make sureConnected Serversis checked.- Click the item you wish to alias (e.g., Shared Music), hold down the mouse button, hold down theCmdandOptionkeys simultaneously, and drag the item to where you want the alias to appear. Instead of moving the original item, this action creates an alias at the new location.-OR -Right-click the item you want to alias (e.g., Shared Music) and clickFile > Make Alias. |
Mapping the Public Folder (Windows)
To map the WD My Cloud Mirror Public folder for quick access in the future:
- In Windows Explorer, under Network, click WDMYCLOUDMIRROR.
- Right-click the Public folder and select Map Network Drive from the menu.
- Select an available letter from the Drive drop-down list.
- Select the Reconnect at login check box.
- Click Finish. Your Public drive is now mapped.

Accessing Your Cloud Remotely
Enabling Cloud Access for the WD My Cloud Mirror Device Configuring Cloud Access for a User Mobilizing Your Files with iOS and Android Mobile Apps
A personal cloud is your content, at home, secure and under your control. Unlike public clouds, a personal cloud allows you to keep all of your content in one safe place on your home network. Share files, stream media, and access your content anywhere, from your PC or Mac computer and from mobile devices. No monthly fees. No mysterious location for your data. Keep your videos, music, photos, and files safe at home and always with you.
This chapter explains how to set up the WD My Cloud Mirror device for remote access and describes some of the ways you can take advantage of its many capabilities.
Enabling Cloud Access for the WD My Cloud Mirror Device
Before you can use your WD My Cloud Mirror device remotely, it must be enabled for cloud access (enabled is the default). To verify that the WD My Cloud device is enabled for remote access and to check the status of its remote connection(s), see "Cloud Access" on page 108.
Configuring Cloud Access for a User

Once you've enabled cloud access on the WD My Cloud Mirror device, use the following steps to give remote access capability to your device users.
- On the navigation bar, click the Cloud Access icon.
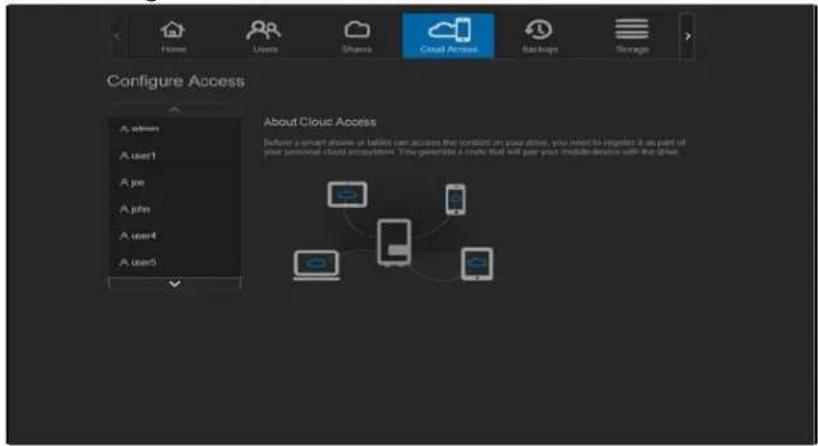
- In the left pane, select the user you'd like to configure for cloud access.
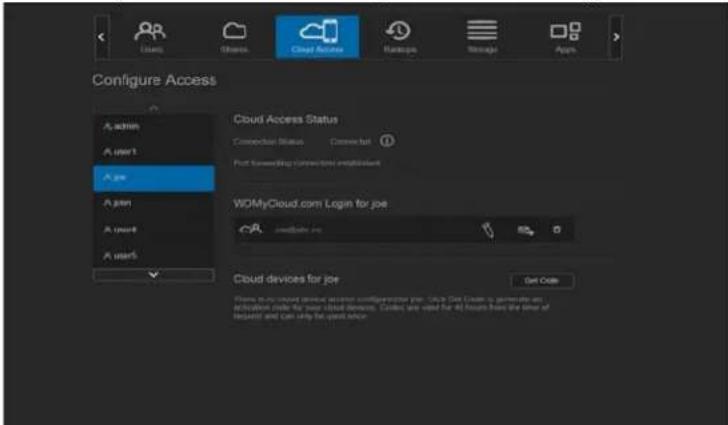
- In the WDMyCloud.com Login for
area, click the Add/Change Email Address icon 📋. Click this icon if you have not previously added an email address to the user account or if you need to update/change the user's email address. - Enter the user's email address. This email address is used to send the user confirmation information and instructions on setting up and activating a password for cloud access.
- Click Save.
- If you have entered an email address, this icon is greyed out. Add an email address and return to this link to send cloud access information.
To generate an activation code for a user's mobile device(s) and My Cloud Desktop app:
Important: Codes are valid for 48 hours from the time of the request and can be used only once.
- On the bottom of the screen, click Get Code. You'll need to generate one code for each mobile device and app you want to activate. You also need a code to activate WD My Cloud for desktop app. A dialog box displays the user's activation code and its expiration date and time.
Note: Make sure to write down the access codes you generate.
- Click OK. Once you use the code(s), the Configure Access page displays the cloud devices to which the user now has access along with the activation code used.
Mobilizing Your Files with iOS and Android Mobile Apps
The WD My Cloud and WD Photos mobile apps and WD My Cloud desktop app allow you to access all the content on your personal cloud from any device.
WD Photos Mobile App
Important: WD Photos enables you to view photos in .jpg format only.
Turn your mobile device into the ultimate photo album. View all the photos stored on your personal cloud with your smartphone or tablet. Or, take a photo or video clip and instantly upload it from your gallery directly to your WD My Cloud Mirror device with ease.WD Photos is compatible with leading Apple mobile devices and many popular Android devices. Photos are automatically optimized for viewing on your mobile device.
Note: Thumbnail images are not available for an attached USB device.
With WD Photos, you can:
■ Instantly post photos to Facebook.
■ Play a slide show with transitions to create digital art.
■ Access previously viewed photos even when you are off line.
■ View your photos all at once or filter them by folder or album.
- Search by file name, folder name, or date using the built-in search options.
- Email a photo to a friend.
- Assign a photo to a contact.
- Download a photo from your personal cloud storage to the camera roll on your mobile device.
- Upload photos and videos from the camera roll on your mobile device directly to your personal cloud storage, no matter where you are.
Note: WD Photos automatically creates a subfolder with the mobile device name in the Public directory on the WD My Cloud Mirror device for uploaded photos. Similarly, the app creates a subfolder with the mobile device name in the Public/Shared Videos directory for uploaded videos.
For more features and instructions for using WD Photos, see its online Guide Me page and Quick Tips, and go to http://wdphotos.wd.com.
Installing WD Photos Mobile App on Your Mobile Device
Important: Make sure the photos you want to view on the mobile device are stored in the Shared Pictures subfolder in the Public share of your WD My Cloud Mirror device. WD Photos lets you view photos in .jpg format only.
Requirements
■ WD My Cloud Mirror personal cloud storage with the most recent firmware, connected to the Internet.
An iPhone ^® , iPad ^® , or iPod ^® touch with iOS 4.3 or higher
- Android smartphone or tablet running versions 2.3 or higher
To install WD Photos on your mobile device:
-
Download WD Photos from the Apple App or Google Play store and install it on your mobile device.
-
Launch WD Photos on your mobile device to display the WD Photos page:
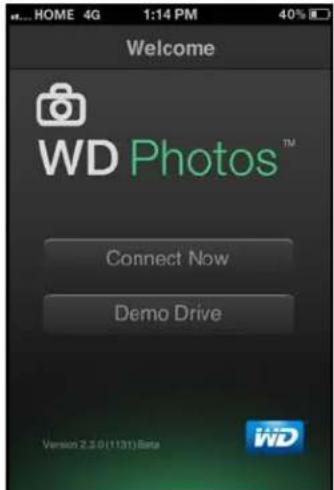
- Tap Connect Now to display a page offering several connection options:
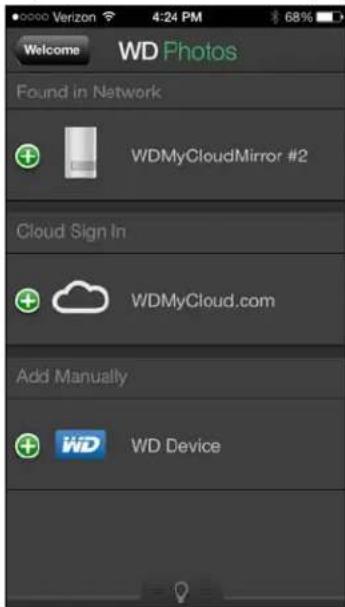
The WD Welcome page contains the following sections:
- Found in Network: If the mobile device is on the same Local Area Network or Wi-Fi Network as the WD My Cloud Mirror device, the activation code is automatically provided behind the scenes and does not need to be entered.
a. In the Found in Network section, tap to the left of WDMyCloudMirror.
b. Select your user name from the Select User Account list.
c. Enter your user password.
Cloud Sign in: Tap and sign in to your personal cloud using your WDMyCloud.com (cloud access) login account email address and password.
- Add Manually: If the mobile device is not on the same LAN or Wi-Fi network as the WD My Cloud device:
a. In the Add Manually section, tap to the left of WD device.
b. Enter the activation code generated on the WD My Cloud Mirror's dashboard and tap Activate:
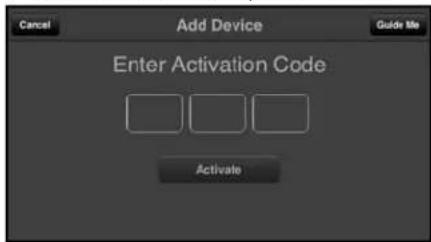
Note: You must generate one code for each app you want to activate. Codes are valid for 48 hours from the time of request and can be used one time only.
A page displaying your WD My Cloud device appears:
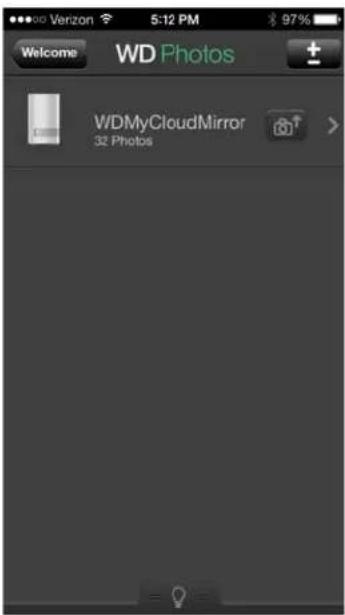
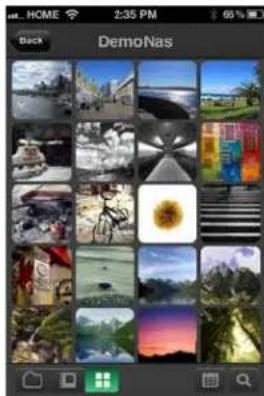
- Tap your WD My Cloud Mirror device to view your album(s) and tap an album to display the photos contained within it:
natural_image
Grid of 20 grayscale photo thumbnails including landscapes, nature, and urban scenes (no text or symbols)Note: If you have problems installing WD Photos, visit http://wd.com/setup/wdphotos. For more features and instructions, see the app's online Guide Me page and tips and go to http://wdphotos.wd.com.
WD My Cloud Mobile App
You are always connected to your personal cloud. Save valuable space on your mobile devices with easy photo and video uploads directly to your personal cloud, then securely access and share your memories.
The WD My Cloud mobile app also allows you to easily transfer files between your personal cloud, Dropbox™, and other public cloud accounts.
With WD My Cloud mobile app, you can:
- Open and view the important files stored on your WD My Cloud Mirror device from anywhere without copying them to your mobile device.
■ Show off the photos stored on your WD My Cloud Mirror device.
■ Connect to other cloud sites such as Dropbox from your tablet or smartphone.
Stream and enjoy music and video files stored on your WD My Cloud Mirror device.
Note: Video streaming performance is best over your LAN and when your mobile device is connected using Wi-Fi wireless connections. WAN streaming performance may be limited by upload speeds on your home Internet connection.
■ Share your presentations on your Apple or Android tablets.
Your WD My Cloud app supports most major file types, such as Microsoft Word documents, Microsoft Excel spreadsheets, and PowerPoint presentations.
For more features and instructions, see the Help, Guide Me page, and Quick Tips within the WD My Cloud mobile app, or go to http://wdmycloud.wd.com.
Note: WD My Cloud app brings your data from your personal cloud to your tablet, handset, or other portable devices using Google Android or Apple iOS. WD My Cloud provides a convenient file list of the WD My Cloud Mirror device contents and then launches your favorite player or viewer for any files you want to open. For file types your mobile device supports, see the device's manual.
Requirements
■ WD My Cloud Mirror personal cloud storage with the most recent firmware, connected to the Internet.
- Access to cloud services requires the WD My Cloud app and an active Dropbox, Google Drive, or OneDrive™ account.
- iOS iPhone or iPad running versions 5.0 or later software.
- Android smartphone or tablet running versions 2.3 or later software.
Installing the WD My Cloud Mobile App
- Download the WD My Cloud mobile app from the Apple App or Google Play store and install it on your mobile device.
- Launch the app. The End User License Agreement displays.
- Accept the agreement. The Welcome page displays:
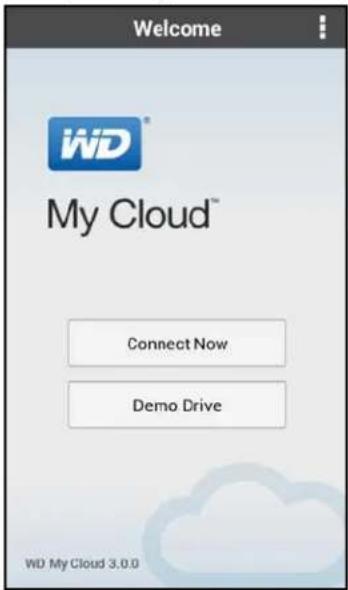
- Tap Connect Now to display a page offering several connection options:
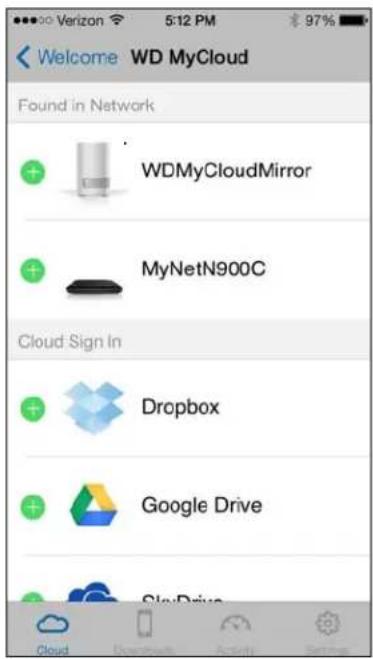
- You have the following options for connecting to the WD My Cloud device:
- From Your Local Network: If the mobile device is connected by Wi-Fi to the same Local Area Network as the WD My Cloud device, the app is automatically activated.
Cloud Sign in: Tap and sign into your personal cloud using your WDMyCloud.com (cloud access) login account email address and password.
- Connect Manually: If the mobile device is not on the same LAN or Wi-Fi network as the WD My Cloud device:
- In the Add Manually section, tap the WD My Cloud Mirror device.
- Enter the activation code generated on the WD My Cloud's dashboard and tap Activate. (See "Configuring Cloud Access for a User" on page 22.)
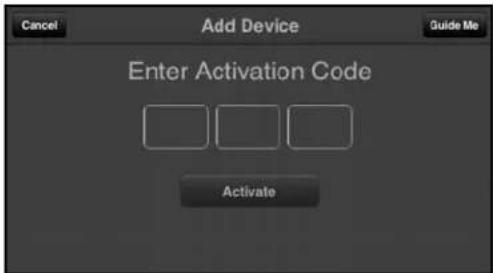
Note: You must generate one code for each app you want to activate. Codes are valid for 48 hours from the time of request and can be used one time only.
A page displaying your WD My Cloud Mirror device displays:
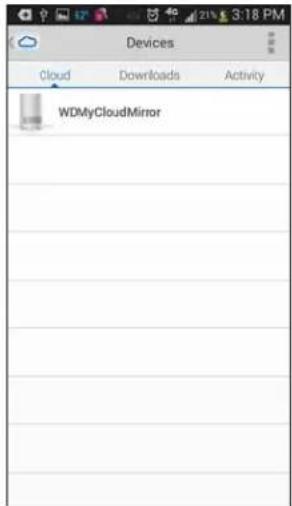
- Tap your device to display its share(s):
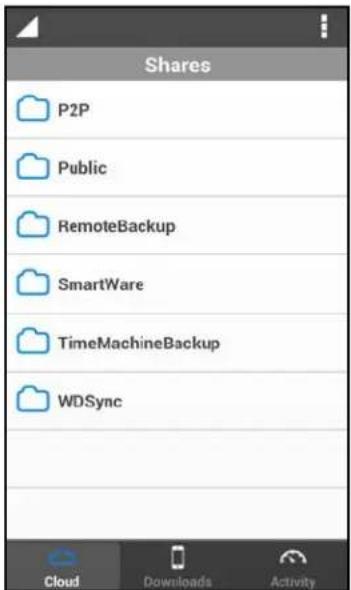
- Tap a share to display its subfolders.
- Tap a subfolder to display a list of files.
- Tap a file to access it.
Note: For more features and instructions, see the app's online Guide Me page, Help, FAQs, and tips, or go to http://wd.setup/wd.mycloudapps.
If you have problems installing the app, go to http://wd.com/setup/wmycloudmobileapps.
WD My Cloud for Desktop App
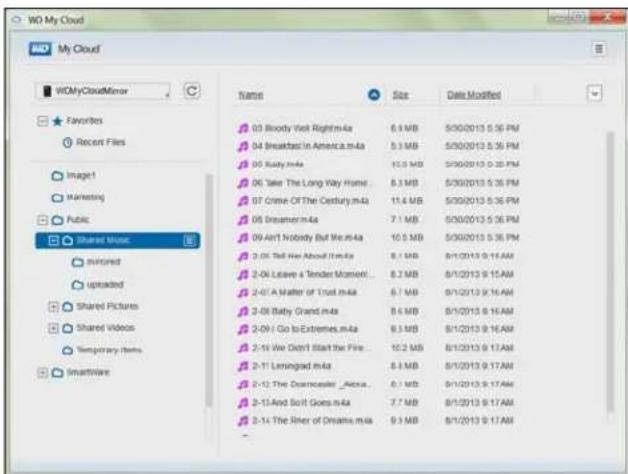
This app keeps your PC or Mac connected to your personal cloud, no matter where you are. From the application, you can easily drag and drop to transfer, manage your files, and share links to specific files or folders via email.
With WD My Cloud desktop app, you can:
■ View the files to which you have access.
- Assign favorites for quick access to your favorite folders, files and recently accessed information.
- Add and remove device content by dragging and dropping files and folders from your computer.
Requirements
- WD My Cloud Mirror personal cloud storage with the most recent firmware, connected to the Internet.
■ A PC or a Mac computer.
Installing WD My Cloud Desktop
Windows
- Open a web browser. For browser requirements, see "Web Browsers" on page 6.
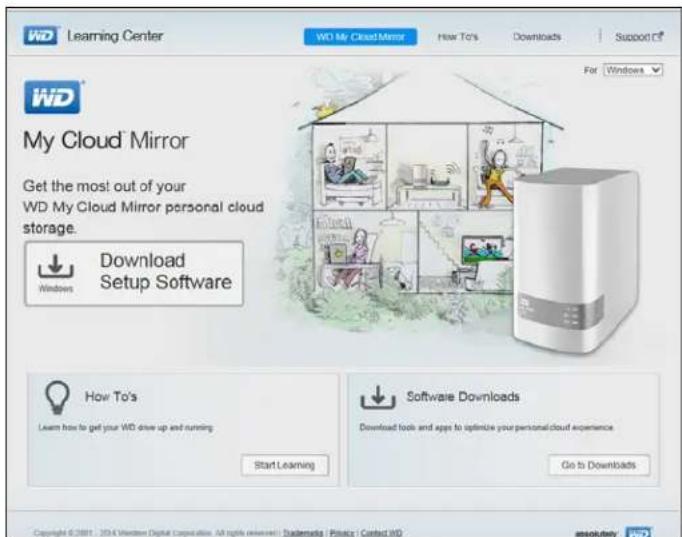
- In the address field, type http://wd.com/setup/wdmycloudmirror to display the Welcome to the Learning Center page:
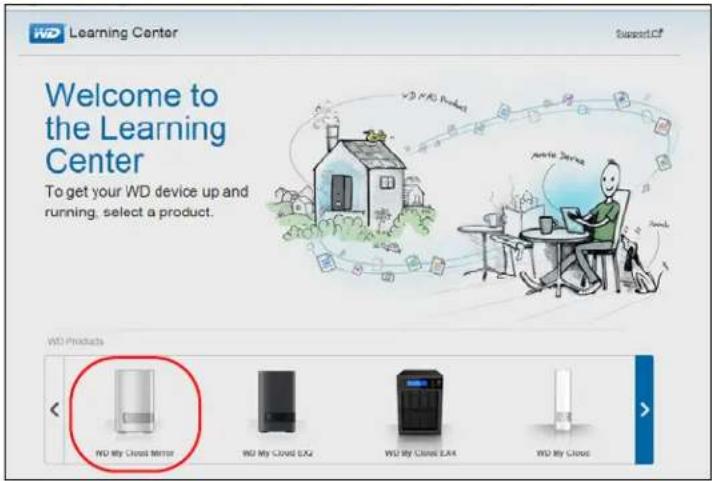
- Click WD My Cloud Mirror to display the download page:
-
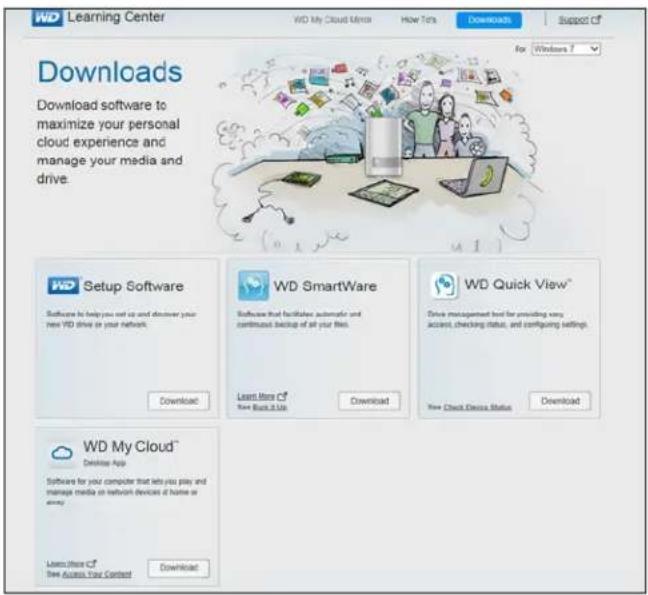
In the Software Downloads area, click Go to Downloads.
-
In the WD My Cloud for desktop area, click Download. The setup software downloads to your computer.
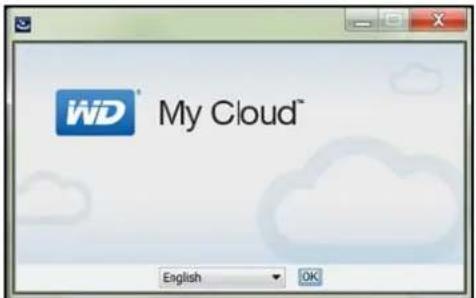
- Access your downloaded files and double-click wdmycloud.exe (Windows) or wdmycloud.dmg (Mac).
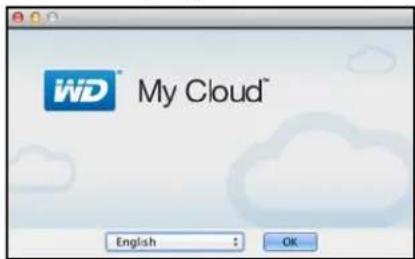
- Select a language from the drop-down menu and click OK.
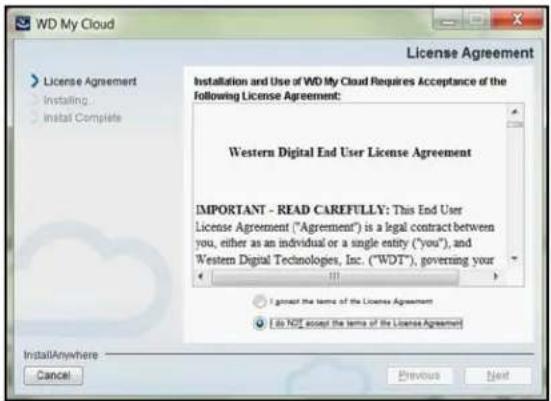
- Read the WD License Agreement and select I accept the terms of the License Agreement:
-
Click Next.
-
Read the Apple License Agreement and select I accept the terms of the License Agreement:
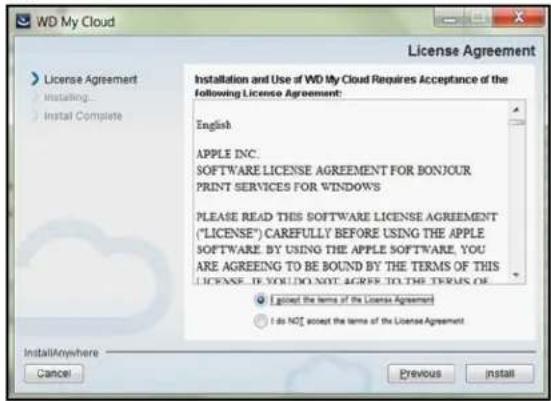
- Click Install. Installation begins.
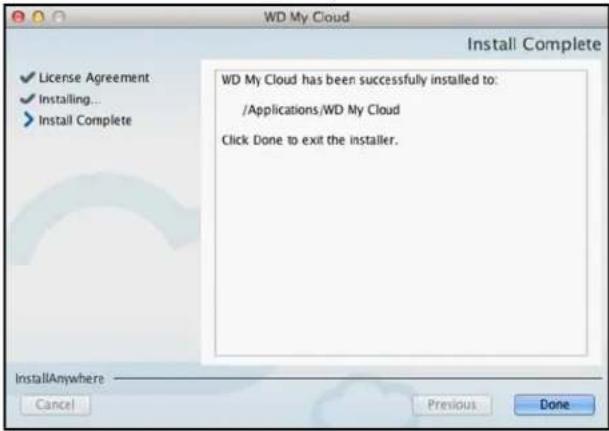
- Once the installation is complete, click Done to close the WD My Cloud installer.
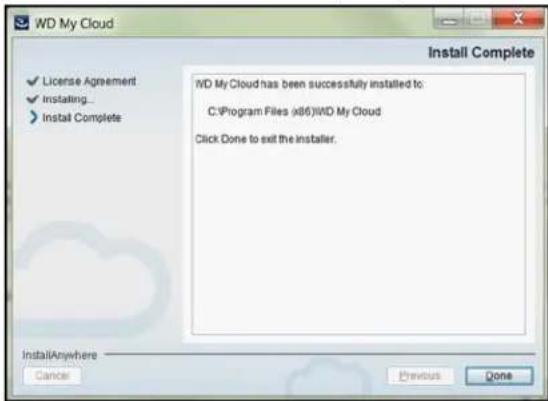
Mac
- Complete Steps 1 - 4 above.
- Click Downloads and select WD My Cloud Installer.
Note: Depending on your software configuration, a request to install a Java runtime may appear. Click Install.
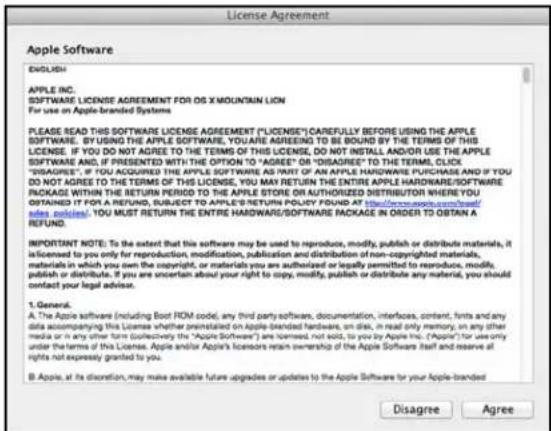
- Read the Apple Software License Agreement and click Agree.
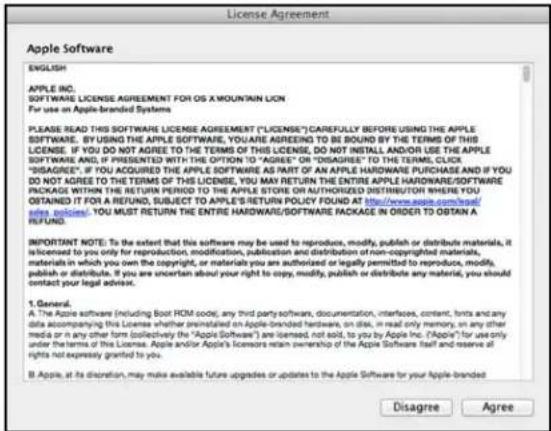
- Select a language from the drop-down menu
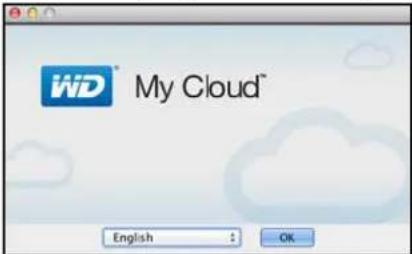
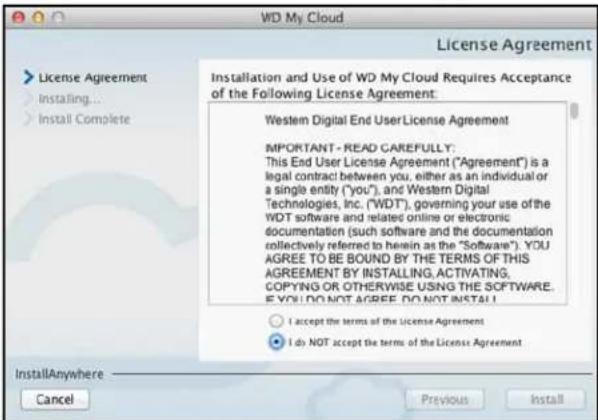
- Read the WD Software License Agreement and click I accept the terms of the License Agreement.
-
Click Install. The installation begins.
-
Once the installation is complete, click Done to close the WD My Cloud installer.
Mac
- Complete Steps 1 - 4 above.
- Click Downloads and select WD My Cloud Installer.
If asked to install a Java runtime, click Install.
■ If a warning screen displays, click Open.
- Read the Apple Software License Agreement and click Agree.
- Select a language from the drop-down menu
- Read the WD Software License Agreement and click I accept the terms of the License Agreement.
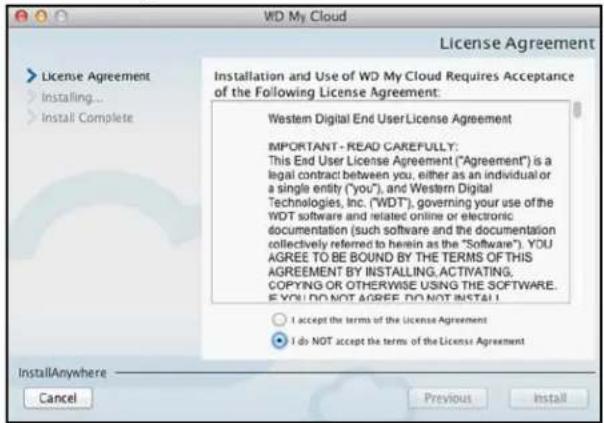
- Click Install. The installation begins.
- Once the installation is complete, click Done to close the WD My Cloud installer.
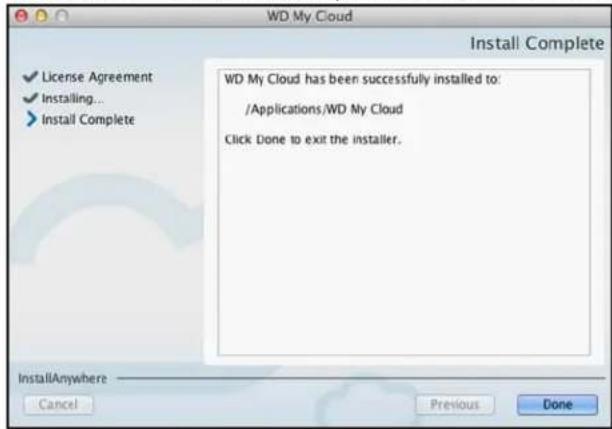
Launching the WD My Cloud Desktop App
Once you've installed the WD My Cloud Desktop app, use the following steps to access the files on your personal cloud:
| IF you want to launch from . . . THEN . . . | |
| Desktop Icon | Double-click the WD My Cloud Desktop icon. |
| Windows 8 or 8.1 | 1. On the Start page, type WD My Cloud.2. Click WD My Cloud. |
| Windows 7/Vista/XP | 1. Click [icon] or Start > (All) Programs.2. In the left panel, select WD My Cloud > WD My Cloud. |
| Mac OS X 1. Click Finder > Applications2. Select WD My Cloud > WD My Cloud. | |
Using the WD My Cloud for Desktop App
- Launch the WD My Cloud Desktop app as described above.
- If a Security Alert Info screen displays, click I understand.
![My Cloud Choose Your Device Security Alert Info You might see an alert like the one spoken before. To connect to your device, click Continue [or Yes for Windows] Why do these messages appear? How can I stop them? Security Alert The user needs a secure connection which indicates serve authentication. The Configles secure the site https://a/1234508/1234508/1234508/1234508/1234508/1234508/1234508/1234508/1234508/1234508/1234508/1234508/1234508/12 Use Certificate Save Info Don't show this message again I understand](/content/2026/05/1026030/images/f1a8d90c3881ca67ad486561ee2ce88c80789abdfb9de2029469ff676595a1c2.jpg)
The Choose Your Device screen displays.
- If your device displays on the screen, select it.
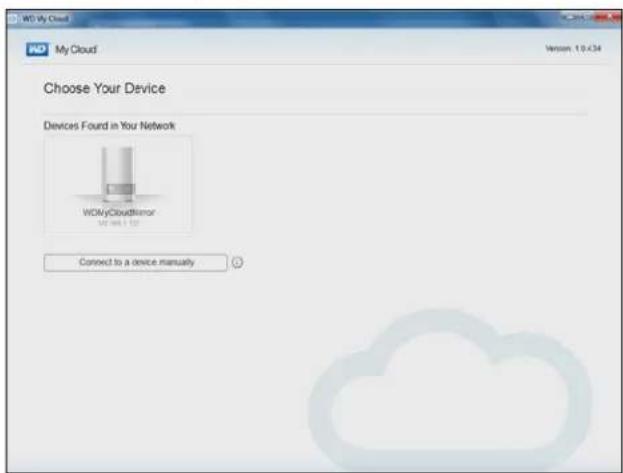
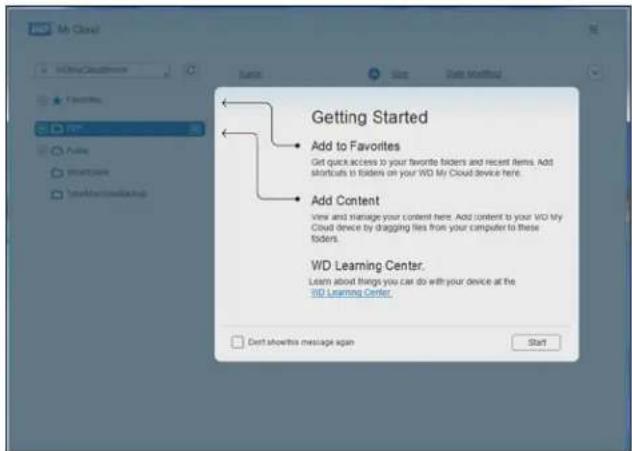
The Getting Started screen displays. Continue to step 6.
- If your device does not display on the Choose your device screen, click Connect to a device manually to display the WD My Cloud Manual Connect screen.
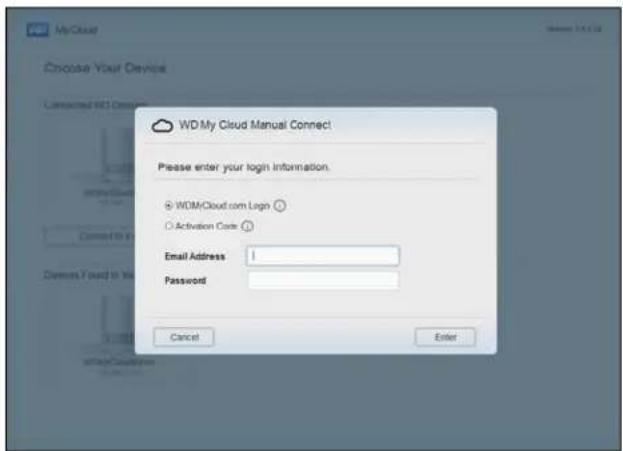
- You have two options:
- Select WDMyCloud.com Login, enter your email address and password and click Enter.
- Click Activation Code and click Enter. Enter the activation code generated by the WD My Cloud Mirror device and click Enter.
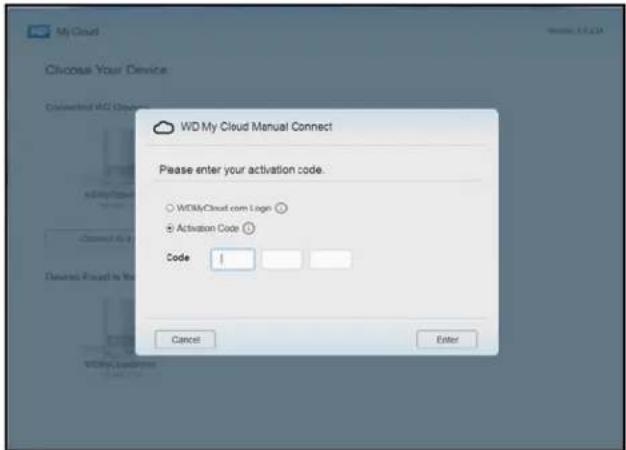
Note: Codes are valid for 48 hours from the time of request and can be used one time only. For details on how to generate an activation code, see "Configuring Cloud Access for a User" on page 22.
The WD My Cloud for Desktop app opens to the Getting Started screen.
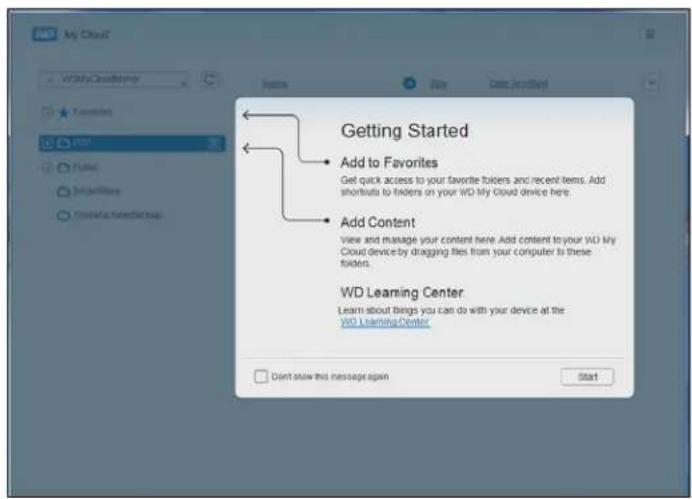
- Click Start. Refer to the application's online help if you have questions.
Managing Users, Groups, and Shares
About Users
About Groups
About Shares
About Users

The Administrator, normally the device owner, is the person in charge of setting up the device. As the WD My Cloud Mirror device owner, you have a special user account (admin) that provides you with administrator privileges. With these privileges, you can set up and configure the device to your specific needs and add other users to your personal cloud. You also have the power to determine exactly what users can access on the device.
As a default, the administrator (admin) user name does not have a password. You can create one at anytime (see "Updating a User Password" on page 47).
Note: Only one individual at a time can use the Administrator logon ID to log into the web browser app. Because of this, ensure that you log out of the WD My Cloud Mirror device web browser app when you're not using it. This allows other users authorized to use the Administrator logon ID to access the web browser app.
See Energy Saver - Web Access Timeout on "Energy Saver" on page 109 to automatically log out of the app after a set amount of time.
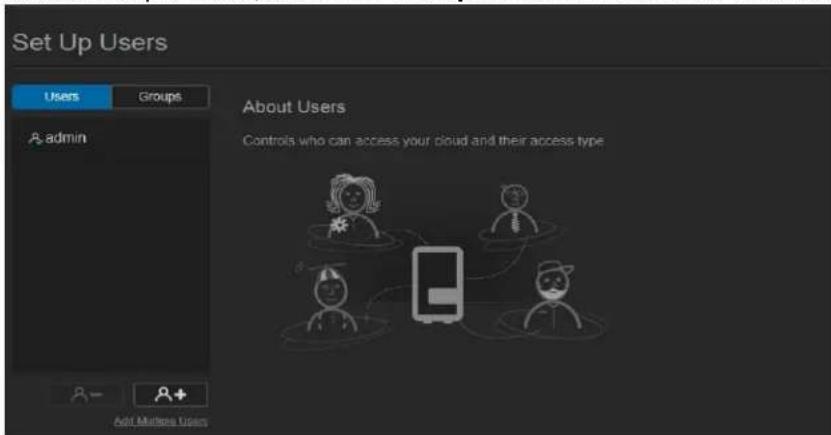
The Users screen displays a list of the current users and allows the Administrator to view user details, create new users, create groups, and grant a user access to existing shares and groups.
Viewing Users
- On the navigation bar, click Users to display the Set Up Users screen.
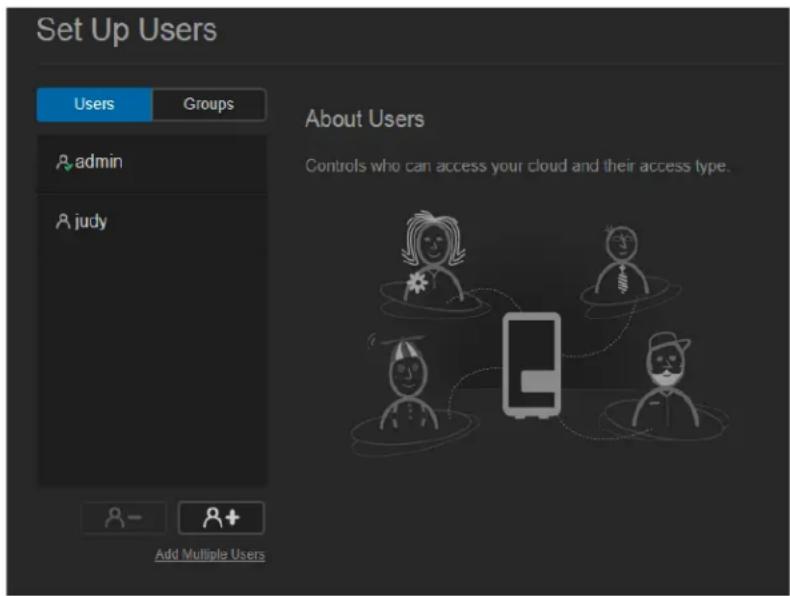
- To view user details, click a user name on the left pane. The user's profile and share access information display. A user can have read only, read/write, or no access to a share.
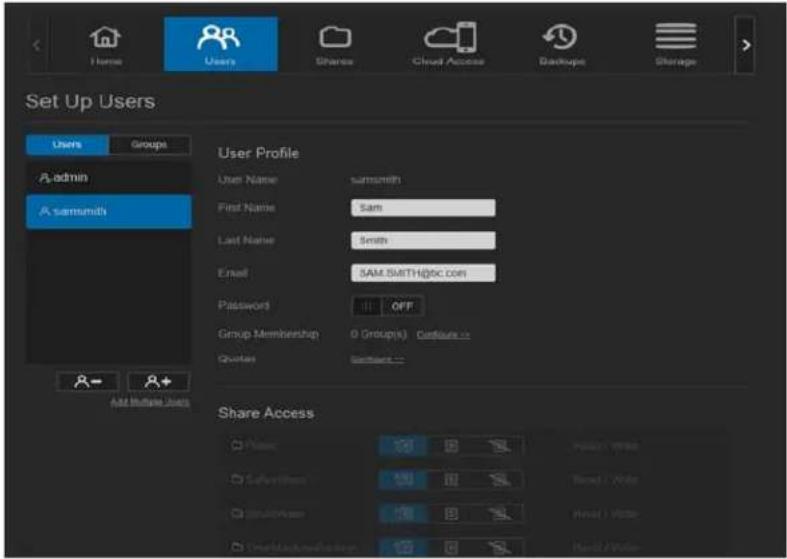
Note: The shares in the Share Access section that don't require access permission are grayed out. Once you make a share private, the share displays in the list and you can edit it. (See "Making a Share Private" on page 54.)
Adding a Single User
The Administrator adds user accounts and sets the parameters of the shares that a user can access. Use the following steps to add a single user account.
- To add a user, click Ⓧ+ in the lower left side of the screen.
- Enter the User Name, First Name, Last Name and Email address (optional) of the user you'd like to add and click Next.
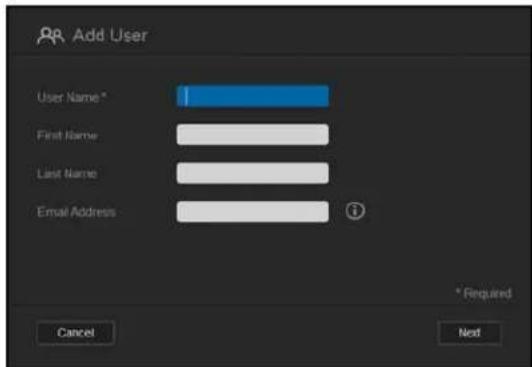
- To assign a password, click the toggle button to ON, enter a password and confirm the user's password. Click Next.
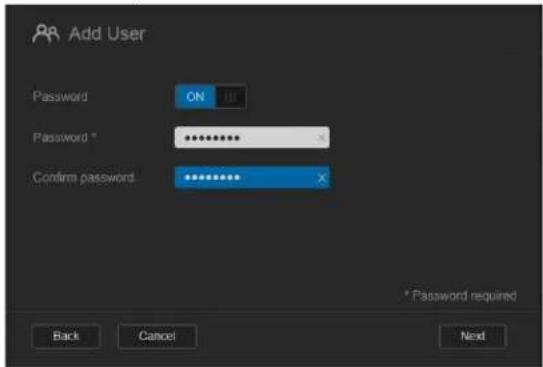
- To assign a group to the new user, click the check box next to a group and click Next.
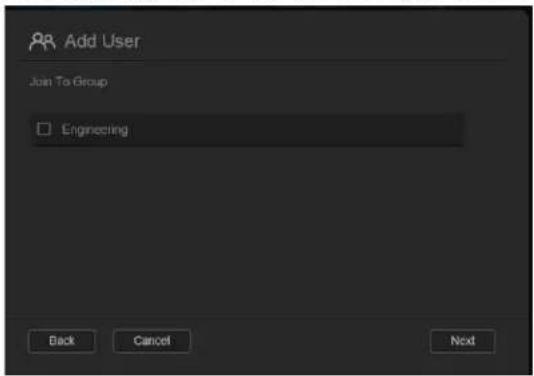
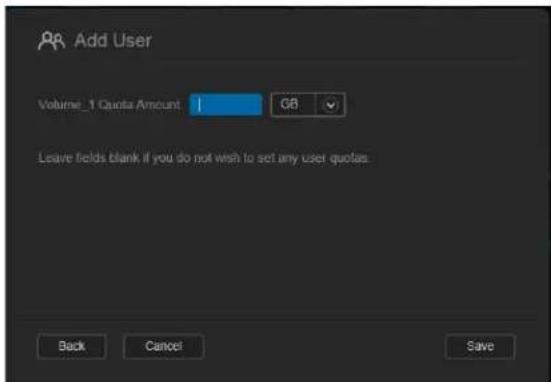
- Enter the Quota Amount, or leave the values blank for unlimited space and click Save. (See "Quota Rules" on page 47.) Your new user account displays on the left pane of the Set Up Users screen.
Adding Multiple Users
Use the following steps to add multiple user accounts:
- To add multiple users, click Add Multiple Users in the lower left side of the screen.
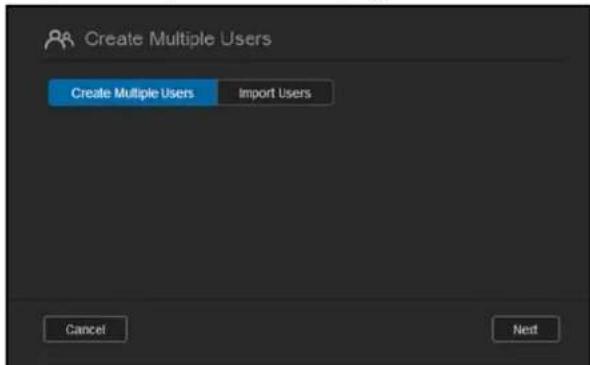
- Select how you'd like to enter your users into the device and click Next:
- Create Multiple Users: Allows you to enter users manually. See “Creating Multiple Users” on page 44.
- Import Users: Allows you to import a list of users into the device. Continue to "Import Multiple Users" on page 46.
Creating Multiple Users
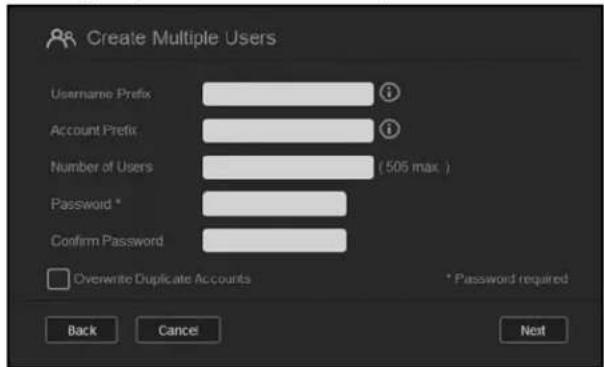
- Enter the following information on the Create Multiple Users screen and click Next:
- Username Prefix: Enter a prefix for your user name. This will be added to the Account Prefix to create the User Name. (Example: HR)
- Account Prefix: Enter a numeric account prefix. This will be added to the Username Prefix to create the User Name (Example: 143)
- Number of Users: Enter the number of user accounts you'd like to create. The maximum number you can add displays to the right.
- Password: Enter a password for the user accounts.
- Confirm Password: Confirm the password for the user accounts.
- Overwrite Duplicate Accounts (optional): Select this check box to overwrite any existing duplicate accounts on your device.
- To assign the new users to a group, click the check box next to a group and click Next.
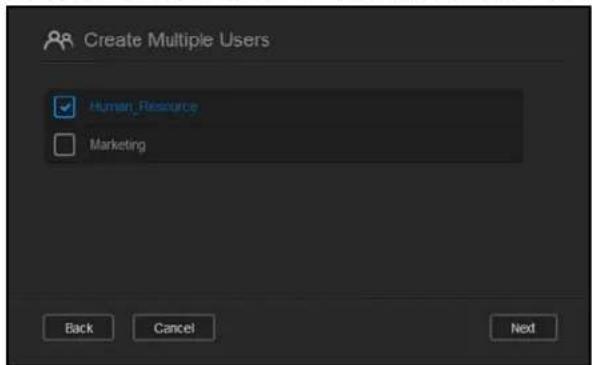
- Enter the Quota Amount or leave the values blank for unlimited space and click Next. (See "Quota Rules" on page 47.)
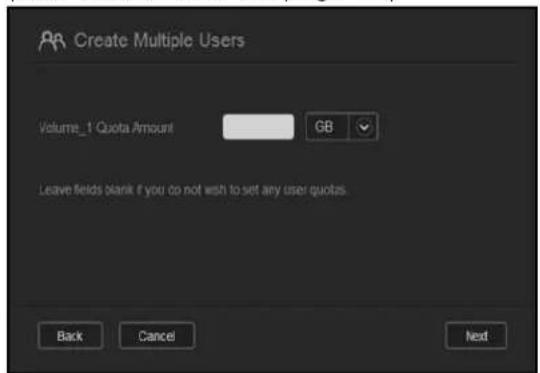
- Your new user accounts display on screen. Click Save to save them to your device.
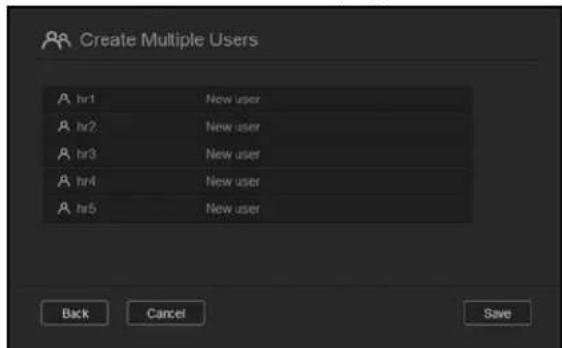
Import Multiple Users
- Click Download to download a .txt file identifying the format you'll need to set up your user import file.
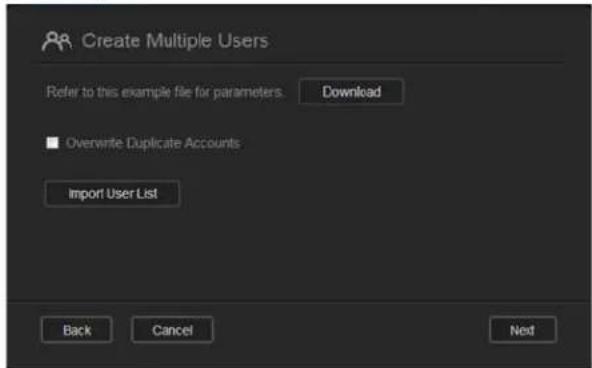
-
Create and save your import file. Your import file should be formatted as follows:
-
User import file format: #user name/user password/user groups/ shared folder(rw)/ shared folder(ro)/ shared folder(deny)/user quota
Example: #user/pw/g1:g2/folder1:folder2/folder3:folder4/folder5:folder6/0:0:0:0 -
Click Import User List and select the import file you created.
- Click Next.
- Select the apps you'd like the new user accounts to have access to and click Next.
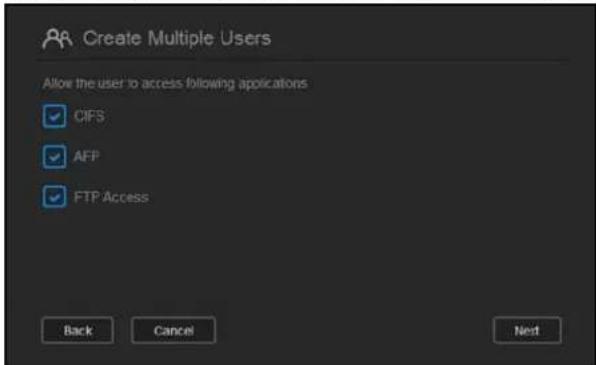
- Click Save. Your new user accounts save to your personal cloud.
Editing User Settings
- On the Set Up Users screen, select the user whose information you want to edit. The User Profile and Share Access panels display.
- Modify the required and optional settings as desired.
- If a private share has been created on the Share screen, it displays in the Share Access area of the Set Up Users screen. You can assign an access level to it for each user. (See "Making a Share Private" on page 54 for information on creating a private share.)
Updating a User Password
When viewing details about a user, the Administrator can add or change the user's password (no password is the default setting).
Use the following steps to update a user password:
- On the Set Up Users screen, select a user from the list on the left.
- Click the toggle button ■■ if no password has been previously created.
- Click Configure to the right of the toggle button III to display the Edit Password screen:
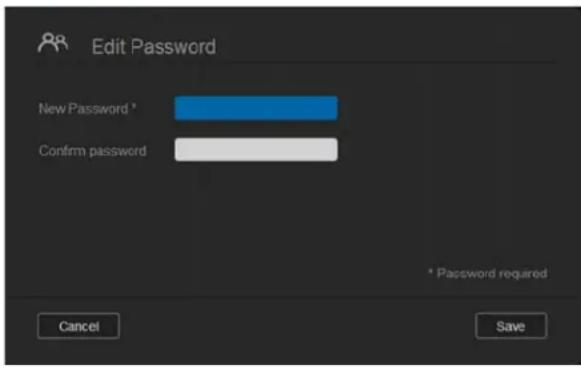
- Enter the new password in both the Password and Confirm Password fields.
- Click Save.
Assigning a User to a Group
Use the following steps to assign a user account to a user group:
- On the Set Up Users screen, select the user from the left pane.
- In the Group Membership field, click Configure.
- Select the check box next to the group you'd like the user to join and click Save.
Quota Rules
Assigning user quotas allows you to better control the disk space allocated to a user or a group. There are various rules dictating which quota takes precedent over another.
- User quota must be ≤ the group quota (e.g., if your group has a 20 GB quota and you try to set the user quota to 30 GB quota, you will be prompted to reduce your user quota to be equal to or less then the group quota).
■ If the user quota is not set, the group quota is assigned to the user. - When a user quota is set prior to the user joining a group and a group is assigned:
- If the user quota > group quota, the individual user's quota is automatically reduced to the group quota amount.
- If the user quota is ≤ group quota, the individual user quota remains unchanged.
Assigning Quotas to a User
A quota determines the amount of disk space allocated to the user on the WD My Cloud Mirror device.
Use the following steps to assign a quota to a user account:
-
On the Set Up Users screen, select the user from the left pane.
-
In the Quotas field, click Configure.
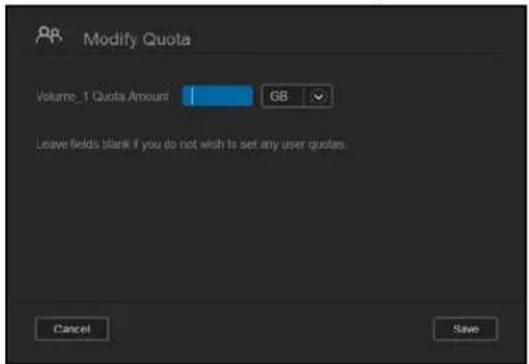
- Enter the amount of space to assign to the user on the WD My Cloud Mirror device.
- To assign unlimited space, leave the Quota Amount field(s) blank.
- Click Save.
Removing a User
Use the following steps to delete users from the WD My Cloud Mirror device.
Note: The Administrator account cannot be deleted.
-
On the Set Up Users screen, in the left pane, select the user you'd like to delete.
-
Click the Remove User icon 🔊-
-
In response to the confirmation message, click OK. The user account is removed from the device and no longer displays in the user account list.
About Groups
A group allows easier management of multiple users. The permissions and privileges you assign to group accounts determine the actions that can be taken by that group.
Viewing Groups
-
On the navigation bar, click Users to display the Set up User screen.
-
Click the Group tab below Set Up Users.
-
To view group details, click a group name on the left pane. The group profile displays.
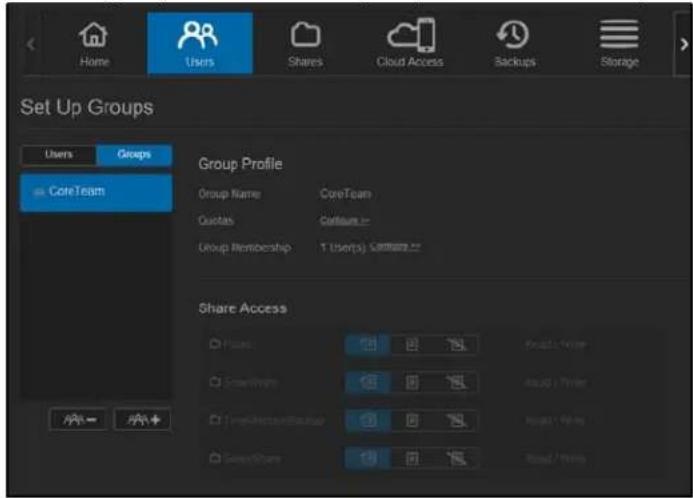
Adding a Group
- To add a group, click 🎨 on the lower left of the Set Up Groups screen.
- Enter a Group Name.
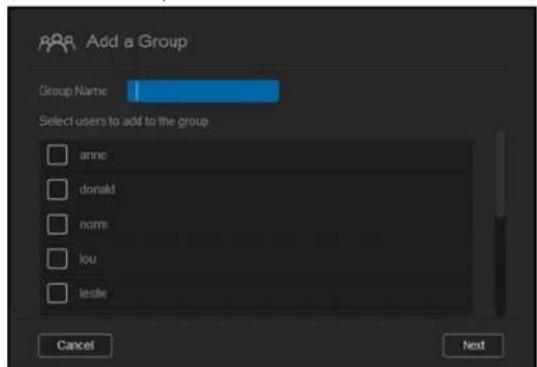
- Click the check box next to the users you'd like to add to your new group and click Next.
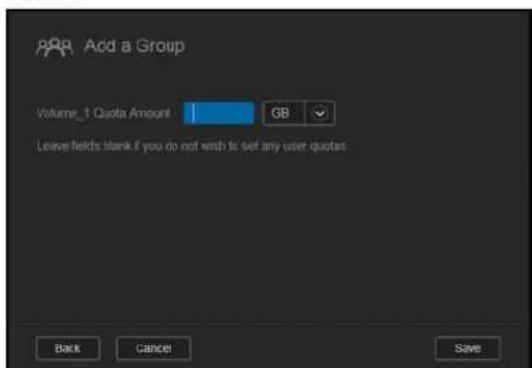
- Enter the Quota Amount, or leave the values blank for unlimited space, and click Save. Your new group account displays on the left pane of the Set Up Groups screen.
Editing Group Settings
- On the Set Up Groups screen, select the group whose information you'd like to edit. The Group Profile and Share Access panel displays.
- Modify the required and optional settings as desired. To update the group's access to shares, see "Assigning Share Access to Groups" on page 50
Assigning Share Access to Groups
Once a group account is created, you can assign access to the various shares on your WD My Cloud Mirror device using the following steps:
- On the Set Up Groups screen, select the group for which you'd like to assign a share.
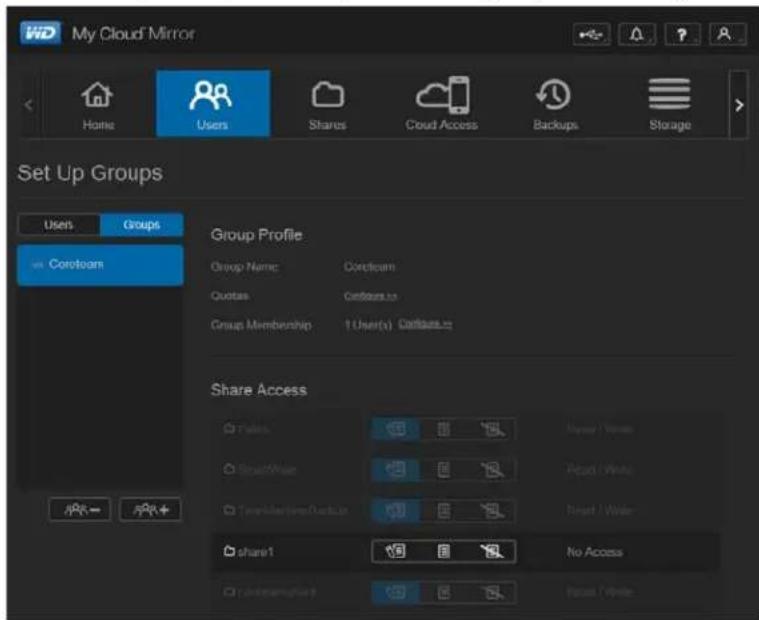
Note: A share must first be made private on the Shares screen. All public shares are grayed out.
-
In the Share Access area, click one of the following icons to indicate the type of access to the share:
-
Read/Write Access: Select this option to provide the group account with read/write access to the selected share. The group members can view and update the share.
- Read Only Access: Select this option to provide the group account with read only access to the selected share. The group member can view the share but can't update it.
■ Deny Access: The group has no access to this share.
The group is updated with your share access selection.
Assigning Quotas to a Group
Use the following steps to assign a quota to a Group. A quota determines the amount of space assigned to the user on the WD My Cloud Mirror device. (See “Quota Rules” on page 47 for information on quotas.)
- On the Set Up Groups screen, select the group from the left pane.
- In the Quotas field, click Configure.
- Enter the amount of space you'd like to assign to the group on the WD My Cloud Mirror device. To assign unlimited space, leave the Quota Amount field(s) blank.
- Click Save.
Removing a Group
Use the following steps to delete a group from the WD My Cloud Mirror device.
- On the Set Up Group screen, select the group you'd like to delete in the left pane.
- Click the Remove Group icon 🎯-
- In response to the confirmation message, click OK. The Group account is removed from the device and no longer displays in the Group account list.
About Shares
A share is an area on the WD My Cloud Mirror device for storing files (similar to a folder or directory).
Note: In this manual, we use the terms share and folder interchangeably.
A share can be public so that all users can access the contents, or private to limit access to selected users. The Shares icon on the navigation bar displays a list of shares on the WD My Cloud Mirror device and enables the Administrator to manage shares and user access.
Viewing a List of Shares
Click the Shares icon on the navigation bar to display a list of shares on the WD My Cloud Mirror device. For each share name, the description, media serving, and public access status display.
Use the following steps to view a list of shares.
- On the navigation bar, click Shares to display the About Shares page.
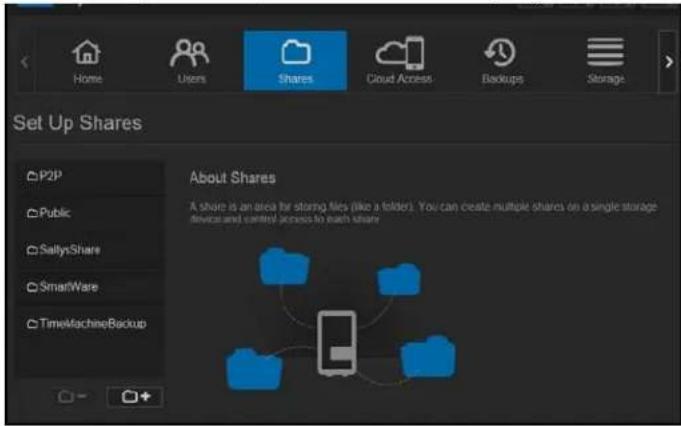
- Click a share to display its profile and share access information.
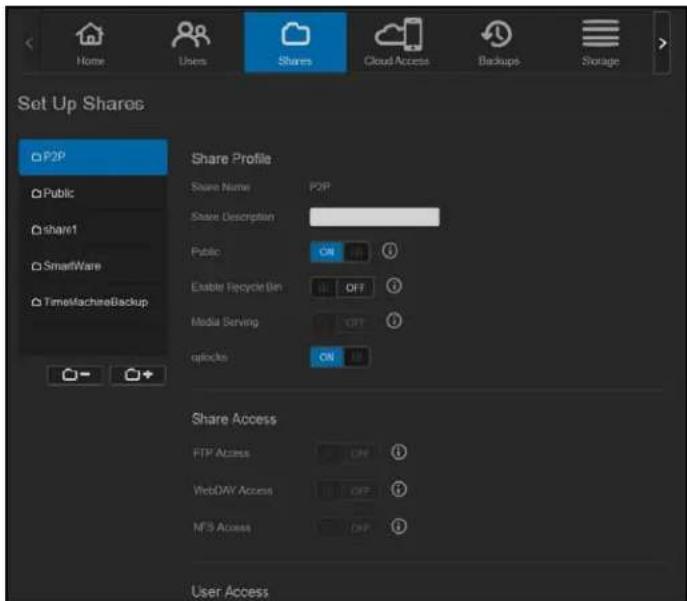
Note: You can only configure permissions if a share is private. Public shares always have read/write access and are grayed out.
Creating a New Share
You can create a share and designate it as public or private. For example, if the share contains financial information, you might want to make the share private. Or, if there are photos you would like a friend to see, you can make the share pubGrouplic to that friend.
- Click the Shares icon 📋 on the navigation bar to display the About Shares screen.
- Click the Add a Share icon 📄+.
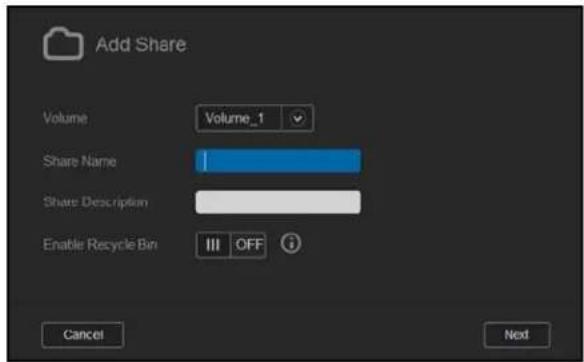
- Enter the following settings:
| Volume Select the volume from the drop-down menu. | |
| Share Name | Assign a name to the share. (Names must be case sensitive and contain 1-32 alphanumeric characters but no spaces.) |
| Share Description (optional) | Enter a brief description of the share to remind yourself of what it contains. Note that share descriptions must begin with an alphanumeric value and can contain up to 256 characters. |
| Enable Recycle Bin (optional) | The Recycle Bin contains any files deleted from the WD My Cloud Mirror device. If you'd like to use the Recycle Bin, click the toggle button III to ON. (Default is OFF.)Note: The Recycle Bin is only available for Windows SMB files. |
- Click Next.
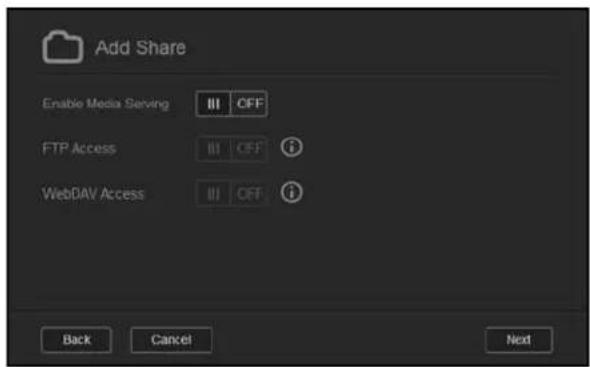
- Complete the following settings:
| Enable Media Serving (optional) | This option allows you to stream media stored in this share to other devices. If you'd like to Enable Media Serving, click the toggle button III to ON. The default is OFF.Note: The media server must be enabled for the device before you can provide media serving for a share.See“Enabling DLNA” on page 98 for instructions on enabling media serving for the device. |
| oplocks This option allows you to turn oplocks (Optimistic concurrency control) off and on. To turn it off, click the toggle button III to OFF.The default is ON.oplocks, also referred to as OCC, is a tool to improve data management and performance for systems with low data contention. | |
| FTP Access (optional) | This option allows FTP access on this share. If you'd like to use FTP Access, click the toggle button III to ON.Note: FTP access must be enabled before you can provide FTP access for a share. See “Network Service” on page 113 for instructions on how to enable FTP access. |
| WebDAV Access (Optional) | This option allows WebDAV access on this share. If you'd like to use WebDAV Access, click the toggle button III to ON.Note: WebDAV access must be enabled before you can provide WebDAV access for a share. See “Network Service” on page 113 for instructions on how to enable WebDAV access. |
Editing Share Settings
- On the Set Up Shares screen, select the share you'd like to edit. The Share Profile panel displays.
- Modify the required and optional settings as desired.
Making a Share Private
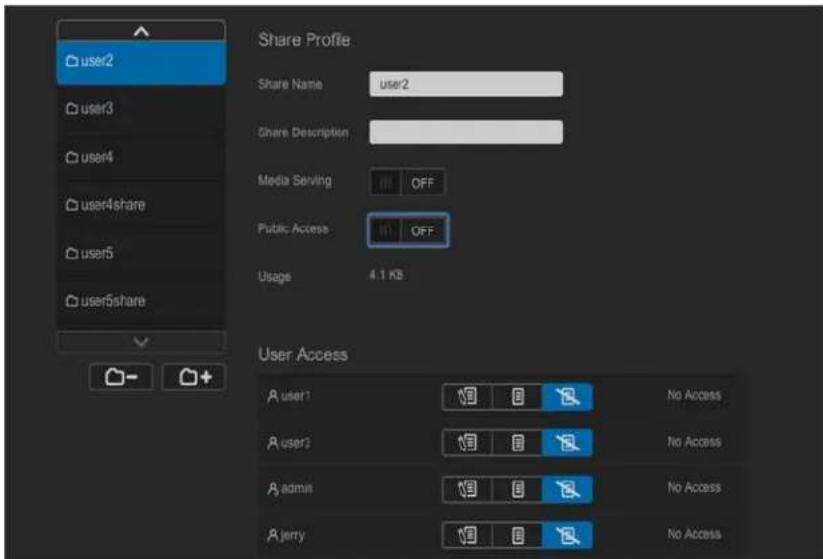
If you decide there is a reason to limit access to a public share, convert it to a private share:
- On the Set Up Shares screen, select the share:
-
Switch the Public Access button to OFF.
-
For each user listed in the User Access section, select the level of access by clicking the appropriate icon for the share (read/write , read only , or no access ).
Deleting a Share
WARNING! Deleting a share erases all files and folders on the share.
- Select the share in the list of shares on the About Shares page.
- Click the Delete Share icon
- In response to the confirmation message, click OK.
Accessing the Contents of a Share Locally
Note: For information on accessing the contents of a share remotely, see "Accessing Your Cloud Remotely" on page 22.
Several options are available for opening a WD My Cloud Mirror share. For a private share, the user must have:
A user name and password assigned to the share name
- Read-only or full access to the share
Note: The table below refers to WD Quick View, an application that helps you perform important functions quickly. You can download WD Quick View and its help from the online Learning Center.
| IF you want to open a share using . . . | THEN . . . |
| WD Quick View icon in the system tray (Windows) | 1. Left- or right-click the WD Quick View icon to display the main menu.2. Click the WD My Cloud device name and click Open. The shares display in Windows Explorer.3. For a private share, if prompted for a user name and password, enter those associated with your user account.4. For a private share, if the user's name and password are the same as for logging into the computer, a user name and password are not required. If they are not the same, visit http://support.wd.com and see Knowledge Base Answer ID 5681. |
| WD Quick View in the menu bar (Mac OS X) | 1. Click the WD Quick View icon in the menu bar and move the cursor over the name of your WD My Cloud device to display the submenu.2. Select Open on the WD Quick View submenu. The shares display in a second submenu.3. Select the desired share.4. For a private share, if prompted for a user name and password, enter those associated with the user account (see “Adding a Single User” on page 42).5. For a Public share, if prompted for a user name and password, select Guest. |
| Windows 8 or 8.1 | 1. In the task bar, click the File Explorer icon.2. In the left panel, select Network and double-click WDMyCloudMirror.3. Double-click a Public or private share on your device. |
| Windows Vista/Windows 7/Windows XP | 1. Click or Start > Computer.2. In the left panel, select Network3. Click WDMyCloudMirror.4. Double-click the Public or private shares on your device. |
| Mac OS X 1. Open a Finder window | low and locate your WD My Cloud device under the Shared heading in the side bar. If presented with an authorization page, select Guest and click Connect.2. Click the device to display the Public share and any private shares to which you have access. |

The Dashboard at a Glance
Launching the Dashboard
The Dashboard Home Page
Obtaining Customer Support
Common Tasks
Use the WD My Cloud Mirror dashboard to configure settings and to manage the device as you prefer. For example, you can set up user accounts and restrict access to the files on your WD My Cloud Mirror device, set up folders for storing files, enable remote access, and customize the device to suit your needs.
Note: If this is the first time you are opening the dashboard, see "Getting Started Without Online Setup Software" on page 17.
Launching the Dashboard
Use one of the following methods to launch the dashboard.
Note: WD Quick View and WD SmartWare are helpful WD apps that you can download from the online Learning Center Downloads page at wd.com/setup/mycloudmirrorapps.
IF you want to launch from... THEN...
Desktop Icon (You must use the setup software for the icon to be)

Double-click the dashboard icon to launch the WD My Cloud Mirror dashboard.
A browser or Windows Explorer
Using Device Name:
- Enter the name of your WD My Cloud Mirror device (default name: wdmycloudmirror) in the browser's address field:
- http://
- http://
- Click Go.
Using IP Address:
-
Enter the IP address of your WD My Cloud Mirror device in the browser's address field: http://
. You can find the IP address from your router's user interface. -
Click Go.
WD SmartWare 1. On the WD SmartWare Home page, select your WD My Cloud device.
-
Click the Settings tab to display the Main Settings page.
-
Click Setup Drive.
| Windows 8 or 8.1 1. On the Start page, type Computer. | |
| 2. Click Computer. | |
| 3. In the left pane, click Network. | |
| 4. In the right panel, locate your WD My Cloud Mirror device under Storage. | |
| 5. Double-click the device, or right-click and selectView device webpagefrom the resulting menu. | |
| Windows 7/Vista | 1. Click > Computer. |
| 2. In the left panel, select Network | |
| 3. In the right panel, locate your WD My Cloud Mirror device under Storage. | |
| 4. Double-click the device, or right-click and selectView device webpagefrom the resulting menu. | |
| Windows XP | 1. Click Start > My Network Places. |
| 2. Locate your WD My Cloud device. | |
| 3. Double-click the device or right-click and selectInvoke. | |
| Mac OS X | 1. Click the Safari icon > bookmark icon > Bonjour. |
| 2. Double-click the WD My Cloud Mirror device on the network. | |
| Mobile Devices iOS Devices: | |
| 1. Open a browser. | |
| 2. In the Address bar, enter http://.local. | |
| Android Devices: | |
| 1. Open a browser. | |
| 2. In the Address bar, enter http://. | |
| WD Quick View icon 1. Left- or right-click the WD Quick View icon. | |
| 2. Select your WD My Cloud device and then Dashboard. | |
The Dashboard Home Page
The WD My Cloud Mirror Home page has an information bar at the top right, an navigation icon bar across the page, and an instant overview of the status of the device's main functions with links for updating settings.
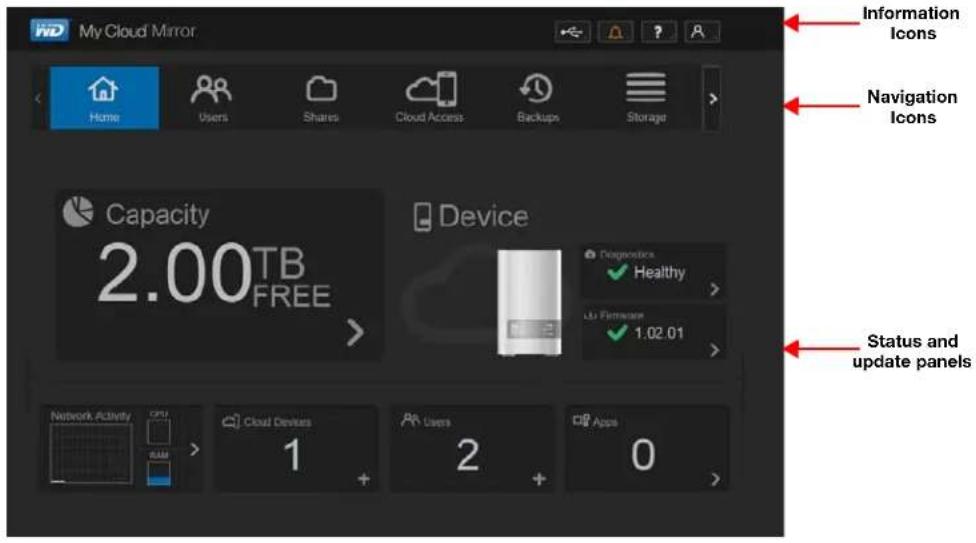
Information Icons
Icon Name Actions
USB device on the WD My Cloud Mirror device
Click to display the number of USB devices connected (a hub with multiple devices can be connected to the USB port). Icon is dim if no USB is attached.

Alerts Click to display recent alerts about new firmware and network issues.

Critical alerts Click to display a severe warning: such as over temperature, under temperature, drive SMART failure, or failure of the data volume to mount.
Navigation Icons
| Icon Name Actions | ||
 | Home Page | The dashboard displays an instant overview of the status of the device's main functions and links for updating settings. |
 | Users | Create, change, and delete users and grant them full or limited access to particular shares. |
 | Shares | Create, change, and delete shares (folders) and grant specific users full, limited, or no access to particular shares. |
 | Cloud Access | Set up, change, and remove remote cloud access to particular shares. Monitor remote access status. |
 | Backups | Create backups to:• A U S B d r i v e• Another WD My Cloud Mirror on your local network or on a remote network• Another location on your WD My Cloud Mirror device• A Cloud backup site |
 | Storage | Select and specify how you want the WD My Cloud Mirror device to store your data. |
 | Apps | Add or remove various apps that allow you to use your device more productively. |
 | Settings | Configure advanced settings for your WD My Cloud Mirror device, including:• General device settings• Network configurations• ISO mount options• Media options• Device utility tasks• Notification settings• Firmware update setting |
Viewing Device Status and Making Updates on the Home Page
The main body of the Home page shows the status of the device and its functions and provides shortcuts to the most necessary tasks.
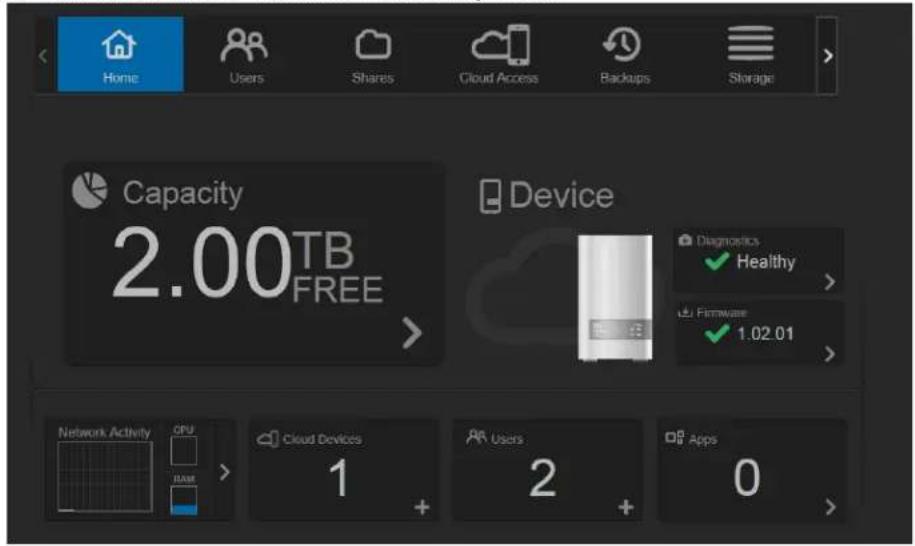
Capacity
The Capacity panel displays the amount of free storage left on your WD My Cloud Mirror device.
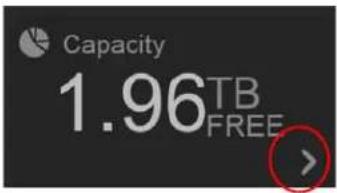
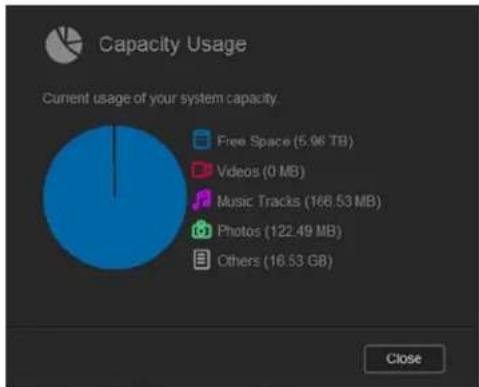
- To see detailed information, click the arrow on the lower right to display the current usage of the drive's capacity:
pie
Capacity Usage | Category | Capacity (TB) | | :--- | :--- | | Free Space | 5.96 | | Videos | 0 | | Music Tracks | 168.53 | | Photos | 122.49 | | Others | 16.53 | Close- To return to the Home page, click Close.
Device
The Device section identifies the overall health of the system, indicates the current version of your firmware, and informs you if firmware updates are available.
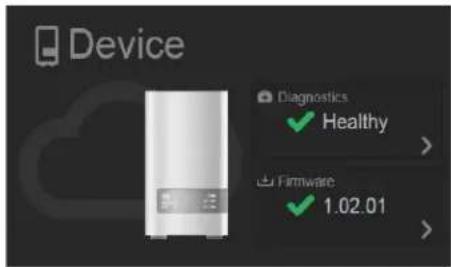
Diagnostics
The Diagnostics section displays a snapshot of the system's components and identifies the overall health of the WD My Cloud Mirror device.
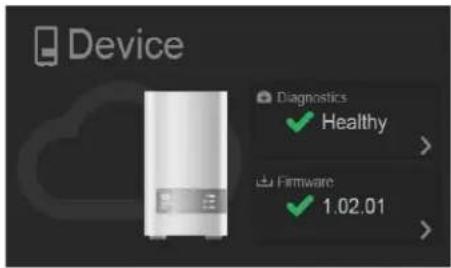
- To see details about the status of system components, click the arrow on the right.
- To return to the Home page, click Close.
Firmware
The Firmware section displays the current version of firmware loaded on your WD My Cloud Mirror device. A green check mark indicates that your firmware is up-to-date.
- To view whether an updated version of the firmware is available, click the arrow to the right of Firmware to display firmware availability:
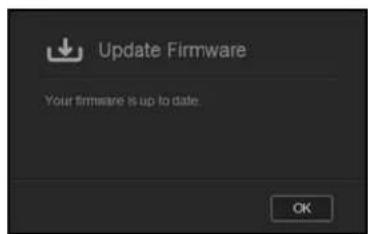
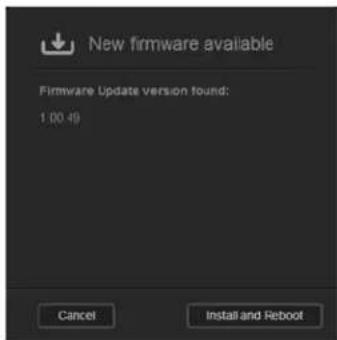
- If an update is available, click Install and Reboot to update your device.
- To return to the Home page, click OK or Cancel.
Note: If new firmware is available, see "Firmware Update" on page 130 for information on updating your WD My Cloud Mirror device.
Network Activity
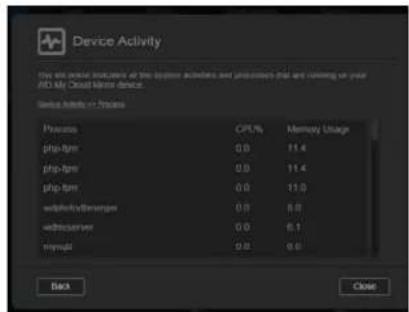
The Network Activity panel displays the system activities and processes that are running on your WD My Cloud Mirror device. At a glance, you can see the network, CPU, and RAM activity.
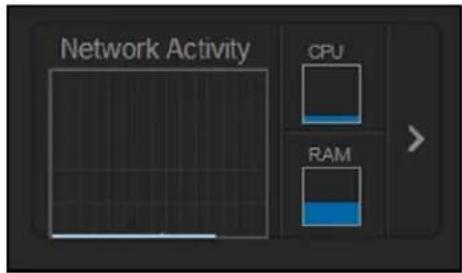
- To view a list of all the system activities and processes that are running on your WD My Cloud Mirror device, click the arrow on the right of the panel to display the device activity panel.
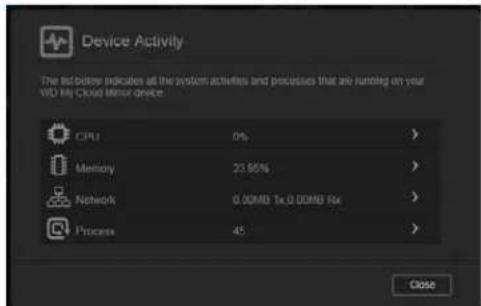
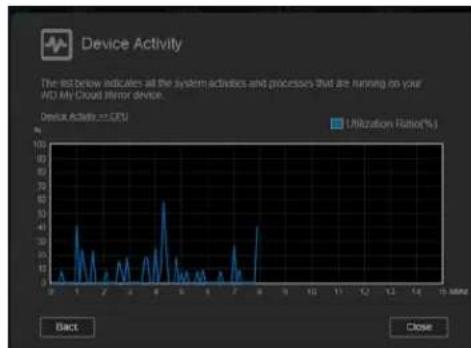
- CPU: Click the right arrow to view the CPU activity. Click Back to return to the Device Activity pane. Click Close to return to the Home page.
line
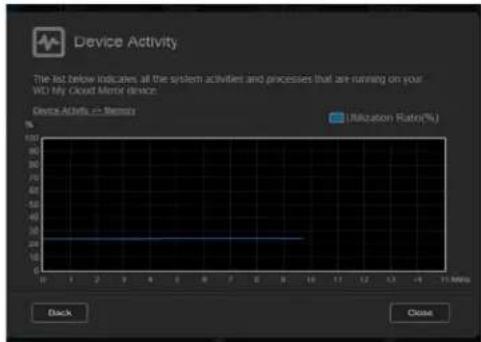
| Time (minutes) | Device Activity (%) | ------------- | ------------------- | | 0 | 5 | | 1 | 30 | | 2 | 10 | | 3 | 20 | | 4 | 15 | | 5 | 25 | | 6 | 60 | | 7 | 10 | | 8 | 5 | | 9 | 15 | | 10 | 20 | | 11 | 10 | | 12 | 5 | | 13 | 10 | | 14 | 20 | | 15 | 30 | | 16 | 40 | | 17 | 25 | | 18 | 15 | | 19 | 5 | | 20 | 10 | | 21 | 20 | | 22 | 30 | | 23 | 40 | | 24 | 25 | | 25 | 15 | | 26 | 5 | | 27 | 10 | | 28 | 20 | | 29 | 30 | | 30 | 40 | | 31 | 25 | | 32 | 15 | | 33 | 5 | | 34 | 10 | | 35 | 20 | | 36 | 30 | | 37 | 40 | | 38 | 25 | | 39 | 15 | | 40 | 5 | | 41 | 10 | | 42 | 20 | | 43 | 30 | | 44 | 40 | | 45 | 25 | | 46 | 15 | | 47 | 5 | | 48 | 10 | | 49 | 20 | | 50 | 30 | | 51 | 40 | | 52 | 25 | | 53 | 15 | | 54 | 5 | | 55 | 10 | | 56 | 20 | | 57 | 30 | | 58 | 40 | | 59 | 25 | | 60 | 15 | | 61 | 5 | | 62 | 10 | | 63 | 20 | | 64 | 30 | | 65 | 40 | | 66 | 25 | | 67 | 15 | | 68 | 5 | | 69 | 10 | | 70 | 20 | | 71 | 30 | | 72 | 40 | | 73 | 25 | | 74 | 15 | | 75 | 5 | | 76 | 10 | | 77 | 20 | | 78 | 30 | | 79 | 40 | | 80 | 25 | | 81 | 15 | | 82 | 5 | | 83 | 10 | | 84 | 20 | | 85 | 30 | | 86 | 40 | | 87 | 25 | | 88 | 15 | | 89 | 5 | | 90 | 10 | | 91 | 20 | | 92 | 30 | | 93 | 40 | | 94 | 25 | | 95 | 15 | | 96 | 5 | | 97 | 10 | | 98 | 20 | | 99 | 30 | | Note: The actual values are not provided in the code. The actual values are estimated based on the provided code. Please note that the actual values are estimated based on the provided code. Back is shown.■ Memory: Click the right arrow to view the Memory activity. Click Back to return to the Device Activity pane. Click Close to return to the Home page.
line
| Device Activity | Utilization Ratio(%) | | --------------- | --------------------- | | 1 | 30 | | 2 | 30 | | 3 | 30 | | 4 | 30 | | 5 | 30 | | 6 | 30 | | 7 | 30 | | 8 | 30 | | 9 | 30 | | 10 | 30 | | 11 | 30 |■ Network: Click the right arrow to view the network activity. Click Back to return to the Device Activity pane. Click Close to return to the Home page.
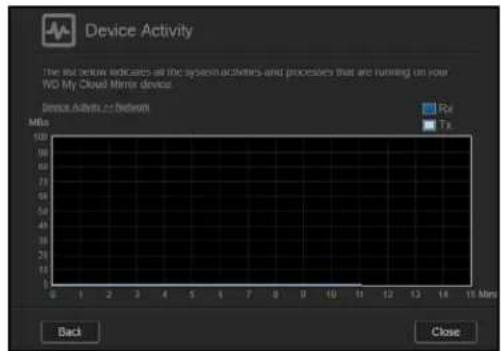
- Process: Click the right arrow to view the process information, including the list of active processes and the amount of CPU and Memory usage for each process. Click Back to return to the Device Activity pane. Click Close to return to the Home page.
Cloud Devices
The Cloud Devices panel displays the number of cloud devices currently accessing the WD My Cloud Mirror device remotely. In this example, one cloud device is accessing it remotely.
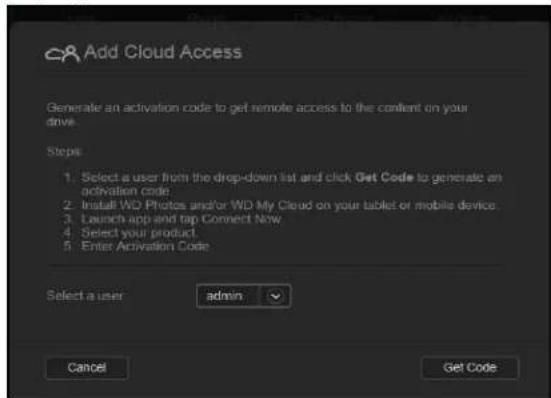
- To add cloud access for a user, click the plus sign (+) in the lower right of the panel to display:
-
To generate an activation code, click Get Code.
-
Follow the page instructions to connect your tablet or mobile device to the WD My Cloud Mirror device.
Users
The Users panel displays the number of users currently set up to use the WD My Cloud Mirror device.
- To add a user, click the plus (+) sign in the lower right of the panel:
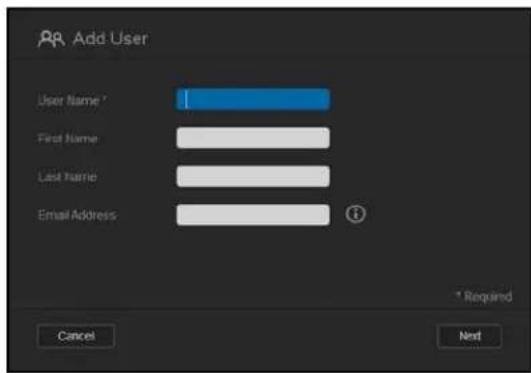
Note: When you enter the email address on the Add User screen, a new account is created for cloud access. The user receives an email with instructions on how to set up and activate a password for cloud access.
- Enter the required information and click Next to display a user password screen.
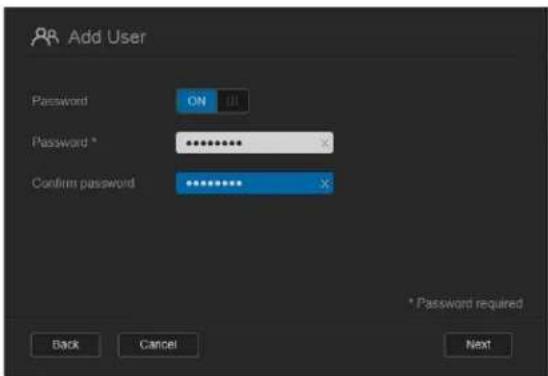
- To assign a password, click the toggle button III, enter a password and confirm your password. Click Next to display the user group screen.
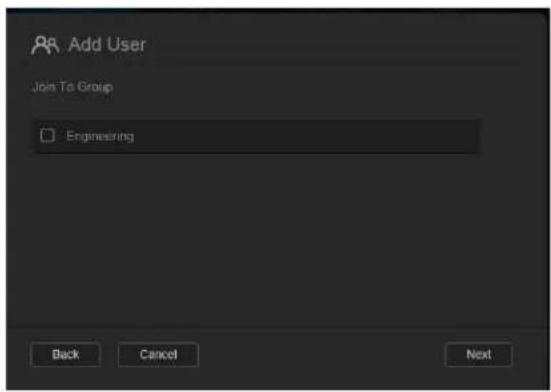
- To assign a group to the new user, click the check box next to a group and click Next to display the Add User screen.
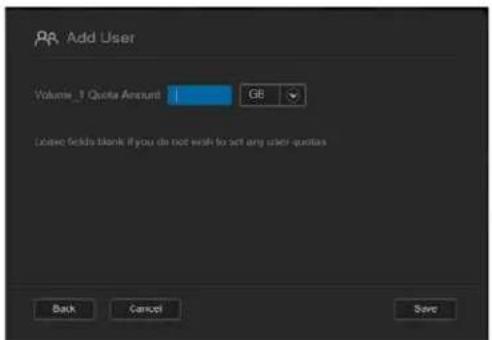
- Enter the Quota Amount or leave the values blank for unlimited space and click Save. You've added a new user.
Apps
The Apps panel displays the apps currently installed on your WD My Cloud Mirror device.
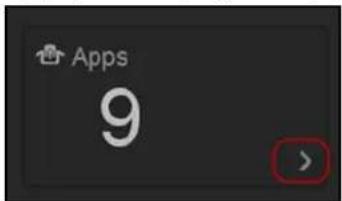
- To view the installed apps, click the arrow in the lower right of the panel to display:
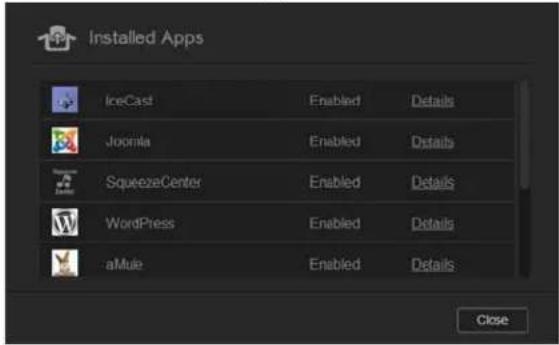
Note: To install an app, see "Managing Apps on WD My Cloud Mirror" on page 85.
- To return to the Home page, click Close.
Managing Alerts
Alerts display system messages containing pertinent information about the status of your WD My Cloud Mirror device. Three three types of alerts appear on the upper right of the dashboard.
| Alert Icon Type of Alert Description | ||
 | Informational | Informational alerts keep you updated on non-vital system information. Example: Reboot Required |
 | Warning | Warnings present a condition that might cause a problem in the future. Example: Network Disconnected. |
 | Critical This alert presents an error or problem that has occurred, usually a system failure. Example: Fan Not Working | |
Viewing Alert Details
-
On the dashboard, click the Alert icon in the upper right corner.
-
From the Alert list, click the arrow ➤ next to the alert you'd like to view, or click View All to review details for all of your alerts.
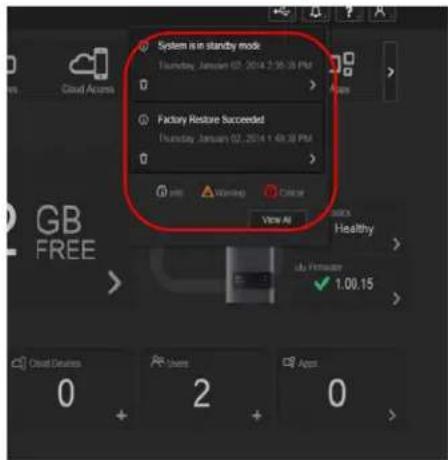
When an alert occurs, the alert message displays the Alert icon 📄 and window within the dashboard. To close the alert message, click Close.
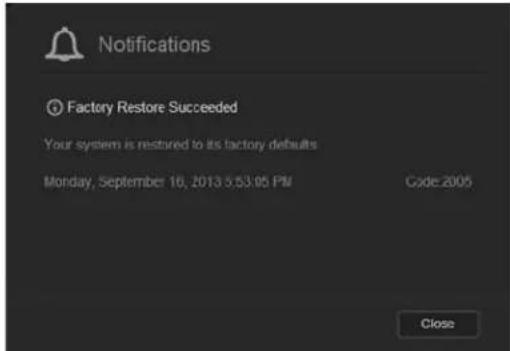
Dismissing an Alert
- On the dashboard, click the Alert icon 🔒 in the upper right corner.
- Select the delete icon 📋 next to the alert you'd like to dismiss.
To dismiss all alerts, click View All and Dismiss All.
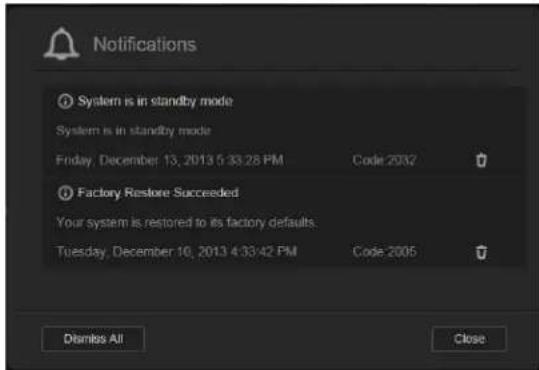
Obtaining Customer Support
To open the Support page:
-
Click the Help icon ? on any page to display the Help menu.
-
Click Support to display the following page:
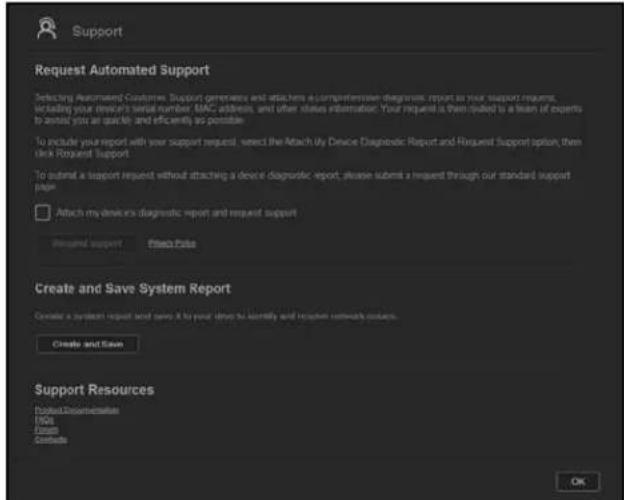
If a problem occurs with the WD My Cloud Mirror device, WD Technical Support will need information about your device to troubleshoot and determine the best solution. There are two ways to get your device info and request support:
- Run a system report and send it to WD automatically,
■ Create a system report manually and send it to WD.
Requesting Automatic Support
In the Request Automated Customer Support section:
- Click the Privacy Policy link to review WD's privacy policy.
- Click the Attach my device's diagnostic report and request support check box.
- Click the Request Support button.
Creating and Saving a System Report
In the Create and Save System Report section:
- Click Create and Save. This saves the file to your computer.
- If desired, email the report to WD Technical Support.
Obtaining Other Support
The Support Resources section contains links to additional resources:
- To obtain the most recently updated user manual, click the Product Documentation link.
- To see answers to frequently asked questions and instructions, click the FAQs link.
To discuss your WD My Cloud Mirror device with other users, click the Forum link. - To see WD phone numbers and other contact information, click the Contacts link.
Common Tasks
The next few chapters step you through the procedures for configuring and using the WD My Cloud Mirror device. The following table provides shortcuts to instructions for some common tasks.
How do I ... See ...
| Set up the device on my network page 10 | |
| Use media servers page 96 | |
| Enable DLNA and iTunes page 98 | |
| Shut down or reboot the WD My Cloud Mirror device page 122 | |
| Update firmware page 130 | |
| Access content from the device (public and private shares) | page 20 |
| Add users page 41 | |
| Create shares page 51 | |
| Upload and back up content to the device page 71 | |
| Back up the device page 71 | |
| Enable or disable remote access for you and people you want to share with) | page 22 |
| Download WD mobile apps | page 24 |
7
Backing Up and Retrieving Files
About Backups
Managing a USB Device and USB Backups
Remote Backups
Internal Backups
Cloud Backups
About Backups
There are various ways to back up your data on the WD My Cloud Mirror device. These include:
- USB Backup—Allows you to back up WD My Cloud Mirror device data to and from your a USB device.
- Remote Backup—Allows you to back up WD My Cloud Mirror device data to and from another WD My Cloud Mirror or WD My Cloud EX4 device.
- Internal Backup—Allows you to back up data from one storage location to another on your WD My Cloud Mirror or WD My Cloud EX4 device.
- Cloud Backup—Allows you to backup WD My Cloud Mirror device data to an external cloud backup service.
Managing a USB Device and USB Backups
When you attach a USB drive to the WD My Cloud Mirror device, you turn it into a network drive. Once connected, the USB drive has the following capabilities:
- When you connect an external USB drive such as a WD Passport, a memory stick, or a camera to the WD My Cloud Mirror device, you can access it with Windows Explorer or Mac Finder.
■ The USB drive can serve as a target for backups. - You now have the option of mapping the drive as a user share drive.
If a WD external drive has been locked, when it is attached to the WD My Cloud Mirror device, it maintains that security. Using the Dashboard, you can unlock or re-lock it as desired.
Connecting A USB Drive
Connect a USB hard drive to the USB port on the rear of your WD My Cloud Mirror device for additional storage and backup capabilities. The USB drive appears as a share on the WD My Cloud Mirror dashboard. (See "About Shares" on page 51.)
The WD My Cloud Mirror device supports the following formats for externally attached USB drives:
FAT/FAT32
■ NTFS (read and write capability)
■ HFS+J
Linux Ext2, Ext3/Ext4
XFS
WARNING! Mounting or ejecting a USB drive while performing an NFS or AFP file transfer will interrupt the file transfer process.
Creating a USB Backup
Use the following steps to back up your data on your WD My Cloud Mirror to or from a USB device.
- On the navigation bar, click Backups to display the Backups screen.
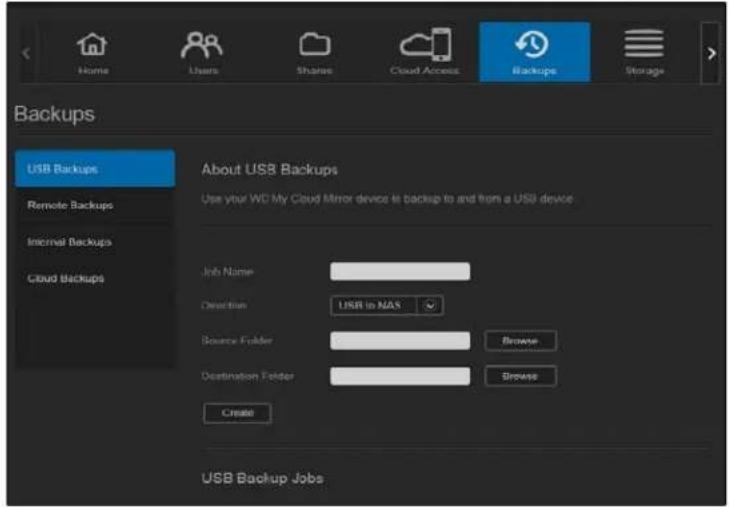
- Click USB Backups, if not already selected.
- Enter the following information to create a USB backup job:
| Job Name Enter a Job Name for your backup. | |
| Direction Indicate the direction of your backup from the drop-down menu. Options include:• USB to NAS: Backs up the data on your USB device to the WD My Cloud Mirror device.• NAS to USB: Backs up the data on your WD My Cloud Mirror device to a USB device. | |
| Source Folder | ClickBrowseand select the folder you'd like to back up. |
| Destination Folder | ClickBrowseand select the destination folder for your backup. |
-
Click Create.
-
In the USB Backup Jobs area, click the arrow to begin your backup.
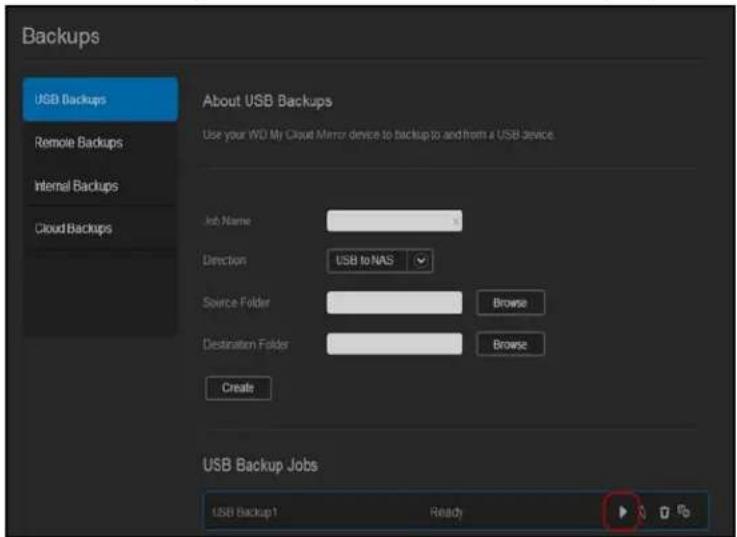
The progress of the backup displays in the USB Backup Jobs area.

Viewing the Details of a USB Backup Job
- On the USB Backups screen, under USB Backup Jobs, select the job you'd like to modify and click the Edit Job button .

- Review the USB Details screen and click Close to close the screen.
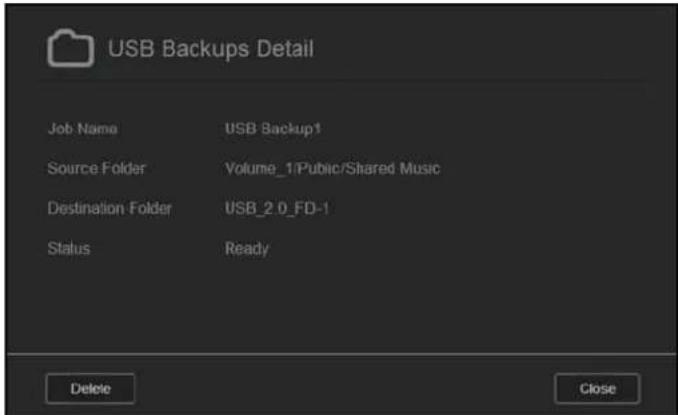
Editing a USB Backup Job
- On the USB Backups screen, under USB Backup Jobs, select the job you'd like to modify and click the Edit Job icon.

- In the USB Backup area, make the necessary changes to your job and click Save.
Deleting a USB Backup Job
- On the USB Backups screen, under USB Backup Jobs, click the Delete Job icon next to the job you'd like to delete.

- In response to the confirmation message, click OK. The selected USB Backup job is now deleted and removed from the USB Backup Jobs list.
Remote Backups
Back up your WD My Cloud Mirror device to another WD My Cloud Mirror or a WD My Cloud EX4 device.
Before you proceed with a remote backup, ensure the following:
- You have a remote WD My Cloud Mirror or WD My Cloud EX4 device to back up this device to. Existing shares and data from this device will be copied to the target device in addition to previously existing data.
■ The remote Server setting is turned ON in the remote WD My Cloud Mirror or WD My Cloud FX4 device. - The backup password for the remote WD My Cloud Mirror or WD M Cloud EX4 device is enabled.
- You have enabled port forwarding to see the remote WD My Cloud Mirror or WD My Cloud EX4 device over the Internet.
For additional information on remote backups, see Knowledge Base Answer ID 10637.
Creating a Remote Backup
Use the following steps to back up your WD My Cloud Mirror to a remote device.
-
On the navigation bar, click Backups to display the Backups screen.
-
Click Remote Backup.
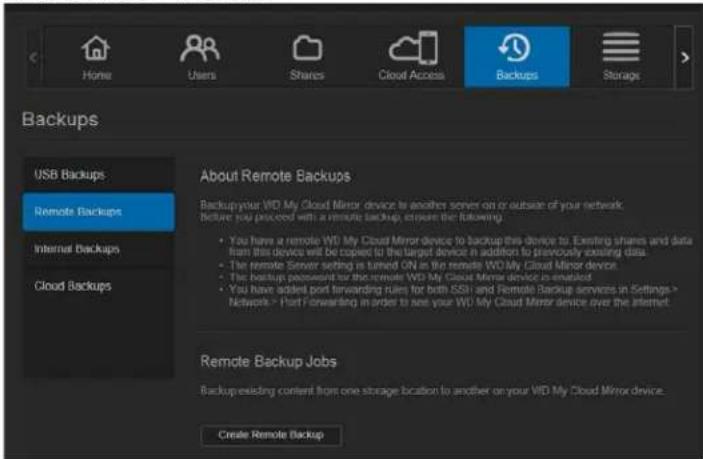
- Click Create Remote Backup.
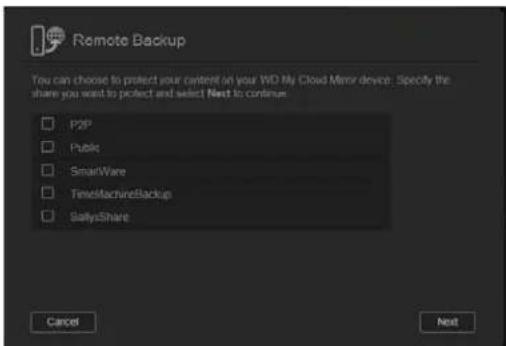
- Place a check mark in the box next to the share you'd like to back up and then click Next.
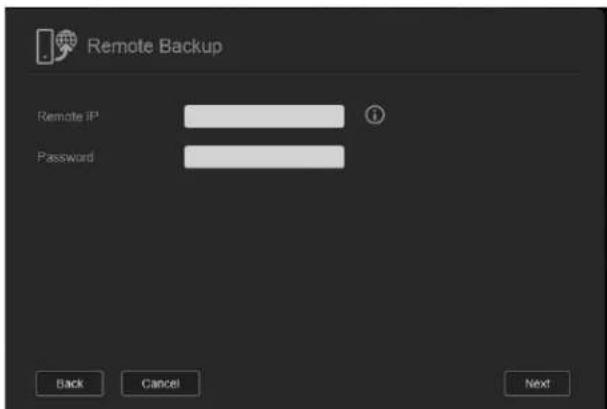
-
In the Remote IP field, enter the IP address of the remote backup server. (Example: 192.168.1.16)
-
In the Password field, enter the password for the remote backup server and click Next.
-
Select the check box next to the share where you'd like to back up your data and click Next.
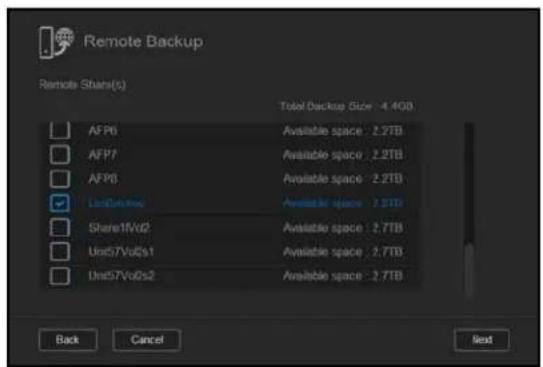
- Enter the following information to create a Remote backup job and click Next:
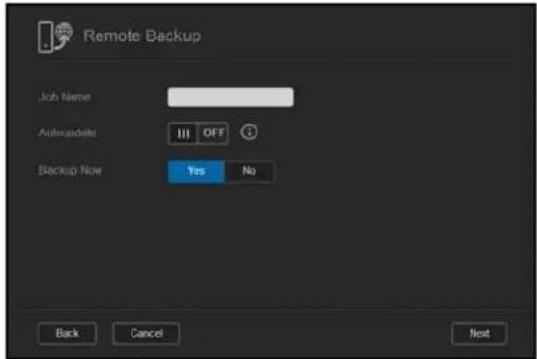
Job Name Enter a Job Name for your backup.
| Auto Update | Click the toggle button in enable the Autoupdate feature. |
| Backup Now | Click Yes to begin your remote backup now. Click No to create a remote backup job for future backup. |
- Review the details of your Remote Backup job and click Finish.
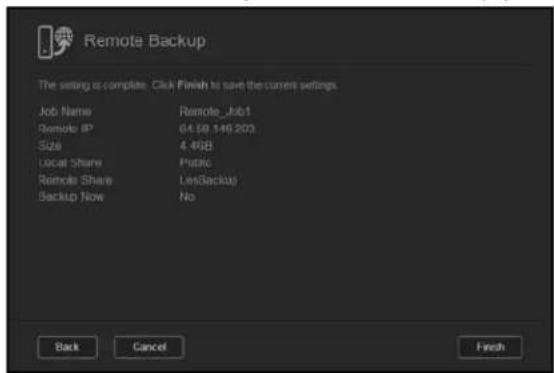
Viewing the Details of a Remote Backup Job
- On the Remote Backup screen, under Remote Backup Jobs, click the Details icon next to the job you'd like to view.

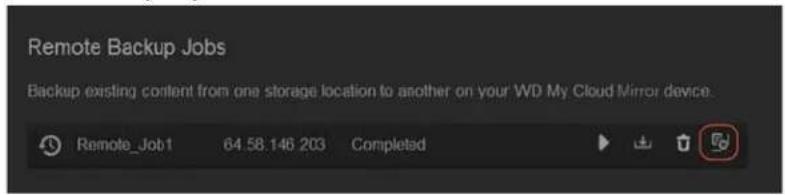
- Review the Details screen and click Close.
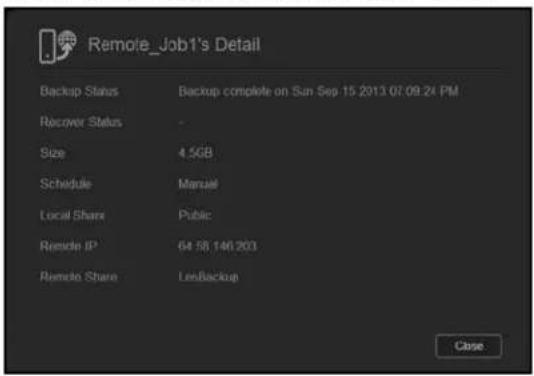
Recovering a Remote Backup
Use the following steps to recover the data you saved on your remote server. This process recovers the data you saved on the remote server to your local server.
- On the Remote Backup screen, under Remote Backup Jobs, click the Recover button next to the job you'd like to view.
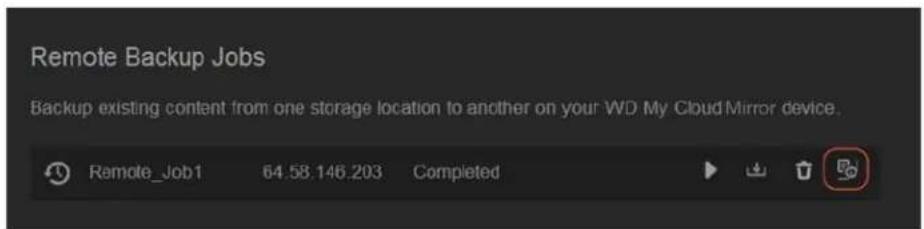
- On the Recover screen, click OK. Your data recovery begins.
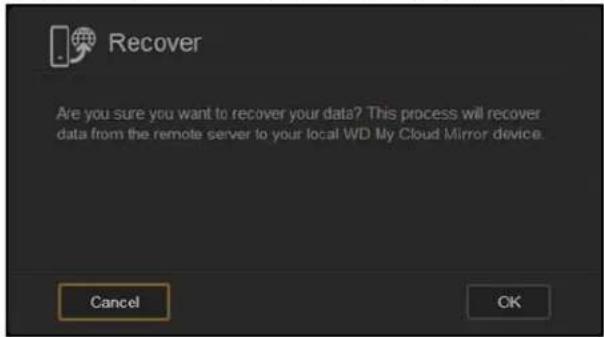
Deleting a Remote Backup
- On the Remote Backup screen, under Remote Backup Jobs, click the Delete icon next to the job you'd like to delete.

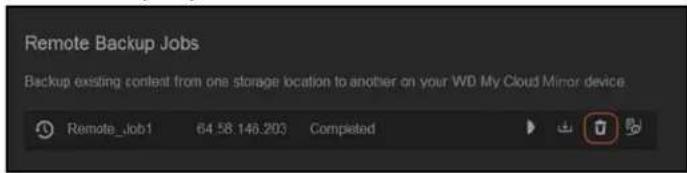
- In response to the confirmation message, click OK. The selected Remote Backup job is now deleted and removed from the Remote Backup Jobs list.
Internal Backups
Internal backups allow you to make backups of the existing content from one storage location to another on your WD My Cloud Mirror device.
Creating an Internal Backup
Use the following steps to back up your WD My Cloud Mirror internally.
- On the navigation bar, click Backups to display the Backups screen.
- Click Internal Backups, if not already selected.
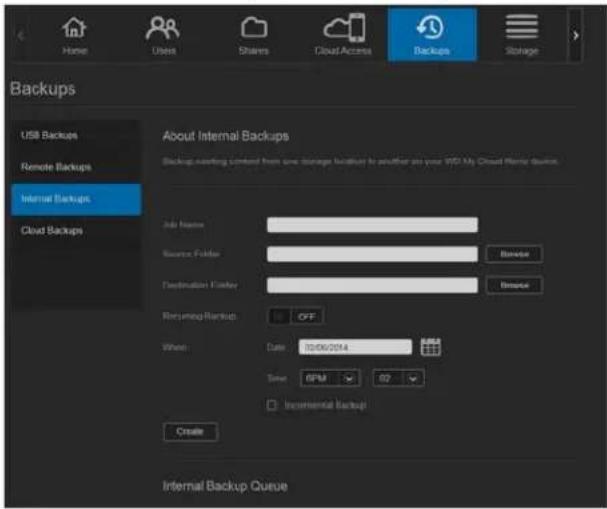
- Enter the following information to create a USB backup job:
| Job Name Enter a Job Name for your internal backup. | |
| Source Folder | ClickBrowseand select the folder you'd like to back up. |
| Destination Folder | ClickBrowseand select the destination folder for your backup. |
Recurring Backup If you'd like to use the Recurring Backup feature:
- Click the toggle button to enable the Recurring Backup feature.
- Select the frequency of the backup: Daily, Weekly, Monthly.
- Select a time (hour and minutes) from the drop-down menu.
- If you did not enable the Recurring backup field:
- Click the Date field and select the date you'd like the backup to occur.
- Select a time of day (hour and minutes) from the drop-down menu.
Incremental Backup
Click the check box if you'd like this job to be an incremental backup.
- Click Create. Your job displays in the Internal Backup Queue area and will begin backing up at the indicated time.

Initiating an Immediate Internal Backup
- On the Internal Backups screen, under Internal Backup Queue, select the job you'd like to modify and click the Begin Now button.

The internal backup begins.
Modifying an Internal Backup Job
- On the Internal Backups screen, under Internal Backup Queue, select the job you'd like to modify and click the Edit button.

- In the Internal Backup area, make the necessary changes to your job and click Save.
Viewing Internal Backup Details
- On the Internal Backups screen, under Internal Backup Queue, select the job you'd like to modify and click the Details icon.

- Review the details of your Internal Backup job and click Close.
Deleting an Internal Backup Job
- On the Internal Backups screen, under Internal Backup Queue, click the Delete button.
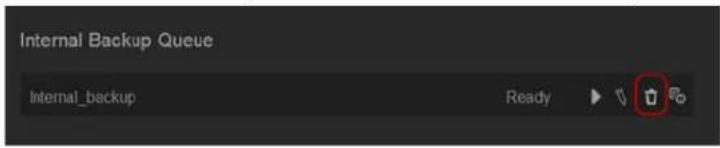
- In response to the confirmation message, click OK. The selected Internal Backup job is now deleted and removed from the Internal Backup Jobs list.
Cloud Backups
A cloud backup allows you to create remote backups that are accessible over the Internet and through various mobile devices. WD My Cloud Mirror device uses the following cloud services to create remote backups:
- ElephantDrive: ElephantDrive is a cloud backup service that provides secure and automatic backups to your files remotely.
- Amazon S3: Amazon Simple Storage Service (S3) is an online file storage web service that can be used to store and retrieve any amount of data, at any time, from anywhere on the web.
Enabling ElephantDrive Cloud Backup
ElephantDrive is a cloud backup service that provides secure and automatic backups to your files remotely. Once enabled, ElephantDrive automatically syncs with your device. For additional information see http://home.elephantdrive.com/welcome/wdc/.
Use the following steps to enable a cloud backup using ElephantDrive.
- On the navigation bar, click Backups to display the Backups screen.
- Click Cloud Backups, if not already selected.
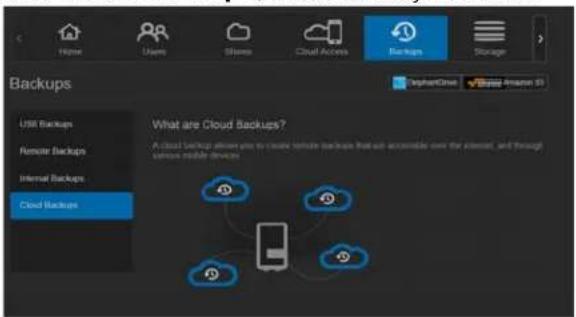
- Click ElephantDrive at the top of the screen.
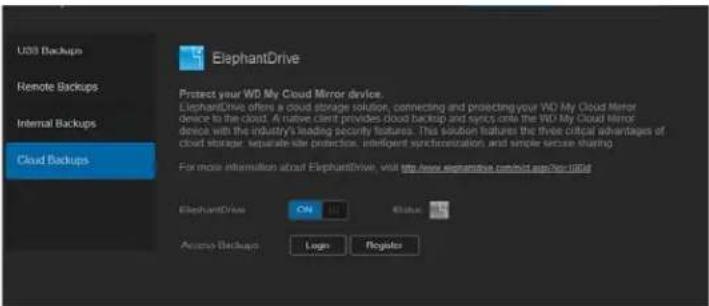
-
In the ElephantDrive field, click the toggle button to turn on your ElephantDrive cloud backup.
-
Click Register. The Register screen displays.
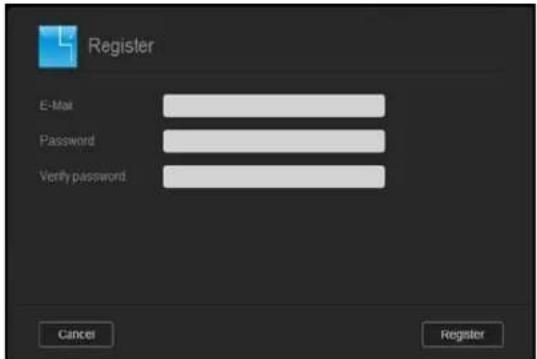
- Enter the following information and click Register:
- Email address: Enter the email address you'll use to receive information from ElephantDrive.
- Password: Enter a password for your new account
- Verify Password: Reenter your password.
- You've now enabled your ElephantDrive cloud backup.
Backing Up with ElephantDrive
Once you've enabled ElephantDrive, use the following steps to create a cloud backup.
-
On the navigation bar, click Backups to display the Backups screen.
-
Click Cloud Backups, if not already selected.
-
Click Elephant Drive at the top right of the screen.
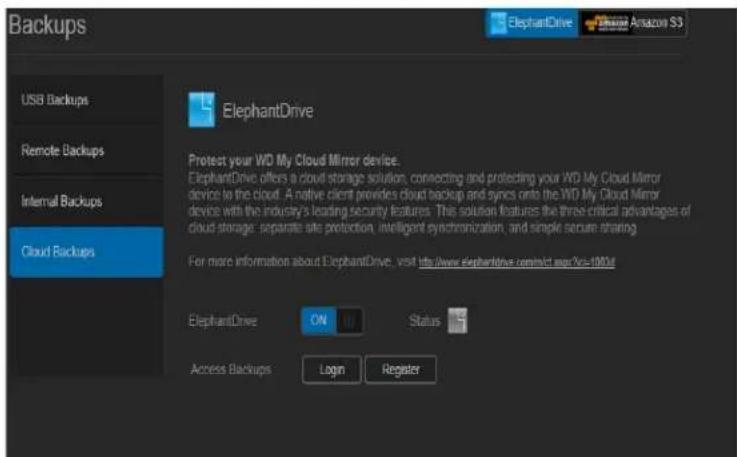
- In the Access Backups field, click Login.
- Enter the email and password you used when you registered with ElephantDrive in Step 6 on page 81. Click Login.
- In the Elephant Drive field, click the New device backup wizard link.
- Follow the steps outlined in the ElephantDrive backup wizard to create your cloud backup.
Enabling an Amazon S3 Cloud Backup
Note: Before creating your Cloud backup, sign up for the Amazon S3 service at http://aws.amazon.com/s3.
Once your Amazon S3 account is set up, use the following steps to create a cloud backup.
- On the navigation bar, click Backups to display the Backups screen.
- Click Cloud Backups, if not already selected.
- Click the Amazon S3 button at the top of the screen.
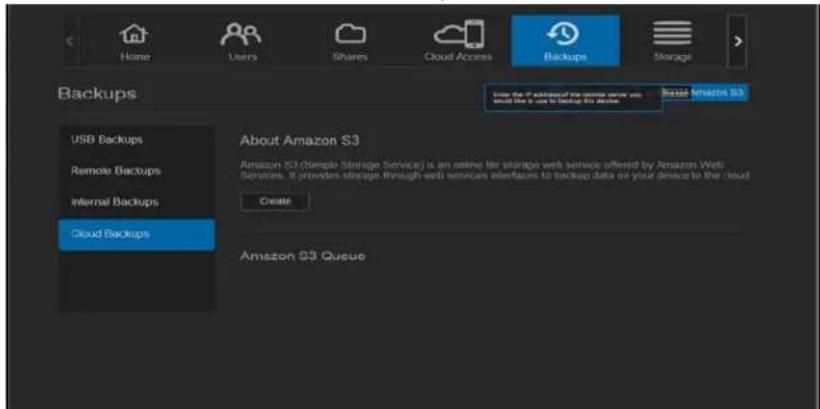
- Click Create.
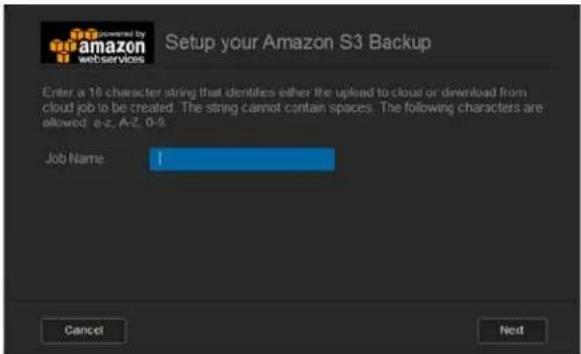
- Enter a Job Name for your cloud backup and click Next.
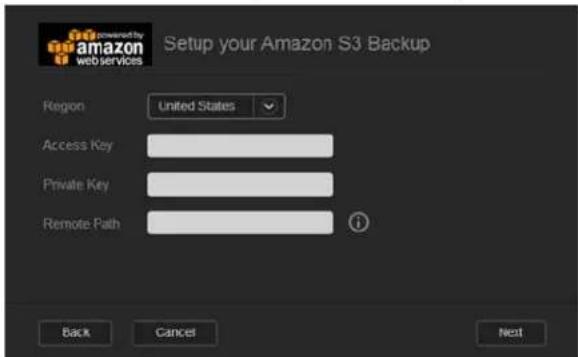
- Enter the following information supplied by Amazon S3:
■ Region: Select the region used for your cloud from the drop-down menu.
- Access Key: Enter the access key supplied to you by Amazon S3.
- Private Key: Enter the private key supplied to you by Amazon S3.
- Remote Path: Enter the remote path for your cloud. This is normally your bucket name.
7. Click Next.
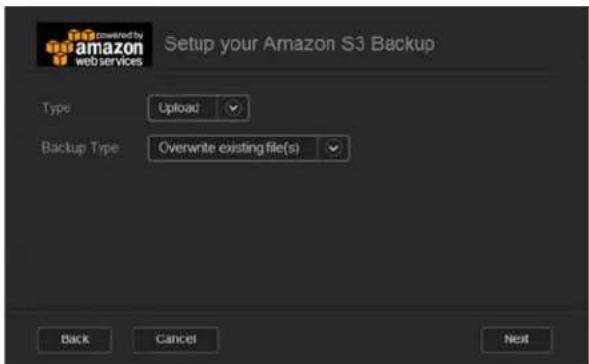
8. Enter the following information and click Next:
TypeSelect one of the following options:
- Upload: Backs up your WD My Cloud Mirror data to your Amazon S3 bucket.
- Download: Backs up your Amazon S3 bucket to your WD My Cloud Mirror device.
Backup Type From the drop-down menu, select the type of backup you'd like to perform. Options include:
• Overwriting existing file(s): Overwrites files in the target folder that have the identical name as your source file.
- Full Backup: Creates a separate folder containing all of the backup data each time the backup is performed.
- Incremental Backup: Overwrites files with source files that are newer then the target files.
9. In the Local Path field, enter a path for your backup on your WD My Cloud Mirror server.
- Click Browse to browse to a location for your backup on the device. (Example Volume_1/backup)
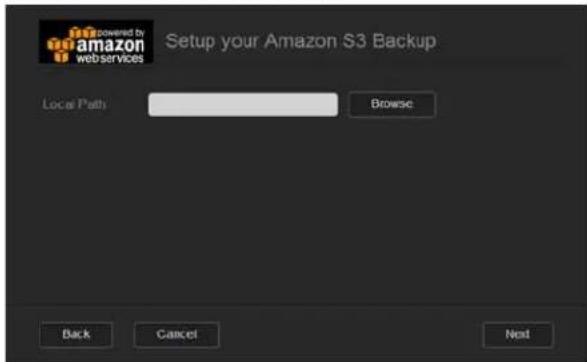
10. Click the toggle button III to activate the Autoupdate feature. This automatically updates your backup based on a schedule you create.
■ If you activate the Autoupdate feature:
- Select the Autoupdate schedule: Daily, Weekly, or Monthly
- Select the Autoupdate Time from the drop-down menu (Daily option).
- Select Autoupdate Date and Time from the drop-down menus (Weekly or Monthly option).
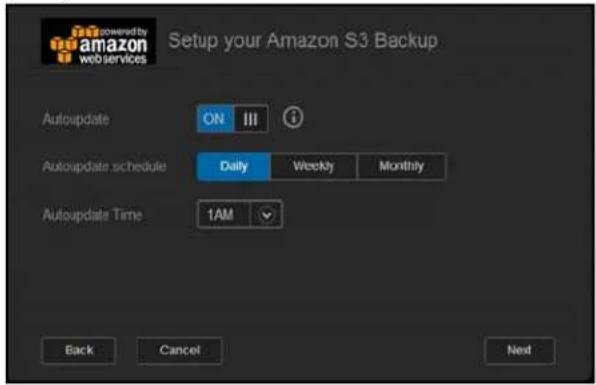
- If you don't select Autoupdate, in the Backup Now field, indicate whether you want to begin the backup now.
■ Select Yes to begin your backup now.
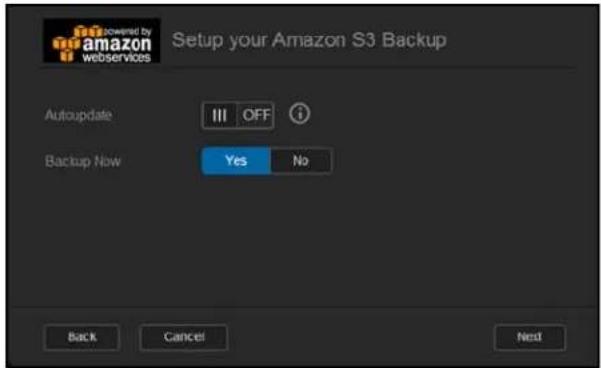
- Click Next.
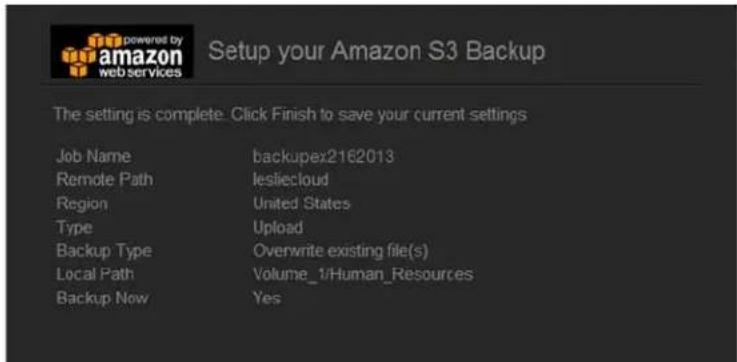
- Review your settings and click Finish. Your Amazon S3 Cloud backup is created. The new job displays in the Amazon S3 Queue section of the Amazon S3 Backup page.
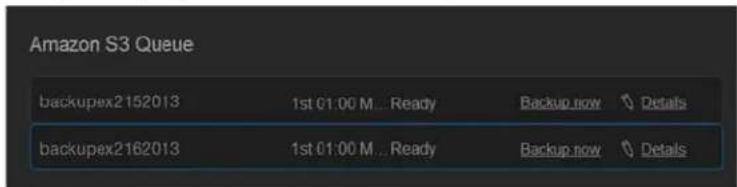
- Access your Amazon S3 Cloud backup bucket to view your device backups.
Managing Apps on WD My Cloud Mirror
About Apps Managing Apps
About Apps
Apps is short for Applications. Apps are little self-contained programs used to enhance the existing functions of your device or service. The WD My Cloud Mirror device provides various apps that allow you to use your device more productively.
Note: WD recommends that you fully understand the nature of any app before you install it on your device.
Note: Obtain support for each app through the individual vendor.
WD My Cloud Mirror comes with various apps installed. There is also a list of available apps for you to choose from on the Add an App screen.
Managing Apps
The Apps screen displays a list of the currently installed apps. From this screen, you can use your installed apps, add new apps, or remove apps you no longer want to use.
Viewing Apps
- On the navigation bar, click Apps to display the Apps screen:
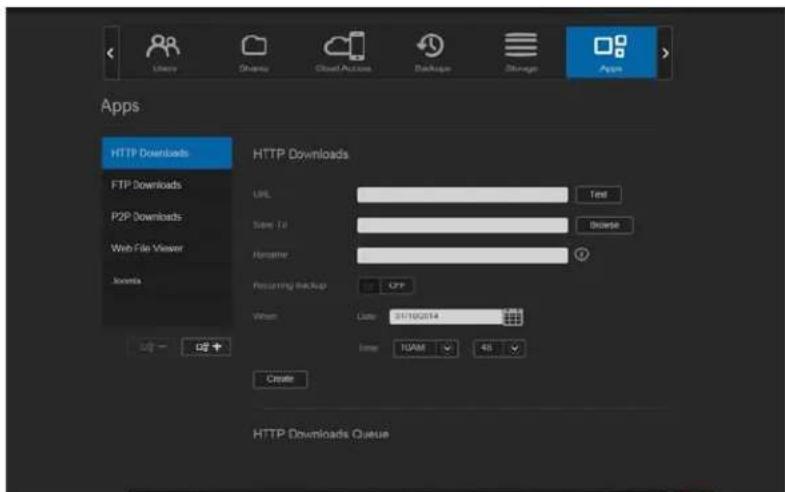
- To select an app, click the name of the app in the left pane. The app displays in the right pane.
Adding an App
Use the following steps to add an app to your WD My Cloud Mirror device:
- On the navigation bar, click Apps to display the Apps screen.
- Click the Add an App icon 📄 in the lower left side of the screen.
The first time you add an app, the Terms of Service screen displays. Read and accept the agreement.
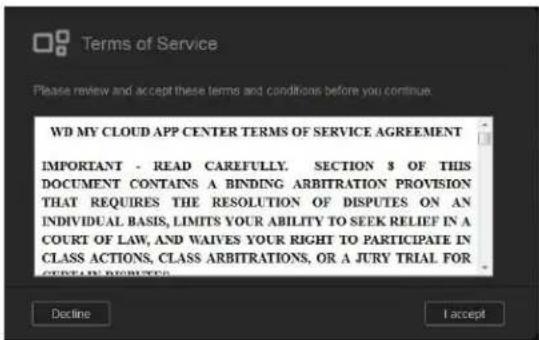
- On the Add an App screen, place a check next to the app you'd like to add to the device.
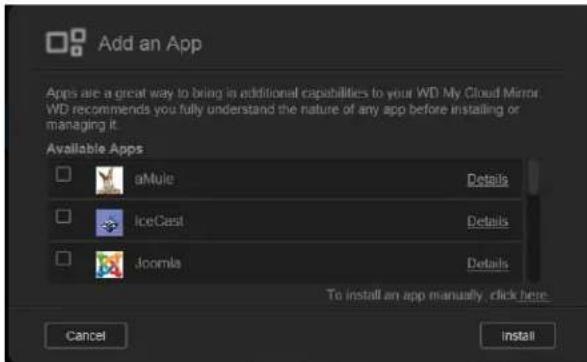
- For details about the app, click Details. Close the Details screen.
- Place a check next to the app(s) you'd like to add to your device and click Install. The selected apps are added to your device.
Manually Adding an App
If you have an app you'd like to add that is not listed on the Add an App screen, use the following steps to manually add that app to your WD My Cloud Mirror device.
Note: WD recommends that you fully understand the nature of any app before you install it on your device.
- On the navigation bar, click Apps to display the Apps screen.
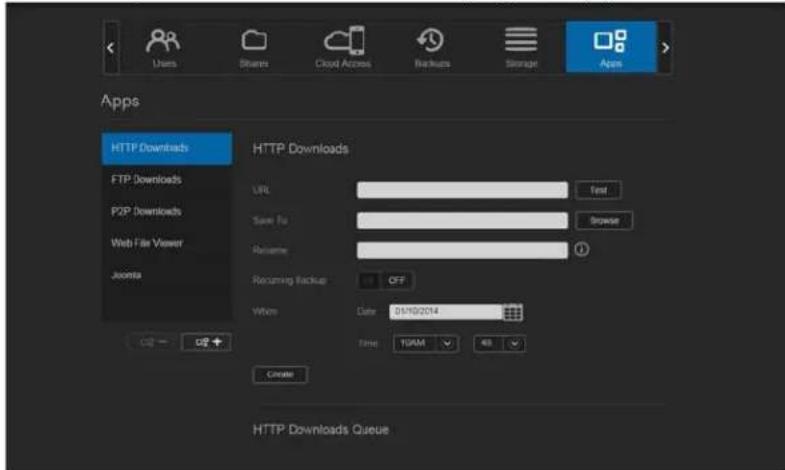
-
Click the Add an App icon 📄 in the lower left side of the screen.
-
Scroll to the bottom of the Add an App screen and click the To install manually, click here link.
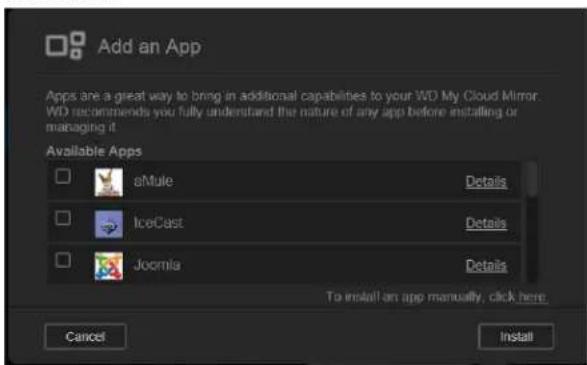
- Navigate to the app you'd like to install on your device.
- Select the app and click Open.
- The selected app is added to your device.
Deleting an App
Use the following steps to delete an app from your WD My Cloud Mirror device.
- On the navigation bar, click Apps to display the Apps screen.
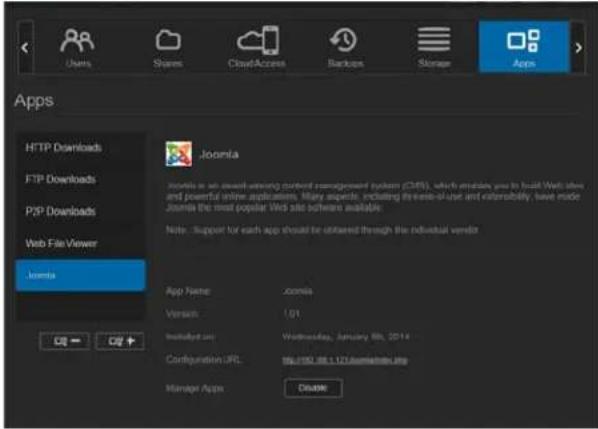
- From the Apps list in the left pane, select the app that you'd like to delete from the device.
- Click the Remove an App icon ☐ in the lower left of the screen.
- In response to the confirmation message, click OK. The app is removed from the device and no longer displays in the user account list.
Updating an App
Use the following steps to update an app that you've added to your WD My Cloud Mirror device.
- On the navigation bar, click Apps to display the Apps screen.
- If there is an update for one of the apps you've added to your device, an Updates available link displays at the top right of the screen.
- Click the Updates Available link to display the Updates Available screen.
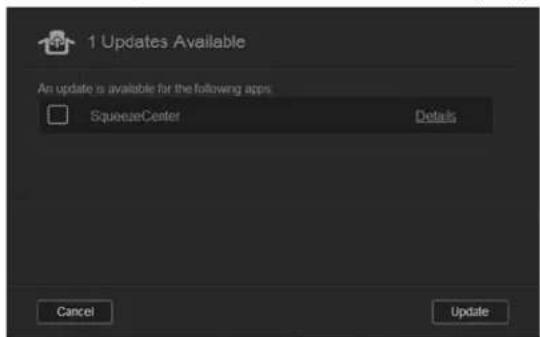
- Select the app you'd like to update from the list and click Update.
If you'd like to view the details of the update, click Details.
- Click Back to return to the Update screen.

Managing Storage on WD My Cloud Mirror
About Storage
RAID Storage
Disk Status
About Storage ≡
The Storage page allows you to configure the storage within your device and view the status and capacity of its disks. This chapter provides details on managing the storage on your WD My Cloud Mirror device.
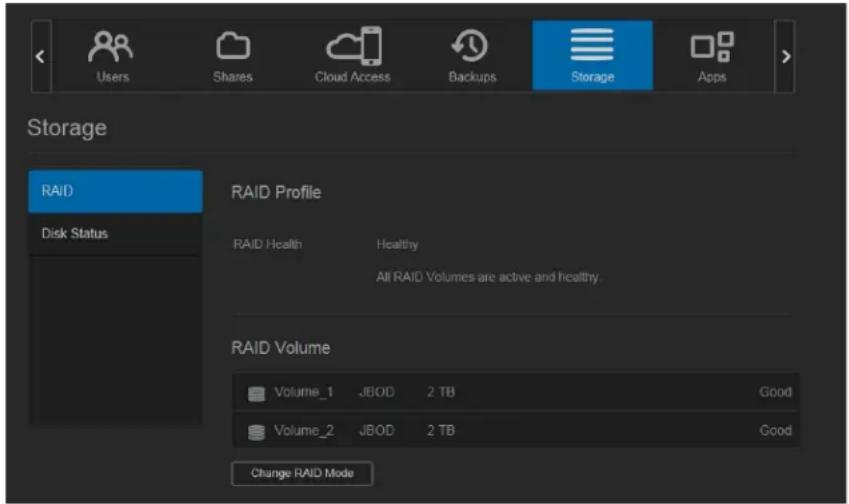
RAID Storage
RAID (Redundant Array of Independent Disks) allows you to store the same data in different places on multiple hard drives, providing necessary redundancy, greater performance, and data integrity. There are several different levels of RAID, each one providing a different method of sharing or distributing data among the drives. Your WD My Cloud Mirror device allows you to select from the following storage modes:
Note: The difference between a drive and a volume is that a volume can be a single drive or multiple drives.
| RAID Mode Description | |
| JBOD | The use of one or more drives not in a RAID configuration but managed as separate logical volumes. |
| Spanning | Combination of drives in a linear fashion to create one large logical volume. |
| RAID 0 | RAID 0 mode provides disk striping across all drives in the RAID drive group. RAID 0 does not provide data redundancy but does provide the best performance of any RAID level. RAID 0 breaks up data into smaller segments and stripes the data segments across each drive in the drive group. |
| RAID 1(default) | In RAID 1 mode, the RAID controller duplicates all data from one drive to a second drive in the drive group. RAID 1 provides complete data redundancy but cuts the required storage capacity in half. |
Viewing the Current RAID Mode
Use the following steps to view the RAID mode currently used on your device.
- On the navigation bar, click Storage to display the Storage screen.
- Click RAID, if not already selected.
-
In the RAID Profile, the following information displays:
-
RAID Health
■ Auto-Rebuild status (whether or not Auto Rebuild is turned on) - RAID Volume shows how many volumes the RAID or JBOD is configured for.
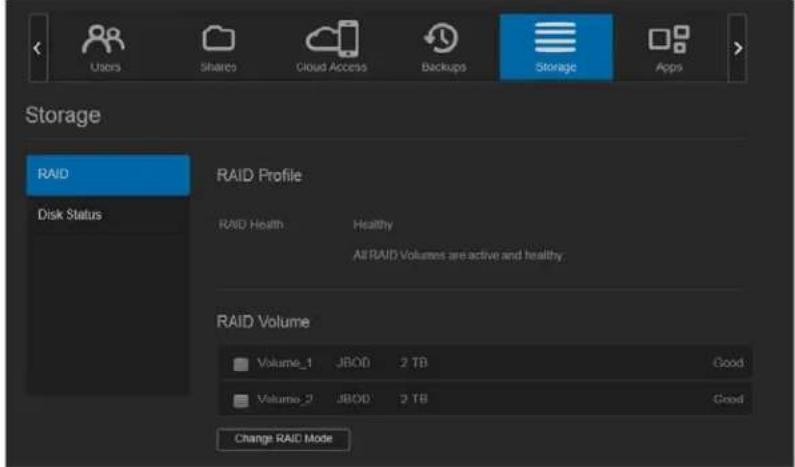
Changing the RAID Mode
Use the following steps to change the current RAID mode on your WD My Cloud Mirror device.
WARNING! Changes made to your RAID mode will delete all of your data and your user settings. See "Saving a Configuration File" on page 122 for information on saving your user settings.
- On the navigation bar, click Storage to display the Storage screen.
- Click RAID, if not already selected.
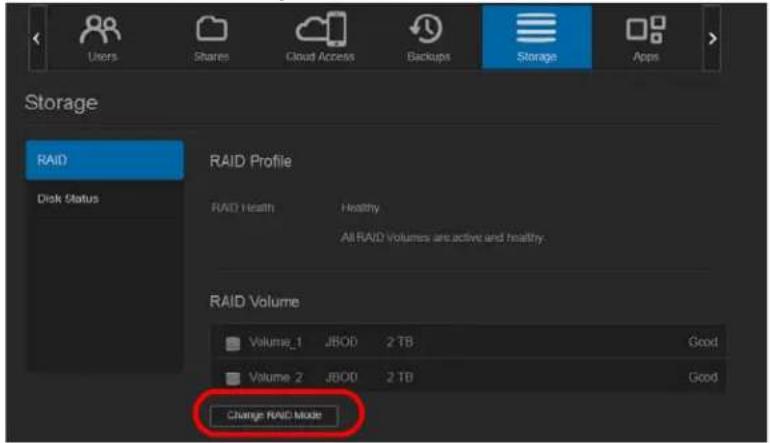
- Click Change RAID Mode at the bottom of the screen.
- Review the Warning message and click OK.
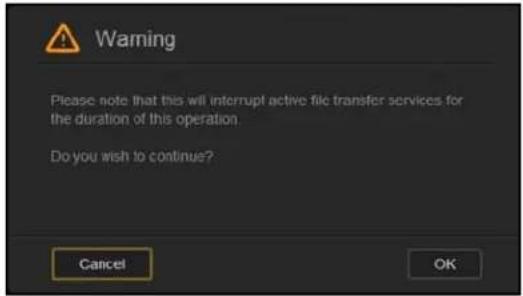
- Select the RAID mode you'd like to use for your WD My Cloud Mirror device.
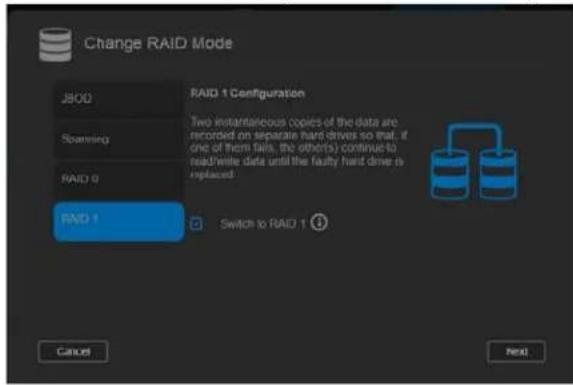
Options include:
| JBOD | The use of one or more drives not in a RAID configuration but managed as separate logical volumes. |
| Spanning Combination of drives in a linear fashion to create one large logical volume. | |
| RAID 0 | Data is striped across multiple hard drives, enabling accelerated reading and recording of data by combining the work of two or more drives to increase performance. |
| RAID 1 (default) | Two instantaneous copies of the data are recorded on separate hard drives so if one of them fails, other(s) continue to read/write data until the faulty hard drive is replaced. |
- Select the Switch to
check box and click Next. - Review the status of your hard drives and click Next.
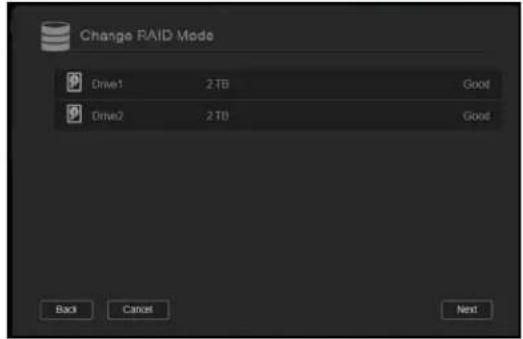
- Review the status of your volumes and click Next.
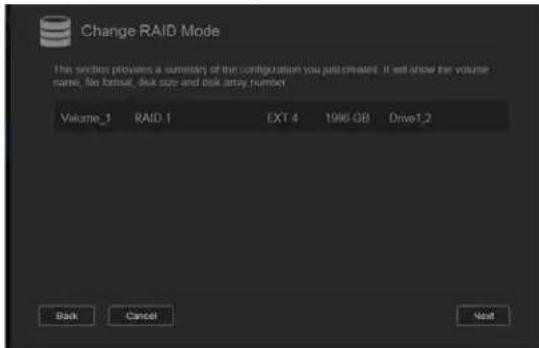
- If the Volume slider displays, select the amount of space you'd like to dedicate to the selected RAID mode. The Volume slider displays for RAID1 (default).
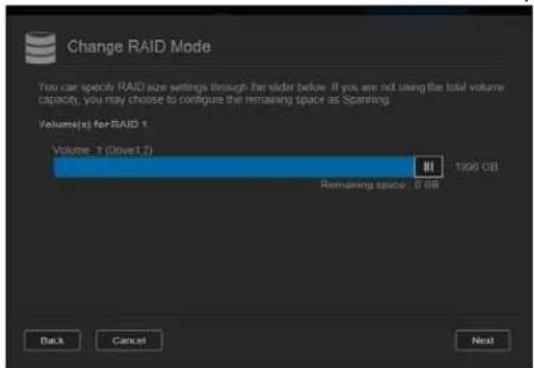
- If you choose not to use the entire volume for your RAID selection, you can configure the remaining disk space as Spanning by selecting the Configure the remaining disk space as Spanning check box.
- Click Next.
- Review the summary of your selections and click Next.
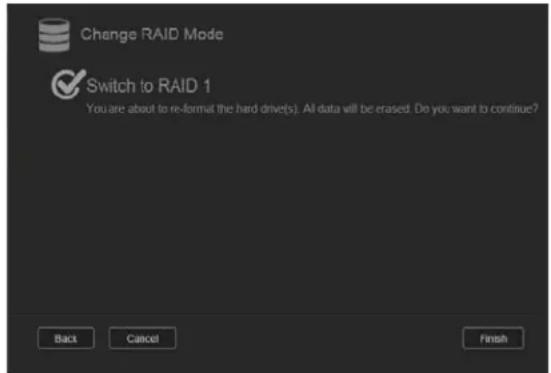
- Review the warning screen and click Finish.
- The requested hard drive changes begin. Do not turn off your WD My Cloud Mirror device while these changes are in progress.
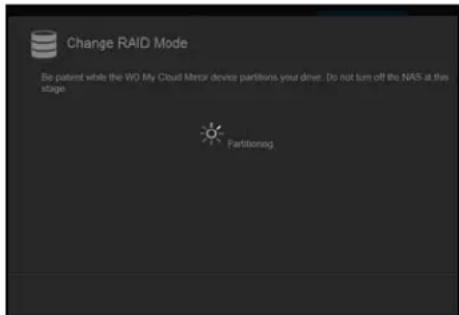
- When the process is complete, click Finish again.
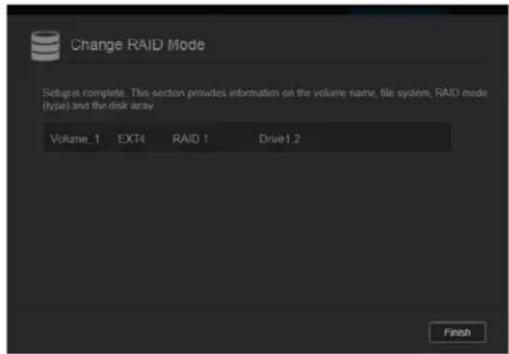
Auto-Rebuilding RAID
The Auto-Rebuilding option allows you to automatically rebuild the RAID for your WD My Cloud Mirror device in case of drive corruption. Use the following steps to enable the auto-rebuild option.
- On the navigation bar, click Storage to display the Storage screen.
-
Click RAID, if not already selected.
-
Review the Auto-Rebuild field to determine whether your WD My Cloud Mirror device is currently set up for auto-rebuild.
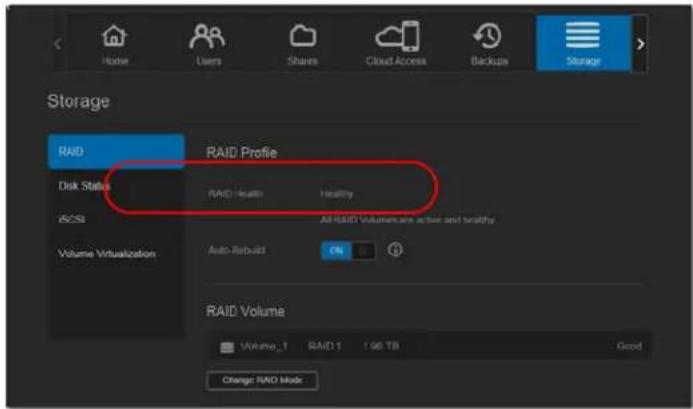
- If Auto-Rebuild is OFF (default), click the toggle button to enable Auto-Rebuild.
Disk Status
The Disk Status screen identifies the health of the disk drives as well as the status and information on each drive used in your WD My Cloud Mirror device. The Disk Status screen consists of the following areas:
- Disks Profile: This area displays the general status of all of the disk drives on your device.
- System Disks: This area identifies the drives on your device, the status of each drive, and the amount of space on that drive.
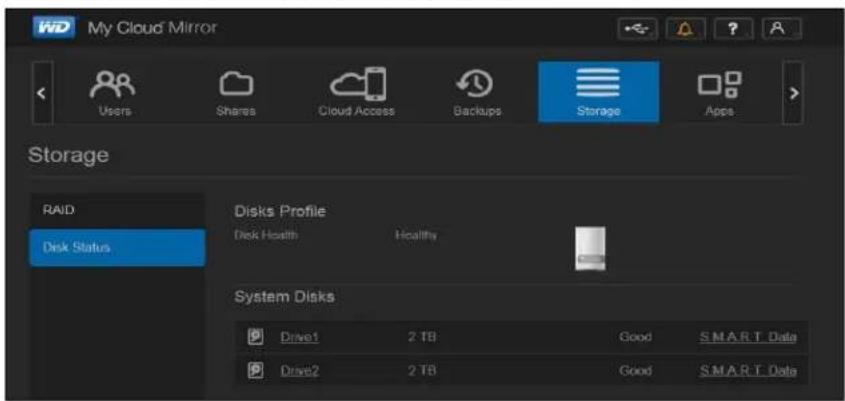
Note: If a drive is not supported, the status is not compatible.
Viewing Hard Drive Information
Use the following steps to view status of the disks on your WD My Cloud Mirror device.
- On the Storage page, click Disk Status, if not already selected.
- Select Drive
next to the disk for which you'd like to view information.
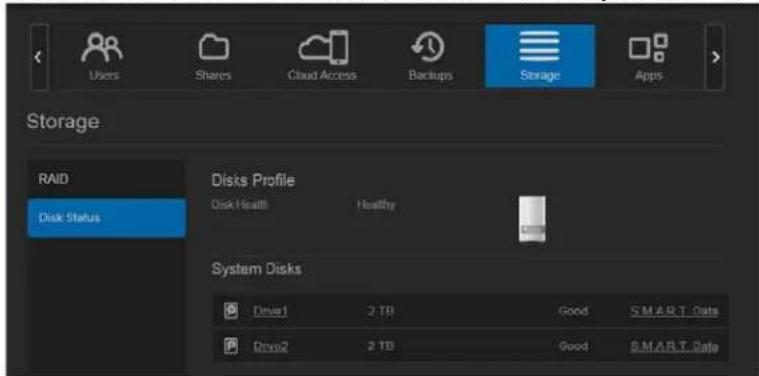
- Review the hard drive information and click Close. The Hard Drive Information screen displays the following data:
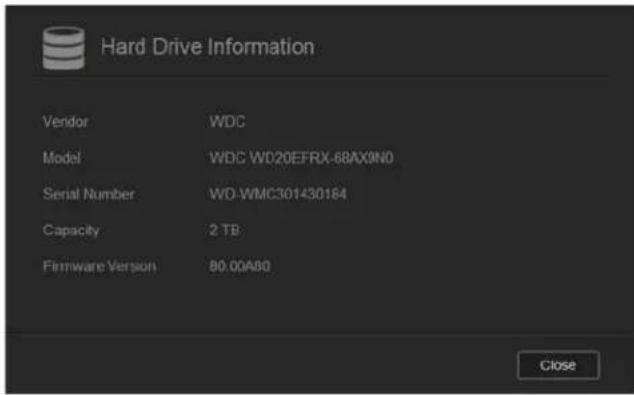
Vendor The vendor from whom the hard drive was obtained.
Model The model number of the hard drive selected.
Serial Number The serial number of the hard drive selected.
Capacity The capacity of the hard drive selected.
Firmware Version
The current firmware version used on the drive selected.
Playing/Streaming Videos, Photos, & Music
Media Servers
Media Storage
Enabling DLNA and iTunes
Accessing Your Personal Cloud Using Media Players
Accessing Your Personal Cloud Using iTunes
Media Servers
WD My Cloud Mirror is designed to serve as your home's media server. It enables you to stream photos, music, and videos to your DLNA-compatible devices and music to your iTunes-compatible devices.
Both DLNA-compatible and iTunes-compatible devices search for media stored in any Public share that has media serving enabled. By default, DLNA Media is disabled. Once you enable it on the Settings > Media Server page, the media serving for the Public share is also automatically enabled. For all other shares, the media serving remains off.
If you do not want DLNA to display specific media files, place them in a private share that is set to disable media sharing. (See “Making a Share Private” on page 54.)
Media Server Overview
The WD My Cloud Mirror device uses TwonkyMedia as its DLNA media server. It streams your music, photos and videos to compatible devices in your home. Playing media on a compatible device is easy.
The media server searches for all the media stored in the Public share on the WD My Cloud Mirror device connected to your home network. After enabling media serving for the device (see “Enabling DLNA and iTunes” on page 98), you can just transfer your multimedia content to the Public share on your WD My Cloud Mirror device, and you are ready to stream and view content on your home entertainment center, game consoles (for example, Xbox 360 ^® or PlayStation ^® 3), WD TV Live ^® media player, or DLNA ^® 1.5 digital media adapters), and other PC computers on your home or office network. Visit
http://www.dlna.org for further information on DLNA.
iTunes Overview
You or anyone connected to the WD My Cloud Mirror device can use iTunes to play stored music files. iTunes creates a virtual music library on the device and treats it as an iTunes repository, making it possible to stream music files from the WD My Cloud Mirror device to Windows or Mac computers running iTunes.
iTunes scans any shares that have the Media Serving setting enabled, including the Public share by default.
Media Types Supported
 | [244A] |  |
| Audio files Video files Image Files | ||
| 3GP | 3GP | BMP |
| AAC | ASF | JPEG |
| AC3 | AVI | PNG |
| AIF | DivX | TIF |
| ASF | DV | |
| FLAC | DVR-MS | |
| LPCM | FLV | |
| M4A | M1V | |
| M4B | M2TS | |
| MP1 | M4P | |
| MP2 | M4V | |
| MP3 | MKV | |
| MP4 | MOV | |
| MPA | MP1 | |
| OGG | MP4 | |
| WAV | MPE | |
| WMA | MPEG1 | |
| MPEG2 | ||
| MPEG4 | ||
| MPG | ||
| MTS | ||
| QT | ||
| QTI | ||
| QTIF | ||
| RM | ||
| SPTS | ||
| TS | ||
| VDR | ||
| VOB | ||
| WMV | ||
| Xvid | ||
Note: Some devices may not support playback of all these files. Please refer to your device's user manual to see which formats are supported.
Media Types Supported by iTunes
Note: iTunes 10.4 or later only supports music files. See Knowledge Base Answer ID 8412 for additional information on iTunes-supported versions.
The iTunes Media Server supports the following file extensions: FLAC, M4A, MP3, MP4A and WAV.
Note: Some devices may not support playback of all these files. Please refer to your device's user manual to see which formats are supported.
Media Storage
You can access and store media content on the WD My Cloud Mirror device by means of network shares. Shares, similar to folders or directories, are areas set up to organize media and access them from your network. Shares can be shared with everyone (public) or with selected users on your network (private).
The device comes pre-configured with the Public network share, which contains the following folders for media storage:
- Shared Music—Stores music files you want to share with other users.
- Shared Pictures—Stores image files you want to share with other users.
- Shared Videos—Stores video files you want to share with other users.
Note: You will notice that the Public share's Shared Music and Shared Pictures shares contain mirrored and uploaded subfolders. These folders are needed by Twonky 7.2. You can now upload all media types to the uploaded subfolder from a DLNA client with "upload" capability.
Go to the Twonky configuration site (NAS_IP:9000) to aggregate content from all NAS devices with DLNA capability on your network to the mirrored folder. Uploading and mirroring are best left to expert users, as these features are not supported by WD customer support.
Enabling DLNA and iTunes
The Media page of the Settings Screen allows you to enable or disable the DLNA and iTunes media servers. Media server utilities for re-scanning the NAS or fully rebuilding the DLNA database are also on the Media page.
Enabling DLNA
- On the Navigation bar, click Settings and in the left panel click Media.
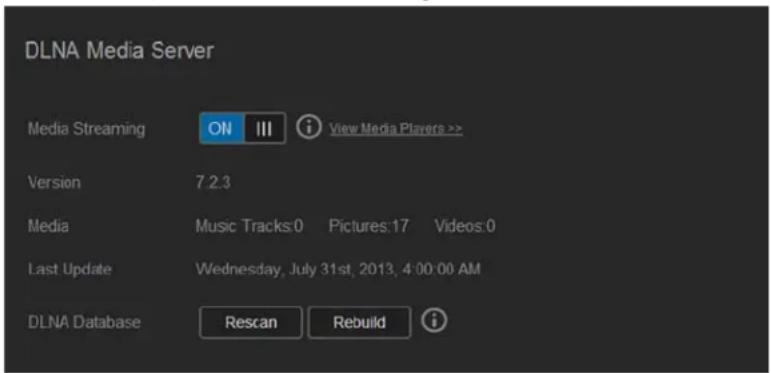
- In the DLNA Media Server area, toggle III the Media Streaming toggle to ON.
Note: Media Streaming is OFF by default. The media server must be enabled before you can provide media serving for a share. (See "Creating a New Share" on page 53 for instructions on how to enable media serving on a share.)
- Click View Media Players to display a list of the media players/receivers on your home network.
Note: If Media Streaming is OFF, this field does not display on your screen.
- On the Media Streaming Options screen, select the media device you'd like to receive streaming music, video, or photos.
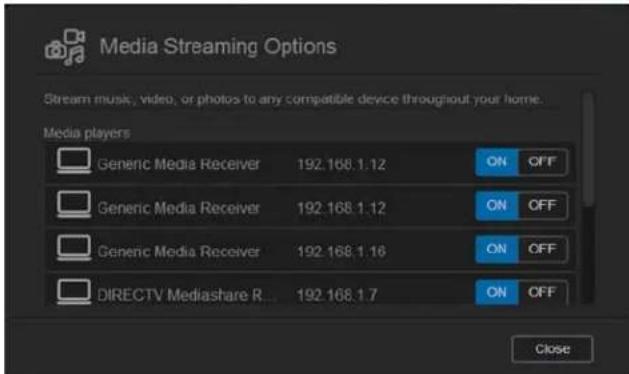
- ON: Select this option to allow DLNA media streaming to the device.
-
OFF: Select this option to disable DLNA media streaming to the device.
-
Once your selections are made, click Close.
Viewing DLNA Media Server Information
The DLNA area displays the current version, the number of music, video, and pictures available on your device, and when the last update occurred.
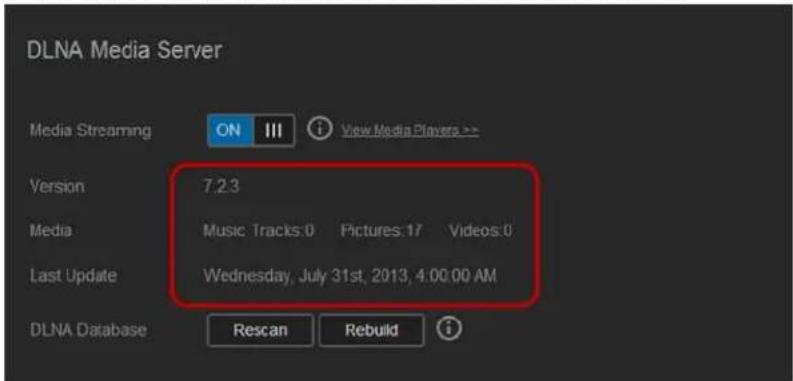
- To view DLNA media server information, on the Settings screen, click Media in the left panel.
Rescanning/Rebuilding the DLNA Database
The WD My Cloud Mirror device automatically rescans and rebuilds the DLNA database; however, if you suspect that your database is corrupted, use the following steps to either rescan or rebuild your DLNA database:
Important: Use caution when completing this procedure. Rebuilding the DLNA server database could take a considerable amount of time, depending on the number and size of the files involved.
- On the Navigation bar, click Settings and then click Media in the left panel.
- In the DLNA Database field, click one of the following.
- Rescan: The WD My Cloud Mirror device searches for changes made to your media libraries. Try this option first.
■ Rebuild: The WD My Cloud Mirror device rebuilds the DLNA database from scratch.
Enabling iTunes
- On the Navigation bar, click Settings and then click Media in the left panel.
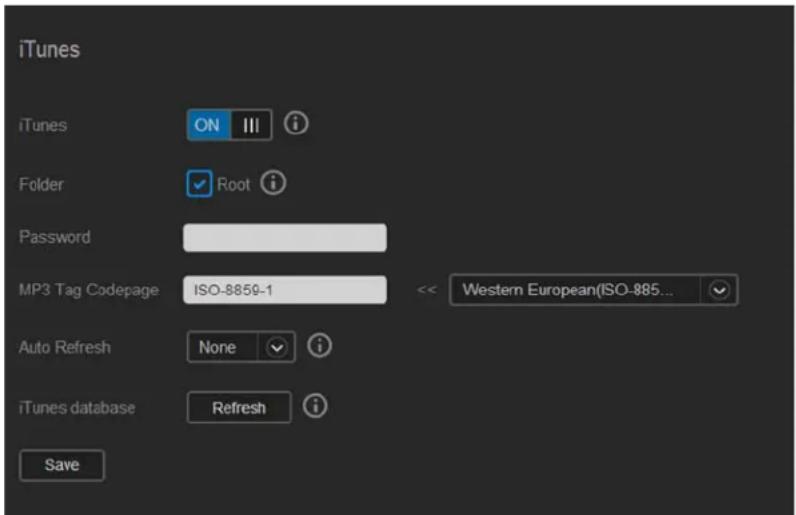
- In the iTunes area iTunes field, click the toggle button to enable iTunes (if not already enabled).
Note: iTunes is ON by default. To disable it, click the toggle button to OFF.
- In the Folder field, select Root, if not previously selected. This field points iTunes to the root directory on your WD My Cloud Mirror device.
If your want to specify a directory on your device where iTunes can access your media:
a. Deselect the Root check box.
b. Click Browse and then navigate to the folder where iTunes can access your media.
c. Click Save at the bottom of the iTunes area.
- In the Password field, enter a password to be used when accessing your WD My Cloud Mirror device on iTunes.
Note: Leave the Password field blank if you don't want to use a password to access your device media in iTunes.
- If you'd like to change the default MP3 Tag Code page, select the page from the dropdown menu.
- For Auto Refresh, select the frequency of the media refresh for iTunes from the dropdown menu.
- Click Save to save your settings.
Refreshing iTunes
Use the following steps to refresh the iTunes directory. This allows iTunes to pick up any new media.
- On the Navigation bar, click Settings and then click Media in the left panel.
- In the iTunes database field, click Refresh.
Adding Media Content to the Folders
1. Open Windows Explorer or Mac Finder.
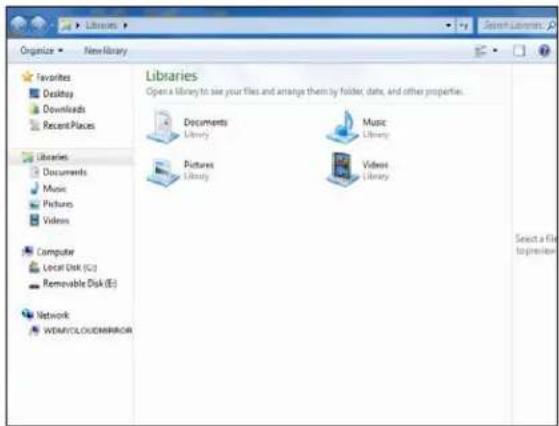
Windows Explorer
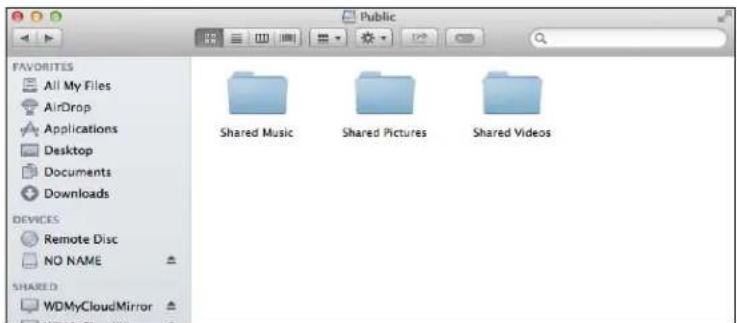
Mac Finder
- Copy your music files to the Shared Music folder.
- Follow the same process to place your videos and pictures into their respective Pictures and Video folders.
Note: You can also access your media files using WD My Cloud Desktop app (see "WD My Cloud for Desktop App" on page 31).
Accessing Your Personal Cloud Using Media Players
Now that you have copied your files to one of the Shared folders, you can use a variety of media players to stream media. The following types are supported:
■ WD TV Live Media Players
■ Windows Media Player 11 (comes with Windows Vista)
■ Windows Media Player 12 (comes with Windows 7 and Windows 8)
- Xbox 360
PlayStation 3
■ Other media players:
- BluRay Players
- Network Connected TVs
- Digital Picture Frames
- Network Music Player
DLNA Devices
Note: For specific information on using and updating the media player, go to the appropriate support site.
WD Media Players
You can connect the various WD TV and WD Media Players to your home network for access to media content stored in a network drive such as the WD My Cloud Mirror device. For details on using a WD Media Player to access files on your device, see Knowledge Base Answer ID 2676 or refer to your WD Media Player User Guide.
Other Media Players
Following are general steps for setting up devices such as digital picture frames, Blu Ray players, network-connected TVs, and digital media adapters:
- Make sure that your WD My Cloud Mirror device is connected to your home's local network and is powered on.
- Follow the user instructions provided with your media player to proceed through any initial setup or installation of drivers.
- Using the navigation feature on your player, scan and detect your WD My Cloud Mirror device on your network.
- Depending on the player you have, you may need to access a Settings/Network Setup page in the user interface to establish connection so that your player can link to your WD My Cloud Mirror device. Please refer to your player's user guide for specific instructions.
DLNA Devices
See specific DLNA media device user manuals for instructions on connecting a DLNA device to your local area network so you can access content on the WD My Cloud Mirror device. Go to http://www.dlna.org for a list of DLNA-certified devices and for further information.
Accessing Your Personal Cloud Using iTunes
You or anyone connected to the WD My Cloud Mirror device can use iTunes to play stored music files. This service creates a virtual music library on the device and treats it as an iTunes repository, making it possible to stream music files from the WD My Cloud Mirror device to Windows or Mac computers running iTunes. For a list of supported media types, see “Media Types Supported” on page 97.
Note: iTunes 10.4 or later only supports music files. See Knowledge Base Answer ID 8412 for additional information on iTunes supported versions.
Note: iTunes scans any shares that have the Media Serving setting enabled, including the Public share by default.
You can drag and drop media files into the corresponding folders in the Public share (e.g., music files into the WDMyCloudMirror/Public/Shared Music default share).
Streaming Media in iTunes
iTunes is enabled by default in the dashboard. See "Enabling iTunes" on page 100 for more information on configuring iTunes.
- Launch iTunes on your computer.
- Click WDMyCloudMirror under the Shared section of the left pane. If you have copied music to the /Public/Shared Music folder or a video to/Public/Shared Videos, and it is in a format supported by iTunes, it is listed in the right pane.
- Double-click a media file you'd like to play.
11
Configuring Settings

General
Network
Media
Utilities
Notifications
Firmware Update
The Settings option on the navigation bar allows the Administrator to view and customize the WD My Cloud Mirror device's system, network, media, utilities, notifications, and firmware settings. This chapter explains how to configure the various settings for your WD My Cloud Mirror device.
General
On the General page you can:
■ View and modify the device name and description
- Select the language in which the web pages should display
■ Set the date, time, and time zone for the device
■ Enable cloud access for your device
■ Set energy saving options
■ Enable and configure Time Machine backups for your Mac
■ Enable various services for your device
WARNING! Renaming the WD My Cloud Mirror device forces all the network computers to remap their shared network resources. Change the device name only when necessary.
Accessing the General Screen
On the Navigation bar, click Settings. The General page displays:
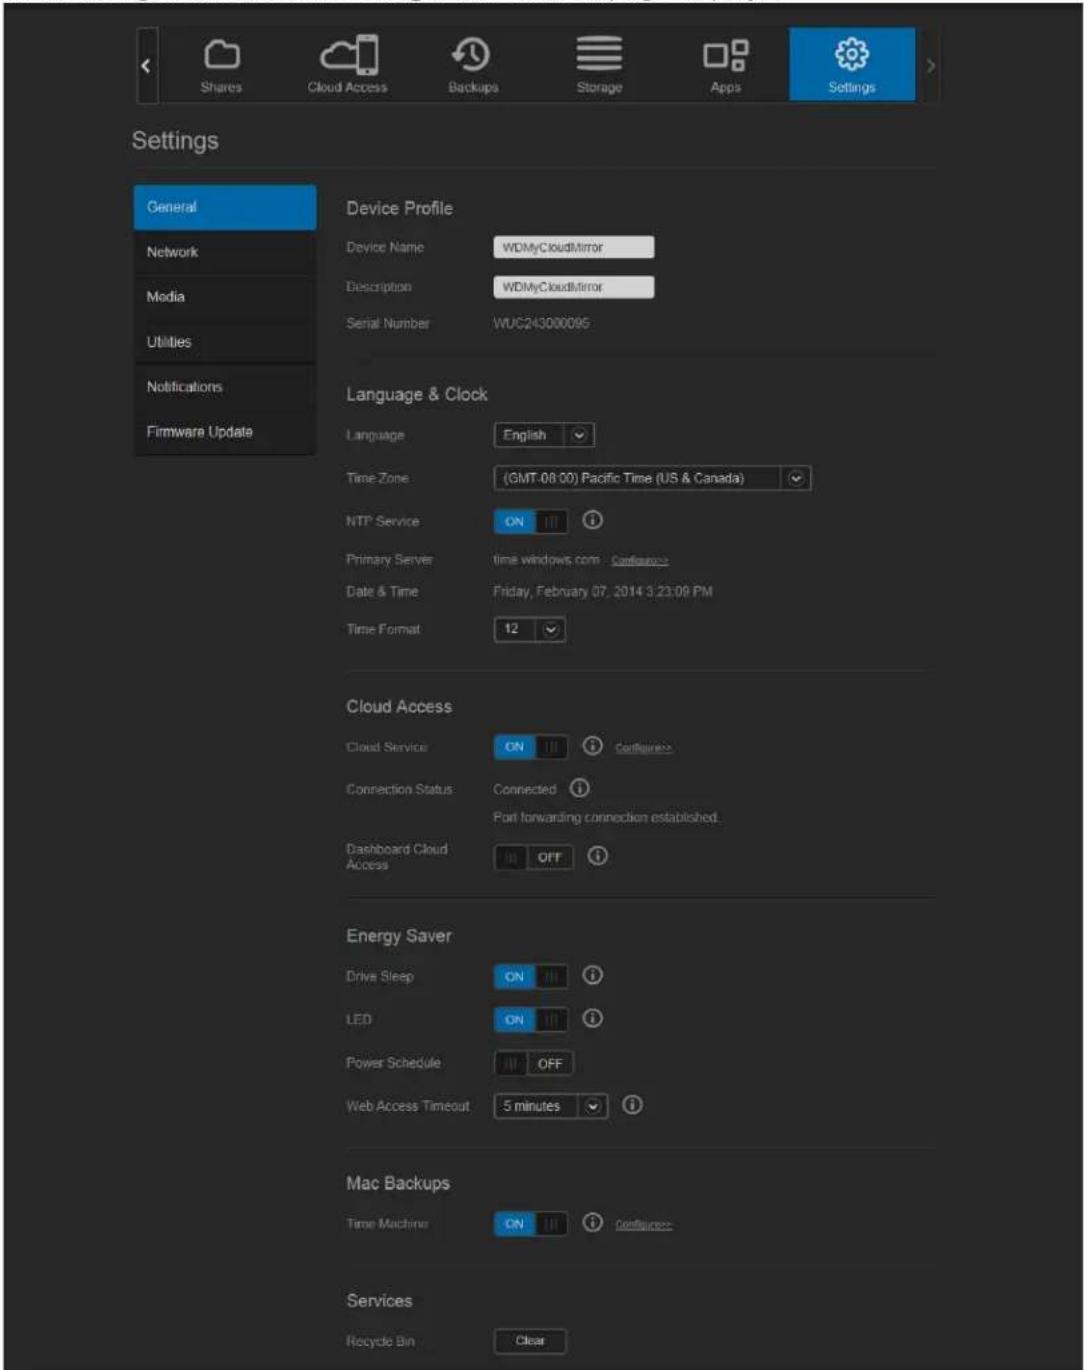
Device Profile
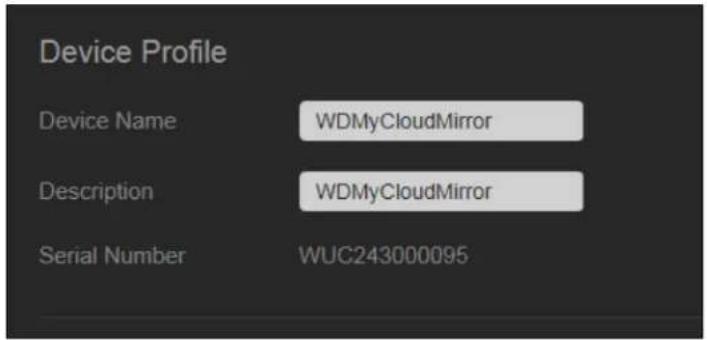
- In the Device Profile section of the General page, view or modify the following settings:
| Device Name Enter a unique name for your device to identify it on the network. The device name can be up to 15 characters long and can not include special characters (e.g., @, #, etc.). |
| Device Description The default description is WDMyCloudMirror. If desired, enter a different description for your device. The device description can be up to 32 characters long and can not include special characters (e.g., @, #, etc.). |
| Serial Number Displays the WD-assigned number that identifies the specific unit. This field can not be updated. |
- If you made any changes, click Save (appears next to the updated field once a change is made).
Note: Throughout the WD My Cloud Mirror dashboard, the Save and Cancel buttons display only if you make changes.
Language and Clock
In this section of the General screen, you can change the language that displays in the WD My Cloud Mirror device's interface and set the date and time. The date and time are synchronized to the NTP (Network Time Protocol) server by default. You have the option of setting the date and time manually or allowing the NTP to access the Internet and automatically set the time. If you are not connected to the Internet, you must enter the date and time manually.
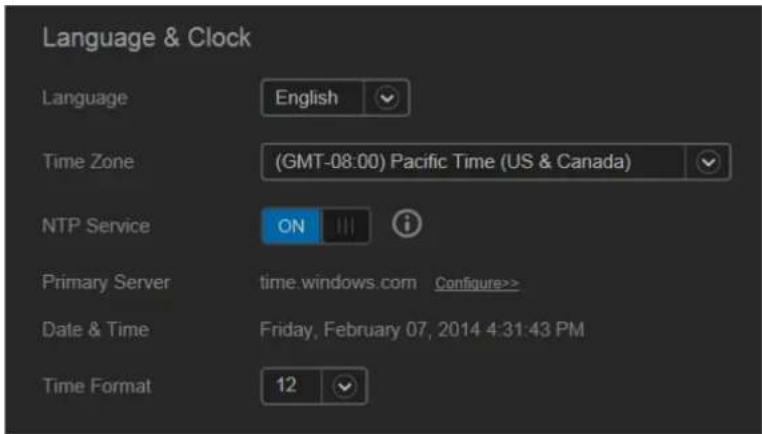
- In the Language & Clock section, view or modify the following settings:
| Language From the drop-down list, select the language you'd like to display on your WD My Cloud Mirror Personal Cloud Storage web pages. The default language is English. | |
| Time Zone From the drop-down list, select the time zone where your device is located. | |
| NTP Service Enable or disable NTP service, which automatically synchronizes your device to update the time and date. A dialog box displays current NTP servers. You can add another NTP server if you choose. | |
| Primary Server Change the primary server used for your NTP service.To change the primary server used for your NTP service, click Configure,Click Add User NTP and enter the URL address of the new primary server.Click Save. | |
| Date & Time Displays the device date and time. This information is synchronized to the NTP (network time protocol) server by default. | |
| Time Format | From the drop-down list, select 12 (12-hour clock) or 24 (24-hour clock). |
- Click Save for each change you make.
Cloud Access
Use the following steps to turn cloud access on or off for all users (i.e., control whether computers and mobile devices can access the content on the WD My Cloud Mirror device).
Note: This action turns on cloud access for the entire device. To turn on access for an individual user, see "Configuring Cloud Access for a User" on page 22
- Scroll down to the Cloud Access area of the General screen.
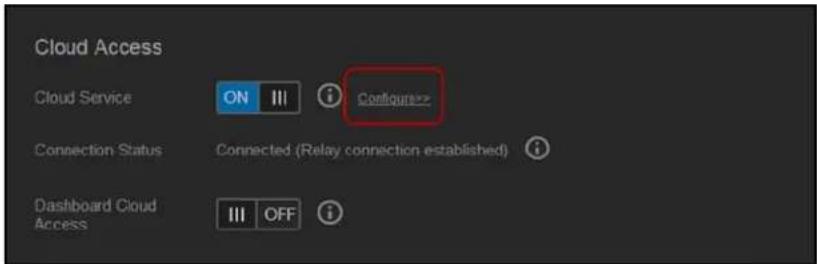
-
In the Cloud Service field, ensure that the toggle button to set to ON (default). The Connection Status changes to Connected (Relay connection established).
-
Click Configure to change the type of connection you use for your cloud access.
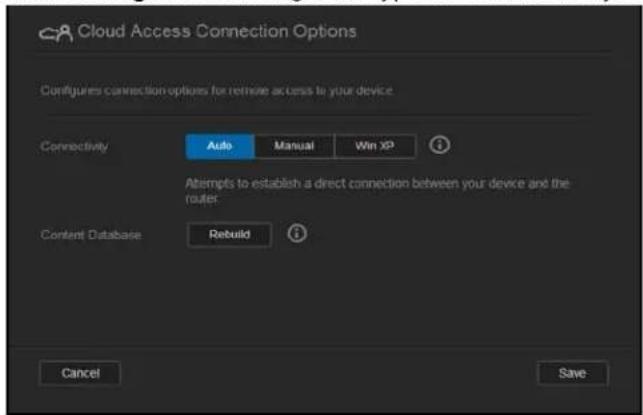
On the Cloud Access Connection Options screen, there are three access options:
- Auto: Auto uses uPnP to attempt to open ports on your router. If successful, a direct connection is established between your device and your apps.
- Manual: Establishes a connection through the two selected ports. If either port is unavailable, a relay connection is established. A manual router configuration is required for this option. See Knowledge Base Answer ID 8526 for information on how to set up your router for manual setup.
- Win XP: Establishes a connection through ports 80 and 443. If these ports are unavailable, a relay connection is established. This option is required if you're using Windows XP.
Note: By default, the WD My Cloud Mirror device automatically establishes a direct connection between your mobile devices and router.
- Select a connection type:
Auto: Click Auto.
- Manual: Click Manual and enter the External Port 1 (HTTP) and External Port 2 (HTTPS) numbers.
- Win XP: Click Win XP.
-
Click Save.
-
In the Dashboard Cloud Access field, click the toggle button to turn on remote access to the dashboard.
Note: Selecting this option allows you to perform administrator functions remotely.
- Review the information on the screen and then enter and reenter a password for your administrator account. Click Save.
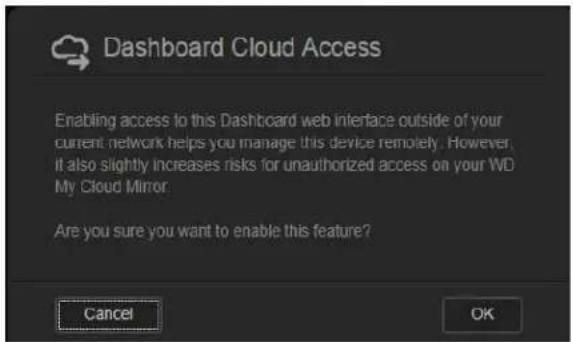
If your administrator account already has a password associated with it, review the Dashboard Cloud Access screen and click Save.
Note: If you set your Cloud Setting to Manual, you will have to access your device remotely using the ports you selected during the manual cloud setup.
Example: If you set up your manual HTTP port as 5040, you'd use the following address to access your device: http://
Energy Saver
The Energy Saver fields allow you to reduce the energy required to run your WD My Cloud Mirror device. Use the following information to configure the energy saving options on your WD My Cloud Mirror device.
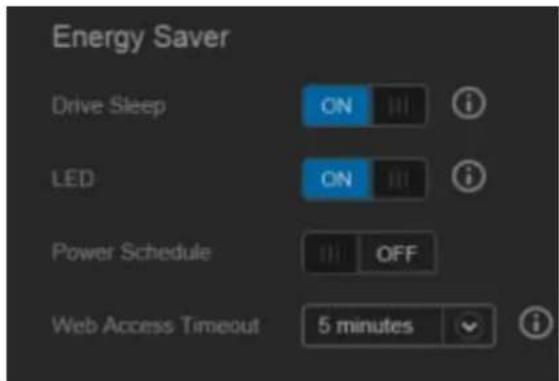
View or change the following settings:
Drive Sleep Enabling this function allows the hard drives to go into standby mode to save power after a designated period of inactivity. Drive Sleep is enabled to sleep after approximately 10 minutes by default.
- To enable/disable Drive Sleep, click the toggle button III.
LED Enabling this function allows the device LEDs to go into standby mode to save power. LED is enabled by default.
- To enable/disable LED, click the toggle button .
Power Recovery Automatically restarts your device from a previously unexpected shutdown due to power failure. Power Recovery is enabled by default.
Note: If you disable this feature, your device will not automatically power on after an unexpected shutdown.
- To enable/disable Power Recovery, click the toggle button .
Power Schedule The Power Schedule allows you to schedule shutdowns for your WD My Cloud Mirror device.
-
To enable Power Schedule, click the toggle button .
-
Click Configure.
-
Use the slider bar to configure the start and stop times for your device.
-
Click to shut down the device for 24-hours.
-
Click Save.
Note: You can use WD Quick View to wake up the system. For information and to download this app go to WD's online Learning Center.
| Web Access Timeout | Automatically logs you out of the system after a designated amount of time. |
| • From the Web Access Timeout drop-down menu, select an amount of time you’d like to use for your system timeout. The system updates automatically. |
Mac Backups
This section of the General screen enables or disables Time Machine backups of Mac computers.
Important: You must set a password for your Administrator account in order to restore your Time Machine backups.
To configure backup settings:
- In the Mac Backups area, click the toggle button to enable Time Machine backups if not previously enabled.
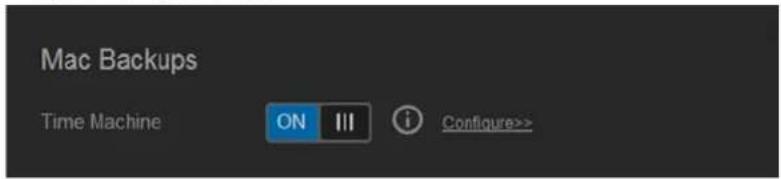
- Click the Configure link to display the Time Machine Settings dialog.
- From the Select a Share drop-down list, select a share you'd like to use to back up your Mac data.
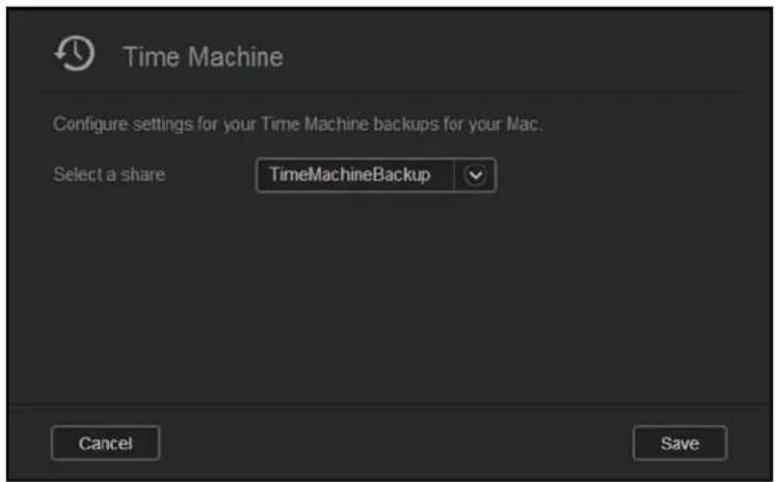
- Click Save.
Important: Once Time Machine begins to back up your files to a selected share, we recommend that you continue to back up to that share. Switching shares generates a new backup file which will not contain your previously saved information.
Service
This section of the General screen enables or disables the Recycle service available on your WD My Cloud Mirror device.
Network
The Network screen displays the device's MAC and IP addresses and allows you to set network options such as FTP access, remote servers, and workgroups.
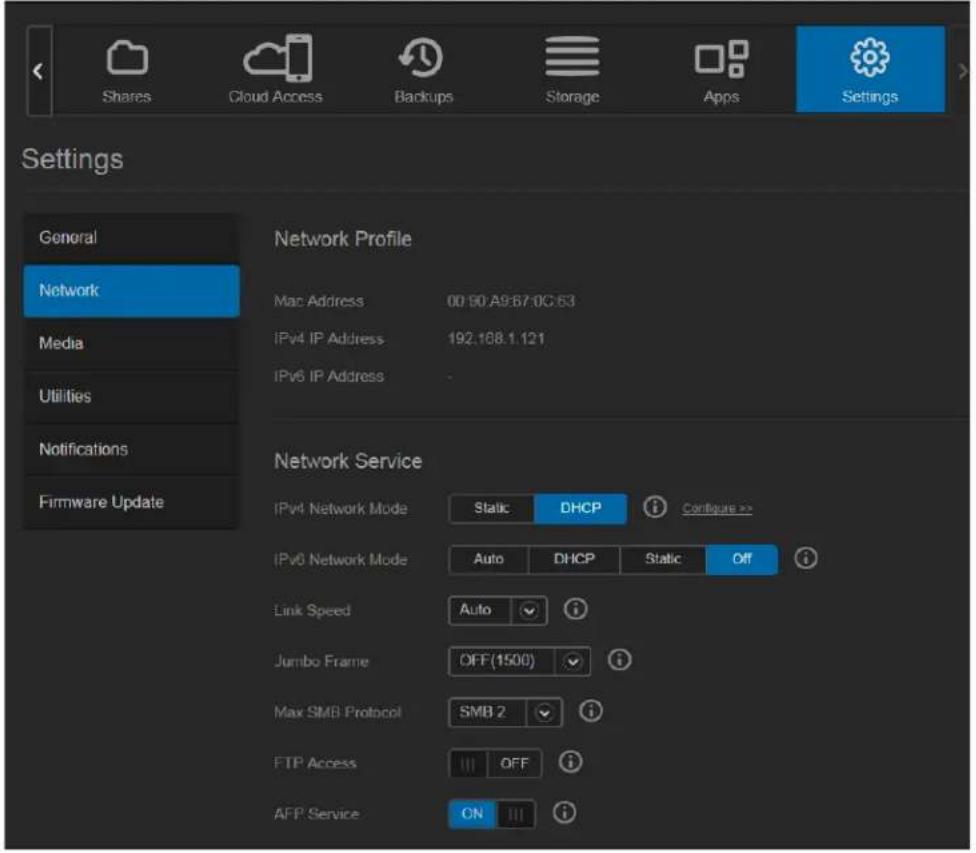
Network Profile
The Network Profile section of the Network screen displays network information for the WD My Cloud Mirror device.
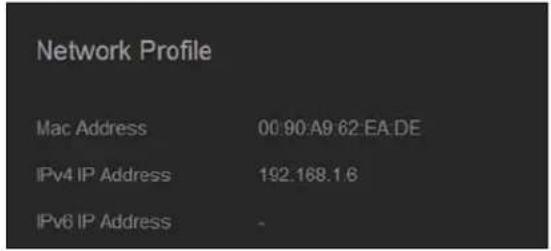
The Network Profile section displays the following information:
MAC Address The Media Access Control (MAC) address for this device.
IPv4 IP Address The IP version 4 address for this device.
Network Service
The Network Services section of the Network screen allows you to enable or disable the services available on your WD My Cloud Mirror device.
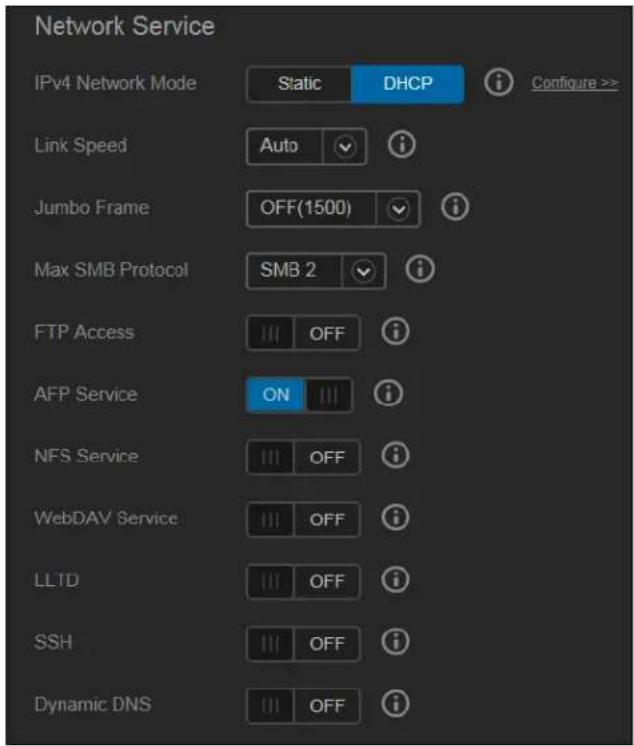
1. Review or update the following:
IPv4 Network Mode
By default, the network mode is set to DHCP, which means the WD My Cloud Mirror device automatically gets the IP address and other settings from your network. Select the method of assigning the device's unique IPv4 address:
- Static: Static IP lets you set an IP address manually. You will be prompted for IP Address, Subnet mask, Gateway IP address, and DNS Server. (If you don't know this information, please check your router settings.)
- DHCP: DHCP Client causes the WD My Cloud Mirror device to obtain an IP address and associated settings automatically from the local DHCP server.
Note: When configuring Static or DHCP, record your Subnet mask, Gateway IP address, and DNS Server in a safe location for future reference. This information will not be displayed once it is entered into the WD My Cloud Mirror server.
Link Speed Select the link speed for your network from the drop-down menu and click Save. Options Include:
- Auto
• 100
• 1 0 0 0
Jumbo Frame Jumbo frames are large IP frames used to increase performance over supported networks. Select the Jumbo Frame for your network from the drop-down menu and click Save.
Note: All devices on your network (e.g., router, computer) must support and be configured for this option in order to maximize performance.
Max SMB Protocol Server Message Block, version 2. Select this option to support Windows File History in Windows 8.
• To enable/disable SMB2, click the toggle button

Note: If you enable SMB2, read/write performance will be impacted.
FTP Access File Transfer Protocol enables the transfer of data from one computer to another through a network. FTP is disabled by default.
- To enable FTP Access, click the toggle button to on.
- Click Configure.
-
On the FTP Settings screen, enter the following information:
-
Maximum Users: From the drop-down menu, select the maximum number of users you'd like to have FTP access.
- Idle Time: Enter the amount of time, in minutes, you'd like the FTP to be idle before it times out.
- Port: Enter the port to be used for FTP access.
-
Flow Control: Select either Unlimited or Customize. If you select Customize, enter a Flow Control value.
-
Click Next.
-
In the Passive Mode field, select either Default or Customize. If you select Customize, enter Passive Mode values.
- Select the check box if you'd like to report external IP in PASV mode and click Next.
-
Enter the following information:
-
Client Language: Select the client language from the drop-down menu.
- SSL/TLS: Select this check box if you'd like to allow only SSL/TLS connections.
-
FXP: To enable FXP, click the toggle button ON.
-
Click Next.
- Enter all IP addresses that you'd like to block from FTP access and select either Permanent or Temporary from the drop-down menu. Click Save to save your entries.
- Click Finish.
AFP Service Apple File Protocol. AFP Service is automatically enabled if you are set up for Time Machine backups.
• To enable/disable AFP Service, click the toggle button .
WARNING! Mounting or ejecting a USB drive while performing an NFS or AFP file transfer will interrupt the file transfer process.
NFS Service Network File System. Select this option to enable NFS Service for your network.
• To enable/disable NFS Service, click the toggle button .
WARNING! Mounting or ejecting a USB drive while performing an NFS or AFP file transfer will interrupt the file transfer process.
WebDAV Service Web Distributed Authoring and Versioning (WebDAV). Select this option to enable WebDAV service for your network.
- To enable/disable WebDAV Service, click the toggle button
Note: In order to connect to the WebDAV service, use the following IP address: http://
LLTD Link Layer Topology Discovery protocol. Select this option to enable LLTD on your network for enhanced network discovery and diagnostics on Microsoft Windows machines.
- To enable/disable LLTD, click the toggle button .
SSH Secured Shell protocol. Select this option to securely access your personal cloud and perform command-line operations via the Secured Shell (SSH) protocol. SSH is disabled by default.
- To enable/disable SSH, click the toggle button

WARNING! Please note that modifying or attempting to modify this device outside the normal operation of the product voids your WD warranty.
Note: The SSH login User Name is sshd.
Dynamic DNS Select this option to host a server (Web, FTP, Game server, etc.) using a domain name.
- To enable/disable Dynamic DNS, click the toggle button III.
- Click Configure.
-
On the DDNS Settings screen, enter the following information:
-
Server Address: Select a server address from the drop-down menu.
- Host Name: Enter a Host Name for the server.
- User Name or Key: Enter a User Name or Key for the server.
- Password or Key: Enter a password or key for the server.
-
Verify Password or Key: Re-enter the password or key for the server.
-
Click Save.
Network UPS
An Uninterruptible Power Supply (UPS) is a device that works off of a battery and keeps devices that are connected to the UPS port running for at least a short time if the main power source goes out. When a WD My Cloud Mirror device is connected via USB to the network drive the drive will automatically shut down when the UPS is drained to a specified percentage.
Communication with the WD My Cloud Mirror device is done using a master/slave protocol in which the master device controls the slave devices.
When the UPS is connected to the WD My Cloud Mirror device by the USB, the device automatically becomes a UPS Network Master. Other WD My Cloud devices that are connected to that UPS can be pointed to the IP address of the UPS Master. If the UPS is discharged to the specified percentage, all of the WD My Cloud Mirror slave drives will automatically shut down properly.
To set up network UPS:
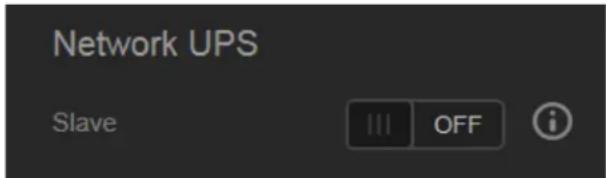
- Click the Slave toggle button to ON. The Network UPS Slave mode screen displays.
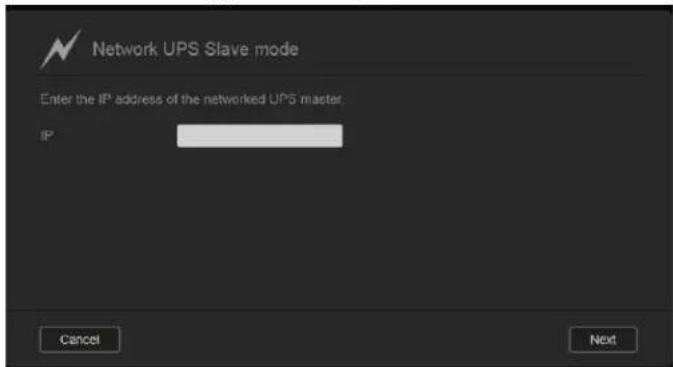
- Enter the IP address of the UPS master. An "in progress" screen displays and when the setting is updated, the Network screen displays with Network UPS Slave set to OFF.
Network Workgroup (Windows)
The Network Workgroup section of the Network screen allows you to enable or disable the workgroup options available on your WD My Cloud Mirror device.
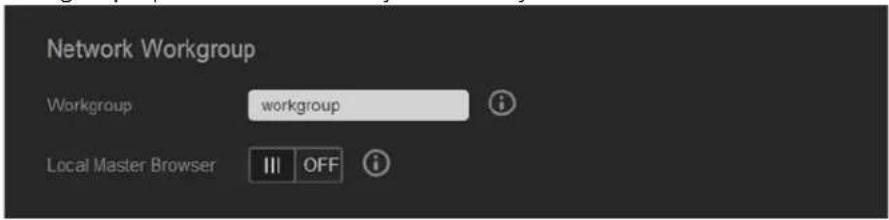
Workgroup
The Workgroup feature allows devices in the same workgroup to access one another. This option is only available for Windows operating systems. Each time you add a device to your network, assign it the same workgroup name to enable access.
- In the Workgroup file, enter the name of the workgroup for your network.
- Click Save.
Local Master Browser
The Local Master Browser feature allows you to collect and record resource and/or service information across multiple locations.
- To enable/disable the Local Master Browser, click the toggle button .
Remote Server
The Remote Server section of the Network screen allows you to enable your WD My Cloud Mirror device to act as a remote server, allowing you to back up shares from another WD My Cloud Mirror on the local LAN or WAN.
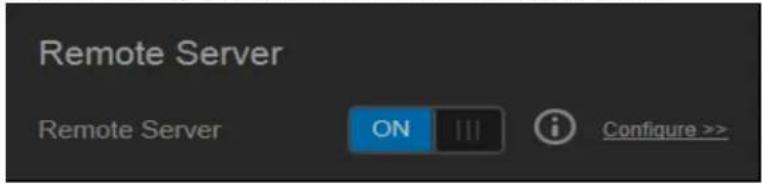
Note: To see your WD My Cloud Mirror device over the Internet, ensure that you've added port forwarding rules for both SSH and Remote Backup services ("Port Forwarding" on page 119).
To enable Remote Server:
- Click the toggle button ■ to ON.
- Click Configure. The Remote Server screen displays:
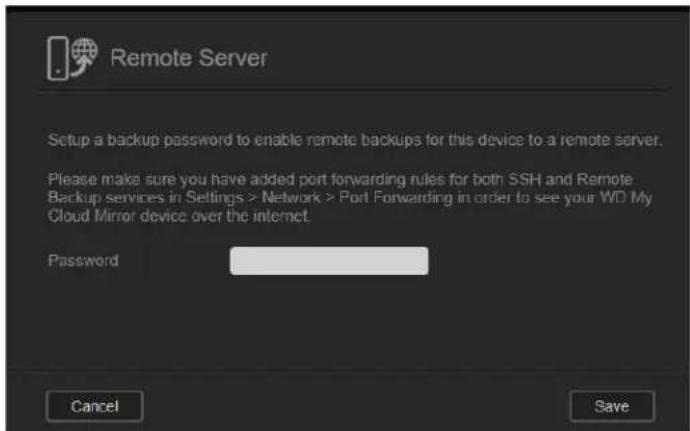
- In the Password field, enter a password to be used to access remote backups for this device to a remote server.
- Click Save.
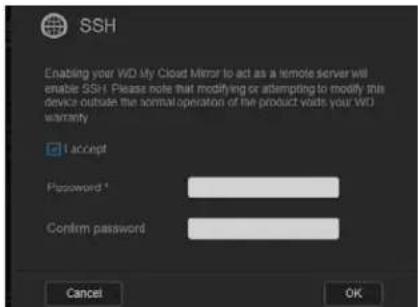
- Review the SSH information and click the I accept check box.
- Create a password for SSH login and then click OK.
Port Forwarding
The Port Forwarding section of the Network screen allows you to manage your connections to particular services by assigning default or custom port numbers.
For additional information on Port Forwarding, see Knowledge Base Answer ID 10649.
Adding Port Forwarding Services
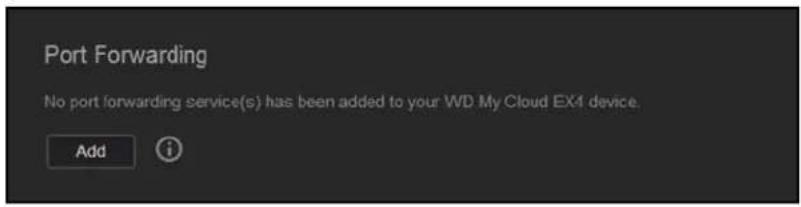
- Click Add to add port forwarding service(s) to your WD My Cloud Mirror device. On the
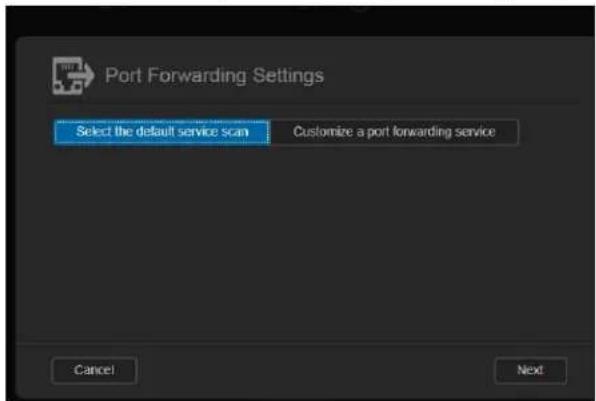
Port Forwarding Settings screen, click either Select the default service scan or the Customize a port forwarding service and click Next.
- If you selected Select the default service scan: Select the default service scan you'd like to use for port forwarding and click Save. - If you selected Customize a port forwarding service, complete the following fields:
Service: Enter a service for your port forwarding.
Protocol: Select a protocol from the drop-down menu.
External Port: Enter an external port number for your port forwarding.
Internal Port: Enter the internal port number for your port forwarding
- Click Finish.
Modifying Port Forwarding Services
- Click Details next to the port forwarding service you'd like to modify.
- Make all necessary changes and click Finish.
Deleting Port Forwarding Services
- Click Details next to the port forwarding service you'd like to delete.
- Click Delete. Your Port Forwarding service is deleted and removed from the Port Forwarding list.
Media
On the Media screen, you can enter DLNA (Digital Living Network Alliance) media server and iTunes media player settings so that you can enjoy media in every room in your house.
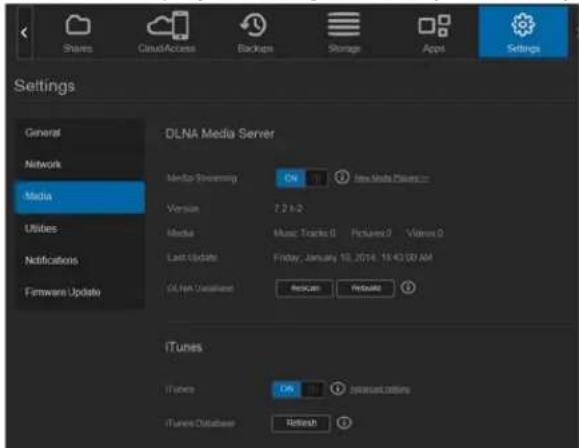
- On the Navigation bar, click the Settings icon and then click Media in the left panel.
Note: DLNA and iTunes only work on your local network.
- For instructions on entering media settings on this page and then displaying or streaming media, see "Playing/Streaming Videos, Photos, & Music" on page 96.
Utilities
On the Utilities page, you can test the WD My Cloud Mirror device and get diagnostic information, restore the device to factory defaults, reboot or shut down the device, and import or export a configuration file.
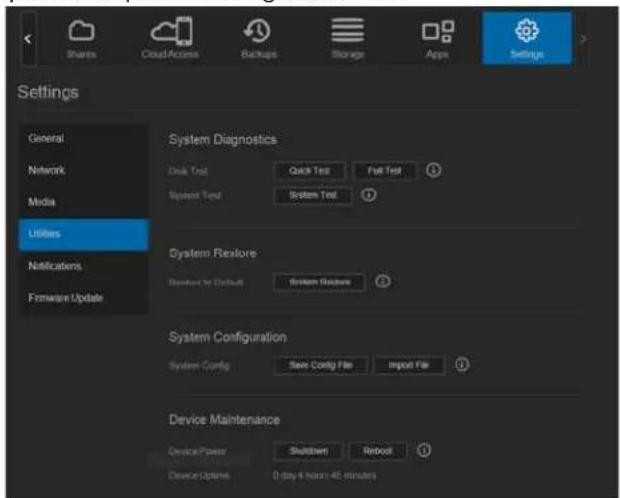
To access the Utilities screen, click the Settings icon and then click Utilities in the left pane.
System Diagnostics
Run diagnostic tests if you are having problems with your device. There are three types of diagnostic tests:
- Quick Test: The quick test checks the hard drives for major performance problems. The result of a quick test is a pass or fail evaluation of the hard drive's condition. The quick test can take several minutes to complete.
Full Test: The full test is a more comprehensive drive diagnostic. It methodically tests each and every sector of the hard drives. You will be informed of the condition of the hard drive once the test is performed. The full test may take hours to complete, depending on the size and data configuration of the hard drives.
- System Test: The system test reviews the health of your device hardware (hard drives, fan, system clock, and device temperature).
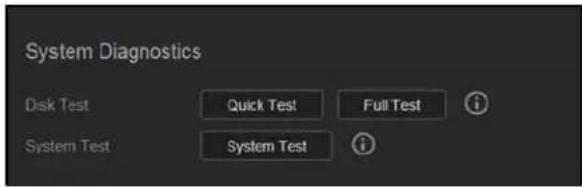
Running a Diagnostic Test
-
On the Utilities page, click Quick Test, Full Test, or System Test. A progress bar displays, indicating test progress and whether the device passed or failed the test.
-
Review the test results and click Close.
If the device fails the test, click ? and then click Support to get assistance.
System Restore
The system restore allows the Administrator to perform a full factory restore on the WD My Cloud Mirror device. This option restores your device to factory default settings with no data loss.
Important: Before doing a factory restore or a system update, you may choose to save your device's current configuration. At a later time, you can import a previously saved configuration. Keep in mind that importing a configuration after restoring factory defaults does not restore shares or users. See "System Configuration," to create or restore a configuration file.
Note: To erase all of the data on your device, see "Format Disk" on page 123.
System Restore
Restore to Default
System Restore

- In the System Restore area, click System Restore.
- Review the confirmation message and click OK.
The device reboots. Don't unplug the device during this rebooting process. Once the reboot is complete, launch the dashboard.
System Configuration
The system configuration area allows you to save a configuration file or import an existing configuration file. This is useful if you perform a system restore and want to maintain your current configurations.
System Configuration
System Config
Save Config File
Import File

Saving a Configuration File
Use the following steps to save a configuration file.
- In the System Configuration area, click Save Config File.
- The configuration file saves to your desktop.
Importing a Configuration File
Use the following steps to save a configuration file.
- In the System Configuration area, click Import File.
- Navigate to the location of your saved configuration file and select it. The configuration file is loaded. The device reboots. Don't unplug the device during this rebooting process. Once the reboot is complete, launch the dashboard.
Device Maintenance
The Device Maintenance area allows you to shut down and reboot your WD My Cloud Mirror device. This area also displays the amount of time the device has been up and running.
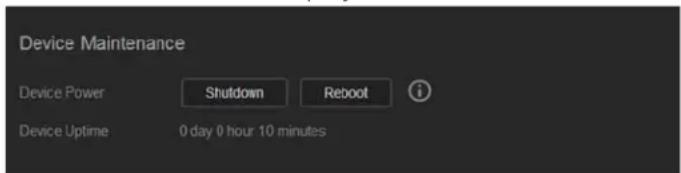
Shutting down the Device
Use the following steps to safely shut down your WD My Cloud Mirror device.
- In the Device Maintenance area, click Shutdown.
- Review the confirmation message and then click OK. Your WD My Cloud Mirror safely shuts down.
Rebooting the Device
- In the Device Maintenance area, click Reboot.
- Review the confirmation message and then click OK. Your WD My Cloud Mirror safely reboots.
Scan Disk
The Scan Disk area allows you to scan your device's hard disks for any errors.

Scanning Your Disk
Use the following steps to run a disk scan on your WD My Cloud Mirror device.
- In the Scan Disk area, select the volume you'd like to scan from the drop-down menu.
- Click Scan Disk.
- Review the confirmation message and click OK. Your WD My Cloud Mirror is scanned for disk errors.
Format Disk
The Format Disk area allows you to format your device's hard disks.
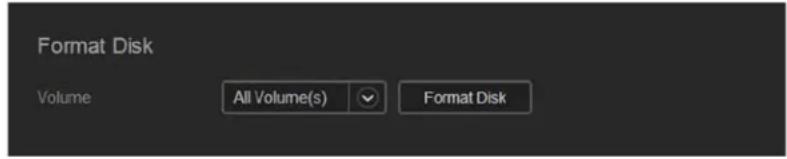
Formatting Your Disk
WARNING! The Format Disk option erases all of the user data and shares permanently, retaining default shares. Data recovery programs cannot be used to restore data; all user data and shares are permanently deleted.
Formatting your disk will take several hours to complete.
Use the following steps to format the disks on your WD My Cloud Mirror device.
- In the Format Disk area, select the volume you'd like to format from the drop-down menu.
- Click Format Disk.
- Review the confirmation message, select the check box, and click OK. Your WD My Cloud Mirror is formatted.
Creating an ISO Image
An ISO image is a file that is an exact copy of an existing file system. Use the following steps to create an ISO image.
- On the Navigation bar, click Settings and then click ISO Mount.
- Click Create ISO Image.
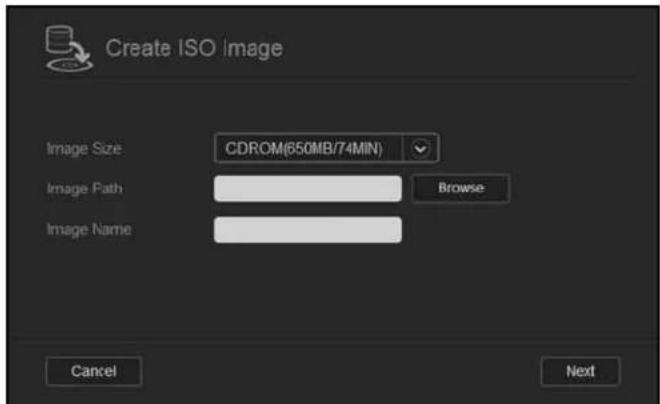
- In the Image Size field, select the image size you'd like to use for your ISO image.
- In the Image Path field, enter the path for the data you'd like to image or click Browse, select the folder you'd like to image and then click OK.
- In the Image Name field, enter a name for your ISO image.
- Click Next.
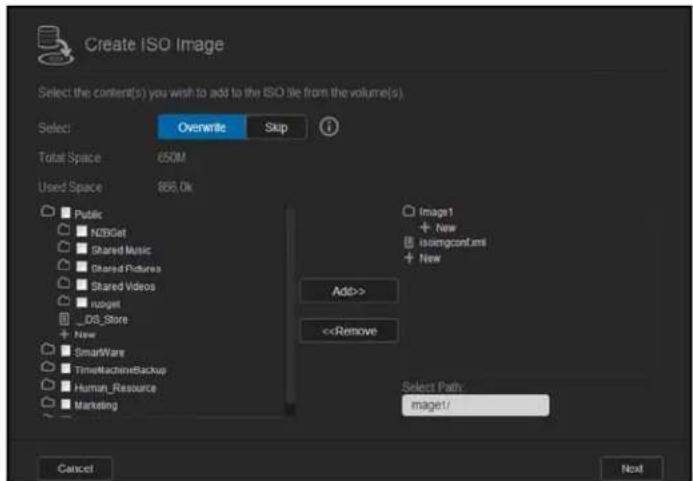
- Click Finish.
Creating an ISO Share
Use the following steps to create an ISO share.
- On the Navigation bar, click Settings and then click ISO Mount.
- Click Create ISO Share.
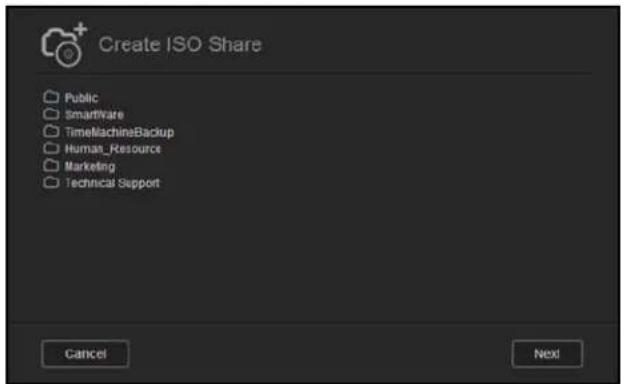
- Browse to the ISO file you'd like to include in your ISO share and place a check next to the file.
- Click Next.
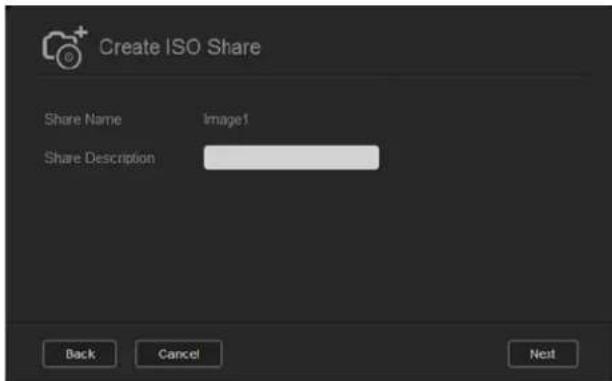
- Enter a description for your ISO share and click Next.
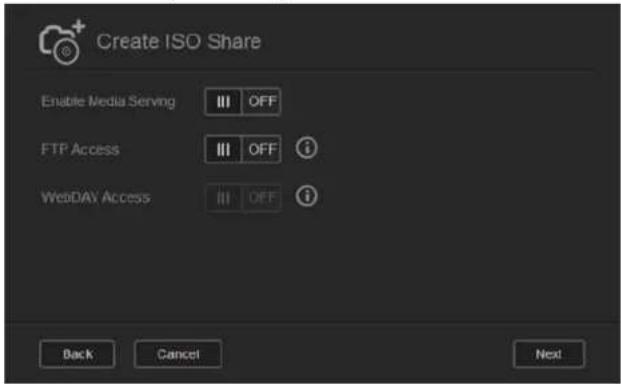
- Complete the following fields:
- Enable Media Serving: To enable Media server for the ISO Share, click the toggle button .
- FTP Access: To enable FTP Access for the ISO Share, click the toggle button .
WebDAV Access: To enable WebDAV Access for the ISO Share, click the toggle button III.
Note: If FTP Access or WebDAV access are disabled for the device, the FTP Access and WebDAV Access fields will be grayed out.
- Click Next.
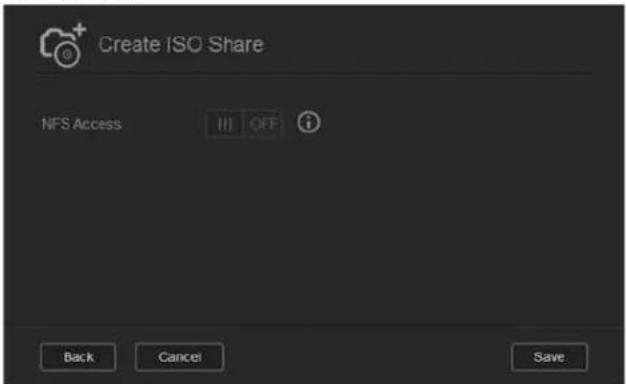
- Click the toggle button to enable NFS Access for the ISO Share.
Note: If NFS Access is disabled for the device, the NFS Access fields will be grayed out.
- Click Save. Your ISO Share is created.
Viewing the Details of an ISO Share
Use the following steps to modify an ISO share.
- On the ISO Mount screen, select Details next to the ISO Share that you'd like to view.
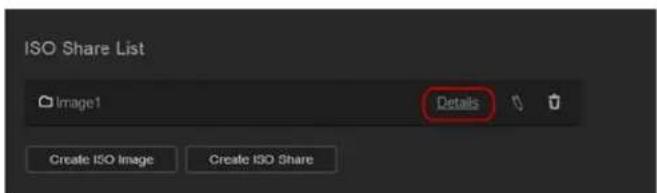
- Review the ISO Share details and click Close.
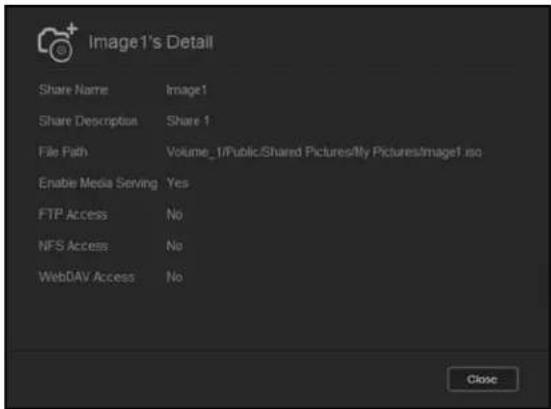
Modifying an ISO Share
Use the following steps to modify an ISO share.
- On the ISO Mount screen, select 📋 next to the ISO Share that you'd like to modify.
- Make any necessary changes and click Save.
Delete an ISO Share
Use the following steps to delete an ISO share.
- On the ISO Mount screen, select 📋 next to the ISO Share that you'd like to delete.
- Review the confirmation message and click OK. The ISO Share is deleted and removed from the ISO Share List.
Notifications
The WD My Cloud Mirror device provides notifications about various events, such as firmware updates, the success of firmware installations, and system shutdowns.
Notifications display in the Alert area at the top of the screen and are also available by email, depending on how your device is configured (for additional information on Alerts, see "Managing Alerts" on page 67).
The Notification page allows you to set up email addresses for up to five users who will receive notifications, set up SMS alert messages for mobile devices, and set the level of alert for which you will be notified
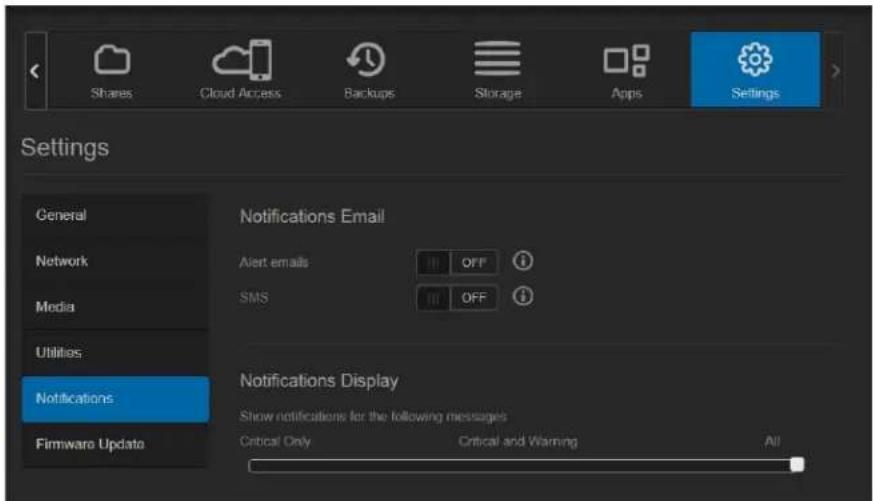
Notifications Email
The Notification Email area allows you to set up email alerts and SMS notifications for specified users.
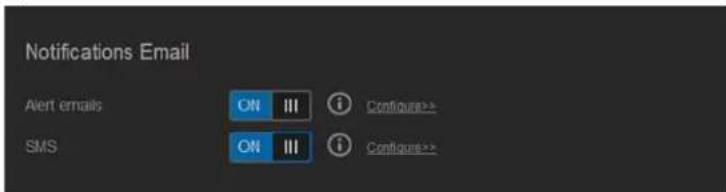
Enabling Email Alerts
- On the Navigation bar, click the Settings icon and click Notifications on the left pane.
- To enable Alert emails, click the toggle button to on.
- Click Configure.
- On the Alert Notification screen, use the slider bar to select the level of alerts you'd like to receive by email:
Critical Only: Send only critical alerts to the specified email address.
- Critical and Warning: Send both critical and warning alerts to the specified email address.
All: Send all alerts (Informational, Critical, Warning) to the specified email address.
-
Click New Email.
-
Enter the email address where you'd like to receive alert emails and click Save.
- Repeat steps 5 - 6 to enter up to 5 email addresses.
- Click Send Test Email to validate the email addresses you entered.
- Click OK and then check your email for a validation email.
Enabling SMS Notifications
Note: Check with your SMS service provider to obtain their requirements for sending SMS messages. Certain carriers may require you to send SMS/text messages by email.
- On the Navigation bar, click the Settings icon and click Notifications from the left pane.
- To enable SMS, click the toggle button .
- Click Configure.
- On the SMS Settings screen, enter the name of your SMS provider.
- Enter the SMS URL with the message content set to be "Hello world"
Note: This SMS URL is used only for setup. No SMS message will be sent after setup is completed. Obtain the URL format requirements from your SMS service provider. They should contain the following parameters: username, password, destination phone, and message content.
- Click Next.
- Select the corresponding category for each SMS parameter from the drop-down menu.
- Click Finish. Your SMS notification is now set up.
Notification Display
The Notification Display allows you to select the type of notifications that are sent to you.
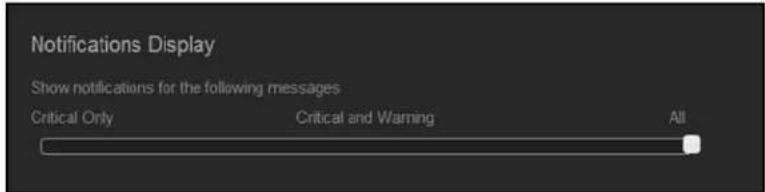
- On the Notification Display screen, using the slider bar, select the level of notifications you'd like to view:
■ Critical Only: Send only critical alerts.
■ Critical and Warning: Send both critical and warning alerts.
■ All: Send all alerts (Informational, Critical, Warning).
The system automatically updates with your selection.
Firmware Update
The Firmware Update page allows you to set up the device to update the My Cloud Mirror firmware automatically or to manually check for an update file. The current version number and the date of last update of the firmware also display on this screen.
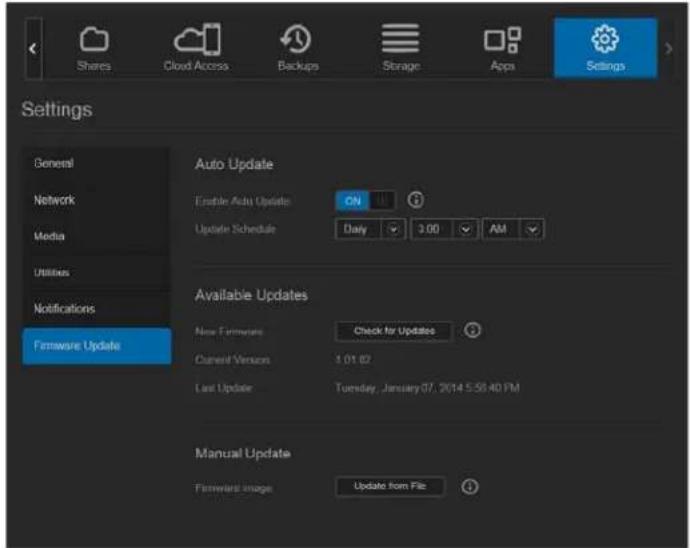
Auto Update
Auto Update allows you to schedule your WD My Cloud Mirror device to conveniently check for available software updates and install them automatically. This is the easiest way of ensuring the WD My Cloud Mirror firmware is current.
Note: After a firmware update installs, the WD My Cloud Mirror device reboots. Since a reboot affects users' ability to access the cloud, schedule the updates to occur at times when the likelihood of users accessing the cloud are minimal.
Note: If you enable Auto Update, you are asked to manually reboot your system when the update is completed.
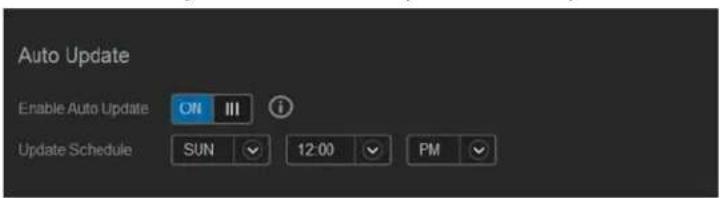
Updating Firmware Automatically
- To enable Auto Update, click the toggle button to ON.
-
In the Update Schedule field, from the drop-down lists, specify the frequency (e.g., daily) and the time at which the device should look for an update on the WD website.
-
Click Save.
Once saved, your device will check for firmware updates at the specified time and day. If an update is available, it will automatically install and prompt you for a reboot.
Available Updates
You can check for available updates at any time in the Available Updates area. This area also displays the current version of the firmware and indicates when the last firmware update was made.
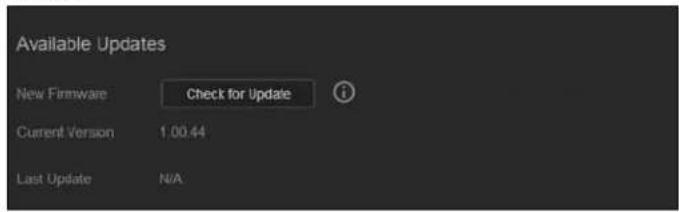
Checking for Updates
-
In the New Firmware field, click Check for Updates.
-
Review the Update Firmware screen and click OK.
If an update is available, click Install and Reboot.
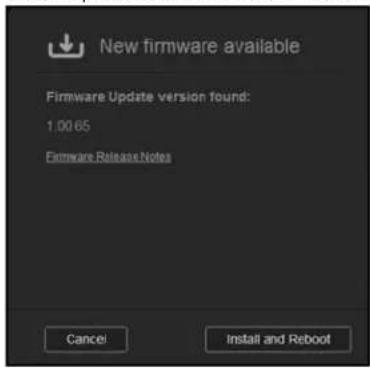
Manual Update
Follow this procedure to perform a manual update.
Note: Ensure that you've downloaded the firmware file you need to install on your device from the WD Tech Support Downloads page at http://support.wd.com/product/download.asp.
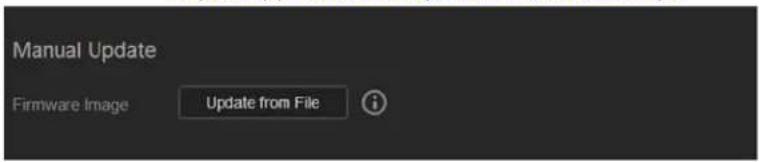
Manually Installing an Update
- In the Manual Update section, click Update from File.
- Navigate to the firmware update file and click Open.
- Review the confirmation message and click OK. The update installs on your device. When the update is complete, your WD My Cloud Mirror device reboots.
12
Replacing a Drive
Identifying a Faulty Hard Drive Replacing a Drive Rebuilding the Drive Returning a WD Drive
The My Cloud Mirror device is a limited user-serviceable product that allows you to replace the hard drives in the enclosure. You can use WD hard drives or another brand's hard drive.
Note: For a complete list of compatible "Returning a WD Drive" on page 135drives, visit wd.com/mycloudmirror
Important: For best performance, WD recommends inserting WD Red™ hard drive assemblies into the unit's enclosure. Visit support.wdc.com and search the knowledge base for Knowledge Base Answer ID 8 to get detailed instructions on obtaining a replacement drive for this product.
Following are instructions for replacing a faulty drive or, if your WD My Cloud Mirror model did not come with drives, for inserting drives.
Identifying a Faulty Hard Drive
If the LEDs on the unit are flashing or you have received an alert, a hard drive may be faulty. To determine which drive is faulty, do the following:
- On the dashboard's navigation panel, click Storage and then Disk Status.
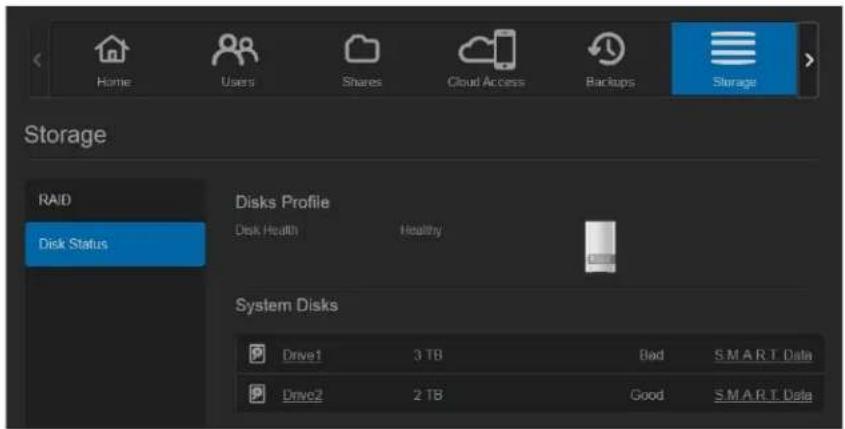
- If one of the drives is Bad or has Failed, select it and view detailed information on the Hard Drive Information dialog box:
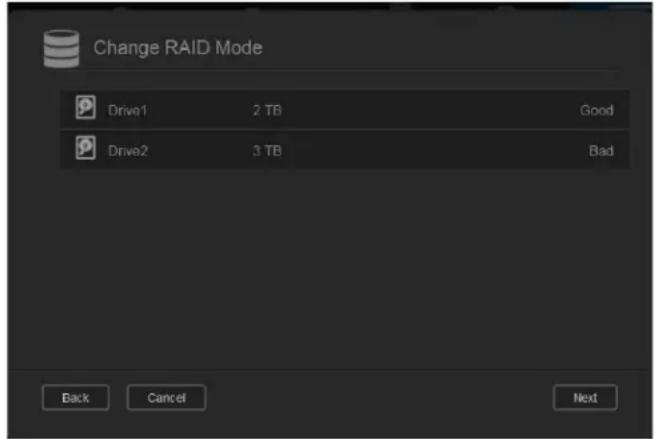
Note: The drive number corresponds to the 1 or 2 decal on the drive.
In the event a fault occurs, and you would like to service the device yourself, visit WD Technical Support at support.wdc.com and search for Knowledge Base Answer ID 8 to obtain detailed instructions on obtaining a replacement drive. When contacting Technical Support, have the following information ready: the WD My Cloud Mirror device's serial number, date of purchase, and the serial number of the internal hard drive(s) requiring replacement.
Replacing a Drive
When replacing an existing drive, you may use a drive made by another company. For a list of compatible drives, go to wd.com/mycloudmirror.
Removing a Drive
Important: Before getting started, power off the unit and disconnect all of its cables. Place the unit on a clean and stable surface.
If the WD My Cloud Mirror still contains the faulty (drive), you must first remove it before you can insert the new one.
- Reveal the hard drives by pressing the indented button on the top of the device and pulling up the door.
- Remove the bracket used for holding drives in.
- Pull the plastic tab at the back of the drive and with your other hand, guide the drive up and out of the enclosure.
Inserting a Drive
Important: To avoid electrostatic discharge (ESD) problems, ground yourself by touching metal before handling the device.
Preparing a Drive
For WD replacement drives, reuse the screws and tabs attached to the faulty drive.
Note: A standard phillips-head screwdriver is all you need.
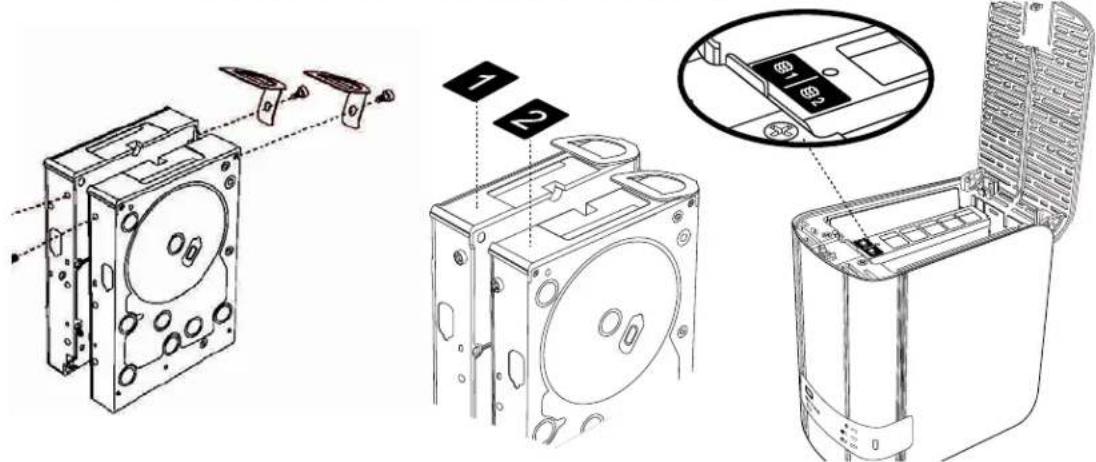
- Using the parts from the faulty drive, attach a plastic tab to the top hole in the drive's side (on the right if the green board is facing you).
- Attach a screw to the corresponding hole on the other side of the drive.
- Attach label 1 or 2 to the top of the drive. Label 1 is on the left and label 2 is on the right, when looking down on the top of the unit. There are corresponding numbers on the cross brace label.
Inserting One or Both Drives
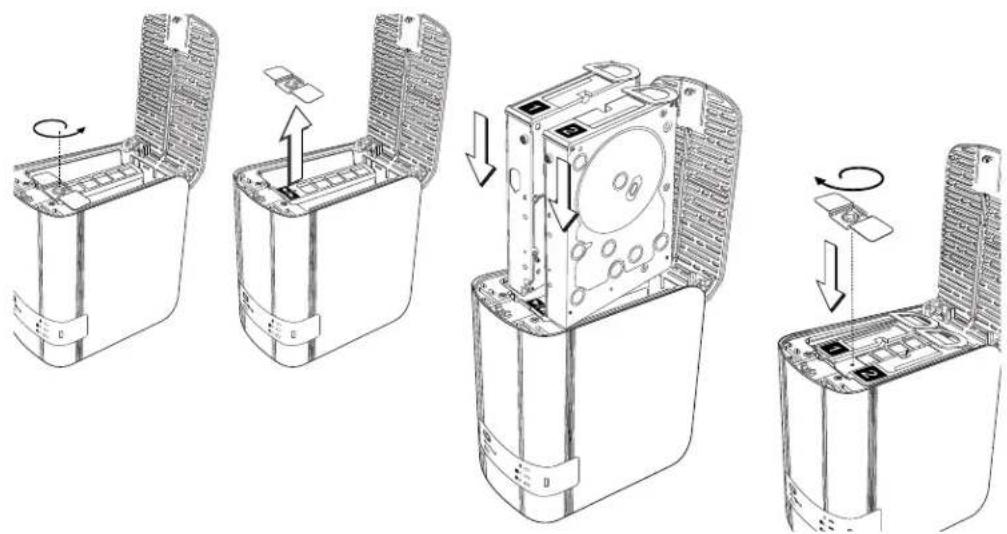
natural_image
Technical line drawings of a device's internal components and assembly, showing four sequential steps with no text or symbols.- Press the indent on the top of the unit to open the door and remove the bracket that holds the drives in.
- When looking down on the top of the unit with the front panel towards you, If you are inserting two drives, arrange them so that the connectors at the bottom face in. (The green boards should face each other.) If inserting one drive, the green board faces the middle of the unit.
- Gently slip a drive into the slot. Make sure the plastic tab is sticking up at the back of the unit. Repeat with the other drive, if applicable.
- Screw the bracket over the tops of the drives. Close the door and firmly push down until it locks into place.
- Reconnect the network and power cables to the device.
Rebuilding the Drive
Depending on the RAID settings, the replacement drive may rebuild automatically, or you may need to rebuild it manually.
If any type of RAID and Auto-Rebuild have been set on the Storage Screen, the drive rebuilds automatically. If Auto-Rebuild has not been set, the rebuild results are as follows:
| If RAID is... Then... | |
| RAID 0 | The data on the volume will no longer be accessible and must be recreated.1. Rebuild the drive. See “RAID Storage” on page 89.2. Reload data from a backup or the original source. |
| RAID 1 | Data is mirrored to the second drive in the volume and is still accessible.Data is recoverable from the working good drive.1. Rebuild the drive. See “RAID Storage” on page 89 |
| Spanning Data on | the volume is no longer accessible. Data on the other drive may be recoverable but will no longer be accessible from the WD My Cloud Mirror device.1. Rebuild the drive. See “RAID Storage” on page 89.2. Reload data from a backup or the original source. |
| JBOD | Data on the volume is no longer accessible. Data on other volumes is still accessible.1. Rebuild the drive. See “RAID Storage” on page 892. Reload data from a backup or the original source. |
For more information about rebuilding a replacement drive, search the WD Knowledge Base for Knowledge Base Answer ID 11107.
Returning a WD Drive
Important: Do not disassemble the internal drive and attached assembly components. Return the entire internal drive assembly intact to WD.
Return the faulty drive following the instructions provided in WD Knowledge Base Answer ID 8.
Regulatory and Warranty Information
Regulatory Compliance
Warranty Information (All Regions Except Australia/New Zealand)
Warranty Information (Australia/New Zealand only)
Regulatory Compliance
Federal Communications Commission (FCC) Class B Information
Operation of this device is subject to the following two conditions:
- This device may not cause harmful interference.
- This device must accept any interference received, including interference that may cause undesired operation.
Changes or modifications not expressly approved by the party responsible for compliance could void the user's authority to operate the equipment.
FCC Requirements, Part 15
This equipment has been tested and found to comply with the limits for a Class B digital device pursuant to Part 15 of the FCC Rules. These limits are designed to provide reasonable protection against harmful interference in a residential installation. This equipment generates, uses, and can radiate radio frequency energy and, if not installed and used in accordance with the manufacturer's instruction manual, may cause interference with radio communications. However, there is no guarantee that interference will not occur in a particular installation. If this equipment does cause harmful interference to radio or television reception, which can be determined by turning the equipment off and on, you are encouraged to try to correct the interference by one or more of the following measures:
■ Reorient or relocate the receiving antenna.
■ Increase the separation between the equipment and the receiver.
■ Connect the equipment into an outlet on a circuit different from that to which the receiver is connected.
- Consult the retailer or an experienced radio/television technician for help.
Any changes or modifications not expressly approved by WD could void the user's authority to operate the equipment.
ICES/NMB-003 Compliance
This device complies with Canadian ICES-003 Class B.
Safety Compliance
Approved for US and Canada. CAN/CSA-C22.2 No. 60950-1, UL 60950-1: Safety of Information Technology Equipment.
Approver pour els Etas-Units et el Canada. CAN/CSA-C22.2 No. 60950-1: Secret equipment DE technologie de l'information.
This product is intended to be supplied by a listed limited power source, double insulated, or direct plug-in power unit marked "Class 2."
CE Compliance for Europe
Verified to comply with EN55022 for RF emission; EN-55024 for Generic Immunity, as applicable; and EN-60950 for Safety.
GS Mark (Germany only)
KC Notice (Republic of Korea only)
Class B Device Please note that this device has been approved for non-business purposes and may be used in any environment, including residential areas.
Korean KCC certification ID: MSIP-REM-WDT-D8C
VCCI Statement
Environmental Compliance (China)
Warranty Information (All Regions Except Australia/New Zealand)
Obtaining Service
WD values your business and always attempts to provide you the very best of service. If this Product requires maintenance, either contact the dealer from whom you originally purchased the Product or visit our product support Web site at http://support.wd.com for information on how to obtain service or a Return Material Authorization (RMA). If it is determined that the Product may be defective, you will be given an RMA number and instructions for Product return. An unauthorized return (i.e., one for which an RMA number has not been issued) will be returned to you at your expense. Authorized returns must be shipped in an approved shipping container, prepaid and insured, to the address provided on your return paperwork. Your original box and packaging materials should be kept for storing or shipping your WD product. To conclusively establish the period of warranty, check the warranty expiration (serial number required) via http://support.wd.com. WD shall have no liability for lost data regardless of the cause, recovery of lost data, or data contained in any Product placed in its possession.
Limited Warranty
WD warrants that the Product, in the course of its normal use, will for the term defined below, be free from defects in material and workmanship and will conform to WD's specification therefor. The term of your limited warranty depends on the country in which your Product was purchased. The term of your limited warranty is for 2 years in the North, South and Central America region, 2 years in the Europe, the Middle East and Africa region, and 2 years in the Asia Pacific region, unless otherwise required by law. The term of your limited warranty period
shall commence on the purchase date appearing on your purchase receipt. WD may at its discretion make extended warranties available for purchase. WD shall have no liability for any Product returned if WD determines that the Product was stolen from WD or that the asserted defect a) is not present, b) cannot reasonably be rectified because of damage occurring before WD receives the Product, or c) is attributable to misuse, improper installation, alteration (including removing or obliterating labels and opening or removing external enclosures, unless the product is on the list of limited user-serviceable products and the specific alteration is within the scope of the applicable instructions, as found at http://support.wd.com, accident or mishandling while in the possession of someone other then WD. Subject to the limitations specified above, your sole and exclusive warranty shall be, during the period of warranty specified above and at WD's option, the repair or replacement of the Product with an equivalent or better Product. The foregoing warranty of WD shall extend to repaired or replaced Products for the balance of the applicable period of the original warranty or ninety (90) days from the date of shipment of a repaired or replaced Product, whichever is longer.
The foregoing limited warranty is WD's sole warranty and is applicable only to products sold as new. The remedies provided herein are in lieu of a) any and all other remedies and warranties, whether expressed, implied or statutory, including but not limited to, any implied warranty of merchantability or fitness for a particular purpose, and b) any and all obligations and liabilities of WD for damages including, but not limited to accidental, consequential, or special damages, or any financial loss, lost profits or expenses, or lost data arising out of or in connection with the purchase, use, or performance of the Product, even if WD has been advised of the possibility of such damages. In the United States, some states do not allow exclusion or limitations of incidental or consequential damages, so the limitations above may not apply to you. This warranty gives you specific legal rights, and you may also have other rights which vary from state to state.
Warranty Information (Australia/New Zealand only)
For consumers purchasing products in Australia and New Zealand, please refer to this warranty information.
Nothing in this warranty modifies or excludes your legal rights under the Australian Competition and Consumer Act or the New Zealand Consumer Guarantees Act. This warranty identifies WD's preferred approach to resolving warranty claims which is likely to be quick and simple for all parties.
No other warranties either express or implied by law, including but not limited to those contained in the Sale of Goods Act, are made with respect to the Product. If you purchased your Product in New Zealand for the purposes of a business, you acknowledge and agree that the New Zealand Consumer Guarantees Act does not apply.
In Australia, our goods come with guarantees that cannot be excluded under the Australian Consumer Law. You are entitled to a replacement or refund for a major failure and compensation for any other reasonably foreseeable loss or damage. You are also entitled to have the goods repaired or replaced if goods fail to be of acceptable quality and the failure does not amount to a major failure. What constitutes a major failure is set out in the Australian Consumer Law.
Warranty
WD warrants that the Product, in the course of its normal use, will for the term defined below, be free from defects in material and workmanship and will conform to WD's specifications. The term of your warranty is 2 years in Australia and New Zealand, unless otherwise required by law. The term of your warranty period shall commence on the purchase date appearing on your purchase receipt from an authorized distributor or authorized reseller. Proof of purchase shall be required to be eligible for this warranty and to establish the commencement date of this warranty. Warranty service will not be provided unless the Product is returned to an authorized distributor, authorized reseller or regional WD return center where the Product was first shipped by WD. WD may at its discretion make extended warranties available for purchase. WD shall have no liability for any Product returned if WD determines that the Product was (i) not purchased from an authorized distributor or authorized reseller, (ii) not used in accordance with WD specifications and instructions, (iii) not used for its intended function, or (iv) stolen from WD, or that the asserted defect a) is not present, b) cannot reasonably be rectified because of damage occurring before WD receives the Product, or c) is attributable to misuse, improper installation, alteration (including removing or obliterating labels and opening or removing external enclosures, including the mounting frame, unless the product is on the list of limited user-serviceable products and the specific alteration is within the scope of the applicable instructions, as found at http://support.wd.com, accident or mishandling while in the possession of someone other then WD.
PRODUCTS ARE COMPLEX AND FRAGILE ITEMS THAT MAY OCCASSIONALY FAIL DUE TO (A) EXTERNAL CAUSES, INCLUDING WITHOUT LIMITATION, MISHANDLING, EXPOSURE TO HEAT, COLD, AND HUMIDITY, AND POWER FAILURES, OR (B) INTERNAL FAULTS. SUCH FAILURES CAN RESULT IN THE LOSS, CORRUPTION, DELETION OR ALTERATION OF DATA. NOTE THAT YOU SHALL BE RESPONSIBLE FOR THE LOSS, CORRUPTION, DELETION OR ALTER A HOWSOEVER CAUSED, AND FOR BACKING UP AND PROTECTING DATA AGAINST LOSS, CORRUPTION, DELETION OR ALTERATION. YOU AGREE TO CONTINUALLY BACK UP ALL DATA ON THE PRODUCT, AND TO COMPLETE A BACKUP PRIOR TO SEEKING ANY GENERAL SERVICE AND TECHNICAL SUPPORT FROM WD.
In Australia, if the Product is not of a kind ordinarily acquired for personal, domestic or household use or consumption, provided it is fair and reasonable to do so, WD limits its liability to replacement of the Product or supply of equivalent or better Product.
This warranty shall extend to repaired or replaced Products for the balance of the applicable period of the original warranty or ninety (90) days from the date of shipment of a repaired or replaced Product, whichever is longer. This warranty is WD's sole manufacturer's warranty and is applicable only to Products sold as new.
Obtaining Service
WD values your business and always attempts to provide you the very best of service. Should you encounter any problem, please give us an opportunity to address it before returning this Product. Most technical support questions can be answered through our knowledge base or email support service at http://support.wd.com. If the answer is not available or, if you prefer, please contact WD at the applicable telephone number shown in the front of this document.
If you wish to make a claim, you should initially contact the dealer from whom you originally purchased the Product. If you are unable to contact the dealer from whom you originally purchased the Product, please visit our product support Web site at http://support.wd.com for information on how to obtain service or a Return Material Authorization (RMA). If it is determined that the Product may be defective, you will be given an RMA number and instructions for Product return. An unauthorized return (i.e., one for which an RMA number has not been issued) will be returned to you at your expense. Authorized returns must be shipped in an approved shipping container, prepaid and insured, to the address provided with your RMA number. If following receipt of a qualifying claim under this warranty, WD or the dealer from whom you originally purchased the Product determines that your claim is valid, WD or such dealer shall, at its discretion, either repair or replace the Product with an equivalent or better Product or refund the cost of the Product to you. You are responsible for any expenses associated with a claim under this warranty. The benefits provided to you under this warranty are in addition to other rights and remedies available to you under the Australian Competition and Consumer Act or the New Zealand Consumer Guarantees Act.
Your original box and packaging materials should be kept for storing or shipping your WD product. To conclusively establish the period of warranty, check the warranty expiration (serial number required) via http://support.wd.com.
Western Digital Technologies, Inc.
3355 Michelson Drive, Suite 100
Irvine, California 92612
Phone: 949-672-7000
Email: support@wd.com
Appendices
Appendix A: WD My Cloud Mirror Quick User Guide
Appendix B: Joomla!® Setup Guide
Appendix C: phpBB Setup Guide
Appendix D: Supported RAID Modes
Appendix E: RAID Migrations
Appendix F: Safe Mode Firmware Update Procedures
Appendix G: Technical Specifications
Appendix A: WD My Cloud Mirror Quick User Guide
This guide is primarily for WD My Cloud Mirror users, rather than the administrator.
Logging into WD My Cloud Mirror
-
Enter the name of your WD My Cloud Mirror device (default name: wdmycloudmirror) in the browser's address field:
-
http://
(Windows) (Example: http://wdmycloudmirror) -
http://
.local (Mac) (Example: http://wdmycloudmirror.local) -
Click Go.
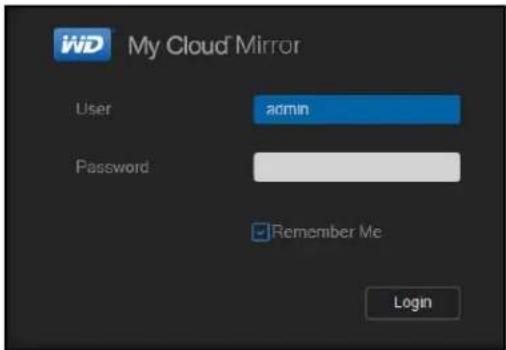
- On the WD My Cloud Mirror Login page, enter your User name and Password (the default is no password).
- Click Login. The WD My Cloud Mirror dashboard home page displays.
The Dashboard Home Page
The WD My Cloud Mirror Home page has an information bar at the top right, a navigation icon bar across the page, an instant overview of the status of the device's main functions and links for updating settings.
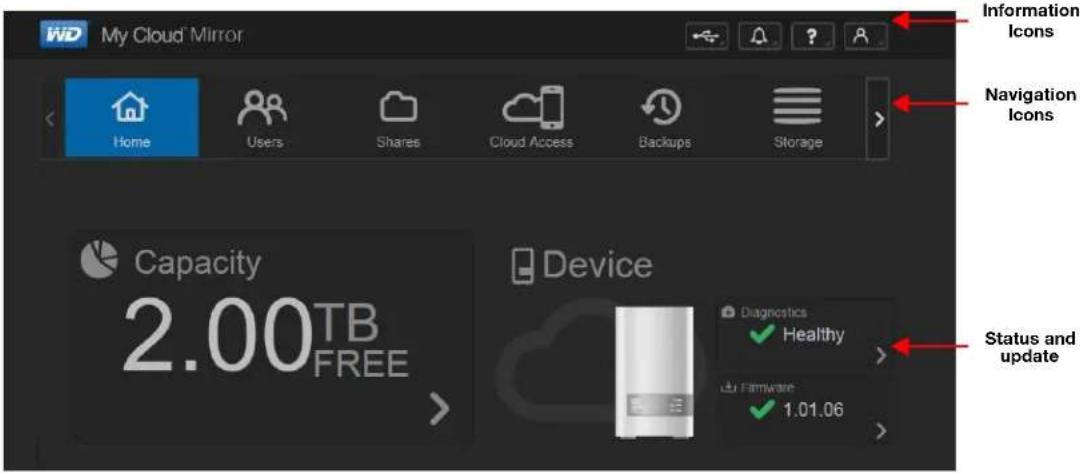
Navigation Icons
| Icon Name Actions | ||
 | Home | The dashboard displays an instant overview of the status of the device's main functions and links for updating settings. |
 | Users | Create, change, and delete users and grant them full or limited access to particular shares. |
 | Shares | Create, change, and delete shares (folders) and grant specific users full, limited, or no access to particular shares. |
 | Cloud Access | Set up, change, and remove remote cloud access to particular shares. Monitor remote access status. |
 | Backups | Create backups to:• A U S B d r i v e• Another WD My Cloud Mirror or a WD My Cloud EX4 on your local network or on a remote network• A Cloud backup site |
 | Storage | Select the way your WD My Cloud Mirror device stores your data. |
 | Apps | Add or remove various apps that allow you to use your device more productively. |
 | Backups | Create backups to:• A U S B d r i v e .• Another WD My Cloud Mirror or other WD My Cloud device on your local or a remote network.• A Cloud backup site. |
Viewing the Home Page
The Home page is your gateway to the WD My Cloud Mirror device. From this page you can find:
■ The capacity of the device
■ Quick status and links to download information
■ Links to desktop and mobile apps
■ Built-in apps to make your device more productive
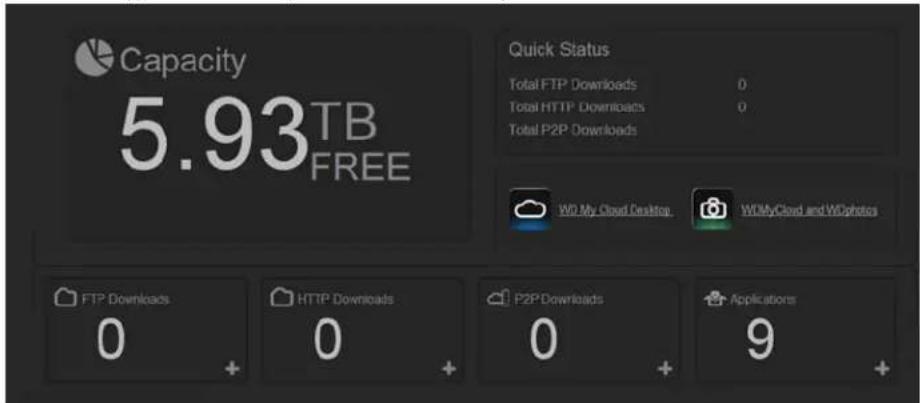
Capacity
The Capacity panel displays the amount of free storage left on your WD My Cloud Mirror device.
- To see detailed information, click the arrow in the lower right to display the current usage of the drive's capacity:
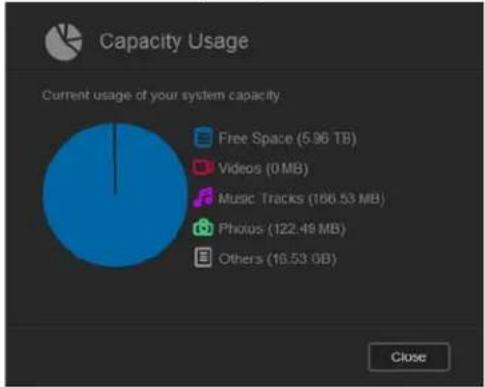
pie
Capacity Usage | Category | Capacity (TB) | | :--- | :--- | | Free Space | 5.96 | | Videos | 0 | | Music Tracks | 186.53 | | Photos | 122.49 | | Others | 16.53 | Close- To return to the Home page, click Close.
Quick Status
Note: Displays for users not the administrator.
The Quick Status area displays the total number of FTP, HTTP, and P2P downloads performed.
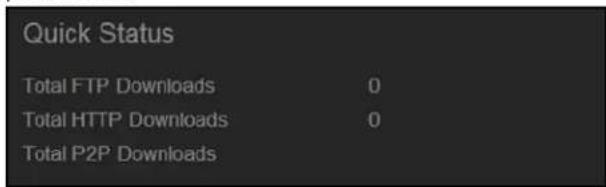
Cloud Access Links
Note: Displays for users not the administrator.
The Cloud Access Links allow you to access the software necessary to gain access to the WD My Cloud Mirror device from your desktop and mobile apps.
Downloads and Apps Information
Note: Displays for users not the administrator.
The Downloads and Applications area displays information on the number of downloads and apps available on your device.

- To access the page associated with each download or applications, click the plus sign + or arrow >.
- In the left pane, click a download method.
- To download files to your location, enter the information required for each download method.
Apps □□
The Apps page provides access to the various apps available for your use on the WD My Cloud Mirror device. Available apps vary depending on what your administrator has implemented.
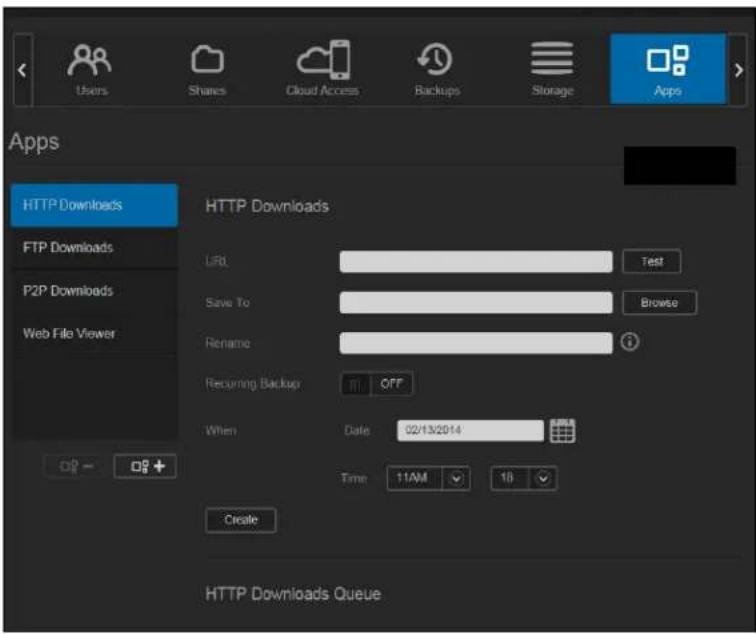
Appendix B: Joomla!® Setup Guide
Joomla! is an award-winning content management system (CMS) that allows you to build Web sites and powerful online apps. For additional information on Joomla!, visit http://www.joomla.org//
Joomla! is one of the many apps available for use from your WD My Cloud Mirror device. Provided in this section are the steps you'll need to set up Joomla!.
Requirements
- Database (e.g., MySQL, FireBird, MS SQL server, Oracle, PostgreSQL, SQLite)
If you're using phpMyAdmin as your SQL database, ensure that you've added the phpMyAdmin app to you My WD Cloud Mirror.
Setting Up Joomla!
- Add the Joomla! app to your WD My Cloud Mirror device (see "Adding an App" on page 86 for information on adding an app to your device).
- On the App screen, click Joomla! in the left pane.
-
In the Configuration URL field, click the configuration URL link. The Joomla! Installation page displays.
-
Select a language from the scrolling window. This is the language that will be used during Joomla! installation.
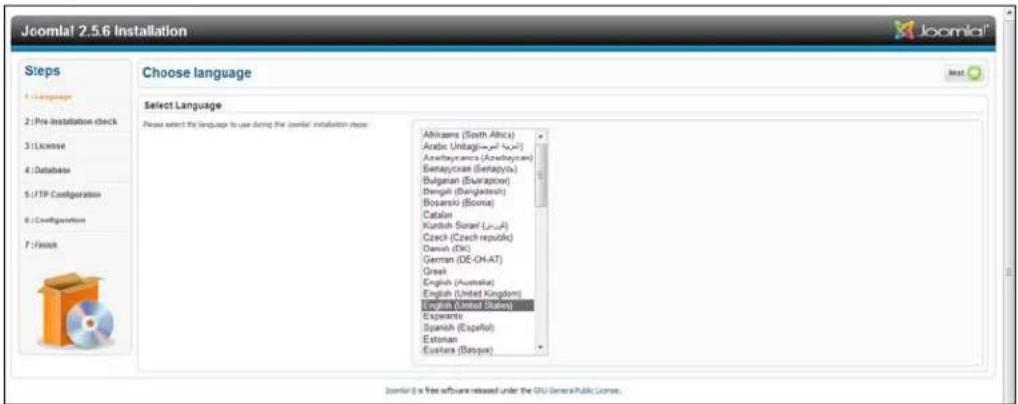
- Click Next.
- Review the Joomla! Pre-installation check to ensure that all items passed and click Next.
![Joomla! 2.5.6 Installation Pre-Installation Check Pre-installation check for Joomla 2.5.6 Stable [ Ember ] 19 June-2012 14:00 GMT: If any of these items is not supported (started as Web) then please take actions to correct them. Failure to do so could lead to your .Joomla installation not maintaining continuity. PHP Version 1 >> 3.2.4 Zio Compression Support VIA Support Debugless Support (Shrak) HS Language is Default HS String Overload Off INS Filler Support JSOUI Support configuration.php?wbleable Recommended settings: These settings are recommended for PHP in order to ensure full compatibility with Joomla. Assistant, Joomla will still operate if your settings do not quite match the recommended. Directive Safe Note Display Strains File Uploads Magic Guide Kurline Magic Guide IPC Register Guide Outdoor Staffing Session Auto Start Native DP support Recommended off off On Off Off Off Off Off Off Off Off Actual on on on on on on on on on on on on on on on on on on on on on on on on on on on on on on on on on on on on on on on on on on on on on on on on on on On On On](/content/2026/05/1026030/images/963ee032dde2912b0670601ca0495b03f3fcf2ff4698cba0eaebb465b111eafa.jpg)
- Read the Joomla! license declaration and click Next.
-
Complete the Database Configuration screen with the following information and click Next.
-
Database Type: Select MySQL if not already selected.
- Host Name: Enter localhost.
- Username: Enter your MySQL account user name.
- If you're using the phpMyAdmin app, enter admin.
- Password: Enter your MySQL password.
- If you're using the phpMyAdmin app, enter admin.
- Database Name: Enter a name for your database to be used for Joomla!.
- Table Prefix: Enter a table prefix. The prefix should be three - four characters long, contain only alphanumeric characters, and MUST end in an underscore. Make sure that the prefix chosen is not used by other tables.
- You can also use the randomly generated table prefix pre-loaded into this field.
- Old Database Process: Select one of the following options:
- Backup: Backs up the old database.
- Remove: Removes the old database
- Keep the FTP Configuration screen default settings as they are and click Next.
- Complete the Database Configuration screen with the following information:.
Site Name: Enter a name for your Joomla! site.
- Your Email: Enter the email address of the individual that will act as the administrator for the Joomla! site.
- Admin Username: Enter the user name you'll use to log into your Joomla! site.
- Admin Password: Enter the password you'll use to log into your Joomla! site.
- Confirm Admin Password: Reenter the password you entered in the Admin Password field.
- Click Install Sample Data.
- Click Next.
- Review the information on the screen and click Remove installation folder.
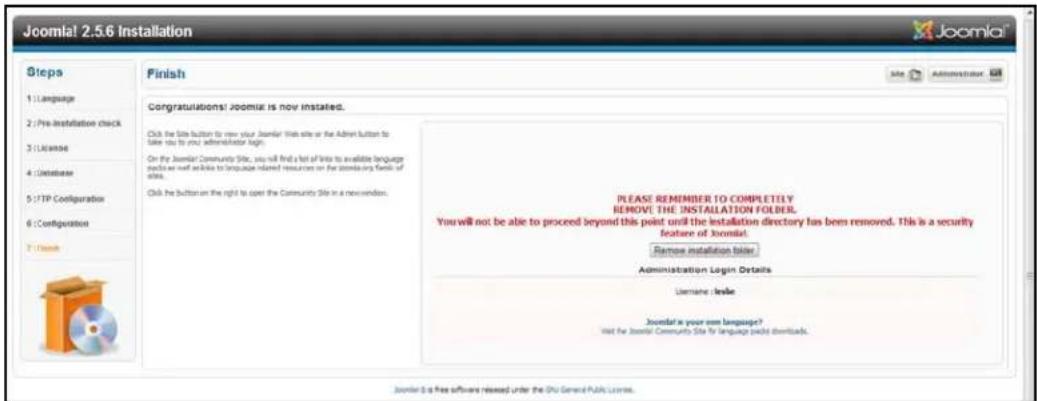
- At the top of this page, click Site. Your Joomla! site has been created and installed on your WD My Cloud Mirror device.
Appendix C: phpBB Setup Guide
phpBB™ is a popular Internet forum package written in the PHP scripting language. You can use phpBB to create your own customized forum that can be accessed and commented on from any Internet connection.
phpBB is one of the many apps available for use from your WD My Cloud Mirror device. Provided in this section are the steps you'll need to set up phpBB.
Requirements
- MySQL database
Setting Up phpBB
- Add the phpBB app to your WD My Cloud Mirror device (see "Adding an App" on page 86).
- On the App screen, click phpBB in the left pane.
- In the Configuration URL field, click the configuration URL link. The phpBB Installation page displays.
- Review the phpBB introduction and click the Install tab.
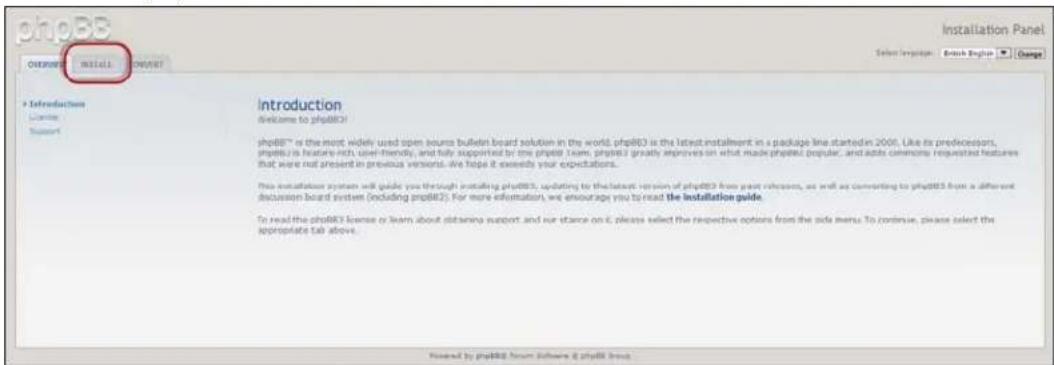
- Review the Welcome to Installation information on your screen and click Proceed to next step.
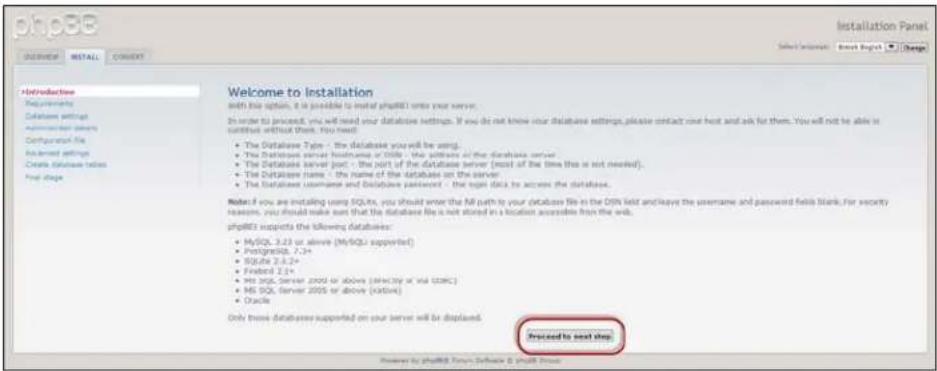
- Review the Installation compatibility information and click Start Install.
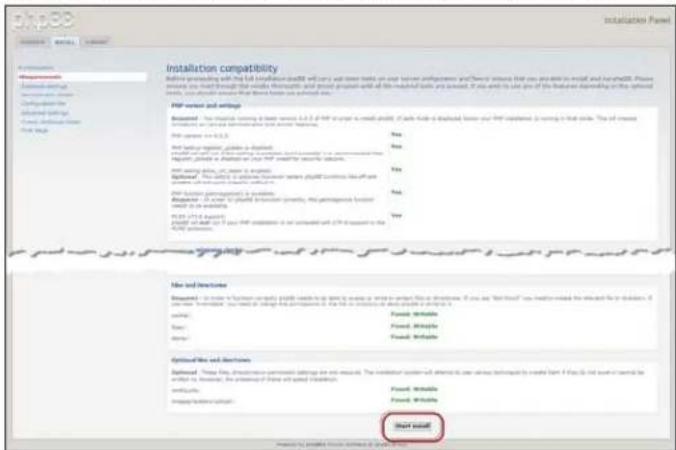
- On the Database configuration screen, enter the following information and click Proceed to Next Step.
- Database Type: Select MySQL if not already selected.
- Database server hostname or DSN: Enter localhost.
- Database server post: Leave this field blank.
- Database name: Enter a name for your database to be used for phpBB.
- Database username: Enter your MvSQL account user name.
- If you're using the phpMyAdmin app, enter admin.
- Database password: Enter your MySQL password.
- If you're using the phpMyAdmin app, enter admin.
- Table Prefix: Enter a table prefix. The prefix must start with a letter and must only contain letters, numbers and underscores. Make sure that the prefix chosen is not used by other tables.
You can also use the randomly generated table prefix pre-loaded into this field.
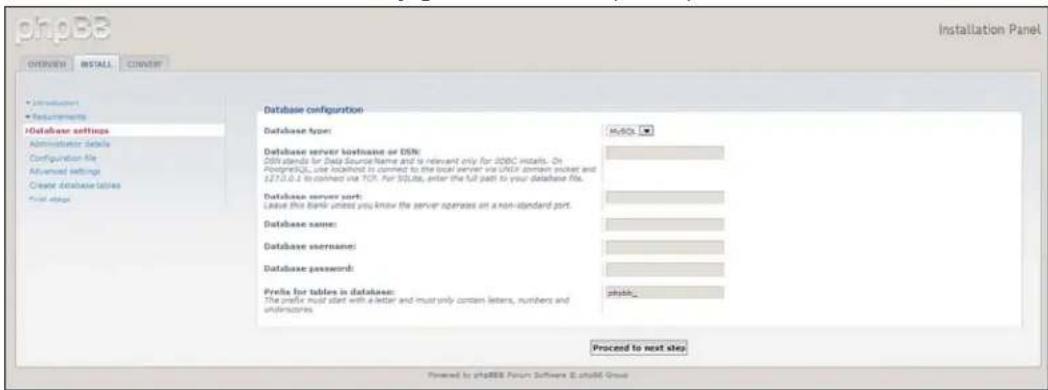
- Review the Database connection screen to ensure that it was performed successfully and click Proceed to next step.
- Complete the Administrator Configuration screen with the following information and click Proceed to next step.
- Default board language: Select the language for your bulletin board from the drop-down menu.
- Administrator username: Enter the user name you'll use to log into your bulletin board.
- Administrator password: Enter the password you'll use to log into your bulletin board
- Confirm administrator password: Reenter the password you entered in the Administrator password field.
- Contact e-mail address: Enter the email address of the individual administering the board.
- Confirm contact e-mail: Reenter the email address you entered in the Contact e-mail address field.
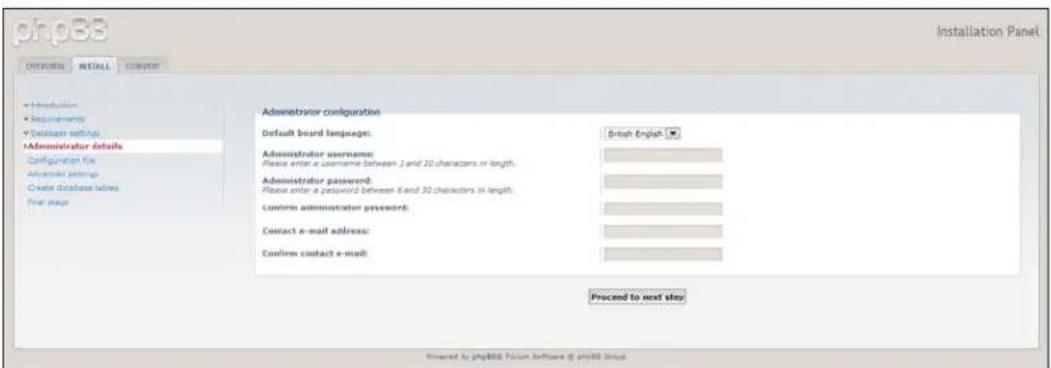
- Review the Administrator details screen to ensure that the administrator configuration was successful and click Proceed to next step.
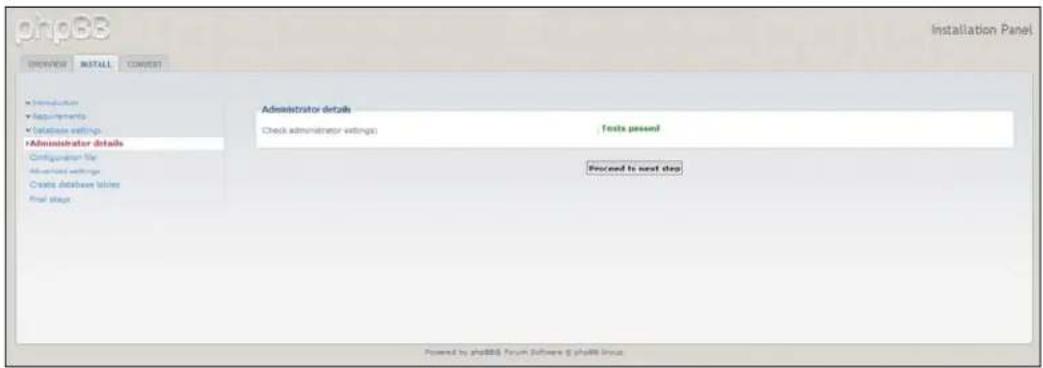
- Review the screen and click Proceed to next step.
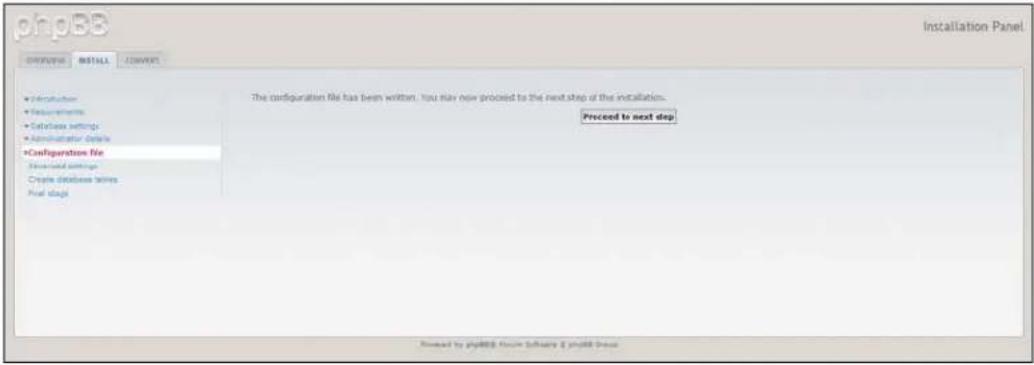
- Review the information on the screen and click Proceed to next step.
Note: Keep the default settings on this screen for now. If you find that you need to update this information in the future, you can do so on the Administration Control Panel after phpBB is installed.
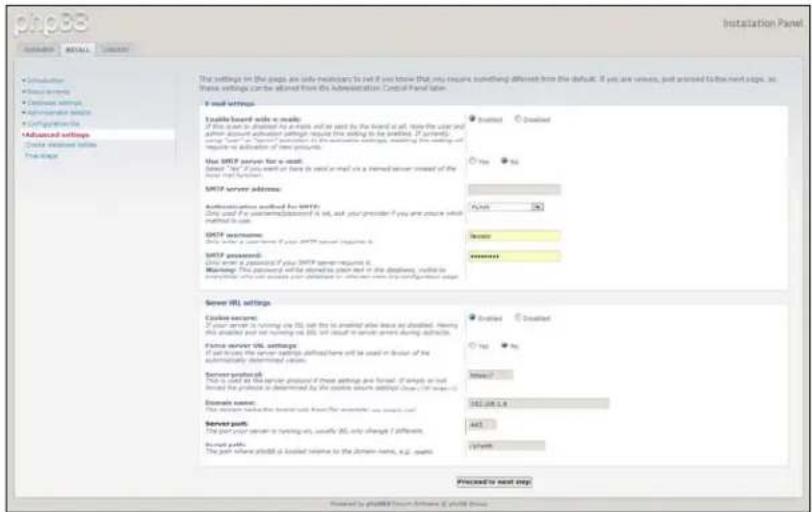
- Review the information on the screen and click Proceed to next step.
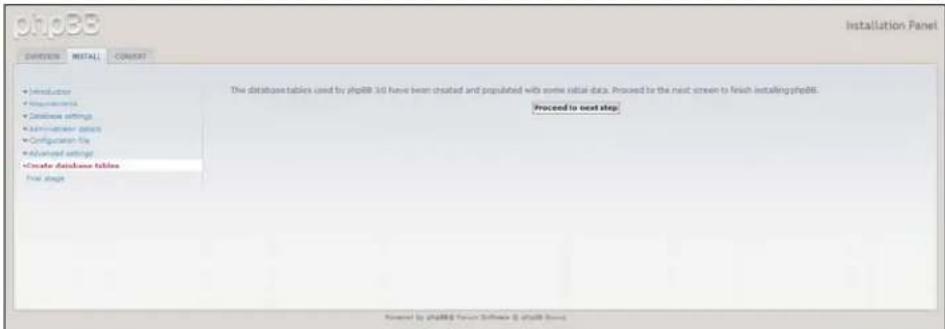
- Review the information on the screen. phpBB is now installed.
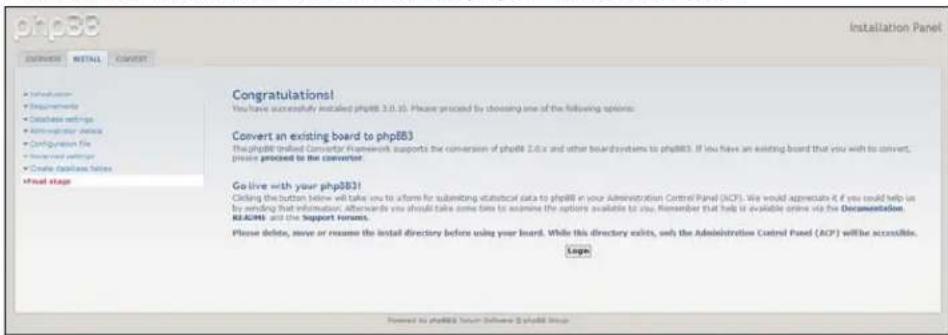
Appendix D: Supported RAID Modes
The chart below identifies those modes that are supported for RAID storage.
| Supported RAID Modes 1 Disk 2 Disks | ||
| Spanning No Yes | ||
| RAID 0 No Yes | ||
| RAID 1 No Yes | ||
| JBOD YesYes | ||
Appendix E: RAID Migrations
The chart below identifies the RAID migration path allowed on your WD My Cloud Mirror device.
| From To | |
| JBOD (1 disk) RAID 1 (2 disks) | |
Appendix F: Safe Mode Firmware Update Procedures
If you see the following screen, use the steps outlined below to recover your server from safe mode.
Note: Before performing these steps, download WD My Cloud Mirror firmware from the WD support website (http://support.wd.com) and save it to a location to which you can browse from your computer. Make sure to unzip the firmware file.
- Log on to your router's DHCP LAN/Device Client Table to obtain the IP address for your device.
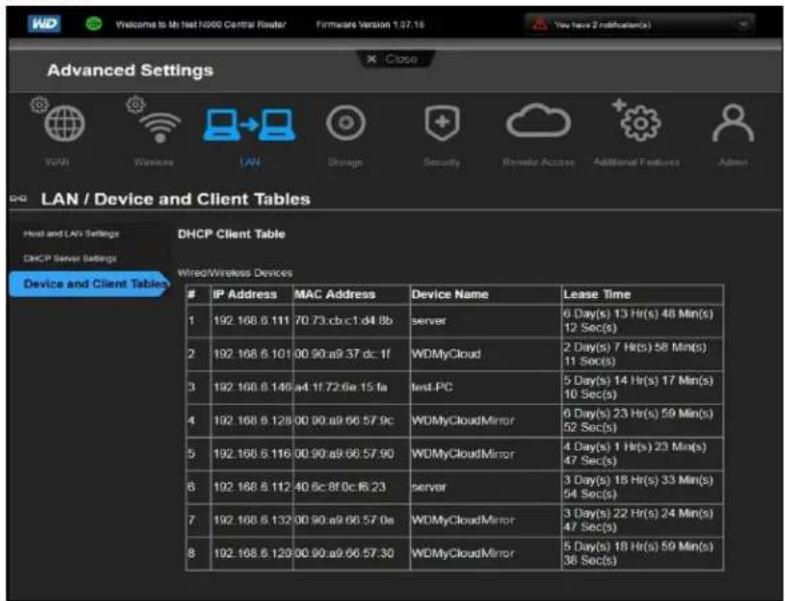
-
Type device IP address in a browser window. The Safe Mode UI appears.
-
Browse to the location where you saved the downloaded firmware.
-
Click Apply to load the firmware.
-
On the dialog box, click OK. The device reboots.
-
Once your reboot is completed, ensure that you clear your browser's cache. Check your browser's help to determine the best way to clear the cache.
-
Once your device has completed the reboot, we recommend that you do a system restore ("System Restore" on page 121).
Appendix G: Technical Specifications
| Ethernet High performance (100/1000) Gigabit Ethernet connection | |
| Internal hard drives 2 WD Red 3.5-inch SATA hard drives | |
| Supported protocols CIFS/SMB, NFS, FTP, AFP | |
| I/O portsData transfer rate | Gigabit Ethernet (RJ-45) portUSB 3.0 up to 5 Gb/s*A USB 3.0 host and USB 3.0 certified cable are required to obtain USB 3.0 performance. |
| CompatibilityNote: Compatibility may vary depending on user's hardware configuration and operating system. | Operating systems:Windows 8.1 or earlierWindows 7Windows VistaWindows XP (32 bit) SP3Mac OS X MavericksMac OS X Mountain LionMac OS X LionMac OS X Snow LeopardBrowsers:Internet Explorer 8.0 or higher on supported Windows computersSafari 6.0 or higher on supported Mac computersFirefox 21 or higher on supported Windows and Mac computersGoogle Chrome 27 or higher on supported Windows and Mac computers |
| Physical dimensions | |
| Width 3.90 in (99.06 mm) | |
| Length 6.10 in (154.94 mm) | |
| Height 6.75 in (171.45 mm) | |
| Weight0 TB 1.8 lbs (0.8 kg)4 TB 3.4 lbs (1.6 kg)6 TB 4.6 lbs (2.1 kg)8 TB 5.0 lbs (2.3 kg) | |
| Power supplyAC input voltage(AC adapter)AC input frequencyDC output | Input voltage: 100V to 240V ACInput frequency: 50 to 60 HzOutput voltage: 12 VDC, 3APower supply: 36W |
| Temperature | Operating temperature: 5°C to 35°C (41°F to 95 °F)Non-operating temperature: -20°C to 65°C (-4°F to 149 °F) |
| RoHs compliant Yes | |
Index
A
about
apps 83
backups 69
disk status 92
DLNA 101
internal backups 76
media servers 94
shares 49
WD Media Players 100
WD My Cloud 26
WD Photos 24
accessing
general settings 103
online support ii
personal cloud using media players 100
personal cloud with iTunes 101
WD My Cloud Desktop 36
Accessories 5
adding
a single user 40
groups 47
media content to a folder 99
multiple users 42
Port Forwarding Services 117
AFP Services 113
alert details 65
alerts icons 65
apps
about 83
deleting 86
managing 83
manually adding 85
updating 86
viewing 83
Apps Panel 64
assigning
a group to a user 45
quotas to a group 49
quotas to users 46
share access to groups 48
automatic support
requesting 67
auto-rebuilding 91
B
backups 72
about 69
Amazon S3 Cloud 80
ElephantDrive 79
USB 69
box contents 4
C
changing the RAID mode 88
China RoHS 135
cloud access settings 106
cloud backups
about 78
ElephantDrive 78
Cloud Devices Panel 62
common tasks 68
compliance
Europe 134
regulatory 134
safety 134
connecting
a USB drive 69
WD My Cloud Mirror 10
contacting WD Technical Support ii
creating
a USB backup 70
an ISO Share 123
internal backups 76
multiple users 42
new shares 51
remote backups 73
customer support 67
Customs Union 135
D
Dashboard
end user 139
Home Page 57
launching 55
navigation icons 58
deep sleep 108
deleting
an app 86
an ISO Share 125
internal backups 78
Port Forwarding Services 117
remote backups 76
USB backups 72
device
health 60
rebooting 120
status 59
Diagnostic Tests
running 119
Diagnostics Panel 60
disabling
DLNA 96
iTunes 98
Disk Status
about 92
dismissing a system alert 66
DLNA
about 101
devices 101
disabling 96
enabling 96
rebuilding the database 98
rescanning the database 98
viewing media server information 97
drive
replacement 130
Dynamic DNS 114
E
editing
group settings 48
shares 52
USB backups 72
user settings 44
ElephantDrive
backing up to 79
enabling a backup 78
enabling
cloud access for a user 22
DLNA 96
ElephantDrive backup 78
iTunes 98
End User Guide 138
Energy Saver 107
deep sleep option 108
LED option 108
Power Recovery option 108
Power Schedule option 108
Web Access Timeout option 108
Environmental compliance (China) 135
F
Faulty hard drive
identifying 130
replacing 131
Features 3
Firmware Panel 60
firmware updates 60
FTP Access 113
G
general settings 102
accessing 103
cloud access 106
Energy Saver 107
language and clock settings 104
Local Master Browser 115
Mac.backup option 108
Network Profile settings 111
Network Services settings 111
Network settings 110
Network Workgroup (Windows) 114
port forwarding 117
services settings 109
workgroup 115
Getting Started
with Online Setup Software 11
without Online Setup Software 17
groups 45
about 46
adding 47
assigning a user 45
assigning quotas to 49
assigning share access 48
editing settings 48
quota rules 45
removing 49
viewing 46
GS Mark 134
H
hard disk
viewing information 93
How do I? 68
|
ICES/NMB-003 compliance 134
icons
navigation (end user) 139
Important
use enclosed Ethernet cable provided 10
importing multiple users 44
initiating an internal backup 77
installing
mobile apps 27
WD My Cloud mobile app 27
WD Photos 24
installing WD My Cloud Desktop
Mac 33
Windows 30
internal backups
about 76
creating 76
deleting 78
initiating 77
modifying 77
viewing 77
IPv4 Network Mode 112
ISO Shares
creating 123
deleting 125
modifying 125
viewing 124
iTunes
accessing personal cloud with 101
disabling 98
enabling 98
overview 94, 96
refreshing 99
streaming media 101
J
Joomla
setup guide 142
Jumbo Frames 112
K
KC Notice 135
L
LAN
configuration 110
requirements 6
language and clock settings 104
launching WD My Cloud Desktop 35
LED
description 8
stability mode 108
LLTD 113
Local Master Browser 115
M
Mac
software folder 20
managing
alerts 65
apps 83
USB backups 69
users 39
manually adding an app 85
media
adding 99
media players
accessing WD My Cloud Mirror 100
accessing your personal cloud using 100
media types 95
other 100
WD 100
media servers
about 94
overview 94
settings 96
media settings
about 118
media storage
about 96
media streaming in iTunes 101
media types supported 95
iTunes 96
mobile apps
installing 27
installing WD Photos mobile app 24
WD My Cloud 26
WD My Cloud Mirror 24
WD Photos 24
modifying
an ISO Share 125
internal backups 77
port forwarding services 117
multiple users 42
creating 42
importing 44
N
navigation icons
end user 139
Network Activity panel 61
Network Profile settings 111
Network Services
IPv4 Network Mode 112
Network Services settings 111
Network settings 110
Network UPS 114
Network Workgroup (Windows) 114
NFS Service 113
0
Online Learning Center
about 4
Online Setup Software
downloading and installing 11
overview
DLNA 94
iTunes 96
P
Package contents 4
password
updating 45
phpBB Setup Guide 145
Port Forwarding 117
adding 117
deleting 117
modifying 117
Power Recovery 108
Power Schedule 108
Precautions 9
Pre-installation requirements 6
product
obtaining service 135
product components 6
product registration ii
public folders
mapping 21
Public share
opening on Mac operating systems 20
opening on Windows Vista/Windows 7, Windows 8 20
Q
quota rules 45
quotas
assigning to a group 49
assigning users to 46
R
RAID 91
auto-rebuilding 91
supported modes 150
RAID Migrations 150
RAID mode 88
RAID Storage
about 87
rebooting the device 120
rebuilding a replacement drive 133
recording WD product information 2
recovering 75
recovering remote backups 75
refreshing iTunes 99
registration
online ii
regulatory compliance 134
remote 72
remote backups 72, 75
creating 73
deleting 76
viewing 75
remote cloud access
about 22
remote server 116
removing a group 49
removing users 46
replacement drive
rebuilding 133
replacing a drive 130
rescanning/rebuilding the DLNA Database 98
RoHS 135
Running a Diagnostic Test 119
S
safe mode
recovering from 150
Safe Mode Firmware Update Procedures 150
Safety
instructions 1
Safety Compliance 134
services settings 109
settings
general 102
setup guide
Joomla 142
phpBB 145
shares
about 49
accessing contents locally 53
assigning group access 48
creating new 51
deleting 53
editing 52
viewing a list of 50
single user
adding 40
SMB2 112
software version 60
SSH
password 114
storage types
about 87
Streaming
media in iTunes 101
videos, photos, and music 94
Supported RAID Modes 150
system activity 61
system alerts
dismissing 66
icons 65
System Configuration about 120
System Diagnostics about 60, 119
system health 60
system report 67 sending to Customer Support 67
System Restore about 119
U
updates making on the Home Page 59
updating apps 86 UPS 114
USB backups creating 70 deleting 72 editing 72 managing 69 viewing details 71
USB drive connecting 69
User settings 39 viewing list of 39
user password updating 45
user settings editing 44
users about 39 adding a single 40 adding multiple 42 assigning a group to 45 assigning quotas to 46 creating multiple 42 editing settings 44 enabling cloud access 22 group quota rules 45 importing multiple 44 removing 46 updating password 45 viewing 39
Users Panel 63 Using Mac OS X Leopard/Snow Leopard/ Lion/Mountain Lion/Mavericks 20, 133 Utilities about 118
V
viewing a list of shares 50 alert details 65 apps 83 details of an ISO Share 124 DLNA Information 97 groups 46 hard disk information 93 internal backups 77 remote backups 75 the RAID mode 88 USB backup details 71
W
WAN 6
Warning changing RAID mode 88 deleting a share 53, 88 modifying the device 114 mounting a USB drive 69, 113 renaming the device 102 renaming the drive 102
warranty information all regions except Australia/New Zealand 135 Australia/New Zealand 136
WD Media Players about 100
WD My Cloud about 26 accessing contents of shares locally 53 deleting a share 53 installing mobile app 27
WD My Cloud Desktop about 29 accessing 36 launching 35 Mac installation 33 Windows installation 30
WD My Cloud Mirror Dashboard (end user) 139 logging in (end user) 138 managing users 39 media server settings 96 mobile apps 24 quick user guide 138 system report 67 user settings 39
WD My Cloud Mirror Home page (end us-
er) 140
WD Photos
about 24
installing 24
WD service and support ii
WD Technical Support
contacting ii
WD's Online Learning Center 11
Web Access Timeout 108
Web browser compatibility 6
WebDAV Service 113
Windows
mapping a public folder 21
Windows Vista/Windows 7/Windows 8
public share 20
workgroups 111, 115
Information furnished by WD is believed to be accurate and reliable; however, no responsibility is assumed by WD for its use nor for any infringement of patents or other rights of third parties which may result from its use. No license is granted by implication or otherwise under any patent or patent rights of WD. WD reserves the right to change specifications at any time without notice.
Western Digital, WD, the WD logo, My Book, My Passport, and WD TV are registered trademarks of Western Digital Technologies, Inc. in the U.S. and other countries, and WD My Cloud, My Cloud Mirror, WD Red, WD SmartWare, WD GreenPower, WD Photos, and WD TV Live are trademarks of Western Digital Technologies, Inc. in the U.S. and other countries. Other marks may be mentioned herein that belong to other companies.
© 2014 Western Digital Technologies, Inc. All rights reserved.
Western Digital
3355 Michelson Drive, Suite 100
Irvine, California 92612 U.S.A.
- WD Service and Support
- Accessing Online Support
- Contacting WD Technical Support
- Registering Your WD Product
- Table of Contents
- Important User Information .... 1
- Product Overview .... 3
- Getting Started ....10
- Accessing Your Cloud Remotely ..... 22
- Managing Users, Groups, and Shares .....39
- The Dashboard at a Glance .....55
- Backing Up and Retrieving Files 69
- Managing Apps on WD My Cloud Mirror ..... 83
- Managing Storage on WD My Cloud Mirror ..... 87
- Playing/Streaming Videos, Photos, & Music 94
- Configuring Settings ..... 102
- Replacing a Drive 130
- Regulatory and Warranty Information ..... 134
- Appendices 138
- Index 153
- 1
- Important User Information
- Important Safety Instructions
- Recording Your WD Product Information
- Product Overview
- About the System
- Features
- About the Online Learning Center
- Package Contents
- Requirements
- Operating System
- Windows®
- Mac OS X®
- Web Browsers
- Local Network
- Internet
- Product Components
- Front View
- Back View
- LEDs
- Front Panel Power LED
- Front Panel Hard Drive (HDD) LEDs
- Back Panel Ethernet (Network) LEDs
- Pre-installation Instructions
- Handling Precautions
- Getting Started
- Physically Connecting the Device
- Getting Started Using Online Setup Software
- Downloading and Installing the Online Setup Software
- Connecting to the Network and Creating a Personal Cloud
- Selecting Options
- Click Finish to close the setup wizard.
- Getting Started Without Online Setup Software
- Setting up the Device Using a Browser
- Accessing Content
- Mapping the Public Folder (Windows)
- Accessing Your Cloud Remotely
- Enabling Cloud Access for the WD My Cloud Mirror Device
- Configuring Cloud Access for a User
- Mobilizing Your Files with iOS and Android Mobile Apps
- WD Photos Mobile App
- Installing WD Photos Mobile App on Your Mobile Device
- WD My Cloud Mobile App
- Installing the WD My Cloud Mobile App
- WD My Cloud for Desktop App
- Installing WD My Cloud Desktop
- Windows
- Mac
- Launching the WD My Cloud Desktop App
- Using the WD My Cloud for Desktop App
- Managing Users, Groups, and Shares
- About Users
- Viewing Users
- Adding a Single User
- Adding Multiple Users
- Creating Multiple Users
- Import Multiple Users
- Editing User Settings
- Updating a User Password
- Assigning a User to a Group
- Quota Rules
- Assigning Quotas to a User
- Removing a User
- About Groups
- Viewing Groups
- Adding a Group
- Editing Group Settings
- Assigning Share Access to Groups
- Assigning Quotas to a Group
- Removing a Group
- About Shares
- Viewing a List of Shares
- Creating a New Share
- Editing Share Settings
- Making a Share Private
- Deleting a Share
- WARNING! Deleting a share erases all files and folders on the share.
- Accessing the Contents of a Share Locally
- The Dashboard at a Glance
- Launching the Dashboard
- IF you want to launch from... THEN...
- Using Device Name:
- Using IP Address:
- The Dashboard Home Page
- Information Icons
- Icon Name Actions
- Navigation Icons
- Viewing Device Status and Making Updates on the Home Page
- Capacity
- Device
- Diagnostics
- Firmware
- Network Activity
- Cloud Devices
- Users
- Apps
- Managing Alerts
- Viewing Alert Details
- Dismissing an Alert
- Obtaining Customer Support
- Requesting Automatic Support
- Creating and Saving a System Report
- Obtaining Other Support
- Common Tasks
- 7
- Backing Up and Retrieving Files
- About Backups
- Managing a USB Device and USB Backups
- Connecting A USB Drive
- Creating a USB Backup
- Viewing the Details of a USB Backup Job
- Editing a USB Backup Job
- Deleting a USB Backup Job
- Remote Backups
- Creating a Remote Backup
- Viewing the Details of a Remote Backup Job
- Recovering a Remote Backup
- Deleting a Remote Backup
- Internal Backups
- Creating an Internal Backup
- Initiating an Immediate Internal Backup
- Modifying an Internal Backup Job
- Viewing Internal Backup Details
- Deleting an Internal Backup Job
- Cloud Backups
- Enabling ElephantDrive Cloud Backup
- Backing Up with ElephantDrive
- Enabling an Amazon S3 Cloud Backup
- Click Next.
- Enter the following information and click Next:
- In the Local Path field, enter a path for your backup on your WD My Cloud Mirror server.
- Click the toggle button III to activate the Autoupdate feature. This automatically updates your backup based on a schedule you create.
- Managing Apps on WD My Cloud Mirror
- About Apps
- Managing Apps
- Viewing Apps
- Adding an App
- Manually Adding an App
- Deleting an App
- Updating an App
- Managing Storage on WD My Cloud Mirror
- About Storage ≡
- RAID Storage
- Viewing the Current RAID Mode
- Changing the RAID Mode
- WARNING! Changes made to your RAID mode will delete all of your data and your user settings. See "Saving a Configuration File" on page 122 for information on saving your user settings.
- Auto-Rebuilding RAID
- Disk Status
- Viewing Hard Drive Information
- Playing/Streaming Videos, Photos, & Music
- Media Servers
- Media Server Overview
- iTunes Overview
- Media Types Supported by iTunes
- Media Storage
- Enabling DLNA and iTunes
- Enabling DLNA
- Viewing DLNA Media Server Information
- Rescanning/Rebuilding the DLNA Database
- Enabling iTunes
- Refreshing iTunes
- Adding Media Content to the Folders
- Open Windows Explorer or Mac Finder.
- Accessing Your Personal Cloud Using Media Players
- WD Media Players
- Other Media Players
- DLNA Devices
- Accessing Your Personal Cloud Using iTunes
- Streaming Media in iTunes
- 11
- Configuring Settings
- General
- Accessing the General Screen
- Device Profile
- Language and Clock
- Cloud Access
- Energy Saver
- Mac Backups
- To configure backup settings:
- Service
- Network
- Network Profile
- Network Service
- Review or update the following:
- IPv4 Network Mode
- WARNING! Mounting or ejecting a USB drive while performing an NFS or AFP file transfer will interrupt the file transfer process.
- WARNING! Please note that modifying or attempting to modify this device outside the normal operation of the product voids your WD warranty.
- Network UPS
- Network Workgroup (Windows)
- Workgroup
- Local Master Browser
- Remote Server
- Port Forwarding
- Adding Port Forwarding Services
- Modifying Port Forwarding Services
- Deleting Port Forwarding Services
- Media
- Utilities
- System Diagnostics
- Running a Diagnostic Test
- System Restore
- System Configuration
- Saving a Configuration File
- Importing a Configuration File
- Device Maintenance
- Shutting down the Device
- Rebooting the Device
- Scan Disk
- Scanning Your Disk
- Format Disk
- Formatting Your Disk
- Creating an ISO Image
- Creating an ISO Share
- Viewing the Details of an ISO Share
- Modifying an ISO Share
- Delete an ISO Share
- Notifications
- Notifications Email
- Enabling Email Alerts
- Enabling SMS Notifications
- Notification Display
- Firmware Update
- Auto Update
- Updating Firmware Automatically
- Available Updates
- Checking for Updates
- Manual Update
- Manually Installing an Update
- 12
- Replacing a Drive
- Identifying a Faulty Hard Drive
- Removing a Drive
- Inserting a Drive
- Preparing a Drive
- Inserting One or Both Drives
- Rebuilding the Drive
- Returning a WD Drive
- Regulatory and Warranty Information
- Regulatory Compliance
- Federal Communications Commission (FCC) Class B Information
- FCC Requirements, Part 15
- ICES/NMB-003 Compliance
- Safety Compliance
- CE Compliance for Europe
- GS Mark (Germany only)
- VCCI Statement
- Warranty Information (All Regions Except Australia/New Zealand)
- Obtaining Service
- Limited Warranty
- Warranty Information (Australia/New Zealand only)
- For consumers purchasing products in Australia and New Zealand, please refer to this warranty information.
- Warranty
- Appendices
- Appendix A: WD My Cloud Mirror Quick User Guide
- Logging into WD My Cloud Mirror
- Viewing the Home Page
- Quick Status
- Cloud Access Links
- Downloads and Apps Information
- Apps □□
- Appendix B: Joomla!® Setup Guide
- Setting Up Joomla!
- Appendix C: phpBB Setup Guide
- Setting Up phpBB
- Appendix D: Supported RAID Modes
- Appendix E: RAID Migrations
- Appendix F: Safe Mode Firmware Update Procedures
- IP Address MAC Address Device Name Lease Time
- Index
- A
- B
- C
- D
- E
- F
- G
- H
- |
- P
- Q
- R
- S
- U
- V
- W
Brand : WESTERN DIGITAL
Model : My Cloud Mirror WDBZVM0120JWT
Category : Server