
PDXF30C-1 - Cooker SMEG - Free user manual and instructions
Find the device manual for free PDXF30C-1 SMEG in PDF.


User questions about PDXF30C-1 SMEG
0 question about this device. Answer the ones you know or ask your own.
Ask a new question about this device
Download the instructions for your Cooker in PDF format for free! Find your manual PDXF30C-1 - SMEG and take your electronic device back in hand. On this page are published all the documents necessary for the use of your device. PDXF30C-1 by SMEG.
USER MANUAL PDXF30C-1 SMEG
INSTRUCTIONS FOR THE USER: these contain user advice, description of the commands and the correct procedures for cleaning and maintenance of the appliance
INSTRUCTIONS FOR THE INSTALLER: these instructions are intended for the qualified technician who must perform the installation, put it into operation and test the appliance
1. INSTRUCTIONS FOR USE
THIS MANUAL IS AN INTEGRAL PART OF THE APPLIANCE. IT MUST BE KEPT IN ITS ENTIRETY AND IN AN ACCESSIBLE PLACE FOR THE WHOLE WORKING LIFE OF THE HOB.
WE URGE YOU TO READ THIS MANUAL AND ALL THE INFORMATION IT CONTAINS CAREFULLY BEFORE USING THE APPLIANCE.
INSTALLATION MUST BE CARRIED OUT BY QUALIFIED PERSONNEL IN ACCORDANCE WITH THE REGULATIONS IN FORCE. THIS APPLIANCE IS INTENDED FOR DOMESTIC USE AND CONFORMS TO THE EEC DIRECTIVES CURRENTLY IN FORCE. THE APPLIANCE HAS BEEN BUILT TO CARRY OUT THE FOLLOWING FUNCTIONS: COOKING AND HEATING OF FOOD; ALL OTHER USES ARE CONSIDERED UNSUITABLE.
THE MANUFACTURER DECLINES ALL RESPONSIBILITY FOR IMPROPER USE.
DO NOT USE THIS APPLIANCE FOR HEATING ROOMS.
DO NOT DISCARD PACKAGING IN THE HOME ENVIRONMENT. SEPARATE THE VARIOUS WASTE MATERIALS AND TAKE THEM TO THE NEAREST DIFFERENTIATED WASTE COLLECTION CENTRE.
THIS APPLIANCE IS MARKED ACCORDING TO THE EUROPEAN DIRECTIVE 2002/96/EC ON WASTE ELECTRICAL AND ELECTRONIC EQUIPMENT (WEEE). THIS DIRECTIVE DETERMINES THE STANDARDS FOR THE COLLECTION AND RECYCLING OF WASTE ELECTRICAL AND ELECTRONIC EQUIPMENT APPLICABLE THROUGHOUT THE EUROPEAN UNION.

DO NOT OBSTRUCT VENTILATION OPENINGS AND HEAT DISPERSAL SLITS.
THE IDENTIFICATION PLATE WITH THE TECHNICAL DATA, SERIAL NUMBER AND BRAND NAME IS IN A VISIBLE POSITION UNDER THE CASING. THE PLATE MUST NOT BE REMOVED.
(ONLY FOR GLASS CERAMIC MODELS).
TAKE CARE NOT TO SPILL SUGAR OR SWEET MIXTURES ON THE HOB WHILE COOKING OR TO PLACE MATERIALS OR SUBSTANCES WHICH COULD MELT ON IT (PLASTIC OR TINFOIL). IF THIS HAPPENS, TO AVOID DAMAGE TO THE SURFACE, TURN OFF THE HEAT IMMEDIATELY AND CLEAN THE SURFACE WITH THE SCRAPER PROVIDED WHILE THE PLATE IS STILL WARM. IF THE GLASS CERAMIC HOB IS NOT CLEANED IMMEDIATELY, THERE IS A RISK THAT INCRUSTATIONS WILL BE LEFT THAT ARE IMPOSSIBLE TO REMOVE ONCE THE HOB HAS COOLED.

2. INSTRUCTIONS FOR DISPOSAL - OUR CONCERN FOR THE ENVIRONMENT
Our product's packing is made of non-polluting materials, therefore compatible with the environment and recyclable. Please help by disposing of the packaging correctly. You can obtain the addresses of collection, recycling and disposal centres from your retailer or from the competent local organisations.
Do not throw the packing or any part of it away. It can constitute a suffocation hazard for children, especially the plastic bags.
Your old appliance also needs to be disposed of correctly.
Important: hand over your appliance to the local agency authorised for the collection of electrical appliances no longer in use. Correct disposal enables intelligent recovery of valuable materials.
It is also necessary to cut the connecting cable to the power supply network, removing it along with the plug.
3. SAFETY INSTRUCTIONS
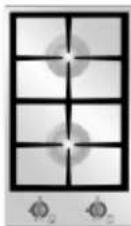
CONSULT THE INSTALLATION INSTRUCTIONS FOR SAFETY STANDARDS ON ELECTRICAL OR GAS APPLIANCES AND FOR VENTILATION FUNCTIONS. IN YOUR INTERESTS AND FOR YOUR SAFETY THE LAW REQUIRES THAT THE INSTALLATION AND SERVICING OF ALL ELECTRICAL APPLIANCES IS CARRIED OUT BY QUALIFIED PERSONNEL IN ACCORDANCE WITH THE REGULATIONS IN FORCE.
OUR APPROVED INSTALLERS GUARANTEE A SATISFACTORY JOB. GAS OR ELECTRICAL APPLIANCES MUST ALWAYS BE DISCONNECTED BY QUALIFIED PEOPLE.
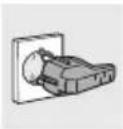
THE PLUG TO BE CONNECTED TO THE POWER SUPPLY CABLE AND ITS SOCKET MUST BE OF THE SAME TYPE AND CONFORM TO THE REGULATIONS IN FORCE.
THE SOCKET MUST BE ACCESSIBLE AFTER THE APPLIANCE IS INSTALLED. NEVER UNPLUG BY PULLING ON THE CABLE.
IT IS OBLIGATORY FOR ALL ELECTRICAL EQUIPMENT TO BE EARTHED ACCORDING TO THE METHODS LAID DOWN BY SAFETY REGULATIONS.
IMMEDIATELY AFTER INSTALLATION CARRY OUT A BRIEF INSPECTION TEST, FOLLOWING THE INSTRUCTIONS BELOW. SHOULD THE APPLIANCE NOT FUNCTION, DISCONNECT IT FROM THE ELECTRICITY SUPPLY AND CALL THE NEAREST TECHNICAL ASSISTANCE CENTRE. NEVER ATTEMPT TO REPAIR THE APPLIANCE.
THE APPLIANCE BECOMES VERY HOT DURING USE. SUITABLE HEAT-PROOF GLOVES SHOULD BE WORN FOR ALL OPERATIONS.
THE APPLIANCE IS INTENDED FOR USE BY ADULTS. KEEP CHILDREN AT A SAFE DISTANCE AND NEVER ALLOW THEM TO PLAY WITH IT.
ALWAYS CHECK THAT THE CONTROL KNOBS ARE IN THE 0 (OFF) POSITION WHEN YOU FINISH USING THE APPLIANCE.
AS SOON AS YOU NOTICE A FRACTURE OR A CRACK ON THE SURFACE OF THE GLASS CERAMIC HOB, SWITCH THE APPLIANCE OFF AND CONTACT AN AUTHORISED TECHNICAL ASSISTANCE CENTRE.
USERS OF PACEMAKERS OR SIMILAR DEVICES MUST ENSURE THAT THE OPERATION OF THEIR DEVICES WILL NOT BE AFFECTED BY THE INDUCTION FIELD, WHICH HAS A FREQUENCY RANGE OF 20-50 KHZ.
Safety instructions
IN CONFORMITY WITH THE PROVISIONS REGARDING ELECTROMAGNETIC COMPATIBILITY, THE ELECTROMAGNETIC INDUCTION COOKING HOB COMES UNDER GROUP 2 AND CLASS B (EN 55011).
The manufacturer cannot be held liable for damage to persons or things caused by failure to observe the above instructions, by interference with any part of the appliance or by the use of non-original spare parts.
Instructions for the user
- GET TO KNOW YOUR APPLIANCE
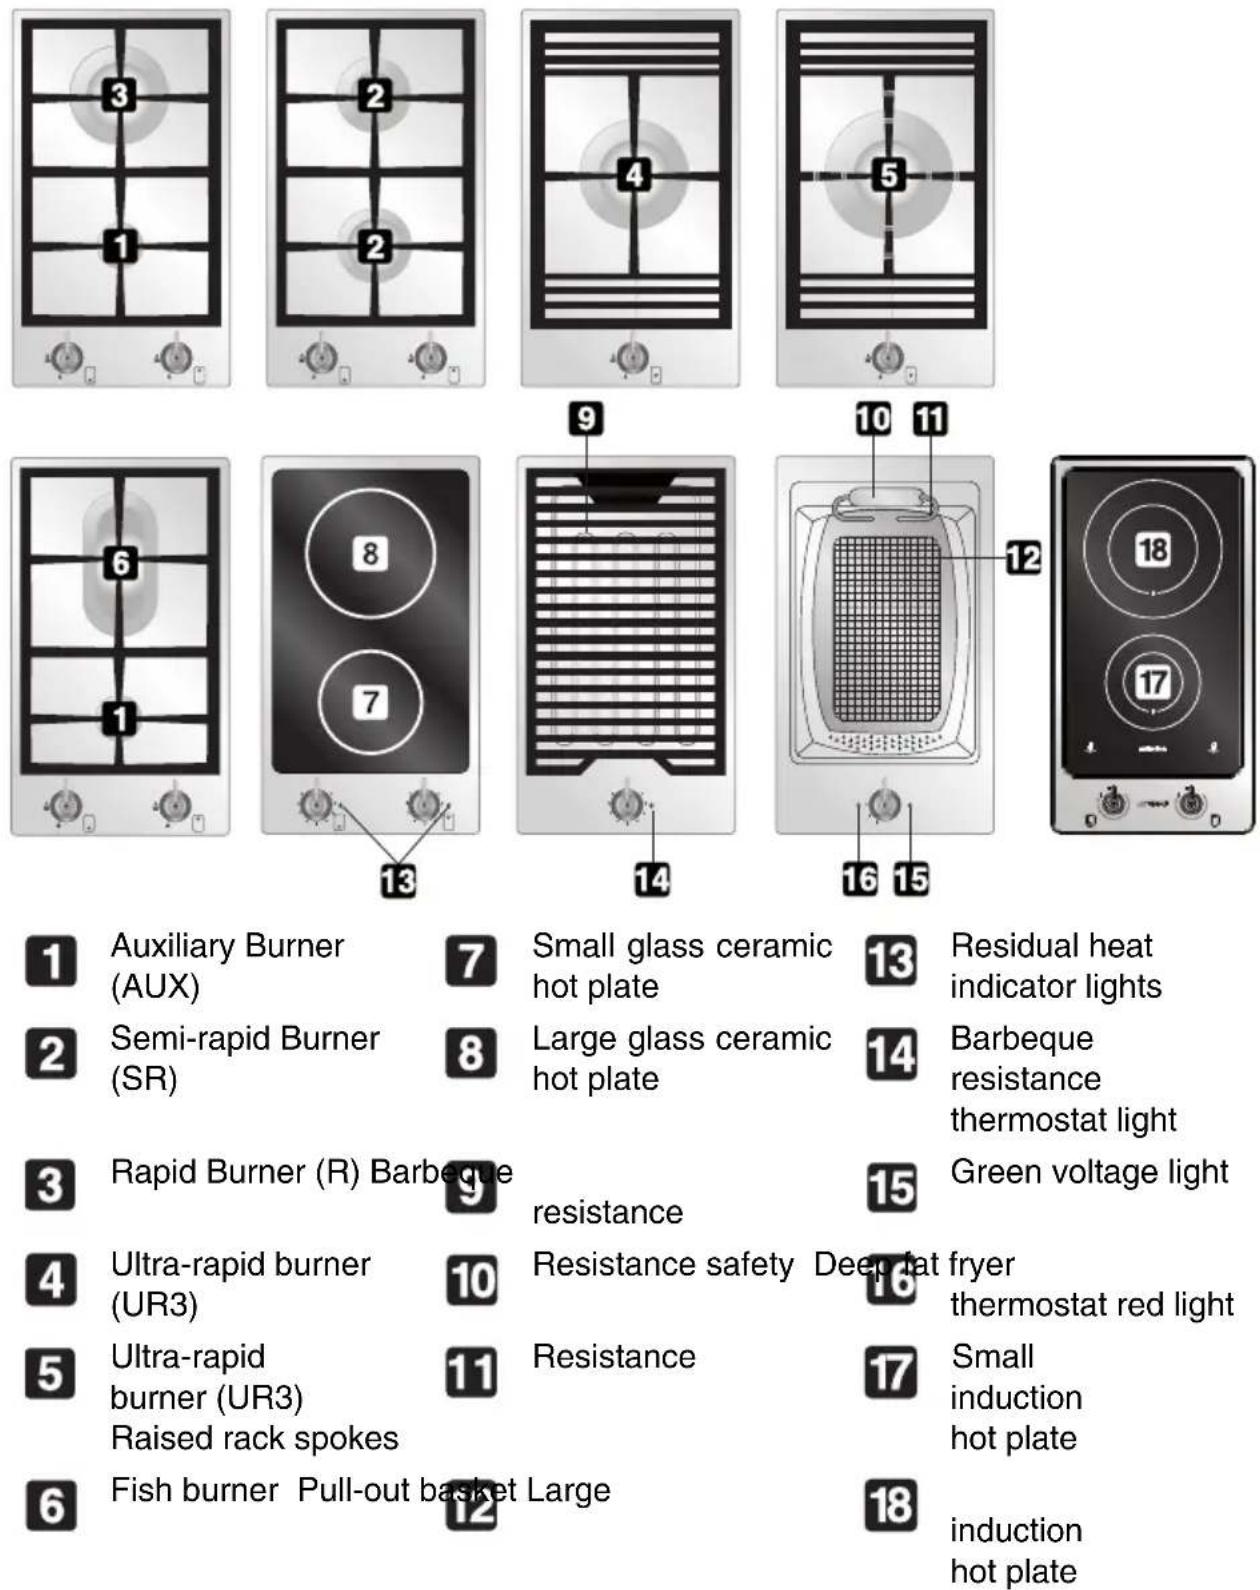
1 Auxiliary Burner (AUX)
2 Semi-rapid Burner (SR)
3 Rapid Burner (R) Barbeque
4 Ultra-rapid burner (UR3)
5 Ultra-rapid burner (UR3) Raised rack spokes
6 Fish burner Pull-out basket Large
7 Small glass ceramic hot plate
8 Large glass ceramic hot plate
eque resistance
10 Resistance safety
11 Resistance
asket Large
13 Residual heat indicator lights
14 Barbeque resistance thermostat light
15 Green voltage light
ep fat fryer thermostat red light
17 Small induction hot plate
18 induction hot plate
Instructions for the user

5. BEFORE INSTALLATION
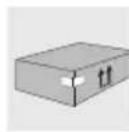
Do not discard packing in the home environment. Separate the various waste materials and take them to the nearest special garbage collection centre.
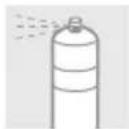
In order to remove all manufacturing residues, we recommend you to clean the appliance. For further information on cleaning see point "7. CLEANING AND MAINTENANCE".
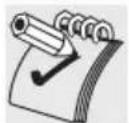
Before using the electric plates or the barbecue (if included) for the first time, pre-heat them to the maximum temperature long enough to burn off any manufacturing oily residues which could give the food a bad smell.
Instructions for the user
6. USING THE HOB
6.1 Gas hob
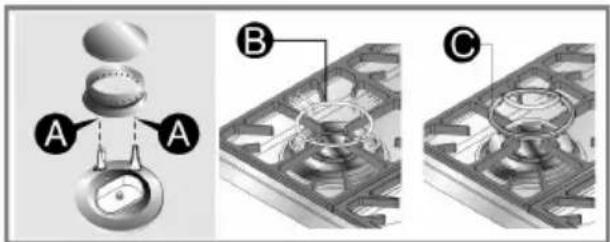
Before lighting the hob burners, check that the flame-spreader crowns are correctly in place with their respective burner caps, making sure that the holes A in the flame-spreaders are aligned with the plugs and thermocouples.
The rack B is for use with woks. To prevent damage to the cooker hob, it comes complete with a raised pan stand C. This must be placed under pans with a diameter bigger than those indicated in the table in point "6.3 Pan diameters". In any case, the pan stand C should not be used on UR-3 burners and the fish burner.
text_image
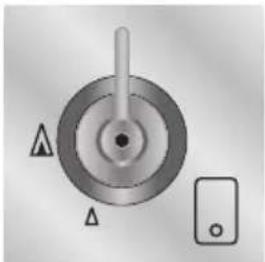
Technical diagram showing three views (A, B, C) of a mechanical component with labeled parts and cross-sectional views.The burner controlled by each knob is shown next to the knob. The appliance is equipped with an electrical ignition device. Simply press the knob and turn it counterclockwise to the maximum flame symbol, until the burner lights. If it does not light in the first 15 seconds, position the knob on 0 and wait at least 60 seconds before trying to light it again.
natural_image
Diagram of a mechanical component with circular features and a rectangular button (no text or symbols)On valved models, once the burner is lit, keep the knob pressed for a few seconds to give the thermocouple time to heat up. The burner may go out when the knob is released: in this case, the thermocouple has not heated up sufficiently. Wait a few moments and repeat the operation keeping the knob pressed for longer. This is not necessary on burners that are not equipped with a thermocouple. Once the burner is lit, the flame can be adjusted as required. Always check that the control knobs are in the (off) position when you finish using the hob.
If the burners should go out accidentally, after about 20 seconds a safety device will be tripped, cutting off the gas supply, even if the gas tap is open. In this case, turn the knob to the OFF position and wait at least 60 seconds before trying to light the burner again.
6.2 Practical tips for using the burners
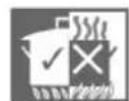
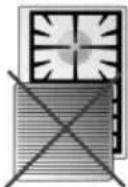
For better burner efficiency and to minimise gas consumption, use pans with a flat, smooth base and a lid that have a suitable size for the burner, thus preventing the flames reaching the sides of the pan (see point "6.3 Pan diameters"). Once the contents come to the boil, turn down the flame far enough to prevent the liquid from boiling over.
To prevent burns or damage to the hob during cooking, all pans or griddle plates must be placed inside the perimeter of the hob.
Take the greatest care when using fats or oils since they may catch fire if overheated.
6.3 Pan diameters
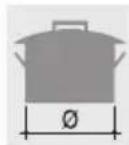
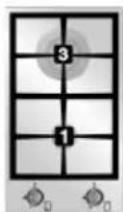
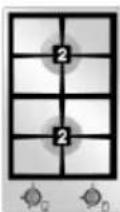
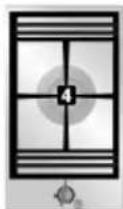
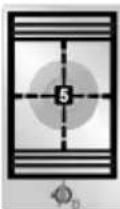
BURNERS
MIN. AND MAX. ∅ (IN CM)
1 Auxiliary 12 - 16
2 Semi-rapid 16 - 24
3 Rapid 18 - 26
4 Ultra-rapid 20 - 26
5 Ultra-rapid 20 - 30
rack with raised spokes
6 Fish b SPECIFIC @VAL CONTAINERS
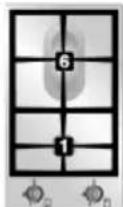
The pot diameters that can be used will be indicated below with raised rack:
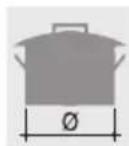
BURNERS
MIN. AND MAX. ∅ (IN CM)
7 Auxiliary 16 - 24
8 Semi-rapid 24 - 28
9 Rapid 26 - 28
Instructions for the user
6.4 Glass ceramic hob
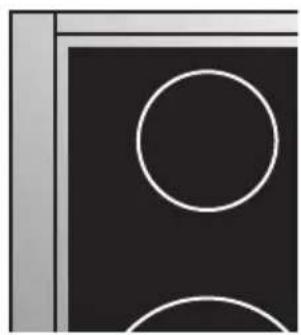
The appliance has two cooking zones of various power levels and diameters.
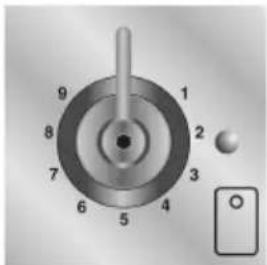
The positions are clearly indicated by circles and the heat is concentrated within the diameters traced on the hob. The radiating zones come on after a few seconds and their heat level can be adjusted by rotating the knob to the required position between 1 and 9.
text_image
9 8 7 6 5 4 3 2 1 OThe adjustment is gradual so all the intermediate zones can be used. The lights to the side of the knobs indicate the residual heat: they come on when the electric hot plates exceed 50^ and go off when the temperature falls below this level. For cleaning, see paragraph "7.3 Cleaning the glass ceramic hob".
6.4.1 Cooking guidelines
The table below shows the power values which can be set, with the relative type of food alongside. Settings may vary depending on the amount of food and personal taste.
| Knob Position | Suitable kind of cooking |
| 1 | To melt butter, chocolate or similar products. |
| 2 - 3 | To heat food, keep small amounts of water on the boil, and whip up sauces with egg yolk or butter. |
| 4 - 5 | To heat solid or liquid food, keep water on the boil, thaw deep-frozen food, cook omelettes of 2 or 3 eggs, fruit and vegetables, various cooking processes. |
| 6 | To stew meat, fish and vegetables, simmer food, make jams, etc. |
| 7 - 8 | To roast meat, fish, steaks and liver; to sauté meat, fish, eggs, etc. |
| 9 | To deep-fry potatoes, etc., or bring water to the boil rapidly. |
For best cooking results and energy saving, only use containers suitable for electric cooking:
- The bases of containers must be very thick, perfectly flat and clean and dry. The hob must also be clean and dry.
- Do not use cast iron saucepans or saucepans with a rough base, as they may scratch the cooking surface.
- The diameter of the base of the saucepans must be equal to the diameter of the circle outlining the cooking zone. If not, energy will be wasted.
natural_image
Abstract geometric composition with two white circles on a black background, no text or symbols present6.5 Barbeque hob
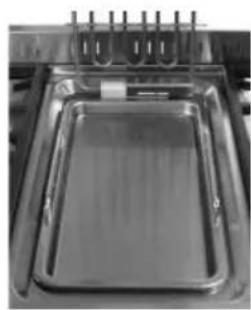
You can use the rack for grilling, cooking au gratin or as a barbeque.
In the tray under the resistance you can put:
- water (Fig. 1) to catch the fat and any grease dripping from the cooking (do not put more than a litre and a half of water into the tray),
- a layer of lava rock that keeps in the heat for longer and therefore improves the cooking times and quality.
1)
natural_image
Close-up of a metallic baking tray with a grid of rings above it (no visible text or symbols)In both cases, do not exceed the edge of the tray. Before pouring the water into the tray or putting in the lava rock, block the resistance as show in fig. 2.
2)
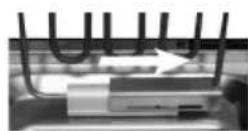
WARNING: if the tilted resistance is raised, it must always be blocked with the proper sliding device.
WARNING: before lifting the resistance up, make sure it is cool. Danger of burns!
WARNING: when the resistance is raised, take care not to activate the control device. Danger of burns!
Instructions for the user
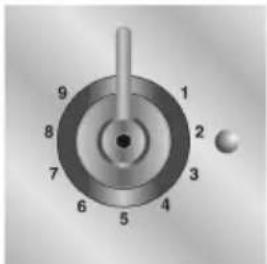
The adjustment of the barbeque hot plate's power is done using the control knob, turning it to the desired position between 1 and 9.
The adjustment is gradual so all the intermediate zones can be used. The indicator light comes on to indicate that the plate is heating up. When this light goes out, the preset power level has been reached.
natural_image
Circular mechanical component with numbered parts and a pointer, no visible text or symbolsWhen the light flashes regularly it means that the power of the hot plate is kept steady on the set level. To remove the rack for cleaning, see paragraph "7.4 Cleaning the barbeque plate"
6.6 Deep fat fryer
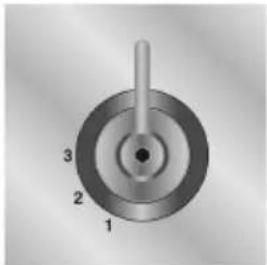
The choice of frying temperature is made by turning the knob to one of the positions between 1, 2 and 3. We have provided a table below that summarises the kind of frying needed for the level selected.
The green light coming on means that the appliance is powered (even when it is not in use).
natural_image
Mechanical component diagram with numbered parts (1, 2, 3) and a central shaft (no text or symbols beyond labels)The indicator light comes on to indicate that the resistance is heating up. When this light goes out, the preset power level has been reached.
When the light flashes regularly it means that the power of the hot plate is kept steady on the set level.
The table below shows the power values which can be set, together with the corresponding type of food. Settings may vary depending on the amount of food and personal taste.
| Knob Position | Suitable kind of cooking | Appropriate amounts (g) | Maximum amounts (g) |
| 1 (160°C) | Chips 500 750 | ||
| Chicken Legs - Wings * * | |||
| 1-2 (170°C) | Fried fish * * | ||
| 2 (180°C) | Fritters - Fish 250 350 | ||
| 2-3 (185°C) | Croquettes - Cheese croquettes | 500 | 750 |
^* = these levels depend mainly on the amount of food. Make sure they are completely immersed in the oil.
6.6.1 Some good frying tips
The level of oil in the basin must always be between 3 litres (minimum amount indicated inside the basin) and 3.5 litres (maximum amount indicated inside the basin). The resistance cannot operate in the open air: it must always be immersed in the oil or fat.
Do not put solid vegetable or animal fat into the basin. It must already be melted before putting it into the basin.
WARNING: before lifting the resistance up, make sure it is cool. Danger of burns!
WARNING: when the resistance is raised, take care not to activate the control device. Danger of burns!
The ideal frying temperature is between 160^ C and 185^ C. The oil will degrade very quickly at levels higher or lower than these.
If the temperature is too low, the food is not broiled on the surface and becomes impregnated with fat.
The larger the pieces the longer they have to fry. It is, therefore, a good idea to pick a cooking temperature that allows you to cook the food right through without burning it on the outside.
Instructions for the user
6.6.2 When the frying is finished
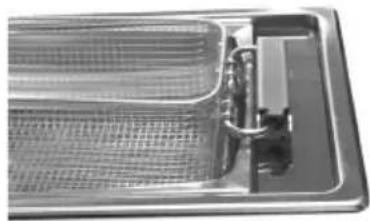
The basket containing the fried food can be left to "drain" before tipping out the contents. You can do this by hanging it using the specific hooks on the upper part of the resistance as shown in the figure to the side.
natural_image
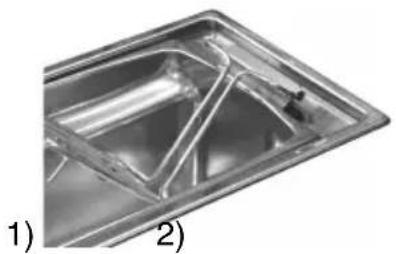
Close-up of a metallic mechanical component with internal mesh structure (no visible text or symbols)Once the basket has been removed, the resistance can be fixed using the specific hold in two positions:
1 position 1 for "draining" the frying oil before lifting it off completely
2 position 2 that allows you to easily remove the basin from its container.
See paragraph "7.5 Cleaning the deep fat fryer".
natural_image
Exterior view of a modern office building (no signage)
natural_image
Close-up of a stainless steel kitchen sink with a handle and lid, no visible text or symbols
WARNING: before draining the oil from the basin, make sure it has cooled. Danger of burns! Keep children at a distance.
6.7 Induction hob
Metal objects such as silverware or lids must not be placed on the cooking hob surface as they can become very hot.
6.7.1 Cooking zones
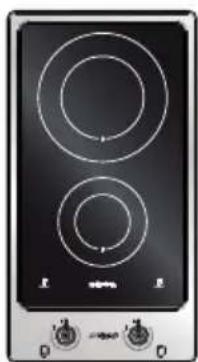
The appliance has 2 cooking zones of various power levels and diameters. Their position is clearly indicated with circles and the heat is limited to within the diameters traced on the glass.
The 2 cooking zones are of the HIGH-LIGHT type, they turn on after a few seconds and the heating is adjustable using the knob on the front panel from low to high.
natural_image
Front view of a black electric stove with two circular burners and control buttons at the bottom (no text or symbols visible)Under each cooking zone there is a coil called an inductor which is powered by an electronic system and which creates a variable magnetic field. When a pan is positioned within this magnetic field, the high frequency currents are concentrated directly onto the pan producing the heat required for cooking the food.
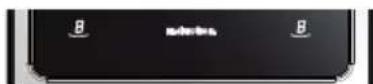
The 2 lights at the front between the cooking zones come on when one or more heating zones surpasses 60^ C. The lights only go off when the temperature drops below approx. 60^ C.
Instructions for the user
6.7.2 Heating accelerator
Each cooking zone has a heating accelerator.
This system lets the burner operate at maximum power for a time that is proportional to the selected power.
To start the heating accelerator, turn the knob to the left, select the "A" position and release. The letter "A" appears on the cooking hob display.
At this point you have 3 seconds to choose the desired heating position.
Once the position has been adjusted between 1 and 9, "A" and the selected position will flash on the display.
During the heating accelerator's operation it is possible to increase the heating intensity at any time. The "full power" period will consequently be modified.
On the other hand, if the power is reduced, turn the knob anti-clockwise. "A" option is automatically deactivated.
6.7.3 Operating power settings
Below is provided a table with the maximum power consumptions of the burners.
| Zone Number: | Zone Diameter Power consumed |
| 1 210 mm | Normal operation: 1850 WWith power function: 2500 W |
| 2 145 mm | Normal operation: 1400 WWith power function: 1800 W |
Before using the hob for the first time, pre-heat it to the maximum temperature long enough to burn any manufacturing oily residues which could give the food a bad smell.
6.7.4 Cookware
Appliances of this type require special cookware to be able to work. In fact, the cookware must have an iron or steel/iron bottom to generate the magnetic field necessary for it to be heated up.
Recipients made of the following are not suitable:
- glass
- ceramic:
- terracotta
- steel, aluminium or copper without a magnetic bottom
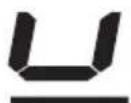
To see whether the pan is suitable, bring a magnet close to the bottom: if it is attracted, the pan is suitable for induction cooking. If you do not have a magnet, you can put a small amount of water in the recipient, place it on a cooking zone and start the burner. If, instead of the power symbol, the
U symbol appears, it means the pan is not suitable.
The pans used for cooking must have a minimum diameter to guarantee proper functioning.
Below is a table with the minimum diameters for pans according to the cooking zone.
| Zone Number | Minimum cookware diameter |
| 1 140 mm | |
| 2 90 mm |
Pans that are larger than the cooking zones can also be used, but care must be taken that the bottom of the pan does not come into contact with other cooking zones and that it is always centred on the cooking zone perimeter.
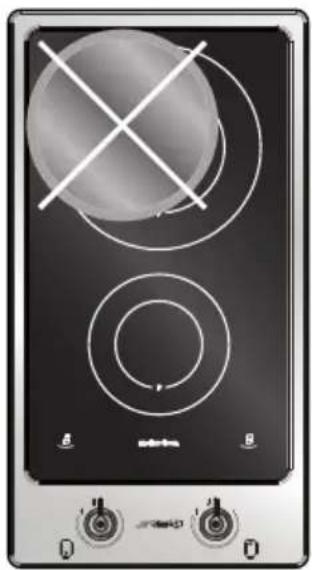
natural_image
Front view of a portable electric stove with two circular burners and a central kiln (no text or symbols visible)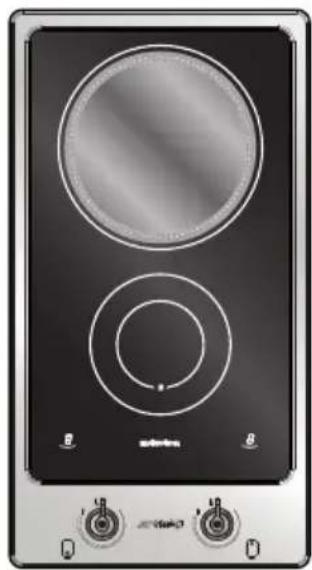
natural_image
Front view of a black electrical stove with two circular burners and three switches (no visible text or symbols)Instructions for the user
Make sure you only use containers intended for induction cooking, with a thick and completely flat bottom, or, if not available, containers without a curved bottom (concave or convex).
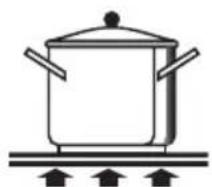
natural_image
Simple line drawing of a cooking pot on a stove (no text or symbols)YES
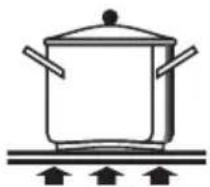
NO
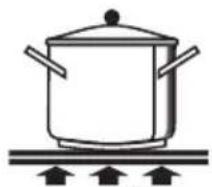
natural_image
Simple line drawing of a cooking pot on a heating element (no text or symbols)NO
6.7.5 Cookware detector signal
Every cooking zone has a “cookware detector” that only starts the cooking if there is a well positioned container with the suitable characteristics present on the burner.
If the container is not well positioned or is not made of the correct material and still tries to activate the burner, after a few seconds from the burner's activation, the symbol will appear on the display.
6.7.6 Residual heat
Each cooking zone is equipped with a residual heat warning device. After any zone is switched off, a flashing “H may appear on the display. This warns that the cooking zone concerned is still very hot. Cooking can be restarted while the “H is flashing: in this case, proceed as described in point “3”.
6.7.7 Cooking hob lock-out
When not in use, the hob can be “locked” from being accidentally turned on by children.
With the hotplates switched off, turn the control knobs to the left at the same time until the power display shows the letter "L", then release the knobs. To unlock it repeat the same operation: The burners' displays will show a 0 that will indicate that the burners' lock has been deactivated.
6.7.8 Circuit board thermal protection
The appliance is provided with a device that constantly measures the temperature of the electronic circuit board.
If the temperature surpasses certain values, the device will activate certain functions to lower the temperature and allow the glass ceramic hob to continue to work correctly.
Below is a table with the operations that are activated automatically and the relative start temperature:
| Operation | Activating temperature |
| Fan turns on at low speed 50°C | |
| Fan turns on at high speed 60°C | |
| Fan returns to low speed 55°C | |
| Fan turns off 45°C | |
| Operating power reduced from Power to 9 76°C | |
| Reduction of power of a point for every cooking zone 85°C | |
| Turning off all the cooking zones 90°C | |
| Switching the cooking zones on again at reduced power | 85°C |
| Normal operation of all the cooking zones 80°C |
Every intervention of this type will be identified on the cooking hob with a flashing light on the power display.
6.7.9 Glass ceramic hob thermal protection
Every cooking zone has a device that constantly measures the temperature.
If the temperature surpasses certain values, the device will activate certain functions to lower the temperature and allow the glass ceramic hob to continue to work correctly.
Below is a table with the operations that are activated automatically and the relative start temperature:
| Operation | Activating temperature |
| Operating power reduced from Power to 9 250°C | |
| Reduction of the power of a point 280°C | |
| Switching off the cooking zone 300°C | |
| Return of the power to the set value 250°C |
Every intervention of this type will be identified on the cooking hob with a flashing light on the power display.
Instructions for the user

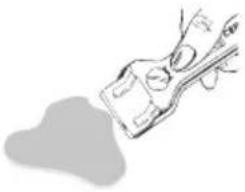
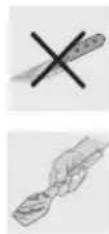
Take care not to spill sugar or sweet mixtures on to the hob when hot. Never place materials or substances which may melt (plastic or aluminium foil) on the hob. If this occurs, promptly switch off and remove the molten material with the scraper provided while the cooking zone is still warm to prevent it from being damaged.
Failure to instantly clean the glass ceramic hob could lead to encrustations which are impossible to remove once the hob has cooled down.
natural_image
Simple line drawing of a hand holding a small object with a cloud shape below (no text or symbols)
Important!
Take care with children as the residual heat indicator lights are out of sight to them. The cooking zones remain hot for a certain period of time even after they have been turned off. Make sure that children never touch the hob.
Do not leave metal objects on the hob: they could heat up
6.7.10 Warming function
The purpose of the warming function is to regulate the temperature of the bottom of the cookware to approximately 65^ C. This allows for the food to be kept warm at the ideal power level, as well as heating slowly. The maximum duration of the keep warm function is limited to 2 hours.
The keep warm function is between [0] and [1] and is indicated with appropriate symbols on the cooking zones.

Instructions for the user

7. CLEANING AND MAINTENANCE
NEVER USE A JET OF STEAM FOR CLEANING THE APPLIANCE.
Before performing any operations requiring access to powered parts, switch off the power supply to the appliance.
7.1 Cleaning stainless steel
To keep stainless steel in good condition it should be cleaned regularly after use. Let it cool first.
7.1.1 Ordinary daily cleaning
To clean and preserve the stainless steel surfaces, use only specific products that do not contain abrasives or chlorine-based acids.
How to use: pour the product onto a damp cloth and wipe the surface, rinse thoroughly and dry with a soft cloth or deerskin.
7.1.2 Food stains or residues
Do not use metallic sponges or sharp scrapers as they will damage the surface. Use ordinary non-abrasive products for steel, with the aid of wooden or plastic utensils if necessary. Rinse thoroughly and dry with a soft cloth or chamois leather.
7.2 Cleaning the gas components
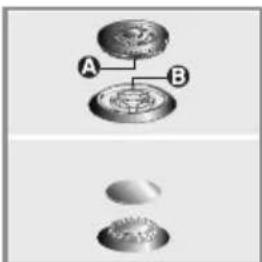
For easier cleaning the pan stands, burner caps, flame spreader crowns and burners can all be removed; wash them with warm water and a non-abrasive detergent making sure to remove any encrustation, then wait until they are perfectly dry. Replace the burner caps on their corresponding crowns, making sure that the slots A are centred with the burner pins B.
text_image
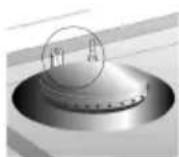
A BFor correct operation, the igniters and thermocouples must always be perfectly clean. Check them frequently and clean them with a damp cloth if necessary. Remove any dry residues with a wooden toothpick or a needle.
Instructions for the user
7.3 Cleaning the glass ceramic hob
The glass ceramic hob should be regularly cleaned, preferably after every use, once the residual heat warning lights have gone off.
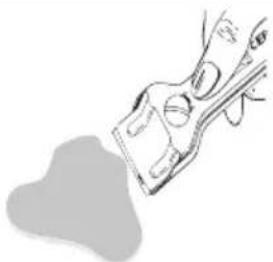
Smudges from aluminium-based pans can be easily cleaned off with a cloth dampened in vinegar. Remove any burnt residues after cooking with the scraper provided; rinse with water and wipe dry with a clean cloth.
natural_image
Simple line drawing of a hand holding a tool or device, with no text or symbols present.Regular use of the scraper considerably reduces the need for chemical detergents for the daily cleaning of the hob. Never use abrasive or corrosive detergents (e.g. cleaning powders, oven sprays, spot-removers and wire sponges).

Never use a jet of steam to clean the appliance.
7.4 Cleaning the barbeque plate
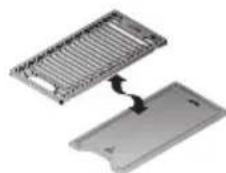
After leaving the plate to cool, remove it from its position by lifting it up from the front as shown in figure 1.
Clean it using standard washing up liquid and a soft sponge.
In order to remove the tray under the barbeque resistance:
1 Remove the plate as described
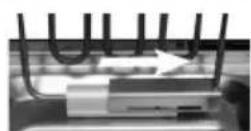
2 Lift the resistance and block it, sliding the hold to the right (as shown in figure 2/3)
3 Remove the basin using the two handles and clean using specific cleaning products for stainless steel and a soft sponge.
1)
natural_image
3D diagram of a mechanical component with a spring attached to a flat base (no text or symbols visible)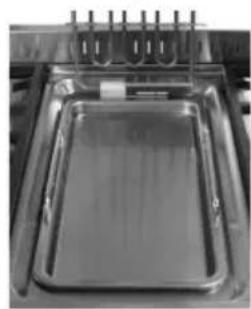
natural_image
Close-up of a metallic baking tray with handles and a grid of rings above (no visible text or symbols)2)
3)
WARNING: before lifting the resistance up, make sure it is cool. Danger of burns!
Instructions for the user

WARNING: when the resistance is raised, take care not to activate the control device. Danger of burns!
7.5 Cleaning the deep fat fryer
As well as following the instructions in paragraph “7.1 Cleaning stainless steel” there are a few considerations need to be made regarding the cleaning of the basin.
Once you have finished frying and removed the basket (that can be washed in the dishwasher), remove the basin with the frying oil, lifting it up using the specific handles.
THIS OPERATION SHOULD BE DONE AFTER LEAVING THE PRODUCT TO COOL AND THE OIL IT CONTAINS. KEEP CHILDREN AT A DISTANCE AT THIS STAGE.
After appropriately eliminating all the frying oil, you can wash the basin together with the basket, in the dishwasher.
WARNING: before lifting the resistance up, make sure it is cool. Danger of burns!

WARNING: when the resistance is raised, take care not to activate the control device. Danger of burns!
Instructions for the installer
8. INSTALLING THE APPLIANCE
8.1 Positioning in the counter top
This is a cat. 3 appliance.
The following operation requires building and/or carpentry work, therefore it must be carried out by a skilled technician.
Installation can be carried out on various materials such as masonry, metal, solid wood or plastic laminated wood as long as they are heat resistant (T 90°C).
8.1.1 Fixing to the supporting structure
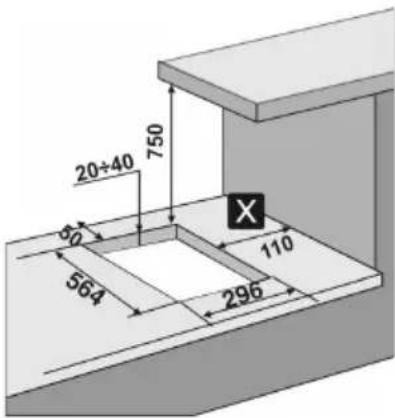
Create an opening in the counter top with the dimensions shown in the figure, keeping a minimum distance of 50 mm from the rear edge. This appliance can be mounted against walls higher than the work surface on condition that a distance of "X" be kept between the appliance and the wall as shown in the figure so as to avoid damage from overheating. Make sure that there is a minimum of 750 mm between the hob and any shelf that may be installed directly above it.
text_image
20÷40 750 80 564 110 296
WARNING: IN THE EVENT THAT YOU ARE INSTALLING A HOB FITTED WITH FISH BURNER, THE DISTANCE "X" FROM THE SIDE WALL, EXTENDS FROM 110 mm TO 300 mm.
Carefully position the insulating gasket provided on the external perimeter of the hole made in the hob top, in an attempt to make it stick on the whole surface with gentle pressure from your hands. After carrying out these operations, use the 7 brackets provided to fit the hob to the structure. The figures below show how to use these brackets.
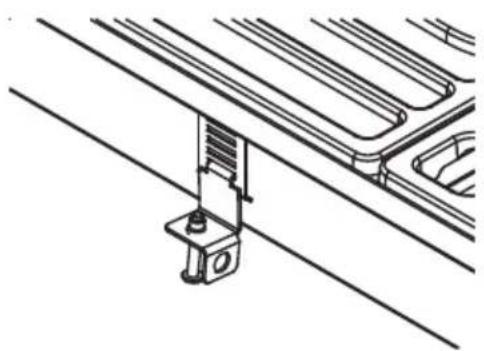
natural_image
Technical line drawing of a mechanical assembly with diagonal lines and a bracket (no text or symbols)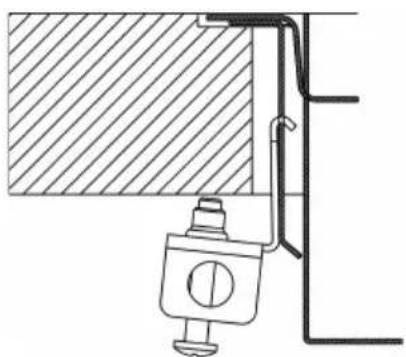
natural_image
Technical line drawing of a mechanical assembly with a hatched section and connected components (no text or symbols)Instructions for the installer
8.1.2 Fixing to the electric model support structure
Create an opening in the counter top with the dimensions shown in the figure, keeping a minimum distance of 40 mm from the rear edge. The lower part of the casing must be fully accessible after the appliance has been installed.
This appliance can be mounted against walls higher than the work surface on condition that a distance of "X" be kept between the appliance and the wall as shown in the figure so as to avoid damage from overheating. Make sure that there is a minimum of 750 mm (Fig. 1) between the hob and any shelf that may be installed directly above it.
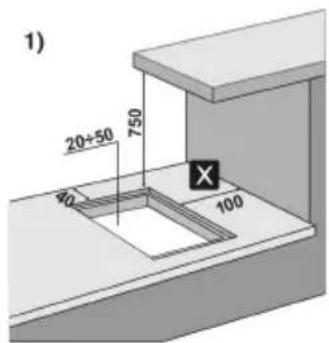
text_image
1) 20÷50 750 40 100
WARNING: IF YOU ARE INSTALLING A HOB FITTED WITH FISH BURNER, THE DISTANCE "X" FROM THE SIDE WALL, EXTENDS FROM 100 mm TO 300 mm.
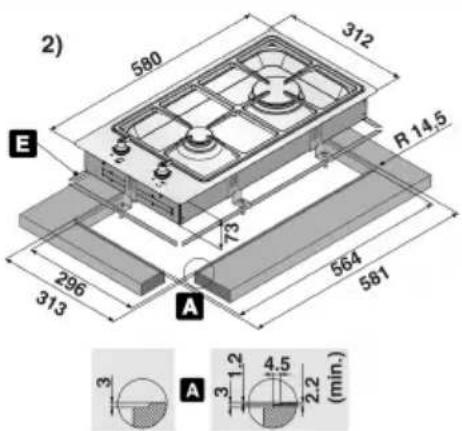
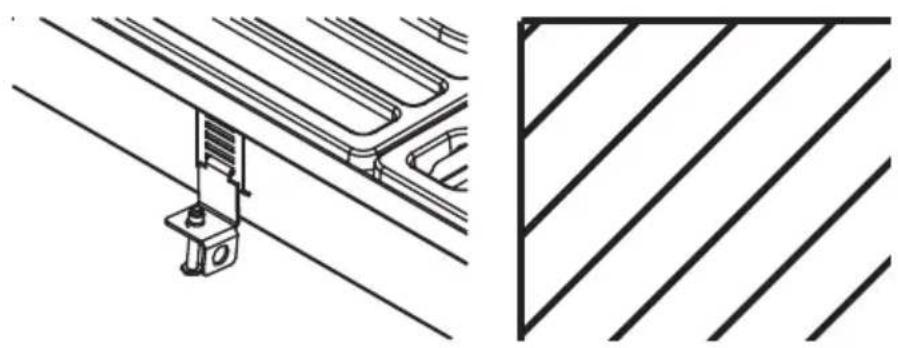
Furthermore, this kind of appliance needs a milling on the hob top of 3 mm in depth; the measurements are indicated in figure 2 (detail A). Before positioning the hob, the supplied adhesive sponge "E" must be spread out over the entire surface of the milling (fig. 2). After carrying out these operations, use the 7 brackets provided to fit the hob to the structure. The figures below show how to use these brackets.
text_image
2) 580 312 E R 14,5 296 313 A 564 581 3 A 3 1,2 4,5 2,2 (min.)We would advise the right section for laminated tops with a thickness less than 3 mm
natural_image
Technical line drawing showing a mechanical assembly and a diagonal striped pattern (no text or symbols)Instructions for the installer
Important: other types of installation are possible if supervised by the manufacturer.
Important: for fixing this product to the support structure, you are advised not to use mechanical or electrical screwdrivers and to exert moderate pressure by hand on the mounting parts.
Important: for fixing the product, use the supplied brackets in all the fixing points.
If this product is installed over an oven, the oven must have a cooling fan.
text_image
Max 150 mm Min. 50 mm Max 100 mm
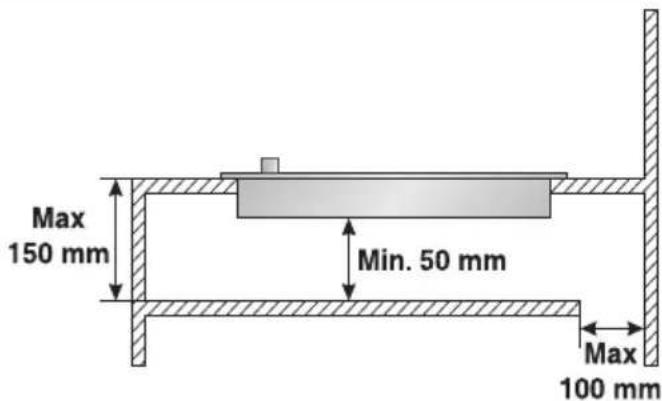
Important (only for Ultra-rapid burners (UR3) (5) with raised racks): if the appliance is mounted on a unit, make sure that a separating shelf is installed, as shown in the figure.
If the appliance, however, is on an oven installed under the hob, there is no need to install a separating shelf.
Installation of an oven without a cooling fan underneath the hob is forbidden.
Instructions for the installer

8.2 Electrical connection
Make sure that the voltage and capacity of the power line conform to the data shown on the plate located under the casing.
Do not remove this plate for any reason.
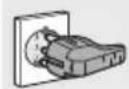
The plug at the end of the power cable and the wall socket must be compatible and in compliance with current legislation on electrical systems. Make sure that the supply line is suitably earthed.
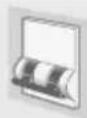
Fit power line with an omnipolar circuit breaker with a contact opening gap equal to or greater than 3 mm in an easily accessible position close to the hob.
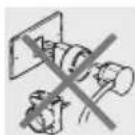
Avoid the use of adapters and shunts.

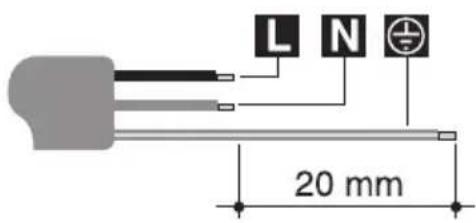
If the power cable needs to be replaced, the wire section of the new cable should not be less than 0.75 mm ^2 (3 x 0.75 cable), with the exception of the induction hob where the section should be no less than 1.5 mm ^2 (3 x 1.5 cable), bearing in mind that the end piece to be connected to the appliance must have an earth wire (yellow-green) that is at least 20 mm longer.
text_image
L N 20 mmOnly use a H05V2V2-F or similar resistance cable to the maximum temperature of 90^ C. Its replacement must be carried out be a specialised technician who must carry out the network connection following the diagram below.
$$ \boldsymbol {L} = \text { brown } $$
$$ \boldsymbol {N} = b l u e $$

yellow-green
The manufacturer declines all responsibility for damage to persons or things caused by the non-observance of the above indications or as a result of tampering with any part of the appliance.
Instructions for the installer
9. GAS CONNECTION
Before installation, make sure that the local distribution conditions (nature and pressure of the gas) and the state of regulation of the appliance are compatible.
Connection to the gas supply network can be made using a rigid copper hose or a flexible steel hose with a continuous wall and in compliance with the guidelines established under current legislation.
Once the operation is complete, check the hose fittings for leaks using a soapy solution; never use a flame. The cooker hob is preset for natural gas G20 (2H) at a pressure of 20 mbar.
For supplying it with other types of gas, see chapter "10. ADAPTATION TO DIFFERENT TYPES OF GAS".
The gas inlet connection is threaded 12 ” external gas (ISO 228-1).
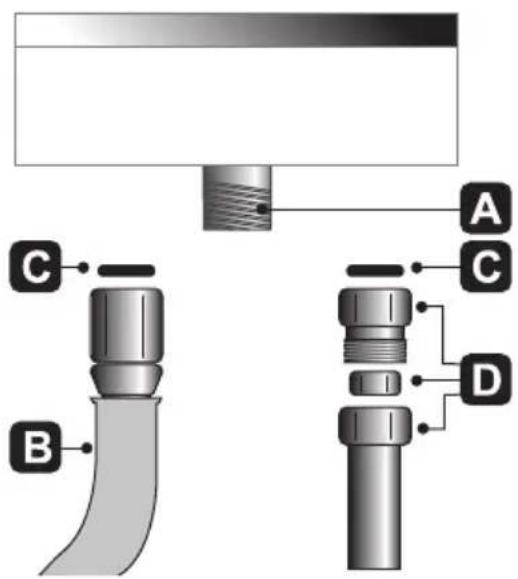
Connection with rigid copper hose: The connection to the gas supply network must be carried out in such a way that it does not cause stress of any kind to the appliance. The connection can be made using the adapter unit D with double cone, always inserting the supplied gasket C in between.
Connection with flexible steel hose: Use only continuous wall stainless steel hoses that comply with current legislation, making sure to always insert the supplied gasket C between the connection A and the flexible hose B.
text_image
A C B C D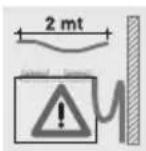
Installation with the flexible hose must be carried out so that the length of the piping does not exceed 2 metres fully extended; make sure that the hoses do not come into contact with moving parts and that they are not crushed in any way.
9.1 Connection to liquid gas
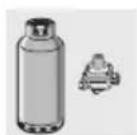
Use a pressure regulator and make the connection on the gas cylinder following the guidelines established by the regulations in force.
Make sure that the supply pressure complies with the values indicated in the table at point "10.2 Burner and nozzle characteristics table".
9.2 Room ventilation
The room containing the appliance should have an air supply in accordance with the standards in force. The room where the appliance is installed must have enough air flow needed for the regular combustion of gas and the necessary air change in the room itself. The air vents, protected by grills, must be the right size to comply with current regulations and positioned so that no part of them is obstructed, not even partially. The room must be kept adequately ventilated in order to eliminate the heat and humidity produced by cooking: in particular, after prolonged use, we recommend you open a window or increase the speed of any fans.
9.3 Extraction of the combustion products
Extraction of the products of combustion must be ensured by means of hoods connected to a natural draught chimney whose efficiency is assured or via forced extraction. An efficient extraction system requires precision planning by a specialist qualified in this area and must comply with the positions and distances indicated by the regulations. When the job is complete, the installer must issue a certificate of conformity.
10. ADAPTATION TO DIFFERENT TYPES OF GAS
Before carrying out the following operations, disconnect the appliance from the electricity supply.
The appliance is preset for natural gas G20 (2H) at a pressure of 20 mbar. In the case of operation with other types of gas the burner nozzles must be changed and the minimum flame adjusted on the gas taps. To change the nozzles, proceed as described below.
10.1 Replacement of nozzles on the hob
1 Extract the pan stands and remove all the caps and flame-spreader crowns;
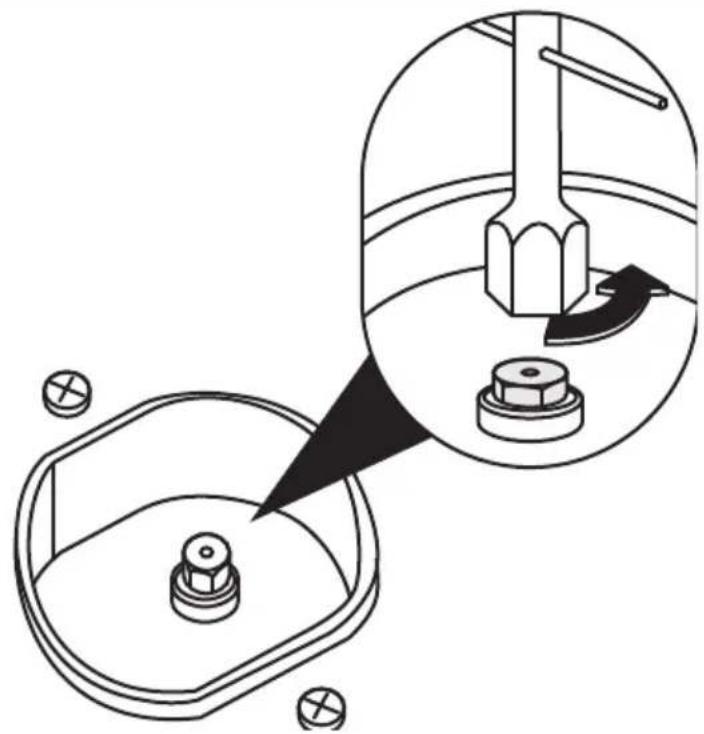
2 Unscrew the burner nozzles with a 7 mm socket wrench;
3 Replace the burner nozzles according to the type of gas to be used (see point "10.2 Burner and nozzle characteristics table").
4 Replace the burners in the correct position.
The nozzles for using city gas (G110 - 8 mbar) are available from authorised service centres.
natural_image
Technical diagram showing a mechanical assembly with a central component and a magnified inset view (no text or labels)10.2 Burner and nozzle characteristics table
| Burner | RATED HEATING CAPACITY (KW) | LPG - G30/G31 30/37 mbar | ||||
| Nozzle diameter 1/100 mm | By-pass 1/100 mm | Reduced capacity (W) | Capacity g/h G30 | Capacity g/h G31 | ||
| Auxiliary (1) 1.05 50 | 28 350 76 75 | |||||
| Semi-rapid (2) 1.75 | 65 32 450 127 125 | |||||
| Rapid (3) 2.3 75 42 | 800 167 164 | |||||
| Ultra-rapid (4) 3.5 | 94 63 1500 254 250 | |||||
| Ultra-rapid (5) | 3.9 | 100 | 63 | 1500 | 284 | 278 |
| Fish burner (6) 1.9 | 68 42 900 138 136 | |||||
| Burner | RATED HEATING CAPACITY (KW) | NATURAL GAS - G20 20 mbar | ||||
| Nozzle diameter 1/100 mm | Reduced capacity (W) | |||||
| Auxiliary (1) | 1.05 | 72 | 350 | |||
| Semi-rapid (2) | 1.75 | 97 | 450 | |||
| Rapid (3) | 2.5 | 108 | 800 | |||
| Ultra-rapid (4) | 3.5 | 133 | 1500 | |||
| Ultra-rapid (5) | 3.9 | 135 | 1500 | |||
| Fish burner (6) | 1.9 | 94 | 900 | |||
To identify the burners on your hob, refer to the drawings in point "4. GET TO KNOW YOUR APPLIANCE".
11. FINAL OPERATIONS FOR GAS APPLIANCES
After making the adjustments described above, reassemble the appliance by following the instructions in point "10.1 Replacement of nozzles on the hob" in reverse order.
After adjustment with a gas other than the preset one, replace the label on the casing of the appliance with the label corresponding to the new gas. This label can be obtained from the nearest Authorised Service Centre.
11.1 Adjusting the minimum for city and natural gas
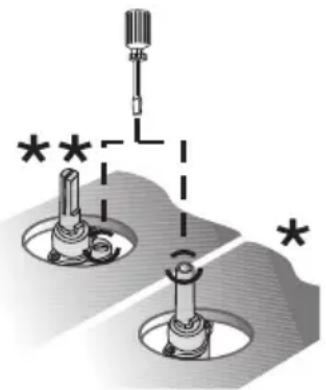
Light the burner and turn it to the minimum position. Extract the gas tap knob and turn the adjustment screw inside or next to the tap rod (depending on the model) until the correct minimum flame is achieved. Refit the knob and verify that the burner flame is stable (when turning the knob rapidly from the maximum to the minimum position the flame must not go out). Repeat the operation on all the gas taps.
natural_image
Diagram showing two mechanical components with a vertical rod and a dashed line, marked with asterisks (no text or symbols present)11.2 Adjusting the minimum for liquid gas
To adjust the minimum with liquid gas, you must tighten the screw inside or next to the tap rod (depending on the model) fully in a clockwise direction. The bypass diameters for each individual burner are shown in the table "10.2 Burner and nozzle characteristics table".
11.3 Lubrication of gas taps
Over time the gas taps may become difficult to turn and get blocked. Clean them internally and replace the lubricating grease. This operation must be carried out by a specialised technician.