
TPMS 2.0 - Uncategorized BLAUPUNKT - Free user manual and instructions
Find the device manual for free TPMS 2.0 BLAUPUNKT in PDF.

| Product Type | Tire Pressure Monitoring System (TPMS) |
| Brand | Blaupunkt |
| Model | TPMS 2.0 |
| Sensor Operating Frequency | 433.92 MHz |
| Sensor Battery Voltage | 1.8V ~ 3.3V |
| Sensor Battery Type | CR1632 |
| Sensor Battery Life | 1 year |
| Sensor Operating Temperature | -20°C ~ 60°C |
| Sensor Pressure Range | 0 ~ 3.5 Bar / 0 ~ 50 PSI |
| Display Operating Frequency | 433.92 MHz |
| Display Operating Voltage | 3.7V |
| Display Operating Temperature | -20°C ~ 70°C |
| Default High Pressure Alert | 3.0 Bar / 43 PSI |
| Default Low Pressure Alert | 1.8 Bar / 26 PSI |
| Default High Temperature Alert | 68°C ~ 80°C |
| Temperature Precision | +/- 2°C |
| Pressure Precision | 0.1 Bar / 1.5 PSI |
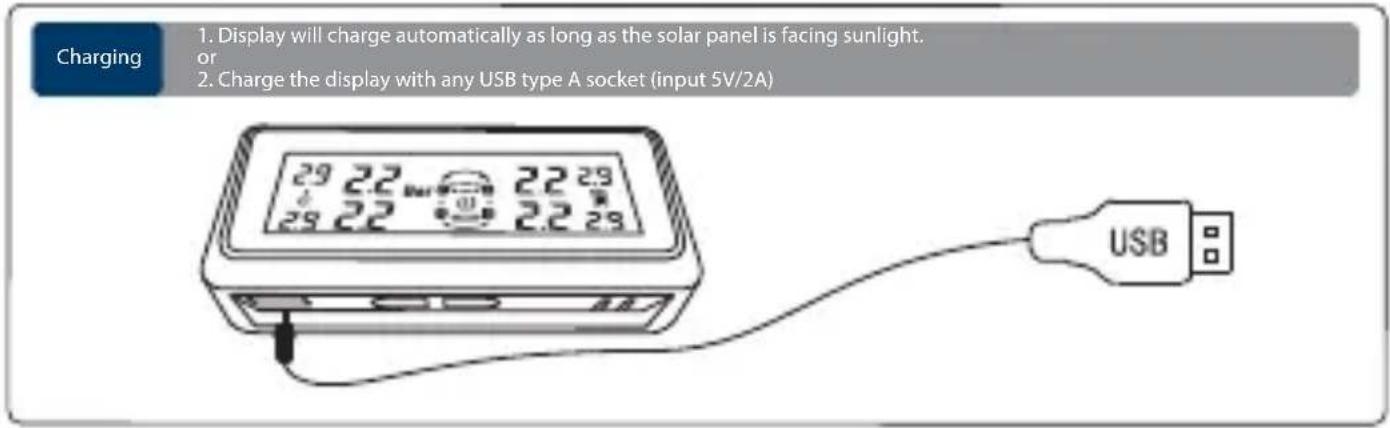
| Power Source (Display) | Rechargeable battery (USB charging) |
| Auto Power Off | 60 seconds after vehicle stops |
| Sensor Installation | Mount on tire valve (ensure compatibility) |
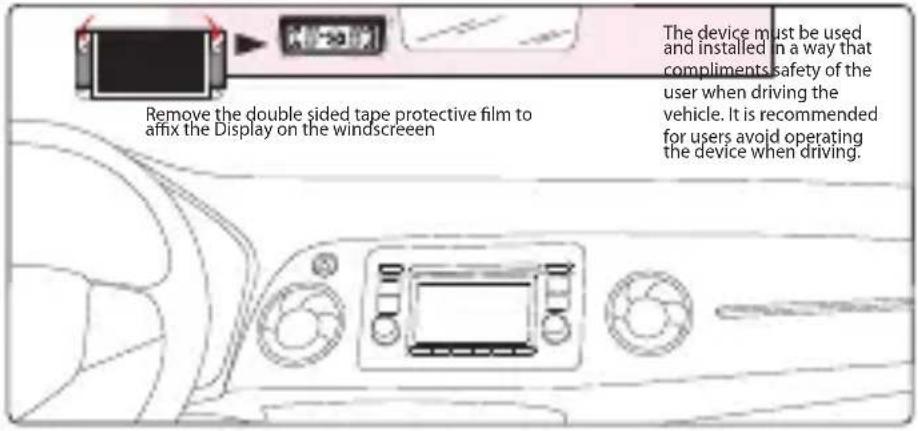
| Display Installation | Place on dashboard or windshield |
| Sensor Pairing | Required when switching tire positions or replacing sensors |
| Compliance | Complies with standard TPMS regulations |
Frequently Asked Questions - TPMS 2.0 BLAUPUNKT
User questions about TPMS 2.0 BLAUPUNKT
0 question about this device. Answer the ones you know or ask your own.
Ask a new question about this device
Download the instructions for your Uncategorized in PDF format for free! Find your manual TPMS 2.0 - BLAUPUNKT and take your electronic device back in hand. On this page are published all the documents necessary for the use of your device. TPMS 2.0 by BLAUPUNKT.
USER MANUAL TPMS 2.0 BLAUPUNKT
natural_image
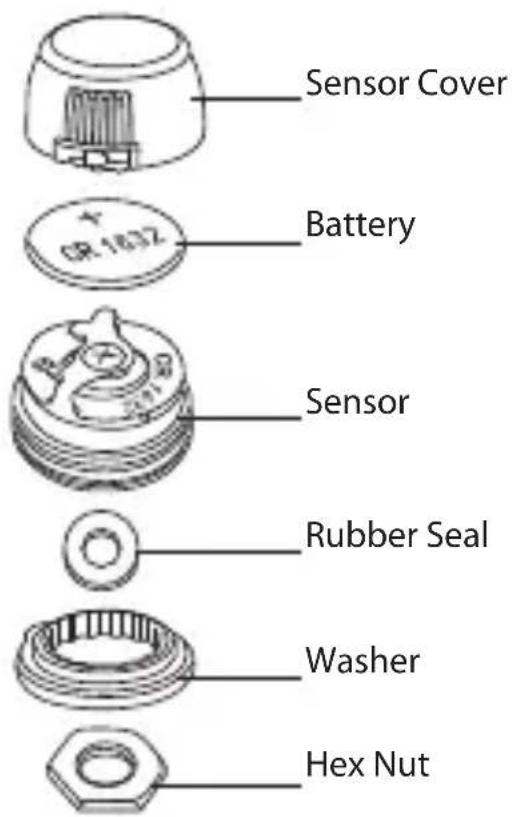
Close-up of four metallic mechanical components with no visible text or symbolsEnjoy it.
Sensor
| Operating frequency | 433.92MHz |
| Battery voltage | 1.8V ~ 3.3V |
| Battery lifetime | 1-year |
| Operating temperature | -20°C ~ 60°C |
| Pressure range | 0~3.5 Bar / 0~50 PSI |
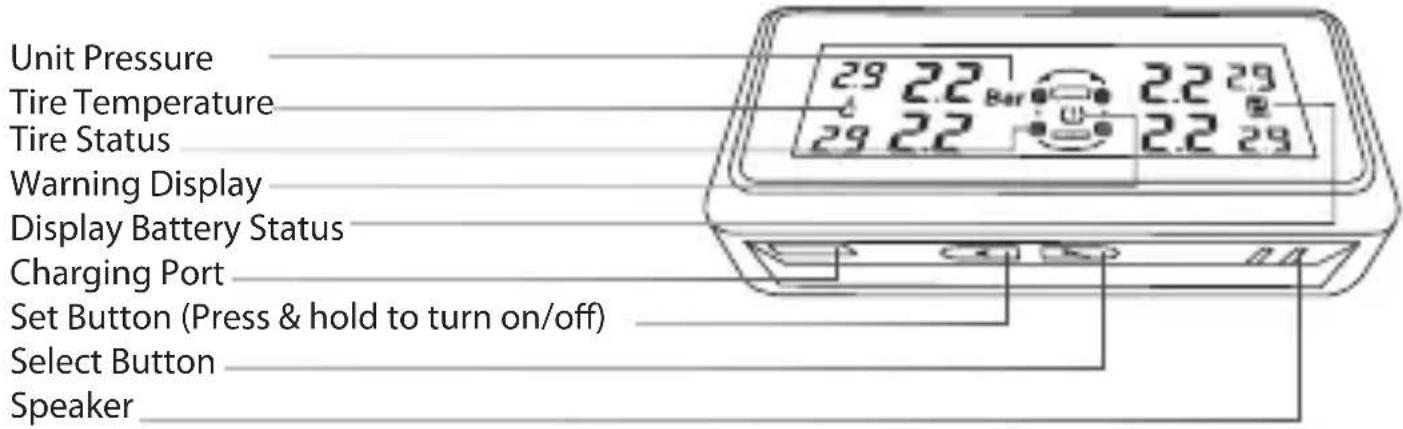
Display
| Operating frequency | 433.92MHz |
| Operating voltage | 3.7V |
| Operating temperature | -20°C ~ 70°C |
Default value
| High pressure value | 3.0 Bar / 43 PSI |
| Low pressure value | 1.8 Bar / 26 PSI |
| High temperature value | 68°C ~ 80°C |
Precision
| Temperature | +/-2°C |
| Pressure | 0.1 Bar / 1.5 PSI |
Air pressure unit 1 Bar = 14.5 PSI = 100 Kpa = 1.02Kgf/cm2
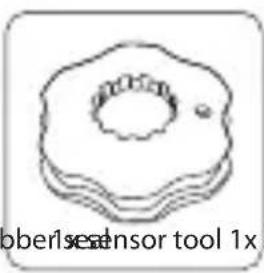
Accessories
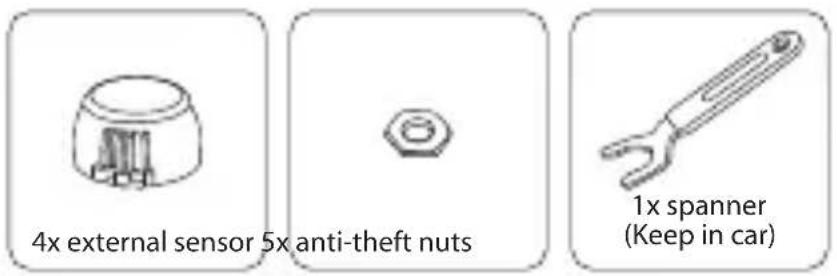

natural_image
Simple line drawing of a donut-shaped object with a central hole and a small dot, no text or symbols present.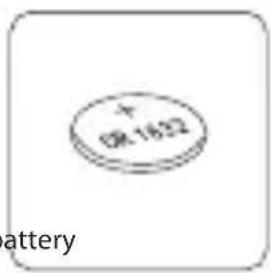

natural_image
Simple geometric shape: a black circle centered inside a white square (no text or symbols)
SENSOR
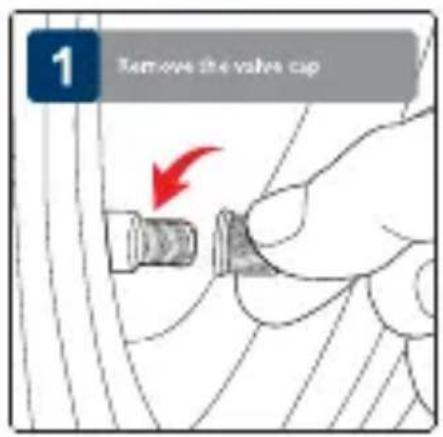
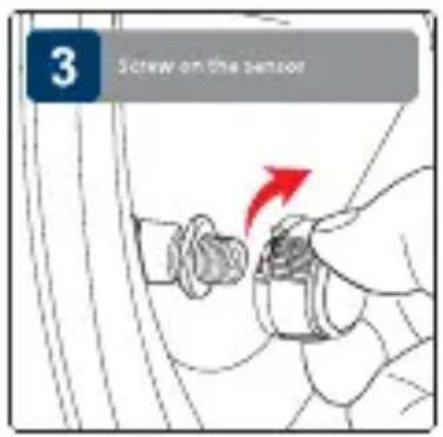
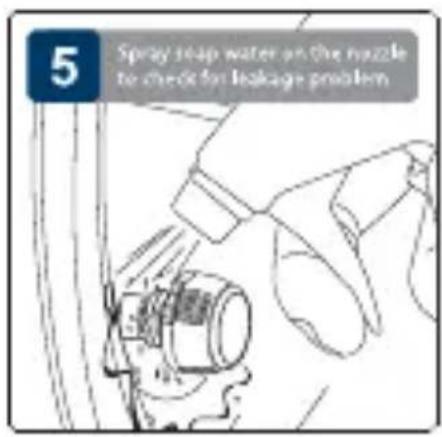
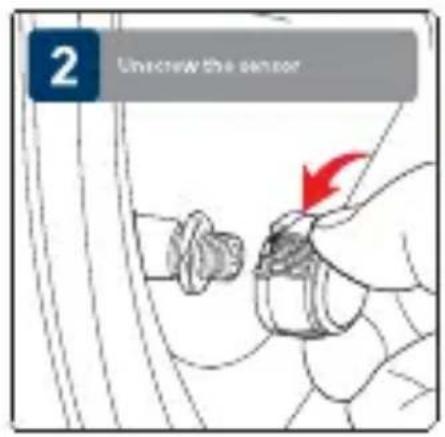
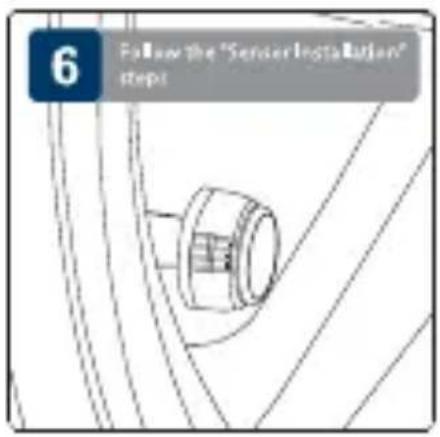
SENSOR INSTALLATION
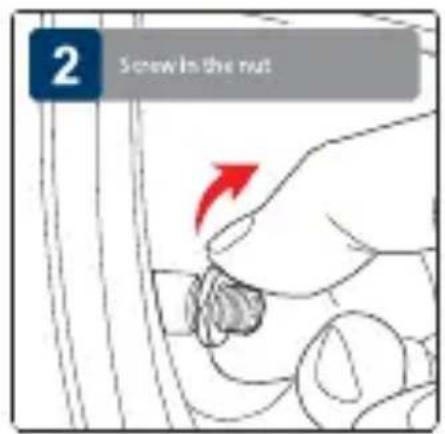
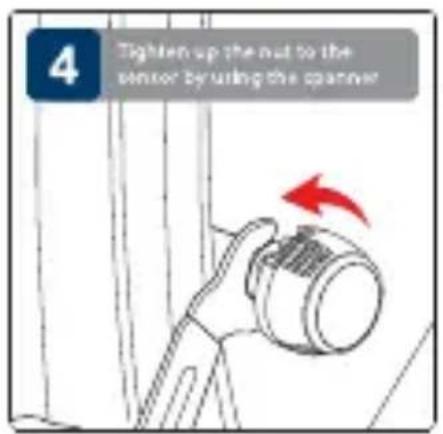

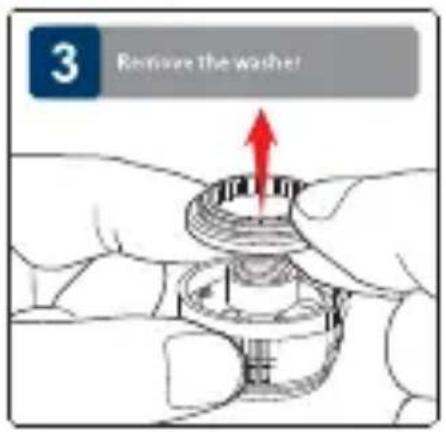
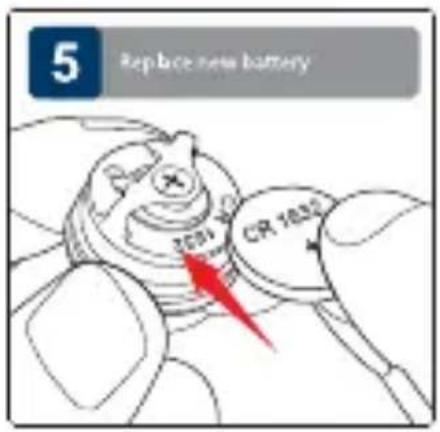
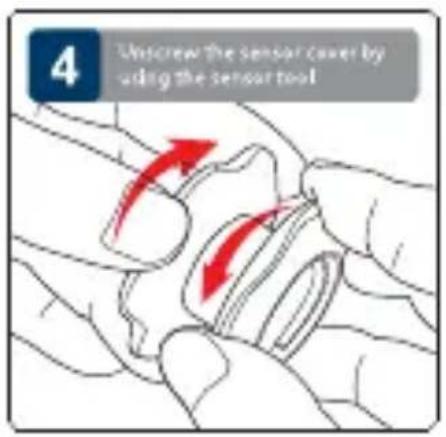
SENSOR BATTERY REPLACEMENT

DISPLAY INSTALLATION
FUNCTIONAL TEST
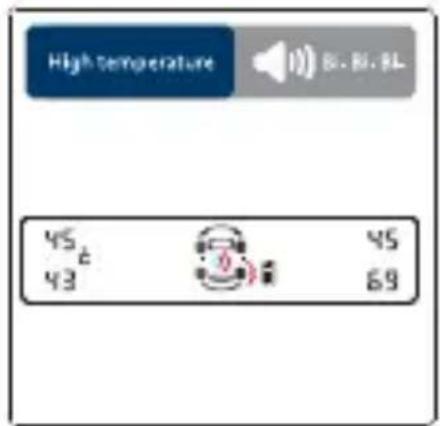
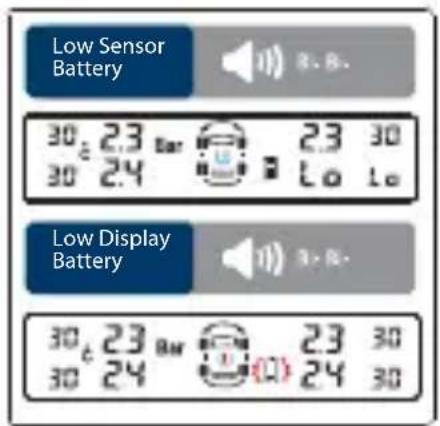
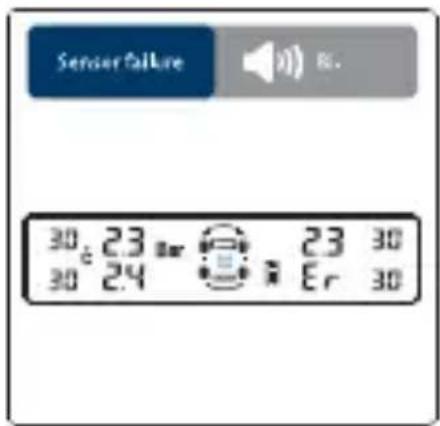
DIFFERENT SCENARIO

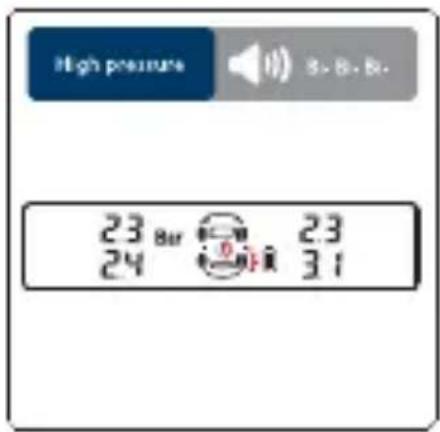
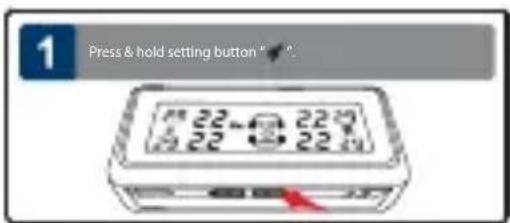
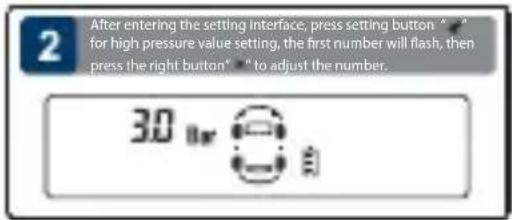
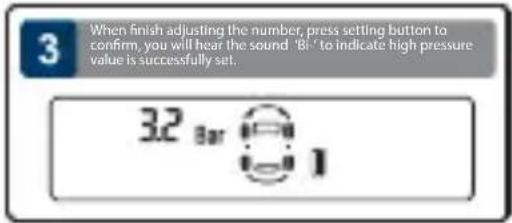
HIGH PRESSURE VALUE SETTING
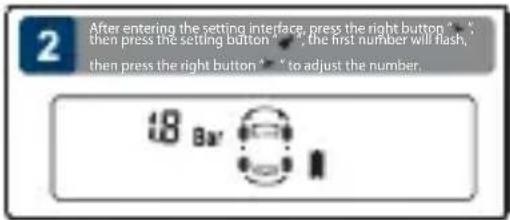
LOW PRESSURE VALUE SETTING

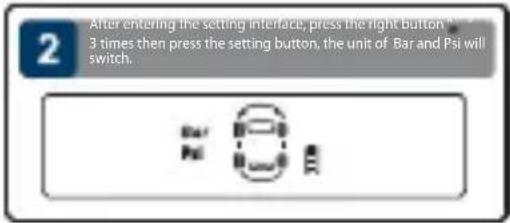
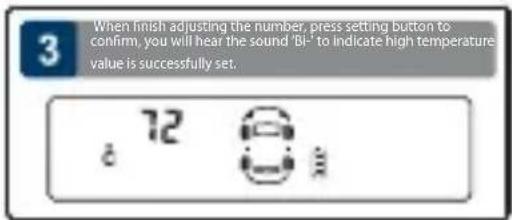
HIGH TEMPERATURE VALUE SETTING UNIT SWITCHING


RESET SETTING
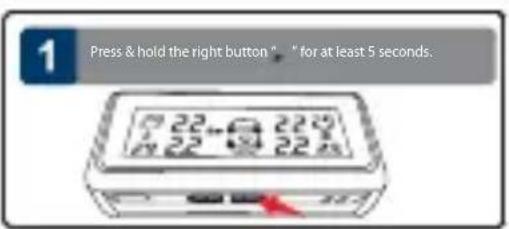

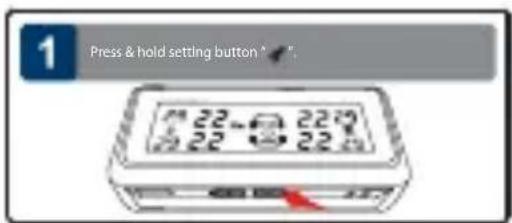
SETTING
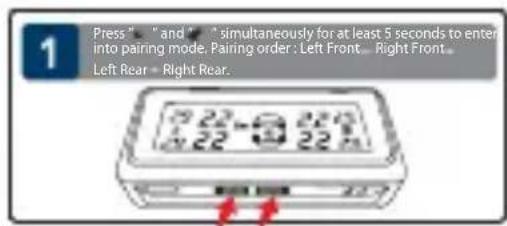
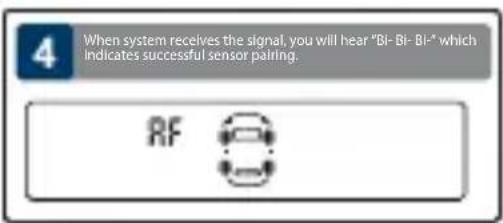
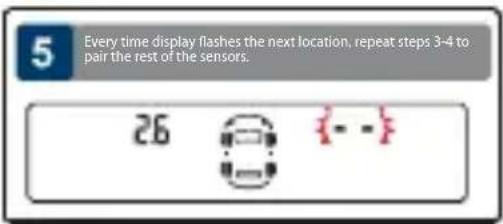
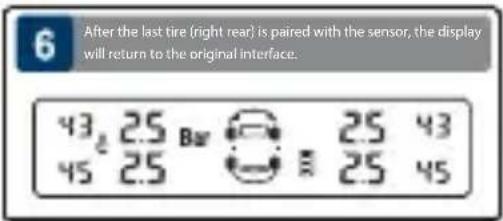
SENSOR PAIRING
(Sensor pairing are required only when the tires or the sensors has switched location or be replaced)


TROUBLESHOOTING
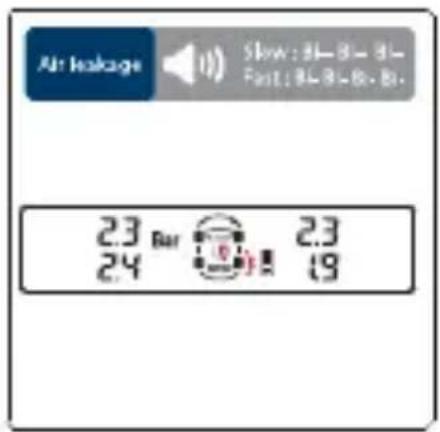
1. Air leakage after sensor installation
The tire valves may not be universal standard, please check with the local workshop.
2. No tire data are displayed after completing installation
a. Display may have run out of battery. Charge display with USB cable.
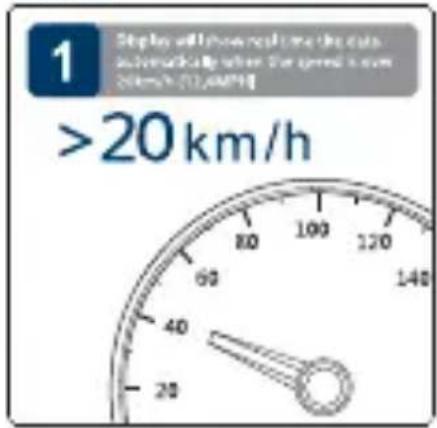
b. Tire sensor will began transmitting data to display when the car moves beyond 20km/h.
3. Missing/lost sensor
Please purchase new sensor.
4. Sensor battery low
Please replace with battery CR1632.
5. Change of tire location
Please reprogram the corresponding sensors.
Note
- TPMS (Tire Pressure Monitoring System) is designed for monitoring tire irregularities. Drive has responsibility to maintain tires regularly.
- Driver should react promptly once warning from this unit alerted.
- Blaupunkt does not guarantee or assumes liability for the loss of sensors.
- All sensors in this unit have been pre-set individually for each tire in the factory.
- Whenever the location of tire changed, the sensor must be reprogrammed.
- The display will turn off automatically 60-sec after the car stopped moving.

Brand : BLAUPUNKT
Model : TPMS 2.0
Category : Uncategorized