
KVA4830MBC - Coffee maker GRUNDIG - Free user manual and instructions
Find the device manual for free KVA4830MBC GRUNDIG in PDF.


| Product Type | Fully Automatic Espresso Machine |
| Brand | Grundig |
| Model | KVA4830MBC |
| Power Consumption | 1350 W |
| Voltage | 220-240 V~, 50-60 Hz |
| Water Tank Capacity | 1.4 L (max) |
| Coffee Spout | Adjustable height |
| Grinder Adjustment | Adjustable fineness via knob in bean container |
| Operating Modes | Default, ECO, Speed |
| Pre-brewing | Yes (in Default and ECO mode) |
| Auto Shut-off | ECO: 10 min, Default: 20 min, Speed: 30 min |
| Cup Volume Memory | Yes, adjustable from 25 ml to 250 ml |
| Hot Water Function | Yes |
| Self-Cleaning | Yes, using included cleaning agent |
| Empty System Function | Yes, for storage or frost protection |
| Manual Rinsing | Yes, to clean coffee nozzle |
| Indicators | Low water, lack of bean, grounds full, descaling, brewer/service door status |
| Included Accessories | Cleaning brush, 3 packs of cleaning agent |
| Drip Trays | Internal and external removable drip trays |
| Safety Features | Overheat protection, child safety lock (not specified but safety instructions for children) |
Frequently Asked Questions - KVA4830MBC GRUNDIG
User questions about KVA4830MBC GRUNDIG
0 question about this device. Answer the ones you know or ask your own.
Ask a new question about this device
Download the instructions for your Coffee maker in PDF format for free! Find your manual KVA4830MBC - GRUNDIG and take your electronic device back in hand. On this page are published all the documents necessary for the use of your device. KVA4830MBC by GRUNDIG.
USER MANUAL KVA4830MBC GRUNDIG
natural_image
Black Grundig coffee maker with visible branding and a gold-colored lid (no text or symbols on device body)ENGLISH 03-17
ROMÂNĂ 18-34
This section includes the safety instructions that will help providing protection against personal injury and material loss risks. Failure to follow these instructions invalidates the granted warranty.
Danger of electric current
Danger to life by electric current!
Contact with live wires or components could lead to serious injury or even death!
Observe the following safety precautions to avoid electric shocks:
■ Do not use the coffee machine if the connecting cable or mains plug are damaged.
■ Before reusing the coffee machine, the mains cable must be renewed by a qualified electrician.
■ Do not open the housing of the coffee machine. Danger of electric shock if live connections are touched and/or the electrical and mechanical configuration is changed.
■ Before cleaning the bean container, pull the mains plug of the appliance out of the socket. Danger from rotating coffee mill!
Danger of burning or scalding
Parts of the coffee machine can become very hot during operation! Dispensed drinks and escaping steam are very hot!
Observe the following safety precautions to avoid burning/scalding yourself and/or others:
- Do not touch either of the metal sleeves on both coffee spouts.
■ Avoid direct contact of the skin with escaping steam or hot rinsing, cleaning and descaling water.
Fundamental safety precautions
Observe the following safety precautions to ensure safe handling of the coffee machine:
■ Never play with packaging material. Risk of suffocation.
■ Inspect the coffee machine for visible signs of damage before use. Do not use a damaged coffee machine.
■ If the connecting cable is damaged, it should only be replaced by a service agent recommended by the manufacturer in order to prevent any danger! Please contact the manufacturer or his customer service.
■ Repairs to the coffee machine must only be carried out by an authorised specialist or by the works customer service. Unqualified repairs can lead to considerable danger for the user. They will also void the warranty.
■ Repairs to the coffee machine during the warranty period may only be carried out by service centres authorised by the manufacturer, otherwise the warranty will become void in the event of subsequent damage.
■ Defective parts may only be replaced with original spare parts. Only original spare parts guarantee that the safety requirements are met.
This appliance can be used by children from the age of 8 up as well as by persons with reduced physical, sensory or mental abilities or with lacking experience and/or knowledge, if these persons are supervised or have been instructed how to use the appliance in a safe way and have understood the hazards which could arise from using it. Children must not play with the appliance. Cleaning and user maintenance shall not be made by children unless they are older than 8 and supervised.
■ This appliance is intended to be used in household and similar applications such as:
- staff kitchen areas in shops, offices and other working environments,
-
farm houses,
-
by clients in hotels, motels and other residential type environments,
- bed and breakfast type environments.
■ Protect the coffee machine against the effects of weather such as rain, frost and direct sunlight. Do not use the coffee machine outdoors.
■ Never immerse the coffee machine itself, the mains cable or the mains plug into water or other liquids.
■ Do not clean the coffee machine or accessories in a dish washer.
- Do not pour any other liquids apart from water or place foodstuffs into the water tank.
■ Do not fill the water tank beyond the maximum mark (lower edge of the filling hole) (1.4 litres).
■ Only operate the machine when the waste container, drip tray and the cup grate are fitted.
■ Do not pull the cable to remove the plug from the mains socket or touch with wet hands.
■ Do not hold the coffee machine with the mains cable.
- Keep the appliance and its cord out of reach of children aged less than 8 years.
AT A GLANCE
Dear Customer,
Congratulations on the purchase of your new GRUNDIG Fully Automatic Espresso Maker KVA 4830 MBC.
Please read the following user notes carefully to ensure full enjoyment of your quality Grundig product for many years to come.
A responsible approach!

GRUNDIG focusses on contractually agreed social working conditions with fair wages for both internal employees and suppliers. We also attach great importance to the efficient use of raw materials
with continuous waste reduction of several tonnes of plastic every year. Furthermore, all our accessories are available for at least 5 years.
For a future worth living. Grundig.
Controls and parts
See the figure on page 3.
A Coffee Beans Container Cover
B Coffee Bean Container
c Control Panel
D Adjustable coffee spout
E Coffee Grounds Container
F Internal Drip Tray
External Drip Tray
H Cleanness brush
Service Door
J Brewer
Power cord
L Water Tank
Control Panel
 | Flashing: Low water level/ Water tank missing |
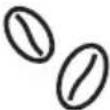 | Lack of bean |
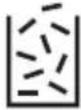 | Lights up stably: coffee grounds container is fullFlashing: Internal Drip Tray/coffee grounds container is missing |
 | Lights up stably: Brewer is missing/ installed improperlyFlashing: Service door is opened / installed improperly |
 | Lights up stably: Requires to do descalingFlashing: Descaling is under process |
 | Empty System Function is running |
 | Power ON/OFF Button |
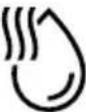 | Hot Water Button |
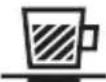 | Strong Espresso Button |
 | Mild Espresso Button |
In the box, three packs of cleaning agents are included for the process of self-cleaning.
Installation
Note
■ Remove any protective films, stickers and any other packing material on the appliance.
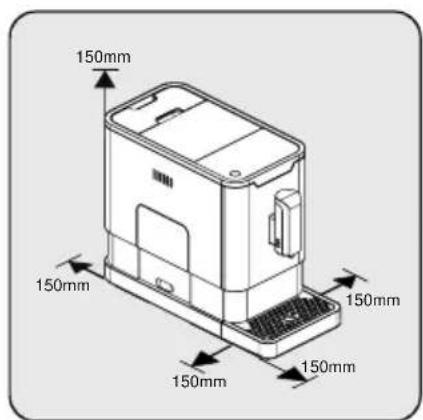
Choose a safe and stable surface with an easily reachable power supply and allow minimum distance from the sides of the machines.
natural_image
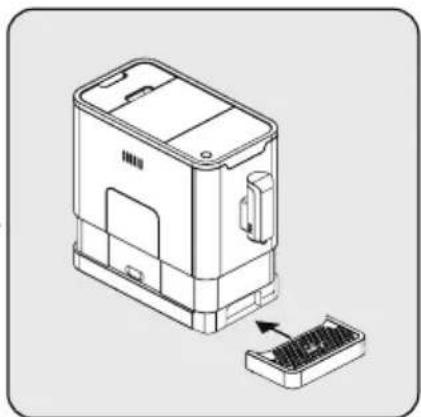
Technical line drawing of a device housing with an open panel and a separate internal component (no text or symbols)Insert the external drip tray. Make sure it is inserted correctly.
natural_image
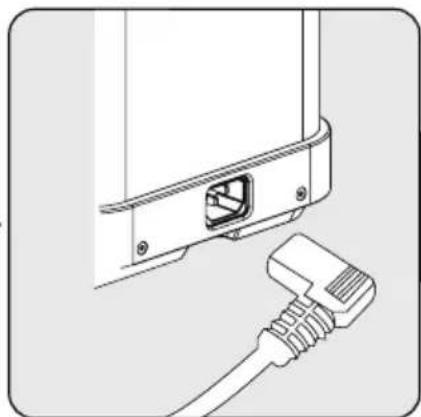
Line drawing of a device rear panel with a cable inserted, showing no text or symbolsUnwind and straighten the power cord and insert the plug into the socket located on the back of the machine. Insert the other end of the power cord into a wall socket with suitable power voltage.
Filing the water tank
Warning
■ When is flashing, the water tank is in low water level and requires filling the water tank.
natural_image
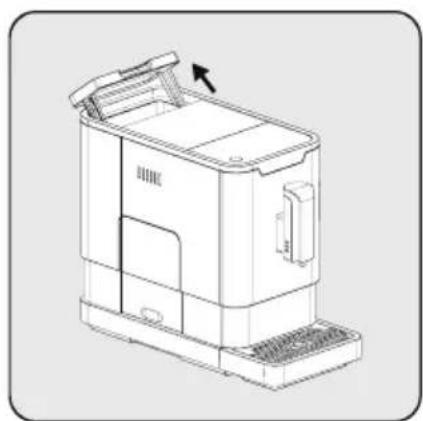
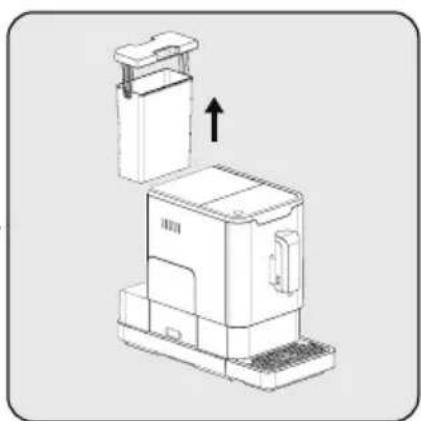
Technical line drawing of a mechanical device with no visible text or symbolsLift the water tank by using the lid as the handle.
natural_image
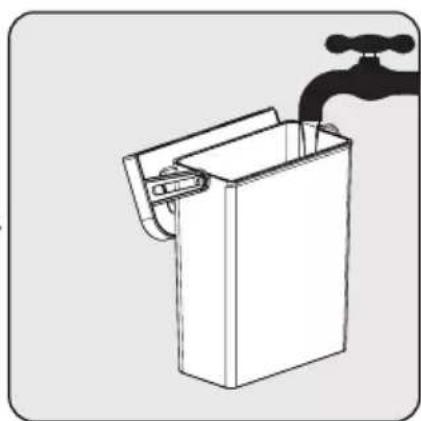
Technical line drawing of a mechanical device with an upward arrow indicating motion (no text or symbols)Take the water tank out. Rinse the water tank with fresh water
natural_image
Line drawing of a water tap with a handle and outlet (no text or symbols)and then fill the tank to the Max level and place it back into the machine. Make sure it is fully inserted.
PREPARATION
Note
■ To prevent overflow of water from the water tank, do not add water directly into the appliance with another container.
Warning
■ Never fill the water tank with warm, hot, sparkling water or any other liquid which might damage the water tank and the machine.
natural_image
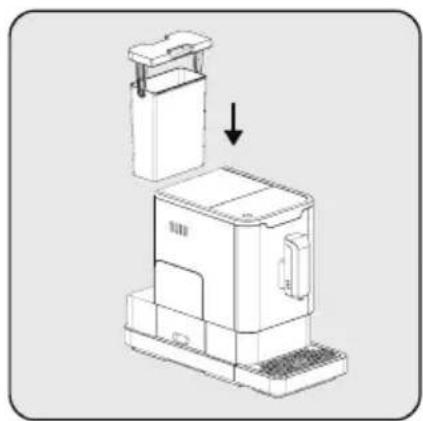
Technical line drawing of a mechanical device with an arrow indicating assembly or transformation (no text or symbols present)Place the water tank back by using the lid as the handle.
natural_image
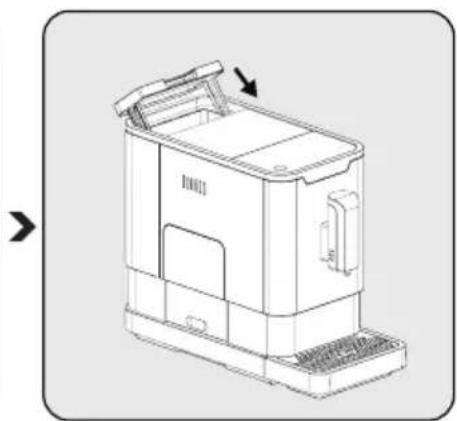
Line drawing of a 3D printer or enclosure with a handle and base, showing internal components and a directional arrow (no text or symbols)Close the water tank by using the lid.
OPERATION
Grinding Adjustment
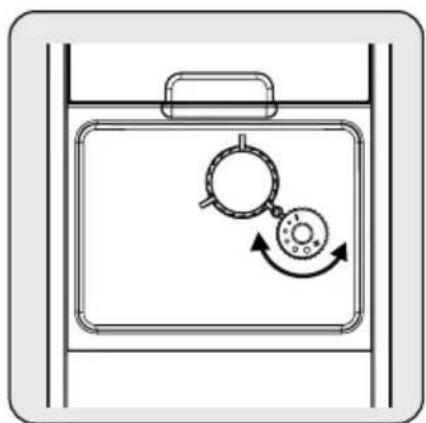
You can adjust the grinder to suit the roast of your coffee by turning adjuster knob in the bean container:
natural_image
Diagram of a device with a circular component and rotational arrow, no text or symbols presentWhen the grinder is grinding the coffee bean when it is making the coffee, you can turn the adjust knob to do the adjustment.
Warning
■ Never do the grinding adjustment when the grinder is not operating. It may damage the grinder.
Note
■ The dots on the adjuster knob indicate the fineness of the grind.
Filing the bean container
Note
■ When is flashing, the appliance needs to be filled with coffee bean.
flowchart
graph LR
    A["Device with lid"] --> B["Feeding"]
    B --> C["Pippling into container"]
    C --> D["Stacked in tray with lid"]
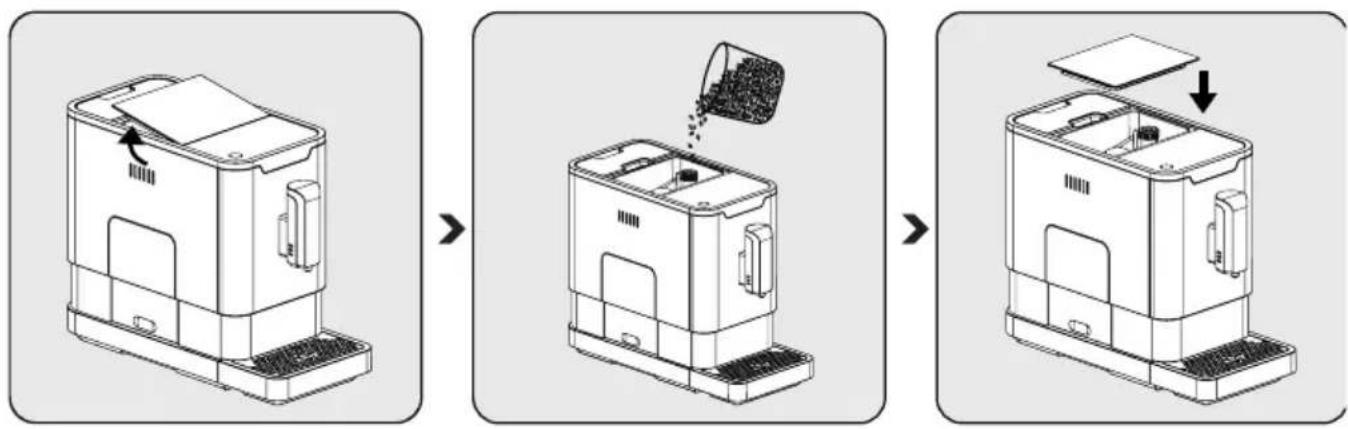
Remove the bean container lid. Slowly pour in the coffee beans. Place the container lid back.
Warning
Fill the coffee bean container only with coffee beans. Grounded coffee, instant coffee, caramelized coffee and any other objects may damage the machine.
Note
■ Press the hot water button (see page 9 section IV) to clean inside of the coffee maker before first use.
Making Your Coffee
natural_image
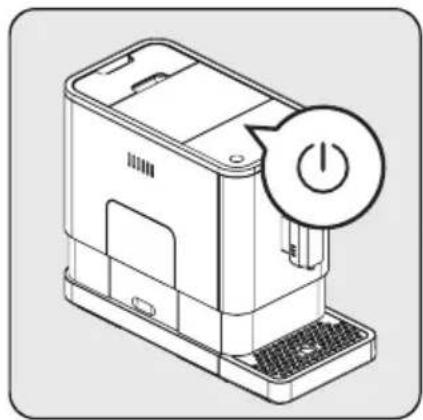
Line drawing of a device with a power button icon (no text or symbols)Switch on the appliance by pressing the power on/off button. The appliance is then in the standby condition.
natural_image
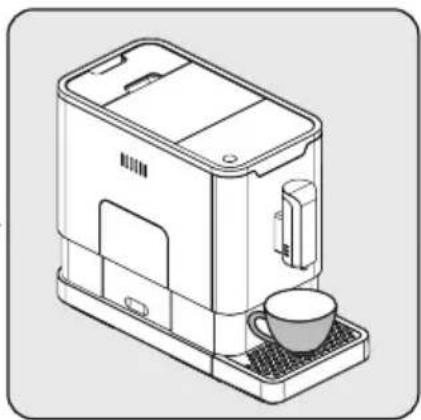
Line drawing of a modern coffee maker with a cup on the tray (no text or symbols)Place a cup under the coffee spout and adjust the height of the spout the fit the cup.
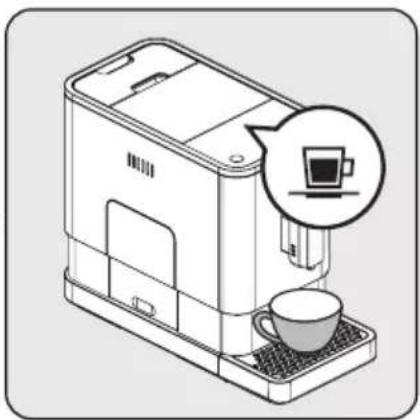
natural_image
Line drawing of a coffee maker with a cup and a coffee cup, showing no text or symbols.The espresso button being pressed will light on and the illumination will lights up indicates that the appliance is preparing the cup of coffee.
When the appliance is back to standby condition, the coffee is ready to serve.
Notes
■ Switch off the appliance by pressing the power on/off button.
■ Depending on the taste of coffee you would like to have, press strong espresso button or mild espresso button.
■ Press the hot water button to clean inside of the coffee maker before first use.
■ The Appliance is equipped with auto-shut off. Depending on the mode you have selected the appliance will have different auto-shut off timing.
Adjustiing The Volume Of Your Coffee/Hot Water
You can memorize your desired volume of coffee for both strong espresso and mild espresso and also the hot water from 25ml to 250ml.
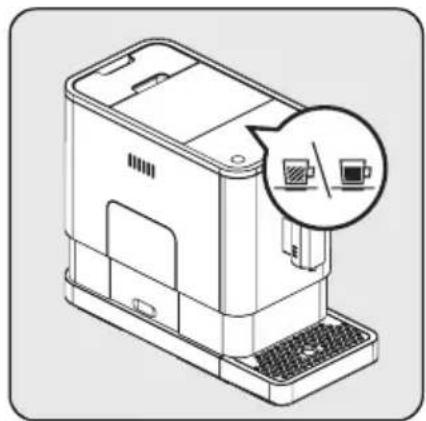
natural_image
Line drawing of a desktop computer with a speech bubble highlighting the screen (no text or symbols present)When making your coffee (either strong espresso or mild espresso) or dispensing hot water, press and hold the button you selected. The appliance will continue to make the cup of coffee.
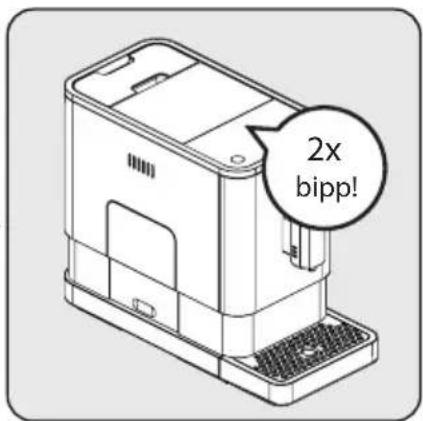
When the volume of coffee meets your desired volume, release the button. Two beep sounds will be heard indicates that the volume of coffee is being memorized.
11 ENGLISH
- You can reset the volume of coffee back to the factory setting by selecting the default setting.
Hot Water
The appliance can dispense hot water by simply pressing the hot water button. The hot water button and the illumination will lights up indicates that the appliance is heating up the water. When the hot water button and the illumination turn off, the water is ready to serve.
Mode Selection
The machine has two different settings: default setting, ECO mode and speed mode. In ECO mode, the appliance helps to save more energy. In speed mode, the user can make their coffee faster than in default setting.
| ECO Mode Speed Mode | Default Setting | ||
| Illumination Light No Yes | Yes | ||
| Pre-brewing* Yes No Yes | |||
| Auto shut off time 10mins | 30mins 20mins | ||
| Cup Volume memory Yes | Yes Yes |
Note
■ The pre-brewing function moistens the grounded beans in the brewer with a small amount of water before full extraction. This expands the coffee grounds to build up a greater pressure in the brewer which help extraction of all the oils and full flavor from the grounded beans.
1 When the machine is in standby condition, press and holds the ⏻ for 5 seconds.
2 The ⏻ will then be flashing and the following button will have the following indications for different settings:
Hot water button | Strong espresso button[DBA3] | Mild espresso button | |
| In ECO Mode | Lights ON | Flashing | Flashing |
| In Speed Mode | Yes No Flashing | ||
| In Default Setting | Flashing | Flashing | Lights On |
3 Press the hot water button for ECO mode, strong espresso button for speed mode and mild espresso button for default setting. Two Beep sound will be heard indicates that the mode is being selected. (Note: If you are pressing the relative lights on button for each mode, the machine will not response).
4 If you would like to remain the setting unchanged, press ⏻ again or wait for 5 seconds for the machine to return to the standby condition
Cleaning of the appliance
1 Disconnect the power cord from the mains supply outlet.
2 Pour away all the water in the internal and external drip tray
3 Use a damped cloth or non-scratching cleaner to clean the water stains on the appliance.
Warning
■ Never use any abrasive, vinegar or descaling agents not included in the box to clean the appliance.
Timely cleaning and maintenance of the appliance is very important in prolonging the life of the appliance.
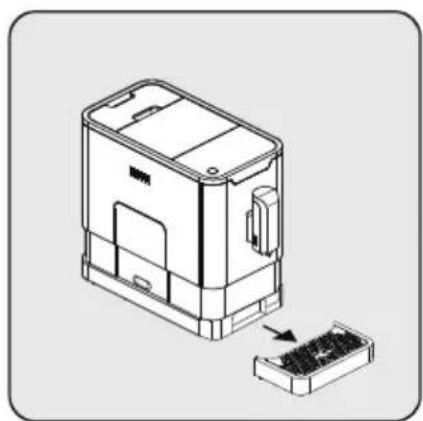
natural_image
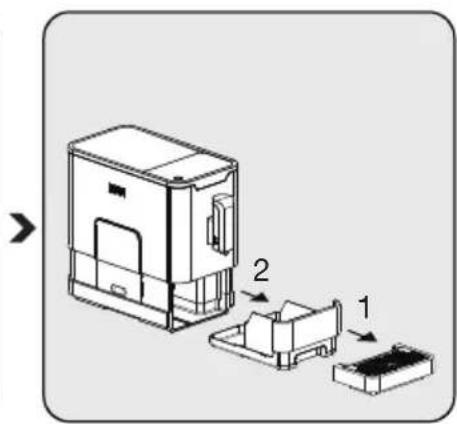
Technical line drawing of a device housing with an inset showing internal components (no text or symbols)Remove the external drip tray. Slides open the internal drip tray and the coffee grounds container.
natural_image
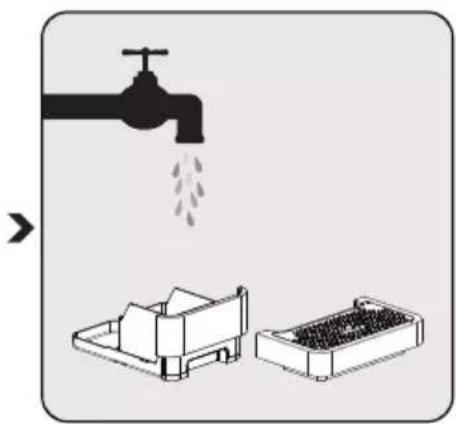
Illustration showing a faucet pouring liquid into a machine and a storage tray (no text or symbols)Empty the coffee grounds container and wash it with fresh water. Dry it afterwards.
Note
■ When lights up, the coffee grounds container needs to be empty.
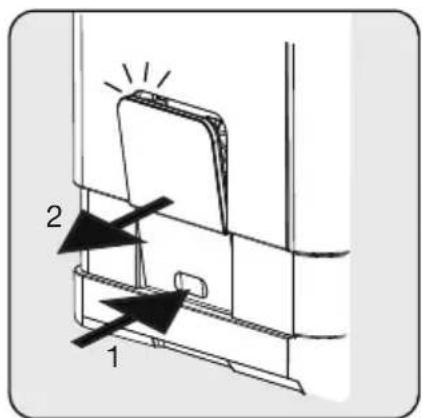
Pull down the service door and remove it.
natural_image
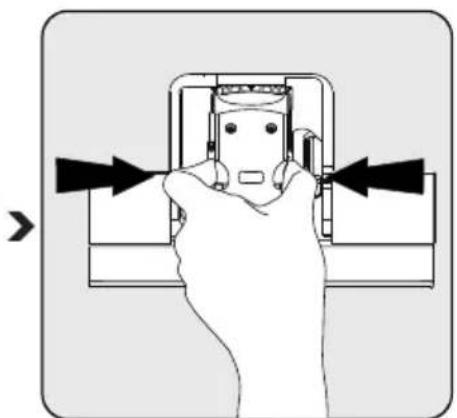
Hand holding a wall-mounted electrical socket with arrows indicating direction (no text or symbols)Press the release knob. Remove the brewer. Wash the brewer
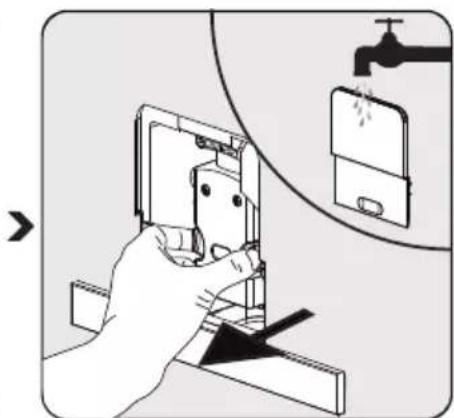
natural_image
Illustration of a hand using a smartphone to adjust or install a device, with a faucet and screen visible (no text or symbols)with fresh water. Dry the brewer afterwards.
Warning
- When lights up stably, it indicates that the brewer is missing / installed improperly. When is flashing, it indicates that the service door is missing/installed improperly.
Self-Cleaning
When Uis flashing, it indicates that the appliance needs to undergo self-cleaning. The appliance will remain in the best condition if this function is performed at least once a month or more regularly depending on the hardness of water used. It is also suggested that to
1 Fully fill the water tank.
2 Adding one pack of cleaning agent included in the box to the water tank.
Warning
■ Do not use vinegar or other cleaning agent to do self-cleaning of this appliance. The cleaning agent might damage the appliance.
3 Plug in the appliance.
4 Place a sufficient large container under the coffee spout.
5 In standby condition, press and hold ⏻ and strong espresso button for 5 seconds. A beep sound will be heard with 📊 and strong espresso button will be flashing.
6 Press strong espresso button to confirm undergoing the self-cleaning process. To resume back to the standby condition, press ⏻.
7 will be flashing indicates that the appliance is undergoing the self-cleaning process.
Warning
- Keep skin/body away from the hot water.
8 When all the water in the water tank is being dispensed out, and strong espresso button will be flashing. Remove all the remaining solution in the water tank and fill the tank with normal tap water until the max position. When water is filled into the water tank, will goes off. Then the appliance will continue the self-cleaning process.
9 When the self-cleaning process is completed, the appliance will switch off automatically.
Empty System Function
The empty system function is recommended to be used before long period of non-use, frost protection and before talking to repair agent.
1 In standby condition, press and hold the ⏻ and mild espresso button 📁 together for 5 seconds.
2 will then be flashing.
3 Remove the water tank from the appliance. 📋 will light up stably indicates that the empty system is under process. You can press ⏻ before removing the water tank to resume back to the standby condition.
4 When the empty system function is completed, the appliance will switch off automatically.
Warning
■ After perform EMPTY SYSYEM FUNCTION; press the hot water button until water can come out from spout when the coffee maker is reused again.
Manual Rinsing
You can perform a manual rinsing cycle to clean the coffee nozzle after use. It is also suggested to perform a manual rinsing if the appliance has not been used for a long period of time.
1 In standby condition, press and hold the ⏻ and hot water button together.
2 The hot water button , strong espresso button and mild espresso button will then goes off. The coffee nozzle will then dispense a small amount of water which is used for the rinsing.
Warning
■ Water comes out of the coffee nozzle is hot and is collected in the drip tray underneath. Avoid contact with splashes of water.
3 After rinsing, the appliance will return to the standby condition.
TROUBLESHOOTING
| Problem Cause Solution | ||
| The appliance does not work. The | appliance is not connected to the mains. | Plug in and press the switch.Check the cable and the Plug |
| No or delayed response in several trials of pressing on function key on the panel | Appliance is under an electromagnetic interferenceDirt over the panel | Unplug the appliance. Restart after few minutesClean the panel with the cloth provided |
| The coffee is not hot enough. | The cups have not been preheated.The brewing unit is too cold. | Rinse the appliance at least 3 times before making the coffee. |
| The coffee cannot come out from spout. | Empty system function maybe used before. | Press the hot water button until water can come out from spout. |
| The first cup of coffee is poor quality. | The first run of grinder does not pour sufficient quantity coffee power into the brewing unit. | Throw the coffee away. The other coffees will always be of good quality. |
| The touch buttons are not sensitive | Excessive scale has built up. | Descale the appliance. |
| The water tank is removed / the water level is very low in the water tank but have no alert. | The area near the water tank connector is wet. | Wipe the water around the water tank connector |
| Internal drip tray is filled with a lot of water. | Coffee powder too fine which block the water to come out. | Adjust the coffee fineness to bigger dot during grinder operation. |
| Coffee is delivered too slowly or a drop at a time. | Coffee powder too fine which block the water to come out. | Adjust the coffee fineness to bigger dot during grinder operation. |
| Lack of bean indicator flashes but there is still a lot of coffee bean inside the container. | Internal coffee powder outlet is blocked. | To follow the steps of section E (V. Cleaning coffee powder outlet). |
Storage
If you do not plan to use the appliance for a long period of time, please store it carefully. Make sure the appliance is unplugged and completely dry.
Store the appliance in a cool, dry place. Make sure the appliance is kept out of the reach of children.
Intended use
The fully automatic coffee machine Beko is intended for use in homes and similar applications, for instance in staff kitchens, shops, offices and similar areas or by customers in bed & breakfast, hotels, motels and other living accommodation. This coffee machine is not intended for commercial use. The machine is only intended for preparing coffee and heating milk and water. Any other use other than previously stated is considered as improper use.
Danger resulting from improper use!
If not used for its intended purpose or used in any other way, the coffee machine may be or become a source of danger.
■ Therefore, the coffee machine may only be used for its intended purpose.
- Observe the procedures described in this user manual.
Notes
■ No claims of any kind will be accepted for damage or injury resulting from use of the coffee machine for other than its intended purpose.
■ The risk has to be borne solely by the machine owner.
Limitation of liability
All technical information, data and instructions on installation, operation and maintenance of the coffee machine contained in these operating instructions represent the current status at the time of printing and are based on the best possible knowledge gained by experience and knowhow.
No claims can be derived from the information, illustrations and descriptions in this user manual.
The manufacturer assumes no liability for damage or injury resulting from failure to observe the user manual, use for other than the intended purpose, unprofessional repairs, unauthorised modifications or use of non-approved spare parts.
Compliance with the WEEE Directive and Disposing of the Waste Product:
This product complies with EU WEEE Directive (2012/19/EU). This product bears a classification symbol for waste electrical and electronic equipment (WEEE).
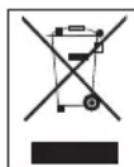
This product has been manufactured with high quality parts and materials which can be reused and are suitable for recycling. Do not dispose of the waste product with normal domestic and other wastes at the end of its service life. Take it to the collection center for the recycling of electrical and electronic equipment. Please consult your local authorities to learn about these collection centers.
Compliance with RoHS Directive
The product you have purchased complies with EU RoHS Directive (2011/65/EU). It does not contain harmful and prohibited materials specified in the Directive.
Package information

Packaging materials of the product are manufactured from recyclable materials in accordance with our National Environment
Regulations. Do not dispose of the packaging materials together with the domestic or other wastes. Take them to the packaging material collection points designated by the local authorities.
Plug Wiring
The moulded plug on this appliance incorporates a 13 A fuse. Should the fuse need to be replaced an ASTA approved BS1362 fuse of the same rating must be used. Do not forget to refit the fuse cover. In the event of losing the fuse cover, the plug must not to be used until a replacement fuse cover has been fitted. Colour of the replacement fuse cover must be the same colour as that visible on the pin face of the plug Fuse covers are available from any good electrical store.
■ Fiting a different plug
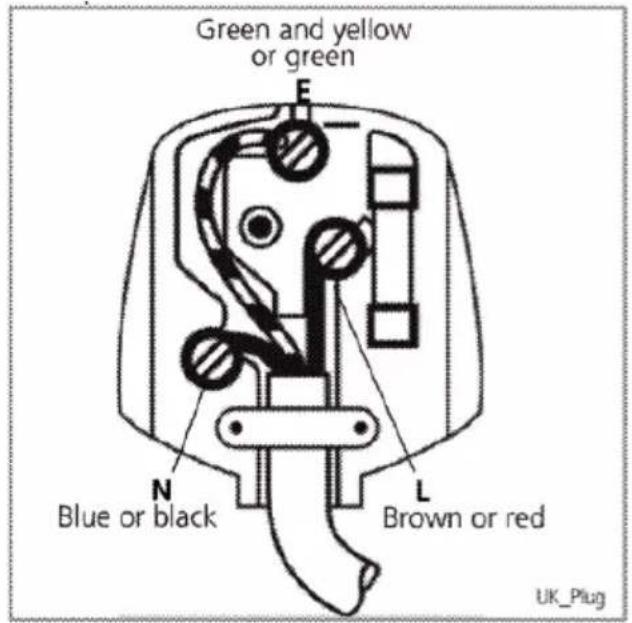
As the colours of the wires in the mains lead of this appliance may not correspond with the coloured markings identifying the terminals on your plug, proceed as follows:
■ Brown cable = L (Live)
■ Blue cable = N (Neutral)
■ Green/yellow cable must be connected to ground (E) line
■ With the alternative plugs a 13 A fuse must be fitted either in the plug or adaptor or in the main fuse box. If in doubt contact a qualified electrician.
Technical data

Power supply: 220-240 V \~, 50-60 Hz Power: 1350 W
Technical and design modifications reserved.
natural_image
Technical line drawing of a device housing with an exploded view showing internal components (no text or symbols)natural_image
Line drawing of a device's cable connector with a socket and connector (no text or symbols)natural_image
Line drawing of a mechanical device with a handle and side panel, showing no text or symbols.natural_image
Technical line drawing of a mechanical device with an upward arrow indicating motion (no text or symbols present)natural_image
Simple line drawing of a water tap with a handle and outlet (no text or symbols)Notă
natural_image
Technical line drawing of a device with two views showing internal components and a downward arrow indicating transformation (no text or symbols)natural_image
Diagram of a device with a magnifying glass and circular dial, showing rotational motion (no text or symbols)natural_image
Technical line drawing of a mechanical device with no visible text or symbolsnatural_image
Line drawing of a small industrial machine with a container pouring granular material from its top outlet (no text or symbols)natural_image
Technical line drawing of a device casing with an open lid and internal compartments, showing no text or symbols.FUNCTIONAREA
Atentie
natural_image
Line drawing of a desktop computer with a power button icon (no text or symbols)natural_image
Line drawing of a modern coffee maker with a cup on the tray (no text or symbols)natural_image
Illustration of a coffee maker with a cup and a speech bubble showing coffee (no text or symbols present)natural_image
Technical line drawing of a device housing with an arrow indicating assembly or disassembly (no text or symbols present)natural_image
Technical line drawing of a mechanical device with labeled parts (no text or symbols present)natural_image
Illustration of a faucet releasing water into a kitchen appliance and a storage tray (no text or symbols)natural_image
Hand holding a device with arrows pointing to the internal components (no text or symbols visible)natural_image
Illustration of a hand using a smartphone to adjust or install a device, with a faucet and screen visible (no text or symbols)Notă

- Danger of electric current
- Danger of burning or scalding
- Fundamental safety precautions
- AT A GLANCE
- A responsible approach!
- Controls and parts
- Installation
- Note
- Filing the water tank
- Warning
- PREPARATION
- OPERATION
- Grinding Adjustment
- Filing the bean container
- Making Your Coffee
- Notes
- Adjustiing The Volume Of Your Coffee/Hot Water
- ENGLISH
- Hot Water
- Mode Selection
- Cleaning of the appliance
- Self-Cleaning
- Empty System Function
- Manual Rinsing
- TROUBLESHOOTING
- Storage
- Intended use
- Danger resulting from improper use!
- Limitation of liability
- Compliance with the WEEE Directive and Disposing of the Waste Product:
- Compliance with RoHS Directive
- Package information
- Plug Wiring
- ■ Fiting a different plug
- Technical data
- Notă
- FUNCTIONAREA
- Atentie
Brand : GRUNDIG
Model : KVA4830MBC
Category : Coffee maker