HD4250 - To scan Contex - Free user manual and instructions
Find the device manual for free HD4250 Contex in PDF.


User questions about HD4250 Contex
0 question about this device. Answer the ones you know or ask your own.
Ask a new question about this device
Download the instructions for your To scan in PDF format for free! Find your manual HD4250 - Contex and take your electronic device back in hand. On this page are published all the documents necessary for the use of your device. HD4250 by Contex.
USER MANUAL HD4250 Contex
Wide Format Scanners
MODELS:
HD5450
HD4250
HD4230
HD3650
HD3630
HD2530
August, 2008 Edition
Contents
Table of Contents
About This Guide 2
Installation 3
System requirements 3
Installation Steps 3
The Operator's Panel 14
Turning Power ON/OFF - Wake/Sleep Modes 15
Main Power ON/OFF 15
The scanner's Self Test Procedure 15
Scanner ready to scan 15
Wake and Sleep modes 16
Automatic Power ON/OFF functions 16
Timer Function – Scheduling ON/OFF Times 17
Automatic Shut Down After Idle Time 18
Loading Originals into the Scanner 19
Load, face down, at the scanner's center 19
Automatic loading 19
Manual loading 19
Unloading the original after scan 20
Fast-loading 20
Soft-handling 20
Setting the input size 20
Scanning
Software applications for scanning 21
Running applications from the scanner panel 21
Batch scanning 21
Monitoring your scanner with WIDEsystem 21
Scanning Thick Media 23
Manual Adjustment for Thick Media – Slider Controls 23
Automatic Thick Media Adjustment 25
When Scanning in Thick Media Positions 26
Maintenance
About scanner maintenance 27
Cleaning the scan area 27
Camera Alignment and Calibration 40
Replacing Scanner Parts 43
Replacing the Glass-plate 44
Replacing the White-Background-Platen 47
Replacing the Scanner Lamp-Unit 51
Replacing the Dust-Filters 53
Downloading New Firmware 54
What is Firmware? 54
When do I need new firmware? 54
How to identify the firmware version running in the scanner? 54
How to install new firmware? 55
Setting the Scanner in Firmware BOOT Mode 56
Trouble Shooting Problems 57
Problems Related to Scanner Installation 57
Problems Related to Operation of the Scanner 60
Problems Related to the Scanning Results 64
Appendix A: Quick Overview of the Operator's Panel 66
The Panel and LED Indicators 66
Power Control – Buttons and LED Patterns 67
Media Control – Buttons and LED Patterns 70
Application Control – One Touch Scan 75
Appendix B: Important Safety Instructions 76
Appendix C: Regulations 77
FCC Regulations 77
CE Regulations 77
VCCI Regulations 77
Toxic or Hazardous Substances or Elements 78
About This Guide
About This Guide
This guide explains how to operate and maintain your wide format scanner.
The guide assumes basic knowledge of your computer and operating system and does not repeat material from their documentation.
Be sure to refer to:
- The Installation section – describes correct installation of your scanner drivers.
- The readme.htm file in the ws folder on the WIDEsystem TOOLS CD-ROM. Contains the most current installation and OS compatibility issues.
- WIDEsystem TOOLS Help – After installing your drivers, open WIDEsystem and press F1. Contains information on using the WIDEsystem application and Scanner Maintenance software.
Identify your scanner model
This operator's guide covers several scanner models. There are topics that describe scanner functions that apply solely for specific models and topics that apply for all models. Generally, Operation of the 54, 42 and 36 inch models is the same while certain operations on the 25 inch model (HD2530) can differ in relation to the wider models.
Each topic will contain a “Scanner Models:” heading that indicates the models relevant for the topic.
This guide covers the following models:
| Scanner Model Description | |
| HD5450 54" color scanner | |
| HD4250 42" color scanner | |
| HD4230 42" color scanner | |
| HD3650 36" color scanner | |
| HD3630 36" color scanner | |
| HD2530 25" color scanner |
IMPORTANT: Be sure to use the WIDEsystem TOOLS CD-ROM that came with your scanner or a newer version. Out-of-date versions of WIDEsystem software may not detect your scanner model.
NOTE: Windows Compatibility - Your scanner and drivers are tested and developed to support the most current active Microsoft Windows version OS systems. Drivers and interface support in regard to specific Windows versions will follow the Microsoft Support Lifecycle Policy. The compatibility specifications can therefore change accordingly. The most current OS compatibility specifications and drivers will be available on your manufacturer's website.
Installation
3
Installation
System requirements
• PC or supported workstation.
- Compatible Windows operating system – View the ws/readme.htm file on the WIDEsystem TOOLS CD-ROM.
• PC with USB port or enabled FireWire Port.
• The WIDEsystem TOOLS CD supplied with your scanner.
- Scanning software or compatible third party software.
- Grounded power outlet.
Installation Steps
To get your scanner up and running, follow the steps below in their written order.

t up the scan station
Your scanner should be placed either on the specially designed stand-alone floor stand or on a sturdy table. Make sure there is enough space behind the scanner to allow the media to run out.

IMPORTANT: DO NOT YET CONNECT THE SCANNER TO VER OR PC.

See also the Safety Instructions at the end of this operator's
Installation
4
2
install drivers and tools on your PC

IMPORTANT: You must install your scanner's drivers and tools before you elect the scanner or install any scanner software applications.
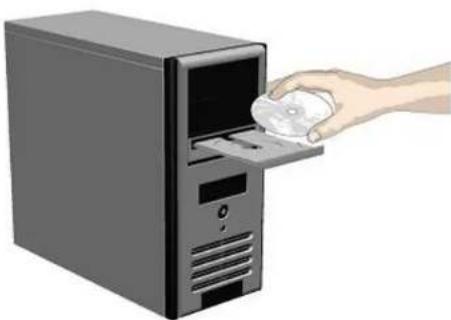
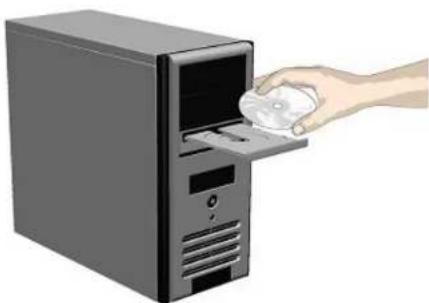
- Insert the WIDEsystem TOOLS CD-ROM into your PC. Normally the setup program interface will start automatically. If it does not, locate the setup.exe file on the CD and start it manually.
- Install WIDE system. Follow the installation guide on your screen. You will be asked to select your language and other important system preferences.
- Install Scanner Maintenance. Follow the installation guide on your screen. You will be asked to select your language.
- Remove the CD-ROM when installation is complete.
natural_image
Illustration of a hand inserting a CD into a desktop computer tower (no text or symbols)3
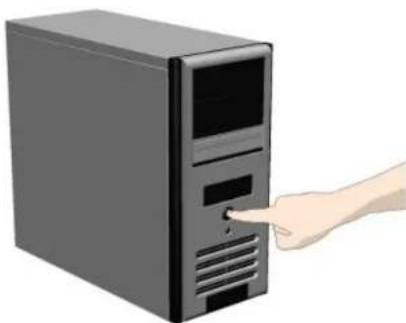
shut down the PC
Your PC must be powered off before connection with the scanner.
natural_image
Illustration of a desktop computer tower with a hand pointing to its left button (no text or symbols present)Installation
5

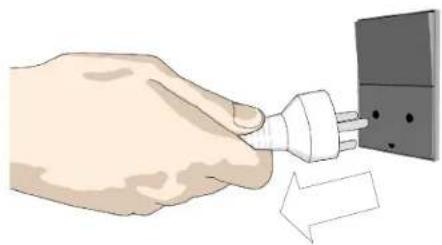
Disconnect the PC power plug

Caution: This step is to ensure your own personal safety and to help protect your face from potential damage.
natural_image
Illustration of a hand inserting a plug into an electrical outlet (no text or symbols)
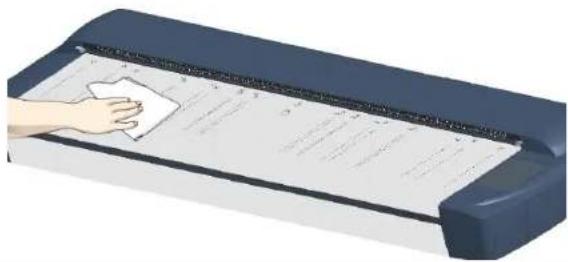
lean the scanner feeding bed
This is the flat surface in front of the insertion slot. Wipe with a dry cloth so dirt and dust are not dragged into the scan area with the original.
natural_image
Hand cleaning a paper roll with a cloth, no visible text or symbolsInstallation
6
6
Wipe the glass plate
The internal scan area should be wiped clean for any dust accumulated during shipping and packaging.
- Open the scan area lid - Push down on the two lock buttons found near the insertion slot on each side of the lid.
- The scanning area lid locking mechanism should now be disengaged.
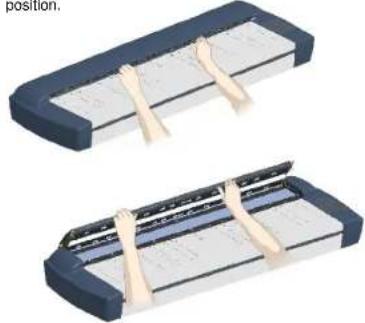
- Place your thumbs in the insertion slot and flip the scanning area lid back to its open position.
- The glass plate is now exposed for cleaning.
- Wipe the glass plate with a dry cloth to remove any dust.
- Close the scanner lid. Make sure the locks reengage (click).
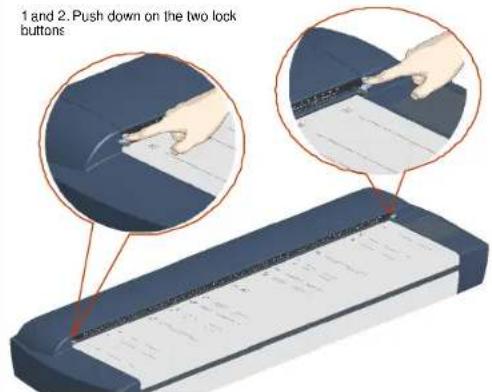
text_image
1 and 2. Push down on the two lock buttons3 and 4. Flip the scanning area lid back to its open position.
natural_image
Two views of a mechanical component with clamps, shown from top and side (no text or symbols visible)- Wipe the glass plate free for dust.
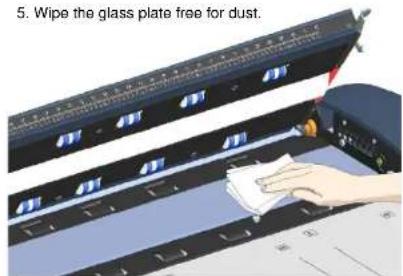
text_image
5. Wipe the glass plate free for dust.Installation
7

Connect interface cable to the scanner
The interface cable connectors are grouped in a Cable-Connector-Panel.

Regulatory Notice: Your scanner product has been tested to comply with the EMC standards EN55022 and FCC, Part 15. To maintain compliance, only use the interfaces supplied with the scanner.
Accessing the interface connectors on scanner models: HD2530:
The cable-connector-panel is found on the underside of the scanner and accessed from the scanner's back. The HD2530 (25") scanner model supports both FireWire and USB connections.
USB connection: Connect the B-connector end (square shaped) end to a USB port on your computer.
Firewire connection: Connect the cable to a firewire port on your computer. Do not use the end marked "Scanner End" if such is specified on your cable.
HD2530: Cable-connector-panel is accessed from the scanner's backside.
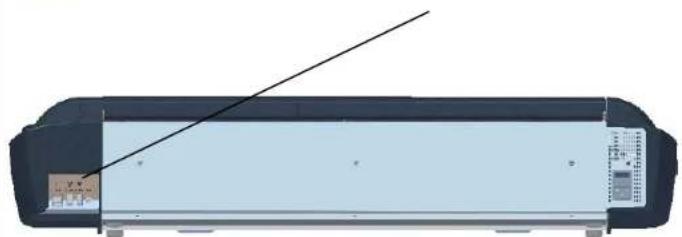
natural_image
Illustration of a printer with a diagonal line extending from its side (no text or symbols visible)Accessing the interface connectors on scanner models: HD5450, HD4250, HD4230, HD3650, HD3630:
The cable connector panel is behind the cover at scanner's right side. You have to remove the cover to connect the cable.
Insert your thumb in the slot at the top of the cable connector panel cover. Push down to snap the lid open.
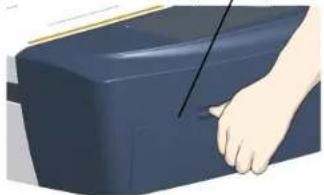
natural_image
Illustration of a hand pressing down on a blue plastic container (no text or symbols visible)Remove the cover with both hands.

natural_image
Illustration of hands inserting a device into a larger device (no text or symbols visible)Continues on next page...
Feed the interface cable's B-connector (square shaped) end through the opening in the back of the scanner until it emerges in front of the cable-connector-panel. Then
Installation
8
connect the B-connector to the USB connection socket on your scanner.
Feed the interface cable through the hole in the back.
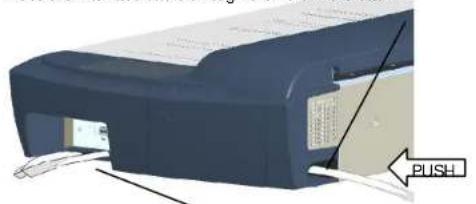
natural_image
3D rendering of a printer with a push button and paper label, no readable text or symbols beyond the directional arrow.....until it emerges in front of thecable connector pane.
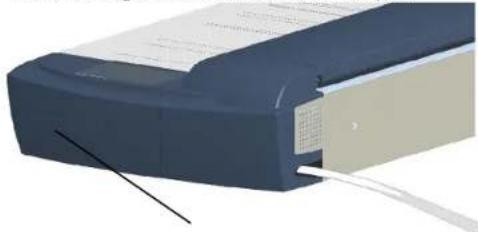
natural_image
3D rendering of a blue electronic device with ventilation slots and a beige cover (no visible text or symbols)Connect the cable and close the cable connector panel cover.

The cover must always be closed before you turn the scanner ON.
Installation
9

Connect the other end of the interface cable to PC
USB connection: Connect the A-connector end (flat end) to a USB port on your computer.
Firewire connection: Connect the cable to a firewire port on your computer. Use the end marked "Scanner End" if specified on your cable.

NOTE: Firewire interfacing s available on the HD2530 only.

natural_image
Hand inserting a USB cable into a server rack (no text or symbols visible)10
Connect the power cable to the scanner
Connect the scanner power cable to the scanner's main power connection socket. The main power connection socket is at the scanner's backside.
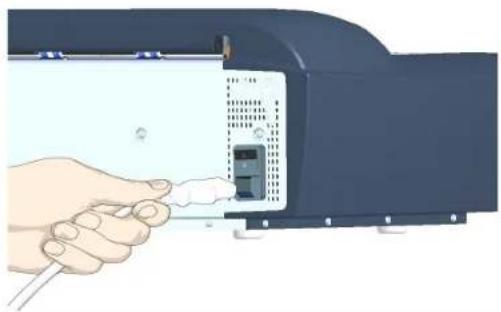
natural_image
Illustration of a hand inserting a cable into a device panel (no text or symbols visible)Installation
10
11
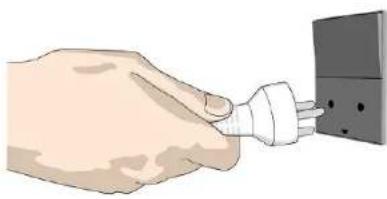
Connect power to the wall outlet
Connect the other end of the scanner power cable to the power outlet.

Caution: The scanner is equipped with a three-wire (pin) grounding type plug. If you cannot insert the plug into your outlet, contact your electrician to replace the plug or outlet to ensure a grounded power connection. Do not try to defeat or ignore the purpose of the grounding-type plug.


natural_image
Illustration of a hand inserting a plug into an electrical outlet (no text or symbols)12
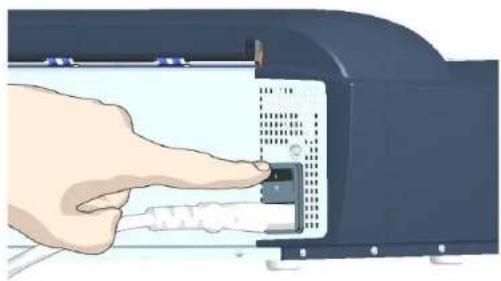
Turn on the scanner
Turn on the main power switch at the back of the scanner.
natural_image
Illustration of a hand pressing down on a device component (no text or symbols visible)Installation
11
13
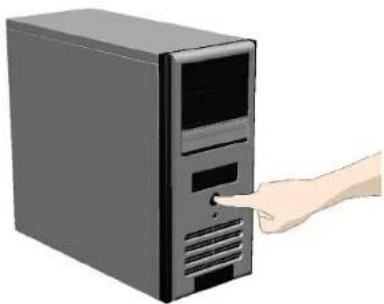
Turn on your PC and start Windows
Windows will detect the new hardware (scanner) during startup and the drivers you installed in step 2. will be recognized. Follow Windows' hardware installation instructions should any appear on your screen.
natural_image
Illustration of a desktop computer tower with a hand inserting a button (no text or symbols)14
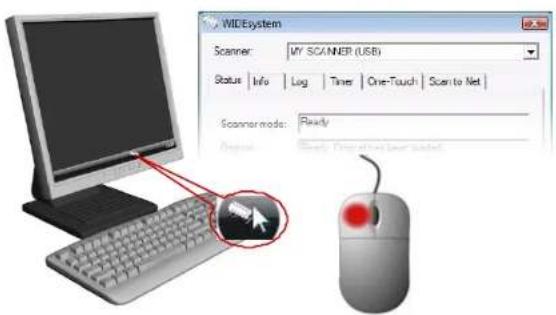
Verify correct scanner installation
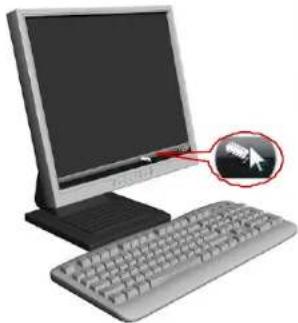
- Locate the scanner icon on the Windows System Tray. This is the WIDEsystem program icon.
- Left -double-click on the WIDEsystem program icon.
- Your scanner is installed and detected if your scanner's name appears at the top of the WIDEsystem Status tab dialog.
- If the scanner was not installed correctly, a message will inform you that your scanner could not be detected. If this is the case turn off power to all connected devices and repeat the installation steps.
text_image
WIDESystem Scanner: MY SCANNER (USB) Status Info Lag Timer.One-Touch Scen to Net Scanner mode: Ready Answer: Ready Time of the User StartedInstallation
12
15
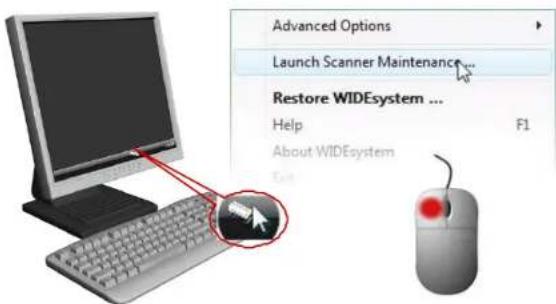
Calibrate - Run scanner maintenance program
This step will ensure that your cameras are aligned.
-
Right click on the WIDEsystem scanner icon .
-
Select Launch Scanner Maintenance
-
Follow the instructions on your screen.
See also in this guide: Camera Alignment and Calibration.
text_image
Advanced Options Launch Scanner Maintenance... Restore WIDEsystem ... Help F1 About WIDEsystem Exit16
Install scan or copy software (optional)
Install the scan and copy software you will use with the scanner. There are many scan and copy applications made specifically for your scanner and all its features. Many common imaging applications support TWAIN and WIA interfacing for simple scanning tasks. Read more in Software applications for scanning.
natural_image
Illustration of a hand inserting a CD into a desktop computer tower (no text or symbols)Installation
13
17
Share the scanner on the LAN (optional)
You can enable other PCs on the LAN to use the scanner. This is called "Sharing". You can setup the scanner as a "shared scanner" through WIDEsystem.
-
Left -double-click on the WIDEsystem program icon and select the Scan to Net tab.
-
Locate the option group Local scanner attached to this computer.
- Select the option: Share your current scanner to allow others on the network to use it.
- Press the OK button to accept the settings.
On most LAN systems, this is all you have to do. However, some systems will require Advanced settings, such as specific communication port numbers. Contact your LAN administrator for information regarding Advanced settings.

NOTE: Open WIDEsystem and press the

NOTE: PCs on the LAN that will use the scanner must be installed with WIDE system compatible scan/copy software.
natural_image
Computer monitor with keyboard and mouse icon highlighting a button (no text or symbols)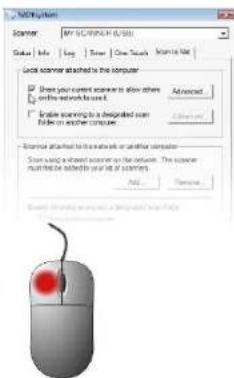
text_image
Windows Marker: MY SCREEN (RGB) Status: All Log Time One Search Movie List Lock scanner attached to the computer □ Does your current scanner to allow others Advanced □ Online network boot □ Enable scanning to be designed from file or on other computer Advanced ■ Remove attached to the network or additional computer □ Store using a custom scanning on the network. The browser must be installed in your list or switches. Add Remove Cancel Closing Project Options (Preview Image)Operator's Panel
The Operator's Panel
The panel operator's consists of operation buttons and LED indicators. There are buttons for power ON/OFF, paper feeding, and triggering applications (one-touch). The LED indicator's function is to display scanner status in relation to its basic operations such as self-testing and media readiness. Operation of the buttons and interpretation of the LED indicator light patterns are described in the next user guide sections – Power ON/OFF, Loading the scanner, Scanning thick media.
See Appendix A – Overview - Operator's Panel for a complete description of the panel's keys and the how to understand the panel LED lighting patterns.
Scanner Models: HD2530
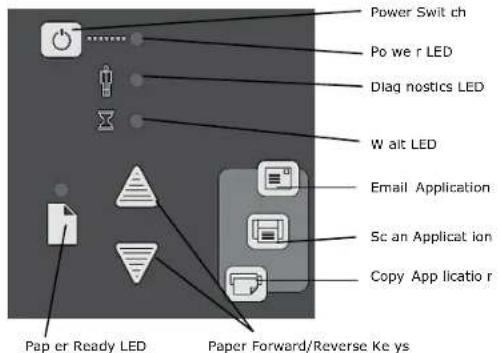
text_image
Power Switch Po we r LED Diag nostics LED W alt LED Email Application Sc an Applicat ion Copy App licatio r Paper Ready LED Paper Forward/Reverse KeysScanner Models: HD5450, HD4250, HD4230, HD3650, HD3630
with ATAC (Automatic Thickness Adjustment Control) key
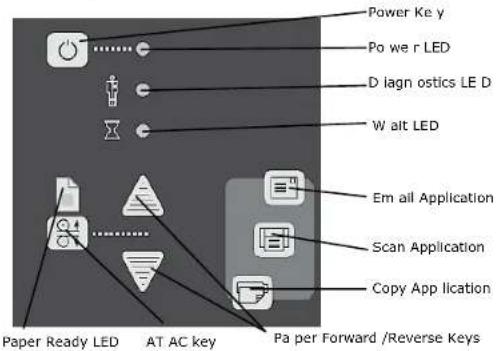
text_image
Power Key y Power r LED Diagn ostics LE D Wait LED Email Application Scan Application Copy App lication Paper Ready LED AT AC key Pa per Forward /Reverse KeysPower ON/OFF
15
Turning Power ON/OFF – Wake/Sleep Modes
Scanners: HD5450, HD4250, HD4230, HD3650, HD3630, HD2530
Main Power ON/OFF
The main power switch is at the back of the scanner. Press the upper half of the switch (marked "l") to turn the main power to ON. Press the lower half of the switch (marked "0") to turn the main power to OFF.
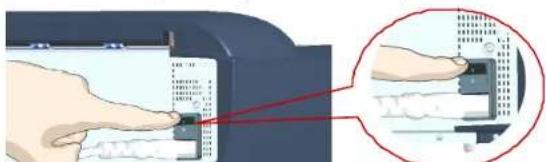
text_image
Illustration showing hands inserting a card into a device, with magnified detail highlighting the process.Main power switch is at the back of the scanner. Press "I" for ON and "0" for OFF.
The scanner's Self Test Procedure
When you connect the scanner to the power outlet and turn on the outlet switch at the back of the scanner, it starts up with a self-test procedure. The scanner's self-test procedure consists of two main steps –
- Init (Initialization) Sequence – the scanner loads and tests internal parameters. Only initiated when you turn the main power ON. The panel's LEDs will be lit as shown in the next illustration:
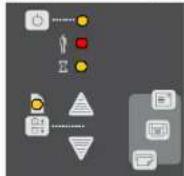
Panel LEDs during the Init Sequence.
- Self-Adjustment - Adjustment of light profiles, stitching and black/white points. Starts after the Init Sequence when the scanner's main power switch is turned ON or right away when the scanner goes from sleep to wake mode. The panel's LEDs will be lit as shown below:
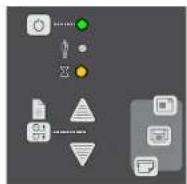
Panel LEDs during Self-Adjustment
Scanner ready to scan
You will know that the self-test procedures have completed and the scanner is Ready when the Power LED is lighted green and the other LEDs are off as shown below:
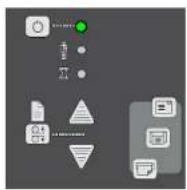
Power ON/OFF
Wake and Sleep modes
With the main power switch ON, scanner power can be set in Sleep mode and Wake mode. Sleep mode is the energy saving mode. The scanner cannot scan when in the Sleep mode. Wake mode is the full power ON mode for scanner operation.
The scanner will go from Wake mode into Sleep mode:
• Automatically: after a set idle time (see Automatic Power functions).
• Automatically: with the Timer (see Automatic Power functions).
- Manually: when you hold the power button down for 3 seconds.
The scanner will go into wake mode:
• Automatically: with the Timer (see Automatic Power functions).
- When you feed a document into the scanner.
- When you press any button on the panel.


Sleep Mode power


Wake Mode (power ON)
Advantages with using Wake-up and Sleep modes:
Ready faster: You turn the scanner OFF and ON (sleep/wake-up) by pressing the power key on the panel. The scanner skips its init sequence and is ready to scan sooner than with Main Power OFF to ON.
Convenience: When OFF (LED is red) the scanner can be powered up (Wake-up) easily by pressing the power key or just by inserting paper into the scanner, thereby indicating you wish to scan.
Timer function: Scanner power with Wake-up and Sleep, can be setup and controlled through the WIDEsystem software timer week schedule feature or through an idle time setting.
Save energy: Sleep mode runs at low power values.
Automatic Power ON/OFF functions
Scanners: HD5450, HD4250, HD4230, HD3650, HD3630, HD2530
Automatic power management lets you schedule your scanner's up-time optimally and helps save energy.
You can set the scanner for automatic power OFF (Sleep) and power ON (Wake-up). Automatic power management functionality is set and controlled through your WIDEsystem software.
There are two automatic power functions:
- Timer function
- Enter Sleep mode automatically (after idle time) option.
In order to use automatic power management functionality: the scanner Main Power switch at the scanner's back must be turned ON.
The power LED on the operator's panel will light red when the scanner is in Sleep Mode (powered OFF) and green when in Wake Mode (powered ON).


Sleep Mode power


Wake Mode power ON)
Power ON/OFF
Timer Function – Scheduling ON/OFF Times Scanners: HD5450, HD4250, HD4230, HD3650, HD3630, HD2530
You can program your whole weekly schedule into the scanner so it powers ON and OFF (wake – sleep) on its own. You enter your schedule's wake-up and sleep times in WIDEsystem's Timer tab as shown in the example below.
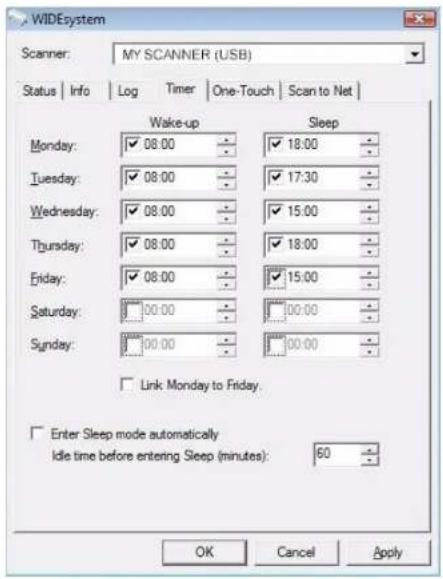
text_image
WIDEsystem Scanner: MY SCANNER (USB) Status | Info | Log | Timer | One-Touch | Scan to Net | Wake-up Sleep Monday: 08:00 18:00 Tuesday: 08:00 17:30 Wednesday: 08:00 15:00 Thursday: 08:00 18:00 Friday: 08:00 15:00 Saturday: 00:00 00:00 Sunday: 00:00 00:00 Link Monday to Friday. Enter Sleep mode automatically Idle time before entering Sleep (minutes): 60 OK Cancel ApplyTo set the Timer:
- Open WIDEsystem - double-left-click the scanner icon in the system tray.
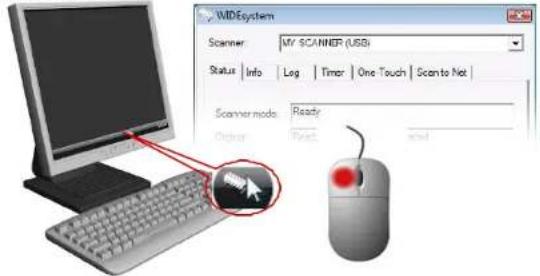
text_image
WIDEsystem Scanner MY SCANNER (USB) Status Info Log Timer One Touch Scento Net Scanner mode Ready Order Read end- Select the Timer Tab.
- Click the checkmark fields for each day you want automatic wake-up and sleep actions.
- Under the Wake-up column - Click on the hour digits in the day's edit field to highlight them. Use the arrow box to increase or decrease the hour value or use your keyboard to write the value in the field.
- Move to the Wake-up column's minute digits for the same day - Click on the minute digits in the day's edit field to highlight them. Use the arrow box to increase or decrease the hour value or use your keyboard to write the value in the field.
- Repeat this process in the Sleep column for the same week-day.
- Make settings for the other week-days in the same manner or...
- You can use the Link Monday to Friday option to make your settings for Monday apply for the whole work-day-week.
- NOTE that the Idle time before sleep time setting will still apply and may conflict with your Timer settings. Change or disable the Idle time before sleep time setting if it does.
- When you have filled out the dialog, press Apply to download your settings into the scanner's memory.
Power ON/OFF
When the Timer is active:
Your scanner will store and remember your settings so you have them after you turn off your PC and shutdown the WIDEsystem program. When you restart WIDEsystem, the Timer tab will display the values currently stored in the scanner.
If the scanner is being used, it will delay entry into Sleep mode. The power LED on the panel will blink just before entry into a scheduled sleep mode. You can cancel entry into Sleep mode by pressing the power button.
Automatic Shut Down After Idle Time
Scanners: HD5450, HD4250, HD4230, HD3650, HD3630, HD2530
On delivery, the scanner is set for automatic entry into sleep mode after a preset default idle time, i.e. the length of time the scanner is not active. You can prolong or shorten the idle time value to match your normal workflow.
To change/set the sleep mode options:
- Open WIDEsystem - double-left-click the scanner icon in the system tray.
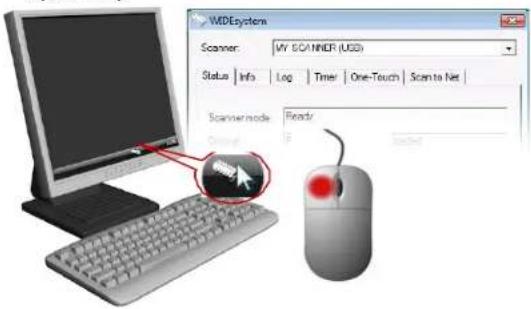
text_image
MDEsystem Scanner: WY SCANNER (UGS) Status | Info | Log | Timer | One-Touch | Scen to Net | Scan-mode: Ready Current: 0 Loaded- Select the Timer Tab.
-
Select or deselect the Enter Sleep mode automatically option.
-
If you do not select the Enter Sleep mode automatically option, you will need to use the manual method for entering sleep mode by holding the power button down for 3 seconds.
- If you do select Enter Sleep mode automatically option, proceed to the next step to set the Idle time value.
- Set the value Idle time before entering sleep. This is the number of minutes the scanner can stand idle before entering the sleep mode on its own.
- Press Apply to download your settings into the scanner's memory.

Enter Sleep mode automatically
Idle time before entering Sleep (minutes):

Sleep Mode options in the WIDEsystem program – Timer tab

NOTE: With the scanner main power ON, the scanner can be also be ght into Wake-up and Sleep modes manually even while the Enter p mode automatically option is selected.
- Wake - by pressing any button on the panel or inserting a document for scanning.
- Sleep – by pressing and holding down the power button for 3 seconds.
You can choose to disable automatic entry into Sleep mode entirely if you want only manual activation of the sleep mode or, you can leave it enabled and retain both manual and automatic functions.
Loading Originals into the Scanner
Scanners: HD5450, HD4250, HD4230, HD3650, HD3630, HD2530
Load, face down, at the scanner's center
Load your document with the image side facing downwards. Align the center of the document with the center arrow marking on the scanner bed. Use the standard size markings to help align the document for a straight scan path.
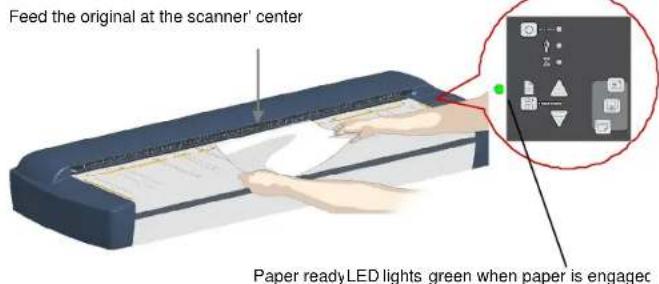
text_image
Feed the original at the scanner' center Paper readyLED lights green when paper is engagecLoad the paper, face down. Hold with both hands and align the document's center with the scanner center marking.
You can use automatic loading or manual loading. These 2 loading options are selected in the scan/copy application dialogs on your PC. Read the instructions about Automatic and Manual loading n the next sections.
NOTE: The availability of the automatic and manual loading options will depend on your scan/copy software and its level of compatibility with the scanner model.
NOTE: See also this guide's section on Scanning Thick Media for instructions on loading thick media originals.
Automatic loading
With automatic loading, the scanner takes the original as soon as you insert it in the paper slot. Automatic loading is reliable for most jobs and especially useful for batch scanning jobs.
- Make sure the Paper handling option "Auto load" is set in your scanning application.
- Align the center of the document with the center arrow marking on the scanner bed.
- Push the original into the insertion slot until you feel it contact the rollers and the Paper Ready LED lights green (yellow for thick media).
- The scanner will grab the original automatically and move it into start-scan position.
- A delay factor can be set in the scanning application. The delay will give you time to control straight positioning of the document in cases where the scanner is grabbing the original too fast.
Manual loading
- Make sure the Paper handling option "Manual" is set in your scanning application.
- Align the center of the document with the center arrow marking on the scanner bed.
- Push the original into the insertion slot until you feel it contact the rollers and the Paper Ready LED lights green (yellow for thick media).
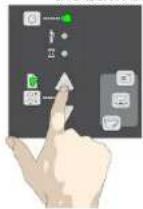
- While holding the original in place with one hand, use the other hand to press and hold down the Paper Forward button on the scanner.
- The original moves into the start-scan position.
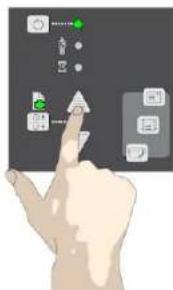
text_image
Hand interacting with a digital interface displaying icons and text, likely for UI or system controlPress paper forward button
Loading
20
Unloading the original after scan
- Press the Paper Reverse button to eject the original back to the scanner feeding bed.
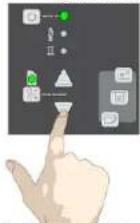
- Press the Paper Forward button if you wish to eject the original out the back of the scanner.
Fast-loading
Fast-loading is a time-saving loading option designed for batch scanning. The fast-loading option can be selected in the scanning application.
NOTE: The availability of the fast loading option will depend on your scan/copy software and its level of compatibility with the scanner model.
What is Fast-loading? – With normal (default) loading, i.e. without the Fast-load option selected, the original is pulled all the way into the drive system, past both roller axles, and then reversed to start-scan position in order to ensure precise detection of the original's placement in the scanner. With the Fast-load option selected, the original is pulled only under the first roller axle and scanning will start from there. The Fast-load option is
convenient for batch scanning of originals with robust edges that feed easily. Normally, with batch scanning, you would use the Fast-load option in conjunction with automatic loading however you can also use manual loading to feed the original into start-scan position.
Soft-handling
The Soft-handling option is selected in your scan application. Soft-handling means that feeding and scanning are slowed down. You can use the option with both Manual and Automatic loading.
NOTE: The availability of the soft handling load option depends on your scan/copy software and its level of compatibility with the scanner model.
Use Soft-handling with
-
Old, curled or creased originals that trigger a paper jam. See Trouble Shooting – Paper Jam error for correcting a paper jam error.
-
Fragile originals you want passed delicately through the drive system.
Setting the input size
The Input size defines the scan area. You enter the input size in your application's input size dialogs.
NOTE: The availability of the Input size options described below will depend on your scan/copy software and its level of compatibility with the scanner model.
3 ways to set find and set the input size:
-
Use automatic size detection - The scanner will detect the edges of the document and calculate the input size for you.
-
Set a standard size - common standard sizes are marked on the scanner bed. Use these markings to determine which standard size matches the original and then select that size in the application's input size dialog.
-
Set the size manually for irregular sizes. To measure your document - use the scanner's ruler just above the insertion slot. Enter your width measurement in the width setting field in your application's input size setup dialog. You can measure and set a length value or choose automatic length detection.
Scanning
21
Scanning
Software applications for scanning
Your scanner is controlled through scan, copy or imaging software installed on your PC.
Optimal full featured scanning functionality is obtainable through scan and copy software specifically developed for compatibility with your scanner model. See the scanner manufacturer's website for information on scanner software and compatible third-party applications.
Simple scanning functionality - Many common imaging applications support TWAIN and WIA interfacing and will thereby support simple scanning tasks through a limited range of settings and control options.
Running applications from the scanner panel
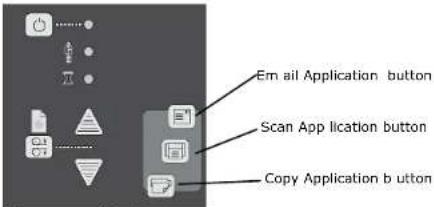
Normally you would control the scanner from your PC through your scan software user interface. However, your scanner also supports one-touch buttons that enable you to trigger your software from the scanner panel. When a button is pressed, a scan is initiated and the result is loaded into the application triggered. You configure your one-touch buttons through WIDE system and your compatible scanning software. Please refer to the on-line help in these applications for instructions.

NOTE: See Appendix A – Overview of the Operator's Panel -ication Control – One Touch Scan for additional information.
text_image
Em ail Application button Scan App lication button Copy Application b uttonThe one touch buttons
Batch scanning
Batch scanning involves jobs where you want to feed and scan a whole set of originals that require equal scan settings. The basic steps are:
-
Set your scan settings (size, type, image adjustments...) for the batch. Your settings will apply to ALL the documents in the batch.
-
Set the scan software into Batch Mode. This will tell the scanner to start scanning as soon as the document is fed so you don't need to trigger the scan.
-
Choose Automatic loading (optional) - for fast and effective loading. Read you scan software's on-line help pages for specific information on batch scanning with the application.

NOTE: The availability of Batch scanning options will depend on your /copy software and its level of compatibility with the scanner model.
Monitoring your scanner with WIDEsystem
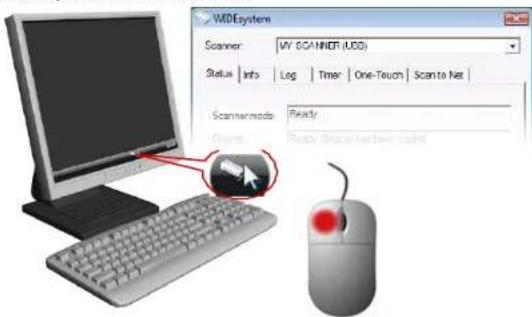
You installed WIDE system with the scanner drivers. WIDE system contains an application that monitors the scanner and reports on its functionality.
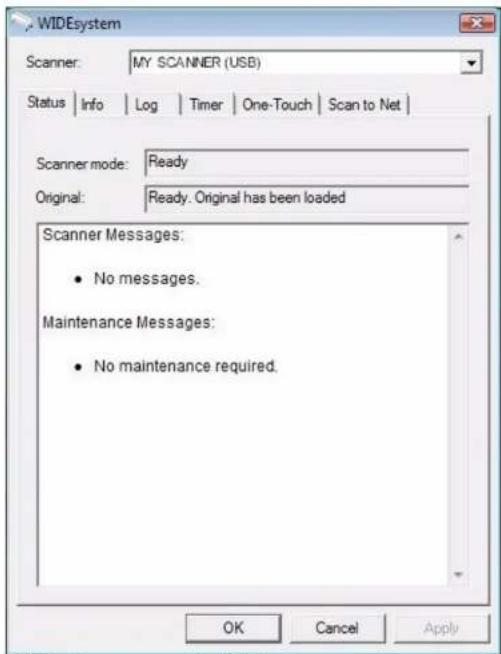
Double left click the system tray's scanner icon to open the WIDEsystem control interface.
text_image
WDEsystem Scanner: WY SCANNER (USD) Status | Info | Log | Timer | One-Touch | Scante Net | Scanernmode: Ready Open | Quick Search/Hi/Hi/Hi/Hi/Hi/Hi/Hi/Hi/Hi/Hi/Hi/Hi/Hi/Hi/Hi/Hi/Hi/Hi/Hi/Hi/Hi/Hi/Hi/Hi/Hi/Hi/Hi/Hi/Hi/Hi/Hi/Hi/Hi/Hi/Hi/Hi/Hi/Hi/Hi/Hi/Hi/Hi/Hi/Hi/Hi/Hi/Hi/Hi/Hi/Hi/My ComputerScanning
22
With WIDEsystem you can:
View the scanner's status. Move the mouse over the scanner icon on the system tray. Status messages include whether or not the scanner is detected, connection and runtime errors and readiness for scanning.

Scanner status message on Windows system tray
View Error messages and logs. Runtime errors are reported immediately on your screen. You can also open the Status tab and Log tab for viewing error messages.
View information about the scanner device in relation to firmware and hardware revisions. Open the Info tab.
Install new firmware – You download new firmware to a folder on your machine. Then right click on the scanner icon, select Advanced Options > Update Scanner Firmware to install it on your scanner.
Initiate a scan of the system's hardware bus for re-establishing the interface. Right click on the scanner icon, select Advanced Options > Rescan Hardware Bus.
Assign/reassign applications to the scanner's one-touch-scan buttons, or disable the one-touch-scan buttons altogether. Open the One-Touch tab to make settings.
Set Automatic Power functions. Timer and Enter Sleep mode automatically (after idle time) options.
Set up your scanner so it can be shared by user PC's on the network. Open the Scan to Net tab to make settings.
Set up your scan software so it can access shared scanners on the network. Open the Scan to Net tab to make settings. See also Installation - Share the scanner on the LAN.
Launch the scanner maintenance program. Right click on the scanner icon, select Launch Scanner Maintenance.
Launch the WIDEsystem on-line help. To find instructions on trouble shooting and using WIDEsystem with your scanner. Open WIDEsystem and press the F1 key.
text_image
WIDEsystem Scanner: MY SCANNER (USB) Status | Info | Log | Timer | One-Touch | Scan to Net | Scanner mode: Ready Original: Ready. Original has been loaded Scanner Messages: • No messages. Maintenance Messages: • No maintenance required. OK Cancel ApplyWIDEsystem program control interface
Scanning Thick Media
23
Scanning Thick Media
You may need to scan documents and drawings printed or pasted on thick media such as cardboard, foamboards, gatorboards etc. To do so, you will need to fit the insertion slot to the thickness of your original. This is done by raising the pressure-platen to the exact correct height.
Manual Adjustment for Thick Media – Slider Controls
Scanner Models: HD2530
On these scanners you change the insertion slot size (pressure-platen height) manually. Adjustments can be made in the range 2mm to 15mm (up to 0.6") so you can fit the slot to the thickness of your original. Originals up to 2mm thick should be scanned with the Normal (2mm) setting. Thicker originals will require adjustment for thick media.
There are 2 methods for manual adjustment for thick media:
- The normal method for all thick original types
- The quick method for stiff thick originals only.
Normal Method - with all thick original types:
- Measure the thickness of your original to find the right setting.
- Insert your fingers in the insertion slot and lift to open the scanning area lid.
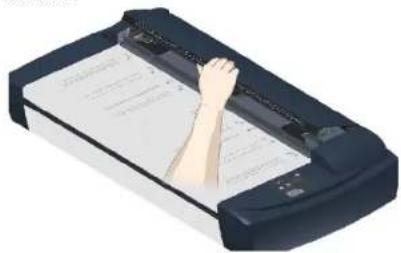
natural_image
Illustration of a hand holding a document with paper, viewed from above (no text or symbols visible)- The thickness adjustment sliders are on right and left sides of the pressure-platen.
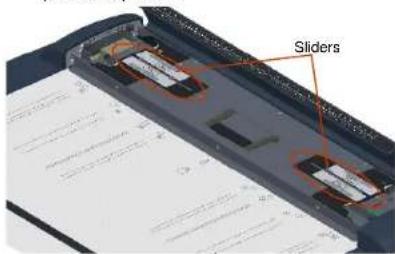
text_image
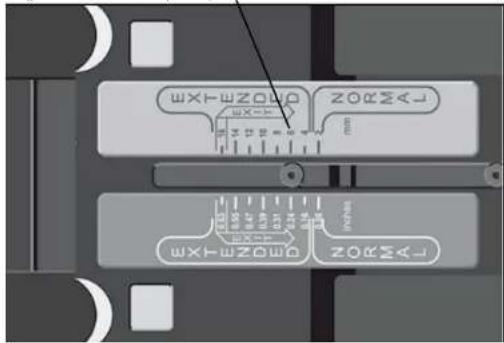
Sliders- A slider is divided into a Normal position and Extended positions.
- The Extended settings are marked in inches and millimeters. Each step marks an interval, i.e., the 4 setting means documents from 2mm to 4mm thick, the 6 setting from 4mm to 6 mm thick, etcetera.
- The round metal button indicates the current setting (see the illustration titled Thickness Adjustment Slider on the next page). For paper thin originals the button will be at the 2mm (0.08") setting – also called the "Normal" setting.
- Press down on the right slider. Place your fingers in the green slots and pull the slider towards middle of scanner to the correct thickness setting.
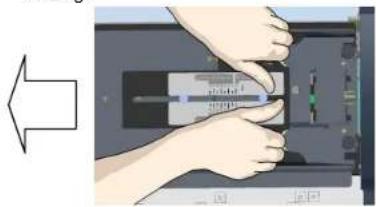
natural_image
Illustration of hands inserting a device into a computer case (no text or symbols visible)- Press down on the left slider. Place your fingers in the green slots and pull the slider towards middle of scanner to the same thickness setting as above. It is important that both sliders are set to the same value.
Scanning Thick Media
24
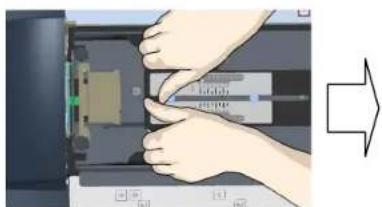
text_image
Diagram showing hands operating a device with labeled ports and directional arrow indicating process flow-
Close the scanning area lid.
-
Feed your thick original. The Paper Ready key will turn yellow (stop blinking) when the pressure-platen is positioned correctly and is ready to scan your thick original.
Thickness Adjustment Slide
In this example, the button position shows the slider set for an original that is 6mm. (0.24") thick
text_image
EXT-WZ000 WZ=12 WZ=12 WZ=12 WZ=12 WZ=12 WZ=12 WZ=12 WZ=12 WZ=12 WZ=12 WZ=12 WZ=12 WZ=12 WZ=12 WZ=12 WZ=12 WZ=12 WZ-UN WZ-UN WZ-UN WZ-UN WZ-UN WZ-UN WZ-UN WZ-UNQuick Method - stiff and thick original types only.
You can use the following Quick method for stiff and hard surface originals. This method is not recommended for soft or flexible media such as originals mounted on foam boards, as there is a high risk for creating an over-tight insertion slot and causing damage to the original.
- Insert your fingers in the insertion slot and lift to open the scanning area lid.
- Press down on the right slider and move inwards (towards middle of scanner) to the highest setting - 16mm (0.63").
- Repeat with the left slider. Your pressure platen is now fully raised to it maximum height.
- Slide the original into the insertion slot and under the fully raised pressure-platen.
- With both hands, press down gently on each side of the pressure-platen until you feel it contacts the original underneath.
- The sliders will move and adjust themselves to the proper height.
- Be sure to control that both sliders (on each side) are set to the same thickness value. If not, adjust one side so they are equal.
- The Paper Ready key will turn yellow (stop blinking) when the pressure-platen is positioned correctly and is ready for thick media scanning. If it keeps blinking, press the paper reverse key to feed out the thick original and then reinsert for scanning.
Scanning Thick Media
Automatic Thick Media Adjustment
Scanner Models: HD5450, HD4250, HD4230, HD3650, HD3630
Scanners with Automatic Thickness Adjustment Control (ATAC) have an ATAC key on the operator's panel. You use the key to raise and lower the pressure-platen. You can change the insertion slot size (pressure-platen height) on your scanner from 2mm to 15 mm (up to 0.6"). Originals up to 2mm thick should be scanned with the pressure all the way down (normal position). Thicker originals will require you use the ATAC key to adjust for thick media.

The ATAC key on the operator panel.
To adjust the insertion slot for thick media with ATAC:
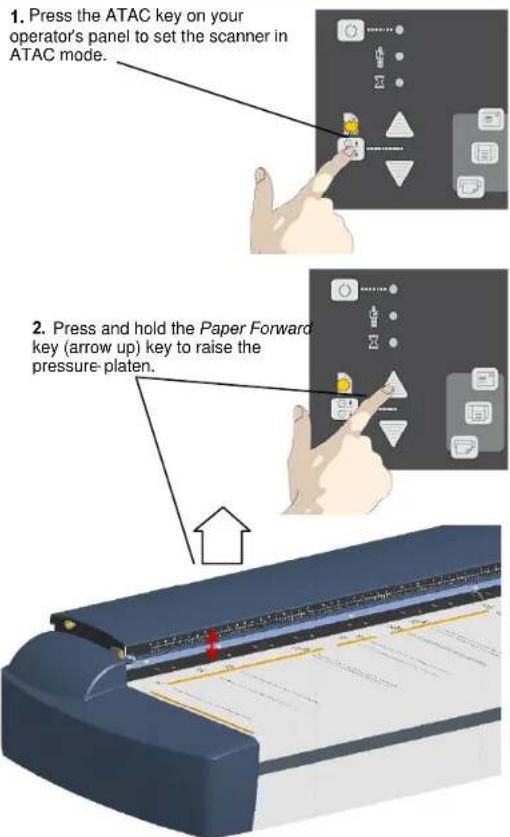
- Press the ATAC key on your operator's panel to set the scanner in ATAC mode.
- The Paper Ready Indicator blinks yellow indicating the scanner is in ATAC mode but not yet ready, i.e., the pressure-platen is not yet positioned for the thick original.
- Press and hold the Paper Forward key (arrow up) key to raise the pressure-platen until there is room to insert the thick original.
- Insert the thick original evenly for a straight scan path.
- Press and hold the Paper Reverse (arrow down) key to lower the pressure-platen until the pressure-platen stops on its own.
- The Paper Ready indicator will stop blinking and remain yellow when the pressure-platen is positioned correctly and is ready for thick media scanning.
- The scanner will automatically leave the ATAC mode, which means that the Paper Forward and Paper Reverse keys will return to their normal functionality for moving the original forwards and backwards.
text_image
1. Press the ATAC key on your operator's panel to set the scanner in ATAC mode. 2. Press and hold the Paper Forward key (arrow up) key to raise the pressure-platen.Scanning Thick Media
When Scanning in Thick Media Positions
On all Scanners: HD5450, HD4250, HD4230, HD3650, HD3630, HD2530
Below are some additional guidelines and facts related to scanning thick originals.
Remember to return to the Normal position so the scanner and run Auto-Self-Adjustment
The scanner employs an automatic self-adjustment procedure (light profile, stitching etc.) that can only activate itself when the scanner is in the Normal position. With prolonged scanning in extended thickness settings, you should from time to time return the scanner to its Normal position to allow it to self-adjust. This will ensure refreshed self-adjustment and optimal performance of your scanner. Make a habit of always setting the scanner in the Normal position when shutting down, so it can auto-self-adjust the next time you turn it ON.
Supporting Thick Originals
To avoid bending and ensure a stable scan: It is important to help support large thick originals during scanning. Hold the end of the original and support it as it feeds.
Scanning speed is reduced when scanning thick originals
The scanner runs at its optimal speed in the Normal position. To allow stable drive handling, scanning speed is automatically reduced when the scanner is in the extended thickness positions.
Modifying Stitching Parameters
Thick stiff originals will rest on top of the scanner rollers and thus raise a small distance over the glass-plate. This can lead to irregularities in relation to "stitching" of the image at points between the cameras (overlapping pixels). In such cases, the stitching parameters will need to be modified. You can modify stitching parameters through your scanning application in the following way:
- Insert your thick original in the scanner and scan the image using your scanning application.
- Check the result in the viewer for overlapping or missing pixels in the camera transition areas.
- Adjust the stitching values in the application's scanner setup dialogs.
- Repeat scanning and adjustment until the effect is minimized.
Scanning thick originals can give distortions when the front edge meets the exit rollers or the trailing edge leaves the entry rollers. To omit this, the leading and trailing edges are by default skipped when in an extended thickness position. Leading/trailing edge skipping can be turned off through the scanning application's setup dialogs.
Maintenance
27
Maintenance
About scanner maintenance
Scanner maintenance will ensure optimal performance of your scanner. There are three basic maintenance tasks:
1. Cleaning
Keep your scanner clean – the next section describes how to thoroughly clean the internal scan area. How often you need to clean the scanner will depend on how often and the types of media you scan. If your work primarily involves scanning newspapers and old blueprints you may need to clean more often than users who only scan brochures and new drawings.
Be sure to clean the scanner when results are not optimal. Particles of dust in the scan area can often be the cause of streaks in the end result.
See more under the section Cleaning the scan area
2. Calibration and camera alignment
Scanner Calibration is easy to perform and most of it is completely automatic. Scanner calibration includes camera alignment and calibration of B&W and color parameters. To run, you insert a Calibration Sheet, and start the Scanner Maintenance program. Be sure to calibrate if your output is not optimal. Make sure the scanner is clean before calibrating.
See more under the section Camera alignment and Calibration.
3. Replacing worn parts
This should be carried out when you get a warning on your screen or when a worn part affects your results. Replaceable parts are:
a. the glass plate
b. the lamp
c. the white background platen
d. the dust filters
See more under the section Replacing scanner parts.

NOTE: Parts are not replaceable on HD2530 models.
Cleaning the scan area
Follow the steps below for thoroughly cleaning the scanner and scan area. Be sure to clean the scan area when results are not optimal. These could be streaks in your scan image due to dust particles in the scan area.
You must clean the following scanner parts/areas:
- The scanner bed
- Glass plate
- White background
- Transport rollers

Caution: do not use abrasives, acetone, benzene or fluids that gain these chemicals. Do not spray liquids directly onto the scanner's-plate or anywhere else in the scanner.

Caution: Before cleaning the scan area, be sure to turn the scanner off and disconnect the power plug.
Instructions on cleaning the scan area follow on the next page.
Maintenance
28
Cleaning the Scan Area
Scanner Models: HD2530
In order to access the scan area for cleaning on the 25" models, you have to detach the pressure-platen. Follow the instructions below.

Turn scanner power off
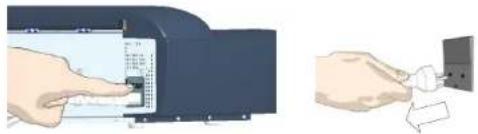
Press the main power switch (scanner back) to OFF and disconnect the power plug.
natural_image
Illustration of hands inserting a card into a device (no text or symbols visible)
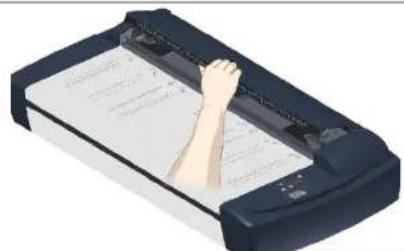
Open the scanner's lid
Place your fingers in the insertion slot and flip open the scanning area lid.
natural_image
Illustration of a hand holding a document with paper, no visible text or symbols on the device itselfMaintenance
29
3
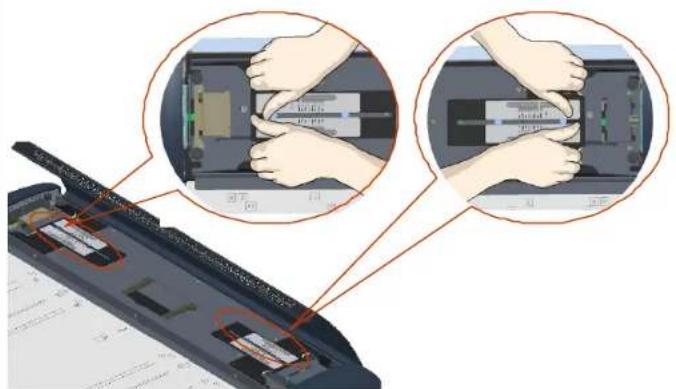
Access the scan area – Free the pressure platen
- Move the pressure platen sliders to unlock the pressure platen. The sliders are on each side of the scanner.
- Place both hands on a slider - push down and move the slider all the way towards the scanner's middle (Exit Position) while maintaining pressure until the metal button pops up.
- Repeat this on both left and right side sliders to free the pressure-platen.
text_image
Diagram showing two hands inserting a component into a device, with Chinese labels indicating components and functions.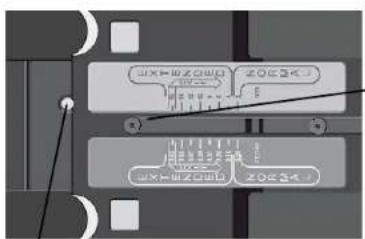
flowchart
graph TD
    A["开始"] --> B{判断条件}
    B -->|是| C["执行操作1"]
    B -->|否| D["执行操作2"]
    C --> E["结束"]
    D --> E
Exit position : The slider is pushed all the way towards the scanner's middle.
The metal button pops up.
Maintenance
30
4
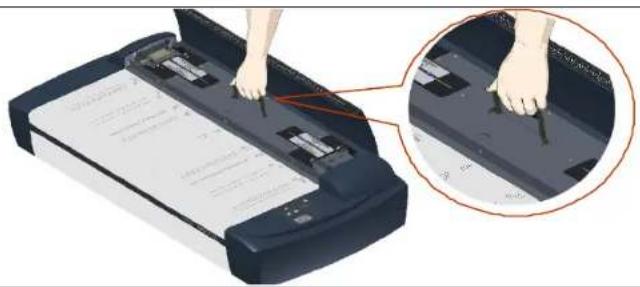
Remove the pressure platen
On the topside of the pressure-platen you will find a hinged handle.
- Flip up the handle.
- Grip the handle and lift out the pressure-platen
natural_image
Illustration of a printer with paper feed and a hand inserting a pencil into the cover, showing a magnified view of the printer's handle (no text or symbols present)5
Clean the glass-plate
With the pressure platen removed, the glass-plate will be exposed for cleaning.
- Clean the glass with a lint-free cloth and a mild, streak-free, glass cleaner. Apply the cleaner to cloth and then wipe the glas
- Dry the glass completely using a separate clean, dry lint-free cloth like the one provided with the maintenance kit.

Caution: Do not spray liquids directly onto the scanner glass-plate.
text_image
Illustration of a hand using a computer to press documents on a printer, with visible text and labelsMaintenance
31
6
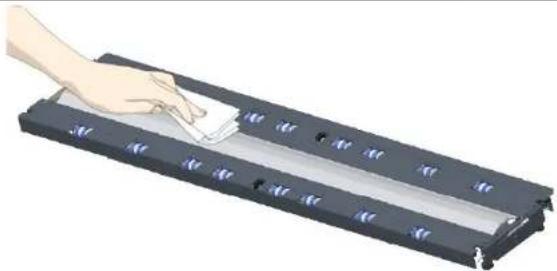
Clean the white-background platen and rollers
The white-background-platen is on the backside of the pressure-platen you removed in step 4.
- Flip the pressure-platen over to clean the white background.
- Wipe the white area and the transport rollers with a lint-free cloth and a mild, streak-free, glass cleaner. Apply the cleaner to the cloth and first wipe the platen's white area and then the transport roller's surface.
- Dry the pressure-platen and rollers completely using separate clean, dry lint-free cloths.
natural_image
Illustration of a hand cleaning a black rectangular object with a cloth (no text or symbols visible)Maintenance
32

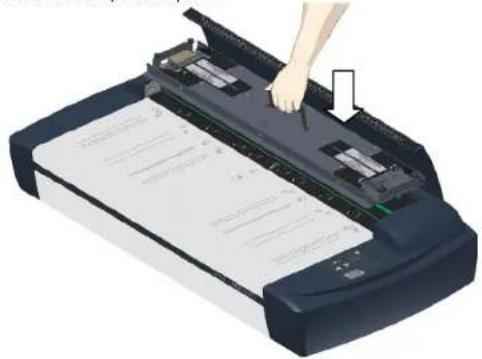
Reinsert the pressure platen and close the lid
- Lift the Pressure platen by its handle and reinsert it into the scanner.
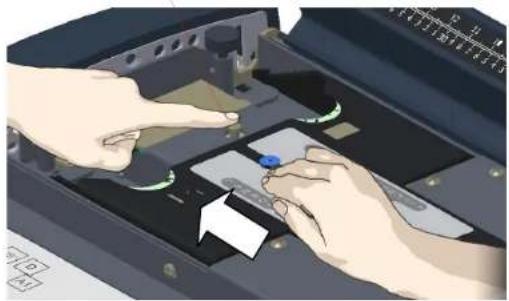
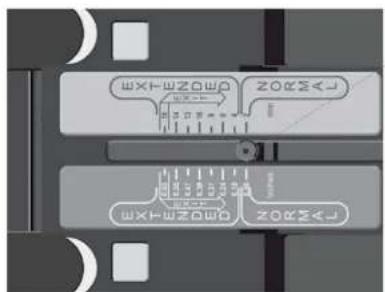
- On each end, you will need to press down the metal button with one hand, and with the other hand, push the slider back from the Exit position to its Normal position.
-
Push the sliders away from the scanner middle until they reach the edge (Normal position).
-
Reinsert the pressure platen
natural_image
Illustration of a hand inserting a card into a printer's tray (no text or symbols visible)- and 3.
Push down on the button so the slider can move back into its normal position
natural_image
Illustration of hands operating a device with a blue knob and control panel (no text or symbols visible)The slider back in its Normal position
text_image
WXH WZ0W WZ0Z WZ0Z WZ0Z WZ0Z WZ0ZMaintenance
33
8
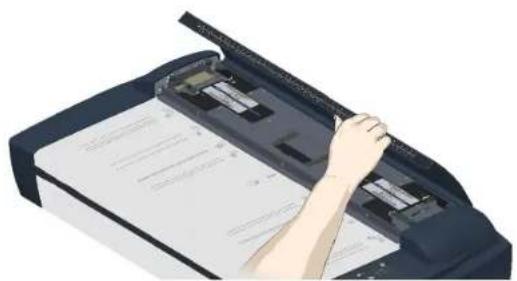
Close the scanning area lid.
Grip the lid's edge and pull it down so it closes.
natural_image
Illustration of a hand inserting a document into a printer (no text or symbols visible)9
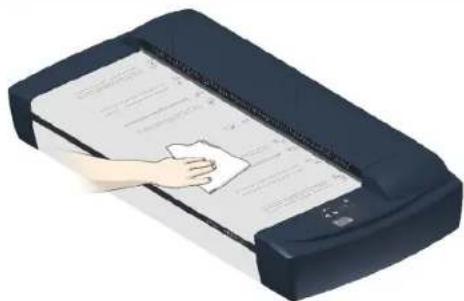
Clean the scanner feed area surface
- Clean also the scanner surface so dirt and dust are not dragged into the scan area with the original.
natural_image
Illustration of a hand cleaning a document on a handheld device (no text or symbols visible)Maintenance
34
10
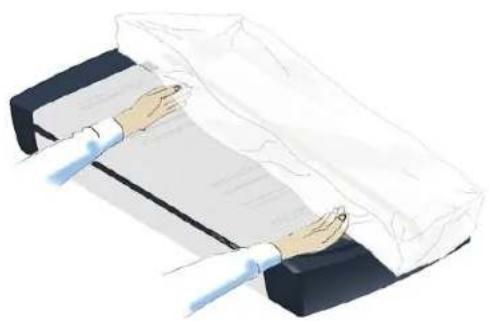
Cover when not in use
- Cover the scanner with its plastic dust cover when not in use.
- Caution: Make sure the scanner power is OFF when using the dust cover.
natural_image
Illustration of two hands operating a rectangular device with a curved panel, no text or symbols presentMaintenance
35
Cleaning the Scan Area
Scanner Models: HD5450, HD4250, HD4230, HD3650, HD3630
You only need to open the lid to access the scan area when cleaning these models. Follow the instructions below.

Turn scanner power off
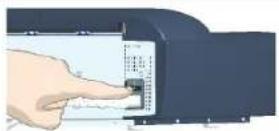
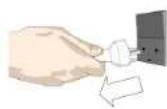
Press the main power switch (scanner back) to OFF and disconnect the power plug.
Maintenance
36

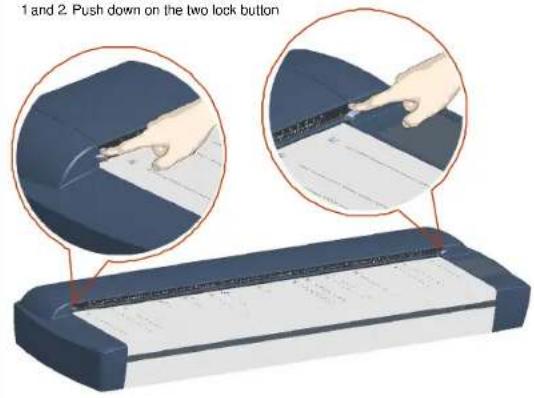
Open the scanner's lid
- Open the scan area lid - Push down on the two lock buttons found near the insertion slot on each side of the lid.
- The scanning area lid locking mechanism should now be disengaged.
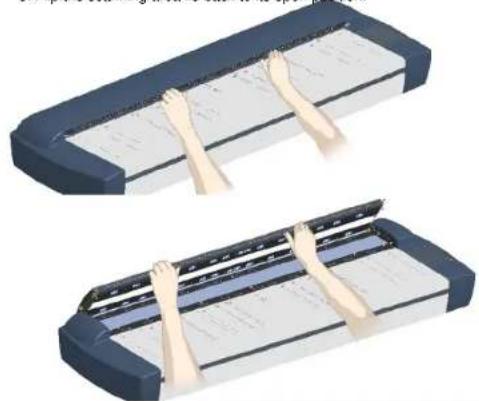
- Place your thumbs in the insertion slot and flip the scanning area lid back to its open position.
1 and 2. Push down on the two lock button
text_image
1 and 2. Push down on the two lock button- Flip the scanning area lid back to its open position.
natural_image
Illustration of two hands holding a tray with sheet music, no text or symbols presentMaintenance
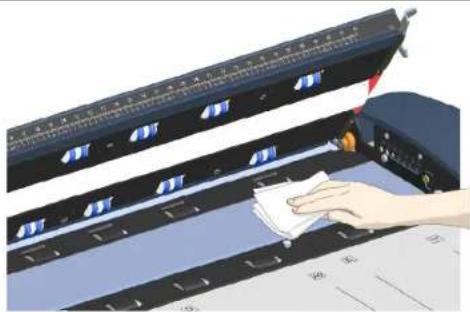
37

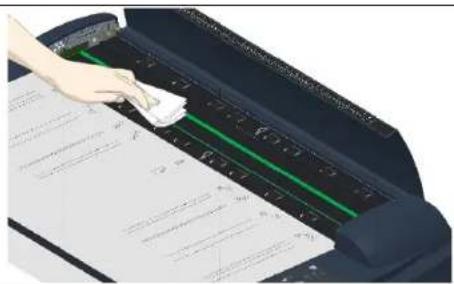
Clean the glass-plate
The glass-plate is now exposed for cleaning.
- Clean the glass with a lint-free cloth and a mild, streak-free, glass cleaner. Apply the cleaner to cloth and wipe the glass-plate.
- Dry the glass completely using a separate clean, dry lint-free cloth like the one provided with the maintenance kit.

Caution: Do not spray liquids directly onto the scanner glass-plate.
natural_image
Hand cleaning a printer with a cloth, showing blade arrangement and paper cutting (no text or symbols visible)
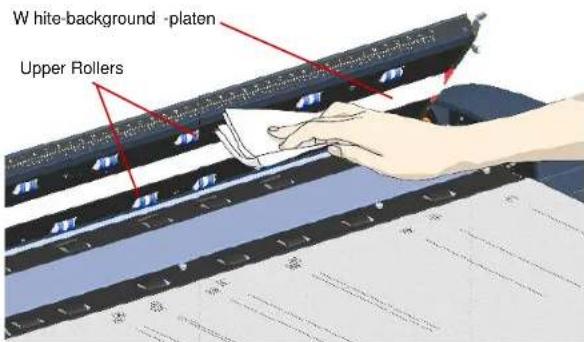
Clean the white-background platen and upperers
The white-background-platen (white metal area) is fixed in the scanning area lid. The upper rollers are aligned in 2 rows on each side of the white-background-platen.
- Hold/support the lid in its open position for support as you clean.
- Use a lint-free cloth and a mild, streak-free, glass cleaner. Apply the cleaner to cloth and wipe the white-background-platen.
- After wiping clean the whole white background platen, wipe all the upper rollers in both rows.
- Dry the platen and rollers completely using separate clean, dry lint-free cloths.

Caution: Do not spray liquids directly onto the scan area.
text_image
W hite-background -platen Upper RollersMaintenance
38
5
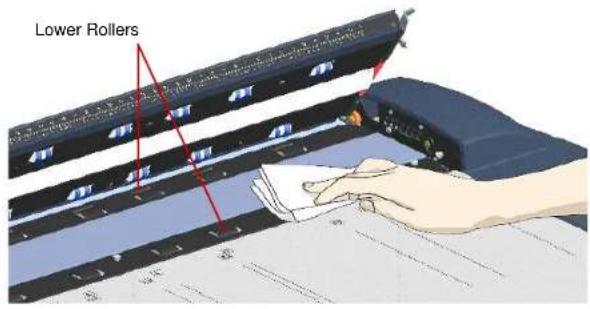
Clean the lower rollers
The lower rollers are the black rubber rollers aligned in 2 rows on each side of the glass-platen.
- Use a lint-free cloth and a mild, streak-free, glass cleaner. Apply the cleaner to cloth and wipe the lower rollers in both rows.
- Dry the lower rollers completely using a separate clean, dry lint-free cloth.

Caution: Do not spray liquids directly onto the scan area.
text_image
Lower Rollers6
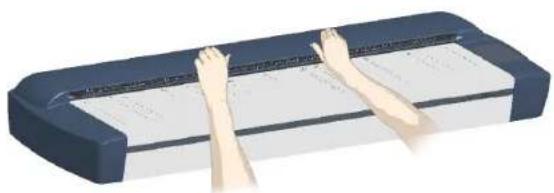
Close the scanning area lid.
- Pull down and close the scanning area lid when finished.
- Press gently down on the cover top to make sure the locks reengage (click).
natural_image
Illustration of two hands pressing down on a rectangular object with a grid-like pattern (no text or symbols)Maintenance
39
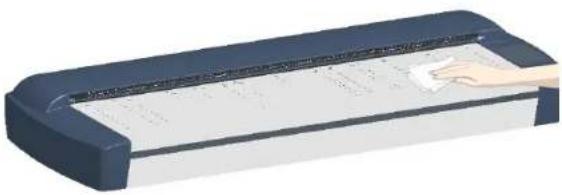
7
Clean the scanner feed area surface
Clean also the scanner surface so dirt and dust are not dragged into the scan area with the original.
natural_image
Illustration of a hand cleaning a rectangular object with a grid of small items (no text or symbols visible)8
Cover when not in use
- Cover the scanner with its plastic dust cover when not in use.
- Caution: Make sure the scanner power is OFF when using the dust cover.

natural_image
Illustration of two hands stretching a rectangular object on a dark base (no text or symbols)Maintenance
40
Camera Alignment and Calibration
Scanners: HD5450, HD4250, HD4230, HD3650, HD3630, HD2530
Scanner calibration is very easy to perform with the Scanner Maintenance program you installed with your drivers. After manually cleaning the scan area, you just insert a calibration sheet, start the Scanner Maintenance program and let the wizard take over.

NOTE: Cleaning and calibration are tied together. Cleaning the scanner creates the need for renewed calibration and correct calibration will always require a clean scan area.

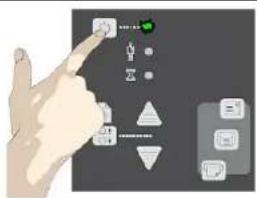
Turn the scanner power ON
Make sure that the scanner has been turned ON for at least 5 minutes prior to camera alignment and calibration. The short warm-up time will ensure that light conditions and camera heights have stabilized.
text_image
Hand pointing at a control panel with icons and labels, likely from a software interface or instructional material.
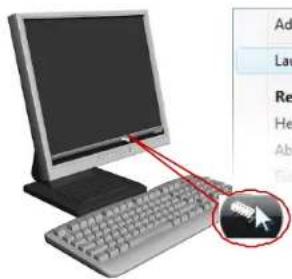
Launch the scanner maintenance
program
- On your PC - Right click on the WIDEsystem scanner icon.
- Select Launch Scanner Maintenance to open the program's welcome dialog.
text_image
Screenshot of a desktop computer with a cursor clicking the mouse, accompanied by a context menu in Chinese.Advanced Options
Launch Scanner Maintenance
Restore WIDEsystem ...
Help
About WIDEsystem

Maintenance
41
3
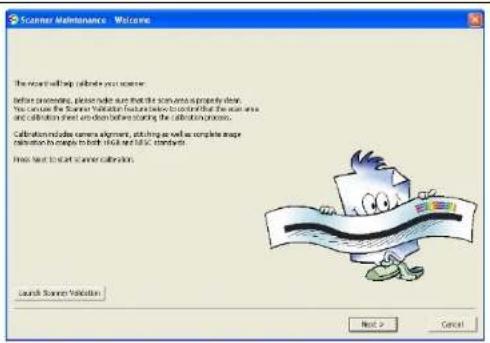
Follow the steps described by the wizard
The scanner maintenance wizard will guide you through the alignment and calibration steps.
Click the Next button in the welcome dialog to proceed.
text_image
Scanner Maintenance Welcome The recent will help navigate your scanner. Before proceeding, please order sure that the scanner is properly clear. You can use the Scanner Valuation feature before stopping that the scan area and calibration sheet are then before starting the calibration process. Calibration includes camera alignment, matching as well as complete image correction to design to both 10x and 15x components. Free next to last Scanner calibration. Launch Scanner Valuation Next > Cancel4
Insert the calibration sheet
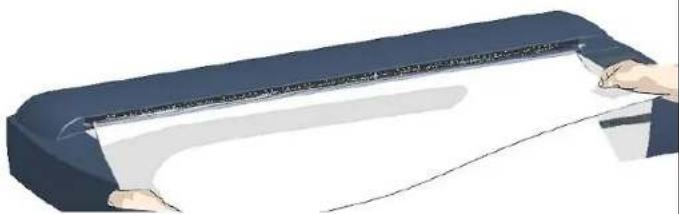
During the process, the wizard will ask you to insert the Calibration Sheet that came with your scanner. The sheet's printed side must be inserted face down. Align the sheet's midpoint arrow with the scanner's midpoint arrow and feed the sheet into the scanner.
Click the wizard's Next button to continue.
natural_image
Illustration of two hands holding a flat object with a curved line, no text or symbols presentMaintenance
42
5
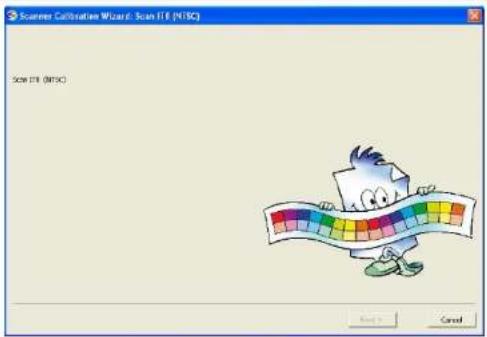
The program aligns and calibrates the scanner
The program works in steps to analyze and correct the alignment and stitching status of the cameras, calibrate black and white values and calibrate color. The calibration sheet will be rescanned a number of times as the program processes data.
Let the program complete all alignment and calibration steps.
text_image
Scan ITR (NTSC) Scan ITR (NTSC)6
Finished
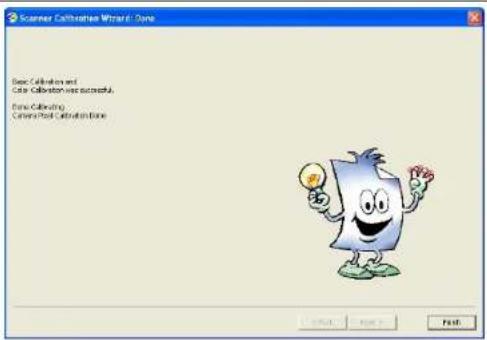
The wizard will tell you when the process is finished.
- Remove the Scanner Calibration Sheet from the scanner.
- Return the Scanner Calibration Sheet to its protective cover and then place it in the storage folder. Store the folder in a dry place and out of direct light.
text_image
Scanner Calibration Wizard - Done Basic Calibration and Color Calibration was successful. Fine Calibration: Color/Red Calibration Done OK Cancel HelpMaintenance
43
Replacing Scanner Parts
Scanner Models: HD5450, HD4250, HD4230, HD3650, HD3630
This section describes how to replace those scanner parts that are liable to wear down over long-term use. Changing parts will renew your scanner and reestablish optimal results. WIDEsystem monitors scanner usage and will warn you when it is time for a replacement.

NOTE: Regarding the 25" MODEL HS2520: There are no
replaceable parts on the 25" scanner model HD2520. Contact your service technician for replacing parts.

NOTE: Regarding WIDEsystem WARNING FLAG - glass plate and
White background platen replacement: After receiving a warning by WIDEsystem and replacing the part, be sure to reset the part replacement warning flag though WIDEsystem's "Status" tab.

NOTE: Regarding RECALIBRATION - glass plate, White
background platen, lamp unit replacement: Replacing these parts will change conditions in the scan area. Therefore, it is recommended to recalibrate right after changing and cleaning these parts.

Important Safety Instruction: Before replacing any parts, be sure to the scanner power off and disconnect the power plug.

Maintenance
44
Replacing the Glass-plate
Scanner Models: HD5450, HD4250, HD4230, HD3650, HD3630
- Turn the scanner power off and disconnect the power plug.
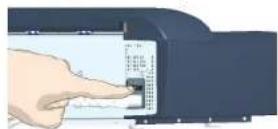
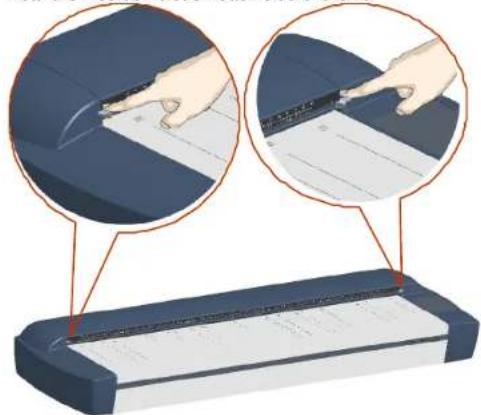
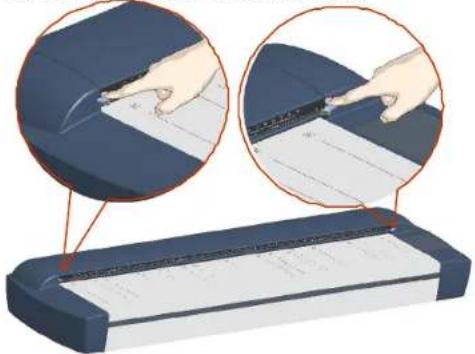
- Open the scan area lid - Push down on the two lever buttons found near the insertion slot on each side of the lid.
natural_image
Illustration of a hand using a tool to press or adjust a document on a device, with magnified views showing the process (no text or symbols present)-
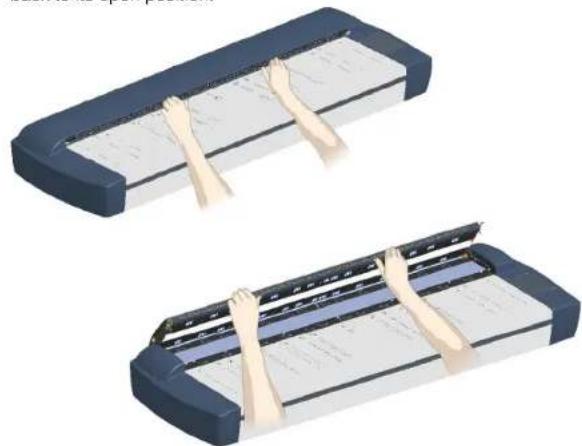
The scanning area lid locking mechanism should now be disengaged.
-
Place your thumbs in the insertion slot and flip the scanning area lid back to its open position.
natural_image
Two 3D illustrations of a mechanical device with hands holding rectangular parts, no visible text or symbols- The glass-plate will be exposed and accessible.
Maintenance
45
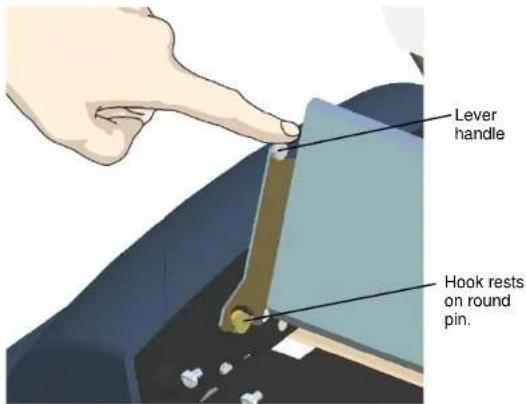
- On each side of the glass-plate there is a small lever with a round lever-handle on its end. Place a finger under both round lever handles on each side of the scanner (see illustration below).
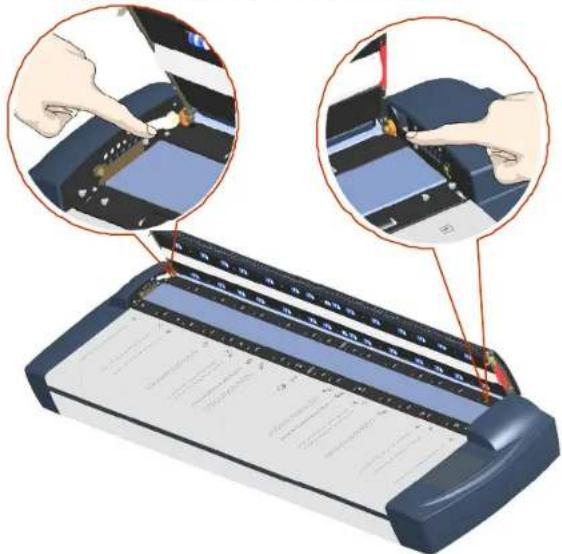
text_image
Diagram showing hands operating a printer with labeled parts and instructions for file operations- With both arms, pull simultaneously on the left and right levers to flip the glass-plate towards your body so it tilts upwards and is fee from the scan area bed.
Pull back on the levers to tilt the glass towards your body:
text_image
Lever handle Hook rests on round pin.- Each lever is attached to the scanner chassis with a small hook that rests on a round pin. As you hold the glass-plate on both its edges, lift it upwards to detach both lever's hooks from the pins and thus free the glass-plate from the scanner.
Maintenance
46
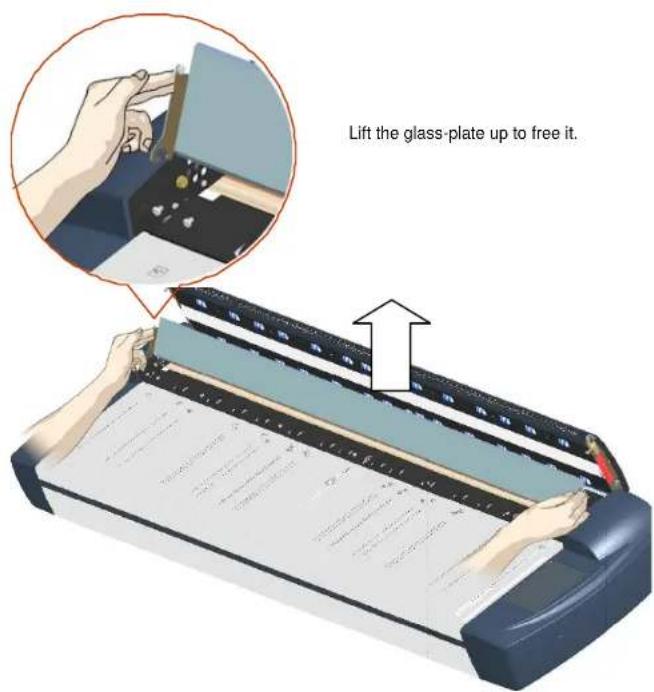
text_image
Lift the glass-plate up to free it.- Reverse the above operations to reinsert a new glass-plate – Carefully set the new glass plate down into the scan area. Fit the new glass-plate's lever hooks on to the round pins on each side of the scanner as shown below.
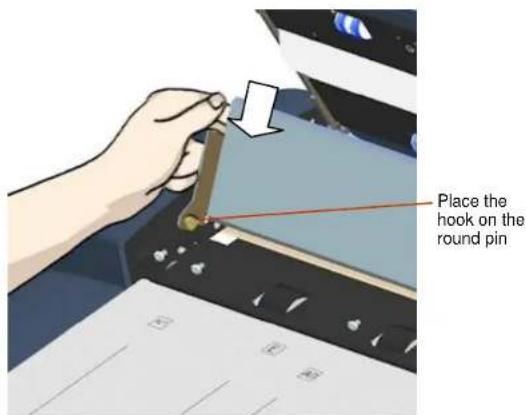
text_image
Place the hook on the round pin-
While supporting the glass-plate with fingers on the lever handles, carefully ease the glass-plate down backwards (away from your body) so it falls into place.
-
Close the scan area lid.

NOTE: It is recommended to clean the new glass-plate after inserting it to a scanner and before scanning.

NOTE: It is recommended to recalibrate after changing the glass-
Maintenance
47
Replacing the White-Background-Platen
Scanner Models: HD5450, HD4250, HD4230, HD3650, HD3630
Your white-background-platen can become worn and discolored after long periods of use and in such cases; replacement with a fresh white-background-platen is recommended. WIDEsystem monitors scanner usage and will warn you when it is time for a replacement.
- Turn the scanner power off and disconnect the power plug.
natural_image
Illustration of hands inserting a device into a device (no text or symbols visible)- Open the scan area lid - Push down on the two lever buttons found near the insertion slot on each side of the lid.
natural_image
Illustration of a printer with paper cutting process, showing hand positioning and paper edge alignment (no text or symbols)- The scanning area lid locking mechanism should now be disengaged.
Maintenance
48
- Place your thumbs in the insertion slot and flip the scanning area lid back to its open position.
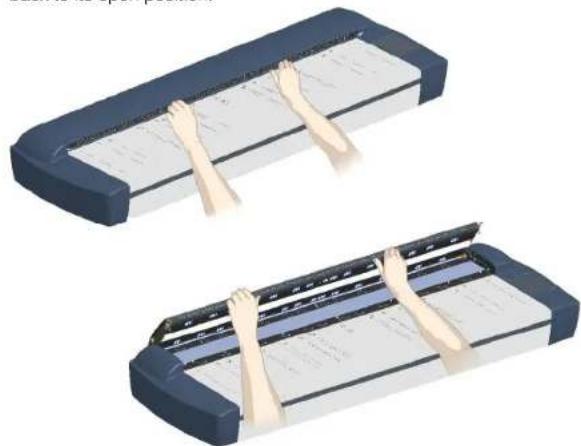
natural_image
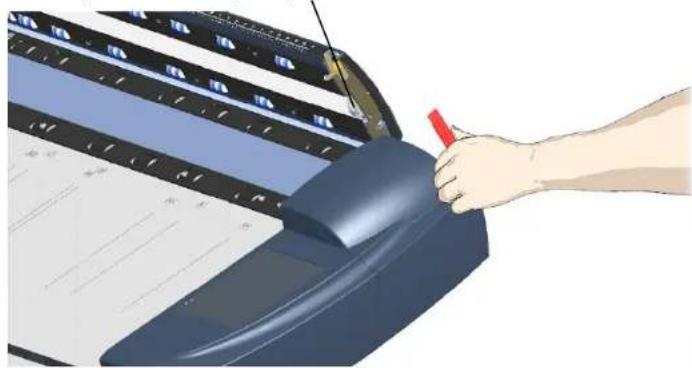
Illustration of two hands holding a tray with a grid, no text or symbols present- On the lid's left edge, you will find a red strip. This is the white platen cover.
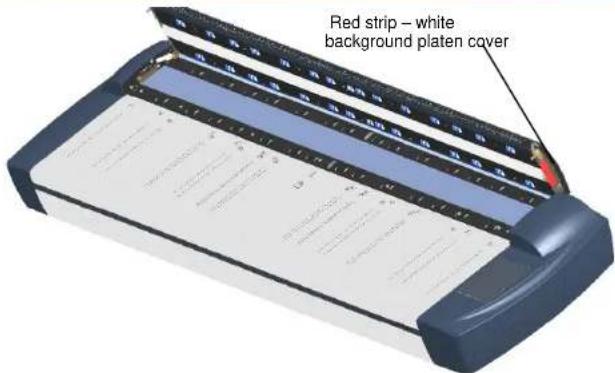
text_image
Red strip – white background platen coverGrip the top (flexible) edge of the red strip with your fingers.
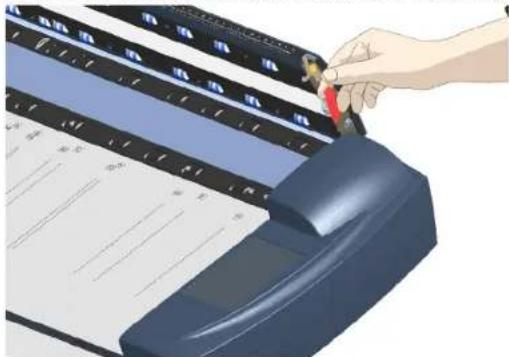
text_image
Illustration of a hand using a digital scanner to press documents, with visible text labels and control buttons.- Remove the red strip to expose the edge of the white-background-platen.
Maintenance
49
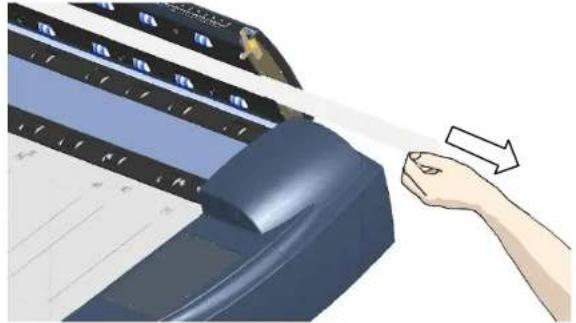
Edge of the white-background-platen
natural_image
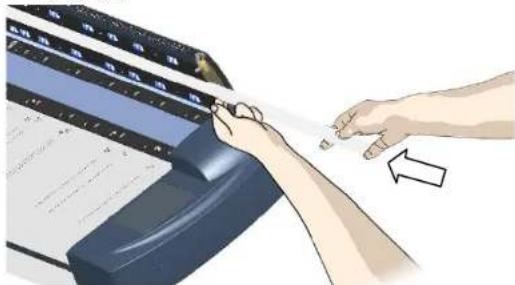
Illustration of a hand using a computer to press documents on a keyboard (no text or symbols visible)- Grip the edge of the white-background-platen with your fingers and pull to slide it out of the scanner.
natural_image
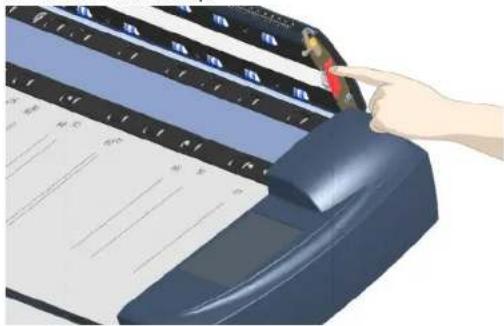
Illustration of a hand pressing down on a blue industrial machine component (no text or symbols visible)- Reverse the steps to insert your new white-background-platen. Carefully slide in a new white-background-platen while taking care not to bend it.
text_image
Illustration showing a hand pressing down on a digital scanner with Chinese text, indicating a process or instruction.- Reattach the red strip
natural_image
Illustration of a hand using a handheld device to press documents on a digital scanner (no visible text or symbols)Maintenance
50
- Close the scanning area lid so the locking mechanism reengages.
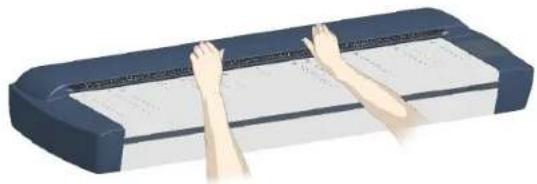
natural_image
Illustration of two hands pressing down on a rectangular object with a grid-like structure (no text or symbols visible)
NOTE: It is recommended to recalibrate after changing the white-
background-platen.
Maintenance
51
Replacing the Scanner Lamp-Unit
Scanner Models: HD5450, HD4250, HD4230, HD3650, HD3630
The lamp's effectiveness can gradually weaken over time and this can effect the quality of your scans. A new lamp-unit (lamp, reflector, power connectors) can be obtained through your dealer. WIDEsystem monitors lamp usage and will warn you when it is time for a replacement.
- Turn the scanner power off and disconnect the power plug.

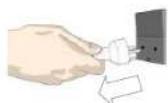
- The lamp cover is on the top right side of the scanner.

text_image
Lamp cover- Grasp the cover on each side with both hands and pull back to detach.
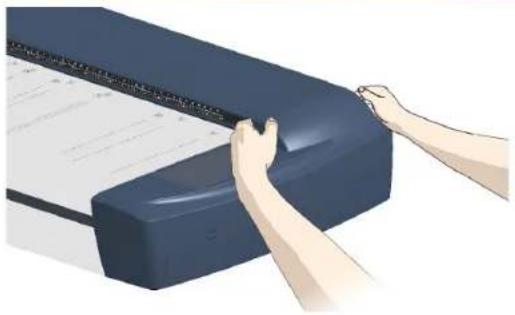
natural_image
Illustration of hands handling a document or scroll with a blue rectangular object (no visible text or symbols)- Lift the cover upwards to free it from the scanner.
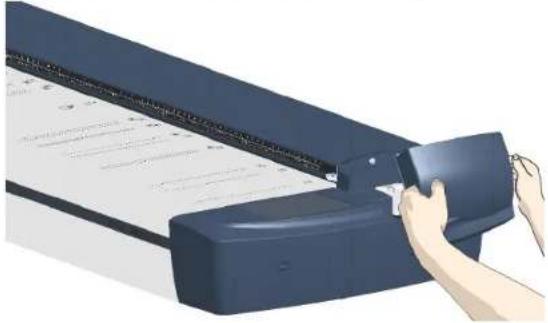
natural_image
Illustration of a hand using a paperclip to press documents on a blue electronic device (no text or symbols visible)- You must remove the whole lamp-unit. A lamp-unit consists of a lamp mounted in a reflector brace and fixed power connectors.
Maintenance
52
- Grasp the edge of the old lamp-unit and carefully pull it out of the scanner.
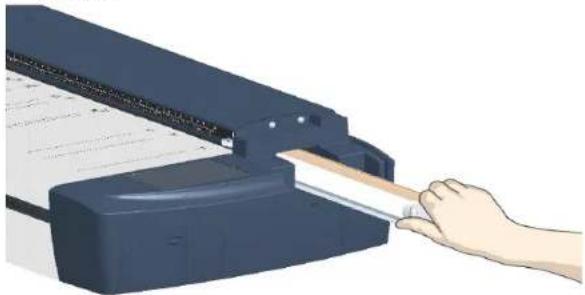
natural_image
Illustration of a hand inserting a paper into a printer (no text or symbols visible)- Reinsert the new lamp-unit. Rest the power-connector side on the slider and carefully push the lamp-unit into the scanner.
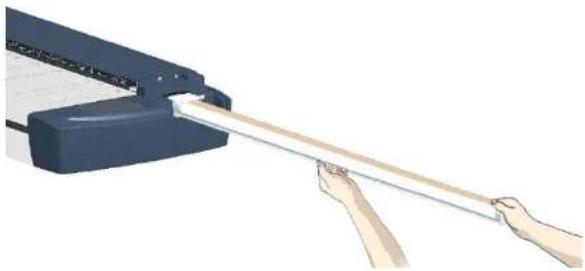
natural_image
Illustration of hands using a tool to lift a wooden beam (no text or symbols visible)-
Insert the lamp-unit all the way so the internal power connections engage with the connections on the lamp-unit.
-
Replace the lamp cover on the scanner - fit the bottom notches in the holes and snap the cover shut. The cover must always be closed before turning scanner power ON.
Fit the cover's bottom notches into the holes
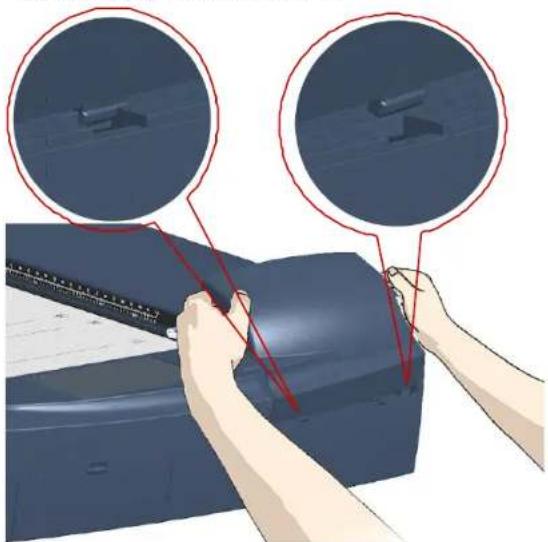
natural_image
Illustration of hands adjusting a dark blue object with red measurement lines, showing a close-up of the top circular components (no text or symbols present)- Test the replacement by turning power and scanner on to see if the lamp lights.
- Reset the part replacement warning flag though WIDEsystem's "Status" tab. Click on the lamp replacement message link to reset.

NOTE: It is recommended to recalibrate after changing the lamp.
Maintenance
53
Replacing the Dust-Filters
Scanner Models: HD5450, HD4250, HD4230, HD3650, HD3630
The dust filters protect your scanner's air-cooling vents. Fresh dust filters can reduce the amount of time spent on cleaning and calibration ad help protect the scanner's glass plate. WIDEsystem monitors usage and will warn you when it is time for a replacement.
- Turn the scanner power off and disconnect the power plug.
- Locate the 2 square-shaped dust filter bins on the underside of the scanner.
- Insert a screw-driver or other sharp tool under one of the bin's edges to snap it down and detach it from its frame.
- The filter (soft material) is inside the bin. Remove the old filter and place a fresh one in the bin.
- Reattach (click on) the bin to its frame on the underside of the scanner.
- Repeat the process with the second filter.
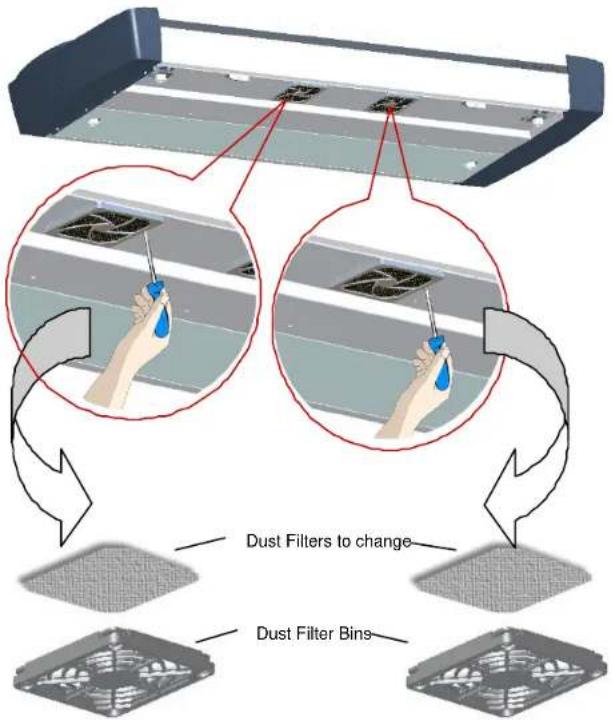
text_image
Dust Filters to change Dust Filter BinsMaintenance
54
Downloading New Firmware
Scanners: HD5450, HD4250, HD4230, HD3650, HD3630, HD2530
What is Firmware?
Like a computer, your scanner needs an operating system in order to work. This operating system is called "Firmware". Firmware runs inside the scanner and links its processors with the PC applications running the scanner.
When do I need new firmware?
Your scanner is shipped with the latest firmware available. You can afterwards upgrade your original firmware with newer firmware and continue to do so as they are released. Firmware upgrades can be downloaded from your manufacture's website or obtained through your dealer.
Upgrade your firmware when:
- One or more new features are released or other improvements are made to the scanner though its firmware.
- An error is discovered in the firmware version you have in the scanner and your manufacturer recommends installation of new firmware in which the error is corrected.

NOTE: Your manufacture's website specifies improvements for every firmware release.
How to identify the firmware version running in the scanner?
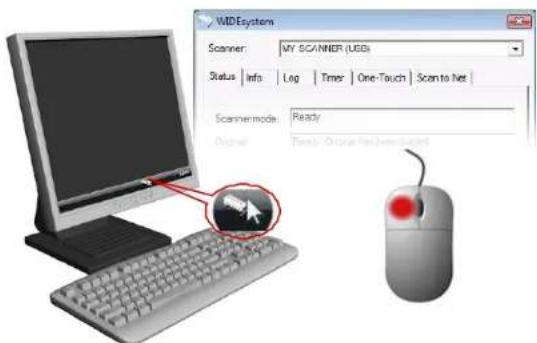
- Start WIDEsystem -Left-click on the system tray's scanner icon.
text_image
WID System Scanner: MY SCANNER (USB) Status | Info | Log | Timer | One-Touch | Scan to Net | Scaner mode: Ready Order: Quick Order No. Downloaded- Select the Info tab.
- The Info tab displays useful data about your scanner firmware.
- Firmware release - Upgradeable firmware version.
- Firmware download time - The date/time the current firmware was downloaded.
You can upgrade your firmware if the Firmware Release number is lower than the newest firmware version number on your manufacture's website.
Maintenance
55
How to install new firmware?
New firmware is installed by opening the firmware .exe file. The firmware .exe file must first reside on your machine. Select the Save target (or Save Link) option if downloading from the web.
To install the firmware file on your scanner:
- Go to your manufacture's website and locate the new firmware for your scanner.
- Download/save the firmware .exe file in a folder on your machine.
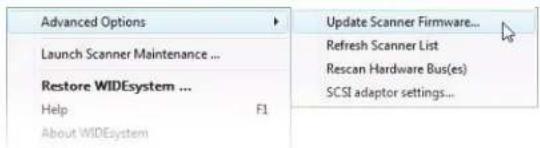
- Start WIDEsystem's Quick menu - Right-click the scanner icon in the system tray.
- Select Advanced Options.
- Select (left-click) Update Scanner Firmware
text_image
Advanced Options Launch Scanner Maintenance ... Restore WIDEsystem ... Help: About WIDEsystem F1 Update Scanner Firmware... Refresh Scanner List Rescan Hardware Bus(es) SCSI adaptor settings...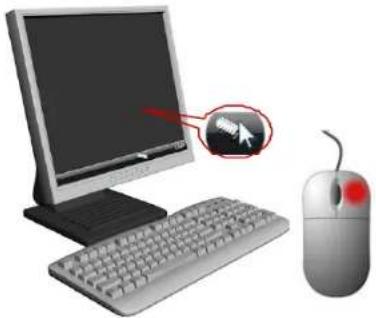
natural_image
Illustration of a desktop computer with keyboard, mouse, and mouse (no text or symbols)- Browse the folders on your machine and find the firmware .exe file you wish to apply.
- Select the firmware file and select OK to install. Installation can take up to 1 minute depending on the scanner model and firmware version. The WIDE system scanner icon on your system tray blinks red during the download process.
- Follow the instructions on your screen.
- If there were errors or power failures during firmware installation, set the scanner in Firmware Boot mode and reinstall the firmware.
Maintenance
56
Setting the Scanner in Firmware BOOT Mode Scanners: HD5450, HD4250, HD4230, HD3650, HD3630, HD2530
You can force the scanner to firmware boot mode. This is useful if an error or power-failure occurred during a firmware update and you need to restart the firmware update process. A scanner will not run correctly after an interrupted firmware update process.
To force the scanner to firmware boot mode:
If restarting after a power-failure interrupted your firmware update, the scanner should start up in boot mode. If not, you can use the following panel function to force the scanner into boot mode.
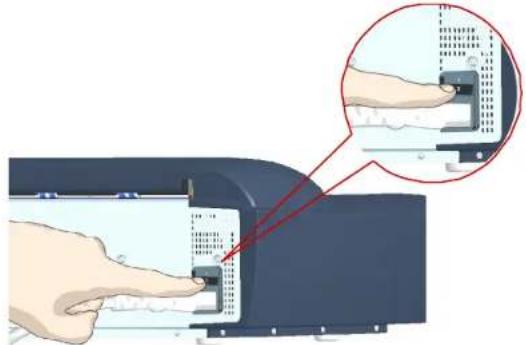
- Turn the scanner's main power switch to OFF. The main power switch is at the back of the scanner.
natural_image
Illustration of hands inserting a device into a device panel, with a magnified inset showing the process (no text or symbols present)- Press and hold down the Power button on the operator's panel.
- As you hold down the power button with one hand, reach to the scanner's back with your other hand and flip the Main Power switch to ON.
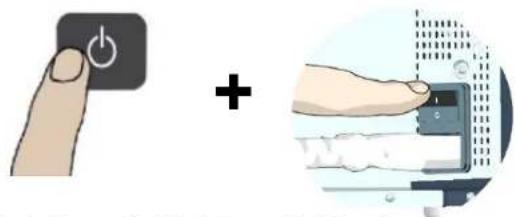
text_image
Diagram showing a finger pressing a button next to a plus button and a computer interface with a battery, likely illustrating a software operation or addition.Invoke Firmware Boot Mode- Press and hold down the Power Key as you flip the main power switch to On.
- When the Power LED turns red and the other LEDs blink as shown below, the scanner is in Firmware Boot mode and you can reapply the Firmware.
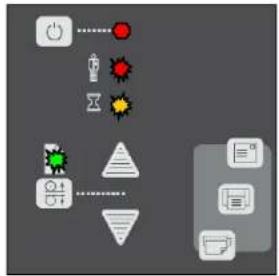
flowchart
graph TD
    A["Power"] --> B["Switch"]
    B --> C["Data Processing Module"]
    C --> D["Data Collection"]
    D --> E["Output"]
    style A fill:#f9f,stroke:#333
    style B fill:#ccf,stroke:#333
    style C fill:#cfc,stroke:#333
    style D fill:#fcc,stroke:#333
    style E fill:#ffc,stroke:#333
Trouble Shooting Problems
This section describes trouble-shooting procedures for the most common problems that can arise with your scanner. Please look for a problem description that matches your actual situation. If found, perform the trouble-shooting procedures before requesting a service call.
Problems Related to Scanner Installation
| Problem Possible Causes and Remedies | |
| “Unknown device is found” message. | Your interface is not enabled on the PC or set up correctly. Go through the installation steps for your interface board and its driver and control that the Windows device manager lists the interface option.WIDEsystem drivers werenot installed before connecting the scanner.Shut down the scanner and PC, unplug the connections and restart the installation from step 1 as described above. If you continued installation before installing WIDEsystem, see the troubleshooting instructions below.Loose interface connection – on both ends, unplug and then firmly plug-in the interface cable.Smart Card not inserted correctly. Control that the smart card contact side faces downwards and the card is inserted all the way in its slot.System needs rebooting - shut down the scanner and PC, unplug the connections. Then plug in the interface connections, turn on the PC and when Windows is loaded, turn on the scanner. |
| Need to reinstall.I got the “Unknown device is found” message and continued installation of the scanner. Now the scanner appears as incorrectly installed on my system. | If you connected and tried to install the scanner before installing WIDEsystem, the unknown device found message will appear. If you continued to step through the dialogs from there, the scanner will be entered on the system as a new device without functional drivers. If this is the case, the scanner will be displayed in the Windows Device Manager with a yellow error icon. The scanner entry must be removed from the Device manager before re-installing correctly.In the Device Manager - remove the scanner entry.Shut-down the PC, shut down and unplug the scanner, disconnect the scanner from the PC.Reboot the PC and install WIDEsystem and Maintenance softwareRefer to the installation instructions for your interface type in this guide. |
| WIDEsystem does not detect the scanner. | The WIDEsystem driver version installed on your PC is older than your scanner model. Install the WIDEsystem drivers form the WIDEsystem TOOLS CD-ROM that came with your scanner. If not available, download the newest version from your manufacturer’s website or contact your dealer to obtain the right WIDEsystem version.WIDEsystem drivers werenot installed before connecting the scanner.Shut down the scanner and PC, unplug the connections and restart the installation from step 1 as described above.Loose interface connection – on both end, unplug and then firmly plug-in the interface cable.System needs rebooting - shut down the scanner and PC, unplug the connections. Then plug in the interface connections, turn on the PC and when Windows is loaded, turn on the scanner. |
Trouble Shooting
58
I purchased a smart card upgrade kit. How do I use it to upgrade the scanner?
You need to insert your new smart card into the scanner to upgrade its functionality.

Be sure that the scanner is turned off when removing and inserting a Smart Card or accessing the Smart Card area.
Accessing the smart card on scanner models: HD2530:
In the small drawer labeled "PUSH" behind the scanner front streamer (slide the streamer towards the left to access the drawer).
Smart Card Drawer is behind the streamer
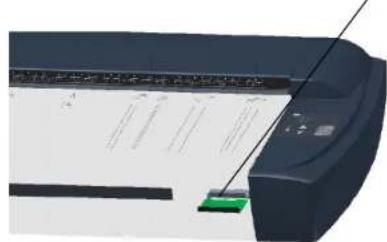
natural_image
Illustration of a printer with paper sheets and a green clip, no visible text or symbolsTrouble Shooting
Accessing the smart card on scanner models: HD5450, HD4250, HD4230, HD3650, HD3630;
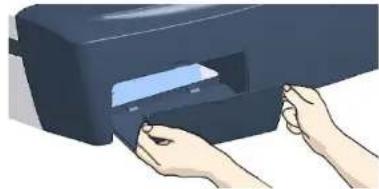
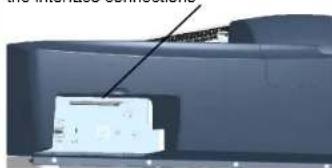
Remove the scanner's right side cover. The Smart Card is placed in the card insertion slot above the scanner interface
Insert your thumb in the slot at the top of the interface cover. Push down to snap the lid open.
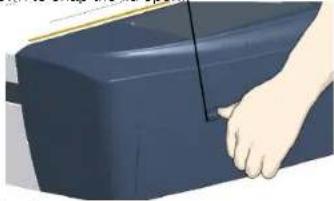
natural_image
Illustration of a hand pressing down on a dark blue mechanical component (no text or symbols visible)connectors.
Remove the interface cover with both hands.
natural_image
Illustration of hands inserting a device into a larger device (no text or symbols visible)Smart Card is inserted in its slot above
the interface connections
natural_image
Close-up of a mechanical component with a diagonal line and a rectangular base (no visible text or symbols)
The cover must always be closed before you turn the scanner ON.
Problems Related to Operation of the Scanner
| Problem Possible Causes and Remedies | |
Wait light flashes, diagnostics light is off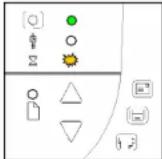 | The scanner needs to run Self-Adjustment but cannot. Self-Adjustment cannot run with a raised pressure platen or with media in the scanner.Self-Adjustment is necessary for maintaining optimal and stable internal conditions.Remedy: Any original in the scanner should be removed, and the pressure-platen should be set to the Normal position (i.e., not a thick media setting).When Self-Adjustment becomes possible, the Wait LED stops flashing, but continues to be on until Self-Adjustment is completed.If the error doesn't disappear turn the scanner off and then on.If the error persists, you can reinitialize all settings by unplugging the scanner and waiting a few minutes before turning power on again. |
Wait LED goes on during calibration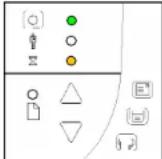 | This is NORMAL - The Wait LED goes on during Calibration to indicate that the original should not be removed or moved during the Calibration procedure. All panel input is prevented during basic calibration. |
Diagnostics LED flashes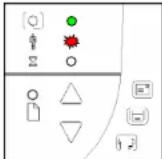 | An Error was detected during the scanner's Self-Test. Open WIDEsystem (scanner icon on your system tray) and select the Status tab to view additional information about the error. |
Trouble Shooting
Both wait and diagnostics LEDs flash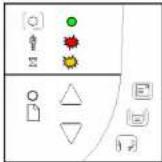 | The scanning area needs cleaning and the cameras need to be calibrated. Run through the scanner maintenance steps described in this guide.If the Diagnostic and the Wait LEDs continue to flash after scanner maintenance, then there may be camera position errors that require help for your technical service provider. |
Paper Ready lights RED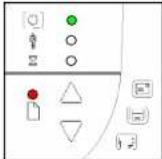 | The pressure-platen is in a thick media setting (a raised pressure-platen) but the scanner does not detect the media. If you are scanning thick media, insert the thick media into the scanner.If the problem persists with thick media in the scanner, control that the pressure-platen level is correct. Repeat the steps for correct adjustment for thick media as described in this guide. |
Error message: Paper Jam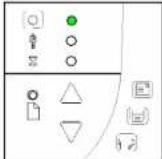 | You know a Paper jam error has occurred when the scanner stops scanning and the Paper-Ready key shuts OFF (from blinking) while the original is still engaged in the drive system. Your scanning application and WIDEsystem's Status tab will report the Paper Jam error.To remedy:Remove the original from the scanner. Use the Paper-Back or Paper-Forward keys.If the original does not respond to the Paper Forward, Paper-Back keys perform the following action depending on your scanner model:a. 25" Models: HD2530: Open the lid and remove the pressure-platen as described under the sectionMaintenance-Cleaning(for models HD2530) and take the original out of the scanning area. Replace the pressure-platen and close the lid.b. 54", 42", 36" Models: Open the lid by pressing the lid lock buttons as described under the sectionMaintenance-Cleaning(for models HD5450, HD4250, HD4230, HD3650, HD3630) and take the original out of the scanning area. Close the lid.Select the Soft-handling option in your scanning application.Feed the document again to scan. |
Trouble Shooting
| Error message: Correction of Camera X (A, B, C, or D..) failed | 1. Your scanner is continuously monitoring its cameras. This error message often appears when the internal glass plate or white background platen is dirty or smudged. Clean the scanning area, reboot the scanner and then complete the maintenance steps (alignment and calibration) as described in the section Maintenance in this guide.2. If the problem persists after cleaning the scanner area - The problem could be caused by a loose object in the optical path. Remove any torn pieces of paper or other loose objects from the scanning area. Even the smallest loose objects will disturb the scanner's adjustment function.3. Summon your technical service provider if the problem persists. |
| Error message: Stitching of Camera X/Y (A/B or B/C or C/D) failed | 1. Your scanner is continuously monitoring its cameras. This error message often appears when the internal glass plate or white background platen is dirty or smudged. Clean the scanning area, reboot the scanner and then complete the maintenance steps (alignment and calibration) as described in the section Maintenance in this guide.2. If the problem persists after cleaning the scanner area - The problem could be caused by a loose object in the optical path. Remove any torn pieces of paper or other loose object from the scanning area. Even the smallest loose objects will disturb the scanner's adjustment function.3. Summon your technical service provider if the problem persists. |
| Error message: Invalid Smart Card for this scanner type.Error message: No Smart Card found. | 1. Control that a Smart Card is in the Smart Card slot. See the section Smart Card in this guide for instructions on locating your scanner's Smart Card slot.2. Smart Card not inserted correctly. Control that the smart card contact side faces downwards and the card is inserted all the way in its slot. Shut down scanner power and restart to initialize with the smart card data. |
| Error message: Unable to Adjust Camera | 1. Control that the scanner is set for Normal (lowest) media thickness. The scanner's pressure-platen must not be raised. Lower the original guide plate on both sides to let the scanner make its adjustments.2. If the thickness setting is/was Normal - there could be a loose object in the optical path. Remove any torn pieces of paper or other loose objects from the scanning area. Even the smallest loose objects will disturb the scanner's adjustment function.3. If the problem persists after controlling for loose objects in the optical path – the problem is often caused by an unclean or smudged internal glass plate or white background platen. Clean the scanning area, reboot the scanner and then complete the maintenance steps (alignment and calibration) as described in the section Maintenance in this guide.4. If the problem persists after cleaning the scanner area and all above possibilities have been attempted - summon your technical service provider. |
Trouble Shooting
63
| Application control keys (one touch) do not work | 1. Check the One Touch setup entries in WIDEsystem. Click on the scanner icon to open WIDEsystem and select the One Touch tab. View WIDEsystem Help for instructions.2. Check that the applications defined in the WIDEsystem One Touch setup entries are installed on your PC3. Make sure that the applications defined in the WIDEsystem One Touch setup entries are actually designed to work with (compatible with) your scanner's application control keys. See the application's documentation or contact the application software dealer. |
| Can't operate or contact scanner after Firmware upgrade failure. | 1. A power failure could interrupt an ongoing firmware upgrade process. The scanner will not run correctly after an interrupted firmware update process. Only part of the intended firmware may be loaded, rending the scanner inaccessible. You need bring the scanner into firmware boot mode to reapply the firmware.2. Restart the scanner. The scanner should start up in boot mode. If not, you can use the following panel function to force the scanner into boot mode.3. Turn the scanner ON so it starts its Init-Sequence (all LEDs on). Towards the end of Init-Sequence, the Power LED lights green while the other LEDs remain lighted, signaling that you can interrupt the self-test to force Firmware Boot mode.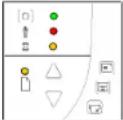 You have to activate the boot mode before the scanner moves into self-adjustment. Self-adjustment is started when the Wait LED lights yellow, the Power LED still lights green and all the other LEDs are off.) To activate boot mode, press and hold down the Power key.When the Power LED turns red and the other LEDs flash (see below), the scanner is in Firmware Boot mode and you can reapply the Firmware. You have to activate the boot mode before the scanner moves into self-adjustment. Self-adjustment is started when the Wait LED lights yellow, the Power LED still lights green and all the other LEDs are off.) To activate boot mode, press and hold down the Power key.When the Power LED turns red and the other LEDs flash (see below), the scanner is in Firmware Boot mode and you can reapply the Firmware.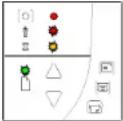 |
Problems Related to the Scanning Results
| Problem Possible Causes and Remedies | |
| Not whole image scanned | 1. Check in your scanning application that your size settings are either for Auto detection or correspond to the size of the whole original.2. Check in your scanning application that you are loading the original correctly in relation to your choice of Center-loading or Side-loading. If you selected Side-loading in your application then the original must be fed into the side of the scanner starting from the 0 marking on the top ruler. If Center-loading was selected in the application then align the center of the original with the scanner's center arrow marking. |
| Stitching problems – Image sections misaligned (at points between the cameras - overlapping pixels) | 1. If scanning normal paper thin media – Remove the original from the scanner, turn power off and then on to reboot so the scanner runs its self-test procedure. The self-test includes camera-stitching correction.2. If scanning normal paper thin media and above procedure does not correct the problem – Remove the original from the scanner and run full scanner maintenance.3. If scanning thick media, thick stiff originals will rest on top of the scanner rollers and thus raise a small distance over the glass-plate. This can lead to stitching irregularities. In such cases, the stitching parameters will need to be modified. You can modify stitching parameters through your scanning application. See the section When Scanning in Thick Media Positions in this guide.4. Summon your technical service provider if the problem persists. |
| Edge distortion with thick originals | 1. Scanning thick stiff originals can give distortions when the front edge meets the exit rollers or the trailing edge leaves the entry rollers. To omit this, the leading and trailing edges are by default skipped when in one of the extended media thickness positions.Leading/trailing edge skipping can be turned off/on through the scanning application's setup dialogs. If you encounter edge distortion, control that the Leading/trailing edge skipping option is set in your application. |
Trouble Shooting
65
One or more thin vertical lines (in the direction of paper feeding) on the scan result, but not on the original drawing.
- This is often caused by an unclean glass plate or unclean white background platen. Even a single spec of dirt in the wrong spot on the glass plate or background plate can apply a streak through your entire scan. To remedy, run a full scanner maintenance session – cleaning, alignment and calibration. The last two maintenance steps are also vital, as the scanner will have memorized dirt specs in previous calibrations and self-adjustments and you need to reset after dirt-removal.
A: Overview – Operator's Panel
Appendix A: Quick Overview of the Operator's Panel
The Panel and LED Indicators
The panel consists of operation buttons and LED indicators. There are buttons for power ON/OFF, paper feeding, and triggering applications (one-touch). The LED indicator's function is to display scanner status in relation to its basic operations such as self-testing and media readiness. Operation of the buttons and interpretation of the LED indicator light patterns are described in this section.
Scanner Models: HD2530
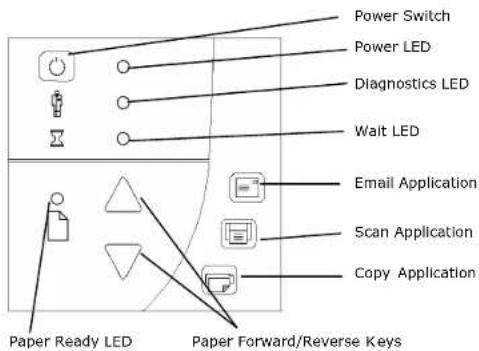
text_image
Power Switch Power LED Diagnostics LED Wait LED Email Application Scan Application Copy Application Paper Ready LED Paper Forward/Reverse KeysScanner Models: HD5450, HD4250, HD4230, HD3650, HD3630
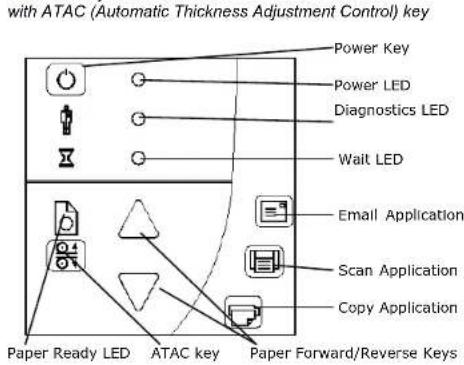
text_image
with ATAC (Automatic Thickness Adjustment Control) key Power Key Power LED Diagnostics LED Wait LED Email Application Scan Application Copy Application Paper Ready LED ATAC key Paper Forward/Reverse KeysA: Overview – Operator's Panel
Power Control – Buttons and LED Patterns
The following table describes the panel's LED light patterns and what they mean. The illustrations marked "startup - phase 1 (2,3,4)" show how the Operator's panel will look (LED lighting patterns) starting from when you turn the Main power switch ON, through the self-test procedures and until the scanner is ready to scan.

NOTE: For simplicity, the illustrations below display a Standard Panel i.e., without an ATAC key. The LED behavior of the Power LED, Diagnostics LED and LED, are identical for Standard and ATAC operator's panels
| How it looks on scanner... What it means.... | ||
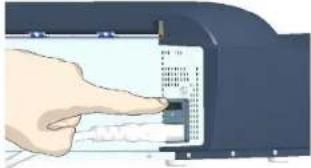 | Turn the scanner power ON – First Time – Main Power ONAt back of the scanner, plug in the power cable and flip the main power switch to ON. The scanner starts the self-test procedure which starts with the Init Sequence (see next). | |
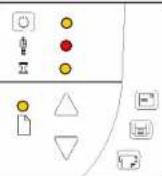 | Init Sequence (startup phase 1)When you turn main power On, the scanner runs it initialization sequence. ALL the LEDs are lighted as shown in the illustration on the left.At this point, panel input is disabled and you cannot begin scanning.NOTE: When you power up through Wake-up, (by pressing the power key), this initialization sequence is skipped and the scanner goes directly to Self-Adjustment (startup-phase 3). | |
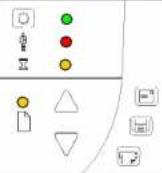 | Power LED Green (startup – phase 2)Towards the end of Init Sequence, the Power LED will change to green while the other LEDs remain unchanged (lighted).From here the scanner moves on to Self Adjustment (startup phase 3). | |
A: Overview – Operator's Panel
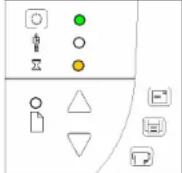 | Self-Adjustment (startup -phase 3)On completion of the Init Sequence, the power LED (green) and the Wait LED (yellow) remain lighted while the others LEDs turn off. This indicates that the scanner is running its Self-Adjustment of light profiles, stitching and black/white points.NOTE: To maintain optimal conditions, the scanner runs new Self-adjustment procedures periodically during the day (without lighting the wait LED). If the Wait indicator blinks, the scanner needs to run Self-Adjustment but cannot (see below). | |
 | Scanner Ready (startup - phase 4)When the Wait LED turns off, and only the Power LED is ON and lights green, self-adjustment is completed and the scanner is ready to scan. | |
 Power ON (Wakeup) Power ON (Wakeup) Power OFF (Sleep) Power OFF (Sleep) | Wake-up / Sleep - Turn power ON/OFF with power key - normal use (with main power switch always ON)With the outlet switch always ON, use the Power key to control scanner power. Hold down on the Power key to toggle power into Wakeup and Sleep modes.The Power LED lights green when the scanner is ON (Wake-up) and red when power is OFF (Sleep). When you turn the scanner ON in this manner, it skips the init sequence and starts with Self-Adjustment as described above for startup phase 3.When in the power Wake-up/Sleep mode:The scanner can be manually powered up and down (wake and sleep) by pressing and holding down the power button or inserting a document for scanning. SeePower, Wake/sleep and Adjustment.The scanner can automatically be powered up and down (wake-up/sleep) by WIDEsystem's timer or idle time setting. SeeAutomatic Power functions | |
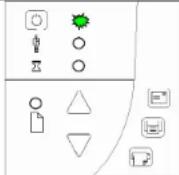 | Green Power LED blinkingThe green power LED will blink just before the scanner automatically powers off because its defined automatic Sleep time (in WIDEsystem) has been reached in the timer.If you are still using the scanner and want to cancel the timer controlled Sleep mode, press the power key until the LED stops blinking.You can at any time disable or change timer settings in WIDEsystem (see WIDEsystem on-line help for details). |
A: Overview – Operator's Panel
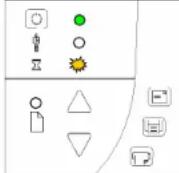 | Wait LED blinking - Self-Adjustment required but not possibleIf the Wait LED blinks (and the Diagnostics LED is off) the scanner needs to run Self-Adjustment but cannot. Self-Adjustment is necessary for maintaining optimal and stable internal conditions.To solve this, any original in the scanner should be removed, and the pressure-platen should be set to the Normal position (i.e., not a thick media setting). A scan may be issued, but the quality will be compromised. When Self-Adjustment is again possible, the Wait LED stops blinking, but continues to be on until Self-Adjustment is completed. The scanner should be left alone while Self-adjustment is running. | |
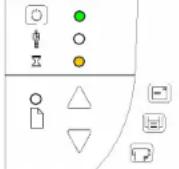 | During Calibration – Wait LED lightsThis is normal. The Wait LED is on during Calibration to indicate that the original should not be removed or moved during the Calibration procedure.All panel input is prevented during basic calibration. | |
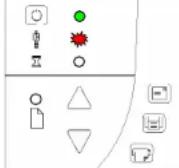 | Diagnostics LED blinking – Error detected during Self-TestThe Diagnostics LED shows the scanner's Self-Test result status. An unlit Diagnostics LED means that the scanner's Self-Test procedures encountered no errors.If the Diagnostics LED blinks, an error was discovered during Self-Test. Open WIDEsystem (double-click the scanner icon on your system tray) and select the Status tab to view additional information about the error. | |
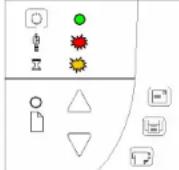 | Both Diagnostic LED and Wait LED blinking – Maintenance neededSimultaneous blinking by both the Diagnostic LED and the Wait LED may mean that the scanning area needs cleaning and the cameras calibrated. See the section on "Maintenance" for instructions.If the Diagnostic and the Wait LEDs continue to blink after scanner maintenance, there may be camera position errors that require professional technical service. |
A: Overview – Operator's Panel
Media Control – Buttons and LED Patterns
Your panel contains LEDs and buttons for controlling the media you insert for scanning. The following basic functionality applies on all models:
- The Paper Ready LED lights up when the media is inserted into the original's insertion slot and correctly positioned for feeding on a straight path. It lights green for normal documents and yellow for thick media scanning.

NOTE: See also this guide's sections on loading originals and Scanning Thick Media.
- The media can then be moved into the start-scan position by pressing the Paper Forward Key or through automatic loading.
- The Paper Ready LED will blink during scanning.
- The media can be moved back for ejection by pressing the Paper Reverse key.
The following illustrations show the panel's media controls and LED patterns. The HD2530 scanners and the HD5450, HD4250, HD4230, HD3650, HD3630, HD2530 scanners differ slightly in relation to their panel media controls and are therefore described separately.
A: Overview – Operator's Panel
Scanner Models: HD2530
| How it looks on scanner... What it means.... | ||
 | Paper Forward and Paper Reverse KeysThe Paper Forward Key will move the document into the start-scan position when manual loading is set in the scan application (see section on Loading).If Auto-Load is set in your scan application, loading will occur automatically (without pressing the key) when the original enters the insertion slot.Pressing the Paper Forward Key during scanning will stop the scanning process and continuously feed the original through the scanner for as long as the key is held down.The Paper Reverse Key stops the current scanning process and reverses the original. The original will be fed backwards through the scanner for as long as the key is held down. | |
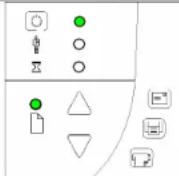 | Paper Ready LED Green - Ready for Normal mediaThe Paper Ready LED lights green when normal thin media is positioned correctly in the insertion slot and stays green when the media is moved to the start-scan position.From there, scanning can be controlled from the computer. | |
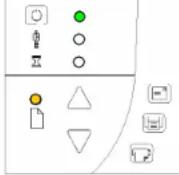 | Paper Ready LED Yellow - Ready for Thick mediaThe Paper Ready LED lights yellow when thick media is positioned correctly in the adjusted insertion slot and stays yellow when the media is moved to the start-scan position.From there, scanning can be controlled from the computer. | |
A: Overview – Operator's Panel
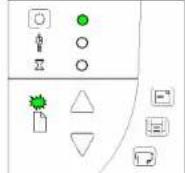 | Paper Ready LED Blinks – (green or yellow) – Document is being scannedThe Paper Ready LED blinks during scanning.On completion of the scan, the Paper Ready LED will stop blinking. Scanning can then be repeated from the computer or terminated by ejecting the document from the scanner.The above behavior applies for both thin media scanning (green blinking) and thick media scanning (yellow blinking). | |
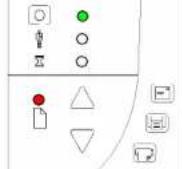 | Paper Ready LED Red – No Thick media detectedThe paper ready indicator will light red if the scanner is in a thick media setting (a raised pressure-platen) but the scanner does not detect the document. |
A: Overview – Operator's Panel
Scanner Models: HD5450, HD4250, HD4230, HD3650, HD3630
These scanner models support Automatic Thickness Adjustment Control (ATAC). ATAC enables easy adjustment of the pressure-platen level for scanning thick media.

See also this guides section: Automatic Thick media adjustment.

Automatic Thickness Adjustment Control (ATAC) key
For both thin and thick media, the Paper Ready LED lights up when the media is inserted into the original's insertion slot and correctly positioned. The media can then be moved into the start-scan position by pressing the Paper Forward Key or through automatic loading. The Paper Ready LED will blink during scanning.
| How it looks on scanner... | What it means.... | |
 | Paper Forward and Paper Reverse KeysThe Paper Forward Key moves the drawing into the start-scan position for manual loading (see section on Loading).If Auto-Load is set, loading will occur automatically (without pressing the key) when the original enters the insertion slot.Pressing the Paper Forward Key during scanning will stop the scanning process and feed the original through the scanner while the key is held down.The Paper Reverse Key stops the current scanning process and reverses the original. The original will be fed backwards through the scanner while the key is held down.When the scanner is in Automatic Thickness Adjustment Control (ATAC) mode the paper forward and paper reverse keys become “pressure-platen up” and “pressure-platen Down” keys (see below). | |
| [DYWWD] | ||
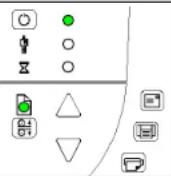 | Paper Ready LED Green - Ready for Normal mediaThe Paper Ready LED lights green when normal thin media is positioned correctly in the insertion slot and stays green when the media is moved to the start-scan position.From there, scanning can be controlled from the computer. | |
A: Overview – Operator's Panel
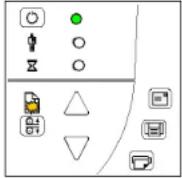 | Paper Ready LED blinks Yellow – Scanner in ATAC mode ATAC keyWhen you press the ATAC key, you set the scanner in ATAC mode. The Paper Ready Key blinks yellow to indicate ATAC mode.The Paper Forward and Paper Reverse keys become "Pressure-platen Up" and "Pressure-platen Down" keys.Paper Forward and Paper reverse Keys become Up/Down keys ATAC keyWhen you press the ATAC key, you set the scanner in ATAC mode. The Paper Ready Key blinks yellow to indicate ATAC mode.The Paper Forward and Paper Reverse keys become "Pressure-platen Up" and "Pressure-platen Down" keys.Paper Forward and Paper reverse Keys become Up/Down keys | |
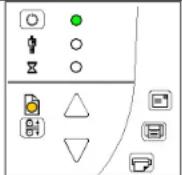 | Paper Ready LED Yellow - Ready for Thick mediaThe Paper Ready LED lights yellow when the scanner is ready to scan thick media. The pressure-platen has been lowered and the media is positioned correctly in the scanner.The scanner goes automatically out of ATAC mode. The Paper Forward and Paper Reverse keys resume their normal functionality so you can move the thick original forwards and backwards in the scanner.Scanning can be controlled from the computer. | |
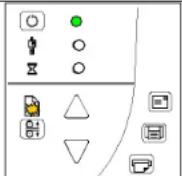 | Paper Ready LED blinks – (green or yellow) – Media is being scannedThe Paper Ready LED blinks during scanning.On completion of the scan, the Paper Ready LED will stop blinking. Scanning can then be repeated from the computer or terminated by ejecting the media from the scanner.The above behavior applies for both thin media scanning (green blinking) and thick media scanning (yellow blinking). | |
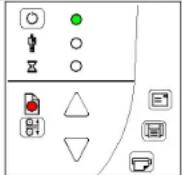 | Paper Ready LED Red – No Thick media detectedThe paper ready indicator will light red if the pressure-platen is in a thick media setting (a raised pressure-platen) but no media is detected in the scanner. |
A: Overview – Operator's Panel
Application Control – One Touch Scan
Scanners: HD5450, HD4250, HD4230, HD3650, HD3630, HD2530
You must install WIDEsystem software, scan applications and setup button definitions before the one-touch buttons can become active. Your PC must be turned on and running.
Descriptions of the key's intentional functionality follow below. You can however, assign applications with other functions to any of the Application Control buttons. Refer to WIDE system help for instructions on configuring the buttons.

Email Application
This key is for activating an application that scans and prepares images for sending via E-mail from the scanner.

Scan Application
Key for activating the scanning application installed on your PC so as to trigger a scan of the document currently loaded in the scanner.

Copy Application
This key is for activating a scan-to-copy application installed on your PC.
Applications you can use with the buttons
The applications you wish to use with the buttons must be designed to recognize your scanner device and the signals sent from its buttons so that when a button is pressed, a scan is initiated and the result is loaded into the application triggered. Any application you assign to a button must be specially programmed in order to work in this manner. Check your application's documentation to verify its functionality with your scanner's one-touch-scan buttons.
Compatible applications will normally be scan/copy application developed by your scanner manufacturer. However, you can also find third party applications that will work with the scanner one-touch-scan buttons. See your scanner manufacturer's website for Information on its own and party scan/copy applications.
Appendix B: Important Safety Instructions

Read all of these instructions and save them for later use. Follow all warnings and instructions marked on the scanner.
A. Do not place the scanner on an unstable surface, stand, cart or table. Serious damage can be caused if the unit falls.
B. For cleaning, do not use liquid cleaners or aerosol cleaners. Use a damp cloth for cleaning.
C. Before cleaning or replacing any user-replaceable parts, be sure to turn the scanner power off and disconnect the power plug.
D. The scanner should be operated from the power source type indicated on the marking label. If you are unsure of the type of power available, consult your dealer or local power company.
E. The scanner is intended for use on IT, TT and TN power distribution systems, and is equipped with a three-wire grounding type plug. This plug will fit only into a grounding-type power outlet. This is a safety feature which relies on building installation. If you are unable to insert the plug into the outlet contact your electrician to replace your obsolete outlet. Do not defeat or ignore the purpose of the grounding-type plug.
F. Do not allow anything to rest on the power cord. Do not locate the scanner where persons will walk on the cord.
G. If an extension cord is used with the scanner, make sure that the total ampere ratings of the products plugged into the extension cord does not exceed the extension card ampere rating. Make sure that the total rating of all products plugged into the wall outlet does not exceed 15 amperes.
H. Slots or openings in the cabinet at the back or bottom are provided for ventilation. This ensures reliable operation of the product and protects it from overheating. These openings must never be blocked or covered. The openings should never be blocked by placing the unit on a bed, sofa, rug, or other similar soft surface. This product should never be placed near or over a radiator or heat register. This product should not be placed in a built-in installation unless proper ventilation is provided.
I. Never push objects of any kind into the scanner through cabinet slots since they may touch dangerous voltage points or short out parts that could result in a risk of fire or electrical shock. Avoid any possibility of spilling liquid of any kind on the scanner.
J. Do not attempt to service the scanner yourself. Opening or removing those covers requiring tools may expose you to dangerous voltage points or other risks. Refer all servicing in those compartments to authorized service personnel.
K. Unplug the scanner from the wall outlet and refer servicing to authorized service personnel under the following conditions:
- When the power cord or plug is damaged or frayed.
- If liquid has been spilled into the scanner.
- If the scanner has been exposed to rain or water.
- If the scanner does not operate normally when operating instructions are followed then adjust only those controls covered by the instructions in this manual. Improper adjustment of controls other than those mentioned in this manual may result in permanent damage and will at best require extensive work by a qualified technician to restore this product to its normal operation.
- If the scanner has been dropped or the cabinet has been damaged.
- If the scanner exhibits a distinct change in performance, indicating a need for service.
C: Regulations
77
Appendix C: Regulations
FCC Regulations
USA
NOTE: This equipment has been tested and found to comply with the limits for a Class A digital device, pursuant to Part 15 of the FCC Rules. These limits are designed to provide reasonable protection against harmful interference when the equipment is operated in a commercial environment. This equipment generates, uses, and can radiate radio frequency energy and, if not installed and used in accordance with the instruction manual, may cause harmful interference to radio communications. Operation of this equipment in a residential area is likely to cause harmful interference in which case the user will be required to correct the interference at his own expense.
Caution: Pursuant to Part 15.21 of the FCC Rules, any changes or modifications not expressly approved by the manufacturer may cause harmful interference and void the use's authority to operate the equipment.
CE Regulations
EU
Warning
This is a class A product. In a domestic environment this product may cause radio interference in which case the user may be required to take adequate measures.
VCCI Regulations
Japan
This equipment has been tested and found to comply with the limits for a Class A product according to Agreement of VCCI:2008 (CISPR 22).
C: Regulations
78
Toxic or Hazardous Substances or Elements
| Part Name部件名称 | Toxic or hazardous Substances and Elements有毒有害物质或元素 | |||||
| Lead (Pb)铅 | Mercury (Hg)汞 | Cadmium (Cd)镉 | Hexavalent Chromium (Cr (VI))六价铬 | Polybrominated biphenyls (PBB)多溴联苯 | Polybrominated diphenyl ethers (PBDE)多溴二苯醚 | |
| Fluorescent Lamp荧光灯管 | O X O | O O O | ||||
| O: Indicates that this toxic or hazardous substance contained in all of the homogeneous materials for this part is below the limit requirement in SJ/T11363-2006.表示该有毒有害物质在该部件所有均质材料中的含量均在SJ/T11363-2006标准规定的限量要求以下。X: Indicates that this toxic or hazardous substance contained in at least one of the homogeneous materials used for this part is above the limit requirement in SJ/T11363-2006.表示该有毒有害物质至少在该部件的某一均质材料中的含量超出 SJ/T11363-2006标准规定的限量要求。(Enterprises may further provide in this box technical explanation for marking "X" based on their actual conditions.企业可在此处根据实际情况对上表中打“X”的技术原因进行进一步说明。) | ||||||