Elegance - Robot vacuum Wertheim - Free user manual and instructions
Find the device manual for free Elegance Wertheim in PDF.


User questions about Elegance Wertheim
0 question about this device. Answer the ones you know or ask your own.
Ask a new question about this device
Download the instructions for your Robot vacuum in PDF format for free! Find your manual Elegance - Wertheim and take your electronic device back in hand. On this page are published all the documents necessary for the use of your device. Elegance by Wertheim.
USER MANUAL Elegance Wertheim
text_image
WERTHEIM DEEP CLEAN ENGINEERINGElegance Robot
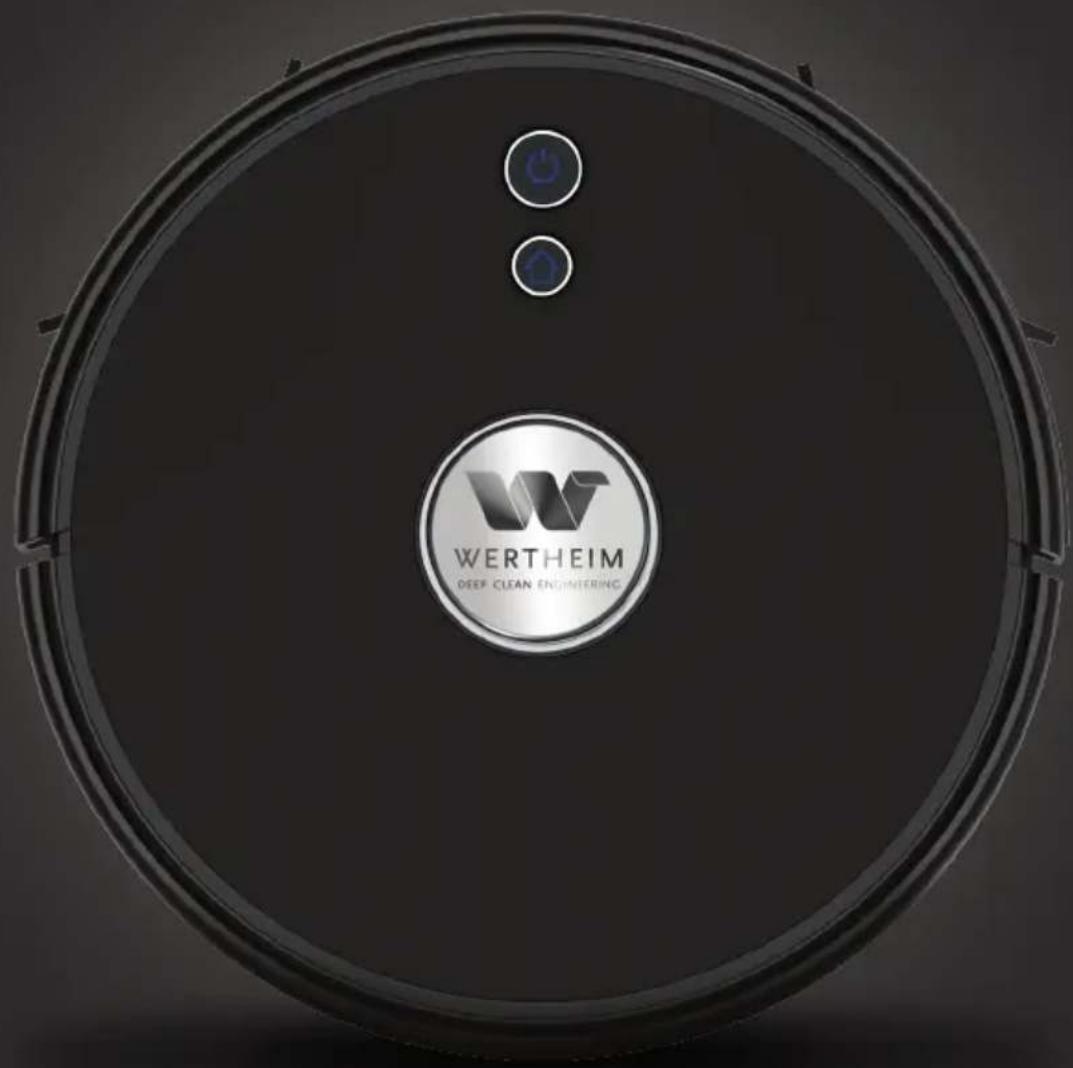
text_image
WERTHEIM DEEP CLEAN ENGINEERING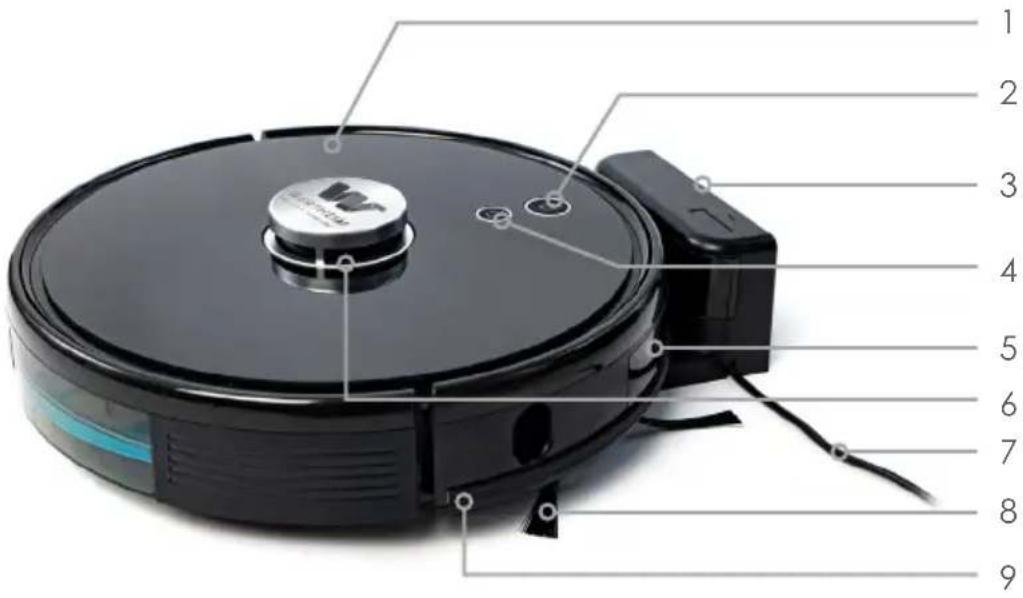
text_image
Labeled diagram of a robotic vacuum cleaner with numbered parts from 1 to 9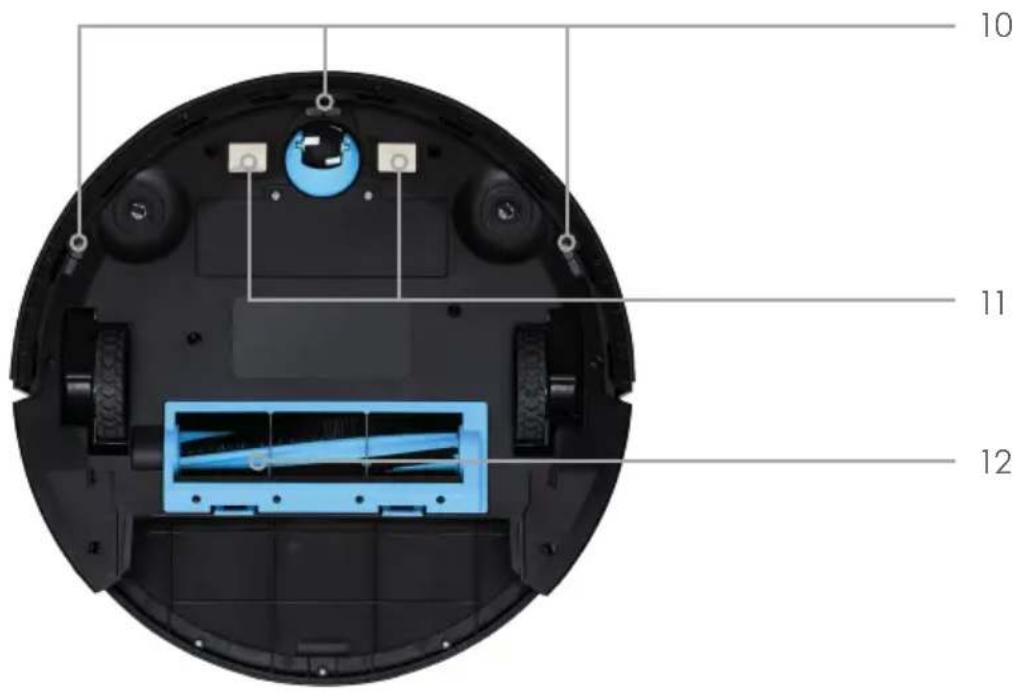
text_image
10 11 12Features
- Top Glass Cover
- On/Off Button
- Charging Base
- Recharge Button
- Bumper Sensor Window
-
Laser Distance Sensor
-
Charger Adaptor
- Side Brush
- Bumper
- Cliff Sensors
- Charging Contacts
- Roller Brush
Accessories Included
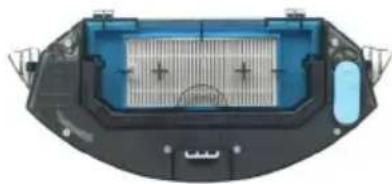
natural_image
Top-down view of a blue and black plastic container with internal grating and side supports (no text or symbols visible)2-in-1 Water Tank and Dust Bin
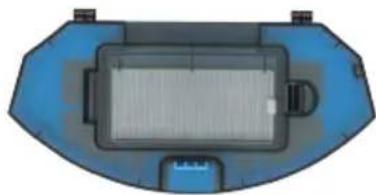
natural_image
Top-down view of a blue and gray inflatable boat hull with no visible text or symbolsDry Dust Bin

natural_image
Close-up of a blue textured fabric or mesh component with a curved cutout (no text or symbols visible)Mop Pads x 2

Remote Control
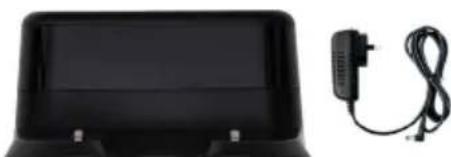
natural_image
Black electronic device with a charging cable and power adapter, shown against a white background (no text or symbols visible)Charging Base & Charger Adaptor
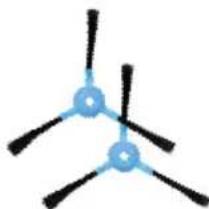
natural_image
Simple diagram of three blue circular elements connected by black lines, resembling a stylized molecular or mechanical structure (no text or symbols)Spare Side Brushes x2
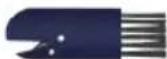
Cleaning Brush
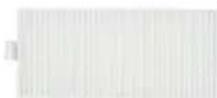
Spare Filter Set x1

text_image
W WERTHEIM DEEP CLEAN ENGINEERINGINTRODUCTION
Congratulations on the purchase of your new Wertheim Elegance Robot. There are many useful features built into your robot cleaner.
We recommend that you carefully read this instruction manual to take the best advantage of these features.
Specifications
- Power: 48W
• Battery Voltage: 14.4V - Charger Voltage:
Input AC 220-240V, 50/60 Hz
Output: DC 24V 1.0A
• Charging Time: 4 Hrs
• Run Time: 230 minutes (on low suction mode)
• Battery: 5200mAh, Li-Ion
• 2-In-1 Water Tank Capacity: 300ml
• 2-In-1 Dust Bin Capacity: 350ml
• Dry Dust Bin Capacity: 600ml
• Net Weight: 3.25Kg
BEFORE YOU BEGIN
This cleaner must be operated in accordance with these instructions and used only for domestic household cleaning to remove DRY dirt and dust from household carpets, hard floors.
This cleaner is not fit to be used as an industrial cleaner and will void the manufacturer's warranty if used inappropriately.
Please read these instructions thoroughly
This will ensure you obtain full benefit from your new cleaner. Keep this Instruction Manual in a handy place for future reference.
Important
Always switch off the cleaner before cleaning, when not in use, attempting any maintenance task, fitting or removing accessories. The charger adapter must only be connected to an AC power supply at the voltage shown on the rating label. This cleaner should only be charged with the charger provided. This cleaner should only be used for its intended purpose as described in these instructions.
Precautionary measures:

- Do not operate the vacuum cleaner too close to heaters, radiators or other hot surfaces.

- Before inserting the plug into the wall, make sure your hands are dry.

- Before turning on the vacuum cleaner, safely remove any large objects from the floor or cleaning surface in order to prevent damage to the filter.

- When you want to remove the plug from the power socket, do not use the power cable, gently pull the plug from the power socket.
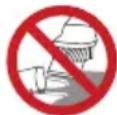
- Do not use this vacuum cleaner to pick-up water or liquids.
Do not use this vacuum cleaner if the battery pack housing and/or the charger housing is damaged.
SAFETY INSTRUCTIONS
IMPORTANT! Always switch off the cleaner before cleaning, when not in use or attempting any maintenance task. The charger must only be connected to an AC power supply at the voltage shown on the rating label. This cleaner should only be used for its intended purpose as described in this instruction manual. Never operate the cleaner without filters.
When using your vacuum cleaner, basic precautions should always be observed, including the following;
-
This appliance is not intended for use by persons (including children) with reduced physical, sensory or mental capabilities or lack of experience and knowledge, unless they have been given supervision or instruction concerning use of the appliance by a person responsible for their safety.
-
Children should be supervised to ensure that they do not play with the appliance.
-
To prevent electrical shock, do not immerse the appliance, battery, or power plug into water or other liquids.
-
To prevent electrical shock, do not use the vacuum cleaner outdoors or on wet surfaces.
-
Always check the power cord before use. The power cord and the plug should be in a good condition and must not be damaged. If the power supply cord is damaged or defective, it must be replaced by the manufacturer, its service agent or similarly qualified persons in order to avoid a hazard.
-
The appliance and charging base are intended for domestic indoors use only.
-
Do not unplug by pulling on the power cord. To unplug, grasp the
plug, not the power cord. Use only Australian and New Zealand electrical safety approved extension cords.
-
Do not pull or carry the appliance by the power cable, use the power cable as a handle or pull the power cable around sharp edges or corners. Avoid running the appliance over the power cable.
-
Do not handle or operate the appliance with wet hands and follow electrical safety precautions at all times.
-
Do not operate the vacuum cleaner too close to heaters, radiators and other hot surfaces.
-
Do not use the appliance to pick up flammable items or combustible liquids (i.e. gasoline, hot ashes, cigarettes, matches, explosive materials or anything burning) or use in areas where such substances and items may be present.
-
Do not use the appliance to pick up toxic materials (i.e. chlorine bleach, ammonia).
-
Never operate or use the appliance without the filters in place.
-
Before vacuuming, remove any large or sharp objects from the floor or cleaning surface in order to prevent damage to the filter. cleaning surface and brushes.
-
If the air inlet is blocked, switch off the cleaner straight away. First, clear the blocked object before attempting to start the vacuum cleaner again.
- Before carrying out any maintenance service or cleaning the filters, always switch off the vacuum cleaner.
- Keep openings away from your face and body.
- Do not use the vacuum cleaner if it is damaged or broken. If connection cables are damaged, have them replaced immediately.
- Never clean the vacuum cleaner or any of the electrical parts, especially the electrical connections with water or liquid cleaners.
- Never attempt to make any modifications electrically to the vacuum cleaner and charging base.
Battery use and care
- The appliance is only to be used with the charger uniquely provided with the appliance.
- Only charge the battery inside the product and only use the specifically designated charger to charge the product.
- When appliance is not in use, keep it away from other metal objects, like paper clips, coins, keys, nails, screws or other small metal objects that can make a connection from one terminal to another. Shorting the appliance terminals together may cause bums or a fire.
-
Under abusive conditions, liquid may be ejected from the battery; avoid contact. If contact
-
Always store the appliance and charger indoors in a cool and dry place.
- Do not pick up water, for dry household use only
- Use the electric roller brush only for vacuuming dust and dry substances in the home.
- Never run over the power cable with the robot cleaner as this may cause damage to the power cable.
- Never touch the roller brush while the vacuum cleaner is switched on.
- To prevent unnecessary wear on the power head, keep it moving while in operation.
- Damage caused by improper use or by not observing the instructions in this manual will void the warranty.
accidentally occurs, flush with water. If liquid comes in contact with eyes, seek medical assistance. Liquid ejected from the battery may cause irritation or burns.
- Do not charge or store the appliance outdoors or inside the car. Only charge or store the battery in a dry indoor area where the temperature is more than 5^ C but less than 45^ C. The charger is for indoor used only.
-
Never attempt to open the battery for any reason. If the plastic housing of the battery casing breaks or cracks, immediately discontinue use and do not recharge.
-
The charger adapter contains electrical connections inside. The charger adapter is not a serviceable part.
- Before disposal of your battery, fully discharge your battery by running the product until it stops.
- The cleaner contains a Lithium battery. Do not dispose of the appliance with your local garbage. Contact your local
Risk of damage!
- Light, moveable objects can be dragged along by the robot vacuum and cause damage to the object or floor depending on the object characteristics.
Risk of fire!
- Do not use the robot vacuum cleaner too close to heaters, radiators and other hot surface.
- Do not spray with, or pick up flammable liquids, cleaning fluids, aerosols, of their vapours, as this may increase the risk of fire/explosion.
Laser navigation sensor
The navigation sensor contains a class one rotating laser.

The following rules of conduct generally apply for lasers:
- Switch off the robot vacuum prior to all changeover tasks.
council for instructions on how to safely dispose of the battery.
- Do not use the charger to charge a non-chargeable battery.
- Do not touch or insert objects into battery pack terminal.
- Do not attempt to short circuit the battery terminal.
-
This appliance contains battery cells that are non-replaceable.
-
Remove light, moveable objects from the work area.
-
Secure cables that hang down or are exposed (e.g. on floor lamps).
-
Do not use the robot vacuum to pick up glowing embers or cigarette butts.
-
Never expose the batteries to open flame or an external heat source.
-
Do not aim the laser beam at other persons.
- Do not look at the direct or reflected laser beam.
Modifications (changes) or attempts to repair the device and especially the navigation sensor are prohibited.
ASSEMBLY
IMPORTANT: Always remove the power plug from the power supply before assembly.
natural_image
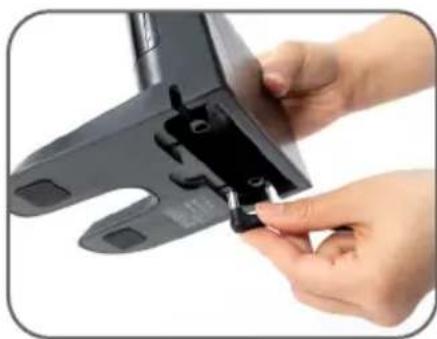
Close-up of hands installing a black plastic clip into a black plastic frame (no text or symbols visible)- Connect the charger adaptor to the charging base, as shown, then connect the power plug to the power supply.
natural_image
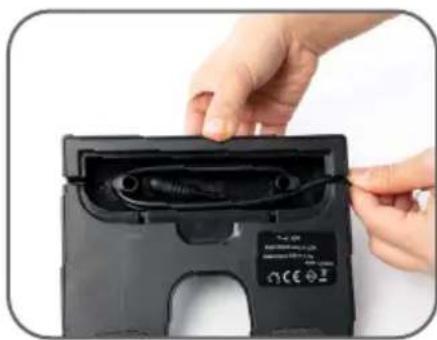
Close-up of hands installing a black plastic component with a cable, no visible text or symbols- To avoid the robot being entangled in the power cord, ensure that excess power cord is neatly stored inside the charging base, as shown.
text_image
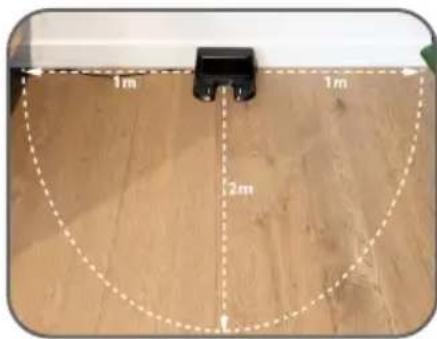
1m 1m 2m- Set the charging base on a level surface next to a wall.
IMPORTANT!
Place the Charging Base in an open, uncluttered area leaving the following distances around the Charging Base:
- At least 1 meter on each side of the Charging Base
- At least 2 meters in front of the Charging Base, and at least 1.5 meters away from stairs
- Always keep the Charging Base plugged in and make sure it is in an area with consistent Wi-Fi® coverage to allow the robot to receive information via the Wertheim Elegance Robot App.
natural_image
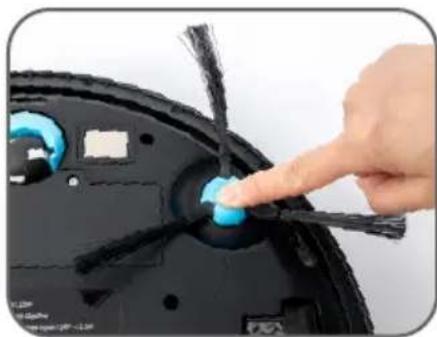
Close-up of a hand adjusting a small blue component on a black robotic device (no visible text or symbols)- Install the side brushes onto the robot ensuring that it clicks into place. Ensure that the side brush marked with the letter 'L' is installed onto the left side of the robot and that the side brush marked with the letter 'R' is installed onto the right side of the robot.
natural_image
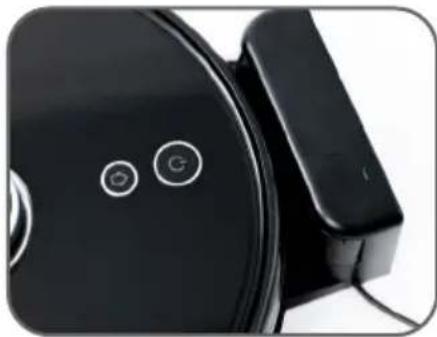
Close-up of a black robotic vacuum cleaner with two circular buttons and a rectangular device (no visible text or symbols)- Press the On/Off Button for 3 seconds to turn on the robot.
NOTE: When the robot completes the cleaning cycle or when battery power is low, the robot will automatically return to the Charging Base to recharge.
natural_image
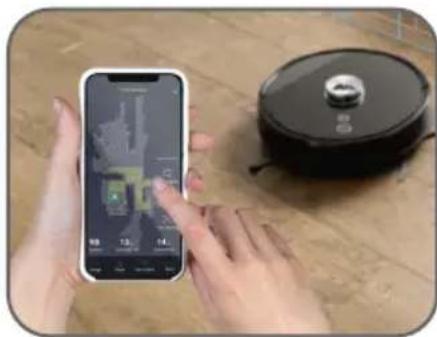
Hands interacting with a smartphone displaying a virtual room interface and a robotic vacuum cleaner on a wooden surface (no visible text or symbols)- Download the Wertheim Elegance Robot App and connect to the Wi-Fi® by following the instructions in the App.
NOTE: The robot can only connect to a 2.4Ghz Wi-Fi® Router.


iOS 9.0 or later Android 5.0 or later
natural_image
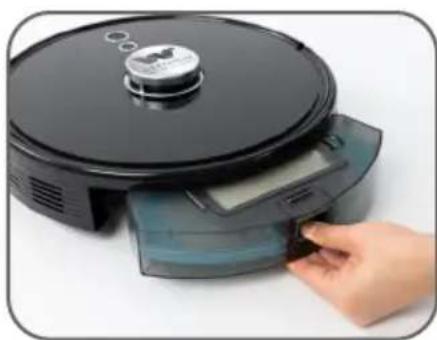
Close-up of a black robotic vacuum cleaner with a hand inserting a small electronic device (no visible text or symbols)Installing the 2-in-1 Water Tank and Dust Bin:
- Remove the Dry Dust Bin from the robot by pressing the Dust Bin Release button and gently pulling.
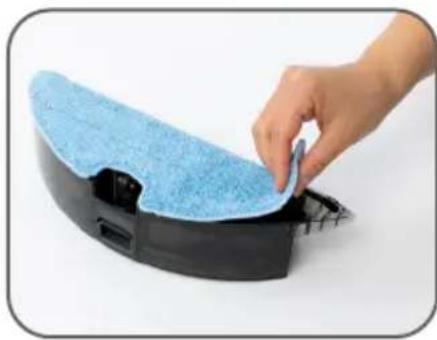
natural_image
Hand placing a blue textured patch onto a black robotic device (no text or symbols visible)- Prepare the 2-in-1 Water Tank and Dust Bin. Ensure that a mop pad is installed onto the water tank as shown.
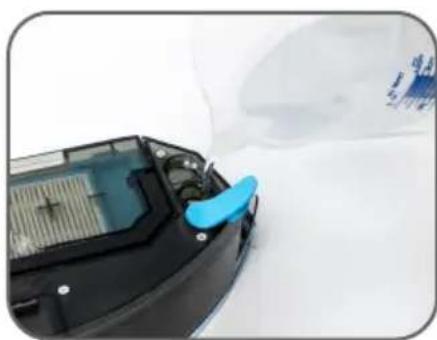
natural_image
Close-up of a robotic vacuum cleaner with a blue plastic clip, attached to a white surface (no visible text or symbols)- Fill the water tank with water, ensuring not to overflow the water tank.
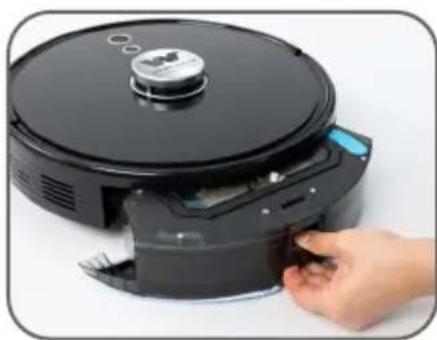
natural_image
Close-up of a hand inserting a black robotic vacuum cleaner into a device (no visible text or symbols)- Install the 2-in-1 Water Tank and Dust Bin into the robot, ensuring that it clicks into position.
INSTRUCTIONS FOR USE
IMPORTANT! Before commencing cleaning, please tidy up objects on the floor like cables, cleaning cloths, slippers and carpet with fringes to avoid the cleaner being tangled.
natural_image
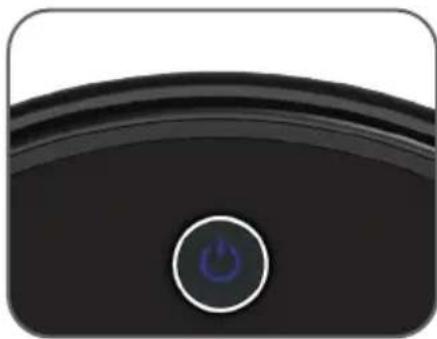
Close-up of a black electronic device with a blue power button icon (no text or symbols visible)On/Off Button
- Short press to start/pause cleaning cycle.
- Long press for 3 seconds to turn the robot on or off.
- Long press for 15 seconds for forced shutdown.
natural_image
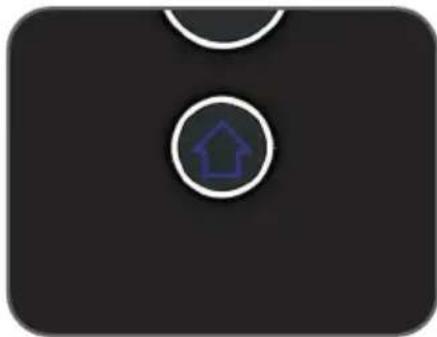
Simple icon with a house inside a circle on a dark background (no text or symbols)Recharge/Area cleaning
- Short press to return the robot to the charging base to recharge or pause the robot.
natural_image
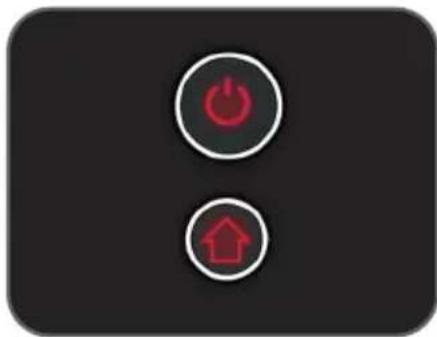
Two circular icons: a red 'Power' button and a red 'Home' button, both on a dark background (no text or symbols)Indicator Light
- Blue: Normal operation or charging.
- Red: Error or low battery.
- Purple: Robot is not connected to the WiFi.
Note: to reset the WiFi, press the On/Off and Recharge buttons simultaneously for 3 seconds.
REMOTE CONTROL
text_image
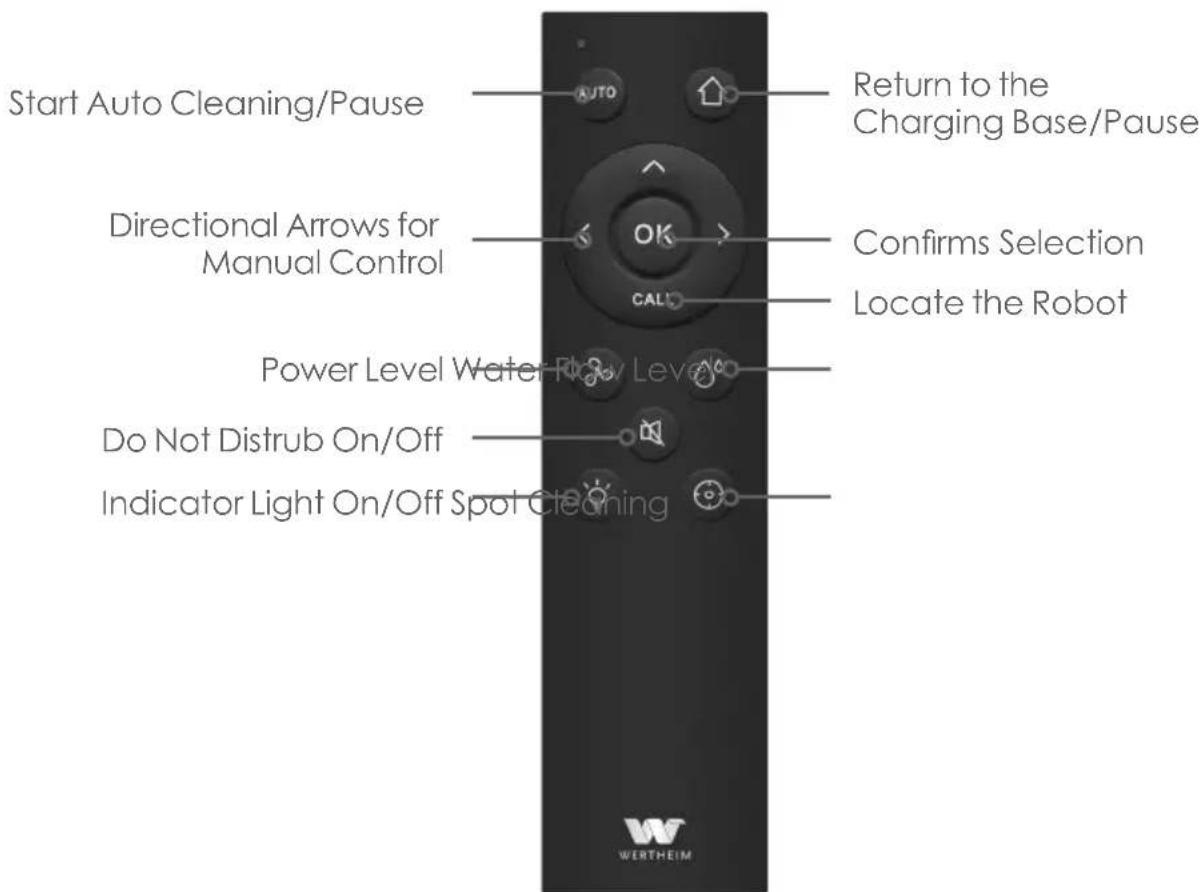
Start Auto Cleaning/Pause Directional Arrows for Manual Control Power Level Water Flow Level Do Not Distrub On/Off Indicator Light On/Off Spot Cleaning Return to the Charging Base/Pause Confirms Selection Locate the Robot WERTHEIMOPERATING THE WERTHEIM ELEGANCE ROBOT APP
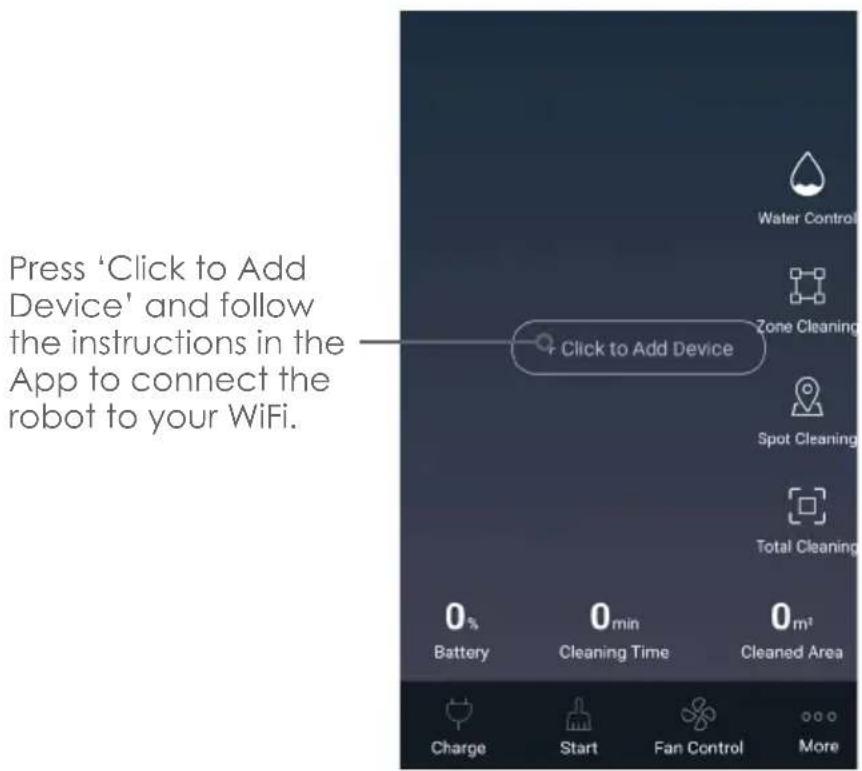
text_image
Press 'Click to Add Device' and follow the instructions in the App to connect the robot to your WiFi. Click to Add Device 0% Battery 0 min Cleaning Time Cleaned Area Water Control Zone Cleaning Spot Cleaning Total Cleaning Charge Start Fan Control More
text_image
Virtual Map. Battery Life Indicator. Command the robot to return to the Charging Base. Command the robot to begin cleaning, pause cleaning or resume cleaning. Command the robot to clean a particular area on the virtual map. Command the robot to clean a particular spot on the virtual map. Command the robot to perform a full home clean. Select to access further options. Allows you to select from three power settings (Low, Medium and High).Select 'More' on the App to access additional App functionality. Below are a few key features:

text_image
Map ZoningTo create a particular cleaning zone in your home, to command the robot to double clean a particular area or to prohibit the robot from cleaning a particular area.

text_image
MaintenanceIndicates the remaining life span of the Filter, Side Brushes & the Roller Brush.

text_image
Fault DetectionIdentifies if there is a fault with the robot.

text_image
ControlAllows you to manually direct the robot.

text_image
My RobotsMy Robot - "+" allows reconnecting the robot to home WiFi.
MAINTENANCE
IMPORTANT! Ensure that the cleaner is switched off before preforming any maintenance.
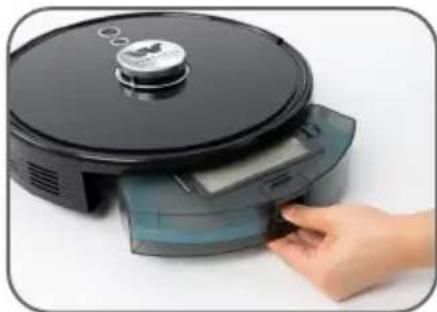
natural_image
Close-up of a hand inserting a device into a blue plastic tray (no visible text or symbols)Emptying the Dry Dust Bin
- Press the Dust Bin Release Button to remove the dust bin.

natural_image
Close-up of a hand holding a blue and gray cleaning device with a black handle (no visible text or symbols)- To empty the dust bin, press the Dust Bin Lid Release Button, then open the dust bin lid, as shown.
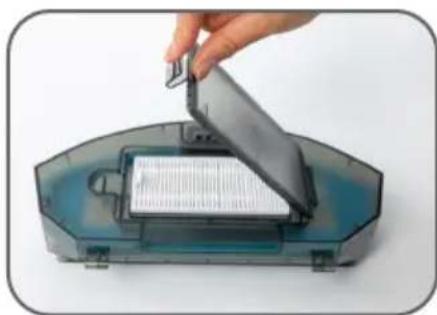
natural_image
Close-up of a hand inserting a small electronic device into a device casing (no visible text or symbols)Cleaning & Replacing the Filters
- Open the dust bin filter cover.
- Remove the filters and clean using the cleaning brush provided. Alternatively, replace the filters if required.
NOTE: it is recommended to replace filters every 6 months.
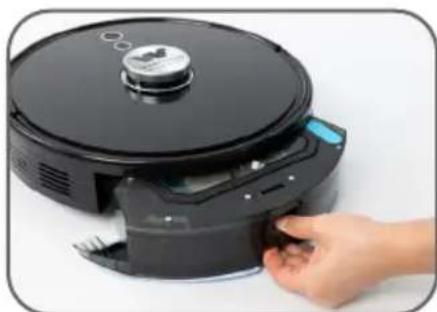
natural_image
Hand inserting a black robotic vacuum cleaner into a device (no visible text or symbols)Emptying the Water Tank Dust Bin
- Press the Dust Bin Release Button to remove the 2-in-1 Water Tank and Dust Bin.
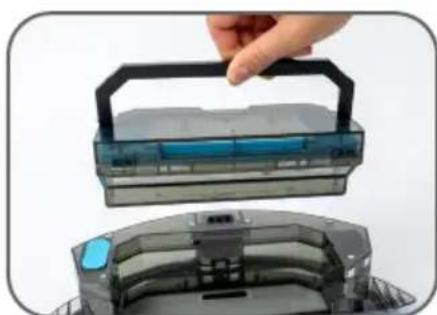
natural_image
Close-up of a hand placing a blue plastic component into a gray cleaning device (no text or symbols visible)- Remove the dust bin from the water tank.
- Open the dust bin lid and empty the contents into a rubbish bin.
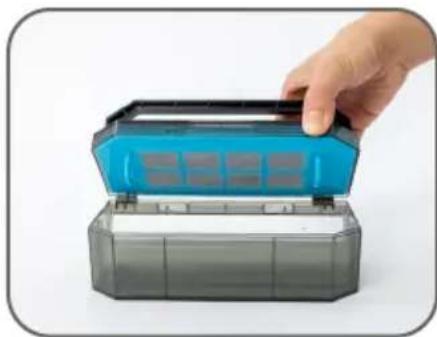
natural_image
Hand placing a blue plastic container into a gray plastic case (no text or symbols visible)Cleaning & Replacing the Filters
- Open the dust bin lid and remove the filter assembly from the dust bin.
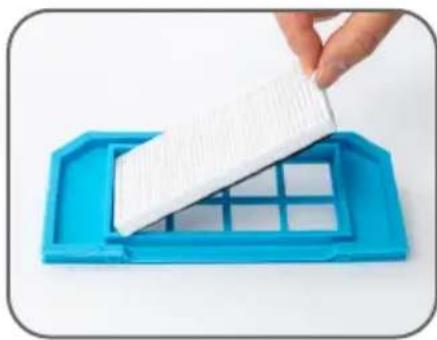
natural_image
Hand placing a white plastic sheet into a blue plastic tray with grid pattern (no text or symbols visible)- Remove the filters and clean using the cleaning brush provided. Alternatively, replace the filters if required.
NOTE: it is recommended to replace filters every 6 months.
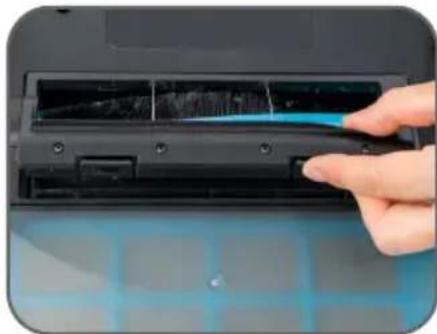
natural_image
Close-up of a hand holding a blue tool interacting with a black electronic device (no visible text or symbols)Cleaning & Replacing the Roller Brush
- Push the two locking buttons as shown to remove the brush cover.
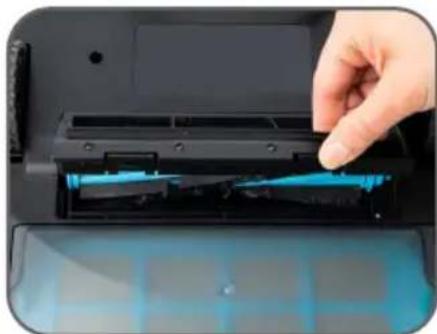
natural_image
Close-up of a hand inserting a blue plastic component into a black electronic device (no visible text or symbols)- Remove the roller brush and clean with the cleaning brush provided. Alternatively, the roller brush can be replaced if required.
NOTE: to reduce the build-up of hair wrap around the roller brush it is recommended to clean the roller brush periodically by removing the roller brush and using the cleaning brush or a pair of scissors to cut away and remove hair wrapped around the roller brush.
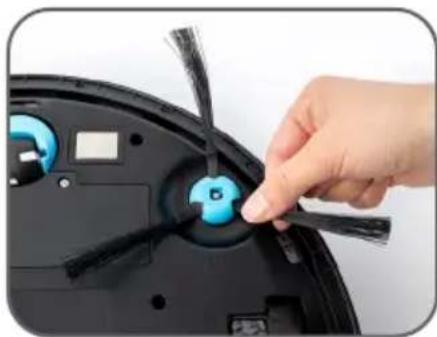
natural_image
Close-up of a hand adjusting a blue circular component with black plastic strips (no visible text or symbols)Cleaning & Replacing the Side Brushes
- Gently pull the side brushes from the robot. Clean the side brushes ensuring that any hair wrap is removed.
NOTE: it is recommended to replace filters every 6 months.
TROUBLESHOOTING
Servicing should be performed by an authorised service agent or qualified technician.
Contact Wertheim Customer Service for your nearest authorised service agent on 1800 815 270 (AUS), 0800 282 288 (NZ).
| Problem Cause | Solution | |
| The robot cannot start. | The indicator light illuminates red. The battery requires charging. | Place the robot onto the charging base to recharge. |
| The robot cannot charge. | The indicator light illuminates red while on the charging base. | Ensure that the charging contacts are aligned to the charging contacts on the charging base. |
| The robot is stuck. | The indicator light illuminates red and cannot move. | Relocate the robot. |
| Abnormal noise during use. | Main brush, side brushes or wheels may be tangled with debris. | Turn off the robot and clear the debris from the main brush, side brushes and wheels. |
| Cleaning ability declines or dust falls out. | The dust bin is full, the filters are blocked or the main brush is tangled with debris. | Empty the dust bin, clean or replace the filters, and/or clean the main brush. |
| Not connecting to WiFi | Wrong Wifi password Router with 5GHz Wifi | Confirm home WiFi password during Add Device. Select 2.4GHz WiFi router. |
SPARE PARTS
| Part Part Number | |
| Roller Brush 33788149 | |
| Side Brushes x 2 33788150 | |
| Filter Set 32201738 | |
| Charger Base 33201792 | |
| Charger Adaptor 33201793 |

text_image
1 YEAR WARRANTYYour Wertheim cleaner, in the case of domestic use, has a one year parts and labour warranty against product defects and failures when the product is used in accordance with the terms and conditions of this warranty statement.
This warranty commences from the original date of purchase and is not transferable; please retain your original proof of purchase for any warranty claims. This warranty is valid only in the country where the cleaner is purchased.
The cleaner must be operated in accordance with these instructions and used only for domestic household cleaning to remove DRY dirt and dust from household carpets, flooring and fabrics. This cleaner is not fit to be used as an industrial cleaner, and is not designed for the collection of vitreous building material including particle board, construction products and similar products such as wood/fibres, cement, fillers, fibre glass etc or excessive or frequent sand. The infrequent pick-up of these materials in these circumstances may be harmful to your cleaner and may void the manufacturer's warranty.
Accessories and consumables including dust bags and filters, unless defective in manufacture, are not subject to this warranty. In order to prolong the life of accessories and consumables, regular care and maintenance is recommended.
When properly used and cared for, your cleaner will render excellent service; refer to the instruction manual for further details, as misuse or failure to follow the instructions makes this warranty void. In the event of service or advice being needed, please contact Electrical Home-Aids Pty. Limited, Level 1, Building 3, Brandon Business Park, 530 Springvale Road, Glen Waverley, Victoria, 3150 or on 1800 815 270 (AUS) or 0800 282 288 (NZ), Monday-Friday 9am-5pm EST. The decision to repair or replace the cleaner is at the sole discretion of Electrical Home-Aids Pty. Limited. If Electrical Home-Aids Pty. Limited decide to repair or replace the cleaner, it will do so at its own cost. Electrical Home-Aids Pty. Limited is unable to accept responsibility under this warranty for any repair work not carried out by an authorised Hoover Service Agent or from the use of non-genuine parts. If any part is no longer available or manufactured, Electrical Home-Aids Pty. Limited will replace it with a genuine functional replacement part. This warranty does not apply to the cost of replacing any parts of the product due to normal wear and tear, alterations, improper installation, physical abuse, misuse or accidental damage. Any transportation costs involved in the repair of defective parts shall be borne by the claimant.
If proof of purchase cannot be provided at the time of a warranty claim or service, any work carried out on the cleaner is chargeable.
The repair of the cleaner under this warranty does not extend the original period of warranty.
The benefits conferred by this warranty are in addition to all other rights and remedies in respect of the product as outlined under the Competition and Consumer Act and other State and Territory laws.
"Our goods come with guarantees that cannot be excluded in the Australian Consumer Law. You are entitled to a replacement or refund for a major failure and for compensation for any other reasonably foreseeable loss or damage. You are also entitled to have the goods repaired or replaced if the goods fail to be of acceptable quality and the failure does not amount to a major failure."
SAVE TIME, REGISTER WARRANTY ONLINE! wertheimcleaning.com.au and wertheim.co.nz

text_image
WERTHEIM DEEP CLEAN ENGINEERINGElectrical Home-Aids Pty. Limited
ABN: 62 007 539 577
Level 1, Building 3, Brandon Business Park
530 Springvale Road,
Glen Waverley, VIC, 3150

wertheimcleaning.com.au
wertheim.co.nz

enquiries@wertheim.net.au