Evolution W7301 - Vacuum Cleaner Wertheim - Free user manual and instructions
Find the device manual for free Evolution W7301 Wertheim in PDF.


| Product Type | Canister Vacuum Cleaner |
| Model | Evolution W7301 |
| Brand | Wertheim |
| Power Consumption | 2000 W |
| Suction Power | 400 Air Watts |
| Dust Bag Capacity | 3.5 L |
| Filtration System | HEPA 13 |
| Noise Level | 78 dB(A) |
| Cord Length | 8 m |
| Weight | 6 kg |
| Dimensions (LxWxH) | 450 x 280 x 320 mm |
| Vacuum Cleaner Type | Bagged |
| Variable Speed Control | Yes |
| Automatic Cord Rewind | Yes |
| Dust Bag Full Indicator | Yes |
| Accessories Included | Crevasse tool, dusting brush, upholstery tool, floor nozzle |
| Floor Type Compatibility | Hard floors, carpets |
| Energy Efficiency Class | A |
| Replacement Filter | Type HEPA 13, part number W7301-FIL |
| Replacement Dust Bag | Type S-Class, part number W7301-BAG |
| Repairability Index | 7.5/10 |
Frequently Asked Questions - Evolution W7301 Wertheim
User questions about Evolution W7301 Wertheim
0 question about this device. Answer the ones you know or ask your own.
Ask a new question about this device
Download the instructions for your Vacuum Cleaner in PDF format for free! Find your manual Evolution W7301 - Wertheim and take your electronic device back in hand. On this page are published all the documents necessary for the use of your device. Evolution W7301 by Wertheim.
USER MANUAL Evolution W7301 Wertheim
Evolution
THE ULTIMATE
HANDSTICK
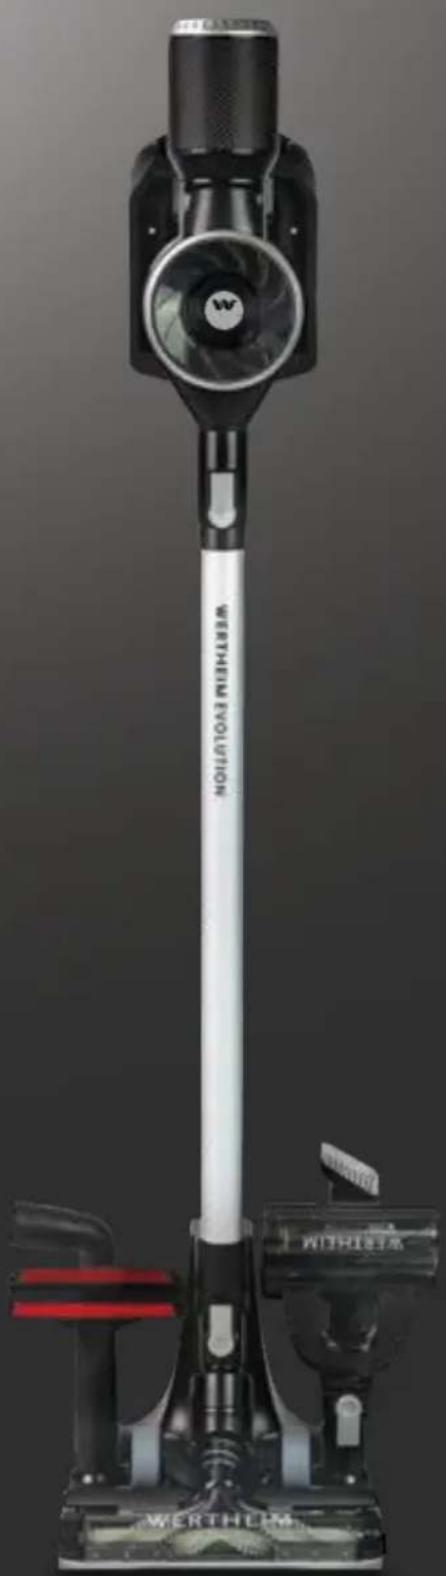
natural_image
Exterior view of a black and white WERTHELM vacuum cleaner with red handle (no visible text or symbols on body)Evolution
Features
- Boost Button
- ChargingDock
- Powerhead
- Dust Bin Filter
- Rod
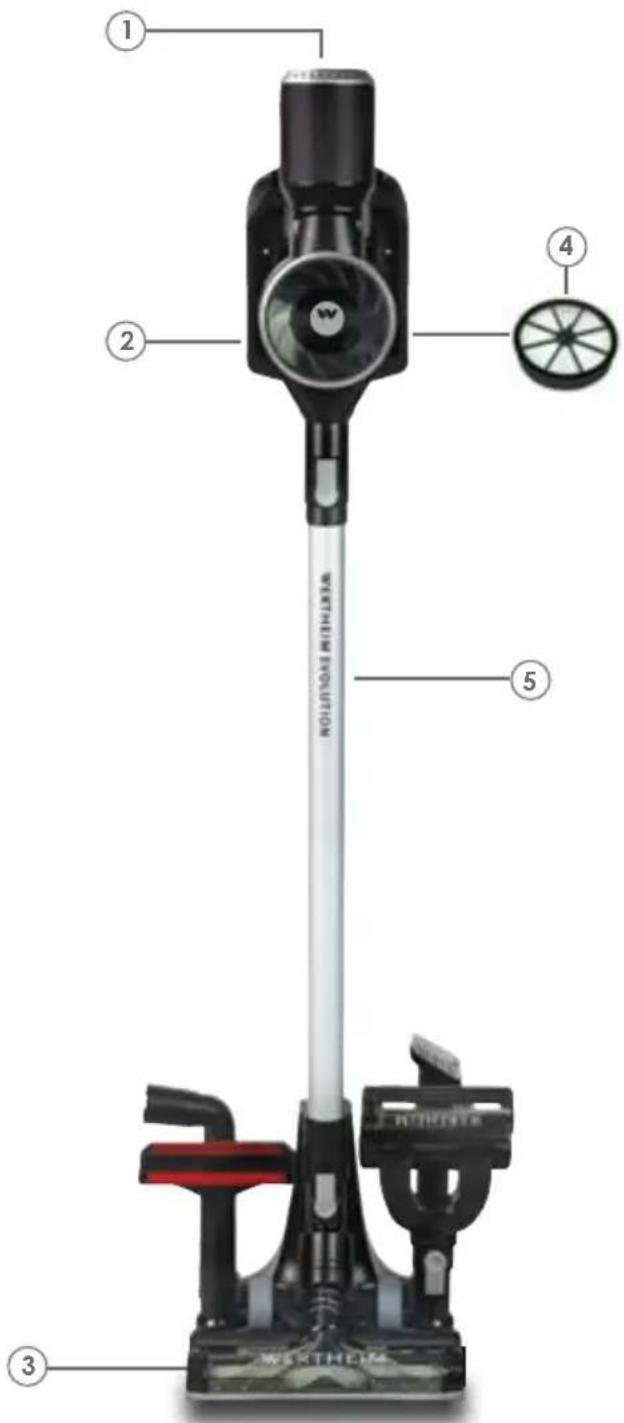
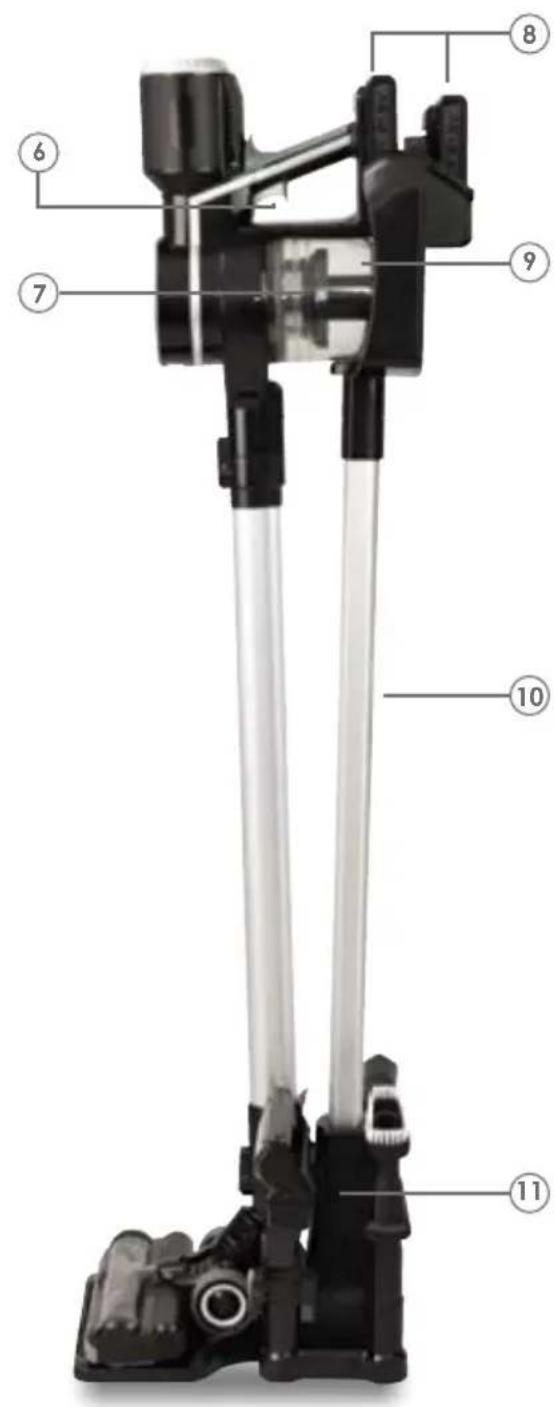
- On/Off Button
- Cyclone Separator
- 2 x 21.6v Li-Ion Batteries
- Dust Bin
- Charging Stand
- Charger Base
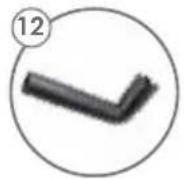
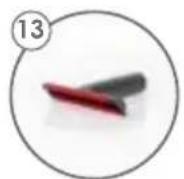
- Angle Attachment
- Upholstery Tool
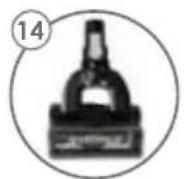
- Mini Motorised Pet Brush
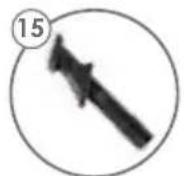
- 3-in-1 Cleaning Tool
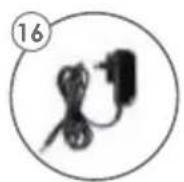
- Charger Adapter

INTRODUCTION
Congratulations on the purchase of your new Wertheim Evolution Handstick. There are many useful features built into your handstick. We recommend that you carefully read this instruction manual to take the best advantage of these features.
Specifications
• Battery Voltage: 21.6V
• Battery Type: Lithium-ion
• Motor Input Power: 275W with powerhead
• Dust Bin Capacity: 0.6L
• Weight: 2.7Kgs with powerhead and rod
• Runtime: Up to 25 mins using a single battery*
Up to 50 mins using two batteries*
*Runtime in Standard Mode
• Charge Time: 4-5 hours
BEFORE YOU BEGIN
This cleaner must be operated in accordance with these instructions and used only for domestic household cleaning to remove DRY dirt and dust from household carpets, flooring, walls and fabrics. This cleaner is not fit to be used as an industrial cleaner and will void the manufacturer's warranty if used inappropriately.
Please read these instructions thoroughly
This will ensure you obtain full benefit from your new cleaner. Keep this Instruction Manual in a handy place for future reference.
Important
Always switch off the cleaner before cleaning, when not in use, attempting any maintenance task, fitting or removing accessories. The charger adapter must only be connected to an AC power supply at the voltage shown on the rating label. This cleaner should only be charged with the charger provided. This cleaner should only be used for its intended purpose as described in these instructions.
Precautionary measures:

- Do not operate the vacuum cleaner too close to heaters, radiators or other hot surfaces.

- Before inserting the plug into the wall, make sure your hands are dry.

- Before turning on the vacuum cleaner, safely remove any large objects from the floor or cleaning surface in order to prevent damage to the filter.

- When you want to remove the plug from the power socket, do not use the power cable, gently pull the plug from the power socket.

- Do not use this vacuum cleaner to pick-up water or liquids.
Do not use this vacuum cleaner if the battery pack housing and/or the charger housing is damaged.
SAFETY INSTRUCTIONS
IMPORTANT! Always switch off the cleaner before cleaning, when not in use or attempting any maintenance task. The charger must only be connected to an AC power supply at the voltage shown on the rating label. This cleaner should only be used for its intended purpose as described in this instruction manual. Never operate the cleaner without filters.
When using your vacuum cleaner, basic precautions should always be observed, including the following;
- This appliance is not intended for use by persons (including children) with reduced physical, sensory, mental capabilities or lack of experience and knowledge, unless they have been given supervision or instruction concerning use of the appliance by a person responsible for their safety.
- Children should be supervised to ensure that they do not play with the appliance.
- To prevent electrical shock, do not immerse the appliance, battery or power plug into water or other liquids.
- To prevent electrical shock, do not use the vacuum cleaner outdoors or on wet surfaces.
- Always check the power cord before use, the power cord and the power adapter should be in a good condition and must not be damaged. If the power cord or the
charger adaptor is damaged or defective, it must be replaced.
- The appliance and charger are intended for domestic indoors use only.
- Do not unplug the charger by pulling on the power cord. To unplug, grasp the power adapter, not the power cord and gently pull the power adapter from the power socket.
- Do not handle or operate the appliance with wet hands. Follow electrical safety precautions at all times.
- Do not attempt to change the attachments while the appliance is switched on. Use only manufacturer's recommended accessories.
- Do not operate the vacuum cleaner too close to heaters, radiators and other hot surfaces.
- Do not use the appliance to pick up flammable items or combustible liquids (i.e. gasoline, hot ashes, cigarettes, matches, explosive materials or anything burning) or use
in areas where such substances and items may be present.
- Do not use the appliance to pick up toxic materials (i.e. chlorine, bleach, ammonia).
- Never operate or use the appliance without the filters in place.
- Before vacuuming, remove any large or sharp objects from the floor or cleaning surface in order to prevent damage to the filter.
- If the air inlet or floor head is blocked, switch off the cleaner straight away. Clear the blocked object before attempting to start the vacuum cleaner again.
- Before carrying out any maintenance or cleaning the filters, always switch off the vacuum cleaner.
- Keep openings away from your face and body.
- Do not use the vacuum cleaner if it is damaged or broken. If connection cables are damaged, have them replaced immediately.
- Never clean the vacuum cleaner or any of the electrical parts, especially the electrical connections with water or liquid cleaners.
- Never attempt to make any modifications to the vacuum cleaner and charger.
- Always store the appliance,
battery and charger indoors in a cool and dry place.
- Do not use the vacuum to pick up water or liquids. This cleaner is for dry household use only.
- Use the electric power head only for vacuuming dust and dry substances in the home.
- Never run over the power cable with the power head, as this may cause damage to the power cable.
- Keep your hands away from the roller brush while the vacuum cleaner is switched on.
- To prevent unnecessary wear on the power head, keep it moving while in operation.
- Damage caused by improper use or by not observing the instructions in this manual will void the warranty.
Battery use and care
- The appliance is only to be used with the charger provided with the appliance.
- Only charge the battery inside the cleaner or the charging dock. Only use the specifically designated charger to charge the product.
- When the appliance is not in use, keep it away from other metal objects, like paper clips, coins, keys, nails, screws or other small metal objects that can make a connection from one terminal to another. Shorting the appliance terminals together may cause burns or a fire.
- Under abusive conditions, liquid may be ejected from the battery; avoid contact. If contact occurs, flush with water immediately. If liquid comes into contact with your eyes, seek medical help immediately.
- Do not charge or store the appliance outdoors or inside the car. Only charge or store the battery in a dry indoor area where the temperature is more than 20^ C but less than 35^ C. The charger is for indoor use only.
- Never attempt to open the battery for any reason. If the plastic housing of the battery casing breaks or cracks, immediately discontinue use and do not recharge.
- The charger is not a serviceable part.
- Before disposal of your battery, fully discharge your battery by running the product until it stops.
- The cleaner contains a Li-Ion battery. Do not dispose the appliance with your local garbage. Contact your local council for instructions on how to safely dispose of the battery.
- Do not use the charger to charge a non-chargeable battery.
ASSEMBLY
IMPORTANT: ALWAYS REMOVE THE POWER PLUG FROM THE POWER SUPPLY BEFORE ASSEMBLY.
natural_image
Hand holding a pen inserted into a black plastic mechanical component, with an arrow indicating the insertion direction (no text or symbols visible)CHARGING STAND
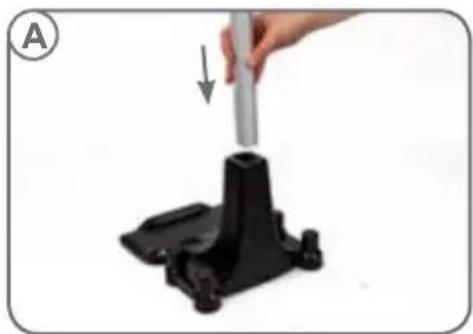
- Insert the charging stand rod into the charger base. Ensure that the rod is inserted securely into the charger base (A).
natural_image
Hand holding a black handheld device with a vertical rod, showing a force or impact (no text or symbols visible)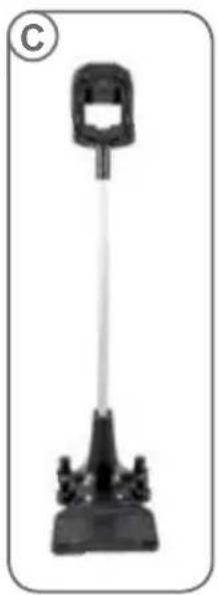
natural_image
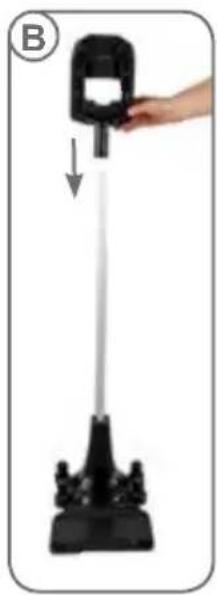
Black plastic stand with a vertical handle and base, no visible text or symbols- Insert the charging dock (B) onto the top of the charging stand rod. Push gently to ensure the dock is secure.
The charging stand should now resemble the image (C).
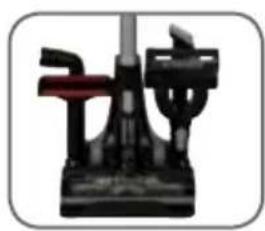
NOTE: THE ACCESSORIES SUPPLIED CAN BE STORED ONTO THE CHARGER BASE, AS SHOWN.
natural_image
Close-up of a mechanical device with black base and red handle (no visible text or symbols)IMPORTANT! ALWAYS REMOVE THE BATTERY FROM THE APPLIANCE BEFORE FITTING OR REMOVING ACCESSORIES.
natural_image
Hand using a vacuum cleaner to lift a black rubber brush (no text or symbols visible)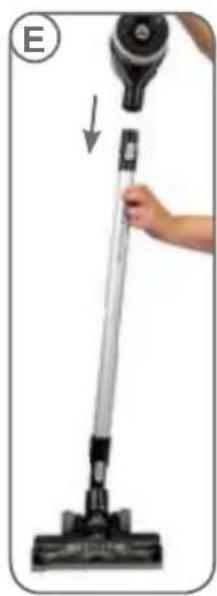
natural_image
Hand holding a vacuum cleaner with a hand adjusting its tip (no text or symbols visible)HANDSTICK
-
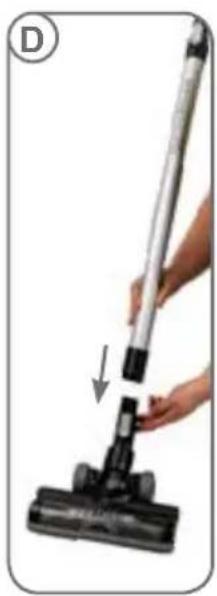
Insert the powerhead into the rod (D). You will hear an audible "click" sound when it is securely in place.
-
Insert the opposite end of the rod into the air inlet of the cleaner (E). You will hear an audible "click" sound when it is securely in place.
natural_image
Close-up of a hand adjusting a black mechanical device with a label 'F' (no visible text or symbols on the device itself)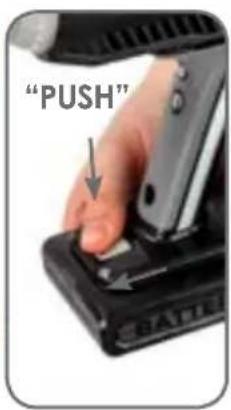
INSTALLING AND REMOVING THE BATTERY
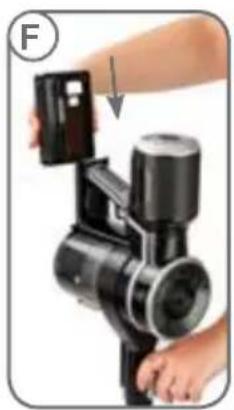
- Insert the battery into the cleaner until it clicks into place (F).
- To remove the battery, press the Battery Release button and gently remove.
INSTRUCTIONS FOR USE
natural_image
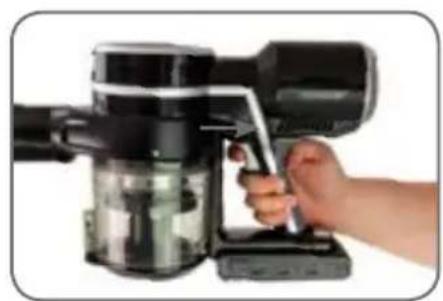
Hand operating a black and silver cleaning brush with a hand adjusting the brush (no visible text or symbols)ON/OFF BUTTON
- Press the On/Off Button to turn the cleaner On or Off.
natural_image
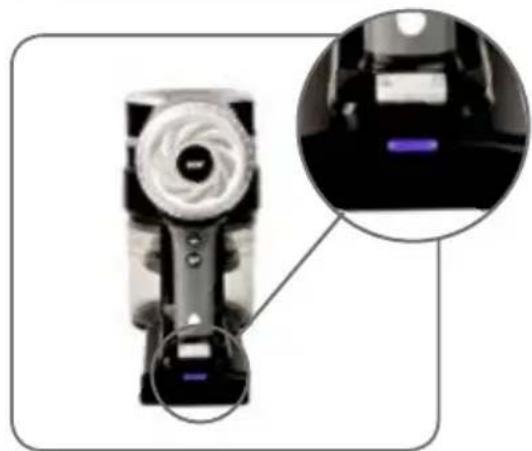
Close-up of a mechanical device with a magnified inset showing internal components (no visible text or symbols)- The light on the battery will illuminate blue while the cleaner is in operation.
natural_image
Close-up of a black and white camera lens with a spiral aperture, no visible text or symbolsBOOST MODE
-
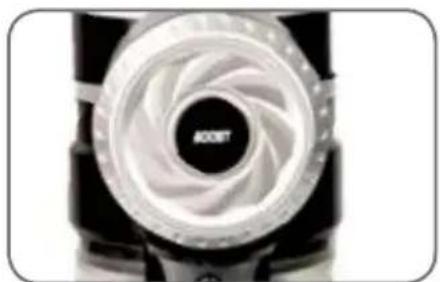
Boost Mode increases the suction performance when activated. To activate, simply press the Boost Button.
-
To deactivate Boost Mode, press the Boost Button a second time.
natural_image
Close-up of a hand holding a black plastic device with an arrow pointing to it, no visible text or symbols.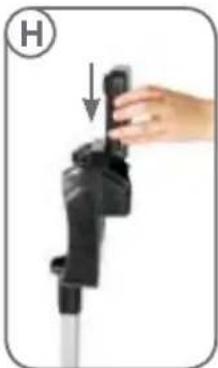
natural_image
Hand holding a black mechanical device with a downward arrow, no visible text or symbolsCHARGING VIA THE CHARGING DOCK
-
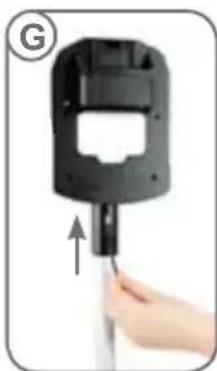
Ensure that the charger adapter is plugged into the charging dock (G).
-
Insert the cleaner onto the charging dock. To charge the second battery insert the battery into the charging dock, as shown (H).
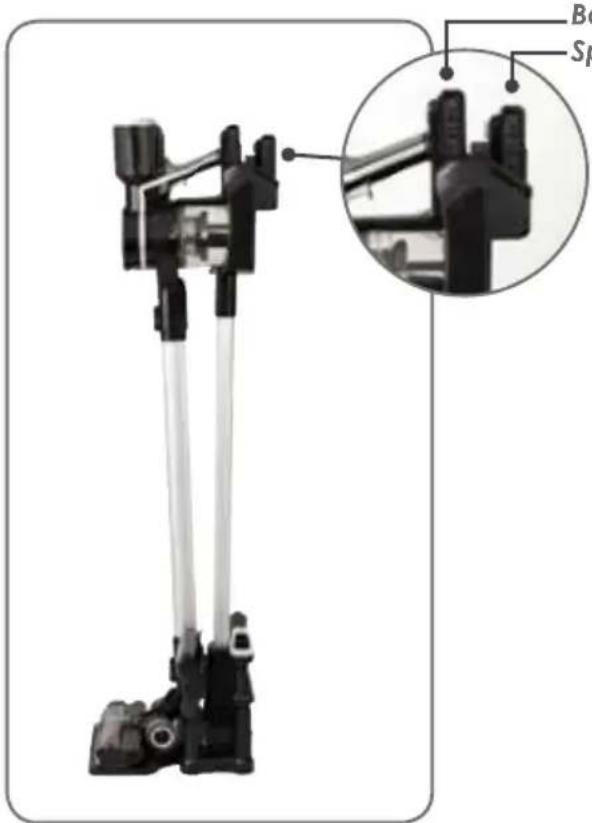
Battery on handstick Spare battery in dock
natural_image
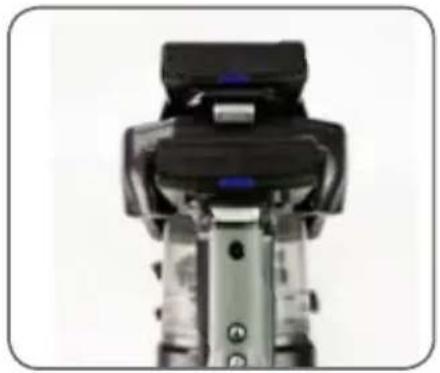
Close-up of a mechanical device with black top and metallic base (no visible text or symbols)The charging indicator will turn blue when the battery is fully charged, as shown in the image.
When the charging indicator displays a red light, the cleaner is charging.
natural_image
Close-up of a hand using a camera lens to adjust the lens (no visible text or symbols)CHARGING VIA THE HANDSTICK
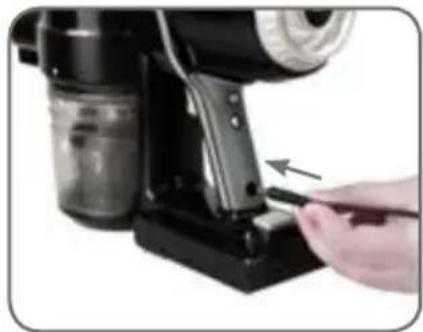
- Insert the charger adaptor into the charging port on the cleaner. When the charging indicator turns blue, the cleaner is fully charged. When the charging indicator displays a red light, the cleaner is charging.
NOTE: THE BATTERY CHARGE TIME IS BETWEEN 4-5 HOURS.
NOTE: WHEN THE CHARGING INDICATOR LIGHT IS FLASHING RED DURING USE, IT MEANS THE BATTERY IS RUNNING LOW AND REQUIRES CHARGING.
CAUTION! DO NOT TRY TO OPEN THE BATTERY AND REPAIR IT YOURSELF.
NOTE: AS A SAFETY PRECAUTION, THE VACUUM CANNOT BE SWITCHED ON WHILE THE VACUUM IS CHARGING.
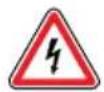
WARNING! THE CHARGER HAS BEEN SPECIALLY DESIGNED TO CHARGE THE WERTHEIM EVOLUTION HANDSTICK. DO NOT USE ANY OTHER CHARGER.
ACCESSORIES
IMPORTANT! ENSURE THAT THE CLEANER IS SWITCHED OFF BEFORE FITTING OR REMOVING ACCESSORIES.
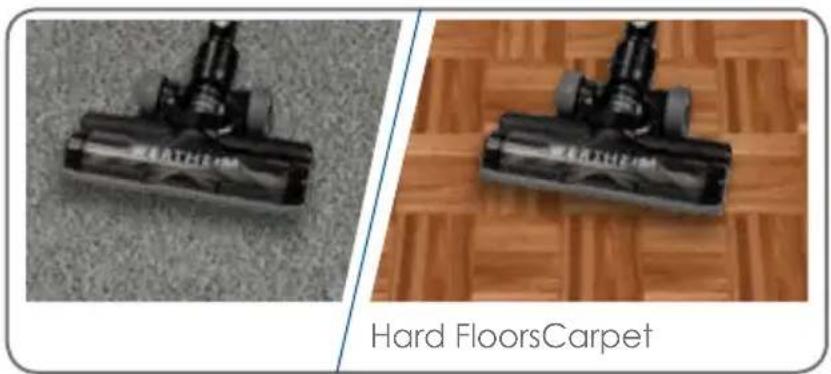
POWERHEAD
Ideal for daily cleaning on carpets and hard floors.
natural_image
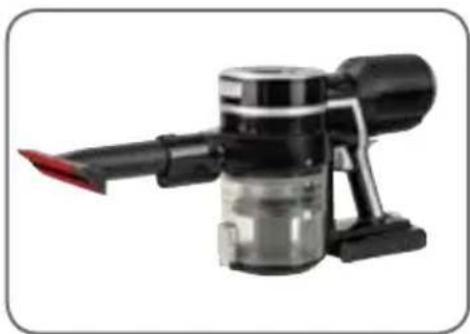
Close-up of a black and silver vacuum cleaner with a red tip, shown against a white background (no text or symbols visible)UPHOLSTERY BRUSH
The upholstery brush can be used for cleaning furniture and upholstery.
natural_image
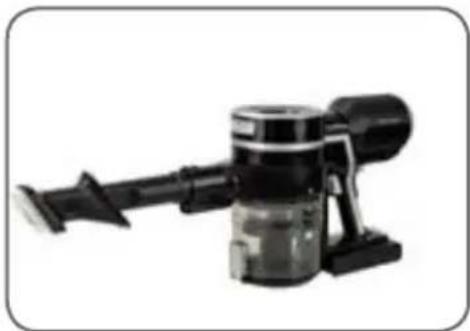
Black and white photo of a vacuum cleaner with a cylindrical body and handle (no visible text or symbols)3-IN-1 CLEANING TOOL
The 3-in-1 cleaning tool can be used as a soft dusting brush for cleaning a variety of surfaces, as an upholstery tool for cleaning furniture or as a crevice tool for cleaning in tight spaces.
natural_image
Black and white photo of a vacuum cleaner with lever handle and jar (no text or symbols visible)ANGLE ATTACHMENT
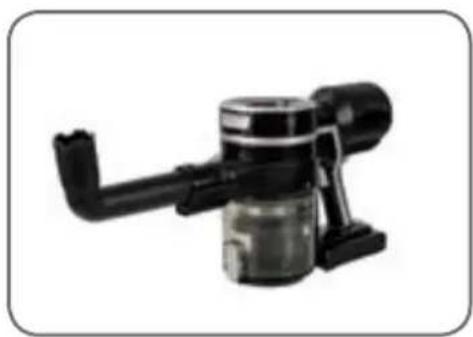
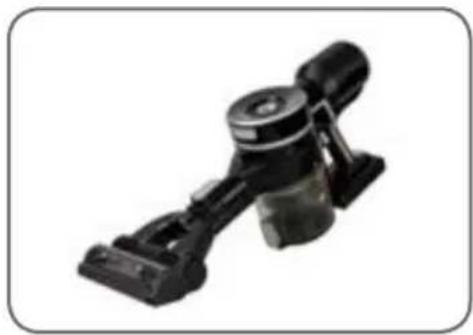
The 3-in-1 Cleaning Tool or the upholstery brush can be connected onto the Angle Attachment for cleaning in awkward, hard to reach places.
natural_image
Black mechanical component with lever and base mount (no visible text or symbols)MINI MOTORISED PET BRUSH
Ideal for picking up pet hair from furniture and upholstery.
Safety Precautions:
- Keep hair, hands and feet away from rotating brush while the motorised brush is running.
- Do not run the motorised brush over electric cables and string.
- Do not use the motorised brush on pets.
- If children are present, make sure to turn the vacuum off when leaving the motorised brush unit unattended.
- Do not attempt to service or unclog the motorised brush while the vacuum is running.
MAINTENANCE
IMPORTANT! ALWAYS REMOVE THE BATTERY FROM THE CLEANER BEFORE PREFORMING ANY MAINTENANCE.
EMPTYING THE DUST BIN
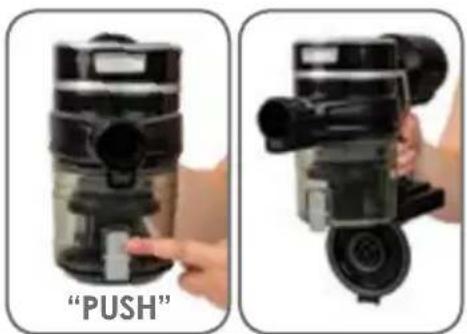
- Disconnect the rod and the powerhead from the cleaner.
- Hold the cleaner over a rubbish bin and press the Dust Bin Lid Release to open and empty the dust bin.
REPLACING THE DUST BIN FILTERS
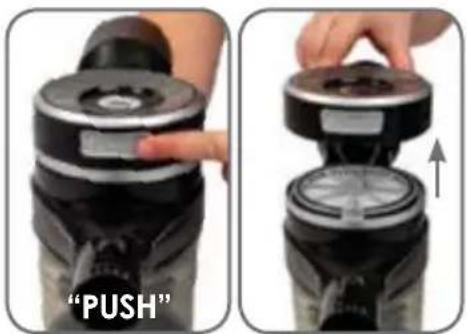
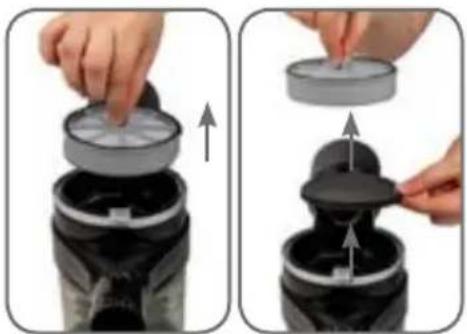
- Press the "Push" button, as shown, and remove the dust bin cover to access the filters.
natural_image
Two-step diagram showing a hand placing a lid onto a cylindrical container, with arrows indicating upward movement (no text or symbols)- The filters can be replaced with a new filters, if required.
THE FILTERS ARE NOT WASHABLE FILTERS. IT IS RECOMMENDED TO REPLACE THE FILTERS EVERY 6 MONTHS OR WHEN THE FILTERS ARE SOILED WITH DIRT.
natural_image
Close-up of a hand inserting a black cylindrical component into a black cylindrical device (no text or symbols visible)CLEANING THE CYCLONE SEPARATOR
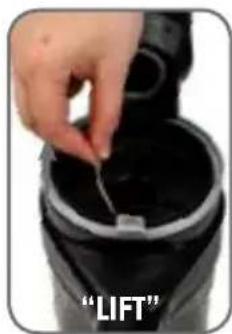
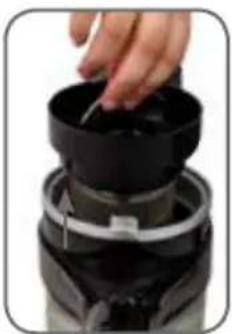
- Use the metal handle, as shown, to remove the cyclone separator from the cleaner.
NOTE: THE CYCLONE SEPARATOR CAN BE WASHED USING LUKEWARM WATER. THE CYCLONE SEPARATOR NEEDS TO FULLY AIR DRY BEFORE REINSTALLING.
natural_image
Close-up of a black handheld vacuum cleaner with blue internal structure and mechanical components (no visible text or symbols)CLEANING OR REPLACING THE AGITATOR BAR
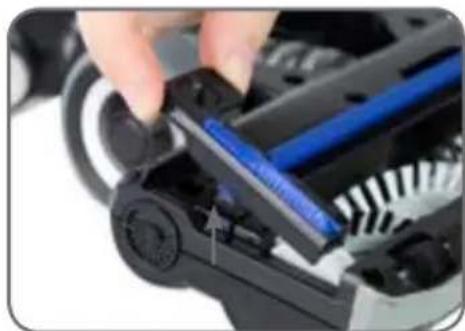
- Disconnect the powerhead from the rod.
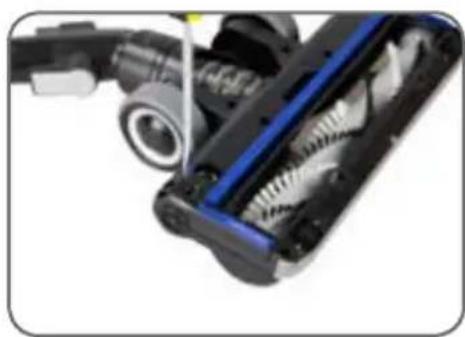
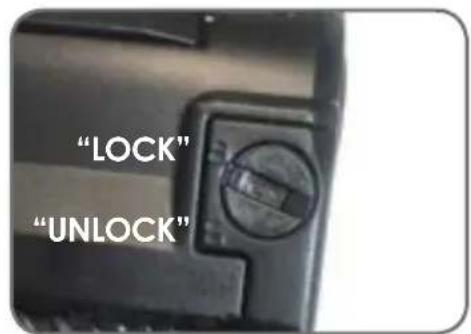
- To release the agitator bar from the powerhead, use a flat head screwdriver (not supplied) and turn to unlock the cover.
- Lift the small cover to access the agitator bar.
natural_image
Close-up of a robotic device with a hand adjusting a blue cable, showing mechanical components and gears (no text or symbols visible)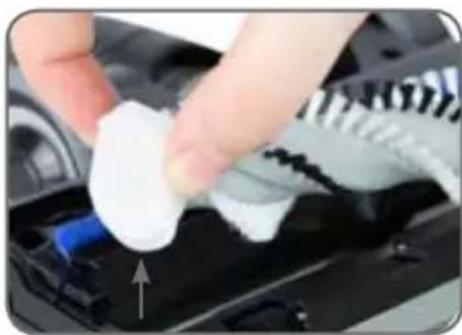
natural_image
Close-up of a hand placing a white circular object onto a black engine component, with no visible text or symbols.-
Lift out the agitator bar from the powerhead.
-
If a build-up of debris is wound around the agitator bar, remove by carefully cutting with scissors. Avoid damaging or cutting the bristles.
natural_image
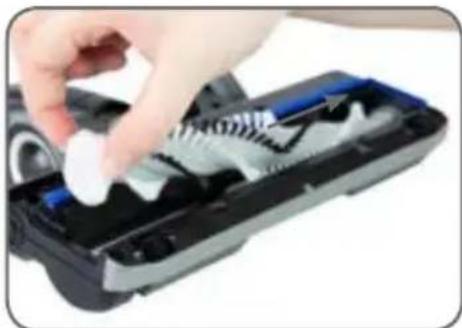
Close-up of a hand placing a white plastic component into a black device casing (no visible text or symbols)- To replace, reverse steps 2 - 4. Ensure the agitator bar "clicks" into position when placed back into the powerhead.
natural_image
Hand inserting a black plastic device into a housing (no text or symbols visible)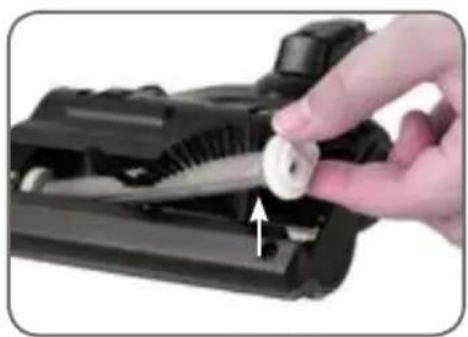
natural_image
Close-up of a hand holding a mechanical component with a white circular part inserted, showing a tool handle (no text or symbols visible)CLEANING OR REPLACING THE MINI MOTORISED PET ROLLER BRUSH
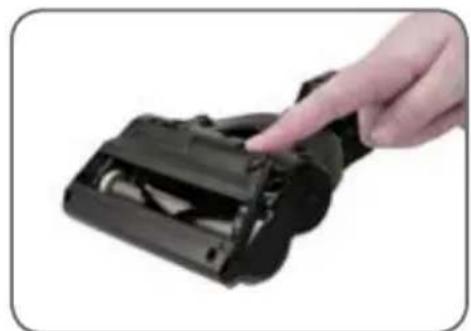
- Ensure that the Mini Motorised Pet Brush is disconnected from the cleaner.
- To release the roller brush from the motorised brush, use a flat head screwdriver (not supplied) and turn to unlock the cover.
- Lift the small cover to access the roller brush.
- Lift the roller brush from the motorised brush.
- If a build-up of debris is wound around the roller brush, remove by carefully cutting with scissors. Avoid damaging or cutting the bristles.
- To replace, reverse steps 2 - 4. Ensure the roller brush "clicks" into position when placed back into the Mini Motorised Pet Brush.
TROUBLESHOOTING
Service problems that appear to be major can often be solved easily. You can be your own troubleshooter by reviewing this guide. All other servicing should be performed by an authorised service agent or qualified technician.
Contact Wertheim Customer Service for your nearest authorised service agent on 1800 815 270 (AUS), 0800 282 288 (NZ).
| FAULT CAUSE SOLUTION | ||
| Cleaner doesn't start | - Flat battery - Charge the vacuum cleaner | |
| Reduced suction - The dust canister is full of dust- Dust bin filter is blocked- The air way is blocked | - Empty the dust canister- Clean or replace the dust bin filter- Clear the air way | |
| Insufficient application time after charging | - Insufficient charging time- Normal discharge reduction in battery | - Fully charge the battery according to the instruction described in the charging section- Purchase a new battery |
| The charging indicator light failed to turn on during charging | - The cleaner is not connected to the charger adapter- The cleaner is connected to a wrong charger | - Connect the cleaner to the charger adapter- Check that the charger model number is ZD12D260050AU |
| The charging indicator flash red during operation | - The roller brush is jammed- The suction inlet is blocked | - Turn off the cleaner and remove the battery.Follow the maintenance procedures in this manual to clean the roller brush- Turn off the cleaner and remove the battery.Follow the maintenance procedures to clear the blockage |
SPARE PARTS
| Agitator Bar 31155489 | |
| Filter Set 32201664 | |
| Battery 33201682 | |
| Charger Adapter 33201685 |

Your Wertheim cleaner, in the case of domestic use, has a two year parts and labour warranty against product defects and failures when the product is used in accordance with the terms and conditions of this warranty statement.
This warranty commences from the original date of purchase and is not transferable; please retain your original proof of purchase for any warranty claims. This warranty is valid only in the country where the cleaner is purchased.
The cleaner must be operated in accordance with these instructions and used only for domestic household cleaning to remove DRY dirt and dust from household carpets, flooring and fabrics. This cleaner is not fit to be used as an industrial cleaner, and is not designed for the collection of vitreous building material including particle board, construction products and similar products such as wood/fibres, cement, fillers, fibre glass etc or excessive or frequent sand. The infrequent pick-up of these materials in these circumstances may be harmful to your cleaner and may void the manufacturer's warranty.
Accessories and consumables including dust bags and filters, unless defective in manufacture, are not subject to this warranty. In order to prolong the life of accessories and consumables, regular care and maintenance is recommended.
When properly used and cared for, your cleaner will render excellent service; refer to the instruction manual for further details, as misuse or failure to follow the instructions makes this warranty void.
In the event of service or advice being needed, please contact Electrical Home-Aids Pty Ltd, Ground Floor, Building 3 Brandon Business Park, 530 Springvale Road, Glen Waverley Victoria 3150, or on 1300 360 845, Monday-Friday 9am-5pm EST. The decision to repair or replace the cleaner is at the sole discretion of Electrical Home-Aids Pty Ltd. If Electrical Home-Aids Pty Ltd decide to repair or replace the cleaner, it will do so at its own cost.
Electrical Home-Aids Pty Ltd is unable to accept responsibility under this warranty for any repair work not carried out by an authorised Wertheim Service Agent or from the use of non-genuine parts. If any part is no longer available or manufactured, Electrical Home-Aids Pty Ltd will replace it with a genuine functional replacement part. This warranty does not apply to the cost of replacing any parts of the product due to normal wear and tear, alterations, improper installation, physical abuse, misuse or accidental damage. Any transportation costs involved in the repair of defective parts shall be borne by the claimant.
If proof of purchase cannot be provided at the time of a warranty claim or service, any work carried out on the cleaner is chargeable.
The repair of the cleaner under this warranty does not extend the original period of warranty.
The benefits conferred by this warranty are in addition to all other rights and remedies in respect of the product as outlined under the Competition and Consumer Act and other State and Territory laws.
"Our goods come with guarantees that cannot be excluded in the Australian Consumer Law. You are entitled to a replacement or refund for a major failure and for compensation for any other reasonably foreseeable loss or damage. You are also entitled to have the goods repaired or replaced if the goods fail to be of acceptable quality and the failure does not amount to a major failure."
SAVE TIME, REGISTER WARRANTY ONLINE! www.wertheimcleaning.com.au and www.wertheim.co.nz

Electrical Home-Aids Pty Ltd.
ABN: 62 007 539 577
Ground Level, Building 3, Brandon Business Park
530 Springvale Road,
Glen Waverley, Victoria 3150

www.wertheimcleaning.com.au
www.wertheim.co.nz

enquiries@wertheim.net.au
- Evolution
- THE ULTIMATE
- Features
- INTRODUCTION
- Specifications
- BEFORE YOU BEGIN
- Please read these instructions thoroughly
- Important
- Precautionary measures:
- SAFETY INSTRUCTIONS
- Battery use and care
- ASSEMBLY
- CHARGING STAND
- HANDSTICK
- INSTALLING AND REMOVING THE BATTERY
- INSTRUCTIONS FOR USE
- ON/OFF BUTTON
- BOOST MODE
- CHARGING VIA THE CHARGING DOCK
- CHARGING VIA THE HANDSTICK
- ACCESSORIES
- POWERHEAD
- UPHOLSTERY BRUSH
- 3-IN-1 CLEANING TOOL
- ANGLE ATTACHMENT
- MINI MOTORISED PET BRUSH
- Safety Precautions:
- MAINTENANCE
- EMPTYING THE DUST BIN
- REPLACING THE DUST BIN FILTERS
- CLEANING THE CYCLONE SEPARATOR
- CLEANING OR REPLACING THE AGITATOR BAR
- CLEANING OR REPLACING THE MINI MOTORISED PET ROLLER BRUSH
- TROUBLESHOOTING
Brand : Wertheim
Model : Evolution W7301
Category : Vacuum Cleaner