
SmarterHome G60 - Robot vacuum Kogan - Free user manual and instructions
Find the device manual for free SmarterHome G60 Kogan in PDF.


| Product Type | Robot Vacuum with Mopping Function |
| Brand | Kogan |
| Model | SmarterHome G60 (KAVACRBG60A) |
| Dimensions | 310 x 310 x 81 mm |
| Battery Type | Lithium-ion |
| Battery Capacity | 4400 mAh |
| Charging Time | ≤ 6 hours |
| Working Time | 120–150 minutes |
| Dust Bin Capacity | 350 ml |
| Noise Level | ≤ 65 dB |
| Rated Power | 15 W |
| Voltage | 7.4 V |
| Connectivity | Wi-Fi 2.4 GHz |
| App Support | Kogan SmarterHome (iOS/Android) |
| Smart Home Integration | Google Home, Amazon Alexa |
| Cleaning Modes | Auto, Edge, Spot, Schedule, Manual |
| Mopping Function | Yes (with water tank and mop) |
| Sensors | Ground sensors, impact sensors, cliff detection |
| Included Accessories | Charging base, power adapter, water tank, side brushes (4), mop, remote control, mid brush, user guide |
| Safety Certifications | FCC Part 15 compliant |
Frequently Asked Questions - SmarterHome G60 Kogan
User questions about SmarterHome G60 Kogan
0 question about this device. Answer the ones you know or ask your own.
Ask a new question about this device
Download the instructions for your Robot vacuum in PDF format for free! Find your manual SmarterHome G60 - Kogan and take your electronic device back in hand. On this page are published all the documents necessary for the use of your device. SmarterHome G60 by Kogan.
USER MANUAL SmarterHome G60 Kogan
natural_image
Circular diagram of a robotic vacuum cleaner with control buttons and a central horizontal line, labeled 'kugan' at bottom (no other text or symbols)KOGAN SMARTERHOME™ G60 ROBOT VACUUM
WITH MOPPING FUNCTION
KAVACRBG60A
SAFETY & WARNINGS
Attention
Children over the age of 8 and those with physical, sensory or mental dysfunction or those without relevant experience can use this product, however, they need to be used in a safe manner under supervision or guidance and they must understand the hazards involved. Children should not play with this product. Children should not clean and maintain this product without supervision.
WARNING!
Do not touch the robot's electronics, battery or cradle. The internal components of the robot are not user serviceable. The vacuum must only be repaired by authorised service personnel. Please ensure that the power supply rated voltage of the charging stand meets the standard socket power.
Safety instructions
- Read the safety precautions and operating instructions before operating the robot.
- Please pay attention to the battery, power adapter, robot and all warnings in the instruction manual.
- Please follow all instructions and instructions for use.
- Please note that seller is responsible for all non-routine maintenance.
- The damage caused by the wrong operation and the degree of damage are as follows.
| Warning | Indicates a potentially hazardous situation that, if not avoided, could result in death or serious injury. | |
 | Attention | Indicates a potential hazard that could result in minor or moderate injury if not avoided. |
Label
This device complies with part 15 of the FCC Rules. Operation is subject to the following two conditions: (1) This device may not cause harmful interference and (2) this device must accept any interference received, including interference that may cause undesired operation.
Product safety matters

Warning
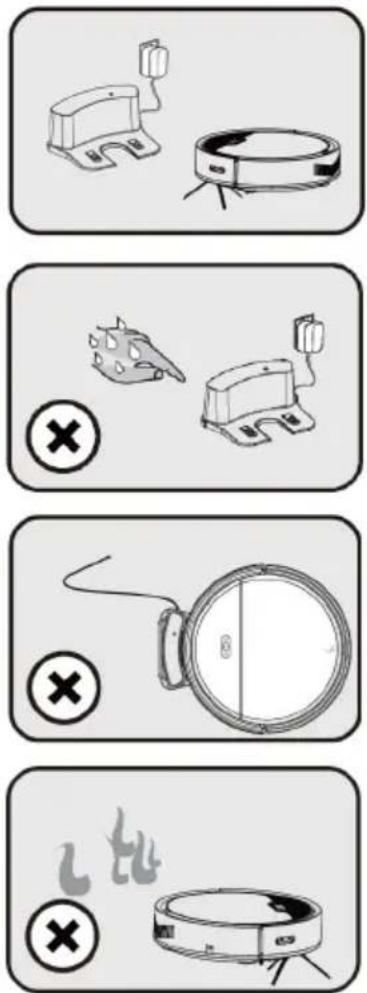
- This product is limited to the original battery cradle and adapter.
- Do not use this product if the host and accessories of the product are found to be damaged.
- Do not touch the power plug or product when your hands are wet.
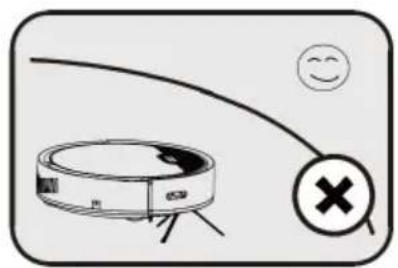
- Do not use in a suspended environment without a guard bar.
- Do not use the power cord to drag or move the product.
- Do not allow the product to be near fire or near flammable, explosive and corrosive materials.
- Do not let clothes or any part of the body (hair, fingers, etc.) to touch the device when in use.
Only use for inside
natural_image
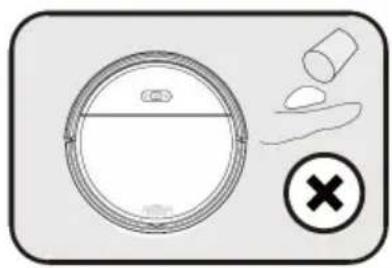
Simple line drawing of a circular object with a handle and a cross mark, next to a cylindrical object (no text or symbols)Prevent inhalation of water, oil or other Liquid.
natural_image
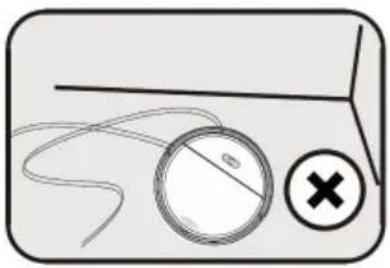
Simple line drawing of a device with a circular component and a cross mark, no text or symbols present.Finishing the ground before use. Remove disordered wires to avoid interference.
natural_image
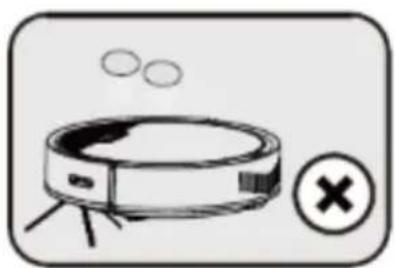
Illustration of a vacuum cleaner with a warning symbol (no text or labels)Remove all consumables before use.
natural_image
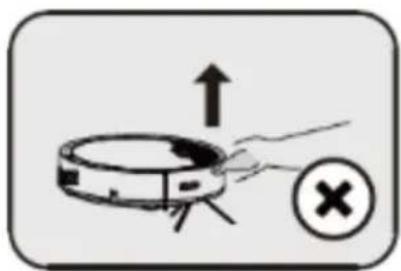
Diagram of a robotic vacuum cleaner with an upward arrow and a cross symbol (no text or labels)Grasping the front shell and lifting the robot is prohibited. Please hold the body with both hands to lift vacuum cleaner.
natural_image
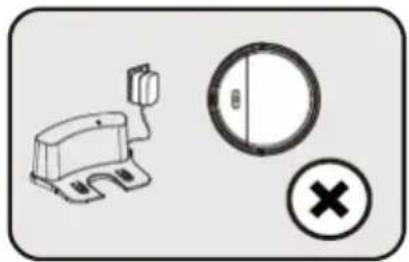
Simple diagram showing a toilet, a door, and a cross symbol (no text or labels)Non-original adaptation is strictly prohibited the charging base is used to charge the machine or will cause damage to the machine.
Children Safety
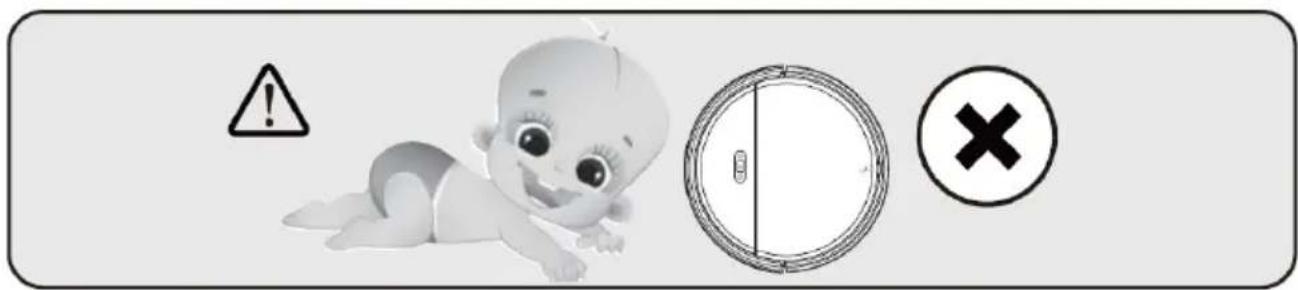
• Do not allow child to use alone.
Children are not allowed to play with the product's packaging, otherwise it may cause suffocation.
Battery
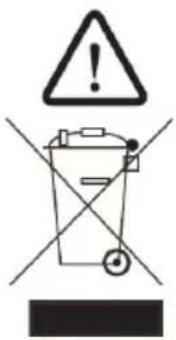
- This product is limited to the manufacturer's battery;
• The battery must be taken out when discarding. - If you need to replace the main battery, please contact after-sales service department if you use the wrong type of battery.
- If the battery leaks and accidentally let the liquid stick to the skin or clothing, immediately wipe it with a dry cloth.
COMPONENTS LIST
natural_image
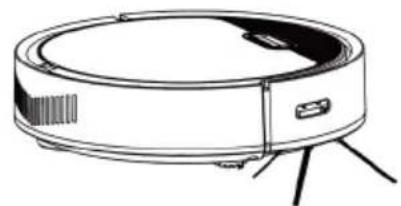
Line drawing of a robotic vacuum cleaner with sensor array and tripod base (no text or symbols)Main Unit x1
natural_image
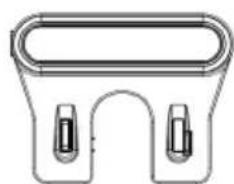
Technical line drawing of a mechanical clamp or bracket (no text or symbols)Charge base x1
natural_image
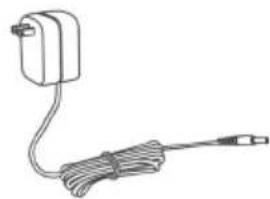
Line drawing of a cable and plug assembly (no text or symbols)Power Adapter x1
natural_image
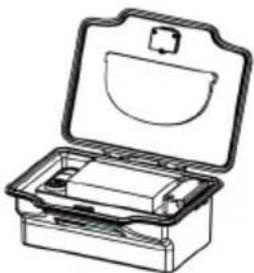
Line drawing of an open first-case medical kit with a lid and internal compartments (no text or symbols)Water Tank x1
User Guide x1
natural_image
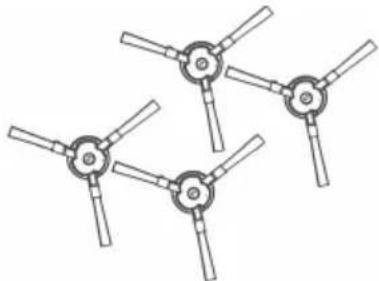
Pure mechanical linkage diagram without any text, numbers, or symbolsSide Brush x4
natural_image
Plain gray rounded rectangle shape with no text or symbolsMop for Robot x1
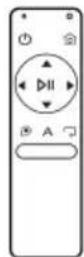
Remote Control x1
natural_image
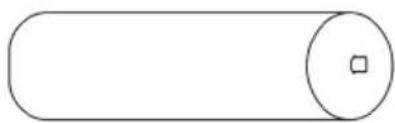
Simple line drawing of a cylindrical object with a small square on its side (no text or symbols)Mid Brush x1
Tip: The battery has been installed in the robot.
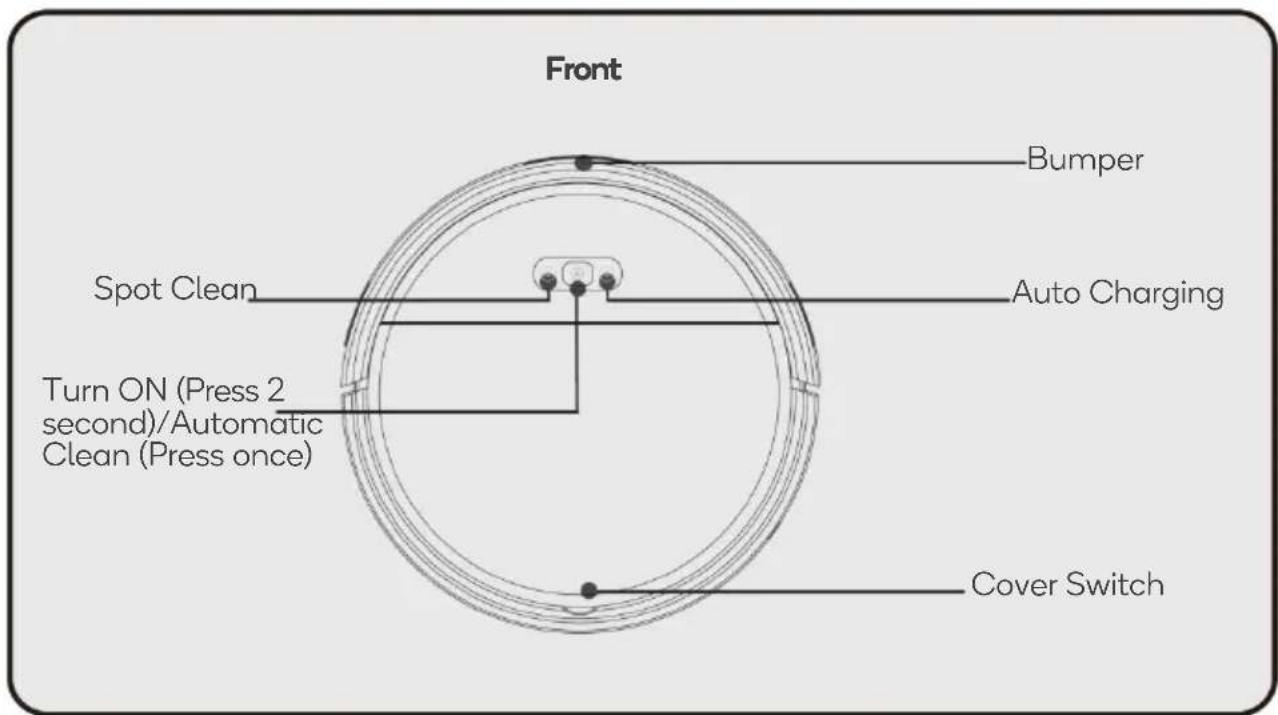
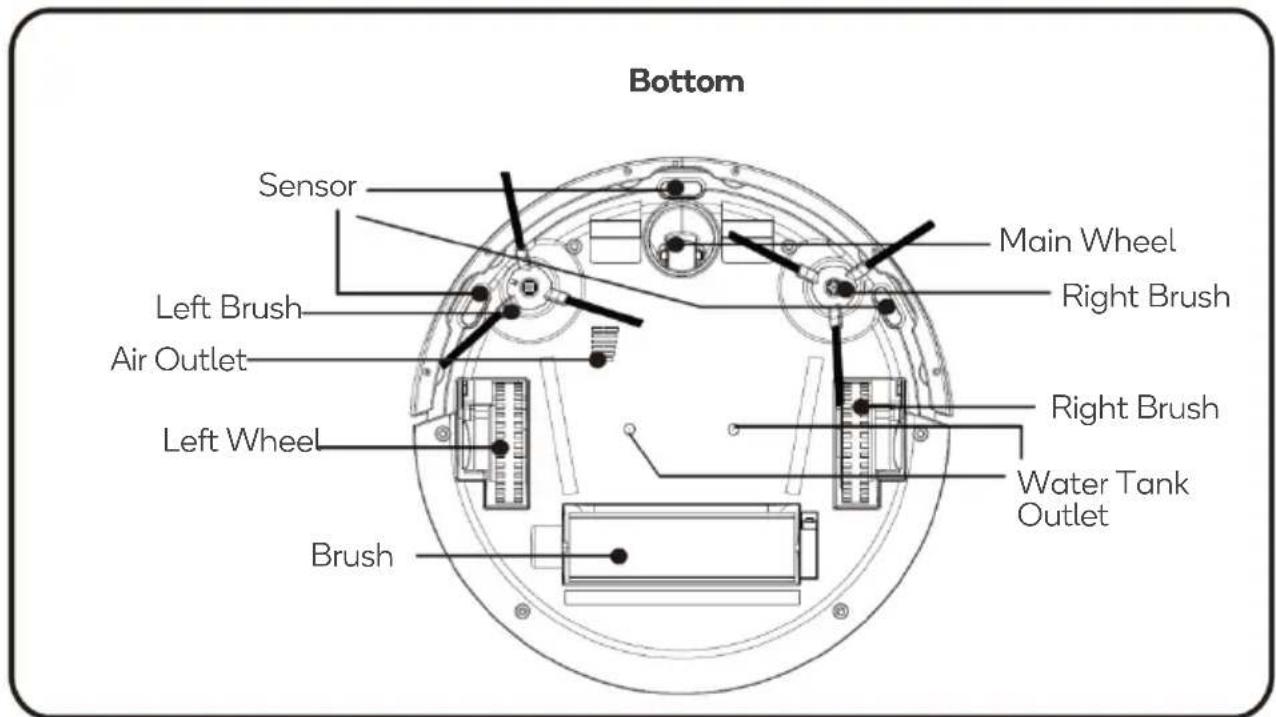
OVERVIEW
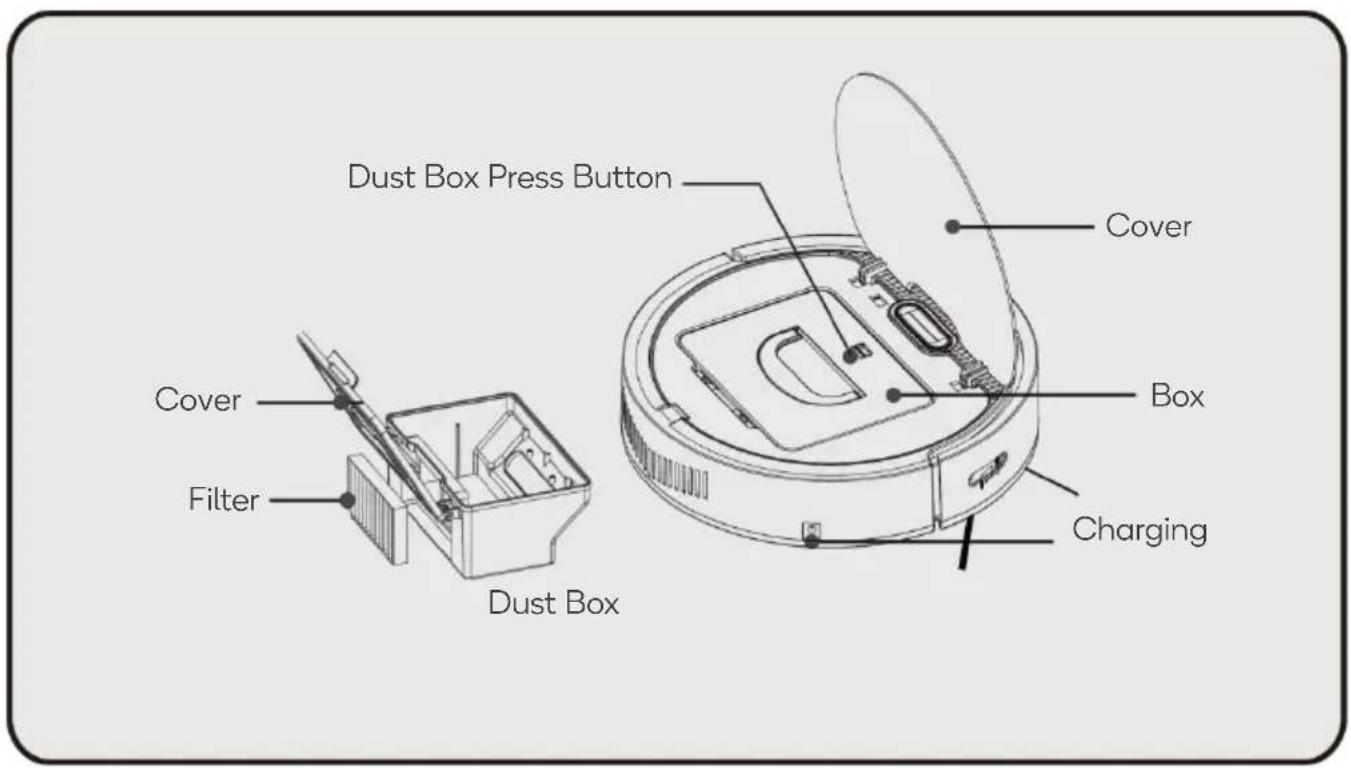
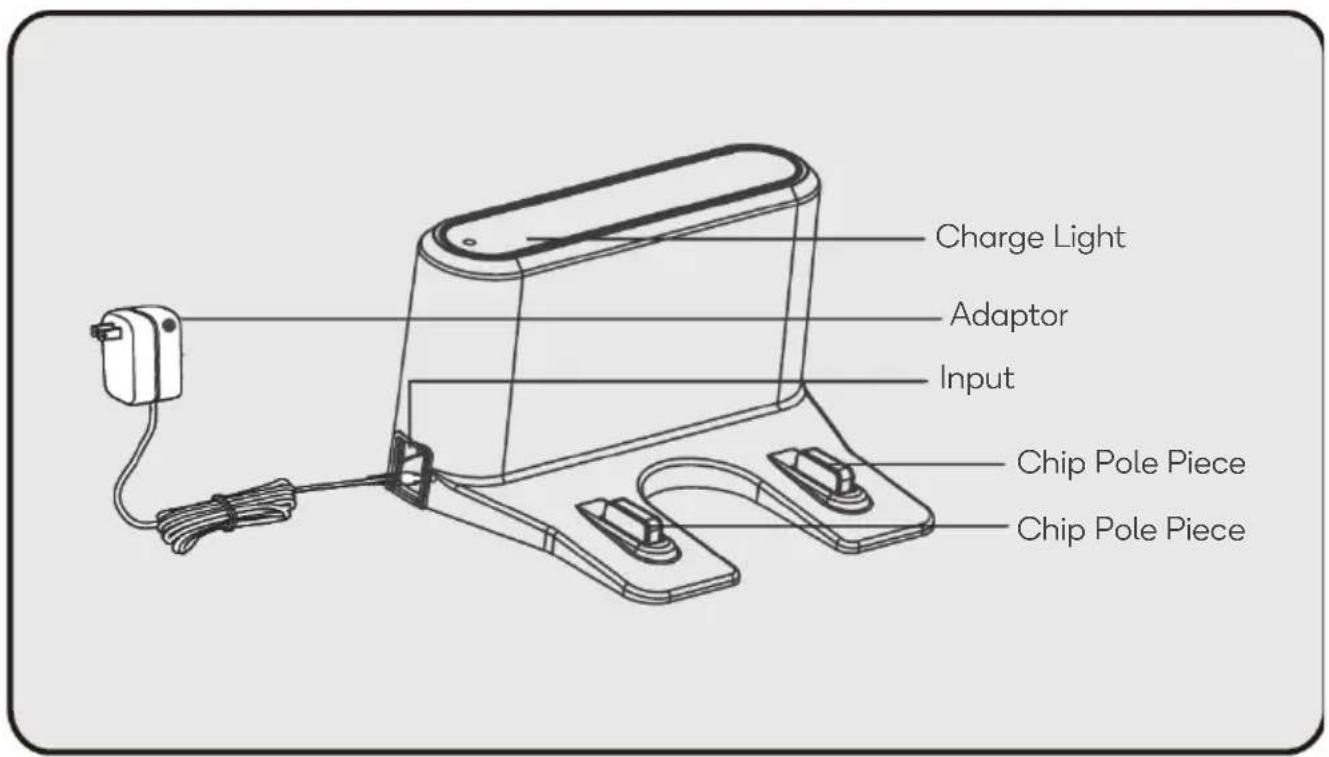
INSTALLATION
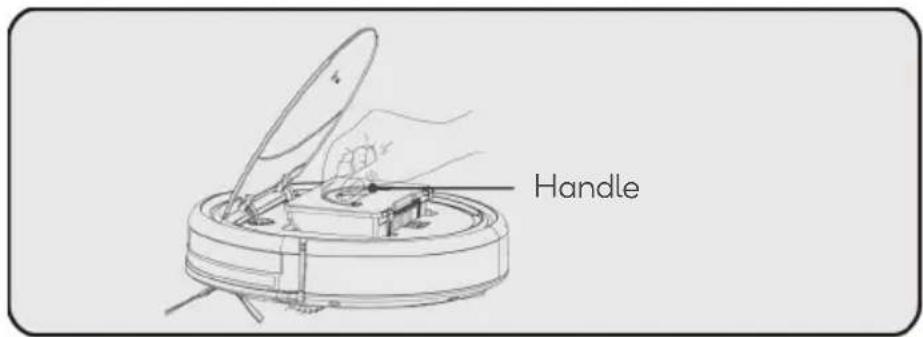
Dust Box Installation
- Holding with the handle, position it into the opening and push down until it clicks into place.
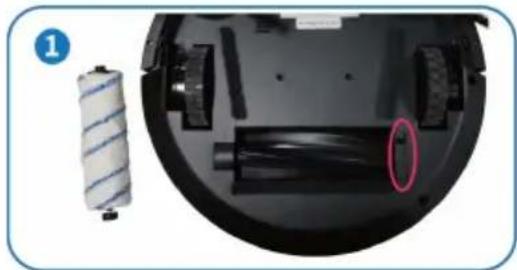
Mop Install
natural_image
Close-up of a mechanical component with a cylindrical spring and a highlighted circular feature (no text or symbols visible)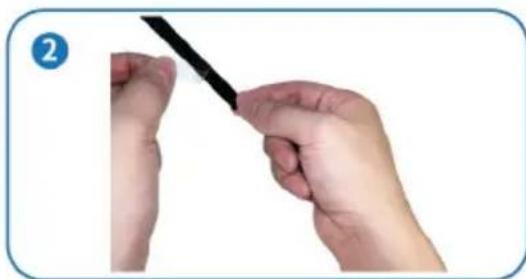
natural_image
Close-up of hands holding a black tool, no visible text or symbols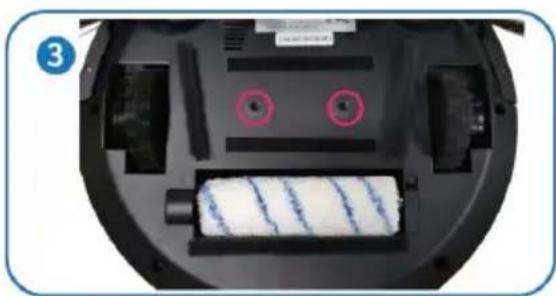
natural_image
Interior view of a robotic vacuum cleaner with two red-circled components (no visible text or symbols)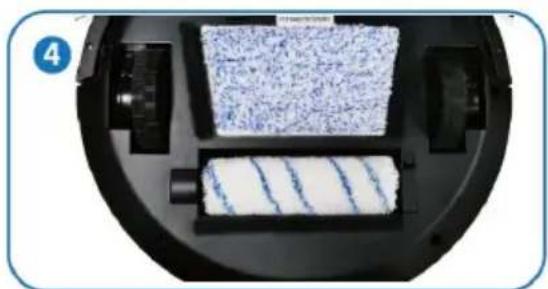
natural_image
Close-up of a circular device with two rectangular compartments filled with blue speckled material, no visible text or symbols.- The back of the machine shall be placed upside down.
-
Open the fixed switch and replace the middle brush.
-
Tear the protective pastes and reveal the magic paste's rubber surface
-
Let the rubber surface downward and keep the back of the machine clean and free of dust as well as water.
-
As shown in the figure, paste the magic paste.
-
Be careful that the magic paste shall not block the water outlet.
-
Install the mop.
- After cleaning the mop, it can be used repeatedly. Paste the flagship magic paste on the machine and don't pick it off.
CONNECT TO SMARTERHOME™ APP
Install App
Download the "Kogan SmarterHome" app from the Play Store (Android) or App Store (iOS).
Register
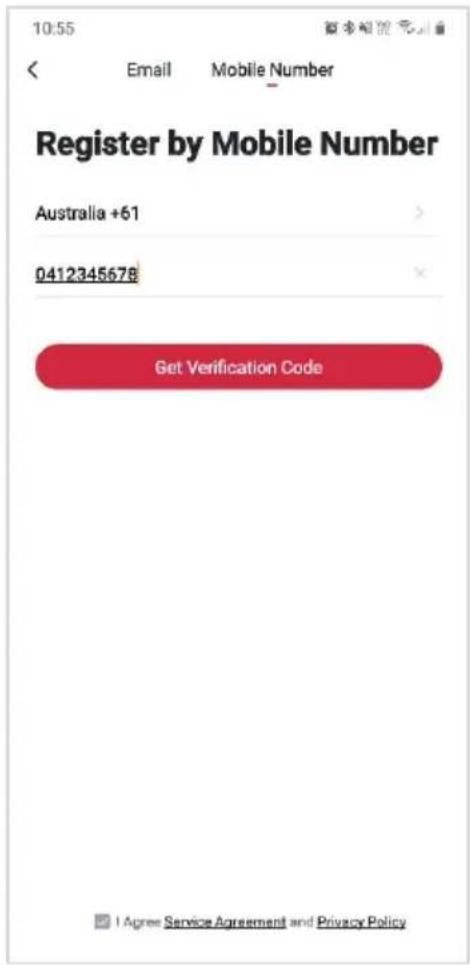
If you do not have a Kogan SmarterHome™ account, register or sign in with a verification code sent by SMS.
To register:
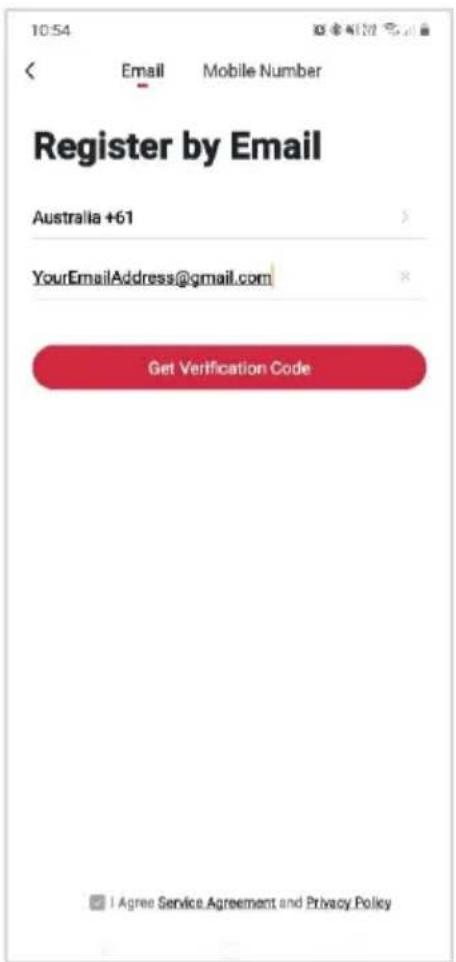
- Tap to enter registration page.
- The system automatically recognises your country/area. You can also select your country code manually. Enter your email address and tap 'Next.'
- Alternatively, you can select 'Register by mobile number' and enter the verification code sent to you by SMS.
- Create a profile on the next page to define your location and room.
Set device in pairing mode
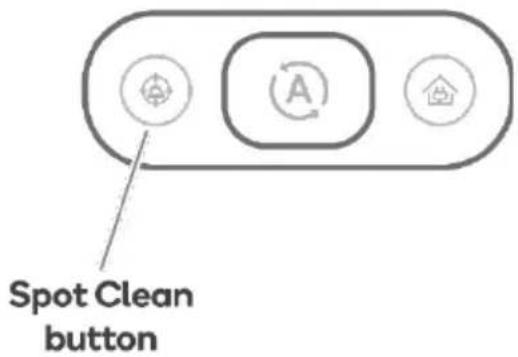
When the device is first turned on, it may automatically enter pairing mode (the indicator light will be continuously flashing).
If not automatically in pairing mode when powered on, you can manually set the device in pairing mode by holding down the Spot Clean button until the light begins flashing.
Add device through network
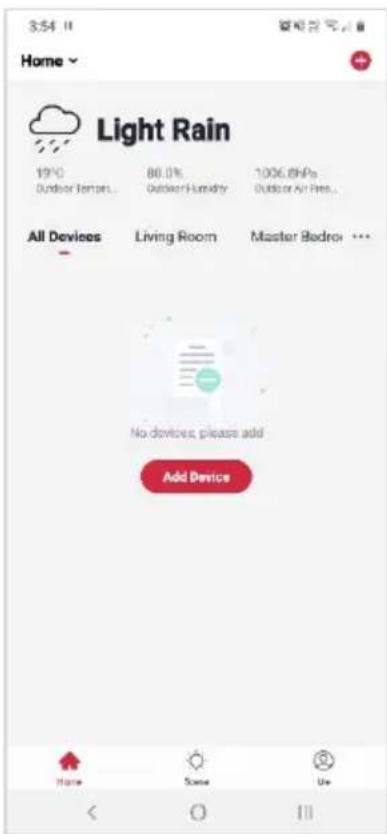
- Once registered, tap "+" in the upper right corner of the app's home page to add a new device through the network.
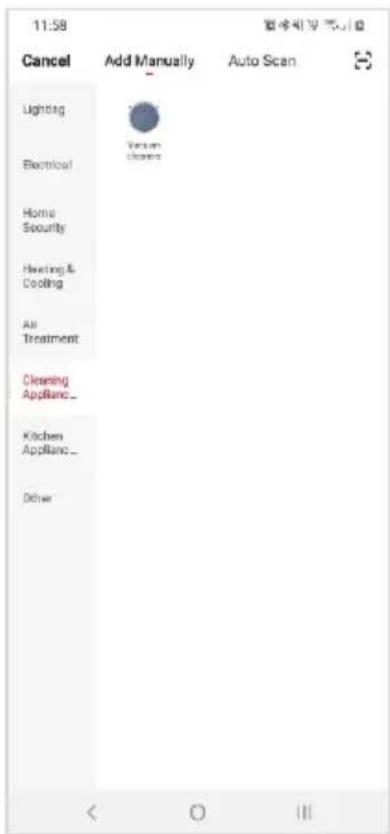
- Select the product type from the list of options in the app (Cleaning Appliances > Vacuum Cleaners).
- Ensure that the device is in pairing mode, with the indicator light flashing, and tap "Confirm light is rapidly flashing". In Standard mode, it will refer to rapid flashing, not slow flashing.
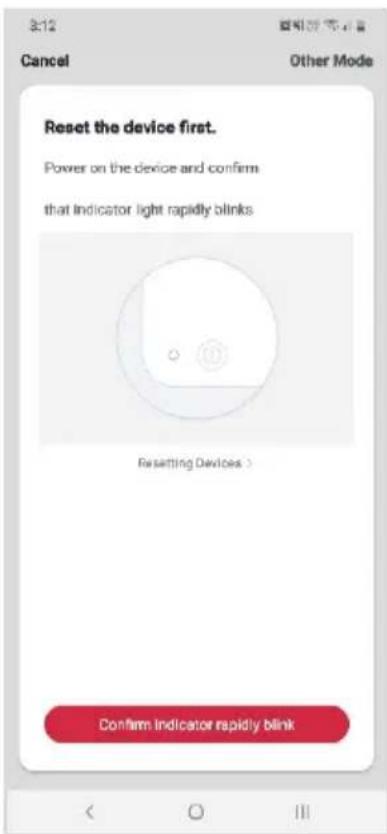
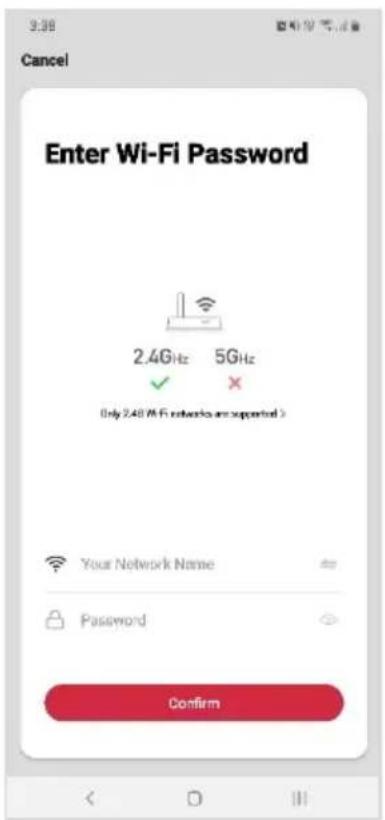
- Upon successfully confirming pairing mode, enter your Wi-Fi details. It is important that your SmarterHome™ device and the app are connected to the same Wi-Fi network during setup.
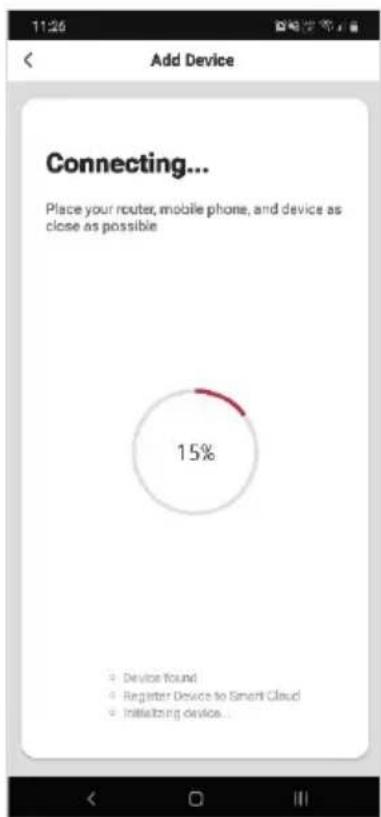
- The device will commence the pairing process and connect to the app. Ensure your Wi-Fi router, mobile phone, and the SmarterHome™ device are kept close until connection is complete.
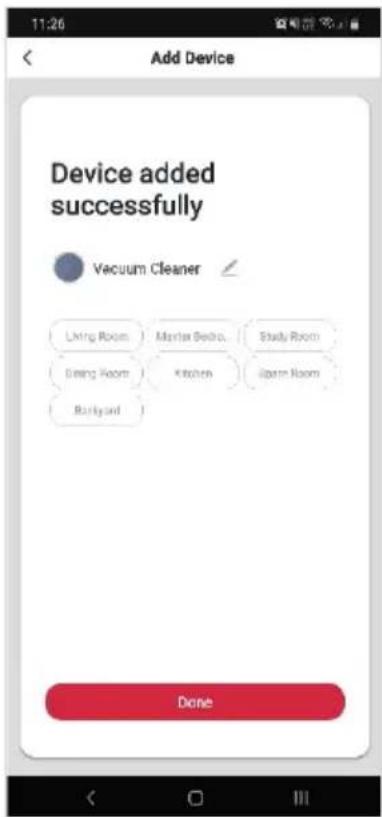
- After successfully being added, you will have the option to rename the device and assign it to a location. It will now be listed on the app's home page. Tap the device listing to enter its control page.
Notes:
• The device and the app have to use the same Wi-Fi network.
• The device is only compatible with 2.4Ghz networks.
OPERATION
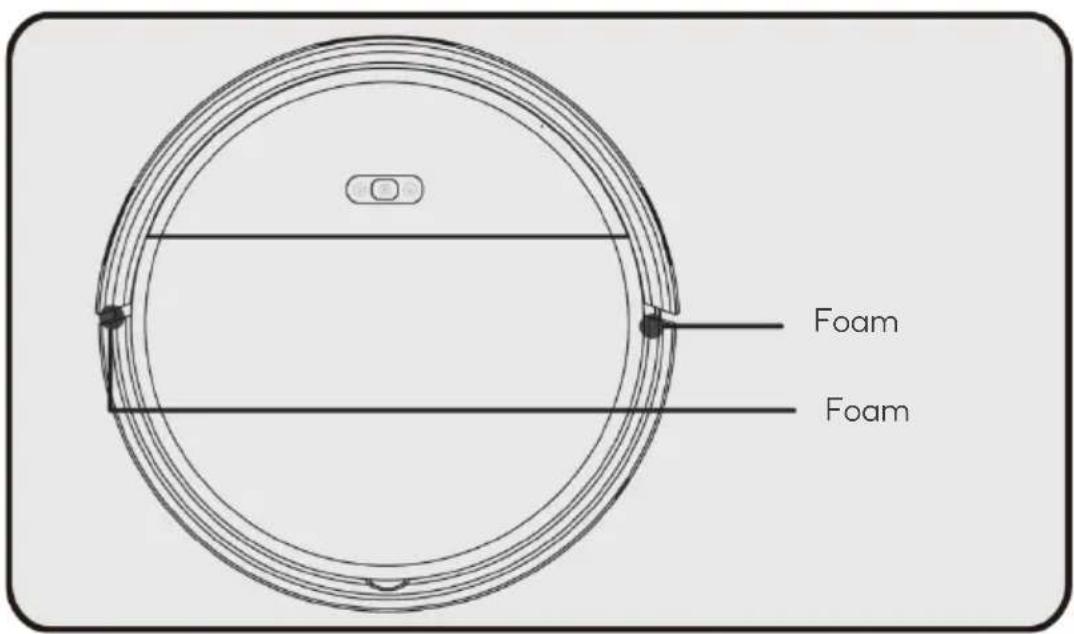
Please take out the foam strip and clean the area around the robot.
Ground for Use
Scope of application
natural_image
Close-up of a textured surface with parallel grooves and minor debris (no text or symbols visible)Wood
Products are applicable to the following ground environment:
natural_image
Abstract geometric pattern with diagonal light beams and dark horizontal bands (no text or symbols)Marble
Inapplicable Scope
natural_image
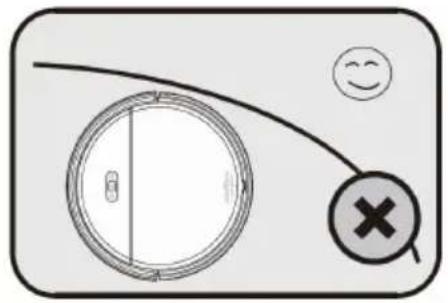
Simple diagram showing a circular object with a vertical line and a smiley face, alongside a cross symbol (no text or labels)- Not suitable for use in extremely hot (+60°C or higher) or extremely cold (-5°C or lower) environments.
- Only use for indoor.
- Cannot be used in a suspended environment without a protective fence.
natural_image
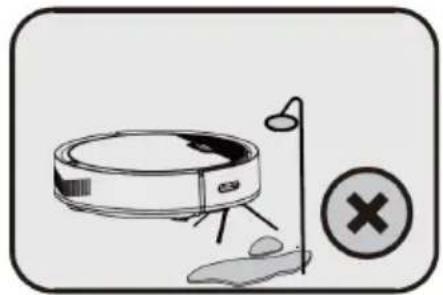
Illustration of a robotic vacuum cleaner with a lamp and a cross symbol (no text or labels)- Do not use in wet or flammable, explosive or corrosive environments.
- Do not allow the product to absorb unburned cigarettes or matches.
natural_image
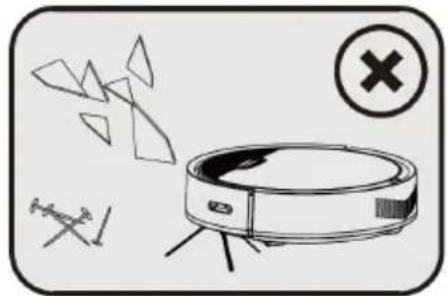
Illustration of a robotic vacuum cleaner with broken glass fragments and a warning symbol (no text or labels)- It cannot be used to absorb toner and toner used in laser printers and copiers.
- Do not use to absorb sharp objects, such as glass sheets, nails, etc.
Working State
1. Power off
natural_image
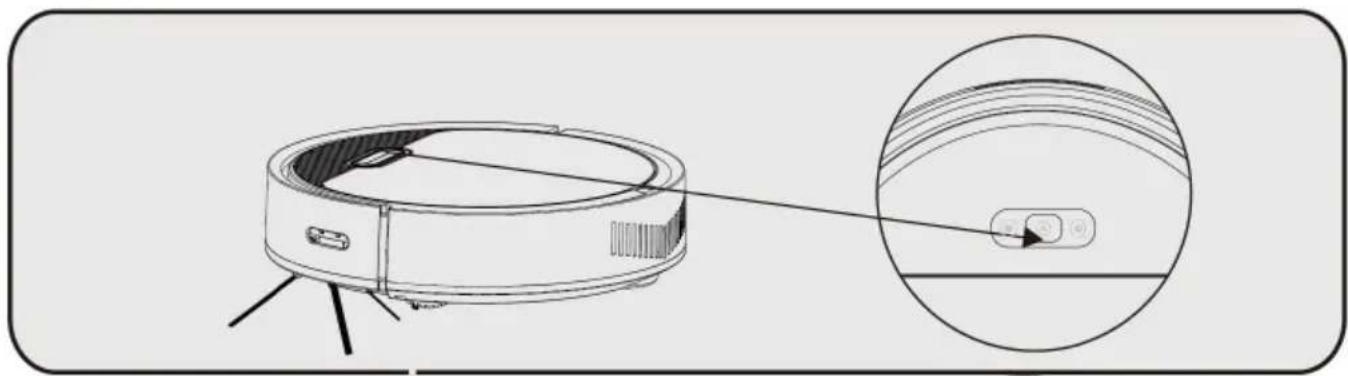
Line drawing of a robotic vacuum cleaner with an inset close-up showing the internal component (no text or symbols)When the machine is off, please press and hold the "auto" button. The LED stops flashing and goes into standby state.
2. Standing by
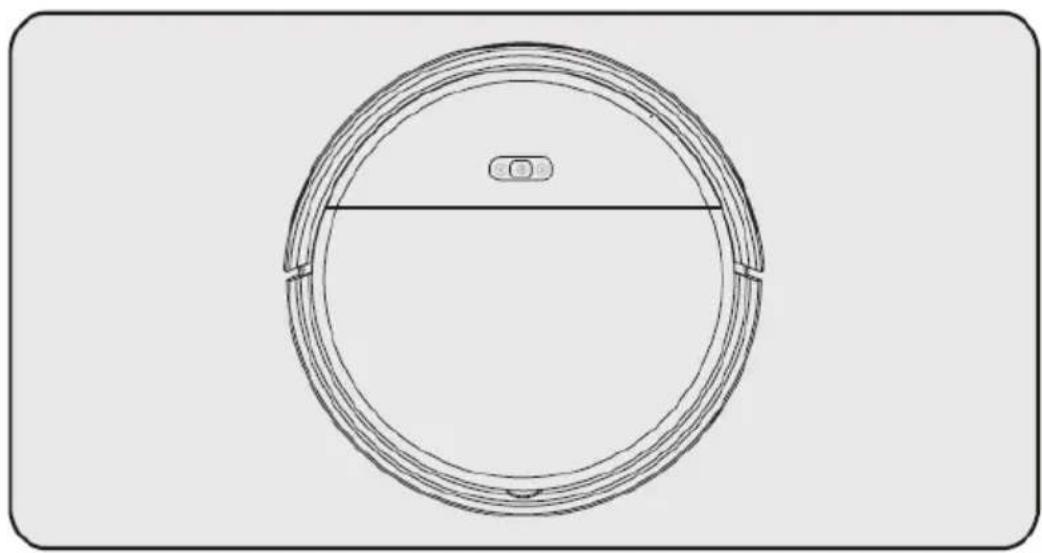
The machine is in standby mode and both LEDs are on at the same time. State change:
- If the machine is not operated, the machine will automatically shut down after 5 minutes in standby.
- Short press the auto button once, the buzzer will sound once and the automatic cleaning mode will be entered after a delay of 3 seconds.
- Press the "fixed-time" button for a short time, the buzzer will sound and enter the fixed-time cleaning mode.
- Press and hold the auto button for 3 seconds, the buzzer will sound and the machine will shut down.
- Plug in the charger and the buzzer will sound and enter charging mode.
natural_image
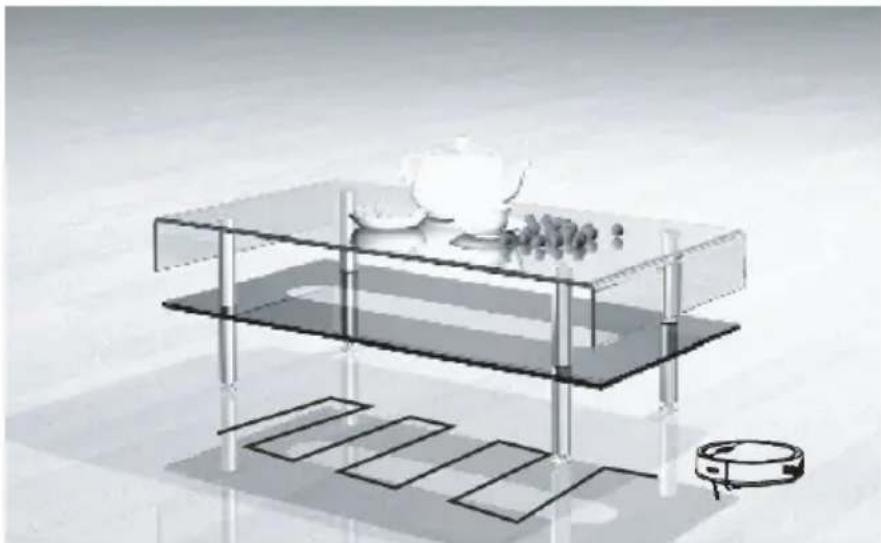
Technical line drawing of a circular mechanical component with a central horizontal line and small inset detail (no text or symbols)3. Automatic Cleaning
The machine is in the automatic cleaning state and the automatic cleaning LED lights up.
State change:
- Press the automatic or fixed-time button on the machine, the buzzer will sound and enter the standby mode.
- Press the spot button, buzzer sounds 3 times and enters the automatic spot cleaning mode.
- The fault is detected, the error mode is entered and the machine alarms.
- When the charger is plugged in, the buzzer will sound and enter the charging mode.
natural_image
3D architectural rendering of a modern coffee table with glass and coffee cup, featuring a vacuum cleaner nearby (no text or symbols)Auto cleaning route
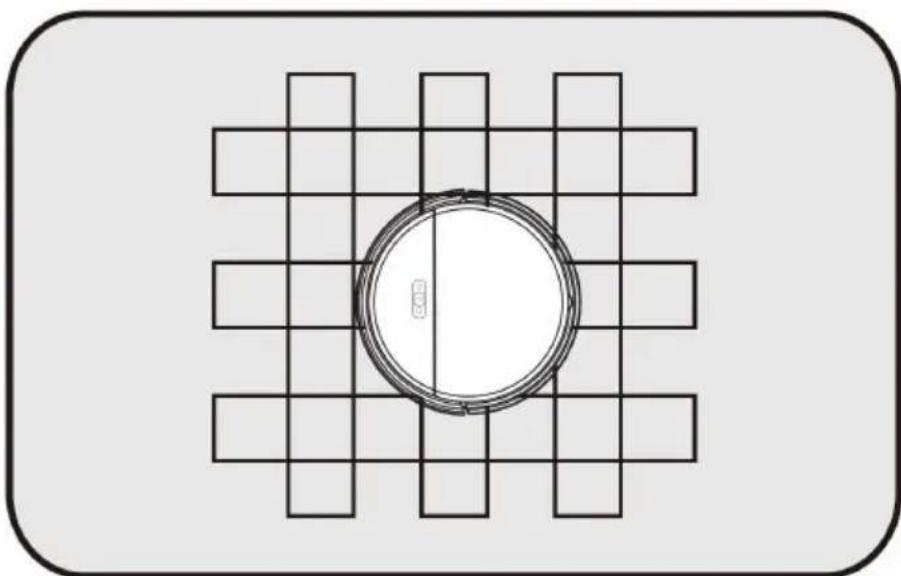
4. Cleaning at fixed time
In cleaning state at fixed time, LED light will be on when it cleans at a fixed time. Cleaning at fixed time mode is suitable for cleaning a small dirty area at home. The machine cleans this area in a bow shape, stops after the cleaning and enters the automatic recharging mode.
State change:
- Press the automatic or fixed-time buttons on the machine, with the buzzer sounds, it enters the standby mode.
- When the battery power is low, buzzer will sound 3 times, then the machine will enter automatic recharge mode.
- If it detects the fault, it will enter the wrong mode and the machine will alarm.
natural_image
Top-down view of a circular object placed on a grid-patterned surface, enclosed in a rounded rectangle (no text or symbols)5. Charging mode
In charging state, automatic cleaning mode, LED light will flash, indicating charging. When it is full of electricity, automatic cleaning LED light will be on.
natural_image
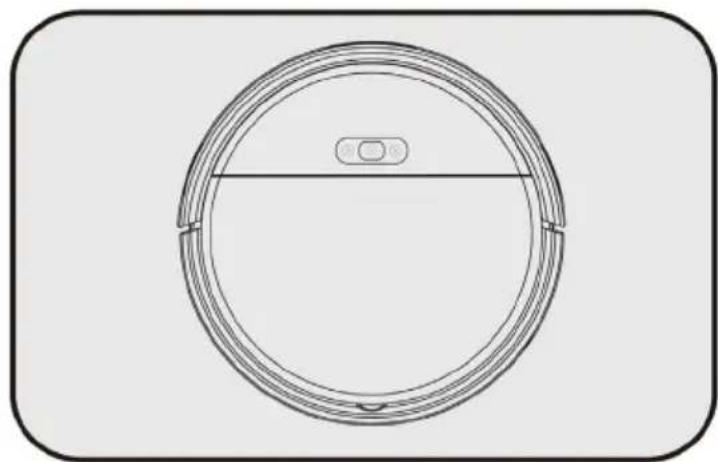
Simple line drawing of a circular device with a central horizontal bar and a small circular button, enclosed in a rounded rectangle (no text or symbols)The following functions are available while robot is charging.
Press the auto button or the spot button on the top of the machine, the buzzer will sound once and the machine will enter the automatic cleaning mode or the spot cleaning mode after exiting the charging stand.
Charging Operation
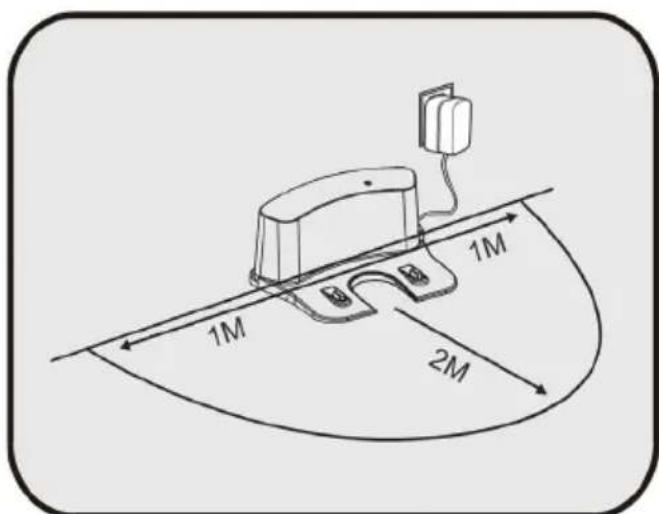
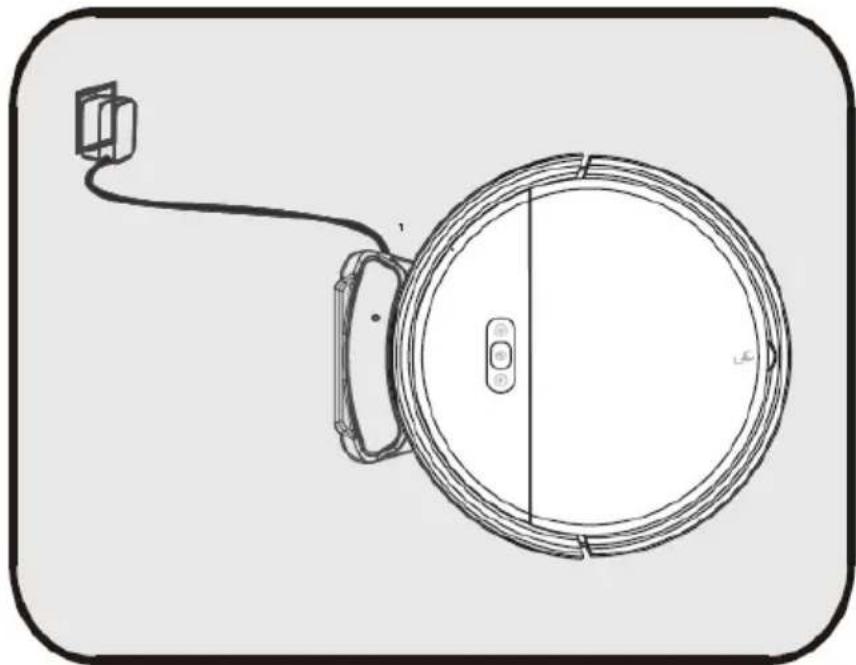
1. Put charger in right place
In order to help the machine to find the charging base in time, it is recommended to place charge base smoothly on the side of the wall and do not place any obstacles around the base within the area of 2 metres at front and within 1 metre to the left and right.
2. Self-Charging
When the battery is lower it will automatically start searching for charge base around the machine.
natural_image
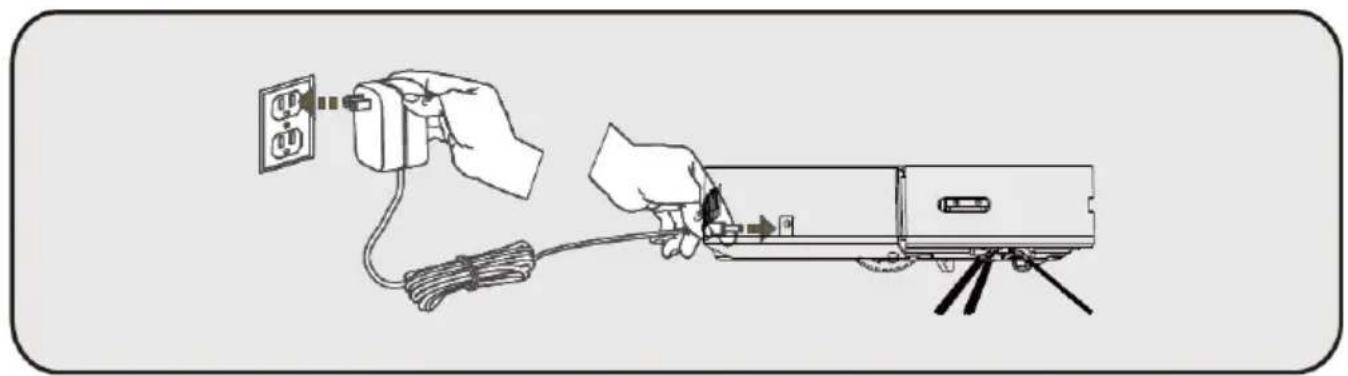
Technical line drawing of a circular mechanical component with a cable and attached bracket (no text or symbols)3. Manual charging
natural_image
Illustration of a hand using a power outlet to install a mounted device with cable and a tripod (no text or symbols)Connect the power adapter directly to the machine and output.
- Fill the robot for 12 hours when charging for the first time.
- For daily using, store the machine on the charging stand and ensure that the charging stand is powered on.
- If the machine is not used for a long time, charge the machine fully, turn off the machine and store it in a dry and ventilated place.
App Control Operation
Tips: App transmission distance depends on your Wi-Fi signal
Power off Button

- Press "Power Off" Button, to turn off the robot.
Stand By

- Press the "standby", pause the robot into standby mode
Auto Button

- Press "Auto", buzzer rings once, the robot will enter to auto cleaning mode.
Edge Button

- Press "Edge", buzzer rings once, the robot will enter to edge cleaning mode to clean along the edges of the wall.
Spot Button

- Press "Spot" button, buzzer rings once, the robot will enter to spot cleaning mode to start cleaning specific areas.
Auto Charging Button

- Press "Auto Charging", buzzer rings once, enter to auto recharging mode.
Manual mode

(You can choose to withdraw)
- Press manual button to enter human operation mode.
Start/Pause

- To start cleaning.
- To stop current cleaning mode.
Direction button

- The robot will move according to selected direction. (Press the left/right for once, choose the direction you want robot to move, then press the forward/back)
Schedule Button

- Press "Add Schedule", enter schedule page to set a cleaning time.
- Select a time you wanted and save it.
- Click "save" on the top right corner.
- Click "√" to cancel the schedule.
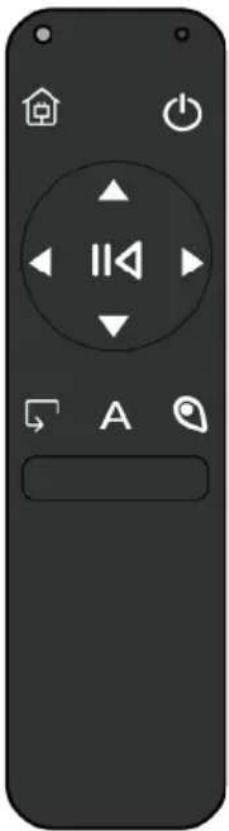
Remote Control
natural_image
Black remote control with icons for home, power, playback, and address (no text or symbols beyond icons)Power button

In the standby mode, press the button to enter the sleep state, press twice to enter standby mode.
In any working mode of the machine, press once to enter standby mode. Press twice to go to sleep.
Note: The power button can't turn on/off the robot cleaner, currently only supports manual turn on/off.
Auto charging

When the machine is in standby or working state, press the button to enter the automatic recharge mode.
Spot clean

In standby or other working state, press to enter the spot cleaning mode, which is suitable for areas where garbage is concentrated and the robot performs cleaning for 3-5 minutes in the designated area.
Auto clean A
In standby mode or other working state, press the button to enter the automatic cleaning mode. Robot will automatically clean the room.
Edge clean
In standby or other working state, press to enter the edge cleaning mode, which is suitable for cleaning the garbage on the edges of the room.
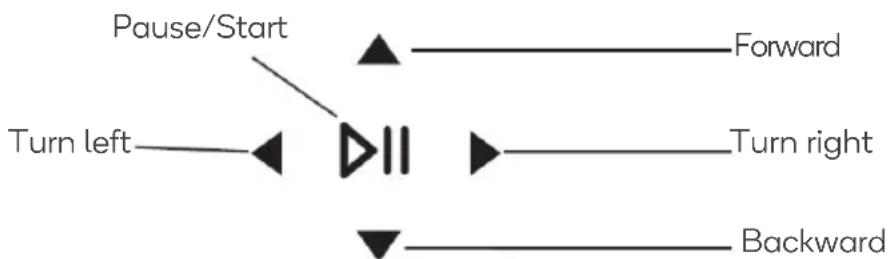
Manual clean
flowchart
graph TD
    A["Pause/Start"] --> B["Turn left"]
    B --> C["Downward"]
    C --> D["Forward"]
    C --> E["Turn right"]
    C --> F["Backward"]
CLEANING & CARE
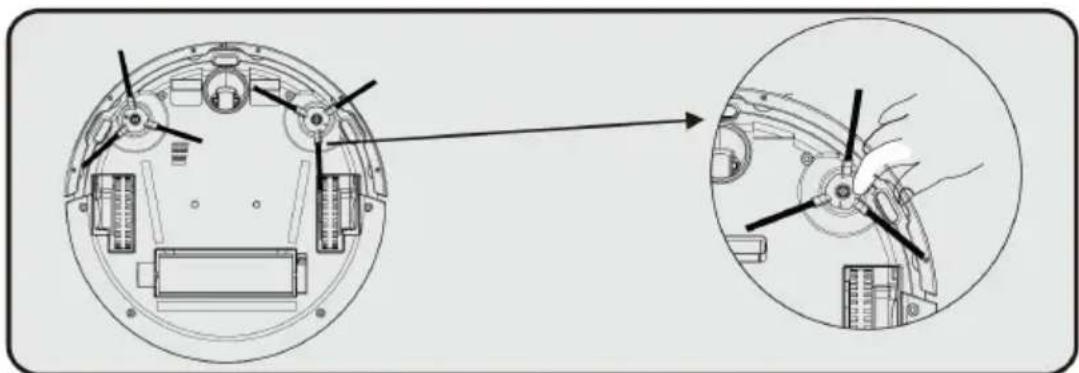
Clean Side Brush
Use a cleaning brush to clean the rubbish on the sides. If you have more hair on the side, use scissors to carefully cut the hair.
natural_image
Technical diagram of a mechanical assembly with cross-sectional and top views (no text or labels)- Installation steps: Sweep the hole in the bottom of the base and press
- Disassembly steps: Grab the brush on both sides of the sweep and pull it out with a little force.
Tip:
- Before each use, please check whether the side sweep has been assembled, otherwise it will affect the normal cleaning of the vacuum cleaner.
- Please distinguish the L side brush and the R side brush when installing the side brush, otherwise it will affect the cleaning process of the vacuum cleaner.
Maintenance
1. Side brush
If the side brush becomes dirty, clean the side brush; if the side brush is damaged, replace it.
2. Dust bin and filter
Cleaning the dust bin and filter after using as following:
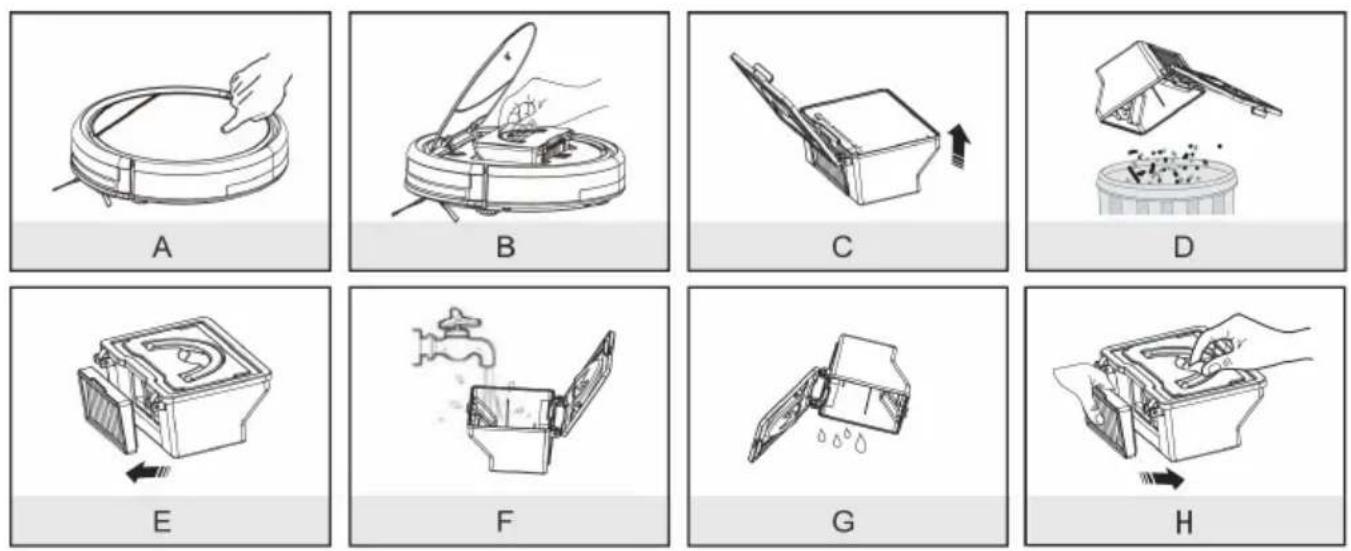
Tip: After removing the dust box, check the dust suction port of the box and robot, if the box is blocked by foreign objects, clean it.
After cleaning, the filter and dust box must be fully dried and then can be re-used, otherwise it will affect the dust absorption effect and service life.
3. Clean the sensor and chip pole piece
Gently wipe the sensor and the chip pole piece with a cleaning tool or a soft cloth.
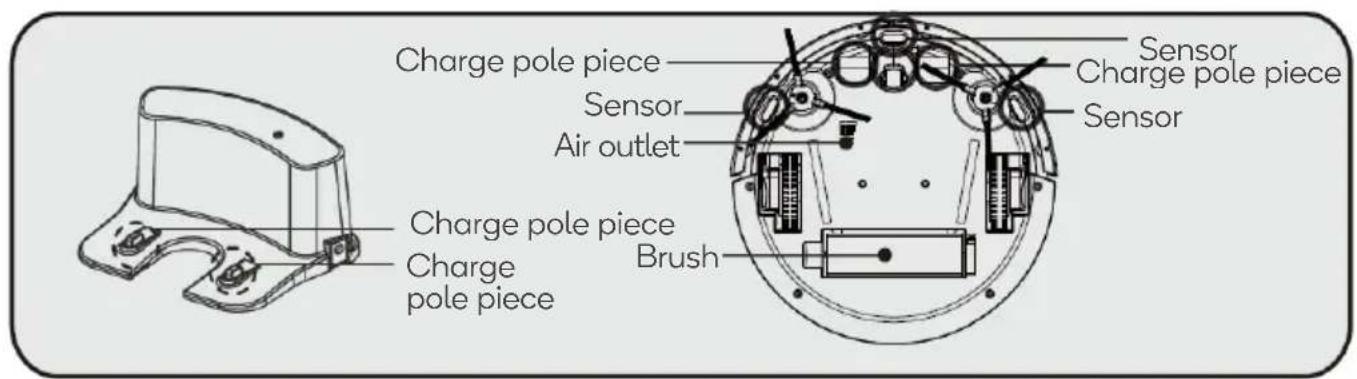
Tips: When there are foreign matters on the charge pole pieces, please make sure it was cleaned up in time.
GOOGLE HOME CONTROL
Note:
You will need to have set up a Google Home account prior to linking your Kogan SmarterHome™ device.
Adding "SmarterHome" to the Google Home app
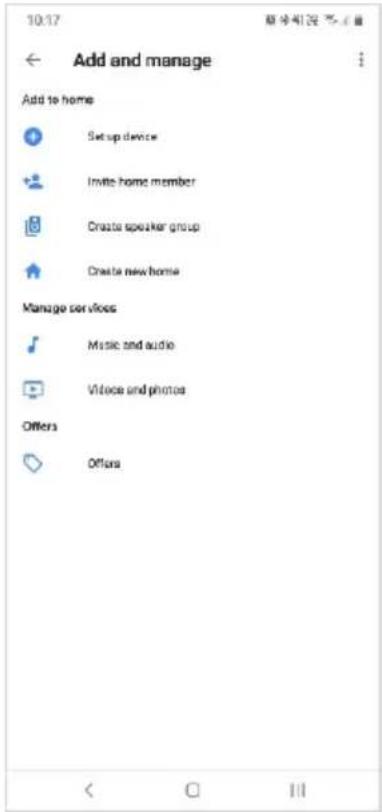
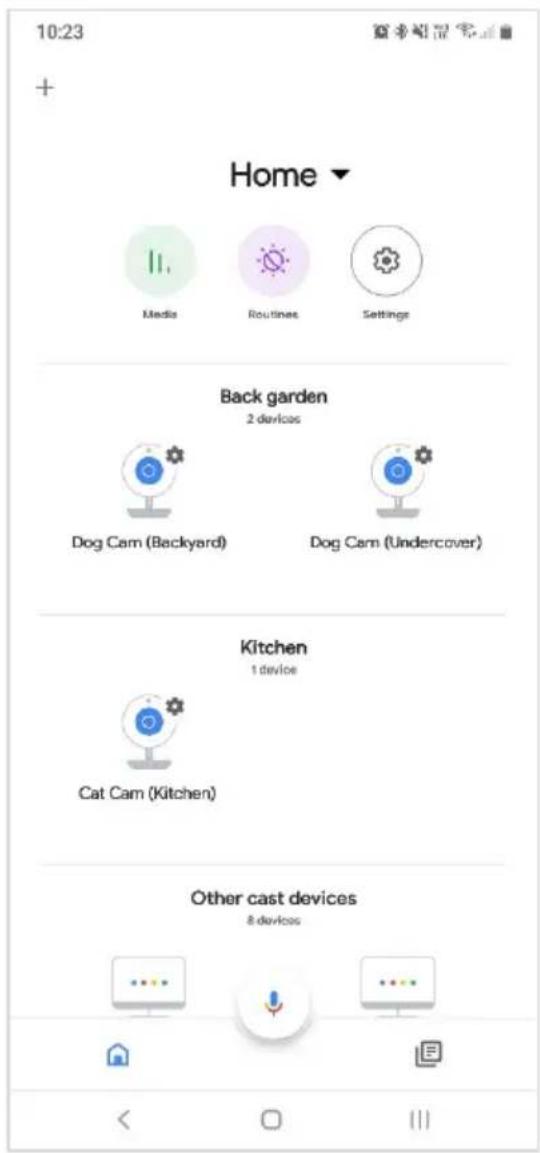
- From the home page of the Google Home app, select the "+" icon to access the 'Add and manage' page.
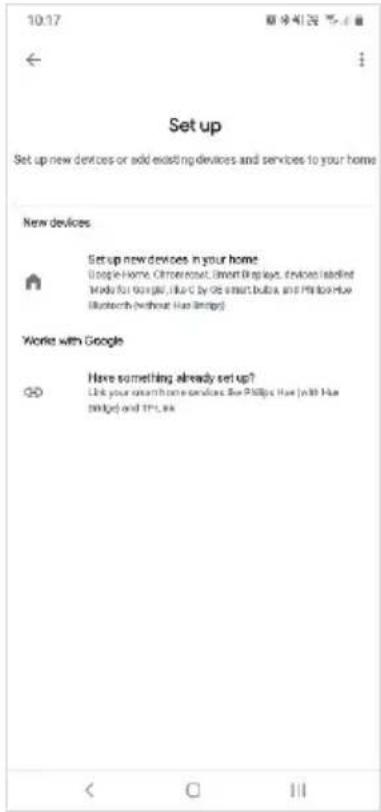
- Select 'Set up device', then under the Works with Google banner, select 'Have something already set up?'
- Select the search bar and type 'Smarter Home' to locate the Kogan SmarterHome™ service.
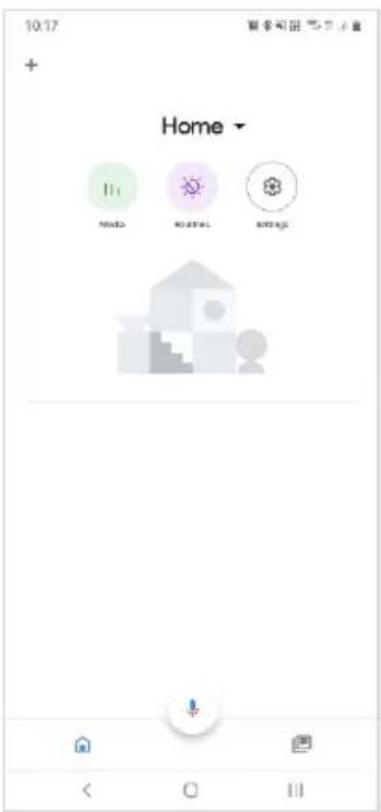
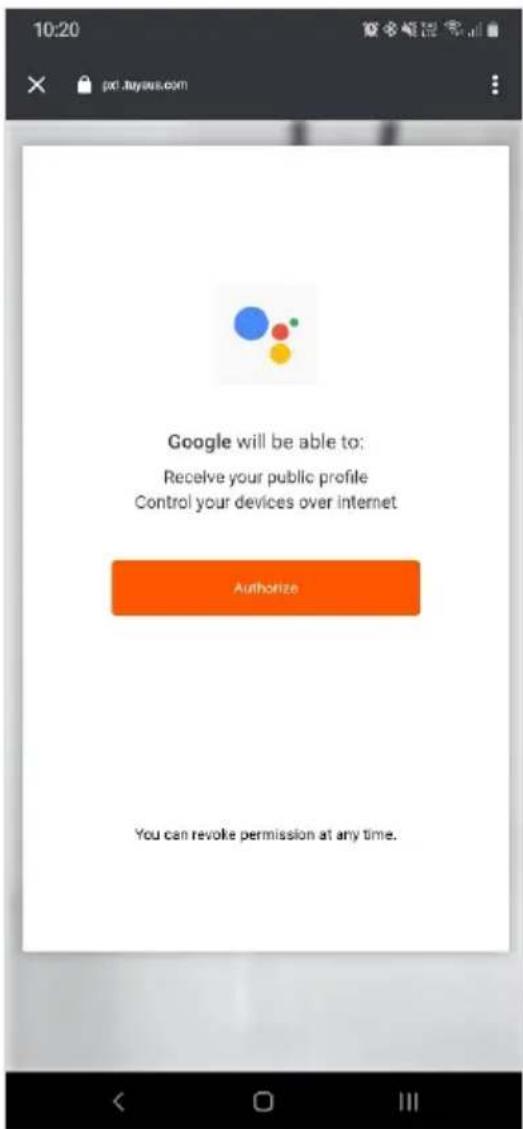
- Tap 'Authorise' to grant Google permission to access the SmarterHome™ app and your devices.
- From here, you will be prompted to sign into your SmarterHome™ account using either your email or mobile phone number, depending on which method you used to register your account.

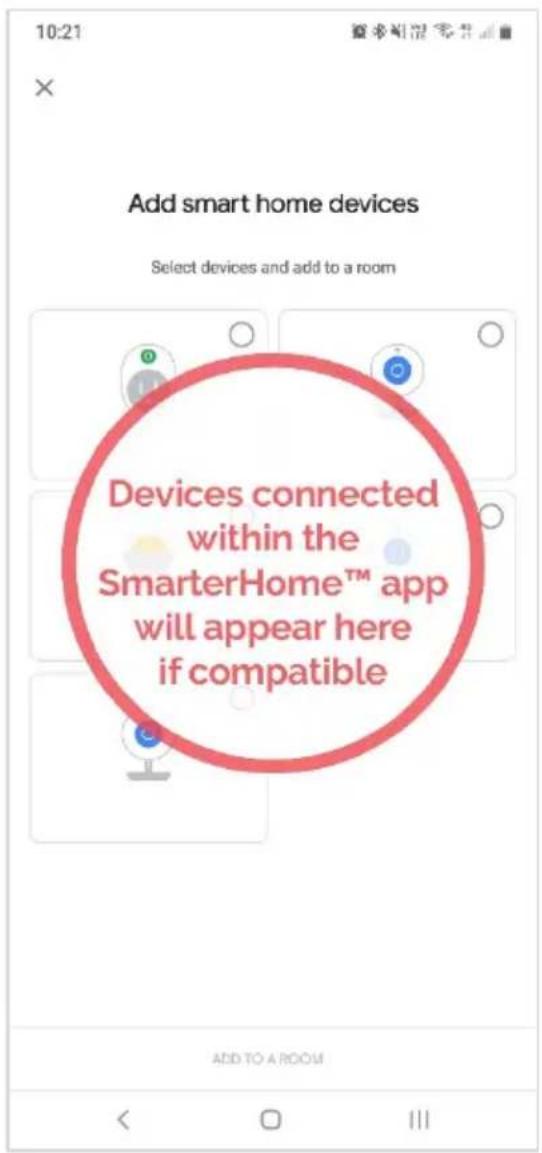
- Once connected, the app will display any compatible devices linked to your SmarterHome™ account. From here you can assign them to rooms and set up any routines.
- Tap on any of the devices to view a list of available commands.
Note:
Please note that Google Home can only control the base/core functions of any compatible SmarterHome™ devices. To make full use of this product's smart functionality, please use the Kogan SmarterHome™ app.
AMAZON ALEXA CONTROL
Note:
You will need to have set up an Alexa account prior to linking your Kogan SmarterHome™ device.
Adding "SmarterHome" to the Alexa app
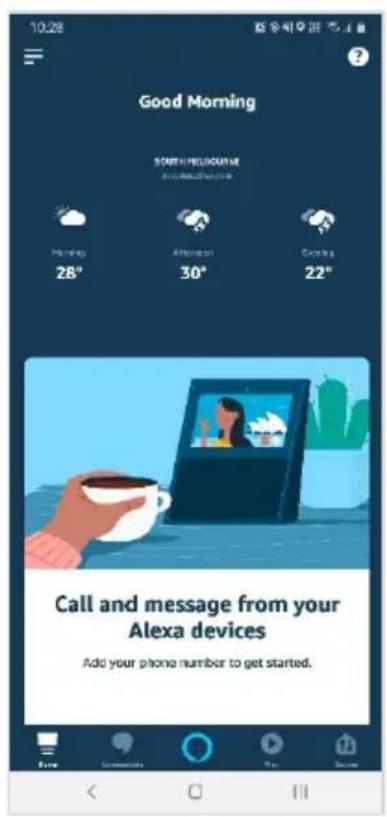
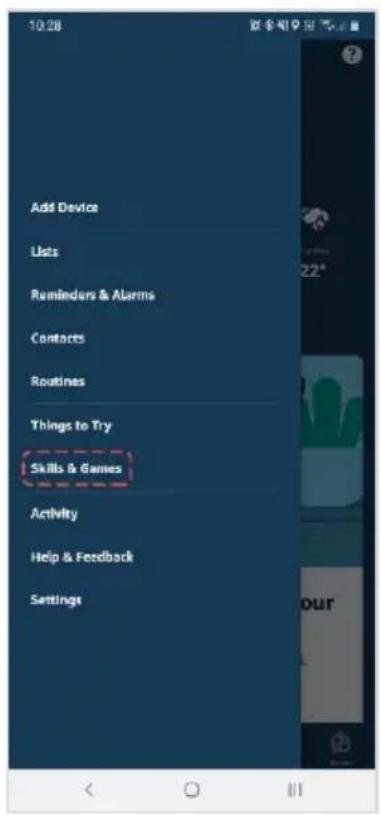
- From the home page of the Alexa app, select the “≡” icon in the top-right and select Skills & Games from the sidebar.
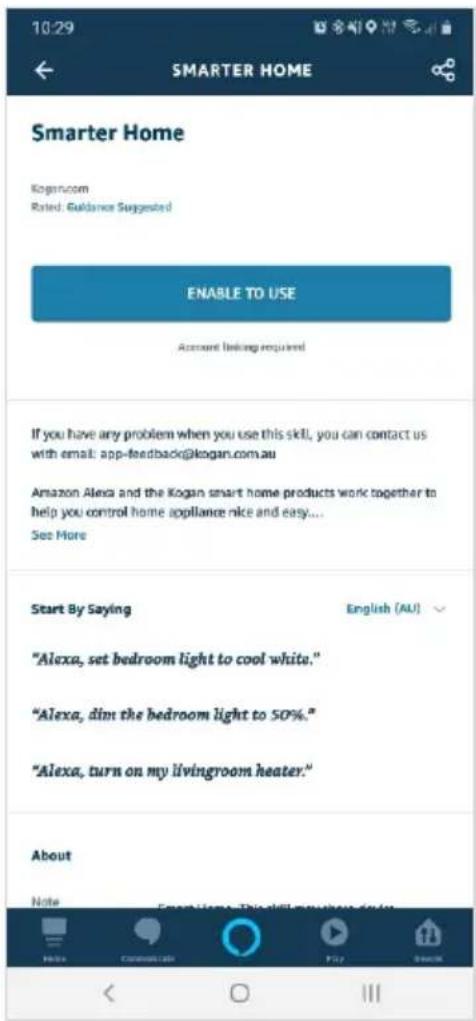
- Select the search bar and type 'Smarter Home' to locate the Kogan SmarterHome™ skill.
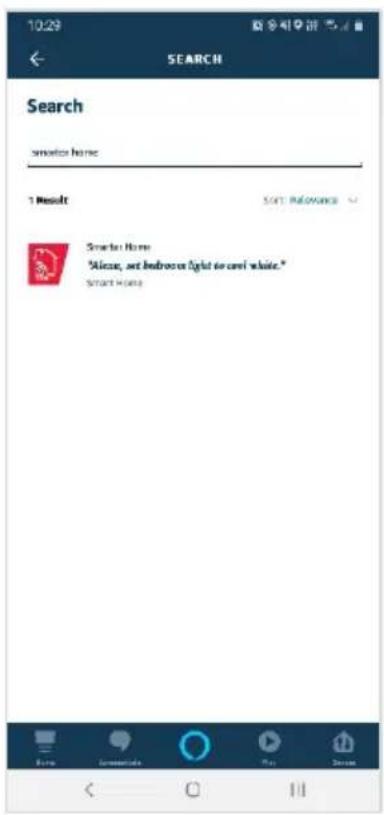
- Tap 'Enable to Use' to add the Kogan SmarterHome™ skill to Alexa.
- From here, you will be prompted to sign into your SmarterHome™ account using either your email or mobile phone number, depending on which method you used to register your account.
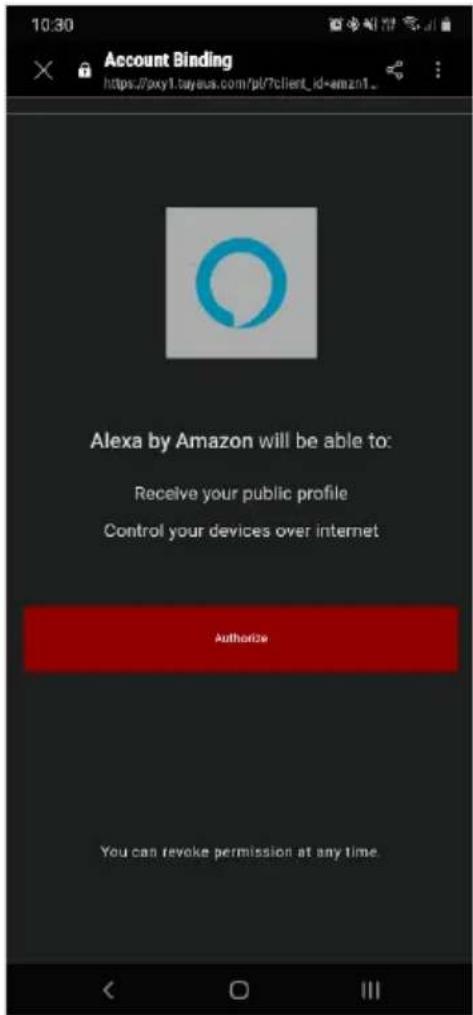
- Tap 'Authorise' to grant Alexa permission to access the SmarterHome™ app and your devices.
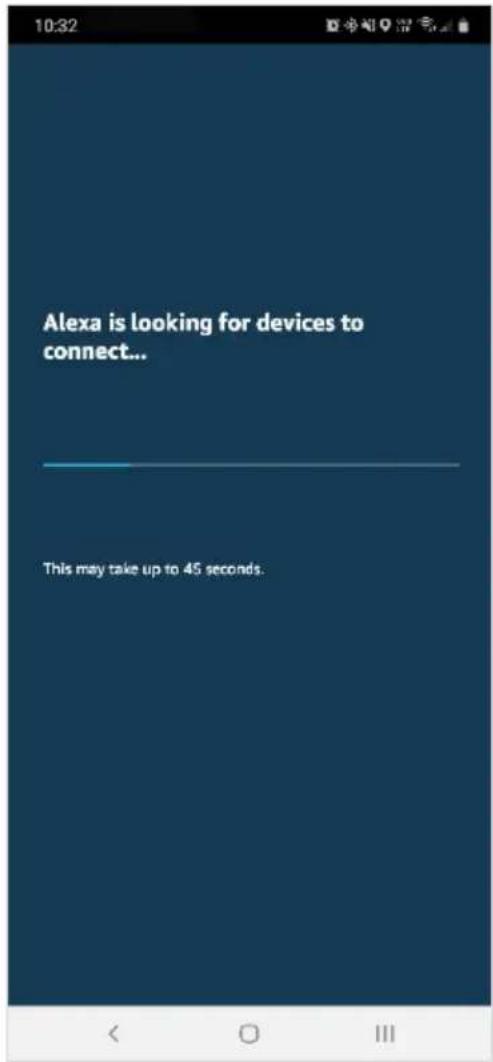
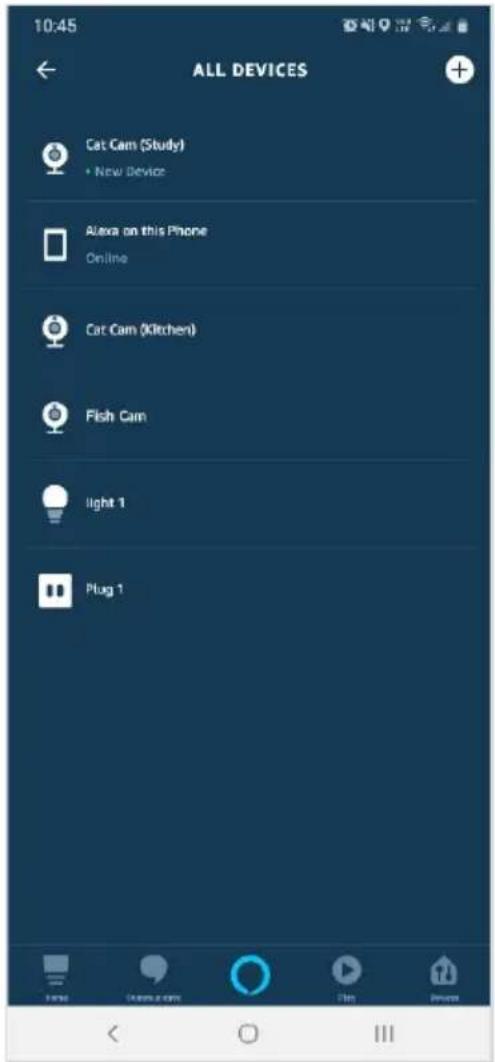
- Once connected, the app will perform a search and display the devices linked to your SmarterHome™ account.
- When your devices have successfully connected to the Alexa app, you will be able to control your Kogan SmarterHome™ devices via Alexa's voice commands.
Note:
Please note that Alexa can only control the base/core functions of any compatible SmarterHome™ devices. To make full use of this product's smart functionality, please use the Kogan SmarterHome™ app.
SPECIFICATIONS
Voltage 7.4V
Rated power 15W
Battery type Lithium battery
Battery capacity 4400mAh
Charging time ≤ 6 hours
Working time 120-150 minutes (approximately)
Temperature range 10°C \~ 45°C
Humidity range ≤90%RH
Dust bin capacity 350ml
Noise ≤65dB
Size 310 x 310 x 81mm
TROUBLESHOOTING
Under the fault state, the machine will stop working. Automatic LED, LED light of fixed time will flash at the same time, the buzzer will make an alarm. The alarm instructions are as follows.
| S/N | Failure mode | Failure reminding | Troubleshooting |
| 1 | Left Ground Sensor Failure | LED flash 1 time, buzzer sounds once | Check whether the left ground sensor responses, lens of machine has amass dust to clean. |
| 2 | Front Ground Sensor Failure | LED flash 2 times, buzzer sounds once | Check whether the front ground sensor responses, lens of machine has amass dust to clean. |
| 3 | Right Ground Sensor Failure | LED flash 3 times, buzzer sounds once | Check whether the right ground sensor responses, lens of machine has amass dust to clean. |
| 4 | Right Impact Failure | LED flash 4 times, buzzer sounds once | Check whether the right front shell has been blocked. |
| 5 | Left Impact Failure | LED flash 5 times, buzzer sounds once | Check whether the left front shell has been blocked. |
| 6 | Left Wheel Failure | LED flash 8 times, buzzer sounds once | Check whether the left wheel is stuck with something or been blocked. |
| 7 | Right Wheel Failure | LED flash 9 times, buzzer sounds once | Check whether the right wheel is stuck with something or been blocked. |
| 8 | Fan Failure | LED flash 10 times, buzzer sounds once | Check whether it has foreign objects in the fan. |
| 9 | Side Brush Failure | LED flash 11 times, buzzer sounds once | Check whether the left and right side brush has been twined. |
| 10 | Mid Brush Failure | LED flash 12 times, buzzer sounds once | Check whether the mid brush has been twined with something. |
| 11 | Robot Stuck | LED flash 13 times, buzzer sounds once | Make sure the environment has no big obstacles, please do use in the 1.5cm carpet |
Tips: If you can't rule out the corresponding faults by referring to the above methods, please contact kogan.com support.
NOTES
NOTES
Need more information?
We hope that this user guide has given you the assistance needed for a simple set-up.
For the most up-to-date guide for your product, as well as any additional assistance you may require, head online to help.kogan.com
kogan.com
- KOGAN SMARTERHOME™ G60 ROBOT VACUUM
- SAFETY & WARNINGS
- Attention
- WARNING!
- Safety instructions
- Label
- Product safety matters
- Warning
- Children Safety
- Battery
- COMPONENTS LIST
- OVERVIEW
- INSTALLATION
- Dust Box Installation
- Mop Install
- CONNECT TO SMARTERHOME™ APP
- Install App
- Register
- To register:
- Set device in pairing mode
- Add device through network
- Notes:
- OPERATION
- Ground for Use
- Inapplicable Scope
- Working State
- Power off
- Standing by
- Automatic Cleaning
- State change:
- Cleaning at fixed time
- Charging mode
- Charging Operation
- Put charger in right place
- Self-Charging
- Manual charging
- App Control Operation
- Power off Button
- Stand By
- Auto Button
- Edge Button
- Spot Button
- Auto Charging Button
- Manual mode
- Start/Pause
- Direction button
- Schedule Button
- Remote Control
- Power button
- Auto charging
- Spot clean
- Auto clean A
- Edge clean
- Manual clean
- CLEANING & CARE
- Clean Side Brush
- Tip:
- Maintenance
- Side brush
- Dust bin and filter
- Clean the sensor and chip pole piece
- GOOGLE HOME CONTROL
- Note:
- Adding "SmarterHome" to the Google Home app
- AMAZON ALEXA CONTROL
- Adding "SmarterHome" to the Alexa app
- SPECIFICATIONS
- TROUBLESHOOTING
- NOTES
- Need more information?
Brand : Kogan
Model : SmarterHome G60
Category : Robot vacuum