
BL110S - Range hood BELLING - Free user manual and instructions
Find the device manual for free BL110S BELLING in PDF.


| Product Type | Range hood |
| Brand | Belling |
| Model | BL110S / BL110B |
| Power Supply | 220-240 V ~ 50/60 Hz |
| Rated Power | 333 W |
| Motor Power | 330 W |
| Lighting Power | 2 x 1.5 W LED |
| Airflow | 800 m³/h |
| Noise Level | ≤ 74 dB |
| Air Outlet Diameter | 150 mm |
| Filter Type | High-density aluminum (washable) |
| Carbon Filter | Optional, replace every 2-3 months |
| Control Type | Push buttons (Stop, Low, Mid, High, Light) |
| Installation Type | Wall-mounted with chimney |
| Minimum Distance from Hob | 650 mm |
| Speed Levels | 3 (Low, Medium, High) |
| Safety Features | Earth connection required, accessible parts may get hot |
| Cleaning | Clean filters every 2 months with hot water and non-corrosive detergent |
| Disposal | Recycle at local waste collection center |
Frequently Asked Questions - BL110S BELLING
User questions about BL110S BELLING
0 question about this device. Answer the ones you know or ask your own.
Ask a new question about this device
Download the instructions for your Range hood in PDF format for free! Find your manual BL110S - BELLING and take your electronic device back in hand. On this page are published all the documents necessary for the use of your device. BL110S by BELLING.
USER MANUAL BL110S BELLING
Read this manual carefully before operation
Pictures in this manual are for reference only.
For Models:
BL110B / BL110S
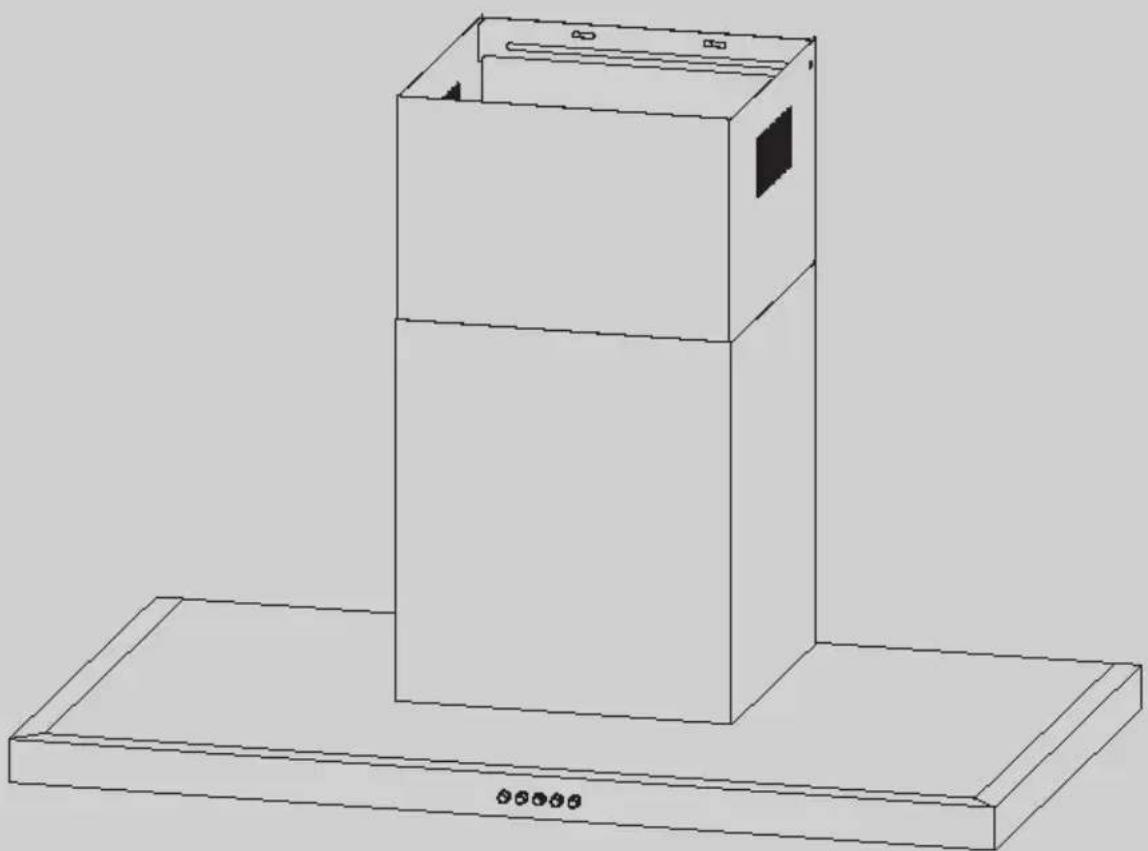
natural_image
Line drawing of a three-tiered rectangular box mounted on a base plate (no text or symbols)Contents
01 Contents.... 1
02 Warnings....2
03 Safety Warning....3
04 Installation.... 4
05 Use....7
06 Maintenance.... 8
07 Trouble Shooting.... 9
08 Specifications....10
09 Disposal.... 10
- This appliance can be used by children aged from 8 years and above and persons with reduced physical, sensory or mental capabilities or lack of experience and knowledge if they have been given supervision or instruction concerning use of the appliance in a safe way and understand the hazards involved. Children shall not play with the appliance. Cleaning and user maintenance shall not be made by children without supervision. If the supply cord is damaged, it must be replaced by the manufacturer, its service agent or similarly qualified persons in order to avoid a hazard.
- There shall be adequate ventilation of the room when the range hood is used at the same time as appliances burning gas or other fuels.
● The filter is made of high density aluminum. - Please do not use corrosive detergent for cleaning. The proper function of the unit is conditioned by the regularity of the maintenance.
- To protect the main body from corrosion caused by long time accumulation of dirt, the cooker hood should becleaned with hot water with non-corrosive detergent every two months.
- There is a fire risk if cleaning is not carried out in accordance with the instructions.
- The air must not be discharged into a flue that is used for exhausting fumes from appliances burning gas or other fuels.
- The minimum distance between the supporting surface for the cooking vessels on the hob and the lowest part of the range hood is 65 mm.
● Regulations concerning the discharge of air have to be fulfilled. -
CAUTION :Accessible parts may become hot when used with cooking appliances.
-
The appliance is not intended for use by young children or infirm persons without supervision.
- Young children should be supervised to ensure they do not play with the appliance.
This appliance must be plugged into an earthed power point.
- The cooker hood is for home use only, not suitable for barbecue, roast shop and other commercial purposes.
- The cooker hood and its filter should be cleaned regularly according to the instruction.
- If any fault occurs with the appliance, please call after-sales service department.
- Please keep the kitchen ventilated.
- Prior to any maintenance, cleaning operation, ensure the power is off.
- If the supply cord is damaged, it must be replaced by the manufacturer, service agent or similarly qualified person in order to avoid a hazard.
- Follow the local laws applicable for external air evacuation.
- The bending of ventilation tube should be ≥ 120^ , parallel or above the start point/should be connected to the external wall.
- pPlace is essentially the installation plate is grease collection at one end. See Fig.1.
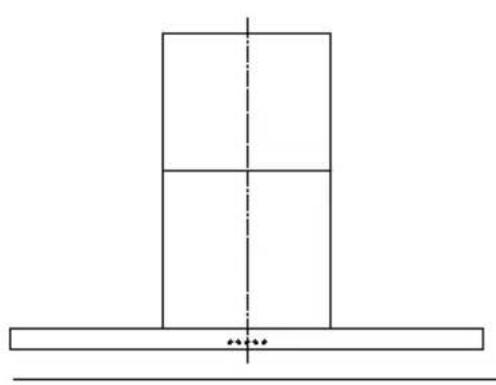
natural_image
Simple line drawing of a T-shaped structure with a vertical dashed line and two horizontal lines, no text or symbols present.Right
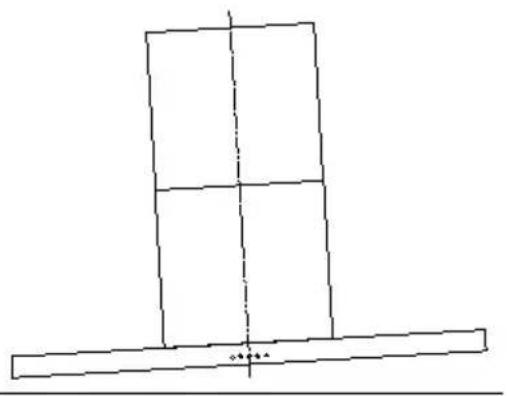
natural_image
Simple line drawing of a T-shaped structure with vertical and horizontal lines intersecting at the center (no text or symbols)Wrong
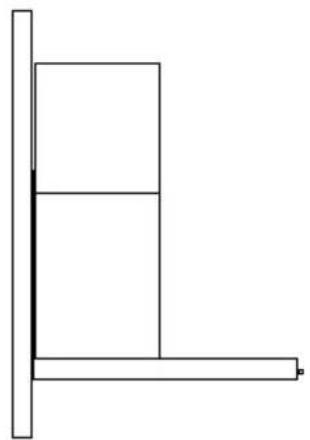
natural_image
Simple line drawing of a vertical pole with a horizontal bar and a horizontal line, no text or symbols present.Fig.1
● After installation, make sure that plug can be removed if necessary.
- ed 650e75Remhoop should be plac cooking plane for safe and a good effect. See Fig.2.
- There shall be adequate ventilation of the room when the cooker hood is working.
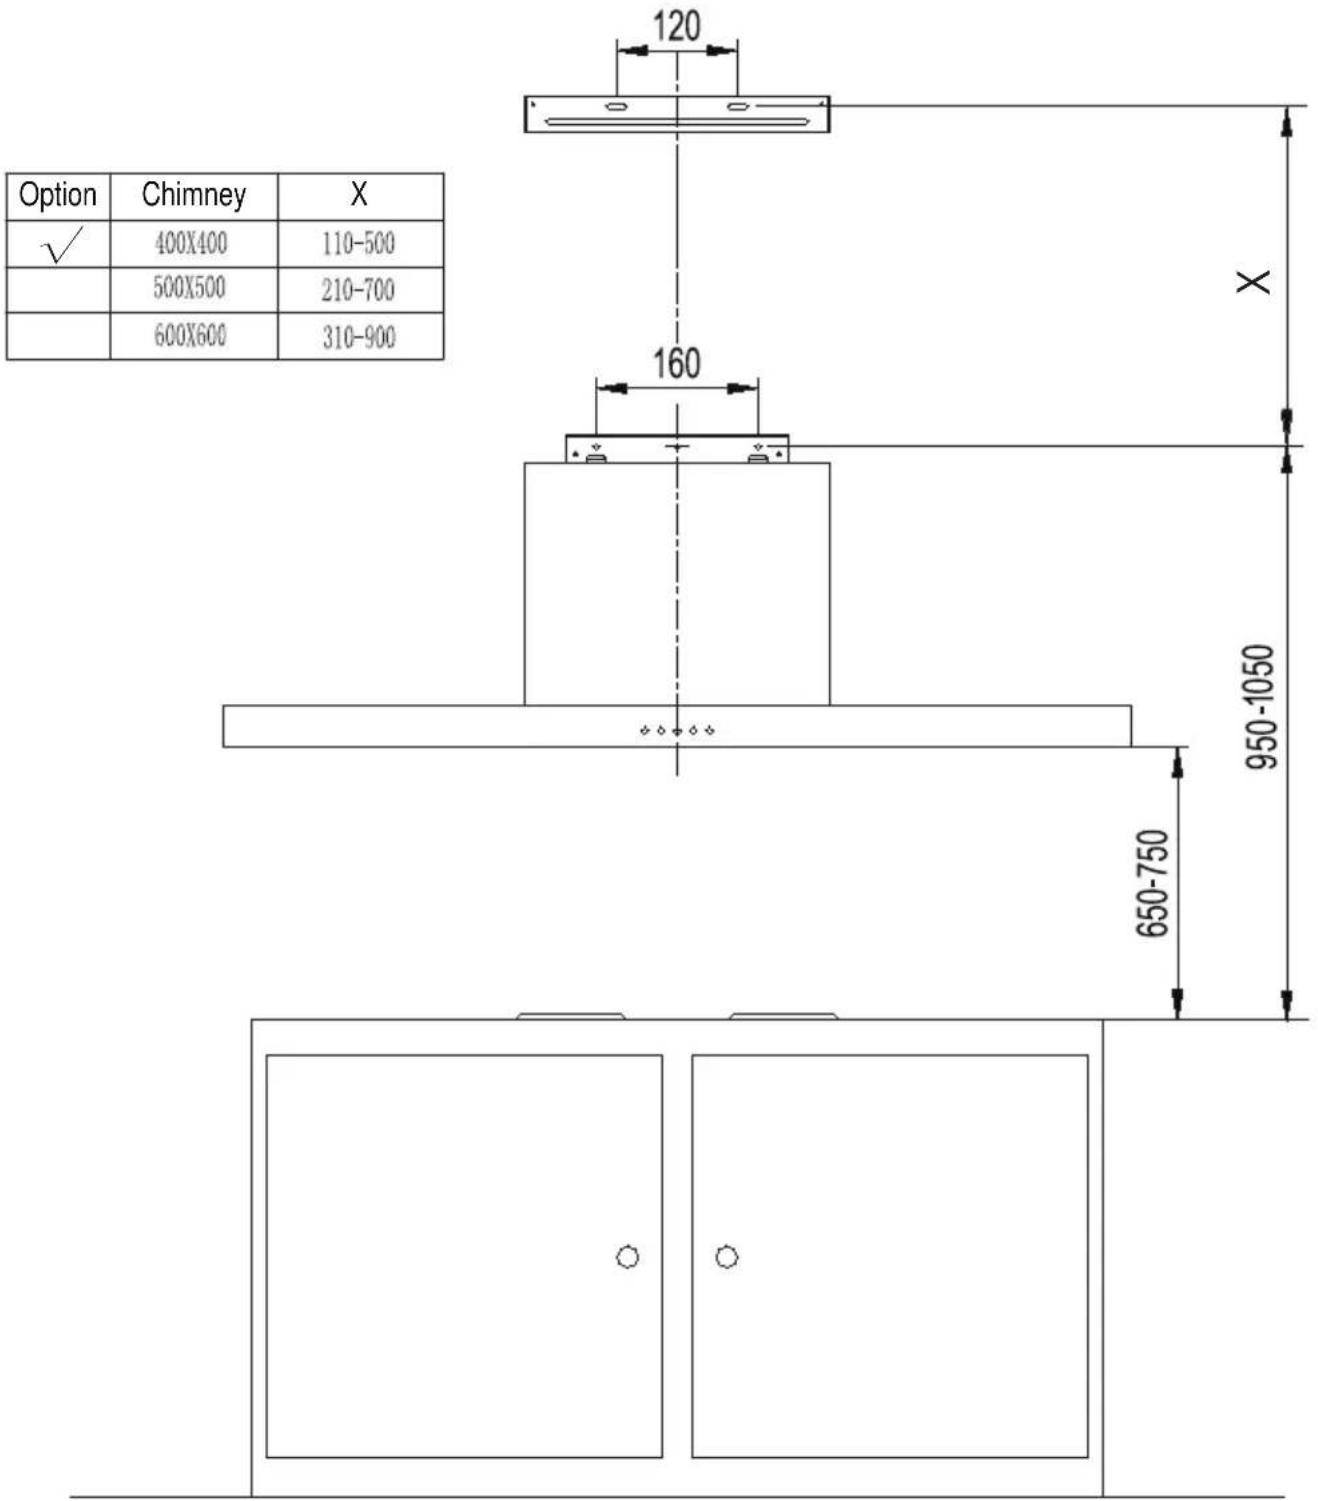
Fig.2
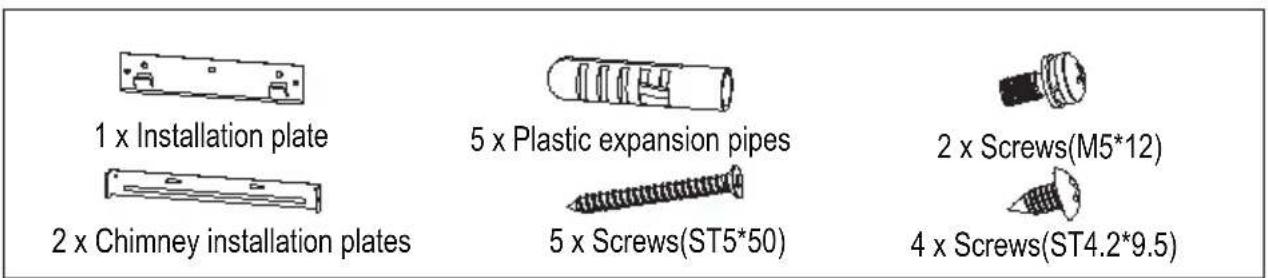
Fig.3
Installation
- Accessories. See Fig.3. (Type and quantity of accessories is subject to actual demand.)
- Fit installation plate and extension chimney installation plate, install the plastic expansion pipes of chimney installation plate on wall. See Fig.4.
● Hang range hood on the installation plate. See Fig.5. - Fit the exhaust pipe on the main body, lock screws (M5*12) to prevent the range hood from accidentally sliding off the installation plate. See Fig.6.
- Connect chimney installation plate and chimney. See Fig.7.
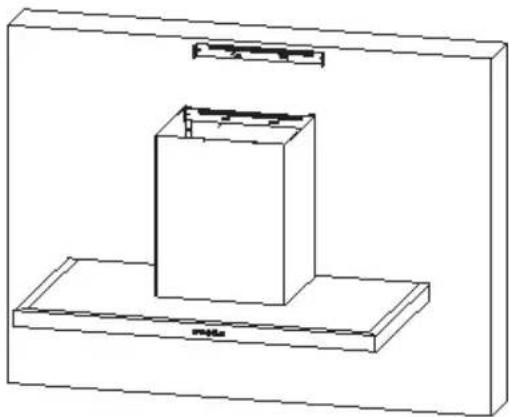
● Fit chimney installation plate. See Fig.8.
● Fit the extension chimney. See Fig.9.
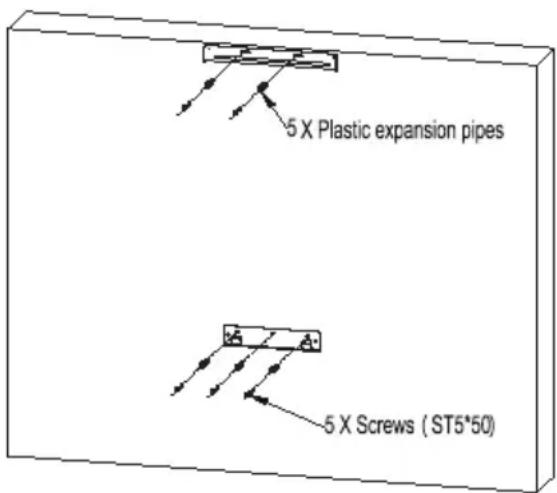
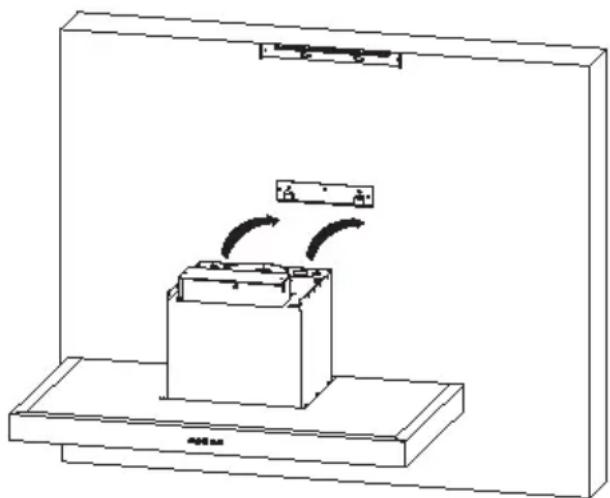
natural_image
Technical line drawing of a mechanical assembly with rotating components and a base plate (no text or symbols)Fig.4 Fig.5
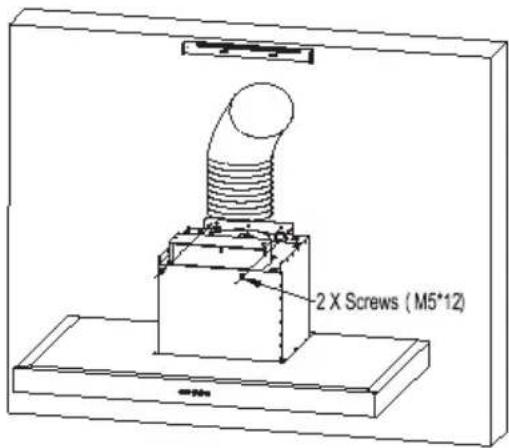
Fig.6
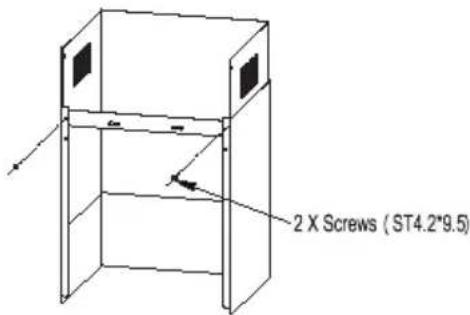
Fig.7
natural_image
3D diagram of a rectangular box mounted on a base plate, with no visible text or symbolsFig.8
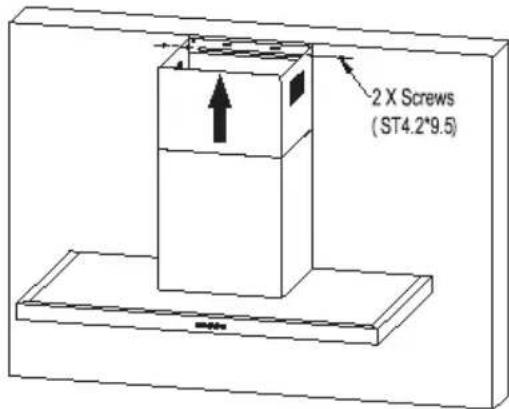
Fig.9

Fig.10.1
Use
Speed adjustment. See Fig.10.1.(For some models)
- Press Stop button, the motor will stop running.
- Press the Low (speed) button, the motor runs at low speed.
- Press the Mid (speed) button, the motor runs at mid speed.
- Press the High (speed) button, the motor runs at high speed.
- Press the Light button, the two lighting lamps will come on.
- Press it again and the lamps will be turned off.
Cleaning of the filters
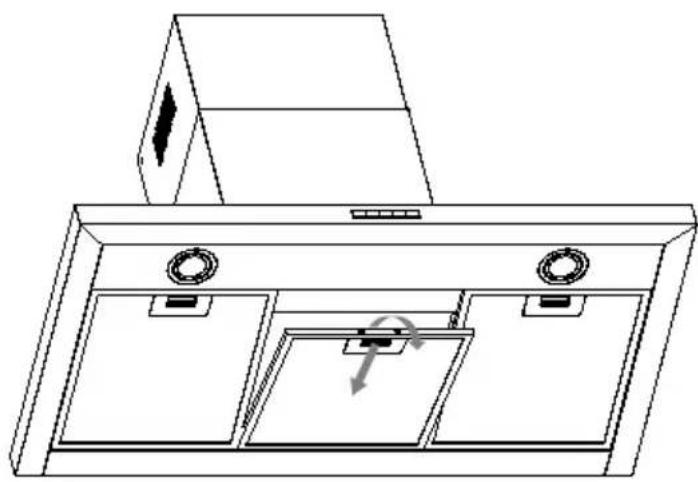
● Removing the filters according to Fig.11
- Put into a dishwasher with detergent, set the temperature below 60 degrees.
- Please do not use abrasive detergent for it will damage the hood.
● Make sure that the hood is shut off before cleaning.
natural_image
Line drawing of a kitchen air conditioner unit with ventilation slots and a cabinet (no text or symbols)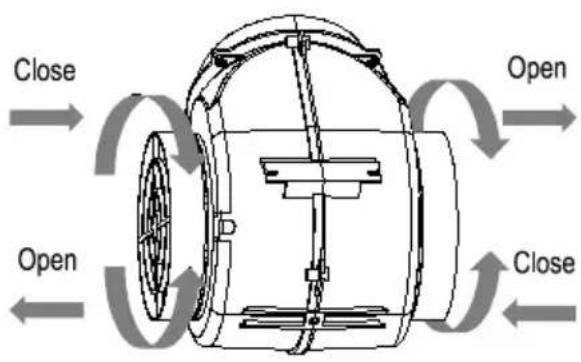
Fig.11 Fig.12
Replacement of the carbon filters (Optional
- Remove the filters see Fig.11.
● The carbon filters are located at both end of the motor.
Turn the carbon filters until they are locked. ee Fig.12. - Apply reverse procedure to remove the carbon filter.
- It should be replaced after approximately 2-3 months of use.
● The carbon filer cannot be washed or recycled.
● Carbon filter is not supplied with your appliance.
| Fault | Cause Solution | |
| Light on, but does not work. | The blades are blocked. | |
| The capacitor is damaged. | Replace capacitor. | |
| motorThe motor is damaged. Replace motor. | ||
| The internal wiring of motor is cut off / disconnected. An unpleasant smell may be produced. | Replace motor. | |
| Both light and do not work. | Apart from the above mentioned, check the following: | |
| light damaged. Replace lights. | ||
| Power cord loose. | Connect the wires as per the electric diagram. | |
| Oil leakage. | Outlet and the air ventilation entrance are not tightly sealed. | Take down the outlet and seal with glue. |
| Leakage from the connection of U-shaped section and cover. | Take U-shaped section down and seal with soap or paint. | |
| Vibration. | The blade, if damaged, can cause vibrating. | Replace the blade. |
| The motor is not tightly fastened. Fasten the motor tightly. | ||
| The cooker hood is not tightly fixed. Fixed the cooker hood tightly. | ||
| Insufficient suction. | The distance between the cooker hood and the cooker top is too large. | Readjust the distance. |
| Too much ventilation from open doors or windows. | Choose a new place to install the appliance or close some doors / windows. | |
| The machine inclines. | The fixing screws are not tight enough. | Tighten the fixing screw and make it horizontal. |
| The hanging screws are not tight enough. | Tighten the hanging screw and make it horizontal. | |
Electrical Diagram
● Electrical diagram see label on main body of the actual product.
| egatloV | 220-240V~50/60Hz |
| Rated Power | 333W |
| Lighting Power | 2 X 1.5W |
| Motor Power | 330W |
| Diameter of air tube | 150mm |
| wolf riA | 800m3/h |
| esioN | ≤74dB |
The air flow parameter is tested under conditions of 230V 50Hz when the voltage is 220-240V 50/60Hz and without carbon filters.
Disposal
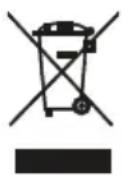
Please dispose of it at your local community waste collection / recycling center and ensure it presents no danger to children while being stored for disposal. The plug must be rendered useless and the cable cut off to prevent misuse.
The manufacturer shall decline all responsibility if the foregoing recommendations and instruction regarding installation, maintenance and use are not observed and respected when using the cooker hood.
Glen Dimplex Australia Pty Ltd
1340 Ferntree Gully Road
Scoresby VIc 3179
Ph: 1300 556 816
Fax: 1800 058 900
Web: www.belling.com.au
Glen Dimplex New Zealand
38 Harris Road
East Tamaki
Auckland New Zealand
Ph: 09 274 2865
Fax: 09 274 8472
Web: www.belling.co.nz


Brand : BELLING
Model : BL110S
Category : Range hood