
GW-B489SQQL - Fridge LG - Free user manual and instructions
Find the device manual for free GW-B489SQQL LG in PDF.


User questions about GW-B489SQQL LG
0 question about this device. Answer the ones you know or ask your own.
Ask a new question about this device
Download the instructions for your Fridge in PDF format for free! Find your manual GW-B489SQQL - LG and take your electronic device back in hand. On this page are published all the documents necessary for the use of your device. GW-B489SQQL by LG.
USER MANUAL GW-B489SQQL LG
Please read this owner's manual thoroughly before operating and keep it handy for reference at all times.
Electrical Connections (In the UK Only)
Important
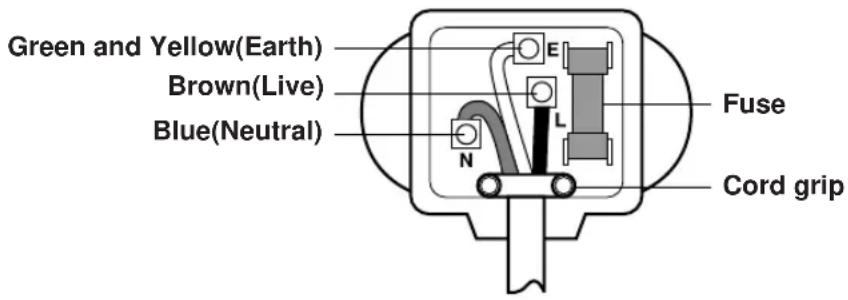
The wires in this mains lead are coloured in accordance with the following code:
GREEN AND YELLOW:EARTH
BLUE:NEUTRAL
BROWN: LIVE
This appliance must be earthed
text_image
Green and Yellow(Earth) Brown(Live) Blue(Neutral) N E L Fuse Cord gripAs the colours of the wires in the mains lead of this apparatus may not correspond with the coloured markings identifying the terminals in your plug, proceed as follows:
The wire which is coloured Green and Yellow must be connected to the terminal in the plug which is marked with the letter E or by the earth symbol( ) or coloured Green or Green and Yellow.
The wire which is coloured Blue must be connected to the terminal which is marked with the letter N or coloured Black.
The wire which is coloured Brown must be connected to the terminal which is marked with the letter L or coloured Red.
If a 13 amp(BS 1363) plug is used, fit a 13 amp BS 1362 fuse.
Registration
The model and serial number are found on the rear of this unit. This number is unique to this unit and not available to others. You should record requested information here and retain this guide as a permanent record of your purchase. Staple your receipt here.
Date of Purchase :
Dealer Purchased From :
Dealer Address :
Dealer Phone No. :
Model No. :
Serial No. :
| Table of Contents | ||
| Introduction | Important Safety Instruction | 4 |
| Identification of Parts | 10 | |
| Installation | Installation | 17 |
| Starting | 18 | |
| Operation | Temperature Control | 19 |
| OPTI-Zone (Chill) | 21 | |
| Express Frz. | 22 | |
| Eco Friendly | 22 | |
| Self Test | 22 | |
| Lock | 23 | |
| On/Off | 23 | |
| Fridge Compartment | 23 | |
| Vita Light | 24 | |
| Door Alarm | 24 | |
| Ice Making | 25 | |
| Defrosting | 25 | |
| Water Dispenser | 26 | |
| Bottle Rack | 28 | |
| Removable Glass Shelf | 28 | |
| Freezer Compartment | 28 | |
| Auto Ice maker | 29 | |
| Suggestion On Food storage | Storing Food | 31 |
| Suggestion for energy saving | 31 | |
| Care and Maintenance | General Information | 32 |
| To Reverse the Doors | 32 | |
| Cleaning | 33 | |
| Trouble Shooting | Smart DiagnosisTM | 34 |
| Trouble Shooting | 35 | |
Important Safety Instruction
BASIC SAFETY PRECAUTIONS
This guide contains many important safety messages. Always read and obey all safety messages.
This is the safety alert symbol. It alerts you to safety messages that inform you of hazards that can kill or hurt you or others or cause damage to the product. All safety messages will be preceded by the safety alert symbol and the hazard signal word DANGER, WARNING, or CAUTION. These words mean:
DANGER
You will be killed or seriously injured if you don't follow instructions.
WARNING
You can be killed or seriously injured if you don't follow instructions.
CAUTION
Indicates an imminently hazardous situation which, if not avoided, may result in minor or moderate injury, or product damage only.
All safety messages will identify the hazard, tell you how to reduce the chance of injury, and tell you what can happen if the instructions are not followed.
WARNING
To reduce the risk of fire, electric shock, or injury to persons when using your product, basic safety precautions should be followed, including the following. Read all instructions before using this appliance.
1. When connecting the power
The dedicated outlet should be used.
- Using several devices at one outlet may cause fire.
- The electric leakage breaker may damage food and the dispenser may be leaked.
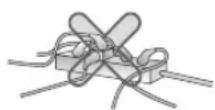
Do not allow the power plug to face upward or to be squeezed at the back of the fridge-freezer.
Water may be flown into or the plug may be damaged, which causes fire or electric shock.

Prevent the power cord from being squeezed or imprinted if the refrigerator is pushed in after the power plug is extracted during the installation.
It becomes the cause of fire or electric shock. When moving your appliance away from the wall, be careful not to roll over or damage the power cord.
Do not allow the power cord bent or pressed by the heavy object to be damaged.
It may damage the power cord to cause fire or electric shock.
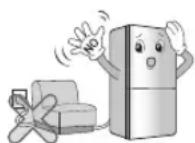
Do not extend or modify the length of the power plug.
It causes electric shock or fire by the electric damage of the power cord or others.
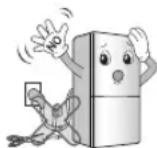
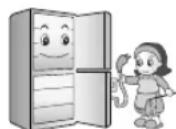
Unplug the power plug when cleaning, handling or replacing the interior lamp of the fridge-freezer.
- It may cause electric shock or injury.
- When replacing the interior lamp of the fridge-freezer, make sure that the rubber ring for
preventing the electric spark within the socket is not taken off.
Important Safety Instruction
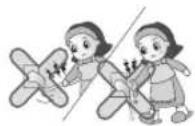
Do not pull out the cord or touch the power plug with wet hands.
It may cause electric shock or injury.
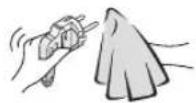
Remove water or dust from the power plug and insert it with the ends of the pins securely connected.
Dust, water or unstable connection may fire or electric shock.
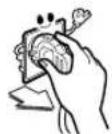
Pull out the power plug not by grasping the cord but the plug of its end.
It may cause electric shock or short circuit to fire.
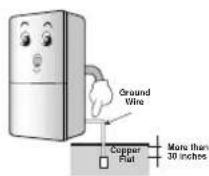
Make sure of grounding.
Consult a qualified electrician or service person if the grounding instructions are not completely understood, or if you have doubts on whether the appliance is properly grounded or not.
The incorrect grounding may cause breakdown and electric shock.
Be sure to use grounded exclusive proper voltage consent for the power plug.
It becomes the cause of fire.
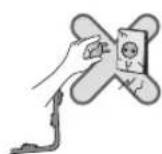
When the power cord or the power plug is damaged or the holes of the outlet are loosed, do not use them.
It may cause electric shock or short circuit to make fire.
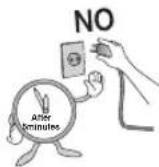
Wait for 5 minutes or longer when reconnecting the plug.
It may cause the operation of the freezer to fail.
2. When using the fridge-freezer
Do not place the heavy object or the dangerous object (container with liquid) on the fridge-freezer.
It may be dropped to cause injury, fire or electric shock when opening or closing the door.
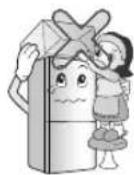
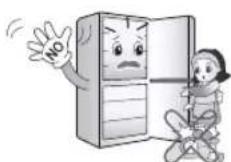
Do not cling to the door or the shelves of the door or the cool chamber.
It may make the fridge-freezer fallen down or damage the hands. Especially, do not allow the children to do the above.
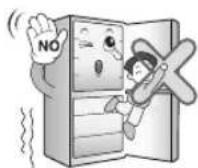
Prevent children from entering the product.
It may endanger the life of a child if the child enters the refrigerator.
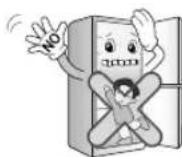
Opening and closing the door of the refrigerator vigorously may cause the stored food in the refrigerator basket to fall by shock and hurt the foot, so take precautions.
Do not install the fridge-freezer in the wet place or the place which water or rain splashes.
Deterioration of insulation of electric parts may cause electric leakage.
Important Safety Instruction
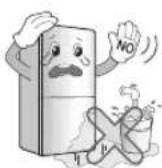
Do not use or store inflammable materials ether, benzene, alcohol, medicine, LP gas, spray or cosmetics near or in the fridge-freezer. It may cause explosion or fire.
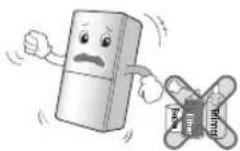
Do not place the lit candle within the fridge-freezer to deodorize. Do not use drier to dry the inside, nor light a candle to remove odor. It may cause explosion or fire.
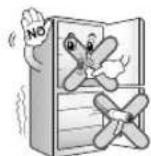
Do not store the medicine or the academic materials at the fridge-freezer.
When the material with the strict temperature control is stored, it may be deteriorated or it may make an unexpected reaction to cause any risk.
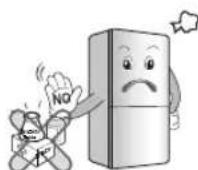
Do not use the combustible spray near the fridge- freezer. It may cause fire.
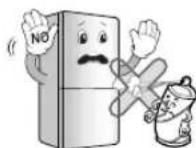
Avoid the heating devices. Install in places away from the fire such as the place where flammable gas is leaked.
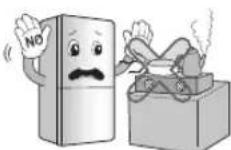
It may cause fire.
Do not place flower vase, cup, cosmetics, medicine or any container with water on the fridge-freezer.
It may cause fire, electric shock or injury by dropping down.
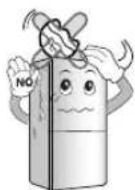
In case of thunder and lightning, or not in use for a long period of time, detach the power plug.
There is a danger of electric shock or fire.
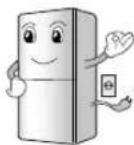
Use the submerged fridge-freezer after checking it.
It may cause electric shock or fire.
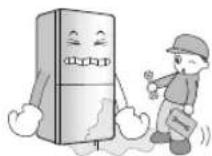
When gas is leaked, do not touch the fridge-freezer or the outlet and ventilate the room immediately.
- The explosion by spark may cause fire or burn. - Because this fridge-freezer uses natural gas (isobutane, R600a) as the environment-friendly refrigerant, even a small amount (80\~90 g) is combustible. When the gas is leaked by the severe damage during delivering, installing or using the fridge-freezer, any spark may cause fire or burn.
Do not spray water at the outside or the inside of the fridge-freezer or do not clean it with benzene or thinner.
Deterioration of insulation of electric parts may cause electric shock or fire.
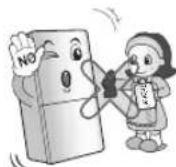
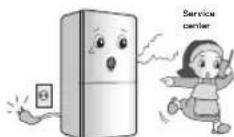
When any strange smell or smoke is detected from the fridge-freezer, disconnect the power plug immediately and contact to the service center.
It may cause fire.
Important Safety Instruction
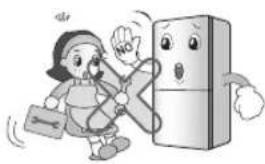
Do not allow any person except the qualified engineer to disassemble, repair or alter the fridge-freezer.
It may cause injury, electric shock or fire.
natural_image
Cartoon illustration of a child running with a briefcase and a smiling refrigerator (no text or symbols)Do not use the fridge-freezer for non-domestic purpose (storing medicine or testing material, using at the ship, etc.).
It may cause an unexpected risk such as fire, electric shock, deterioration of stored material or chemical reaction.
When disposing the fridge-freezer, remove the packing materials from the door.
It may cause to lock out the child.

This appliance is not intended for use by persons (including children) with reduced physical, sensory or mental capabilities, or lack of experience and knowledge, unless they have been given supervision or instruction concerning use of the appliance by a person responsible for their safety.
Children should be supervised to ensure that they do not play with the appliance.
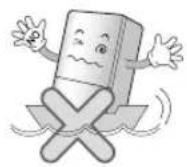
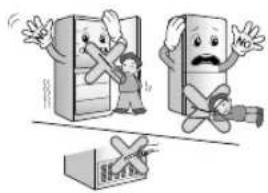
Install the fridge-freezer on the solid and level floor.
Installing it on the unstable place may cause death by falling down the fridge-freezer when opening or closing the door.
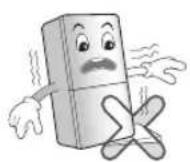
Do not insert the hands or the metal stick into the exit of cool air, the cover, the bottom of the fridge-freezer, the heatproof grill (exhaust hole) at the backside.
It may cause electric shock or injury.
natural_image
Illustration of a child and a crying refrigerator with a crossed-out box (no text or symbols)CAUTION
Violating this direction may cause injury or damage house or furniture. Always be careful, please.
Do not touch food or containers at the freezer with wet hands.
It may cause frostbite.

Do not place the food in disorder inside the refrigerator.
The food may fall during opening and closing the door of the refrigerator and hurt people.
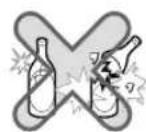
Do not put bottle in the freezer.
It may freeze the contents to break the bottle to cause injury.
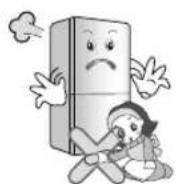
Do not insert the hands into the bottom of the fridge-freezer.
The iron plate of the bottom may cause injury.
Important Safety Instruction
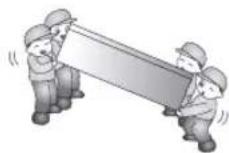
Carry the fridge-freezer with the handle bar at the bottom of the front and the top of the rear.
Otherwise, your hands may be slipped to cause injury. Because the product is heavy, carrying it alone may hurt people or accidents may occur.
Because opening or closing the door of the fridge-freezer may cause injury to the person around it, be careful, please.
Opening or closing the door may cause feet or hands to be caught in the chink in door or the child to be get hurt by the corner.
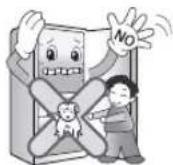
Do not put any living animal in the fridge-freezer.
Precaution
WARNING
- This fridge-freezer must be properly installed and located in accordance with the Installation Instruction before it is used.
- Never unplug your fridge-freezer by pulling on the power cord. Always grip plug firmly and pull straight out from the outlet.
• After your fridge-freezer is in operation, do not touch the cold surfaces in the freezer compartment, particularly when hands are damp or wet. Skin may adhere to these extremely cold surfaces.
Accessibility of Supply Plug
The supply plug of the refrigerator-freezer should be placed in easy accessible position for quick disconnection in emergency.
Supply Cord Replacement
If the supply cord is damaged, it must be replaced by the manufacturer or its service agent or a similarly qualified person in order to avoid a hazard.
DANGER
Risk of child entrapment.
Before you throw away your old refrigerator or freezer, take off the doors.
Leave the shelves in place so that children may not easily climb inside.
Don't store
- Don't store or use gasoline or other flammable vapors and liquids in the vicinity of this or any other appliance.
- Don't store explosive substances such as aerosol cans with a flammable propellant in this appliance.
Grounding (Earthing)
In the event of an electric short circuit, grounding (earthing) reduces the risk of electric shock by providing an escape wire for the electric current. In order to prevent possible electric shock, this appliance must be grounded. Improper use of the grounding plug can result in an electric shock.
Important Safety Instruction
WARNINGCAUTION
▲ Keep ventilation openings, in the appliance enclosure or in the built-in structure, clear of obstruction.
Do not use mechanical devices or other means to accelerate the defrosting process, other than those recommended by the manufacturer.
⚠️Do not damage the refrigerant circuit.
Do not use electrical appliances inside the food storage compartments of the appliance, unless they are of the type recommended by the manufacturer.
The refrigerant and insulation blowing gas used in the appliance require special disposal procedures. When disposal, please consult with service agent or a similarly qualified person.

This appliance contains a small amount of isobutane refrigerant (R600a), natural gas with high environmental compatibility, but it is also combustible. When transporting and installing the appliance, care should be taken to ensure that no parts of the refrigerating circuit are damaged. Refrigerant squirting out of the pipes could ignite or cause an eye injury. If a leak is detected, avoid any naked flames or potential sources of ignition and air the room in which the appliance is standing for several minutes.
In order to avoid the creation of a flammable gas air mixture if a leak in the refrigerating circuit occurs, the size of the room in which the appliance may be sited depends on the amount of refrigerant used. The room must be 1 m ^2 in size for every 8 g of R600a refrigerant inside the appliance. The amount of refrigerant in your particular appliance is shown on the identification plate inside the appliance.
Never start up an appliance showing any signs of damage. If in doubt, consult your dealer.

- If the wall socket is loose, do not insert the power plug. It may cause electric shock or fire.
- Never unplug your refrigerator by pulling on the power cord. Always grip plug firmly and pull it straight out from the outlet. You may disconnect a wire and cause a short circuit.
- Do not use a wet or damp cloth when cleaning the plug. Remove any foreign matter from the power plug pins. Otherwise, there is a risk of fire.
- After unplugging the appliance, wait for at least five minutes before plugging it again to the wall socket. Abnormal operation of the freezer may cause material damage.
- If the appliance is not to be used for a long time, pull out the power plug. Any deterioration in the insulation may cause fire.
- Do not let children touch or play with the control panel on the front of the appliance.
- The refrigerant used in fridge/freezer and the gases in the insulation material require special disposal procedures. Ensure that none of the pipes on the back of the appliances are damaged prior to disposal.
WARNING
Please do not use a dishwasher to clean the lower drawers; the high temperature may cause damage to the baskets which make them unusable.
Identification of Parts
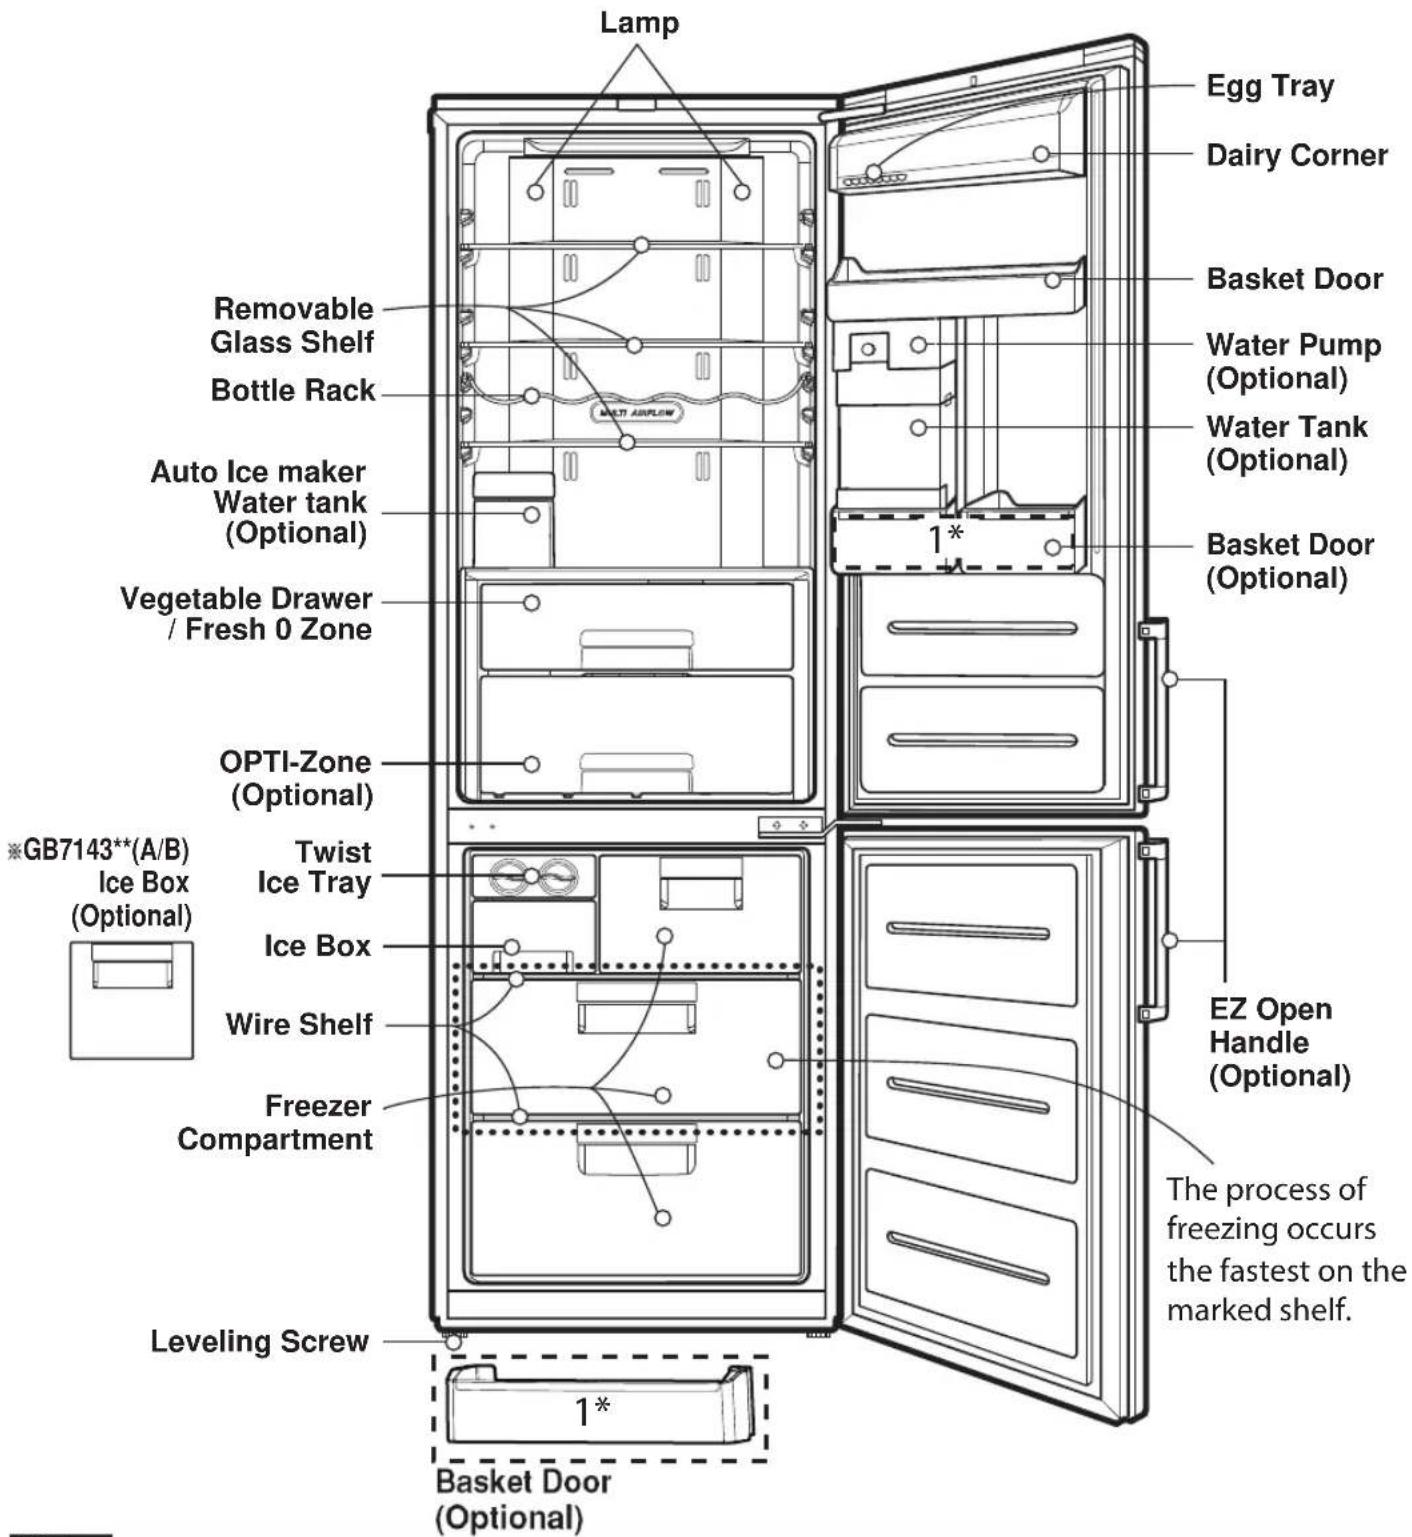
Model Name : GB7143**(A/B/G/P/R)*
text_image
Lamp Removable Glass Shelf Bottle Rack Auto Ice maker Water tank (Optional) Vegetable Drawer / Fresh 0 Zone OPTI-Zone (Optional) GB7143**(A/B) Ice Box (Optional) Twist Ice Tray Ice Box Wire Shelf Freezer Compartment Leveling Screw 1* 1* Basket Door (Optional) Egg Tray Dairy Corner Basket Door Water Pump (Optional) Water Tank (Optional) Basket Door (Optional) EZ Open Handle (Optional) The process of freezing occurs the fastest on the marked shelf.Note
If you find some parts missing from your unit, they may be parts only used in other models. (i.e. the "OPTI-Zone" is not included in all models)
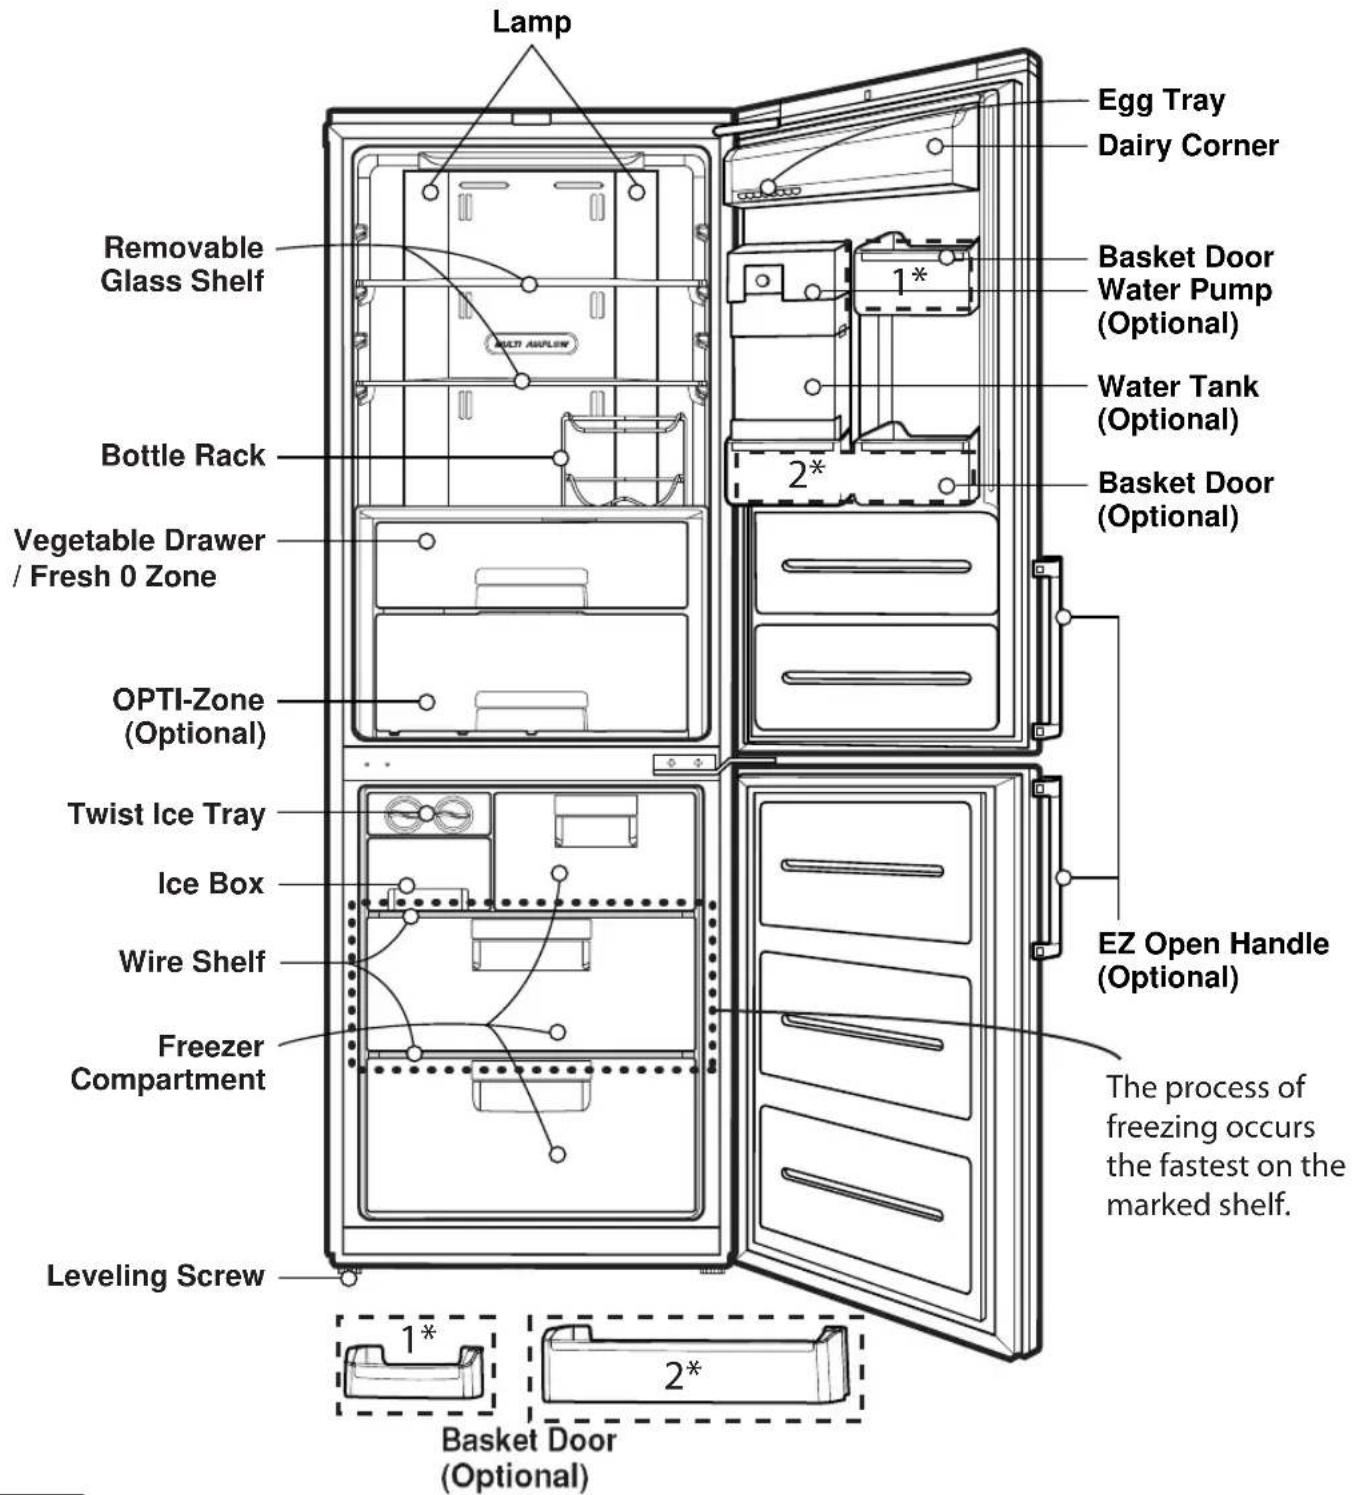
Model Name : GB7138****
text_image
Lamp Removable Glass Shelf Bottle Rack Vegetable Drawer / Fresh 0 Zone OPTI-Zone (Optional) Twist Ice Tray Ice Box Wire Shelf Freezer Compartment Leveling Screw 1* 2* Egg Tray Dairy Corner 1* Basket Door Water Pump (Optional) Water Tank (Optional) Basket Door (Optional) EZ Open Handle (Optional) The process of freezing occurs the fastest on the marked shelf. Basket Door (Optional)Note
If you find some parts missing from your unit, they may be parts only used in other models. (i.e. the "OPTI-Zone" is not included in all models)
Identification of Parts
Model:
GB5219****
GB5237****
GB5240****
GB*530*****
GB*539*****
GB5219**E*
GB5237**E*
GB5240**A*
GB*530**CF*
GB*539**CF*
GB5219**F*
GB5237**F*
GB5240**C*
GB*530**CP*
GB*539**CP*
GB*530**QP*
GB*539**QP*
GB*530**QW*
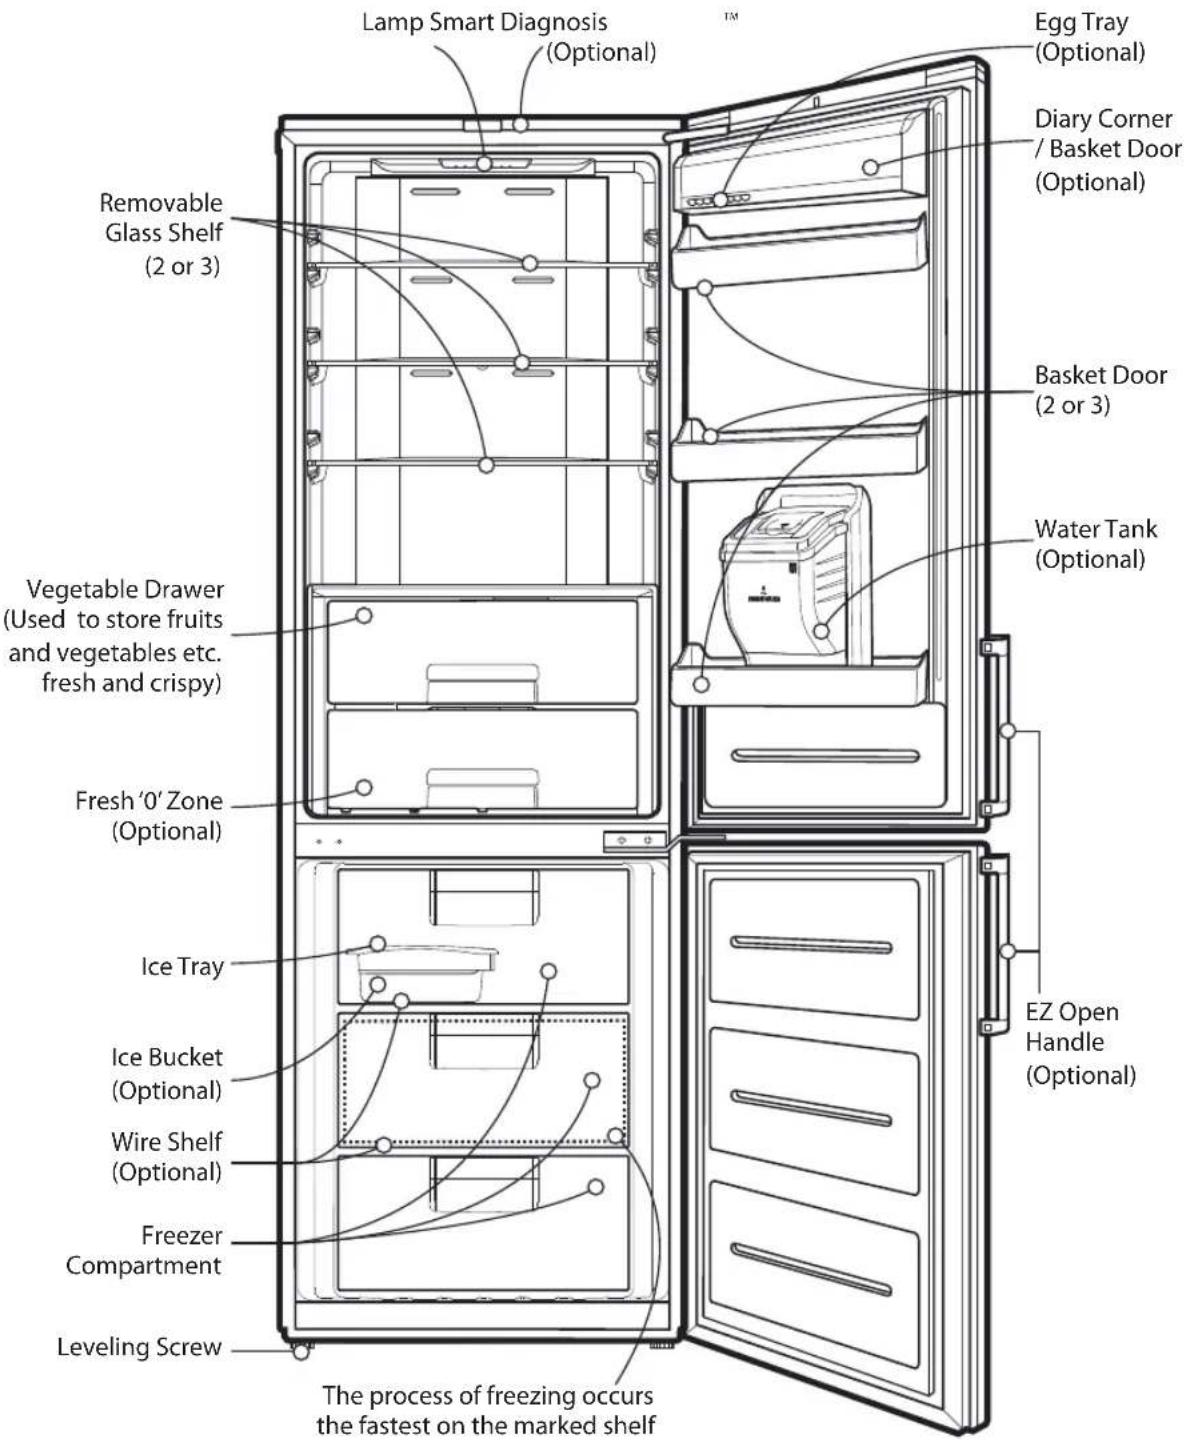
text_image
Lamp Smart Diagnosis (Optional) Removable Glass Shelf (2 or 3) Vegetable Drawer (Used to store fruits and vegetables etc. fresh and crispy) Fresh '0' Zone (Optional) Ice Tray Ice Bucket (Optional) Wire Shelf (Optional) Freezer Compartment Leveling Screw The process of freezing occurs the fastest on the marked shelf Egg Tray (Optional) Diary Corner / Basket Door (Optional) Basket Door (2 or 3) Water Tank (Optional) EZ Open Handle (Optional)Note
If you find some parts missing from your unit, they may be parts only used in other models.
Identifi cation Of Parts
Model: GB5234****
GB5237****
GB5240****
GB*539*****
GB5234**H* GB5234**I*
GB5237**G* GB5237**J*
GB5240**D*
GBB539**H** GB*539**QW*
GB5237PMG
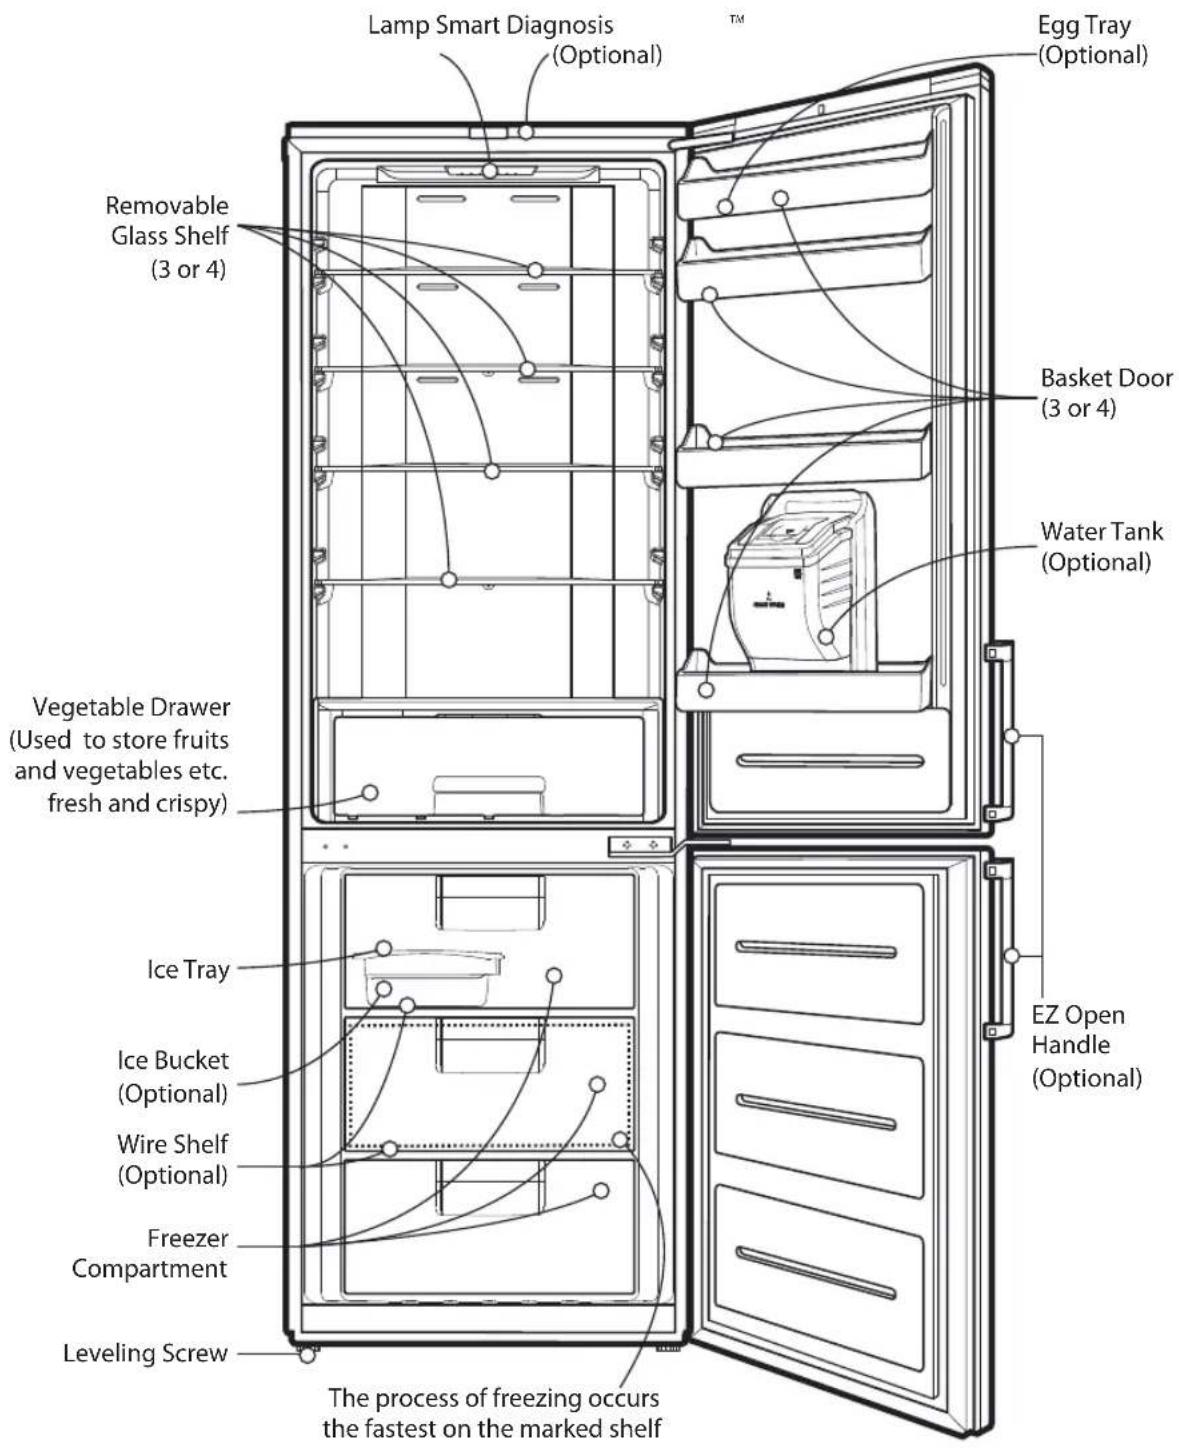
text_image
Lamp Smart Diagnosis (Optional) Removable Glass Shelf (3 or 4) Vegetable Drawer (Used to store fruits and vegetables etc. fresh and crispy) Ice Tray Ice Bucket (Optional) Wire Shelf (Optional) Freezer Compartment Leveling Screw The process of freezing occurs the fastest on the marked shelf Egg Tray (Optional) Basket Door (3 or 4) Water Tank (Optional) EZ Open Handle (Optional)Note
If you find some parts missing from your unit, they may be parts only used in other models.
Identification of Parts
Model Name : GB5240****
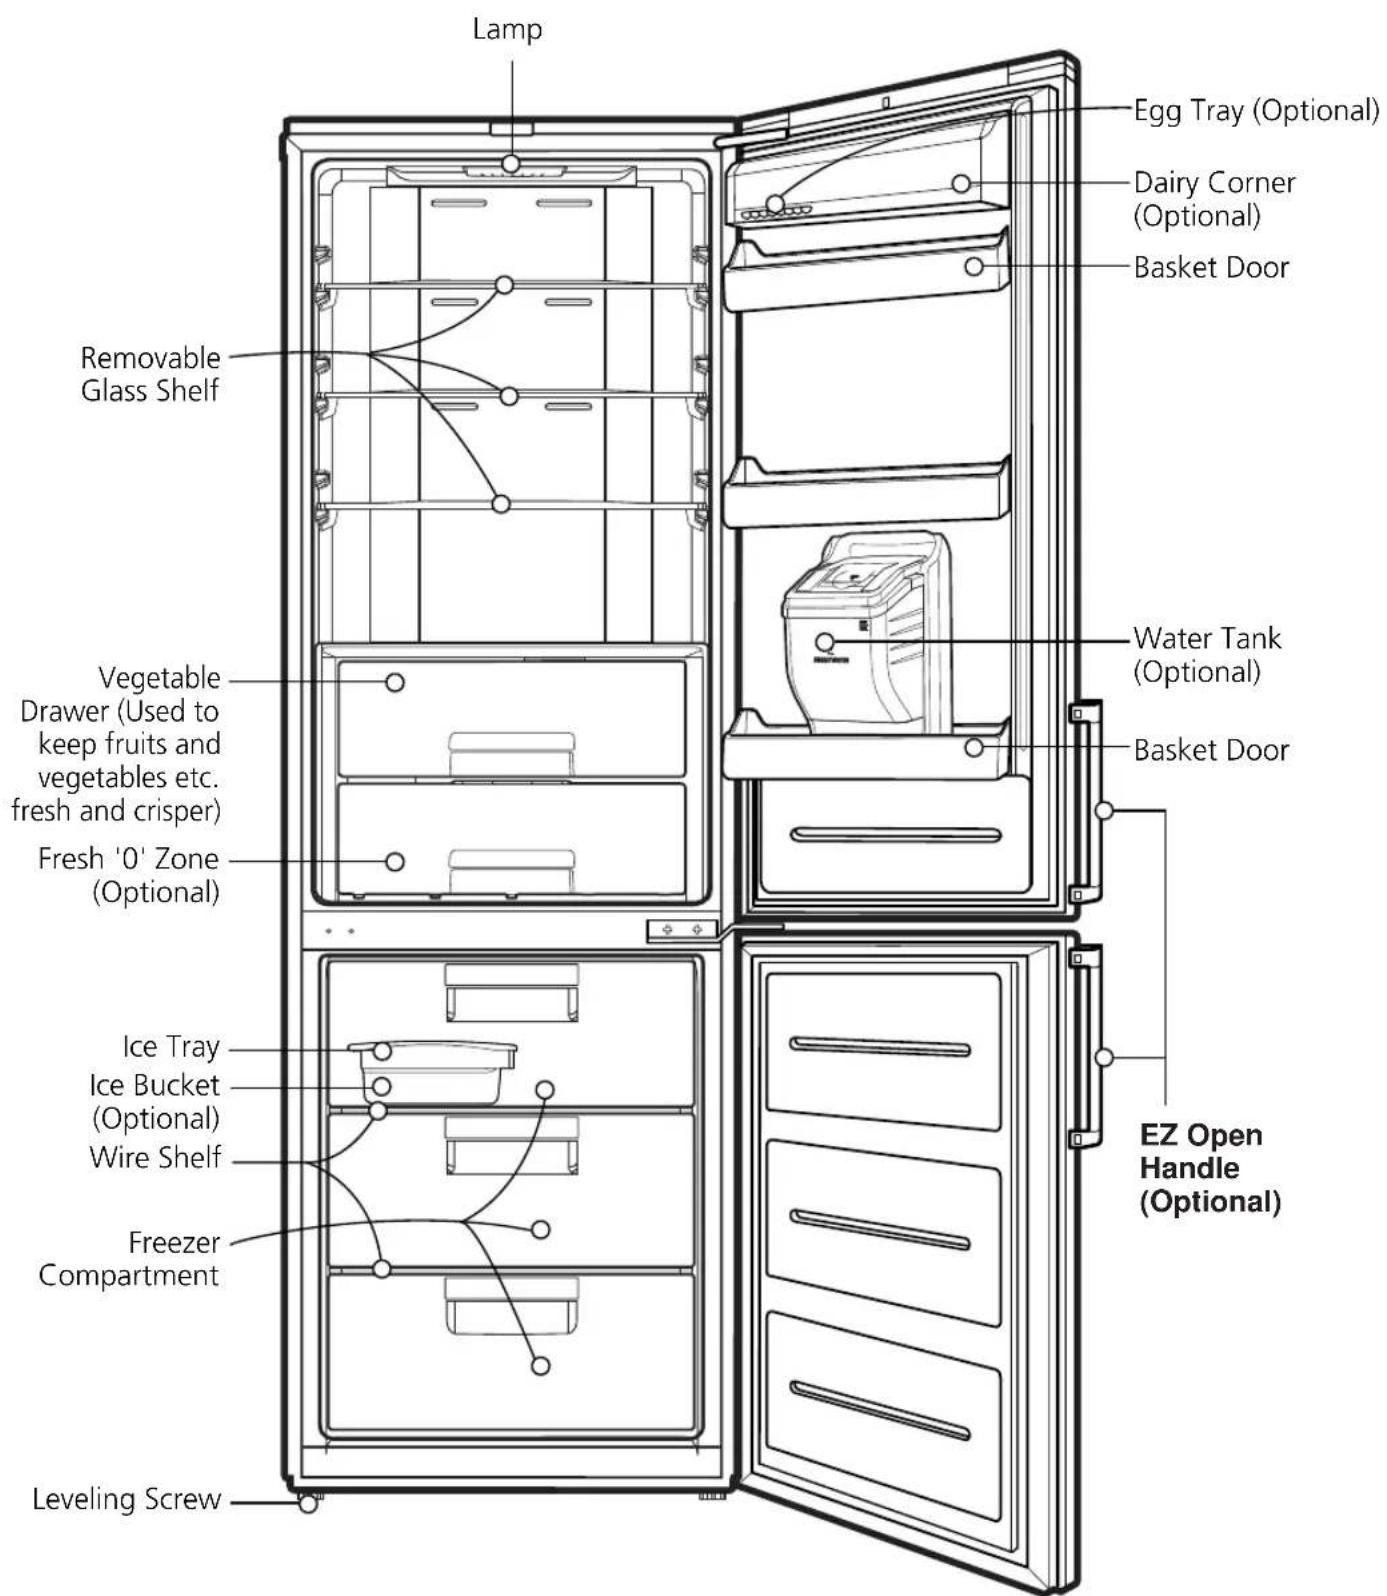
text_image
Lamp Removable Glass Shelf Vegetable Drawer (Used to keep fruits and vegetables etc. fresh and crisper) Fresh '0' Zone (Optional) Ice Tray Ice Bucket (Optional) Wire Shelf Freezer Compartment Leveling Screw Egg Tray (Optional) Dairy Corner (Optional) Basket Door Water Tank (Optional) Basket Door EZ Open Handle (Optional)Note
If you find some parts missing from your unit, they may be parts only used in other models.
Model Name : GB5237****
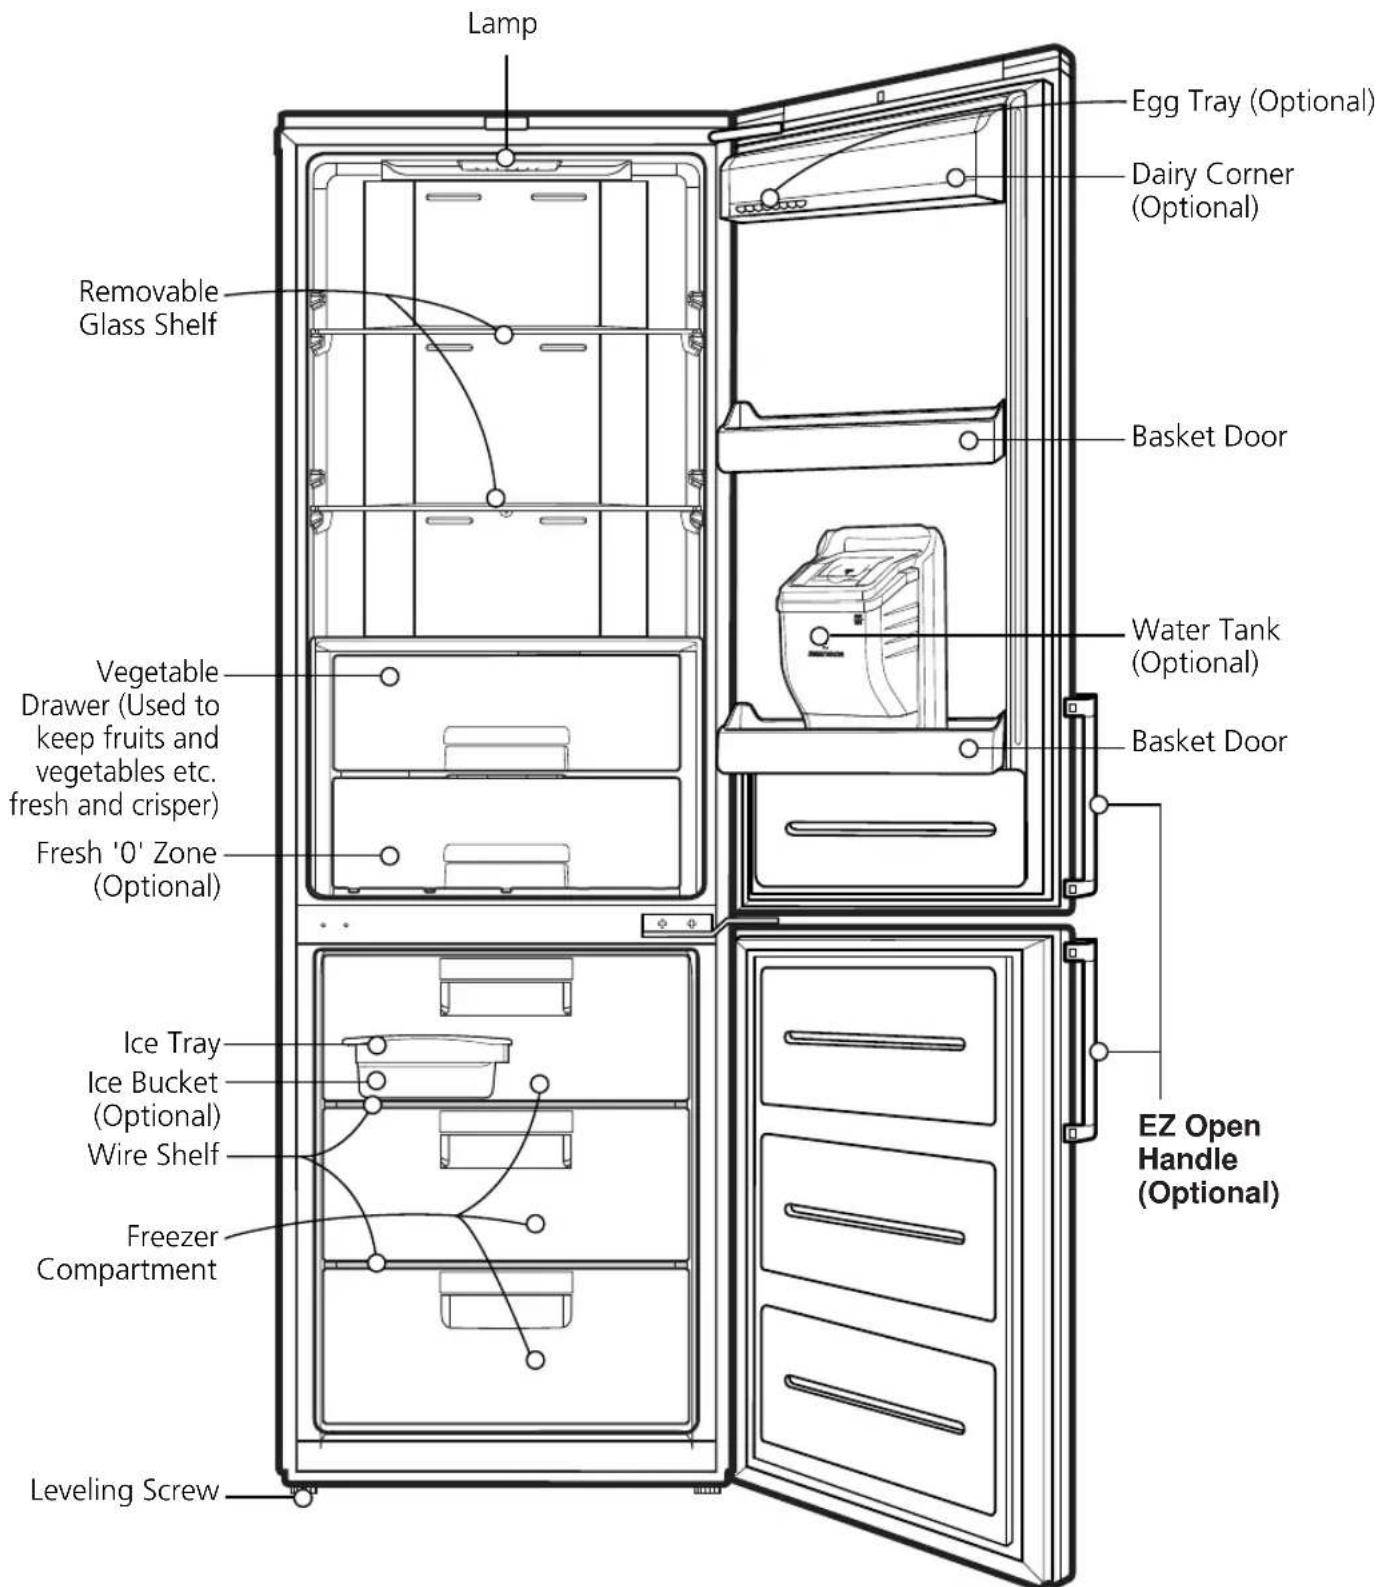
text_image
Lamp Removable Glass Shelf Egg Tray (Optional) Dairy Corner (Optional) Basket Door Water Tank (Optional) Basket Door Vegetable Drawer (Used to keep fruits and vegetables etc. fresh and crisper) Fresh '0' Zone (Optional) Ice Tray Ice Bucket (Optional) Wire Shelf Freezer Compartment Leveling Screw EZ Open Handle (Optional)Note
If you find some parts missing from your unit, they may be parts only used in other models.
Identification of Parts
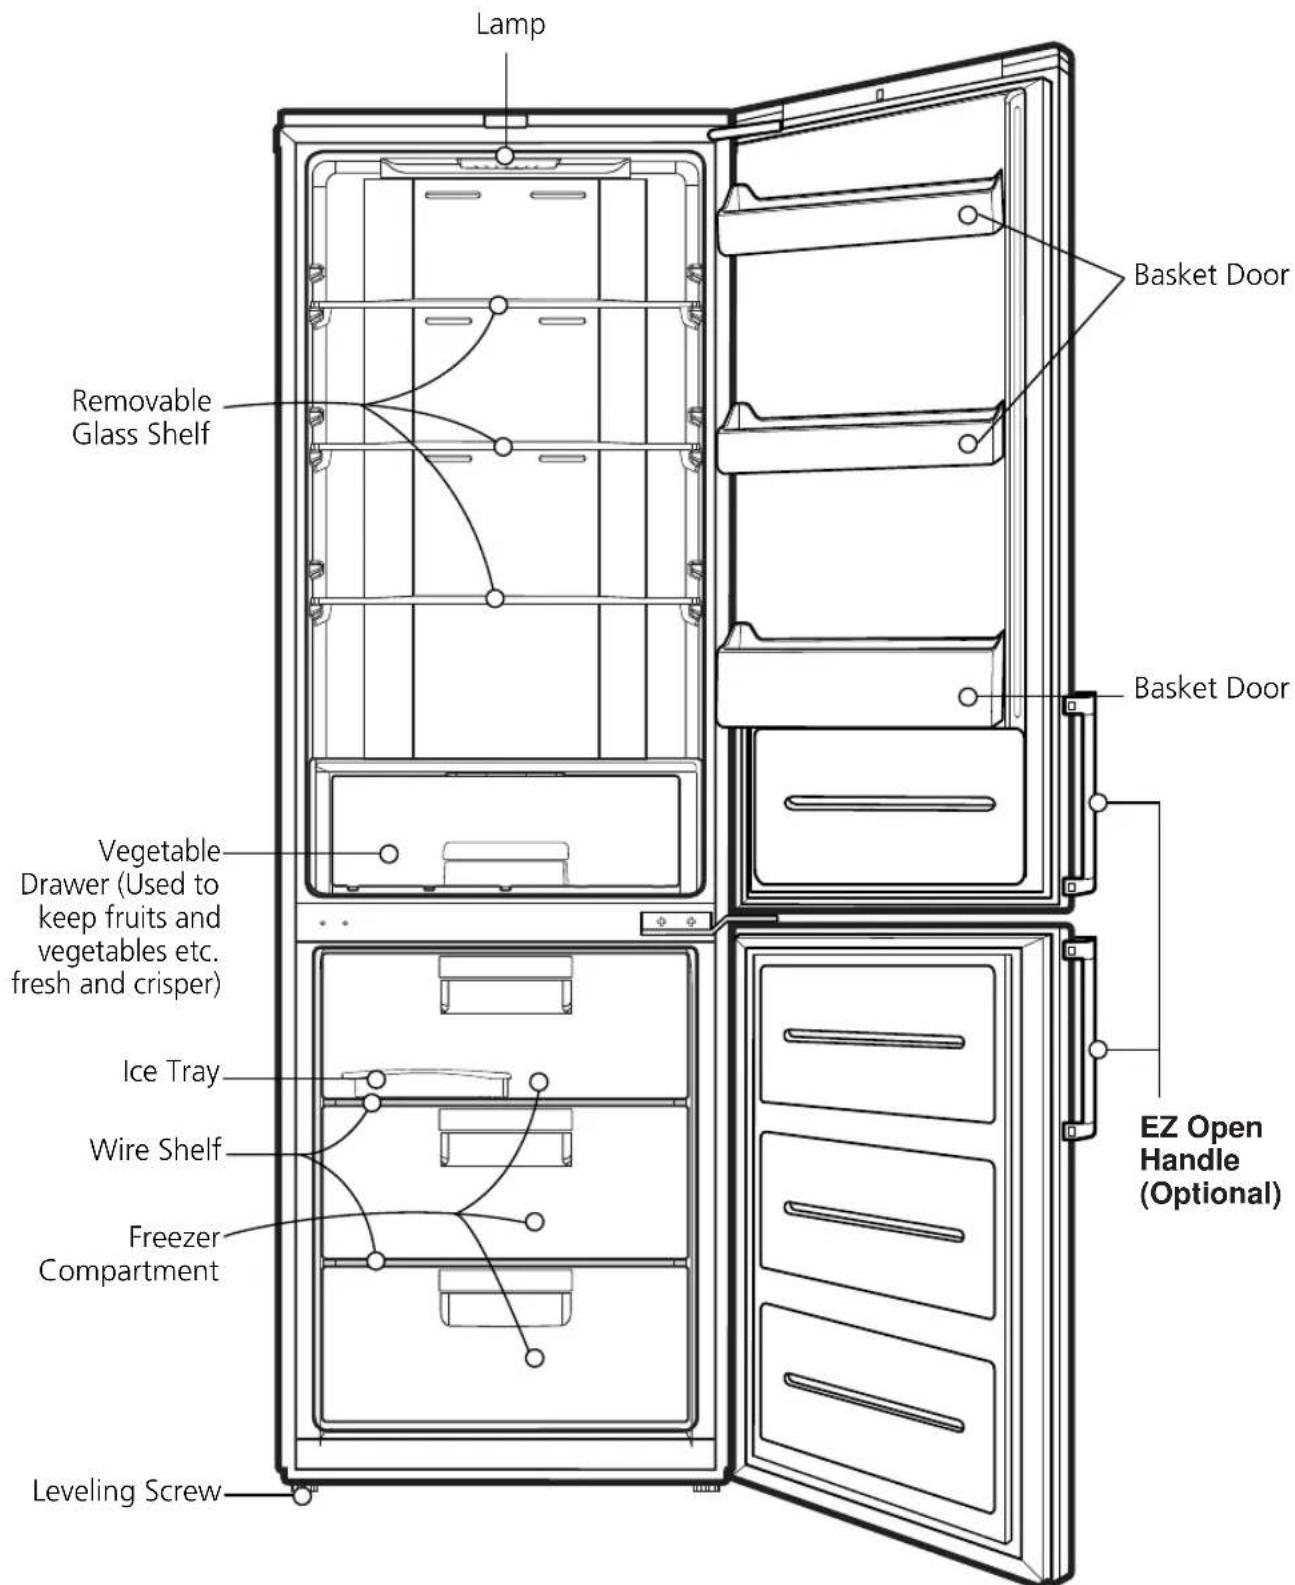
Model Name : GB5234****
text_image
Lamp Removable Glass Shelf Basket Door Basket Door Vegetable Drawer (Used to keep fruits and vegetables etc. fresh and crisper) Ice Tray Wire Shelf Freezer Compartment Leveling Screw EZ Open Handle (Optional)Note
If you find some parts missing from your unit, they may be parts only used in other models.
Installation
- Select a good location.
Place your fridge-freezer where it is easy to use. - Avoid placing the unit near heat sources, direct sunlight or moisture.
- To ensure proper air circulation around the fridge-freezer, please maintain sufficient space on both the sides as well as top and maintain at least 2 inches (5 cm) from the rear wall.
- To avoid vibration, the unit must be leveled. If required, adjust the leveling screws to compensate for the uneven floor.
The front should be slightly higher than the rear to aid in door closing.
Leveling screws can be turned easily by tipping the cabinet slightly.
Turn the leveling screws counterclockwise (☐) to raise the unit, clockwise (☐) to lower it. - Clean your fridge-freezer thoroughly and wipe off all dust accumulated during shipping.
- Install accessories such as ice cube box, etc., in their proper places. They are packed together to prevent possible damage during shipment.
- Connect the power supply cord (or plug) to the outlet. Don't double up with other appliances on the same outlet.
Applicable to some models only: - To provide necessary air circulation, you should leave enough space on each side, top and behind the refrigerator-freezer.
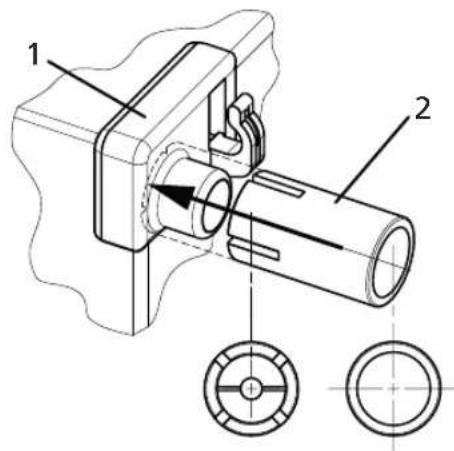
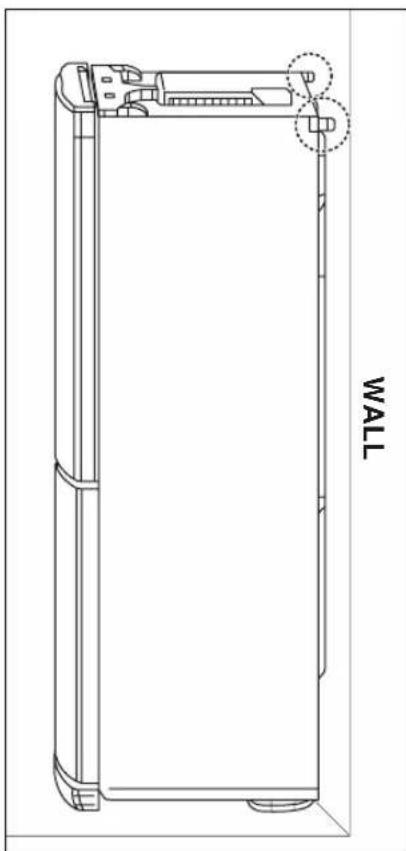
Set the limit stops in the upper corners of the back plate of the device as shown in Fig. 1. Stops (2) can be found in the drawer inside refrigerator compartment.
text_image
Technical diagram of a mechanical assembly with labeled parts and cross-sectional viewsFig. 1. Push Stopper (2) onto part (1) until the end
natural_image
Technical line drawing of a rectangular device with a wall-mounted bracket and mounting feet (no text or symbols)Fig. 2. Push the refrigerator to the wall.
Appliance usage range
This appliance is intended to be used in household and similar applications such as:
- staff kitchen areas in shops, offices and other working environments;
- farm houses and by clients in hotels, motels and other residential type environments;
• bed and breakfast type environments;
• catering and similar non-retail applications
Starting
When your fridge-freezer is installed, allow it 2-3 hours to stabilize at normal operating temperature prior to filling it with fresh or frozen foods. If power plug is disconnected, allow 5 minutes delay before restarting.
Your fridge-freezer is now ready for use.
Note
Do not move refrigerator while the refrigerator is operating.
Compressor may occur a temporary rattling noise. (This is normal and will not impact on the performance or the life of the compressor. The rattling will stop after the refrigerator comes to a rest.)
Climate class
The appliance is designed to operate at the limited range of ambient temperature, depending on climate zones. Do not use the appliance at the temperature out of the limit. Climate class of your appliance is indicated on the label with technical description inside the fridge compartment.
| Class | Symbol | Ambient temperature range °C |
| Extended temperate | SN | +10 ~ +32 |
| Temperate | N | +16 ~ +32 |
| Subtropical | ST | +16 ~ +38 |
| Tropical | T | +16 ~ +43 |
Temperature Control
Your fridge-freezer has controls that let you regulate the temperature in the fridge and freezer compartments.
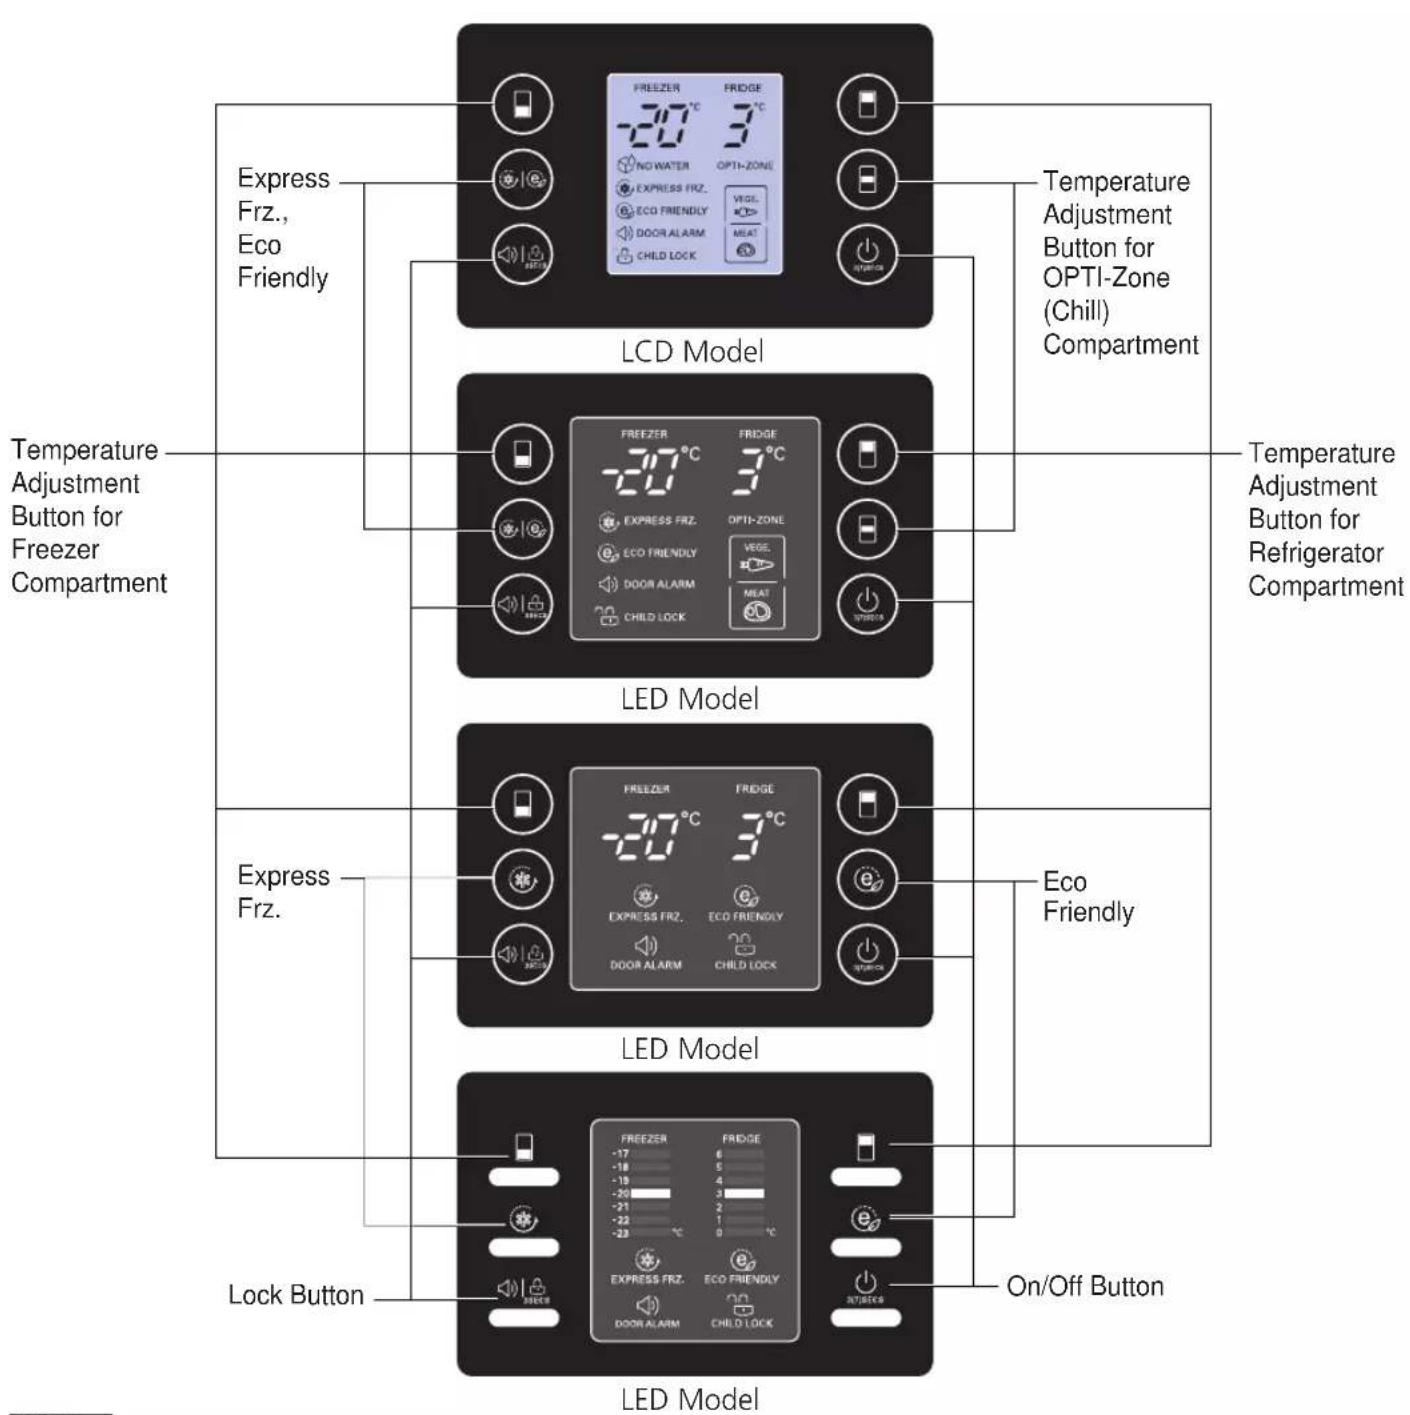
Display Panel For Temperature Control
Adjusting the temperatures and functions
text_image
Express Frz., Eco Friendly LCD Model Temperature Adjustment Button for Freezer Compartment LCD Model Temperature Adjustment Button for OPTI-Zone (Chill) Compartment Temperature Adjustment Button for Refrigerator Compartment LED Model Express Frz. Eco Friendly LED Model Lock Button On/Off Button LED ModelNote
All adjust function of LCD Model is operated after pressing any button.
Display Panel For Temperature Control
Adjusting the temperatures and functions
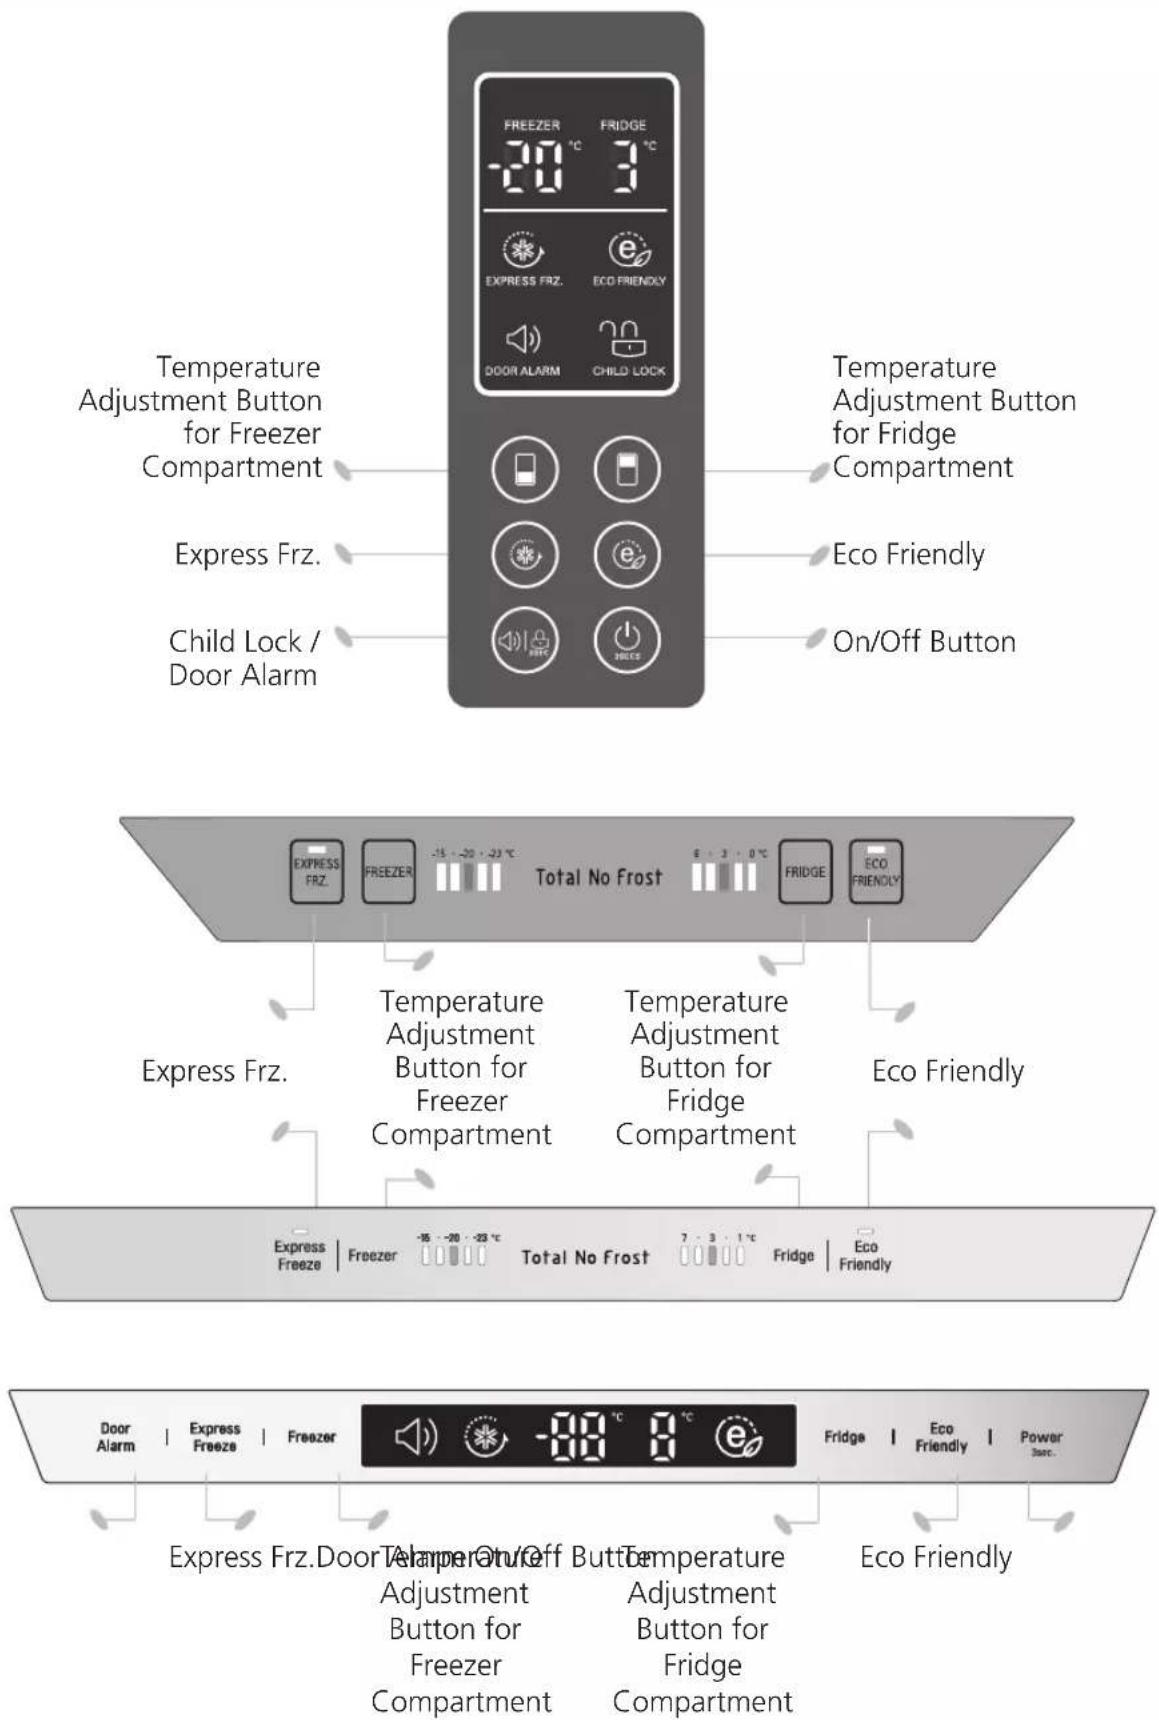
text_image
Temperature Adjustment Button for Freezer Compartment Express Frz. Child Lock / Door Alarm Temperature Adjustment Button for Fridge Compartment Eco Friendly On/Off Button Total No Frost FRIDGE ECO FRIENDLY Express Frz. Temperature Adjustment Button for Freezer Compartment Temperature Adjustment Button for Fridge Compartment Eco Friendly Express Freeze | Freezer | Total No Frost | Fridge | Eco Friendly Door Alarm | Express Freeze | Freezer | Temperature Adjustment Button for Freezer Compartment | Fridge | Eco Friendly | Power Source. Express Frz. Door Alarm On/Off Button Temperature Adjustment Button for Fridge Compartment Eco FriendlyHow to adjust the temperature in the refrigerator and freezer compartment
- The initial temperature of the freezer and refrigerator Compartment is -20°C and 3°C respectively.
You can now adjust the temperature of the compartments as you want.
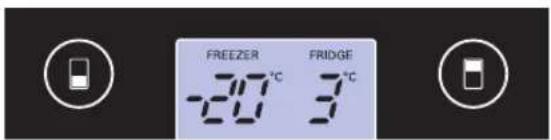
text_image
FREEZER FRIDGE -20°C 3°CLCD Model
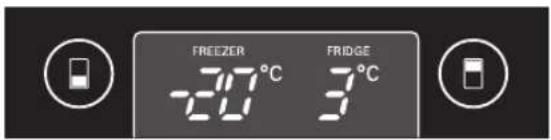
text_image
FREEZER -20°C FRIDGE 3°CLED Model
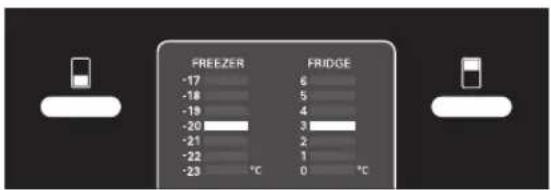
text_image
FREEZER -17 -18 -19 -20 -21 -22 -23 6 5 4 3 2 1 0 °C °FRIGE °CLED Model
< Exterior Type >
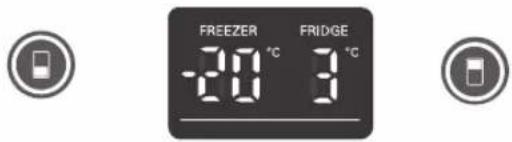
text_image
FREEZER FRIDGE -20 °C 3 °C< Interior Type >

text_image
FREEZER -15 -20 -23 °C 6 - 3 - 0 °C FRIDGE Freezer -80 °C 8 °C FridgeNote
The actual inner temperature varies depending on the food status, as the indicated setting temperature is a target temperature, not actual temperature within refrigerator.
Refrigeration function is weak in the initial time. Please adjust temperature as above after using refrigerator for minimum 2\~3 days.
OPTI-Zone (Chill) (Optional)
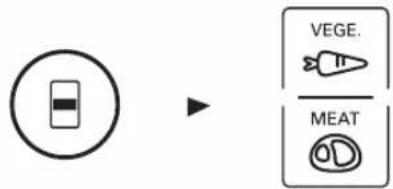
- By pressing the button, store vegetables, fruits (at relatively low conservation temperature) or other types of food such as meat to be defrosted.
Method to Use
- You can select optimum temperature range depending on types of food stored.
flowchart
graph LR
    A["Start"] --> B["VEGE."]
    B --> C["MEAT"]
- 2 Step of temperature selection including vegetables, Fruits (2°C) and meat and fish (-1°C) is available.
- Vegetable and cold storage foods requiring humidity Maintenance and meats/fishes can be more freshly stored depending on type of foods stored.
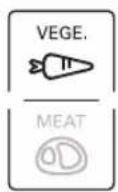
- When "VEGE." button's lamp is taken on, opti-zone is to chill compartment.
- Chill compartment' temperature is maintained within -2°C \~ 3°C regardless of ambient temperature.
Chill compartment is the special temperature zone.
OPTI-ZONE
Express Frz.
- Please select this function for prompt freezing.
- This function is used when you want to freeze the foods quickly. Press the Express Frz. button once, and then the quick freeze operation starts with the lamp on.
- The Express Frz. operation takes about 3/24 hours. When its operation ends, it automatically returns to the previous temperature setting. If you want to stop the quick freeze operation, press the Express Frz. button once more, the lamp goes out, and the Express Frz. operation stops and the refrigerator returns to the previous temperature setting.
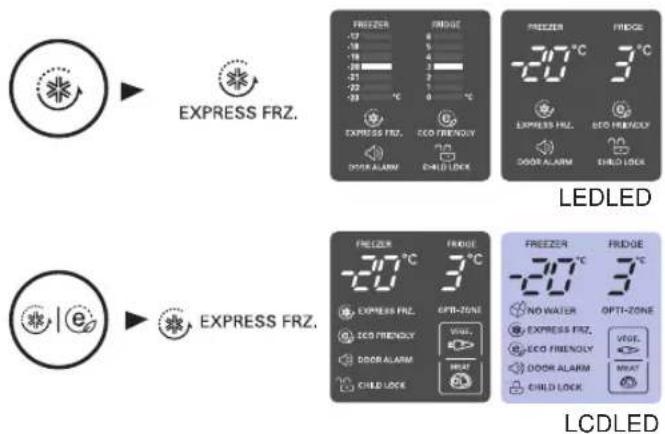
- The arrow mark graphic remains at the on status after flickering for 4 times when selecting Express Frz. is turned "On".
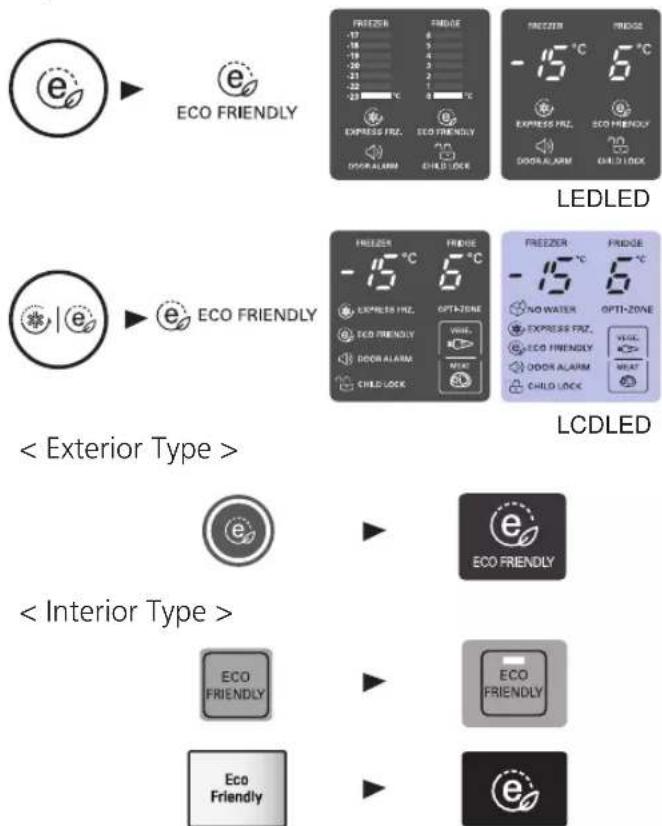
Eco Friendly
- This function makes the fridge-freezer work in a power saving mode which is useful for when you are away on holiday, by reducing energy consumption.
Pressing 'ECO FRIENDLY' starts operation with lamp on and pressing it again stops the operation.
text_image
e ECO FRIENDLY FREIZER -17 -18 -19 -20 -21 -22 -23 EXPRESS FRZ. DOOR ALARM FRIEDGE CHILD LOCK FREIZER -15°C EXPRESS FRZ. DOOR ALARM FRIEDGE CHILD LOCK 6°C ECO FRIENDLY LEDLED e ECO FRIENDLY FREIZER -15°C EXPRESS FRZ. DOOR ALARM FRIEDGE CHILD LOCK 6°C OPTI-ZONE NO WATER EXPRESS FRZ. DOOR ALARM FRIEDGE CHILD LOCK 6°C OPTI-ZONE ECONFLY ECONFLY ECONFLY ECONFLY ECONFLY ECONFLY LCDLED < Exterior Type > < Interior Type > ECONFLY ECONFLY ECONFLY ECONFLYNote
When the Eco Friendly mode is "ON", the other buttons will not operate. When you come back from Eco Friendly, press the Eco Friendly mode off so that other buttons work and the refrigerator returns to previous temperature setting.
Self Test
- This function automatically detects failure when failure is found in product during the use of refrigerator.
- If the failure occurs at product and it does not operate by pressing any button and normal indication is not done, do not turn the power off and immediately contact with the local service center.
- A lot of time is needed for service engineer to detect the failed part by turning it off.
Lock
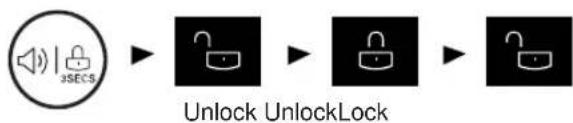
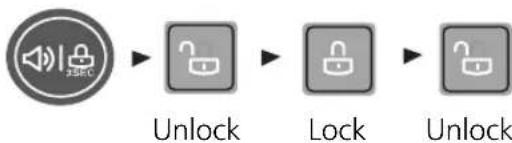
For LED Model
- Pressing this button stops operation of other buttons.
- "Locking" or "Un-Locking" is repeated
whenever pressing the LOCK button.
(For "Locking" press the "LOCK" button for 3 secs.
For "Un-Locking" press the "LOCK" button for 3 secs.) - When 'LOCK' is activated, pressing the other buttons would not work.
flowchart
graph LR
    A["Speaker icon"] --> B["Unlocked Lock"]
    B --> C["Unlocked Lock"]
    C --> D["Unlocked Lock"]
< Exterior Type >
flowchart
graph LR
    A["Audio Speaker"] --> B["Lock"]
    B --> C["Lock"]
    C --> D["Unlock"]
On/Off
- Pressing this button refrigerator power is ON or OFF.
- ON or OFF is repeated whenever pressing the ON/OFF button.
(For "OFF" press the "ON/OFF" button for 3\~7 secs.
For "ON" press the "ON/OFF" button for 1 secs.)
Fridge Compartment (Applicable to some models only)
Fresh '0' Zone
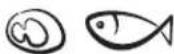
Store only meat, fish.
If store vegetables and fruits, they can be frozen.
"Fresh 0 Zone" temperature can be changed by setting listed like below.
When the refrigerator room is set on 6°C, FRESH 0 ZONE has 4 2°C.
When the refrigerator room is set on 3^ C, FRESH 0 ZONE has 0 ±2^ C.
When the refrigerator room is set on 0°C, FRESH 0 ZONE has -3 2°C.
How to Separate the Cover, Assembly
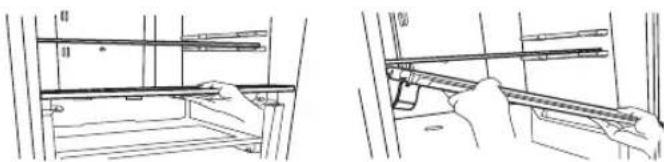
For Roller Model
When separating the vegetable drawer, pull the vegetable drawer toward and then Lift the drawer.
- Lift the front of the Cover, Assembly Slightly and pull the Cover, Assembly toward yourself.
- Lean the Cover, Assembly slightly to one side.
- Pull out the Cover, Assembly.
natural_image
Technical line drawing showing two views of a mechanical assembly with no visible text or symbols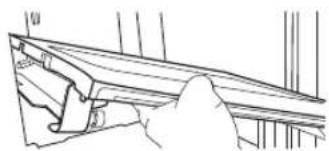
natural_image
Line drawing of a hand adjusting a window frame (no text or symbols)Vita Light (Optional)
natural_image
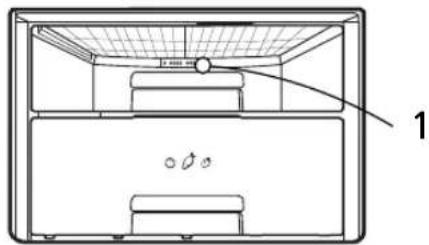
Technical line drawing of a mechanical device interior with no visible text or symbols- LED lamp is operated automatically for all day. It may make vegetable to photosynthesize. Vita-Light is located at the rear of the vegetable drawer.
- Viewing the laser out put with certain optical instruments (e.g. telescopes, binoculars, glasses, magnifier) may pose an eye hazard.
- The LEDs will operate automatically. Do not uncover the LEDs. Contact qualified service technician if there is any failure in LEDs.
CAUTION
- Use of controls or adjustments or performance of procedures other than those specified herein may result in hazardous radiation exposure.
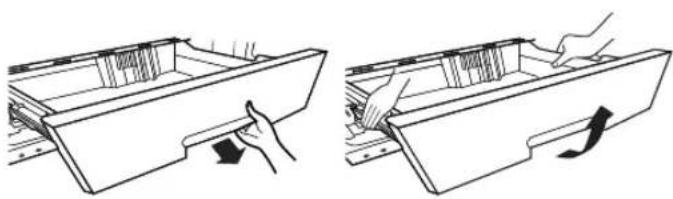
How to separate the vegetable drawer
natural_image
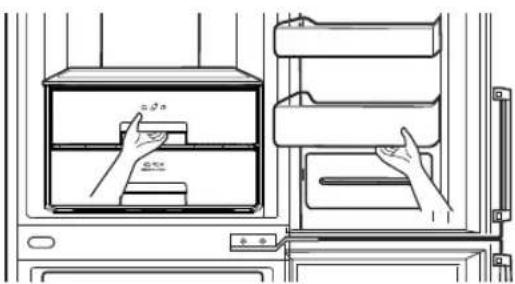
Line drawing of a refrigerator interior with hand placing items on the cabinet (no text or symbols)Remove the lower basket from the door by lifting it up.
Pull the drawer until it stops and slightly lifting it up pull it to take it out.
How to separate the vegetable drawer or opti-zone drawer (Optional)
natural_image
Two line drawings of a drawer with hand positioning and a scroll arrow indicating movement (no text or symbols)For Rail Model
When separating the vegetable and opti-zone drawer, pull the vegetable toward you and then lift the drawer up with both hands.
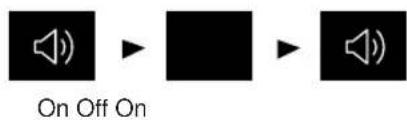
Door Alarm
- When the door of the fridge is opened for a while, the alarm sounds. Please contact with the local service center if warning continue to sound even after closing the door.
- You can choice door alarm on/off pressing door alarm button shortly.
flowchart
graph LR
    A["Speaker icon"] --> B["On State"]
    B --> C["Speaker icon"]
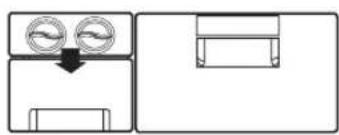
Ice Making
- Take out the twist ice maker, fill it up and put it back to its original location.
flowchart
graph TD
    A["Two circular components"] --> B["Output Box"]
    C["Rectangular Output Box"] --> D["Rectangular Output Box"]
- Ice will be dropped into the ice storage bin by rotating ice separation handle of ice making compartment.
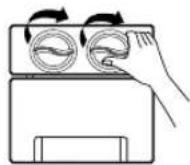
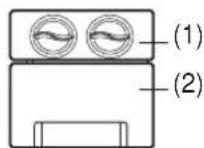
- You can make ice and also use this space as a storage space for Frozen food. Removing (1) (Twist ice maker) as shown in the picture.
Note
- Rotating the ice separation handle before ice is fully frozen may cause the remaining water drop into the ice storage bin to lump the ice together.
• Take the ice out of the ice storage bin for use but do not pour water into the ice storage bin to freeze the water to ice. The ice storage bin can be Frozen and broken. - When the ice is full, it is designed for the ice to fall to the bottom in case the ice storage bin can not pulled out. Be careful not to store the ice too full.
Ice Making
natural_image
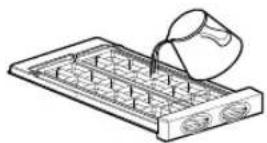
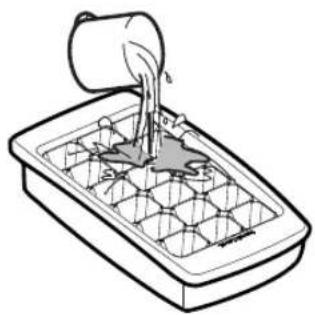
Line drawing of a container with liquid being poured into it, no text or symbols present• Take out container with ice tray. Fill the ice tray to the water level and put it back.
- You can place container with ice tray in upper or middle drawer of freezing compartment.
- If ice cubes are required fast, press the «EXPRESS FRZ.» button.
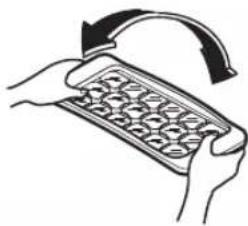
• To remove ice cubes, hold the tray at its ends and twist gently.
natural_image
Illustration of hands holding a keyboard with an arrow indicating rotation (no text or symbols)TIP
To remove ice cubes easily, run water on the tray before twisting.
Defrosting
- Defrosting takes place automatically.
- The defrosting water flows down to the evaporating tray and is evaporated automatically.
Water Dispenser (Optional)
Features
text_image
Dispenser Pad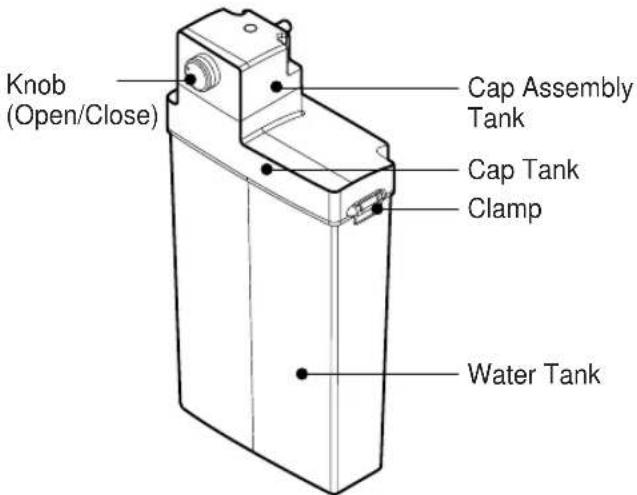
text_image
Knob (Open/Close) Cap Assembly Tank Cap Tank Clamp Water TankFilling of WATER TANK
- Turn the knob shutter to open. And pull out the water tank assembly. After unlocking the clamp, open the cap tank and then fill water using a kettle etc.
- After filling potable water, fix the cap cover and then lock the clamp.
- When long period does not use or the first use, You have to fill the water tank with over 3.2 L water.
Water Dispenser (Optional)
Dispenser Pad Cap Cover
text_image
Water TankFilling of WATER TANK
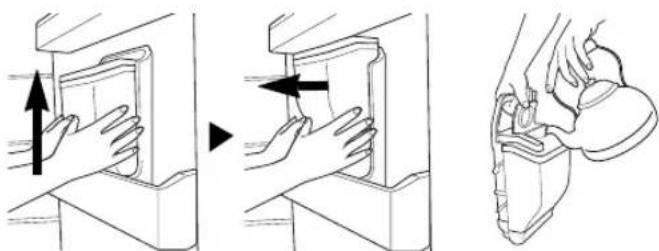
How to Remove the Water Tank
natural_image
Illustration showing three steps of a hand holding a device, with arrows indicating motion (no text or symbols present)• The assembly is the reverse of removal.
- Be careful not to press on with valve.
- When you assemble water tank on the door, be careful to install certainly.
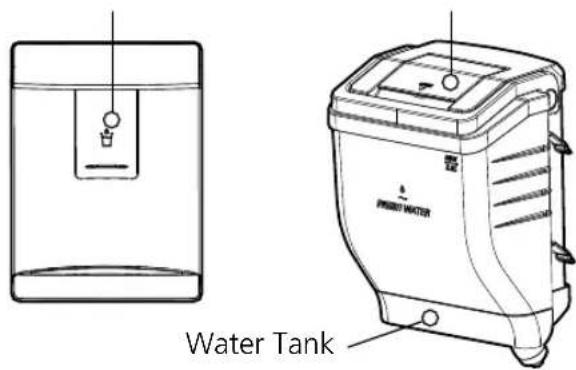
- Pull out the water tank.
Then open the cap cover. - Water can be filled up to 2.3 liter.
- After filling potable water. Close the Cap Cover.
Filling of PET Bottle (Optional)
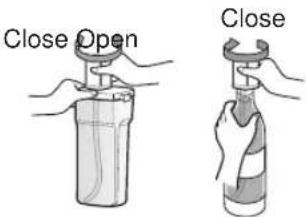
When using the water bottle, you can connect the cap assembly tank to the general water bottle to use the water bottle, instead of the water tank provided.
- Turn the cap assembly tank in open direction to separate from cap tank. Open the water bottle and insert the tube into the water bottle.
text_image
Close Open Close- Assembly water bottle by the cap assembly tank (Height of water bottle_Below 350 mm, Beyond 300 mm). Please relocate the tilting basket. There are some types that are not compatible.
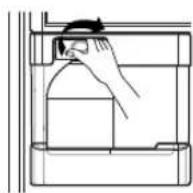
- Assembly the water bottle on the door.
CAUTION
- Please use bottled water currently circulated.
- If you fill soft drinks, milk and fruit juices or ground water(included Ca, Mg, Si etc.) or no filtered water, it may cause malfunctioning.
- When you fill water tank with water, please let hot water cool before putting water tank in refrigerator.
- Hot water cause malfunctioning.
- When you install water tank in refrigerator, cap should fit into (plug) housing and safety knob has to be pointed to "close".
- When water tank is not correctly inserted, dispenser might not work or water tank might fall off on the floor.
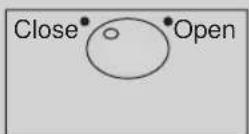
- If you want to take out water tank for re-dispensing or cleaning, you should grab and pull the upper part of the water tank and have safety knob pointed to "open".
Drinking
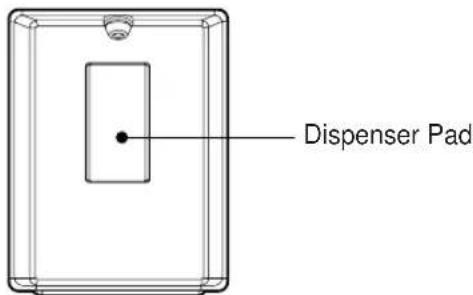
- Press the dispenser pad with a cup.
- If pressing the pad, water inside of the dispenser is supplied.
- If slowly removing a cup from the pad, water will not fall down.
- Some noise after dispensing is the sound to absorb water remained in the tube, which is for the purpose of sanitation.
CAUTION
Do not use other beverage (milk, juice, carbonated beverage etc) than potable water. Especially beverage including grain must not be used (may result in failure).
WARNING
Fill with the potable water only.
Pump can generate some noise, while the cool water is taken from the tank (e.g. Bottle, water tank).
Bottle Rack
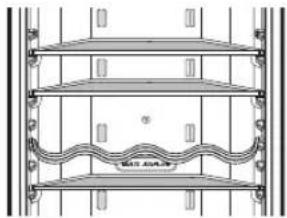
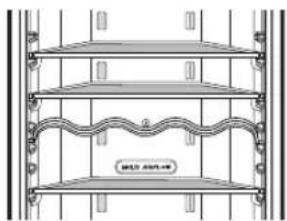
Model Name : GB7143****
- Bottles can be stored laterally with this wine corner.
Then you can invert the wine rack and place it on the shelf.
This will enable more shelf-place.
natural_image
Architectural elevation drawing of a multi-level building facade with wavy horizontal shelves and decorative railings (no text or symbols)ex) in using
natural_image
Architectural elevation drawing of a three-tiered shelving unit with ornate eaves and decorative railings (no text or symbols)ex) in not using
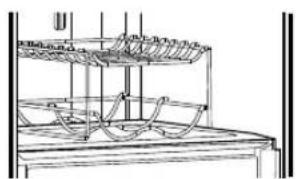
Model Name : GB7138****
- Bottles can be stored laterally with this wine corner.
Then you can invert the wine rack and place it on the cover, assembly.
natural_image
Technical line drawing of a mechanical assembly with curved components and layered structure (no text or symbols)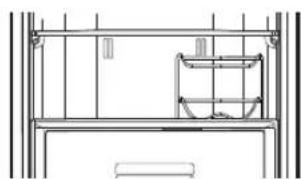
natural_image
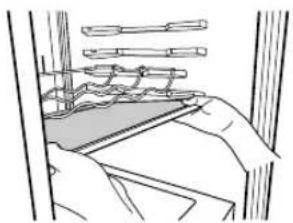
Architectural line drawing of a two-story building facade with horizontal supports and a central storage unit (no text or symbols)Removable Glass Shelf
- Lift the front of the removable glass shelf.
- Pull the removable glass shelf toward door direction about 11 cm \~ 14 cm.
- Lean the glass shelf slightly to one side.
- Separate the glass shelf to designated place.
natural_image
Line drawing of a person hanging from a window with hanging clothes (no text or symbols)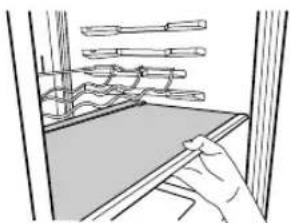
natural_image
Line drawing of a hand using a tool to clean or install a surface, with no visible text or symbols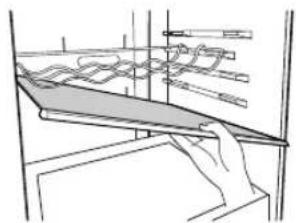
natural_image
Pure technical line drawing of a mechanical assembly without any text, numbers, or symbols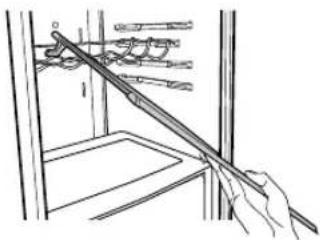
natural_image
Line drawing of a hand holding a tool interacting with a mechanical device (no text or symbols visible)Freezer Compartment
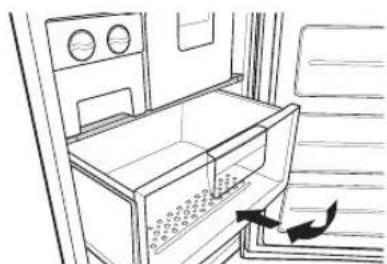
If a large quantity of food is to be placed in the freezer compartment,
- The upper drawer of freezer compartment, twist ice maker kit shall be taken out of the appliance and the food shall be stacked directly on the wire shelf.
- The middle drawer of freezer compartment shall be taken out of the appliance and food shall be stacked directly on the wire shelf.
Freezer compartment provides wire self on default to maximize food storage capacity. And also the drawer is provided to convenient usage for watery meat or half-liquid state food.
natural_image
Line drawing of a refrigerator interior with doors, seats, and a door handle (no text or symbols)Max Freezing capacity If there is already food in the compartment, please set freezer to the coldest condition (-23°C) and press on "Express frz", button several hours before placing fresh produce in the freezer compartment to get maximum capacity, As a rule 7 hours is adequate.
Auto Ice maker
WARNING
Personal Injury Hazard
DO NOT insert your hands in to the Icemaker in operation. It may cause to injure you.
OPERATION INSTUCTIONS
A Newly-installed refrigerator may take 12 to 24 hours to begin making ice.
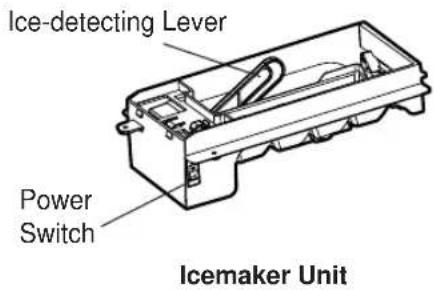
text_image
Ice-detecting Lever Power Switch Icemaker Unit- The automatic icemaker can automatically make8 cubes at a time, 60\~80 pieces per day. This quantity may vary by circumstance, including ambient temperature, door opening, freezer load. Etc.
- Throw away the first few batches of ice to allow the water line to clear.
- Ice making stops when the ice storage bin is full.
- If you don't want to use the automatic icemaker, turn the icemaker switch to OFF. If you want to use automatic icemaker again, change the switch to ON.
- If ice is not used frequently, old ice cubes will become cloudy, taste stale, and shrink.
Note
The sound produced when the ice drops in the ice storage bin is normal. Not caused by the defective product.
WARNING
- If ice is not used frequently, old ice cubes will become cloudy, taste stale, and shrink.
- Do not store ice (cubes) longer then two weeks.
WHEN YOU SHOULD SET THE KAER POWER SWITCH TO O(OFF)
- When the water supply will be shut off for several days.
- When the ice storage bin is removed for more than a minute or two.
- When the refrigerator will not be used for several day.
PREPARING FOR VACATION
- Set the icemaker power switch to O(OFF) and shut off the water supply to the refrigerator.
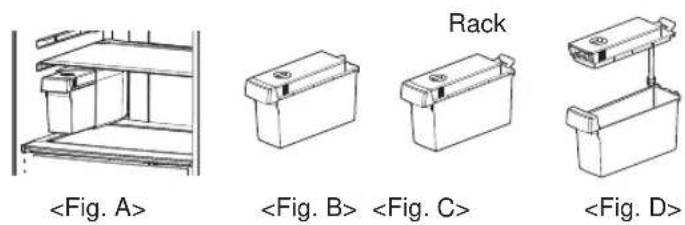
Water tank
No Plumbing Ice & Water
You can use the water in the water tank to use the Auto ice maker function without having to Connect the water pipe to the refrigerator.
How to uninstall (Cleaning)
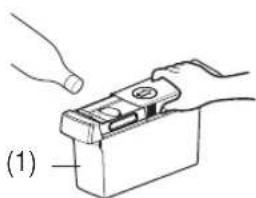
- When filling water to the water tank, Pull the cover on top sides to open the water Tank as shown in (1)
natural_image
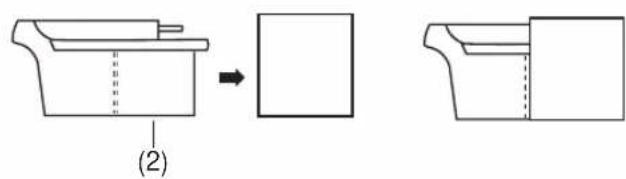
Illustration of hands operating a battery pack with a handle, labeled (1), no text or symbols present.- When assembling the water tank, Please push water tank until indicated line matches the hole As shown in (2).
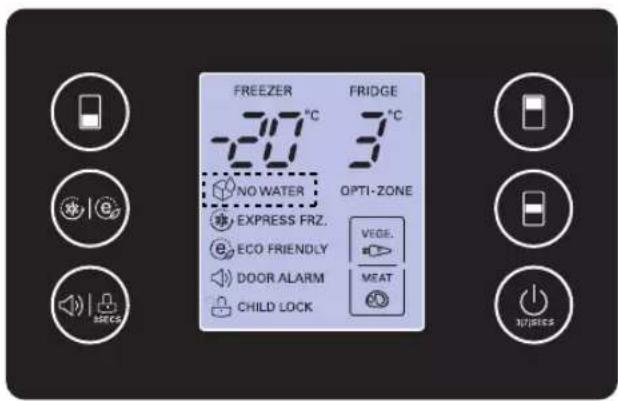
Auto ice making is not operating when water tank is wrong position. As this moment you can see "no water" signal on display window.
text_image
(2)NO WATER Indicator
text_image
FREEZER -207°C FRIDGE 3°C NO WATER OPTI-ZONE EXPRESS FRZ. VEGE. ECO FRIENDLY MEAT DOOR ALARM CHILD LOCK ISSUES- NO WATER mark (NO WATER) appear on the display when Water Tank is not equipped with refrigerator or no water in the Water Tank.
- NO WATER mark disappear on the display if Water Tank filled water is re-equipped with refrigerator. But if Water Tank filled no water is equipped with refrigerator, NO WATER mark disappear for a moment and NO WATER mark is displayed again.
- The sound made while the ice is dropping to the bin is normal. After dispensing, "thump" may be heard as the pump operate. This is a normal sound.
Note
- When assembling or disassembling the water tank, be careful not to apply excessive force as it can damage the water tank.
- If there is no water in the water tank, you will not able to use the Auto Ice Maker function.
- When the water in the water tank is low, the size of the ice may be made smaller.
- When you are refilling the water to the water tank, it is good to empty the water.
- Please fill water tank with water until 1.5L.
WARNING
- Please use potable water currently circulated
- If you soft drinks, milk and fruit juices or ground water (included Ca, Mg, Si, etc...) or no filtered water, it may cause out of working.
- When you fill water tank with water, please let hot water cool and put water tank in refrigerator - Hot water can be caused out of working.
- Because the water tank can get heavy, don't let children use or hold the water tank, especially with on hand.
Storing Food
CAUTION
- Do not store food which goes bad easily at low temperature, such as banana, and melon.
- Allow hot food to cool prior to storing. Placing hot food in the fridge-freezer could spoil other food, and lead to higher electric bills.
- When storing the food, use a container with a lid. This prevents moisture from evaporating, and helps food to keep its taste and nutrients.
- Do not block air vents with food. Smooth circulation of cold air keeps fridge-freezer temperature even.
- Do not open the door frequently. Opening the door lets warm air enter the fridge-freezer, and cause temperature to rise.
- Never keep too many foods in door rack, as this may stop the door from fully closing.
- Do not store bottles in the freezer compartment—they may break when frozen.
- Do not refreeze food that has been thawed. This causes loss of taste and nutrition.
- Do not store pharmaceutical products, scientific materials or other temperature sensitive products in the refrigerator. Products that require strict temperature controls must not be stored in the refrigerator.
- If you want to quick freeze new food, you put it middle drawer of freezer compartment, and then press the Express Frz. button.
- To ensure good air circulation in the appliance, insert the freezer drawers all the way.
Suggestion for energy saving
- Please do not keep the door open for a long time, close door in the shortest time.
- Too much food are not advised to be put in. Enough space should be kept for cool air circulating freely.
- Do not set the temperature of fridge-freezer lower than needed. Do not put the food near the temperature sensor. Keep the distance of at least 5mm from the sensors.
- Allow hot food to cool prior to storing. Placing hot food in the fridge-freezer could spoil other food, and lead to higher electric bills.
- Do not block air vents with food. Smooth circulation of cold air keeps fridge-freezer temperature even.
- Do not open the door frequently. Opening the door lets warm air enter the fridge-freezer, and cause temperature to rise.
- To Keep a position of inner parts like as baskets, drawers (Fridge), shelves and wire shelves Supplied by manufacturer is the most efficient usage for energy saving.
General Information
Power Failure
- 1\~2 hour power failure does no harm to the foods stores. Try to avoid opening and closing the door too frequently.
If You Move
• Take out foods from the fridge-freezer and firmly fix the loose items with tape.
- Turn the leveling screws until they stop before moving the fridge-freezer. Otherwise the screw may scratch the floor or the fridge-freezer cannot move.
Anti Condensation Pipe
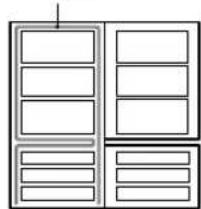
- The Anti-Condensation pipe is installed around the front side of fridge and freezer, only freezer as well as on the partition between fridge compartment and freezer compartment to prevent dewing.
- Especially after installation or when ambient temperature is high, the fridge-freezer may feel hot, which is quite normal.
Anti-Condensation Pipe
natural_image
Pure diagram of a cabinet or storage unit with no text, numbers, or symbolsTo Reverse the Doors
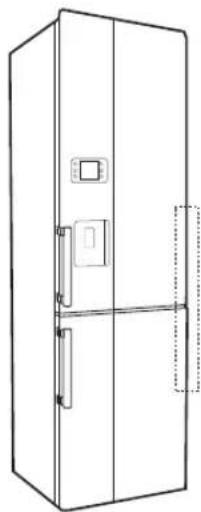
- Your fridge-freezer is designed with reversible doors, do that they may open from either the left of right hand side to suit your kitchen design.
Door Handles (2-tone models)
natural_image
Line drawing of a double door with handle and door lock (no text or symbols)- If you have chosen a two-tone refrigerator and would like to reverse the doors, you can either re-attach the handles that come with the unit or can purchase an alternative pair in the opposite colour tone. To purchase these handles please call LG Customer Services at the telephone number shown on your warranty card, or contact the retailer where you bought the unit.
CAUTION
However, When you want to reverse the doors, you must call to service agent. Reversing the doors is not covered by the warranty.
Cleaning
Before Cleaning
Be sure to unplug the power.
Exterior
Clean the outside of the fridge-freezer with a soft cloth soaked with hot water or liquid detergent. If you use a detergent, be sure to wipe it with a clean wet cloth.
Interior
Same as above.
After Cleaning
Check that the power cord is not damaged, power plug has not overheated, and that the power plug is tightly inserted into the outlet.
WARNING
Be sure to dry the appliance with a cloth after washing it with water. Do not use abrasive, petroleum, benzene, thinner, hydrochloride acid, boiling water, rough brush, etc, as they may damage parts of the fridge-freezer.
Drip Tray
Wipe moisture out around the door part and the drip tray using a clean cloth.
Exterior Dispenser
Wipe moisture out of dispenser and on the dispenser pad using a cloth.
Water Tank
- Turn the knob shutter to open. And pull out the water tank assembly.
- After unlocking the clamp and remove it, clean and fully rinse the inside/outside part of the water tank by using neutral cleansing agent.
Cap assembly tank & Cap tank
Clean and fully rinse the cap assembly tank & cap tank by using neutral cleansing agent. Especially for the groove part of the cap tank, it is convenient to cleanse it by using a small brush.
CAUTION
Don't separate the screw and tube from the cap assembly tank. Please clean the out surface.
Smart Diagnosis™
(Optional)
Should you experience any problems with your refrigerator, it has the capability of transmitting data via your telephone to the LG service center. This gives you the capability of speaking directly to our trained specialists. The specialist records the data transmitted from your machine and uses it to analyze the issue, providing a fast and effective diagnosis.
If you experience problems with your refrigerator, call to the LG service center.
Only use the Smart Diagnosis feature when instructed to do so by the LG call center agent. The transmission sounds that you will hear are normal and sound similar to a fax machine.
Smart Diagnosis cannot be activated unless your refrigerator is connected to power. If your refrigerator is unable to turn on, then troubleshooting must be done without using Smart Diagnosis.
First, call to the LG service center. Only use the Smart Diagnosis feature when instructed to do so by the LG call center agent.
- Open the refrigerator door.
3 sec.
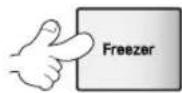
- Press and Hold the 'Freezer' button for 3 seconds.
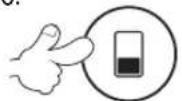
Note
If the door has been opened for over one minute, you must close the door and start again No.1
- Following the instructions of the operator, hold the phone's microphone close to the icon «SmartDiagnosis».
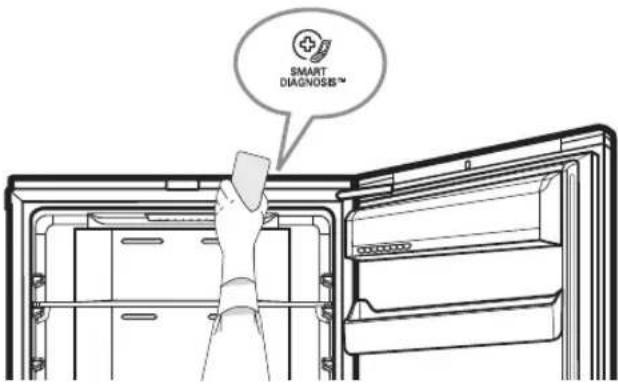
text_image
SMART DIAGNOSIS™-
Hold the phone in the position until the end of the sound data transfer.
-
Keep the phone in place until the tone transmission has finished. This takes about 3 second. Resume your conversation with the specialist, who will then be able to assist you in using the information transmitted for analysis.
Note
- For best results, do not move the phone while the tones are being transmitted.
- If the call center agent is not able to get an accurate recording of the data, you may be asked to try again.
- Call quality differences by region may affect the function.
- Use the home telephone for better communication performance, resulting in better service.
- Bad call quality may result in poor data transmission from your phone to the machine, which could cause Smart Diagnosis to not work properly.
Before calling for service, check this list.
It may save you both time and expense.
This list includes common occurrences that are not the result of defective workmanship or materials in this appliance.
Problem Possible Causes
Fridge-Freezer does not operate
- Power plug may be unplugged from the electric outlet. Plug it in securely.
- House fuse has blown or circuit breaker has tripped. Check and/or replace fuse and reset circuit breaker.
• Power cut. Check house lights.
Fridge or Freezer Compartment Temperature too warm
- Temperature control not set on proper position. Refer to Temperature Control section.
- Appliance is placed close to heat source.
- Warm weather-frequent door openings.
- Door left open for a long time.
- Package holding door open or blocking air duct in freezer compartment.
Vibration or Rattling or Abnormal Noise
- The floor on which the fridge-freezer is installed may be uneven or the fridge-freezer may be unstable. Make it even by rotating the leveling screw.
- Unnecessary objects placed in the back side of the fridge-freezer.
Frost or Ice Crystals on frozen Food
- Door may have been left ajar or package holding door open.
- Too frequent or too long door openings.
- Frost within package is normal.
Moisture forms on Cabinet Surface
- This phenomenon is likely to occur in a wet space. Wipe it with a dry towel.
Moisture collects inside
- Too frequent or too long door openings.
- In humid weather, air carries moisture into fridge when doors are opened.
Fridge has odor
- Foods with strong odors should be tightly covered or wrapped.
- Check for spoiled food.
- Interior needs cleaning. Refer to CLEANING section.
| Door not closing properly | Food package is keeping door open.Move packages that keep door from closing.Fridge-freezer is not level.Adjust the leveling screws.The floor on which the fridge-freezer is installed may be uneven or the fridge-freezer may be unstable.Slightly raise the front side with the leveling screw. |
| Interior light does not work | No power at outlet.When you want to replace the lamp, you must contact service agent. |
| No water dispensing | To low water level in Water Tank.Fill the Water Tank with over 3.2L water. |
text_image
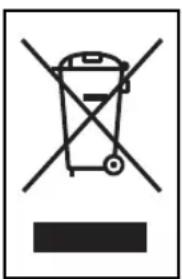
Prohibition sign with crossed-out trash bin and no text, likely indicating waste sorting or disposal restrictionDISPOSAL OF YOUR OLD APPLIANCE
- When this crossed-out wheeled bin symbol is attached to a product it means the product is covered by the European Directive 2002/96/EC.
- All electrical and electronic products should be disposed of separately from the municipal waste stream via designated collection facilities appointed by the government or the local authorities.
- The correct disposal of your old appliance will help prevent potential negative consequences for the environment and human health.
- For more detailed information about disposal of your old appliance, please contact your city office, waste disposal service or the shop where you purchased the product.

text_image
Black and white barcode image with vertical lines on both sidesMFL67794801

LG
Life's Good
The model and serial number of the refrigerator is located on the back or one side of the refrigerator. Record it below should you ever need service.
MODEL SERIAL
Manufacturer address:
LG Electronics Wrocław Sp. z o.o., ul. LG Electronics 1-2, Biskupice Podgórne, 55-040 Kobierzyce, Poland.
Printed in Poland