
LBW148E - Washing machine SMEG - Free user manual and instructions
Find the device manual for free LBW148E SMEG in PDF.


User questions about LBW148E SMEG
0 question about this device. Answer the ones you know or ask your own.
Ask a new question about this device
Download the instructions for your Washing machine in PDF format for free! Find your manual LBW148E - SMEG and take your electronic device back in hand. On this page are published all the documents necessary for the use of your device. LBW148E by SMEG.
USER MANUAL LBW148E SMEG
ELECTRONIC WASHING MACHINE USER MANUAL

natural_image
Line drawing of a single washing machine with front panel and control panel (no text or symbols)BEFORE USING THE WASHING MACHINE, YOU SHOULD CERTAINLY READ THE INFORMATION IN USER'S MANUAL.
CONTENTS
CHAPTER-1: TECHNICAL SPECIFICATIONS 3
CHAPTER-2: BEFORE USING WASHING MACHINE 5
• Safety warnings 5
- Recommendations 6
CHAPTER-3: SETTING UP 7
- Removing transport safety screws....7
- Adjusting feet for balance 9
• Electrical connection 1
• Water inlet connection 1
• Water discharge connection 1
CHAPTER-4: PRELIMINARY PREPARATION FOR
LAUNDERING 12
CHAPTER-5: CONTROL PANEL 16
• Detergent drawer 17
• Programme knob 18
Electronic display 19
- Selecting programme 20
- Auxiliary functions 20
• Starting the programme 29 - Adding/Removing laundry....30
- Child lock 31
- Cancelling programme 32
• Finishing programme 33
CHAPTER-7: ELECTRONIC DISPLAY WARNING SYMBOLS 34
- Warning of water cut-off/low mains water pressure 34
CHAPTER -1: TECHNICAL SPECIFICATIONS
text_image
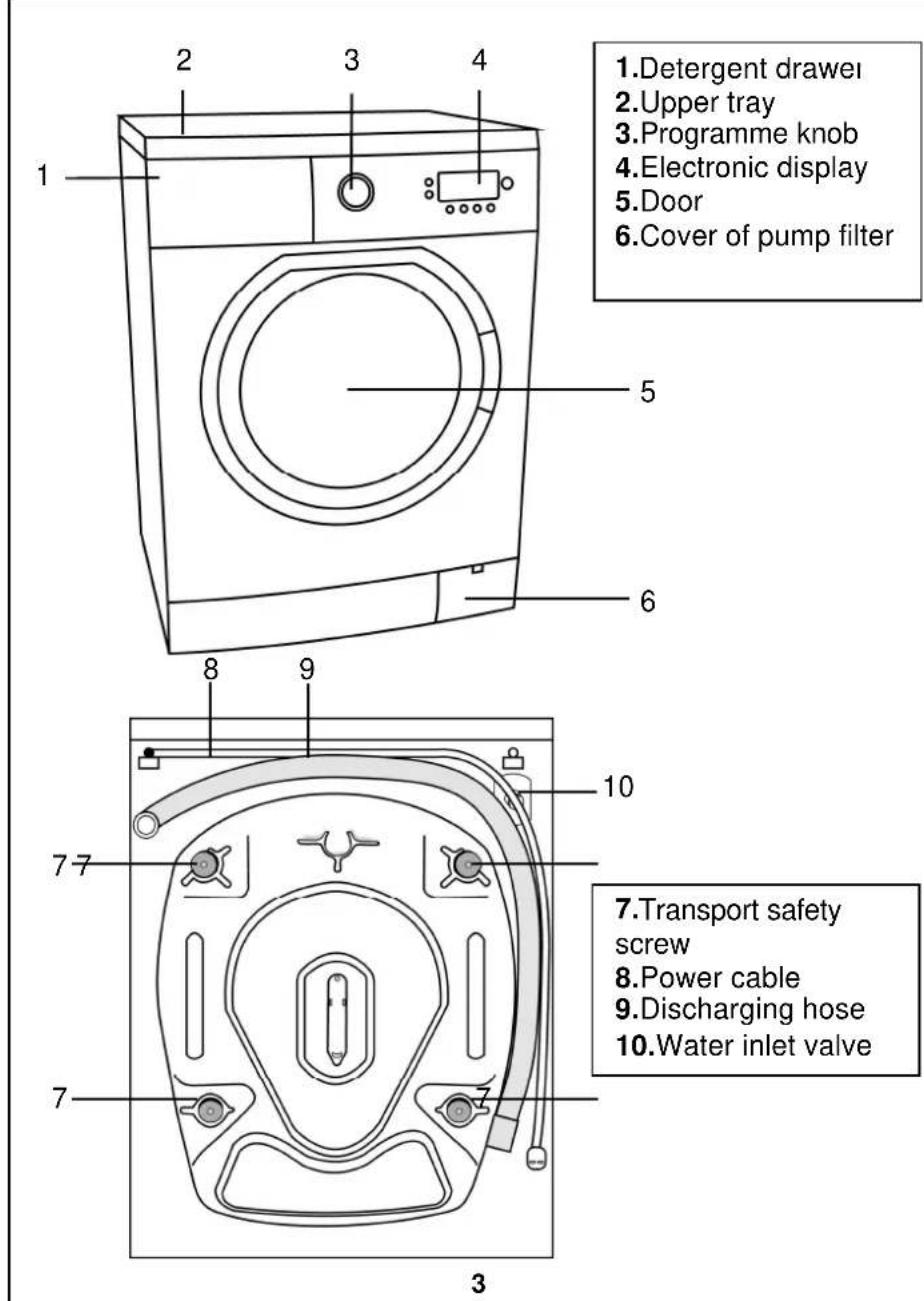
1.Detergent drawer 2.Upper tray 3.Programme knob 4.Electronic display 5.Door 6.Cover of pump filter 1 2 3 4 5 6 7 8 9 10 7. Transport safety screw 8.Power cable 9.Discharging hose 10.Water inlet valve 7 7 3| CHAPTER -1: TECHNICAL SPECIFICATIONS | |
| LBW148E | |
| Operating voltage / frequency (V/Hz) | (220-240) V ~/50Hz |
| Total current (A) | 10 |
| Water pressure (Mpa) | Maximum: 1 MpaMinimum: 0.1 MPa |
| Total power (W) | 2200 |
| Maximum dry laundry capacity (kg) | 8 |
| Spinning revolution (rev / min) | 1400 |
| Programme number | 15 |
| Dimensions (Height x Width x Depth) (mm) | 845 x 597 x 557 |
CHAPTER -2: BEFORE USING YOUR WASHING MACHINE SAFETY WARNINGS
- Do not use a multiple socket or extension cord.
- Do not insert a plug with damaged or broken cord into the socket.
- If the cord is damaged it should be replaced by the manufacturer or appointed service agent in order to avoid a hazard.
- Always pull the plug from the socket when disconnecting, do not pull on the electrical cable.
- Do not plug the power supply with wet hands.
- Never touch the machine with wet hands or feet.
- Never open the detergent drawer while the device is running.
- Never force open the door of the machine while the machine is running.
- Since the machine can reach high temperatures while running, do not touch the drain hose and water during draining.
- In case of any failure, first unplug the device and close the water tap. Do not attempt to repair .Please apply to the nearest authorised service station.
- Do not forget that the packing material of your machine may be hazardous for children.
- Do not let your children play with the washing machine.
- Keep your pet away from your machine.
- Your machine should only be used by adults within the information written in this manual.
- Your machine is designed for use in house environment.
CHAPTER -2: BEFORE USING YOUR WASHING MACHINE RECOMMENDATIONS
- The detergent or softener in contact with air for a long time will dry and stick to your detergent drawer. To avoid this put your detergent and softener into the detergent drawer just before washing.
- It is recommended that you use pre-washing programme for only very dirty clothes.
- Please do not exceed the maximum loading capacity.
- The appliance is not intended for use by people (including children) with reduced physical, sensory or mental capabilities, or lack of experience and knowledge, unless they have been given supervision or instruction concerning use of the appliance by a person responsible for their safety. Children should be supervised to ensure that they do not play with the appliance.
- If you do not need to use your machine for a long time, unplug it, close the water supply and leave the door open. This will keep the inside dry and prevent unpleasant odour building up.
CHAPTER -3: SETTING UP REMOVING TRANSPORT SAFETY SCREWS
As a result of manufacturing quality control procedures, a certain amount of water may remain in your machine, this is normal and not harmful.
You must pay attention to the following issues before using your washing machine.
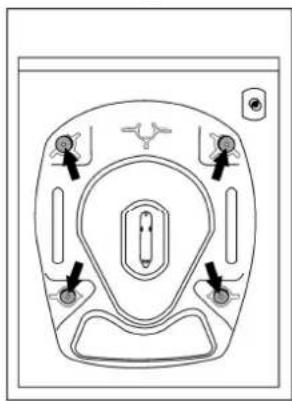
Transportation screws, which are located at the back of the machine, must be removed before running the machine.
natural_image
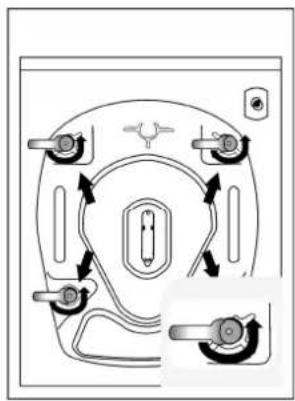
Technical diagram of a mechanical component with no visible text or symbolsLoosen the screws by rotating counterclockwise by a suitable wrench.
natural_image
Diagram of a mechanical or electrical component with four directional arrows indicating rotation or movement (no text or symbols present)CHAPTER -3: SETTING UP REMOVING TRANSPORT SAFETY SCREWS
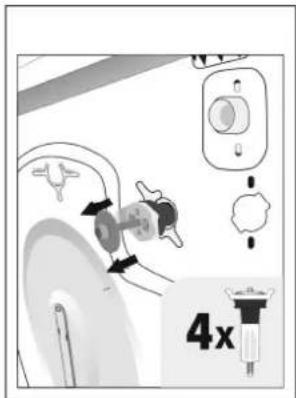
Remove the screws by pulling them.
text_image
4xTo the holes where the transport screws have been removed, insert the plastic transport screw taps found in the accessories bag.
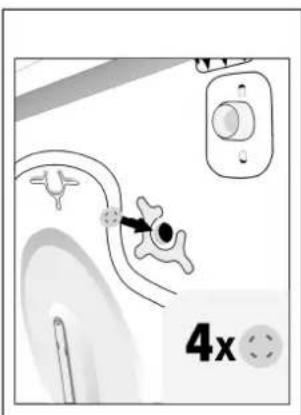
text_image
4xThe transportation screws that have been removed should be kept for future use if the machine needs to be transported elsewhere.
CHAPTER -3 SETTING UP ADJUSTING FEET FOR BALANCE
- Do not install your machine on rugs or similar surfaces.
- For your machine to work silently and without any vibration, it should be positioned on a flat, non-slippery and durable floor.
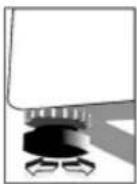
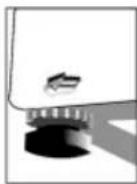
- You can adjust the feet of your machine to stabilise the balance.
- First, loosen the plastic adjustment nut.
- Adjust by rotating the feet upwards or downwards.
- After the balance has been reached, tighten the plastic adjustment nut again by rotating it upwards.
- Never put cartons, wooden blocks or similar materials under the machine to achieve balance.
CHAPTER -3: SETTING UP ELECTRICAL CONNECTION / WATER SUPPLY CONNECTION
ELECTRICAL CONNECTION
- Your washing machine works with 220-240V and 50Hz.
- An earthed plug has been attached to the power cable of your washing machine. It is essential to connect this plug to an earthed 10 ampere socket. The fuse flow value of the electricity line attached to this should also be 10 ampere. If you have no such sockets and fuses in your house, call a qualified electrician.
- The guarantee will be invalidated by any damage that could occur as a result of usage without earthing.
- Insert the machine's plug to an earthed socket within easy reach.
WATER SUPPLY CONNECTION
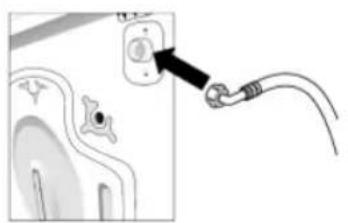
- Depending on the features of your machine, there may be single water inlet (cold) or double water inlet (cold/hot). The white headed hose is for cold water inlet and red headed hose is for hot water inlet (valid for machines with hot and cold water inlet).
- To prevent leakage from the connection joints, 1 (valid for cold water inlet) or 2 (valid for machines with hot and cold water inlet) seals are included in the hose packing. Fit these seals at the end of water inlet hoses on the tap side.
The following table provides the information in English:
CHAPTER -3: SETTING UP WATER DRAIN CONNECTION
natural_image
Diagram showing a plug inserted into a socket connected to a cable (no text or symbols visible)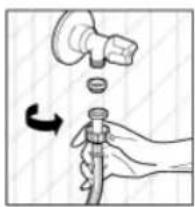
natural_image
Illustration of a hand holding a tool with a mechanical component above, showing a rotation arrow (no text or symbols)WATER DRAIN CONNECTION
- Be sure that water inlet hoses are not folded, twisted, crushed or elongated by stretching.
• Water drain hose should be mounted at a height of minimum 60 cm, maximum 100 cm from the ground. - The end of the water drain hose may directly be fitted to the dirty water outlet hole or a special apparatus mounted on the outlet bracket of the wash-stand.
- Never attempt to extend the water drain hose by adding extra parts.

CHAPTER-4: PRELIMINARY PREPARATION FOR LAUNDERING SEPARATING LAUNDRY
- Sort your clothes according to their types (cotton, synthetic, sensitive, woollen, etc.), washing temperatures and level of dirtiness.
• Never wash your white and coloured clothes together. - Since your new coloured clothes may shed dye on the first wash, wash them separately.
- Be careful that no metal parts are found on or in the pockets of your clothes, remove if there are any.
- Zip up and/or button up your clothes.
- Remove plastic or metal hooks from curtains or place them inside a washing bag and tie.
- Pull items like trousers, knitted fabrics, t-shirts and sweat shirts inside out.
- Wash small clothes like socks and handkerchiefs in a washing bag.
| Normal washing | Maximum washing temperature is 90°C | Maximum washing temperature is 60°C | |
CHAPTER-4: PRELIMINARY PREPARATION FOR LAUNDERING SEPARATING LAUNDRY
 |  |  |
| Whitening available | No whitening | Ironing temperature is maximum 110°C |
 |  |  |
| Ironing temperature is maximum 150°C | Ironing temperature is maximum 200°C | No ironing |
 |  |  |
| Dry cleaning available | No dry cleaning | Leave on a flat place |
 |  |  |
| Hang when wet Dry by hanging | Drying by twirling is not allowed | |
 |  |  |
| Dry cleaning in gas oil, pure alcohol and R113 is allowed | Perchloroethylene R11, R113, Petroleum | Perchlorinetyhlene R11, R113, Gas oil |
CHAPTER-4: PUTTING LAUNDRY IN THE MACHINE
- Open the door of your machine.
- Load clothes into the machine evenly.
- Load each item separately.
- When you shut the door of your machine, be careful that no cloth is jammed between the cover and the gasket.
- Shut the door of your machine tightly otherwise your machine will not start the washing process.
CHAPTER-4: ADDING DETERGENT INTO MACHINE
The quantity of the detergent that you will put in your machine depends on the following criteria:
- Your detergent consumption will change according to the dirtiness of your clothes. For slightly dirty clothes, do not pre-wash and put a small amount of detergent in the compartment no.2 of the detergent drawer.
- For excessively dirty clothes, select a programme with pre-washing, fill 1/4 portion of the detergent you will put in compartment 1 in the detergent drawer and the remaining portion in compartment 2.
- Only use detergents developed especially for automatic washing machines. The quantities that will be used for your clothes are written on the detergent packaging.
- As the hardness of your water increases, the amount of the detergent to be consumed will also increase.
- As the amount of your clothes increases, the amount of the detergent to be consumed will also increase.
- Put softener in the softener compartment in the detergent drawer. Do not exceed the MAX level. Otherwise, the softener will diffuse in the washing water via the siphon.
- Concentrated softeners should be diluted with some water before filling in the drawer. This is because the softener with a high density can obstruct the siphon and prevent the correct flow of the softener.
- You can use fluid detergents in all programmes without pre-
CHAPTER 5: CONTROL PANEL
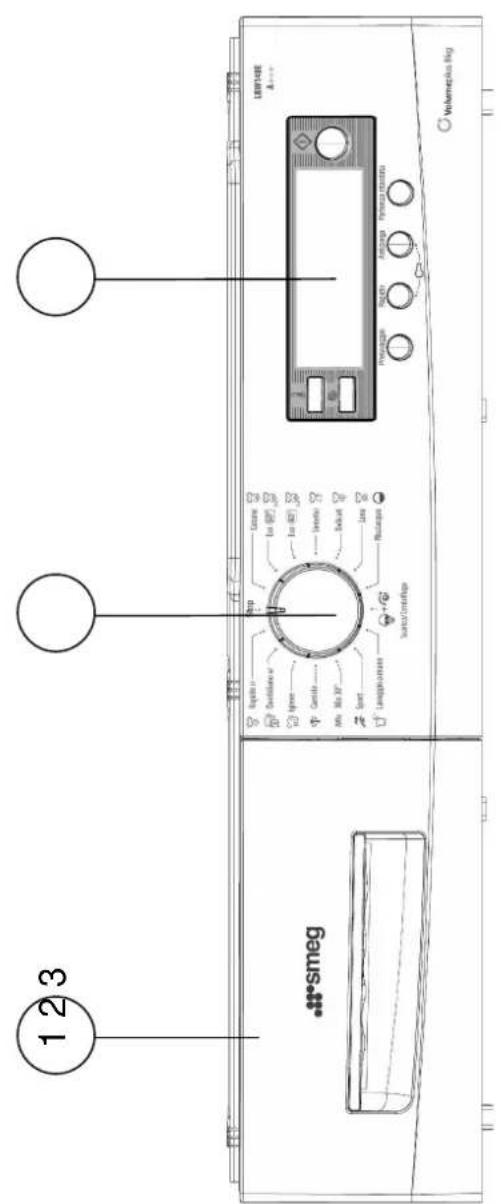
text_image
1 2 3 smeg LW148E A++ Source/ConRefuge Prelugage Ricardo Antizanga Pembasa manda Volumegius Nig1-Detergent drawer
2-Programme knob
3-Electronic display and auxiliary functions
CHAPTER 5: CONTROL PANEL DETERGENT DRAWER
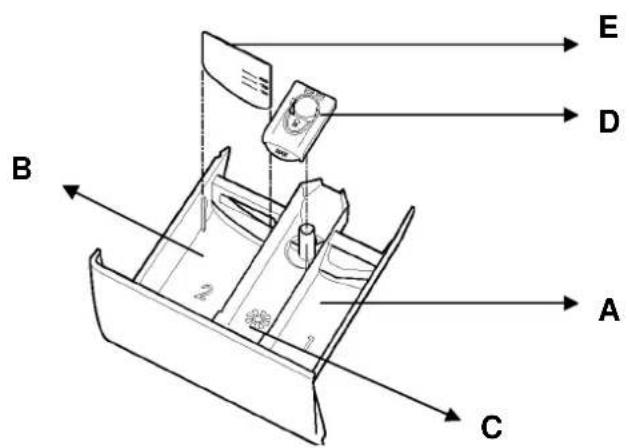
text_image
B 2 1 A C D EA. Prewashing compartment
B. Main washing compartment
C. Softener compartment
D. Siphon cover
E. Liquid level detergent plate
CHAPTER 5: CONTROL PANEL PROGRAMME KNOB
You may select the programme you like to wash your Laundry through programme knob. You may set the programme selection operation by rotating the programme knob in both direction. Ensure that the programme knob is exactly on the programme you want to select.
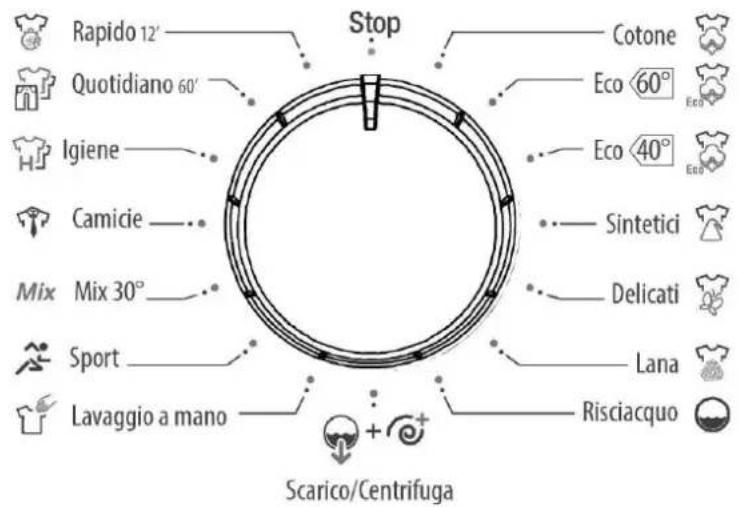
text_image
Rapido 12' Quotidiano 60' Igiene Camicie Mix 30° Sport Lavaggio a mano Stop Cotone Eco 60° Eco 40° Sintetici Delicati Lana Risciacquo Scarico/CentrifugaCHAPTER 5: CONTROL PANEL ELECTRONIC DISPLAY
text_image
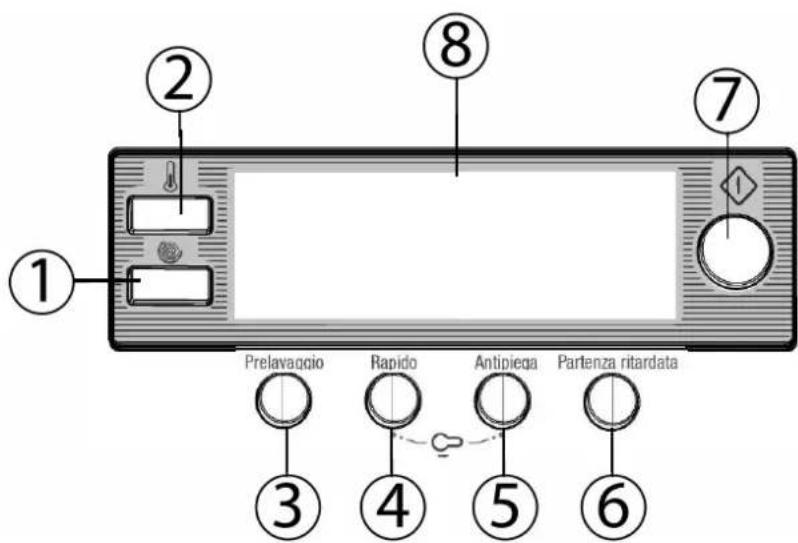
① ② ⑧ ⑦ Prelavaggio Rapido Antipiega Partenza ritardata ③ ④ ⑤ ⑥1-Adjusting button for revolution speed
2-Adjusting button for temperature of washing water
3-Auxiliary function prewash
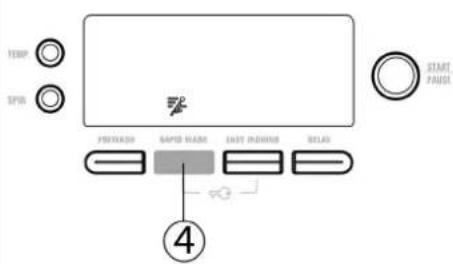
4-Auxiliary function for rapid wash
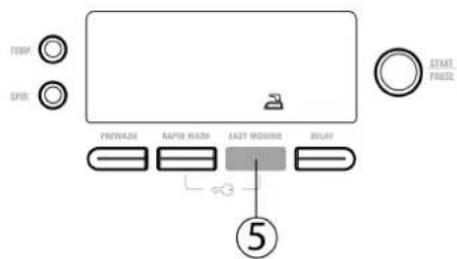
5-Auxiliary function for easy ironing
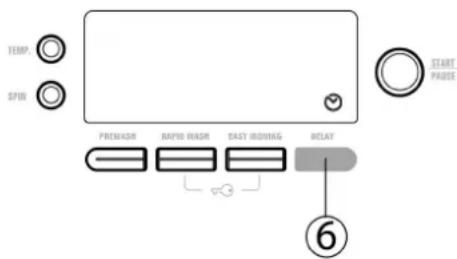
6-Auxiliary function for delay timer
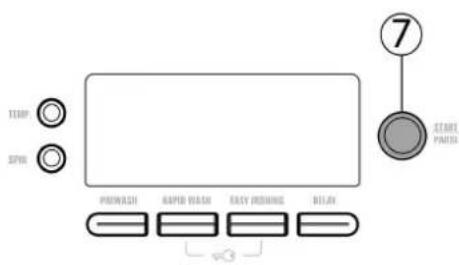
7-Start/Pause button
8-Electronic display
On the electronic display, you may view washing water temperature, spinning revolution speed of your machine, the amount time your machine will continue washing, the auxiliary functions you have selected and whether the door of your machine is locked or not. Furthermore, electronic display will warn you by means of fault symbols on the display when a fault occurs on your machine and notify you of the completion of the washing programme by revealing expression of "END" on the display as soon as the washing programme you have selected has finished as well.
CHAPTER 6: OPERATING YOUR MACHINE
- Plug your machine in.
- Open the water tap.
- Open the machine door.
- Spread your Laundry in your machine.
- Push the door of your machine until hearing the locking sound to close it.
- Put detergent and softener in the detergent drawer.
First washing operation
Some water may be left in your machine due to experiments and tests carried out during production. To dispose of this water, it is recommended to perform the first washing operation in 1^st programme and without laundry by inserting 12 scale of detergent in 2^nd compartment of the detergent drawer.
Selecting programme
Select the convenient programme for your Laundry on the programme table.
Auxiliary functions
Before starting the programme, you can optionally select an auxiliary function.
- Press on the button of auxiliary function you like to select.
- If auxiliary function symbol on electronic display flashes continuously, the auxiliary function you have selected will be
CHAPTER 6: OPERATING YOUR MACHINE
Half-load detection system
Your machine features a half-load detection system. In case you put approximately half or less amount of Laundry of maximum laundry capacity in your machine, your machine will run so as to save washing time, water consumption and energy in some programmes(White cotton 95°, Colourfast cotton 60°, Non colourfast cotton 40°). When half-load function is active, the machine can complete the programme you have set in a shorter time.
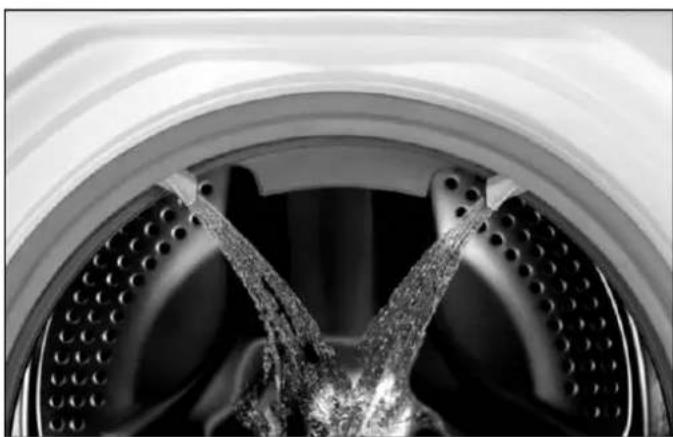
Twinjet system
Detergent water in your machine will be circulated with 2 water injection mechanisms and a mixing system via twinjet system. Circulated detergent water will be injected over your laundries, which allows a better washing performance.
Twinjet system will help you wash higher amount of laundries in a shorter time with a better washing performance, guaranteeing less energy and water consumption.
natural_image
Close-up of a mechanical component with textured surfaces and circular grooves (no visible text or symbols)CHAPTER 6: OPERATING YOUR MACHINE PROGRAM TABLE
| PROGRAMME | TEMPERATURE(°C) | DETERGENTCOMPARTMENT | MAXIMUM AMOUNT OFDRY LAUNDRY (kg) | LAUNDRY TYPE |
| LBW148E | ||||
| 1- COTTON 95 2 8 | Very dirty cotton and flax textiles. (Underwears, linen, tablecloth, towel (maximum 4 kg), bedclothes, etc. | |||
| 2- COTTON ECO 60 2 8 | Dirty cotton and flax textiles. (Underwears, linen, tablecloth, towel (maximum 4 kg), bedclothes, etc. | |||
| 3- ECO 40 2 8 | Dirty cotton and flax textiles. (Underwears, linen, tablecloth, towel (maximum 4 kg), bedclothes, etc. | |||
| 4-SYNTHETICS 60 2 3,5 | Very dirty synthetic or synthetic-mixed textiles. (Nylon socks, shirts, blouses, synthetic-including trousers etc.) | |||
| 5-SILK | 30 | 2 | 2,5 | Less dirty silk-mixed Laundry with machine wash labels. |
| 6-WOOL | 40 | 2 | 2,5 | Woollen Laundry with machine wash labels. |
| 7-RINSE - - | 8 | If you want to additionally rinse your Laundry upon completion of washing operation, you may use this programme for any kind of Laundry. | ||
| 8-SPIN | -- | 8 | If you want to additionally spin your Laundry upon completion of washing operation, you may use this programme for any kind of Laundry. | |
| 9-HAND WASH | 30 2 2,5 | Sensitive and woollen Laundry with non-machine wash label recommended to be washed by hand. | ||
| 10-SPORTS WEAR | 30 2 3,5 Sportswear. | |||
| 11-MIX WASH | 30 2 3,5 | Dirty cotton, synthetic, colour and flax textiles can be washed together. | ||
| 12-SHIRTS/ BLOUSES | 60 2 4 | Dirty cotton, synthetic and synthetic-mixed shirts and blouses can be washed together. | ||
| 13-HYGIENE | 30 2 5 | You can use this programme which eliminates bacteria on your laundries at a low temperature such as 30°C for less dirty colour, flax textiles and for baby clothes. | ||
| 14-DAILY 60 min. | 60 2 4 | You can wash your dirty cotton, colour and flax textiles at 60°C in 60 minutes. | ||
| 15-SUPER RAPID12 min. | 30 2 2 | You can wash your dirty cotton, colour and flax textiles in 12 minutes that is a short period.Note: As the washing period is short, less amount of detergent is required to be used compared to other programmes. The programme period will increase if your machine detects instable loading. You can open the door of your machine 2 minutes after the completion of washing operation. (The duration of 2 minutes required to open the door of your machine is not included in the washing period.) | ||
| Program duration, energy consumption and water consumption values may vary according to wash load weight and type, selected extra functions, tap water and ambient temperature | ||||
| CHAPTER 6: OPERATING YOUR MACHINEPROGRAM TABLE | ||||
| PROGRAMME | LBW148E | |||
| Total Water Consumption Max. (°C) Total Time (min) | Total Energy Consumption(kwH) | |||
| 1- COTTON 79 95 C 208 2,52 | ||||
| 2- COTTON ECO | 48 | 60°C | 210 | 0,91 |
| 3- ECO | 53 | 40°C | 190 | 0,89 |
| 4- SYNTHETICS 52 60 C | 101 0,83 | |||
| 5- SILK 90 30 C 90 0,28 | ||||
| 6- WOOL | 94 | 40C | 81 | 0,55 |
| 7- RINSE | 55 | Cold | 42 | 0,11 |
| 8- SPIN | Cold | 17 | 0,04 | |
| 9-HAND WASH | 68 | 30 C | 93 | 0,31 |
| 10- SPORTS WEAR | 48 | 30 C | 76 | 0,20 |
| 11-MIX WASH | 60 30 C | 92 | 0,39 | |
| 12-SHIRTS/BLOUSES | 51 60 C 118 1,15 | |||
| 13- HYGIENE | 85 | 30 C | 141 | 1,48 |
| 14-DAILY 60 min. | 32 | 60 C | 60 | 0,85 |
| 15-SUPER RAPID12 min. | 27 30 C 12 0,05 | |||
| Program duration, energy consumption and water consumption values may vary according to wash load weight and type, selected extra functions, tap water and ambient temperature | ||||
CHAPTER 6: OPERATING YOUR MACHINE AUXILIARY FUNCTIONS
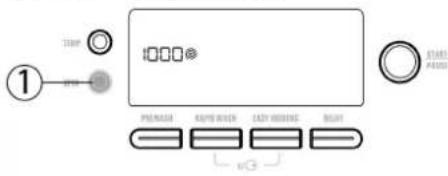
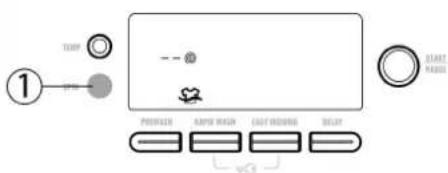
1-Revolution speed selection and auxiliary function of soaking You can set the spinning revolution for your Laundry via revolution speed setting button.
text_image
TEMP 1000 STARTS PUMBER RIPPE SWITCH AUTO SWITCHER BEUT 1000When you select a new programme, the maximum spinning revolution speed of the programme you have selected will be viewed on the display of revolution speed.
text_image
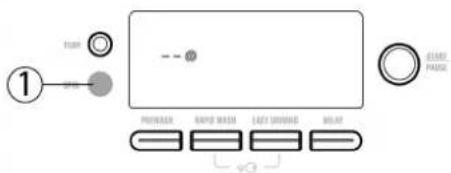
1 START -- - PRESSER RIPID MOUNT LEFT SMOODING BUTTER CLOCK GARAGE PULSEYou can gradually reduce the revolution speed between cancel spinning (--) options through the maximum spinning revolution of the programme selected by pressing revolution speed setting button.
If you have skipped the spinning revolution you want to set, you can re-switch to the revolution by keeping the revolution setting button pressed.
If you will not unload your Laundry upon completion of the programme and you want them not wrinkle in your machine, you can use the auxiliary function of soaking.
text_image
1 TEMP -- + PRODUCE RANGE SWITCH CAUT SWITCHING BELOW START PULSEIn programmes where auxiliary function of soaking is applicable, it may be activated by pressing on revolution speed setting button once more pursuant to stage of cancel spinning (--). When it is active the symbol ( ) flashes on electronic display.
CHAPTER 6: OPERATING YOUR MACHINE AUXILIARY FUNCTIONS
If this function is selected, your Laundry will be soaked in the latest rinsing water. When your machine soaks your Laundry in the latest rinsing water, symbol 📋 will blink on electronic display.
If you want to take your Laundry out, press on "Start / Pause" button. Your machine will empty the water in it and finish the programme without spinning.
If you like to spin your Laundry:
a) You can select spinning revolution by using the revolution speed setting button when your machine is soaking your Laundry in the latest rinsing water. If you want to take your Laundry out, press on "Start / Pause" button. Your machine will empty the water in it and finish the programme after spinning your Laundry through the spinning revolution you have selected.
b) Switch the programme knob to 0. Select spinning programme on programme knob. You can optionally reduce the revolution speed. You can start your machine by pressing on Start/Pause button. Your machine will finish the programme after spinning your Laundry in the spinning revolution you have selected.
CHAPTER 6: OPERATING YOUR MACHINE AUXILIARY FUNCTIONS
2-Washing water temperature selection
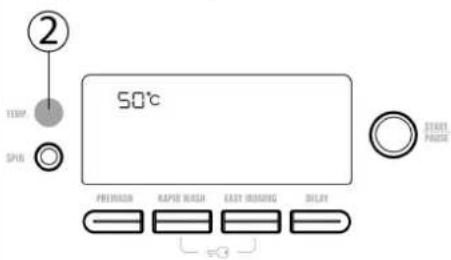
You can select the washing water temperature with the washing water temperature adjustment button.
text_image
2 1130V SP16 50°C PREFRASS RAPPIE RASH EASY IRRESUNG DILAY START PASEWhenever you select a new programme, the maximum washing water temperature is shown on the washing water temperature display.
text_image
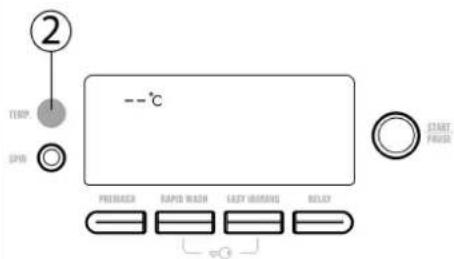
② --°C TIME SPIN START PRESS PRESSER RAPID MASH RADY GROUND RELAYYou can gradually decrease the washing water temperature between the maximum temperature and cold washing (--) by pressing washing water temperature adjustment button.
If you have missed the washing water temperature you wanted, you can return to the intended temperature by continuously pressing the washing water temperature adjustment button.
3-Auxiliary function prewash
text_image
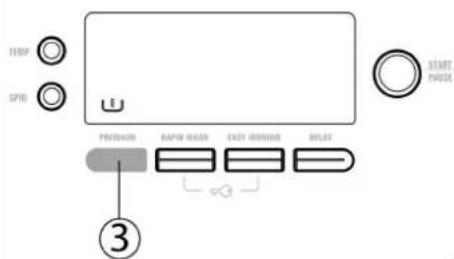
TEMP SPIN RUN/WASH RATW/WASH START/RESET DELAY 3You can expose your very dirty laundry to prewashing operation prior to main washing by using this auxiliary function. When using this function, you should put detergent in front washing compartment of the detergent drawer.
CHAPTER 6: OPERATING YOUR MACHINE AUXILIARY FUNCTIONS
4-Auxiliary function for rapid wash
text_image
TEMP SPIN PREWASH S&PID NAME EAST INDRIVE RELAY 4 START PAUSEThis auxiliary function will enable the washing duration of your Laundry that are not very dirty to be shortened. In case you put half of or less than half of the laundry capacity of the washing programme you have selected in your machine, your machine will detect this event thanks to automatic
Half-load detection system, and the programme you have selected will wash your Laundry in a shorter time to consume less energy and water.
If your machine detects half load, symbol will automatically flash on electronic display. To cancel it, pressing on the auxiliary function of quick washing for once will be enough. However, selection of auxiliary function of quick washing is not possible in course of the same washing operation.
5-Auxiliary function for easy ironing
text_image
TEMP SPR PRAWAGE FAST RUNNING EASY RUNNING RELAY START FRUSS ⑤This auxiliary function will use a lower spin speed, resulting in less wrinkled laundry.
CHAPTER 6: OPERATING YOUR MACHINE AUXILIARY FUNCTIONS
6-Auxiliary function for delay timer
text_image
TEMP. SPIN PRAWAUR RAPID HEAD EAST IRDNING RELAY START PRADE ⑥By using this auxiliary function, you can let your machine start washing after half an hour to 23 hours.
To use auxiliary function of delay timer:
- Press time delay button once.
- Expression of "0.5h" will appear on the display.
- Press on time delay button until the time, on which you want washing operation to be started.
- To activate the time delay you have selected in the programme, you may press on any auxiliary function button you like except "Start/Pause" button.
Intervals of delay timer is half an hour for the first 2 hours, 1 hour for 3 hours to 23 hours.
If you have accidentally skipped the time delay you want to set by pushing the time delay timer button more than needed, keep pressing on delay timer button until you set the correct time delay. If you want to cancel the delay timer, you are required to press the delay timer button once.
If you want to cancel the delay timer, you are required to press the delay timer button once.
To run delay timer function, your machine is required to be operated by pressing on Start/Pause button. As soon as you start your machine, the count down process will start on the electronic display based on the delay period you have selected.
CHAPTER 6: OPERATING YOUR MACHINE AUXILIARY FUNCTIONS
7-Anti-Allergic auxiliary function
text_image
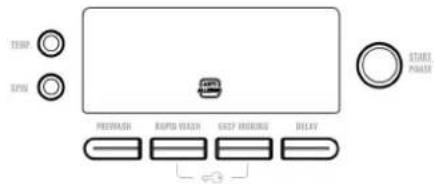
TEMP SPIN START POWER PRESS/WEACH RAPID WEACH GIFT RESOURCES DELAY ≤3In the programmes where this auxiliary function is active, your machine will perform an extra rinsing operation on your Laundry prior to latest rinsing operation.
Note: Anti-Allergic auxiliary function is selected automatically only in Baby wear programme.
CHAPTER 6: OPERATING YOUR MACHINE STARTING THE PROGRAMME
Start/Pause button
text_image
TEMP SPIN PROWASH RAPID WASH RASY REDUING RELAY 7 STRAW PARTSBy pressing on Start/Pause button, you may start the programme you have selected, suspend a running programme. If you switch your machine to pause mode, electronic display will blink.
When you start your machine, the following symbols for the programmes you have selected will be available on electronic display.
- Temperature of washing water
- Revolution speed
- If you have selected, symbols of auxiliary functions
- Programme ending time or programme delay time based on your selection
- Symbol of open or locked door
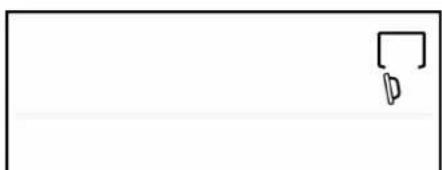
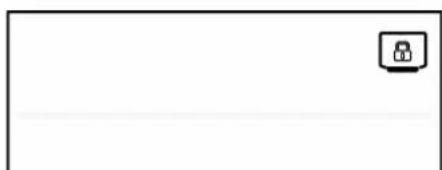
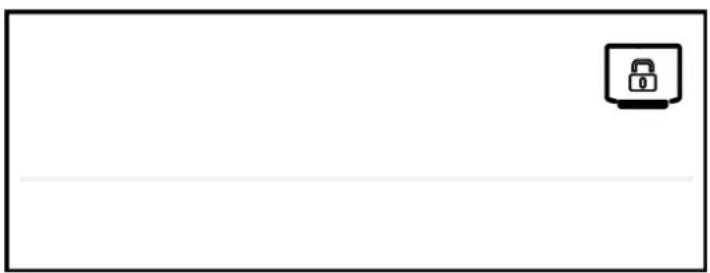
Note: The flashing symbol for Open Door will come on. This will be replaced by the Locked Door symbol, within a minute of pressing Start /Pause button again.
natural_image
Simple line drawing of a rectangular shape with a small square and arrowhead, no text or symbols present.Open door
natural_image
Blank white rectangle with a small icon in the top-right corner (no text or symbols)Locked door
CHAPTER 6: OPERATING YOUR MACHINE ADDING/REMOVING LAUNDRY
Laundry adding to / removing from the machine
-If you want to add or remove Laundry when your machine is running, switch your machine to Pause mode by pressing Start/Pause button.
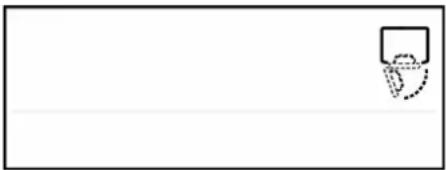
- When you Pause the machine, the Open Door symbol will flash and you can open the door to either add or remove laundry.

- When you want to unload your machine at the end of a programme the Door Unlocked symbol will flash [ ] and you can safely open the door to remove laundry.
natural_image
Simple line drawing of a basketball hoop with a dashed arrow indicating the yard (no text or symbols)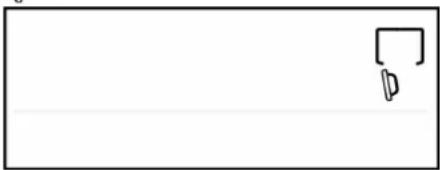
natural_image
Simple line drawing of a rectangular shape with a small square cutout and a downward arrow, no text or symbols present.Note: If symbol 0 blinks on the electronic display, it means that your machine cannot carry out the operation of laundry adding or removing as your machine has passed the steps in question.
- Upon completion of laundry adding or removing function, close the door of your machine and press on Start/Pause button.
- Your machine will continue to wash after locking the door of your machine.
- Symbol will flash on electronic display.
natural_image
Blank white rectangle with a small black padlock icon in the top-right corner (no text or symbols)To avoid the cycle being altered if any programme knobs are pressed or turned when a programme has started, the Child Lock may be set. Child lock is an auxiliary function which can be activated by pressing and holding Quick Wash and Wrinkle Removing functions together for 3 seconds.
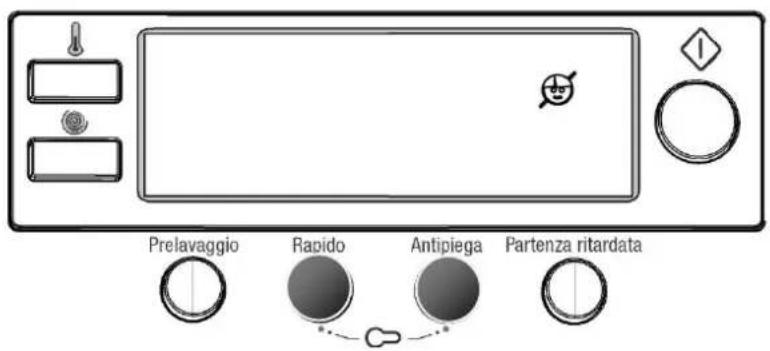
Symbol 📁 will flash on the electronic display when activated.
If any button is pressed while child lock is active, symbol will blink on the electronic display.
When any of the programmes is running and child lock is active, if another programme is selected after programme knob is switched to 0 position, the programme already running will resume.
To deactivate it, it will be sufficient to press on the same buttons for more than 3 seconds. When child lock is deactivated, symbol 🤒 on the electronic display will go off.
CHAPTER 6: OPERATING YOUR MACHINE CANCELLING PROGRAMME
Cancelling programme
If you want to cancel any programme running:
- Switch the programme knob to 0.
- Your machine will stop the washing operation and the programme will be cancelled.
- To get rid of the water accumulated in the machine switch the programme knob to any programme.
- Your machine will perform the necessary discharge operation and cancel the programme.
- You can run your machine by selecting a new programme.
CHAPTER 6: OPERATING YOUR MACHINE FINISHING PROGRAMME
Finishing programme
- Your machine will stop by itself as soon as the programme you have selected finishes.
-Expression of "END" will flash on the electronic display.
End
Note: Within 2 minutes after the programme has finished, your machine will extinguish the electronic display to save energy. It will re-flash when pressed on a button of any auxiliary function.
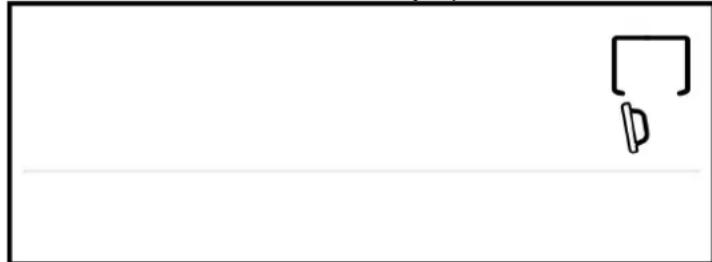
-When the Door Unlocked symbol flashes on the electronic display, this indicates the door can be safely opened to remove laundry.
natural_image
Simple line drawing of a pen and ruler on a blank white background (no text or symbols)- Leave the door of your machine open to allow the inner part of your machine to dry after removing your Laundry.
- Switch the programme knob to 0.
- Unplug your machine.
- Turn the water tap off.
CHAPTER -7: ELECTRONIC DISPLAY WARNING SYMBOLS WARNING OF WATER CUT-OFF / LOW MAINS WATER PRESSURE

If symbol flashes on the electronic display:
- Water tap may be closed. Check.
- Mains water may be cut-off. Check. If so, switch the programme knob to position 0. You can select a programme and run your machine after the mains water is supplied.
- Mains water pressure may be low. Check.
- Water inlet hose may be twisted. Check.
- Water inlet hose may be clogged. Clean water inlet hose filters. (*)
- Valve inlet filter may be clogged. Clean the valve inlet filters. (*)

(*) See the chapter regarding maintenance and cleaning of your machine.
CHAPTER -7: ELECTRONIC DISPLAY WARNING SYMBOLS WARNING OF CLOGGED PUMP FILTER
If symbol flashes on the electronic display:
- Pump filter may be clogged. Clean the pump filter. (*)
- Discharging hose may be clogged or twisted. Check the discharging hose.
natural_image
Simple geometric diagram with a triangle and wavy line inside, no text or symbols present(*) See the chapter regarding maintenance and cleaning of your machine.
CHAPTER -8: MAINTENANCE AND CLEANING OF YOUR MACHINE

• Unplug your machine.
- Close the water tap.
WATER INLET FILTERS
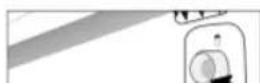
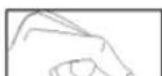
On the tap part of your machine's water inlet hose and at the ends of water inlet valves, there are filters to prevent dirt and foreign materials in the water entering the machine. If the machine is unable to receive sufficient water although your water tap is opened, these filters should be cleaned.
- Remove the water inlet hose.
- Remove the filter found on the water inlet valve using pliers and wash thoroughly with a brush.
- Clean the filters of the water inlet hoses located on the tap side by removing manually together with the washer.
- After you clean the filters, you can fit them the same way as you have removed them.

CAUTION: Filters of water inlet valves may be clogged due to contaminated water tap or lack of necessary maintenance or
valves may be broken down, causing water to leak from your machine continuously. For these reasons, breakdowns that may arise are out of scope of warranty.
CHAPTER -8: MAINTENANCE AND CLEANING OF YOUR MACHINE / PUMP FILTER
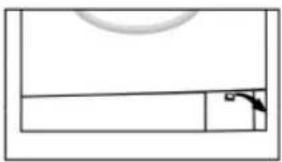
The pump filter system elongates the life of your pump, which is used to drain the dirty water. It prevents lint entering the pump. Cleaning the pump filter every 2-3 months is recommended. To clean the pump:
- Open the kickplate's cover, by pulling the handle.
- Before opening the filter cover, place a shallow dish in front to contain overflow of water left in the machine.
- Loosen the filter cover by rotating it counter clockwise and drain the water.
- Remove the foreign materials from the filter.
- Check for the rotation of the pump manually.
- After you have cleaned the pump, fit the filter cover by rotating clockwise.
• Fit the kickplate cover in place.
• If the filter cover is not fitted properly, it will leak water.
natural_image
Simple line drawing of a room layout with a circular top and rectangular walls (no text or symbols)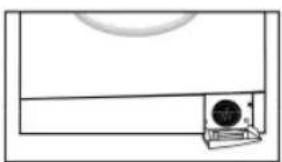
natural_image
Simple line drawing of a room with a large window and a small circular object inside (no text or symbols)CHAPTER -8: MAINTENANCE AND CLEANING OF YOUR MACHINE / PUMP FILTER

WARNING!
Danger of being scalded!
Since the water inside the pump maybe hot, wait for it to cool.
CHAPTER -8: MAINTENANCE AND CLEANING OF YOUR MACHINE / DETERGENT DRAWER
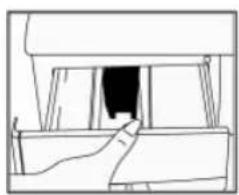
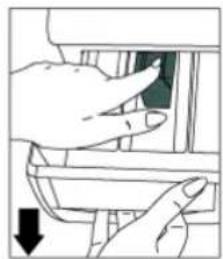
Detergents may form a sediment in your detergent drawer or in the housing of the detergent drawer over time. To clean this sediment, you must remove the detergent drawer. To pull out the detergent drawer:
• Pull the detergent drawer to the end.(DIAGRAM-1)
- Press the blue siphon plug in the drawer, and continue to pull the drawer until it is removed.(DIAGRAM-2)
- Wash with a small brush and plenty of water
- Ensure that any detergent residue does not drop into your machine.
- After drying the detergent drawer replace it in the housing in the same way that you pulled it out.
natural_image
Simple line drawing of a window with a door opening, no text or symbols presentDIAGRAM-1
natural_image
Illustration of hands inserting a component into a device (no text or symbols visible)DIAGRAM-2
CHAPTER -8: MAINTENANCE AND CLEANING OF YOUR MACHINE / SIPHON PLUG / CABINET / DRUM
Siphon plug
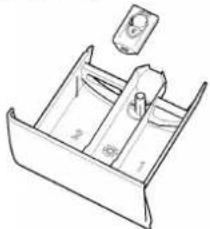
Pull out the detergent drawer. Remove the siphon plug and clean the residues of the softener thoroughly. Fit the cleaned siphon plug in its location. Check it is fitted properly.
natural_image
Line drawing of a mechanical device with labeled parts (no text or symbols)The Cabinet
Clean the exterior surface of the cabinet of your machine with lukewarm water and a cleaning substance that will not damage the cabinet. After rinsing with clean water, wipe it with a soft and dry cloth.
The Drum
Do not leave metal items like needles, staples or coins inside your machine. These pieces cause rust stains in the drum. To eliminate these stains, use a suitable cleaning substance and follow the recommendations of the cleaning substance producer. When cleaning rust stains, never use scouring pads or similar rough objects.
CHAPTER -9: PRACTICAL INFORMATION
(Take care to ensure the type of fabric being treated is considered)

Alcoholic beverages: The stain point, should first be washed with cold water, then should be wiped with glycerine and water and be rinsed with water mixed with vinegar.

Shoe Polish: The stain should be slightly scratched without ruining the cloth, rubbed with detergent and rinsed. In case it is not eliminated, it should be rubbed with 1 unit of pure alcohol (96 degrees) mixed in 2 units of water and then washed with lukewarm water.

Tea and coffee: Stretch the stained area of your cloth on the top of a container and pour water as hot as the type of your cloth can endure on it.

Chocolate and cocoa: By leaving your clothes in cold water and rubbing with soap or detergent, wash it in the highest temperature that the type of your cloth can endure.

Tomato paste: After scraping the dried pieces without ruining the cloth, leave in cold water for about 30 minutes and wash by rubbing with detergent.

Meat broth-egg: Eliminate the dried stain residues and wipe with a sponge or soft cloth wetted in cold water. Rub with detergent and wash.

Grease and oil stains: First wipe the residues. Rub the stain with detergent and then wash with lukewarm soapy water.

Mustard: First apply glycerine to the stained area. Rub with detergent and then wash. If the stain still does not disappear, wipe with alcohol (On synthetic and coloured cloth, a mixture of 1 unit alcohol, 2 units water should be used)
CHAPTER -9: PRACTICAL INFORMATION

Blood stain: Lay your clothes in cold water for 30 minutes. If the stain still does not disappear, lay in mixture of water and ammonia (3 table-spoons of ammonia in 4 litres of water) for 30 minutes.

Cream, ice-cream and milk: Lay your clothes in cold water and rub the stained area with detergent.

Mould: Mould stains should be cleaned as soon as possible. The stain should be washed with detergent, and if it does not disappear, it should be wiped with oxygenated water (in proportion of 3%).
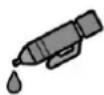
Ink: Hold the stained area under cold water and wait until the inky water completely runs off. Then rub with water diluted with lemon juice and detergent, wash after waiting for 5 minutes.

Fruit: Stretch the stained area of your clothes on the top of a container and pour cold water on it. Do not pour hot water on the stain. Wipe with cold water and apply glycerine. Wait for 1-2 hours and rinse after wiping with a few drops of white vinegar.

Grass stain: Rub the stained part with detergent.

Oil Paint: The stain should be eliminated before it dries by applying thinners on it. Then it should be rubbed with detergent and washed.
CHAPTER -10: TROUBLESHOOTING
All repairs which must be done on the machine should be done by authorised agents only. When a repair is required for your machine or you are unable to eliminate the failure with the help of the information given below:
• Unplug the machine.
- Close the water tap.
• Call your authorised service agent.
| FAILURE | PROBABLE CAUSE | METHODS OF ELIMINATION |
| Your machine does not operate. | It is unplugged. | Insert the plug into the socket. |
| Your fuse is defective. | Change your fuse. | |
| The electric power is off. | Check the electric power. | |
| Start/pause button has not been pressed. | Press the start/pause button. | |
| The programme knob is in O(off) status. | Put the programme knob on the required status. | |
| The door is not shut properly. | Shut the door properly. You should hear the click. |
CHAPTER -10: TROUBLESHOOTING
| FAILURE | PROBABLE CAUSE | METHODS OF ELIMINATION |
| Your machine does not receive water. | Water tap is closed. Open | water tap. |
| The water inlet hose may be bent. | Check the water inlet hose. | |
| The water inlet hose is obstructed. | Clean the filters of water inlet hose. (*) | |
| The valve inlet filter is obstructed. | Clean the valve inlet filters. (*) | |
| The door is not shut properly. | Shut the door properly. You should hear the click. | |
| Your machine is not draining water. | The drain hose is obstructed or bent. | Check the drain hose. |
| The pump filter is obstructed. | Clean the pump filter. (*) | |
| The clothes are not placed inside the machine in a well-balanced manner. | Distribute the load more evenly inside the machine. | |
| Your machine is vibrating. | The feet of your machine are not adjusted. | Adjust the feet. (**) |
| Transportation screws are not removed. | Remove transportation screws. (**) |
(*)See the section concerning the maintenance and cleaning of your machine.
(**)See the section concerning installation of your machine.
CHAPTER -10: TROUBLESHOOTING
| FAILURE | PROBABLE CAUSE | METHODS OF ELIMINATION |
| Your machine is vibrating. | There is a small amount of clothes in the device. | It does not prevent operation of the machine. |
| Excessive amount of clothes are filled in the machine or the clothes are not placed in a well-balanced manner. | Do not exceed the recommended quantity, and distribute the load more evenly inside the machine. | |
| Excessive foam in the detergent drawer. | Too much detergent has been used. | Press the start/pause button.In order to stop the foam,dilute one table-spoon of softener in half litre of water and pour it in the detergent drawer.Press the start/pause button after 5-10 minutes.Arrange the amount of the detergent properly in the next washing process. |
| Wrong detergent has been used. | Use only the detergents produced for fully automatic machines. | |
| The washing result is bad. | Your laundry too dirty for the programme you have selected. | Select a suitable programme. (see Table-1) |
| The amount of detergent used is not sufficient. | Use more detergent according to the detergent guidelines. |
CHAPTER -10: TROUBLESHOOTING
| FAILURE | PROBABLE CAUSE | METHODS OF ELIMINATION |
| The washing result is bad. | Clothes exceeding the maximum capacity has been filled in your machine. | Lighten the load. |
| Your water may be hard. | Use the amount of detergent according to the declaration of the detergent producer. | |
| Distribution of the clothes in your machine is not well-balanced. | Spread the clothes inside the machine in an orderly and well-balanced manner . | |
| The water is drained from the machine as soon as it is filled. | The end of the water drain hose is in a position too low according to the machine. | Place the water drain hose in an appropriate height.(**) |
| No water is seen in the drum during washing. | No failure. The water is at the lower part of the drum. | - |
| There are residues of detergent on the clothes. | The pieces of some detergents which do not dissolve in water may stick to your clothes as white stains. | By calibrating your machine for “Rinsing” programme,make an additional rinsing or eliminate the stains After drying with the help of a brush. |
| There are grey stains on the clothes. | These stains may be caused by oil,cream or ointment . | In the next washing operation, use the maximum detergent amount declared by the detergent producer. |
(**) See the section concerning installations your machine.
CHAPTER -10: TROUBLESHOOTING
| FAILURE | PROBABLE CAUSE | METHODS OF ELIMINATION |
| The spinning process is not done or starts with delay. | No failure. The unbalanced load control works in that way. | The load control system will automatically attempt to balance the load before a spin cycle starts.It is important when loading the machine to distribute laundry evenly, so that the drum load is balanced for spinning. |
CHAPTER -11: AUTOMATIC FAULT WARNINGS AND HOW TO CORRECT THEM
Your machine is equipped with the systems which are capable of both taking necessary precautions and warning you in case of any breakdown by means of continuous self-checking during washing operations.
| TROUBLE CODE | POSSIBLE FAULT | WHAT TO DO |
| E01 | The door of your machine is left open. | Close the machine door. If your machine persists to indicate fault, turn off your machine, unplug it and contact the nearest authorised service immediately. |
| E03 | Pump is faulty or pump filter is clogged or electrical connection of the pump is faulty. | Clean the pump filter. If the problem persists, contact the nearest authorised service. (*) |
| E04 | Your machine has excessive amount of water. | Your machine will discharge water by itself. Pursuant to discharging operation, turn off your machine and unplug it. Turn off your tap and contact the nearest authorised service. |
(*) See the chapter regarding maintenance and cleaning of your machine.
CHAPTER -11: AUTOMATIC FAULT WARNINGS AND HOW TO CORRECT THEM
| TROUBLE CODE | POSSIBLE FAULT | WHAT TO DO |
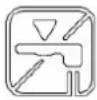 | Water cut-off or low mains water pressure.. | - Water tap may be closed. Check.- Mains water may be cut-off. Check.- If so, switch the programme knob to position 0. You can select a programme and run your machine after the mains water is supplied.- Mains water pressure may be low. Check.- Water inlet hose may be twisted. Check.- Water inlet hose may be clogged.- Clean water inlet hose filters. (*)- Valve inlet filter may be clogged.- Clean the valve inlet filters. (*)If the problem persists, unplug your machine, turn off your tap and contact the nearest authorised service. |
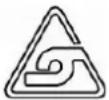 | Pump is faulty or pump filter is clogged or electrical connection of the pump is faulty. | - Pump filter may be clogged. Clean the pump filter. (*)- Discharging hose may be clogged or twisted. Check the discharging hose.If the problem persists, contact the nearest authorised service. (*) |
CHAPTER -12: DESCRIBING SAVING ENERGY
Energy and water consumption may vary based on water pressure, water hardness, water temperature, ambient temperature, laundry amount, additional function selection, voltage fluctuations.
It will reduce energy and water consumption to use your machine with the laundry capacity proposed for the selected programme, wash your Laundry less dirty or daily Laundry in short programmes, carry out cleaning and maintenance periodically, use your machine in convenient time intervals specified by electricity vendor.
DISPOSAL OF YOUR OLD MACHINE
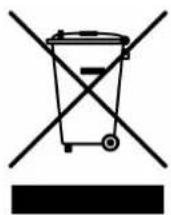
This symbol on the product or package implies that the product should not be treated as domestic waste. Instead, it should be delivered to applicable waste collection places recycling electrical and electronic equipment. You will contribute to avoid potential negative results regarding environment and human health, which will arise due to wrong waste procedure for the product by ensuring that this product is annihilated properly. Recycling materials will help natural resources be preserved. For more detailed information regarding recycling of this product, please contact local municipality, domestic waste annihilation service or the shop you have purchased the product.
CE
52114679