
flex 6008 AF - Camera ROLLEI - Free user manual and instructions
Find the device manual for free flex 6008 AF ROLLEI in PDF.


User questions about flex 6008 AF ROLLEI
0 question about this device. Answer the ones you know or ask your own.
Ask a new question about this device
Download the instructions for your Camera in PDF format for free! Find your manual flex 6008 AF - ROLLEI and take your electronic device back in hand. On this page are published all the documents necessary for the use of your device. flex 6008 AF by ROLLEI.
USER MANUAL flex 6008 AF ROLLEI
natural_image
Black Rolleiflex 6008 AF digital camera with visible lens and control buttons (no text-heavy elements)
natural_image
Pure white background with no visible text, symbols, or objectsCONTENTS
Components and controls » 6
Introduction » 10
Brief instructions
Charging the battery » 12
Inserting the battery » 12
Attaching the lens » 12
Loading fi Im » 13
Attaching the magazine » 14
Advancing the film » 14
Switching camera on and off » 15
Opening the viewfi nder hood » 15
Closing the viewfi nder hood » 15
Focusing » 16
- Autofocusing: Single AF* » 16
- Manual focusing* » 17
Selecting the exposure mode » 17
Selecting the metering pattern » 18
Exposure metering » 18
Removing the fi Im » 18
Viewfi nder display » 19
Handling and using the camera
Using your camera » 20
Preparing the camera » 21
Attaching the shoulder strap » 21
Inserting the battery » 21
Opening the folding hood » 21
Closing the folding hood » 21
Charging the battery » 22
Charging from car battery » 23
Additional power supply » 23
Battery status » 24
Changing batteries » 25
Changing fuses » 26
Attaching the handgrip » 26
Changing the grip position » 27
Adjusting the wrist strap » 27
Loading and changing fi Im inserts » 28
Loading fi lm inserts » 29
Removing the fi Im » 30
Setting the fi lm speed » 30
Removing/changing magazines » 31
Magazine identifi cation » 32
Changing lenses » 33
Changing the viewfi nder system » 33
Changing magnifi ers
(for eyeglass wearers) » 34
Changing focusing screens » 34
Film advance
Switching camera on and off » 35
Single frames » 35
Continuous shooting » 35
Bracketing » 36
Silent operation » 36
Limiting the length of
continuous bursts » 36
Focusing » 37
Autofocusing\*
- Single AF » 39
- Continuous AF » 39
Manual focusing
Metering patterns and exposure modes
Selecting a metering pattern
- Center-weighted
multi-zone metering » 41
- Spot metering » 42
- Multi-spot metering » 42
Setting an exposure compensation » 44
Exposure modes and
exposure metering » 44
- Aperture-priority AE » 44
- Shutter-priority AE » 45
- Programmed AE » 45
- Program curve » 46
- Metered manual » 47
-Bulb/T » 47
Depth-of-fi eld preview » 48
AE lock » 48
Stray-light compensation » 49
*(6008 AF only)
CONTENTS
Shutter release
- Using a cable release or release cable » 50
- Using the self-timer » 51
- Mirror lockup » 52
Automatic bracketing » 53
Multiple exposures » 55
Frame counter » 57
Additional viewfi nder display » 58
Error management » 59
Variable default settings » 60
Selecting the AF mode\*
- Three active AF areas » 61
- Spot AF » 61
Selecting leading or trailing sync
- Leading sync » 62
- Trailing sync » 62
Selecting the bracketing mode
- First bracketing mode » 63
- Second bracketing mode » 63
Frame counter
Activating and adjusting the frame counter for standard
magazines » 64
Reset » 64
Custom functions
Applying custom functions to switch » 65
Flash photography
Flash photography » 66
Setting leading or trailing sync and sync speed » 67
Manual fl ash control without an SCA adapter » 67
Flash photography with Rollei SCA-3562 (or SCA-356)
Dedicated Flash Adapter » 68
Autofl ash with SCA adapter in low light » 70
- Flash photography with programmed AE » 70
- Flash photography with aperture-priority AE » 70
- Flash photography with shutter-priority AE » 71
- Automatic fill flash with SCA adapter » 71
Compensated fill flash » 72
- Additive fill flash » 72
- Automatic fill flash with flash units permitting flash-exposure compensation
(only with SCA-3562 adapter) » 73
Manual flash control » 74
Flash bracketing with SCA adapter » 75
Prefl ash » 76
CONTENTS
Practical hints
Shooting at low temperature » 77
Shooting in extreme lighting conditions » 77
- Spot metering » 78
- Multi-spot metering » 78
- Exposure compensation » 79
- Automatic bracketing » 79
- Substitute reading » 80
- Close-up reading » 80
- Subject contrast » 80
Close-up photography » 81
Instant shutter release » 83
Care of your camera » 84
Further optional accessories » 85
Interchangeable lenses » 85
Teleconverters » 86 Interchangeable magazines » 86
Interchangeable viewfi nders » 86
Focusing screens » 88
Matte box » 89
External battery connector » 89
PowerInterface » 90
SCA-3562 Flash Adapter » 90
MasterWare » 91
The Rolleifl ex 6000 System » 92
Troubleshooting » 96
Compatibility with
older components » 102
Specifications » 105
Lens table » 108
COMPONENTS AND CONTROLS
text_image
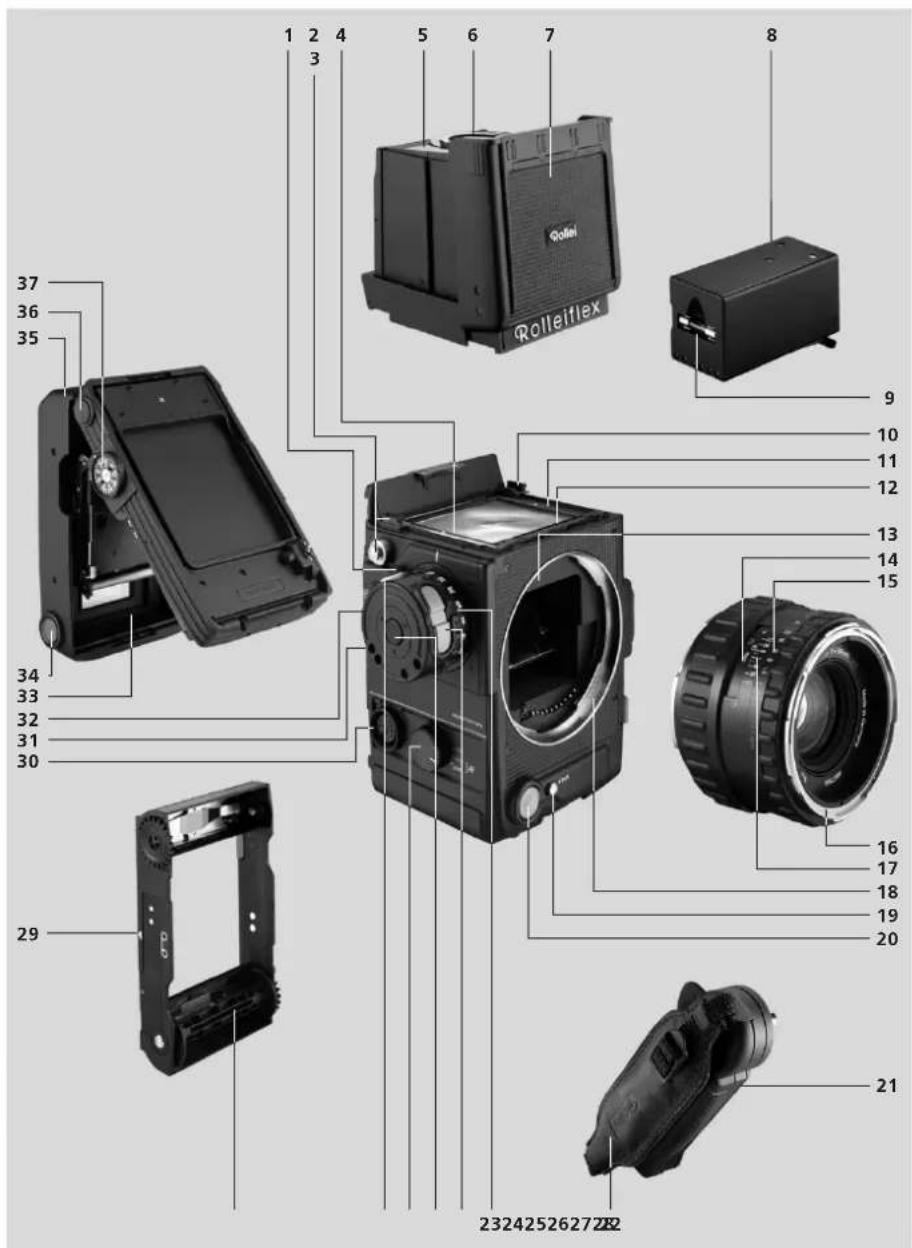
1 2 4 3 5 6 7 8 37 36 35 34 33 32 31 30 29 23242526272R2 Golei Rolleflex 9 10 11 12 13 14 15 16 17 18 19 20 21COMPONENTS AND CONTROLS
1 Master switch
2 Viewfinder release button, right
3 Strap holder, right
4 Screen-holder release, right
5 Magnifi er holder
6 Viewfinder magnifier
7 Folding viewfinder hood
8 Rechargeable battery
9 Fuse
10 Viewfinder release, left
11 Screen-holder release, right
12 Data panel
13 Distance scale
14 Aperture scale
15 Double fi Iter bayonet
16 Aperture index
17 Distance index and depth-of-fi eld scale
18 Camera bayonet mount
19 Shutter-release lock
20 Shutter release, bottom right (two-stage)*
21 Lateral grip
22 Leather wrist strap, detachable
23 Shutter-speed dial
24 Shutter release, top right (two-stage)*
25 Lateral-grip holder
26 Focus-mode dial*
27 Memo button
28 Empty film spool
29 Index for arrow on film leader
30 Universal terminal with screw thread
31 Custom-function switch
32 Stop-down button
33 Seat for empty film spool, with icon
34 Release knob for film change, right
35 Magazine back
36 Release knob for magazine change, right
37 Film-speed dial
*(6008 AF only)
COMPONENTS AND CONTROLS

text_image
38 39 40 41 42 43 44 45 46 47 48 49 50 77 76 75 74 73 72 71 70 69 68 67 66 65 62 64 63 6160 575859 55 56 6008 AF 51 52 53 54COMPONENTS AND CONTROLS
38 Spare fuse
39 Spare-fuse slide
40 Interchangeable focusing screen
41 Folding hood, detachable
42 Strap holder, left
43 Exposure-compensation/fill-flash switch
44 Metering-pattern/menu dial
45 Multi-exposure knob
46 Release knob for magazine change, left
47 Sticker recess
48 Film-change release, left
49 Grip for laminar drawslide
50 Interchangeable magazine
51 Frame-counter window
52 Memo holder
53 Film stage, detachable for use of special accessories
54 Magazine hinge
55 Spring tab for fi lm spool
56 Memo-holder slot
57 Film insert
58 Film-path icon
59 Film-advance fl ange
60 Auxiliary shutter
61 Tripod quick-release bracket
62 3/8" tripod socket
63 1/4" tripod socket
64 Battery slot
65 Grip-adjustment release
66 Lateral-grip holding pin
67 Lens bayonet mount
68 Interchangeable lens
69 Diaphragm ring
70 Shutter-priority AE lock
71 Focusing ring
72 Lens release
73 Mirror-lockup button
74 X-sync terminal
75 Hot shoe with additional dedicated contacts
76 Cable-release socket
77 Battery tab
ROLLEIFLEX 6008 AF/6008 integral2
Rolleifl ex 6008 AF Rolleifl ex 6008 integral2
Congratulations on your new Rolleifl ex 6008. We appreciate your patronage and trust that your new camera will give you outstanding service for many years to come.
Your Rolleifl ex 6008 has been designed for professional use. It is ideally suited for creative use in fashion, people and action photography as well as in architectural and industrial applications.
For the hurried reader, there are introductory brief instructions.
These are followed by a detailed description with pictures of all important aspects of the camera, guiding you step by step from assembling the basic camera modules right up to removing the exposed fi lm.
This in turn is followed by a number of practical tips and additional information on the workings of your camera as well as its major accessories.
A tabular annex gives all important data of our line of interchangeable lenses.
In the case of operating errors – which even an experienced photographer might make in the heat of a shoot or after prolonged non-use of the camera – a trouble-shooting guide will help you locate possible causes and find a way to correct them. All parts numbers in the text and the illustrations stand for one and the same part and can be looked up in the two picture plates.
ROLLEIFLEX 6008 AF/6008 integral2
Please note:
Like any precision instrument, your Rolleifl ex 6008 AF/6008 integral2 deserves careful handling.
Proceed with care above all when removing or attaching interchangeable magazines or lenses:
» Never touch the reflex mirror or special light-absorbing surfaces when there is no lens on the camera. In this case, always close the camera's mirror box with its protective cap.
» When there is no magazine on the camera, make sure that the exposed auxiliary shutter 60 is not subject to pressure. In this case, always protect the camera by attaching its rear cover.
» Interchangeable magazines removed from the camera should always be protected by closing their laminar drawslide and attaching their protective cover.
» These cover the most important controls and manipulations you need to acquaint yourself with your camera and its operation. Readers who prefer detailed information right from the beginning should start on page 19.
» Hints regarding autofocus or focus indication refer exclusively to the Rolleifl ex 6008 AF.
Note:
Users of earlier models of the Rolleifl ex 6000 Series should read the paragraph "Compatibility with earlier components".
BRIEF INSTRUCTIONS
text_image
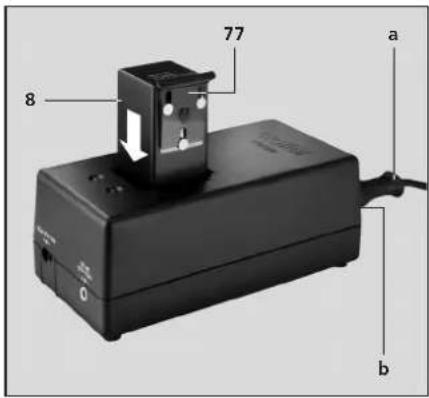
77 8 a b CCharging the battery
Connect power-supply cable a to power terminal b of charger and the latter to AC. The green LED signals readiness.
All usual line voltages between 100 and 240 V AC may be used. Press tab 77 up, withdraw battery 8 and insert it in the charger as shown. Charging takes about one hour.
Nicad batteries are subject to a slow continual discharge. To ensure that your camera is always ready for use, be sure to recharge your battery every 2 to 3 months.
text_image
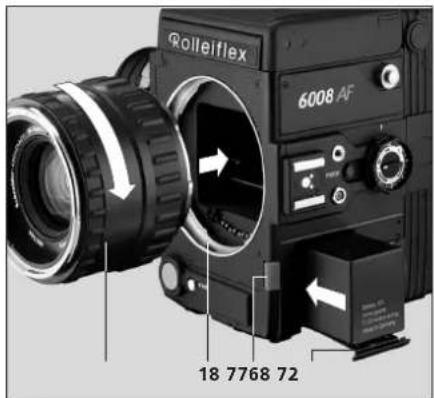
Rolleiflex 6008 AF 18 7768 72Inserting the battery
Slide charged battery 8 with tab 77 down into camera and engage tab.
Attaching the lens
Press red button 72 down and remove cap turning it counterclockwise. Align red index of lens 68 with red dot on camera bayonet mount 18, insert it as far as it will go and turn it clockwise until it clicks into place.
BRIEF INSTRUCTIONS
text_image
57 35 c 29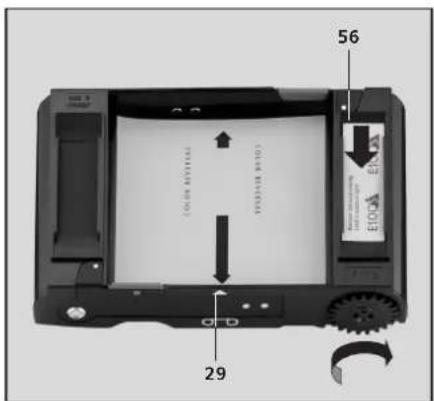
text_image
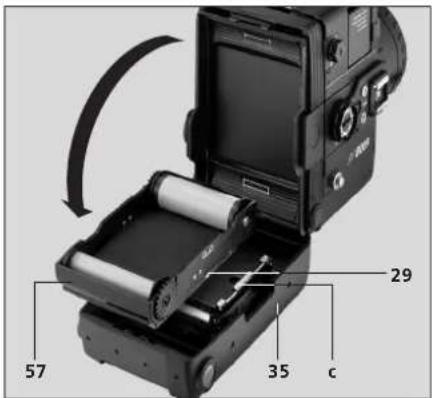
56 (ONION REFLECTIVE) (ONION REFLECTIVE) 29Loading fi lm
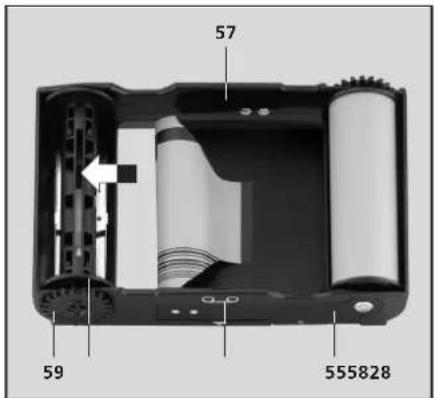
Push grip 49 of laminar drawslide of magazine as far as it will go in the direction of arrow "magazine change/remove insert", press release buttons 34 and 48, remove magazine back 35 and take out film insert 57. Pull red tab 55 outwards and insert fi lm spool according to icon 58. Thread paper leader straight into empty spool 28 and wind it up until the arrow (!) is aligned white index 29. Slide fi lm-box tab into slot 56 (on side of film spool). Position fi lm insert in magazine: fi lm spool aligned with I, empty spool with I.
text_image
57 59 555828Note:
Make sure that the film leader is on top of retaining springs c of film pressure plate; it will automatically be threaded below these springs. Close magazine back tightly. Set ISO speed on dial of magazine 37.
BRIEF INSTRUCTIONS
natural_image
Two black electronic devices with ports and connectors, shown from front and side views (no visible text or symbols)Attaching the magazine
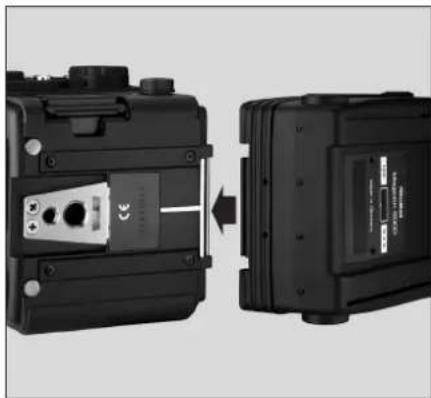
Hook interchangeable magazine straight into bottom hinge, swing it up and press down until it engages with a click. Push grip 49 down as far as it will go.
Advancing the fi Im
Set master switch 1 to "1" and press the shutter release down fully: The fi lm will be advanced to frame 1. Frame counter 51 reads "1". Should "1" fail to appear, press the shutter release again.
BRIEF INSTRUCTIONS
text_image
Labeled diagram of a DSLR camera with adjustment knobs and control buttons, showing numbered parts 1 and 31.Switching camera on and off
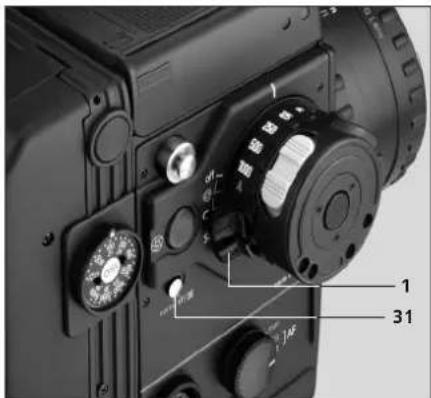
Master switch set to "S", "C" or "S±". Switch camera on by briefy pressing memo button or shutter release. It will now remain active in its standard mode for at least 40 s. This period will be extended for another 40 s if one of the camera's controls is used. To switch the camera off, turn its master switch to "off". Accidental activation will then be impossible.
text_image
1 2 3 4 5 6 7 8 9 10 11 12 13 14 15 16 17 18 19 20 21 22 23 24 25 26 27 28 29 30 31 32 33 34 35 36 37 38 39 40 41 42 43 44 45 46 47 48 49Opening the viewfi nder hood
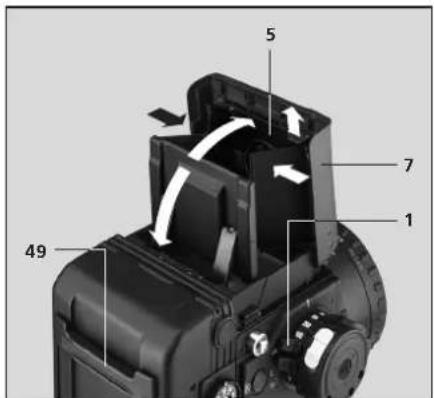
Lift viewfi nder hood 7 at rear and swing it up. To flip up magnifier holder 5, press the grip towards the edge of the hood.
Closing the viewfinder hood
Press magnifi er holder 5 down until it locks. Press two side fl aps of the hood inwards and release, letting the hood close automatically.
BRIEF INSTRUCTIONS
text_image
Made in Germany • man • sing • cont AF 26Focusing
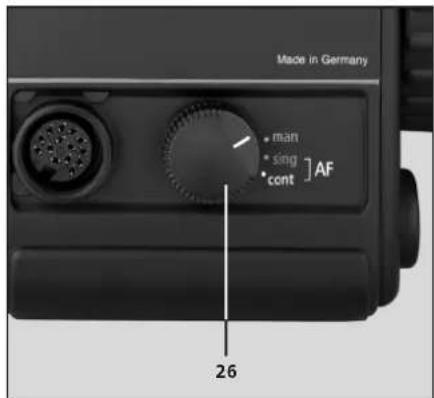
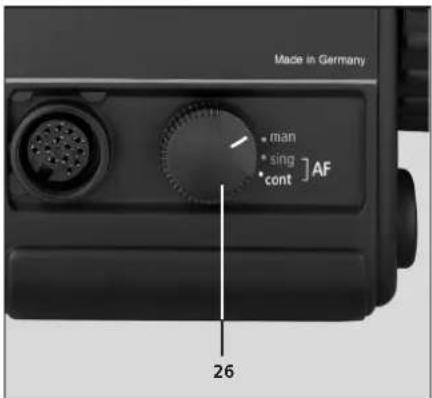
Use focus mode dial 26 (6008 AF) to change over between autofocus (single AF - "sing" - or continuous AF - "cont") and manual focusing ("man").
natural_image
Close-up of a camera lens system with a grid screen and control panel (no visible text or symbols)Autofocusing: Single AF (6008 AF)
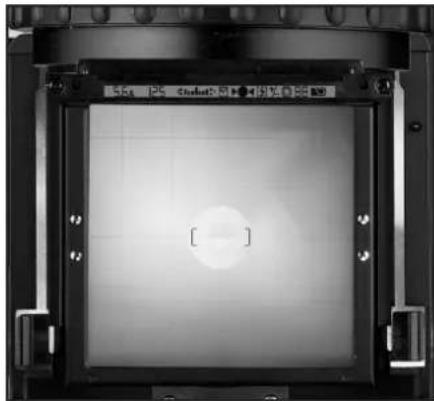
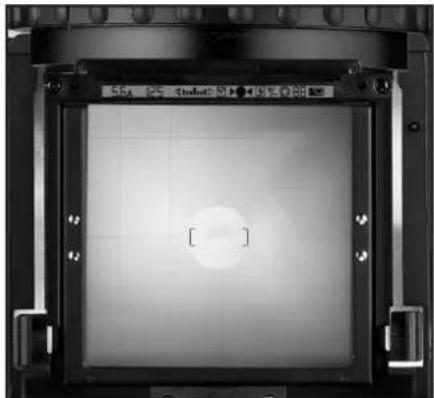
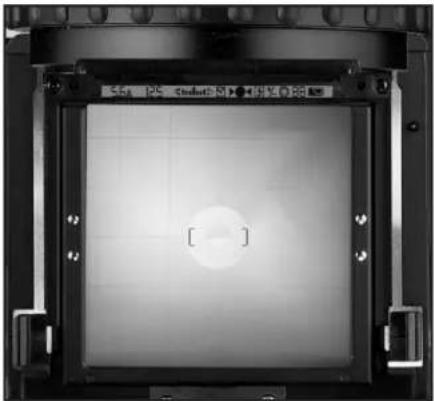
Place the focus area on the ground-glass screen over the subject to be focused (see illustration) and slightly depress the shutter release. Your AF lens will now focus automatically. To repeat focusing, release the shutter button and again press it lightly. Your subject has been detected as soon as only the center icon of the focus indicator appears.
If the three components of the focus indicator are blinking, automatic focusing is impossible. In this case, place the focus area on a more contrasty and better textured subject at the same distance and focus on the latter. If necessary, focus manually.
text_image
100mm A 22 16 11 8 5.6 4 2.8 P/Q Lens 72 16 8 | 8 16 72 5 10 m 25 mm 71Manual focusing (Focus indication\*)
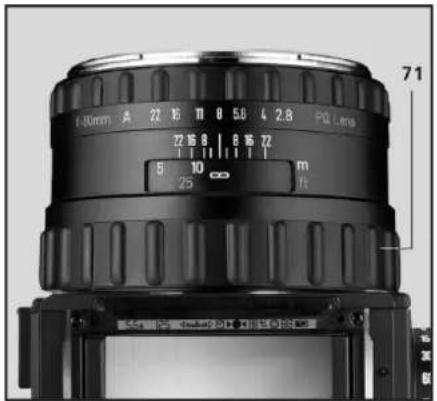
Point the focus area of the 6008 AF at the subject detail on which you wish to focus and turn ring 71 until only the central symbol of the focus display appears.
Keep turning focusing ring 71 until only the central part of the focus indicator appears. Arrows indicate the direction in which the focusing ring should be turned. If all three components of the focus indicator are blinking, autofocusing is impossible. In this case, make the focus area coincide with a more contrasty and better textured subject located at the same distance.
text_image
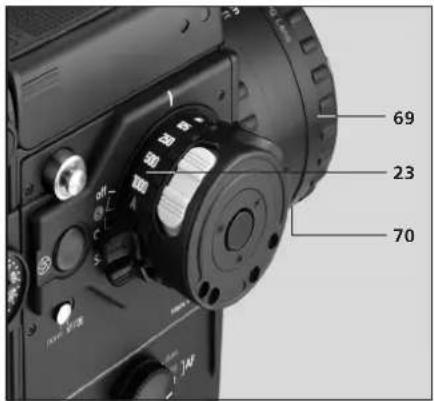
69 23 70Selecting the exposure mode
» Programmed AE
Set aperture ring 69 and shutter-speed dial 23 to "A". The camera is biased for a minimum shutter speed of 1/125 s.
» Aperture priority AE
Set shutter-speed dial 23 to "A", release aperture ring 69 by pressing knob 70 and set desired working aperture.
» Shutter-priority AE
Set aperture ring 69 to "A" and select desired shutter speed by turning dial 23.
» Manual exposure control
Select aperture and shutter speed using the aperture ring and the shutter-speed dial. Balance exposure on the large central index of the light balance.
*(6008 AF only)
BRIEF INSTRUCTIONS
text_image
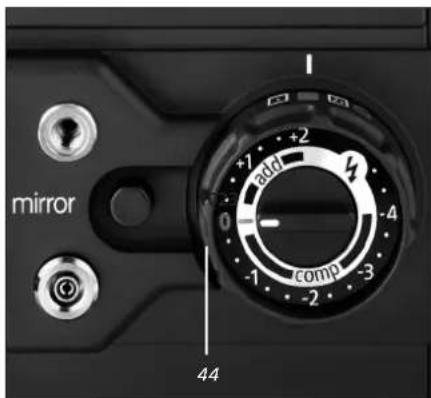
mirror 44Selecting the metering pattern
Dial 44 offers the following metering patterns:
» Center-weighted multi-zone metering
for normal lighting conditions
» Spot metering for diffi cult lighting conditions
» Multi-spot metering for diffi cult or extreme lighting conditions. Up to fi ve separate spot readings are pos- sible.
Exposure metering
The metering system is active as soon as the camera is switched on. To lock the exposure, keep memo button 27 depressed or engage it (pushing it back).
text_image
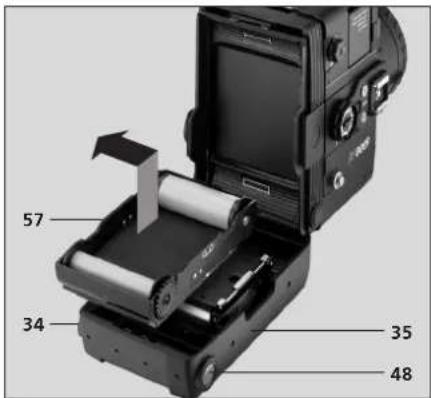
57 34 35 48Removing the fi lm
After the last exposure, the fi Im is automatically wound up. Then open the magazine back and remove the fi Im insert. Take out the exposed fi Im and glue down its leader. Replace the fi Im insert. Press down the magazine back until it clicks into place. It is advisable to remove the magazine from the camera when changing fi lms.
Note:
Before opening the magazine back 35, be sure to push grip 49 all the way in the direction of the arrow "magazine change/remove insert". Failure to do so may damage the laminar drawslide!
VIEWFINDER DISPLAY
text_image
Aperture Shutter-priority AE Shutter speed Aperture-priority AE Exposure lock Metering pattern Flash metering Light-balancing scale Focus indicator* Flash readiness Exposure compensation Horizontal/vertical format (magazine 4560) Frame counter Battery statusViewfi nder display
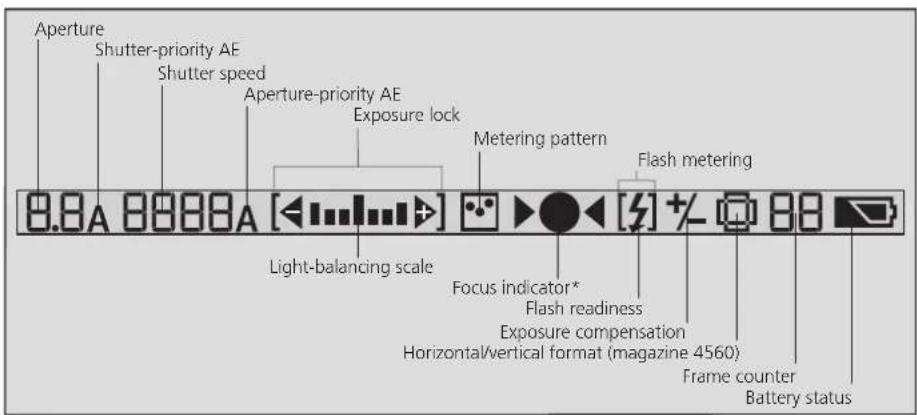
All important camera data are displayed in panel 12 inside the viewfinder. These are, above all:
» Automatic exposure mode
» Shutter speed and aperture
» Light-balance indicator for manual exposure control
» Metering pattern
» Focus indicator*
» Flash readiness
» Battery status
*(6008 AF only)
HANDLING AND USING YOUR CAMERA
Handling and using the camera
This is a step-by-step explanation of all important operations right from assembling the camera modules up to the removal of the exposed film. If necessary, additional hints are given for additional clarification. For practical tips, see page 77.
Should problems be encountered, see the table on pages 96 – 101.
Note:
In its basic configuration, the camera is shipped in special packing designed to provide optimum protection for all its components. It is recommended that this packing be kept for later use. Make a point of noting down the serial numbers of camera and lenses. These will help you recover the equipment and prove your ownership should it ever be lost.
text_image
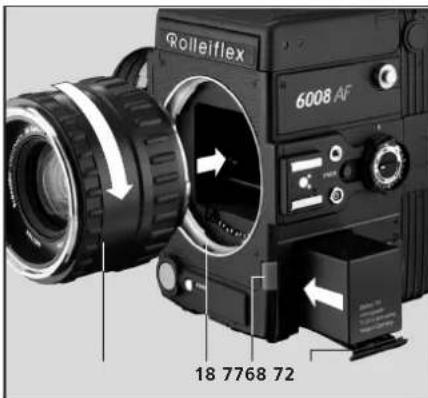
Rolleiflex 6008 AF 18 7768 72Attaching the lens
Remove the front and rear caps. Press button 72 and remove the protective body cap by counterclockwise rotation. Fully insert lens 68 with its red index aligned with the red dot of the camera bayonet mount 18, and turn it clockwise until it clicks into position.
Inserting the battery
Slide battery 8 with tab 77 down into the battery compartment and tighten the tab.
text_image
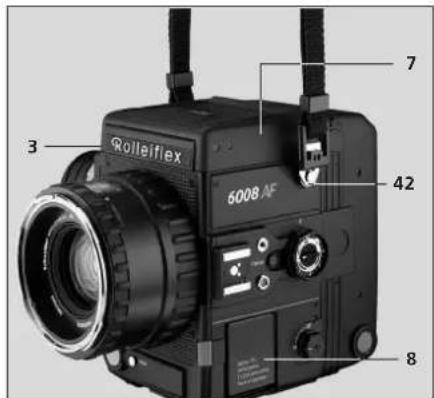
3 Rolleiflex 6008 AF 7 42 8Attaching the shoulder strap
Push the self-locking eyelets onto holders 3 and 42 until they click into place. To loosen the strap, lift the release grip and unhook the eyelets.
The strap holders of the camera allow the strap to be turned freely so that the camera can easily be carried in various positions.
Opening the folding hood
Lift viewfi nder hood 7 at rear and swing it up. To flip the magnifier holder 5 up, press the grip towards the edge of the hood. The magnifi er holder swings up.
Closing the folding hood
Push magnifi er holder 5 down. Press the two lateral hood fl aps inwards and release them. The viewfi nder hood will close automatically.
CHARGING THE BATTERY
text_image
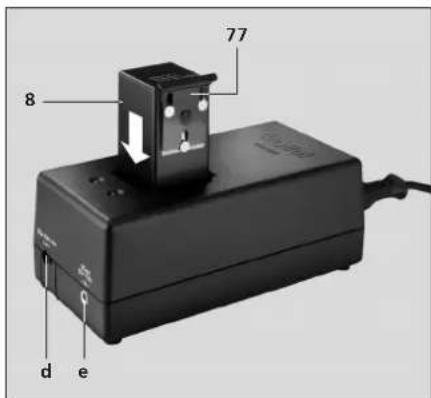
77 8 d eCharging the battery
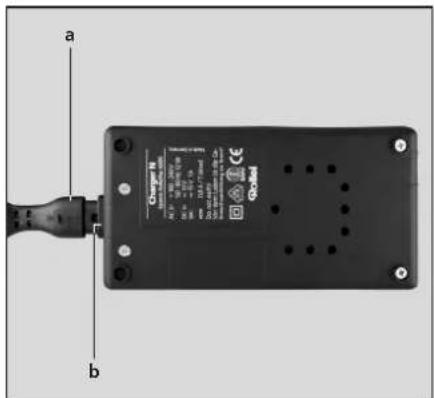
Plug the power-supply cable a into the AC terminal b of the charger and connect it to the AC supply. The green LED indicates readiness. All normal AC voltages and frequencies are suitable:
» 100V - 240V AC, 50 Hz - 60 Hz.
The power-supply unit has protective insulation and conforms to the pertinent EU safety regulations. It comes with a 1.25amp slow-blow fuse. Its outputs (battery pins, terminals) are protected against short circuits due to defective batteries or metallic objects. Battery temperature is monitored and limited.
Note:
Be sure to prevent bare metallic objects from entering the battery slot and use the unit exclusively in a dry environment.
text_image
a bPlace battery 8 with its contacts onto the pins in the charger slot. Rapid charging will start after about 2 s, and the red LED glows. Cutoff voltage and battery temperature are monitored during charging. At the cutoff voltage, the unit switches to trickle charge. If the battery voltage exceeds the admissible maximum, the red LED will go out and rapid charging is interrupted until the temperature is back to normal.
Trickle charging is in progress when the green and red LEDs are blinking. This makes up for the spontaneous discharge of the battery so that the latter may be left in the charger over prolonged periods.
Ambient temperature: approx. 5°C to 35°C. The overall duration of the charging cycle depends on battery condition. After normal discharge, about one hour or less is suffi cient.
CHARGING FROM CAR BATTERY
text_image
D+2000 d eNote:
If you wish to resume rapid charging after trickle charge has started, briefly lift the battery off the contacts and replace it: The one-hour timer starts, and rapid charging is resumed.
If the battery is very hot – red LED off with battery in place –, rapid charging can be started only after it has cooled down.
Charging from car battery
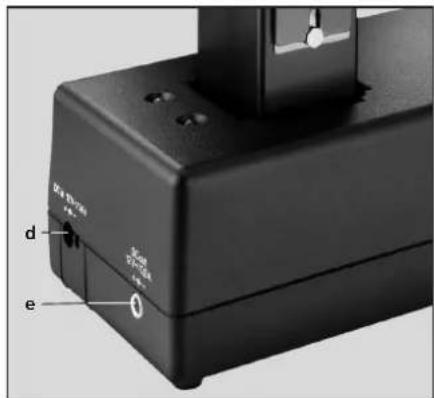
Connect the car's lighter socket to the low-voltage terminal d of the charger. Normal charging from a 12V car battery will take about 14 hours. The two LEDs will remain off.
Additional power supply
An external device running on 12 VDC with a maximum of 500 mA can be connected to the 3.5 mm jack e of the charger. The green LED signals readiness. The maximum admissible length of the connecting cable is 2 m.
BATTERY STATUS
text_image
6008 AF Battery 100 in-charge T 1250A driving Inlet or Damping 77Battery status
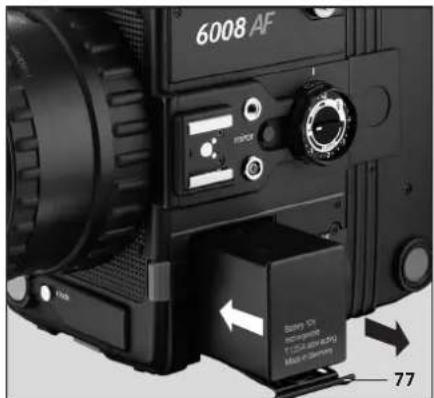
With the camera switched on, battery status is monitored automatically.
The following display appears:
» for full or sufficient capacity 📋, » for partial discharge 📋,
» blinking ▶ for very low capacity (suffi cient only for a few additional shots).
When the display reads "CHArGE", the camera will switch off. If possible, keep a fully charged spare battery ready.
It is advisable to recharge the battery as soon as the icon ▶ starts blinking, above all at low temperatures. Use of the external battery connector – which allows the battery to be carried close to your body – also is very helpful at low ambient temperatures.
CHANGING BATTERIES
text_image
Battery I/O ncorpgable T1.25A label acting Made in Germany 77Note:
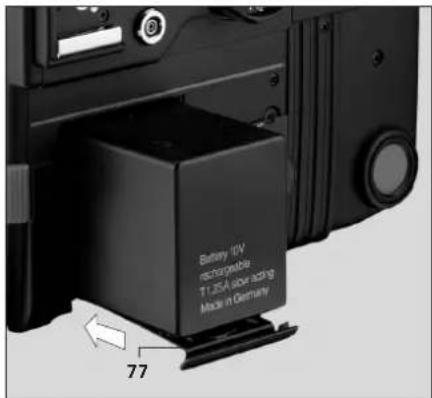
To avoid premature discharging of the battery, be sure to reset master switch 1 to "off" after using the camera.
For technical reasons, Nicad batteries will slowly discharge even if they are not used. To ensure instant readiness of your camera, be sure to recharge the battery every two to three months.
Changing batteries
Push tab 77 up and remove discharged battery 8. Insert the recharged battery with its tab pointing down into the battery slot. Firmly press down the tab until it engages.
Note:
Always switch your camera off before changing batteries to keep exposure settings in memory.
CHANGING FUSES
text_image
39388Changing fuses
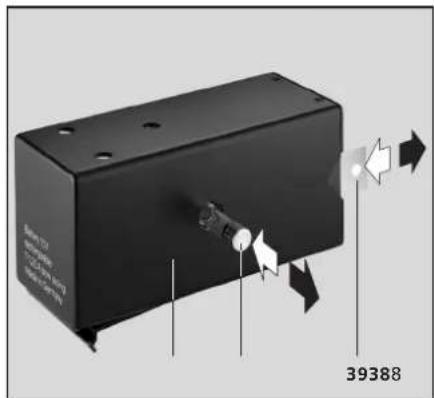
Remove battery and pull fuse 9 out of its holder. The open slide 39 exposes the spare fuse 38. Press this down into the holder so that it clicks into place. Close slide 39.
Suitable fuses – 1.25amp/250V, slow-blow – are commercially available.
To avoid damage to the camera, never use fuses of higher rating!
Should the spare fuse blow too, try to locate the cause (e.g. fi Im-loading error, especially film running off the spool; film torn at low temperature or come off paper leader.) If the trouble cannot be located, please contact Rollei Service.
text_image
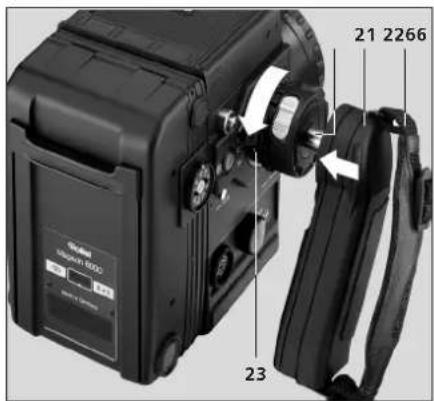
21 2266 23Attaching the handgrip
To avoid unintentional shutter tripping when attaching the grip, set the master switch to "off". Turn shutter-speed dial 23 to <> and hold it in this position. Insert holding pin 66 of grip 21 fully into the opening in the shutter-speed dial. Let go of the dial so that it resets from its <> position.
The grip is now fixed to the camera. To remove the grip, proceed in the reverse order.
CHANGING THE GRIP POSITION
natural_image
Close-up of a black Nikon MDA 6000 camera with attached strap and belt, no visible text or symbols on the device itself.Changing the grip position
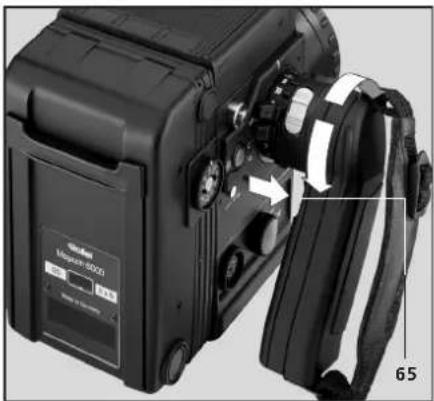
The grip has four click stops that ensure convenient holding of the camera with the waist-level finder, the 45° prism finder and the 90° eye-level fi nder.
To change the grip position, press the release button 65 on the inside until the grip can be moved freely. Let go of the release button and move the grip forward or backward until the lock pin engages.
natural_image
Close-up of a mechanical component with a coiled spring and threaded end (no visible text or symbols)Adjusting the wrist strap
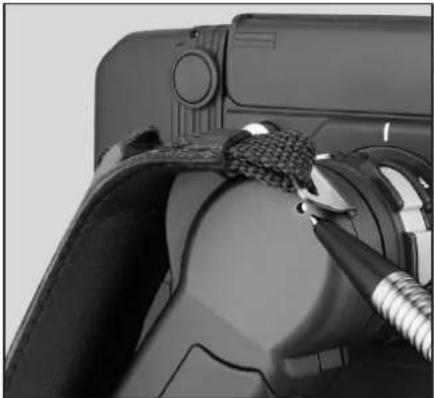
Loosen the strip on the buckle and adjust it so that the camera can be held safely with only your right hand.
To remove the strap, press the two lock pins of the strap holder with a pointed object (e.g. a ball pen) and withdraw the holders from the guide slots. To attach the strap, proceed in the reverse order.
LOADING AND CHANGING FILM INSERTS
text_image
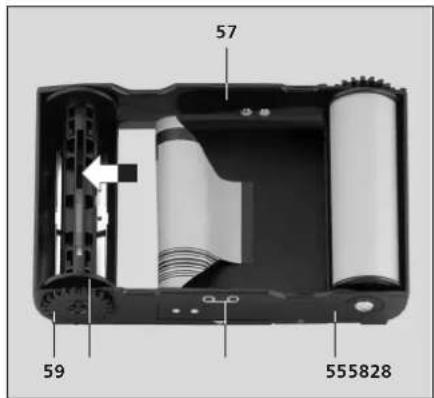
57 59 555828Loading and changing fi lm inserts
Pull the grip of the magazine's laminar drawslide 49 all the way in the direction of the arrow "magazine change/remove insert". Press release buttons 34 and 48, swing the magazine back down and remove fi lm insert 57. The recesses in the back make removal very easy. If necessary, briefl y press the empty spool with one fi nger to loosen the insert.
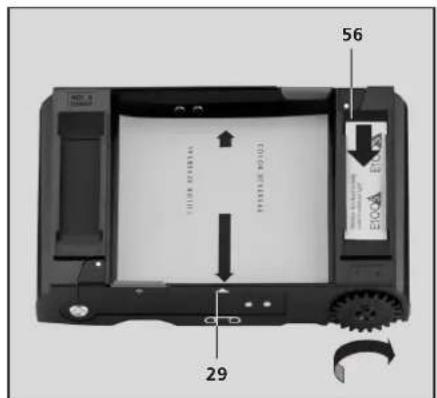
Pull red tab 55 outwards, insert the film spool according to icon 58 (black side of paper facing inside) and engage the tab. Thread the fi lm leader straight into empty spool 28 and use advance fl ange 59 to wind it up tight until the arrow on the paper backing is properly aligned with index 29. Slip the film-box tab into memo holder 56 (on side of fi lm spool).
text_image
56 29The camera comes with a fi lm insert inside. Unless you use interchangeable magazines, which are even more practical, it is advisable to keep several fi lm inserts ready for prolonged shoots. The inserts can be preloaded and are easy to carry. The same type of insert can be used for size 120 and 220 roll fi lm (not the same type of magazine, though!).
The empty fi lm spool from the last roll need not be changed – it will accept the leader of the new fi lm without repositioning. This is a special benefit of the symmetrical insert that fits the film-advance system even when it is turned through 180°. If the new fi lm is of different speed or type, also change the fi lm tab in the memo holder, and reset the fi lm speed on dial 37.
LOADING FILM INSERTS
text_image
57 35 29 cNote:
At subzero temperatures it is not advisable to preload the fi lm inserts. Instead, it is preferable to load the fi lm directly from its box and advance it to frame 1. Due to the cold, the glue holding the fi lm on the paper leader will get brittle and might give rise to fi lm-advance problems.
Loading fi lm inserts
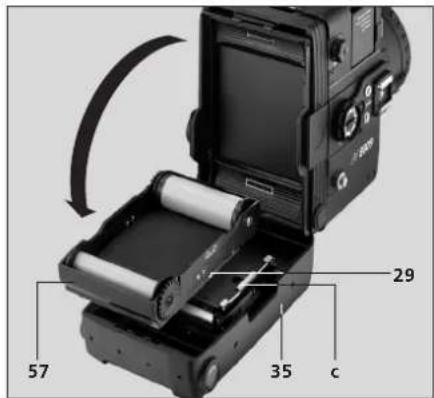
Open the magazine back as described before and load the insert so that the fi lm spool coincides with the icon I—, the empty spool with I—. Do not try to insert the fi lm edges beneath the spring clips c. Simply leave them on top. As the fi lm is wound on automatically, it will pass below the clips on its own.
Close the back until it engages and pull the grip fully down to cancel the release lock. Set the master switch to "S" and briefly press shutter release 20 or 24: The fi lm will automatically advance to the fi rst frame, and the frame counter 51 will read "1". Should this not be the case – which does happen from time to time with certain makes of fi lm –, press the shutter release once more.
REMOVING THE FILM
text_image
57 34 35 48Removing the fi lm
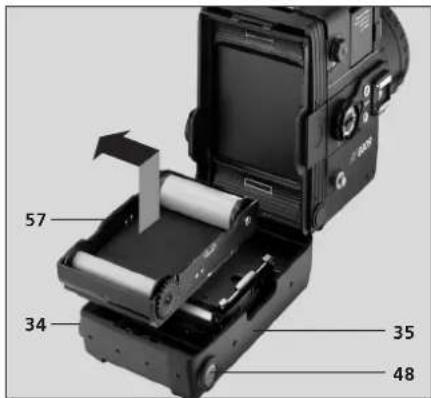
After the last frame, wait for the fi lm advance and wind-up to finish and "End" to appear in the display. Then close the laminar drawslide (grip in direction of arrow "magazine change/remove insert"). Open the magazine back, remove the insert and take out the fi lm. If necessary, replace the fi lm insert and close the back until it engages. It is advisable to remove the magazine from the camera before removing the fi lm. (See paragraph "Removing/changing magazines".)
Note:
Before opening the magazine back 35, pull grip 49 fully in the direction of the arrow "magazine change/remove insert", or the drawslide may be damaged!
natural_image
Close-up of a DSLR camera with adjustment knobs and a dial indicator (no readable text or symbols)Setting the fi lm speed
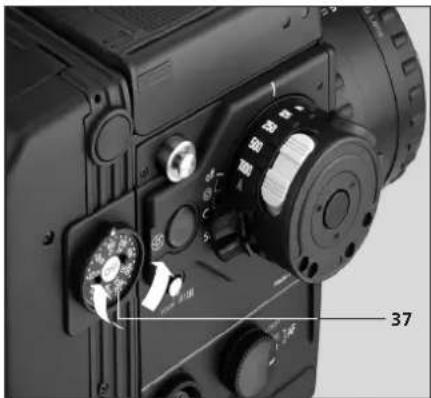
Engage dial 37 in the position for the ISO speed concerned. The dial must be in one of its click stops!
Film speed can be set over a range of ISO 25/15° to 6400/39°, which covers practically all the emulsions available in the world.
If the film speed is changed with the camera switched on (!) or if magazines with different ISO settings are attached to the camera, the corresponding ISO value will be displayed for about one second, e.g. 25 – 32 – 40 ... 4000 – 5000 – 6400, preceded by "Sn" (for sensitivity).
REMOVING/CHANGING MAGAZINES
text_image
mirror +2 add 0 -4 -1 -2 corio -3 43Note:
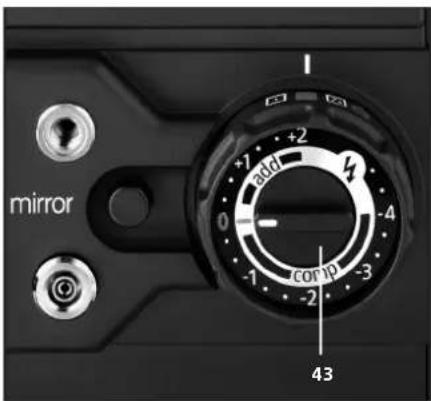
If there is no magazine on the camera or if camera backs without their own speed setting are used, the camera will default to ISO 100/21°. In this case, the exposure-compensation icon will not be displayed.
When using other fi Im speeds, use the exposure-compensation switch 43 to set the camera for fi Im speeds from ISO 25/15° to 2500/35° according to the table below:
| ISO 25 | 50 | 100 | 200 | 400 | 800 | 1600 | 2500 | |
| EV compensation | +2 | +1 | 0 | -1 | -2 | -3 | -4/3 |
text_image
46 36 49 51 Maser 8000 Audio & BroadcastRemoving/changing magazines
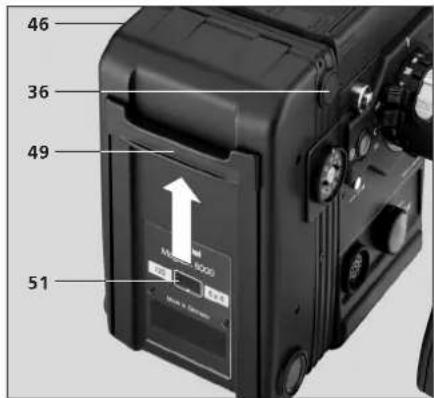
Push grip 49 fully up in the direction of the arrow "magazine change/remove insert". Press the two release buttons 36 and 46. Swing the magazine down and remove it from its hinge.
Hook the interchangeable magazine straight into the hinge at the bottom, swing it up and press so that it engages. Push grip 49 fully down: The drawslide opens and firmly locks the magazine on the camera. At the same time, the metering and release functions are enabled.
As long as the drawslide is closed or only partially open, "SLIdE" appears in the display.
INTERCHANGEABLE MAGAZINES
text_image
47 Magellan Magellan 6000The following four interchangeable magazines may be used:
» 6x6/120 magazine for 12 6x6cm frames on size 120 fi lm.
» 6x6/220 magazine for 24 6x6cm frames on size 220 fi lm.
» Type 4560 ^1 magazine for use in either horizontal or vertical format; "120" position for 16 4.5x6 cm frames on size 120 film, "220" position for 32 4.5x6 cm frames on size 220 fl lm.
» Polaroid magazine
for 10 6x6cm frames on instant fi lm.
Important:
When using the type 4560 magazine (or most of the digital backs), it is indispensable that the film stage 53 be removed. The stage remains in place with all the other aforementioned magazines.
Magazine identifi cation
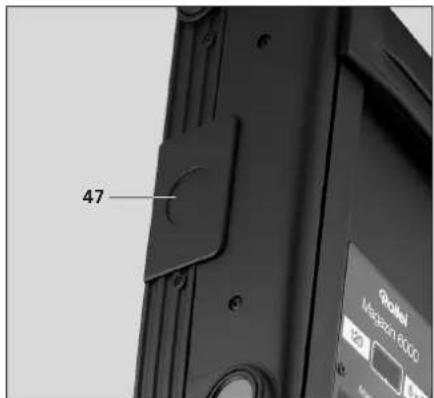
The recess 47 takes commercially available stickers of 12 – 13 mm diameter (and possibly in different colors). These may be used to number the magazines, specify the fl lm type, etc.
As an additional precaution against magazine confusion, the sticker at the frame-counter window has been assigned different colors for the different types of magazine.
text_image
Qolleiflex 13 68 72Changing lenses
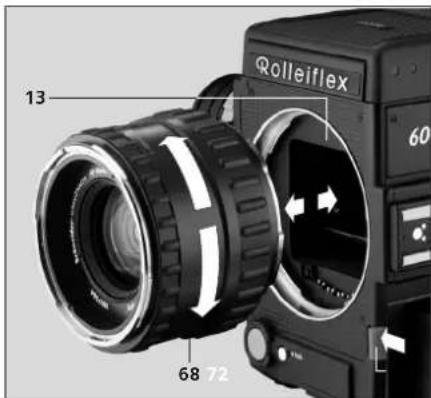
Press button 72 and remove the lens from the camera's bayonet mount by counterclockwise rotation. Align the red index of the interchangeable lens with the red dot and turn it clockwise to engage.
At present, interchangeable lenses are available with focal lengths from 30 - 1000 mm.
text_image
6 5 10 2Changing the viewfi nder system
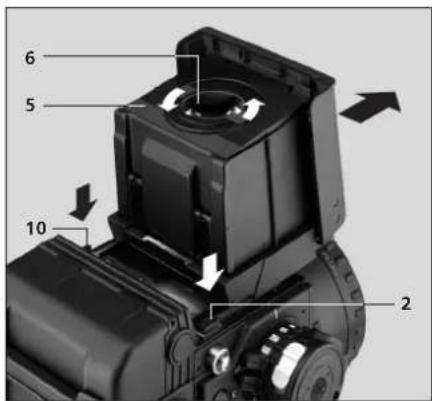
Open the focusing hood of the standard waist-level fi nder, press the two release buttons 2 and 10 and withdraw the finder horizontally towards the front. Mount the interchangeable viewfi nder in the same manner, pushing it horizontally towards the back (without pressing the release buttons). The fi nder will click into place.
When attaching a 45° or 90° viewfinder, the display panel will automatically be switched to unreversed display of viewfinder data.
CHANGING MAGNIFIERS
text_image
6 5 10 2Changing magnifi ers (for eyeglass wearers)
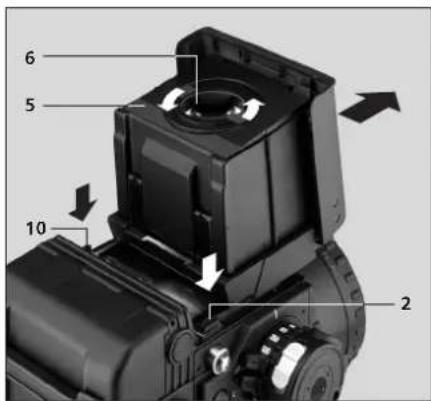
The magnifi er in the folding focusing hood can be changed to allow focusing without eyeglasses. Magnifi ers with +2.5 to -4.5 diopters (as referred to the dioptric correction of the eyeglass wearer) are available.
To change magnifiers, grasp the magnifier holder 5 laterally with your thumb and index finger, at the same time pressing the sides of the focusing hood against the magnifier holder. Release magnifier 6 by turning its protrusions counterclockwise and lift it out. Insert the interchangeable magnifier in the reverse order and turn it clockwise to lock it.
text_image
40 11 4Changing focusing screens
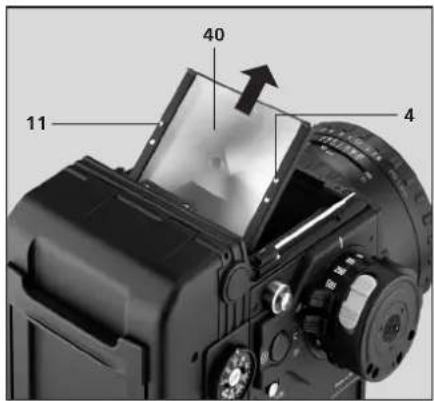
After removing the viewfi nder, withdraw the two releases 4 and 11 and carefully swing the frame up. Withdraw focusing screen 40 and store it away from dust. Do not touch its upper or lower surface and grasp it at the edges only. Hold the interchangeable focusing screen with its matte side facing the refl ex mirror and insert it between the tabs and springs. Close the frame, move it back slightly and engage it on either side.
text_image
Labeled diagram of a DSLR camera with numbered parts and adjustment knobsSwitching the camera on and off
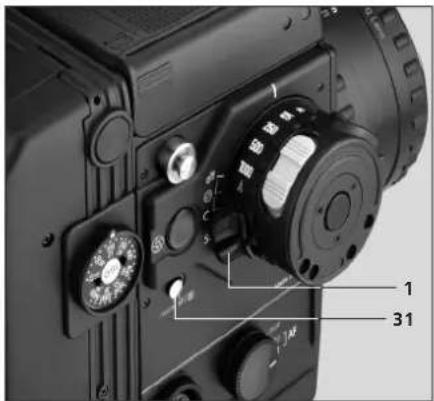
With its master switch 1 set to "off", the camera circuits are dead, and the camera cannot be inadvertently activated by operating one of its controls.
After setting the camera to one of the fi lm-advance modes "S" (single frames), "C" (continuous shooting) or "S±" (bracketing), it can be activated with the aid of the memo button, one of the shutter buttons, the stop-down button or the mirror-lockup button. As long as the camera is inactive, the display will remain blank.
In its default setting (that can be changed with MasterWare), the camera remains active for 40 seconds. The use of any of its controls will extend this period by another 40 seconds. In the multi-spot mode and when the memo button is locked in, the camera will remain active for an additional four minutes.
Single frames
With the master switch set to "S", a single frame will be exposed whenever the shutter release is pressed. For another exposure, first release the button, then press it again.
Continuous shooting
With the master switch set to "C", the camera will expose one frame after another for as long as the shutter release is kept depressed. The maximum shooting speed is about two frames per second (fps) at normal temperature (20°C), with a full battery and at shutter speeds faster than 1/250 s.
BRACKETING
Bracketing
Set the master switch to "S±". The camera will then take a limited number of pictures, automatically applying a certain exposure compensation. For more details about this exposure mode, see "Automatic bracketing" on page 53.
Silent operation (default setting of custom function)
Film advance is quieter, but slower as well. The shooting rate in continuous shooting will then drop to about one frame per second. Should the "silent operation" custom function not be programmed on switch 31, see "Custom functions".
Note:
When using a type 4560 magazine, the quiet-operation custom function is not available.
Limiting the length of continuous bursts
This mode serves to limit the number of frames exposed during continuous shooting. First, apply the limiting function "SF Coun" to switch 31 – see "Custom functions". The function will be activated as soon as switch 31 is turned on.
The default setting is two exposures. This may be varied with the aid of MasterWare. When the maximum number of exposures has been taken, release the shutter button so that it can be pressed again.
The picture series can be interrupted at any time by simply releasing the shutter button. The number of pictures set can then again be exposed in the next following sequence.
FOCUSING
text_image
Made in Germany • man • sing ]AF • cont 26Focusing (6008 AF)
Switch 26 serves to select either single AF, continuous AF or manual focusing.
Focus detection is activated by slight depression of the shutter release. Only upon full depression of one of the two shutter buttons will the camera expose the frame. To avoid unintentional exposure, it is recommended that you first acquaint yourself with the two operating stages of the shutter release before you load a film.
The AF module of the camera normally detects focus with three separate sensors, the central one responding above all to vertical patterns, the two lateral ones to horizontal patterns. For spot autofocus, the two lateral sensors can be disabled using the menu mode (see "Custom functions).
Notes:
To avoid ranging errors, keep stray light away from the focusing screen!
natural_image
Close-up of a camera lens frame with grid overlay and control buttons (no readable text or symbols)When shooting from a tripod without using the viewfi nder, for example, the focusing hood should be closed, or a prism fi nder should be used. Swung up, the magnifi er may enhance the effect of stray light like a burning glass.
When a manually focusing lens is attached and the focus-mode switch set to "sing" or "cont" for autofocusing, the camera will respond as if it were set to manual focusing. However, if you wish to use the AF system for focus detection, press the shutter release slightly.
Both autofocusing and manual focusing with the aid of the ranging system will work only with lenses with an effective maximum aperture of at least f/5.6. This should be noted above all when using a teleconverter or close-up accessories.
FOCUSING
Focusing (6008 integral2)
Turn ring 71 to focus image on the screen. The focusing distance can be read off in m or ft against the index 17. Depth of fi eld can be checked against the aperture scales to each side of the distance index 17. For infrared photography read off the focused distance and set it against the red index on the depth-of-fi eld scale. All lenses focus at full aperture.
natural_image
Close-up of a camera lens or screen with a grid overlay and control buttons (no readable text or symbols)Single AF (6008 AF)
Make sure that the subject to be focused coincides with a focus area (see illustration) on the ground glass and slightly depress the shutter release. The lens will now be focused automatically, and only the central component of the focus indicator will appear in the display. To repeat focusing, simply release the shutter button and press it once more to its first stage.
If all three components of the focus indicator are blinking, focusing is impossible. In this case, place the focus area on a more contrasty and better textured detail at the same distance and focus on this. If necessary, focus manually.
Single AF is based on focus priority. In other words, the shutter will release only after focusing has been achieved.
Continuous AF (6008 AF)
Contrary to single AF, the autofocus system is here active for as long as the shutter release is held down to its first stage. The lens will refocus should the subject leave the focus position.
This focus mode is based on release priority. The shutter can thus be released at any desired moment, regardless of the focus status. In all other respects, this mode is identical to single AF.
MANUAL FOCUSING
text_image
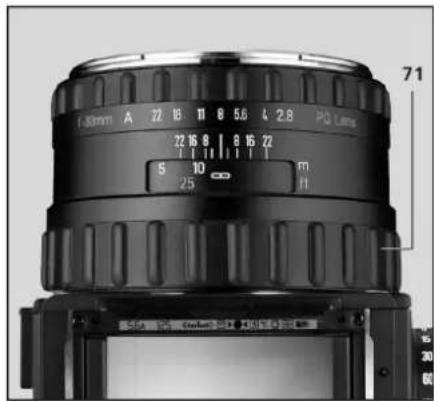
10mm A 22 18 11 8 5.6 4 2.8 PQ Lens 22 16 8 | 8 16 22 5 10 m 25 11 71Manual focusing (6008 AF)
To focus, turn ring 71. Check focus status either on the ground glass or with the aid of the focus indicator, placing the focus area (see illustration) on the subject to be focused.
Keep turning ring 71 until only the central part of the focus indicator appears. Arrows indicate in which direction the ring should be turned. (See the table below.)
| Display | Optimum focus |
| Far behind subject | |
| Far in front of subject | |
| Directly behind subject | |
| Directly in front of subject | |
| On subject | |
| Focusing impossib | |

natural_image
Close-up of a camera lens system with measurement grid and control buttons (no readable text or symbols)If all three components of the focus indicator are blinking, focusing with the ranging system is impossible. In this case, place the focus area on a more contrasty and better textured subject detail at the same distance.
Note:
Coarse manual prefocusing is required with lenses of longer than 180mm focal length, since ranging errors are then possible for technical reasons.
SELECTING THE METERING PATTERN
natural_image
Close-up of a mechanical component with four circular holes and concentric rings (no visible text or symbols)Center-weighted multi-zone metering
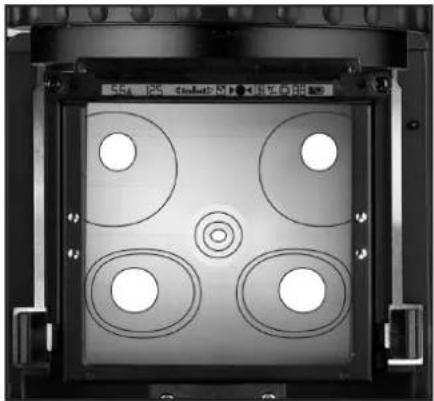
Seven silicon photodiodes located behind the partially transmitting refl ex mirror meter the light through the lens. They are arranged in five groups and in the default setting give a center-weighted multi-zone pattern that normally ensures good results.
Off center, this metering pattern gives greater weight to the bottom parts of the frame than to the top (which in scenic shots will include the sky).
text_image
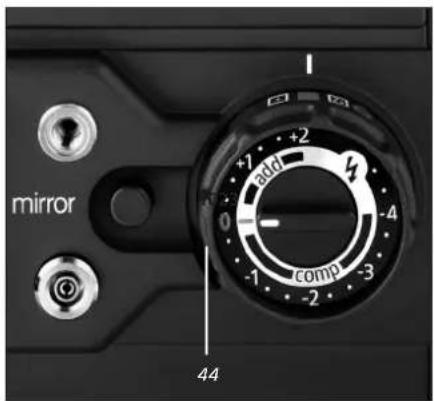
mirror +2 add 0 -4 comp -1 -2 44To select this mode, set dial 44 to ■. This icon will also appear in the display. To make allowance for special shooting conditions, multi-zone metering without center-weighting can be selected with switch 31 and the custom function "SF Cent" (see "Custom functions"). Center-weighting is then disabled as soon as switch 31 is turned on. The amount of center-weighting can be customized using MasterWare.
SPOT METERING
Spot metering
The central spot-metering sensor (covering <1% of the frame) may be used to meter important subject detail in the case of backlight or high-contrast subjects. Since this detail rarely coincides with the center of the frame, the reading can be locked in by pressing the memo button 27 (see "Memo function", page 48). On the standard focusing screen, the spot focus area is equivalent to the split-image spot. Setting dial 44 to ☐ will switch the camera to spot metering. The mode is also displayed in the viewfi nder.
Multi-spot metering
In this mode, up to fi ve readings – of highlights, shadows or mid-tones – can be taken and locked into memory. The camera's computer will then average these. If necessary, the resulting exposure can be locked in for several shots.
Multi-spot metering is active in the ☐ position of the switch. Separate readings are taken by pressing the memo button 27. With the memo button depressed, "1 Spot" will be displayed for the first reading for about one second. After that, the reading will be displayed as a shutter-speed/aperture combination and put in memory. This may be repeated up to the fifth reading. When five separate readings have been stored, the multi-spot display will blink. With the memo button depressed, the averaged exposure will be displayed as a shutter-speed/aperture combination, while the last reading will appear in the display when the memo button is not pressed.
MULTI-SPOT METERING
Should the aperture or shutter-speed display be blinking while separate readings are taken in the multi-spot mode (see "Exposure metering"), no correction of any kind is required. The camera will correctly process values outside the metering range. If the fi nal result is out of range, it can easily be shifted back by varying the aperture or shutter speed. To delete the multi-spot exposure, simply switch to another exposure mode or briefly switch the camera off and on again.
In both steps, depression of the one or two-step* shutter release will display the average reading that will be used for exposure.
If you wish to keep this value active beyond the actual exposure, lock the memo button during your last spot reading. Otherwise the camera will delete the averaged exposure value.
Note:
Should no separate reading be stored in the multi-spot mode, the camera will respond as in the spot-metering mode.
*(6008 AF only)
EXPOSURE COMPENSATION
text_image
mirror 44 43Setting an exposure compensation
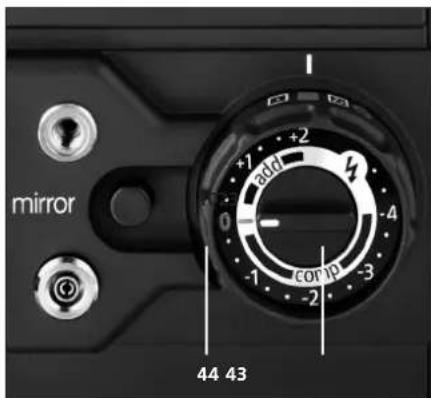
Set the desired value using the exposure-compensation switch 43. As long as an interchangeable magazine is attached, "+/-" will be displayed in the viewfinder. See also "Setting the film speed".
Exposure modes and exposure metering
As long as the camera is active, its exposure meter is likewise active.
To select an exposure mode, proceed as follows:
natural_image
Close-up of a camera lens control panel with no visible text or symbols on the lens bodyShutter-priority AE
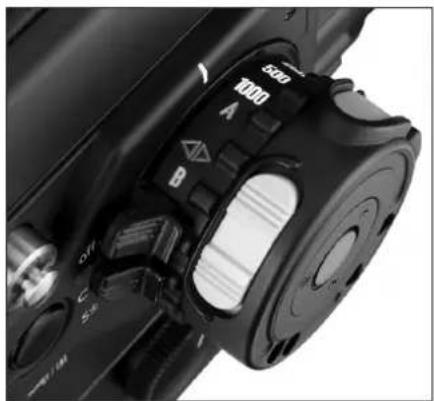
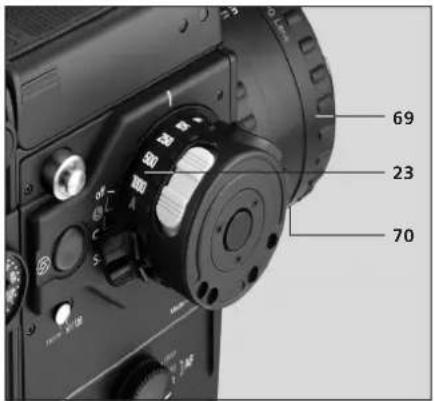
Set shutter-speed dial 23 to "A". Release aperture ring 69 by pressing button 70, and select the aperture in one-third increments. "A" will be displayed in the camera beside the shutter speed. If correct exposure is impossible at the aperture selected due to existing lighting conditions, the shutter-speed display will blink, and the light balance will indicate the deviation from correct exposure (over a range of ±1 EV in one-third increments). Should the difference exceed 1 EV, the entire light balance will blink.
APERTURE-PRIORITY AE
text_image
69 23 70Aperture-priority AE
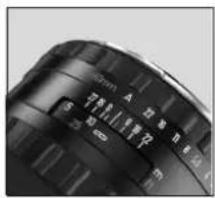
Engage aperture ring 69 on "A" und use shutter-speed dial 23 to select the desired aperture (in one-third increments). "A" will be displayed in the camera beside the aperture. If correct exposure is impossible at the shutter speed selected due to existing lighting conditions, the aperture display will blink, and the light balance will indicate the deviation from correct exposure (over a range of ±1 EV in one-third increments). Should the difference exceed 1 EV, the entire light balance will blink.
text_image
A 摄影 100mm 100mm 50mm 50mm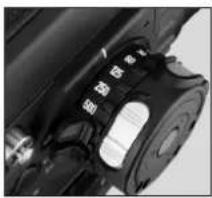
natural_image
Close-up of a mechanical component with no visible text or symbols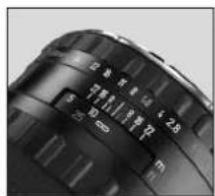
natural_image
Close-up of a black mechanical component with a white tab and control buttons (no visible text or symbols)Programmed AE
Set both the aperture ring and the shutter-speed dial to "A". "A" will be displayed beside the aperture and the shutter speed. The camera will now automatically select a suitable shutter-speed/aperture combination. In its default setting, the program is high-speed biased to keep the risk of camera shake as small as possible. The basic shutter speed in the default setting is 1/125 s.
PROGRAM CURVE
text_image
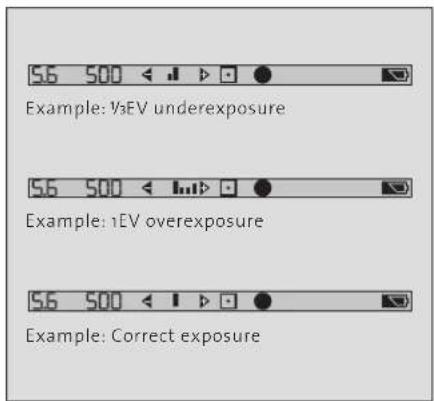
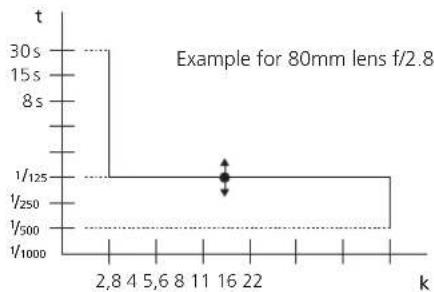
5.6 500 < > ● Example: ½EV underexposure 5.6 500 < > ● Example: 1EV overexposure 5.6 500 < > ● Example: Correct exposureProgram curve
line
| k | t | | --- | ----- | | 2,8 | 30s | | 4 | 1/125 | | 5,6 | 1/250 | | 8 | 1/500 | | 11 | 1/1000| | 16 | 1/1000| | 22 | 1/1000|If correct exposure is impossible at the shutter-speed/aperture combination selected by the camera for the existing lighting conditions, the display will blink, and the light balance will indicate the departure from correct exposure (over a range of ±1 EV in one-third increments). Should the difference exceed 1 EV, the entire light balance will blink.
Note:
The optional MasterWare allows the basic shutter speed for programmed AE to be chosen and varied over a range of 30 s to 1/500 s (for PQ lenses) or 1/1000 s (for PQS lenses) so that it can be fi ne-tuned to suit the work in hand. As a result, there are fourteen additional versions of the program.
Metered manual
Any desired shutter-speed/aperture combination can be selected in this mode. Exposure is balanced with either the aperture or the shutter speed. Correct exposure has been set when the light balance shows only the large center line. Departures from optimum exposure are displayed in 1/3 EV. Should the difference exceed 1 EV, the entire light balance will blink.
Note:
If "88 8888" is displayed in an automatic mode instead of aperture and shutter speed, with the entire light balance blinking, you have exceeded the metering range. In metered manual, the aperture and shutter-speed display will remain visible, and the entire light balance will blink.
Bulb/T
Set shutter-speed dial 23 to "B". "bulb" will appear in the display. In "bulb", the shutter will remain open for as long as the shutter release is kept depressed. Shutter-priority AE is not available in this mode. Should it be selected after all, the display will read "no Auto".
If memo button 27 is also locked, "-t-" will be displayed for T mode. Contrary to "bulb", the shutter will now stay open when the shutter button is released.
To close it, press the shutter release again. It goes without saying that exposure metering is not possible in either of these modes.
DEPTH-OF-FIELD PREVIEW
text_image
off C S± 32Depth-of-fi eld preview
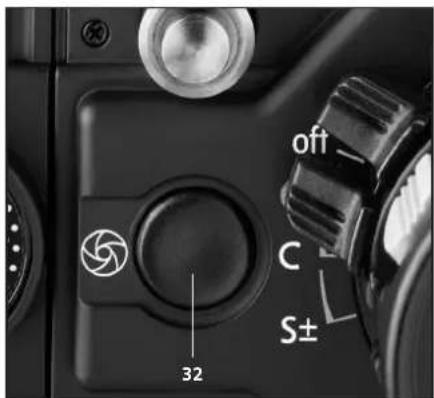
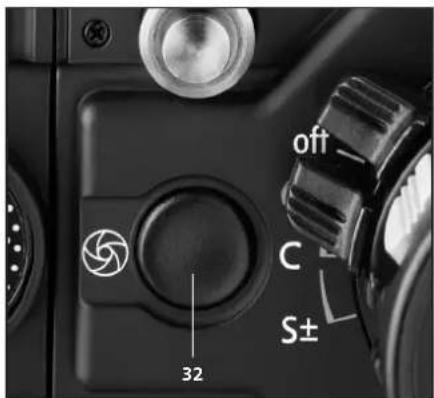
To check depth of fi eld on the ground-glass screen, press stop-down button 32. Flip up the viewfinder magnifier for optimum viewing ease.
text_image
125 250 500 1000 A B 27AE lock
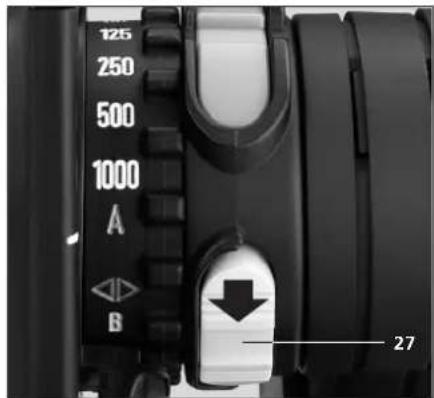
In difficult lighting conditions – e.g. in the case of high subject contrast or backlight – take a reading of the most important part of your subject and store the result by pressing or locking memo button 27 until after the exposure.
The exposure value will remain in memory until the memo button is released. In the multi-spot mode, a slight depression of the memo button serves to store separate spot readings. In the display panel 12, the memo mode is marked by square brackets around the light balance.
Note:
With the memo button pressed or locked, the camera will remain active for an additional four minutes.
STRAY-LIGHT COMPENSATION
Stray-light compensation
Stray light entering through the open focusing hood will be taken into account during metering and compensated up to an intensity ratio of approx. 16:1 for stray light and metered light. This compensation is independent of the type of viewfi under used.
When viewing the ground glass through the focusing hood without the magnifi er, be sure to avoid direct exposure of the focusing screen during metering (e.g. light sources, above all fl fluorescent tubes). For time exposures always close the focusing hood.
Note:
Stop-down metering with earlier lenses and open focusing hood frequently exceeds the compensation range. This is why you should take the reading with the magnifi er swung up and your face close to the magnifi er so as to avoid the direct incidence of light on the ground-glass screen.
SHUTTER RELEASE
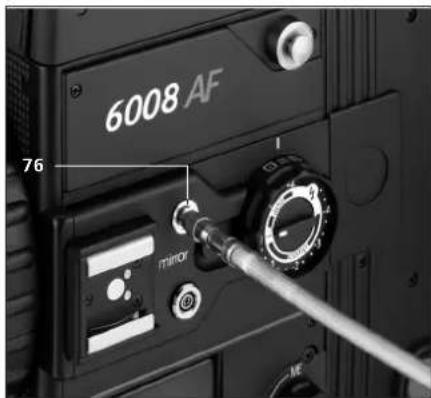
text_image
6008 AF 76 minorShutter release
The two release buttons 20 and 24 work in two stages*: The first stage activates autofocusing, the second triggers the exposure.
Using a cable release
Screw a commercial cable release into thread 76 and use it as usual.
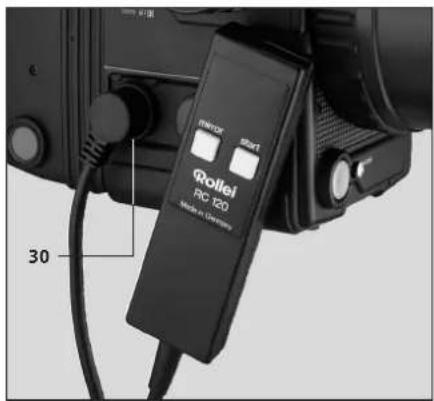
text_image
RORTEK Start Qollei RC 120 30Using an optional RC-120 Remote Cable
Plug the cable into terminal 30 and press the "start" button for exposure. The film will automatically be advanced after the exposure.
Note:
Using a cable release or remote cable, automatic focusing is not possible in the continuous-AF (6008 AF) mode (release priority!).
USING THE SELF-TIMER
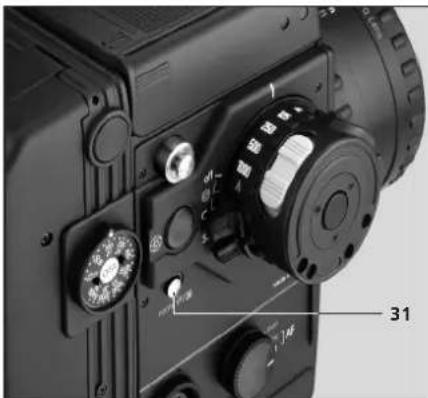
natural_image
Close-up of a DSLR camera with dual rotary dials and adjustment knobs (no visible text or symbols)Using the self-timer
Apply "self-timer" custom function to switch 31 (see "Custom functions") and switch the self-timer on or off with switch 31. Start the self-timer by pressing the shutter release. The timer delay (default 10 s) is displayed in the camera. To stop the self-timer, turn off switch 31.
To ensure exposure without camera shake, the mirror will be locked up 2 s before the actual exposure. This at the same time is a warning of imminent exposure. With the aid of MasterWare, the timer delay can be varied from 1 s to 99 s.
MIRROR LOCKUP
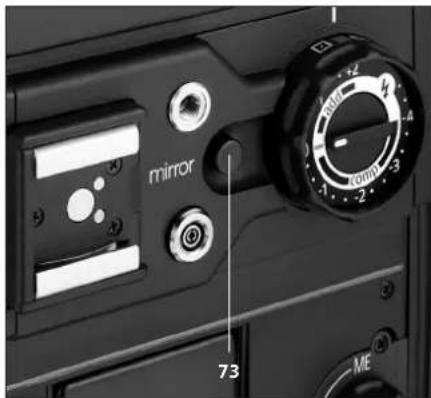
text_image
mirror 73Mirror lockup
Camera shake is a major problem above all with long-focus lenses and in close-up work. A suitable remedy is mirror lockup. To do this, briefly press knob 73 "mirror": The refl ex mirror will swing up; then press the shutter release. The release lag is just a few milliseconds.
If there was no previous AE lock – by locking memo button 27 or multi-spot metering –, the exposure value determined at the instant of mirror lockup will be put in memory.
After mirror lockup, the camera will remain active for an additional four minutes. Be sure not to make any exposure adjustment after mirror lockup because the exposure meter is then inactive. The measured values are put in memory if the camera is switched off via the master switch or if it turns off on its own.
text_image
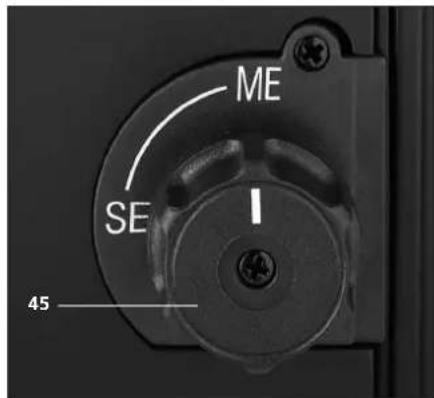
ME SE 45If no further exposure is desired with mirror lockup: Set multi-exposure knob 45 to "ME" (film advance disengaged) and trigger the camera with its lens capped. The refl ex mirror will swing down again, and no frame will be lost. Then reset knob 45 to "SE".
Note:
In the case of the type 4560 magazine, fi Im advance is engaged or disengaged directly on the magazine. See Operating Instructions of magazine.
AUTOMATIC BRACKETING
text_image
off C S±Automatic bracketing
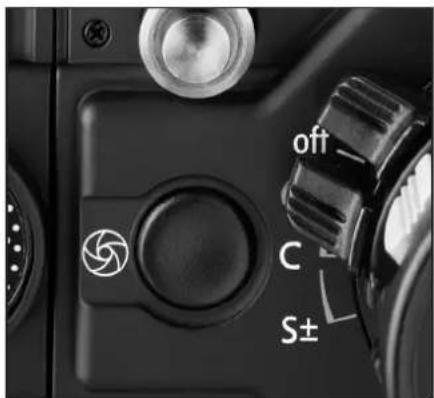
This mode allows very precise exposure compensation. It is enabled in both automatic and manual modes and, in its default setting, will provide a normally exposed picture plus one overexposed by 2/3 EV and another one underexposed by 2/3 EV.
In addition, there is another bracketing mode with a compensation of ±1/3 EV. See "Variable default settings".
Switch to automatic bracketing by setting the master switch to "S±". Keep the shutter release depressed until the three exposures have been made. To abort the series, simply release the shutter button. The autobracketing series can be shifted with the aid of the exposure-compensation switch 43.
Note:
Should the shutter-speed or aperture range be insufficient for the entire bracketing series, the shutter-speed or aperture display plus the +/- icon will blink to warn you.
BRACKETING FUNCTION
Depending on the exposure function and configuration selected, bracketing will be performed in different ways:
| WithoutTTL flash | TTL flash | |
| Programmed AE Shutter-speed Flash bracketingbracketing | ||
| Aperture AE Shutter-speed Flash bracketingbracketing | ||
| Shutter-priority AE Aperture Flash bracketingbracketing | ||
| Metered manual Shutter-speed Flash bracketingbracketing | ||
Shutter-speed bracketing:
Exposure compensation by means of shutter speed.
With Aperture bracketing:
Exposure compensation by means of aperture.
Flash bracketing:
Exposure compensation by means of flash output.
Note:
Should the working range be exceeded in fl ash bracketing, the icons ^+/- and will blink. See "Flash bracketing".
MasterWare allows the user to set bracketing to two to fi ve exposures with an exposure compensation of up to ±9/3 EV for each of the shots.
MULTIPLE EXPOSURES
text_image
ME SE 45Multiple exposures
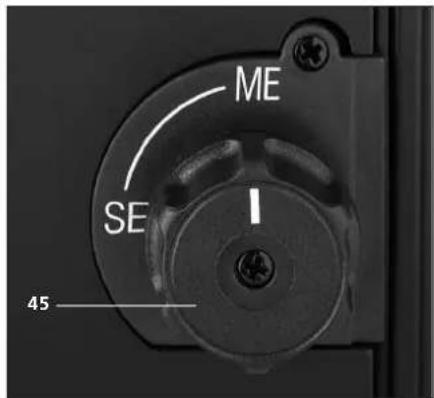
Set dial 45 to "ME" (multiple exposures) to disengage the fi Im advance so that several exposures can be superimposed on one and the same frame. A red square on the dial serves as an additional warning that the fi Im advance has been disengaged.
Before the last of a multi-exposure series reset knob 45 to "SE" (Single Exposure) and press to re-engage the fi Im advance for the next-following shot with normal exposure. Between multiple-exposure shots, you may view your subject in the viewfi nder as usual.
Note:
The "ME" setting is inactive if a type 4560 magazine is used. Film advance will be disengaged directly on the magazine – see Operating Instructions of magazine.
MULTIPLE-EXPOSURE
A multiple-exposure alternative is the fi Im-advance custom function ("SF trAn"), see "Custom functions". In this case, the fi Im advance is disengaged electronically, and the refl ex mirror remains locked up after the fi rst exposure. This means, however, that viewfi nder observation and renewed exposure metering as well as focusing are impossible. On the other hand, this form of multiple exposures allows higher shooting rates, and it is adjustable via MasterWare. To terminate multiple exposure, either switch 31 off before the last exposure or press the mirror-lockup button 73 after the last exposure.
Notes:
In the latter case, serial photography is impossible. With the master switch set to "C", the camera responds as if "S" had been set.
For serial photography, MasterWare is required. This allows up to ten successive photographs with a minimal delay of 10 ms between individual exposures.
Important:
Magazines must not be changed during a series of multiple exposures.
FRAME COUNTER
text_image
off C S± 32Frame counter
The frame counter 51 always displays the number of the frame to be exposed next. If "S" is displayed, no film is loaded or the fi lm is not yet wound up. A "red arrow" indicates that the fi lm has been would up but has not reached frame 1; a red area marks the film trailer or a fully wound film.
When the magazine back is opened, the frame counter will reset to zero, displaying "S" (start).
By activating the custom function "Activate frame counter", the frame number can be displayed in 12.
Note:
This reading may differ from that of the magazine frame counter. See "Custom functions".
If a type 4560 magazine is attached, the camera will always display the reading of the frame counter. This will agree with the reading of the magazine frame counter. In addition, the display will show whether the magazine is used for horizontal or vertical format.
VIEWFINDER DISPLAY
text_image
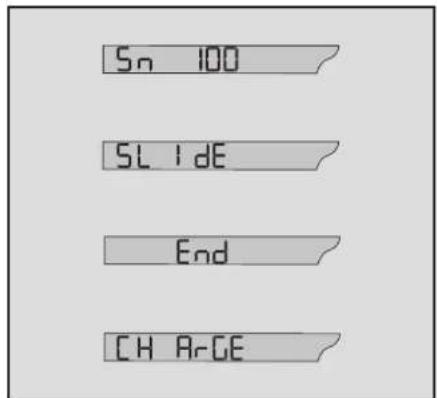
Sn 100 SL I dE End CH ArGEAdditional viewfi nder display
The areas of the aperture and shutter-speed display in the viewfi nder are used for additional information as well:
» When the camera is on and the film-speed setting is changed, "Sn" (for sensitivity) will appear in place of the aperture and the corresponding ISO value in that of the shutter speed.
» If the release lock of the magazine is still active (laminar drawslide closed or opened only partially), "SLIde" will be displayed. After the fi Im has been wound up after the last frame, the display will read "End".
» When the battery is empty, the display "CHArGE" will prompt you to recharge it.
» The intensity of the display illumination is automatically adjusted for that of the ambient light (default setting).
» Should the display be found disturbing in certain uses, it can be switched off. To do this, apply "Display" custom function ("SF diSP") to switch 31, then switch off the display by turning on switch 31. The brightness of the display can be adjusted with MasterWare.
ERROR MANAGEMENT
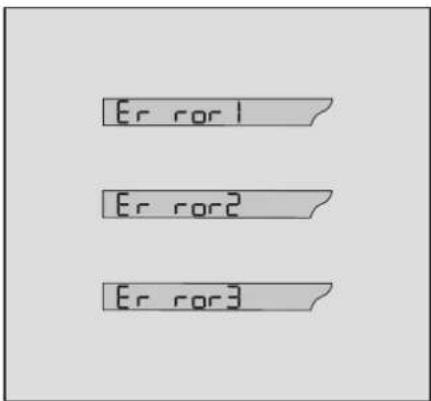
The 6008 AF/6008 integral2 have an up-to-date self-diagnostic and error-management system. This makes it possible to diagnose possible malfunctions and helps correct them.
The following error messages are possible:
» "Error 1": Inadmissible light leak in mirror box, no magazine or lens attached or defective shutter control.
» "Error 2": Malfunctioning of shutter or diaphragm. Should this message appear frequently, check your lens. The display will also appear when no lens is attached.
» "Error 3"*: AF electronics malfunctioning. Check your lens if this display appears frequently.
» "Error 4": Magazine 4560 malfunctioning: No film loaded or film-advance problem.
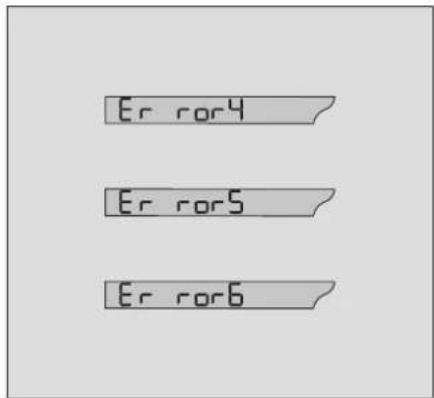
» "Error 5": Mirror drive malfunctioning. Have your camera checked if this display appears frequently.
» "Error 6"*: Defective AF control. Have your camera checked if this display appears frequently.
Note:
In the case of "Error 3" and "Error 6"*, the camera will respond like a manually focusing camera. The error can usually be corrected by switching the camera off and on. Should the error message reappear there-after, check the component concerned.
"Error 8" and "Error 9" are error messages that may appear when a digital back is used. These malfunctions do not concern the camera, but the digital back.
*(6008 AF only)
DEFAULT SETTINGS
Variable default settings
The 6008 AF/6008 integral2 have a menu with the aid of which the following settings can be made:
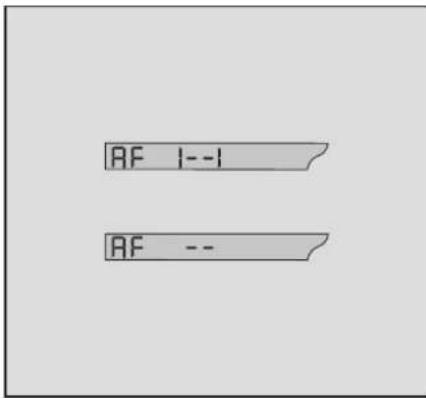
» (6008 AF) Selection of AF mode "AF I-1" (3 focus areas active) or "AF --" (spot AF).
» Leading or trailing sync "1 Syn" or "2 Syn".
» Selection of bracketing mode "1 brt" or "2 brt".
» Activation and adjustment of frame counter for 6x6 magazine "count".
» Camera "rESEt.
Turn custom-function switch 31 to "norm" and select the menu by turning switch 44 to "M".
All active settings are displayed without blinking, while optional functions will blink. Use memo button 27 to select menu items and the shutter release to activate the function chosen. To terminate your setting, turn switch 44 off its "M" position.
SELECTING THE AF-MODE (6008 AF)
text_image
AF 1--1 AF --Three active focus areas (default)\*
Select the menu with switch 44 as described above.
Your last selection will always be displayed fi rst. In the default setting, this is "AF I- -I" (3-area mode). If you wish to keep this setting, turn switch 44 back and leave the menu. However, if the menu shows "AF - -", press memo button 27 once so that "AF I- -I" starts blinking. Conf i rm your selection by pressing the shutter release fully down; the display will stop blinking. Finally, turn switch 44 out of its "M" position.
Spot AF\*
Select the menu as described before. Then press memo button 27 until the display "AF - -" appears blinking. Confi rm your selection by pressing the shutter release fully down. The display will stop blinking. Finally turn switch 44 off its "M" position.
*(6008 AF only)
SELECTING LEADING OR TRAILING SYSNC
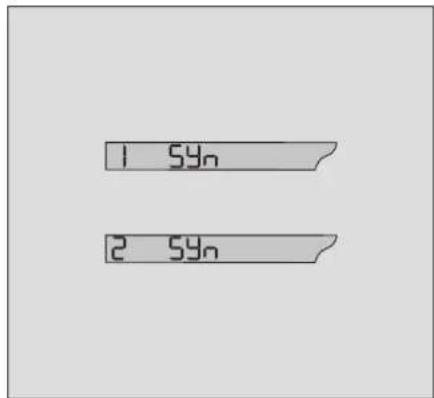
text_image
1 5yn 2 5ynSelecting leading sync (default)
Select the menu as described. Then press memo button 27 repeatedly until the display "1 Syn" appears blinking. If "1 Syn" appears without blinking, the setting has already been made. Reset switch 44 and leave the menu.
If the display "1 Syn" is blinking, confirm your selection by pressing the shutter release fully down. The display will stop blinking. Finally, turn switch 44 off its "M" position.
Selecting trailing sync
Select the menu with switch 44. Then press memo button 27 until "2 Syn" appears blinking. If the display appears without blinking, the setting has already been made. Leave the menu by resetting switch 44.
If the display "2 Syn" is blinking, confirm your selection by pressing the shutter release fully down. The display will stop blinking. Finally, turn switch 44 off its "M" position.
SELECTING THE BRACKETING MODE
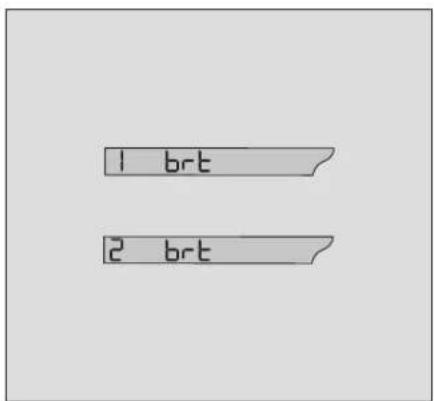
text_image
1 brt 2 brtSelecting the first bracketing mode
(default: ±2/3 EV, three frames): Select the menu as described before.
Then press memo button 27 repeatedly until "1 brt" is displayed. If the display appears without blinking, the setting has already been made. Leave the menu by resetting switch 44.
If the display "1 brt" is blinking, press the shutter release fully down to confirm your selection. The display will stop blinking. Finally, turn switch 44 off its "M" position.
Selecting the second bracketing mode
(default: ±1/3 EV, three frames): Select the menu via switch 44.
Then press memo button 27 repeatedly until "2 brt" is displayed. If the display appears without blinking, the setting has already been made. Leave the menu by resetting switch 44.
If the display "2 brt" is blinking, press the shutter release fully down. The display will stop blinking. Finally, turn switch 44 off its "M" position.
FRAME COUNTER
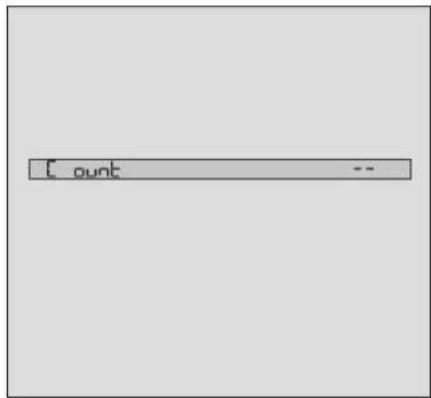
text_image
[ count --Activating and adjusting the frame counter for standard magazines
Select menu via switch 44. Then press memo button 27 to select the item "Count". This will be blinking. Press the shutter release to confirm. The display "Count" and the frame-counter icon "-" will stop blinking. "-" means that the frame counter is disabled. Press the memo button to zero the frame counter.
After selecting the desired frame number, confi rm by pressing the shutter release. The next menu item "rESEt" will appear. Leave the menu via switch 44. The frame number chosen will be displayed.
Note:
When changing 6x6 magazines containing partially exposed fi lm, it will be necessary to set the counter to the current reading.
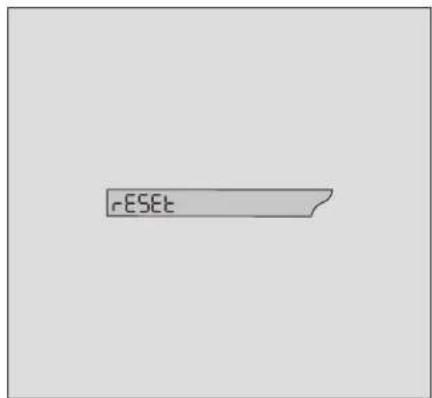
text_image
RESETReset
This resets the camera to its defaults. First select the menu via switch 44. Then press memo button 27 repeatedly until "rESEt" is displayed blinking. Press the shutter release to activate the "rESEt" menu item.
The display will stop blinking. If you are sure that you wish to reset the camera to its defaults, confi rm by pressing the shutter release fully down. Finally, turn switch 44 off its "M" position.
Should the reset function have been activated inadvertently but not executed (display "rESEt" appears without blinking), it can be aborted by pressing memo button 27 or resetting switch 44.
CUSTOM FUNCTIONS
text_image
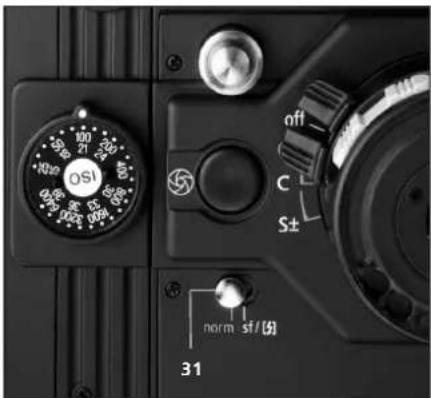
OSI 100 21 30 40 50 60 70 80 90 100 110 120 130 140 150 160 170 180 190 200 210 220 230 240 250 260 270 280 290 300 310 off C S± norm sf/8Custom functions
Your Rolleifl ex 6008 AF offers a number of custom functions.
One of these custom functions can be applied to switch 31 at a time and enabled or disabled with this switch. The letters "SF" appearing in place of the aperture display stand for "Custom function".
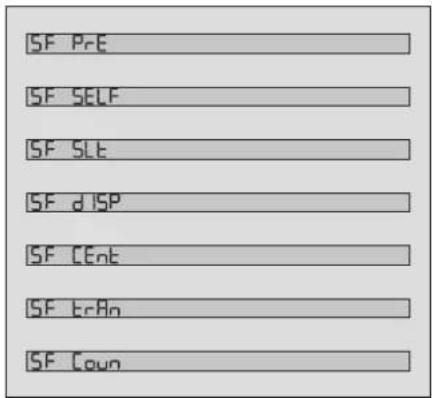
Function Display
| » Preflash, display | on/off | “SF PrE” |
| » Self-timer, display | on/off | “SF SELF” |
| » Silent operation, display | on/off | “SF SLt” |
| » Display, | off/on | “SF dISP” |
| » Center weighting, display | deactivate | “SF CEnt” |
| » Film advance, display | deactivate | “SF trAn” |
| » Limiting continuous bursts, display | select |
text_image
SF PrE SF SELF SF SLt SF dISP SF CEnt SF trAn SF CounApplying custom function to switch 31
Set custom-function switch 31 to "sf". Select the menu by turning switch 44 to "m".
The custom function last used will be displayed. Press memo button 27 until the desired function starts blinking in the menu. Confirm and store your selection by pressing the shutter release fully down. Finally, turn switch 44 off its "M" position.
Note:
Active settings will always be displayed without blinking, while options will appear blinking. If you do not intend to make immediate use of the custom function selected, return switch 31 to "norm".
"SF Coun"
FLASH PHOTOGRAPHY
text_image
mirror 74Flash photography
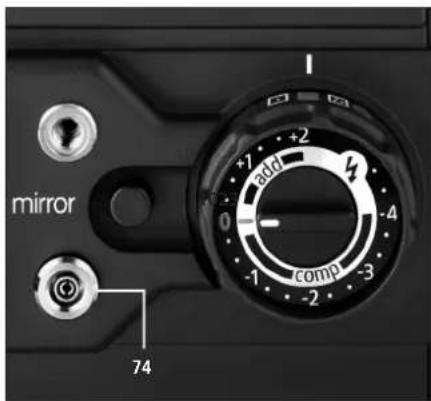
Your Rolleifl ex 6008 AF/6008 integral2 are X-synchronized at all shutter speeds up to 1/500 s (with PQS lenses up to 1/1000 s). Flash units may be connected either to hot shoe 75 or to flash terminal 74 with its (parallel-connected) standard 3mm socket. The camera offers the following fl ash modes:
» Manual flash control (aperture set as a function of flash distance).
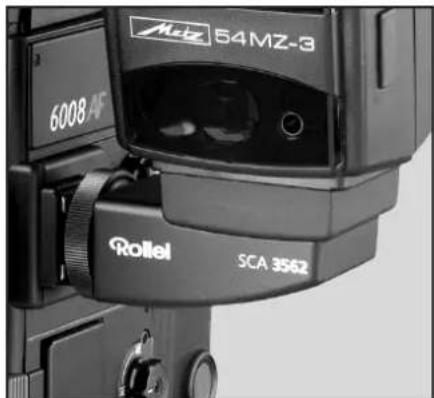
» Dedicated autoflash (TTL flash metering and control) with Rollei SCA-3562 (SCA-356) Dedicated Flash Adapter and suitable dedicated flash units, e.g. by Metz.
» TTL preflash with manually controlled or studio flash units.
text_image
54MZ-3 6008 AF Rollel SCA 3562Note:
Studio fl ash units may have considerably longer response time and fl ash duration than compact or grip-type units. At shutter speeds faster than 1/250 s, the fl ash may be fi red too late and exceed the open time of the shutter. Please check the instructions supplied with your fl ash unit.
Setting leading or trailing fl ash and sync speed
Leading or trailing fl ash can be selected either with the aid of the Variable Defaults (see preceding section) or with MasterWare:
» Selecting "1 Syn": The flash will fire after the shutter has opened, that is at the beginning of exposure.
» Selecting "2 Syn": The flash will fire 3 ms before the shutter closes, that is at the end of exposure.
Due to the use of between-the-lens shutters, flash photography is possible at any shutter speed. At speeds faster than 1/250 s there will be no difference between leading and trailing sync.
Manual flash control without an SCA adapter
Be sure to switch your fl ash unit off before connecting it to the hot-shoe contact or PC terminal. In this case, the camera is unable to detect the fl ash and will therefore respond as if no fl ash were attached. Set the aperture on the lens according to the requirements of the fl ash unit.
Automatic computer fl ashes use their built-in sensor to control fl ash output for an aperture selected on the fl ash unit and manually transferred to the camera. Simpler types of fl ash unit will require the aperture to be varied as a function of fl ash distance (from a table on the unit). For details, see the instructions supplied with your fl ash unit.
Alternatively, the working aperture required can also be found using the pre-fl ash mode available in manual fl ash control. See "Preflash mode".
FLASH PHOTOGRAPHY
natural_image
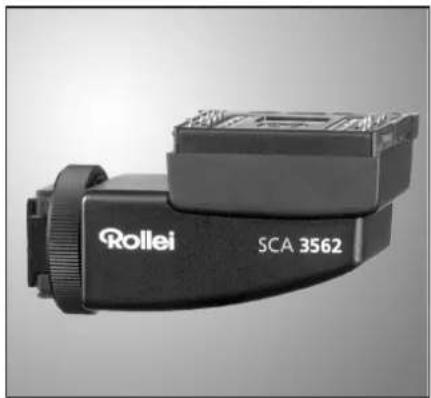
Exterior view of a black Rollei SCA 3562 camera lens (no additional text or symbols visible)Flash photography with Rollei SCA-3562 (or SCA-356) Dedicated Flash Adapter
In conjunction with dedicated fl ash units and the Rollei SCA-3562 (or SCA-356) Dedicated Flash Adapter, you may use the TTL fl ash-metering technique supported by your camera. To do this, connect the switched-off fl ash unit with the adapter to the camera and set it to TTL metering. The fl ash sensor incorporated in your camera will meter the light reflected from the film surface and control fl ash output to suit the film speed and the intensity of ambient lighting. The result is optimum exposure
over a range of ISO 25/15° to 1600/33°.
To ensure proper flash exposure, an SCA-356 Flash Adapter always has to be set to ISO 100/21°.
In the case of insufficient flash output, "Lo" will appear for a few seconds in the shutter-speed display of the camera.
If the flash icon blinks in the viewfinder right after shutter release, the flash is still being charged. As soon as the blinking stops, the flash is ready to fire.
FLASH PHOTOGRAPHY
The SCA-3562 adapter allows the automatic transmission of the following data between camera and flash unit:
» The focal length of AF lenses for automatic control of their zoom reflector. (Note: For technical reasons, the focal length is converted to 35mm equivalents!)*
» Lens aperture and film speed for sensor autofl ash.
» Flash exposure compensation with compatible flash units.
» AF preflash control*
Note:
When using an SCA-356 adapter, you will be unable to check whether the fl ash has fi red with suffi cient output. If the upper film-speed limit for TTL flash metering (ISO 1600/33°) is exceeded, the fl ash icon and the fi lm-speed display will blink as a warning.
*(6008 AF only)
FLASH PHOTOGRAPHY
Autofl ash with SCA adapter in low light
The light is too low whenever a wider fl ash aperture or slower than basic sync speed would be required for correct exposure. If there is suffi cient light, the system will respond as described under "Automatic fi ll fl ash with SCA adapter".
Flash photography with programmed AE
If the light is so low that the fl ash aperture range (see following table) would be exceeded at the basic sync speed of 1/60 s (default), the camera will automatically activate the fl ash to avoid underexposure.
Flash photography with aperture-priority AE
If the ambient light is too low for adequate exposure at the preset aperture and the basic sync speed of 1/60 s, the camera will automatically activate the flash to avoid underexposure.
If in flash photography with aperture-priority AE the f-stop is smaller than in the following table (page 71), the display will blink as a warning.
Note:
Use wide apertures only at long fl ash distances, since proper fl ash exposure might be impeded in view of the different response times of fl ash units.
FLASH PHOTOGRAPHY
Flash photography with shutter-priority AE
Select the desired shutter speed. If the light is low (see following table), the camera will at fi rst make full use of the available aperture range. Whatever additional light is then needed for proper exposure will be provided by the fl ash. The aperture range is a function of fi lm speed and starts with the values given below.
| ISO | 25 | 50 | 100 | 200 | 400 | 800 | 1600 |
| Aperture | f/2.8 | f/3.5 | f/4.0 | f/5.0 | f/5.6 | f/7.1 | f/8 |
Automatic fill flash with SCA adapter
If there is sufficient light so that no flash is required, the latter will not be triggered, which is evident from the fact that the fl ash icon is inactive. However, if you wish to use flash for fill-in, you may use one of the following two alternatives, provided that your fl ash unit does not allow fl ash exposure compensation. (See also the instructions provided by the manufacturer of your fl ash unit.)
FLASH PHOTOGRAPHY
text_image
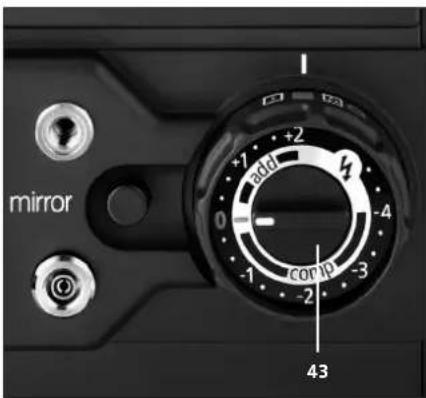
mirror +2 add 0 -4 -1 con -3 -2 43Compensated fill flash
To select this fill-flash mode, set the exposure-compensation switch 43 to a value in the "comp" range. This will reduce the effect of the ambient light by the minus value selected, the flash providing the remaining light required for proper exposure.
Example:
You have set -1. Ambient-light exposure will be reduced by one exposure value. The flash will compensate for the light loss.
This is particularly interesting in shots where the fl ash has a strong effect on background exposure (e.g. in interiors).
Additive fill flash
To activate this fill-flash mode, set the exposure compensation to a value within the "add" range. The exposure compensation has no effect on the ambient light. The flash output is high enough to brighten the subject by the compensation value set.
Example:
You have set +1. The surroundings of your subject will be rendered naturally, with the main subject reproduced lighter by one exposure value.
This fill-flash mode is of particular importance for subjects in which the foreground should be reproduced brighter without the background being affected by the limited flash output (e.g. outdoors).
Automatic fill-flash with fl ash units permitting fl ash-exposure compensation (only with SCA-3562 Adapter)
Your Rolleifl ex 6008 AF/6008 integral2 will automatically detect such a flash unit.
These units permit a variation of the ratio between flash output and ambient light intensity. The exposure-compensation switch 43 affects exclusively the metering system of the camera and thus the ambient-light exposure. Outside the working range the shutter-speed/aperture display will blink in the viewfinder as a warning.
The exposure-compensation switch of the fl ash unit, on the other hand, exclusively affects the fl ash output.
Examples:
If there is suffi cient light and the two exposure-compensation switches are zeroed, a normal shot will be taken without flash. The exposure-compensation switch 43 of the camera allows the exposure to be shifted by the compensation value set. The flash will not be fired as long as the exposure-compensation switch of the flash unit remains set to zero. If you now set the exposure-compensation switch of the flash unit to a positive value, sufficient flash light will be added to expose the frame with the desired compensation.
Setting the compensation switch of the fl ash unit to a negative value makes sense if you wish to underexpose your fl ash shot.
Note:
Minor fl ash-exposure compensation values close to zero may exceed the TTL metering range (fl ash icon and light balance blinking). In this case, choose a larger fl ash-compensation value or use fi lm with a speed of ISO 100/21° to 800/27°. All of the automatic fill-flash techniques cannot be used with interchangeable magazines that do not allow any fi lm-speed setting.
FLASH PHOTOGRAPHY
Manual fl ash control
If you have not selected any of the three automatic exposure modes (neither shutter-speed dial nor aperture set to "A"), the exposure will be determined by ambient light and fl ash output independently of each other. Exposure by available light alone may be controlled as described under "Metered manual". In addition, the fl ash output is controlled by TTL metering. Without any attempt at exposure compensation, your subject will in this case be reproduced lighter by 1 EV. To vary the available-light exposure, change either your aperture or shutter-speed setting. In fl ash units without their own exposure compensation, fl ash output can be varied by changing the position of compensation switch 43 that in this case will affect exclusively TTL fl ash metering.
If your flash unit does provide for flash-exposure compensation, vary flash output by means of its own exposure-compensation switch. In this case, the exposure compensation applied by the camera will affect exclusively the ambient light.
FLASH PHOTOGRAPHY
Flash bracketing with SCA adapter
In this mode, the exposure compensation applied to a bracketing sequence is attained exclusively by a variation of fl ash output. For details on the use of this mode, see "Bracketing".
To avoid the TTL fl ash-metering range from being exceeded, the fi lm speed and compensation values should be properly matched.
The limit for negative compensation is ISO 1600/33°, the one for positive compensation is ISO 25/15°. The fi lm speed should vary from the limit of the measuring range by at least the amount of the compensation desired.
Note:
In this mode, the exposure range cannot be shifted with the aid of exposure-compensation switch 43. However, the fi ll-fl ash mode will remain intact.
FLASH PHOTOGRAPHY
Prefl ash (manual aperture control)
First apply the prefl ash custom function ("SF PrE") to switch 31, then switch this on. See "Custom functions". The preflash mode is based on the spot sensor incorporated in the refl ex mirror. Therefore position the subject to be metered in the center of the focusing screen for optimum exposure.
Pressing the shutter release will set the working aperture and initiate a release cycle without actual exposure or fi Im advance. The light balance displays the exposure value determined. Vary the aperture or the fl ash output and repeat the prefl ash until the light is balanced, that is, until only the large central line is visible.
If the reading is away from correct exposure by no more than 1 EV (light balance should not be blinking!), proper exposure may be determined without renewed metering, by simply varying the f-stop. If the difference exceeds 1 EV, be sure to repeat the reading, since the metering range has been exceeded and subsequent adjustment is impossible. Finally, use switch 31 to terminate the custom-function setting.
To ensure proper metering, be sure to avoid stray light on the focusing screen.
Note:
Contrary to TTL fl ash metering, the pre-fl ash mode is restricted to a fi lm-speed range of ISO 25/15° - 800/27° and is not available in any of the automatic exposure modes. In this case, the display will read "no Auto".
PRACTICAL HINTS
Shooting at low temperature
Below -10^ , it is advisable to separate the battery from the camera and carry it close to your body and thus well-protected until you actually want to shoot. The optional external battery connector is a particularly attractive accessory. In extreme conditions (in polar areas, refrigerators, cold laboratories, etc.) it will also be necessary to protect the camera from extreme temperatures.
Shooting in extreme lighting conditions
The automatic exposure-metering and control systems incorporated in the camera body remain fully operational with all interchangeable viewfinders, filters, extension tubes, reversing adapter and bellows unit. The exposure will always be metered with high precision, directly through the lens. In other words, the viewing angle will be taken into account just as any filter factor. The three metering modes available in the camera optimally cover any lighting situation encountered in photographic practice.
Spot metering
In the case of strong backlight or subjects against a bright or dark background, spot metering allows very precise metering of the main subject. The split-image spot of the standard focusing screen serves as an aid for aiming. Spot metering covers about 1% of the frame and thus provides exposure accuracy that gives you complete control over your images. If the subject detail metered is off center, lock AE and recompose.
Multi-spot metering
Using this mode, you may meter up to fi ve different subject details (highlights or shadows). The camera computer will then average them and put them in memory.
Individual details may be emphasized by taking repeated readings. The mode may be used in any of the available automatic exposure modes. The result can be shifted at will by varying the aperture or shutter speed.
PRACTICAL HINTS
Exposure compensation
This is very helpful above all in conjunction with one of the automatic exposure modes. Compensation values can be set in one-third increments and have click stops. This allows very precise exposure control.
Automatic bracketing
If in spite of all the options mentioned you should still be uncertain as to how obtain optimum exposure, you still have the automatic bracketing mode: A brief series of pictures taken with different exposure compensation. For a special spacing of exposure-compensation steps or plus compensation only, you may combine bracketing with an exposure compensation so that you can combine automatic control with very precise corrective measures.
With manual exposure control, shutter speed is varied for exposure compensation. The default setting is for a variation of exposure by 2/3 EV. Using the Variable Defaults, this can be reduced to 1/3 EV. Further variations are possible with MasterWare.
PRACTICAL HINTS
Substitute reading
A substitute reading, for instance with a gray card (and following the instructions supplied with this) is advisable in very diffi cult lighting conditions. It will give an average for an optimum compromise for the best possible rendition of mid-tones.
Close-up reading
This also is a viable alternative for difficult lighting conditions: Take a close-up reading of your subject and lock AE. Then recompose and take your picture.
Subject contrast
It is a known fact that fi nding proper exposure data is all the more diffi cult, the steeper the gradation of the fi lm and the higher the contrast in the subject.
Excessive contrast can be reduced by using fill flash, softer illumination, a different type of fi lm, compensating development or changing your shooting angle or camera station.
If none of these measures is enough to reduce subject contrast sufficiently, the purpose of your picture will decide over what is more important: highlights, shadows or mid-tones. Multi-spot metering is a viable technique for this type of shooting condition.
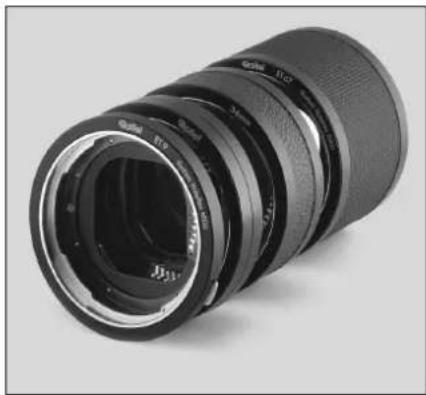
natural_image
Close-up of a black cylindrical lens with visible focal lines and aperture (no text or symbols)Close-up photography
Extension tubes and a bellows attachment take you right into the close-up range. Extension tubes may be used in whatever combination seems adequate. And this also holds for a combination of extension tubes and bellows attachment. In either case, the electronic exposure control of the camera will remain fully operative.
The following close-up accessories are available:
» 9mm extension tube
» 17mm extension tube
» 34mm extension tube
» 67mm extension tube
» Bellows attachment, 67 – 204 mm
» Zoom extension tube, 22 – 68 mm
» Reverse adapter
All extension tubes have a double Rollei bayonet mount and can thus be combined at will. If all four of the tubes are used, a total extension up to 127mm is available.
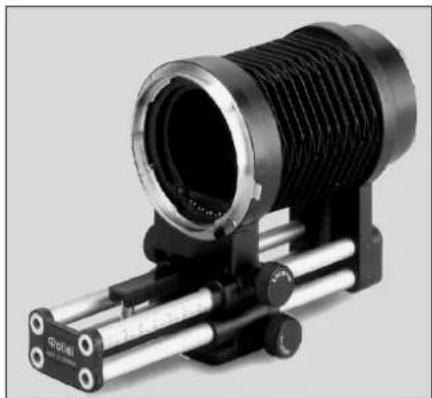
natural_image
Close-up of a black optical lens mounted on a metal frame with no visible text or symbolsThe zoom extension tube has a precise focusing mount and provides extensions from 22 mm to 68 mm. It thus covers the close-up range seamlessly, without changing individual components, and can be used in conjunction with the reverse adapter. It is suitable for use with any lens with a size VI fi Iter bayonet.
The bellows attachment has a rack-and-pinion drive and a focusing slide. Clamp screws are provided to secure extension settings from 67 to 204 mm. Extensions can be read from a scale. The unit can be mounted on a tripod via a 1/4" screw socket. All metering and exposure modes of the camera are retained even with the bellows attachment in place.
PRACTICAL HINTS
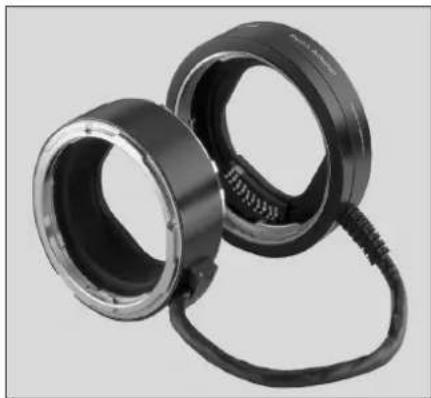
natural_image
Close-up of two black mechanical components with metallic rings and a coiled cable (no visible text or symbols)The reverse adapter further enhances the versatility of your Rolleifl ex 6008 AF/integral2 in close-up photography. The adapter allows lenses with a size VI fi Iter bayonet to be reverse-mounted, retaining all metering and exposure modes. It should preferably be used in conjunction with the bellows attachment. In this case, reproduction ratios from 1.8:1 to 3.5:1 can be covered with a reverse-mounted 80mm Planar f/2.8 lens.
A valuable aid for this kind of photography, usually combined with complex illumination technique, is the matte box.
Note (6008 AF):
For technical reasons, the AF module is operative only up to an effective lens speed of f/5.6. Remember that this limit can easily be exceeded when a teleconverter is used or accessories are employed to increase the extension of the lens.
PRACTICAL HINTS
Instant shutter release (Quick Release)
In practice, instant response may be very important for capturing a subject at the decisive moment – for example if the camera is mounted on a tripod for shutter tripping via a light barrier. Since hardly any release lag is admissible in this particular case, light metering and mirror motion are performed in advance.
To select the "Quick-Release" mode (-qr -), lock the mirror up while pressing the memo button. This will prompt the camera to meter the light, put the result in memory and fl ip the mirror up. The exposure will be made approx. 3 – 4 ms after shutter tripping. If a PQS lens is used, the release lag will only be about 2 ms.
If you press the stop-down button while - qr - is displayed, qr Auto will appear in the display. To cancel Auto, press the stop-down button once more. Releasing the shutter in the qr Auto mode will result in quick release with automatic standby for the next shot.
With the aid of MasterWare, release lags from 1 ms to 99 ms can be set in increments of milliseconds. The mode can be canceled by another depression of the stop-down button.
CARE OF YOUR CAMERA
Care of your camera
Your Rolleifl ex 6008 AF/6008 integral2 deserve the same careful treatment as any other precision instrument that is expected to give reliable service over a prolonged period. Here are a few useful hints:
» Never touch the reflex mirror or the upper and bottom faces of the focusing screen with your fingers! Remove dust with a blower brush.
» Never exert any pressure on the auxiliary shutter of the camera!
» If necessary, breathe on lens surfaces and clean them with lens tissue. To avoid an antistatic charge, breathe on the surface and let the humidity evaporate.
» Protect your camera from prolonged exposure to harmful vapors and humidity.
» Store your camera in a cool and dry place. In humid climate, the camera should be kept in an airtight container together with a suitable amount of desiccant. Excessive humidity in tropical and subtropic areas can cause corrosion on metallic parts and fungus growth on glass surfaces.
» Take special care to protect your camera from dust and dirt.
The Rollei Factory Service will be glad to help you with any question you may have regarding your camera or practical photography with it.
Professional advice:
Tel.: ++49 - 531/68 00 - 277
Service:
Tel.: ++49 - 531/68 00 - 333
Fax: ++49 - 531/68 00 - 243
FURTHER OPTIONAL ACCESSORIES
Further optional accessories
The Rolleifl ex 6000 System includes further dedicated accessories extending the uses of the Rolleifl ex 6008, optimizing its handling and preparing the camera for certain specific uses.
For an overall view of the entire camera system with all its accessories, see the System Chart on pages 92 – 95.
Interchangeable lenses
These lenses are based on Rollei's proprietary direct-drive technology. Two integral linear motors are controlled by the microcomputer of the camera and allow the generation of exact apertures and highly precise shutter speeds from 1/1000 s to 30 s, without any noticeable time lag. The interface between camera and lens is a ten-pin contact bar. In other words, there are neither moving parts, nor is there wear.
The line of available lenses ranges from 30mm fi sheye to 1000mm telephoto. It includes all popular focal lengths as well as perspective-control and zoom lenses. Together with the high-speed lenses by Schneider it fully satisfi es the needs of the professional.
FURTHER OPTIONAL ACCESSORIES
Teleconverters
Two teleconverters with extension factors of 1.4x and 2x are available for manual focusing with Rollei lenses*.
Interchangeable magazines
allow the use of size 120 and 220 roll fi lm for 6x6cm or 4.5x6cm pictures in either horizontal or vertical format. All roll-fi lm magazines have fast-loading fi lm inserts, an automatic frame counter and an integral laminar drawslide.
There also is an instant magazine for ten 6x6cm exposures on Polaroid or Fuji 8.5x10.8cm fi Im-pack.
Interchangeable viewfi nders
Interchangeable viewfi nder attachments and various bright focusing screens make for optimum ground-glass viewing in any situation.
The standard focusing hood serves for waist-level viewing and has an interchangeable magnifier (3x magnification, +2.5 to -4.5 dp).
FURTHER OPTIONAL ACCESSORIES
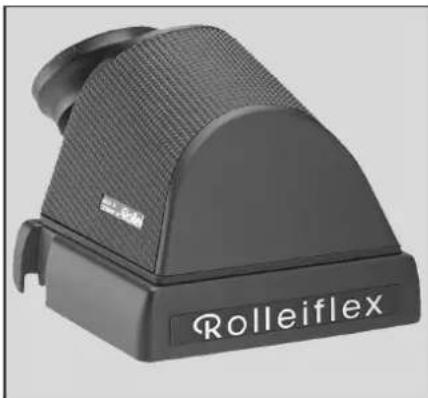
natural_image
Rolleiflex brand light switch device (no visible text or symbols on body)The 45° prism finder and the 90° telescopic viewfinder give an upright and unreversed image. They have four click stops at intervals of 90° and thus ensure convenient viewfi under observation even in the case of diffi cult shooting angles. As these viewfi nders are attached, their display is automatically modifi ed so that it will appear unreversed.
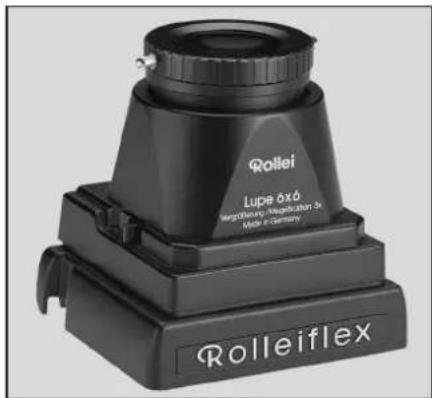
text_image
Rollei Lupé 6x6 Magnification Made in Germany RolleiflexThe magnifier hood consists of the Rollei 6x6 magnifi er and a base frame for the Rolleifl ex 6008 AF/6008 integral2. The Rollei magnifi er, which is available as an optional accessory, may be used to view full-frame 6x6 slides, negatives or paper prints.
And this applies even more to mounted or unmounted 35mm slides. The loupe with 3x linear magnifi cation is highly corrected and excels by outstanding color fi delity and freedom from color fringes over the entire fi eld. With the interchangeable base, the pictures can be viewed both in incident and transmitted light. Placed on the base frame, the magnifi er becomes a rigid magnifi er hood.
FURTHER OPTIONAL ACCESSORIES
Focusing screens
Bright focusing screen with a central microprism collar and a split-image rangefinder for highly accurate focusing on vertical detail. The focus criterion for the microprism collar is a clear image without shimmer. The micro-fi ne texture of the focusing screen allows focusing anywhere in the frame; in addition, the screen has grid lines.
Fine ground-glass screen for highly precise focusing, especially in close-up photography, at any aperture and at high reproduction ratios. Particularly well-suited for creative composition when focusing aids would be distracting.
Bright focusing screen with micro-fi netexture for focusing anywhere in theframe and easy composition, also suitablefor very low-speed lenses and for checkingdepth of fi eld. With guidelines for horizontal and vertical-format 4.5x6 shots.
Bright focusing screen with microprism spot for rapid focusing with microprism spot and ground glass. For easy and precise focusing even in poor light. Focusing criterion: no image shimmer.
High-D screen for outstanding brightness of viewfi nder image and precise focusing even in critical lighting conditions, such as in twilight or in a portrait studio. A central split-image rangefi nder facilitates focusing on vertical lines. Guidelines for horizontal and vertical 4.5x6 shots also serve to align the camera with high precision.
FURTHER OPTIONAL ACCESSORIES

natural_image
Black-and-white photo of a Roitel air conditioner unit with cooling fins and a rotary knob (no visible text or symbols)Matte box
The matte box is a kind of extensible bellows and serves to shield the lens very effectively from stray light in back or side lighting. A scale marks focal lengths of 50 mm, 80 mm and 120 – 250 mm.
Masks for focal lengths of 120mm and 250mm are standard equipment. A rear drawer will take gelatine filters up to 75x75mm in size.
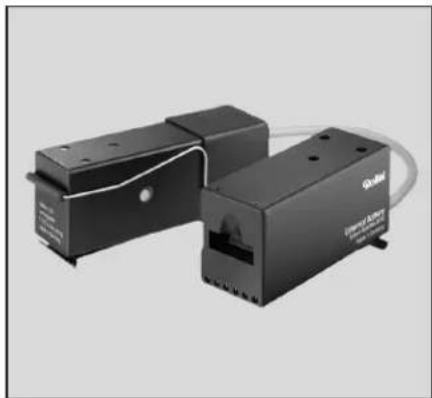
natural_image
Two black industrial electronic components with white wiring, no visible text or symbolsExternal battery connector
With this accessory, the battery can be conveniently carried close to your body to keep it warm and powerful even at low temperatures.
FURTHER OPTIONAL ACCESSORIES
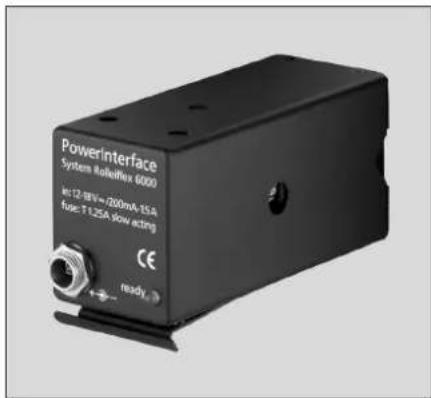
text_image
Powerinterface System Reflex 6000 in 12-BV=200mA-15A Fuse: T 1.25A slow acting CE readyPowerInterface
This is of the same size as the Nicad battery and can be inserted into the battery slot of the camera. Various different power sources can then be connected to the interface, such as the Rollei charger from the Rolleifl ex 6000 System, the Rollei 12V AC adapter, the mobile power source by Einhell or an automobile cigarette lighter. This will greatly increase both the stationary and mobile uses of the camera.
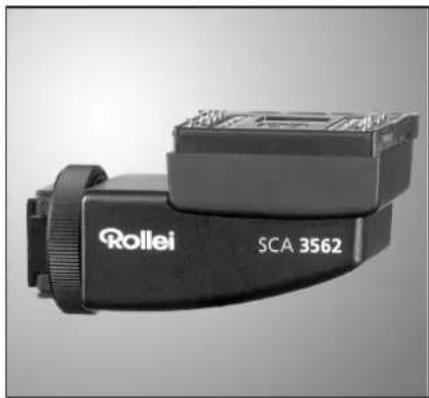
natural_image
Close-up of a black SCA 3562 camera lens with visible branding (no text or symbols on body)Rollei SCA-3562 Flash Adapter
This permits dedicated fl ash photography with the dedicated fl ash units of popular brands offering the SCA-3000 System.
Connection to the system is made by simply slipping the fl ash unit with the SCA adapter into the hot shoe of the camera. This ensures perfect transmission of all the data needed for dedicated fl ash photography and results in optimum fl ash exposure.
FURTHER OPTIONAL ACCESSORIES
MasterWare
Remote-control and confi guration soft-ware for Rolleifl ex 6008 AF/6008 integral2. Allows computer control of camera modes as well as fi ne-tuning of the camera to suit individual user requirements (Windows).
10772 High-D focusing screen
14987 Type 4560 magazine
22493 PanShot swivel adapter
25857 22-68mm zoom extension tube
30017 Power Interface
30019 Power-supply adapter
39715 Nicad battery
54001 AF-Xenotar 80mm f/2.8 HFT PQS
54080 AF-Super-Angulon 50mm f/2.8 HFT
54120 AF-Apo-Symmar 100mm f/3.5 HFT
54501 AF-Variogon 60-140mm f/4.6 PQS
54701 AF-Tele-Xenar 180mm f/2.8 HFT PQ
56561 Rolleifl ex 6001 Professional body
56601 Rolleifl ex 6008 AF body
56650 Rolleifl ex 6008 integral2 body
56701 AF-Longar 1.4x teleconverter
59426 Apo-Tele-Xenar 300mm f/4 HFT PQ
59439 Super-Angulon 40mm f/3.5 HFT PQ
59551 6x6 magnifi er
59602 Sonnar 150mm f/4 HFT PQS
59670 Longar 1.4x teleconverter
59901 Handgrip
59926 M39/40 shutter adapter
60471 Lens hood for 40mm f/4
62069 67mm extension tube
62624 Sonnar 250mm f/5.6 HFT PQS
62903 90° telescopic viewfi nder
63045 Tele-Tessar 1000mm f/8 HFT
63048 Frame base for magnifi er
63346 Super-Angulon 50mm f/2.8 HFT PQS
63348 Apo-Symmar 90mm f/4 HFT PQS
64002 Planar 80mm f/2.8 HFT PQS
64866 F-Distagon 30mm f/3.5 HFT PQ
64872 LensControl S unit
64899 Rapid charger
64911 Bright focusing screen
65631 Tele-Tessar 350mm f/5.6 HFT PQS
66300 Makro-Planar 120mm f/4 HFT PQS
86674 Planar 110mm f/2 HFT PQ
86675 Planar 80mm f/2.8 HFT EL
86705 Distagon 50mm f/4 FLE HFT PQ
86706 Distagon 50mm f/4 HFT EL
86725 Distagon 60mm f/3.5 HFT PQ
86757 Sonnar 150mm f/4 HFT EL
86760 Sonnar 250mm f/5.6 HFT EL
86900 Super-Angulon 55m f/4.5 HFT PQ
86913 Variogon 140-280mm HFT PQ
86926 Variogon 75-150mm HFT PQ
87606 Tele-Xenar 180mm f/2.8 HFT PQ
87612 Xenotar 80mm f/2 HFT PQ
88798 6x6/120 magazine
88799 6x6/220 magazine
91187 Automobile charging cable
96725 Tripod quick-release bracket
96741 Lens hood for 80 - 250mm (except 180mm)
96752 Lens hood for 50mm f/4 and 60mm f/3.5
96841 Circular polarizing filter
96900 Zeiss Softar
96904 Zeiss Softar II
96950 Size VI gelatine-fi Iter holder
97054 Ground-glass focusing screen
97069 Bright focusing screen with central microprism collar and split-image rangefinder
97074 Bright focusing screen with microprism spot
97661 Rollei SCA-356
Dedicated Flash Adapter
97698 Average-metering back
97700 Spot-metering back
97814 45° prism fi nder
97844 9mm extension tube
97868 17mm extension tube
97888 34mm extension tube
97979 Polaroid magazine
98004 Film insert
98029 Rapid focusing lever
98065 Bellows attachment
98080 Matte box
98200 External battery connector
98253 2x teleconverter
98290 Rollei SCA-3562 Dedicated Flash Adapte
98410 Reversing adapter
98531 Apo-Symmar 150mm f/4.6 HFT PQ
98839 Lens hood for 180mm f/2.8
98874 RC-120 remote release
98989 Electronic Shutter ^1
99090 Sliding adapter
1) View-camera lenses of shutter sizes 0 and 1 by Rodenstock and Schneider Kreuznach
Camera does not work
Camera does not work, display 5 LI dE
Film does not advance to frame 1
No aperture display
No viewfinder display
Display ---- with PQ lens
Display ---- with older lens
Display regardless of lens
Display no Auto with older lens
Display 88 8888 with PQ lens in automatic or manual mode
Display 88 8888 with older lens
Aperture display blinking with PQ lens
Shutter speed blinking with PQ or older lens
Fastest shutter speed blinking with PQ or older lens
No aperture or shutter-speed display with older lenses
Shutter does not release immediately
Light balance not displayed with older lens or in manual exposure mode
No change of exposure display after shutter-speed/aperture variation with older lens
TROUBLESHOOTING
| Cause | Remedy |
| Camera switched off Set master switch to "S" | |
| No Nicad battery loaded or battery empty Load Nicad battery or recharge it | |
| Grip of magazine drawslide not Push grip fully down against bottom stop | |
| Lens not engaged Engage lens | |
| Film curl and loose loops in film leader | Press shutter release again. If necessary, wind up film leader tightly when loading film |
| Film stage of 6x6 magazine not in place Insert film stage | |
| No PQ lens attached Mount PQ lens | |
| Switch 31 set to "norm" | Set switch 31 to "sf" |
| Multiple exposure set to bulb or T Select discrete shutter speed | |
| Multi-spot metering selected Select average or spot metering | |
| Camera set to shutter-priority AE and bulb or T Select manual exposure control | |
| Camera set to preflash and an automatic exposure mode | Select manual exposure control |
| You have selected shutter-priority AE or multi-spot metering | Choose aperture-priority AE or metered manual |
| Exposure value ≤ 0 | Use flash |
| Exposure value ≤ 5 | Select wider aperture or use flash |
| f-stop range insufficient | Choose slower shutter speed |
| Shutter-speed range insufficient | Choose wider aperture |
| Faster than fastest sync speed set | Reduce shutter speed until blinking stops |
| With older lenses used with aperture-priority AE, the shutter speed or possible out-of-range of aperture will be displayed only when the lens is stopped down | Stop down lens using the memo or stop-down button |
| Custom function "Self-timer" enabled | Set switch 31 to "norm" |
| With older lenses and in manual exposure mode, the light balance will be displayed only when the lens is stopped down | Stop down lens using the memo or stop-down button |
| Variation was made with memo button depressed | Release memo button and repeat reading |
TROUBLESHOOTING
Problem
No viewfinder image on focusing screen
Viewfi nder image blurred at ∞
Unsharp picture with 6x6 magazine
Shutter release locked
Shutter does not release, but previous light reading satisfactory
Battery prematurely empty
Camera switches off during winding or advance of film because fuse responds
Camera switches off during continuous shooting
No fill flash in dedicated flash mode
TROUBLESHOOTING
| Cause | Remedy |
| Mirror locked up reading, if necessary | Press shutter release and repeat exposure |
| Focusing screen misaligned or not engaged | Insert screen properly (matte side facing down) and fi rmly press holding frame |
| Magnifi er unsuitable for visual defect of photographer | Use viewfinder magnifier of proper power (available from +2.5 to -4.5 dp) |
| No film stage loaded | Insert film stage |
| Autofocus set to focus priority ("sing" position) but unable to achieve focus due to diffi cult contrast situation | Set switch 26 to "man" or "cont" or take reading of substitute detail at the same distance |
| Insuffi cient battery power: Electronic system cuts off | Change battery or recharge it |
| Working temperature too low | Keep battery warm and recharge or use interchangeable battery and external battery connector |
| Film base too brittle, e.g. after storage in refrigerator or at very low temperatures | Keep fi lm (and camera) warm. Replace fuse (exclusively 1.25amp/250V, slow-blow). Carry recharged batteries close to your body to keep them warm. |
| Film loaded improperly | Wind up fi lm uniformly when loading. Replace fuse |
| Insuffi cient battery power | If possible, use fully charged battery |
| Fill-fl ash ratio was not selected | Set fi ll amount on compensation switch from -1/3 EV to -3 EV (compensating) or from +1/3 EV to 2 EV (additive) |
TROUBLESHOOTING
Problem
Incorrect exposure
Wrong exposure in spite of prefl ash
Camera does not focus in AF mode (6008 AF)
Camera defocuses in AF mode (6008 AF)
Size 220 fi lm is not wound up fully
One to two frames remain unexposed at end of roll
Frame counter stopped at 15 or 16
TROUBLESHOOTING
| Cause | Remedy |
| Change in lighting conditions after mirror lockup | Do not use mirror lockup in rapidly changing lighting conditions to leave autoexposure fully active right up to shutter release |
| Strong stray light striking viewfi nder screen (especially from fl uorescent tubes) | Swing up viewfinder magnifier, avoid direct exposure to light; in diffi cult lighting conditions close focusing hood, perhaps use other viewfi nder |
| Viewfi nder warnings went unheeded | Take a reading before every shot and watch out for warnings (blinking aperture or shutter speed, light balance > ±1 EV ---- , 88 8888 ) |
| Heavy stray light | Avoid heavy stray light. In diffi cult lighting conditions close focusing hood; if necessary, use different viewfi nder attachment |
| Subject too low in contrast | Focus on more contrasty substitute detail at about the same distance |
| Heavy stray light | Avoid heavy stray light, e.g. close focusing hood or use different viewfi nder attachment |
| You have used size 220 fi lm in a size 120 magazine | Press shutter release about 20 times for |
| Film was not wound up suffi ciently for loading | Wind up fi lm until arrow is aligned with index |
| Size 120 fi lm has been used in type 220 magazine fully (expect blurring due to inadequate fi lm fl attening) | Press shutter release twice to wind up fi lm |

fi lm advance
Note:
If your camera responds unexpectedly, fi rst check whether one of the custom functions (e.g. self-timer) has been activated or whether the default settings have been changed.
COMPATIBILITY
Compatibility with older components
With the exception of SLX and 6002 backs, all interchangeable components can be used on the 6008 AF, although some of them only to a limited extent.
Using the interchangeable type 6006 magazine
When interchangeable magazines for the Rolleifl ex 6006 are used, the ISO speed will not be transferred automatically because these magazines do not allow any fi lm-speed setting.
In this case, your Rolleifl ex 6008 AF will default to ISO 100/21°. Should you use film of different speed, make the necessary correction by means of compensation switch 43. The exposure-compensation icon will not be displayed in this case. Films with speeds from ISO 25/15° to 2500/35° can thus be used according to the following table:
| ISO 25 | 50 | 100 | 200 | 400 | 800 | 1600 | 2500 | |
| EV compensation | +2 | +1 | 0 | -1 | -2 | -3 | 2/8 |
If necessary, type 6006 magazines can be converted at the Rollei factory.
Please note:
While the back of a Rolleifl ex 6002 or SLX can be attached to the body of the Rolleifl ex 6008 AF/6008 integral2, blur must be expected due to a lack of film flattening.
Magazines of the Rolleifl ex 6008 AF/6008 integral2 or 6008 Integral, on the other hand, should never be attached to a Rolleifl ex 6002 or SLX body, or mechanical damage is unavoidable!
Film inserts of the Rolleifl ex SLX (which may be recognized by interior icons and indices) should not be used because they may jam when they are removed.
COMPATIBILITY
Use of older interchangeable lenses (for SLX, 6002 and 6006)
When using the lenses of the Rolleifl ex SLX, 6002 or 6006 (no PQ lenses), note the following: Since these lenses have not been designed for open-aperture simulation, the working aperture metered will be displayed only when the memory button 27 or the stop-down button 32 is pressed.
Pressing the memo button will also lock in the AE value. This is why the reading should be repeated by renewed depression of the memo or stop-down button after any variation of the shutter speed or aperture. Exposure will in any case be made with the shutter-speed/aperture combination determined when the shutter release is pressed – regardless of whether the memo or stop-down button was pressed. Only exception: If the memo button is locked.
Due to stop-down metering, the aperture range of EV 5 to 19 is smaller than with PQ lenses. With these, shutter-speed and programmed AE as well as multi-spot metering and fill flash are not available. Also, bulb cannot be combined with T.
Due to the lack of aperture simulation, the aperture is not displayed. All other displays are analogous to the display with PQ lenses. If a certain operating mode should not be available with older interchangeable lenses, the display "no Auto" or "----" will appear in the place of the aperture or shutter-speed display.
COMPATIBILITY
Since older lenses can only be used with stop-down metering, the stray-light compensation range for open focusing hood is frequently exceeded. It is therefore advisable to take the reading with the magnifier flipped up, and your eye should be as close to the magnifi er as possible to shield the focusing screen against direct exposure to light.
Important:
The accessories FM1, ME1 and SRC/MRC 120 cannot be used on your Rolleifl ex 6008 AF and 6008 integral2.
Specifications
Camera type
Dedicated single-lens refl ex camera with electronic microcomputer control, autofocus*, manual focus*, multiple exposures, variable metering pattern, TTL autofl ash, motorized fi lm advance and functional handgrip.
Negative sizes
6x6cm and 4.5x6cm
Film sizes
Size 120 and 220 roll fi lm for 12 or 24 6x6 or 16 or 32 4.5x6 exposures. Instant fi lm pack for ten 6x6cm exposures.
Film speed
ISO 25/15° to 6400/39° adjustable in interchangeable magazine. ISO speed displayed if readjusted.
Shutter and aperture
Between-lens shutter (1/500 s or 1/1000 s to 30 s in one-third increments, plus bulb and T) and aperture electronically controlled by camera. Direct-Drive technology using two linear motors integrated in the lenses.
Time exposures from 1 s to 99 min: 99 s can be set in one-second intervals via MasterWare.
AF-system\*
Three-area phase-detection AF system, AF lock, alternative spot autofocus, manual focusing via LCD.
Exposure metering
» Center-weighted multi-zone metering by seven silicon photodiodes arranged in five groups behind reflex mirror
» Spot metering with photo diode in center of focusing screen (about 1% of frame area)
» Multi-spot metering of up to five subject details, with memo function. Automatic compensation for stray light.
Metering range
EV -1 to EV 19 at ISO 100/21°, f/2 EV 0 to EV 10 at ISO 100/21°, f/2.8 EV 5 to EV 19 with 6006 lens and ISO 100/21° at f/2.
Exposure modes
» Shutter-priority AE
» Aperture-priority AE
» Programmed AE: Automatic control of shutter speed and aperture (high-speed priority).
With MasterWare, the shutter-priority AE default speed can be set anywhere from 30 s to 1/500 s.
» Metered manual in one-third increments.
AE lock
Available in all automatic exposure modes. Locks shutter speed and aperture (exposure value).
Exposure compensation
Manual setting from -4 2/3 to +2 EV in one-third increments. Automatic bracketing ( ± 2/3 EV). Display of compensation during selection. Exposure variation from ± 1/3 to ± 9/3.
SPECIFICATIONS
Autofl ash
OTF TTL fl ash metering by special Si photodiode; display of fl ash readiness and exposure in viewfi nder. Working range ISO 25/15° - 1600/33°. Selection of leading or trailing sync. Fill fl ash in any automatic exposure mode.
Flash synchronization
At all speeds from 1/1000 s (PQS) or 1/500 s (PQ) down to 30 s. Hot shoe with contacts for dedicated fl ash units (SCA 3000). Rollei SCA-3562 Flash Adapter.
Shutter release
At right-hand front of camera and on shutter-speed dial. Additional cable-release and remote-control sockets. Self-timer, interval adjustable with control software from 1 s to 99 s.
Instant shutter release
Time lag between depression of shutter release and opening of shutter (PQ lenses) approx. 3 – 4 ms, with PQS lenses approx. 2 ms. Automatic readiness after every exposure is possible. Release lag can be set from 1 ms to 99 ms with MasterWare.
Depth-of-fi eld preview
By depression of a button, in any exposure mode.
Mirror lockup
In any exposure mode, with AE lock and display. Shutter speed, ISO speed and exposure compensation can still be varied after lockup.
Lens mount
Rollei bayonet mount. 10-pin contact bar for signal transfer for aperture and shutter-speed drives. Exposure control fully functional even with bellows unit, extension tubes and reversing adapter.
Lenses
Zeiss and Schneider interchangeable lenses of PQ and PQS types using all operating modes with full-aperture metering, possibility of switching to stop-down metering for depth-of-fi eld preview. Schneider autofocus lenses (6008 AF). Zeiss and Schneider lenses without PQ characteristics can also be used (with stop-down metering only).
Multiple exposures
Film advance can be disengaged in ME position of camera switch; viewfinder image always visible. With MasterWare, up to 10 multiple exposures in 1/10 s.
Refl ex mirror
Instant-return mirror with partially transmitting multicoating and pneumatic brake; can be locked up.
Viewfi nder system
Standard folding focusing hood with fl ip-up interchangeable magnifi er; can be exchanged for 45° prism fi nder, rigid magnifying hood or 90° telescopic fi nder. Interchangeable focusing screens.
Viewfi nder display
Shutter speed and aperture in one-third increments, focus, metered-manual null balancing, exposure compensation, spot/multi-spot, AE lock, flash readiness, flash exposure, battery status. Automatic reversal of display with 45^/90^ finders. Automatic brightness control, individual brightness setting of display with MasterWare.
SPECIFICATIONS
Film advance
Automatic by integral high-performance motor. Single frames and continuous shooting with approx. two frames per second. Automatic windup to frame 1. Automatic windup of fi lm at end of roll. MasterWare options: slow, fast or disabled.
Power supply
By rechargeable sintered-plate Nicad battery for about 200 exposures (6008 AF: fully charged, 20°C ambient temperature, camera switched on for 60 s, single-frame AF, AF cycle close-infinity-close). Rapid charger (110-240V, 50/60 Hz) automatically switching to trickle charge; 12V terminal for automobile battery.
Handgrip
With four click stops (for use of waist-level or prism fi nder), detachable. Leather wrist strap likewise detachable.
Interchangeable magazines
For type 6x6/120, 6x6/220 and 4560 magazines, for size 120 and 220 4.5x6 fi lm. With integral laminar drawslide, frame counter, film-speed setting, film-type indicator and preloadable fi lm inserts. Instant fi lm-pack magazine (ten 6x6 exposures).
Terminals
14-pin universal screw socket for release cable and other electrical release devices, interface for digital backs and PC (MasterWare), quick-release tripod bracket, 1/4" and 3/8" tripod sockets.
Operating temperature
From -20^ to +60^ .
Dimensions (mm/wxhxd)
without handgrip
Without lens 143 x 139 x 124, with 80mm f/2.8 lens 143 x 139 x 176.
Weight
Without lens 1,450 g, with standard 80mm f/2.8 lens 2,060 g.
The manufacturer reserves the right to make technical modifications.
LENS TABLE
| Aperture | Shutter range f/ | Angular speeds 30 s to | Elements/ field diagonal/ | Focusing components | Max range m/ft horizontal | Max diameter mm/inch | Weight length mm/inch | g/oz | Filter size | |
| F-Distagon 30mm f/3.5 (fisheye) | PQ | 3.5 - 22 | 1/500 | 180/112^ | 8 / 7 | ∞ - 0.3 m∞ - 0.984 ft | 108 mm4.252 in | 122 mm4.803 in | 1550 g54.675 oz | built-inM 24 x 0.5 |
| Super-Angulon 40mm f/3.5 (with floating elements) | PQ | 3.5 - 22 | 1/500 | 88/68^ | 8 / 8 | ∞ - 0.4 m∞ - 1.312 ft | 83.2 mm3.276 in | 72 mm2.835 in | 750 g26.455 oz | M 77 x 0.75 |
| Distagon 50mm f/4 (with floating elements) | PQ | 4 - 32 | 1/500 | 75/57^ | 9 / 8 | ∞ - 0.5 m∞ - 1.640 ft | 82 mm3.228 in | 95 mm3.740 in | 880 g31.041 oz | Rollei size VI bayonet |
| Distagon 50mm f/4 | EL | 4 - 32 | 1/500 | 75/57^ | 7 / 7 | ∞ - 0.5 m∞ - 1.640 ft | 81.5 mm3.209 in | 96 mm3.780 in | 840 g29.630 oz | M 67 (inside)VI (outside) |
| AF-Super-Angulon 50mm f/2.8** | PQS | 2.8 - 22 | 1/1000 | 74/56^ | 9 / 8 | ∞ - 0.6 m∞ - 1.969 ft | 104 mm4.094 in | 115 mm4.528 in | 1500 g52.911 oz | M 95 x 1 |
| Super-Angulon 50mm f/2.8 | PQS | 2.8 - 22 | 1/1000 | 74/56^ | 9 / 8 | ∞ - 0.6 m∞ - 1.969 ft | 104 mm4.094 in | 115 mm4.528 in | 1600 g56.438 oz | M 95 x 1 |
| Distagon 60mm f/3.5 | PQ | 3.5 - 22 | 1/500 | 67/49^ | 7 / 7 | ∞ - 0.6 m∞ - 1.969 ft | 81 mm3.189 in | 83 mm3.268 in | 770 g27.161 oz | Rollei size VI bayonet |
| Planar 80mm f/2.8 | PQS | 2.8 - 22 | 1/1000 | 52/38^ | 7 / 5 | ∞ - 0.9 m∞ - 2.953 ft | 81.5 mm3.209 in | 63 mm2.480 in | 590 g20.812 oz | Rollei size VI bayonet |
| Planar 80mm f/2.8 | EL | 2.8 - 22 | 1/500 | 52/38^ | 7 / 5 | ∞ - 0.9 m∞ - 2.953 ft | 81.5 mm3.209 in | 63 mm2.480 in | 590 g20.812 oz | M 67 (inside)VI (outside) |
| Xenotar 80mm f/2 | PQ | 2 - 16 | 1/500 | 52/38^ | 7 / 5 | ∞ - 0.8 m∞ - 2.625 ft | 97.3 mm3.831 in | 100 mm3.937 in | 960 g33.863 oz | Rollei size VI bayonet |
| AF-Xenotar 80mm f/2.8* | PQS | 2.8 - 22 | 1/1000 | 52/38^ | 7 / 6 | ∞ - 0.8 m∞ - 2.625 ft | 84.5 mm3.327 in | 66.5 mm2.618 in | 520 g18.342 oz | Rollei size VI bayonet |
| Apo-Symmar 90mm f/4 Makro | PQS | 4 - 32 | 1/1000 | 47/34^ | 6 / 4 | ∞ - 0.4 m∞ - 1.312 ft | 104 mm4.094 in | 110 mm4.331 in | 860 g30.336 oz | M 95 x 1 |
| AF-Makro-Symmar 100mm f/3.5** | PQS | 3.5 - 32 | 1/1000 | 43/32^ | 8 / 7 | ∞ - 0.45 m∞ - 1.476 ft | 82 mm3.228 in | 110 mm4.331 in | 900 g31.747 oz | Rollei size bayonet VI |
| Planar 110mm f/2 | PQ | 2 - 16 | 1/500 | 39/28^ | 7 / 6 | ∞ - 0.8 m∞ - 2.625 ft | 104 mm4.094 in | 95 mm3.740 in | 1295 g45.680 | M 95 x 1(filter)oxy, 104 (ens hood) |
| Makro-Planar 120mm f/4 | PQS | 4 - 32 | 1/1000 | 36/26^ | 6 / 4 | ∞ - 0.8 m∞ - 2.625 ft | 81.5 mm3.209 in | 102 mm4.016 in | 960 g33.863 oz | Rollei size VI bayonet |
* Only Rolleif ex 6008 AF
** Only Rollefl ex 6008 AF – in preparation
| Aperture | Shutter range f/ | Angular speeds 30 s to | Elements/ field diagonal/ | Focusing components | Max. range m/ft horizontal | Max. diameter mm/inch | Weight length mm/inch | Fitter size | |
| Apo-Symmar 150mm f4.6 Makro | PQ | 4.6 – 32 | 1/500 | 29/21° | 6 / 4 | ∞ – 1:1.1 | 81.5 mm 3.209 in | 81.5 mm 3.209 in | 706 g 24.903 oz |
| Sonnar 150mm f4 | PQS | 4 – 32 | 1/1000 | 29/21° | 5 / 3 | ∞ – 1.4 m∞ – 4.593 ft | 81.5 mm 3.209 in | 102 mm 4.016 in | 890 g 31.394 oz |
| Sonnar 150mm f4 | EL | 4 – 32 | 1/500 | 29/21° | 5 / 3 | ∞ – 1.4 m∞ – 4.593 ft | 81.5 mm 3.209 in | 102 mm 4.016 in | 890 g 31.394 oz |
| Tele-Xenar 180mm f2.8 | PQ | 2.8 – 22 | 1/500 | 26/18° | 6 / 6 | ∞ – 1.8 m∞ – 5.906 ft | 100 mm 3.937 in | 150 mm 5.906 in | 1525 g 53.793 oz |
| AF-Tele-Xenar 180mm f2.8* | PQ | 2.8 – 22 | 1/500 | 26/18° | 7 / 7 | ∞ – 1.8 m∞ – 5.906 ft | 100 mm 3.937 in | 135 mm 5.315 in | 1480 g 52.205 oz |
| Sonnar 250mm f5.6 | PQS | 5.6 – 45 | 1/1000 | 18/13° | 4 / 3 | ∞ – 2.5 m∞ – 8.202 ft | 82.5 mm 3.248 in | 170 mm 6.693 in | 1150 g 40.565 oz |
| Sonnar 250mm f5.6 | EL | 5.6 – 45 | 1/500 | 18/13° | 4 / 3 | ∞ – 2.5 m∞ – 8.202 ft | 82.5 mm 3.248 in | 170 mm 6.693 in | 1150 g 40.565 oz |
| Apo-Tele-Xenar 300mm f4 | PQ | 4 – 32 | 1/500 | 15/11° | 6 / 6 | ∞ – 3.2 m∞ – 10.499 ft | 101 mm 3.976 in | 262 mm 10.315 in | 2000 g 70.548 oz |
| Tele-Tessar 350mm f5.6 | PQS | 5.6 – 45 | 1/1000 | 13/9° | 4 / 4 | ∞ – 5 m∞ – 16.404 ft | 90 mm 3.543 in | 227 mm 8.937 in | 1650 g 58.202 oz |
| Tele-Tessar 500mm f8 | EL | 8 – 64 | 1/500 | 9/6° | 5 / 3 | ∞ – 8.5 m∞ – 27.887 ft | 100 mm 3.937 in | 316 mm 12.441 in | 1995 g 70.372 oz |
| Tele-Tessar 1000mm f8 | PQ | 8 – 64 | 1/500 | 4.5/3° | 4 / 4 | ∞ – 21 m∞ – 68.898 ft | 215 mm 8.465 in | 790 mm 31.102 in | 8740 g 308.294 oz |
| PCS-Super-Angulon 55mm f4.5 | PQ | 4.5 – 32 | 1/500 | 70/85° | 10 / 8 | ∞ – 0.5 m∞ – 1.640 ft | 104 mm 4.094 in | 155 mm 6.102 in | 1650 g 58.202 oz |
| AF-Variogon 60 – 140mm f4.6* | PQS | 4.6 – 32 | 1/1000 | 67/50° | 13 / 11 32/23° | ∞ – 0.7 m∞ – 2.297 ft | 119 mm 4.685 in | 210 mm 8.268 in | 2400 g 84.658 oz |
| Variogon 140 – 280mm f5.6 | PQ | 5.6 – 45 | 1/500 | 32/23° | 17 / 14 16/11° | ∞ – 2.5 m∞ – 8.202 ft Makro | 94 mm 3.701 in | 238 mm 9.370 in | 1750 g 61.729 oz |
NOTES