
d330 motion - Camera ROLLEI - Free user manual and instructions
Find the device manual for free d330 motion ROLLEI in PDF.


User questions about d330 motion ROLLEI
0 question about this device. Answer the ones you know or ask your own.
Ask a new question about this device
Download the instructions for your Camera in PDF format for free! Find your manual d330 motion - ROLLEI and take your electronic device back in hand. On this page are published all the documents necessary for the use of your device. d330 motion by ROLLEI.
USER MANUAL d330 motion ROLLEI
DIGITAL STILL CAMERA
USER'S MANUAL

natural_image
Illustration of a digital camera with lens and control panel (no text or symbols)DIGITAL STILL CAMERA 3.3 MEGAPIXEL 2XOPTICAL ZOOM 2XDIGITAL ZOOM
Welcome
Thank you for purchasing a the product. We strongly recommend that you read this user's manual before operating the camera. Keep the manual handy for quick reference. You are on your way to experiencing a digital camera like no other. This easy-to-follow user's manual shows you how to use your new camera like a pro, whether you want to:
- download photos to your computer,
- preview and take images via the television.
- create a mini movie using the live video feature.
Before using the camera, please ensure that you:
Read and understand the user's manual.
- Check the contents to make sure that all of the components are included.
- Check that your camera is recording the images correctly by taking a number of test shots.
- If your camera is used for a prolonged period, the camera body may become warm. Please be aware of this and take care when operating the camera.
Table of Contents
CHAPTER 1: Components Guide
The Camera Kit....1
Index of Controls (Front / Left / Back / Up / Bottom View)......2
On Screen Display (OSD) 7
CHAPTER 2: Getting Started
Attaching the Strap....9
Turning the Power On/Off....9
Installing the Batteries....10
Inserting / Removing a Security Digital Card....11
The Memory Priority....12
Setting the Language ( ^a_b )....12
CHAPTER 3: Basic Photography
Taking Pictures (Auto Focus)....13
Adjust the zoom
Press the shutter button
Taking Pictures (Manual Focus)....15
Switching the LCD Monitor Display Information (☐)......16
Using the Flash (A#/#/②) 17
Using the Self-Timer (_) 17
Using the Macro (💡) ......18
Adjusting the Exposure Compensation....18
Table of Contents
CHAPTER 4: Advanced Features Photography
Capture Mode (☐/ ☐/ ☐)....19
Scene Mode (▲/ ▲/ ■/ ■/ ■)....20
Delete Mode (☐ / ☐)....22
Resolution (◇)....24
Compression Ratio (s/ ) 24
Exposure Time (E)....25
Sharpness / Softness ( )....25
Light Metering Mode (AE)....26
Communication Setting ( )....27
Setting the ISO (ISO)....27
Beeper On/Off ( meaning / meaning)......28
Auto Power Off (OFF) 28
Monitor Brightness ( )....29
Setting the Date and Time ( )....29
Setting the TV System (☐)....30
Reset Definition (RESET)....30
Setting the Focus before Using the Self-Timer (L)....31
CHAPTER 5: Viewing the Images
Switching between Capture and Replay Mode....32
Multi-Image Replay (▶) 32
Auto Playback ....33
The Zoom in the Replay Mode....33
Erasing the Single Image ....34
Protecting Images (Oπ) 34
Playing Back Movies ....35
Table of Contents
CHAPTER 6: Capturing / Replaying with a TV Monitor
Connecting the Camera with a TV Monitor....36
Capturing the Images with a TV Monitor....36
Replaying the Images with a TV Monitor....37
CHAPTER 7: Installing the USB DISK Driver
For Windows 98 only....38
CHAPTER 8: Download Images via USB DISK......40
CHAPTER 9: Appendix
Troubleshooting 42
Additional Information......45
1. Components Guide
The Camera Kit
The camera kit includes:
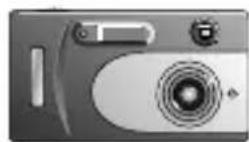
- The camera
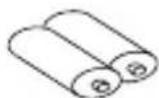
- AA alkaline batteries (x2)
- Camera strap
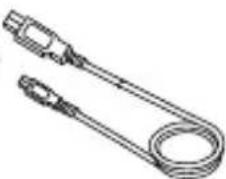
- Mini USB cable
- User's manual
①
④
natural_image
Technical line drawing of a coiled tool or spring with two handles (no text or symbols)②
⑤
③
NOTE
TV cable sold separately. Please see your local retailer.
This is not your traditional camera. This is a "digital" camera. A digital camera allows you to take pictures without the use of film. With the camera, going digital is just the beginning. Before going into creating fun projects with the camera, familiarize yourself with the cameras features and functions.
Index of Controls (Front/Left/Back/Up/Bottom View)
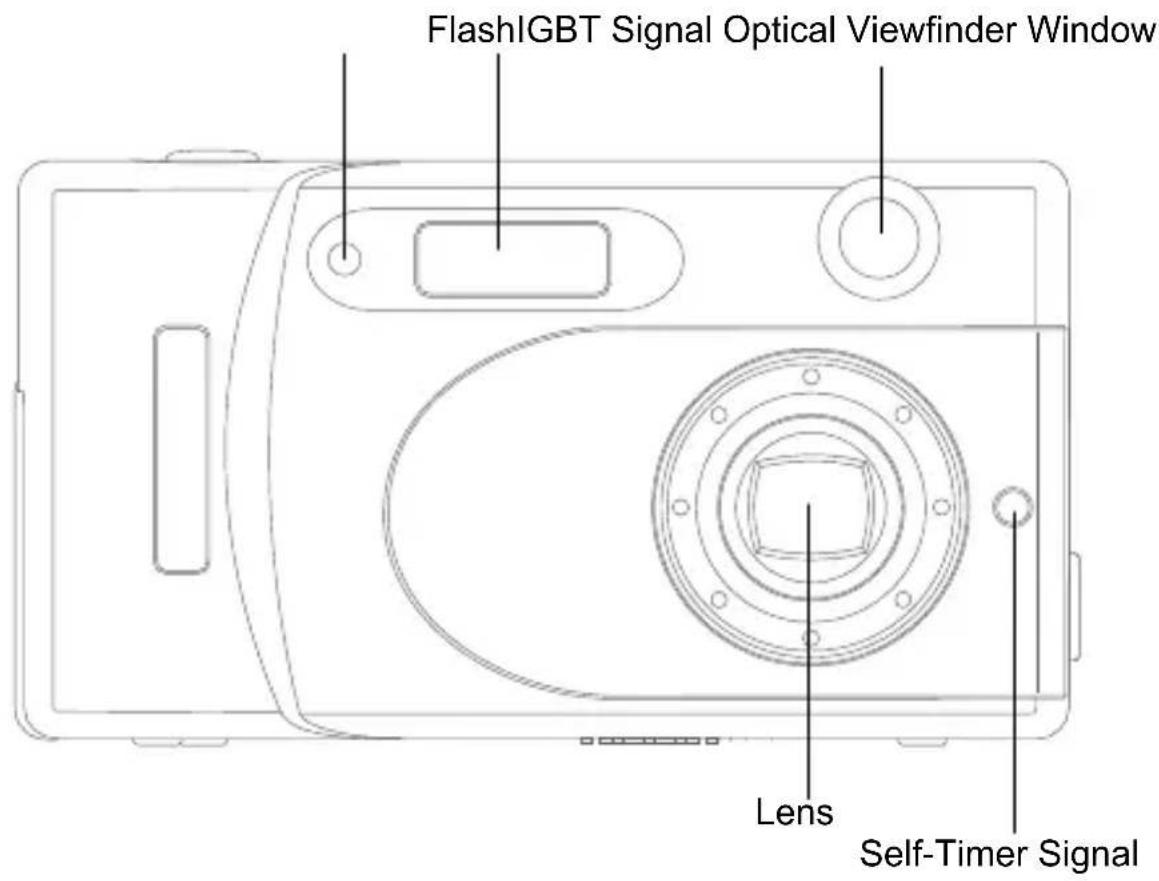
Front View
text_image
FlashIGBT Signal Optical Viewfinder Window Lens Self-Timer SignalIndex of Controls (Front/Left/Back/Up/Bottom View)
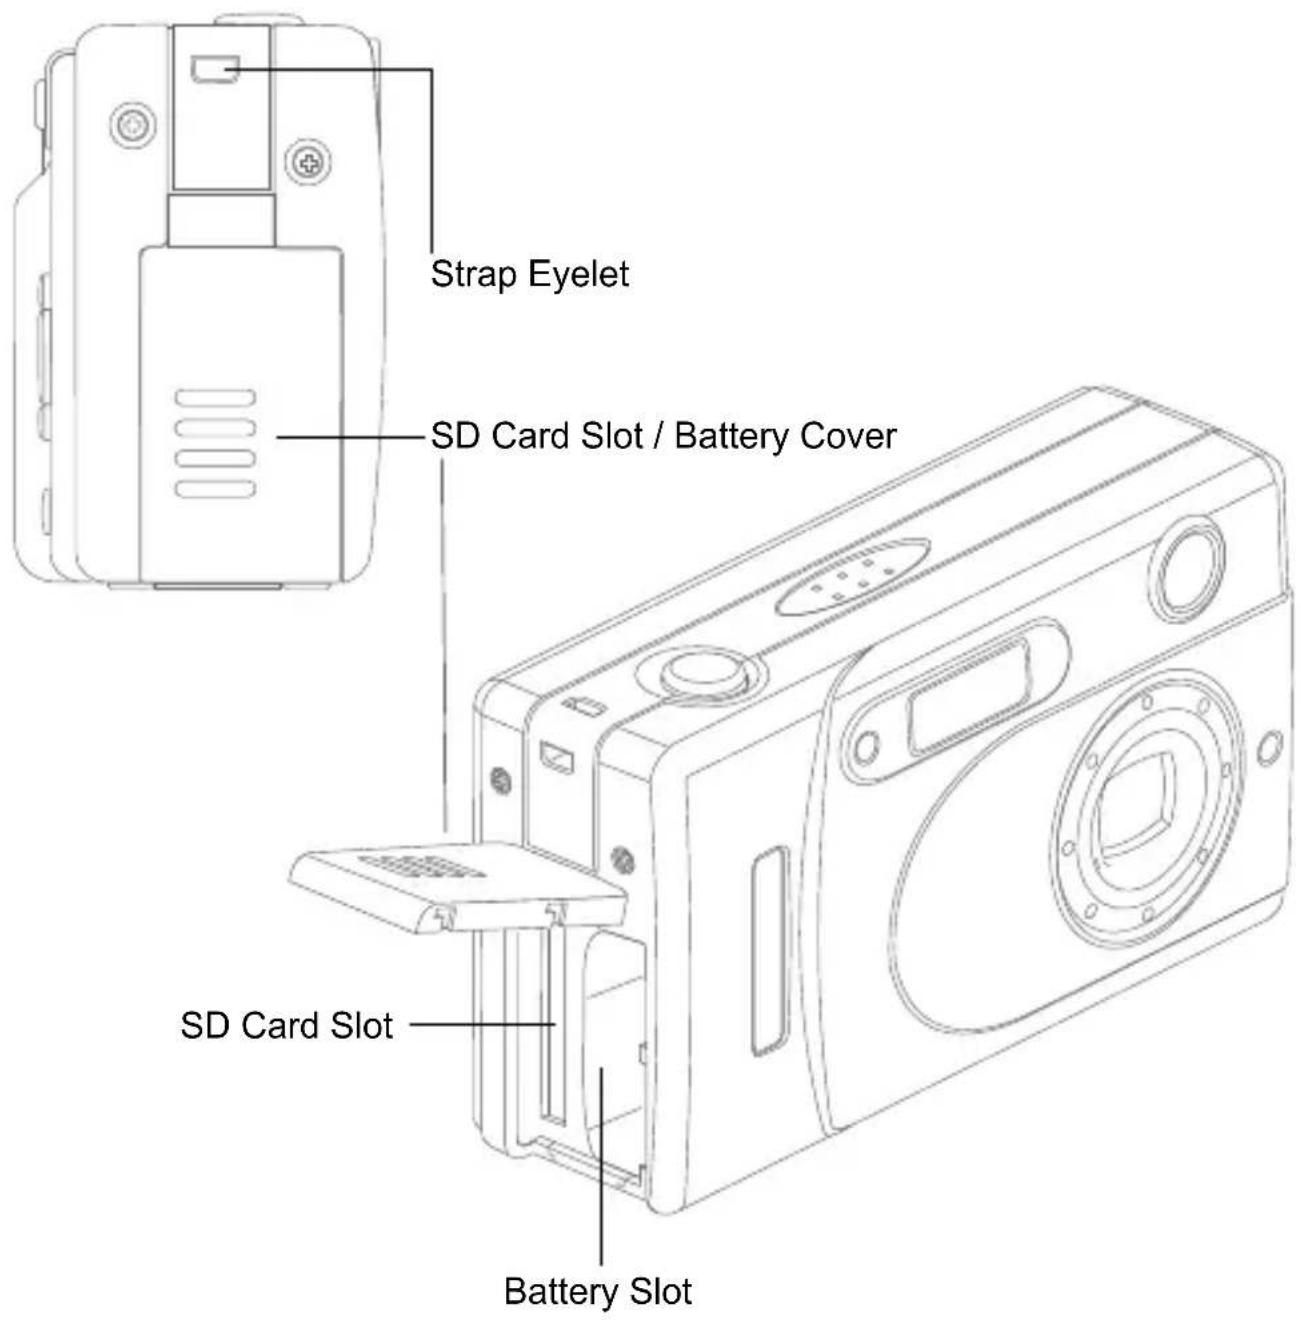
Left View
text_image
Strap Eyelet SD Card Slot / Battery Cover SD Card Slot Battery SlotIndex of Controls (Front/Left/Back/Up/Bottom View)
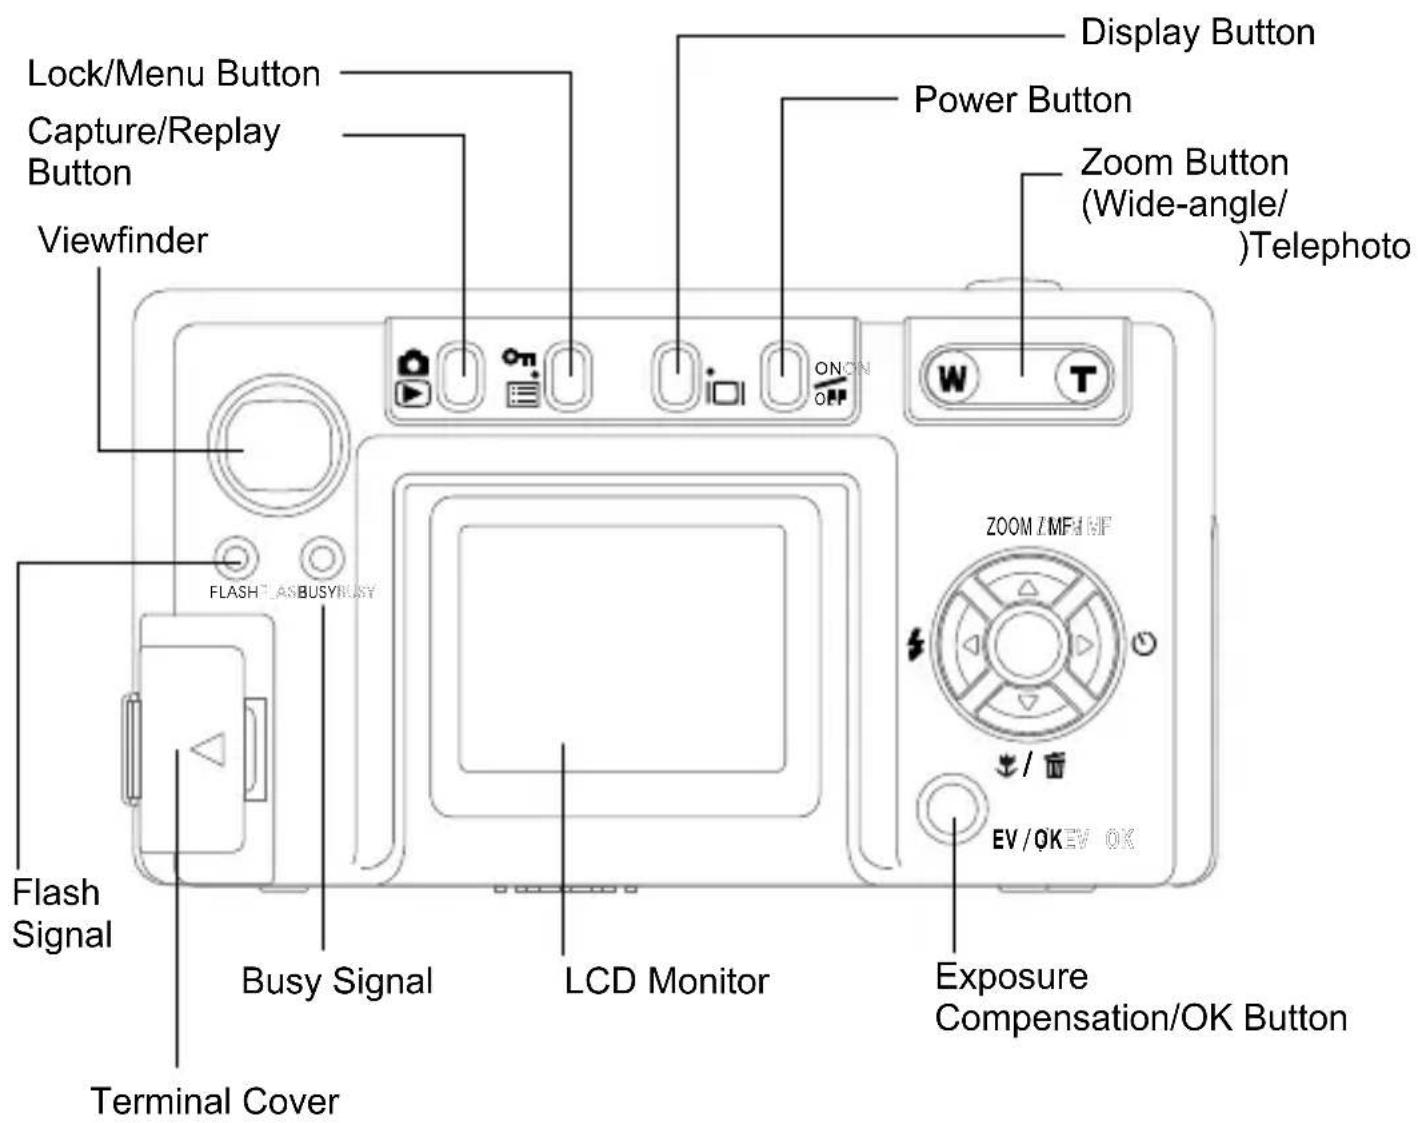
Back View
text_image
Lock/Menu Button Capture/Replay Button Viewfinder Flash Signal Terminal Cover Busy Signal LCD Monitor Display Button Power Button Zoom Button (Wide-angle/ )Telephoto FLASH/AS/BUSY/BLXY ON/OFF W T ZOOM/IMF/IEF EV/OK/EV OK Exposure Compensation/OK ButtonIndex of Controls (Front/Left/Back/Up/Bottom View)
text_image
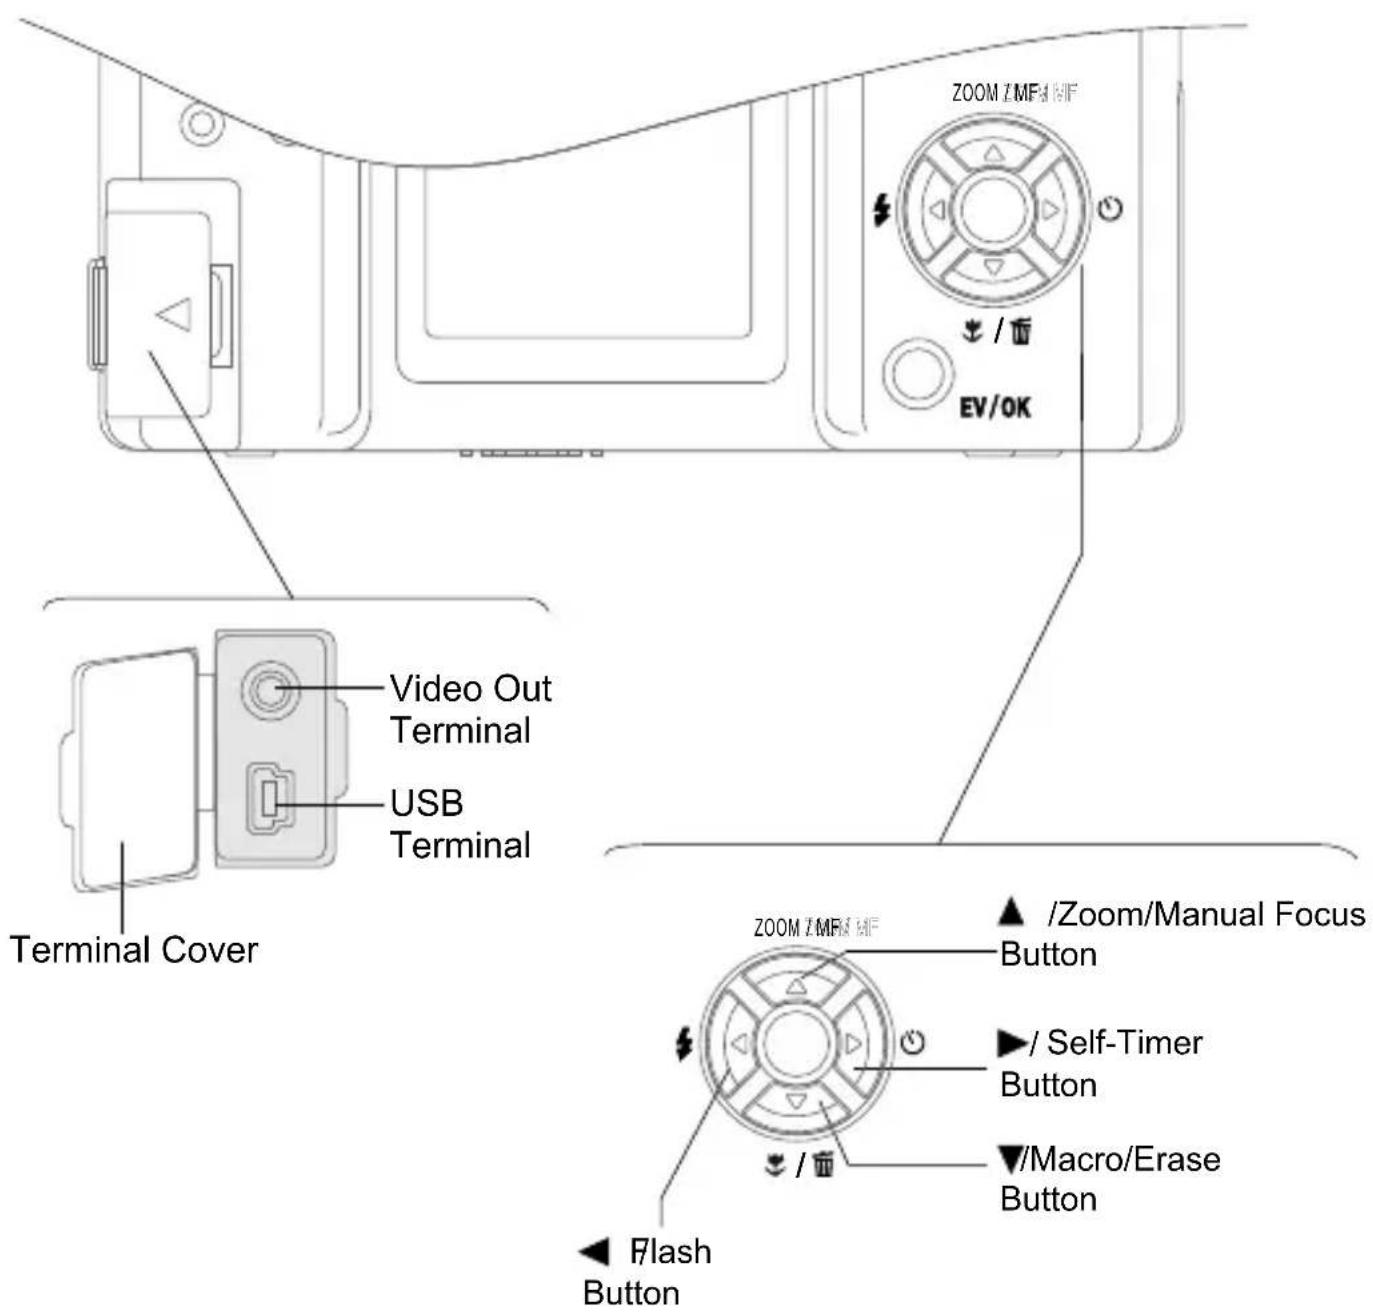
ZOOM ZMFA 16F EV/OK Video Out Terminal USB Terminal Terminal Cover ZOOM ZMFA 16F ▲ /Zoom/Manual Focus Button ► / Self-Timer Button ▼/Macro/Erase Button ◀ Flash ButtonIndex of Controls (Front/Left/Back/Up/Bottom View)
Up View
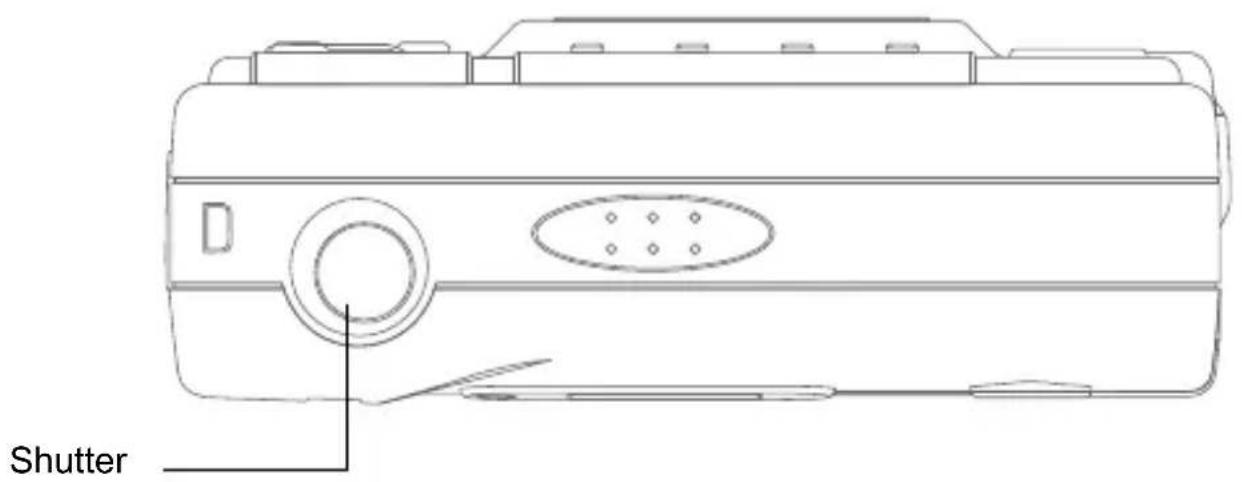
text_image
ShutterBottom View
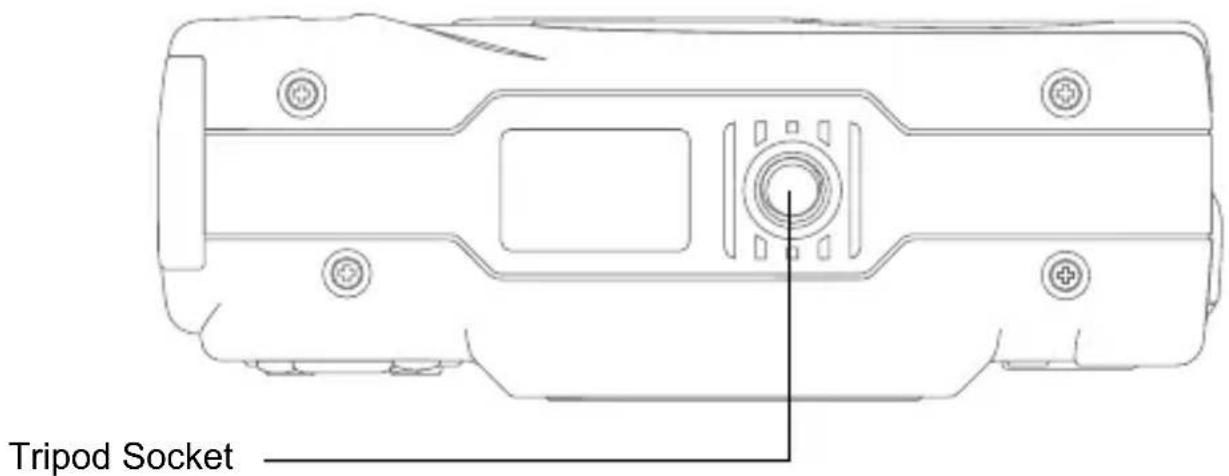
text_image
Tripod SocketOn Screen Display (OSD)
Capture Mode
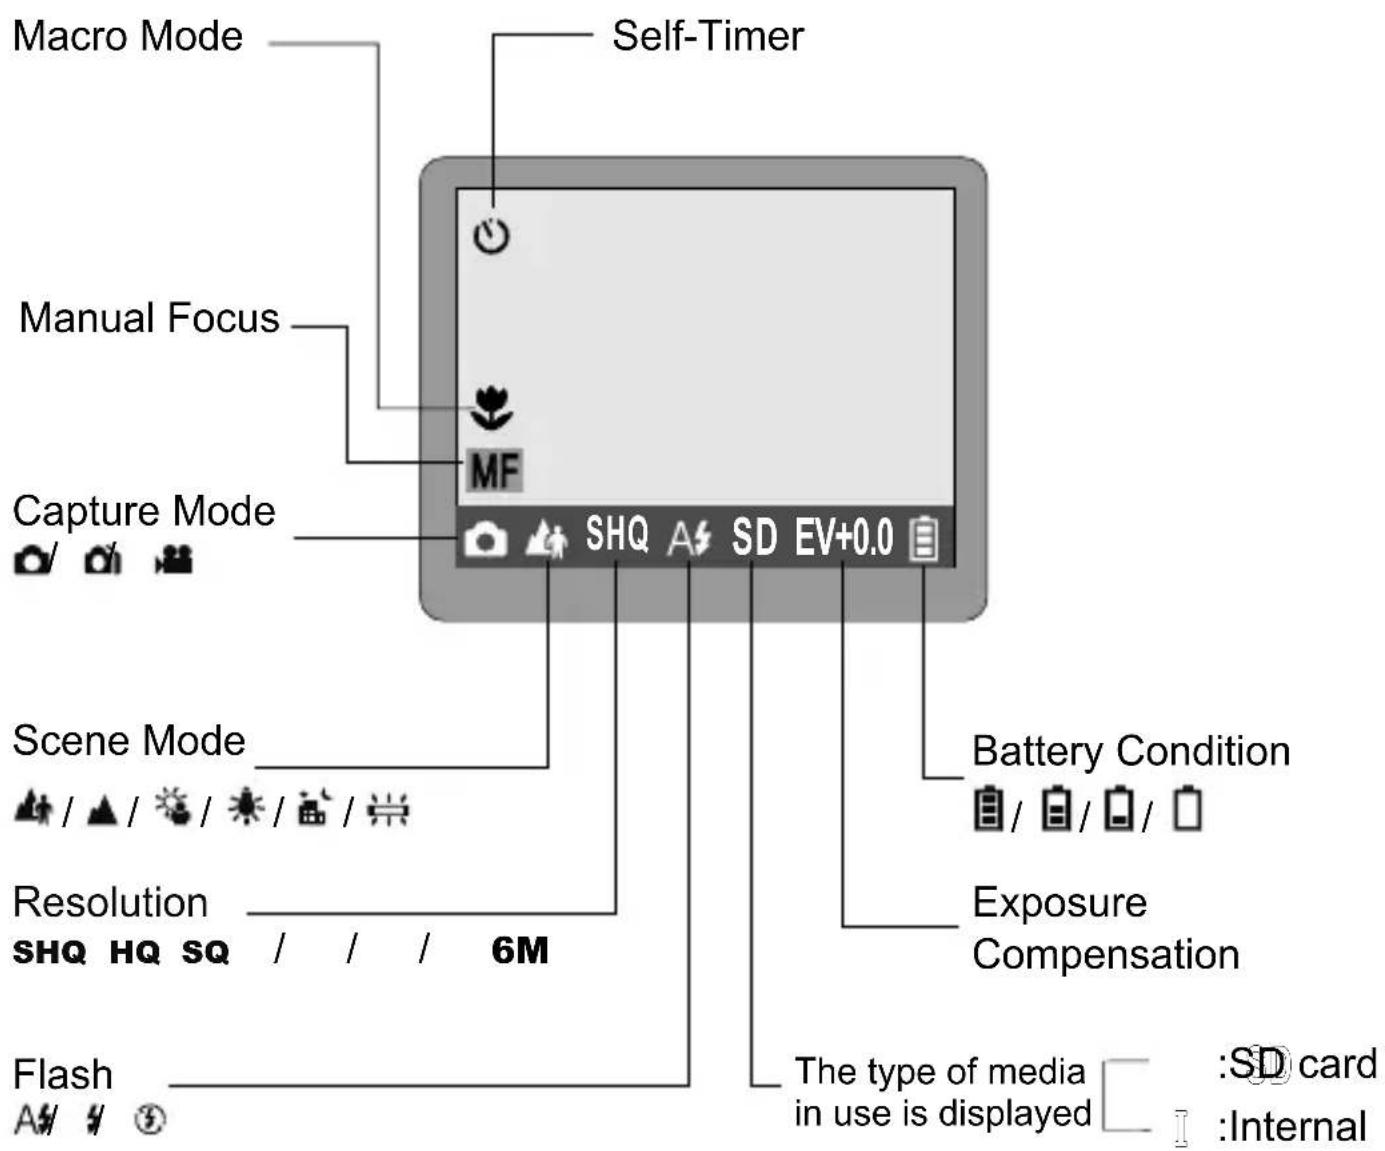
text_image
Macro Mode Manual Focus Capture Mode Scene Mode Resolution SHQ HQ SQ / / / 6M Flash Self-Timer MF SHQ A SD EV+0.0 Battery Condition Exposure Compensation The type of media in use is displayed :SD card :InternalOn Screen Display (OSD)
Capture Mode
Press " 🔥 " button to capture photos.

text_image
Images Taken SD-0001/1000 I-0001/1000 Last Image Taken First Image Taken SD Card / Internal SD-0001/1000Replay Mode
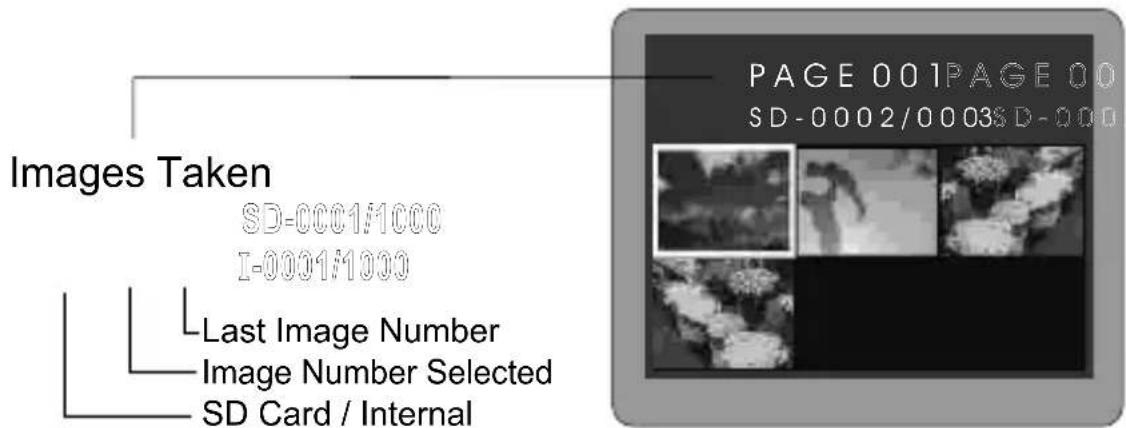
Press " 🔍" button again to replay. Use the "▲", "▼", "◀" and "▶" button to select the photo. Press " EV/ON" button to enlarge photo.
text_image
Images Taken SD-0001/1000 I-0001/1000 Last Image Number Image Number Selected SD Card / Internal PAGE 001PAGE 00 SD-0002/0003SD-0002. Getting Started
Attaching the Strap
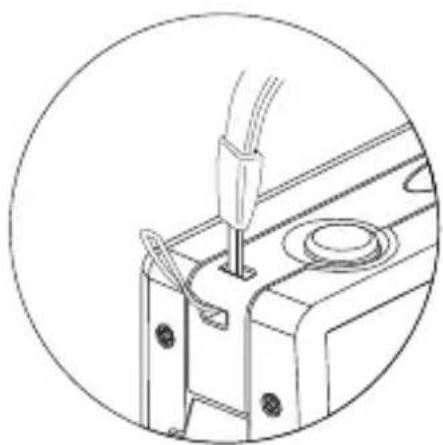
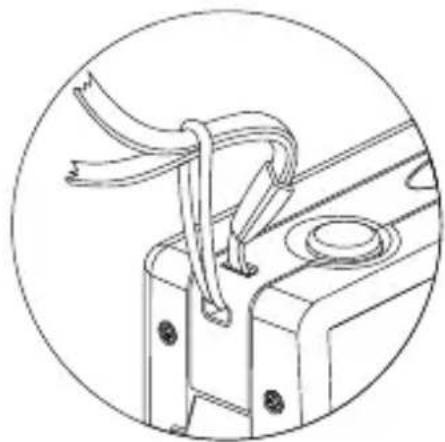
Attach the camera strap as shown in the illustration below.
natural_image
Technical line drawing of a mechanical assembly with a tool inserted into a housing (no text or symbols)Figure 1
natural_image
Technical line drawing of a mechanical assembly with no visible text or symbolsFigure 2
Turning the Power On/Off
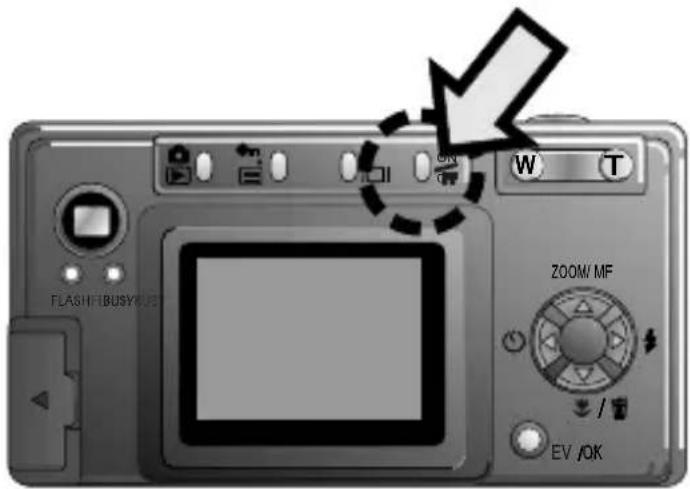
Press "ON" button to turn the camera on.
Press "ON" button
3 seconds to turn the camera off.
text_image
FLASH/IBUSY/UE ON W T ZOOM MF EV /OKInstalling the Batteries
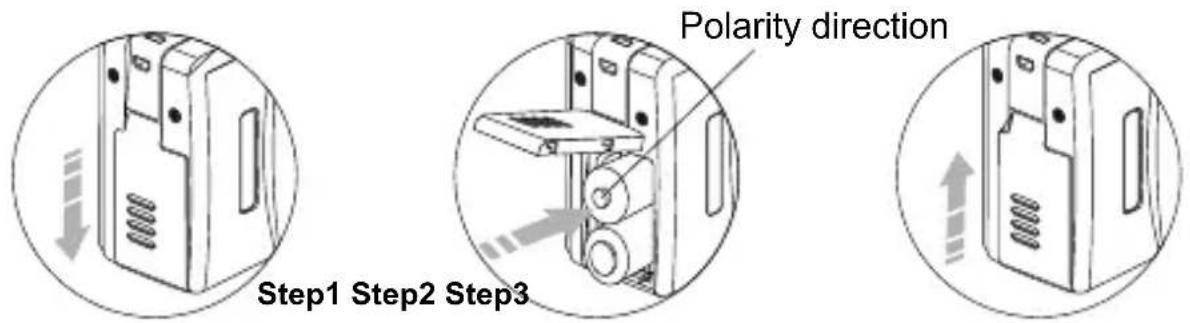
- Open the SD card slot/battery cover in the direction of the arrow.
- Put the batteries in.
- Clock the cover.
text_image
Polarity direction Step1 Step2 Step3NOTE
- We recommend the use of NI-MH batteries, which have longer lives than alkaline batteries. NI-MH batteries are rechargeable, alkaline batteries are not.
- Remove the batteries if you aren't going to use the camera. Don't short, disassemble or throw the batteries into a fire.
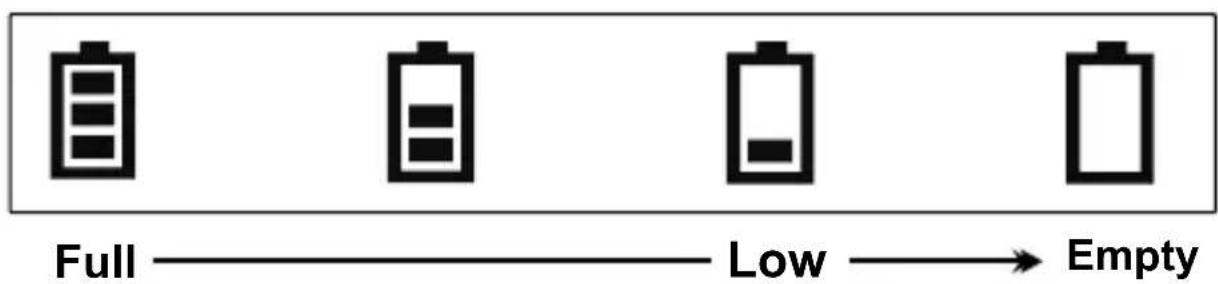
Battery Condition
As the battery is depleted, the indication changes as follows.
text_image
Full → Low → EmptyPower is running out, change the batteries.
Inserting / Removing a Security Digital Card
- Turn off the camera.
- Open the SD card slot/battery cover.
NOTE-
The SD card is optional, you can purchase at your local retailer.
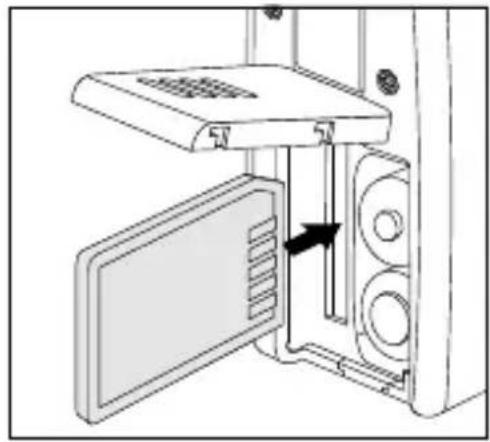
3. Inserting the card
Orient the SD card correctly and push it into the card slot as far as it will go.
NOTE
Note the orientation of the card. If it inserts incorrectly, it may become jammed.
natural_image
Diagram of a microwave oven with ventilation slots and an open door, showing internal airflow direction (no text or symbols)4. Removing the card
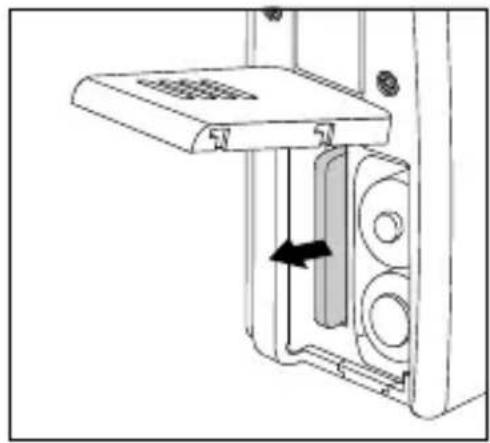
4-1. Push the card into the card slot slightly and allow it to eject back out.
4-2. Grasp the card and pull it straightly out.
NOTE
Never remove the card while the camera is turned on. It will destroy the image data or damage the card itself.
natural_image
Diagram of a device with a lid and internal components, showing a directional arrow (no text or symbols)The Memory Priority
You can store image data with an external SD card or internal memory in the camera. As the SD card is inserted into the camera, the image data will be recorded or viewed or downloaded into the SD card first. Only if the SD card is removed from the camera will the image data be recorded or viewed or downloaded into the internal memory of the camera.
Setting the Language ( ^a_b_c )
You can select from 9 different languages:
Traditional Chinese / English / German / French / Italian / Spanish / Portuguese / Dutch / Polish
- Press "button to display the menu."
- Use "▲" or "▼" button to select this mode ( ^a_b ).
- Use "◀" or "▶" button to select the language.
- When you have finished setting, press "☐" button to exit.
3. Basic Photography
Taking Pictures (Auto Focus)
- Press "ON" button. The camera will beep.
- Aim the camera at the subject.
3. Adjust the zoom
3-1. Use the zoom lever to achieve the desired composition.
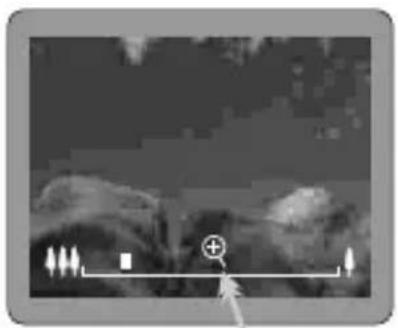
3-2. To zoom in on the subject, press the "T" button. To zoom out, press the "W" button. The zoom bar appears on the LCD monitor when you zoom in or out. Zooming stops briefly when the camera switches between optical zoom and digital zoom.
natural_image
Grayscale image of a person's face with a plus sign and directional arrows, no readable text or symbols present.The zoom in or zoom out will stop briefly here. Press "T" or "W" button again to switch between optical and digital zoom.
NOTE
TO USE THE DIGITAL ZOOM
Use the optical zoom to zoom in fully and then press "T" button again. Digital zoom can not be used as the LCD monitor is turned off.
TO USE THE OPTICAL ZOOM
Use the digital zoom to zoom out fully and then press "W" button again.
4. Press the shutter button
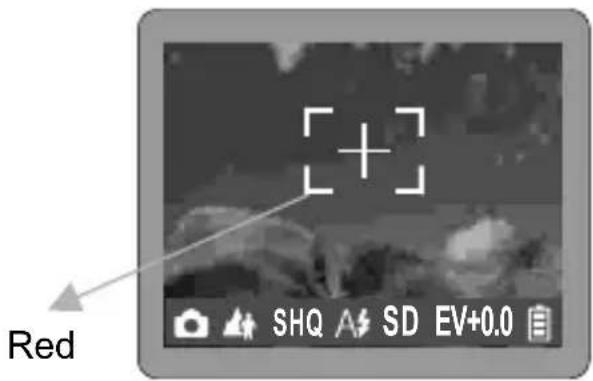
4-1. Press the "shutter" button down half way. The color of the focus frame will be red.
text_image
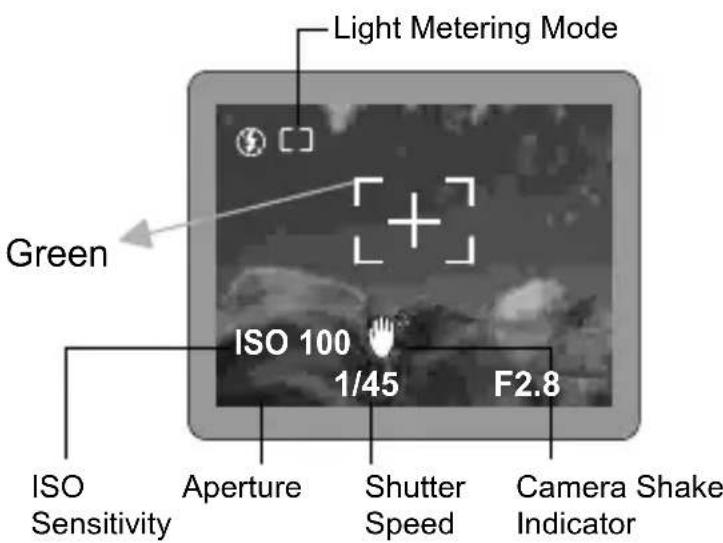
Red SHQ A SD EV+0.04-2. When the camera has finished metering, the color of the focus frame will be green.
text_image
Light Metering Mode Green ISO 100 1/45 F2.8 ISO Sensitivity Aperture Shutter Speed Camera Shake Indicator4-3. Then press the "shutter" button down fully to take the picture. The camera beeps and the data is then recorded.
NOTE
The " 🔍" appears on the LCD monitor when the shutter speed ≥ 1/45 second. Please use the tripod to steady the camera.
Taking Pictures (Manual Focus)
- Press "ON OFF" button. The camera will beep.
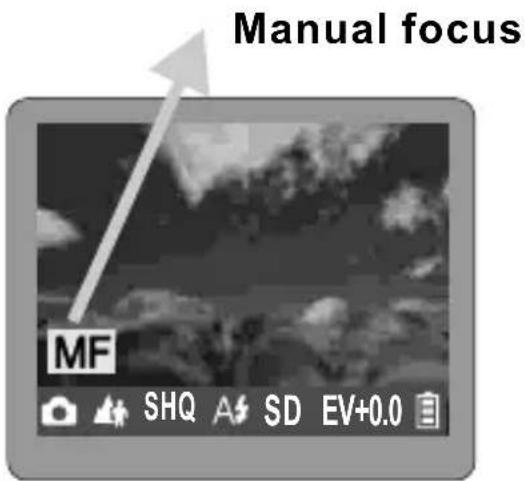
- Press "▲" button until "MF" icon appears on the monitor.
- Use the zoom lever (T or W button) to focus the subject.
- Use the LCD monitor to check the focus.
- Press the "shutter" button down fully to take the picture. The camera beeps and the data is then recorded.
text_image
Manual focus MF SHQ A4 SD EV+0.0NOTE When you select the manual focus mode, the "MF" icon appears on the LCD monitor. Press "▲" button again to cancel the manual focus mode.
Switching the LCD Monitor Display Information (☐)
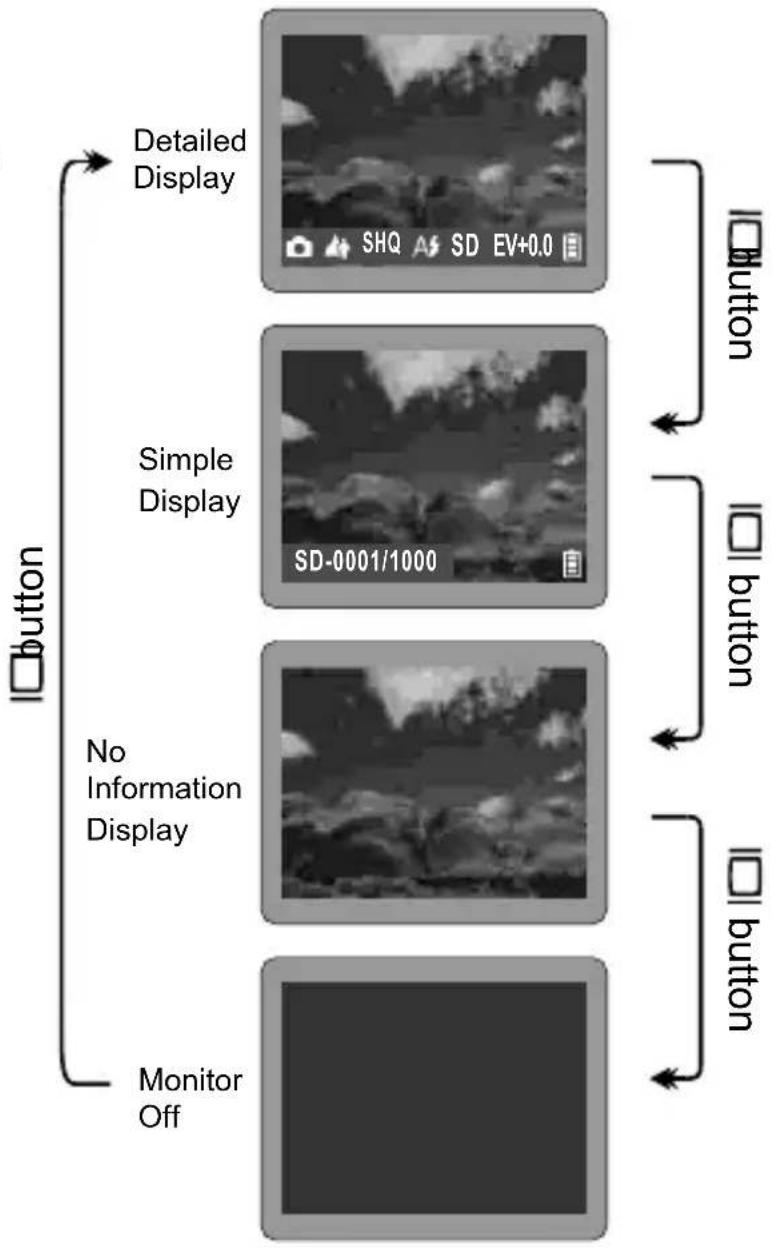
Pressing "☐" button switches the LCD monitor display information. In the capture mode, pressing "☐" button cycles the LCD monitor to the next mode each time the button is pressed.
Detailed Display:
The LCD monitor displays information such as the camera setting, resolution, battery condition.....
Simple Display:
The LCD monitor only displays remaining image capacity.
No Information Display:
The LCD monitor displays no information on it.
Monitor Off:
Turn of the monitor.
NOTE
Digital zoom can not be used if the LCD monitor is turned off.
flowchart
graph TD
    A["Detailed Display"] --> B["No Information Display"]
    C["Simple Display"] --> B
    D["Monitor Off"] --> B
    B --> E["Button 1"]
    B --> F["Button 2"]
    B --> G["Button 3"]
    style A fill:#f9f,stroke:#333
    style C fill:#f9f,stroke:#333
    style D fill:#f9f,stroke:#333
    style E fill:#ccf,stroke:#333
    style F fill:#ccf,stroke:#333
    style G fill:#ccf,stroke:#333
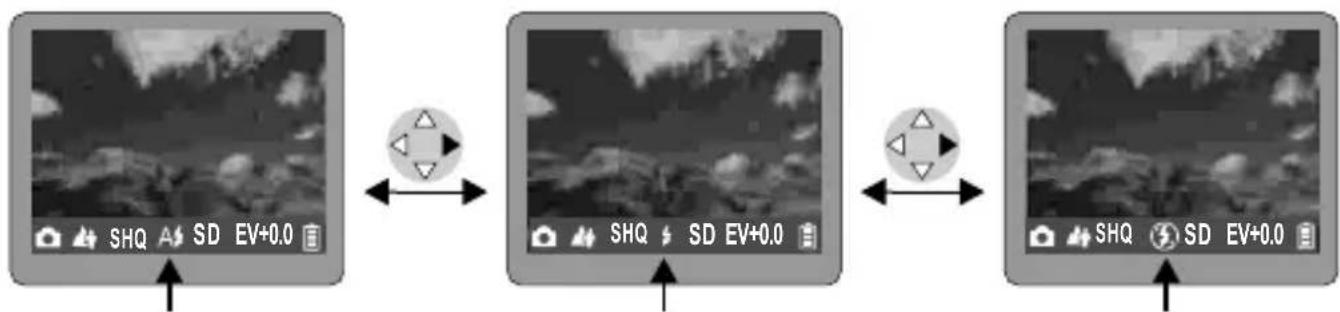
The flash mode is used to add extra light to your image. Press "⚡" button to select the flash setting. The flash setting changes (A⚡ ⚡ ③) each time you press "⚡" button. And the selected flash mode appears on the LCD monitor.
NOTE
A#: Auto Flash Mode
:Forced Flash Mode
④No Flash Mode
flowchart
graph LR
    A["ShQ"] --> B["SD EV+0.0"]
    B --> C["SHQ"]
    C --> D["SD EV+0.0"]
    D --> E["SHQ"]
    E --> F["SD EV+0.0"]
Forced FlashAuto Flash No Flash
Using the Self-Timer (💡)
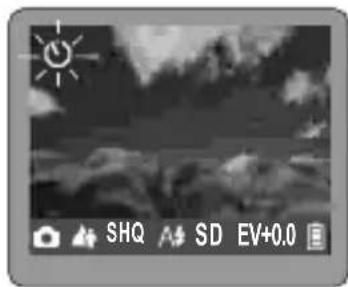
This is used to take a picture with a 10 seconds delay.
- Press "O" button to select the self-timer setting. The "appears on the LCD monitor."
- Take the picture by pressing the "shutter" button. You have 10 seconds which is indicated by the camera beeping and the self-timer indicator blinking on the front of the camera.
- You can set the focus before using the self-timer. Please see p.3 for more details.
natural_image
Grayscale night sky with sun and clouds, no visible text or symbolsNOTE
Press "💡" button again to cancel this mode.
Using the Macro (💡)
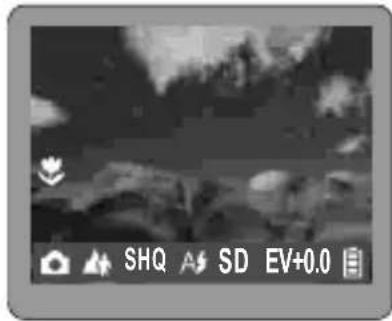
- The macro mode is used to shoot close-up of subjects in the range of 6cm to 14m. Press ""/button and " " icon appears on the LCD monitor.
- Shoot the image.
natural_image
Grayscale outdoor scene with cloud and foliage, no visible text or symbolsNOTE Press "√"/button again to cancel the macro mode.
Adjusting the Exposure Compensation
Adjust the exposure compensation setting to obtain the optimum image brightness (Exposure) when the subject is much brighter or darker than the background.
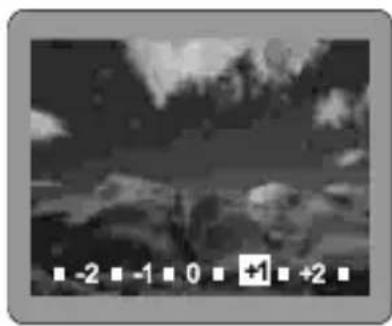
- Press "EV"/button to get into the EV mode. The exposure compensation bar will appear on the LCD monitor.
- Press "Ludoh" The brightness of the subject will be adjusted according to the exposure value. You can see the change on the LCD monitor.
- Press "EV"/button to exit.
natural_image
Grayscale image of a person in motion with cloud-like background (no visible text or symbols)NOTE The settings can be adjusted in 1/2 steps in the range of -2.5EV\~+2.5EV. The higher the value, the greater the exposure (brightness).
4. Advanced Features Photography
Capture Mode (☐/ ☐/ )
In the capture mode, you can choose from 3 types of shots:
Single Shot / Continuous Shots / Recording
- Press "button to display the menu."
- Use "▲" or "▼" button to select this mode (☐).
- Use "◀ or "▶ button to select 📷 or 📇 .
- Press "☐" button to confirm setting.
- The selected mode will appear on the LCD monitor.
Single Shot Continuous Shots
Use this mode to shoot single shot.
- Press the "shutter" button to take a picture.
Recording
Use this mode to recording a short movie.
- Press the "shutter" button to start recording.
- Press the "shutter" button again to stop recording.
Use this mode to capture continuous shots.
- Press the "shutter" button to take the pictures.
*Take up 3 pictures in super fine resolution at one time.
*Take up 6 pictures in fine resolution at one time.
*Take up 12 pictures in normal resolution at one time.
Scene Mode (▲/▲/
In the scene mode, you can choose from 6 types of scenes:
▲ Portrait / ▲ Landscape / ✿ Back Light / ✿ Tungsten /
Night Landscape / Fluorescent
- Press "button to display the menu."
- Use "▲" or "▼" button to select this mode ( )
- Use "◀" or "▶" button to select ▲ or ▲ or △ or △ or △. As the scene type is selected, press "☐" button again to exit the menu.
- The selected mode will appear on the LCD monitor.
| Portrait LandscapeUse this mode for shots of people.1. Press the "shutter" button to take a picture.NOTE Use this mode for normal, everyday use. | [W778]Use this mode for daytime shots of scenery.1. Press the "shutter" button to take a picture. |
| Back Light TungstenUse this mode for shots in back light.1. Press the "shutter" button to take a picture. |  Use this mode for shots in incandescent light.1. Press the "shutter" button to take a picture. Use this mode for shots in incandescent light.1. Press the "shutter" button to take a picture. |
Portrait Landscape
Back Light Tungsten

Night Landscape
Use this mode for shots taken in the evening or at night.
- Press the "shutter" button to take a picture.
Fluorescent

Use this mode for shots in fluorescent light.
- Press the "shutter" button to take a picture.
Delete Mode (\~/)
In the delete mode, no matter what type of media (SD card / Internal memory) you set, you can choose from 2 types of this mode:
Delete All / Format
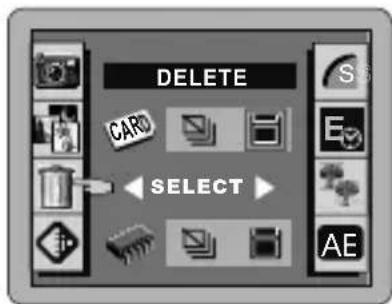
Delete All (In a SD card)
- Make sure the SD card is in the camera.
- Press "button to display the menu."
- Use "▲" or "▼" button to select this mode (☐).
- Use "◀ or "▶ button to select " 🔊 in higher level.
- Press "EV"/button.
- Select "Yes" using "◀" or "▶" button.
- Press "EV"/button to delete all the images.

text_image
DELETE CARD SELECT AENOTE
Locked images can not be deleted.
Format a SD card
- Make sure the SD card is in the camera.
- Press "button to display the menu."
- Use "▲" or "▼" button to select this mode (☐).
- Use "◀ or "▶ button to select " □ in higher level.
- Press "EV"/button.
- Select "Yes" using "◀ or "▶ button.
- Press "EV/0K" button to format the card.
text_image
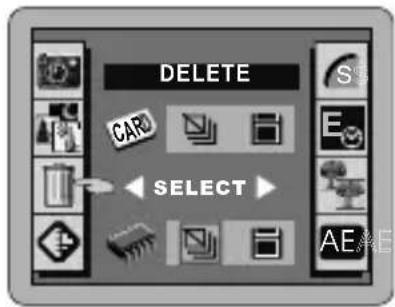
DELETE CARD SELECT AEDelete All (the internal memory)
- Make sure the SD card is out of the camera.
- Press "button to display the menu."
- Use "▲" or "▼" button to select this mode (☐).
- Use "◀ or "▶ button to select " ▼ in the lower level.
- Press "EV"/button.
- Select "Yes" using "◀" or "▶" button.
- Press "EV"/button to delete all the images.
text_image
DELETE CAR SELECT AENOTE
Locked images can not be deleted.
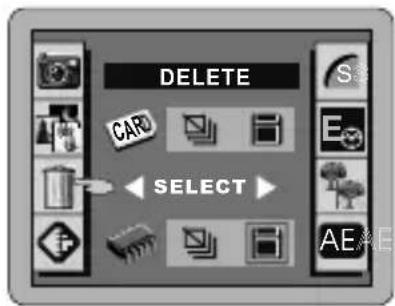
Format the internal memory
- Make sure the SD card is out of the camera.
- Press "button to display the menu.
- Use "▲" or "▼" button to select this mode (☐).
- Use "◀ or "▶ button to select " □ in the lower level.
- Press "EV"/bKutton.
- Select "Yes" using "◀" or "▶" button.
- Press "EV"/button to format.
text_image
DELETE CAR SELECT AEResolution (◆)
In the resolution mode, you can choose the setting (SHQ HQ SQ / 6M/ / according to the type of shot you want to take.
NOTE
SHQ = 2048 x 1536 pixels / Suer Fine
HQ = 1024 x 768 pixels / Fine
sq = 640 x 480 pixels / Normal
6M = 2976x2240 pixels / Interpolation
- Press "button to display the menu."
- Use "▲" or "▼" button to select this mode ( ◊).
- Use "◀" or "▶" button to select the quality.
- When you have finished setting, press "☐ button to exit."
- The selected resolution icon will appear on the LCD monitor.
Compression Ratio (s / ▲/ ▲)
In the compression ratio mode, you can choose the quality setting (s / ▲/ ▲) according to the type of shot you want to take.
NOTE
s = Super Fine
= Fine
= Normal
- Press "button to display the menu."
- Use "▲" or "▼" button to select this mode ( \$).
- Use "◀ or "▶" button to select the quality.
- When you have finished setting, press "button to exit."
Exposure Time (E)
Using this function when you want to adjust the shutter speed.
NOTE
- The settings can be adjusted to 1 second / 2 seconds / 4 seconds and turn off.
-
This function only work in the Night Landscape mode.
-
Press "button to display the menu."
- Use "▲" or "▼" button to select this mode (E).
- Use "◀ or "▶" button to select the time.
- When you have finished setting, press "button to exit."
Sharpness / Softness ( )
Use this setting to emphasize (soften) the outlines of the image.
NOTE
The settings can be adjusted in the range of -3 +3 .
-1\~-3 = Softness
0 = Normal
+1\~+3 = Sharpness
- Press "button to display the menu."
- Use "▲" or "▼" button to select this mode (☐).
- Use "◀ or "▶" button to select the grade.
- When you have finished setting, press "☐" button to exit.
Light Metering Mode (AE)
Using this function for scenes where the brightness of the subject and background differ markedly. You can choose from 2 types of this mode.
- Press "button to display the menu."
- Use "▲" or "▼" button to select this mode (AE).
- Use "◀ or "▶ button to select " [” or " ”[·]
- When you have finished setting, press "☐ button to exit."
NOTE
[ ] Center - Average:
Averages the exposure at the center of the image. Use this mode when the subject is backlit or surrounded by bright light.
Center - Weighted:
Place more weight of the exposure at the center of the image. It is useful for subjects with strongly contrasting light and dark areas.
Communication Setting ( )
The default setting is "he" camera uses the USB DISK to download the images. When you download the images for the first time, please do this:
- Press "button to display the menu."
- Use "▲" or "▼" button to select this mode (✗).
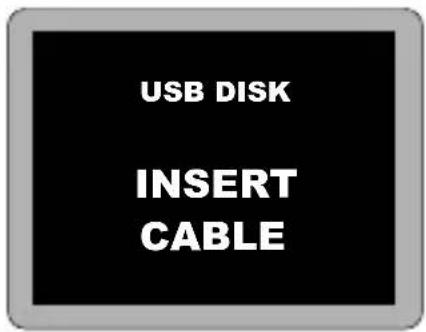
- Then press "EV/Outton to start, and "INSERT CABLE" will appear on the LCD monitor.

text_image
USB DISK ISO OFFSET RESET RESSET USB DISK INSERT CABLESetting the ISO (ISO)
You can change the ISO sensitivity when taking images. You can set the ISO sensitivity to Auto, ISO 50, ISO 100 or ISO 200.
- Press "button to display the menu."
- Use "▲" or "▼" button to select this mode (ISO)
- Use "◀" or "▶" button to select the ISO sensitivity (Auto, ISO 50, ISO 100 or ISO 200).
- When you have finished setting, press "☐" button to exit.
Beeper On/Off (/
In this mode, you can set the beeper on or off.
- Press "☐" button to display the menu.
- Use "▲" or "▼" button to select this mode (◀◀◀).
- Use "◀" or "▶" button to select "播放" or "播放".
- When you have finished setting, press "button to exit."
Auto Power Off (OFF)
Using this function when you want to get the maximum possible running time from the batteries.
NOTE
The settings can be adjusted in 30 / 45 / 60 / 120 / 180 seconds and turn off.
- Press the "button to display the menu."
- Use "▲" or "▼" button to select this mode (OFF).
- Use "◀" or "▶" button to select the time.
- When you have finished setting, press the "button to exit."
Monitor Brightness ( )
You can adjust the monitor brightness in the range of 1\~4.
NOTE
1 = Monitor-Darker
4 = Monitor-Lightest
- Press "button to display the menu."
- Use "▲" or "▼" button to select this mode ( ).
- Use "◀" or "▶" button to select the grade.
- When you have finished setting, press "button to exit."
Setting the Date and Time (9)
You can set the date from 5 types of this mode:
$$ \begin{array}{l} \mathrm{M} 1 = \mathrm{DD/MM/YY} \ \mathrm{M} 2 = \mathrm{YY/MM/DD} \ \mathrm{M} 3 = \mathrm{DD/MM/YY/HH/MM} \ \mathrm{M} 4 = \mathrm{YY/MM/DD/HH/MM} \ \mathrm{M} 5 = \text { N O N - D I S P L A Y } \ \end{array} $$
- Press "button to display the menu."
- Use "▲" or "▼" button to select this mode (☐).
- Use "◀" or "▶" button to select M1 or M2 or M3 or M4 type.
- Press "EV"/button to setup.
- Use "◀ or "▶" button to select the desired item and then use "▲" or "▼" button to correct the setting.
- If you do not want the date displayed on photos select M5.
- When you have finished the setting, press "EV/OKutton to return the menu.
Setting the TV System ( )
In this mode, you can set the TV system in NTSC or PAL.
- Press "button to display the menu."
- Use "▲" or "▼" button to select this mode (☐).
- Use "◀" or "▶" button to select "NTSC" or "PAL".
- When you have finished setting, press "button to exit."
Reset Definition (RESET)
You can reset all of the menu and button operation settings to the default settings.
- Press the "button to display the menu."
- Use "▲" or "▼" button to select this mode ( RESET)
- Press "EV"/button to reset.
- When you have finished setting, press the "button to exit."
NOTE
Do not use the "Reset Definition" mode to confirm new settings. This mode should only be used to reset the menu to the factory default settings.
Setting the Focus before Using the Self-Timer ( ^7 )
This mode only works when using the self-timer function. Before using the self-timer, you can choose from 2 types of the focus ( Ⓞ/[+], [+]/ Ⓞ) to take the photo.
- Press "button to display the menu."
- Use "▲" or "▼" button to select this mode (L);
- Use "◀" or "▶" button to select "◎/[+] " or "[+] / ◎".
- When you have finished setting, press "☐" button to exit. Now you can use the self-timer with new focus setting.
NOTE
f[+]
Using the self-timer with focus setting, then you press the "shutter" button. The camera will beep for 10 seconds. After that, the camera starts focusing and taking the photo.
[+]:/
Using the self-timer with focus setting, the camera will start focusing after you have pressed the "shutter" button. Once the focus is set, you have 10 seconds before the photo is taken.
5. Viewing the Images
Switching between Capture and Replay Mode
- Press " 🔍 " button to switch capture mode to replay mode.
- In the replay mode, you can preview and zoom in on the images.
NOTE
When the memory setting is in the external SD card mode (the SD card is in the camera), you can only view or download the images stored in the SD card. If you want to view or download the images in the internal memory of the camera, please remove the SD card first .(p. 11)
Multi-Image Replay (▶)
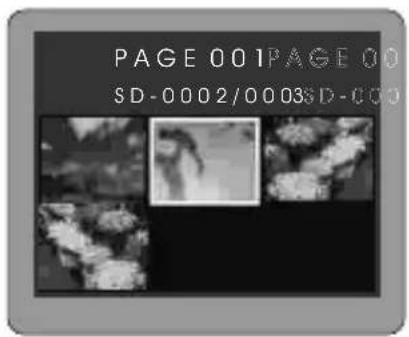
- Select the image by pressing "▲", "▼", "◀" and "▶" button to move the white line box to the desired image.
- You can enlarge the desired image by pressing the "EV/button. Select the other enlarged images by pressing "◀ and "▶" button.
text_image
PAGE 001PAGE 00 SD-0002/0003SD-000NOTE
Press the "EV" button to switch between the enlarged image and multi-image replay mode.
Auto Playback
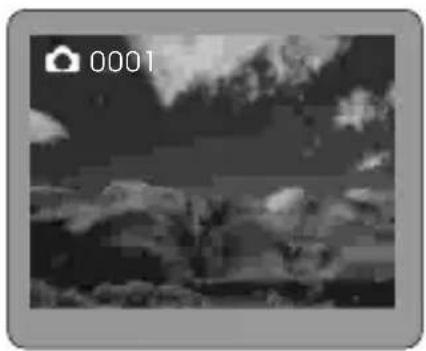
The function automatically plays all the images stored in the camera.
- In single image replay, hold on "◀" or "▶" button for 2 seconds to preview the images automatically (slides show).
- Adjust the playback speed by pressing "▲" or "▼" button.
- Press "◀ or "▶" button to pause.
- Press "EV"/button to stop this function or press "☐" button to go back to the capture mode.
natural_image
Black-and-white photo of a cloudy sky with distant buildings and clouds, no visible text or symbolsNOTE
To playback the images slowly, press the "▼" button.
The Zoom in the Replay Mode
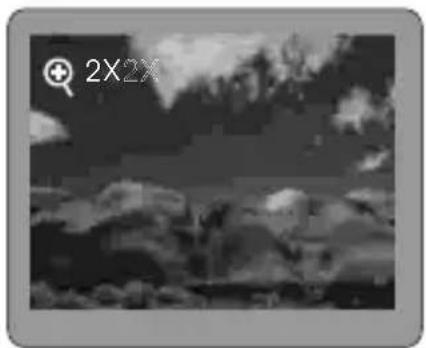
- In single image replay, the displayed image can be zoomed in and out by using the "W", "T" button.
- Select the desired photo and press "EV/OK" button to switch to the single image replay. Press W", "T" button to magnified the image. Press the", ▲", ▼" and " " button to plan the magnified
- To return to the normal mode (zoom ratio=1X), press the "W" button.
natural_image
Black-and-white photo of a landscape with trees and hills, no visible text or symbolsNOTE
The zoom ratio is displayed on the LCD monitor.
Erasing the Single Image
- In single image replay, select the image you wish to erase using "◀" or "▶" button.
- Press the "√"/button.
- Select "Yes" using "◀" or "▶" button.
- Press "EV"/okbutton to erase the image.
Protecting Images (O)
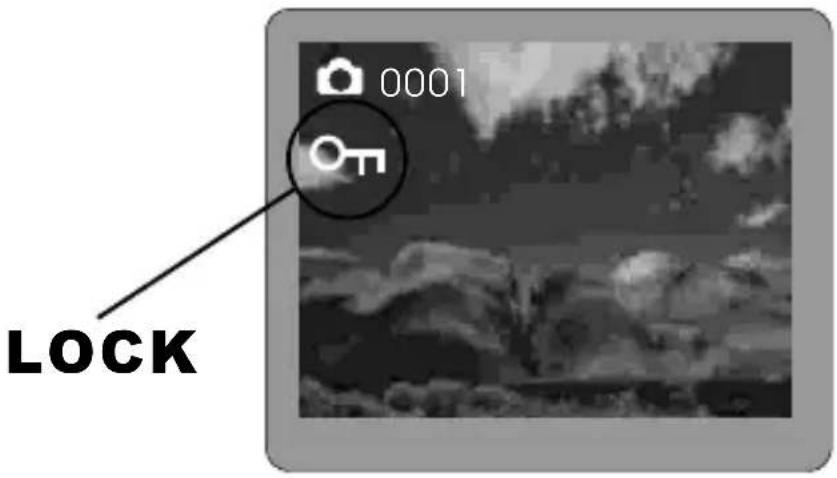
In single image replay, select an image you want to protect using "◀" or "▶" button and press "○" button. Then the image has been locked. Press "○" button again to cancel the function.
text_image
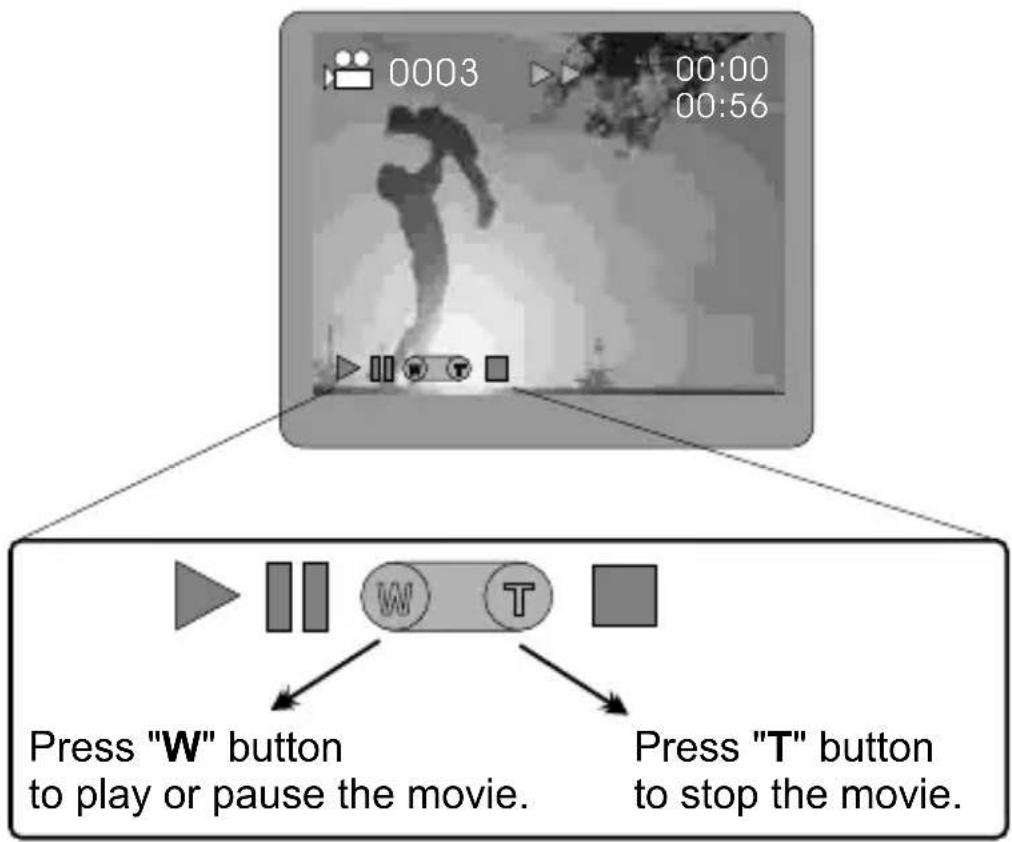
0001 LOCKPlaying Back Movies
- In single image replay, select the movie you wish to play using "◀" or "▶" button.
- Press the "W" button, the movie images will be played back. You can press the "W" button again to pause the movie.
- If you want to stop during playback, press the "T" button.
- Press the "◀" or "▶" button to continue view the other image.
- You can press 🔊" button to go back to the capture mode.
text_image
0003 00:00 00:56 Press "W" button to play or pause the movie. Press "T" button to stop the movie.NOTE
"is displayed on the movie image."
6. Capturing / Replaying with a TV Monitor
Connecting the Camera with a TV Monitor
- Turn off the camera and TV.
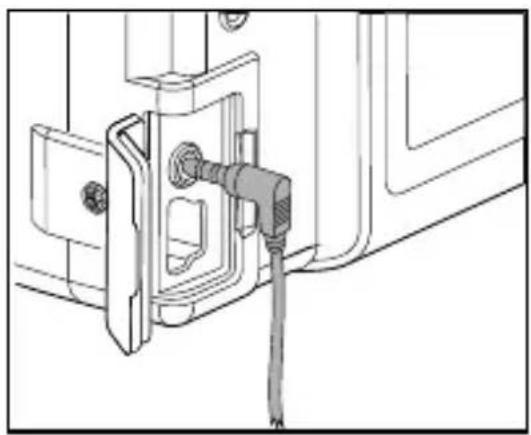
- Attach the TV cable (optional) to the video out terminal on the camera.
- Plug the other end of the TV cable to the video in jack on the TV.
natural_image
Technical line drawing of a mechanical assembly with a cable inserted into a component (no text or symbols)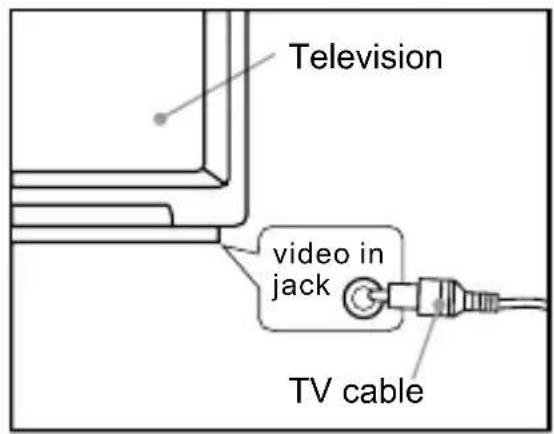
text_image
Television video in jack TV cableNOTE
The TV cable is sold separately (Model Number =1WCR648RCATVA).
Capturing the Images with a TV Monitor
- Make sure you have connected the camera to the TV.
- Turn on the TV and switch it to video mode.
- Turn on the camera in capture mode and select the type of capturing (p. 19).
- Shooting or recording the images.
NOTE
If an incorrect TV system is set, the output image will not display properly. Please set the TV system correctly . (p. 30)
Replaying the Images with a TV Monitor
- Make sure you have connected the camera to the TV.
- Turn on the TV and switch it to video mode.
- Turn on the camera in replay mode (p. 32)
- In the replay mode, you can preview and zoom in on the images.
NOTE
If an incorrect TV system is set, the output image will not display properly. Please set the TV system correctly . (p. 30)
7. Installing the USB DISK Driver
For Windows 98 only
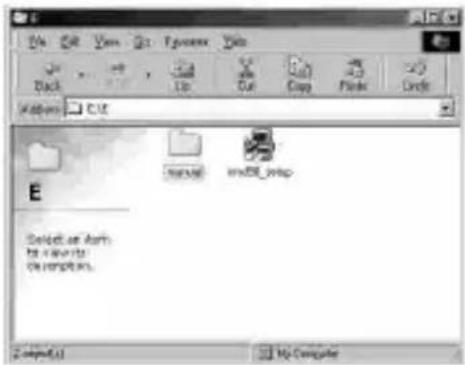
If you have Windows 98 operating system on your PC, please place the CD-ROM into the appropriate drive, then install the USB DISK driver (msd98_setup.exe) to your computer. If your operating system is Windows 2000/ME/XP, you do not need to install any driver.
- Click "msd98_setup.exe" file to install the USB DISK Driver.
- Click "Next" on the Welcome screen.
- The files will begin to copy to your computer.
text_image
File Edit View Go Process Data Back Edit Copy Print Circles Windows C:\E E Microsoft Microsoft Select an empty to access to comptives. 2004.6.1 My Computer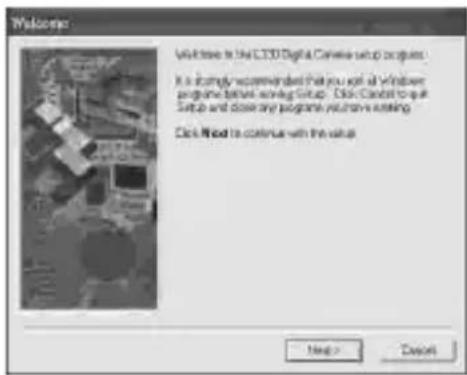
text_image
Welcome We'll have to be the LED Digital Camera setup project. It is currently recommended that you get at Windows program below running Setup. Click Card will not use Setup and close any program successfully existing. Click Wind to continue with the value Next > Cancel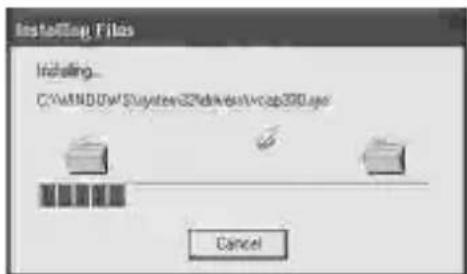
text_image
Installing Files Installing... C:\My\AND\DM\Suyaten32\delark\vocap300.exe Cancel-
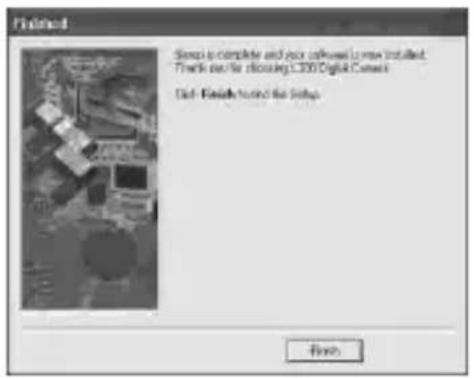
Click "Finish" to end the setup.
-
In order for the driver to take effect, you should click "OK" to restart your computer now.
text_image
Finished Semi is complete and your instructions to install. Please use for choosing L300 Digital Connects Diet: Finish turned the Setup.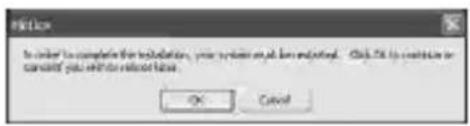
text_image
File Close In order to complete the installation, your system is all fine adjustment. Click OK to continue or continue you and do relevant future. OK Cancel8. Download Images via USB DISK
- Switch the camera to the Communication Setting mode and press the "EV/OK" button. The LCD monitor will show "INSERT CABLE" (p. 27).
NOTE
Make sure you have installed the driver first, If you have Windows 98 operating system on your PC.
- Attach the USB cable to the USB terminal on the camera.
- Plug the other end of the USB cable to the USB port on the PC.
- After a moment, Windows will find new hardware, and install the driver automatically. You will find the images as follows:
My computer / Removable Disk / DCIM / 100IMAGE
text_image
USB DISK INSERT CABLE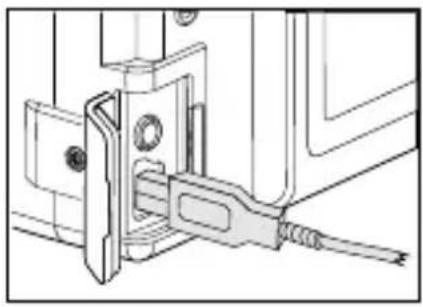
natural_image
Technical line drawing of a mechanical assembly with a tool inserted into a bracket (no text or symbols)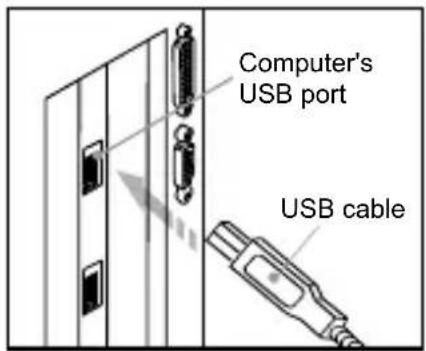
text_image
Computer's USB port USB cable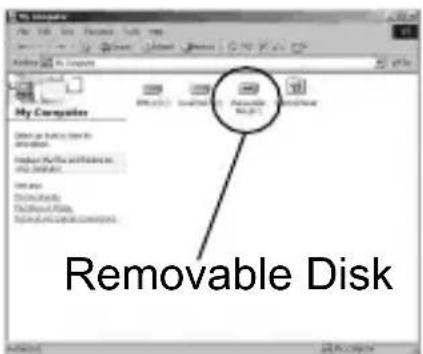
text_image
My Computer Enter as follows: Import the following: OK/Cancel Remove disk Remove disk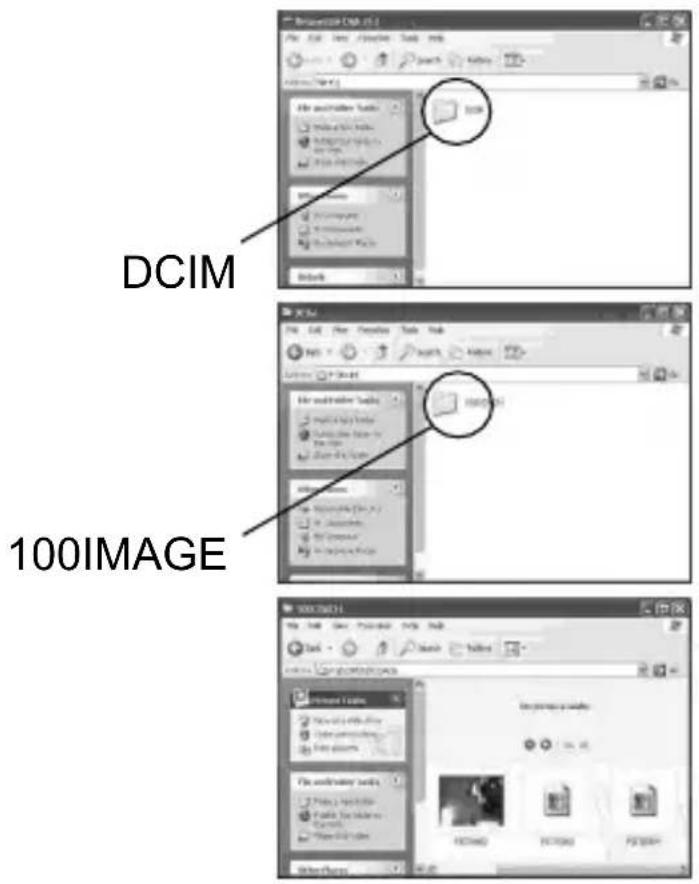
text_image
DCIM 100IMAGENOTE
When the memory setting is in the external SD card mode (the SD card is in the camera), you can only view or download the images stored in the SD card. If you want to view or download the images in the internal memory of the camera, please remove the SD card first (p. 11).
9. Appendix
Troubleshooting
| Symptom | Check this | Remedy | |
| Power supply | Power will not turn on | Battery level too low | Replace with new batteries |
| Batteries inserted incorrectly | Insert the batteries correctly | ||
| Power turns off right after turning on | Battery level too low | Replace with new batteries | |
| Shooting the pictures | Can not take a picture even if pres'sing the shutter button | Power supply not on | Turn power on |
| No space on the SD card | Delete unwanted files or insert a new card | ||
| The camera is not set to capture mode | Set to capture mode, | ||
| End of SD card service life | Insert a new card | ||
| Shooting the pictures | Can not focus | Subject is not in the center | Move the subject to the center |
| Doesn't Flash | Flash is set to "mode" | Change flash mode to "A" or " $ " | |
| Capture mode is set to "", "mode" | Switch capture mode to "mode" | ||
| Battery is exhausted | Replace with new batteries | ||
| Image appears dark | Distance too great, the flash did not reach the subject | Move closer to subject | |
| Play back | Cannot playback image or playback screen will not appear, | Mode is not set to " | Set to "mode" |
| No image data or the data is erased | Take photos | ||
| SD card is not inserted or does not contain any files | Take photos | ||
| SD card is not formatted with this camera | Format the SD card with this camera ( )p.22 | ||
| Play back | Can not delete the image | Image is protected | Unlock this image (p.34) |
| Other | No image on TV screen | Incorrect video system setting | See p.30 |
Additional Information
Technical Specifications
Sensor Resolution
2140 x 1560 CCD sensor with 3.34M pixels
Image Resolution
Still Mode :
2048 x 1536; 1024 x 768; 640 x 480 pixels
2976 x 2240 (Interpolation) pixels
Video Clip: 320 x 240 pixels
Lens
f=6\~12/24 mm (2X Optical Zoom / 2X Digital Zoom)
Focus Range
5.6 inches (0.14m) to infinity
Focus Range-Macro Mode
2.4\~5.6 inches (0.06\~0.14m)(macro mode)
Shutter
Electronic shutter, Mechanical shutter
Strobe / Auto Exposure / Continuous Shots
Yes
Video-Out
Live / Still (Preview)
Interface
Mini USB
LCD Display
TFT LCD (1.5")
Protocol
Mass storage
Technical Specifications
| Self Timer |
| 10 seconds |
| Image Type |
| JPEG |
| Image Capacity |
| SD card / Internal 8 MB flash memory |
| Power Source |
| USB 5V / AA alkaline batteries x 2 |
| Power Saving |
| Automatically power off after 30 / 45 / 60 / 120 / 180 seconds |
| Dimensions |
| 3.99"(W) x 2.17"(H) x 1.44"(D) ; |
| 101.3 x 55 x 36.8 mm |
| Weight |
| 138 g (without batteries & SD card) |
System Requirements for PC
- Windows 98 / ME / 2000 / XP
- A Pentium, Pentium II or higher PC, or compatible computer with MMX
- A hard disk with at least 200 MB space available to run the program
- At least 64 MB of RAM (128 MB recommended)
- Built-in USB port
System Requirements for MAC
- OS 9.1 or above
Maintenance and Storage
- Stop operating the camera immediately if it emits smoke or noxious fumes. Immediately turn the camera's power off, remove the camera battery. Continued use of the product may result in fire or electrical shock.
- Do not dismantle, modify or repair the camera yourself. Fire and/or electrical shock may occur as a result.
- Do not allow the camera to come into contact with, or become immersed in, water or other liquids. The camera has not been waterproofed. If the exterior comes into contact with liquids or salt air, wipe it dry with a soft, absorbent cloth.
- Do not drop or insert metal objects or combustible items inside the camera. Fire and/or electrical shock may occur as a result.
- Do not directly look at the sun through the viewfinder or use the flash near eyes. Eye injury may occur as a result.
- Do not use or store this camera in environments of direct sunlight, high humidity and dusty places, next to air conditioner, electric heater or other heat sources, in a closed car,.....etc.
- Do not use organic solvents, such as alcohol, to clean the camera. If the lens or viewfinder are dirty, use a lens brush or soft cloth. Never use your fingers.
- To prevent electrical shock, do not attempt to disassemble or repair the camera. Water may cause fire or electric shock, store in a dry place.
- Usage environment / temperature: 10 degrees celsius Usage environment / relative humidity: 45% \~80%