Anova Pro 56K-S - Lighting Rotolight - Free user manual and instructions
Find the device manual for free Anova Pro 56K-S Rotolight in PDF.


User questions about Anova Pro 56K-S Rotolight
0 question about this device. Answer the ones you know or ask your own.
Ask a new question about this device
Download the instructions for your Lighting in PDF format for free! Find your manual Anova Pro 56K-S - Rotolight and take your electronic device back in hand. On this page are published all the documents necessary for the use of your device. Anova Pro 56K-S by Rotolight.
USER MANUAL Anova Pro 56K-S Rotolight
natural_image
Top-down view of a black LED array light fixture with multiple blades and central hub (no text or symbols visible)Bi Colour (6300K-3150K) flicker-free continuous output • True Aperture Dimming™ and Designer Fade™ modes Accucolour™ technology for best in class CRI>96, TLCI 91 • Efficient V-Lock battery or Mains power Operation CineSFX™ delivers custom lighting FX on set / location • Zero Latency DMX VFX Sync with FX-Slave™

Guild of Television
Cameramen

Technical Achievement and Innovation

Technical & Scientific Achievement Award

Technical Award

The Most Intriguing Gear of the Year

natural_image
Woman sitting on a wooden stool against a dark background, wearing a gray turtleneck sweater and black leather pants (no text or symbols visible)"I LOVE THE WAY THE ANOVA LOOKS...ABSOLUTELY BEAUTIFUL"
MARK MANN, LEICA AMBASSADOR
Margot Robbie Lit by ROTOLIGHT ANOVA for Sundance Film Festival by Mark Mann
Contents
Chapter Title Page
1 TLCI & CRI 4
2 About Anova Pro 5
3 Whats in the Box 5
4 Hardware Notes 6
5 Anova Pro Basic Operation 9
6 Advanced Operation 10
7 Component Weights & 20 Dimensions
8 Technical Specificatons 21
9 F-Stop Tables 22
10 Troubleshooting 23
11 Warranty Information 23
12 Limitation of Liability 24
13 Credits 24
14 Rotolight Quality Assurance 24
Published by Rotolight
Pinewood Studios,
Pinewood Road,
Iver Heath, SL0 0NH
United Kingdom
www.rotolight.com
Tech Support: support@rotolight.com
UK +44 (0) 1753 422 750
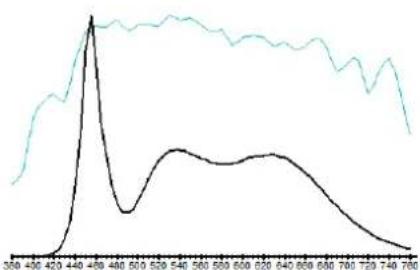
ANOVA PRO POLAR PATTERN & CRI TEST
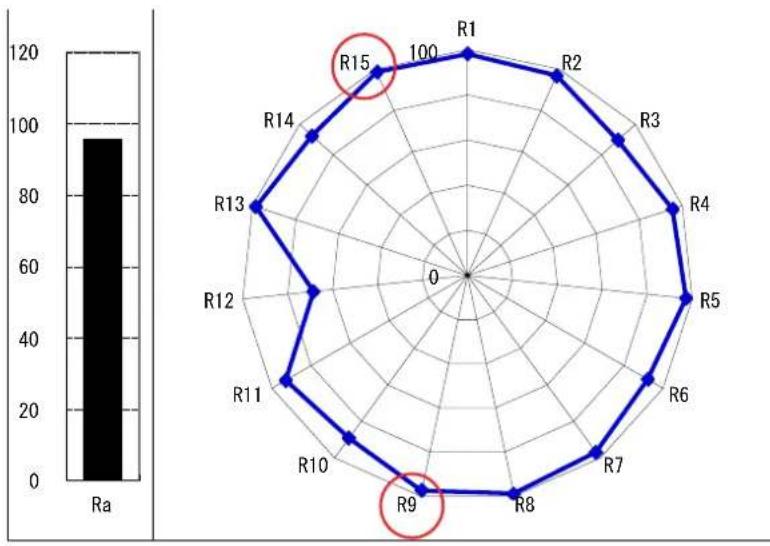
radar
| Label | Value | |---|---| | R1 | 120 | | R2 | 118 | | R3 | 115 | | R4 | 112 | | R5 | 108 | | R6 | 105 | | R7 | 102 | | R8 | 98 | | R9 | 95 | | R10 | 92 | | R11 | 88 | | R12 | 85 | | R13 | 82 | | R14 | 78 | | R15 | 75 |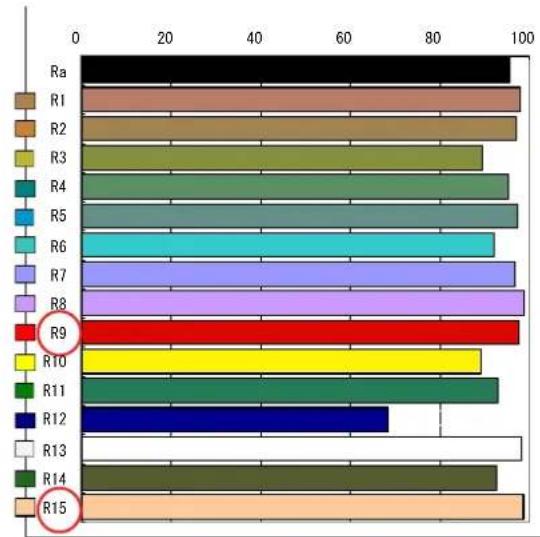
bar
| Category | Value | |---|---| | Ra | 98 | | R1 | 97 | | R2 | 96 | | R3 | 92 | | R4 | 95 | | R5 | 96 | | R6 | 93 | | R7 | 97 | | R8 | 98 | | R9 | 97 | | R10 | 92 | | R11 | 94 | | R12 | 70 | | R13 | 98 | | R14 | 94 | | R15 | 98 || x TyT | cp(JIS)Td | vJIS(US) | duv(US) | Peak Wave# | Ra | R1 | R2 | R3 | R4 | R5 | R6 | R7 | R8 | R9 | R10 | R11 | R12 | R13 | R14 | R15 |
| 0.3786 | 0.3721 | 3773 | -0.0017 | 455 | 96 | 98 | 97 | 90 | 95 | 97 | 92 | 97 | 99 | 98 | 89 | 93 | 69 | 98 | 93 | 99 |
As Cameras progress to 4K and beyond, lighting with perfect colour reproduction becomes supremely important. To meet this criteria, Rotolight have developed an LED Colour phosphor technology called Accucolour™.
Developed at Pinewood Studios, for the most demanding of professionals. ANOVA PRO™'s Bi-Colour LED system with AccuColour™ technology delivers exceptional colour rendering CRI>96, with skin tones R15 > 99. ANOVA also includes an accurate colour temperature display (CCT).
The soft-light output from ANOVA still reveals crisp skin detail when the light is used for portraiture or interviews, and ANOVA produces that Rotolight signature 'Ring-Light' Effect, perfect for artistic 'Rembrandt Style' lighting.
natural_image
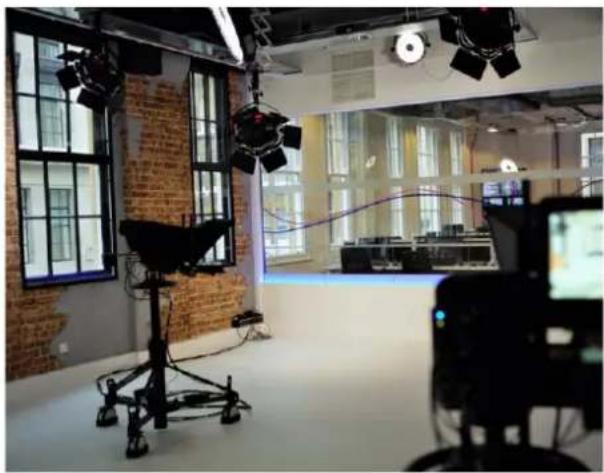
Interior of a modern studio with brick walls, overhead lighting equipment, and a camera rig (no visible text or symbols)ROTOLIGHT LED TLCI TEST
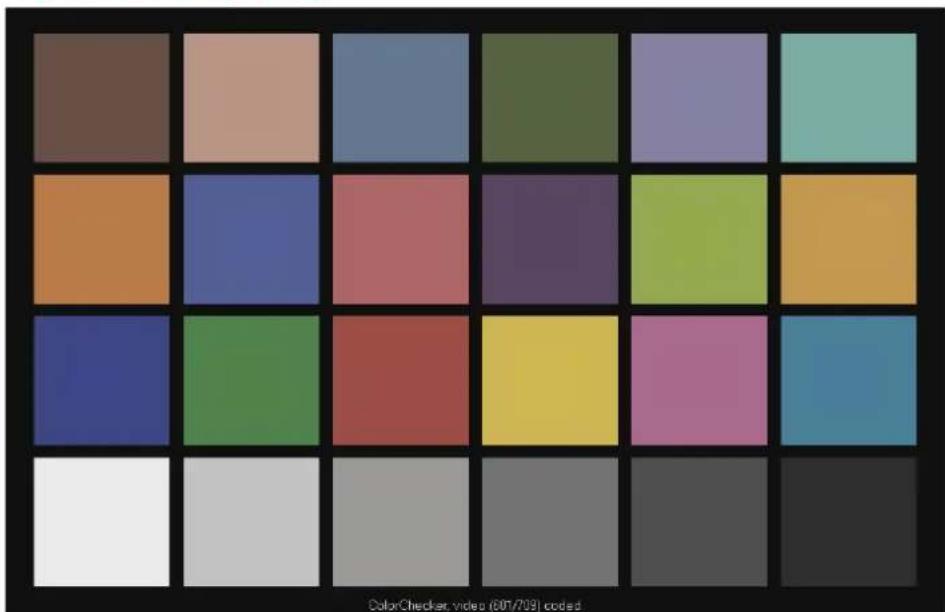
(5600): CCT = D5478 (-2.1)
TLCI-2012:91(D5478)
text_image
ColorChecker, video (007/709) codedEBU : TLCI-2012 Alan Roberts - Oc
| Sector | Lightness | Chroma | Hue |
| R | 0 | 0 | 0 |
| R/Y | 0 | 0 | - |
| Y | 0 | - | - |
| Y/G | 0 | - | 0 |
| G | 0 | - | 0 |
| G/C | 0 | 0 | + |
| C | + | 0 | 0 |
| C/B | + | 0 | ... |
| B | 0 | .. | .. |
| B/M | 0 | - | 0 |
| M | 0 | 0 | 0 |
| M/R | 0 | 0 | 0 |
line
| X Value | Black Line | Teal Line | |---------|------------|-----------| | 350 | 0 | 0 | | 400 | 0 | 0 | | 450 | 1 | 1 | | 500 | 0 | 1 | | 550 | 0 | 1 | | 600 | 0 | 1 | | 650 | 0 | 1 | | 700 | 0 | 1 | | 750 | 0 | 1 | | 780 | 0 | 1 |About the Anova Pro
Thank you for purchasing Rotolight ANOVA, the world's most advanced LED Floodlight.
Now up to 43% Brighter and featuring 'BEST IN CLASS' Colour rendering
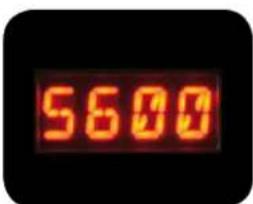
Rotolight Anova Pro is the ultimate LED studio/ location light designed for the most demanding of professionals. Now up to 43% brighter than the previous generation, Anova Pro's Bi-Colour LED system with Accucolour™ delivers exceptional colour rendering (CRI:96+), and dual controls for fast, tunable colour thanks to the accurate colour temperature display (CCT).
Anova PRO represents the pinnacle of LED technology, with many unique innovations: CINESFX™ Provides an powerful arsenal of Cinematographic Lighting FX (CineSFX) with remote trigger functionality for use on set or location, and you can use DMX to connect multiple slave ANOVAs for studio sized SFX. TRUE APERTURE DIMMING™ calculates and displays the correct aperture (F-Stop) for your subject at a given distance. DESIGNER FADE™ provides custom fade up / fade down production effects and High speed FLASH SYNC synchronizes your Anova Pro to your camera shutter release for use in a traditional photographic workflow, featuring both a colour tuneable flash and modelling light, with hyper fast sync and virtually no recycle time for maximum frame rate stills. Under the hood, ANOVA Pro continues to excel, with Dynamic Drift Stabilisation (DDS) to maintain your perfect colour temperature throughout the dimming range, and the extraordinary DMX-FAST which automatically adjust the DMX frame rate to optimise DMX performance for SFX and Flash (up to 15 times faster than normal DMX).
Powered by V-Lock or mains power, ANOVA PRO™ delivers a powerful output (up to 6545 Lux at 3 feet), whilst using 94% less energy than a standard tungsten bulb. Anova Pro delivers unparalleled versatility, superior colour rendering and gorgeous soft light output and is ideal for cinematographers, videographers and photographers alike. Available in either Bi-Colour (6300K-3150K) 'STANDARD' 50 beam angle (for greater straight line output), 110 'ULTRAWIDE' (for soft-fill, or Chromakey) or fixed colour 5600K. Optional Wifi models available separately.
What's in the Box
3
Your Anova kit includes the following:
1 x Rotolight ANOVA PRO™
1 x Yoke with standard TVMP Bracket
1 x Rotolight Universal power adapter with regional mains cable
1 x Gel Filter Holder
1 x User ANOVA PRO™ manual
1 x ANOVA PRO™ Filter pack:
1 x 216 Full Diffuser (1.5 Stops)
1 x 250 Medium, Half White Diffuser (3/4 Stops)
1 x 184 "Cosmetic Peach" Diffusion
1 x 279 1/8th Minus Green (Magenta)
1 x 249 ¼ Minus Green (Magenta)
1 x 248 12 Minus Green (Magenta)
4 Hardware Notes
text_image
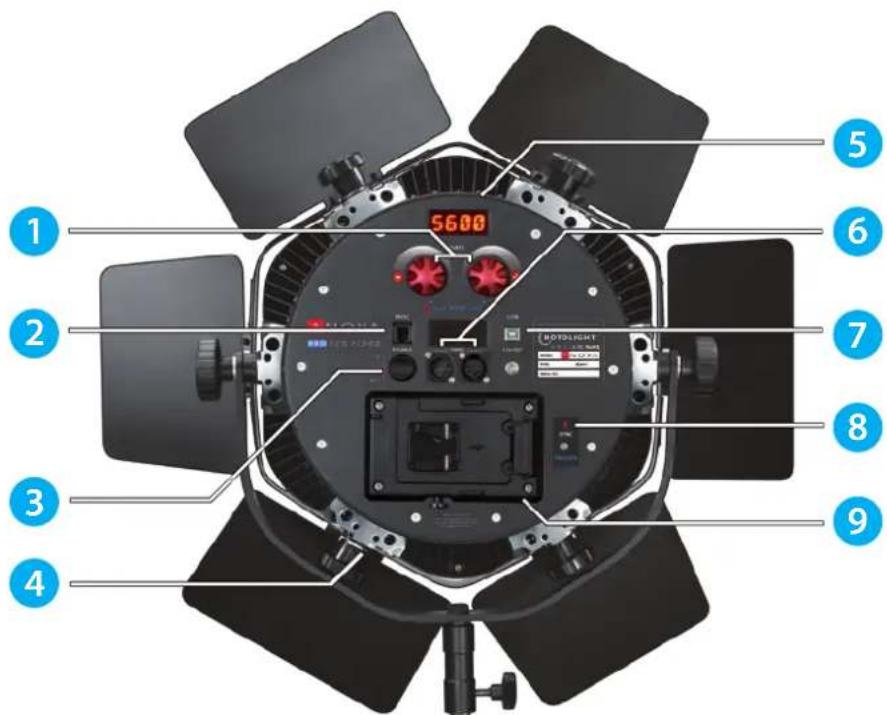
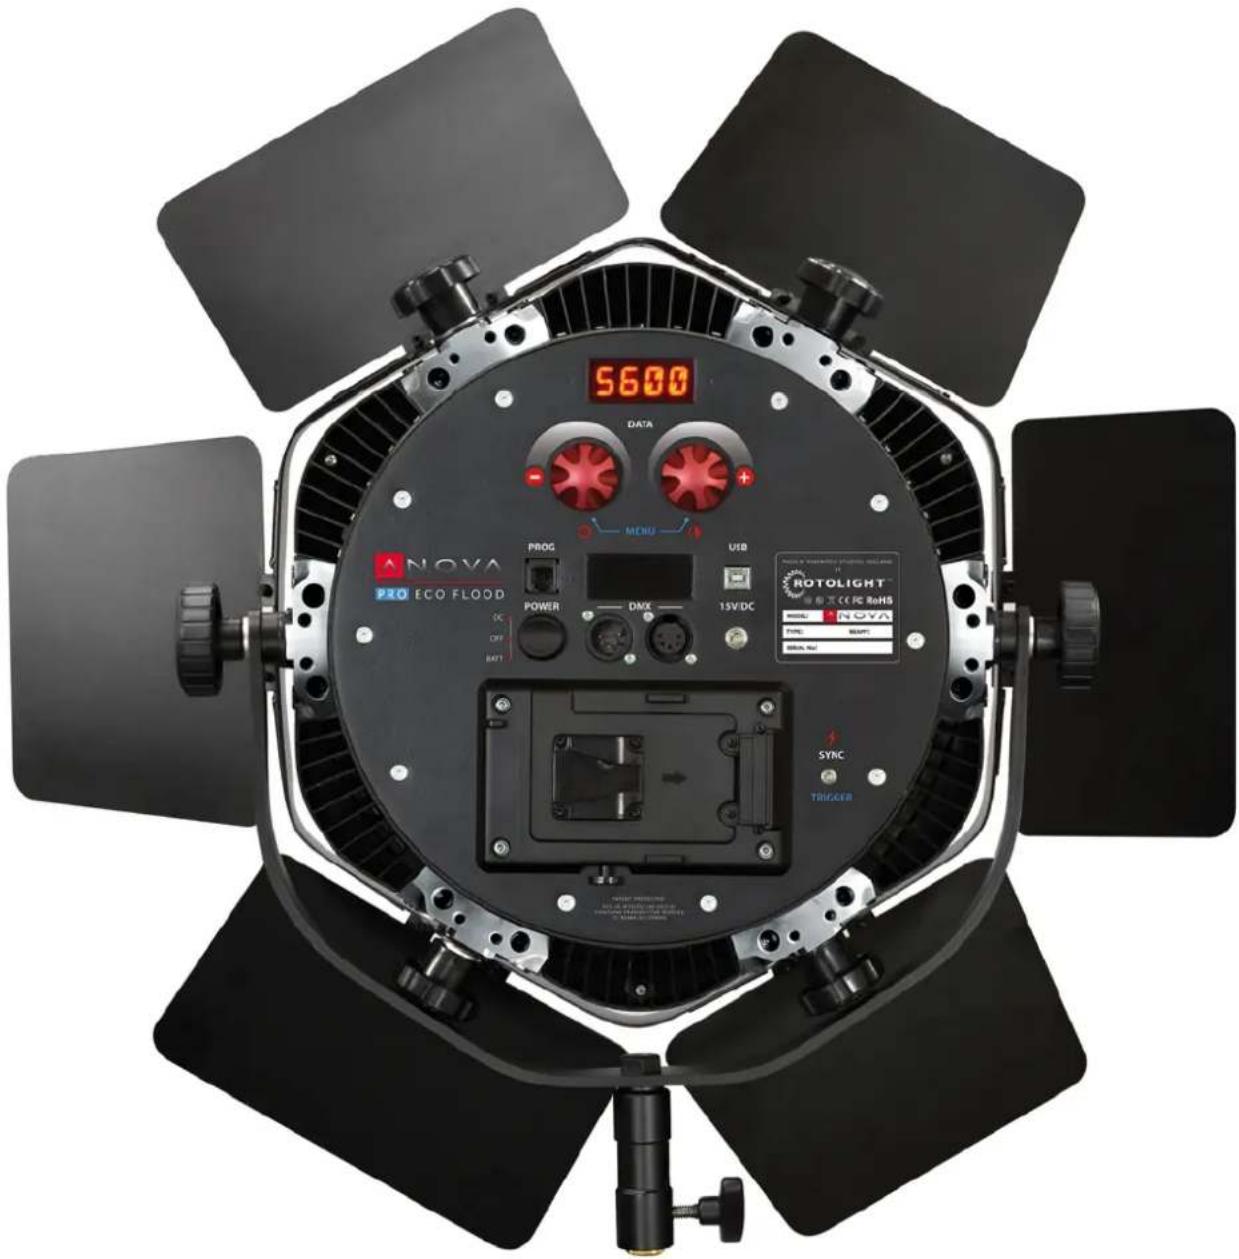
1 2 3 4 5 5600 6 7 8 91 Rotary Encoder Knobs / Switches
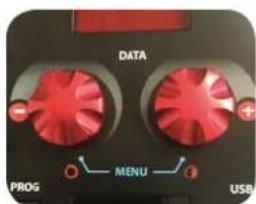
Rotate to Increase (+) or Decrease (-) displayed value. Click to select. Press, hold and rotate for 'Fast' data entry. Click both switches together to enter MENU mode. The Left Rotary knob controls Brightness (BRI) and the right knob controls colour (COL). NB: To reset the device to the Factory Default Values, Power up the ANOVA whilst holding down the encoder switch, it will display 'ZERO' (reset factory defaults), and you select either yes or no to reset the unit.
2 Firmware Programming Socket
Firmware programming socket. This is not intended for use by users, and is used to install firmware updates by the manufacturer or its distributors.
3 Power Switch
Select DC for an attached DC Input, Off, or Battery for the V-Lock Plate.
NB: you can use standard V-Lock Batteries or Anton Bauer Goldmount Batteries with a QR-A200 plate adapter
4 Utility Blocks
Use these to connect the Yoke, or Barn Doors. There are additional mounting holes on the rear face and either side of the main mounting point, these can be used to fix the T-Bar connector plates which join the lights together. ANOVA is designed with an outer 'Honeycomb' shape so it can easily be 'tesselated' into a panel/wall/ring of lights. Rotolight Inc at Pinewood Studios, England (+44 1753 422750) are happy to quote on custom Yokes for larger arrays of ANOVA lights. The ANOVA Yoke is fitted with a 'TVMP' (TeleVision Motion Picture) bracket. This will fit a standard 'Junior' Lighting support stud as used in film and television studios. The TVMP Bracket on the ANOVA has two positions for the retaining screw, The higher position is for a Junior stud, the lower position is so you can mount the Anova on a 3/8 stud on a normal studio lighting stand.
(Please check that the stand is designed to take the weight of the Anova, approximately 2.6 Kg without Barn Doors or 4.1Kg with Yoke and the Barn Doors fitted)
5 Display
This displays the Menu Item or selected value.
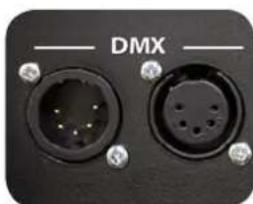
6 DMX In/Out
Connect to 3rd party devices or lighting console using standard 5 pin DMX wired XLR cable. NB: To prevent accidental damage disconnect DMX Consoles or Controller before selecting 'DMX Master Mode' on the ANOVA.
7 USB Port
The USB socket will be used in future versions of the firmware for a variety of functions but is not currently intended for use by users, please refer to www.rotolight.com for info on future updates for ANOVA Pro
DC Input Socket
Use this 2.1mm DC socket to connect the supplied 15volt 60W AC/DC converter. You can also run ANOVA from a 14.4volt D-Tap connector via this socket. Only use the recommended AC/DC adapter. Never exceed the recommended Voltage (13-17 volts DC). Make sure you use the 'XTRA Strap' cable ties to secure the Power connector / adapter to your light stand, so there is no strain on the 2.1mm DC Socket, otherwise damage may occur to the socket.
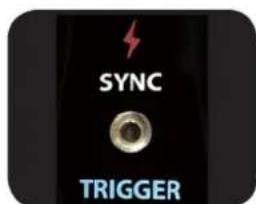
8 Flash Sync and Trigger Input Port
This 3.5mm mono jack socket allows you to connect an external wired sync or trigger input from a DSLR camera (Nikon /Canon /Sony etc), or a remote trigger device (Optical coupler, Wireless Remote Flash trigger, Flash trigger switch, etc) to the Anova Pro. It doubles as the right encoder switch, and can be used to control the FLSH (Flash) function or various trigger functions in the CineSFX menu.
The ANOVA pro can trigger within 1/2500 of a second, and has the capability of generating a flash pulse at 150% of its nominal power (approximately 10,000lux at 3ft, and has a flash guide number of 24 at ISO100 at 9 feet). You can match the colour of the flash to your ambient light settings, and you can have the Anova pro act as a modelling light whilst simultaneously flashing from your trigger input with no recycle time at any stills frame rate.
It is a universal 'fast sync' input. For full 3rd party product compatibility information check the compatibility table at www.rotolight.com
9 V-Lock Battery Plate
Connect standard (14.4 volt) V-Lock Batteries or Anton Bauer Goldmount Batteries with a QR-A200 plate adapter. To release the battery, press the button on the bottom of the plate.
text_image
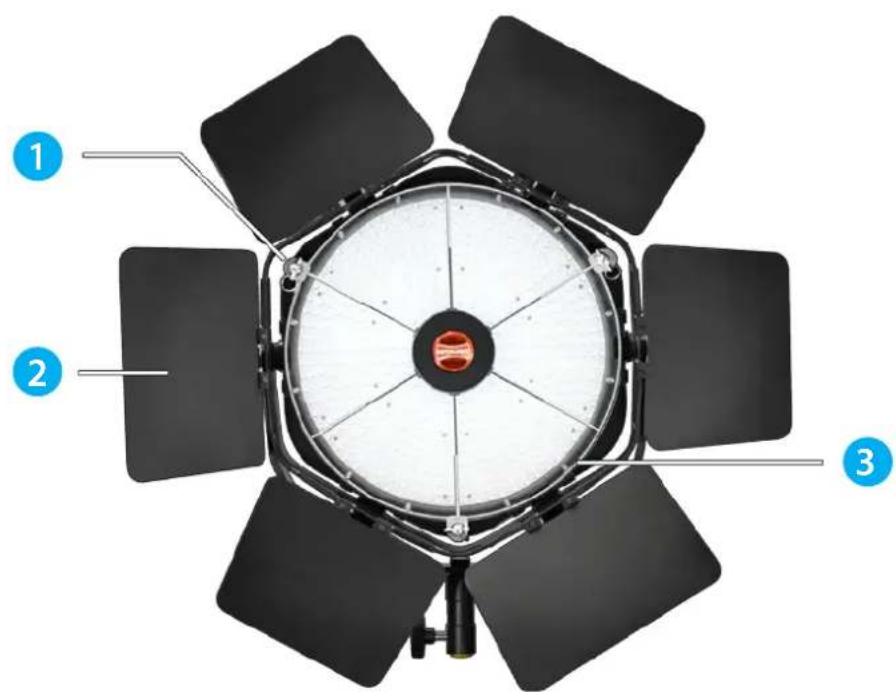
Diagram of a spherical lamp or radar system with labeled components: 1, 2, and 3.1 Accessory Mounting Spigots
The three spigots on the front face of ANOVA are used to mount the 'Gel Frame Holder' (lower position) using three 'Ball Lock Pins', and the upper mounting position is used to mount optional accessories for the ANOVA, e.g. Honeycomb Louver, SoftBox, Focussing Fresnel Filter (Available separately).
2 Barn Doors
The Barn doors install using 4 of the smaller 'soft touch' knobs on the main mounting points of the utility blocks. The six sided barn doors have two types of shutter shapes, the three shutters which become narrower at the outer edges close in first, and the three trapezoid shutters which become wider at the outer edge close in after the other types, this enables the ANOVA to create soft hexagon shaped pools of light when the doors are folded inwards. The doors can be folded 'flat' at 90 degrees to the body.
The flight case will store the ANOVA with both the Gel Frame holder and the Barn doors fitted (closed).
3 Gel Frame Holder
The 'Gel Frame Holder' mounts the spigots with the ring and spokes closest to the protective window glass, and is secured in place using three 'Ball Lock Pins' at the lowest positions on the spigots. You can carefully slide a precut filter gel underneath the Gel frame or, alternatively you can remove two of the pins and lift the frame up slightly to install the filter gel. The 'Lee' filter gels are stored in the Gel Sleeve, in the lid of the flightcase.
5 Anova Pro Basic Operation To operate ANOVA PRO you will find
To operate ANOVA PRO you will find two red rotary controls, which are also switches, and a DC on/off switch, these are all located on the rear of ANOVA PRO.
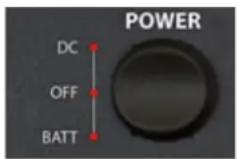
Power
To power up ANOVA PRO click the power switch (located next to the DMX sockets)
ANOVA PRO can be powered by a broadcast V-lock battery or Anton Bauer Battery with a QR200A adapter, or from a DC source in the range of 7v-15v (i.e. optional Car 12v Socket, D-TAP from a broadcast battery), or from the supplied AC Adapter. The DC switch has two positions, switch up to select an external source, or down to select the V-lock battery. NB if you are connecting an external DC source make sure the power is the correct polarity, to avoid damaging your ANOVA PRO, better still, use the supplied Rotolight adapter.
On power up, you will see 'ROTOLIGHT ANOVA PRO' scroll across the screen, you can interrupt this anytime by operating one of the control knobs.
To Power ANOVA PRO Down, click the power switch back to mid (OFF) position. NB – ANOVA PRO stores all the user settings in non-volatile RAM so it will remember your last used settings.
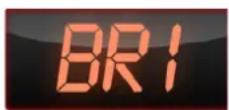
Brightness
You can adjust the brightness output of ANOVA PRO by rotating the left rotary encoder.
If you rotate the knob quickly it will speed up the data input. You can press, hold and rotate to deliberately adjust the brightness in steps of 10% (Fast Mode), or spin the control to move in hyper fast steps. Simply rotating the knob will adjust the brightness in steps of 1%.
ANOVA PRO has a dimming range of 0% -100% and is completely flicker free at any brightness level.
(NB There is a special mode called 'True Aperture Dimming' (F-DIM), available in the MENU section, which will display the brightness as an F-Stop, based on your camera exposure settings – see 'True Aperture Dimming')
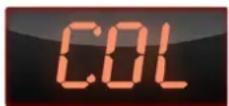
Colour
You can adjust and accurately display the Colour Temperature (CCT) of ANOVA PRO by rotating the right control knob. If you rotate the knob quickly it will speed up the data input. You can press, hold and rotate to deliberately adjust the colour in steps of 100kelvin (Fast Mode) or spin the control to move in steps of 1000 kelvin. Simply rotating the knob will adjust the brightness in steps of 10 kelvin.
ANOVA PRO has a Colour Temperature Range of 3150 kelvin (Tungsten) up to 6300 kelvin (direct daylight).
ANOVA PRO has a special technology called 'Dynamic Drift Stabilisation' which maintains the colour temperature through the entire dimming range.
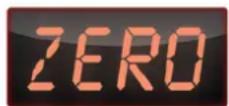
Reset
You can reset all the user parameters in ANOVA PRO's non-volatile memory by holding down one of the red control switches whilst simultaneously powering ANOVA Pro ON.
The word 'ZERO' will be displayed, select Y for yes (reset all data), or N for NO.
6 Advanced Operation You can enter the MENU mode b
You can enter the MENU mode by pressing both red encoder switches together (or clicking and holding down the left switch followed by the right control switch). If you wish to leave MENU, you can return to the basic operation (BRI / COL) by pressing both control switches together again.
In the MENU there are eight optional submenus, which you can select by rotating the left knob:- 'DISP', 'FADE', 'FLSH', 'F-DIM', 'SFX', 'CNTL', 'TECH', 'DEMO'
You can enter your selected menu function by clicking the Right switch
You can leave the selected menu function by clicking the Left switch, alternatively you can return to the basic operation mode (BRI /COL) at any time by pressing both switches together at the same
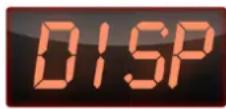
Display
Allows the display to be set to low brightness or 'off' to reduce power consumption/increase battery life or for discrete usage on set.
Click the left switch to enter 'DISP'
Rotate either the left or right knob to select the display mode:-
'High' – the display will be at full brightness
'Low' – the display will be dim, reduced power consumption
'Off' – The display will automatically switch off after 5 seconds unless a control is operated for maximum power saving or discretion on set.
Click the left switch to return to MENU, alternatively you can return to the basic operation (BRI / COL) by pressing both control switches together.
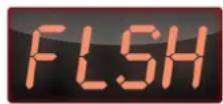
Flash with Modelling Light
ANOVA PRO is the first LED panel to be able to simultaneously act a both a modelling light and flashlight. It has a flash guide number of 24 at 100 ISO at 9 feet. It responds to flash triggers via the 3.5mm jack Flash Sync and Trigger port on the rear panel. It is a universal input and will accept flash commands from most models of camera (Nikon, Canon, Sony, etc) as well as trigger systems like wireless remotes, opto flash couplers, flash trigger switches. It has been tested to work with devices from Hahnel, Pocket Wizard, Phottix, and many others (for a full list please refer to the compatible 3rd Party Devices list at www.rotolight.com)
Start by using basic (BRI/COL) mode to match ANOVA's colour to the ambient lighting colour, and then, from the Menu Mode, enter the FLSH mode by clicking on the right switch.
Clicking the right switch (or using an external trigger via the trigger port) now triggers the Flash at 150% of the maximum nominal output level. There is virtually no recycle time so you can use very fast frame rates to trigger the flash.
Anova Pro reacts to trigger commands in 1/2500 seconds, ten times faster than 'Fast Sync' (i.e. 1/250)
You can use the right rotary control to adjust the flash duration (in milliseconds), if you accidentally set a duration that is longer than the interval between your flash triggers, ANOVA will automatically adjust the flash duration to an appropriate duration, using a Rotolight technology called Adaptive Interval Monitoring (AIM)
The left rotary control will adjust the level of the modelling light, if you want to reduce the power of the flash you can press and turn the left control to set the power output level.
To exit FLSH mode click the left switch, to exit back to basic operation click both switches at the same time.
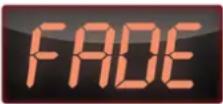
'FADE' Designer Fade™
(Programmable fade up / fade down production effects for interview/ ENG applications.)
Scroll to 'FADE'
Click the right switch to enter 'FADE' mode
Rotate the right knob to adjust the fade duration
(It will display DN (=fade down) followed by a numeral value 'X's where X = seconds of fade duration)
The fade can be from 1 to 12 seconds long.
Please note, the FADE will be a fade to zero from the current brightness level the ANOVA PRO is set to (ie if brightness is currently 80%, then fade will be 80%-0% over custom time duration).
(NB: both the last used brightness setting and fade duration parameter are stored in non volatile memory)
Once you have selected the length of the fade, Click the right switch to perform the fade, or use an external trigger via the Trigger input port jack.
You will notice the display now shows UP X s (i.e. it will now fade up to your previous brightness setting over 'X' seconds)
To fade up click the Right switch again (or external trigger)
If you only want Fade downs' use the Left switch to click out of FADE and click back in – use the right switch to perform the Fade.
Click the left switch to return to MENU, alternatively you can return to the basic operation menu (BRI / COL) by pressing both control switches together.
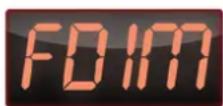
'FDIM' True Aperture Dimming™
(Shows the brightness setting as an accurately calculated aperture (F-Stop) for your subject at a given distance.)
Cycle the menu to 'F-DIM' then Click the right switch to enter 'F-DIM' mode.
Rotating the left knob cycles through the available user parameters:-
'ISO' (your camera ISO setting), 'EXP' (your camera shutter speed) and 'FEET' (the distance from the light to your subject in feet)
Rotating the right knob will adjust the selected user parameter (ISO/EXP/FEET)
Clicking the right switch will enter the 'F-Stop Dimming Display' where the brightness is dynamically displayed as an aperture or 'F-Stop
(True Aperture Dimming continued)
Adjust the brightness with the right knob and the display will show the adjusted F-Stop aperture for your camera.
(Please note the 'True Aperture Dimming ^TM ' algorithm calculates the F-Stop based on the ANOVA PRO Brightness setting, your camera's ISO and shutter speed, the distance to the subject AND compensates for the skin contrast of the subject)
To re-adjust the last selected parameter (usually FEET) click the right switch, make the adjustment, then click the right switch again to return to the 'F-Stop Dimming Display', alternatively rotate the left knob to select a different parameter to edit, and then click the right switch to re-enter 'F-Stop Dimming Display'.
This enables you to effectively 'bookmark' the active user parameter that is dynamically changing during your shoot (ie distance to subject), and without needing to re-meter the shot, update the parameter and calculate the revised F-STOP, allowing you to work fast.
You can also decide to work at a specified F-Stop, for instance F2.8, and adjust the light output to exactly match you camera settings, allowing you to compose you exposure setting for a particular depth of field, and then adjusting the light to match that setting as required. This is a novel way of working and is very useful for portraiture (i.e adjusting the light to suit the camera exposure settings rather than adjusting the camera settings to match the light!).
Click the left switch to return to MENU, alternatively you can return to the basic operation (BRI / COL) by pressing both control switches together.
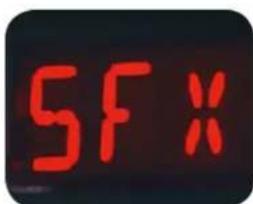
'SFX' Cinematic Special Effects
In collaboration with Stefan Lange, DOP and Visual FX Veteran, we have created an arsenal of Cinematographic Special FX (CineSFX™), these production tools are designed to complement your feature/ music video/short film.
SFX Brightness and Colour Temperature :
Please note, the current brightness level and colour temperature setting of ANOVA PRO is used by SFX mode to represent the 'peak output' level of each effect, enabling accurate metering (ie if ANOVA PRO is set to 75% brightness and 5600 Kelvin, then the lightning effect peak brightness level shall be 75% brightness at 5600 Kelvin).
Therefore, to ensure maximum SFX brightness, set ANOVA Pro to 100% brightness and 4300 Kelvin for maximum brightness in SFX mode. To do this, you can return to the basic operation (BRI / COL) by pressing both control switches together.
natural_image
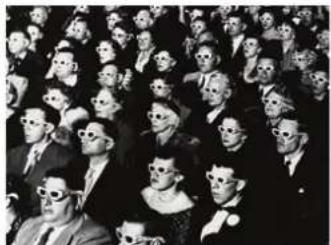
Black-and-white photo of a large group of formally dressed individuals wearing round headgear (no visible text or symbols)WARNING - HEALTH HAZARD – USE STROBE WITH CAUTION: CineSFX™ mode uses Strobe Lighting effects that may pose a risk to those at risk of photosensitive seizures/ epilepsy. Manufacturer accepts no liability or responsibility for misuse of this product. You should take all precautions to pre-warn and ensure the safety of those who may come into contact with the product. If you or any of your relatives have a history of seizures or epilepsy, consult a doctor before using. If you feel unwell from using these effects, immediately discontinue use and consult a doctor. If strobe lighting is to be used in a production, warnings should be posted at the front of house or entrance doors to the set/theater as well as in a video or program, if distributed. Example: "WARNING: Strobe lights are used during this performance".
This product is not suitable for use by children of any age and is designed for professional use only.
'SFX' Cinematic Special Effects (CineSFX™)
Rotolight have a policy of continuous product improvement and so some of the CineSFX may operate in a different way than is described here, or may be forthcoming on a future firmware update, check www.rotolight.com for details or ask your dealer.
Click the Right switch to enter 'SFX'
Rotating the left knob cycles through the available 'SFX':-
'Strb' - 'Ltng' - 'Thrb' - 'Cycl' - 'Fire' - 'Plce' - 'TV' - 'Weld' - 'Sprk' - 'Film' - 'Neon' - 'Shot' - 'Roto'
You can activate your selected SFX function by clicking the right switch
You can leave the selected function by clicking the left switch, alternatively you can return to the basic operation mode (BRI /COL) at any time by pressing both switches together at the same time.
'STRB' Strobe
The Strobe effect produces a regular flashing light, you can control the speed
Click the right switch to activate the strobe effect
Rotate the right knob to adjust the strobe speed
(It will display XX hz, where= 'XX' = number of strobe cycles per second) The strobe range is from 1hz up to 4hz. (NB: the last used strobe parameters are stored in non volatile memory). Rotate the left knob to adjust the 'duty cycle' (flash duration) to eliminate any issues with rolling shutter cameras. Click the left switch to exit the Strobe Menu and return to SFX Menu.
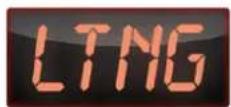
'LTNG' Lightning
The lightning effect simulates real lightning, it is a random effect but you can control the speed at which the lightning bursts re-occur, ideally you would set the brightness (BRI) to 100% and the colour (COL) temperature to 6300k
Click the right switch to activate the lightning effect
Rotate the right knob to adjust the lightning speed.
(It will display XX hz which is an indication of the effect frequency)The lighting range is from 1hz up to 50hz.
Click the right switch to arm the effect and fade to black, 'Trig' will be displayed - re-Click the right switch to trigger the effect, you can also trigger the effect from an external trigger source via the Flash Sync and Trigger port. Rotate the left knob to adjust the 'duty cycle' (flash duration) to eliminate any issues with rolling shutter cameras. (NB: the last used lightning parameters are stored in non volatile memory). Click the left control switch to exit the Lightning effect and return to SFX Menu.
(NB the duration of the lightning flashes is 20ms which is the recommended duration for cinematography, The lightning strikes come in bursts of between 2 and 8 random length pulses)
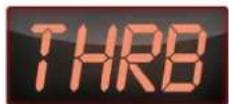
'THRB' Throb
Throb is a regular smoothly pulsing light
Click the right switch to activate the 'Throb' effect
Rotate either the left or right knob to adjust the 'Throb' effect frequency
(It will display XX hz which is an indication of the effect frequency)
The Throb range is from 1hz up to 50hz. (NB: the Throb parameters are stored in non volatile memory). Click the left switch to exit the Throb effect and return to SFX Menu.
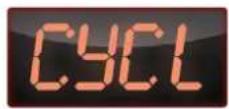
'CYCLE' Colour Cycle
Cycle is a regular smoothly pulsing light which fades between the tungsten and blue LED's Click the right switch to activate the 'Colour CYCLE' effect
Rotate either the left or right knob to adjust the 'Cycle' effect frequency
(It will display XX hz which is an indication of the effect frequency)
The Cycle range is from 1hz up to 50hz. (NB: the Cycle parameters are stored in non volatile memory). Click the left switch to exit the Cycle effect and return to SFX Menu.
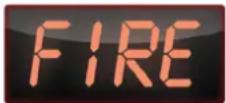
'Fire'
Fire is a complex emulation of a burning fire and it can be tuned to your requirements. Some VFX artists like to use multiple lights with slightly different settings/gels to achieve a fire with 'dancing shadows'.
NB Before activating the Fire effect you can set a brightness level and then meter 'ANOVA PRO's output which will be your peak exposure during the Fire effect. For best results preset the COL (colour temperature) to 3150kelvin.
Click the right switch to activate the 'Fire' effect
Rotate either the right knob to adjust the 'Fire' effect frequency
(It will display XX hz which is an indication of the effect frequency – around 45hz is nice for a 'campfire')
Rotate either the left knob to adjust the 'Fire' effect depth threshold (about 35% is nice for a 'campfire')
(It will display XX % which is an indication of the effect depth)
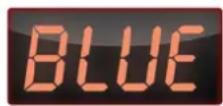
Inside the fire effect there is a switchable parameter called 'ColourSwing BLUE' which emulates the colour transition of flames going up the chimney (i.e. from yellow to blue) to activate this parameter click the right button.
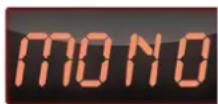
To deactivate 'Colour Swing BLUE' click the right knob again and 'MONO' (Monochrome) will be displayed.
(NB: the Fire parameters are stored in non volatile memory)
The fire effect can be enhanced with a warm colour filter included within the optional Add on Colour FX Pack (RL-NEO-CFP) available from your dealer or www.Rotolight.com ('777' 'Rust' is recommended for best impact, '182' Light Red also works well, or an Amber, half CT Straw or half CTO filter).
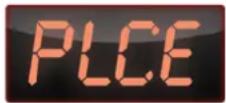
'Plce' Police
This effect is an emulation of an emergency services light – it works best by adding the 712 Bedford Blue Filter Gel included within the optional Add on Colour FX Pack or the 182 Light Red Filter.
Click the right switch to activate the Police effect
Rotate either the left or right knob to adjust the Police beacon speed
(It will display XX hz, which will give you an indication of the effect speed)
(NB: the Police parameters are stored in non volatile memory). Click the left switch to exit the Police effect and return to SFX Menu.
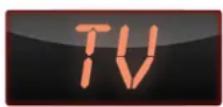
'TV' Television
This effect is an emulation of someone watching a TV show – it works best by setting the colour temperature to 6300K or adding the 116 Medium blue/green filter from the Add on Colour FX Pack.
Click the right switch to activate the TV effect
Rotate either the left or right knob to adjust the TV effect speed (It will display XX hz, which will give you an indication of the effect speed)
Click the right switch to pause the effect / fade to black - 'Trig' will be displayed - re-Click the right switch again to Trigger the effect. You can also trigger this effect from a trigger connected to the flash sync port (NB: the TV parameters are stored in non volatile memory). Click the left switch to exit the TV effect and return to SFX Menu.
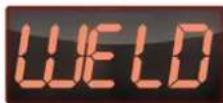
'Weld'
This effect simulates the light from an electric arc welding torch.
To enter the effect press the right switch. The right rotary control varies the speed of the effect. The right switch starts / stops the effect, or you can also start/stop the effect via the external trigger port.
A key characteristic of the arc welding process is the electric blue arc flame and the orange sparks, you can use the left rotary control to set the balance between the two components of this effect.
To exit the effect press the left switch, or to exit back to basic BRI/COL operation press both switches together.
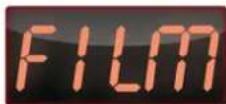
'Film'
The 'Film' SFX effect is designed to simulate the light coming from a celluloid film projector in a movie theatre. To enter the effect click the right switch. You can start stop the effect using the right switch or an external trigger from the Flash Sync and Trigger port. The right rotary control changes the speed of the movement on the screen. The left rotary control changes the the speed of the flicker frames emulating the sprocket fed film.
To exit this effect press the left switch, to exit back to basic (BRI/COL) operation press both left and right switches together.
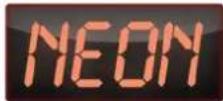
'Neon'
This effect is used to simulate a faulty NEON fixture. To enter the effect click the right switch. Use the right switch to start/stop the effect, alternatively use the sync/tigger input port to externally start/stop the effect.
The right rotary encoder controls the flicker speed of this effect.
To exit the effect press the left switch. To exit to BRI/COL operation press both right and left switches together.
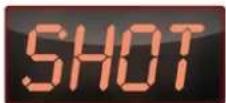
'Shot'
This effect simulates the light produced when a gun is fired.
Enter the effect by pressing the right switch. Trigger the effect by pressing the right switch, or trigger the effect externally via the Trigger Port. Control the decay time of the gunshot using the right rotary control. Use the left rotary control to control the 'colour swing' of the fire coming from the muzzle, I.e. Rotate right (clockwise) to set a blue to orange value, or rotate left (anti-clockwise) to select an orange to blue value
To exit the effect, press the left button, or to exit back to basic BRI/COL operation press both switches.
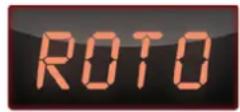
'ROTO' (Rotary Special Effects)
The submenu set of ROTO SFX are designed to offer VFX Designers something uniquely different even experimental. Because ANOVA PROs can address each set of LEDs individually, we have made a set of SFX tools that offer some unique spinning lighting effects for VFX designers, of particular note is the spooky shadowing that is created by many of the ROTO FX, which lend themselves well for Drama/Horror productions.
Click the right switch to enter the ROTO SFX, click the Left switch to exit, use the left rotary encoder to select the desired ROTO effect.
The ROTO spinning FX comprise the following:-
Seg1: creates a single spinning LED segment. The right rotary controller adjusts the speed of the effect. The right switch changes spin direction.
Seg2: creates a double spinning LED segment. The right rotary controller adjusts the speed of the effect. The right switch changes spin direction.
Seg3: creates a triple spinning LED segment. The right rotary controller adjusts the speed of the effect. The right switch changes spin direction.
Seg4: creates a quadruple spinning LED segment. The right rotary controller adjusts the speed of the effect. The right switch changes spin direction.
Seg5: creates a quintuple spinning LED segment. The right rotary controller adjusts the speed of the effect. The right switch changes spin direction.
NUKE: is a three bladed spinning propellor effect similar to a large industrial extractor fan. The right rotary controller adjusts the speed of the effect. The right switch changes spin direction.
PROP: is a two bladed spinning propellor effect similar to a light aircraft. The right rotary controller adjusts the speed of the effect. The right switch changes spin direction.
WIPE: A single segment Rotates around the Anova face. It either fills or darkens each LED segment sequentially. The right rotary controller adjusts the effect speed. The right switch (or trigger input) reverses the direction.
You can also use an external trigger via the sync trigger port to change the spin direction of any of the spin effects.
Use the left switch to exit the ROTO effects, or use both left and right switches together to return to the normal BRI/COL operation.
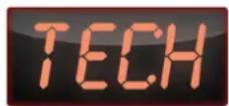
Technical Utilities
This set of functions are utilities designed to enhance ANOVA's operation. They include 'VOLT', 'TEMP', 'CAL' and 'VERS'.
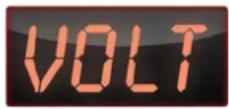
Voltage
VOLT mode will scroll display the voltage from the selected power source. (e.g '9.4V BATTERY' or '15.2V DC IN'). Please note ANOVA PRO will automatically give you a warning if the voltage drops too low which indicates a battery change is needed (e.g. 'Low Battery'). ANOVA PRO will also put a blinking dot on the bottom right of the current display to indicate Low Battery Voltage whilst reducing the output by progressive steps of 10% until voltage stabilises to eliminate flicker.
ANOVA PRO will operate from 6V DC up to 17.5V DC and draws up to 48 watts at full power. Only connect external power sources with the correct polarity and voltage to avoid serious damage to ANOVA PRO.
(In 'VOLT' mode, to check your battery performance in action, you can click the right switch and then rotate the left knob to observe the actual battery voltage during the range of dimming)
Click the left switch to return to MENU, alternatively you can return to the basic operation (BRI / COL) by pressing both control switches together.
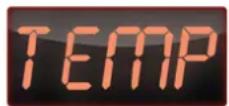
Temperature
Click the left switch to display the internal operating Temperature of ANOVA PRO. NB: if ANOVA PRO detects the battery temperature rising to 58 degrees or above, it will display 'Too Hot' (touch any knob to clear message) and automatically cut the output down to 25% to prevent overheating.
(Please use only quality battery systems inside ANOVA PRO)
Click the left switch to return to MENU, alternatively you can return to the basic operation (BRI / COL) by pressing both control switches together.
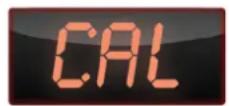
Calibrated Colour
This mode allows you set a special colour setting that is outside of ANOVA's normal COL range. The left knob controls the yellow tungsten LED channel, and the right knob controls the Daylight LED Channel. Using this software tool together with an external colorimeter (e.g. Sekonic C-700), you can adjust the two channels to create custom colour settings in the range of 2900kelvin up to 7000kelvin (+/- 300kelvin)
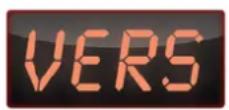
Firmware Version
Click the left switch to display the firmware version installed in your ANOVA PRO.
(NB The firmware can be updated if required by your Rotolight Distributor via the update port in the battery compartment)
Click the left switch to return to MENU, alternatively you can return to the basic operation (BRI / COL) by pressing both control switches together.
Filter Information
ANOVA PRO's Filters have a diameter of 304mm and a 40mm hole in the centre, so it is easy to cut your own.
A filter holder is included with ANOVA PRO.
ANOVA PRO ships with a standard filter pack consisting of :-
216 Full Diffuser
250 Half Diffuser
184 'Cosmetic Peach'
(Cosmetic diffuser for softer skin tones)
279 1/8th Magenta (or Minus Green)
249 1/4 Magenta
248 1/2 Magenta
There is an optional add on 'Colour Filter Pack' which is highly recommended for use in conjunction with CineSFX™ mode, consisting of 10 Colour FX Filters, the first five (255, 791, 103, 162, 061) have been recommended by Visual FX Veteran and DOP Stefan Lange:-
255 'Hollywood Frost'
(Soft gentle Diffuser with minimal light loss)
791 'Moroccan Frost'
(warm Cosmetic Diffuser for darker skin tones)
103 Straw
(Light sunshine FX, or subtle Fill/Hair Light FX)
162 'Bastard Amber'
(warm very popular amber filter.eg sunshine)
061 'Mist Blue'
(great for moonlight FX)
The optional 'Colour Filter Pack' also includes the following five popular colour FX filters :-
116 'Medium Blue Green'
(Great for simulating Fluorescent, or a TV glow)
712 'Bedford Blue'
(Excellent blonde hair light, or "Police" light SFX)
128 'Bright Pink'
(Excellent as a hair light for Blonde/ Brunette)
182 'Light Red'
(Excellent as a hair light for Brunette)
777 'Rust' rich warm burgundy red
(Recommended for use with 'Fire' CineSFX)
Mounting
ANOVA PRO has a TVMP bracket (TeleVision Motion Picture) on its Yoke which is compatible with 'Baby' 5/8ths and Junior studs found on common lighting stands and C-Stands. When mounting Anova on to a gantry or lighting trusses please use a safety cord to prevent accidental injury from lighting fixtures falling.
ANOVA PRO can be mounted directly onto standard tripods or lighting stands.
Batteries
ANOVA Pro will operate from a DC voltage of 6 volts up to 18 volts. Best performance is with Rotolight Lithium Ion V-Lock Batteries. high performance lithium AA batteries, or high performance rechargeable AA batteries but you can also use professional alkaline AA Recommended batteries:
Rotolight Lithium ion 100mAh V-Lock Batteries(available from www.rotolight.com)
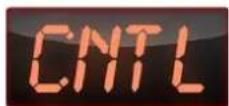
Control Mode
ANOVA Pro offers two control methods:
Local Control
Displayed as LOCL, this mode allows control via the backplate rotary encoders and switches.
DMX Control
This mode allows control via a DMX device (i.e. DMX Lighting Desk) wired through the DMX input.
In addition, ANOVA can be set to act as a DMX Master Controller and output the Brightness and Colour (BRI/COL) settings from Rotary controllers and some of the effects via the selected DMX -bri (brightness channel #) and -col (colour channel #), (this is DMX Master Mode)

NB: CONNECTING WIRED DMX INPUTS FROM AN EXTERNAL DMX CONSOLE MAY CAUSE DAMAGE TO THE ANOVA IF DMX MASTER MODE IS SWITCHED ON.
DMX Menu
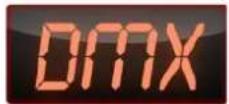
In the DMX Menu you can select the channels that will control ANOVA's brightness (-bri) and Colour (-col). Simply select the function that you wish to edit and enter the channel number using the encoder knob. Each channel is set separately.
Additionally you can set DMX Master Mode to -on or -off. Now ANOVA Pro behaves as a 2 channel master DMX controller and can be used to control other ANOVAs or 3rd party lights via wired DMX cables on the selected -BRI and -COL DMX channels.
DMX Master mode allows you to connect legacy 3rd party equipment to the DMX wired output and control it using the rotary controllers on the ANOVA pro.
DMX Master mode can be used to create a wired DMX512 'universe' from your ANOVA Pro To summarise, you can set the channels for DMX control of brightness and colour in the DMX Menu. You can also activate DMX Master Mode, which in turn will transmit the right and left controller data and selected SFX data from the DMX output port on the back of ANOVA pro.
To create a wired universe consisting of an ANOVA PRO master (in DMX Master Mode) and ANOVA / ANOVA Pro DMX Slaves do the following :-
- On the Master ANOVA Pro, select CNTL / 'DMX' - Mstr - On
- On the master ANOVA Pro, select your desired DMX channels in CNTL / 'DMX' - Bri (Channel Number), and -Col (Channel Number)
- On the wired DMX Slave ANOVA's, select 'CNTL' - Mode dmx
- On the wired DMX Slave ANOVA's, set the same DMX channels in CNTL / 'DMX' - bri, and -col.
Make sure none of the slaves are in DMX Master Mode
Make sure you use quality 5 pin XLR DMX cables and have a DMX terminator at the end of the DMX daisy chain.
To summarise, you can set the channels for DMX control of brightness and colour in the DMX Menu. You can also activate DMX Master Mode, which will allow you to control/sync other Anovas or third party lights from the encoders, fade, flash and certain SFX. You must choose CNTL - DMX if you wish for ANOVA to be controlled via wired DMX or via DMX Master mode.
7 Component Weights & Dimensions
| CRI (Colour Rendering Index) CRI=> 96 | |
| Beam Angle Flood -110 degrees or 50 degrees | |
| Variable Colour Temperature Range 31 | 50K to 6300K |
| Lighting System Bi Colour LED | |
| Equivalent Output 4100 Watt Tungsten Bulb Equivalent | |
| Power Consumption 48 Watts at full power | |
| Operating Temperature -15degrees to +40degrees Celsius | |
| PSU Operating range 100V AC to 250V AC output 15V DC at 60W | |
| Dimensions W 340mm x H 380mm x D 55mm (w/ barn doors fitted) |
Component Weights
| Anova 2590g (2.59kg) | |
| Yoke 440g (0.44kg) | |
| One piece yoke with knobs | 610g (0.6kg) |
| Anova with Yoke, and knobs 3202g (3.2kg) | |
| Flight Case | 7100g (7.1kg) |
| Case filled with Anova, yoke, PSU and AC cord | 8530g (8.53kg) |
| Filter Sleeve Set | 90g (0.9kg) |
| Power Supply and AC Cord | 500g (0.5kg) |
| Barn Doors and fixing knobs | 1500g (1.5kg) |
Optional Accessories
• 'Anton Bauer' Dionic Battery Bundle / Rotolight Battery Bundles
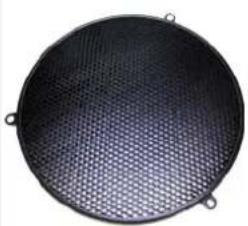
• Hexagonal Honeycomb louver
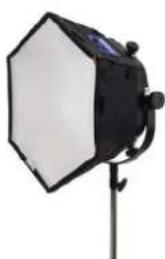
- SoftBox, Snoot and SnapGrid
• T-Bar Mounting plate
• V-Bracket for joining lights
- Double Yoke
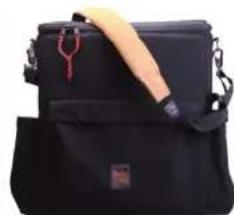
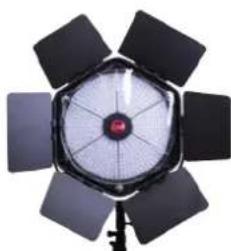
• Portabrace Rain Cover and Soft Carry Bag
• Replacement Filter Pack / Colour Filter Pack
• Masters Kit (Barn Doors & Flight Case)
• Hexagonal Barn Doors
• Bespoke Custom Yokes and Mounts on request
natural_image
Circular black mesh fan or cover with four small holes, no text or symbols visibleHONEYCOMB LOUVER
natural_image
Black backpack with a yellow strap and red handle, no visible text or symbolsPORTABRACE
SOFT CARRYING CASE
natural_image
Top-down view of a double-lit studio lighting fixture with multiple blades and central hub (no text or symbols visible)PORTABRACE RAIN COVER
natural_image
Studio lighting equipment with hexagonal frame and stand (no visible text or symbols)CHIMERA SOFT BOX
natural_image
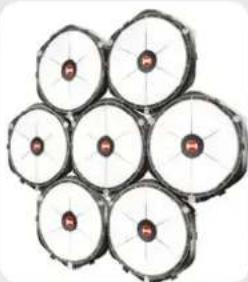
Circular arrangement of six identical circular objects with central dots, resembling mechanical or industrial components (no text or symbols visible)DOUBLE YOKE & HEX RING
8
Technical Specifications:
| ROTOLIGHT ANOVA PRO BI-COLOUR 'STANDARD' | ROTOLIGHT ANOVA PRO BI-COLOUR 'ULTRAWIDE' | ROTOLIGHT ANOVA PRO 5600K 'FIXED COLOUR' | |
| MODEL SKU | RL-ANVPRO-BI-S | RL-ANVPRO-BI-W | RL-ANVPRO-56K-S |
| BEAM ANGLE | 'Standard' 50 Degree' | 'Ultrawide' 110 Degree' | 'Standard' 50 Degree' |
| COLOUR TEMPERATURE RANGE | Electronically Adjustable from 3150K - 6300K | Electronically Adjustable from 3150K - 6300K | Fixed 5600K (+/- 100K) - Correction filters supplied to achieve 6300K, 4400K or 3200K |
| TLCI Television Lighting Consistency | 91 | 91 86 | |
| OVERALL CRI (Ra) | CRI=> 96(Skintone R15CRI=99) | CRI=> 96(Skintone R15CRI=99) | CRI=> 91(Skintone R15CRI=99) |
| GUIDE NUMBER | GN 24 @ ISO 100 @ 9ft | GN 9.63 @ ISO 100 @ 9ft | GN 24 @ ISO 100 @ 9ft |
| LUX AT 3 FEET ** (0.9m) FOOT CANDLES (fc)LUMENf-STOP at ISO 200/400/800 | 6280 Lux(583 fc)3091 Lumensf8 / f11 / f16 | 1800 Lux(167 fc)4032 Lumensf4.0 / f5.6 / f8 | 6910 Lux(642 fc)3401 Lumensf8 / f11 / f16 |
| LUX AT 6 FEET ** (1.8m) FOOT CANDLES (fc)LUMENf-STOP at ISO 200/400/800 | 1760 Lux(164 fc)3466 Lumensf4.59 / f6.5 / f9.19 | 537 Lux(50 fc)4807 Lumensf2.14 / f3.03 / f4.29 | 1950 Lux(181 fc)3835 Lumensf4.59 / f6.5 / f9.19 |
| LUX AT 9 FEET ** (2.7m) FOOT CANDLES (fc)LUMENf-STOP at ISO 200/400/800 | 857 Lux(80 fc)3795 Lumensf3.73 / f5.28 / f7.46 | 270 Lux(25 fc)5442 Lumensf1.57 / f2.22 / f3.03 | 933 Lux(87 fc)4017 Lumensf3.73 / f5.28 / f7.46 |
| POWER CONSUMPTION@100% OUTPUT | 48 Watts at@100% Output | 48 Watts at@100% Output | 51 Watts at@100% Output |
| CONTROL | Local, DMX or Wifi Via Magic Eye App for iOS, Flash Sync and trigger input | ||
| WEIGHT | 2.47kg (3.34 Kg with Yoke), 4.78Kg with Yoke and Barn Doors | ||
| DIMENSIONS | 440mm (Width) x 493mm (Height) x 107mm (Depth) | ||
| MOUNTING | Via Standard TVMP Bracket on Yoke or M8 via Utility Block | ||
| INCLUDED FILTERS | 216 Full Diffuser, 250 Medium Diffuser, 184 Cosmetic Peach, 279 1/8 Minus Green, 249 1/4 Minus Green, 248 1/2 Minus Green | ||
* Based on calculation by 'The Lumen Coalition' of leading Lighting manufacturers and Government Bodies, where the agreed tungsten standard is 1 watt produces 16 Lumens in 360 degree beam angle. ** Measured at peak output 4500K Bi-colour or 5600K (fixed colour), brightness will vary with colour temperature and accurate to +/- 10%
9
Guide Number + F-Stop Tables
Bi Colour 50 degree at midpoint 4300K
| Distance (ft) | 3 | 6 | 9 | 12 | 15 | ||||
| ISO | F number | F number | F number | F number | F number | ||||
| 100 | 5.6 (2) | 2.8 (3) | 2.0 (8) | 1.4 (5) | 1.4 (1) | ||||
| 200 | 8 | 4.0 (4) | 2.8 (8) | 2.0 (5) | 2.0 (1) | ||||
| 400 | 11 | 5.6 (4) | 4.0 (8) | 2.8 (5) | 2.8 (1) | ||||
| 800 | 16 | 8.0 (4) | 5.6 (8) | 4.0 (5) | 4.0 (1) | ||||
| 1600 | 22 | 11.0 (4) | 8.0 (8) | 5.6 (5) | 5.6 (1) | ||||
| 2500 | 22 (7) | 16 (1) | 11.0(4) | 8.0 (2) | 5.6 (8) | ||||
( ) = tenths of an fstop
Note: Square root of 2 = 1.414 . F/stop = 1.414 (stop number + fraction) e.g. two tenth stops past f11 (stop number 7) is 1.414^7.2 = f/12.125
Guide Numbers & Actual Calculated fstops at tenths of an fstop
| Distance (ft) | 3 | GN | 6 | GN | 9 | GN | 12 | GN | 15 | GN |
| ISO | F number | F number | F number | F number | F number | |||||
| 100 | 5.86 | 18 | 2.93 | 18 | 2.64 | 24 | 1.68 | 20 | 1.46 | 22 |
| 200 | 8 | 24 | 4.59 | 28 | 3.73 | 34 | 2.38 | 29 | 2.07 | 31 |
| 400 | 11 | 33 | 6.5 | 39 | 5.28 | 48 | 3.36 | 40 | 2.64 | 40 |
| 800 | 16 | 48 | 9.19 | 55 | 7.46 | 67 | 4.76 | 57 | 4.14 | 62 |
| 1600 | 22.6 | 68 | 13 | 78 | 10.6 | 95 | 6.73 | 81 | 5.86 | 88 |
| 2500 | 28.8 | 86 | 16.6 | 100 | 13 | 117 | 8.57 | 103 | 7.46 | 112 |
| GN = Guide Number |
10 Troubleshooting
I have attached a battery but the unit does not power up?
Check that the power switch is set to 'BATT' and not 'OFF' or 'DC IN'.
I have attached the AC to DC Adapter but the unit does not power up?
Check that the power switch is set to 'DC IN' and not 'OFF' or 'BATT'.
I want to use an Anton Bauer battery with my ANOVA, how does it fit?
You need to get an Anton Bauer QR-A200 adapter plate, available from your dealer or the Rotolight online store.
My ANOVA has powered up but when I try to adjust the brightness or colour using the encoder knob, nothing changes?
The CNTL (control) needs to be set to -LOC (local), not DMX.
I used a standard photographic colorimeter to check the colour of light on my ANOVA and it did not seem to give me a sensible reading.
Most colorimeters are not designed to accurately measure the light colour from LED's. The ANOVAs are all calibrated using a Sekonic C-7000 colorimeter which is specially designed to accurately measure LED light sources.
I attached an Anova DMX slave but it does not respond.
Check that your master Anova is in DMX/MSTR mode 'ON' and your slave is set to the same DMX channels and is in CNTL/DMX with MSTR mode switched 'OFF'.
11 Warranty Information
Manufacturer will extend Distributor and its customers a Limited manufacturer's Product Warranty of 1 Year on Manufacturers Products from date of purchase. Distributor agrees that this warranty shall not include General 'wear and tear', and shall be invalidated by tampering with, dropping or damaging the product or misuse. The Manufacturer's Products warranty will specifically not include the tearing or damage to filter Gels, unless immediately reported upon delivery, water damage to the unit, battery acid damage to the unit, stress fractures to the unit or filter holder (unless reported on delivery), or disconnection of wires (unless reported on delivery). This warranty is subject to the manufacturer standard terms and conditions available on request. Rotolight strives to continually improve its products. We therefore reserve the right to modify the specifications and designs discussed herein.
Register online now to activate your warranty at www.rotolight.com/register
12 Limitation of Liability
The liability of the Manufacturer or Distributor, if any, for damages for any claim of any kind whatsoever with regard to any order placed for the Manufacturers products, regardless of the delivery or non-delivery of the Products, or with respect to the Products covered thereby, shall not (except in respect of liability for death or personal injury caused by Manufacturers or Distributor's negligence or in the case of fraud) be greater than the actual purchase price of the Products with respect to which such claim is made. Under no circumstances shall the Manufacturer or Distributor be liable for injury or harm caused by product misuse or compensation, reimbursement, or damages on account of the loss of present or prospective profits, expenditures, investments, or commitments, whether made in the establishment, development, or maintenance of business reputation or goodwill or for any other reason whatsoever.
13 Credits Conceptual
Conceptual Design and Imagineering Rod Gammons
Artwork Robert Turner
SFX Consultant Stefan Lange
D.O.P & Visual FX Veteran
(James Bond, Notting Hill)
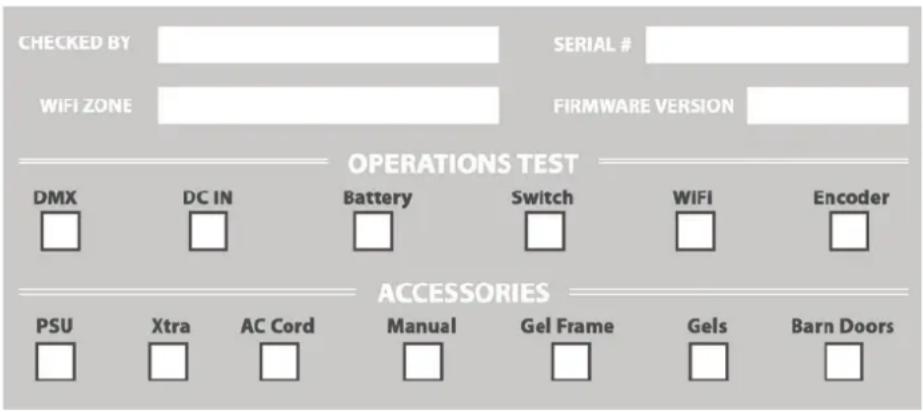
14 Rotolight Quality Assurance Your Rotolight has been individually
Your Rotolight has been individually examined and found to pass Rotolight's Quality Assurance testing.
text_image
CHECKED BY WIFI ZONE SERIAL # FIRMWARE VERSION OPERATIONS TEST DMX DC IN Battery Switch WIFI Encoder ACCESSORIES PSU Xtra AC Cord Manual Gel Frame Gels Barn Doors
THE NEW ROTOLIGHT ANOVA PRO
"GAMECHANGER"
SHUTTERBUG MAGAZINE
ROTOLIGHT ANOVA LIGHTS CELEBRO STUDIOS LONDON!
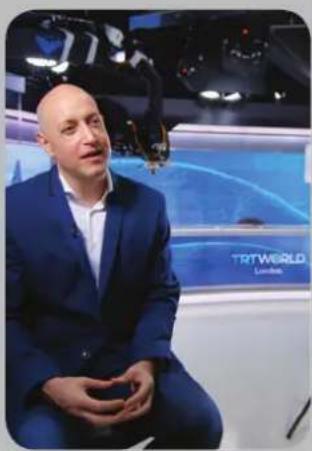
"The Rotolight Anova is really the perfect light for working in a live television environment and we have over 50 Anova's in the space. What the Rotolight has given us is the ability to light people accurately very very quickly, and that has saved us so much time, it has saved us mistakes on air and its also saved us a lot of money. The power efficiency of the Rotolight Anova is one of the biggest things that drew us to it, and the lack of requirement for maintenance is also massive deal for us. The response from our clients has been amazing, and we work with companies like MTV, BBC and TRT world the Turkish state broadcaster.
There are so many advantages to using this system, we get cost efficiencies and cost savings, we get flexibility in the way that we work, we get clients happy which is very very important, and really importantly, every presenter who walks into our studios always asks, what are your lights - they make me look good!" - Wesley Dodd CEO Celebro Media Studios
text_image
TRITWORLD LondonROTOLIGHT ANOVA AT THE SUNDANCE FILM FESTIVAL WITH MARK MANN & LEICA !

natural_image
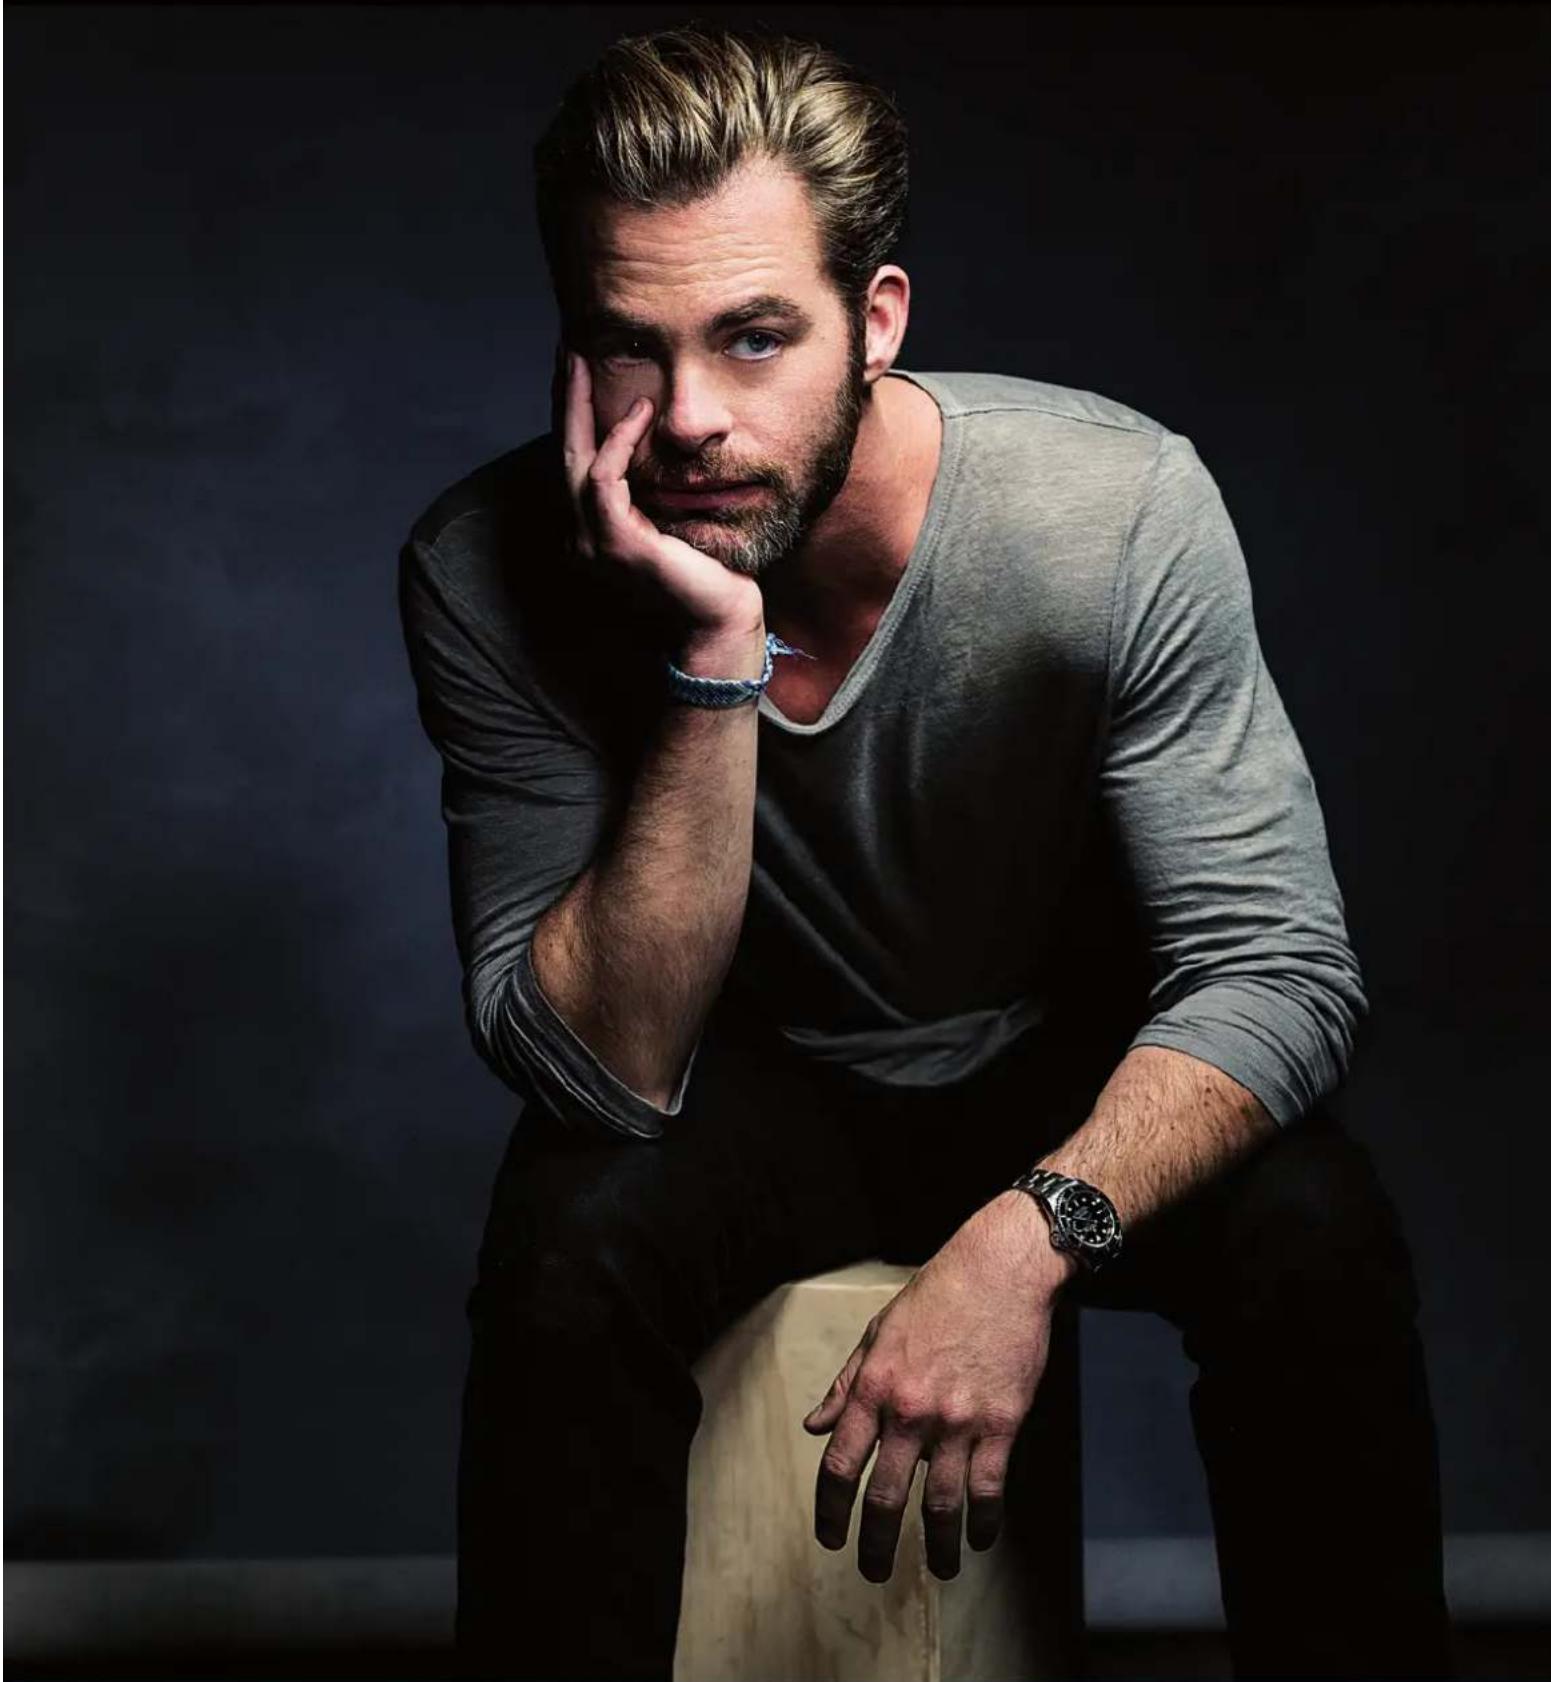
Two men posing with arms crossed, one pointing at the side (no visible text or symbols)At this years Sundance Film Festival, Celebrity Portrait Photographer, Mark Mann, was asked by Leica to create a series of A-List portraits. All the portraits were lit using Rotolight ANOVA, thanks to its exceptional colour rendering and soft light characteristic.
The shoot featured A-List actors including Jack Black, Spike Lee, Margot Robbie, Jason Swartzman, Ejiofor Chewetil, Zachary Quinto, Jason Sudeikis, Chris Pine, Johnny Knoxville, Slash, James Franco
"I'm really enjoying the flexibility of the Anova lights, they really have been my go to light for the last year. Just like the camera, the lights guide the shot."
"The build quality of the ANOVA is exceptional, as is Rotolight's support. I love the quality of the ANOVA lights, it was really easy to shape the light with the Rotolight LEDs in an way that was complimentary to each subject, keeping a palette of warm skin tones, from a natural looking soft-light."
natural_image
Man in plaid shirt holding a studio lighting equipment (no visible text or symbols)Chris Chisnall, head of lighting at ITV for the past 11 years, recently purchased several of the new revolutionary Rotolight ANOVA PRO Bi-Colour 110° LED Floodlights for use on set of Coronation Street, and he was not disappointed!
"What a fantastic piece of kit! I have to say I've fallen in love with these lights! I found the Rotolight ANOVA PRO Bi-Colour to be extremely useful on the floor as a flexible fill alternative to Chimera with Arri 300/500's... Coronation Street is purposely lit to look warm, turnaround is very quick between scenes and the ANOVA's play their part superbly as a fill source. Quick to place around cameras, the Bi-Colour ANOVA's make balancing easy being able to match the prevailing colour temperature perfectly without having to resort to a selection of gels. In addition the ability to run off batteries, even in the studio, make them a dream for fast rigging. "The ROTOLIGHT ANOVA'S really speed up shooting for us and have become the fill lights of choice in the 'ROVERS'!"
natural_image
Portrait of a man with a beard and goatee, wearing a gray shirt and wristwatch, posing against a dark background (no text or symbols visible)"AN ESSENTIAL TOOL FOR MY PORTRAIT PHOTOGRAPHY"
GREG GORMAN, LIFETIME ACHIEVEMENT AWARD WINNER
CHRIS PINE lit by ROTOLIGHT ANOVA for Sundance Film Festival, photo by Mark Mann (Leica)
text_image
5600 DATA NOVA PRO ECO FLOOD PROG MENU USB 13V/DC ROTOLIGHT™ © 2CC EC RoHS NOVA SYNC TRIGGERROTOLIGHT ANOVA PRO
THE WORLD'S MOST ADVANCED LED FLOOD LIGHT
text_image
5600ACCURATE COLOUR TEMPERATURE DISPLAY
text_image
DATA PROG MENU USBDUAL CONTROLS FOR COLOUR / BRIGHTNESS
natural_image
Close-up of two black electronic connectors with pins, labeled 'DMX' (no additional text or symbols visible)CONTROLLABLE VIA
DMX * WIFI
* Wifi Models Available late
text_image
SFXCINEMATIC SPECIAL FX
text_image
SYNC TRIGGERFLASH SYNC AND TRIGGER