NEO ll - Lighting Rotolight - Free user manual and instructions
Find the device manual for free NEO ll Rotolight in PDF.


User questions about NEO ll Rotolight
0 question about this device. Answer the ones you know or ask your own.
Ask a new question about this device
Download the instructions for your Lighting in PDF format for free! Find your manual NEO ll - Rotolight and take your electronic device back in hand. On this page are published all the documents necessary for the use of your device. NEO ll by Rotolight.
USER MANUAL NEO ll Rotolight
natural_image
Circular LED light fixture with a red 'ROTOLIGHT' logo on its side, mounted on a black base against a dark grid background (no text or symbols on the main subject)Version 2.1

text_image
ROTOLIGHTPage Contents
2 Box contents
3 Operation flowchart
4 Technical specifications
5 TLCI, test result, photometrics, CRI
8 About Rotolight
8 About NEO 2
10 Basic operation
12 Advanced operation
14 Flash mode
19 Setting up the HSS transmitter
22 F-stop table
25 Designer Fade™
26 CineSFX™
27 Strobe
28 Lightning
29 Throb and Cycle
30 Fire
31 Police and TV
32 Shot, Neon, Film
33 Weld and Paparazzi
34 FDIM - True Aperture Dimming™
43 Filter information
44 Mounting and batteries
45 Manufacturer's limited warranty
46 Limitation of liability
47 NEO 2 optional accessories
38 Control menu - primary DMX channel address, settings lock
39 Skyport, Skyport Group, Technical Utilities menu and Voltage
40 Calibrated custom colour mode, temperature
41 Serial number, firmware version, display, scrolling text control
42 Fine dimming mode, CineSFX™ demonstration mode
Box Contents
1 x Rotolight NEO 2
1 x 1/4" Shoe Adapter
1 x Rotolight universal power adapter with regional mains cable
1 x Filter holder
1 x NEO 2 Filter pack: 1x 216 Full Diffuser (1.5 Stops); 1x 250 Medium,
Half White Diffuser (3/4 Stops); 1 x 184 "Cosmetic Peach" Diffusion;
1 x 279 1/8th Minus Green (Magenta).
Thank you for purchasing Rotolight NEO 2! We hope you enjoy using it as much as we enjoyed making it.
Please register to activate your warranty at
www.rotolight.com/register
text_image
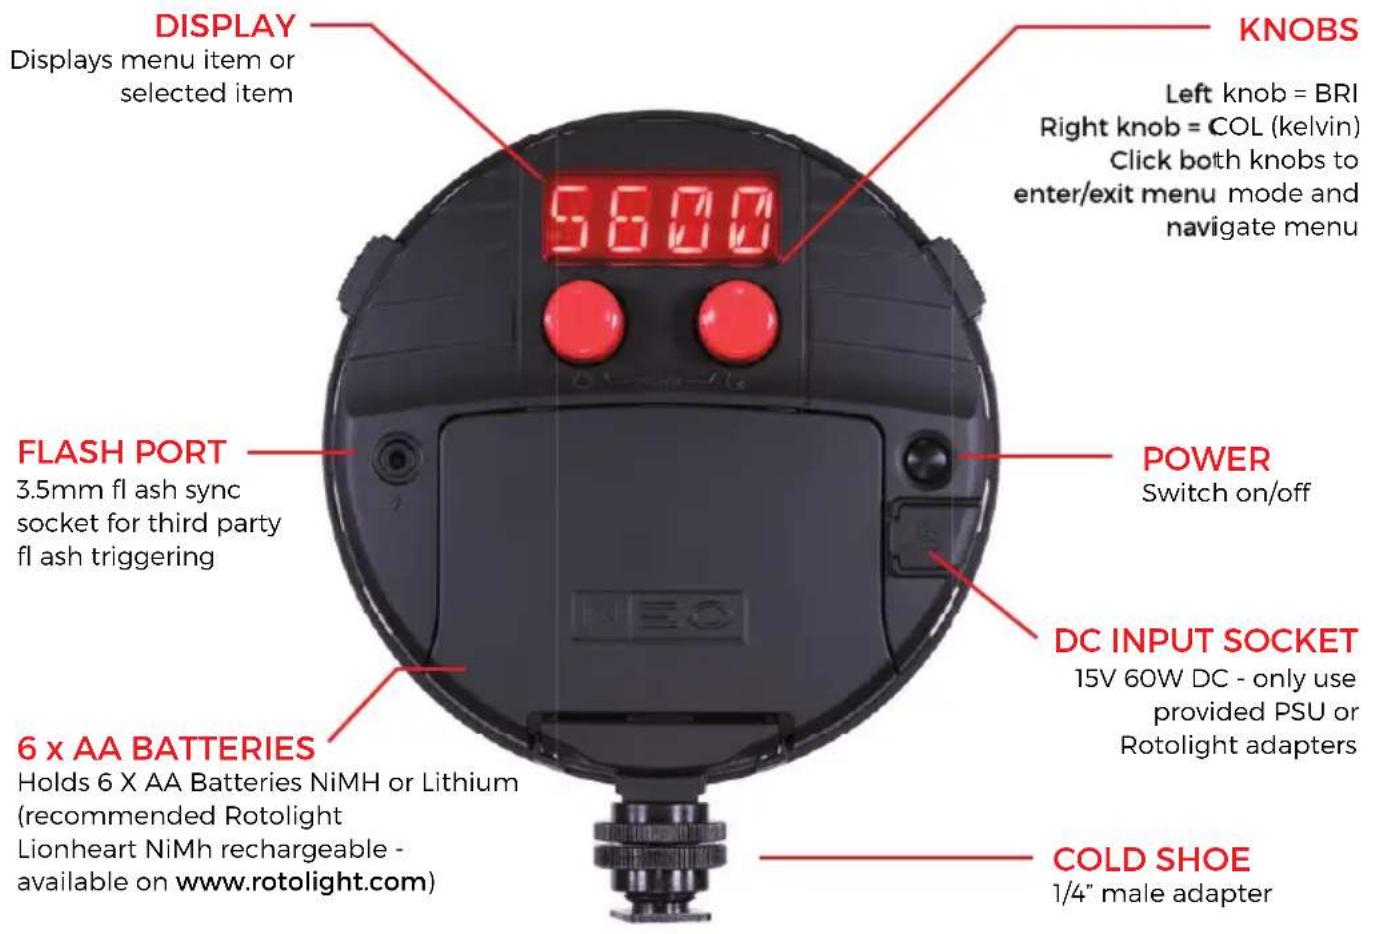
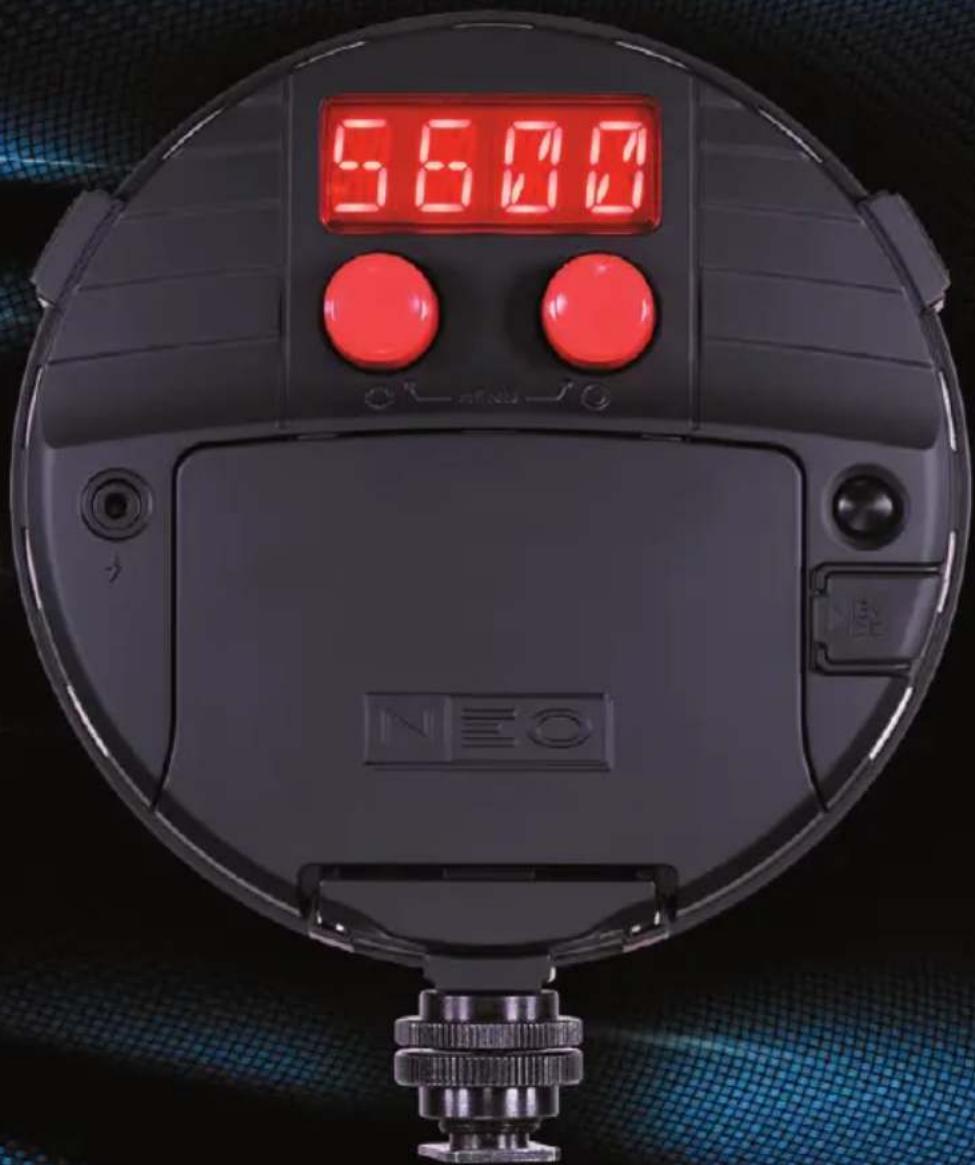
DISPLAY Displays menu item or selected item 5600 KNOBS Left knob = BRI Right knob = COL (kelvin) Click both knobs to enter/exit menu mode and navigate menu FLASH PORT 3.5mm fl ash sync socket for third party fl ash triggering POWER Switch on/off DC INPUT SOCKET 15V 60W DC - only use provided PSU or Rotolight adapters 6 x AA BATTERIES Holds 6 X AA Batteries NiMH or Lithium (recommended Rotolight Lionheart NiMh rechargeable - available on www.rotolight.com) COLD SHOE 1/4" male adapterNEO 2 Operation Flowchart
flowchart
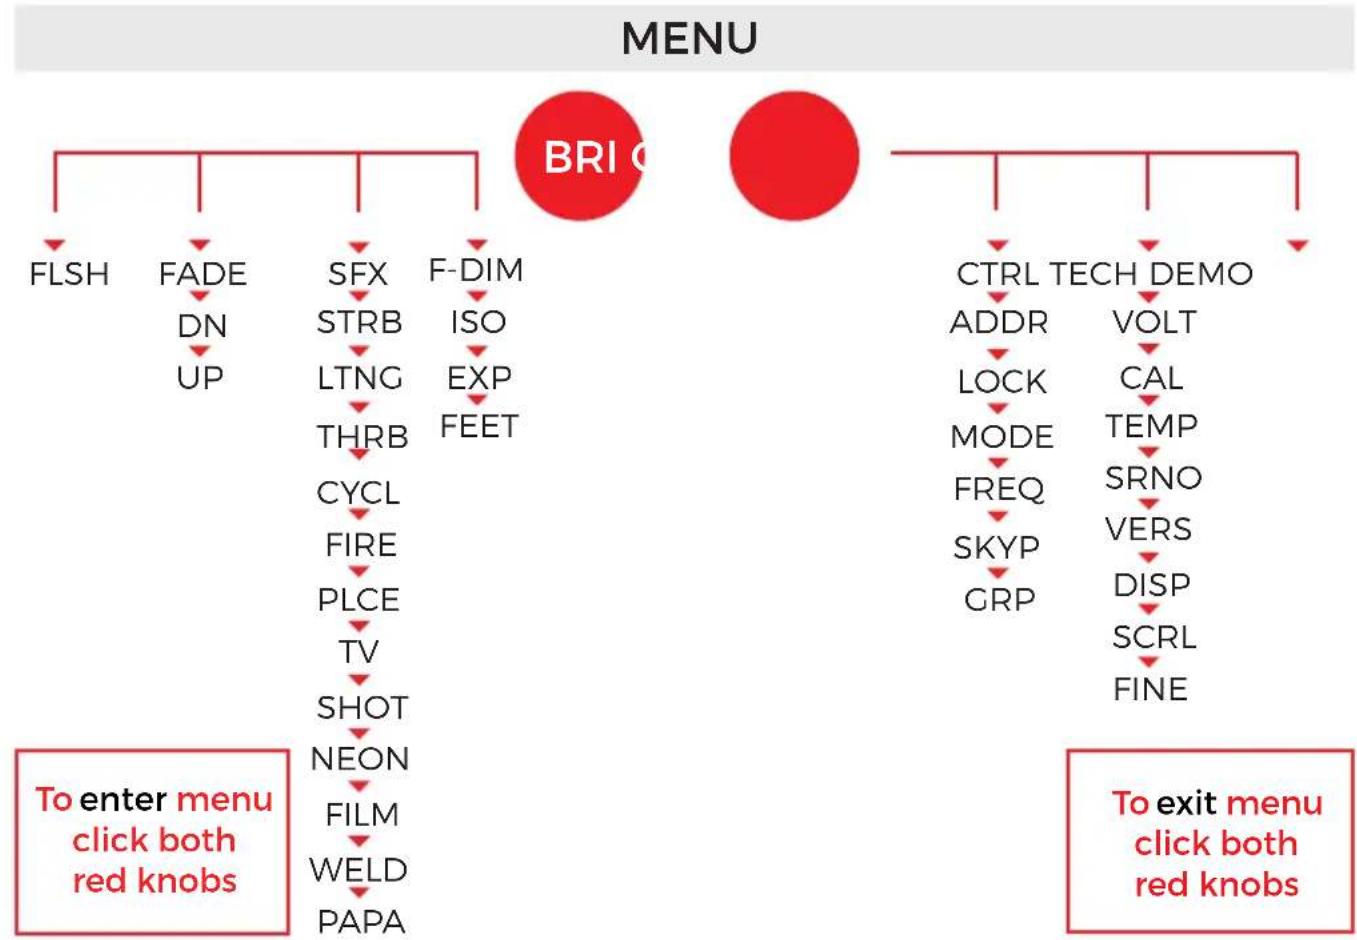
graph TD
    A["MENU"] --> B["BRI"]
    A --> C["To enter menu click both red knobs"]
    A --> D["To exit menu click both red knobs"]

    B --> E["FLSH"]
    B --> F["FADE"]
    B --> G["SFX"]
    B --> H["F-DIM"]
    B --> I["DN"]
    B --> J["UP"]

    C --> K["STRB"]
    C --> L["LTNG"]
    C --> M["THRb"]
    C --> N["CYCL"]
    C --> O["FIRE"]
    C --> P["PLCE"]
    C --> Q["TV"]
    C --> R["SHOT"]
    C --> S["NEON"]
    C --> T["FILM"]
    C --> U["WELD"]
    C --> V["PAPA"]

    D --> W["CTRL"]
    D --> X["TECH DEMO"]
    D --> Y["ADDR"]
    D --> Z["VOLT"]
    D --> AA["LOCK"]
    D --> AB["MODE"]
    D --> AC["SPRNO"]
    D --> AD["VERS"]
    D --> AE["DISP"]
    D --> AF["SCRL"]
    D --> AG["FINE"]
Technical Specification
| ROTOLIGHT NEO 2 | |
| Beam Angle 50 degree | |
| TLCI(Television lightingconsistency index) | 91Approved for live broadcast withoutcorrection |
| Overall CRI (Ra)Skintone CRI (R15) | CRI=> 96(skintone R15, CRI=98) |
| Power Consumption@100% Output | 12 Watts@100% Output 15 V DC |
| lux at 3ft (0.9m)*f-stop at ISO 200/400/800 | 2000f8.0 / f11.0 / f16 |
| lux at 6ft (1.82m)*f-stop at ISO 200/400/800 | 510f4.0 / f5.6 / f8.0 |
| lux at 9ft (2.74m)*f-stop at ISO 200/400/800 | 227f2.8 / f4.0 / f5.6 |
| Control | Local or Skyport wireless, with DynamicDrift Compensation and thermalmonitoring |
| Weight | 354g (body only)504g inc 6xAA |
| Dimensions | diameter 145mm (5.7") xdepth 50mm (1.96") |
| Mounting | Integral 1/4" - 20 tripod mounts,with hot shoe adapter |
| Peak Output | 2000 lux at 3ft(measured at midpoint of 4110K) |
| Luminous Flux | 1032 Lumens |
| Colour Range | 3150K -6300K |
| Included Filters | 216 - Full Diffuser, 250 - Half Diffuser184 - Cosmetic Peach Skin Tone279 - 1/8 Magenta |
| Battery Life | 85,000 fl ashes or 2 hours (continuousmode) |
| Maximum shutter sync speedfl ash duration at maximum power | 1/8000thAdjustable from 1/50th - 1/1000th |
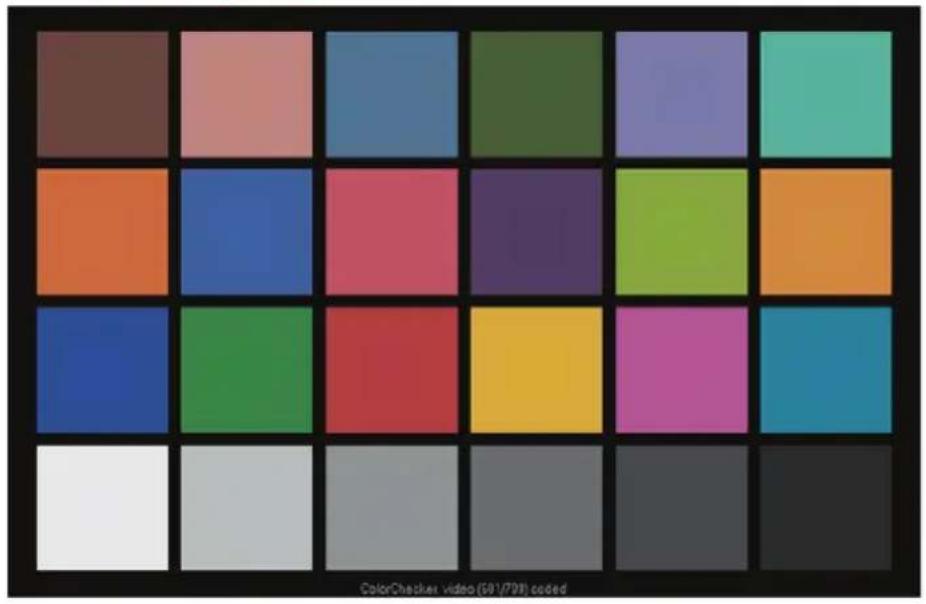
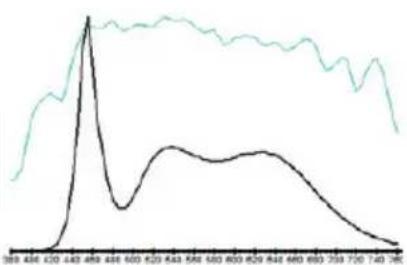
Rotolight LED TLCI Test Result
Rotolight LED (5600): CCT = D5478 (-2.1)
TLCI-2012:91(D5478)
EBU : TLCI-2012
Alan Roberts - Oc
text_image
ColorChecker video (501/728) coded| Sector | Lightness | Chroma | Huo |
| R | 0 | 0 | 0 |
| R/Y | 0 | 0 | - |
| Y | 0 | - | - |
| Y/G | 0 | - | 0 |
| G | 0 | - | 0 |
| G/C | 0 | 0 | + |
| C | + | 0 | 0 |
| C/B | + | 0 | ... |
| B | 0 | - - | - - |
| B/M | 0 | - | 0 |
| M | 0 | 0 | 0 |
| M/R | 0 | 0 | 0 |
line
| X Value | Black Line | Green Line | |---------|------------|------------| | 360 | 0 | 0 | | 480 | 1.43 | 1.43 | | 600 | 6.29 | 6.29 | | 800 | 6.43 | 6.43 | | 1000 | 6.50 | 6.50 | | 1200 | 6.52 | 6.52 | | 1400 | 6.54 | 6.54 | | 1600 | 6.56 | 6.56 | | 1800 | 6.58 | 6.58 | | 2000 | 6.60 | 6.60 | | 2200 | 6.62 | 6.62 | | 2400 | 6.64 | 6.64 | | 2600 | 6.66 | 6.66 | | 2800 | 6.68 | 6.68 | | 3000 | 6.70 | 6.70 | | 3200 | 6.72 | 6.72 | | 3400 | 6.74 | 6.74 | | 3600 | 6.76 | 6.76 | | 3800 | 6.78 | 6.78 | | 4000 | 6.80 | 6.80 | | 4200 | 6.82 | 6.82 | | 4400 | 6.84 | 6.84 | | 4600 | 6.86 | 6.86 | | 4800 | 6.88 | 6.88 | | 5000 | 6.90 | 6.90 | | 5200 | 6.92 | 6.92 | | 5400 | 6.94 | 6.94 | | 5600 | 6.96 | 6.96 | | 5800 | 6.98 | 6.98 | | 6000 | 7.00 | 7.00 | | 6200 | 7.02 | 7.02 | | 6400 | 7.04 | 7.04 | | 6600 | 7.06 | 7.06 | | 6800 | 7.08 | 7.08 | | 7000 | 7.10 | 7.10 | | 7200 | 7.12 | 7.12 | | 7400 | 7.14 | 7.14 | | 7600 | 7.16 | 7.16 | | 7800 | 7.18 | 7.18 | | 8000 | 7.20 | 7.20 | | 8200 | 7.22 | 7.22 | | 8400 | 7.24 | 7.24 | | 8600 | 7.26 | 7.26 | | 8800 | 7.28 | 7.28 | | 9000 | 7.30 | 7.30 | | 9200 | 7.32 | 7.32 | | 9400 | 7.34 | 7.34 | | 9600 | 7.36 | 7.36 | | 9800 | 7.38 | 7.38 | | 10000 | 7.40 | 7.40 |Photometrics
| FIXTURE | LED Angle | 3 ft. / 0.9m 6 ft. / 1.82m 9 ft. / | 2.74m | ||||
| NEO 2 (at midpoint 4110K) | 50° | 194fc | 2000 lx | 49fc | 510 lx | 21fc | 227 lx |
CRI Test
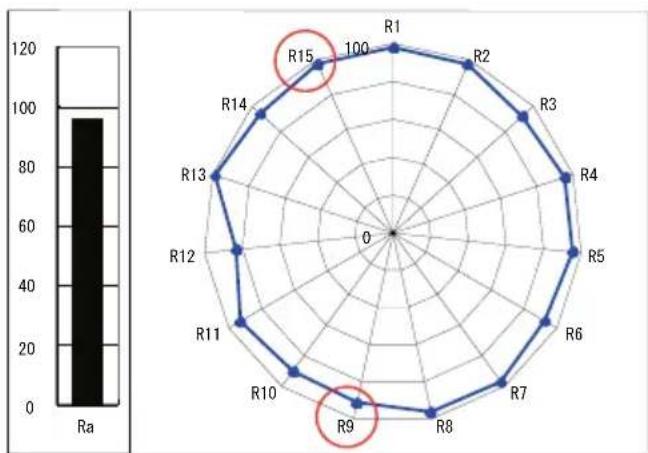
radar
| Point | Value | |---|---| | R1 | 100 | | R2 | 100 | | R3 | 100 | | R4 | 100 | | R5 | 100 | | R6 | 100 | | R7 | 100 | | R8 | 100 | | R9 | 100 | | R10 | 100 | | R11 | 100 | | R12 | 100 | | R13 | 100 | | R14 | 100 | | R15 | 100 |CRI 96
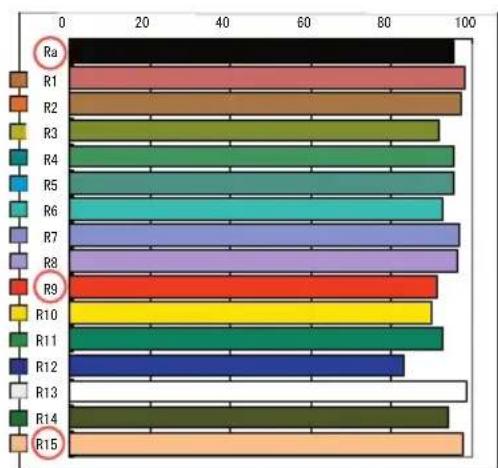
bar
| Category | Value | |---|---| | Ra | 98 | | R1 | 99 | | R2 | 98 | | R3 | 94 | | R4 | 96 | | R5 | 97 | | R6 | 95 | | R7 | 98 | | R8 | 98 | | R9 | 95 | | R10 | 92 | | R11 | 94 | | R12 | 88 | | R13 | 99 | | R14 | 95 | | R15 | 99 || x | y | Top(JSS) | Dur(JSS) | Peak Wavelet | Ra | Rb | Rc | Rd | Rf | Rg | Rh | Ri | Rj | Rk | Rl | Rm |
| 0.3890 | 0.3685 | 3700 | -0.0063 | 456 | 96 | 98 | 97 | 92 | 95 | 95 | 93 | 97 | 96 | 91 | 90 | 93 |

natural_image
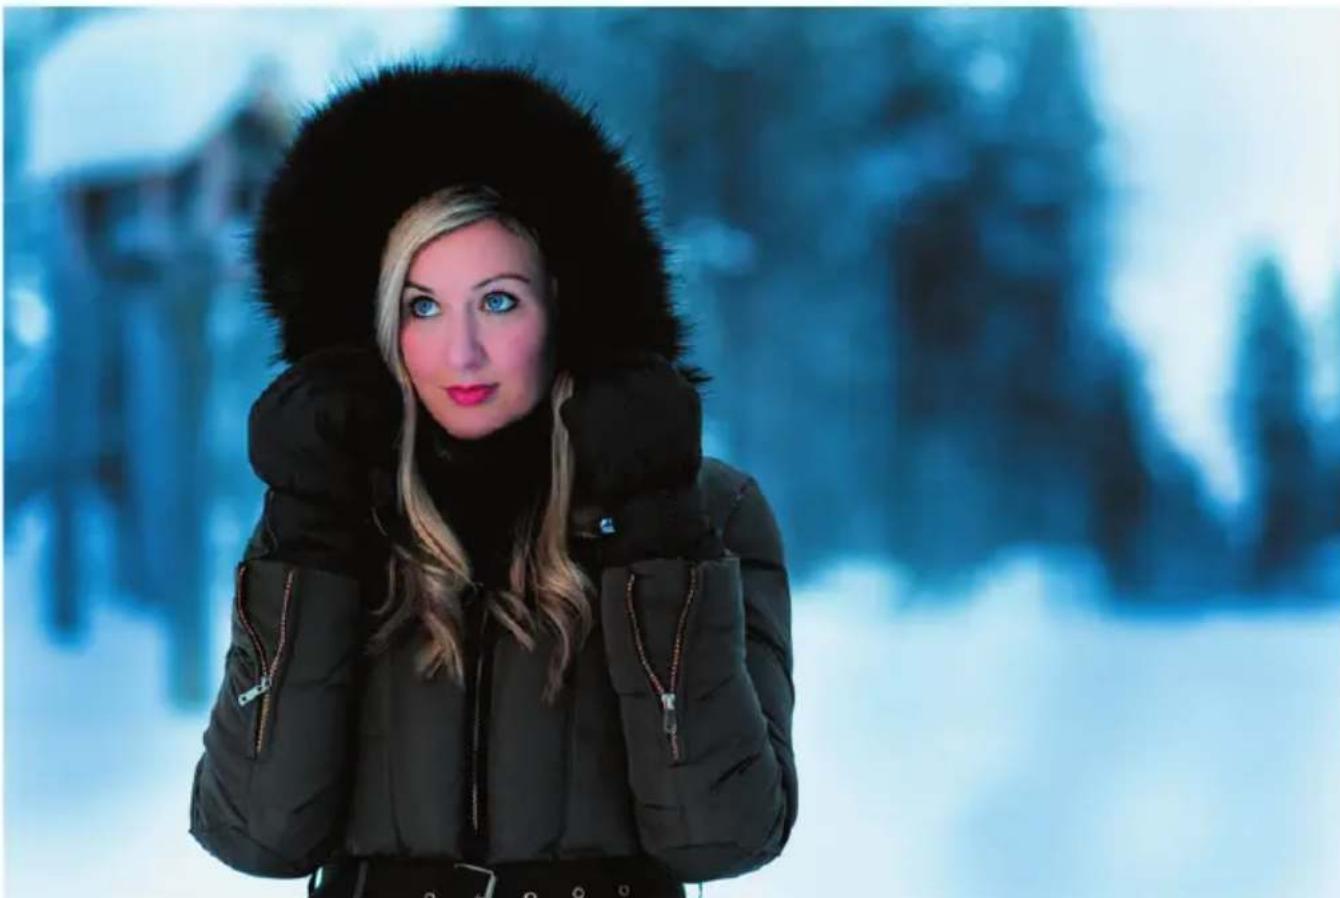
Portrait of a woman wearing a wide-brimmed hat, hands touching her face (no text or symbols visible)"NEO 2 is a game-changer. You'll never miss a shot. There's no recycle time, no light loss, no power loss"
Jason Lanier - Rotolight Master of Light
natural_image
Woman in winter coat and fur hat standing in snowy landscape (no text or symbols visible)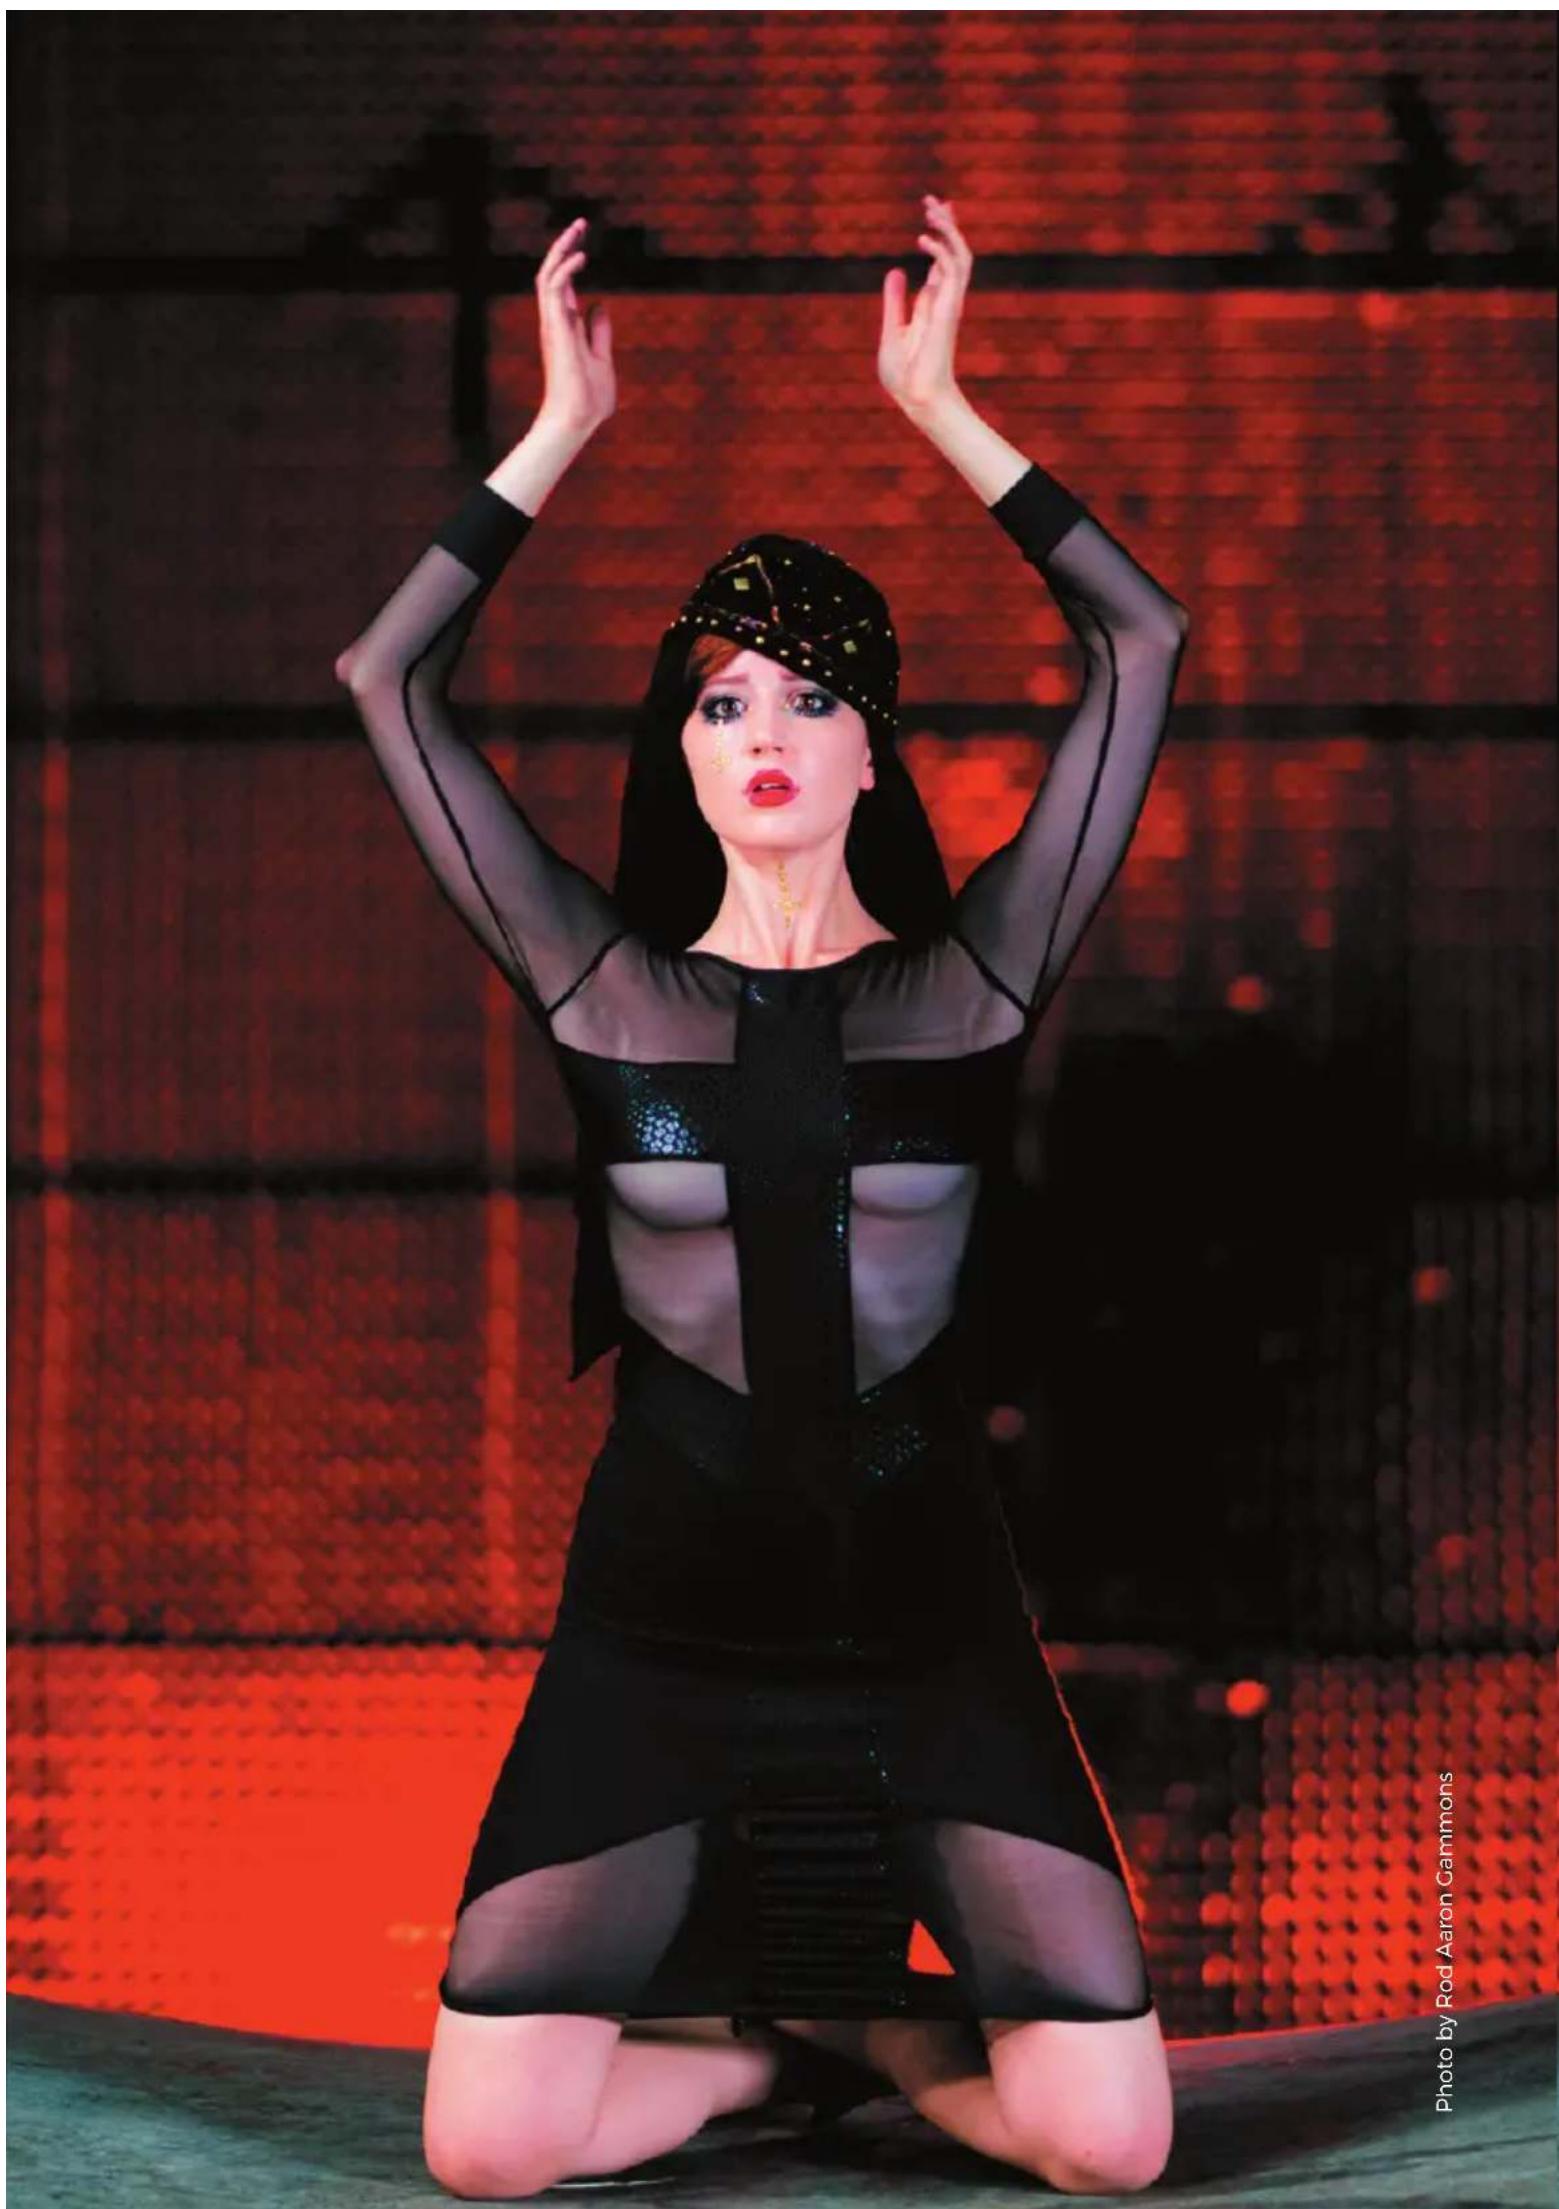
natural_image
Woman in black costume performing a pose on stage with red LED lighting (no text or symbols visible)About Rotolight
Rotolight is a pioneering British technology company, specialising in creating award-winning LED lighting products for photographers, cinematographers and videographers. Known for constantly pushing the boundaries of innovation, Rotolight strives to create products that provide unique tools for image makers, allowing them to realise their creative aspirations.
Leading where others follow, Rotolight has developed countless industry-fi rst features and has been widely recognised with numerous global awards and accolades for its innovation, technical excellence and product quality.
As a family business, Rotolight has a unique long-term outlook allowing the company to focus on continually investing to deliver outstanding quality products and a totally unique customer experience.
For more information visit www.rotolight.com
Foreword - What is NEO 2?
NEO 2 is an industry-fi rst High Speed Sync (HSS) fl ash and continuous on-camera LED all-in-one; integrating the ‘shoot what you see’ benefits of continuous lighting with the fl exibility of HSS fl ash with zero recycle time.
The NEO 2's continuous modelling light allows photographers to easily acquire focus in dimly lit environments and optimise the composition of their shots. Designed for photographers and videographers on the go, NEO 2 provides up to 500% fl ash output for whenever users need to freeze action. HSS also enables users to shoot with wider apertures to create beautiful separation between the subject and background.
Rotolight has collaborated with Elinchrom to integrate its Skyport 2.4GHz HSS wireless flash
receiver into NEO 2, which eliminates the need to purchase a stand-alone flash receiver. Providing range, flexibility and control for off-camera lighting setups, Skyport enables users to wirelessly control up to ten lights in four groups at up to 200m (656ft) with the Rotolight HSS transmitter; optimised for Rotolight by Elinchrom. Available for Canon, Nikon, Sony, Olympus/Panasonic and Fujifilm camera systems.
"The NEO 2 is going to revolutionise how people use light and eliminate the need for external flash. If you have those moments that you just cannot afford to miss, this is an incredible light for you. You'll never miss a shot," says Jason Lanier, a Rotolight Master of Light and professional photographer.
"I tested NEO 2 on a Sony A6500 at 11 frames per second," explains Lanier. "It fired every single time. There's genuinely no recycle time, no light loss, no power loss. That is just a game-changer, there is no other light in the world that can do that."
Featuring electronically adjustable colour temperature (3150-6300K) in both Flash and Continuous modes and a built-in kelvin display, NEO 2 enables photographers to easily adjust white balance or match ambient light settings to create more natural looking shots. Lightweight and portable, NEO 2 can be mounted both on or off camera for ultimate creative control. Delivering unrivalled battery performance, NEO 2 provides 85,000 full power flashes on a single set of rechargeable AA batteries, compared to the 200 flashes of a typical speedlight. 85% brighter in Continuous mode than its predecessor, NEO 2 is a small light that delivers big results.
"Rather than spending time on cumbersome lighting setups, NEO 2 enables photographers to focus on composing the perfect shot. For those shooting both stills and video, it entirely eliminates the need for two separate setups," says Rod Aaron Gammons, managing director of Rotolight.
Packed with innovative features for cinematographers, NEO 2 also provides an updated suite of Rotolight's industry-fi rst, built-in CineSFX™.
Designed in conjunction with VFX veteran Stefan Lange, CineSFX™ enables the simulation of Fire, Lightning, TV, Paparazzi and more for added drama in productions. In addition, NEO 2 offers the Designer Fade™ function for the creation of custom in-camera fade FX.
NEO 2 also features Rotolight's AccuColour™ phosphor technology that delivers outstanding colour rendering (CRI 96, TLCI 91) for perfect skin tones. The unique circular shape provides a naturally soft, fl attering light output, with Rotolight's signature catchlight effect.
NEO 2 Basic Operation
To operate NEO 2 you will find two red rotary controls, a DC input and an on/off switch, located on the rear of NEO 2.
Power
To power up NEO 2 click the power switch (located next to the DC input jack).
NEO 2 is a high performance light and requires high performance batteries. NEO 2 can be powered by 6 x AA high performance NiMH rechargeable AA or Lithium batteries Note: Alkaline batteries are not suitable for NEO 2. NEO 2 can also be powered by 1 x V-Lock battery (with D-Tap cable), DC from the supplied AC mains adapter or from a DC source in the range of 7v-15v (i.e. optional 12v Car Adaptor Cable).
When connecting a power source to the DC input socket, for instance mains adapter or an optional D-Tap to DC connection, the internal batteries are automatically disconnected, thus saving battery power.
If you are connecting an external DC source make sure the power is the correct polarity to avoid
natural_image
Close-up of a black circular button or knob on a dark surface (no text or symbols visible)damaging your NEO 2.
For best results use the Rotolight Powerex Pro LionHeart AA batteries and charging systems. These are the most powerful NiMH AA rechargeable available (2700mAh) and are designed for demanding systems like the NEO 2. Alternatively use the Rotolight 95Wh V-Lock batteries with D-Tap cable (available from www.rotolight.com) which will power your NEO 2 for up to 8 hours at full power.
On power up, you will see ‘Rotolight NEO 2’ scroll across the screen, you can interrupt this anytime by operating one of the knobs.
To power NEO 2 down, click the power switch again. Note: NEO 2 stores and will recall your last used settings until you reset.
Reset
You can reset all the user parameters in NEO 2 by holding down the left red control knob whilst simultaneously powering NEO 2 on. This resets all the parameters to the factory default settings.
The word 'ZERO' will be displayed, turn the knob to select YES (reset all data), or NO.
Basic Operation Mode (BRI / COL)
BRI
('BRI') Brightness
You can adjust the brightness output of NEO 2 by rotating the left knob.
If you rotate the knob quickly it will speed up the data input. You can press and rotate to adjust the brightness in steps of 10% (fast mode). Simply rotating the knob will adjust the brightness in steps of 1%. NEO 2 has a dimming range of 0%-100% and is completely fl icker-free at any brightness level, shutter speed or frame rate. Note: There is a special mode called 'True Aperture Dimming™' (FDIM), available in the MENU section,
which will display the brightness as an f-stop (aperture), based on your camera exposure settings – see 'True Aperture Dimming™'.
COL
('COL') Colour
You can adjust and accurately display the colour temperature of NEO 2 by rotating the right control knob.
If you rotate the knob quickly it will speed up the data input. You can press and rotate to adjust the colour in steps of 100 kelvin (fast mode).
Slowly rotating the knob will adjust the colour temperature in steps of 10 kelvin.
NEO 2 has a colour temperature range of 3150 kelvin (tungsten) up to 6300 kelvin (cloudy/overcast/daylight).
As a bi-colour light, NEO 2 will be brightest at the ‘midpoint’ colour; roughly 4100 kelvin, where both sets of LEDs are at full power. This also applies in flash mode. As the lights are individually calibrated, the midpoint on each light will vary. When midpoint colour is set, a small dot will appear in the window of the NEO 2.
NEO 2 has a special technology called 'Dynamic Drift Stabilisation™', which maintains the colour temperature through the entire dimming range.
ME NU
('MENU') Advanced Operation
You can enter the MENU by pressing both red knobs together. If you wish to leave MENU at any time, you can return to the basic operation (BRI/ COL) by pressing both red control knobs together again.
In ‘MENU’ mode rotating the left knob navigates the menus and pressing it takes you back one level. Rotating the right knob is ‘value/data entry’ and pressing the right knob in is ‘activate/go/enter/start/trigger’ depending on the menu position.
For a full flowchart of the NEO 2's menus, refer to page 3.

natural_image
Portrait of a woman with blonde hair wearing a black turtleneck and gold dots, against a dark background (no text or symbols visible)Rotolight Master of Light Terry Donnelly shooting with the NEO 2
FLSH
('FLSH') Flash Mode
NEO 2 is capable of High Speed Sync Flash (HSS, 1/8000th), and has a built-in Elinchrom Skyport wireless HSS receiver.
For best results, use the Rotolight HSS Transmitter (RL-HSS-TX) (by Elinchrom) available now for Sony, Canon, Nikon, Fujifi Im, Olympus and Panasonic cameras from www.rotolight.com and all major stores.
Capable of controlling up to 10 Rotolights in four groups, the Rotolight HSS transmitter also provides wireless control of brightness and colour temperature in both Flash and Continuous modes, and can trigger CineSFX™ and Designer Fade™ (Rotolight HSS transmitter only - see page 25). To access Flash mode, scroll to 'FLSH' and click the right knob to to enter 'FLSH' mode.
Note: in order to use the flash, you must be in Flash mode (indicated by flash duration on the display. If you see word 'FLSH', you are not in Flash mode and must right click to ENTER Flash mode).
natural_image
Two people posing in front of a concrete wall, one holding a camera and the other standing beside her (no visible text or symbols)
natural_image
Portrait of a woman with blonde hair and large eyes, wearing a black top (no text or symbols visible)Rotolight Master of Light Jason Lanier shooting with the NEO 2
NEO 2 is not a TTL flash, it is a manual flash with adjustable flash power, modelling light, colour temperature and duration settings.
Set your camera to manual Flash mode and refer to the f-stop table (see page 22) for an exposure guide. Take a test shot and either adjust flash power, or distance to the subject to achieve optimal exposure.
Rotate the left knob to set the desired brightness level in order to preview focus, shadow and highlights on your subject (0-100%) and compose your shot.
Note: NEO 2 is intentionally less bright whilst in modelling light mode than regular continuous light mode in order to make the light more comfortable for the subject and prolong battery life.
Press, hold and rotate the left knob to set the desired colour temperature for your fl ash (in kelvin, from 3150-6300K.
Rotate the right knob to set the desired duration for the flash, in fractions of a second, i.e. 1/50s, 1/60s, 1/80s, 1/100s...up to 1/1000s ('1/1K0').
Note: you can just leave the duration set to 1/50th and NEO 2 will automatically adjust the duration for you if the number of frames per second requires a shorter flash.
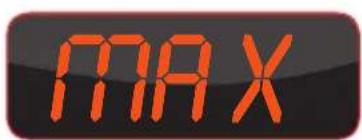
Press, hold and rotate the right hand knob to set the flash output power, 'MAX' (=250% of max continuous output), '1/2' (=125%), '1/4' (=62%), 'X8' (=modelling light level x 8), and 'X16' (= modelling light level x 16).
Note: when an external 15V power source is connected (such as the AC adapter or V-Lock battery) the NEO 2 will automatically raise the flash output power to 'MAX +' (= 500% of the normal continuous maximum output, or 1 x f-stop
more flash power).
natural_image
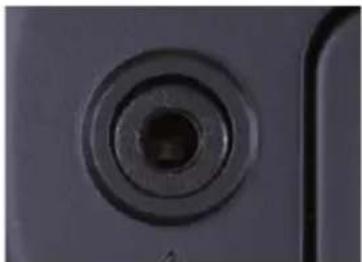
Close-up of a circular mechanical component with concentric rings (no text or symbols visible)To trigger the flash from your camera (wired operation), connect a PC sync cable from your camera's PC sync port to the 3.5mm mono jack on the NEO 2.
If your camera does not have a PC sync port, then you can purchase the optional Rotolight accessory shoe to PC adapter and the PC flash sync cable, which converts your accessory shoe into a PC socket.
Note: Operating flash via the PC sync port is limited to your camera's internal sync speed (usually 1/60th up to 1/250th). It is not High Speed Sync.
text_image
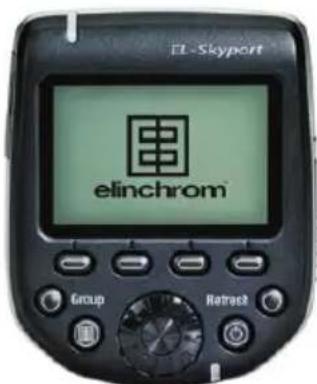
EL-Skyport elinchrom Group RetreeRotolight HSS trigger by Elinchrom:
To shoot in High Speed Sync, you will need an HSS wireless transmitter, such as the Rotolight or Elinchrom HSS transmitter (both are compatible with the internal receiver inside the NEO 2).
Using third party triggers:
Alternatively, you can connect third party flash receivers which have a PC sync or 3.5mm flash output, with a PC sync/3.5mm cable to the 3.5mm mono jack trigger input located on the rear of NEO 2.
Use the provided cold shoe to mount NEO 2 to the third party receiver, or the Rotolight Mini Arm (RL-ARM-MINI, sold separately). Connect the transmitter to your camera and follow the instructions supplied with your transmitter.
text_image
MAXRecommended settings for simple one-light NEO 2 fl ash operation:
1) Set fl ash power to MAX (or MAX +, if available). 2) Set fl ash duration to 1/50th (any faster shutter speed eg 1/100th will be automatically captured).
3) Set colour temp (kelvin) to midpoint (approx. 4100K – midpoint is indicated by a dot in lower right hand corner of the kelvin display).
Shooting in High Speed Sync
NEO 2 is a High Speed Sync (HSS) capable flash. High Speed Sync allows you to utilise the flash of NEO 2, and synchronise it with your camera's shutter release, at speeds faster than your camera's native internal sync speed (typically 1/160th or 1/250th). This enables you to freeze action, and shoot with wider apertures for improved subject isolation.
NEO 2 will happily work with any camera and any trigger/receiver using Skyport or a PC sync input, however to shoot in High Speed Sync your camera must itself be capable of HSS (many are not), and you must use a HSS capable trigger and receiver (most trigger/receivers are not natively HSS compatible unless explicitly stated).
When syncing in HSS, NEO 2 will flash once to match the duration of the shutter speed, ensuring that the complete frame is illuminated. If NEO 2 detects a flash re-trigger event during the set interval, it will automatically adjust the duration of the flash to a shorter interval, to avoid damage occurring to the LEDs.
Recommended triggers
The NEO 2 is compatible with the Rotolight HSS transmitters and the Elinchrom Skyport Plus HS transmitters available for Canon, Nikon, Sony, Fujifilm, Olympus and Panasonic camera systems.
Compatible transmitters include, but are not limited to:
- Godox X1T
- Pixel King Pro
- Flashpoint R2
-
Phottix ODIN II
-
Pocketwizard Flex TT5 and Flex TT6
• Cactus VI II
*Rotolight accepts no responsibility for the operation or functionality of third party transmitters.
To exit Flash mode
Click the left knob to return to MENU, alternatively you can return to the basic operation (BRI/COL) by pressing both control knobs together.
Setting Up The HSS Transmitter
The below setup instructions are based on the HSS transmitter firmware 3.0 and NEO 2 firmware V642. To check the firmware version on your HSS transmitter, this is shown on the screen when you turn the device on. To check the NEO 2 firmware version, press both knobs to enter MENU, navigate to 'VERS' in the TECH menu, press the right knob to enter, and the firmware version will scroll across the display (for a full menu flowchart, see page 3).
If your HSS transmitter has a version earlier than 3.0, please visit the Elinchrom website to update manually, which should only take a few minutes. If you are operating from an older firmware on your NEO 2 than v642, please contact us on sales@rotolight.com or +441753 422750.
text_image
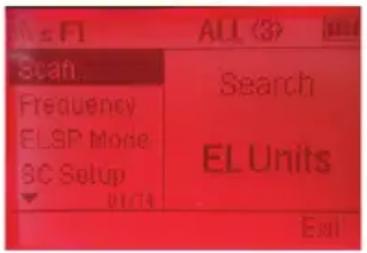
Scan Frequency ELSP Mode BC Setup Search EL Units ExitFirst, turn on your NEO 2 then after a few seconds, turn on your Rotolight or Elinchrom HSS Transmitter. If you are operating from the correct firmware, the transmitter should automatically find the NEO 2 and display this on screen. We automatically set the units to default to channel 1, frequency 1 out of the box.
However, if it does not automatically find it or if you want to change settings:
Firstly, ensure the bottom left text says 'TTL' not 'Manual'. If you can see 'Manual', this means you
are in TTL mode which is not compatible with NEO 2. Press the button underneath 'Manual' to enter the Manual mode.
If the NEO 2 is still not visible on your HSS transmitter, try the following:
Ensure that Skyport receiver mode is set to 'SPED' on the NEO 2 by turning NEO 2 on, pushing both red control knobs together to access the MENU options, turn the right-hand red knob clockwise until the display shows 'CTRL', click the right-hand knob once and then turn it clockwise again until 'SKYP' is displayed. Click the right-hand knob once more and turn it again until 'SPED' is displayed. This ensures that Skyport receiving is active and is in HSS mode. Click the left-hand control knob twice to return to the main menu.
Press the setup button on the right-hand side of the HSS transmitter.
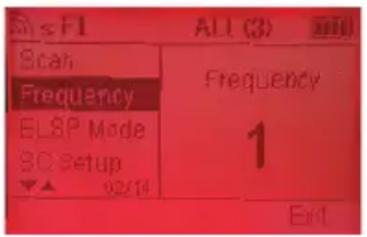
Scroll using the rotary wheel to ‘Frequency’, and ensure it is on the desired frequency – we recommend defaulting to channel 1, however if you happen to encounter interference from other signals, try changing to a lesser used frequency, such as channel 20.
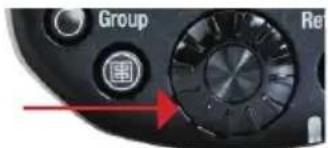
To then adjust the frequency, press the button in the centre of the rotary wheel and scroll to change the number. Press the centre button to confirm, which also navigates you back to the main setup menu.
text_image
Scan Frequency ELSP Mode SC Setup 02/14 Frequency 1 ExitFor users wishing to operate both Elinchrom and Rotolight units simultaneously using the HSS Transmitter, scroll using the rotary wheel to 'ELSP mode', use the centre button to enter the mode and scroll to adjust to 'NORMAL'. Press the button in the centre of the rotary wheel centre to confirm. The screen will change to a green background colour to confirm you are in Normal mode. The Skyport receiver mode in the NEO 2 CTRL menu must also be set to 'NORM' when the HSS transmitter is set to 'NORMAL' in order to operate correctly.
If you are only operating Rotolight units via the HSS transmitter, we recommend using speed mode, which will turn the background colour red.
text_image
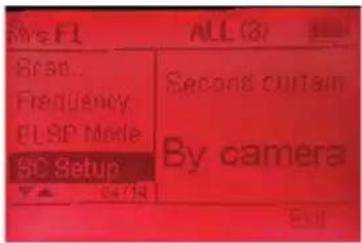
F5 FL ALL (3) Scan... Frequency ELSP Mode SC Setup Second curtain By camera 04/14Press once for Power which controls the output of the continuous light. Press once more for MOD which controls the colour temperature of the continuous light.
Then, use the rotary wheel to scroll to 'SC Setup' (Second Curtain). The SC Setup should automatically to default to the 'By Camera' setting. However, for Nikon compatible HSS transmitters only, ensure the Second Curtain is set to OFF.
Scroll to Auto MOD and ensure this is set to 'No Use.' However, for Nikon compatible HSS transmitters only, ensure this is set to 'OFF'.
Scroll to 'Iden.' at the bottom of the Setup menu and ensure this is set to 'Type' to display the Rotolight units correctly during control.
Then scroll to the top of the menu and click Scan, this will now re-scan for devices and will find the NEO 2 and display it in the control menu.
text_image
elinchrom Group RefreshWhen you have NEO 2 Skyport configured you can remote control NEO 2\*
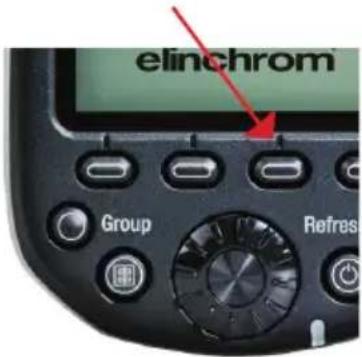
On the Rotolight/Elinchrom transmitter press the third soft key (MOD/Power to see MOD) and use the wheel to control the NEO 2's colour temperature.
On the Rotolight/Elinchrom transmitter press the third 'soft key' (POWER) and use the wheel to control NEO 2's brightness on all lights connected on that channel and group.
text_image
Group ReRotary Control
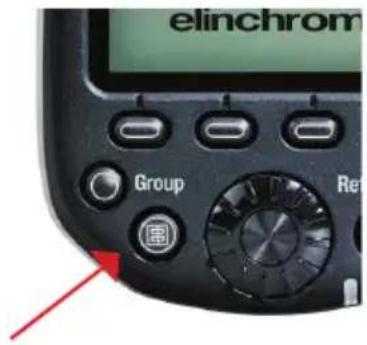
To enter flash mode, on the Rotolight/Elinchrom transmitter press the center button in the rotary wheel once - 'MENU' will be displayed, followed by 'FLSH'. Press the test key (Elinchrom logo key) to enter Flash mode. To test the flash, press the test key.
To change the settings of the NEO 2 in Flash mode, press the Select button to access three settings. To move between the three settings,
NEO 2 F-Stop table in FLASH MODE (measured at midpoint colour 4110K)
| Distance (ft) | 369 | |||||||||||
| Lux 2000 | 510 | 227 | ||||||||||
| Fc 18547 | 21 | |||||||||||
| Lumens 10321032 | 1032 | |||||||||||
| ISO | F-stop FLASH mode (AA) | Guide Number (GN) | F-stop FLASH mode (PSU) | Guide Number (GN) | F-stop FLASH mode (AA) | Guide Number (GN) | F-stop FLASH mode (PSU) | Guide Number (GN) | F-stop FLASH mode (AA) | Guide Number (GN) | F-stop FLASH mode (PSU) | Guide Number (GN) |
| 200 | 5.6 | 16.8 | 8 | 24 | 2.8 | 16.8 | 4 | 24 | 2 | 18 | 2.8 | 25.2 |
| 400 | 8 | 24 | 11 | 33 | 4.0 | 24 | 5.6 | 33.6 | 2.8 | 25.2 | 4 | 36 |
| 800 | 11 | 33 | 16 | 48 | 5.6 | 33.6 | 8 | 48 | 4 | 36 | 5.6 | 50.4 |
Shutter Speed = 1/60th
Measured at midpoint colour temperature 4110 kelvin with Sekonic flash meter, no modifiers or intensifiers used.
natural_image
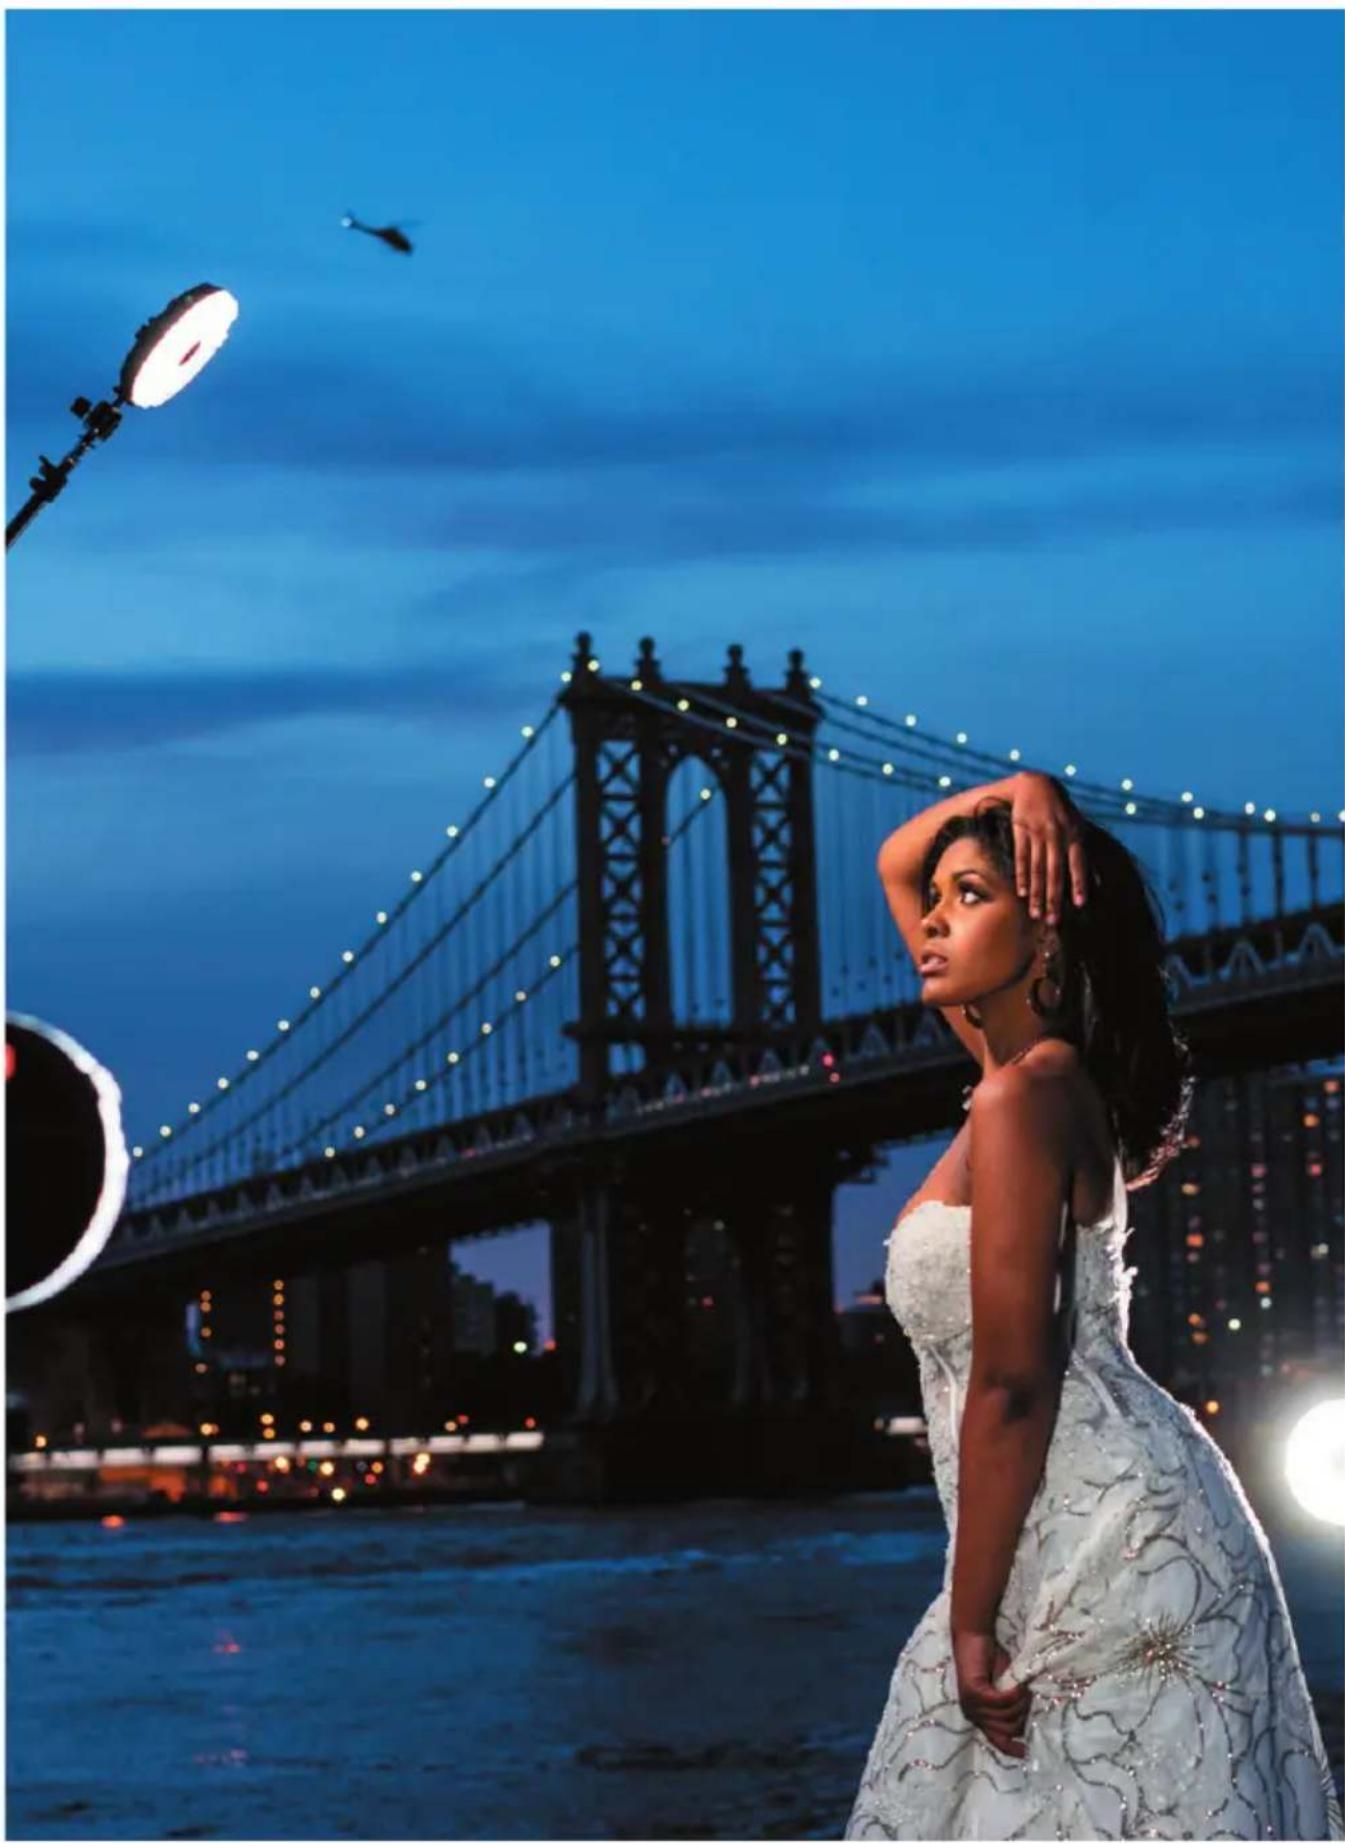
A woman in a white dress posing on a river at dusk with a large suspension bridge and a helicopter in the sky (no visible text or symbols)Photo by Master of Light Jason Lanier using the NEO - 3 light kit
text_image
elinchrom Group RefTest flash button (single click=right click, double click=left click from NEO 2)
press the third button repeatedly until you access your desired one:
Power – adjust the rotary wheel to change the power of the modelling light. You will see the percentage changing on the screen of the HSS transmitter and the back of the NEO 2, as you scroll.
Color – adjust the rotary wheel to change the colour temperature of the modelling light – this will also change the colour temperature of the flash when it fires so the modelling light and flash will always be set to the same kelvin. You will see the kelvin value changing on the screen of the HSS transmitter and the back of the NEO 2, as you scroll.
NAV – adjust the rotary wheel to change the flash power. You will not see this change reflected on the screen of the HSS transmitter, but it will show the adjustment on the back of the NEO 2 as you scroll. To understand the different flash power options, see page 16.
Note: when scrolling the rotary wheel through the flash power options, if you scroll past X16, this will automatically take you out of Flash mode.
Note: adjusting NAV will adjust all lights paired to the HSS Transmitter. To adjust individually, set each light into different Groups, and adjust by Group.
To exit Flash mode, either enter the NAV setting and continue scrolling past x16 to return to main menu or press both red knobs on the back of the NEO 2.
Navigating menu mode using the HS transmitter remote control\*
When you are in BRI/COL mode press the select button, Press the third button repeatedly until you reach NAV and use the rotary wheel to move
throughout the NEO 2 main menu.
Press the test key to enter the sub menu, e.g. 'SFX' then you can scroll through the menu items using the rotary wheel, and press the test button once to select/trigger/pause etc.
To exit and go back to BRI/COL mode, do not press any buttons on the HSS transmitter for a few seconds, and you will see the screen return to basic operation.
At the top of the the HSS Transmitter screen, it will automatically default to control ALL lights that it is paired with. To adjust the group of lights that your HSS Transmitter will control, press the Group button repeatedly until you reach the desired Group. As the HSS Transmitter scrolls through ALL, 1, 2, 3, 4 - you will see the lights (if any) within that group.
*Note: Elinchrom Skyport key functionality may vary with camera type and fi rmware version.
FADE
('FADE') Designer Fade™
Designer Fade™ creates programmable fade up/down for practical in-camera production fade effects.
Scroll to 'FADE', click the right knob to enter Fade mode.
Rotate the right knob to adjust the fade duration - range is from 1-12 seconds up or down.
It will display DN (= fade down) followed by a numerical value 'X's where X = seconds of fade duration.
The NEO 2 will fade to zero from the current brightness level (i.e. if brightness is currently 80%, then fade will be 80-0% over the set duration).
Both the last used brightness setting and fade duration parameter are stored in non-volatile memory.
Once you have selected the length of the fade, click the right knob to trigger it (you can also
trigger the fade using an external flash trigger). You will notice the display now shows 'UP Xs' and it will now fade up to your previous brightness setting over 'X' seconds.
To trigger the fade, click the right knob again. If you only want to fade down, use the left knob to click out of FADE and click back in then use the right knob to perform the fade.
Click the left knob to return to MENU, alternatively you can return to the basic operation menu (BRI/ COL) by pressing both control knobs together.
('SFX') Cinematic Special Effects (CineSFX™)
In collaboration with Stefan Lange, DOP and visual FX veteran, we have created an arsenal of cinematic special FX (CineSFX™), to complement your feature/music video/short fi Im.
SFX brightness and colour temperature:
The current brightness level and colour temperature setting of NEO 2 are used by CineSFX ^™ mode to represent the peak output level of each effect, enabling accurate metering. For example if NEO 2 is set to 75% brightness and 5600 kelvin, then the effect peak brightness level shall be 75% brightness at 5600 kelvin.
To ensure maximum SFX brightness, set NEO 2 to 100% brightness and 4100 kelvin in effects mode. If you require maximum brightness with a specific colour temperature, please use the additional Colour Filter Pack accessory to achieve this.
To adjust the colour temperature of the light to better match your desired effect;
Fire: set the NEO 2 to 3150K, TV: set the COL to '6000K' Lightning set the NEO 2 to 6300K.
To do this, once you have selected your desired SFX (i.e. Fire), press hold and rotate the right knob
SFX
to set the desired colour temperature (in kelvin, from 3150-6300K).
natural_image
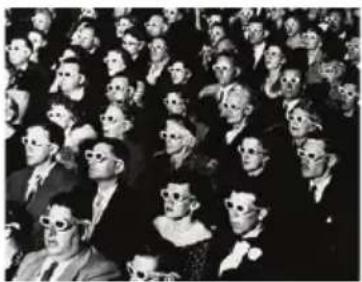
Black-and-white photo of a large group of people seated in rows, some wearing sunglasses (no visible text or symbols)WARNING - HEALTH HAZARD - USE STROBE WITH CAUTION:
CineSFX™ mode uses strobe lighting effects that may pose a risk to those at risk of photosensitive seizures/epilepsy. Manufacturer accepts no liability or responsibility for misuse of this product.
You should take all precautions to pre-warn and ensure the safety of those who may come into contact with the product.
If you or any of your relatives have a history of seizures or epilepsy, consult a doctor before using. If you feel unwell from using these effects, immediately discontinue use and consult a doctor.
If strobe lighting is to be used in a production, warnings should be posted at the front of house or entrance doors to the set/theatre as well as in a video or programme, if distributed.
Example: "WARNING: Strobe lights are used during this performance".
This product is not suitable for use by children of any age and is designed for professional use only.
To enter the SFX menu, press both knobs to enter the main menu, rotate either knob to cycle to 'SFX' and right click to enter. Rotating either knob will cycle through all of the SFX functions. When you find your desired effect, click the right knob to enter. Then you can adjust the settings of the desired SFX.
text_image
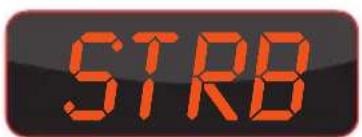
STRB('STRB') Strobe
The strobe effect produces a regular fl ashing strobe. Click the right knob to activate the strobe effect and rotate the right knob to adjust the strobe speed (it will display XX Hz, where 'XX' = number of strobe cycles per second). The strobe
range is from 0.3 Hz up to 7 Hz.
Note: The NEO 2 stores the last used strobe parameters in non-volatile memory.
Rotating the right knob adjusts the duty cycle (fl ash duration) to eliminate any issues with rolling shutter cameras (this is known as 'Rolling Shutter Compensation') where you can match the light fl ashes to the shutter speed and/or frame rate of your camera to avoid unlit portions of the image/frame. Click the left knob to exit the strobe menu and return to SFX menu.
Turn the left knob to adjust the minimum brightness of the flash, but press, hold and rotate the left knob for the maximum brightness. The strobe will cycle between the minimum and maximum brightness you have set.
LTNG
('LTNG') Lightning
The Lightning effect simulates lightning strikes. It is a random effect, but you can control the speed at which the lightning bursts re-occur.
Because this is a stroboscopic effect you can also adjust the Rolling Shutter Compensation. Click and hold the right knob to adjust the colour temperature of the lightning strike. Manufacturer recommends 6000K for realistic lightning.
natural_image
Profile view of a person with long hair and visible facial features (no text or symbols)LIGHTNING
Click the right knob to activate the lightning effect, rotate the right knob to adjust the lightning strike speed (it will display XX Hz which is an indication of the effect frequency). The lightning range is from 1 Hz up to 50 Hz. Click the right knob to arm the effect, 'TRIG' will be displayed - re-click the right knob to trigger the effect.
Rotating the left knob adjusts minimum brightness, which is limited to 90%. Press and hold the left knob to adjust maximum brightness.
Note: the last used lightning parameters are stored in non-volatile memory.
The duration of the lightning fl ashes is 20ms which is the recommended duration for cinematography occurring in bursts of between two and eight pulses.
Click the left control knob to exit the Lightning effect and return to SFX menu.
THRB
('THRB') Throb
Throb is a regular smoothly pulsing light. Click the right knob to activate the Throb effect. Rotate the right knob to adjust the effect frequency (it will display XX Hz or with the left knob seconds, which is an indication of the effect frequency). The throb range is from 1 Hz up to 50 Hz.
Rotate the left knob to adjust the duration between each throb from 0.1s-9.0s. Rotating the right knob adjusts the speed of each throb from 1 Hz to 50 Hz. Hold and rotate the right knob to adjust the output of the minimum light level. Hold and rotate the left knob to adjust the maximum light level of the throb. To adjust the colour temperature of the throb, press both knobs together to exit, adjust the kelvin by rotating the right knob and re-enter the SFX mode.
The Throb parameters are stored in non-volatile memory. Click the left knob to exit the Throb effect and return to SFX menu.
CYCL
('CYCL') Cycle
Cycle is a regular smoothly-pulsing light which fades between the tungsten and blue LEDs. Click the right knob to activate the effect and rotate either the left or right knob to adjust the 'Cycle speed' (it will display XX Hz which is an indication of the effect frequency).
The Cycle range is from 1 Hz up to 50 Hz. Note: the cycle parameters are stored in non-volatile memory). Click the left knob to exit the Cycle effect and return to SFX menu.
text_image
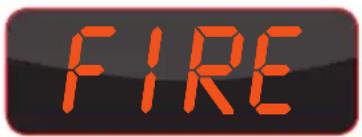
FIRE('FIRE') Fire
Fire is a complex emulation of a burning fi re and it can be tuned to your requirements. Some VFX artists like to use multiple lights with slightly different settings/gels to achieve a fi re with dancing shadows and stereoscopic characteristics.
Before activating the Fire effect it is a good idea to adjust the colour temperature to 3150 kelvin.
To adjust the output of the NEO 2, press and hold the left knob; this will be your maximum power. Rotate the left knob to adjust the Fire effect depth threshold (residual glow); about 35% is nice for a campfire.
The NEO 2 will display XX % which is an indication of the effect depth.
natural_image
Close-up of a person reading a book under warm lighting (no visible text or symbols)FIRE
Click the right knob to activate the Fire effect. Rotate the right knob to adjust the Fire effect frequency (it will display XX Hz which is an indication of the effect frequency – around 45 Hz is nice for a campfire).
Inside the Fire effect there is a changeable parameter called ‘colour swing blue’ which emulates the colour transition of flames going up the chimney (i.e. from yellow to blue), to activate this parameter click the right button ('BLUE' is displayed).
To deactivate ‘colour swing blue’ click the right knob again and ‘MONO’ (monochrome) will be displayed. Note: the Fire parameters are stored in non-volatile memory.
The fi re effect can be enhanced with a warm colour fi Iter included within the optional add on Colour FX Pack (RL-NEO 2-CFP) available from your dealer or www.rotolight.com. '205' LED CTO is recommended for best impact, '182' Light Red also works well, or an Amber, CT Straw or other CTO fi Iter.
PLCE
('PLCE') Police
This effect is an emulation of an emergency services light and can be enhanced by adding the 712 Bedford Blue, or '182' Light Red Filter Gel included within the optional Add On Colour FX Pack.
Click the right knob to activate the Police effect. Rotate the right knob to adjust the police beacon speed (it will display XX Hz, which will give you an indication of the effect speed).
Note: the Police parameters are stored in non-volatile memory. Click the left knob to exit the Police effect and return to SFX menu.
Rotating the left knob will adjust the number of fl ashes such as 'DBL' = two fl ashes. 'TRIP' = three fl ashes, 'QUAD' = four fl ashes as different forces use different types.
Press and hold the right knob to adjust colour temperature. Press and hold the left knob to adjust peak brightness.
-IV-
('TV') Television
This effect is an emulation of someone watching a TV show – it works best by setting the colour temperature to around 6000K to emulate the light from a cathode ray tube.
Click the right knob to activate the TV effect. Rotate either the left or right knob to adjust the TV effect speed (it will display XX Hz, which will give you an indication of the effect speed).
Press and hold the left knob to adjust peak brightness. Press and hold the right knob to adjust colour temperature.
Click the right knob to pause the effect/fade to black - 'Trig' will be displayed - re-click the right knob again to trigger the effect. You can also use
text_image
SHOTan external flash trigger to trigger the TV effect, just connect this to the Flash sync port on the rear of NEO 2.
Note: the TV parameters are stored in non-volatile memory.
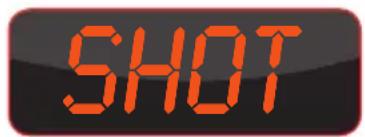
('SHOT') Shot
This effect simulates the muzzle flash produced when a gun is fixed. Enter the effect by pressing the right knob. Trigger the effect by pressing the right knob, or trigger the effect externally via the trigger port. Control the decay time of the gunshot using either the left or right knobs.
Press and hold the left knob to adjust peak brightness. Press and hold the right knob to adjust colour temperature.
To exit the effect, press the left button, or to exit back to basic BRI/COL operation press both knobs.
text_image
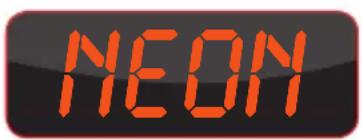
NEON('NEON') Neon
This effect is used to simulate a faulty neon fi xture. To enter the effect click the right knob. Use the right knob to start/stop the effect, alternatively use the sync/trigger input port to externally start/stop the effect.
Both the left and right knob adjust the fl icker speed of the effect. Press and hold the left knob to adjust peak brightness. Press and hold the right knob to adjust colour temperature.
To exit the effect press the left knob or exit to BRI/ COL operation press both knobs together.
text_image
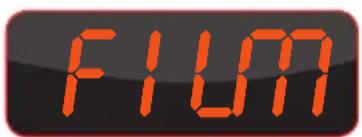
FILIT('FILM') Film
The ‘Film’ effect is designed to simulate the light coming from a celluloid film projector in a movie theatre. To enter the effect click the right knob. You can start/stop the effect using the right knob or an external trigger from the flash sync. The left
and right knobs both adjust the speed of the movement on the screen. Press and hold the left knob to adjust peak brightness. Press and hold the right knob to adjust colour temperature.
To exit this effect press the left knob, to exit back to basic operation press both knobs together.
text_image
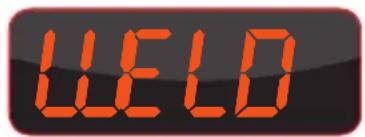
WELD('WELD') Weld
This effect simulates the light from an electric arc welding torch. To enter the effect press the right knob. Both left and right knobs adjust the speed of the effect. Pressing it starts/stops the effect, or you can also start/stop the effect via the external trigger port.
Press and hold the left knob to adjust peak brightness. Press and hold the right knob to adjust colour temperature. Rotate the right knob to vary the frequency of the effect.
To exit the effect press the left knob, or to exit back to basic operation press both knobs together.
text_image
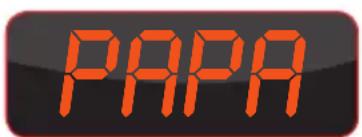
PAPA('PAPA') Paparazzi
This effect is used to simulate a flash mob of paparazzi photographers. To enter the effect click the right knob.
Press the right knob to start/stop the effect, alternatively use the sync port to externally start/stop the effect.
Both left and right knobs adjust the flicker speed of this effect. Press and turn the left knob to control the brightness of the effect or press and turn the right knob to control the colour temperature of the effect.
To exit the effect press the left knob. To exit to basic operation press both knobs together.
Shows the brightness setting as an accurately calculated aperture (f-stop) for your subject at a given distance.
Cycle the menu to 'FDIM' then click the right knob to enter 'FDIM' mode.
Rotating the left knob cycles through the available user parameters:
'ISO' (your camera ISO setting), 'EXP' (your camera shutter speed) and 'FEET' (the distance from the light to your subject in feet).
Rotating the right knob will adjust the selected user parameter (ISO/EXP/FEET).
Clicking the right switch will enter the 'f-stop dimming display' where the brightness is dynamically displayed as an aperture or f-stop.
Adjust the brightness with the right knob and the display will show the adjusted f-stop aperture for your camera.
Note: the True Aperture Dimming™ algorithm calculates the f-stop based on the NEO 2 brightness setting, your camera's ISO and shutter speed, the distance to the subject.
To re-adjust the last selected parameter (usually FEET) click the right knob, make the adjustment, then click the right knob again to return to the f-stop Dimming Display, alternatively rotate the left knob to select a different parameter to edit, and then click the right knob to re-enter 'f-stop dimming display'.
This enables you to effectively ‘bookmark’ the user parameter that is dynamically changing during your shoot (i.e. distance to subject), and without needing to re-meter the shot, update the parameter and calculate the revised f-stop, allowing you to work fast.
natural_image
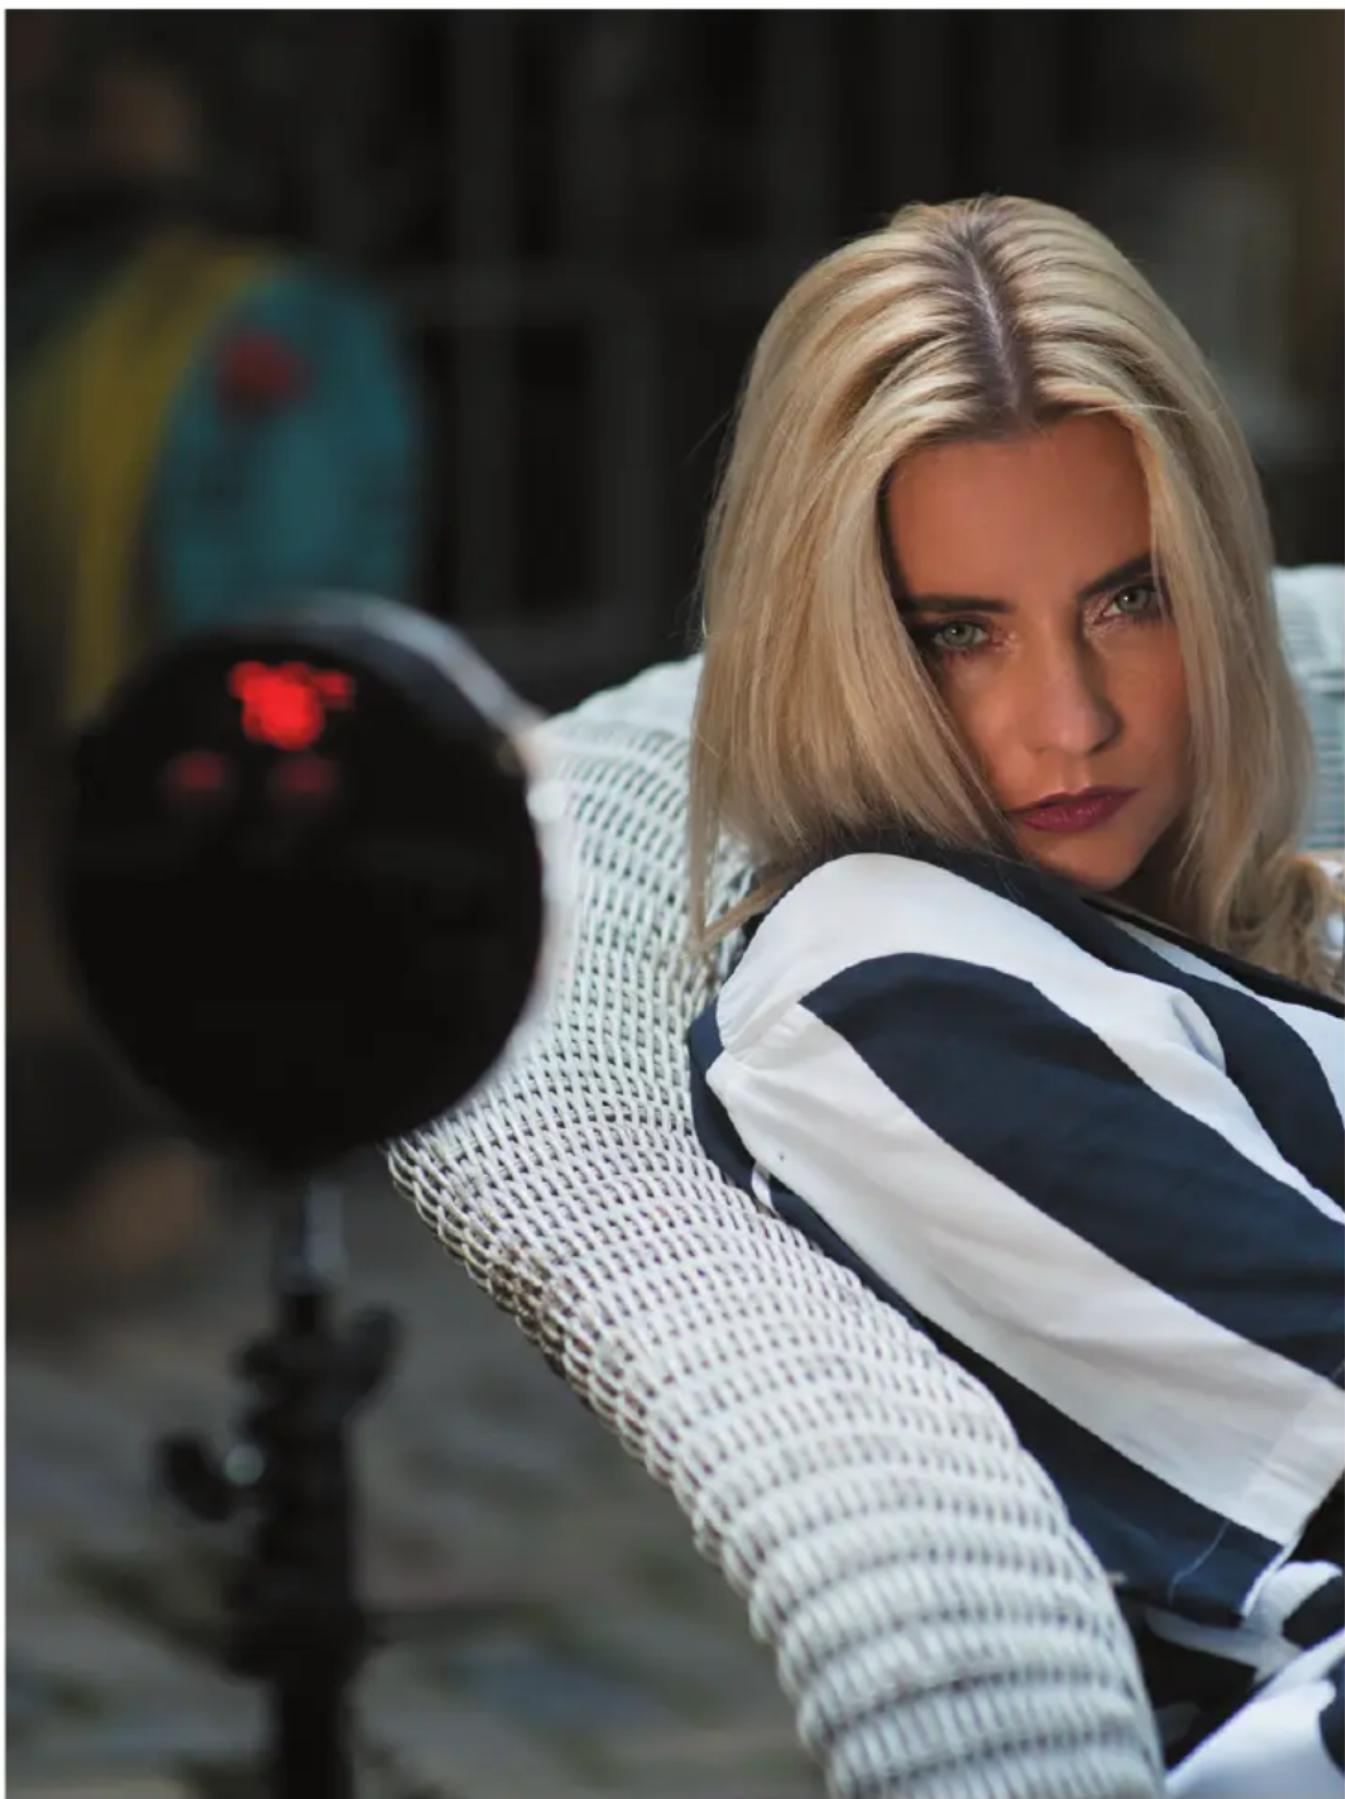
Woman in striped outfit with red light beam, focused on her side (no visible text or symbols)Rotolight Master of Light Peter Müller shooting with the NEO 2
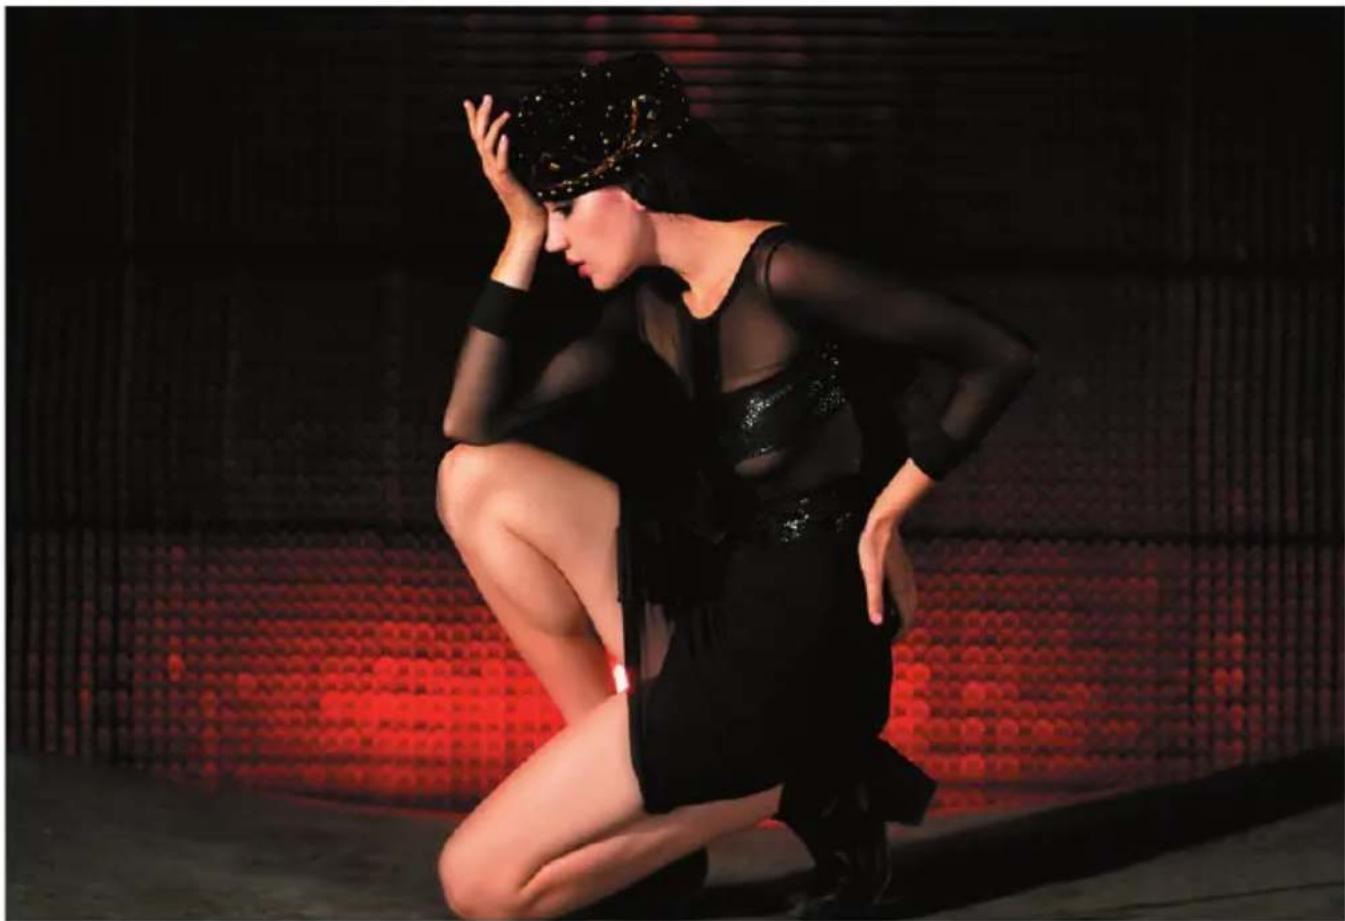
natural_image
Figure in black costume and headband posing on stage with red patterned backdrop (no text or symbols visible)Rotolight NEO 2 - result shots Shot by Master of Light Jason Lanier
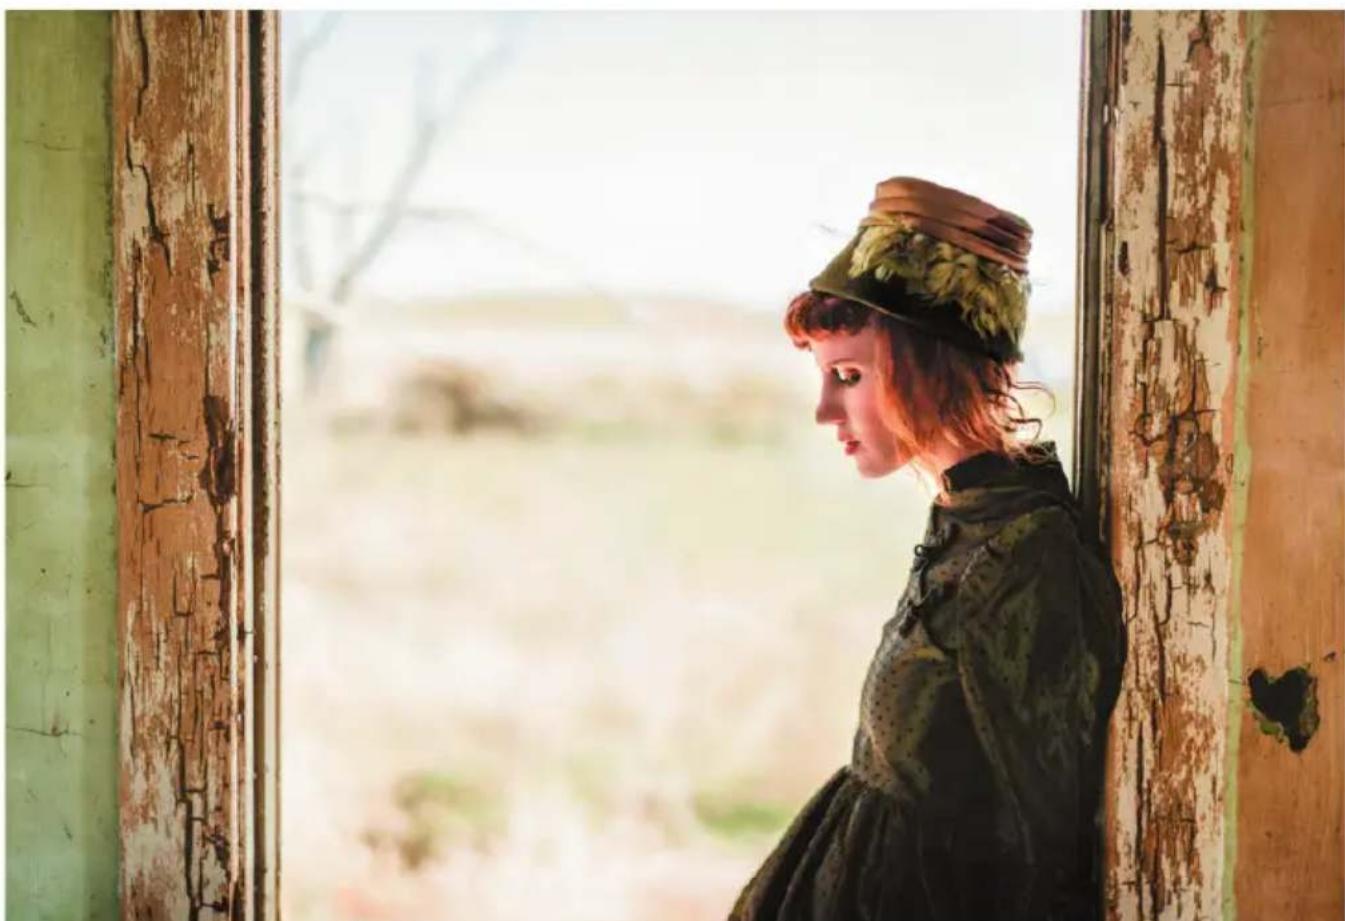
natural_image
Side profile of a woman in vintage attire standing by a doorway, looking out the window (no text or symbols visible)
natural_image
Woman in black dress sitting in front of a vintage car with steering wheel and dashboard (no visible text or symbols)Rotolight NEO 2 - result shots Shot by Master of Light Peter Müller

natural_image
Close-up of a woman with long blonde hair resting her chin, looking at a purple lamp in the background (no text or symbols visible)You can also choose to work in reverse, i.e. you creatively choose an aperture (i.e. f/3.0) and match your light to your camera exposure settings, this way all the photos from your shoot will have the same grain structure/depth of fi eld/etc.
Click the left switch to return to MENU, alternatively you can return to the basic operation (BRI / COL) by pressing both control knobs together.
CTRL
('CTRL') Control Menu
This menu allows you to set what is controlling the NEO 2.
ADDR
('ADDR') - Primary DMX Channel Address
Use ADDR to select the starting DMX channel address of the NEO 2.
LOCK
('LOCK') Settings Lock
Use ‘LOCK’ to isolate and protect a specific light from changes bring made by a master Anova PRO 2 running AUTO.
MODE
('MODE') What Controls NEO 2
Select which mode you want to use to control NEO 2, options are 'LOCL' (the local knobs, trigger input and/or SKYPORT) 'wDMX' where the NEO 2 is wirelessly controlled by Rotolight wDMX (i.e. from an Anova PRO 2).
Simply enter into CTRL menu, turn the right knob to MODE and click the right knob to enter. Scroll either knob between Locl or wDMX.
FREQ
('FREQ') Frequency
Select the channel for Skyport.
SKYP
('SKYP') Skyport
This activates the Skyport wireless HSS receiver. NEO 2 will also still flash in Skyport mode from a wired external source connected to the flash sync 3.5mm port, however it is not necessary for the unit to be in Skyport mode if using with a wired receiver.
For users wishing to operate both Elinchrom and Rotolight units simultaneously using the HSS Transmitter, change the mode to 'NORM'. If you are only operating Rotolight units via the HSS transmitter, we recommend using 'SPED' mode.
If users aren't intending to use the HSS transmitter, you can turn Skyport 'OFF'. In addition, if you are in the vicinity of other Elinchrom/Rotolight users and do not wish your units to be controlled by their transmitters, turn Skyport mode 'OFF'.
GRP
('GRP') Skyport Group
Click the right knob to enter 'GRP' settings. Rotate the right knob to select your desired group (1-4). Click the left knob to set and return.
TECH
('TECH') Technical Utilities Menu
In ‘TECH’ submenu you can monitor battery voltage, set up a custom calibrated colour, monitor the operating temperature, or check the firmware version.
VOLT
('VOLT') Voltage
VOLT mode will scroll display the voltage from the selected power source. (e.g '9.4V BATTERY' or '15.2V DC IN'). Please note NEO 2 will automatically give you a warning if the voltage drops too low, which indicates a battery change is needed (e.g. 'low battery').
NEO 2 will also put a blinking dot on the bottom right of the current display to indicate low battery
voltage whilst reducing the output by progressive steps of 10% until voltage stabilises to eliminate flicker.
NEO 2 will operate from 6V DC up to 17.5V DC. Only connect external power sources with the correct polarity and voltage to avoid serious damage to NEO 2.
In 'VOLT' mode, to check your battery performance in action, you can click the right knob and then rotate the left knob to observe the actual battery voltage during the range of dimming.
Click the left knob to return to MENU, alternatively you can return to the basic operation (BRI/COL) by pressing both control knobs together.

text_image
CAL('CAL') Calibrated Custom Colour Mode
Click the right switch to enter 'CAL' mode. The two knobs individually control the blue channel LEDs ('b' XX), or the yellow channel LEDs ('y' XX). You can now set very specific colours by balancing the two colour channels, within an expanded range of colour from 2800 kelvin up to 7200 kelvin.
This custom colour value is held as an operating preset whilst you operate the NEO 2, but will be reset if you power the unit down.
It is very useful to have an accurate colorimeter (such as a Sekonic C-700) to create these custom colours.
text_image
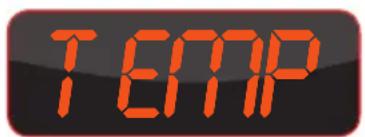
TEMP('TEMP') Temperature
Click the left knob to display the internal operating temperature of NEO 2.
Note: if NEO 2 detects the battery temperature rising to 58 degrees or above, it will display 'Too Hot' (touch any knob to clear message) and
automatically cut the output down to 25% to prevent overheating.
Please use only high-quality battery systems with NEO 2, such as the Rotolight LionHeart 2700MaH AA batteries which will drive the light at full continuous power for up to 2 hours.
Click the left switch to return to MENU, alternatively you can return to the basic operation (BRI/COL) by pressing both control switches together.
SRNO
('SRNo') Serial Number
Use the right knob to activate a scrolling display of the serial number. Left knob to exit.
VERS
('VERS') - Firmware Version
Click the left knob to display the firmware version installed in your NEO 2.
Note: The firmware can be updated, if required, by your Rotolight distributor.
DISP
('DISP') Display
Allows the display to be set to low brightness or 'off' to reduce power consumption/increase battery life or for discrete usage on set.
Click the right knob to enter 'DISP' and rotate the left knob to select the display mode:
'High' – the display will be at full brightness 'Low' – the display will be dim, reduced power consumption.
'Off – the display will automatically switch off after 5 seconds, unless a control is operated, for maximum power saving or discretion on set.
SCRL
('SCRL') Scrolling Text Control
Allows the control status scrolling to be set to 'on' or 'off'. When 'on' NEO 2 will continuously display the status of the control mode, DMX channels, and reception. When set to 'off', NEO 2 will only display
text_image
FINEthis information once when you make a change to the configuration.
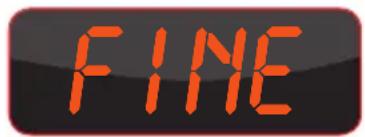
('FINE') Fine Dimming Mode
Fine dimming mode enhances the low light level operation of the NEO 2 (in normal operation below 7% brightness). It enables the NEO 2 to offer smooth dimming down to zero, with accurate colour rendition, and enhances basic (BRI/COL) operation, as well as FADE, THROB and CHASE.
If you are shooting with a high frame rate camera, FINE mode can sometimes cause fl ickering at very low light levels. The default setting is on, but for high frame rate operation you can turn this parameter off by rotating the right control knob and selecting on or off.
text_image
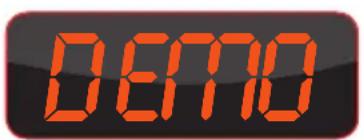
DETTO('DEMO') CineSFX Demonstration Mode
Use this mode to let NEO 2 automatically demonstrate a selection of its unique CineSFX™ capabilities, mainly useful for retail stores. Set a desired brightness and base colour temperature using BRI/COL. Enter MENU then navigate to 'DEMO' by rotating either knob.
Select ‘DEMO’ by clicking the right knob. NEO 2 will now demonstrate a range of effects from its library, whilst simultaneously explaining what is being demo’d on the display. Click the left switch to return to MENU, alternatively you can return to the basic operation (BRI/COL) by pressing both control knobs together.
Filter Information
A filter holder is included with NEO 2. Simply place your desired filter underneath the filter holder, then using both thumbs, rotate the filter holder into a locking position on the front cover the NEO 2 light (you will hear a 'click' to indicate it has locked). To unlock, rotate in the other direction. NEO 2's filters are 130mm diameter and have a 40.5mm hole in the centre, so its easy to cut your own. You may combine multiple filters should you so wish (for example diffuser + colour FX). Utilising diffusion filters will not affect the colour temperature of the light setting.
NEO 2 includes a standard filter pack comprising:
216 Strong Full Diffusion
to soften light output and shadows. 1.5 stop light loss.
250 Half Diffusion
to soften light output & shadows, great for portraits. 3/4 stop light loss.
184 'Cosmetic Peach'
Cosmetic diffuser for softer skin tones, great for portraits and video interviews.
279 1/8th Magenta (or minus green)
adds magenta to match to fluorescent/tungsten lighting or enhance ‘pinker’ skin tone (if desired).
There is an optional add on 'Colour Filter Pack' which is highly recommended for photography, and for use in conjunction with CineSFX™ mode. To purchase this product go to www.rotolight.com.
Mounting
NEO 2 has three tripod mounting (1/4"-20) standard mounting sockets, positioned around its circumference so NEO 2 can mount directly onto standard light stands, tripods or arms. These are also used to attach accessories like the barn doors.
NEO 2 is compatible with all the Rotolight NEO 1 & RL48 mounting accessories (foam handgrip, magic arm and clamp kits).
NEO 2 is incredibly portable at just 450 grams. If you plan to use the NEO 2 with a compact V-Lock battery, like a Rotolight (RL-BATT-95) remotely from the light, you can carry it in a belt pouch (RL48-ABP) with a d-tap DC cable.
Batteries
NEO 2 does not include batteries as standard and will operate from 6 x AA Lithium or NiMH rechargeable batteries, or any third party V-mount battery with a DC voltage of 7 volts up to 18 volts and a d-tap port and d-tap DC cable.
Recommended batteries:
DO NOT USE STANDARD ALKALINE BATTERIES WITH NEO 2, AS IT NEEDS HIGH PERFORMANCE BATTERIES.
For best results use Rotolight rechargeable (NiMH) AA batteries, which will provide 2 hours continuous light output at 100% power, or 85,000 full power flashes. As with any electronic device, do NOT mix brands of batteries inside NEO 2 and ensure all batteries have a similar level of charge to avoid overstressing the battery which could lead to the risk of damage to the battery and NEO 2.
Alternatively, use the Rotolight (RL-BATT-95) Lithium-ion V-Lock Battery (available from www.
rotolight.com) with a d-tap cable for up to 8 hours run time, and MAX + flash mode.
The Rotolight V-Lock battery is also available with a bundled D-TAP travel charger (110/220volt). Rotolight also offers optional two-way or four-way desktop battery chargers.
WARNING: Take care to use recommended batteries in your NEO 2. If the batteries you are using get hot then use the supplied mains adapter instead.
Manufacturer's Limited Warranty
Rotolight Ltd will extend to its customers a Limited Manufacturer's Product Warranty of one year on Manufacturer's products from their date of purchase. This warranty shall not include general wear and tear, and shall be invalidated by tampering with, dropping, damaging the product or misuse. The Manufacturer's products warranty will specifically not include the tearing or damage to filter gels, (unless immediately reported upon delivery), water damage to the unit, battery acid damage to the unit, stress fractures to the unit, filter holder or battery mount (unless reported on delivery), or disconnection of wires (unless reported on delivery).
Customer will be solely liable for any and all shipping costs, duties and import taxes of any components or units returned for service/repair. This warranty is subject to the manufacturer's standard terms and conditions available on request. This product is made for professional use.
Extended 3 year warranty is available within the first month of purchase from
www.rotolight.com
Limitation of Liability
The liability of the Manufacturer or Distributor, if any, for damages for any claim of any kind whatsoever with regard to any order placed for the Manufacturer's products, regardless of the delivery or non-delivery of the products, or with respect to the products covered thereby, shall not (except in respect of liability for death or personal injury caused by Manufacturer's or Distributor's negligence or in the case of fraud) be greater than the actual purchase price of the products with respect to which such claim is made. Under no circumstances shall the Manufacturer or Distributor be liable for injury or harm caused by product misuse or compensation, reimbursement, or damages on account of the loss of present or prospective profits, expenditures, investments, or commitments, whether made in the establishment, development, or maintenance of business reputation or goodwill or for any other reason whatsoever.

natural_image
Pure geometric lines forming a V-shape with no text, numbers, or symbolsNEO 2 Optional Accessories
All accessories are available to purchase from www.rotolight.com or authorised Rotolight dealers.
1) Rotolight Lionheart AA batteries by Powerex PRO (RL-LION-AA)
2) Rotolight HSS Transmitter (RL-HSS-TX) available for Canon, Fujifilm, Nikon, Olympus/Panasonic and Sony
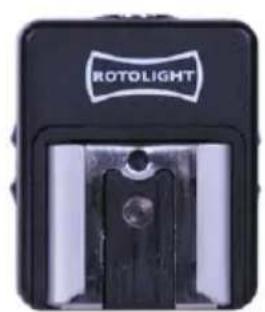
3) Rotolight Flash Shoe (RL-Flash-Shoe) for inexpensive wired flash triggering (non HSS)
4) NEO Barn Doors (RL-NEO-BD)
5) NEO Softbox Kit (RL-NEO-SOFTBOX) Note: requires Barn Doors to mount
6) 10 Piece Add on Colour FX Kit (RL-NEO-CFP)
7) Compact Light Stand (RL-COMPACT-LS)
8) Rotolight Mini Arm (RL-ARM-MINI) to mount external flash receiver to NEO
9) Replacement filter pack (RL-NEO-RFP)
10) Raincover (RL-NEO-II-RAIN)
11) Rotopod desk mount (RL-ROTOPOD)
12) 360 Pro Ball Head Adapter (RL-360-PRO)
13) PC Sync to 3.5mm mono jack flash sync cable (RL-35PC-CBL)
natural_image
Black rotolight device with a central display and circular lens (no visible text or symbols)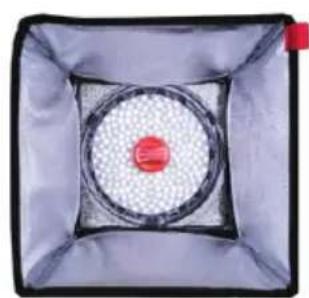
natural_image
Top-down view of a square box containing a circular pattern with a red sphere at the center (no text or symbols visible)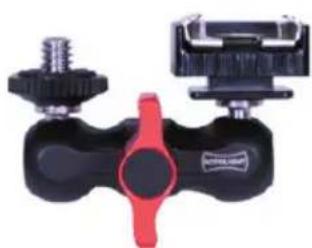
natural_image
Close-up of a black and red mechanical clamp or connector with two metallic clamps (no visible text or symbols)Rotolight RL-FLASH-SHOE Rotolight RL-ARM-MINIRotolight RL-SOFTBOX
Recommended Batteries Rotolight Lionheart AA by Powerex Pro Available from www.rotolight.com

text_image
ROTOLIGHT AA 2700mAh LION HEART BY POWEREX POWEREX Built for Performance NIMM RECHARGEABLE BATTERIES KOSU ROLLIG NLLA ROTOLIGHT.COMNEO II
WWW.ROTOLIGHT.COM
text_image
56:00 NEO