Nightvision 4 - Pregnant Roswell - Free user manual and instructions
Find the device manual for free Nightvision 4 Roswell in PDF.


User questions about Nightvision 4 Roswell
0 question about this device. Answer the ones you know or ask your own.
Ask a new question about this device
Download the instructions for your Pregnant in PDF format for free! Find your manual Nightvision 4 - Roswell and take your electronic device back in hand. On this page are published all the documents necessary for the use of your device. Nightvision 4 by Roswell.
USER MANUAL Nightvision 4 Roswell
natural_image
Technical line drawing of a mechanical assembly with four cylindrical components and two octagonal enclosures (no text or symbols)Part # C910-1722
Information: info@roswellglobal.com
If you have any questions please call:1-321-638-1331
PACKAGE CONTENTS
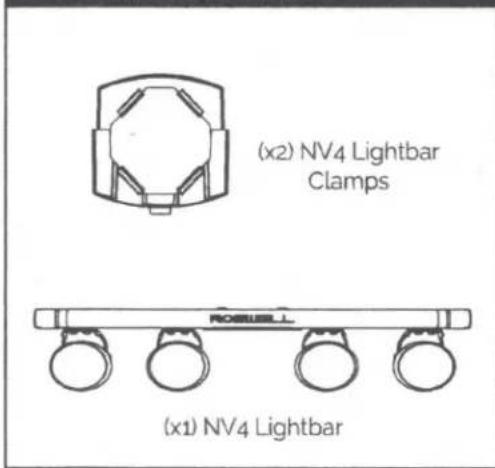
text_image
(x2) NV4 Lightbar Clamps ROSSULL (x1) NV4 Lightbar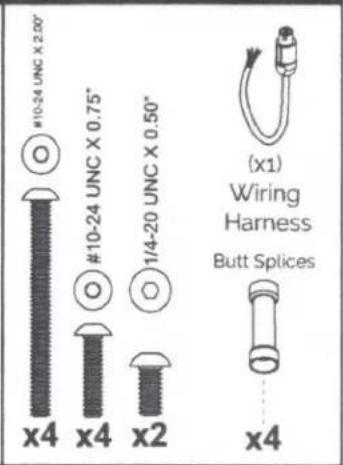
text_image
#10-24 UNC X 2.00" #10-24 UNC X 0.75" 1/4-20 UNC X 0.50" (x1) Wiring Harness Butt Splices x4 x4 x2 x4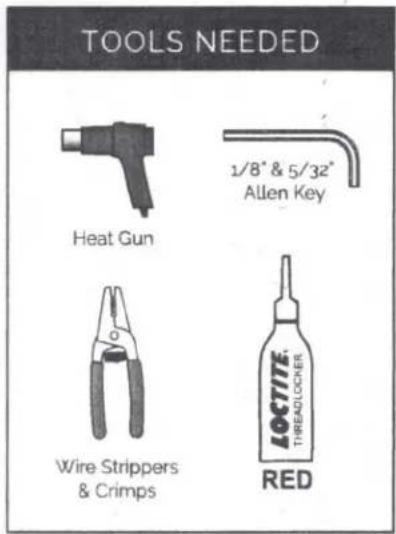
text_image
TOOLS NEEDED Heat Gun 1/8" & 5/32" Allen Key Wire Strippers & Crimps REDNOTES
You may need to provide wire for your tower and boat. You will need two fuses for the interior boat wiring. You will need wire for both the lights and the LED interior light – enough length to run to your desired power source or switch (depending on your install).
We recommend a minimum 18 gauge wire for powering both the lights and the interior LED. You must mount an in-line fuse on the positive wire of each circuit between your battery and the switch. The in-line fuse is designed to protect your wires and the lightbar in case of short circuit. We recommend using a 5 amp fuse.
MOUNTING OPTIONS
Your new NV4 Light Bar can be mounted anywhere on your tower – it has been designed to have the interior LED facing down but can be mounted to face upward. The lights will rotate to face either direction so it's up to you to choose a suitable mounting location.
Both ends of the light bar are equipped with a speakon connector, however only one end needs to be plugged in. This allows you to connect multiple lightbars on the tower without running a dedicated circuit for each.

Hold the bar in the position you would like on your tower (see recommendations for mounting options at the beginning of these instructions).
Verify which of the 2 mounting positions will work best for the location you have chosen.
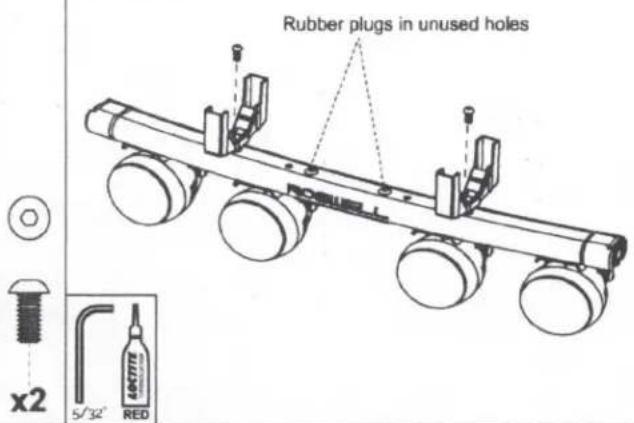
Replace the rubber plugs in the extra holes you will not use and attach the clamps to the holes that will be used. (See Step B)
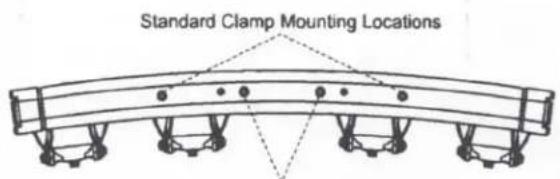
text_image
Standard Clamp Mounting LocationsAdditional/Optional Clamp Mounting Locations

Install the 2 bottom halves of the clamps to the lightbar in the locations chosen in Step A using the hardware provided and a 5/32" allen key. Apply red Loctite to the bolts first.
text_image
Rubber plugs in unused holes x2 5/32" RED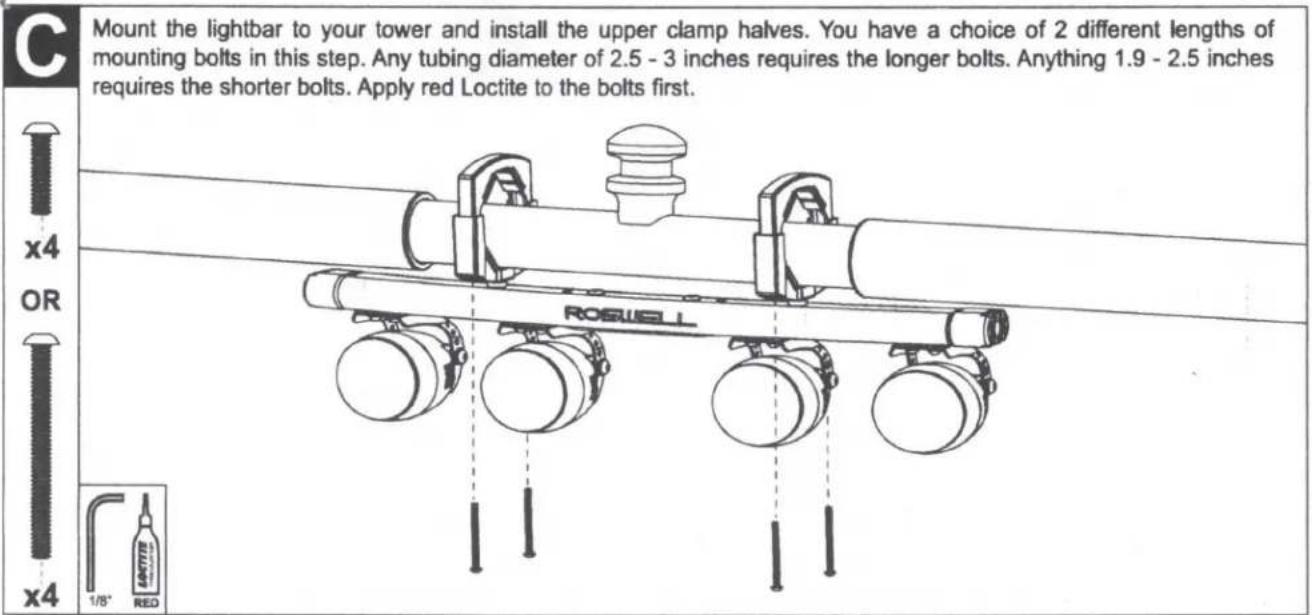
text_image
Mount the lightbar to your tower and install the upper clamp halves. You have a choice of 2 different lengths of mounting bolts in this step. Any tubing diameter of 2.5 - 3 inches requires the longer bolts. Anything 1.9 - 2.5 inches requires the shorter bolts. Apply red Loctite to the bolts first. x4 OR x4 ROSWELL 1/8" RED C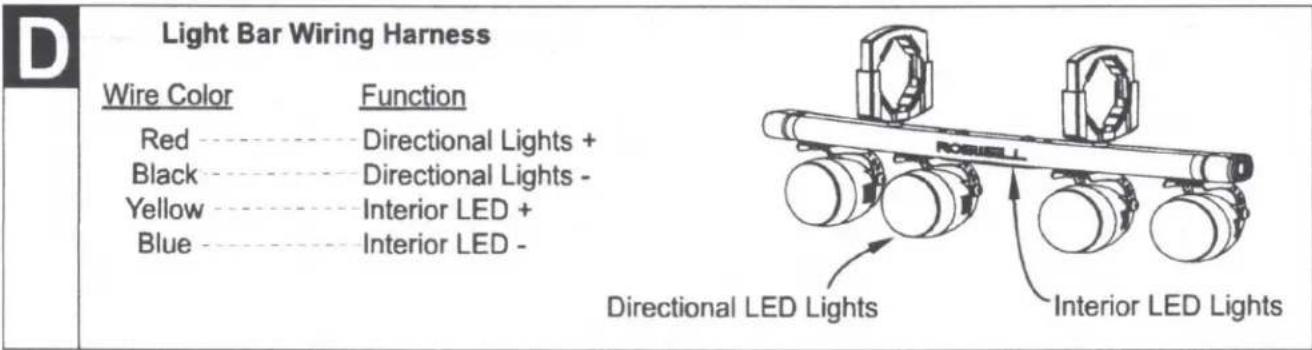
text_image
Light Bar Wiring Harness Wire Color Function Red Directional Lights + Black Directional Lights - Yellow Interior LED + Blue Interior LED - Directional LED Lights Interior LED Lights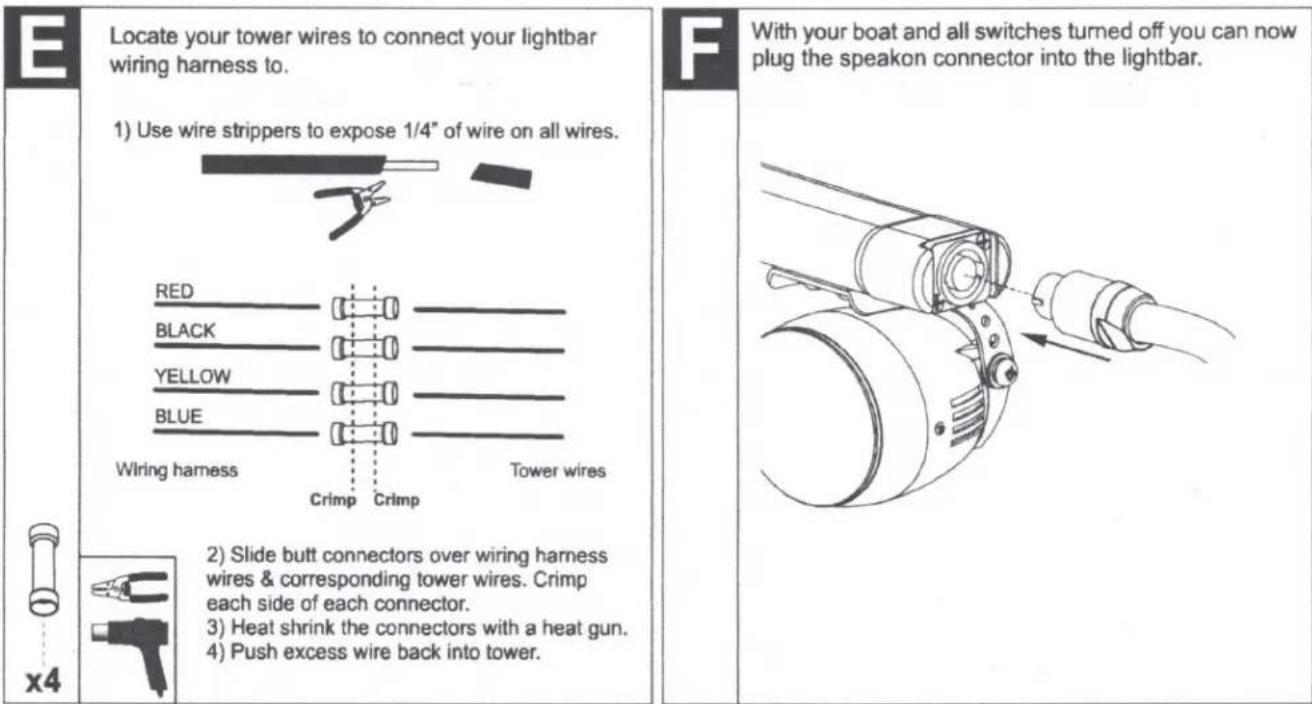
text_image
E Locate your tower wires to connect your lightbar wiring harness to. 1) Use wire strippers to expose 1/4" of wire on all wires. RED BLACK YELLOW BLUE Wiring harness Crimp Crimp Tower wires 2) Slide butt connectors over wiring harness wires & corresponding tower wires. Crimp each side of each connector. 3) Heat shrink the connectors with a heat gun. 4) Push excess wire back into tower. F With your boat and all switches turned off you can now plug the speakon connector into the lightbar. x4
ROSWELL.
wake-air
To our valued customers and dealers, thank you for choosing Roswell Wake-Air products for your wakeboard accessory needs. To ensure proper function of your wakeboard accessories and a lifetime of enjoyment, please note the following.

ATTENTION

Towers and tower accessories require regular maintenance. Tower hardware and retaining bolts can become loose with normal operation; it is the owner's responsibility to ensure all hardware is kept tight and secure.
Corrosion and/or oxidation on coated surfaces as well as on all hardware are specifically excluded from warranty as their care, maintenance, and environments of use cannot be controlled by Roswell Wake-Air. Damage due to misuse or improper care is also excluded from warranty. For full warranty details please visit our website at www.roswellwakeair.com/customer-support/warranty or contact your local dealer.

CAUTION

Roswell Wake-Air strongly recommends that a routine inspection of hardware and components be done to ensure proper function, safety, and to maximize product life. If bolts are found to be loose, discontinue use until Loctite is re-applied where applicable and bolts are re-tightened.
Thanks again for choosing Roswell Wake-Air as your wakeboard accessory provider. If you have any questions or concerns please contact your local dealer or call our toll-free number at 1-855-962-WAKE (9253).
ROSWELL wake-air
WARRANTY CARD
This card must be filled out and returned within 15 days of purchase and must accompany a copy of proof of purchase.
Please complete the following warranty card, apply correct postage and mail to Roswell Wake-Air or register online at roswellwakeair.com
NAME ____ REGISTRATION DATE ____
ADDRESS____ CITY____
PROVINCE/STATE POSTAL/ZIP
SELLING DEALER ____ PURCHASE DATE ____
PRODUCT DESCRIPTION PIN
ROSWELL WARRANTY POLICY
3 YEAR LIMITED PARTS AND STRUCTURE WARRANTY- Roswell manufactured products are warranted to be free from defects in materials and workmanship for a period of 3 years from the initial retail date of sale. Warranty will only be determined by the Roswell Warranty Department and will at their discretion be repaired or replaced within the first three years.
Excluded in the limited warranty is damage due to misuse or improper care. If a Roswell Wake-Air product fails due to defective materials or workmanship after the original warranty period, it will, at the manufacturer's discretion, be repaired or replaced. Any modifications or improper use, not approved in writing by Roswell Wake-Air, shall void this warranty. Roswell Wake-Air is not responsible for personal injury or damage to the boat caused by the use of any Roswell product.
1 YEAR LIMITED ESTHETIC WARRANTY- Roswell products are warranted to be free from defects in the clear coat, paint and anodizing for a period of 1 year from the initial retail date of sale. Warranty will only be determined by the Roswell Warranty Department and will at their discretion be repaired or replaced within the first year.
Excluded in the limited aesthetics warranty is damage due to misuse or improper care. Coated surfaces as well as all hardware corrosion/oxidation are specifically excluded from the 1 year warranty as their care, maintenance and environment of use cannot be controlled by Roswell Wake-Air. If the coating has an issue due to defective materials or workmanship after the original 1 year warranty period, it will, at the manufacturer's discretion, be repaired or replaced.
The 1 year and 3 year limited warranties are in effect as long as the original owner keeps the product and are not transferable.
Defects must be reported within 30 days of receipt.
Full warranty available at roswellwakeair.com/customer-support/warranty
PLACE STAMP HERE
ROSWELL WAKE-AIR
WARRANTY
206,26229 TWP 531A
ACHESON, AB CANADA
T7X 5A4