
JTA-460 - Turntable JENSEN - Free user manual and instructions
Find the device manual for free JTA-460 JENSEN in PDF.


| Product Type | Turntable with AM/FM Radio and USB/SD Recording |
| Model | Jensen JTA-460 |
| Brand | Jensen |
| Power Supply | 120V~60Hz AC |
| Turntable Speeds | 33, 45, 78 RPM |
| Radio Bands | AM, FM, FM Stereo |
| Media Playback | USB Flash Drive, SD/MMC Card (MP3 only) |
| Recording | Records from turntable to USB/SD as MP3 |
| Audio Output | RCA Line Out (L/R), Headphone Jack (3.5mm) |
| Speaker | Built-in (with ON/OFF selector) |
| Remote Control | Yes, for USB/SD functions (CR2025 battery included) |
| Controls | Volume, Tuning, Bass Boost, Function/Band Selector, Playback Controls |
| Additional Features | Auto-Stop Selector, 45 RPM Adapter, Cue Lever, Dust Cover |
| Display | LCD with track info, radio frequency, etc. |
| Stylus | User-replaceable (refer to diagram in manual) |
| Safety | Class II, double insulation; polarized plug; do not expose to moisture |
| Care | Clean with damp cloth; avoid solvents, direct sunlight, humidity |
| Warranty | 90 days limited (USA only) |
| FCC Compliance | Class B digital device |
| Dimensions (approx) | 16.5 x 14.2 x 5.7 inches (not official) |
| Weight (approx) | 8.5 lbs (not official) |
Frequently Asked Questions - JTA-460 JENSEN
User questions about JTA-460 JENSEN
0 question about this device. Answer the ones you know or ask your own.
Ask a new question about this device
Download the instructions for your Turntable in PDF format for free! Find your manual JTA-460 - JENSEN and take your electronic device back in hand. On this page are published all the documents necessary for the use of your device. JTA-460 by JENSEN.
USER MANUAL JTA-460 JENSEN
natural_image
JENSEN portable radio with open lid and control knobs, no visible text or symbols on main devicePLEASE READ THIS OPERATING MANUAL COMPLETELY BEFORE OPERATING THIS UNIT AND RETAIN IT FOR FUTURE REFERENCE.
IMPORTANT SAFETY INSTRUCTIONS
WARNING:
TO REDUCE THE RISK OF FIRE OR ELECTRIC SHOCK, DO NOT EXPOSE THIS APPLIANCE TO RAIN OR MOISTURE. DANGEROUS HIGH VOLTAGES ARE PRESENT INSIDE THE ENCLOSURE. DO NOT OPEN THE CABINET REFER SERVICING TO QUALIFIED PERSONNEL ONLY.
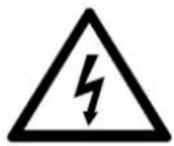
The lightening flash and arrow head within the triangle is a Warning sign alerting you of "dangerous voltage" inside the product
CAUTION
RISK OF ELECTRIC SHOCK DO NOT OPEN
CAUTION: TO REDUCE THE RISK OF ELECTRIC SHOCK DO NOT REMOVE COVER (OR BACK) NO USER SERVICEABLE PARTS INSIDE. REFER SERVICING TO QUALIFIED SERVICE PERSONNEL

The exclamation point within the triangle is a Warning sign alerting you of Important Instructions accompanying the product
CAUTION:
PLEASE READ AND OBSERVE ALL WARNINGS AND INSTRUCTIONS GIVEN IN THIS OWNER'S MANUAL AND THOSE MARKED ON THE UNIT, KEEP THESE INSTRUCTIONS. RETAIN THIS BOOKLET FOR FUTURE REFERENCE.
This set has been designed and manufactured to assure personal safety. Improper use can result in electric shock or fire hazard. The safeguards incorporated in this unit will protect you if you observe the following procedures for installation, use and servicing. This unit does not contain any parts that can be repaired by the user.

The symbol for class II (Double insulation)
DO NOT REMOVE THE CABINET COVER, OR YOU MAY BE EXPOSED TO DANGEROUS VOLTAGE. REFER SERVICING TO QUALIFIED SERVICE PERSONNEL ONLY.
- Read these Instructions.
- Keep these Instructions.
- Heed all Warnings.
- Follow all instructions.
- Do not use this apparatus near water.
-
Clean only with a dry cloth.
-
Do not block any of the ventilation openings. Install in accordance with the manufacturer's instructions.
- Do not install near any heat sources such as radiators, heat registers, stoves, or other apparatus (including amplifiers) that produce heat.
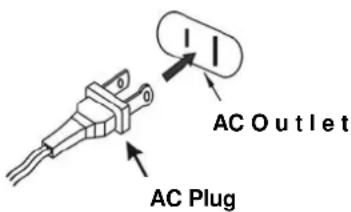
- Do not defeat the safety purpose of the polarized or grounding – type plug. A polarized plug has two blades with one wider than the other. A grounding type plug has two blades and a third grounding prong. The wide blade or the third prong is provided for your safety. If the provided plug does not fit into your outlet, consult an electrician for replacement of the obsolete outlet.
- Protect the power cord from being walked on or pinched particularly at plugs, convenience receptacles and the point where they exit from the apparatus.
- Only use attachments/accessories specified by the manufacturer.
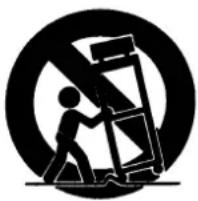
- Use only with a cart, stand, tripod, bracket, or table specified by the manufacturer, or sold with the apparatus. When a cart is used, use caution when moving the cart/apparatus combination to avoid injury from tip-over.
- Unplug this apparatus during lightning storms or when unused for long periods of time.
- Refer all servicing to qualified service personnel. Servicing is required when the apparatus has been damaged in anyway, such as power-supply cord or plug is damaged, liquid has been spilled or objects have fallen into the apparatus, the apparatus has been exposed to rain or moisture, does not operate normally, or has been dropped.
- The apparatus shall not be exposed to dripping or splashing and that no objects filled with liquids, such as vases, shall be placed on apparatus.
- Main plug is used as disconnect device and it should remain readily operable during intended use. In order to disconnect the apparatus from the mains completely, the mains plug should be disconnected from the mains socket outlet completely.
- Battery shall not be exposed to excessive heat such as sunshine, fire or the like.
natural_image
Symbolic icon of a person climbing a ladder with a diagonal line, enclosed in a circle (no text or symbols)CAUTION:
TO PREVENT ELECTRIC SHOCK, MATCH WIDE BLADE OF PLUG TO WIDE SLOT. FULLY INSERT.
FCC NOTICE:
This equipment has been tested and found to comply with the limits for a Class B digital device, pursuant to Part 15 of the FCC Rules. These limits are designed to provide reasonable protection against harmful interference in a residential installation. This equipment generates, uses and can radiate radio frequency energy and, if not installed and used in accordance with the instructions, may cause harmful interference to radio communications.
However, there is no guarantee that interference will not occur in a particular installation. If this equipment does cause harmful interference to radio or television reception, which can be determined by turning the equipment off and on, the user is encouraged to try to correct the interference by one or more of the following measures:
– Reorient or relocate the receiving antenna.
– Increase the separation between the equipment and receiver.
- Connect the equipment into an outlet on a circuit different from that to which the receiver is needed.
- Consult the dealer or an experienced radio/TV technician for help.
WARNING:
Changes or modifications to this unit not expressly approved by the party responsible for compliance could void the user's authority to operate the equipment.
PROTECT YOUR FURNITURE!!
This system is equipped with non-skid rubber ‘feet’ to prevent the product from moving when you operate the controls. These ‘feet’ are made from non-migrating rubber material specially formulated to avoid leaving any marks or stains on your furniture. However certain types of oil based furniture polishes, wood preservatives, or cleaning sprays may cause the rubber ‘feet’ to soften, and leave marks or a rubber residue on the furniture.
To prevent any damage to your furniture we strongly recommend that you purchase small self-adhesive felt pads, available at hardware stores and home improvement centers everywhere, and apply these pads to the bottom of the rubber ‘feet’ before you place the product on fine wooden furniture.
LOCATION OF CONTROLS
MAIN UNIT
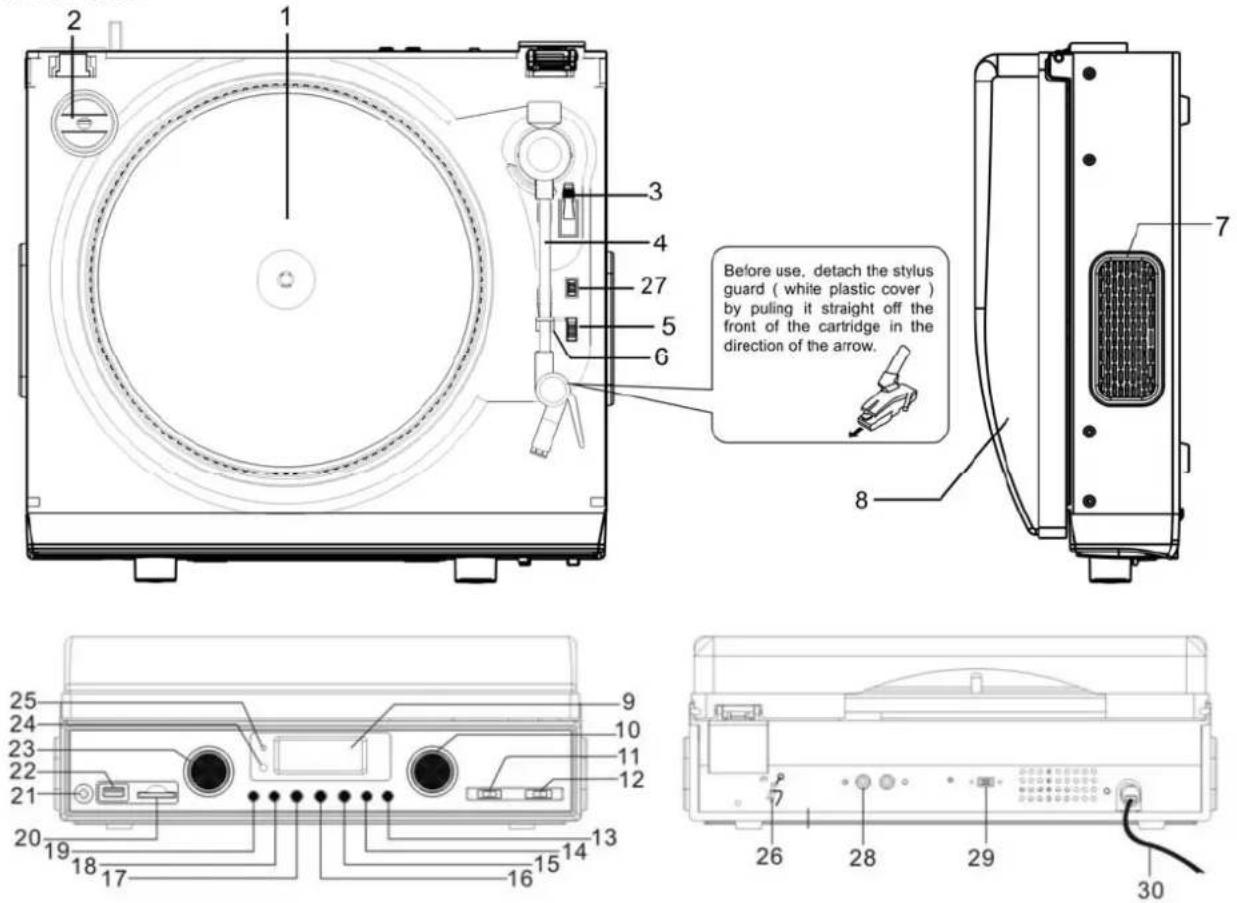
| 1. Turntable 16. Play / Pause Button | |
| 2. 45 RPM Adaptor 17. Record Button | |
| 3. Cue-lever (use this lever to lift the tone arm). 18. | Skip + Button |
| 4. Tone Arm 19. Skip - Button | |
| 5. Speed Selector 20. SD/MMC Card Slot | |
| 6. Tone Arm Holder 21. Headphone Jack | |
| 7. Speaker 22. USB Port | |
| 8. Dust Cover 23. Volume Control | |
| 9. Display 24. IR Sensor | |
| 10. Tuning Control 25. Power Indicator | |
| 11. Band Selector 26. FM Antenna | |
| 12. Function Selector 27. Auto Stop (ON/OFF) Selector | |
| 13. Bass Boost Button 28. Audio LINE OUT Jacks | |
| 14. Mode Button 29. Internal Speaker (ON / OFF) Selector | |
| 15. Stop/USB/Card Button 30. AC Power Cord | |
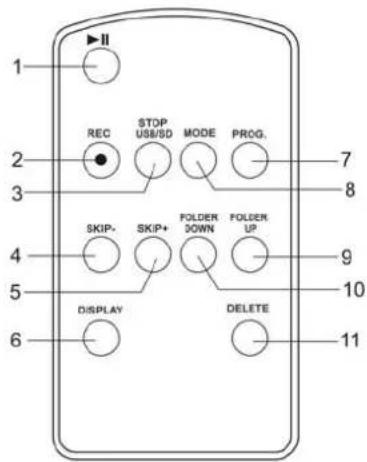
REMOTE CONTROL UNIT
- PLAY/PAUSE BUTTON
- RECORD BUTTON
- STOP/USB/SD BUTTON
- SKIP- BUTTON
- SKIP+ BUTTON
- DISPLAY BUTTON
- PROG BUTTON
- MODE BUTTON
- FOLDER UP BUTTON
- FOLDER DOWN BUTTON
- DELETE BUTTON
IMPORTANT NOTES
Avoid installing the unit in locations described below:
- Places exposed to direct sunlight or close to heat radiating appliances such as electric heaters.
• Dusty, humid or moist places. - Places subject to constant vibration.
POWER SOURCE
This Unit is designed to only operate on normal 120V\~60Hz household power. Do not attempt to operate the System using any other power source. You could cause damage to the unit and void your warranty.
The remote control unit operates on 1 CR2025 Lithium battery (Included).
AC OPERATION
- Plug the AC POWER CORD into a 120V AC \~ 60Hz outlet.
- Turn the System on by sliding the Function Selector (12) to either "TUNER", "USB/SD" or "PHONO". The LCD backlight will turn on.
Remarks:
If there is a malfunction due to electrostatic discharge (ESD), reset the unit by unplugging the AC CORD from the outlet, wait 30 seconds and then plug the AC CORD in again to reset to normal operation.
ACTIVATING THE REMOTE CONTROL
Remove the plastic insulator tag sticking out of the Battery Compartment of the Remote Control by pulling on it. Once the tag is removed, the Remote Control will be ready for use.
BATTERY CARE
i. If the unit is not to be used for an extended period of time, remove the battery. An old or leaking battery can cause damage to the Remote Control.
ii. Do not dispose of batteries in fire, batteries may explode or leak.
BATTERY REPLACEMENT
When the battery becomes weak, the operating distance of the Remote Control is greatly reduced and you will need to replace the Lithium battery.
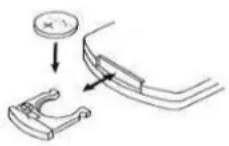
- Remove the battery compartment from bottom of the Remote Control.
- Install 1 "CR2025" Lithium battery with the positive side facing up.
- Replace the battery compartment.
IMPORTANT: Be sure that the battery is installed correctly. Wrong polarity may damage the Remote Control and void the warranty.
USING THE REMOTE CONTROL CORRECTLY
Note: The Remote Control is only for operating the USB and MMC Card functions.
- Point the Remote Control at the SENSOR (IR) located on the front of the System.
- The functions of the remote buttons are the same as the corresponding controls on the main unit.
- The performance of the infrared SENSOR may be degraded causing unreliable operation if there is a strong ambient light source in the same room.
● The recommended effective distance for remote operation is about 10-15 feet.
RADIO OPERATION
- Slide the FUNCTION Selector (12) to the "TUNER" position.
- Slide the BAND Selector (11) to either AM, FM or FM ST (FM Stereo Mode).
- Rotate the TUNING CONTROL (10) until you reach the radio station you wish to listen to. The radio station frequency shows on the LCD DISPLAY.
- Adjust the sound level by rotating the VOLUME CONTROL (23).
- To turn off the radio, Slide the FUNCTION Selector (12) to the "OFF" position. The LCD DISPLAY will go "off".
FM STEREO RECEPTION
With the BAND Selector (11) in the "FM ST" position, the FM Stereo Indicator "ST" will light up when listening to a strong station that is broadcasting in "Stereo".
Slide the BAND Selector (11) to the FM position if the FM stereo reception is weak. The reception may improve, but the sound is now monaural (MONO).
TIPS FOR BEST RECEPTION
AM – The AM antenna is located inside the cabinet of the main unit. If AM reception is weak, change the position of cabinet until the internal antenna picks up the strongest AM signal.
FM – During FM reception, always keep the FM Wire Antenna fully extended. If FM reception is weak try repositioning the FM Wire Antenna until you find the strongest FM signal.
To enhance the low frequency sound, press the BASS BOOST BUTTON (13) once (button in) to activate. Press the BASS BOOST Button (13) again (button out) to turn the Bass Boost off.
Note :
Please refer to the ON/OFF graphic on the Front Panel for correct operation of the Bass Boost function.
- Raise the Turntable Dust Cover.
- Remove the stylus protector and release the Tone Arm Clamp (6).
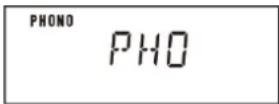
- Slide the Function Selector (12) to "PHONO".
-
Place a record on the turntable, over the center spindle.
-
Set the Speed Selector Switch to 33, 45 or 78 rpm according to the record you are playing. Place the included 45 RPM adaptor (2) over the center spindle when playing 45 rpm records.
-
Move the Tone Arm to the beginning of the record or to the beginning of a particular track. Gently lower the Tone Arm onto the record to start playing. Adjust the Volume if needed. The Turntable will stop automatically when the record finishes.
-
To stop the record before it ends, lift the Tone Arm (4) using the Cue-lever (3) and return it carefully onto the Tone Arm Clamp (6).
-
Replace the stylus protector on the stylus when not in use.
NOTE:
i. Do not stop or turn the platter manually.
ii. Moving or jarring the turntable without securing the Tone arm clamp could result in damage to the Tone arm.
AUTO-STOP SWITCH OPERATION
The Auto-Stop area on some records may extend beyond the preset setting. As a result the turntable could possibly stop before the last track finishes. If you experience this during playback, set the AUTO-STOP Switch (27) to the "OFF" position. The turntable will now run to the end of the record, but will no longer stop automatically. To stop the turntable you will need to either set the Function Selector (12) to the OFF position or return the AUTO-STOP Switch (27) to the "ON" position. After the record stops, lift and return the Tone Arm (4) carefully back onto the Tone Arm Clamp (6).
IMPORTANT:
Moving or jarring the Turntable without securing the Tone Arm Clamp (6) could result in damage to the Tone Arm (4).
ENCODING RECORDS TO MP3
You can convert you favorite records into MP3 files and store then on a USB Flash Drive or SD/MMC Memory Card via the USB port (22) or SD/MMC slot (20) located on the front panel.
The following tasks can be accomplished by either using the controls on the REMOTE Control or those which have similar function markings on the JTA-460 main unit.
This icon ⚪ indicates that a task can only be performed using the controls on JTA-460.
- Insert a USB flash drive into the USB PORT (22) or an SD/MMC Memory Card into the SD/MMC Slot (20) located on the front panel.
- Press the RECORD Button (2), "REC" and "USB" will begin to flash in the display, If a USB Flash Drive is inserted. If an SD/MMC Card is inserted then "REC" and "CARD" will flash in the display. If both USB and SD/MMC card are inserted, then Icon "SEL" will also appear and flash in the Display.
- You can use the ▶▶▶ Button or the ◀◀Button to select what media you want to record to.
- Select the track to be encoded and start playing the record.
- Press the Record button to start sync encoding. The following will be displayed depending on what media you are using to store the music.
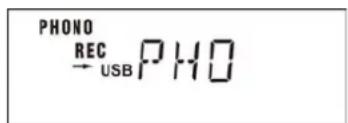
Encoding to USB
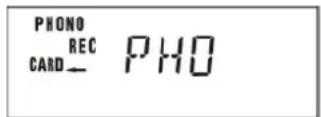
Encoding to Card
- To stop encoding press the STOP/USB/SD Button (3).
Note: To ensure the encoding is successful, remove the USB or Card a few seconds after pressing the STOP Button. - To start recording again, press the RECORD Button (2) again and follow step #2 above.
PLEASE NOTE : If you want to encode an entire side of a record and have separate MP3 files for each track, you must manually press the STOP/USB/SD Button (3) at the end of each track and then press the RECORD Button (2) again to start recording the next track. If you do not manually Stop and Start the recording process after each track, you will end up with one large MP3 file that will have all the songs from the side of the record playing one after the other.
The following tasks can be accomplished by either using the controls on the REMOTE Control or those which have similar function markings on the JTA-460 main unit.
This icon ⬆ indicates that a task can only be performed using the controls on JTA-460.
- Select the USB / CARD function mode by setting the Function selector (12) to "USB/CARD". The Display will show "USB NO" when the USB port is empty.
- Insert either a USB flash drive into the USB PORT (22) or an SD/MMC Memory Card into the SD/MMC Slot (20). Press and hold the STOP/USB/CARD Button (3) for 2 seconds to switch between USB and CARD modes if necessary.
- The total number of tracks on the USB or SD/MMC card will be displayed and playback will automatically start from the first track depending which mode you have chosen (USB or CARD).
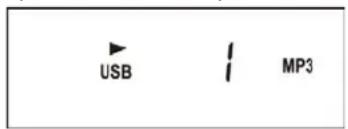
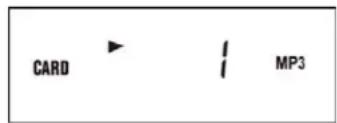
NOTE:
i. Only MP3 file formats are supported.
ii. Not all brands of USB flash drives are supported.
iii. The Display will show "NOF" if there are no MP3 files on the USB or SD/MMC card you inserted.
-
To interrupt playback, press the ▶ button (1). The track being played will flash.
-
To resume playback, press the ▶Button (1) again.
-
Press the DISPLAY Button (6) once then the Title, Artist and Album of the playing song if available will be displayed one by one on the LCD.
-
To stop playback, briefly press the STOP button (3).
TRACK SKIP
To select a particular track, in Stop mode or during playback, press the ▶▶▶ or ◀◀◀ Buttons (4, 5) repeatedly until the desired track number appears on the display. The selected track will start playback automatically.
FOLDER SKIP
To select a particular folder, in Stop mode or during playback, press the ▶/◀◀ Button (9,10), until the track number (first track number) of the Album appears in the Display. Playback of the first track of the selected folder will start automatically.
REPEAT 1/FOLDER/ ALL PLAYBACK
- During playback, if you want to repeat the same track, simply press the MODE (8) Button once. 'appears in the Display.
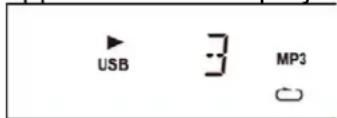
- The track will be repeated and stop until the STOP Button (3) is pressed.
- To repeat a Folder, press the MODE button (8) twice. "FOLDER" will light up.
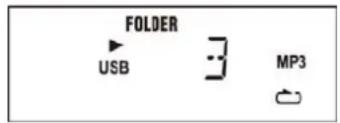
The selected Folder will be repeated and stop until the STOP Button (3) is pressed.
- To repeat all the tracks, press the MODE Button (8) 3 times and the Repeat All Indicator "ALL" will light up.
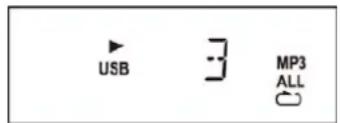
- All the tracks of the storing device will be repeated until the STOP Button (3) is pressed.
- To cancel repeat play, press the MODE button (8) repeatedly until all the repeat indicator disappear in the Display.
INTRO PLAY
This function enables the first 10 seconds of each track to be played.
- During playback press the MODE button (8) four times, the Intro Indicator "INTRO" will light up.
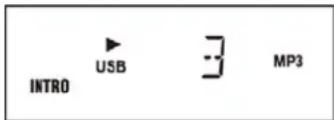
- Press the ▶ button once to start playback from the next track.
- To cancel intro play, press the MODE Button (8) twice.
RANDOM PLAY
- During palyback press the MODE button (8) five times, the Random Indicator "RADDOM" will light up.
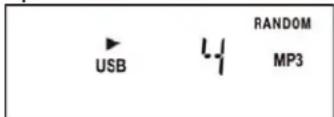
- Press the ▶ button once. A track is selected at random and playback starts.
- To cancel random play, press the MODE Button (8) again. The Random Indicator 'RANDOM' disappears in the Display.
PROGRAMMED PLAY
Programmed play can only be achieved in Stop mode.
- In stop mode, briefly press the PROG button (7) on the unit. Program Channel No. 'P1' will briefly appear. 'P' will then disappear leaving the Program Indicator, 'PROG' and '1' flash in the Display to prompt for input.
- Press the ▶▶▶ or ◀◀◀ Buttons (4, 5) to select your desired track to be stored in the program. For example the first selection is track no.5.
- Press the PROG button (7) to confirmed when track No.5 flashed in the Display.
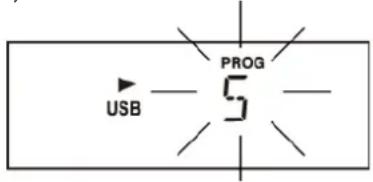
The first program selection is now stored in the program memory.
The Program Channel No. ‘P 2’ will appear briefly. ‘P’ will disappear and 2 will revert to 5, i.e. the first selected program and flash together with ‘PROG’ to prompt for another input.
- Repeat points 2 and 3 to enter the desired tracks up to max 32 selections.
- Press the ▶ button (1) once to start playback in your programmed sequence.
- To clear the program memory, while playing press the Stop button (3) 2 times or select TUNER, PHONO function or turn the System off.
COPYING FILES BETWEEN USB AND CARD
The files stored on your USB flash drive or on the SD/MMC card can be copied to each other. Please follow the instructions below to copy the files between the USB port and the Card slot.
The following tasks can be accomplished by either using the controls on the REMOTE Control or those which have similar function markings on the JTA-460 main unit.
This icon 📄 indicates that a task can only be performed using the controls on JTA-460.
- Insert your USB flash drive into the USB PORT (22) and the SD/MMC Memory Card into the SD/MMC Slot (20).
- Select the USB / CARD function mode by setting the Function selector (12) to "USB/CARD". The total number of tracks on the USB will be displayed and playback will automatically start from the first track.
- Press the STOP/USB/SD Button (3) once to stop the playback. Copy of the USB files to the Card is now ready to proceed any time. If you want to copy the files from the Card to the USB, you need to enter the Card playback Stop mode first then proceed to Step 4 below for copying.
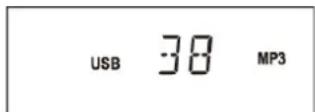
USB Playback Stop Mode
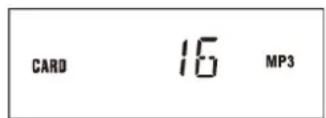
Card Playback Stop Mode
- To start copying briefly press the RECORD Button (2) once. Flashing "CHE" will appear briefly and disappear in the Display and copying will then start right away. Note: "CHE" means "CHECKING". Every file to be copied will be checked before copying starts.
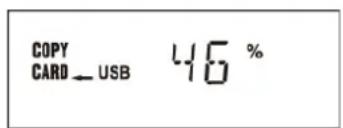
Copying USB Files to Card
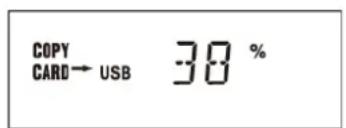
Copying Card Files to USB
- To stop copying, briefly press the STOP Button once.
DELETING FILES
- With the USB or Card in the playback stop mode, press ▶▶ or ◀◀ Buttons to select the track to delete, for example track 5 is selected.
- When the desired track appears in the Display press the DELETE Button(11) to confirm. 'DEL' will flash few times and then disappear. The chosen track, '005', will appear and blink in the Display to prompt for confirmation. In case you want to cancel the delete function just briefly press the STOP Button.
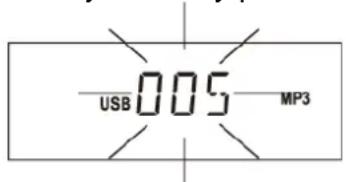
- To confirm, briefly press the RECORD button (2) once. 'DEL' will appear steadily in the Display for few seconds and then the Display will resume to USB/Card playback stop mode with the total track number deducted by 1.
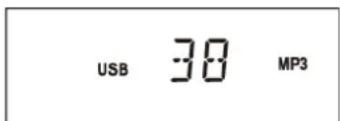
Original 38 Files
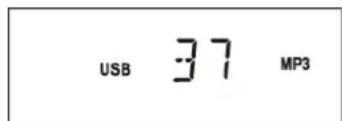
After Deleting track 5
- Repeat 1-3 above to delete more tracks as desired.
LINE OUT OPERATION (OPTIONAL)
For better playback sound, you can connect the JTA-460 to an external Audio Amplifier via the RCA LINE OUT JACKS located at the back panel. Please proceed as following:
- Connect the "L" & "R" LINE OUT Jacks and the AUX IN of your Audio Amplifier. (Connection cable is not included).
- Select the music source by setting the Function Selector (12) to "PHONO", "USB/SD" or "TUNER" as desired.
-
Turn on the external Amplifier.
-
Sound will then come out from the system's built-in speakers and the external Amplifier's speakers simultaneously.
- Set the VOLUME CONTROL (23) to "MIN" and adjust the sound level using the VOLUME CONTROL on the external Amplifier as desired.
- Turn the System and the external Amplifier off when you have finished listening.
- Unplug the connection cable.
USING HEADPHONES (NOT INCLUDED)
This System accepts stereo headphones with a 3.5mm plug and an impedance of 8 ohms or greater.
Inserting the plug of your headphones into the Headphone jack (21) will enable you to listen privately. When using headphones, the speakers will be disconnected automatically.
READ THIS IMPORTANT INFORMATION BEFORE USING YOUR HEADPHONES
- Avoid extended play at very high volume as it may impair your hearing.
- If you experience ringing in your ears, reduce the volume or shut off your unit.
- Keep the volume at a reasonable level even if your headset is an open-air type designed to allow you to hear outside sounds. Please note that excessively high volume may still block outside sounds.
NOTE:
We recommend that you reduce the volume control to a lower level before putting on the headphones. After putting on the headphones, gradually increase the volume to a comfortable listening level.
STYLUS REPLACEMENT
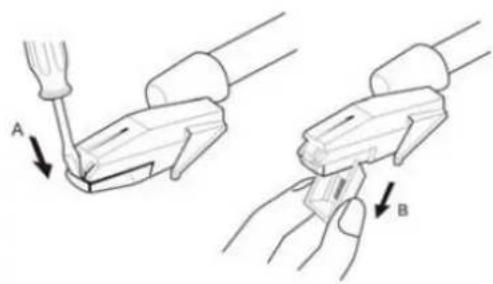
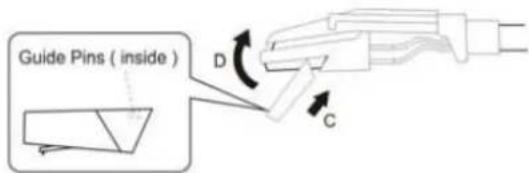
PLEASE REFER TO THE DIAGRAM BELOW TO REPLACE THE STYLUS.
NO ADDITIONAL STYLUS IS SUPPLIED WITH THE SYSTEM.
(1) Loose the red part stylus by screw driver and take out as diagram A and B.
(2) Replace the new stylus as C and D diagram (not supply).
CARE AND MAINTENANCE
- Clean your unit with a damp (never wet) cloth. Solvent or detergent should never be used.
- Avoid leaving your unit in direct sunlight or in hot, humid or dusty places.
- Keep your unit away from heating appliances and sources of electrical noise such as fluorescent lamps or motors.
- Always clean the outside of the cabinet thoroughly if it becomes wet with moisture or water splashes. This will help to prevent the internal parts of the unit from entry of water and possible moisture damage.
TROUBLESHOOTING GUIDE
Should you experience difficulties in the use of this player please refer to the following chart or call 1-800-777-5331 for Customer Service.
| PROBLEM | POSSIBLE CAUSE | REMEDY |
| The unit will not play | ·The unit is disconnected from the AC outlet | ·Connect to an outlet. |
| ·The AC outlet has no power | ·Try the unit on another outlet | |
| Poor AM or FM reception | ·Weak signal on distant stations | ·Rotate the cabinet for better reception |
| Unit ON but there is low or no volume | ·The volume Control has been turned all the way down | ·Turn the Volume control to a higher output |
| ·Headphones are inserted into the Headphone jack | ·Pull the headphones out |

At Spectra, environmental and social responsibility is a core value of our business. We are dedicated to continuous implementation of responsible initiatives with an aim to conserve and maintain the environment through responsible recycling.
Please visit us at http://www.spectraintl.com/green.htm for more information on Spectra's green initiatives or to find a recycler in your area.
90 DAY LIMITED WARRANTY AND SERVICE VALID IN THE U.S.A ONLY
SPECTRA MERCHANDISING INTERNATIONAL, INC. warrants this unit to be free from defective materials or factory workmanship for a period of 90 days from the date of original customer purchase and provided the product is utilized within the U.S.A. This warranty is not assignable or transferable. Our obligation under this warranty is the repair or replacement of the defective unit or any part thereof, except batteries, when it is returned to the SPECTRA Service Department, accompanied by proof of the date of original consumer purchase, such as a duplicate copy of a sales receipt.
You must pay all shipping charges required to ship the product to SPECTRA for warranty service. If the product is repaired or replaced under warranty, the return charges will be at SPECTRA's expense. There are no other express warranties other than those stated herein.
This warranty is valid only in accordance with the conditions set forth below:
- The warranty applies to the SPECTRA product only while:
a. It remains in the possession of the original purchaser and proof of purchase is demonstrated.
b. It has not been subjected to accident, misuse, abuse, improper service, usage outside the descriptions and warnings covered within the user manual or non-SPECTRA approved modifications.
c. Claims are made within the warranty period.
-
This warranty does not cover damage or equipment failure caused by electrical wiring not in compliance with electrical codes or SPECTRA user manual specifications, or failure to provide reasonable care and necessary maintenance as outlined in the user manual.
-
Warranty of all SPECTRA products applies to residential use only and is void when products are used in a nonresidential environment or installed outside the United States.
This warranty gives you specific legal rights, and you may also have other rights which vary from state to state. TO OBTAIN SERVICE please remove all batteries (if any) and pack the unit carefully and send it freight prepaid to SPECTRA at the address shown below. IF THE UNIT IS RETURNED WITHIN THE WARRANTY PERIOD shown above, please include a proof of purchase (dated cash register receipt) so that we may establish your eligibility for warranty service and repair of the unit without cost. Also include a note with a description explaining how the unit is defective. A customer service representative may need to contact you regarding the status of your repair, so please include your name, address, phone number and email address to expedite the process.
IF THE UNIT IS OUTSIDE THE WARRANTY PERIOD, please include a check for \$50.00 to cover the cost of repair, handling and return postage. All out of warranty returns must be sent prepaid.
It is recommended that you contact SPECTRA first at 1-800-777-5331 or by email at custserv@spectraintl.com for updated information on the unit requiring service. In some cases the model you have may be discontinued, and SPECTRA reserves the right to offer alternative options for repair or replacement.
SPECTRA MERCHANDISING INTERNATIONAL, INC.
4230 North Normandy Avenue,
Chicago, IL60634, USA.
1-800-777-5331
To register your product, visit the link on the website below to enter your information. http://www.spectraintl.com/wform.htm
Printed in China



- IMPORTANT SAFETY INSTRUCTIONS
- WARNING:
- CAUTION
- CAUTION:
- FCC NOTICE:
- PROTECT YOUR FURNITURE!!
- LOCATION OF CONTROLS
- REMOTE CONTROL UNIT
- IMPORTANT NOTES
- POWER SOURCE
- AC OPERATION
- Remarks:
- ACTIVATING THE REMOTE CONTROL
- BATTERY CARE
- BATTERY REPLACEMENT
- USING THE REMOTE CONTROL CORRECTLY
- RADIO OPERATION
- FM STEREO RECEPTION
- TIPS FOR BEST RECEPTION
- Note :
- NOTE:
- AUTO-STOP SWITCH OPERATION
- IMPORTANT:
- ENCODING RECORDS TO MP3
- TRACK SKIP
- FOLDER SKIP
- REPEAT 1/FOLDER/ ALL PLAYBACK
- INTRO PLAY
- RANDOM PLAY
- PROGRAMMED PLAY
- COPYING FILES BETWEEN USB AND CARD
- DELETING FILES
- LINE OUT OPERATION (OPTIONAL)
- USING HEADPHONES (NOT INCLUDED)
- READ THIS IMPORTANT INFORMATION BEFORE USING YOUR HEADPHONES
- STYLUS REPLACEMENT
- CARE AND MAINTENANCE
- TROUBLESHOOTING GUIDE
- DAY LIMITED WARRANTY AND SERVICE VALID IN THE U.S.A ONLY
Brand : JENSEN
Model : JTA-460
Category : Turntable