
GM-T563UQTC - Fridge LG - Free user manual and instructions
Find the device manual for free GM-T563UQTC LG in PDF.


User questions about GM-T563UQTC LG
0 question about this device. Answer the ones you know or ask your own.
Ask a new question about this device
Download the instructions for your Fridge in PDF format for free! Find your manual GM-T563UQTC - LG and take your electronic device back in hand. On this page are published all the documents necessary for the use of your device. GM-T563UQTC by LG.
USER MANUAL GM-T563UQTC LG
Please read this manual carefully before operating your set and retain it for future reference.
MANUAL DE USUARIO
REFRIGERADOR
CON CONGELADOR
SUPERIOR
Identification of Parts 4
Installation of the Refrigerator 6
Unpacking 6
Install it away from heat sources and humid areas 6
Though and even floor 6
Ambient Temperature 6
A proper distance from adjacent items 6
Waiting Period 6
Connection 6
Before Storing Food 7
In case of Uninstalling
Installation of Base Grille 7
Operations and Functions 7
Connection 7
Ice Maker Operation 7
Thawing 8
Meat Tray 8
Humidity Control 8
Vegetable Drawer 8
Temperature Control Functions 9
Auto Checking 11
Using your Refrigerator 12
Storing Food Suggestions 13
Cleaning 14
What to do when 15
What you have to know about your refrigerator ____
Warranties 35
SAFETY MEASURES
This manual contains several important safety notices. Always read and obey all of the following safety messages.

THIS IS THE SAFETY ALERT SYMBOL. IT WILL INDICATE WHEN CERTAIN ACTIONS MUST NOT BE DONE.

DANGER
If you fail to follow these instructions you will be killed or seriously injured.

WARNING
Misuses of the product will cause you physical damage or personal wounds.

CAUTION
Inadequate use and installation will cause damage to your property.
All safety labels will inform you of potential danger, ways to reduce chance of injury and what can happen if instructions are not followed.
Warnings and Important Safety Measures
Read all instructions before using the product

CAUTION
This appliance is not intended for use by children, persons with physical or mental disabilities, persons with reduced sensory or mental capacity, or persons with lack of experience or know-how, unless they have supervision or instruction in relation to the use of the appliance by the person responsible for their safety. Children should be supervised to assure that they do not play with the appliance.

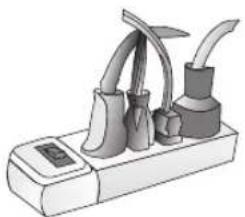
Never connect multiple machines to same socket; this can cause wiring to overcharge, warming, cause voltage vibrations and bad functioning.
natural_image
Illustration of a medical or laboratory device with multiple tubes and tubing (no text or symbols visible)
ELECTRICAL CORD REPLACEMENT
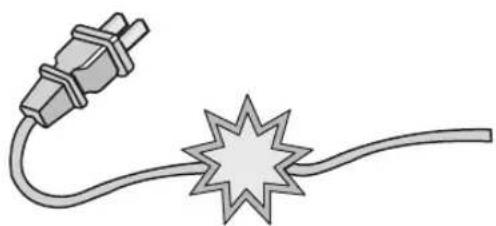
If feed cable gets damaged it must be replaced by the manufacturer, our service center or qualified LG Electronics personnel to minimize risks.

GROUND CONNECTION
In case of electrical surge, connection to ground will reduce risks of electric shock hazard. This unit must be grounded/landed. Consult a qualified electrician. When moving your refrigerator, be careful not to step on the feed cable with the machine's keepers.
natural_image
Simple line drawing of a plug and starburst connector (no text or symbols)
WHAT TO DO WITH YOUR OLD REFRIGERATOR
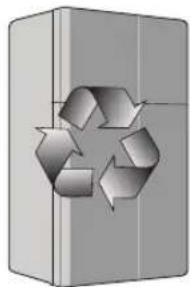
Your refrigerator contains liquids (refrigerant, lubricant) made of recyclable materials. All these materials must be sent to a recycling waste disposal site as they can be reused after a specific recycling process. Contact local authorities.
natural_image
Gray 3D box with a white recycling symbol on top, no text or labels present
NEVER USE MECHANICAL DEVICES
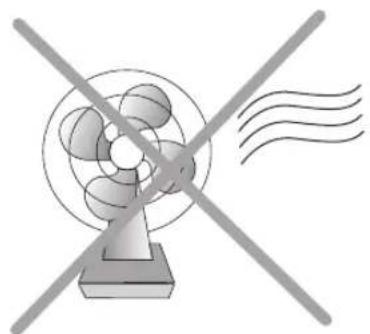
Never use mechanical devices or any other means to accelerate the thawing process, use only those which are approved by the manufacturer.
natural_image
Illustration of a fan with wind lines indicating airflow or exhaust (no text or symbols)SAFETY MEASURES
Warnings and Important Safety Measures
Read all instructions before using the product
DANGEROUS FUN
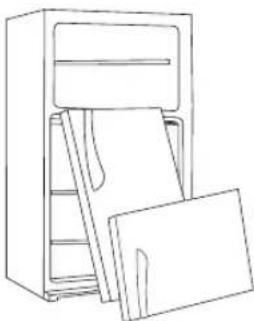
An empty refrigerator can be very dangerous for children. Remove doors or magnetic packaging when not in use or secure it in a way to make it impossible to open and allow a child to go in as this can lead to suffocation.
Never allow a child to climb, hang or play with the refrigerator racks. They can get hurt and damage the refrigerator.
natural_image
Line drawing of a refrigerator with open doors and stacked sheets (no text or symbols)PLUG ACCESS
The refrigerator-freezer must be placed in a way that the Power cord can be pulled easily in case of emergency.
SUPERVISION IN RELATION TO THE USE
This appliance is not intended for use by children, persons with physical or mental disabilities, persons with reduced sensory or mental capacity, or persons that lack experience or know-how, unless they have supervision or instruction in relation to the use of the appliance by the person responsible for their safety. Children should be supervised to assure that they do not play with the appliance.
NEVER KEEP EXPLOSIVES INSIDE
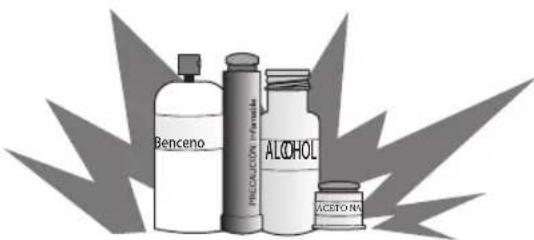
Never store explosive substances or chemicals in your refrigerator such as benzene, alcohol etc. It is DANGEROUS!
text_image
Benceno PRECA/CON FRANILA ALOHOL ACETONANEVER STORE ELECTRONIC DEVICES
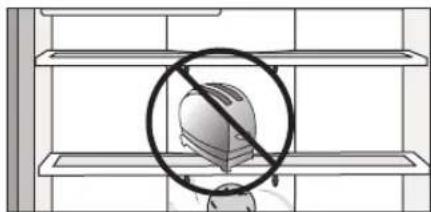
Never use electronic equipment to store food unless they are specific models approved by the manufacturer.
natural_image
Illustration of a person standing on a shelf with a prohibition symbol overlay (no text or symbols present)WHEN CLOSING REFRIGERATOR DOOR
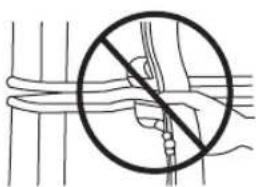
Never place your thumb or fingers on the superior part of the handle, as it can be pressed against the lower part of the freezer handle. Keep away all fingers from injury prone areas such as where doors close cabinets and hinges, etc. Be careful when closing doors if children are nearby.
natural_image
Simple line drawing of a hand holding a tool crossed out by a diagonal line, enclosed in a circle (no text or symbols)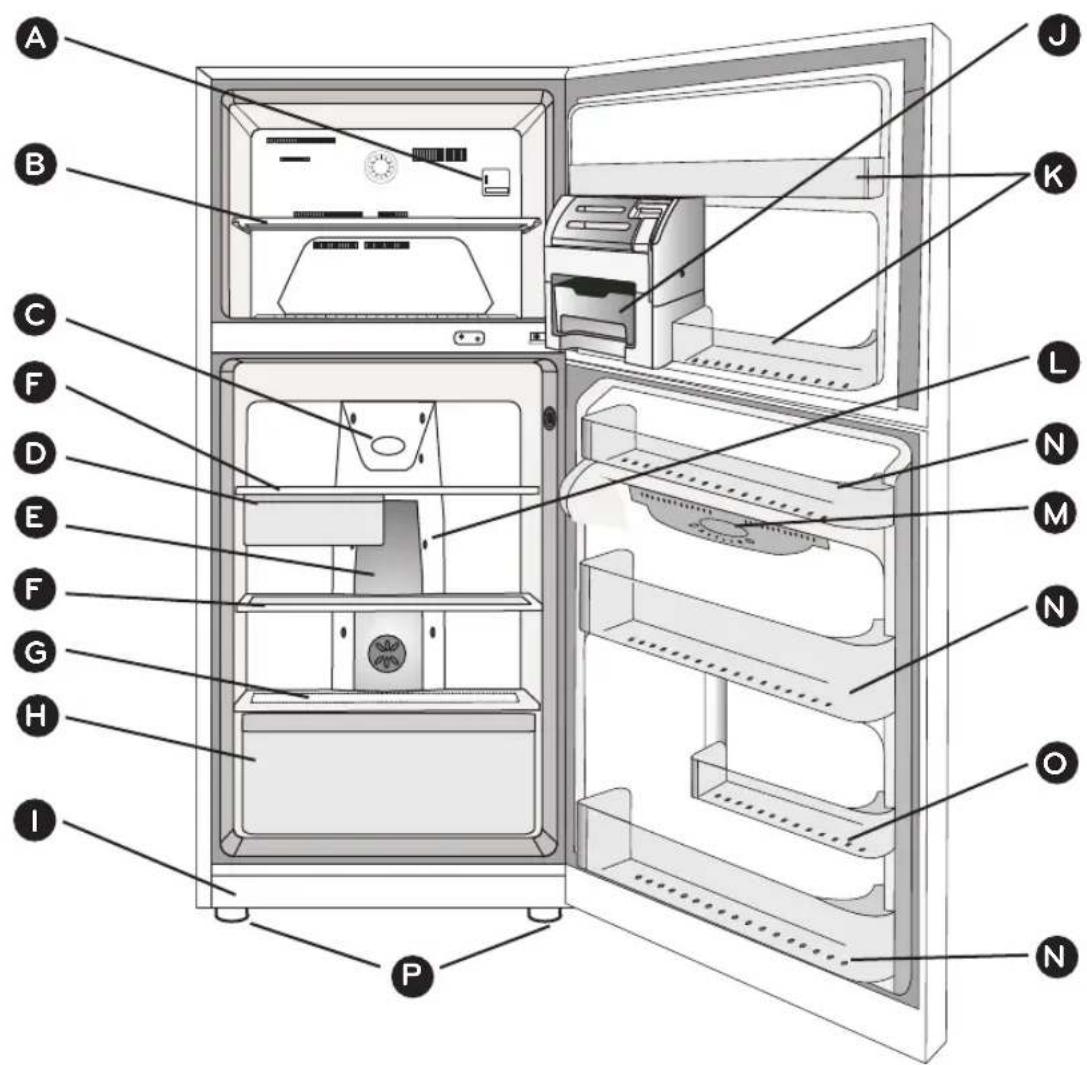
text_image
Labeled diagram of a refrigerator interior showing internal compartments and doorways with numbered parts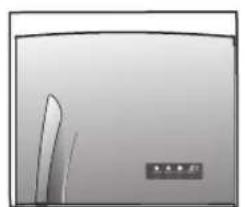
natural_image
Simple grayscale illustration of a curved object with a small label in the corner (no text or symbols on the object itself)C Temperature Control at Front of the Freezer door
NOTE: Certain components featured in the diagram may not be included in your refrigerator, as these vary depending on your model characteristics.
A Temperature Control (Freezer)
B Freezer Shelf (Rack)
C Temperature Control (Refrigerator) *
D Fresh Meat Tray
E Lamp
F Refrigerator Shelves (Glass, plastic or steel)
G Magic Crisper
Cover for vegetable shelf it controls humidity
H Vegetable Drawer
Keeps fruits and vegetables fresh
I Base Grille *
J Ice Drawer
K Freezer Door Racks
L Multi Flow Air Duct
Distributes air to all refrigerator compartments
M Door Cooling
Cold air flow form door
N Large Refrigerator Door Rack
Small Refrigerator Door Rack
P Leveling Screws
text_image
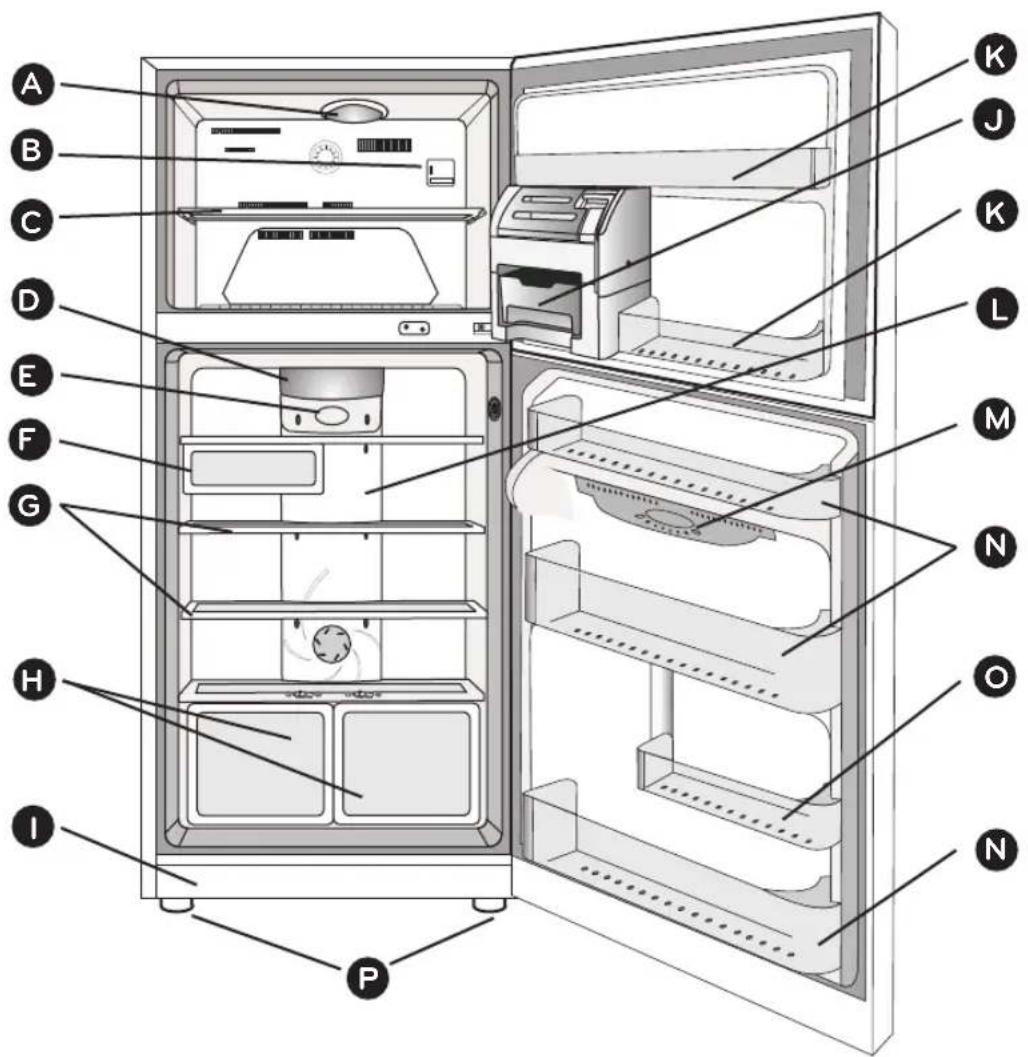
Labeled diagram of a refrigerator interior showing internal compartments and doorways with numbered parts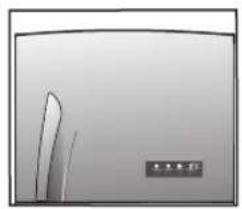
natural_image
Simple grayscale illustration of a leaf on a surface with a small button labeled '未命名' (Rename) in the corner (no other text or symbols)E Temperature Control at Front of the Freezer door
NOTE: Certain components featured in the diagram may not be included in your refrigerator, as these vary depending on your model characteristics.
A Freezer Lamp
B Temperature Control (Freezer)
C Freezer Shelf
D Refrigerator Lamp
E Temperature Control (Refrigerator) *
F Fresh Meat Tray
G Refrigerator Shelves (Glass, plastic or steel)
H Vegetable Drawers
Keeps fruits and vegetables fresh
1 Base Grille *
J Ice Drawer
K Freezer Door Racks
Multi- Flow Air Duct
Distributes air to all refrigerator compartments
M Door Cooling
Cold air flow form door
N Large Refrigerator Door Rack
Small Refrigerator Door Rack
P Leveling Screws
INSTALLATION OF THE REFRIGERATOR
1. UNPACKING
Before installing your refrigerator, remove any tape or temporary stickers. Do not remove any stickers that feature warnings, the model serial number or the technical label of the product located on the back of the refrigerator. To remove adhesive tape residue, rub it well with your fingers and a little liquid detergent. Clean with warm water and let dry.
Do not use sharp instruments, rubbing alcohol, flammable liquids or abrasive cleaning products to remove the adhesive tape or glue. These products can damage the surface of your refrigerator. The shelves come already installed in their factory position. Remove the shelves and replace them according to your spacing needs.
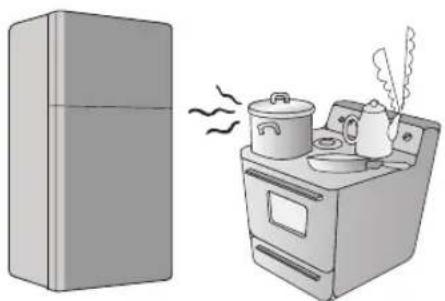
2. INSTALL IT AWAY FROM HEAT SOURCES AND HUMID AREAS
In places with high temperatures, freezing capacity can be affected and cause high consumption of electrical energy.
Never install in places with high humidity as this can cause oxidation and electric shock hazard.
natural_image
Illustration of a refrigerator next to a cooking appliance with steam rising (no text or symbols)3. THOUGH AND EVEN FLOOR
Your refrigerator must be leveled and placed on a strong floor. An unstable installation can produce noise and vibrations. If the floor is uneven, level the unit by twisting the height adjusting screw, this will eliminate unwanted sounds and vibrations.

text_image
4.5 cm FRONT TURN THE LEVELING SCREWS TO HEIGHT4. AMBIENT TEMPERATURE
The refrigerator will work efficiently if room temperature is between 10 °C and 43 °C (50 °F and 109,4 °F).
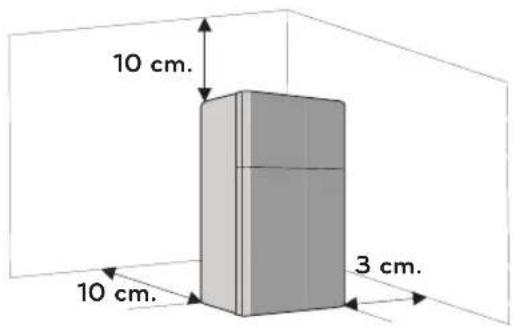
5. A PROPER DISTANCE FROM ADJACENT ITEMS
Adequate air flow is needed for an efficient operation. Keep your refrigerator at a relative distance from other objects. Reduces distance between the unit and other nearby objects can diminish freezing capacity and rise consumption of electrical energy.
text_image
10 cm. 10 cm. 3 cm.WARNING
EXCESSIVE WEIGHT HAZARD. Use the assistance of two or more persons to move or install the refrigerator. Not following these instructions may cause injury to the back and other parts of the body.
6. WAITING PERIOD
Wait at least an hour before connecting, after installation was completed.
7. CONNECTION
DANGER
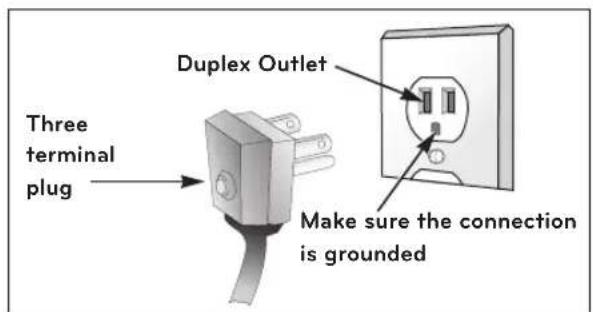
FOR YOUR PERSONAL SAFETY, this device must be properly landed. Connect to a single undamaged socket. Not having proper installation will require you to call qualified personnel to achieve it.
Do not, under any circumstance, cut or extract the third prong from the plug.
It is your responsibility and obligation to replace two-prong outlets with that of an adequately grounded three-prong outlet.
text_image
Three terminal plug Duplex Outlet Make sure the connection is groundedWARNING
REPLACING ELECTRICAL CABLE; if the power cord is damaged, it must be replaced by our service center or qualified LG technician to avoid any risk. NEVER disconnect the refrigerator by pulling the power cord, always grip the plug firmly and disconnect it directly from the outlet.

natural_image
Illustration of a hand inserting a plug into an electrical outlet (no text or symbols)8. BEFORE STORING FOOD
Leave it working from 2 h to 3 h before storing food. If operation were to be interrupted wait 5 min before trying again.
9. IN CASE OF UNINSTALLING
If you wish to dispose of your refrigerator, keep in mind the following Warning.
WARNING
If the use of this unit is no longer needed, please contact local authorities to dispose of this product in a safely manner; as is Pentane-cycle or pentane like gas for insulation. Insulation gases require a special elimination process. This product contains flammable insulation.
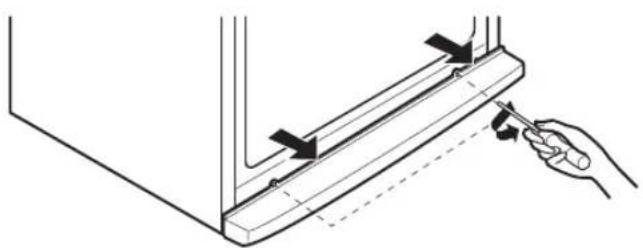
10. INSTALLATION OF BASE GRILLE (in some models) Installing or Replacing the Base Grille:
- Remove the 2 screws from the bottom front part of your refrigerator (in front).
- Place base grille into position and insert and tighten screws.
To remove the Base Grille:
- Open the refrigerator's door.
- Once the door is open, remove screws from base grille and remove.
- Remove the base grille.
- Reattach screws to the base of refrigerator.
natural_image
Diagram of a hand using a tool to adjust or install a mechanical component, with no visible text or symbols.OPERATIONS AND FUNCTIONS
1. CONNECTION
Remember that your refrigerator must be landed.
CAUTION
If operation were to be interrupted, wait 5 min before restarting it.
- To make ice cubes, pull out the ice drawer and pour water on the shelves (Fig. 1.) Then place in their original position until you hear a "click" sound.
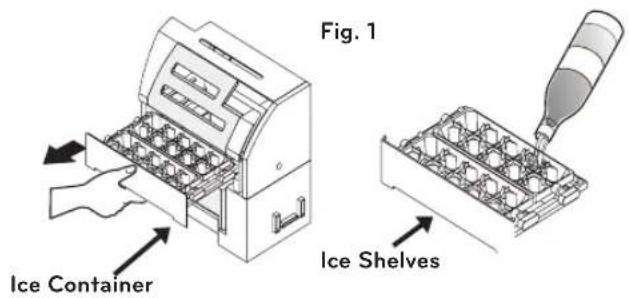
text_image
Fig. 1 Ice Container Ice ShelvesWARNING
Fill only with potable water.
WARNING
Make sure the level of water in the shelf is even on the entire surface, guiding yourself with pointing arrows on Fig. 2. Water must not surpass this level as it can get spilled when opening or closing door.
Water Level Indicators
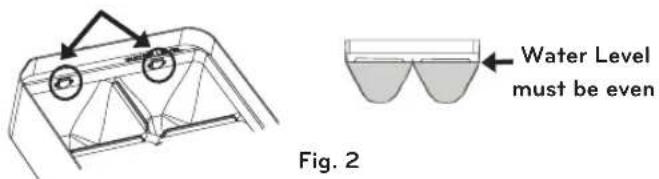
text_image
Water Level must be even Fig. 2- The ice maker takes around 4 hours to produce ice cubes. Check the ice status through the transparent panel.
- To remove ice cubes, carefully pull the drawer lever (Fig. 3). The ice cubes will fall into the ice container (Fig. 4).
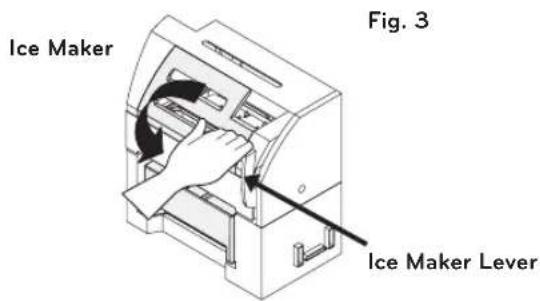
text_image
Ice Maker Fig. 3 Ice Maker Lever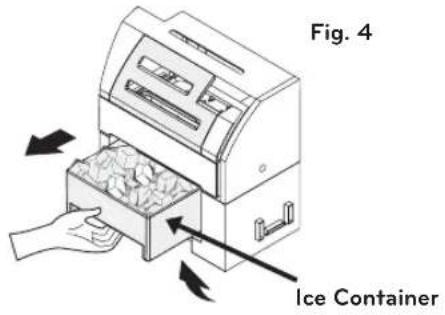
text_image
Fig. 4 Ice ContainerWARNING
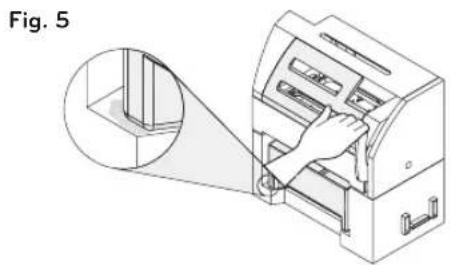
Refrain from pulling the lever before ice cubes have been completely made, as this can cause water to spill, freeze, and cause the container to stick to the Ice maker Fig. 5. If water spills, immediately wipe it off with a cloth. Avoid heavy ice accumulation in the container as this can cause problems to move the lever and/or container.
natural_image
Illustration of a hand inserting a component into a machine, with an inset showing the same component (no text or symbols present)3. THAWING
- Thawing occurs automatically, you do not need to worry about this. Thawed water will flow into the evaporation shelf at the back of the refrigerator.
4. MEAT TRAY
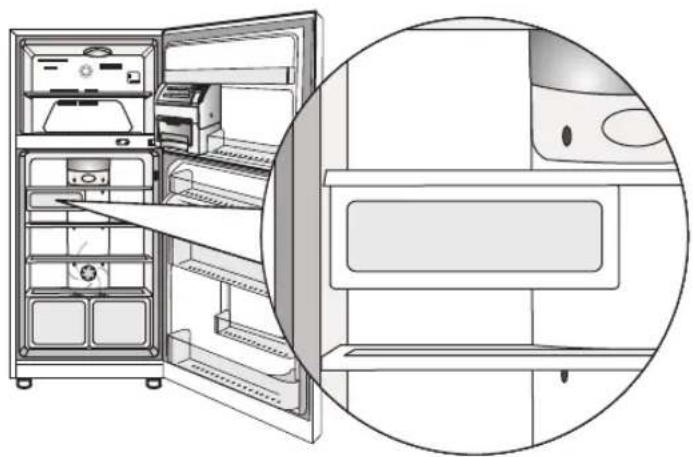
- The air which comes in when the door is opened, will not affect your meat due to the position of the shelf. It is important not to switch places so this function persists.
NOTE: Door should not be kept open for long periods of time.
natural_image
Interior view of a refrigerator showing open doors and internal compartments, with an inset close-up of the front cabinet (no text or symbols visible)5. HUMIDITY CONTROLS (in some models)
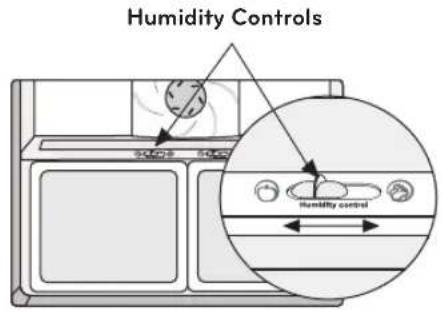
- If you slide the humidity control to the left, you will keep the fruits crispy.

• If you slide the humidity control to the right, you will keep the vegetables crispy.

text_image
Humidity Controls Humidity control6. VEGETABLE DRAWER (in some models)
Magic Crisper
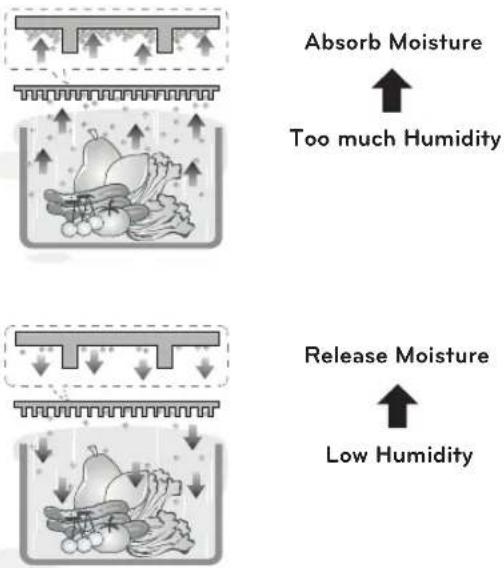
- The magic crisper allows a better preservation of your fruits and vegetables allowing to easily control the level if humidity inside.
flowchart
graph TD
    A["Absorb Moisture"] --> B["Too much Humidity"]
    C["Release Moisture"] --> D["Low Humidity"]
- It has a vent located in the inner wall of the lid to let humidity in or out.
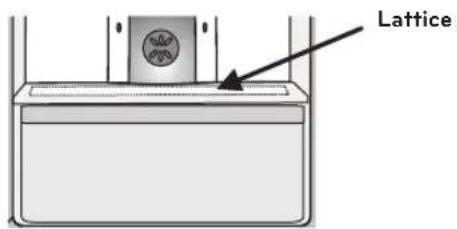
text_image
Lattice7. TEMPERATURE CONTROL SETTINGS
- Refrigerator temperature will always be the same, despite ambient temperature changes.
- The correct temperature configuration for the refrigerator compartment should be 37,4 °F (3 °C).
• We recommend not to change the temperature adjustments after they have been set unless it is necessary. - The correct temperature configuration for the freezer compartment should be -2,2 °F (-19 °C).
- This refrigerator contains a button which controls the refrigerator's temperature and a knob to control the freezer's temperature.
- The refrigerator compartment contains a temperature sensor which will automatically start and stop the compressor functions as needed.
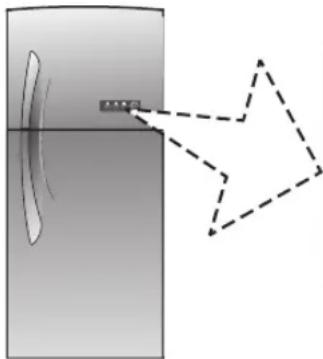
7.1 External Temperature Control
- Refrigerator: Monitors the refrigerator temperature. External temperature control, Fig. 6, (certain models).
natural_image
Diagram showing light rays interacting with a lens, with a dashed arrow indicating direction (no text or symbols)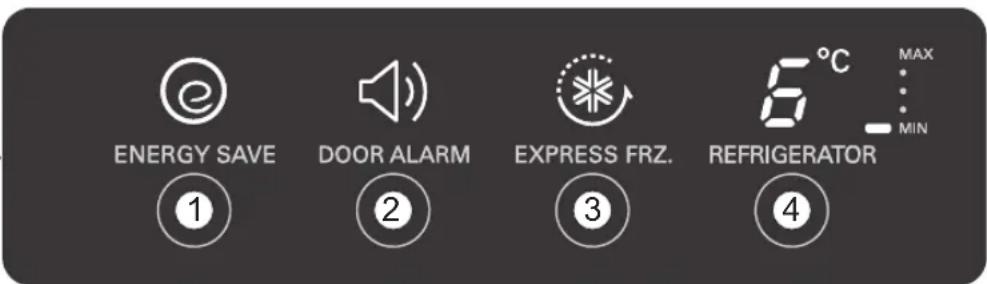
text_image
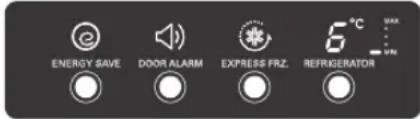
ENERGY SAVE ① DOOR ALARM ② EXPRESS FRZ. ③ REFRIGERATOR ④ 6°C MAX MINFig. 6 External Temperature Control for the refrigerator (certain models)
① ENERGY SAVE: By pressing this button the refrigerator will work with minimal power, reducing the time it is spent used and energy consumption. This feature will not activate if "EXPRESS FREEZING" is on.
② DOOR ALARM: You will hear an alarm when the refrigerator or freezer door stays open for over a minute. The alarm will continue to sound every 30 seconds. Alarm will stop once both doors have been shut. By pressing the button, the alarm can be deactivated.
③ EXPRESS FRZ: Once this button is pressed, the refrigerator will begin to cool at full power to a maximum of two 2 hours. Pressing the button a second time will deactivate the mechanism. This feature will not be available if "ENERGY SAVE" is on.
④ REFRIGERATOR: This feature allows you to adjust the refrigerator temperature. The number appearing on the screen will match the degrees of the inside of the refrigerator. You can choose from 5 different settings, from 0 °C to 6 °C (32 °F to 42,8 °F).
Temperature Configuration
| HOW TO ADJUST | ||
| COLDER RECOMMENDED LESS COLD | ||
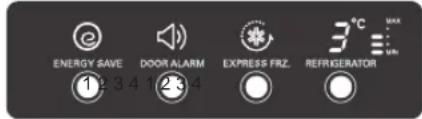 |  | |
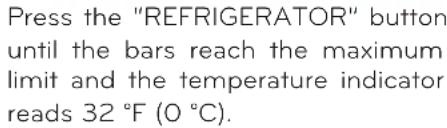 | Press the "REFRIGERATOR" button until the indicator reads 37,4 °F (3 °C). This is the desired temperature for best performance of this unit (Up to the third bar will be lighted). | Press the "REFRIGERATOR" button until the bars reach the minimum level. The indicator will reads 42,8 °F (6 °C). |
- Freezer: Controls the flow of cold air that goes from the freezer into the refrigerator.
NOTE: To check functions of the freezer temperature control, please look for Internal Temperature Control Function.
7.2 Internal Temperature Control
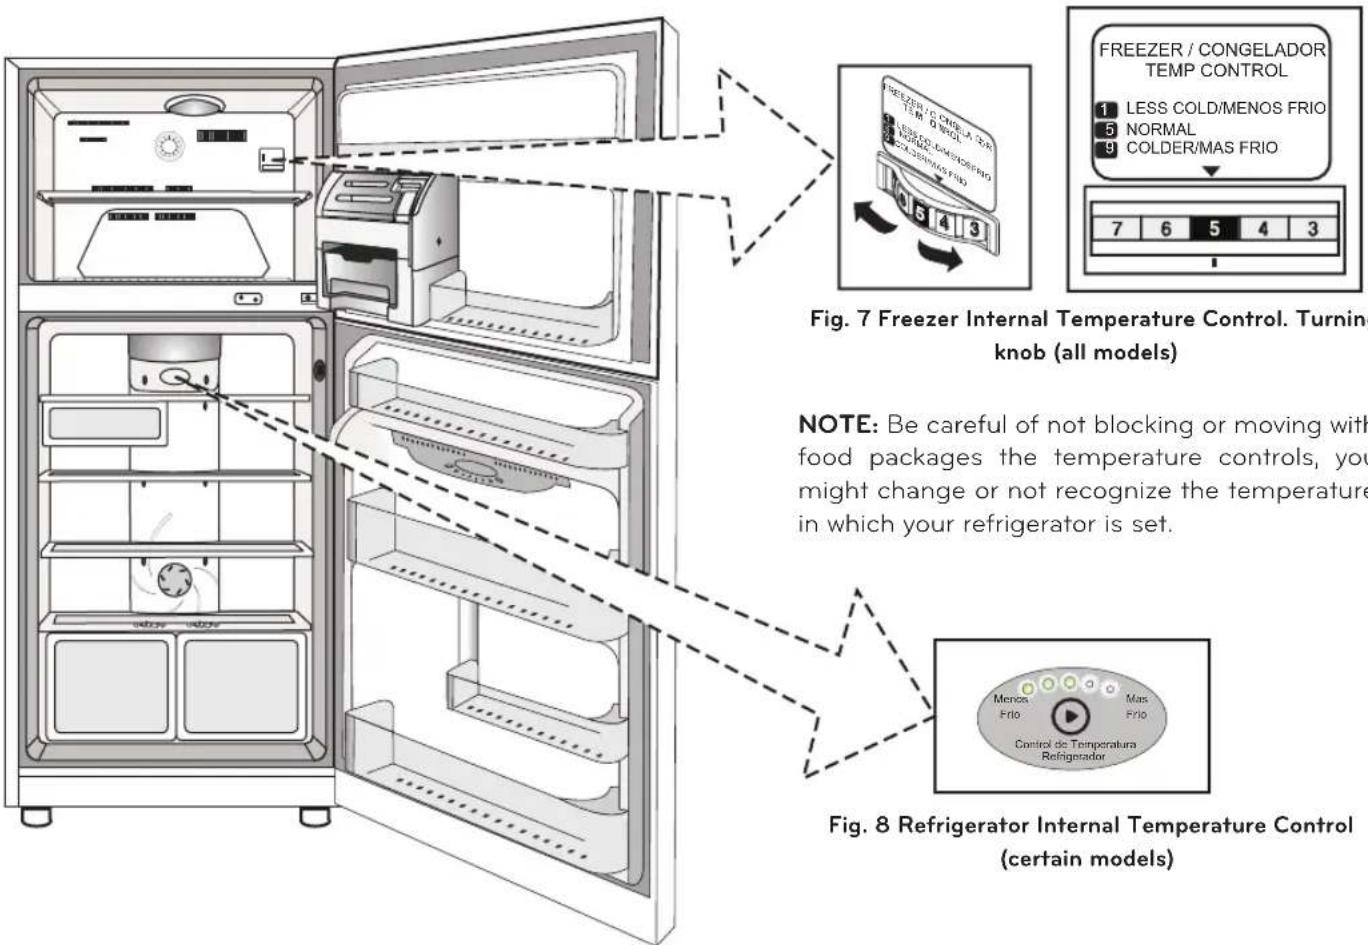
- Freezer: Controls the air flow from the freezer to the refrigerator, Fig 7.
| HOW TO ADJUST | COLDER RECOMMENDED | LESS COLD | |
| To adjust the position knob turn to either side to make it turn. The arrow will set the temperature in your freezer. | 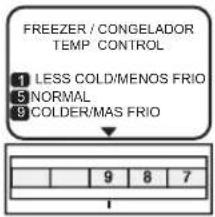 | 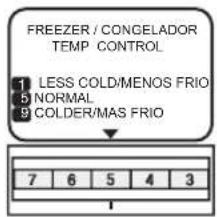 | 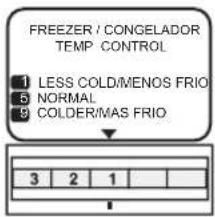 |
text_image
FREEZER / CONGELADOR TEMP CONTROL 1 LESS COLD/MENOS FRIO 5 NORMAL 9 COLDER/MAS FRIO 7 6 5 4 3 Fig. 7 Freezer Internal Temperature Control. Turning knob (all models) NOTE: Be careful of not blocking or moving with food packages the temperature controls, you might change or not recognize the temperature in which your refrigerator is set. Fig. 8 Refrigerator Internal Temperature Control (certain models)- Refrigerator: Controls the temperature of the refrigerator Control the internal temperature, Fig. 8 (according to every model).
| HOW TO ADJUST | ||
| COLDER RECOM | MENDED LESS COLD | |
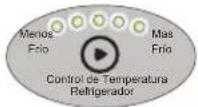 | 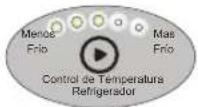 | 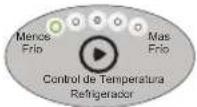 |
| Press the button until the maximum level lights are on. | Press the button until the third light is on. This temperature is the recommended one for the optimum refrigerator performance. | Press the button until the first light in on. The temperature is the minimum. |
OPERATIONS AND FUNCTIONS
8. AUTO CHECKING
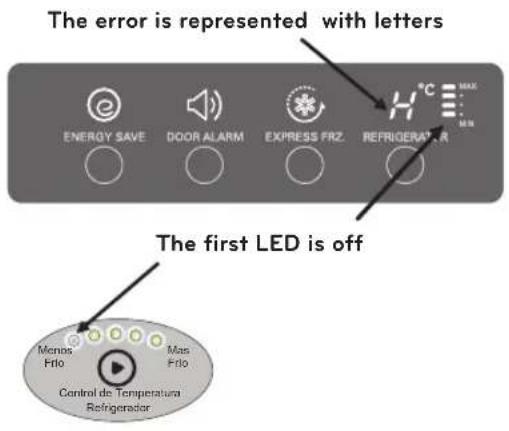
Your refrigerator has the capacity of auto checking. If any failure comes to happen a code will be displayed to help the technician for it repairing. While this code in on display, the rest of the functions of control a visualizing will not be functioning.
NOTE: In the temperature controls, the code is represented with a no consecutive blinking of the LED (left to right/down to up) as would be in the normal mode.
Example:
text_image
The error is represented with letters ENERGY SAVE DOOR ALARM EXPRESS FRZ. REFRIGERATOR The first LED is off Menos F10 Mas F10 Control de Temperatura RefrigeradorUSING YOUR REFRIGERATOR
1. SHELVES
The shelves of your refrigerator can be adjusted to comply with your storage necessities; depending on the model you have it can include glass shelves or wired shelves. Storing your foods together and adjusting the shelves to different heights will ease to help you locate what you need. This also helps your refrigerator to stay shut longer which will save you energy.
IMPORTANT: While your refrigerator glass shelves are cold do not clean with hot or warm water. The glass shelves may break if exposed to rapid temperature changes or hard impacts. For your safety the glass shelves are made out of tempered glass so when at breaking they will fracture into tiny fragments.
NOTE: Be careful while moving or relocating the shelves, they are heavy. If moving the shelves is required keep in mind to locate them in a safe environment to prevent them from breaking.
Shelf (Refrigerator and Freezer)
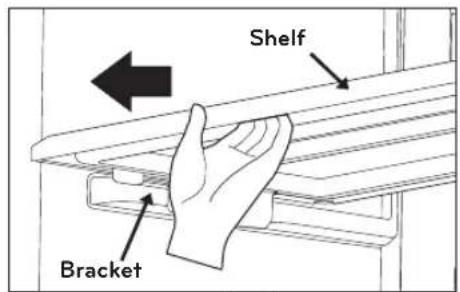
To remove the shelves of your refrigerator as of the freezer, follow these instructions.
- Pull the shelf from the front Fig 9.
text_image
Shelf BracketFig. 9
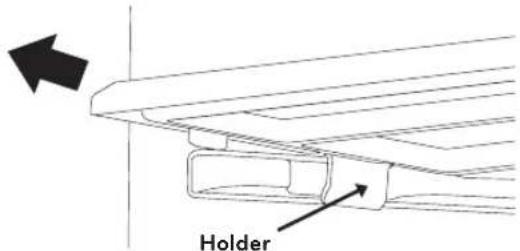
- Pull the shelf outside raising it until the lock Fig. 10.
text_image
HolderFig. 10
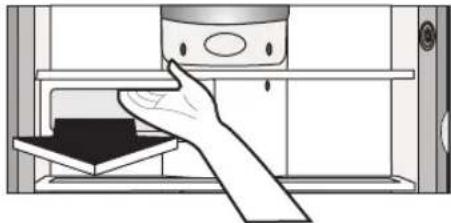
Frozen Meat Compartment
Pull the frozen meat compartment forward while holding it with your other hand, slightly lift and pull.
natural_image
Illustration of a hand inserting a device into a rack (no text or symbols visible)NOTE: DO NOT store lettuce or other leafy produce in this drawer.
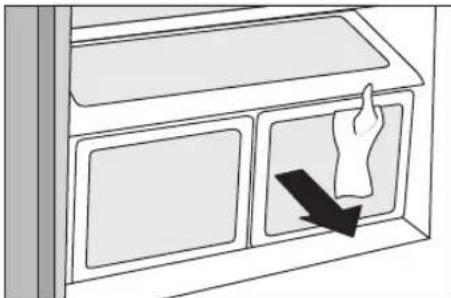
Removing the Vegetable Drawer
To remove the vegetable drawer, follow the next instructions:
- Slip out the drawer towards the outside until it stops.
- Slightly lift the front part and pull the rest, in order to completely remove the drawer.
- To relocate the drawer slip out towards the front until it stops.
natural_image
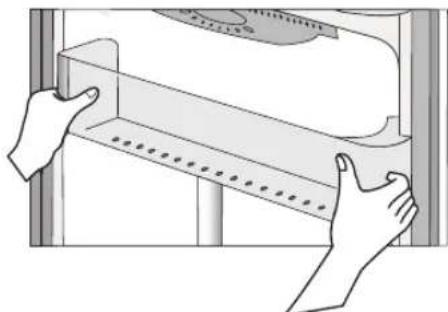
Diagram of a hand pressing down on a cabinet with a black arrow indicating the motion (no text or symbols present)Door Racks
Door racks can be taken off in order to clean them better.
- To remove the rack, raise it and pull it.
- To replace the rack again slide it on the desirable guide and push it down until it is tighten (you will listen a "tick").
natural_image
Illustration of hands handling a rectangular object with dotted lines, no text or symbols presentWARNING
Someone could get hurt if the racks are not well assembled.
NOTE: Empty the food charge before you move the containers.
CAUTION
DO NOT allow children play with baskets. Sharp corners on basket could cause in
STORING FOOD SUGGESTIONS
- Keep fresh food in the refrigerator.
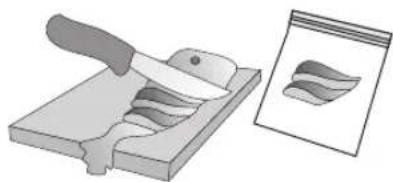
• Freeze only small amounts of food.
natural_image
Illustration of a knife cutting through a wooden block with a magnified inset showing a patterned object (no text or symbols)• After you freeze some food, once you thaw it do not freeze them again, they loose their taste and nutritional value; after thawing them, you might keep them in the refrigerator up to 48 hours.
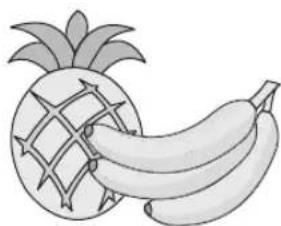
- Do not store food that might get decomposed under low temperatures (like pineapple, bananas and cantaloupe).
natural_image
Illustration of a pineapple and two bananas (no text or symbols)• Do not store garlic in the refrigerator.
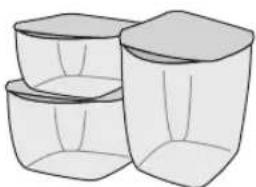
- When storing food in the refrigerator use closed containers to avoid odor mixing and loosing of humidity.
natural_image
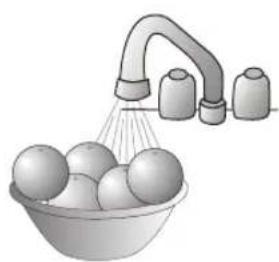
Line drawing of three separate plastic containers (no text or symbols)• Always clean the food before placing them in the refrigerator. Wash and dry the fruits and vegetables.
natural_image
Illustration of a kitchen sink with a showerhead spraying water from a bowl containing five round objects (no text or symbols)- It is recommendable to store onion in plastic bags to avoid other food odor to get mixed with it odor.
- If your are going to store ice cream for a long period of time, place it on the freezer grid and not on the freezer door.
- When storing eggs always place them in the highest shelf or in the first grid in order to keep them fresh for a longer period of time.
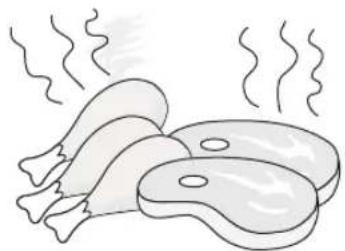
- Throw away any food that is being decomposed; it may contaminate other foods.
natural_image
Illustration of steaming meat slices with steam rising (no text or symbols)- Store cold cuts, cheese and sausages in bags or plastic sealed containers.
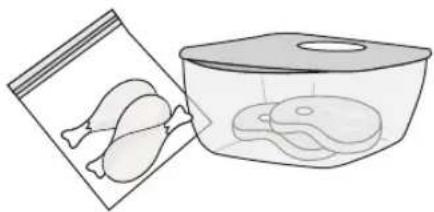
natural_image
Illustration of a bag and a container with fish inside, no text or symbols present- Do not store glass bottles in the freezer because they can break when they freeze.
- Do not store hot food inside the refrigerator they might decrease the refrigerator's efficiency.
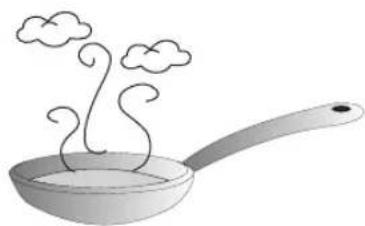
natural_image
Illustration of a frying pan with smoke rising from its side (no text or symbols)- In the models with water dispenser it is recommended that you change the water at least every 7 days.
In order to avoid bad or unwanted odors, is important to keep the refrigerator clean. Any spilled food must be cleaned immediately; they can stain and/or acidify the plastic parts of the refrigerator if they are let to get dry.
WARNING
Unplug the power plug always before cleaning around the electrical parts (lamps, switches, etc.) Clean any humidity to avoid any liquid might get into any electrical part. Do not touch the frozen part with wet hands, humid or wet object stick to frozen surfaces.
Exterior
Use a warm mixture of mild detergent or soap to clean the refrigerator's surface. Clean with a damp cloth and dry immediately.
Interior
It is recommended to clean the interior often. Wash all the bins and drawers with a mixture of bicarbonate or mild detergent with water. Clean and dry. Using other kinds of products might damage your refrigerator.
After Cleaning
Check that the plug is not damaged or overheated and it is properly plugged.
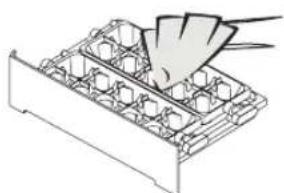
Ice Tray Kit
Indoor Ice Maker
- Remove the ice tray from the kit. Fig. 11.
- Clean the inside and the outside of the tray with a mild soap, rinse with tap water. Fig. 12.
• Pass a damp piece of cloth, dry Fig. 13.
Fig. 11
Ice Maker
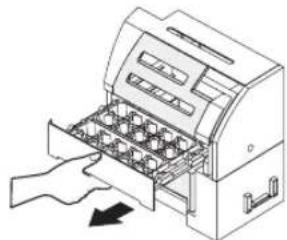
natural_image
Illustration of a hand inserting into a machine into a grid array (no text or symbols)Fig. 12
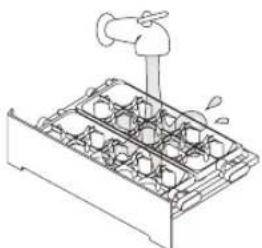
natural_image
Line drawing of a kitchen sink with a faucet and water drop (no text or symbols)Fig. 13
Ice Tray
natural_image
Diagram of a mechanical component with a hand inserting a pin into a grid (no text or symbols)CAUTION
Do not immerse the ice tray in water. If done, completely dry the tray.
Door lining and gaskets
Use only a mild detergent (such as dish soap).
Plastic Parts
Do not use abrasive, paper or rough products. These could damage the product.
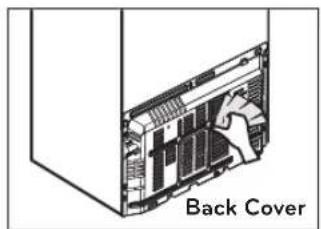
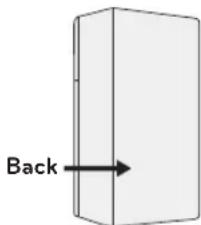
Back Cover
In order to get an efficient performance of your refrigerator, clean the rear part of it at least twice a year.
text_image
Back CoverThe refrigerator does not work
- Check if any fuse is broken in the electric facility.
- Check if the power cord is correctly plugged.
- Check if the power outlet is not damaged.
- Identify if there are any high consume electrical appliances working at the same time, unplug the one that are not necessary.
There is a power interruption
- Check that no fuse is burned.
• Check if the power cord is plugged. - Check that the outlet is not damaged.
- Identify weather you have different high consumption equipment plugged at the same time, unplug the one you do not use.
The temperature of the refrigerator or the freezer is too warm or hot
- Check that the temperature control is in the right position.
- Place the refrigerator away from any heat sources or direct sunlight.
- Open the doors only when necessary.
• There are too many food that block the air vents.
• Don't let the doors open for too long.
I can hear some weird or abnormal sounds
- Check that the refrigerator is placed over an even leveled surface, if not, adjust the refrigerator using the leveling height adjusting screws.
- Remove the unnecessary object from the back or top of the refrigerator.
- Check that the voltage is the correct one, if not call your electric company.
There are some odors in the refrigerator
• Store all food in sealed containers.
• Frequently clean the refrigerator inside.
In case of a black out, call your electric company and ask how long it will last.
-
In case of a 24 hour or less black out, do not open the refrigerator; this will keep the food fresh.
• In case of a longer black out, do one of the following options: -
Pull out all of the frozen food and keep them in an ice chest.
-
Put 2 lbs (0,907 Kg) of frozen ice (make sure you use gloves) for each square foot (28 L) inside the freezer. This task will preserve the food for 2 to 4 days. While handling dry ice (CO _2 ), wear gloves to protect your hands from frostbite.
-
In case you do not possess neither ice chest or dry ice (CO2), consume your food as soon as possible.
REMEMBER: In a power failure, a full freezer stays cold longer than a partially filled one. A freezer full of meat stays cold longer than a freezer full of baked goods. If you see that food contains ice crystals, it may be safely refrozen, although the quality and flavor may be affected. If the condition of the food is poor or if you feel it unsafe, dispose of it.
Some humidity is formed in the cabinet's surface
- When the weather is humid is normal.
- The door might be opened, check that is properly closed.
The front part of the refrigerator is getting warm
- Do not worry, is part of the normal functioning of the refrigerator, and this happens in order to avoid condensation or "sweat".
- If this comes to happen, just clean with a dry piece of cloth.
The compressor works too frequently and for extended periods of time
- Check if the temperature controls are place in the maximum, if so, place then in the middle.
- Check that the doors are properly closed.
• Do not store over heated products. - Do not let the doors open for too long. Move away from any heat sources the refrigerator.
1. THE OVERALL PERFORMANCE OR EFFICIENCY OF YOUR REFRIGERATOR MIGHT BE AFFECTED IF:
• It is place near a heat source or humid area.
• You open the door frequently.
- If you introduce water or any object in the cold air vents.
• You block the air vents with food.
• You store hot food.
2. DURING VACATIONS WE RECOMMENDED YOU THE FOLLOWING:
- If the vacations are for a short period of time place the freezable food in the refrigerator.
- If you are going to be outside or away for a longer period of time, do the following:
→ Take out all food.
→ Unplug the power cord.
Leave the doors open to avoid bad odors.
→ Thoroughly clean the refrigerator.
→ Empty and clean the water bin not forgetting to purge the system (turning on the switch).
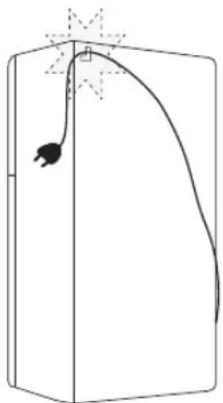
3. IF YOU ARE PLANNING TO MOVE OR TO CHANGE YOUR REFRIGERATOR FROM IT CURRENT POSITION:
- Remove and secure all attachments inside the refrigerator.
• To avoid any damage to the leveling height adjusting screws, turn then completely until the base. - Place the power cord in the hook located in the upper left side.
- Clean and empty the water container and do not forget to purge the system (turning on the switch).
• After these procedures, you will be able to move your refrigerator.
natural_image
Simple line drawing of a box with a curved arrow and starburst above it, no text or symbols present.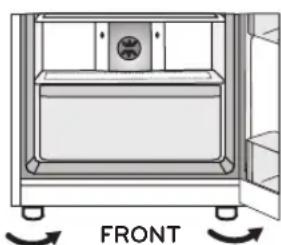
natural_image
Front view of a double-door refrigerator with doors open and arrows indicating front orientation (no text or symbols on the device itself)TURN THE LEVELING SCREWS UP TO REFRIGERATOR BASE
4. LAMP REPLACEMENT
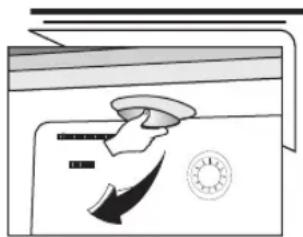
4.1 Freezer Lamp
• Unplug the power cord from the outlet.
- Remove the lamp lid, pulling it from behind down and to the front.
- Screw out the lamp clockwise, remove it and replace.
• Assembly in the inverse order.
natural_image
Simple line drawing of a washing machine with no text or symbols4.2 Refrigerator Lamp (Identify your type)
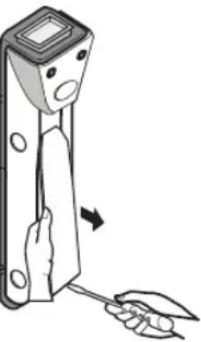
Type 1
- Unplug the power cord from the outlet.
- Remove the shelves and the lid of the vegetable container.
• To remove the lamp cover, pull with your hand or with a tool from the bottom. - Turn the lamps clock wise, remove
• Assembly in the inverse order.

natural_image
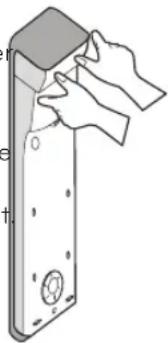
Illustration of a hand holding a device with a tool, showing a curved arrow indicating motion (no text or symbols present)Type 2
- Unplug the refrigerator from the power outlet.
- Remove the shelves.
- Remove the lamp lid by pushing in the center and removing it carefully.
• Turn the lamp clock wise and remove it
• Assembly in the inverse order.
natural_image
Illustration of hands installing or adjusting a door panel on a metal door (no text or symbols visible)
WARNING
The replacing lamp must be the same specification as the original.
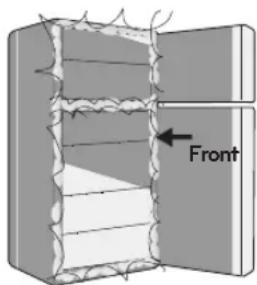
5. THE FRONT AREA WARMS UP
The front wall of the cabinet of the refrigerator might warm up sometimes specially during installation. DO NOT ALARM! It's normal due to avoid humidity or "sweat".
text_image
Front6. THE BACK OF THE REFRIGERATOR WARMS UP (some models)
The warming up is normal because from behind passes the cooling coil.
text_image
BackNOTES / NOTAS

LG
Life's Good