
MDX Sport Hybrid (2020) - Automotive Acura - Free user manual and instructions
Find the device manual for free MDX Sport Hybrid (2020) Acura in PDF.


User questions about MDX Sport Hybrid (2020) Acura
0 question about this device. Answer the ones you know or ask your own.
Ask a new question about this device
Download the instructions for your Automotive in PDF format for free! Find your manual MDX Sport Hybrid (2020) - Acura and take your electronic device back in hand. On this page are published all the documents necessary for the use of your device. MDX Sport Hybrid (2020) by Acura.
USER MANUAL MDX Sport Hybrid (2020) Acura
California Proposition 65 Warning
Operating, servicing and maintaining a passenger vehicle or off-highway motor vehicle can expose you to chemicals including engine exhaust, carbon monoxide, phthalates, and lead, which are known to the State of California to cause cancer and birth defects or other reproductive harm. To minimize exposure, avoid breathing exhaust, do not idle the engine except as necessary, service your vehicle in a well-ventilated area and wear gloves or wash your hands frequently when servicing your vehicle. For more information go to www.P65Warnings.ca.gov/passenger-vehicle.
Event Data Recorders
This vehicle is equipped with an event data recorder (EDR).
The main purpose of an EDR is to record, in certain crash or near crash-like situations, such as an air bag deployment or hitting a road obstacle, data that will assist in understanding how a vehicle's systems performed. The EDR is designed to record data related to vehicle dynamics and safety systems for a short period of time, typically 30 seconds or less. The EDR in this vehicle is designed to record such data as:
- How various systems in your vehicle were operating;
-
Whether or not the driver and passenger safety belts were buckled/fastened;
-
How far (if at all) the driver was depressing the accelerator and/or brake pedal; and,
• How fast the vehicle was traveling.
These data can help provide a better understanding of the circumstances in which crashes and injuries occur. NOTE: EDR data are recorded by your vehicle only if a non-trivial crash situation occurs; no data are recorded by the EDR under normal driving conditions and no personal data (e.g., name, gender, age, and crash location) are recorded. However, other parties, such as law enforcement, could combine the EDR data with the type of personally identifying data routinely acquired during a crash investigation.
To read data recorded by an EDR, special equipment is required, and access to the vehicle or the EDR is needed. In addition to the vehicle manufacturer, other parties, such as law enforcement, that have the special equipment, can read the information if they have access to the vehicle or the EDR.
The data belongs to the vehicle owner and may not be accessed by anyone else except as legally required or with the permission of the vehicle owner.
Service Diagnostic Recorders
This vehicle is equipped with service-related devices that record information about powertrain performance. The data can be used to verify emissions law requirements and/or help technicians diagnose and solve service problems. It may also be combined with data from other sources for research purposes, but it remains confidential. Some diagnostic and maintenance information is uploaded to Acura upon vehicle start up.
California Perchlorate Contamination Prevention Act
The airbags, seat belt tensioners, and CR type batteries in this vehicle may contain perchlorate materials - special handling may apply. See www.dtsc.ca.gov/hazardouswaste/perchlorate/
As you read this manual, you will find information that is preceded by a NOTICE. This information is intended to help you avoid damage to your vehicle, other property, or the environment.
Software End User License Agreement
Your vehicle comes equipped with software, which is governed by the End User License Agreement in Owner's Manual, and which contains a binding arbitration clause. Please refer to the End User License Agreement for the terms and conditions governing your use of the installed software, as well as the applications, services, functions, and content provided through the software. Your use of the installed software will serve as your consent to the terms and conditions of the End User License Agreement.
You may opt out within 30 days of your initial use of the Software by sending a signed, written notice to ACURA at American Honda Motor Co., Inc. Acura Client Relations Mail Stop 100-5E-8F, 1919 Torrance Blvd. Torrance, CA 90501-2746.
Privacy Notice
This vehicle may share location and usage information. To manage this setting, visit www.acuralink.com/vehicle-data-choices.
A Few Words About Safety
Your safety, and the safety of others, is very important. And operating this vehicle safely is an important responsibility.
To help you make informed decisions about safety, we have provided operating procedures and other information on labels and in this manual. This information alerts you to potential hazards that could hurt you or others.
Of course, it is not practical or possible to warn you about all the hazards associated with operating or maintaining your vehicle. You must use your own good judgment.
You will find this important safety information in a variety of forms, including:
● Safety Labels - on the vehicle.
- Safety Messages - preceded by a safety alert symbol ⚠ and one of three signal words: DANGER, WARNING, or CAUTION. These signal words mean:
DANGER
You WILL be KILLED or SERIOUSLY HURT if you don't follow instructions.
WARNING
You CAN be KILLED or SERIOUSLY HURT if you don't follow instructions.
CAUTION
You CAN be HURT if you don't follow instructions.
● Safety Headings - such as Important Safety Precautions.
● Safety Section - such as Safe Driving.
● Instructions - how to use this vehicle correctly and safely.
This entire book is filled with important safety information - please read it carefully.
This owner's manual should be considered a permanent part of the vehicle and should remain with the vehicle when it is sold.
This owner's manual covers all models of your vehicle. You may find descriptions of equipment and features that are not on your particular model.
Images throughout this owner's manual (including the front cover) represent features and equipment that are available on some, but not all, models. Your particular model may not have some of these features.
This owner's manual is for vehicles sold in the United States and Canada.
The information and specifications included in this publication were in effect at the time of approval for printing. Honda Motor Co., Ltd. reserves the right, however, to discontinue or change specifications or design at any time without notice and without incurring any obligation.
→Safe Driving P. 33
For Safe Driving P. 34 Seat Belts P. 39 Airbags P. 47
→Instrument Panel P. 83
Indicators P. 84 Gauges and Multi-Information Display (MID) P. 123
→Controls P. 141
Clock P. 142 Locking and Unlocking the Doors P. 143
Moonroof P. 170
Adjusting the Seats P. 194
Features P. 235
Audio System P. 236 Audio System Basic Operation P. 243
Rear Entertainment System (RES) ^* P. 342 Customized Features P. 362
→Driving P. 447
Before Driving P. 448 Towing a Trailer P. 454
Parking Your Vehicle P. 535 Multi-View Rear Camera ^® P. 545
Fuel Economy and CO _2 Emissions P. 560
→Maintenance P. 561
Before Performing Maintenance P. 562 Maintenance Minder ^TM P. 565
Checking and Maintaining Wiper Blades P. 587
Remote Control and Wireless Headphone Care ^P. 602
→Handling the Unexpected P. 613
Tools P. 614 If a Tire Goes Flat P. 615
Indicator, Coming On/Blinking P. 642 Fuses P. 648
When You Cannot Open the Tailgate P. 659
Information P. 661
Specifications P. 662 Identification Numbers P. 664
Emissions Testing P. 667 Warranty Coverages P. 668
| Contents | ||||
| Child Safety P. 62 | Exhaust Gas Hazard P. 80 | Safety Labels P. 81 | Quick Reference Guide | P. 4 |
| Safe Driving | P. 33 | |||
| Tailgate P. 158 | Security System P. 165 | Opening and Closing the Windows P. 168 | Instrument Panel | P. 83 |
| Operating the Switches Around the Steering Wheel P. 171 | Adjusting the Mirrors P. 191 | |||
| Interior Lights/Interior Convenience Items P. 209 | Climate Control System P. 222 | Controls | P. 141 | |
| Audio Error Messages P. 315 General Information on the Audio System P. 323 | Features | P. 235 | ||
| HomeLink® Universal Transceiver P. 394 | Bluetooth® HandsFreeLink® P. 397 | AcuraLink® P. 438 | ||
| Off-Highway Driving Guidelines P. 455 | When Driving P. 457 | Braking P. 518 | Driving | P. 447 |
| Surround View Camera System* P. 547 Refueling P. 557 | ||||
| Maintenance Under the Hood P. 569 Replacing Light Bulbs P. 582 | Maintenance | P. 561 | ||
| Checking and Maintaining Tires P. 591 | 12-Volt Battery P. 600 | Remote Transmitter Care P. 601 | Handling the Unexpected | P. 613 |
| Climate Control System Maintenance P. 604 | Cleaning P. 605 | Accessories and Modifications P. 611 | ||
| Power System Won't Start P. 635 | Jump Starting P. 638 | Overheating P. 640 | Information | P. 661 |
| Emergency Towing P. 657 | When You Cannot Unlock the Fuel Fill Door P. 658 | |||
| Refueling P. 660 | Index | P. 675 | ||
| Devices that Emit Radio Waves P. 665 | Reporting Safety Defects P. 666 | |||
| Authorized Manuals P. 670 | Client Service Information P. 671 | |||
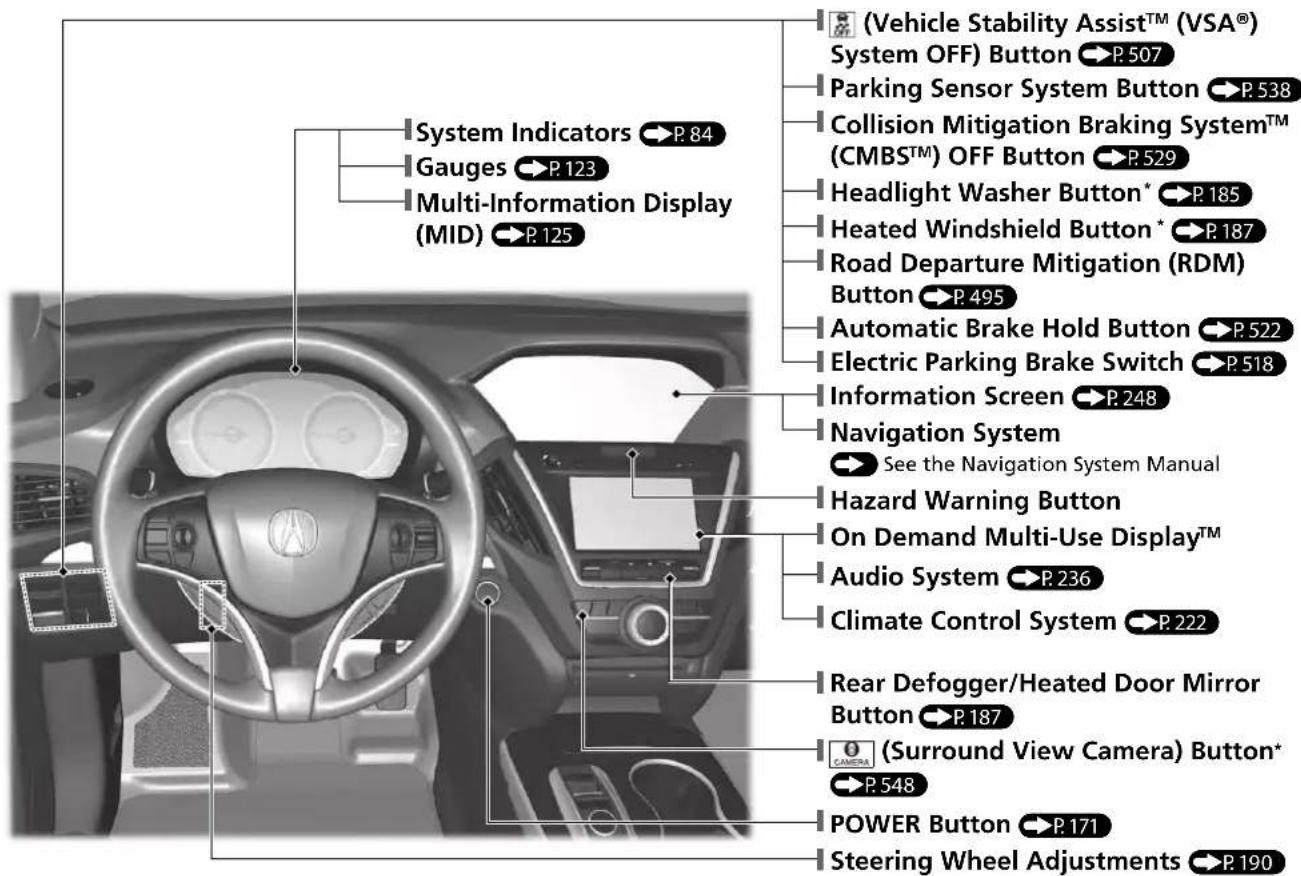
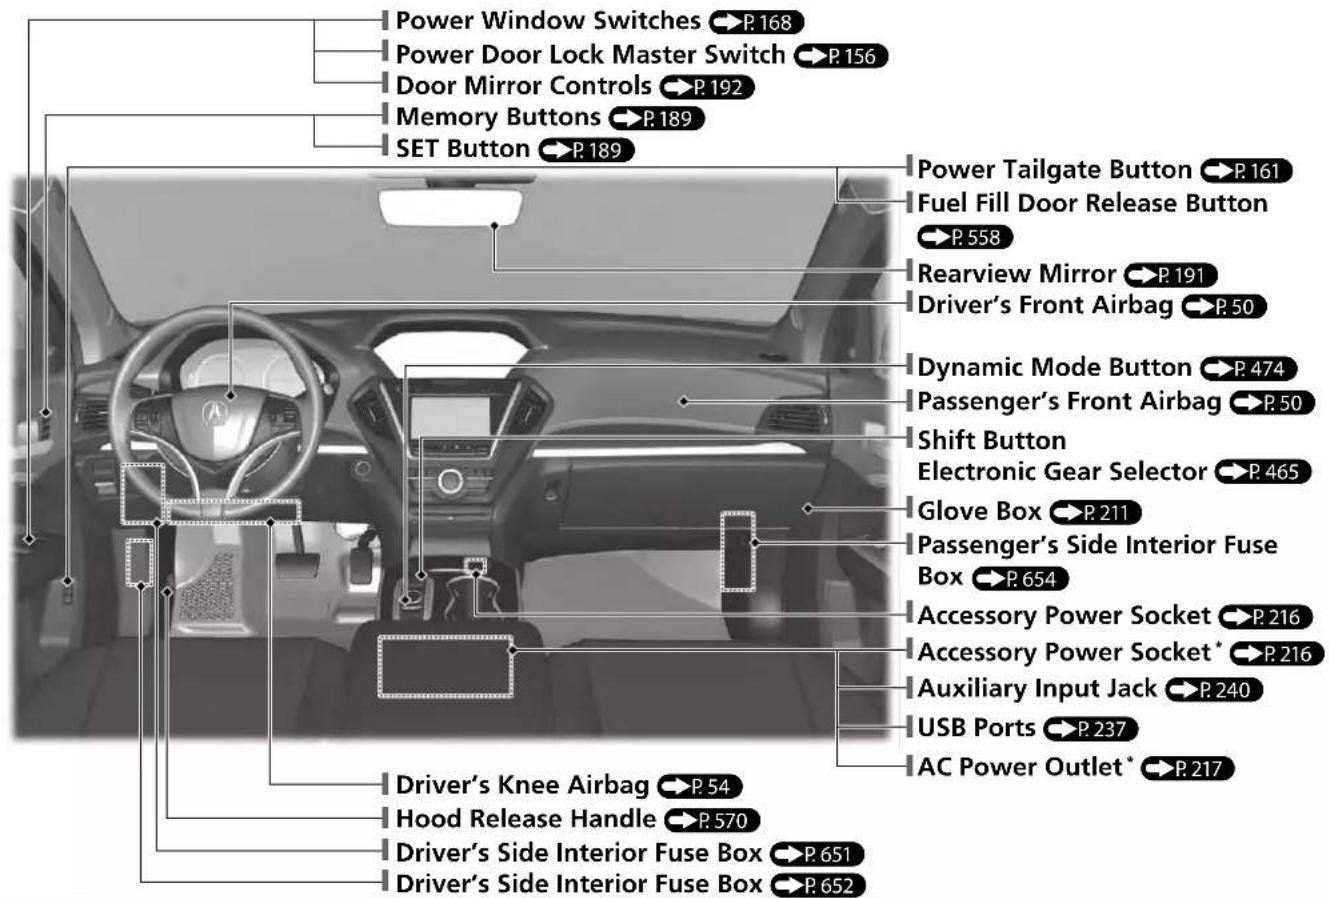
Visual Index
text_image
(Vehicle Stability Assist™ (VSA®) System OFF) Button P.507 Parking Sensor System Button P.538 Collision Mitigation Braking System™ (CMBS™) OFF Button P.529 Headlight Washer Button* P.185 Heated Windshield Button* P.187 Road Departure Mitigation (RDM) Button P.495 Automatic Brake Hold Button P.522 Electric Parking Brake Switch P.518 Information Screen P.248 Navigation System See the Navigation System Manual Hazard Warning Button On Demand Multi-Use Display™ Audio System P.236 Climate Control System P.222 Rear Defogger/Heated Door Mirror Button P.187 (Surround View Camera) Button* P.548 POWER Button P.171 Steering Wheel Adjustments P.190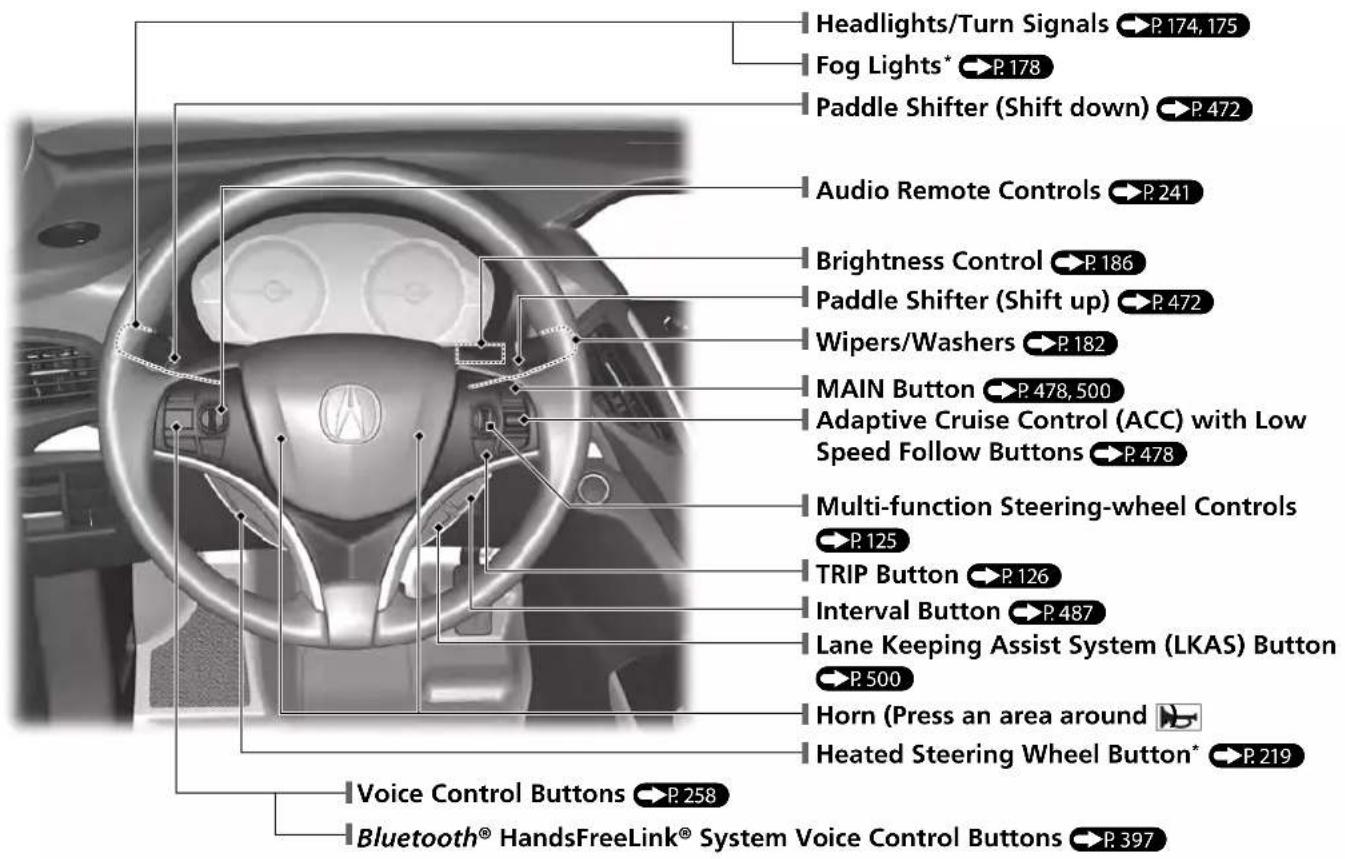
text_image
Headlights/Turn Signals P.174,175 Fog Lights* P.178 Paddle Shifter (Shift down) P.472 Audio Remote Controls P.241 Brightness Control P.186 Paddle Shifter (Shift up) P.472 Wipers/Washers P.182 MAIN Button P.478,500 Adaptive Cruise Control (ACC) with Low Speed Follow Buttons P.478 Multi-function Steering-wheel Controls P.125 TRIP Button P.126 Interval Button P.487 Lane Keeping Assist System (LKAS) Button P.500 Horn (Press an area around) Heated Steering Wheel Button* P.219 Voice Control Buttons P.258 Bluetooth® HandsFreeLink® System Voice Control Buttons P.397Visual Index
text_image
Power Window Switches P.168 Power Door Lock Master Switch P.156 Door Mirror Controls P.192 Memory Buttons P.189 SET Button P.189 Power Tailgate Button P.161 Fuel Fill Door Release Button P.558 Rearview Mirror P.191 Driver's Front Airbag P.50 Dynamic Mode Button P.474 Passenger's Front Airbag P.50 Shift Button Electronic Gear Selector P.465 Glove Box P.211 Passenger's Side Interior Fuse Box P.654 Accessory Power Socket P.216 Accessory Power Socket* P.216 Auxiliary Input Jack P.240 USB Ports P.237 AC Power Outlet* P.217 Driver's Knee Airbag P.54 Hood Release Handle P.570 Driver's Side Interior Fuse Box P.651 Driver's Side Interior Fuse Box P.652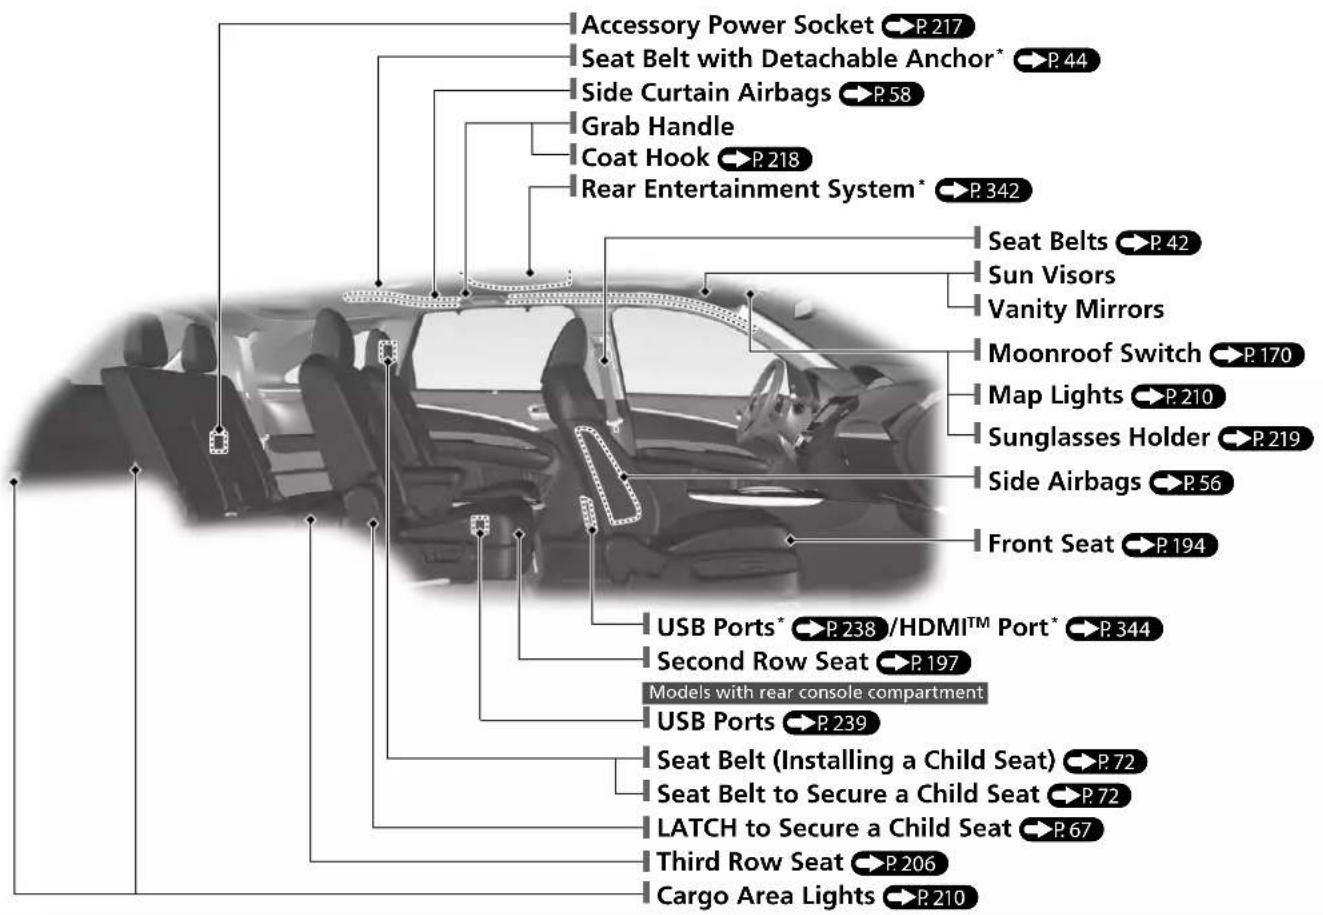
text_image
Accessory Power Socket →P.217 Seat Belt with Detachable Anchor* →P.44 Side Curtain Airbags →P.58 Grab Handle Coat Hook →P.218 Rear Entertainment System* →P.342 Seat Belts →P.42 Sun Visors Vanity Mirrors Moonroof Switch →P.170 Map Lights →P.210 Sunglasses Holder →P.219 Side Airbags →P.56 Front Seat →P.194 USB Ports* →P.238 /HDMI™ Port* →P.344 Second Row Seat →P.197 Models with rear console compartment USB Ports →P.239 Seat Belt (Installing a Child Seat) →P.72 Seat Belt to Secure a Child Seat →P.72 LATCH to Secure a Child Seat →P.67 Third Row Seat →P.206 Cargo Area Lights →P.210* Not available on all models
Visual Index
text_image
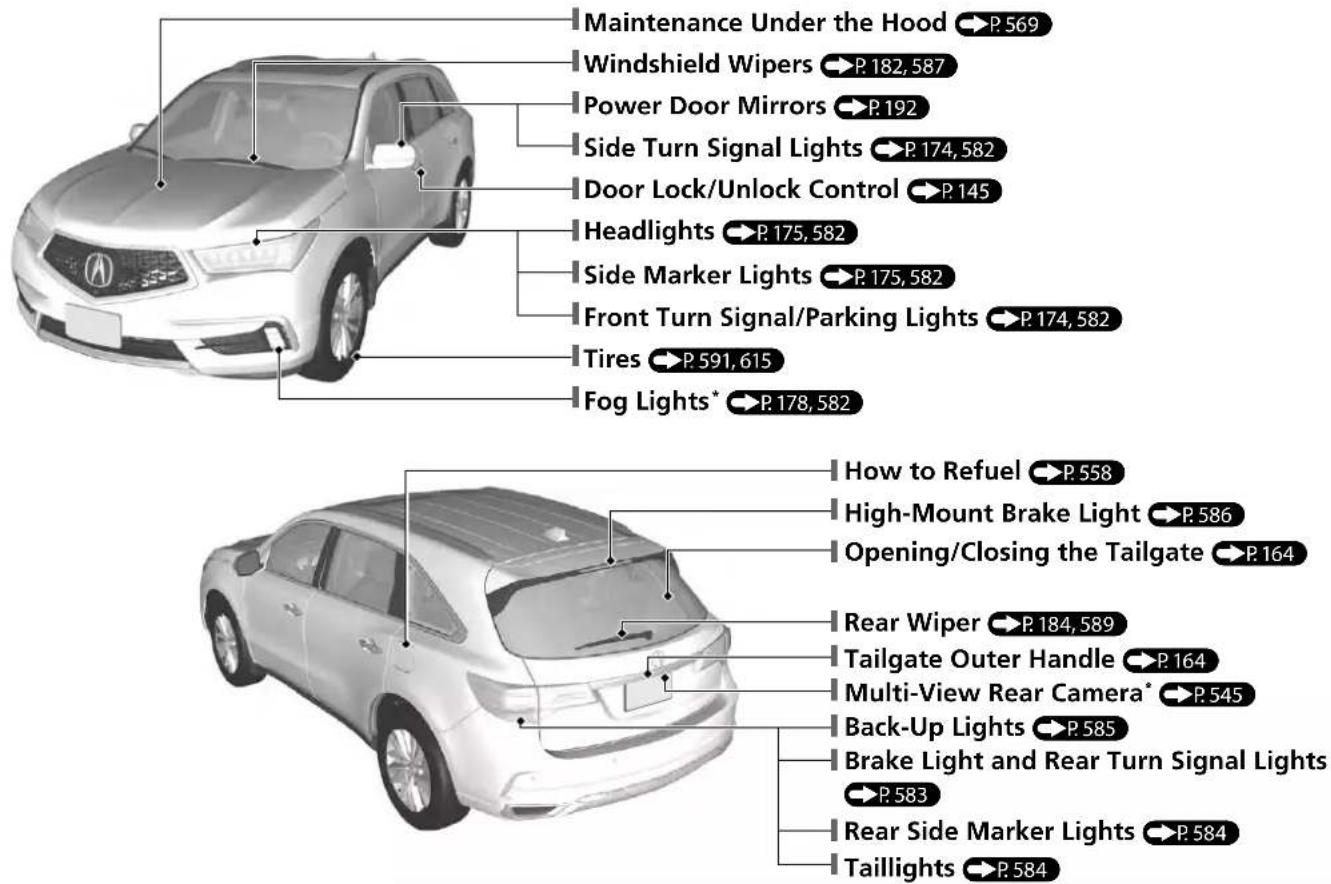
Maintenance Under the Hood P.569 Windshield Wipers P.182,587 Power Door Mirrors P.192 Side Turn Signal Lights P.174,582 Door Lock/Unlock Control P.145 Headlights P.175,582 Side Marker Lights P.175,582 Front Turn Signal/Parking Lights P.174,582 Tires P.591,615 Fog Lights* P.178,582 How to Refuel P.558 High-Mount Brake Light P.586 Opening/Closing the Tailgate P.164 Rear Wiper P.184,589 Tailgate Outer Handle P.164 Multi-View Rear Camera* P.545 Back-Up Lights P.585 Brake Light and Rear Turn Signal Lights P.583 Rear Side Marker Lights P.584 Taillights P.584SPORT HYBRID Super Handling-All Wheel Drive™ (SPORT HYBRID SH-AWD®)
Your SPORT HYBRID SH-AWD® vehicle uses both electric motors and a gasoline engine as propulsion sources, with electric motors receiving electricity from an internal High Voltage battery.
* Not available on all models
| Operating mode | EV Launch* | Engine Drive EV Cruising | Power Acceleration |
| Driving Speed | Launch Acceleration:• Rear Motor Drive | Gentle Acceleration:• Engine Drive | Low Speed Cruise:• Rear Motor Drive |
| Power Flow Monitor |  |  |  |
| Electric motors | Drive - / Drive Drive Drive | ||
| Generators - Generate / --- | |||
| Engine Stopped Running Stopped Running | |||
| High Voltage battery | Discharges | Charges/Discharges | Discharges |
*: When Integrated Dynamics System is in SPORT+ mode, EV Launch and EV Cruising cannot be operated.
*: Operating paddle shifters when the gear position is in D or S cancels EV Launch and EV Cruising.
| Operating mode | Engine Cruising Regeneration AWD Mode | ||
| Driving Speed | High Speed Cruise:• Engine Drive | Deceleration:• Front & Rear Regeneration | Slippery Condition:• Engine Drive• Front Generation• Rear Motor Drive |
| Power Flow Monitor | 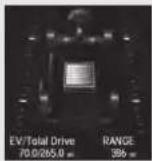 | 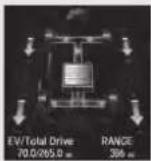 | 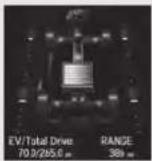 |
| Electric motors | Drive Regenerate Drive | ||
| Generators Generate Regenerate Generate | |||
| Engine Running Stopped Running | |||
| High Voltage battery | Charges/Discharges Charges Charges/Discharges | ||
Energy Efficiency
As with a gasoline-powered vehicle, hybrid vehicle fuel efficiency and driving range is most impacted by your driving style. Aggressive acceleration and high-speed driving can easily trigger the system to switch the propulsion source to the gasoline-powered engine. In addition, heavy climate control system use negatively affects vehicle range and efficiency. Either of these use patterns will more quickly reduce the High Voltage battery's state of charge.
Battery Types
There are two types of batteries used in this vehicle: a standard 12-volt battery that powers the airbags, the interior and exterior lights, and other standard 12-volt systems; and a high voltage battery that is used to power the propulsion motors and recharge the 12-volt battery.
Regenerative Energy and Regenerative Braking
When decelerating without the accelerator being depressed or the brake pedal being applied, or while driving downhill, the electric motors act as generators that recover a portion of the electrical energy that was used to accelerate the vehicle. This regenerative braking slows the vehicle in a manner similar to engine braking in a gasoline-powered vehicle.
When the high voltage battery is fully charged or its condition is affected by extreme temperatures or other factors, regenerative braking may not work.
Auto Engine Stop/Start
Your vehicle's gasoline engine will automatically stop and start during vehicle operation as needed to meet driving and battery conditions. These are some examples that could cause the gasoline engine to automatically start.
In the following cases, however, Auto Engine Stop may not activate.
- When the Integrated Dynamics System is in SPORT+ mode.
● The vehicle momentarily needs additional power for aggressive acceleration, driving uphill, or driving at high speeds.
● The climate control system is in heavy use.
● The High Voltage battery temperature is high or low.
● The High Voltage battery state of charge is low. - When the gear position is in S or R.
Sounds Unique to the SPORT HYBRID SH-AWD® System
When you first start driving this vehicle, you will likely hear some unfamiliar sounds, particularly when you turn on the power system, or while you are driving or accelerating from a stop. Some of these sounds are unique to this vehicle's powertrain, fuel, and climate control systems; others are similar to sounds generated by conventional automobiles that typically are masked by louder noises absent from a vehicle of this design.
These sounds are not a cause for concern, and you will soon recognize them as normal and thus be able to detect any new or unusual noise should one develop.
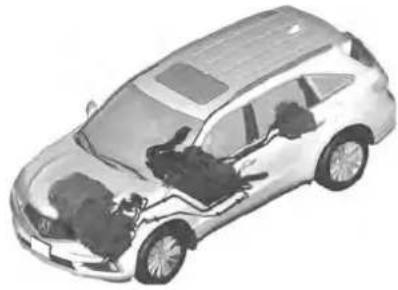
Safety Precautions
natural_image
3D cutaway illustration of a car showing internal engine and battery components (no text or symbols)Do not touch the High Voltage system
Attempting to take a High Voltage system component apart or disconnect one of its wires can cause severe electrical shock. Make sure that any maintenance or repairs to the High Voltage system is performed by an Acura dealer.
If a crash occurs
● Be careful of electric shock hazard.
If a severe crash damages your vehicle's High Voltage system, there is a possibility of electrical shock due to exposed High Voltage components or wires. If this happens, do not touch any of the High Voltage system components or any of its orange wires.
● Avoid contact with High Voltage battery fluid.
The High Voltage battery contains a flammable electrolyte that could leak as a result of a severe crash. Avoid skin or eye contact with the electrolyte as it is corrosive. If you accidentally come into contact with the electrolyte, rinse the exposed skin or flush your eyes with copious amounts of water for at least five minutes, and seek medical attention immediately.
● Use a fire extinguisher for an electrical fire.
▶ Attempting to extinguish an electrical fire with a small quantity of water, from a garden hose for instance, can be dangerous.
● Anytime the vehicle is damaged in a crash, have it repaired by an Acura dealer.
Emergency Shutdown System for the High Voltage System
If the vehicle is involved in a crash, the emergency shutdown system will activate depending on the severity of the impact. When the system activates, the High Voltage system automatically shuts down, and the vehicle can no longer move under its own power. To return the High Voltage system back to normal operation, consult an Acura dealer.
Acura collects and recycles High Voltage batteries used in its vehicles – consult an Acura dealer for more information.
Safe Driving
P.33
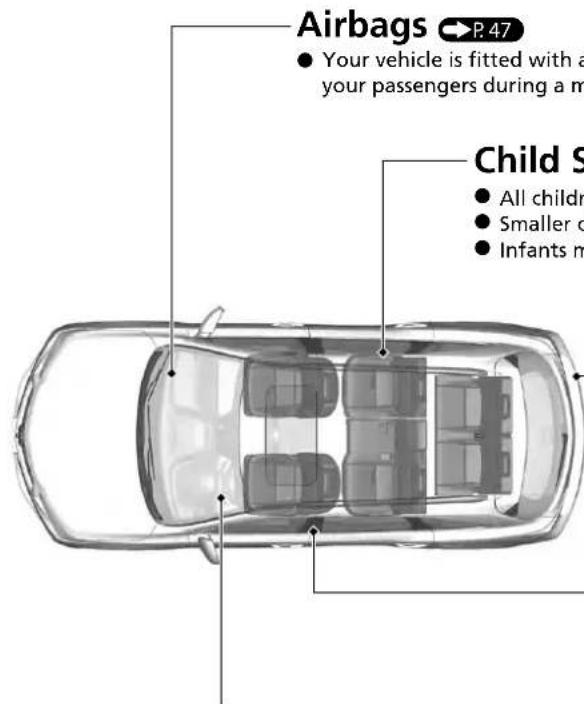
text_image
Airbags P. 47 • Your vehicle is fitted with a your passengers during a m Child S • All children • Smaller c • Infants mBefore Driving Checklist → P.38
● Before driving, check that the front seats, head restraints, steering wheel, and mirrors have been properly adjusted.
Exhaust Gas Hazard →P.80
- Your vehicle emits dangerous exhaust gases that contain carbon monoxide. Do not run the engine in confined spaces where carbon monoxide gas can accumulate.
Seat Belts P.39
● Fasten your seat belt and sit upright well back in the seat.
- Check that your passengers are wearing their seat belts correctly.
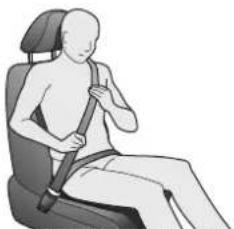
natural_image
Illustration of a person sitting in a car seat using a seatbelt (no text or symbols)Fasten your lap belt as low as possible.
Instrument Panel
P.83
Gauges P.123 /Multi-Information Display (MID) P.125 /System Indicators P.84
System Indicators

Blind spot information System Indicator

Speed-sensitive Electric Power Steering (EPS) System Indicator

Malfunction Indicator Lamp

Low Oil Pressure Indicator
SPORT+
SPORT+ Mode Indicator
READY
READY Indicator

Vehicle Stability Assist™ (VSA®) System Indicator

Vehicle Stability Assist™ (VSA®) OFF

Immobilizer System Indicator

Keyless Access System Indicator

12-Volt Battery Charging System Indicator

System Message Indicator

Automatic Brake Hold System Indicator

Automatic Brake Hold Indicator
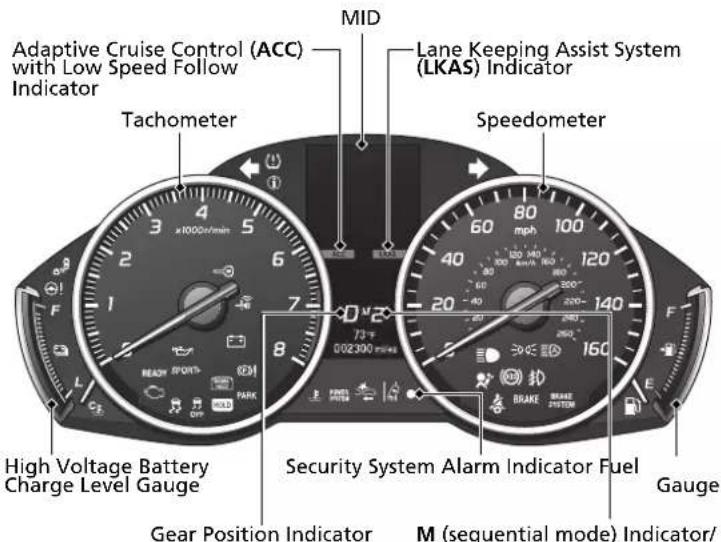
text_image
Adaptive Cruise Control (ACC) with Low Speed Follow Indicator Tachometer MID Lane Keeping Assist System (LKAS) Indicator Speedometer High Voltage Battery Charge Level Gauge Security System Alarm Indicator Fuel Gear Position Indicator M (sequential mode) Indicator/ GaugeSystem Indicators

Low Tire Pressure/TPMS Indicator

High Temperature Indicator

Low Temperature Indicator
Lights Indicators

Lights On Indicator

High Beam Indicator

Fog Light Indicator*

Auto High-Beam Indicator
System Indicators

Electric Parking Brake System Indicator

Electric Parking Brake Indicator

Turn Signal and Hazard Warning Indicators

Supplemental Restraint System Indicator

Anti-lock Brake System (ABS) Indicator

Collision Mitigation Braking System™ (CMBS™) Indicator

Road Departure Mitigation (RDM) Indicator
POWER SYSTEM
POWER SYSTEM Indicator
BRAKE

Brake System Indicator (Red)
BRAKE
SYSTEM

Brake System Indicator (Amber)

[Non-Text]

Low Fuel Indicator Seat Belt Reminder Indicator
Controls
P.141
Clock
P.142
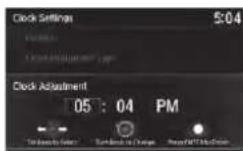
1 Enter the Clock Adjustment screen.
→Adjusting the Clock →P.142
2 Rotate to change hour, then move
3 Rotate to change minute, then press ⚙.
The navigation system receives signals from GPS satellites, updating the clock automatically.
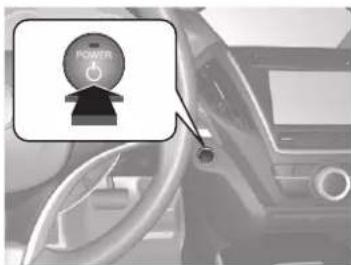
POWER Button
P.171
Press the button to change the vehicle's power mode.
text_image
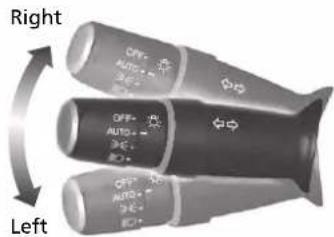
POWERTurn Signals P.174
Turn Signal Control Lever
text_image
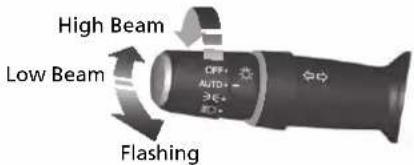
Right LeftLights P.175
Light Control Switches
text_image
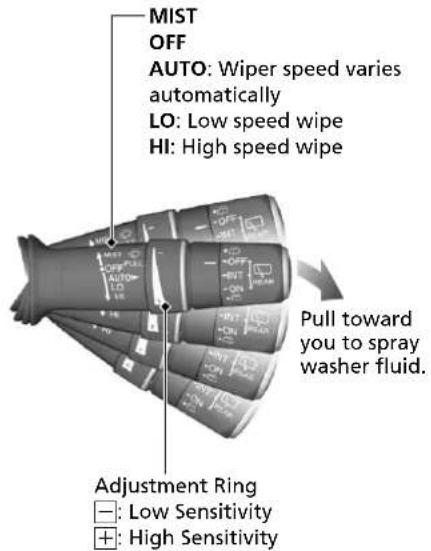
High Beam Low Beam FlashingWipers and Washers
Wiper/Washer Control Lever
text_image
MIST OFF AUTO: Wiper speed varies automatically LO: Low speed wipe HI: High speed wipe Adjustment Ring - Low Sensitivity + High Sensitivity Pull toward you to spray washer fluid.AUTO should always be turned OFF before the following situations in order to prevent severe damage to the wiper system:
● Cleaning the windshield
● Driving through a car wash
● No rain present
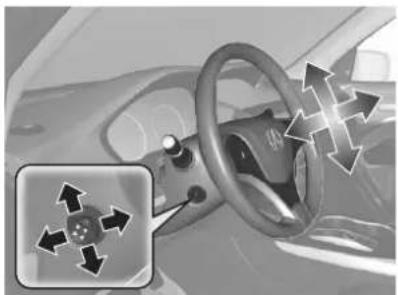
Steering Wheel

● To adjust, push and hold the adjustment switch to move the steering wheel to the desired position.
natural_image
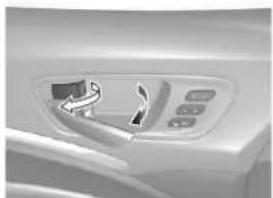
Interior view of a car showing steering wheel and dashboard with directional arrows indicating motion (no text or symbols)Unlocking the Front Doors from the Inside

● Pull either front door inner handle to unlock and open it at the same time.
natural_image
Close-up of a car air conditioner panel with control buttons and a handle (no visible text or symbols)Tailgate
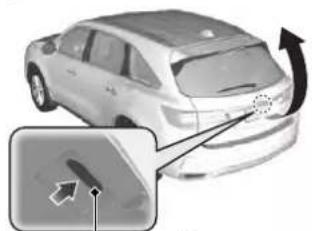
natural_image
Side view of a car with a curved arrow indicating rotation or change, showing no text or symbols.Tailgate Outer Handle
- Press the tailgate outer handle to unlock and open the tailgate when you carry the keyless access remote.
- Press the power tailgate button on the driver's door or the remote transmitter to open and close the power tailgate.
Power Door Mirrors
P.192
● With the power mode in ON, move the selector switch to L or R.
● Push the appropriate edge of the adjustment switch to adjust the mirror.
- Press the fold button to fold the door mirrors.
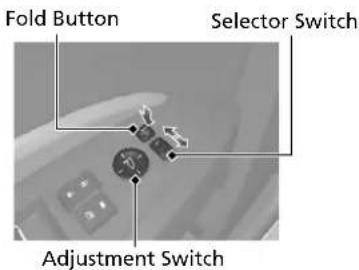
text_image
Fold Button Selector Switch Adjustment SwitchPower Windows
P.168
● With the power mode in ON, open and close the power windows.
- If the power window lock button is in the off position, each passenger's window can be opened and closed with its own switch.
- If the power window lock button is in the on position (indicator is on), each passenger's window switch is disabled.
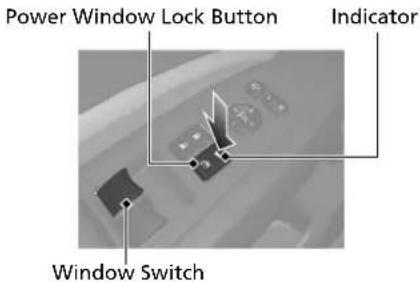
text_image
Power Window Lock Button Indicator Window SwitchClimate Control System P.222
● Press the AUTO button to activate the climate control system.
● Press the button to turn the system on or off.
- Press the 📄 button or select the Front 📌 icon to defrost the windshield.
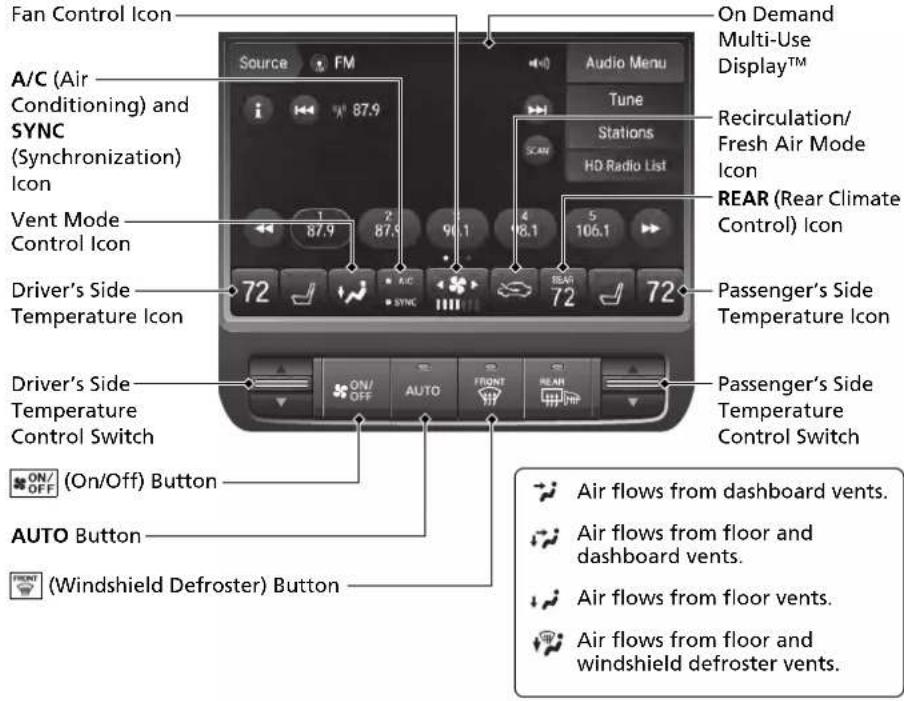
text_image
Fan Control Icon A/C (Air Conditioning) and SYNC (Synchronization) Icon Vent Mode Control Icon Driver's Side Temperature Icon Driver's Side Temperature Control Switch (On/Off) Button AUTO Button (Windshield Defroster) Button Source FM Audio Menu Tune Stations HD Radio List 1 87.9 2 87.9 3 90.1 4 18.1 5 106.1 6 ON/OFF AUTO FRONT REAR 72 72 72 Rear (Rear Climate Control) Icon Passenger's Side Temperature Icon Passenger's Side Temperature Control Switch On Demand Multi-Use Display™ Recirculation/ Fresh Air Mode Icon REAR (Rear Climate Control) Icon Air flows from dashboard vents. Air flows from floor and dashboard vents. Air flows from floor vents. Air flows from floor and windshield defroster vents.Rear Climate Control P.232
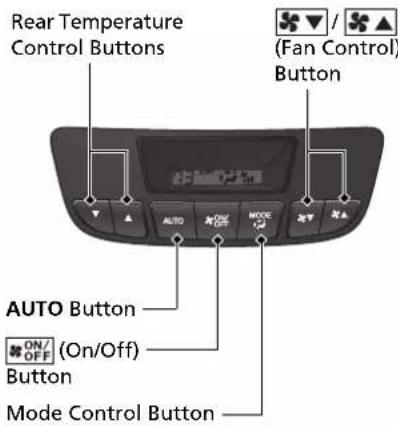
- Press the AUTO button to activate the rear climate control system.
- Press the ON/OFF ton to turn the system on or off.
text_image
Rear Temperature Control Buttons AUTO Button ON/OFF (On/Off) Button Mode Control Button (Fan Control) ButtonAir flows from the rear console vents.
Air flow from the rear console vents and floor vents.
Air flows from the rear floor vents.
Features
P.235
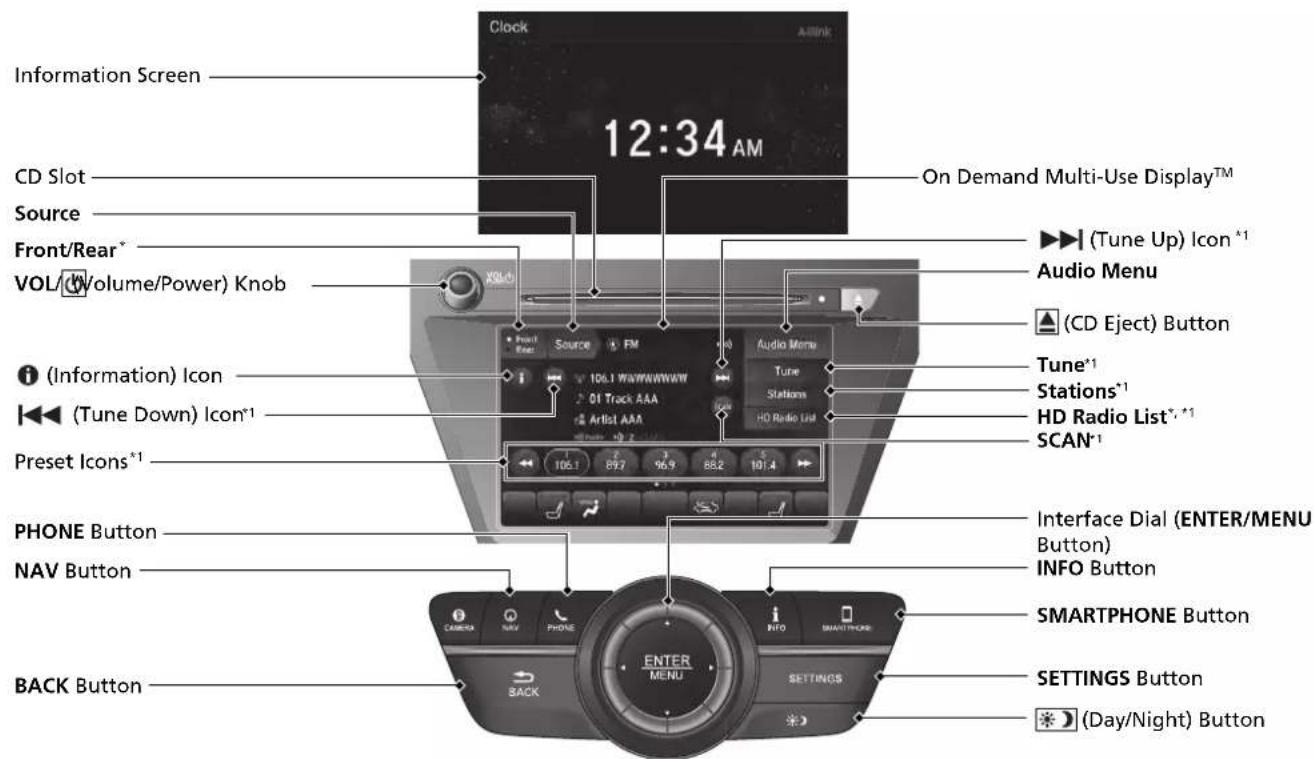
Audio System P.243 For navigation system operation See the Navigation System Manual
text_image
Information Screen CD Slot Source Front/Rear* VOL/(Volume/Power) Knob On Demand Multi-Use Display™ ►► (Tune Up) Icon *1 Audio Menu ▲ (CD Eject) Button Tune*1 Stations*1 HD Radio List*, *1 SCAN* i (Information) Icon ◄► (Tune Down) Icon*1 Preset Icons*1 PHONE Button NAV Button BACK Button Interface Dial (ENTER/MENU Button) INFO Button SMARTPHONE Button SETTINGS Button ★ (Day/Night) Button*1:Icons that appear on the screen vary by the source selected.
* Not available on all models
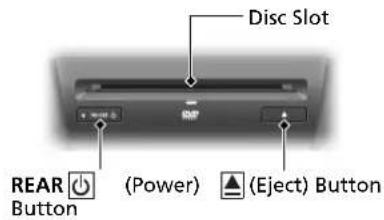
Models with rear entertainment system
text_image
Disc Slot REAR Button (Power) (Eject) ButtonAudio Remote Controls
P.241
text_image
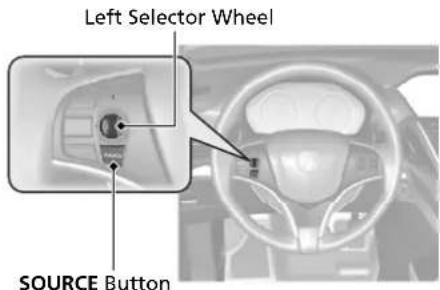
Left Selector Wheel SOURCE Button- SOURCE Button
Press to change the audio mode: FM/AM/SiriusXM®/CD/Rear DVD*/HDD/USB/iPod/Apple CarPlay/Android Auto/Bluetooth®Audio/Pandora®*/AUX.
● Left Selector Wheel
Roll to adjust the volume up/down. Radio: Move to a side to change the preset station. Move to a side and hold to select the next or previous strong station.
CD/HDD/USB device:
Move to a side to skip to the beginning of the next song or return to the beginning of the current song. Move to a side and hold to change a folder.
Driving
P. 447
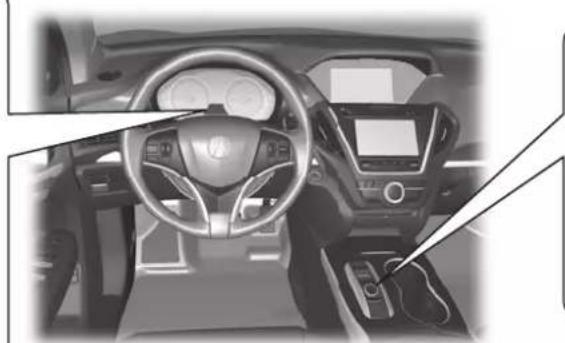
Electronic Gear Selector P.465
● Always depress the brake pedal before selecting P or changing the gear position from P.
- Select P and depress the brake pedal when turning on the power.
Shifting
Gear Position Indicator
The gear position indicator and the shift button indicator indicate the current gear selection.
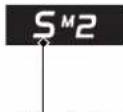
Gear Position Indicator
natural_image
Interior view of a car dashboard and infotainment system (no visible text or symbols)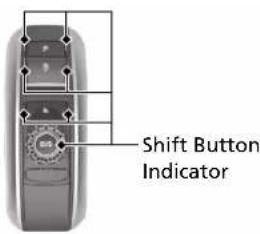
text_image
Shift Button Indicator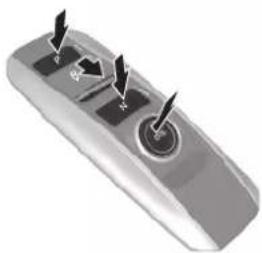
natural_image
Close-up of a remote control switch with three buttons and an arrow indicator (no text or symbols)
Park
Press the |P| button.
Used when parking or before
turning the power on or off.
Transmission is locked.

Reverse
Pull back the R button.
Used when reversing.

Neutral
Press the N button.
Transmission is not locked.

Drive
Press the □wgtton.
Used for normal driving.
Sequential shift mode can be used temporarily.

Drive (S)
Press the D/Sutton twice.
Sequential shift mode can be used.
Sequential Mode P.472
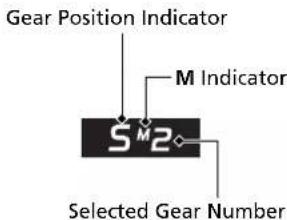
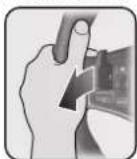
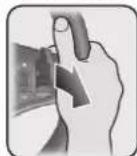
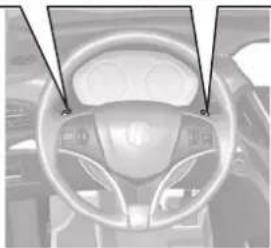
Paddle shifters allow you to shift gears much like a manual transmission (1st through 7th). This is useful for regenerative braking.
text_image
Gear Position Indicator M Indicator S M 2 Selected Gear NumberWhen the transmission is in D
● The transmission will shift back to automatic mode once the system detects that the vehicle is cruising.
When the transmission is in S
- Holds the selected gear, and the M (sequential mode) indicator comes on.
● The sequential mode gear selection is shown in the instrument panel.
Shift Down —
Paddle Shifter
Shift Up +
Paddle Shifter
natural_image
Interior view of a car dashboard and steering wheel (no visible text or symbols)VSA® On and Off P.507
- The Vehicle Stability Assist™ (VSA®) system helps stabilize the vehicle during cornering and helps maintain traction while accelerating on loose or slippery road surfaces.
- VSA ^ comes on automatically every time you turn on the power system.
- To partially disable or fully restore VSA® function, press and hold the button until you hear a beep.
CMBS™ On and Off
P.529
- When a possible collision is likely unavoidable, the CMBS™ can help you to reduce the vehicle speed and the severity of the collision.
- The CMBS™ is turned on every time you start the power system.
● To turn the CMBS™ on or off, press and hold the button until you hear a beep.
Tire Pressure Monitoring System (TPMS) with Tire Fill Assist P.513,646
● The TPMS monitors tire pressure.
● TPMS is turned on automatically every time you turn on the power system.
● TPMS fill assist provides audible and visual guidance during tire pressure adjustment.
Refueling P.557
Fuel recommendation: Unleaded premium gasoline, pump octane number 91 or higher
Fuel tank capacity: 19.4 US gal (73.3 L)
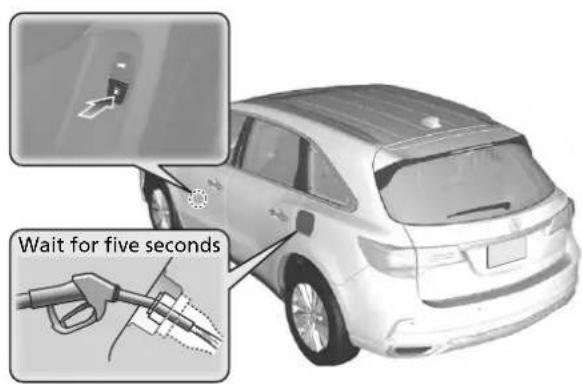
1 Press the fuel fill door release button.
text_image
Wait for five seconds2 After refueling, wait for about five seconds before removing the filler nozzle.
AcuraWatch™
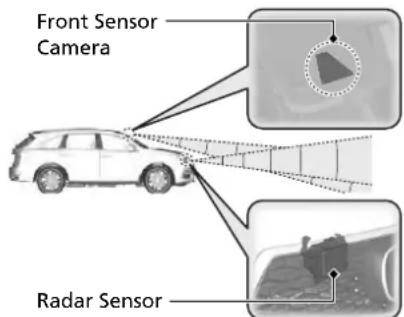
AcuraWatch™ is a driver support system which employs the use of two distinctly different kinds of sensors, a radar sensor located behind the emblem and a front sensor camera mounted to the interior side of the windshield, behind the rearview mirror.
The camera is located behind the rearview mirror.
text_image
Front Sensor Camera Radar SensorThe radar sensor is behind the emblem.
Adaptive Cruise Control (ACC) with Low Speed Follow P.477
Helps maintain a constant vehicle speed and a set following-interval behind a vehicle detected ahead of yours and, if the detected vehicle comes to a stop, can decelerate and stop your vehicle, without you having to keep your foot on the brake or the accelerator.
Road Departure Mitigation (RDM) System
P. 493
Alerts and helps to assist you when the system detects a possibility of your vehicle unintentionally crossing over detected lane markings and/or leaving the roadway altogether.
Lane Keeping Assist System (LKAS) P.498
Provides steering input to help keep the vehicle in the middle of a detected lane and provides tactile and visual alerts if the vehicle is detected drifting out of its lane.
Collision Mitigation Braking System™ (CMBS™) P.526
Can assist you when there is a possibility of your vehicle colliding with a vehicle or a pedestrian detected in front of yours. The CMBSTM is designed to alert you when a potential collision is determined, as well as to reduce your vehicle speed to help minimize collision severity when a collision is deemed unavoidable.
Maintenance
Under the Hood
P.569
- Check engine oil, engine coolant, windshield washer fluid and inverter coolant. Add when necessary.
- Check brake fluid.
- Check the 12-volt battery condition monthly.
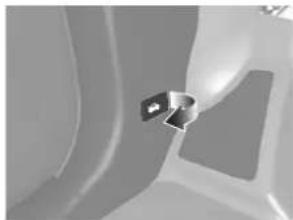
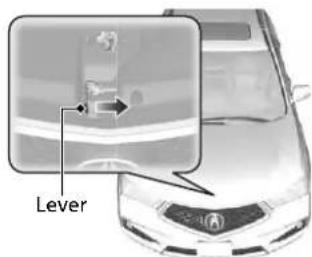
1 Pull the hood release handle under the corner of the dashboard.
natural_image
Abstract grayscale 3D rendering of a mechanical component or bracket (no text or symbols visible)2 Locate the hood latch lever, push it to the side, and then raise the hood. Once you have raised the hood slightly, you can release the lever.
text_image
Lever3 When finished, close the hood and make sure it is firmly locked in place.
Wiper Blades
P.587
- Replace blades if they leave streaks across the windshield.
natural_image
3D rendering of a silver Acura SUV with visible headlights and grille (no text or symbols)Tires P.591
Lights P.582
● Inspect tires and wheels regularly.
- Check tire pressures regularly.
● Install snow tires for winter driving.
- Inspect all lights regularly.
Handling the Unexpected
P.613
Flat Tire
P.615
Models with temporary tire repair kit
● Park in a safe location and repair the flat tire using the tire repair kit.
Models with a compact spare tire
● Park in a safe location and replace the flat tire with the compact spare tire located under the cargo area.
natural_image
Rear view of a silver SUV (no visible text or symbols)Indicators Come On
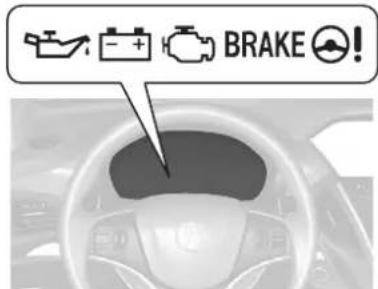
P.642
- Identify the indicator and consult the owner's manual.
text_image
BRAKE!Power System Won't Start P.635
- If the battery is dead, jump start using a booster battery.
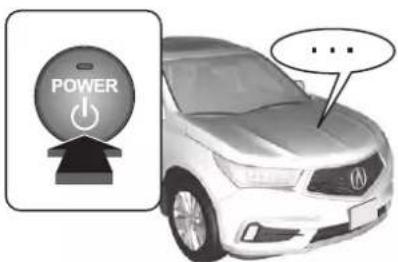
text_image
POWER ...Blown Fuse
P.648
- Check for a blown fuse if an electrical device does not operate.
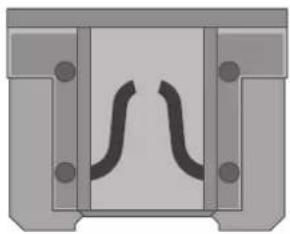
natural_image
Pure mechanical component diagram without any text, numbers, or symbolsOverheating
P.640
● Park in a safe location. If you do not see steam under the hood, open the hood, and let the engine cool down.
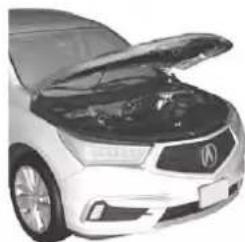
natural_image
Front view of a white Honda car with its hood open, showing engine compartment and roof structure (no visible text or symbols)Emergency Towing
P.657
- Call a professional towing service if you need to tow your vehicle.

natural_image
Side view illustration of a flatbed truck with a single car on its side (no text or symbols)What to Do If

Why do I hear an operating noise when applying the brakes?

This can occur when the ABS activates and does not indicate a problem. Apply firm, steady pressure on the brake pedal. Never pump the brake pedal.
Anti-lock Brake System (ABS) P.524

The rear door cannot be opened from inside the vehicle. Why?

Check if the childproof lock is in the lock position. If so, open the rear door with the outside door handle. To cancel this function, slide the lever upwards to the unlock position.

natural_image
Side view of a car showing the door and seatbelt with an arrow pointing to it (no text or symbols visible)
Why do the doors lock after I unlocked the doors?

If you do not open the doors within 30 seconds, the doors are relocked automatically for security.

Why does the beeper sound when I open the driver's door?

The beeper sounds when:
- The power mode is in ACCESSORY.
- The exterior lights are left on.
 | Why does a beeper sound when I walk away from the vehicle after I close the door? |  | The beeper sounds if you move outside the walk away auto lock operating range before the door completely closes. ➡ Locking the doors and tailgate (Walk away auto lock®) ➡ P.148 |
 | Why does the beeper sound when I start driving? |  | The beeper sounds when the driver and/or front passenger are not wearing their seat belts. |
 | Pulling the electric parking brake switch does not release the parking brake. Why? |  | Pull the electric parking brake switch with the brake pedal depressed. |
 | I'm seeing an amber indicator of a tire with an exclamation point. What is that? |  | The Tire Pressure Monitoring System (TPMS) needs attention. Check tire pressure. ➡ If the Low Tire Pressure/TPMS Indicator Comes On or Blinks ➡ P.646 |

Depressing the accelerator pedal does not release the parking brake automatically. Why?

- Fasten the driver's seat belt.
- Check if the transmission is in or . If so, select any other position.

Why does the gear position automatically change to P when I open the driver's door to check for parking space lines when reversing?

- Fasten the driver's seat belt.
- Close the driver's door and manually change the gear position.
When opening the driver's door → P. 468

Why do I hear a screeching sound when I apply the brake pedal?

The brake pads may need to be replaced. Have your vehicle inspected by a dealer.

Unleaded gasoline with a Pump Octane Number (PON) of 91 or higher is recommended. Is it possible to use unleaded gasoline with a Pump Octane Number (PON) of 87 or lower on this vehicle?

Use of a lower octane gasoline can cause occasional metallic knocking noise in the engine and will result in decreased engine performance.
Use of a gasoline with a pump octane less than 87 can lead to engine damage.
The use of regular unleaded gasoline can cause metallic knocking noises in the engine and will result in decreased engine performance.
This page intentionally left blank.
text_image
Safe Driving You can find many safety recommendations throughout this chapter, and throughout this manual.For Safe Driving
Important Safety Precautions.... 34
Important Handling Information...... 36
Your Vehicle's Safety Features...... 37
Safety Checklist 38
Seat Belts
About Your Seat Belts.... 39
Fastening a Seat Belt 42
Seat Belt Inspection.... 46
Airbags
Airbag System Components...... 47
Types of Airbags 50
Front Airbags (SRS) 50
Driver's Knee Airbag 54
Side Airbags.... 56
Side Curtain Airbags 58
Airbag System Indicators.... 59
Airbag Care 61
Child Safety
Protecting Child Passengers 62
Safety of Infants and Small Children .. 64
Safety of Larger Children 78
Exhaust Gas Hazard
Carbon Monoxide Gas.... 80
Safety Labels
Label Locations 81
For Safe Driving
The following pages explain your vehicle's safety features and how to use them properly. The safety precautions below are ones that we consider to be among the most important.
Important Safety Precautions
■ Always wear your seat belt
A seat belt is your best protection in all types of collisions. Airbags are designed to supplement seat belts, not replace them. So even though your vehicle is equipped with airbags, make sure you and your passengers always wear your seat belts, and wear them properly.
■ Restrain all children
Children ages 12 and under should ride properly restrained in a back seat, not the front seat. Infants and small children should be restrained in a child seat. Larger children should use a booster seat and a lap/shoulder seat belt until they can use the belt properly without a booster seat.
■ Be aware of airbag hazards
While airbags can save lives, they can cause serious or fatal injuries to occupants who sit too close to them, or are not properly restrained. Infants, young children, and short adults are at the greatest risk. Be sure to follow all instructions and warnings in this manual.
■ Don't drink and drive
Alcohol and driving don't mix. Even one drink can reduce your ability to respond to changing conditions, and your reaction time gets worse with every additional drink. So don't drink and drive, and don't let your friends drink and drive, either.
Important Safety Precautions
Some states, provinces and territories prohibit the use of cell phones other than hands-free devices by the driver while driving.
■ Pay appropriate attention to the task of driving safely
Engaging in cell phone conversation or other activities that keep you from paying close attention to the road, other vehicles, and pedestrians could lead to a crash. Remember, situations can change quickly, and only you can decide when it is safe to divert some attention away from driving.
■ Control your speed
Excessive speed is a major factor in crash injuries and deaths. Generally, the higher the speed, the greater the risk, but serious injuries can also occur at lower speeds. Never drive faster than is safe for current conditions, regardless of the maximum speed posted.
- Keep your vehicle in safe condition
Having a tire blowout or a mechanical failure can be extremely hazardous. To reduce the possibility of such problems, check your tire pressures and condition frequently, and perform all regularly scheduled maintenance.
■ Do not leave children unattended in the vehicle
Children, pets and people needing assistance left unattended in the vehicle may be injured if they activate one or more of the vehicle controls. They may also cause the vehicle to move, resulting in a crash in which they and/or another person(s) can be injured or killed. Also, depending on the ambient temperature, the temperature of the interior may reach extreme levels, which can result in harm or death. Even if the climate control system is on, never leave them in the vehicle unattended as the climate control system can shut off at any time.
Important Handling Information
Your vehicle has higher ground clearance than a passenger vehicle designed for use only on pavement. Higher ground clearance has many advantages for off-highway driving. It allows you to travel over bumps, obstacles, and rough terrain. It also provides good visibility so you can anticipate problems earlier.
These advantages come at some cost. Because your vehicle is taller and rides higher off the ground, it has a higher center gravity making it more susceptible to tipping or roll over if you make abrupt turns. Utility vehicles have a significantly higher rollover rate than other types of vehicles. In a rollover crash, an unbelted person is significantly more likely to die than a person wearing a seat belt. As a reminder, make sure you and your passengers always wear seat belts.
Important Handling Information
For information on how to reduce the risk of rollover, read:
Driving Guidelines for Your Utility Vehicle P. 463
→ Off-Highway Driving Guidelines P. 455
Failure to operate your vehicle correctly might result in a crash or a rollover.
Your Vehicle's Safety Features
text_image
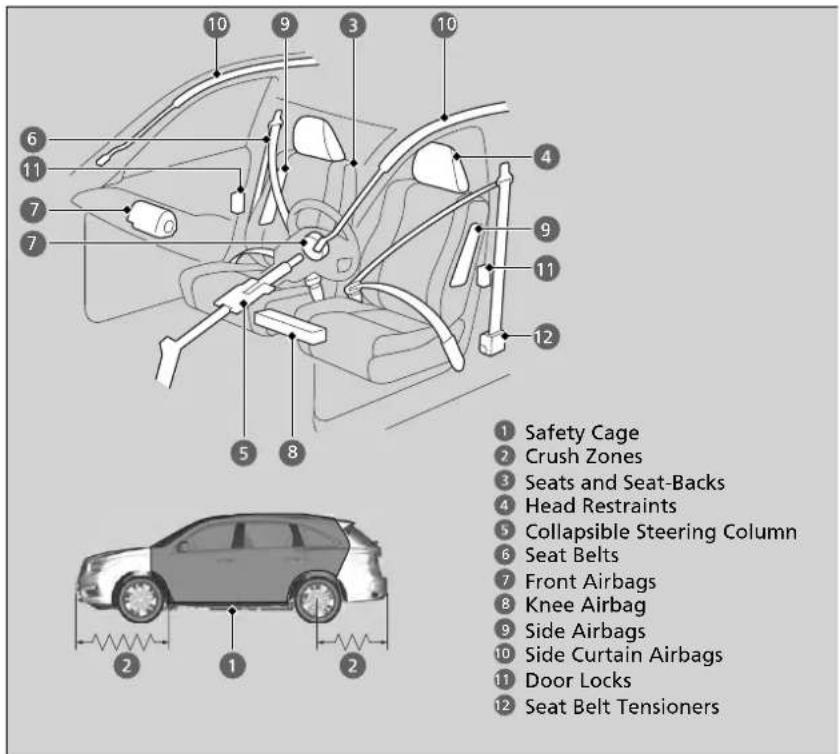
1 Safety Cage 2 Crush Zones 3 Seats and Seat-Backs 4 Head Restraints 5 Collapsible Steering Column 6 Seat Belts 7 Front Airbags 8 Knee Airbag 9 Side Airbags 10 Side Curtain Airbags 11 Door Locks 12 Seat Belt TensionersThe following checklist will help you take an active role in protecting yourself and your passengers.
Your Vehicle's Safety Features
Your vehicle is equipped with many features that work together to help protect you and your passengers during a crash.
Some features do not require any action on your part. These include a strong steel framework that forms a safety cage around the passenger compartment, front and rear crush zones, a collapsible steering column, and tensioners that tighten the front seat belts in a sufficient crash.
However, you and your passengers cannot take full advantage of these features unless you remain seated in the correct position and always wear your seat belts. In fact, some safety features can contribute to injuries if they are not used properly.
Safety Checklist
For the safety of you and your passengers, make a habit of checking these items each time before you drive.
- After everyone has entered the vehicle, be sure all doors and the tailgate are closed and locked. Locking the doors and the tailgate helps prevent an occupant from being ejected and an outsider from unexpectedly opening a door or the tailgate.
Locking/Unlocking the Doors from the Inside P. 154
- Adjust your seat to a position suitable for driving. Be sure the front seats are adjusted as far to the rear as possible while allowing the driver to control the vehicle. Sitting too close to a front airbag can result in serious or fatal injury in a crash.
Adjusting the Seats P. 194
- Adjust head restraints to the proper position. Head restraints are most effective when the center of the head restraint aligns with the center of your head. Taller persons should adjust their head restraint to the highest position.
Adjusting the Front and Second Row Outer Head Restraint Positions P. 201
- Always wear your seat belt, and make sure you wear it properly. Confirm that any passengers are properly belted as well.
Fastening a Seat Belt P. 42
- Protect children by using seat belts or child seats according to a child's age, height and weight.
Child Safety P. 62
>>Safety Checklist
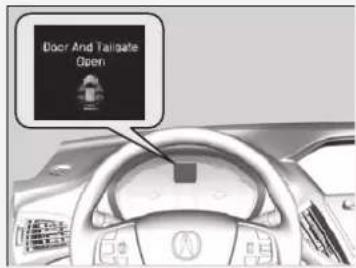
If the door and/or tailgate open message appears on the multi-information display (MID), a door and/or the tailgate is not completely closed. Close all doors and the tailgate tightly until the message disappears.
Multi-Information Display (MID) Warning and Information Messages P. 105
text_image
Door And Tailgate OpenSeat Belts
About Your Seat Belts
Seat belts are the single most effective safety device because they keep you connected to the vehicle so that you can take advantage of many built-in safety features. They also help keep you from being thrown against the inside of the vehicle, against any passengers, or out of the vehicle. When worn properly, seat belts also keep your body properly positioned in a crash so that you can take full advantage of the additional protection provided by the airbags.
In addition, seat belts help protect you in almost every type of crash, including:
- frontal impacts
- side impacts
- rear impacts
- rollovers
■ Lap/shoulder seat belts
All six or seven seating positions are equipped with lap/shoulder seat belts with emergency locking retractors. In normal driving the retractor lets you move freely while keeping some tension on the belt. During a collision or sudden stop the retractor locks to restrain your body.
The front passenger's, second row and third row seat belts also have a lockable retractor for use with child seats.
Installing a Child Seat with a Lap/Shoulder Seat Belt P. 72
About Your Seat Belts
WARNING
Not wearing a seat belt properly increases the chance of serious injury or death in a crash, even though your vehicle has airbags.
Be sure you and your passengers always wear seat belts and wear them properly.
Seat belts cannot completely protect you in every crash. But in most cases, seat belts can reduce your risk of serious injury.
Most states and all Canadian provinces and territories require you to wear seat belts.
If you extend the seat belt too quickly, it will lock in place. If this happens, slightly retract the seat belt, then extend it slowly.
■ Proper use of seat belts
Follow these guidelines for proper use:
- All occupants should sit upright, well back in the seat, and remain in that position for the duration of the trip. Slouching and leaning reduce the effectiveness of the belt and can increase the chance of serious injury in a crash.
- Never place the shoulder part of a lap/shoulder seat belt under your arm or behind your back. This could cause very serious injuries in a crash.
- Two people should never use the same seat belt. If they do, they could be very seriously injured in a crash.
- Do not put any accessories on the seat belts. Devices intended to improve comfort or reposition the shoulder part of a seat belt can reduce the protective capability and increase the chance of serious injury in a crash.
Seat Belt Reminder
text_image
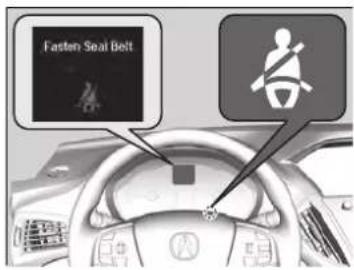
Fasten Seal BeltThe seat belt system includes an indicator on the instrument panel to remind the driver or a front passenger or both to fasten their seat belts.
If you set the power mode to ON and a seat belt is not fastened, a beeper will sound and the indicator will blink. After a few seconds, the beeper will stop and the indicator will come on and remain illuminated until the seat belt is fastened.
The beeper will periodically sound and the indicator will blink while the vehicle is moving until the seat belt is fastened.
About Your Seat Belts
If a front passenger and rear seat passenger moves around and extends the seat belt, the lockable retractor may activate. If this happens, release the retractor by unfastening the seat belt and allow the belt to retract completely. Then refasten the belt.
Seat Belt Reminder
The indicator will also come on if a front passenger does not fasten their seat belt within six seconds after the power mode is set to ON.
When no one is sitting in the front passenger's seat, the indicator will not come on and the beeper will not sound.
The indicator also may not come on and the beeper may not sound when the occupant is not heavy enough to trigger the weight sensor. Such occupants (e.g., infants and smaller children) should be moved to the rear seat as a deploying front airbag likely will injure or kill them.
→ Protecting Child Passengers P. 62
Automatic Seat Belt Tensioners
natural_image
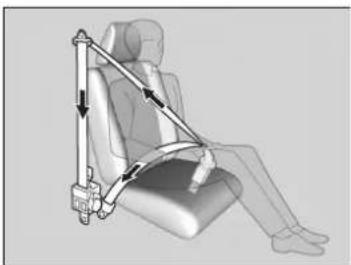
Diagram of a car seatbelt device with directional arrows indicating movement (no text or symbols)The front seats are equipped with automatic seat belt tensioners to enhance safety.
The tensioners automatically tighten the front seat belts during a moderate-to-severe frontal collision, sometimes even if the collision is not severe enough to inflate the front airbags or the driver's knee airbag.
Automatic Seat Belt Tensioners
The seat belt tensioners can only operate once. If a tensioner is activated, the SRS indicator will come on. Have a dealer replace the tensioner and thoroughly inspect the seat belt system as it may not offer protection in a subsequent crash.
During a moderate-to-severe side impact, the tensioner on that side of the vehicle also activates.
Fastening a Seat Belt
After adjusting a front seat to the proper position, and while sitting upright and well back in the seat:
Adjusting the Seats P. 194
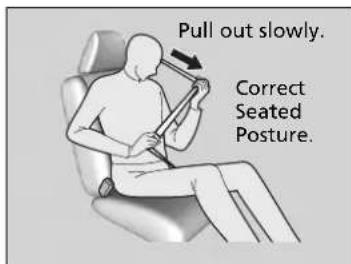
text_image
Pull out slowly. Correct Seated Posture.-
Pull the seat belt out slowly.
-
Insert the latch plate into the buckle, then tug on the belt to make sure the buckle is secure.
▶ Make sure that the belt is not twisted or caught on anything.
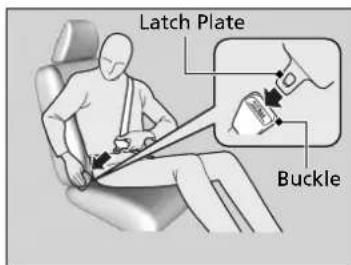
text_image
Latch Plate BuckleFastening a Seat Belt
No one should sit in a seat with an inoperative seat belt or one that does not appear to be working correctly. Using a seat belt that is not working properly may not protect the occupant in a crash. Have a dealer check the belt as soon as possible.
Never insert any foreign objects into the buckle or retractor mechanism.
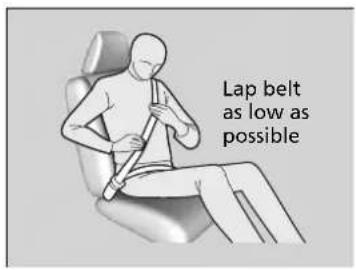
text_image
Lap belt as low as possible- Position the lap part of the belt as low as possible across your hips, then pull up on the shoulder part of the belt so the lap part fits snugly. This lets your strong pelvic bones take the force of a crash and reduces the chance of internal injuries.
- If necessary, pull up on the belt again to remove any slack, then check that the belt rests across the center of your chest and over your shoulder. This spreads the forces of a crash over the strongest bones in your upper body.
■ Adjusting the Shoulder Anchor
The front seats have adjustable shoulder anchors to accommodate taller and shorter occupants.
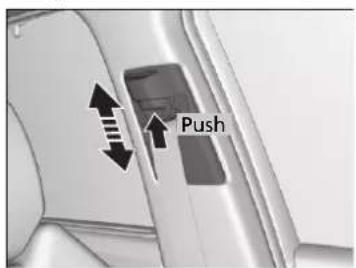
text_image
Push- Move the anchor up and down while holding the release button.
- Position the anchor so that the belt rests across the center of your chest and over your shoulder.
Fastening a Seat Belt
WARNING
Improperly positioning the seat belts can cause serious injury or death in a crash.
Make sure all seat belts are properly positioned before driving.
To release the belt, push the red PRESS button and then guide the belt by hand until it has retracted completely.
When exiting the vehicle, be sure the belt is properly stowed so that it will not get caught in the closing door.
Adjusting the Shoulder Anchor
The shoulder anchor height can be adjusted to four levels. If the belt contacts your neck, lower the height one level at a time.
After an adjustment, make sure that the shoulder anchor position is secure.
Continued
Models with second row bench seat
Seat Belt with Detachable Anchor
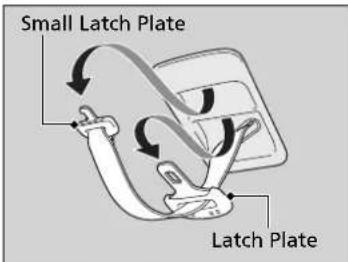
text_image
Small Latch Plate Latch Plate- Pull out the seat belt's small latch plate and the latch plate from each holding slot in the ceiling.
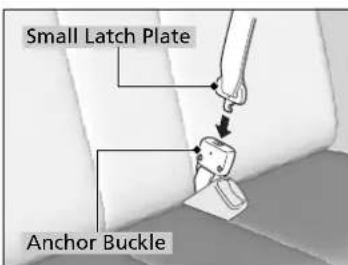
text_image
Small Latch Plate Anchor Buckle- Line up the triangle marks on the small latch plate and anchor buckle. Make sure the seat belt is not twisted. Attach the belt to the anchor buckle.
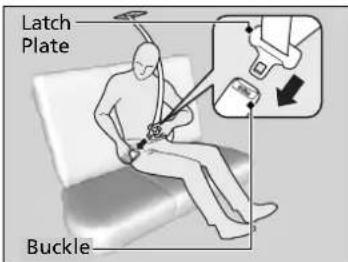
text_image
Latch Plate Buckle- Insert the latch plate into the buckle. Properly fasten the seat belt the same way you fasten the lap/shoulder seat belt.
Seat Belt with Detachable Anchor
WARNING
Using the seat belt with the detachable anchor unlatched increases the chance of serious injury or death in a crash.
Before using the seat belt, make sure the detachable anchor is correctly latched.
To unlatch the detachable anchor, insert the latch plate into the slot on the side of the anchor buckle.
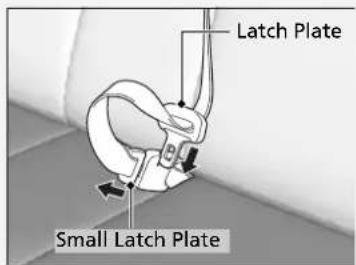
text_image
Latch Plate Small Latch PlateAdvice for Pregnant Women
If you are pregnant, the best way to protect yourself and your unborn child when driving or riding in a vehicle is to always wear a seat belt and keep the lap part of the belt as low as possible across the hips.
Wear the shoulder belt across the chest avoiding the abdomen.
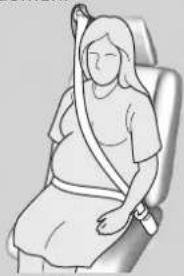
natural_image
Illustration of a person sitting in a chair with a bandage (no text or symbols)Wear the lap part of the belt as low as possible across the hips.
»Advice for Pregnant Women
Each time you have a checkup, ask your doctor if it is okay for you to drive.
To reduce the risk of injuries to both you and your unborn child that can be caused by an inflating front airbag:
- When driving, sit upright and adjust the seat as far back as possible while allowing full control of the vehicle.
- When sitting in the front passenger's seat, adjust the seat as far back as possible.
Seat Belt Inspection
Regularly check the condition of your seat belts as follows:
- Pull each belt out fully, and look for frays, cuts, burns, and wear.
- Check that the latch plates and buckles work smoothly and the belts retract easily.
If a belt does not retract easily, cleaning the belt may correct the problem. Only use a mild soap and warm water. Do not use bleach or cleaning solvents. Make sure the belt is completely dry before allowing it to retract.
Any belt that is not in good condition or working properly will not provide proper protection and should be replaced as soon as possible.
A belt that has been worn during a crash may not provide the same level of protection in a subsequent crash. Have your seat belts inspected by a dealer after any collision.
Seat Belt Inspection
WARNING
Not checking or maintaining seat belts can result in serious injury or death if the seat belts do not work properly when needed.
Check your seat belts regularly and have any problem corrected as soon as possible.
Airbags
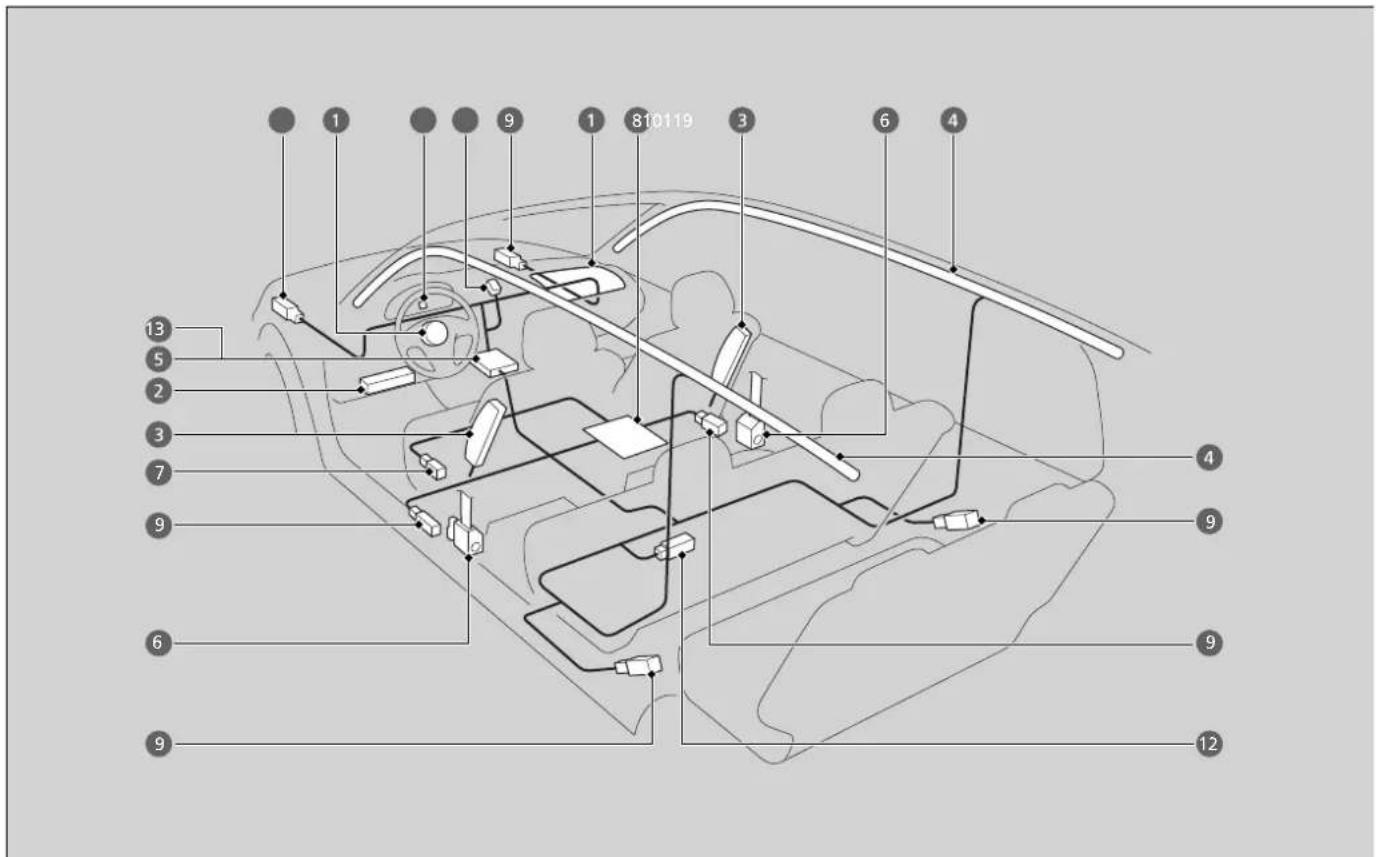
Airbag System Components
text_image
Diagram of car interior with numbered labels pointing to various components such as steering wheel, dashboard, and rear seats.Continued
The front, driver's knee, front side, and side curtain airbags are deployed according to the direction and severity of impact. Both side curtain airbags are deployed in a rollover. The airbag system includes:
① Two SRS (Supplemental Restraint System) front airbags. The driver's airbag is stored in the center of the steering wheel; the front passenger's airbag is stored in the dashboard. Both are marked SRS AIRBAG.
②Driver's knee airbag. The knee airbag is stored under the steering column. It is marked SRS AIRBAG.
③ Two side airbags, one for the driver and one for a front passenger. The airbags are stored in the outer edges of the seat-backs. Both are marked SIDE AIRBAG.
4 Two side curtain airbags, one for each side of the vehicle. The airbags are stored in the ceiling, above the side windows. The front and rear pillars are marked SIDE CURTAIN AIRBAG.
⑤An electronic control unit that, when the power mode is in ON, continually monitors information about the various impact sensors, seat and buckle sensors, rollover sensor, airbag activators, seat belt tensioners, and other vehicle information. During a crash event the unit can record such information.
⑥Automatic front seat belt tensioners. In addition, the driver's and front passenger's seat belt buckles incorporate sensors that detect whether or not the belts are fastened.
⑦A driver's seat position sensor. This sensor determines the optimal force at which the airbag will deploy in a crash.
Weight sensors in the front passenger's seat. The front passenger's airbag will be turned off if the weight on the seat is approximately 65 lbs (29 kg) or less (the weight of an infant or small child).
⑨Impact sensors that can detect a moderate-to-severe front or side impact.
10 An indicator on the dashboard that alerts you that the front passenger's front airbag has been turned off.
⑪ An indicator on the instrument panel that alerts you to a possible problem with your airbag system or seat belt tensioners.
⑫ Safing Sensor
⑬A rollover sensor that can detect if your vehicle is about to roll over and signal the control unit to deploy both side curtain airbags.
■ Important Facts About Your Airbags
Airbags can pose serious hazards. To do their job, airbags must inflate with tremendous force. So, while airbags help save lives, they can cause burns, bruises, and other minor injuries, sometimes even fatal ones if occupants are not wearing their seat belts properly and sitting correctly.
What you should do: Always wear your seat belt properly, and sit upright and as far back from the steering wheel as possible while allowing full control of the vehicle. A front passenger should move their seat as far back from the dashboard as possible.
Remember, however, that no safety system can prevent all injuries or deaths that can occur in a severe crash, even when seat belts are properly worn and the airbags deploy.
Do not place hard or sharp objects between yourself and a front airbag. Carrying hard or sharp objects on your lap, or driving with a pipe or other sharp object in your mouth, can result in injuries if your front airbag inflates.
Do not attach or place objects on the front and driver's knee airbag covers. Objects on the covers marked SRS AIRBAG could interfere with the proper operation of the airbags or be propelled inside the vehicle and hurt someone if the airbags inflate.
Important Facts About Your Airbags
Do not attempt to deactivate your airbags. Together, airbags and seat belts provide the best protection.
When driving, keep hands and arms out of the deployment path of the front airbag by holding each side of the steering wheel. Do not cross an arm over the airbag cover.
▶▶ Airbags▶ Types of Airbags
Types of Airbags
Your vehicle is equipped with four types of airbags:
- Front airbags: Airbags in front of the driver's and front passenger's seats.
- Driver's knee airbag: Airbag under the steering column.
- Side airbags: Airbags in the driver's and front passenger's seat-backs.
- Side curtain airbags: Airbags above the side windows.
Each is discussed in the following pages.
Front Airbags (SRS)
The front SRS airbags inflate in a moderate-to-severe frontal collision to help protect the head and chest of the driver and/or front passenger.
SRS (Supplemental Restraint System) indicates that the airbags are designed to supplement seat belts, not replace them. Seat belts are the occupant's primary restraint system.
Housing Locations
The front airbags are housed in the center of the steering wheel for the driver, and in the dashboard for the front passenger. Both airbags are marked SRS AIRBAG.
Types of Airbags
The airbags can inflate whenever the power mode is in ON.
After an airbag inflates in a crash, you may see a small amount of smoke. This is from the combustion process of the inflator material and is not harmful. People with respiratory problems may experience some temporary discomfort. If this occurs, get out of the vehicle as soon as it is safe to do so.
Front Airbags (SRS)
During a frontal crash severe enough to cause one or both front airbags to deploy, the airbags can inflate at different rates, depending on the severity of the crash, whether or not the seat belts are latched, and/or other factors. Frontal airbags are designed to supplement the seat belts to help reduce the likelihood of head and chest injuries in frontal crashes.
Operation
Front airbags are designed to inflate during moderate-to-severe frontal collisions. When the vehicle decelerates suddenly, the sensors send information to the control unit which signals one or both front airbags to inflate.
A frontal collision can be either head-on or angled between two vehicles, or when a vehicle crashes into a stationary object, such as a concrete wall.
How the Front Airbags Work

natural_image
Illustration of a person sitting in a chair holding a car, no text or symbols presentWhile your seat belt restrains your torso, the front airbag provides supplemental protection for your head and chest.
The front airbags deflate immediately so that they won't interfere with the driver's visibility or the ability to steer or operate other controls.
The total time for inflation and deflation is so fast that most occupants are not aware that the airbags deployed until they see them lying in front of them.
>>How the Front Airbags Work
Although the driver's and front passenger's airbags normally inflate within a split second of each other, it is possible for only one airbag to deploy. This can happen if the severity of a collision is at the margin, or threshold that determines whether or not the airbags will deploy. In such cases, the seat belt will provide sufficient protection, and the supplemental protection offered by the airbag would be minimal.
Continued
■ When front airbags should not deploy
Minor frontal crashes: Front airbags were designed to supplement seat belts and help save lives, not to prevent minor scrapes, or even broken bones that might occur during a less than moderate-to-severe frontal crash.
Side impacts: Front airbags can provide protection when a sudden deceleration causes a driver or front passenger to move toward the front of the vehicle. Side airbags and side curtain airbags have been specifically designed to help reduce the severity of injuries that can occur during a moderate-to-severe side impact which can cause the driver or passenger to move toward the side of the vehicle.
Rear impacts: Head restraints and seat belts are your best protection during a rear impact. Front airbags cannot provide any significant protection and are not designed to deploy in such collisions.
Rollovers: In a rollover, your best form of protection is a seat belt or, if your vehicle is equipped with a rollover sensor, both a seat belt and a side curtain airbag. Front airbags, however, are not designed to deploy in a rollover as they would provide little if any protection.
■ When front airbags deploy with little or no visible damage
Because the airbag system senses sudden deceleration, a strong impact to the vehicle framework or suspension might cause one or more of the airbags to deploy. Examples include running into a curb, the edge of a hole, or other low fixed object that causes a sudden deceleration in the vehicle chassis. Since the impact is underneath the vehicle, damage may not be readily apparent.
■ When front airbags may not deploy, even though exterior damage appears severe
Since crushable body parts absorb crash energy during an impact, the amount of visible damage does not always indicate proper airbag operation. In fact, some collisions can result in severe damage but no airbag deployment because the airbags would not have been needed or would not have provided protection even if they had deployed.
Advanced Airbags
The airbags have advanced features to help reduce the likelihood of airbag related injuries to smaller occupants.
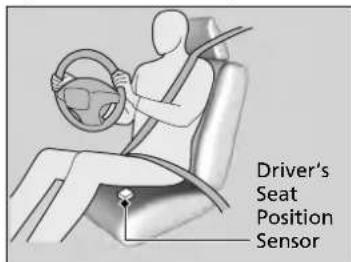
text_image
Driver's Seat Position SensorThe driver's advanced airbag system includes a seat position sensor.
Based on information from this sensor and the severity of the impact, the advanced airbag system determines the optimal deployment of the driver's airbag.
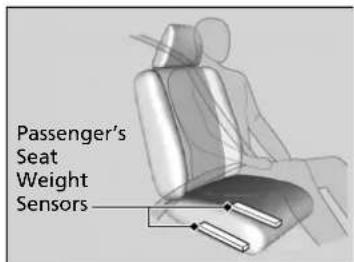
text_image
Passenger's Seat Weight SensorsThe front passenger's advanced airbag system has weight sensors.
We advise against allowing a child age 12 or under to ride in the front passenger's seat. However, if you do allow a child age 12 or under to ride in the front passenger's seat, note that the system will automatically turn off the front passenger's airbag if the sensors detect that the child is approximately 65 lbs (29 kg) or less.
>>Advanced Airbags
If there is a problem with the driver's seat position sensor, the SRS indicator will come on, and in the event of a crash, the airbag will deploy (regardless of the driver's seating position) with a force corresponding to the severity of the impact.
For the advanced airbags to work properly:
- Do not spill any liquid on or under the seats.
- Do not put any object under the passenger's seat.
- Make sure any objects are positioned properly on the floor. Improperly positioned objects can interfere with the advanced airbag sensors.
- All occupants should sit upright and wear their seat belts properly.
- Do not cover the passenger's side dashboard with a cloth, towel, cover, etc.
Passenger Front Airbag Off Indicator P. 60
Make sure the floor mat behind the front passenger's seat is hooked to the floor mat anchor. An improperly placed mat can interfere with the advanced airbag sensors.
→Floor Mats P. 606
▶▶ Airbags▶ Driver's Knee Airbag
Driver's Knee Airbag
The driver's knee SRS airbag inflates in a moderate-to-severe frontal collision to help keep the driver in the proper position and to help maximize the benefit provided by the vehicle's other safety features.
SRS (Supplemental Restraint System) indicates that the airbag is designed to supplement seat belts, not replace them. Seat belts are the occupant's primary restraint system.
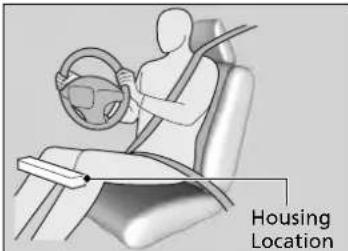
Housing Locations
text_image
Housing LocationThe driver's knee airbag is housed under the steering column.
The airbag is marked SRS AIRBAG.
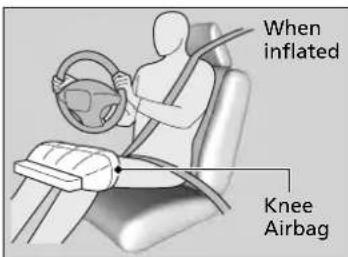
Operation
text_image
When inflated Knee AirbagWhen the driver's front airbag inflates, the driver's knee airbag also inflates.
Driver's Knee Airbag
Do not attach accessories on or near a knee airbag as they can interfere with the proper operation of the airbag, or even hurt someone if the airbag inflates.
The driver should not store any items under the seat or behind their feet. The items can interfere with proper airbag deployment in the event of a moderate to sever frontal collision and may result in inadequate protection.
■ When driver's knee airbag deploys with little or no visible damage
Because the airbag system senses sudden deceleration, a strong impact to the vehicle framework or suspension might cause one or more of the airbags to deploy. Examples include running into a curb, the edge of a hole, or other low fixed object that causes a sudden deceleration in the vehicle chassis. Since the impact is underneath the vehicle, damage may not be readily apparent.
- When driver's knee airbag may not deploy, even though exterior damage appears severe
Since crushable body parts absorb crash energy during an impact, the amount of visible damage does not always indicate proper airbag operation. In fact, some collisions can result in severe damage but no airbag deployment because the airbags would not have been needed or would not have provided protection even if they had deployed.
Side Airbags
The side airbags help protect the torso and pelvis of the driver or a front passenger during a moderate-to-severe side impact.
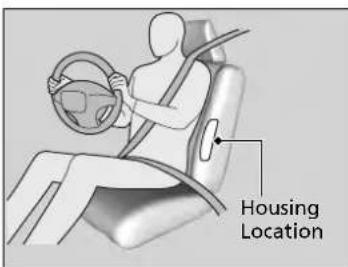
Housing Locations
text_image
Housing LocationThe side airbags are housed in the outside edge of the driver's and passenger's seat-backs.
Both are marked SIDE AIRBAG.
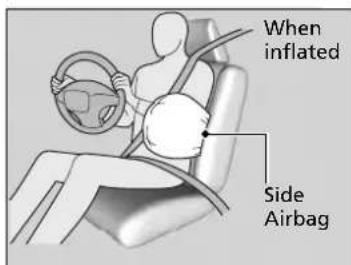
Operation
text_image
When inflated Side AirbagWhen the sensors detect a moderate-to-severe side impact, the control unit signals the side airbag on the impact side to immediately inflate.
Side Airbags
Make sure you and your front seat passenger always sit upright. Leaning into the path of a side airbag can prevent the airbag from deploying properly and increases your risk of serious injury.
Do not attach accessories on or near the side airbags. They can interfere with the proper operation of the airbags, or hurt someone if an airbag inflates.
Do not cover or replace the front seat-back covers without consulting a dealer.
Improperly replacing or covering front seat-back covers can prevent your side airbags from properly deploying during a side impact.
■ When a side airbag deploys with little or no visible damage
Because the airbag system senses sudden acceleration, a strong impact to the side of the vehicle's framework can cause a side airbag to deploy. In such cases, there may be little or no damage, but the side impact sensors detected a severe enough impact to deploy the airbag.
■ When a side airbag may not deploy, even though visible damage appears severe
It is possible for a side airbag not to deploy during an impact that results in apparently severe damage. This can occur when the point of impact was toward the far front or rear of the vehicle, or when the vehicle's crushable body parts absorbed most of the crash energy. In either case, the side airbag would not have been needed nor provided protection even if it had deployed.
Side Curtain Airbags
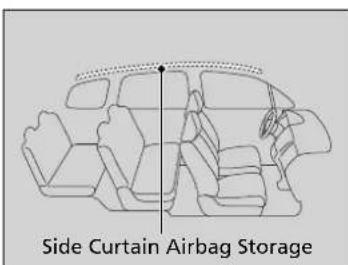
The side curtain airbags help protect the heads of the driver and passengers in the outer seating positions during a moderate-to-severe side impact. The side curtain airbags equipped in this vehicle are also designed to help reduce the likelihood of partial and complete ejection of vehicle occupants through side windows in crashes, particularly rollover crashes.
Housing Locations
text_image
Side Curtain Airbag StorageThe side curtain airbags are located in the ceiling above the side windows on both sides of the vehicle.
Operation
text_image
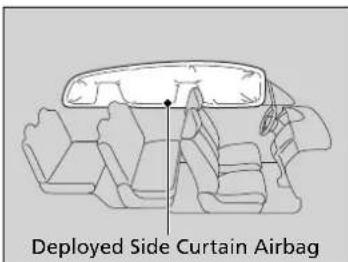
Deployed Side Curtain AirbagThe side curtain airbag is designed to deploy in a rollover or a moderate-to-severe side impact.
>>Side Curtain Airbags
If the SRS control unit senses that your vehicle is about to rollover, it immediately deploys both side curtain airbags and activates both front seat belt tensioners.
If the impact is on the passenger's side, the passenger's side curtain airbag deploys even if there are no occupants on that side of the vehicle.
To get the best protection from the side curtain airbags, occupants should wear their seat belts properly and sit upright and well back in their seats.
Do not attach any objects to the side windows or roof pillars as they can interfere with the proper operation of the side curtain airbags.
■ When side curtain airbags deploy in a frontal collision
One or both side curtain airbags may also inflate in a moderate-to-severe angled frontal collision.
Airbag System Indicators
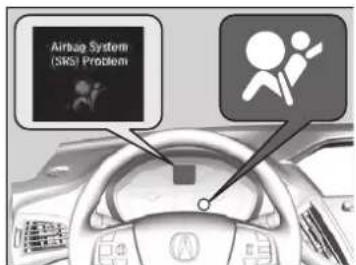
If a problem occurs in the airbag system, the SRS indicator will come on and a message appears on the multi-information display.
■ Supplemental Restraint System (SRS) Indicator
text_image
Airbag System (SKS) Problem■ When the power mode is set to ON
The indicator comes on for a few seconds, then goes off. This tells you the system is working properly.
If the indicator comes on at any other time, or does not come on at all, have the system checked by a dealer as soon as possible. If you don't, your airbags and seat belt tensioners may not work properly when they are needed.
Supplemental Restraint System (SRS) Indicator
WARNING
Ignoring the SRS indicator can result in serious injury or death if the airbag systems or tensioners do not work properly.
Have your vehicle checked by a dealer as soon as possible if the SRS indicator alerts you to a possible problem.
Continued
Passenger Front Airbag Off Indicator
text_image
U.S. Canada PASSenger AIRBAG OFF OFF■ When the passenger front airbag off indicator comes on
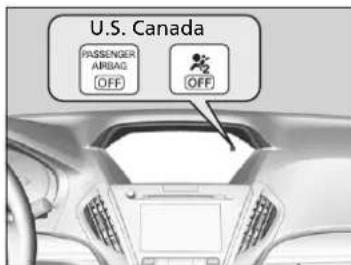
The indicator comes on to alert you that the passenger's front airbag has been turned off. This occurs when the weight sensors detect about 65 lbs (29 kg) or less, the weight of an infant or small child, on the seat.
Children age 12 or under should always ride properly restrained in a back seat.
Child Safety P. 62
Objects placed on the seat can also cause the indicator to come on.
If the front passenger's seat is empty, the passenger's front airbag will not deploy and the indicator will not come on.
>>Passenger Front Airbag Off Indicator
If the indicator comes on with no front passenger and no objects on the passenger's seat, or with an adult riding there, something may be interfering with the weight sensor, such as:
- An object hanging on the seat or in the seat-back pocket.
- A child seat or other object pressing against the rear of the seat-back.
- A rear passenger pushing or pulling on the back of the front passenger's seat.
- The front seat or seat-back is forced back against an object on the seat or floor behind it.
- An object placed under the front passenger's seat.
If none of these conditions exist, have your vehicle checked by a dealer as soon as possible.
The passenger front airbag off indicator may come on and go off repeatedly if the total weight on the seat is near the airbag cutoff threshold.
Airbag Care
You do not need to, and should not, perform any maintenance on or replace any airbag system components yourself. However, you should have your vehicle inspected by a dealer in the following situations:
■ When the airbags have deployed
If an airbag has inflated, the control unit and other related parts must be replaced. Similarly, once an automatic seat belt tensioner has been activated, it must be replaced.
■ When the vehicle has been in a moderate-to-severe collision
Even if the airbags did not inflate, have your dealer inspect the following: the driver's seat position sensor, weight sensors in the passenger's seat, front seat belt tensioners, and each seat belt that was worn during the crash.
■ Do not remove or modify a front seat without consulting a dealer
This would likely disable or affect the proper operation of the driver's seat position sensor or the weight sensors in the passenger's seat. If it is necessary to remove or modify a front seat to accommodate a person with disabilities, contact an Acura dealer, or for U.S. vehicles, Acura Client Relations at 1-800-382-2238 and for Canadian vehicles, Acura Client Services at 1-888-9-ACURA-9.
Airbag Care
We recommend against the use of salvaged airbag system components, including the airbag, tensioners, sensors, and control unit.
Child Safety
Protecting Child Passengers
Each year, many children are injured or killed in vehicle crashes because they are either unrestrained or not properly restrained. In fact, vehicle crashes are the number one cause of death of children ages 12 and under.
To reduce the number of child deaths and injuries, every state, Canadian province and territory requires that infants and children be properly restrained when they ride in a vehicle.
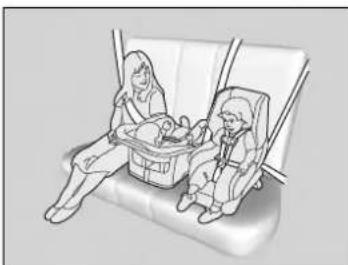
Children should sit properly restrained in a rear seat. This is because:
natural_image
Illustration of a woman and child in a baby seat inside a vehicle (no text or symbols)- An inflating front or side airbag can injure or kill a child sitting in the front seat.
- A child in the front seat is more likely to interfere with the driver's ability to safely control the vehicle.
• Statistics show that children of all sizes and ages are safer when they are properly restrained in a rear seat.
Protecting Child Passengers
WARNING
Children who are unrestrained or improperly restrained can be seriously injured or killed in a crash.
Any child too small for a seat belt should be properly restrained in a child seat. A larger child should be properly restrained with a seat belt, using a booster seat if necessary.
The National Highway Traffic Safety Administration and Transport Canada recommend that all children ages 12 and under be properly restrained in a rear seat. Some states or provinces/territories have laws restricting where children may ride.
- Any child who is too small to wear a seat belt correctly must be restrained in an approved child seat that is properly secured to the vehicle using either the seat belt or the lower anchors of the LATCH system.
- Never hold a child on your lap because it is impossible to protect them in the event of a collision.
- Never put a seat belt over yourself and a child. During a crash, the belt would likely press deep into the child and cause serious or fatal injuries.
- Never let two children use the same seat belt. Both children could be very seriously injured in a crash.
- Do not allow children to operate the doors, windows or seat adjustments.
- Do not leave children in the vehicle unattended, especially in hot weather when the inside of the vehicle can get hot enough to kill them. They could also activate vehicle controls causing it to move unexpectedly.
Protecting Child Passengers
WARNING
Allowing a child to play with a seat belt or wrap one around their neck can result in serious injury or death.
Instruct children not to play with any seat belt and make sure any unused seat belt a child can reach is buckled, fully retracted, and locked.
To deactivate a lockable retractor, release the buckle and allow the seat belt to wind up all the way.
To remind you of the passenger's front airbag hazards and child safety, your vehicle has warning labels on the dashboard (U.S. models) and on the front visors. Please read and follow the instructions on these labels.
→Safety Labels P. 81
Safety of Infants and Small Children
Protecting Infants
An infant must be properly restrained in a rear-facing, reclining child seat until the infant reaches the seat manufacturer's weight or height limit for the seat, and the infant is at least one year old.
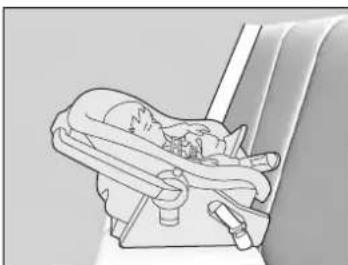
natural_image
Illustration of a dog resting on a vehicle's seatbelt (no text or symbols)■ Positioning a rear-facing child seat
Child seats must be placed and secured in a rear seating position.
When properly installed, a rear-facing child seat may prevent the driver or a front passenger from moving their seat all the way back, or from locking their seat-back in the desired position. Make sure that there is no contact between the child seat and the seat in front of it.
It can also interfere with proper operation of the passenger's advanced front airbag system.
Airbags P. 47
If this occurs, we recommend that you install the child seat directly behind the front passenger's seat, move the seat as far forward as needed, and leave it unoccupied. Or, you may wish to get a smaller rear-facing child seat.
Protecting Infants
WARNING
Placing a rear-facing child seat in the front seat can result in serious injury or death during a crash.
Always place a rear-facing child seat in the rear seat, not the front.
Many experts recommend use of a rear-facing seat for a child up to two years old if the child's height and weight are appropriate for a rear-facing seat.
Rear-facing child seats should never be installed in a forward-facing position.
Always refer to the child seat manufacturer's instructions before installation.
Do not allow a front seat to rest against a child seat installed in a rear seating position:
The weight sensor in the front seat may not correctly detect the actual weight of the occupant.
■ Protecting Smaller Children
If a child is at least one year old and has exceeded the weight and height limitations of a rearward-facing child seat, the child should be properly restrained in a firmly secured forward-facing child seat until they exceed the weight and height limitations for the forward-facing child seat.
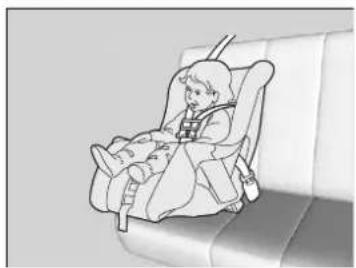
natural_image
Illustration of a child seated in a car seatbelt, no text or symbols present■ Forward-facing child seat placement We strongly recommend placing a forward-facing child seat in a rear seating position.
Placing a forward-facing child seat in the front seat can be hazardous, even with advanced front airbags that automatically turn the passenger's front airbag off. A rear seat is the safest place for a child.
Protecting Smaller Children
WARNING
Placing a forward-facing child seat in the front seat can result in serious injury or death if the front airbag inflates.
If you must place a forward-facing child seat in front, move the vehicle seat as far back as possible, and properly restrain the child.
Educate yourself about the laws and regulations regarding child seat use where you are driving, and follow the child seat manufacturer's instructions.
Continued
Selecting a Child Seat
Most child seats are LATCH-compatible (Lower Anchors and Tethers for CHildren). Some have a rigid-type connector while others have a flexible-type connector. Both are equally easy to use. Some existing and previously owned child seats can only be installed using the seat belt. Whichever type you choose, follow the child seat manufacturer's use and care instructions including recommended expiration dates as well as the instructions in this manual. Proper installation is key to maximizing your child's safety.
In seating positions and vehicles not equipped with LATCH, a LATCH-compatible child seat can be installed using the seat belt and a top tether for added security. This is because all child seats are required to be designed so that they can be secured with a lap belt or the lap part of a lap/shoulder belt. In addition, the child seat manufacturer may advise that a seat belt be used to attach a LATCH-compatible seat once a child reaches a specified weight. Please read the child seat owner's manual for proper installation instructions.
■ Important consideration when selecting a child seat
Make sure the child seat meets the following three requirements:
- The child seat is the correct type and size for the child.
- The child seat is the correct type for the seating position.
- The child seat is compliant with Federal Motor Vehicle Safety Standard 213 or Canadian Motor Vehicle Safety Standard 213.
>>Selecting a Child Seat
Installation of a LATCH-compatible child seat is simple.
LATCH-compatible child seats have been developed to simplify the installation process and reduce the likelihood of injuries caused by incorrect installation.
■ Installing a LATCH-Compatible Child Seat
A LATCH-compatible child seat can be installed in the second row seats. A child seat is attached to the lower anchors with either the rigid or flexible type of connectors.
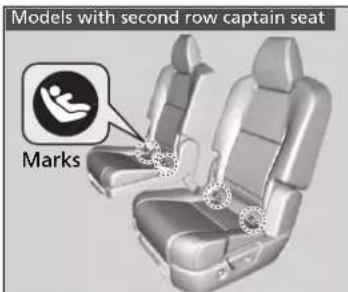
text_image
Models with second row captain seat Marks- Locate the lower anchors under the marks.
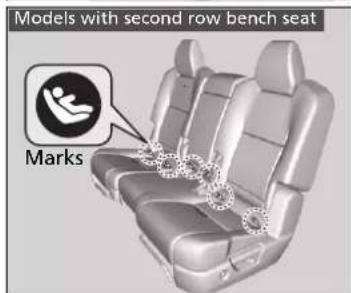
text_image
Models with second row bench seat MarksInstalling a LATCH-Compatible Child Seat
WARNING
Never attach two child seats to the same anchor. In a collision, one anchor may not be strong enough to hold two child seat attachments and may break, causing serious injury or death.
Continued
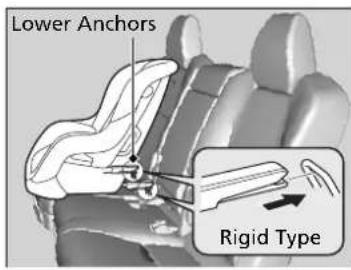
text_image
Lower Anchors Rigid Type- Place the child seat on the vehicle seat, then attach the child seat to the lower anchors according to the instructions that came with the child seat.
When installing the child seat, make sure that the lower anchors are not obstructed by the seat belt or any other object.
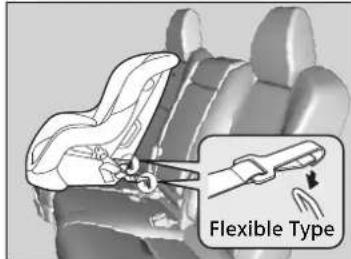
text_image
Flexible Type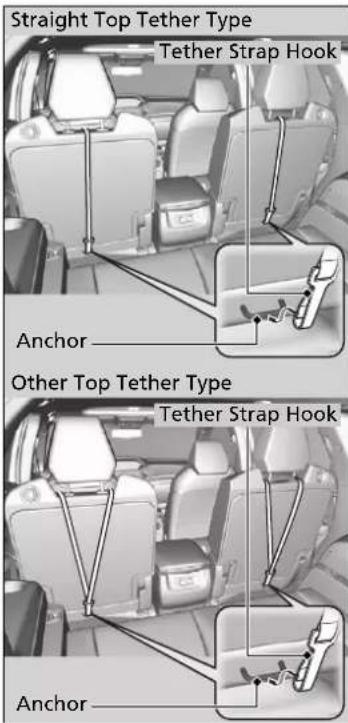
text_image
Straight Top Tether Type Tether Strap Hook Anchor Other Top Tether Type Tether Strap Hook AnchorSecond row captain seat
Straight Top Tether Type
- Put the outer head restraint to its uppermost position, then route the tether strap between the head restraint legs, and secure the tether strap hook to the anchor. Make sure the strap is not twisted.
Other Top Tether Type
- Put the outer head restraint to its upper most position, then route the tether strap outside the head restraint legs, and secure the tether strap hook to the anchor. Make sure the strap is not twisted.
All Types
- Tighten the tether strap as instructed by the child seat manufacturer.
- Make sure the child seat is firmly secured by rocking it forward and back and side to side; little movement should be felt.
- Make sure any unused seat belt that a child can reach is buckled, the lockable retractor is activated, and the belt is fully retracted and locked.
→ Protecting Child Passengers P. 62
Installing a LATCH-Compatible Child Seat
For your child's safety, when using a child seat installed using the LATCH system, make sure that the child seat is properly secured to the vehicle. A child seat that is not properly secured will not adequately protect a child in a crash and may cause injury to the child or other vehicle occupants.
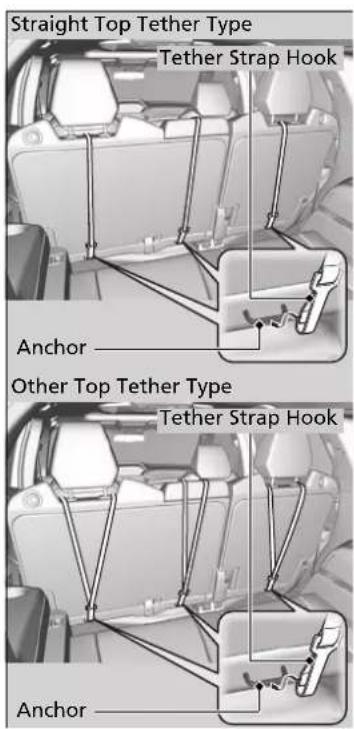
text_image
Straight Top Tether Type Tether Strap Hook Anchor Other Top Tether Type Tether Strap Hook AnchorSecond row bench seat
Outer position
Straight Top Tether Type
- Put the outer head restraint to its uppermost position, then route the tether strap between the head restraint legs, and secure the tether strap hook to the anchor. Make sure the strap is not twisted.
Outer position
Other Top Tether Type
- Put the outer head restraint to its upper most position, then route the tether strap outside the head restraint legs, and secure the tether strap hook to the anchor. Make sure the strap is not twisted.
Center position
- Put the center head restraint to its lowest position, then route the tether strap over the top of the head restraint and secure the tether strap hook to the anchor. Make sure the strap is not twisted.
All positions
- Tighten the tether strap as instructed by the child seat manufacturer.
- Make sure the child seat is firmly secured by rocking it forward and back and side to side; little movement should be felt.
- Make sure any unused seat belt that a child can reach is buckled, the lockable retractor is activated, and the belt is fully retracted and locked.
→ Protecting Child Passengers P. 62
Installing a Child Seat with a Lap/Shoulder Seat Belt
A child seat can be installed with a lap/shoulder belt in any rear seat or, if absolutely necessary, the front passenger seat.
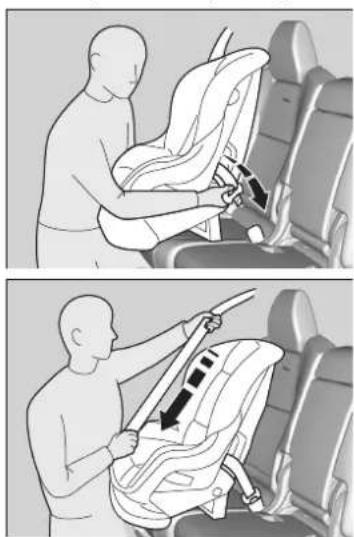
natural_image
Two-step illustration showing a person adjusting a car seatbelt, with no text or symbols present.-
Place the child seat on the vehicle seat.
-
Route the seat belt through the child seat according to the seat manufacturer's instructions, and insert the latch plate into the buckle.
▶Insert the latch plate fully until it clicks.
-
Slowly pull the shoulder part of the belt all the way out until it stops. This activates the lockable retractor.
-
Let the seat belt retract a few inches and check that the retractor has switched modes by pulling on the webbing. It should not pull out again until it is reset by removing the latch plate from the buckle.
▶If you are able to pull the shoulder belt out, the lockable retractor is not activated. Slowly pull the seat belt all the way out, and repeat steps 3 – 4.
Installing a Child Seat with a Lap/Shoulder Seat Belt
A child seat that is not properly secured will not adequately protect a child in a crash and may cause injury to the child or other vehicle occupants.
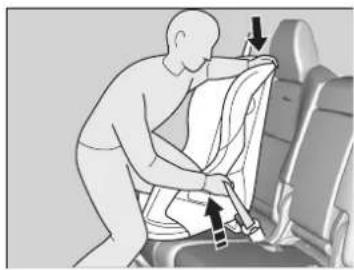
natural_image
Illustration of a person installing or adjusting a car seatbelt, with arrows indicating the mechanism (no text or symbols present)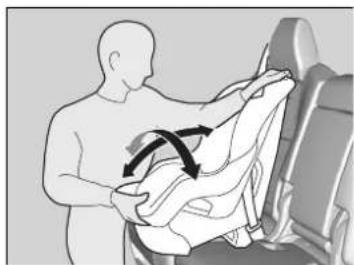
natural_image
Illustration of a person carrying a baby in a car, with arrows indicating motion (no text or symbols)- Grab the shoulder part of the seat belt near the buckle, and pull up to remove any slack from the lap part of the belt.
When doing this, place your weight on the child seat and push it into the vehicle seat.
-
Make sure the child seat is firmly secured by rocking it forward and back and side to side; less than one inch of movement should occur near the seat belt.
-
Make sure any unused seat belt that a child can reach is buckled, the lockable retractor is activated, and the belt is fully retracted and locked.
Installing a Child Seat with a Lap/Shoulder Seat Belt
To deactivate a lockable retractor, release the buckle and allow the seat belt to wind up all the way.
Adding Security with a Tether
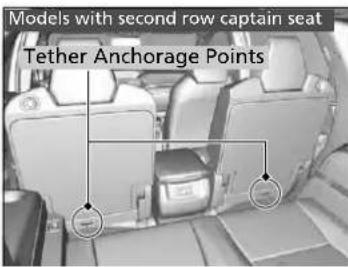
text_image
Models with second row captain seat Tether Anchorage PointsA tether anchorage point is provided behind each second and third row seating position. If you have a child seat that comes with a tether but can be installed with a seat belt, the tether may be used for additional security.
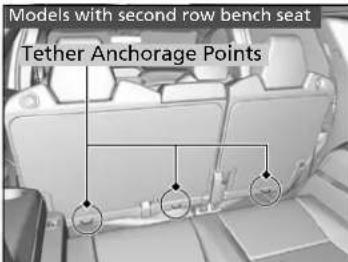
text_image
Models with second row bench seat Tether Anchorage Points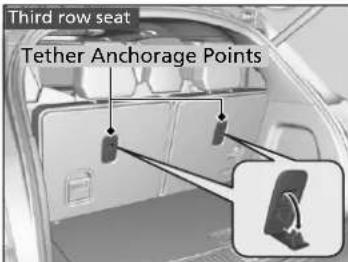
text_image
Third row seat Tether Anchorage PointsAdding Security with a Tether
Always use a tether for forward-facing child seats when using the seat belt or lower anchors.
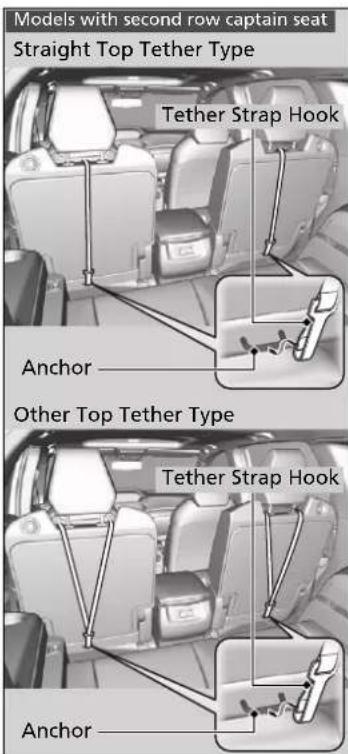
text_image
Models with second row captain seat Straight Top Tether Type Tether Strap Hook Anchor Other Top Tether Type Tether Strap Hook Anchor■ Using a second row anchor
Outer positions
Straight Top Tether Type
- Put the outer head restraint to its uppermost position, then route the tether strap between the head restraint legs, and secure the tether strap hook to the anchor. Make sure the strap is not twisted.
Outer positions
Other Top Tether Type
- Put the outer head restraint to its upper most position, then route the tether strap outside the head restraint legs, and secure the tether strap hook to the anchor. Make sure the strap is not twisted.
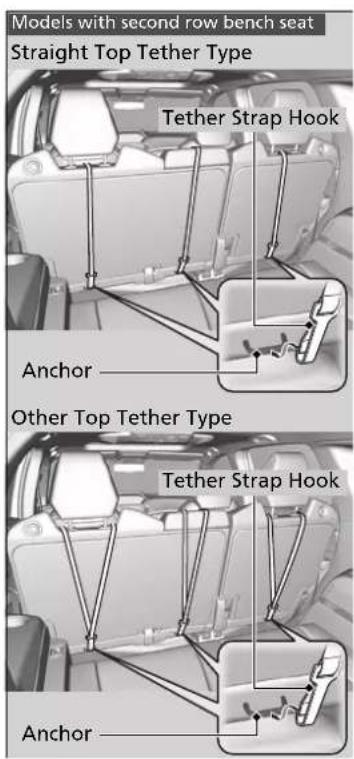
text_image
Models with second row bench seat Straight Top Tether Type Tether Strap Hook Anchor Other Top Tether Type Tether Strap Hook AnchorCenter position of second row bench seat
- Put the center head restraint to its lowest position, then route the tether strap over the top of the head restraint and secure the tether strap hook to the anchor. Make sure the strap is not twisted.
All positions
- Tighten the tether strap as instructed by the child seat manufacturer.
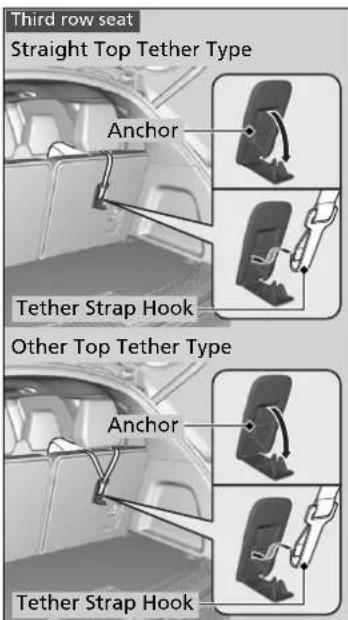
text_image
Third row seat Straight Top Tether Type Anchor Tether Strap Hook Other Top Tether Type Anchor Tether Strap Hook■ Using a third row anchor
Straight Top Tether Type
- Pull up the head restraint and push rearwards until it latches, then route the tether strap through the head restraint legs. Make sure the strap is not twisted.
Other Top Tether Type
- Pull up the head restraint and push rearwards until it latches, then route the tether strap outside the head restraint legs. Make sure the strap is not twisted.
All Types
- Open the anchor cover.
- Secure the tether strap hook to the anchor.
- Tighten the tether strap as instructed by the child seat manufacturer.
Safety of Larger Children
Protecting Larger Children
The following pages give instructions on how to check proper seat belt fit, what kind of booster seat to use if one is needed, and important precautions for a child who must sit in front.
Checking Seat Belt Fit
When a child is too big for a child seat, secure the child in a rear seat using the lap/shoulder seat belt. Have the child sit upright and all the way back, then answer the following questions.
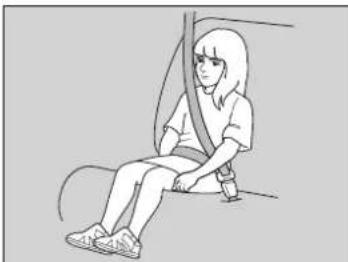
natural_image
Illustration of a person sitting on a chair wearing a seatbelt (no text or symbols)Checklist
- Do the child's knees bend comfortably over the edge of the seat?
- Does the shoulder belt cross between the child's neck and arm?
- Is the lap part of the seat belt as low as possible, touching the child's thighs?
- Will the child be able to stay seated like this for the whole trip?
If you answer yes to all these questions, the child is ready to wear the lap/shoulder seat belt correctly. If you answer no to any question, the child needs to ride on a booster seat until the seat belt fits properly without a booster seat.
Safety of Larger Children
WARNING
Allowing a child age 12 or under to sit in front can result in injury or death if the passenger's front airbag inflates.
If a larger child must ride in front, move the vehicle seat as far to the rear as possible, have the child sit up properly and wear the seat belt properly, using a booster seat if needed.
Booster Seats
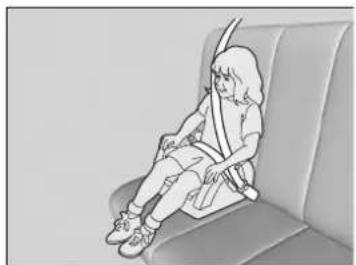
natural_image
Illustration of a person sitting on a chair wearing a seatbelt (no text or symbols visible)If a lap/shoulder seat belt cannot be used properly, position the child in a booster seat in the rear seat. For the child's safety, check that the child meets the booster seat manufacturer's recommendations.
Protecting Larger Children-Final Checks
Your vehicle has a rear seat where children can be properly restrained. If you ever have to carry a group of children, and a child must ride in front:
- Make sure you read and fully understand the instructions and safety information in this manual.
- Move the front passenger seat as far back as possible.
- Have the child sit upright and well back in the seat.
- Check that the seat belt is properly positioned so that the child is secure in the seat.
■ Monitoring child passengers
We strongly recommend that you keep an eye on child passengers. Even older, more mature children sometimes need to be reminded to fasten their seat belts and sit up properly.
Booster Seats
When installing a booster seat, make sure to read the instructions that came with it, and install the seat accordingly.
There are high- and low-type booster seats. Choose a booster seat that allows the child to wear the seat belt correctly.
Some U.S. states and Canadian provinces and territories require children to use a booster seat until they reach a given age or weight (e.g. 6 years or 60 lbs). Be sure to check current laws in the state or province, or territory where you intend to drive.
Exhaust Gas Hazard
Carbon Monoxide Gas
The engine exhaust from this vehicle contains carbon monoxide, a colorless, odorless, and highly toxic gas. As long as you properly maintain your vehicle, carbon monoxide gas will not get into the interior.
■ Have the exhaust system inspected for leaks whenever
- The exhaust system is making an unusual noise.
- The exhaust system may have been damaged.
- The vehicle is raised for an oil change.
When you operate a vehicle with the tailgate open, airflow can pull exhaust gas into the interior and create a hazardous condition. If you must drive with the tailgate open, open all the windows and set the climate control system as shown below.
- Select the fresh air mode.
- Select the ↓ mode.
-
Set the fan speed to high.
-
Set the temperature control to a comfortable setting.
Adjust the climate control system in the same manner if you sit in your parked vehicle with the engine running.
Carbon Monoxide Gas
WARNING
Carbon monoxide gas is toxic.
Breathing it can cause unconsciousness and even kill you.
Avoid any enclosed areas or activities that expose you to carbon monoxide.
An enclosed area such as a garage can quickly fill up with carbon monoxide gas.
Do not run the engine with the garage door closed. Even when the garage door is open, drive out of the garage immediately after starting the engine.
Safety Labels
Label Locations
These labels are in the locations shown. They warn you of potential hazards that can cause serious injury or death. Read these labels carefully.
If a label comes off or becomes hard to read (except for the U.S. dashboard label which may be removed by the owner), contact a dealer for a replacement.
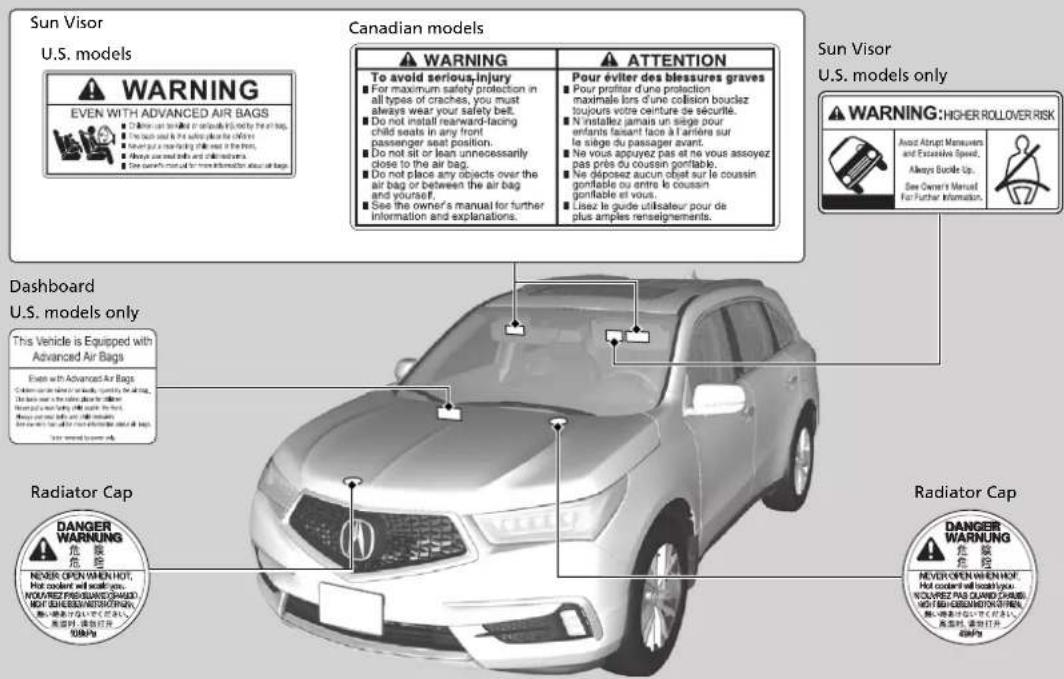
text_image
Sun Visor U.S. models WARNING EVEN WITH ADVANCED AIR BAGS ■ Children can be allowed or not able to do the air bag. ■ I have been used for a vehicle to ensure that you want to use the car. ■ I have got a car following all road on the front. ■ I choose one of the next board and other boards. ■ See owners' manual for more information about all bags. Canadian models WARNING To avoid serious injury ■ For maximum safety protection in all types of crashes, you must always wear your safety belt. ■ Do not install rearward-lacing child seats in any front passenger seat position. ■ Do not sit or lean unnecessarily close to the air bag. ■ Do not place any objects over the air bag or between the air bag and yourself. ■ See the owner's manual for further information and explanations. ATTENTION Pour éviter des blessures graves ■ Pour protier d'une protection maximale lors d'une collision boulez toujours votre ceinture de sécurité. ■ N'installez jamais un siège pour enfants faisant face à l'arrière sur le siège du passager avant. ■ Ne vous appuyez pas et ne vous assoyez pas près du coussin gonflable. ■ Ne disposez aucun objet sur le coussin gonflable ou entre le coussin gonflable et vous. ■ Lisez le guide utilisateur pour de plus amples renseignements. Sun Visor U.S. models only WARNING: HIGHER ROLLOVER RISK Avoid Attempt Maneuers and Excessive Speed, Always Bundle Up. See Owner's Manual For Further Information. Dashboard U.S. models only This Vehicle is equipped with Advanced Air Bags Even with Advanced Air Bags ■ This vehicle is equipped with Advanced Air Bags ■ The best life is at least 10 minutes. It is just open to the vehicle. It is just closed to the vehicle. It is just closed to the vehicle. It is just closed to the vehicle. It is just closed to the vehicle. It is just closed to the vehicle. It is just closed to the vehicle. It is just closed to the vehicle. It is just closed to the vehicle. It is just closed to the vehicle. It is just closed to the vehicle. It is just closed to the vehicle. It is just closed to the vehicle. It is just closed to the vehicle. Radiator Cap DANGER WARNING 危険危険 NEVER OPEN WHEN HOT, Hot coolant will scale off. WOLVERZ PAS QUARD CHAIRS, NOT FOR BEANS/REACHING/ NOV FOR BEANS/REACHING/ MINI FOR BEANS/REACHING/ MINI FOR BEANS/REACHING/ MINI FOR BEANS/REACHING/ MINI FOR BEANS/REACHING/ MINI FOR BEANS/REACHING/ MINI FOR BEANS/REACHING/ MINI FOR BEANS/REACHING/ MINI FOR BEANS/REACHING/ MINI FOR BEANS/REACHING/ MINI FOR BEANS/REACHING/ Radiator Cap DANGER WARNING 危険危険 NEVER OPEN WHEN HOT, Hot coolant will scale off. WOLVERZ PAS QUARD CHAIRS, NOT FOR BEANS/REACHING/ MINI FOR BEANS/REACHING/ MINI FOR BEANS/REACHING/ MINI FOR BEANS/REACHING/ MINI FOR BEANS/REACHING/ MINI FOR BEANS/REACHING/ MINI FOR BEANS/REACHING/ MINI FOR BEANS/REACHING/ MINI FOR BEANS/REACHING/ MINI FOR BEANS/REACHING/ MINi for every one of the four cars, but no one of them, so it is still being used for any one of the four cars, but no one of them, so it is still being used for any one of the four cars, but no one of them, so it is still being used for any one of the four cars, but no one of them, so it is still being used for any one of the four cars, but no one of them, so it is still being used for any one of the four cars, but no one of them, so it is still being used for an additional one of the four cars, but no one of them, so it is still being used for an additional one of the four cars, but no one of them, so it is still being used for an additional one of the four cars, but no one of them, so it is still being used for an additional one of the four cars, but no one of them, so it is still being used for an additional one of the four cars, but no one of them, so it is daily using a daily usage plan.This page intentionally left blank.
Instrument Panel
This chapter describes the buttons, indicators, and gauges that are used while driving.
Indicators 84
Multi-Information Display (MID) Warning
and Information Messages .... 105
Gauges and Multi-Information Display (MID)
Gauges.... 123
MID 125
Indicators
| Indicator | Name | On/Blinking | Explanation | Message |
| U.S.BRAKECanada(Red) | Brake System Indicator (Red) | Comes on for a few seconds when you set the power mode to ON, then goes off.Comes on when the brake fluid level is low.Comes on if there is a problem with the brake system. | Comes on while driving- Check the brake fluid level.What to do when the indicator comes on while driving P. 644Comes on along with the brake system indicator (amber)- Immediately stop in a safe place. Contact a dealer for repair. The brake pedal becomes harder to operate. Depress the pedal further than you normally do.Comes on along with the ABS indicator - Have your vehicle checked by a dealer.If the Brake System Indicator (Red) Comes On P. 644 |  |
| U.S.BRAKE SYSTEMCanada(Amber) | Brake System Indicator (Amber) | Comes on for a few seconds when you set the power mode to ON, then goes off.Comes on if there is a problem with a system related to braking other than the conventional brake system.Comes on if there is a problem with the electric parking brake system.Comes on if there is a problem with the cooperative control with regenerative braking, the electric servo brake system, or the hill start assist system. | Comes on while driving- Have your vehicle checked by a dealer.Stays on constantly- Avoid high speeds and sudden braking. Take the vehicle to a dealer immediately.With this indicator on, your vehicle still has normal braking ability. | 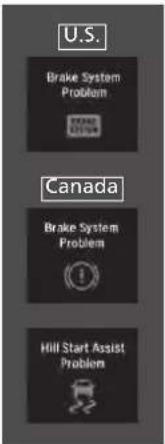 |
| Comes on if there is a problem with the automatic brake hold system. | Automatic Brake Hold P. 522 |  | ||
| Electric Parking Brake Indicator | Comes on for a few seconds when you set the power mode to ON, then goes off.Comes on when the parking brake is applied, and goes off when it is released.Comes on for about 15 seconds then goes off when you push the electric parking brake switch with the power mode in OFF.Comes on for about 15 seconds then goes off when you set the power mode to OFF with the parking brake applied. | Blinks and the electric parking brake system indicator comes on at the same time- There is a problem with the electric parking brake system. The parking brake may not be set. |  | |
| Comes on when you pull the electric parking brake switch without depressing the brake pedal. | Depress the brake pedal to release the parking brake.Parking Brake P. 518 |  | ||
| Electric Parking Brake System Indicator | Comes on for a few seconds when you set the power mode to ON, then goes off.Comes on if there is a problem with the electric parking brake system. | Comes on while driving- Avoid using the parking brake and have your vehicle checked by a dealer immediately.If the Electric Parking Brake System Indicator Comes On P. 645 |  | |
 | Automatic Brake Hold System Indicator | Comes on for a few seconds when you set the power mode to ON, then goes off.Comes on when the automatic brake hold system is on. | Automatic Brake Hold P. 522 |  |
 | Automatic Brake Hold Indicator | Comes on for a few seconds when you set the power mode to ON, then goes off.Comes on when the automatic brake hold is activated. | Automatic Brake Hold P. 522 |  |
 | Low Oil Pressure Indicator | Comes on when you set the power mode to ON, and goes off when the power system starts.Comes on when the engine oil pressure is low. | Comes on while driving- Immediately stop in a safe place.If the Low Oil Pressure Indicator Comes On P. 642 |  |
 | Malfunction Indicator Lamp | Comes on when you set the power mode to ON, and goes off either when the power system is on or after several seconds if the power system did not start. If "readiness codes" have not been set, it blinks five times before it goes off.Comes on if there is a problem with the emissions control systems.Blinks when a misfire in the engine's cylinders is detected. | Readiness codes are part of the on board diagnostics for the emissions control systems.Testing of Readiness Codes P. 667Comes on while driving- Have your vehicle checked by a dealer.Blinks while driving- Stop in a safe place where there are no flammable objects. Stop the power system for 10 minutes or more, and wait for it to cool down. Then, take your vehicle to a dealer.If the Malfunction Indicator Lamp Comes On or Blinks P. 643 |  |
 | 12-Volt Battery Charging System Indicator | Comes on when you set the power mode to ON, and goes off when the power system is on.Comes on when the 12-volt battery is not charging. | Comes on while driving- Turn off the climate control system and rear defogger in order to reduce electricity consumption.If the 12-Volt Battery Charging System Indicator Comes On P. 642 |  |
 | Gear Position Indicator | Indicates the current gear selection. | Shifting P. 465 |  |
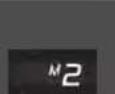 | M (sequential mode) Indicator/ Sequential Mode Gear Selection Indicator | Comes on when the manual sequential mode is applied. | Sequential Mode P. 471 |  |
| Transmission System Indicator | The indicated current gear selection blinks if there is a problem with the transmission system. | Avoid sudden start and acceleration, and stop in a safe place immediately.Have your vehicle checked by a dealer. |  | |
| All the gear positions may light for several seconds. | When all the gear positions light, immediately stop your vehicle in a safe place. | |||
| Indicators go off if there is no problem.However, even if they go off, take your vehicle to a dealer for inspection. | — | |||
| The indicated current gear selection or all the gear positions blink if there is a problem with the transmission system, and the vehicle no longer moves. | Immediately stop in a safe place.Emergency Towing P. 657Have your vehicle checked by a dealer. |  | ||
| The indicated current gear selection or all the gear positions blink if you cannot selectPdue to the transmission system failure. | The power system can be activated as a temporary measure.If the Transmission System Indicator Blinks along with the Warning Message P. 646Set the parking brake when parking.Have your vehicle checked by a dealer immediately. |  | ||
 | Seat Belt Reminder Indicator | Comes on and the beeper sounds if you are not wearing a seat belt when you set the power mode to ON.If the front passenger is not wearing a seat belt, the indicator comes on about a few seconds later.Blinks while driving if either you and/or the front passenger has not fastened a seat belt. The beeper sounds and the indicator blinks at regular intervals. | The beeper stops and the indicator goes off when you and the front passenger fasten their seat belts.Stays on after you and/or the front passenger has fastened the seat belt(s) - A detection error may have occurred in the sensor. Have your vehicle checked by a dealer.Seat Belt Reminder P. 40 |   |
 | Low Fuel Indicator | Comes on when the fuel reserve is running low (approximately 2.5 U.S. gal./9.5 Liter left).Blinks if there is a problem with the fuel gauge. | Comes on - Refuel your vehicle as soon as possible.Blinks - Have your vehicle checked by a dealer. |   |
| POWERSYSTEM | POWER SYSTEM Indicator | Comes on for a few seconds when you set the power mode to ON, then goes off.Comes on if there is a problem with the electric vehicle system. | Comes on while driving - Have your vehicle checked by a dealer immediately.If the Power System Indicator Comes On P. 647 |  |
 | High Temperature Indicator | Comes on for a few seconds when you set the power mode to ON, then goes off.Blinks when the engine coolant temperature goes up, and stays on if the temperature continues to rise. | Blinks while driving- Drive slowly to prevent overheating. |  |
| Stays on while driving- Immediately stop in a safe place and allow the engine to cool.Overheating P. 640 |  | |||
 | Low Temperature Indicator | Comes on for a few seconds when you set the power mode to ON, then goes off.Comes on when the engine coolant temperature is low. | If the indicator stays on after the engine has reached normal operating temperature, there may be problem with the temperature sensors. Have your vehicle inspected by a dealer. |  |
| SPORT+ | SPORT+ mode Indicator | Comes on for a few seconds when you set the power mode to ON, then goes off.Comes on when you press the Dynamic Mode button if the Sport+ mode was selected. | Integrated Dynamics System P. 474 |  |
| READY | READY Indicator | Comes on when the vehicle is ready to drive. | Turning on the Power P. 457 |  |
 | Anti-lock Brake System (ABS) Indicator | Comes on for a few seconds when you set the power mode to ON, then goes off.If it comes on at any other time, there is a problem with the ABS. | Stays on constantly - Have your vehicle checked by a dealer. With this indicator on, your vehicle still has normal braking ability but no anti-lock function.Anti-lock Brake System (ABS) P. 524 |  |
 | Supplemental Restraint System Indicator | Comes on for a few seconds when you set the power mode to ON, then goes off.Comes on if a problem with any of the following is detected: Supplemental restraint system Side airbag system Side curtain airbag system Seat belt tensioner | Stays on constantly or does not come on at all - Have your vehicle checked by a dealer. | 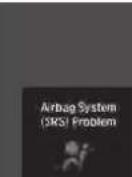 |
 | Auto High-Beam Indicator | Comes on when all the operating conditions of the Auto high-beam are met. | Auto High-Beam P. 179 |  |
 | Vehicle Stability AssistTM (VSA®) System Indicator | Comes on for a few seconds when you set the power mode to ON, then goes off.Blinks when VSA® is active.Comes on if there is a problem with the VSA®. | Stays on constantly - Have your vehicle checked by a dealer.Vehicle Stability Assist TM (VSA®), aka Electronic Stability Control (ESC), System P. 506 | 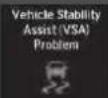 |
 | Vehicle Stability AssistTM (VSA®) OFF Indicator | Comes on for a few seconds when you set the power mode to ON, then goes off.Comes on when you partially disable VSA®. | VSA® On and Off P. 507 | — |
 | Speed-sensitive Electric Power Steering (EPS) System Indicator | Comes on when you set the power mode to ON, and goes off when the power system is on.Comes on if there is a problem with the EPS system. | Stays on constantly or does not come on at all - Have your vehicle checked by a dealer.If the Speed-Sensitive Electric Power Steering (EPS) System Indicator Comes On P. 644 | 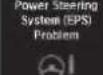 |
 | Low Tire Pressure/TPMS Indicator | Comes on for a few seconds when you set the power mode to ON, then goes off.Comes on if the tire pressure of any of the tires becomes significantly low.Blinks for about one minute, and then stays on if there is a problem with the TPMS, or when a spare tire' is temporarily installed. | Comes on while driving - Stop in a safe place, check tire pressures, and inflate the tire(s) if necessary.Blinks and remains on - Have your vehicle checked by a dealer. If the vehicle is fitted with a spare, get your regular tire repaired or replaced and put back on your vehicle as soon as you can. | [TWXGC][PWGS] |
 | Turn Signal and Hazard Warning Indicators | Blinks when you operate the turn signal lever.Blink along with all turn signals when you press the hazard warning button. | Does not blink or blinks rapidlyReplacing Light Bulbs P. 582 |  |
| High Beam Indicator | Comes on when the high beam headlights are on. | — |
* Not available on all models
Continued
| Indicator | Name | On/Blinking | Explanation | Message |
| Lights On Indicator | Comes on when the light switch in a position other thanOFFor when the switch is set toAUTOand the exterior lights come on. | If you set the power mode to ACCESSORY or VEHICLE OFF while the exterior lights are on, a chime sounds when the driver's door is opened. | — | |
| Fog Light Indicator* | Comes on when the fog lights are on. | — — | ||
| Immobilizer System Indicator | Comes on briefly when you set the power mode to ON, then goes off.Comes on if the immobilizer system cannot recognize the key information. | Blinks- You cannot start the power system. Set the power mode to VEHICLE OFF, then select the ON mode again.Repeatedly blinks- The system may be malfunctioning. Have your vehicle checked by a dealer.Do not attempt to alter this system or add other devices to it. Electrical problems can occur. | — | |
 | Security System Alarm Indicator | Blinks when the security system alarm has been set. | Security System Alarm P. 165 |  |
 | System Message Indicator | Comes on for a few seconds when you set the power mode to ON, then goes off.Comes on along with a beep when a problem is detected. A system message on the MID appears at the same time. | While the indicator is on, roll the multi-function steering wheel control to see the message again.Refer to the Indicators information in this chapter when a system message appears on the MID. Take the appropriate action for the message.The MID does not return to the normal screen unless the warning is canceled, or the multi-function steering-wheel controls is rolled. |  |
 | Keyless Access System Indicator | Comes on for a few seconds when you set the power mode to ON, then goes off.Comes on as soon as a problem is detected in the keyless access system or keyless starting system. | Have your vehicle checked by a dealer. |  |
 | Lane Keeping Assist System (LKAS) Indicator (Amber) | Comes on for a few seconds when you set the power mode to ON, then goes off.Comes on if there is a problem with the LKAS. | Stays on constantly - Have your vehicle checked by a dealer. |  |
 | Lane Keeping Assist System (LKAS) Indicator (Green) | Comes on when you press the MAIN button. | Lane Keeping Assist System (LKAS) P. 498 |  |
| Comes on when the LKAS is in operation, or the LKAS button is pressed, but the temperature inside the front sensor camera is too high. The LKAS cancels automatically. The beeper sounds simultaneously. | Use the climate control system to cool down the camera.Goes off - The camera has been cooled down and the system activates normally.Front Sensor Camera P. 475 | |||
| Comes on when the area around the camera is blocked by dirt, mud, etc. Stop your vehicle in a safe place, and wipe it off with a soft cloth.May come on when driving in bad weather (rain, snow, fog, etc.) | Have your vehicle checked by a dealer if the indicator and message come back on after you cleaned the area around the camera. |  | ||
| [CBAK] | Road Departure Mitigation (RDM) Indicator | Comes on for a few seconds when you set the power mode to ON, then goes off.Comes on if there is a problem with the RDM system. | Stays on constantly - Have your vehicle checked by a dealer. |  |
| Comes on when the RDM system shuts itself off. | Stays on - The temperature inside the camera is too high.Use the climate control system to cool down the camera.The system activates when the temperature inside the camera cools down.Front Sensor Camera P. 475 |  | ||
| Stays on - The area around the camera is blocked by dirt, mud, etc. Stop your vehicle in a safe place, and wipe it off with a soft cloth.Have your vehicle checked by a dealer if the indicator and message come back on after you cleaned the area around the camera.Front Sensor Camera P. 475 |  | |||
 | Adaptive Cruise Control (ACC) with Low Speed Follow Indicator (Amber) | Comes on for a few seconds when you set the power mode to ON, then goes off.Comes on if there is a problem with ACC with Low Speed Follow. | Comes on while driving - Have your vehicle checked by a dealer. |  |
 | Adaptive Cruise Control (ACC) with Low Speed Follow Indicator (Green) | Comes on when you press the MAIN button. | Adaptive Cruise Control (ACC) with Low Speed Follow P. 477 |  |
| Comes on if anything covers the radar sensor cover and prevents the sensor from detecting a vehicle in front.May come on when driving in bad weather (rain, snow, fog, etc.)ACC with Low Speed Follow has been automatically canceled. | When the radar sensor gets dirty, stop your vehicle in a safe place, and wipe off dirt using a soft cloth.Have your vehicle checked by a dealer if the message does not disappear even after you clean the sensor cover. | |||
 | Adaptive Cruise Control (ACC) with Low Speed Follow Indicator (Green) | Comes on when ACC with Low Speed Follow is in operation, but the temperature inside the front sensor camera is too high. ACC with Low Speed Follow cancels automatically. The beeper sounds simultaneously. | Use the climate control system to cool down the camera.Goes off - The camera has been cooled down and the system activates normally. |  |
| Comes on when the area around the camera is blocked by dirt, mud, etc. Stop your vehicle in a safe place, and wipe it off with a soft cloth.May come on when driving in bad weather (rain, snow, fog, etc.) | Have your vehicle checked by a dealer if the indicator and message come back on after you cleaned the area around the camera. |  | ||
 | Collision Mitigation Braking SystemTM (CMBSTM) Indicator | Comes on for a few seconds when you set the power mode to ON, then goes off.Comes on when you deactivate the CMBSTM. A multi-information display message appears for five seconds.Comes on if there is a problem with the CMBSTM. | Stays on constantly without the CMBSTM off - Have your vehicle checked by a dealer.Collision Mitigation Braking SystemTM (CMBSTM) P. 526 |  |
 | Collision Mitigation Braking SystemTM (CMBSTM) Indicator | Comes on when the CMBSTM system shuts itself off. | Stays on - The area around the camera is blocked by dirt, mud, etc. Stop your vehicle in a safe place, and wipe it off with a soft cloth.Front Sensor Camera P. 475 |  |
| When the radar sensor gets dirty, stop your vehicle in a safe place, and wipe off dirt using a soft cloth.Have your vehicle checked by a dealer if the message does not disappear even after you clean the sensor cover.Collision Mitigation Braking SystemTM (CMBSTM) P. 526 | 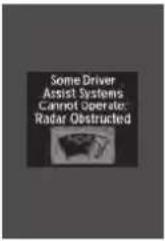 | |||
| Stays on - The temperature inside the camera is too high. Use the climate control system to cool down the camera. The system activates when the temperature inside the camera cools down.Front Sensor Camera P. 475 | 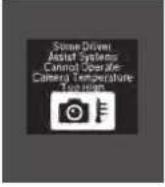 | |||
 | Blind spot information System Indicator | Comes on for a few seconds when you set the power mode to ON, then goes off.Stays on while blind spot information system is turned off. | Customized Features P. 131 | 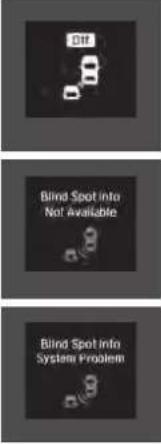 |
| Comes on when mud, snow, or ice accumulates in the vicinity of sensor. | Comes on while driving - Remove the obstacle in the vicinity of sensor.Blind spot information System P. 510 | |||
| Comes on if there is a problem with the system. | Comes on while driving - Have your vehicle checked by a dealer. |
Multi-Information Display (MID) Warning and Information Messages
The following messages appear only on the MID. Roll the multi-function steering-wheel controls to see the message again with the system message indicator on.
| Message Condition Explanation | ||
| • Appears if any door or the tailgate is not completely closed. | • Goes off when all doors and the tailgate are closed. | |
| • Appears when the hood is opened. | • Close the hood. | |
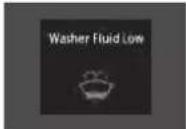 | • Appears when the washer fluid is low. | • Refill washer fluid. ➤ Refilling Window Washer Fluid P. 581 |
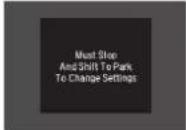 | • Appears while you are customizing the settings and the transmission is in other than P. | ➤Customized Features P. 131 |
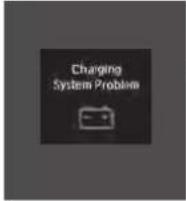 | • Appears when there is a problem with the sensor on the 12-volt battery. | • Have your vehicle checked by a dealer. ➤ Checking the 12-Volt Battery P. 600 |
| • Appears along with the battery charging system indicator when the battery is not charging. | • Turn off the climate control system and rear defogger to reduce electricity consumption. ➤If the 12-Volt Battery Charging System Indicator Comes On P. 642 | |
 | • Appears when the scheduled maintenance is due soon.• Consequently,Maintenance Due NowandMaintenance Past Duefollow. |  |
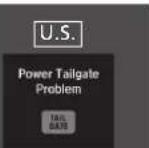 | • Appears when there is a problem with the power tailgate system. | • Manually open or close the power tailgate.• Have your vehicle checked by a dealer. |
 | ||
 | • Appears if there is a problem with the starter system. | • Hold the POWER button up to 15 seconds to start the power system. ➤Turning on the Power P. 457 Have your vehicle checked by a dealer. |
 | ||
 | • Appears when you set the power mode to ACCESSORY or ON. | ➤Turning on the Power P. 457 |
 | • Appears three seconds after you bring the keyless access remote in front of the POWER button when To Start, Hold Remote Near Start Button appears. To Start Engine: Brake + Push appears sequentially. | • Unless you bring the keyless access remote in front of the POWER button, this message does not appear. ➤ If the Keyless Access Remote Battery is Weak P. 636 |
 | • Appears when the power mode is in ACCESSORY. | — |
 | • Appears after the driver's door is opened when the power mode is in ACCESSORY. | • Change the power mode to VEHICLE OFF. ➤ POWER Button P. 171 |
 | • Appears when you close the door with the power mode is in ON without the keyless access remote inside the vehicle. | • Disappears when you bring the keyless access remote back inside the vehicle and close the door. ➤ Keyless Access Remote Reminder P. 173 |
 | • Appears when the keyless access remote's battery becomes weak. | ➤ Replacing the Button Battery P. 601 |
 | • Appears if the keyless access remote's battery is too weak to start the power system or the key is not within operating range to start the power system. The beeper sounds six times. | • Bring the keyless access remote in front of the POWER button to be touched with. ➤ If the Keyless Access Remote Battery is Weak P. 636 |
| Appears when the transmission system temperature is too high. | Immediately stop in a safe place in P.Let the engine idle until the message disappears. | |
| Appears when you turn the power system on with the transmission not in P. | Press the P button. | |
| Appears if there is a problem with the electric system. Appears when you set the power mode to OFF while driving. | Immediately stop in a safe place and set the parking brake.Continue driving if the message goes off soon after.If there is a problem with the transmission system, the transmission system indicator comes on.Transmission System Indicator P. 90 | |
| Appears if you depress the accelerator pedal when the transmission is in N. | Release the accelerator pedal.After that, depress the brake pedal and change the transmission position. | |
 | • Appears when you attempt to put the transmission into another gear position with the transmission in P and the engine OFF. | • To select another gear position while in P the engine must be ON. |
 | • Appears when you try to change the gear position after the position has automatically been changed to P with the driver's door open and the driver's seat belt unfastened. | • Press the P button If you leave the vehicle. |
 | • Appears when the vehicle is stopped with the driver's seat belt unfastened and there is a chance that the vehicle may roll unintentionally. | • Press the P button before release the brake pedal when idling, parking or exiting the vehicle. ➤ Shift Operation P. 467 |
 | • Appears for a few seconds if you have not pressed the N button long enough to initiate Neutral-Hold mode. | ➤ If you want to keep the transmission in N position [car wash mode] P. 469 |
 | • Appears when you press and hold N button for more than 2 seconds. | • Disappears when you set the gear position to other than N. ➤ If you want to keep the transmission in N position [car wash mode] P. 469 |
| • Appears when you try to change the gear position without depressing the brake pedal. | • Depress the brake pedal, then select a shift button. | |
| • Appears when you try to change the gear position without releasing your foot off the accelerator pedal. | • Release your foot off the accelerator pedal, then select a shift button. | |
| • Appears when the P button is pressed while the vehicle is moving.• Appears if you change the gear position to R while the vehicle is moving forward, or to D while the vehicle is reversing. | • Make sure that the vehicle comes to a stop before operating the select button. | |
| • Appears when you set the power mode to ON without fastening the driver's seat belt.• Appears when you change the gear position after P has been automatically selected with the driver's door open, the driver's seat belt unfastened, then the brake pedal is released. | • Fasten the seat belt properly before you start to drive. ➡Shift Operation P. 467 | |
| • Appears when you press the P button but it is not engaged due to low ATF temperature. | • Depress the brake pedal until this message disappear. | |
 | Appears when pressing the Dynamic Mode button. ▶Press again to change the next mode. | ▶Integrated Dynamics System P. 474 |
 | Appears if there is a problem with the active damper system. | Have your vehicle checked by a dealer. With this icon on, your vehicle has limited damping ability without the active damper system. |
 | Appears if there is a problem with the cooling system. | Drive slowly to prevent overheating and have your vehicle checked by a dealer as soon as possible. |
 | Appears when there is a problem with the headlights. | Appears while driving - The headlights may not be on. When conditions allow you to drive safety, have your vehicle checked by a dealer as soon as possible. |
 | Appears if there is a problem with the parking sensor system. | Check if the area around the sensor(s) is covered with mud, ice, snow, etc. If the indicator(s) stays on or the beeper does not stop even after you clean the area, have the system checked by a dealer. |
| • Appears if the automatic brake hold is automatically canceled while it is in operation. | • Immediately depress the brake pedal. | |
| • Appears when the automatic brake hold system is turned off. | →Automatic Brake Hold P. 522 | |
| • Appears when the automatic brake hold button is pressed without wearing the driver's seat belt. | • Fasten the driver's seat belt.→Automatic Brake Hold P. 522 | |
| • Appears when the automatic brake hold button is pressed without depressing the brake pedal while the automatic brake hold is in operation. | • Press the automatic brake hold button with the brake pedal depressed.→Automatic Brake Hold P. 522 | |
| • Appears when the parking brake is applied automatically while it is in operation. | →Automatic Brake Hold P. 522→Parking Brake P. 518 | |
 | Appears if there is a problem with the Auto high-beam. | Manually operate the headlight switch.If you are driving with the high-beam headlights when this happens, the headlights are changed to low beams. |
 | Appears if the temperature inside the camera is too high and either the auto high beams are in operation or the headlight switch is turned to AUTO. | Use the climate control system to cool down the camera.Goes off - The camera has cooled down. To resume the system, turn the headlight switch to AUTO.Front Sensor Camera P. 475 |
 | Appears when the area around the camera is blocked by dirt, mud, etc. Stop your vehicle in a safe place, and wipe it off with a soft cloth.May appear when driving in bad weather (rain, snow, fog, etc.) | Have your vehicle checked by a dealer if the message comes back on after you have cleaned the area around the camera. |
 | Appears after the 12-volt battery charging system indicator comes on. | Your vehicle has less ability to accelerate and may be harder to start on an incline.Contact a dealer immediately. |
 | Appears if there is a problem with the acoustic vehicle alerting system. | Have your vehicle checked by a dealer immediately. |
 | • Appears when the high voltage battery temperature is too low to operate (approx. -22°F [-30°C] or below). | • You can start the engine and use the climate control system to warm up the interior, which will also warm the high voltage battery enough for you to drive the vehicle.• The engine speed does not increase even if you fully depress the accelerator pedal. |
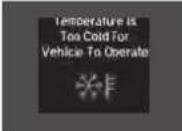 | • Appears when the high voltage battery and other system control temperatures are too low to operate (approx. -40°F [-40°C] or below). | • You must wait for an increase in the ambient temperature or move the vehicle to a warmer location.• Consult a dealer. |
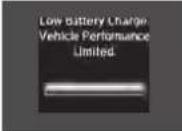 | • Appears when the high voltage battery is running extremely low due to continuous slow driving. | • Driving at low speed for a long time decreases the amount of electricity generated, leading to high voltage battery drain. |
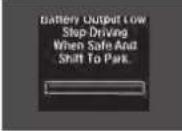 | • Appears when the high voltage battery is drained even further and a stop is needed to charge the battery. | • Stop in a safe place in P, then charge the high voltage battery by idling the engine. ➤If the 12-Volt Battery Charging System Indicator Comes On P. 642 |
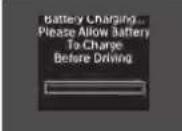 | • Appears while the high voltage battery is being charged with the engine running after the vehicle is parked with an extremely low battery level. | • Do not drive the vehicle until Ready To Drive appears. ➤READY Indicator P. 92 |
 | Appears when the rear motor fluid temperature is extremely low. | The vehicle speed is temporarily limited up to 81 mph (130 km/h).This is canceled after the fluid temperature rises. |
 | Appears if the AWD system has a problem due to a hybrid system or power distribution control failure. | Set the power mode to OFF, then set it back to ON.Have your vehicle checked by a dealer if the message appears again. |
 | • Flashes when the system senses a likely collision with a vehicle in front of you. | • Take the appropriate means to prevent a collision (apply the brakes, change lanes, etc.)➤Collision Mitigation Braking SystemTM (CMBSTM)P. 526➤Adaptive Cruise Control (ACC) with Low Speed Follow P. 477 |
 | • Appears when ACC with Low Speed Follow has been automatically canceled. | • You can resume the set speed after the condition that caused ACC with Low Speed Follow to cancel improves. Press the RES/+/SET/− switch up.➤Adaptive Cruise Control (ACC) with Low Speed Follow P. 477 |
 | • Appears when the vehicle speed slows down to 25 mph (40 km/h) and the vehicle ahead of you goes out of the ACC with Low Speed Follow range while ACC with Low Speed Follow is in operation. | • ACC with Low Speed Follow has been automatically canceled.➤Adaptive Cruise Control (ACC) with Low Speed Follow P. 477 |
 | • Appears when pressing the RES/+/SET/− switch down while the vehicle speed is less than 25 mph (40 km/h) and the vehicle ahead of you goes out of the ACC with Low Speed Follow range. | • ACC with Low Speed Follow cannot be set.➤Adaptive Cruise Control (ACC) with Low Speed Follow P. 477 |
 | • Appears when the distance between your vehicle and the vehicle ahead of you is too close while ACC with Low Speed Follow is in operation. | • ACC with Low Speed Follow has been automatically canceled.➤Adaptive Cruise Control (ACC) with Low Speed Follow P. 477 |
 | Appears when pressing the RES/+/SET/− switch down while the distance between your vehicle and the vehicle ahead of you is too close. | ACC with Low Speed Follow cannot be set. ➤Adaptive Cruise Control (ACC) with Low Speed Follow P. 477 |
 | Appears when pressing the RES/+/SET/− switch down while the driver's seat belt is unfastened. | ACC with Low Speed Follow cannot be set. ➤Adaptive Cruise Control (ACC) with Low Speed Follow P. 477 |
 | Appears when pressing the RES/+/SET/− switch down while the transmission is not in D. | ACC with Low Speed Follow cannot be set. ➤Adaptive Cruise Control (ACC) with Low Speed Follow P. 477 |
 | • Appears when the vehicle is stopped on a very steep slope while ACC with Low Speed Follow is in operation. | • ACC with Low Speed Follow has been automatically canceled.➢Adaptive Cruise Control (ACC) with Low Speed Follow P. 477 |
 | ||
 | • Appears when pressing the RES/+/SET/− switch down while the vehicle is stopped on a very steep slope. | • ACC with Low Speed Follow cannot be set.➢Adaptive Cruise Control (ACC) with Low Speed Follow P. 477 |
 | ||
 | • Appears when pressing the RES/+/SET/− switch down while the parking brake is applied. | • ACC with Low Speed Follow cannot be set.➢Adaptive Cruise Control (ACC) with Low Speed Follow P. 477➢Parking Brake P. 518 |
 | • Appears if ACC with Low Speed Follow is canceled while your vehicle is automatically stopped by ACC with Low Speed Follow. The beeper sounds. | • Immediately depress the brake pedal. |
 | • Appears when pressing the RES/+/SET/− switch down while the vehicle is moving and the brake pedal is depressed. | • ACC with Low Speed Follow cannot be set. ➤Adaptive Cruise Control (ACC) with Low Speed Follow P. 477 |
 | • Appears when you unlock and open the driver's door while the power system is on by two-way keyless access remote. | ➤ Remote Engine Start with Vehicle Feedback P. 459 |
 | ||
 | Lane Keeping Assist System (LKAS)Appears when the vehicle is driving out of a detected lane. The steering wheel vibrates rapidly. | Keep the vehicle within the lane you are driving.Lane Keeping Assist System (LKAS) P. 498 |
| Road Departure Mitigation (RDM) SystemAppears when the vehicle is driving out of a detected lane.When you selected Warning Only- The steering wheel vibrates rapidly when the vehicle is drifting out of a detected lane.When you selected Normal or Wide- The steering wheel vibrates rapidly when the vehicle is drifting out of a detected lane. The system also steers the vehicle to help you remain within your driving lane. | Keep the vehicle within the lane you are driving.Road Departure Mitigation (RDM) System P. 493You can change the setting for the road departure mitigation system.Normal, Wide, and Warning Only can be selected.Customized Features P. 131 | |
 | Blinks when you fail to steer the vehicle. The beeper sounds simultaneously. | Operate the steering wheel to resume the LKAS. |
 | Appears when the LKAS is in operation, or the LKAS button is pressed, but there is a problem with a system related to the LKAS. The LKAS cancels automatically. The beeper sounds simultaneously. | If any other system indicators come on, such as the VSA®, ABS and brake system, take appropriate action.Indicators P. 84 |
Gauges and Multi-Information Display (MID)
Gauges
Gauges include the speedometer, tachometer, fuel gauge, high voltage battery charge level gauge, and related indicators. They are displayed when the power mode is in ON.
Speedometer
Displays your driving speed in mph (U.S.) or km/h (Canada).
Tachometer
Shows the number of engine revolutions per minute.
Fuel Gauge
Displays the amount of fuel left in the fuel tank.
Fuel Gauge
NOTICE
You should refuel when the reading approaches E Running out of fuel can cause the engine to misfire, damaging the catalytic converter.
The actual amount of remaining fuel may differ from the fuel gauge reading.
Continued
High Voltage Battery Charge Level Gauge
Shows the remaining high voltage battery charge level.
High Voltage Battery Charge Level Gauge
The high voltage battery charge level may decrease under the following conditions:
- When the 12-volt battery has been replaced.
- When the 12-volt battery has been disconnected.
- When the high voltage battery control system corrects its reading.
The charge level reading will be corrected automatically while driving.
Changes in the temperature of the high voltage battery can increase or decrease the battery's charging capacity. If temperature changes cause the battery's capacity to change, the number of indicators in the battery charge level gauge may also change, even if the amount of charging remains the same.
MID
The MID shows the odometer, trip meter, outside temperature indicator, and other gauges. It also displays important messages such as warnings and other helpful information.
■ Switching the Display
■ Main displays
Roll the multi-function steering-wheel controls to change the display.
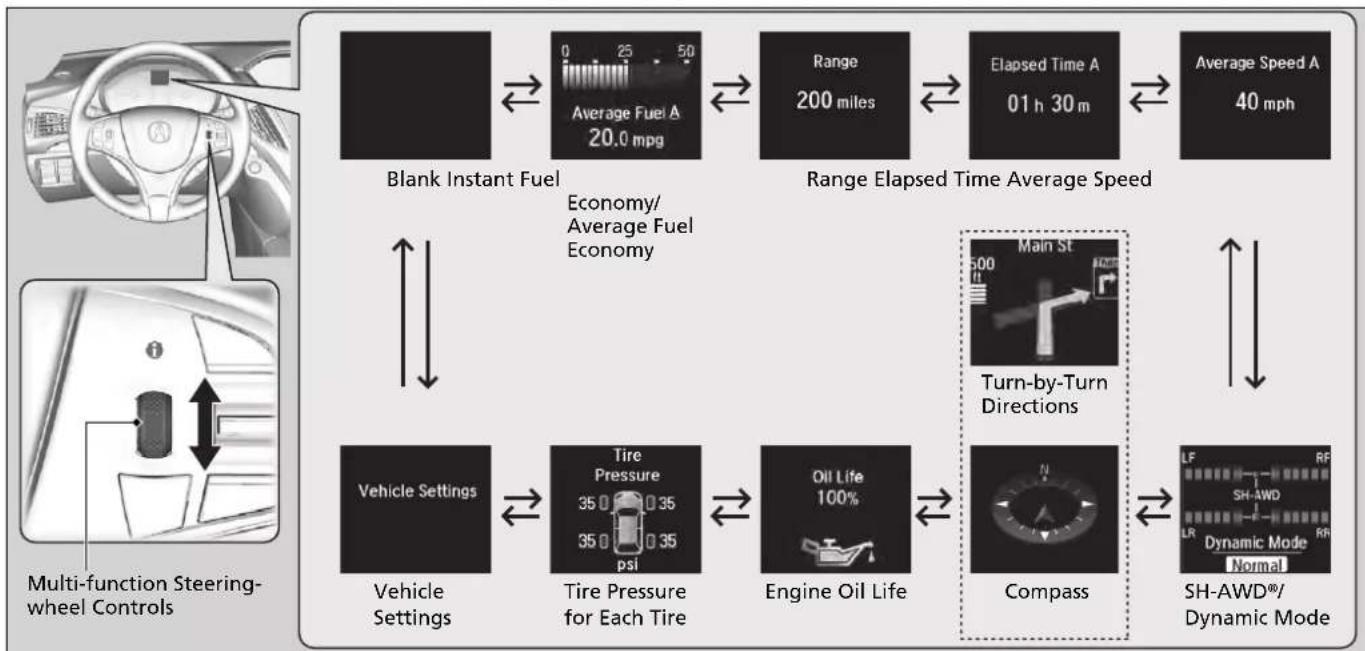
flowchart
graph TD
    A["Blank Instant Fuel"] --> B["Economy/Average Fuel Economy"]
    B --> C["Range 200 miles"]
    C --> D["Elapsed Time A 01 h 30 m"]
    D --> E["Average Speed A 40 mph"]
    F["Vehicle Settings"] --> G["Tire Pressure for Each Tire"]
    G --> H["Engine Oil Life"]
    H --> I["Compass"]
    I --> J["SH-AWD®/ Dynamic Mode"]
    K["Turn-by-Turn Directions"] --> L["Main St 500 ft"]
    L --> M["Shift from Start to Turn-Start"]
    N["Multi-function Steering-wheel Controls"] --> O["Control Icon"]
■ Lower displays
Press the TRIP button to change the display.
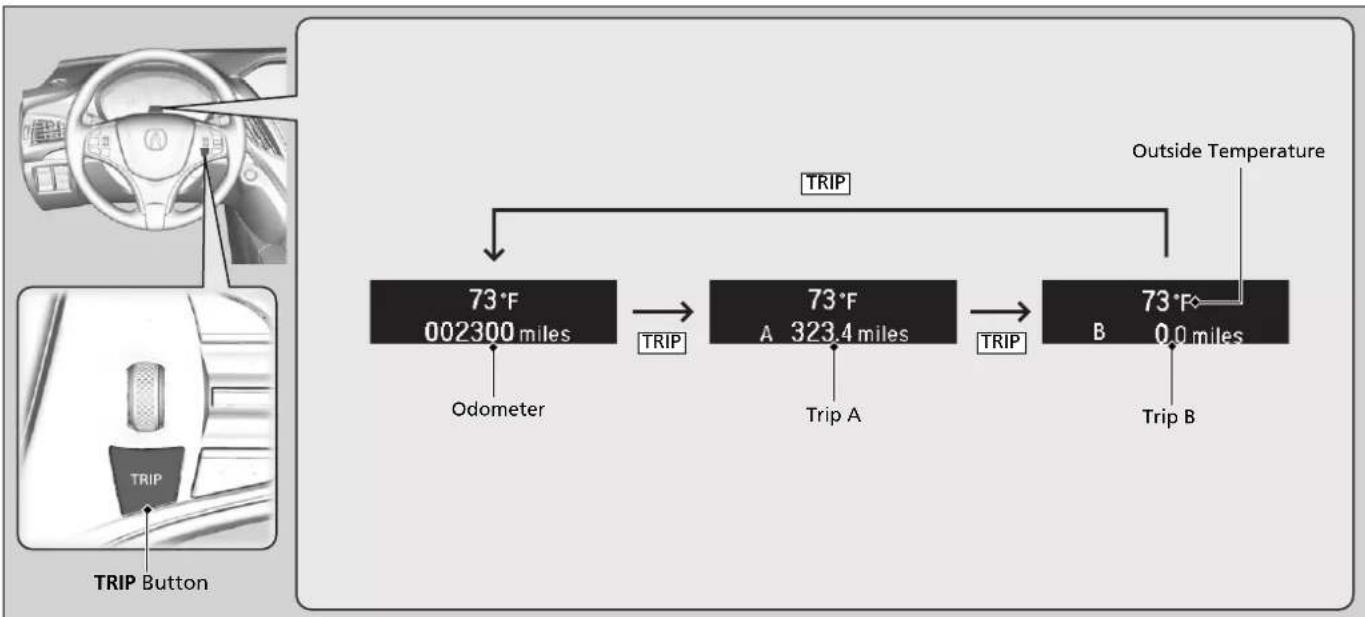
flowchart
graph TD
    A["TRIP"] --> B["73°F 002300 miles"]
    B --> C["TRIP"]
    C --> D["73°F A 323.4 miles"]
    D --> E["TRIP"]
    E --> F["73°F B 0.0 miles"]
    G["Outside Temperature"] --> H["TRIP"]
    I["TRIP Button"] --> J["TRIP"]
Odometer
Shows the total number of miles (U.S.) or kilometers (Canada) that your vehicle has accumulated.
Trip Meter
Shows the total number of miles (U.S.) or kilometers (Canada) driven since the last reset. Meters A and B can be used to measure two separate trips.
■ Resetting a trip meter
To reset a trip meter, display it, then press and hold the TRIP button until the trip meter is reset to 0.0.
■ Outside Temperature
Shows the outside temperature in Fahrenheit (U.S.) or Celsius (Canada).
■ Adjusting the outside temperature display
Adjust the temperature reading up to ±5^ or ±3^ if the temperature reading seems incorrect.
Average Fuel Economy
Shows the estimated average fuel economy of each trip meter in mpg (U.S.) or l/100 km (Canada). The display is updated at set intervals. When a trip meter is reset, the average fuel economy is also reset.
>>Trip Meter
Switch between trip meter A and trip meter B by pressing the TRIP button.
Outside Temperature
The temperature sensor is located in the front bumper.
Road heat and exhaust from another vehicle can affect the temperature reading when your vehicle speed is less than 19 mph (30 km/h).
It may take several minutes for the display to be updated after the temperature reading has stabilized.
Use the MID's customized features to correct the temperature.
→Customized Features P. 131
Average Fuel Economy
You can change when to reset the average fuel economy.
→Customized Features P. 131
Continued
Instant Fuel Economy
Shows the instant fuel economy as a bar graph in mpg (U.S.) or l/100 km (Canada).
Range
Shows the estimated distance you can travel on the remaining power and fuel. This estimated distance is based on the vehicle's current fuel economy.
Elapsed Time
Shows the time elapsed since Trip A or Trip B was reset.
Average Speed
Shows the average speed in mph (U.S.) or km/h (Canada) since Trip A or Trip B was reset.
Elapsed Time
You can change when to reset the elapsed time. →Customized Features P. 131
Average Speed
You can change when to reset the average speed. →Customized Features P. 131
SH-AWD® Torque Distribution Monitor
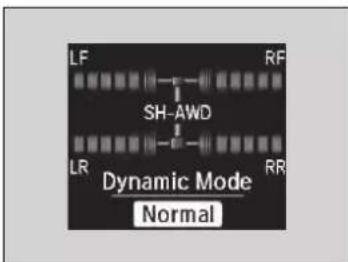
text_image
LF RF SH-AWD LR RR Dynamic Mode NormalThe indicators on the display show the amount of torque being transferred to the right front, left front, right rear, and left rear wheels.
SPORT HYBRID Super Handling-All Wheel Drive™ (SPORT HYBRID SH-AWD®) P. 509
Current Mode for Dynamic Mode
Shows the current mode for Dynamic Mode.
→ Integrated Dynamics System P. 474
Navigation
Compass
Shows the compass screen.
■ Turn-by-Turn Directions
When driving guidance is provided by the navigation system or Android Auto, turn-by-turn directions to your destination appear.
Refer to the Navigation System Manual
Android Auto P. 310
Navigation
You can select whether the turn-by-turn display comes on or not during the route guidance.
Customized Features P. 131, 362
■ Engine Oil Life and Maintenance Items
Shows the remaining oil life and Maintenance Minder™.
→Maintenance Minder™ P. 565
Tire Pressure Monitor
Shows each tire's pressure.
Tire Pressure Monitoring System (TPMS) with Tire Fill Assist P. 513
Customized Features
Use the MID to customize certain features.
■ How to customize
Select the Vehicle Settings screen by rolling the multi-function steering-wheel controls while the power mode is in ON, and the vehicle is at a complete stop. Push the multi-function steering-wheel controls.
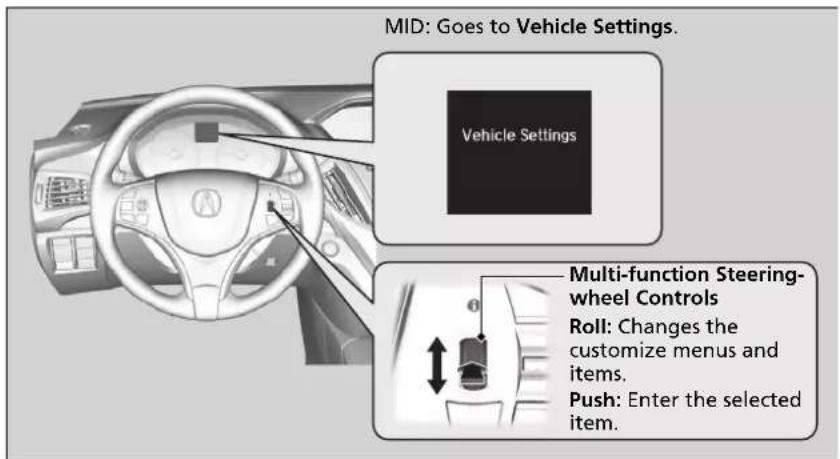
text_image
MID: Goes to Vehicle Settings. Vehicle Settings Multi-function Steering- wheel Controls Roll: Changes the customize menus and items. Push: Enter the selected item.>>Customized Features
To customize other features, roll the multi-function steering-wheel controls.
List of customizable options P. 134
Example of customization settings P. 139
Customization is possible when you see the driver's
ID (Driver 1 or Driver 2) on the screen.
The driver's ID indicates which remote transmitter you have used to unlock the driver's door. The customized settings are recalled every time you unlock the driver's door with that remote.
Put the transmission into P before you attempt to change any customized setting.
Customizing is also available from the information screen.
You cannot have Vehicle Settings displayed on the multi-information display while the information screen shows the same menu.
→Customized Features P. 362
Continued
■ Customization flow
Roll the multi-function steering-wheel controls to select Vehicle Settings and push the multi-function steering-wheel controls.
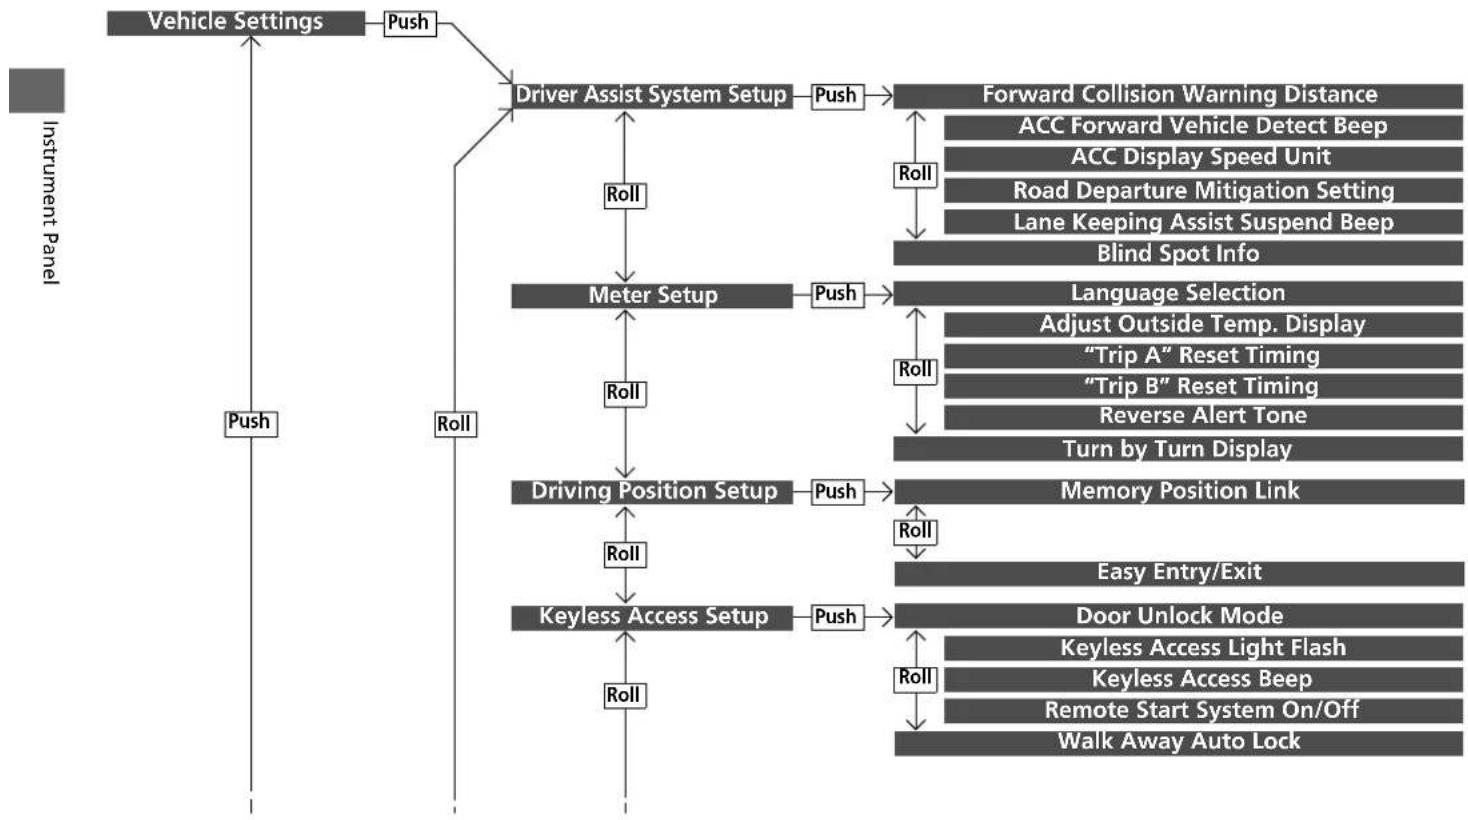
flowchart
graph TD
    A["Vehicle Settings"] --> B["Push"]
    B --> C["Driver Assist System Setup"]
    C --> D["Forward Collision Warning Distance"]
    C --> E["Roll"]
    E --> F["Meter Setup"]
    F --> G["Language Selection"]
    F --> H["Roll"]
    H --> I["Driving Position Setup"]
    I --> J["Memory Position Link"]
    I --> K["Roll"]
    K --> L["Keyless Access Setup"]
    L --> M["Easy Entry/Exit"]
    L --> N["Roll"]
    N --> O["Keyless Access Light Flash"]
    N --> P["Roll"]
    P --> Q["Remote Start System On/Off"]
    P --> R["Walk Away Auto Lock"]
    style A fill:#999,stroke:#333
    style B fill:#ccc,stroke:#333
    style C fill:#ccc,stroke:#333
    style D fill:#ccc,stroke:#333
    style E fill:#ccc,stroke:#333
    style F fill:#ccc,stroke:#333
    style G fill:#ccc,stroke:#333
    style H fill:#ccc,stroke:#333
    style I fill:#ccc,stroke:#333
    style J fill:#ccc,stroke:#333
    style K fill:#ccc,stroke:#333
    style L fill:#ccc,stroke:#333
    style M fill:#ccc,stroke:#333
    style N fill:#ccc,stroke:#333
    style O fill:#ccc,stroke:#333
    style P fill:#ccc,stroke:#333
    style Q fill:#ccc,stroke:#333
    style R fill:#ccc,stroke:#333
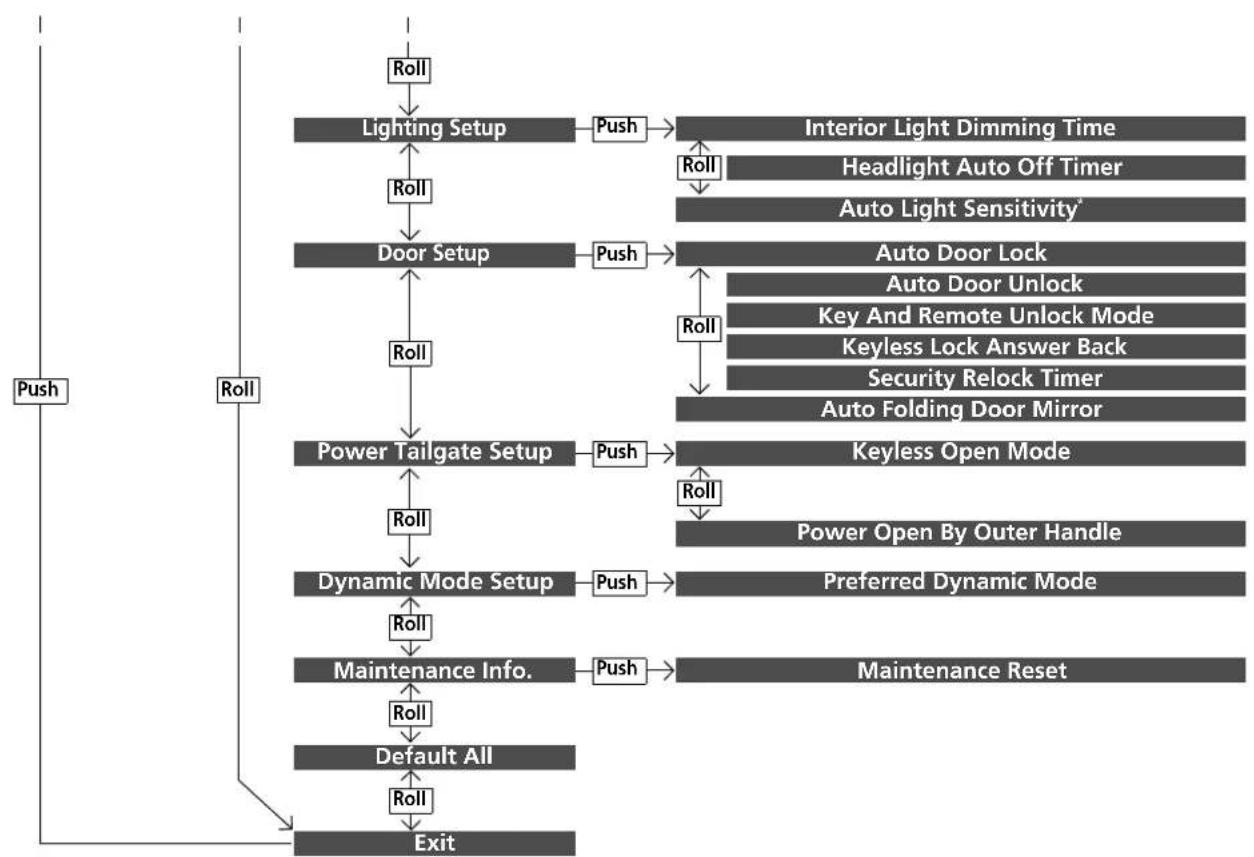
flowchart
graph TD
    A["Roll"] --> B["Lighting Setup"]
    B --> C["Push"]
    C --> D["Interior Light Dimming Time"]
    D --> E["Headlight Auto Off Timer"]
    E --> F["Auto Light Sensitivity*"]
    B --> G["Roll"]
    G --> H["Door Setup"]
    H --> I["Push"]
    I --> J["Auto Door Lock"]
    J --> K["Auto Door Unlock"]
    K --> L["Key And Remote Unlock Mode"]
    L --> M["Keyless Lock Answer Back"]
    M --> N["Security Relock Timer"]
    N --> O["Auto Folding Door Mirror"]
    H --> P["Roll"]
    P --> Q["Power Tailgate Setup"]
    Q --> R["Push"]
    R --> S["Keyless Open Mode"]
    S --> T["Power Open By Outer Handle"]
    Q --> U["Roll"]
    U --> V["Dynamic Mode Setup"]
    V --> W["Push"]
    W --> X["Preferred Dynamic Mode"]
    X --> Y["Maintenance Reset"]
    V --> Z["Roll"]
    Z --> AA["Maintenance Info."]
    AA --> AB["Push"]
    AB --> AC["Maintenance Reset"]
    AA --> AD["Default All"]
    AD --> AE["Roll"]
    AE --> AF["Exit"]
    style A fill:#f9f,stroke:#333
    style AF fill:#f9f,stroke:#333
* Not available on all models
Continued
■ List of customizable options
| Setup Group Customizable Features Description Selectable Settings | |||
| Driver Assist System Setup | Forward Collision Warning Distance | Changes at which distance forward collision warning alerts. | Long/Normal*1/Short |
| ACC Forward Vehicle Detect Beep | Causes the system to beep when the system detects a vehicle, or when the vehicle goes out of the ACC with Low Speed Follow range. | On/Off*1 | |
| ACC Display Speed Unit | Changes the speed unit for ACC with Low Speed Follow on the MID. | mph*1/km/h (U.S.) mph/km/h*1 (Canada) | |
| Road Departure Mitigation Setting | Changes the setting for the road departure mitigation system. | Normal*1/Wide/Warning Only | |
| Lane Keeping Assist Suspend Beep | Causes the system to beep when the LKAS is suspended. | On/Off*1 | |
| Blind Spot Info | Changes the setting for the blind spot information. | Audible And Visual Alert*1/Visual Alert/Off | |
*1:Default Setting
| Setup Group | Customizable Features | Description | Selectable Settings |
| Meter Setup | Language Selection Changes the displayed language. English | ^*1 /Français/Espanol | |
| Adjust Outside Temp. Display | Adjusts the temperature reading by a few degrees. | -5°F ~ ±0°F ^*1 ~ +5°F (U.S.) | |
| -3°C ~ ±0°C ^*1 ~ +3°C (Canada) | |||
| “Trip A” Reset Timing | Changes the setting of how to reset trip meter A, average fuel economy A, average speed A, and elapsed time A. | When Refueled/IGN Off/ Manually Reset ^*1 | |
| “Trip B” Reset Timing | Changes the setting of how to reset trip meter B, average fuel economy B, average speed B, and elapsed time B. | When Refueled/IGN Off/ Manually Reset ^*1 | |
| Reverse Alert Tone | Causes the beeper to sound once when the change the gear position to . | On ^*1 /Off | |
| Turn by Turn Display | Select whether the turn-by-turn display comes on during the route guidance. | On ^*1 /Off | |
*1:Default Setting
| Setup Group Customizable Features Description Selectable Settings | |||
| Driving Position Setup | Memory Position Link | Turns the driving position memory system on and off. | On*1/Off |
| Easy Entry/Exit | Moves the seat rearward and steering wheel fully up when you get in/get out of the vehicle. Changes the setting for this feature. | Seat & Steering Wheel*1/ Seat Only/Steering Wheel Only/Off | |
| Keyless Access Setup | Door Unlock Mode | Changes which doors unlock when you grab the driver's door handle. | Driver's Door or Tailgate Only*1/All Doors |
| Keyless Access Light Flash | Causes some exterior lights to flash when you unlock/lock the doors. | On*1/Off | |
| Keyless Access Beep | Causes the beeper to sound when you unlock/lock the doors. | On*1/Off | |
| Remote Start System On/Off | Turns the remote engine start feature on and off. On | *1/Off | |
| Walk Away Auto Lock | Changes the settings for the automatic locking the doors when you walk away from the vehicle while carrying the keyless access remote. | On/Off*1 | |
*1: Default Setting
| Setup Group | Customizable Features | Description | Selectable Settings |
| Lighting Setup | Interior Light Dimming Time | Changes the length of time the interior lights stay on after you close the doors. | 60sec/30sec*1/15sec |
| Headlight Auto Off Timer | Changes the length of time the exterior lights stay on after you close the driver's door. | 60sec/30sec/15sec*1/0sec | |
| Auto Light Sensitivity* | Changes the timing for the headlights to come on. | Max/High/Mid*1/Low/Min | |
| Door Setup | Auto Door Lock | Changes the setting for when the doors automatically lock. | With Vehicle Speed*1/Shift From P/Off |
| Auto Door Unlock | Changes the setting for when the doors automatically unlock. | All Doors When Driver's Door Opens*1/All Doors When Shifted To Park/All Doors When Ignition Switched Off/Off | |
| Key And Remote Unlock Mode | Sets up either the driver's door or all doors to unlock on the first operation of the remote or built-in key. | Driver Door*1/All Doors | |
| Keyless Lock Answer Back | LOCK/UNLOCK- The exterior lights flash. LOCK (2nd push)- The beeper sounds. | On*1/Off | |
| Security Relock Timer | Changes the time it takes for the doors to relock and the security system to set after you unlock the vehicle without opening any door. | 90sec/60sec/30sec*1 | |
| Auto Folding Door Mirror | Changes how you can fold the door mirrors. | Auto Fold With Keyless*1/Manual Only |
*1: Default Setting
* Not available on all models
Continued
Setup Group Customizable Features Description Selectable Settings
| Power Tailgate Setup | Keyless Open Mode | Changes the keyless setting for when the power tailgate opens. | Anytime*1/When Unlocked |
| Power Open By Outer Handle | Changes the setting to open power tailgate by tailgate outer handle. | Off (Manual Only)/On (Power/Manual)*1 | |
| Dynamic Mode Setup | Preferred Dynamic Mode | Changes the Dynamic Mode setting for when you set the power mode to ON. | Last Used*1/Comfort/ Normal/Sport |
| Maintenance Info. | Maintenance Reset | Resets/ Cancels the engine oil life display when you have performed the maintenance service. | Cancel/Reset |
| Default All — | Cancels/Resets all the customized settings as default. | Cancel/Set |
*1: Default Setting
■ Example of customization settings
The steps for changing the "Trip A" Reset Timing setting to When Refueled are shown below. The default setting for "Trip A" Reset Timing is Manually Reset.
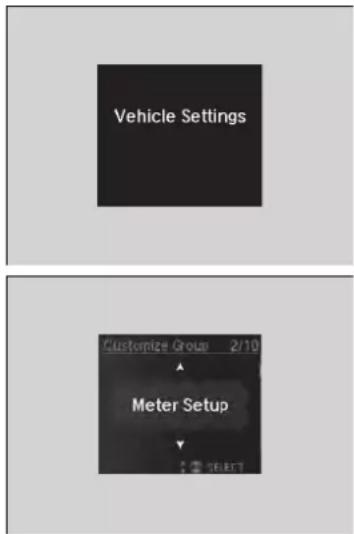
text_image
Vehicle Settings Customize Group 2/10 Meter Setup- Roll the multi-function steering-wheel controls to select Vehicle Settings, then push the multi-function steering-wheel controls.
- Roll the multi-function steering-wheel controls until Meter Setup appears on the display.
- Push the multi-function steering-wheel controls. ▶Language Selection appears first on the display.
- Roll the multi-function steering-wheel controls until Meter Setup appears on the display.
- Push the multi-function steering-wheel controls.
▶Language Selection appears first on the display.
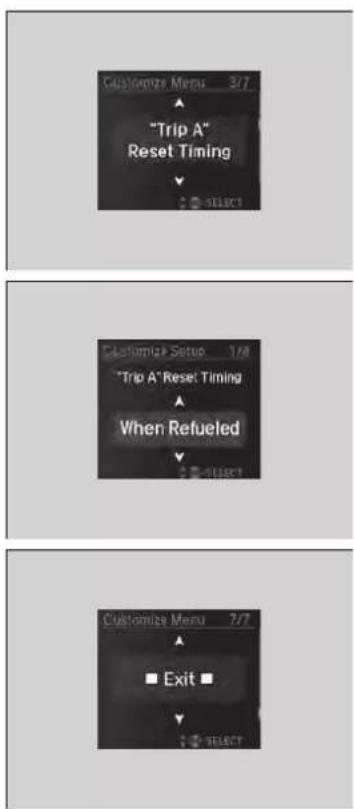
text_image
Customize Menu 3/7 "Trip A" Reset Timing SELECT Customize Setup 1/8 "Trip A" Reset Timing When Refueled SELECT Customize Menu 7/7 Exit SELECT- Roll the multi-function steering-wheel controls until "Trip A" Reset Timing appears on the display, then push the multi-function steering-wheel controls.
The display switches to the customization setup screen, where you can select When Refueled, IGN Off, Manually Reset, or Exit. - Roll the multi-function steering-wheel controls and select When Refueled, then push the multi-function steering-wheel controls.
The When Refueled Setup screen appears, then the display returns to the customization menu screen. - Roll the multi-function steering-wheel controls until Exit appears on the display, then push the multi-function steering-wheel controls.
- Repeat Step 6 until you return to the normal screen.
Controls
This chapter explains how to operate the various controls necessary for driving.
Clock 142
Locking and Unlocking the Doors
Key Types and Functions 143
Low Keyless Access Remote Signal Strength.... 144
Locking/Unlocking the Doors from the
Outside 145
Locking/Unlocking the Doors from the Inside 154
Childproof Door Locks 156
Auto Door Locking/Unlocking ..... 157
Tailgate 158
Security System
Immobilizer System 165
Security System Alarm.... 165
Opening and Closing the Windows ... 168
Moonroof 170
Operating the Switches Around the Steering Wheel
POWER Button.... 171
Turn Signals.... 174
Light Switches.... 175
Fog Lights* 178
Daytime Running Lights 178
Auto High-Beam 179
Wipers and Washers 182
Brightness Control 186
Rear Defogger/Heated Door Mirror Button . 187
Driving Position Memory System ..... 188
Adjusting the Steering Wheel...... 190
Adjusting the Mirrors
Interior Rearview Mirror 191
Power Door Mirrors 192
Adjusting the Seats
Front Seats 194
Second Row Seats 197
Third Row Seats.... 206
Armrest 207
Interior Lights/Interior Convenience Items
Interior Lights 209
Interior Convenience Items 211
Climate Control System
Using Automatic Climate Control .... 222
Rear Climate Control System ..... 229
Automatic Climate Control Sensors... 233
* Not available on all models
Clock
Adjusting the Clock
The clock is automatically updated through the navigation system, so the time does not need to be adjusted.
You can adjust the time manually in the information screen with the power mode in ON.
Adjusting the Time
■ Using the Settings menu on the information screen
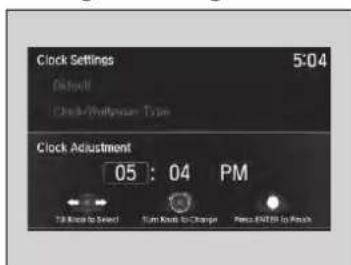
text_image
Clock Settings 5:04 Default Clock-Whirlpower Type Clock Adjustment 05 : 04 PM Till Reset to Select Turn Knock to Charge Press EBITB to Finish- Press the SETTINGS button.
- Rotate 🔊 to select Clock Settings, then press 🔕.
▶ Repeat the procedure to select Clock Adjustment. - Rotate to change hour, then move.
- Rotate to change minute, then press 😊.
Clock
These indications are used to show how to operate the interface dial.
Rotate to select.
Press 🤔 to enter.
Move do select a secondary menu.
You can customize the clock display to show the 12 hour clock or 24 hour clock.
Customized Features P. 362
You can turn the clock display in the information screen on and off.
Customized Features P. 362
Except Canadian models
You cannot adjust the time while the vehicle is moving.
Locking and Unlocking the Doors
Key Types and Functions
This vehicle comes with the following keys:
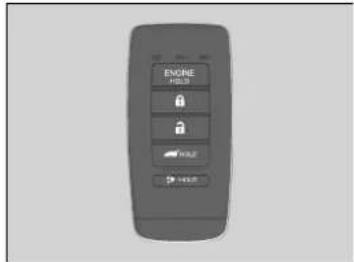
text_image
ENGINE HOLD WRITE WRITEUse the keys to turn on and off the power system, and to lock and unlock all the doors and tailgate. You can also use the keyless access system to lock and unlock all the doors and tailgate.
Built-in Key
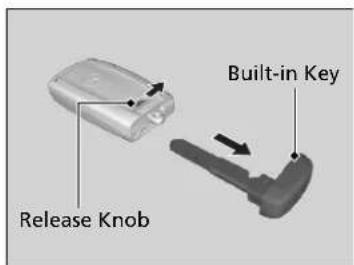
text_image
Release Knob Built-in KeyThe built-in key can be used to lock/unlock the doors when the keyless access remote battery becomes weak and the power door lock/unlock operation is disabled.
To remove the built-in key, slide the release knob and then pull out the key. To reinstall the built-in key, push the built-in key into the keyless access remote until it clicks.
Key Types and Functions
All the keys have an immobilizer system. The immobilizer system helps to protect against vehicle theft.
Immobilizer System P. 165
Follow the advice below to prevent damage to the keys:
- Do not leave the keys in direct sunlight, or in locations with high temperature or high humidity.
- Do not drop the keys or set heavy objects on them.
- Keep the keys away from liquids, dust and sand.
- Do not take the keys apart except for replacing the battery.
If the circuits in the keys are damaged, the power system may not activate, and the keyless access system may not work.
If the keys do not work properly, have them inspected by a dealer.
You can remotely turn the power system on using the two-way keyless access remote.
Remote Engine Start with Vehicle Feedback P. 459
Key Number Tag
natural_image
Simple white rectangular object with a circular top and oval shape on a gray background (no text or symbols)Contains a number that you will need if you purchase a replacement key.
Low Keyless Access Remote Signal Strength
The vehicle transmits radio waves to locate the keyless access remote when locking/unlocking the doors and tailgate, or to activate the power system.
In the following cases, locking/unlocking the doors and tailgate, or activating the power system may be inhibited or operation may be unstable:
• Strong radio waves are being transmitted by nearby equipment.
- You are carrying the keyless access remote together with telecommunications equipment, laptop computers, cell phones, or wireless devices.
- A metallic object is touching or covering the keyless access remote.
Key Number Tag
Keep the key number tag separate from the key in a safe place outside of your vehicle. If you wish to purchase an additional key, contact a dealer.
If you lose your key and you cannot activate the power system, contact a dealer.
Low Keyless Access Remote Signal Strength
Communication between the keyless access remote and the vehicle consumes the keyless access remote's battery.
Battery life is about two years, but this varies depending on regularity of use.
The battery is consumed whenever the keyless access remote is receiving strong radio waves. Avoid placing it near electrical appliances such as televisions and personal computers.
Locking/Unlocking the Doors from the Outside
■ Using the Keyless Access System
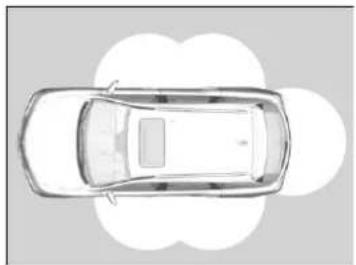
natural_image
Top-down line drawing of a car with no text or symbolsWhen you carry the keyless access remote, you can lock/unlock the doors and the tailgate.
You can lock/unlock the doors and tailgate within a radius of about 32 inches (80 cm) of the outside door handle or tailgate outer handle.
Locking/Unlocking the Doors from the Outside
If the interior light switch is in the door activated position, the interior light comes on when you unlock the doors and tailgate.
No doors opened: The light fades out after 30 seconds.
Doors and tailgate relocked: The light goes off immediately.
→Interior Lights P. 209
Using the Keyless Access System
If you do not open a door or the tailgate within 30 seconds of unlocking the vehicle with the keyless access system, the doors and tailgate will automatically relock.
You can lock or unlock doors using the keyless access system only when the power mode is in VEHICLE OFF.
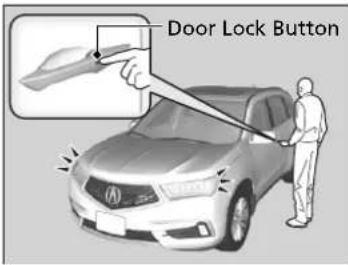
text_image
Door Lock Button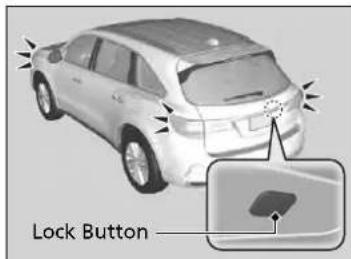
text_image
Lock Button■ Locking the doors and tailgate
Press the door lock button on the front or rear doors, or on the tailgate.
▶Some exterior lights flash; the beeper sounds; all the doors and tailgate lock; and the security system sets.
>>Using the Keyless Access System
- Do not leave the keyless access remote in the vehicle when you get out. Carry it with you.
- Even if you are not carrying the keyless access remote, you can lock/unlock the doors and tailgate while someone else with the remote is within range.
- The door may be unlocked if the door handle is covered with water in heavy rain or in a car wash if the keyless access remote is within range.
- If you grip a door handle wearing gloves, the door sensor may be slow to respond or may not respond by unlocking the doors.
- After locking the door, you have up to two seconds during which you can pull the door handle to confirm whether the door is locked. If you need to unlock the door immediately after locking it, wait at least two seconds before gripping the handle, otherwise the door will not unlock.
- The door might not open if you pull it immediately after gripping the door handle. Grip the handle again and confirm that the door is unlocked before pulling the handle.
- Even within the 32 inches (80 cm) radius, you may not be able to lock/unlock the doors with the keyless access remote if it is above or below the outside handle.
- The keyless access remote may not operate if it is too close to the door and door glass.
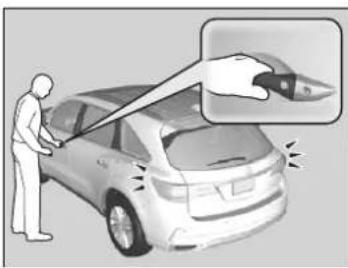
natural_image
Illustration of a person cleaning a car with a magnified inset showing the hand holding a small object (no text or symbols present)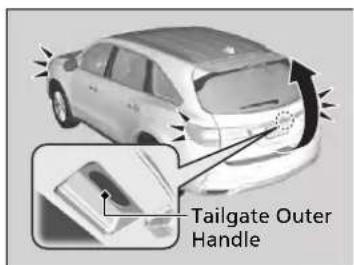
text_image
Tailgate Outer Handle■ Unlocking the doors and tailgate
Grab the driver's door handle:
The driver's door unlocks.
▶ Some exterior lights flash twice and the beeper sounds twice.
Grab the front passenger's door or rear door handle:
▶ All doors and the tailgate unlock.
▶ Some exterior lights flash twice and the beeper sounds twice.
Press and hold the tailgate outer handle:
The tailgate unlocks and opens.
▶ Some exterior lights flash twice and the beeper sounds twice.
Opening/Closing the Tailgate P. 164
Using the Keyless Access System
The light flash, beep and door unlock mode settings can be customized using the information screen or MID.
→Customized Features P. 131, 362
When you go into the keyless access system working range with all the doors locked, the LED puddle lights come on for 30 seconds.
The lights do not come on if you have previously stayed within the range for more than two minutes, or the doors have been locked for a few days.
The feature activates again after you drive the vehicle, then lock the doors.
You can also unlock and open with the power tailgate.
→ Opening/Closing the Tailgate P. 164
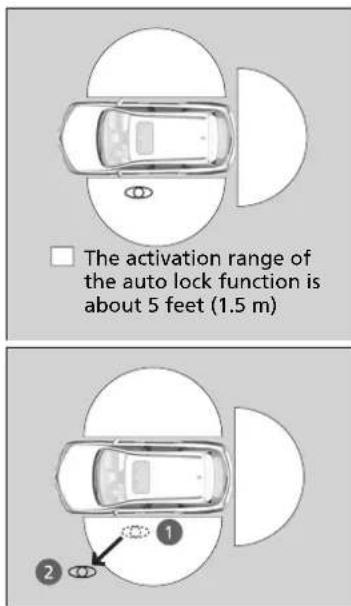
text_image
The activation range of the auto lock function is about 5 feet (1.5 m)■ Locking the doors and tailgate (Walk away auto lock®)
When you walk away from the vehicle while carrying the keyless access remote, the doors will automatically lock.
The auto lock function activates when all doors and tailgate are closed, and the keyless access remote is within about 5 feet (1.5 m) radius of the outside door handle.
Exit vehicle while carrying keyless access remote and close door(s).
- While within about 5 feet (1.5 m) radius of the vehicle.
The beeper sounds; the auto lock function will be activated.
- Carry the keyless access remote beyond about 5 feet (1.5 m) from the vehicle and remain outside this range for 2 or more seconds.
▶ Some exterior lights flash; the beeper sounds; all doors and tailgate will then lock.
Locking the doors and tailgate (Walk away auto lock®)
The auto lock function is set to OFF as the factory default setting. The auto lock function can be set to ON using the information screen or multi-information display (MID).
If you set the auto lock function to ON using the information screen or the MID, only the remote transmitter that was used to unlock the driver's door prior to the setting change can activate auto lock.
→ Customized Features P. 131, 362
After the auto lock function has been activated, when you stay within the locking/unlocking operation range, the indicator on the keyless access remote will continue to flash until the doors are locked.
When you stay beside the vehicle within the operation range, the doors will automatically lock approximately 30 seconds after the auto lock function activating beeper sounds.
When you open a door after the auto lock function activating beeper sounds, the auto lock function will be delayed until all doors and tailgate are closed.
Under the following circumstances, the auto lock function will not activate:
- The keyless access remote is inside the vehicle. ▶The beeper will not sound.
- The keyless access remote is taken out of its operational range before all the doors are closed.
The beeper will sound.
To temporarily deactivate the function:
- Set the power mode to OFF.
- Open the driver's door.
- Using the master door lock switch, operate the lock as follows:
Lock → Unlock Lock Unlock.
The beeper sounds and the function is deactivated.
To restore the function:
- Set the power mode to ON.
- Lock the vehicle without using the auto lock function.
- With the keyless access remote on you, move out of the auto lock function operation range.
- Open any door.
Locking the doors and tailgate (Walk away auto lock®)
You must wait until the power tailgate fully closes before the auto lock function will be activated.
The auto lock function does not operate when any of the following conditions are met.
- The keyless access remote is inside the vehicle.
• A door or the hood is not closed. - The power mode is set to any mode other than OFF.
- The keyless access remote is not located within a radius of about 5 feet (1.5 m) from the vehicle when you get out of the vehicle and close the doors.
Auto lock function operation stop beeper
After the auto lock function has been activated, the auto lock operation stop beeper sounds for
approximately two seconds in the following cases.
- The keyless access remote is put inside the vehicle through a window.
- You are located too close to the vehicle.
- The keyless access remote is put inside the tailgate. If the warning beeper sounds, check that you are carrying the keyless access remote. Then, open/close a door and confirm the auto lock activation beeper sounds once.
Using the Remote Transmitter
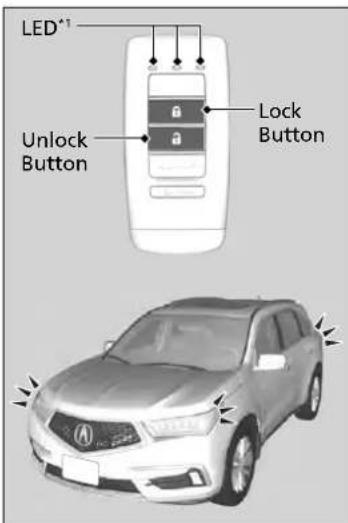
text_image
LED*1 Unlock Button Lock Button*1: Checking Door Lock Status P. 153
■ Locking the doors and tailgate
Press the lock button.
Once:
▶ Some exterior lights flash, all the doors and tailgate lock, and the security system sets.
Twice (within five seconds after the first push):
The beeper sounds and verifies the security system is set.
■ Unlocking the doors and tailgate
Press the unlock button.
Once:
Some exterior lights flash twice, and the driver's door unlocks.
Twice:
The remaining doors and tailgate unlock.
>>Using the Remote Transmitter
If you do not open a door or the tailgate within 30 seconds of unlocking the vehicle with the remote transmitter, the doors and tailgate will automatically relock.
You can change the relock timer setting.
→ Customized Features P. 131, 362
You can lock or unlock doors using the remote transmitter only when the power mode is in VEHICLE OFF.
The remote transmitter uses low-power signals, so the operating range may vary depending on the surroundings.
The remote will not lock the vehicle when a door or the tailgate is open.
If the distance at which the remote transmitter works varies, the battery is probably low. If the LED does not come on when you press a button, the battery is dead.
→ Replacing the Button Battery P. 601
You can customize the door unlock mode setting.
→ Customized Features P. 131, 362
■ Locking/Unlocking the Doors Using a Key
If the lock or unlock button of the keyless access remote does not work, use the key instead.
→ Replacing the Button Battery P. 601
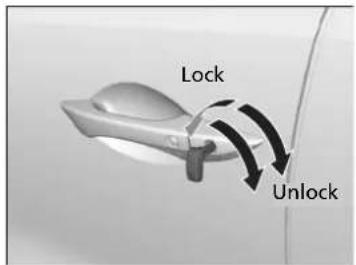
text_image
Lock UnlockFully insert the key and turn it.
Continued
Locking/Unlocking the Doors Using a Key
When you lock the driver's door with a key, all the other doors and tailgate lock at the same time. When unlocking, the driver's door unlocks first. Turn the key a second time within a few seconds to unlock the remaining doors and the tailgate.
You can customize the door unlock mode setting.
Customized Features P. 131, 362
Locking a Door Without Using a Key
If you do not have the key on you, or if for some reason you cannot lock a door using the key, you can lock the door without it.
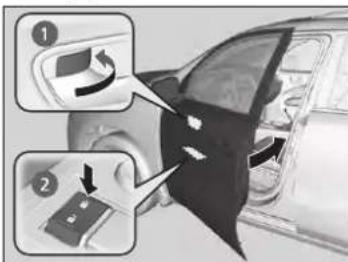
text_image
Diagram showing car door panel adjustment with numbered steps and directional arrows indicating movement■ Locking the front doors
Push the lock tab forward ① or push the master door lock switch in the lock direction ②, and close the door.
■ Locking the rear doors
Push the lock tab forward and close the door.
■ Lockout prevention system
The doors and tailgate cannot be locked when the keyless access remote is inside the vehicle.
Locking a Door Without Using a Key
When you lock the driver's door, all the other doors and tailgate lock at the same time. Before locking a door, make sure that the key is not inside the vehicle.
- Checking Door Lock Status
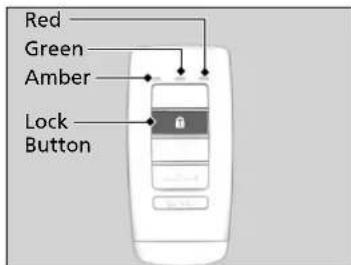
text_image
Red Green Amber Lock ButtonYou can remotely check if your vehicle's doors are all locked or any are unlocked using the keyless access remote from extended distances.
Press the lock button, the Amber (LEFT) LED blinks once. Then after three seconds one of the following feedback will come:
- Green (center) comes on: Acknowledges that the doors are locked.
- Red (right) comes on: Acknowledges that doors are not locked, or any door is not completely closed.
- Red (right) blinks three times: The remote does not receive the door lock status from the vehicle.
>>Checking Door Lock Status
Operate the remote in an open space. If there are buildings or other obstacles between your vehicle and the remote, the remote may not work even within the operable range. However, the range required for unlocking the tailgate and all the doors as well as activating the panic function is the same as that required for operating the standard keyless access remote.
When checking the door lock status, you can also turn the power system on or off.
Remote Engine Start with Vehicle Feedback P. 459
Locking/Unlocking the Doors from the Inside
Using the Lock Tab
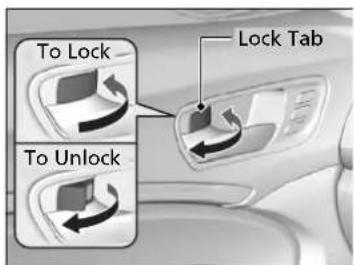
text_image
To Lock To Unlock Lock Tab■ Locking a door
Push the lock tab forward.
■ Unlocking a door
Pull the lock tab rearward.
>>Using the Lock Tab
When you lock the door using the lock tab on the driver's door, all of the other doors and the tailgate lock at the same time.
When you unlock the door using the lock tab on the driver's door, only the driver's door will unlock.
■ Unlocking Using the Front Door Inner Handle
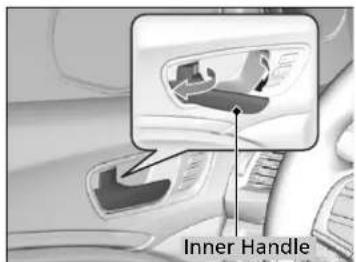
text_image
Inner HandlePull the front door inner handle.
The door unlocks and opens in one motion.
Unlocking and opening the driver's door from the inner handle unlocks all the other doors.
To avoid all the doors to be unlocked, use the lock tab on the driver's door to unlock, then lock again before opening the door.
This setting works for one time only. If you do not want all the doors to be unlocked all the time, customize the Auto Door Unlock setting to Off using the MID or information screen.
Unlocking Using the Front Door Inner Handle
The front door inner handles are designed to allow front seat occupants to open the door in one motion. However, this feature requires that front seat occupants never pull a front door inner handle while the vehicle is in motion.
Children should always ride in a rear seat where childproof door locks are provided.
Childproof Door Locks P. 156
Using the Master Door Lock Switch
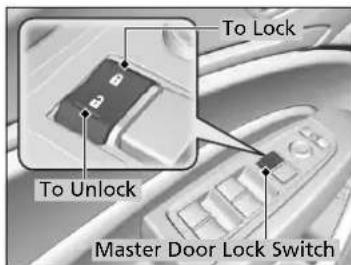
text_image
To Lock To Unlock Master Door Lock SwitchPress the master door lock switch in as shown to lock or unlock all the doors and the tailgate.
Childproof Door Locks
The childproof door locks prevent the rear doors from being opened from the inside regardless of the position of the lock tab.
Setting the Childproof Door Locks
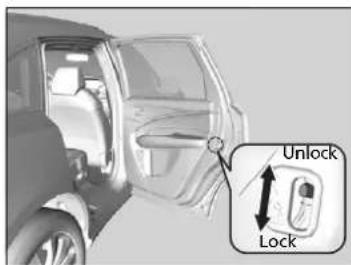
text_image
Unlock LockSlide the lever in the rear door to the lock position, and close the door.
■ When opening the door
Open the door using the outside door handle.
Using the Master Door Lock Switch
When you lock/unlock either front door using the master door lock switch, all the other doors and the tailgate lock/unlock at the same time.
Childproof Door Locks
To open the door from the inside when the childproof door lock is on, put the lock tab in the unlock position, lower the rear window, put your hand out of the window, and pull the outside door handle.
Auto Door Locking/Unlocking
Your vehicle locks or unlocks all doors automatically when a certain condition is met.
■ Auto Door Locking
■ Drive lock mode
All doors and tailgate lock when the vehicle's speed reaches about 10 mph (15 km/h).
Auto Door Unlocking
All doors unlock when the driver's door is opened.
Auto Door Locking/Unlocking
You can turn off or change to another auto door locking/unlocking setting using the information screen or MID.
→ Customized Features P. 131, 362
Tailgate
Precautions for Opening/Closing the Tailgate
Always make sure individuals and objects are clear of the tailgate before opening or closing it.
- Open the tailgate all the way.
▶If it is not fully opened, the tailgate may begin to close under its own weight. - Be careful when it is windy. The wind may cause the tailgate to close.
Keep the tailgate closed while driving to:
▶ Avoid possible damage.
▶Prevent exhaust gas from leaking into the vehicle.
Carbon Monoxide Gas P. 80
Precautions for Opening/Closing the Tailgate
WARNING
Anyone caught in the path of a tailgate that is being opened or closed can be seriously injured.
Make sure that all people are clear of the tailgate before opening or closing it.
Be careful not to hit your head on the tailgate or to put your hands between the tailgate and the cargo area when closing the tailgate.
When you are storing or picking up luggage from the cargo area while the engine is idling, do not stand in front of the exhaust pipe. You may get burned.
Do not allow any passenger in the cargo space. They may get hurt during hard braking, a sudden acceleration, or a crash.
Opening/Closing the Power Tailgate
The power tailgate can be operated by pressing the power tailgate button on the remote transmitter or driver's door, or pressing the outer handle or button on the tailgate.
The power tailgate can be opened/closed when the transmission is in P.
Opening/Closing the Power Tailgate
WARNING
Opening or closing a power tailgate while any part of a passenger is in the tailgate's operating path can cause serious injury. Make sure all passengers or objects are clear of the tailgate operating range before opening or closing the tailgate.
NOTICE
Do not push or pull on the power tailgate when it is being automatically opened or closed. Forcibly opening or closing the power tailgate while in operation can deform the tailgate frame.
When operating the power tailgate, make sure there is enough space around your vehicle. People near the tailgate may be seriously hurt if the tailgate hits or closes on their heads. Be especially cautious if children are around.
The power tailgate may not open or close under the following conditions:
- You start the power system while the tailgate is automatically opening or closing.
• The vehicle is parked on a steep hill.
• The vehicle is swayed in a strong wind. - The tailgate or the roof is covered with snow or ice.
Continued
Using the Remote Transmitter
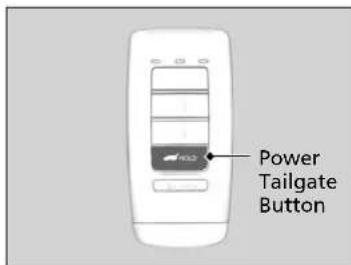
text_image
Power Tailgate ButtonPress the power tailgate button for more than one second to operate when the power mode is in VEHICLE OFF (LOCK).
▶ Some exterior lights flash and the beeper sounds.
If you press the button again while the power tailgate is moving, it will reverse direction.
■ Customizing when to open the tailgate
Anytime: The power tailgate unlocks and opens at the same time. This is the default setting.
When Unlocked: The tailgate opens when all doors are unlocked.
→ Customized Features P. 131, 362
Opening/Closing the Power Tailgate
If you close the power tailgate when all the doors are locked, the power tailgate locks automatically.
If you replace the 12-volt battery or the power tailgate fuse while the tailgate is open, the power tailgate may be disabled. The power tailgate resumes once you manually close the tailgate.
Installing aftermarket components other than Acura genuine accessories on the power tailgate may prevent it from fully opening or closing.
Make sure the power tailgate is fully open before you get your luggage in and out.
The beeper sounds when you start driving while the power tailgate is still open, or closing.
Do not touch the sensors located on both sides of the tailgate. The power tailgate does not close if you touch either sensor when you are trying to close the tailgate.
Be careful not to scratch the sensors with a sharp object. If scratched, they can be damaged, and the power tailgate closing feature malfunctions.
If the power tailgate meets resistance while opening or closing, the auto reverse feature reverses the direction. The beeper sounds three times.
Using the Power Tailgate Button
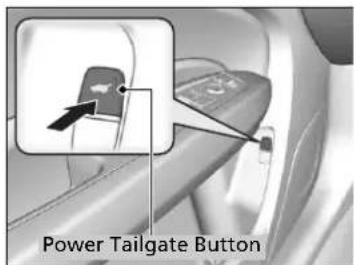
text_image
Power Tailgate ButtonTo open or close the power tailgate, press the power tailgate button for about one second.
▶ Some exterior lights flash and the beeper sounds.
If you press the button again while the power tailgate is moving, it will reverse direction.
Using the Tailgate Outer Handle
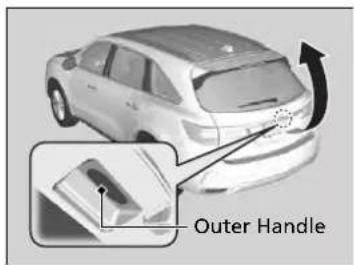
text_image
Outer HandleIf you press the outer handle of the tailgate for no longer than one second, the tailgate opens automatically.
The beeper sounds.
▶If you want to open the tailgate manually, press the outer handle for more than one second.
Opening/Closing the Tailgate P. 164
If you are carrying the keyless access remote, you do not have to unlock the tailgate before opening it.
If you press the outer handle again while the power tailgate is moving, it will reverse direction.
Continued
Opening/Closing the Power Tailgate
The auto reverse function stops sensing when the tailgate is almost closed to make sure that it fully closes.
Using the Tailgate Outer Handle
- Do not leave the keyless access remote in the vehicle when you get out. Carry it with you.
- Even if you are not carrying the keyless access remote, you can unlock the tailgate while someone else with the remote is within range.
- Do not leave the keyless access remote inside the cargo area and close the tailgate. The beeper sounds and the tailgate cannot be closed.
You can change the power tailgate operation setting on and off.
→ Customized Features P. 131, 362
Using the Tailgate Inner Button
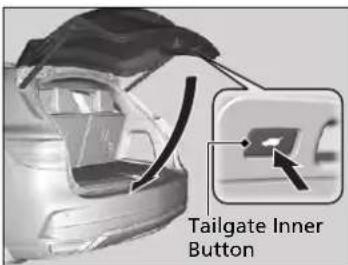
text_image
Tailgate Inner ButtonPress the button on the tailgate to close the power tailgate.
The beeper sounds.
If you press the button again while the power tailgate is moving, it will reverse direction.
Auto-Closer
If you manually close the power tailgate, it latches automatically.
Auto-Closer
Keep your hands away from the tailgate when you manually close the tailgate and let it latch automatically. It is dangerous to put your hands around the tailgate as it starts to latch itself.
The auto-closer feature does not activate if you press and hold the tailgate outer handle while the power tailgate is closing.
Do not put any force on the tailgate while the power tailgate is latching.
Power Tailgate Fall Detection
Automatically lowers the power tailgate when there is a possibility that the fully opened power tailgate can fall down by its own weight (for example, by snow on the tailgate). The beeper sounds while the power tailgate lowers.
Power Tailgate Fall Detection
If you try to manually close the power tailgate immediately after it fully opens, the power tailgate fall detection may activate.
Once the power tailgate fall detection activates, wait until the power tailgate fully closes. Keep away from the power tailgate when it is in motion.
If the power tailgate fall detection constantly activates, consult at a dealer.
Opening/Closing the Tailgate
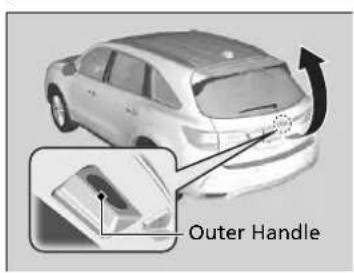
text_image
Outer HandleWhen all the doors are unlocked, the tailgate is unlocked.
Press the outer handle of the tailgate and lift open the tailgate.
If you are carrying the keyless access remote, you do not have to unlock the tailgate before opening it.
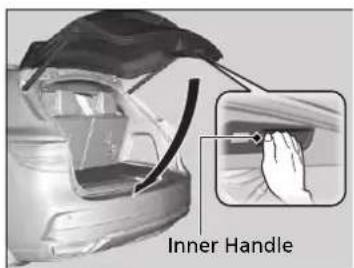
text_image
Inner HandleTo close the tailgate, grab the inner handle, pull the tailgate down, and push it closed from outside.
If you close the tailgate when the driver's door is locked, the tailgate locks automatically.
Opening/Closing the Tailgate
- Do not leave the keyless access remote in the vehicle when you get out. Carry it with you.
- Even if you are not carrying the keyless access remote, you can unlock the tailgate while someone else with the remote is within range.
- Do not leave the keyless access remote inside the cargo area and close the tailgate. The beeper sounds and the tailgate cannot be closed.
Security System
Immobilizer System
The immobilizer system prevents a key that has not been pre-registered from starting the power system. Each key contains electronic transmitters that use electronic signals to verify the key.
Pay attention to the following when pressing the POWER button:
- Do not allow objects that emit strong radio waves near the POWER button.
• Make sure the key is not covered by or touching a metal object. - Do not bring a key from another vehicle's immobilizer system near the POWER button.
- Do not put the key near magnetic items. Electronic devices, such as televisions and audio systems emit strong magnetic fields. Note that even a key chain can become magnetic.
Security System Alarm
The security system alarm activates when the tailgate, hood or doors are forcibly opened. The alarm does not activate if the tailgate or doors are opened with the key, remote transmitter or keyless access system.
However, the alarm activates if a door is opened with the key and then the hood is opened before the power mode is set to ON.
■ When the security system alarm activates
The horn sounds intermittently, and some exterior lights flash.
■ To deactivate the security system alarm
Unlock the vehicle using the key, remote transmitter or keyless access system, or set the power mode to ON. The system, along with the horn and flashing lights, is deactivated.
Continued
Immobilizer System
NOTICE
Leaving the key in the vehicle can result in theft or accidental movement of the vehicle. Always take the key with you whenever you leave the vehicle unattended.
Do not alter the system or add other devices to it. Doing so may damage the system and make your vehicle inoperable.
Security System Alarm
Do not alter the system or add other devices to it. Doing so may damage the system and make your vehicle inoperable.
The security system alarm continues for a maximum of two minutes until the security system alarm deactivates.
■ Setting the security system alarm
The security system alarm automatically sets when the following conditions have been met:
- The power mode is set to VEHICLE OFF (LOCK).
• The hood is closed. - All doors and the tailgate are locked from outside with the key, remote transmitter, or keyless access system.
■ When the security system alarm sets
The security system alarm indicator in the instrument panel blinks and the blinking interval changes after about 15 seconds.
■ To cancel the security system alarm
The security system alarm is canceled when the vehicle is unlocked using the remote transmitter or keyless access system, or when the power mode is set to ON. The security system alarm indicator goes off at the same time.
Security System Alarm
Do not set the security system alarm when someone is in the vehicle or a window is open. The system can accidentally activate when:
- Unlocking the door with the lock tab.
- Opening the hood with the hood release.
If the 12-volt battery goes dead after you have set the security system alarm, the security alarm may go off once the 12-volt battery is recharged or replaced.
If this occurs, deactivate the security system alarm by unlocking a door using the key, remote transmitter, or keyless access system.
Panic Mode
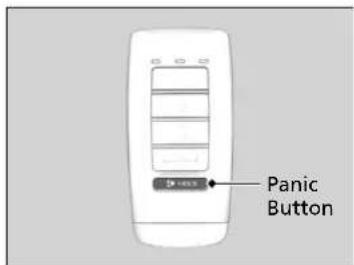
text_image
Panic Button■ The panic button on the remote transmitter
If you press the panic button for approximately one second, the following will occur for about 30 seconds:
• The horn sounds.
- Some exterior lights flash.
■ Canceling panic mode
- Press any button on the remote transmitter.
- Set the power mode to ON.
Opening and Closing the Windows
Opening/Closing the Power Windows
The power windows can be opened and closed when the power mode is in ON, using the switches on the doors.
The driver's side switches can be used to open and close all the windows. The power window lock button on the driver's side must be switched off (not pushed in, indicator off) to open and close the windows from anywhere other than the driver's seat.
When the power window lock button is pushed in, the indicator comes on and you can only operate the driver's window. Turn the power window lock button on if a child is in the vehicle.
Opening/Closing the Windows with Auto-Open/Close Function
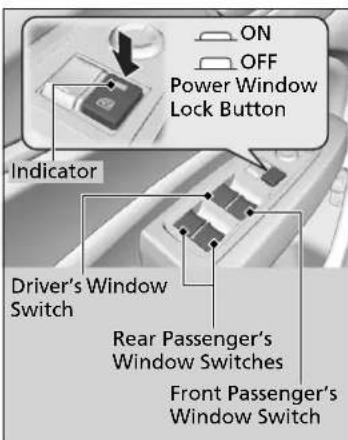
text_image
ON OFF Power Window Lock Button Indicator Driver's Window Switch Rear Passenger's Window Switches Front Passenger's Window Switch■ Manual operation
To open: Push the switch down lightly, and hold it until the desired position is reached.
To close: Pull the switch up lightly, and hold it until the desired position is reached.
■ Automatic operation
To open: Push the switch down firmly. To close: Pull the switch up firmly.
The window opens or closes completely. To stop the window at any time, push or pull the switch briefly.
Opening/Closing the Power Windows
WARNING
Closing a power window on someone's hands or fingers can cause serious injury.
Make sure your passengers are away from the windows before closing them.
The power windows can be operated for up to 10 minutes after you set the power mode to VEHICLE OFF (LOCK).
Opening either front door cancels this function.
Auto Reverse
If a power window senses resistance when closing automatically, it will stop closing and reverse direction.
The driver's window auto reverse function is disabled when you continuously pull up the switch.
The auto reverse function stops sensing when the window is almost closed to ensure that it fully closes.
■ Opening the Windows with the Remote
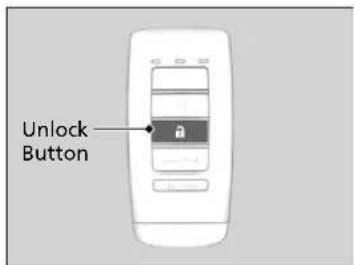
text_image
Unlock ButtonTo open: Press the unlock button, and then within 10 seconds, press it again and hold it.
If the windows stop midway, repeat the procedure.
■ Opening/Closing the Windows with the Key

text_image
Close OpenTo open: Unlock the driver's door with the key. Within 10 seconds of returning the key to the central position, turn the key in the unlock direction and hold it there.
To close: Lock the driver's door with the key. Within 10 seconds of returning the key to the central position, turn the key in the lock direction and hold it there.
Release the key to stop the windows at the desired position. If you want further adjustment, repeat the same operation.
Opening the Windows with the Remote
If you open the windows with the remote, the moonroof will open automatically along with them.
Opening/Closing the Windows with the Key
If you open/close the windows with the key, the moonroof will open/close automatically along with them.
Moonroof
Opening/Closing the Moonroof
You can operate the moonroof when the power mode is in ON. Use the switch in the front of the ceiling to open and close the moonroof.
Using the Moonroof Switch
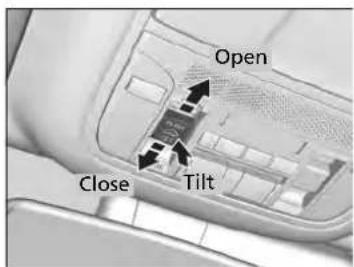
text_image
Open Close Tilt■ Automatic operation
To open: Pull the switch back firmly.
To close: Push the switch forward firmly.
The moonroof automatically opens or closes all the way. To stop the moonroof midway, pull or push the switch briefly.
■ Manual operation
To open: Pull the switch back lightly, and hold it until the desired position is reached.
To close: Push the switch forward lightly, and hold it until the desired position is reached.
■ Tilting the moonroof up
To tilt: Push on the center of the moonroof switch.
To close: Push the switch forward firmly, then release.
Moonroof
WARNING
Opening or closing the moonroof on someone's hands or fingers can cause serious injury.
Make sure all hands and fingers are clear of the moonroof before opening or closing it.
NOTICE
Opening the moonroof in below freezing temperature or when it is covered with snow or ice can damage the moonroof panel or motor.
The moonroof can be operated for up to 10 minutes after you set the power mode to VEHICLE OFF (LOCK).
Opening either front door cancels this function.
When resistance is detected, the auto reverse function causes the moonroof to change directions, then stop. Auto reverse stops sensing when the moonroof is almost closed to ensure that it fully closes. Make sure that all objects, including fingers, are clear of the moonroof.
You can use the remote transmitter or the key to operate the moonroof.
Opening the Windows with the Remote P. 169
Opening/Closing the Windows with the Key P. 169
Operating the Switches Around the Steering Wheel
POWER Button
■ Changing the Power Mode
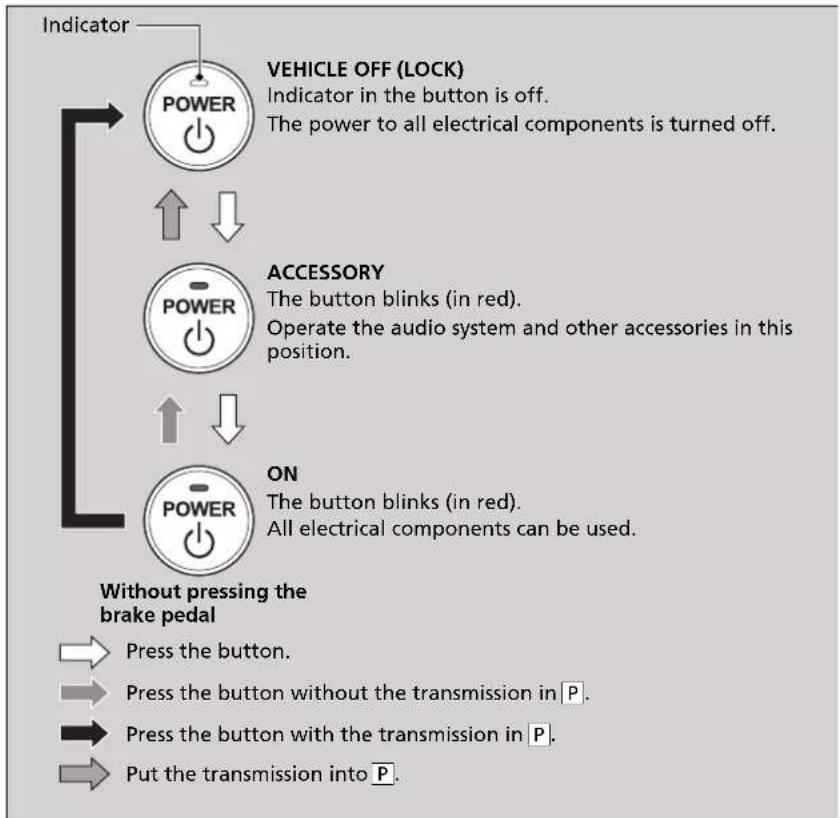
flowchart
graph TD
    A["Indicator"] --> B["POWER"]
    B --> C["VEHICLE OFF (LOCK)"]
    B --> D["ACCESSORY"]
    D --> E["POWER"]
    E --> F["ON"]
    F --> G["POWER"]
    G --> H["Without pressing the brake pedal"]

    B --> I["↑"]
    E --> J["↓"]

    style A fill:#f9f,stroke:#333
    style B fill:#ccf,stroke:#333
    style C fill:#cfc,stroke:#333
    style D fill:#fcc,stroke:#333
    style E fill:#cff,stroke:#333
    style F fill:#ffc,stroke:#333
    style G fill:#cfc,stroke:#333
    style H fill:#fcc,stroke:#333

    note1["Indicator in the button is off. The power to all electrical components is turned off."]:::note
    note2["The button blinks (in red). Operate the audio system and other accessories in this position."]:::note
    note3["The button blinks (in red). All electrical components can be used."]:::note
    note4["Press the button. Press the button without the transmission in P. Press the button with the transmission in P. Put the transmission into P."]:::note
Continued
POWER Button
POWER Button Operating Range
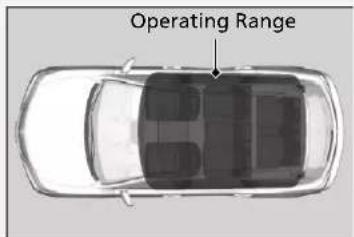
text_image
Operating RangeYou can start the power system when the keyless access remote is inside the vehicle.
The power system may also start if the keyless access remote is close to the door or window, even if it is outside the vehicle.
If the battery of the keyless access remote is getting low, the power system may not start when you press the POWER button. If the power system does not start, refer to the following link.
If the Keyless Access Remote Battery is Weak P. 636
Do not leave the power mode in ACCESSORY or ON when you get out.
Automatic Power Off
If you leave the vehicle for 30 to 60 minutes with the transmission in [P] and the power mode in ACCESSORY, the vehicle automatically goes into the mode to VEHICLE OFF (LOCK) to avoid draining the 12-volt battery.
Power Mode Reminder
If you open the driver's door when the power mode is set to ACCESSORY, a warning buzzer sounds.
■ Keyless Access Remote Reminder
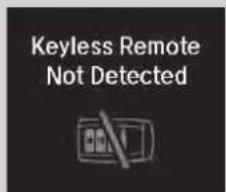
text_image
Keyless Remote Not DetectedWarning buzzers may sound from inside and/or outside the vehicle to remind you that the keyless access remote is out of the vehicle. If the buzzer continues even after the remote is put back inside, place it to be within its operational range.
■ When the power mode is in ON
If the keyless access remote is taken out of the vehicle, and all the doors are closed, a warning buzzer sounds from both inside and outside the vehicle. A warning message on the MID notifies the driver inside that the remote is outside of the vehicle.
■ When the power mode is in ACCESSORY
If the keyless access remote is taken out of the vehicle, and all the doors are closed, a warning buzzer sounds from outside the vehicle.
Keyless Access Remote Reminder
When the keyless access remote is within the system's operational range, and the driver's door is closed, the warning function cancels.
If the keyless access remote is taken out of the vehicle after the power system has been turned on, you can no longer change the POWER button mode or restart the power system. Always make sure if the remote is in your vehicle when you operate the POWER button.
Removing the keyless access remote from the vehicle through a window does not activate the warning buzzer.
Do not put the keyless access remote on the dashboard or in the glove box. It may cause the warning buzzer to go off. Under some other conditions that can prevent the vehicle from locating the remote, the warning buzzer may also go off even if the remote is within the system's operational range.
Turn Signals
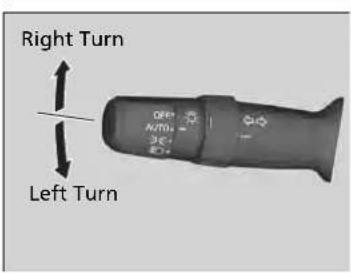
text_image
Right Turn Left TurnThe turn signals can be used when the power mode is in ON.
■ One-touch turn signal
When you lightly push up or down and release the turn signal lever, the exterior turn signals and turn signal indicator blink three times.
This feature can be used when signaling for a lane change.
Light Switches
■ Manual Operation
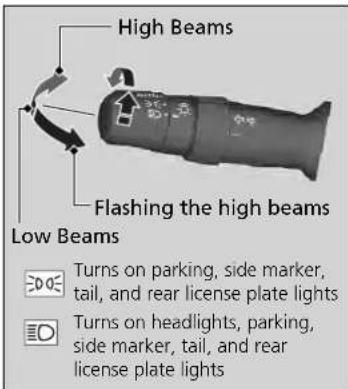
text_image
High Beams Flashing the high beams Low Beams Turns on parking, side marker, tail, and rear license plate lights Turns on headlights, parking, side marker, tail, and rear license plate lightsRotating the light switch turns the lights on and off, regardless of the power mode setting.
■ High beams
Push the lever forward until you hear a click.
■ Low beams
When in high beams, pull the lever back to return to low beams.
■ Flashing the high beams
Pull the lever back, and release it.
■ Lights off
Turn the lever to OFF either when:
• The transmission is in P.
• The parking brake is applied.
To turn the lights on again, turn the lever to OFF to cancel the lights off mode. Even if you do not cancel the lights off mode, the lights come on automatically when:
- The transmission is taken out of P and the parking brake is released.
• The vehicle starts to move.
>>Light Switches
If you leave the power mode in VEHICLE OFF (LOCK) while the lights are on, a chime sounds when the driver's door is opened.
When the lights are on, the lights on indicator in the instrument panel will be on.
→Lights On Indicator P. 96
Do not leave the lights on when the power system is off because it will cause the 12-volt battery to discharge.
Models without automatic headlight adjusting system
If you sense that the level of the headlights is abnormal, have the vehicle inspected by a dealer.
Models with automatic headlight adjusting system
Your vehicle is equipped with the automatic headlight adjusting system that automatically adjusts the vertical angle of the high/low beam headlights. If you find a significant change in the vertical angle of the headlights, there may be a problem with the system. Have your vehicle checked by a dealer.
Continued
Automatic Operation (automatic lighting control)
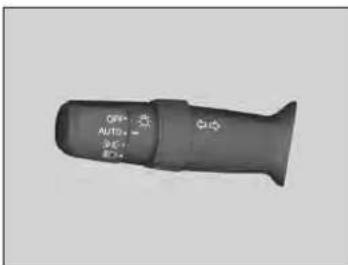
text_image
OFF AUTO ACAutomatic lighting control can be used when the power mode is in ON.
When the light switch is in AUTO, the headlights and other exterior lights will switch on and off automatically depending on the ambient brightness.
The headlights come on when you unlock a door in dark areas with the headlight switch in
AUTO
▶ Once you lock the door, the headlights will go off.
▶▶Automatic Operation (automatic lighting control)
We recommend that you turn on the lights manually when driving at night, in a dense fog, or in dark areas such as long tunnels or parking facilities.
The light sensor is in the location shown below.
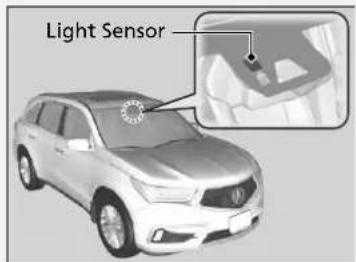
text_image
Light SensorU.S. models
You can adjust the auto light sensitivity as follows:
| Setting | The exterior lights come on when the ambient light is at |
| Max | Bright |
| High | |
| Mid | |
| Low | Dark |
| Min |
→ Customized Features P. 131, 362
Headlight Integration with Wiper
The headlights automatically come on when the wipers are used several times within a certain number of intervals with the headlight switch in AUTO.
The headlights automatically go off a few minutes later if the wipers are stopped.
■ Automatic Lighting Off Feature
The headlights, all other exterior lights, and the instrument panel lights turn off 15 seconds after you set the power mode to VEHICLE OFF (LOCK), take the remote with you, and close the driver's door.
If you set the power mode to VEHICLE OFF (LOCK) with the headlight switch on, but do not open the door, the lights turn off after 10 minutes (3 minutes, if the switch is in the AUTO position).
The lights turn on again when you unlock or open the driver's door. If you unlock the door, but do not open it within 15 seconds, the lights go off. If you open the driver's door, you will hear a lights on reminder chime.
Headlight Integration with Wiper
This feature activates while the headlights are off in AUTO.
The instrument panel brightness does not change when the headlights come on.
At dark ambient light levels, the automatic lighting control feature turns on the headlights, regardless of the number of wiper sweeps.
Automatic Lighting Off Feature
You can change the headlight auto off timer setting.
→ Customized Features P. 131, 362
▶▶ Operating the Switches Around the Steering Wheel▶ Fog Lights *
Fog Lights\*
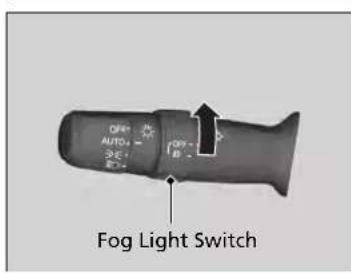
text_image
OFF AUTO E: B Fog Light SwitchWhen the low beam headlights are on, turn the fog light switch on to use the fog lights.
Daytime Running Lights
The daytime running lights come on when the following conditions have been met:
• The power mode is in ON.
• The headlight switch is in AUTO or EDO.
• The parking brake is released.
The lights remain on even if you set the parking brake. Setting the power mode to VEHICLE OFF (LOCK) will turn off the daytime running lights.
The daytime running lights are off once the headlight switch is turned on, or when the head light switch is in AUTO and it is getting darker outside.
Auto High-Beam
The front sensor camera detects the light sources ahead of the vehicle such as the lights of a preceding or oncoming vehicle, or street lights. When you are driving at night, the system automatically switches the headlights between low beam and high beam depending on the situation.
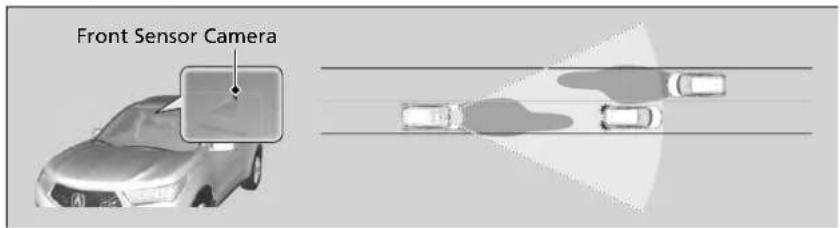
text_image
Front Sensor CameraHow to Use the Auto High-Beam
When all of the following conditions have been met, the auto high-beam indicator comes on and the auto high-beam is activated.
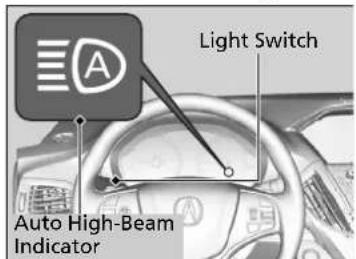
text_image
Light Switch Auto High-Beam Indicator• The power mode is in ON.
• The light switch is in AUTO.
• The lever is in the low beam position.
- The headlights have been automatically activated.
- It is dark outside the vehicle.
If the auto high-beam indicator does not come on even when all the conditions have been met, carry out the following procedure and the indicator will come on.
- Pull the lever toward you for flashing the high beams then release it while driving.
Auto High-Beam
The auto high-beam system does not always operate in every situation. This system is just for assisting the driver. Always observe your surroundings and switch the headlights between high beam and low beam manually if necessary.
If you find the timing of beam changes inconvenient for driving, change the headlight beams manually.
The range and the distance at which the camera can recognize varies depending on conditions surrounding your vehicle.
Regarding the handling of the camera mounted to the inside of the windshield, refer to the following.
→ Front Sensor Camera P. 475
For the auto high-beam to work properly:
- Do not place an object that reflects light on the dashboard.
- Keep the windshield around the camera clean.
- When cleaning the windshield, be careful not to apply the windshield cleanser to the camera lens
- Do not attach an object, sticker or film to the area around the camera.
- Do not touch the camera lens.
If the camera receives a strong impact, or repairing of the area near the camera is required, consult a dealer.
■ Automatic switching between high-beam and low-beam
When auto-high beam is active, the headlights switch between high beam and low beam based on the following conditions.
Switching to high beam: Switching to low beam:
All of the following conditions must be met before the high beams turn on.
- Your vehicle speed is 45 mph (72 km/h) or more.
- There are no preceding or oncoming vehicle with headlights or taillights turned on.
- There are few street lights on the road ahead.

One of the following conditions must be met before the low beams turn on.
- Your vehicle speed is 30 mph (48 km/h) or less.
- There is a preceding or oncoming vehicle with headlights or taillights turned on.
• There are many street lights on the road ahead.
■ Manual switching between high-beam and low-beam
If you want to manually switch the headlights between high beam and low beam, follow either of the procedures below. Note that when you do this, the auto high-beam indicator will turn off and the auto high-beam will be deactivated.
Using the lever:
Pull the lever toward you for flashing the high beams then release it within about one second while driving.
▶ To reactivate the auto high-beam, pull the lever toward you for flashing the high beams then release it while driving. The auto high-beam indicator will come on.
Using the light switch:
Turn the light switch to ☐
▶ To reactivate the auto high-beam, turn the light switch to AUTO when the lever is in the low beam position, the auto high-beam indicator will come on.
>>How to Use the Auto High-Beam
In the following cases, the auto high-beam system may not switch the headlights properly or the switching timing may be changed. In case of the automatic switching operation does not fit for your driving habits, please switch the headlights manually.
- The brightness of the lights from the preceding or oncoming vehicle is intense or poor.
- Visibility is poor due to the weather (rain, snow, fog, windshield frost, etc.).
- Surrounding light sources, such as street lights, electric billboards and traffic lights are illuminating the road ahead.
- The brightness level of the road ahead constantly changes.
• The road is bumpy or has many curves. - A vehicle suddenly appears in front of you, or a vehicle in front of you is not in the preceding or oncoming direction.
- Your vehicle is tilted with a heavy load in the rear.
- A traffic sign, mirror, or other reflective object ahead is reflecting strong light toward the vehicle.
- The oncoming vehicle frequently disappears under roadside trees or behind median barriers.
- The preceding or oncoming vehicle is a motorcycle, bicycle, mobility scooter, or other small vehicle.
The auto high-beam system keeps the headlight low beam when:
• Windshield wipers are operating.
• The camera has been detected a dense fog.
How to Turn Off the Auto High-Beam
You can turn the auto high-beam system off. If you want to turn the system off or on, set the power mode to ON, then carry out the following procedures while the vehicle is stationary.
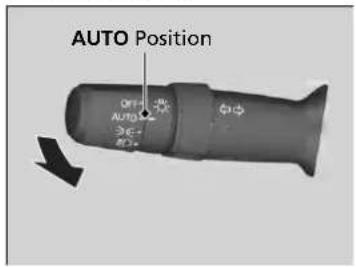
text_image
AUTO Position OFF AUTOTo turn the system off:
With the light switch is in AUTO, pull the lever toward you and hold it for at least 40 seconds. After the auto high-beam indicator light blinks twice, release the lever.
To turn the system on:
With the light switch is in AUTO, pull the lever toward you and hold it for at least 30 seconds. After the auto high-beam indicator light blinks once, release the lever.
>>How to Use the Auto High-Beam
If the Some Driver Assist Systems Cannot Operate: Camera Temperature Too High message appears:
- Use the climate control system to cool down the interior and, if necessary, also use defroster mode with the airflow directed toward the camera.
- Start driving the vehicle to lower the windshield temperature, which cools down the area around the camera.
If the Some Driver Assist Systems Cannot Operate: Clean Front Windshield message appears:
- Park your vehicle in a safe place, and clean the windshield. If the message does not disappear after you have cleaned the windshield and driven for a while, have your vehicle checked by a dealer.
>>How to Turn Off the Auto High-Beam
If you turn the auto high-beam system off, the system does not operate until you turn the system on.
Park in a safe place before turning the system off or on.
Wipers and Washers
Windshield Wipers/Washers
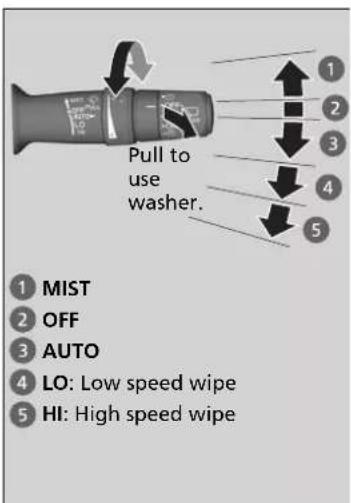
text_image
Pull to use washer. MIST OFF AUTO LO: Low speed wipe HI: High speed wipeThe windshield wipers and washers can be used when the power mode is in ON.
MIST
The wipers run at high speed until you release the lever.
■ Wiper switch (OFF, AUTO, LO, HI)
Move the lever up or down to change the wiper settings.
■ Washer
Sprays while you pull the lever toward you. When you release the lever for more than one second, the spray stops, the wipers sweep two or three more times to clear the windshield, then stop.
Wipers and Washers
NOTICE
Do not use the wipers when the windshield is dry. The windshield will get scratched, or the rubber blades will get damaged.
NOTICE
Turn the washers off if no washer fluid comes out. The pump may get damaged.
The wiper motor may stop motor operation temporarily to prevent an overload. Wiper operation will return to normal within a few minutes, once the circuit has returned to normal.
NOTICE
In cold weather, the blades may freeze to the windshield.
Operating the wipers in this condition may damage the wipers. Use the defroster or heated windshield* to warm the windshield, then turn the wipers on.
If the wipers stop operating due to an obstacle such as the build-up of snow, park the vehicle in a safe place.
Rotate the wiper switch to OFF, and set the power mode to ACCESSORY or VEHICLE OFF (LOCK), then remove the obstacle.
■ Automatic Intermittent Wipers
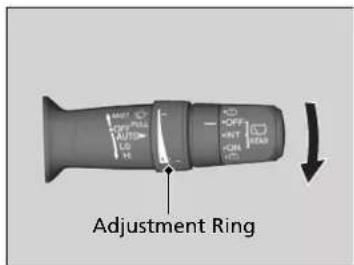
text_image
Adjustment RingWhen you push the lever down to AUTO, the windshield wipers sweep once, and go into the automatic mode.
The wipers operate intermittently, at low speed, or at high speed and stops in accordance with the amount of rainfall the rainfall sensor detects.
■ Auto sensitivity adjustment
When the wiper function is set to AUTO, you can adjust the sensitivity of the rainfall sensor (using the adjustment ring) so that wipers will operate in accordance with your preference.
Sensor sensitivity
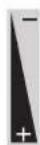
Low sensitivity
High sensitivity
>>Automatic Intermittent Wipers
The rainfall sensor is in the location shown below.
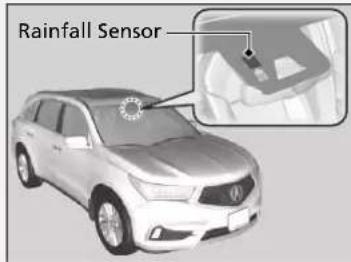
text_image
Rainfall SensorNOTICE
AUTO should always be turned OFF before the following situations in order to prevent severe damage to the wiper system:
- Cleaning the windshield
- Driving through a car wash
- No rain present
Continued
Rear Wiper/Washer
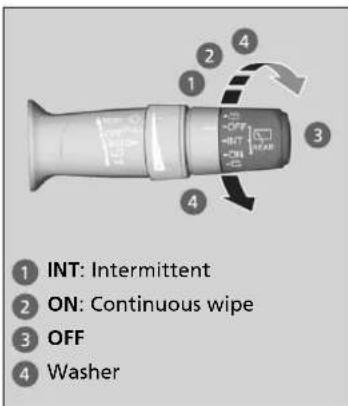
text_image
INT: Intermittent ON: Continuous wipe OFF WasherThe rear wiper and washer can be used when the power mode is in ON.
■ Wiper switch (OFF, INT, ON)
Change the wiper switch setting according to the amount of rain.
■ Washer ( )
Sprays on the rear window while you rotate the switch to this position.
Hold it to activate the rear wiper and to spray the washer. Once released, the washer spray will stop and the rear wiper will return to its selected switch setting after a few sweeps.
■ Operating in reverse
When you select the transmission to R with the windshield wipers activated, the rear wiper operates automatically as follows even if its switch is off.
Windshield Wiper Operation Rear Wiper Operation
| Intermittent Intermittent | |
| Low speed wipe | Continuous |
| High speed wipe | |
Canadian models
Headlight Washers
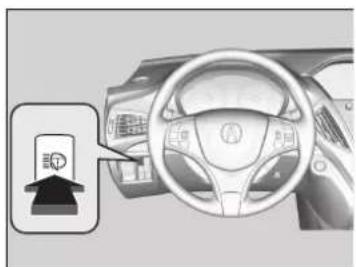
natural_image
Interior view of a car dashboard and steering wheel, showing steering wheel and dashboard (no text or symbols visible)Turn the headlights on and press the headlight washer button to operate. The headlight washers also operate when you turn the windshield washers for the first time after the power mode is set to ON.
Headlight Washers
The headlight washers use the same fluid reservoir as the windshield washers.
Brightness Control
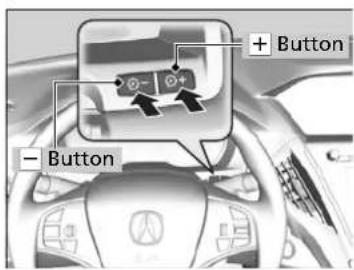
text_image
+ Button - ButtonWhen the power mode is in ON, you can use the + or - button to adjust instrument panel brightness.
Brighten: Press the + button.
Dim: Press the — button.
You will hear a beep when the brightness reaches minimum or maximum. Several seconds after adjusting the brightness, you will be returned to the previous display.
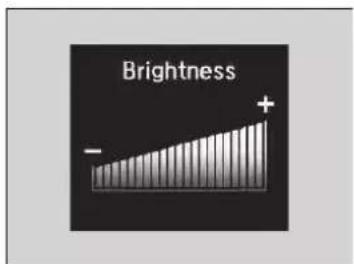
bar
Brightness | Category | Value | |---|---| | Negative | -1 | | Positive | + |■ Brightness level indicator
The brightness level is shown on the MID while you are adjusting it.
Brightness Control
The brightness of the instrument panel will be reduced when the following conditions:
• The power mode is in ON.
- The light switch is in any position other than OFF and it is dark outside.
To cancel the reduced instrument panel brightness when the exterior lights are on, press the + button until the brightness display is up to max, the beeper sounds.
The brightness can be set differently for when the exterior lights are on, and when they are off.
Rear Defogger/Heated Door Mirror Button
Press the rear defogger and heated door mirror button to defog the rear window and mirrors when the power mode is in ON.
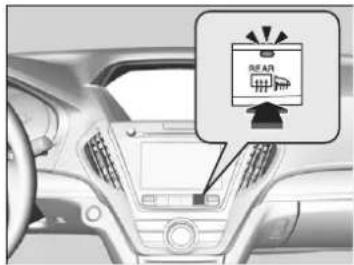
text_image
BEARThe rear defogger and heated door mirrors automatically switch off after 10-30 minutes depending on the outside temperature.
Heated Windshield Button\*

text_image
Diagram showing car steering wheel with warning icon and control panel, likely from a vehicle safety or emergency response system.Press the heated windshield button to deice the windshield at the wiper park area and along the driver side edge of the windshield when the power mode is in ON. The heated windshield will automatically switch off after 15 minutes.
* Not available on all models
Rear Defogger/Heated Door Mirror Button
This system consumes a lot of power, so turn it off when the window has been defogged. Also, do not use the system for a long time while the power system is stopped. This may weaken the 12-volt battery, making it difficult to turn the power system on.
When the power mode is set to ON and the outside temperature is below 41^ F ( 5^ C), the heated door mirror may automatically activate for 10 minutes.
Heated Windshield Button \*
This system consumes a lot of power, so turn it off when the window has been deiced. Also, do not use the system for a long period when the power system is stopped. This may weaken the 12-volt battery, making it difficult to turn the power system on.
When the power mode is set to ON and the outside temperature is below 39^ F ( 4^ C), the heated windshield may automatically activate for up to 15 minutes.
Driving Position Memory System
You can store two driver's seat (except for power lumbar), steering wheel and door mirror positions with the driving position memory system.
When you unlock and open the driver's door with a remote transmitter, or keyless access system, door mirrors adjust to one of the two preset positions and the seat adjusts to retracted positions of one of the two preset positions automatically.
The steering wheel and the seat will move to the stored position when you set the power mode to ACCESSORY.
When you enter the vehicle, the MID briefly shows you which remote transmitter you used to unlock the vehicle.
- DRIVER 1 transmitter is linked to memory button 1.
- DRIVER 2 transmitter is linked to memory button 2.
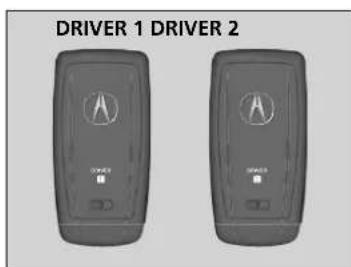
text_image
DRIVER 1 DRIVER 2 DRIVER DRIVER DRIVERThe driver's seat moves rearward and steering wheel fully up depending on the set seating position once you
- Stop the vehicle.
- Put the transmission in P.
- Turn the power system off.
- Then open the driver's door.
Once the power mode is in the ACCESSORY position, the driver's seat and steering wheel moves to the DRIVER 1 or 2 preset position.
>>Driving Position Memory System
Using the information screen or MID, you can disable the automatic seat, steering wheel and door mirrors adjustment function.
→ Customized Features P. 131, 362
The driver's seat easy exit feature can be turned ON/OFF.
→ Customized Features P. 131, 362
System Operation
The system will not operate if:
• The vehicle speed is above 3 mph (5 km/h).
- Either memory position button is pressed while the seat or steering wheel is in motion.
- The seat or steering wheel position is adjusted while in operation.
- The memory 1 or 2 position is set fully to the rear.
Storing a Position in Memory
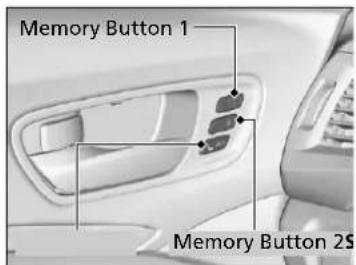
text_image
Memory Button 1 Memory Button 2S- Set the power mode to ON. Adjust the driver's seat, the steering wheel and the door mirrors to the desired position.
- Press the SET button.
▶You will hear the beeper, and the memory button indicator light will blink.
- Press and hold memory button 1 or 2 within five seconds of pressing the SET button.
▶Once the seat, the steering wheel and the outside mirror positions have been memorized, the indicator light on the button you pressed stays on and you will hear the double-beep.
Recalling the Stored Position
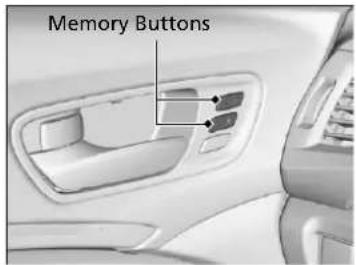
text_image
Memory Buttons- Put the transmission into P.
- Apply the parking brake.
- Press a memory button (1 or 2).
▶You will hear the beeper, and the indicator light will blink.
The seat, the steering wheel and the door mirrors will automatically move to the memorized positions. When it has finished moving, you will hear the beeper, and the indicator light stays on.
Storing a Position in Memory
After you press the SET button, the storing operation will be canceled when:
- You do not press the memory button within five seconds.
- You readjust the seat, the steering wheel or the outside mirror position before the double-beep.
- You set the power mode to any position except ON.
Recalling the Stored Position
The seat, the steering wheel and the door mirrors will stop moving if you:
- Press the SET button or memory button 1 or 2.
- Adjust the seat position, door mirrors, or steering wheel.
- Put the transmission into a position other than .
Adjusting the Steering Wheel
The steering wheel height and distance from your body can be adjusted so that you can comfortably grip the steering wheel in an appropriate driving posture.
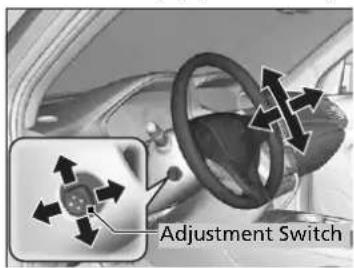
text_image
Adjustment SwitchPush and hold the adjustment switch to move the steering wheel in, out, up or down.
▶Make sure you can see the instrument panel gauges and indicators.
Adjusting the Steering Wheel
WARNING
Adjusting the steering wheel position while driving may cause you to lose control of the vehicle and be seriously injured in a crash.
Adjust the steering wheel only when the vehicle is stopped.
Adjusting the Mirrors
Interior Rearview Mirror
Adjust the angle of the rearview mirror when you are sitting in the correct driving position.
■ Automatic Dimming Rearview Mirror and Power Door Mirrors\*
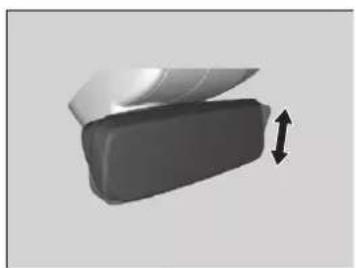
natural_image
3D rendering of a rectangular object with an arrow indicating rotation or movement (no text or symbols)When you are driving after dark, the automatic dimming rearview mirror and power door mirrors' reduce the glare from headlights behind you, based on inputs from the mirror sensor. This feature is always active.
* Not available on all models
Adjusting the Mirrors
Keep the inside and outside mirrors clean and adjusted for best visibility.
Adjust the mirrors before you start driving.
Front Seats P. 194
Automatic Dimming Rearview Mirror and Power Door Mirrors \*
The auto dimming function cancels when the transmission is in [R] .
Power Door Mirrors
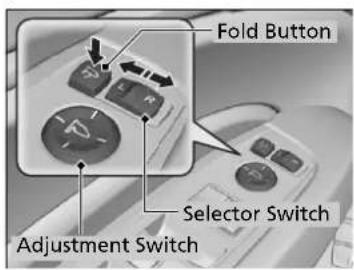
text_image
Fold Button Selector Switch Adjustment SwitchYou can adjust the door mirrors when the power mode is set to ON.
■ Mirror position adjustment
L/R selector switch: Select the left or right mirror. After adjusting the mirror, return the switch to the center position.
Mirror position adjustment switch: Press the switch left, right, up, or down to move the mirror.
Press the fold button to fold the door mirrors.
Reverse Tilt Door Mirror
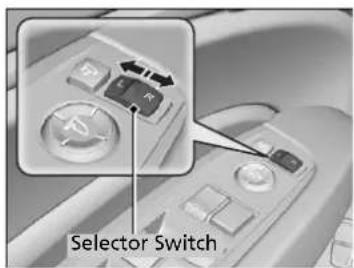
text_image
Selector SwitchIf activated, either side door mirror automatically tilts downward when you put the transmission into R; this improves close-in visibility on the selected side of the vehicle when backing up. The mirror automatically returns to its original position when you take the transmission out of R.
To activate this feature, set the power mode to ON and slide the selector switch to the left or right side.
Automatic Folding Door Mirror Function
■ Folding the door mirrors
Lock all doors from outside the vehicle.
▶The mirrors start folding automatically.
→ Locking and Unlocking the Doors P. 143
■ Unfolding the door mirrors
Unlock the driver's or all doors from outside the vehicle.
The mirrors start unfolding automatically.
Locking and Unlocking the Doors P. 143
>>Automatic Folding Door Mirror Function
Door mirrors will not unfold automatically if fold button is pressed.
You can turn the automatic folding door mirror function on and off.
Customized Features P. 131, 362
Door mirrors will not fold automatically when locking from inside the vehicle using lock tab or master door lock switch.
Adjusting the Seats
Front Seats
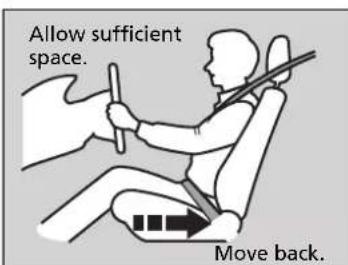
text_image
Allow sufficient space. Move back.Adjust the driver's seat as far back as possible while allowing you to maintain full control of the vehicle. You should be able to sit upright, well back in the seat and be able to adequately press the pedals without leaning forward, and grip the steering wheel comfortably. The passenger's seat should be adjusted in a similar manner, so that it is as far back from the front airbag in the dashboard as possible.
Adjusting the Seat Positions
■ Adjusting the front power seats
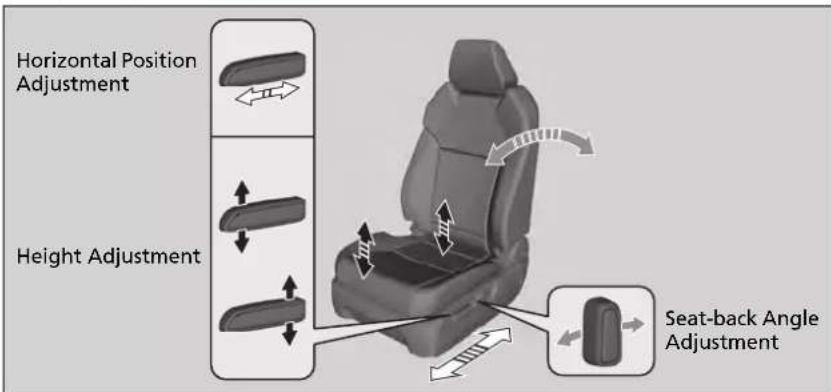
text_image
Horizontal Position Adjustment Height Adjustment Seat-back Angle AdjustmentAdjusting the Seats
WARNING
Sitting too close to a front airbag can result in serious injury or death if the front airbags inflate.
Always sit as far back from the front airbags as possible while maintaining control of the vehicle.
The National Highway Traffic Safety Administration and Transport Canada recommend that drivers allow at least 10 inches (25 cm) between the center of the steering wheel and the chest.
Always make seat adjustments before driving.
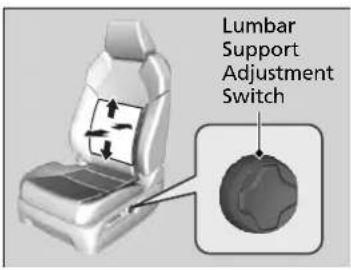
text_image
Lumbar Support Adjustment Switch■ Lumbar Support Adjustment Switch
Press the top: To move the lumbar support up.
Press the bottom: To move the lumbar support down.
Press the front: To increase the entire lumbar support.
Press the rear: To decrease the entire lumbar support.
Adjusting the Seat-Backs
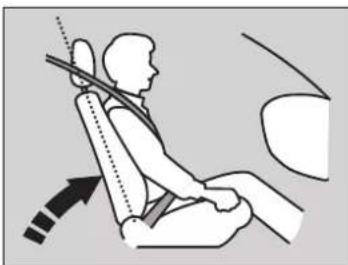
natural_image
Illustration of a person seated in a car seat using a medical device, with no visible text or symbols.Adjust the driver's seat-back to a comfortable, upright position, leaving ample space between your chest and the airbag cover in the center of the steering wheel.
The front seat passenger should also adjust their seat-back to a comfortable, upright position.
Reclining a seat-back so that the shoulder part of the belt no longer rests against the occupant's chest reduces the protective capability of the belt. It also increases the chance of sliding under the belt in a crash and being seriously injured. The farther a seat-back is reclined, the greater the risk of injury.
Adjusting the Seat-Backs
WARNING
Reclining the seat-back too far can result in serious injury or death in a crash.
Adjust the seat-back to an upright position, and sit well back in the seat.
Do not put a cushion, or other object, between the seat-back and your back. Doing so may interfere with proper seat belt or airbag operation.
If you cannot get far enough away from the steering wheel and still reach the controls, we recommend that you investigate whether some type of adaptive equipment may help.
Second Row Seats
■ Adjusting the Seat Positions
Models with bench seat
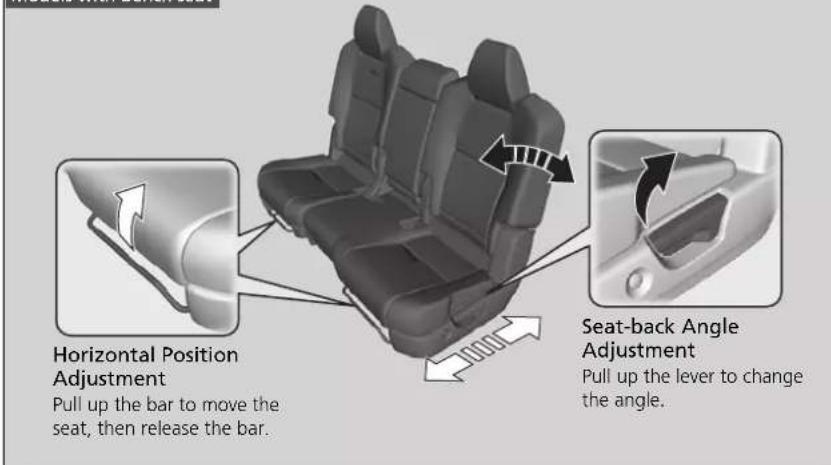
text_image
Horizontal Position Adjustment Pull up the bar to move the seat, then release the bar. Seat-back Angle Adjustment Pull up the lever to change the angle.Second Row Seats
WARNING
An unsecured seat or seat-back can move out of position or collapse without warning if there is sudden acceleration or stop or in a crash.
A seat or seat-back that suddenly moves or collapses can result in severe injury or death.
Always make sure all seats and seat-backs are securely locked into position before driving.
Once a seat is adjusted correctly, rock it back and forth to make sure it is locked in position.
Continued
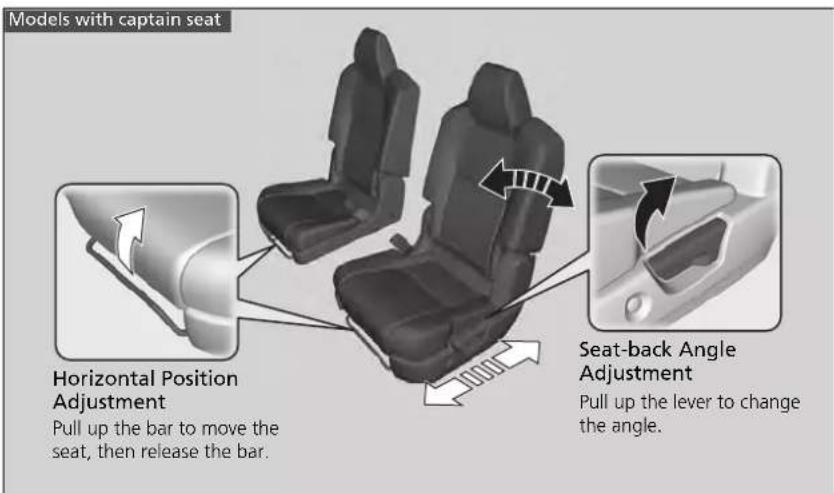
text_image
Models with captain seat Horizontal Position Adjustment Pull up the bar to move the seat, then release the bar. Seat-back Angle Adjustment Pull up the lever to change the angle.Third Row Seat Access
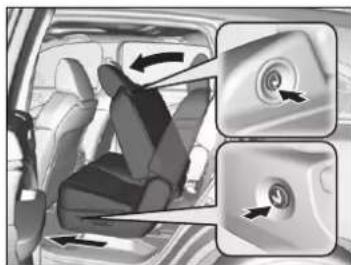
natural_image
Interior view of a car showing seat, steering wheel, and gear shift icons (no text or symbols)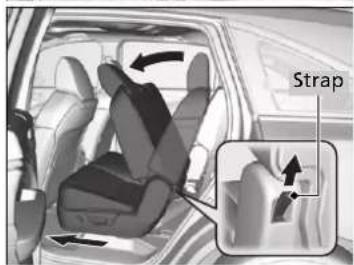
text_image
StrapPressing the button on the seat-back, or seat cushion tilts the second row outer seat's seat-back forward.
▶The whole seat slides forward.
Pulling up on the strap also tilts the seat-back forward.
Third Row Seat Access
The button is disabled when the vehicle is moving.
When you enter the third row seat, be careful not to trip over the second row seat belt.
Continued
Folding Down the Second Row Seat
Separately fold down the left and right halves of the second row seat to make room for cargo.
Models with bench seat
- Store the center seat belt first. Insert the latch plate into the slot on the side of the anchor buckle.
- Retract the seat belt into the holder on the ceiling.
Seat Belt with Detachable Anchor P. 44
- Lower the center head restraint to its lowest position. Put the armrest back into the seat-back.
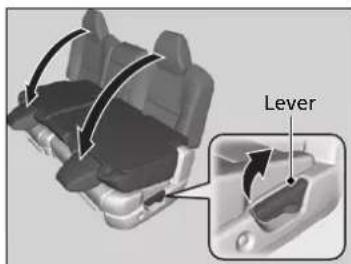
text_image
LeverAll Models
- Pull up on the seat-back angle adjustment lever.
To return the seat to the original position, pull up the seat-back in the upright position.
Folding Down the Second Row Seat
Make sure that the folded seat-back does not press against the front passenger seat, as this can cause the weight sensors in the front passenger seat to work improperly.
→ Passenger Front Airbag Off Indicator P. 60
The front seats must be far enough forward so they do not interfere with the second row seats as they fold down.
To lock the seat-back upright, push it backwards until it locks.
Make sure the seat-back, head restraints and seat cushion are securely latched back into place before driving. Also, make sure all rear shoulder belts are positioned in front of the seat-back.
Models with bench seat
Make sure the center shoulder belt is re-positioned in the holding slot.
Head Restraints
Your vehicle is equipped with head restraints in all seating positions.
■ Adjusting the Front and Second Row Outer Head Restraint Positions
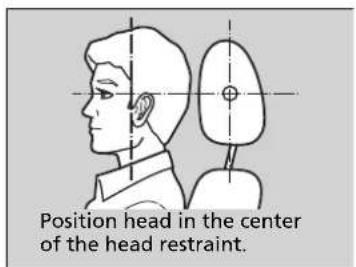
text_image
Position head in the center of the head restraint.Head restraints are most effective for protection against whiplash and other rear-impact crash injuries when the center of the back of the occupant's head rests against the center of the restraint. The tops of the occupant's ears should be level with the center height of the restraint.
Head Restraints
WARNING
Improperly positioning head restraints reduces their effectiveness and increases the likelihood of serious injury in a crash.
Make sure head restraints are in place and positioned properly before driving.
In order for the head restraint system to work properly:
- Do not hang any items on the head restraints, or from the restraint legs.
- Do not place any objects between an occupant and the seat-back.
• Install each restraint in its proper location.
Continued
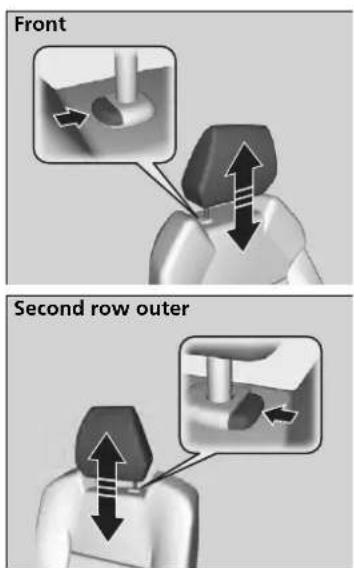
text_image
Front Second row outerTo raise the head restraint: Pull it upward. To lower the head restraint: Push it down while pressing the release button.
■ Changing the Second Row Center Seat Head Restraint Position\*

natural_image
Interior view of a car showing the rear seat and dashboard with directional arrows indicating movement (no text or symbols)A passenger sitting in the second row center seating position should adjust the height of their head restraint to an appropriate position before the vehicle begins moving.
To raise the head restraint:
Pull it upward.
To lower the head restraint:
Push it down while pressing the release button.
■ Removing and Reinstalling the Head Restraints
Front and second row head restraints
Head restraints can be removed for cleaning or repair.
To remove a head restraint:
Pull the restraint up as far as it will go. Then push the release button, and pull the restraint up and out.
To reinstall a head restraint:
Insert the legs back in place, then adjust the head restraint to an appropriate height while pressing the release button. Pull up on the restraint to make sure it is locked in position.
Removing and Reinstalling the Head Restraints
WARNING
Failure to reinstall, or correctly reinstall, the head restraints can result in severe injury during a crash.
Always replace the head restraints before driving.
Folding Down the Third Row Head Restraint
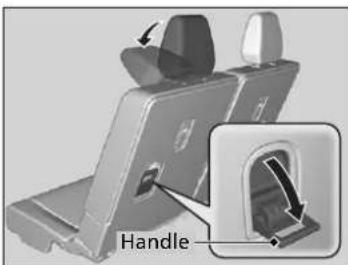
text_image
HandleA passenger in the third row seating position should put the head restraint in the upright position before the vehicle begins moving.
To fold down the head restraint:
Pull the handle.
To put the head restraint back in the upright position:
Pull up the head restraint and push rearward until it latches.
Maintain a Proper Sitting Position
After all occupants have adjusted their seats and head restraints, and put on their seat belts, it is very important that they continue to sit upright, well back in their seats, with their feet on the floor until the vehicle is safely parked and the power system is off.
Sitting improperly can increase the chance of injury during a crash. For example, if an occupant slouches, lies down, turns sideways, sits forward, leans forward or sideways, or puts one or both feet up, the chance of injury during a crash is greatly increased.
In addition, an occupant who is out of position in the front seat can be seriously or fatally injured in a crash by striking interior parts of the vehicle or being struck by an inflating front airbag.
Maintain a Proper Sitting Position
WARNING
Sitting improperly or out of position can result in serious injury or death in a crash.
Always sit upright, well back in the seat, with your feet on the floor.
Third Row Seats
Folding Down the Third Row Seat
Separately fold down the left and right halves of the third row seat to make room for cargo.
■ To fold down the seat
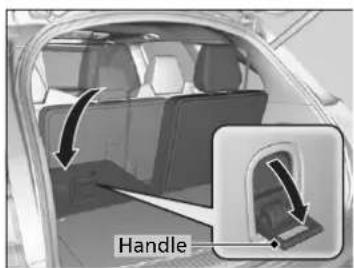
text_image
Handle- Pull the handle on the seat-back fully. ▶The head restraint tilts downward.
- Push the seat-back forward while pulling the handle.
■ To return the seat to the original position
- Pull the seat-back up with the handle pulled.
- Push the head restraint up to its original position.
Folding Down the Third Row Seat
Make sure all items in the cargo area or items extending to the third row seats are properly secured. Loose items can fly forward if you have to brake hard.
To return the seat to the original position
Make sure the seat-back and head restraints are securely latched back into place before driving.
Armrest
Using the Front Seat Armrest
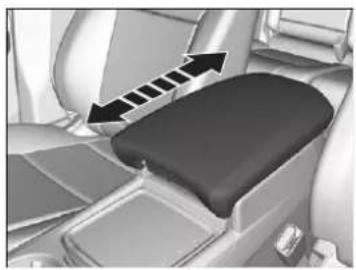
natural_image
Interior view of a car seatbelt with directional arrows indicating movement or force (no text or symbols)The console lid can be used as an armrest.
To adjust:
Slide the armrest to a desired position.
Continued
Using the Rear Seat Armrest
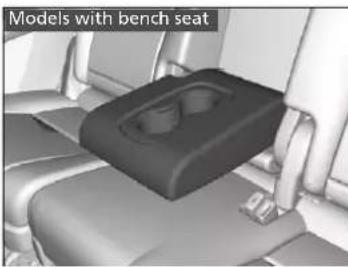
natural_image
3D model of a bench seat with visible mounting bracket and side arm (no text or symbols)Pull down the armrest in the center backrest.
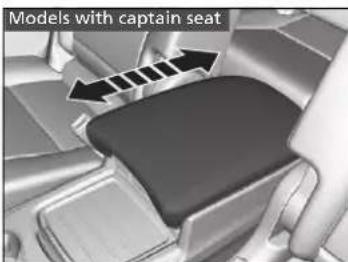
text_image
Models with captain seatThe console lid can be used as an armrest.
To adjust:
Slide the armrest to a desired position.
Interior Lights/Interior Convenience Items
Interior Lights
Interior Light Switches
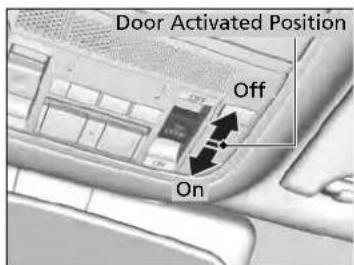
text_image
Door Activated Position Off OnON
The interior lights come on regardless of whether the tailgate and doors are open or closed.
■ Door activated
The interior lights come on in the following situations:
- When the tailgate or any of the doors are opened.
- You unlock the driver's door.
- When the power mode is set to VEHICLE OFF (LOCK).
OFF
The interior lights remain off regardless of whether the tailgate or any doors are open or closed.
Interior Light Switches
In the door activated position, the interior lights fade out and go off about 30 seconds after the doors are closed.
The lights go off after about 30 seconds in the following situations:
- When you unlock the driver's door but do not open it.
- When you set the power mode to VEHICLE OFF (LOCK) but do not open a door.
You can change the interior lights dimming time.
→ Customized Features P. 131, 362
The interior lights go off immediately in the following situations:
- When you lock the driver's door.
- When you close the driver's door in ACCESSORY mode.
- When you set the power mode to ON.
To avoid draining the 12-volt battery, do not leave the interior light on for an extended length of time when the power system is off.
If you leave any of the tailgate or doors open in VEHICLE OFF (LOCK) mode, the interior lights go off after about 15 minutes.
Continued
Map Lights
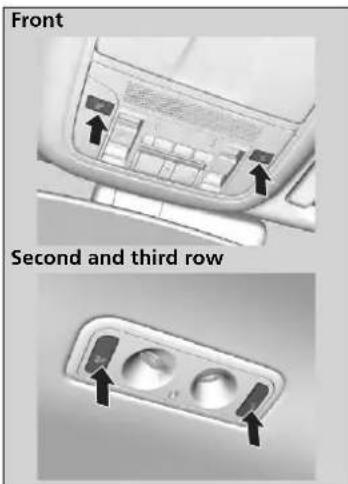
text_image
Front Second and third rowFront
The map lights can be turned on and off by pressing the map light) button.
■ Second and third row
The map lights can be turned on and off by pressing the X map light) button when the front interior light switch is in the door activated position.
Cargo Area Lights
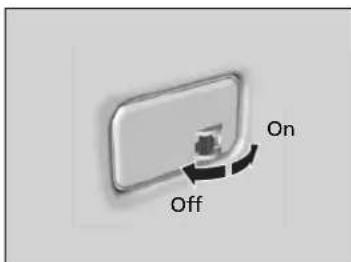
text_image
On Off■ ON
The light comes on when you open the tailgate, and goes off when closed.
OFF
The light stays off with or without opening the tailgate.
>>Map Lights
When the interior light switch is in the door activated position and any door is open, the map light will not go off when you press the button.
Interior Convenience Items
Glove Box
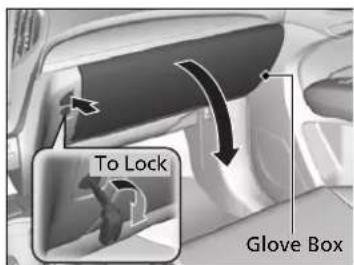
text_image
To Lock Glove BoxPress the button to open the glove box. You can lock the glove box with the built-in key.
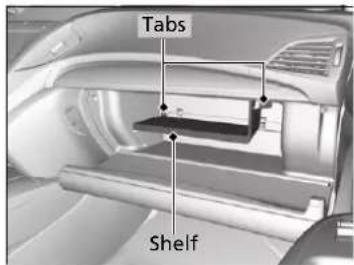
text_image
Tabs Shelf■ Removable shelf
The shelf in the glove box is detachable. To remove it, disengage the tabs.
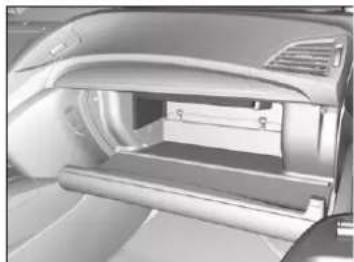
natural_image
Interior view of a car showing the intake manifold and side panel (no text or symbols visible)The removed shelf can be stored upside down in the glove box.
Glove Box
WARNING
An open glove box can cause serious injury to your passenger in a crash, even if the passenger is wearing the seat belt.
Always keep the glove box closed while driving.
Continued
Front and Rear\* Console Compartment
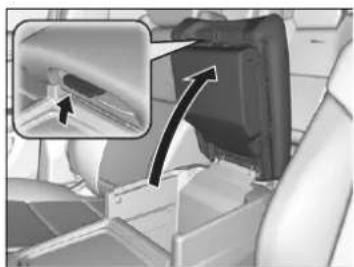
natural_image
Interior view of a vehicle showing a mechanical component with an inset close-up highlighting a component (no text or symbols visible)Pull the passenger's side handle to open the console compartment.
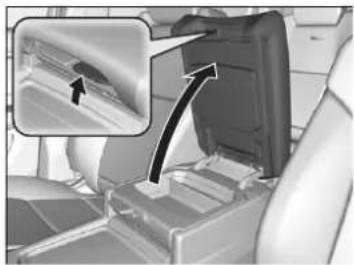
natural_image
Interior view of a computer monitor with an open screen showing a scroll, and an inset magnified view highlighting a scroll (no text or symbols visible)Pull the driver's side handle to open the utility tray in the console lid.
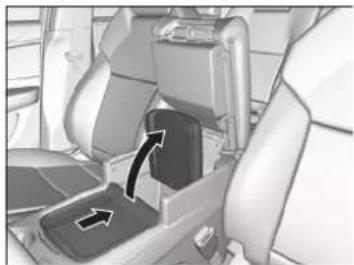
natural_image
Interior view of a car seatbelt with directional arrows indicating movement (no text or symbols)■ Console Tray
Slide or lift the tray when you use the console compartment.
▶To lift this tray, slide it rearward, then pull it up.
Center Pocket
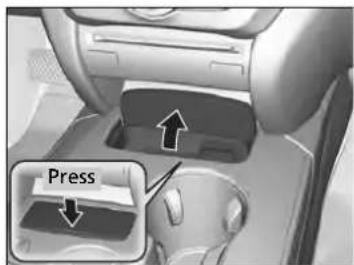
text_image
PressPress the raised detent to open the lid. To close the lid, push it down until it latches.
■ Under-floor Storage Area
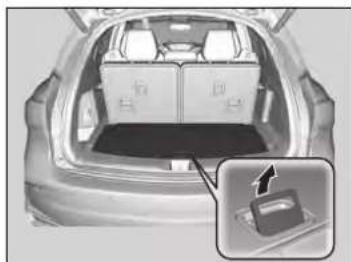
natural_image
Top-down view of a car showing front seats and rear seats, with an inset close-up highlighting a component (no text or symbols visible)Pull the handle to open the cargo floor lid.
Beverage Holders
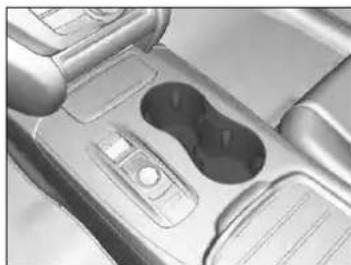
natural_image
Close-up of a car interior showing dashboard, seatbelt, and control panel (no visible text or symbols)■ Front seat beverage holders
Are located in the console between the front seats.
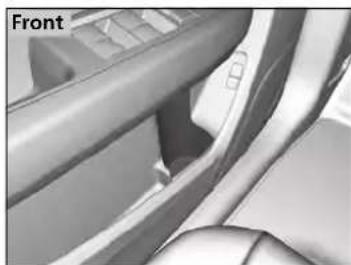
natural_image
Close-up of a car interior showing the front side of the seat and dashboard (no text or symbols visible)■ Door side beverage holders
Are located on the both of the front and rear door side pockets.
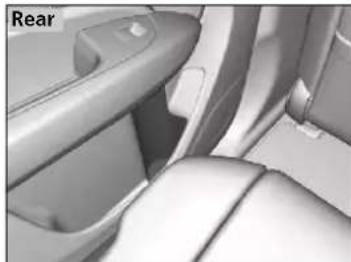
natural_image
Interior view of a car seatbelt and rearview mirror (no text or symbols visible)>> Beverage Holders
NOTICE
Spilled liquids can damage the upholstery, carpeting, and electrical components in the interior.
Be careful when you are using the beverage holders. Hot liquid can scald you.
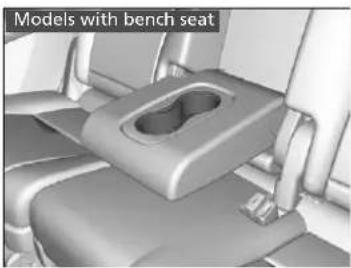
natural_image
3D model of a vehicle seat with a highlighted vent, no visible text or symbols■ Second row seat beverage holders
Fold the armrest down to use the rear seat beverage holders.
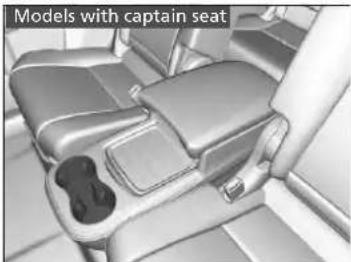
natural_image
Interior view of a car seatbelt with visible seat covers and dashboard (no text or symbols)Are located in the console between the second row seats.
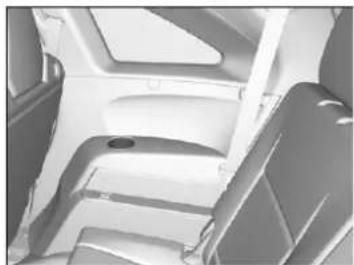
natural_image
Interior view of a vehicle showing seats and structural brackets (no visible text or symbols)■ Third row seat beverage holders
Continued
Accessory Power Sockets
The accessory power sockets can be used when the power mode is in ACCESSORY or ON.
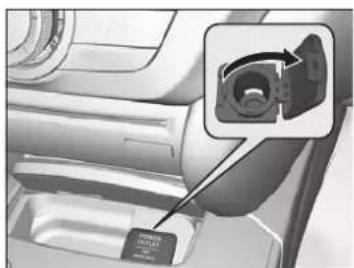
natural_image
Close-up of a mechanical component with an inset showing a close-up of a cylindrical component (no visible text or symbols)■ Accessory power socket (center pocket) Open the lid and the cover to use it.
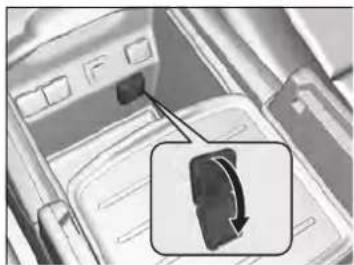
natural_image
Close-up of a mechanical component with a button and arrow indicator (no text or symbols)■ Accessory power socket (front console compartment)* Pull the handle and open the cover to use it.
Accessory Power Sockets
NOTICE
Do not insert an automotive type cigarette lighter element. This can overheat the power socket.
The accessory power sockets are designed to supply power for 12-volt DC accessories that are rated 180 watts (15 amps) or less.
To prevent 12-volt battery drain, only use the power socket with the power system on.
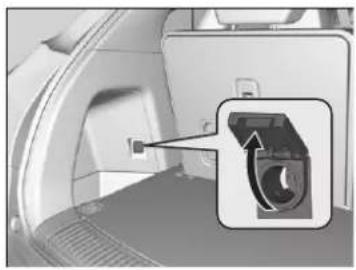
natural_image
Medical scan image showing a device with an inset close-up of internal components (no visible text or symbols)■ Accessory power socket (cargo area)
Open the cover to use it.
Canadian models
AC Power Outlet
The AC power outlet can be used when the power system is on.
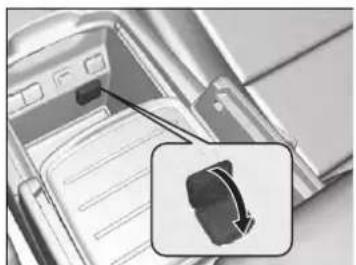
natural_image
Close-up of a smartwatch with a magnified inset showing the device (no visible text or symbols)Open the cover to use it. Plug in the appliance slightly, turn it 90° clockwise, then push it all the way.
AC Power Outlet
NOTICE
Do not use the AC power outlet for electric appliances that require high initial peak wattage, such as cathode-ray tube type televisions, refrigerators, electric pumps, etc. It is not suitable for devices that process precise data, such as medical equipment, and that require an extremely stable power supply, such as microcomputer-controlled electric blankets, touch sensor lamps, etc.
The AC power outlet is designed to supply power for up to 115 volt appliances that are rated 150 watts or less.
Continued use of any electric appliance/device exceeding these ratings may result in damage to the appliance/device.
Coat Hooks
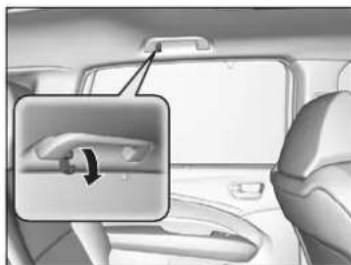
natural_image
Interior view of a car showing the side panel with a highlighted button and arrow (no text or symbols)There is a coat hook on the rear grab handle of both sides. Pull it down to use it.
Tie-down Anchors
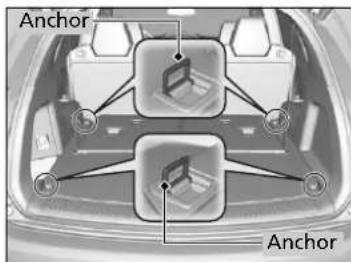
text_image
Anchor AnchorThe tie-down anchors on the cargo area floor can be used to install a net for securing items.
Coat Hooks
The coat hooks are not designed for large or heavy items.
Tie-down Anchors
Do not let anyone access items in the cargo area while driving. Loose items can cause injury if you have to brake hard.
Sunglasses Holder
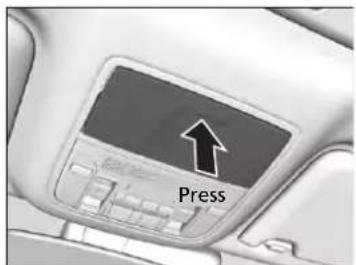
text_image
PressTo open the sunglasses holder, press and release the indent. To close, press it again until it latches.
You can store eyeglasses and other small items in this holder.
Heated Steering Wheel\*
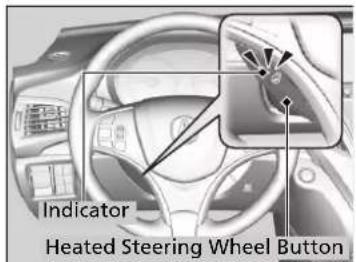
text_image
Indicator Heated Steering Wheel ButtonThe power mode must be in ON to use the heated steering wheel.
Press the button on the left side of the steering wheel.
When a comfortable temperature is reached, press the button again to turn it off.
The heated steering wheel is turned off every time you start the power system, even if you turned it on the last time you drove the vehicle.
Sunglasses Holder
Keep the holder closed while driving except when accessing stored items.
Heated Steering Wheel \*
Do not use the heated steering wheel continuously when the power system is off. Under such conditions, the 12-volt battery may be weakened, making the power system difficult to start.
* Not available on all models
Continued
Front Seat Heaters and Seat Ventilation\*
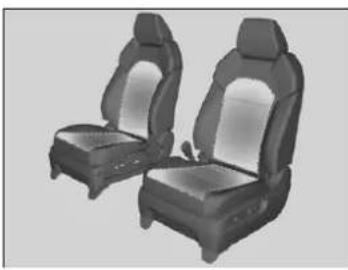
natural_image
3D render of two car seats with seat covers and frontrests (no text or symbols visible)Models with seat ventilation
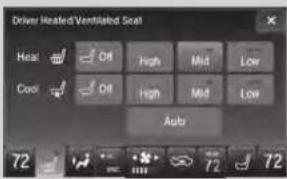
text_image
Driver Healed Ventilated Seal Heat Off High Mid Low Cool Off High Mid Low Auto 72 72Models without seat ventilation
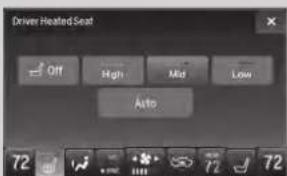
text_image
Driver Heated Seat Off High Mid Low Auto 72 72 72The power mode must be in ON to use the seat heaters and ventilators ^4 .
1. Select
- Change the setting with one of the following:
The Low icon: The LO setting (one indicator on)
The Mid icon: The MID setting (two indicators on)
The High icon: The HI setting (three indicators on)
Auto: The system automatically selects the setting most suitable to the ambient environment.
Off: Turn off the system.
When the power mode is turned on after it is turned off, the previous setting of front seat heaters and ventilators* are maintained.
Front Seat Heaters and Seat Ventilation *
WARNING
Heat induced burns are possible when using seat heaters.
Persons with a diminished ability to sense temperature (e.g., persons with diabetes, lower-limb nerve damage, or paralysis) or with sensitive skin should not use seat heaters.
Do not use the seat heaters and the seat ventilation even in LO when the power system is off. Under such conditions, the 12-volt battery may be weakened, making it difficult to turn the power system on.
After a certain period of time, the strength setting for the seat heaters will automatically be reduced by one level at a time until the seat heater shuts off. The elapsed time varies according to the interior environment.
Second Row Outer Seat Heaters\*
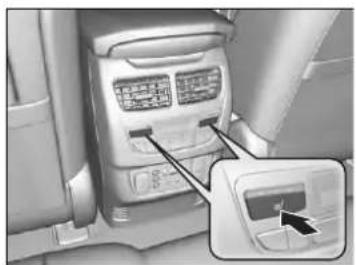
natural_image
Interior view of a car seatbelt with labeled buttons and a zoomed-in section showing a button (no text or symbols visible)The power mode must be in ON to use the seat heaters.
Press the seat heater button: Once - The HI setting (three indicators on) Twice - The MID setting (two indicators on) Three times - The LO setting (one indicator on) Four times - The OFF setting (no indicators on)
Integrated Sunshades\*
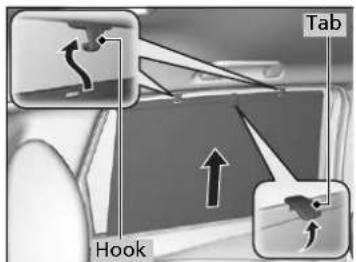
text_image
Hook TabPull the tab and roll up the sunshade all the way. Use the hooks to hang it.
* Not available on all models
Second Row Outer Seat Heaters *
WARNING
Heat induced burns are possible when using seat heaters.
Persons with a diminished ability to sense temperature (e.g., persons with diabetes, lower-limb nerve damage, or paralysis) or with sensitive skin should not use seat heaters.
Do not use the seat heaters even in LO when the power system is off. Under such conditions, the 12-volt battery may be weakened, making it difficult to turn the power system on.
After a certain period of time, the strength setting for the seat heaters will automatically be reduced by one level at a time until the seat heater shuts off. The elapsed time varies according to the interior environment.
Integrated Sunshades *
Use the sunshades only when the windows are fully closed. Using the shade while a window is open can unhook and blow off the shade, hitting and hurting anyone sitting near the window.
Climate Control System
Using Automatic Climate Control
The automatic climate control system maintains the interior temperature you select. The system also selects the proper mix of heated or cooled air that raises or lowers the interior temperature to your preference as quickly as possible.
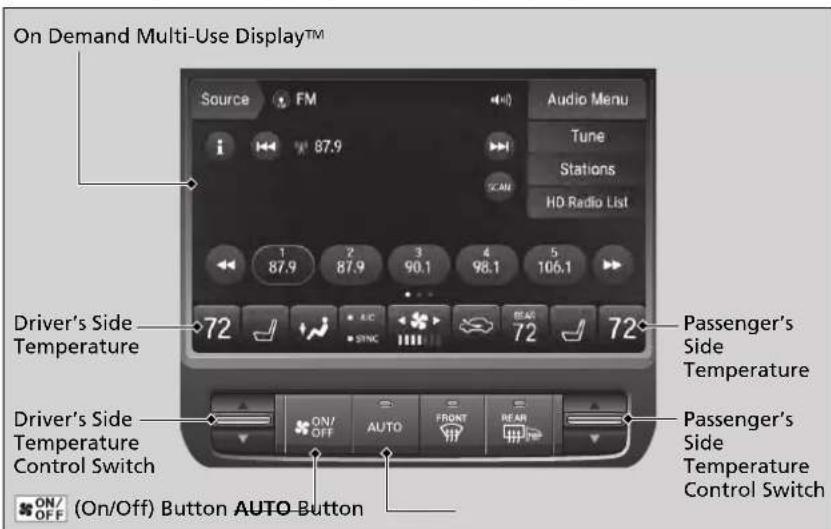
text_image
On Demand Multi-Use Display™ Source FM Audio Menu i 87.9 Tune Stations HD Radio List 1 87.9 2 87.9 3 90.1 4 98.1 5 106.1 Driver's Side Temperature 72 Driver's Side Temperature Control Switch ON/OFF AUTO FRONT REAR (On/Off) Button AUTO Button Passenger's Side Temperature Passenger's Side Temperature Control SwitchUse the system when the power system is on.
- Press the AUTO button.
- Adjust the interior temperature using the driver's side or passenger's side temperature control switch.
- Press the ☐(Off)/Off) button to cancel.
Using Automatic Climate Control
If any buttons/icons on the touch screen are pressed while using the climate control system in auto, the function of the button/icon that was pressed will take priority.
The AUTO indicator will go off, but functions unrelated to the button/icon that was pressed will be controlled automatically.
To prevent cold air from blowing in from outside, the fan may operate at low speed for a while after the AUTO button has been pressed.
If the interior is very warm, you can cool it down more rapidly by partially opening the windows, turning the system on auto, and setting the temperature to low. Change the fresh air mode to recirculation mode until the temperature cools down.
When you set the temperature to the lower or upper limit, Lo or Hi is displayed.
Pressing the ▶80ton switches the climate control system between on and off. When turned on, the system returns to your last selection.
Operating from the On Demand Multi-Use Display™
In addition to the button/switch controls, you can operate the climate control system from the On Demand Multi-Use Display™ touch screen.
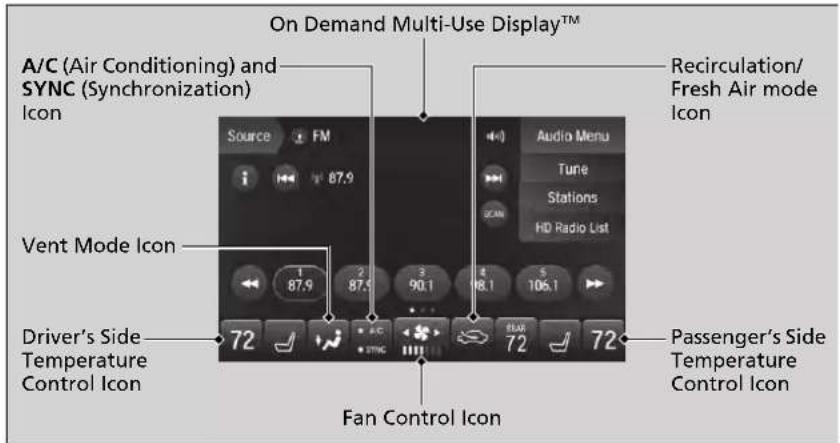
text_image
On Demand Multi-Use Display™ A/C (Air Conditioning) and SYNC (Synchronization) Icon Source FM Audio Menu Tune Stations HD Radio List Recirculation/ Fresh Air mode Icon Vent Mode Icon Driver's Side Temperature Control Icon Fan Control Icon Passenger's Side Temperature Control IconUsing Automatic Climate Control
When you unlock the doors with your remote, the driver's ID (Driver 1 or Driver 2) is detected, and the climate control settings are turned to the respective mode automatically when you set the power mode to ON.
Continued
Changing the Interior Temperature Setting
The side you selected.
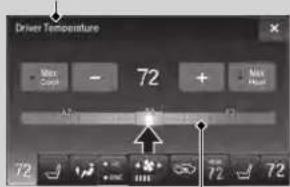
text_image
Driver Temperature Max Cash - 72 + Min Heat 72 72Temperature Bar
- Select the driver's or passenger's side temperature control icon.
- Change the temperature setting from the following:
Temperature bar: Select a point where your desired temperature setting is.
Farther to the left is for a lower, and to the right for a higher setting.
+/- : To raise or lower the temperature setting one degree at a time.
While you select and hold +/- , the temperature decreases or increases.
Max Cool: To rapidly cool down the interior.
The A/C indicator comes on. The setting returns to the previously selected value when you select it again.
Max Heat: To rapidly warm up the interior.
The A/C indicator goes off. The setting returns to the previously selected value when you select it again.
Using Automatic Climate Control
If you select the Max Heat during Auto Engine Stop, the engine restarts automatically.
■ Switching the vent mode
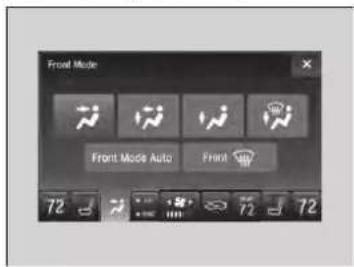
text_image
Front Mode Front Mode Auto Front 72 72 72Select a desired vent mode icon, or Front Mode Auto: The system automatically selects the vent mode most suitable to the ambient environment.
Vent mode
: Dashboard vents
: Dashboard and floor vents
: Floor vents
: Floor and defroster vents
Switching the vent mode
While the climate control system is in auto, Front Mode Auto is highlighted.
A/C on and off
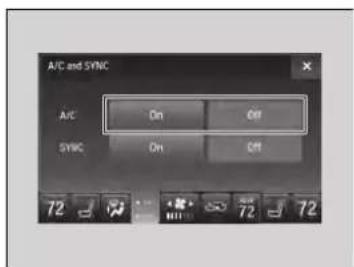
text_image
A/C and SYNC A/C On Off SYNC On Off 72 72 72- Select A/C.
- Select On or Off.
Continued
■ SYNC on and off
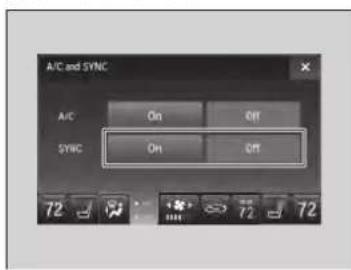
text_image
A/C and SYNC A/C On Off SYNC On Off 72 72 72- Select SYNC.
- Select On for synchronization mode.
When in synchronization mode, the front passenger's side temperature and the rear passenger compartment become the same as the driver's side settings.
When in synchronization mode, the front passenger's side temperature and the rear passenger compartment become the same as the driver's side settings.
- Adjust the temperature or change the mode from the driver's side.
>>SYNC on and off
When you press the Button or select the Front icon, the system synchronizes the driver's and front passenger's temperature settings.
When the system is not in SYNC mode, the driver's side temperature, the front passenger's side temperature and the rear passenger compartment (if it is on) can be set separately.
You can also turn off SYNC mode by changing the front passenger's side temperature or rear passenger's temperature.
■ Changing the fan speed
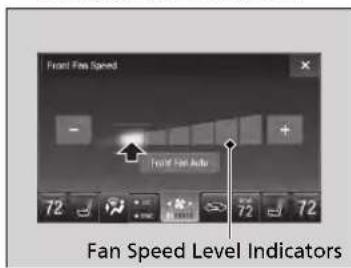
text_image
Front Fines Speed Front Fines Jacks Fan Speed Level Indicators- Select
When the left or right side of the is selected, the fan speed level goes up or down one level at a time.
- Change the fan speed with one of the following:
The fan speed level indicators: Select your desired speed level. The smaller indicator is for a slower speed, and the larger for a faster speed.
+/- : To go up or down one level at a time.
Front Fan AUTO: The system automatically selects the fan speed most suitable to the ambient environment.
Changing the fan speed
While the climate control system is in auto, Front Fan AUTO is highlighted.
Switching between the Recirculation and Fresh Air Modes
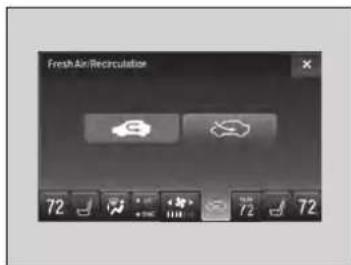
text_image
Fresh Air Recirculation 72 72Select currently shown to switch between the modes depending on environmental conditions.
▶Selecting 📄 currently shown changes the display to the Fresh Air/Recirculation display. You can also switch the mode by selecting 📄 icon appearing in the display.
(Recirculation Mode): Recirculates air from the vehicle's interior through the system. (Fresh Air Mode): Maintains outside ventilation. Keep the system in fresh air mode in normal situations.
Defrosting the Windshield and Windows
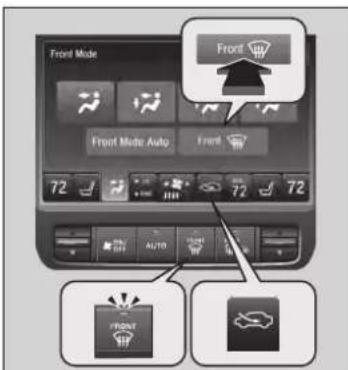
text_image
Front Mode Front Mode Auto Front 72 72 72 72 AUTO FRONTPressing the 📄 button or selecting the Front 📄 icon appearing after the vent mode icon is selected turns the air conditioning system on and automatically switches the system to fresh air mode.
Press the button or select the Front icon again to turn off, the system returns to the previous settings.
■ To rapidly defrost the windows
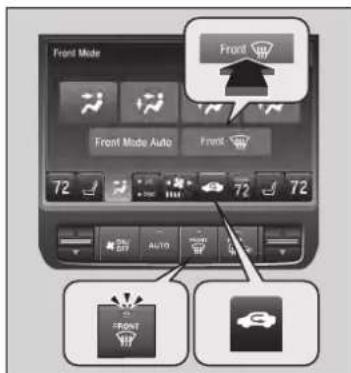
text_image
Front Mode Front Front Mode Auto Front 72 72 72 Auto FRONT FRONT- Press the Button, or select the vent mode icon and then the Front icon.
- Select the recirculation mode. Switching between the Recirculation and Fresh Air Modes P. 227
Defrosting the Windshield and Windows
For your safety, make sure you have a clear view through all the windows before driving.
Do not set the temperature near the upper or lower limit.
When cold air hits the windshield, the outside of the windshield may fog up.
If the side windows fog up, adjust the vents so that the air hits the side windows.
To rapidly defrost the windows
After defrosting the windows, switch over to fresh air mode. If you keep the system in recirculation mode, the windows may fog up from humidity. This impedes visibility.
Rear Climate Control System
■ Using the Rear Climate Control System From the Front Panel
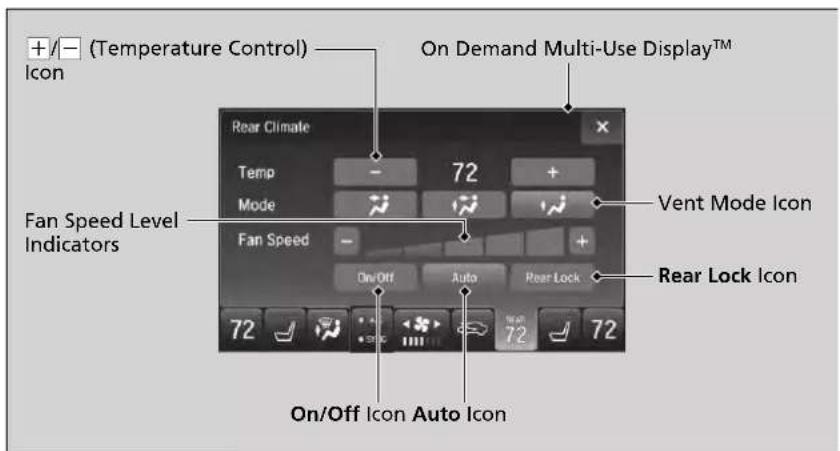
text_image
+/− (Temperature Control) Icon On Demand Multi-Use Display™ Rear Climate Temp - 72 + Mode - 72 Vent Mode Icon Fan Speed - 72 Rear Lock Icon On/Off Icon Auto Icon 72 72Use the system when the power system is on.
- Select REAR.
- Select Auto
The rear system changes to auto mode.
- Adjust the rear passenger's compartment temperature using the temperature control icon.
- Select the On/Off to cancel.
When the turned back on, the system returns to your last selection.
Rear Climate Control System
If any icons on the touch screen are pressed while using the rear climate control system in auto, the function of the icon that was pressed will take priority.
Rear Lock: Appears on the front panel. When selected, it disables the rear panel control. LOCK: Appears on the rear control panel while the rear lock is on.
If the rear lock is on while in SYNC mode, the rear control panel is disabled. LOCK SYNC appears on the rear control panel.
Continued
■ Changing the rear temperature setting
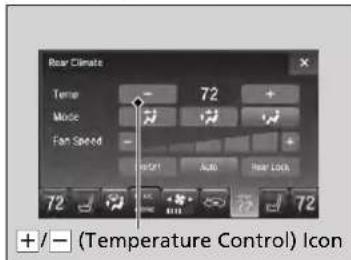
text_image
Rear Climate Temper 72 + Mode Fan Speed +/- (Temperature Control) IconChange the temperature setting from the following:
+/- : To raise or lower the temperature setting one degree at a time.
While you select and hold +/- , the temperature decreases or increases.
■ Switching the vent mode
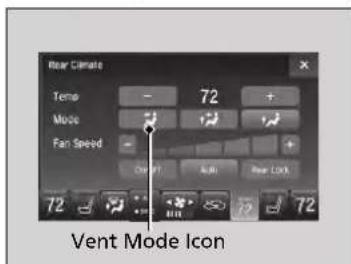
text_image
Rear Climate Temp - 72 + Mode Fan Speed - 72 Vent Mode Icon 72 72Select a desired vent mode icon.
Vent mode
Rear console vents
: Rear console vents and floor vents
Rear floor vents
Changing the rear temperature setting
When you set the temperature to the lower or upper limit, Lo or Hi is displayed.
■ Changing the fan speed
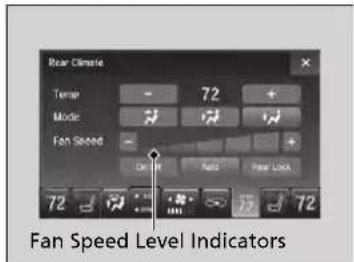
text_image
Rear Climate Temp - 72 + Mode 1 1 1 Fan Speed - + On Run Build Close Lock 72 72 Fan Speed Level IndicatorsChange the fan speed with one of the following:
The fan speed level indicators: Select your desired speed level. The smaller indicator is for a slower speed, and the larger for a faster speed.
+/-: To go up or down one level at a time.
Using the Rear Climate Control System From the Rear Panel
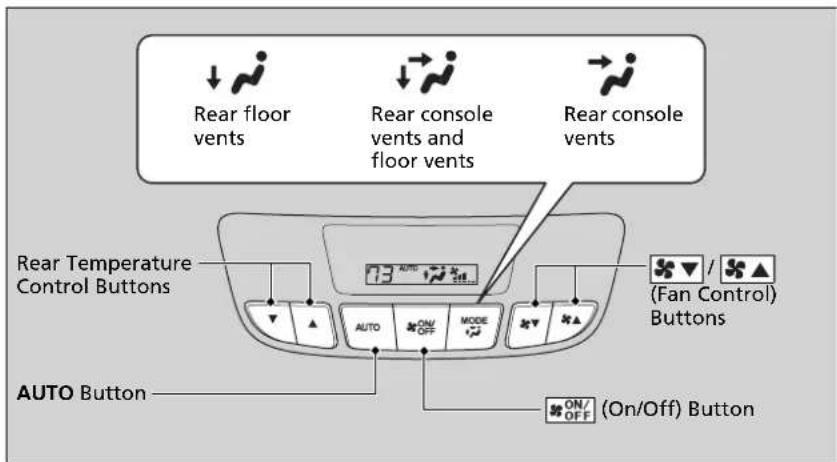
text_image
Rear floor vents Rear console vents and floor vents Rear console vents Rear Temperature Control Buttons AUTO Button ON/OFF (On/Off) Button (Fan Control) ButtonsUse the system when the power system is on.
- Press the AUTO button.
- Adjust the interior temperature using the rear temperature control button.
- To turn off the rear climate control system, press button.
Using the Rear Climate Control System From the Rear Panel
When the Rear Lock icon on the front control panel is off, the temperature of the rear passenger compartment can be controlled independently.
Automatic Climate Control Sensors
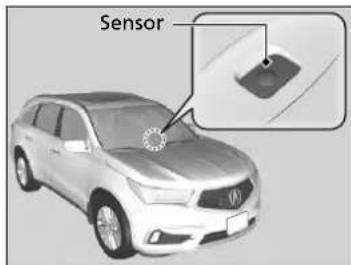
text_image
SensorThe automatic climate control system is equipped with sensors. Do not cover or spill any liquid on them.
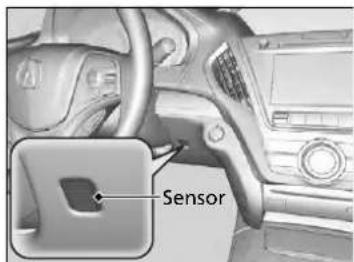
text_image
SensorThis page intentionally left blank.
Features
This chapter describes how to operate technology features.
Audio System
About Your Audio System...... 236
USB Ports 237
Auxiliary Input Jack 240
Audio System Theft Protection ..... 240
Audio Remote Controls.... 241
Audio System Basic Operation ..... 243
On Demand Multi-Use Display™...... 244
Information Screen 248
Adjusting the Sound 256
Display Setup 257
Voice Control Operation 258
Playing AM/FM Radio 261
Playing SiriusXM® Radio.... 264
Playing a CD 275
Playing Hard Disk Drive (HDD) Audio ...278
Playing an iPod 291
Song By Voice™ (SBV).... 294
Playing Pandora ^®*1 298
Playing a USB Flash Drive 300
Playing Bluetooth® Audio.... 303
Siri Eyes Free 305
Apple CarPlay 306
Android Auto.... 310
Audio Error Messages 315
General Information on the Audio
System 323
Rear Entertainment System (RES)* .. 342
Customized Features.... 362
HomeLink® Universal Transceiver ... 394
Bluetooth® HandsFreeLink®
Using HFL 397
HFL Menus 400
AcuraLink ^® 438
*1: Available only on U.S. models.
Audio System
About Your Audio System
The audio system features AM/FM radio and SiriusXM® Radio service. It can also play audio CDs, WMA/MP3/AAC files, Hard Disk Drive (HDD) audio, USB flash drives, and iPod, iPhone and Bluetooth® devices.
You can operate the audio system from the remote controls on the steering wheel, or the icons on the On Demand Multi-Use Display™.
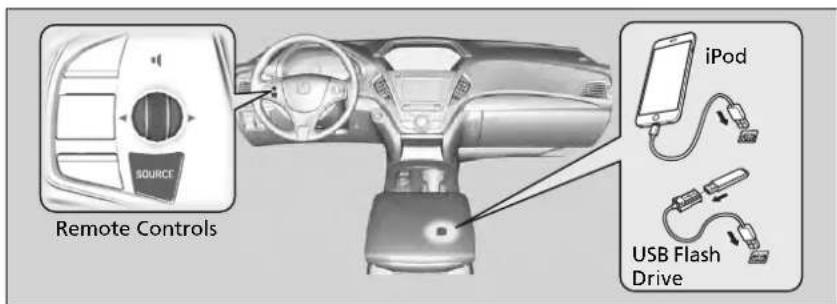
text_image
Remote Controls iPod USB Flash DriveAbout Your Audio System
SiriusXM® Radio is available on a subscription basis only. For more information on SiriusXM® Radio, contact a dealer.
General Information on the Audio System P. 323
SiriusXM® Radio is available in the United States and Canada, except Hawaii, Alaska, and Puerto Rico.
SiriusXM® is a registered trademark of SiriusXM Radio, Inc.
Video CDs, DVDs*, and 3-inch (8-cm) mini CDs are not supported.
iPod, iPhone and iTunes are trademarks of Apple Inc.
State or local laws may prohibit the operation of handheld electronic devices while operating a vehicle.
When the screen is viewed through polarized sunglasses, a rainbow pattern may appear on the screen due to optical characteristics of the screen. If this is disturbing, please operate the screen without polarized sunglasses.
USB Ports
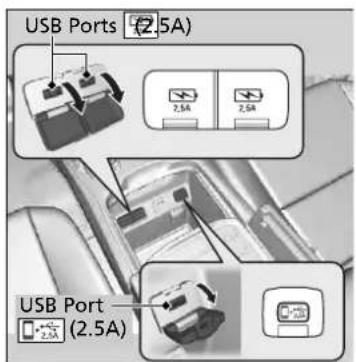
text_image
USB Ports (2.5A) 2.5A 2.5A USB Port (2.5A)■ In the front console compartment
Install the device USB connector or the USB flash drive to the USB port ☐(2.5A).
The USB port (2.5A) is for charging devices, playing audio files and connecting compatible phones with Apple CarPlay or Android Auto.
To prevent any potential issues, be sure to use an Apple MFi Certified Lightning Connector for Apple CarPlay, and for Android Auto, the USB cables should be certified by USB-IF to be compliant with USB 2.0 Standard.
The USB ports (2.5A) are only for charging devices.
>>USB Ports
- Do not leave the iPod or USB flash drive in the vehicle. Direct sunlight and high temperatures may damage it.
- We recommend that you use a USB cable if you are attaching a USB flash drive to the USB port.
- Do not connect the iPod or USB flash drive using a hub.
- Do not use a device such as a card reader or hard disk drive, as the device or your files may be damaged.
- We recommend keeping your data backed up before using the device in your vehicle.
- Displayed messages may vary depending on the device model and software version.
USB charge
The USB port can supply up to 2.5A of power. It does not output 2.5A unless requested by the device. For amperage details, read the operating manual of the device that needs to be charged.
Continued
Models without rear console compartment

text_image
Models without rear entertainment system 2.5A 2.5A■ On the back of the front console compartment
The USB ports (2.5A) are only for charging devices.
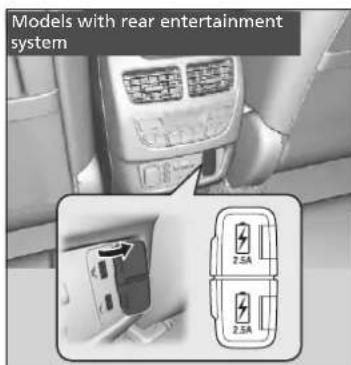
text_image
Models with rear entertainment system 2.5A 2.5AUSB Ports
USB Ports 5A
These ports are for battery charge only. You cannot play music even if you have connected a music player to it.
Under certain conditions, a device connected to the port may generate noise in the radio you are listening to.
Models with rear console compartment
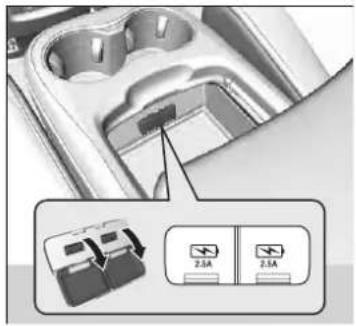
text_image
Diagram showing a battery pack with two 2.5A current indicators and an electrical symbol, likely illustrating a power or safety concept.■ In the rear console compartment
The USB ports (2.5A) are only for charging devices.
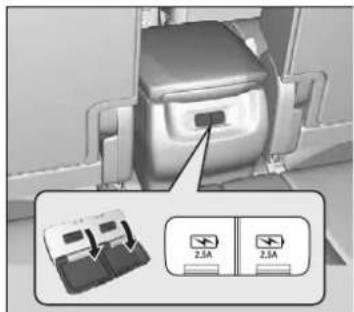
text_image
2.5A 2.5A■ On the back of the rear console compartment
The USB ports 5A) are only for charging devices.
Auxiliary Input Jack
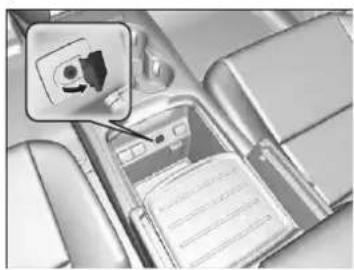
natural_image
Close-up of a car interior showing a vehicle's seatbelt with a highlighted device (no visible text or symbols)Use the jack to connect a standard audio device.
-
Open the AUX cover.
-
Connect a standard audio device to the input jack using a 1/8 inch (3.5 mm) stereo miniplug.
The audio system automatically switches to the AUX mode.
Audio System Theft Protection
The audio system is disabled when it is disconnected from the power source, such as when the 12-volt battery is disconnected or goes dead. In certain conditions, the system may display a code entry screen. If this occurs, reactivate the audio system.
■ Reactivating the audio system
- Set the power mode to ON.
-
Turn on the audio system.
-
Press and hold the audio system power button for more than two seconds. ▶ The audio system is reactivated when the audio control unit establishes a connection with the vehicle control unit. If the control unit fails to recognize the audio unit, you must go to a dealer and have the audio unit checked.
Auxiliary Input Jack
To switch to another mode or return to the AUX mode, press the SOURCE button on the steering wheel or select Source on the On Demand Multi-Use Display™.
Audio Remote Controls
Allows you to operate the audio system while driving. The information is shown on the multi-information display (MID).
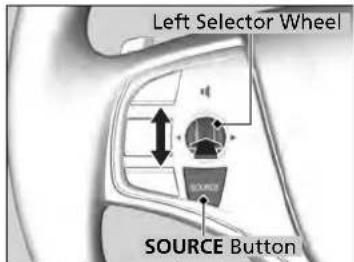
text_image
Left Selector Wheel SOURCE ButtonSOURCE Button
Cycles through the audio modes as follows: FM -AM SiriusXM® CD→Rear-DVD HDD -USB/iPod/Apple CarPlay/Android Auto →Bluetooth® Audio → Pandora® → AUX
Left Selector Wheel
Roll Up: To increase the volume.
Roll Down: To decrease the volume.
Push: To mute. Push again to unmute.
- When listening to the radio
Move to the right: To select the next preset radio station.
Move to the left: To select the previous preset radio station.
Move to the right and hold: To select the next strong station.
To select the next channel. (SiriusXM® only)
Move to the left and hold: To select the previous strong station.
To select the previous channel. (SiriusXM® only)
- When listening to a CD, HDD, iPod, USB flash drive, or Bluetooth® Audio Move to the right: To skip to the next song.
Move to the left: To go back to the beginning of the current or previous song.
Move to the right and hold: To go to the next folder. (Bluetooth® Audio only)
Move to the left and hold: To go to the previous folder. (Bluetooth® Audio only)
* Not available on all models
Continued
>>Audio Remote Controls
Some mode appears only when an appropriate device or medium is used.
Depending on the Bluetooth ^® device you connect, some functions may not be available.
Models with rear entertainment system
If you operate some remote control switch while rear source mode is selected, the rear source mode changes to the front source mode.
→ Selecting an Audio Source P. 244
- When listening to a CD, HDD or USB flash drive
Move to the right and hold: To skip to the next folder.
Move to the left and hold: To go back to the previous folder. - When listening to Pandora® *
Move to the right: To skip to the next track.
Move to the right and hold: To select the next station.
Move to the left and hold: To select the previous station.
Audio System Basic Operation
To use the audio system, the power mode must be in ACCESSORY or ON.
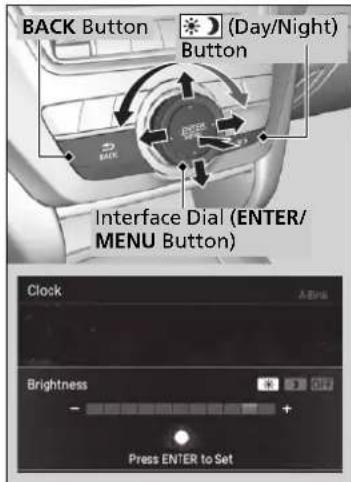
text_image
BACK Button Button Interface Dial (ENTER/ MENU Button) Clock Brightness Press ENTER to SetUse the interface dial or ENTER/MENU button to access phone, information or smartphone functions.
Interface dial (ENTER/MENU button):
Rotate left or right to scroll through the available choices. Press to set your selection. Move right, left, up or down to select a secondary menu.
Press to switch the display to the Information Menu screen while the trip computer screen or clock/wallpaper screen is displayed.
BACK button: Press to go back to the previous display.
(Day/Night) button: Press to change the information screen brightness. Press ☐ and make an adjustment using the interface dial.
▶ Each time you press the mode switches between the daytime mode, nighttime mode and off mode.
Audio System Basic Operation
Voice Control System
The navigation/audio system is voice operable.
→ Voice Control Operation P. 258
These indications are used to show how to operate the interface dial.
Rotate to select.
Press 🤔 to enter.
Move 40 or to select a secondary menu.
Audio function items
Preset Memory P. 262, 266
Radio Text P. 263
Music Search P. 276, 280, 292, 301
Scan P. 263, 274, 277, 281, 302
→ Random/Repeat P. 277, 282, 293, 302
When you unlock the doors with your remote, the driver's ID (Driver 1 or Driver 2) is detected, and the audio system settings and preset memory are turned to the respective mode automatically when you set the power mode to ON.
On Demand Multi-Use Display™
Use the On Demand Multi-Use Display™ to operate the audio system.
Selecting an Audio Source
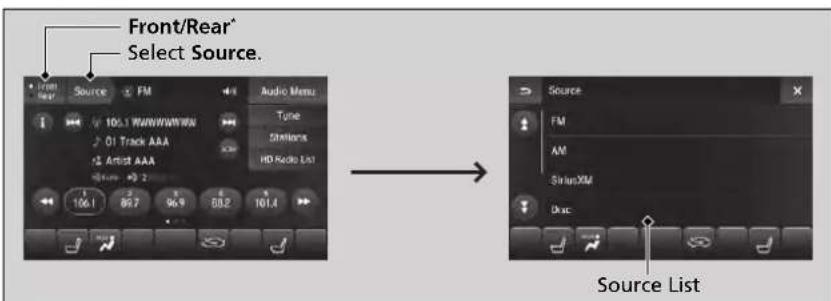
text_image
Front/Rear* Select Source. Source FM Audio Menu Tune Simmons HD Radio List 106.1 89.7 96.9 88.2 101.4 Source ListSelect Source, then select an item on the source list to switch the audio source.
Models with rear entertainment system
Select Front/Rear to changes between the front side audio source selection and rear side audio source selection.
Selecting the Audio Source using Front Control Panel P. 356
On Demand Multi-Use Display™
Icons that appear on the screen vary by the source selected.
Select or to go back to the previous screen.
Use the 🔊 icons to turn the page.
Selecting an Audio Source
You can change the order of source list displayed.
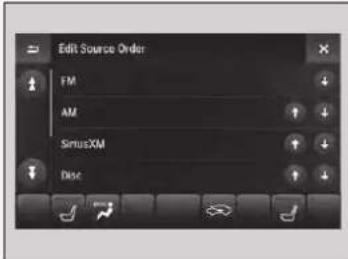
text_image
Edit Source Order FM AM SimusXM Disc- Select Audio Menu, then Edit Source Order.
- Select ↑ ↓ or .
You can also change the source order by pressing and holding the source on the source list for two seconds.
■ Displaying the Menu Items
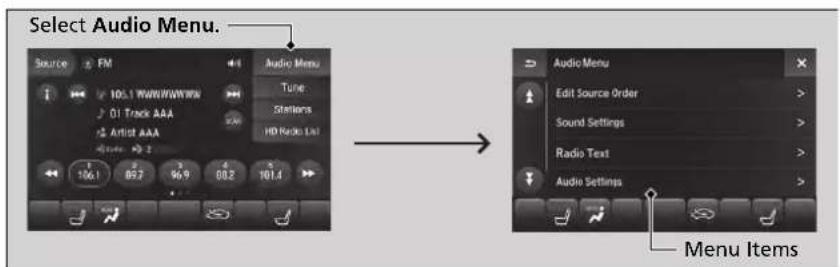
text_image
Select Audio Menu. Source FM Audio Menu Tune Steflera HD Radio List 106.1 89.2 96.9 88.2 101.4 Audio Menu Edit Source Order > Sound Settings > Radio Text > Audio Settings > Menu ItemsSelect Audio Menu to display the menu items.
The following items are available:
- Edit Source Order: Displays the Edit Source Order screen.
Selecting an Audio Source P. 244
• Sound Settings: Displays the Sound Settings screen.
Adjusting the Sound P. 256
- Edit/Delete HDD Music (HDD mode): Displays the Edit/Delete HDD Music screen.
Editing an Album or Playlist P. 284
- Radio Text (FM mode): Displays the text information broadcast by the current RDS station.
Radio text P. 263
- SportsFlash (SiriusXM® mode): Displays the SportsFlash™ list. If the favorite sport team is not registered, the setup screen of SportsFlash™ is displayed.
Live Sports Alert P. 270
→Customized Features P. 362 - Traffic & Weather Now (SiriusXM® mode): Displays to the Traffic & Weather Now screen.
Traffic and Weather Information P. 272 - View Channel Schedule (SiriusXM® mode): Displays the SiriusXM® channel schedule.
• Audio Settings: Displays the Audio Settings screen.
→Customized Features P. 362 - Screen Settings: Displays the Screen Settings screen.
→ Changing the Screen Settings P. 247 - RES Settings *: Displays the RES Settings screen.
Rear System Setup P. 360
Customized Features P. 362
■ Changing the Screen Settings
text_image
> Screen Settings Sync Display Brightness Opt On Brightness - + Contrast - + Black Level -- Select Audio Menu, then select Screen Settings.
- Use +, - or other icons to adjust the setting.
Changing the Screen Settings
The following are adjustable screen settings:
- Sync Display Brightness
Selects whether the screen brightness synchronizes with the instruments panel brightness.
- Brightness
- Contrast
- Black Level
- Beep
Mutes a beep that sounds every time you touch the screen.
- Keyboard
Changes the on-screen keyboard from the alphabetical order to the qwerty type.
Instead of using ⊕, ⊖ or icons, you can also touch the point where your desired setting is.
Information Screen
Displays the navigation, HFL information, clock/wallpaper, trip computer, Apple CarPlay and Android Auto. From this screen, you can go to various setup options.
Switching the Display
Press the NAV, PHONE, INFO and SMARTPHONE buttons to go to the corresponding display.
Navigation
Phone Info Smartphone
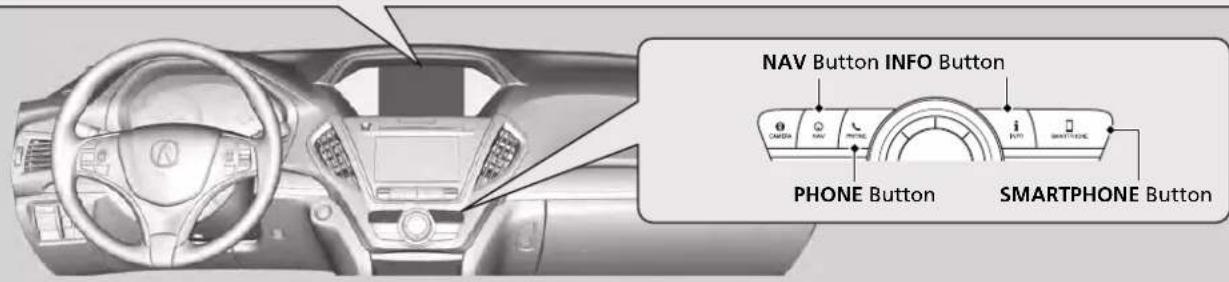
text_image
NAV Button INFO Button CAMERA NAV PHONE PHONE Button SMARTPHONE ButtonNavigation
Shows the navigation screen.
Refer to the Navigation System Manual
Phone
Shows the HFL information.
Bluetooth® HandsFreeLink® P. 397
Info
Shows the AcuraLink/Messages, Trip Computer, Clock, Traffic Incidents, Power Distribution Monitor or Voice Recognition Guide. Press 😊 or INFO button to display the Information Menu screen.
AcuraLink/Messages:
Shows a AcuraLink® message menu list.
AcuraLink Message P. 442
Trip Computer:
Current Drive
Shows the range, instant and average fuel economy, and EV/total drive of the current trip, as well as the average fuel economy from your last trip.
History of Trip A
Shows the range, average fuel economy and distances traveled for the current trip, as well as the average fuel economy and distances traveled during the last three driving cycles.
Each time you reset the trip meter A, the information on the display updates. The history of the previous three driving cycles is kept.
Continued
Deleting the history manually
- Press 😊 on the History of Trip A screen to select Delete History.
- A confirmation message appears on the screen. Rotate 🔗 to select Yes, then press 😊.
Clock:
Shows a clock screen and an image you import.
Traffic Incidents:
Shows a traffic incidents list.
Refer to the Navigation System Manual
Power Distribution Monitor:
Displays the power flow monitor.
Power Distribution Monitor P. 251
Voice Recognition Guide:
Shows a voice recognition guide screen.
Smartphone
Displays the Apple CarPlay or Android Auto.
→Apple CarPlay P. 306
Android Auto P. 310
Power Distribution Monitor
■ Power flow monitor
Consists of the information screen showing the vehicle's power flow and torque distribution indicators.
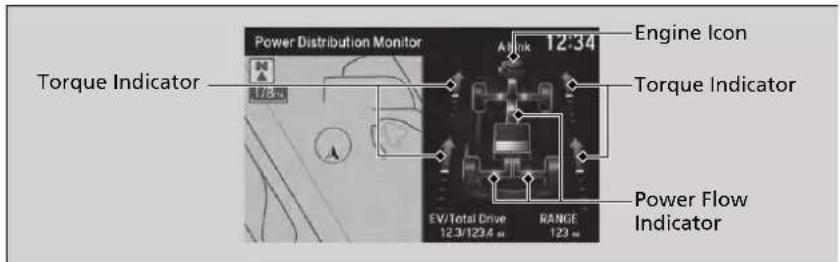
text_image
Power Distribution Monitor 178.5 Torque Indicator A/ink 12-34 Engine Icon Torque Indicator EV/Total Drive RANGE 123 m 12.3/123.4 m 123 m Power Flow IndicatorShows motor and engine power flow, indicating what supplies power to the vehicle, or if the High Voltage battery is being charged.
| Power flow pattern Color of indicators Vehicle's Condition | |
| Blue Power is supplied by the motors and the engine. | |
Power Distribution Monitor
While the vehicle is stationary with the engine running, the following may appear on the screen.
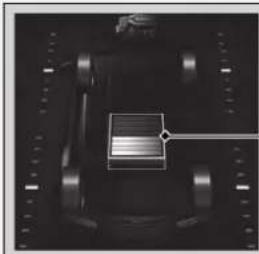
natural_image
Top-down view of a mechanical component with a highlighted rectangular section (no visible text or symbols)High Voltage Battery Charge Level Gauge
The High Voltage battery charge level gauge shows the current High Voltage battery charge level.
| Power flow pattern Color of indicators Vehicle's Condition | ||
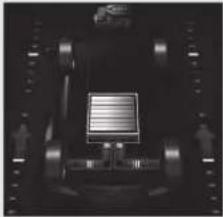 | Blue | Power is only supplied by the motors. |
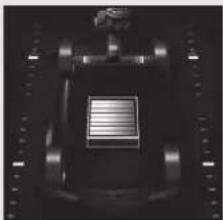 | Blue | Power is only supplied by the engine. |
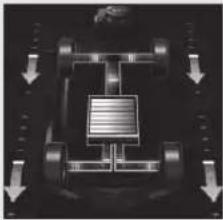 | Green | The motors charge the High Voltage battery. |
■ SPORT HYBRID SH-AWD® torque distribution monitor
The indicators on the screen show the amount of torque being transferred to each wheel or regenerative energy being supplied to the High Voltage battery.
SPORT HYBRID Super Handling-All Wheel Drive ^TM (SPORT HYBRID SH-AWD ^ )
P. 509
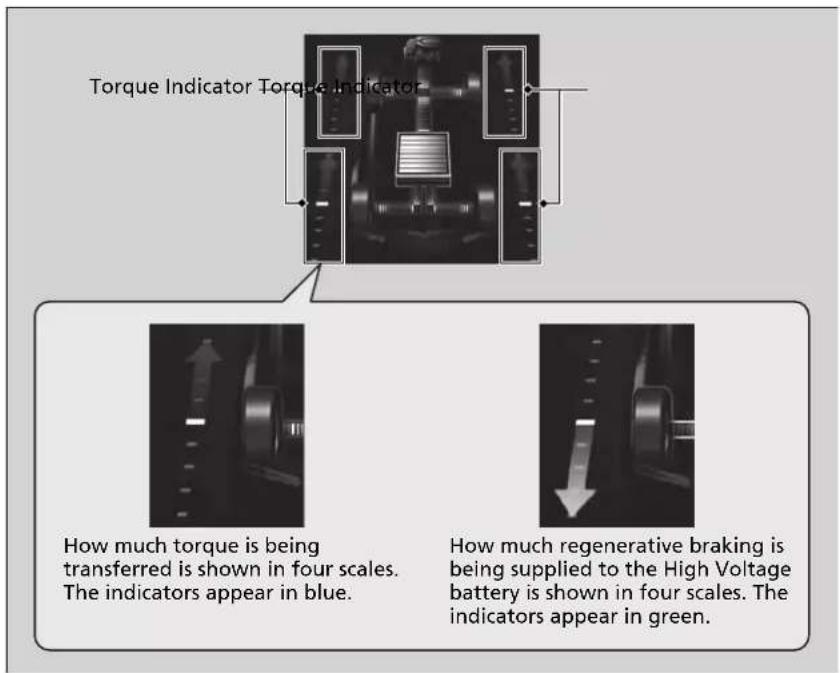
text_image
Torque Indicator Torque Indicator How much torque is being transferred is shown in four scales. The indicators appear in blue. How much regenerative braking is being supplied to the High Voltage battery is shown in four scales. The indicators appear in green.Continued
Wallpaper Setup
You can change, store, and delete the wallpaper on the information screen.
Import wallpaper
text_image
Clock Type 12:34 Clock Options... Blank Galaxy Metallic-
Connect the USB flash drive to the USB port (2.5A).
USB Ports P. 237 -
Press the SETTINGS button.
- Rotate 🔊 to select Clock Settings, then press 🔕.
▶ Repeat the procedure to select Clock/Wallpaper Type.
- Move 🔗 to select Wallpaper tab.
The screen will change to the wallpaper list.
- Rotate 🔺 to select Options..., then press 😊.
▶ Repeat the procedure to select, Add New Wallpaper.
- Rotate to select a desired picture.
The preview is displayed on the left side on the screen.
- Rotate 🔗 to select Start Import, then press 🔗 to save the data.
The display will return to the wallpaper list.
Wallpaper Setup
- When importing wallpaper files, the image must be in the USB flash drive's root directory. Images in a folder cannot be imported.
- The file name must be fewer than 210 characters.
- The file format of the image that can be imported is BMP (bmp) or JPEG (jpg).
• The individual file size limit is 10 MB. - The maximum image size is 5,800 x 5,800 pixels.
- Up to 10 files can be saved for each driver (Driver 1 and Driver 2).
- If the USB flash drive does not have any pictures, the No files detected message appears.
■ Select wallpaper
-
Press the SETTINGS button.
-
Rotate 🔊 to select Clock Settings, then press 🔕. ▶ Repeat the procedure to select Clock/Wallpaper Type.
-
Move ▶ to select Wallpaper. ▶The screen changes to the wallpaper list.
-
Rotate to select a desired wallpaper, then press . 😊 ▶The preview is displayed on the left side on the screen. ▶The pop-up menu appears on the screen.
-
Rotate 🔺 to select Set, then press 🔺. ▶ The display will return to the Clock Settings screen.
■ Delete wallpaper
-
Press the SETTINGS button.
-
Rotate 🔒 to select Clock Settings, then press 🔒. ▶ Repeat the procedure to select Clock/Wallpaper Type.
-
Move ▶ to select Wallpaper. ▶The screen changes to the wallpaper list.
-
Rotate 🎨 to select a wallpaper that you want to delete, then press 😊. ▶The preview is displayed on the left side on the screen. ▶The pop-up menu appears on the screen.
-
Rotate 🔺 to select Delete, then press 🔺. ▶The confirmation message will appear.
-
Rotate 🔺 to select Yes, then press 🔺 to delete completely. ▶The display will return to the wallpaper list.
Adjusting the Sound
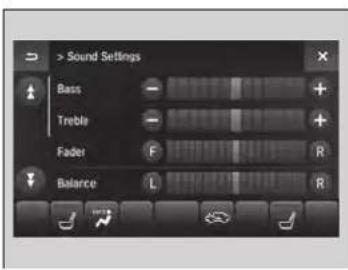
text_image
> Sound Settings Bass Treble Fader Balance L R- Select Audio Menu, then select Sound Settings.
- Select the Bass, Treble, Fader, Balance, Center, Subwoofer, SVC (Speed-sensitive Volume Compensation) or DTS Neural Surround.
- Use +, - or other icons to adjust the setting.
Adjusting the Sound
The SVC has four modes: Off, Low, Mid, and High. SVC adjusts the volume level based on the vehicle speed. As you go faster, audio volume increases. As you slow down, audio volume decreases.
DTS Neural Surround is a trademark of DTS, Inc.
Instead of using + , - or icons, you can also touch the point where your desired setting is.
Display Setup
You can change the brightness of the information screen and On Demand Multi-Use Display ^™ .
■ Changing the Screen Brightness
Information Screen
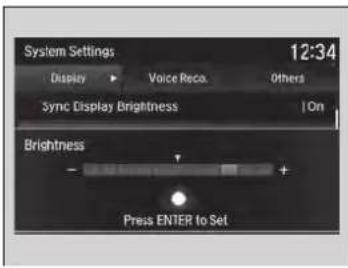
text_image
System Settings 12:34 Display ▶ Voice Reco. Others Sync Display Brightness | On Brightness Press ENTER to SetOn Demand Multi-Use Display™
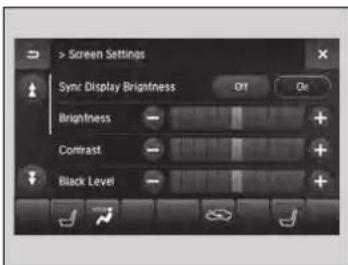
text_image
> Screen Settings Sync Display Brightness Off On Brightness + Contrast + Black Level- Press the SETTINGS button.
- Rotate 🔒 to select System Settings, then press 🔒.
- Rotate 🔺 to select Brightness, then press 🔺.
- Rotate to adjust the setting.
-
Press 😊. ▶The display will return to the System Settings screen.
-
Select Audio Menu, then select Screen Settings.
-
Use +, - to adjust the setting.
Changing the Screen Brightness
You can change the Contrast and Black Level settings in the same manner.
Voice Control Operation
Your vehicle has a voice control system that allows hands-free operation. The voice control system uses the 📄(1)alk) and (hang-up/back) buttons on the steering wheel and a microphone near the map lights in the ceiling.
Voice Recognition
To achieve optimum voice recognition when using the voice control system:
- Make sure the correct screen is displayed for the voice command that you are using.
The system recognizes only certain commands.
Available voice command P. 259 - Close the windows and moonroof.
- Adjust the dashboard and side vents so air does not blow onto the microphone in the ceiling.
- Speak clearly in a natural speaking voice without pausing between words.
- Reduce any background noise if possible. The system may misinterpret your command if more than one person is speaking at the same time.
Voice Control Operation
When you press the button, a helpful prompt asks what you would like to do. Press and release the button again to bypass this prompt and give a command.
»Voice Recognition
The voice control system can only be used from the driver's seat because the microphone unit removes noises from the front passenger's side.
Voice Portal Screen
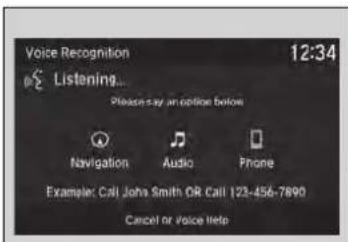
text_image
Voice Recognition 12:34 Listening... Please say an online below Navigation Audio Phone Example: Call John Smith OR Call 123-456-7890 Cancel or Voice HelpWhen the 📄alk) button is pressed, available voice commands appear on the screen. For a complete list of commands, say "Voice Help" after the beep.
The system only recognizes the commands on the following pages, at certain screens. Free form voice commands are not recognized.
Navigation
Refer to the Navigation System Manual
Audio
When the system recognizes the Audio command, the screen will change the dedicated screen for the voice recognition of the audio.
- Tune to FM <87.7-107.9>
- Tune to AM <530-1710>
• SiriusXM Channel <0-999>
• SXM Channel <0-999> - More
- Back
- Cancel
- Play Artist
- Play
- Play Album
- Play
- Play Song
- Play
- Play Composer
- Play
- Play Genre
- Play
- Play Playlist
- Play
-
List Artist
-
List
- List Album
- List
- List Composer
- List
- List Genre
- List
- List Playlist
- List
Phone
This can be only used when the phone is connected. When the system recognizes the Phone command, the screen will change the dedicated screen for the voice recognition of the phone.
- Dial by Number
• Redial - Back
- Cancel
- Call
• Dial - Call
- Dial
- Call
- Dial
Phone commands are not available if using Apple CarPlay.
Voice Help
You can see a list of the available commands on the screen.
- Phone Commands
• Audio Commands - Navigation Commands
- Voice Settings
• Voice Recognition Guide
Playing AM/FM Radio
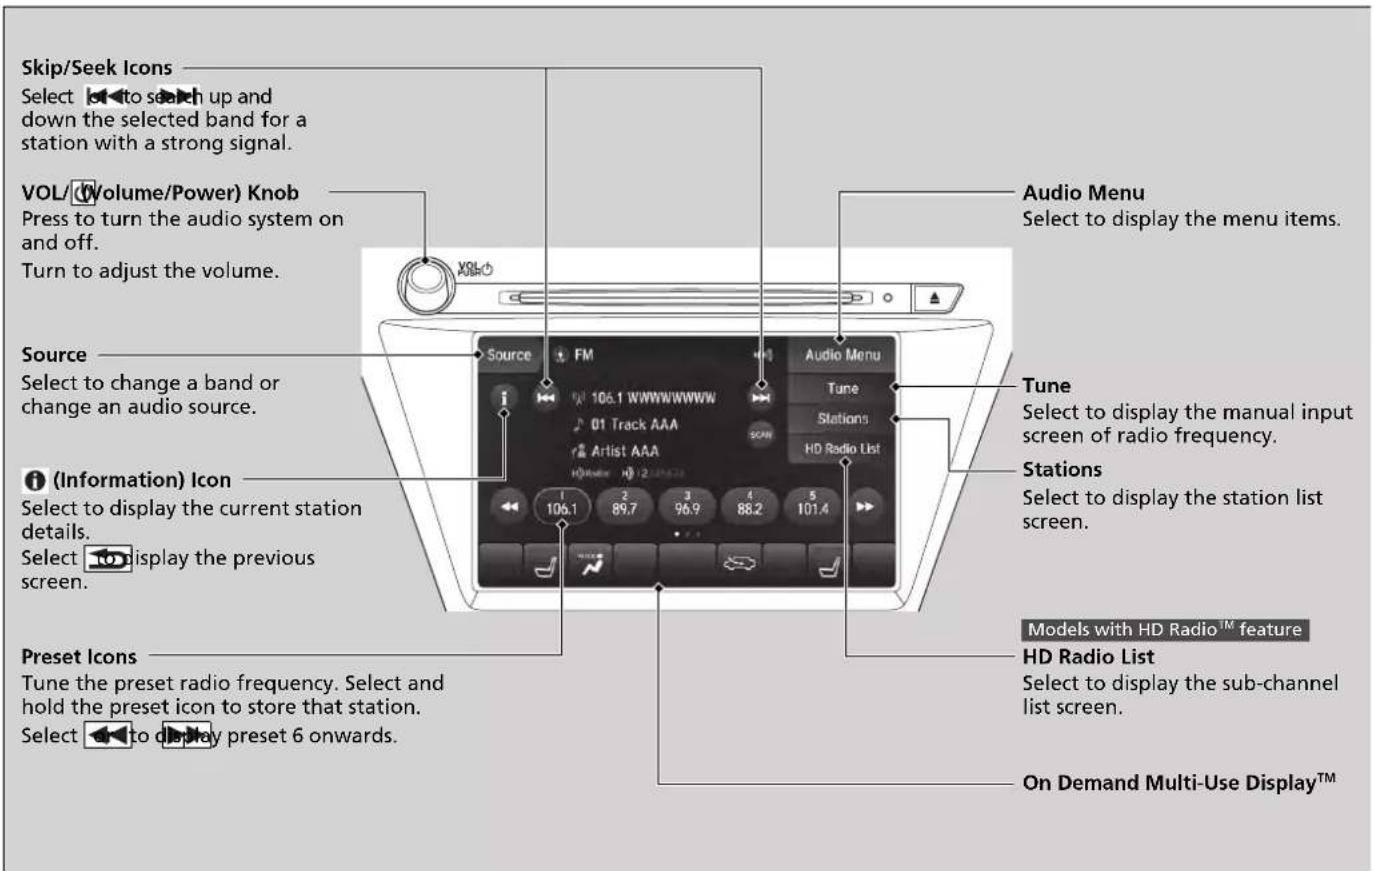
text_image
Skip/Seek Icons Select to search up and down the selected band for a station with a strong signal. VOL(Volume/Power) Knob Press to turn the audio system on and off. Turn to adjust the volume. Source Select to change a band or change an audio source. (Information) Icon Select to display the current station details. Select to display the previous screen. Preset Icons Tune the preset radio frequency. Select and hold the preset icon to store that station. Select to display preset 6 onwards. Audio Menu Select to display the menu items. Tune Select to display the manual input screen of radio frequency. Stations Select to display the station list screen. Models with HD Radio™ feature HD Radio List Select to display the sub-channel list screen. On Demand Multi-Use Display™Continued
▶▶ Audio System Basic Operation ▶ Playing AM/FM Radio
■ Preset Memory
To store a station:
-
Tune to the selected station.
-
Select and hold the preset number you want to store that station.
■ Radio Data System (RDS)
Provides text data information related to your selected RDS-capable FM station.
■ To find an RDS station from Station List
-
Select Stations
-
Select station on the list.
■ Manual update
Updates your available station list at any time.
-
Select Stations.
-
Select Refresh on the list.
Playing AM/FM Radio
You can control the AM/FM radio using voice commands.
→ Voice Control Operation P. 258
The ST indicator appears on the display indicating stereo FM broadcasts.
Stereo reproduction in AM is not available.
Switching the Audio Mode
Press the SOURCE button on the steering wheel.
Audio Remote Controls P. 241
You can store 6 AM stations and 12 FM stations into the preset memory.
HD Radio Technology manufactured under license from iBiquity Digital Corporation. U.S. and Foreign Patents. HD Radio™ and the HD, HD Radio, and "Arc" logos are proprietary trademarks of iBiquity Digital Corp.
■ Radio frequency manual tune screen
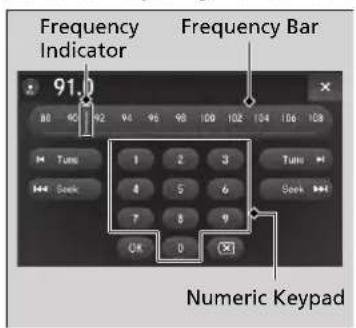
text_image
Frequency Indicator 91.0 Frequency Bar Numeric Keypad- Select Tune.
- Enter the desired radio frequency using the numeric keypad.
- Select OK to tune into the frequency.
You can also tune into the radio frequency of your choice following the procedures below instead of inputting its frequency value.
- Touch the desired frequency value on the frequency bar.
- Select and hold the frequency indicator, then slide it to the desired frequency value on the frequency bar.
■ Radio text
Display the radio text information of the selected RDS station.
- Select Audio Menu.
- Select Radio Text.
Scan
Samples each of the strongest stations on the selected band for 10 seconds.
Select SCAN.
To turn off scan, select Stop Scan.
Radio frequency manual tune screen
You can tune the range of FM frequency between 87.7 to 107.9MHz and range of AM frequency between 530 to 1710kHz.
Tune icons:
Select to tune the radio frequency.
Seek icons:
Select to search the selected band up or down for a station with a strong signal.
Radio text
The text indicator comes on when you received a text message. The indicator stays on until you read the message.
The radio text information is not updated automatically. If you want to display the latest information, return to the previous screen and select Radio Text again.
Playing SiriusXM® Radio
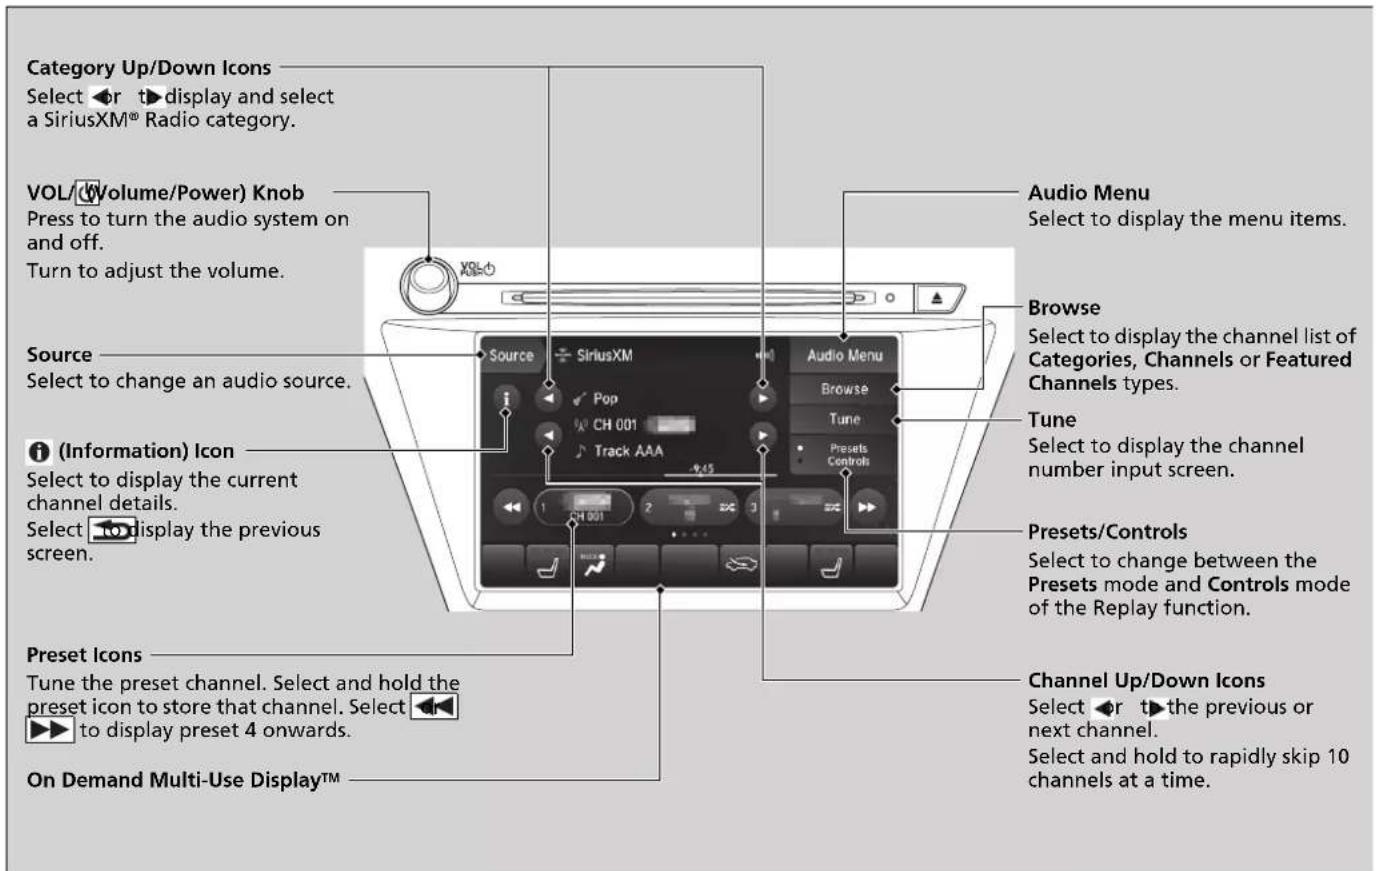
text_image
Category Up/Down Icons Select ◄r ▶ display and select a SiriusXM® Radio category. VOL(Volume/Power) Knob Press to turn the audio system on and off. Turn to adjust the volume. Source Select to change an audio source. i (Information) Icon Select to display the current channel details. Select ▶ to display the previous screen. Preset Icons Tune the preset channel. Select and hold the preset icon to store that channel. Select ◄▶ to display preset 4 onwards. On Demand Multi-Use Display™ Audio Menu Select to display the menu items. Browse Select to display the channel list of Categories, Channels or Featured Channels types. Tune Select to display the channel number input screen. Presets/Controls Select to change between the Presets mode and Controls mode of the Replay function. Channel Up/Down Icons Select ◄r ▶ the previous or next channel. Select and hold to rapidly skip 10 channels at a time.To Play SiriusXM® Radio
- Select the SiriusXM® mode.
Audio Remote Controls P. 241
On Demand Multi-Use Display™ P. 244
- Select a channel using the ◀, ▶ icons or the preset numbers (1-12) on the preset mode screen.
SiriusXM® channel manual tune screen
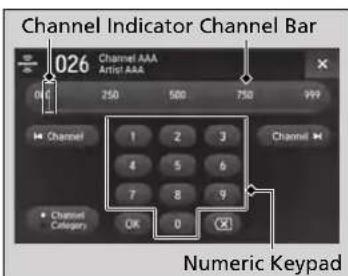
text_image
Channel Indicator Channel Bar 026 Channel AAA Artist AAA 010 750 500 750 999 Channel 1 2 3 4 5 6 7 8 9 Channel Category OK 0 (X) Numeric Keypad- Select Tune.
- Enter the desired channel number using the numeric keypad.
- Select OK to tune into the channel.
You can also tune into the channel of your choice following the procedures below instead of inputting its channel number.
- Touch the desired channel number on the channel bar.
- Select and hold the channel indicator, then slide it to the desired channel number on the channel bar.
Playing SiriusXM® Radio
You can control the SiriusXM® radio using voice commands.
→ Voice Control Operation P. 258
In the channel mode, all available channels are selectable. In the category mode, you can select a channel within a category (Jazz, Rock, Classical, etc.).
There may be instances when SiriusXM® Radio does not broadcast all the data fields (artist name, title). This does not indicate a problem with your audio system.
SiriusXM® Radio stations load in ascending order, which can take about a minute. Once they have loaded you will be able to scroll up or down to make your selections.
Tune Start:
When you change a channel, a song being played on that channel restarts from the beginning with this function. This can be turned on or off from the Play the Song from the Beginning setting.
→Customized Features P. 362
SiriusXM® channel manual tune screen
Channel icons:
Select to the previous or next channel. Select and hold to rapidly skip 10 channels at a time.
Continued
To change the tune mode:
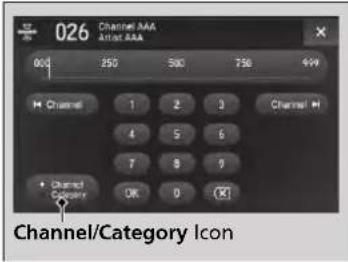
text_image
026 Channel AAA Active AAA 800 750 500 750 449 Channel 1 2 3 Channel # 4 5 6 7 8 9 + Channel Category OK 0 (K) Channel/Category Icon- Select Tune.
- Select Channel/Category icon.
Preset Memory
To store a station:
- Tune to the selected channel.
- Select Presets/Controls icon to set the Presets.
- Select and hold the preset number you want to store that channel.
Playing SiriusXM® Radio
You can store 12 SiriusXM® stations into the preset memory.
■ TuneMix™ (Multi-channel preset)
You can store up to 10 of your preferred music channels and listen to them randomly.
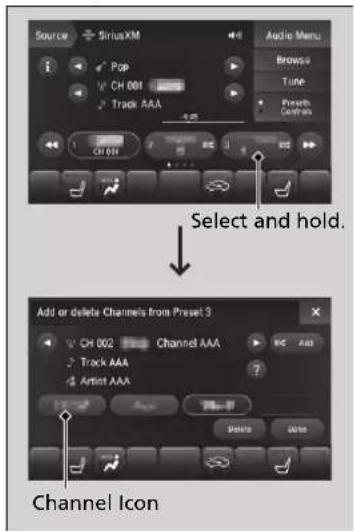
text_image
Source + SiriusXM Audio Menu Browse Tune Search Controls 1 Pop CH 001 Track AAA 2.5 CH 001 Select and hold. Add or delete Channels from Preset 3 CH 002 Channel AAA Track AAA Artist AAA ?? Channel Icon Delete Auto- Tune a channel.
-
Select and hold the preset number you want to store that channel.
-
Select Add.
- Select Done to return the previous screen.
TuneMix™ (Multi-channel preset)
TuneMix ^™ is registered trademarks of SiriusXM ^® Radio, Inc.
To store a multi-channel preset, you need to setup the TuneMix setting to On.
Customized Features P. 362
TuneMix ^TM is available for music channels only.
To delete a multi-channel preset:
- Select and hold the preset number you want to delete that channel.
- Select the channel icon.
- Select Delete.
- Select Done to return the previous screen.
Continued
Listening to Featured Channels
Suggested channel listing received from SiriusXM® can be displayed and selected.
- Select Browse.
- Select Featured Channels.
- Select a channel.
Displaying a Channel Schedule
You can check a channel schedule by selected channel list on the On Demand Multi-Use Display™.
- Select Audio Menu.
- Select View Channel Schedule.
You can also check the other channel by the following procedure.
- Select Categories, Channels or Presets.
- Select a channel.
>>Listening to Featured Channels
Up to three featured channels by SiriusXM® can be displayed.
Replay Function
The system constantly records up to the last 60 minutes of your currently tuned channel and all the preset channel broadcast, starting from the moment you turn the power mode to ON. You can rewind and replay the last 60 minutes of each broadcast.
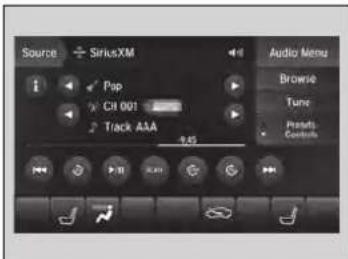
text_image
Source SinksXM Audio Menu Browse Turn Pap C# 001 Track AAA 9.65- Select Presets/Controls to set the Controls.
- Select an option.
The following items are available:
▶/Ⅲ: Pauses or plays a storing broadcast.
C: Returns to real-time broadcast.
: Skips to the previously stored channel.
▶▶▶: Skips to the next channel.
: Select to skip back 15 seconds in the current selection. Select and hold to fast-rewind the current selection.
☐: Select to skip forward 15 seconds in the current selection. Select and hold to fast-forward the current selection.
■ Returning to real-time broadcast
Select ☐ while listening to the playback channel.
>>Replay Function
The system starts storing broadcast in memory when the power mode is turned ON. You can go back to the program from that point.
You can no longer replay any program once the power mode is turned OFF as it erases memory. You can check how long the program has been stored in memory from the On Demand Multi-Use Display™.
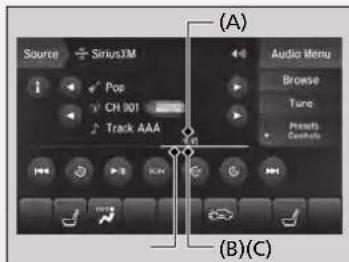
text_image
Source Sirius3M Pop CH 901 Track AAA (A) Audio Menu Browse Tune Preset Controls (B)(C)(A): Shows how much time the replayed segment is behind the real-time broadcast
(B): Replayed segment
(C): Length stored in memory
Live Sports Alert
While listening to other channels you can receive sports alerts such as scores from your favorite teams.
To set up a sports alert
text_image
>>> SportsFlash Notification Discite > Beep On Diff Favorite TeamB >- Select Audio Menu.
- Select Audio Settings.
- Select SiriusXM.
- Select SportsFlash.
- Select Notification, then select Enable.
- Select Favorite Teams, then select a team.
Live Sports Alert
The sports alert function at SiriusXM® mode only.
To set up a sports alert
Sports alerts cut in only when SiriusXM® mode is on. Selecting Enable once from customized settings disables the alert feature next time you turn the power mode to ON.
→Customized Features P. 362
■ Receiving a sports alert
- A pop-up appears and notifies you of a sports alert.
- Select Listen Now.
text_image
SportsFlash CH XXX Live XXX Play-by-Play XXXXXXXXXXXXXX XXXXXXXXXXXXXX BackThe following items are available:
II/▶: Pauses or plays a current sports alert.
Live: Returns to real-time broadcast.
: Skips to the previously stored sports alert.
▶▶▶: Skips to the next stored sports alert.
Select to skip back 15 seconds to the current sports alert. Select and hold to fast-rewind the current sports alert.
☐: Select to skip forward 15 seconds to the current sports alert. Select and hold to fast-forward the current sports alert.
Back: Returns to previous channel.
■ Listening to a missed sports alert
- Select Audio Menu.
- Select SportsFlash.
- Select an item.
Traffic and Weather Information
You can receive the SiriusXM® traffic and weather information service in SiriusXM® mode.
■ To set up a traffic & weather information
text_image
>>> Traffic & Weather New Setup No City Selected Atlanta Baltimore Boston- Select Audio Menu.
- Select Audio Settings.
- Select SiriusXM
- Select Traffic & Weather Now Setup
- Select the region.
When you do not want to receive the information, select No City Selected.
»Traffic and Weather Information
The traffic and weather information function in SiriusXM® mode only.
Traffic & Weather Now are registered trademarks of SiriusXM® Radio, Inc.
To set up a traffic & weather information
When you listen to the traffic and weather information service, set up the applicable city using Traffic & Weather Now Setup.
■ Listening a traffic and weather information
- Select Audio Menu.
- Select Traffic & Weather Now.
text_image
Traffic & Weather Now XXXXXXXXXXXXXX XXXXXXXXXXXXXX XXXXXXXXXXXXXX BackThe following items are available:

Pauses or plays a stored broadcast.

Returns to real-time broadcast.

Skips to the previously stored channel.

Skips to the next channel.

Select to skip back 15 seconds in the current broadcast. Select and hold to fast- vind the current broadcast.

Select to skip forward 15 seconds in the current broadcast. Select and hold to -forward the current broadcast.
Back: Returns to previous channel.
▶▶ Audio System Basic Operation ▶ Playing SiriusXM® Radio
Scan
Sample each channel on the selected mode for 10 seconds.
- Select Presets/Controls to set the Controls.
- Select SCAN.
- Select Scan Channels or Scan Presets
To turn off scan, select Stop Scan.
Scan
You can select desired channel by songs using Scan Presets.
The "Scan Songs in Presets" function is based on TuneScan™ technology of SiriusXM®.
The "Featured Channels" function is based on Featured Favorites™ technology of SiriusXM®.
TuneScan ^TM and Featured Favorites ^TM are registered trademarks of SiriusXM ^® Radio, Inc.
Scan Mode Menu Items
Scan Channels: Scans for channels with a strong signal in the selected mode.
Scan Presets: Scans for desired preset channel by songs. Select (skip up) or (skip down) to skip to the next/previous stored selection.
Playing a CD
Your audio system supports audio CDs, CD-Rs and CD-RWs in either MP3, WMA, or AAC ^4 format. With the CD loaded, select the CD mode.
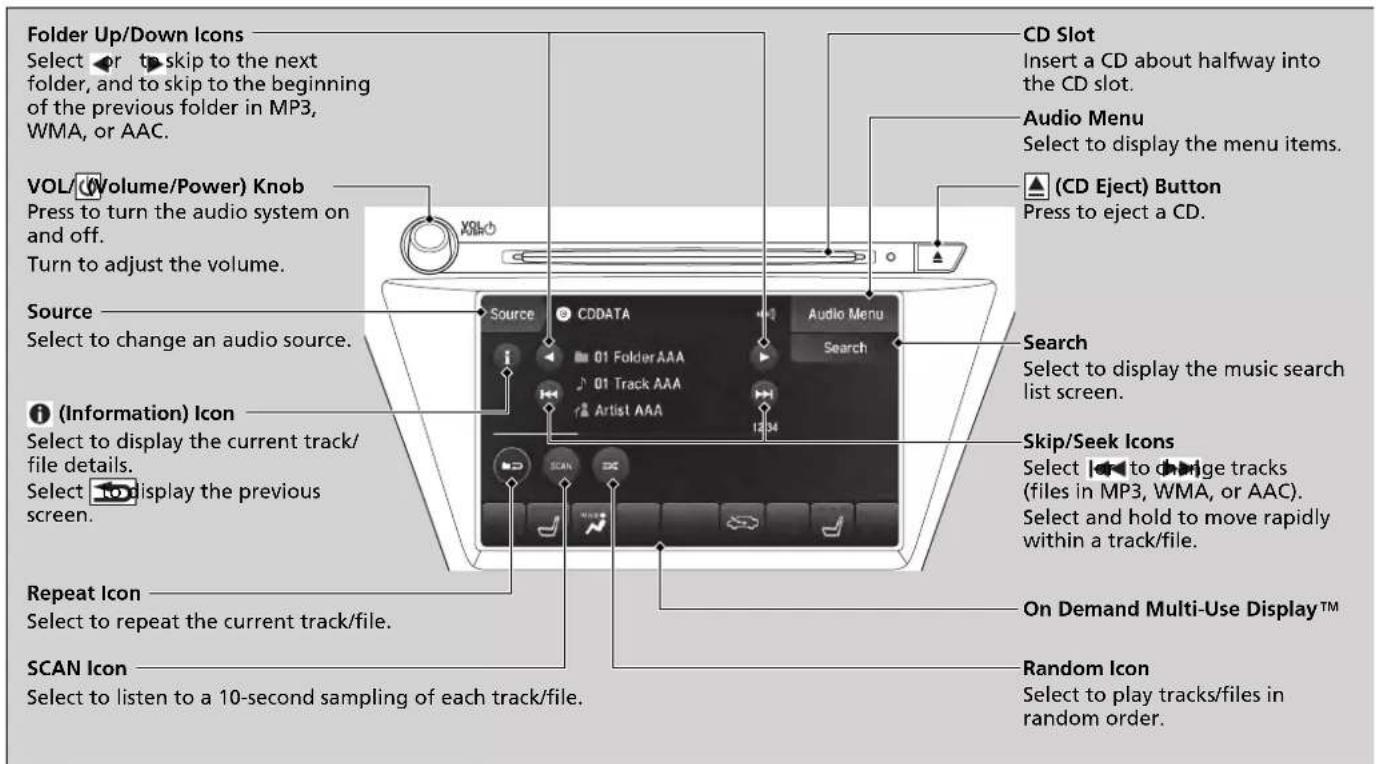
text_image
Folder Up/Down Icons Select or skip to the next folder, and to skip to the beginning of the previous folder in MP3, WMA, or AAC. VOL (Volume/Power) Knob Press to turn the audio system on and off. Turn to adjust the volume. Source Select to change an audio source. (Information) Icon Select to display the current track/file details. Select to display the previous screen. Repeat Icon Select to repeat the current track/file. SCAN Icon Select to listen to a 10-second sampling of each track/file. CD Slot Insert a CD about halfway into the CD slot. Audio Menu Select to display the menu items. (CD Eject) Button Press to eject a CD. Search Select to display the music search list screen. Skip/Seek Icons Select to change tracks (files in MP3, WMA, or AAC). Select and hold to move rapidly within a track/file. On Demand Multi-Use Display™ Random Icon Select to play tracks/files in random order.*1: Only AAC format files recorded with iTunes are playable on this unit.
Continued
How to Select a File from the Music Search List (MP3/WMA/AAC)
Folder Selection
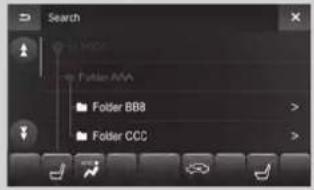
text_image
Search Folder AAA Folder BBB > Folder CCC >
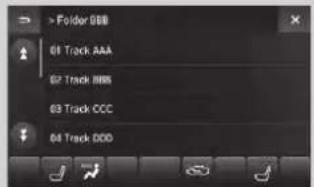
text_image
> Folder GBB 01 Track AAA 02 Track AAA 03 Track CCC 04 Track DDD- Select Search.
-
Select a folder.
-
Select a track.
Playing a CD
NOTICE
Do not use CDs with adhesive labels. The label can cause the CD to jam in the unit.
WMA and AAC files protected by digital rights management (DRM) cannot be played. The audio system skips to the next file.
Text data appears on the display under the following circumstances:
- When you select a new folder, file, or track.
- When you change the audio mode to CD.
- When you insert a CD.
If you eject the CD but do not remove it from the slot, the system reloads the CD automatically after several seconds.
How to Select a Play Mode
You can select scan, repeat, and random modes when playing a track or file.
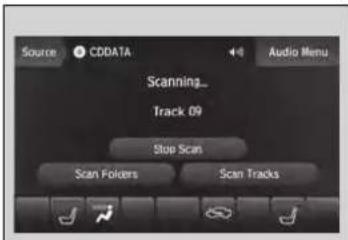
text_image
Source CDDATA Audio Menu Scanning_ Track 09 Stop Scan Scan Folders Scan TracksScan
Select SCAN to provide a 10-second sampling of each track/file.
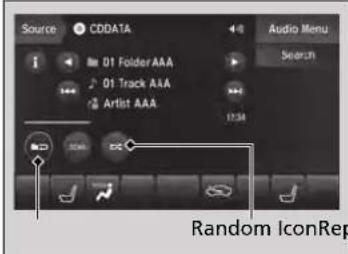
text_image
Source CDDATA Audio Menu 01 Folder AAA Search 01 Track AAA Artist AAA 1234 Random IconRep■ Random/Repeat
Select repeat or random icon repeatedly until you reach a desired mode.
■ To turn off a play mode
To turn off scan, select Stop Scan.
To turn off random/repeat, select repeat or random icon repeatedly.
>>How to Select a Play Mode
Play Mode Menu Items
SCAN
Scan Folders (MP3/WMA/AAC): Provides a 10-second sampling of the first file in each of the main folders.
Scan Tracks (MP3/WMA/AAC): Provides a 10-second sampling of all files in the current folder in MP3, WMA, or AAC.
Repeat

(repeat off): Repeat mode to off.

(repeat track): Repeats the current track/file.

(repeat folder) (MP3/WMA/AAC): Repeats all files in the current folder.
Random

(random off): Random mode to off.

(random in folder) (MP3/WMA/AAC): Plays all files in the current folder in random order.

(random all tracks): Plays all tracks/files in random order.
Playing Hard Disk Drive (HDD) Audio
The Hard Disk Drive (HDD) Audio function plays tracks from music CDs that have been recorded onto the built-in HDD. You can arrange the tracks in playlists or play the tracks using various search methods.
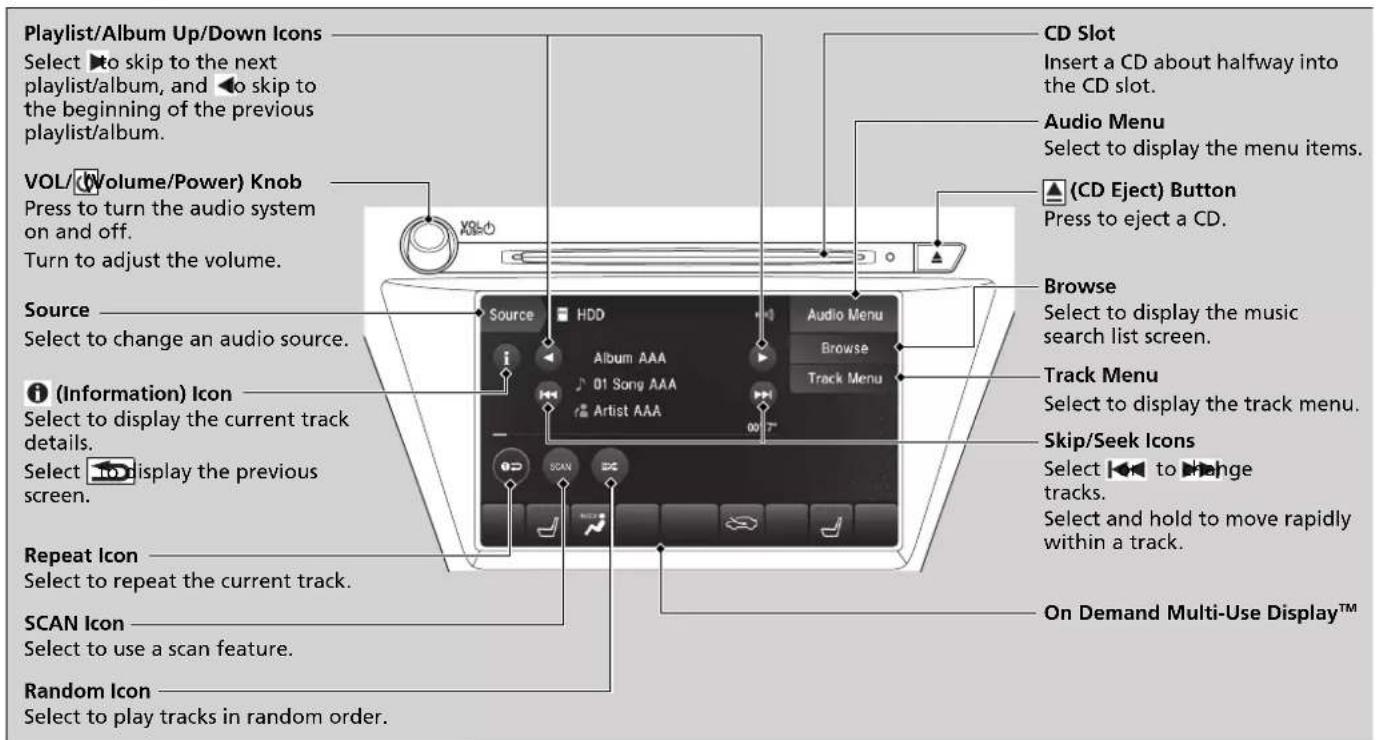
text_image
Playlist/Album Up/Down Icons Select ▶to skip to the next playlist/album, and ◄to skip to the beginning of the previous playlist/album. VOL/(Volume/Power) Knob Press to turn the audio system on and off. Turn to adjust the volume. Source Select to change an audio source. (Information) Icon Select to display the current track details. Select ▶to display the previous screen. Repeat Icon Select to repeat the current track. SCAN Icon Select to use a scan feature. Random Icon Select to play tracks in random order. CD Slot Insert a CD about halfway into the CD slot. Audio Menu Select to display the menu items. (CD Eject) Button Press to eject a CD. Browse Select to display the music search list screen. Track Menu Select to display the track menu. Skip/Seek Icons Select ◄◀ to ▶change tracks. Select and hold to move rapidly within a track. On Demand Multi-Use Display™Recording a Music CD to HDD
When Recording from CD is set to Auto, the songs on music CDs are automatically recorded to the HDD the first time you play each disc. You can then play the songs directly from the HDD.
→Customized Features P. 362
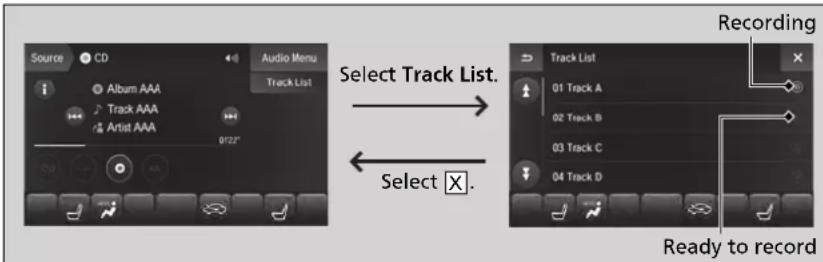
text_image
Source CD Audio Menu i Album AAA Track List Track AAA Artist AAA 0122° Select Track List. Select X. Recording Track List 01 Track A 02 Track B 03 Track C 04 Track D Ready to recordStop Recording
Select (in CD mode)
Recording a CD Manually
When Recording from CD is set to Manual, the songs on music CDs can be manually recorded to the HDD.
Select ●(in CD mode)
Recording a Music CD to HDD
You can add tracks to user playlists, where you can mix and match tracks from other CDs recorded on the HDD.
→ Editing an Album or Playlist P. 284
Editing Track Information P. 287
If you turn off the power system or the audio system is turned off while recording a CD, there may be pauses between songs when you play back from the HDD.
Repeat, random, and scan functions are not available during recording.
You can play music from other sources (e.g., SiriusXM®, HDD, etc.) while recording.
Please note that there is no compensation offered in the case of unsuccessful recording of audio data or the loss of audio data due to any cause whatsoever.
Clearing the HDD
Any music tracks stored on the HDD can be deleted.
→Deleting all HDD Data P. 290
Continued
How to Select a Track from the Music Search List
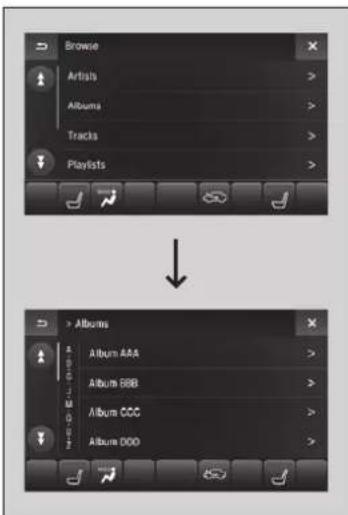
text_image
Browse Artists > Albums > Tracks > Playlists > Albums Album AAA > Album BBB > Album CCC > Album DDD >- Select Browse.
- Select the items on that menu.
▶Title information is displayed if found in the Gracenote® Album Info (Gracenote® Media Database) stored on the HDD.
The HDD has two types of playlists: original playlists and user playlists. An original playlist is automatically created for each album when a music CD is recorded.
How to Select a Track from the Music Search List
You can control the HDD audio using voice commands.
→ Voice Control Operation P. 258
→Song By Voice ™ (SBV) P. 294
Music tracks recorded on HDD cannot be recorded onto CDs or other devices.
Tracks are recorded at four times the playback speed using ultra-efficient compression technology; therefore, sound quality may vary slightly from the original.
If the HDD is ever replaced, all music data is lost and cannot be recovered.
If there is a problem, you may see an error message on the On Demand Multi-Use Display™.
→ Hard Disk Drive (HDD) Audio P. 316
How to Select a Play Mode
You can select scan, repeat, and random modes when playing a track.
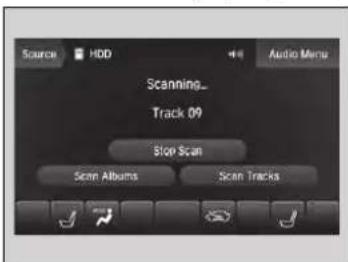
text_image
Source HDD Audio Menu Scanning_ Track 09 Stop Scan Scan Albums Scan TracksScan
Select SCAN to provide a 10-second sampling of each track.
How to Select a Play Mode
Play Mode Menu Items
SCAN
The following menu items vary depending on the category you selected by the Browse list.
Scan Albums: Provides a 10-second sampling of all tracks in current album.
Scan Tracks: Provides a 10-second sampling of all tracks on the HDD.
Scan Artists: Provides a 10-second sampling of all tracks in current artist.
Scan Playlists: Provides a 10-second sampling of all tracks in current playlist.
Scan Genres: Provides a 10-second sampling of all tracks in current genre.
Scan Composers: Provides a 10-second sampling of all tracks in current composer.
Scan Rec. Date: Provides a 10-second sampling of all tracks in current recorded date.
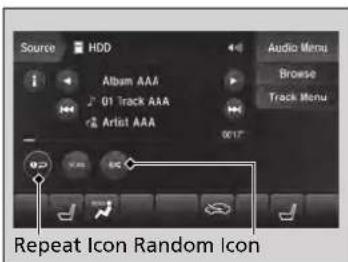
text_image
Source HDD Album AAA 01 Track AAA Artist AAA Audio Menu Browse Track Menu 0017 Repeat Icon Random Icon■ Random/Repeat
Select repeat or random icon repeatedly until you reach a desired mode.
■ To turn off a play mode
To turn off scan, select Stop Scan.
To turn off random/repeat, select repeat or random icon repeatedly.
>>Random/Repeat
Random/Repeat
The following menu items vary depending on the category you selected by the Browse list.
Repeat

(repeat off): Changes repeat mode to off.

(repeat track): Repeats the current track.

(repeat album): Repeats all tracks in the current album.

(repeat playlist): Repeats all tracks in the current playlist.

(repeat artist): Repeats all tracks in the current artist.

(repeat genre): Repeats all tracks in the current genre.

(repeat composer): Repeats all tracks in the current composer.

(repeat recorded date): Repeats all tracks in the current recorded date.
Editing a Current Track
You can edit the information of the current selected track on the playlist.
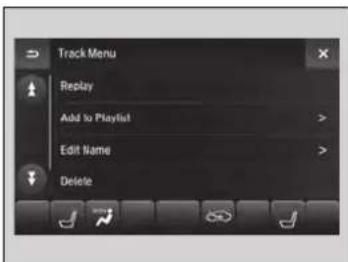
text_image
Track Menu Replay Add to Playlist Edit Name Delete- Select Track Menu.
- Select the items on that menu.
The following items are available:
Replay: Select to replay from the beginning of current selected track.
Add to Playlist: Add a current selected track to the playlist.
Edit Name: Edit current selected track information.
Delete: Delete a current selected track from the album and playlist.
Move: Change the order of tracks currently playing in an album or playlist.
>>Random/Repeat
Random

(random off): Changes random mode to off.

(random all tracks): Plays all tracks in random order.

(random in album): Plays all tracks in the current album in random order.

(random in playlist): Plays all tracks in the current playlist in random order.

(random in artist): Plays all tracks in the current artist in random order.

(random in genre): Plays all tracks in the current genre in random order.

(random in composer): Plays all tracks in the current composer in random order.

(random in recorded date): Plays all tracks in the current recorded date in random order.
Continued
Editing an Album or Playlist
Change the playlist name, album name, genre, and track order of the current playlist. You can also delete tracks, playlists, and albums.
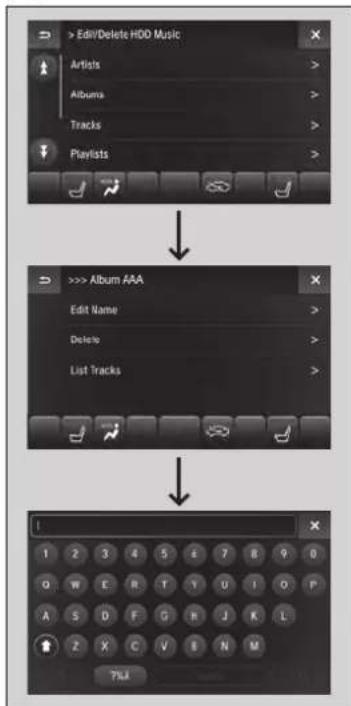
flowchart
graph TD
    A["> Edit/Delete HDD Music"] --> B[">>> Album AAA"]
    B --> C["1 2 3 4 5 6 7 8 9 0"]
    C --> D["Q W E R T Y U I O P"]
    D --> E["A S D F G H J K L"]
    E --> F["Z X C V E N M"]
    F --> G["7PKA"]
■ Editing an album
- Select Audio Menu.
- Select Edit/Delete HDD Music.
- Select the items other than Tracks and Playlists on that menu.
-
Select an album that you want to edit or delete.
-
To edit an album name: Select Edit Name, then select Album Name.
▶ Enter the album name using the keyboard, then select OK.
To delete an album: Select Delete, then select Yes.
To edit track information or delete a track: Select List Tracks.
Editing Track Information P. 287
- Select Done.
Editing an Album or Playlist
The maximum number of original playlists is 50 with a maximum of 99 songs in each playlist.
Each album CD counts as an original playlist. Adding a track from a user playlist into the same user playlist will cause the track to appear twice in the playlist.
Deleting an album (original playlist) also deletes the album tracks you have stored in any user playlists.
Deleting a user playlist or deleting all tracks from a user playlist does not remove the playlist folder. The folder retains the playlist name and artist information.
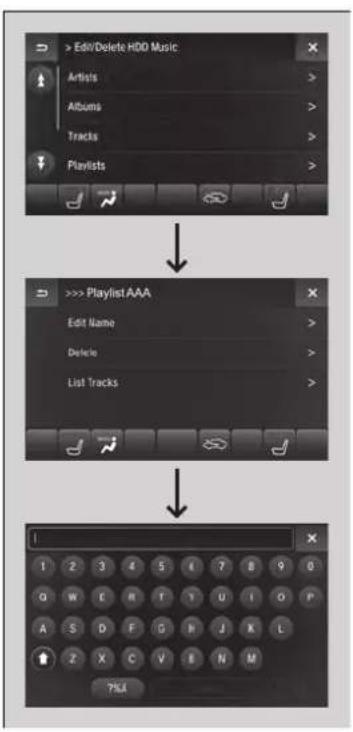
flowchart
graph TD
    A["> Edit/Delete HDD Music"] --> B[">>> PlaylistAAA"]
    B --> C["I"]
■ Editing a playlist
- Select Audio Menu.
- Select Edit/Delete HDD Music.
- Select Playlists.
-
Select a playlist that you want to edit or delete.
-
To edit a playlist name: Select Edit Name, then select Playlist Name.
▶ Enter the playlist name using the keyboard, then select OK.
To delete a playlist: Select Delete, then select Yes.
To edit track information or delete a track: Select List Tracks. Editing Track Information P. 287
- Select Done.
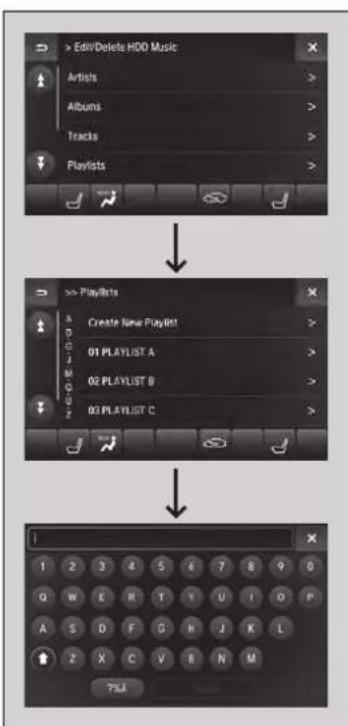
flowchart
graph TD
    A["> Edit/Delete HDD Music"] --> B["> Playlists"]
    B --> C["1 2 3 4 5 6 7 8 9 0"]
    C --> D["Q W E R T I U I O P"]
    D --> E["A S D F G H J K L"]
    E --> F["Z X C V B N M"]
    F --> G["75A"]
■ Creating a new playlist
- Select Audio Menu.
- Select Edit/Delete HDD Music.
-
Select Playlists.
-
Select Create New Playlist.
-
Enter the playlist name using the keyboard, then select OK.
- Select an item, then select desired track.
- Select Done.
Editing Track Information
Change the track title, artist name, genre and composer. You can also delete tracks.
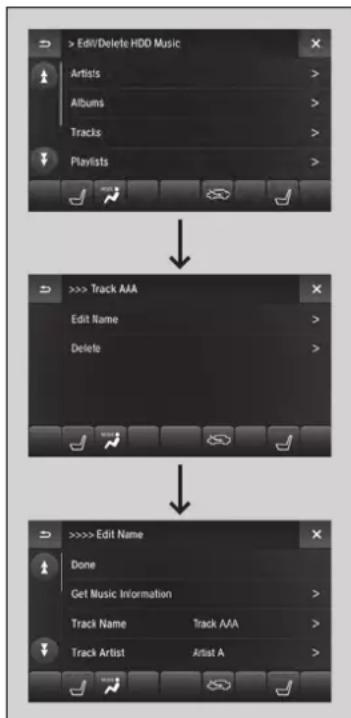
flowchart
graph TD
    A["> Edit/Delete HDD Music"] --> B[">>> Track AAA"]
    B --> C[">>> Edit Name"]
    C --> D["Done"]
    D --> E["Get Music Information"]
    E --> F["Track Name"]
    F --> G["Track AAA"]
    G --> H["Track Artist"]
    H --> I["Artist A"]
- Select Audio Menu.
- Select Edit/Delete HDD Music.
- Select Tracks.
-
Select a track you want to edit or delete.
-
To edit track information: Select Edit Name, then select Track Name, Track Artist, etc.
▶ Enter the track name, track artist, etc. using the keyboard, then select OK.
To delete a track: Select Delete, then select Yes.
- Select Done.
Displaying Music Information
Music information (album name, artist name, genre) can be acquired by accessing the Gracenote® Album Info.
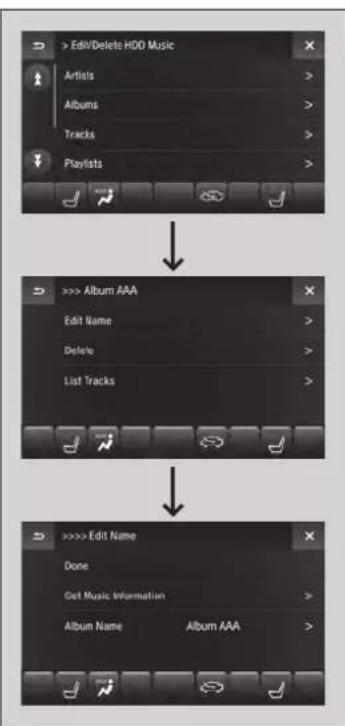
flowchart
graph TD
    A["> Edit/Delete HDD Music"] --> B[">>> Album AAA"]
    B --> C[">>> Edit Name"]
    C --> D["Done"]
    C --> E["Get Music Information"]
    C --> F["Album Name"]
    C --> G["Album AAA"]
- Select Audio Menu.
- Select Edit/Delete HDD Music.
-
Select an item about which you want to acquire information.
-
Select Edit Name.
-
Select Get Music Information.
The system starts to access the Gracenote® Album Info.
■ Updating Gracenote® Album Info
Update the Gracenote® Album Info (Gracenote® Media Database) that is included with the navigation system.
text_image
> CD/HDD Recording Options > HDD Information Update Gracanote Album Information Delete All HDD Data- Select Audio Menu.
- Select Audio Settings.
- Select CD/HDD.
- Insert the update disc into the disc slot or connect the USB flash drive that includes the update.
- Select Update Gracenote Album Information.
- Select Update by CD or Update by USB.
The system starts updating and the confirmation message appears on the screen. Select OK to finish.
>>Updating Gracenote® Album Info
To acquire updated files:
- Consult a dealer.
• U.S.: Visit www.acura.com.
• Canada: Visit www.acura.ca.
Once you perform an update, any information you edited before will be overwritten or erased.
▶▶ Audio System Basic Operation▶ Playing Hard Disk Drive (HDD) Audio
Deleting all HDD Data
Delete all music data on the HDD.
text_image
> CD/HDD Recording Options HDD Information Update Gracemote Album Information Delete All HDD Data- Select Audio Menu.
- Select Audio Settings.
- Select CD/HDD
- Select Delete All HDD Data.
The confirmation message will appear. - Select Yes.
Playing an iPod
Connect the iPod using your USB connector to the USB port (2.5A), then select the iPod mode.
USB Ports P. 237
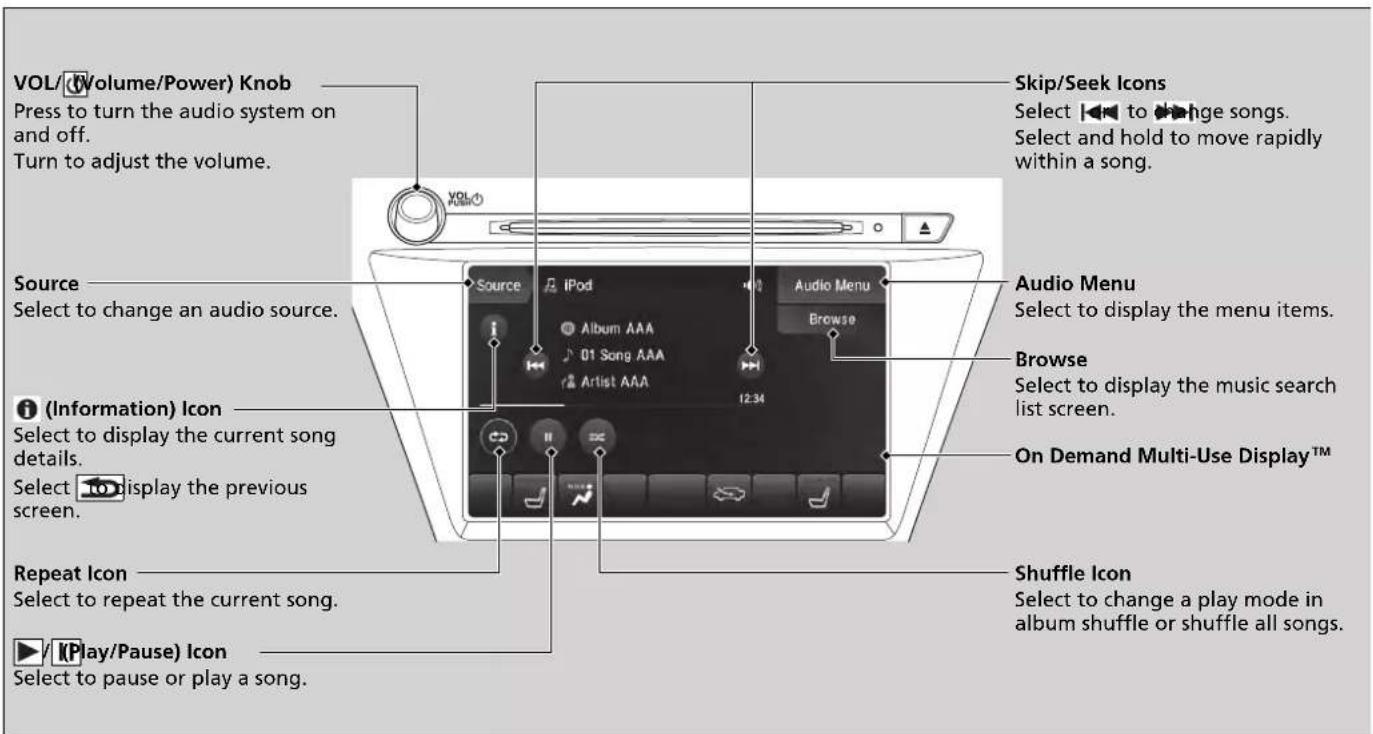
text_image
VOL/(Volume/Power) Knob Press to turn the audio system on and off. Turn to adjust the volume. Source Select to change an audio source. (i) (Information) Icon Select to display the current song details. Select to display the previous screen. Repeat Icon Select to repeat the current song. ▶ Play/Pause) Icon Select to pause or play a song. Skip/Seek Icons Select to change songs. Select and hold to move rapidly within a song. Audio Menu Select to display the menu items. Browse Select to display the music search list screen. On Demand Multi-Use Display™ Shuffle Icon Select to change a play mode in album shuffle or shuffle all songs.How to Select a Song from the Music Search List

text_image
Browse Artists Albuma Songs Genres Albums All Album AAA Album BBB Album CCC- Select Browse.
- Select the items on that menu.
How to Select a Song from the Music Search List
You can control an iPod using voice commands.
→ Voice Control Operation P. 258
→Song By Voice ™ (SBV) P. 294
Available operating functions vary on models and/or versions. Some functions may not be available on the vehicle's audio system.
If there is a problem, you may see an error message on the On Demand Multi-Use Display™.
→iPod/USB Flash Drive P. 317
How to Select a Play Mode
You can select repeat and shuffle modes when playing a song.
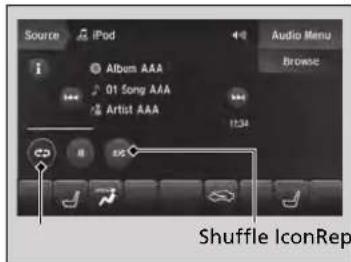
text_image
Source iPod Album AAA 01 Song AAA Artist AAA Audio Menu Browse 1:34 CD EPC Shuffle IconRep■ Shuffle/Repeat
Select shuffle or repeat icon repeatedly until you reach a desired mode.
■ To turn off a play mode
To turn off the shuffle or repeat, select shuffle or repeat icon repeatedly.
>>How to Select a Play Mode
Play Mode Menu Items
Repeat

(repeat off) ^1 : Repeat mode to off.

(repeat song): Repeats the current song.

(repeat all): Repeats the all songs.
Shuffle

(shuffle off): Shuffle mode to off.

(shuffle all songs): Plays all available songs in a selected list (playlists, artists, albums, songs, genres, or composers) in random order.

(shuffle albums): Plays all available albums in a selected list (playlists, artists, albums, songs, genres, or composers) in random order.
*1: Not available on all iPod.
Song By Voice™ (SBV)
Use SBV to search for and play music from your HDD or iPod using voice commands.
■ To enable SBV
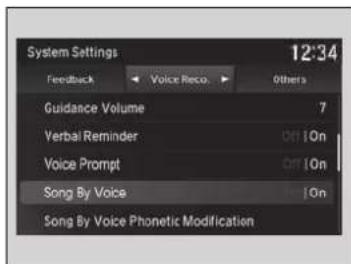
text_image
System Settings 12:34 Feedback Voice Reco Others Guidance Volume 7 Verbal Reminder Off On Voice Prompt Off On Song By Voice 10n Song By Voice Phonetic Modification- Press the SETTINGS button.
- Rotate 🔊 to select System Settings, then press 😊.
- Move
to select the Voice Reco. tab. - Rotate 🔺 to select Song By Voice.
- Press 🤔 to select On or Off.
>>Song By Voice™ (SBV)
Setting options:
- On (factory default): Song By Voice™ commands are available.
- Off: Disable the feature.
■ Searching for music using SBV
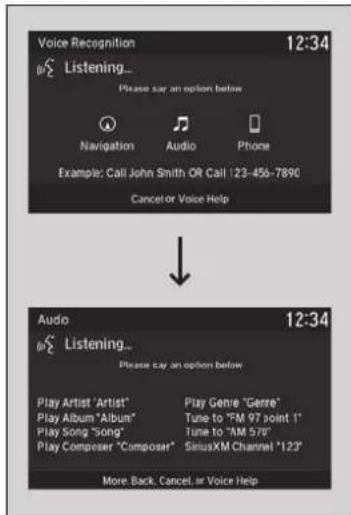
text_image
Voice Recognition 12:34 Listening... Please say an option below Navigation Audio Phone Example: Call John Smith OR Call 123-456-7890 Cancelor Voice Help Audio 12:34 Listening... Please say an option below Play Artist 'Artist' Play Genre "Genre" Play Album "Album" Tune to "FM 97 point I" Play Song "Song" Tune to "AM 576" Play Composer "Composer" SiriusXM Channel "123" More Back Cancel or Voice Help- Set the Song By Voice setting to On.
-
Press the 📋 (Talk) button and say "Audio" to activate the SBV feature for the HDD and iPod.
-
Press the button and say a command.
Example 1: Say "(List) 'Artist A'" to view a list of songs by that artist. Select the desired song to start playing.
Example 2: Say "Play 'Artist A'" to start playing songs by that artist.
- To cancel SBV, press the ☐hang-up/back) button on the steering wheel. The selected song continues playing.
Once you have canceled this mode, you need to press the button and say "Audio" again to re-activate this mode.
Searching for music using SBV
Song By Voice™ Commands List
→ Voice Control Operation P. 258
NOTE:
Song By Voice™ commands are available for tracks stored on the HDD or iPod.
You can add phonetic modifications of difficult words so that it is easier for SBV to recognize artists, songs, albums, and composers in voice commands.
Phonetic Modification P. 296
SBV may not be able to recognize languages other than English for the artist name, song title, album title, and composers.
Continued
Phonetic Modification
Add phonetic modifications of difficult or foreign words so that it is easier for SBV to recognize artists, songs, albums, and composers in voice commands when searching for music on the HDD or iPod.
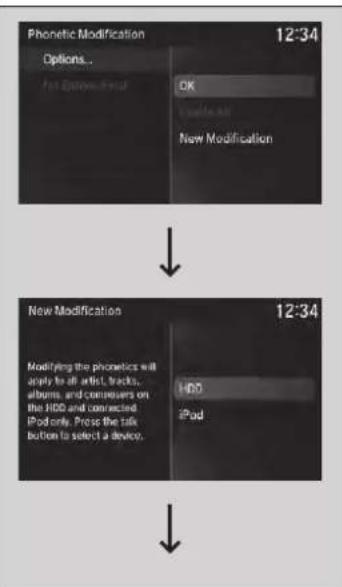
flowchart
graph TD
    A["Phonetic Modification Options"] --> B["New Modification"]
    B --> C["Modifying the phonetics will apply to all audio, tracks, albums and converters on the HDD and connected iPod only. Press the talk button to select a device."]
    C --> D["12:34"]
- Press the SETTINGS button.
- Rotate 🔺 to select System Settings, then press 😊
- Move ◀ or ▶ to select the Voice Reco. tab.
- Rotate 🔗 to select Song By Voice Phonetic Modification, then press 😊
- Rotate 🔺 to select Options..., then press 😊.
- Rotate 🔺 to select New Modification, then press 😊
- Rotate 🔒 to select HDD or iPod, then press 😊.
Phonetic Modification
Song By Voice Phonetic Modification is grayed out when Song By Voice is set to Off.
You can store up to 2,000 phonetic modification items.
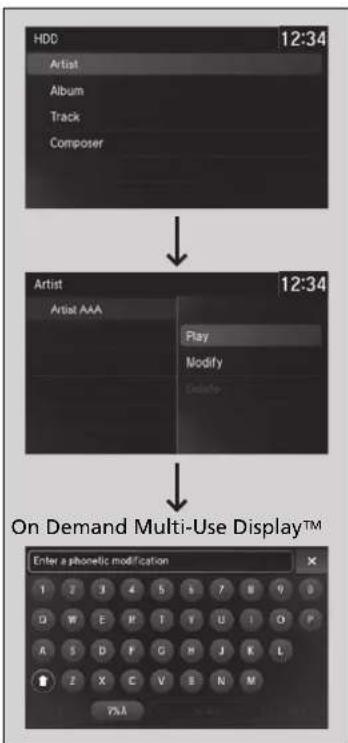
flowchart
graph TD
    A["HDD 12:34"] --> B["Artist"]
    B --> C["Album"]
    C --> D["Track"]
    D --> E["Composer"]
    F["Artist 12:34"] --> G["Artist AAA"]
    G --> H["Play"]
    G --> I["Modify"]
    G --> J["Delete"]
    K["On Demand Multi-Use Display™"] --> L["Enter a phonetic modification"]
- Rotate to select the item to modify (e.g., Artist), then press The list of the selected item appears on the screen.
- Rotate 🔗 to select an entry (e.g., No Name), then press 🔕 ▶The pop-up menu appears on the screen.
- Rotate 🔺 to select Modify, then press 😊.
▶ To listen to the current phonetic modification, rotate to select Play, then press 😊 ▶ To delete the current phonetic modification, rotate to select Delete, then press 😊 - Enter the phonetic spelling you wish to use (e.g., "Artist A") when prompted.
- Select OK to exit. ▶ The artist "No Name" is phonetically modified to "Artist A." When in the SBV mode, you can press the (talk) button and use the voice command "Play 'Artist A'" to play songs by the artist "No Name."
- Rotate 🔒 to select Options..., then press 🔊.
- Rotate 🔺 to select OK, then press 🔺.
Playing Pandora®\*1
Your audio system allows you to listen to music from the Pandora® app on a compatible smartphone.
This function is available when the phone is paired and connected to the vehicle's Bluetooth® HandsFreeLink® (HFL) system, or with an iPhone, you can connect using your USB cable to the USB port (2.5A).
Phone Setup P. 405
USB Ports P. 237
Playing Pandora® ^1
Pandora®, the Pandora logo, and the Pandora trade dress are trademarks or registered trademarks of Pandora Media, Inc., used with permission. Pandora is currently available exclusively in the United States.
To find out if your phone is compatible with this feature, visit www.handsfreelink.com/Acura, or call 1-888-528-7876.
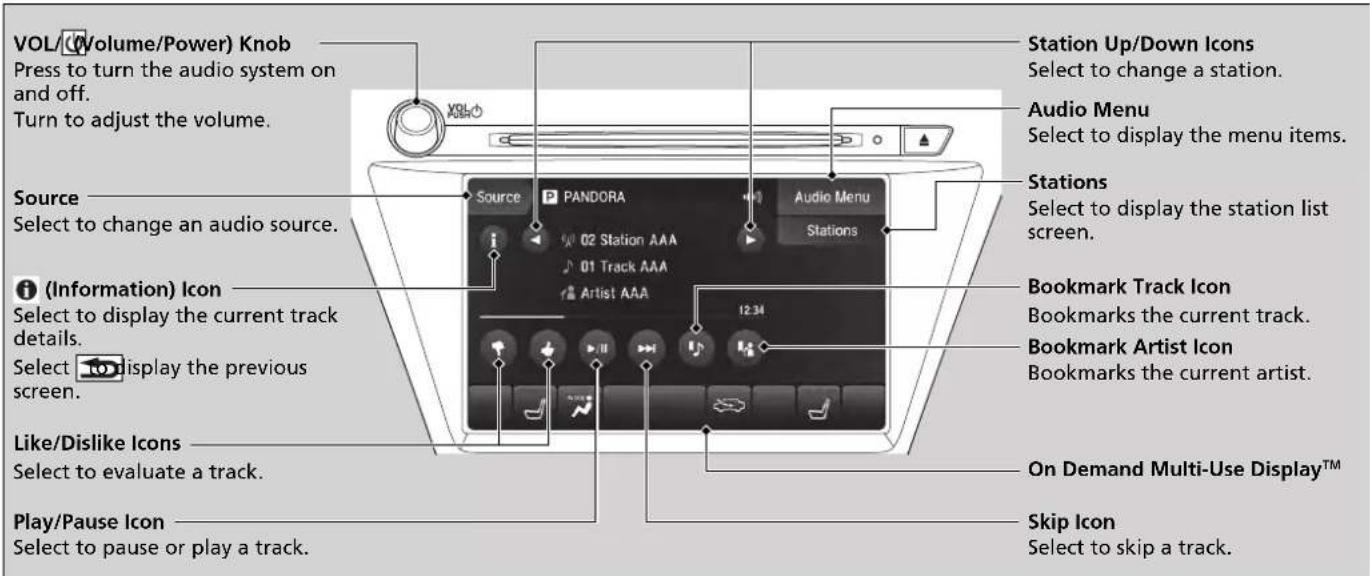
text_image
VOL/(Volume/Power) Knob Press to turn the audio system on and off. Turn to adjust the volume. Source Select to change an audio source. (i) (Information) Icon Select to display the current track details. Select to display the previous screen. Like/Dislike Icons Select to evaluate a track. Play/Pause Icon Select to pause or play a track. Station Up/Down Icons Select to change a station. Audio Menu Select to display the menu items. Stations Select to display the station list screen. Bookmark Track Icon Bookmarks the current track. Bookmark Artist Icon Bookmarks the current artist. On Demand Multi-Use Display™ Skip Icon Select to skip a track.*1: Available only on U.S. models.
How to Select a Track from the Stations List
- Select Stations.
- Select an item to select a track.
■ Create Station

text_image
Select track or artist name. Source PANDORA 02 Station AAA 01 Track AAA Artist AAA Audio Menu Stations 12:34You can create a station by Genre, Current Track or Current Artist.
- Select Stations.
- Select Create Station.
- Select the item you want to create a station.
You can also create a station by the following procedure.
- Select track name or artist name.
- Select Yes.
■ Select the connecting method
If the two devices that install Pandora app are connected via the USB and Bluetooth® connection separately, you can select the USB or Bluetooth® connection to use the Pandora®.
- Select the PANDORA on the source list screen.
- Select USB or Bluetooth.
Playing Pandora®
Pandora® is a personalized Internet radio service that selects music based on an artist, track, or genre a user enters, and streams what is likely to be of interest.
To use this service in your vehicle, the Pandora® app must first be installed on your phone. Visit www.pandora.com. for more information.
If you cannot operate Pandora® through the audio system, it may be streaming through Bluetooth® Audio. Make sure Pandora® mode on your audio system is selected.
Available operating functions vary on software versions. Some functions may not be available on the vehicle's audio system.
If there is a problem, you may see an error message on the On Demand Multi-Use Display™.
→ Pandora® P. 319
There are restrictions on the number of tracks you can skip or dislike in a given hour.
If your phone is connected to Android Auto, Pandora® is only available through the Android Auto interface. Visit the Android Auto website to check compatibility.
Playing a USB Flash Drive
Your audio system reads and plays sound files on a USB flash drive in either MP3, WMA, or AAC ^4 format. Connect your USB flash drive to the USB port ☐-2.5A (2.5A), then select the USB mode.
USB Ports P. 237
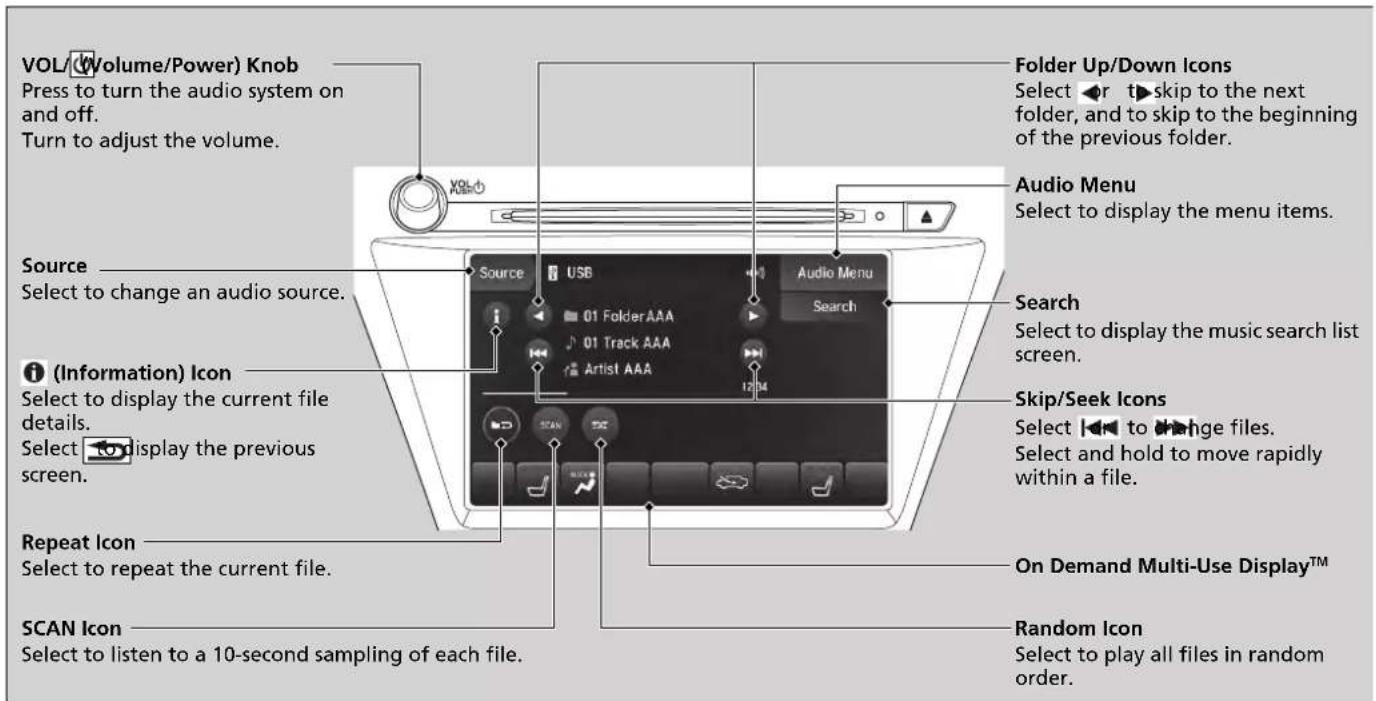
text_image
VOL(Volume/Power) Knob Press to turn the audio system on and off. Turn to adjust the volume. Source Select to change an audio source. (Information) Icon Select to display the current file details. Select display the previous screen. Repeat Icon Select to repeat the current file. SCAN Icon Select to listen to a 10-second sampling of each file. Folder Up/Down Icons Select ▶ t▶skip to the next folder, and to skip to the beginning of the previous folder. Audio Menu Select to display the menu items. Search Select to display the music search list screen. Skip/Seek Icons Select ▶ to ▶hge files. Select and hold to move rapidly within a file. On Demand Multi-Use Display™ Random Icon Select to play all files in random order.*1: Only AAC format files recorded with iTunes are playable on this unit.
How to Select a File from the Music Search List
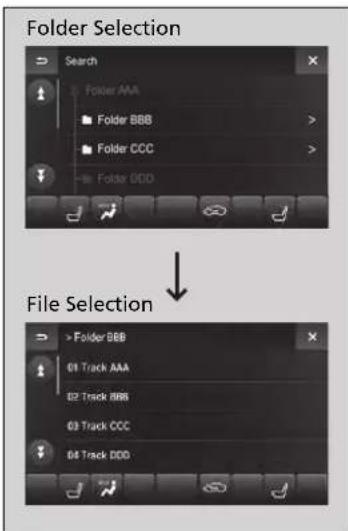
text_image
Folder Selection Search Folder AAA Folder BBB Folder CCC Folder DDD File Selection > Folder BBB 01 Track AAA 02 Track BBB 03 Track CCC 04 Track DDD- Select Search.
-
Select a folder.
-
Select a file.
Playing a USB Flash Drive
Use the recommended USB flash drives. ▶General Information on the Audio System P. 323
Files in WMA/AAC format protected by digital rights management (DRM) are not played. The audio system skips to the next file.
If there is a problem, you may see an error message on the On Demand Multi-Use Display™. ▶iPod/USB Flash Drive P. 317
How to Select a Play Mode
You can select scan, repeat, and random modes when playing a file.
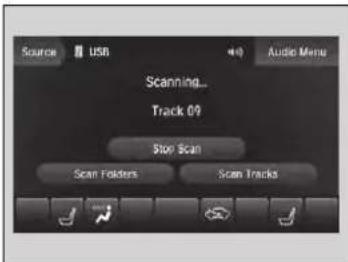
text_image
Source USB Audio Menu Scanning... Track 09 Stop Scan Scan Folders Scan TracksScan
Select SCAN to provide a 10-second sampling of each file.
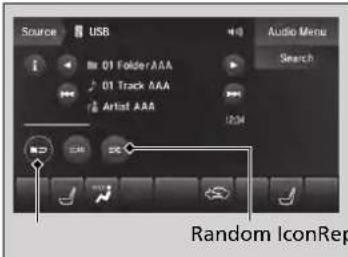
text_image
Source USB 01 Folder AAA 01 Track AAA Artist AAA Audio Menu Search Random IconRep■ Random/Repeat
Select repeat or random icon repeatedly until you reach a desired mode.
■ To turn off a play mode
To turn off scan, select Stop Scan.
To turn off random or repeat, select repeat or random icon repeatedly.
>>How to Select a Play Mode
Play Mode Menu Items
SCAN
Scan Folders: Provides a 10-second sampling of the first file in each of the main folders.
Scan Tracks: Provides a 10-second sampling of all files in the current folder.
Repeat

(repeat off): Repeat mode to off.

(repeat track): Repeats the current file.

(repeat folder): Repeats all files in the current folder.
Random

(random off): Random mode to off.

(random in folder): Plays all files in the current folder in random order.

(random all tracks): Plays all files in random order.
Playing Bluetooth® Audio
Your audio system allows you to listen to music from your Bluetooth-compatible phone.
This function is available when the phone is paired and connected to the vehicle's Bluetooth® HandsFreeLink® (HFL) system.
Phone Setup P. 405
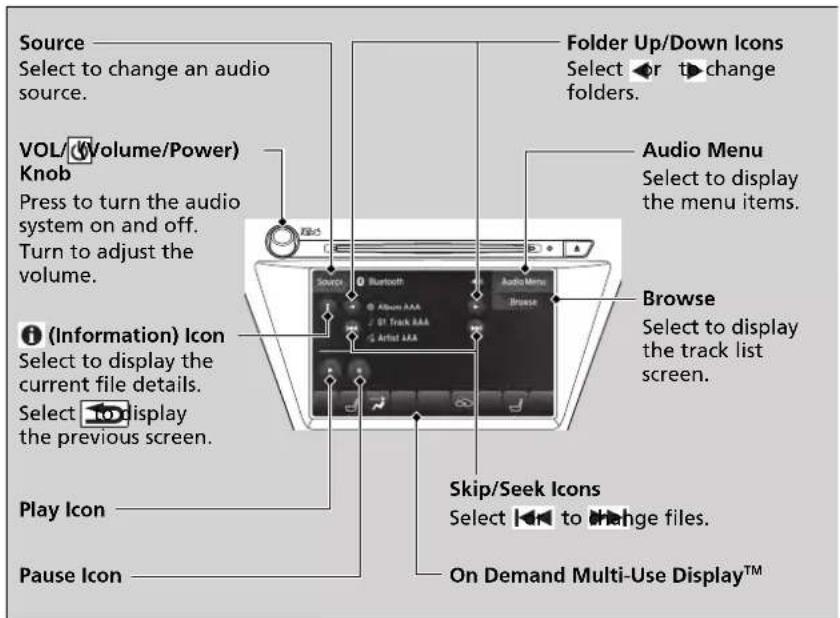
text_image
Source Select to change an audio source. VOL(Volume/Power) Knob Press to turn the audio system on and off. Turn to adjust the volume. ① (Information) Icon Select to display the current file details. Select to display the previous screen. Play Icon Pause Icon Folder Up/Down Icons Select or t→change folders. Audio Menu Select to display the menu items. Browse Select to display the track list screen. Skip/Seek Icons Select to Change files. On Demand Multi-Use Display™Playing Bluetooth® Audio
Not all Bluetooth-enabled phones with streaming audio capabilities are compatible with the system. For a list of compatible phones:
• U.S.: Visit www.handsfreelink.com/Acura, or call 1-888-528-7876.
• Canada: For more information on smartphone compatibility, call 1-855-490-7351.
In some states, it may be illegal to perform some data device functions while driving.
If more than one phone is paired to the HFL system, there will be a delay before the system begins to play.
Some functions may not be available on some devices.
If a phone is currently connected via Apple CarPlay or Android Auto, Bluetooth® Audio from that phone is unavailable. However, a second previously paired phone can stream Bluetooth® Audio by selecting Connect to Audio from the Edit Bluetooth Device.
Phone Setup P. 405
Continued
To Play Bluetooth® Audio Files
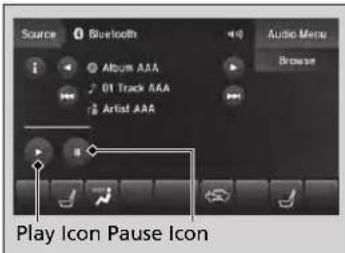
text_image
Source Bluetooth Audio Menu Browse Album AAA 01 Track AAA Artist AAA Play Icon Pause Icon- Make sure that your phone is paired and connected to HFL.
- Select the Bluetooth® Audio mode.
If the phone is not recognized, another HFL-compatible phone, which is not compatible for Bluetooth® Audio, may already be connected.
■ To pause or resume a file
Select the play icon or pause icon.
Searching for Music
text_image
Browse Artists > Albums > Songs > Genres >- Select Browse
- Select a search category (e.g., Albums).
- Select an item.
The selection begins playing.
To Play Bluetooth® Audio Files
To play the audio files, you may need to operate your phone. If so, follow the phone maker's operating instructions.
The pause function may not be available on some phones.
Switching to another mode pauses the music playing from your phone. This function may not be available on some phones.
Searching for Music
Depending on the Bluetooth® device you connect, some or all of the lists may not be displayed.
Siri Eyes Free
You can talk to Siri using the Talk button on the steering wheel when your compatible iPhone is paired to Bluetooth® HandsFreeLink®.
Phone Setup P. 405
Using Siri Eyes Free
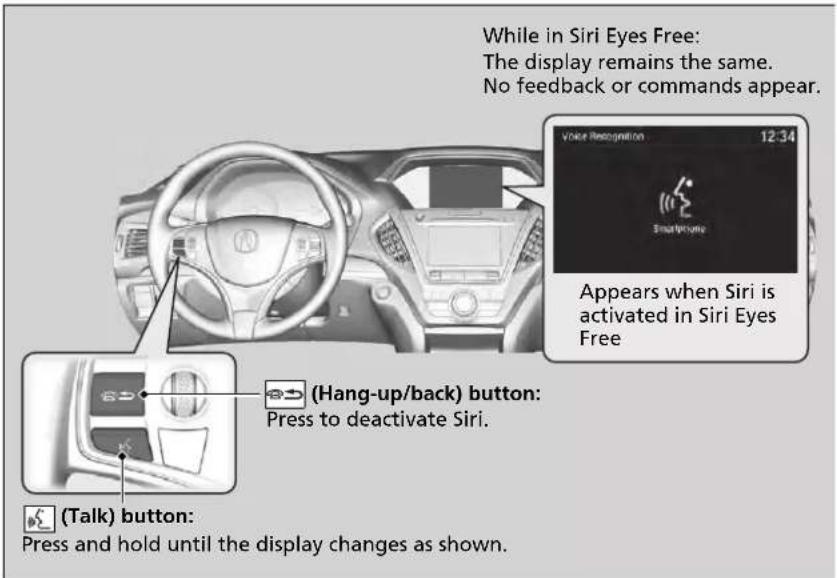
text_image
While in Siri Eyes Free: The display remains the same. No feedback or commands appear. Voice Recognition 12:34 Appearance when Siri is activated in Siri Eyes Free (Hang-up/back) button: Press to deactivate Siri. (Talk) button: Press and hold until the display changes as shown.Siri Eyes Free
Siri is a trademark of Apple Inc.
Check Apple Inc. website for features available for Siri.
We recommend against using Siri other than in Siri Eyes Free while operating a vehicle.
Using Siri Eyes Free
Some commands work only on specific phone features or apps.
Apple CarPlay
If you connect an Apple CarPlay-compatible iPhone to the system via the 2.5A USB port (☐) you can use the information screen, instead of the iPhone display, to make a phone call, listen to music, view maps (navigation), and access messages.
USB Ports P. 237
Apple CarPlay Menu
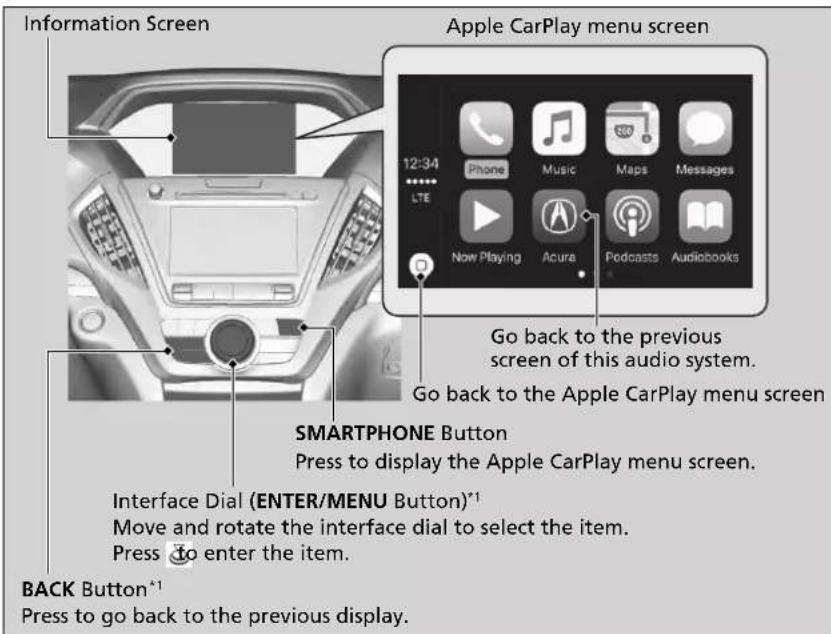
text_image
Information Screen Apple CarPlay menu screen 12:34 Phone Music Maps Messages LTE Now Playing Acura Podcasts Audiobooks Go back to the previous screen of this audio system. Go back to the Apple CarPlay menu screen SMARTPHONE Button Press to display the Apple CarPlay menu screen. Interface Dial (ENTER/MENU Button)*1 Move and rotate the interface dial to select the item. Press to enter the item. BACK Button*1 Press to go back to the previous display.*1: The operation methods may differ from your connected iPhone.
Apple CarPlay
Only iPhone 5 or newer versions with iOS 8.4 or later are compatible with Apple CarPlay.
Park in a safe place before connecting your iPhone to Apple CarPlay and when launching any compatible apps.
To use Apple CarPlay, connect the USB cable to the 2.5A USB port (☐)
→USB Ports P. 237
To directly access the Apple CarPlay phone function, press the PHONE button. While connected to Apple CarPlay, calls are only made through Apple CarPlay. If you want to make a call with Bluetooth® HandsFreeLink®, turn Apple CarPlay OFF or detach the USB cable from your iPhone.
Setting Up Apple CarPlay P. 308
When your iPhone is connected to Apple CarPlay, it is not possible to use the Bluetooth® Audio or Bluetooth® HandsFreeLink®. However, other previously paired phones can stream audio via Bluetooth® while Apple CarPlay is connected.
Phone Setup P. 405
For details on countries and regions where Apple CarPlay is available, as well as information pertaining to function, refer to the Apple homepage.
Phone
Access the contact list, make phone calls, or listen to voice mail.
■ Messages
Check and reply to text messages, or have messages read to you.
Music
Play music stored on your iPhone.
Maps
Display Apple Maps and use the navigation function just as you would on your iPhone.
Only one navigation system (pre-installed navigation or Apple Maps) can give directions at a time. When you are using one system, directions to any prior destination set on the other system will be canceled, and the system you are currently using will direct you to your destination.
Apple CarPlay
Apple CarPlay Operating Requirements & Limitations
Apple CarPlay requires a compatible iPhone with an active cellular connection and data plan. Your carrier's rate plans will apply.
Changes in operating systems, hardware, software, and other technology integral to providing Apple CarPlay functionality, as well as new or revised governmental regulations, may result in a decrease or cessation of Apple CarPlay functionality and services. Acura cannot and does not provide any warranty or guarantee of future Apple CarPlay performance or functionality.
It is possible to use 3rd party apps if they are compatible with Apple CarPlay. Refer to the Apple homepage for information on compatible apps.
Continued
Setting Up Apple CarPlay
After you have connected your iPhone to the system via the 2.5A USB port (Q-73) use the following procedure to set up Apple CarPlay. Use of Apple CarPlay will result in the transmission of certain user and vehicle information (such as vehicle location, speed, and status) to your iPhone to enhance the Apple CarPlay experience. You will need to consent to the sharing of this information on the information screen.
Enabling Apple CarPlay
text_image
Smartphone 12:34 Would you like to enable Apple CarPlay? Apple CarPlay may use Immuneor and vehicle. Information (e.g. location and speed) to enhance service. It is subject to the Apple Privacy policy and HCI terms of use. You can change your selection later under the Smartphone Settings menu. Always Enable Enable Once CancelEnable Once: Allows only once. (Prompt shows again next time.)
Always Enable: Allows anytime. (Prompt does not show again.)
Cancel: Does not allow this consent.
You may change the consent settings under the Smartphone Settings menu.
Setting Up Apple CarPlay
You can also use the method below to set up Apple CarPlay:
Press the SETTINGS→Select Smartphone
Settings→Apple CarPlay Device List
Use of user and vehicle information
The use and handling of user and vehicle information transmitted to/from your iPhone by Apple CarPlay is governed by the Apple iOS terms and conditions and Apple's Privacy Policy.
■ Operating Apple CarPlay with Siri
Press and hold the talk button to activate Siri.
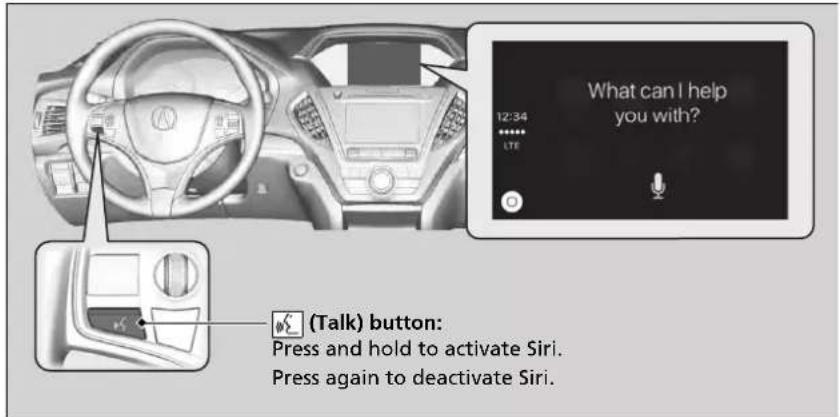
text_image
What can I help you with? 12:34 ... LTE (Talk) button: Press and hold to activate Siri. Press again to deactivate Siri.Operating Apple CarPlay with Siri
Below are examples of questions and commands for Siri.
• What movies are playing today?
- Call dad at work.
• What song is this?
• How's the weather tomorrow?
- Read my latest email.
• Find a table for four tonight in Chicago.
For more information, please visit www.apple.com/ios/siri.
Android Auto
When you connect an Android phone to the audio system via the 2.5A USB port (Android Auto is automatically initiated. When connected via Android Auto, you can use the information screen to access the Phone, Google Maps (Navigation), Google Play Music, and Google Now functions. When you first use Android Auto, a tutorial will appear on the screen. We recommend that you complete this tutorial while safely parked before using Android Auto.
→USB Ports P. 237
Auto Pairing Connection P. 313
Android Auto
To use Android Auto, you need to download the Android Auto app from Google Play to your smartphone.
Only Android 5.0 (Lollipop) or later versions are compatible with Android Auto. Bluetooth A2DP cannot be used with Android Auto phone.
Park in a safe place before connecting your Android phone to Android Auto and when launching any compatible apps.
To use Android Auto, connect the USB cable to the 2.5A USB port (☐)
USB Ports P. 237
When your Android phone is connected to Android Auto, it is not possible to use the Bluetooth® Audio. However, other previously paired phones can stream audio via Bluetooth® while Android Auto is connected.
Phone Setup P. 405
Android Auto Menu
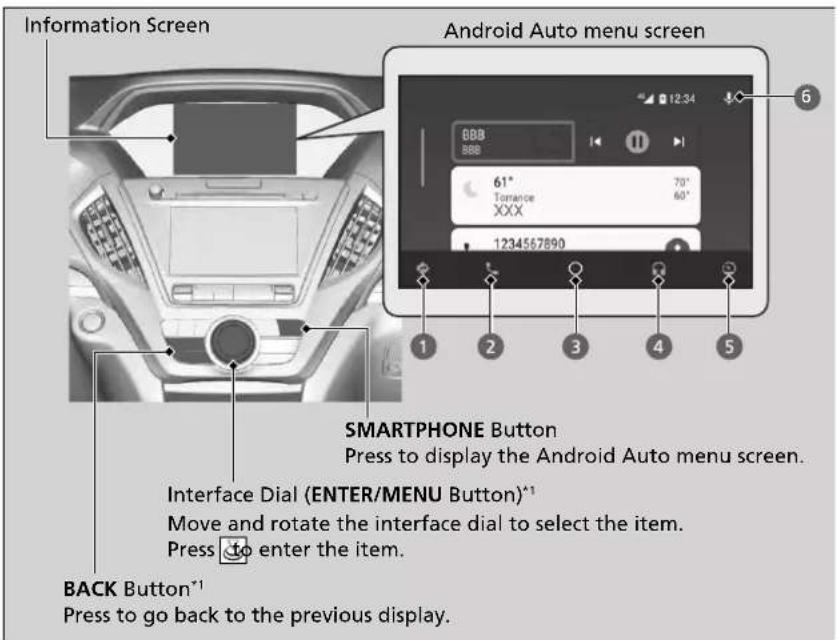
text_image
Information Screen Android Auto menu screen 6 8BB 12:34 61° 70° Turance 60° XXX 1234567890 1 2 3 4 5 SMARTPHONE Button Press to display the Android Auto menu screen. Interface Dial (ENTER/MENU Button)*1 Move and rotate the interface dial to select the item. Press → enter the item. BACK Button*1 Press to go back to the previous display.*1: The operation methods may differ from your connected Android phone.
»Android Auto
For details on countries and regions where Android Auto is available, as well as information pertaining to function, refer to the Android Auto homepage.
Android Auto Operating Requirements & Limitations
Android Auto requires a compatible Android phone with an active cellular connection and data plan. Your carrier's rate plans will apply.
Changes in operating systems, hardware, software, and other technology integral to providing Android Auto functionality, as well as new or revised governmental regulations, may result in a decrease or cessation of Android Auto functionality and services. Acura cannot and does not provide any warranty or guarantee of future Android Auto performance or functionality.
It is possible to use 3rd party apps if they are compatible with Android Auto. Refer to the Android Auto homepage for information on compatible apps.
Continued
1 Maps (Navigation)
Display Google Maps and use the navigation function just as you would with your Android phone. When the vehicle is in motion, it is not possible to make keyboard entries. Stop the vehicle in a safe location to undertake a search or provide other inputs.
Only one navigation system (pre-installed navigation or Android Auto) can give directions at a time. When you are using one system, directions to any prior destination set on the other system will be canceled, and the system you are currently using will direct you to your destination.
The information screen shows you turn-by-turn driving directions to your destination.
② Phone (Communication)
Make and receive phone calls as well as listen to voicemail.
3 Google Now (Home screen)
Display useful information organized by Android Auto into simple cards that appear just when they're needed.
4 Music and audio
Play Google Play Music and music apps that are compatible with Android Auto. To switch between music apps, press this icon.
5 Go back to the previous screen of this audio system.
6 Voice
Operate Android Auto with your voice.
Auto Pairing Connection
When you connect an Android phone to the unit via the 2.5A USB port (☐) Android Auto is automatically initiated.
Enabling Android Auto
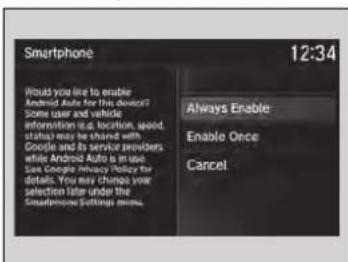
text_image
Smartphone 12:34 Would you like to enable Android Auto for this device? Some user and vehicle information i.e. location, speed, status may be shared with Google and its service providers while Android Auto is in use. Use Google Privacy Policy for details. You may change your selection later under the Smartphone Settings menu. Always Enable Enable Once CancelEnable Once: Allows only once. (Prompt shows again next time.)
Always Enable: Allows anytime. (Prompt does not show again.)
Cancel: Does not allow this consent.
You may change the consent settings under the Smartphone Settings menu.
Enabling Android Auto
Only initialize Android Auto when you are safely parked. When Android Auto first detects your phone, you will need to set up your phone so that auto pairing is possible. Refer to the instruction manual that came with your phone.
You can use the method below to change Android Auto settings after you have completed the initial setup:
Press the SETTINGS→Select Smartphone Settings→Android Auto Device List
Use of user and vehicle information
The use and handling of user and vehicle information transmitted to/from your phone by Android Auto is governed by Google's Privacy Policy.
Operating Android Auto with Voice Recognition
Press and hold the talk button to operate Android Auto with your voice.
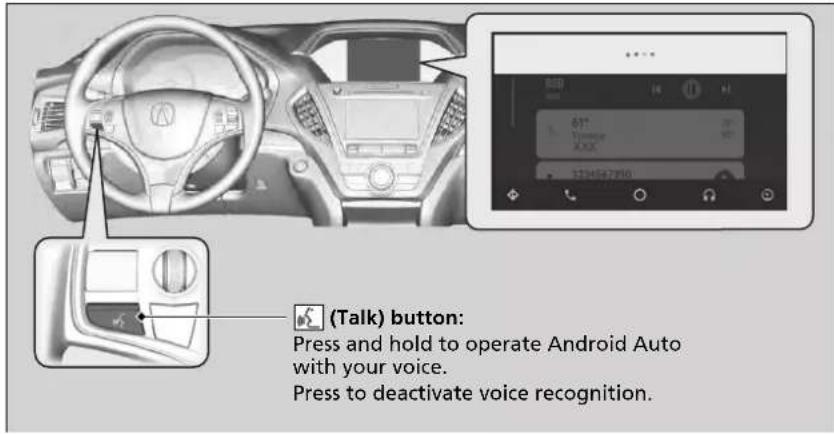
text_image
(Talk) button: Press and hold to operate Android Auto with your voice. Press to deactivate voice recognition.Operating Android Auto with Voice Recognition
Below are examples of commands you can give with voice recognition:
- Reply to text.
- Call my wife.
- Navigate to Acura.
- Play my music.
- Send a text message to my wife.
- Call flower shop.
For more information, please refer to the Android Auto homepage.
You can also activate the voice recognition function by moving 🔒
Audio Error Messages
CD Player
If a disc error occurs, you may see the following error messages.
| Error Message Cause Solution | ||
| This function is not available because the system has encountered a file error or a DRM protected file. | Track/file format not supported | Current track/file will be skipped. The next supported track/file plays automatically. |
| This is a bad disc. Please see your owner's manual for more details. Push Eject. | Mechanical error | Press the ▲eject) button and remove the disc, and check that the error message is cleared.Check that the disc is not damaged or deformed, and insert the disc again.▶Protecting CDs P. 324If the error message reappears, press the ▲button, and pull out the disc.Insert a different disc.If the new disc plays, there is a problem with the first disc.If the error message repeats, or the disc cannot be removed, contact a dealer.Do not try to force the disc out of the player. |
| Mecha Error | ||
| This is a bad disc. Please see your owner's manual for more details. | Servo error | |
| Check the disc Disc error | Check that the disc is not damaged or deformed.▶Protecting CDs P. 324 | |
| Heat Error High temperature | Turn the audio system off and allow the player to cool down until the error message is cleared. | |
Hard Disk Drive (HDD) Audio
If an error occurs while playing the Hard Disk Drive (HDD) Audio, you may see the following error messages. If you cannot clear the error message, contact a dealer.
| Error Message Solution | |
| HDD access error.Please consult your dealer. | — |
| The navigation system temperature is too high. For protection, the system will shut off until it cools down. | Turn the audio system off and allow the player to cool down until the error message is cleared. |
| The navigation system atmospheric pressure is too low. For protection, the system will shut off until the pressure returns to safe levels. | The navigation system has difficulty reading the HDD when the atmospheric pressure is too low. The navigation system starts up automatically when the atmospheric pressure returns to safe levels. |
| Unplayable File | Appears when a file format not supported. Current track will be skipped. The next supported track plays automatically. |
| There is no data available. | Appears when the HDD is empty or there are no available files in the HDD. |
| This function is not available during CD recording while the CD is recording to the HDD. | Appears when no available function is selected while the CD is recording to the HDD. |
| Generating voice recognition commands. Please try again later. | Appears when no available function is selected while the dictionary of the Song By VoiceTM recognition function is generated. |
iPod/USB Flash Drive
If an error occurs while playing an iPod or USB flash drive, you may see the following error messages. If you cannot clear the error message, contact a dealer.
| Error Message Solution | |
| Communication error detected. When safe, please reconnect your device. | Appears when there is a problem with the audio system. Check if the device is compatible with the audio system. |
| This USB device is incompatible. Please see your owner's manual for more details. | Appears when an incompatible device is connected. Disconnect the device. Then turn the audio system off, and turn it on again. Do not reconnect the device that caused the error. |
| This version of iOS is not supported. | Appears when an unsupported iPod is connected. If it appears when a supported iPod is connected, update the iPod software to the newer version. |
| There is an authentication error. When safe, please reconnect your device. | Appears when the system does not acknowledge the iPod. Reconnect the iPod. |
| This function is not available because the system has encountered a file error or a DRM protected file. | Appears when you select the grayed-out option on the screen while displaying the DRM or an unsupported format file. |
Error Message Solution
There is no data detected. When safe, please check your device and try again.
iPod
Appears when the iPod is empty.
USB flash drive
Appears when the USB flash drive is empty or there are no MP3, WMA, or AAC files in the USB flash drive.
iPod and USB flash drive
Check that compatible files are stored on the device.
Unsupported
USB hubs are not supported. To listen to audio, directly connect device to USB port.
Appears when an unsupported device is connected. If it appears when a supported device is connected, reconnect the device.
Appears when the USB device is connected via the USB hubs. Disconnect the USB hubs and directly connect the device to the USB port (2:\$A).
U.S. models
Pandora®
If an error occurs while playing Pandora ^® , you may see the following error messages. If you cannot clear the error message, contact a dealer.
| Error Message Solution | |
| This USB device is incompatible. Please see your owner's manual for more details. | Appears when an incompatible device is connected. Disconnect the device. Then turn the audio system off, and turn it again. Do not reconnect the device that caused the error. |
| There is an unsupported device detected. When safe, please reconnect your device. | Appears when there is a problem with the audio system. Check if the device is compatible with the audio system. |
| No stations have been created. When safe, please create a station on the device. | Appears when there is no station list on the device. Use the device to create a station. |
| There is no active station. | |
| This PANDORA station is currently not available. Please select another station. | |
| Music licenses force us to limit the number of tracks you may skip each hour. | Appears when you try to skip a track over the predetermined number of times in an hour. |
| The system is unable to save rating.The system is unable to save bookmark.orThe system is unable to skip. | Appears when the commanded operation is failed. Try again later. |
| There is no data available. | Appears when no data is available with Pandora® activated.Reboot the app and reconnect the device. |
| The PANDORA app version on your device is not supported. When safe, please update the app and try again later. | Appears when Pandora^ version is not supported. Update Pandora^ to the latest version. |
| PANDORA is performing system maintenance. Please try again later. | Appears when the Pandora^ server is in maintenance. Try again later. |
| The system cannot connect to PANDORA. When safe, please check your device. | Appears when Pandora^ is unable to play music. Check your device. |
| The system is unable to play PANDORA. When safe, login to PANDORA. | |
| The maximum number of stations that can be created is 100. To create more, please delete one or more previously created stations. | Appears when the number of created stations reaches the limitation. Delete one or more created stations from Pandora^ app on the connected device. |
| The system is unable to create a new station. Please try again. | Appears when there is a temporary error with the audio system. Try again later. |
| The system is unable to play PANDORA. Please try again later. | Appears when your connected device has network problems. Check your device. |
| When safe, please check your device. | Appears when your connected device has some kind of problem such as being out of the service area. Check that the connected device is within the service area, and then try again to play Pandora^ . If the problem persists, consult a dealer. |
| The system is unable to play PANDORA. Music licensing restricts play in this area. | Appears when you try playing the Pandora^ in the country where the service is not available. |
Apple CarPlay/Android Auto
If an error occurs while using the Apple CarPlay or Android Auto, you may see the following error messages. If you cannot clear the error message, contact a dealer.
| Error Message Solution | |
| Information ScreenA charging error has occurred with the connected device.When safe, please check the compatibility of the device and USB cable. Please see your owner's manual for more details.On Demand Multi-Use DisplayTMThis USB device is incompatible. Please see your owner's manual for more details. | Appears when an incompatible device is connected. Disconnect the device. Then turn the audio system off, and turn it again. Do not reconnect the device that caused the error. |
| Unable to start Apple CarPlay. When safe, please confirm the USB connection. | Appears when Apple CarPlay or Android Auto fails to recognize your device. Check if your device is compatible with Apple CarPlay or Android Auto, or the latest version of the app is installed on your device. |
| Unable to start Android Auto. When safe, please confirm the USB connection. | |
| Unable to start Apple CarPlay. When safe, please try again. | Appears when Apple CarPlay or Android Auto fails to recognize your device. Reconnect your device and try again. |
| Unable to start Android Auto. When safe, please try again. | |
| Unable to start Apple CarPlay with your device. Your device is connected in digital audio mode. | Appears when your connected device is incompatible with Apple CarPlay. Check if your device is compatible with Apple CarPlay. |
| This device is not compatible with Android Auto. | Appears when your connected device is incompatible with Android Auto.Check if your device is compatible with Android Auto or the latest version of the app is installed on your device. |
| Please update to the latest version of Android Auto. | Appears when your version of the Android Auto is not supported.Update Android Auto to the latest version. |
| Connection failed. Please confirm Bluetooth connection status and try again. | Appears when Bluetooth® connection is failed.Check the Bluetooth® connection of this audio system and your connected device. |
General Information on the Audio System
SiriusXM® Radio Service
Subscribing to SiriusXM® Radio
- You need your radio ID ready before registering for subscription. To see the ID in the On Demand Multi-Use Display™, select channel up/down icons until CH000 and the radio ID appears.
- Have your radio ID and credit card number ready, and either call or visit the SiriusXM® website to subscribe.
Receiving SiriusXM® Radio
Switch to the SiriusXM® mode by pressing the SOURCE button on the steering wheel, or through the On Demand Multi-Use Display™, and stay in this mode for about 30 minutes until the service is activated. Make sure your vehicle is in an open area with good reception.
SiriusXM® Radio Display Messages
Loading...:
SiriusXM ^® is loading the audio or program information.
No Signal:
The signal is too weak in the current location.
Unsubscribed channel:
You are not subscribed to the channel selected.
Unavailable channel:
No such channel exists, the channel is not part of your subscription, or the artist or title information is unavailable.
Check the antenna, Disconnected antenna, Shorted antenna:
There is a problem with the SiriusXM® antenna. Contact a dealer.
>>Subscribing to SiriusXM® Radio
Contact Information for SiriusXM® Radio:
• U.S.: SiriusXM® Radio at www.siriusxm.com/ subscribedow, or 1-866-635-2349
- Canada: SiriusXM® Canada at www.siriusxm.ca/subscribe-now, or 1-877-209-0079
>>Receiving SiriusXM® Radio
The SiriusXM® satellites are in orbit over the equator; therefore, objects south of the vehicle may cause satellite reception interruptions. Satellite signals are more likely to be blocked by tall buildings and mountains the farther north you travel from the equator.
You may experience reception problems under the following circumstances:
- In a location with an obstruction to the south of your vehicle.
• In tunnels - On the lower level of a multi-tiered road
• Large items carried on the roof rack
Recommended CDs
- Use only high-quality CD-R or CD-RW discs labeled for audio use.
- Use only CD-R or CD-RW discs on which the recordings are closed.
- Play only standard round-shaped CDs.
The CD packages or jackets should have one of these marks.





CDs with MP3, WMA or AAC files
- Some software files may not allow for audio play or text data display.
- Some versions of MP3, WMA or AAC formats may be unsupported.
■ Protecting CDs
Follow these precautions when handling or storing CDs:
- Store a CD in its case when it is not being played.
- When wiping a CD, use a soft clean cloth from the center to the outside edge.
- Handle a CD by its edge. Never touch either surface.
- Never insert foreign objects into the CD player.
- Keep CDs out of direct sunlight and extreme heat.
- Do not place stabilizer rings or labels on the CD.
- Avoid fingerprints, liquids, and felt-tip pens on the CD.
Recommended CDs
A Dual-disc cannot play on this audio unit. If recorded under certain conditions, a CD-R or CD-RW may not play either.
>>Protecting CDs
NOTICE
Do not insert a damaged CD. It may be stuck inside and damage the audio unit.
Examples:
- Bubbled, wrinkled, labeled, and excessively thick CDs
Bubbled/Wrinkled
With Label/Sticker
Using Printer Label Kit
Sealed With Plastic Ring
- Damaged CDs
- Poor quality CDs
Chipped/ Cracked
Warped Burrs
- Small CDs

3-inch (8-cm) CD
Compatible iPod, iPhone, and USB Flash Drives
■ iPod and iPhone Model Compatibility
Model
iPod (5th generation)
iPod classic 80GB/160GB (launch in 2007)
iPod classic 120GB (launch in 2008)
iPod classic 160GB (launch in 2009)
iPod nano (1st to 7th generation) released between 2005 and 2012
iPod touch (1st to 5th generation) released between 2007 and 2012
iPhone 3G/iPhone 3GS/iPhone 4/iPhone 4s/iPhone 5/iPhone 5c/iPhone 5s/iPhone 6/
iPhone 6s/iPhone 7
USB Flash Drives
• A USB flash drive of 256 MB or higher is recommended.
- Some digital audio players may not be compatible.
- Some USB flash drives (e.g., a device with security lockout) may not work.
- Some software files may not allow for audio play or text data display.
- Some versions of MP3, WMA, or AAC formats may be unsupported.
iPod and iPhone Model Compatibility
This system may not work with all software versions of these devices.
USB Flash Drives
Files on the USB flash drive are played in their stored order. This order may be different from the order displayed on your PC or device.
Honda App License Agreement
END USER LICENSE AGREEMENT
PLEASE CAREFULLY READ THIS END USER LICENSE AGREEMENT (THIS "AGREEMENT") WHICH GOVERNS YOUR USE OF THE SOFTWARE INSTALLED ON YOUR HONDA OR ACURA VEHICLE (YOUR "VEHICLE") AS WELL AS THE APPLICATIONS, SERVICES, FUNCTIONS, AND CONTENT PROVIDED THROUGH THE SOFTWARE (COLLECTIVELY, THE "SERVICES"). YOUR USE OF THE SOFTWARE OR SERVICES WILL SERVE AS YOUR CONSENT TO THE TERMS OF THIS AGREEMENT. THE SOFTWARE IS OWNED (OR LICENSED), PROVIDED, AND/OR OPERATED BY AMERICAN HONDA MOTOR CO. INC., ("HONDA," "US," "WE," OR "OUR"), WITH ITS BUSINESS ADDRESS AT 1919 TORRANCE BLVD., TORRANCE, CA 90501. REFERENCE TO "HONDA" IN THIS AGREEMENT INCLUDES HONDA'S PARENT COMPANY AND ITS AFFILIATES AND DESIGNATED AGENTS. THE SERVICES ARE OWNED (OR LICENSED), PROVIDED, AND/OR OPERATED BY HONDA OR A THIRD-PARTY SERVICE PROVIDER (A "PROVIDER"). REFERENCE TO A "PROVIDER" IN THIS AGREEMENT INCLUDES SUCH PROVIDER'S PARENT COMPANY, AFFILIATES, AND DESIGNATED AGENTS.
A. Description of the Software. The SOFTWARE includes the software, firmware and the like, installed and executing on your VEHICLE during manufacture, and thereafter updated from time to time by HONDA, you or an authorized HONDA dealer (a "DEALER"). The SOFTWARE allows you to access and use a variety of SERVICES, including but not limited to: (a) HONDA applications, services, and content provided through the SOFTWARE (together, "HONDA SERVICES"); and (b) PROVIDER applications, services, and content provided through the SOFTWARE (together, "PROVIDER SERVICES"), each of which may provide access to various information, media, content, and services.
B. SOFTWARE Licensing and Intellectual Property.
- SOFTWARE. This AGREEMENT grants you a non-exclusive, limited, and revocable license to use the SOFTWARE and SERVICES solely (a) as installed on your VEHICLE by HONDA, (b) as updated on your Vehicle by HONDA, you (but only as and when directed by HONDA), or a DEALER and (c) as permitted under the terms of this AGREEMENT.
-
HONDA Services. The SOFTWARE may provide you with access to various HONDA SERVICES. Installation, activation, or use of HONDA SERVICES may require your consent to additional terms, conditions, and privacy policies applicable to those HONDA SERVICES (the "HONDA TERMS"). You acknowledge and agree that any collection, use, sharing of data generated by your VEHICLE or your use of your VEHICLE, and your use of the HONDA SERVICES shall be subject to this AGREEMENT and any additional HONDA TERMS that may be specifically applicable to such HONDA SERVICES or data generation. The HONDA SERVICES may collect, use, and share such data while you are using the SOFTWARE.
-
Open-Source Software. The SOFTWARE and SERVICES may incorporate software licensed to HONDA under free or open-source licenses which govern HONDA's distribution and your use of such software. HONDA and the third-party authors, licensors, and distributors of such software disclaim all warranties and all liability arising from any and all use or distribution of the software. To the extent such software is provided under terms that differ from the applicable free or open-source licenses, those terms are offered by HONDA alone. Additional information regarding free and open-source software incorporated in the SOFTWARE and SERVICES is available in this manual or within the SOFTWARE.
-
Provider Services. The SOFTWARE may provide you with access to various PROVIDER SERVICES. Installation or use of such PROVIDER SERVICES may require your consent to additional terms, conditions, and privacy policies of the applicable PROVIDER (the "PROVIDER TERMS"). This AGREEMENT restricts the manner in which you can install and use PROVIDER SERVICES but does not grant you a license or permission to use such PROVIDER SERVICES. Your permission to use PROVIDER SERVICES is limited and subject to any license grants, conditions, and limitations included in the PROVIDER TERMS. You acknowledge that any collection, use, sharing of your information, targeted advertising practices by PROVIDERS, and your use of the PROVIDER SERVICES shall be subject to both this AGREEMENT and any applicable PROVIDER TERMS. The PROVIDER SERVICES may collect, use, and share such information while you are using the SOFTWARE.
5. License Limitations and Restrictions on Use.
(a) Limited License. You understand and agree that the SOFTWARE and SERVICES are licensed, not sold, to you solely for use in accordance with this AGREEMENT and any applicable PROVIDER TERMS, and any documentation for the VEHICLE made available to you by HONDA (any "DOCUMENTATION"). HONDA and its licensors reserve all rights in the SOFTWARE and HONDA SERVICES not expressly granted to you under this AGREEMENT. PROVIDERS and their licensors reserve all rights in the PROVIDER SERVICES not expressly granted to you under the applicable PROVIDER TERMS.
(b) Restrictions on Use. The licenses granted under this AGREEMENT do not permit you to use the SOFTWARE or SERVICES on a device other than your VEHICLE. As a condition of using the SOFTWARE and SERVICES, you agree that you may not and will not:
(1) copy, download, distribute, modify, publish, sell, rent, lease, lend, license, sublicense, reuse, or create derivative works of the SOFTWARE or SERVICES or any of the content or other material within the SOFTWARE or SERVICES, including without limitation, HONDA or PROVIDER names, logos, or any other trademarks of HONDA or PROVIDERS or used in association with the SOFTWARE or any SERVICES, except as required to use the SOFTWARE or SERVICES in accordance with this AGREEMENT, any applicable PROVIDER TERMS, and the DOCUMENTATION;
(2) access or use the SOFTWARE or SERVICES in any manner intended to damage or impair the operation of the SOFTWARE or SERVICES or interfere with anyone else's use and enjoyment of the SOFTWARE or SERVICES;
(3) access or attempt to access any system or server on which the SOFTWARE or SERVICES is hosted or modify or alter the SOFTWARE or SERVICES in any way;
(4) use the SOFTWARE or SERVICES for any unlawful purpose, or in violation of any third party rights;
(5) use the SOFTWARE or SERVICES in violation of any applicable traffic regulations, rules or laws, including but not limited to any driver distraction laws, rules or regulations;
(6) violate the terms of this AGREEMENT, any HONDA TERMS, any PROVIDER TERMS or other applicable third-party terms, conditions, and privacy policies; or
(7) reverse engineer, decompile, disassemble, attempt to derive the source code of, nor permit others to reverse engineer, decompile, or disassemble, or attempt to derive the source code of the SOFTWARE or SERVICES, except and only to the extent that such activity is expressly permitted (a) by applicable law notwithstanding this limitation or (b) the terms of applicable free or opensource software licenses.
-
Intellectual Property Rights. All title and intellectual property rights in and to the SOFTWARE and SERVICES, the accompanying DOCUMENTATION, and all copies of the SOFTWARE or SERVICES are owned by HONDA, PROVIDERS, or their suppliers or licensors. This AGREEMENT does not grant you any rights in connection with any trademarks or service marks of HONDA, PROVIDERS, or their licensors, affiliates, or suppliers.
-
Export Restrictions: You acknowledge that the SOFTWARE and SERVICES are subject to U.S., European Union, and other export jurisdictions. You agree to comply with all applicable international and national laws that apply to the SOFTWARE and SERVICES, including the U.S. Export Administration Regulations, as well as end-user, end-use, and destination restrictions issued by the U.S. and other governments.
C. SOFTWARE Operation
- HONDA reserves the right to suspend or terminate your access to and use of the SOFTWARE or SERVICES if you are found to be in violation of this AGREEMENT or as reasonably deemed necessary by HONDA.
- Eligibility/Registration/Activation. The SOFTWARE is intended for and available to individuals who (a) are of legal age of majority in their jurisdiction of residence (and at least 18 years of age), or are younger than 18 years of age and possess a valid driver's license issued by their jurisdiction of residence, and (b) own or have permissive access to a compatible VEHICLE. We do not knowingly collect any information, including personal information, from children under 13. If we learn or are notified that we have collected personal information of a child under 13, we will immediately take steps to delete such information.
- Use of PROVIDER SERVICES through the SOFTWARE. Certain PROVIDER SERVICES made available through the SOFTWARE may require that you register or otherwise have an account with the PROVIDER and agree to PROVIDER TERMS. Any use of any of such PROVIDER SERVICES within the SOFTWARE is subject to this AGREEMENT and the applicable PROVIDER TERMS. HONDA does not exercise control over such PROVIDER SERVICES and is not responsible or liable for the availability, security, or content of such PROVIDER SERVICES, and the inclusion of any PROVIDER SERVICES does not imply a referral from, the approval of, or the endorsement by HONDA of such PROVIDER SERVICES. HONDA is not responsible or liable, directly or indirectly, for any damage relating to or resulting from your use of the PROVIDER SERVICES.
-
Links to Third Party Sites: The SOFTWARE may provide you with the ability to access third-party sites and content through the use of the SOFTWARE or SERVICES. The third-party sites and content are not under the control of HONDA. HONDA is not responsible or liable, directly or indirectly, for such third-party websites and their content or for any damage relating to or resulting from your access or use of such websites and content.
-
Unauthorized Use and Abuse. You are responsible for ensuring your (and any authorized third parties') use of the SOFTWARE and SERVICES remains in compliance with this AGREEMENT and all other applicable HONDA TERMS and PROVIDER TERMS. You acknowledge and agree that any use of the SOFTWARE or SERVICES occurring through your VEHICLE will be deemed your actions and that HONDA and PROVIDERS may rely upon such actions. You agree to immediately notify us if you suspect fraudulent or abusive activity involving the SOFTWARE or SERVICES. If you so notify us or if we otherwise suspect fraudulent or abusive activity, you agree to cooperate with us in any fraud investigation and to use any fraud prevention measures we prescribe. Your failure to immediately notify us or cooperate to use such measures will result in your liability for all fraudulent usage or abusive activity associated with your VEHICLE.
-
SOFTWARE Updates. The SOFTWARE and SERVICES may be updated when your VEHICLE is serviced by a DEALER or remotely, over-the-air, by HONDA from time to time; such updates may occur with or without further notice or your future consent. The SOFTWARE may be updated at HONDA's discretion and for any purpose including, without limitation, to patch or otherwise improve the SOFTWARE or SERVICES functionality, security, or stability. All updates to the SOFTWARE and SERVICES are subject to this AGREEMENT and any other applicable HONDA TERMS and PROVIDER TERMS.
-
Uninstalling, Removing, and Replacing the SOFTWARE. Replacing SOFTWARE or HONDA SERVICES with software or firmware not provided and installed by HONDA or a DEALER will render all representations and warranties for the SOFTWARE, HONDA SERVICES, and VEHICLE functionality reliant upon the SOFTWARE or HONDA SERVICES null and void.
D. SOFTWARE Operational Notices and Warnings
-
Vehicle Geolocation Information. You acknowledge that your VEHICLE may be equipped with certain traffic and map features. The traffic feature will automatically collect and transmit, through GPS technology, your Vehicle's current location (longitude and latitude), travel direction and speed ("VEHICLE GEOLOCATION INFORMATION") to HONDA and PROVIDERS. The VEHICLE GEOLOCATION INFORMATION is used by HONDA and PROVIDERS to provide traffic and navigation-related information to you, but may also be used to provide other SERVICES or offers to you. HONDA will not use such VEHICLE GEOLOCATION INFORMATION for its own marketing efforts, or provide such information to unaffiliated third parties for their own purposes, without your express consent.
-
Potential Map Inaccuracy and Route Safety. Maps used by this system may be inaccurate because of changes in roads, traffic controls, routing, or driving conditions. Always use good judgment and common sense when following suggested routes. Do not follow the route suggestions if doing so would result in an unsafe or illegal driving maneuver, if you would be placed in an unsafe situation, or if you would be directed into an area that you consider unsafe. Do not rely on any navigation features included in the system to route you to emergency services. Not all emergency services such as police, fire stations, hospitals, or clinics are likely to be contained in the map database for such navigation features. Ask local authorities or an emergency services operator for such locations and routes. The driver is ultimately responsible for the safe operation of the vehicle and therefore, must evaluate whether it is safe to follow the suggested directions. Any navigation features are provided only as an aid. Make your driving decisions based on your observations of local conditions and existing traffic regulations. Navigation features are not a substitute for your personal judgment. Any route suggestions made by the SOFTWARE or SERVICES should never replace any local traffic regulations or your personal judgment or knowledge of safe driving practices.
- Speech Recognition: You acknowledge and understand that HONDA and PROVIDERS may record, retain, and use voices commands when you use the speech recognition components of the SOFTWARE or SERVICES. You and all VEHICLE operators and passengers (a) consent to the recording and retention of voice commands in support of providing speech recognition components and (b) release HONDA and PROVIDERS from all claims, liabilities, and losses that may result from any use of such recorded voice commands. Recognition errors are inherent in speech recognition. It is your responsibility to monitor any speech recognition functions included in the system and address any errors. Neither HONDA nor PROVIDERS will be liable for any damages arising out of errors in the speech recognition process.
- Distraction Hazards. Navigation features may require manual (non-verbal) input or setup. Attempting to perform such set-up or insert data while driving can seriously distract your attention and could cause a crash or other serious consequences; the ability to undertake such interactions may also be limited by state or local law, which laws you are responsible to know and follow. Even occasional short scans of the screen may be hazardous if your attention has been diverted away from your driving at a critical time. Pull over and stop the vehicle in a safe and legal manner before attempting to access a function of the system requiring prolonged attention. Do not raise the volume excessively. Keep the volume at a level where you can still hear outside traffic and emergency signals while driving. Driving while unable to hear these sounds could result in a crash.
Continued
E. Information Collection and Storage
-
Information Collection, Use, Transmission and Storage of Data. Consent to Use of Data: You agree that HONDA and PROVIDERS may collect and use your information gathered in any manner as part of product support services related to the SOFTWARE or related services. HONDA may share such information with third parties, including, without limitation, PROVIDERS, third party software and services suppliers, their affiliates and/or their designated agents, solely to improve their products or to provide services or technologies to you. HONDA, third party software and systems suppliers, their affiliates and/or their designated agent may disclose this information to others, but not in a form that personally identifies you.
-
Information Storage. Depending on the type of multimedia system you have in your VEHICLE, certain information may be stored for ease of use of the SOFTWARE including, without limitation, search history, location history in certain applications, previous and saved destinations, map locations within certain applications, and device numbers and contact information.
(a) Vehicle Health Information. Your VEHICLE may remotely transmit information regarding the status and health of your VEHICLE (“VEHICLE INFORMATION”) to HONDA without notification to you. VEHICLE INFORMATION may contain VEHICLE maintenance and malfunction status that is derived from VEHICLE diagnostic data and includes, but is not limited to, status of powered doors and windows, battery life data, battery charging data, VEHICLE speed, coolant temperature, air compressor revolution, output power, warning codes, diagnostic trouble codes, fuel injection volume, and engine rotations per minute. VEHICLE HEALTH INFORMATION may be used by HONDA for research and development, to deliver HONDA SERVICES and information to you, and to contact you, and is retained only for a period of time necessary to fulfill these goals.
(b) VEHICLE Geolocation Data (non-navigation/map based). If you opt-in to geolocation-based SERVICES, your vehicle's geolocation data (latitude and longitude) will be automatically sent from your VEHICLE to HONDA and PROVIDERS.
(c) You understand that the inputting or uploading of information to your VEHICLE's multimedia system or the SOFTWARE or SERVICES is at your own risk and that HONDA is not responsible for unauthorized access to or use of any personal or other information. All information uploaded to the SOFTWARE and SERVICES may be stored on your VEHICLES's multimedia system and you understand that the security and safety of your VEHICLE's multimedia system is your sole responsibility.
F. NO WARRANTY. You understand and agree that your use of the SOFTWARE and SERVICES are solely at your own risk and that you will be solely responsible for any damage to your VEHICLE's multimedia system or any other equipment or any loss of data that may result from your use of the SOFTWARE or SERVICES. THE SOFTWARE AND SERVICES ARE PROVIDED ON AN "AS IS" AND "AS AVAILABLE" BASIS WITHOUT ANY WARRANTY OF ANY KIND, EXPRESSED, IMPLIED OR STATUTORY. WE SPECIFICALLY DISCLAIM ANY IMPLIED WARRANTIES OF MERCHANTABILITY, FITNESS FOR A PARTICULAR PURPOSE, AND NON-INFRINGEMENT. HONDA makes no warranties that the SOFTWARE or SERVICES will meet your requirements, or that the SOFTWARE or SERVICES will be uninterrupted, timely, secure, non-infringing or error free. You understand and agree that you are responsible for any and all charges, costs or expenses associated with your use of the SOFTWARE or SERVICES. Advice or information, whether oral or written, obtained by you from us or through the SOFTWARE or SERVICES are provided for informational purposes only and will not create any warranty not expressly made herein. You should not rely on any such information or advice. We assume no liability or responsibility for any errors or omissions in the SOFTWARE or SERVICES. We do not make any warranty or representation that your use of the material displayed on, or obtained through, the SOFTWARE or SERVICES is non-infringing of any rights of any third party. Any decision or action taken by you on the basis of information or content provided via the application is at your sole discretion and risk. HONDA and PROVIDERS are not responsible or liable for any such decision, or for the accuracy, completeness, usefulness, or availability of any content or information displayed, transmitted, or otherwise made available via the SOFTWARE or SERVICES. To the extent jurisdictions do not allow the exclusion of certain warranties, some of the above exclusions may not apply to you.
G. LIMITATIONS ON LIABILITY. You and HONDA are each waiving important rights.
-
Limitations on YOUR liability. HONDA cannot recover from you any consequential, indirect, incidental, or special damages, or attorney's fees in connection with your use of the SOFTWARE or HONDA SERVICES. HONDA WAIVES TO THE FULLEST EXTENT ALLOWED BY LAW ANY CLAIM FOR DAMAGES OTHER THAN DIRECT, COMPENSATORY DAMAGES AS LIMITED IN THIS AGREEMENT.
-
Limitation on HONDA and PROVIDER liability. Neither HONDA nor PROVIDERS will be liable to you or any other party for consequential, indirect, incidental, special, or punitive damages (including without limitation lost profits) in connection with your use of the SOFTWARE or SERVICES, even if HONDA or PROVIDERS are aware of the possibility of such damages. These limitations apply to all claims, including, without limitation, claims in contract and tort (such as negligence, product liability and strict liability). To the extent that a jurisdiction does not permit the exclusion or limitation of liability as set forth herein our liability is limited to the maximum extent permitted by law in such states. If HONDA or PROVIDERS are found liable to you for any reason, you agree that the aggregate liability of all these parties to you for any claim is limited to ten U.S. dollars (US \$10.00). Neither HONDA nor any PROVIDER would have agreed to provide the SOFTWARE or SERVICES to you if you did not agree to this limitation. This amount is the sole and exclusive liability of HONDA and PROVIDERS to you, and is payable as liquidated damages and not as a penalty. Except where prohibited by law, you may not bring any claim against HONDA or any third-party beneficiary more than two (2) years after the claim arises. We do not have any liability for SOFTWARE or SERVICES interruptions of any length.
(a) Release of HONDA and PROVIDERS For yourself and anyone else claiming under you, you agree to release and discharge HONDA, PROVIDERS, their respective officers, directors, and employees, and each third-party beneficiary from all claims, liabilities and losses in connection with the SOFTWARE or SERVICES, including, but not limited to claims for personal injury or property damage arising from the total or partial failure of performance of the SOFTWARE or SERVICES, even if caused by or based upon the negligence, gross negligence, strict products liability, Deceptive Trade Practices Act violations, bad faith, or breach of warranty of us or the malfunction of the SOFTWARE or SOFTWARE SERVICES. YOU AGREE TO WAIVE TO THE FULLEST EXTENT ALLOWED BY LAW, ANY CLAIM FOR DAMAGES OTHER THAN DIRECT, COMPENSATORY DAMAGES AS LIMITED IN THIS AGREEMENT. YOU HEREBY RELEASE AND DISCHARGE HONDA AND ITS LICENSORS AND CONTRACTORS (INCLUDING ANY THIRD PARTIES PROVIDING ALL OR PART OF THE SOFTWARE OR SERVICES) FROM AND AGAINST ANY CLAIMS, DAMAGES, EXPENSES AND LIABILITY ARISING FROM OR RELATED TO ANY INJURIES, DAMAGES, OR LOSSES TO ANY PERSON (INCLUDING DEATH) OR PROPERTY OF ANY KIND RESULTING IN WHOLE OR PART, DIRECTLY OR INDIRECTLY, FROM YOUR USE OF THE SOFTWARE OR SERVICES.
H. Survival. You agree that the limitations of liability and indemnities in this AGREEMENT will survive even after the AGREEMENT has ended. These limitations of liability apply not only to you, but to anyone using the SOFTWARE or SERVICES via your VEHICLE, to anyone making a claim on your behalf, and to any claims made by your family, employees, customers, or others arising out of or relating to your VEHICLE, the SOFTWARE, or SERVICES.
I. Availability/Interruption. The SOFTWARE and certain SERVICES are made available through your VEHICLE's compatible multimedia system when the VEHICLE is turned on. Certain SERVICES may be available only through your compatible mobile device when it is within the operating range of the VEHICLE and a wireless carrier. The availability of the SOFTWARE and SERVICES may be subject to transmission limitation or interruption, including but not limited to technical obsolesce or sunsetting of the hardware, software or firmware, inside of or external to the Vehicle, required for data transmission or receipt. HONDA does not guarantee that the SOFTWARE, SERVICES, or any portion thereof will be available at all times or in all areas. You acknowledge and agree that HONDA is not responsible for performance degradation, interruption or delays. You acknowledge that HONDA shall not be liable to you if the SOFTWARE or SERVICES in a given location are not available. If the SOFTWARE or SERVICES are not available within your intended location, you agree that your sole remedy shall be to cease using the SOFTWARE and SERVICES.
J. PRODUCT SUPPORT: Product support for the SOFTWARE is provided by HONDA. For product support, please refer to HONDA instructions provided in the DOCUMENTATION. Should you have any questions concerning this AGREEMENT, or if you desire to contact HONDA for any other reason, please refer to the HONDA contact information provided in the DOCUMENTATION.
K. Termination and Transfer.
- Termination. This AGREEMENT is effective until terminated by you or US. WE may terminate this AGREEMENT for any or no reason, and with or without notice to you. Your rights under this AGREEMENT will terminate automatically without notice from US if you fail to comply with any term of this AGREEMENT. Upon termination of this AGREEMENT, you shall cease all use of the SOFTWARE and SERVICES
- Transfer: You may permanently transfer your rights under this AGREEMENT only as part of a sale or transfer of the VEHICLE, provided you retain no copies, you transfer all of the SOFTWARE and HONDA SERVICES (including all component parts, the media and printed materials, and any upgrades), and the recipient agrees to the terms of this AGREEMENT. You agree to notify HONDA upon the sale or transfer of the VEHICLE. To contact HONDA, please refer to the HONDA contact information provided in the DOCUMENTATION.
L. Changes to the SOFTWARE or SERVICES. WE may change, modify, or update the SOFTWARE or SERVICES from time to time. Unless explicitly stated otherwise, any new features or services that augment or enhance the SOFTWARE or SERVICES in the future shall respectively be considered part of the SOFTWARE or SERVICES and subject to this AGREEMENT. WE reserve the right at any time and from time to time to interrupt, restrict, modify, suspend, discontinue, temporarily or permanently, the SOFTWARE or SERVICES (or any portion thereof), with or without notice to you, and you agree that HONDA shall not be liable to you or to any third party for any modification, suspension or discontinuance of the SOFTWARE or SERVICES.
M.ARBITRATION:
PLEASE READ THIS ARBITRATION PROVISION CAREFULLY TO UNDERSTAND YOUR RIGHTS. YOU AGREE THAT ANY CLAIM THAT YOU MAY HAVE IN THE FUTURE MUST BE RESOLVED THROUGH BINDING ARBITRATION. YOU WAIVE THE RIGHT TO HAVE YOUR DISPUTE HEARD IN COURT AND WAIVE THE RIGHT TO BRING CLASS CLAIMS. YOU UNDERSTAND THAT DISCOVERY AND APPEAL RIGHTS ARE MORE LIMITED IN ARBITRATION.
Arbitration is a method of resolving a claim, dispute or controversy without filing a lawsuit. By agreeing to arbitrate, the right to go to court is waived and instead claims, disputes or controversies are submitted to binding arbitration. This provision sets forth the terms and conditions of our agreement. YOU and HONDA agree and acknowledge that this Agreement affects interstate commerce and the Federal Arbitration Act ("FAA") applies. By using the Software, Vehicle, or Services, YOU elect to have disputes resolved by arbitration. YOU, HONDA or any involved third party may pursue a Claim. "Claim" means any dispute between YOU, HONDA, or any involved third party relating to your use of the Software, the Vehicle, or the Services, this Agreement, or our relationship, including any representations, omissions or warranties. "Claim" does not include personal injury or wrongful death claims. YOU or HONDA may seek remedies in small claims court or provisional judicial remedies without arbitrating. In addition, notwithstanding anything herein to the contrary, YOU or HONDA may seek equitable relief in a court of competent jurisdiction.
YOU or HONDA may select arbitration with American Arbitration Association, JAMS or National Arbitration and Mediation. Contact these sponsors for their rules. The hearing will be in the federal district where YOU reside. If agreed, it may be by telephone or written submissions. Filing and arbitrator fees to be paid per the sponsor rules. You may contact the sponsor for a fee waiver. If no fee waivers, HONDA will pay filing and arbitrator fees up to \$5,000, unless law requires more. Each party is responsible for other fees. Arbitrator may award costs or fees to prevailing party, if permitted by law. HONDA will not seek fees, unless the claims are frivolous.
Arbitrator shall be an attorney or current or retired judge familiar with automotive or consumer software. The arbitrator shall follow substantive law, statute of limitations and decide all issues relating to the interpretation, construction, enforceability and applicability of this provision. The arbitrator may order relief permitted by law. This provision is governed and enforceable by the FAA. An award shall include a written opinion and be final, subject to appeal by the FAA.
This provision survives termination of this Agreement or relationship, bankruptcy, assignment or transfer. If part of this provision is unenforceable, the remainder remains in effect. If unenforceability allows arbitration as a class action, then this provision is entirely unenforceable. YOU may opt out within 30 days of your initial use of the Software by sending a signed, written notice to HONDA at Honda Financial Services, P.O. Box 165007, Irving, TX 75016. HONDA reserves the right to make changes to this provision after providing written notice and an opportunity to opt out.
N. Miscellaneous: You may not assign this AGREEMENT without HONDA's prior written consent. This AGREEMENT and any additional HONDA TERMS and PROVIDER TERMS represents the entire agreement between you and US. HONDA may amend the terms of this AGREEMENT by providing you with notices of such updated terms. If you do not consent to be bound by the updated terms, your sole remedy will be to cease using the SOFTWARE and SERVICES. If any part of this AGREEMENT is found invalid, void, or unenforceable, the balance of the AGREEMENT will remain valid and enforceable according to its terms. To the fullest extent permitted by law, and except as explicitly provided otherwise, this AGREEMENT and any disputes arising out of or relating to it will be governed by the laws of the State of California, except that California laws concerning choice of law or conflicts shall not apply if they would cause the substantive law of another jurisdiction to apply. Notwithstanding the foregoing, Section M shall be governed by the Federal Arbitration Act and the laws of the State of California, as applicable, as set forth therein. The failure to enforce any term of this AGREEMENT on one occasion shall not prevent enforcement on any other occasion or the enforcement of any other term. Headings and captions shall not be considered included for purposes of interpretation or application hereof, but are for convenience only.
Legal Information on Apple CarPlay/Android Auto
OWNER'S MANUAL LICENSE/LIABILITY STATEMENTS
USE OF APPLE CARPLAY IS SUBJECT TO YOUR AGREEMENT TO THE CARPLAY TERMS OF USE, WHICH ARE INCLUDED AS PART OF THE APPLE iOS TERMS OF USE. IN SUMMARY, THE CARPLAY TERMS OF USE DISCLAIM APPLE AND ITS SERVICE PROVIDERS' LIABILITY IF THE SERVICES FAIL TO PERFORM CORRECTLY OR ARE DISCONTINUED, STRICTLY LIMIT APPLE AND ITS SERVICE PROVIDERS' OTHER LIABILITIES, DESCRIBE THE KINDS OF USER INFORMATION (INCLUDING, FOR EXAMPLE, VEHICLE LOCATION, VEHICLE SPEED, AND VEHICLE STATUS) BEING GATHERED AND STORED BY APPLE AND ITS SERVICE PROVIDERS, AND DISCLOSE CERTAIN POSSIBLE RISKS ASSOCIATED WITH THE USE OF CARPLAY, INCLUDING THE POTENTIAL FOR DRIVER DISTRACTION. SEE APPLE'S PRIVACY POLICY FOR DETAILS REGARDING APPLE'S USE AND HANDLING OF DATA UPLOADED BY CARPLAY.
USE OF ANDROID AUTO IS SUBJECT TO YOUR AGREEMENT TO THE ANDROID AUTO TERMS OF USE WHICH MUST BE AGREED TO WHEN THE ANDROID AUTO APPLICATION IS DOWNLOADED TO YOUR ANDROID PHONE. IN SUMMARY, THE ANDROID AUTO TERMS OF USE DISCLAIM GOOGLE AND ITS SERVICE PROVIDERS' LIABILITY IF THE SERVICES FAIL TO PERFORM CORRECTLY OR ARE DISCONTINUED, STRICTLY LIMIT GOOGLE AND ITS SERVICE PROVIDERS' OTHER LIABILITIES, DESCRIBE THE KINDS OF USER INFORMATION (INCLUDING, FOR EXAMPLE, VEHICLE LOCATION, VEHICLE SPEED, AND VEHICLE STATUS) BEING GATHERED AND STORED BY GOOGLE AND ITS SERVICE PROVIDERS, AND DISCLOSE CERTAIN POSSIBLE RISKS ASSOCIATED WITH THE USE OF ANDROID AUTO, INCLUDING THE POTENTIAL FOR DRIVER DISTRACTION. SEE GOOGLE'S PRIVACY POLICY FOR DETAILS REGARDING GOOGLE'S USE AND HANDLING OF DATA UPLOADED BY ANDROID AUTO.
■ DISCLAIMER OF WARRANTIES; LIMITATION ON LIABILITY
YOU EXPRESSLY ACKNOWLEDGE AND AGREE THAT USE OF APPLE CARPLAY OR ANDROID AUTO ("THE APPLICATIONS") IS AT YOUR SOLE RISK AND THAT THE ENTIRE RISK AS TO SATISFACTORY QUALITY, PERFORMANCE, ACCURACY AND EFFORT IS WITH YOU TO THE MAXIMUM EXTENT PERMITTED BY APPLICABLE LAW, AND THAT THE APPLICATIONS AND INFORMATION ON THE APPLICATIONS IS PROVIDED "AS IS" AND "AS AVAILABLE," WITH ALL FAULTS AND WITHOUT WARRANTY OF ANY KIND, AND HONDA HEREBY DISCLAIMS ALL WARRANTIES AND CONDITIONS WITH RESPECT TO THE APPLICATIONS AND INFORMATION ON THE APPLICATIONS, EITHER EXPRESS, IMPLIED OR STATUTORY, INCLUDING, BUT NOT LIMITED TO, THE IMPLIED WARRANTIES AND/OR CONDITIONS OF MERCHANTABILITY, SATISFACTORY QUALITY, FITNESS FOR A PARTICULAR PURPOSE, ACCURACY, QUIET ENJOYMENT, AND NON-INFRINGEMENT OF THIRD PARTY RIGHTS. NO ORAL OR WRITTEN INFORMATION OR ADVICE GIVEN BY HONDA OR AN AUTHORIZED REPRESENTATIVE SHALL CREATE A WARRANTY. AS EXAMPLES, AND WITHOUT LIMITATION, HONDA DISCLAIMS ANY WARRANTY REGARDING THE ACCURACY OF DATA PROVIDED BY THE APPLICATIONS, SUCH AS THE ACCURACY OF DIRECTIONS, ESTIMATED TRAVEL TIME, SPEED LIMITS, ROAD CONDITIONS, NEWS, WEATHER, TRAFFIC, OR OTHER CONTENT PROVIDED BY APPLE, GOOGLE, THEIR AFFILIATES, OR THIRD PARTY PROVIDERS; HONDA DOES NOT GUARANTEE AGAINST LOSS OF APPLICATION DATA, WHICH MAY BE LOST AT ANY TIME; HONDA DOES NOT GUARANTEE THAT THE APPLICATIONS OR ANY SERVICES PROVIDED THROUGH THEM WILL BE PROVIDED AT ALL TIMES OR THAT ANY OR ALL SERVICES WILL BE AVAILABLE AT ANY PARTICULAR TIME OR LOCATION. FOR EXAMPLE, SERVICES MAY BE SUSPENDED OR INTERRUPTED WITHOUT NOTICE FOR REPAIR, MAINTENANCE, SECURITY FIXES, UPDATES, ETC., SERVICES MAY BE UNAVAILABLE IN YOUR AREA OR LOCATION, ETC. IN ADDITION, YOU UNDERSTAND THAT CHANGES IN THIRD PARTY TECHNOLOGY OR GOVERNMENT REGULATION MAY RENDER THE SERVICES AND/OR APPLICATIONS OBSOLETE AND/OR UNUSABLE.
TO THE EXTENT NOT PROHIBITED BY LAW, IN NO EVENT SHALL HONDA OR ITS AFFILIATES BE LIABLE FOR PERSONAL INJURY, OR ANY INCIDENTAL, SPECIAL, INDIRECT OR CONSEQUENTIAL DAMAGES WHATSOEVER, INCLUDING, WITHOUT LIMITATION, DAMAGES FOR LOSS OF PROFITS, CORRUPTION OR LOSS OF DATA, FAILURE TO TRANSMIT OR RECEIVE ANY DATA, BUSINESS INTERRUPTION OR ANY OTHER COMMERCIAL DAMAGES OR LOSSES, ARISING OUT OF OR RELATED TO THE APPLICATIONS OR YOUR USE OF OR INABILITY TO USE THE APPLICATIONS OR INFORMATION ON THE APPLICATIONS, HOWEVER CAUSED, REGARDLESS OF THE THEORY OF LIABILITY (CONTRACT, TORT OR OTHERWISE) AND EVEN IF HONDA WERE ADVISED OF THE POSSIBILITY OF SUCH DAMAGES. SOME STATES AND JURISDICTIONS DISALLOW THE EXCLUSION OR LIMITATION OF LIABILITY FOR DAMAGES, SO THESE LIMITATIONS AND EXCLUSIONS MAY NOT APPLY TO YOU. IN NO EVENT SHALL HONDA'S TOTAL LIABILITY TO YOU FOR ALL DAMAGES (OTHER THAN AS MAY BE REQUIRED BY APPLICABLE LAW IN CASES INVOLVING PERSONAL INJURY) EXCEED THE AMOUNT OF FIVE DOLLARS (\$5.00). THE FOREGOING LIMITATIONS WILL APPLY EVEN IF THE ABOVE STATED REMEDY FAILS OF ITS ESSENTIAL PURPOSE.
About Open Source Licenses
■ Important information on the software
About the software license of the product
The software installed in the product contains open source software.
See the following Alpine website for details on the open source software.
http://www.alpine.com/h/e/oss/download/
License information
DOLBY DIGITAL\*
Manufactured under license from Dolby Laboratories. Dolby and the double-D symbol are registered trademarks of Dolby Laboratories.

DOLBY DIGITAL
DTS
For DTS patents, see http://patents.dts.com. Manufactured under license from DTS Licensing Limited. DTS, the Symbol, & DTS and the Symbol together are registered trademarks, and DTS Digital Surround and Neural Surround are trademarks of DTS, Inc. © DTS, Inc. All Rights Reserved.

dts Digital Surround

dts ^® Neural Surround
* Not available on all models
Rear Entertainment System (RES)\*
Allows the rear passengers to enjoy a different entertainment source, such as DVD, CD, and radio, than the front passengers.
Wireless Headphones
The rear seat passengers can listen to audio from the rear entertainment system by a wireless headphone that comes with your vehicle.
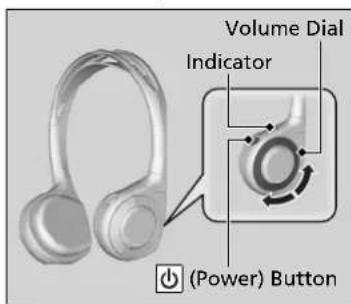
text_image
Volume Dial Indicator (Power) ButtonTo turn on the switch: Press the (power) button at the right earpiece. The indicator comes on.
To adjust the volume: Turn the dial at the right earpiece.
Rear Entertainment System (RES) \*
CAUTION: Radio Frequency Radiation Exposure The Rear Entertainment System remote complies with FCC radiation exposure limits set forth for an uncontrolled environment and meets the FCC radio frequency (RF) Exposure Guidelines.
The Rear Entertainment System remote should be kept at least 7.9 inches (20 cm) or more away from a person's body when operated.
Wireless Headphones
Your vehicle comes with two wireless headphones.
Wear the headphone correctly with the earpiece marked with L goes to your left ear and R goes to your right ear.
Wearing the headphone backward may affect the audio reception.
Auxiliary Console Panel
Auxiliary input jacks and headphone connectors for the rear entertainment system are on the back of the front console compartment.
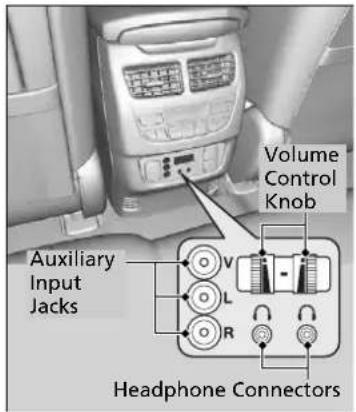
text_image
Volume Control Knob Auxiliary Input Jacks Headphone ConnectorsV = Video jack L = Left audio jack R = Right audio jack
■ Auxiliary input jacks
The system will accept auxiliary inputs from standard video games and video equipment. Some video game power supplies may cause poor picture quality.
■ Headphone connectors
The headphones can also be used by connecting to the auxiliary console panel. There are two headphone connectors for the rear passengers. Each connector has its own volume control.
HDMI™ Port
There is an HDMI port on the back of the front console compartment. The system will accept HDMI input from video games and video equipment which are equipped with an HDMI port.
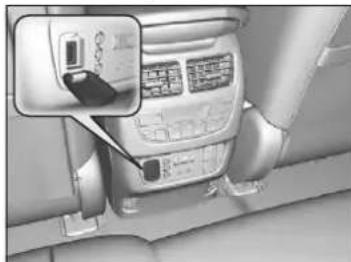
natural_image
Interior view of a car dashboard with a touchscreen display and control panel (no visible text or symbols)Open the outlet cover and insert the cable.
HDMI™ Port
- Do not leave the HDMI connected device in the vehicle. Direct sunlight and high temperatures may damage it.
• We recommend keeping your data backed up before using the device in your vehicle. - Displayed messages may vary depending on the device model and software version.
The terms HDMI and HDMI High-Definition Multimedia Interface, and the HDMI Logo are trademarks or registered trademarks of HDMI Licensing LLC in the United States and other countries.
Overhead Screen
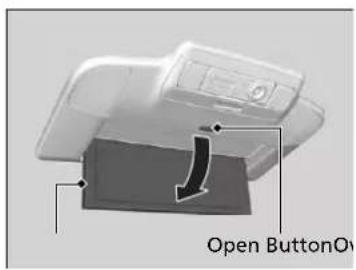
text_image
Open ButtonOnPress the open button to open and pull down the screen.
Operating the System
To operate the system, set the power mode to ON or ACCESSORY. Press the REAR (power) button to turn on the system.
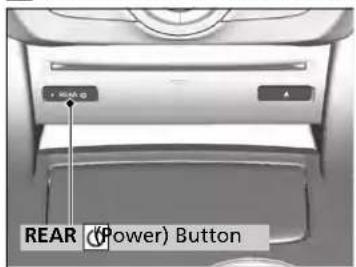
text_image
REAR (Power) ButtonOverhead Screen
You can use the rear control panel as a remote. Press the release button to detach it.
Rear Control Panel Operation
The rear passengers can operate the system with the rear control panel.
text_image
DUAL Button Press to change the screen mode to dual. SINGLE Button Press to change the screen mode to single. SOURCE Button Press to select the audio source. (Power) Button Press to turn the system on or off (when rear power is turned on). (Light-up) Button Press to illuminate the buttons on the rear control panel. CH/FOLDER Bar Press to change the channel (Radio) or folder (Disc/USB). TUNE/SKIP Bar Press |◀ to →←h up and down the selected band for a station with a strong signal (FM/AM). Press |◀ to →→ge tracks. Press and hold to move rapidly within a track/file (Disc/USB/DVD). (Play/Pause) Button Press to play or pause the playback. SWAP Button Press to swap left side screen and right side screen. MENU Button Press to display the audio menu. Interface Dial, ▲/▼/▶/◀ (Directional) Buttons, and ENTER Button Rotate the interface dial or press directional button to select items. Press the ENTER button to make a selection. DVD bar Press to change the DVD mode. AUX bar Press to change the input source toggling through the auxiliary input jack(s), HDMI port and USB port (2.5A). CANCEL Button Press to go back to the previous display or operation. CATEGORY Bar Press to change the category (SiriusXM®). TITLE SCROLL Button Press to display the track title, artist, and other text information.Selecting the Audio Source
text_image
H DVD Select Source DVD REAR AUX Video REAR AUX HDMI HDD Rotate Knob Push to Select-
Press the REAR ⏻ (power) button on the front control panel.
-
Press the SOURCE button on the rear control panel.
-
Select the audio source. Press the ENTER button.
▶You can also change the audio source by the front control panel.
Front Control Panel Operation P. 356
- Select a station, channel, track, or chapter using the CH/FOLDER, TUNE/SKIP, or CATEGORY bars.
>>Rear Control Panel Operation
In the procedures of this section, "select" means the following actions:
Rotate the interface dial or press the directional buttons on the rear control panel.
The rear control panel can be detached from the ceiling unit and used as a remote control.
Overhead Screen P. 345
The screen is displayed on the overhead screen.
Rear DVD Menu
text_image
MENU Top Menu Menu Play Mode Search/NumInput Repeat Pause/Play Stop Return- Press the MENU button (in DVD mode).
- Select an item. Press the ENTER button.
The following items are available:
- Top Menu: Displays the top menu of the DVD.
- Menu: Displays the menu of the DVD.
- Play Mode: Displays while a DVD is playing and changes the DVD's audio, subtitle, or angle settings.
Setting the play mode P. 349
- Search/NumInput: Skips to a title or chapter by entering the number.
→ Searching a title/chapter P. 350
- Repeat:

(title repeat): Repeats the current title.
_chapter repeat): Repeats the current chapter.
- Pause/Play: Pause or play the playback.
- Stop: Stops the playback.
- Return: Hides the rear audio menu.
■ Setting the play mode
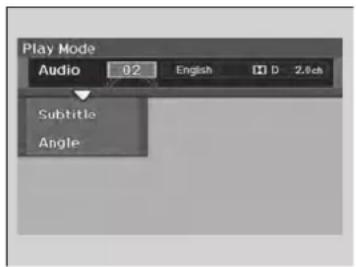
text_image
Play Mode Audio 02 English D 2.8ch Subtitle Angle- Press the MENU button (in DVD mode).
- Select Play Mode. Press the ENTER button.
- Select an item. Press the ENTER button.
- Select an option. Press the ENTER button.
The following items are available:
• Audio: Selects the language of the DVD audio.
- Subtitle: Selects the language of the DVD subtitle.
- Angle: Selects the angle of a scene shot with multiple cameras.
■ Searching a title/chapter
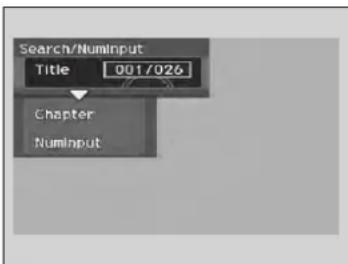
text_image
Search/Numinput Title 001/026 Chapter Numinput- Press the MENU button (in DVD mode).
- Select Search/NumInput. Press the ENTER button.
- Select an item. Press the ENTER button.
- Select a number. Press the ENTER button.
The following items are available:
• Title: Skips to a title you specify.
• Chapter: Skips to a chapter you specify.
- NumInput: Enters a number of a title or chapter to skip. Enter a number and press the ENTER button. Select DONE.
Screen and Surround Settings
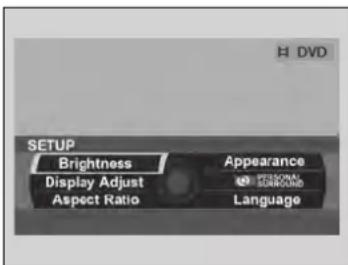
text_image
H DVD SETUP Brightness Display Adjust Aspect Ratio Appearance PERSONAL SURROUND Language- Press the SETUP button (in DVD mode).
- Select an item. Press the ENTER button.
The following items are available:
- Brightness: Adjusts the screen's brightness. Adjust the brightness using the interface dial and press the ENTER button.
- Appearance: Selects the color of the rear menu screen.
- Display Adjust: Adjusts the screen's preferences. ▶Adjusting the screen P. 352
- Aspect Ratio: Selects an aspect ratio of the image. Setting the aspect ratio P. 353
- PERSONAL SURROUND: Sets the surround of the wireless headphones. You can choose from three options: Music, Cinema, or Voice. Select Off to disable the feature.
- Language: Sets the system language used on all screens. You can choose from three languages: English, Français (French), or Español (Spanish).
■ Adjusting the screen
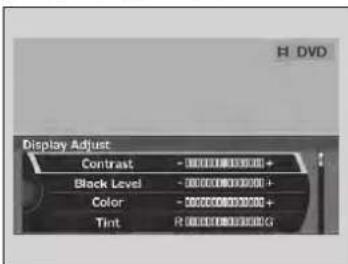
text_image
H DVD Display Adjust Contrast - 00000000000 + Black Level - 00000000000 + Color - 00000000000 + Tint R 0000000000G- Press the SETUP button (in DVD mode).
- Select Display Adjust. Press the ENTER button.
- Select an item. Press the ENTER button.
- Make the adjustment. Press the ENTER button.
The following items are available:
- Contrast: Adjusts the screen's contrast.
- Black Level: Adjusts the screen's black level.
• Color: Adjusts the screen's color strength. - Tint: Adjusts the screen's hue.
- Reset: Resets all the settings to their factory default.
■ Setting the aspect ratio
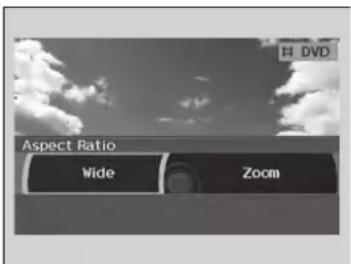
text_image
H DVD Aspect Ratio Wide Zoom- Press the MENU button (in DVD mode).
- Select Aspect Ratio. Press the ENTER button.
- Select an item. Press the ENTER button.
- Select an option. Press the ENTER button.
The following items are available:
- Wide: Selects the wide screen option (Normal, Full, Super Full, Ultra Full).
- Zoom: Selects the zoom screen option (Super Zoom, Ultra Zoom).
Dual Screen Mode
Select between the two screen modes, single or dual.
Rear Control Panel Operation P. 346
■ Single mode
The selected source is displayed in the center of the screen.
Dual mode
Two separate screens are displayed side by side. You can only select one output source from the front audio system. The other source must come from "REAR AUX Video" or "REAR AUX HDMI".
■ Single mode to dual mode
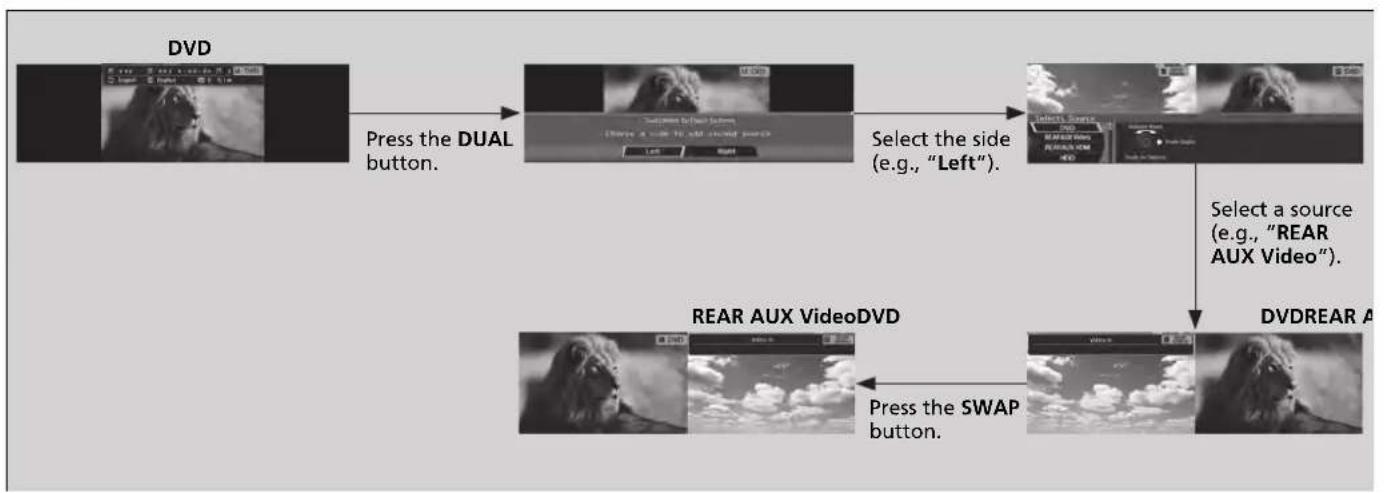
flowchart
graph TD
    A["DVD"] -->|Press the DUAL button.| B["Video Player"]
    B -->|Select the side (e.g., "Left").| C["Video Player"]
    C -->|Select a source (e.g., "REAR AUX Video").| D["DVDREAR A"]
    D -->|Press the SWAP button.| E["Video Player"]
    E --> F["Video Player"]
■ Dual mode to single mode

flowchart
graph LR
    A["DVREAR AUX Video"] -->|Press the SINGLE button.| B["Select a source (e.g., "DVD")"]
    B --> C["DVD"]
Front Control Panel Operation
Operate the Rear Entertainment System (RES) from the On Demand Multi-Use Display ^™ .
Selecting the Audio Source using Front Control Panel
text_image
Source FM AM StatusXM Disc- Press the REAR ⏻ (power) button on the front control panel.
- Select Front/Rear to switch Rear mode.
- Select Source.
The rear source is displayed on the On Demand Multi-Use Display™.
- Select the audio source on the On Demand Multi-Use Display ^TM .
The rear source is heard from the front speakers.
- Select a station, channel, track, or chapter in the same way as the front audio system.
Selecting an Audio Source P. 244
■ Operating the DVD Rear Entertainment System
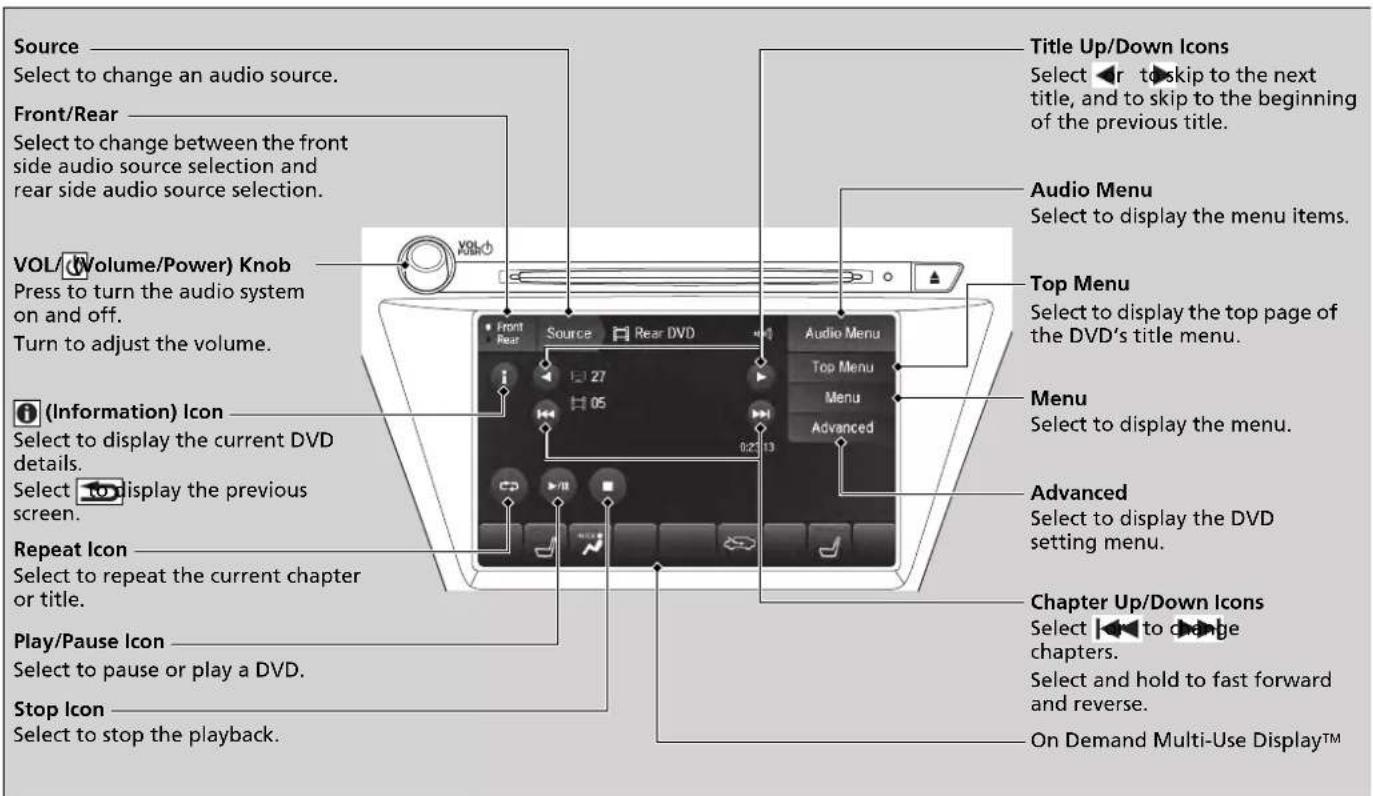
text_image
Source Select to change an audio source. Front/Rear Select to change between the front side audio source selection and rear side audio source selection. VOL(Volume/Power) Knob Press to turn the audio system on and off. Turn to adjust the volume. (Information) Icon Select to display the current DVD details. Select to display the previous screen. Repeat Icon Select to repeat the current chapter or title. Play/Pause Icon Select to pause or play a DVD. Stop Icon Select to stop the playback. Title Up/Down Icons Select to skip to the next title, and to skip to the beginning of the previous title. Audio Menu Select to display the menu items. Top Menu Select to display the top page of the DVD's title menu. Menu Select to display the menu. Advanced Select to display the DVD setting menu. Chapter Up/Down Icons Select to change chapters. Select and hold to fast forward and reverse. On Demand Multi-Use Display™DVD Setup
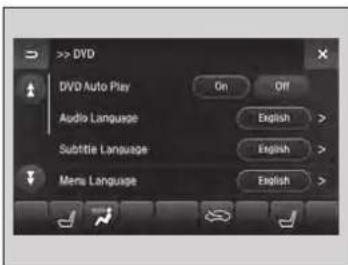
text_image
> DVD DVD Auto Play On Off Audio Language English > Subtle Language English > Menu Language English >- Select Audio Menu.
- Select Audio Settings
- Select DVD.
The following items are available:
• DVD Auto Play: Turns the auto play feature on or off.
• Audio Language: Selects a language for the audio that is available on the DVD
- Subtitle Language: Selects a language for the subtitle that is available on the DVD.
- Menu Language: Selects a language for the DVD menu that is available on the DVD.
• Dynamic Range: Sets whether to control the range of the loud and low sounds.
Operating the DVD Rear Entertainment System
Play Mode Menu Item
Repeat

(repeat off): Repeat mode to off.

(repeat chapter): Repeats the current chapter.

(repeat title): Repeats the current title.
Setting the DVD Menu
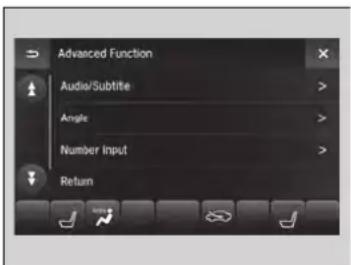
text_image
Advanced Function Audio/Subtitle > Angle > Number Input > ReturnSelect Advanced.
The following items are available:
• Audio/Subtitle: Selects the language of the DVD audio and the DVD subtitle.
• Angle: Selects the angle of a scene shot with multiple cameras.
• Number Input: Enters a number of a title or chapter to skip.
- Return: Return to the previous screen.
- Search: Skips to a title or chapter.
Rear System Setup
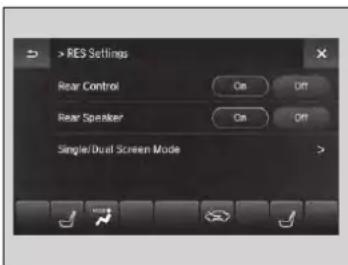
text_image
> RES Settings Rear Control On Off Rear Speaker On Off Single/Dual Screen Mode- Select Audio Menu.
- Select RES Settings
The following items are available:
- Rear Control: Sets whether to use the rear control panel to control the RES. When setting is set to On, operates the RES using the rear control panel.
- Rear Speaker: Sets the front audio source to play through the rear speakers, even when the RES is on. The RES source can only be heard through the wireless headphones. When setting is set to On, outputs the sound of the front source to the rear speakers.
- Single/Dual Screen Mode: Selects a source to continue playing when you switch from dual mode to single mode on the overhead screen.
playable Discs
The discs that come with these labels can be played in your vehicle's rear entertainment system.
Also look for the region code of 1 or ALL on the package or jacket on the disc.
DVD-ROMs are not playable in this unit.
The disc packages or jackets should have one of these marks.




Also includes:

>>Playable Discs
This product incorporates copyright protection technology that is protected by U.S. patents and other intellectual property rights.
Use of this copyright protection technology must be authorized by Rovi Corporation, and is intended for home and other limited viewing uses only unless otherwise authorized by Rovi Corporation. Reverse engineering and disassembly are prohibited.
For DTS patents, see http://patents.dts.com. Manufactured under license from DTS Licensing Limited. DTS, the Symbol, & DTS and the Symbol together are registered trademarks, and DTS Digital Surround and Neural Surround are trademarks of DTS, Inc. © DTS, Inc. All Rights Reserved.
Manufactured under license from Dolby Laboratories. Dolby, Pro Logic, MLP Lossless and the double-D symbol are trademarks of Dolby Laboratories.
Customized Features
Use the information screen and On Demand Multi-Use Display ^™ to customize certain features.
Information Screen
■ How to customize
Select your desired setting item by pressing the SETTINGS button, then rotating 📞 while the power mode is ON and the vehicle is at a complete stop. Press 😊
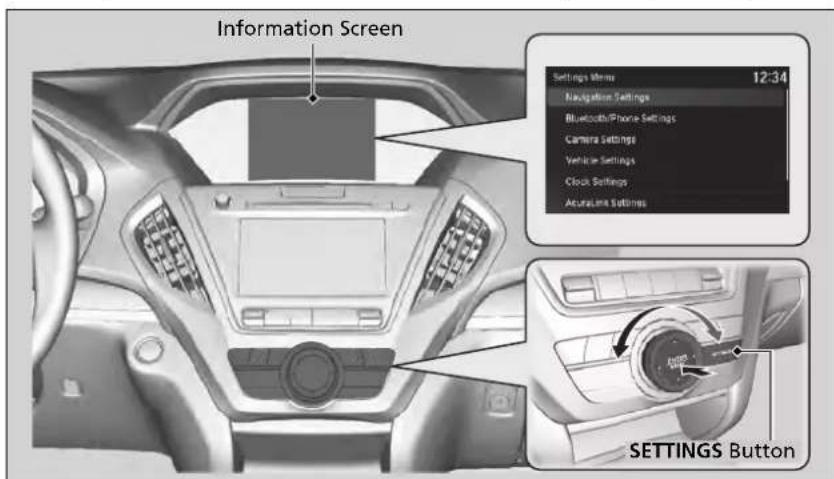
text_image
Information Screen Settings Menu 12:34 Navigation Settings Bluetooth/Phone Settings Camera Settings Vehicle Settings Clock Settings Accuracy Settings SETTINGS ButtonCustomized Features
When you customize settings, make sure that the vehicle is at a complete stop and transmission is put into [P].
Information Screen
To customize other features, rotate move,
→ List of customizable options P. 369
How to customize
The following settings can be customized on the On Demand Multi-Use Display™.
- Edit Source Order
- Sound Settings
- Edit/Delete HDD Music
- Audio Settings
- Screen Settings
- RES Settings
→How to customize P. 385
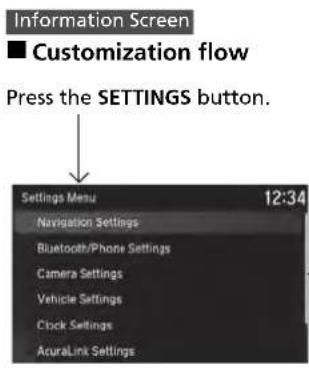
text_image
Information Screen ■ Customization flow Press the SETTINGS button. Settings Menu 12:34 Navigation Settings Bluetooth/Phone Settings Camera Settings Vehicle Settings Clock Settings AcuraLink Settings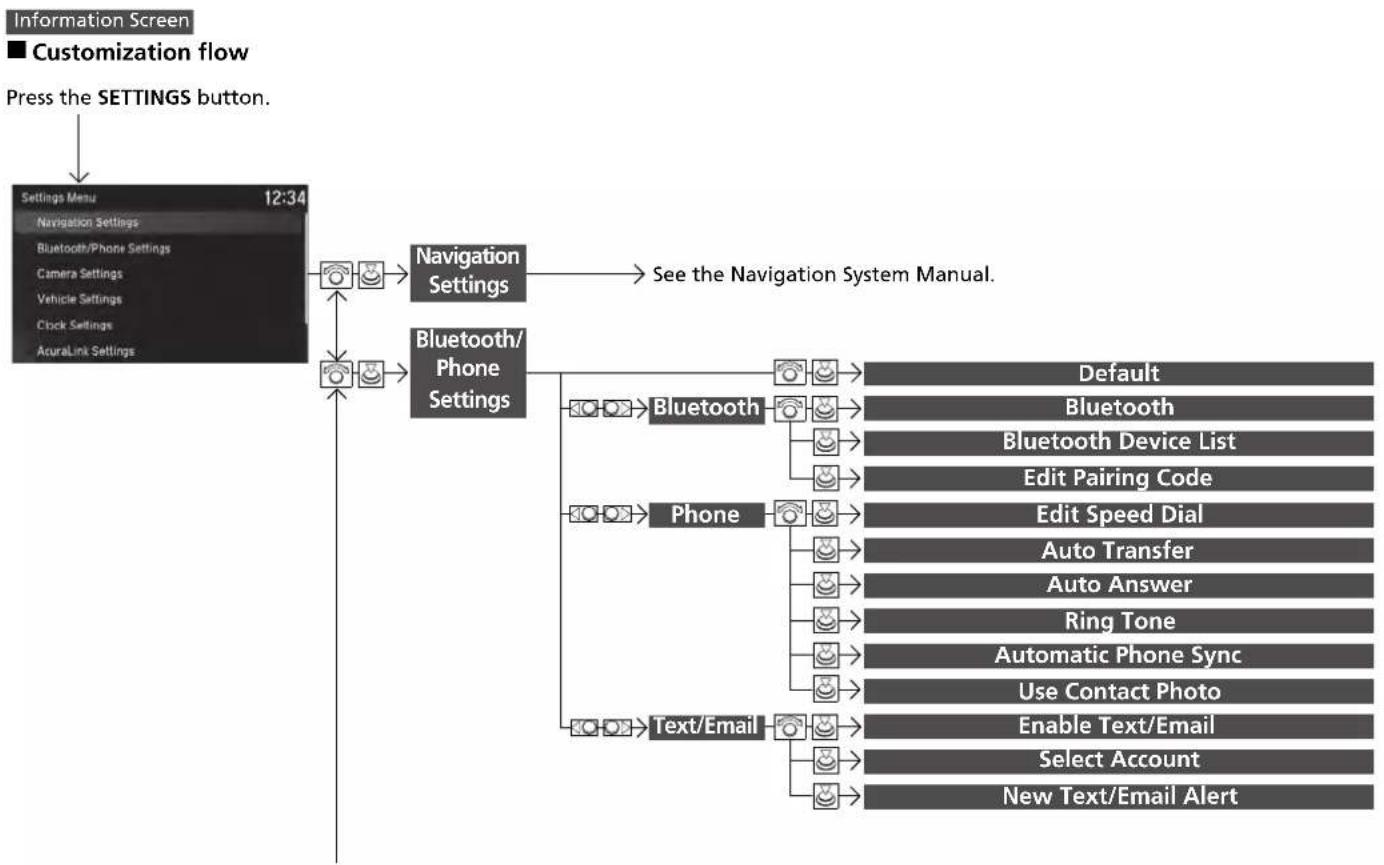
flowchart
graph TD
    A["Settings Menu 12:34"] --> B["Navigation Settings"]
    A --> C["Bluetooth/Phone Settings"]
    B --> D["See the Navigation System Manual."]
    C --> E["Default"]
    C --> F["Bluetooth Device List"]
    C --> G["Edit Pairing Code"]
    C --> H["Edit Speed Dial"]
    C --> I["Auto Transfer"]
    C --> J["Auto Answer"]
    C --> K["Ring Tone"]
    C --> L["Automatic Phone Sync"]
    C --> M["Use Contact Photo"]
    C --> N["Enable Text/Email"]
    C --> O["Select Account"]
    C --> P["New Text/Email Alert"]
Features
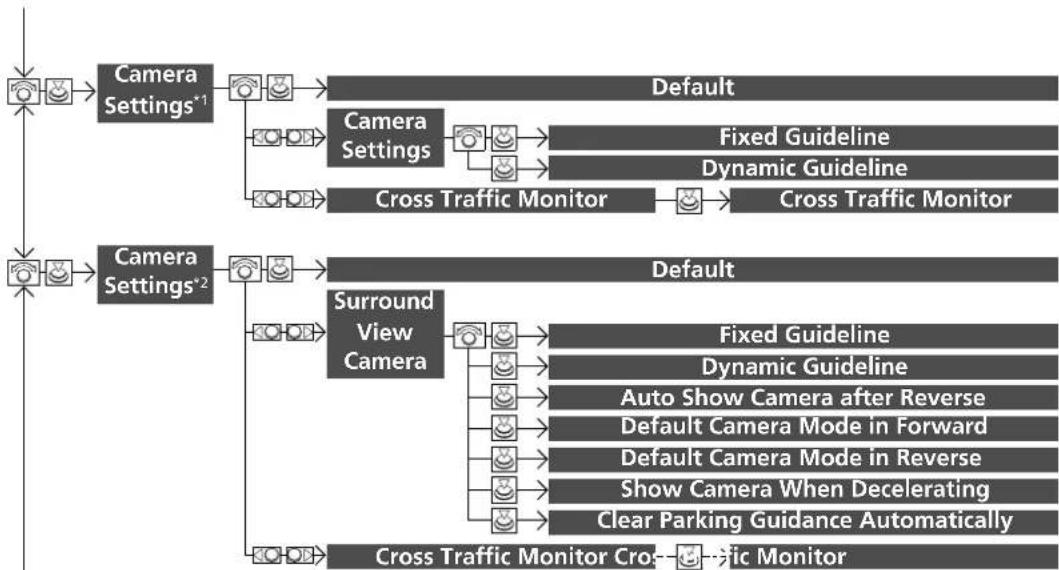
flowchart
graph TD
    A["Camera Settings*1"] --> B["Default"]
    C["Camera Settings*2"] --> D["Default"]
    B --> E["Fixed Guideline"]
    B --> F["Dynamic Guideline"]
    E --> G["Cross Traffic Monitor"]
    F --> H["Cross Traffic Monitor"]
    G --> I["Surround View Camera"]
    H --> J["Surround View Camera"]
    I --> K["Fixed Guideline"]
    I --> L["Dynamic Guideline"]
    K --> M["Auto Show Camera after Reverse"]
    K --> N["Default Camera Mode in Forward"]
    K --> O["Default Camera Mode in Reverse"]
    K --> P["Show Camera When Decelerating"]
    K --> Q["Clear Parking Guidance Automatically"]
    L --> R["Cross Traffic Monitor Cross-Fic Monitor"]
    M --> S["Cross Traffic Monitor Cross-Fic Monitor"]
*1: Models with multi-view rear camera
*2: Models with surround view camera system
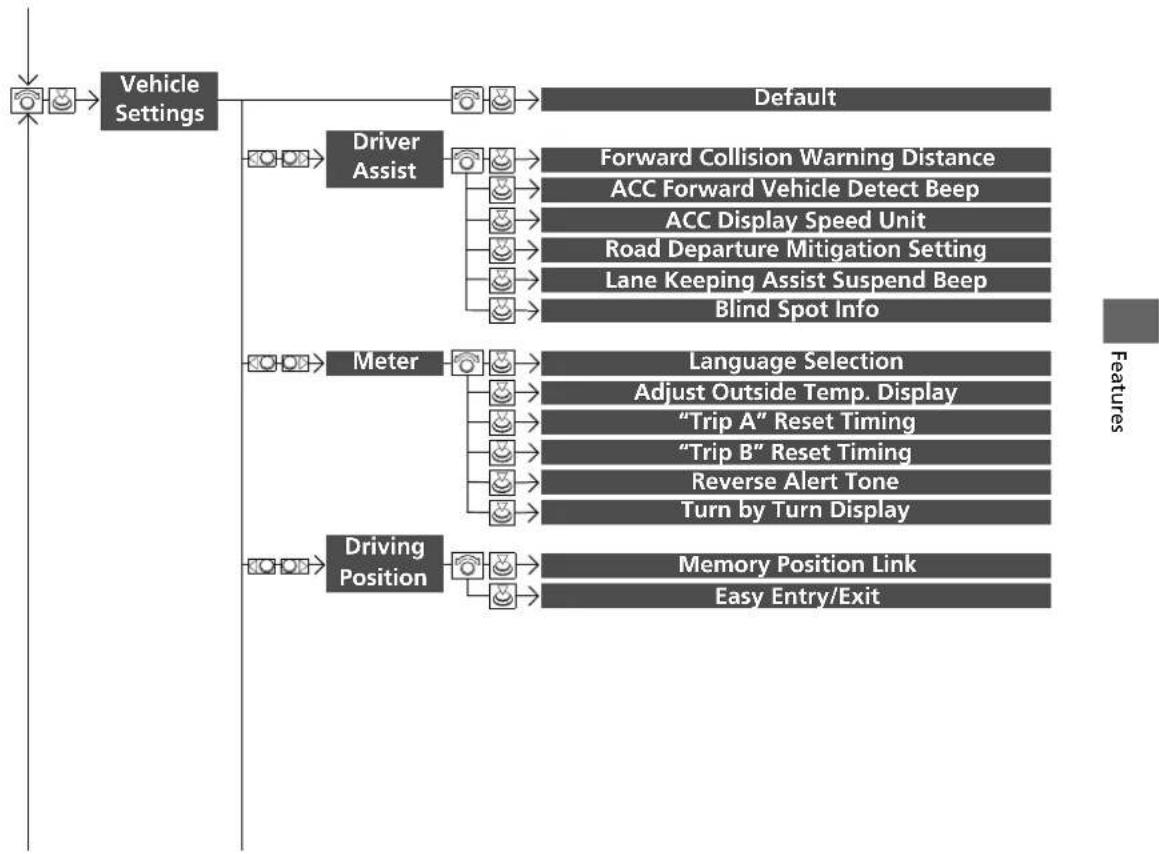
flowchart
graph TD
    A["Vehicle Settings"] --> B["Driver Assist"]
    B --> C["Forward Collision Warning Distance"]
    B --> D["ACC Forward Vehicle Detect Beep"]
    B --> E["ACC Display Speed Unit"]
    B --> F["Road Departure Mitigation Setting"]
    B --> G["Lane Keeping Assist Suspend Beep"]
    B --> H["Blind Spot Info"]
    I["Meter"] --> J["Language Selection"]
    I --> K["Adjust Outside Temp. Display"]
    I --> L[""Trip A" Reset Timing"]
    I --> M[""Trip B" Reset Timing"]
    I --> N["Reverse Alert Tone"]
    I --> O["Turn by Turn Display"]
    P["Driving Position"] --> Q["Memory Position Link"]
    P --> R["Easy Entry/Exit"]
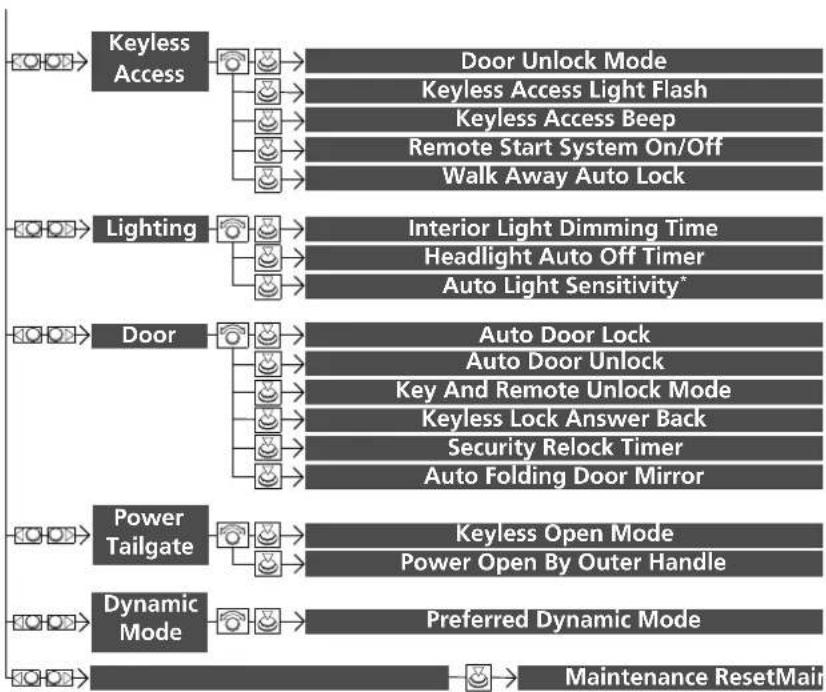
flowchart
graph TD
    A["Keyless Access"] --> B["Door Unlock Mode"]
    A --> C["Keyless Access Light Flash"]
    A --> D["Keyless Access Beep"]
    A --> E["Remote Start System On/Off"]
    A --> F["Walk Away Auto Lock"]

    G["Lighting"] --> H["Interior Light Dimming Time"]
    G --> I["Headlight Auto Off Timer"]
    G --> J["Auto Light Sensitivity*"]

    K["Door"] --> L["Auto Door Lock"]
    K --> M["Auto Door Unlock"]
    K --> N["Key And Remote Unlock Mode"]
    K --> O["Keyless Lock Answer Back"]
    K --> P["Security Relock Timer"]
    K --> Q["Auto Folding Door Mirror"]

    R["Power Tailgate"] --> S["Keyless Open Mode"]
    R --> T["Power Open By Outer Handle"]

    U["Dynamic Mode"] --> V["Preferred Dynamic Mode"]

    W["Maintenance ResetMain"] --> X["→"]
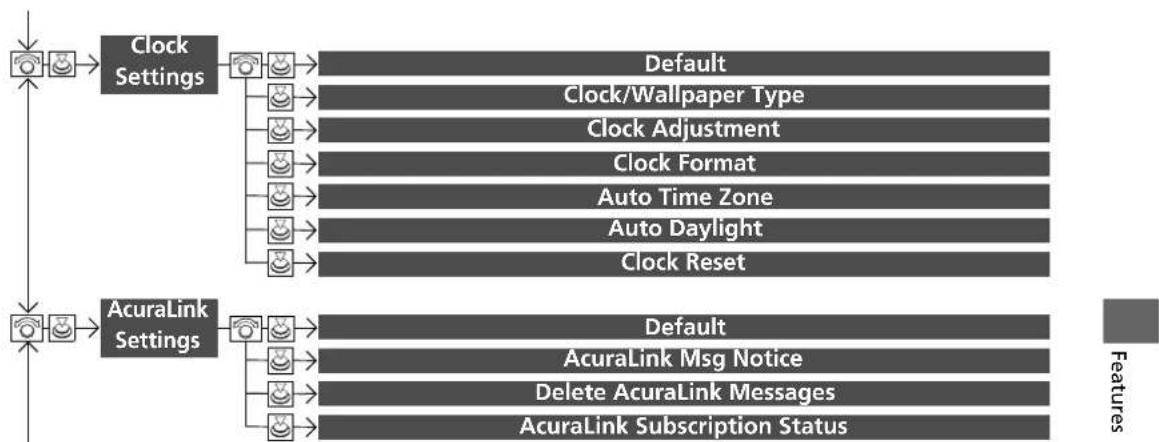
flowchart
graph TD
    A["Clock Settings"] --> B["Default"]
    A --> C["Clock/Wallpaper Type"]
    A --> D["Clock Adjustment"]
    A --> E["Clock Format"]
    A --> F["Auto Time Zone"]
    A --> G["Auto Daylight"]
    A --> H["Clock Reset"]
    I["AcuraLink Settings"] --> J["Default"]
    I --> K["AcuraLink Msg Notice"]
    I --> L["Delete AcuraLink Messages"]
    I --> M["AcuraLink Subscription Status"]
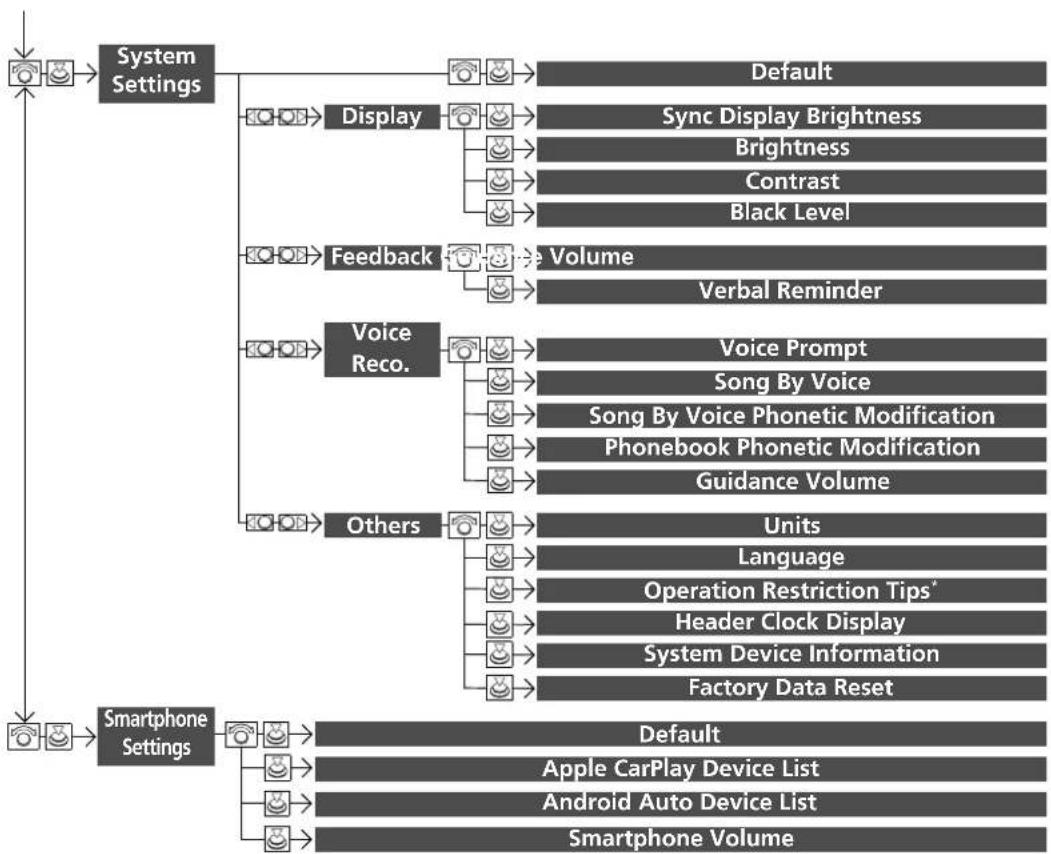
flowchart
graph TD
    A["System Settings"] --> B["Display"]
    A --> C["Feedback"]
    A --> D["Voice Reco."]
    A --> E["Others"]
    B --> F["Default"]
    C --> G["Sync Display Brightness"]
    C --> H["Brightness"]
    C --> I["Contrast"]
    C --> J["Black Level"]
    D --> K["Volume"]
    D --> L["Verbal Reminder"]
    E --> M["Units"]
    E --> N["Language"]
    E --> O["Operation Restriction Tips'"]
    E --> P["Header Clock Display"]
    E --> Q["System Device Information"]
    E --> R["Factory Data Reset"]
    S["Smartphone Settings"] --> T["Default"]
    S --> U["Apple CarPlay Device List"]
    S --> V["Android Auto Device List"]
    S --> W["Smartphone Volume"]
Information Screen
■ List of customizable options
| Setup Group | Customizable Features Description Selectable Settings | |||
| Bluetooth/ Phone Settings | Default | Cancels/Resets all customized items in the Bluetooth/Phone Settings group as default. | Yes/No | |
| Bluetooth | Bluetooth | Turns the Bluetooth® on and off. | On*1/Off | |
| Bluetooth Device List | Pairs a new phone to HFL, edits or deletes a paired phone, or creates a security PIN. ➡Phone Setup P. 405 | — | ||
| Edit Pairing Code | Changes a pairing code. ➡To change the pairing code setting P. 407 | Random/Fixed*1 | ||
| Phone | Edit Speed Dial | Edits, adds or deletes a speed dial entry. ➡Phone Setup P. 405 | — | |
| Auto Transfer | Sets calls to automatically transfer from your phone to HFL when you enter the vehicle. | On*1/Off | ||
| Auto Answer | Sets whether to automatically answer an incoming call after about four seconds. | On/Off*1 | ||
*1:Default Setting
| Setup Group | Customizable Features Description Selectable Settings | |||
| Bluetooth/ Phone Settings | Phone | Ring Tone | Selects a fixed ring tone or the one from the connected cell phone. | Fixed/Mobile Phone*1/Off |
| Automatic Phone Sync | Sets a phonebook data to be automatically imported when a phone is paired to HFL. | On/Off | ||
| Use Contact Photo | Displays a caller's picture on an incoming call screen. | On*1/Off | ||
| Text/Email | Enable Text/Email | Turns the text/e-mail message function on and off. | On*1/Off | |
| Select Account | Selects a text or e-mail message account. | — | ||
| New Text/Email Alert | Selects whether a pop-up alert comes on the screen when HFL receives a new text/e-mail message. | — | ||
*1:Default Setting
| Setup Group | Customizable Features Description Selectable Settings | |||
| Default | Cancels/Resets all customized items in the Camera Settings group as default. | Yes/No | ||
| Models with multi-view rear cameraCamera Settings | Rear Camera | Fixed Guideline | Selects whether the fixed guidelines come on the rear camera monitor. | On*1/Off |
| Dynamic Guideline | Selects whether the dynamic guidelines come on the rear camera monitor. | On*1/Off | ||
| Cross Traffic Monitor | Cross Traffic Monitor | Turns the cross traffic monitor feature on and off. | On*1/Off | |
*1:Default Setting
| Setup Group | Customizable Features Description Selectable Settings | |||
| Models with surround view camera systemCamera Settings | Default | Cancels/Resets all customized items in the Camera Settings group as default. | Yes/No | |
| Surround View Camera | Fixed Guideline | Sets whether to turn on the reference line display. | On*1/Off | |
| Dynamic Guideline | Sets whether to turn on the projection line display. | On*1/Off | ||
| Auto Show Camera after Reverse | Sets the rear view to be automatically switched to the front view when the transmission is out of R. | On/Off*1 | ||
| Default Camera Mode in Forward | Sets which screen to display when the surround view camera system is turned on while the vehicle is moving forward. | (Front Ground View)*1/Last Used/(Front Wide View)/(Side View) | ||
| Default Camera Mode in Reverse | Sets which screen to display when the surround view camera system is turned on while the vehicle is reversing. | (Rear Ground View)*1/Last Used/(Rear Normal View)/(Rear Wide View) | ||
| Show Camera When Decelerating | Sets the screen to automatically return to the camera view at vehicle speeds of 7 mph (12 km/h) or lower. | On/Off*1 | ||
*1:Default Setting
| Setup Group | Customizable Features Description Selectable Settings | |||
| Models with surround view camera system | Surround View Camera | Clear Parking Guidance Automatically | Turns the parking guide lines on and off. On | ^1 /Off |
| Camera Settings | Cross Traffic Monitor | Cross Traffic Monitor | Turns the cross traffic monitor feature on and off. | On ^1 /Off |
*1:Default Setting
| Setup Group | Customizable Features Description Selectable Settings | |||
| Vehicle Settings | Default | Cancels/Resets all customized items in the Vehicle Settings group as default. | Yes/No | |
| Driver Assist | Forward Collision Warning Distance | Changes at which distance CMBS^TM alerts. Long/Normal | ^*1 /Short | |
| ACC Forward Vehicle Detect Beep | Causes the system to beep when the system detects a vehicle, or when the vehicle goes out of the ACC with Low Speed Follow range. | On/Off ^*1 | ||
| ACC Display Speed Unit | Changes the speed unit for ACC with Low Speed Follow on the MID. | mph ^*1 /km/h (U.S.) mph/km/h ^*1 (Canada) | ||
| Road Departure Mitigation Setting | Changes the setting for the road departure mitigation system. | Normal ^*1 /Wide/Warning Only | ||
| Lane Keeping Assist Suspend Beep | Causes the system to beep when the LKAS is suspended. | On/Off ^*1 | ||
| Blind Spot Info | Changes the setting for the blind spot information. | Audible And Visual Alert ^*1 /Visual Alert/Off | ||
*1:Default Setting
| Setup Group | Customizable Features Description Selectable Settings | ||
| Vehicle Settings | Meter | Language Selection Changes the displayed language on the MID. | English ^*1 /Français/Español |
| Adjust Outside Temp. Display | Adjusts the temperature reading by a few degrees. | ||
| "Trip A" Reset Timing | Changes the setting of how to reset trip meter A, average fuel economy A, average speed A, and elapsed time A. | ||
| "Trip B" Reset Timing | Changes the setting of how to reset trip meter B, average fuel economy B, average speed B, and elapsed time B. | ||
| Reverse Alert Tone | Causes the beeper to sound once when the transmission is put into . | ||
| Turn by Turn Display | Selects whether the turn-by-turn display comes on during the route guidance. | ||
*1:Default Setting
| Setup Group | Customizable Features Description Selectable Settings | |||
| Vehicle Settings | Driving Position | Memory Position Link | Turns the driving position memory system on and off. | On*1/Off |
| Easy Entry/Exit | Moves the seat fully rearward and steering wheel fully up when you get in/get out of the vehicle. Changes the setting for this feature. | Seat & Steering Wheel*1/Seat Only/Steering Wheel Only/Off | ||
| Keyless Access | Door Unlock Mode | Changes which doors unlock when you grab the driver's door handle. | Driver's Door or Tailgate Only*1/All Doors | |
| Keyless Access Light Flash | Causes some exterior lights to flash when you unlock/lock the doors. | On*1/Off | ||
| Keyless Access Beep | Causes the beeper to sound when you unlock/lock the doors. | On*1/Off | ||
| Remote Start System On/Off | Turns the remote engine start feature on and off. On *1/Off | |||
| Walk Away Auto Lock | Changes the settings for the automatic locking the doors when you walk away from the vehicle while carrying the keyless access remote. | On/Off*1 | ||
*1:Default Setting
| Setup Group | Customizable Features Description Selectable Settings | |||
| Vehicle Settings | Lighting | Interior Light Dimming Time | Changes the length of time the interior lights stay on after you close the doors. | 60seconds/30seconds ^1 /15seconds |
| Headlight Auto Off Timer | Changes the length of time the exterior lights stay on after you close the driver's door. | 60seconds/30seconds/15seconds ^1 /0seconds | ||
| Auto Light Sensitivity* | Changes the timing for the headlights to come on. | Max/High/Mid ^1 /Low/Min | ||
*1:Default Setting
| Setup Group | Customizable Features Description Selectable Settings | |||
| Vehicle Settings | Door | Auto Door Lock | Changes the setting for when the doors automatically lock. | With Vehicle Speed*1/Shift from P/Off |
| Auto Door Unlock | Changes the setting for when the doors unlock automatically. | All Doors When Driver's Door Opens*1/All Doors When Shifted to Park/All Doors When Ignition Switched Off/Off | ||
| Key And Remote Unlock Mode | Sets up either the driver's door or all doors to unlock on the first push of the remote or built-in key. | Driver Door*1/All Doors | ||
| Keyless Lock Answer Back | LOCK/UNLOCK- The exterior lights flash. LOCK (2nd push)- The beeper sounds. | On*1/Off | ||
| Security Relock Timer | Changes the time it takes for the doors to relock and the security system to set after you unlock the vehicle without opening any door. | 90seconds/60seconds/30seconds*1 | ||
| Auto Folding Door Mirror | Changes how you can fold the door mirrors. | Auto Fold With Keyless*1/Manual Only | ||
*1:Default Setting
| Setup Group | Customizable Features Description Selectable Settings | |||
| Vehicle Settings | Power Tailgate | Keyless Open Mode | Changes the keyless setting for when the power tailgate opens. | Anytime*1/When Unlocked |
| Power Open By Outer Handle | Selects whether to enable the power tailgate open operation using the tailgate outer handle. | Off (Manual only)/ On (Power/ Manual)*1 | ||
| Dynamic Mode | Preferred Dynamic Mode | Changes the dynamic mode setting for when you set the power mode to ON. | Last Used*1/Comfort/ Normal/Sport | |
| Maintenance Info. | Maintenance Reset | Resets the engine oil life display when you have performed the maintenance service. | — | |
*1:Default Setting
| Setup Group | Customizable Features Description Selectable Settings | ||
| Clock Settings | Default | Cancels/Resets all customized items in the Clock Settings group as default. | Yes/No |
| Clock/Wallpaper Type | Clock Changes the clock display type. | Analog/Digital*1/ Small Digital/Off | |
| WallpaperChanges the wallpaper type Imports an image file for a new wallpaper. Deletes an image file for a wallpaper.Wallpaper Setup P. 254 | Blank/Galaxy*1/ Metallic/Options... | ||
| Clock Adjustment | Adjusts Clock.Wallpaper Setup P. 254 | — | |
| Clock Format | Selects the digital clock display from 12H to 24H. | 12H*1/24H | |
| Auto Time Zone | Sets the audio system to automatically adjust the clock when driving through different time zones. | On*1/Off | |
| Auto Daylight | Sets the audio system to automatically adjust the clock ("spring ahead" or "fall back" by one hour) when a daylight saving time change occurs. | On*1/Off | |
| Clock Reset | Resets the clock settings to the factory default. | Yes/No | |
*1:Default Setting
| Setup Group | Customizable Features Description Selectable Settings | ||
| AcuraLink Settings | Default | Cancels/Resets all customized items in the AcuraLink Settings group as default. | Yes/No |
| AcuraLink Msg Notice | Selects whether newly received AcuraLink messages are to be displayed. | On ^-1 /Off | |
| Delete AcuraLink Message Deletes AcuraLink messages. — | |||
| AcuraLink Subscription Status | Displays your current AcuraLink subscription status. | — | |
*1:Default Setting
| Setup Group | Customizable Features Description Selectable Settings | |||
| System Settings | Default | Cancels/Resets all customized items in the System Settings group as default. | Yes/No | |
| Display | Sync Display Brightness | Selects whether the display brightness synchronizes with the instrument panel brightness. | On*1/Off | |
| Brightness | Changes the brightness of the information screen. | — | ||
| Contrast | Changes the contrast of the information screen. | — | ||
| Black Level | Changes the black level of the information screen. | — | ||
| Feedback | Guidance Volume | Changes the volume of the audio speakers. | 0~8*1~11 | |
| Verbal Reminder | Turns the verbal reminders on and off. | On*1/Off | ||
*1:Default Setting
| Setup Group | Customizable Features Description Selectable Settings | ||
| System Settings | Voice Repo. | Voice Prompt Turns the voice prompt on and off. On | *1/Off |
| Song By Voice | Turns the Song By VoiceTM on and off.➢Song By VoiceTM (SBV) P. 294 | ||
| Song By Voice Phonetic Modification | Modifies a voice command for music stored in the HDD or an iPod.➢Phonetic Modification P. 296 | ||
| Phonebook Phonetic Modification | Modifies a voice command for the phonebook.➢Phonebook Phonetic Modification P. 419 | ||
| Guidance Volume | Changes the volume of the voice prompt. | ||
*1:Default Setting
| Setup Group | Customizable Features Description Selectable Settings | |||
| System Settings | Others | Units | Changes the distance unit on the navigation map screen. | mile^+1/km (U.S.) mile/km^+1 (Canada) |
| Language Changes the display language. | English ^+1 /Français/ Español | |||
| Operation Restriction Tips* | Alerts you when manual control of the system is disabled to prevent distraction while driving. Only voice commands are available. | On^+1/Off | ||
| Header Clock Display | Selects whether the clock display comes on. | On^+1/Off | ||
| System Device Information | Displays the system/device information. — | |||
| Factory Data Reset | Resets all the settings to their factory default. ➤ Defaulting All the Settings P. 393 | — | ||
| Smartphone Settings | Default | Cancels/Resets all customized items in the Smartphone Settings group as default. | Yes/No | |
| Apple CarPlay Device List Sets up the Apple CarPlay connection. — | ||||
| Android Auto Device List Sets up the Android Auto connection. — | ||||
| Smartphone Volume | Adjusts the volume of the smartphone function. | 1~8 ^+1 ~11 | ||
| Version | Shows software version of Apple CarPlay and Android Auto unit. | — | ||
*1:Default Setting
* Not available on all models
On Demand Multi-Use Display™
■ How to customize
While the vehicle is at a complete stop with the power mode in ON, select Audio
Menu, then select a setting item.
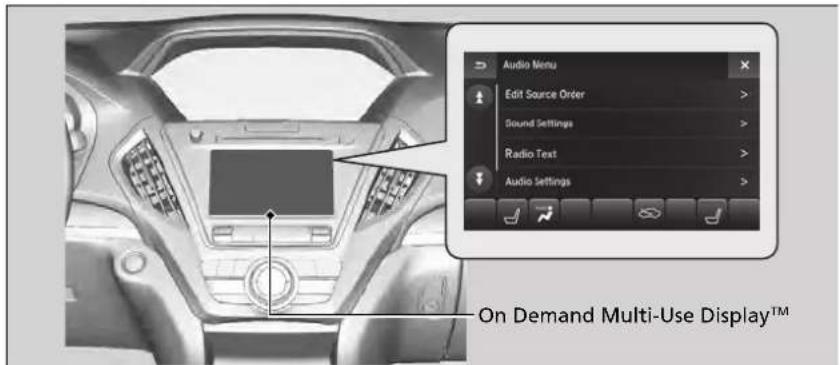
text_image
Audio Menu Edit Source Order > Sound Settings > Radio Text > Audio Settings > On Demand Multi-Use Display™Continued
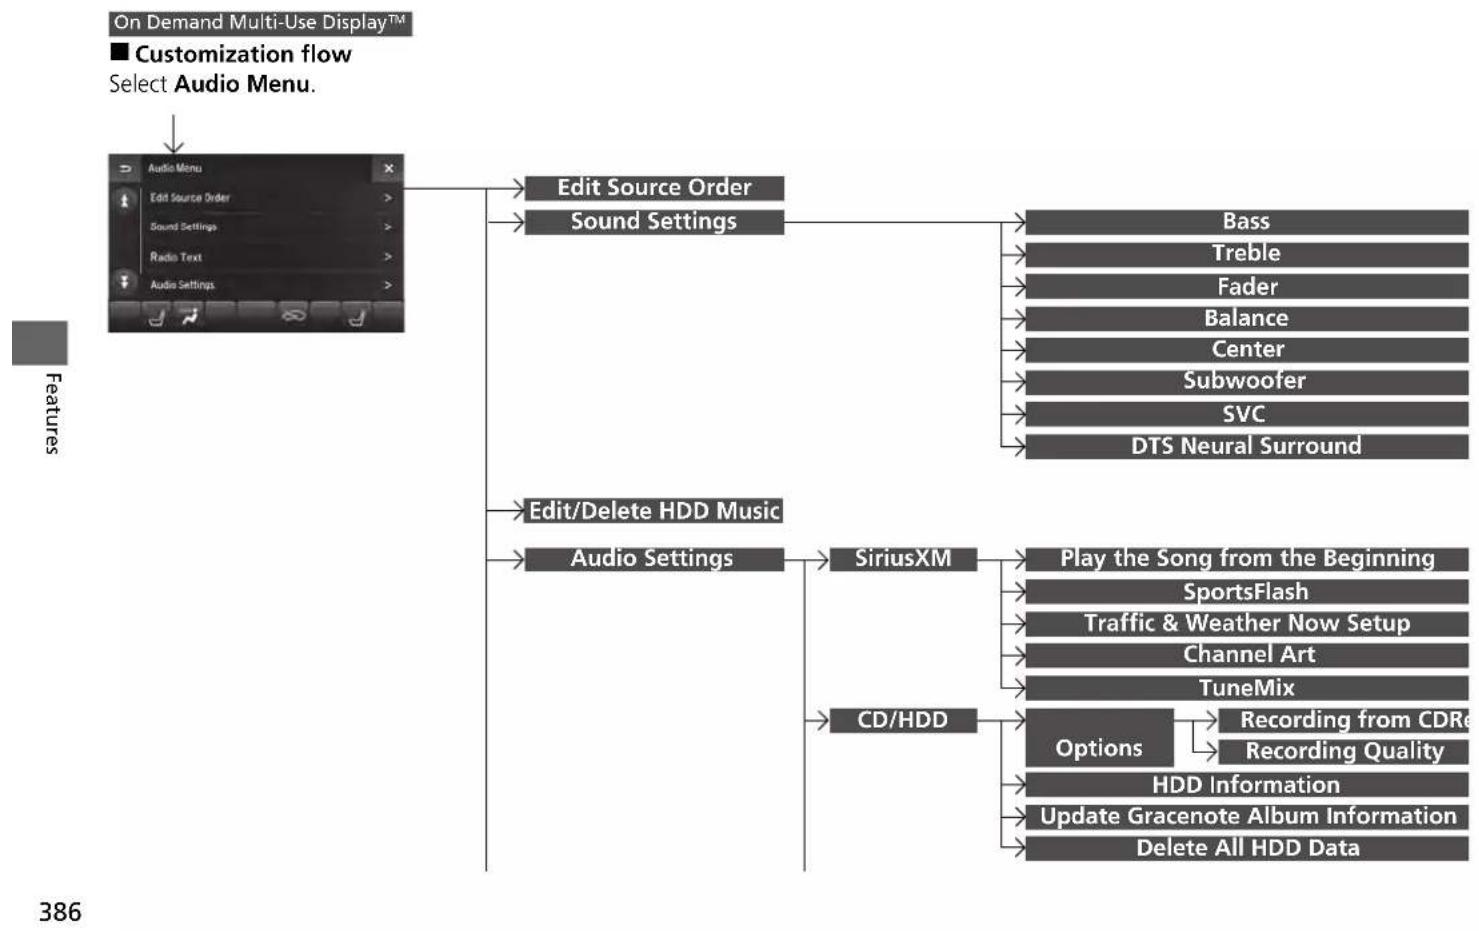
flowchart
graph TD
    A["Audio Menu"] --> B["Edit Source Order"]
    A --> C["Sound Settings"]
    B --> D["Bass"]
    B --> E["Treble"]
    B --> F["Fader"]
    B --> G["Balance"]
    B --> H["Center"]
    B --> I["Subwoofer"]
    B --> J["SVC"]
    B --> K["DTS Neural Surround"]
    L["Features"] --> M["Edit/Delete HDD Music"]
    L --> N["Audio Settings"]
    N --> O["SiriusXM"]
    N --> P["CD/HDD"]
    O --> Q["Play the Song from the Beginning"]
    O --> R["SportsFlash"]
    O --> S["Traffic & Weather Now Setup"]
    O --> T["Channel Art"]
    O --> U["TuneMix"]
    P --> V["Options"]
    P --> W["Recording from CDRe"]
    P --> X["Recording Quality"]
    P --> Y["HDD Information"]
    P --> Z["Update Gracenote Album Information"]
    P --> AA["Delete All HDD Data"]
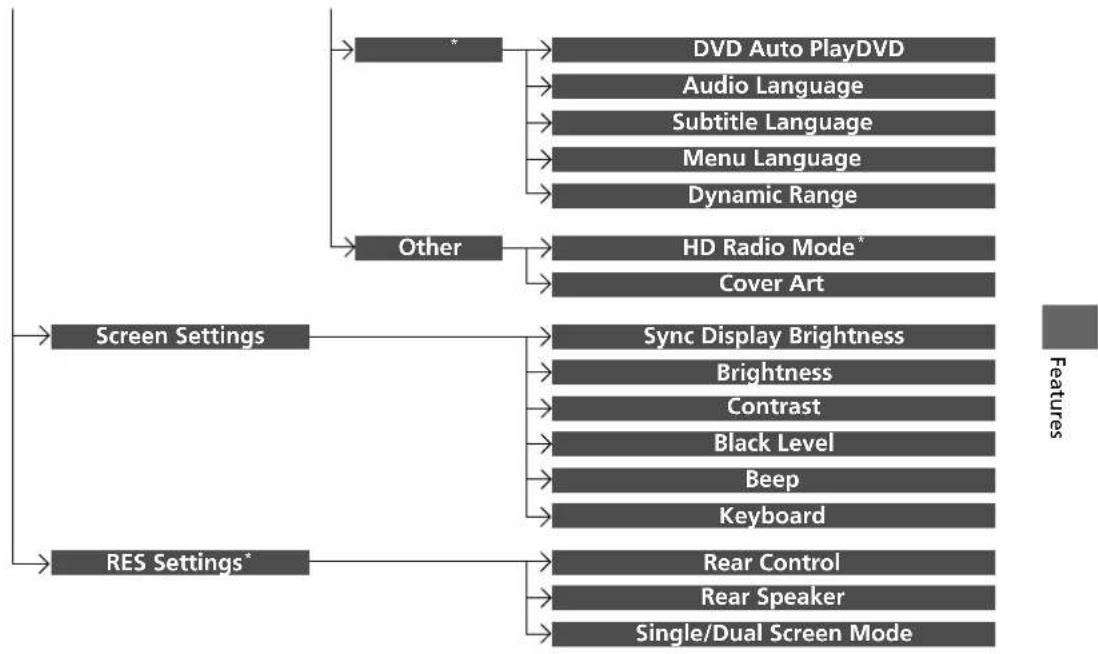
flowchart
graph TD
    A["DVDAutoPlayDVD"] --> B["Audio Language"]
    B --> C["Subtitle Language"]
    C --> D["Menu Language"]
    D --> E["Dynamic Range"]
    F["HD Radio Mode*"] --> G["Cover Art"]
    H["Screen Settings"] --> I["Sync Display Brightness"]
    I --> J["Brightness"]
    I --> K["Contrast"]
    I --> L["Black Level"]
    I --> M["Beep"]
    I --> N["Keyboard"]
    O["RES Settings*"] --> P["Rear Control"]
    O --> Q["Rear Speaker"]
    O --> R["Single/Dual Screen Mode"]
On Demand Multi-Use Display™
■ List of customizable options
| Setup Group | Customizable Features Description Selectable Settings | |||
| Edit Source Order | Changes the order of source list. ➡ Selecting an Audio Source P. 244 | — | ||
| Sound Settings | Bass | |||
| Treble | ||||
| Fader | ||||
| Balance | Adjusts the settings of the audio speaker's sound. ➡Adjusting the Sound P. 256 | — | ||
| Center | ||||
| Subwoofer | ||||
| SVC | ||||
| DTS Neural Surround | ||||
| Edit/Delete HDD Music | Change the playlist name, album name, genre, and track order of the current playlist. You can also delete tracks, playlists, and albums. ➡ Editing an Album or Playlist P. 284 | — | ||
| Audio Settings | SiriusXM | Play the Song from the Beginning | Turns on and off the Tune Start function. | On/Off*1 |
*1:Default Setting
| Setup Group | Customizable Features Description Selectable Settings | |||
| Audio Settings | SiriusXM | Notification Turns on and off the sports alert function. | Disable/Enable once/ Enable*1 | |
| SportsFlash | Beep | Causes the system to beep when the sports alert is notified. | ||
| Favorite Teams | Selects your favorite sport teams. — | |||
| Traffic & Weather Now Setup | Selects a city for using the SiriusXM® traffic and weather information. | — | ||
| Channel Art Turns on and off the channel art display. On | *1/Off | |||
| TuneMix | Turns multiple channel mix preset on and off. | On/Off*1 | ||
| CD/ HDD | Recording Options | Recording from CD | Selects whether the songs on music CDs are automatically recorded to the HDD. | |
| Recording Quality | Selects the quality of the music files recorded to the HDD. | |||
| HDD Information Displays the HDD capacity. — | ||||
| Update Gracenote Album Information | Updates the Gracenote® Album Info (Gracenote® Media Database) from CD or USB. | Update by CD/ Update by USB | ||
| Delete All HDD Data | Deleting all HDD Data P. 290 | — | ||
*1:Default Setting
| Setup Group | Customizable Features Description Selectable Settings | ||
| Audio Settings | DVD * | DVD Auto Play Turns the auto play feature on or off. On | *1/Off |
| Audio Language | Selects a language for the audio that is available on the DVD. | ||
| Subtitle Language | Selects a language for the subtitle that is available on the DVD. | ||
| Menu Language | Selects a language for the DVD menu that is available on the DVD. | ||
| Dynamic Range | Sets whether to control the range of the loud and low sounds. | ||
| Other | HD Radio Mode* | Selects whether the audio system automatically switches to the digital radio waves or receives the analog waves only. | |
| Cover Art Turns on and off the cover art display. On | *1/Off | ||
*1:Default Setting
| Setup Group | Customizable Features Description Selectable Settings | ||
| Screen Settings | Sync Display Brightness | Selects whether the screen brightness synchronizes with the instruments panel brightness. | Off/On*1 |
| Brightness | Changes the brightness of the On Demand Multi-Use DisplayTM. | — | |
| Contrast | Changes the contrast of the On Demand Multi-Use DisplayTM. | — | |
| Black Level | Changes the black level of the On Demand Multi-Use DisplayTM. | — | |
| Beep | Mutes a beep that sounds every time you touch the screen. | Off/On*1 | |
| Keyboard | Changes the on-screen keyboard from the alphabetical order to the qwerty type. | Alphabet/QWERTY*1 | |
*1:Default Setting
| Setup Group | Customizable Features Description Selectable Settings | ||
| RES Settings* | Rear Control | Select weather to use the rear control panel to control the RES. | On*1/Off |
| Rear Speaker | Sets the front audio source to play through the rear speakers, even when the RES is on. The RES source can only be heard through the wireless headphones. | On*1/Off | |
| Single/Dual Screen Mode | Selects a source to continue playing when you switch from dual mode to single mode on the overhead screen. | — | |
*1:Default Setting
Defaulting All the Settings
You can reset all the menu and customized settings as the factory defaults.
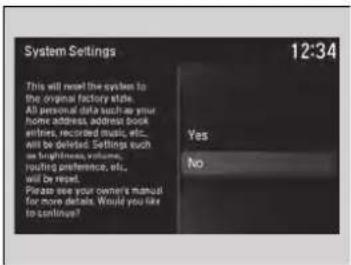
text_image
System Settings 12:34 This will reveal the system to the original factory state. All personal data such as your home address address book setters, recorded music, etc., will be deleted. Settings such as brightness volume, routing preference, etc., will be reset. Please see your owner's manual for more details. Would you like to continue? Yes No- Press the SETTINGS button.
- Rotate 🔒 to select System Settings, then press 🔒.
- Rotate 🔒 to select Factory Data Reset, then press 🔒
The pop-up menu appears on the screen. - Rotate 🔺 to select Yes, then press 😊.
The confirmation message will appear. - Rotate 🔗 to select Yes, then press 😊 again to reset the settings.
The confirmation message will appear. Press & to select OK.
Defaulting All the Settings
When you transfer the vehicle to a third party, reset all settings to default and delete all personal data.
Driver 1 and Driver 2 has stored each settings and personal data separatory.
Perform both Driver 1 and Driver 2 data reset.
The following settings will be reset:
- Routing & Guidance: Rerouting, Unverified Area Routing, Traffic Rerouting, Edit Waypoint Search Area, Guidance Mode, Street Name Guidance
- Route Preference
• Audio preset settings - Phonebook entries
- Other display and each item settings
HomeLink® Universal Transceiver
The HomeLink® Universal Transceiver can be programmed to operate up to three remote controlled devices around your home, such as garage doors, lighting, or home security systems.
Important Safety Precautions
Refer to the safety information that came with your garage door opener to test that the safety features are functioning properly. If you do not have the safety information, contact the manufacturer.
Before programming HomeLink, make sure that people and objects are out of the way of the garage or gate to prevent potential injury or damage.
When programming a garage door opener, park just outside the garage door's path.
HomeLink® Universal Transceiver
Before programming HomeLink to operate a garage door opener, confirm that the opener has an external entrapment protection system, such as an "electronic eye," or other safety and reverse stop features. If it does not, HomeLink may not be able to operate it.
Training HomeLink
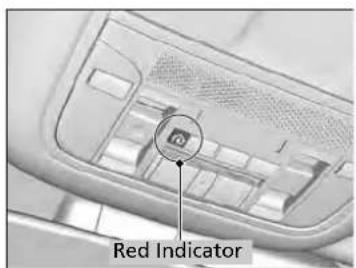
text_image
ro Red IndicatorIf it is necessary to erase a previously entered learned code:
- Press and hold the two outside buttons for about 20 seconds, until the red indicator blinks. Release the buttons, and proceed to step 1.
- If you are training the second or third button, go directly to step 1.
The instructions on the next page should work for most gate or garage openers, but may not work for all. For detailed instructions about your specific remote opener, visit http://www.homelink.com or call (800) 355-3515.
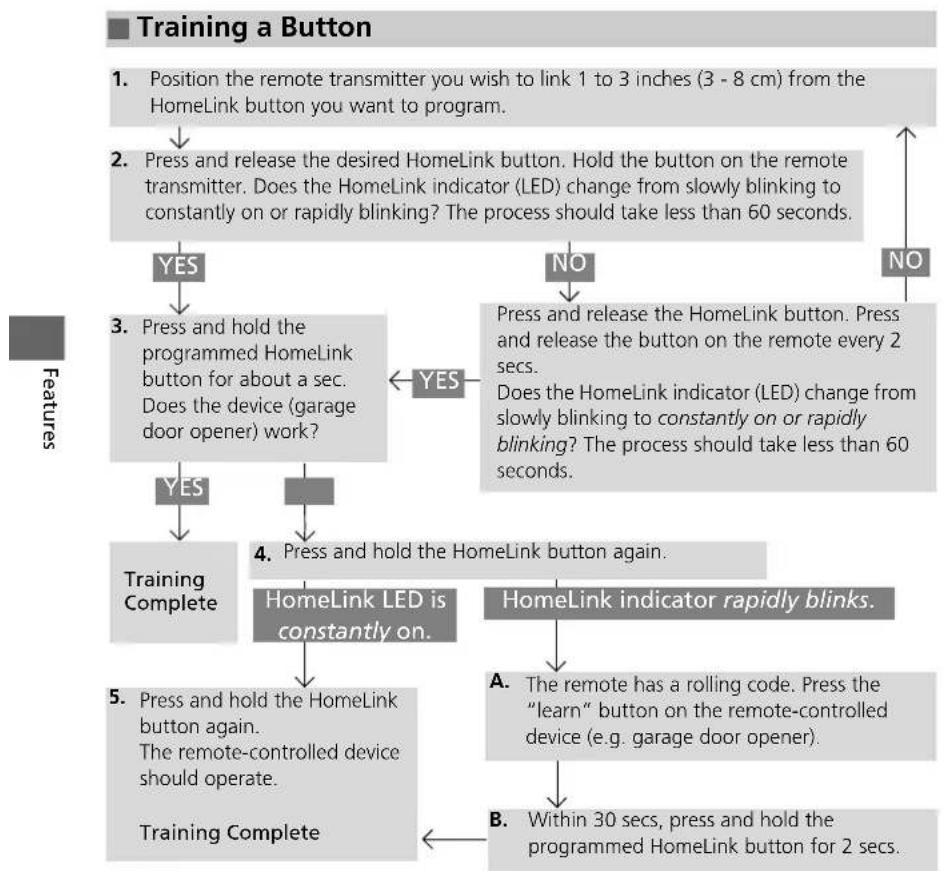
flowchart
graph TD
    A["Position the remote transmitter you wish to link 1 to 3 inches (3 - 8 cm) from the HomeLink button you want to program."] --> B["Press and release the desired HomeLink button. Hold the button on the remote transmitter. Does the HomeLink indicator (LED) change from slowly blinking to constantly on or rapidly blinking? The process should take less than 60 seconds."]
    B --> C{YES}
    B --> D{NO}
    C --> E["Press and release the HomeLink button. Press and release the button on the remote every 2 secs. Does the HomeLink indicator (LED) change from slowly blinking to constantly on or rapidly blinking? The process should take less than 60 seconds."]
    D --> F{YES}
    D --> G{NO}
    E --> H["Training Complete"]
    F --> I["4. Press and hold the HomeLink button again."]
    G --> J["HomeLink LED is constantly on."]
    H --> K["5. Press and hold the HomeLink button again. The remote-controlled device should operate."]
    I --> L["HomeLink indicator rapidly blinks."]
    J --> M["Training Complete"]
    K --> N["A. The remote has a rolling code. Press the "learn" button on the remote-controlled device (e.g. garage door opener)."]
    L --> O["B. Within 30 secs, press and hold the programmed HomeLink button for 2 secs."]
>>Training HomeLink
Retraining a Button
If you want to retrain a programmed button for a new device, you do not have to erase all button memory. You can replace the existing memory code using this procedure:
- Press and hold the desired HomeLink button until the HomeLink indicator begins to blink.
Standard transmitter
Indicator remains on for about 25 secs.
Rolling code transmitter
Indicator remains on for about 25 secs.
- Quickly release the HomeLink button and follow steps 1 - 3 under "Training a Button." You do not need to press and release the HomeLink button again in step 2.
Erasing Codes
To erase all the codes, press and hold the two outside buttons until the HomeLink indicator begins to blink (about 10 to 20 secs). You should erase all codes before selling the vehicle.
If you have any problems, see the device's instructions, visit www.homelink.com, or call HomeLink at (800) 355-3515.
HomeLink® is a registered trademark of Gentex Corporation.
Bluetooth® HandsFreeLink®
Bluetooth® HandsFreeLink® (HFL) allows you to place and receive phone calls using your vehicle's audio system, without handling your cell phone.
Using HFL
HFL Buttons
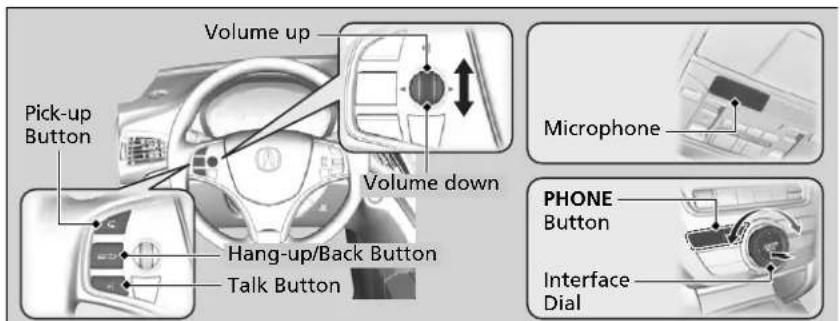
text_image
Volume up Pick-up Button Volume down Hang-up/Back Button Talk Button Microphone PHONE Button Interface Dial(Pick-up) button: Press to go to the Speed Dial/Call History on the MID or to answer an incoming call.
(Hang-up/back) button: Press to end a call, to cancel a command or to clear the phone information on the MID.
(Talk) button: Press to give HFL voice commands.
PHONE button: Press to go directly to the phone menu screen.
Interface dial (ENTER/MENU button): Rotate 🔗 to select an item on the screen, then press 🤨Move , 🔔 on ➤ to select secondary menu.
Bluetooth® HandsFreeLink®
Place your phone where you can get good reception. To use HFL, you need a Bluetooth-compatible cell phone. For a list of compatible phones, pairing procedures, and special feature capabilities:
• U.S.: Visit www.handsfreelink.com/Acura, or call 1-888-528-7876.
• Canada: For more information on smartphone compatibility, call 1-855-490-7351.
To use HFL, the Bluetooth setting must be On. If there is an active connection to Apple CarPlay, HFL is unavailable.
Customized Features P. 362
Voice control tips:
- Aim the vents away from the ceiling and close the windows, as noise coming from them may interfere with the microphone.
- Press and release the button when you want to call a number using a stored voice tag, a phonebook name, or a number. Speak clearly and naturally after a beep.
- If the microphone picks up voices other than yours, the command may be misinterpreted.
State or local laws may prohibit the operation of handheld electronic devices while operating a vehicle.
Continued
HFL Status Display
The On Demand Multi-Use Display™ notifies you when there is an incoming call.
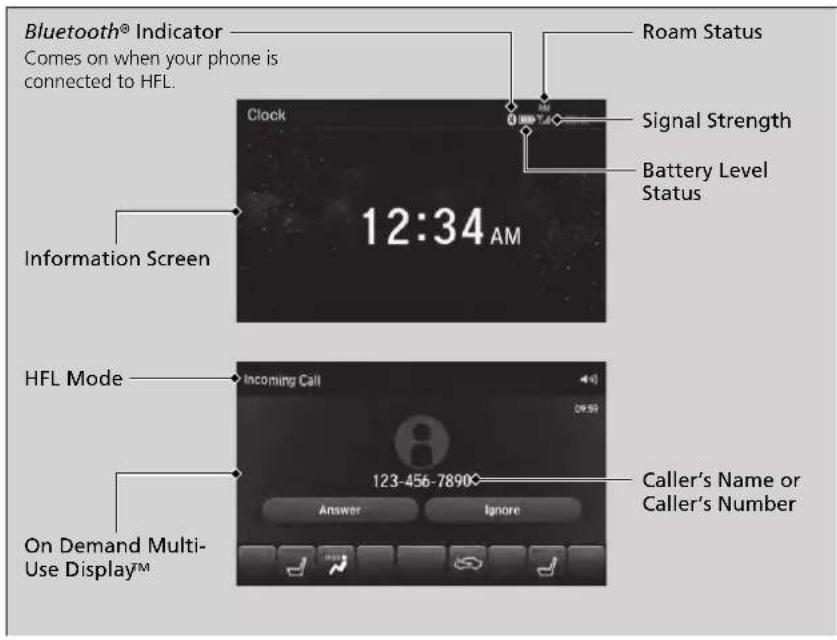
text_image
Bluetooth® Indicator Comes on when your phone is connected to HFL. Roam Status Signal Strength Battery Level Status Clock 12:34 AM Information Screen HFL Mode Incoming Call 123-456-7890° Answer Ignore On Demand Multi- Use Display™ Caller's Name or Caller's NumberBluetooth® HandsFreeLink®
Bluetooth® Wireless Technology
The Bluetooth® word mark and logos are registered trademarks owned by Bluetooth SIG, Inc., and any use of such marks by Honda Motor Co., Ltd., is under license. Other trademarks and trade names are those of their respective owners.
HFL Limitations
An incoming call on HFL will interrupt the audio system when it is playing. It will resume when the call is ended.
HFL Status Display
The information that appears on the information screen varies between phone models.
Limitations for Manual Operation
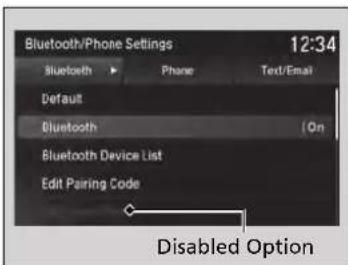
text_image
Bluetooth/Phone Settings 12:34 Bluetooth ▶ Phone Text/Email Default Bluetooth (On) Bluetooth Device List Edit Pairing Code Disabled OptionCertain manual functions are disabled or inoperable while the vehicle is in motion. You cannot select a grayed-out option until the vehicle is stopped.
Only previously stored speed dial entries with voice tags, phonebook names, or numbers can be called using voice commands while the vehicle is in motion.
→Speed Dial P. 416
HFL Menus
The power mode must be in ACCESSORY or ON to use HFL.
■ Bluetooth/Phone Settings screen
text_image
Bluetooth/Phone Settings 12:34 Bluetooth ▶ Phone Text/Email Default Bluetooth On Bluetooth Device List Edit Pairing Code Edit Speed Dial- Press the SETTINGS button.
- Rotate to select Bluetooth/Phone Settings, then press
HFL Menus
To use HFL, you must first pair your Bluetooth-compatible cell phone to the system while the vehicle is parked.
Some functions are limited while driving. A message appears on the screen when the vehicle is moving and the operation is canceled.
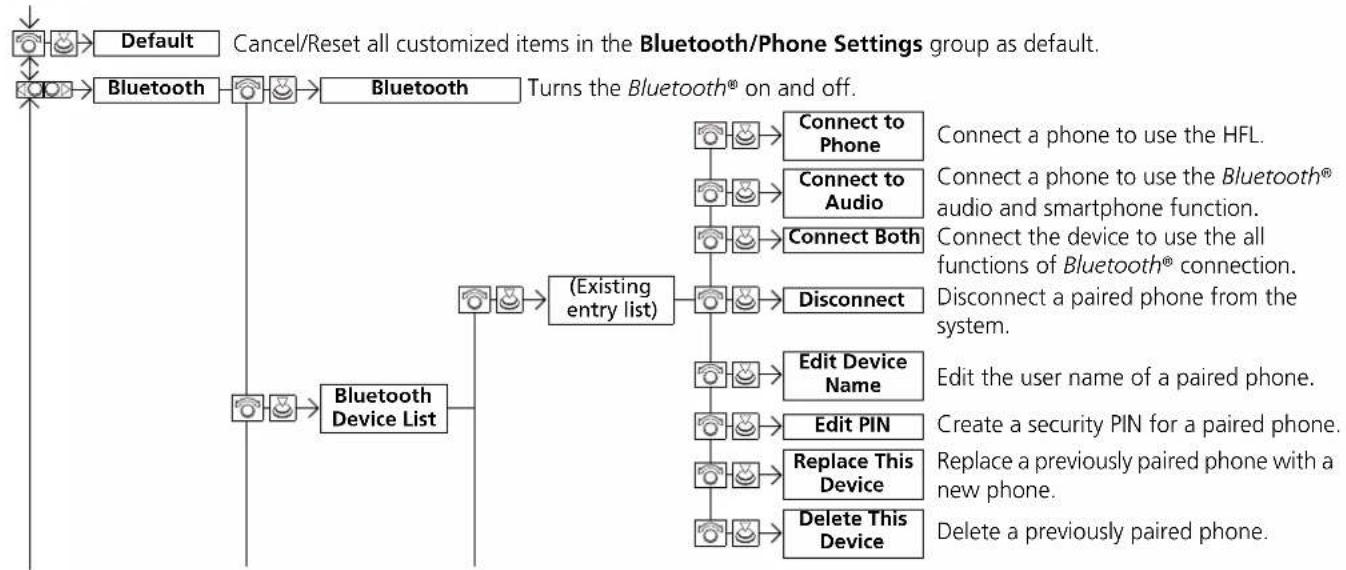
flowchart
graph TD
    A["Default"] --> B["Bluetooth"]
    B --> C["Bluetooth"]
    C --> D["Turns the Bluetooth® on and off."]
    D --> E["Connect to Phone"]
    E --> F["Connect to Audio"]
    F --> G["Connect Both"]
    G --> H["Disconnect"]
    H --> I["Edit Device Name"]
    I --> J["Edit PIN"]
    J --> K["Replace This Device"]
    K --> L["Delete This Device"]
    style A fill:#f9f,stroke:#333
    style B fill:#f9f,stroke:#333
    style C fill:#f9f,stroke:#333
    style D fill:#f9f,stroke:#333
    style E fill:#ccf,stroke:#333
    style F fill:#ccf,stroke:#333
    style G fill:#ccf,stroke:#333
    style H fill:#ccf,stroke:#333
    style I fill:#ccf,stroke:#333
    style J fill:#ccf,stroke:#333
    style K fill:#ccf,stroke:#333
    style L fill:#ccf,stroke:#333
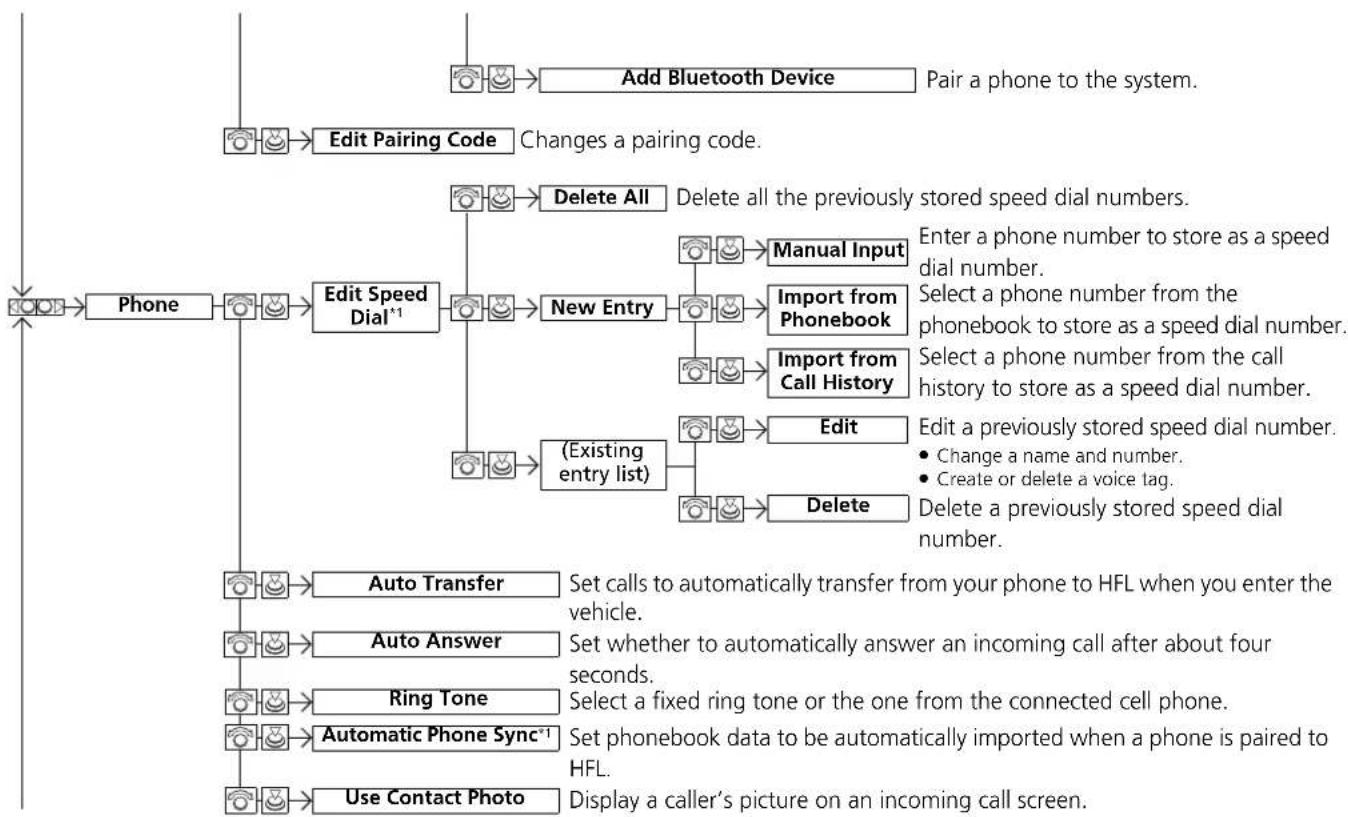
flowchart
graph TD
    A["Add Bluetooth Device"] --> B["Edit Pairing Code"]
    B --> C{Changes a pairing code}
    C --> D["Delete All"]
    D --> E["Edit Speed Dial*1"]
    E --> F["New Entry"]
    F --> G["(Existing entry list)"]
    G --> H["Manual Input"]
    H --> I["Import from Phonebook"]
    I --> J["Import from Call History"]
    J --> K["Edit"]
    K --> L["Edit a previously stored speed dial number."]
    L --> M["Change a name and number."]
    L --> N["Create or delete a voice tag."]
    L --> O["Delete a previously stored speed dial number."]
    P["Auto Transfer"] --> Q["Set calls to automatically transfer from your phone to HFL when you enter the vehicle."]
    R["Auto Answer"] --> S["Set whether to automatically answer an incoming call after about four seconds."]
    T["Ring Tone"] --> U["Select a fixed ring tone or the one from the connected cell phone."]
    V["Automatic Phone Sync*1"] --> W["Set phonebook data to be automatically imported when a phone is paired to HFL."]
    X["Use Contact Photo"] --> Y["Display a caller's picture on an incoming call screen."]
*1: Appears only when a phone is connected to HFL.
Bluetooth® HandsFreeLink® HFL Menus
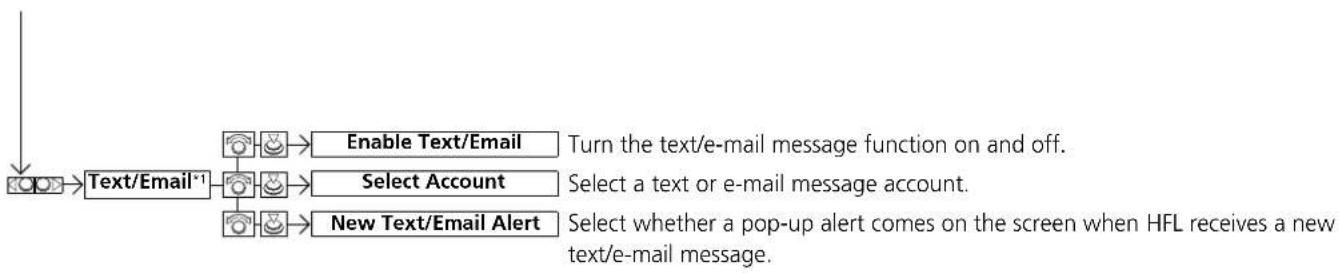
flowchart
graph TD
    A["Text/Email*1"] --> B["Enable Text/Email"]
    A --> C["Select Account"]
    A --> D["New Text/Email Alert"]
    B --> E["Turn the text/e-mail message function on and off."]
    C --> F["Select a text or e-mail message account."]
    D --> G["Select whether a pop-up alert comes on the screen when HFL receives a new text/e-mail message."]
*1: Appears only when a phone is connected to HFL.
■ Phone Menu screen
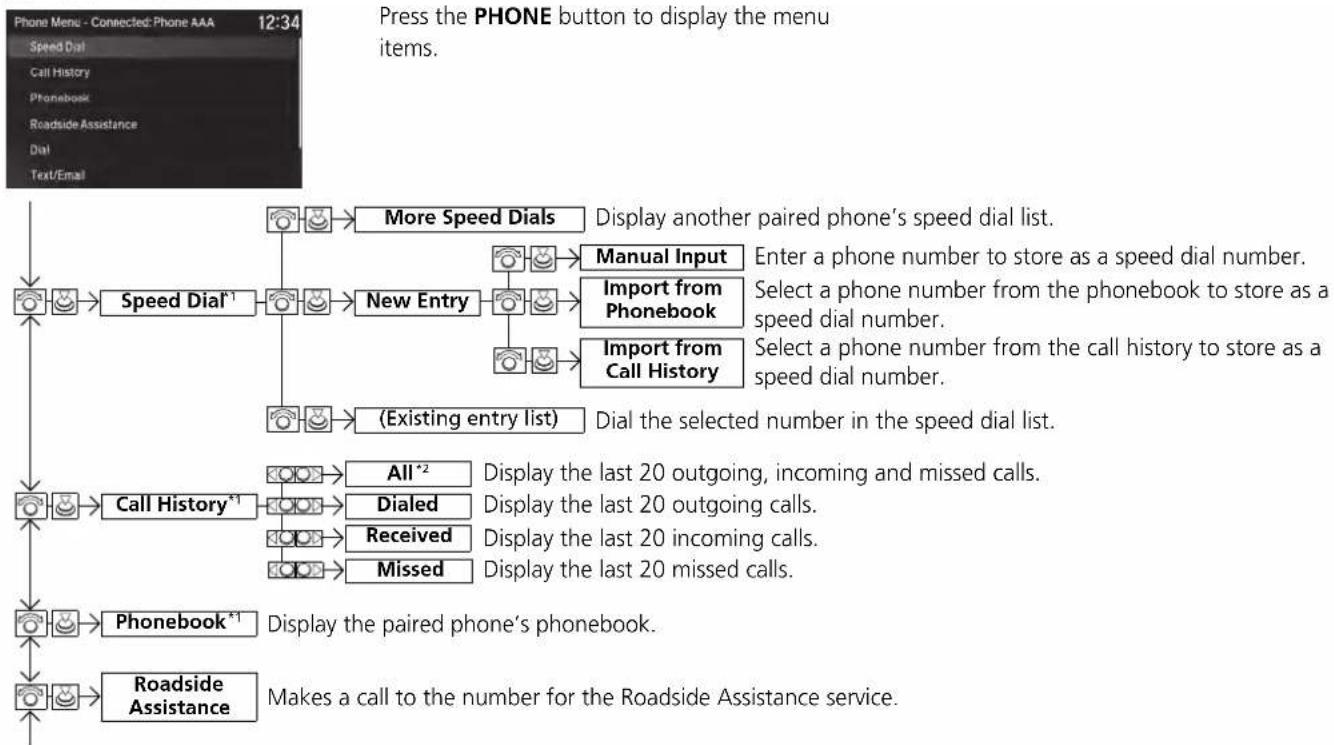
flowchart
graph TD
    A["Speed Dial"] --> B["Speed Dial*1"]
    B --> C["New Entry"]
    C --> D["(Existing entry list)"]
    D --> E["Call History*1"]
    E --> F["Phonebook*1"]
    F --> G["Roadside Assistance"]

    B --> H["More Speed Dials"]
    C --> I["Manual Input"]
    C --> J["Import from Phonebook"]
    C --> K["Import from Call History"]

    D --> L["Dial the selected number in the speed dial list."]
    E --> M["All*2"]
    E --> N["Dialed"]
    E --> O["Received"]
    E --> P["Missed"]

    F --> Q["Display the paired phone's phonebook."]

    G --> R["Makes a call to the number for the Roadside Assistance service."]
*1: Appears only when a phone is connected to HFL.
*2: This function is not available if your phone is not supported.
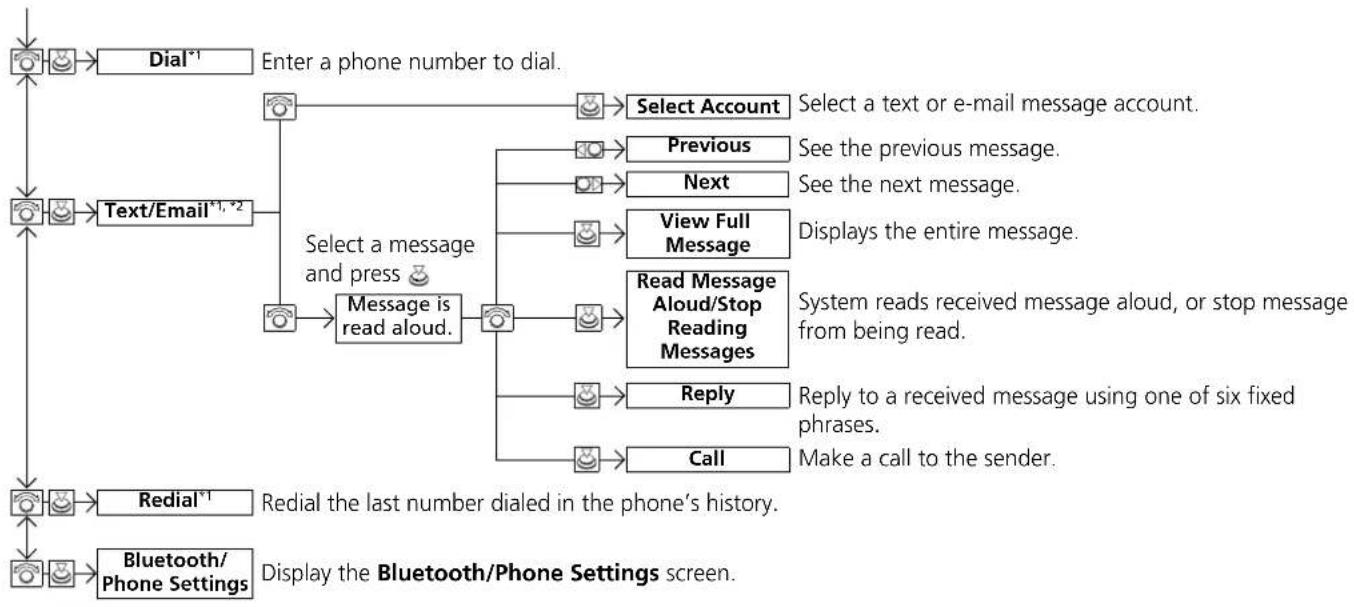
flowchart
graph TD
    A["Enter a phone number to dial."] --> B["Dial*1"]
    A --> C["Text/Email*1,*2"]
    C --> D["Select a message and press 😊"]
    C --> E["Message is read aloud."]
    E --> F["Select Account"]
    F --> G["Previous"]
    F --> H["Next"]
    F --> I["View Full Message"]
    E --> J["Read Message Aloud/Stop Reading Messages"]
    E --> K["Reply"]
    E --> L["Call"]
    G --> M["Select a text or e-mail message account."]
    H --> N["See the previous message."]
    H --> O["See the next message."]
    I --> P["Displays the entire message."]
    J --> Q["System reads received message aloud, or stop message from being read."]
    K --> R["Reply to a received message using one of six fixed phrases."]
    L --> S["Make a call to the sender."]
    T["Redial*1"] --> U["Redial the last number dialed in the phone's history."]
    V["Bluetooth/Phone Settings"] --> W["Display the Bluetooth/Phone Settings screen."]
*1: Appears only when a phone is connected to HFL.
*2: This function is not available if your phone is not supported.
Phone Setup
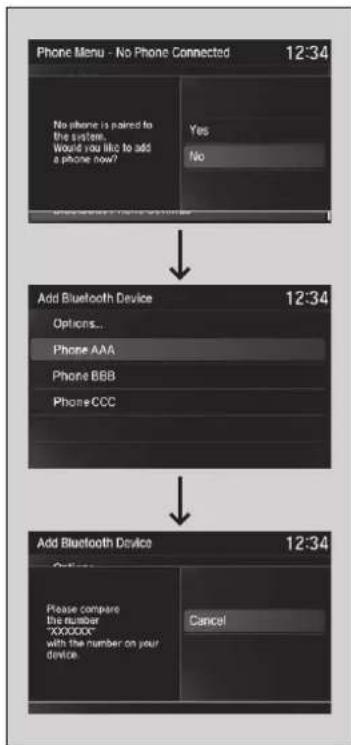
flowchart
graph TD
    A["Phone Menu - No Phone Connected 12:34"] --> B["Add Bluetooth Device 12:34"]
    B --> C["Add Bluetooth Device 12:34"]
    C --> D["Please compare the number "XXXXXXC" with the number on your device."]
    D --> E["Cancel"]
■ To pair a cell phone (when there is no phone paired to the system)
- Press the PHONE button.
- Rotate 🔺 to select Yes, then press 🔒.
- Make sure your phone is search or discoverable mode, then press 😊
▶HFL automatically searches for a Bluetooth device.
- When your phone appears on the list, select it by pressing 😊
▶ If your phone does not appear, you can select Options... and Refresh to search again.
If your phone still does not appear, select Options... to select Device Not Found? and search for Bluetooth devices using your phone. From your phone, select HandsFreeLink.
- HFL gives you a pairing code on the information screen.
▶ Confirm if the pairing code on the screen and your phone match. This may vary by phone.
- A notification appears on the screen if pairing is successful.
Phone Setup
Your Bluetooth-compatible phone must be paired to HFL before you can make and receive hands-free calls.
Phone Pairing Tips:
- You cannot pair your phone while the vehicle is moving.
- Up to six phones can be paired.
- Your phone's battery may drain faster when it is connected to HFL.
- If your phone is not ready for pairing or not found by the system within three minutes, the system will time out and returns to idle.
Once you have paired a phone, you can see it displayed on the screen with one or two icons on the right side.
These icons indicate the following:
: The phone can be used with HFL.
: The phone is compatible with Bluetooth® Audio.
When pairing is completed, an Automatic Phone Sync prompt appears. Select On if you want your call history and phonebook automatically imported to HFL.
Changing the Automatic Phone Sync setting P. 415
If there is an active connection to Apple CarPlay, pairing of additional Bluetooth-compatible devices is unavailable.
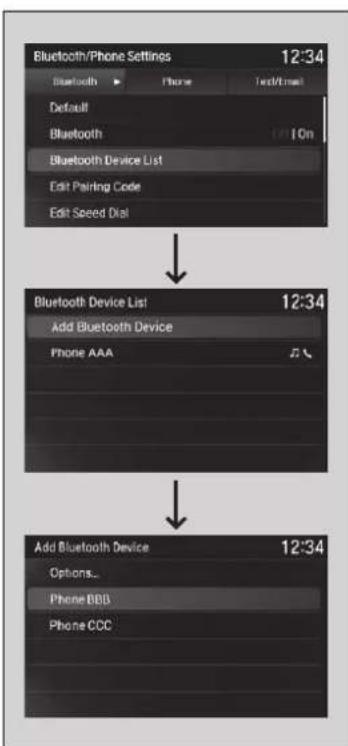
flowchart
graph TD
    A["Bluetooth/Phone Settings 12:34"] --> B["Default"]
    B --> C["Bluetooth"]
    C --> D["Edit Pairing Code"]
    C --> E["Edit Speed Dial"]
    F["Bluetooth Device List 12:34"] --> G["Add Bluetooth Device"]
    G --> H["Phone AAA"]
    H --> I["Add Bluetooth Device 12:34"]
    I --> J["Options..."]
    I --> K["Phone BBB"]
    I --> L["Phone CCC"]
■ To pair a cell phone (when a phone has already been paired to the system)
- Press the SETTINGS button.
- Rotate to select Bluetooth/Phone Settings, then press
▶ Repeat the procedure to select Bluetooth Device List, then Add Bluetooth Device.
- Make sure your phone is in search or discoverable mode, then press 😊
▶HFL automatically searches for a Bluetooth device.
- When your phone appears on the list, select it by pressing 😊
▶ If your phone does not appear, you can select Options... and Refresh to search again.
If your phone still does not appear, select Options... to select Device Not Found? and search for Bluetooth devices using your phone. From your phone, select HandsFreeLink.
- HFL gives you a pairing code on the information screen.
▶ Confirm if the pairing code on the screen and your phone match. This may vary by phone.
- A notification appears on the screen if pairing is successful.
text_image
Bluetooth/Phone Settings 12:34 Bluetooth Phone Text/Email Default Bluetooth On Bluetooth Device List Edit Pairing Code Edit Speed Dial■ To change the currently paired phone
- Press the SETTINGS button.
- Rotate to select Bluetooth/Phone
Settings, then press 😊
▶ Repeat the procedure to select Bluetooth Device List.
- Select a phone to connect.
▶HFL disconnects the connected phone and starts searching for another paired phone. - Select Connect to Phone, Connect to Audio, or Connect Both, then press 😊.
■ To change the pairing code setting
- Press the SETTINGS button.
- Rotate to select Bluetooth/Phone Settings, then press
▶ Repeat the procedure to select Edit Pairing Code.
- Rotate 🔺 to select Fixed or Random, then press 😊
To change the pairing code setting
The pairing code may be four or six digits depending on your phone.
The default pairing code is 0000 until you change the setting.
To create your own, select Fixed, and delete the current code, then enter a new one.
For a randomly generated pairing code each time you pair a phone, select Random.
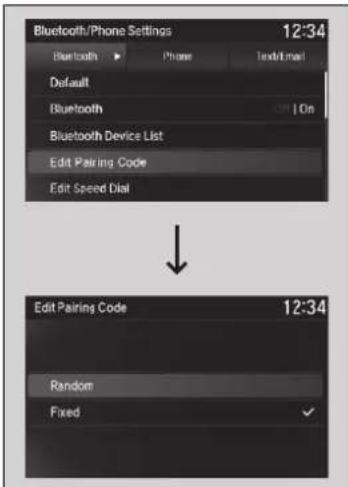
text_image
Bluetooth/Phone Settings 12:34 Bluetooth Phone Text/Email Default Bluetooth On Bluetooth Device List Edit Pairing Code Edit Speed Dial Edit Pairing Code 12:34 Random FixedContinued
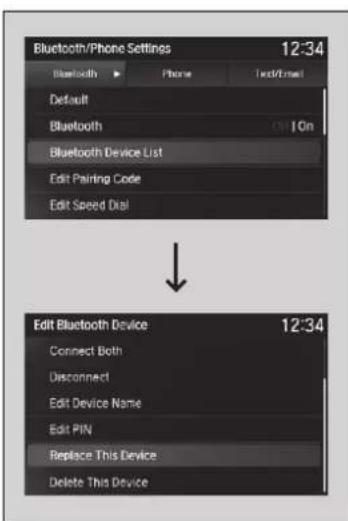
text_image
Bluetooth/Phone Settings 12:34 Bluetooth ▶ Phone Text/Email Default Bluetooth On Bluetooth Device List Edit Pairing Code Edit Speed Dial Edit Bluetooth Device 12:34 Connect Both Disconnect Edit Device Name Edit PIN Replace This Device Delete This Device■ To replace an already-paired phone with a new phone
- Press the SETTINGS button.
- Rotate to select Bluetooth/Phone Settings, then press 😊
▶ Repeat the procedure to select Bluetooth Device List.
- Rotate to select a paired phone you want to replace, then press 😊
- Rotate 🔺 to select Replace This Device, then press 😊
- HFL enters the pairing process and searches a new phone.
▶Follow the prompts to pair a new phone. - A notification appears on the screen if pairing is successful.
To replace an already-paired phone with a new phone
The replaced phone will keep the same speed dial entries, and security PIN information from the previously paired phone.
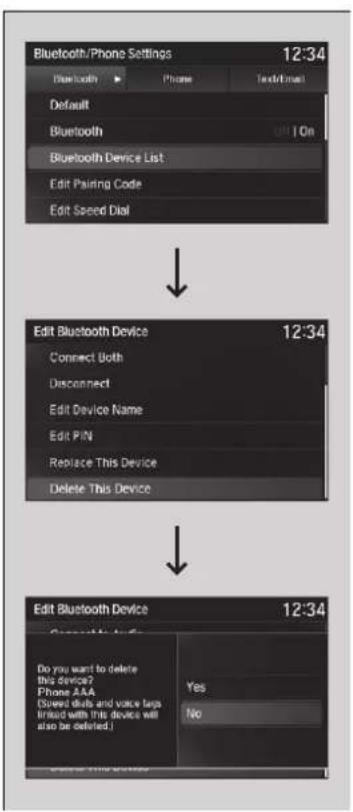
flowchart
graph TD
    A["Bluetooth/Phone Settings 12:34"] --> B["Default"]
    B --> C["Bluetooth"]
    C --> D["Edit Pairing Code"]
    D --> E["Edit Speed Dial"]
    F["Edit Bluetooth Device 12:34"] --> G["Connect Both"]
    G --> H["Disconnect"]
    H --> I["Edit Device Name"]
    I --> J["Edit PIN"]
    J --> K["Replace This Device"]
    K --> L["Delete This Device"]
    M["Edit Bluetooth Device 12:34"] --> N["Do you want to delete this device?\nPhone AAA\n(Speed bits and voice tags\nIread with this device will also be deleted)."]
    N --> O{Yes}
    N -->|No| P["End"]
■ To delete a paired phone
- Press the SETTINGS button.
- Rotate to select Bluetooth/Phone
Settings, then press 🤨
▶ Repeat the procedure to select Bluetooth Device List. - Rotate to select a phone you want to delete, then press 😊
- Rotate 🔺 to select Delete This Device, then press 😊
- A confirmation message appears on the screen. Rotate to select Yes, then press &
- A notification appears on the screen if pairing is successful.
To Set Up a Text/E-mail Message Option
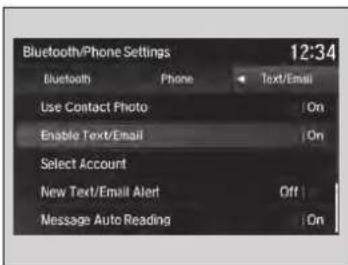
text_image
Bluetooth/Phone Settings 12:34 Bluetooth Phone Text/Email Use Contact Photo On Enable Text/Email On Select Account New Text/Email Alert Off Message Auto Reading On■ To turn on or off the text/e-mail message function
- Press the SETTINGS button.
- Rotate to select Bluetooth/Phone Settings, then press
- Rotate 🔗 to select Enable Text/Email.
- Press 🔒 to select On or Off.
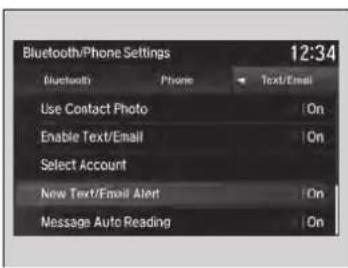
text_image
Bluetooth/Phone Settings 12:34 Bluetooth Phone Text/Email Use Contact Photo On Enable Text/Email On Select Account New Text/Email Alert On Message Auto Reading On■ To turn on or off the text/e-mail message notice
- Press the SETTINGS button.
- Rotate to select Bluetooth/Phone Settings, then press 😊
- Rotate 🔒 to select New Text/Email Alert.
- Press 🤔 to select On or Off.
To Set Up a Text/E-mail Message Option
To use the text/e-mail message function, you need a Bluetooth-compatible cell phone. For a list of compatible phones, pairing procedures, and special feature capabilities:
• U.S.: Visit www.handsfreelink.com/Acura, or call 1-888-528-7876.
• Canada: For more information on smartphone compatibility, call 1-855-490-7351.
Some text/e-mail message features may not be available depending on a cellular phone.
To turn on or off the text/e-mail message notice
On: A pop-up notification comes on every time you receive a new text message.
Off: The message you receive is stored in the system without notification.
To Create a Security PIN
You can protect each of the six cell phones with a security PIN.
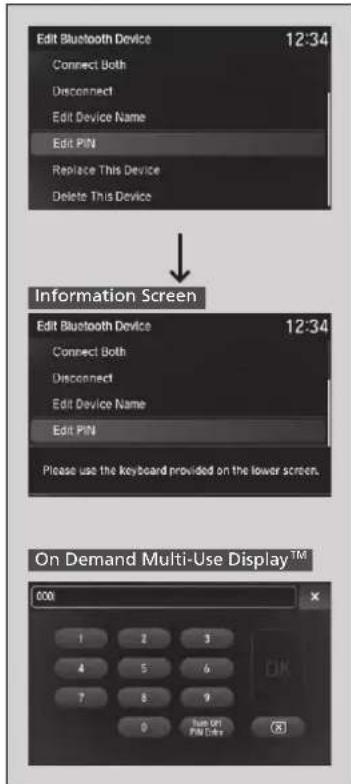
text_image
Edit Bluetooth Device 12:34 Connect Both Disconnect Edit Device Name Edit PIN Replace This Device Delete This Device Information Screen Edit Bluetooth Device 12:34 Connect Both Disconnect Edit Device Name Edit PIN Please use the keyboard provided on the lower screen. On Demand Multi-Use Display™ 000- Press the SETTINGS button.
- Rotate to select Bluetooth/Phone Settings, then press 😊
▶ Repeat the procedure to select Bluetooth Device List.
- Rotate to select a phone you want to add a security PIN to, then press 🧿
- Rotate 🔺 to select Edit PIN, then press 😊.
- Enter a new four-digit number.
▶Select ☒ delete. Select of ☒ the right side upper screen, the screen returns to the previous screen.
- Select OK to enter the security PIN.
- Re-enter the four-digit number.
The screen returns to the screen in step 4.
To Create a Security PIN
If the phone is already security PIN protected, you need to enter the current security PIN before clearing the PIN or creating a new one.
Continued
Editing User Name
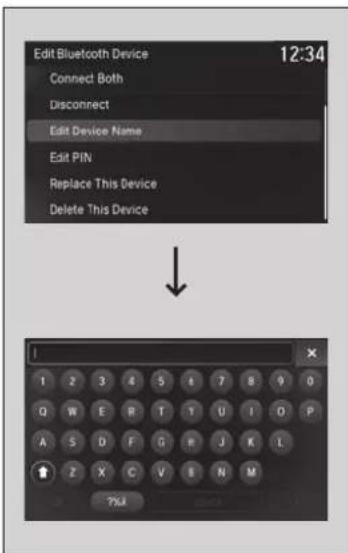
text_image
Edit Bluetooth Device 12:34 Connect Both Disconnect Edit Device Name Edit PIN Replace This Device Delete This Device I 1 2 3 4 5 6 7 8 9 0 Q W E P T T U I O P A S D F G P J K L Z X C V B N M ?P.AEdit the user name of a paired phone as follows:
- Press the SETTINGS button.
- Rotate to select Bluetooth/Phone Settings, then press
▶ Repeat the procedure to select Bluetooth Device List.
- Rotate to select a phone you want to edit, then press 😊
- Rotate 🔺 to select Edit Device Name, then press 🔺
- Enter a new name of the phone.
▶ Use the keyboard on the On Demand Multi-Use Display™ to enter the name, then select OK.
Automatic Transferring
If you get into the vehicle while you are on the phone, the call can be automatically transferred to HFL.
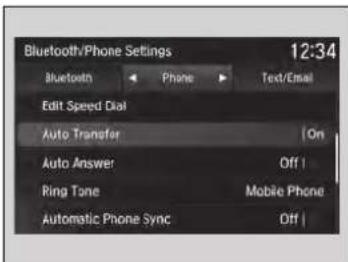
text_image
Bluetooth/Phone Settings 12:34 Bluetooth Phone Text/Email Edit Speed Dial Auto Transfer On Auto Answer Off | Ring Tone Mobile Phone Automatic Phone Sync Off |- Press the SETTINGS button.
- Rotate to select Bluetooth/Phone Settings, then press
- Rotate 🔒 to select Auto Transfer.
- Press 🔔 to select On or Off.
Auto Answer
You can set HFL to automatically answer an incoming call in four seconds.
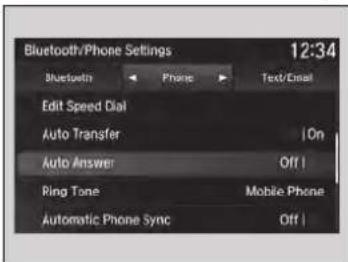
text_image
Bluetooth/Phone Settings 12:34 Bluetooth Phone Text/Deal Edit Speed Dial Auto Transfer On Auto Answer Off | Ping Tone Mobile Phone Automatic Phone Sync Off |- Press the SETTINGS button.
- Rotate to select Bluetooth/Phone Settings, then press 😊
- Rotate 🔺 to select Auto Answer
- Press 🔒 to select On or Off.
Ring Tone
You can change the ring tone setting.
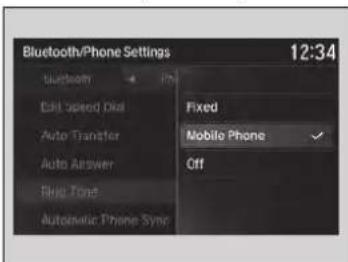
text_image
Bluetooth/Phone Settings 12:34 Bluetooth 4 Ph Edit Speed Disk Auto Transfer Auto Answer Flip Toss Automatic Phone Sync Fixed Mobile Phone ✓ Off- Press the SETTINGS button.
- Rotate to select Bluetooth/Phone Settings, then press 😊
▶ Repeat the procedure to select Ring Tone.
- Rotate 🔗 to select Fixed, Mobile Phone or Off, then press 😊
Use Contact Photo
You can display a caller's picture on an incoming call screen.
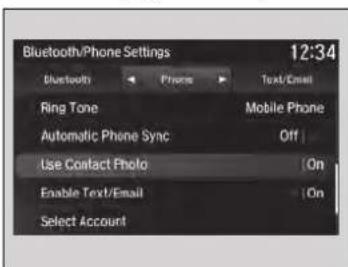
text_image
Bluetooth/Phone Settings 12:34 Bluetooth Phone Text/Email Ring Tone Mobile Phone Automatic Phone Sync Off Use Contact Photo On Enable Text/Email On Select Account- Press the SETTINGS button.
- Rotate to select Bluetooth/Phone Settings, then press
- Rotate 🔊 to select Use Contact Photo.
- Press 🔊 to select On or Off.
Ring Tone
Fixed: The fixed ring tone sounds from the speaker. Mobile Phone: Depending on the make and model of the cell phone, the ring tone stored in the phone will sound if the phone is connected.
Off: No ring tones sound from the speaker.
Automatic Import of Cellular Phonebook and Call History
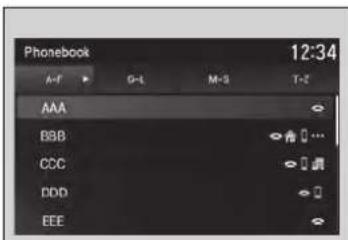
text_image
Phonebook 12:34 A-F G-L M-S T-I AAA BBB CDC DDD EEE■ When Automatic Phone Sync is set to On:
When your phone is paired, the contents of its phonebook and call history are automatically imported to HFL.
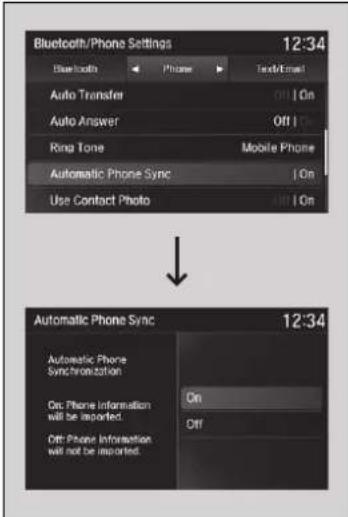
text_image
Bluetooth/Phone Settings 12:34 Bluetooth Phone Text/Email Auto Transfer Off On Auto Answer Off On Ring Tone Mobile Phone Automatic Phone Sync On Use Contact Photo Off On Automatic Phone Sync 12:34 Automatic Phone Synchronization On On: Phone Information will be reported. Off: Phone Information will not be reported.■ Changing the Automatic Phone Sync setting
- Press the SETTINGS button.
- Rotate 🔒 to select Bluetooth/Phone Settings, then press 🔒
▶ Repeat the procedure to select Automatic Phone Sync.
- Rotate 🔺 to select On or Off, then press 😊.
Automatic Import of Cellular Phonebook and Call History
When you select a person from the list in the cellular phonebook, you can see up to three category icons. The icons indicate what types of numbers are stored for that name.
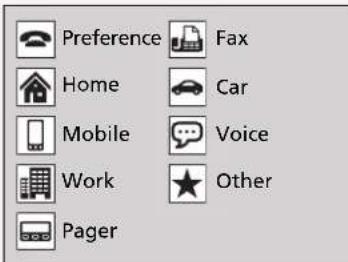
text_image
Preference Home Mobile Work Pager Fax Car Voice OtherOn some phones, it may not be possible to import the category icons to HFL.
The phonebook is updated after every connection. Call history is updated after every connection or call.
Speed Dial
Up to 20 speed dial numbers can be stored per phone.
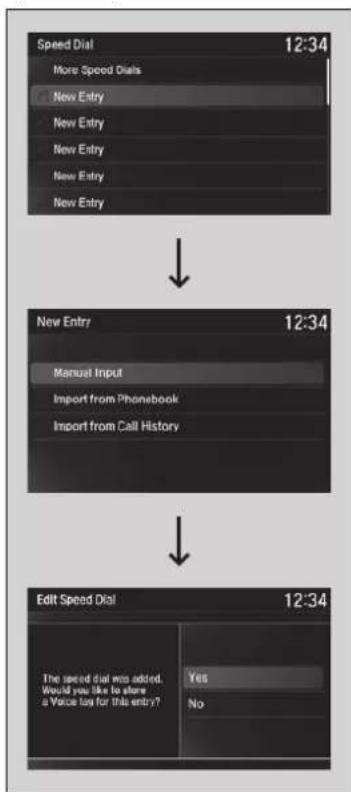
flowchart
graph TD
    A["Speed Dial 12:34"] --> B["More Speed Dial"]
    B --> C["New Entry"]
    C --> D["New Entry"]
    D --> E["New Entry"]
    E --> F["New Entry"]
    F --> G["New Entry"]
    G --> H["New Entry"]
    H --> I["New Entry"]
    I --> J["New Entry"]
    J --> K["New Entry"]
    K --> L["New Entry"]
    L --> M["New Entry"]
    M --> N["New Entry"]
    N --> O["New Entry"]
    O --> P["New Entry"]
    P --> Q["New Entry"]
    Q --> R["New Entry"]
    R --> S["New Entry"]
    S --> T["New Entry"]
    T --> U["New Entry"]
    U --> V["New Entry"]
    V --> W["New Entry"]
    W --> X["New Entry"]
    X --> Y["New Entry"]
    Y --> Z["New Entry"]
    Z --> AA["New Entry"]
    AA --> AB["New Entry"]
    AB --> AC["New Entry"]
    AC --> AD["New Entry"]
    AD --> AE["New Entry"]
    AE --> AF["New Entry"]
    AF --> AG["New Entry"]
    AG --> AH["New Entry"]
    AH --> AI["New Entry"]
    AI --> AJ["New Entry"]
    AJ --> AK["New Entry"]
    AK --> AL["New Entry"]
    AL --> AM["New Entry"]
    AM --> AN["New Entry"]
    AN --> AO["New Entry"]
    AO --> AP["New Entry"]
    AP --> AQ["New Entry"]
    AQ --> AR["New Entry"]
    AR --> AS["New Entry"]
    AS --> AT["New Entry"]
    AT --> AU["New Entry"]
    AU --> AV["New Entry"]
    AV --> AW["New Entry"]
    AW --> AX["New Entry"]
    AX --> AY["New Entry"]
    AY --> AZ["New Entry"]
    AZ --> BA["New Entry"]
    BA --> BB["New Entry"]
    BB --> BC["New Entry"]
    BC --> BD["New Entry"]
    BD --> BE["New Entry"]
    BE --> BF["New Entry"]
    BF --> BG["New Entry"]
    BG --> BH["New Entry"]
    BH --> BI["New Entry"]
    BI --> BJ["New Entry"]
    BJ --> BK["New Entry"]
    BK --> BL["New Entry"]
    BL --> BM["New Entry"]
    BM --> BN["New Entry"]
    BN --> BO["New Entry"]
    BO --> BP["New Entry"]
    BP --> BQ["New Entry"]
    BQ --> BR["New Entry"]
    BR --> BS["New Entry"]
    BS --> BT["New Entry"]
    BT --> BU["New Entry"]
    BU --> BV["New Entry"]
    BV --> BW["New Entry"]
    BW --> BX["New Entry"]
    BX --> BY["New Entry"]
    BY --> BZ["New Entry"]
To store a speed dial number:
- Press the PHONE button.
-
Rotate 🔒 to select Speed Dial, then press 🔒.
▶ Repeat the procedure to select New Entry. -
Rotate to select a place to choose a number from, then press From Manual Input:
▶Input the number manually. From Import from Phonebook:
Select a number from the linked cell phone's imported phonebook.
From Import from Call History:
▶Select a number from the call history.
-
When the speed dial is successfully stored from Import from Call History or Import from Phonebook, you are asked to create a voice tag for the number. Rotate to select Yes or No, then press 🔒.
-
Using the button, follow the prompts to store a voice tag for the speed dial entry.
Speed Dial
When a voice tag is stored, press the button to call the number using the voice tag. Say "Call" and the voice tag name.
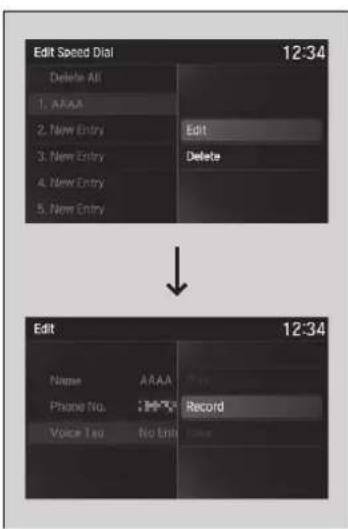
text_image
Edit Speed Dial 12:34 Delete All 1. AAAA 2. New Entry 3. New Entry 4. New Entry 5. New Entry Edit Delete ↓ Edit 12:34 Name AAAA Play Phone No.: Record Voice Test No Entry Show■ To add a voice tag to a stored speed dial number
- Press the SETTINGS button.
- Rotate to select Bluetooth/Phone Settings, then press 😊
▶ Repeat the procedure to select Edit Speed Dial.
- Select an existing speed dial entry.
▶From the pop-up menu, rotate to select Edit, then press 😊 -
Rotate 🔺 to select Voice Tag, then press 🔺.
▶From the pop-up menu, rotate to select Record, then press 😊 -
Press
▶ Using the button, follow the prompts to complete the voice tag.
- You will receive a confirmation message on the screen. Rotate 📋 to select OK, then press 😊.
>>Speed Dial
Avoid using duplicate voice tags. Avoid using "home" as a voice tag. It is easier for HFL to recognize a longer name. For example, use "John Smith" instead of "John."
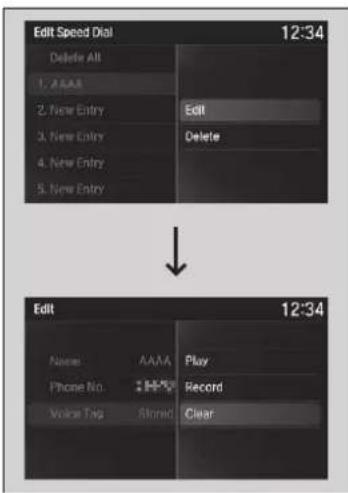
text_image
Edit Speed Dial 12:34 Delete All 1. AAAA 2. New Entry 3. New Entry 4. New Entry 5. New Entry Edit Delete ↓ Edit 12:34 Name AAAA Play Phone No.: H75 Record Voice Tag Stored Clear■ To delete a voice tag
- Press the SETTINGS button.
- Rotate to select Bluetooth/Phone
Settings, then press 😊
▶ Repeat the procedure to select Edit Speed Dial.

- Select an existing speed dial entry.
▶From the pop-up menu, rotate to select Edit, then press 😊 - Rotate 🔺 to select Voice Tag, then press
▶From the pop-up menu, rotate to select Clear, then press 😊 - A confirmation message appears on the screen. Rotate to select Yes, then press 😊.
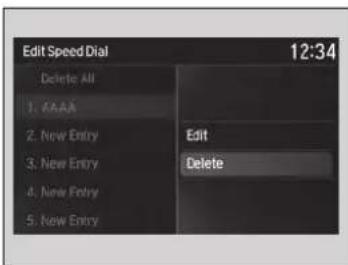
text_image
Edit Speed Dial 12:34 Delete All 1. AAA 2. New Entry 3. New Entry 4. New Entry 5. New Entry Edit Delete■ To delete a speed dial
- Press the SETTINGS button.
- Rotate to select Bluetooth/Phone Settings, then press
▶ Repeat the procedure to select Edit Speed Dial.
- Select an existing speed dial entry.
▶ From the pop-up menu, rotate to select Delete, then press 😊 - A confirmation message appears on the screen. Rotate to select Yes, then press 🤔.
■ Phonebook Phonetic Modification
Add phonetic modifications or a new voice tag to the phone's contact name so that it is easier for HFL to recognize voice commands.
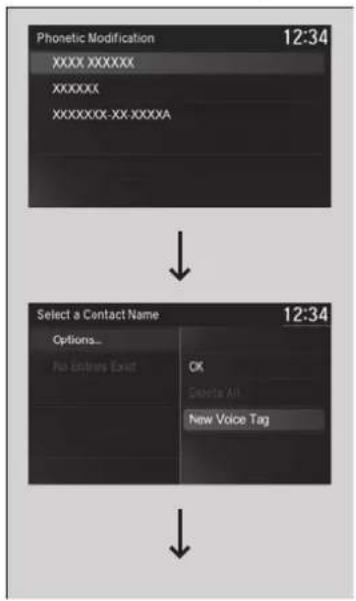
text_image
Phonetic Modification 12:34 XXXX XXXXXX XXXXXX XXXXXXXX-XX.XXXXXA Select a Contact Name 12:34 Options... No entries exist OK Delete All New Voice Tag■ To add a new voice tag
- Press the SETTINGS button.
- Rotate 🔺 to select System Settings, then press 🔺
- Rotate 🔺 to select Phonebook Phonetic Modification, then press 😊
- Rotate to select the phone you want to add phonetic modification to, then press 😊.
- Rotate 🔺 to select Options..., then press 😊.
- Rotate 🔊 to select New Voice Tag, then press 🔊.
Phonebook Phonetic Modification
You can store up to 20 phonetic modification items.
Continued
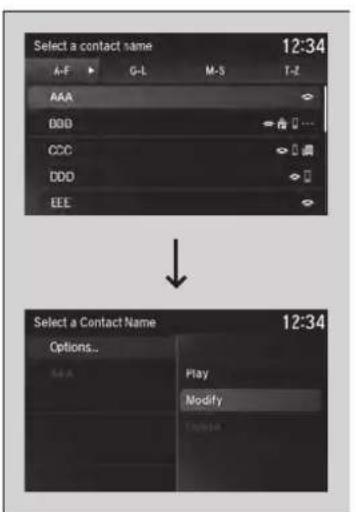
text_image
Select a contact name 12:34 A-F G-L M-S T-Z AAA DDD CCC DDD EEE Select a Contact Name 12:34 Options... Play Modify Include- Move or and rotate to select a contact name, then press 😊
The pop-up menu appears on the screen.
-
Rotate 🔒 to select Modify, then press 🔒.
-
Press 😊. ▶ Using the button, follow the prompts to complete the voice tag.
-
You will receive a confirmation message on the screen. Rotate to select OK, then press 😊
-
Rotate 🔊 to select Options..., then press 🔕.
-
Rotate 🔺 to select OK, then press 😊.
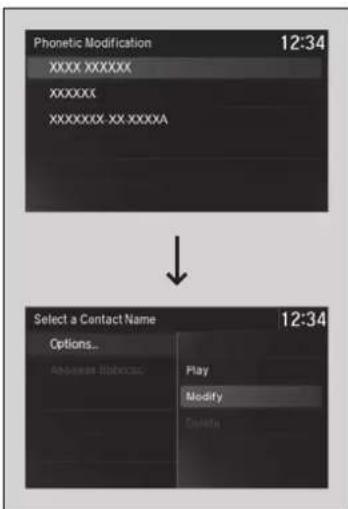
text_image
Phonetic Modification 12:34 XXXX XXXXXX XXXXXX XXXXXXXX XX XXXXA Select a Contact Name 12:34 Options... Access Ekbccsc Play Modify Delete■ To modify a voice tag
-
Press the SETTINGS button.
-
Rotate 🔺 to select System Settings, then press 🔺
-
Rotate 🔺 to select Phonebook Phonetic Modification, then press 🌐
-
Rotate to select the phone you want to add phonetic modification to, then press ⚙.
-
Rotate to select a contact name you want to modify, then press The pop-up menu appears on the screen.
-
Rotate 🔺 to select Modify, then press 🔺.
-
Press 😊. ▶ Using the button, follow the prompts to complete the voice tag.
-
You will receive a confirmation message on the screen. Rotate to select OK, then press 😊
-
Rotate 🔺 to select Options..., then press 😊.
-
Rotate 🔺 to select OK, then press 😊.
Phonebook Phonetic Modification
You can only modify or delete contact names for the currently connected phone.
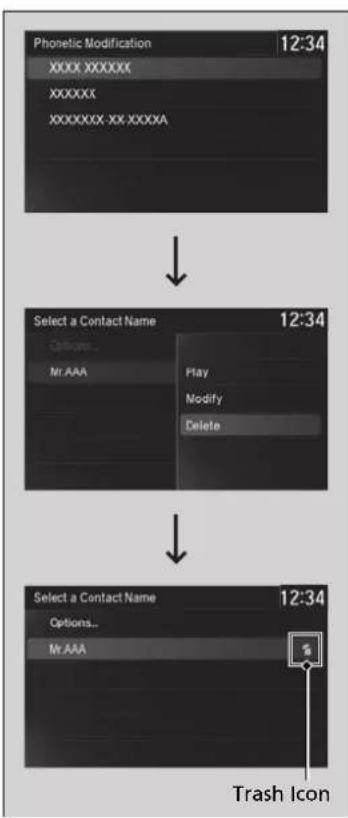
flowchart
graph TD
    A["Phonetic Modification 12:34"] --> B["Select a Contact Name 12:34"]
    B --> C["Select a Contact Name 12:34"]
    C --> D["Trash Icon"]
■ To delete a modified voice tag
- Press the SETTINGS button.
- Rotate 🔗 to select System Settings, then press 🔕.
- Rotate 🔺 to select Phonebook Phonetic Modification, then press 😊
- Rotate to select the phone you want to delete phonetic modification, then press 🧿.
- Rotate to select a contact name you want to delete, then press The pop-up menu appears on the screen.
- Rotate 🔗 to select Delete, then press 🔕. ▶Items to be deleted are indicated with a trash icon.
- Rotate 🔺 to select Options..., then press 🔺.
- Rotate 🔺 to select OK, then press 😊.
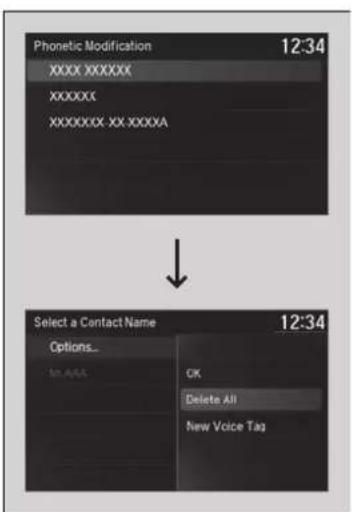
text_image
Phonetic Modification 12:34 XXXX XXXXXX XXXXXX XXXXXXXX XX XXXXA Select a Contact Name 12:34 Options... OK Delete All New Voice Tag■ To delete all modified voice tags
- Press the SETTINGS button.
- Rotate 🔺 to select System Settings, then press 🔺.
- Rotate 🔺 to select Phonebook Phonetic Modification, then press 😊
- Rotate to select the phone you want to delete phonetic modification, then press ⚙.
- Rotate 🔺 to select Options..., then press 🔺.
- Rotate 🔺 to select Delete All, then press 🔺.
- You will receive a confirmation message on the screen. Rotate to select Yes, then press 😊.
Making a Call
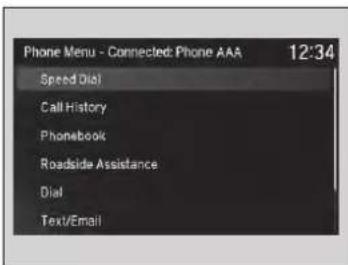
text_image
Phone Menu - Connected: Phone AAA 12:34 Speed Dial Call History Phonebook Roadside Assistance Dial Text/EmailYou can make calls by inputting any phone number, or by using the imported phonebook, call history, speed dial entries, or redial.
Making a Call
Any voice-tagged speed dial entry, phonebook name, or number can be dialed by voice from most screens. Press the button and say "Call" and the voice tag name, "Call by name" and the phonebook name, or "Call" and the phone number.
The maximum range between your phone and vehicles is 30 feet (10 meters).
Once a call is connected, you can hear the voice of the person you are calling through the audio speakers.
While there is an active connection with Apple CarPlay, phone calls cannot be made with HandsFreeLink® and are only made from Apple CarPlay.
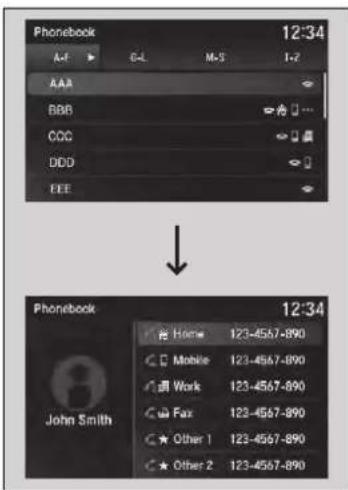
text_image
Phonebook 12:34 A-F C-L M-S I-Z AAA BBB CCC DDD EEE Phonebook 12:34 Home 123-4567-890 Mobile 123-4567-890 Work 123-4567-890 Fax 123-4567-890 Other 1 123-4567-890 Other 2 123-4567-890 John Smith■ To make a call using the imported phonebook
- Press the PHONE button.
- Rotate 🔒 to select Phonebook, then press 😊.
- Rotate to select a contact name, then press 😊.
The phonebook is stored alphabetically. - Rotate to select a number, then press 😊.
▶Dialing starts automatically.
To make a call using the imported phonebook
You can call a stored voice-tagged speed dial number, phonebook name, or number using voice commands.
→Speed Dial P. 416
You can use the keyboard on the On Demand Multi-Use Display ^™ for a partial match search.
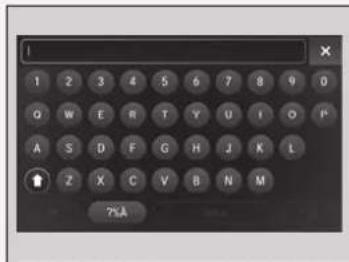
text_image
1 2 3 4 5 6 7 8 9 0 Q W E R T Y U I O P A S D F G H J K L Z X C V B N M ?L A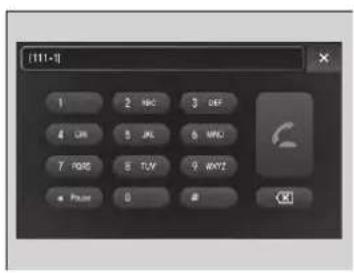
text_image
[111-1] 1 2 NBC 3 DEF 4 CM 5 JKL 6 MPO 7 PDG 8 TUV 9 WAY2 * Price 0 # OK■ To make a call using a phone number
- Press the PHONE button.
- Rotate 🔺 to select Dial, then press 😊.
- Select a number.
▶ Use the keyboard on the On Demand Multi-Use Display™ for entering numbers. - Select 📞.
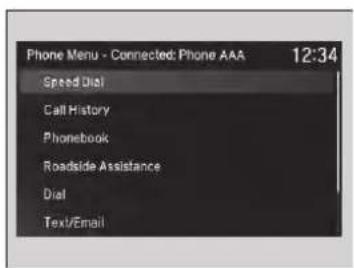
text_image
Phone Menu - Connected: Phone AAA 12:34 Speed Dial Call History Phonebook Roadside Assistance Dial Text/Email■ To make a call using redial
- Press the PHONE button.
- Rotate 🔺 to select Redial, then press ✅.
▶Dialing starts automatically.
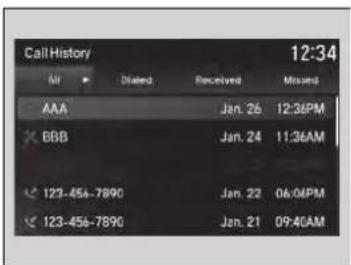
■ To make a call using the call history
Call history is stored by All ^*1 , Dialed, Received, and Missed.
-
Press the PHONE button.
-
Rotate 🔗 to select Call History, then press 🔘.
-
Move
to sèleDialeAll Received, and Missed. -
Rotate to select a number, then press 😊.
▶Dialing starts automatically.
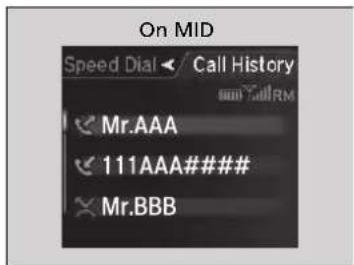
text_image
On MID Speed Dial Call History Mr.AAA 111AAA### Mr.BBBSteering switches
-
Press the 📄 button.
-
Move the left selector wheel right to select Call History.
-
Roll the left selector wheel to select a number.
-
Push the left selector wheel or the button.
▶Dialing starts automatically.
To make a call using the call history
The call history displays the last 20 dialed, received, or missed calls.
(Appears only when a phone is connected to HFL.)
These icons next to the number indicate the following:
: Dialed calls.
: Received calls.
: Missed calls.
Steering switches
The call history displays the last 12 dialed, received, or missed calls.
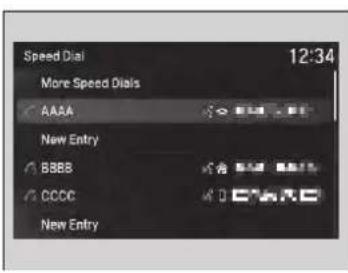
text_image
Speed Dial 12:34 More Speed Dials AAAA New Entry BBBB CCCC New Entry■ To make a call using a speed dial entry
- Press the PHONE button.
- Rotate 🔗 to select Speed Dial, then press
- Rotate to select a number, then press
▶Dialing starts automatically.


To make a call using a speed dial entry
Rotate to select More Speed Dials to view another paired phone's speed dial list. You can make a call from that list using the currently connected phone.
When a voice tag is stored, press the button to call the number using the voice tag.
Speed Dial P. 416
Any voice-tagged speed dial entry, phonebook name or number can be dialed by voice from any screen. Press the button and follow the prompts.
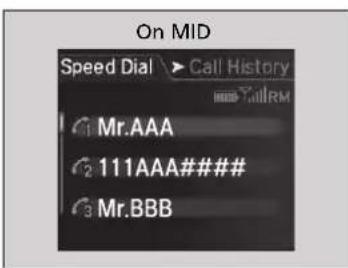
text_image
On MID Speed Dial ▶ Call History Mr.AAA 111AAA### Mr.BBBSteering switches
- Press the button.
- Move the left selector wheel left to select Speed Dial.
- Roll the left selector wheel to select a number.
- Push the left selector wheel or the button.
▶Dialing starts automatically.
Steering switches
The speed dial displays the 20 speed dial entries.
Receiving a Call
Information Screen
text_image
Phone Menu - Connected: Phone AAA 12:34 Incoming Call - Press ENTER to answerOn Demand Multi-Use Display™
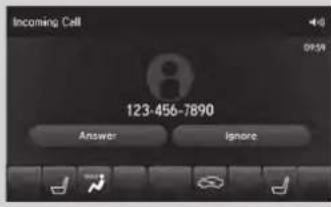
text_image
Incoming Cell 123-456-7890 Answer IgnoreWhen there is an incoming call, an audible notification sounds (if activated) and the Incoming Call screen appears.
Press the button to answer the call. Press the button to decline or end the call.
>>Receiving a Call
Call Waiting
Press the button to put the current call on hold to answer the incoming call.
Press the 📄 button again to return to the current call.
Ignore the incoming call if you do not want to answer it.
Press the button if you want to hang up the current call.
Options During a Call
The following options are available during a call.
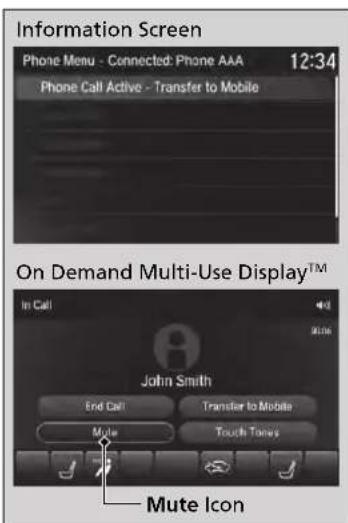
text_image
Information Screen Phone Menu - Connected: Phone AAA 12:34 Phone Call Active - Transfer to Mobile On Demand Multi-Use Display™ In Call John Smith End Call Transfer to Mobile Mute Touch Tones Mute IconInformation Screen
Phone Call Active - Transfer to Mobile:
Transfer a call from HFL to your phone.
On Demand Multi-Use Display™
Mute: Mute your voice.
Transfer to Mobile: Transfer a call from HFL
to your phone.
Touch Tones: Send numbers during a call.
This is useful when you call a menu-driven
phone system.
The available options are shown on the On Demand Multi-Use Display™.
Select the option.
The Mute icon is checked when Mute is selected. Select Mute again to turn it off.
>>Options During a Call
Touch Tones: Available on some phones.
■ Receiving a Text/E-mail Message
HFL can display newly received text and e-mail messages as well as 20 of the most recently received messages on a linked cell phone. Each received message can be read aloud and replied to using a fixed common phrase.
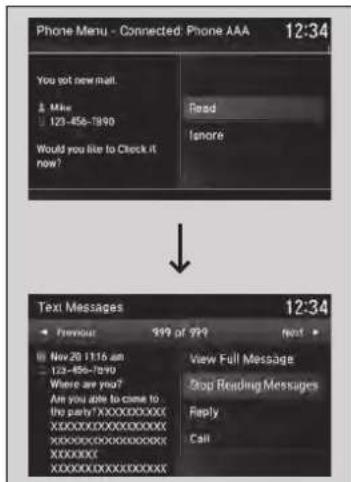
text_image
Phone Menu - Connected: Phone AAA 12:34 You not new mail. Mike 123-856-1990 Would you like to Check it now? Read Ignore Text Messages 12:34 Previous 999 of 999 Next > Nov 20 11/16 am 123-856-1990 Where are you? Are you able to come to the party?XXXXXXXXXXXXXX XXXXXXXXXXXXXXXXXXXXX XXXXXXXXXXXXXXXXXXXXX View Full Message Stop Reading Messages Reply Call-
A pop-up appears and notifies you of a new text or e-mail message.
-
Rotate 🔺 to select Read to listen to the message, then press 🔺
The text or e-mail message is displayed. The system automatically starts reading out the message.
- To discontinue the message read-out, press 😊.
>>Receiving a Text/E-mail Message
The system does not display any received messages while you are driving. You can only hear them read aloud.
With some phones, you may be able to display up to 20 most recent text and e-mail messages.
State or local laws may limit your use of the HFL text/e-mail message feature. Only use the text/e-mail message feature when conditions allow you to do so safely.
When you receive a text or e-mail message for the first time since the phone is paired to HFL, you are asked to turn the New Text/Email Alert setting to On.
To turn on or off the text/e-mail message notice P. 410
Selecting a Text/E-mail Message Account
If a paired phone has text or e-mail message accounts, you can select one of them to be active and receive notifications.
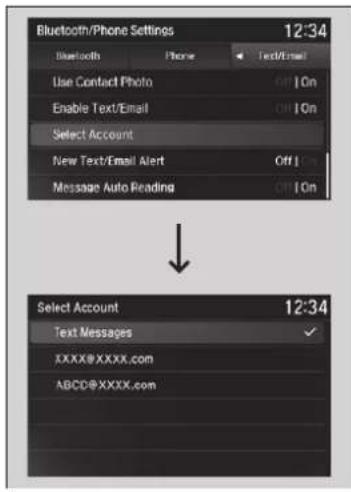
text_image
Bluetooth/Phone Settings 12:34 Bluetooth Phone Text/Email Use Contact Photo Off On Enable Text/Email Off On Select Account New Text/Email Alert Off On Message Auto Reading Off On Select Account 12:34 Text Messages ✓ XXXX@XXXX.com ABCD@XXXX.com- Press the SETTINGS button.
- Rotate to select Bluetooth/Phone Settings, then press
▶ Repeat the procedure to select Select Account.
- Rotate 🔊 to select Text Messages or an e-mail message account you want, then press 🔕.
Selecting a Text/E-mail Message Account
You can also select an e-mail message account from the folder list screen or the message list screen.
Rotate to select Select Account, then press.
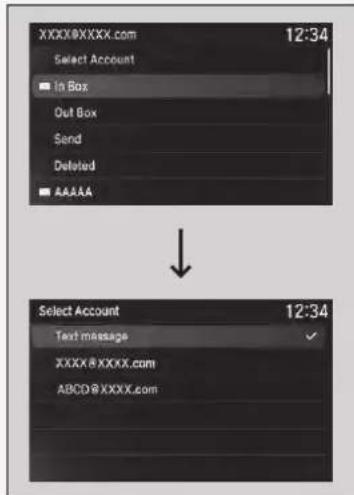
text_image
XXXX@XXXX.com 12:34 Select Account In Box Out Box Send Deleted AAAAA Select Account 12:34 Text message XXXX@XXXX.com ABCD@XXXX.comYou can only receive notifications from one text or e-mail message account at a time.
■ Displaying Messages
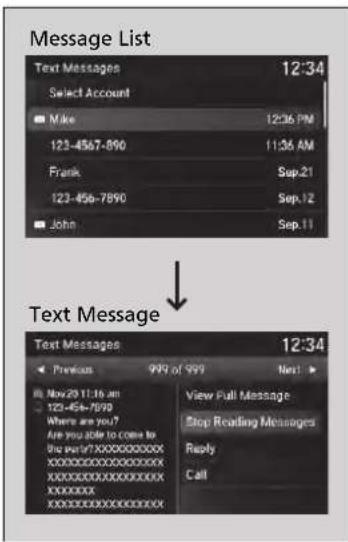
text_image
Message List Text Messages 12:34 Select Account Mike 12:36 PM 123-4567-890 11:36 AM Frank Sep.21 123-456-7890 Sep.12 John Sep.11 Text Message 12:34 Previous 999 of 999 Next > Now 20:11:16 am 123-456-7590 Where are you? Are you able to come to One start?XXXXXXXXXXXXXX XXXXXXXXXXXXXXXXXXXXX XXXXXXXXXXXXXXXXXXXXX View Full Message Stop Reading Messages Reply Call■ Displaying text messages
- Press the PHONE button.
- Rotate 🔺 to select Text/Email, then press

▶ Select account if necessary.
- Rotate to select a message, then press

The text message is displayed. The system automatically starts reading the message aloud.
- Rotate 🔒 to select View Full Message.
- Press to display the full text of the message.
>>Displaying Messages
The icon appears next to an unread message.
If you delete a message on the phone, the message will also be deleted from the system. If you send a message from the system, the message goes to your phone's outbox.
To see the previous or next message, move on the text message screen.
Continued
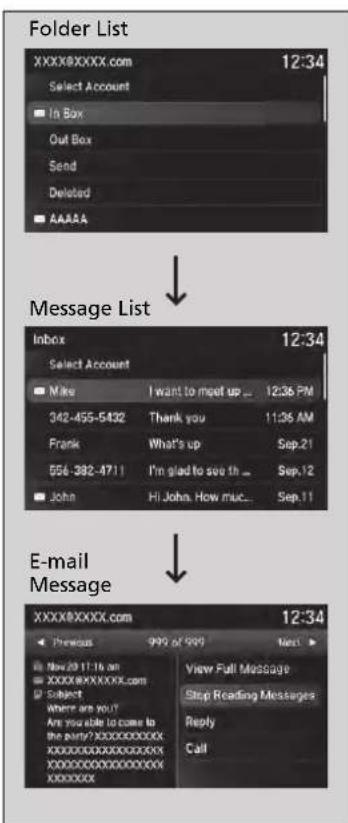
text_image
Folder List XXXXBXXXX.com 12:34 Select Account In Box Out Box Send Deleted AAAAA Message List Inbox 12:34 Select Account Mike I want to meet up ... 12:36 PM 342-455-5432 Thank you 11:36 AM Frank What's up Sep.21 656-382-4711 I'm glad to see th ... Sep.12 John Hi John, How muc... Sep.11 E-mail Message XXXXBXXXX.com 12:34 Previous 999 of 999 Next > Now 20:17:00 am XXXXBXXXXXXL.com Subject Where are you? Are you able to come to the party?XXXXXXXXXX XXXXXXXXXXXXXXXXXXXXX XXXXXXXXX View Full Message Stop Reading Messages Reply Call■ Displaying e-mail messages
- Press the PHONE button.
- Rotate 🔺 to select Text/Email, then press
- Rotate to select a folder, then press.
- Rotate to select a message, then press
The e-mail message is displayed. The system automatically starts reading the message aloud. - Rotate 🔺 to select View Full Message.
- Press to display the full text of the message.


>>Displaying e-mail messages
Received text and e-mail messages may appear in the message list screen at the same time. In this case, text messages are titled No Subject.
text_image
Text Messages 12:34 Previous 999 of 999 Next Nov 20 11:16 am 123-458-7890 Where are you? Are you able to come to the party?XXXXXXXXXXXXXX XXXXXXXXXXXXXXXXXXXXX XXXXXXXXXXXXXXXXXXXXX XXXXXXXXXXXXXXXXXXXXX View Full Message Stop Reading Messages Reply Call■ Read or stop reading a message
- Go to the text or e-mail message screen.
The system automatically starts reading the message aloud.
→Displaying Messages P. 433
- Rotate 🔒 to select Stop Reading Messages.
- Press to stop reading. Press again to start reading the message from the beginning.
■ Reply to a message
- Go to the text or e-mail message screen.
The system automatically starts reading the message aloud.
→Displaying Messages P. 433
- Rotate 🔺 to select Reply, then press 😊.
- Rotate to select the reply message, then press 🔒.
▶Message sent appears on the screen when the reply message was successfully sent.
>>Reply to a message
The available fixed reply messages are as follows:
• Talk to you later, I'm driving.
- I'm on my way.
- I'm running late.
• OK
- Yes
• No
You cannot add, edit, or delete reply messages.
Only certain phones receive and send messages when paired and connected. For a list of compatible phones:
• U.S.: Visit www.handsfreelink.com/Acura, or call 1-888-528-7876.
- Canada: For more information on smartphone compatibility, call 1-855-490-7351.
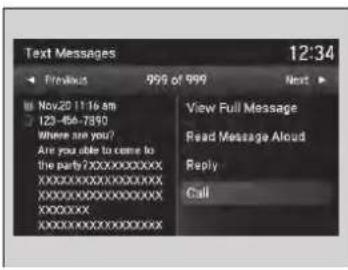
text_image
Text Messages 12:34 Previous 999 of 999 Next Nov20 11:16 am 123-456-7390 Where are you? Are you able to come to the party?XXXXXXXXXXXXXX XXXXXXXXXXXXXX XXXXXXXXXXXXXX XXXXXXXXXXXXXX View Full Message Read Message Aloud Reply Call■ Making a call to a sender
- Go to the text message screen.
The system automatically starts reading the message aloud.
→Displaying text messages P. 433
- Rotate 🔺 to select Call, then press 🔺.
Roadside Assistance
Provides a nationwide service for unexpected incidents. You can call for assistance using a phone paired and connected to Bluetooth® HandsFreeLink®.
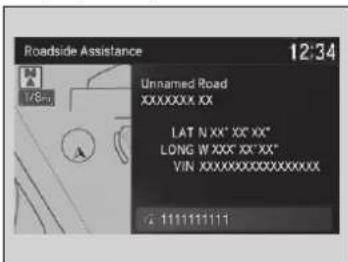
text_image
Roadside Assistance 12:34 Unnamed Road XXXXXXXX XX LAT N XX" XX" XX" LONG W XXX" XX"XX" VINXXXXXXXXXXXXXX 1111111111- Press the PHONE button.
- Rotate 🔺 to select Roadside Assistance, then press 😊
- Rotate to select a phone number, then press 😊.
▶Dialing starts automatically.
Roadside Assistance
If you are subscribed to a paid AcuraLink package, you can call roadside assistance using the LINK button instead of your phone.
AcuraLink® P. 438
AcuraLink®
Is a subscription-based service that provides convenient features such as voice communication in case of emergency, online security, one-on-one operator assistance, and the transmission of important messages regarding your vehicle's status.
Canadian models
For information on traffic rerouting and traffic information updates, provided by the AcuraLink server, see the Navigation System Manual.
In Case of Emergency
Automatic collision notification
When connected to the AcuraLink operator:
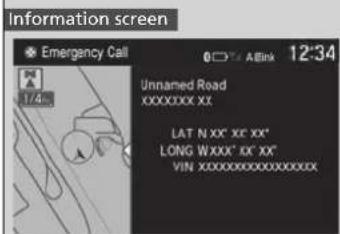
text_image
Information screen Emergency Call 1/4... Unnamed Road XXXXXXXX XX LAT N XX' XF' XX* LONG WXXX' XX' XX" VINXXXXXXXXXXXXXX 12-34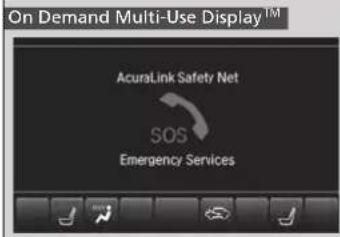
text_image
On Demand Multi-Use Display™ AcuraLink Safety Net SOS Emergency ServicesIf your vehicle's airbags deploy or if the unit detects that the vehicle is severely impacted, your vehicle will automatically attempt to connect to the AcuraLink operator. Once connected, information about your vehicle, its positioning, and its condition will be sent to the operator; you also can speak to the operator when connected.
AcuraLink ^®
AcuraLink also provides services you can operate from the Internet or your smartphone.
To subscribe to AcuraLink, or to get more information about all of its features, contact an Acura dealer, or visit owners.acura.com (U.S.) or www.acura.ca/owners/acuralink (Canada).
In Case of Emergency
Your vehicle may not be able to connect to the operator if the battery level is low, the line is disconnected, or you do not have adequate cellular coverage.
You cannot use emergency services when:
- You travel outside the AcuraLink service coverage areas.
- There is a problem with the connecting devices, such as the ASSIST button, microphone, speakers, or the unit itself.
- You are not subscribed to the service or your subscription is no longer valid.
You cannot operate other navigation or phone related functions using the screens while talking to the operator.
Only the operator can terminate the connection to your vehicle.
>>Automatic collision notification
If the unit fails to connect to the operator, it repeatedly tries until it succeeds.
■ Manual operator connection
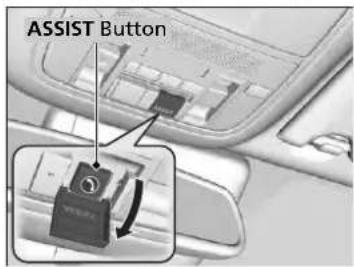
text_image
ASSIST ButtonIf you need to talk to the AcuraLink operator in an emergency situation, you can manually connect to them by pressing the ASSIST button with the power mode in ACCESSORY or ON.
-
Open the cover attached to the ceiling console.
-
Press the ASSIST button.
▶You are connected to the AcuraLink operator.
>>Manual operator connection
Do not press the button while driving. When you need to contact the operator, park the vehicle in a safe place.
If the unit fails to connect to the operator, it automatically cancels the action after three minutes.
In an emergency, the cover can be broken through to press the ASSIST button.
Continued
Security Features
Your subscribed telematics service provider can track your vehicle's location, remotely lock or unlock doors, and help you find your vehicle. To use these features, you need your user ID and personal identification number (PIN).
■ Stolen vehicle tracking
This feature searches and tracks down your vehicle position even if it is on the move. If you believe that your vehicle has been stolen, contact the police as well as the provider.
■ Remote door lock/unlock
The provider can remotely lock or unlock doors upon your request.
■ Vehicle finder
This feature is convenient to use when trying to locate your vehicle in large areas, such as a crowded parking lot. If you cannot locate your vehicle after using the remote transmitter's answerback function, you can contact the provider which can then flash your vehicle's exterior lights and sound the horn.
■ Security alarm notification
If the security system in your vehicle detects an abnormal condition, such as someone tampering with the lock on your vehicle, the provider notifies you by your preferred method.
>>Security Features
The contact information of your provider, your user ID and PIN will be given when you subscribe to AcuraLink. If you forget any of the above, contact a dealer, or visit owners.acura.com (U.S.) or www.acura.ca/owners/acuralink (Canada).
You can also activate the remote door lock/unlock and vehicle finder features from the Internet or using your smartphone app. Ask a dealer, or visit owners.acura.com (U.S.) or www.acura.ca/owners/acuralink (Canada) for details.
»Vehicle finder
The lights will stop flashing and horn will stop sounding under the following conditions:
- When 30 seconds have elapsed.
- You unlock the doors using the remote transmitter.
- You unlock the doors using the keyless access system.
- You unlock the doors using the built-in key.
- The power mode is set to ACCESSORY or ON.
Operator Assistance
Connect to the AcuraLink operator when trying to find a destination or for roadside assistance.
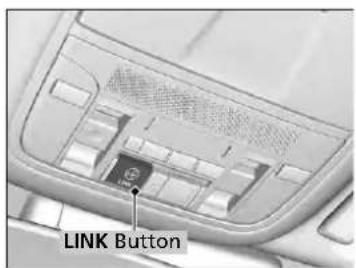
text_image
LINK Button- Press the LINK button.
▶ Connection to the operator begins.
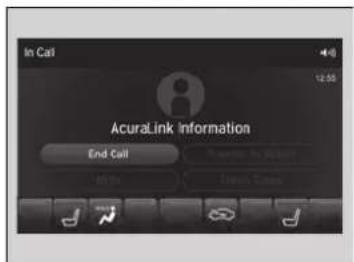
text_image
In Call 12:55 AcuraLink Information End Call 80.0x Current Status- Talk to the operator.
▶ To disconnect, select End Call or press the (Hang-up/back) button on the steering wheel.
Operator Assistance
Remain attentive to road conditions and driving during operator assistance.
AcuraLink Message
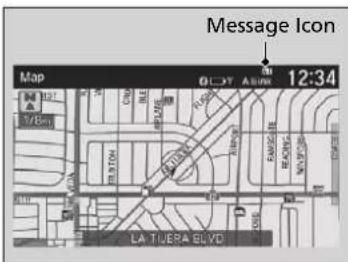
text_image
Message Icon Map 01.37 ASIM 12:34 LA TIJERA BLVDAcuraLink sends you messages on vehicle features, safety and emissions recall campaigns, maintenance reminders, and diagnostic information.
When you receive a new message, an icon appears on the information screen.
■ Message category
There are six message categories.
- Feature Guide: Appears for the first 30 days of ownership, introducing vehicle features each day.
- Quick Tips: Supplements your Owner's Manual with updated vehicle information.
- Diagnostic Information: Appears when a warning indicator or message comes on.
Rotate 🔺 to select Check Later or Check Now.
▶ Selecting Check Now lets you know if you should see a dealer immediately or later in accordance with the warning severity level.
- Scheduled Dealer Appointment: An appointment made through the Acura server or Acura Owners website can be rescheduled or canceled from this option. P. 444
- Maintenance Minder: Lets you know which maintenance item is due along with a reminder message.
- Recalls/Campaigns: Reminds you of a recall or important safety information. You should also be notified by mail.
AcuraLink Message
Messages may not appear immediately after your vehicle purchase. It can take several days for your dealer to register your vehicle's ID.
If an icon includes an exclamation point, it indicates that Acura gives high priority to this message compared to the one without.
• An unread message with high priority
• An unread message
Message category
Message categories can be added, edited, or deleted through broadcast messages from Acura.
You can call your dealer, find the nearest dealer, or schedule appointments from the message options in Maintenance Minder, Recalls/Campaigns, and Diagnostic Information.
Message Options P. 443
■ Reading a message
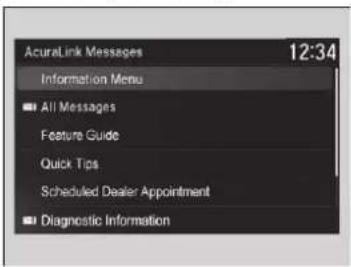
text_image
AcuraLink Messages 12:34 Information Menu All Messages Feature Guide Quick Tips Scheduled Dealer Appointment Diagnostic Information- Press the INFO button or press 😊, follow the message on the information screen.
- Rotate 🔺 to select AcuraLink/Messages, then press 🔺
▶AcuraLink messages appears. - Rotate to select a category, then press 😊.
▶If there are unread messages in a category, a message icon appears next to that category. - Rotate to select a message you want to read, then press 😊
■ Message Options
While a message is displayed, you can use options to take immediate action to the message.
Available options are:
- Read Messages Aloud: Reads the message aloud. Select Stop Reading Messages to cancel it.
• View Full Message: Displays the entire message.
• Phone number: Dials a number displayed in the message via HFL. - Delete: Deletes the displayed message.
- Call Your Dealer: Calls your Acura dealer using HFL.
• Find Acura Dealer: Searches for the nearest Acura dealer. - Roadside Assistance: Makes a call to the number for the Roadside Assistance service.
- Schedule Dealer Appoi...: Automatically sets an appointment date at your dealer.
Reading a message
If there is no message listed on the menu, each category items are grayed out and cannot be selected.
The message icon disappears once you read the message.
However, the exclamation mark that indicates that the message has a high priority remains.
• : A read message with high priority.
Message Options
The available options vary by message category.
You can delete all messages in a category at once.
Customized Features P. 362
■ Dealer Appointments
You can confirm the scheduled appointment date when you receive a Maintenance Minder, Recalls/Campaigns, or Diagnostic Information message, or reschedule any existing appointments.
- Select a Maintenance Minder, Recalls/Campaigns, Diagnostic Information, or Scheduled Dealer Appointment message.
- Rotate 🔗 to select Schedule Dealer Appoi... or Reschedule Appoint... (depending on the screen). Press 😊
▶ A suggested time and date are displayed. - Rotate 🔒 to select Confirm Appointment. Press 🔒 to accept the time and date.
- Press 🤨 to select OK.
Dealer Appointments
To set up an automated dealer appointment when a regular maintenance is due, visit the Acura Owners website at owners.acura.com (U.S.) or www.acura.ca/owners/acuralink (Canada), and set the required option. A reminder message will be sent as the date for the dealer appointment approaches. A reminder message will also be sent if you schedule an appointment online using Schedule Service Appointment function.
If you are not satisfied with the proposed appointment date and time, call your dealer directly.
To cancel the scheduled appointment, select Cancel Appointment when a message is displayed.
AcuraLink Subscription Status
You can confirm your AcuraLink subscription status.
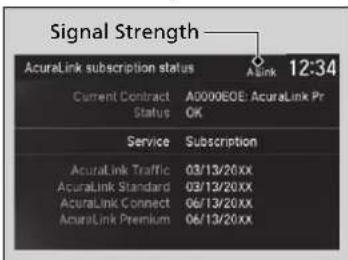
text_image
Signal Strength Acuralink subscription status Current Contract A0000EOE: Acuralink Pr Status OK Service Subscription Acuralink Traffic 03/13/20XX Acuralink Standard 03/13/20XX Acuralink Connect 06/13/20XX Acuralink Premium 06/13/20XX A Link 12:34- Press the SETTINGS button.
- Rotate 🔺 to select AcuraLink Settings, then press 😊
▶ Repeat the procedure to select AcuraLink Subscription Status.
Item Information
A-Link
You can check the signal strength.
Current Contract The AcuraLink subscription number and subscription level is displayed.
Service You can confirm the type of service.
Subscription You can confirm the expiration date.
Status The following message can be displayed:
- Check Antenna: There is a problem with the AcuraLink antenna. Contact a dealer.
• No Signal: Signal is not received. - No data: The signal is received, but some error has occurred in the system.
- OK: The system is receiving the signal or traffic data*.
This page intentionally left blank.
Driving
This chapter discusses driving and refueling.
Before Driving 448
Towing a Trailer 454
Off-Highway Driving Guidelines ..... 455
When Driving
Turning on the Power 457
Dual Clutch Transmission 464
Shifting 465
Acoustic Vehicle Alerting System..... 473
Integrated Dynamics System...... 474
Front Sensor Camera 475
Adaptive Cruise Control (ACC) with Low
Speed Follow 477
Road Departure Mitigation (RDM) System ...493
Lane Keeping Assist System (LKAS)... 498
Vehicle Stability Assist™ (VSA®), aka
Electronic Stability Control (ESC),
System 506
Agile Handling Assist 508
SPORT HYBRID Super Handling-All Wheel
Drive™ (SPORT HYBRID SH-AWD®) .. 509
Blind spot information System...... 510
Tire Pressure Monitoring System (TPMS)
with Tire Fill Assist.... 513
Tire Pressure Monitoring System (TPMS) -
Required Federal Explanation...... 515
High Voltage Battery.... 517
Braking
Brake System 518
Anti-lock Brake System (ABS) 524
Brake Assist System 525
Collision Mitigation Braking System™
(CMBS™) 526
Parking Your Vehicle
When Stopped 535
Parking Sensor System 537
Cross Traffic Monitor 541
Multi-View Rear Camera ^* 545
Surround View Camera System* ..... 547
Refueling
Fuel Information 557
How to Refuel 558
Fuel Economy and CO _2 Emissions.... 560
Before Driving
Driving Preparation
Check the following items before you start driving.
Exterior Checks
- Make sure there are no obstructions on the windows, door mirrors, exterior lights, or other parts of the vehicle.
▶Remove any frost, snow, or ice.
Remove any snow on the roof, as this can slip down and obstruct your field of vision while driving. If frozen solid, remove ice once it has softened.
▶ When removing ice from around the wheels, be sure not to damage the wheel or wheel components. - Make sure the hood is securely closed.
▶If the hood opens while driving, your front view will be blocked. - Make sure the tires are in good condition.
▶ Check air pressures, and check for damage and excessive wear.
→ Checking and Maintaining Tires P. 591 - Make sure there are no people or objects behind or around the vehicle.
▶There are blind spots from the inside.
Exterior Checks
NOTICE
When doors are frozen shut, use warm water around the door edges to melt any ice. Do not try to force them open, as this can damage the rubber trim around the doors. When done, wipe dry to avoid further freezing.
Do not pour warm water into the key cylinder. You will be unable to insert the key if the water freezes in the hole.
Heat from the engine and exhaust can ignite flammable materials left under the hood, causing a fire. If you've parked your vehicle for an extended period, inspect and remove any debris that may have collected, such as dried grass and leaves that have fallen or have been carried in for use as a nest by a small animal. Also check under the hood for leftover flammable materials after you or someone else has performed maintenance on your vehicle.
Interior Checks
- Store or secure all items on board properly.
Carrying too much cargo, or improperly storing it, can affect your vehicle's handling, stability, stopping distance, and tires, and make it unsafe.
Maximum Load Limit P. 451 - Do not pile items higher than the seat height.
▶They can block your view and may be thrown forward in the event of sudden braking. - Do not place anything in the front seat footwells. Make sure to secure the floor mat.
An object or unsecured floor mat can interfere with your brake and accelerator pedal operation while driving. - If you have any animals on board, do not let them move around in the vehicle.
▶They may interfere with driving and a crash could occur. - Securely close and lock all doors and the tailgate.
Locking/Unlocking the Doors from the Inside P. 154 - Adjust your seating position properly.
▶Adjust the head restraint, too.
Adjusting the Seats P. 194
Adjusting the Front and Second Row Outer Head Restraint Positions P. 201 - Adjust the mirrors and steering wheel properly.
▶Adjust them while sitting in the proper driving position.
Adjusting the Steering Wheel P. 190
Adjusting the Mirrors P. 191
»Interior Checks
The headlight aim is set by the factory, and does not need to be adjusted. However, if you regularly carry heavy items in the cargo area, have the aiming readjusted at a dealer or by a qualified technician.
Canadian models
Your vehicle is equipped with the automatic headlight adjusting system that automatically adjusts the vertical angle of the low beam headlights.
Continued
- Be sure items placed on the floor behind the front seats cannot roll under the seats.
They can interfere with the driver's ability to operate the pedals, the operation of the seats, or the operation of the sensors under the seats. - Everyone in the vehicle must fasten their seat belt.
Fastening a Seat Belt P. 42 - Make sure that the indicators in the instrument panel come on when you start the vehicle, and go off soon after.
▶ Always have a dealer check the vehicle if a problem is indicated.
→Indicators P. 84
Maximum Load Limit
Models with bench seat
The maximum load for your vehicle is 1,173 lbs (532 kg).
Models with captain seat
The maximum load for your vehicle is 1,005 lbs (456 kg). See the Tire and Loading Information label attached to the driver's doorjamb.
Label Example
| TIRE AND LOADING INFORMATION | |||
| SEATING CAPACITY TOTAL 7 FRONT 2 REAR 5 The combined weight of occupants and cargo should never exceed 532 kg or 1,173 lbs. | |||
| TIRE | SIZE | COLD TIRE PRESSURE | SEE OWNER'S MANUAL FOR ADDITIONAL INFORMATION |
| FRONT | XXXX/XXXXXXX XXX | XXXXKPA,XXPS I | |
| REAR | XXXXKPA,XXPS I | ||
| SPARE | XXXX/XXXXXXX XXX | XXXXKPA,XXPS I | |
This figure includes the total weight of all occupants, cargo, and accessories, and the tongue load if you are towing a trailer.
Steps for Determining Correct Load Limit -
(1) Locate the statement "The combined weight of occupants and cargo should never exceed XXX kg or XXX lbs." on your vehicle's placard.
(2) Determine the combined weight of the driver and passengers that will be riding in your vehicle.
(3) Subtract the combined weight of the driver and passengers from XXX kg or XXX lbs.
Maximum Load Limit
WARNING
Overloading or improper loading can affect handling and stability and cause a crash in which you can be hurt or killed.
Follow all load limits and other loading guidelines in this manual.
Gross Vehicle Weight Rating (GVWR): The maximum allowable weight of the vehicle, all occupants, all accessories, all cargo.
Specifications P. 662
Gross Axle Weight Rating (GAWR): The maximum allowable weight of the vehicle axle.
Specifications P. 662
(4) The resulting figure equals the available amount of cargo and luggage load capacity. For example, if the "XXX" amount equals 1,400 lbs. and there will be five 150 lb. passengers in your vehicle, the amount of available cargo and luggage load capacity is 650 lbs.
(1,400 - 750 (5 x 150) = 650 lbs.)
(5) Determine the combined weight of luggage and cargo being loaded on the vehicle. That weight may not safely exceed the available cargo and luggage load capacity calculated in step 4.
(6) If your vehicle will be towing a trailer, load from your trailer will be transferred to your vehicle. Consult this manual to determine how this reduces the available cargo and luggage load capacity of your vehicle.
In addition, the total weight of the vehicle, all occupants, accessories, cargo, and trailer tongue load must not exceed the Gross Vehicle Weight Rating (GVWR) or the Gross Axle Weight Rating (GAWR). Both are on a label on the driver's doorjamb.
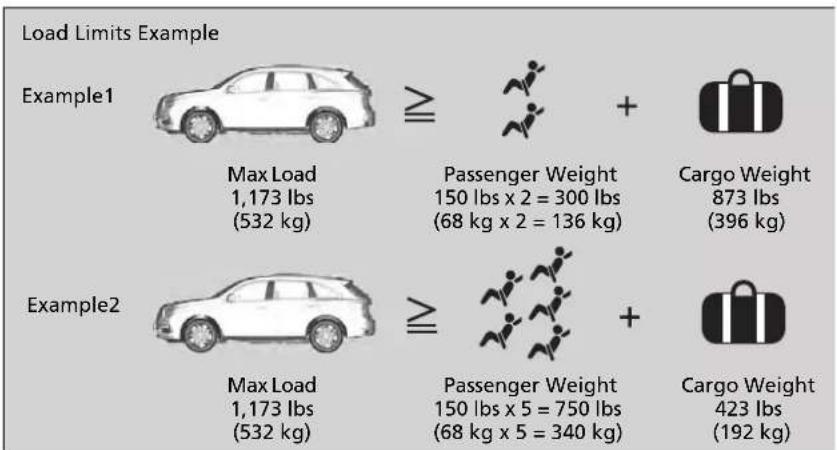
other
Load Limits Example | Example | Max Load (lbs) | Passenger Weight (lbs x 2 = 300 lbs) (kg x 2 = 136 kg) | Cargo Weight (lbs) | |---|---|---|---| | Example1 | 1,173 | 150 | 873 | | Example2 | 1,173 | 150 | 423 |>>Maximum Load Limit
Towing a Trailer: See Towing a Trailer to determine whether your vehicle is designed to tow a trailer.
Towing a Trailer P. 454
Towing a Trailer
Your vehicle is not designed to tow a trailer. Attempting to do so can void your warranties.
Towing Your Vehicle
Your vehicle is not designed to be towed behind a motor home. If your vehicle needs to be towed in an emergency, refer to the emergency towing information.
Emergency Towing P. 657
Off-Highway Driving Guidelines
General Information
Your vehicle has been designed primarily for use on pavement, however, its higher ground clearance allows you to occasionally travel on unpaved roads. It is not designed for trail-blazing, or other challenging off-highway activities.
If you decide to drive on unpaved roads, you will find that it requires somewhat different driving skills and that your vehicle will handle somewhat differently than it does on pavement. Pay attention to the precautions and tips in this section, and get acquainted with your vehicle before leaving the pavement.
Important Safety Precautions
To avoid loss of control or rollover, be sure to follow all precautions and recommendations:
- Be sure to store cargo properly and do not exceed your cargo load limits.
Maximum Load Limit P. 451 - Whenever you drive, make sure you and your passengers always wear seat belts.
- Keep your speed low, and never go faster than the conditions allow.
- It's up to you to continually assess the situation and drive within the limits.
▶Off-Highway Driving Guidelines
WARNING
Improperly operating this vehicle on or off-pavement can cause a crash or rollover in which you and your passengers could be seriously injured or killed.
- Follow all instructions and guidelines in this owner's manual.
- Keep your speed low, and don't drive faster than conditions permit.
Failure to operate your vehicle correctly might result in a crash or a rollover.
→ Important Handling Information P. 36
Precautions While Driving P. 463
Spinning the tires can also damage the SPORT HYBRID Super Handling-All Wheel Drive™ system.
Avoiding Trouble
- Check Out Your Vehicle before you leave the pavement and make sure that all scheduled maintenance has been completed. Pay special attention to the condition of the tires, and check the tire pressures.
- Remember the route you choose presents limits (too steep or bumpy), you have limits (driving skill and comfort), and your vehicle has limits (traction, stability, and power). Failing to recognize these limits will likely put you and your passengers in a hazardous situation.
- Accelerating and Braking should be done slowly and gradually. Trying to start or stop too fast can cause a loss of traction and you could lose control.
- Avoiding Obstacles and Debris in the road reduces the likelihood of a rollover or damage to your suspension or other components.
- Driving on Slopes increases your risk of a rollover, particularly if you attempt to drive across a slope that is too steep. Going straight up or down a slope is usually the safest. If you can't clearly see all conditions or obstacles on a slope, walk it before you drive it. If there is any doubt whether you can safely pass, don't try it. Find another route. If you get stuck when climbing, do not try to turn around. Back down slowly following the same route you took up the hill.
- Crossing a Stream - Avoid driving through deep water. If you encounter water in your route (a small stream or large puddle, for example), evaluate it carefully before going ahead. Make sure it is shallow, flowing slowly, and has firm ground underneath. If you are not sure of the depth or the ground, turn around and find another route. Driving through deep water can also damage your vehicle. The water can get into the transmission and differential, diluting the lubricant and causing an eventual failure. It can also wash the grease out of the wheel bearings.
- If You Get Stuck, carefully go in the direction that you think will get you unstuck. Do not spin the tires as this will only make things worse and could damage the transmission. If you are unable to free yourself, your vehicle will need to be towed. Front and rear tow hooks are provided for this purpose.
When Driving
Turning on the Power
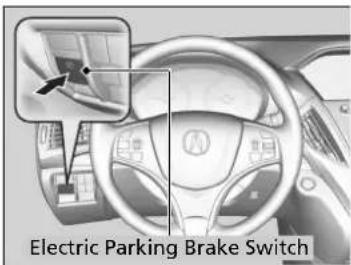
text_image
Electric Parking Brake Switch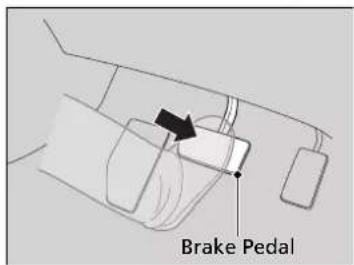
text_image
Brake Pedal- Make sure the parking brake is applied.
The electric parking brake indicator comes on for 15 seconds when you press the electric parking brake switch.
- Depress the brake pedal.
Turning on the Power
Keep your foot firmly on the brake pedal when starting the power system.
The engine is harder to start in cold weather and in thinner air found at altitudes above 8,000 feet (2,400 meters).
When turning on the power system in cold weather, turn off all electrical accessories such as the lights, climate control system, and rear defogger in order to reduce 12-volt battery drain.
If you live in a region where winter is extremely cold, an engine block heater and transmission clutch actuator heater will improve starting and warming of the engine. Consult a dealer for details.
If exhaust system sounds abnormal or you can smell exhaust gas inside the vehicle, have your vehicle checked by a dealer. There may be a problem with the engine or exhaust system.
Continued
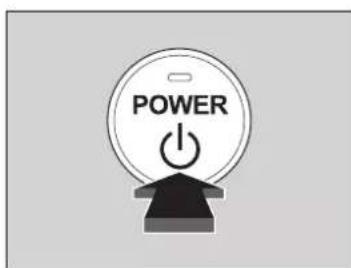
text_image
POWER- Without depressing the accelerator pedal, press the POWER button while depressing the brake pedal.
- Check the READY indicator.
▶Keep depressing the brake pedal until the READY indicator comes on.
The READY indicator comes on when the power system is on and you can start driving.
If the outside temperature is extremely low, you cannot drive until conditions are improved. In this case, the READY indicator does not come on and a warning message appears on the multi-information display (MID).
Multi-Information Display (MID)
Warning and Information Messages
P. 105
Turning on the Power
The immobilizer system protects your vehicle from theft.
If an improperly coded key (or other device) is used, the power system does not activate.
Immobilizer System P. 165
When you set the power mode to ON, you may feel the brake pedal slightly sink down. This is normal.
Bring the keyless access remote close to the POWER button if the battery in the keyless access remote is weak.
If the Keyless Access Remote Battery is
Weak P. 636
The power system may not activate if the keyless access remote is subjected to strong radio waves.
The engine may not run when the vehicle is ready for driving.
You can start driving with the READY indicator on. If you press the POWER button while depressing the brake pedal with the READY indicator on, the power mode is set to VEHICLE OFF and you cannot start driving.
→READY Indicator P. 92
Do not hold the POWER button to start the power system.
If the power system does not start, wait at least 30 seconds before trying again.
Remote Engine Start with Vehicle Feedback
You can remotely turn the power system on using the two-way keyless access remote from extended distances.
■ To turn the power system on
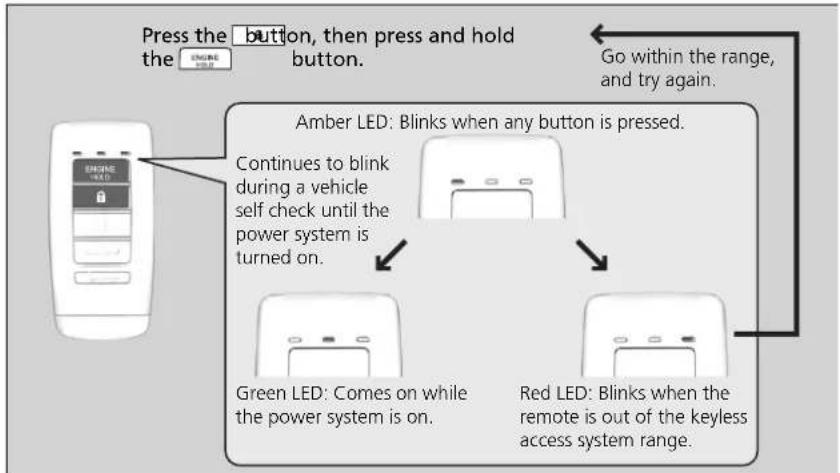
flowchart
graph TD
    A["Press the button, then press and hold the engine hold"] --> B["Go within the range, and try again."]
    B --> C["Amber LED: Blinks when any button is pressed."]
    C --> D["Continues to blink during a vehicle self check until the power system is turned on."]
    D --> E["Green LED: Comes on while the power system is on."]
    E --> F["Red LED: Blinks when the remote is out of the keyless access system range."]
The power system is on for up to 10 minutes without you starting the vehicle. To extend the time for another 10 minutes during the first 10 minutes, press the □ button, then press and hold the □ button.
The amber LED blinks, then the green LED comes back on if a 10-minute extension request was transmitted successfully.
After pressing the button, wait for the green LED to blink. This indicates that the all the doors and the tailgate are locked.
Remote Engine Start with Vehicle Feedback
WARNING
Carbon monoxide gas is toxic and can rapidly accumulate in closed or even partly enclosed areas.
Breathing it can cause unconsciousness and even kill you.
Never use the remote engine starter with the vehicle parked in a garage or other areas with limited ventilation.
The remote engine start may violate local laws. Before using the remote engine start, check your local laws.
Remote Engine Start run timer extension
The power system is on for another 10 minutes from the time of extension request. The max time is 20 minutes, if the extension request is made after 10 minutes of first 10 minutes.
The vehicle may start in EV mode depending on High Voltage battery conditions.
▶If the High Voltage battery is fully charged, the gasoline engine may not start.
▶If the High Voltage battery charge level is low, the gasoline engine starts.
■ To turn the power system off
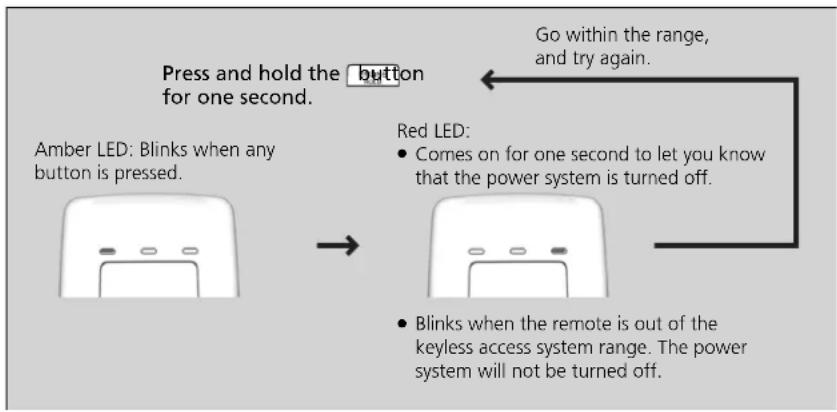
flowchart
graph TD
    A["Press and hold the button for one second."] --> B["Amber LED: Blinks when any button is pressed."]
    B --> C["Red LED: Comes on for one second to let you know that the power system is turned off."]
    C --> D["Blinks when the remote is out of the keyless access system range. The power system will not be turned off."]
    D --> E["Go within the range, and try again."]
>>Remote Engine Start with Vehicle Feedback
If there are buildings and obstacles between your vehicle and the remote, the range will be reduced. This distance may vary by external electrical interference.
The power system may not be turned on by the remote engine start if:
- You have disabled a remote engine start setting using the MID.
- The power mode is not in VEHICLE OFF (LOCK).
- The transmission is in a position other than .
- The hood is open, or any door or the tailgate is unlocked.
- You have already used the remote twice to turn the power system on.
- Another registered keyless access remote is in the vehicle.
• There is any antenna failure. - The door is unlocked with the built-in key.
• The engine oil pressure is low. - The engine coolant temperature is extremely high.
• The telematics unit malfunctions. - The security system alarm is not set.
Before turning the power system on, make sure to check the door lock status using the remote. When you press the button, wait for the green LED to blink. If the red LED turns on, the doors and tailgate did not lock, and the power system is not turned on.
>>Remote Engine Start with Vehicle Feedback
While the power system is on, the vehicle will automatically precondition inside the vehicle. When it is warm outside:
- The climate control system is activated in recirculation mode.
- The seat ventilation ^* is activated.
When it is cold outside:
- The defroster is activated at a moderately warm temperature.
- The rear defogger and door mirror heaters are activated.
- The seat heaters and heated steering wheel are activated*.
Heated Steering Wheel *P. 219
Front Seat Heaters and Seat Ventilation * P. 220, 221
* Not available on all models
Continued
Starting to Drive
When the power system was started using the keyless access remote
- Depress the brake pedal and press the POWER button simultaneously.
When the power system was started in any case
-
Keeping your right foot on the brake pedal, check that the READY indicator is on, then press the DrSfton. Select R when reversing.
-
With the parking brake applied, release the brake pedal and gently depress the accelerator pedal.
▶ Make sure the electric parking brake indicator goes off.
→Parking Brake P. 518
If the Transmission System Indicator Blinks along with the Warning Message P. 646
■ Hill start assist system
Hill start assist keeps the brake engaged briefly to help prevent the vehicle from rolling on inclines as you move your foot from the brake pedal to the accelerator.
Change the gear position to D or S when facing uphill, or R when facing downhill, then release the brake pedal.
Starting to Drive
When the power system was started using the keyless access remote
The power system is turned off when the gear position is changed from P before the POWER button is pressed. Follow step 1 when starting to drive.
You can also release the parking brake by pulling the electric parking brake switch while depressing the brake pedal.
When facing downhill, you can start your vehicle more smoothly by manually releasing it with the electric parking brake switch than by releasing it with the accelerator pedal.
As a hybrid vehicle, the sounds and vibrations from the engine may be absent even though the vehicle is ready for driving. It also makes you fail to recognize that you can start.
Make sure to check if the READY indicator is on before you start to drive.
Hill start assist system
Hill start assist may not prevent the vehicle from rolling downhill on a very steep or slippery slope, and will not operate on small inclines.
Hill start assist is not a replacement for the parking brake.
Precautions While Driving
Driving Guidelines for Your Utility Vehicle
Utility vehicles have a significantly higher rollover rate than other types of vehicles. To prevent rollovers or loss of control:
• Take corners at slower speeds than you would with a passenger vehicle.
- Avoid sharp turns and abrupt maneuvers whenever possible.
- Do not modify your vehicle in any way that you would raise the center of gravity.
- Do not carry heavy cargo on the roof.
Never carry more than 165 lbs (75 kg) of cargo on the roof rack (Acura accessory).
In Rain
Avoid driving in deep water and on flooded roads. This can damage the power system or driveline, or cause electrical component failure.
Other Precautions
If there is a strong impact with something under the vehicle, stop in a safe location. Check the underside of the vehicle for damage or any fluid leaks.
Precautions While Driving
NOTICE
Do not select a shift button while pressing the accelerator pedal. You could damage the transmission.
NOTICE
If you repeatedly turn the steering wheel at an extremely low speed, or hold the steering wheel in the full left or right position for a while, the electric power steering (EPS) system heats up. The system goes into a protective mode, and limits its performance. The steering wheel becomes harder and harder to operate. Once the system cools down, the EPS system is restored. Repeated operation under these conditions can eventually damage the system.
If the power mode is set to ACCESSORY while driving, the power system will shut down and all steering and brake power assist functions will stop, making it difficult to control the vehicle.
Do not press the N button, as you will lose regenerative braking (and acceleration) performance.
During the first 600 miles (1,000 km) of operation, avoid sudden acceleration or full throttle operation so as not to damage the power system or powertrain.
Avoid hard braking for the first 200 miles (300 km). You should also follow this when the brake pads are replaced.
Dual Clutch Transmission
Creeping
As with a conventional gasoline-powered vehicle with an automatic transmission, this vehicle will creep.
Keep the brake pedal firmly depressed when stopped.
Kickdown
Quickly depressing the accelerator pedal while driving uphill may cause the transmission to drop to a lower gear, unexpectedly increasing vehicle speed. Depress the accelerator pedal carefully, especially on slippery roads and curves.
Driving Guidelines for Your Utility Vehicle
Failure to operate your vehicle correctly might result in a crash or a rollover.
Important Handling Information P. 36
→ Precautions While Driving P. 463
Shifting
Change the gear position in accordance with your driving needs.
Shift button positions
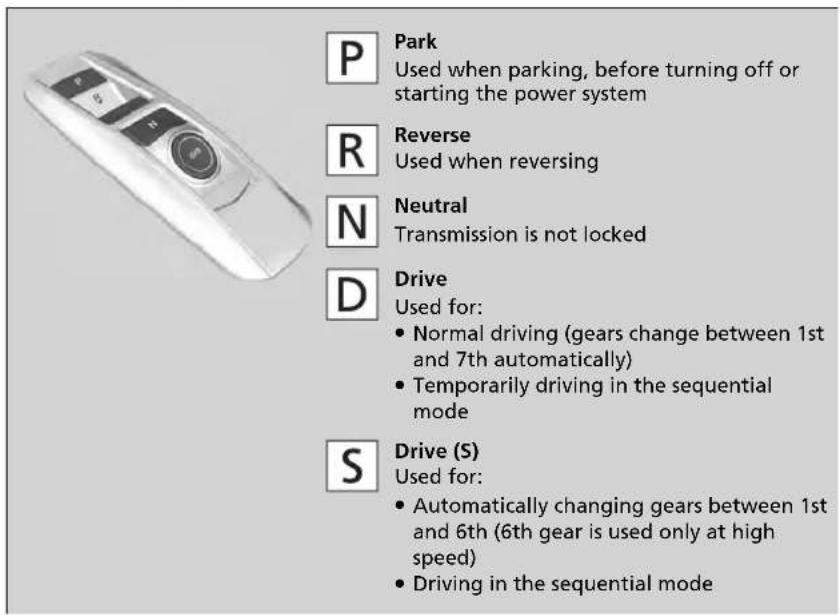
text_image
P Park Used when parking, before turning off or starting the power system R Reverse Used when reversing N Neutral Transmission is not locked D Drive Used for: • Normal driving (gears change between 1st and 7th automatically) • Temporarily driving in the sequential mode S Drive (S) Used for: • Automatically changing gears between 1st and 6th (6th gear is used only at high speed) • Driving in the sequential modeShifting
WARNING
The vehicle can roll away if left unattended without confirming that Park is engaged.
A vehicle that rolls away could cause a crash resulting in serious injury or death.
Always keep your foot on the brake pedal until you have confirmed that |P| is shown on the gear position indicator.
To prevent malfunction and unintended engagement:
- Do not spill any liquids on or around shift buttons.
- Do not place or drop any objects on or around shift buttons.
- Do not let passengers or children operate the shift buttons.
You may occasionally find that it takes longer than usual for the vehicle to start moving when you select R, release the brake pedal, and/or depress the accelerator pedal. This may occur when the High Voltage battery level is extremely low, and does not indicate a vehicle malfunction.
■ P (parking) button
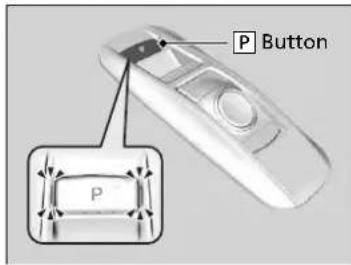
text_image
P Button PThe gear position changes to P when you press the P button while the vehicle is parked with the power mode in ON. The indicators on the sides of the P button come on.
Shifting
When shifting gears in extremely low temperatures ( -22^/-30^ ), there may be a short delay before the shift is indicated in the display. Always confirm you are in the correct gear before driving.
Shift Operation

text_image
M (sequential mode) Indicator Sequential Mode Gear Selection Indicator Gear Position Indicator Tachometer's red zone P Press the P button. R Pull back the R button. N Press the N button. D Press the D button. S Press the D button twice. If the gear position is in D, press the D button again. Shift Button Indicator>>Shift Operation
NOTICE
When you change D to R and vice versa, come to a complete stop and keep the brake pedal depressed. Operating the shift button before the vehicle has come to a complete standstill can damage the transmission.
Use the gear position indicator and the shift button indicator to check the gear position before selecting a shift button.
If the indicator of the currently selected gear position, or all the gear position indicators are blinking simultaneously, there is a problem with the transmission.
Avoid sudden acceleration and have the transmission checked by a dealer as soon as possible.
The fuel supply may be cut off if you drive at engine speeds in or over the tachometer's red zone (engine speed limit). If this happens, you may experience a slight jolt.
When the engine speed is increased while the transmission is in [N] , [P] or [R] , the fuel supply may be cut off even without the engine speed entering the tachometer's red zone.
The beeper sounds once when you change to R. →Customized Features P. 131, 362
Continued
■ When opening the driver's door
If you open the driver's door under the following conditions, the gear position automatically changes to P.
- The vehicle is in stationary with the power mode in ON, or moving at 1 mph (2 km/h) or slower.
- The transmission is in other than .
- You have unfastened the driver side seat belt.
▶If you manually change the gear position from P with the brake pedal depressed, the gear position will automatically return to P once you release the brake pedal.
■ When turning off the power mode
If you turn the power system off while the vehicle is stationary, and the transmission is in other than P, the gear position automatically changes to P.
When opening the driver's door
While the system is designed to automatically change the gear position to under the described conditions, in the interest of safety you should always select before opening the driver's door. Make sure to park the vehicle in a safe place.
When Stopped P. 535
If you want to drive the vehicle after the gear position has automatically changed to P under the described conditions, close the door, fasten the seat belt, depress the brake pedal, then change the gear position.
If you leave the vehicle, turn off the power system and lock the doors.
■ If you want to keep the transmission in N position [car wash mode]
With the READY indicator on:
- Press and hold the brake pedal.
- Select N, then release the button to display N (Neutral) hold mode on the MID.
- Press and hold N again for two seconds.
This puts the vehicle in car wash mode which must be used when your vehicle is pulled through a conveyor type automatic car wash where you or an attendant do not remain in the vehicle.
![Acura MDX Sport Hybrid (2020) - ■ If you want to keep the transmission in N position [car wash mode] - 1](/content/2026/05/815307/images/a23c2b9ff28e6e73d07f22f0d2e7b08fbc295fbfa5860471db46596283025e7a.jpg)
flowchart
graph TD
    A["To Exit Vehicle\nIn Neutral: Press N\nAgain & Hold\nFor 2sec"] --> B["↓\nNeutral-Hold Mode ON\nShift To P\nWhen Done"]
    B --> C["N → P"]
If the POWER button is pressed after car wash mode has been activated, the power mode will change to ACCESSORY and a message will be displayed on the MID.
The gear position remains in N with the power mode in ACCESSORY for 15 minutes, then, it automatically changes to P and the power mode changes to OFF.
▶Manually changing to P cancels ACCESSORY mode. The P indicator comes on and the power mode changes to OFF. You must always shift to P when car wash mode is no longer needed.
If you want to keep the transmission in [N] position [car wash mode]
The transmission may not stay in N position while the following indicators are on or when the message below appears:
- Malfunction indicator lamp
• Transmission system indicator
• POWER SYSTEM indicator
• 12-Volt battery charging system indicator - The Charging System Problem message on the MID.
■ Restriction on selecting a gear position
You cannot select a gear position under certain circumstances that may lead to a crash.
| When the transmission is in: | 1. Under the circumstances of that: | 2. You cannot select: | 3. The gear position remains in/changes to: | How to change the gear position |
| P | The brake pedal is not depressed. | P | Release the accelerator pedal and depress the brake pedal. | |
| The accelerator pedal is depressed. | ||||
| N | The vehicle is moving at low speed without the brake pedal depressed. | Other gear position | N | |
| The vehicle is moving at low speed with the accelerator pedal depressed. | ||||
| N, D or S | The vehicle is moving forward. | R | Stop your vehicle in a safe place, depress the brake pedal, and select the appropriate gear position. | |
| R or N | The vehicle is moving backward. | D, S | ||
| R, N, D or S | The vehicle is moving. | P | ||
| P or N | The READY indicator is not on. | A gear position other than P or N | P or N | Make sure that the READY indicator comes on. |
Sequential Mode
Use the paddle shifters to change between 1st and 7th gears without releasing your hands from the steering wheel. The transmission will switch to the sequential mode.
■ When the transmission is in D:
The vehicle will go into the sequential mode momentarily, and the sequential mode gear selection indicator will come on.
Once you start traveling at a constant speed, the sequential mode will automatically switch off, and the sequential mode gear selection indicator will go off.
Hold the + paddle shifter for two seconds or push the D/S button to return to normal drive.
■ When the transmission is in S
The vehicle will go into the sequential mode, and the M (sequential mode) indicator and sequential mode gear selection indicator will come on.
If the vehicle speed increases and the engine speed reaches near the tachometer's red zone, the transmission automatically shifts up to the next gear.
You can cancel this mode by holding the + paddle shifter for two seconds or push the 0/5 ton. When the sequential mode is canceled, the sequential mode indicator and sequential mode gear selection indicator will turn off.
Sequential Mode
The vehicle is engine operated when SPORT+ mode is on.
Sequential Mode Operation
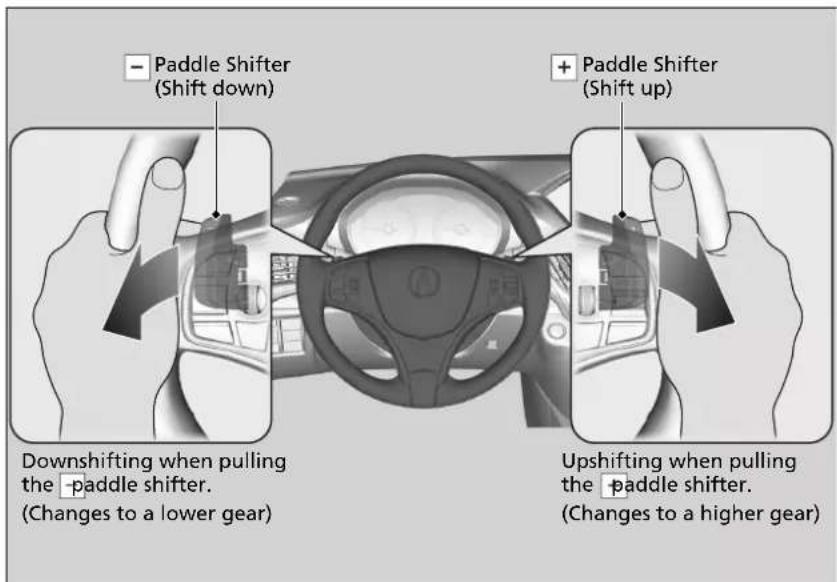
text_image
Paddle Shifter (Shift down) Paddle Shifter (Shift up) Downshifting when pulling the -paddle shifter. (Changes to a lower gear) Upshifting when pulling the -paddle shifter. (Changes to a higher gear)Sequential Mode Operation
Each paddle shift operation makes a single gear change.
To change gears continuously, release the paddle shifter before pulling it again for the next gear.
If the sequential mode gear selection indicator blinks when you try to shift up or down, this means your vehicle speed is not in its allowable gear range.
Slightly accelerate to shift up and decelerate to shift down while the indicator is blinking.
The transmission is in [S] and SPORT+ mode, to prioritize the engine performance enhancement, the transmission may not allow for shifting up while the engine speed is low.
Acoustic Vehicle Alerting System
Alerts pedestrians when a vehicle is propelled solely by electricity, approaching at speeds around 12 mph (20 km/h) or less.
Integrated Dynamics System
Modifies the dynamic character of the vehicle. There are four modes to select from: Comfort, Normal, Sport, and Sport+. Press the Dynamic Mode button to select a mode. The mode you have selected appears on the MID.
You can customize the mode default setting using the MID.
Customized Features P. 131, 362
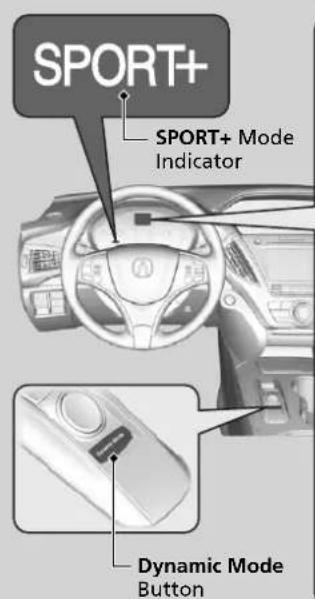
text_image
SPORT+ SPORT+ Mode Indicator Dynamic Mode Button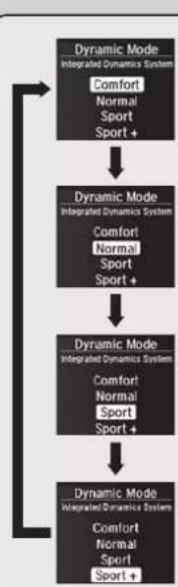
flowchart
graph TD
    A["Dynamic Mode Integrated Dynamics System\nComfort\nNormal Sport\nSport +"] --> B["Dynamic Mode Integrated Dynamics System\nComfort\nNormal Sport\nSport +"]
    B --> C["Dynamic Mode Integrated Dynamics System\nComfort\nNormal Sport\nSport +"]
    C --> D["Dynamic Mode Integrated Dynamics System\nComfort\nNormal Sport\nSport +"]
Comfort
Maximizes driver comfort through increased steering assist and a softer Active Damper setting.
Normal
Balanced driving performance for most driving situations.
Sport
Enhances vehicle response feel through decreased steering assist, increased SPORT HYBRID SH-AWD ^® torque bias, modified Active Sound Control, and a more firm Active Damper setting.
Sport+
Adds to Sport to allow for increased performance by locking out EV mode, enhancing throttle response, and changing the shift map.
When you restart the power system with Sport+ mode, the mode is changed to Sport automatically.
Front Sensor Camera
The camera, used in systems such as LKAS, RDM, ACC with Low Speed Follow, CMBS ^™ , and auto high-beam, is designed to detect an object that triggers any of the systems to operate its functions.
■ Camera Location and Handling Tips
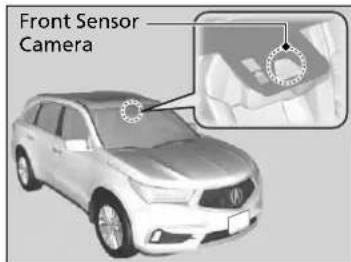
text_image
Front Sensor CameraThis camera is located behind the rearview mirror.
To help reduce the likelihood that high interior temperatures will cause the camera's sensing system to shut off, when parking, find a shady area or face the front of the vehicle away from the sun. If you use a reflective sun shade, do not allow it to cover the camera housing. Covering the camera can concentrate heat on it.
Front Sensor Camera
Never apply a film or attach any objects to the windshield, the hood, or the front grille that could obstruct the camera's field of vision and cause the system to operate abnormally. Scratches, nicks, and other damage to the windshield within the camera's field of vision can cause the system to operate abnormally. If this occurs, we recommend that you replace the windshield with a genuine Acura replacement windshield. Making even minor repairs within the camera's field of vision or installing an aftermarket replacement windshield may also cause the system to operate abnormally. After replacing the windshield, have a dealer recalibrate the camera. Proper calibration of the camera is necessary for the system to operate properly.
Do not place an object on the top of the instrument panel. It may reflect onto the windshield and prevent the system from detecting lane lines properly.
Front Sensor Camera
If the Some Driver Assist Systems Cannot Operate: Camera Temperature Too High message appears:
- Use the climate control system to cool down the interior and, if necessary, also use defroster mode with the airflow directed towards the camera.
- Start driving the vehicle to lower the windshield temperature, which cools down the area around the camera.
If the Some Driver Assist Systems Cannot Operate: Clean Front Windshield message appears:
- Park your vehicle in a safe place, and clean the windshield. If the message does not disappear after you have cleaned the windshield and driven for a while, have your vehicle checked by a dealer.
Adaptive Cruise Control (ACC) with Low Speed Follow
Helps maintain a constant vehicle speed and a set following-interval behind a vehicle detected ahead of yours and, if the detected vehicle comes to a stop, can decelerate and stop your vehicle, without you having to keep your foot on the brake or the accelerator.
When ACC with Low Speed Follow slows your vehicle by applying the brakes, your vehicle's brake lights will illuminate.
When to use
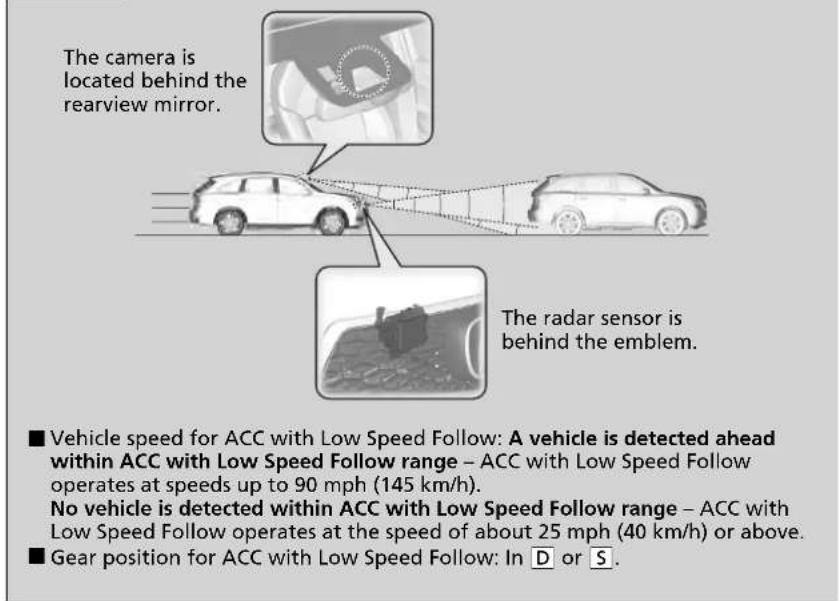
text_image
The camera is located behind the rearview mirror. The radar sensor is behind the emblem. ■ Vehicle speed for ACC with Low Speed Follow: A vehicle is detected ahead within ACC with Low Speed Follow range – ACC with Low Speed Follow operates at speeds up to 90 mph (145 km/h). No vehicle is detected within ACC with Low Speed Follow range – ACC with Low Speed Follow operates at the speed of about 25 mph (40 km/h) or above. ■ Gear position for ACC with Low Speed Follow: In D or S.Adaptive Cruise Control (ACC) with Low Speed Follow
WARNING
Improper use of ACC with Low Speed Follow can lead to a crash.
Use ACC with Low Speed Follow only when driving on expressways or freeways and in good weather conditions.
WARNING
ACC with Low Speed Follow has limited braking capability and may not stop your vehicle in time to avoid a collision with a vehicle that quickly stops in front of you.
Always be prepared to apply the brake pedal if the conditions require.
Important Reminder
As with any system, there are limits to ACC with Low Speed Follow. Use the brake pedal whenever necessary, and always keep a safe interval between your vehicle and other vehicles.
Be careful not to severely impact the radar sensor cover.
Continued
■ How to activate the system
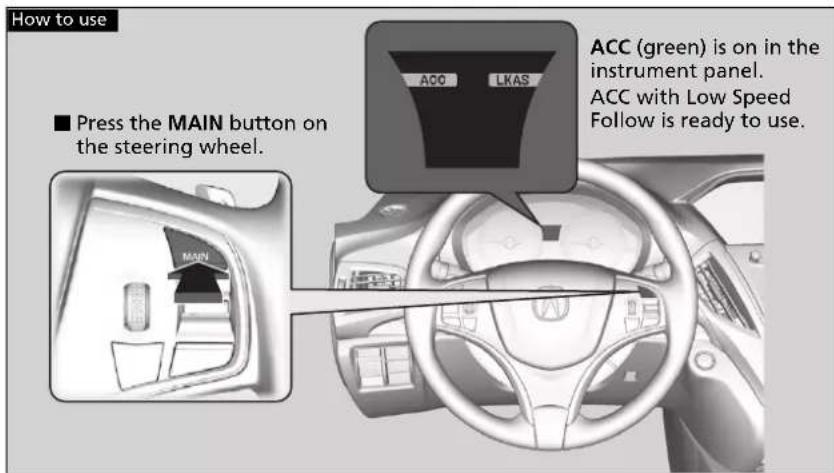
text_image
How to use ■ Press the MAIN button on the steering wheel. ACC (green) is on in the instrument panel. ACC with Low Speed Follow is ready to use.>>Adaptive Cruise Control (ACC) with Low Speed Follow
When the MAIN button is pressed, both ACC with Low Speed Follow and the Lane Keeping Assist System (LKAS) are either turned on or off.
ACC with Low Speed Follow may not work properly under certain conditions.
☑ACC with Low Speed Follow Conditions and Limitations P. 484
When not using ACC with Low Speed Follow: Turn off adaptive cruise by pressing the MAIN button. This also will turn off the Lane Keeping Assist System (LKAS).
Do not use ACC with Low Speed Follow under the following conditions:
- On roads with heavy traffic or while driving in continuous stop and go traffic.
- On roads with sharp turns.
- On roads with steep downhill sections, as the set vehicle speed can be exceeded by coasting. In such cases, ACC with Low Speed Follow will not apply the brakes to maintain the set speed.
- On roads with toll collection facilities or other objects between lanes of traffic, or in parking areas, or facilities with drive through access.
■ To Set the Vehicle Speed
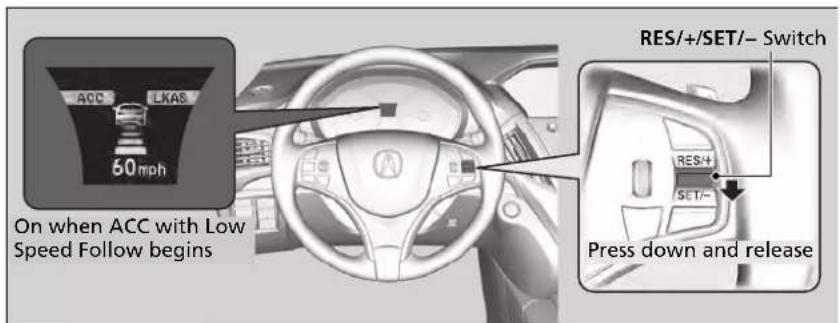
text_image
ACC LKAS 60mph On when ACC with Low Speed Follow begins RES/+/SET/- Switch RES/+ SET/- Press down and releaseWhen driving at about 25 mph (40 km/h) or above: Take your foot off the pedal and press down the RES/+/SET/− switch when you reach the desired speed. The moment you release the switch, the set speed is fixed, and ACC with Low Speed Follow begins.
When driving at slower than about 25 mph (40 km/h): If the vehicle is moving and the brake pedal is not depressed, pressing the switch fixes the set speed to about 25 mph (40 km/h) regardless of current vehicle speed. If your vehicle is stationary, you can set the vehicle speed even with the brake pedal depressed.
Continued
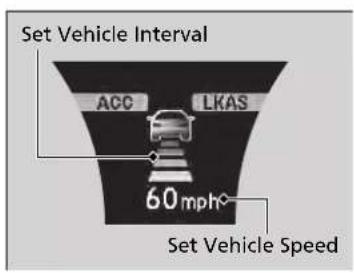
text_image
Set Vehicle Interval ACC LKAS 60 mph Set Vehicle SpeedWhen ACC with Low Speed Follow starts operating, the vehicle icon, interval bars and set speed appear on the MID.
When in Operation
■ There is a vehicle ahead
ACC with Low Speed Follow monitors if a vehicle ahead of you enters the ACC with Low Speed Follow range. If a vehicle is detected doing so, the ACC with Low Speed Follow system maintains or decelerates your vehicle's set speed in order to keep the vehicle's set following-interval from the vehicle ahead.
To Set or Change Following-interval P. 487
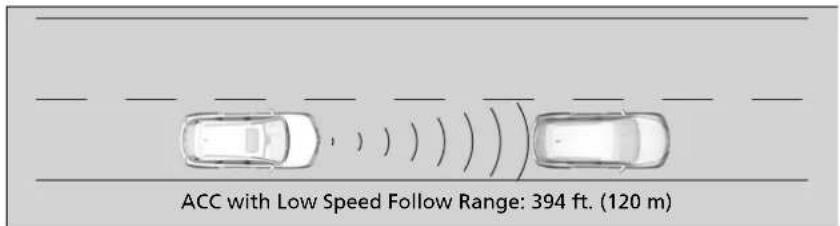
text_image
ACC with Low Speed Follow Range: 394 ft. (120 m)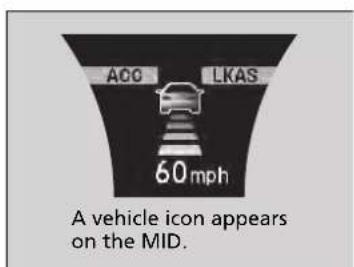
text_image
ACG LKAS 60 mph A vehicle icon appears on the MID.When a vehicle whose speed is slower than your set speed is detected in front of you, your vehicle starts to slow down.
* Not available on all models
Continued
When in Operation
If the vehicle detected ahead of you slows down abruptly, or if another vehicle is detected cutting in front of you, the beeper sounds, a message appears on the MID, and the head-up warning lights' come on.
Depress the brake pedal, and keep an appropriate interval from the vehicle ahead.
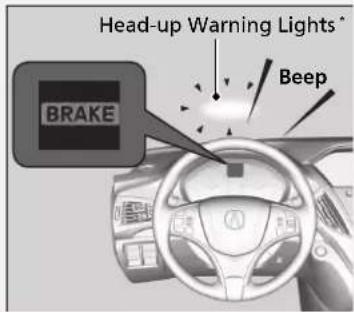
text_image
Head-up Warning Lights* BRAKE BeepEven if the interval between your vehicle and the vehicle detected ahead is short, ACC with Low Speed Follow may start accelerating your vehicle under the following circumstances:
- The vehicle ahead of you is going at almost the same speed as, or faster than, your vehicle.
- A vehicle that cuts in front of you is going faster than your vehicle, gradually increasing the interval between the vehicles.
■ There is no vehicle ahead
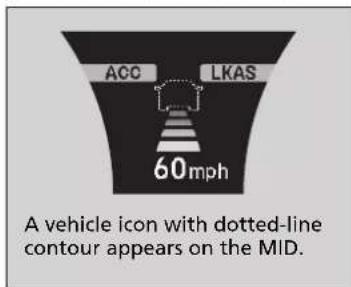
text_image
ACC LKAS 60mph A vehicle icon with dotted-line contour appears on the MID.Your vehicle maintains the set speed without having to keep your foot on the brake or accelerator pedal.
If there previously was a vehicle detected ahead that kept your vehicle from traveling at the set speed, ACC with Low Speed Follow accelerates your vehicle to the set speed, and then maintains it.
While stationary and no vehicle is detected, ACC with Low Speed Follow automatically cancels and a beeper sounds.
■ When you depress the accelerator pedal
You can temporarily increase the vehicle speed. In this case, there is no audible or visual alert even if a vehicle is in the ACC with Low Speed Follow range.
ACC with Low Speed Follow stays on unless you cancel it. Once you release the accelerator pedal, the system resumes the set speed.
There are times when the vehicle speed will decrease when the accelerator pedal is lightly applied.
When in Operation
You can also set the system to beep when a vehicle in front of you comes in and goes out of the ACC with Low Speed Follow detecting range. Change the ACC
Forward Vehicle Detect Beep setting.
→ Customized Features P. 131, 362
Limitations
You may need to use the brake to maintain a safe interval when using ACC with Low Speed Follow. Additionally, ACC with Low Speed Follow may not work properly under certain conditions.
ACC with Low Speed Follow Conditions and Limitations P. 484
A vehicle detected ahead is within ACC with Low Speed Follow range and slows to a stop
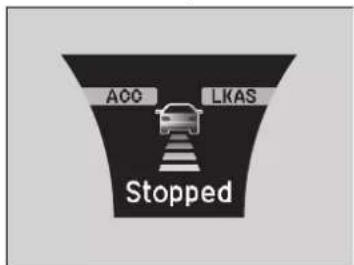
text_image
AOC LKAS StoppedYour vehicle also stops, automatically. The Stopped message appears on the MID. When the vehicle ahead of you starts again, the vehicle icon on the MID blinks. If you press the RES/+/SET/− switch up or down, or depress the accelerator pedal, ACC with Low Speed Follow operates again within the prior set speed.
A vehicle detected ahead is within ACC with Low Speed Follow range and slows to a stop
WARNING
Exiting a vehicle that has been stopped while the ACC with Low Speed Follow system is operating can result in the vehicle moving without operator control.
A vehicle that moves without operator control can cause a crash, resulting in serious injury or death.
Never exit a vehicle when the vehicle is stopped by ACC with Low Speed Follow.
Continued
ACC with Low Speed Follow Conditions and Limitations
The system may automatically shut off and the ACC indicator will come on under certain conditions. Some examples of these conditions are listed below. Other conditions may reduce some of the ACC functions.
Front Sensor Camera P. 475
■ Environmental conditions
Driving in bad weather (rain, fog, snow, etc.).
■ Roadway conditions
Driving on a snowy or wet roadway (obscured lane marking, vehicle tracks, reflected lights, road spray, high contrast).
■ Vehicle conditions
- The outside of the windshield is blocked by dirt, mud, leaves, wet snow, etc.
- An abnormal tire or wheel condition (Wrong sized, varied size or construction, improperly inflated, compact spare tire*, etc.).
• The camera temperature gets too high.
• The parking brake is applied. - When the front grille is dirty.
- The vehicle is tilted due to a heavy load or suspension modifications.
- When tire chains are installed.
ACC with Low Speed Follow Conditions and Limitations
The radar sensor for ACC with Low Speed Follow is shared with the Collision Mitigation Braking System™ (CMBS™).
Collision Mitigation Braking System ^TM (CMBS ^TM ) P. 526
You can read about handling information for the camera equipped with this system.
Front Sensor Camera P. 475
Always keep the radar sensor cover clean.
Never use chemical solvents or polishing powder for cleaning the sensor cover. Clean it with water or a mild detergent.
Do not put a sticker on the radar sensor cover or replace the radar sensor cover.
If you need the radar sensor to be repaired, or removed, or the radar sensor cover is strongly impacted, turn off the system by pressing the MAIN button and take your vehicle to a dealer.
■ Detection limitations
• A vehicle suddenly crosses in front of you.
• The interval between your vehicle and the vehicle ahead of you is too short.
- A vehicle cuts in front of you at a slow speed, and it brakes suddenly.
- When you accelerate rapidly and approach the vehicle ahead of you at high speed.
- The vehicle ahead of you is a motorcycle, bicycle, mobility scooter, or other small vehicle.
- When there are animals in front of your vehicle.
- When you drive on a curved or winding or undulating road that makes it difficult for the sensor to properly detect a vehicle in front of you.
- The speed difference between your vehicle and a vehicle in front of you is significantly large.
- An oncoming vehicle suddenly comes in front of you.
- Your vehicle abruptly crosses over in front of an oncoming vehicle.
- When driving through a narrow iron bridge.
- When the vehicle ahead of you brakes suddenly.
- When the vehicle ahead of you has a unique shape.
- When your vehicle or the vehicle ahead of you is driving on one edge of the lane.
ACC with Low Speed Follow Conditions and Limitations
Have your vehicle checked by a dealer if you find any unusual behavior of the system (e.g., the warning message appears too frequently).
If the front of the vehicle is impacted in any of the following situations, the radar sensor may not work properly. Have your vehicle checked by a dealer:
- The vehicle impacted a bump, curb, chock, embankment, etc.
- You drive the vehicle where the water is deep.
- Your vehicle has a frontal collision.
To Adjust the Vehicle Speed
Increase or decrease the vehicle speed using the RES/+/SET/− switch on the steering wheel.
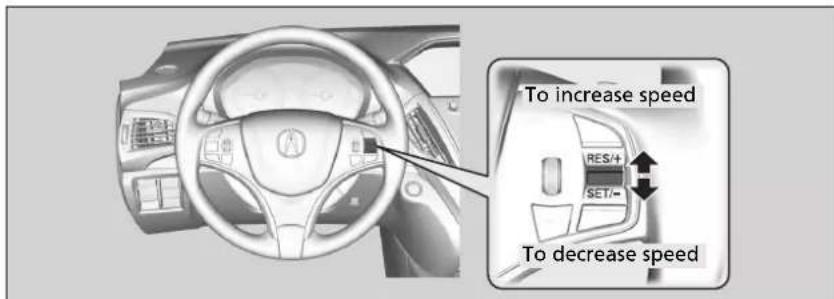
text_image
To increase speed RES/+ SET/- To decrease speed- Each time you press the switch up or down, the vehicle speed is increased or decreased by about 1 mph or 1 km/h accordingly.
- If you keep the switch pressed up or down, the vehicle speed increases or decreases by about 5 mph or 5 km/h accordingly.
To Adjust the Vehicle Speed
If a vehicle detected ahead is going at a speed slower than your increased set speed, ACC with Low Speed Follow may not accelerate your vehicle. This is to maintain the set interval between your vehicle and the vehicle ahead.
You can switch the displayed set speed measurements on the MID or information screen between mph and km/h.
→ Customized Features P. 131, 362
■ To Set or Change Following-interval
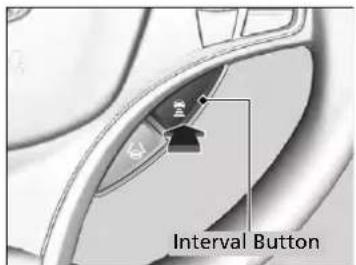
text_image
Interval ButtonPress the ☑(Interval) button to change the ACC with Low Speed Follow following-interval.
Each time you press the button, the following-interval (the interval behind a vehicle detected ahead of you) setting cycles through short, middle, long, and extra long following-intervals.
Determine the most appropriate following-interval setting based on your specific driving conditions. Be sure to adhere to any following-interval requirements set by local regulation.
The higher your vehicle's following-speed is, the longer the short, middle, long or extra long following-interval becomes. See the following examples for your reference.
| Following-interval | When the Set Speed is: | ||
| 50 mph (80 km/h) 65 mph (104 km/h) | |||
| Short |  | 83 feet25 meters1.1 sec | 100 feet31 meters1.1 sec |
| Middle |  | 110 feet33 meters1.5 sec | 137 feet42 meters1.5 sec |
| Long |  | 154 feet47 meters2.1 sec | 200 feet61 meters2.1 sec |
| Extra Long |  | 204 feet62 meters2.8 sec | 265 feet81 meters2.8 sec |
When your vehicle stops automatically because a vehicle detected ahead of you has stopped, the interval between the two vehicles will vary based on the ACC with Low Speed Follow interval setting.
To Cancel
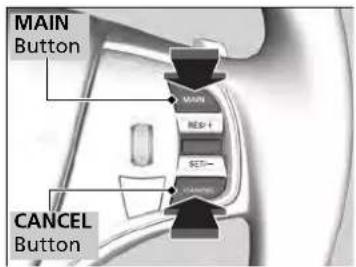
text_image
MAIN Button MAIN RESET+ RESET- CANCEL ButtonTo cancel ACC with Low Speed Follow, do any of the following:
- Press the CANCEL button.
- Press the MAIN button.
▶ACC with Low Speed Follow indicator goes off. - Depress the brake pedal.
When the Low Speed Follow function has stopped the vehicle, you cannot cancel ACC with Low Speed Follow by depressing the brake pedal.
To Cancel
Resuming the prior set speed: After you have canceled ACC with Low Speed Follow, you can resume the prior set speed while it is still displayed. Press the RES/+/SET/- switch up.
The set speed cannot be set or resumed when ACC with Low Speed Follow has been turned off using the MAIN button. Press the MAIN button to activate the system, then set the desired speed.
■ Automatic cancellation
The beeper sounds and a message appears on the MID when ACC with Low Speed Follow is automatically canceled. Any of these conditions may cause the ACC with Low Speed Follow to automatically cancel:
• Bad weather (rain, fog, snow, etc.)
- When the radar sensor behind the emblem gets dirty.
- The vehicle ahead of you cannot be detected.
- An abnormal tire condition is detected, or the tires are skidding.
- Driving on a mountainous road, or driving off road for extended periods.
- Abrupt steering wheel movement.
- When the ABS, VSA ^ or CMBS ^TM is activated.
- When the ABS or VSA® system indicator comes on.
- When the vehicle is stopped on a very steep slope.
- When you manually apply the parking brake.
- When the detected vehicle within the ACC with Low Speed Follow range is too close to your vehicle.
- When the detected vehicle goes out of the ACC with Low Speed Follow range while your vehicle is stationary.
- The camera behind the rearview mirror, or the area around the camera, including the windshield, gets dirty.
The ACC with Low Speed Follow automatic cancellation can be also triggered by the following causes. In these cases, the electric parking brake will be automatically applied.
- The driver's seat belt is unfastened when the vehicle is stationary.
• The vehicle stops for more than 10 minutes.
• The power system is turned off.
>>Automatic cancellation
Even though ACC with Low Speed Follow has been automatically canceled, you can still resume the prior set speed. Wait until the condition that caused ACC with Low Speed Follow to cancel improves, then press the RES/+/SET/- switch up or down.
■ To Switch ACC with Low Speed Follow to Cruise Control
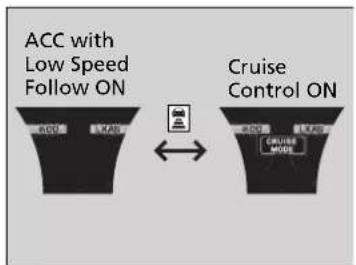
flowchart
graph LR
    A["ACC with Low Speed Follow ON"] --> B["Cruise Control ON"]
    B --> C["Driver icon: Driver"]
    B --> D["L-Stop icon: L-Stop"]
    B --> E["Control mode: Control"]
Press and hold the interval) button for one second. Cruise Mode Selected appears on the MID for two seconds, and then the mode switches to Cruise.
To switch back to ACC with Low Speed Follow, press and hold the 📋 button again for one second. ACC Mode Selected appears on the MID for two seconds.
■ When to use
Desired speed in a range above roughly 25 mph (40 km/h) \~.
To Set the Vehicle Speed
Take your foot off the pedal and press the RES/+/SET/− switch down when you reach the desired speed.
The moment you release the RES/+/SET/- switch, the set speed is fixed, and cruise control begins. The CRUISE CONTROL indicator comes on.
■ To Adjust the Vehicle Speed
Each time you press the RES/+/SET/− switch up or down, the vehicle speed is increased or decreased by about 1 mph (1.6 km/h).
If you keep the RES/+/SET/− switch pressed up or down, the vehicle speed increases or decreases until you release it. This speed is then set.
To Switch ACC with Low Speed Follow to Cruise Control
Always be aware which mode you are in. When you are driving in Cruise mode, the system will not assist you to maintain a following-interval from a vehicle ahead of you.
You can switch the displayed set speed measurements on the MID or information screen between mph and km/h.
Customized Features P. 131, 362
Continued
To Cancel
To cancel cruise control, do any of the following:
- Press the CANCEL button.
- Press the MAIN button.
- Depress the brake pedal.
The CRUISE CONTROL indicator goes off.
To Cancel
Resuming the prior set speed:
After cruise control has been canceled, you can still resume the prior set speed by pressing the RES/+/
SET/– switch up while driving at a speed of at least 25 mph (40 km/h) or more.
You cannot set or resume in the following situations:
- When vehicle speed is less than 25 mph (40 km/h).
- When the MAIN button is turned off.
At vehicle speeds of 22 mph (35 km/h) or less, cruise control is canceled automatically.
Road Departure Mitigation (RDM) System
Alerts and helps to assist you when the system detects a possibility of your vehicle unintentionally crossing over detected lane markings and/or leaving the roadway altogether.
How the System Works
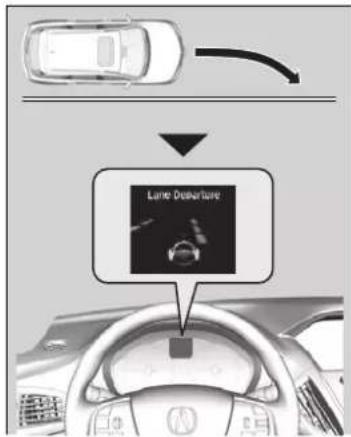
text_image
Lane DepartureThe front camera behind the rearview mirror monitors left and right lane markings (in white or yellow). If your vehicle is getting too close to detected lane markings without a turn signal activated, the system, in addition to a visual alert, applies steering torque and alerts you with rapid vibrations on the steering wheel, to help you remain within the detected lane.
Customized Features P. 131, 362
As a visual alert, the Lane Departure message appears on the MID.
If the system determines that its steering input is insufficient to keep your vehicle on the roadway, it may apply braking.
▶ Braking is applied only when the lane markings are solid continuous lines.
The system cancels assisting operations when you turn the steering wheel to avoid crossing over detected lane markings.
If the system operates several times without detecting driver response, the system beeps to alert you.
Road Departure Mitigation (RDM) System
Important Safety Reminder
Like all assistance systems, the RDM system has limitations.
Over-reliance on the RDM system may result in a collision. It is always your responsibility to keep the vehicle within your driving lane.
The RDM system only alerts you when lane drift is detected without a turn signal in use. The RDM system may not detect all lane markings or lane or roadway departures; accuracy will vary based on weather, speed and lane marker condition. It is always your responsibility to safely operate the vehicle and avoid collisions.
You can read about handling information for the camera equipped with this system.
Front Sensor Camera P. 475
The RDM system may not work properly or may work improperly under the certain conditions:
RDM Conditions and Limitations P. 496
There are times when you may not notice RDM functions due to your operation of the vehicle, or road surface conditions.
Continued
How the System Activates
The system becomes ready to start searching for lane markings when all the following conditions are met:
• The vehicle is traveling between about 45 and 90 mph (72 and 145 km/h).
- The vehicle is on a straight or slightly curved road.
• The turn signals are off.
• The brake pedal is not depressed.
- The wipers are not in continuous operation.
- The vehicle is not accelerating or braking, and the steering wheel is not being turned.
- The system makes a determination that the driver is not actively accelerating, braking or steering.
How the System Activates
The RDM system may automatically shut off and the indicator comes and stays on.
Indicators P. 99
RDM system function can be impacted when the vehicle is:
- Not driven within a traffic lane.
- Driven on the inside edge of a curve, or outside of a lane.
- Driven in a narrow lane.
RDM On and Off
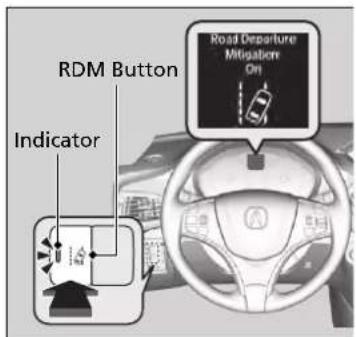
text_image
RDM Button Indicator Road Departure Mitigation OnPress the RDM button to turn the system on and off.
The indicator in the button comes on and the message appears on the MID when the system is on.
RDM On and Off
When you have selected Warning Only from the customized options using the MID or information screen, the system does not operate the steering wheel and braking.
Customized Features P. 131, 362
Continued
RDM Conditions and Limitations
The system may not properly detect lane markings and the position of your vehicle under certain conditions. Some examples of these conditions are listed below.
■ Environmental conditions
- Driving in bad weather (rain, fog, snow, etc.).
- Sudden changes between light and dark, such as an entrance or exit of a tunnel.
- There is little contrast between lane lines and the roadway surface.
- Driving into low sunlight (e.g., at dawn or dusk).
• Strong light is reflected onto the roadway. - Driving in the shadows of trees, buildings, etc.
- Shadows of adjacent objects are parallel to lane markings.
- Roadway objects or structures are misinterpreted as lane markers.
• Reflections on the interior of the windshield - Driving at night or in a dark condition such as a tunnel.
■ Roadway conditions
- Driving on a snowy or wet roadway (obscured lane marking, vehicle tracks, reflected lights, road spray, high contrast).
- Driving on a road with temporary lane markings.
- Faint, multiple, or varied lane markings are visible on the roadway due to road repairs or old lane markings.
- The roadway has merging, split, or crossing lines (e.g., such as at an intersection or crosswalk).
- The lane markings are extremely narrow, wide, or changing.
- The vehicle in front of you is driving near the lane lines.
- The road is hilly or the vehicle is approaching the crest of a hill.
- Driving on rough or unpaved roads, or over bumpy surfaces.
- When objects on the road (curb, guard rail, pylons, etc.) are recognized as white lines (or yellow lines).
- Driving on roads with double lines.
■ Vehicle conditions
- Headlight lenses are dirty or the headlights are not properly adjusted.
- The outside of the windshield is streaked or blocked by dirt, mud, leaves, wet snow, etc.
- The inside of the windshield is fogged.
- The camera temperature gets too high.
- An abnormal tire or wheel condition (wrong sized, varied size or construction, improperly inflated, compact spare tire*, etc.).
- The vehicle is tilted due to a heavy load or suspension modifications.
- When tire chains are installed.
* Not available on all models
Lane Keeping Assist System (LKAS)
Provides steering input to help keep the vehicle in the middle of a detected lane and provides tactile and visual alerts if the vehicle is detected drifting out of its lane.
■ Steering input assist
The system applies torque to the steering to keep the vehicle between the left and right lane lines. The applied torque becomes stronger as the vehicle gets closer to either of the lane lines.
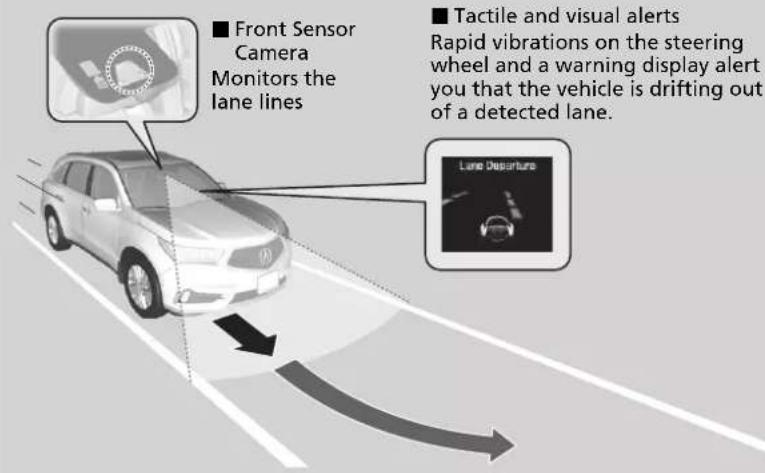
text_image
Front Sensor Camera Monitors the lane lines Tactile and visual alerts Rapid vibrations on the steering wheel and a warning display alert you that the vehicle is drifting out of a detected lane. Lane DepartureWhen you operate the turn signals to change lanes, the system is suspended, and resumes after the signals are off.
If you make a lane change without operating the turn signals, the LKAS alerts activate, and torque is applied to the steering.
Lane Keeping Assist System (LKAS)
Important Safety Reminders
The LKAS is for your convenience only. It is not a substitute for your vehicle control. The system does not work if you take your hands off the steering wheel or fail to steer the vehicle.
Multi-Information Display Warning and Information Messages P. 122
Do not place objects on the instrument panel. Objects may reflect on the windshield and prevent correct detection of the traffic lanes.
The LKAS only alerts you when lane drift is detected without a turn signal in use. The LKAS may not detect all lane markings or lane departures; accuracy will vary based on weather, speed, and lane marker condition. It is always your responsibility to safely operate the vehicle and avoid collisions.
The LKAS is convenient when it is used on freeways.
The LKAS may not work properly or may work improperly under the certain conditions:
LKAS Conditions and Limitations P. 504
You can read about handling information for the camera equipped with this system.
Front Sensor Camera P. 475
The LKAS may not function as designed while driving in frequent stop and go traffic, or on roads with sharp curves.
Lane Keep Support Function
Provides assistance to keep the vehicle in the center of the lane. When the vehicle nears a white or yellow line, steering force of the electric power steering will become stronger.
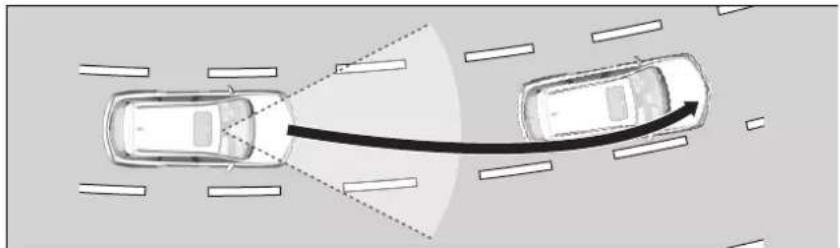
natural_image
Top-down diagram of two cars on a road with dashed arrows indicating traffic or perspective (no text or symbols)Lane Departure Warning Function
When the vehicle enters the warning area, the LKAS alerts you with slight steering wheel vibration as well as a warning display.
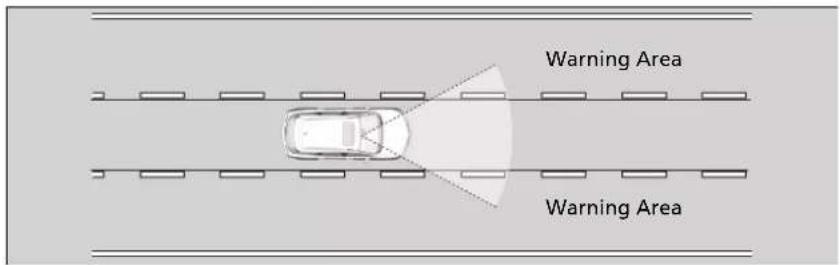
text_image
Warning Area Warning AreaLane Keeping Assist System (LKAS)
When it fails to detect lanes, the system will temporarily be canceled. When a lane is detected, the system will recover automatically.
Continued
When the System can be Used
The system can be used when the following conditions are met.
- The lane in which you are driving has detectable lane markers on both sides, and your vehicle is in the center of the lane.
• The vehicle is traveling between about 45 and 90 mph (72 and 145 km/h). - You are driving on a straight or slightly curved road.
- The turn signals are off.
• The brake pedal is not depressed. - The wipers are not in continuous operation.
When the System can be Used
If the vehicle drifts toward either left or right lane line due to the system applying torque, turn off the LKAS and have your vehicle checked by a dealer.
■ How to activate the system
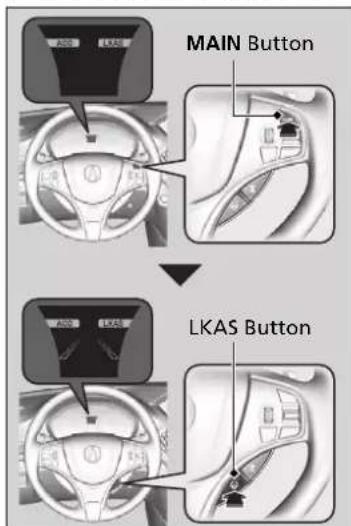
text_image
MAIN Button LKAS Button- Press the MAIN button.
The LKAS is on in the MID. The system is ready to use.
- Press the LKAS button.
▶Lane outlines appear on the MID. The system is activated.
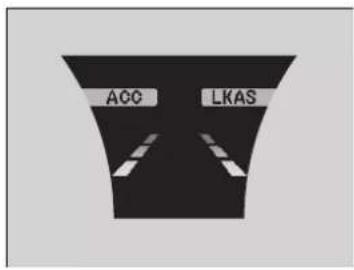
text_image
ACC LKAS- Keep your vehicle near the center of the lane while driving.
The dotted outer lines change to solid ones once the system starts operating after detecting the left and right lane markings.
To Cancel
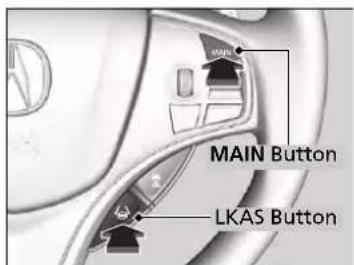
text_image
MAIN Button LKAS ButtonTo cancel the LKAS:
Press the MAIN or LKAS button.
The LKAS is turned off every time you turn the power system off, even if you turned it on the last time you drove the vehicle.
To Cancel
Pressing the MAIN button also turns ACC with Low Speed Follow on and off.
Continued
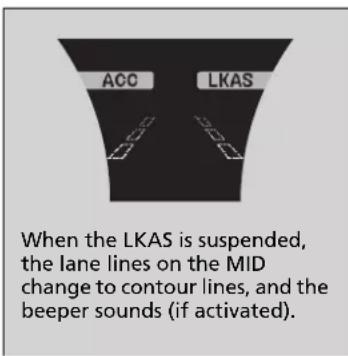
text_image
ACC LKAS When the LKAS is suspended, the lane lines on the MID change to contour lines, and the beeper sounds (if activated).■ The system operation is suspended if you:
- Set the wipers to continuous operation.
▶Turning the wipers off resumes the LKAS.
- Set the wiper switch to AUTO and the wipers operate continuously.
The LKAS resumes when the wipers stop or operate intermittently.
- Decrease the vehicle speed to about 40 mph (64 km/h) or less.
▶ Increasing the vehicle speed to about 45 mph (72 km/h) or more resumes the LKAS.
- Depress the brake pedal.
The LKAS resumes and starts detecting the lane lines again once you release the brake pedal.
■ The LKAS may automatically be suspended when:
- The system fails to detect lane lines.
• The steering wheel is quickly turned. - You fail to steer the vehicle.
- Driving through a sharp curve.
- Driving at a speed in excess of approximately 90 mph (145 km/h).
Once these conditions no longer exist, the LKAS automatically resumes.
■ The LKAS may automatically be canceled when:
- The camera temperature gets extremely high or low.
- The camera behind the rearview mirror, or the area around the camera, including the windshield, gets dirty.
- The ABS or VSA® system engages.
The beeper sounds if the LKAS is automatically canceled.
LKAS Conditions and Limitations
The system may not detect lane markings and therefore may not keep the vehicle in the middle of a lane under certain conditions, including the following:
■ Environmental conditions
- Driving in bad weather (rain, fog, snow, etc.).
- Sudden changes between light and dark, such as an entrance or exit of a tunnel.
- There is little contrast between lane lines and the roadway surface.
- Driving into low sunlight (e.g., at dawn or dusk).
• Strong light is reflected onto the roadway. - Driving in the shadows of trees, buildings, etc.
- Shadows of adjacent objects are parallel to lane markings.
- Roadway objects or structures are misinterpreted as lane markers.
• Reflections on the interior of the windshield - Driving at night or in a dark condition such as a tunnel.
■ Roadway conditions
- Driving on a snowy or wet roadway (obscured lane marking, vehicle tracks, reflected lights, road spray, high contrast).
- Driving on a road with temporary lane markings.
- Faint, multiple, or varied lane markings are visible on the roadway due to road repairs or old lane markings.
- The roadway has merging, split, or crossing lines (e.g., such as at an intersection or crosswalk).
- The lane markings are extremely narrow, wide, or changing.
- The vehicle in front of you is driving near the lane lines.
- The road is hilly or the vehicle is approaching the crest of a hill.
- Driving on rough or unpaved roads, or over bumpy surfaces.
- When objects on the road (curb, guard rail, pylons, etc.) are recognized as white lines (or yellow lines).
- Driving on roads with double lines.
■ Vehicle conditions
- Headlight lenses are dirty or the headlights are not properly adjusted.
- The outside of the windshield is streaked or blocked by dirt, mud, leaves, wet snow, etc.
- The inside of the windshield is fogged.
- The camera temperature gets too high.
- An abnormal tire or wheel condition (wrong sized, varied size or construction, improperly inflated, compact spare tire*, etc.).
- The vehicle is tilted due to a heavy load or suspension modifications.
Vehicle Stability Assist™ (VSA®), aka Electronic Stability Control (ESC), System
VSA® helps to stabilize the vehicle during cornering if the vehicle turns more or less than what was intended. It also assists in maintaining traction on slippery surfaces. It does so by regulating engine and motor output and selectively applying the brakes.
VSA® Operation
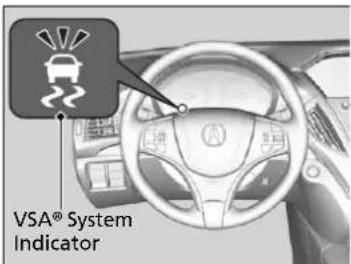
text_image
VSA® System IndicatorWhen VSA® activates, you may notice that the engine and motor do not respond to the accelerator. You may also notice some noise from the hydraulic system. You will also see the indicator blink.
»Vehicle Stability Assist™ (VSA®), aka Electronic Stability Control (ESC), System
The VSA ^® may not function properly if tire type and size are mixed. Make sure to use the same size and type of tire, and the air pressures as specified.
When the VSA® system indicator comes on and stays on while driving, there may be a problem with the system. While this may not interfere with normal driving, have your vehicle checked by a dealer immediately.
VSA ^® cannot enhance stability in all driving situations and does not control the entire braking system. You still need to drive and corner at speeds appropriate for the conditions and always leave a sufficient margin of safety.
The main function of the VSA® system is generally known as Electronic Stability Control (ESC). The system also includes a traction control function.
VSA® On and Off
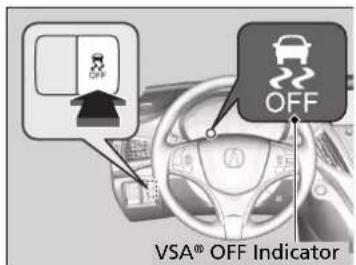
text_image
VSA® OFF IndicatorThis button is on the driver side control panel. To partially disable VSA® functionality/features, press and hold it until you hear a beep.
Your vehicle will have normal braking and cornering ability, but traction control function will be less effective.
To restore VSA® functionality/features, press the 📄 (VSA® OFF) button until you hear a beep.
VSA® is turned on every time you turn the power system on, even if you turned it off the last time you drove the vehicle.
Vehicle Stability Assist™ (VSA®), aka Electronic Stability Control (ESC), System
In certain unusual conditions when your vehicle gets stuck in shallow mud or fresh snow, it may be easier to free it with the VSA® temporarily switched off.
When the button is pressed, the traction control function becomes less effective. This allows for the wheels to spin more freely at low speed. You should only attempt to free your vehicle with the VSA® off if you are not able to free it when the VSA® is on.
Immediately after freeing your vehicle, be sure to switch VSA® on again. We do not recommend driving your vehicle with the VSA® system switched off.
You may hear a motor sound coming from the engine compartment while system checks are being performed immediately after turning the power system on or while driving. This is normal.
Agile Handling Assist
Lightly brakes each of the front and rear wheels, as needed, when you turn the steering wheel, and helps support the vehicle's stability and performance during cornering.
Agile Handling Assist
The agile handling assist cannot enhance stability in all driving situations. You still need to drive and corner at speeds appropriate for the conditions and always leave a sufficient margin of safety.
When the VSA® system indicator comes on and stays on while driving, the agile handling assist does not activate.
You may hear a sound coming from the engine compartment while the agile handling assist is activated. This is normal.
SPORT HYBRID Super Handling-All Wheel Drive™ (SPORT HYBRID SH-AWD®)
The system controls and transfers varying amounts of motor and/or engine torque to each wheel in accordance with the driving conditions.
SPORT HYBRID SH-AWD® helps to enhance driving stability, and lets you handle situations like slippery surfaces, such as snow, sand, mud, and steep hills, better than when driving with standard two wheel drive. However, the system does not help to enhance braking. Be cautious about the following:
- It is still your responsibility to drive safely when you steer, accelerate, and apply brakes.
- Leave a sufficient margin when braking on slippery surfaces.
SPORT HYBRID Super Handling-All Wheel Drive™ (SPORT HYBRID SH-AWD®)
Do not drive through deep water.
The SPORT HYBRID SH-AWD® system may not function properly if tire type and size are mixed. Make sure to use the same size and type of tire, and the air pressures as specified.
Tire and Wheel Replacement P. 597
Blind spot information System
Is designed to detect vehicles in specified alert zones adjacent to your vehicle, particularly in harder to see areas commonly known as "blind spots."
When the system detects vehicles approaching from behind in adjacent lanes, the appropriate indicator comes on for a few seconds, providing assistance when you change lanes.
■ How the system works
- The transmission is in D or S.
- Your vehicle speed is between 20 mph (32 km/h) and 100 mph (160 km/h)
Alert zone range
A: Approx. 1.6 ft. (0.5 m)
B: Approx. 10 ft. (3 m)
C: Approx. 10 ft. (3 m)
Radar Sensors: - underneath the rear bumper corners
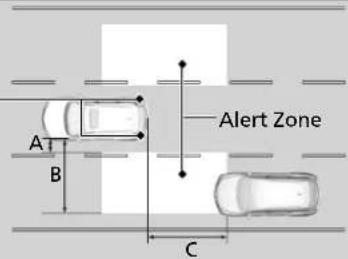
text_image
A B C Alert ZoneBlind spot information System
WARNING
Failure to visually confirm that it is safe to change lanes before doing so may result in a crash and serious injury or death. Do not rely only on the blind spot information system when changing lanes.
Always look in your mirrors, to either side of your vehicle, and behind you for other vehicles before changing lanes.
Important Safety Reminder
Like all assistance systems, blind spot information system has limitations. Over reliance on blind spot information system may result in a collision.
The blind spot information system alert indicator may not come on under the following conditions:
- A vehicle does not stay in the alert zone for more than two seconds.
- A vehicle is parked in a side lane.
- The speed difference between your vehicle and the vehicle you are passing is greater than 6 mph (10 km/h).
- An object not detected by the radar sensors approaches or passes your vehicle.
- A vehicle running in the adjacent lane is a motorcycle or other small vehicle.
■ When the system detects a vehicle
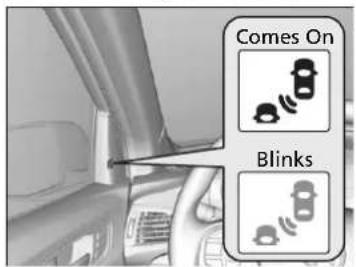
text_image
Comes On BlinksBlind spot information System Alert Indicator: Located near the pillar on both sides.
Comes on when:
- A vehicle enters the alert zone from behind to overtake you with a speed difference of no more than 31 mph (50 km/h) from your vehicle.
- You pass a vehicle with a speed difference of no more than 12 mph (20 km/h).
Blinks and a beeper sounds when:
You move the turn signal lever in the direction of the detected vehicle. The beeper sounds three times.
Blind spot information System
The system is for your convenience only. Even if an object is within the alert zone, the following situations may occur.
- The blind spot information system alert indicator may not come on due to obstruction (splashes, etc.) even without the Blind Spot Info Not Available MID appearing.
- The blind spot information system alert indicator may come on even with the message appearing.
The system does not operate when in R.
You can turn off the audible alert, or all the blind spot information system alert using the information screen or MID.
→ Customizable Features P. 134, 362
Blind spot information system may be adversely affected when:
- Objects (guard rails, poles, trees, etc.) are detected.
- An object that does not reflect radio waves well, such as a motorcycle, is in the alert zone.
- Driving on a curved road.
- A vehicle is moving from a far lane to the adjacent lane.
• The system picks up external electrical interference. - The rear bumper or the sensors have been improperly repaired or the rear bumper has been deformed.
• The orientation of the sensors has been changed.
• In bad weather (Heavy rain, snow, and fog).
Continued
>>Blind spot information System
For a proper blind spot information system operation:
• Always keep the rear bumper corner area clean.
- Do not cover the rear bumper corner area with labels or stickers of any kind.
• Take your vehicle to a dealer if you need the rear bumper corner area or the radar sensors to be repaired, or the rear bumper corner area is strongly impacted.
Tire Pressure Monitoring System (TPMS) with Tire Fill Assist
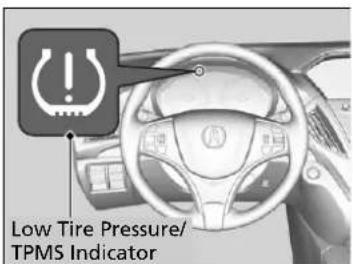
text_image
Low Tire Pressure/ TPMS IndicatorMonitors the tire pressure while you are driving. If your vehicle's tire pressure becomes significantly low, the low tire pressure/TPMS indicator comes on and a message appears on the MID.
Tire Pressure Monitoring System (TPMS) with Tire Fill Assist
Conditions such as low ambient temperature and altitude change directly affect tire pressure and can trigger the low tire pressure/TPMS indicator to come on.
If the Low Tire Pressure/TPMS Indicator Comes On or Blinks P. 646
Tire pressure checked and inflated in:
- Warm weather can become under-inflated in colder weather.
- Cold weather can become over-inflated in warmer weather.
The low tire pressure/TPMS indicator will not come on as a result of over inflation.
The TPMS audibly and visually informs you of changes in tire pressure of the individual tire that you are adjusting using audible and visual indications.
If a change in tire pressure has been significant, the system beeps and the hazard lights flash continuously for five seconds when the specified tire pressure is reached. Stop filling the tire.
Continued
Tire Pressure Monitor
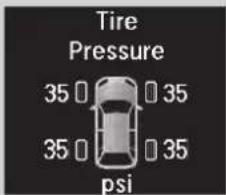
text_image
Tire Pressure 35 35 35 35 psiTo select the tire pressure monitor, set the power mode to ON, and roll the multi-function steering-wheel controls until you see the tire pressure screen.
The pressure for each tire is displayed in psi (U.S.) or kPa (Canada).
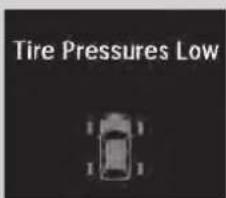
text_image
Tire Pressures LowTire Pressures Low is displayed when a tire has significantly low pressure. The specific tire is displayed on the screen.
Tire Pressure Monitor
The pressure displayed on the MID can be slightly different from the actual pressure as measured by a gauge. If there is a significant difference between the two values, or if the low tire pressure/TPMS indicator and the message on the MID do not go off after you have inflated the tire to the specified pressure, have the system checked by a dealer.
Tire Pressure Monitor Problem may appear if you drive with the compact spare tire*, or there is a problem with the TPMS.
Tire Pressure Monitoring System (TPMS) - Required Federal Explanation
Each tire, including the spare (if provided), should be checked monthly when cold and inflated to the inflation pressure recommended by the vehicle manufacturer on the vehicle placard or tire inflation pressure label.
(If your vehicle has tires of a different size than the size indicated on the vehicle placard or tire inflation pressure label, you should determine the proper tire inflation pressure for those tires.)
As an added safety feature, your vehicle has been equipped with a tire pressure monitoring system (TPMS) that illuminates a low tire pressure telltale

when one or more of your tires is significantly under-inflated.
Accordingly, when the low tire pressure telltale illuminates, you should stop and check your tires as soon as possible, and inflate them to the proper pressure.
Driving on a significantly under-inflated tire causes the tire to overheat and can lead to tire failure. Under-inflation also reduces fuel efficiency and tire tread life, and may affect the vehicle's handling and stopping ability.
Please note that the TPMS is not a substitute for proper tire maintenance, and it is the driver's responsibility to maintain correct tire pressure, even if under-inflation has not reached the level to trigger illumination of the TPMS low tire pressure telltale.
Your vehicle has also been equipped with a TPMS malfunction indicator to indicate when the system is not operating properly. The TPMS malfunction indicator is combined with the low tire pressure telltale. When the system detects a malfunction, the telltale will flash for approximately one minute and then remain continuously illuminated. This sequence will continue upon subsequent vehicle start-ups as long as the malfunction exists.
When the malfunction indicator is illuminated, the system may not be able to detect or signal low tire pressure as intended.
TPMS malfunctions may occur for a variety of reasons, including the installation of replacement or alternate tires or wheels on the vehicle that prevent the TPMS from functioning properly.
Always check the TPMS malfunction telltale after replacing one or more tires or wheels on your vehicle to ensure that the replacement or alternate tires and wheels allow the TPMS to continue to function properly.
High Voltage Battery
The High Voltage battery gradually discharges when the vehicle is not in use. As a result, if your vehicle is parked for an extended period of time, the battery level may get low. Keeping your vehicle's battery level low can shorten the battery life. To maintain the battery, drive your vehicle for more than 30 minutes to recharge the battery at least once every three months.
To help maintain the battery life, when parking under the direct sunlight during summer, try find a shaded area.
Braking
Brake System
Parking Brake
Use the parking brake to keep the vehicle stationary when parked. When the parking brake is applied, you can manually or automatically release it.
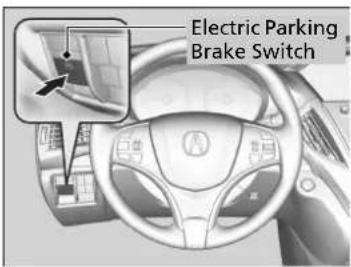
text_image
Electric Parking Brake Switch■ To apply
The electric parking brake can be applied any time the vehicle has battery, no matter which position the power mode is in.
Press the electric parking brake switch gently and securely.
The electric parking brake indicator comes on.
Brake System
When you depress the brake pedal, you may hear a whirring sound from the engine compartment. This is because the brake system is in operation, and it is normal.
Parking Brake
You may hear the electric parking brake system motor operating from the rear wheel area when you apply or release the parking brake. This is normal.
The brake pedal may slightly move due to the electric parking brake system operation when you apply or release the parking brake. This is normal.
You cannot apply or release the parking brake if the 12-volt battery goes dead.
Jump Starting P. 638
If you press and hold the electric parking brake switch while driving, the brakes on all four wheels are applied by the VSA® system until the vehicle comes to a stop. The electric parking brake then applies, and the switch should be released.
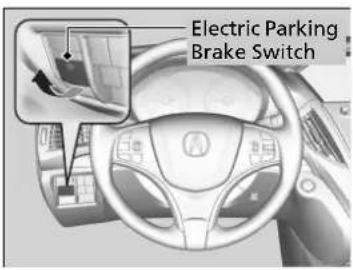
text_image
Electric Parking Brake Switch■ To release
The power mode must be in ON in order to release the electric parking brake.
- Depress the brake pedal.
- Pull the electric parking brake switch up.
The electric parking brake indicator goes off.
Manually releasing the parking brake using the switch helps your vehicle start slowly and smoothly when facing down hill on steep hills.
Parking Brake
In the following situations, the parking brake automatically operates.
- When the vehicle stops more than 10 minutes while ACC with Low Speed Follow is activated.
- When the driver's seat belt is unfastened while your vehicle is stopped automatically by ACC with Low Speed Follow.
- When the power system is turned off while ACC with Low Speed Follow is activated.
- When the vehicle stops with the automatic brake hold system activated for more than 10 minutes.
- When the driver's seat belt is unfastened while your vehicle is stopped and automatic brake hold is applied.
- When the power system is turned off while automatic brake hold is applied.
- When there is a problem with the Automatic Brake Hold System while automatic brake hold is applied.
Continued
■ To release automatically
Depressing the accelerator pedal releases the parking brake.
Use the accelerator pedal to release the brake when you are starting the vehicle facing uphill, or in a traffic jam.
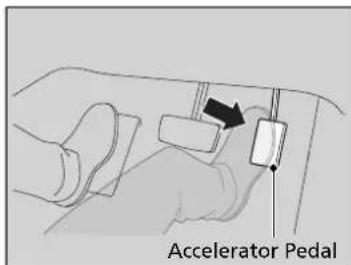
text_image
Accelerator PedalGently depress the accelerator pedal. When on a hill, it may require more accelerator input to release.
The electric parking brake indicator goes off.
You can release the parking brake automatically when:
- You are wearing the driver's seat belt.
• The power system is on. - The transmission is not in P or N.
Parking Brake
If the parking brake cannot be released automatically, release it manually.
When the vehicle is traveling uphill, the accelerator pedal may need to be pressed farther to automatically release the electric parking brake.
The parking brake cannot be released automatically while the following indicators are on:
- Malfunction indicator lamp
• Transmission system indicator
The parking brake may not be released automatically while the following indicators are on:
• Electric parking brake system indicator
- VSA® system indicator
- ABS indicator
• Supplemental restraint system indicator
Foot Brake
Your vehicle is equipped with disc brakes at all four wheels. The brake assist system increases the stopping force when you depress the brake pedal hard in an emergency situation. The anti-lock brake system (ABS) helps you retain steering control when braking very hard.
→Brake Assist System P. 525
Anti-lock Brake System (ABS) P. 524
Foot Brake
Check the brakes after driving through deep water, or if there is a buildup of road surface water. If necessary, dry the brakes by lightly depressing the pedal several times.
If you hear a continuous metallic friction sound when applying the brakes, this is caused by the brake wear indicator rubbing on the brake rotor and indicates that the brake pads need to be replaced. Have the vehicle checked by a dealer. If you hear only an occasional squeak or squeal when you initially apply the brake pedal, this may be normal and caused by high frequency vibration of the brake pads against the rotating brake disc.
Constantly using the brake pedal while going down a long hill builds up heat, which reduces the brake effectiveness. Apply regenerative braking by taking your foot off the accelerator pedal and downshifting to a lower gear.
Do not rest your foot on the brake pedal while driving, as it will lightly apply the brakes and cause them to lose effectiveness over time and reduce pad life. It will also confuse drivers behind you.
Continued
Automatic Brake Hold
Keeps the brake applied after releasing the brake pedal until the accelerator pedal is pressed. You can use this system while the vehicle is temporarily stopped, like at traffic lights and in heavy traffic.
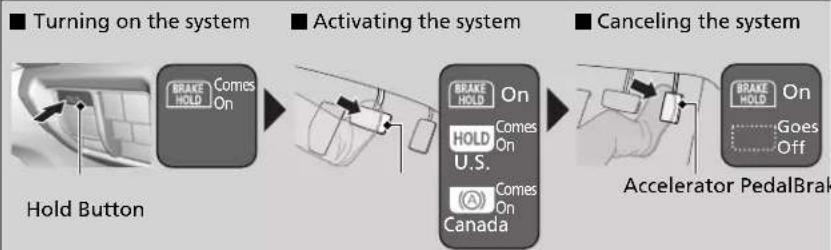
Fasten your seat belt properly, then start the power system. Press the automatic brake hold button.
- The automatic brake hold system indicator comes on. The system is turned on.
Depress the brake pedal to come to a complete stop. The transmission must be in D, S or N.
- The automatic brake hold indicator comes on. Braking is kept for up to 10 minutes.
- Release the brake pedal after the automatic brake hold indicator comes on.
Depress the accelerator pedal while the transmission is in D or
S. The system is canceled and the vehicle starts to move.
- The automatic brake hold indicator goes off. The system continues to be on.
Automatic Brake Hold
WARNING
Activating the automatic brake hold system on steep hills or slippery roads may still allow the vehicle to move if you remove your foot from the brake pedal.
If a vehicle unexpectedly moves, it may cause a crash resulting in serious injury or death.
Never activate the automatic brake hold system or rely on it to keep a vehicle from moving when stopped on a steep hill or slippery roads.
WARNING
Using the automatic brake hold system to park the vehicle may result in the vehicle unexpectedly moving.
If a vehicle moves unexpectedly, it may cause a crash, resulting in serious injury or death.
Never leave the vehicle when braking is temporarily kept by automatic brake hold and always park the vehicle by putting the transmission in P and applying the parking brake.
■ The system automatically cancels when:
- You depress the brake pedal and change to P or R.
- You engage the parking brake.
■ The system automatically cancels and the parking brake is applied when:
- Braking is kept for more than 10 minutes.
• The driver's seat belt is unfastened.
• The power system is turned off. - There is a problem with automatic brake hold system.
■ Turning off the automatic brake hold system
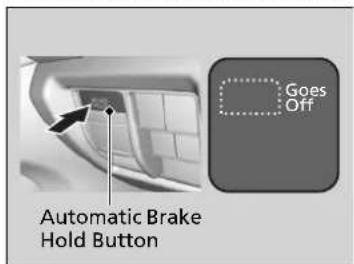
text_image
Automatic Brake Hold Button Goes OffWhile the system is on, press the automatic brake hold button again.
The automatic brake hold system indicator goes off.
If you want to turn off automatic brake hold while the system is in operation, press the automatic brake hold button with the brake pedal depressed.
>>Automatic Brake Hold
While the system is activated, you can turn off the power system or park the vehicle through the same procedure as you normally do.
When Stopped P. 535
Whether the system is on, or the system is activated, the automatic brake hold turns off once the power system is off.
Turning off the automatic brake hold system
Make sure to turn off the automatic brake hold system before using an automated car wash.
You may hear an operating noise if the vehicle moves while the automatic brake hold system is in operation.
Anti-lock Brake System (ABS)
ABS
Helps prevent the wheels from locking up, and helps you retain steering control by pumping the brakes rapidly, much faster than you.
The electronic brake distribution (EBD) system, which is part of the ABS, also balances the front-to-rear braking distribution according to vehicle loading.
You should never pump the brake pedal. Let the ABS work for you by always keeping firm, steady pressure on the brake pedal. This is sometimes referred to as "stomp and steer."
■ ABS operation
You may hear an operating noise when the ABS is working. Depress the brake pedal and keep holding the pedal firmly down. On dry pavement, you will need to press on the brake pedal very hard before the ABS activates. However, you may feel the ABS activate immediately if you are trying to stop on snow or ice.
ABS may activate when you depress the brake pedal when driving on:
- Wet or snow covered roads.
- Roads paved with stone.
- Roads with uneven surfaces, such as potholes, cracks, manholes, etc.
When the vehicle speed goes under 6 mph (10 km/h), the ABS stops.
Anti-lock Brake System (ABS)
NOTICE
The ABS may not function correctly if you use a tire of the wrong size or type.
If the ABS indicator comes on while driving, there may be a problem with the system.
While normal braking will not be affected, there is a possibility that the ABS will not be operating. Have your vehicle checked by a dealer immediately.
The ABS is not designed for the purpose of reducing the time or distance it takes for a vehicle to stop: It is designed to limit brake lockup which can lead to skidding and loss of steering control.
In the following cases, your vehicle may need more distance to stop than a vehicle without the ABS:
- You are driving on rough or uneven road surfaces, such as gravel or snow.
- The tires are equipped with tire chains.
The following may be observed with the ABS system:
- Motor sounds coming from the engine compartment when the brakes are applied, or when system checks are being performed after the power system has been turned on and while the vehicle accelerates.
- Brake pedal and/or the vehicle body vibration when ABS activates.
These vibrations and sounds are normal to ABS systems and are no cause for concern.
Brake Assist System
Designed to assist the driver by generating greater braking force when you depress the brake pedal hard during emergency braking.
■ Brake assist system operation
Press the brake pedal firmly for more powerful braking.
Collision Mitigation Braking System™ (CMBS™)
Can assist you when there is a possibility of your vehicle colliding with a vehicle or a pedestrian detected in front of yours. The CMBS ^™ is designed to alert you when a potential collision is determined, as well as to reduce your vehicle speed to help minimize collision severity when a collision is deemed unavoidable.
■ How the system works
When to use
The camera is located behind the rearview mirror.
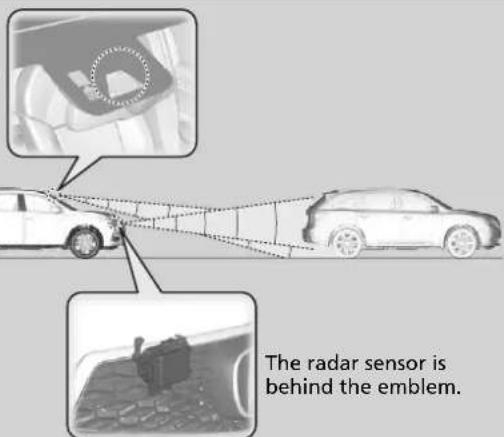
text_image
The radar sensor is behind the emblem.The system starts monitoring the roadway ahead when your vehicle speed is about 3 mph (5 km/h) and there is a vehicle in front of you.
The CMBS ^TM activates when:
- The speed difference between your vehicle and a vehicle or pedestrian detected in front of you becomes about 3 mph (5 km/h) and over with a chance of a collision.
- Your vehicle speed is about 62 mph (100 km/h) or less and there is a chance of a collision with an oncoming detected vehicle or a pedestrian in front of you.
Collision Mitigation Braking System™ (CMBS™)
Important Safety Reminder
The CMBS ^™ is designed to reduce the severity of an unavoidable collision. It does not prevent a collision nor stop the vehicle automatically. It is still your responsibility to operate the brake pedal and steering wheel appropriately according to the driving conditions.
The CMBS™ may not activate or may not detect a vehicle in front of your vehicle under certain conditions:
CMBS™ Conditions and Limitations P. 530
You can read about handling information for the camera equipped with this system.
→ Front Sensor Camera P. 475
Be careful not to severely impact the radar sensor cover.
How the system works
Rapid vibrations on the steering wheel alert you when your vehicle speed is between 19 and 62 mph (30 and 100 km/h) with an oncoming vehicle detected in front of you.
When the CMBS ^™ activates, it may automatically apply the brake. It will be canceled when your vehicle stops or a potential collision is not determined.
■ When the system activates
The system provides visual, audible and tactile alerts of a possible collision, and stops if the collision is avoided.
▶ Take appropriate action to prevent a collision (apply the brakes, change lanes, etc.)
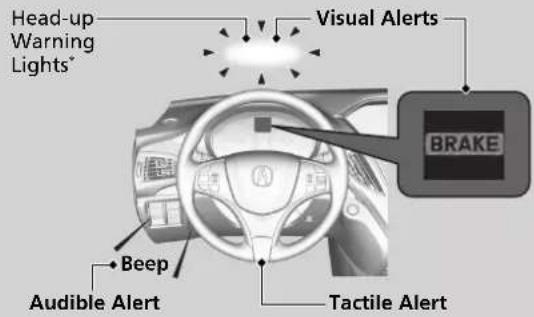
text_image
Head-up Warning Lights* Visual Alerts BRAKE Beep Audible Alert Tactile AlertAt system's earliest collision alert stage, you can change the distance (Long/Normal/Short) between vehicles at which alerts will come on through MID setting options.
List of customizable options P. 134, 362
■ Vibration alert on the steering wheel
When a potential collision to an oncoming detected vehicle is determined, the system alerts you with rapid vibration on the steering wheel, in addition to visual and audible alerts.
▶ Take appropriate action to prevent a collision (apply the brakes, operate the steering wheel, etc.).
* Not available on all models
Continued
When the system activates
The camera in the CMBS ^™ is also designed to detect pedestrians.
However, this pedestrian detection feature may not activate or may not detect a pedestrian in front of your vehicle under certain conditions.
Refer to the ones indicating the pedestrian detection limitations from the list.
CMBS™ Conditions and Limitations P. 530
The head-up warning ^* uses a lens located at the front end of the dashboard.
Do not cover the lens or spill any liquid on it.
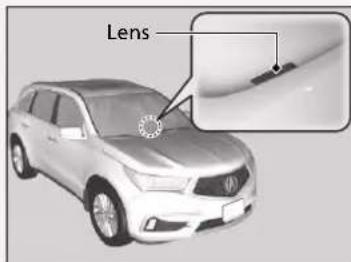
text_image
LensVibration alert on the steering wheel
Vibration alert function is disabled when the electric power steering (EPS) system indicator comes on.
Speed-sensitive Electric Power Steering (EPS) System Indicator P. 95
Collision Alert Stages
The system has three alert stages for a possible collision. However, depending on circumstances, the CMBS ^™ may not go through all of the stages before initiating the last stage.
| Distance between vehicles | CMBS^TM | ||||
| The sensors detect a vehicle | Audible & Visual WARNINGS | Steering Wheel Braking | |||
| Stage one | 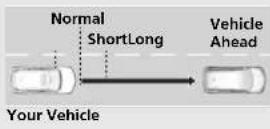 | There is a risk of a collision with the vehicle ahead of you. | When inLong, visual and audible alerts come on at a longer distance from a vehicle ahead than inNormalsetting, and inShort, at a shorter distance than inNormal. | In case of an oncoming vehicle detected, rapid vibration is provided. | — |
| Stage two | 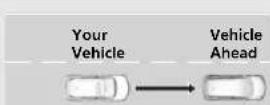 | The risk of a collision has increased, time to respond is reduced. | Visual and audible alerts. — | Lightly applied | |
| Stage three | 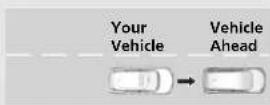 | The CMBS^TM determines that a collision is unavoidable. | Forcefully applied | ||
CMBS™ On and Off
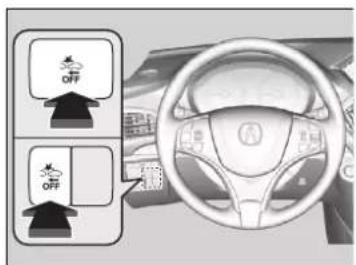
text_image
OFF OFFPress and hold the button until the beeper sounds to switch the system on or off.
When the CMBS ^TM is off:
- The CMBS ^TM indicator in the instrument panel comes on.
- A message on the MID reminds you that the system is off.
The CMBS ^™ is turned on every time you start the power system, even if you turned it off the last time you drove the vehicle.
Collision Mitigation Braking System™ (CMBS™)
The CMBS ^™ may automatically shut off, and the CMBS ^™ indicator will come and stay on under certain conditions:
CMBS™ Conditions and Limitations P. 530
Continued
CMBS™ Conditions and Limitations
The system may automatically shut off and the CMBS ^™ indicator will come on under certain conditions. Some examples of these conditions are listed below. Other conditions may reduce some of the CMBS ^™ functions.
Front Sensor Camera P. 475
■ Environmental conditions
- Driving in bad weather (rain, fog, snow, etc.).
- Sudden changes between light and dark, such as an entrance or exit of a tunnel.
- There is little contrast between objects and the background.
- Driving into low sunlight (e.g., at dawn or dusk).
• Strong light is reflected onto the roadway. - Driving in the shadows of trees, buildings, etc.
- Roadway objects or structures are misinterpreted as vehicles and pedestrians.
• Reflections on the interior of the windshield. - Driving at night or in a dark condition such as a tunnel.
■ Roadway conditions
- Driving on a snowy or wet roadway (obscured lane marking, vehicle tracks, reflected lights, road spray, high contrast).
- The road is hilly or the vehicle is approaching the crest of a hill.
- Driving on curvy, winding, or undulating roads.
CMBS™ Conditions and Limitations
Have your vehicle checked by a dealer if you find any unusual behavior of the system (e.g., the warning message appears too frequently).
If the front of the vehicle is impacted in any of the following situations, the radar sensor may not work properly. Have your vehicle checked by a dealer:
- The vehicle impacted a bump, curb, chock, embankment, etc.
- You drive the vehicle where the water is deep.
- Your vehicle has a frontal collision.
If you need the radar sensor to be repaired, or removed, or the radar sensor cover is strongly impacted, turn off the system by pressing the CMBS™ off button and take your vehicle to a dealer.
■ Vehicle conditions
- Headlight lenses are dirty or the headlights are not properly adjusted.
- The outside of the windshield is blocked by dirt, mud, leaves, wet snow, etc.
- The inside of the windshield is fogged.
- An abnormal tire or wheel condition (wrong sized, varied size or construction, improperly inflated, compact spare tire*, etc.).
- When tire chains are installed.
- The vehicle is tilted due to a heavy load or suspension modifications.
- The camera temperature gets too high.
- Driving with the parking brake applied.
- When the radar sensor behind the emblem gets dirty.
■ Detection limitations
- A vehicle or pedestrian suddenly crosses in front of you.
- The distance between your vehicle and the vehicle or pedestrian ahead of you is too short.
- A vehicle cuts in front of you at a slow speed, and it brakes suddenly.
- When you accelerate rapidly and approach the vehicle or pedestrian ahead of you at high speed.
- The vehicle ahead of you is a motorcycle, bicycle, mobility scooter or other small vehicle.
- When there are animals in front of your vehicle.
- When you drive on a curved, winding or undulating road that makes it difficult for the sensor to properly detect a vehicle in front of you.
- The speed difference between your vehicle and a vehicle or pedestrian in front of you is significantly large.
- An oncoming vehicle suddenly comes in front of you.
- Another vehicle suddenly comes in front of you at an intersection, etc.
- Your vehicle abruptly crosses over in front of an oncoming vehicle.
- When driving through a narrow iron bridge.
- When the lead vehicle suddenly slows down.
Limitations applicable to pedestrian detection only
- When there is a group of people in front of your vehicle walking together side by side.
- Surrounding conditions or belongings of the pedestrian alter the pedestrian's shape, preventing the system from recognizing that the person is a pedestrian.
- When the pedestrian is shorter than about 3.3 feet (1 meter) or taller than about 6.6 feet (2 meters) in height.
- When a pedestrian blends in with the background.
- When a pedestrian is bent over or squatting, or when their hands are raised or they are running.
- When several pedestrians are walking ahead in a group.
- When the camera cannot correctly identify that a pedestrian is present due to an unusual shape (holding luggage, body position, size).
■ Automatic shutoff
The CMBS ^™ may automatically shut itself off and the CMBS ^™ indicator comes and stays on when:
- The temperature inside the system is high.
- You drive off-road or on a mountain road, or curved and winding road for an extended period.
- An abnormal tire condition is detected (wrong tire size, flat tire, etc.).
- The camera behind the rearview mirror, or the area around the camera, including the windshield, gets dirty.
Once the conditions that caused the CMBS ^™ to shut off improve or are addressed (e.g., cleaning), the system comes back on.
With Little Chance of a Collision
The CMBS ^™ may activate even when you are aware of a vehicle ahead of you, or when there is no vehicle ahead. Some examples of this are:
■ When Passing
Your vehicle approaches another vehicle ahead of you and you change lanes to pass.
■ At an intersection
Your vehicle approaches or passes another vehicle that is making a left or right turn.
■ On a curve
When driving through curves, your vehicle comes to a point where an oncoming vehicle is right in front of you.
■ Through a low bridge at high speed
You drive under a low or narrow bridge at high speed.
■ Speed bumps, road work sites, train tracks, roadside objects, etc.
You drive over speed bumps, steel road plates, etc., or your vehicle approaches train tracks or roadside objects [such as a traffic sign and guard rail] on a curve or, when parking, stationary vehicles and walls.
Collision Mitigation Braking System™ (CMBS™)
For the CMBS ^TM to work properly:
Always keep the radar sensor cover clean.
Never use chemical solvents or polishing powder for cleaning the sensor cover. Clean it with water or a mild detergent.
Do not put a sticker on the radar sensor cover or replace the radar sensor cover.
Do not paint, or apply any coverings or paint to radar sensor area. This can impact CMBST ^™ operation.
Parking Your Vehicle
When Stopped
- Depress the brake pedal firmly.
- With the brake pedal depressed, press the electric parking brake switch slowly, but fully.
- Change the gear position to P.
- Turn off the power system.
The electric parking brake indicator goes off in about 15 seconds.
Parking Your Vehicle
WARNING
The vehicle can roll away if left unattended without confirming that Park is engaged.
A vehicle that rolls away could cause a crash resulting in serious injury or death.
Always keep your foot on the brake pedal until you have confirmed that P is shown on the gear position indicator.
Do not park your vehicle near flammable objects, such as dry grass, oil, or timber. Heat from the exhaust can cause a fire.
When Stopped
NOTICE
The following can damage the transmission:
- Depressing the accelerator and brake pedals simultaneously.
- Holding the vehicle in place when facing uphill by depressing the accelerator pedal or creeping.
Creeping P. 464 - Changing to before the vehicle stops completely.
Continued
Always confirm the electric parking brake is set, particularly if you are parked on an incline.
If during in Auto Engine Stop, the gear position changes to P and the engine restarts automatically under the following conditions:
• The power system is on.
• The gear position is not in P.
- You unfasten the driver side seat belt and open the door.
When Stopped
In extremely cold temperatures, the parking brake may freeze up if applied. If such temperatures are expected, do not apply the parking brake but, if parking on a slope, either turn the front wheels so they will contact the curb if the vehicle rolls down the slope or block the wheels to keep the vehicle from moving. If you do not take either precaution, the vehicle may roll unexpectedly, leading to a crash.
Parking Sensor System
The corner and center sensors monitor obstacles around your vehicle, and the beeper and information screen let you know the approximate distance between your vehicle and the obstacle.
■ The sensor location and range
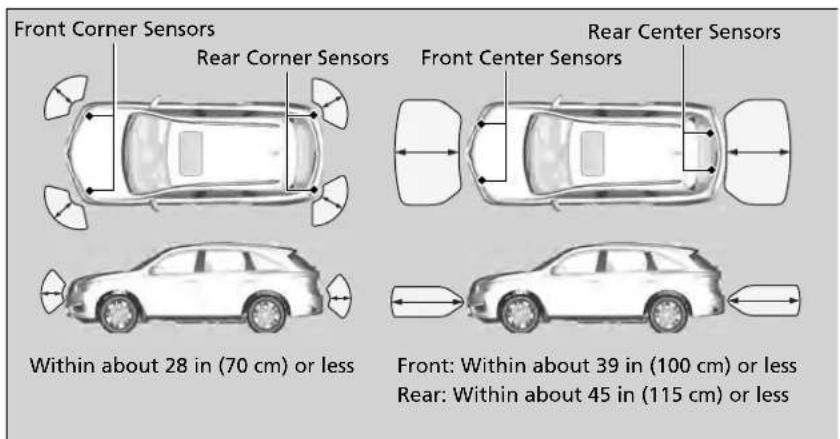
Parking Sensor System
Even when the system is on, always confirm if there is no obstacle near your vehicle before parking.
The system may not work properly when:
- The sensors are covered with snow, ice, mud or dirt.
- The vehicle is on uneven surface, such as grass, bumps, or a hill.
• The vehicle has been out in hot or cold weather. - The system is affected by devices that emit ultrasonic waves.
- Driving in bad weather.
The system may not sense:
- Thin or low objects.
- Sonic-absorptive materials, such as snow, cotton, or sponge.
- Objects directly under the bumper.
Do not put any accessories on or around the sensors.
■ Parking sensor system on and off
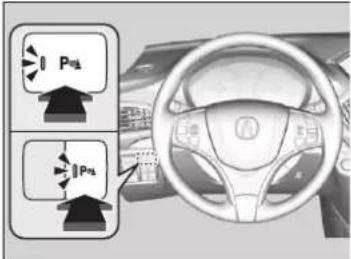
text_image
Pd PdWith the power mode in ON, press the parking sensor system button to turn on or off the system. The indicator in the button comes on when the system is on.
The rear center and corner sensors and the front corner sensors start to detect an obstacle when the transmission is in , and the vehicle speed is less than 5 mph (8 km/h).
The front center and corner sensors start to detect an obstacle when the transmission is not in [P] or [R], and the vehicle speed is less than 5 mph (8 km/h).
■ When the distance between your vehicle and obstacles becomes shorter
| Length of the intermittent beep | Distance between the Bumper and Obstacle | Indicator Information Screen | |
| Corner Sensors Center Sensors | |||
| Moderate — | Rear: About 45-28 in (115-70 cm)Front: About 39-28 in (100-70 cm) | Blinks in Yellow*1 | |
| Short | About 28-18 in (70-45 cm) | About 28-18 in (70-45 cm) | Blinks in Amber |
| Very short | About 18-14 in (45-35 cm) | About 18-14 in (45-35 cm) | |
| Continuous | About 14 in (35 cm) or less | About 14 in (35 cm) or less | Blinks in Red |
*1: At this stage, only the center sensors detect obstacles.
Turning off All Rear Sensors
- Make sure that the parking sensor system is not activated. Set the power mode to VEHICLE OFF (LOCK).
- Press and hold the parking sensor system button, and set the power mode to ON.
- Keep pressing the button for 10 seconds. Release the button when the indicator in the button flashes.
- Press the button again. The indicator in the button goes off.
The beeper sounds twice. The rear sensors are now turned off.
To turn the rear sensors on again, follow the above procedure. The beeper sounds three times when the rear sensors come back on.
Turning off All Rear Sensors
When you set the gear position to , the indicator in the parking sensor system button blinks as a reminder that the rear sensors have been turned off.
Cross Traffic Monitor
Monitors the rear corner areas using the radar sensors when reversing, and alerts you if a vehicle approaching from a rear corner is detected.
The system is convenient when you are backing out of a parking space.
Cross Traffic Monitor
CAUTION
Cross Traffic Monitor cannot detect all approaching vehicles and may not detect an approaching vehicle at all.
Failure to visually confirm that it is safe to back up the vehicle before doing so may result in a collision.
Do not solely rely on the system when reversing; always also use your mirrors, and look behind and to the sides of your vehicle before reversing.
Continued
How the System Works
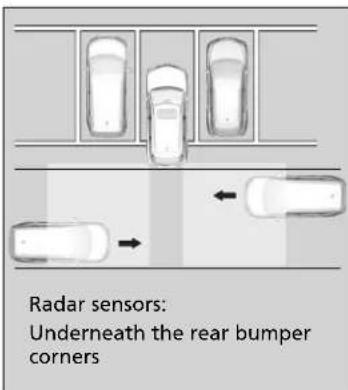
text_image
Radar sensors: Underneath the rear bumper cornersThe system activates when:
• The power mode is in ON.
• The Cross Traffic Monitor is turned on.
→ Cross Traffic Monitor On and Off P. 544
• The transmission is in R.
- Your vehicle is moving at 3 mph (5 km/h) or lower.
When a vehicle is detected approaching from a rear corner, Cross Traffic Monitor alerts you with a buzzer and a displayed warning.
The system will not detect a vehicle that approaches from directly behind your vehicle, nor will it provide alerts about a detected vehicle when it moves directly behind your vehicle.
The system does not provide alerts for a vehicle that is moving away from your vehicle, and it may alert for pedestrians, bicycles, or stationary objects.
Cross Traffic Monitor
Cross Traffic Monitor may not detect or may delay alerting an approaching vehicle, or may alert without an approaching vehicle under the following conditions:
- An obstacle, such as another vehicle and a wall, near your vehicle's rear bumper, is blocking the radar sensor's scope.
- Your vehicle is moving at the speed of about 3 mph (5 km/h) or higher.
- A vehicle is approaching at the speed other than between about 6 mph (10 km/h) and 16 mph (25 km/h).
- The system picks up external interference such as other radar sensors from another vehicle or strong radio wave transmitted from a facility nearby.
- Either corner of the rear bumper is covered with snow, ice, mud or dirt.
- When there is bad weather.
- Your vehicle is on an incline.
- Your vehicle is tilted due to a heavy load in the rear.
- Your vehicle is reversing towards a wall, a pole, a vehicle, and so on.
The rear bumper or the sensors have been improperly repaired or the rear bumper has been deformed. Have your vehicle checked by a dealer.
For proper operation, always keep the rear bumper corner area clean.
Do not cover the rear bumper corner area with labels or stickers of any kind.
When the System Detects a Vehicle
Models with multi-view rear camera system
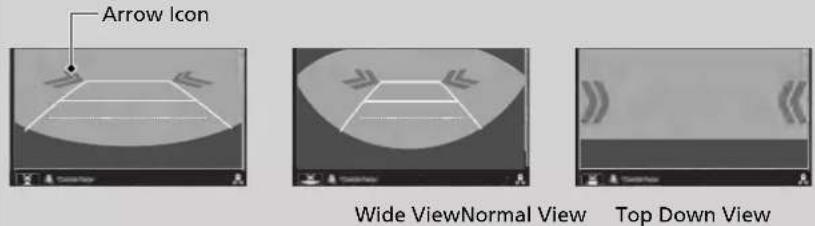
Models with surround view camera system
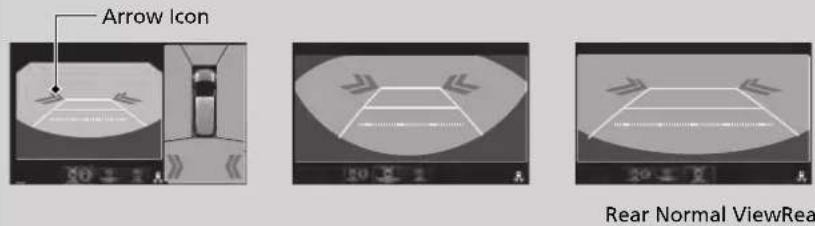
An arrow icon appears on the side a vehicle is approaching on the information screen.
Cross Traffic Monitor
The parking sensor system's alerting buzzer overrides the Cross Traffic Monitor buzzer when the sensors are detecting obstacles at the closest range.
When the System Detects a Vehicle
If the ☐ on the lower right changes to in member when the transmission is in R, mud snow or ice, etc. may have accumulated in the vicinity of the sensor. The system is temporarily canceled. Check the bumper corners for any obstructions, and thoroughly clean the area if necessary.
If the ☐imes on when the transmission is in ☐, there may be a problem with the Cross Traffic Monitor system. Do not use the system and have your vehicle checked by a dealer.
If the display remains the same with the transmission in R, there may be a problem with the rear camera system and the Cross Traffic Monitor system. Do not use the system and have your vehicle checked by a dealer.
Cross Traffic Monitor On and Off
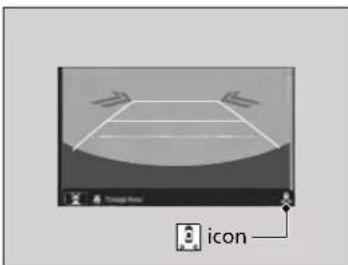
text_image
IconYou can switch the system on and off from the customized feature on the information screen.
Customized Features P. 362
Multi-View Rear Camera\*
About Your Multi-View Rear Camera
The information screen can display your vehicle's rear view. The display automatically changes to the rear view when the transmission is put into R.
Multi-View Rear Camera Display Area
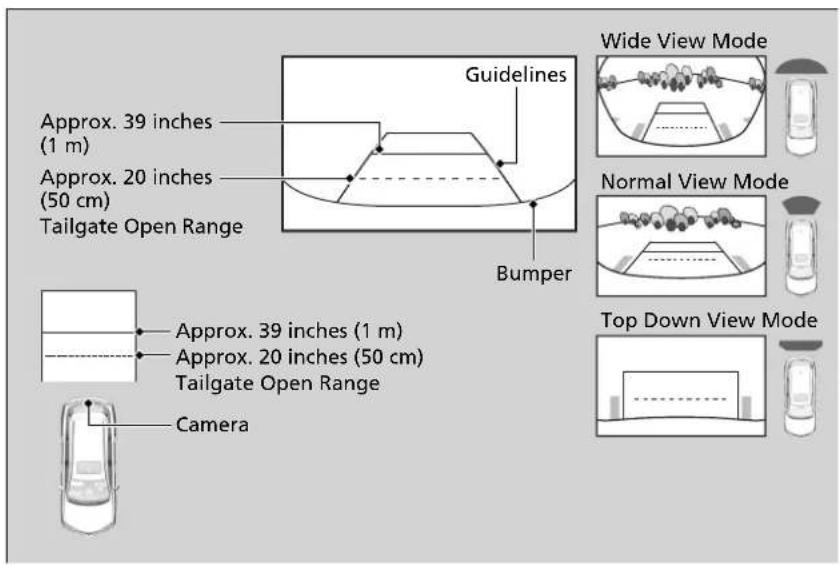
text_image
Guidelines Approx. 39 inches (1 m) Approx. 20 inches (50 cm) Tailgate Open Range Bumper Wide View Mode Normal View Mode Top Down View Mode Approx. 39 inches (1 m) Approx. 20 inches (50 cm) Tailgate Open Range Camera* Not available on all models
Continued
»About Your Multi-View Rear Camera
The rear camera view is restricted. You cannot see the corner ends of the bumper or what is underneath the bumper. Its unique lens also makes objects appear closer or farther than they actually are.
Visually confirm that it is safe to drive before backing up. Certain conditions (such as weather, lighting, and high temperatures) may also restrict the rear view. Do not rely on the rearview display which does not give you all information about conditions at the back of your vehicle.
If the camera lens is covered with dirt or moisture, use a soft, moist cloth to keep the lens clean and free of debris.
You can change the Fixed Guideline and Dynamic Guideline settings.
Customized Features P. 362
Fixed Guideline
On: Guidelines appear when you put the transmission into [R].
Off: Guidelines do not appear.
Dynamic Guideline
On: Guidelines move according to the steering wheel direction.
Off: Guidelines do not move.
You can view three different camera modes on the rearview display. Press the selector knob to switch the mode.

Wide view mode

Normal view mode

Top down view mode
- If the last used viewing mode was Wide or Normal view mode, the same mode is selected the next time you put the transmission into .
- If Top down view mode was last used before you turned the power mode to OFF, Wide View mode is selected next time you set the power mode to ON and put the transmission into .
- If Top down view mode was last used more than 10 seconds after you change from , Wide View mode is selected the next time you put the transmission into .
Surround View Camera System\*
Is a four camera system that views areas commonly known as "blind spots" from different angles, then displays the images on the information screen. This system can be used to:
- Check the right and left sides of the vehicle while crossing at intersections with poor visibility (fog, heavy rain, obstructed view, etc.).
→ Checking from the front wide view at intersections P. 555 - Check for obstacles in front of the vehicle when parking or maneuvering in confined areas.
→ Checking the sides of your vehicle P. 555 - Check for obstacles when you are moving in .
When Parking Your Vehicle P. 551 - Assist you when backing into or parallel parking the vehicle in a lined parking space.
Reversing into a Parking Space Marked with Parking Lines P. 552
Parallel Parking into a Parking Space Marked with Parking Lines P. 553
Surround View Camera System *
WARNING
Failure to visually assess the area around the vehicle (directly or by use of the mirrors) may result in a crash causing serious injury or death.
The areas shown in the surround view camera system display are limited. The display may not show all pedestrians or other objects around your vehicle.
Do not solely rely only on the surround view camera system display to assess whether it is safe to move your vehicle.
WARNING
Failure to pay proper attention to your surroundings while driving may result in a crash causing serious injury or death.
To help mitigate the chances of a collision, only look at the surround view camera system display when it is safe to do so.
Displaying an Image From the Surround View Cameras
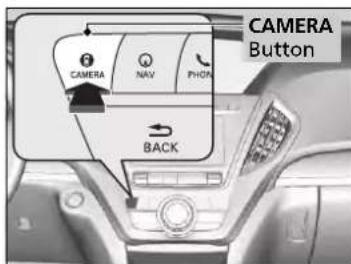
text_image
CAMERA Button CAMERA NAV PHON BACK■ For frontal views:
Press the CAMERA button when the vehicle is stationary or moving at 7 mph (12 km/h) or slower. Press the button again to switch camera views.
■ For rear reviews:
Change the gear position to R when the vehicle is stationary. Press the CAMERA button to switch to rear view mode.
You can customize the display setting.
→ Customized Features P. 362
>>Surround View Camera System\*
The surround view camera system does not eliminate all blind spots. The system is for your convenience only.
Always keep the camera lenses clean and free from debris.
▶ Displaying an Image From the Surround View Cameras
The navigation system is disabled when the gear position is in R.
Operating the navigation system while the surround view camera system screen is displayed cancels the surround view camera system screen and starts up the navigation system screen.
If you press the CAMERA button while the vehicle speed is more than 9 mph (15 km/h), the standby screen appears.
When Show Camera When Decelerating is on, and the vehicle speed is reduced below 7 mph (12 km/h), the screen switches to a surround view camera system image.
→Customized Features P. 362
■ Camera Locations and Images
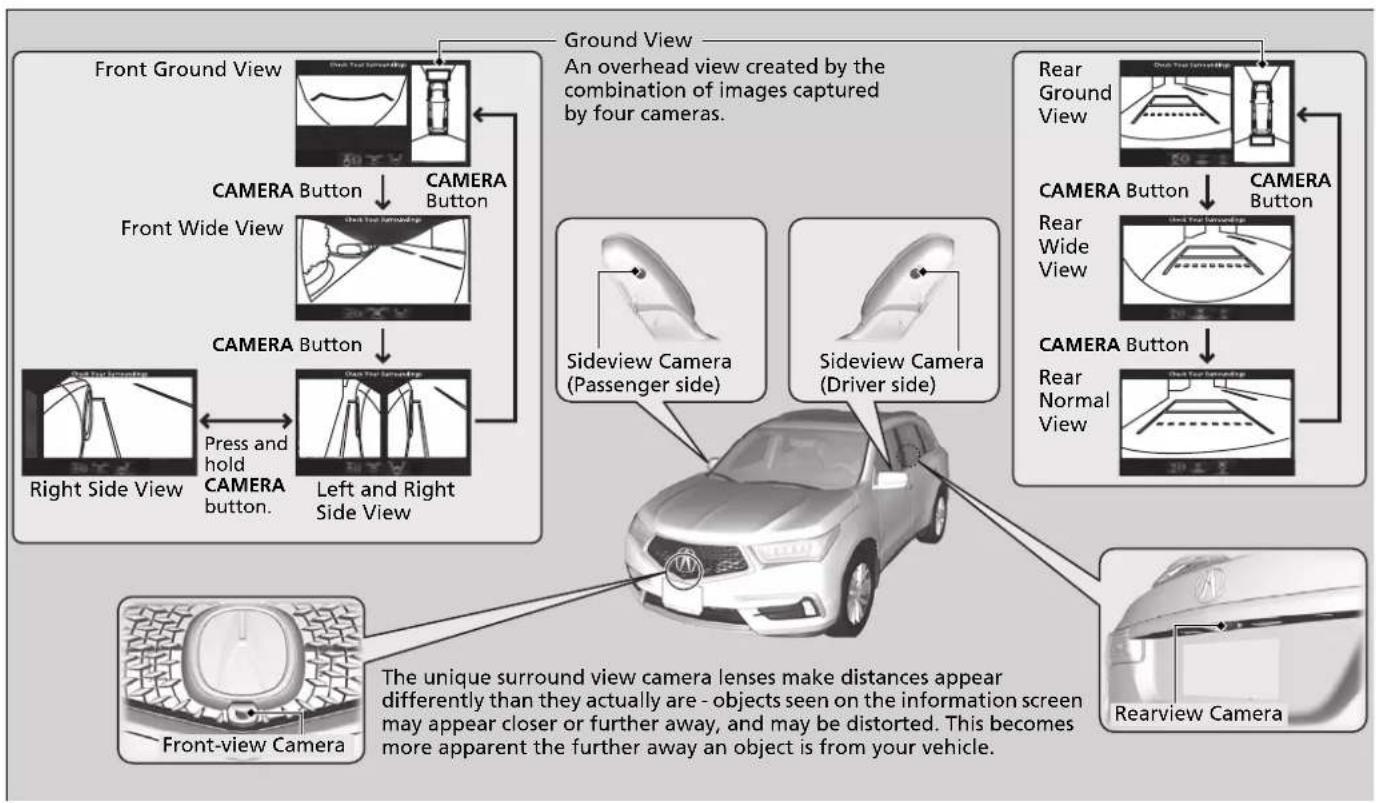
flowchart
graph TD
    A["Front Ground View"] --> B["CAMERA Button"]
    B --> C["Front Wide View"]
    C --> D["CAMERA Button"]
    D --> E["Right Side View"]
    E --> F["Press and hold CAMERA button."]
    F --> G["Left and Right Side View"]
    G --> H["Ground View"]
    H --> I["An overhead view created by the combination of images captured by four cameras."]
    I --> J["Sideview Camera (Passenger side)"]
    I --> K["Sideview Camera (Driver side)"]
    J --> L["Rear Ground View"]
    K --> M["Rear Ground View"]
    L --> N["CAMERA Button"]
    M --> O["Camera Button"]
    N --> P["Rear Wide View"]
    O --> Q["Camera Button"]
    P --> R["Rear Normal View"]
    Q --> S["Rear Normal View"]
    T["Front-view Camera"] --> U["The unique surround view camera lenses make distances appear differently than they actually are - objects seen on the information screen may appear closer or further away, and may be distorted. This becomes more apparent the further away an object is from your vehicle."]
    U --> V["Rearview Camera"]
Reference Lines and Guides
The following can be displayed when the system is on.
Guide lines: Help you to get a sense of a distance between your vehicle and the rear surroundings. The distance may appear differently than the actual distance.
Projection lines: Indicate vehicle direction while the steering wheel is in the current position.
Depending on your parking situation, you can select Back-in Left Park Guidance, Back-in Right Park Guidance, Left Parallel Park Guidance, or Right Parallel Park Guidance from Camera Menu to display:
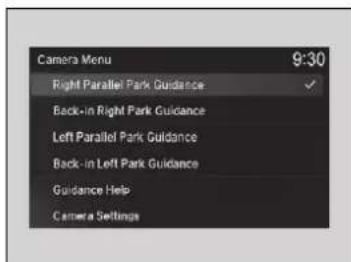
text_image
Camera Menu 9:30 Right Parallel Park Guidance Back-in Right Park Guidance Left Parallel Park Guidance Back-in Left Park Guidance Guidance Help Camera SettingsInitial position guide: Marks the point where your vehicle is headed when reversing. Steering position alignment guide: Indicates when to change the steering wheel position.
Reference Lines and Guides
The positions/distances indicated by the guide lines and camera views on the display may differ from the actual positions/distances due to the changes in the vehicle height, road conditions, and other factors. The guide lines should be used as a reference only.
The guide lines can be turned on and off using the information screen.
Customized Features P. 362
If you turn the guide lines off, they remain off until you turn them back on.
Using the Surround View Camera System
When Parking Your Vehicle
■ Checking for Obstacles at the Back of Your Vehicle
The display automatically changes to the rear view when the gear position is changed to R.
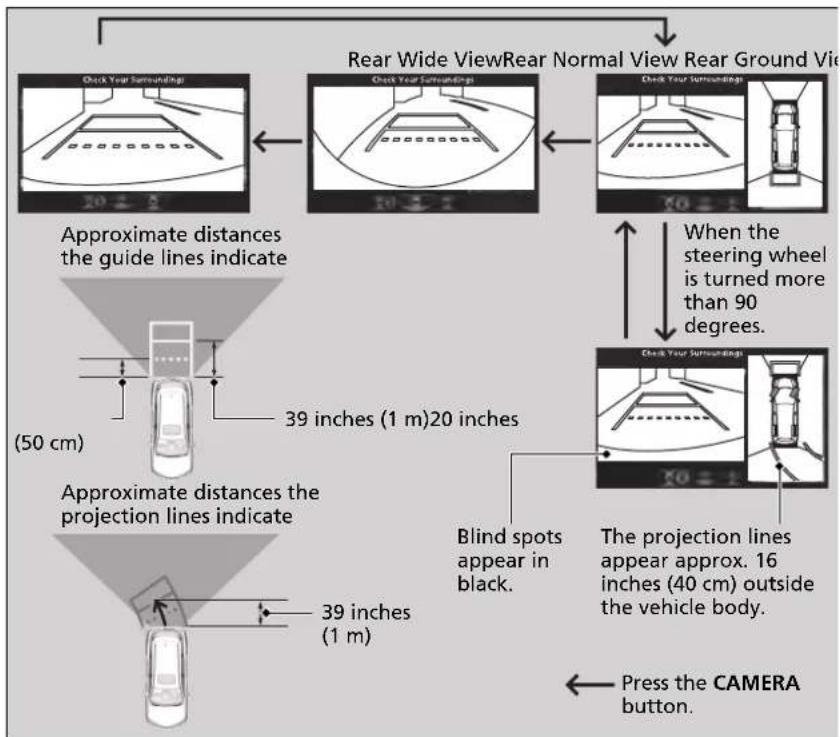
flowchart
graph TD
    A["Check Your Surroundings"] --> B["Check Your Surroundings"]
    B --> C["Check Your Surroundings"]
    C --> D["Check Your Surroundings"]
    D --> E["Approximate distances the guide lines indicate (50 cm)"]
    D --> F["Approximate distances the projection lines indicate (39 inches (1 m)20 inches)"]
    D --> G["When the steering wheel is turned more than 90 degrees."]
    G --> H["Blind spots appear in black."]
    H --> I["The projection lines appear approx. 16 inches (40 cm) outside the vehicle body."]
    I --> J["Press the CAMERA button."]
When Parking Your Vehicle
The ground view can be displayed even with the door mirrors folded. However, the viewable angle and blind spot change.
Do not refer to the surround view camera system when the door mirrors are folded.
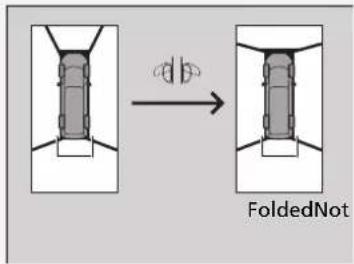
text_image
FoldedNot»Checking for Obstacles at the Back of Your Vehicle
When changing the gear position from/to [R], you may experience a delay in switching between the information screen and a rear view image.
Continued
Reversing into a Parking Space Marked with Parking Lines
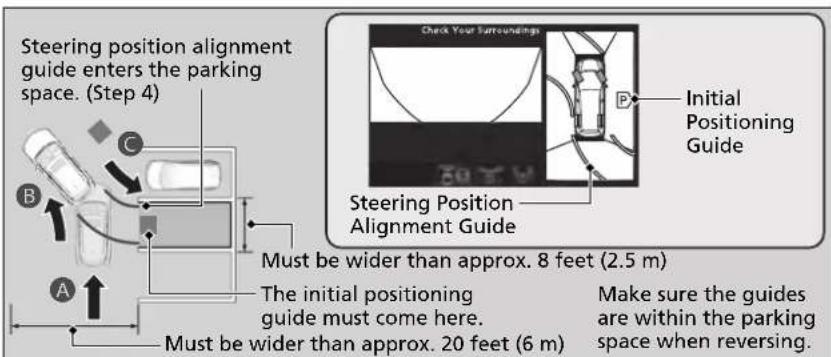
text_image
Steering position alignment guide enters the parking space. (Step 4) Must be wider than approx. 8 feet (2.5 m) The initial positioning guide must come here. Must be wider than approx. 20 feet (6 m) Check Your Surroundings Initial Positioning Guide Steering Position Alignment Guide Make sure the guides are within the parking space when reversing.- With your vehicle at a complete stop, press the CAMERA button, then press the ENTER/MENU button. Rotate 🔺 to select Back-in Left Park Guidance or Back-in Right Park Guidance. Press 😊
- Move the vehicle forward perpendicular to the parking space and stop where the initial positioning guide in the display is at the center of the parking space.
- Turn the steering wheel fully to the left (if the parking space is on the passenger side) at a stop. ▶The steering position alignment guide is displayed.
- Slowly move the vehicle forward. ▶ Stop the vehicle when the steering position alignment guide enters the parking space.
- Turn the steering wheel fully to the right (if the parking space is on the passenger side) at a stop. Start reversing the vehicle slowly.
- Stop the vehicle when it is parallel to the parking lines.
- Return the steering wheel to its center position, then reverse the vehicle slowly until it is parked within the space.
Reversing into a Parking Space Marked with Parking Lines
If the steering position alignment guide does not fit in the parking lines, the parking space is too small for the vehicle.
Reference lines can be useful only when the parking space is in a rectangular shape with straight parking marks and when vehicles in the next parking spaces are within the spaces.
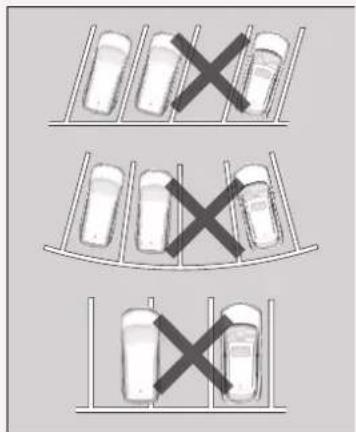
natural_image
Three identical parking lot diagrams with 'X' marks crossed out by black Xs, no text or symbols present.Parallel Parking into a Parking Space Marked with Parking Lines
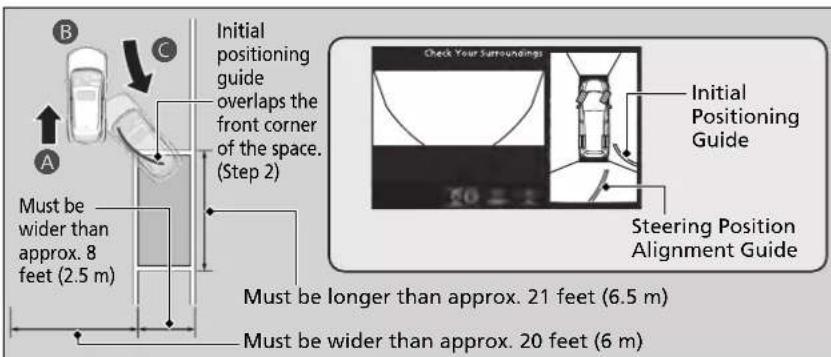
text_image
Initial positioning guide overlaps the front corner of the space. (Step 2) Must be wider than approx. 8 feet (2.5 m) Must be longer than approx. 21 feet (6.5 m) Must be wider than approx. 20 feet (6 m) Check Your Surroundings Initial Positioning Guide Steering Position Alignment Guide- Press the CAMERA button, then press the ENTER/MENU button. Rotate 🔺 to select Left Parallel Park Guidance or Right Parallel Park Guidance. Press 🔺.
- Move the vehicle forward parallel to the parking space and stop when the initial positioning guide shown in the display overlaps the front corner of the space.
- Turn the steering wheel fully to the right (if the parking space is on the passenger side) at a stop.
The steering position alignment guide is displayed.
- Slowly reverse the vehicle.
▶Stop the vehicle when the steering position alignment guide overlaps the sideline of the parking space.
- Turn the steering wheel fully to the left (if the parking space is on the passenger side) at a stop. Reverse the vehicle slowly.
- Stop the vehicle when it is parallel to the parking lines.
- Return the steering wheel to its center position, then reverse the vehicle slowly until it is parked within the space.
Continued
Parallel Parking into a Parking Space Marked with Parking Lines
Reference lines can be useful only when the parking space is in a rectangular shape with straight parking marks and when vehicles in the next parking spaces are within the spaces.
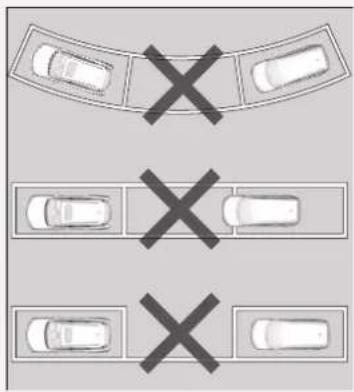
text_image
Diagram showing car parking layout with parking spaces and cross symbols indicating parking or parking restriction.Checking for the Sides of Your Vehicle
You can display the front ground view screen using all the four cameras for the system. Pressing the CAMERA button when the vehicle speed is at below 7 mph (12 km/h) changes the image as follows.
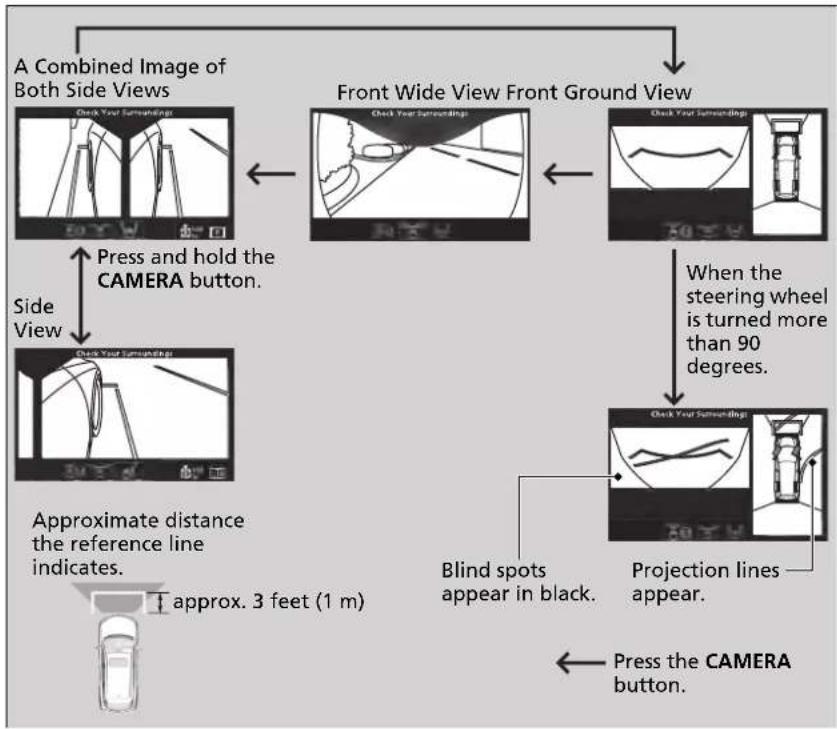
flowchart
graph TD
    A["Combined Image of Both Side Views"] --> B["Front Wide View Front Ground View"]
    B --> C["Check Your Surroundings"]
    C --> D["Check Your Surroundings"]
    D --> E["Check Your Surroundings"]
    E --> F["When the steering wheel is turned more than 90 degrees."]
    F --> G["Check Your Surroundings"]
    G --> H["Projection lines appear."]
    H --> I["Blind spots appear in black."]
    I --> J["Approximate distance the reference line indicates."]
    J --> K["approx. 3 feet (1 m)"]
    K --> L["A side View"]
    L --> M["Press and hold the CAMERA button."]
    M --> N["A Combined Image of Both Side Views"]
>>Checking for the Sides of Your Vehicle
When the vehicle speed exceeds 9 mph (15 km/h), the front or side view on the screen automatically switches to the information screen. The front or side view screen resumes when Show Camera When Decelerating is on, and the vehicle speed is reduced below 7 mph (12 km/h).
Customized Features P. 362
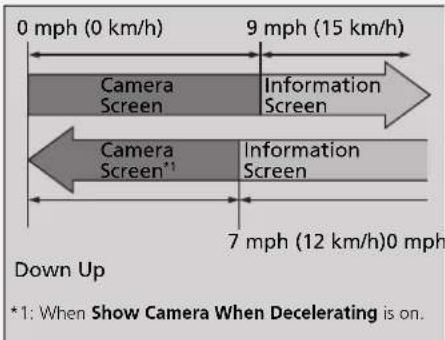
text_image
0 mph (0 km/h) 9 mph (15 km/h) Camera Screen Information Screen Camera Screen*1 Information Screen 7 mph (12 km/h)0 mph Down Up *1: When Show Camera When Decelerating is on.- Checking from the front wide view at intersections
The front wide view screen is useful when you need to check for vehicles crossing from either direction at an intersection with poor visibility.
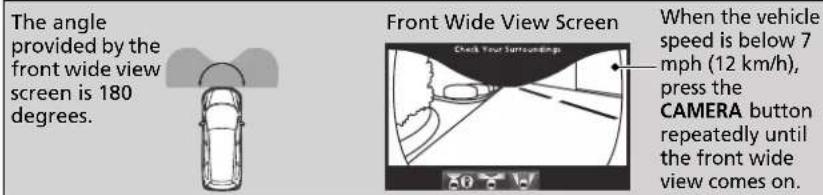
■ Checking the sides of your vehicle
The side view screens are convenient when you pull over at a curb or tollbooth, or slowly pass by oncoming vehicles on a narrow road.
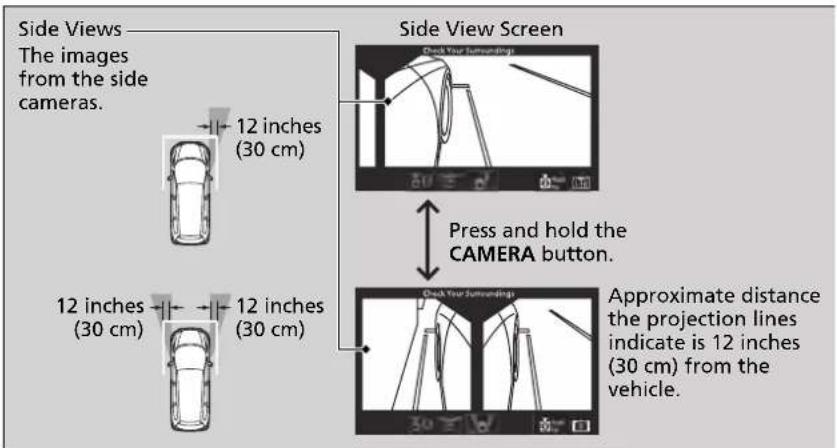
Continued
>> Checking from the front wide view at intersections
The front wide view image is a wide-angled view. The displayed image will be largely distorted, and objects may appear closer or more distant than they actually are.
>>Checking the sides of your vehicle
When the door mirrors are folded, the side views cannot be displayed.
Surround View Camera System Limitations
The system may not work properly under the following conditions.
| Conditions Solutions | ||
| The images may not appear clearly when: | You activate the system in bad weather (heavy rain, snow, fog, etc.) or in the dark.Camera temperatures are high.A sudden change between light and dark such as an entrance or exit of a tunnel.You drive into the sunlight (e.g., at dawn or dusk.) | Do not use the surround view camera system but rely only on visual confirmation until the conditions allow the system to work properly. |
| A camera lens is covered with dirt, moisture, or debris.A camera lens is scratched. | Clean camera lenses with a soft cloth moisturized with water, mild detergent or glass cleaner. | |
| The information screen is dirty. Wipe off the screen using a soft dry cloth. | ||
| A camera angle is altered. | A camera or the area around the camera has been severely impacted. | Do not use the surround view camera system and contact a dealer. |
| An error message is displayed while the surround view camera system is in use. | ||
Refueling
Fuel Information
■ Fuel recommendation
Unleaded premium gasoline, pump octane number 91 or higher
Use of a lower octane gasoline can cause occasional metallic knocking noise in the engine and will result in decreased engine performance.
Use of a gasoline with a pump octane less than 87 can lead to engine damage. The use of regular unleaded gasoline can cause metallic knocking noises in the engine and will result in decreased engine performance.
■ Top tier detergent gasoline
Because the level of detergency and additives in gasoline vary in the market, Acura endorses the use of "TOP TIER Detergent Gasoline" where available to help maintain the performance and reliability of your vehicle. TOP TIER Detergent Gasoline meets a new gasoline standard jointly established by leading automotive manufacturers to meet the needs of today's advanced engines.
Qualifying gasoline retailers will, in most cases, identify their gasoline as having met "TOP TIER Detergent Gasoline" standards at the retail location. This fuel is guaranteed to contain the proper level of detergent additives and be free of metallic additives. The proper level of detergent additives, and absence of harmful metallic additives in gasoline, help avoid build-up of deposits in your engine and emission control system.
For further important fuel-related information for your vehicle, or on information on gasoline that does not contain MMT, visit Acura Owners at owners.acura.com In Canada, visit www.acura.ca for additional information on gasoline. For more information on top tier gasoline, visit www.toptiergas.com.
■ Fuel tank capacity: 19.4 US gal (73.3 L)
»Fuel Information
NOTICE
We recommend quality gasoline containing detergent additives that help prevent fuel system and engine deposits. In addition, in order to maintain good performance, fuel economy, and emissions control, we strongly recommend the use of gasoline that does NOT contain harmful manganese-based fuel additives such as MMT, if such gasoline is available.
Use of gasoline with these additives may adversely affect performance, and cause the malfunction indicator lamp on your instrument panel to come on. If this happens, contact a dealer for service. Some gasoline today is blended with oxygenates such as ethanol. Your vehicle is designed to operate on oxygenated gasoline containing up to 15% ethanol by volume. Do not use gasoline containing methanol. If you notice any undesirable operating symptoms, try another service station or switch to another brand of gasoline.
How to Refuel
Your fuel tank is not equipped with a fuel filler cap. You can insert the filler nozzle directly into the filler neck. The tank seals itself again when you pull out the filler nozzle.
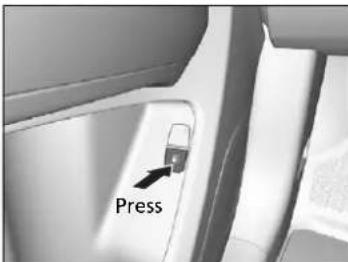
text_image
Press- Stop your vehicle with the service station pump on the left side of the vehicle in the rear.
- Turn off the power system.
- Press the fuel fill door release button.
The fuel fill door opens.
How to Refuel
WARNING
Gasoline is highly flammable and explosive. You can be burned or seriously injured when handling fuel.
- Turn the power system off, and keep heat, sparks, and flame away.
- Handle fuel only outdoors.
- Wipe up spills immediately.
The fuel filler opening is designed to accept only service station filler nozzles for refueling. Use of smaller diameter tubes (e.g., those used to siphon fuel for other uses) or other non-service station devices can damage the area in and around the filler opening.
The filler nozzle automatically stops to leave space in the fuel tank so that fuel does not overflow as a result of changes in air temperature.
Do not continue to add fuel after the filler nozzle has automatically stopped. Additional fuel can exceed the full tank capacity.
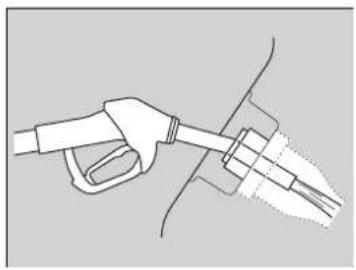
natural_image
Line drawing of a fuel pump nozzle connecting a valve to a car (no text or symbols)- Place the end of the filler nozzle on the lower part of filler opening, then insert it slowly and fully.
▶Make sure that the end of the filler nozzle goes down along with the filler pipe.
▶ Keep the filler nozzle level.
When the tank is full, the filler nozzle will click off automatically.
▶ After filling, wait about five seconds before removing the filler nozzle.
- Shut the fuel fill door by hand.
>>How to Refuel
If the filler nozzle keeps turning off when the tank is not full, there may be a problem with the pump's fuel vapor recovery system. Try filling at another pump. If this does not fix the problem, consult a dealer.
If you have to refuel your vehicle from a portable container, use the funnel provided with your vehicle.
Refueling From a Portable Fuel Container P. 660
Fuel Economy and CO₂ Emissions
Improving Fuel Economy and Reducing CO_2 Emissions
Achieving fuel economy and reducing CO_2 emissions is dependent on several factors, including driving conditions, load weight, idling time, driving habits, and vehicle condition. Depending on these and other factors, you may not achieve the rated fuel economy of this vehicle.
Maintenance and Fuel Economy
You can optimize your fuel economy with proper maintenance of your vehicle. Always maintain your vehicle in accordance with the messages displayed on the MID.
- Use the recommended viscosity engine oil.
Recommended Engine Oil P. 572
- Maintain the specified tire pressure.
- Do not load the vehicle with excess cargo.
- Keep your vehicle clean. A buildup of snow or mud on your vehicle's underside adds weight and increases wind resistance.
Improving Fuel Economy and Reducing CO₂ Emissions
Direct calculation is the recommended method to determine actual fuel consumed while driving.
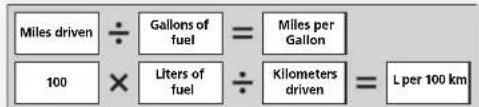
text_image
Miles driven ÷ Gallons of fuel = Milles per Gallon 100 × Liters of fuel ÷ Kilometers driven = L per 100 kmIn Canada, posted fuel economy numbers are established following a simulated test. For more information on how this test is performed, please visit http://oee.nrcan.gc.ca/
Maintenance
This chapter discusses basic maintenance.
Before Performing Maintenance
Inspection and Maintenance .... 562
Safety When Performing Maintenance..563
Parts and Fluids Used in Maintenance Service...564
Maintenance Minder™ 565
Maintenance Under the Hood
Maintenance Items Under the Hood.. 569
Opening the Hood 570
Engine Compartment Cover...... 571
Recommended Engine Oil 572
Oil Check 573
Adding Engine Oil 574
Changing the Engine Oil and Oil Filter...575
Cooling System 577
Inverter Coolant.... 579
Transmission Fluid 580
Brake Fluid.... 581
Refilling Window Washer Fluid..... 581
Replacing Light Bulbs 582
Checking and Maintaining Wiper Blades ... 587
Checking and Maintaining Tires
Checking Tires 591
Tire and Loading Information Label .. 592
Tire Labeling 592
DOT Tire Quality Grading (U.S. Vehicles).. 594
Wear Indicators.... 596
Tire Service Life 596
Tire and Wheel Replacement ..... 597
Tire Rotation.... 598
Winter Tires 599
12-Volt Battery 600
Remote Transmitter Care.... 601
Remote Control and Wireless
Headphone Care* 602
Climate Control System Maintenance..604
Cleaning
Interior Care 605
Exterior Care....607
Accessories and Modifications ..... 611
Before Performing Maintenance
Inspection and Maintenance
For your safety, perform all listed inspections and maintenance to keep your vehicle in good condition. If you become aware of any abnormality (noise, smell, insufficient brake fluid, oil residue on the ground, etc.), have your vehicle inspected by a dealer. (Note, however, that service at a dealer is not mandatory to keep your warranties in effect.) Refer to the separate maintenance booklet for detailed maintenance and inspection information.
Types of Inspection and Maintenance
■ Daily inspections
Perform inspections before long distance trips, when washing the vehicle, or when refueling.
■ Periodic inspections
- Check the brake fluid level monthly.
→ Checking the Brake Fluid P. 581 - Check the tire pressure monthly. Examine the tread for wear and foreign objects.
→ Checking and Maintaining Tires P. 591 - Check the operation of the exterior lights monthly.
→ Replacing Light Bulbs P. 582 - Check the condition of the wiper blades at least every six months.
▶ Checking and Maintaining Wiper Blades P. 587
Inspection and Maintenance
U.S. models
Maintenance, replacement, or repair of emissions control devices and systems may be done by any automotive repair establishment or individuals using parts that are "certified" to EPA standards.
According to state and federal regulations, failure to perform maintenance on the maintenance main items marked with # will not void your emissions warranties. However, all maintenance services should be performed in accordance with the intervals indicated by the multi-information display (MID).
→ Maintenance Service Items P. 567
If you want to perform complex maintenance tasks that require more skills and tools, you can purchase a subscription to the Service Express website at www.techinfo.honda.com.
Authorized Manuals P. 670
If you want to perform maintenance yourself, make sure that you have the necessary tools and skills first. After performing maintenance, update the records in the separate maintenance booklet.
Safety When Performing Maintenance
Some of the most important safety precautions are given here. However, we cannot warn you of every conceivable hazard that can arise in performing maintenance. Only you can decide whether you should perform a given task.
Maintenance Safety
- To reduce the possibility of fire or explosion, keep cigarettes, sparks, and flames away from the 12-volt battery, all High Voltage system, and all fuel related parts.
- Never leave rags, towels, or other flammable objects under the hood.
▶ Heat from the engine and exhaust can ignite them, causing a fire. - To clean parts, use a commercially available degreaser or parts cleaner, not gasoline.
- Wear eye protection and protective clothing when working with the 12-volt battery or compressed air.
- Engine exhaust contains carbon monoxide, which is poisonous and can kill you.
▶ Only operate the engine if there is sufficient ventilation.
Safety When Performing Maintenance
WARNING
Improperly maintaining this vehicle or failing to correct a problem before driving can cause a crash in which you can be seriously hurt or killed.
Always follow the inspection and maintenance recommendations according to the schedules in this owner's manual.
WARNING
Failure to properly follow maintenance instructions and precautions can cause you to be seriously hurt or killed.
Always follow the procedures and precautions in this owner's manual.
Continued
Vehicle Safety
• The vehicle must be in a stationary condition.
▶ Make sure your vehicle is parked on level ground, the parking brake is set, and the power system is turned off.
- Be aware that hot parts can burn you.
▶ Make sure to let the power system including the engine and exhaust system cool thoroughly before touching vehicle parts.
- Be aware that moving parts can injure you.
Do not activate the power system unless instructed, and keep your hands and limbs away from moving parts. When the power system is on, the engine can automatically start, or the radiator fan may start operating without the engine running.
- Do not touch the high-voltage battery and wiring (orange).
Parts and Fluids Used in Maintenance Service
The use of Acura genuine parts and fluids is recommended when maintaining and servicing your vehicle. Acura genuine parts are manufactured according to the same high quality standards used in Acura vehicles.
Parts and Fluids Used in Maintenance Service
NOTICE
Do not press the engine cover forcibly. This may damage the engine cover and component parts.
Maintenance Minder™
If the engine oil life is less than 15%, you will see the Maintenance Minder messages appear on the multi-information display (MID) every time you set the power mode to ON. The messages notify you when to change the engine oil, or when to bring your vehicle to a dealer for indicated maintenance services.
To Use Maintenance Minder™
Displaying the Maintenance Minder Information
Maintenance items, which should be serviced at the same time that you replace the engine oil, appear on the MID.
You can view them on the engine oil life screen at any time.
- Set the power mode to ON.
- Roll the multi-function steering-wheel controls until the engine oil life appears on the MID.
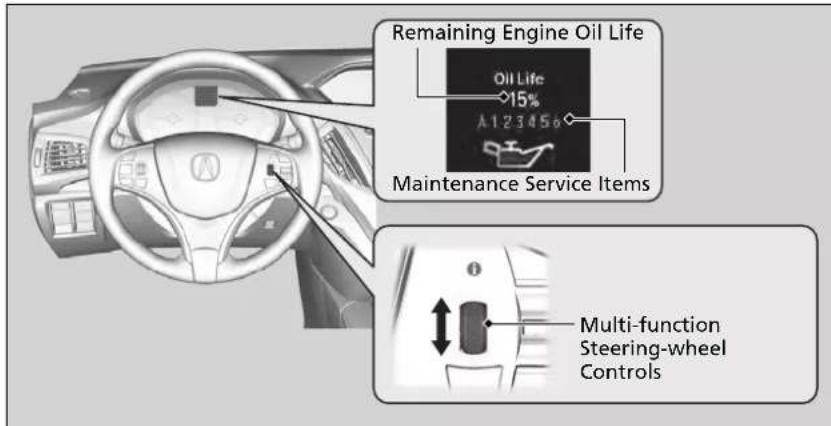
text_image
Remaining Engine Oil Life Oil Life 15% A 12345° Maintenance Service Items Multi-function Steering-wheel ControlsContinued
Displaying the Maintenance Minder Information
Based on the engine operating conditions, the remaining engine oil life is calculated and displayed as a percentage.
| Displayed Engine Oil Life (%) | Calculated Engine Oil Life (%) |
| 100 100 to 91 | |
| 90 90 to 81 | |
| 80 80 to 71 | |
| 70 70 to 61 | |
| 60 60 to 51 | |
| 50 50 to 41 | |
| 40 40 to 31 | |
| 30 30 to 21 | |
| 20 20 to 16 | |
| 15 15 to 11 | |
| 10 10 to 6 | |
| 5 5 to 1 | |
| 0 | 0 |
There is a list of maintenance main and sub items you can view on the MID.
→ Maintenance Service Items P. 567
Maintenance Minder Messages on the Multi-Information Display (MID)
| Maintenance Message | Oil Life Display | Explanation | Information |
Maintenance Due Soon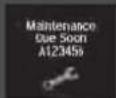 | 15% | The remaining engine oil life is 15 to 6 percent. Once you switch the display by rolling the multi-function steering-wheel controls, this message will go off. | The engine oil is approaching the end of its service life, and the maintenance items should be inspected and serviced soon. |
Maintenance Due Now | 5% | The remaining engine oil life is 5 to 1 percent. Roll the multi-function steering-wheel controls to switch to another display. | The engine oil has almost reached the end of its service life, and the maintenance items should be inspected and serviced as soon as possible. |
Maintenance Past Due | Negative DistanceU.S. Service-10miles B123456 Canada Service-10km B123456 | The remaining engine oil life has passed its service life, and a negative distance appears after driving over 10 miles (U.S. models) or 10 km (Canadian models). Roll the multi-function steering wheel control to switch to another display. | The engine oil life has passed. The maintenance items must be inspected and serviced immediately. |
The system message indicator (i) comes on along with the Maintenance Minder message.
■ Maintenance Service Items
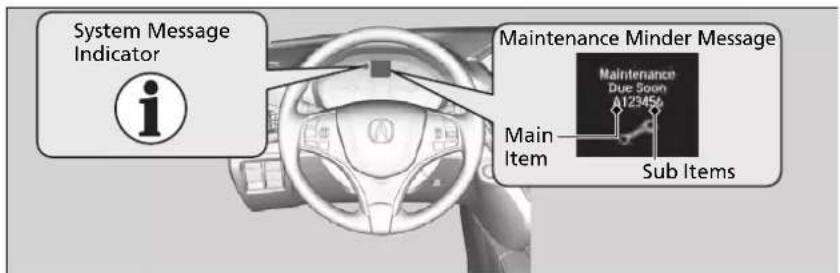
text_image
System Message Indicator i Maintenance Minder Message Main Item Sub Items Maintenance Due Soon A123456Maintenance Service Items
- Independent of the Maintenance Minder information, replace the brake fluid every 3 years.
- Adjust the valves during services A, B, 1, 2, or 3 if they are noisy.
CODE Maintenance Main Items
A • Replace engine oil*1
B • Replace engine oil*1 and oil filter
- Inspect front and rear brakes
- Check expiration date for Temporary Tire Repair Kit bottle*
- Inspect tie rod ends, steering gearbox, boots
- Inspect suspension components
- Inspect driveshaft boots
- Inspect brake hoses and lines (Including ABS/VSA®)
- Inspect all fluid levels and condition of fluids
- Inspect exhaust system#
- Inspect fuel lines and connections*
*1: If the message Maintenance Due Now does not appear more than 12 months after the display is reset, change the engine oil every year.
: See information on maintenance and emissions warranty.
*2: If you drive in dusty conditions, replace the air cleaner element every 15,000 miles (24,000 km).
*3: If you drive primarily in urban areas that have high concentrations of soot in the air from industry and from diesel-powered vehicles, replace the dust and pollen filter every 15,000 miles (24,000 km).
CODE Maintenance Sub Items
1 • Rotate tires
2 • Replace air cleaner element ^2
- Replace dust and pollen filter ^3
3 • Replace transmission fluid*4
4 • Replace spark plugs
- Replace timing belt and inspect water pump ^5
- Inspect valve clearance
5 • Replace engine coolant
6 • Replace twin motor unit fluid ^4
*4: Driving in mountainous areas at very low vehicle speeds results in higher transmission temperature. This requires transmission fluid changes more frequently than recommended by the Maintenance Minder. If you regularly drive your vehicle under these conditions, have the transmission fluid changed at 30,000 miles (48,000 km), then every 25,000 miles (40,000 km).
*5: If you drive regularly in very high temperatures (over 110°F, 43°C), in very low temperatures (under -20°F, -29°C), replace every 60,000 miles/100,000 km.
*6: Driving in mountainous areas at very low vehicle speeds results in higher level of mechanical (Shear) stress to fluid. This requires twin motor unit fluid changes more frequently than recommended by the Maintenance Minder. If you regularly drive your vehicle under these conditions, have the twin motor unit fluid changed at 7,500 miles (12,000 km), then every 15,000 miles (24,000 km).
Resetting the Display
Reset the engine oil life display if you have performed the maintenance service.
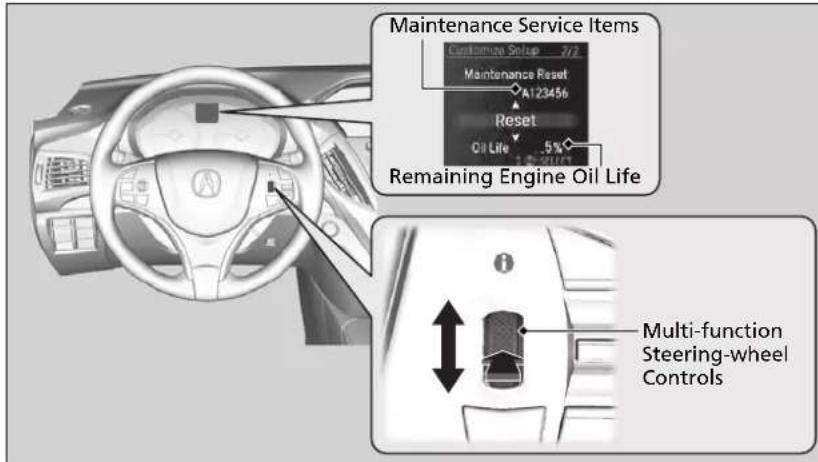
text_image
Maintenance Service Items Customer Setup 2/2 Maintenance Reset A123456 Reset Oil Life 5% Remaining Engine Oil Life Multi-function Steering-wheel Controls- Set the power mode to ON.
- Go to Vehicle Settings, then go to the Maintenance Info. group. ▶Customized Features P. 131
- Push the multi-function steering-wheel controls.
The oil life reset mode is displayed on the MID.
- Select Reset with the multi-function steering-wheel controls, then push the multi-function steering wheel control.
The displayed maintenance items disappear, and the engine oil life display returns to 100%.
To cancel the oil life reset mode, select Cancel, then push the multi-function steering-wheel controls.
Resetting the Display
NOTICE
Failure to reset the engine oil life after a maintenance service results in the system showing incorrect maintenance intervals, which can lead to serious mechanical problems.
The dealer will reset the engine oil life display after completing the required maintenance service. If someone other than a dealer performs maintenance service, reset the engine oil life display yourself.
You can also reset the engine oil life display using the information screen.
→Customized Features P. 362
Maintenance Under the Hood
Maintenance Items Under the Hood
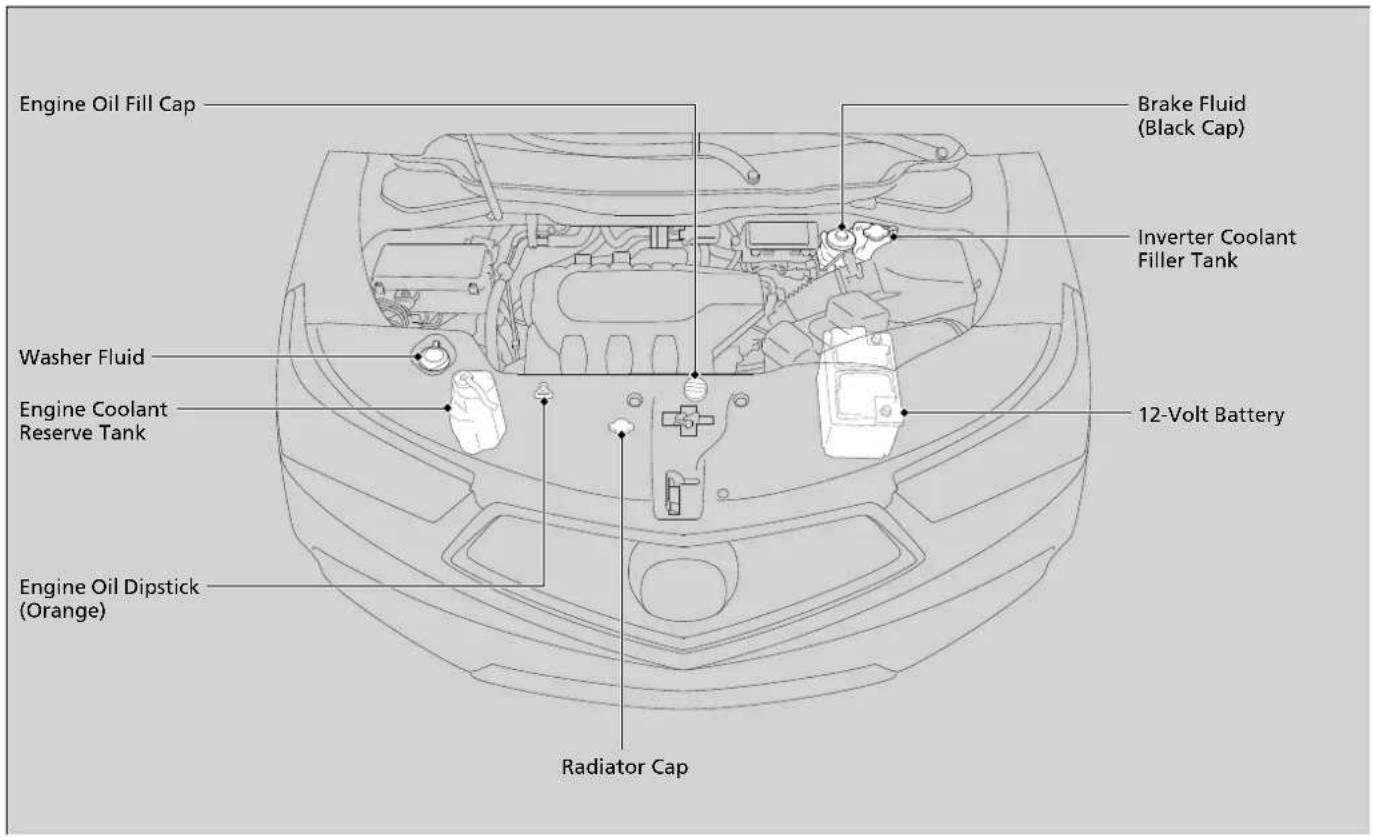
text_image
Engine Oil Fill Cap Brake Fluid (Black Cap) Inverter Coolant Filler Tank Washer Fluid Engine Coolant Reserve Tank 12-Volt Battery Engine Oil Dipstick (Orange) Radiator CapOpening the Hood
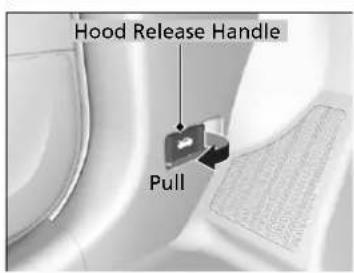
text_image
Hood Release Handle Pull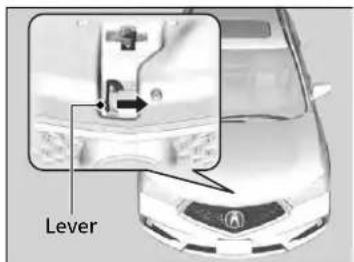
text_image
Lever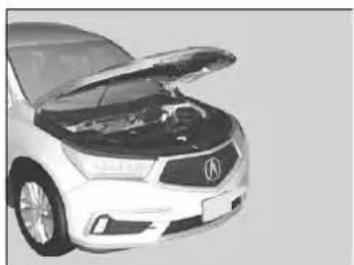
natural_image
Front view of a white Audi A3 car with its hood open, showing engine compartment and roof structure (no text or symbols visible)- Park the vehicle on a level surface, and set the parking brake.
- Pull the hood release handle under the driver's side lower corner of the dashboard.
The hood will pop up slightly.
- Push the hood latch lever (located under the front edge of the hood to the center) to the side and raise the hood. Once you have raised the hood slightly, you can release the lever.
- Lift the hood up most of the way.
The hydraulic support will lift it up the rest of the way and hold it up.
When closing, lower it to approximately 12 inches (30 cm), then press down firmly with your hands.
Opening the Hood
NOTICE
Do not open the hood when the wiper arms are raised. The hood will strike the wipers, resulting in possible damage to the hood and/or the wipers.
NOTICE
Do not press the engine cover forcibly. This may damage the engine cover and component parts.
When closing the hood, check that the hood is securely latched.
If the hood latch lever moves stiffly, or if you can open the hood without lifting the lever, the latch mechanism should be cleaned and lubricated.
Engine Compartment Cover
The component parts in the engine compartment are protected by a cover. You may need to remove the cover when you perform certain maintenance work. Pull up on the engine compartment cover carefully until all pins are removed from their grommets.
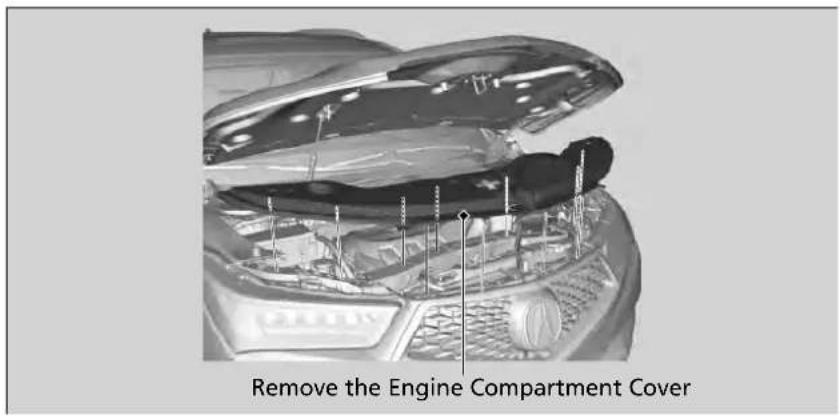
text_image
Remove the Engine Compartment CoverRecommended Engine Oil
• Genuine Acura Motor Oil
- Premium-grade 0W-20 detergent oil with an API Certification Seal on the container.

text_image
AMERICAN PETROLEUM INSTITUTE FOR GASOLINE ENGINES CERTIFIEDOil is a major contributor to your engine's performance and longevity. If you drive the vehicle with insufficient or deteriorated oil, the engine may fail or be damaged.
This seal indicates the oil is energy conserving and that it meets the American Petroleum Institute's latest requirements.
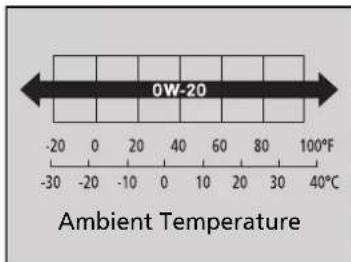
text_image
0W-20 Ambient TemperatureUse a Genuine Acura Motor Oil or another commercial engine oil of suitable viscosity for the ambient temperature as shown.
■ Synthetic oil
You may also use synthetic motor oil if it is labeled with the API Certification Seal and is the specified viscosity grade.
Recommended Engine Oil
Engine Oil Additives
Your vehicle does not require oil additives. In fact, they may adversely affect the engine performance and durability.
Oil Check
We recommend that you check the engine oil level every time you refuel.
Park the vehicle on level ground.
Turn off the power system. You can check the oil level without the engine having run beforehand. If the engine has been running, wait approximately three minutes before you check the oil.
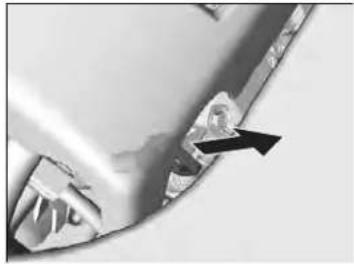
natural_image
Close-up of a mechanical component with a black arrow pointing to a small feature (no visible text or symbols)- Remove the dipstick (orange).
- Wipe the dipstick with a clean cloth or paper towel.
- Insert the dipstick back all the way into its hole.
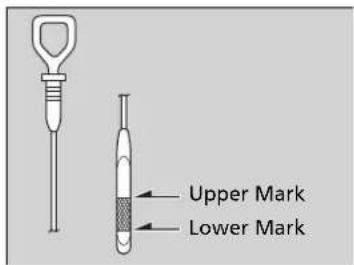
text_image
Upper Mark Lower Mark- Remove the dipstick again, and check the level. It should be between the upper and lower marks. Add oil if necessary.
Oil Check
If the oil level is near or below the lower mark, slowly add oil, being careful not to overfill.
Adding Engine Oil
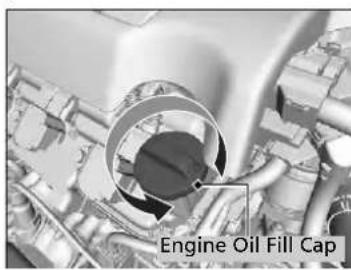
text_image
Engine Oil Fill Cap- Unscrew and remove the engine oil fill cap.
- Add oil slowly.
- Reinstall the engine oil fill cap, and tighten it securely.
- Wait for three minutes and recheck the engine oil dipstick.
>>Adding Engine Oil
NOTICE
Do not fill the engine oil above the upper mark. Overfilling the engine oil may result in leaks and engine damage.
If any oil spills, wipe it away immediately. Spilled oil may damage the engine compartment components.
Changing the Engine Oil and Oil Filter
You must change the engine oil and oil filter regularly in order to maintain the engine's lubrication. The engine may be damaged if they are not changed regularly.
Change the oil and filter in accordance with the maintenance message on the multi-information display.
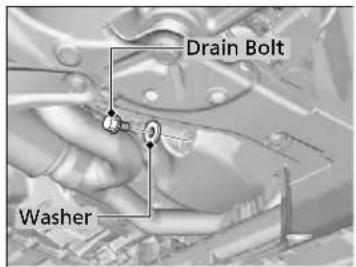
text_image
Drain Bolt Washer- Run the engine until it reaches normal operating temperature, and then turn the engine off.
- Open the hood and remove the engine oil fill cap.
- Remove the drain bolt and washer from the bottom of the engine, and drain the oil into a suitable container.
Changing the Engine Oil and Oil Filter
NOTICE
You may damage the environment if you do not dispose of the oil in a suitable way. If you are changing the oil by yourself, appropriately dispose of the used oil. Put the oil in a sealed container and take it to a recycling center. Do not throw the oil away into a garbage can or onto the ground.
Continued
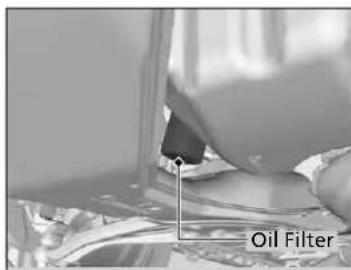
text_image
Oil Filter- Remove the oil filter and dispose of the remaining oil.
- Check that the filter gasket is not stuck to the engine contact surface.
▶If it is stuck, you must detach it.
- Wipe away dirt and dust adhering to the contact surface of the engine block, and install a new oil filter.
▶ Apply a light coat of new engine oil to the filter gasket.
- Put a new washer on the drain bolt, then reinstall the drain bolt.
▶ Tightening torque: 29 lbf·ft (39 N·m, 4.0 kgf·m)
- Pour the recommended engine oil into the engine.
▶Engine oil change capacity (including filter): 4.5 US qt (4.3 L)
-
Reinstall the engine oil fill cap securely and start the engine.
-
Run the engine for a few minutes, and then check that there is no leak from the drain bolt or oil filter.
-
Stop the engine, wait for three minutes, and then check the oil level on the dipstick.
▶If necessary, add more engine oil.
Changing the Engine Oil and Oil Filter
You will need a special wrench to replace the oil filter. You can buy this wrench from a dealer.
When installing the new oil filter, follow the instructions supplied with the oil filter.
Reinstall the engine oil fill cap. Start the engine. The low oil pressure indicator should go off within five seconds. If it does not, turn off the engine, and check your work.
Cooling System
Specified coolant: Acura Long Life Antifreeze/Coolant Type 2
This coolant is premixed with 50% antifreeze and 50% water. Do not add any straight antifreeze or water.
We recommend you check the engine coolant level every time you refuel. Check the reserve tank first. If it is completely empty, also check the coolant level in the radiator. Add the engine coolant accordingly.
Reserve Tank
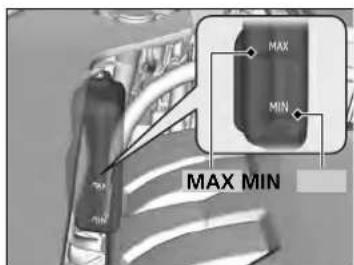
text_image
MAX MIN MAX MIN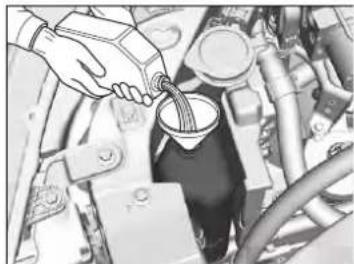
natural_image
Close-up of a hand pouring liquid into a car engine compartment (no visible text or symbols)-
Make sure the engine and radiator are cool.
-
Check the amount of coolant in the reserve tank.
▶ If the coolant level is below the MIN mark, add the specified coolant until it reaches the MAX mark.
Engine Compartment Cover P. 571
- Inspect the cooling system for leaks.
Continued
Cooling System
WARNING
Removing the radiator cap while the engine is hot can cause the coolant to spray out, seriously scalding you.
Always let the engine and radiator cool down before removing the radiator cap.
NOTICE
Genuine Acura engine coolant is a 50/50 mixture of antifreeze and water that can withstand freezing at temperatures as low as about -31^ (-35^) . If your vehicle is consistently subjected to temperatures below this, the concentration of antifreeze in the coolant should be increased. Consult a dealer for details.
If Acura antifreeze/coolant is not available, you may use another major brand of non-silicate coolant as a temporary replacement. Check that it is a high quality coolant recommended for aluminum engines.
Continued use of any non-Acura coolant can result in corrosion, causing the cooling system to malfunction or fail. Have the cooling system flushed and refilled with Acura antifreeze/coolant as soon as possible.
Do not add rust inhibitors or other additives to your vehicle's cooling system. They may not be compatible with the coolant or with the engine components.
Radiator

text_image
Radiator Cap- Make sure the engine and radiator are cool.
- Remove the engine compartment cover. Engine Compartment Cover P. 571
- Turn the radiator cap 1/8 turn counterclockwise and relieve any pressure in the cooling system.
- Push down and turn the radiator cap counterclockwise to remove it.
- The coolant level should be up to the base of the filler neck. Add coolant if it is low.
- Put the radiator cap back on, and tighten it fully.
Radiator
NOTICE
Pour the fluid slowly and carefully so you do not spill any. Clean up any spills immediately; they can damage components in the engine compartment.
Inverter Coolant
Specified coolant: Acura Long Life Antifreeze/Coolant Type 2
This coolant is premixed with 50% antifreeze and 50% water. Do not add any straight antifreeze or water.
We recommend you check the inverter coolant level every time you refuel.
Have a dealer replace the inverter coolant.
- Checking the Coolant
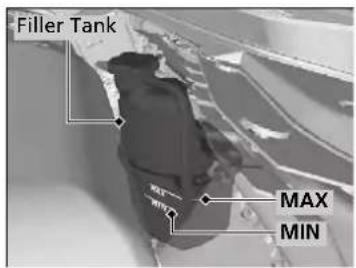
text_image
Filler Tank MAX MIN-
Check the fluid level in the tank.
-
If the coolant level has dropped below the MIN level, have your vehicle serviced at a dealer.
▶ Only a properly trained technician can refill the coolant and check the system for leaks.
Inverter Coolant
NOTICE
Genuine Acura engine coolant is a 50/50 mixture of antifreeze and water that can withstand freezing at temperatures as low as about -31^ (-35^) . If your vehicle is consistently subjected to temperatures below this, the concentration of antifreeze in the coolant should be increased. Consult a dealer for details.
If Acura antifreeze/coolant is not available, you may use another major brand of non-silicate coolant as a temporary replacement. Check that it is a high quality coolant recommended for aluminum engines.
Continued use of any non-Acura coolant can result in corrosion, causing the cooling system to malfunction or fail. Have the cooling system flushed and refilled with Acura antifreeze/coolant as soon as possible.
Do not add rust inhibitors or other additives to your vehicle's cooling system. They may not be compatible with the coolant or with the motor components.
Transmission Fluid
Dual Clutch Transmission Fluid
Specified fluid: Acura ATF DW-1
Have a dealer check the fluid level and replace if necessary.
Do not attempt to check or change the dual clutch transmission fluid yourself.
Dual Clutch Transmission Fluid
NOTICE
Do not mix Acura ATF DW-1 with other transmission fluids.
Using a transmission fluid other than Acura ATF DW-1 may adversely affect the operation and durability of your vehicle's transmission, and damage the transmission.
Any damage caused by using a transmission fluid that is not equivalent to Acura ATF DW-1 is not covered by Acura's new vehicle limited warranty.
Brake Fluid
Specified fluid: Acura Heavy Duty Brake Fluid DOT 3
- Checking the Brake Fluid
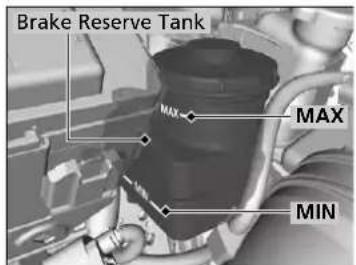
text_image
Brake Reserve Tank MAX MINThe fluid level should be between the MIN and MAX marks on the side of the reserve tank.
Refilling Window Washer Fluid
If the washer fluid is low, a message appears on the MID. Pour the washer fluid carefully. Do not overflow the reservoir.
Brake Fluid
NOTICE
Brake fluid marked DOT 5 is not compatible with your vehicle's braking system and can cause extensive damage.
If the specified brake fluid is not available, you should use only DOT 3 or DOT 4 fluid from a sealed container as a temporary replacement.
Using any non-Acura brake fluid can cause corrosion and decrease the longevity of the system. Have the brake system flushed and refilled with Acura Heavy Duty Brake Fluid DOT 3 as soon as possible.
If the brake fluid level is at or below the MIN mark, have a dealer inspect the vehicle for leaks or worn brake pads as soon as possible.
>>Refilling Window Washer Fluid
NOTICE
Do not use engine antifreeze or a vinegar/water solution in the windshield washer reservoir. Antifreeze can damage your vehicle's paint. A vinegar/water solution can damage the windshield washer pump.
Use only commercially available windshield washer fluid.
Avoid prolonged use of hard water to prevent lime scale build up.
Replacing Light Bulbs
Headlights
Headlights are LED type. Have an authorized Acura dealer inspect and replace the light assembly.
Front Turn Signal/Parking, Daytime Running and Front Side Marker Lights
Front turn signal/parking, daytime running and front side marker lights are LED type. Have an authorized Acura dealer inspect and replace the light assembly.
Fog Lights\*
Fog lights are LED type. Have an authorized Acura dealer inspect and replace the light assembly.
Side Turn Signal/Emergency Indicator Lights
Door mirror side turn lights are LED type. Have an authorized Acura dealer inspect and replace the light assembly.
Headlights
The headlight aim is set by the factory, and does not need to be adjusted. However, if you regularly carry heavy items in the cargo area, have the aiming readjusted at a dealer or by a qualified technician.
Brake Light and Rear Turn Signal Light Bulbs
When replacing, use the following bulbs.
Brake Light: 21 W
Rear Turn Signal Light: 21 W
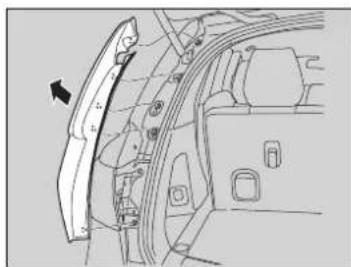
natural_image
Technical line drawing of a car interior showing structural components and a directional arrow (no text or symbols)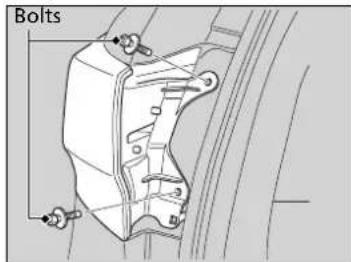
text_image
Bolts- Remove the cover.
Starting at the bottom, carefully pull the cover straight out, working upward until all pins are removed from their grommets.
The grommets should remain in the body.
- Use a Phillips-head screwdriver to remove the bolts.
- Pull the light assembly out of the rear pillar.
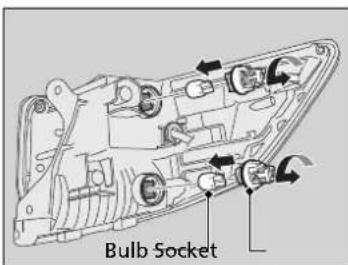
text_image
Bulb Socket- Turn the socket counter-clockwise and remove it. Remove the old bulb.
- Insert a new bulb.
- Slide the light assembly onto the guide on the body.
- Align the pins with the body grommets, then push in until they fully seat.
Taillights/Rear Side Marker Lights
Taillights/rear side marker lights are the LED type. Have an authorized Acura dealer inspect and replace the light assembly.
Back-Up Light Bulbs
When replacing, use the following bulbs.
Back-Up Light: 21 W
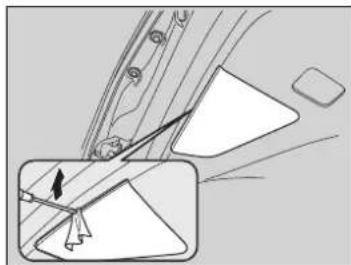
natural_image
Diagram of a mechanical component with arrows indicating motion or force direction (no text or symbols)- Remove the cover by prying on the edge using a flat-tip screwdriver.
Wrap the flat-tip screwdriver with a cloth to prevent scratches. - Turn the socket counter-clockwise and remove it. Remove the old bulb.
- Insert a new bulb.

text_image
Bulb SocketTaillights
Taillights are the LED type. Have an authorized Acura dealer inspect and replace the light assembly.
Rear License Plate Lights
Rear license plate lights are LED type. Have an authorized Acura dealer inspect and replace the light assembly.
High-Mount Brake Light
High-mount brake light is LED type. Have an authorized Acura dealer inspect and replace the light assembly.
Puddle Lights
Puddle lights are LED type. Have an authorized Acura dealer inspect and replace the light assembly.
Checking and Maintaining Wiper Blades
Checking Wiper Blades
If the wiper blade rubber has deteriorated, it will leave streaks and the hard surfaces of the blade may scratch the window glass.
Changing the Front Wiper Blade Rubber
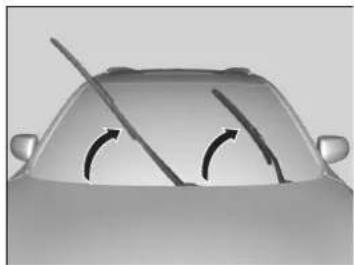
natural_image
Top-down view of a car with visible steering wheel and curved arrows indicating motion (no text or symbols)- Lift the driver side wiper arm first, then the passenger side.
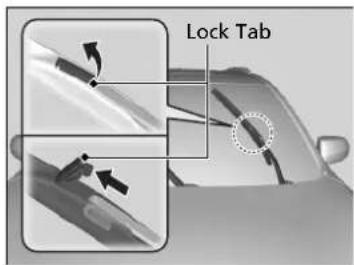
text_image
Lock Tab-
Pry on the edge of the lock tab using a flat-tip screwdriver to push it up. Wrap the flat-tip screwdriver with a cloth to prevent scratches.
-
Slide the holder off the wiper arm.
Changing the Front Wiper Blade Rubber
NOTICE
Avoid dropping the wiper arm onto the windshield, it may damage the wiper arm and/or the windshield.
Continued
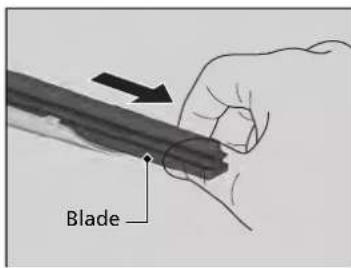
text_image
Blade- Slide the wiper blade out of the holder by pulling the tabbed end out.
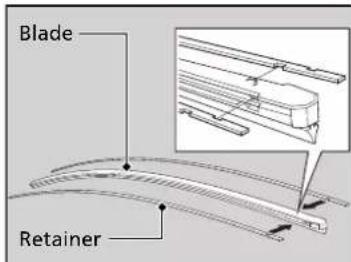
text_image
Blade Retainer- Remove the retainers from the wiper blade that has been removed, and mount to a new wiper blade.
Correctly align the wiper blade protrusion and the retainer grooves.

natural_image
Technical illustration of two elongated, curved mechanical components with internal features (no text or symbols)- Slide the new wiper blade onto the holder from the bottom end.
The tab on the holder should fit in the indent of the wiper blade.
-
Slide the holder onto the wiper arm, then push down the lock tab.
-
Lower the passenger side wiper arm first, then the driver side.
Changing the Rear Wiper Blade Rubber
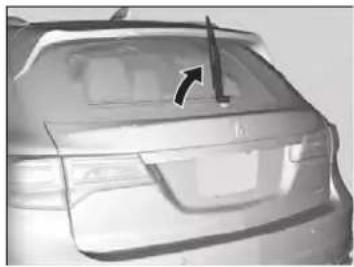
natural_image
Front view of a car's rear bumper with a black arrow pointing to the side (no visible text or symbols)- Raise the wiper arm off.
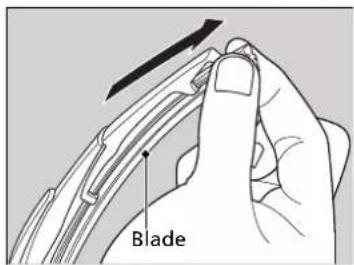
text_image
Blade- Slide the wiper blade out from the end with the indent.
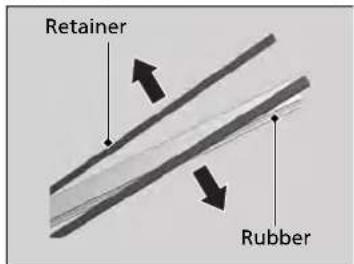
text_image
Retainer Rubber- Remove the retainers from wiper blade and mount to a new rubber blade.
Changing the Rear Wiper Blade Rubber
NOTICE
Avoid dropping the wiper arm, it may damage the rear window.
Continued
▶▶ Checking and Maintaining Wiper Blades▶ Changing the Rear Wiper Blade Rubber
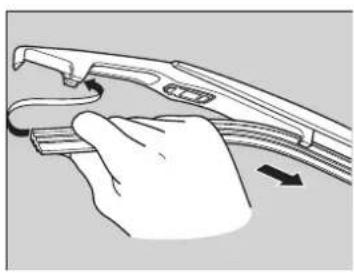
natural_image
Illustration of a hand holding a cable with a curved arrow indicating motion (no text or symbols)- Slide the new wiper blade onto the holder.
▶ Make sure it is engaged correctly, then install the wiper blade assembly onto the wiper arm.
Checking and Maintaining Tires
Checking Tires
To safely operate your vehicle, your tires must be of the proper type and size, in good condition with adequate tread, and properly inflated.
■ Inflation guidelines
Properly inflated tires provide the best combination of handling, tread life, and comfort. Refer to the driver's doorjamb label or specifications page for the specified pressure.
Underinflated tires wear unevenly, adversely affect handling and fuel economy, and are more likely to fail from overheating.
Overinflated tires make your vehicle ride harshly, are more prone to road hazards, and wear unevenly.
Every day before you drive, look at each of the tires. If one looks lower than the others, check the pressure with a tire gauge.
At least once a month or before long trips, use a gauge to measure the pressure in all tires, including the spare ^4 . Even tires in good condition can lose 1–2 psi (10–20 kPa, 0.1–0.2 kgf/cm ^2 ) per month.
■ Inspection guidelines
Every time you check inflation, also examine the tires and valve stems. Look for:
- Bumps or bulges on the side or in the tread. Replace the tire if you find any cuts, splits, or cracks in the side of the tire. Replace it if you see fabric or cord.
- Remove any foreign objects and inspect for air leaks.
- Uneven tread wear. Have a dealer check the wheel alignment.
- Excessive tread wear.
2 Wear Indicators P. 596
- Cracks or other damage around valve stem.
* Not available on all models
1 Checking Tires
3 WARNING
Using tires that are excessively worn or improperly inflated can cause a crash in which you can be seriously hurt or killed.
Follow all instructions in this owner's manual regarding tire inflation and maintenance.
Measure the air pressure when tires are cold. This means the vehicle has been parked for at least three hours, or driven less than 1 mile (1.6 km). If necessary, add or release air until the specified pressure is reached.
If checked when hot, tire pressure can be as much as 4–6 psi (30–40 kPa, 0.3–0.4 kgf/cm ^2 ) higher than if checked when cold.
Have a dealer check the tires if you feel a consistent vibration while driving. New tires and any that have been removed and reinstalled should be properly balanced.
Tire and Loading Information Label
The label attached to the driver's doorjamb provides necessary tire and loading information.
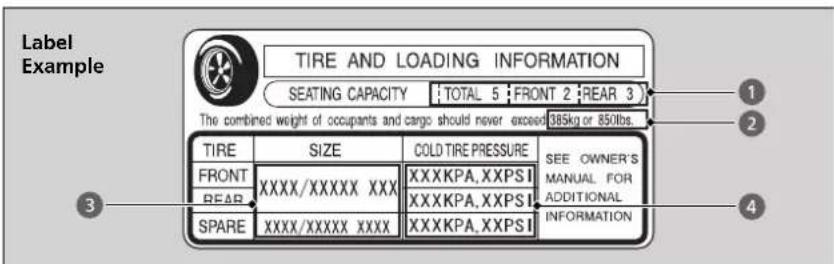
text_image
Label Example TIRE AND LOADING INFORMATION SEATING CAPACITY TOTAL 5 FRONT 2 REAR 3 The combined weight of occupants and cargo should never exceed 385kg or 850lbs. TIRE SIZE COLD TIRE PRESSURE SEE OWNER'S FRONT XXXX/XXXXX XXX XXXKPA,XXPSI MANUAL FOR REAR XXXKPA,XXPSI ADDITIONAL SPARE XXXX/XXXXX XXX XXXKPA,XXPSI INFORMATIONTire Labeling
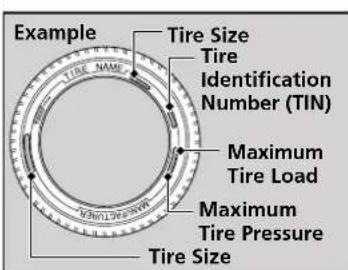
text_image
Example Tire Size Tire Identification Number (TIN) Maximum Tire Load Maximum Tire Pressure Tire SizeThe tires that came on your vehicle have a number of markings. Those you should be aware of are described as shown.
Tire Sizes
Whenever tires are replaced, they should be replaced with tires of the same size.
Tire and Loading Information Label
The tire and loading information label attached to the driver's doorjamb contains:
①The number of people your vehicle can carry.
② The total weight your vehicle can carry. Do not exceed this weight.
③The original tire sizes for front, rear, and spare.
4 The proper cold tire pressure for front, rear, and spare.
Tire Sizes
Following is an example of tire size with an explanation of what each component means.
P235/60R18 102T
P: Vehicle type (P indicates passenger vehicle).
235: Tire width in millimeters.
60: Aspect ratio (the tire's section height as a percentage of its width).
R: Tire construction code (R indicates radial).
18: Rim diameter in inches.
102: Load index (a numerical code associated with the maximum load the tire can carry).
T: Speed symbol (an alphabetical code indicating the maximum speed rating).
■ Tire Identification Number (TIN)
The tire identification number (TIN) is a group of numbers and letters that look like the example in the side column. TIN is located on the sidewall of the tire.
■ Glossary of Tire Terminology
Cold Tire Pressure – The tire air pressure when the vehicle has been parked for at least three hours or driven less than 1 mile (1.6 km).
Load Rating – Means the maximum load that a tire is rated to carry for a given inflation pressure.
Maximum Inflation Pressure – The maximum tire air pressure that the tire can hold.
Maximum Load Rating – Means the load rating for a tire at the maximum permissible inflation pressure for that tire.
Recommended Inflation Pressure – The cold tire inflation pressure recommended by the manufacturer.
Treadwear Indicators (TWI) – Means the projections within the principal grooves designed to give a visual indication of the degrees of wear of the tread.
Tire Identification Number (TIN)
DOT B97R FW6X 2209
DOT: This indicates that the tire meets all requirements of the U.S. Department of Transportation.
B97R: Manufacturer's identification mark. FW6X: Tire type code.
22 09: Date of manufacture.

DOT Tire Quality Grading (U.S. Vehicles)
The tires on your vehicle meet all U.S. Federal Safety Requirements. All tires are also graded for treadwear, traction, and temperature performance according to Department of Transportation (DOT) standards. The following explains these gradings.
Uniform Tire Quality Grading
Quality grades can be found where applicable on the tire sidewall between tread shoulder and maximum section width.
Treadwear
The treadwear grade is a comparative rating based on the wear rate of the tire when tested under controlled conditions on a specified government test course. For example, a tire graded 150 would wear one and one-half (1 1/2) times as well on the government course as a tire graded 100. The relative performance of tires depends upon the actual conditions of their use, however, and may depart significantly from the norm due to variations in driving habits, service practices and differences in road characteristics and climate.
Uniform Tire Quality Grading
For example: Treadwear 200 Traction AA Temperature A
All passenger car tires must conform to Federal Safety Requirements in addition to these grades.
Traction
The traction grades, from highest to lowest, are AA, A, B, and C. Those grades represent the tire's ability to stop on wet pavement as measured under controlled conditions on specified government test surfaces of asphalt and concrete. A tire marked C may have poor traction performance.
Temperature
The temperature grades are A (the highest), B, and C, representing the tire's resistance to the generation of heat and its ability to dissipate heat when tested under controlled conditions on a specified indoor laboratory test wheel. Sustained high temperature can cause the material of the tire to degenerate and reduce tire life, and excessive temperature can lead to sudden tire failure. The grade C corresponds to a level of performance which all passenger car tires must meet under the Federal Motor Vehicle Safety Standard No. 109. Grades B and A represent higher levels of performance on the laboratory test wheel than the minimum required by law.
Traction
Warning: The traction grade assigned to this tire is based on straight-ahead braking traction tests, and does not include acceleration, cornering, hydroplaning, or peak traction characteristics.
Temperature
Warning: The temperature grade for this tire is established for a tire that is properly inflated and not overloaded. Excessive speed, underinflation, or excessive loading, either separately or in combination, can cause heat buildup and possible tire failure.
Wear Indicators
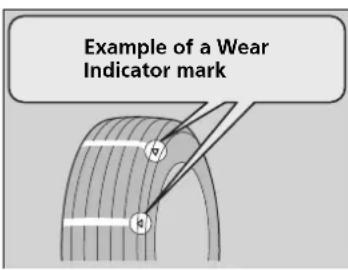
text_image
Example of a Wear Indicator markThe groove where the wear indicator is located is 1/16 inch (1.6 mm) shallower than elsewhere on the tire. If the tread has worn so that the indicator is exposed, replace the tire. Worn out tires have poor traction on wet roads.
Tire Service Life
The life of your tires is dependent on many factors, including driving habits, road conditions, vehicle loading, inflation pressure, maintenance history, speed, and environmental conditions (even when the tires are not in use).
In addition to regular inspections and inflation pressure maintenance, it is recommended that you have annual inspections performed once the tires reach five years old. All tires, including the spare ^* , should be removed from service after 10 years from the date of manufacture, regardless of their condition or state of wear.
Tire and Wheel Replacement
Replace your tires with radials of the same size, load range, speed rating, and maximum cold tire pressure rating (as shown on the tire's sidewall). Using tires of a different size or construction can cause certain vehicle systems such as the ABS and Vehicle Stability Assist™ (VSA®) system to work incorrectly.
It is best to replace all four tires at the same time. If that isn't possible, replace the front or rear tires in pairs.
If you replace a wheel, only use TPMS specified wheels approved for your vehicle. Make sure that the wheel's specifications match those of the original wheels.
Tire and Wheel Replacement
WARNING
Installing improper tires on your vehicle can affect handling and stability. This can cause a crash in which you can be seriously hurt or killed.
Always use the size and type of tires recommended in this owner's manual.
Tire Rotation
Rotating tires according to the maintenance messages on the MID helps to distribute wear more evenly and increase tire life.
■ Tires without rotation marks
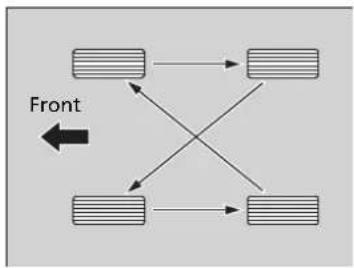
flowchart
graph TD
    A["Rectangular Node 1"] --> B["Rectangular Node 2"]
    B --> C["Rectangular Node 3"]
    C --> D["Rectangular Node 4"]
    D --> A
    style A fill:#f9f,stroke:#333
    style B fill:#f9f,stroke:#333
    style C fill:#f9f,stroke:#333
    style D fill:#f9f,stroke:#333
    note right of A Front
Rotate the tires as shown here.
■ Tires with rotation marks
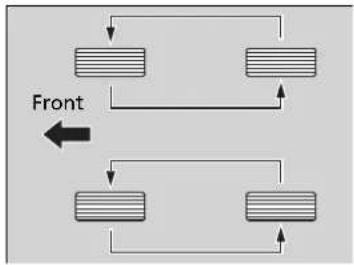
flowchart
graph TD
    A[" "] --> B[" "]
    C[" "] --> D[" "]
    E[" "] --> F[" "]
    G[" "] --> H[" "]
    I[" "] --> J[" "]
    K[" "] --> L[" "]
    M[" "] --> N[" "]
    O[" "] --> P[" "]
    Q[" "] --> R[" "]
    S[" "] --> T[" "]
    U[" "] --> V[" "]
    W[" "] --> X[" "]
    Y[" "] --> Z[" "]
    AA[" "] --> AB[" "]
    AC[" "] --> AD[" "]
    AE[" "] --> AF[" "]
    AG[" "] --> AH[" "]
    AI[" "] --> AJ[" "]
    AK[" "] --> AL[" "]
    AM[" "] --> AN[" "]
    AO[" "] --> AP[" "]
    AQ[" "] --> AR[" "]
    AS[" "] --> AT[" "]
    AU[" "] --> AV[" "]
    AW[" "] --> AX[" "]
    AY[" "] --> AZ[" "]
    BA[" "] --> BB[" "]
    BC[" "] --> BD[" "]
    BE[" "] --> BF[" "]
    BG[" "] --> BH[" "]
    BI[" "] --> BJ[" "]
    BK[" "] --> BL[" "]
    BM[" "] --> BN[" "]
    BO[" "] --> BP[" "]
    BQ[" "] --> BR[" "]
    BS[" "] --> BT[" "]
    BU[" "] --> BV[" "]
    BW[" "] --> BX[" "]
    BY[" "] --> BZ[" "]
    CA[" "] --> CB[" "]
    CC[" "] --> CD[" "]
    CE[" "] --> CF[" "]
    CG[" "] --> DH[" "]
    DI[" "] --> DJ[" "]
    DK[" "] --> DL[" "]
    DM[" "] --> DJ
    DB[" "] --> DJ
    DB --> DC
    DB --> DJ
    DB --> DL
    DB --> DJ
    DB --> DL
    DB --> DC
    DB --> DL
    DB --> DW
    DB --> DL
    DB --> DW
    DB --> DL
    DB --> DW
    DB --> DL
    DB --> DW
    DB --> DL
    DB --> DW
    DB --> DL
    DB --> DW
    DB --> DL
    DB --> DW
    DB --> DL
    DB --> DW
    DB --> DL
    DB --> DW
    DB --> DL
    DB --> DW
    DB --> DL
    DB --> DL
Rotate the tires as shown here.
Tire Rotation
Tires with directional tread patterns should only be rotated front to back (not from one side to the other). Directional tires should be mounted with the rotation indication mark facing forward, as shown below.
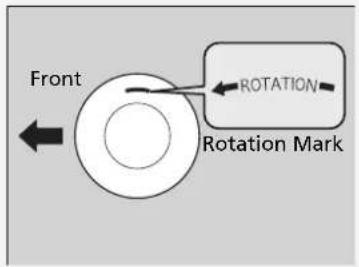
text_image
Front Rotation Mark ROTATIONWinter Tires
If driving on snowy or frozen roads, mount all season marked M+S tires, snow tires, or tire chains; reduce speed; and maintain sufficient distance between vehicles when driving.
Be particularly careful when operating the steering wheel or brakes to prevent skidding.
Use tire chains, snow tires, or all season tires when necessary or according to the law.
When mounting, refer to the following points.
For winter tires:
- Select the size and load ranges that are the same as the original tires.
- Mount the tires to all four wheels.
For tire chains:
• Install them on the front tires only. - Because your vehicle has limited tire clearance, we strongly recommend using the chains listed below:
Cable-type: SCC Cable Chain Super Z LT - ZT735
- Follow the chain manufacturer's instruction when installing. Mount them as tightly as you can.
- Check that the chains do not touch the brake lines or suspension.
- Drive slowly.
Winter Tires
WARNING
Using the wrong chains, or not properly installing chains, can damage the brake lines and cause a crash in which you can be seriously injured or killed.
Follow all instructions in this owner's manual regarding the selection and use of tire chains.
NOTICE
Traction devices that are the wrong size or improperly installed can damage your vehicle's brake lines, suspension, body, and wheels. Stop driving if they are hitting any part of the vehicle.
When tire chains are mounted, follow the chain manufacturer's instructions regarding vehicle operational limits.
If your vehicle is equipped with summer tires, be aware that these tires are not designed for winter driving conditions. For more information, contact a dealer.
12-Volt Battery
Checking the 12-Volt Battery
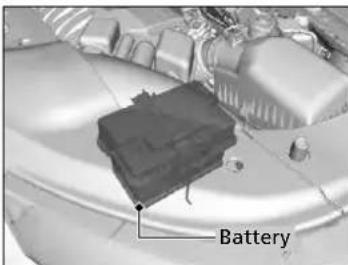
text_image
BatteryThe condition of the battery is monitored by a sensor located on the negative terminal of the battery. If there is a problem with this sensor, the multi-information display (MID) will display a warning message. If this happens, have your vehicle inspected by a dealer.
Check the battery terminals for corrosion monthly.
If your vehicle's battery is disconnected or goes dead:
• The audio system is disabled.
→ Audio System Theft Protection P. 240
- The clock resets.
→Clock P. 142
Charging the 12-Volt Battery
Disconnect both battery cables to prevent damaging your vehicle's electrical system. Always disconnect the negative (−) cable first, and reconnect it last.
12-Volt Battery
WARNING
The battery gives off explosive hydrogen gas during normal operation.
A spark or flame can cause the battery to explode with enough force to kill or seriously hurt you.
When conducting any battery maintenance, wear protective clothing and a face shield, or have a skilled technician do it.
WARNING: Battery post, terminals, and related accessories contain lead and lead compounds. Wash your hands after handling.
When you find corrosion, clean the battery terminals by applying a baking powder and water solution. Clean the terminals with a damp towel. Cloth/towel dry the battery. Coat the terminals with grease to help prevent future corrosion.
When replacing the battery, the replacement must be of the same specifications. Consult a dealer for more information.
Remote Transmitter Care
Replacing the Button Battery
If the indicator does not come on when the button is pressed, replace the battery.
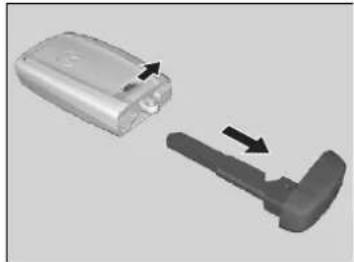
natural_image
Two 3D-rendered objects: a silver rectangular device and a gray mechanical component, both with arrows indicating transformation or assembly (no text or symbols present)Battery type: CR2032
- Remove the built-in key.
As a convenience, lightly place masking tape over the remote buttons to hold them in place.
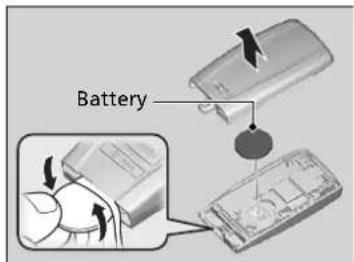
text_image
Battery- Remove the upper half of the cover by carefully prying on the edge with a coin.
▶ Wrap a coin with a cloth to prevent scratching the transmitter.
- Press down on the center of the assembly and remove the battery.
When removing the button battery, be careful not to touch parts around it.
- Make sure to replace the battery with the correct polarity.
Replacing the Button Battery
WARNING
CHEMICAL BURN HAZARD
The battery that powers the remote transmitter can cause severe internal burns and can even lead to death if swallowed. Keep new and used batteries away from children.
If you suspect that a child has swallowed the battery, seek medical attention immediately.
NOTICE
An improperly disposed of battery can damage the environment. Always confirm local regulations for battery disposal.
Replacement batteries are commercially available or at a dealer.
NOTICE
The Remote transmitter is equipped with two batteries: A standard replaceable CR2032 coin button battery and an integral non-replaceable rechargeable battery. To prevent permanent damage to the rechargeable battery, replace the CR2032 battery every three to four years.
Remote Control and Wireless Headphone Care\*
Models with Rear Entertainment System
Replacing the Battery
Remote Control
If it takes several pushes on the remote control buttons to operate the rear entertainment system, replace the battery.
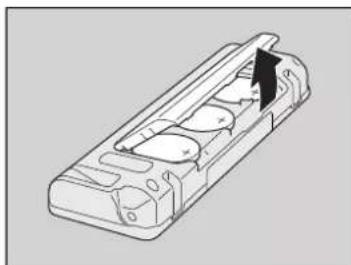
natural_image
Technical line drawing of a mechanical component with internal cavities and an arrow indicating direction (no text or symbols)Battery type: BR3032
- Remove the cover.
- Make sure to replace the battery with the correct polarity.
Replacing the Battery
WARNING
CHEMICAL BURN HAZARD
The battery that powers the remote control can cause severe internal burns and can even lead to death if swallowed.
Keep new and used batteries away from children.
If you suspect that a child has swallowed the battery, seek medical attention immediately.
NOTICE
An improperly disposed of battery can damage the environment. Always confirm local regulations for battery disposal.
Replacement batteries are commercially available or at a dealer.
Make sure to replace all the batteries at once.
Wireless Headphone
If there is no sound coming from the wireless headphone, replace the battery.
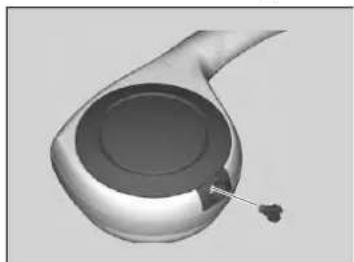
natural_image
3D rendered illustration of a mechanical component with a curved handle and central circular feature (no text or symbols)Battery type: AAA
- Remove the screw.
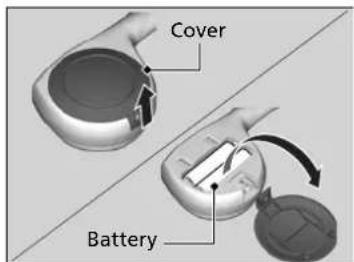
text_image
Cover Battery-
Open the cover.
-
Make sure to replace the battery with the correct polarity.
Climate Control System Maintenance
Dust and Pollen Filter
The climate control system is equipped with a dust and pollen filter that collects pollen, dust, and other debris in the air. The Maintenance Minder™ messages will let you know when to replace the filter.
We recommend that you replace the dust and pollen filter sooner when using your vehicle in areas with high concentrations of dust.
Dust and Pollen Filter
If the airflow from the climate control system deteriorates noticeably, and the windows fog up easily, the filter may need to be replaced. Please contact a dealer for replacement.
Cleaning
Interior Care
Use a damp cloth with a mixture of mild detergent and warm water to remove dirt. Use a clean cloth to remove detergent residue.
Cleaning Seat Belts
Use a soft brush with a mixture of mild soap and warm water to clean the seat belts. Let the belts air dry. Wipe the openings of the seat belt anchors using a clean cloth.
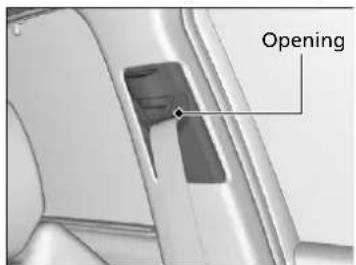
text_image
OpeningInterior Care
Do not spill liquids inside the vehicle. Electrical devices and systems may malfunction if liquids are splashed on them.
Do not use silicone based sprays on electrical devices such as audio devices and switches. Doing so may cause the items to malfunction or cause a fire inside the vehicle.
If a silicone based spray is inadvertently used on electrical devices, consult a dealer.
Depending on their composition, chemicals and liquid aromatics may cause discoloration, wrinkles, and cracking to resin-based parts and textiles.
Do not use alkali solvents or organic solvents such as benzene or gasoline.
After using chemicals, make sure to gently wipe them away using a dry cloth.
Do not place used cloths on top of resin based parts or textiles for long periods of time without washing.
Continued
Cleaning the Window
Wipe using a glass cleaner.
Floor Mats
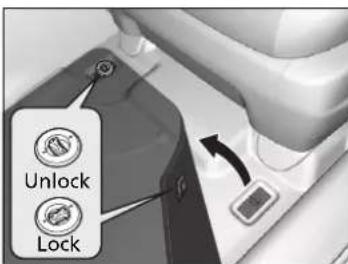
text_image
Unlock LockThe front and second row passenger's floor mats hook over floor anchors, which keep them from sliding forward. To remove a mat for cleaning, turn the anchor knobs to the unlock position. When reinstalling the mat after cleaning, turn the knobs to the lock position.
Do not put additional floor mats on top of the anchored mats.
Maintaining Genuine Leather
To properly clean leather:
- Use a vacuum or soft dry cloth first to remove any dirt or dust.
- Clean the leather with a soft cloth dampened with a solution comprised of 90% water and 10% neutral soap.
- Wipe away any soap residue with a clean damp cloth.
- Wipe away residual water and allow leather to air dry in the shade.
>>Cleaning the Window
Wires are mounted to the inside of the rear window. Wipe along the same direction as the wires with a soft cloth so as not to damage them.
Be careful not to spill fluids, such as water or glass cleaner, on or around the cover of both the front sensor camera and the rainfall/light sensor.
Automatic Operation (automatic lighting control) P. 176
→ Automatic Intermittent Wipers P. 183
Front Sensor Camera P. 475
»Floor Mats
If you use any floor mats that were not originally provided with your vehicle, make sure they are designed for your specific vehicle, fit correctly, and are securely anchored by the floor anchors. Position the rear seat floor mat properly. If they are not properly positioned, the floor mat can interfere with the front seat functions.
Maintaining Genuine Leather
It is important to clean or wipe away dirt or dust as soon as possible. Spills can soak into leather resulting in stains. Dirt or dust can cause abrasions in the leather. In addition, please note that some dark colored clothing can rub onto the leather seats resulting in discoloration or stains.
Exterior Care
Dust off the vehicle body after you drive.
Regularly inspect your vehicle for scratches on painted surfaces. A scratch on a painted surface can result in body rust. If you find a scratch, promptly repair it.
Washing the Vehicle
Wash the vehicle regularly. Wash more frequently when driving in the following conditions:
- If driving on roads with road salt.
- If driving in coastal areas.
- If tar, soot, bird droppings, insects, or tree sap are stuck to painted surfaces.
Using an Automated Car Wash
- Make sure to follow the instructions indicated on the automated car wash.
- Fold in the door mirrors.
- For models equipped with automatic intermittent wipers, turn the wipers off.
Washing the Vehicle
Do not spray water into the air intake vents. It can cause a malfunction.
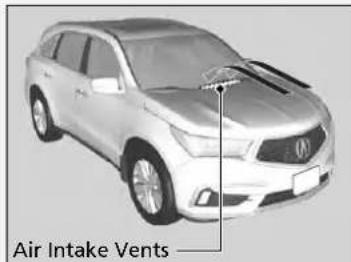
text_image
Air Intake VentsDo not spray water onto the capless unit when the fuel fill door is open. It can cause damage to the fuel system or engine.
Using an Automated Car Wash
When using an automated car wash that pulls the vehicle through with a conveyor, make sure vehicle is in car wash mode.
If you want to keep the transmission in position [car wash mode] P. 469
Continued
Using High Pressure Cleaners
- Keep sufficient distance between the cleaning nozzle and the vehicle body.
- Take particular care around the windows. Standing too close may cause water to enter the vehicle interior.
- Do not spray high pressure water directly into the engine compartment. Instead, use low pressure water and a mild detergent.
Applying Wax
A good coat of automotive body wax helps protect your vehicle's paint from the elements. Wax will wear off over time and expose your vehicle's paint to the elements, so reapply as necessary.
Maintaining the Bumpers and Other Resin Coated Parts
If you get gasoline, oil, engine coolant, or battery fluid on resin coated parts, they may be stained or the coating may peel. Promptly wipe it away using a soft cloth and clean water.
Cleaning the Window
Wipe using a glass cleaner.
>> Applying Wax
NOTICE
Chemical solvents and strong cleaners can damage the paint, metal, and plastic on your vehicle. Wipe away spills immediately.
>>Maintaining the Bumpers and Other Resin Coated Parts
Ask a dealer about the correct coating material when you want to repair the painted surface of the parts made of resin.
Maintaining Aluminum Wheels
Aluminum is susceptible to deterioration caused by salt and other road contaminants. When necessary, as early as possible use a sponge and mild detergent to wipe away these contaminants. Do not use a stiff brush or harsh chemicals (including some commercial wheel cleaners). These can damage the protective finish on aluminum alloy wheels, resulting in corrosion. Depending on the type of finish, the wheels also may lose their luster or appear burnished. To avoid water stains, wipe the wheels dry with a cloth while they are still wet.
Fogged Exterior Light Lenses
The inside lenses of exterior lights (headlights, brake lights, etc.) may fog temporarily if you have driven in the rain, or after the vehicle has been run through a car wash. Dew condensation also may build up inside the lenses when there is a significant enough difference between the ambient and inside lens temperatures (similar to vehicle windows fogging up in rainy conditions). These conditions are natural processes, not structural design problems in the exterior lights. Lens design characteristics may result in moisture developing on the light lens frame surfaces. This also is not a malfunction. However, if you see large amounts of water accumulation, or large water drops building up inside the lenses, have your vehicle inspected by a dealer.
Continued
Painting the Vehicle
Refer to the temperature notice label affixed to the driver's doorjamb before painting the vehicle.
Painting the Vehicle
U.S. models
NOTICE
High temperature may damage the high-voltage battery used to power the electric motor. When drying paint in a heated paint booth, make sure the temperature does not exceed 150^ F( 65^ C).

Canadian models
NOTICE
High temperature may damage the high-voltage battery used to power the electric motor. When drying paint in a heated paint booth, make sure the temperature does not exceed 150°F(65°C).
AVIS
Accessories and Modifications
Accessories
When installing accessories, check the following:
- Do not install accessories on the windshield. They can obstruct your view and delay your reaction to driving conditions.
- Do not install any accessories over areas marked SRS Airbag, on the sides or backs of the front seats, on front or side pillars, or near the side windows.
Accessories installed in these areas may interfere with proper operation of the vehicle's airbags or may be propelled into you or another occupant if the airbags deploy. - Be sure electronic accessories do not overload electrical circuits or interfere with proper operation of your vehicle.
Fuses P. 648 - Before installing any electronic accessory, have the installer contact a dealer for assistance. If possible, have a dealer inspect the final installation.
Accessories and Modifications
WARNING
Improper accessories or modifications can affect your vehicle's handling, stability, and performance, and cause a crash in which you can be seriously hurt or killed.
Follow all instructions in this owner's manual regarding accessories and modifications.
WARNING
Use of improperly designed, engineered or manufactured high-voltage battery assemblies could cause a fire in your vehicle.
A vehicle fire could result in a crash or injury.
Only use a genuine Acura high-voltage battery assembly, or its equivalent, in your vehicle.
Acura Genuine accessories are recommended to ensure proper operation on your vehicle.
Modifications
Do not modify your vehicle in a manner that may affect its handling, stability, or reliability, or install non-genuine Acura parts or accessories that may have a similar effect.
Even minor modifications to vehicle systems can affect overall vehicle performance. Always make sure all equipment is properly installed and maintained, and do not make any modification to your vehicle or its systems that might cause your vehicle to no longer meet federal, state, province, territory, and local regulations.
The on-board diagnostic port (OBD-II/SAE J1962 connector) installed on this vehicle is intended to be used with automobile system diagnostic devices or with other devices that Acura has approved. Use of any other type of device may adversely affect the vehicle's electronic systems or allow them to be compromised, possibly resulting in a system malfunction, drained battery, or other unexpected problems.
Do not modify or attempt to repair your vehicle's high-voltage hybrid power system or otherwise modify vehicle electrical systems. Disassembling or modifying electrical equipment can result in a crash or a fire.
If you ever need to replace your vehicle's high-voltage battery assembly outside of warranty coverage, we highly recommend that you only use a genuine Acura high-voltage battery assembly. Genuine Acura high-voltage battery assemblies are designed to work with your vehicle's hybrid power system and have been designed, engineered and manufactured to avoid overcharging situations. Non-genuine high-voltage battery assemblies may not have been similarly designed, engineered and manufactured, and installation of such assemblies could result in overcharging, fires, loss of power, or other conditions that may increase the likelihood of a crash or injury.
Handling the Unexpected
This chapter explains how to handle unexpected troubles.
Tools
Types of Tools 614
If a Tire Goes Flat
Models with a compact spare tire
Changing a Flat Tire.... 615
Models with temporary tire repair kit
Temporarily Repairing a Flat Tire..... 623
Power System Won't Start.... 635
Checking the Procedure.... 635
If the Keyless Access Remote Battery is
Weak 636
Emergency Power System Off...... 637
Jump Starting 638
Overheating
How to Handle Overheating...... 640
Indicator, Coming On/Blinking
If the Low Oil Pressure Indicator Comes On... 642
If the 12-Volt Battery Charging System
Indicator Comes On 642
If the Malfunction Indicator Lamp Comes
On or Blinks 643
If the Brake System Indicator (Red) Comes
On 644
If the Speed-Sensitive Electric Power Steering
(EPS) System Indicator Comes On .....644
If the Low Tire Pressure/TPMS Indicator
Comes On or Blinks.... 646
If the Transmission System Indicator Blinks
along with the Warning Message..... 646
If the Power System Indicator Comes On.. 647
Fuses
Fuse Locations 648
Inspecting and Changing Fuses...... 656
Emergency Towing
When You Cannot Unlock the Fuel Fill
Door 658
When You Cannot Open the Tailgate..659
Refueling 660
Refueling From a Portable Fuel
Container 660
Tools
Types of Tools
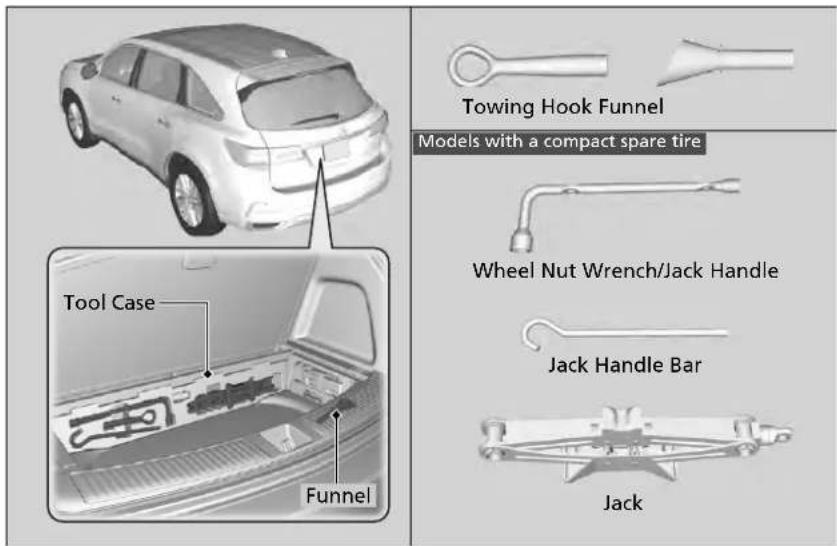
Types of Tools
The tools are stored in the cargo area.
If a Tire Goes Flat
Models with a compact spare tire
Changing a Flat Tire
If a tire goes flat while driving, grasp the steering wheel firmly, and brake gradually to reduce speed. Then, stop in a safe place. Replace the flat tire with a compact spare tire. Go to a dealer as soon as possible to have the full-size tire repaired or replaced.
- Park the vehicle on firm, level, non-slippery surface and apply the parking brake.
- Put the transmission into P.
- Turn on the hazard warning lights and set the power mode to VEHICLE OFF.
Changing a Flat Tire
Follow compact spare precautions: Periodically check the tire pressure of the compact spare. It should be set to the specified pressure. Specified Pressure: 60 psi (420 kPa, 4.2 kgf/cm ^2 )
When driving with the compact spare tire, keep the vehicle speed under 50 mph (80 km/h). Replace with a full-size tire as soon as possible.
The compact spare tire and wheel in your vehicle are specifically for this model. Do not use them with another vehicle. Do not use another type of compact spare tire or wheel with your vehicle.
Do not mount tire chains on a compact spare tire. If a chain-mounted front tire goes flat, remove one of the full-size rear tires and replace it with the compact spare tire. Remove the flat front tire and replace it with the full-size tire that was removed from the rear. Mount the tire chains on the front tire.
Do not use a puncture-repairing agent other than the one provided in the kit that came with your vehicle (if equipped). If a different agent is used, you may permanently damage the tire pressure sensor.
Continued
Getting Ready to Replace the Flat Tire
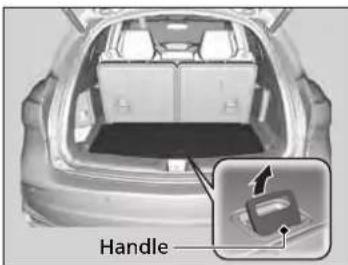
text_image
Handle- Push the rear edge of the handle on the floor lid and open the lid.
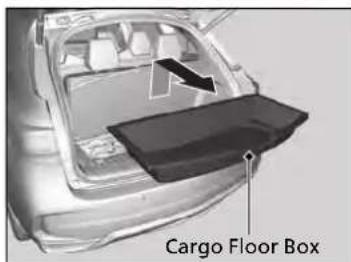
text_image
Cargo Floor Box- Take out the cargo floor box.
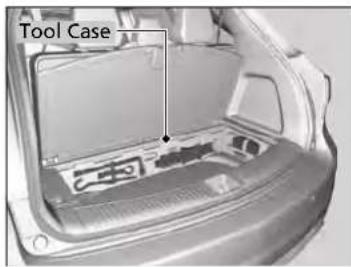
text_image
Tool Case- Take the jack, wheel nut wrench, and jack handle bar out of the tool case.
Changing a Flat Tire
NOTICE
Do not use the jack if it doesn't work properly. Call your dealer or a professional towing service.
The wheel nut wrench supplied with your vehicle is specially adapted to fit the holder shaft. Do not use any other tool.
The subwoofer is located on the rear right side. Do not store anything in this area. Doing so may compromise vehicle audio performance.
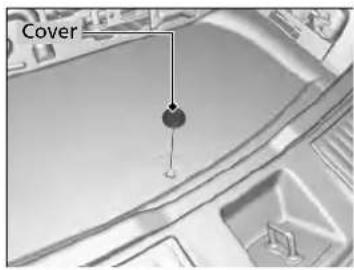
text_image
Cover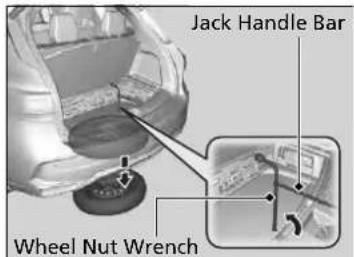
text_image
Jack Handle Bar Wheel Nut Wrench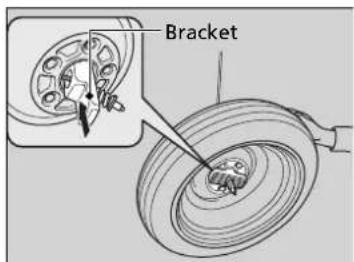
text_image
Bracket- Remove the cover on the cargo area lining to access the shaft for the spare tire hoist.
- Put the wheel nut wrench with the jack handle bar on the hoist shaft. Turn the wrench to the left to lower the spare tire to the ground.
- Keep turning the wheel nut wrench to create slack in the cable.
- Remove the bracket from the spare tire.
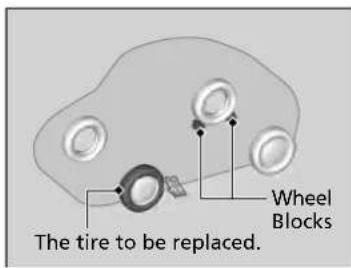
text_image
The tire to be replaced. Wheel Blocks- Place a wheel block or rock in front and rear of the wheel diagonal to the flat tire.
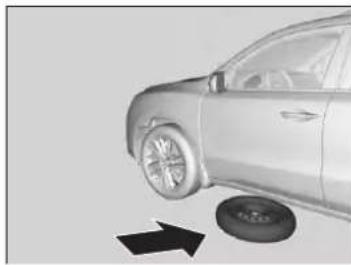
natural_image
Side view of a car with a tire and arrow indicating direction (no text or symbols)- Place the compact spare tire (wheel side up) under the vehicle body, near the tire that needs to be replaced.
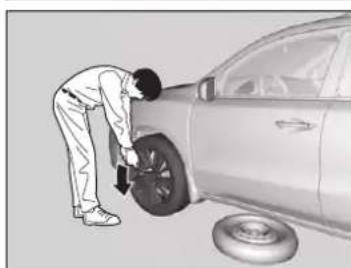
natural_image
Person applying a tire to a car, no visible text or symbols- Loosen each wheel nut about one turn using the wheel nut wrench.
How to Set Up the Jack
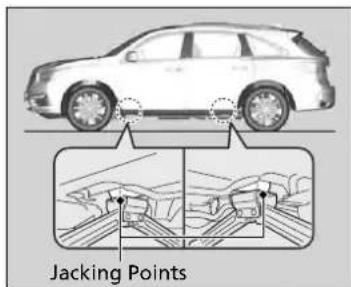
text_image
Jacking Points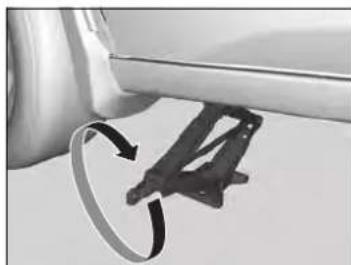
natural_image
Close-up of a metallic mechanical component with a curved arrow indicating rotation (no text or symbols visible)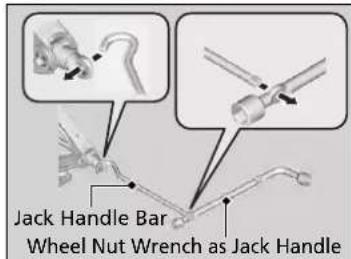
text_image
Jack Handle Bar Wheel Nut Wrench as Jack Handle-
Place the jack under the jacking point closest to the tire to be changed.
-
Turn the end bracket clockwise as shown in the image until the top of the jack contacts the jacking point.
▶ Make sure that the jacking point tab is resting in the jack notch.
- Raise the vehicle, using the jack handle bar and the jack handle, until the tire is off the ground.
Continued
How to Set Up the Jack
WARNING
The vehicle can easily roll off the jack, seriously injuring anyone underneath.
Follow the directions for changing a tire exactly, and no person should place any portion of their body under a vehicle that is supported by a jack.
Do not use the jack with people or luggage in the vehicle.
Use the jack provided in your vehicle. Other jacks may not support the weight ("load") or may not fit the jacking point.
The following instructions must be followed to use the jack safely:
- Do not use while the power system is on
- Use only where the ground is firm and level.
- Use only at the jacking points.
- Do not get in the vehicle while using the jack.
- Do not put anything on top of or underneath the jack.
Replacing the Flat Tire
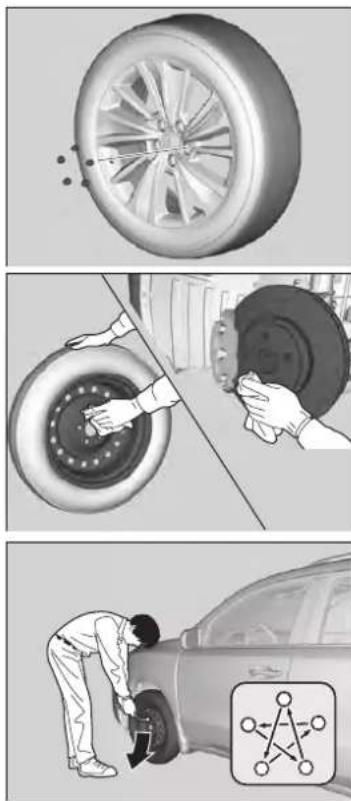
- Remove the wheel nuts and flat tire.
- Wipe the mounting surfaces of the wheel with a clean cloth.
- Mount the compact spare tire.
- Screw the wheel nuts until they touch the lips around the mounting holes, then stop rotating.
- Lower the vehicle and remove the jack. Tighten the wheel nuts in the order indicated in the image. Go around, tightening the nuts, two to three times in this order.
Wheel nut torque:
94 lbf·ft (127 N·m, 13.0 kgf·m)
Replacing the Flat Tire
Do not over tighten the wheel nuts by applying extra torque using your foot or a pipe.
Storing the Flat Tire
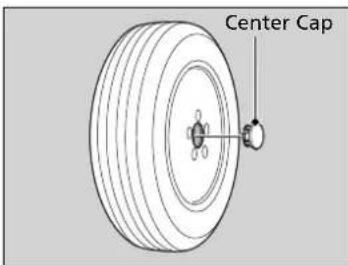
text_image
Center Cap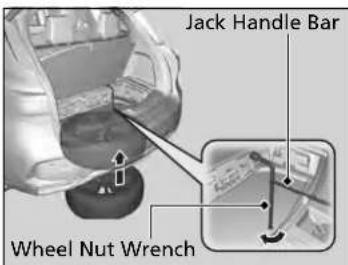
text_image
Jack Handle Bar Wheel Nut Wrench- Remove the center cap.
- Place the flat tire face up under the hoist.
- Insert the hoist bracket into the center hole of the flat tire.
-
Slowly turn the wheel nut wrench clockwise to take up the hoist cable slack. Make sure the bracket is seated in the center hole of the flat tire.
-
Turn the wheel nut wrench with the jack handle bar (clockwise) until the flat tire rests against the underbody of the vehicle, and you hear the hoist click.
- Securely store the jack, wheel nut wrench, and jack handle bar back in the tool case. Store the case in the cargo area.
Storing the Flat Tire
WARNING
Loose items can fly around the interior in a crash and can seriously injure the occupants. Store the jack and tools securely before driving.
TPMS and the Compact Spare Tire
If you replace a flat tire with the spare tire, the low tire pressure/TPMS indicator comes on while you are driving. After driving for a few miles (kilometers), Tire Pressure Monitor Problem will appear on the multi-information display and the indicator will start blinking for a short time and then stay on; however, this is normal and is no cause for concern.
If you replace the tire with a full-size tire, the warning message on the MID and the low tire pressure/TPMS indicator will go off after a few miles (kilometers).
TPMS and the Compact Spare Tire
The system cannot monitor the pressure of the spare tire. Manually check the spare tire pressure to be sure that it is correct.
Use TPMS specific wheels. Each is equipped with a tire pressure sensor mounted inside the tire behind the valve stem.
Models with temporary tire repair kit
Temporarily Repairing a Flat Tire
If the tire has a large cut or is otherwise severely damaged, you will need to have the vehicle towed. If the tire only has a small puncture, from a nail for instance, you can use the temporary tire repair kit so that you can drive to the nearest service station for a more permanent repair.
If a tire goes flat while driving, grasp the steering wheel firmly, and brake gradually to reduce speed. Then stop in a safe place.
- Park the vehicle on a firm, level, and non-slippery surface and apply the parking brake.
- Put the transmission into P.
- Turn on the hazard warning lights and set the power mode to VEHICLE OFF.
▶ Temporarily Repairing a Flat Tire
The kit should not be used in the following situations. Instead, contact a dealer or roadside assistance to have the vehicle towed.
• The tire sealant has expired.
- More than one tire is punctured.
• The puncture or cut is larger than 3/16 inch (4mm).
- The tire side wall is damaged or the puncture is outside the contact area.
| Smaller than 3/16 inch(4 mm) | Yes |
| Larger than 3/16 inch(4 mm) | No |
- Damage has been caused by driving with the tires extremely under inflated.
• The tire bead is no longer seated. - The rim is damaged.
Do not remove a nail or screw that punctured the tire. If you remove it from the tire, you may not be able to repair the puncture using the kit.
NOTICE
Do not use a puncture-repairing agent other than the one provided in the kit that came with your vehicle. If a different agent is used, you may permanently damage the tire pressure sensor.
Continued
Getting Ready to Temporarily Repair the Flat Tire
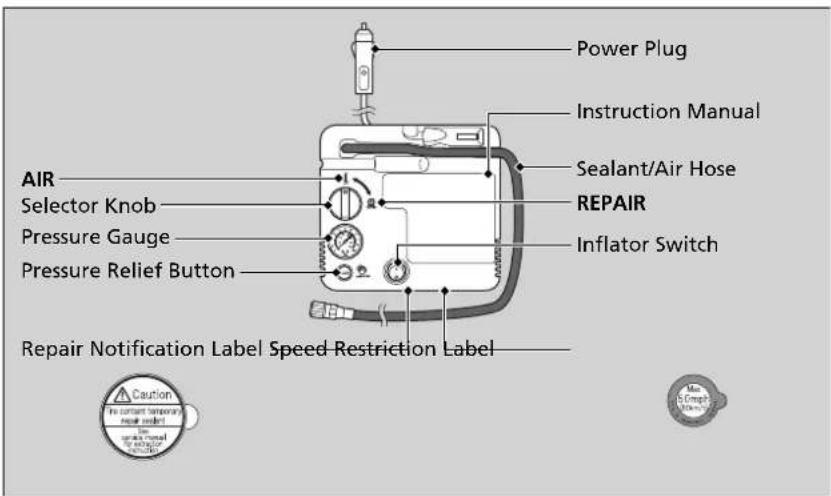
text_image
AIR Selector Knob Pressure Gauge Pressure Relief Button Power Plug Instruction Manual Sealant/Air Hose REPAIR Inflator Switch Repair Notification Label Speed Restriction Label Caution in constant temperature reast modelGetting Ready to Temporarily Repair the Flat Tire
Repair notification label and speed restriction label are applied to the side of temporary tire repair kit.
When making a temporary repair, carefully read the instruction manual provided with the kit.
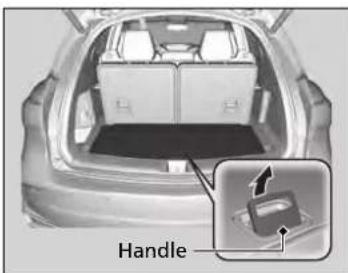
text_image
Handle- Pull the handle on the cargo area floor lid and open the lid.
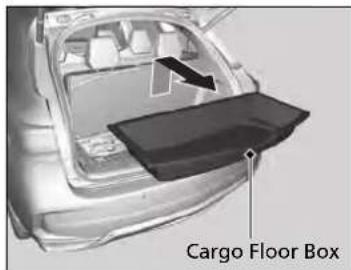
text_image
Cargo Floor Box- Take out the cargo floor box.
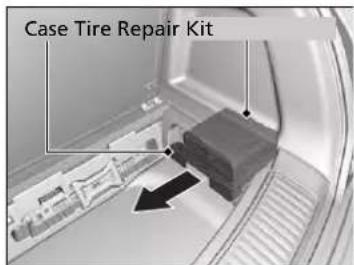
text_image
Case Tire Repair Kit-
Take the kit out of the case.
-
Place the kit face up, on flat ground near the flat tire, and away from traffic. Do not place the kit on its side.
Injecting Sealant and Air
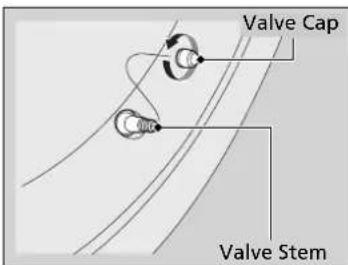
text_image
Valve Cap Valve Stem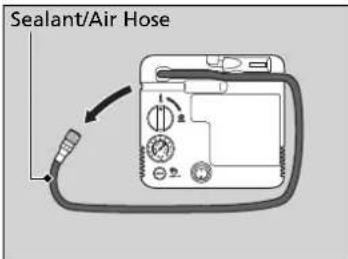
text_image
Sealant/Air Hose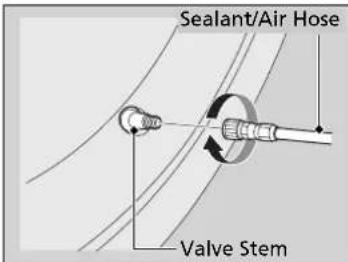
text_image
Sealant/Air Hose Valve Stem- Remove the valve cap from the tire valve stem.
- Remove the sealant/air hose from the packaging.
- Attach the sealant/air hose onto the tire valve stem. Screw it until it is tight.
Injecting Sealant and Air
WARNING
Tire sealant contains substances that are harmful and can be fatal if swallowed.
If accidentally swallowed, do not induce vomiting. Drink plenty of water and get medical attention immediately.
For skin or eye contact, flush with cool water and get medical attention if necessary.
In cold temperatures, the sealant may not flow easily. In this situation, warm it up for five minutes before using.
The sealant can permanently stain clothing and other materials. Be careful during handling and wipe away any spills immediately.
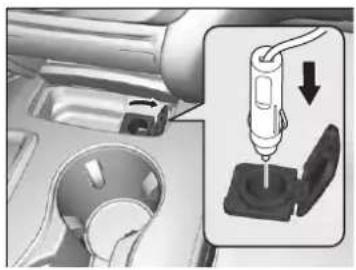
natural_image
Mechanical assembly diagram showing a drill bit being inserted into a component (no text or symbols visible)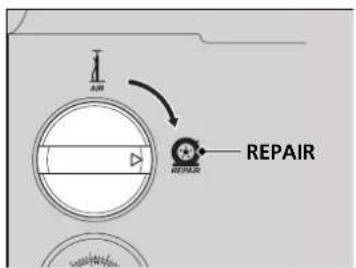
text_image
AIR REPAIR REPAIR- Plug in the compressor to the accessory power socket.
▶ Be careful not to pinch the cord in a door or window.
▶ Do not plug any other electric devices into other accessory power sockets.
→ Accessory Power Sockets P. 216
- Turn the power system on.
▶ Keep the power system on while injecting sealant and air.
Carbon Monoxide Gas P. 80
- Turn the selector knob to REPAIR.
Injecting Sealant and Air
WARNING
Running the engine with the vehicle in an enclosed or even partly enclosed area can cause a rapid build-up of toxic carbon monoxide.
Breathing this colorless, odorless gas can cause unconsciousness and even death. Only run the engine to power the air compressor with the vehicle outdoors.
NOTICE
Do not operate the temporary tire repair kit compressor for more than 15 minutes. The compressor can overheat and become permanently damaged.
There are three accessory power sockets:
• In the console compartment
• In the front of the center pocket
• In the left side panel in the cargo area
→Accessory Power Sockets P. 216
Until the sealant injection is complete, the pressure shown on the pressure gauge will appear higher than actual. After the sealant injection is complete the pressure will drop and then begin to rise again as the tire is inflated with air. This is normal. To accurately measure the air pressure using the gauge, turn the air compressor off only after the sealant injection is complete.
Continued
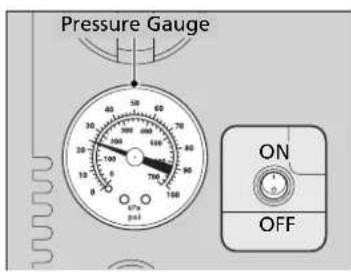
text_image
Pressure Gauge ON OFF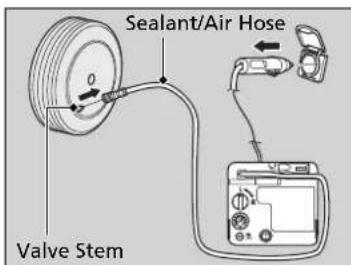
text_image
Sealant/Air Hose Valve Stem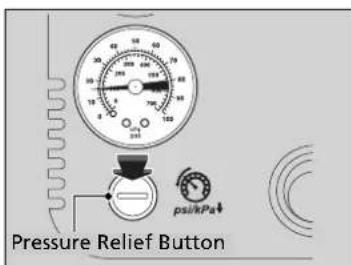
text_image
Pressure Relief Button psikPa- Press the inflator switch to turn on the compressor.
The compressor starts injecting sealant and air into the tire.
When the sealant injection is complete, continue to add air.
- After the air pressure reaches 35 psi (240 kPa), turn off the kit.
▶To check the pressure, occasionally turn off the compressor and read the gauge.
- Unplug the power plug from the accessory power socket.
-
Unscrew the sealant/air hose from the tire valve stem. Reinstall the valve cap.
-
Press the pressure relief button until the gauge returns to 0 psi (0 kPa).
Injecting Sealant and Air
If the required air pressure is not reached within 10 minutes, the tire may be too severely damaged for the kit to provide the necessary seal, and your vehicle will need to be towed.
See an Acura dealer for a replacement sealant bottle and proper disposal of an empty bottle.
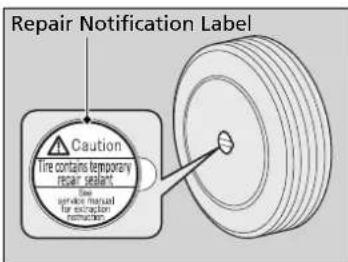
text_image
Repair Notification Label Caution Tire contains temporary repair sealant Use fire service manual for extraction remainment- Apply the repair notification label to the flat surface of the wheel.
The wheel surface must be clean to ensure the label adheres properly.
■ Distributing the Sealant in the Tire
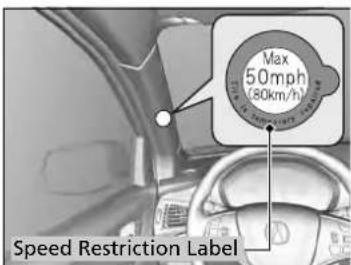
text_image
Max 50mph (80km/h) Speed Restriction Label- Apply the speed restriction label to the location as shown.
- Drive the vehicle for about 10 minutes.
▶ Do not exceed 50 mph (80 km/h). - Stop the vehicle in a safe place.
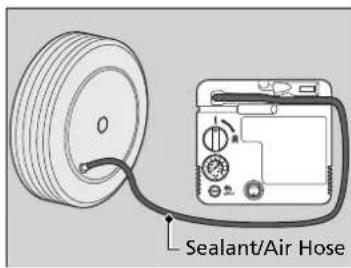
text_image
Sealant/Air Hose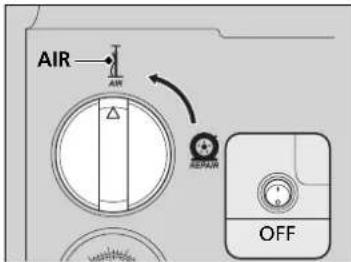
text_image
AIR AERMIR OFF-
Recheck the air pressure using the sealant/air hose on the compressor.
-
Turn the selector knob to AIR.
▶ Do not turn the air compressor on to check the pressure.
Inflating an Under-inflated Tire P. 632
- If the air pressure is
• Less than 25 psi (175 kPa):
Do not add air or continue driving. The leak is too severe. Call for help and have your vehicle towed.
Emergency Towing P. 657
• 35 psi (240 kPa) or more:
Continue driving for another 10 minutes or until you reach the nearest service station, whichever is sooner. Do not exceed 50 mph (80 km/h). If you have not reached a service station, stop and check the tire pressure.
▶If the air pressure does not go down after 10 minutes of driving, you do not need to check the tire pressure again.
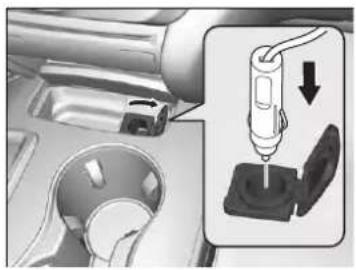
natural_image
Mechanical assembly diagram showing a drill bit being inserted into a socket (no text or symbols present)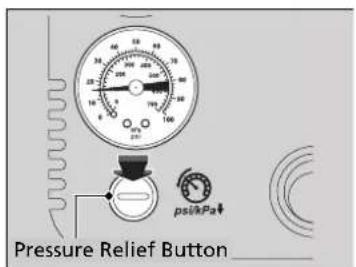
text_image
Pressure Relief Button psikPa- Greater than 25 psi (175 kPa), but less than 35 psi (240 kPa): Turn the air compressor on to inflate the tire until the tire pressure reaches 35 psi (240 kPa).
Inflating an Under-inflated Tire P. 632 Then drive carefully for 10 more minutes or until you reach the nearest service station, whichever is sooner. Do not exceed 50 mph (80 km/h). If you have not reached a service station, stop and check the tire pressure.
▶You should repeat this procedure as long as the air pressure is within this range.
- Unplug the kit from the accessory power socket.
- Unscrew the sealant/air hose from the tire valve stem. Reinstall the valve cap.
- Press the pressure relief button until the gauge returns to 0 psi (0 kPa).
- Repackage and properly stow the kit.
Distributing the Sealant in the Tire
WARNING
Running the engine with the vehicle in an enclosed or even partly enclosed area can cause a rapid build-up of toxic carbon monoxide.
Breathing this colorless, odorless gas can cause unconsciousness and even death. Only run the engine to power the air compressor with the vehicle outdoors.
Inflating an Under-inflated Tire
You can use the kit to inflate a non-punctured, under-inflated tire.
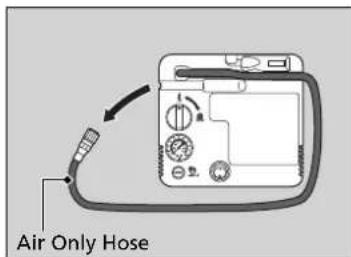
text_image
Air Only Hose- Open the cargo area floor lid.
Getting Ready to Temporarily Repair the Flat Tire P. 624
- Remove the kit from the case.
- Place the kit, face up, on flat ground near the flat tire, away from traffic. Do not place the kit on its side.
- Remove the sealant/air hose from the kit.
- Remove the valve cap.
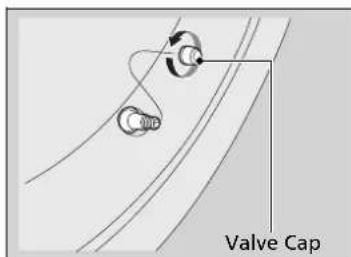
text_image
Valve Cap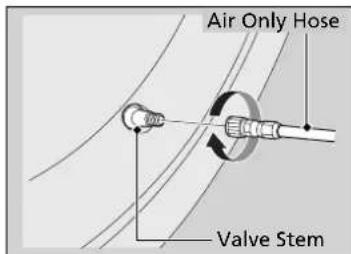
text_image
Air Only Hose Valve Stem- Attach the sealant/air hose onto the tire valve stem. Screw it until it is tight.
Inflating an Under-inflated Tire
NOTICE
Do not operate the temporary tire repair kit compressor for more than 15 minutes. The compressor can overheat and become permanently damaged.
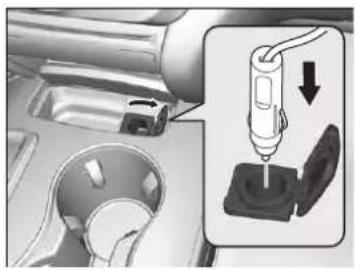
natural_image
Mechanical assembly diagram showing a drill bit being inserted into a socket (no text or symbols present)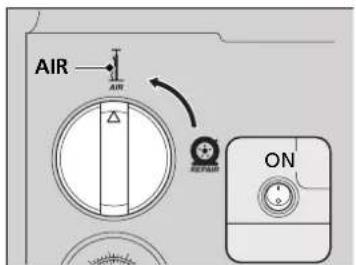
text_image
AIR AIR ON- Plug in the kit to the accessory power socket.
▶ Be careful not to pinch the cord in a door or window.
▶Do not plug any other electronic devices into other accessory power sockets.
→ Accessory Power Sockets P. 216
- Turn the power system on.
▶ Keep the power system on while injecting air.
Carbon Monoxide Gas P. 80
-
Turn the selector knob to AIR.
-
Press the inflator switch to turn on the kit.
The compressor starts to inject air into the tire.
- Inflate the tire to the specified air pressure.
Inflating an Under-inflated Tire
WARNING
Running the engine with the vehicle in an enclosed or even partly enclosed area can cause a rapid build-up of toxic carbon monoxide.
Breathing this colorless, odorless gas can cause unconsciousness and even death. Only run the engine to power the air compressor with the vehicle outdoors.
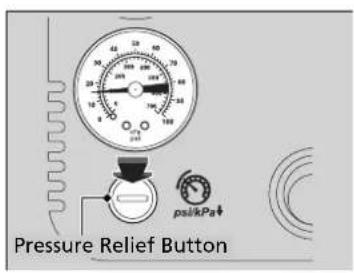
text_image
Pressure Relief Button psikPa- Turn off the kit.
▶Check the pressure gauge on the air compressor.
▶If overinflated, press the pressure relief button.
-
Unplug the kit from the accessory power socket.
-
Unscrew the sealant/air hose from the tire valve stem. Reinstall the valve cap.
-
Press the pressure relief button until the gauge returns to 0 psi (0 kPa).
-
Repackage and properly stow the kit.
Power System Won't Start
Checking the Procedure
When the READY indicator does not come on and the Ready To Drive message does not appear on the multi-information display, check the following items and take appropriate action.
Checking the Procedure
If you must start the vehicle immediately, use an assisting vehicle or booster battery to jump start it.
Jump Starting P. 638
Checklist Condition What to Do
| Check if the related indicator or multi-information display messages come on. | The Temperature Is Too Cold For Vehicle To Operatemeessage appears. | Multi-Information Display (MID) Warning and Information Messages P. 105 |
| The To Start, Hold Remote Near Start Buttonmessageappears. | If the Keyless Access Remote Battery isWeak P. 636 | |
| Make sure the keyless access remote is in its operating range.POWER Button Operating Range P. 171 | ||
| The POWER SYSTEM indicator comes on. | Have your vehicle checked by a dealer. | |
| The transmission system indicator blinks and TransmissionProblem Apply Parking Brake When Parked messageappears. | If the Transmission System Indicator Blinks along with the Warning Message P. 646 | |
| Check the brightness of the interior lights. | The interior lights are dim or do not come on at all. | Have the 12-volt battery checked by a dealer. |
| The interior lights come on normally. Check all fuses, or have your vehicle checked bya dealer. | Inspecting and Changing Fuses P. 656 | |
| Check the gear position. | The transmission is not in P. | Change the gear position to P. |
| Check the immobilizer system indicator. | When the immobilizer system indicator is blinking, the power system cannot be turned on. | Immobilizer System Indicator P. 96 |
If the Keyless Access Remote Battery is Weak
If the beeper sounds, the To Start, Hold Remote Near Start Button message appears on the multi-information display, and the indicator on the POWER button flashes, and the READY indicator does not come on.
Turn on the power system as follows:
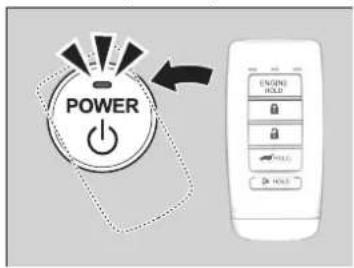
text_image
POWER HOLD
text_image
POWER- Touch the center of the POWER button with the A logo on the keyless access remote while the indicator on the POWER button is flashing. The buttons on the keyless access remote should be facing you.
The indicator flashes for about 30 seconds.
- Depress the brake pedal and press the POWER button within 10 seconds after the beeper sounds while the indicator stays on.
If you don't depress the pedal, the mode will change to ACCESSORY.
Emergency Power System Off
The POWER button may be used to turn the power system off due to an emergency situation even while driving. If you must turn the power system off, do either of the following operations:
- Press and hold the POWER button about for two seconds.
- Firmly press the POWER button three times.
The steering wheel will not lock. However, because turning off the power system disables the power assist the power system provides to the steering and braking systems, it will require significantly more physical effort and time to steer and slow the vehicle. Use both feet on the brake pedal to slow down the vehicle and stop immediately in a safe place.
The transmission automatically changes to P after the vehicle comes to a complete stop. Then, the power mode changes to VEHICLE OFF.
Emergency Power System Off
Do not press the POWER button while driving unless it is absolutely necessary for the power system to be turned off.
If you press the POWER button while driving, the beeper sounds.
Jump Starting
Jump Starting Procedure
Turn off the power to electric devices, such as audio and lights. Turn off the power system, then open the hood.
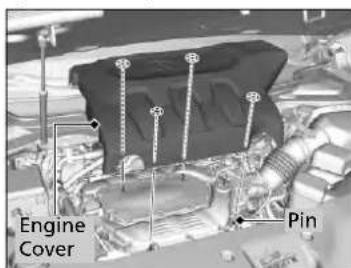
text_image
Engine Cover Pin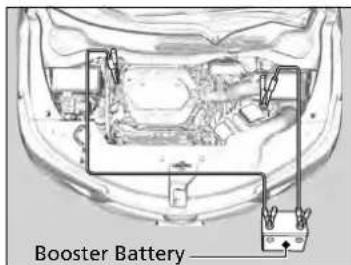
text_image
Booster Battery- Pull up on the engine cover, remove it from the pins.
▶ Start on the passenger side and lift up on the outermost edge of the cover.
▶Move towards the driver side while applying uniform upward pressure.
-
Connect the first jumper cable to your vehicle's 12-volt battery ⊕ terminal.
-
Connect the other end of the first jumper cable to the booster battery ⊕ terminal.
▶ Use a 12-volt booster battery only.
When using an automotive battery charger to boost your 12-volt battery, select a lower charging voltage than 15 volt. Check the charger manual for the proper setting.
4. Connect the second jumper cable to the booster battery ⊖ terminal.
Jump Starting
WARNING
A 12-volt battery can explode if you do not follow the correct procedure, seriously injuring anyone nearby.
Keep all sparks, open flames, and smoking materials away from the 12-volt battery.
Securely attach the jumper cables clips so that they do not come off when the engine vibrates. Also be careful not to tangle the jumper cables or allow the cable ends to touch each other while attaching or detaching the jumper cables.
12-volt Battery performance degrades in cold conditions and may prevent the engine from starting.
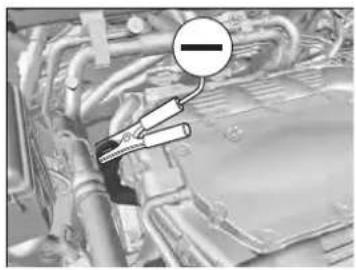
natural_image
Close-up of an automotive engine bay with a tool inserted, showing no visible text or symbols.- Connect the other end of the second jumper cable to the engine hanger as shown. Do not connect this jumper cable to any other part.
- If your vehicle is connected to another vehicle, start the assisting vehicle's engine and increase its rpm slightly.
- Attempt to start your vehicle's engine. If it turns over slowly, check that the jumper cables have good metal-to-metal contact.
What to Do After the Engine Starts
Once your vehicle's engine has started, remove the jumper cables in the following order.
- Disconnect the jumper cable from your vehicle's ground.
- Disconnect the other end of the jumper cable from the booster battery ⊖ terminal.
- Disconnect the jumper cable from your vehicle's 12-volt battery ⊕ terminal.
- Disconnect the other end of the jumper cable from the booster battery ⊕ terminal.
Have your vehicle inspected by a nearby service station or a dealer.
Overheating
How to Handle Overheating
Overheating symptoms are as follows:
- The high temperature indicator comes on or the engine suddenly loses power.
- The Stop Driving When Safe. Engine Temperature Too Hot message appears on the multi-information display (MID).
- Steam or spray comes out of the engine compartment.
■ First thing to do
- Immediately park the vehicle in a safe place.
- Turn off all accessories and turn on the hazard warning lights.
▶ No steam or spray present: Keep the power system on and open the hood.
▶ Steam or spray is present: Turn off the power system and wait until it subsides. Then open the hood.
How to Handle Overheating
WARNING
Steam and spray from an overheated engine can seriously scald you. Do not open the hood if steam is coming out.
NOTICE
Continuing to drive with the high temperature indicator on may damage the engine.
Continuing to drive with the Stop Driving When Safe. Engine Temperature Too Hot message on the multi-information display may damage the engine.
■ Next thing to do

text_image
Reserve Tank MAX MIN MAX MIN- Check that the cooling fan is operating and turn the power system off once the high temperature indicator goes off.
▶If the cooling fan is not operating, immediately turn the power system off.
- Once the engine has cooled down, inspect the coolant level and check the cooling system components for leaks.
▶If the coolant level in the reserve tank is low, add coolant until it reaches the MAX mark.
If there is no coolant in the reserve tank, check that the radiator is cool. Cover the radiator cap with a heavy cloth and open the cap. If necessary, add coolant up to the base of the filler neck, and put the cap back on.
■ Last thing to do
Once the engine has cooled sufficiently, turn the power system on, and check the high temperature indicator.
If the high temperature indicator is off, resume driving. If it stay on, contact a dealer for repairs.
How to Handle Overheating
WARNING
Removing the radiator cap while the engine is hot can cause the coolant to spray out, seriously scalding you.
Always let the engine and radiator cool down before removing the radiator cap.
If the coolant is leaking, contact a dealer for repairs.
Use water as an emergency/temporary measure only. Have a dealer flush the system with proper antifreeze as soon as possible.
Indicator, Coming On/Blinking
If the Low Oil Pressure Indicator Comes On

■ Reasons for the indicator to come on
Comes on when the engine oil pressure is low.
■ What to do as soon as the indicator comes on
-
Immediately park the vehicle on level ground in a safe place.
-
If necessary, turn the hazard warning lights on.
■ What to do after parking the vehicle
-
Turn the power system off and let it sit for approximately three minutes.
-
Open the hood and check the oil level. Oil Check P. 573
-
Start the engine and check the low oil pressure indicator.
▶The indicator goes off: Start driving again.
The indicator does not go off within 10 seconds: Immediately turn the power system off and contact a dealer for repairs.
If the 12-Volt Battery Charging System Indicator Comes On

■ Reasons for the indicator to come on
Comes on when the 12-Volt battery is not being charged.
■ What to do when the indicator comes on
Turn off the climate control system, rear defogger, and other electrical systems, and immediately contact a dealer for repairs.
If the Low Oil Pressure Indicator Comes On
NOTICE
Running the engine with low oil pressure can cause serious mechanical damage almost immediately.
If the 12-Volt Battery Charging System Indicator Comes On
If you need to stop temporarily, do not turn off the power system. Restarting the power system may rapidly discharge the battery.
If the Malfunction Indicator Lamp Comes On or Blinks

■ Reasons for the indicator lamp to come on or blink
- Comes on when there is a problem with the engine emissions control system.
- Blinks when engine misfiring is detected.
■ What to do when the indicator lamp comes on
Avoid high speeds and immediately get your vehicle inspected at a dealer.
■ What to do when the indicator lamp blinks
Park the vehicle in a safe place with no flammable items and wait at least 10 minutes or more with the engine stopped until it cools.
If the Malfunction Indicator Lamp Comes On or Blinks
NOTICE
If you drive with the malfunction indicator lamp on, the emissions control system and the engine could be damaged.
If the malfunction indicator lamp blinks again when restarting the power system, drive to the nearest dealer at 31 mph (50 km/h) or less. Have your vehicle inspected.
If the Brake System Indicator (Red) Comes On
U.S.


■ Reasons for the indicator to come on
• The brake fluid is low.
• There is a malfunction in the brake system.
Depress the brake pedal lightly to check pedal pressure.
- If normal, check the brake fluid level the next time you stop.
- If abnormal, take immediate action. If necessary, downshift the transmission to slow the vehicle using regenerative braking.
■ What to do when the indicator comes on while driving
If the Speed-Sensitive Electric Power Steering (EPS) System Indicator Comes On

■ Reasons for the indicator to come on
- Comes on when there is a problem with the EPS system.
- If you depress the accelerator pedal repeatedly to increase the engine speed while the engine is idling, the indicator comes on, and sometimes the steering wheel becomes harder to operate.
Stop the vehicle in a safe place and restart the power system. If the indicator comes on and stays on, immediately have your vehicle inspected by a dealer.
■ What to do when the indicator comes on
If the Brake System Indicator (Red) Comes On
Have your vehicle repaired immediately. It is dangerous to drive with low brake fluid. If there is no resistance from the brake pedal, stop immediately in a safe place. If necessary downshift the gears.
If the brake system indicator and ABS indicator come on simultaneously, the electronic brake distribution system is not working. This can result in vehicle instability under sudden braking. Have your vehicle inspected by a dealer immediately.
If both red and amber brake system indicators come on, stop the vehicle in a safe place and have it inspected by a dealer immediately.
If the Electric Parking Brake System Indicator Comes On

■ Reasons for the indicator to come on
Comes on when there is a problem with the electric parking brake system.
■ What to do when the indicator comes on
Avoid using the parking brake and immediately get your vehicle inspected at a dealer.
■ What to do when the electric parking brake indicator comes on or blinks at the same time
Release the parking brake.
→Parking Brake P. 518
- If the electric parking brake indicator remains on or blinks, even after releasing the parking brake, immediately stop the vehicle in a safe place, and call a dealer.
▶ Preventing the vehicle from moving, put the transmission into P. - If only the electric parking brake indicator goes off, immediately get your vehicle inspected at a dealer.
If the Electric Parking Brake System Indicator Comes On
If you apply the parking brake, it may not release.
If the electric parking brake indicator also turns on, the parking brake is still applied.
When the electric parking brake indicator blinks at the same time as the electric parking brake system indicator, the system must be checked. The parking brake may not operate under these conditions.
If the Low Tire Pressure/TPMS Indicator Comes On or Blinks

■ Reasons for the indicator to come on or blink
A tire pressure is significantly low. If there is a problem with the TPMS with Tire Fill Assist or the compact spare tire* is installed, the indicator blinks for about one minute, and then stays on.
■ What to do when the indicator comes on
Drive carefully and avoid abrupt cornering and hard braking.
Stop your vehicle in a safe place. Check the tire pressure and adjust the pressure to the specified level. The specified tire pressure is on a label on the driver side doorjamb.
If the compact spare tire ^4 causes the indicator to come on, change the tire to a full-size tire.
■ What to do when the indicator blinks
Have the tire inspected by a dealer as soon as possible. If the compact spare tire* causes the indicator to first blink, and then stays on, change the tire to a full-size tire. The indicator goes off after driving for a few miles (kilometers).
If the Transmission System Indicator Blinks along with the Warning Message
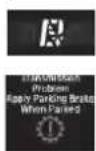
■ Reasons for the indicator to blink
The transmission is malfunctioning.
■ What to do when the indicator blinks
- Immediately have your vehicle inspected by a dealer.
If the Low Tire Pressure/TPMS Indicator Comes On or Blinks
NOTICE
Driving on an extremely underinflated tire can cause it to overheat. An overheated tire can fail. Always inflate your tires to the prescribed level.
TPMS with Tire Fill Assist provides visual and audible assistance during tire pressure adjustment. With the power mode in ON, while you adjust tire pressure up or down, the system alerts you as follows:
Below recommended pressure: The beeper sounds and exterior lights flash once every five seconds.
At recommended pressure: The beeper sounds and the exterior lights flash rapidly for five seconds.
Above recommended pressure: The beeper sounds and lights flash twice every two seconds.
If the Transmission System Indicator Blinks along with the Warning Message
You may not be able to turn on the power system.
Make sure to set the parking brake when parking your vehicle.
Call a professional towing service if you need to tow your vehicle.
Emergency Towing P. 657
If the Power System Indicator Comes On

■ Reasons for the indicator to come on
Comes on when there is a problem with the hybrid system.
■ What to do when the indicator comes on
Avoid high speeds and immediately have your vehicle inspected by a dealer.
Fuses
Fuse Locations
If any electrical devices are not working, set the power mode to VEHICLE OFF and check to see if any applicable fuse is blown.
Engine Compartment Fuse Box Type A
Fuse locations are shown on the fuse box cover. Locate the fuse in question by the fuse number and box cover number. Located near the brake fluid reservoir. Push the tabs to open the box.
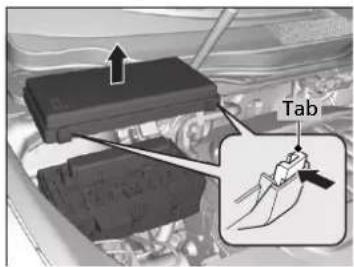
text_image
Tab■ Circuit protected and fuse rating
| Circuit Protected Amps | ||
| 1 -- | ||
| 2 -- | ||
| 3 ACG FR 15 A | ||
| 4 Washer 15 A | ||
| 5 IG1 OP (7.5 A) | ||
| 6 ECU FR 7.5 A | ||
| 7 VBSOL (10 A) | ||
| 8 | F | I |
| 9 DBW | 15 A | |
| 10 | FI Main | 15 A |
| 11 | IG Coil | 15 A |
| 12 DRL R | 10 A | |
| 13 | DRL L | 10 A |
| 14 | Injector | 20 A |
| 15 | Radio | 20 A |
| Circuit Protected | Amps | |
| 16 | Back Up | 10 A |
| 17 | MG Clutch | (7.5 A) |
| 18 | FR Fog* | (7.5 A) |
| 19 | -- | |
| 20 | H/L HI R 7.5 A | |
| 21 | -- | |
| 22 | Small LT 10 A | |
| 23 | -- | |
| 24 | u H/L HI L b | 7.5 A 1 |
| 25 | SBW | 15 A |
| 26 | H/L LO R 10 A | |
| 27 | H/L LO L | 10 A |
| 28 | Oil LVL | 7.5 A |
| 29 | Main Fan | 30 A |
| 30 | Sub Fan 30 A | |
| 31 | Wiper Main | 30 A |
■ Engine Compartment Fuse Box Type B
Fuse locations are shown on the fuse box cover. Locate the fuse in question by the fuse number and box cover number. Located near the battery. Push the tabs to open the box.
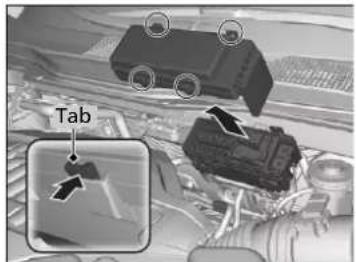
text_image
Tab■ Circuit protected and fuse rating
| Circuit Protected Amps | |
| 1 Main Fuse 200 A | |
| 2 | AS F/B-1 50 A |
| DR F/B-2 50 A | |
| DR F/B-1 50 A | |
| RR DEF 40 A | |
| RR F/B-2 60 A | |
| FR Blower 40 A | |
| H/L Washer ^ (30 A) | |
| RR BLOWER & BMS 30 A | |
| Circuit Protected | Amps | |
| 3 | SUB F/B-1 60 A | |
| VSA MTR 40 A | ||
| AS F/B-2 60 A | ||
| R/B Main 60 A | ||
| EPS 70 A | ||
| SUB F/B-2 60 A | ||
| VSA FSR 20 A | ||
| ESB 40 A | ||
| 4 Stop & Horn & Hazard 30 A | ||
| 5 | EOP RLY 30 A | |
| 6 RR F/B-1 40 A | ||
| 7 FI Main | 40 A | |
| 8 | Stop & Horn | 20 A |
| 9 Hazard | 10 A | |
| 10 | BMS | 7.5 A |
| 11 | - | - |
▶▶Fuses▶Fuse Locations
Engine Compartment Fuse Box Type C
Located near the ⊕ terminal on the battery.
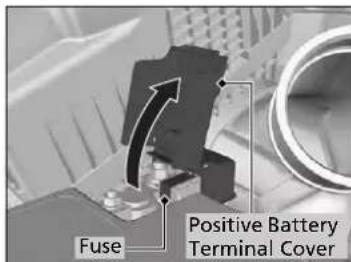
text_image
Fuse Positive Battery Terminal CoverPull up the cover.
Replacement of this fuse should be done by a dealer.
Fuse location is shown on the back of the positive battery terminal cover.
■ Circuit protected and fuse rating
Circuit Protected Amps

Fan Main 60 A
Driver's Side Interior Fuse Box Type A
Located under the dashboard.
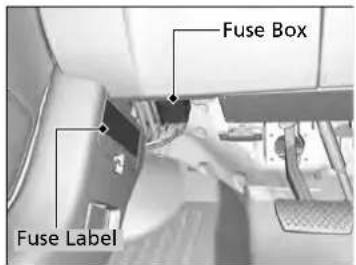
text_image
Fuse Box Fuse LabelFuse locations are shown on the label on the outer side of the side panel cover. Locate the fuse in question by the fuse number and label number.
■ Circuit protected and fuse rating
| Circuit Protected Amps | ||
| 1 AS Door Lock 10 A | ||
| 2 RR DR Door Lock 7.5 A | ||
| 3 DR Door Lock 7.5 A | ||
| 4 FR AS Door Unlock 10 A | ||
| 5 RR DR Door Unlock 7.5 A | ||
| 6 DR Door Unlock (7.5 A) | ||
| 7 D/L Main 20 A | ||
| 8 | - | - |
| 9 | ETS TELE | 20 A |
| 10 | IG1 RR | 15 A |
| 11 Meter | 7.5 A | |
| 12 | IG1 FR | 20 A |
| 13 | ACC | 7.5 A |
| 14 | - | - |
| 15 | DR P/Seat (SLI) 20 A | |
| 16 | S/R | 20 A |
| Circuit Protected | Amps | |
| 17 | RR DR P/W | 20 A |
| 18 | Smart | 10 A |
| 19 | FR DR P/W | 20 A |
| 20 | - | - |
| 21 | Fuel Pump | 20 A |
| 22 | IG1 AS | 15 A |
| 23 | ABS/VSA | 7.5 A |
| 24 | ACG AS 7.5 A | |
| 25 | STRLD | 7.5 A |
| 26 | IG2 HAC | 7.5 A |
| 27 | DRL | 7.5 A |
| 28 | ACC Key Lock | 7.5 A |
| 29 | DR P/Seat (LUM) | 7.5 A |
| 30 | INT Lights | 7.5 A |
| 31 | ETS TILT | 20 A |
| 32 | DR P/Seat (REC) | 20 A |
| 33 | - | - |
| 34 | - | - |
Driver's Side Interior Fuse Box Type B
Located under the type A driver's side interior fuse box. Take off the cover to open.
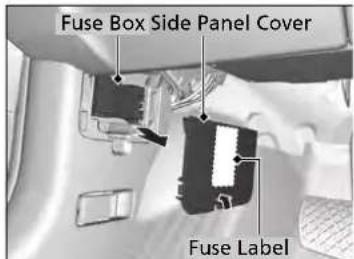
text_image
Fuse Box Side Panel Cover Fuse LabelFuse locations are shown on the label on the back side of the side panel cover. Locate the fuse in question by the fuse number and label number.
■ Circuit protected and fuse rating
Circuit Protected Amps
| 1 DCT 20 A |
| 2 -- |
| 3 DCT 20 A |
| 4 IG Main 30 A |
| 5 Hybrid System 10 A |
| 6 Hybrid System 15 A |
| 7 Hybrid System 15 A |
| 8 DCT 30 A |
Driver's Side Interior Fuse Box Type C
Located under the type A driver's side interior fuse box. Take off the cover to open.
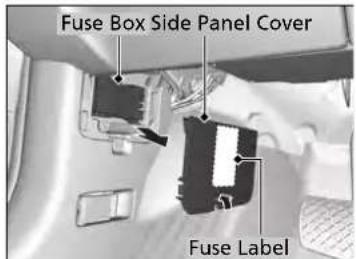
text_image
Fuse Box Side Panel Cover Fuse LabelFuse locations are shown on the label on the back side of the side panel cover. Locate the fuse in question by the fuse number and label number.
■ Circuit protected and fuse rating
| Circuit Protected Amps |
| 1 ADS 30 A |
| 2 -- |
| 3 -- |
| 4 IG Main 30 A |
| 5 Smart 10 A |
| 6 A/C Water Pump 10 A |
| 7 -- |
| 8 Starter Motor 30 A |
Passenger's Side Interior Fuse Box
Located on the lower side panel. Take off the cover to open.
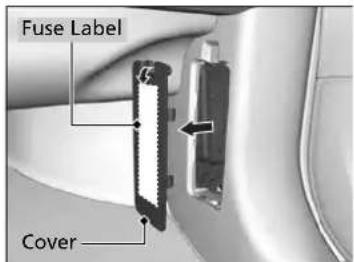
text_image
Fuse Label CoverFuse locations are shown on the cover.
■ Circuit protected and fuse rating
| Circuit Protected Amps | ||
| 1 -- | ||
| 2 RR AS P/W 20 A | ||
| 3 ACM 20 A | ||
| 4 FR DEF | * | (15 A) |
| 5 AVS Heated Seat 20 A | ||
| 6 FR AS P/W 20 A | ||
| 7 | AS P/Seat (SLI) | 20 A |
| 8 | AS P/Seat (REC) | 20 A |
| 9 | AS P/Seat (LUM) | (7.5 A) |
| 10 | Spare | 5 A |
| 11 | Heated Steering* | (10 A) |
| 12 | -- | |
| 13 | -- | |
| Circuit Protected | Amps | |
| 14 | RR ACC Socket | 20 A |
| 15 | FR ACC Socket | 20 A |
| 16 | -- | |
| 17 | -- | |
| 18 | AMP | 30 A |
| 19 | SRS | 10 A |
| 20 | AS ECU | 7.5 A |
| 21 | Option | 7.5 A |
| 22 | -- | |
| 23 | -- | |
| 24 | OPDS | 7.5 A |
| 25 | ILLUMI (INT) 5 A | |
| 26 | -- | |
| 27 | CTR ACC Socket | 20 A |
| 28 | AC INVTR* | (30 A) |
Rear Fuse Box
Located on the left side of cargo area. Remove the cover by prying on the edge of the cover using a flat-tip screwdriver.
▶ Wrap the flat-tip screwdriver with a cloth to prevent scratches.
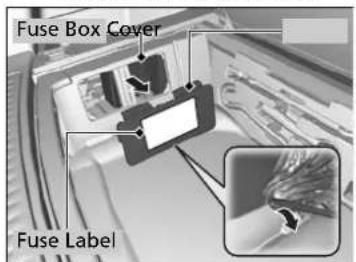
text_image
Fuse Box Cover Fuse LabelFuse locations are shown on the cover. Locate the fuse in question by the fuse number and box cover number.
■ Circuit protected and fuse rating
| Circuit Protected Amps | ||
| 1 PTG Closer 20 A | ||
| 2 -- | ||
| 3 USB CHARGE 15 A | ||
| 4 Fuel Lid 7.5 A | ||
| 5 Seat Slide 20 A | ||
| 6 -- | ||
| 7 RR Heat Seat * (20 A) | ||
| 8 -- | ||
| 9 -- | ||
| 10 | -- | |
| 11 | -- | |
| 12 | Rear Wiper 10 A | |
| 13 | Rear ECU | 7.5 A |
| 14 | SH-AWD | (20 A) |
| 15 | EPB-R | 30 A |
| 16 | EPB-L | 30 A |
| 17 | -- | |
| 18 | PTG MTR 40 A | |
Inspecting and Changing Fuses
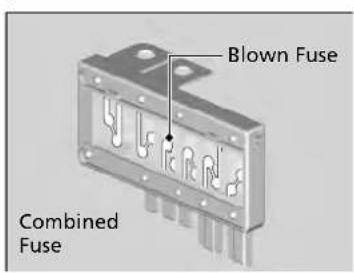
text_image
Blown Fuse Combined Fuse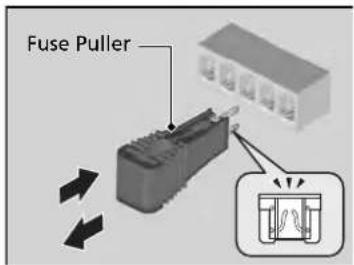
text_image
Fuse Puller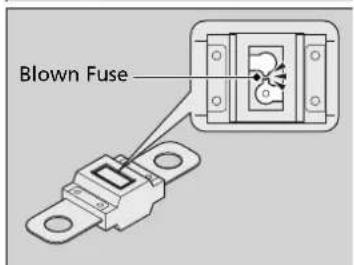
text_image
Blown Fuse- Set the power mode to VEHICLE OFF. Turn headlights and all accessories off.
- Remove the fuse box cover.
- Check the large fuse in the engine compartment.
▶If the fuse is blown, use a Phillips-head screwdriver to remove the screw and replace it with a new one.
- Inspect the small fuses in the engine compartment and the vehicle interior.
▶If there is a blown fuse, remove it with the fuse puller and replace it with a new one.
Inspecting and Changing Fuses
NOTICE
Replacing a fuse with one that has a higher rating greatly increases the chances of damaging the electrical system.
Replace fuse with a spare fuse of the same specified amperage.
Use the charts to locate the fuse in question and confirm the specified amperage on the fuse label.
→Fuse Locations P. 648
There is a fuse puller in the engine compartment fuse box.
Emergency Towing
Call a professional towing service if you need to tow your vehicle.
■ Flat bed equipment
The operator loads your vehicle on the back of a truck.
This is the only way you can safely transport your vehicle.
Any other towing method will damage the vehicle's drive system.
Emergency Towing
NOTICE
Trying to lift or tow your vehicle by the bumpers will cause serious damage. The bumpers are not designed to support the vehicle's weight.
NOTICE
Improper towing such as towing behind a motorhome or other motor vehicle can damage the transmission.
Never tow your vehicle with just a rope or chain. It is very dangerous since ropes or chains may shift from side to side or break.
When You Cannot Unlock the Fuel Fill Door
What to Do When Unable to Unlock the Fuel Fill Door
If you cannot unlock the fuel fill door, use the following procedure.
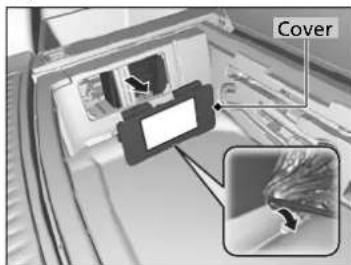
text_image
Cover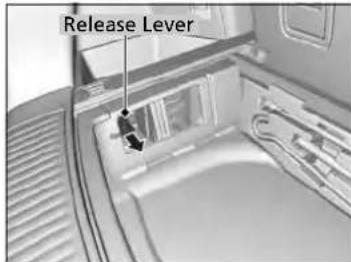
text_image
Release Lever- Open the tailgate.
- Lift the cargo floor lid by the handle in the center.
- Remove the cargo floor box and set it aside.
-
Wrap a cloth around the flat-tip screwdriver. Put it into the cover slot (as shown in the image) and remove the cover.
-
Pull the release lever toward you.
The release lever unlocks the fuel fill door when it is pulled.
What to Do When Unable to Unlock the Fuel Fill Door
After taking these steps, contact a dealer to have the vehicle checked.
When You Cannot Open the Tailgate
What to Do When Unable to Open the Tailgate
If you cannot open the tailgate, use the following procedure.
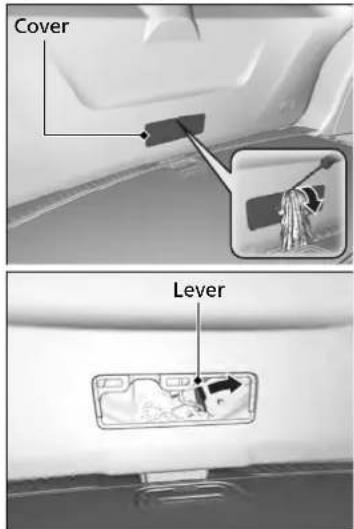
text_image
Cover Lever- Use a flat-tip screwdriver and remove the cover on the back of the tailgate.
▶ Wrap the flat-tip screwdriver with a cloth to prevent scratches.
- To open the tailgate, push the tailgate while sliding the lever to the right.
What to Do When Unable to Open the Tailgate
Following up: After taking these steps, contact a dealer to have the vehicle checked.
When you open the tailgate from inside, make sure there is enough space around the tailgate, and it does not hit anyone or any object.
Refueling
Refueling From a Portable Fuel Container
If you have run out of fuel and need to refuel your vehicle from a portable fuel container, use the funnel provided with your vehicle.
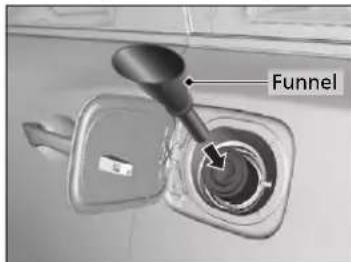
text_image
Funnel- Turn off the power system.
- Press the fuel fill door release button.
The fuel fill door opens. - Take the funnel out of its clip in the cargo area.
Types of Tools P. 614
- Place the end of the funnel on the lower part of filler opening, then insert it slowly and fully.
▶ Make sure that the end of the funnel goes down along with the filler pipe.
- Fill the tank with fuel from the portable fuel container.
▶ Pour fuel carefully so you do not spill any.
- Remove the funnel from the filler neck.
▶ Wipe up any fuel from the funnel before storing it.
- Shut the fuel fill door by hand.
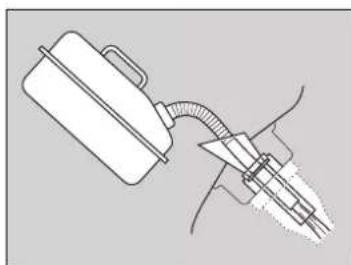
natural_image
Line drawing of a container connected to a device with a curved pipe (no text or symbols)Refueling From a Portable Fuel Container
WARNING
Gasoline is highly flammable and explosive. You can be burned or seriously injured when handling fuel.
- Turn the power system off, and keep heat, sparks, and flame away.
- Handle fuel only outdoors.
- Wipe up spills immediately.
NOTICE
Do not insert the nozzle of a portable fuel container or any funnel other than the one provided with your vehicle. Doing so can damage the fuel system. Do not try to pry open or push open the sealed fuel tank with foreign objects. This can damage the fuel system and its seal.
Make sure the fuel in the portable fuel container is gasoline before you refuel.
Information
This chapter includes your vehicle's specifications, locations of identification numbers, and other information required by regulation.
Specifications 662
Identification Numbers
Vehicle Identification Number (VIN), Engine Number, Motor Number, and Transmission Number.... 664
Devices that Emit Radio Waves ..... 665
Reporting Safety Defects 666
Emissions Testing
Testing of Readiness Codes...... 667
Warranty Coverages 668
Authorized Manuals.... 670
Client Service Information 671
Specifications
■ Vehicle Specifications
| Model MDX | |
| No. of Passengers: | |
| Front 2 | |
| Rear (2nd) | 2^*1 3^*2 |
| Rear (3rd) 2 | |
| Total | 6^*1 7^*2 |
| Weights: | |
| Gross Vehicle Weight Rating See the certification label on the driver's doorjamb | |
| Gross Axle Weight Rating(Front) | See the certification label on the driver's doorjamb |
| Gross Axle Weight Rating(Rear) | See the certification label on the driver's doorjamb |
*1: Models with second row captain seat
*2: Models with second row bench seat
Air Conditioning
| Refrigerant Type HFC-134a (R-134a) | ||
| Charge Quantity 23.8 – 25.6 oz (675 – 725 g) | ||
| Lubricant Type ND-OIL11 (POE) | ||
| Quantity 8.54 – 9.46 cu-in (140 – 155 cm) | 3) | |
| ■ Engine Specifications | ||
| Displacement 182.8 cu-in (2,997 cm) | 3) | |
| Spark Plugs | NGK | ILZKR7B11 |
| DENSO | SXU22HCR11 | |
Fuel
| Type | Unleaded premium gasoline, Pump octane number of 91 or higher |
| Fuel Tank Capacity | 19.4 US gal (73.3 L) |
Washer Fluid
| Tank Capacity | U.S.: 4 US qt (3.8 L)Canada: 5.6 US qt (5.3 L) |
Light Bulbs
| Headlights (High/Low Beam) LED | |
| Fog Lights* | LED |
| Front Turn Signal/Side Marker/Parking Lights | LED |
| Daytime Running Lights LED | |
| Side Turn Signal Lights (on Door Mirrors) | LED |
| Brake Lights 21 W | |
| Rear Side Marker Lights LED | |
| Taillights LED | |
| Back-Up Lights | 21 W |
| Rear Turn Signal Lights | 21 W |
| High-Mount Brake Light LED | |
| Rear License Plate Lights | LED |
| Puddle Lights | LED |
| Interior Lights | |
| Front, Second Row and Third Row Lights | LED |
| Front and Rear Ambient Lights | LED |
| Vanity Mirror Lights | 1.4 W |
| Door Courtesy Lights | 3.4 W |
| Door Inner Handle Lights | LED |
| Front and Rear® Console Compartment Lights | LED |
| Glove Box Light | 1.4 W |
| Foot Lights | 5 W |
| Cargo Area Lights 5 W | |
Brake Fluid
| Specified Acura Heavy Duty Brake Fluid DOT 3 |
■ Dual Clutch Transmission Fluid
| Specified Acura ATF DW-1 |
| Capacity Change 3.7 US qt (3.5 L) |
■ Twin Motor Unit Fluid
| Specified Acura ATF DW-1 |
| Capacity Change 2.56 US qt (2.42 L) |
Engine Oil
| Recommended | -Genuine Acura Motor Oil 0W-20 -API Premium-grade 0W-20 detergent oil | |
| Change 4.2 US qt (4.0 L) | ||
| Capacity | Change including filter | 4.5 US qt (4.3 L) |
Engine Coolant
| Specified Acura Long Life Antifreeze/Coolant Type 2 | |
| Ratio 50/50 with distilled water | |
| 2.03 US gal (7.68 L) | |
| Capacity | (change including the remaining 0.22 US gal (0.82 L) in the reserve tank) |
Inverter Coolant
| Specified Acura Long Life Antifreeze/Coolant Type 2 |
| Ratio 50/50 with distilled water |
Tire
| Regular | Size 245/50R20 102H | |
| Pressure psi (kPa [kgf/cm2]) | 35 (240 [2.4]) | |
| Compact Spare* | Size T165/80D17 104M | |
| Pressure psi (kPa [kgf/cm2]) | 60 (420 [4.2]) | |
| Wheel Size | Regular 20 x 8J | |
| Compact Spare* | 17 x 4T | |
Identification Numbers
Vehicle Identification Number (VIN), Engine Number, Motor Number, and Transmission Number
Your vehicle has a 17-digit vehicle identification number (VIN) used to register your vehicle for warranty purposes, and for licensing and insuring your vehicle. The locations of your vehicle's VIN, engine number, motor number, and transmission number are shown as follows.
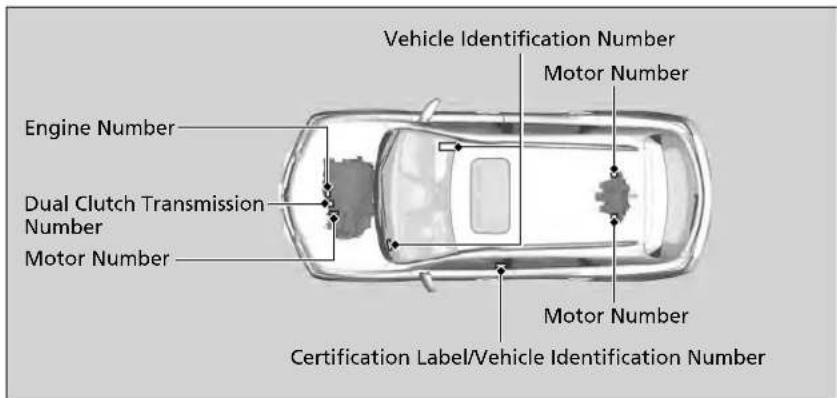
text_image
Engine Number Dual Clutch Transmission Number Motor Number Vehicle Identification Number Motor Number Motor Number Certification Label/Vehicle Identification NumberVehicle Identification Number (VIN), Engine Number, Motor Number, and Transmission Number
The interior vehicle identification number (VIN) is located under the cover.
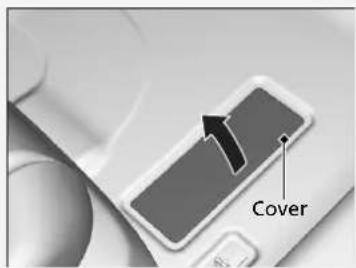
text_image
CoverDevices that Emit Radio Waves
Each radio frequency device installed in the vehicle conforms to the requirements and standards of the regulation listed below:
As required by the FCC:
This device complies with Part 15 of the FCC rules. Operation is subject to the following two conditions: (1) This device may not cause harmful interference, and (2) this device must accept any interference received, including interference that may cause undesired operation.
Changes or modifications not expressly approved by the party responsible for compliance could void the user's authority to operate the equipment.
This device complies with Industry Canada licence-exempt RSS standard(s).
Operation is subject to the following two conditions: (1) this device may not cause interference, and (2) this device must accept any interference, including interference that may cause undesired operation of the device.
Reporting Safety Defects
In the U.S.
If you believe that your vehicle has a defect which could cause a crash or could cause injury or death, you should immediately inform the National Highway Traffic Safety Administration (NHTSA) in addition to notifying American Honda Motor Co., Inc.
If NHTSA receives similar complaints, it may open an investigation, and if it finds that a safety defect exists in a group of vehicles, it may order a recall and remedy campaign. However, NHTSA cannot become involved in individual problems between you, your dealer, or American Honda Motor Co., Inc.
To contact NHTSA, you may call the Vehicle Safety Hotline toll-free at 1-888-327-4236 (TTY: 1-800-424-9153); go to http://www.safercar.gov; or write to: Administrator, NHTSA, 1200 New Jersey Avenue, SE., Washington, DC 20590. You can also obtain other information about motor vehicle safety from http://www.safercar.gov.
In Canada
If you believe that your vehicle has a defect which could cause a crash or could cause injury or death, you should immediately inform Honda Canada Inc. and you may also inform Transport Canada.
If Transport Canada receives similar complaints, it may open an investigation, and if it finds that a safety defect exists in a group of vehicles, it may lead to a recall and remedy campaign. However, Transport Canada cannot become involved in individual problems between you, your dealer, or Honda Canada Inc.
To contact Transport Canada's Defect Investigations and Recalls Division, you may call 1-800-333-0510. For more information on reporting safety defects or about motor vehicle safety, go to http://www.tc.gc.ca/roadsafety.
Emissions Testing
Testing of Readiness Codes
Your vehicle has readiness code as part of the onboard self diagnostic system. Some states use these codes for testing to verify whether your vehicle's emissions components are working properly. The codes may not be read properly if testing is performed just after the 12-volt battery has gone dead or been disconnected.
To check if they are set, set the power mode to ON, without turning the power system on. The malfunction indicator lamp will come on for several seconds. If it then goes off, the readiness codes are set. If it blinks five times, the readiness codes are not set.
If you are required to have your vehicle tested before the readiness codes are ready, prepare the vehicle for retesting by doing the following:
- Fill the gas tank to approximately 3/4 full.
- Park the vehicle and leave the power system off for 6 hours or more.
- Make sure the ambient temperature is between 40°F and 95°F (4°C and 35°C).
- Turn the power system on.
- Select a nearby, lightly traveled major highway where you can maintain a speed of 50 mph (80 km/h) over for at least 20 minutes. Do not use cruise control and perform the following when traffic allows. When stopped before entering the highway, use paddle shifters. During acceleration up to speed, target 5,500 to 6,500 engine rpm continuously for at least 10 seconds. Then shift to D range and drive for 90 seconds without moving the accelerator pedal. (Vehicle speed may vary slightly; this is okay.) If you cannot do this for a continuous 90 seconds because of traffic conditions, drive for at least 30 seconds, then repeat it two more times (for a total of 90 seconds).
- Drive in city or suburban traffic for at least 10 minutes. When traffic conditions allow, let the vehicle coast for several seconds without using the accelerator pedal or the brake pedal.
- Park the vehicle and leave the power system off for 40 minutes.
Testing of Readiness Codes
The readiness codes are erased when the 12-volt battery is disconnected, and set again only after several days of driving under a variety of conditions.
If a testing facility determines that the readiness codes are not set, you may be requested to return at a later date to complete the test.
If the testing facility determines the readiness codes are still not set, see a dealer.
Warranty Coverages
■ U.S. Owners
Your new vehicle is covered by these warranties:
New Vehicle Limited Warranty – covers your new vehicle, except for the emissions control systems and accessories, against defects in materials and workmanship.
Emissions Control Systems Defects Warranty and Emissions Performance
Warranty – these two warranties cover your vehicle's emissions control systems. Time, mileage, and coverage are conditional. Please read your warranty booklet for exact information.
Seat Belt Limited Warranty – a seat belt that fails to function properly is covered by a limited warranty. Please read your warranty booklet for details.
Rust Perforation Limited Warranty – all exterior body panels are covered against rusting from the inside out for the specified time period, regardless of mileage.
Accessory Limited Warranty – Acura accessories are covered under this warranty. Time and mileage limits depend on the type of accessory and other factors. Please read your warranty booklet for details.
Replacement Parts Limited Warranty – covers all Acura replacement parts against defects in materials and workmanship.
Replacement 12-Volt Battery Limited Warranty – provides prorated coverage for a replacement battery purchased from your dealer.
Replacement Muffler Lifetime Limited Warranty – provides coverage for as long as the purchaser of the muffler owns the vehicle.
Restrictions and exclusions apply to all these warranties. Please read the Acura warranty information booklet that came with your vehicle for precise information on warranty coverages. Your vehicle's original tires are covered by their manufacturer. Tire warranty information is in a separate booklet.
■ Canadian Owners
Please refer to the warranty manual that came with your vehicle.
■ EPA Contact Information
An owner may obtain further information concerning emission warranties or report violations of the terms of the emission warranties by contacting:
Director,
Light-Duty Vehicle Center,
U.S. Environmental Protection Agency,
Attention: Warranty Claim
2000 Traverwood Drive,
Ann Arbor, MI 48105;
complianceinfo@epa.gov
Authorized Manuals
Service Express
For electronic copies of service publications, you can purchase a subscription to Service Express. Visit www.techinfo.honda.com for pricing and options.
■ For U.S. Owners
Manuals can be purchased from Helm Incorporated. You can order a manual by phone at 1 (800) 782-4356 (credit card orders only), or online at www.helminc.com.
■ For Canadian Owners
Please contact a dealer to order any manuals that you may require.
Client Service Information
Acura dealership personnel are trained professionals who should be able to deal with any problems you may encounter with your vehicle. If, however, you are faced with a problem that they cannot resolve to your satisfaction, contact Acura Client Relations/Services.
U.S. Owners
American Honda Motor Co., Inc.
Acura Client Relations
Mail Stop 100-5E-8F
1919 Torrance Blvd.
Torrance, CA 90501-2746
Tel: 1 (800) 382-2238
Canadian Owners
Honda Canada Inc.
Acura Client Services
180 Honda Boulevard
Markham, ON
L6C 0H9
Tel: 1-888-9-ACURA-9
Fax: 1-877-939-0909
E-mail: acura_cr@ch.honda.com
In Puerto Rico and the U.S. Virgin Islands
Bella International
P.O. Box 190816
San Juan, PR 00919-0816
Tel: 1 (787) 620-7546
>>Client Service Information
When you call or write, please give us the following information:
• Vehicle Identification Number
Vehicle Identification Number (VIN), Engine Number, Motor Number, and Transmission Number P. 664
- Date of purchase
- Odometer reading of your vehicle
- Your name, address, and telephone number
• A detailed description of the problem
• Name of the dealer who sold the vehicle to you
Continued
Gracenote Music Recognition Service (CDDB)

gracenote.
Music recognition technology and related data are provided by Gracenote®.
Gracenote is the industry standard in music recognition technology and related content delivery.
For more information, visit www.gracenote.com.
When music is recorded to the HDD from a CD, information such as the recording artist and track name are retrieved from the
Gracenote Database and displayed (when available).
Gracenote may not contain information for all albums.
Gracenote is an internet-based music recognition service that allows artist, album, and track information from CDs to display on the HDD.
Gracenote users are allowed 4 free updates a year. More information about Gracenote, its features, and downloads are available at www.acura.com (in U.S.) or www.acura.ca (in Canada).
CD and music-related data from Gracenote, Inc., copyright © 2000 to present
Gracenote. Gracenote Software, copyright © 2000 to present Gracenote.
One or more patents owned by Gracenote apply to this product and service. See the Gracenote website for a non-exhaustive list of applicable Gracenote patents.
Gracenote, CDDB, MusicID, MediaVOCS, the Gracenote logo and logotype, and the "Powered by Gracenote" logo are either registered trademarks or trademarks of Gracenote in the United States and/or other countries.
Gracenote® END USER LICENSE AGREEMENT
This application or device contains software from Gracenote, Inc. of Emeryville, California ("Gracenote"). The software from Gracenote (the "Gracenote Software") enables this application to perform disc and/or file identification and obtain music-related information, including name, artist, track, and title information ("Gracenote Data") from online servers or embedded databases (collectively, "Gracenote Servers") and to perform other functions. You may use Gracenote Data only by means of the intended End-User functions or this application or device.
You agree that you will use Gracenote Data, the Gracenote Software, and Gracenote Servers for your own personal non-commercial use only.
You agree not to assign, copy, transfer, or transmit the Gracenote Software or any Gracenote Data to any third party.
YOU AGREE NOT TO USE OR EXPLOIT GRACENOTE DATA, THE GRACENOTE SOFTWARE, OR GRACENOTE SERVERS, EXCEPT AS EXPRESSLY PERMITTED HEREIN.
You agree that your non-exclusive license to use the Gracenote Data, the Gracenote Software, and Gracenote Servers will terminate if you violate these restrictions. If your license terminates, you agree to cease any and all use of the Gracenote Data, the Gracenote Software, and Gracenote Servers.
Gracenote reserves all rights in Gracenote Data, the Gracenote Software, and the Gracenote Servers, including all ownership rights. Under no circumstances will Gracenote become liable for any payment to you for any information that you provide. You agree that Gracenote, Inc. may enforce its rights under this Agreement against you directly in its own name.
The Gracenote service uses a unique identifier to track queries for statistical purposes. The purpose of a randomly assigned numeric identifier is to allow the Gracenote service to count queries without knowing anything about who you are. For more information, see the web page for the Gracenote Privacy Policy for the Gracenote service.
The Gracenote Software and each item of Gracenote Data are licensed to you "AS IS."
Gracenote makes no representations or warranties, express or implied, regarding the accuracy of any Gracenote Data from in the Gracenote Servers. Gracenote reserves the right to delete data from the Gracenote Servers or to change data categories for any
cause that Gracenote deems sufficient. No warranty is made that the Gracenote Software or Gracenote Servers are error-free or that functioning of Gracenote Software or Gracenote Servers will be uninterrupted.
Gracenote is not obligated to provide you with new enhanced or additional data types or categories that Gracenote may provide in the future and is free to discontinue its services at any time.
GRACENOTE DISCLAIMS ALL WARRANTIES EXPRESS OR IMPLIED, INCLUDING, BUT NOT LIMITED TO, IMPLIED WARRANTIES OF MERCHANTABILITY, FITNESS FOR A PARTICULAR PURPOSE, TITLE, AND NONINFRINGEMENT. GRACENOTE DOES NOT WARRANT THE RESULTS THAT WILL BE OBTAINED BY YOUR USE OF THE GRACENOTE SOFTWARE OR ANY GRACENOTE SERVER. IN NO CASE WILL GRACENOTE BE LIABLE FOR ANY CONSEQUENTIAL OR INCIDENTAL DAMAGES OR FOR ANY LOST PROFITS OR LOST REVENUES. © Gracenote 2009
Disclaimer of Pandora®\*
Requirements to access Pandora®
- Latest version of the Pandora app installed on your Android, Blackberry, or iPhone.
- Registered Pandora account (you can create a free account at www.pandora.com http://www.pandora.com/ or on your smartphone)
- Connection to the internet via Wi-Fi or cellular data network.
Limitations
- Access to Pandora requires an active internet connection
- Ability to access Pandora through this system is subject to change without notice
- Certain functionality of Pandora service is not available when accessing the service through this system including, but not limited to, creating new stations, deleting stations, emailing current stations, buying tracks, viewing additional text information, logging in to Pandora, and adjusting Cell Network Audio Quality. Pandora internet radio is a music service not affiliated with HONDA. More information is available at http://www.pandora.com http://www.pandora.com/. Pandora, the Pandora logo, and the Pandora trade dress are trademarks or registered trademarks of Pandora Media, Inc., used with permission.
- Mobile access requires a smartphone with an active data plan. Standard data rates may apply.
- Pandora is only available in the United States.
Index
A
AAC 275,300
ABS (Anti-lock Brake System).... 524
AC Power Outlet 217
Accessories and Modifications 611
Accessory Power Sockets 216
Acoustic Vehicle Alerting System.... 473
AcuraLink ^® 438
AcuraWatch™ 26
Adaptive Cruise Control (ACC) with Low
Speed Follow 477
Indicator 100
Additives
Coolant 577
Engine Oil 572
Washer 581
Additives, Engine Oil 572
Adjusting
Armrest 207
Front Seats.... 194
Head Restraints.... 201, 203, 204
Headlights 582
Mirrors.... 191
Second Row Seats.... 197
Steering Wheel 190
Temperature 127
Agile Handling Assist.... 508
Air Conditioning System (Climate Control
System).... 222
Changing the Mode.... 225
Defrosting the Windshield and
Windows 228
Dust and Pollen Filter 604
Rear Climate Control System 229
Sensors 233
Synchronized Mode 226
Using Automatic Climate Control 222
Air Pressure 592,663
Airbags 47
Advanced Airbags 53
After a Collision.... 51
Airbag Care....61
Driver's Knee Airbag 54
Event Data Recorder 0
Front Airbags (SRS) 50
Indicator 59, 93
Passenger Front Airbag Off Indicator ...... 60
Sensors 47
Side Airbags 56
Side Curtain Airbags 58
AM/FM Radio 261
Android Auto 310
Anti-lock Brake System (ABS) 524
Indicator....93
Apple CarPlay 306
Armrest 207
Audio Remote Controls.... 241
Audio System 236
Adjusting the Sound 256
Auxiliary Input Jack 240
Error Messages 315
General Information 323
HDD 278
iPhone.... 298,325
iPod 291
MP3/WMA/AAC 275,300
Pandora ^® 298
Reactivating 240
Recommended CDs.... 324
Recommended Devices.... 325
Remote Controls 241
Security Code 240
Theft Protection 240
USB Flash Drives.... 300, 325
USB Port 237
Authorized Manuals 670
Auto Door Locking/Unlocking.... 157
Customize.... 137, 378
Auto Engine Stop/Start 13
Auto High-Beam 179
Indicator 93
Automatic Brake Hold 522
Indicator 87
Automatic Folding Door Mirror 193
Automatic Intermittent Wipers.... 183
Automatic Lighting 176
Auxiliary Console Panel 343
Auxiliary Input Jack 240
Average Fuel Economy 127
Average Speed 128
B
Back-Up Light....585
Battery....600
12-Volt 600
12-Volt Battery Charging System
Indicator 88,642
High Voltage 517
Jump Starting 638
Maintenance (Checking the
12-Volt Battery) 600
Maintenance (Replacing).... 601
Battery Types 12
Belts (Seat) 39
Beverage Holders.... 214
Blind spot information System 510
Indicator.... 104
Bluetooth® Audio 303
Bluetooth® HandsFreeLink® 397
Booster Seats (For Children)....79
Brake System....518
Anti-lock Brake System (ABS) 524
Automatic Brake Hold.... 522
Brake Assist System 525
Fluid 581
Foot Brake 521
Indicator 84, 85, 644
Parking Brake 518
Brake System (Amber)
Indicator 85
Brake System (Red)
Indicator....84,644
Brightness Control (Instrument Panel).... 186
Bulb Replacement 582
Back-Up Light.... 585
Brake Light and Rear Turn Signal Light .... 583
Fog Lights 582
Front Turn Signal/Parking, Daytime Running and Front Side Marker Lights ... 582
Headlights.... 582
High-Mount Brake Light 586
Puddle Lights.... 586
Rear License Plate Lights.... 586
Side Turn Signal/Emergency Indicator
Lights 582
Taillights.... 585
Taillights/Rear Side Maker Lights.... 584
Bulb Specifications 662
C
CAMERA Button 548
Car Wash Mode 469
Carbon Monoxide Gas 80
Carrying Cargo 449, 451
CD Player 275
Center Pocket 213
Certification Label 664
Changing Bulbs 582
Charging System Indicator.... 88, 642
Child Safety 62
Childproof Door Locks.... 156
Child Seat 62
Booster Seats 79
Child Seat for Infants 64
Child Seat for Small Children 65
Installing a Child Seat with a Lap/Shoulder
Seat Belt 72
Larger Children 78
Rear-facing Child Seat.... 64
Selecting a Child Seat 66
Childproof Door Locks.... 156
Cleaning the Exterior 607
Cleaning the Interior 605
Client Service Information.... 671
Climate Control System 222
Changing the Mode.... 225
Defrosting the Windshield and
Windows 228
Dust and Pollen Filter 604
Rear Climate Control System.... 229
Sensors 233
Synchronized Mode 226
Using Automatic Climate Control.... 222
Clock 142
CMBS™ (Collision Mitigation Braking
System ^TM 526
Coat Hook 218
Collision Mitigation Braking System™
(CMBS ^TM ) 526
Compact Spare Tire.... 615, 663
Console Compartment 212
Controls 141
Coolant (Engine) 577
Adding to the Radiator 578
Adding to the Reserve Tank 577
Overheating.... 640
Coolant (Inverter) 579
Creeping (Dual Clutch Transmission)..... 464
Cross Traffic Monitor 541
Cup Holders 214
Customized Features 131, 362
D
Daytime Running Lights 178
Dead Battery 638
Defrosting the Windshield and Windows.... 228
Detachable Anchor 44
Devices that Emit Radio Waves.... 665
Dimming Headlights .... 175 Rearview Mirror .... 191
Dipstick (Engine Oil) 573
Directional Signals (Turn Signal).... 174
Door Mirrors 192
Doors 143 Auto Door Locking 157
Auto Door Unlocking 157
Door Open Message 38
Keys.... 143
Locking/Unlocking the Doors from the Inside 18, 154
Locking/Unlocking the Doors from the
Outside.... 145
Lockout Prevention System 152
DOT Tire Quality Grading 594
Driver's Knee Airbag 54
Driving 447
Braking....518
Dual Clutch Transmission.... 464
Off-Highway Driving Guidelines 455
Shifting Gear 465
Turning on the Power 457
Driving Position Memory System...... 188
Dual Clutch Transmission 464
Creeping 464
Fluid 580
Kickdown 464
Operating the Shift Button 23,467
Shifting 465
Dust and Pollen Filter.... 604
Dynamic Mode button 474
E
Elapsed Time.... 128
Electric Parking Brake Indicator....86 Switch....518
Electric Parking Brake System Indicator....86
Electric Power Steering (EPS) System 95,644
Electronic Stability Control (ESC).... 506
Emergency 657
Emissions Testing (Readiness Codes)...... 667
Energy Efficiency 12
Engine 664
Coolant 577
Jump Starting 638
Oil 572
Remote Engine Start 459
Starting 457
Engine Compartment Cover 571
Engine Coolant 577
Adding to the Radiator.... 578
Adding to the Reserve Tank 577
Overheating 640
Engine Oil 572
Adding 574
Checking 573
Displaying Oil Life 565
Low Oil Pressure Indicator 88,642
Recommended Engine Oil 572
EPS (Electric Power Steering)
System 95,644
Exhaust Gas Hazard (Carbon Monoxide).. 80
Exterior Care (Cleaning).... 607
Exterior Mirrors 192
F
Features 235
Filters
Dust and Pollen 604
Oil 575
Flat Tire 615,623
Floor Mats 606
Fluids
Brake 581
Dual Clutch Transmission.... 580
Engine Coolant.... 577
Windshield Washer 581
Fog Lights.... 178
Folding Down the Second Row Seat ..... 200
Folding Down the Third Row Seat ..... 206
Foot Brake 521
Front Airbags (SRS) 50
Front Seats 194
Adjusting.... 194
Front Sensor Camera 475
Fuel 25,557
Fuel Economy and CO2 Emissions...... 560
Gauge 123
Instant Fuel Economy.... 128
Low Fuel Indicator 91
Range.... 128
Recommendation 557
Refueling....557
Fuel Economy and CO₂ Emissions ..... 560
Fuel Fill Door 25,558
Unable to Unlock.... 658
Fuses 648
Inspecting and Changing.... 656
Locations.... 648, 651, 654, 655
G
Gasoline (Fuel)
Economy 560
Gauge.... 123
Information 557
Low Fuel Indicator 91
Refueling.... 557
Gauges 123
Gear Position Indicator 89,467
Gear Shift Positions
Dual Clutch Transmission 465
Glass (care) 608
Glove Box....211
H
Handling the Unexpected.... 613
HandsFreeLink® (HFL) 397
Auto Answer 413
Automatic Import of Cellular Phonebook and Call History 415
Automatic Transferring.... 413
Displaying Messages.... 433
HFL Buttons.... 397
HFL Menus 400
HFL Status Display 398
Limitations for Manual Operation .... 399
Making a Call.... 424
Options During a Call.... 430
Phone Setup 405
Phonebook Phonetic Modification...... 419
Receiving a Call.... 429
Receiving a Text/E-mail Message 431
Ring Tone 414
Roadside Assistance 437
Selecting a Mail Account.... 432
Selecting a Text/E-mail Message Account 432
Speed Dial 416
To Create a Security PIN.... 411
To Set Up a Text/E-mail Message Option 410
Use Contact Photo.... 414
Hard Disk Drive (HDD) Audio 278
Hazard Warning Button 4
HDMI™ Port 344
Head Restraints 201, 203, 204
Headlight Washers.... 185
Headlights 175
Aiming.... 582
Auto High-Beam System 179
Automatic Operation 176
Dimming.... 175, 178
Operating 175
Heated Door Mirrors 187
Heated Steering Wheel 219
Heated Windshield 187
Heater (Steering Wheel).... 219
Heaters (Seat) 220, 221
HFL (HandsFreeLink ^® ) 397
High Beam Indicator 95
High Voltage Battery.... 517
Hill Start Assist System 462
HomeLink® Universal Transceiver 394
Honda App License Agreement 326
Hybrid Vehicle SPORT HYBRID Super Handling-All Wheel Drive™ (SPORT HYBRID SH-AWD®).... 9
|
Identification Numbers.... 664
Engine, Motor, and Transmission 664
Vehicle Identification.... 664
Illumination Control 186
Button 186
Immobilizer System.... 165
Indicator 96
Indicators 84
12-Volt Battery Charging System ..... 88, 642
Adaptive Cruise Control (ACC) with Low Speed Follow 100, 478
Anti-lock Brake System (ABS) 93
Auto High-Beam 93
Automatic Brake Hold.... 87, 522
Automatic Brake Hold System 87, 522
Blind spot information System.... 104
Brake System (Amber) 85
Brake System (Red) 84,644
Collision Mitigation Braking System ^TM (CMBS ^TM ) 102, 103
Electric Parking Brake 86
Electric Parking Brake System...... 86, 645
Fog Lights....96
Gear Position....89
High Beam 95
High Temperature 92
Immobilizer System.... 96
Keyless Access System 97
Lane Keeping Assist System (LKAS) .... 98, 500
Lights On....96
Low Fuel....91
Low Oil Pressure 88,642
Low Temperature 92
Low Tire Pressure/TPMS 95,646
M (sequential mode) Indicator/Sequential Mode Gear Selection 89
Malfunction Indicator Lamp.... 88, 643
POWER SYSTEM Indicator.... 91,647
READY 92
Road Departure Mitigation (RDM).... 99
Seat Belt Reminder 40,91
Security System Alarm 97
Speed-sensitive Electric Power Steering (EPS) System 95, 644
SPORT+ mode 92
Supplemental Restraint System 59, 93
System Message 97
Transmission System.... 90, 646
Turn Signal 95
Vehicle Stability Assist™ (VSA®)
System 94,506
/SA® OFF 94,507
Information 661
Information Screen 248
Instrument Panel 83
Brightness Control.... 186
Integrated Dynamics System 474
Dynamic Mode button 474
Interface Dial.... 243
Interior Lights.... 209
Interior Rearview Mirror.... 191
iPhone 298,325
iPod 291,325
J
Jack (Wheel Nut Wrench) 619
Jump Starting 638
K
Key Number Tag.... 144
Keyless Access System 145
Keyless Lockout Prevention 152
Keys.... 143
Lockout Prevention 152
Number Tag.... 144
Rear Door Won't Open 156
Remote Transmitter.... 150
Types and Functions 143
Kickdown (Dual Clutch Transmission) ..... 464
L
Lane Keeping Assist System (LKAS) ...... 498
Indicator....98
LATCH (Child Seats) 67, 74
LED Puddle Light 147
Legal Information on Apple CarPlay/Android Auto 338
License information.... 341
Lights 175,582
Automatic 176
Bulb Replacement.... 582
Daytime Running Lights.... 178
High Beam Indicator 95
Interior 209
Light Switches 175
Lights On Indicator 96
Turn Signals.... 174
Load Limits 451
Locking/Unlocking 143
Auto Door Locking/Unlocking 157
Childproof Door Locks 156
From Inside.... 154
From Outside.... 145
Keys 143
Using a Key 151
Lockout Prevention System.... 152
Low Battery Charge 642
Low Fuel Indicator....91
Low Oil Pressure Indicator 88,642
Lower Anchors.... 67, 74
Lubricant Specifications Chart.... 663
Luggage (Maximum Load Limit) 451
Lumbar Support 195
M
Maintenance.... 561
12-Volt Battery 600
Brake Fluid 581
Cleaning 605
Climate Control System.... 604
Coolant.... 577, 579
Maintenance Minder ^TM 565
Oil 573
Precautions 562
Radiator 578
Remote Control.... 602
Remote Transmitter.... 601
Replacing Light Bulbs 582
Safety.... 563
Service Items 567
Tires 591
Transmission Fluid 580
Under the Hood 569
Wireless Headphone 603
Malfunction Indicator Lamp.... 88, 643
Map Lights.... 210
Maximum Load Limit 451
Meters, Gauges.... 123
MID (Multi-information Display) 125
Mirrors 191
Adjusting 191
Door 192
Exterior 192
Interior Rearview.... 191
Modifications (and Accessories).... 611
Moonroof 170
MP3 275,300
Multi-function Steering-wheel
Controls 125
Multi-Information Display (MID) 125
Multi-View Rear Camera 545
N
Numbers (Identification) 664
0
Odometer 126
Off-Highway Driving Guidelines 455
Oil (Engine) 572
Adding 574
Checking 573
Displaying Oil Life 565
Low Oil Pressure Indicator 88,642
Recommended Engine Oil 572
Viscosity.... 572
On Demand Multi-Use Display™ 244
Open Source Licenses 340
Opening/Closing
Hood 570
Moonroof 170
Power Windows.... 168
Tailgate.... 158
Operating the Switches Around the
Steering Wheel.... 171
Outside Temperature Display 127
Overhead Screen 345
Overheating 640
P
Paddle Shifters (Sequential Mode) ..... 472
Pandora ^® 298
Panic Mode 167
Parking 535
Parking Brake 518
Parking Sensor System.... 537
Passenger Front Airbag Off Indicator..... 60
Passing Indicators.... 175
POWER Button 171
Power Tailgate 159
Power Windows 168
Precautions While Driving 463
Driving Guidelines for Your Utility
Vehicle 463
Rain 463
Pregnant Women.... 45
Puncture (Tire) 615, 623
R
Radiator 578
Radio (AM/FM) 261
Radio (SiriusXM®) 264
Radio Data System (RDS) 262
Range 128
RDS (Radio Data System) 262
Readiness Codes (Emissions Testing) ..... 667
Rear Climate Control System 229
From the Front Panel 229
From the Rear Panel 232
Rear Defogger/Heated Door Mirror
Button 187
Rear Entertainment System (RES).... 342
Auxiliary Console Panel 343
Front Control Panel Operation 356
HDMI™ Port 344
Operating the System 345
Overhead Screen 345
playable Discs 361
Playing a DVD 346
Rear Control Panel Operation 346
Wireless Headphones 342
Rear Seats
Second Row Seat.... 197
Third Row Seat 206
Rearview Mirror.... 191
Refueling....557
Fuel Gauge.... 123
Gasoline 557,662
Low Fuel Indicator 91
Regenerative Energy and Regenerative
Braking.... 12
Regulations.... 515, 594, 665
Remote Engine Start with Vehicle
Feedback 459
Checking Door Lock Status.... 153
Remote Transmitter 150
Replacement
Battery 601, 602, 603
Bulbs.... 582
Front Wiper Blade Rubber 587
Fuses.... 648, 651, 654, 655
Rear Wiper Blade Rubber.... 589
Tires.... 597
Reporting Safety Defects.... 666
Resetting a Trip Meter 127
Reverse Tilt Door Mirror 192
Right Selector Wheel 125, 131
Road Departure Mitigation (RDM) 493
On and Off 495
S
Safe Driving 33
Safety Checklist 38
Safety Labels 81
Safety Message.... 1
Seat Belts 39
Adjusting the Shoulder Anchor 43
Automatic Seat Belt Tensioners.... 41
Checking.... 46
Detachable Anchor 44
Fastening....42
Installing a Child Seat with a Lap/Shoulder Seat Belt 72
Pregnant Women 45
Reminder 40
Warning Indicator.... 40, 91
Seat Heaters.... 220, 221
Seat Ventilation 220
Seats 194
Adjusting.... 194
Driver's Seat Lumbar Support.... 194
Front Seats 194
Seat Heaters 220, 221
Seat Ventilation 220
Second Row Seat.... 197
Third Row Seat 206
Second Row Outer Seats Heaters 221
Second Row Seat (Folding Down) 200
Security System 165
Immobilizer System Indicator 96
Security System Alarm Indicator 97
Selecting a Child Seat 66
Sequential Mode 471
Sequential Mode Operation 472
Setting the Clock 142
SH-AWD® Torque Distribution Monitor.. 129
Shift Button 23,465
Operation 467
Shifting (Transmission).... 23, 465
Shoulder Anchor 43
Side Airbags....56
Side Curtain Airbags 58
Siri Eyes Free 305
SiriusXM® Radio 264
Snow Tires....599
Sounds Unique to the SPORT HYBRID SH-AWD® System.... 13
Spare Tire.... 615, 663
Spark Plugs 662
Specifications.... 662
Specified Fuel 557,662
Speedometer 123
Speed-sensitive Electric Power Steering (EPS) System Indicator.... 95, 644
SPORT HYBRID Super Handling-All Wheel Drive™ (SPORT HYBRID SH-AWD®) ..... 509
SRS Airbags (Airbags) 50
Steering Wheel.... 190
Adjusting 190 Heater 219
Stopping 535
Summer Tires.... 599
Sunglasses Holder 219
Supplemental Restraint System (SRS).... 50
Surround View Camera System 547
Switches (Around the Steering
Wheel) 4,5,171
Synchronized Mode 226
System Message Indicator 97
T
Tachometer 123
Tailgate.... 158
Unable to Open 659
Temperature
Outside Temperature Display 127
Temperature Sensor 127, 233
Temporary Tire Repair Kit 624
Text Message 431, 433
Third Row Seat (Folding Down).... 206
Third Row Seat Access 199
Tie-down Anchors.... 218
Time (Setting).... 142
Tire Fill Assist.... 513, 646
Tire Pressure Monitoring System (TPMS)
with Tire Fill Assist 513
Indicator 95,646
Tire Repair Kit 623
Tires 591
Air Pressure.... 592, 663
Checking and Maintaining 591
Inspection 591
Labeling 592
Puncture (Flat Tire) 615, 623
Regulations.... 594
Rotation.... 598
Spare Tire 615,663
Summer.... 599
Temporary Tire Repair Kit 624
Tire Chains.... 599
Tire Repair Kit 623
Wear Indicators.... 596
Winter 599
Tools 614
Towing a Trailer 454
Towing Your Vehicle 454
Emergency.... 657
TPMS (Tire Pressure Monitoring System)
with Tire Fill Assist 513
Indicator 95,646
Transmission 464
Dual Clutch.... 23, 464, 465
Fluid 580
Gear Position Indicator.... 89, 467
Number 664
Sequential Mode 471
TRIP Button 126
Trip Meter 127
Troubleshooting 613
Blown Fuse 648, 651, 654, 655
Brake Pedal Vibrates 29
Buzzer Sounds When Opening Door 29
Emergency Towing 657
Noise When Braking 31
Overheating.... 640
Power System Won't Start 635
Puncture/Flat Tire.... 615, 623
Rear Door Won't Open 29,156
Warning Indicators 84
Turn Signals 174
Indicators (Instrument Panel).... 95
Turn-by-Turn Directions 129
Turning on the Power 457
Does Not Activate.... 635
Jump Starting 638
Remote Engine Start 459
U
Under-floor Storage Area 213
Unlocking the Doors 145
Unlocking the Front Doors from the Inside 18, 154
USB Flash Drives.... 300, 325
USB Port 237
V
Vanity Mirrors....7
Vehicle Identification Number 664
Vehicle Stability Assist™ (VSA®).... 506
Off Button.... 507
Off Indicator....94
System Indicator 94, 506
Viscosity (Oil) 572,663
Voice Control Operation.... 258
Voice Portal Screen 259
Voice Recognition 258
VSA® (Vehicle Stability Assist™) 506
W
Wallpaper 254
Warning and Information Messages..... 105
Warning Indicator On/Blinking 642
Warning Labels.... 81
Warranties (Warranty Manual provided separately) 668
Watts.... 662
Wear Indicators (Tire) 596
Wheel Nut Wrench (Jack Handle) 619
Window Washers 182
Adding/Refilling Fluid 581
Switch.... 182
Windows (Opening and Closing) 168
Windshield.... 182
Cleaning 608
Defrosting/Defogging.... 228
Washer Fluid 581
Wiper Blades.... 587
Wipers and Washers.... 182
Winter Tires 599
Snow Tires 599
Tire Chains 599
Wipers and Washers.... 182
Automatic Intermittent Wipers.... 183
Checking and Replacing Wiper Blades ..... 587
Front 182
Rear....184
Wireless Headphones 342
WMA 275,300
Worn Tires....591

ACURA
PRECISION CRAFTED PERFORMANCE
mygarage.acura.com (U.S.A.)
acura.ca (Canada)
31TRX631
OM-22038
00X31-TRX-6310
2020 Acura MDX Sport Hybrid Owner's Manual
© 2023 Honda Motor Co., Ltd. — All Rights Reserved
Printed in the U.S.A.