
NSX (2020) - Automotive Acura - Free user manual and instructions
Find the device manual for free NSX (2020) Acura in PDF.


User questions about NSX (2020) Acura
0 question about this device. Answer the ones you know or ask your own.
Ask a new question about this device
Download the instructions for your Automotive in PDF format for free! Find your manual NSX (2020) - Acura and take your electronic device back in hand. On this page are published all the documents necessary for the use of your device. NSX (2020) by Acura.
USER MANUAL NSX (2020) Acura
California Proposition 65 Warning
Operating, servicing and maintaining a passenger vehicle or off-highway motor vehicle can expose you to chemicals including engine exhaust, carbon monoxide, phthalates, and lead, which are known to the State of California to cause cancer and birth defects or other reproductive harm. To minimize exposure, avoid breathing exhaust, do not idle the engine except as necessary, service your vehicle in a well-ventilated area and wear gloves or wash your hands frequently when servicing your vehicle. For more information go to www.P65Warnings.ca.gov/passenger-vehicle.
Event Data Recorders
This vehicle is equipped with an event data recorder (EDR).
The main purpose of an EDR is to record, in certain crash or near crash-like situations, such as an air bag deployment or hitting a road obstacle, data that will assist in understanding how a vehicle's systems performed. The EDR is designed to record data related to vehicle dynamics and safety systems for a short period of time, typically 30 seconds or less. The EDR in this vehicle is designed to record such data as:
- How various systems in your vehicle were operating;
-
Whether or not the driver and passenger safety belts were buckled/fastened;
-
How far (if at all) the driver was depressing the accelerator and/or brake pedal; and,
• How fast the vehicle was traveling.
These data can help provide a better understanding of the circumstances in which crashes and injuries occur. NOTE: EDR data are recorded by your vehicle only if a non-trivial crash situation occurs; no data are recorded by the EDR under normal driving conditions and no personal data (e.g., name, gender, age, and crash location) are recorded. However, other parties, such as law enforcement, could combine the EDR data with the type of personally identifying data routinely acquired during a crash investigation.
To read data recorded by an EDR, special equipment is required, and access to the vehicle or the EDR is needed. In addition to the vehicle manufacturer, other parties, such as law enforcement, that have the special equipment, can read the information if they have access to the vehicle or the EDR.
The data belongs to the vehicle owner and may not be accessed by anyone else except as legally required or with the permission of the vehicle owner.
Service Diagnostic Recorders
This vehicle is equipped with service-related devices that record information about powertrain performance. The data can be used to verify emissions law requirements and/or help technicians diagnose and solve service problems. It may also be combined with data from other sources for research purposes, but it remains confidential. Some diagnostic and maintenance information is uploaded to Acura upon vehicle start up.
California Perchlorate Contamination Prevention Act
The airbags, seat belt tensioners, and CR type batteries in this vehicle may contain perchlorate materials - special handling may apply. See www.dtsc.ca.gov/hazardouswaste/perchlorate/
As you read this manual, you will find information that is preceded by a NOTICE. This information is intended to help you avoid damage to your vehicle, other property, or the environment.
Software End User License Agreement
Your vehicle comes equipped with software, which is governed by the End User License Agreement in Owner's Manual, and which contains a binding arbitration clause. Please refer to the End User License Agreement for the terms and conditions governing your use of the installed software, as well as the applications, services, functions, and content provided through the software. Your use of the installed software will serve as your consent to the terms and conditions of the End User License Agreement.
You may opt out within 30 days of your initial use of the Software by sending a signed, written notice to ACURA at American Honda Motor Co., Inc. Acura Client Relations Mail Stop 100-5E-8F, 1919 Torrance Blvd. Torrance, CA 90501-2746.
Privacy Notice
This vehicle may share location and usage information. To manage this setting, visit www.acuralink.com/vehicle-data-choices.
A Few Words About Safety
Your safety, and the safety of others, is very important. And operating this vehicle safely is an important responsibility.
To help you make informed decisions about safety, we have provided operating procedures and other information on labels and in this manual. This information alerts you to potential hazards that could hurt you or others.
Of course, it is not practical or possible to warn you about all the hazards associated with operating or maintaining your vehicle. You must use your own good judgment.
You will find this important safety information in a variety of forms, including:
● Safety Labels - on the vehicle.
● Safety Messages - preceded by a safety alert symbol ⚠ and one of three signal words: DANGER, WARNING, or CAUTION. These signal words mean:
DANGER
You WILL be KILLED or SERIOUSLY HURT if you don't follow instructions.
WARNING
You CAN be KILLED or SERIOUSLY HURT if you don't follow instructions.
CAUTION
You CAN be HURT if you don't follow instructions.
● Safety Headings - such as Important Safety Precautions.
● Safety Section - such as Safe Driving.
● Instructions - how to use this vehicle correctly and safely.
This entire book is filled with important safety information - please read it carefully.
This owner's manual should be considered a permanent part of the vehicle and should remain with the vehicle when it is sold.
This owner's manual covers all models of your vehicle. You may find descriptions of equipment and features that are not on your particular model.
Images throughout this owner's manual (including the front cover) represent features and equipment that are available on some, but not all, models. Your particular model may not have some of these features.
This owner's manual is for vehicles sold in the United States and Canada.
The information and specifications included in this publication were in effect at the time of approval for printing. Honda Motor Co., Ltd. reserves the right, however, to discontinue or change specifications or design at any time without notice and without incurring any obligation.
→ Safe Driving P. 31
For Safe Driving P. 32
Seat Belts P. 36
Airbags P. 43
→ Instrument Panel P. 69
Indicators P. 70 Gauges and Displays P. 95
→ Controls P. 103
Clock P. 104 Locking and Unlocking the Doors P. 105
Operating the Switches Around the Steering Wheel P. 127
Climate Control System P. 155
Features P. 161
Audio System P. 162 Audio System Basic Operation P. 166
Customized Features P. 244
HomeLink® Universal Transceiver P. 267
→ Driving P. 309
Before Driving P. 310 Towing a Trailer P. 320
Multi-View Rear Camera P. 369
→ Maintenance P. 375
Before Performing Maintenance P. 376 Maintenance Minder ^TM P. 379
Checking and Maintaining Wiper Blades P. 404
Climate Control System Maintenance P. 419
Handling the Unexpected P. 431
Tools P. 432 If a Tire Goes Flat P. 433
Overheating P. 450 Indicator, Coming On/Blinking P. 452
When You Cannot Open the Hatch P. 464
Information P. 467
Specifications P. 468
Identification Numbers P. 470
Emissions Testing P. 473 Warranty Coverages P. 475
| Contents | ||||
| Child Safety P. 58 | Exhaust Gas Hazard P. 67 | Safety Labels P. 68 | Quick Reference Guide | P. 4 |
| Safe Driving | P. 31 | |||
| Opening and Closing the Hatch P. 119 | Security System P. 122 | Opening and Closing the Windows P. 125 | Instrument Panel | P. 69 |
| Adjusting the Mirrors P. 141 | Adjusting the Seats P. 144 | Interior Convenience Items P. 149 | Controls | P. 103 |
| Audio Error Messages P. 223 | General Information on the Audio System P. 226 | Features | P. 161 | |
| Bluetooth® HandsFreeLink® P. 270 | AcuraLink®* P. 304 | Driving | P. 309 | |
| When Driving P. 321 | Braking P. 357 | Parking Your Vehicle P. 364 | Maintenance | P. 375 |
| Refueling P. 371 | Fuel Economy and CO | Emissions P. 373 | ||
| Maintenance Under the Hood and Hatch P. 385 | Replacing Light Bulbs P. 401 | Handling the Unexpected | P. 431 | |
| Checking and Maintaining Tires P. 407 | 12-Volt Battery P. 417 | Remote Transmitter Care P. 418 | ||
| Cleaning P. 420 | Accessories and Modifications P. 426 | Storage P. 428 | ||
| Power System Won't Start P. 445 | Jump Starting P. 448 | Information | P. 467 | |
| Fuses P. 457 | Emergency Towing P. 462 | When You Cannot Unlock the Fuel Fill Door P. 463 | ||
| Refueling P. 465 | Index | P. 479 | ||
| Devices that Emit Radio Waves P. 471 | Reporting Safety Defects P. 472 | |||
| Authorized Manuals P. 477 | Client Service Information P. 478 | |||
Visual Index
text_image
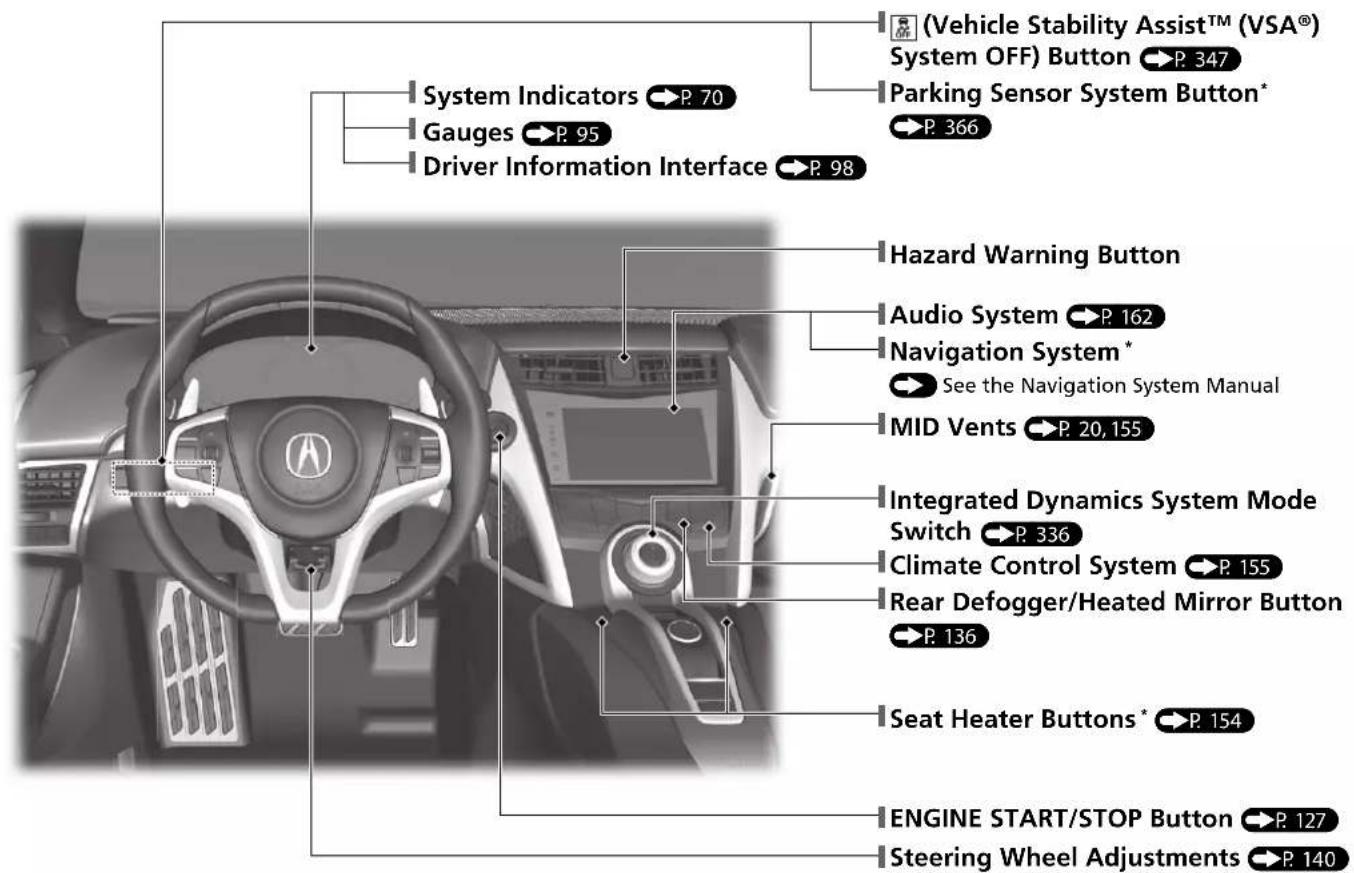
(Vehicle Stability Assist™ (VSA®) System OFF) Button P. 347 Parking Sensor System Button* P. 366 System Indicators P. 70 Gauges P. 95 Driver Information Interface P. 98 Hazard Warning Button Audio System P. 162 Navigation System* See the Navigation System Manual MID Vents P. 20, 155 Integrated Dynamics System Mode Switch P. 336 Climate Control System P. 155 Rear Defogger/Heated Mirror Button P. 136 Seat Heater Buttons* P. 154 ENGINE START/STOP Button P. 127 Steering Wheel Adjustments P. 140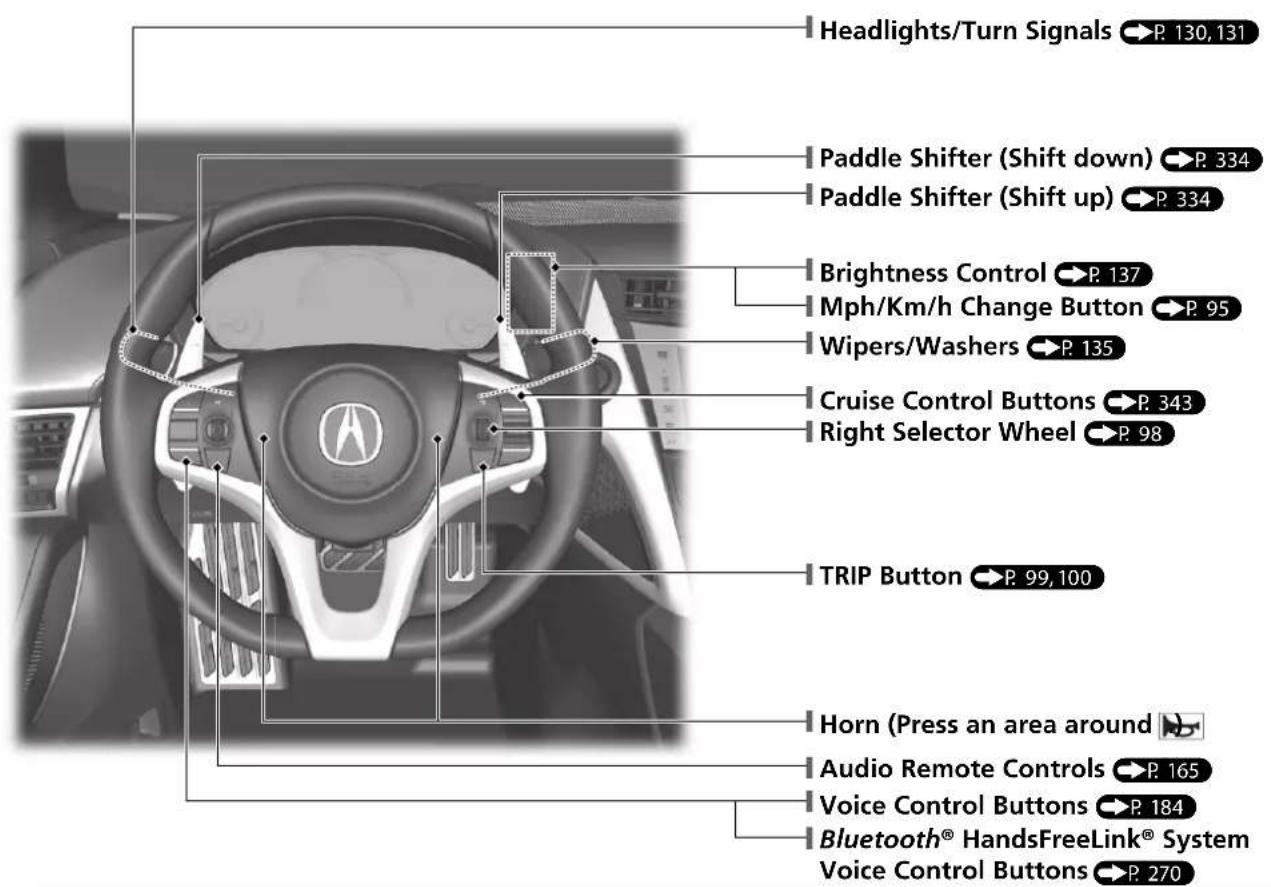
text_image
Headlights/Turn Signals P. 130,131 Paddle Shifter (Shift down) P. 334 Paddle Shifter (Shift up) P. 334 Brightness Control P. 137 Mph/Km/h Change Button P. 95 Wipers/Washers P. 135 Cruise Control Buttons P. 343 Right Selector Wheel P. 98 TRIP Button P. 99,100 Horn (Press an area around) Audio Remote Controls P. 165 Voice Control Buttons P. 184 Bluetooth® HandsFreeLink® System Voice Control Buttons P. 270* Not available on all models
Visual Index
text_image
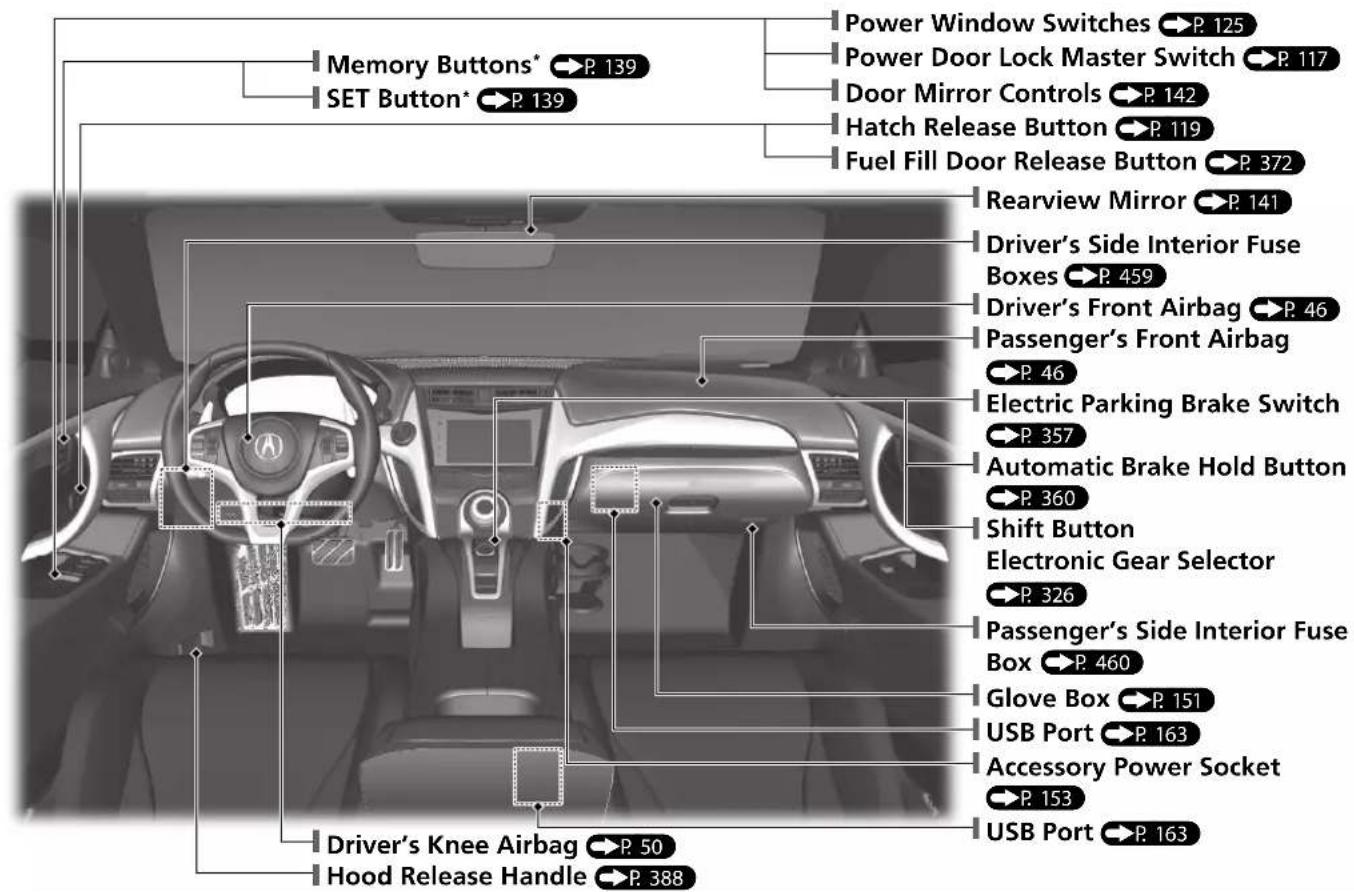
Power Window Switches → P. 125 Power Door Lock Master Switch → P. 117 Door Mirror Controls → P. 142 Hatch Release Button → P. 119 Fuel Fill Door Release Button → P. 372 Rearview Mirror → P. 141 Driver's Side Interior Fuse Boxes → P. 459 Driver's Front Airbag → P. 46 Passenger's Front Airbag → P. 46 Electric Parking Brake Switch → P. 357 Automatic Brake Hold Button → P. 360 Shift Button Electronic Gear Selector → P. 326 Passenger's Side Interior Fuse Box → P. 460 Glove Box → P. 151 USB Port → P. 163 Accessory Power Socket → P. 153 USB Port → P. 163 Driver's Knee Airbag → P. 50 Hood Release Handle → P. 388
text_image
Side Airbags → P. 52 Side Curtain Airbags → P. 54 Sun Visors Map Lights → P. 150 Seat Belts → P. 36 Seat → P. 144 Seat Belt (Installing a Child Seat) → P. 63Visual Index
text_image
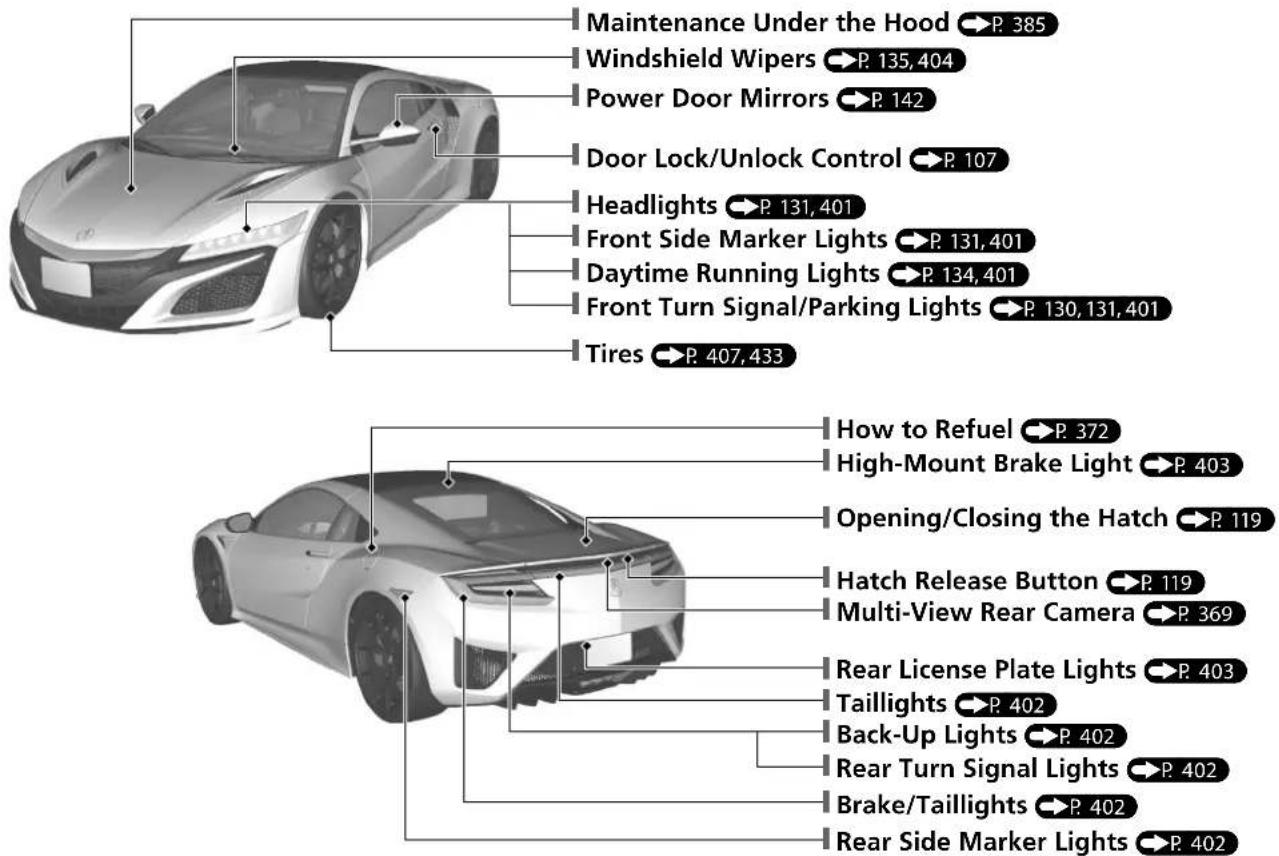
Maintenance Under the Hood P. 385 Windshield Wipers P. 135,404 Power Door Mirrors P. 142 Door Lock/Unlock Control P. 107 Headlights P. 131,401 Front Side Marker Lights P. 131,401 Daytime Running Lights P. 134,401 Front Turn Signal/Parking Lights P. 130,131,401 Tires P. 407,433 How to Refuel P. 372 High-Mount Brake Light P. 403 Opening/Closing the Hatch P. 119 Hatch Release Button P. 119 Multi-View Rear Camera P. 369 Rear License Plate Lights P. 403 Taillights P. 402 Back-Up Lights P. 402 Rear Turn Signal Lights P. 402 Brake/Taillights P. 402 Rear Side Marker Lights P. 402SPORT HYBRID Super Handling All-Wheel-Drive™ (SPORT HYBRID SH-AWD®)
Your SPORT HYBRID SH-AWD ^® vehicle uses a Twin Motor Unit, Direct Drive Motor, and a gasoline engine as propulsion sources, with electric motors receiving electricity from an internal High Voltage battery.
| Operating mode | EV Launch* | Engine Drive EV Cruising | * | Power Acceleration |
| Vehicle Speed | Launch Acceleration:• Front Motor Drive | Gentle Acceleration:• Engine Drive | Low Speed Cruise:• Front Motor Drive | Aggressive Acceleration:• Engine Drive• Motor Assist |
| Twin Motor Unit | Drive - Drive Drive | |||
| Direct Drive Motor | Stopped Generate / - Stopped Generate / Drive | |||
| Engine Stopped Running Stopped Running | ||||
| High Voltage battery | Discharges | Charges/Discharges | Discharges | Discharges |
*: When Integrated Dynamics System is in SPORT+ mode or TRACK mode, EV Launch and EV Cruising cannot be operated.
*: Operating paddle shifters when the gear position is in D cancels EV Launch and EV Cruising.
| Operating mode | Engine Cruising Regeneration AWD Mode | ||
| Vehicle Speed | High Speed Cruise:• Engine Drive | Deceleration:• Front & Rear Regeneration | Slippery Condition:• Engine Drive• Front Motor Drive |
| Twin Motor Unit | - Regenerate Drive | ||
| Direct Drive Motor | Generate/Drive Stopped Generate/Drive | ||
| Engine Running Running/Stopped Running | |||
| High Voltage battery | Charges/Discharges Charges Charges/Discharges | ||
Energy Efficiency
As with a gasoline-powered vehicle, hybrid vehicle fuel efficiency and driving range is most impacted by your driving style. Aggressive acceleration and high-speed driving can easily trigger the system to switch the propulsion source to the gasoline-powered engine. In addition, heavy climate control system use negatively affects vehicle range and efficiency. Either of these use patterns will more quickly reduce the High Voltage battery's state of charge.
Battery Types
There are two types of batteries used in this vehicle; a standard 12-volt battery that powers the airbags, the interior and exterior lights, and other standard 12-volt systems; and a High Voltage battery that is used to power the propulsion motors and recharge the 12-volt battery.
Regenerative Energy and Regenerative Braking
When decelerating without the accelerator being depressed or the brake pedal being applied, or while driving downhill, the electric motors act as generators that a portion of the electrical energy that was used to accelerate the vehicle. This regenerative braking slows the vehicle in a manner similar to engine braking in a gasoline-powered vehicle.
Auto Engine Stop/Start
Your vehicle's gasoline engine will automatically stop and start during vehicle operation as needed to meet driving and battery conditions. These are some examples that could cause the gasoline engine to automatically start.
In the following cases, however, Auto Engine Stop may not activate.
- When the Integrated Dynamics System is in SPORT+ mode or TRACK mode.
● The vehicle momentarily needs additional power for aggressive acceleration, or driving uphill or at high speed.
● The climate control system is in heavy use.
● The High Voltage battery temperature is high or low.
● The High Voltage battery state of charge is low.
● The engine coolant temperature is low.
● When the door is opened after releasing seatbelt. - When the shift position is in M (Manual) mode.
About Your Vehicle's Limited Operating Temperature
If the outside temperature is about -4^ (-20°C), some operation might be limited.
The limited operation is listed below:
→ High Voltage Battery → P. 90
→ Dual Clutch Transmission → P. 325
→ Shifting → P.326
Sounds Unique to the SPORT HYBRID SH-AWD® System
When you first start driving this vehicle, you likely will hear some unfamiliar sounds, particularly when you first turn on the power system, while driving, and just after parking. Some of these sounds are unique to this vehicle's powertrain, fuel, and climate control systems; others are similar to sounds generated by conventional automobiles that typically are masked by louder noises absent from a vehicle of this design. These sounds are not a cause for concern, and you will soon recognize them as normal and thus be able to detect any new or unusual noise should one develop.
About a system to cool the High Voltage battery using the climate control system.
● The system will not be activated when the defroster is ON.
- When the outside temperature is in extreme hot or cold condition, the system may not provide sufficient cooling performance to the High Voltage battery due to the protection of the electric A/C compressor.
- When the system is active, the climate control system may not work sufficiently.
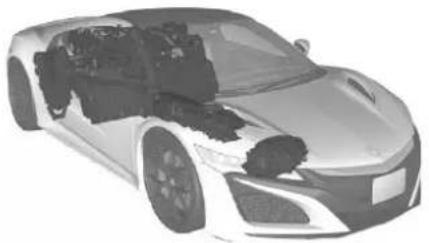
Safety Precautions
natural_image
Cutaway illustration of a modern sports car showing internal engine and dashboard components (no text or symbols)Do not touch the High Voltage system
Attempting to take a High Voltage system component apart or disconnect one of its wires can cause severe electrical shock. If the High Voltage system needs maintenance or repair, it should be performed at an authorized Acura NSX dealer.
If a crash occurs
● Be careful of electric shock hazard.
If a severe crash damages your vehicle's High Voltage system, there is a possibility of electrical shock due to exposed High Voltage components or wires. If this happens, do not touch any of the High Voltage system components or any of its orange wires.
● Avoid contact with High Voltage battery fluid.
The High Voltage battery contains a flammable electrolyte that could leak as a result of a severe crash. Avoid any skin or eye contact with the electrolyte as it is corrosive. If you accidentally touch it, flush your eyes or skin with a large quantity of water for at least five minutes, and seek medical attention immediately.
● Use a fire extinguisher for an electrical fire.
▶ Attempting to extinguish an electrical fire with even a small quantity of water, from a garden hose for instance, can be dangerous.
● Anytime the vehicle is damaged in a crash, have it repaired by an authorized Acura NSX dealer.
Emergency Shutdown System for the High Voltage System
The emergency shutdown system may activate when the vehicle is impacted by some incident such as a crash. When this system activates, the High Voltage system automatically shuts down, and your vehicle no longer will move under its own power. To return the High Voltage system back to normal operation, consult an authorized Acura NSX dealer.
Acura collects and recycles High Voltage batteries used in its vehicles – consult an authorized Acura NSX dealer for more information.
Safe Driving
P. 31
text_image
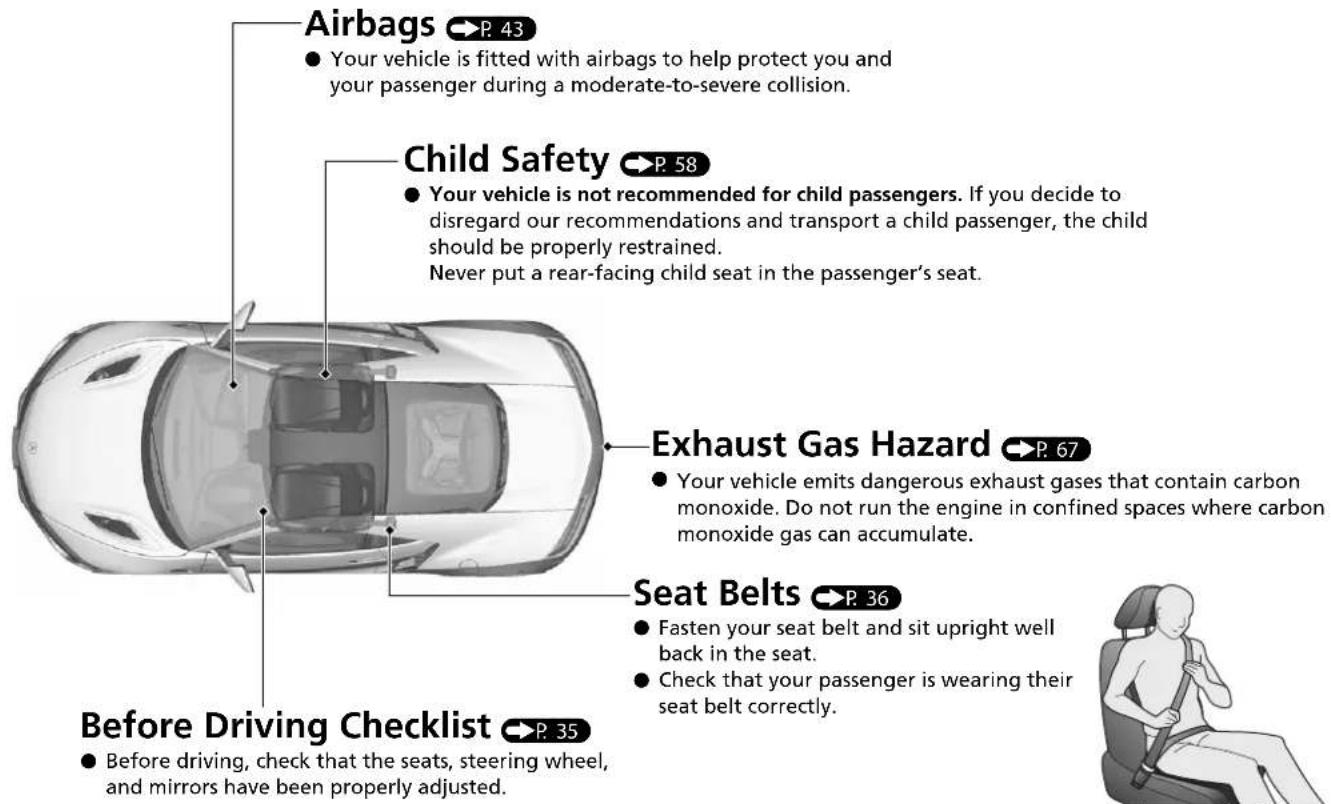
Airbags →P. 43 ● Your vehicle is fitted with airbags to help protect you and your passenger during a moderate-to-severe collision. Child Safety →P. 58 ● Your vehicle is not recommended for child passengers. If you decide to disregard our recommendations and transport a child passenger, the child should be properly restrained. Never put a rear-facing child seat in the passenger's seat. Exhaust Gas Hazard →P. 67 ● Your vehicle emits dangerous exhaust gases that contain carbon monoxide. Do not run the engine in confined spaces where carbon monoxide gas can accumulate. Seat Belts →P. 36 ● Fasten your seat belt and sit upright well back in the seat. ● Check that your passenger is wearing their seat belt correctly. Before Driving Checklist →P. 35 ● Before driving, check that the seats, steering wheel, and mirrors have been properly adjusted.Before Driving Checklist P. 35
● Before driving, check that the seats, steering wheel, and mirrors have been properly adjusted.
natural_image
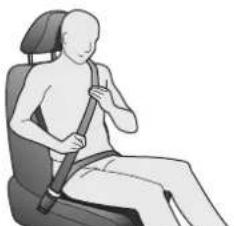
Illustration of a person sitting in a seat with a bandage, no text or symbols presentFasten your lap belt as low as possible.
Instrument Panel
P. 69
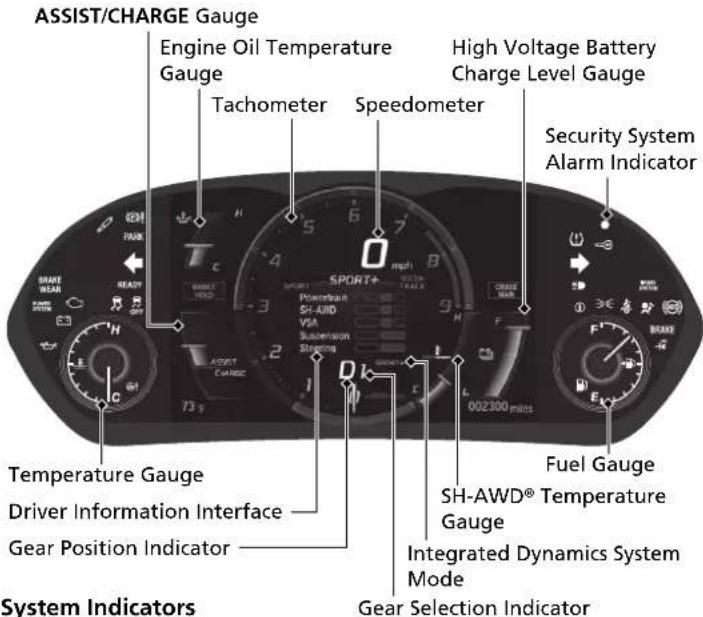
Gauges P. 95 /Driver Information Interface P. 98 /System Indicators P. 70
System Indicators

Electric Power Steering (EPS) System Indicator

Malfunction Indicator Lamp

Low Oil Pressure Indicator

Immobilizer System Indicator

12-Volt Battery Charging System Indicator

Automatic Brake Hold System Indicator

Automatic Brake Hold Indicator
Canada

Electric Parking Brake System Indicator

Electric Parking Brake Indicator
Canada

Active Damper System Indicator

Brake Wear Indicator*
anada
text_image
ASSIST/CHARGE Gauge Engine Oil Temperature Gauge High Voltage Battery Charge Level Gauge Tachometer Speedometer Security System Alarm Indicator SPOR7+ H B C 4 5 6 7 8 9 10 Dk 002300 miles Fuel Gauge SH-AWD® Temperature Gauge Driver Information Interface Integrated Dynamics System Mode Gear Position Indicator Gear Selection Indicator System IndicatorsSystem Indicators

Vehicle Stability Assist™ (VSA®) System Indicator

VSA® OFF Indicator

Low Tire Pressure/TPMS Indicator

System Message Indicator
Lights Indicators

Lights On Indicator

High Beam Indicator
System Indicators

Turn Signal and Hazard Warning Indicators

Supplemental Restraint System Indicator

Anti-lock Brake System (ABS) Indicator
BRAKE

Brake System Indicator (Red)
Canada
BRAKE
SYSTEM
U.S.
Brake System Indicator (Amber)
Canada

Low Fuel Indicator

Seat Belt Reminder Indicator
READY
POWER SYSTEM
POWER SYSTEM Indicator

CRUISE MAIN Indicator

CRUISE CONTROL Indicator

Keyless Access System Indicator
Controls
P. 103
Clock
P. 104
Models with navigation system
The navigation system receives signals from GPS satellites, updating the clock automatically.
You can also adjust the time manually.
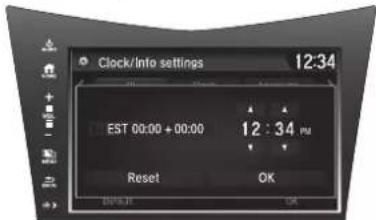
text_image
Clock/Info settings 12:34 EST 00:00 + 00:00 12 : 34 PM Reset OK DEFAULT OK1 Select the HOME) icon, then select Settings.
② Select Clock/Info, then Clock Adjustment.
3 Touch the ▲iøn to adjust the numbers up or down.
4 Select OK.
ENGINE START/STOP Button P. 127
Press the button to changes the vehicle's power mode.
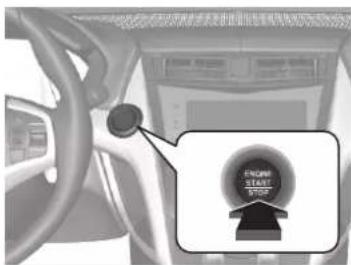
text_image
Car interior view with a circular dial indicator showing 'EACON' and 'START' text, highlighting the dial as the main function.Turn Signals P. 130
Turn Signal Control Lever
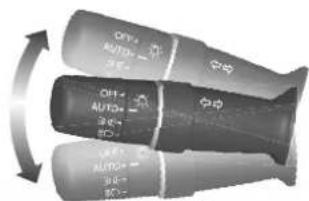
text_image
OFF AUTO+ 3E- OFF AUTO+ 3E- 3E- OFF AUTO+ 3E-Lights P. 131
Light Control Switches
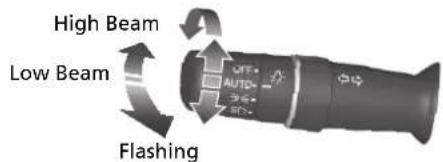
text_image
High Beam Low Beam FlashingWipers and Washers

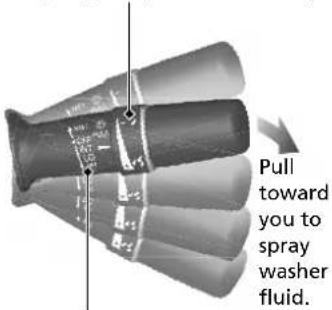
Wiper/Washer Control Lever
Adjustment Ring
: Lower speed, fewer sweeps
: Higher speed, more sweeps
text_image
Pull toward you to spray washer fluid.MIST
OFF
INT: Low speed with intermittent
LO: Low speed wipe
HI: High speed wipe
Steering Wheel

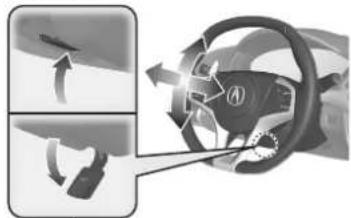
To adjust, push the adjustment lever down, adjust to the desired position, then lock the lever back in place.
To lock
natural_image
Diagram showing car steering wheel and gear shift process (no text or symbols)To adjust
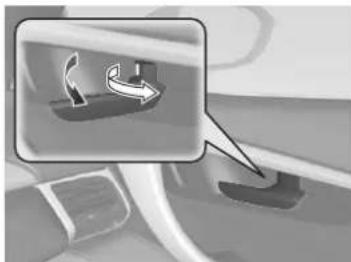
Unlocking the Doors from the Inside P.115

● Pull either inner door handle to unlock and open it in one motion.
natural_image
Close-up of a car's dashboard with a magnified inset showing a curved arrow pointing to the dashboard (no text or symbols visible)- Unlocking and opening the driver's door from the inner handle unlocks the passenger's door.
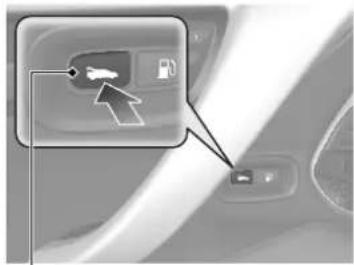
Hatch

natural_image
Close-up of a car's side panel with a highlighted car icon and control buttons (no text or symbols visible)Hatch Release Button
● To unlock and open the hatch:
- Press the hatch release button on the driver's door.
- Press the hatch release button on the keyless access remote.
- Press the hatch release button on the hatch.
Power Door Mirrors
P. 142
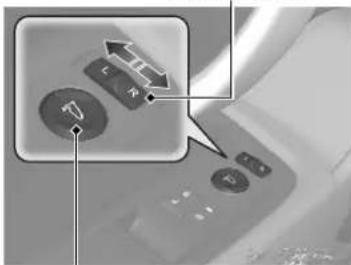
● With the power mode in ON, move the selector switch to L or R.
● Push the appropriate edge of the adjustment switch to adjust the mirror.
Selector Switch
natural_image
Close-up of a car dashboard with control buttons and a highlighted directional arrow (no text or symbols visible)Adjustment Switch
Power Windows
P. 125
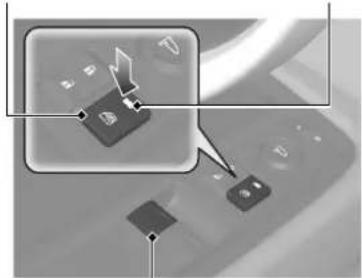
● With the power mode in ON, open and close the power windows.
- If the power window lock button is in the off position, the passenger's window can be opened and closed with its own switch.
- If the power window lock button is in the on position (indicator on), the passenger's window switch is disabled.
Power Window Lock Button Indicator
natural_image
Close-up of a computer keyboard with an icon and cursor arrow, no visible text or symbolsWindow Switch
Climate Control System
P. 155
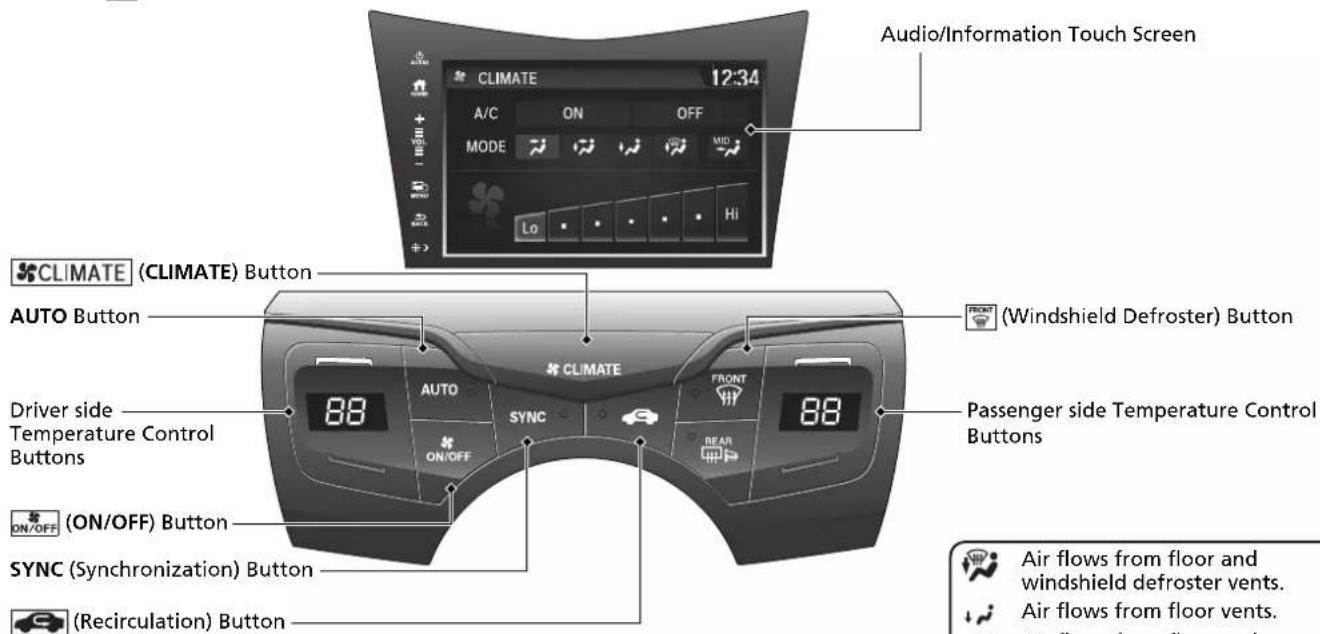
● Press the AUTO button to activate the climate control system.
● Press the button to turn the system on or off.
● Press the button to defrost the windshield.
text_image
Audio/Information Touch Screen CLIMATE 12:34 A/C ON OFF MODE MID Lo Hi CLIMATE (CLIMATE) Button AUTO Button Driver side Temperature Control Buttons ON/OFF SYNC (Synchronization) Button Recirculation) Button FRONT (Windshield Defroster) Button 88 AUTO SYNC 88 REAR 88 Passenger side Temperature Control Buttons ON/OFF ON/OFF) Button Air flows from floor and windshield defroster vents. Air flows from floor vents.

Air flows from floor and windshield defroster vents.

Air flows from floor vents.

Air flows from floor and dashboard vents.

Air flows from dashboard vents.

MID vents provide supplemental air to the lower body of the occupant(s). MID vents can be used together with any other vent mode.
Features

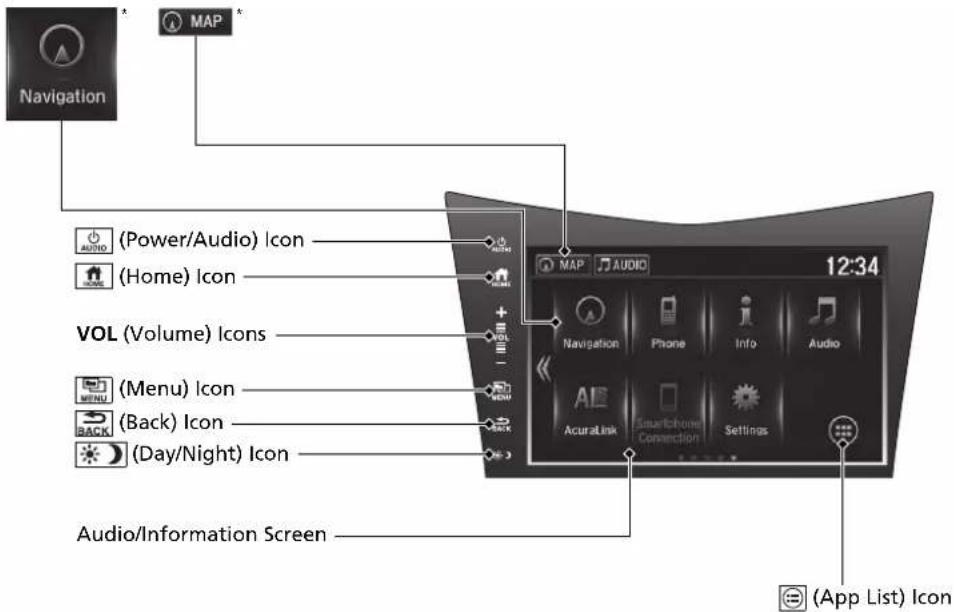
Audio system

For navigation system operation ↩ See the Navigation System Manual
text_image
Navigation MAP (Power/Audio) Icon (Home) Icon VOL (Volume) Icons (Menu) Icon (Back) Icon (Day/Night) Icon Audio/Information Screen 12:34 MAP AUDIO Navigation Phone Info Audio AcuraLink Smartphone Connection Settings (App List) IconAudio Remote Controls
→P. 165
text_image
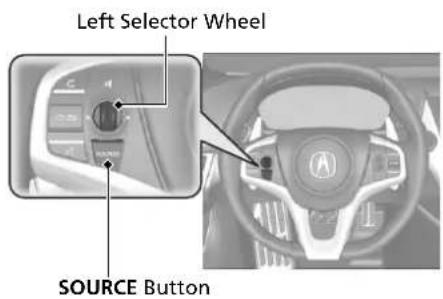
Left Selector Wheel SOURCE Button● SOURCE Button
Press to change the audio mode: FM/SiriusXM®/USB/iPod/Pandora®/Apps*/Bluetooth® Audio/Audio Apps*.
● Left Selector Wheel
Roll to adjust the volume up/down. Radio: Move right or left to change the preset station. Move and hold to select the next or previous strong station.
USB device:
Move right or left to skip to the beginning of the next song or return to the beginning of the current song. Move and hold to change a folder.
Driving
P. 309
Electronic Gear Selector P. 326
- Select P and depress the brake pedal when turning on the power.
Gear selection
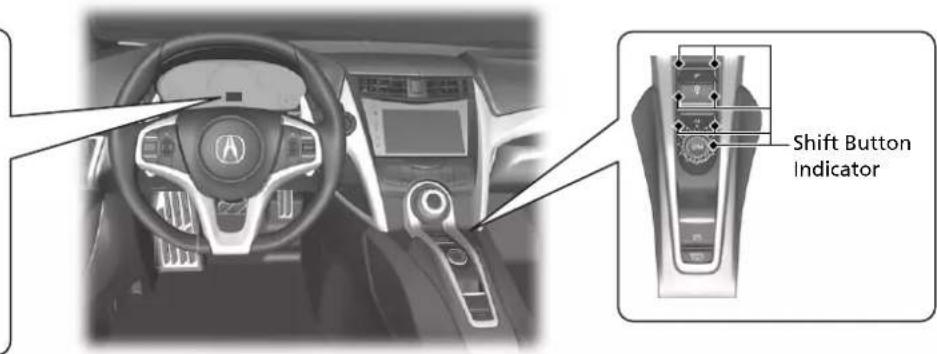
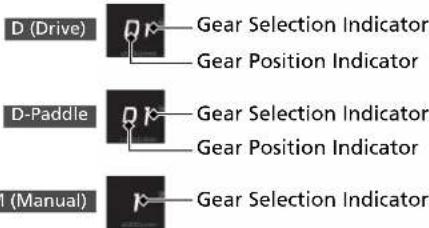
Gear Position Indicator/Gear Selection Indicator
The gear position indicator, the gear selection indicator and the shift button indicator indicate the current gear selection.
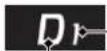
Gear Position Indicator
Gear Selection Indicator
text_image
Shift Button Indicator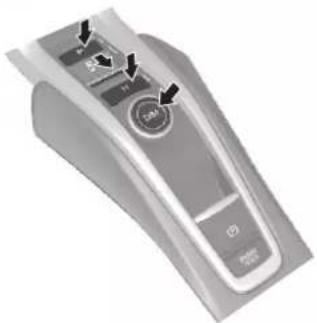
natural_image
Close-up of a remote control device with buttons and a central dial (no visible text or symbols)
Park
Press the P button.
Used when parking or before turning the power on or off.
Transmission is locked.

Reverse
Press back the R button.
Used when reversing.

Neutral
Press the N button.
Used to keep the transmission disengaged from the engine and motor.

Drive/Manual
Each time you press the button, the mode switches between D (drive) and M (manual) mode.
D (Drive)
- Normal driving (gears change between 1st and 9th automatically)
• Temporarily driving in the sequential mode
M (Manual)
- Driving in the sequential mode
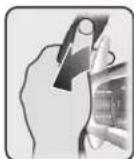
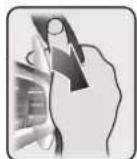
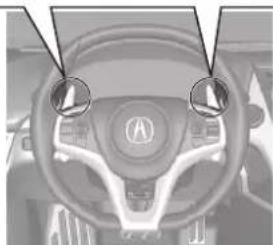
Paddle Shifters P.334
Paddle shifters allow you to shift gears much like a manual transmission (1st through 9th). This is useful for regenerative braking. You cannot shift up or down while in EV mode.
text_image
D (Drive) Gear Selection Indicator Gear Position Indicator D-Paddle Gear Selection Indicator Gear Position Indicator I (Manual) Gear Selection IndicatorShift Down — Paddle Shifter
Shift Up + Paddle Shifter
natural_image
Interior view of a car dashboard with steering wheel and circular indicators (no text or symbols)When the transmission is in D (D-paddle shift mode)
The vehicle will go into the sequential mode momentarily, and the gear selection indicator becomes more prominent.
The sequential mode is automatically canceled and the gear selection indicator returns to ordinary display under the following conditions.
- Hold the |+ paddle shifter for a few seconds.
- Once you start traveling at a constant speed.
• The vehicle comes to a complete stop. - When you change to another Integrated Dynamics System mode.
The sequential mode automatically shifts under following condition
- Accelerator pedal depressed beyond the click.
- Engine speed reaches near the tachometer's red zone.
• Engine speed reaches idle speed while deceleration.
When the transmission is in M (Manual) mode
The vehicle will go into the sequential mode, and the gear position indicator goes off and only the gear selection indicator is displayed.
You can cancel this mode by pressing the ☐Mton, pulling the + paddle shifter for a few seconds or changing Integrated Dynamics System mode to
QUIET. When the sequential mode is canceled, the display is changed from only the gear selection indicator to both of the gear position indicator and the gear selection indicator.
The transmission automatically shifts up from 1st to 2nd and does not automatically shift up between 2nd and 9th gear.
VSA® On and Off
P. 347
- The Vehicle Stability Assist™ (VSA®) system helps stabilize the vehicle during cornering, and helps maintain traction while accelerating on loose or slippery road surfaces.
- VSA ^ comes on automatically every time you turn on the power system.
Tire Pressure Monitoring System (TPMS) P. 352
● The TPMS monitors tire pressure.
● The TPMS is turned on automatically every time you turn on the power system.
Refueling P. 371
Fuel requirement: Unleaded premium gasoline with a pump octane number 91 or higher
Fuel tank capacity: 15.6 US gal (59.0 liters)

Press the fuel fill door release button.
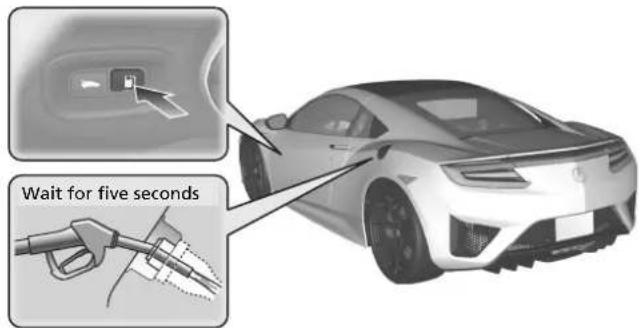
text_image
Wait for five seconds
After refueling, wait for about five seconds before removing the filler nozzle.
Maintenance
P. 375
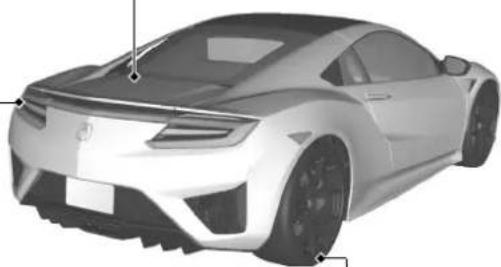
Under the Hatch
P. 386
- Check engine oil and engine coolant. Add when necessary.
natural_image
3D rendering of a silver sports car front view (no visible text or symbols)Lights
P.401
- Inspect all lights regularly.
Tires
P.407
● Inspect tires and wheels regularly.
- Check tire pressures regularly.
● Install winter tires for winter driving.
Handling Summer Only tires and Ultra High Performance (UHP) tires in low ambient temperatures.

Cold Weather Driving
P.416
Press the hatch release button on the driver's door.
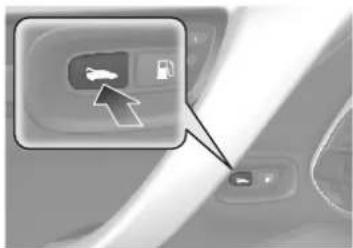
text_image
Close-up of a car interior panel with a highlighted icon and arrow pointing to a vehicle symbolUnder the Hood
P. 385
- Check inverter coolant.
- Check brake fluid.
- Check the 12-volt battery condition monthly.
Wiper Blades
P.404
- Replace blades if they leave streaks across the windshield.
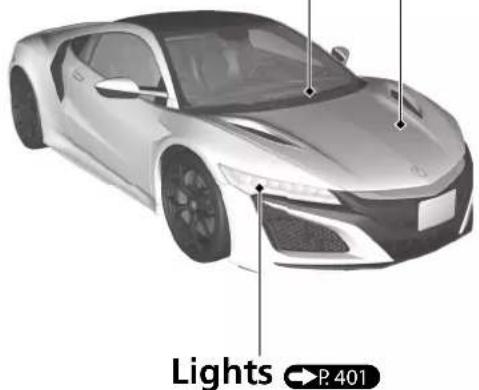
text_image
Lights → P.401- Inspect all lights regularly.
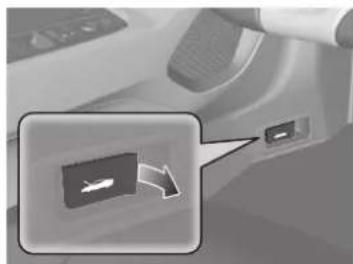
1 Pull the hood release handle under the corner of the dashboard.
natural_image
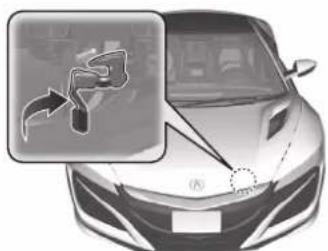
Close-up of a car interior showing a door panel with a close-up of a device (no visible text or symbols)2 Locate the hood latch lever, pull it up, and then raise the hood. Once you have raised the hood slightly, you can release the lever.
natural_image
Front view of a car with a highlighted route arrow (no text or symbols)3 When finished, close the hood and make sure both right and left latches are firmly locked in place.
Handling the Unexpected
P. 431
Flat Tire
P. 433
● Park in a safe location and repair the flat tire using the temporary tire repair kit.
natural_image
Rear view of a modern silver sports car (no visible text or symbols)Power System Won't Start
P. 445
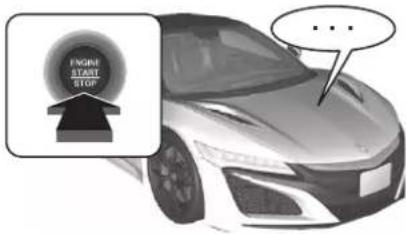
- If the 12-volt battery is dead, jump start using a booster battery.
text_image
CREATE STOP ...Overheating
P. 450
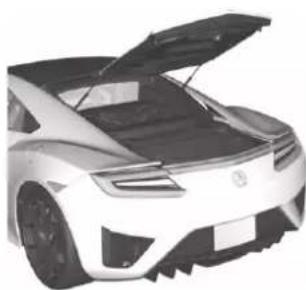
● Park in a safe location. If you do not see steam under the hatch, open the hatch, and let the power system and the engine cool down.
natural_image
Front view of a silver sports car with its hood open, showing engine compartment and front grille (no visible text or symbols)Indicators Come On
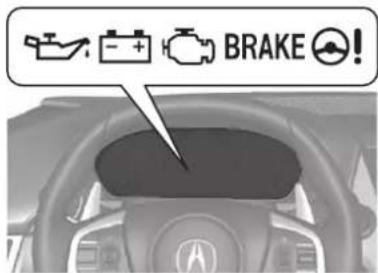
P. 452
- Identify the indicator and consult the owner's manual.
text_image
BRAKE!Blown Fuse
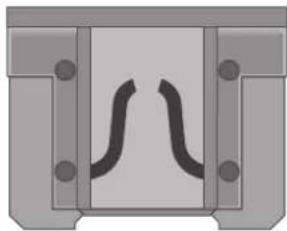
P. 457
- Check for a blown fuse if an electrical device does not operate.
natural_image
Pure mechanical component diagram without any text, numbers, or symbolsEmergency Towing
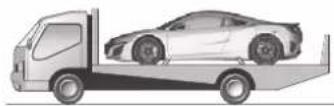
P. 462
- Call a professional towing service if you need to tow your vehicle.
What to Do If

Why do the doors lock after I unlocked the doors?

If you do not open the doors within 30 seconds, the doors are relocked automatically for security.

Why does the beeper sound when I open the driver's door?

The beeper sounds when:
- The power mode is in ACCESSORY.
- The exterior lights are left on.

Why does the beeper sound when I start driving?

The beeper sounds when the driver and/or passenger are not wearing their seat belts.

Models with iron brake discs Why do I hear a screeching sound when I apply the brake pedal?

The brake pads may need to be replaced. Have your vehicle inspected by an authorized Acura NSX dealer.

Pressing the electric parking brake switch does not release the parking brake. Why?

Press the electric parking brake switch with the brake pedal depressed.

Depressing the accelerator pedal does not release the parking brake automatically. Why?

- Fasten the driver's seat belt.
- Check if the transmission is in or . If so, select any other position.

Why does the gear position automatically change to P when I open the driver's door to check for parking space lines when reversing?

- Fasten the driver's seat belt.
- Close the driver's door and manually change the gear position.
When opening the driver's door P. 329

I'm seeing an amber indicator of a tire with an exclamation point. What is that?

The Tire Pressure Monitoring System (TPMS) needs attention. Check tire pressure.
If the Low Tire Pressure/TPMS Indicator Comes On or Blinks P. 455
text_image
Safe Driving You can find many safety recommendations throughout this chapter, and throughout this manual.For Safe Driving
Important Safety Precautions.... 32
Your Vehicle's Safety Features...... 34
Safety Checklist 35
Seat Belts
About Your Seat Belts.... 36
Fastening a Seat Belt 39
Seat Belt Inspection.... 42
Airbags
Airbag System Components.... 43
Types of Airbags 46
Front Airbags (SRS) 46
Driver's Knee Airbag 50
Side Airbags....52
Side Curtain Airbags 54
Airbag System Indicators.... 55
Airbag Care 57
Child Safety
Protecting Child Passengers 58
Safety of Infants and Small Children... 60
Safety of Larger Children 65
Exhaust Gas Hazard
Carbon Monoxide Gas.... 67
Safety Labels
Label Locations 68
For Safe Driving
The following pages explain your vehicle's safety features and how to use them properly. The safety precautions below are ones that we consider to be among the most important.
Important Safety Precautions
■ Always wear your seat belt
A seat belt is your best protection in all types of collisions. Airbags are designed to supplement seat belts, not replace them. So even though your vehicle is equipped with airbags, make sure you and your passenger always wear your seat belts, and wear them properly.
■ Your vehicle is not recommended for child passengers
The National Highway Traffic Safety Administration and Transport Canada recommend that all children ages 12 and under be properly restrained in a back seat. Since this vehicle does not have a back seat, we strongly recommend that you do not carry any child who is not large enough and mature enough to ride in front.
■ Be aware of airbag hazards
While airbags can save lives, they can cause serious or fatal injuries to occupants who sit too close to them, or are not properly restrained. Infants, young children, and short adults are at the greatest risk. Be sure to follow all instructions and warnings in this manual.
■ Don't drink and drive
Alcohol and driving don't mix. Even one drink can reduce your ability to respond to changing conditions, and your reaction time gets worse with every additional drink. So don't drink and drive, and don't let your friends drink and drive, either.
Important Safety Precautions
Some states, provinces and territories prohibit the use of cell phones other than hands-free devices by the driver while driving.
Never carry an infant in a rear-facing child seat in this vehicle.
If an older child must ride in this vehicle, follow all child safety instructions and warnings in this manual.
→ Child Safety P. 58
■ Pay appropriate attention to the task of driving safely
Engaging in cell phone conversation or other activities that keep you from paying close attention to the road, other vehicles, and pedestrians could lead to a crash. Remember, situations can change quickly, and only you can decide when it is safe to divert some attention away from driving.
■ Control your speed
Excessive speed is a major factor in crash injuries and deaths. Generally, the higher the speed, the greater the risk, but serious injuries can also occur at lower speeds. Never drive faster than is safe for current conditions, regardless of the maximum speed posted.
- Keep your vehicle in safe condition
Having a tire blowout or a mechanical failure can be extremely hazardous. To reduce the possibility of such problems, check your tire pressures and condition frequently, and perform all regularly scheduled maintenance.
■ Do not leave children unattended in the vehicle
Children, pets and people needing assistance left unattended in the vehicle may be injured if they activate one or more of the vehicle controls. They may also cause the vehicle to move, resulting in a crash in which they and/or another person(s) can be injured or killed. Also, depending on the ambient temperature, the temperature of the interior may reach extreme levels, which can result in harm or death. Even if the climate control system is on, never leave them in the vehicle unattended as the climate control system can shut off at any time.
Your Vehicle's Safety Features
text_image
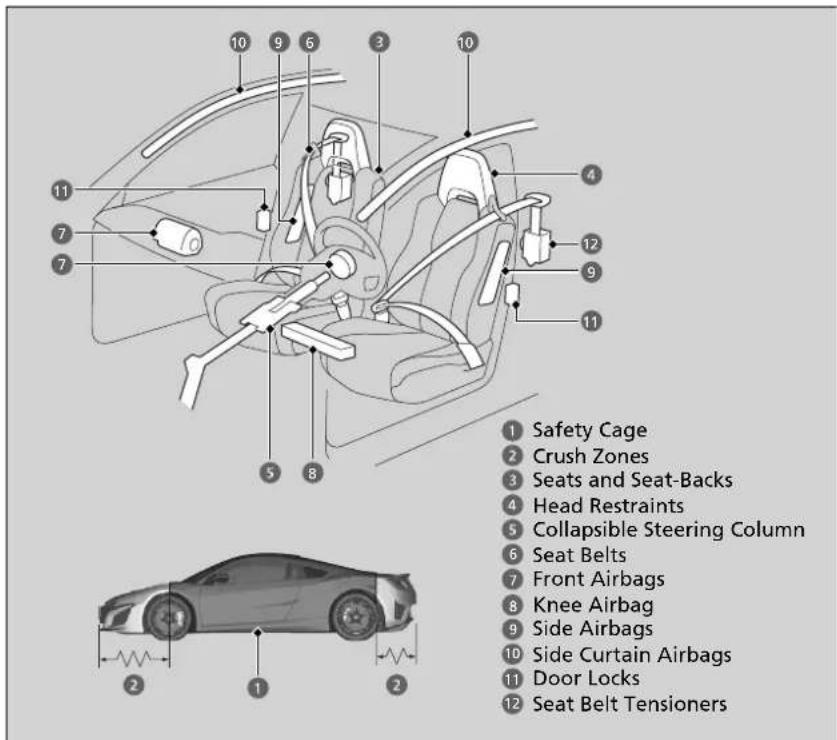
1 Safety Cage 2 Crush Zones 3 Seats and Seat-Backs 4 Head Restraints 5 Collapsible Steering Column 6 Seat Belts 7 Front Airbags 8 Knee Airbag 9 Side Airbags 10 Side Curtain Airbags 11 Door Locks 12 Seat Belt TensionersThe following checklist will help you take an active role in protecting yourself and your passenger.
Your Vehicle's Safety Features
Your vehicle is equipped with many features that work together to help protect you and your passenger during a crash.
Some features do not require any action on your part. These include a strong framework that forms a safety cage around the passenger compartment, front and rear crush zones, a collapsible steering column, and tensioners that tighten the seat belts in a sufficient crash.
However, you and your passenger cannot take full advantage of these features unless you remain seated in the correct position and always wear your seat belts. In fact, some safety features can contribute to injuries if they are not used properly.
Safety Checklist
For the safety of you and your passenger, make a habit of checking these items each time before you drive.
- After everyone has entered the vehicle, be sure both doors are closed and locked. Locking the doors helps prevent an occupant from being ejected and an outsider from unexpectedly opening a door.
Locking/Unlocking the Doors from the Inside P. 115
- Adjust your seat to a position suitable for driving. Be sure the seats are adjusted as far to the rear as possible while allowing the driver to control the vehicle. Sitting too close to a front airbag can result in serious or fatal injury in a crash.
Adjusting the Seats P. 144
- Always wear your seat belt, and make sure you wear it properly. Confirm that any passenger is properly belted as well.
→ Fastening a Seat Belt P. 39
- If you choose to ignore our warnings and carry a child in this vehicle, make every effort to protect them by properly using a seat belt or a child seat according to the child's age, height, and weight.
→ Child Safety P. 58
>>Safety Checklist
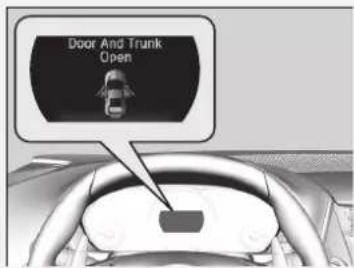
If the Door Open or Door And Trunk Open message appears on the driver information interface, a door and/or the trunk (hatch) is not completely closed. Close both doors and the trunk (hatch) tightly until the message disappears.
Driver Information Interface Warning and Information Messages P. 88
text_image
Door And Trunk OpenSeat Belts
About Your Seat Belts
Seat belts are the single most effective safety device because they keep you connected to the vehicle so that you can take advantage of many built-in safety features. They also help keep you from being thrown against the inside of the vehicle, against any passenger, or out of the vehicle. When worn properly, seat belts also keep your body properly positioned in a crash so that you can take full advantage of the additional protection provided by the airbags.
In addition, seat belts help protect you in almost every type of crash, including:
- frontal impacts
- side impacts
- rear impacts
- rollovers
■ Lap/shoulder seat belts
Both seating positions are equipped with lap/shoulder seat belts with emergency locking retractors. In normal driving the retractor lets you move freely while keeping some tension on the belt. During a collision or sudden stop the retractor locks to restrain your body. The passenger's seat belt has a lockable retractor that must be properly activated when using a forward-facing child seat, should you choose to disregard our recommendations and install one.
→ Installing a Child Seat P. 63
About Your Seat Belts
WARNING
Not wearing a seat belt properly increases the chance of serious injury or death in a crash, even though your vehicle has airbags.
Be sure you and your passenger always wear seat belts and wear them properly.
Seat belts cannot completely protect you in every crash. But in most cases, seat belts can reduce your risk of serious injury.
Most states and all Canadian provinces and territories require you to wear seat belts.
If you extend the seat belt too quickly, it will lock in place. If this happens, slightly retract the seat belt, then extend it slowly.
■ Proper use of seat belts
Follow these guidelines for proper use:
- All occupants should sit upright, well back in the seat, and remain in that position for the duration of the trip. Slouching and leaning reduce the effectiveness of the belt and can increase the chance of serious injury in a crash.
- Never place the shoulder part of a lap/shoulder seat belt under your arm or behind your back. This could cause very serious injuries in a crash.
- Two people should never use the same seat belt. If they do, they could be very seriously injured in a crash.
- Do not put any accessories on the seat belts. Devices intended to improve comfort or reposition the shoulder part of a seat belt can reduce the protective capability and increase the chance of serious injury in a crash.
Seat Belt Reminder
text_image
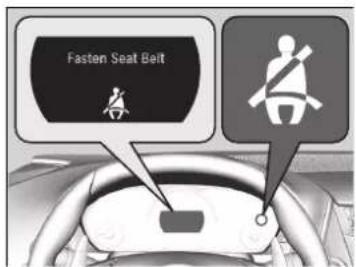
Fasten Seat BeitThe seat belt system includes an indicator on the instrument panel to remind the driver or a passenger or both to fasten their seat belts. If you set the power mode to ON and a seat belt is not fastened, a beeper will sound and the indicator will blink. After a few seconds, the beeper will stop and the indicator will come on and remain illuminated until the seat belt is fastened.
The beeper will periodically sound and the indicator will blink while the vehicle is moving until the seat belt is fastened.
About Your Seat Belts
If your passenger moves around and extends the seat belt, the lockable retractor may activate. If this happens, release the retractor by unfastening the seat belt and allow the belt to retract completely. Then refasten the belt.
Seat Belt Reminder
The indicator will also come on if a passenger does not fasten their seat belt within six seconds after the power mode is set to ON.
When no one is sitting in the passenger's seat, or a child is riding there, the indicator will not come on and the beeper will not sound.
Automatic Seat Belt Tensioners
natural_image
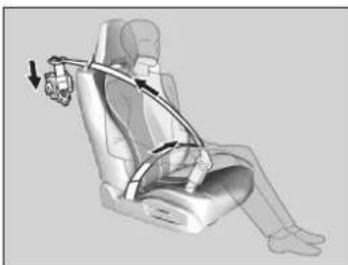
3D illustration of a person seated in a car seat with a belt buckle, showing no text or symbols.The driver's and passenger's seats are equipped with automatic seat belt tensioners to enhance safety.
The tensioners automatically tighten the seat belts during a moderate-to-severe frontal collision, sometimes even if the collision is not severe enough to inflate the front airbags or the driver's knee airbag.
Automatic Seat Belt Tensioners
The seat belt tensioners can only operate once. If a tensioner is activated, the SRS indicator will come on. Have an authorized Acura NSX dealer replace the tensioner and thoroughly inspect the seat belt system as it may not offer protection in a subsequent crash.
During a moderate-to-severe side impact, the tensioner on that side of the vehicle also activates.
Fastening a Seat Belt
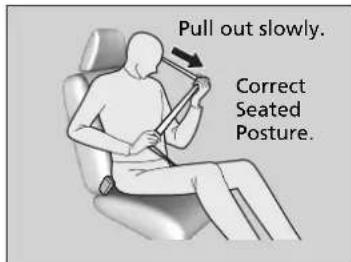
After adjusting your seat to the proper position, and while sitting upright and well back in the seat:
Adjusting the Seats P. 144
text_image
Pull out slowly. Correct Seated Posture.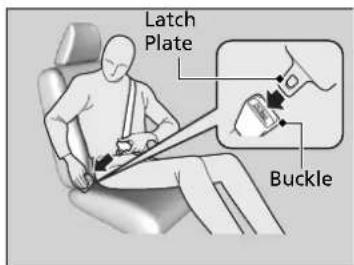
text_image
Latch Plate Buckle-
Pull the seat belt out slowly.
-
Insert the latch plate into the buckle, then tug on the belt to make sure the buckle is secure.
▶ Make sure that the belt is not twisted or caught on anything.
Fastening a Seat Belt
No one should sit in a seat with an inoperative seat belt or one that does not appear to be working correctly. Using a seat belt that is not working properly may not protect the occupant in a crash. Have an authorized Acura NSX dealer check the belt as soon as possible.
Never insert any foreign objects into the buckle or retractor mechanism.
If the seat belt appears to be locked in a fully retracted position, firmly pull out on the shoulder belt once, then push it back in.
Then smoothly pull it out of the retractor and fasten. If you are unable to release the seat belt from a fully retracted position, do not allow anyone to sit in the seat, and take your vehicle to a dealer for repair.
About Your Seat Belts P. 36
→ Seat Belt Inspection P. 42
Continued
text_image
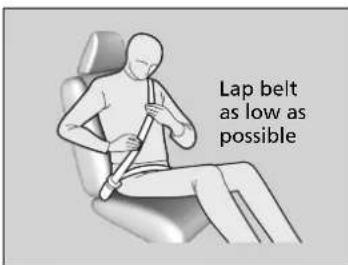
Lap belt as low as possible- Position the lap part of the belt as low as possible across your hips, then pull up on the shoulder part of the belt so the lap part fits snugly. This lets your strong pelvic bones take the force of a crash and reduces the chance of internal injuries.
- If necessary, pull up on the belt again to remove any slack, then check that the belt rests across the center of your chest and over your shoulder. This spreads the forces of a crash over the strongest bones in your upper body.
Fastening a Seat Belt
WARNING
Improperly positioning the seat belts can cause serious injury or death in a crash.
Make sure all seat belts are properly positioned before driving.
To release the belt, push the red PRESS button and then guide the belt by hand until it has retracted completely.
When exiting the vehicle, be sure the belt is properly stowed so that it will not get caught in the closing door.
Advice for Pregnant Women
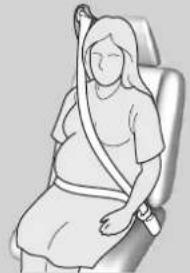
If you are pregnant, the best way to protect yourself and your unborn child when driving or riding in a vehicle is to always wear a seat belt and keep the lap part of the belt as low as possible across the hips.
Wear the shoulder belt across the chest avoiding the abdomen.
natural_image
Illustration of a person sitting in a car seat with a bandage (no text or symbols)Wear the lap part of the belt as low as possible across the hips.
»Advice for Pregnant Women
Each time you have a checkup, ask your doctor if it is okay for you to drive.
To reduce the risk of injuries to both you and your unborn child that can be caused by an inflating front airbag:
- When driving, sit upright and adjust the seat as far back as possible while allowing full control of the vehicle.
- When sitting in the passenger's seat, adjust the seat as far back as possible.
Seat Belt Inspection
Regularly check the condition of your seat belts as follows:
- Pull each belt out fully, and look for frays, cuts, burns, and wear.
- Check that the latch plates and buckles work smoothly and the belts retract easily.
If a belt does not retract easily, cleaning the belt may correct the problem. Only use a mild soap and warm water. Do not use bleach or cleaning solvents. Make sure the belt is completely dry before allowing it to retract.
Any belt that is not in good condition or working properly will not provide proper protection and should be replaced as soon as possible.
A belt that has been worn during a crash may not provide the same level of protection in a subsequent crash. Have your seat belts inspected by an authorized Acura NSX dealer after any collision.
Seat Belt Inspection
WARNING
Not checking or maintaining seat belts can result in serious injury or death if the seat belts do not work properly when needed.
Check your seat belts regularly and have any problem corrected as soon as possible.
Airbags
Airbag System Components
text_image
Diagram of a car interior with numbered parts for identification and assembly reference.Continued
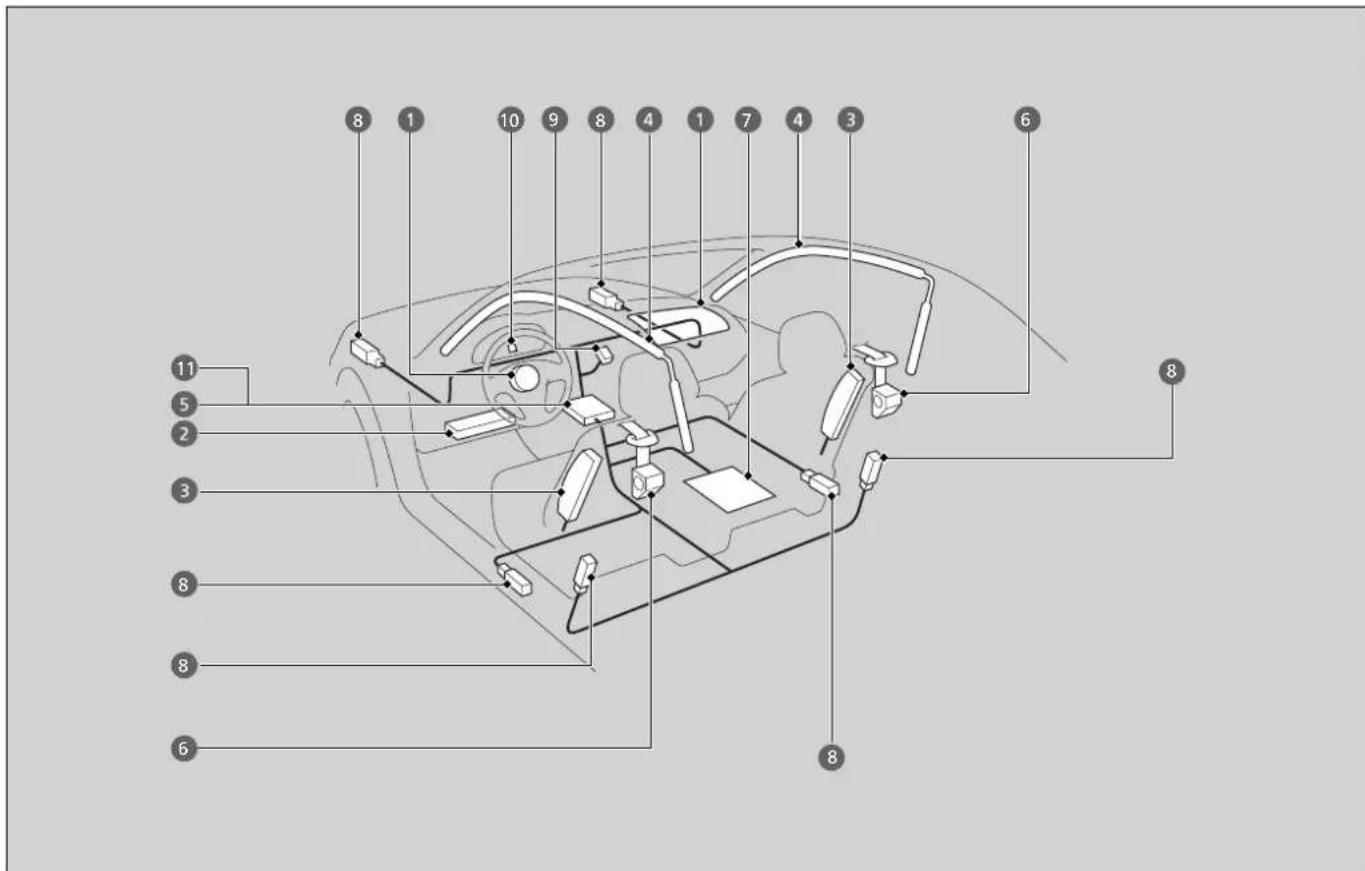
The front, driver's knee, side, and side curtain airbags are deployed according to the direction and severity of impact. Both side curtain airbags are deployed in a rollover. The airbag system includes:
Two SRS (Supplemental Restraint System) front airbags. The driver's airbag is stored in the center of the steering wheel; the passenger's airbag is stored in the dashboard. Both are marked SRS AIRBAG.
② Driver's knee airbag. The knee airbag is stored under the steering column. It is marked SRS AIRBAG.
③ Two side airbags, one for the driver and one for a passenger. The airbags are stored in the outer edges of the seat-backs. Both are marked SIDE AIRBAG.
4 Two side curtain airbags, one for each side of the vehicle. The airbags are stored in the ceiling, above the side windows. The front and rear pillars are marked SIDE CURTAIN AIRBAG.
⑤ An electronic control unit that, when the power system is on, continually monitors information about the various impact sensors, seat and buckle sensors, rollover sensor, airbag activators, seat belt tensioners, and other vehicle information. During a crash event the unit can record such information.
6 Automatic seat belt tensioners. In addition, the driver's and passenger's seat belt buckles incorporate sensors that detect whether or not the belts are fastened.
⑦ Weight sensors in the passenger's seat. The passenger's airbag will be turned off if the weight on the seat is approximately 65 lbs (29 kg) or less (the weight of an infant or small child).
⑧ Impact sensors that can detect a moderate-to-severe front or side impact.
⑨ An indicator on the dashboard that alerts you that the passenger's front airbag has been turned off.
10 An indicator on the instrument panel that alerts you to a possible problem with your airbag system or seat belt tensioners.
11 A rollover sensor that can detect if your vehicle is about to roll over and signal the control unit to deploy both side curtain airbag.
■ Important Facts About Your Airbags
Airbags can pose serious hazards. To do their job, airbags must inflate with tremendous force. So, while airbags help to save lives, they can cause burns, bruises, and other minor injuries, sometimes even fatal ones if occupants are not wearing their seat belts properly and sitting correctly.
What you should do: Always wear your seat belt properly, and sit upright and as far back from the steering wheel as possible while allowing full control of the vehicle. A passenger should move their seat as far back from the dashboard as possible.
Remember, however, that no safety system can prevent all injuries or deaths that can occur in a severe crash, even when seat belts are properly worn and the airbags deploy.
Do not place hard or sharp objects between yourself and a front airbag.
Carrying hard or sharp objects on your lap, or driving with a pipe or other sharp object in your mouth, can result in injuries if your front airbag inflates.
Do not attach or place objects on the front and driver's knee airbag covers.
Objects on the covers marked SRS AIRBAG could interfere with the proper operation of the airbags or be propelled inside the vehicle and hurt someone if the airbags inflate.
Important Facts About Your Airbags
Do not attempt to deactivate your airbags. Together, airbags and seat belts provide the best protection.
When driving, keep hands and arms out of the deployment path of the front airbag by holding each side of the steering wheel. Do not cross an arm over the airbag cover.
Types of Airbags
Your vehicle is equipped with four types of airbags:
- Front airbags: Airbags in front of the driver's and passenger's seats.
- Driver's knee airbag: Airbag under the steering column.
- Side airbags: Airbags in the driver's and passenger's seat-backs.
- Side curtain airbags: Airbags above the side windows.
Each is discussed in the following pages.
Front Airbags (SRS)
The front SRS airbags inflate in a moderate-to-severe frontal collision to help protect the head and chest of the driver and/or passenger.
SRS (Supplemental Restraint System) indicates that the airbags are designed to supplement seat belts, not replace them. Seat belts are the occupant's primary restraint system.
Housing Locations
The front airbags are housed in the center of the steering wheel for the driver, and in the dashboard for the passenger. Both airbags are marked SRS AIRBAG.
Types of Airbags
The airbags can inflate whenever the power mode is in ON.
After an airbag inflates in a crash, you may see a small amount of smoke. This is from the combustion process of the inflator material and is not harmful. People with respiratory problems may experience some temporary discomfort. If this occurs, get out of the vehicle as soon as it is safe to do so.
Front Airbags (SRS)
During a frontal crash severe enough to cause one or both front airbags to deploy, the airbags can inflate at different rates, depending on the severity of the crash, whether or not the seat belts are latched, and/or other factors. Frontal airbags are designed to supplement the seat belts to help reduce the likelihood of head and chest injuries in frontal crashes.
Operation
Front airbags are designed to inflate during moderate-to-severe frontal collisions. When the vehicle decelerates suddenly, the sensors send information to the control unit which signals one or both front airbags to inflate.
A frontal collision can be either head-on or angled between two vehicles, or when a vehicle crashes into a stationary object, such as a concrete wall.
How the Front Airbags Work
natural_image
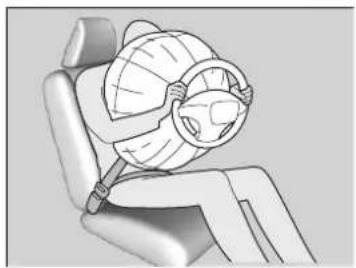
Illustration of a person seated in a chair holding a globe (no text or symbols visible)While your seat belt restrains your torso, the front airbag provides supplemental protection for your head and chest.
The front airbags deflate immediately so that they won't interfere with the driver's visibility or the ability to steer or operate other controls.
The total time for inflation and deflation is so fast that most occupants are not aware that the airbags deployed until they see them lying in front of them.
>>How the Front Airbags Work
Although the driver's and passenger's airbags normally inflate within a split second of each other, it is possible for only one airbag to deploy. This can happen if the severity of a collision is at the margin, or threshold that determines whether or not the airbags will deploy. In such cases, the seat belt will provide sufficient protection, and the supplemental protection offered by the airbag would be minimal.
■ When front airbags should not deploy
Minor frontal crashes: Front airbags were designed to supplement seat belts and help save lives, not to prevent minor scrapes, or even broken bones that might occur during a less than moderate-to-severe frontal crash.
Side impacts: Front airbags can provide protection when a sudden deceleration causes a driver or passenger to move toward the front of the vehicle. Side airbags and side curtain airbags have been specifically designed to help reduce the severity of injuries that can occur during a moderate-to-severe side impact which can cause the driver or passenger to move toward the side of the vehicle.
Rear impacts: Head restraints and seat belts are your best protection during a rear impact. Front airbags cannot provide any significant protection and are not designed to deploy in such collisions.
Rollovers: In a rollover, your best form of protection is a seat belt or, if your vehicle is equipped with a rollover sensor, both a seat belt and a side curtain airbag. Front airbags, however, are not designed to deploy in a rollover as they would provide little if any protection.
■ When front airbags deploy with little or no visible damage
Because the airbag system senses sudden deceleration, a strong impact to the vehicle framework or suspension might cause one or more of the airbags to deploy. Examples include running into a curb, the edge of a hole, or other low fixed object that causes a sudden deceleration in the vehicle chassis. Since the impact is underneath the vehicle, damage may not be readily apparent.
■ When front airbags may not deploy, even though exterior damage appears severe
Since crushable body parts absorb crash energy during an impact, the amount of visible damage does not always indicate proper airbag operation. In fact, some collisions can result in severe damage but no airbag deployment because the airbags would not have been needed or would not have provided protection even if they had deployed.
■ Advanced Airbags
The passenger's airbag have advanced features to help reduce the likelihood of airbag related injuries to a smaller occupant.
text_image
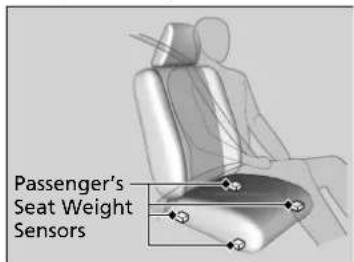
Passenger's Seat Weight SensorsThe passenger's advanced airbag system has weight sensors.
We advise against allowing a child age 12 or under to ride in the passenger's seat. However, if you do allow a child age 12 or under to ride in the passenger's seat, note that the system will automatically turn off the passenger's airbag if the sensors detect that the child is approximately 65 lbs (29 kg) or less.
>>Advanced Airbags
For the passenger's advanced front airbag to work properly:
- Do not spill any liquid on or under the seat.
- Do not put any object under the passenger's seat.
- Make sure any objects are positioned properly on the floor. Improperly positioned objects can interfere with the advanced airbag sensors.
- An occupant should sit upright and wear their seat belts properly.
- Do not cover the passenger's side dashboard with a cloth, towel, cover, etc.
→ Passenger Front Airbag Off Indicator P. 56
▶▶ Airbags▶ Driver's Knee Airbag
Driver's Knee Airbag
The driver's knee SRS airbag inflates in a moderate-to-severe frontal collision to help keep the driver in the proper position and to help maximize the benefit provided by the vehicle's other safety features.
SRS (Supplemental Restraint System) indicates that the airbag is designed to supplement seat belts, not replace them. Seat belts are the occupant's primary restraint system.
Housing Locations
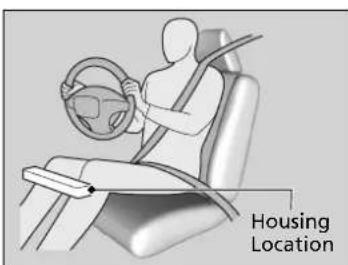
text_image
Housing LocationThe driver's knee airbag is housed under the steering column.
The airbag is marked SRS AIRBAG.
Operation
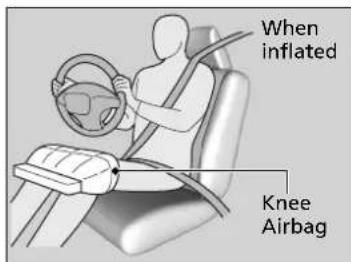
text_image
When inflated Knee AirbagWhen the driver's front airbag inflates, the driver's knee airbag also inflates.
Even if the collision is not severe enough to deploy the front airbag, the knee airbag may inflate alone.
Driver's Knee Airbag
Do not attach accessories on or near a knee airbag as they can interfere with the proper operation of the airbag, or even hurt someone if the airbag inflates.
The driver should not store any items under the seat or behind their feet. The items can interfere with proper airbag deployment in the event of a moderate to sever frontal collision and may result in inadequate protection.
■ When driver's knee airbag deploys with little or no visible damage
Because the airbag system senses sudden deceleration, a strong impact to the vehicle framework or suspension might cause one or more of the airbags to deploy. Examples include running into a curb, the edge of a hole, or other low fixed object that causes a sudden deceleration in the vehicle chassis. Since the impact is underneath the vehicle, damage may not be readily apparent.
- When driver's knee airbag may not deploy, even though exterior damage appears severe
Since crushable body parts absorb crash energy during an impact, the amount of visible damage does not always indicate proper airbag operation. In fact, some collisions can result in severe damage but no airbag deployment because the airbags would not have been needed or would not have provided protection even if they had deployed.
Side Airbags
The side airbags help protect the torso and pelvis of the driver or a passenger during a moderate-to-severe side impact.
Housing Locations
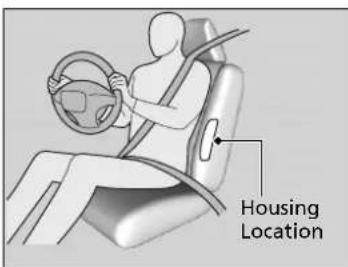
text_image
Housing LocationThe side airbags are housed in the outside edge of the driver's and passenger's seat-backs.
Both are marked SIDE AIRBAG.
Operation
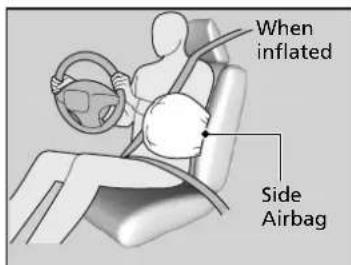
text_image
When inflated Side AirbagWhen the sensors detect a moderate-to-severe side impact, the control unit signals the side airbag on the impact side to immediately inflate.
Side Airbags
Make sure you and your passenger always sit upright. Leaning into the path of a side airbag can prevent the airbag from deploying properly and increases your risk of serious injury.
Do not attach accessories on or near the side airbags. They can interfere with the proper operation of the airbags, or hurt someone if an airbag inflates.
Do not cover or replace the seat-back covers without consulting an authorized Acura NSX dealer. Improperly replacing or covering seat-back covers can prevent your side airbags from properly deploying during a side impact.
■ When a side airbag deploys with little or no visible damage
Because the airbag system senses sudden acceleration, a strong impact to the side of the vehicle's framework can cause a side airbag to deploy. In such cases, there may be little or no damage, but the side impact sensors detected a severe enough impact to deploy the airbag.
■ When a side airbag may not deploy, even though visible damage appears severe
It is possible for a side airbag not to deploy during an impact that results in apparently severe damage. This can occur when the point of impact was toward the far front or rear of the vehicle, or when the vehicle's crushable body parts absorbed most of the crash energy. In either case, the side airbag would not have been needed nor provided protection even if it had deployed.
Side Curtain Airbags
The side curtain airbags help protect the heads of the driver and any passengers during a moderate-to-severe side impact. The side curtain airbags equipped in this vehicle are also designed to help reduce the likelihood of partial and complete ejection of vehicle occupants through side windows in crashes, particularly rollover crashes.
Housing Locations
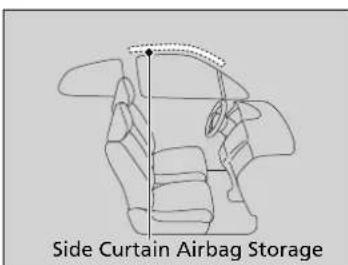
text_image
Side Curtain Airbag StorageThe side curtain airbags are located in the ceiling above the side windows on both sides of the vehicle.
Operation
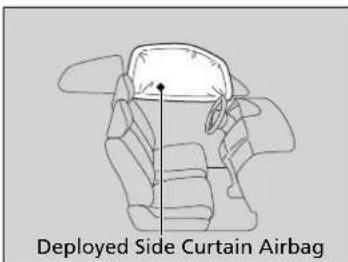
text_image
Deployed Side Curtain AirbagThe side curtain airbag is designed to deploy in a rollover or a moderate-to-severe side impact.
>>Side Curtain Airbags
If the SRS control unit senses that your vehicle is about to rollover, it immediately deploys both side curtain airbags and activates both seat belt tensioners.
If the impact is on the passenger's side, the passenger's side curtain airbag deploys even if there is no occupant on that side of the vehicle.
To get the best protection from the side curtain airbags, occupants should wear their seat belts properly and sit upright and well back in their seats.
Do not attach any objects to the side windows or roof pillars as they can interfere with the proper operation of the side curtain airbags.
■ When side curtain airbags deploy in a frontal collision
One or both side curtain airbags may also inflate in a moderate-to-severe angled frontal collision.
Airbag System Indicators
If a problem occurs in the airbag system, the SRS indicator will come on and a message appears on the driver information interface.
■ Supplemental Restraint System (SRS) Indicator
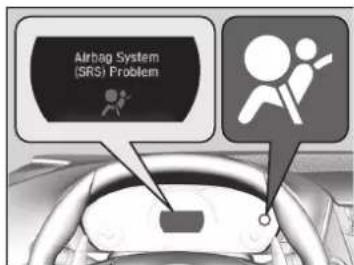
text_image
Airbag System (SRS) Problem■ When the power mode is set to ON The indicator comes on for a few seconds then goes off. This tells you the system is working properly.
If the indicator comes on at any other time, or does not come on at all, have the system checked by an authorized Acura NSX dealer as soon as possible. If you don't, your airbags and seat belt tensioners may not work properly when they are needed.
Supplemental Restraint System (SRS) Indicator
WARNING
Ignoring the SRS indicator can result in serious injury or death if the airbag systems or tensioners do not work properly.
Have your vehicle checked by an authorized Acura NSX dealer as soon as possible if the SRS indicator alerts you to a possible problem.
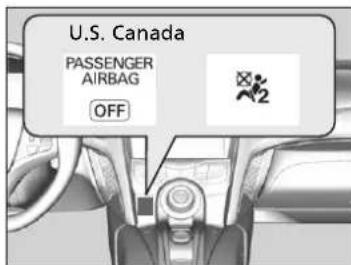
Passenger Front Airbag Off Indicator
text_image
U.S. Canada PASSENGER AIRBAG OFF■ When the passenger front airbag off indicator comes on
The indicator comes on to alert you that the passenger's front airbag has been turned off. This occurs when the weight sensors detect about 65 lbs (29 kg) or less, the weight of an infant or small child, on the seat.
Your vehicle is not recommended for child passengers. Never put a rear-facing child seat in this vehicle.
If you decided to disregard our recommendations and transport a small child, they should be properly restrained.
→ Child Safety P. 58
Objects placed on the seat can also cause the indicator to come on.
If the passenger's seat is empty, the passenger's front airbag will not deploy and the indicator will not come on.
>>Passenger Front Airbag Off Indicator
If the indicator comes on with no passenger and no objects on the passenger's seat, or with an adult riding there, something may be interfering with the weight sensor, such as:
• An object hanging on the seat.
- An object pressing the rear of the seat-back.
- The seat or seat-back is forced back against cargo on the rear trays or floor behind it.
- An object placed under the passenger's seat.
If none of these conditions exist, have your vehicle checked by an authorized Acura NSX dealer as soon as possible.
The passenger front airbag off indicator may come on and go off repeatedly if the total weight on the seat is near the airbag cutoff threshold.
Airbag Care
You do not need to, and should not, perform any maintenance on or replace any airbag system components yourself. However, you should have your vehicle inspected by an authorized Acura NSX dealer in the following situations:
■ When the airbags have deployed
If an airbag has inflated, the control unit and other related parts must be replaced. Similarly, once an automatic seat belt tensioner has been activated, it must be replaced.
■ When the vehicle has been in a moderate-to-severe collision
Even if the airbags did not inflate, have an authorized Acura NSX dealer inspect the following: the weight sensors in the passenger's seat, seat belt tensioners, and each seat belt that was worn during the crash.
■ Do not remove or modify a seat without consulting an authorized Acura NSX dealer
This would likely disable or affect the proper operation of the weight sensors in the passenger's seat. If it is necessary to remove or modify a seat to accommodate a person with disabilities, contact an authorized Acura NSX dealer, or for U.S. vehicles, Acura Client Relations at 1-844-682-2872 and for Canadian vehicles, Acura Client Service at 1-888-9-ACURA-9 or 1-844-9-MYNSX-9 (NSX-specific).
Airbag Care
We recommend against the use of salvaged airbag system components, including the airbag, tensioners, sensors, and control unit.
Child Safety
Protecting Child Passengers
Each year, many children are injured or killed in vehicle crashes because they are either unrestrained or not properly restrained. In fact, vehicle crashes are the number one cause of death of children ages 12 and under.
To reduce the number of child deaths and injuries, every state, Canadian province and territory requires that children be properly restrained when they ride in a vehicle.
Since this vehicle does not have a back seat, we recommend that you do not carry a child, age 12 or under, as a passenger. This is because:
- An inflating front or side airbag can injure or kill a child sitting in the passenger's seat.
- A child in the passenger's seat is more likely to interfere with the driver's ability to safely control the vehicle.
- Statistics show that children of all sizes and ages are safer when they are properly restrained in a rear seat. Because this vehicle does not have a rear seat, we recommend that you do not carry a child age 12 or under in this vehicle.
Protecting Child Passengers
WARNING
Children who are unrestrained or improperly restrained can be seriously injured or killed in a crash.
Any child too small for a seat belt should be properly restrained in a child seat. A larger child should be properly restrained with a seat belt, using a booster seat if necessary.
The National Highway Traffic Safety Administration and Transport Canada recommend that all children ages 12 and under be properly restrained in a rear seat. Some states or provinces/territories have laws restricting where children may ride.
Never put a rear-facing child seat in this vehicle.
- Any child who is too small to wear a seat belt correctly must be restrained in an approved child seat that is properly secured to the vehicle using the lap belt portion of the lap/shoulder belt.
- Never hold a child on your lap because it is impossible to protect them in the event of a collision.
- Never put a seat belt over yourself and a child. During a crash, the belt would likely press deep into the child and cause serious or fatal injuries.
- Never let two children use the same seat belt. Both children could be very seriously injured in a crash.
- Do not allow children to operate the doors, windows or seat adjustments.
- Do not leave children in the vehicle unattended, especially in hot weather when the inside of the vehicle can get hot enough to kill them. They could also activate vehicle controls causing it to move unexpectedly.
Protecting Child Passengers
WARNING
Allowing a child to play with a seat belt or wrap one around their neck can result in serious injury or death.
Instruct children not to play with any seat belt.
To deactivate a lockable retractor, release the buckle and allow the seat belt to wind up all the way.
To remind you of the passenger's front airbag hazards and child safety, your vehicle has warning labels on the dashboard (U.S. models) and on the front visors. Please read and follow the instructions on these labels.
→ Safety Labels P. 68
Safety of Infants and Small Children
Protecting Infants
An infant must be properly restrained in a rear-facing, reclining child seat until the infant reaches the seat manufacturer's weight or height limit for the seat, and the infant is at least one year old. Because rear-facing child seats should not be used in this vehicle, you should never carry an infant in this vehicle.
Protecting Infants
WARNING
Placing a rear-facing child seat in the passenger's seat can result in serious injury or death during a crash.
Never install a rear-facing child seat in this vehicle.
Rear-facing child seats should never be installed in a forward-facing position.
Protecting Smaller Children
Since this vehicle does not have a back seat, we recommend that you do not carry a child, age 12 or under, as a passenger.
This is because placing a forward-facing child seat in the passenger's seat can be hazardous, even with advanced front airbags that automatically turn the passenger's front airbag off.
If you choose to ignore our warnings and transport a small child in this vehicle, be sure to move the passenger seat as far to the rear as possible, and follow the instructions and guidelines in the following pages.
Protecting Smaller Children
WARNING
Placing a forward-facing child seat in the passenger's seat can result in serious injury or death if the front airbag inflates.
If you must place a forward-facing child seat in passenger's seat, move the vehicle seat as far back as possible, and properly restrain the child.
Educate yourself about the laws and regulations regarding child seat use where you are driving, and follow the child seat manufacturer's instructions.
A child seat must be secured to the vehicle with the lap part of a lap/shoulder belt. A child whose seat is not properly secured to the vehicle can be endangered in a crash.
Continued
Selecting a Forward-facing Child Seat
■ Important consideration when selecting a child seat
Make sure the child seat meets the following three requirements:
- The child seat is the correct type and size for the child.
- The child seat is the correct type for the seating position.
- The child seat is compliant with Federal Motor Vehicle Safety Standard 213 or Canadian Motor Vehicle Safety Standard 213.
Installing a Child Seat
natural_image
Illustration of a person using a seatbelt to lift a car (no text or symbols visible)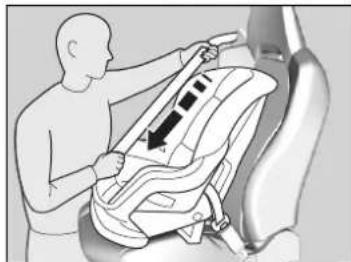
natural_image
Illustration of a person adjusting a car seatbelt, no text or symbols present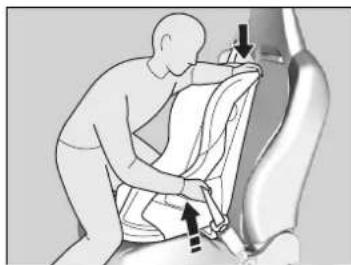
natural_image
Illustration of a person adjusting a seatbelt, with arrows indicating movement (no text or symbols)-
Move the passenger seat to the rearmost position.
-
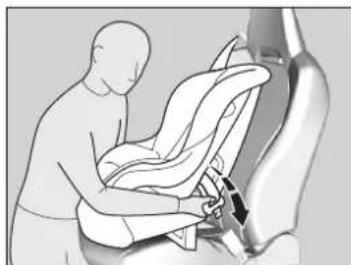
Place the child seat on the passenger seat.
-
Route the seat belt through the child seat according to the seat manufacturer's instructions, and insert the latch plate into the buckle.
▶ Insert the latch plate fully until it clicks.
-
Slowly pull the shoulder part of the belt all the way out until it stops. This activates the lockable retractor.
-
Let the seat belt completely wind up into the retractor, then try to pull it out to make sure the retractor is locked.
▶ If you are able to pull the shoulder belt out, the lockable retractor is not activated. Pull the seat belt all the way out, and repeat steps 3 – 5.
- Grab the shoulder part of the seat belt near the buckle, and pull up to remove any slack from the lap part of the belt.
When doing this, place your weight on the child seat and push it into the vehicle seat.
Installing a Child Seat
A child seat must be secured to the vehicle with the lap part of a lap/shoulder belt.
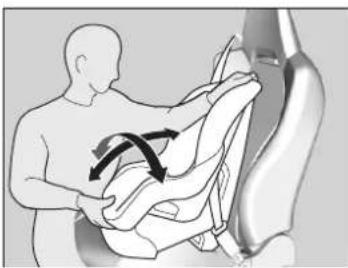
For your child's safety, when using a child seat installed using the vehicle's seat belt system, check that the seat is properly secured to the vehicle.
natural_image
Illustration of a person performing a medical or therapeutic procedure with arrows indicating direction (no text or symbols)- Make sure the child seat is firmly secured by rocking it forward and back and side to side; less than one inch of movement should occur near the seat belt.
Adding Security with a Tether
text_image
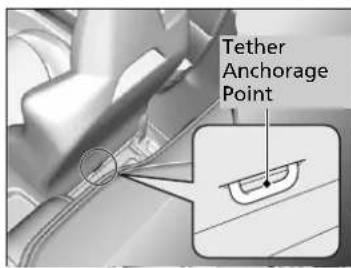
Tether Anchorage PointA tether anchorage point is provided behind the passenger seat. A child seat with a tether can be installed, so long as the base of the child seat is secured using a seat belt.
text_image
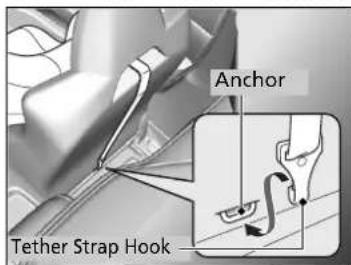
Anchor Tether Strap Hook- Move the seat forward.
Adjusting the Seat Positions P. 144 - Route the tether strap through the hole between head restraint and seat-back. Make sure the strap is not twisted.
- Secure the tether strap hook to the anchor.
- Tighten the tether strap as instructed by the child seat manufacturer.
- Move the seat to the rearmost position.
Installing a Child Seat
A child seat that is not properly secured will not adequately protect a child in a crash and may cause injury to the child or another vehicle occupant.
To deactivate a lockable retractor, release the buckle and allow the seat belt to wind up all the way.
>>Adding Security with a Tether
Since a tether can provide additional security to the lap/shoulder seat belt installation, we recommend using a tether whenever one is available.
Safety of Larger Children
Protecting Larger Children
Since this vehicle does not have a back seat, we recommend that you do not carry a child age 12 or under as a passenger. This is because children who have outgrown child seats are also at risk of being injured or killed by an inflating passenger's front airbag. If a larger child must ride in this vehicle, the information in the following pages provides guidelines to help you decide when a given child may ride in this vehicle, and how to properly protect the child.
Checking Seat Belt Fit
When a child is too big for a child seat, secure the child in the passenger's seat using the lap/shoulder seat belt. Have the child sit upright and all the way back, then answer the following questions.
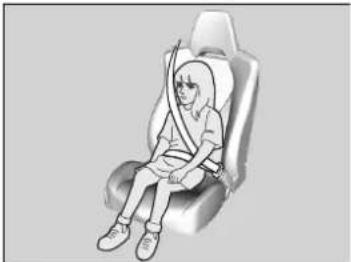
natural_image
Illustration of a person sitting in a car seat, wearing a seatbelt and carrying a bandage (no text or symbols)Checklist
- Do the child's knees bend comfortably over the edge of the seat?
- Does the shoulder belt cross between the child's neck and arm?
- Is the lap part of the seat belt as low as possible, touching the child's thighs?
- Will the child be able to stay seated like this for the whole trip?
If you answer yes to all these questions, the child is ready to wear the lap/shoulder seat belt correctly. If you answer no to any question, the child needs to ride on a booster seat until the seat belt fits properly without a booster seat.
Safety of Larger Children
WARNING
Allowing a child age 12 or under to sit in the vehicle can result in injury or death if the passenger's front airbag inflates.
If a larger child must ride in the vehicle, move the vehicle seat as far to the rear as possible, have the child sit up properly and wear the seat belt properly, using a booster seat if needed.
Booster Seats
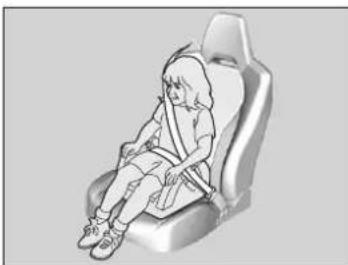
natural_image
Illustration of a person sitting in a car seat, wearing a seatbelt and holding a belt (no text or symbols present)If a lap/shoulder seat belt cannot be used properly, position the child in a booster seat in the passenger's seating position. For the child's safety, check that the child meets the booster seat manufacturer's recommendations.
Protecting Larger Children-Final Checks
If you decide that a child can safely ride in this vehicle:
- Make sure you read and fully understand the instructions and safety information in this manual.
- Move the passenger seat as far back as possible.
- Have the child sit upright and well back in the seat.
- Check that the seat belt is properly positioned so that the child is secure in the seat.
■ Monitoring a child passenger
We strongly recommend that you keep an eye on a child passenger. Even older, more mature children sometimes need to be reminded to fasten their seat belts and sit up properly.
Booster Seats
When installing a booster seat, make sure to read the instructions that came with it, and install the seat accordingly.
There are high- and low-type booster seats. Choose a booster seat that allows the child to wear the seat belt correctly.
Some U.S. states, and Canadian provinces and territories require children to use a booster seat until they reach a given age or weight (e.g. six years or 60 lbs). Be sure to check current laws in the state or province, or territory where you intend to drive.
Exhaust Gas Hazard
Carbon Monoxide Gas
The engine exhaust from this vehicle contains carbon monoxide, a colorless, odorless, and highly toxic gas. As long as you properly maintain your vehicle, carbon monoxide gas will not get into the interior.
■ Have the exhaust system inspected for leaks whenever
- The exhaust system is making an unusual noise.
• The exhaust system may have been damaged. - The vehicle is raised for an oil change.
Carbon Monoxide Gas
WARNING
Carbon monoxide gas is toxic.
Breathing it can cause unconsciousness and even kill you.
Avoid any enclosed areas or activities that expose you to carbon monoxide.
An enclosed area such as a garage can quickly fill up with carbon monoxide gas. Do not turn the power system on with the garage door closed. Even when the garage door is open, drive out of the garage immediately after turning the power system on.
Safety Labels
Label Locations
These labels are in the locations shown. They warn you of potential hazards that can cause serious injury or death. Read these labels carefully.
If a label comes off or becomes hard to read (except for the U.S. dashboard label which may be removed by the owner), contact an authorized Acura NSX dealer for a replacement.
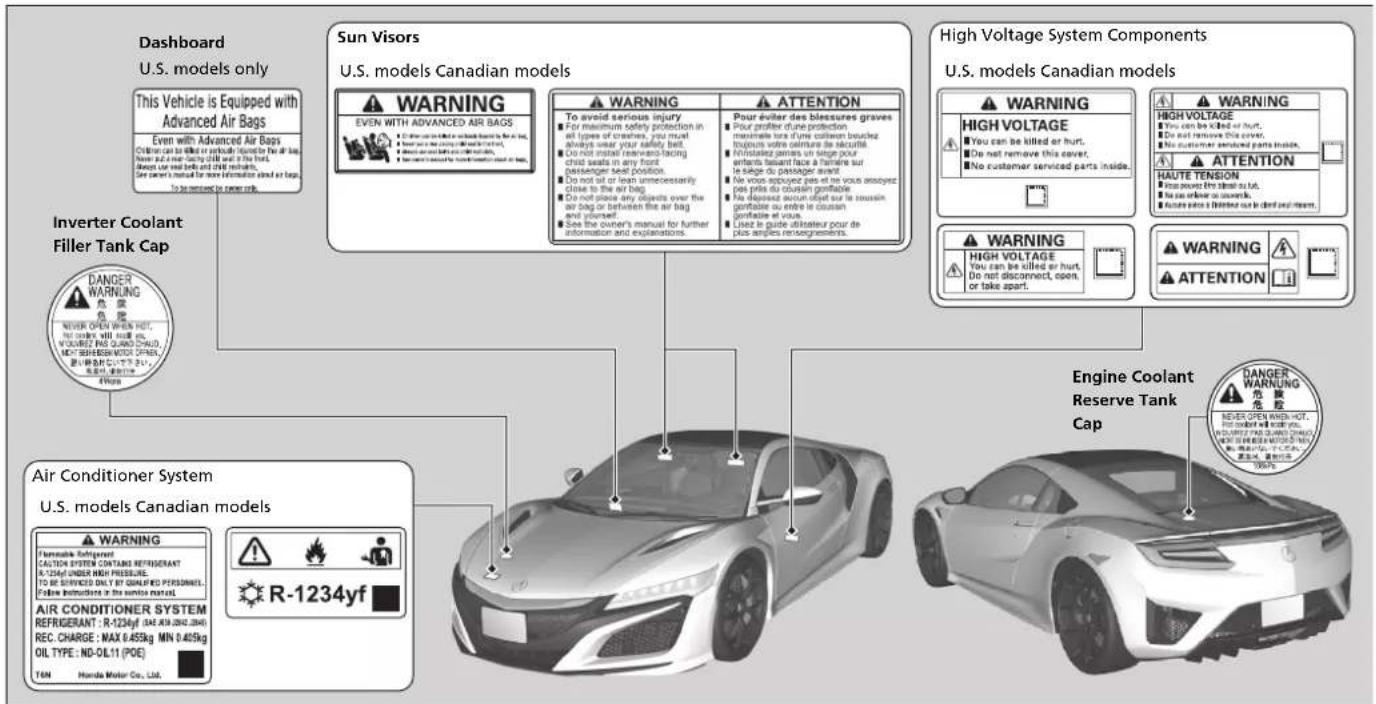
text_image
Dashboard U.S. models only This Vehicle is Equipped with Advanced Air Bags Even with Advanced Air Bags All other can be killed or caused by the air bag. Hearts and air factory will not in the hands. Always use real body and CNE residues. See camera manual for more information about air bags. To be removed or repair only. Inverter Coolant Filler Tank Cap Danger WARNING 危废 危废 NOVOR OPEN IN CHAMP OUT. No covers will be used. NOVOR OPEN FOR QUARD CHAPID. MILLY SHORES MOTOR ON CHAPID. 是可换色灯,可选可选灯。 Air Conditioner System U.S. models Canadian models WARNING Flammable fuelizer CAUTION SYSTEM CONTAINS REFRIGERANT R-1234yf (MAX AIR 2000, 2000) REC. CHARGE : MAX 0.45kg MIN 0.45kg OIL TYPE : NO-DL11 (POE) TEN Honda Motor Co., Ltd. Sun Visors U.S. models Canadian models WARNING EVEN WITH ADVANCED AIR BAGS To avoid serious injury ■ For maximum safety protection in all types of crashes, you must always wear your safety test. ■ Does not install rear-end facing child seats in any front passenger seat position. ■ Do not sit or lean unnecessarily close to the air bag. ■ Do not place any objects over the air bag or between the air bag and opened. ■ See the owner's manual for further information and explanations. WARNING Pour tighter down bleissures graves ■ Pour profiler clure protection maximale lors d'une collaven bouchez toujours votre osimare de secuita. ■ In installed gents un large pour enfants laissant face a fairene sur le large du passenger award. ■ Ne vous appuyez pas et ne vous appuyez pas prils du cousin fortifiable. ■ Ne disposed exon eldit sur le cousin fortifiable ou entre le cousin fortifiable ou vous. Use it guide altatateur pour de plus amples reosegressions. High Voltage System Components U.S. models Canadian models WARNING HIGH VOLTAGE You can be killed or hurt. Do not remove this cover. No customer serviced parts inside. WARNING HAUTE TENSION You can be killed or hurt. No driver or guard. Auto driver or guard. Engine Coolant Reserve Tank Cap WARNING ATTENTION WARNING WHOLE VOLTAGE You can be killed or hurt. Do not disconnect, open, or take apart. WARNING DANGER WARNING 危废 NEVER OPEN INCHOT. For covered will qualify you. WHOLE VOLTAGE SHALL QUARD CHAPID. WE ARE NOT TO BE USED TO USE IT. FOR ALL OR ALL ITEMS OF THE CABLES OF THE CABLES OF THE CABLES OF THE CABLES OF THE CABLES OF THE CABLES OF THE CABLES OF THE CABLES OF THE CABLES OF THE CABLES OF THE CABLES OF THE CABLES OF THE CABLES OF THE CABLES OF THE CABLES OF THE CABLES OF THE CABLES OF THE CABLES OF THE CABLES OF THE CABLES OF THE CABLE SOUTHERN WARNING R-1234yf R-1234yf (MAX AIR 2000, 2000) REC. CHARGE : MAX 0.45kg MIN 0.45kg OIL TYPE : NO-DL11 (POE) TEN Honda Motor Co., Ltd.Instrument Panel
This chapter describes the buttons, indicators, and gauges that are used while driving.
Indicators 70
Driver Information Interface Warning and
Information Messages.... 83
Gauges and Displays 95
Gauges....95
Driver Information Interface 98
Indicators
| Indicator | Name | On/Blinking | Explanation | Message |
| U.S.BRAKECanada(Red) | Brake System Indicator (Red) | Comes on for a few seconds when you set the power mode to ON, then goes off.Comes on when the brake fluid level is low.Comes on if there is a problem with the brake system. | Comes on while driving- Check the brake fluid level.What to do when the indicator comes on while driving P. 453Comes on along with the brake system indicator (amber)- Immediately stop in a safe place. Contact an authorized Acura NSX dealer for repair. The brake pedal becomes harder to operate. Depress the pedal further than you normally do.Comes on along with the ABS indicator- Have your vehicle checked by an authorized Acura NSX dealer.If the Brake System Indicator (Red) Comes On P. 453 | 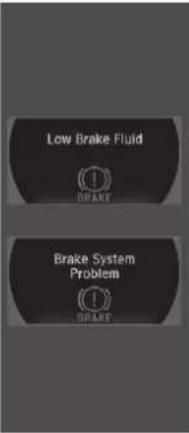 |
| Low Oil Pressure Indicator | Comes on when you set the power mode to ON, and goes off when the power system starts.Comes on when the engine oil pressure is low.Comes on if there is a problem with the engine oil pressure system. | Comes on while driving- Immediately stop in a safe place and set the power mode to VEHICLE OFF, then contact an authorized Acura NSX dealer. | 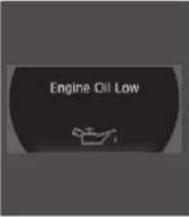 | |
| U.S.PARKCanada(P) | Electric Parking Brake Indicator | Comes on when the parking brake is applied, and goes off when it is released.Comes on for about 15 seconds then goes off when you pull the electric parking brake switch with the power mode in OFF.Comes on for about 15 seconds then goes off when you set the power mode to OFF with the parking brake applied. | Blinks and the electric parking brake system indicator comes on at the same time- There is a problem with the electric parking brake system. The parking brake may not be set. | 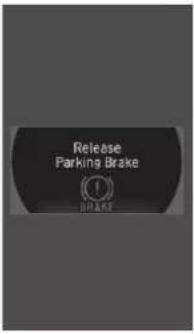 |
| Comes on when you press the electric parking brake switch without depressing the brake pedal. | Depress the brake pedal to release the parking brake.Parking Brake P. 357 |  | ||
| (P)! | Electric Parking Brake System Indicator | Comes on for a few seconds when you set the power mode to ON, then goes off.Comes on if there is a problem with the electric parking brake system. | Comes on while driving- Avoid using the parking brake and have your vehicle checked by an authorized Acura NSX dealer immediately.If the Electric Parking Brake System Indicator Comes On P. 454 |  |
 | Automatic Brake Hold System Indicator | Comes on when the automatic brake hold system is on. | Automatic Brake Hold P. 360 |  |
 | Automatic Brake Hold Indicator | Comes on for a few seconds when you set the power mode to ON, then goes off.Comes on when the automatic brake hold is activated. | Automatic Brake Hold P. 360 |  |
| U.S.BRAKE SYSTEMCanada(Amber) | Brake System Indicator (Amber) | Comes on for a few seconds when you set the power mode to ON, then goes off.Comes on if there is a problem with a system related to braking other than the conventional brake system.Comes on if there is a problem with the cooperative control with regenerative braking, the electric servo brake system, or the hill start assist system. | Comes on while driving- Have your vehicle checked by an authorized Acura NSX dealer.Stays on constantly- Avoid high speeds and sudden braking. Take the vehicle to an authorized Acura NSX dealer immediately.With this indicator on, your vehicle still has normal braking ability. | 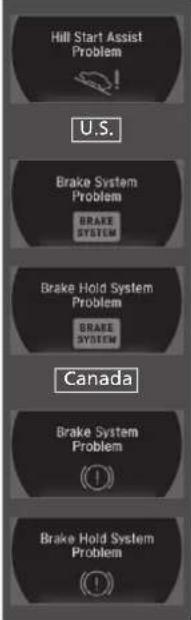 |
| POWERSYSTEM | POWERSYSTEMIndicator | Comes on for a few seconds when you set the power mode to ON, then goes off.Comes on if there is a problem with the electric vehicle system. | Comes on while driving- Have your vehicle checked by an authorized Acura NSX dealer immediately. | |
| READY | READY Indicator | Comes on when the vehicle is ready to drive. | Turning on the Power P. 321 | Ready To Drive |
| Active Damper System Indicator | Comes on for a few seconds when you change the power mode to ON, then goes off.Comes on if there is a problem with the Active Damper System. The speed of the vehicle will be limited. | Stays on constantly- Have the vehicle checked by an authorized Acura NSX dealer. With this indicator on, your vehicle has normal damping ability without the active damper feature.Integrated Dynamics System P. 336 | Check ADS SystemADS System Problem.Drive With Caution.Vehicle Speed Limited. | |
| U.S.BRAKEWEARCanada | Brake Wear Indicator* | Comes on for a few seconds when you change the power mode to ON, then goes off.Comes on if a worn brake pad is detected. | Comes on while driving- The brake pads may need to be replaced. Have your vehicle inspected by an authorized Acura NSX dealer. | U.S.Low Brake Pad LifeBRAKE WEARCanadaLow Brake Pad Life |
* Not available on all models
| Indicator | Name | On/Blinking | Explanation | Message |
 | Malfunction Indicator Lamp | Comes on when you set the power mode to ON, and goes off either when the power system is on or after several seconds if the power system did not turn on. If "readiness codes" have not been set, it blinks five times before it goes off.Comes on if there is a problem with the emissions control system.Blinks when a misfire in the engine's cylinders is detected. | Readiness codes are part of the on board diagnostics for the emissions control systems.Testing of Readiness Codes P. 473Comes on while driving - Have your vehicle checked by an authorized Acura NSX dealer.Blinks while driving - Stop in a safe place where there are no flammable objects. Stop the power system for 10 minutes or more, and wait for it to cool down. Then, take the vehicle to an authorized Acura NSX dealer.If the Malfunction Indicator Lamp Comes On or Blinks P. 452 |  |
| Comes on if there is a problem with the gear shift mechanism. | Comes on and gear position indicator blinks at the same time - Have your vehicle checked by an authorized Acura NSX dealer. | |||
 | 12-Volt Battery Charging System Indicator | Comes on when you set the power mode to ON, and goes off when the power system is on.Comes on when the 12-volt battery is not charging. | Comes on while driving - Turn off the climate control system and rear defogger in order to reduce electricity consumption.If the 12-Volt Battery Charging System Indicator Comes On P. 452 |  |
 | Gear Position Indicator | Indicates the current gear selection. | Shifting P. 326 |  |
| Transmission System Indicator | The indicated current gear selection blinks if there is a problem with the transmission system. | Avoid sudden start and acceleration, and stop in a safe place immediately.Have your vehicle checked by an authorized Acura NSX dealer. |  | |
| All the gear positions may light for several seconds, and go off. | When all the gear positions light, immediately stop your vehicle in a safe place.Indicators go off if there is no problem.However, even if they go off, take your vehicle to an authorized Acura NSX dealer for inspection. |  | ||
| The indicated current gear selection or all the gear positions blink if there is a problem with the transmission system. | Immediately stop in a safe place.Emergency Towing P. 462Have your vehicle checked by an authorized Acura NSX dealer. |  | ||
| The indicated current gear selection or all the gear positions blink if you cannot select due to the transmission system failure. | The power system can be activated as a temporary measure.If the Transmission System Indicator Blinks along with the Warning Message P. 456Set the parking brake when parking.Have your vehicle checked by an authorized Acura NSX dealer immediately. |  | ||
 | Seat Belt Reminder Indicator | Comes on and the beeper sounds if you are not wearing a seat belt when you set the power mode to ON.If the passenger is not wearing a seat belt, the indicator comes on a few seconds later.Blinks while driving if either you or the passenger has not fastened a seat belt. The beeper sounds and the indicator blinks at regular intervals. | The beeper stops and the indicator goes off when you and the passenger fasten their seat belts.Stays on after you or the passenger has fastened the seat belt - A detection error may have occurred in the sensor. Have your vehicle checked by an authorized Acura NSX dealer.Seat Belt Reminder P. 37 | 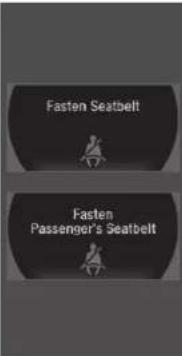 |
| Low Fuel Indicator | Comes on when the fuel reserve is running low (approximately 2.4 U.S. gal/8.9 Liter left).Blinks if there is a problem with the fuel gauge. | Comes on - Refuel your vehicle as soon as possible.Blinks - Have your vehicle checked by an authorized Acura NSX dealer. | 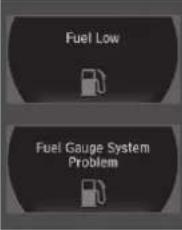 | |
 | Anti-lock Brake System (ABS) Indicator | Comes on for a few seconds when you set the power mode to ON, then goes off.If it comes on at any other time, there is a problem with the ABS. | Stays on constantly - Have your vehicle checked by an authorized Acura NSX dealer. With this indicator on, your vehicle still has normal braking ability but no anti-lock function.Anti-lock Brake System (ABS) P. 362 | 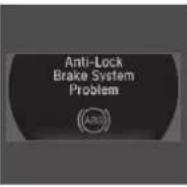 |
 | Supplemental Restraint System Indicator | Comes on for a few seconds when you set the power mode to ON, then goes off.Comes on if a problem with any of the following is detected: Supplemental restraint system Side airbag systemSide curtain airbag systemKnee airbag systemSeat belt tensioner | Stays on constantly or does not come on at all - Have your vehicle checked by an authorized Acura NSX dealer. | 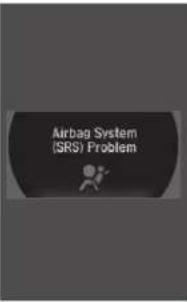 |
 | Electric Power Steering (EPS) System Indicator | Comes on when you set the power mode to ON, and goes off when the power system is on.Comes on if there is a problem with the EPS system. | Stays on constantly or does not come on at all - Have your vehicle checked by an authorized Acura NSX dealer.If the Electric Power Steering (EPS) System Indicator Comes On P. 453 | 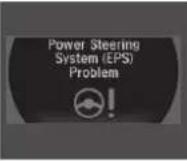 |
 | Vehicle Stability AssistTM (VSA®) System Indicator | Comes on for a few seconds when you set the power mode to ON, then goes off.Blinks when VSA® is active.Comes on if there is a problem with the VSA® system. | Stays on constantly- Have your vehicle checked by an authorized Acura NSX dealer.Vehicle Stability AssistTM (VSA®), aka Electronic Stability Control (ESC), System P. 346 | 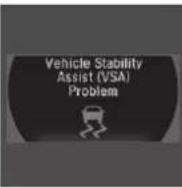 |
 | Vehicle Stability AssistTM (VSA®) OFF Indicator | Comes on for a few seconds when you set the power mode to ON, then goes off.Comes on when you press the VSA® OFF button to change VSA® mode.Comes on when you select TRACK mode by the Integrated Dynamics System mode switch. | VSA® On and Off P. 347Integrated Dynamics System P. 336 | 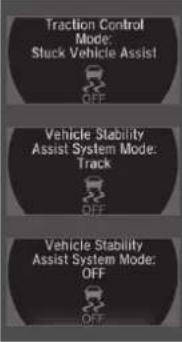 |
 | Low Tire Pressure/TPMS Indicator | Comes on for a few seconds when you set the power mode to ON, then goes off.Comes on if the tire pressure of any of the tires becomes significantly low.Blinks for about one minute, and then stays on if there is a problem with the TPMS. | Comes on while driving- Stop in a safe place, check tire pressures, and inflate the tire(s) if necessary.Blinks and remains on- Have your vehicle checked by an authorized Acura NSX dealer. | 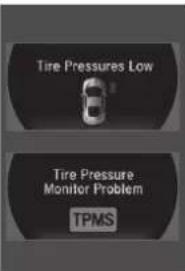 |
 | System Message Indicator | Comes on for a few seconds when you set the power mode to ON, then goes off.Comes on along with a beep when a problem is detected. A system message on the driver information interface appears at the same time. | While the indicator is on, roll the right selector wheel to see the message again.Refer to the Indicators information in this chapter when a system message appears on the driver information interface. Take the appropriate action for the message.The driver information interface does not return to the normal screen unless the warning is canceled, or the right selector wheel is rolled. |  |
 | Turn Signal and Hazard Warning Indicators | Blinks when you operate the turn signal lever.Blink if you press the hazard warning button. | Does not blink or blinks rapidly - Have your vehicle checked by an authorized Acura NSX dealer.Replacing Light Bulbs P. 401, 402 | — |
 | High Beam Indicator | Comes on when the high beam headlights are on. | — | |
 | Lights On Indicator | Comes on whenever the light switch is on, or in AUTO when the exterior lights are on. | If you set the power mode to VEHICLE OFF while the exterior lights are on, a chime sounds when the driver's door is opened. | — |
 | Immobilizer System Indicator | Comes on briefly when you set the power mode to ON, then goes off.Comes on if the immobilizer system cannot recognize the key information. | Blinks - You cannot start the power system. Set the power mode to VEHICLE OFF, then select the ON mode again.Repeatedly blinks - The system may be malfunctioning. Have your vehicle checked by an authorized Acura NSX dealer.Do not attempt to alter this system or add other devices to it. Electrical problems can occur. | — |
 | Security System Alarm Indicator | Blinks when the security system alarm has been set. | Security System Alarm P. 122 |  |
 | Keyless Access System Indicator | Comes on for a few seconds when you set the power mode to ON, then goes off.Comes on as soon as a problem is detected in the keyless access system or keyless starting system. | Have your vehicle checked by an authorized Acura NSX dealer. | 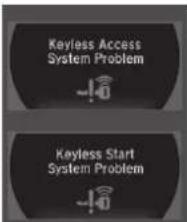 |
 | CRUISE MAIN Indicator | Comes on when you press the CRUISE button. | Cruise Control P. 343 |  |
 | CRUISE CONTROL Indicator | Comes on if you have set a speed for cruise control. | Cruise Control P. 343 |  |
Driver Information Interface Warning and Information Messages
The following messages appear only on the driver information interface. Roll the right selector wheel to see the message again with the system message indicator on.
| Message Condition Explanation | ||
 | Appears when the washer fluid is low. | Refill the washer fluid.Refilling Window Washer Fluid P. 400 |
 | Appears when the scheduled maintenance is due soon.Consequently,Service Due NowandService Past Duefollow. | Maintenance Minder Messages on the Driver Information Interface P. 381 |
 | Appears when the temperature of the transmission is starting to get too hot.The performance of the vehicle may be reduced. | It may not be possible to use the paddle shifters.Until the message disappears, reduce your speed and allow the system to cool down. |
 | Appears when the transmission system temperature is too high. The vehicle does not operate properly. | You may find it difficult to accelerate, or to start the vehicle on uphill.Immediately stop in a safe place inP.Let the engine idle until the message disappears. |
 | • Appears when there is a problem with the sensor on the 12-volt battery. | • Have your vehicle checked by an authorized Acura NSX dealer. ➤ Checking the 12-Volt Battery P. 417 |
 | • Appears after the driver's door is opened when the power mode is in ACCESSORY. | • Press the ENGINE START/STOP button twice with your foot off the brake pedal to change the power mode to VEHICLE OFF. |
 | • Appears when the power mode is in ACCESSORY. | — |
 | • Appears when you close the door with the power mode in ON without the keyless access remote inside the vehicle. | • Disappears when you bring the keyless access remote back inside the vehicle and close the door. ➤ Keyless Access Remote Reminder P. 129 |
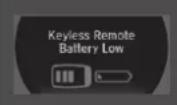 | • Appears when the keyless access remote battery becomes weak. | • Replace the battery as soon as possible. ➤ Replacing the Button Battery P. 418 |
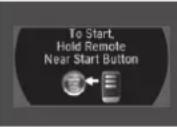 | • Appears if the keyless access remote battery is too weak to turn on the power system or the key is not within operating range to turn on the power system. A beeper sounds six times. | • Bring the keyless access remote in front of the ENGINE START/STOP button to be touched with. ➤ If the Keyless Access Remote Battery is Weak P. 446 |
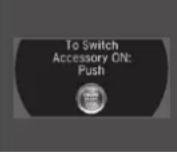 | • Appears three seconds after you bring the keyless access remote in front of the ENGINE START/STOP button when To Start, Hold Remote Near Start Button appears. To Start Engine: Brake + Push appears sequentially. | • Unless you bring the keyless access remote in front of the ENGINE START/STOP button, this message does not appear. ➤ If the Keyless Access Remote Battery is Weak P. 446 |
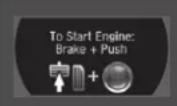 | • Appears when you set the power mode to ACCESSORY or ON. | ➤ Turning on the Power P. 321 |
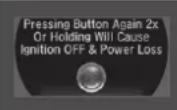 | • Appears if you press the ENGINE START/STOP button while the vehicle is moving. | • The message will disappear after six seconds or when the power mode is set to VEHICLE OFF. |
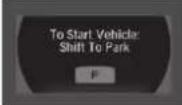 | • Appears when you turn the power system on with the transmission not in P. | • Press the P button. |
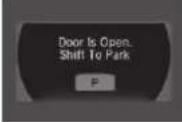 | • Appears when you try to change the gear position after the position has automatically been changed to P with the driver's door open and the driver's seat belt unfastened. | • Press the P button if you leave the vehicle. |
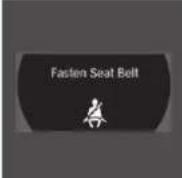 | • Appears when you set the power mode to ON without fastening the driver's seat belt.• Appears when you change the gear position after P has been automatically selected with the driver's door open, the driver's seat belt unfastened, then the brake pedal is released. | • Fasten the seat belt properly before you start to drive. ➤ Shift Operation P. 328 |
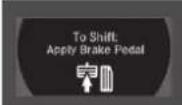 | • Appears when you try to change the gear position without depressing the brake pedal. | • Depress the brake pedal, then select a shift button. |
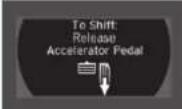 | • Appears when you try to change the gear position without releasing your foot off the accelerator pedal. | • Release your foot from the accelerator pedal, depress the brake pedal, then select a gear. |
 | Appears when the park button is pressed while the vehicle is moving.Appears if you change the gear position to while the vehicle is moving forward, or to D or M while the vehicle is reversing. | Make sure that the vehicle comes to a stop before operating the select button. |
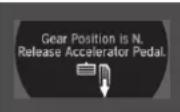 | Appears if you depress the accelerator pedal when the transmission is in . | Release the accelerator pedal. After that, depress the brake pedal and change the transmission position. |
 | Appears when the shift is repeatedly changed between and any other position. | Wait for a while then change the shift position. |
 | Appears if there is a problem with the electric system.Appears when you set the power mode to OFF while driving. | Immediately stop in a safe place and set the parking brake.Continue driving if the message goes off soon after.If there is a problem with the transmission system, the transmission system indicator comes on. Transmission System Indicator P. 76 |
 | Appears when you change to , and press the ENGINE START/STOP button within five seconds. | The gear position remains in for 15 minutes, then automatically switches to . If you want to keep the transmission in position (car wash mode) P. 329 |
| Appears when the vehicle is stopped with the driver's seat belt unfastened and there is a chance that the vehicle may roll unintentionally. | Press the button before release the brake pedal when idling, parking or exiting the vehicle. Shift Operation P. 328 | |
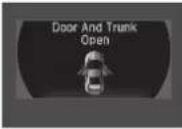 | • Appears if any door or the trunk (hatch) is not completely closed.• Appears if any door or the trunk (hatch) is opened while driving. The beeper sounds. | • Goes off when all doors and the trunk (hatch) are closed. |
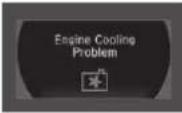 | • Appears if there is a problem with the radiator system. | • Drive slowly to prevent overheating and have your vehicle checked by an authorized Acura NSX dealer as soon as possible. |
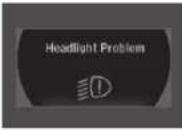 | • Appears when there is a problem with the headlights. | • Appears while driving - The low beam headlights may not be on. When conditions allow you to drive safely, have your vehicle checked by an authorized Acura NSX dealer as soon as possible. |
 | • Appears if there is a problem with the parking sensor system. | • Check if the area around the sensor(s) is covered with mud, ice, snow, etc. If the indicator(s) stays on even after you clean the area, have the system checked by an authorized Acura NSX dealer. |
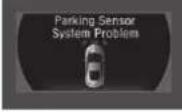 | ||
 | • Appears if the automatic brake hold is automatically canceled while it is in operation. | • Immediately depress the brake pedal. |
 | • Appears when the automatic brake hold system is turned off. | ➤ Automatic Brake Hold P. 360 |
 | • Appears if there is a problem with the acoustic vehicle alerting system. | • Have your vehicle checked by an authorized Acura NSX dealer. |
 | • Appears when the automatic brake hold button is pressed without wearing the driver's seat belt. | • Fasten the driver's seat belt.➤ Automatic Brake Hold P. 360 |
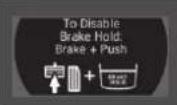 | • Appears when the automatic brake hold button is pressed without depressing the brake pedal while the automatic brake hold is in operation. | • Press the automatic brake hold button with the brake pedal depressed.➤ Automatic Brake Hold P. 360 |
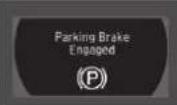 | • Appears when the parking brake is applied automatically while it is in operation. | ➤ Automatic Brake Hold P. 360➤ Parking Brake P. 357 |
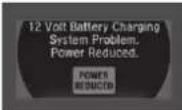 | • Appears after the 12-volt battery charging system indicator comes on. | • Your vehicle has less ability to accelerate and may be harder to start on an incline.• Contact an authorized Acura NSX dealer immediately. |
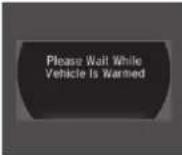 | • Appears when the transmission temperature is too low to operate (approx. -13°F [-25°C] or below). | • You can start the engine and use the climate control system to warm up the interior, which will also warm the transmission enough for you to drive the vehicle.• The engine speed does not increase even if you fully depress the accelerator pedal. |
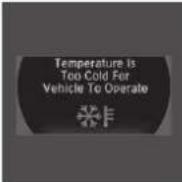 | • Appears when the High Voltage battery temperature is extremely low (-4°F [-20°C]). | • Contact an authorized Acura NSX dealer immediately.• To prevent the message to come on, store the vehicle in the garage or drive in advance to warm up the High Voltage battery.• The minimum operation guarantee environmental temperature is -4°F [-20°C]. |
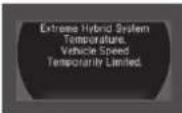 | • Appears when the twin motor unit fluid temperature is extremely low. | • Vehicle speed is limited to 109 mph (175 km/h) until twin motor unit fluid warms up. |
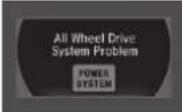 | • Appears if the AWD system has a problem due to a hybrid system or power distribution control failure. | • Drives with the rear wheels only in this state.Have your vehicle checked by an authorized Acura NSX dealer. |
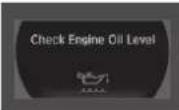 | • Appears when the engine is running and indicates that the engine oil level is low. | • Appears while driving - Immediately stop in a safe place. ➡ If the Low Oil Level Symbol Appears P. 456 |
 | • Appears when the engine is running and indicates that there is a problem with the oil level sensor. | • Have your vehicle checked by an authorized Acura NSX dealer as soon as possible. |
 | • Appears if the engine coolant temperature is abnormally high. | ➤ Overheating P. 450 |
 | • Appears if there is a problem with the fuel system. Engine performance will be limited. | • Immediately stop in a safe place and set the power mode to VEHICLE OFF, then select the ON mode again. Have your vehicle checked by an authorized Acura NSX dealer if the message appears again. |
 | • Appears if there is a temporary problem with the gear shift mechanism and initialization is necessary. | • Depress the brake pedal and shift to P. |
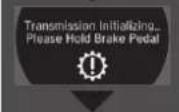 | • Appears when the transmission is undergoing initialization. | • Keep the brake pedal depressed. |
| To Complete Initialization: Restart Engine When Sale | • Appears when a temporary problem is fixed. | • Initialization will be completed when the engine is restarted. |
Continued
| Message Condition Explanation | ||
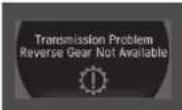 | • Appears when a problem with the transmission prevents a gear from changing to R. | • Have your vehicle checked by an authorized Acura NSX dealer. |
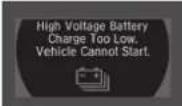 | • Appears when the High Voltage battery is extremely low and cannot start the power system. | • Have your vehicle checked by an authorized Acura NSX dealer. |
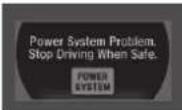 | • Appears when the vehicle cannot be driven by the engine. | • Stop your vehicle in a safe place and contact an authorized Acura NSX dealer. |
 | • Appears when the engine speed exceeds reduced REV LIMIT while engine temperature is low. | • Continue driving at a low engine speed until the engine temperature becomes warm. |
 | • Appears when braking ability is reduced due to increased fluid consumption in the braking system. | • Slow Down and drive carefully. The message will disappear once the brakes have cooled and the system has returned to normal operating condition. |
 | • Appears if you are driving at an extremely high speed and one or more tires are underinflated. | • Decelerate and drive your vehicle until the message disappears. |
 | Appears for a few seconds if you have not pressed the N button long enough to initiate Neutral-Hold mode. | If you want to keep the transmission in N position (car wash mode) P. 329 |
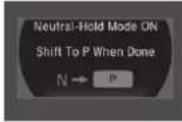 | Appears when you press and hold N button for more than 2 seconds. | Disappears when you set the gear position to other than N.If you want to keep the transmission in N position (car wash mode) P. 329 |
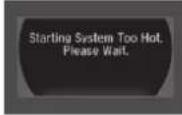 | Appears when the device for starting the vehicle is too hot. | Wait until message disappears. |
| • Appears when launch control cannot be used due to the condition of your vehicle. | ➤ Launch Control P. 341 | |
| • Appears if you shift the gear or do anything else after Launch Mode is ready. | ➤ Launch Control P. 341 | |
| • Appears when Launch Mode is ready. | ➤ Launch Control P. 341 | |
| • Appears when the temperature of the transmission is not in the operable range for launch control. | ➤ Launch Control P. 341 | |
| • Appears if the Integrated Dynamics System mode cannot be changed due to certain situations, such as a system error or adverse driving conditions. | ➤ Integrated Dynamics System P. 336 | |
Gauges and Displays
Gauges
Gauges include the speedometer, tachometer, fuel gauge, temperature gauge, High Voltage battery charge level gauge, ASSIST/CHARGE gauge, SH-AWD® temperature gauge, and related indicators. They are displayed when the power mode is in ON.
Speedometer
Displays your driving speed in mph or km/h.
Tachometer
Shows the number of engine revolutions per minute.
■ Engine speed red-zone indication
Alerts you when the engine speed is near the tachometer's red zone.
When the engine speed exceeds 7,000 rpm, the outer ring of the tachometer flashes in red.
To protect the engine from damage, never drive with the tachometer in its red zone.
Fuel Gauge
Displays the amount of fuel left in the fuel tank.
>>Speedometer
Press and hold the mph/km/h change button until you hear a beep. The speedometer reading and the displayed measurements switch between mph and km/h.
Fuel Gauge
NOTICE
You should refuel when the needle approaches E Running out of fuel can cause the engine to misfire, damaging the catalytic converter.
The actual amount of remaining fuel may differ from the fuel gauge reading.
Temperature Gauge
Displays the temperature of the engine coolant.
■ High Voltage Battery Charge Level Gauge
Shows the remaining High Voltage battery charge level.
ASSIST/CHARGE Gauge
Electric motor
The degree to which the electric motor is being powered is displayed by the readings on the ASSIST side.
■ Battery charge in progress
The degree to which the High Voltage battery is being charged is displayed by the readings on the CHARGE side.
Temperature Gauge
Driving with the temperature gauge pointer in the upper zone can cause serious engine damage. Pull safely to the side of the road and allow engine temperature to return to normal.
→ Overheating P. 450
High Voltage Battery Charge Level Gauge
The High Voltage battery charge level may decrease under the following conditions:
- When the 12-volt battery has been replaced.
- When the 12-volt battery has been disconnected.
- When the High Voltage battery control system corrects its reading.
The charge level reading will be corrected automatically while driving.
Changes in the temperature of the High Voltage battery can increase or decrease the battery's charging capacity. If temperature changes cause the battery's capacity to change, the number of indicators in the battery charge level gauge may also change, even if the amount of charging remains the same.
SH-AWD® Temperature Gauge
Displays the temperature of the SH-AWD® system.
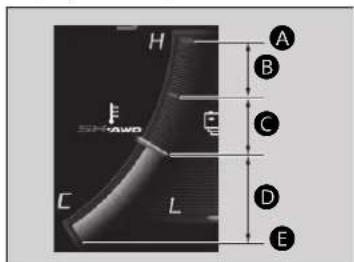
text_image
H A B C D E C LA: System performance is severely limited due to extreme operating temperature. Stop your vehicle in a safe place and contact an authorized Acura NSX dealer.
B: System performance is limited due to high operating temperature.
C: System is operating at optimum performance.
D: System performance is limited due to low operating temperature.
E: System is not warm enough for vehicle to drive.
Engine Oil Temperature Gauge
Displays the temperature of the engine oil when the Integrated Dynamics System is in SPORT+ mode and TRACK mode.
Since the actual oil temperature is not measured, the temperature displayed here may differ from the actual temperature.
→ Integrated Dynamics System P. 336
SH-AWD® Temperature Gauge
If the temperature reaches the red zone, stop your vehicle in a safe place and allow the system to cool down. After that, change the power mode to VEHICLE OFF and set the power mode to ON again. Even though the system has cooled down, the
POWER SYSTEM indicator will stay on. Have your vehicle inspected by an authorized Acura NSX dealer.
Engine Oil Temperature Gauge
Driving with the temperature gauge pointer in the upper zone can cause serious engine damage. Pull safely to the side of the road and allow engine temperature to return to normal.
Driver Information Interface
The driver information interface shows the odometer, trip meter, outside temperature indicator, and other gauges. It also displays important messages such as warnings and other helpful information.
Switching the Display
Roll the right selector wheel to change the display.
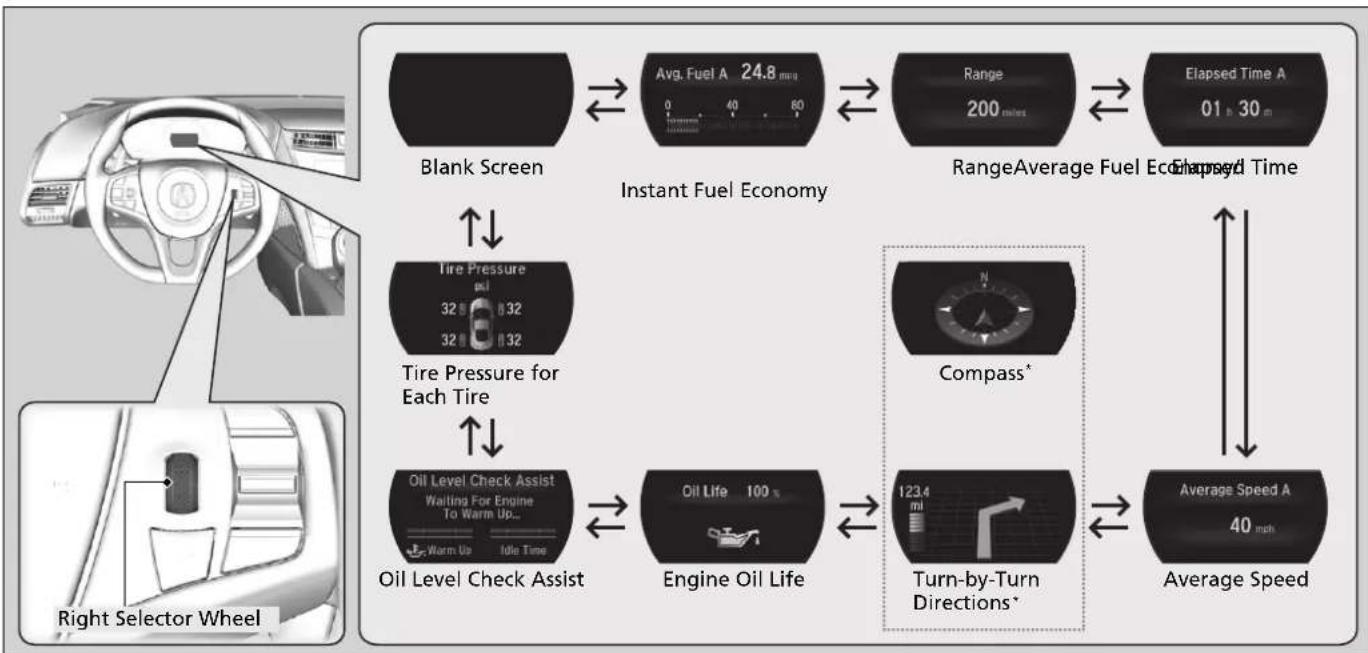
flowchart
graph TD
    A["Blank Screen"] --> B["Instant Fuel Economy"]
    B --> C["Range Average Fuel Echapsed Time"]
    C --> D["Tire Pressure for Each Tire"]
    D --> E["Oil Level Check Assist"]
    E --> F["Engine Oil Life"]
    F --> G["Turn-by-Turn Directions*"]
    G --> H["Average Speed A 40 mph"]
    H --> I["Compass*"]
    I --> J["Tire Pressure at 32 psi"]
    J --> K["Oil Level Check Assist Waiting For Engine To Warm Up..."]
    K --> L["Left side: Right Selector Wheel"]
Press the TRIP button to change the display.
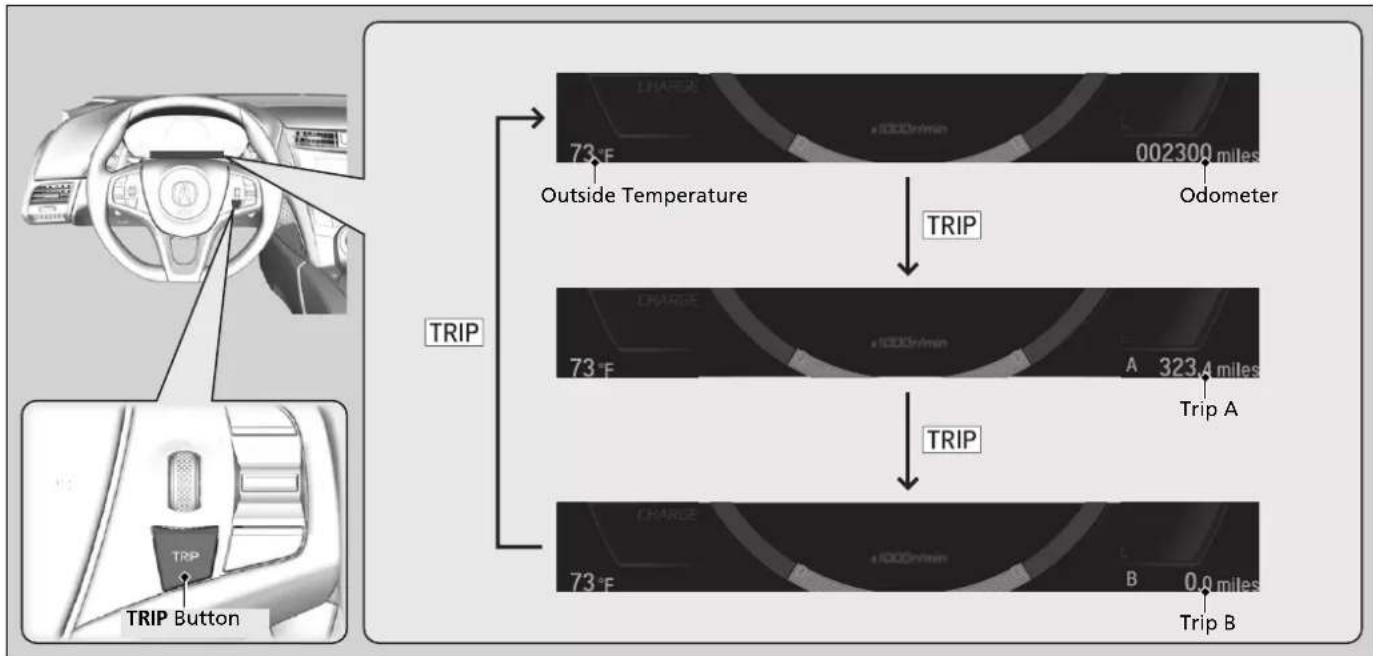
flowchart
graph TD
    A["Interior Car"] --> B["TRIP Button"]
    B --> C["TRIP"]
    C --> D["Outside Temperature"]
    D --> E["TRIP"]
    E --> F["TRIP"]
    F --> G["TRIP"]
    G --> H["TRIP"]
    H --> I["TRIP"]
    I --> J["TRIP"]
    J --> K["TRIP"]
    K --> L["TRIP"]
    L --> M["TRIP"]
    M --> N["TRIP"]
    N --> O["TRIP"]
    O --> P["TRIP"]
    P --> Q["TRIP"]
    Q --> R["TRIP"]
    R --> S["TRIP"]
    S --> T["TRIP"]
    T --> U["TRIP"]
    U --> V["TRIP"]
    V --> W["TRIP"]
    W --> X["TRIP"]
    X --> Y["TRIP"]
    Y --> Z["TRIP"]
    Z --> AA["TRIP"]
    AA --> AB["TRIP"]
    AB --> AC["TRIP"]
    AC --> AD["TRIP"]
    AD --> AE["TRIP"]
    AE --> AF["TRIP"]
    AF --> AG["TRIP"]
    AG --> AH["TRIP"]
    AH --> AI["TRIP"]
    AI --> AJ["TRIP"]
    AJ --> AK["TRIP"]
    AK --> AL["TRIP"]
    AL --> AM["TRIP"]
    AM --> AN["TRIP"]
    AN --> AO["TRIP"]
    AO --> AP["TRIP"]
    AP --> AQ["TRIP"]
    AQ --> AR["TRIP"]
    AR --> AS["TRIP"]
    AS --> AT["TRIP"]
    AT --> AU["TRIP"]
    AU --> AV["TRIP"]
    AV --> AW["TRIP"]
    AW --> AX["TRIP"]
    AX --> AY["TRIP"]
Odometer
Shows the total number of miles or kilometers that your vehicle has accumulated.
Trip Meter
Shows the total number of miles or kilometers driven since the last reset. Meters A and B can be used to measure two separate trips.
■ Resetting a trip meter
To reset a trip meter, display it, then press and hold the TRIP button. The trip meter is reset to 0.0.
When a trip meter is reset, the average fuel economy, the elapsed time, and the average speed are also reset.
Outside Temperature
Shows the outside temperature in Fahrenheit (U.S.) or Celsius (Canada).
■ Adjusting the outside temperature display
Adjust the temperature reading up to ±5^ F or ±3^ C if the temperature reading seems incorrect.
>>Trip Meter
Switch between trip meter A and trip meter B by pressing the TRIP button.
Outside Temperature
The temperature sensor is in the front bumper. Road heat and exhaust from another vehicle can affect the temperature reading when your vehicle speed is less than 19 mph (30 km/h).
It may take several minutes for the display to be updated after the temperature reading has stabilized.
Use the audio system's customized features to correct the temperature.
→ Customized Features P. 244
Average Fuel Economy
Shows the estimated average fuel economy of each trip meter in mpg or l/100 km. The display is updated at set intervals. When a trip meter is reset, the average fuel economy is also reset.
■ Instant Fuel Economy
Shows the instant fuel economy as a bar graph in mpg or l/100 km.
Range
Shows the estimated distance you can travel on the remaining power and fuel. This distance is estimated from the fuel economy of your previous trips.
Elapsed Time
Shows the time elapsed since Trip A or Trip B was reset.
Average Speed
Shows the average speed in mph or km/h since Trip A or Trip B was reset.
Average Fuel Economy
You can change when to reset the average fuel economy.
Customized Features P. 244
>>Range
The displayed range may change even when the vehicle is stationary.
Elapsed Time
You can change when to reset the elapsed time.
→ Customized Features P. 244
Average Speed
You can change when to reset the average speed.
→ Customized Features P. 244
Continued
Navigation\*
■ Compass
Shows the compass screen.
■ Turn-by-Turn Directions
When driving guidance is provided by the navigation system or Android Auto, turn-by-turn directions to your destination appear.
Refer to the Navigation System Manual
→ Android Auto™ P. 219
Engine Oil Life
Shows the remaining oil life and Maintenance Minder™.
→ Maintenance Minder™ P. 379
Oil Level Check Assist
Shows the engine oil level check assist display.
Oil Check P. 391
Tire Pressure Monitor
Shows each tire's pressure.
Tire Pressure Monitoring System (TPMS) P. 352
>>Navigation\*
You can select whether to have the turn-by-turn display come on or not during the route guidance.
Customized Features P. 244
Controls
This chapter explains how to operate the various controls necessary for driving.
Clock 104
Locking and Unlocking the Doors
Key 105
Low Keyless Access Remote Signal Strength.... 106
Locking/Unlocking the Doors from the Outside 107
Locking/Unlocking the Doors from the Inside 115
Auto Door Locking/Unlocking ..... 118
Opening and Closing the Hatch..... 119
Security System 122
Immobilizer System 122
Security System Alarm.... 122
Opening and Closing the Windows .... 125
Operating the Switches Around the Steering Wheel
ENGINE START/STOP Button..... 127
Turn Signals.... 130
Light Switches.... 131
Daytime Running Lights 134
Wipers and Washers 135
Rear Defogger/Heated Door Mirror Button ....136
Brightness Control 137
Driving Position Memory System* .... 138
Adjusting the Steering Wheel ..... 140
Adjusting the Mirrors.... 141
Interior Rearview Mirror 141
Power Door Mirrors 142
Adjusting the Seats 144
Interior Convenience Items.... 149
Climate Control System 155
Using Automatic Climate Control .... 155
Automatic Climate Control Sensors.....159
Clock
Adjusting the Clock
Models without navigation system
You can adjust the time in the clock display with the power mode in ON.
Adjusting the Time
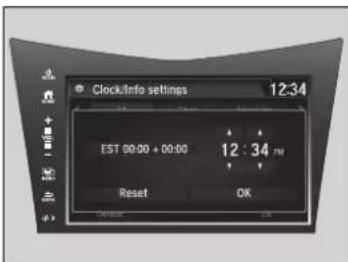
text_image
ClockInfo settings 12:34 EST 00:00 + 00:00 12 : 34 PM Reset OK■ Using the Settings menu on the audio/information screen
- Select Settings.
- Select Clock/Info.
- Select Clock Adjustment.
- Select ▲ or ▼ to change hour.
- Select ▲ or to change minute, then select OK.
Adjusting the Clock
Models with navigation system
The clock is automatically updated through the audio system, so the time does not need to be adjusted.
Models with Display Audio
You cannot adjust the time while the vehicle is moving.
Using the Settings menu on the audio/information screen
Models with Display Audio
You can customize the clock display to show the 12 hour clock or 24 hour clock.
→ Customized Features P. 244
The clock display is set to on by factory default. You can turn the clock display on and off.
→ Customized Features P. 244
The clock is automatically updated when your smartphone is connected to the audio system. You can also adjust the clock by touching the clock displayed on the upper right corner of the display.
- Touch the clock on the display for a few seconds.
- Select Clock Adjustment.
- Select ▲ to change hour.
- Select ▲ to ▼ change minute, then select OK.
Locking and Unlocking the Doors
Key
This vehicle comes with the following key:
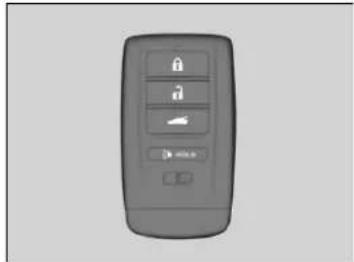
natural_image
Close-up of a gray remote control device with four function buttons (lock, lock, gear, switch) and a small icon below (no text or symbols visible)Use the keyless access remote to turn on and off the power system, to lock and unlock the doors and to open the hatch.
Built-in Key
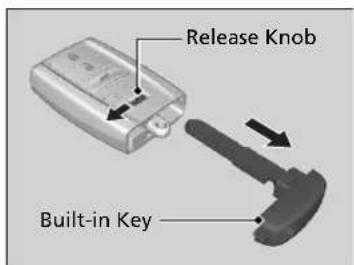
text_image
Release Knob Built-in KeyThe built-in key can be used to lock or unlock the doors when the keyless access remote battery becomes weak and the power door lock/unlock operation is disabled.
To remove the built-in key, slide the release knob and then pull out the key. To reinstall the built-in key, push the built-in key into the keyless access remote until it clicks.
Key
All the keys have an immobilizer system. The immobilizer system helps to protect against vehicle theft.
Immobilizer System P. 122
Follow the advice below to prevent damage to the keys:
- Do not leave the keys in direct sunlight, or in locations with high temperature or high humidity.
- Do not drop the keys or set heavy objects on them.
- Keep the keys away from liquids, dust and sand.
- Do not take the keys apart except for replacing the battery.
If the circuits in the keys are damaged, the power system may not activate, and the keyless access system may not work.
If the keys do not work properly, have them inspected by an authorized Acura NSX dealer.
Continued
Key Number Tag
natural_image
Simple white rectangular object with a rounded top and a small oval shape inside, placed on a plain gray background (no text or symbols)Contains a number that you will need if you purchase a replacement key.
Low Keyless Access Remote Signal Strength
The vehicle transmits radio waves to locate the keyless access remote when locking/unlocking the doors, opening the hatch, or to activate the power system.
In the following cases, locking/unlocking the doors, opening the hatch, or activating the power system may be inhibited or operation may be unstable:
• Strong radio waves are being transmitted by nearby equipment.
- You are carrying the keyless access remote together with telecommunications equipment, laptop computers, cell phones, or wireless devices.
- A metallic object is touching or covering the keyless access remote.
Key Number Tag
Keep the key number tag separate from the key in a safe place outside of your vehicle. If you wish to purchase an additional key, contact an authorized Acura NSX dealer.
If you lose your key and you cannot activate the power system, contact an authorized Acura NSX dealer.
Low Keyless Access Remote Signal Strength
Communication between the keyless access remote and the vehicle consumes the keyless access remote's battery. Battery life is about two years, but this varies depending on regularity of use.
The battery is consumed whenever the keyless access remote is receiving strong radio waves. Avoid placing it near electrical appliances such as televisions and personal computers.
Locking/Unlocking the Doors from the Outside
■ Using the Keyless Access System
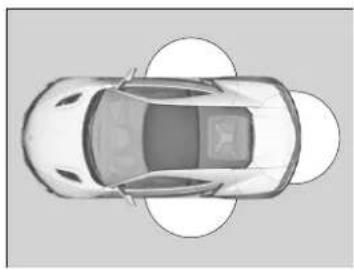
natural_image
Top-down architectural rendering of a car with circular structural elements (no text or symbols)When you carry the keyless access remote, the outer door handles automatically pop in/out and you can lock/unlock the doors and open the hatch.
Outer door handles automatically pop in/out within about 6 feet (2 m) radius of the outside door handle.
You can lock/unlock the doors within a radius of about 32 inches (80 cm) of the outside door handle. You can open the hatch within about 32 inches (80 cm) radius from the hatch release button.
■ Locking the vehicle
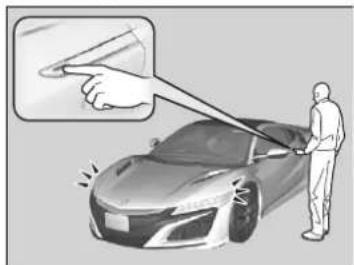
natural_image
Illustration of a person cleaning a car with a hand pointing at the dashboard (no text or symbols present)Press the door lock button on either door.
▶ Some exterior lights flash; the beeper sounds; both doors lock; both outer door handles pop in if they are popped out; and the security system sets.
>>Using the Keyless Access System
If you do not open a door within 30 seconds of unlocking the vehicle, the doors will automatically relock and the outer handles of the doors will automatically pop back in.
You can lock or unlock doors using the remote transmitter or keyless access system only when the power mode is in VEHICLE OFF.
- Do not leave the keyless access remote in the vehicle when you get out. Carry it with you.
- Even if you are not carrying the keyless access remote, you can lock/unlock the doors while someone else with the remote is within range.
- The door may be unlocked if the door handle is covered with water in heavy rain or in a car wash if the keyless access remote is within range.
- If you grip either door handle wearing gloves, the door sensor may be slow to respond or may not respond by unlocking the doors.
- The door may not open if you pull it immediately after gripping the door handle. Grip the handle again and confirm that the door is unlocked before pulling the handle.
- Even within the 32 inches (80 cm) radius, you may not be able to lock/unlock the doors with the keyless access remote if it is above or below the outside handle.
- The keyless access remote may not operate if it is too close to the door and door glass.
■ Unlocking the vehicle
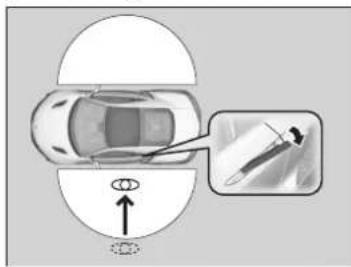
natural_image
Top-down diagram of a car inside a vehicle dome with an inset showing a hand holding a pen (no text or symbols)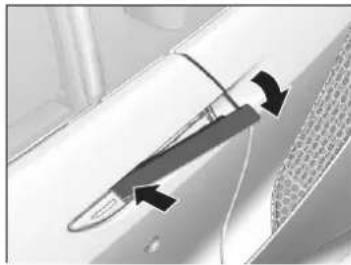
natural_image
Close-up of a car door handle with arrows indicating movement or force (no text or symbols visible)When you walk to the vehicle while carrying the keyless access remote, the outer door handles will automatically pop out. The auto pop-out function activates when both doors are closed, and the keyless access remote is within a 6-foot (2 m) radius of the outside door handle.
Pushing out the door handle
To push out the outer door handle manually, push the front side inwards.
Using the Keyless Access System
If you lock the doors and then keep the keyless remote within the detection range for more than 2 minutes, the auto pop-out function will be disabled. If the function is disabled, pop out the handle manually or use the unlock button on the keyless access remote.
If you walk away from the vehicle when the power system is on, the auto pop-out function will not work.
If you close the doors and take the keyless access remote out of the 6-foot (2m) detection range and then bring it back into the range within 10 seconds, the pop-out function will not work. In this case, pop out the door handle manually or use the remote transmitter.
If, however, you bring the remote back into range after 10 seconds, the handles will automatically pop out.
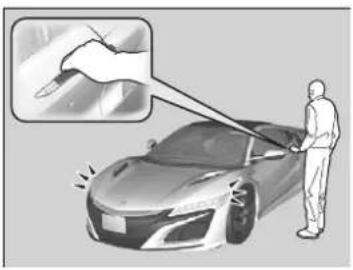
natural_image
Illustration of a person in protective suit using a tool to clean a car (no text or symbols visible)Grab the driver's door handle:
The driver's door unlocks.
▶ Some exterior lights flash twice and the beeper sounds twice.
Grab the front passenger's door handle:
▶ Both doors unlock.
▶ Some exterior lights flash twice and the beeper sounds twice.
Using the Keyless Access System
If the passenger's door is not opened, the outer handle of the passenger's door will pop back in 30 seconds after the driver's door is closed or when the gear position is moved out of [P].
If the vehicle is left for more than 8 days, the auto pop-out function will not work. In this case, unlock the vehicle using the remote transmitter.
Auto Pop-Out Main Switch P. 111
If the outer handle of a door is popped out and the keyless access remote is taken out of the 6-feet (2m) detection range, the handle will pop back in after 18 to 30 seconds.
The light flash, beep and unlock settings can be customized using the audio/information screen.
Customized Features P. 244
▶▶ Locking and Unlocking the Doors ▶Locking/Unlocking the Doors from the Outside
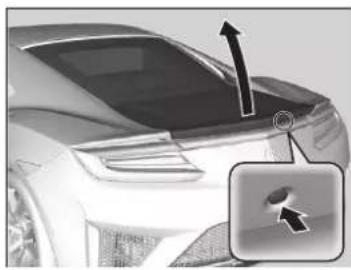
natural_image
Side profile of a modern car with a visible roof and side-mounted sensor array (no text or symbols)Press the hatch release button:
The hatch unlocks and opens.
The beeper sounds.
Using the Hatch Release Button P. 119
Auto Pop-Out Main Switch
By switching the auto pop-out main switch to OFF, you can disable the auto pop-out function. For the purpose of safety and to prevent damaging the vehicle, disable this function and manually operate the handle, especially when the vehicle is:
- being shipped by train, truck, or boat.
- going through a car wash.
• having maintenance performed on it.
■ To temporarily deactivate the auto pop-out function:
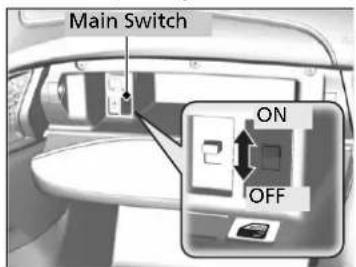
text_image
Main Switch ON OFFTurn off the auto pop-out main switch in the glove box.
Continued
Auto Pop-Out Main Switch
The auto pop-out function is deactivated in the following situations:
- The auto pop-out main switch is turned off.
- The keyless access remote is not within a 6-foot (2m) radius of the outside door handle.
- The keyless access remote is in the vehicle.
- The power mode is in ACCESSORY or ON.
Using the Remote Transmitter
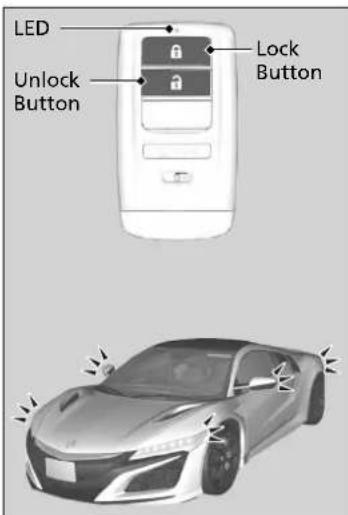
text_image
LED Unlock Button Lock Button■ Locking the doors
Press the lock button.
Once:
▶ Some exterior lights flash, both doors lock, both outer door handles pop in, and the security system sets.
Twice (within five seconds after the first push):
The beeper sounds and verifies the security system is set.
Using the Remote Transmitter
If you do not open a door within 30 seconds of unlocking the vehicle with the remote transmitter, the doors will automatically relock and the outer handles of the doors will automatically pop back in. You can change the relock timer setting.
→ Customized Features P. 244
If the interior light switch is in the door activated position, the interior lights come on when you press the unlock button.
No doors opened: The lights fade out after 30 seconds.
Doors relocked with the remote: The lights go off immediately.
→ Interior Lights P. 149
The remote transmitter uses low-power signals, so the operating range may vary depending on the surroundings.
The remote will not lock the vehicle when a door is open.
■ Unlocking the doors
Press the unlock button.
Once:
Some exterior lights flash twice, the driver's door unlocks and the driver's outer door handle pops out.
Twice:
The passenger's door unlocks and the passenger's outer door handle pops out.
Using the Remote Transmitter
If the distance at which the remote transmitter works varies, the battery is probably low.
If the LED does not come on when you press a button, the battery is dead.
→ Replacing the Button Battery P. 418
You can customize the door unlock mode setting.
→ Customized Features P. 244
If the passenger's door is not opened, the outer handle of the passenger's door will pop back in 30 seconds after the driver's door is closed or when the gear position is moved out of [P].
To pop out the outer handle of the passenger's door when the gear position is in [P], press the unlock button on the remote transmitter or press the master door unlock switch.
Locking/Unlocking the Doors Using a Key
If the lock or unlock button of the remote does not work, use the key instead.
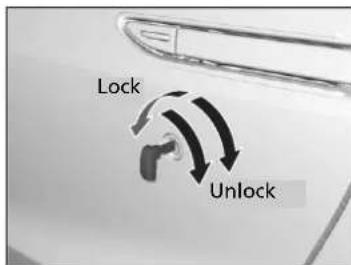
text_image
Lock UnlockFully insert the key and turn it.
Locking a Door Without Using a Key
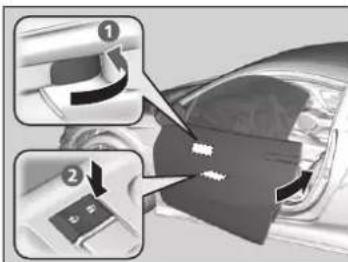
text_image
Diagram showing car door adjustment steps with numbered instructions for adjusting partsIf you do not have the key on you, or if for some reason you cannot lock a door using the key, you can lock the door without it.
■ Locking the doors
Push the lock tab forward ① or push the master door lock switch in the lock direction ②, and close the door.
■ Lockout prevention system
The doors cannot be locked when the keyless access remote is inside the vehicle.
Locking/Unlocking the Doors Using a Key
When you lock the driver's door with a key, the passenger's door locks at the same time. When unlocking, the driver's door unlocks first. Turn the key a second time within a few seconds to unlock the passenger's door.
If you unlock the doors with the key, the alarm goes off when you open the hood or select other than P before the power mode is set to ON.
You can customize the door unlock mode setting.
→ Customized Features P. 244
Locking a Door Without Using a Key
When you lock the driver's door, the passenger's door locks at the same time. Before locking a door, make sure that the key is not inside the vehicle.
Locking/Unlocking the Doors from the Inside
Using the Lock Tab
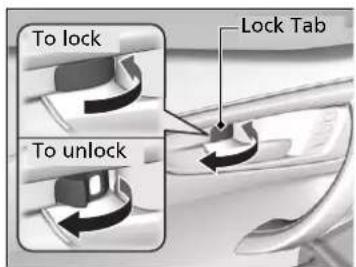
text_image
To lock To unlock Lock Tab■ Locking a door
Push the lock tab forward.
■ Unlocking a door
Pull the lock tab rearward.
Using the Lock Tab
When you lock the door using the lock tab on the driver's door, both doors lock at the same time. When you unlock the door using the lock tab on the driver's door, only the driver's door will unlock.
Continued
Unlocking Using the Inner Handle
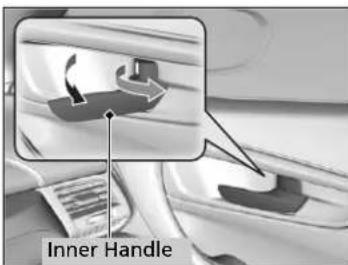
text_image
Inner HandlePull the either door inner handle.
The door unlocks and opens in one motion.
Unlocking and opening the driver's door with the inner handle unlocks both doors.
To avoid both doors to be unlocking, use the lock tab on the driver's door to unlock, then lock again before opening the door.
This setting works for one time only. If you do not want both doors to be unlocked all the time, customize the Auto Door Unlock setting to Off using the audio/information screen.
Unlocking Using the Inner Handle
The inner door handles are designed to allow occupants to open the door in one motion. However, this feature requires that occupants never pull an inner handle while the vehicle is in motion.
Using the Master Door Lock Switch
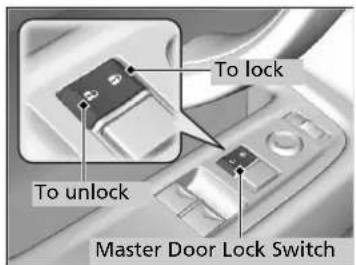
text_image
To lock To unlock Master Door Lock SwitchPress the master door lock switch in as shown to lock or unlock both doors.
Using the Master Door Lock Switch
When you lock/unlock the driver's door using the master door lock switch, the passenger's door locks/ unlocks at the same time.
Auto Door Locking/Unlocking
Your vehicle locks and unlocks both doors automatically when a certain condition is met.
Auto Door Locking
■ Drive lock mode
Both doors lock when the vehicle's speed reaches about 10 mph (15 km/h).
■ Auto Door Unlocking
Both doors unlock when the driver's door is opened.
Auto Door Locking/Unlocking
You can turn off or change to another auto door locking/unlocking setting using the audio/information screen.
→ Customized Features P. 244
Opening and Closing the Hatch
Precautions for Opening/Closing the Hatch
■ Opening the hatch
Open the hatch all the way.
▶ If it is not fully opened, the hatch may begin to close under its own weight.
■ Closing the hatch
Keep the hatch closed while driving to:
▶ Avoid possible damage.
▶ Prevent exhaust gas from leaking into the vehicle.
Exhaust Gas Hazard P. 67
Using the Hatch Release Button
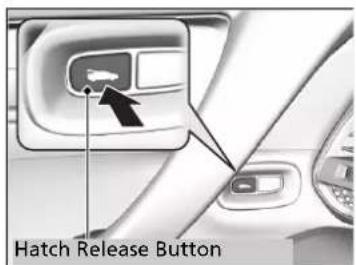
text_image
Hatch Release ButtonPress the hatch release button on the driver's door unlocks and opens the hatch.
When You Cannot Open the Hatch P. 464
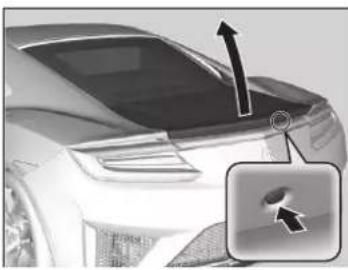
natural_image
Side profile of a car's roof and side panel, showing a black arrow pointing to the roof edge (no text or symbols visible)Push the release button on the hatch after the doors are unlocked.
When You Cannot Open the Hatch P. 464
Even if the hatch is locked, you can open the hatch if you carry the keyless access remote.
The beeper sounds.
Using the Remote Transmitter
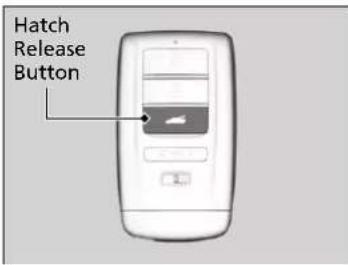
text_image
Hatch Release ButtonPress the hatch release button for approximately one second to unlock and open the hatch.
Using the Hatch Release Button
- If you forget the remote inside, the beeper will sound and the hatch will not close.
- A person who is not carrying the keyless access remote can unlock the hatch if a person who is carrying it is within range.
- If the beeper sounds after close the hatch, move the keyless access remote away from the trunk and close again.
- The keyless access remote may not operate if it is too close to the hatch.
Hatch Main Switch
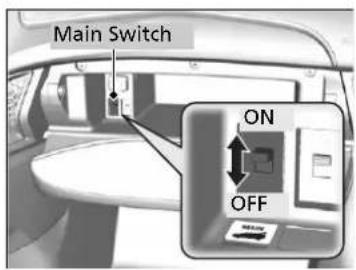
text_image
Main Switch ON OFFThe hatch main switch disables the hatch release button on the remote transmitter, the hatch release button on the hatch and the hatch release button on the driver's door to protect luggage in the trunk.
- Turn off the hatch main switch in the glove box.
- Lock the glove box.
Emergency Hatch Opener
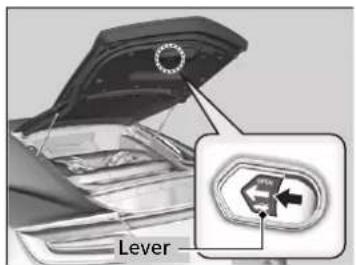
text_image
LeverThe hatch release lever allows you to open the hatch from inside for your safety.
Slide the release lever in the direction of the arrow.
Hatch Main Switch
If you need to give the key to someone else, remove the built-in key from the keyless access remote by sliding the release knob, and give the remote as a valet key.
Emergency Hatch Opener
Parents should decide if their children should be shown how to use this feature.
Security System
Immobilizer System
The immobilizer system prevents a key that has not been pre-registered from starting the power system. Each key contains electronic transmitters that use electronic signals to verify the key.
Pay attention to the following when pressing the ENGINE START/STOP button:
- Do not allow objects that emit strong radio waves near the ENGINE START/STOP button.
- Make sure the key is not covered by or touching a metal object.
- Do not bring a key from another vehicle's immobilizer system near the ENGINE START/STOP button.
- Do not put the key near magnetic items. Electronic devices, such as a televisions and audio systems emit strong magnetic fields. Note that even a key chain can become magnetic.
Security System Alarm
The security system alarm activates when the hood, hatch or doors are forcibly opened. The alarm does not go off if the hatch or doors are opened with the key, remote transmitter or keyless access system.
However, the alarm goes off when a door is opened with the key, then select other than P or the hood is opened before the power mode is set to ON.
■ When the security system alarm activates
The horn sounds intermittently, and some exterior lights flash.
■ To deactivate the security system alarm
Unlock the vehicle using the remote transmitter or keyless access system, or the power mode is set to ON. The system, along with the horn and flashing lights, is deactivated.
Immobilizer System
NOTICE
Leaving the keyless access remote in the vehicle can result in theft or accidental movement of the vehicle. Always take the remote with you whenever you leave the vehicle unattended.
Do not alter the system or add other devices to it. Doing so may damage the system and make your vehicle inoperable.
»Security System Alarm
The security alarm continues for a maximum of two minutes until the security system deactivates.
■ Setting the security system alarm
The security system alarm automatically sets when the following conditions have been met:
- The power mode is set to VEHICLE OFF.
• The hood and hatch are closed.
- Both doors are locked from outside with the key, remote transmitter or keyless access system.
■ When the security system alarm sets
The security system indicator in the instrument panel blinks. When the blinking interval changes after about 15 seconds, the security system is set.
■ To cancel the security system alarm
The security system is canceled when the vehicle is unlocked using the remote transmitter, keyless access system, or when the power mode is set to ON. The security system indicator goes off at the same time.
>>Security System Alarm
Do not set the security system alarm when someone is in the vehicle or a window is open. The system can accidentally activate when:
- The door is unlocked with the lock tab.
- The hatch is opened with the hatch release button on the driver's door or with the emergency hatch opener.
- The gear position is shifted out of P.
• The hood is opened with the hood release.
If the 12-volt battery goes dead after you have set the security system alarm, the security alarm may go off once the 12-volt battery is recharged or replaced. If this occurs, deactivate the security system alarm by unlocking a door using the remote transmitter or keyless access system.
Do not alter the system or add other devices to it. Doing so may damage the system and make your vehicle inoperable.
Do not open the hatch with the key unless it is an emergency.
Opening the hatch with the key will trigger the security system.
When You Cannot Open the Hatch P. 464
Continued
Panic Mode
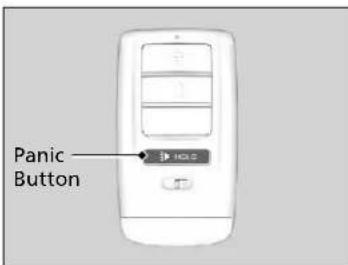
text_image
Panic Button■ The panic button on the remote transmitter
If you press the panic button for approximately one second, the following will occur for about 30 seconds:
• The horn sounds.
- Some exterior lights flash.
■ Canceling panic mode
- Press any button on the remote transmitter.
- Set the power mode to ON.
Opening and Closing the Windows
Opening/Closing the Power Windows
The power windows can be opened and closed when the power mode is in ON, using the switches on the doors. The driver's side switches can be used to open and close both windows.
The power window lock button on the driver's side must be switched off (not pushed in, indicator off) to open and close the passenger's window from the passenger's side.
When the power window lock button is pushed in, the indicator comes on and you can only operate the driver's window. Turn the power window lock button on if a child is in the vehicle.
Opening/Closing the Windows with Auto-Open/Close Function
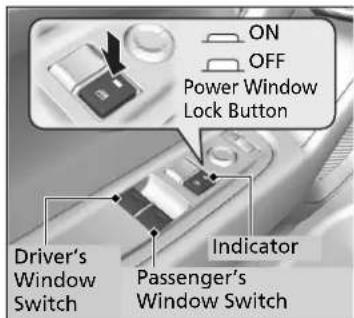
text_image
ON OFF Power Window Lock Button Driver's Window Switch Indicator Passenger's Window Switch■ Automatic operation
To open: Push the switch down firmly. To close: Pull the switch up firmly.
The window opens or closes completely. To stop the window at any time, push or pull the switch briefly.
■ Manual operation
To open: Push the switch down lightly, and hold it until the desired position is reached. To close: Pull the switch up lightly, and hold it until the desired position is reached.
Opening/Closing the Power Windows
WARNING
Closing a power window on someone's hands or fingers can cause serious injury.
Make sure your passenger is away from the windows before closing them.
The power windows can be operated for up to 10 minutes after you set the power mode to VEHICLE OFF. Opening either door cancels this function.
Auto Reverse
If a power window senses resistance when closing automatically, it stops closing and reverses direction.
The driver's window auto reverse function is disabled when you continuously pull up the switch.
The auto reverse function stops sensing when the window is almost closed to ensure that it fully closes.
Opening the Windows with the Remote
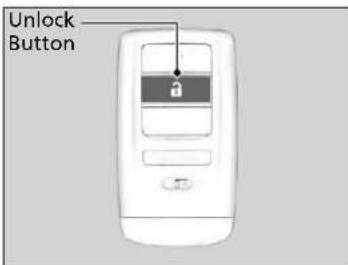
text_image
Unlock ButtonTo open: Press the unlock button, and then within 10 seconds, press it again and hold it. If the windows stop midway, repeat the procedure.
Opening/Closing the Windows with the Key
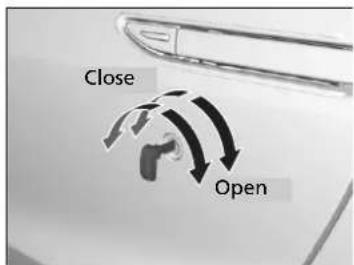
text_image
Close OpenTo open: Unlock the driver's door with the key. Within 10 seconds of returning the key to the central position, turn the key in the unlock direction and hold it there.
To close: Lock the driver's door with the key. Within 10 seconds of returning the key to the central position, turn the key in the lock direction and hold it there.
Release the key to stop the windows at the desired position. If you want further adjustment, repeat the same operation.
Operating the Switches Around the Steering Wheel
ENGINE START/STOP Button
■ Changing the Power Mode
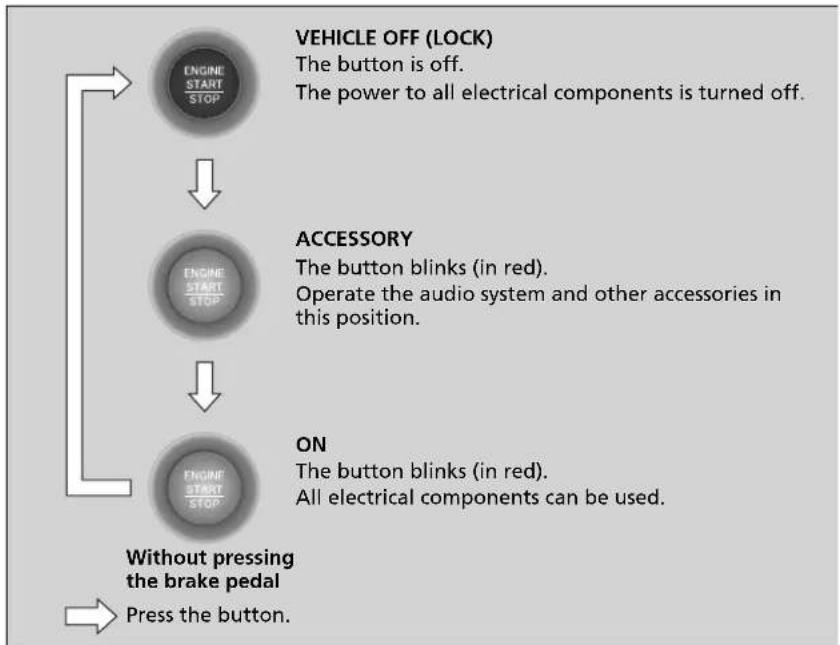
flowchart
graph TD
    A["ENGINE START STOP"] --> B["ENGINE START STOP"]
    B --> C["ENGINE START STOP"]
    D["VEHICLE OFF (LOCK)<br>The button is off.<br>The power to all electrical components is turned off."] --> A
    E["ACCESSORY<br>The button blinks (in red).<br>Operate the audio system and other accessories in this position."] --> B
    F["ON<br>The button blinks (in red).<br>All electrical components can be used."] --> C
    G["Without pressing the brake pedal"] --> C
    H["Press the button."] --> I["End"]
ENGINE START/STOP Button
ENGINE START/STOP Button Operating Range
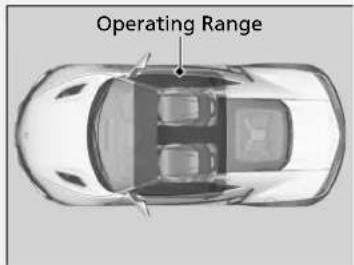
text_image
Operating RangeYou can start the power system when the keyless access remote is inside the vehicle. The power system may also start if the keyless access remote is close to the door or window, even if it is outside the vehicle.
If the battery of the keyless access remote is getting low, the power system may not start when you push the ENGINE START/STOP button. If the power system does not start, refer to the following link.
If the Keyless Access Remote Battery is Weak P. 446
Do not leave the power mode in ACCESSORY or ON when you get out.
Automatic Power Off
If you leave the vehicle for more than 30 minutes with the transmission in [P] and the power mode in ACCESSORY, the vehicle will automatically go into VEHICLE OFF (LOCK) mode to prevent draining the 12-volt battery.
Power Mode Reminder
If you open the driver's door when the power mode is set to ACCESSORY, a warning buzzer will sounds.
■ Keyless Access Remote Reminder
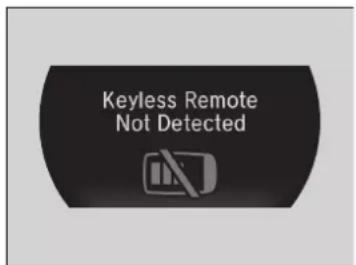
text_image
Keyless Remote Not DetectedWhen the power mode is set to any mode other than OFF and you remove the keyless access remote from the vehicle and shut the door, an alarm will sound. If the alarm continues to sound, place the keyless access remote in another location.
■ When the power mode is in ACCESSORY
The alarm will sound from outside the vehicle.
■ When the power mode is in ON
An alarm will sound both inside and outside the vehicle. In addition, a warning indicator will appear on the instrument panel.
Keyless Access Remote Reminder
When the keyless access remote is within the system's operational range, and both doors are closed, the warning function cancels.
If the keyless access remote is taken out of the vehicle after the power system has been turned on, you can no longer change the ENGINE START/STOP button mode or restart the power system. Always make sure if the remote is in your vehicle when you operate the ENGINE START/STOP button.
Removing the keyless access remote from the vehicle through a window does not activate the warning buzzer.
Do not put the keyless access remote on the dashboard or in the glove box. It may cause the warning buzzer to go off. Under some other conditions that can prevent the vehicle from locating the remote, the warning buzzer may also go off even if the remote is within the system's operational range.
Turn Signals
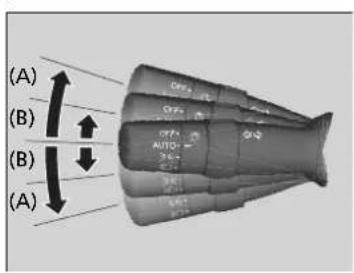
text_image
(A) (B) (B) (A)The turn signals can be used when the power mode is in ON.
■ (A): Turn signal
Push the lever up or down based on the direction you want to turn, and the turn signal will blink.
■ (B): One-touch turn signal
When you lightly push the lever up or down and release it, the turn signal will blink 3 times.
>>Turn Signals
The turn signal indicator on the instrument panel will blink when the external turn signal blinks.
Indicators P. 70
Light Switches
■ Manual Operation
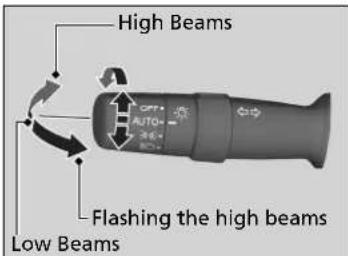
text_image
High Beams OFF AUTO- 24+ 30+ Flashing the high beams Low Beams
Turns on parking, side marker, tail, and rear license plate lights Turns on headlights, parking, side marker, tail, and rear license plate lights
Rotating the light switch turns the lights on and off, regardless of the power mode setting.
■ High beams
Push the lever forward until you hear a click.
■ Low beams
When in high beams, pull the lever back to return to low beams.
■ Flashing the high beams
Pull the lever back, and release it.
■ Lights off
Turn the lever to OFF either when:
- The transmission is in P.
• The parking brake is applied.
To turn the lights on again, turn the lever to OFF to cancel the lights off mode. Even if you do not cancel the lights off mode, the lights come on automatically when:
• The gear position is changed out of P.
• The parking brake is released.
• The vehicle starts to move.
Continued
>>Light Switches
If you leave the power mode in VEHICLE OFF while the lights are on, a chime sounds when the driver's door is opened.
When the lights are on, the lights on indicator in the instrument panel will be on.
→ Lights On Indicator P. 81
If you sense that the level of the headlights is abnormal, have your vehicle inspected by an authorized Acura NSX dealer.
Do not leave the lights on when the power system is off because it will cause the 12-volt battery to discharge.
Automatic Operation (automatic lighting control)
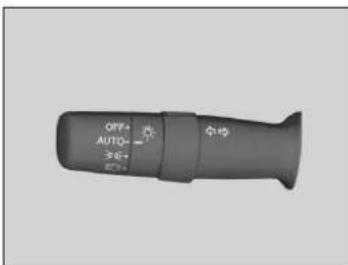
text_image
OFF+ AUTO- S/O- S/O+Automatic lighting control can be used when the power mode is in ON.
When the light switch is in AUTO, the headlights and other exterior lights will switch on and off automatically depending on the ambient brightness.
The headlights come on when you unlock a door in dark areas with the headlight switch in AUTO.
▶ Once you lock the door, the headlights will go off.
▶▶Automatic Operation (automatic lighting control)
We recommend that you turn on the lights manually when driving at night, in a dense fog, or in dark areas such as long tunnels or parking facilities.
The light sensor is in the location shown below. Do not cover this light sensor with anything; otherwise, the automatic lighting system may not work properly.

text_image
Light SensorU.S. models
Adjust the auto light sensitivity as follows:
| Setting | The exterior lights come on when the ambient light is at |
| MAX | Bright |
| HIGH | |
| MID | Dark |
| LOW | |
| MIN |
Customized Features P. 244
Headlight Integration with Wipers
The headlights automatically come on when the wipers are used several times within a certain interval with the headlight switch in AUTO.
The headlights automatically go off a few minutes later if the wipers are stopped.
Automatic Lighting Off Feature
The headlights, all other exterior lights, and the instrument panel lights turn off 15 seconds after you set the power mode to VEHICLE OFF, take the remote with you, and close the driver's door.
If you set the power mode to VEHICLE OFF with the headlight switch on, but do not open the door, the lights turn off after 10 minutes (3 minutes, if the switch is in the AUTO position).
The lights turn on again when you unlock or open the driver's door. If you unlock the door, but do not open it within 15 seconds, the lights go off. If you open the driver's door, you will hear a lights on reminder chime.
Headlight Integration with Wipers
This feature activates when the headlights are off in AUTO.
The instrument panel brightness does not change when the headlights come on.
At dark ambient light levels, the automatic lighting control feature turns on the headlights, regardless of the number of wiper sweeps.
You can turn the headlight integration with wipers function on and off.
→ Customized Features P. 244
>>Automatic Lighting Off Feature
You can change the headlight auto off timer setting.
Customized Features P. 244
Daytime Running Lights
The daytime running lights come on when the following conditions have been met:
• The power mode is in ON.
• The headlight switch is in AUTO.
• The parking brake is released.
The daytime running lights are off the headlight switch is turned on, or when the headlight switch is in AUTO and it is getting darker outside.
Daytime Running Lights
U.S. models
The brightness of the daytime running lights is lower when the headlight switch is in that when it is in AUTO. When it is in AUTO, the low-beam headlights come on once the level of ambient light is very low.
Wipers and Washers
Windshield Wiper/Washer
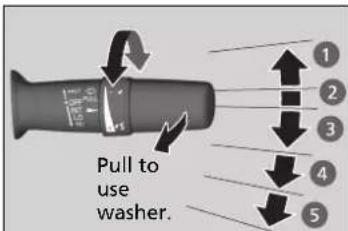
text_image
Pull to use washer.1 MIST
2 OFF
3 INT: Low speed with intermittent
4 LO: Low speed wipe
5 HI: High speed wipe
The windshield wipers and washers can be used when the power mode is in ON.
MIST
The wipers run at high speed until you release the lever.
■ Wiper switch (OFF, INT, LO, HI)
Change the wiper switch setting according to the amount of rain.
■ Adjusting wiper operation
Turn the adjustment ring to adjust wiper operation.
Lower speed, fewer sweeps
Higher speed, more sweeps
Washer
Sprays while you pull the lever toward you. When you release the lever for more than one second, the spray stops, the wipers sweep two or three more times to clear the windshield, then stop.
Wipers and Washers
NOTICE
Do not use the wipers when the windshield is dry. The windshield will get scratched, or the rubber blades will get damaged.
NOTICE
In cold weather, the blades may freeze to the windshield. Operating the wipers in this condition may damage wipers. Use the defroster to warm the windshield, then turn the wipers on.
If the vehicle speeds up while the wipers are operating intermittently, the length of the wipe interval shortens.
When the vehicle speeds up, the wiper operation's shortest delay setting (☐) and the LO setting become the same.
Turn the washers off if no washer fluid comes out. The pump may get damaged.
The wiper motor may stop motor operation temporarily to prevent an overload. Wiper operation will return to normal within a few minutes, once the circuit has returned to normal.
If the wipers stop operating due to any obstacle such as the build-up of snow, park the vehicle in a safe place.
Rotate the wiper switch to OFF, and set the power mode to ACCESSORY or VEHICLE OFF, then remove the obstacle.
Rear Defogger/Heated Door Mirror Button
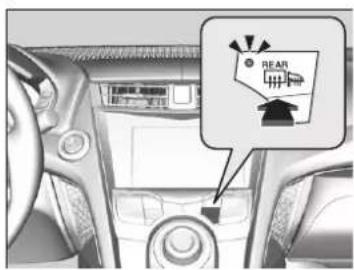
text_image
Car interior diagram with a 'REAR' warning sign and directional arrows indicating vehicle safety or emergency response.Press the rear defogger and heated door mirror button to defog the rear window and mirrors when the power mode is in ON.
The rear defogger and heated door mirrors automatically switch off after 10-30 minutes depending on the outside temperature.
However, if the outside temperature is 32^ F ( 0^ C) or below, they do not automatically switch off.
Rear Defogger/Heated Door Mirror Button
This system consumes a lot of power, so turn it off when the window has been defogged. Also, do not use the system for a long time while the power system is stopped. This may weaken the 12-volt battery, making it difficult to turn the power system on.
When the outside temperature is below 41^ F ( 5^ C), the heated door mirror may activate automatically for 10 minutes when you set the power mode to ON.
Brightness Control
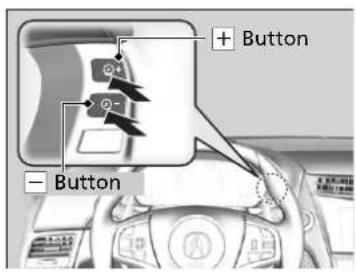
text_image
+ Button - ButtonWhen the power mode is in ON, you can use the ☐ or ☐ button to adjust instrument panel brightness.
To brighten: Press the + button.
To dim: Press the — button.
You will hear a beep when the brightness reaches minimum or maximum. Several seconds after you have adjusted the brightness, you will be returned to the previous screen.
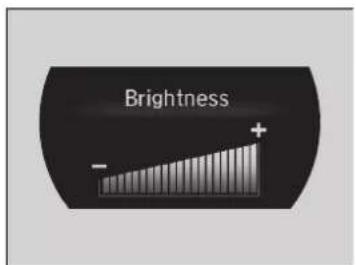
text_image
Brightness - +■ Brightness level indicator
The brightness level is shown on the driver information interface while you are adjusting it.
Brightness Control
The brightness of the instrument panel will be reduced when the following conditions:
• The power mode is in ON.
- The light switch is in any position other than off and it is dark outside.
When it is bright outside and the headlight integration with the wiper is activated, the instrument panel brightness does not change.
The brightness can be set differently for when the exterior lights are on, and when they are off.
Driving Position Memory System\*
You can store two driver's seat (except for power lumbar) and outside door mirrors position with the driving position memory system.
When you unlock and open the driver's door with a remote transmitter, or keyless access system, door mirrors adjust to one of the two preset positions and the seat adjusts to retracted positions of one of the two preset positions automatically.
The seat will move to the stored position when you set the power mode to ACCESSORY.
When you enter the vehicle, the driver information interface briefly shows you which remote transmitter you used to unlock the vehicle.
- DRIVER 1 transmitter is linked to memory button 1.
- DRIVER 2 transmitter is linked to memory button 2.
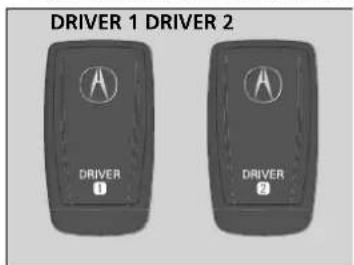
text_image
DRIVER 1 DRIVER 2 DRIVER 1 DRIVER 2The driver's seat moves rearward depending on the set seating position once you
- Stop the vehicle.
- Put the transmission in P.
- Set the power mode to VEHICLE OFF.
- Then open the driver's door. Once the power mode is in the ACCESSORY position, the driver's seat moves to the DRIVER 1 or 2 preset position.
Driving Position Memory System \*
Using the audio/information screen, you can disable the automatic seat and door mirrors adjustment function.
→ Customized Features P. 244
The driver's seat easy exit feature:
- Will tilt slightly forward and then move rearward to allow you to more easily exit the vehicle.
- Can be turned ON/OFF.
→ Customized Features P. 244
System Operation
The system will not operate if:
• The vehicle speed is above 3 mph (5 km/h).
- Either memory position button is pressed while the seat or the outside mirror is in motion.
- The seat or the outside mirror position is adjusted while in operation.
- The memory 1 or 2 position is set fully to the rear.
Storing a Position in Memory
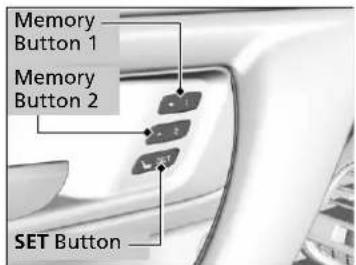
text_image
Memory Button 1 Memory Button 2 SET Button- Set the power mode to ON. Adjust the driver's seat and the door mirrors to the desired position.
- Press the SET button.
▶ You will hear the beeper, and the memory button indicator light will blink.
- Press memory button 1 or 2 within five seconds of pressing the SET button.
▶ Once the seat and the outside mirrors position have been memorized, you will hear the beeper twice, and the indicator light on the button you pressed stays on.
Recalling the Stored Position
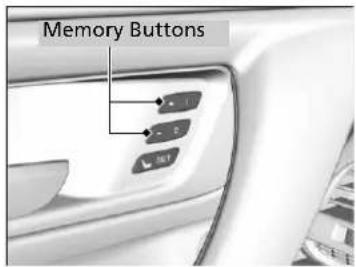
text_image
Memory Buttons- Put the transmission into P.
- Apply the parking brake.
- Press a memory button (1 or 2).
▶ You will hear the beep, and the indicator light will blink.
The seat and the door mirrors will automatically move to the memorized positions. When it has finished moving, you will hear the beeper twice, and the indicator light stays on.
Storing a Position in Memory
After you press the SET button, the storing operation will be canceled when:
- You do not press the memory button within five seconds.
- You readjust the seat or the outside mirror position before the double-beep.
- You set the power mode to any position except ON.
Recalling the Stored Position
The seat and door mirrors will stop moving if you:
- Press the SET button, or a memory button (1 or 2).
- Adjust the seat position or door mirrors.
- Put the transmission into a position other than P.
Adjusting the Steering Wheel
The steering wheel height and distance from your body can be adjusted so that you can comfortably grip the steering wheel in an appropriate driving posture.
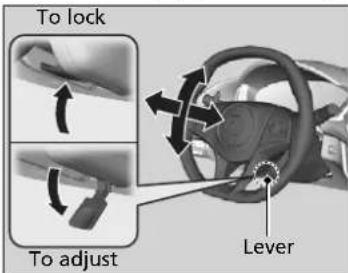
text_image
To lock To adjust Lever- Push the steering wheel adjustment lever down.
The steering wheel adjustment lever is under the steering column.
- Move the steering wheel up or down, and in or out.
▶ Make sure you can see the instrument panel gauges and indicators.
- Pull the steering wheel adjustment lever up to lock the steering wheel in position.
▶ After adjusting the position, make sure you have securely locked the steering wheel in place by trying to move it up, down, in, and out.
Adjusting the Steering Wheel
WARNING
Adjusting the steering wheel position while driving may cause you to lose control of the vehicle and be seriously injured in a crash.
Adjust the steering wheel only when the vehicle is stopped.
Adjusting the Mirrors
Interior Rearview Mirror
Adjust the angle of the rearview mirror when you are sitting in the correct driving position.
■ Automatic Dimming Rearview Mirror
natural_image
3D-rendered gray rectangular object with a curved top edge, isolated on white background (no text or symbols)When you are driving after dark, the automatic dimming rearview mirror reduces the glare from headlights behind you, based in inputs from the mirror sensor. This feature is always active.
Adjusting the Mirrors
Keep the inside and outside mirrors clean and adjusted for best visibility.
Adjust the mirrors before you start driving.
Adjusting the Seat Positions P. 144
Automatic Dimming Rearview Mirror
The auto dimming function cancels when the transmission is in [R].
Power Door Mirrors
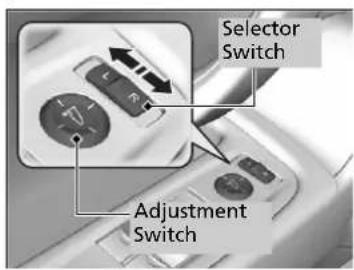
text_image
Selector Switch Adjustment SwitchYou can adjust the door mirrors when the power mode is in ON.
■ Mirror position adjustment
L/R selector switch: Select the left or right mirror. After adjusting the mirror, return the switch to the center position.
Mirror position adjustment switch: Press the switch left, right, up, or down to move the mirror.
Reverse Tilt Door Mirror
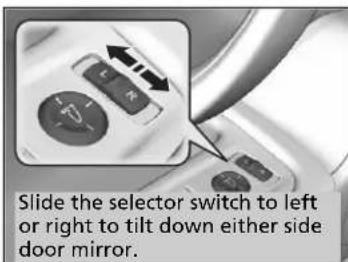
text_image
Slide the selector switch to left or right to tilt down either side door mirror.Models with driving position memory system
If activated, either side door mirror automatically tilts downward when you press back the R button; this improves close-in visibility on the selected side of the vehicle when backing up. The mirror automatically returns to its original position when you take the transmission out of R.
To activate this feature, set the power mode to ON and slide the selector switch to the left or right side.
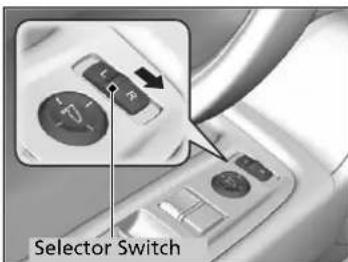
text_image
Selector SwitchModels without driving position memory system
If activated, passenger side door mirror automatically tilts downward when you press back the R button; this improves close-in visibility on the passenger side of the vehicle when backing up. The mirror automatically returns to its original position when you take the transmission out of R.
To activate this feature, set the power mode to ON and slide the selector switch to the passenger side.
Adjusting the Seats
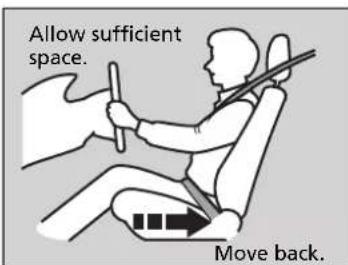
text_image
Allow sufficient space. Move back.Adjust the driver's seat as far back as possible while allowing you to maintain full control of the vehicle. You should be able to sit upright, well back in the seat and be able to adequately depress the pedals without leaning forward, and grip the steering wheel comfortably. The passenger's seat should be adjusted in a similar manner, so that it is as far back from the front airbag in the dashboard as possible.
■ Adjusting the Seat Positions
■ Adjusting the power seats*

text_image
Horizontal Position Adjustment Seat-back Angle Adjustment Driver's seat is shown.Adjusting the Seats
WARNING
Sitting too close to a front airbag can result in serious injury or death if the front airbags inflate.
Always sit as far back from the front airbags as possible while maintaining control of the vehicle.
The National Highway Traffic Safety Administration and Transport Canada recommend that drivers allow at least 10 inches (25 cm) between the center of the steering wheel and the chest.
Always make seat adjustments before driving.
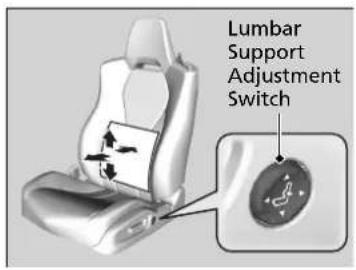
text_image
Lumbar Support Adjustment Switch■ Lumbar Support Adjustment Switch\*
Press the top: To move the lumbar support up.
Press the bottom: To move the lumbar support down.
Press the front: To increase the entire lumbar support.
Press the rear: To decrease the entire lumbar support.
■ Adjusting the manual seats\*
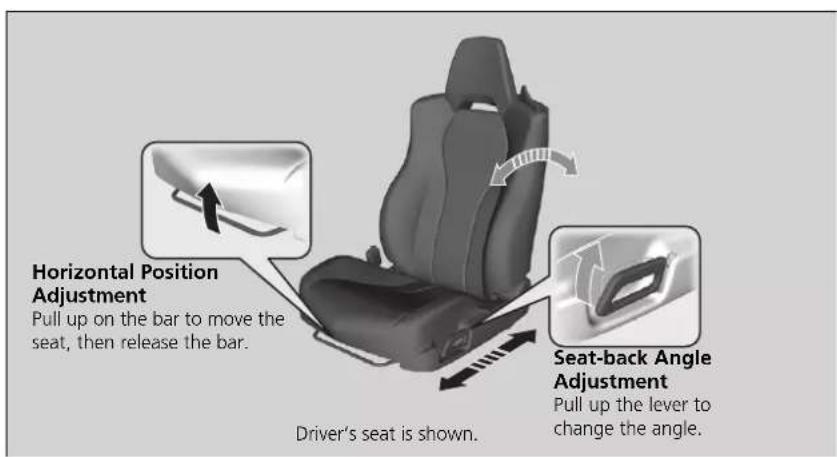
text_image
Horizontal Position Adjustment Pull up on the bar to move the seat, then release the bar. Seat-back Angle Adjustment Pull up the lever to change the angle. Driver's seat is shown.Adjusting the manual seats
Once a seat is adjusted correctly, rock it back and forth to make sure it is locked in position.
Adjusting the Seat-Backs
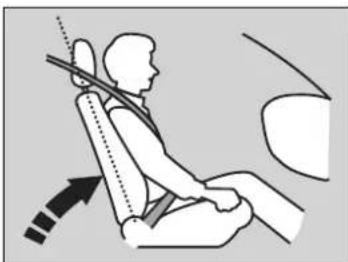
natural_image
Illustration of a person seated in a car seat with a hand holding the seat, showing motion direction (no text or symbols)Adjust the driver's seat-back to a comfortable, upright position, leaving ample space between your chest and the airbag cover in the center of the steering wheel.
The passenger should also adjust their seat-back to a comfortable, upright position.
Reclining a seat-back so that the shoulder part of the belt no longer rests against the occupant's chest reduces the protective capability of the belt. It also increases the chance of sliding under the belt in a crash and being seriously injured. The farther a seat-back is reclined, the greater the risk of injury.
Adjusting the Seat-Backs
WARNING
Reclining the seat-back too far can result in serious injury or death in a crash.
Adjust the seat-back to an upright position, and sit well back in the seat.
Do not put a cushion, or other object, between the seat-back and your back. Doing so may interfere with proper seat belt or airbag operation.
If you cannot get far enough away from the steering wheel and still reach the controls, we recommend that you investigate whether some type of adaptive equipment may help.
Maintain a Sitting Proper Position
After all occupants have adjusted their seats and put on their seat belts, it is very important that they continue to sit upright, well back in their seats, with their feet on the floor, until the vehicle is safely parked and the power system is off.
Sitting improperly can increase the chance of injury during a crash. For example, if an occupant slouches, lies down, turns sideways, sits forward, leans forward or sideways, or puts one or both feet up, the chance of injury during a crash is greatly increased.
In addition, an occupant who is out of position in the seat can be seriously or fatally injured in a crash by striking interior parts of the vehicle or being struck by an inflating front airbag.
Maintain a Sitting Proper Position
WARNING
Sitting improperly or out of position can result in serious injury or death in a crash.
Always sit upright, well back in the seat, with your feet on the floor.
Interior Convenience Items
Interior Lights
Interior Light Switches
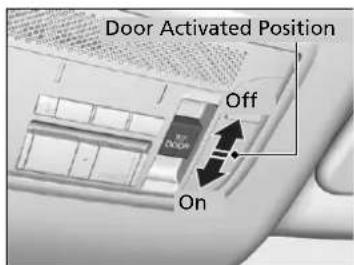
text_image
Door Activated Position Off OnON
The interior lights come on regardless whether the doors are open or closed.
■ Door activated
The interior lights come on in the following situations:
- When either of the doors are opened.
- You unlock the driver's door.
- When the power mode is set to VEHICLE OFF.
OFF
The interior lights remain off regardless whether the doors are open or closed.
Interior Light Switches
In the door activated position, the interior lights fade out and go off about 30 seconds after the doors are closed.
The lights go off after about 30 seconds in the following situations:
- When you unlock the driver's door but do not open it.
- When you set the power mode to VEHICLE OFF but do not open a door.
You can change the interior lights dimming time.
→ Customized Features P. 244
The interior lights go off immediately in the following situations:
- When you lock the driver's door.
- When you close the driver's door in ACCESSORY mode.
- When you set the power mode to ON.
To avoid draining the 12-volt battery, do not leave the interior light on for an extended length of time when the power system off.
If you leave either door open in VEHICLE OFF mode, the interior lights go off after about 15 minutes.
Map Lights
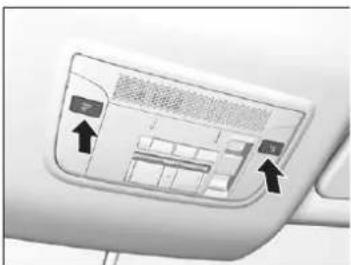
text_image
Diagram of a car interior with directional arrows and labeled components, likely indicating movement or navigation.The map lights can be turned on and off by pressing the map light) button.
>>Map Lights
When the ceiling light switch is in the door activated position and either door is open, the map light will not go off when you press the 📄 (map light) button.
Storage Items
Glove Box
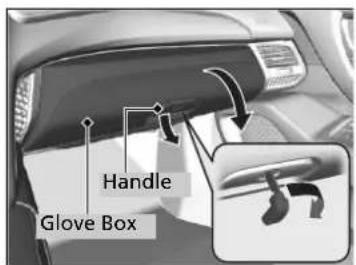
text_image
Handle Glove BoxPull the handle to open the glove box. You can lock the glove box with the built-in key.
Console Compartment
natural_image
Close-up of a car interior showing a curved seat and dashboard with an arrow indicating direction (no text or symbols)Pull the lid to open the console compartment.
Glove Box
WARNING
An open glove box can cause serious injury to your passenger in a crash, even if the passenger is wearing the seat belt.
Always keep the glove box closed while driving.
Continued
Beverage Holders
natural_image
Close-up of a car interior showing a handle and vent, with an arrow pointing to the handle (no text or symbols visible)Insert the beverage holders into the passenger side of the center console.
>> Beverage Holders
NOTICE
Spilled liquids damage the upholstery, carpeting, and electrical components in the interior.
Other Interior Convenience Items
■ Accessory Power Socket
The accessory power socket can be used when the power mode is in ACCESSORY or ON.
natural_image
Close-up of a car interior showing a door panel with a hand inserting a button, no visible text or symbols■ Accessory power socket
Open the cover to use it.
>>Accessory Power Socket
NOTICE
Do not insert an automotive type cigarette lighter element.
The accessory power socket can overheat.
The accessory power socket is designed to supply power for 12-volt DC accessories that are rated 180 watts (15 amps) or less.
To prevent draining the 12-volt battery, use the accessory power socket only when the power system on.
When the accessory power socket is not in use, close the cover to prevent any small foreign objects from getting into the accessory power socket.
Continued
Seat Heaters\*
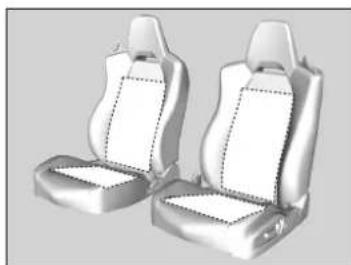
natural_image
3D rendering of two white car seat compartments with dashed lines indicating seating areas (no text or symbols)The power mode must be in ON to use the seat heaters.
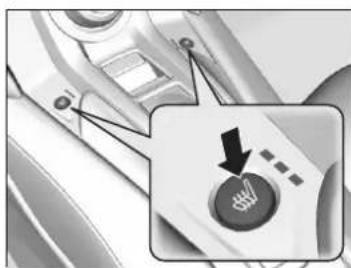
natural_image
Close-up of a car dashboard with a highlighted control knob and arrow indicator (no readable text or symbols)Press the seat heater button: Once - The HI setting (three indicators on) Twice - The MID setting (two indicators on) Three times - The LO setting (one indicator on) Four times - The OFF setting (no indicators on)
When the power mode is turned on after it is turned off, the previous setting of seat heaters is maintained.
Seat Heaters*
WARNING
Heat induced burns are possible when using seat heaters.
Persons with a diminished ability to sense temperature (e.g., persons with diabetes, lower-limb nerve damage, or paralysis) or with sensitive skin should not use seat heaters.
Do not use the seat heaters even in LO when the power system is off. Under such conditions, the 12-volt battery may be weakened, making the power system difficult to start.
Climate Control System
Using Automatic Climate Control
The automatic climate control system maintains the interior temperature you select. The system also selects the proper mix of heated or cooled air to raise or lower the interior temperature to your preference as quickly as possible.
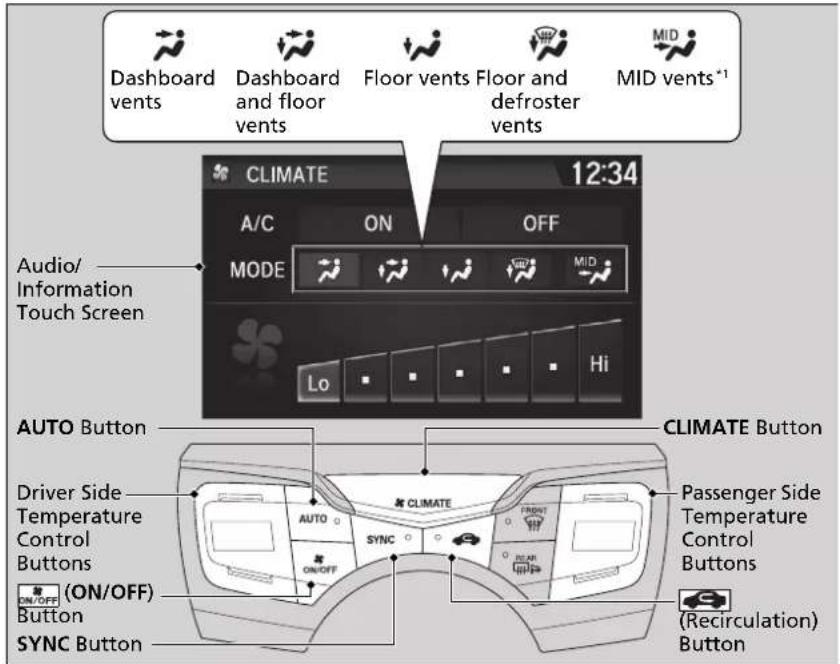
text_image
Dashboard vents Dashboard and floor vents Floor vents Floor and defroster vents MID vents*1 CLIMATE 12:34 A/C ON OFF MODE MID Audio/ Information Touch Screen Lo Hi AUTO Button Driver Side Temperature Control Buttons (ON/OFF) Button SYNC Button CLIMATE Button AUTO SYNC ON/OFF Passenger Side Temperature Control Buttons (Recirculation) ButtonUse the system when the power mode is ON.
- Press the AUTO button.
- Adjust the interior temperature using the driver's side or passenger's side control buttons.
- Press the ON/OFF button to cancel.
Continued
Using Automatic Climate Control
Press the CLIMATE button to display A/C, MODE, fan control information on the audio/information screen for several seconds. Select icon to turn on or off A/C, change the vent mode, or change the fan speed.
If any buttons are pressed while using the climate control system in auto, the function of the button that was pressed will take priority.
The AUTO indicator will go off, but functions unrelated to the button that was pressed will be controlled automatically.
To prevent cold air from blowing in from outside, the fan may not start immediately when the AUTO button is pressed.
If the interior is very warm, you can cool it down more rapidly by partially opening the windows, turning the system to AUTO, and setting the temperature to low. Change the fresh mode to recirculation mode until the temperature cools down.
When you set the temperature to the lower or upper limit, Lo or Hi is displayed.
Pressing the button switches the climate control system on or off. When turned on, the system returns to your last selection.
*1: MID vents provide supplemental air to the lower body of the occupant(s). MID vents can be used together with any other vent mode.
▶▶ Climate Control System ▶ Using Automatic Climate Control
■ Switching between the recirculation and fresh air modes
Press the (circulation) button and switch the mode depending on environmental conditions.
Recirculation mode (indicator on): Recirculates air from the vehicle's interior through the system.
Fresh air mode (indicator off): Maintains outside ventilation. Keep the system in fresh air mode in normal situations.
■ Defrosting the Windshield and Windows
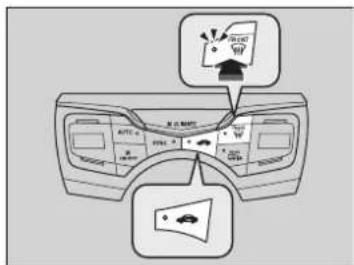
text_image
Diagram showing car interior with labeled sections and icons, including a fan icon and speech bubblePressing the windshield defroster) button turns the air conditioning system on and automatically switches the system to fresh air mode.
Press the button again to turn off, the system returns to the previous settings.
■ To rapidly defrost the windows
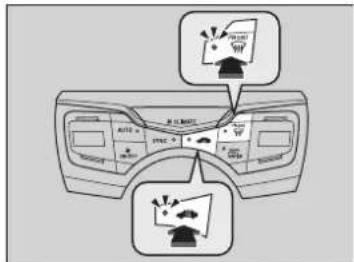
text_image
Diagram showing car interior with labeled zones and icons, likely illustrating a parking or parking area layout.- Press the button.
- Press the button.
Defrosting the Windshield and Windows
For your safety, make sure you have a clear view through all the windows before driving.
Do not set the temperature near the upper or lower limit.
When cold air hits the windshield, the outside of the windshield may fog up.
If the side windows fog up, adjust the vents so that the air hits the side windows.
To rapidly defrost the windows
After defrosting the windows, switch over to fresh air mode. If you keep the system in recirculation mode, the windows may fog up from humidity. This impedes visibility.
Continued
Synchronization Mode
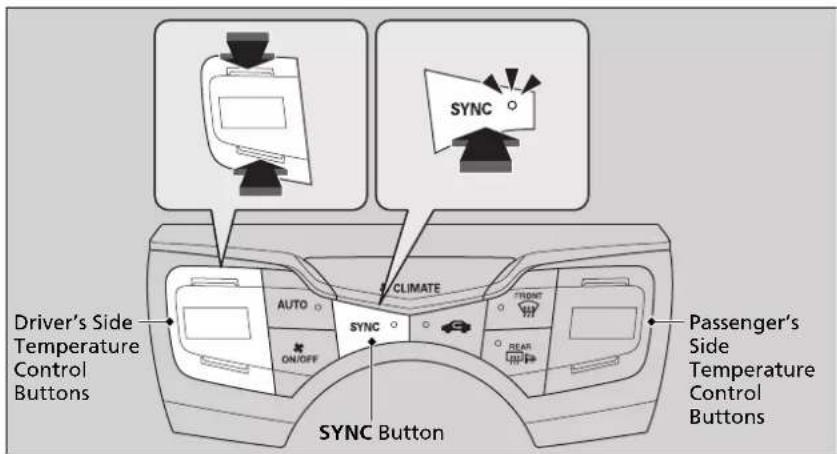
text_image
Driver's Side Temperature Control Buttons AUTO ON/OFF SYNC CLIMATE SYNC Button FRONT REAR PASSenger's Side Temperature Control ButtonsYou can set the temperature synchronously for the driver's side and the passenger's side in synchronization mode.
- Press the SYNC button.
The system switches to synchronization mode. - Adjust the temperature using the driver's side temperature control buttons.
Press the SYNC button to return to dual mode.
Synchronization Mode
When the system is in dual mode, the driver's side temperature and the passenger's side temperature can be set separately.
Automatic Climate Control Sensors
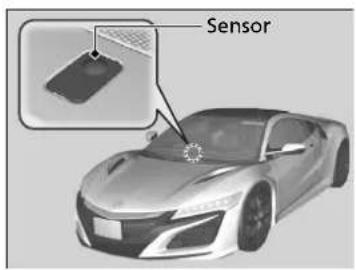
text_image
SensorThe automatic climate control system is equipped with sensors. Do not cover or spill any liquid on them.
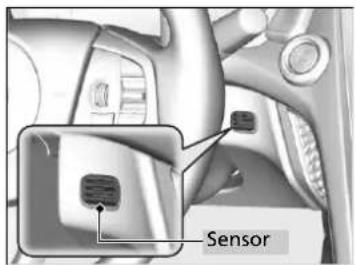
text_image
SensorFeatures
This chapter describes how to operate technology features.
Audio System
About Your Audio System...... 162
USB Ports 163
Audio System Theft Protection ..... 164
Audio Remote Controls.... 165
Audio System Basic Operation ..... 166
Audio/Information Screen 167
Adjusting the Sound 181
Display Setup 182
Voice Control Operation 184
Playing FM Radio 188
Playing SiriusXM® Radio * 192
Playing an iPod 199
Song By Voice™ (SBV) 202
Playing Pandora ^®*1 206
Playing a USB Flash Drive 208
Playing Bluetooth® Audio.... 211
Wi-Fi Connection 213
Siri® Eyes Free 215
Apple CarPlay™ 216
Android Auto™ 219
Audio Error Messages
iPod/USB Flash Drive 223
Pandora®*1 224
Android/Apps 225
General Information on the Audio System
SiriusXM® Radio Service* 226
Compatible iPod, iPhone, and USB Flash
Drives 227
Honda App License Agreement...... 228
Legal Information on Apple CarPlay/
Android Auto....240
About Open Source Licenses...... 242
License Information 243
Customized Features 244
Defaulting All the Settings 266
HomeLink® Universal Transceiver ... 267
Bluetooth® HandsFreeLink®
Using HFL 270
HFL Menus 273
AcuraLink ^® 304
*1: Available only on U.S. models.
Audio System
About Your Audio System
The audio system features FM radio and SiriusXM® Radio service*. It can also play USB flash drives, and iPod, iPhone and Bluetooth® devices.
You can operate the audio system from the icons on the touchscreen interface or the remote controls on the steering wheel.
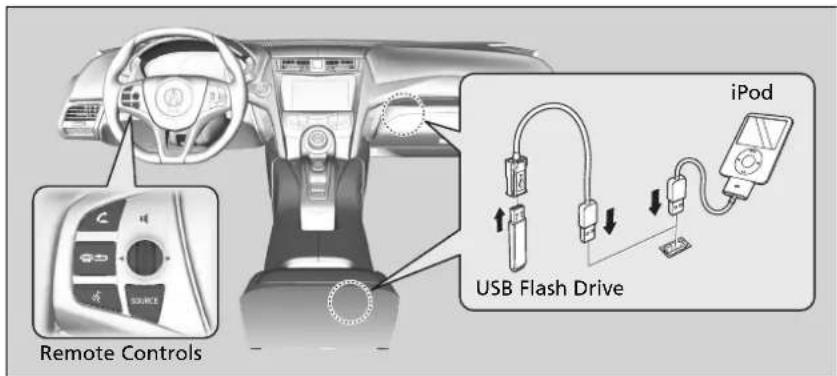
text_image
Remote Controls iPod USB Flash DriveAbout Your Audio System
SiriusXM® Radio ^ is available on a subscription basis only. For more information on SiriusXM® Radio, contact an authorized Acura NSX dealer.
General Information on the Audio System P. 226
SiriusXM® Radio * is available in the United States and Canada, except Hawaii, Alaska, and Puerto Rico.
SiriusXM®* is a registered trademark of SiriusXM Radio, Inc.
iPod, iPhone and iTunes are trademarks of Apple Inc.
State or local laws may prohibit the operation of handheld electronic devices while operating a vehicle.
USB Ports
Install the iPod USB connector or the USB flash drive to the USB port.
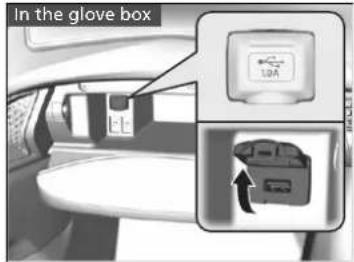
text_image
In the glove box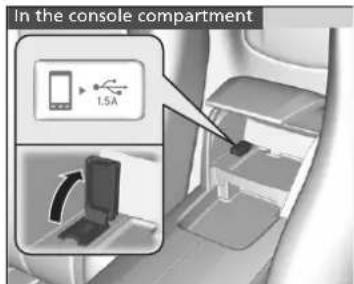
text_image
In the console compartment 1.5AIn the glove box
The USB port (1.0A) is for playing audio files on a USB flash drive and connecting a cellular phone and charging device.
■ In the console compartment
The USB port (1.5A) is for charging devices, playing audio files and connecting compatible phones with Apple CarPlay or Android Auto.
To prevent any potential issues, be sure to use an Apple MFi Certified Lightning Connector for Apple CarPlay, and for Android Auto, the USB cables should be certified by USB-IF to be compliant with USB 2.0 Standard.
>>USB Ports
- Do not leave the iPod or USB flash drive in the vehicle. Direct sunlight and high temperatures may damage it.
- We recommend using an extension cable with the USB port.
- Do not connect the iPod or USB flash drive using a hub.
- Do not use a device such as a card reader or hard disk drive, as the device or your files may be damaged.
- We recommend keeping your data backed up before using the device in your vehicle.
- Displayed messages may vary depending on the device model and software version.
If the audio system does not recognize the iPod, try reconnecting it a few times or reboot the device. To reboot, follow the manufacturer's instructions provided with the iPod or visit www.apple.com/ipod.
USB charge
The USB port can supply up to 1.0A/1.5A of power. It does not output 1.0A/1.5A unless requested by the device. For amperage details, read the operating manual of the device that needs to be charged. Set the power mode to ACCESSORY or ON first.
Under certain conditions, a device connected to the port may generate noise in the radio you are listening to.
Audio System Theft Protection
The audio system is disabled when it is disconnected from the power source, such as when the 12-volt battery is disconnected or goes dead. In certain conditions, the system may display a code entry screen. If this occurs, reactivate the audio system.
■ Reactivating the audio system
- Set the power mode to ON.
- Turn on the audio system.
- Select and hold the ☐ (power/audio) icon for more than two seconds.
The audio system is reactivated when the audio control unit establishes a connection with the vehicle control unit. If the control unit fails to recognize the audio unit, you must go to an authorized Acura NSX dealer and have the audio unit checked.
Audio Remote Controls
Allows you to operate the audio system while driving.
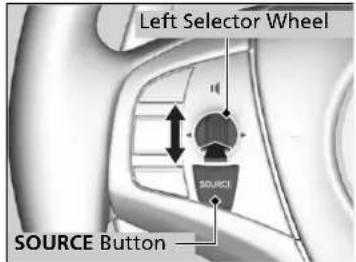
text_image
Left Selector Wheel SOURCE SOURCE ButtonSOURCE Button
Cycles through the audio modes as follows: FM-SiriusXM® *→USB-iPod Pandora® *→ Apps*→Bluetooth® Audio→Audio Apps'
Left Selector Wheel
Roll Up: To increase the volume. Roll Down: To decrease the volume. Push: To mute. Push again to unmute.
- When listening to the radio Move to the right: To select the next preset radio station. Move to the left: To select the previous preset radio station. Move to the right and hold: To select the next strong station. Move to the left and hold: To select the previous strong station.
- When listening to an iPod, USB flash drive, or Bluetooth® Audio Move to the right: To skip to the next song. Move to the left: To go back to the beginning of the current or previous song. Move to the right and hold: To skip to the next folder. Move to the left and hold: To go back to the previous folder.
- When listening to Pandora® * Move to the right: To skip to the next song. Move to the right and hold: To select the next station. Move to the left and hold: To select the previous station.
>>Audio Remote Controls
Some mode appears only when an appropriate device or medium is used.
Audio System Basic Operation
To use the audio system function, the power mode must be in ACCESSORY or ON.
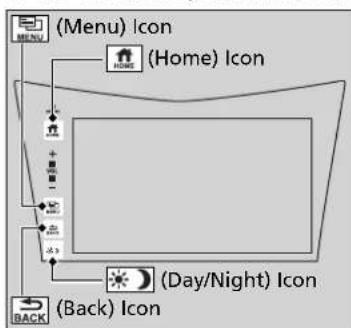
flowchart
graph TD
    A["(Menu) Icon"] --> B["HOME (Home) Icon"]
    B --> C["(Day/Night) Icon"]
    C --> D["(Back) Icon"]
    D --> E["(Back Icon)"]
: Select to go to the home screen.
Switching the Display P. 167
MENU: Select to display available options including Sound, View Radio Text, Music Search, and playback modes.
BACK: Select to go back to the previous screen.
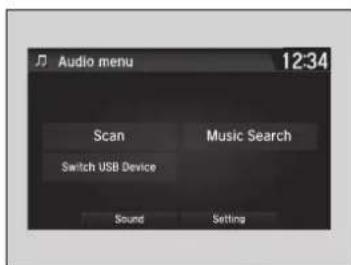
text_image
Audio menu 12:34 Scan Music Search Switch USB Device Sound Setting※): Select to change the audio/information screen brightness.
Select ☐one and select — or + to make an adjustment.
▶ Each time you select the mode switches among the daytime mode, nighttime mode and off mode.
Audio System Basic Operation
Audio Menu Items
Station List P. 189, 191
Music Search List P. 200, 209
Scan P. 190, 191, 198, 210
Play Mode P. 201, 210
Audio/Information Screen
Displays the audio status and wallpaper. From this display, you can go to various setup options.
Switching the Display
■ Using the audio/information screen
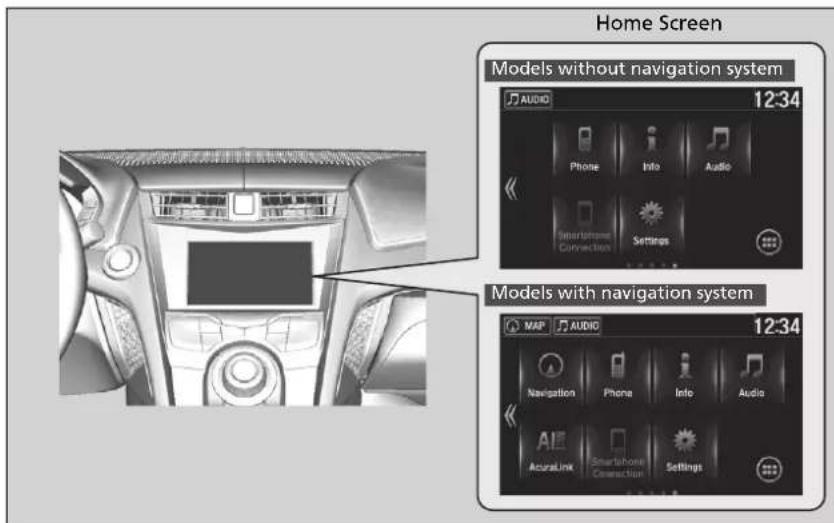
text_image
Home Screen Models without navigation system AUDIO 12:34 Phone Info Audio Smartphone Connection Settings Models with navigation system MAP AUDIO 12:34 Navigation Phone Info Audio Auralink Smartphone Connection SettingsSelect go to the home screen.
Select Phone, Info, Audio, Settings, Navigation*, AcuraLink*, Smartphone Connection (Apple CarPlay, Android Auto), or 📄 (app list).
* Not available on all models
Continued
>>Using the audio/information screen
Touchscreen operation
- Use simple gestures - including touching, swiping and scrolling - to operate certain audio functions.
- Some items may be grayed out during driving to reduce the potential for distraction.
- You can select them when the vehicle is stopped or use voice commands.
- Wearing gloves may limit or prevent touchscreen response.
- You can use the microfiber cleaning cloth included in your owner's kit to remove dust or fingerprints from the touchscreen.
Phone
Displays the HFL information.
Bluetooth® HandsFreeLink® P. 270
Info
Displays Trip Computer or Clock/Wallpaper. Select 📋 on the Info Menu screen to see all available options: Trip Computer, Voice Info, Clock/Wallpaper and System/Device Information.
Trip Computer:
- Current Drive tab: Displays the current trip information.
- History of Trip A tab: Displays information for the three previous drives. The information is stored every time you reset Trip A.
To delete the history manually, select Delete History on the History of Trip A tab. The confirmation message appears on the screen, then select Yes.
Voice Info: Displays a list of all voice commands.
Clock/Wallpaper: Displays the clock and wallpaper.
System/Device Information:
- System Info: Displays the software version of the audio system.
- USB Info: Displays the memory usage of the USB device.
Audio
Displays the current audio information.
Settings
Enters the customizing menu screen.
→ Customized Features P. 244
Navigation\*
Displays the navigation screen.
Refer to the Navigation System Manual
AcuraLink\*
Is a subscription-based service that can provide convenient features such as voice communication if an airbag deploys, online security, and one-on-one operator assistance.
AcuraLink®* P. 304
■ Smartphone Connection
Displays Apple CarPlay or Android Auto.
Apple CarPlay™ P. 216
→ Android Auto™ P. 219
■ App List
Adds or removes apps or widgets on the home screen.
Home Screen P. 173
Changing the Home Screen Icon Layout
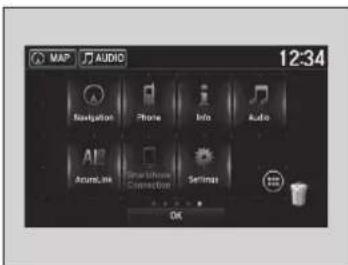
text_image
MAP AUDIO 12:34 Navigation Phone Info Audio Audio Smartphone Connection Settings OK- Select HOME.
- Select and hold an icon.
The screen switches to the customization screen. - Drag and drop the icon to where you want it to be.
- Select OK. ▶ The screen will return to the home screen.
Wallpaper Setup
You can change, store, and delete the wallpaper on the audio/information screen.
■ Import wallpaper
You can import up to five images, one at a time, for wallpaper from a USB flash drive.
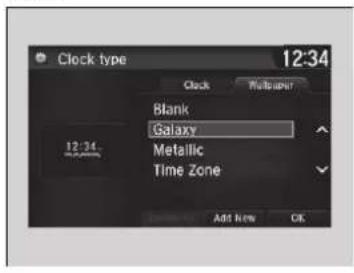
text_image
Clock type 12:34 Clock Multiplane Blank Galaxy Metallic Time zone Add Now OK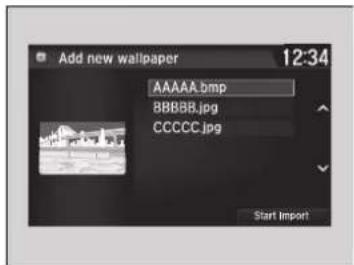
text_image
Add new wallpaper 12:34 AAAAA.bmp BBBBB.jpg CCCCC.jpg Start Import- Connect the USB flash drive to the USB port.
USB Ports P. 163
- Select Settings
- Select Clock/Info
- Select Clock/Wallpaper Type, then open the Wallpaper tab.
- Select Add New.
The picture name is displayed on the list.
- Select a desired picture.
The preview is displayed on the left side on the screen. - Select Start Import to save the data.
The display will return to the wallpaper list.
»Wallpaper Setup
The wallpaper you set up on Clock/Wallpaper Type cannot be displayed on the driver information interface.
- When importing wallpaper files, the image must be in the USB flash drive's root directory. Images in a folder cannot be imported.
- The file name must be fewer than 64 characters.
- The file format of the image that can be imported is BMP (bmp) or JPEG (jpg).
• The individual file size limit is 5 MB. - The maximum image size is 4,096 × 4,096 pixels. If the image size is less than 800 × 480 pixels, the image is displayed in the middle of the screen with the extra area appearing in black.
- If the USB flash drive does not have any pictures, the No files detected message appears.
■ Select wallpaper
- Select Settings.
- Select Clock/Info.
- Select Clock/Wallpaper Type, then open the Wallpaper tab.
The screen changes to the wallpaper list.
- Select a desired wallpaper.
The preview is displayed on the left side on the screen.
The pop-up menu appears on the screen.
- Select Set.
The display will return to the wallpaper list.
■ To view wallpaper once it is set
- Select HOME.
- Select Info.
- Select MENU.
- Select Clock/Wallpaper.
■ Delete wallpaper
- Select Settings
- Select Clock/Info
- Select Clock/Wallpaper Type, then open the Wallpaper tab.
The screen changes to the wallpaper list.
- Select a wallpaper that you want to delete.
The preview is displayed on the left side on the screen.
The pop-up menu appears on the screen.
- Select Delete.
▶ A confirmation message appears on the screen. - Select Yes to delete completely.
The display will return to the wallpaper list.
Wallpaper Setup
From the pop-up menu, select Preview to see a preview at full-size screen.
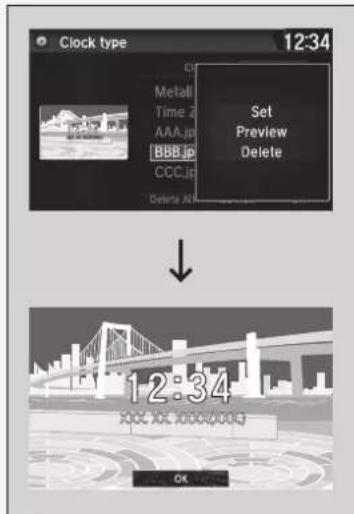
text_image
Clock type 12:34 Metall Time a AAA.jp BBB.jp CCC.jp Delete Alt Set Preview Delete 12:34 OKTo go back to the previous screen, select OK, or select BACK.
When the file size is large, it takes a while to be previewed.
To delete all wallpapers you add, select Delete All, then Yes.
Home Screen
■ To change to a next screen
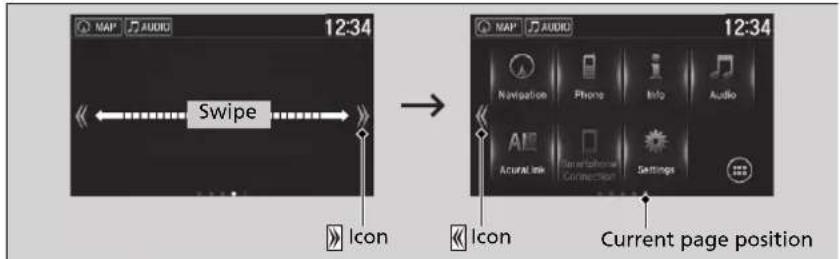
text_image
MAP AUDIO 12:34 Swipe Icon Current page position NAV AUDIO 12:34 Navigation Phone Info Audio Accrual Link Smartphone Connection SettingsSelecting ◀ or ▶, or swiping the screen left or right changes to the next screen.
Home Screen
The home screen has 5 pages (fixed). You cannot add any more pages.
Select go directly back to the first page of the home screen from any page.
Continued
■ To use apps or widgets
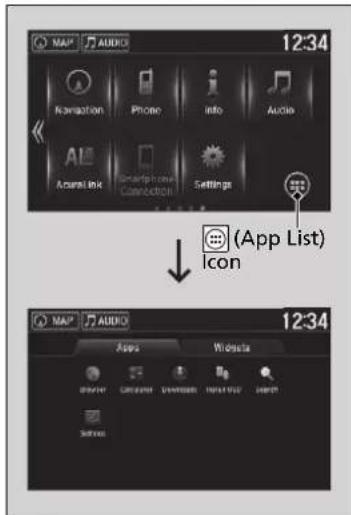
text_image
MAP AUDIO 12:34 Origination Phone info Audio Animal ink Smartphone Control Settings (App List) Icon MAP AUDIO 12:34 Apps Website NEW YORK CHANGE FREE FREE OPEN SUPPORT-
Select HOME
-
Select (app list) icon.
The Apps screen appears.
- Select the app or widget you want to use.
Pre-installed app list:
- Browser: Displays the web browser utilized by smartphone and Wi-Fi connection.
- Calculator: Displays Calculator.
- Downloads: Displays the data downloaded from the web browser and so on.
• Install USB: Installs the driver for the USB flash drive. - Search: Displays various retrieval screen.
- Settings: Displays the Android setting screen.
To use apps or widgets
Select and hold a selected app or widget to add that app's or widget's shortcut on the home screen.
Pre-installed apps may not start up normally. If this occurs, you need to reset the system.
→ Defaulting All the Settings P. 266
If you perform Factory Data Reset, it may reset all the settings to their factory default.
→ Defaulting All the Settings P. 266
In case those apps still do not startup normally even after Factory Data Reset, contact an authorized Acura NSX dealer.
There is a possibility that a browser is shut down in the situation of the use. In that situation, the screen will return to before the browser startup.
You can delete user installed apps by the following procedure.
- Select
- Select Settings.
- Select System.
- Select the Others tab.
- Select Detail Information
- Select Apps
- Select an app that you want to delete.
- Select Delete.
Pre-installed apps cannot be deleted.
■ To add app or widget icons on the home screen
App or widget icons can be added on the home screen.
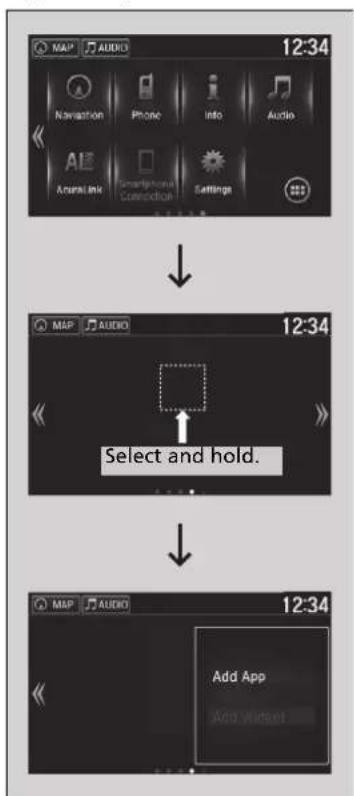
flowchart
graph TD
    A["MAP"] --> B["Navigation"]
    B --> C["Phone"]
    C --> D["Info"]
    D --> E["Audio"]
    E --> F["Audio Link"]
    F --> G["Smartphone Connection"]
    G --> H["Settings"]
    H --> I["12:34"]
    I --> J["Select and hold."]
    J --> K["Add App"]
    K --> L["Add Window"]
-
Select
-
Select
-
Select and hold empty space on the home screen.
The pop-up menu appears on the screen.
- Select Add App or Add Widget.
The Apps/Widgets screen appears.
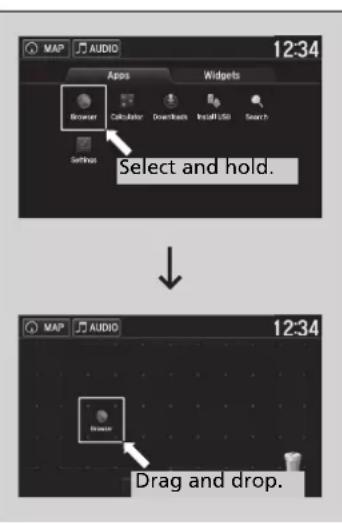
text_image
MAP AUDIO 12:34 Apps Widgets Browser Calculator Downloads Install Info Search Settings Select and hold. MAP AUDIO 12:34 Drag and drop.- Select and hold an app or widget icon you want to add.
The screen switches to the customization screen.
-
Drag and drop the icon to where you want it to be.
-
Select OK.
The screen will return to the home screen.
■ To move icons on the home screen
You can change location on the home screen.
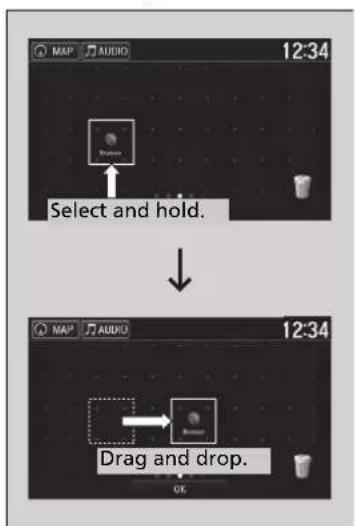
flowchart
graph TD
    A["Select and hold."] --> B["Drag and drop."]
- Select and hold an icon.
The screen switches to the customization screen. - Drag and drop the icon to where you want it to be.
- Select OK.
The screen will return to the home screen.
To move icons on the home screen
You can also move the Phone, Info, Audio, Settings, Navigation*, AcuraLink*, Smartphone
Connection, and 📄app list) icons in the same manner.
* Not available on all models
Continued
■ To remove icons from the home screen You can delete the icons on the home screen.
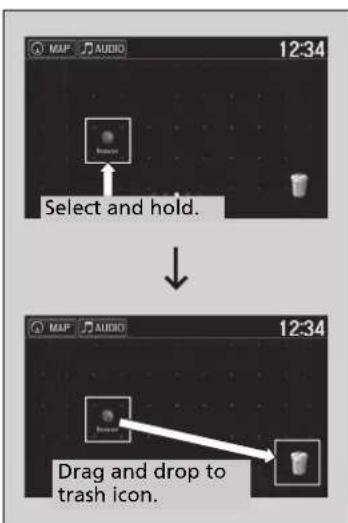
text_image
MAP AUDIO 12:34 Select and hold. Drag and drop to trash icon.- Select and hold an icon.
The screen switches to the customization screen. - Drag and drop the icon you want to remove to the trash icon.
The icon is removed from the home screen. - Select OK.
The screen will return to the home screen.
To remove icons from the home screen
You cannot delete the Phone, Info, Audio, Settings, Navigation*, AcuraLink*, Smartphone Connection, and (app list) icons.
Apps or widgets will not be deleted by deleting the icon on the home screen.
Status Area
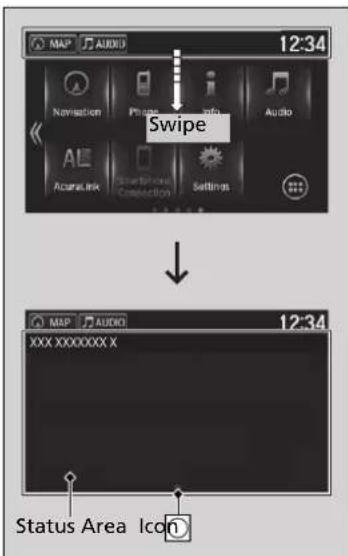
text_image
MAP AUDIO 12:34 Navigation Phone info Audio Swipe Acoustic Link Connection Settings XXX XXXXXXXX X Status Area Icon- Swipe the upper area of the screen.
The status area appears. - Select an item to see the details.
- Select 📄 swipe up the icon to close the area.
Closing Apps
You can close specific apps running in the background on the system.
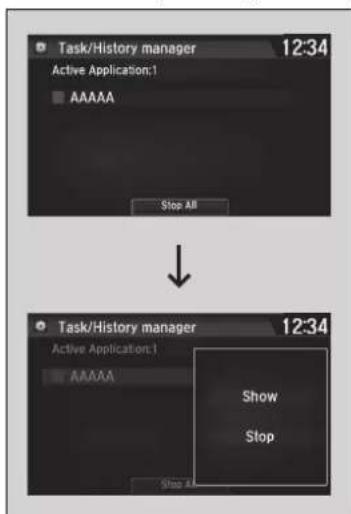
text_image
Task/History manager 12:34 Active Application:1 AAAAA Stop All ↓ Task/History manager 12:34 Active Application:1 AAAAA Show Stop Stop All- Select and hold HOME
- Select an app you want to close.
- Select Stop.
The display will return to the app list.
Closing Apps
If you have a number of apps running in the background and something goes wrong with the audio system, some of those apps may not work properly. If this happens, close all the apps and relaunch the app/apps that you want to use.
To close all apps on the system, select Stop All, then Yes.
You cannot close the Garmin ^* apps.
Adjusting the Sound
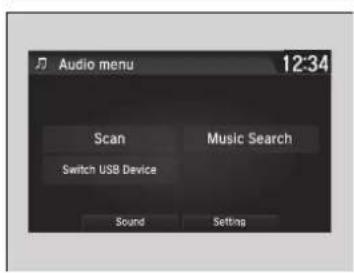
text_image
Audio menu 12:34 Scan Music Search Switch USB Device Sound Setting- Select
- Select Audio.
- Select MENU
- Select Sound
Select a tab from the following choices:
• BAS-TRE: Bass, Treble
• FAD-BAL: Fader, Balance
• CTR *-SUBW: Center*, Subwoofer
- SVC-Neural ^* : Speed Volume Compensation, DTS Neural Surround™*
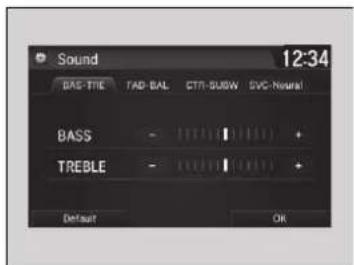
text_image
Sound 12:34 BAS-TIME TAD-BAL CTRI-SUBW SVC-Neural BASS - TREBLE - - + + Default OKAdjusting the Sound
The SVC has four modes: Off, Low, Mid, and High. SVC adjusts the volume level based on the vehicle speed. As you go faster, audio volume increases. As you slow down, audio volume decreases.
You can also adjust the sound the following procedure.
- Select
- Select Settings
- Select Audio.
- Select Sound.
Display Setup
You can change the brightness or color theme of the audio/information screen.
Changing the Screen Brightness
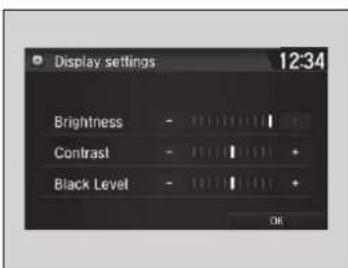
text_image
Display settings 12:34 Brightness - Contrast - Black Level - OK- Select
- Select Settings.
- Select System.
- Select the Display tab.
- Select Display Settings.
- Select the setting you want.
- Select OK.
Changing the Screen's Color Theme
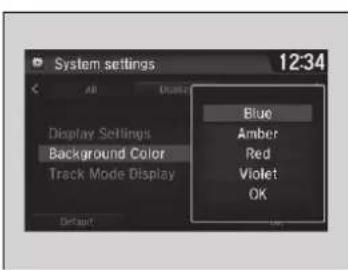
text_image
System settings 12:34 Display Settings Background Color Track Mode Display Blue Amber Red Violet OK- Select
- Select Settings.
- Select System.
- Select the Display tab.
- Select Background Color.
- Select the setting you want.
- Select OK.
Changing the Screen Brightness
You can change the Contrast and Black Level settings in the same manner.
Changing the Screen's Color Theme
When the vehicle is in SPORT+ or TRACK mode, the background color of the screen automatically changes to red.
Selecting an Audio Source
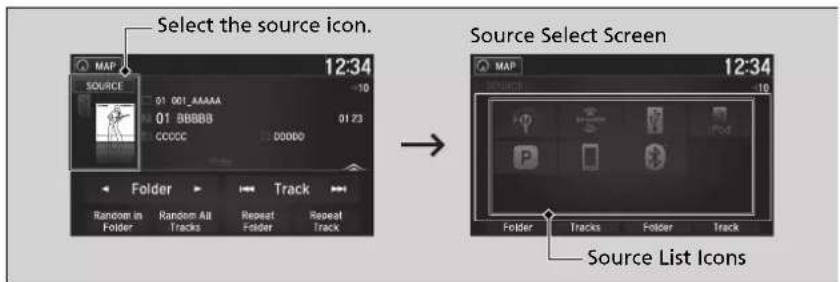
text_image
Select the source icon. 12:34 MAP SOURCE 01 001_AAAAA 01 BBBBB CCCCC D000D Folder Track Random in Folder Random All Tracks Repeat Folder Repeat Track Source Select Screen MAP 12:34 SOURCE Source List Icons Folder Tracks Folder TrackSelect the current source icon, then select an icon on the source list to switch the audio source.
Limitations for Manual Operation
Certain manual functions are disabled or inoperable while the vehicle is in motion. You cannot select a grayed-out option until the vehicle is stopped.
>>Selecting an Audio Source
If you startup pre-installed audio apps, audio Apps displayed on the lower right of the screen. These pre-installed apps cannot be displayed on the source select screen.
You can startup those audio apps from AUDIO Apps
Pandora® is available only in the U.S.
Limitations for Manual Operation
When the vehicle is in TRACK mode, the following screen is displayed and the audio system becomes inoperable. To return to the normal screen, touch any part of the audio/information screen.
You can turn the limitation on and off.
→ Customized Features P. 244
text_image
NSXVoice Control Operation
Your vehicle has a voice control system that allows hands-free operation. The voice control system uses the 📄alk) and ( meaning / back) buttons on the steering wheel and a microphone near the map lights on the ceiling.
Voice Recognition
To achieve optimum voice recognition when using the voice control system:
- Make sure the correct screen is displayed for the voice command that you are using. The system recognizes only certain commands. Available voice commands.
→ Voice Portal Screen P. 185
- Close the windows.
- Adjust the dashboard and side vents so air does not blow onto the microphone on the ceiling.
- Speak clearly in a natural speaking voice without pausing between words.
- Reduce any background noise if possible. The system may misinterpret your command if more than one person is speaking at the same time.
»Voice Control Operation
When you press the button, a helpful prompt asks what you would like to do. Press and release the button again to bypass this prompt and give a command.
»Voice Recognition
The voice control system can only be used from the driver's seat because the microphone unit removes noises from the front passenger's side.
Voice Portal Screen
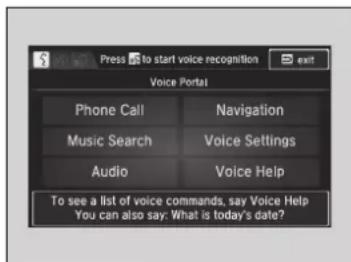
text_image
Press to start voice recognition exit Voice Portal Phone Call Navigation Music Search Voice Settings Audio Voice Help To see a list of voice commands, say Voice Help You can also say: What is today's date?When the (Talk) button is pressed, available voice commands appear on the screen.
For a complete list of commands, say "Voice Help" after the beep or select Voice Help.
You can see the list of commands in Voice Info on the Info menu screen. Select Info, then select MENU
The system only recognizes the commands on the following pages, at certain screens. Free form voice commands are not recognized.
*1: Models with navigation system
*2: Available only on U.S. models.
* Not available on all models
Phone Call
This can be only used when the phone is connected. When the system recognizes the Phone call command, the screen will change to the voice recognition screen for phone commands.
- Dial by number
- Call history
- Redial
- Call
- Call
- Call Police
- Call 911
Phone Call commands are not available if using Apple CarPlay.
■ Music Search\*1
This can be only used when the iPod or USB device is connected.
■ Climate Control ^1
When the system recognizes the Climate Control command, the screen will change the dedicated screen to the climate control voice recognition screen.
Climate Control Commands ^*1 P. 187
Audio\*1
When the system recognizes the Audio command, the screen will change to the audio voice recognition screen.
- Audio On
- Audio Off
- Radio FM
- Radio SXM *
• Pandora *2 - iPod
- USB
- Other Sources
Pandora ^®2 cannot be used while Android Auto is active.
Navigation ^*1
The screen changes to the navigation screen.
Refer to the Navigation System Manual
■ Voice Setting
The screen changes to the Voice Recog tab on the System settings screen.
■ Voice Help
You can see a list of the available commands on the screen.
- Useful Commands
- Phone Commands
- Audio Commands *1
- On Screen Commands
• Music Search Commands *1 - General Commands
• Climate Control Commands *1
Useful Commands
The system accepts these commands on the voice portal top screen.
- Call
- Call
• What time is it?
• What is today's date?
*1: Models with navigation system
*2: Available only on U.S. models.
* Not available on all models
Phone Commands
The system accepts these commands on the dedicated screen for the voice recognition of the phone.
- Call by Number
- Call by Name
- Call
- Call
Audio Commands\*1
The system accepts these commands on the dedicated screen for the voice recognition of the audio.
■ Radio FM Commands
• Radio tune to <87.7-107.9> FM
- Radio tune to <87.7 -107.9> HD <1-8> FM
• Radio FM preset <1-12>
■ Radio SXM Commands\*
- SXM channel <1-999>
- SXM channel
• Radio SXM preset <1-12>
■ Pandora Commands ^*2
- Pandora play
■ iPod Commands
- iPod play
- iPod play track <1-30>
- Music Search
• What album is this?
• What am I listening to?
USB Commands
- USB play
- USB play track <1-30>
- Music Search
• What album is this?
• What am I listening to?
Bluetooth® Audio Commands
- Bluetooth® Audio play
NOTE:
Bluetooth® Audio commands may not work on some phones or Bluetooth® Audio devices.
On Screen Commands
When On Screen Commands is selected, the explanation screen is displayed.
■ Music Search Commands ^*1
The system accepts these commands on the Music Search screen.
■ Using Song By Voice
Song By Voice™ is a feature that allows you to select music from your iPod or USB device using Voice Commands. To activate this mode, you must push the talk switch and say: "Music search".
■ Song By Voice Commands
• What am I listening to?
• Who am I listening to?
• Who is this?
• What's playing?
• Who's playing?
• What album is this?
■ Play Commands
- Play artist
- Play track/song
- Play album
- Play genre/category
- Play playlist
- Play composer
■ List Commands
- List artist
- List album
- List genre/category
- List playlist
- List composer
General Commands
• What time is it?
• What is today's date?
Climate Control Commands ^*1
• Climate Control on
• Climate Control off
- Fan Speed <1-7>
• Temperature max heat
• Temperature max cool
• Temperature <57-87> degrees
- Defrost on
- Defrost off
• Air conditioner on
• Air conditioner off
- More
• Climate control automatic
- Vent
- Dash and floor
- Fan speed up
- Fan speed down
- Floor vents
• Floor and defrost
- Temperature up
- Temperature down
Playing FM Radio
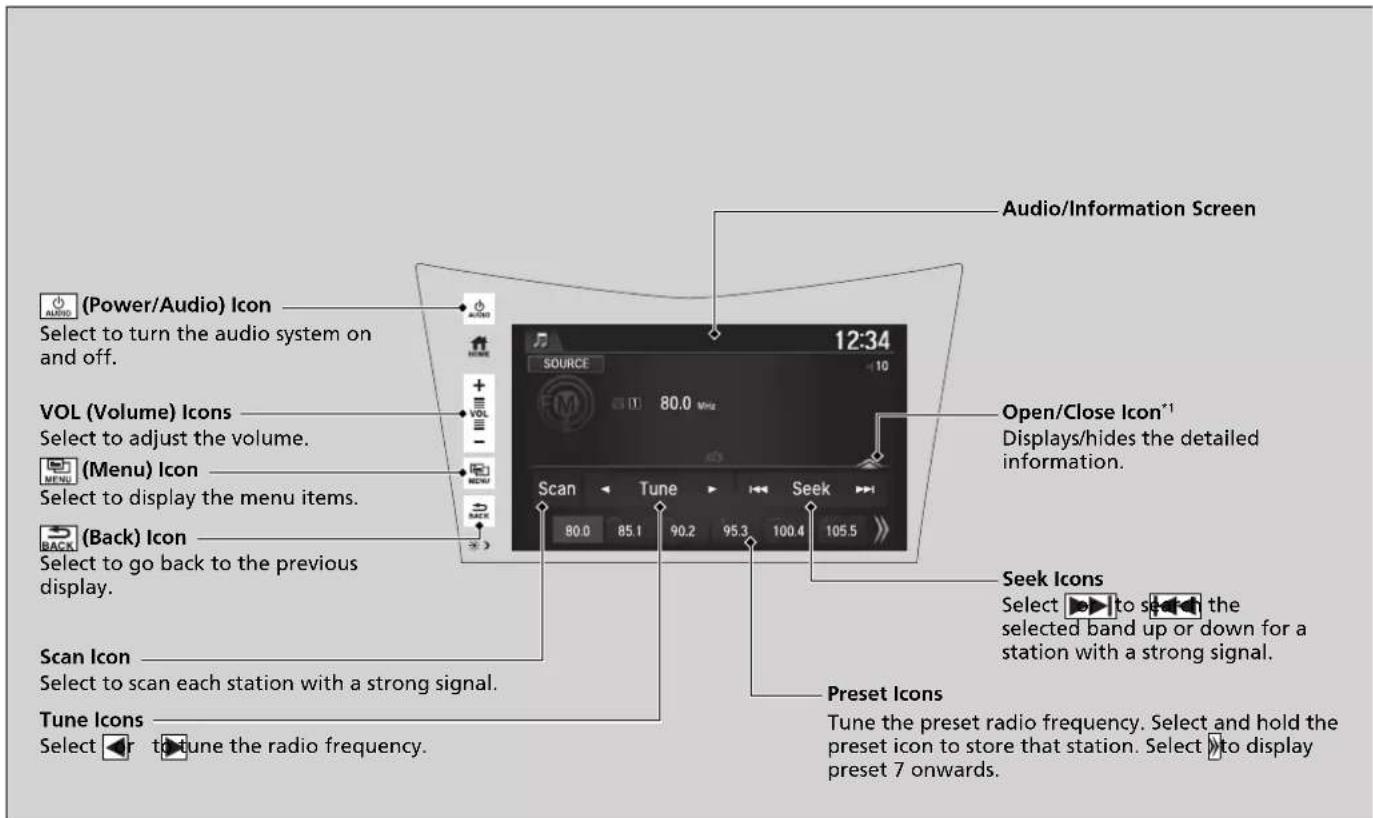
text_image
(Power/Audio) Icon Select to turn the audio system on and off. VOL (Volume) Icons Select to adjust the volume. excess (Menu) Icon Select to display the menu items. excess (Back) Icon Select to go back to the previous display. Scan Icon Select to scan each station with a strong signal. Tune Icons Select to tune the radio frequency. Audio/Information Screen 12:34 SOURCE 80.0 MHz Scan Tune Seek 80.0 85.1 90.2 95.3 100.4 105.5 Open/Close Icon*1 Displays/hides the detailed information. Seek Icons Select to select the selected band up or down for a station with a strong signal. Preset Icons Tune the preset radio frequency. Select and hold the preset icon to store that station. Select to display preset 7 onwards.*1: Some or all of the lists may not be displayed.
Preset Memory
To store a station:
-
Tune to the selected station.
-
Select and hold the preset number for the station you want to store.
You can also store a preset station by the following procedure.
-
Tune to the selected station.
-
Select the open/close icon to display a list.
-
Select the Preset tab.
-
Select and hold the preset number for the station you want to store.
Station List
Lists the strongest stations on the selected band.
-
Select the open/close icon to display a list.
-
Select the Station List tab.
-
Select the station.
■ Manual update
Updates your available station list at any time.
-
Select the open/close icon to display a list.
-
Select the Station List tab.
-
Select Refresh.
Preset Memory
The ST indicator appears on the display indicating stereo FM broadcasts.
Switching the Audio Mode
Press the SOURCE button on the steering wheel or select SOURCE on the screen.
Audio Remote Controls P. 165
You can store 12 FM stations into preset memory.
HD Radio Technology manufactured under license from iBiquity Digital Corporation. U.S. and Foreign Patents. HD Radio™ and the HD, HD Radio, and "Arc" logos are proprietary trademarks of iBiquity Digital Corp.

Scan
Samples each of the strongest stations on the selected band for 10 seconds. To turn off scan, select Cancel or BACK
HD Subchannel
Displays the subchannel list when an HD Radio ^TM station is selected while listening to an FM station.
- Select MENU.
- Select HD Radio Subchannel.
- Select the channel number.
Radio Data System (RDS)
Provides text data information related to your selected RDS-capable FM station.
■ To find an RDS station from Station List
- Select the open/close icon to display a list while listening to an FM station.
- Select the Station List tab.
- Select the station.
■ Manual update
Updates your available station list at any time.
1. Select the open/close icon to display a list while listening to an FM station.
2. Select the Station List tab.
3. Select Refresh.
■ Radio text
Displays the radio text information of the selected RDS station.
-
Select MENU.
-
Select View Radio Text.
Scan
Samples each of the strongest stations on the selected band for 10 seconds.
To turn off scan, select Cancel or BACK
>>Radio Data System (RDS)
When you select an RDS-capable FM station, the RDS automatically turns on, and the frequency display changes to the station name. However, when the signals of that station become weak, the display changes from the station name to the frequency.
Playing SiriusXM® Radio\*
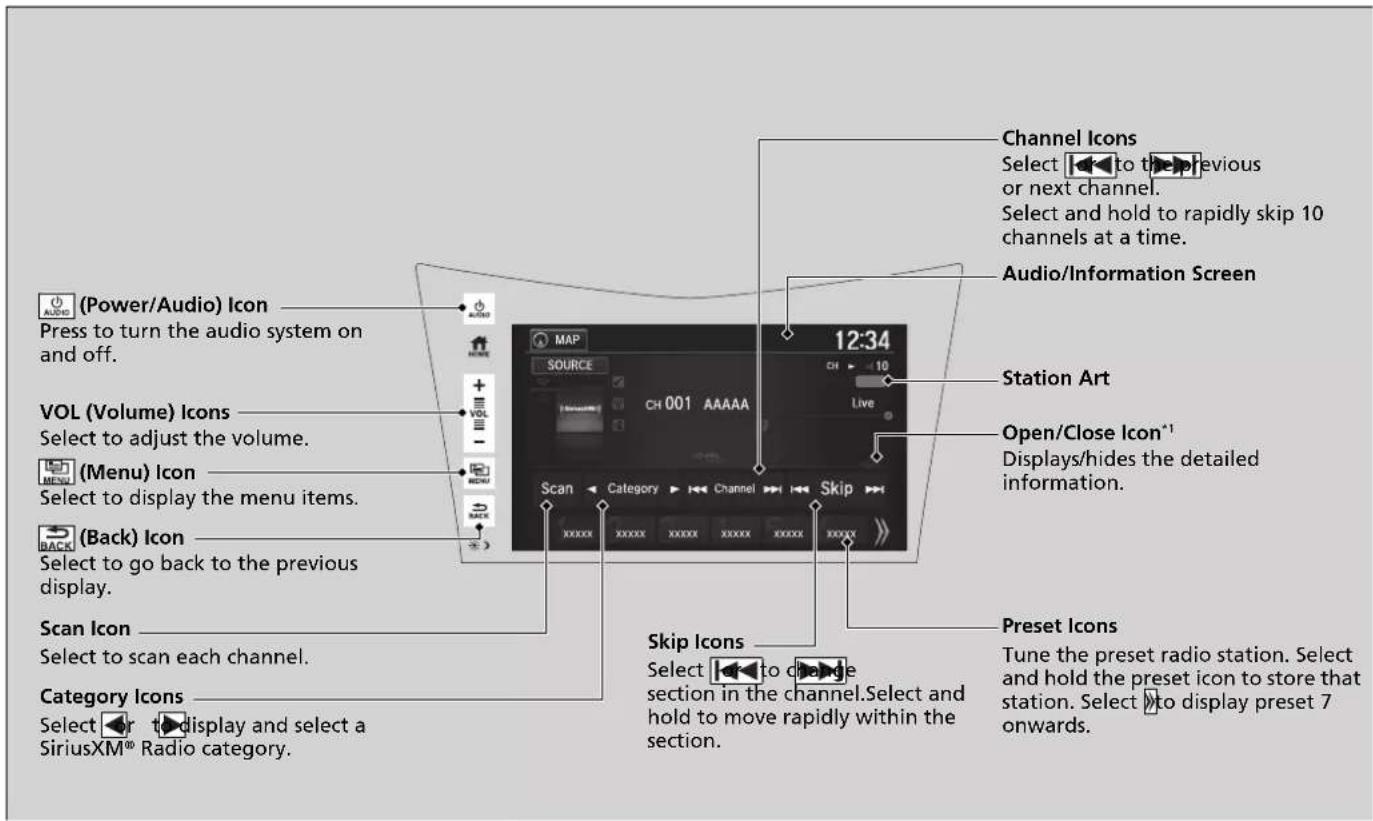
text_image
Channel Icons Select to the previous or next channel. Select and hold to rapidly skip 10 channels at a time. Audio/Information Screen Station Art Open/Close Icon*1 Displays/hides the detailed information. Scan Icon Select to scan each channel. Category Icons Select to display and select a SiriusXM® Radio category. Skip Icons Select to change section in the channel.Select and hold to move rapidly within the section. Preset Icons Tune the preset radio station. Select and hold the preset icon to store that station. Select to display preset 7 onwards.*1: Some or all of the lists may not be displayed.
* Not available on all models
■ To Change the Tune Mode
- Select MENU.
- Select Tune Mode.
- Select Channel Mode or Category Mode.
Playing SiriusXM® Radio *
In the channel mode, all available channels are selectable. In the category mode, you can select a channel within a category (Jazz, Rock, Classical, etc.).
There may be instances when SiriusXM® Radio does not broadcast all the data fields (artist name, title). This does not indicate a problem with your audio system.
SiriusXM® Radio stations load in ascending order, which can take about a minute. Once they have loaded you will be able to scroll up or down to make your selections.
Switching the Audio Mode
Press the SOURCE button on the steering wheel or select SOURCE on the screen.
Audio Remote Controls P. 165
Tune Start:
When you change to a preset channel, a song being played on that channel restarts from the beginning with this function. This can be turned on or off from the Audio settings screen.
Customized Features P. 244
* Not available on all models
Continued
▶▶ Audio System Basic Operation ▶ Playing SiriusXM® Radio*
Preset Memory
To store a channel:
- Tune to the selected channel.
- Press and hold the preset number for the station you want to store.
- Select Replace.
You can also store a channel by the following procedure.
- Tune to the selected channel.
- Select the open/close icon to display a list.
- Select the Preset tab.
- Select and hold the preset number for the station you want to store.
■ Multi-channel preset (for music channels only)
You can store up to five of your preferred music channels per preset.
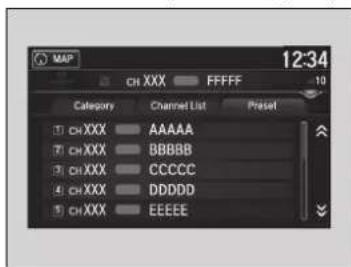
- Tune a station.
- Select the open/close icon to display a list.
- Select the Preset tab.
- Select and hold the preset number you want to add a music channel.
▶ A message appears if there are no available presets.
- Select Combine.
Playing SiriusXM® Radio \*
You can store 12 SiriusXM® channels into the preset memory.
■ Listening to Featured Channels
Suggested channel listing received from SiriusXM® can be displayed and selected.
- Select the open/close icon to display a channel list.
- Select the Channel List tab.
- Select the featured channel list title you want to listen to.
The selected channel list of the title is displayed. - Select the channel.
>>Listening to Featured Channels
Up to three featured channels by SiriusXM® can be displayed.
Featured channel lists are at the top of the channel list.
Continued
Replay Function
The system can record up to the last 60 minutes of your currently tuned channel's broadcast, as well as the last 30 minutes of your preset channel's broadcast, starting from the moment you turn the vehicle on. If you tuned to a preset channel, the system records up to 60 minutes of a broadcast instead of up to 30 minutes. You can rewind and replay the last 30 or 60 minutes of a broadcast.
- Select MENU.
- Select Playback Position.
- Move the time marker to the position you want to replay.
To play or pause on playback mode:
- Select MENU
- Select Play/Pause.
■ Returning to real-time broadcast
- Select MENU
- Select Play Live Broadcast.
>>Replay Function
The system starts storing broadcast in memory when the power mode is turned ON. You can go back to the program from that point.
You can no longer replay any program once the power mode is turned off as it erases memory. You can check how long the program has been stored in memory from the audio/information screen.
After 30 or 60 minutes of recording the system will automatically start deleting the oldest data.
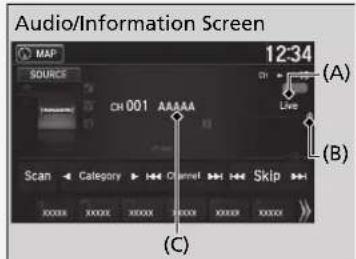
text_image
Audio/Information Screen MAP 12:34 SOURCE CH 001 AAAAA Live Scan Category Channel Skip XXXX XXXXX XXXXX XXXXX XXXX (A) (B) (C)(A): Shows how much time the replayed segment is behind the real-time broadcast
(B): Replayed segment
(C): Length stored in memory
Live Sports Alert
While listening to other channels, you can receive sports alerts such as scores from the games of your favorite teams.
■ To set up a favorite team
text_image
Favorite Team 01 AAAAA 02 BBBBB 03 CCCCC 04 New Entry 05 New Entry 12:34- Select
- Select Settings.
- Select Audio.
- Select the SXM tab.
- Select SportsFlash Setup(Favorite Team).
- Select a team.
■ To set up an alert message
- Select HOME.
- Select Settings.
- Select Audio.
- Select the SXM tab.
- Select SportsFlash Setup(Interrupt).
- Select On(one time) or On(continue)
Live Sports Alert
The sports alert function is available in SiriusXM® mode only.
To set up a favorite team
Sports alerts cut in only when SiriusXM® mode is on. Selecting On(one time) from the customized
settings disables the alert feature next time you turn the power mode to ON.
Customized Features P. 244
You can also set up a favorite team by the following procedure.
- Select Audio.
- Select MENU
- Select Setting.
- Select SportsFlash Setup(Favorite Team)
■ To set up an alert beep
- Select HOME.
- Select Settings.
- Select Audio.
- Select the SXM tab.
- Select SportsFlash Setup(Interrupt Beep).
- Select On.
■ Traffic and Weather Information
You can receive traffic and weather information.
- Select HOME.
- Select Settings.
- Select Audio.
- Select the SXM tab.
- Select Traffic & Weather Setup.
- Select the region.
When you do not want to receive the information, select Unset.
Scan
Sample each channel on the selected mode for 10 seconds.
- Select Scan.
- Select Scan Channels
▶ You can select the desired channel by songs using Scan Songs in Presets.
To turn off scan, select Cancel.
To set up an alert beep
You can also set up a alert beep by the following procedure.
- Select Audio.
- Select
- Select Setting.
- Select SportsFlash Setup(Interrupt Beep).
Traffic and Weather Information
The traffic and weather information function in SiriusXM® mode only.
You can also set up the traffic and weather information by the following procedure.
- Select Audio.
- Select
- Select Setting
- Select Traffic & Weather Setup.
Scan
The "Scan Songs in Preset" function is based on TuneScan™ technology of SiriusXM®.
The "Featured Channels" function is based on Featured Favorites™ technology of SiriusXM®.
TuneScan™ and Featured Favorites™ are registered trademarks of SiriusXM® Radio, Inc.
Playing an iPod
Connect the iPod using your dock connector to the USB port, then select the iPod mode.
USB Ports P. 163
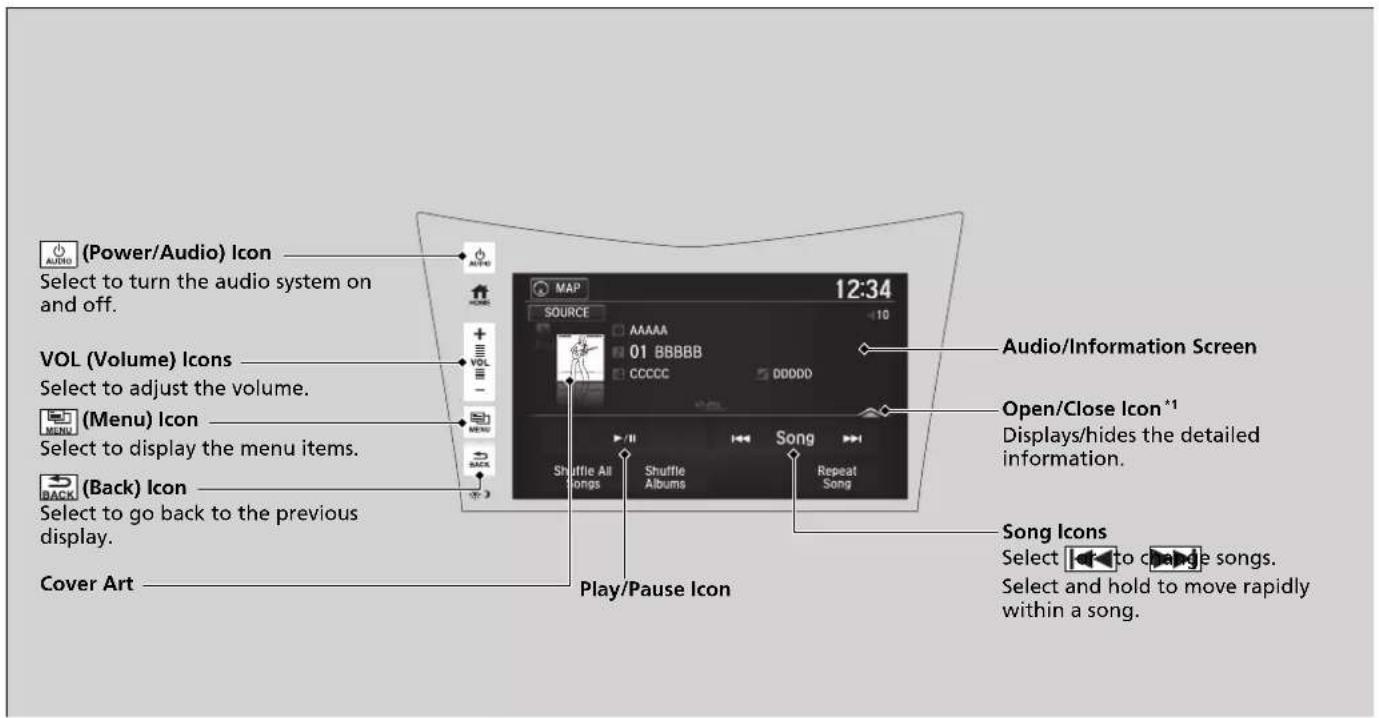
text_image
(Power/Audio) Icon Select to turn the audio system on and off. VOL (Volume) Icons Select to adjust the volume. excess (Menu) Icon Select to display the menu items. (Back) Icon Select to go back to the previous display. Cover Art 12:34 Audio/Information Screen Open/Close Icon *1 Displays/hides the detailed information. Play/Pause Icon Song Icons Select to change songs. Select and hold to move rapidly within a song.*1: Some or all of the lists may not be displayed.
How to Select a Song from the Music Search List
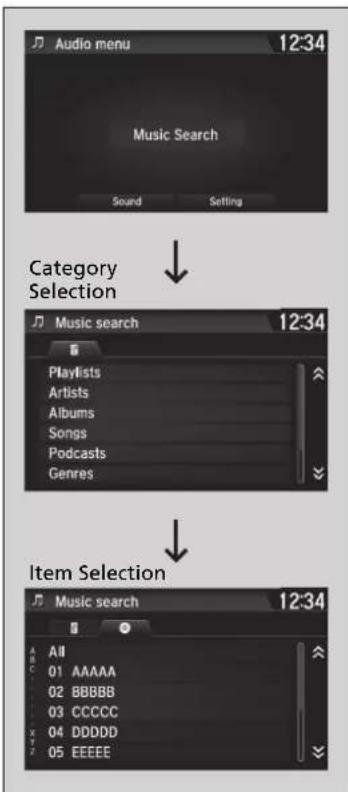
flowchart
graph TD
    A["Audio menu 12:34"] --> B["Music Search"]
    B --> C["Category Selection"]
    C --> D["Music search 12:34"]
    D --> E["Playlists"]
    D --> F["Artists"]
    D --> G["Albums"]
    D --> H["Songs"]
    D --> I["Podcasts"]
    D --> J["Genres"]
    K["Item Selection"] --> L["Music search 12:34"]
    L --> M["All"]
    L --> N["01 AAAAA"]
    L --> O["02 BBBBB"]
    L --> P["03 CCCCC"]
    L --> Q["04 DDDDD"]
    L --> R["05 EEEEE"]
-
Select 📄 and select Music Search.
-
Select the items on that menu.
Playing an iPod
Available operating functions vary on models or versions. Some functions may not be available on the vehicle's audio system.
If there is a problem, you may see an error message on the audio/information screen.
iPod/USB Flash Drive P. 223
If you operate any music app on your iPhone/iPod while the phone is connected to the audio system, you may no longer be able to operate the same app on the audio/information screen. Reconnect the device if necessary.
If an iPhone is connected via Apple CarPlay, the iPod/USB source is unavailable and audio files on the phone can only be played within Apple CarPlay.
How to Select a Play Mode
You can select shuffle and repeat modes when playing a file.
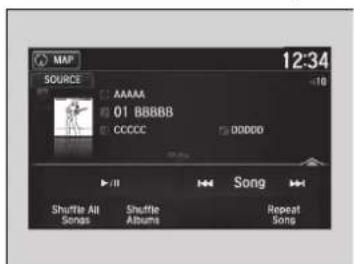
text_image
MAP 12:34 SOURCE AAAAA 01 BBBBB CCCCC D0000 ▶/II Song Shuffle All Songs Shuffle Albums Repeat SongsSelect a play mode.
■ To turn off a play mode
Select the mode you want to turn off.
>>How to Select a Play Mode
Play Mode Menu Items:
Shuffle All Songs: Plays all available files in a selected list (playlists, artists, albums, songs, podcasts, genres, composers, or audiobooks) in random order.
Shuffle Albums: Plays all available albums in a selected list (playlists, artists, albums, songs, podcasts, genres, composers, or audiobooks) in random order.
Repeat Song: Repeats the current track.
Models with navigation system
Song By Voice™ (SBV)
Use SBV to search for and play music from your USB flash drive or iPod using voice commands.
■ To enable SBV
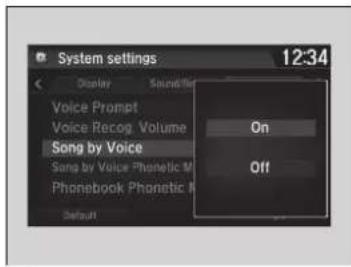
text_image
System settings 12:34 Display Sound/ Voice Prompt Voice Recogn. Volume Song by Voice Song by Voice Phonetic M Phonebook Phonetic M Default On Off- Select HOME.
- Select Settings.
- Select System.
- Select the Voice Recog tab.
- Select Song by Voice.
- Select On or Off.
>>Song By Voice™ (SBV)
Setting options:
- On (factory default): Song By Voice™ commands are available.
- Off: Disable the feature.
■ Searching for music using SBV
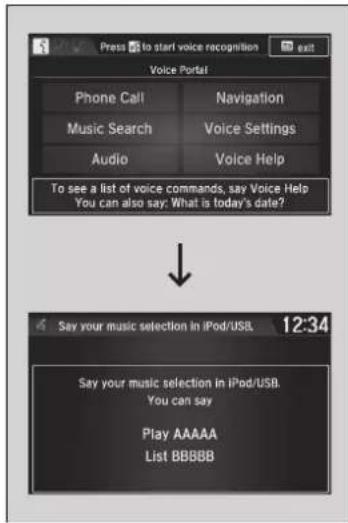
text_image
Press to start voice recognition exit Voice Portal Phone Call Navigation Music Search Voice Settings Audio Voice Help To see a list of voice commands, say Voice Help You can also say: What is today's date? Say your music selection in iPod/USB. 12:34 Say your music selection in iPod/USB. You can say Play AAAAA List BBBBB- Set the Song by Voice setting to On.
- Press the 📋 (Talk) button and say "Music Search" to activate the SBV feature for the USB flash drive and iPod.
- Then, say the next command.
Example 1: Say "(List) 'Artist A'" to view a list of songs by that artist. Select the desired song to start playing.
Example 2: Say "Play 'Artist A'" to start playing songs by that artist.
- To cancel SBV, press the up/back) button on the steering wheel. The selected song continues playing.
Once you have canceled this mode, you need to press the button and say "Music Search" again to re-activate this mode.
Searching for music using SBV
Song By Voice™ Commands List
→ Song By Voice Commands P. 187
NOTE:
Song By Voice™ commands are available for tracks stored on the USB flash drive or iPod.
You can add phonetic modifications of difficult words so that it is easier for SBV to recognize artists, songs, albums, and composers in voice commands.
Phonetic Modification P. 204
SBV is not available when using Apple CarPlay. Use Siri Eyes Free instead.
Phonetic Modification
Add phonetic modifications of difficult or foreign words so that it is easier for SBV to recognize artists, songs, albums, and composers in voice commands when searching for music on the USB flash drive or iPod.
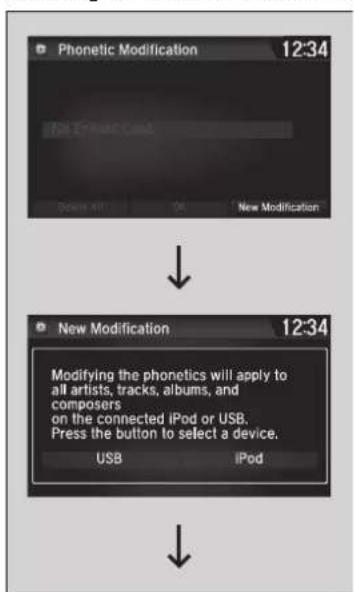
text_image
Phonetic Modification 12:34 iPod EnthusiCold Delete All OK New Modification New Modification 12:34 Modifying the phonetics will apply to all artists, tracks, albums, and composers on the connected iPod or USB. Press the button to select a device. USB iPod- Select HOME
- Select Settings.
- Select System.
- Select the Voice Recog tab.
- Select Song by Voice Phonetic Modification.
- Select New Modification.
- Select USB or iPod.
Phonetic Modification
Song by Voice Phonetic Modification is grayed out when Song by Voice is set to Off.
You can store up to 2,000 phonetic modification items.
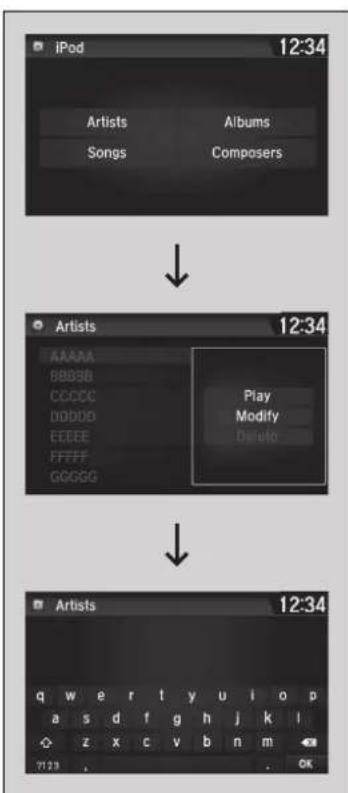
flowchart
graph TD
    A["iPod 12:34"] --> B["Artists"]
    B --> C["Songs"]
    B --> D["Albums"]
    B --> E["Composers"]
    F["Artists 12:34"] --> G["Play"]
    G --> H["Modify"]
    G --> I["Delete"]
    J["Artists 12:34"] --> K["q w e r t y u i o p"]
    K --> L["a s d f g h j k l"]
    K --> M["z x c v b n m"]
    K --> N["7:23 . OK"]
- Select the item to modify (e.g., Artists).
The list of the selected item appears on the screen.
- Select an entry to modify.
The pop-up menu appears on the screen.
▶ To listen to the current phonetic modification, select Play.
▶ To delete the current phonetic modification, select Delete.
-
Select Modify.
-
Select the phonetic spelling you want to use (e.g., "Artist A") when prompted.
-
Select OK.
The artist "No Name" is phonetically modified to "Artist A." When in the SBV mode, you can press the [walk] button and use the voice command "Play 'Artist A'" to play songs by the artist "No Name."
Playing Pandora®\*1
Your audio system allows you to listen to music from the Pandora® app on a compatible smartphone.
This function is available when the phone is paired and connected to the vehicle's Bluetooth® HandsFreeLink® (HFL) system, or with an iPhone, you can connect using your USB cable to the USB port.
Phone Setup P. 278
USB Ports P. 163

text_image
(Power/Audio) Icon Select to turn the audio system on and off. VOL (Volume) Icons Select to adjust the volume. (Menu) Icon Select to display the menu items. (Back) Icon Select to go back to the previous display. Station Up/Down Icons Select to change a station. Cover Art Audio/Information Screen 12:34 Station Like/Dislike Icons Select to evaluate a song. Play/Pause Icon Select to resume or play a song. Skip Icon Select to skip a song.*1: Available only on U.S. models.
Playing Pandora®\*1
Pandora®, the Pandora logo, and the Pandora trade dress are trademarks or registered trademarks of Pandora Media, Inc., used with permission. Pandora is only available in certain countries. Visit the Pandora website for more information.
To find out if your phone is compatible with this feature, visit www.acura.com/handsfreelink, or call 1-888-528-7876.
To use this service in your vehicle, the Pandora® app must first be installed on your phone. Visit www.pandora.com for more information.
Pandora® is free, personalized radio that plays music and comedy you'll love. Just start with the name of one of your favorite artists, songs, comedians or composers and Pandora® will create a custom station that plays similar tracks. Pandora® also features hundreds of genre stations ranging from Dubstep to Smooth Jazz to Power Workout.
If you cannot operate Pandora® through the audio system, it may be streaming through Bluetooth® Audio. Make sure Pandora® mode on your audio system is selected.
If your phone is connected to Android Auto, Pandora is only available through the Android Auto interface. Visit the Android Auto website to check compatibility.
Pandora® Menu
You can operate some of the Pandora® menu items from your vehicle's audio system. The available items are:
- Bookmark
- Station List
- New Station
- Sound
- Setting
■ Operating a menu item
text_image
Audio menu 12:34 Bookmark Station List New Station Sound Setting- Select MENU
- Select an item.
>>Pandora® Menu
Available operating functions vary on software versions. Some functions may not be available on the vehicle's audio system.
If there is a problem, you may see an error message on the audio/information screen.
Pandora®1 P. 224
Pandora® may limit the total number of skips allowed on the service. If you dislike a track after the skip limit has been reached, your feedback will be saved but the current track will continue to play.
To change stations, activate the Pandora® menu, select Station List, and then select a new station. It also changes stations on the main Pandora® screen.
Playing a USB Flash Drive
Your audio system reads and plays sound files on a USB flash drive in either MP3,
WMA, or AAC ^*1 format.
Connect your USB flash drive to the USB port, then select the USB mode.
USB Ports P. 163
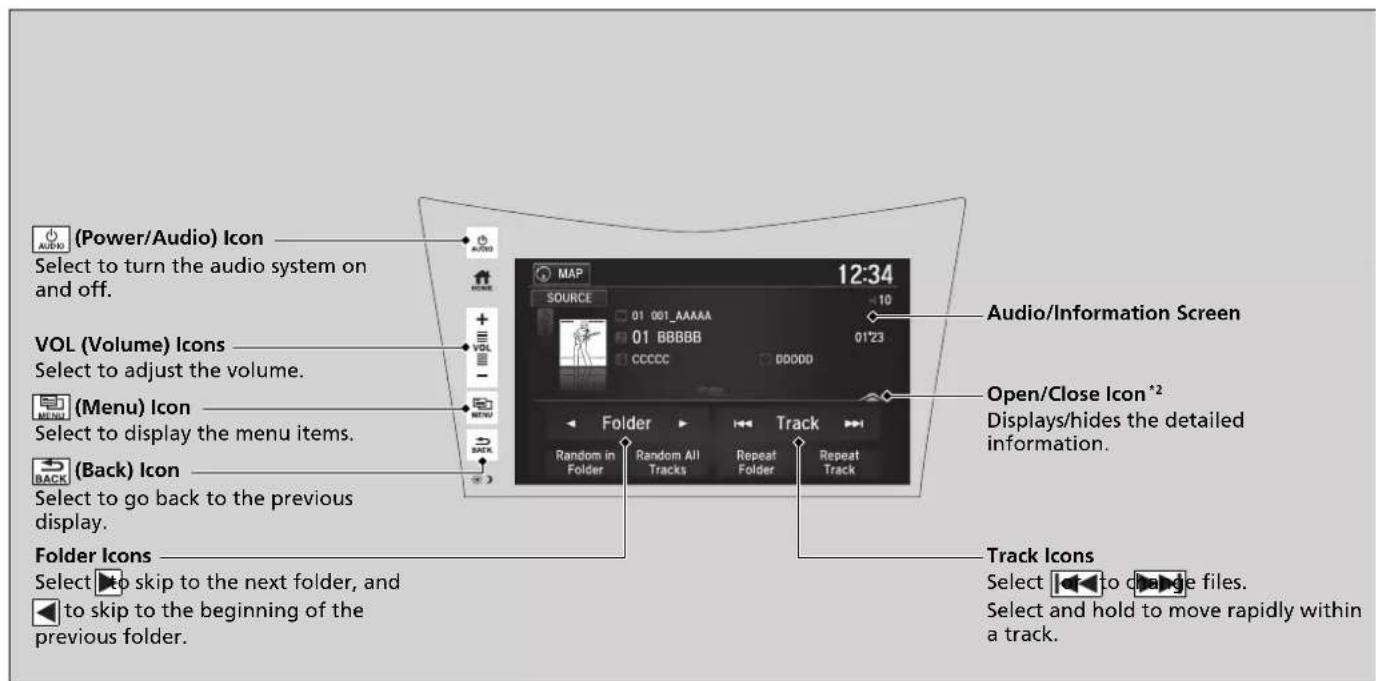
text_image
(Power/Audio) Icon Select to turn the audio system on and off. VOL (Volume) Icons Select to adjust the volume. (Menu) Icon Select to display the menu items. (Back) Icon Select to go back to the previous display. Folder Icons Select ▶to skip to the next folder, and ◀to skip to the beginning of the previous folder. MAP 12:34 SOURCE 01 001_AAAAA 01 BBBBB CCCCC DDDDD Folder Random in Folder Random All Tracks Repeat Folder Repeat Track Audio/Information Screen Open/Close Icon *2 Displays/hides the detailed information. Track Icons Select ◀to change files. Select and hold to move rapidly within a track.*1: Only AAC format files recorded with iTunes are playable on this unit.
*2: Some or all of the lists may not be displayed.
How to Select a File from the Music Search List
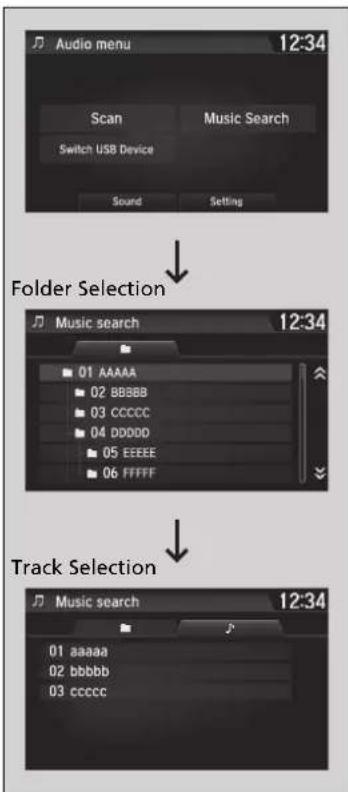
flowchart
graph TD
    A["Audio menu 12:34"] --> B["Scan"]
    B --> C["Music Search"]
    C --> D["Switch USB Device"]
    D --> E["Sound"]
    D --> F["Setting"]
    G["Folder Selection"] --> H["01 AAAAA"]
    H --> I["02 BBBBB"]
    I --> J["03 CCCCC"]
    J --> K["04 DDDDD"]
    K --> L["05 EEEEE"]
    L --> M["06 FFFFF"]
    N["Track Selection"] --> O["01 aaaaaa"]
    O --> P["02 bbbbb"]
    P --> Q["03 ccccc"]
- Select 📄 and select Music Search.
- Select a folder.
- Select a track.
Playing a USB Flash Drive
Use the recommended USB flash drives.
General Information on the Audio System P. 226
WMA files protected by digital rights management (DRM) cannot be played.
The audio system displays Unplayable File, then skips to the next file.
If there is a problem, you may see an error message on the audio/information screen.
→ iPod/USB Flash Drive P. 223
Select Switch USB Device in the Audio menu to switch another USB device.
Continued
How to Select a Play Mode
You can select scan, repeat, and random modes when playing a file.
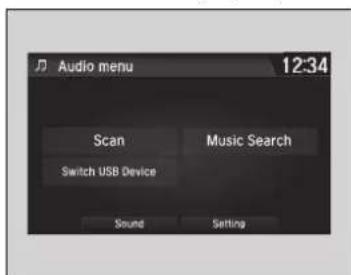
text_image
Audio menu 12:34 Scan Music Search Switch USB Device Sound SettingScan
- Select MENU.
- Select Scan
- Select a play mode.
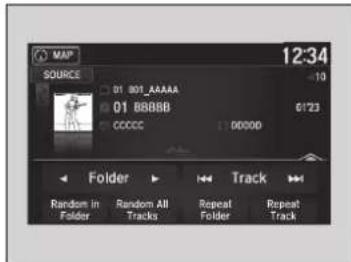
text_image
MAP SOURCE 01 801_AAAAA 01 8BBBB CCCCC 100000 12:34 -10 01'23 Folder Track Random in Folder Random All Tracks Repeat Folder Repeat Track■ Random/Repeat
Select a play mode.
■ To turn off a play mode
To turn off Scan, select BACK or Cancel.
To turn off Random/Repeat, select the mode again.
>>How to Select a Play Mode
Play Mode Menu Items:
Scan
Scan Folders: Provides 10-second sampling of the first file in each of the main folders.
Scan Tracks: Provides 10-second sampling of all files in the current folder.
Random/Repeat
Random in Folder: Plays all files in the current folder in random order.
Random All Tracks: Plays all files in random order.
Repeat Folder: Repeats all files in the current folder.
Repeat Track: Repeats the current file.
Playing Bluetooth® Audio
Your audio system allows you to listen to music from your Bluetooth-compatible phone.
This function is available when the phone is paired and connected to the vehicle's Bluetooth® HandsFreeLink® (HFL) system.
Phone Setup P. 278
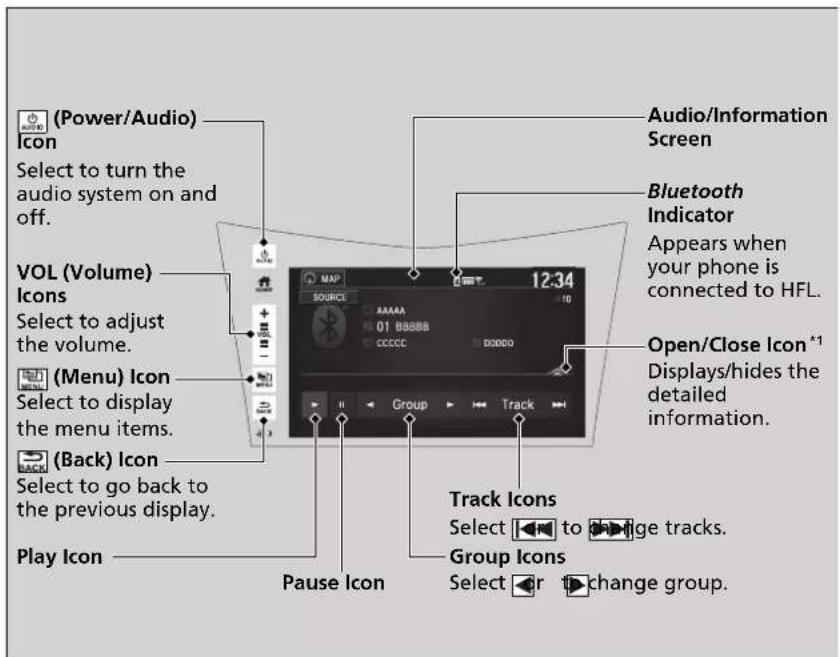
text_image
(Power/Audio) Icon Select to turn the audio system on and off. VOL (Volume) Icons Select to adjust the volume. (Menu) Icon Select to display the menu items. (Back) Icon Select to go back to the previous display. Play Icon Audio/Information Screen Bluetooth Indicator Appears when your phone is connected to HFL. Open/Close Icon *1 Displays/hides the detailed information. Track Icons Select to change tracks. Group Icons Select or change group. Pause Icon*1: Depending on the Bluetooth® device you connect, some or all of the lists may not be displayed.
Continued
Playing Bluetooth® Audio
Not all Bluetooth-enabled phones with streaming audio capabilities are compatible with the system. For a list of compatible phones:
• U.S.: Visit www.acura.com/handsfreelink, or call 1-888-528-7876.
- Canada: For more information on smartphone compatibility, call 1-888-528-7876.
It may be illegal to perform some data device functions while driving.
Only one phone can be used with HFL at a time. When there are more than two paired phones in the vehicle, the first paired phone the system finds is automatically connected.
The connected phone for Bluetooth® Audio can be different.
If more than one phone is paired to the HFL system, there may be a delay before the system begins to play.
In some cases, the name of the artist, album, or track may not appear correctly.
Some functions may not be available on some devices.
If a phone is currently connected via Apple CarPlay or Android Auto, Bluetooth® Audio from that phone is unavailable. However, a second previously paired phone can stream Bluetooth® Audio by selecting
Connect 📌 from the Bluetooth Device List. Phone Setup P. 278
To Play Bluetooth® Audio Files
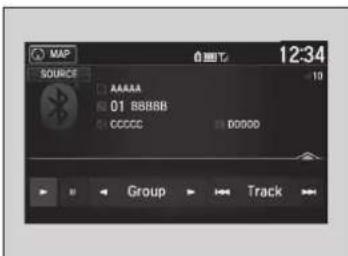
text_image
MAP SOURCE AAAAA 01 B88BB CCCC D0000 Group Track 12:34■ To pause or resume a file Select the play icon or pause icon.
Searching for Music

text_image
Audio menu 12:34 Music Search Sound Setting- Make sure that your phone is paired and connected to the system.
Phone Setup P. 278
- Select the Bluetooth® Audio mode.
If the phone is not recognized, another HFL-compatible phone, which is not compatible for Bluetooth® Audio, may already be connected.
-
Select MENU
-
Select Music Search
-
Select a search category (e.g., Albums).
-
Select an item.
The selection begins playing.
To Play Bluetooth® Audio Files
To play the audio files, you may need to operate your phone. If so, follow the phone maker's operating instructions.
Switching to another mode pauses the music playing from your phone.
You can change the connected phone in the Bluetooth® settings on the Audio menu screen by the following procedure.
-
Select
-
Select Setting.
Searching for Music
Depending on the Bluetooth ^® device you connect, some or all of the lists may not be displayed.
Wi-Fi Connection
You can connect the audio system to the Internet using Wi-Fi and browse websites or use online services on the audio/information screen. If your phone has wireless hotspot capabilities, the system can be tethered to the phone. Use the following steps to setup.
■ Wi-Fi mode (setting for the first time)
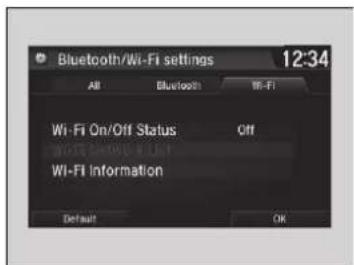
text_image
Bluetooth/Wi-Fi settings 12:34 AB Bluetooth Wi-Fi Wi-Fi On/Off Status Off Wi-Fi Information Default OK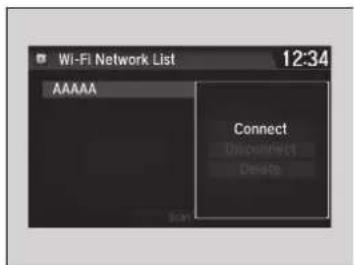
text_image
Wi-Fi Network List 12:34 AAAAA Connect Unconnect Delete- Select
- Select Settings.
- Select Bluetooth/Wi-Fi.
- Select the Wi-Fi tab.
-
Select Wi-Fi On/Off Status, then On.
-
Select Wi-Fi Network List.
Make sure your phone's Wi-Fi setting is in access point (tethering) mode.
▶ Select the phone you want to connect to the system.
▶ If you do not find the phone you want to connect in the list, select Scan.
- Select Connect.
▶ If needed, enter a password for your phone and select OK.
When the connection is successful, the icon is displayed on the top of the screen.
- Select 📁 go back to the home screen.
Wi-Fi mode (setting for the first time)
You cannot go through the setting procedure while a vehicle is moving. Park in a safe place to setup the Wi-Fi connection.
Some cell phone carriers charge for tethering and smartphone data use. Check your phone's data subscription package.
Check your phone manual to find out if the phone has Wi-Fi connectivity.
You can confirm whether Wi-Fi connection is on or off with the icon on Wi-Fi Network List. Network speed will not be displayed on this screen.
Wi-Fi mode (after the initial setting has been made)
Make sure your phone's Wi-Fi setting is in access point (tethering) mode.
Wi-Fi mode (after the initial setting has been made)
iPhone users
You may need to go through an initial setup for Wi-Fi connection again after you boot your phone.
Siri® Eyes Free
You can talk to Siri using the 📂talk) button on the steering wheel when your iPhone is paired to the Bluetooth® HandsFreeLink® (HFL) system.
Phone Setup P. 278
Using Siri Eyes Free
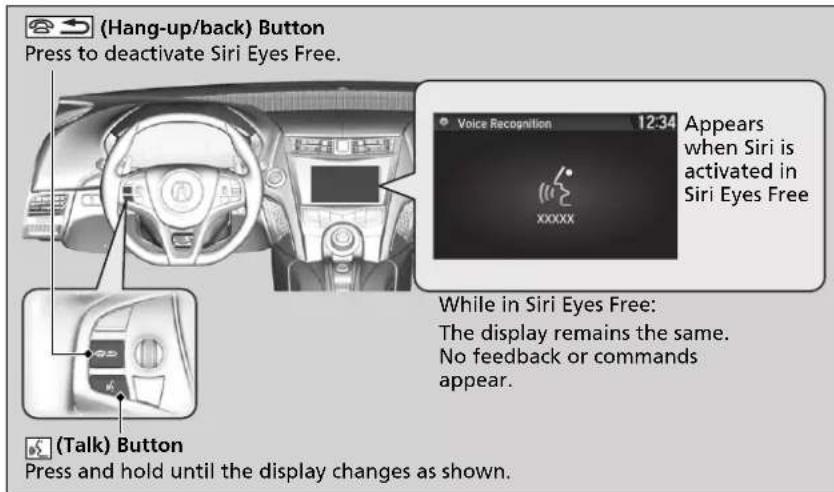
Siri® Eyes Free
Siri is a trademark of Apple Inc.
Check Apple Inc. website for features available for Siri.
We recommend against using Siri other than in Siri Eyes Free mode while operating a vehicle.
Using Siri Eyes Free
Some commands work only on specific phone features or apps.
Apple CarPlay™
If you connect an Apple CarPlay-compatible iPhone to the system via USB, you can use the audio/information screen, instead of the iPhone display, to make a phone call, listen to music, view maps (navigation), and access messages.
USB Ports P. 163
Apple CarPlay Menu
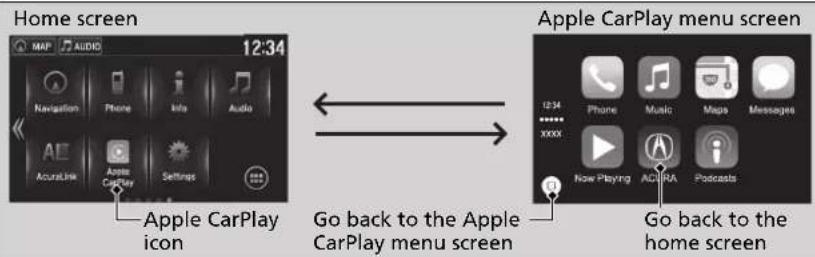
text_image
Home screen 12:34 Apple CarPlay icon Go back to the Apple CarPlay menu screen Apple CarPlay menu screen 12:34 Phone Music Maps Messages XXXXX Now Playing ACURA Podcasts Go back to the home screenPhone
Access the contact list, make phone calls, or listen to voice mail.
Messages
Check and reply to text messages, or have messages read to you.
Music
Play music stored on your iPhone.
Apple CarPlay™
Only iPhone 5 or newer versions with iOS 8.4 or later are compatible with Apple CarPlay.
Park in a safe place before connecting your iPhone to Apple CarPlay and when launching any compatible apps.
To use Apple CarPlay, connect the USB cable to the USB port located in the console compartment. The USB port located in the glove box will not enable Apple CarPlay operation.
USB Ports P. 163
To directly access the Apple CarPlay phone function, select Phone on the home screen. While connected to Apple CarPlay, calls are only made through Apple CarPlay. If you want to make a call with HandsFreeLink, turn Apple CarPlay OFF or detach the USB cable from your iPhone.
Setting Up Apple CarPlay P. 217
When your iPhone is connected to Apple CarPlay, it is not possible to use the Bluetooth® Audio or Bluetooth® HandsFreeLink®. However, other previously paired phones can stream audio via Bluetooth® while Apple CarPlay is connected.
Phone Setup P. 278
For details on countries and regions where Apple CarPlay is available, as well as information pertaining to function, refer to the Apple homepage.
Maps
Display Apple CarPlay map and use the navigation function just as you would on your iPhone.
Models with navigation system
Only one navigation system (pre-installed navigation or Apple CarPlay) can give directions at a time. When you are using one system, directions to any prior destination set on the other system will be canceled, and the system you are currently using will direct you to your destination.
Setting Up Apple CarPlay
After you have connected your iPhone to the system via USB, use the following procedure to set up Apple CarPlay. Use of Apple CarPlay will result in the transmission of certain user and vehicle information (such as vehicle location, speed, and status) to your iPhone to enhance the Apple CarPlay experience. You will need to consent to the sharing of this information on the audio/information screen.
■ Enabling Apple CarPlay
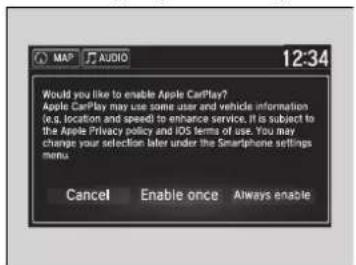
text_image
Would you like to enable Apple CanPlay? Apple CanPlay may use some user and vehicle information it is a location and speed to enhance service. It is subject to the Apple Privacy policy and iOS terms of use. You may change your selection later under the Smartphone settings menu. Cancel Enable once Always enableEnable once: Allows only once. (Prompt shows again next time.)
Always enable: Allows anytime. (Prompt does not show again.)
Cancel: Does not allow this consent.
You may change the consent settings under the Smartphone settings menu.
Continued
Apple CarPlay™
Apple CarPlay Operating Requirements & Limitations
Apple CarPlay requires a compatible iPhone with an active cellular connection and data plan. Your carrier's rate plans will apply.
Changes in operating systems, hardware, software, and other technology integral to providing Apple CarPlay functionality, as well as new or revised governmental regulations, may result in a decrease or cessation of Apple CarPlay functionality and services. Acura cannot and does not provide any warranty or guarantee of future Apple CarPlay performance or functionality.
It is possible to use 3rd party apps if they are compatible with Apple CarPlay. Refer to the Apple homepage for information on compatible apps.
Setting Up Apple CarPlay
You can also use the method below to set up Apple CarPlay:
Select → Settings → Smartphone Apple
Use of user and vehicle information
The use and handling of user and vehicle information transmitted to/from your iPhone by Apple CarPlay is governed by the Apple iOS terms and conditions and Apple's Privacy Policy.
Operating Apple CarPlay with Siri Eyes Free
Press and hold the talk button to activate Siri Eyes Free.
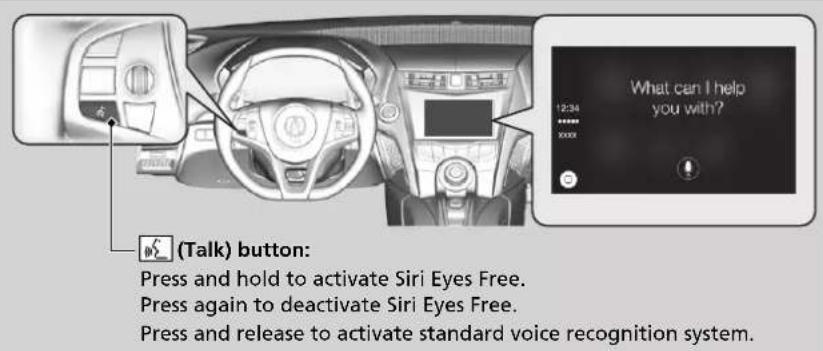
text_image
(Talk) button: Press and hold to activate Siri Eyes Free. Press again to deactivate Siri Eyes Free. Press and release to activate standard voice recognition system.Operating Apple CarPlay with Siri Eyes Free
Below are examples of questions and commands for Siri Eyes Free.
• What movies are playing today?
- Call dad at work.
• What song is this?
• How's the weather tomorrow?
- Read my latest email.
• Find a table for four tonight in Chicago.
For more information, please visit www.apple.com/ios/siri.
Android Auto™
When you connect an Android phone to the audio system via USB, Android Auto is automatically initiated. When connected via Android Auto, you can use the audio/information screen to access the Phone, Google Maps (Navigation), Google Play Music, and Google Now functions. When you first use Android Auto, a tutorial will appear on the screen.
We recommend that you complete this tutorial while safely parked before using Android Auto.
USB Ports P. 163
Auto Pairing Connection P. 221
»Android Auto™
To use Android Auto, you need to download the Android Auto app from Google Play to your smartphone.
Only Android 5.0 (Lollipop) or later versions are compatible with Android Auto. Bluetooth A2DP cannot be used on your phone while connected to Android Auto.
Park in a safe place before connecting your Android phone to Android Auto and when launching any compatible apps.
To use Android Auto, connect the USB cable to the USB port located in the console compartment. The USB port in the glove box will not enable Android Auto operation.
USB Ports P. 163
When your Android phone is connected to Android Auto, it is not possible to use the Bluetooth® Audio. However, other previously paired phones can stream audio via Bluetooth® while Android Auto is connected.
Phone Setup P. 278
Continued
Android Auto Menu
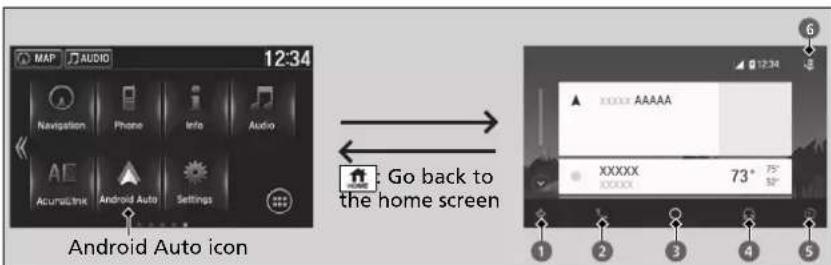
text_image
MAP AUDIO 12:34 Navigation Phone Info Audio Acoustic Android Auto Settings Android Auto icon Go back to the home screen XXXX AAAAA XXXXX 73° 50° 1 2 3 4 51 Maps (Navigation)
Display Google Maps and use the navigation function just as you would with your Android phone. When the vehicle is in motion, it is not possible to make keyboard entries. Stop the vehicle in a safe location to undertake a search or provide other inputs.
Models with navigation system
Only one navigation system (pre-installed navigation or Android Auto) can give directions at a time. When you are using one system, directions to any prior destination set on the other system will be canceled, and the system you are currently using will direct you to your destination.
The audio/information screen shows you turn-by-turn driving directions to your destination.
② Phone (Communication)
Make and receive phone calls as well as listen to voicemail.
3 Google Now (Home screen)
Display useful information organized by Android Auto into simple cards that appear just when they're needed.
Android Auto™
For details on countries and regions where Android Auto is available, as well as information pertaining to function, refer to the Android Auto homepage.
Android Auto Operating Requirements & Limitations
Android Auto requires a compatible Android phone with an active cellular connection and data plan. Your carrier's rate plans will apply.
Changes in operating systems, hardware, software, and other technology integral to providing Android Auto functionality, as well as new or revised governmental regulations, may result in a decrease or cessation of Android Auto functionality and services. Acura cannot and does not provide any warranty or guarantee of future Android Auto performance or functionality.
It is possible to use 3rd party apps if they are compatible with Android Auto. Refer to the Android Auto homepage for information on compatible apps.
4 Music and audio
Play Google Play Music and music apps that are compatible with Android Auto.
To switch between music apps, press this icon.
5 Go back to the Home Screen.
6 Voice
Operate Android Auto with your voice.
■ Auto Pairing Connection
When you connect an Android phone to the unit via USB, Android Auto is automatically initiated.
■ Enabling Android Auto
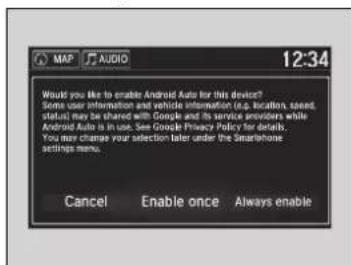
text_image
Would you like to enable Android Auto for this device? Some user information and upside information (e.g. location, speed, status) may be shared with Google and its service providers while Android Auto is in use. See Google Privacy Policy for details. You now charge your selection later under the Smartphone settings menu. Cancel Enable once Always enableEnable once: Allows only once. (Prompt shows again next time.)
Always enable: Allows anytime. (Prompt does not show again.)
Cancel: Does not allow this consent.
You may change the consent settings under the Smartphone settings menu.
Enabling Android Auto
Only initialize Android Auto when you are safely parked. When Android Auto first detects your phone, you will need to set up your phone so that auto pairing is possible. Refer to the instruction manual that came with your phone.
You can use the method below to change Android Auto settings after you have completed the initial setup:
Select →Settings → Smartphone Androi
Use of user and vehicle information
The use and handling of user and vehicle information transmitted to/from your phone by Android Auto is governed by Google's Privacy Policy.
Operating Android Auto with Voice Recognition
Press and hold the talk button to operate Android Auto with your voice.
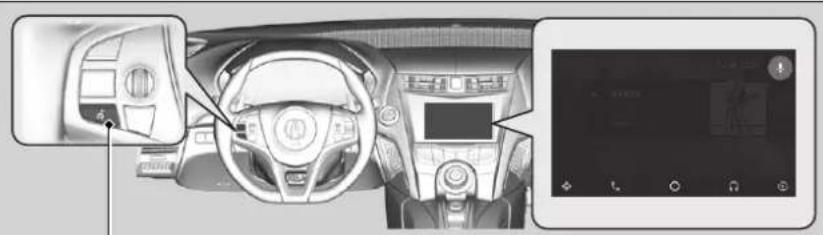
natural_image
Interior view of a car dashboard and tablet dashboard (no visible text or symbols)(Talk) button:
Press and hold to operate Android Auto with your voice.
Press again to deactivate voice recognition.
Press and release to activate standard voice recognition system.
Operating Android Auto with Voice Recognition
Below are examples of commands you can give with voice recognition:
- Reply to text.
- Call my wife.
- Navigate to Acura.
- Play my music.
- Send a text message to my wife.
- Call flower shop.
For more information, please refer to the Android Auto homepage.
You can also activate the voice recognition function by pressing the 📄 on in the upper-right corner of the screen.
Audio Error Messages
iPod/USB Flash Drive
If an error occurs while playing an iPod or USB flash drive, you may see the following error messages. If you cannot clear the error message, contact an authorized Acura NSX dealer.
| Error Message Solution | |
| USB Error | Appears when there is a problem with the audio system. Check if the device is compatible with the audio system. |
| The connected USB device has a problem.See Owner's Manual | Appears when an incompatible device is connected. Disconnect the device. Then turn the audio system off, and turn it on again. Do not reconnect the device that caused the error. |
| Unsupported Version | Appears when an unsupported iPod is connected. If it appears when a supported iPod is connected, update the iPod software to the newer version. |
| Connect Retry | Appears when the system does not acknowledge the iPod. Reconnect the iPod. |
| Unplayable File | Appears when the files in the USB flash drive are copyright protected or an unsupported format. This error message appears for about three seconds, then plays the next song. |
| No Data | iPodAppears when the iPod is empty.USB flash driveAppears when the USB flash drive is empty or there are no MP3, WMA, or AAC files in the USB flash drive.iPod and USB flash driveCheck that compatible files are stored on the device. |
| Unsupported | Appears when an unsupported device is connected. If it appears when a supported device is connected, reconnect the device. |
Pandora®\*1
If an error occurs while playing Pandora ^® , you may see the following error messages. If you cannot clear the error message, contact an authorized Acura NSX dealer.
| Error Message Solution | |
| To begin listening, select a station from the Stations list. | Appears when there is no station list on the device. Use the device to create a station. |
| Unable to rate track. Please try again.Skip limit reached. | Appears when you try to skip a song or selectLike/Dislikeover the predetermined number of times in an hour. |
| Unable to play Pandora. Please try again later.Unable to retrieve a track explanation. Please try again later.Unable to create bookmark. Please try again later. | Appears when the commanded operation fails. Try again later. |
| No Data | Appears when no data is available with Pandora®activated.Reboot the app and reconnect the device. |
| Pandora App version is not supported | Appears when Pandora®version is not supported. Update Pandora®to the latest version. |
| Unable to complete the operation. Please try again later. | Appears when the Pandora®server is in maintenance. Try again later. |
| Unable to connect Pandora. When stopped, check your mobile phone | Appears when Pandora®is unable to play music. Check your device. |
| Unable to connect Pandora. When stopped, check your mobile phone | Appears when Pandora®app is not installed on your device. Install Pandora®app to your device. |
*1: Available only on U.S. models.
Android/Apps
If an error occurs while using the audio system or apps, you may see the following error messages. If you cannot clear the error message, contact an authorized Acura NSX dealer.
| Error Message*1 | Solution |
| Unfortunately, **** has stopped. | Error has occurred within app, select OK on the screen to close the app. |
| **** is not responding.Would you like to close it? | App is not responding.Select Wait if you can wait for a response from app a little longer. If it does not respond even if you keep waiting, select OK to close the app and start it up. If the error message continues, perform Factory Data Reset.➤ Defaulting All the Settings P. 266 |
*1:****part is variable characters, and will change depending upon where an error occurs.
General Information on the Audio System
SiriusXM® Radio Service\*
Subscribing to SiriusXM® Radio
- You need your radio ID ready before registering for subscription. To see the ID on the screen, select Channel 0.
- Have your radio ID ready, and either call SiriusXM® or visit the SiriusXM® website to subscribe.
Receiving SiriusXM® Radio
Switch to the SiriusXM® mode by using the SOURCE button on the steering wheel, or through the audio/information screen, and stay in this mode for about 30 minutes until the service is activated. Make sure your vehicle is in an open area with good reception.
SiriusXM® Radio Display Messages
Channel Not Subscribed:
You are not subscribed to the channel selected.
Subscription Update:
SiriusXM® radio is receiving information update from the network.
Channel Not Available:
No such channel exists, or the artist or title information is unavailable.
No Signal:
The signal is too weak in the current location.
Antenna Disconnected:
The SiriusXM® antenna is disconnected. Contact an authorized Acura NSX dealer.
>>Subscribing to SiriusXM® Radio
Contact Information for SiriusXM® Radio:
• U.S.: SiriusXM® Radio at www.siriusxm.com/ subscribenow, or 1-877-447-0011
- Canada: SiriusXM® Canada at www.siriusxm.ca/subscribe-now, or 1-877-209-0079
Receiving SiriusXM® Radio
The SiriusXM® satellites are in orbit over the equator; therefore, objects south of the vehicle may cause satellite reception interruptions. Satellite signals are more likely to be blocked by tall buildings and mountains the farther north you travel from the equator.
You may experience reception problems under the following circumstances:
- In a location with an obstruction to the south of your vehicle.
• In tunnels - On the lower level of a multi-tiered road
• Large items carried on the roof rack
Compatible iPod, iPhone, and USB Flash Drives
■ iPod and iPhone Model Compatibility
Model
iPod (5th generation)
iPod classic 80GB/160GB (launch in 2007)
iPod classic 120GB (launch in 2008)
iPod classic 160GB (launch in 2009)
iPod nano (1st to 7th generation) released between 2005 and 2012
iPod touch (1st to 5th generation) released between 2007 and 2012
iPhone 3G/iPhone 3GS/iPhone 4/iPhone 4S/iPhone 5/iPhone 5c/iPhone 5s/iPhone
6/iPhone 6s/iPhone 6 Plus/iPhone 6s Plus
USB Flash Drives
- A USB flash drive of 256 MB or higher is recommended.
- Some digital audio players may not be compatible.
- Some USB flash drives (e.g., a device with security lockout) may not work.
- Some software files may not allow for audio play or text data display.
- Some versions of MP3, WMA, or AAC formats may be unsupported.
iPod and iPhone Model Compatibility
This system may not work with all software versions of these devices.
USB Flash Drives
Files on the USB flash drive are played in their stored order. This order may be different from the order displayed on your PC or device.
Honda App License Agreement
END USER LICENSE AGREEMENT
PLEASE CAREFULLY READ THIS END USER LICENSE AGREEMENT (THIS "AGREEMENT") WHICH GOVERNS YOUR USE OF THE SOFTWARE INSTALLED ON YOUR HONDA OR ACURA VEHICLE (YOUR "VEHICLE") AS WELL AS THE APPLICATIONS, SERVICES, FUNCTIONS, AND CONTENT PROVIDED THROUGH THE SOFTWARE (COLLECTIVELY, THE "SERVICES"). YOUR USE OF THE SOFTWARE OR SERVICES WILL SERVE AS YOUR CONSENT TO THE TERMS OF THIS AGREEMENT. THE SOFTWARE IS OWNED (OR LICENSED), PROVIDED, AND/OR OPERATED BY AMERICAN HONDA MOTOR CO. INC., ("HONDA," "US," "WE," OR "OUR"), WITH ITS BUSINESS ADDRESS AT 1919 TORRANCE BLVD., TORRANCE, CA 90501. REFERENCE TO "HONDA" IN THIS AGREEMENT INCLUDES HONDA'S PARENT COMPANY AND ITS AFFILIATES AND DESIGNATED AGENTS. THE SERVICES ARE OWNED (OR LICENSED), PROVIDED, AND/OR OPERATED BY HONDA OR A THIRD-PARTY SERVICE PROVIDER (A "PROVIDER"). REFERENCE TO A "PROVIDER" IN THIS AGREEMENT INCLUDES SUCH PROVIDER'S PARENT COMPANY, AFFILIATES, AND DESIGNATED AGENTS.
A. Description of the Software. The SOFTWARE includes the software, firmware and the like, installed and executing on your VEHICLE during manufacture, and thereafter updated from time to time by HONDA, you or an authorized HONDA dealer (a "DEALER"). The SOFTWARE allows you to access and use a variety of SERVICES, including but not limited to: (a) HONDA applications, services, and content provided through the SOFTWARE (together, "HONDA SERVICES"); and (b) PROVIDER applications, services, and content provided through the SOFTWARE (together, "PROVIDER SERVICES"), each of which may provide access to various information, media, content, and services.
B. SOFTWARE Licensing and Intellectual Property.
- SOFTWARE. This AGREEMENT grants you a non-exclusive, limited, and revocable license to use the SOFTWARE and SERVICES solely (a) as installed on your VEHICLE by HONDA, (b) as updated on your Vehicle by HONDA, you (but only as and when directed by HONDA), or a DEALER and (c) as permitted under the terms of this AGREEMENT.
-
HONDA Services. The SOFTWARE may provide you with access to various HONDA SERVICES. Installation, activation, or use of HONDA SERVICES may require your consent to additional terms, conditions, and privacy policies applicable to those HONDA SERVICES (the "HONDA TERMS"). You acknowledge and agree that any collection, use, sharing of data generated by your VEHICLE or your use of your VEHICLE, and your use of the HONDA SERVICES shall be subject to this AGREEMENT and any additional HONDA TERMS that may be specifically applicable to such HONDA SERVICES or data generation. The HONDA SERVICES may collect, use, and share such data while you are using the SOFTWARE.
-
Open-Source Software. The SOFTWARE and SERVICES may incorporate software licensed to HONDA under free or open-source licenses which govern HONDA's distribution and your use of such software. HONDA and the third-party authors, licensors, and distributors of such software disclaim all warranties and all liability arising from any and all use or distribution of the software. To the extent such software is provided under terms that differ from the applicable free or open-source licenses, those terms are offered by HONDA alone. Additional information regarding free and open-source software incorporated in the SOFTWARE and SERVICES is available in this manual or within the SOFTWARE.
-
Provider Services. The SOFTWARE may provide you with access to various PROVIDER SERVICES. Installation or use of such PROVIDER SERVICES may require your consent to additional terms, conditions, and privacy policies of the applicable PROVIDER (the "PROVIDER TERMS"). This AGREEMENT restricts the manner in which you can install and use PROVIDER SERVICES but does not grant you a license or permission to use such PROVIDER SERVICES. Your permission to use PROVIDER SERVICES is limited and subject to any license grants, conditions, and limitations included in the PROVIDER TERMS. You acknowledge that any collection, use, sharing of your information, targeted advertising practices by PROVIDERS, and your use of the PROVIDER SERVICES shall be subject to both this AGREEMENT and any applicable PROVIDER TERMS. The PROVIDER SERVICES may collect, use, and share such information while you are using the SOFTWARE.
5. License Limitations and Restrictions on Use.
(a) Limited License. You understand and agree that the SOFTWARE and SERVICES are licensed, not sold, to you solely for use in accordance with this AGREEMENT and any applicable PROVIDER TERMS, and any documentation for the VEHICLE made available to you by HONDA (any "DOCUMENTATION"). HONDA and its licensors reserve all rights in the SOFTWARE and HONDA SERVICES not expressly granted to you under this AGREEMENT. PROVIDERS and their licensors reserve all rights in the PROVIDER SERVICES not expressly granted to you under the applicable PROVIDER TERMS.
(b) Restrictions on Use. The licenses granted under this AGREEMENT do not permit you to use the SOFTWARE or SERVICES on a device other than your VEHICLE. As a condition of using the SOFTWARE and SERVICES, you agree that you may not and will not:
(1) copy, download, distribute, modify, publish, sell, rent, lease, lend, license, sublicense, reuse, or create derivative works of the SOFTWARE or SERVICES or any of the content or other material within the SOFTWARE or SERVICES, including without limitation, HONDA or PROVIDER names, logos, or any other trademarks of HONDA or PROVIDERS or used in association with the SOFTWARE or any SERVICES, except as required to use the SOFTWARE or SERVICES in accordance with this AGREEMENT, any applicable PROVIDER TERMS, and the DOCUMENTATION;
(2) access or use the SOFTWARE or SERVICES in any manner intended to damage or impair the operation of the SOFTWARE or SERVICES or interfere with anyone else's use and enjoyment of the SOFTWARE or SERVICES;
(3) access or attempt to access any system or server on which the SOFTWARE or SERVICES is hosted or modify or alter the SOFTWARE or SERVICES in any way;
(4) use the SOFTWARE or SERVICES for any unlawful purpose, or in violation of any third party rights;
(5) use the SOFTWARE or SERVICES in violation of any applicable traffic regulations, rules or laws, including but not limited to any driver distraction laws, rules or regulations;
(6) violate the terms of this AGREEMENT, any HONDA TERMS, any PROVIDER TERMS or other applicable third-party terms, conditions, and privacy policies; or
(7) reverse engineer, decompile, disassemble, attempt to derive the source code of, nor permit others to reverse engineer, decompile, or disassemble, or attempt to derive the source code of the SOFTWARE or SERVICES, except and only to the extent that such activity is expressly permitted (a) by applicable law notwithstanding this limitation or (b) the terms of applicable free or opensource software licenses.
-
Intellectual Property Rights. All title and intellectual property rights in and to the SOFTWARE and SERVICES, the accompanying DOCUMENTATION, and all copies of the SOFTWARE or SERVICES are owned by HONDA, PROVIDERS, or their suppliers or licensors. This AGREEMENT does not grant you any rights in connection with any trademarks or service marks of HONDA, PROVIDERS, or their licensors, affiliates, or suppliers.
-
Export Restrictions: You acknowledge that the SOFTWARE and SERVICES are subject to U.S., European Union, and other export jurisdictions. You agree to comply with all applicable international and national laws that apply to the SOFTWARE and SERVICES, including the U.S. Export Administration Regulations, as well as end-user, end-use, and destination restrictions issued by the U.S. and other governments.
C. SOFTWARE Operation
- HONDA reserves the right to suspend or terminate your access to and use of the SOFTWARE or SERVICES if you are found to be in violation of this AGREEMENT or as reasonably deemed necessary by HONDA.
- Eligibility/Registration/Activation. The SOFTWARE is intended for and available to individuals who (a) are of legal age of majority in their jurisdiction of residence (and at least 18 years of age), or are younger than 18 years of age and possess a valid driver's license issued by their jurisdiction of residence, and (b) own or have permissive access to a compatible VEHICLE. We do not knowingly collect any information, including personal information, from children under 13. If we learn or are notified that we have collected personal information of a child under 13, we will immediately take steps to delete such information.
- Use of PROVIDER SERVICES through the SOFTWARE. Certain PROVIDER SERVICES made available through the SOFTWARE may require that you register or otherwise have an account with the PROVIDER and agree to PROVIDER TERMS. Any use of any of such PROVIDER SERVICES within the SOFTWARE is subject to this AGREEMENT and the applicable PROVIDER TERMS. HONDA does not exercise control over such PROVIDER SERVICES and is not responsible or liable for the availability, security, or content of such PROVIDER SERVICES, and the inclusion of any PROVIDER SERVICES does not imply a referral from, the approval of, or the endorsement by HONDA of such PROVIDER SERVICES. HONDA is not responsible or liable, directly or indirectly, for any damage relating to or resulting from your use of the PROVIDER SERVICES.
-
Links to Third Party Sites: The SOFTWARE may provide you with the ability to access third-party sites and content through the use of the SOFTWARE or SERVICES. The third-party sites and content are not under the control of HONDA. HONDA is not responsible or liable, directly or indirectly, for such third-party websites and their content or for any damage relating to or resulting from your access or use of such websites and content.
-
Unauthorized Use and Abuse. You are responsible for ensuring your (and any authorized third parties') use of the SOFTWARE and SERVICES remains in compliance with this AGREEMENT and all other applicable HONDA TERMS and PROVIDER TERMS. You acknowledge and agree that any use of the SOFTWARE or SERVICES occurring through your VEHICLE will be deemed your actions and that HONDA and PROVIDERS may rely upon such actions. You agree to immediately notify us if you suspect fraudulent or abusive activity involving the SOFTWARE or SERVICES. If you so notify us or if we otherwise suspect fraudulent or abusive activity, you agree to cooperate with us in any fraud investigation and to use any fraud prevention measures we prescribe. Your failure to immediately notify us or cooperate to use such measures will result in your liability for all fraudulent usage or abusive activity associated with your VEHICLE.
-
SOFTWARE Updates. The SOFTWARE and SERVICES may be updated when your VEHICLE is serviced by a DEALER or remotely, over-the-air, by HONDA from time to time; such updates may occur with or without further notice or your future consent. The SOFTWARE may be updated at HONDA's discretion and for any purpose including, without limitation, to patch or otherwise improve the SOFTWARE or SERVICES functionality, security, or stability. All updates to the SOFTWARE and SERVICES are subject to this AGREEMENT and any other applicable HONDA TERMS and PROVIDER TERMS.
-
Uninstalling, Removing, and Replacing the SOFTWARE. Replacing SOFTWARE or HONDA SERVICES with software or firmware not provided and installed by HONDA or a DEALER will render all representations and warranties for the SOFTWARE, HONDA SERVICES, and VEHICLE functionality reliant upon the SOFTWARE or HONDA SERVICES null and void.
D. SOFTWARE Operational Notices and Warnings
-
Vehicle Geolocation Information. You acknowledge that your VEHICLE may be equipped with certain traffic and map features. The traffic feature will automatically collect and transmit, through GPS technology, your Vehicle's current location (longitude and latitude), travel direction and speed ("VEHICLE GEOLOCATION INFORMATION") to HONDA and PROVIDERS. The VEHICLE GEOLOCATION INFORMATION is used by HONDA and PROVIDERS to provide traffic and navigation-related information to you, but may also be used to provide other SERVICES or offers to you. HONDA will not use such VEHICLE GEOLOCATION INFORMATION for its own marketing efforts, or provide such information to unaffiliated third parties for their own purposes, without your express consent.
-
Potential Map Inaccuracy and Route Safety. Maps used by this system may be inaccurate because of changes in roads, traffic controls, routing, or driving conditions. Always use good judgment and common sense when following suggested routes. Do not follow the route suggestions if doing so would result in an unsafe or illegal driving maneuver, if you would be placed in an unsafe situation, or if you would be directed into an area that you consider unsafe. Do not rely on any navigation features included in the system to route you to emergency services. Not all emergency services such as police, fire stations, hospitals, or clinics are likely to be contained in the map database for such navigation features. Ask local authorities or an emergency services operator for such locations and routes. The driver is ultimately responsible for the safe operation of the vehicle and therefore, must evaluate whether it is safe to follow the suggested directions. Any navigation features are provided only as an aid. Make your driving decisions based on your observations of local conditions and existing traffic regulations. Navigation features are not a substitute for your personal judgment. Any route suggestions made by the SOFTWARE or SERVICES should never replace any local traffic regulations or your personal judgment or knowledge of safe driving practices.
- Speech Recognition: You acknowledge and understand that HONDA and PROVIDERS may record, retain, and use voices commands when you use the speech recognition components of the SOFTWARE or SERVICES. You and all VEHICLE operators and passengers (a) consent to the recording and retention of voice commands in support of providing speech recognition components and (b) release HONDA and PROVIDERS from all claims, liabilities, and losses that may result from any use of such recorded voice commands. Recognition errors are inherent in speech recognition. It is your responsibility to monitor any speech recognition functions included in the system and address any errors. Neither HONDA nor PROVIDERS will be liable for any damages arising out of errors in the speech recognition process.
- Distraction Hazards. Navigation features may require manual (non-verbal) input or setup. Attempting to perform such set-up or insert data while driving can seriously distract your attention and could cause a crash or other serious consequences; the ability to undertake such interactions may also be limited by state or local law, which laws you are responsible to know and follow. Even occasional short scans of the screen may be hazardous if your attention has been diverted away from your driving at a critical time. Pull over and stop the vehicle in a safe and legal manner before attempting to access a function of the system requiring prolonged attention. Do not raise the volume excessively. Keep the volume at a level where you can still hear outside traffic and emergency signals while driving. Driving while unable to hear these sounds could result in a crash.
Continued
E. Information Collection and Storage
-
Information Collection, Use, Transmission and Storage of Data. Consent to Use of Data: You agree that HONDA and PROVIDERS may collect and use your information gathered in any manner as part of product support services related to the SOFTWARE or related services. HONDA may share such information with third parties, including, without limitation, PROVIDERS, third party software and services suppliers, their affiliates and/or their designated agents, solely to improve their products or to provide services or technologies to you. HONDA, third party software and systems suppliers, their affiliates and/or their designated agent may disclose this information to others, but not in a form that personally identifies you.
-
Information Storage. Depending on the type of multimedia system you have in your VEHICLE, certain information may be stored for ease of use of the SOFTWARE including, without limitation, search history, location history in certain applications, previous and saved destinations, map locations within certain applications, and device numbers and contact information.
(a) Vehicle Health Information. Your VEHICLE may remotely transmit information regarding the status and health of your VEHICLE (“VEHICLE INFORMATION”) to HONDA without notification to you. VEHICLE INFORMATION may contain VEHICLE maintenance and malfunction status that is derived from VEHICLE diagnostic data and includes, but is not limited to, status of powered doors and windows, battery life data, battery charging data, VEHICLE speed, coolant temperature, air compressor revolution, output power, warning codes, diagnostic trouble codes, fuel injection volume, and engine rotations per minute. VEHICLE HEALTH INFORMATION may be used by HONDA for research and development, to deliver HONDA SERVICES and information to you, and to contact you, and is retained only for a period of time necessary to fulfill these goals.
(b) VEHICLE Geolocation Data (non-navigation/map based). If you opt-in to geolocation-based SERVICES, your vehicle's geolocation data (latitude and longitude) will be automatically sent from your VEHICLE to HONDA and PROVIDERS.
(c) You understand that the inputting or uploading of information to your VEHICLE's multimedia system or the SOFTWARE or SERVICES is at your own risk and that HONDA is not responsible for unauthorized access to or use of any personal or other information. All information uploaded to the SOFTWARE and SERVICES may be stored on your VEHICLES's multimedia system and you understand that the security and safety of your VEHICLE's multimedia system is your sole responsibility.
F. NO WARRANTY. You understand and agree that your use of the SOFTWARE and SERVICES are solely at your own risk and that you will be solely responsible for any damage to your VEHICLE's multimedia system or any other equipment or any loss of data that may result from your use of the SOFTWARE or SERVICES. THE SOFTWARE AND SERVICES ARE PROVIDED ON AN "AS IS" AND "AS AVAILABLE" BASIS WITHOUT ANY WARRANTY OF ANY KIND, EXPRESSED, IMPLIED OR STATUTORY. WE SPECIFICALLY DISCLAIM ANY IMPLIED WARRANTIES OF MERCHANTABILITY, FITNESS FOR A PARTICULAR PURPOSE, AND NON-INFRINGEMENT. HONDA makes no warranties that the SOFTWARE or SERVICES will meet your requirements, or that the SOFTWARE or SERVICES will be uninterrupted, timely, secure, non-infringing or error free. You understand and agree that you are responsible for any and all charges, costs or expenses associated with your use of the SOFTWARE or SERVICES. Advice or information, whether oral or written, obtained by you from us or through the SOFTWARE or SERVICES are provided for informational purposes only and will not create any warranty not expressly made herein. You should not rely on any such information or advice. We assume no liability or responsibility for any errors or omissions in the SOFTWARE or SERVICES. We do not make any warranty or representation that your use of the material displayed on, or obtained through, the SOFTWARE or SERVICES is non-infringing of any rights of any third party. Any decision or action taken by you on the basis of information or content provided via the application is at your sole discretion and risk. HONDA and PROVIDERS are not responsible or liable for any such decision, or for the accuracy, completeness, usefulness, or availability of any content or information displayed, transmitted, or otherwise made available via the SOFTWARE or SERVICES. To the extent jurisdictions do not allow the exclusion of certain warranties, some of the above exclusions may not apply to you.
G. LIMITATIONS ON LIABILITY. You and HONDA are each waiving important rights.
-
Limitations on YOUR liability. HONDA cannot recover from you any consequential, indirect, incidental, or special damages, or attorney's fees in connection with your use of the SOFTWARE or HONDA SERVICES. HONDA WAIVES TO THE FULLEST EXTENT ALLOWED BY LAW ANY CLAIM FOR DAMAGES OTHER THAN DIRECT, COMPENSATORY DAMAGES AS LIMITED IN THIS AGREEMENT.
-
Limitation on HONDA and PROVIDER liability. Neither HONDA nor PROVIDERS will be liable to you or any other party for consequential, indirect, incidental, special, or punitive damages (including without limitation lost profits) in connection with your use of the SOFTWARE or SERVICES, even if HONDA or PROVIDERS are aware of the possibility of such damages. These limitations apply to all claims, including, without limitation, claims in contract and tort (such as negligence, product liability and strict liability). To the extent that a jurisdiction does not permit the exclusion or limitation of liability as set forth herein our liability is limited to the maximum extent permitted by law in such states. If HONDA or PROVIDERS are found liable to you for any reason, you agree that the aggregate liability of all these parties to you for any claim is limited to ten U.S. dollars (US \$10.00). Neither HONDA nor any PROVIDER would have agreed to provide the SOFTWARE or SERVICES to you if you did not agree to this limitation. This amount is the sole and exclusive liability of HONDA and PROVIDERS to you, and is payable as liquidated damages and not as a penalty. Except where prohibited by law, you may not bring any claim against HONDA or any third-party beneficiary more than two (2) years after the claim arises. We do not have any liability for SOFTWARE or SERVICES interruptions of any length.
(a) Release of HONDA and PROVIDERS For yourself and anyone else claiming under you, you agree to release and discharge HONDA, PROVIDERS, their respective officers, directors, and employees, and each third-party beneficiary from all claims, liabilities and losses in connection with the SOFTWARE or SERVICES, including, but not limited to claims for personal injury or property damage arising from the total or partial failure of performance of the SOFTWARE or SERVICES, even if caused by or based upon the negligence, gross negligence, strict products liability, Deceptive Trade Practices Act violations, bad faith, or breach of warranty of us or the malfunction of the SOFTWARE or SOFTWARE SERVICES. YOU AGREE TO WAIVE TO THE FULLEST EXTENT ALLOWED BY LAW, ANY CLAIM FOR DAMAGES OTHER THAN DIRECT, COMPENSATORY DAMAGES AS LIMITED IN THIS AGREEMENT. YOU HEREBY RELEASE AND DISCHARGE HONDA AND ITS LICENSORS AND CONTRACTORS (INCLUDING ANY THIRD PARTIES PROVIDING ALL OR PART OF THE SOFTWARE OR SERVICES) FROM AND AGAINST ANY CLAIMS, DAMAGES, EXPENSES AND LIABILITY ARISING FROM OR RELATED TO ANY INJURIES, DAMAGES, OR LOSSES TO ANY PERSON (INCLUDING DEATH) OR PROPERTY OF ANY KIND RESULTING IN WHOLE OR PART, DIRECTLY OR INDIRECTLY, FROM YOUR USE OF THE SOFTWARE OR SERVICES.
H. Survival. You agree that the limitations of liability and indemnities in this AGREEMENT will survive even after the AGREEMENT has ended. These limitations of liability apply not only to you, but to anyone using the SOFTWARE or SERVICES via your VEHICLE, to anyone making a claim on your behalf, and to any claims made by your family, employees, customers, or others arising out of or relating to your VEHICLE, the SOFTWARE, or SERVICES.
I. Availability/Interruption. The SOFTWARE and certain SERVICES are made available through your VEHICLE's compatible multimedia system when the VEHICLE is turned on. Certain SERVICES may be available only through your compatible mobile device when it is within the operating range of the VEHICLE and a wireless carrier. The availability of the SOFTWARE and SERVICES may be subject to transmission limitation or interruption, including but not limited to technical obsolesce or sunsetting of the hardware, software or firmware, inside of or external to the Vehicle, required for data transmission or receipt. HONDA does not guarantee that the SOFTWARE, SERVICES, or any portion thereof will be available at all times or in all areas. You acknowledge and agree that HONDA is not responsible for performance degradation, interruption or delays. You acknowledge that HONDA shall not be liable to you if the SOFTWARE or SERVICES in a given location are not available. If the SOFTWARE or SERVICES are not available within your intended location, you agree that your sole remedy shall be to cease using the SOFTWARE and SERVICES.
J. PRODUCT SUPPORT: Product support for the SOFTWARE is provided by HONDA. For product support, please refer to HONDA instructions provided in the DOCUMENTATION. Should you have any questions concerning this AGREEMENT, or if you desire to contact HONDA for any other reason, please refer to the HONDA contact information provided in the DOCUMENTATION.
K. Termination and Transfer.
-
Termination. This AGREEMENT is effective until terminated by you or US. WE may terminate this AGREEMENT for any or no reason, and with or without notice to you. Your rights under this AGREEMENT will terminate automatically without notice from US if you fail to comply with any term of this AGREEMENT. Upon termination of this AGREEMENT, you shall cease all use of the SOFTWARE and SERVICES
-
Transfer: You may permanently transfer your rights under this AGREEMENT only as part of a sale or transfer of the VEHICLE, provided you retain no copies, you transfer all of the SOFTWARE and HONDA SERVICES (including all component parts, the media and printed materials, and any upgrades), and the recipient agrees to the terms of this AGREEMENT. You agree to notify HONDA upon the sale or transfer of the VEHICLE. To contact HONDA, please refer to the HONDA contact information provided in the DOCUMENTATION.
L. Changes to the SOFTWARE or SERVICES. WE may change, modify, or update the SOFTWARE or SERVICES from time to time. Unless explicitly stated otherwise, any new features or services that augment or enhance the SOFTWARE or SERVICES in the future shall respectively be considered part of the SOFTWARE or SERVICES and subject to this AGREEMENT. WE reserve the right at any time and from time to time to interrupt, restrict, modify, suspend, discontinue, temporarily or permanently, the SOFTWARE or SERVICES (or any portion thereof), with or without notice to you, and you agree that HONDA shall not be liable to you or to any third party for any modification, suspension or discontinuance of the SOFTWARE or SERVICES.
M. ARBITRATION:
PLEASE READ THIS ARBITRATION PROVISION CAREFULLY TO UNDERSTAND YOUR RIGHTS. YOU AGREE THAT ANY CLAIM THAT YOU MAY HAVE IN THE FUTURE MUST BE RESOLVED THROUGH BINDING ARBITRATION. YOU WAIVE THE RIGHT TO HAVE YOUR DISPUTE HEARD IN COURT AND WAIVE THE RIGHT TO BRING CLASS CLAIMS. YOU UNDERSTAND THAT DISCOVERY AND APPEAL RIGHTS ARE MORE LIMITED IN ARBITRATION.
Arbitration is a method of resolving a claim, dispute or controversy without filing a lawsuit. By agreeing to arbitrate, the right to go to court is waived and instead claims, disputes or controversies are submitted to binding arbitration. This provision sets forth the terms and conditions of our agreement. YOU and HONDA agree and acknowledge that this Agreement affects interstate commerce and the Federal Arbitration Act ("FAA") applies. By using the Software, Vehicle, or Services, YOU elect to have disputes resolved by arbitration. YOU, HONDA or any involved third party may pursue a Claim. "Claim" means any dispute between YOU, HONDA, or any involved third party relating to your use of the Software, the Vehicle, or the Services, this Agreement, or our relationship, including any representations, omissions or warranties. "Claim" does not include personal injury or wrongful death claims. YOU or HONDA may seek remedies in small claims court or provisional judicial remedies without arbitrating. In addition, notwithstanding anything herein to the contrary, YOU or HONDA may seek equitable relief in a court of competent jurisdiction.
YOU or HONDA may select arbitration with American Arbitration Association, JAMS or National Arbitration and Mediation. Contact these sponsors for their rules. The hearing will be in the federal district where YOU reside. If agreed, it may be by telephone or written submissions. Filing and arbitrator fees to be paid per the sponsor rules. You may contact the sponsor for a fee waiver. If no fee waivers, HONDA will pay filing and arbitrator fees up to \$5,000, unless law requires more. Each party is responsible for other fees. Arbitrator may award costs or fees to prevailing party, if permitted by law. HONDA will not seek fees, unless the claims are frivolous.
Arbitrator shall be an attorney or current or retired judge familiar with automotive or consumer software. The arbitrator shall follow substantive law, statute of limitations and decide all issues relating to the interpretation, construction, enforceability and applicability of this provision. The arbitrator may order relief permitted by law. This provision is governed and enforceable by the FAA. An award shall include a written opinion and be final, subject to appeal by the FAA.
This provision survives termination of this Agreement or relationship, bankruptcy, assignment or transfer. If part of this provision is unenforceable, the remainder remains in effect. If unenforceability allows arbitration as a class action, then this provision is entirely unenforceable. YOU may opt out within 30 days of your initial use of the Software by sending a signed, written notice to HONDA at Honda Financial Services, P.O. Box 165007, Irving, TX 75016. HONDA reserves the right to make changes to this provision after providing written notice and an opportunity to opt out.
N. Miscellaneous: You may not assign this AGREEMENT without HONDA's prior written consent. This AGREEMENT and any additional HONDA TERMS and PROVIDER TERMS represents the entire agreement between you and US. HONDA may amend the terms of this AGREEMENT by providing you with notices of such updated terms. If you do not consent to be bound by the updated terms, your sole remedy will be to cease using the SOFTWARE and SERVICES. If any part of this AGREEMENT is found invalid, void, or unenforceable, the balance of the AGREEMENT will remain valid and enforceable according to its terms. To the fullest extent permitted by law, and except as explicitly provided otherwise, this AGREEMENT and any disputes arising out of or relating to it will be governed by the laws of the State of California, except that California laws concerning choice of law or conflicts shall not apply if they would cause the substantive law of another jurisdiction to apply. Notwithstanding the foregoing, Section M shall be governed by the Federal Arbitration Act and the laws of the State of California, as applicable, as set forth therein. The failure to enforce any term of this AGREEMENT on one occasion shall not prevent enforcement on any other occasion or the enforcement of any other term. Headings and captions shall not be considered included for purposes of interpretation or application hereof, but are for convenience only.
Legal Information on Apple CarPlay/Android Auto
OWNER'S MANUAL LICENSE/LIABILITY STATEMENTS
USE OF APPLE CARPLAY IS SUBJECT TO YOUR AGREEMENT TO THE CARPLAY TERMS OF USE, WHICH ARE INCLUDED AS PART OF THE APPLE iOS TERMS OF USE. IN SUMMARY, THE CARPLAY TERMS OF USE DISCLAIM APPLE AND ITS SERVICE PROVIDERS' LIABILITY IF THE SERVICES FAIL TO PERFORM CORRECTLY OR ARE DISCONTINUED, STRICTLY LIMIT APPLE AND ITS SERVICE PROVIDERS' OTHER LIABILITIES, DESCRIBE THE KINDS OF USER INFORMATION (INCLUDING, FOR EXAMPLE, VEHICLE LOCATION, VEHICLE SPEED, AND VEHICLE STATUS) BEING GATHERED AND STORED BY APPLE AND ITS SERVICE PROVIDERS, AND DISCLOSE CERTAIN POSSIBLE RISKS ASSOCIATED WITH THE USE OF CARPLAY, INCLUDING THE POTENTIAL FOR DRIVER DISTRACTION. SEE APPLE'S PRIVACY POLICY FOR DETAILS REGARDING APPLE'S USE AND HANDLING OF DATA UPLOADED BY CARPLAY.
USE OF ANDROID AUTO IS SUBJECT TO YOUR AGREEMENT TO THE ANDROID AUTO TERMS OF USE WHICH MUST BE AGREED TO WHEN THE ANDROID AUTO APPLICATION IS DOWNLOADED TO YOUR ANDROID PHONE. IN SUMMARY, THE ANDROID AUTO TERMS OF USE DISCLAIM GOOGLE AND ITS SERVICE PROVIDERS' LIABILITY IF THE SERVICES FAIL TO PERFORM CORRECTLY OR ARE DISCONTINUED, STRICTLY LIMIT GOOGLE AND ITS SERVICE PROVIDERS' OTHER LIABILITIES, DESCRIBE THE KINDS OF USER INFORMATION (INCLUDING, FOR EXAMPLE, VEHICLE LOCATION, VEHICLE SPEED, AND VEHICLE STATUS) BEING GATHERED AND STORED BY GOOGLE AND ITS SERVICE PROVIDERS, AND DISCLOSE CERTAIN POSSIBLE RISKS ASSOCIATED WITH THE USE OF ANDROID AUTO, INCLUDING THE POTENTIAL FOR DRIVER DISTRACTION. SEE GOOGLE'S PRIVACY POLICY FOR DETAILS REGARDING GOOGLE'S USE AND HANDLING OF DATA UPLOADED BY ANDROID AUTO.
■ DISCLAIMER OF WARRANTIES; LIMITATION ON LIABILITY
YOU EXPRESSLY ACKNOWLEDGE AND AGREE THAT USE OF APPLE CARPLAY OR ANDROID AUTO ("THE APPLICATIONS") IS AT YOUR SOLE RISK AND THAT THE ENTIRE RISK AS TO SATISFACTORY QUALITY, PERFORMANCE, ACCURACY AND EFFORT IS WITH YOU TO THE MAXIMUM EXTENT PERMITTED BY APPLICABLE LAW, AND THAT THE APPLICATIONS AND INFORMATION ON THE APPLICATIONS IS PROVIDED "AS IS" AND "AS AVAILABLE," WITH ALL FAULTS AND WITHOUT WARRANTY OF ANY KIND, AND HONDA HEREBY DISCLAIMS ALL WARRANTIES AND CONDITIONS WITH RESPECT TO THE APPLICATIONS AND INFORMATION ON THE APPLICATIONS, EITHER EXPRESS, IMPLIED OR STATUTORY, INCLUDING, BUT NOT LIMITED TO, THE IMPLIED WARRANTIES AND/OR CONDITIONS OF MERCHANTABILITY, SATISFACTORY QUALITY, FITNESS FOR A PARTICULAR PURPOSE, ACCURACY, QUIET ENJOYMENT, AND NON-INFRINGEMENT OF THIRD PARTY RIGHTS. NO ORAL OR WRITTEN INFORMATION OR ADVICE GIVEN BY HONDA OR AN AUTHORIZED REPRESENTATIVE SHALL CREATE A WARRANTY. AS EXAMPLES, AND WITHOUT LIMITATION, HONDA DISCLAIMS ANY WARRANTY REGARDING THE ACCURACY OF DATA PROVIDED BY THE APPLICATIONS, SUCH AS THE ACCURACY OF DIRECTIONS, ESTIMATED TRAVEL TIME, SPEED LIMITS, ROAD CONDITIONS, NEWS, WEATHER, TRAFFIC, OR OTHER CONTENT PROVIDED BY APPLE, GOOGLE, THEIR AFFILIATES, OR THIRD PARTY PROVIDERS; HONDA DOES NOT GUARANTEE AGAINST LOSS OF APPLICATION DATA, WHICH MAY BE LOST AT ANY TIME; HONDA DOES NOT GUARANTEE THAT THE APPLICATIONS OR ANY SERVICES PROVIDED THROUGH THEM WILL BE PROVIDED AT ALL TIMES OR THAT ANY OR ALL SERVICES WILL BE AVAILABLE AT ANY PARTICULAR TIME OR LOCATION. FOR EXAMPLE, SERVICES MAY BE SUSPENDED OR INTERRUPTED WITHOUT NOTICE FOR REPAIR, MAINTENANCE, SECURITY FIXES, UPDATES, ETC., SERVICES MAY BE UNAVAILABLE IN YOUR AREA OR LOCATION, ETC. IN ADDITION, YOU UNDERSTAND THAT CHANGES IN THIRD PARTY TECHNOLOGY OR GOVERNMENT REGULATION MAY RENDER THE SERVICES AND/OR APPLICATIONS OBSOLETE AND/OR UNUSABLE.
TO THE EXTENT NOT PROHIBITED BY LAW, IN NO EVENT SHALL HONDA OR ITS AFFILIATES BE LIABLE FOR PERSONAL INJURY, OR ANY INCIDENTAL, SPECIAL, INDIRECT OR CONSEQUENTIAL DAMAGES WHATSOEVER, INCLUDING, WITHOUT LIMITATION, DAMAGES FOR LOSS OF PROFITS, CORRUPTION OR LOSS OF DATA, FAILURE TO TRANSMIT OR RECEIVE ANY DATA, BUSINESS INTERRUPTION OR ANY OTHER COMMERCIAL DAMAGES OR LOSSES, ARISING OUT OF OR RELATED TO THE APPLICATIONS OR YOUR USE OF OR INABILITY TO USE THE APPLICATIONS OR INFORMATION ON THE APPLICATIONS, HOWEVER CAUSED, REGARDLESS OF THE THEORY OF LIABILITY (CONTRACT, TORT OR OTHERWISE) AND EVEN IF HONDA WERE ADVISED OF THE POSSIBILITY OF SUCH DAMAGES. SOME STATES AND JURISDICTIONS DISALLOW THE EXCLUSION OR LIMITATION OF LIABILITY FOR DAMAGES, SO THESE LIMITATIONS AND EXCLUSIONS MAY NOT APPLY TO YOU. IN NO EVENT SHALL HONDA'S TOTAL LIABILITY TO YOU FOR ALL DAMAGES (OTHER THAN AS MAY BE REQUIRED BY APPLICABLE LAW IN CASES INVOLVING PERSONAL INJURY) EXCEED THE AMOUNT OF FIVE DOLLARS (\$5.00). THE FOREGOING LIMITATIONS WILL APPLY EVEN IF THE ABOVE STATED REMEDY FAILS OF ITS ESSENTIAL PURPOSE.
About Open Source Licenses
To see the open source license information, follow these steps.
- Select HOME
- Select Settings.
- Select System.
- Select the Others tab.
- Select Detail Information.
- Select About device.
- Select Legal information.
- Select Open source licenses.
License Information
DTS
For DTS patents, see http://patents.dts.com. Manufactured under license from DTS Licensing Limited. DTS, the Symbol, & DTS and the Symbol together are registered trademarks, and DTS Neural Surround is trademark of DTS, Inc. © DTS, Inc. All Rights Reserved.


Neural Surround
Customized Features
Use the audio/information screen to customize certain features.
■ How to customize
While the vehicle is at a complete stop with the power mode in ON, select and Settings, then select a setting item.
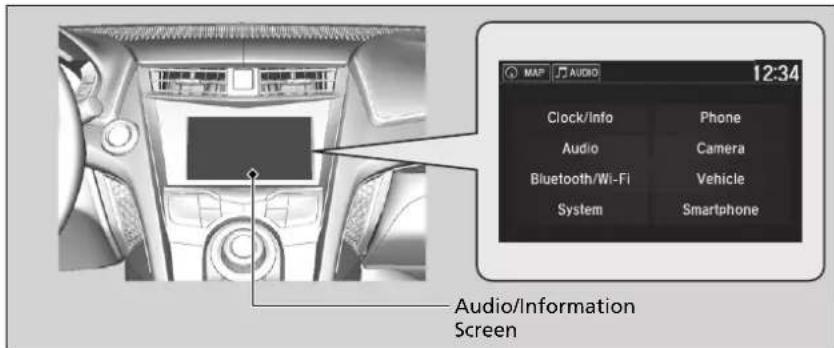
text_image
12:34 Clock/Info Phone Audio Camera Bluetooth/Wi-Fi Vehicle System Smartphone Audio/Information ScreenCustomized Features
When you customize settings, make sure that the vehicle is at a complete stop and shift to P.
To customize other features, select Settings.
→ List of customizable options P. 252
■ Customization flow
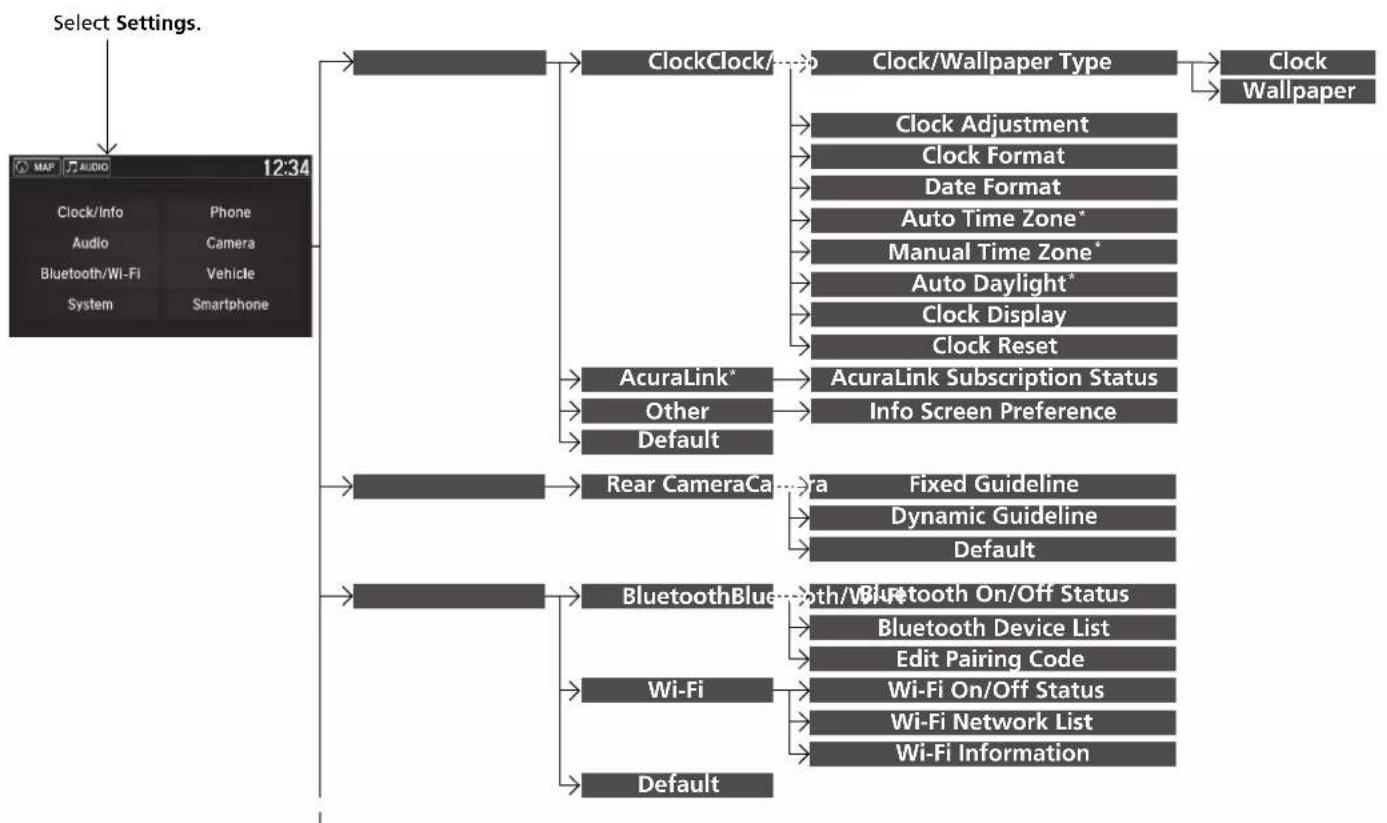
flowchart
graph TD
    A["Select Settings."] --> B["Clock"]
    B --> C["Clock/Wallpaper Type"]
    C --> D["Clock"]
    C --> E["Wallpaper"]
    B --> F["AcuraLink*"]
    B --> G["Other"]
    B --> H["Default"]
    F --> I["AcuraLink Subscription Status"]
    F --> J["Info Screen Preference"]
    G --> K["Rear CameraCam"]
    G --> L["Fixed Guideline"]
    G --> M["Dynamic Guideline"]
    G --> N["Default"]
    K --> O["BluetoothBlue"]
    K --> P["Wi-Fi"]
    O --> Q["Bluetooth On/Off Status"]
    O --> R["Bluetooth Device List"]
    O --> S["Edit Pairing Code"]
    O --> T["Wi-Fi On/Off Status"]
    O --> U["Wi-Fi Network List"]
    O --> V["Wi-Fi Information"]
* Not available on all models
Continued

flowchart
graph TD
    A["Phone"] --> B["Phone"]
    A --> C["Text/Email"]
    A --> D["Default"]
    E["Audio"] --> F["Common"]
    E --> G["FM"]
    E --> H["SXM*"]
    E --> I["Default"]
    B --> J["Bluetooth Device List"]
    B --> K["Edit Speed Dial"]
    B --> L["Ring Tone"]
    B --> M["Automatic Phone Sync"]
    B --> N["Enable Text/Email"]
    B --> O["Select Account"]
    B --> P["New Message Notification"]
    F --> Q["Sound"]
    F --> R["Audio Source Pop-Up"]
    F --> S["Cover Art"]
    F --> T["Bluetooth Device List"]
    G --> U["HD Radio Mode"]
    G --> V["RDS INFO"]
    H --> W["Tune Start"]
    H --> X["SportsFlash Setup(Interrupt)"]
    H --> Y["SportsFlash Setup(Interrupt Beep)"]
    H --> Z["SportsFlash Setup(Favorite Team)"]
    H --> AA["Traffic & Weather Setup"]
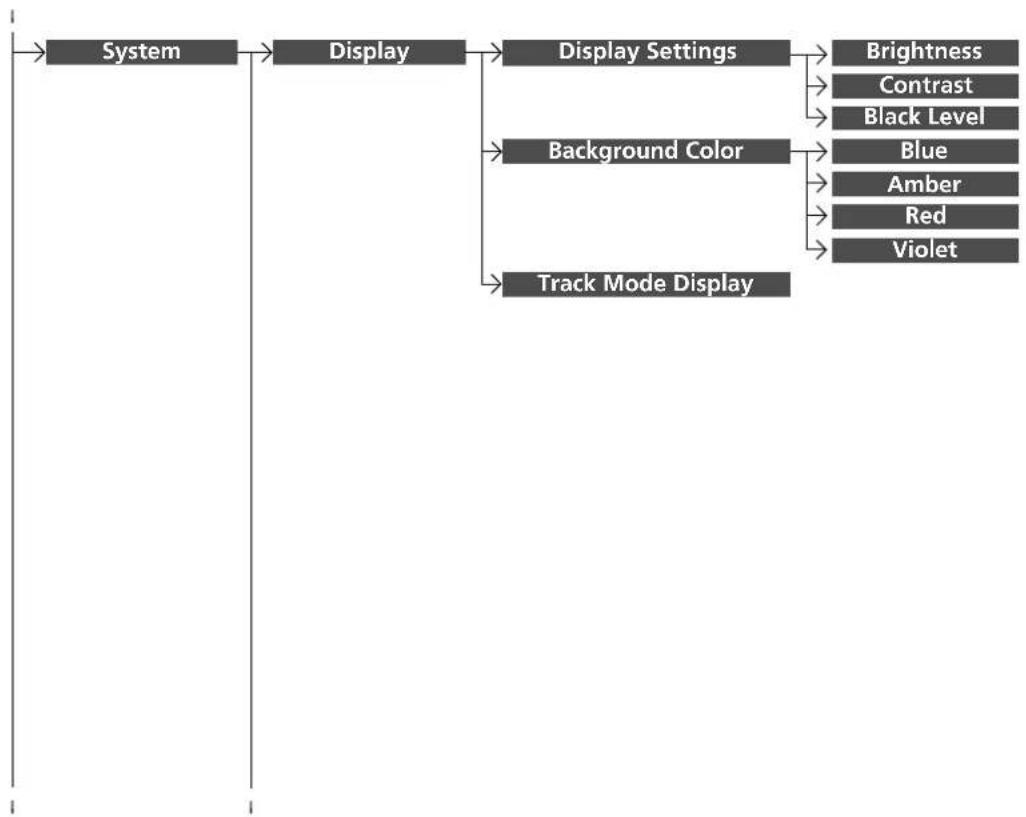
flowchart
graph TD
    A["System"] --> B(Display)
    B --> C["Display Settings"]
    C --> D["Brightness"]
    C --> E["Contrast"]
    C --> F["Black Level"]
    B --> G["Background Color"]
    G --> H["Blue"]
    G --> I["Amber"]
    G --> J["Red"]
    G --> K["Violet"]
    B --> L["Track Mode Display"]
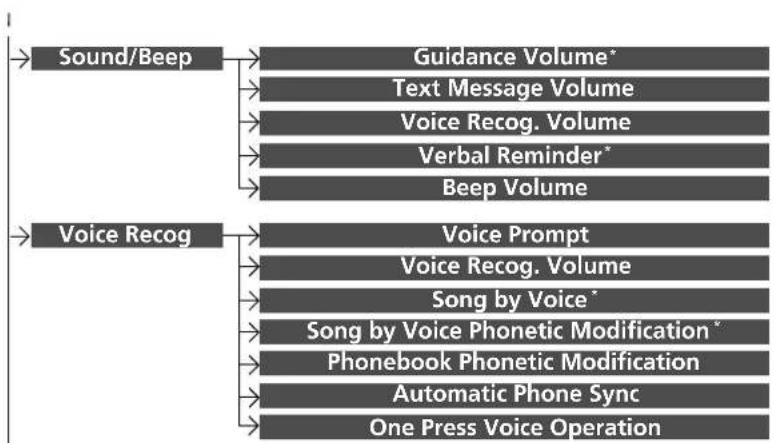
flowchart
graph TD
    A["Sound/Beep"] --> B["Guidance Volume*"]
    A --> C["Text Message Volume"]
    A --> D["Voice Recog. Volume"]
    A --> E["Verbal Reminder*"]
    A --> F["Beep Volume"]
    G["Voice Recog"] --> H["Voice Prompt"]
    G --> I["Voice Recog. Volume"]
    G --> J["Song by Voice*"]
    G --> K["Song by Voice Phonetic Modification*"]
    G --> L["Phonebook Phonetic Modification"]
    G --> M["Automatic Phone Sync"]
    G --> N["One Press Voice Operation"]
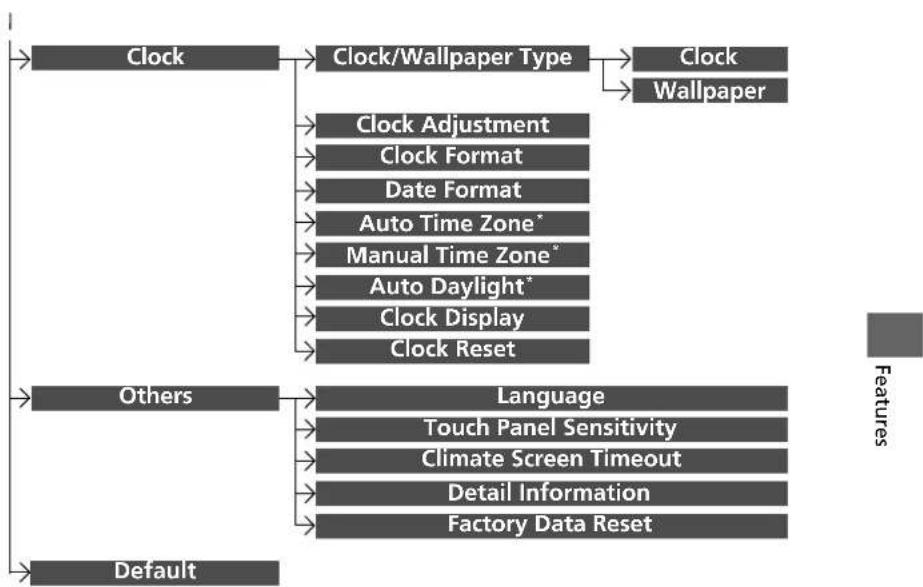
flowchart
graph TD
    A["Clock"] --> B["Clock/Wallpaper Type"]
    B --> C["Clock"]
    B --> D["Wallpaper"]
    B --> E["Clock Adjustment"]
    E --> F["Clock Format"]
    F --> G["Date Format"]
    G --> H["Auto Time Zone*"]
    H --> I["Manual Time Zone*"]
    I --> J["Auto Daylight*"]
    J --> K["Clock Display"]
    K --> L["Clock Reset"]

    M["Others"] --> N["Language"]
    N --> O["Touch Panel Sensitivity"]
    O --> P["Climate Screen Timeout"]
    P --> Q["Detail Information"]
    Q --> R["Factory Data Reset"]

    S["Default"] --> N
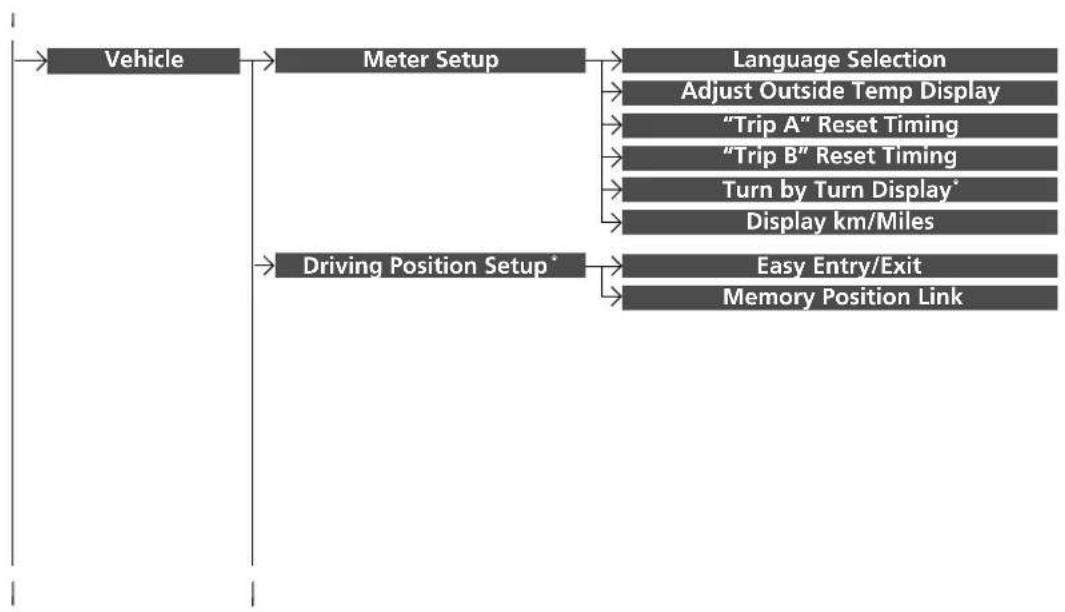
flowchart
graph TD
    A["Vehicle"] --> B["Meter Setup"]
    B --> C["Language Selection"]
    C --> D["Adjust Outside Temp Display"]
    B --> E[""Trip A" Reset Timing"]
    B --> F[""Trip B" Reset Timing"]
    B --> G["Turn by Turn Display*"]
    B --> H["Display km/Miles"]
    I["Driving Position Setup*"] --> J["Easy Entry/Exit"]
    I --> K["Memory Position Link"]
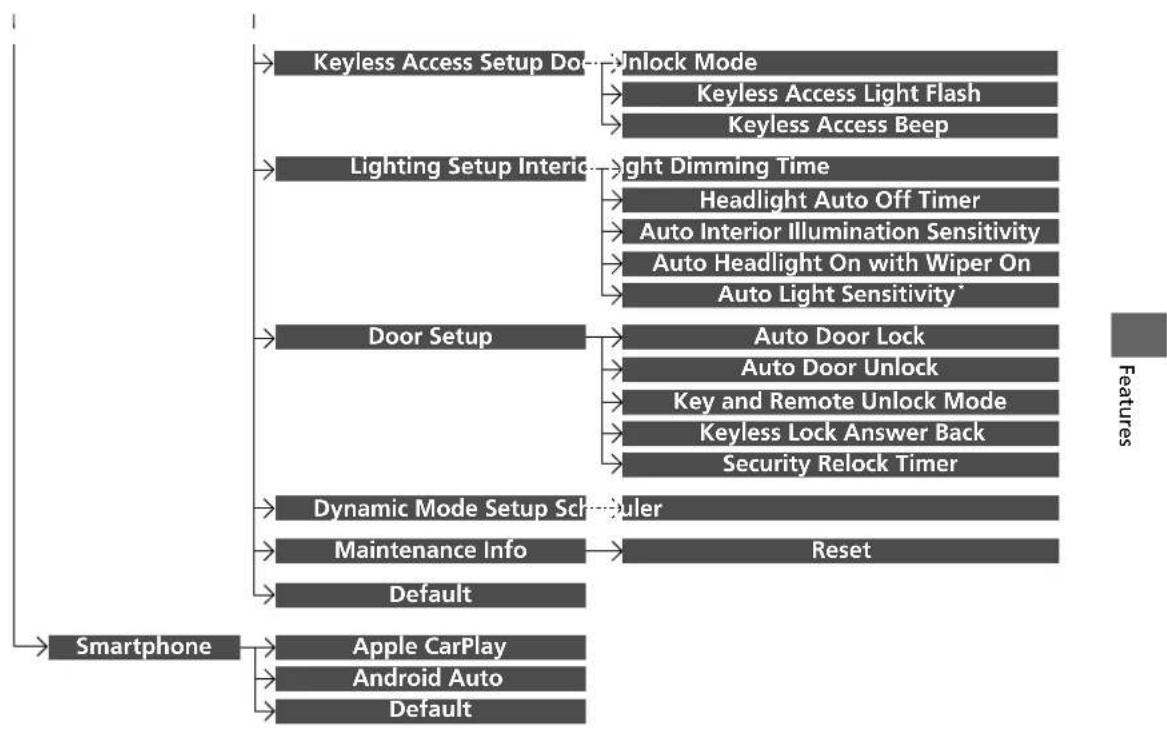
flowchart
graph TD
    A["Smartphone"] --> B["Keyless Access Setup Do"]
    A --> C["Lighting Setup Interic"]
    A --> D["Door Setup"]
    A --> E["Dynamic Mode Setup Sch"]
    A --> F["Maintenance Info"]
    A --> G["Default"]
    A --> H["Apple CarPlay"]
    A --> I["Android Auto"]
    A --> J["Default"]

    B --> K["Unlock Mode"]
    B --> L["Keyless Access Light Flash"]
    B --> M["Keyless Access Beep"]

    C --> N["Light Dimming Time"]
    C --> O["Headlight Auto Off Timer"]
    C --> P["Auto Interior Illumination Sensitivity"]
    C --> Q["Auto Headlight On with Wiper On"]
    C --> R["Auto Light Sensitivity*"]

    D --> S["Auto Door Lock"]
    D --> T["Auto Door Unlock"]
    D --> U["Key and Remote Unlock Mode"]
    D --> V["Keyless Lock Answer Back"]
    D --> W["Security Relock Timer"]

    E --> X["Reset"]

    F --> Y["Reset"]

    G --> Z["Reset"]

    style A fill:#f9f,stroke:#333
    style B fill:#ccc,stroke:#333
    style C fill:#ccc,stroke:#333
    style D fill:#ccc,stroke:#333
    style E fill:#ccc,stroke:#333
    style F fill:#ccc,stroke:#333
    style G fill:#ccc,stroke:#333
    style H fill:#ccc,stroke:#333
    style I fill:#ccc,stroke:#333
■ List of customizable options
| Setup Group | Customizable Features Description Selectable Settings | |||
| Clock/Info | Clock | Clock Changes the clock display type. | Analog/Digital*1/ Small Digital/Off | |
| Wallpaper | Changes the wallpaper type Imports an image file for a new wallpaper. Deletes an image file for a wallpaper. | Blank/Galaxy*1/ Metallic/Time Zone | ||
| Clock Adjustment Adjusts Clock. — | ||||
| Clock Format | Selects the digital clock display from 12H to 24H. | 12H*1/24H | ||
| Date Format Changes the date display type. | YYYY/MM/DD, MM/ DD/YYYY*1, DD/ MM/YYYY | |||
| Auto Time Zone* | Automatically adjusts the clock when driving through different time zones. | On*1/Off | ||
| Manual Time Zone* | Changes the time zone manually. — | |||
| Auto Daylight* | Select On to have the GPS automatically adjust the clock to daylight savings time. Select Off to cancel this function. | On*1/Off | ||
| Clock Display | Selects whether the clock display comes on. | On*1/Off | ||
| Clock Reset | Resets the clock settings to the factory default. | Yes/No | ||
*1:Default Setting
* Not available on all models
| Setup Group | Customizable Features Description Selectable Settings | |||
| Clock/Info | AcuraLink* | AcuraLink Subscription Status | Displays your current AcuraLink subscription status. | — |
| Other Info Screen Preference | Changes the information screen type.·Info Top- A brief menu pops up.·Info Menu- A full menu pops up.·Off- A menu does not pop up. | Info Top/InfoMenu*1/Off | ||
| Default | Cancels/Resets all customized items in the Clock/Info group as default. | Yes/No | ||
| Camera | Rear Camera | Fixed Guideline | Selects whether the fixed guidelines come on the rear camera monitor.➤ Multi-View Rear Camera P. 369 | On*1/Off |
| Dynamic Guideline | Selects whether the guidelines adjust to the movement of the steering wheel.➤ Multi-View Rear Camera P. 369 | On*1/Off | ||
| Default | Cancels/Resets all customized items in the Rear Camera setting group as default. | Yes/No | ||
*1:Default Setting
| Setup Group | Customizable Features Description Selectable Settings | |||
| Bluetooth /Wi-Fi | Bluetooth On/Off Status | Changes the Bluetooth® status. | On*1/Off | |
| Bluetooth Device List | Pairs a new phone to HFL, edits or deletes a paired phone. ➡ Phone Setup P. 278 | — | ||
| Edit Pairing Code | Edits a pairing code. ➡ To change the pairing code setting P. 279 | Random/Fixed*1 | ||
| Wi-Fi On/Off Status | Changes the Wi-Fi mode. | On/Off*1 | ||
| Wi-Fi Network List | Connects, disconnects, or deletes the Wi-Fi device. | — | ||
| Wi-Fi Information Shows the Wi-Fi information of the head unit. — | ||||
| Default | Cancels/Resets all customized items in the Bluetooth/Wi-Fi group as default. | Yes/No | ||
*1:Default Setting
| Setup Group | Customizable Features Description Selectable Settings | ||
| Phone | Bluetooth Device List | Pairs a new phone to HFL, connects or disconnects a paired phone. ➡ Phone Setup P. 278 | — |
| Edit Speed Dial | Edits, adds or deletes a speed dial entry. ➡ Speed Dial P. 284 | — | |
| Ring Tone Selects the ring tone. | Fixed/Mobile Phone*1 | ||
| Automatic Phone Sync | Sets phonebook and call history data to be automatically imported when a phone is paired to HFL. | On*1/Off | |
| Text/Email | Enable Text/Email | Turns the text/e-mail message function on and off. | On*1/Off |
| Select Account Selects a text or e-mail message account. — | |||
| New Message Notification | Selects whether a pop-up alert comes on the screen when HFL receives a new text/e-mail message. | On/Off*1 | |
| Default | Cancels/Resets all customized items in the Phone settings group as default. | Yes/No | |
*1:Default Setting
| Setup Group | Customizable Features Description Selectable Settings | ||
| Audio | Sound | Adjusts the settings of the audio speakers' sound. ➤ Adjusting the Sound P. 181 | -6~0*1~+6 (BASS and TREBLE), RR9~0*1~FR9 (FADER), L9~0*1~R9 (BALANCE), -6~0*1~+6 (Center* and Subwoofer), Off/Low/Mid*1/High (Speed Volume Compensation), Off*1/On (Neural*) |
| Audio Source Pop-Up | Selects whether the list of selectable audio sources comes on when Audio is selected on the home screen. | On/Off*1 | |
| [Your selected media] Cover Art | Turns the cover art display on and off. | On*1/Off | |
| Bluetooth Device List | Pairs a new phone to HFL, edits or deletes a paired phone. ➤ Phone Setup P. 278 | — | |
| FM mode FM | HD Radio Mode | Selects whether the audio system automatically switches to the digital radio waves or receives the analog waves only. | Auto*1/Analog |
| RDS INFO | Turns on and off the RDS information. | On*1/Off | |
*1:Default Setting
* Not available on all models
| Setup Group | Customizable Features Description Selectable Settings | |||
| Audio | SiriusXM® modeSXM* | Tune Start | Turns on and off, starts the song from the beginning as you change preset stations. | On*1/Off |
| SportsFlash Setup(Interrupt) | Turns on and off the sports alert function. | Off*1/On(one time)/ On(continue) | ||
| SportsFlash Setup(Interrupt Beep) | Causes the system to beep when the sports alert is notified. | On*1/Off | ||
| SportsFlash Setup(Favorite Team) | Selects your favorite sports teams. ➡ Live Sports Alert P. 197 | — | ||
| Traffic & Weather Setup | Selects the region you want to receive the information. | — | ||
| Default | Cancels/Resets all customized items in the Audio settings group as default. | Yes/No | ||
*1:Default Setting
| Setup Group | Customizable Features Description Selectable Settings | |||
| System | Display | Brightness | Changes the brightness of the audio/information screen. | 0~5~10*1(Daytime mode)0~5*1~10(Nighttime mode) |
| Contrast | Changes the contrast of the audio/information screen. | -5~0*1~+5 | ||
| Black Level | Changes the black level of the audio/information screen. | -5~0*1~+5 | ||
| Background Color | Changes the background color of the audio/information screen. | Blue*1/Amber/Red/Violet | ||
| Track Mode Display | Turns the limitation screen for the TRACK mode on and off.Limitations for Manual Operation P. 183 | On*1/Off | ||
| Sound/Beep | Guidance Volume* | Changes the sound volume.Adjusts the guidance volume of the navigation system. | 1~6*1~11 | |
| Text Message Volume | Changes the text/e-mail message reading volume. | 1~6*1~11 | ||
*1:Default Setting
| Setup Group | Customizable Features Description Selectable Settings | ||
| System | Sound /Beep | Voice Recog. Volume | Changes the volume of the voice prompt. 1 6^*1 11 |
| Verbal Reminder* | Turns the verbal reminders on and off. On *1/Off | ||
| Beep Volume Changes the beep volume. Off | *1/1/2/3 | ||
| Voice Recog | Voice Prompt Turns the voice prompt on and off. On | *1/Off | |
| Voice Recog. Volume | Changes the volume of the voice prompt. 1 6^*1 11 | ||
| Song by Voice* | Turns the Song By VoiceTM on and off. On *1/Off | ||
| Song by Voice Phonetic Modification* | Modifies a voice command for music stored in the system or an iPod/iPhone. ➡ Phonetic Modification P. 204 — | ||
| Phonebook Phonetic Modification | Modifies a voice command for the phonebook. ➡ Phonebook Phonetic Modification P. 287 — | ||
| Automatic Phone Sync | Sets phonebook and call history data to be automatically imported when a phone is paired to HFL. On *1/Off | ||
| One Press Voice Operation | Changes the setting of the [walk] button operation when using the voice operation. On *1/Off | ||
*1:Default Setting
| Setup Group | Customizable Features Description Selectable Settings | |||
| System | Clock | Clock/ Wallpaper Type | Clock/ Wallpaper | See Clock/Info on P. 252 |
| Clock Adjustment | ||||
| Clock Format | ||||
| Date Format | ||||
| Auto Time Zone* | ||||
| Manual Time Zone* | ||||
| Auto Daylight* | ||||
| Clock Display | ||||
| Clock Reset | ||||
| Others | Language Change the display language. | English*1/Français/ Español | ||
| Touch Panel Sensitivity | Sets the sensitivity of the touch panel screen. | High*1/Low | ||
*1:Default Setting
| Setup Group | Customizable Features Description Selectable Settings | |||
| System | Others | Climate Screen Timeout | Changes the length of time the climate control display stays on when you press the CLIMATE button. | Never/5 Seconds/10 Seconds*1/20 Seconds |
| Detail Information | Displays the details of the head unit and operating system information. | — | ||
| Factory Data Reset | Resets all the settings to their factory default. ➤ Defaulting All the Settings P. 266 | Yes/No | ||
| Default | Cancels/Resets all customized items in the System group as default. | Yes/No | ||
*1:Default Setting
| Setup Group | Customizable Features Description Selectable Settings | |||
| Vehicle | Meter Setup | Language Selection | Changes the displayed language on the driver information interface. | English*1/Français/ Español |
| Adjust Outside Temp Display | Adjusts the temperature reading by a few degrees. | -5°F ~ ±0°F*1 ~ +5°F (U.S.) -3°C ~ ±0°C*1 ~ +3°C (Canada) | ||
| "Trip A" Reset Timing | Changes the setting of how to reset trip meter A and average fuel economy A. | With Refuel/IGN Off/ Manually Reset*1 | ||
| "Trip B" Reset Timing | Changes the setting of how to reset trip meter B and average fuel economy B. | With Refuel/IGN Off/ Manually Reset*1 | ||
| Turn by Turn Display* | Selects whether the turn-by-turn display comes on during the route guidance. | On*1/Off | ||
| Display km/Miles Selects the trip computer units. Auto | *1/km/Miles | |||
*1:Default Setting
| Setup Group | Customizable Features Description Selectable Settings | |||
| Vehicle | Driving Position Setup* | Easy Entry/Exit | Moves the seat rearward when you get in/get out of the vehicle. Changes the setting for this feature. | On*1/Off |
| Memory Position Link | Turns the driving position memory system on and off. | On*1/Off | ||
| Keyless Access Setup | Door Unlock Mode | Changes which doors unlock when you grab the driver's door handle. | Driver Door Only*1/All Doors | |
| Keyless Access Light Flash | Causes some exterior lights to flash when you unlock/lock the doors. | On*1/Off | ||
| Keyless Access Beep | Causes the beeper to sound when you unlock/lock the doors. | On*1/Off | ||
| Lighting Setup | Interior Light Dimming Time | Changes the length of time the interior lights stay on after you close the doors. | 60 sec/30 sec*1/15 sec | |
| Headlight Auto Off Timer | Changes the length of time the exterior lights stay on after you close the driver's door. | 60 sec/30 sec/15 sec*1/0 sec | ||
| Auto Interior Illumination Sensitivity | Changes the sensitivity of the brightness of the instrument panel when the headlight switch is in the AUTO position. | Min/Low/Mid*1/High/Max | ||
*1:Default Setting
| Setup Group | Customizable Features Description Selectable Settings | |||
| Vehicle | Lighting Setup | Auto Headlight On with Wiper On | Changes the settings for the wiper operation when the headlights automatically come on while the headlight switch is in the AUTO position. | On *1/Off |
| Auto Light Sensitivity* | Changes the level of ambient light that causes the headlights to come on in AUTO position. | Max/High/Mid*1/ Low/Min | ||
| Door Setup | Auto Door Lock | Used to change the setting for when the doors automatically lock. | With Vehicle Speed*1/Shift from P/ Off | |
| Auto Door Unlock | Changes the setting for when the doors unlock automatically. | All Doors with Driver's Door Opens*1/All Doors with Shift to P/All Doors with IGN Off/ Off | ||
| Key And Remote Unlock Mode | Sets up the driver's door or all the doors to unlock on the first push of the remote. | Driver Door*1/All Doors | ||
| Keyless Lock Answer Back | LOCK/UNLOCK- The exterior lights flash. LOCK (2nd push)- The beeper sounds. | On*1/Off | ||
| Security Relock Timer | Changes the time it takes for the doors to relock and the security system to set after you unlock the vehicle without opening either door. | 90 sec/60 sec/30 sec*1 | ||
*1:Default Setting
* Not available on all models
| Setup Group | Customizable Features Description Selectable Settings | |||
| Vehicle | Dynamic Mode Setup | Scheduler | Changes the Integrated Dynamics System mode schedule. The vehicle starts in the QUIET or SPORT mode according to the selected item or time schedule. | OFF/Always Sport*1/ Always Quiet/Last Start/Quiet: 12am-6am/Quiet: 12am-8am |
| Maintenance Info | Reset | Used to reset the engine oil life display when the maintenance service has been performed. | — | |
| Default | Cancels/Resets all customized items in the Vehicle group as default. | Yes/No | ||
| Smart-phone | Apple CarPlay Sets up the Apple CarPlay connection. — | |||
| Android Auto Sets up the Android Auto connection. — | ||||
| Default | Cancels/Resets all customized items in the Smartphone group as default. | Yes/No | ||
*1:Default Setting
Defaulting All the Settings
Reset all the menu and customized settings as the factory defaults.
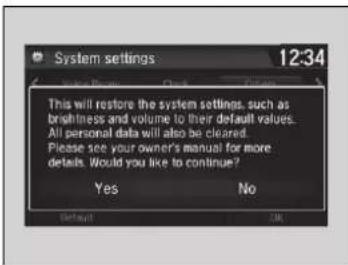
text_image
System settings 12:34 This will restore the system settings, such as brightness and volume to their default values. All personal data will also be cleared. Please see your owner's manual for more details. Would you like to continue? Yes No Default OK- Select HOME
- Select Settings.
- Select System.
- Select the Others tab.
- Select Factory Data Reset.
▶ A confirmation message appears on the screen. - Select Yes to reset the settings.
- Select Yes again to reset the settings.
▶ A confirmation message appears on the screen. Select OK.
▶ After selecting OK, the system will reboot.
Defaulting All the Settings
When you transfer the vehicle to a third party, reset all settings to default and delete all personal data.
If you perform Factory Data Reset, it will reset the pre-installed apps to their factory default.
HomeLink® Universal Transceiver
The HomeLink® Universal Transceiver can be programmed to operate up to three remote controlled devices around your home, such as garage doors, lighting, or home security systems.
Important Safety Precautions
Refer to the safety information that came with your garage door opener to test that the safety features are functioning properly. If you do not have the safety information, contact the manufacturer.
Before programming HomeLink, make sure that people and objects are out of the way of the garage or gate to prevent potential injury or damage.
When programming a garage door opener, park just outside the garage door's path.
HomeLink® Universal Transceiver
Before programming HomeLink to operate a garage door opener, confirm that the opener has an external entrapment protection system, such as an "electronic eye," or other safety and reverse stop features. If it does not, HomeLink may not be able to operate it.
Training HomeLink
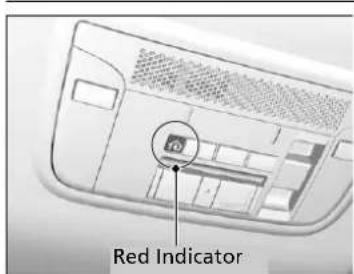
text_image
Red IndicatorIf it is necessary to erase a previously entered learned code:
- Press and hold the two outside buttons for about 20 seconds, until the red indicator blinks. Release the buttons, and proceed to step 1.
- If you are training the second or third button, go directly to step 1.
The instructions on the next page should work for most gate or garage openers, but may not work for all. For detailed instructions about your specific remote opener, visit http://www.homelink.com or call (800) 355-3515.
Training a Button
- Position the remote transmitter you wish to link 1 to 3 inches (3 - 8 cm) from the HomeLink button you want to program.
- Press and release the desired HomeLink button. Hold the button on the remote transmitter. Does the HomeLink indicator (LED) change from slowly blinking to constantly on or rapidly blinking? The process should take less than 60 seconds.

- Press and hold the programmed HomeLink button for about a sec. Does the device (garage door opener) work?


Press and release the HomeLink button. Press and release the button on the remote every 2 secs.
Does the HomeLink indicator (LED) change from slowly blinking to constantly on or rapidly blinking? The process should take less than 60 seconds.

- Press and hold the HomeLink button again.

- Press and hold the HomeLink button again. The remote-controlled device should operate.
Training Complete
A. The remote has a rolling code. Press the "learn" button on the remote-controlled device (e.g. garage door opener).
B. Within 30 secs, press and hold the programmed HomeLink button for 2 secs.
>>Training HomeLink
Retraining a Button
If you want to retrain a programmed button for a new device, you do not have to erase all button memory. You can replace the existing memory code using this procedure:
- Press and hold the desired HomeLink button until the HomeLink indicator begins to blink.
Standard transmitter Indicator remains on for about 25 secs.
Rolling code transmitter Indicator remains on for about 25 secs.
- Quickly release the HomeLink button and follow steps 1 - 3 under "Training a Button." You do not need to press and release the HomeLink button again in step 2.
Erasing Codes
To erase all the codes, press and hold the two outside buttons until the HomeLink indicator begins to blink (about 10 to 20 secs). You should erase all codes before selling the vehicle.
If you have any problems, see the device's instructions, visit www.homelink.com, or call HomeLink at (800) 355-3515.
HomeLink® is a registered trademark of Gentex Corporation.
Bluetooth® HandsFreeLink®
Bluetooth® HandsFreeLink® (HFL) allows you to place and receive phone calls using your vehicle's audio system, without handling your cell phone.
Using HFL
HFL Buttons
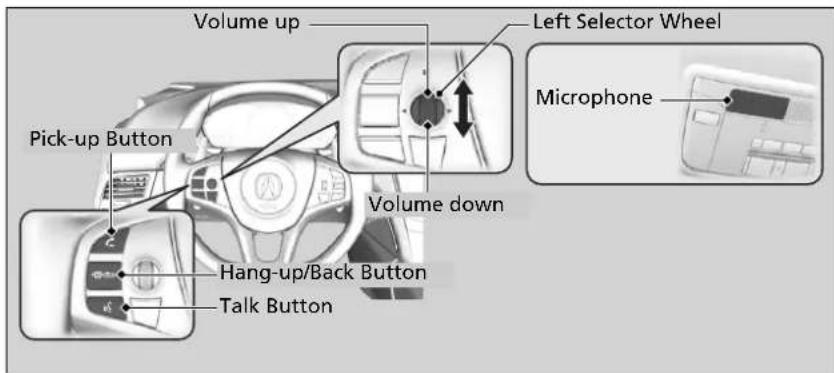
text_image
Volume up Pick-up Button Hang-up/Back Button Talk Button Volume down Left Selector Wheel MicrophoneBluetooth® HandsFreeLink®
Place your phone where you can get good reception.
To use HFL, you need a Bluetooth-compatible cell phone. For a list of compatible phones, pairing procedures, and special feature capabilities:
• U.S.: Visit www.acura.com/handsfreelink, or call 1-888-528-7876.
• Canada: For more information on smartphone compatibility, call 1-888-528-7876.
To use the system, the Bluetooth On/Off Status
setting must be On. If there is an active connection to Apple CarPlay, HFL is unavailable.
→ How to customize P. 244
Voice control tips
- Aim the vents away from the ceiling and close the windows, as noise coming from them may interfere with the microphone.
- Press the 📄Button when you want to call a number using a stored voice tag, a phonebook name, or a number. Speak clearly and naturally after a beep.
- If the microphone picks up voices other than yours, the command may be misinterpreted.
- To change the volume level, select the audio system's VOL (Volume) or use the remote audio controls on the steering wheel.
Up to five speed dial entries can be displayed among a total of 20 that can be entered.
→ Speed Dial P. 284
Up to five previous calls can be displayed at a time among a total of 20 that can be entered. If there is no call history, Call History is disabled.
(Pick-up) button: Press to go to the Speed Dial/Call History on the driver information interface, or to answer an incoming call.
(Hang-up/back) button: Press to end a call, go back to the previous command, cancel a command, or clear the phone information on the driver information interface.
(£) (Talk) button: Press to access Voice Portal.
Left selector wheel:
Move to the right or left to select the Speed Dial or Call History on the driver information interface.
Roll up or down to select an item displayed on the Speed Dial/Call History display. Push to call a number listed in the selected item on the Speed Dial/Call History display.
To go to the Phone menu screen:
- Select HOME
- Select Phone to switch the display to the phone screen.
- Select MENU.
Bluetooth® HandsFreeLink®
Bluetooth® Wireless Technology
The Bluetooth® word mark and logos are registered trademarks owned by Bluetooth SIG, Inc., and any use of such marks by Honda Motor Co., Ltd., is under license. Other trademarks and trade names are those of their respective owners.
HFL Limitations
An incoming call on HFL will interrupt the audio system when it is playing. It will resume when the call is ended.
Bluetooth® HandsFreeLink® Using HFL
■ HFL Status Display
The audio/information screen notifies you when there is an incoming call.
Bluetooth Indicator
Appears when your phone is connected to HFL.
Battery Level Status
Signal StrengthHFL Mo
HFL Status Display
The information that appears on the audio/information screen varies between phone models.
You can change the system language.
→ How to customize P. 244
Caller's Name
Caller's Number
■ Limitations for Manual Operation
Certain manual functions are disabled or inoperable while the vehicle is in motion. You cannot select a grayed-out option until the vehicle is stopped.
Only previously stored speed dial entries with voice tags, phonebook names, or numbers can be called using voice commands while the vehicle is in motion.
→ Speed Dial P. 284
HFL Menus
The power mode must be in ACCESSORY or ON to use HFL.
■ Phone settings screen
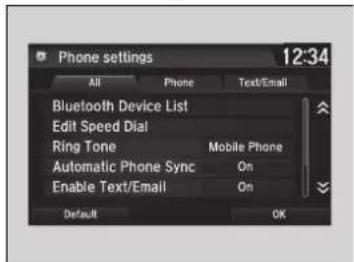
text_image
Phone settings 12:34 All Phone Text/Email Bluetooth Device List Edit Speed Dial Ring Tone Mobile Phone Automatic Phone Sync On Enable Text/Email On Default OK- Select
- Select Settings.
- Select Phone.
HFL Menus
To use HFL, you must first pair your Bluetooth-compatible cell phone to the system while the vehicle is parked.
Some functions are limited while driving.
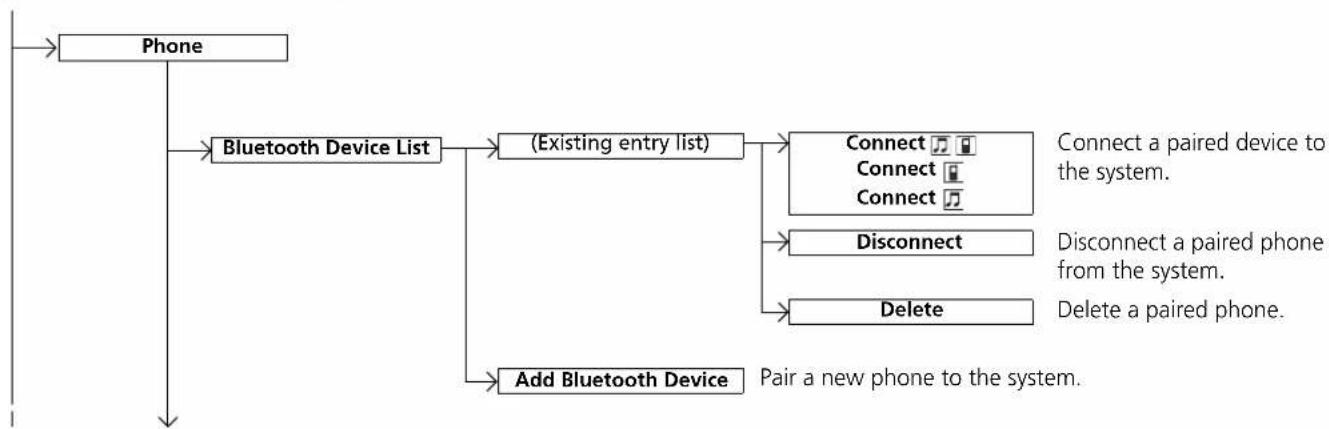
flowchart
graph TD
    A["Phone"] --> B["Bluetooth Device List"]
    B --> C["(Existing entry list)"]
    C --> D["Connect 🎯 Connect 🎯 Connect"]
    C --> E["Disconnect"]
    C --> F["Delete"]
    B --> G["Add Bluetooth Device"]
    D --> H["Connect a paired device to the system."]
    E --> I["Disconnect a paired phone from the system."]
    E --> J["Delete a paired phone."]
    G --> K["Pair a new phone to the system."]
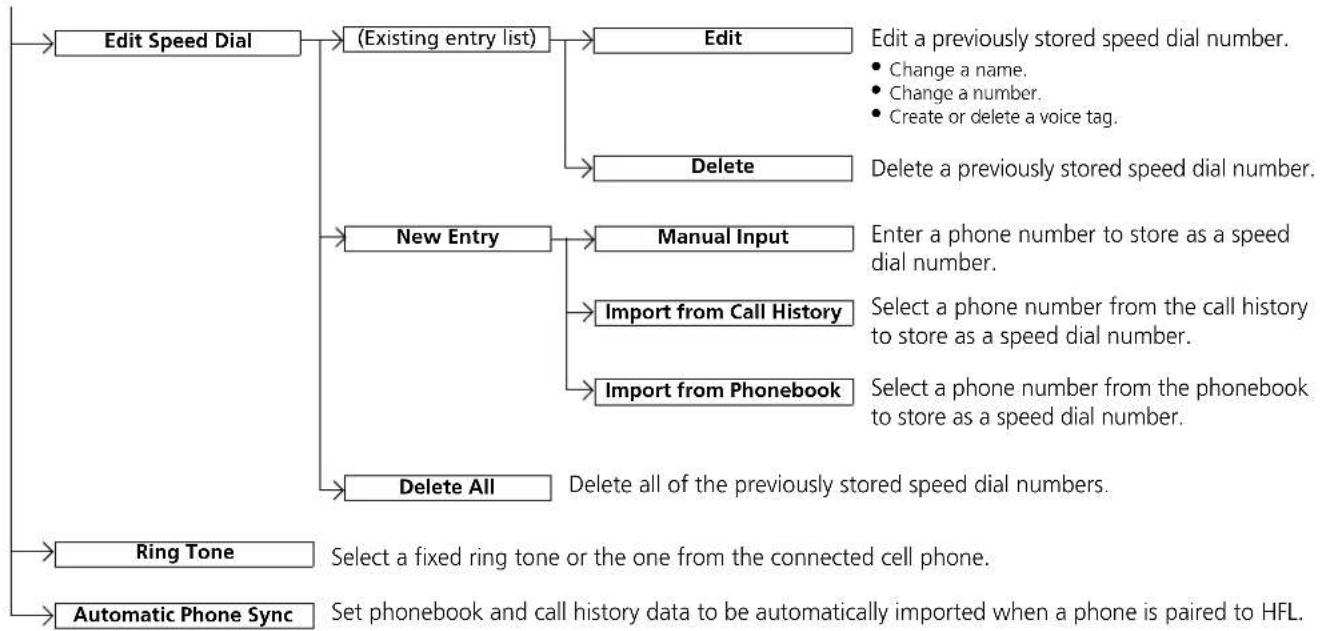
flowchart
graph TD
    A["Edit Speed Dial"] --> B["(Existing entry list)"]
    B --> C["Edit"]
    B --> D["Delete"]
    C --> E["Edit a previously stored speed dial number."]
    C --> F["Change a name."]
    C --> G["Change a number."]
    C --> H["Create or delete a voice tag."]
    D --> I["Delete a previously stored speed dial number."]
    J["New Entry"] --> K["Manual Input"]
    K --> L["Enter a phone number to store as a speed dial number."]
    J --> M["Import from Call History"]
    M --> N["Select a phone number from the call history to store as a speed dial number."]
    J --> O["Import from Phonebook"]
    O --> P["Select a phone number from the phonebook to store as a speed dial number."]
    J --> Q["Delete All"]
    Q --> R["Delete all of the previously stored speed dial numbers."]
    S["Ring Tone"] --> T["Select a fixed ring tone or the one from the connected cell phone."]
    U["Automatic Phone Sync"] --> V["Set phonebook and call history data to be automatically imported when a phone is paired to HFL."]
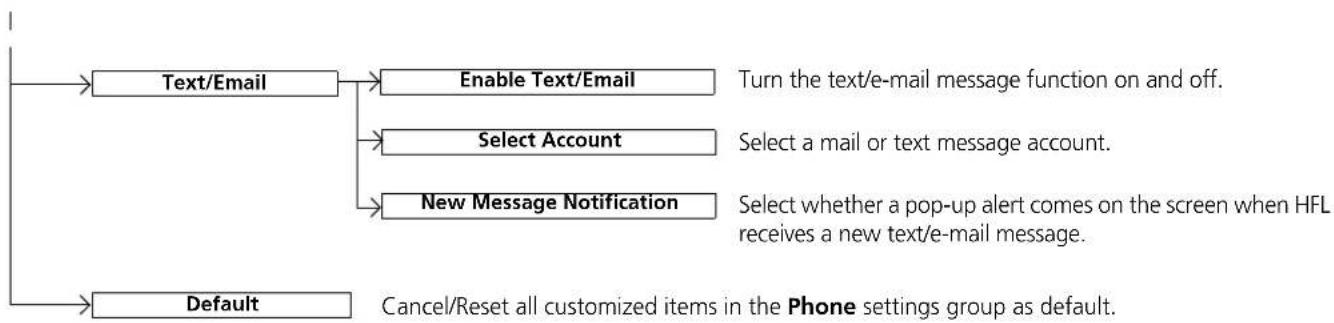
flowchart
graph TD
    A["Text/Email"] --> B["Enable Text/Email"]
    A --> C["Select Account"]
    A --> D["New Message Notification"]
    E["Default"] --> F["Cancel/Reset all customized items in the Phone settings group as default."]
■ Phone menu screen
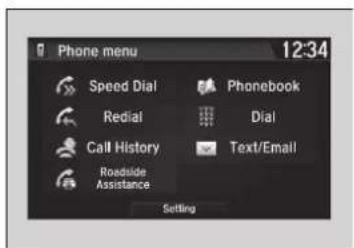
text_image
Phone menu 12:34 Speed Dial Redial Call History Roadside Assistance Phonebook Dial Text/Email Setting- Select
- Select Phone.
- Select MENU
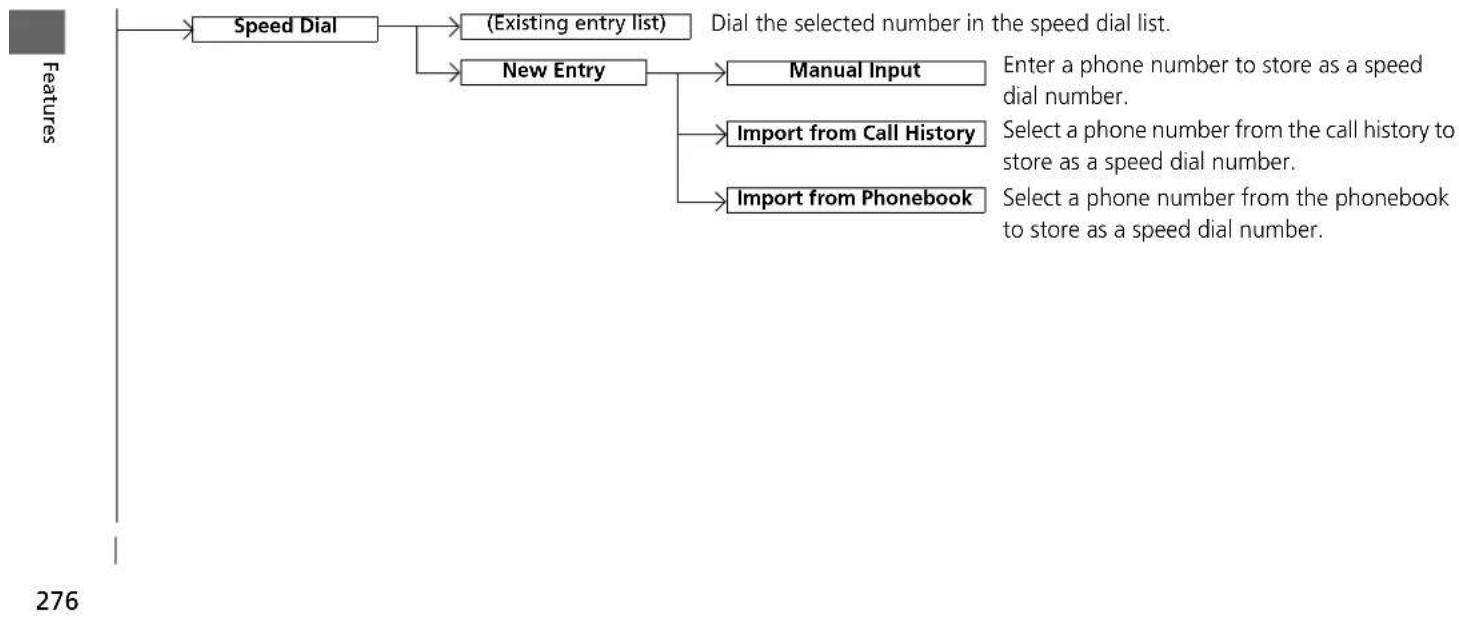
flowchart
graph TD
    A["Speed Dial"] --> B["(Existing entry list)"]
    A --> C["New Entry"]
    C --> D["Manual Input"]
    C --> E["Import from Call History"]
    C --> F["Import from Phonebook"]
    D --> G["Enter a phone number to store as a speed dial number."]
    E --> H["Select a phone number from the call history to store as a speed dial number."]
    F --> I["Select a phone number from the phonebook to store as a speed dial number."]
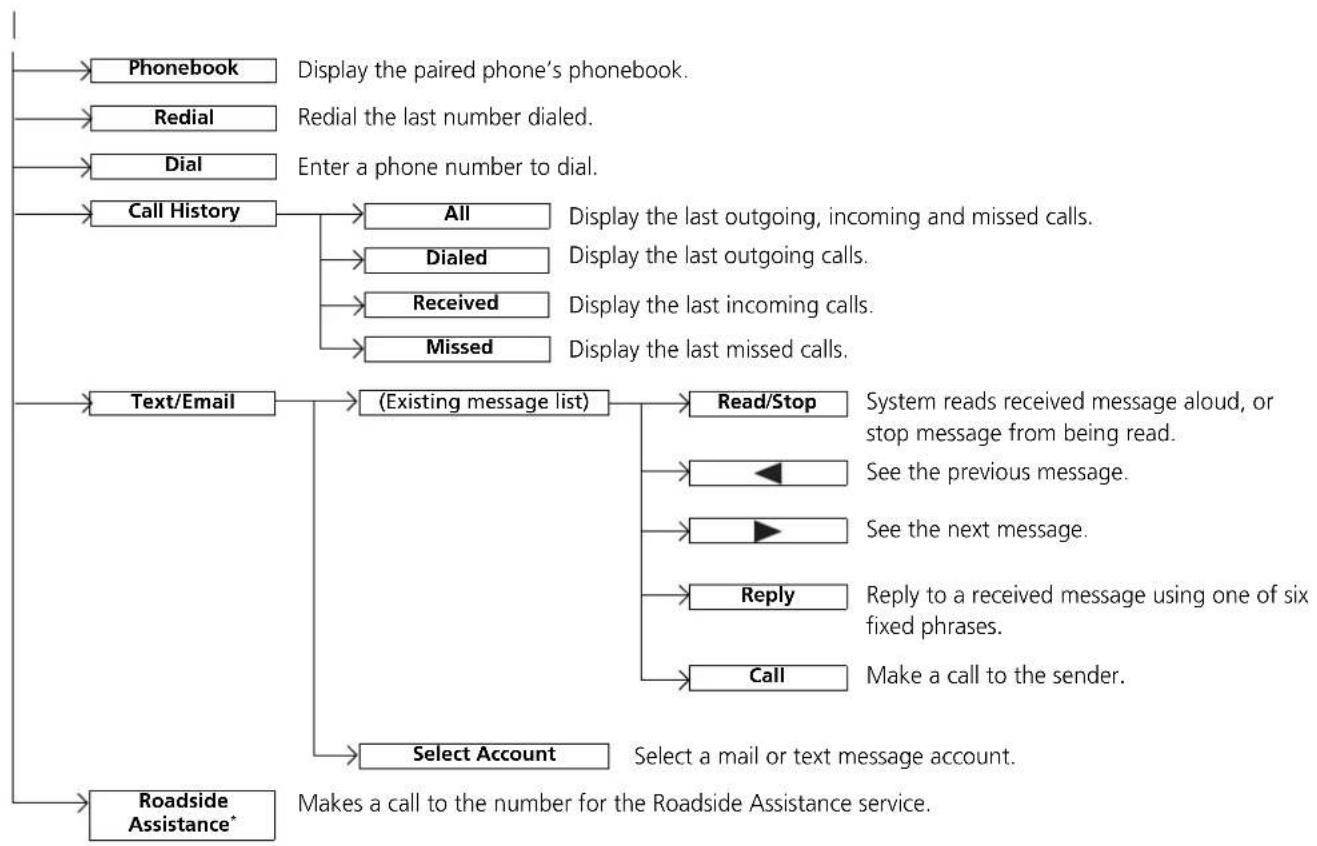
flowchart
graph TD
    A["Phonebook"] --> B["Display the paired phone's phonebook."]
    C["Redial"] --> D["Redial the last number dialed."]
    E["Dial"] --> F["Enter a phone number to dial."]
    G["Call History"] --> H["All"] --> I["Display the last outgoing, incoming and missed calls."]
    G --> J["Dialed"] --> K["Display the last outgoing calls."]
    G --> L["Received"] --> M["Display the last incoming calls."]
    G --> N["Missed"] --> O["Display the last missed calls."]
    P["Text/Email"] --> Q["(Existing message list)"] --> R["Read/Stop"] --> S["System reads received message aloud, or stop message from being read."]
    S --> T["◀"] --> U["See the previous message."]
    S --> V["▶"] --> W["See the next message."]
    S --> X["Reply"] --> Y["Reply to a received message using one of six fixed phrases."]
    S --> Z["Call"] --> AA["Make a call to the sender."]
    P --> AB["Select Account"] --> AC["Select a mail or text message account."]
    AB --> AD["Roadside Assistance*"]
    AD --> AE["Makes a call to the number for the Roadside Assistance service."]
* Not available on all models
Continued
Phone Setup
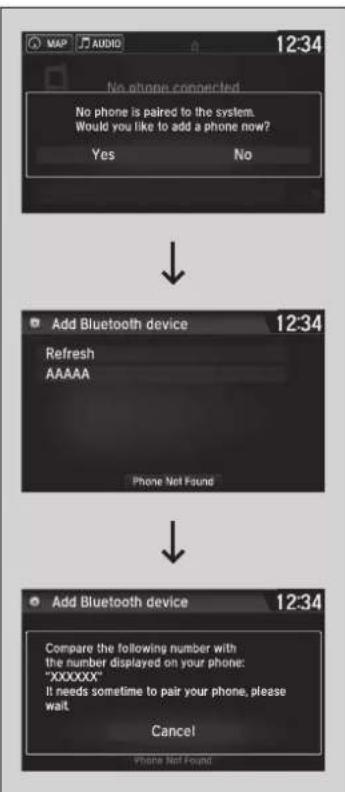
flowchart
graph TD
    A["No phone connected\nNo phone is paired to the system.\nWould you like to add a phone now?\nYes\nNo"] --> B["Add Bluetooth device\nRefresh\nAAAAA\nPhone Not Found"]
    B --> C["Compare the following number with\nthe number displayed on your phone:\n"XXXXXX"\nIt needs sometime to pair your phone, please\nwait\nCancel\nPhone Not Found"]
■ To pair a cell phone (when there is no phone paired to the system)
- Select Phone.
- Select Yes.
- Make sure your phone is in search or discoverable mode, then select Continue.
HFL automatically searches for a Bluetooth® device.
- Select your phone when it appears on the list.
▶ If your phone does not appear, you can select Refresh to search again.
If your phone still does not appear, select Phone Not Found and search for Bluetooth® devices using your phone. From your phone, search for HandsFreeLink.
- The system gives you a pairing code on the audio/information screen.
▶ Confirm if the pairing code on the screen and your phone match. This may vary by phone.
Phone Setup
Your Bluetooth-compatible phone must be paired to the system before you can make and receive hands-free calls.
Phone Pairing Tips:
- You cannot pair your phone while the vehicle is moving.
- Up to six phones can be paired.
- Your phone's battery may drain faster when it is paired to the system.
- If your phone is not ready for pairing or not found by the system within three minutes, the system will time out and return to idle.
Once you have paired a phone, you can see it displayed on the screen with one or two icons on the right side.
These icons indicate the following:
☐: The phone can be used with HFL
: The phone is compatible with Bluetooth® Audio.
If there is an active connection to Apple CarPlay, pairing of additional Bluetooth-compatible devices is unavailable and Add Bluetooth Device is grayed out from the Bluetooth Device List screen.
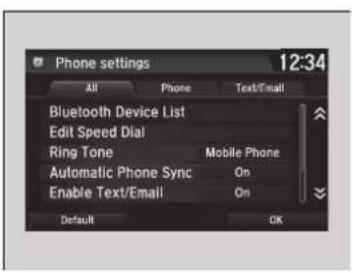
text_image
Phone settings 12:34 All Phone Text/Email Bluetooth Device List Edit Speed Dial Ring Tone Mobile Phone Automatic Phone Sync On Enable Text/Email On Default OK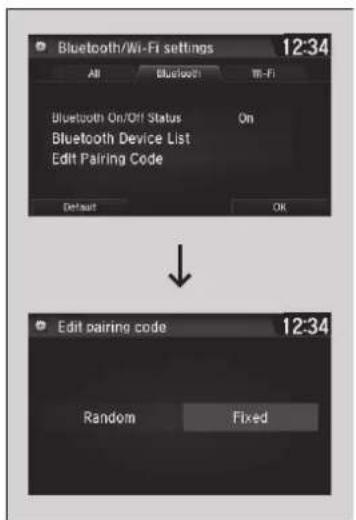
text_image
Bluetooth/Wi-Fi settings 12:34 All Bluetooth Wi-Fi Bluetooth On/Off Status On Bluetooth Device List Edit Pairing Code Default OK Edit pairing code 12:34 Random Fixed■ To change the currently paired phone
- Go to the phone settings screen.
Phone settings screen P. 273
- Select Bluetooth Device List.
- Select a phone to connect.
▶ HFL disconnects the connected phone and starts searching for another paired phone.
- Select Connect 🎯, Connect 🎯, or Connect 🎯.
■ To change the pairing code setting
- Select
- Select Settings.
- Select Bluetooth/Wi-Fi.
- Select the Bluetooth tab.
-
Select Edit Pairing Code.
-
Select Random or Fixed.
To change the currently paired phone
If no other phones are found or paired when trying to switch to another phone, HFL will inform you that the original phone is connected again.
To pair other phones, select Add Bluetooth Device from the Bluetooth device list screen.
To change the pairing code setting
The default pairing code is 0000 until you change the setting.
To create your own, select Fixed, and delete the current code, then enter a new one.
For a randomly generated pairing code each time you pair a phone, select Random.
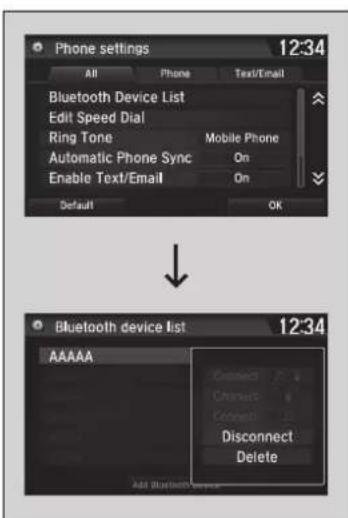
text_image
Phone settings 12:34 All Phone Text/Email Bluetooth Device List Edit Speed Dial Ring Tone Mobile Phone Automatic Phone Sync On Enable Text/Email On Default OK Bluetooth device list 12:34 AAAAA Connect F Connect C Connect A Disconnect Delete Add Bluetooth/Internet■ To delete a paired phone
- Go to the phone settings screen.
Phone settings screen P. 273
- Select Bluetooth Device List.
-
Select a phone you want to delete.
-
Select Delete.
-
A confirmation message appears on the screen. Select Yes.
To Set Up Text/E-mail Message Options
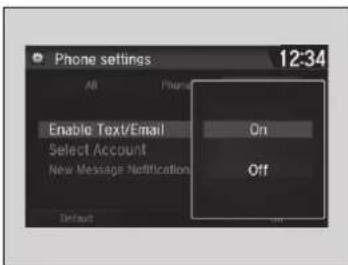
text_image
Phone settings 12:34 All Enable Text/Email Select Account New Message Notification On Off Default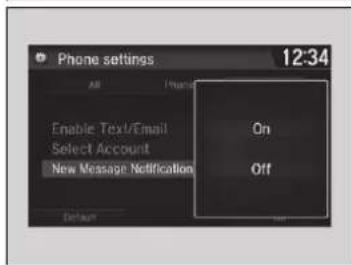
text_image
Phone settings 12:34 All Enable Text/Email Select Account New Message Notification On Off Default■ To turn on or off the text/e-mail function
- Go to the phone settings screen.
Phone settings screen P. 273
- Select the Text/Email tab, then Enable Text/Email.
▶ A pop-up menu appears on the screen.
- Select On or Off.
■ To turn on or off the text/e-mail notice
- Go to the phone settings screen.
Phone settings screen P. 273
- Select the Text/Email tab, then New Message Notification.
▶ A pop-up menu appears on the screen.
- Select On or Off.
To Set Up Text/E-mail Message Options
To use the text/e-mail message function, it may be necessary to set up on your phone.
To turn on or off the text/e-mail notice
On: A pop-up notification comes on every time you receive a new message.
Off: The message you receive is stored in the system without notification.
Ring Tone
You can change the ring tone setting.
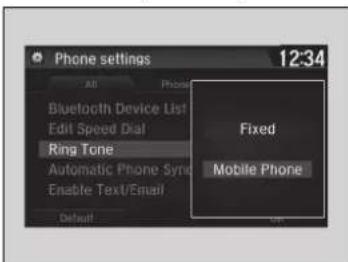
text_image
Phone settings 12:34 Fixed Mobile Phone- Go to the phone settings screen.
→ Phone settings screen P. 273 - Select Ring Tone.
- Select Fixed or Mobile Phone.
Ring Tone
Fixed: The fixed ring tone sounds from the speakers. Mobile Phone: For certain connected phones, the ring tone stored in the phone sounds from the speakers.
Automatic Import of Cellular Phonebook and Call History
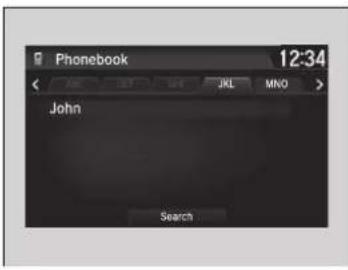
text_image
Phonebook 12:34 John Search■ When Automatic Phone Sync is set to On:
When your phone is paired, the contents of its phonebook and call history are automatically imported to the system.
■ Changing the Automatic Phone Sync setting
-
Go to the phone settings screen. ▶ Phone settings screen P. 273
-
Select Automatic Phone Sync.
-
Select On or Off.
Automatic Import of Cellular Phonebook and Call History
When you select a name from the list in the cellular phonebook, you can see up to three category icons. The icons indicate what types of numbers are stored for that name.
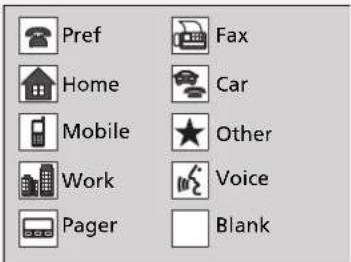
text_image
Pref Home Mobile Work Pager Fax Car Other Voice BlankOn some phones, it may not be possible to import the category icons to the system.
The phonebook is updated after every connection. Call history is updated after every connection or call.
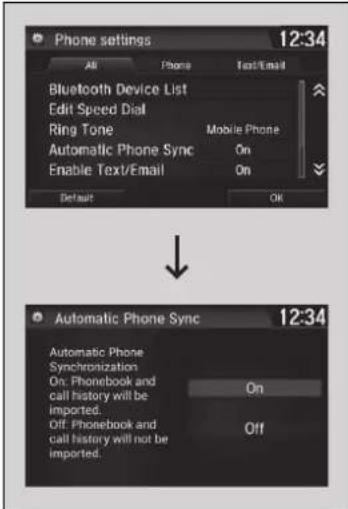
text_image
Phone settings 12:34 All Phone Text/Email Bluetooth Device List Edit Speed Dial Ring Tone Mobile Phone Automatic Phone Sync On Enable Text/Email On Default OK Automatic Phone Sync 12:34 Automatic Phone Synchronization On: Phonebook and call history will be imported. Off: Phonebook and call history will not be imported. On OffContinued
Speed Dial
Up to 20 speed dial numbers can be stored per phone.
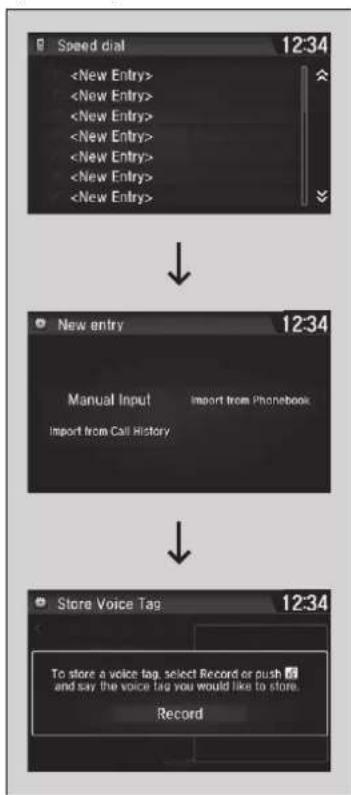
flowchart
graph TD
    A["Speed dial 12:34"] --> B["New entry 12:34"]
    B --> C["Manual Input Import from Phonebook"]
    C --> D["Store Voice Tag 12:34"]
    D --> E["To store a voice tag, select Record or push 📋 and say the voice tag you would like to store. Record"]
To store a speed dial number:
- Go to the Phone menu screen. Phone menu screen P. 276
- Select Speed Dial.
- Select New Entry.
From Import from Call History:
▶ Select a number from the call history.
From Manual Input:
▶ Input the number manually.
From Import from Phonebook:
Select a number from the connected cell phone's imported phonebook.
-
When the speed dial is successfully stored, you are asked to create a voice tag for the number. Select Yes or No.
-
Select Record, or use the ⏻ button and follow the prompts to complete the voice tag.
>>Speed Dial
When a voice tag is stored, press the button to call the number using the voice tag. Say the voice tag name.
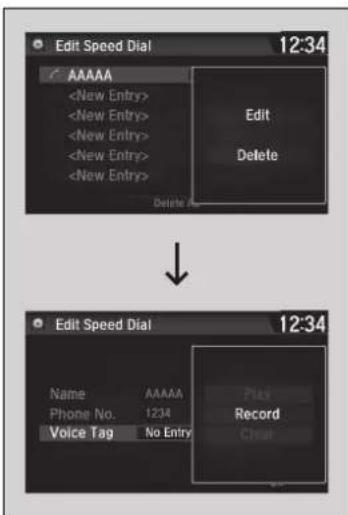
text_image
Edit Speed Dial 12:34 AAAAA
text_image
Edit Speed Dial 12:34 Name AAAAA Play Phone No. 1234 Record Voice Tag No Entry Clear■ To add a voice tag to a stored speed dial number
- Go to the phone settings screen.
Phone settings screen P. 273 - Select Edit Speed Dial.
- Select an existing speed dial entry.
▶ From the pop-up menu, select Edit. - Select Voice Tag.
▶ From the pop-up menu, select Record. - Select Record, or use the button and follow the prompts to complete the voice tag.
■ To delete a voice tag
- Go to the phone settings screen.
Phone settings screen P. 273 - Select Edit Speed Dial.
- Select an existing speed dial entry.
▶ From the pop-up menu, select Edit. - Select Voice Tag.
▶ From the pop-up menu, select Clear. - A confirmation message appears on the screen. Select Yes.
>>Speed Dial
Avoid using duplicate voice tags.
Avoid using "home" as a voice tag.
It is easier for the system to recognize a longer name.
For example, use "John Smith" instead of "John."
text_image
Edit Speed Dial 12:34 AAAAA■ To edit a speed dial
- Go to the phone settings screen.
Phone settings screen P. 273
-
Select Edit Speed Dial.
-
Select an existing speed dial entry.
▶ From the pop-up menu, select Edit.
- Select a setting you want.
■ To delete a speed dial
- Go to the phone settings screen.
Phone settings screen P. 273
-
Select Edit Speed Dial.
-
Select an existing speed dial entry.
▶ From the pop-up menu, select Delete.
- A confirmation message appears on the screen. Select Yes.
■ Phonebook Phonetic Modification
Add phonetic modifications or a new voice tag to the phone's contact name so that it is easier for HFL to recognize voice commands.
text_image
System settings 12:34 Display Sound/Beep Voice Recog Voice Prompt On Voice Recog. Volume 6 Song by Voice On Song by Voice Phonetic Modification Phonebook Phonetic Modification Default OK Phonetic Modification 12:34 AAAAA■ To add a new voice tag
- Select HOME
- Select Settings.
- Select System.
- Select the Voice Recog tab.
- Select Phonebook Phonetic Modification.
- Select the phone you want to add the phonetic modification to.
Phonebook Phonetic Modification
You can store up to 20 phonetic modification items.
Continued
text_image
Select a contact name 12:347. Select New Voice Tag
- Select a contact name you want to add to.
The pop-up menu appears on the screen.
9. Select Modify.
-
Using Record or the Ⓞ button, follow the prompts to complete the voice tag.
-
You will receive a confirmation message on the screen, then select OK.
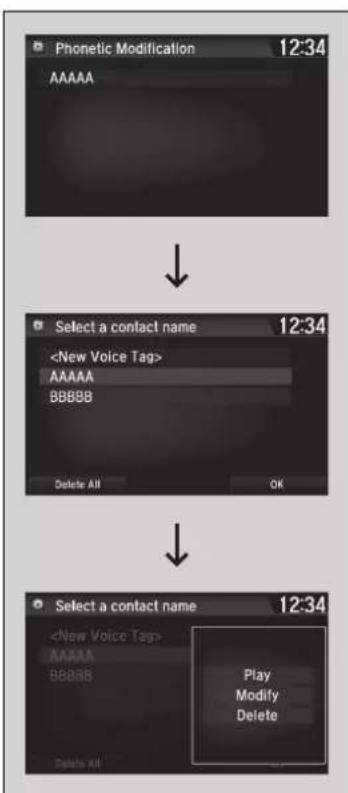
flowchart
graph TD
    A["Phonetic Modification\n12:34\nAAAAA"] --> B["Select a contact name\n12:34\n<New Voice Tag>\nAAAAA\nBBBBB\nDelete All OK"]
    B --> C["Select a contact name\n12:34\n<New Voice Tag>\nAAAAA\nBBBBB\nDelete All Play\nModify\nDelete"]
■ To modify a voice tag
- Select HOME
- Select Settings.
- Select System.
- Select the Voice Recog tab.
- Select Phonebook Phonetic Modification.
- Select the phone for which you want to modify the voice tag.
- Select a contact name you want to modify.
The pop-up menu appears on the screen.
-
Select Modify.
-
Using Record or the Ⓞ button, follow the prompts to complete the voice tag.
- You will receive a confirmation message on the screen, then select OK.
Phonebook Phonetic Modification
You can only modify or delete contact names for the currently connected phone.
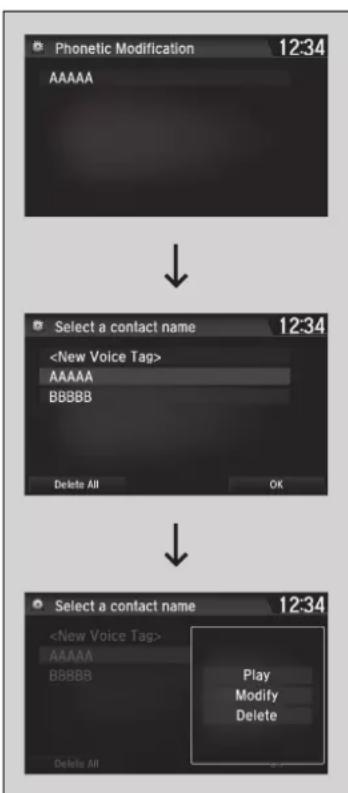
flowchart
graph TD
    A["Phonetic Modification 12:34"] --> B["Select a contact name 12:34"]
    B --> C["Select a contact name 12:34"]
    C --> D["Play\nModify\nDelete"]
■ To delete a modified voice tag
- Select HOME
- Select Settings.
- Select System.
- Select the Voice Recog tab.
- Select Phonebook Phonetic Modification.
- Select the phone from which you want to delete the phonetic modification.
- Select a contact name you want to delete.
The pop-up menu appears on the screen. - Select Delete.
The selected contact name has been selected. - Select OK.
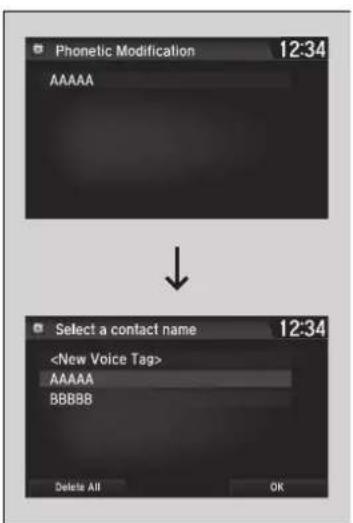
text_image
Phonetic Modification 12:34 AAAAA Select a contact name 12:34■ To delete all modified voice tags
- Select
- Select Settings.
- Select System.
- Select the Voice Recog tab.
- Select Phonebook Phonetic Modification.
- Select the phone from which you want to delete the phonetic modifications. ▶ The contact name list appears.
- Select Delete All.
- You will receive a confirmation message on the screen, then select Yes.
Making a Call
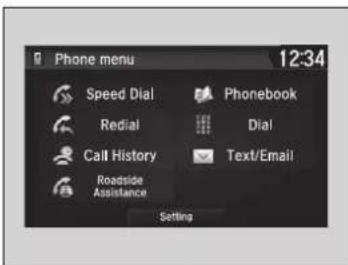
text_image
Phone menu 12:34 Speed Dial Phonebook Redial Dial Call History Text/Email Roadside Assistance SettingYou can make calls by inputting any phone number, or by using the imported phonebook, call history, speed dial entries, or redial.
Making a Call
Any voice-tagged speed dial entry can be dialed by voice from most screens.
Press the 📋 button and say the voice tag name.
Once a call is connected, you can hear the voice of the person you are calling through the audio speakers.
While there is an active connection with Apple CarPlay, phone calls cannot be made with HandsFreeLink® and are only made from Apple CarPlay.
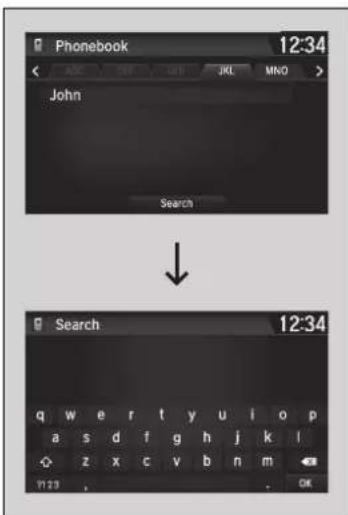
text_image
Phonebook 12:34 John Search Search 12:34■ To make a call using the imported phonebook
- Go to the Phone menu screen.
Phone menu screen P. 276
- Select Phonebook.
- Select a name.
▶ You can also search by letter. Select Search.
▶ Use the keyboard on the touch screen for entering a name. If multiple numbers exist, select a number.
- Select a number.
▶ Dialing starts automatically.
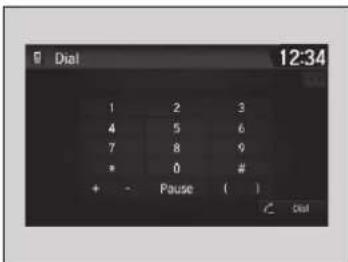
text_image
Dial 1 2 3 4 5 6 7 8 9 * 0 # + - Pause ( ) Dial■ To make a call using a phone number
- Go to the Phone menu screen.
Phone menu screen P. 276
- Select Dial.
- Select a number.
▶ Use the keyboard on the touch screen for entering numbers.
- Select 📞 Dial
▶ Dialing starts automatically.
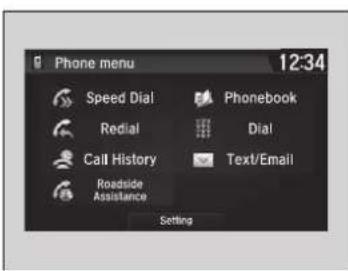
text_image
Phone menu 12:34 Speed Dial Redial Call History Roadside Assistance Phonebook Dial Text/Email Setting■ To make a call using redial
- Go to the Phone menu screen.
Phone menu screen P. 276
- Select Redial.
▶ Dialing starts automatically.
To make a call using redial
Press and hold the 📋 button to redial the last number dialed.
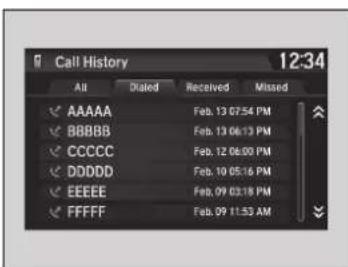
Call history is stored by All, Dialed,
Received, and Missed
- Go to the Phone menu screen.
Phone menu screen P. 276
-
Select Call History.
-
Select All, Dialed, Received, or Missed.
-
Select a number.
▶ Dialing starts automatically.
To make a call using the Call History
The call history displays the last 20 all, dialed, received, or missed calls.
(Appears only when a phone is connected to the system.)
These icons next to the number indicate the following:
: Dialed calls.
: Received calls.
: Missed calls.
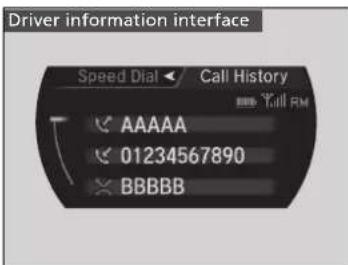
text_image
Driver information interface Speed Dial Call History AAAAA 01234567890 BBBBBSteering switches
-
Press the 📄 button.
-
Move the left selector wheel right to select Call History.
-
Roll the left selector wheel to select a number.
-
Push the left selector wheel or the button.
▶ Dialing starts automatically.
Steering switches
The call history displays the last 12 dialed, received, or missed calls.
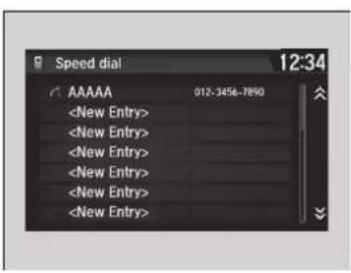
text_image
Speed dial 12:34 AAAAA 012-3456-7890■ To make a call using a Speed Dial entry
- Go to the Phone menu screen. → Phone menu screen P. 276
- Select Speed Dial.
- Select a number. ▶ Dialing starts automatically.
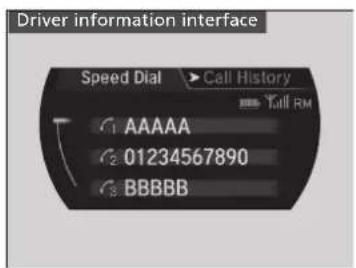
text_image
Driver information interface Speed Dial ▶ Call History AAAAA 01234567890 BBBBBSteering switches
- Press the 📞 button.
- Move the left selector wheel left to select Speed Dial.
- Roll the left selector wheel to select a number.
- Push the left selector wheel or the button.
▶ Dialing starts automatically.
To make a call using a Speed Dial entry
When a voice tag is stored, press the button to call the number using the voice tag.
→ Speed Dial P. 284
Any voice-tagged speed dial entry can be dialed by voice from any screen.
Press the button and follow the prompts.
Steering switches
The speed dial displays the 20 speed dial entries.
Receiving a Call
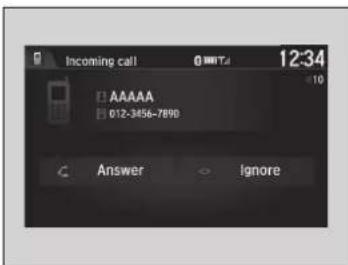
text_image
Incoming call 12:34 AAAAA 012-3456-7890 Answer IgnoreWhen there is an incoming call, an audible notification sounds (if activated) and the Incoming call screen appears.
Press the button to answer the call. Press the button to decline or end the call.
Options During a Call
The following options are available during a call.
Mute: Mute your voice.
Transfer: Transfer a call from the system to your phone.
Touch Tones: Send numbers during a call. This is useful when you call a menu-driven phone system.
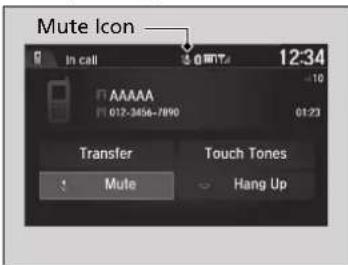
text_image
Mute Icon In call 12:34 AAAAA 012-3456-7890 01:23 Transfer Touch Tones Mule Hang UpThe available options are shown on the lower half of the screen.
Select the option.
The mute icon blinks when Mute is selected. Select Mute again to turn it off.
>>Receiving a Call
Call Waiting
Press the button to put the current call on hold to answer the incoming call.
Press the 📄 button again to return to the current call.
Select Ignore to ignore the incoming call if you do not want to answer it.
Press the button if you want to hang up the current call.
You can select the icons on the audio/information screen instead of the 📄 and 🔍 buttons
>>Options During a Call
Touch Tones: Available on some phones.
You can select the icons on the audio/information screen.
Receiving a Text/E-mail Message
HFL can display newly received text or e-mail messages as well as 20 of the most recently received messages on a linked cell phone. Each received message can be read aloud and replied to using a fixed common phrase.
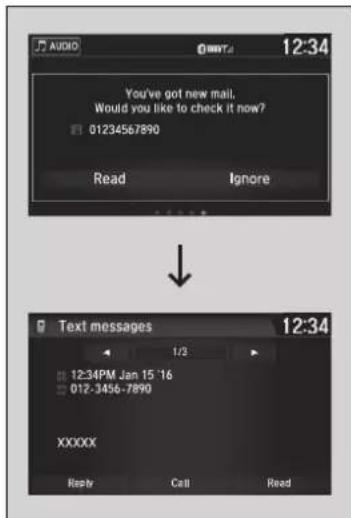
text_image
AUDIO 12:34 You've got new mail. Would you like to check it now? 01234567890 Read Ignore ↓ Text messages 12:34 1/3 12:34PM Jan 15 16 012-3456-7890 XXXXX Repr Call Read- A pop-up appears and notifies you of a new text or e-mail message.
- Select Read to listen to the message.
The text or e-mail message is displayed. The system automatically starts reading out the message. - To discontinue the message read-out, select Stop.
>>Receiving a Text/E-mail Message
The system does not display any received messages while you are driving. You can only hear them read aloud.
The system can only receive messages that are sent as text (SMS) messages. Messages sent using data services will not be displayed in the list.
With some phones, you may be able to display up to 20 most recent text and e-mail messages.
State or local laws may limit your use of the HFL text /e-mail message feature. Only use the text /e-mail message feature when conditions allow you to do so safely.
When you receive a text or e-mail message for the first time since the phone is paired to HFL, you are asked to turn the New Message Notification setting to On.
To turn on or off the text/e-mail notice
P. 281
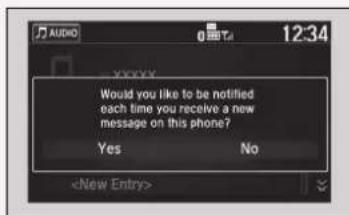
text_image
Would you like to be notified each time you receive a new message on this phone? Yes NoSelecting a Mail Account
If a paired phone has text or mail message accounts, you can select one of them to be active and receive notifications.
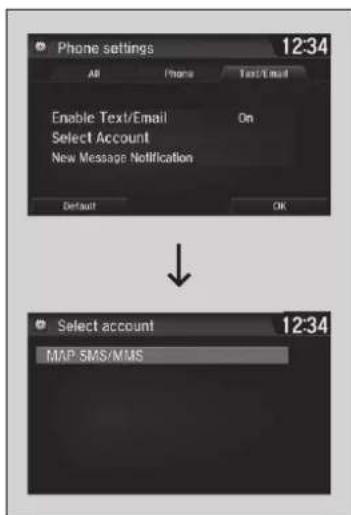
text_image
Phone settings 12:34 All Phone Text/Email Enable Text/Email On Select Account New Message Notification Default OK Select account 12:34 MAP SMS/MMS- Go to the phone settings screen.
Phone settings screen P. 273
- Select the Text/Email tab, then Select Account.
▶ A pop-up menu appears on the screen.
- Select Text Messages or an e-mail account you want.
>>Selecting a Mail Account
You can also select a mail account from the folder list screen or the message list screen.
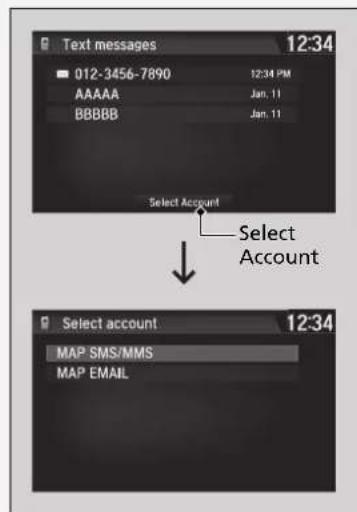
text_image
Text messages 12:34 012-3456-7890 12:34 PM AAAAA Jan. 11 BBBBB Jan. 11 Select Account Select Account Select account 12:34 MAP SMS/MMS MAP EMAILYou can only receive notifications from one text or mail message account at a time.
■ Displaying Messages
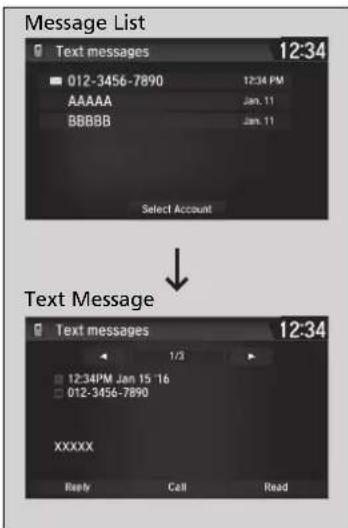
text_image
Message List Text messages 12:34 012-3456-7890 12:34 PM AAAA Jan. 11 BBBB Jan. 11 Select Account Text Message 1/3 12:34PM Jan 15 '16 012-3456-7890 XXXXX Reply Call Read■ Displaying text messages
- Go to the Phone menu screen.
Phone menu screen P. 276
- Select Text/Email.
▶ Select account if necessary.
- Select a message.
The text message is displayed. The system automatically starts reading the message aloud.
>>Displaying Messages
The icon appears next to an unread message.
If you delete a message on the phone, the message is also deleted in the system. If you send a message from the system, the message goes to your phone's outbox.
To see the previous or next message, select (previous) or □next) on the message screen.

Continued
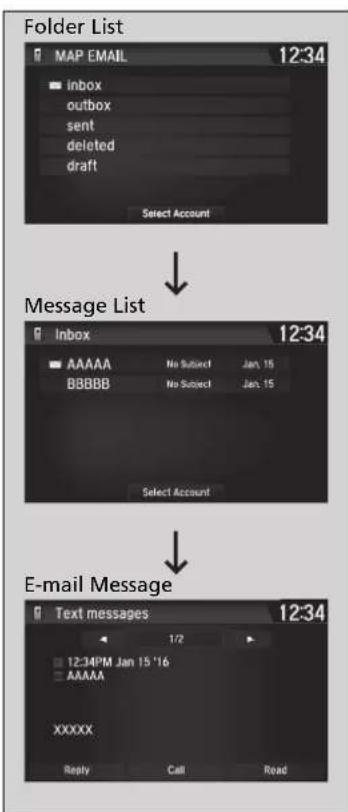
flowchart
graph TD
    A["Folder List"] --> B["Message List"]
    B --> C["E-mail Message"]
■ Displaying e-mail messages
- Go to the Phone menu screen.
Phone menu screen P. 276 - Select Text/Email.
▶ Select Select Account if necessary. - Select a folder.
- Select a message.
The e-mail message is displayed. The system automatically starts reading the message aloud.
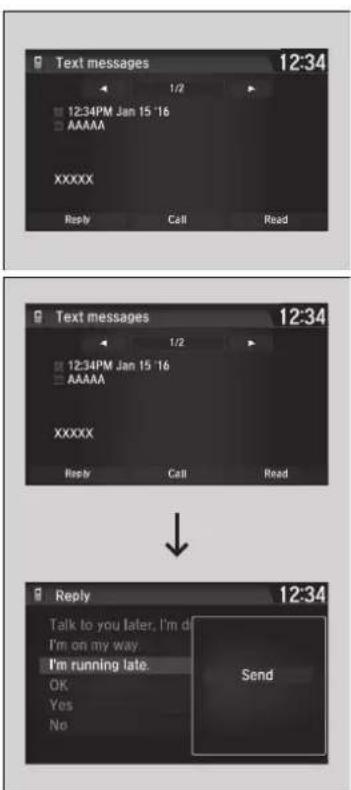
text_image
Text messages 12:34 1/2 12:34PM Jan 15 '16 AAAAA XXXXX Reply Call Read Text messages 12:34 1/2 12:34PM Jan 15 '16 AAAAA XXXXX Reply Call Read Reply 12:34 Talk to you later, I'm d I'm on my way. I'm running late. OK Yes No Send■ Read or Stop reading a message
- Go to the text or e-mail message screen.
The system automatically starts reading the message aloud.
→ Displaying Messages P. 299
- Select Stop to stop reading.
Select Read again to start reading the message from the beginning.
■ Reply to a message
- Go to the text or e-mail message screen.
The system automatically starts reading the message aloud.
→ Displaying Messages P. 299
2. Select Reply
- Select the reply message.
The pop-up menu appears on the screen.
- Select Send to send the message.
▶ Complete appears on the screen when the reply message was successfully sent.
>>Reply to a message
The available fixed reply messages are as follows:
• Talk to you later, I'm driving.
- I'm on my way.
- I'm running late.
• OK
- Yes
• No
You cannot add, edit, or delete reply messages.
Only certain phones receive and send messages when paired and connected. For a list of compatible phones:
• U.S.: Visit www.acura.com/handsfreelink/, or call 1-888-528-7876.
• Canada: For more information on smartphone compatibility, call 1-888-528-7876.
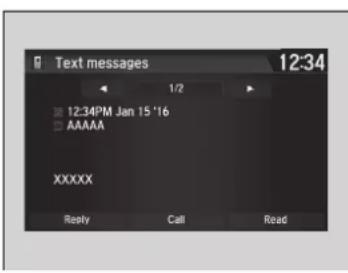
text_image
Text messages 12:34 1/2 12:34PM Jan 15 '16 AAAAA XXXXX Reply Call Read■ Making a call to a sender
- Go to the text message screen.
- Select Call.
Roadside Assistance\*
Provides a nationwide service for unexpected incidents. You can call for assistance using a phone paired and connected to Bluetooth® HandsFreeLink®.
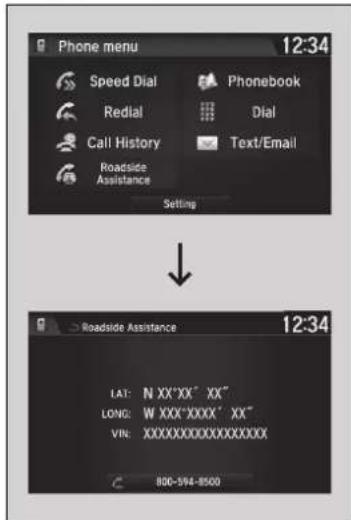
text_image
Phone menu 12:34 Speed Dial Phonebook Redial Dial Call History Text/Email Roadside Assistance Setting Roadside Assistance 12:34 LAT: N XX"XX" XX" LONG: W XXX"XXXX" XX" VIN:XXXXXXXXXXXXXXX 800-594-8500- Go to the Phone menu screen.
Phone menu screen P. 276 - Select Roadside Assistance.
- Select a phone number.
▶ Dialing starts automatically.
Roadside Assistance \*
If you are subscribed to a paid AcuraLink package, you can call roadside assistance (1-844-682-2872) using the LINK button instead of your phone. If you need to contact Acura Client Relations, call 1-800-382-2238.
AcuraLink®* P. 304
AcuraLink®\*
Is a subscription-based service that provides convenient features such as voice communication in case of an airbag deployment, online security, and one-on-one operator assistance. For information on traffic rerouting and traffic information updates, provided by the AcuraLink server, see the Navigation System Manual.
In Case of a Crash
■ Automatic collision notification
If your vehicle's airbags deploy or if the unit detects that the vehicle is severely impacted, your vehicle will automatically attempt to connect to the AcuraLink operator. Once connected, information about your vehicle, its positioning, and its condition will be sent to the operator; you also can speak to the operator when connected.
AcuraLink ^®
AcuraLink also provides services you can operate from the Internet or your smartphone.
To subscribe to AcuraLink, or to get more information about all of its features, contact an authorized Acura NSX dealer, or visit owners.acura.com (in U.S.) or www.acura.ca (in Canada).
In Case of a Crash
Your vehicle may not be able to connect to the operator if the battery level is low, the line is disconnected or you do not have adequate cellular coverage.
You cannot use the Assist services when:
- You travel outside the AcuraLink service coverage areas.
- There is a problem with the connecting devices, such as the ASSIST button, microphone, speakers, or the unit itself.
- You are not subscribed to the service or your subscription is no longer valid.
You cannot operate other navigation- or phone-related functions using the screens while talking to the operator. Only the operator can terminate the connection to your vehicle.
>>Automatic collision notification
If the unit fails to connect to the operator, it repeatedly tries until it succeeds.
■ Manual operator connection
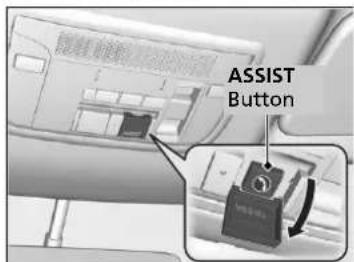
text_image
ASSIST ButtonIf you need to talk to the AcuraLink operator in a situation where no airbag has deployed, you can manually connect to them by pressing the ASSIST button with the power mode in ACCESSORY or ON.
- Open the cover attached to the ceiling console.
- Press the ASSIST button.
▶ You are connected to the AcuraLink operator.
Manual operator connection
Do not press the button while driving. When you need to contact the operator, park the vehicle in a safe place.
If the unit fails to connect to the operator, it automatically cancels the action after three minutes.
If necessary, the cover can be broken to access the ASSIST button.
Continued
Security Features
Your subscribed telematics service provider can track your vehicle's location, remotely lock or unlock doors, and help you find your vehicle. To use these features, you need your user ID and personal identification number (PIN).
■ Stolen vehicle tracking
This feature searches and tracks down your vehicle position even if it is on the move. If you believe that your vehicle has been stolen, contact the police as well as the provider. Tracking requests must be initiated by the police.
■ Remote door lock/unlock
The provider can remotely lock or unlock doors upon your request.
■ Vehicle finder
This feature is convenient to use when trying to locate your vehicle in large areas, such as a crowded parking lot. If you cannot locate your vehicle after using the remote transmitter's answerback function, you can contact the provider which can then flash your vehicle's exterior lights and sound the horn.
■ Security alarm notification
If the security system in your vehicle detects an abnormal condition, such as someone tampering with the lock on your vehicle, the provider notifies you by email or SMS.
>>Security Features
The contact information of your provider, your user ID and PIN will be given when you subscribe to AcuraLink. If you forget any of the above, contact an authorized Acura NSX dealer, or go to owners.acura.com (in U.S.) or www.acura.ca (in Canada).
You can also activate the remote door lock/unlock and vehicle finder features from the Internet or using your smartphone app. Ask an authorized Acura NSX dealer, or visit owners.acura.com (in U.S.) or www.acura.ca (in Canada) for details.
»Vehicle finder
The lights will stop flashing and horn will stop sounding under the following conditions:
- When 30 seconds have elapsed.
- You unlock the doors using the remote transmitter.
- You unlock the doors using the keyless access system.
- You unlock the doors using the built-in key.
- The power mode is set to ACCESSORY or ON.
Operator Assistance
Connect to the AcuraLink operator when trying to find a destination or for roadside assistance.
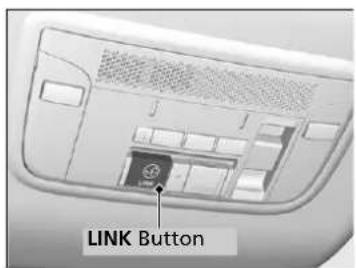
text_image
LINK Button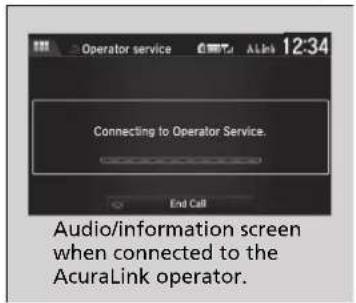
text_image
Operator service 12:34 Connecting to Operator Service. End Call Audio/information screen when connected to the AcuraLink operator.- Press the LINK button.
▶ Connection to the operator begins.
- Talk to the operator.
To disconnect, select End Call on the audio/information screen or press the button on the steering wheel.
Operator Assistance
Remain attentive to road conditions and driving during operator assistance.
Driving
This chapter discusses driving and refueling.
Before Driving
Driving Preparation 310
Maximum Load Limit.... 313
High-Performance Driving 315
Towing a Trailer
Towing Your Vehicle.... 320
When Driving
Turning on the Power 321
Precautions While Driving.... 324
Dual Clutch Transmission 325
Shifting.... 326
Acoustic Vehicle Alerting System..... 335
Integrated Dynamics System ...... 336
Launch Control 341
Cruise Control 343
Vehicle Stability Assist™ (VSA®), aka Electronic Stability Control (ESC), System ...... 346
Agile Handling Assist 350
SPORT HYBRID Super Handling All-Wheel-Drive™ (SPORT HYBRID SH-AWD®).... 351
Tire Pressure Monitoring System (TPMS) .....352
Tire Pressure Monitoring System (TPMS) - Required Federal Explanation ..... 354
High Voltage Battery 356
Braking
Brake System 357
Anti-lock Brake System (ABS) 362
Brake Assist System 363
Parking Your Vehicle
When Stopped 364
Parking Sensor System * 365
Multi-View Rear Camera 369
Refueling
Fuel Information 371
How to Refuel 372
Fuel Economy and CO₂ Emissions.... 373
Turbo Engine Vehicle 374
* Not available on all models
Before Driving
Driving Preparation
Check the following items before you start driving.
Exterior Checks
- Make sure there are no obstructions on the windows, door mirrors, exterior lights, or other parts of the vehicle.
▶ Remove any frost, snow, or ice.
Remove any snow on the roof, as this can slip down and obstruct your field of vision while driving. If frozen solid, remove ice once it has softened.
▶ When removing ice from around the wheels, be sure not to damage the wheel or wheel components. - Make sure the hood is securely closed.
▶ If the hood opens while driving, your front view will be blocked. - Make sure the tires are in good condition.
▶ Check air pressures, and check for damage and excessive wear. - Make sure there are no people or objects behind or around the vehicle.
There are blind spots from the inside. - Check the front bumper ducts and side intercooler ducts for mud, leaves, and road debris that could build up and prevent proper cooling performance.
→ Checking and Maintaining Tires P. 407
Exterior Checks
NOTICE
When doors are frozen shut, use warm water around the door edges to melt any ice. Do not try to force them open, as this can damage the rubber trim around the doors. When done, wipe dry to avoid further freezing.
Do not pour warm water into the key cylinder. You will be unable to insert the key if the water freezes in the hole.
Heat from the engine and exhaust can ignite flammable materials left under the hatch, causing a fire. If you've parked your vehicle for an extended period, inspect and remove any debris that may have collected, such as dried grass and leaves that have fallen or have been carried in for use as a nest by a small animal.
Also check under the hatch for leftover flammable materials after you or someone else has performed maintenance on your vehicle.
Interior Checks
- Store or secure all items on board properly.
Carrying too much cargo, or improperly storing it, can affect your vehicle's handling, stability, stopping distance, and tires, and make it unsafe.
→ Maximum Load Limit P. 313 - Do not pile items higher than the seat height.
They can block your view and may be thrown forward in the event of sudden braking. - Do not place anything in the seat footwells. Make sure to secure the floor mat.
▶ An object or unsecured floor mat can interfere with your brake and accelerator pedal operation while driving. - If you have any animals on board, do not let them move around in the vehicle.
▶ They may interfere with driving and a crash could occur. - Securely close and lock both doors and the hatch
Locking/Unlocking the Doors from the Inside P. 115 - Adjust your seating position properly.
Adjusting the Seats P. 144 - Adjust the mirrors and steering wheel properly.
▶ Adjust them while sitting in the proper driving position.
Adjusting the Mirrors P. 141
Adjusting the Steering Wheel P. 140
»Interior Checks
The headlight aim is set by the factory, and does not need to be adjusted. However, if you regularly carry heavy items in the trunk have the aiming readjusted at an authorized Acura NSX dealer or by a qualified technician.
- Be sure items placed on the floor behind the driver's and passenger's seats cannot roll under the seats.
They can interfere with the driver's ability to operate the pedals, the operation of the seats, or the operation of the sensors under the seats. - Everyone in the vehicle must fasten their seat belt.
Fastening a Seat Belt P. 39 - Make sure that the indicators in the instrument panel come on when you start the vehicle, and go off soon after.
▶ Always have an authorized Acura NSX dealer check the vehicle if a problem is indicated.
Indicators P. 70
Maximum Load Limit
The maximum load for your vehicle is 507 lbs (230 kg). The maximum load for the cargo area is 100 lbs (45 kg). See the Tire and Loading Information label attached to the driver's doorjamb.
Label Example
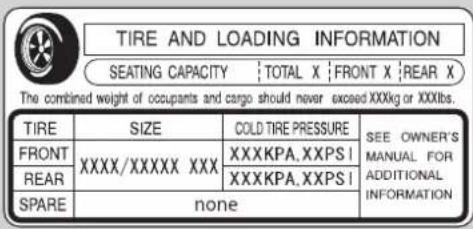
text_image
TIRE AND LOADING INFORMATION SEATING CAPACITY | TOTAL X | FRONT X | REAR X The combined weight of occupants and cargo should never exceed XXXkg or XXXlbs. TIRE SIZE COLD TIRE PRESSURE SEE OWNER'S FRONT XXXX/XXXXXXX XXX XXXKPA.XXPSI MANUAL FOR REAR XXXKPA.XXPSI ADDITIONAL SPARE none INFORMATIONThis figure includes the total weight of all occupants, cargo, and accessories, and the tongue load if you are towing a trailer.
Steps for Determining Correct Load Limit -
(1) Locate the statement "The combined weight of occupants and cargo should never exceed XXX kg or XXX lbs." on your vehicle's placard.
(2) Determine the combined weight of the driver and passengers that will be riding in your vehicle.
(3) Subtract the combined weight of the driver and passengers from XXX kg or XXX lbs.
(4) The resulting figure equals the available amount of cargo and luggage load capacity. For example, if the "XXX" amount equals 1,400 lbs. and there will be five 150 lb. passengers in your vehicle, the amount of available cargo and luggage load capacity is 650 lbs. (1,400 - 750 (5 x 150) = 650 lbs.)
Continued
Maximum Load Limit
WARNING
Overloading or improper loading can affect handling and stability and cause a crash in which you can be hurt or killed.
Follow all load limits and other loading guidelines in this manual.
Gross Vehicle Weight Rating (GVWR): The maximum allowable weight of the vehicle, all occupants, all accessories and all cargo.
Specifications P. 468
Gross Axle Weight Rating (GAWR): The maximum allowable weight of the vehicle axle.
Specifications P. 468
(5) Determine the combined weight of luggage and cargo being loaded on the vehicle. That weight may not safely exceed the available cargo and luggage load capacity calculated in step 4.
(6) If your vehicle will be towing a trailer, load from your trailer will be transferred to your vehicle. Consult this manual to determine how this reduces the available cargo and luggage load capacity of your vehicle.
In addition, the total weight of the vehicle, all occupants, accessories, cargo, and trailer tongue load must not exceed the Gross Vehicle Weight Rating (GVWR) or the Gross Axle Weight Rating (GAWR). Both are on a label on the driver's doorjamb.
Load Limits Example
Example1
Max Load 507 lbs (230 kg)

Passenger Weight 150 lbs x 1 + 257 lbs = 407 lbs (68 kg x 1 + 117 kg = 185 kg)


Maximum Cargo Weight 100 lbs (45 kg)
Example2
Max Load 507 lbs (230 kg)

Passenger Weight 150 lbs x 2 + 107 lbs = 407 lbs (68 kg x 2 + 49 kg = 185 kg)


Maximum Cargo Weight 100 lbs (45 kg)
>>Maximum Load Limit
Towing a Trailer: See Towing a Trailer to determine whether your vehicle is designed to tow a trailer.
Towing a Trailer P. 320
High-Performance Driving
Your Acura NSX is designed, built and equipped with systems and features to provide you with exceptional driving performance, including the ability to engage in high-performance driving. However, due to the risks to both you and other road users, including the risk of injury or death from a high-speed loss of control or crash, if you engage in high-performance driving, Acura recommends you only do so where conditions are controlled, such as at a track or other closed-course venue. When driving on public roads you should always obey the posted speed limits and other traffic laws, reduce speed as needed for traffic and environmental conditions, and not engage in driving behaviors (including, for instance, use of Launch Control) that may create heightened risks for yourself and any other road users who may be present (even if you are unaware of them).
NSX TRACK mode, Launch Control and other systems are designed for increased performance, both in terms of acceleration and handling, up to near-performance-limit conditions. They are most appropriately used on closed courses and they should not be used on public roads. Use of these systems may delay the intervention of vehicle safety systems designed to minimize the risk of a loss of traction or steering control, and can cause the NSX to handle differently than you might expect or would experience under normal driving conditions. Use of these systems will not make up for a lack of appropriate driver experience and skill, and will not allow the driver to overcome risks created by:
- A lack of proper vehicle maintenance
• Less than ideal road conditions and/or unfamiliarity with the driving environment - Other traffic or road users
>>High-Performance Driving
NOTICE
The NSX warranty does not cover any damage or failure resulting from high-performance driving, racing, competitive driving of any sort whatsoever, or use on a track or similar-type venue. See warranty book for details.
→ TRACK Mode P. 340
→ Launch Control P. 341
Continued
High-performance driving requires special skills, knowledge and experience, as the safety risks are greatly increased when the NSX is operated at its upper performance abilities. As a responsible NSX driver, you should not drive above your skill limits or training, even if the NSX's performance levels would otherwise allow you to do so. If you intend to engage in high-performance driving, Acura strongly recommends that:
- You first obtain appropriate, professional training
- Turn off any devices or systems that may distract you from the driving task
High-performance driving in general, and the use of TRACK mode and Launch Control in particular, puts very high loads on the NSX and its components, and results in greater wear and tear on the vehicle. Because of these high loads, if your NSX is not in top condition or if certain components, such as the brakes or tires, have undue wear, those components could experience a loss of performance, or fail, when engaging in high-performance driving. Therefore, Acura highly recommends that you undertake more proactive and frequent maintenance than that required under normal use and have your vehicle inspected at an authorized Acura NSX dealer (and all necessary repairs or adjustments made) before you engage in any high-performance driving. In addition to any required maintenance, there are certain NSX specific items and protocols that you should pay special attention to before, during and after engaging in any high-performance driving. Ultimately, the decision whether to engage in high-performance driving is yours, and depending on your NSX's condition and prior usage, the items and protocols listed below may or may not be sufficient to ensure a safe driving experience.
BEFORE DRIVING
- With the vehicle parked on level ground, properly bleed brake system after replacing with Acura Heavy Duty Brake Fluid DOT 4 or equivalent
-
Inspect brake pad thickness and replace if 6.0 mm or less
-
Burnish the brake pads shortly before high-performance driving so that they have the performance characteristics necessary to repeatedly and quickly slow the NSX when it is being operated at significantly high speeds. (While the NSX's brake pads are properly burnished for the demands expected in ordinary day-to-day driving, high-performance driving puts unique demands on the brake system which require further burnishing.)
- Inspect ALL cooling openings to confirm they are open and free of debris such as leaves, etc. Cooling openings include engine undercover ducts, heat resistance ducts, brake ducts, radiators, and intercoolers
- Remove Tire Repair Kit from the trunk, along with any other cargo area contents
- Check tire wear and tire pressure, and make certain wheel lug bolts are properly torqued, as driving at high speed puts additional strain on tires and wheels. Never use slick tires, and do not use Summer Only tires and Ultra High Performance tires if temperatures will be lower than 45°F (7°C)
- If you anticipate sustained driving at speeds greater than 168 mph/270 km/h, adjust the cold tire pressure as shown on the driver door jamb warning label. This will help avoid heat build-up and sudden tire failure
| DRIVING SPEED | TIRE | COLD TIRE PRESSURE |
| OVER 168 mph/270 km/h | FRONT | 260K PA,38 PSI |
| REAR | 260K PA,38 PSI |
Canadian models U.S. models
| WARNING | ATTENTION | |
| # following all speeds (lower than 160 mph), actual lift for pressure as shown below to avoid pressure head压力 and counter the load. | Pour pressure to ensure value of 160 mph/250 mph/upper pressure des pneus & lower pressure in air pressure, after other non-temperature exercise in colour or air temperature during pressure. | |
| DRIVING SPEEDATITUDE OF CONDUIT | TRE/PNEU | COLD TIRE PRESSUREPRESSION DES PINTUS À FROD |
| OVER/ PLUS DE168 mph/ 270 km/h | FRONT/AVANT | 260 KPA, 38 PSI |
| REAR/ ARBIERE | 260 KPA, 38 PSI | |
Continued
High-Performance Driving
WARNING
Use of slick tires/racing slicks may subject the chassis and body components to higher dynamic loads than they were designed for. Higher than intended dynamic loads could result in component failure, loss of control, and serious injury or death to you or others. Do not install slick tires on the NSX.
- Inspect all exhaust mounts for cracks or signs of wear
- Inspect tailpipe active exhaust valves to ensure they are functioning correctly. You can do this by cycling the Integrated Dynamics System mode switch between SPORT and TRACK modes, while the engine is idling
WHILE DRIVING
- You may see a brake warning message in the Driver Information Interface (and warning message chime) and/or experience increased brake pedal stroke. If either occurs, immediately slow down and allow for increased stopping distances. The message will disappear once the brakes have cooled and the system has returned to normal operating condition
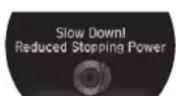
- After high-performance driving, it is critical to allow your vehicle to properly cool down. Do not immediately stop your vehicle. Instead, continue driving at reduced speeds, allowing for increased braking distances until your vehicle returns to normal operating temperatures. Once you stop and safely park the NSX, open the hatch to aid cooling. If the engine oil temperature reaches the HMark during high-performance driving, have your NSX inspected by an authorized Acura NSX dealer
AFTER DRIVING
- Check your NSX, and each of its relevant components, to make sure that it still is in a safe operating condition (example: wheel lug bolt torque, tire pressure, etc.). We recommend repeating the BEFORE DRIVING protocol, and if any item shows excessive wear or appears to be in an unusual condition, have it replaced, or exercise appropriate caution when driving and see your authorized Acura NSX dealer
For more information, please contact your authorized Acura NSX dealer, and/or Acura Client Relations.
→ Client Service Information P. 478
Towing a Trailer
Your vehicle is not designed to tow a trailer. Attempting to do so can void your warranties.
Towing Your Vehicle
Your vehicle is not designed to be towed behind a motor home. If your vehicle needs to be towed in an emergency, refer to the emergency towing information.
Emergency Towing P. 462
When Driving
Turning on the Power
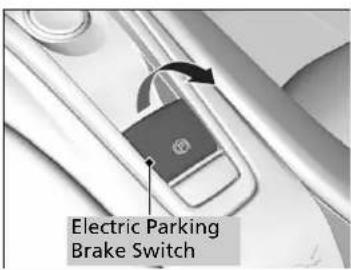
text_image
Electric Parking Brake Switch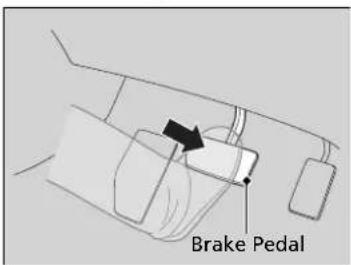
text_image
Brake Pedal-
Make sure the parking brake is applied.
The electric parking brake indicator comes on for 15 seconds when you pull up the electric parking brake switch. -
Depress the brake pedal.
Turning on the Power
Keep your foot firmly on the brake pedal when starting the power system.
The engine is harder to start in cold weather and in thinner air found at altitudes above 8,000 feet (2,400 meters).
When turning on the power system in cold weather, turn off all electrical accessories such as the lights, climate control system, and rear defogger in order to reduce 12-volt battery drain.
If the exhaust system sounds abnormal or you can smell exhaust gas inside the vehicle, have your vehicle checked by an authorized Acura NSX dealer. There may be a problem with the engine or exhaust system.
Continued
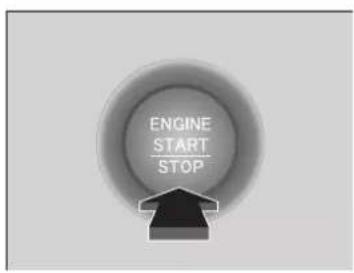
text_image
ENGINE START STOP- Press the ENGINE START/STOP button without depressing the accelerator pedal.
The Ready To Drive message appears on the driver information interface.
When the ambient temperature is extremely low, the vehicle does not move until certain conditions are met.
A warning message appears instead of Ready To Drive.
Driver Information Interface
Warning and Information Messages
P. 90
When the Integrated Dynamics System is in QUIET mode
▶ If the High Voltage battery is fully charged, the gasoline engine may not start.
The gasoline engine starts either according to the temperature of the engine or when the High Voltage battery charge level is low.
When the Integrated Dynamics System is in SPORT mode
▶ Regardless of the High Voltage battery charge level, the gasoline engine always starts.
▶ Gasoline engine starts with a louder sound than QUIET mode. When engine temperature or High Voltage battery temperature are low, or when High Voltage battery charge level is low, gasoline engine starts at the same sound level as QUIET mode.
Stopping the Power System
You can turn the power system off when the vehicle is completely stopped.
- Select P.
- Press the ENGINE START/STOP button.
Turning on the Power
The immobilizer system protects your vehicle from theft. If an improperly coded key (or other device) is used, the power system does not activate.
Immobilizer System P. 122
Bring the keyless access remote close to the ENGINE START/STOP button if the battery in the keyless access remote is weak.
If the Keyless Access Remote Battery is Weak P. 446
The power system may not activate if the keyless access remote is subjected to strong radio waves.
Do not hold the ENGINE START/STOP button to start the power system. If the power system does not start, wait at least 30 seconds before trying again.
You can set the Integrated Dynamics System mode to be selected when you set the power mode to ON.
→ Customized Features P. 244
Starting to Drive
- Change the gear position to D/M. Select R when reversing.
- With the parking brake applied, release the brake pedal and gently depress the accelerator pedal.
▶ Make sure the electric parking brake indicator goes off. - Gradually release the brake pedal and gently depress the accelerator pedal to pull away.
■ Hill Start Assist System
Hill start assist keeps the brake engaged briefly to help prevent the vehicle from rolling on inclines as you move your foot from the brake pedal to the accelerator.
Change to D when facing uphill, or R when facing downhill, then release the brake pedal.
Starting to Drive
You can also release the parking brake by pressing the electric parking brake switch while depressing the brake pedal. When facing downhill, you can start your vehicle more smoothly by manually releasing it with the electric parking brake switch than by releasing it with the accelerator pedal.
Hill Start Assist System
Hill start assist may not prevent the vehicle from rolling downhill on a very steep or slippery slope, and does not operate on small inclines.
Hill start assist is not a replacement for the parking brake.
Precautions While Driving
In Rain
Avoid driving in deep water and on flooded roads. This can damage the power system or driveline, or cause electrical component failure.
The vehicle is equipped with ultra high performance summer tires that, due to their decreased tread depth, are at greater risk of hydroplaning on wet roads compared to regular tires. Exercise caution when driving on wet surfaces.
In Snow and Ice
The vehicle is equipped with ultra high performance summer tires. These tires are designed for optimum performance and handling in warm climates, and are not suitable for below freezing, snowy or icy weather conditions. If you drive under these circumstances, use of winter tires is recommended and may be mandatory, depending on your region, province or territory.
→ Winter Tires P. 415
→ Cold Weather Driving P. 416
Due to limitations of the Lithium-ion High Voltage battery, the minimum starting temperature for the vehicle is -4^ (-20°C).
Inability to start the vehicle and/or decreased performance is expected if the vehicle is operated at temperatures below -4^ (-20°C).
Precautions While Driving
NOTICE
Do not select a shift button while pressing the accelerator pedal.
NOTICE
The following can damage the under spoiler, under covers, front bumper, rear diffuser, brake cooling components, and side sill:
- Parking the vehicle by a parking block
• Parallel parking along the road shoulder - Driving toward the bottom of a hill
- Driving up or down to a different surface level (such as a road shoulder)
- Driving on a rutted or bumpy road
- Driving on a road with potholes
- Driving over speed bump
NOTICE
If you repeatedly turn the steering wheel at an extremely low speed, or hold the steering wheel in the full left or right position for a while, the electric power steering (EPS) system heats up. The system goes into a protective mode, and limits its performance. The steering wheel becomes harder and harder to operate. Once the system cools down, the EPS system is restored.
Repeated operation under these conditions can eventually damage the system.
If the power mode is set to ACCESSORY while driving, the power system will shut down and all steering and brake power assist functions will stop, making it difficult to control the vehicle.
Driving in snow or icy conditions may accumulate ice on the brake disk surface, reducing braking power.
Other Precautions
If there is a strong impact with something under the vehicle, stop in a safe location. Check the underside of the vehicle for damage or any fluid leaks. If any of these components are damaged or loose, the stability, handling, and powertrain cooling performance of the vehicle may be adversely affected.
Dual Clutch Transmission
Creeping
As with a conventional gasoline-powered vehicle with an automatic transmission, this vehicle will creep. Keep the brake pedal firmly depressed when stopped.
Kickdown
The accelerator pedal features a kickdown switch. Quickly depressing the accelerator pedal while driving may cause the transmission to drop to a lower gear, subsequently increasing vehicle speed. Depress the accelerator pedal carefully, especially when driving uphill, on slippery roads, and curves.
>>Precautions While Driving
Do not press the N button, as you will lose regenerative braking (and acceleration) performance.
Models with iron brake discs
Avoid hard braking for the first 200 miles (300 km). You should also follow this recommendation when the brake pads are replaced.
Dual Clutch Transmission
The DCT will not operate when it is extremely cold. If the vehicle has been parked in extremely cold conditions, after you start the engine, wait until it gets warm. Keep your vehicle parked until the READY indicator comes on.
Shifting
Change the gear position in accordance with your driving needs.
■ Shift button positions

text_image
P Park Used when parking or before turning the power on or off. Transmission is locked. R Reverse Used when reversing N Neutral Used to keep the transmission disengaged from the engine and motor. D/M Drive/Manual Each time you press the D/Mtion, the mode switches between D (drive) and M (manual) mode. Used for: D (Drive) • Normal driving (gears change between 1st and 9th automatically) • Temporarily driving in the sequential mode M (Manual) • Driving in the sequential modeShifting
WARNING
The vehicle can roll away if left unattended without confirming that Park is engaged.
A vehicle that rolls away could cause a crash resulting in serious injury or death.
Always keep your foot on the brake pedal until you have confirmed that |P| is shown on the gear position indicator.
While the High Voltage battery charge level is full, or the High Voltage battery temperature is low, regenerative braking may become less effective.
To prevent malfunction and unintended engagement:
- Do not spill any liquids on or around shift buttons.
- Do not place or drop any objects on or around shift buttons.
- Do not let passenger or children operate the shift buttons.
You may occasionally find that it takes longer than usual for the vehicle to start moving when you select R, release the brake pedal, and/or depress the accelerator pedal. This may occur when the High Voltage battery charge level is extremely low; in this circumstance, it does not indicate a vehicle malfunction.
■ P (park) button
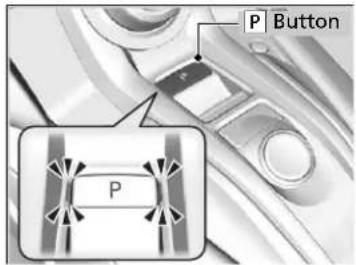
text_image
P Button PThe gear position changes to P when you press the P button while the vehicle is parked with the power mode in ON. The indicators on the sides of the P button come on.
>>Shifting
The beeper sounds when you depress the accelerator pedal with the gear position in N while in EV mode or while gear position changed to N without direct shifter selection in any mode.
Change the gear position to D/M | R| with the brake pedal depressed.
When shifting gears in extremely low temperatures (-22°F/-30°C), there may be a short delay before the shift is indicated in the display. Always confirm you are in the correct gear before driving.
Continued
Shift Operation
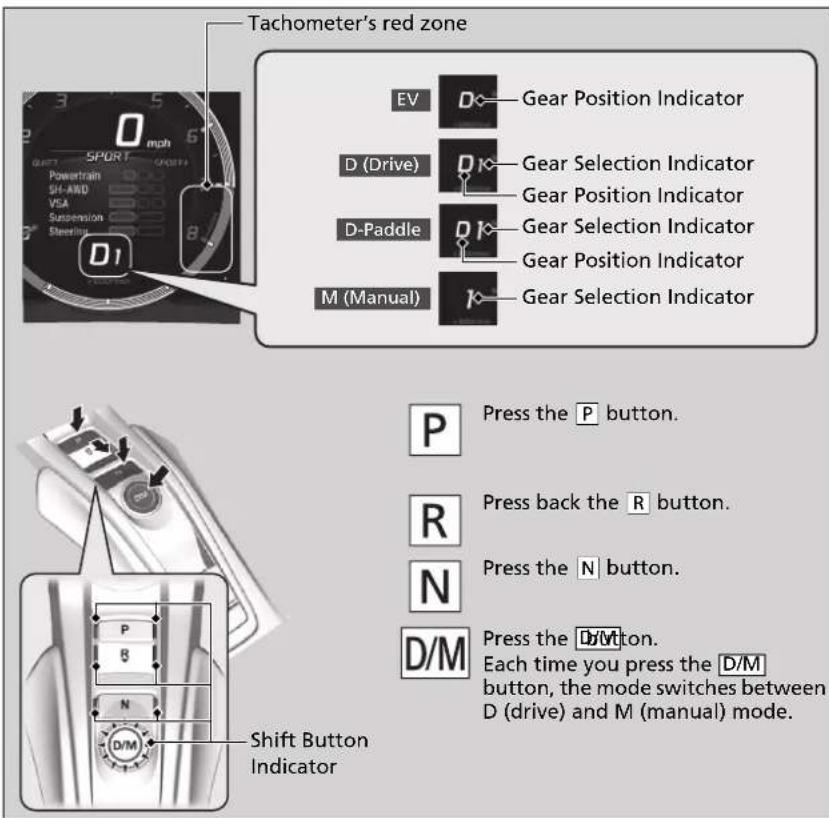
text_image
Tachometer's red zone EV D Gear Position Indicator D (Drive) D Gear Selection Indicator Gear Position Indicator D-Paddle R Gear Selection Indicator Gear Position Indicator M (Manual) Gear Selection Indicator P Press the P button. R Press back the R button. N Press the N button. D/M Press the D/M button. Each time you press the D/M button, the mode switches between D (drive) and M (manual) mode. Shift Button Indicator>>Shift Operation
NOTICE
Before you change D/M to R and vice versa, come to a complete stop and keep the brake pedal depressed.
Operating the shift button before the vehicle has come to a complete standstill may damage the transmission.
Use the gear position indicator and the shift button indicator to check the gear position before selecting a shift button.
If the indicator of the currently selected gear position, or all gear position indicators, are blinking simultaneously, there is a problem with the transmission.
Avoid sudden acceleration and have the transmission checked by an authorized Acura NSX dealer as soon as possible.
The fuel supply may be cut off if you drive at engine speeds in or over the tachometer's red zone (engine speed limit). If this happens, you may experience a slight jolt.
When the engine speed is increased while the transmission is in |N| , |P| or |R| , the fuel supply may be cut off even without the engine speed entering the tachometer's red zone.
The beeper sounds once when you change to R.
■ When opening the driver's door
If you open the driver's door under the following conditions, the gear position automatically changes to P.
- The vehicle is in stationary with the power mode in ON, or moving at 1 mph (2 km/h) or slower.
• The transmission is in other than P. - You have unfastened the driver side seat belt.
If you manually change the gear position from P with the brake pedal depressed, the gear position will automatically return to P once you release the brake pedal.
■ When turning off the power mode
If you turn the power system off while the vehicle is stationary, and the transmission is in other than P, the gear position automatically changes to P.
■ If you want to keep the transmission in N position (car wash mode)
With the engine running:
- Press and hold the brake pedal.
- Press N. Within two seconds press and hold N for two seconds.
- Within five seconds press the ENGINE START/STOP button.
This puts the vehicle in car wash mode which must be used when your vehicle is pulled through a conveyor type automatic car wash where you or an attendant do not remain in the vehicle.
The gear position remains in N with the power mode in ACCESSORY for 15 minutes, then, it automatically changes to P and the power mode changes to OFF.
Manually changing to P cancels ACCESSORY mode. The P indicator comes on and the power mode changes to OFF.
When opening the driver's door
While the system is designed to automatically change the gear position to P under the described conditions, in the interest of safety you should always select P before opening the driver's door. Make sure to park the vehicle in a safe place.
When Stopped P. 364
If you want to drive the vehicle after the gear position has automatically changed to P under the described conditions, close the door, fasten the seat belt, depress the brake pedal, then change the gear position.
If you leave the vehicle, turn off the power system and lock the doors.
■ Restriction on selecting a gear position
You cannot select a gear position under certain circumstances that may lead to a crash.
| When the transmission is in: | 1. Under the circumstances of that: | 2. You cannot select: | 3. The gear position remains in/changes to: | How to change the gear position |
| P | The brake pedal is not depressed. | P | Release the accelerator pedal and depress the brake pedal. | |
| The accelerator pedal is depressed. | ||||
| N | The vehicle is moving at low speed without the brake pedal depressed. | Other gear position | N | |
| The vehicle is moving at low speed with the accelerator pedal depressed. | ||||
| N or D/M | The vehicle is moving forward. | R | Park your vehicle in a safe place. | |
| R or N | The vehicle is moving backward. | D/M | ||
| R, N, or D/M | The vehicle is moving. | P | ||
| P or N | The READY indicator is not on. | A gear position other than P or N | P or N | Make sure that the READY indicator comes on. |
| N or D/M | The brake pedal is not depressed. | R N | Depress the brake pedal. |
Sequential Mode
Use the paddle shifters to change between 1st and 9th gears without removing your hands from the steering wheel. The transmission will switch to the sequential mode.
■ When the transmission is in D (D-paddle shift mode):
The vehicle will go into the sequential mode momentarily, and the gear selection indicator becomes more prominent.
The sequential mode is automatically canceled and the gear selection indicator returns to ordinary display under the following conditions.
- Hold the + paddle shifter for a few seconds.
- Once you start traveling at a constant speed.
• The vehicle comes to a complete stop. - When you change to another Integrated Dynamics System mode.
The sequential mode automatically shifts under following condition
- Accelerator pedal depressed beyond the click.
- Engine speed reaches near the tachometer's red zone.
• Engine speed reaches idle speed while deceleration.
Sequential Mode
When sequential mode is selected, the gasoline engine powers the vehicle.
Continued
■ When the transmission is in M (Manual) mode:
The vehicle will go into the sequential mode, and the gear position indicator goes off and only the gear selection indicator is displayed.
You can cancel this mode by pressing the □on, pulling the + paddle shifter for a few seconds or changing Integrated Dynamics System mode to QUIET. When the sequential mode is canceled, the display is changed from only the gear selection indicator to both of the gear position indicator and the gear selection indicator.
The transmission automatically shifts up from 1st to 2nd and does not automatically shift up between 2nd and 9th gear.
| Transmission Control Mode[Displayed on Instrument Panel](Y = Yes/N= No) | Auto Mode D-Paddle Mode Manual Mode | ||
 |  |  | |
| Activation Method Initial Startup | Use Shift Paddle While in EV or Auto Mode | Press D/M Button | |
| Automatically Upshift Y | N | N | |
| Automatically Downshift Y | N | N | |
| Kickdown Shift beyond click Y Y | N | ||
| Deceleration Downshift Y Y Y | |||
| Automatic Upshift at Redline Y Y | N | ||
| Transmission Control Mode[Displayed on Instrument Panel](Y = Yes/N= No) | D-Paddle Mode Manual Mode |  | |
| Activation Method ▶ | Use Shift Paddle While in EV or Auto Mode | Press D/M Button | |
| To return to Auto Mode | Automatically after cruising | Y | N |
| Pull & hold + Shift paddle for a few seconds | Y | Y | |
| Vehicle come to complete stop | Y | N | |
| Integrated Dynamics System mode change to other mode | Y | Return to Auto mode only when QUIET mode is selected. | |
Sequential Mode Operation
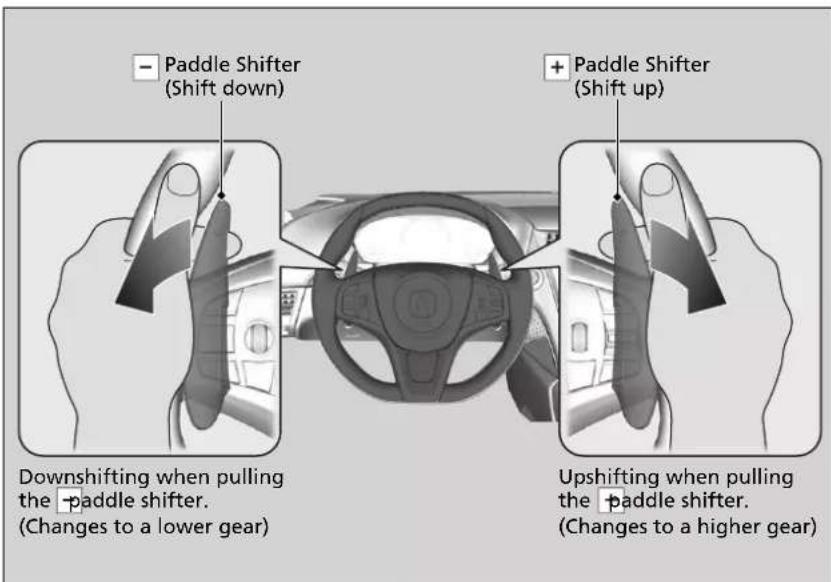
text_image
Paddle Shifter (Shift down) Paddle Shifter (Shift up) Downshifting when pulling the paddle shifter. (Changes to a lower gear) Upshifting when pulling the paddle shifter. (Changes to a higher gear)Sequential Mode Operation
Each paddle shift operation makes a single gear change. To change gears continuously, release the paddle shifter before pulling it again for the next gear.
If the sequential mode gear selection indicator blinks when you try to shift up or down, this means your vehicle speed is not in its allowable gear range. Slightly accelerate to shift up and decelerate to shift down while the indicator is blinking.
In Manual mode, to prioritize the engine performance enhancement, the transmission may not allow for shifting up while the engine speed is low.
Acoustic Vehicle Alerting System
Alerts pedestrians when the vehicle transmission is in a position other than P and is traveling at speeds of 22 mph (36 km/h) or less.
Integrated Dynamics System
Constantly controls your vehicle's engine, transmission, High Voltage battery, EPS, dampers, brakes, VSA® and SH-AWD® according to the mode you select.
You can choose between four modes, QUIET mode, SPORT mode, SPORT+ mode and TRACK mode by turning the switch on the center console.
Current mode is displayed on the Driver Information Interface, and each mode will appear differently.
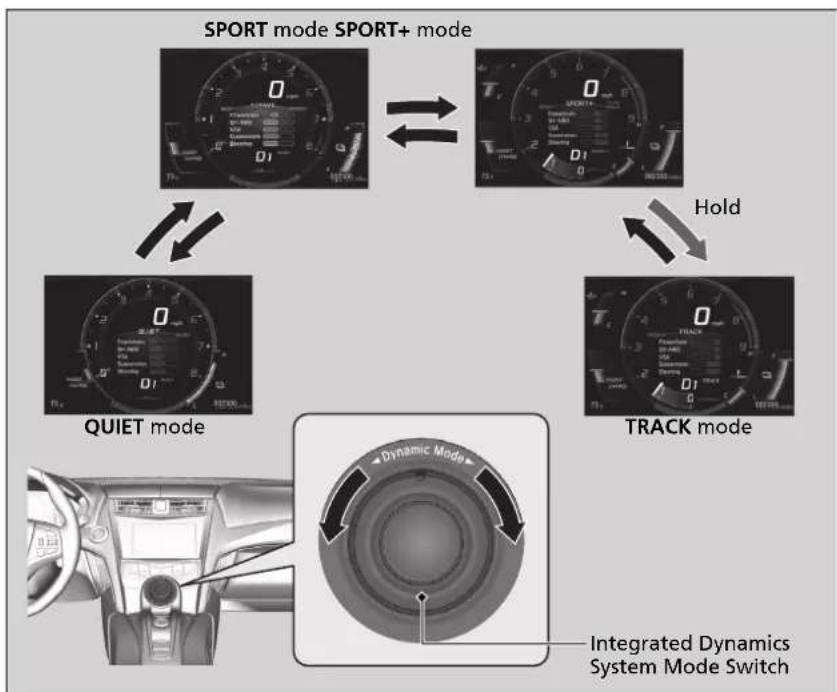
flowchart
graph TD
    A["SPORT mode SPORT+ mode"] --> B["QUIET mode"]
    B --> C["TRACK mode"]
    C --> D["Integrated Dynamics System Mode Switch"]
    style A fill:#f9f,stroke:#333
    style B fill:#ccf,stroke:#333
    style C fill:#cfc,stroke:#333
    style D fill:#fcc,stroke:#333
▶▶ Integrated Dynamics System
You can set the mode to be selected when you set the power mode to ON.
Customized Features P. 244
The mode may not be able to be changed under some driving conditions. If mode change is necessary, reduce speed or cornering speed.
This message will also be shown if you try to change modes when any vehicle systems have failed.
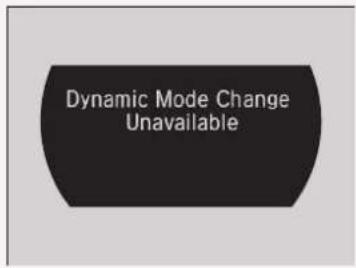
text_image
Dynamic Mode Change UnavailableCategory QUIET SPORT SPORT+ TRACK
| Information Display | Driver Information Interface | Minimized and not intrusive. | Easy to read information for every day driving. | Information for more aggressive driving is added (engine oil temp, SH-AWD® system temp, tachometer position prioritizes high engine speed). |
| Chassis Control | Steering | Steering effort is balanced for city and highway use. | Increased steering effort for driver feedback. | |
| Suspension Damping | Damping is set for balanced use in every day driving. | Damping is set for higher body control and performance in a performance driving environment. | ||
| Braking Feel settings are balanced for operation on all public road environments. | Feel setting is calibrated for high temperature operation on track. | |||
| VSA® | Balanced calibration for VSA® and Traction control in all environments. | Enhanced control for Agile Handling Assist, VSA®, and Traction Control during performance driving. | ||
Category QUIET SPORT SPORT+ TRACK
| Powertrain Control | Powertrain Start-up | EV operation is prioritized, starts quietly. | Powerful start-up sound. | ||
| Powertrain Sound | Minimum sound for quiet driving. | Balanced sound for city and highway use. | Emotional sound for increased feedback. | Maximum sound for driving on race track with helmet on. | |
| Hybrid Battery Management | Efficiency and smooth quiet operation are prioritized. | Balanced management for response and efficiency. | Maximum electric assist for acceleration. | Battery charge is managed to give consistent lap time during track use. | |
| Hybrid Battery A/C Cooling | Battery A/C cooling is not used in this mode. | Battery A/C cooling is active however cabin cooling is prioritized. | Battery A/C cooling is active and may compromise cabin cooling. | ||
| EV Operation | Available | Available | Not available | Not available | |
| Driving Force Character | Ease of force modulation for comfortable operation. | Balanced tuning of drive force request for all driving scenarios. | Maximum response. | Linear response for ease of cornering line control. | |
| DCT Shift Map/Response | Comfortable/low engine speed priority. | Balanced tuning for all driving scenarios. | Quick downshifts on request, lower gears are held for maximum response. | Gears are held to maximize performance on track. Shifts are very fast. | |
| SH-AWD® | Quiet and comfortable operation. | Balanced setting for secure every day use in any condition. | Traction and response are prioritized for performance on winding roads. | Settings are optimized for dry surface, high cornering load with neutral handling attitude. | |
QUIET Mode
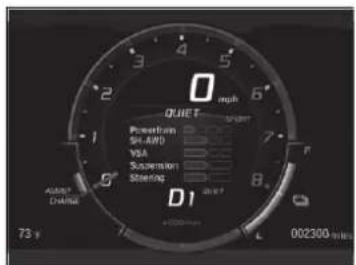
text_image
0 mpb QUET Powertrain Si-AND VSA Supervision Sensing D1 73°F 002300 °CQUIET mode prioritizes quiet and relaxed driving. The powertrain prioritizes EV operation, quiet sound, and low engine speed in all driving situations including start-up.
• The engine speed is limited to 4,000rpm.
• The vehicle speed is limited to approximately 120 mph (193 km/h).
SPORT Mode
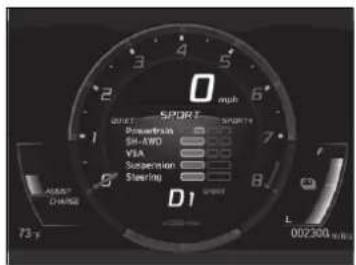
text_image
0 mpb SPORT Powertrain SH-AWD VEA Suspension Starlight D1 002300 MPa/100kmSPORT mode gives the driver an everyday New Sports eXperience. The dynamic systems function to balance sport and touring driving performance.
SPORT+ Mode
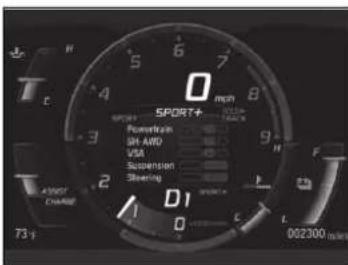
text_image
0 mph SPORT+ Powertrain SH AWD VSM Suspension Steering A350T CHANGE 73 t D1 0 L L 002300 m/sSPORT+ mode optimizes dynamic response from all powertrain and chassis systems - perfect for your favorite winding road.
- EV operation is eliminated while operating in SPORT+.
TRACK Mode
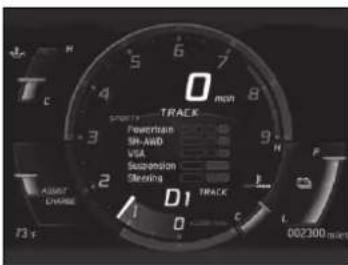
text_image
0 MON SUPPORT Powertrain SH-AWD VST Suspension Steering 2 1 D1 TRACK C 0 73 F 002300 mmsTRACK mode gives maximum, consistent performance from dynamic systems during track day lapping sessions. Hybrid battery charge is maintained for consistent performance.
- VSA® OFF indicator is illuminated in TRACK mode indicating reduced stability control. This allows more body side slip and wheel spin before VSA® begins to operate.
- Integrated Dynamics switch must be turned and held to the right for several seconds to engage TRACK mode.
»TRACK Mode
Before choosing the TRACK mode, carefully read the information about high performance driving.
→ High-Performance Driving P. 315
During TRACK mode, the climate control system may weaken its function to prioritize cooling the High Voltage battery.
Launch Control
Your vehicle controls the engine and transmission response to maximize acceleration from standstill.
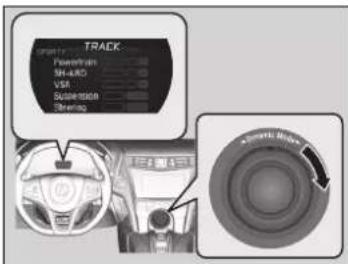
text_image
TRACK Performance SH-AUD VSA Transmission Steering- Use the Integrated Dynamics System mode switch to set the Integrated Dynamics System mode to TRACK.
→ Integrated Dynamics System P. 336
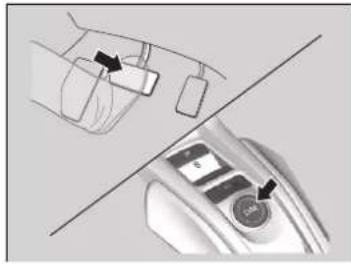
natural_image
Diagram showing hand holding a device with an arrow pointing to a screen, intersected by a diagonal line (no text or symbols present)- Depress the brake pedal firmly and change the gear position to D/M
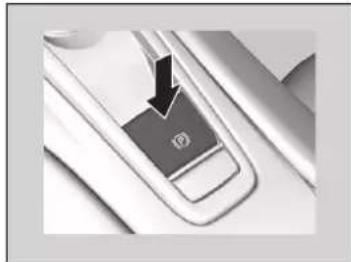
natural_image
Close-up of a car interior showing a black arrow pointing to a button labeled 'P' (no text or symbols beyond the icon)- Release the parking brake.
Launch Control
WARNING
Using this system on public roads that are used by other vehicles and pedestrians can result in a collision involving serious injury or death.
Do not use this system when driving on wet or slippery surfaces as you may lose control of the vehicle.
The system puts a tremendous load on the engine and transmission. Frequent use of this system may lead to reduced vehicle life.
The system does not function when:
- VSA® is off.
• The vehicle is not at standstill.
• The gear position is not in D/M - A gear other than 1st gear is selected when the system is in manual mode.
• The parking brake is applied. - The vehicle is facing uphill or downhill on a steep slope.
- The transmission temperature is too cold or too hot.
- There is a problem with a vehicle system.
Continued
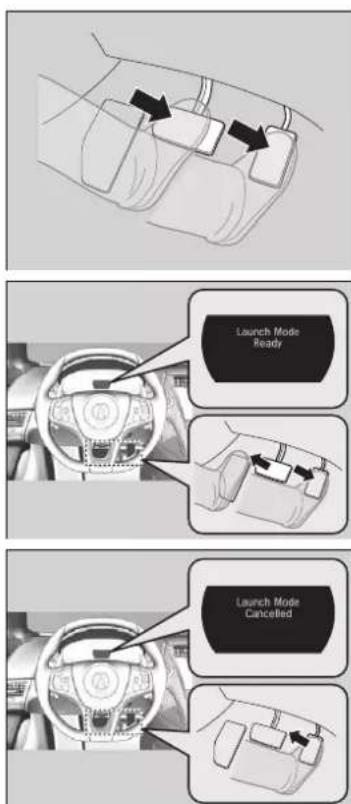
-
While keeping the brake pedal firmly depressed, depress the accelerator pedal all the way, beyond the point when the transmission downshifts.
-
When Launch Mode Ready is displayed in the driver information interface, release the brake pedal at once.
-
To cancel launch mode, take your foot off the accelerator pedal. Launch Mode Cancelled is displayed in the driver information interface.
Cruise Control
Maintains a constant vehicle speed without having to keep your foot on the accelerator. Use cruise control on freeways or open roads where you can travel at a constant speed with little acceleration or deceleration.
When to use
■ Vehicle speed for cruise control: Desired speed in a range above roughly 25 mph (40 km/h) \~
■ Gear positions for cruise control: In D (Drive) or M (Manual)
■ Integrated Dynamics System modes for cruise control: QUIET, SPORT, SPORT+ mode
Always keep sufficient distance between you and the vehicle in front of you.

How to use
■ Press the CRUISE button on the steering wheel.
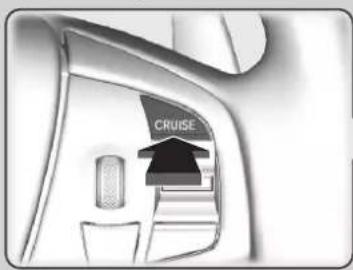
text_image
CRUISECRUISE MAIN
CRUISE MAIN is on in the instrument panel.
Cruise control is ready to use.
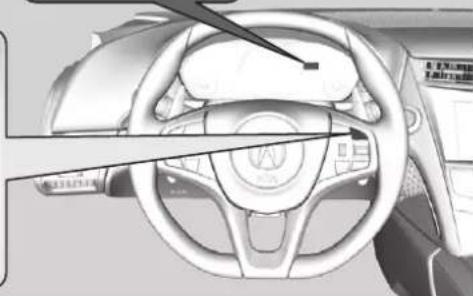
natural_image
Interior view of a car dashboard and steering wheel (no visible text or symbols)Continued
Cruise Control
WARNING
Improper use of the cruise control can lead to a crash.
Use cruise control only when traveling on open highways in good weather.
It may not be possible to maintain a constant speed when driving uphill or downhill.
When not using cruise control:
Turn off cruise control by pressing the CRUISE button.
To Set the Vehicle Speed
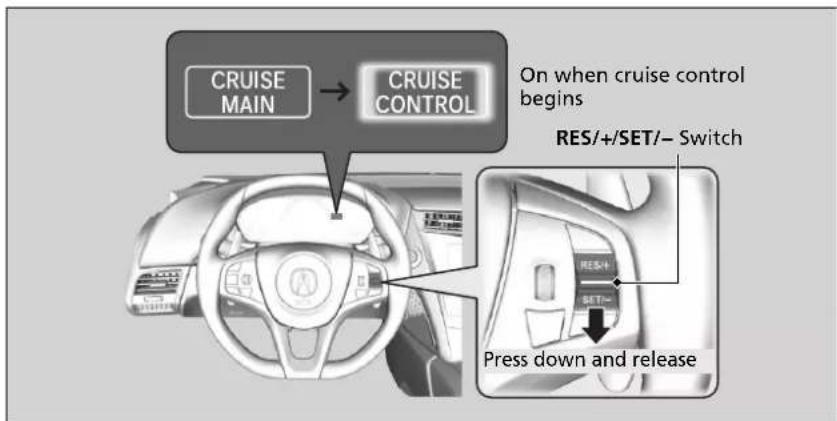
text_image
CRUISE MAIN → CRUISE CONTROL On when cruise control begins RES/+/SET/- Switch Press down and releaseTake your foot off the pedal and press the RES/+/SET/- switch down when you reach the desired speed.
The moment you release the RES/+/SET/- switch, the set speed is fixed, and cruise control begins. The CRUISE CONTROL indicator comes on.
■ To Adjust the Vehicle Speed
Increase or decrease the vehicle speed using the RES/+/SET/− switch on the steering wheel.
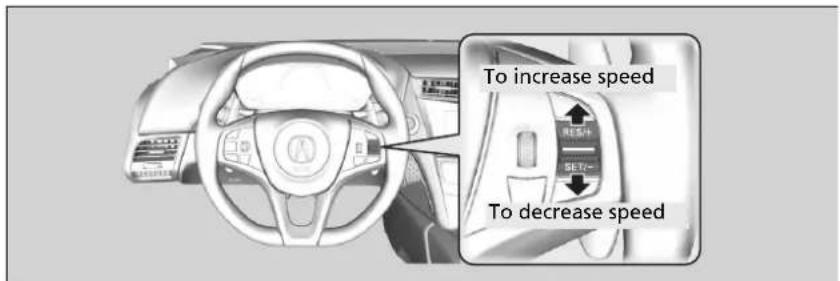
text_image
To increase speed To decrease speed• Each time you press the switch up or down, the vehicle speed is increased or decreased by about 1 mph (1.6 km/h).
- If you keep the switch pressed up or down, the vehicle speed increases or decreases until you release it. This speed is then set.
To Cancel
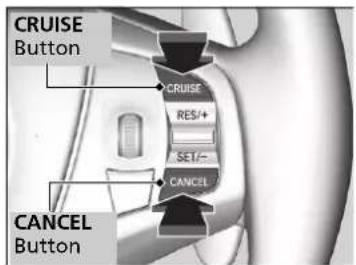
text_image
CRUISE Button CRUISE RES/+ SET/- CANCEL CANCEL ButtonTo cancel cruise control, do any of the following:
- Press the CANCEL button.
- Press the CRUISE button.
- Depress the brake pedal.
The CRUISE CONTROL indicator goes off.
To Adjust the Vehicle Speed
You can set the vehicle speed pressing the RES/+/SET/- switch down on the steering wheel when adjusting the speed with the accelerator and brake pedals.
To Cancel
Resuming the prior set speed:
After cruise control has been canceled, you can still resume the prior set speed by pressing the RES/+/SET/- switch up while driving at a speed of at least 25 mph (40 km/h) or more.
You cannot set or resume in the following situations:
- When vehicle speed is less than 25 mph (40 km/h)
- When the CRUISE button is turned off
At vehicle speeds of 22 mph (35 km/h) or less, cruise control is canceled automatically.
Vehicle Stability Assist™ (VSA®), aka Electronic Stability Control (ESC), System
VSA® helps to stabilize the vehicle during cornering if the vehicle turns more or less than what was intended. It also assists in maintaining traction on slippery surfaces. It does so by regulating engine and motor output and selectively applying the brakes.
VSA® Operation
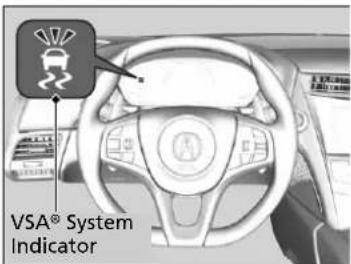
text_image
VSA® System IndicatorWhen VSA® activates, you may notice that the engine and motor do not respond to the accelerator. You may also notice some noise from the hydraulic system. You will also see the indicator blink.
Vehicle Stability Assist™ (VSA®), aka Electronic Stability Control (ESC), System
VSA® may not function properly if tire type and size are mixed. Make sure to use the same size and type of tire, and the air pressures as specified.
→ Tire and Wheel Replacement P. 413
When the VSA® system indicator comes on and stays on while driving, there may be a problem with the system. While this may not interfere with normal driving, have your vehicle checked by an authorized Acura NSX dealer immediately.
VSA® cannot enhance stability in all driving situations and does not control the entire braking system. You still need to drive and corner at speeds appropriate for the conditions and always leave a sufficient margin of safety.
The main function of the VSA® system is generally known as Electronic Stability Control (ESC). The system also includes a traction control function.
VSA® On and Off
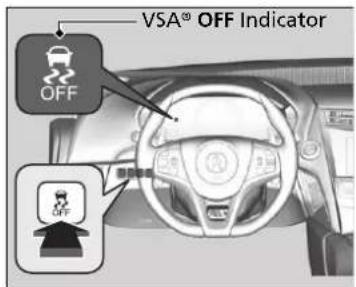
text_image
VSA® OFF Indicator OFFThis button is on the driver side control panel. This button is used to change VSA® modes. See below for more information.
VSA® is turned on every time you turn the power system on, even if you press the button the last time you drove the vehicle.
■ When the Integrated Dynamics System mode is in QUIET mode, SPORT mode, or SPORT+ mode
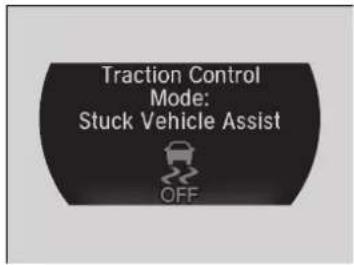
text_image
Traction Control Mode: Stuck Vehicle Assist OFFTo enter Stuck Vehicle Assist mode, press the VSA® OFF button until a single beep is heard and the VSA® OFF indicator illuminates.
This message appears on the driver information interface for a few seconds.
If the Integrated Dynamics System mode is changed, VSA® will remain in Stuck Vehicle Assist mode.
To exit Stuck Vehicle Assist mode, press the VSA® OFF button until a single beep is heard and the VSA® OFF indicator extinguishes.
Vehicle Stability Assist™ (VSA®), aka Electronic Stability Control (ESC), System
In Stuck Vehicle Assist mode, your vehicle will have normal braking and cornering ability, but VSA® traction and stability enhancement becomes less effective.
In certain unusual conditions when your vehicle gets stuck in shallow mud or fresh snow, it may be easier to free it with Stuck Vehicle Assist mode.
In Stuck Vehicle Assist mode, the traction control function becomes less effective. This allows for the wheels to spin more freely at low speed. You should only attempt to free your vehicle with the button pressed if you are not able to free it without.
Immediately after freeing your vehicle, be sure to press the button again. We do not recommend driving your vehicle with Stuck Vehicle Assist mode.
You may hear a motor sound coming from the front of the vehicle while system checks are being performed immediately after turning the power system on or while driving. This is normal.
■ When the Integrated Dynamics System mode is in TRACK mode
When you set the Integrated Dynamics System mode to TRACK, the VSA® system switches to Track mode and the VSA® OFF indicator comes on. The VSA® features do not stop, but the thresholds for them to activate become higher. Additional care should be used while driving in TRACK mode, and TRACK mode should only be used while driving on closed circuits.
text_image
Traction Control Mode: Stuck Vehicle Assist OFFTo enter Stuck Vehicle Assist mode, press the VSA® OFF button until a single beep is heard.
This message appears on the driver information interface for a few seconds. the Integrated Dynamics System mode is changed, VSA® will remain in Stuck Vehicle assist mode.
To exit Stuck Vehicle Assist mode, press the VSA® OFF button until a single beep is heard.
This message appears on the driver information interface.
When the Integrated Dynamics System mode is in TRACK mode
In OFF mode, your vehicle will have normal braking and cornering ability, but it will not have VSA® traction and stability enhancement.
When the VSA ^® system is off, the traction control system and agile handling assist system are also off.
We do not recommend driving your vehicle with the VSA®, traction control system, and agile handling assist system switched off.
If the low tire pressure/TPMS indicator comes on or blinks, the VSA® system comes on automatically. In this case, you can select Stuck Vehicle Assist mode to free a stuck vehicle, but you cannot select the VSA® OFF mode by pressing the 📁 button.
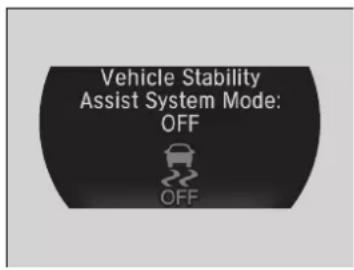
text_image
Vehicle Stability Assist System Mode: OFF OFFTo completely disable VSA ^® , the VSA ^® must be in TRACK mode (it cannot be in Stuck Vehicle Assist mode). Press and hold the VSA ^® OFF button until you hear a single beep, then later two more beeps.
This message appears on the driver information interface.
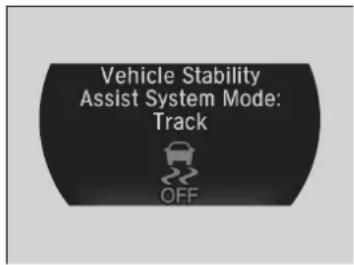
text_image
Vehicle Stability Assist System Mode: Track OFFTo resume VSA ^® full function, press the VSA ^® OFF button until a single beep is heard. The VSA ^® will return to Track Mode.
This message appears on the driver information interface.
If VSA® OFF mode is selected, and Integrated Dynamics System is changed to a mode other than TRACK, VSA® full function will resume, and the VSA® OFF indicator will go off.
Agile Handling Assist
Lightly brakes each of the front and rear wheels, as needed, when you turn the steering wheel, and helps support the vehicle's stability and performance during cornering.
Agile Handling Assist
The agile handling assist cannot enhance stability in all driving situations. You still need to drive and corner at speeds appropriate for the conditions and always leave a sufficient margin of safety.
When the VSA® system indicator comes on and stays on while driving, the agile handling assist does not activate.
You may hear a sound coming from the front of the car while the agile handling assist is activated. This is normal.
SPORT HYBRID Super Handling All-Wheel-Drive™ (SPORT HYBRID SH-AWD®)
The system controls and transfers varying amounts of motor and/or engine torque to each wheel in accordance with the driving conditions.
SPORT HYBRID SH-AWD® helps to enhance driving stability, and lets you handle situations like slippery surfaces better than when driving with standard two wheel drive. However, the system does not help to enhance braking. Be cautious about the following:
- It is still your responsibility to drive safely when you steer, accelerate, and apply brakes.
- Leave a sufficient margin when braking on slippery surfaces.
SPORT HYBRID Super Handling All-Wheel-Drive™ (SPORT HYBRID SH-AWD®)
Do not drive through deep water.
The SPORT HYBRID SH-AWD® system may not function properly if tire type and size are mixed. Make sure to use the same size and type of tire, and the air pressures as specified.
Tire and Wheel Replacement P. 413
Tire Pressure Monitoring System (TPMS)

natural_image
Interior view of a car dashboard with steering wheel and headlight (no visible text or symbols)Monitors the tire pressure while you are driving. If your vehicle's tire pressure becomes significantly low, the low tire pressure/TPMS indicator comes on and a message appears on the driver information interface.
Tire Pressure Monitoring System (TPMS)
Conditions such as low ambient temperature and altitude change directly affect tire pressure and can trigger the low tire pressure/TPMS indicator to come on.
If the Low Tire Pressure/TPMS Indicator Comes On or Blinks P. 455
Tire pressure checked and inflated in:
- Warm weather can become under-inflated in colder weather.
- Cold weather can become over-inflated in warmer weather.
The low tire pressure/TPMS indicator will not come on as a result of over inflation.
Tire Pressure Monitor
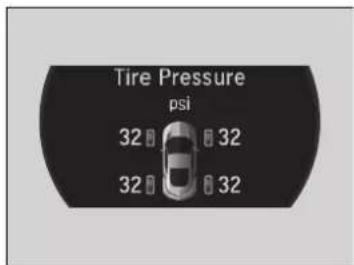
text_image
Tire Pressure psi 32 32 32 32To select the tire pressure monitor, set the power mode to ON, and roll the right selector wheel until you see the tire pressure screen.
The pressure for each tire is displayed in PSI (U.S.) or kPa (Canada).
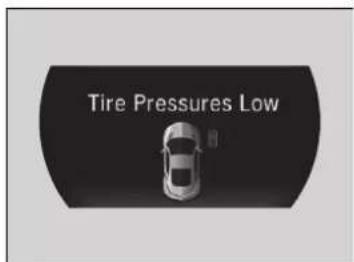
text_image
Tire Pressures LowTire Pressures Low is displayed when a tire has significantly low pressure. The specific tire is displayed on the screen.
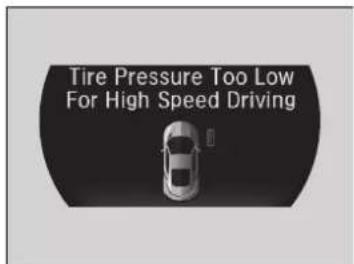
text_image
Tire Pressure Too Low For High Speed DrivingTire Pressure Too Low For High Speed Driving is displayed when driving at an extremely high speed and one or more tires are underinflated.
▶ Decelerate and drive your vehicle until the message disappears.
Tire Pressure Monitor
The pressure displayed on the driver information interface can be slightly different from the actual pressure as measured by a gauge. If there is a significant difference between the two values, or if the low tire pressure/TPMS indicator and the message on the driver information interface do not go off after you have inflated the tire to the specified pressure, have the system checked by an authorized Acura NSX dealer.
Tire Pressure Monitor Problem may appear on the driver information interface if there is a problem with the TPMS. Please have the system checked by an authorized Acura NSX dealer.
Tire Pressure Monitoring System (TPMS) - Required Federal Explanation
Each tire, including the spare (if provided), should be checked monthly when cold and inflated to the inflation pressure recommended by the vehicle manufacturer on the vehicle placard or tire inflation pressure label.
(If your vehicle has tires of a different size than the size indicated on the vehicle placard or tire inflation pressure label, you should determine the proper tire inflation pressure for those tires.)
As an added safety feature, your vehicle has been equipped with a tire pressure monitoring system (TPMS) that illuminates a low tire pressure telltale

when one or more of your tires is significantly under-inflated.
Accordingly, when the low tire pressure telltale illuminates, you should stop and check your tires as soon as possible, and inflate them to the proper pressure.
Driving on a significantly under-inflated tire causes the tire to overheat and can lead to tire failure. Under-inflation also reduces fuel efficiency and tire tread life, and may affect the vehicle's handling and stopping ability.
Please note that the TPMS is not a substitute for proper tire maintenance, and it is the driver's responsibility to maintain correct tire pressure, even if under-inflation has not reached the level to trigger illumination of the TPMS low tire pressure telltale.
Your vehicle has also been equipped with a TPMS malfunction indicator to indicate when the system is not operating properly. The TPMS malfunction indicator is combined with the low tire pressure telltale. When the system detects a malfunction, the telltale will flash for approximately one minute and then remain continuously illuminated. This sequence will continue upon subsequent vehicle start-ups as long as the malfunction exists.
When the malfunction indicator is illuminated, the system may not be able to detect or signal low tire pressure as intended.
TPMS malfunctions may occur for a variety of reasons, including the installation of replacement or alternate tires or wheels on the vehicle that prevent the TPMS from functioning properly.
Always check the TPMS malfunction telltale after replacing one or more tires or wheels on your vehicle to ensure that the replacement or alternate tires and wheels allow the TPMS to continue to function properly.
High Voltage Battery
The High Voltage battery gradually discharges when the vehicle is not in use. As a result, if your vehicle is parked for an extended period of time, the battery level may get low. Keeping the High Voltage battery's charge level low can shorten its life.
To maintain the High Voltage battery, drive your vehicle for more than 30 minutes to recharge it at least once every three months. Also, try to park in shaded areas instead of direct sunlight.
→ Storage P. 428
Braking
Brake System
Parking Brake
Use the parking brake to keep the vehicle stationary when parked. When the parking brake is applied, you can manually or automatically release it.
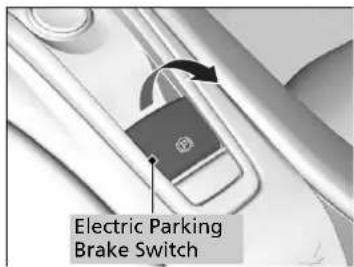
text_image
Electric Parking Brake Switch■ To apply
The electric parking brake can be applied any time the vehicle has battery, no matter which power mode the vehicle is in.
Pull the electric parking brake switch up gently and securely.
The parking brake indicator comes on.
■ To release
The power mode must be in the ON position to release the electric parking brake.
-
Depress the brake pedal.
-
Press the electric parking brake switch.
The parking brake indicator goes off.
Manually releasing the parking brake using the switch helps your vehicle start slowly and smoothly when facing downhill on steep hills.
Brake System
When you depress the brake pedal, you may hear a whirring sound from the engine compartment. This is because the brake system is in operation, and it is normal.
Parking Brake
You may hear the electric parking brake system motor operating from the rear wheel area when you apply or release the parking brake.
You cannot apply or release the parking brake if the 12-volt battery goes dead.
→ Jump Starting P. 448
If you pull up and hold the electric parking brake switch while driving, the brakes on all four wheels are applied by the electric servo brake system until the vehicle comes to a stop. The electric parking brake then applies, and the switch should be released.
Continued
■ To release automatically
Depressing the accelerator pedal releases the parking brake.
Use the accelerator pedal to release the brake when you are starting the vehicle facing uphill, or in a traffic jam.
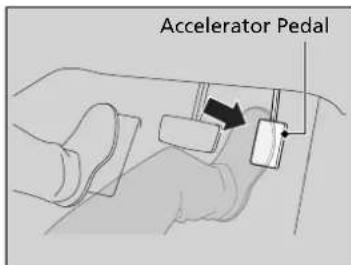
text_image
Accelerator PedalGently depress the accelerator pedal. When on a hill, it may require more accelerator input to release.
The electric parking brake indicator goes off.
You can release the parking brake automatically when:
- You are wearing the driver's seat belt.
• The power system is on. - The transmission is not in or .
Parking Brake
In the following situations, the parking brake automatically operates.
- When the vehicle stops with the automatic brake hold system activated for more than 10 minutes.
- When the driver's seat belt is unfastened while your vehicle is stopped and brake hold is applied.
- When the power system is turned off while brake hold is applied.
- When there is a problem with the Brake Hold System.
If the parking brake cannot be released automatically, release it manually.
The parking brake cannot be released automatically while the following indicators are on:
- Malfunction indicator lamp
• Transmission system indicator
The parking brake may not be released automatically while the following indicators are on:
• Electric parking brake system indicator
- VSA® system indicator
- ABS indicator
• Supplemental restraint system indicator
Foot Brake
Your vehicle is equipped with disc brakes at all four wheels. The brake assist system increases the stopping force when you depress the brake pedal hard in an emergency situation. The anti-lock brake system (ABS) helps you retain steering control when braking very hard.
→ Brake Assist System P. 363
Anti-lock Brake System (ABS) P. 362
Models with iron brake discs
Brake squeal
To satisfy the performance under a wide range of driving conditions, a high-performance braking system is equipped on your vehicle. You may hear the brake squeal under certain conditions, such as vehicle speed, deceleration, humidity, and so on. This is not a malfunction.
Foot Brake
Check the brakes after driving through deep water, or if there is a buildup of road surface water. If necessary, dry the brakes by lightly depressing the pedal several times.
Models with iron brake discs
If you hear a continuous metallic friction sound when applying the brakes, this is caused by the brake wear indicator rubbing on the brake rotor and indicates that the brake pads need to replaced. Have your vehicle checked by an authorized Acura NSX dealer. If you hear only an occasional squeak or squeal when you initially apply the brake pedal, this may be normal and caused by high frequency vibration of the brake pads against the rotating brake disc.
Constantly using the brake pedal while going down a long hill builds up heat, which reduces the brake effectiveness. Apply regenerative braking by taking your foot off the accelerator pedal and downshifting to a lower gear.
Do not rest your foot on the brake pedal while driving, as it will lightly apply the brakes and cause them to lose effectiveness over time and reduce pad life. It will also confuse drivers behind you.
Automatic Brake Hold
Keeps the brake applied after releasing the brake pedal until the accelerator pedal is pressed. Use this system only while the vehicle is temporarily stopped, like at traffic lights and in heavy traffic.
■ Turning on the system
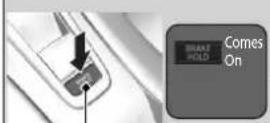
Automatic Brake
Hold Button
■ Activating the system
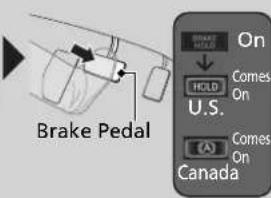
text_image
Brake Pedal BRAKE HOLD On HOLD U.S. Comes On Comes On Canada■ Canceling the system
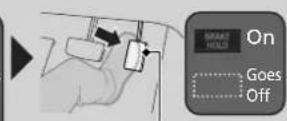
Accelerator Pedal
Fasten your seat belt properly, then start the power system. Press the automatic brake hold button.
- The automatic brake hold system indicator comes on. The system is turned on.
Depress the brake pedal to come to a complete stop. The transmission must be in ☑/M ☑ N.
- The automatic brake hold indicator comes on. Braking is kept for up to 10 minutes.
- Release the brake pedal after the automatic brake hold indicator comes on.
Depress the accelerator pedal while the transmission is in DMV
R. The system is canceled and the vehicle starts to move.
- The automatic brake hold indicator goes off. The system continues to be on.
Automatic Brake Hold
WARNING
Activating the automatic brake hold system on steep hills or slippery roads may still allow the vehicle to move if you remove your foot from the brake pedal.
If a vehicle unexpectedly moves, it may cause a crash resulting in serious injury or death.
Never activate the automatic brake hold system or rely on it to keep a vehicle from moving when stopped on a steep hill or slippery roads.
WARNING
Using the automatic brake hold system to park the vehicle may result in the vehicle unexpectedly moving.
If a vehicle moves unexpectedly, it may cause a crash, resulting in serious injury or death.
Never leave the vehicle when braking is temporarily kept by automatic brake hold and always park the vehicle by putting the transmission in P and applying the parking brake.
■ The system automatically cancels when:
- You depress the brake pedal and change to P or R.
- You engage the parking brake.
Under the following conditions, the system automatically cancels, and the parking brake is applied:
- Braking is kept for more than 10 minutes.
• The driver's seat belt is unfastened.
• The power system is turned off. - Brake Hold System Problem appears on the driver information interface.
■ Turning off the automatic brake hold system
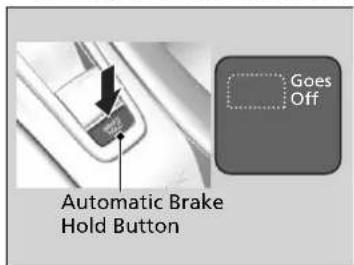
text_image
Automatic Brake Hold ButtonWhile the system is on, press the automatic brake hold button again.
The automatic brake hold system indicator goes off.
If you want to turn off automatic brake hold while the system is in operation, press the automatic brake hold button with the brake pedal depressed.
Automatic Brake Hold
While the system is activated, you can turn off the power system or park the vehicle through the same procedure as you normally do.
When Stopped P. 364
Whether the system is on, or the system is activated, the automatic brake hold turns off once the power system is off.
Make sure to turn off the automatic brake hold system before using an automated car wash.
You may hear an operating noise if the vehicle moves while the automatic brake hold system is in operation. The system generates sound while holding the vehicle and it moves.
Anti-lock Brake System (ABS)
ABS
Helps prevent the wheels from locking up, and helps you retain steering control by pumping the brakes rapidly, much faster than you.
The electronic brake distribution (EBD) system, which is part of the ABS, also balances the front-to-rear braking distribution according to vehicle loading.
You should never pump the brake pedal. Let the ABS work for you by always keeping firm, steady pressure on the brake pedal. This is sometimes referred to as "stomp and steer."
■ ABS operation
You may hear an operating noise when the ABS is working. Depress the brake pedal and keep holding the pedal firmly down. On dry pavement, you will need to press on the brake pedal very hard before the ABS activates. However, you may feel the ABS activate immediately if you are trying to stop on snow or ice.
ABS may activate when you depress the brake pedal when driving on:
- Wet or snow covered roads.
- Roads paved with stone.
- Roads with uneven surfaces, such as potholes, cracks, manholes, etc.
When the vehicle speed goes under 6 mph (10 km/h), the ABS stops.
Anti-lock Brake System (ABS)
NOTICE
The ABS may not function correctly if you use an incorrect tire type and size.
When the ABS indicator comes on while driving, there may be a problem with the system. While normal braking is not affected, there is a possibility of the ABS not operating. Have your vehicle checked by an authorized Acura NSX dealer immediately.
The ABS does not reduce the time or distance it takes to stop the vehicle. It only helps with steering control during hard braking.
In the following cases, your vehicle may need more stopping distance than a vehicle without the ABS:
- When driving on rough road surfaces, including when driving on uneven surfaces, such as gravel or snow.
- When tire chains are installed.
The following may be observed with the ABS system:
- Motor sounds coming from the engine compartment when the brakes are applied, or when system checks are being performed after the engine has been started and while vehicle is accelerates.
These sounds are normal to ABS systems and are no cause for concern.
Brake Assist System
Brake Assist System
Designed to assist the driver by generating greater braking force when you depress the brake pedal hard during emergency braking.
■ Brake assist system operation
Press the brake pedal firmly for more powerful braking.
When brake assist operates, an operating noise may be heard. This is normal. Keep holding the brake pedal firmly down.
Parking Your Vehicle
When Stopped
- Depress the brake pedal firmly.
- With the brake pedal depressed, pull up the electric parking brake switch slowly, but fully.
- Change the gear position to P.
- Turn off the power system.
The electric parking brake indicator goes off in about 15 seconds.
Always confirm the electric parking brake is set, in particular if you are parked on an incline.
When the Integrated Dynamics System mode is in QUIET mode or SPORT mode
During Auto Engine Stop, the gear position changes to P and the engine restarts automatically under the following conditions:
- You unfasten the driver side seat belt and open the door.
Parking Your Vehicle
WARNING
The vehicle can roll away if left unattended without confirming that Park is engaged.
A vehicle that rolls away could cause a crash resulting in serious injury or death.
Always keep your foot on the brake pedal until you have confirmed that P is shown on the gear position indicator.
Do not park your vehicle near flammable objects, such as dry grass, oil, or timber. Heat from the exhaust can cause a fire.
When Stopped
NOTICE
The following can damage the driveline:
- Depressing the accelerator and brake pedals simultaneously.
- Changing to before the vehicle stops completely.
When facing uphill, do not hold the vehicle by depressing the accelerator pedal.
Doing so may cause the power system to overheat and fail.
In extremely cold temperatures, the parking brake may freeze up if applied. If such temperatures are expected, do not apply the parking brake. If parking on a slope, either turn the steering wheel so one of the front tires will contact the curb or block the wheels to keep the vehicle from moving. If you do not take either precaution, the vehicle may roll unexpectedly, leading to a crash.
Parking Sensor System\*
The corner and center sensors monitor obstacles around your vehicle, and the beeper and audio/information screen let you know the approximate distance between your vehicle and the obstacle.
■ The sensor location and range
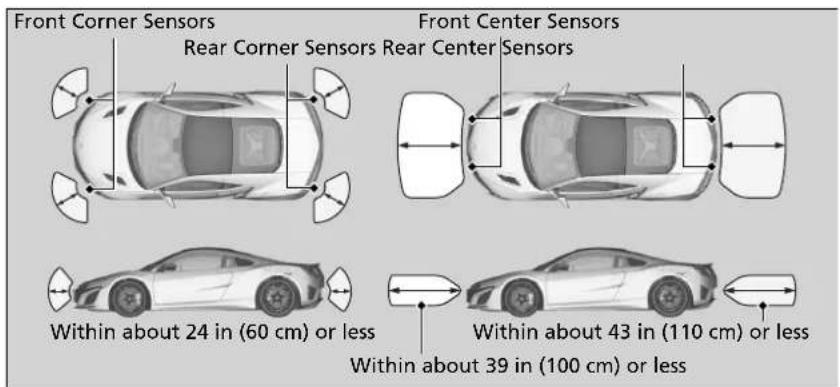
text_image
Front Corner Sensors Rear Corner Sensors Rear Center Sensors Front Center Sensors Within about 24 in (60 cm) or less Within about 43 in (110 cm) or less Within about 39 in (100 cm) or lessParking Sensor System \*
Even when the system is on, always confirm if there is no obstacle near your vehicle before parking.
The system may not work properly when:
- The sensors are covered with snow, ice, mud or dirt.
- The vehicle is on uneven surface, such as grass, bumps, or a hill.
• The vehicle has been out in hot or cold weather. - The system is affected by devices that emit ultrasonic waves.
- Driving in bad weather.
The system may not sense:
- Thin or low objects.
- Sonic-absorptive materials, such as snow, cotton, or sponge.
- Objects directly under the bumper.
Do not put any accessories on or around the sensors.
■ Parking sensor system on and off
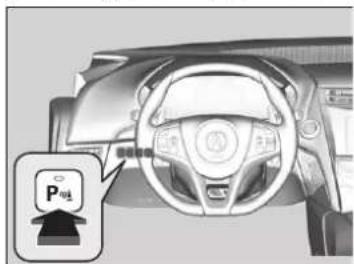
natural_image
Interior view of a car dashboard and steering wheel (no visible text or symbols)With the power mode in ON, press the parking sensor system button to turn the system on or off. The indicator in the button comes on when the system is on.
The rear center and corner sensors start to detect an obstacle when the transmission is in R, and the vehicle speed is less than 5 mph (8 km/h).
The front center and corner sensors start to detect an obstacle when the transmission is not in [P], and the vehicle speed is less than 5 mph (8 km/h).
■ When the distance between your vehicle and detected obstacles becomes shorter
| Length of the intermittent beep | Distance between the Bumper and Detected Obstacle | Indicator Audio/information screen | ||
| Corner Sensors Center Sensors | ||||
| Moderate — | Front: About 39-24 in (100-60 cm)Rear: About 43-24 in (110-60 cm) | Blinks in Yellow*1 | 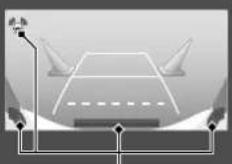 Indicators light where the sensor detects an obstacle. Indicators light where the sensor detects an obstacle.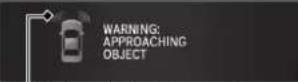 Indicators light where the sensor detects an obstacle. Indicators light where the sensor detects an obstacle. | |
| Short | About 24-18 in (60-45 cm) | About 24-18 in (60-45 cm) | Blinks in Amber | |
| Very short | About 18-14 in (45-35 cm) | About 18-14 in (45-35 cm) | ||
| Continuous | About 14 in (35 cm) or less | About 14 in (35 cm) or less | Blinks in Red | |
*1: At this stage, only the center sensors detect obstacles.
Turning Off All Rear Sensors
- Make sure that the parking sensor system is not activated. Set the power mode to VEHICLE OFF.
- Press and hold the parking sensor system button, and set the power mode to ON.
- Keep pressing the button for ten seconds. Release the button when the indicator in the button blinks.
- Press the button again. The indicator in the button goes off.
The beeper sounds twice. The rear sensors are now turned off.
To turn the rear sensors on again, follow the above procedure. The beeper sounds three times when the rear sensors come back on.
Turning Off All Rear Sensors
When you select [R], the indicator in the parking sensor system button blinks as a reminder that the rear sensors have been turned off.
Multi-View Rear Camera
About Your Multi-View Rear Camera
The audio/information screen can display your vehicle's rear view. The display automatically changes to the rear view when the gear position is changed to R.
Multi-View Rear Camera Display Area
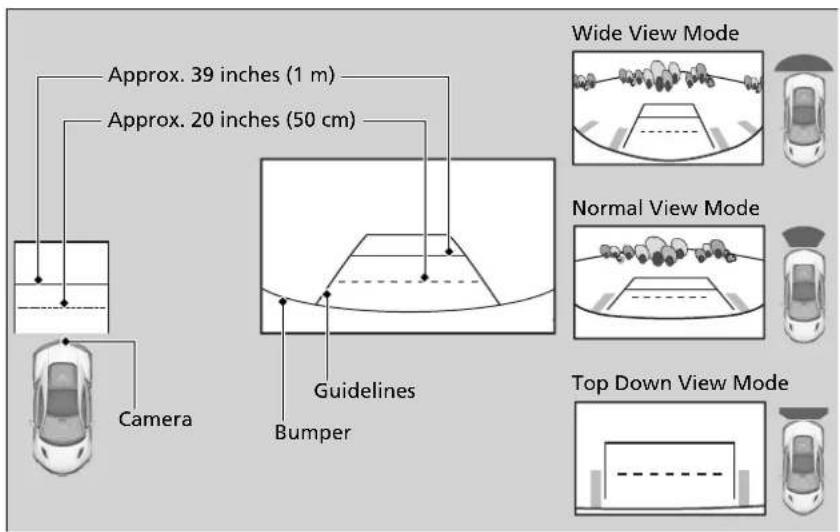
text_image
Approx. 39 inches (1 m) Approx. 20 inches (50 cm) Camera Guidelines Bumper Wide View Mode Normal View Mode Top Down View Mode»About Your Multi-View Rear Camera
The rear camera view is restricted. You cannot see the corner ends of the bumper or what is underneath the bumper. Its unique lens also makes objects appear closer or farther than they actually are.
Visually confirm that it is safe to drive before backing up. Certain conditions (such as weather, lighting, and high temperatures) may also restrict the rear view. Do not rely on the rearview display which does not give you all information about conditions at the back of your vehicle.
If the camera lens is covered with dirt or moisture, use a soft, moist cloth to keep the lens clean and free of debris.
You can change the Fixed Guideline and Dynamic Guideline settings.
→ Customized Features P. 244
Fixed Guideline
On: Guidelines appear when you select R.
Off: Guidelines do not appear.
Dynamic Guideline
On: Guidelines move according to the steering wheel direction.
Off: Guidelines do not move.
You can view three different camera modes on the rearview display. Touch the appropriate icon to switch the mode.

Wide view mode
Normal view mode
Top down view mode
- If the last used viewing mode was Wide or Normal view mode, the same mode is selected the next time you put the transmission into .
- If Top down view mode was last used before you turned off the power system, Wide view mode is selected next time you turn the power system on and put the transmission into R.
- If Top down view mode was last used more than 10 seconds after you change from , Wide view mode is selected the next time you put the transmission into .
Refueling
Fuel Information
■ Fuel requirement
Unleaded premium gasoline, pump octane number 91 or higher
Use of lower octane gasoline can cause occasional metallic knocking noise in the engine and will result in decreased engine performance.
We recommend that you use a pump octane of 93 or higher to maximize the performance of the engine.
Use of gasoline with a pump octane less than 91 can lead to engine damage.
■ Top tier detergent gasoline
Because the level of detergency and additives in gasoline vary in the market, Acura endorses the use of "TOP TIER Detergent Gasoline" where available to help maintain the performance and reliability of your vehicle. TOP TIER Detergent Gasoline meets a new gasoline standard jointly established by leading automotive manufacturers to meet the needs of today's advanced engines.
Qualifying gasoline retailers will, in most cases, identify their gasoline as having met "TOP TIER Detergent Gasoline" standards at the retail location. This fuel is guaranteed to contain the proper level of detergent additives and be free of metallic additives. The proper level of detergent additives, and absence of harmful metallic additives in gasoline, help avoid build-up of deposits in your engine and emission control system.
For further important fuel-related information for your vehicle, or on information on gasoline that does not contain MMT, visit Acura Owners at owners. acura.com. In Canada, visit www.acura.ca for additional information on gasoline. For more information on top tier gasoline, visit www.toptiergas.com.
■ Fuel tank capacity: 15.6 US gal (59.0 liters)
»Fuel Information
NOTICE
We recommend quality gasoline containing detergent additives that help prevent fuel system and engine deposits. In addition, in order to maintain good performance, fuel economy, and emissions control, we strongly recommend the use of gasoline that does NOT contain harmful manganese-based fuel additives such as MMT, if such gasoline is available.
Use of gasoline with these additives may adversely affect performance, and cause the malfunction indicator lamp on your instrument panel to come on. If this happens, contact an authorized Acura NSX dealer for service.
Some gasoline today is blended with oxygenates such as ethanol. Your vehicle is designed to operate on oxygenated gasoline containing up to 15% ethanol by volume. Do not use gasoline containing methanol. If you notice any undesirable operating symptoms, try another service station or switch to another brand of gasoline.
How to Refuel
Your fuel tank is not equipped with a fuel fill cap. You can insert the filler nozzle directly into the filler neck. The tank seals itself again when you pull out the filler nozzle.
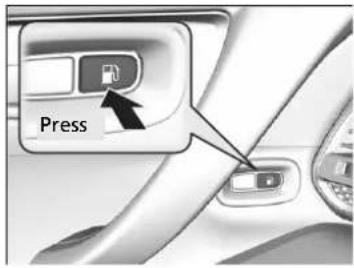
text_image
Press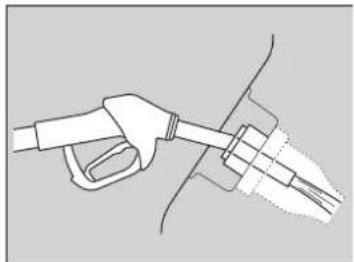
natural_image
Line drawing of a fuel pump nozzle connecting a pipe to a terminal outlet (no text or symbols)- Stop your vehicle with the service station pump on the left side of the vehicle in the rear.
- Turn off the power system.
- Press the fuel fill door release button.
The fuel fill door opens.
- Place the end of the filler nozzle on the lower part of filler opening, then insert it slowly and fully.
▶ Make sure that the end of the filler nozzle goes down along with the filler pipe.
▶ Keep the filler nozzle level.
When the tank is full, the filler nozzle will click off automatically.
▶ After filling, wait about five seconds before removing the filler nozzle.
- Shut the fuel fill door by hand.
How to Refuel
WARNING
Gasoline is highly flammable and explosive. You can be burned or seriously injured when handling fuel.
- Turn the power system off, and keep heat, sparks, and flame away.
- Handle fuel only outdoors.
- Wipe up spills immediately.
The fuel filler opening is designed to accept only service station filler nozzles for refueling. Use of smaller diameter tubes (e.g., to siphon fuel for other uses) or other non-service station devices can damage the area in and around the filler opening.
The filler nozzle automatically stops to leave space in the fuel tank so that fuel does not overflow as a result of changes in air temperature.
Do not continue to add fuel after the nozzle has automatically stopped. Additional fuel can exceed the full tank capacity.
If the fuel nozzle keeps turning off when the tank is not full, there may be a problem with the pump's fuel vapor recovery system. Try filling at another pump. If this does not fix the problem, consult an authorized Acura NSX dealer.
If you have to refuel your vehicle from a portable container, use the funnel provided with your vehicle.
Refueling from a Portable Fuel Container P. 465
Fuel Economy and CO₂ Emissions
Improving Fuel Economy and Reducing CO_2 Emissions
Achieving fuel economy and reducing CO_2 emissions is dependent on several factors, including driving conditions, load weight, idling time, driving habits, and vehicle condition. Depending on these and other factors, you may not achieve the rated fuel economy of this vehicle.
Maintenance and Fuel Economy
You can optimize your fuel economy with proper maintenance of your vehicle. Always maintain your vehicle in accordance with the messages displayed on the driver information interface.
- Use the recommended viscosity engine oil.
- Maintain the specified tire pressure.
- Do not load the vehicle with excess cargo.
- Keep your vehicle clean. A buildup of snow or mud on your vehicle's underside adds weight and increases wind resistance.
Improving Fuel Economy and Reducing CO₂ Emissions
Direct calculation is the recommended method to determine actual fuel consumed while driving.
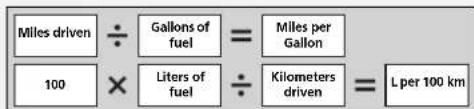
text_image
Miles driven 100 Gallons of fuel × Liters of fuel Miles per Gallon Kilometers driven L per 100 kmIn Canada, posted fuel economy numbers are established following a simulated test. For more information on how this test is performed, please visit http://oee.nrcan.gc.ca/
Turbo Engine Vehicle
Handling Precautions
The turbocharger is a high-precision device designed to obtain greater horsepower by delivering a large volume of compressed air into the engine using a turbine driven by the engine's exhaust gas pressure.
- When the engine is cold just after starting, avoid hard or sudden acceleration.
- Always replace the engine oil and engine oil filter according to the Maintenance Minder™.
The turbine rotates at very high speeds over 100,000 rpm and its temperature reaches over 1,292°F (700°C). It is lubricated and cooled by engine oil. If you fail to replace the engine oil and filter at the scheduled distance or interval, deteriorated engine oil may cause failure such as sticking and abnormal noise of the turbine bearing.
Turbo Engine Vehicle
The scheduled maintenance intervals for replacing the engine oil and filter is indicated on the Maintenance Minder™. Follow the information of when to replace them.
→ Maintenance Minder™ P. 379
→ Recommended Engine Oil P. 390
The temperature gauge needle is at the H mark when you restart the engine after driving under high load conditions such as at high speed or in hilly terrain. This is normal. The gauge needle goes down after you idle or drive the vehicle for about one minute.
Maintenance
This chapter discusses basic maintenance.
Before Performing Maintenance
Inspection and Maintenance 376
Safety When Performing Maintenance .... 377
Parts and Fluids Used in Maintenance
Service 378
Maintenance Minder™ 379
Maintenance Under the Hood and Hatch
Maintenance Items Under the Hood and
Hatch 385
Opening the Hatch 387
Opening the Hood 388
Engine Compartment Cover...... 389
Recommended Engine Oil 390
Oil Check 391
Adding Engine Oil 394
Cooling System.... 396
Inverter Coolant 398
Transmission Fluids 399
Brake Fluid 400
Refilling Window Washer Fluid..... 400
Replacing Light Bulbs 401
Checking and Maintaining Wiper Blades ....404
Checking and Maintaining Tires
Checking Tires 407
Tire and Loading Information Label ..... 408
Tire Labeling 408
DOT Tire Quality Grading (U.S. Vehicles)..... 410
Wear Indicators 412
Tire Service Life 412
Tire and Wheel Replacement ..... 413
Tire Rotation.... 414
Winter Tires 415
Cold Weather Driving 416
12-Volt Battery 417
Remote Transmitter Care
Replacing the Button Battery ..... 418
Climate Control System Maintenance ....419
Cleaning
Interior Care 420
Exterior Care.... 422
Accessories and Modifications
Accessories 426
Modifications.... 427
Storage 428
Before Performing Maintenance
Inspection and Maintenance
For your safety, perform all listed inspections and maintenance to keep your vehicle in good condition. If you become aware of any abnormality (noise, smell, insufficient brake fluid, oil residue on the ground, etc.), have your vehicle inspected by an authorized Acura NSX dealer. (Note, however, that service at an authorized Acura NSX dealer is not mandatory to keep your warranties in effect.) Refer to the separate maintenance booklet for detailed maintenance and inspection information.
Types of Inspection and Maintenance
■ Daily inspections
Perform inspections before long distance trips, when washing the vehicle, or when refueling.
■ Periodic inspections
- Check the brake fluid level monthly.
→ Brake Fluid P. 400 - Check the tire pressure monthly. Examine the tread for wear and foreign objects.
→ Checking and Maintaining Tires P. 407 - Check the operation of the exterior lights monthly.
→ Replacing Light Bulbs P. 401 - Check the condition of the wiper blades at least every six months.
▶ Checking and Maintaining Wiper Blades P. 404
Inspection and Maintenance
U.S. models
Maintenance, replacement, or repair of emissions control devices and systems may be done by any automotive repair establishment or individuals using parts that are "certified" to EPA standards.
According to state and federal regulations, failure to perform maintenance on the maintenance main items marked with # will not void your emissions warranties. However, all maintenance services should be performed in accordance with the intervals indicated by the driver information interface.
→ Maintenance Service Items P. 382
If you want to perform complex maintenance tasks that require more skills and tools, you can purchase a subscription to the Service Express website at www.techinfo.honda.com.
→ Authorized Manuals P. 477
If you want to perform maintenance yourself, make sure that you have the necessary tools and skills first. After performing maintenance, update the records in the separate maintenance booklet.
Safety When Performing Maintenance
Some of the most important safety precautions are given here. However, we cannot warn you of every conceivable hazard that can arise in performing maintenance. Only you can decide whether you should perform a given task.
Maintenance Safety
- To reduce the possibility of fire or explosion, keep cigarettes, sparks, and flames away from the 12-volt battery, all High Voltage system, and all fuel related parts.
- Never leave rags, towels, or other flammable objects under the hood and hatch. ▶ Heat from the engine and exhaust can ignite them, causing a fire.
- To clean parts, use a commercially available degreaser or parts cleaner, not gasoline.
- Wear eye protection and protective clothing when working with the 12-volt battery or compressed air.
- Engine exhaust contains carbon monoxide, which is poisonous and can kill you.
▶ Only operate the engine if there is sufficient ventilation.
Vehicle Safety
- The vehicle must be in a stationary condition.
▶ Make sure your vehicle is parked on level ground, the parking brake is set, and the power system is turned off. - Be aware that hot parts can burn you.
▶ Make sure to let the power system, including the engine and exhaust system, cool thoroughly before touching vehicle parts. - Be aware that moving parts can injure you.
▶ Do not activate the power system unless instructed, and keep your hands and limbs away from moving parts. When the power system is on, the engine can automatically start, or the radiator fan may start operating without the engine running.
Safety When Performing Maintenance
WARNING
Improperly maintaining this vehicle or failing to correct a problem before driving can cause a crash in which you can be seriously hurt or killed.
Always follow the inspection and maintenance recommendations according to the schedules in this owner's manual.
WARNING
Failure to properly follow maintenance instructions and precautions can cause you to be seriously hurt or killed.
Always follow the procedures and precautions in this owner's manual.
Parts and Fluids Used in Maintenance Service
The use of Acura genuine parts and fluids is recommended when maintaining and servicing your vehicle. Acura genuine parts are manufactured according to the same high quality standards used in Acura vehicles.
Maintenance Minder™
Select the Maintenance Minder to see maintenance items that are due soon and to see the percentage of life remaining in the engine oil.
When the engine oil life is less than 15%, a Maintenance Minder message will appear every time you set the power mode to ON, reminding you to bring your vehicle to an authorized Acura NSX dealer for service.
To Use Maintenance Minder™
Displaying the Engine Oil Life and Maintenance Items
Certain maintenance items due soon, along with the estimated remaining oil life, appear on the driver information interface.
You can view them on the Maintenance Minder screen at any time.
- Set the power mode to ON.
- Roll the right selector wheel until the engine oil life appears on the driver information interface.
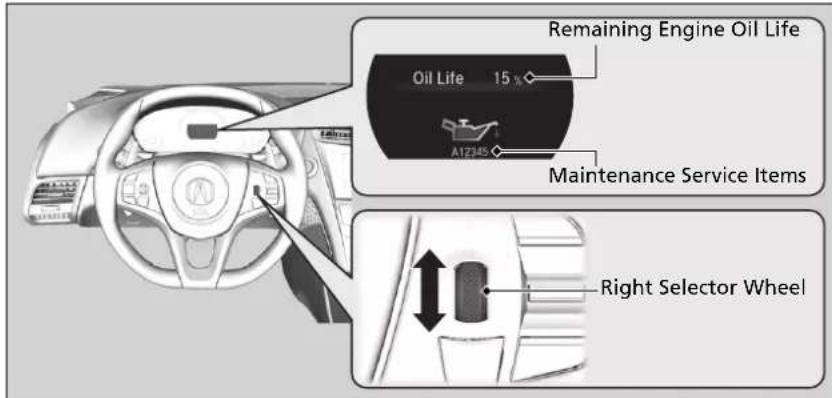
text_image
Remaining Engine Oil Life Oil Life 15% A12345 Maintenance Service Items Right Selector Wheel>>Displaying the Engine Oil Life and Maintenance Items
Based on the engine operating conditions and oil age, the remaining engine oil life is calculated and displayed as a percentage.
| Displayed Engine Oil Life (%) | Calculated Engine Oil Life (%) |
| 100 100 to 91 | |
| 90 90 to 81 | |
| 80 80 to 71 | |
| 70 70 to 61 | |
| 60 60 to 51 | |
| 50 50 to 41 | |
| 40 40 to 31 | |
| 30 30 to 21 | |
| 20 20 to 16 | |
| 15 15 to 11 | |
| 10 10 to 6 | |
| 5 5 to 1 | |
| 0 0 |
There is a list of maintenance main and sub items you can view on the driver information interface.
→ Maintenance Service Items P. 382
■ Maintenance Minder Messages on the Driver Information Interface
| Maintenance Message | Oil Life Display | Explanation | Information |
Service Due Soon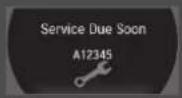 | 15%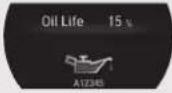 | The engine oil life indicator starts to appear along with other due-soon maintenance item codes when the remaining oil life drops to 15 percent. Once you switch the display by rolling the right selector wheel, this message will go off. | The engine oil is approaching the end of its service life. |
Service Due Now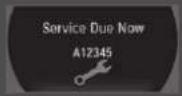 | 5%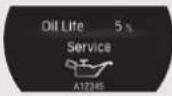 | The remaining engine oil life is 5 to 1 percent. Roll the right selector wheel to switch to another display. | The engine oil has almost reached the end of its service life, and the maintenance items should be inspected and serviced as soon as possible. |
Service Past Due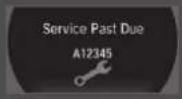 | Negative DistanceOil Life - 10 milesServiceA12345 | The engine oil life has passed its service life, and a negative distance appears after driving over 10 miles (U.S. models) or 10 km (Canadian models). Roll the right selector wheel to switch to another display. | The engine oil life has passed. The maintenance items must be inspected and serviced immediately. |
The system message indicator (①) comes on along with the Maintenance Minder message.
Maintenance Service Items
Maintenance Minder Message
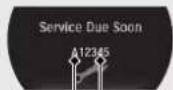
Main Item Sub Items
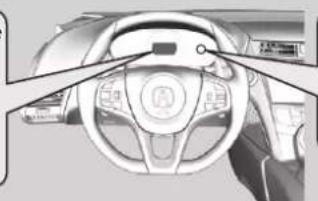
natural_image
Interior view of a car dashboard and steering wheel (no visible text or symbols)System Message Indicator

Maintenance Service Items
- Independent of the Maintenance Minder information, replace the brake fluid every 3 years.
- Adjust the valves during services A, B, 1, 2, or 3 if they are noisy.
- Inspect direct injection + port injection fuel system every 3 years or service item B is indicated.
- Inspect tire condition every 3,100 miles (5,000 km).
CODE Maintenance Main Items
A • Replace engine oil
*1
B • Replace engine oil
^*1 and oil filter
- Inspect front and rear brakes
- Check expiration date for temporary tire repair kit bottle
- Inspect tie rod ends, steering gearbox, and boots
- Inspect suspension components
- Inspect driveshaft boots
- Inspect brake hoses and lines (Including ABS/VSA®)
- Inspect all fluid levels and condition of fluids
- Inspect exhaust system"
- Inspect fuel lines and connections"
- Inspect direct injection + port injection fuel system
*1: If a message SERVICE does not appear more than 12 months after the display is reset, change the engine oil every year.
4: See information on maintenance and emissions warranty.
CODE Maintenance Sub Items
1 • Inspect tire condition
2 • Replace air cleaner element ^2 • Replace dust and pollen filters ^3
3 • Replace transmission fluid • Replace clutch fluid *4
4 • Replace spark plugs
- Inspect valve clearance
- Inspect Active Exhaust Valve function
- Replace Intake Sound Control
5 • Replace engine coolant
6 • Replace Twin Motor Unit fluid *5
*2: If you drive in dusty conditions, replace the air cleaner element every 15,000 miles (24,000 km).
*3: If you drive primarily in urban areas that have high concentrations of soot in the air from industry and from diesel-powered vehicles, replace the dust and pollen filters every 15,000 miles (24,000 km) or every year.
*4: Driving in mountainous areas at very low vehicle speeds results in higher transmission temperature. This requires transmission fluid and clutch fluid changes more frequently than recommended by the Maintenance Minder. If you regularly drive your vehicle under this condition, have the transmission fluid and clutch fluid changed every 20,000 miles (32,000 km).
*5: Driving in mountainous areas at very low vehicle speeds results in higher level of mechanical (Shear) stress to fluid. This requires Twin Motor Unit fluid changes more frequently than recommended by the Maintenance Minder. If you regularly drive your vehicle under these conditions, have the Twin Motor Unit fluid changed at 7,500 miles (12,000 km), then every 15,000 miles (24,000 km).
■ Resetting the Display
Reset the Maintenance Minder display if you have performed the maintenance service.
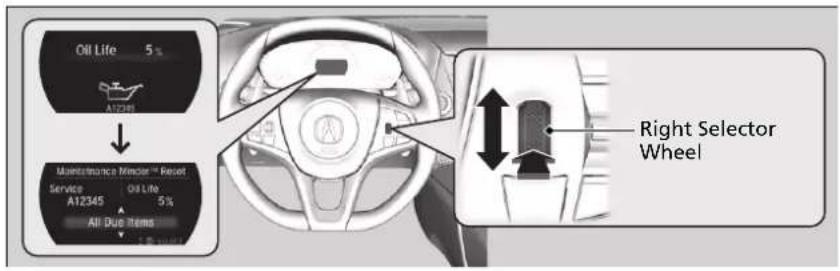
text_image
Oil Life 5% A12345 Maintenance Mincer™ Reset Service Oil Life 5% A12345 All Due Items Right Selector WheelUsing the driver information interface
- Set the power mode to ON.
- Roll the right selector wheel until the engine oil life appears on the driver information interface.
- With all doors closed, press and hold the right selector wheel for more than 10 seconds to enter the reset mode.
- Select All Due Items with the right selector wheel, then press the right selector wheel.
The displayed maintenance items disappear, and the engine oil life display returns to 100%.
To cancel the oil life reset mode, select Cancel with the right selector wheel, then press the right selector wheel.
>>Resetting the Display
NOTICE
Failure to reset the Maintenance Minder™ display after a maintenance service results in the system showing incorrect maintenance intervals, which can lead to serious mechanical problems.
An authorized Acura NSX dealer will reset the Maintenance Minder™ display after completing the required maintenance service. If someone other than an authorized Acura NSX dealer performs maintenance service, reset the Maintenance Minder™ display yourself.
▶▶ Maintenance Minder™▶To Use Maintenance Minder™
Using the audio/information screen
- Set the power mode to ON.
- Select □ on the audio/information screen.
- Select Settings
- Select Vehicle, then Maintenance Info
- Select Reset
▶ A confirmation message appears on the screen. - Select Reset.
The engine oil life display returns to 100%.
To cancel the oil life reset mode, select Cancel.
Maintenance Under the Hood and Hatch
Maintenance Items Under the Hood and Hatch
Hood
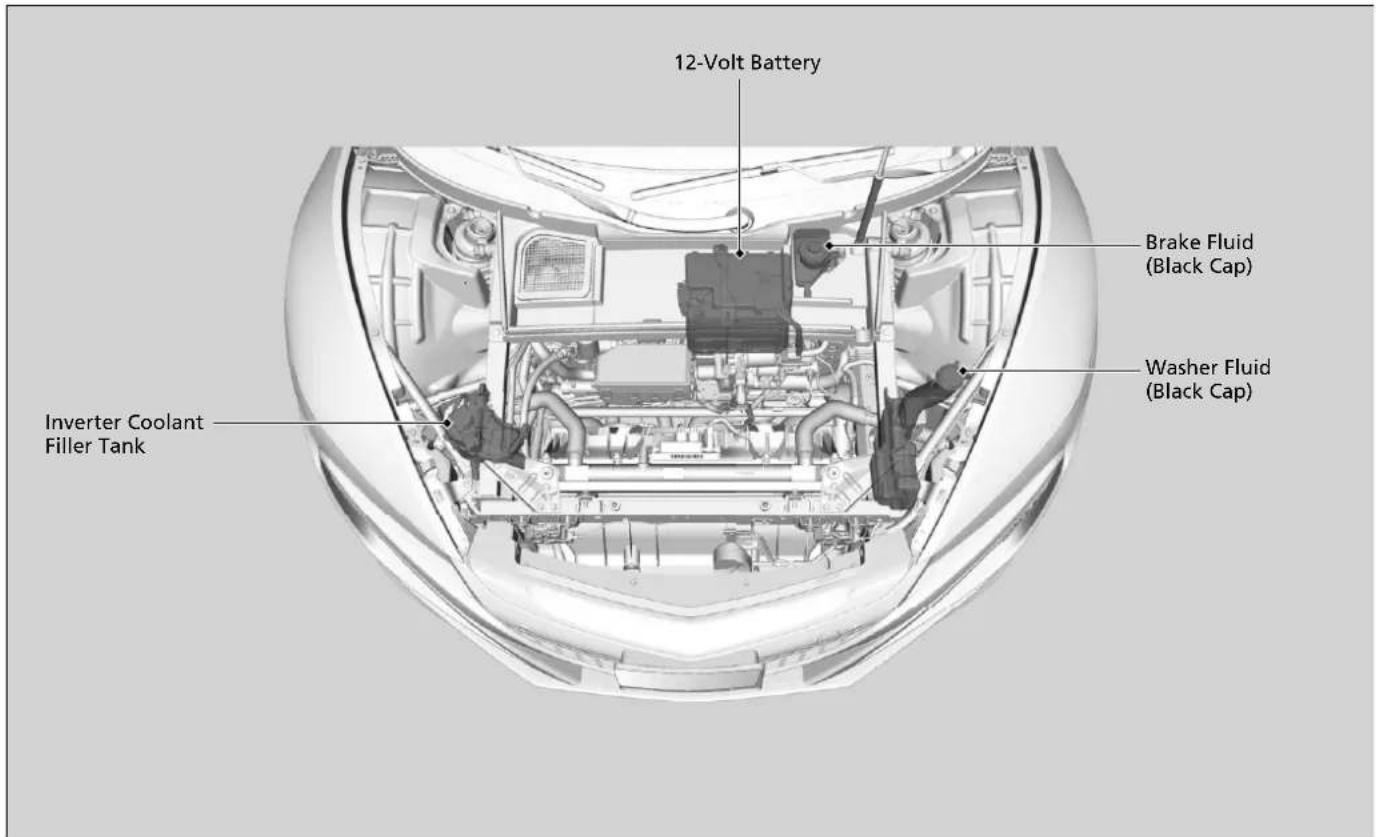
text_image
12-Volt Battery Brake Fluid (Black Cap) Washer Fluid (Black Cap) Inverter Coolant Filler TankContinued
Hatch
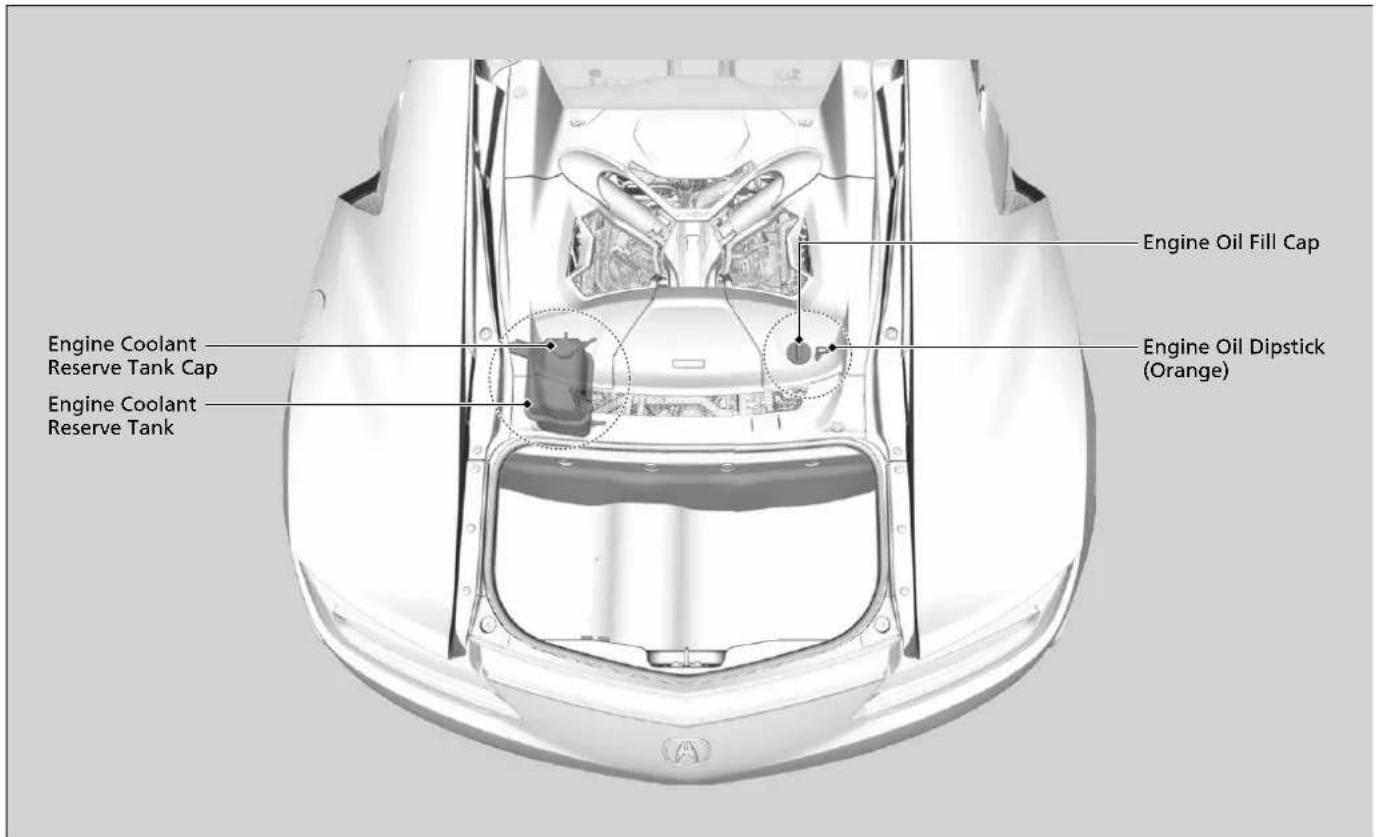
text_image
Engine Coolant Reserve Tank Cap Engine Coolant Reserve Tank Engine Oil Fill Cap Engine Oil Dipstick (Orange)Opening the Hatch
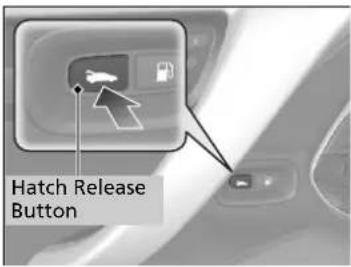
text_image
Hatch Release Button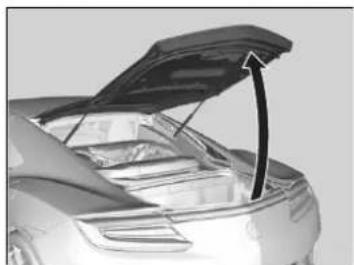
natural_image
Close-up of a car's rear window showing the hood and side panel (no text or symbols visible)-
Park the vehicle on a level surface, and set the parking brake.
-
Press the hatch release button on the driver's door.
-
Lift the hatch up most of the way.
The hydraulic supports will lift it up the rest of the way and hold it up.
When closing, press down firmly with your hands.
Opening the Hatch
When closing the hatch, check that the hatch is securely latched.
The hatch can be opened by pressing the release button on the hatch.
→ Using the Hatch Release Button P. 119
Opening the Hood
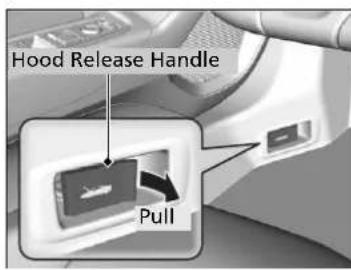
text_image
Hood Release Handle Pull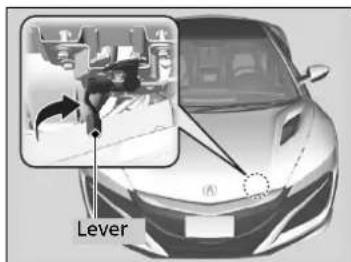
text_image
Lever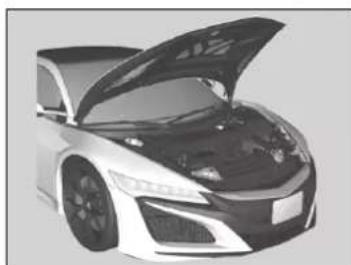
natural_image
Front view of a modern sports car with its hood open, showing engine and dashboard components (no visible text or symbols)- Park the vehicle on a level surface, and set the parking brake.
- Pull the hood release handle under the driver's side lower corner of the dashboard. ▶ The hood will pop up slightly.
- Pull up the hood latch lever (located under the front edge of the hood to the center) and raise the hood. Once you have raised the hood slightly, you can release the lever.
- Lift the hood up most of the way. ▶ The hydraulic support will lift it up the rest of the way and hold it up.
When closing, lower it to approximately 12 inches (30 cm), then press down firmly with your hands, and make sure both right and left latches are firmly locked in place.
Opening the Hood
NOTICE
Do not open the hood when the wiper arms are raised. The hood will strike the wipers, resulting in possible damage to the hood and/or the wipers.
When closing the hood, check that both right and left latches are securely latched.
If the hood latch lever moves stiffly, or if you can open the hood without lifting the lever, the latch mechanism should be cleaned and lubricated.
Engine Compartment Cover
The component parts in the engine compartment are protected by covers. You may need to remove the cover when you perform certain maintenance work. Pull up on the engine compartment cover, remove it from the pins.
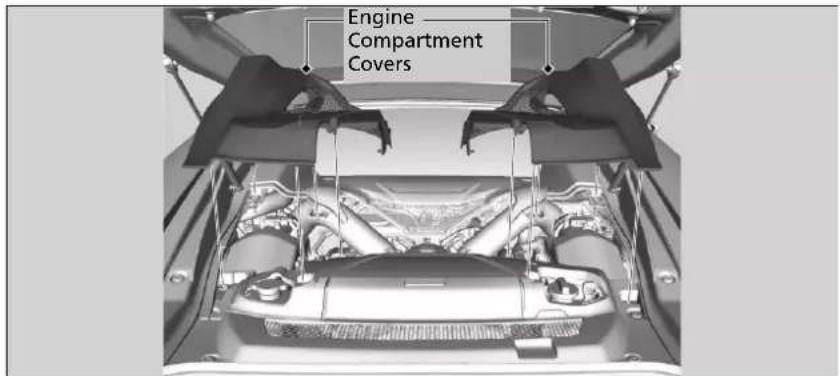
text_image
Engine Compartment CoversRecommended Engine Oil
Under normal ambient temperature and driving conditions, Acura NSX specifications require full synthetic, 0W-40 motor oil such as Ultimate Full Synthetic Motor Oil, Type 3, 0W-40, available at your authorized Acura NSX dealer. Contact your authorized Acura NSX dealer for more details.
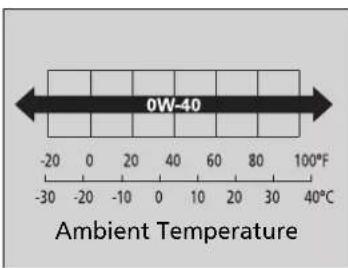
text_image
0W-40 Ambient TemperatureOil is a major contributor to your engine's performance and longevity. If you drive the vehicle with insufficient or deteriorated oil, the engine may fail or be damaged.
Recommended Engine Oil
NOTICE
Acura cannot ensure proper engine operation and durability if other engine oil is used.
Oil Check
We recommend that you check the engine oil level every time you refuel.
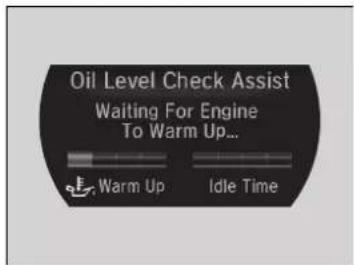
text_image
Oil Level Check Assist Waiting For Engine To Warm Up... Warm Up Idle Time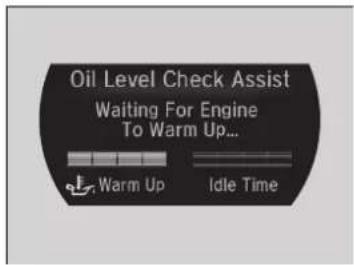
text_image
Oil Level Check Assist Waiting For Engine To Warm Up... Warm Up Idle Time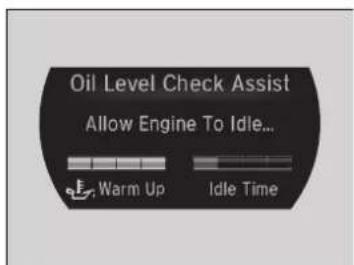
text_image
Oil Level Check Assist Allow Engine To Idle... Warm Up Idle Time- Bring up the Oil Level Check Assist display on the driver information interface. ▶ Driver Information Interface P. 98
-
Warm up the engine until all the bars in the Warm Up gauge light up.
-
When the bars turn green, park the vehicle on level ground and select P.
-
Allow the engine to continue idling until all the bars in the Idle Time gauge in the engine Oil Level Check Assist display light up.
Do not depress the accelerator pedal while the engine is idling, as this will reset the Idle Time.
Oil Check
NOTICE
Do not open a door or the hatch before the Ready To Check Oil Level message appears. If a door or the hatch is open, the corresponding warning message will be given priority, and the Oil Level Check Assist will not be displayed.
Continued
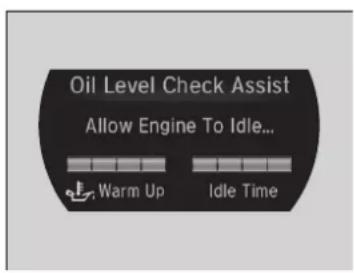
text_image
Oil Level Check Assist Allow Engine To Idle... Warm Up Idle Time- When all the bars in the Idle Time gauge light up, Ready To Check Oil Level message appears.
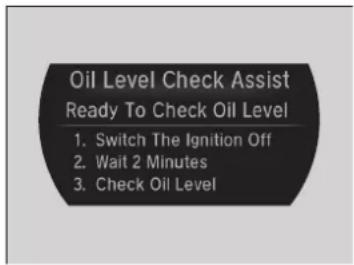
text_image
Oil Level Check Assist Ready To Check Oil Level 1. Switch The Ignition Off 2. Wait 2 Minutes 3. Check Oil Level-
Change the display in the driver information interface to any display other than the Oil Level Check Assist display. ▶ Driver Information Interface P. 98
-
Change the power mode to VEHICLE OFF.
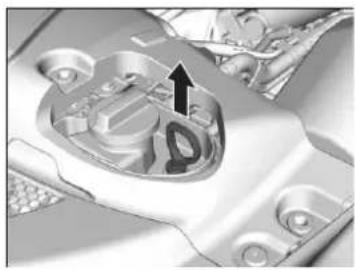
natural_image
Close-up of a mechanical component with a highlighted section and arrow indicator (no readable text or symbols)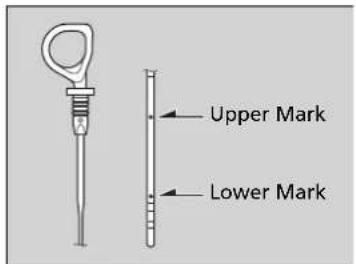
text_image
Upper Mark Lower Mark- Open the hatch.
Opening the Hatch P. 387
- Remove the right engine compartment cover.
Engine Compartment Cover P. 389
- Remove the dipstick (orange).
- Wipe the dipstick with a clean cloth or paper towel.
- Insert the dipstick back all the way into its hole.
- Remove the dipstick again, and check the level. It should be between the upper and lower marks.
The engine oil level should be checked after two minutes after changing the power mode to VEHICLE OFF.
▶ Add oil if necessary.
When engine oil is added, recheck the engine oil level using steps 1 - 14.
- After checking the engine oil level, make sure to select a display other than the Oil Level Check Assist display.
Driver Information Interface P. 98
Oil Check
For a proper oil level reading, the dipstick must be inserted with the flat side of the dipstick handle facing the oil fill cap.
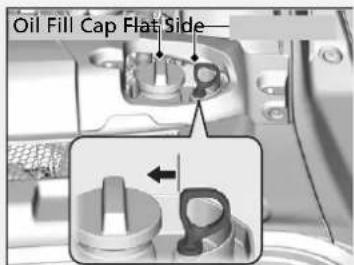
text_image
Oil Fill Cap Flat SideThe amount of oil consumed depends on how the vehicle is driven and the climatic and road conditions encountered. The rate of oil consumption can be up to 1.05 US quart (1 liter) per 625 miles (1000 km). Consumption is likely to be higher when the engine is new.
Adding Engine Oil
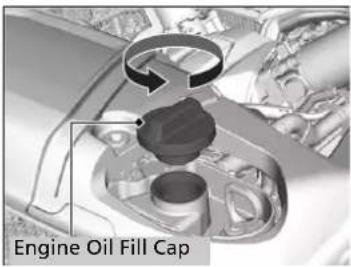
text_image
Engine Oil Fill Cap- Unscrew and remove the engine oil fill cap.
- Add oil slowly.
- Reinstall the engine oil fill cap, and tighten it securely.
- Recheck the engine oil level.
Oil Check P. 391
Adding Engine Oil
NOTICE
Do not fill the engine oil above the upper mark. Overfilling the engine oil may result in leaks and engine damage.
If any oil spills, wipe it away immediately. Spilled oil may damage the engine compartment components.
Changing the Engine Oil and Oil Filter
You must change the engine oil and oil filter regularly in order to maintain the engine's lubrication. The engine may be damaged if they are not changed regularly.
Specialized equipment and procedures are required to change the engine oil and oil filter. Have an authorized Acura NSX dealer replace them.
Do not attempt to change the engine oil and oil filter yourself.
Cooling System
Specified coolant: Acura Long Life Antifreeze/Coolant Type 2
This coolant is premixed with 50% antifreeze and 50% water. Do not add any straight antifreeze or water.
We recommend you check the engine coolant level every time you refuel. Check the reserve tank. Add the engine coolant accordingly.
Checking the Coolant
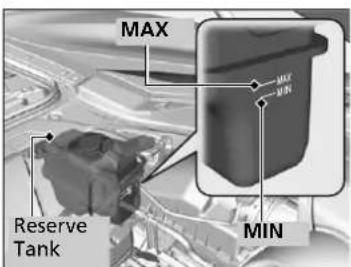
text_image
MAX MAX MIN Reserve Tank MIN-
Make sure the engine and radiator are cool.
-
Open the hatch.
→ Opening the Hatch P. 387
- Remove the left engine compartment cover.
Engine Compartment Cover P. 389
- Check the amount of coolant in the reserve tank.
▶ If the coolant level is below the MIN mark, add the specified coolant until it reaches the MAX mark.
- Inspect the cooling system for leaks.
Cooling System
WARNING
Removing the reserve tank cap while the engine is hot can cause the coolant to spray out, seriously scalding you.
Always let the engine and radiator cool down before removing the reserve tank cap.
NOTICE
Genuine Acura engine coolant is a 50/50 mixture of antifreeze and water that can withstand freezing at temperatures as low as about -31°F (-35°C). If your vehicle is consistently subjected to temperatures below this, the concentration of antifreeze in the coolant should be increased. Consult an authorized Acura NSX dealer for details. If Acura antifreeze/coolant is not available, you may use another major brand of non-silicate coolant as a temporary replacement. Check that it is a high quality coolant recommended for aluminum engines. Continued use of any non-Acura coolant can result in corrosion, causing the cooling system to malfunction or fail. Have the cooling system flushed and refilled with Acura antifreeze/coolant as soon as possible.
Do not add rust inhibitors or other additives to your vehicle's cooling system. They may not be compatible with the coolant or with the engine components.
Adding the Coolant
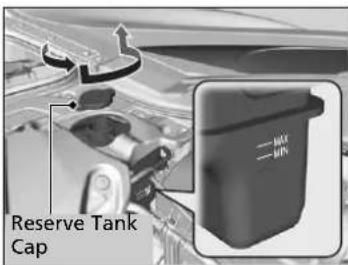
text_image
Reserve Tank Cap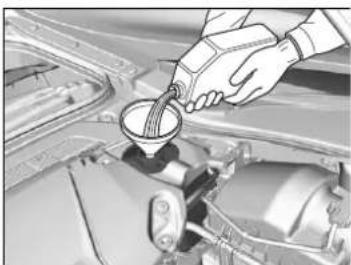
natural_image
Close-up of a hand pouring liquid into a car engine compartment (no visible text or symbols)-
Make sure the engine and radiator are cool.
-
Turn the reserve tank cap 1/8 turn counterclockwise and relieve any pressure in the cooling system.
-
Push down and turn the reserve tank cap counter-clockwise to remove it.
-
Pour coolant into the reserve tank until it reaches the MAX mark.
-
Put the reserve tank cap back on, and tighten it fully.
>>Adding the Coolant
NOTICE
Pour the fluid slowly and carefully so you do not spill any. Clean up any spills immediately; they can damage components in the engine compartment.
Inverter Coolant
Specified coolant: Acura Long Life Antifreeze/Coolant Type 2
This coolant is premixed with 50% antifreeze and 50% water. Do not add any straight antifreeze or water.
We recommend you check the inverter coolant level every time you refuel.
Have an authorized Acura NSX dealer replace the inverter coolant.
Checking the Coolant
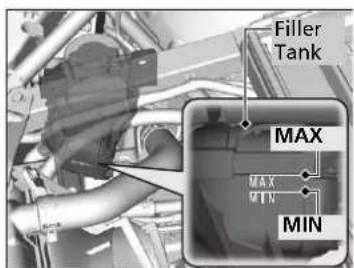
text_image
Filler Tank MAX MAX MIN- Open the hood.
→ Opening the Hood P. 388
-
Check the fluid level in the tank.
-
If the coolant level has dropped below the MIN level, have your vehicle serviced at an authorized Acura NSX dealer.
▶ Only a properly trained technician can refill the coolant and check the system for leaks.
Inverter Coolant
NOTICE
Genuine Acura engine coolant is a 50/50 mixture of antifreeze and water that can withstand freezing at temperatures as low as about -31^ (-35°C). If your vehicle is consistently subjected to temperatures below this, the concentration of antifreeze in the coolant should be increased. Consult an authorized Acura NSX dealer for details.
If Acura antifreeze/coolant is not available, you may use another major brand non-silicate coolant as a temporary replacement. Check that it is a high quality coolant recommended for aluminum engines.
Continued use of any non-Acura coolant can result in corrosion, causing the cooling system to malfunction or fail. Have the cooling system flushed and refilled with Acura antifreeze/coolant as soon as possible.
Do not add rust inhibitors or other additives to your vehicle's cooling system. They may not be compatible with the coolant or with the motor components.
Transmission Fluids
Dual Clutch Transmission Fluids
Specified fluids:
Clutch
Acura Automatic Transmission Fluid ATF DW-1
Transmission
Acura Gear Oil GO-Type 2.0
Have an authorized Acura NSX dealer check the fluid level and replace if necessary.
Do not attempt to check or change the dual clutch transmission fluids yourself.
Twin Motor Unit Fluid
Specified fluid:
Acura Automatic Transmission Fluid ATF DW-1
Have an authorized Acura NSX dealer check the fluid level and replace if necessary.
Do not attempt to check or change the twin motor unit fluid yourself.
»Dual Clutch Transmission Fluids
NOTICE
Do not mix Acura ATF DW-1 with other transmission fluids.
Using a transmission fluid other than Acura ATF DW-1 may adversely affect the operation and durability of your vehicle's transmission, and damage the transmission.
Any damage caused by using a transmission fluid that is not equivalent to Acura ATF DW-1 is not covered by Acura's new vehicle limited warranty.
Twin Motor Unit Fluid
NOTICE
Do not mix Acura ATF Type DW-1 with other transmission fluids.
Using a transmission fluid other than Acura ATF DW-1 may adversely affect the operation and durability of your vehicle's twin motor unit, and damage the twin motor unit.
Any damage caused by using a transmission fluid that is not equivalent to Acura ATF DW-1 is not covered by Acura's new vehicle limited warranty.
Brake Fluid
Specified fluid: Acura Heavy Duty Brake Fluid DOT 4
Checking the Brake Fluid
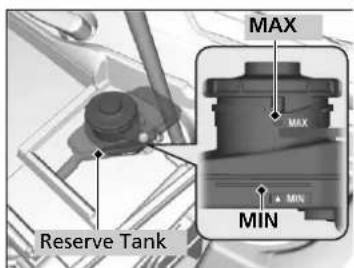
text_image
MAX MAX MIN Reserve TankThe fluid level should be between the MIN and MAX marks on the side of the reserve tank.
Refilling Window Washer Fluid
If the washer fluid is low, a message appears on the driver information interface. Pour the washer fluid carefully. Do not overflow the reservoir.
Brake Fluid
NOTICE
Brake fluid marked DOT 5 is not compatible with your vehicle's braking system and can cause extensive damage.
If the specified brake fluid is not available, you should use only DOT 4 fluid from a sealed container as a temporary replacement.
Using any non-Acura brake fluid can cause corrosion and decrease the longevity of the system. Have the brake system flushed and refilled with Acura Heavy Duty Brake Fluid DOT 4 as soon as possible.
If the brake fluid level is at or below the MIN mark, have an authorized Acura NSX dealer inspect the vehicle for leaks or worn brake pads as soon as possible.
Refilling Window Washer Fluid
NOTICE
Do not use engine antifreeze or a vinegar/water solution in the windshield washer reservoir. Antifreeze can damage your vehicle's paint. A vinegar/water solution can damage the windshield washer pump.
Use only commercially available windshield washer fluid. Avoid prolonged use of hard water to prevent lime scale build up.
Replacing Light Bulbs
Headlights
Headlights are LED type. Have an authorized Acura NSX dealer inspect and replace the light assembly.
Front Turn Signal/Parking Lights
Front turn signal/parking lights are LED type. Have an authorized Acura NSX dealer inspect and replace the light assembly.
Front Side Marker Lights
Front side marker lights are LED type. Have an authorized Acura NSX dealer inspect and replace the light assembly.
Side Turn Signal/Emergency Indicator Lights
Door mirror side turn lights are LED type. Have an authorized Acura NSX dealer inspect and replace the light assembly.
Daytime Running Lights
Daytime running lights are LED type. Have an authorized Acura NSX dealer inspect and replace the light assembly.
Headlights
The headlight aim is set by the factory, and does not need to be adjusted. However, if you regularly carry heavy items in the trunk, have the aiming readjusted at an authorized Acura NSX dealer or by a qualified technician.
Rear Turn Signal Lights
Rear Turn Signal lights are LED type. Have an authorized Acura NSX dealer inspect and replace the light assembly.
Brake/Taillights
Brake/Taillights are LED type. Have an authorized Acura NSX dealer inspect and replace the light assembly.
Rear Side Marker Lights
Rear side marker lights are LED type. Have an authorized Acura NSX dealer inspect and replace the light assembly.
Taillights
Taillights are LED type. Have an authorized Acura NSX dealer inspect and replace the light assembly.
Back-Up Lights
Back-up lights are LED type. Have an authorized Acura NSX dealer inspect and replace the light assembly.
Rear License Plate Lights
Rear license plate lights are LED type. Have an authorized Acura NSX dealer inspect and replace the light assembly.
High-Mount Brake Light
High-mount brake light is LED type. Have an authorized Acura NSX dealer inspect and replace the light assembly.
Checking and Maintaining Wiper Blades
Checking Wiper Blades
If the wiper blade rubber has deteriorated, it will leave streaks and the hard surfaces of the blade may scratch the window glass.
Changing the Wiper Blade Rubber
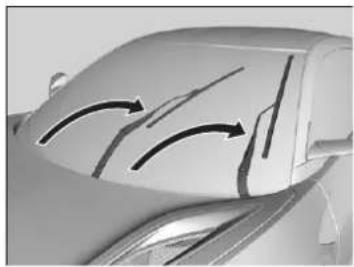
natural_image
Close-up of a car's front window with curved arrows indicating motion or movement (no text or symbols)-
While holding the wiper switch in the MIST position, change the power mode to VEHICLE OFF.
-
Wiper arms will move into service position.
-
Lift both wiper arms.
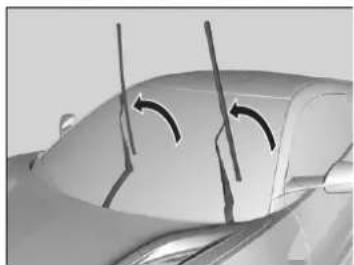
natural_image
Close-up of a car's side profile showing two curved arrows indicating motion or force vectors (no text or symbols present)Changing the Wiper Blade Rubber
NOTICE
Avoid dropping the wiper arm onto the windshield, it may damage the wiper arm and/or the windshield.
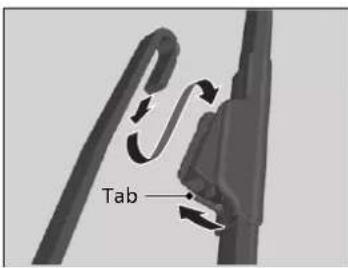
text_image
Tab- Press up on and hold the tab, then slide the holder off the wiper arm.
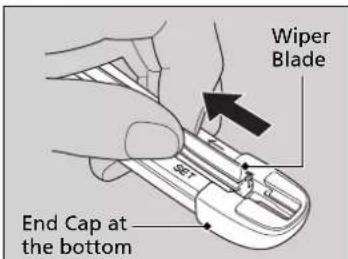
text_image
Wiper Blade End Cap at the bottom- Pull the end of the wiper blade in the direction of the arrow in the image until it is out of the holder's end cap.
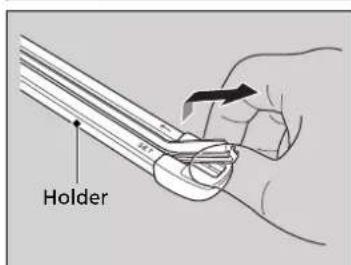
text_image
Holder- Pull the wiper blade in the opposite direction to slide it out of the holder.
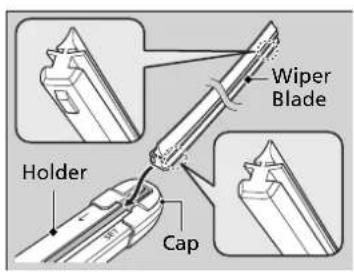
text_image
Wiper Blade Holder Cap- Insert the flat side of the new wiper blade onto the bottom part of the holder. Insert the blade all the way.
- Install the end of the wiper blade into the cap.
- Slide the wiper blade onto the wiper arm until it locks.
- Lower both wiper arms.
- Set the power mode to ON and hold the wiper switch in the MIST position until both wiper arms return to the standard position.
Checking and Maintaining Tires
Checking Tires
To safely operate your vehicle, your tires must be of the proper type and size, in good condition with adequate tread, and properly inflated.
■ Inflation guidelines
Properly inflated tires provide the best combination of handling, tread life, and comfort. Refer to the driver's doorjamb label or specifications page for the specified pressure.
Underinflated tires wear unevenly, adversely affect handling and fuel economy, and are more likely to fail from overheating.
Overinflated tires make your vehicle ride harshly, are more prone to road hazards, and wear unevenly.
Every day before you drive, look at each of the tires. If one looks lower than the others, check the pressure with a tire gauge.
At least once a month or before long trips, use a gauge to measure the pressure in all tires. Even tires in good condition can lose 1 – 2 psi (10 – 20 kPa, 0.1 – 0.2 kgf/cm ^2 ) per month.
■ Inspection guidelines
Every time you check inflation, also examine the tires and valve stems. Look for:
- Bumps or bulges on the side or in the tread. Replace the tire if you find any cuts, splits, or cracks in the side of the tire. Replace it if you see fabric or cord.
- Remove any foreign objects and inspect for air leaks.
- Uneven tread wear. Have an authorized Acura NSX dealer check the wheel alignment.
- Excessive tread wear.
Wear Indicators P. 412
- Cracks or other damage around valve stem.
Checking Tires
WARNING
Using tires that are excessively worn or improperly inflated can cause a crash in which you can be seriously hurt or killed.
Follow all instructions in this owner's manual regarding tire inflation and maintenance.
Measure the air pressure when tires are cold. This means the vehicle has been parked for at least three hours, or driven less than 1 mile (1.6 km). If necessary, add or release air until the specified pressure is reached.
If checked when hot, tire pressure can be as much as 4 – 6 psi (30 – 40 kPa, 0.3 – 0.4 kgf/cm ^2 ) higher than if checked when cold.
Have an authorized Acura NSX dealer check the tires if you feel a consistent vibration while driving. New tires and any that have been removed and reinstalled should be properly balanced.
Tire and Loading Information Label
The label attached to the driver's doorjamb provides necessary tire and loading information.
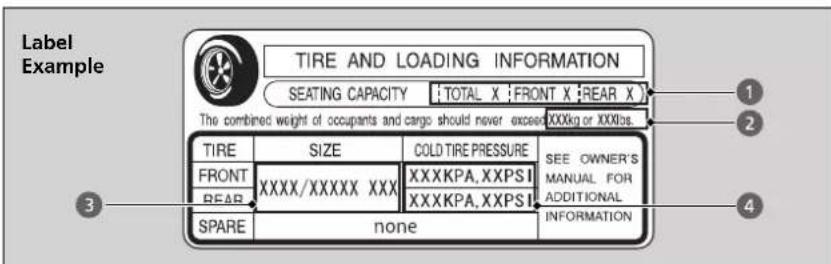
text_image
Label Example TIRE AND LOADING INFORMATION SEATING CAPACITY : TOTAL X : FRONT X : REAR X The combined weight of occupants and cargo should never exceed XXXkg or XXXlbs. TIRE SIZE COLD TIRE PRESSURE SEE OWNER'S FRONT XXXX/XXXXX XXXX XXXKPA,XXPSI MANUAL FOR REAR XXXKPA,XXPSI ADDITIONAL SPARE none INFORMATIONTire Labeling
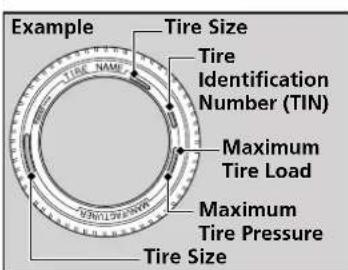
text_image
Example Tire Size Tire Identification Number (TIN) Maximum Tire Load Maximum Tire Pressure Tire SizeThe tires that came on your vehicle have a number of markings. Those you should be aware of are described as follows.
Tire Sizes
Whenever tires are replaced, they should be replaced with tires of the same size, load index and speed rating.
Tire and Loading Information Label
The tire and loading information label attached to the driver's doorjamb contains:
① The number of people your vehicle can carry.
② The total weight your vehicle can carry. Do not exceed this weight.
③ The original tire sizes for front, rear, and spare, if equipped.
4 The proper cold tire pressure for front, rear, and spare, if equipped.
Tire Sizes
Following is an example of tire size with an explanation of what each component means.
245/40R19 98W
245: Tire width in millimeters.
40: Aspect ratio (the tire's section height as a percentage of its width).
R: Tire construction code (R indicates radial).
19: Rim diameter in inches.
98: Load index (a numerical code associated with the maximum load the tire can carry).
W: Speed symbol (an alphabetical code indicating the maximum speed rating).
■ Tire Identification Number (TIN)
The tire identification number (TIN) is a group of numbers and letters that look like the example in the side column. TIN is located on the sidewall of the tire.
■ Glossary of Tire Terminology
Cold Tire Pressure – The tire air pressure when the vehicle has been parked for at least three hours or driven less than 1 mile (1.6 km).
Load Rating – Means the maximum load that a tire is rated to carry for a given inflation pressure.
Maximum Inflation Pressure – The maximum tire air pressure that the tire can hold.
Maximum Load Rating – Means the load rating for a tire at the maximum permissible inflation pressure for that tire.
Recommended Inflation Pressure – The cold tire inflation pressure recommended by the manufacturer.
Treadwear Indicators (TWI) – Means the projections within the principal grooves designed to give a visual indication of the degrees of wear of the tread.
>>Tire Identification Number (TIN)
DOT B97R FW6X 2209
DOT: This indicates that the tire meets all requirements of the U.S. Department of Transportation.
B97R: Manufacturer's identification mark. FW6X: Tire type code.
22 09: Date of manufacture.
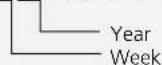
DOT Tire Quality Grading (U.S. Vehicles)
The tires on your vehicle meet all U.S. Federal Safety Requirements. All tires are also graded for treadwear, traction, and temperature performance according to Department of Transportation (DOT) standards. The following explains these gradings.
■ Uniform Tire Quality Grading
Quality grades can be found where applicable on the tire sidewall between tread shoulder and maximum section width.
Treadwear
The treadwear grade is a comparative rating based on the wear rate of the tire when tested under controlled conditions on a specified government test course. For example, a tire graded 150 would wear one and one-half (1 1/2) times as well on the government course as a tire graded 100. The relative performance of tires depends upon the actual conditions of their use, however, and may depart significantly from the norm due to variations in driving habits, service practices and differences in road characteristics and climate.
Uniform Tire Quality Grading
For example:
Treadwear 200
Traction AA
Temperature A
All passenger car tires must conform to Federal Safety Requirements in addition to these grades.
Traction
The traction grades, from highest to lowest, are AA, A, B, and C. Those grades represent the tire's ability to stop on wet pavement as measured under controlled conditions on specified government test surfaces of asphalt and concrete. A tire marked C may have poor traction performance.
Temperature
The temperature grades are A (the highest), B, and C, representing the tire's resistance to the generation of heat and its ability to dissipate heat when tested under controlled conditions on a specified indoor laboratory test wheel. Sustained high temperature can cause the material of the tire to degenerate and reduce tire life, and excessive temperature can lead to sudden tire failure. The grade C corresponds to a level of performance which all passenger car tires must meet under the Federal Motor Vehicle Safety Standard No. 109. Grades B and A represent higher levels of performance on the laboratory test wheel than the minimum required by law.
Traction
Warning: The traction grade assigned to this tire is based on straight-ahead braking traction tests, and does not include acceleration, cornering, hydroplaning, or peak traction characteristics.
»Temperature
Warning: The temperature grade for this tire is established for a tire that is properly inflated and not overloaded. Excessive speed, underinflation, or excessive loading, either separately or in combination, can cause heat buildup and possible tire failure.
Wear Indicators
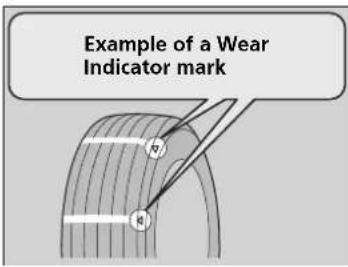
text_image
Example of a Wear Indicator mark n kThe groove where the wear indicator is located is 1/16 inch (1.6 mm) shallower than elsewhere on the tire. If the tread has worn so that the indicator is exposed, replace the tire. Worn out tires have poor traction on wet roads.
Tire Service Life
The life of your tires is dependent on many factors, including driving habits, road conditions, vehicle loading, inflation pressure, maintenance history, speed, and environmental conditions (even when the tires are not in use).
In addition to regular inspections and inflation pressure maintenance, it is recommended that you have annual inspections performed once the tires reach five years old. All tires should be removed from service after 10 years from the date of manufacture, regardless of their condition or state of wear.
>>Checking Tires
High speed driving
We recommend that you do not drive on public roads faster than the posted speed limits and conditions allow. If you intend to drive at sustained high speeds (over 168 mph or 270 km/h), such as at a track or other closed course venue, adjust the cold tire pressures as shown below to avoid excessive heat build up and sudden tire failure.
| Tire Size Front: | 245/35ZR19 (93Y)Rear:305/30ZR20 (103Y) |
| Pressure Front: | 38 psi (260 kPa, 2.6 kgf/cm ^2 )Rear:38 psi (260 kPa, 2.6 kgf/cm ^2 ) |
Tire and Wheel Replacement
Replace your tires with radials of the same size, load range, speed rating, and maximum cold tire pressure rating (as shown on the tire's sidewall). Using tires of a different size or construction can cause certain vehicle systems such as the ABS and Vehicle Stability Assist™ (VSA®) system to work incorrectly.
It is best to replace all four tires at the same time.
If you replace a wheel, only use TPMS specified wheels approved for your vehicle. Make sure that the wheel's specifications match those of the original wheels.
Tire and Wheel Replacement
WARNING
Installing improper tires on your vehicle can affect handling and stability. This can cause a crash in which you can be seriously hurt or killed.
Always use the size and type of tires recommended in this owner's manual.
Tire Rotation
The front and rear tire sizes are different and they are directional tires.
Due to tire sizes and directional tires, the tires on this vehicle cannot be rotated.
Tire Rotation
Directional tires should be mounted with the rotation indication mark facing forward, as shown below.
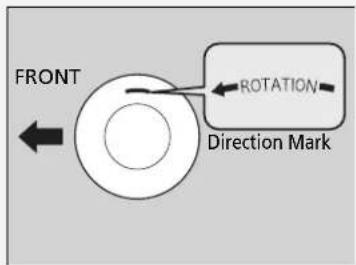
text_image
FRONT ROTATION Direction MarkWinter Tires
If driving on snowy or frozen roads, mount all-season marked M+S tires, snow tires, or tire chains; reduce speed; and maintain sufficient distance between vehicles when driving.
Be particularly careful when operating the steering wheel or brakes to prevent skidding.
Use tire chains, snow tires, or all-season tires when necessary or according to the law.
When mounting, refer to the following points.
For winter tires:
- Mount the tires to all four wheels.
Recommended Winter Tires:
- Michelin Alpin PA4
Front: 245/35R19 (93W)
Rear: 295/30R20 (97V)
Rear: 305/30R20 (103W)
For tire chains:
• Install them on the rear tires only.
- Because your vehicle has limited tire clearance, we strongly recommend using the chains listed below:
• Auto-trac 232405 *1
• K-Summit K-44 *2
*1: Tire chains to be used only on optional 295/30R20 winter tires.
*2: Tire chains to be used only on optional 305/30R20 winter tires.
- Follow the chain manufacturer's instruction when installing. Mount them as tightly as you can.
- Check that the chains do not touch the brake lines or suspension.
- Drive slowly.
Winter Tires
WARNING
Using the wrong chains, or not properly installing chains, can damage the brake lines and cause a crash in which you can be seriously injured or killed.
Follow all instructions in this owner's manual regarding the selection and use of tire chains.
NOTICE
Traction devices that are the wrong size or improperly installed can damage your vehicle's brake lines, suspension, body, and wheels. Stop driving if they are hitting any part of the vehicle.
When tire chains are mounted, follow the chain manufacturer's instructions regarding vehicle operational limits.
If your vehicle is equipped with summer tires, be aware that these tires are not designed for winter driving conditions. For more information, contact an authorized Acura NSX dealer.
Cold Weather Driving
Summer Only tires and Ultra High Performance (UHP) tires are very sensitive to ambient temperatures and are designed to be used at temperatures above 45^ F ( 7^ C). If the vehicle is operated with Summer Only tires or UHP tires at temperatures below 45^ F ( 7^ C), the tires will provide decreasing amounts of grip and other performance attributes. If the vehicle is operated with Summer Only tires or UHP tires at temperatures below -4^ F ( -20^ C), the tire tread may lose their elasticity and become brittle, resulting in permanent damage to the tread. A damaged tire may fail during use. Therefore, if you operate the vehicle when ambient temperatures are below 45^ F ( 7^ C), we recommend that you install other tires (e.g., mud+snow, winter) that are designed to provide appropriate performance attributes under the anticipated conditions.
COLD Weather Driving
WARNING
Use of Summer Only tires or Ultra High Performance tires at temperatures below 45^ F ( 7^ C) may lead to a loss of performance and control, which could result in a crash, serious injury or death.
12-Volt Battery
Checking the 12-Volt Battery
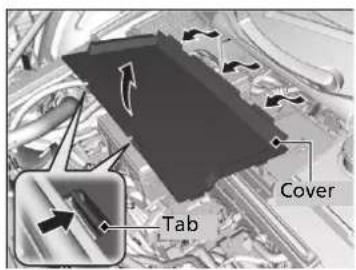
text_image
Tab CoverCheck the battery terminals for corrosion monthly.
The battery is protected by a cover. Remove the cover by pressing the tabs.
Slide the terminal cover on your vehicle's 12-volt battery positive ⊕ terminal.
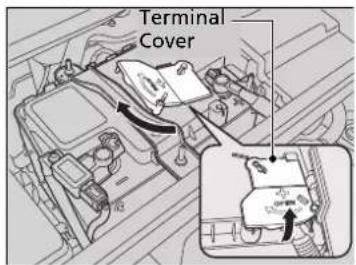
text_image
Terminal CoverThe battery condition is monitored by the sensor on the negative terminal. If there is a problem with the sensor, the warning message on the driver information interface will let you know. Have your vehicle checked by an authorized Acura NSX dealer.
If your vehicle's battery is disconnected or goes dead:
• The audio system is disabled.
→ Reactivating the audio system P. 164
- The clock resets.
→ Clock P. 104
Charging the AGM Battery
AGM labeled batteries can be damaged if improperly charged. For more information on how to charge an AGM battery, consult an authorized Acura NSX dealer.
12-Volt Battery
WARNING
The battery gives off explosive hydrogen gas during normal operation.
A spark or flame can cause the battery to explode with enough force to kill or seriously hurt you.
When conducting any battery maintenance, wear protective clothing and a face shield, or have a skilled technician do it.
WARNING: Battery post, terminals, and related accessories contain lead and lead compounds.
Wash your hands after handling.
When you find corrosion, clean the battery terminals by applying a baking powder and water solution. Clean the terminals with a damp towel. Cloth/towel dry the battery. Coat the terminals with grease to help prevent future corrosion.
When replacing the battery, the replacement must be of the same specifications.
Consult an authorized Acura NSX dealer for more information.
Remote Transmitter Care
Replacing the Button Battery
If the indicator does not come on when the button is pressed, replace the battery.
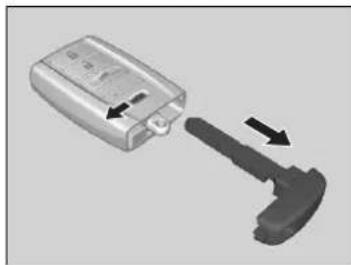
natural_image
3D illustration of a device with a handle and arrow indicating direction (no text or symbols)Battery type: CR2032
- Remove the built-in key.
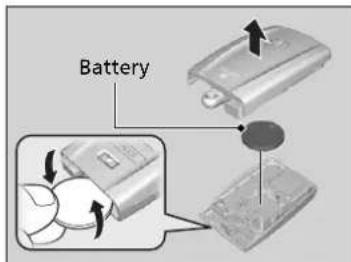
text_image
Battery- Remove the upper half of the cover by carefully prying on the edge with a coin.
▶ Remove carefully to avoid losing the buttons.
Wrap a coin with a cloth to prevent scratching the keyless access remote.
- Make sure to replace the battery with the correct polarity.
Replacing the Button Battery
WARNING
CHEMICAL BURN HAZARD
The battery that powers the remote transmitter can cause severe internal burns and can even lead to death if swallowed. Keep new and used batteries away from children.
If you suspect that a child has swallowed the battery, seek medical attention immediately.
NOTICE
An improperly disposed of battery can damage the environment. Always confirm local regulations for battery disposal.
Replacement batteries are commercially available or at an authorized Acura NSX dealer.
Climate Control System Maintenance
Air Conditioning
To ensure proper and safe operation, the Society of Automotive Engineers (SAE J2845) recommends that the refrigerant system only be serviced by trained and certified technicians.
Never repair or replace the air conditioning evaporator (cooling coil) with one removed from a used or salvaged vehicle.
New replacement mobile air conditioning evaporators must be certified (and labeled) as meeting SAE Standard J2842.
Dust and Pollen Filters
The climate control system is equipped with dust and pollen filters that collect pollen, dust, and other debris in the air. The Maintenance Minder ^™ messages will let you know when to replace the filters.
We recommend that you replace the dust and pollen filters sooner when using your vehicle in areas with high concentrations of dust.
Air Conditioning
NOTICE
Vented refrigerant is harmful to the environment. To avoid refrigerant from venting, never replace the evaporator with one removed from a used or salvaged vehicle.
Refrigerant in your vehicle's air conditioning system is flammable and can be ignited during servicing if proper procedures are not followed.
The air conditioner label is found under the hood:
→ Safety Labels P. 68
Specifications P. 468
Canadian models
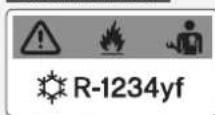
A : Caution
: Flammable Refrigerant
: Requires Registered Technician to Service
: Air Conditioning System
Dust and Pollen Filters
If the airflow from the climate control system deteriorates noticeably, and the windows fog up easily, the filters may need to be replaced. Please contact an authorized Acura NSX dealer for replacement.
Cleaning
Interior Care
Use a damp cloth with a mixture of mild detergent and warm water to remove dirt. Use a clean cloth to remove detergent residue.
Cleaning Seat Belts
Use a soft brush with a mixture of mild soap and warm water to clean the seat belts. Let the belts air dry.
Cleaning the Window
Wipe using a glass cleaner.
»Interior Care
Do not spill liquids inside the vehicle. Electrical devices and systems may malfunction if liquids are splashed on them.
Do not use silicone based sprays on electrical devices such as audio devices and switches. Doing so may cause the items to malfunction or cause a fire inside the vehicle.
If a silicone based spray is inadvertently used on electrical devices, consult an authorized Acura NSX dealer.
Depending on their composition, chemicals and liquid aromatics may cause discoloration, wrinkles, and cracking to resin-based parts and textiles. Do not use alkali solvents or organic solvents such as benzene or gasoline.
After using chemicals, make sure to gently wipe them away using a dry cloth. Do not place used cloths on top of resin based parts or textiles for long periods of time without washing.
>>Cleaning the Window
Wires are mounted to the inside of the hatch glass. Wipe along the same direction as the wires with a soft cloth so as not to damage them.
Floor Mats
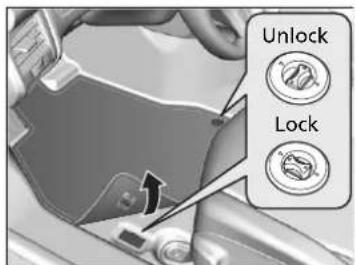
text_image
Unlock LockThe floor mats hook over the floor anchors, which keep the mats from sliding forward. To remove the mats for cleaning, turn the anchor knobs to the unlock position. When reinstalling the mats after cleaning, turn the knobs to the lock position.
Do not put additional floor mats on top of the anchored mat.
■ Maintaining Genuine Leather
To properly clean leather:
- Use a vacuum or soft dry cloth first to remove any dirt or dust.
- Clean the leather with a soft cloth dampened with a solution comprised of 90% water and 10% neutral soap.
- Wipe away any soap residue with a clean damp cloth.
- Wipe away residual water and allow leather to air dry in the shade.
■ Carbon Fiber Meter Visor and Steering Wheel
Do not use abrasive cleaners.
Floor Mats
If you use any floor mats that were not originally provided with your vehicle, make sure they are designed for your specific vehicle, fit correctly, and are securely anchored by the floor anchors.
Maintaining Genuine Leather
It is important to clean or wipe away dirt or dust as soon as possible. Spills can soak into leather resulting in stains. Dirt or dust can cause abrasions in the leather. In addition, please note that some dark colored clothing can rub onto the leather seats resulting in discoloration or stains.
Exterior Care
Dust off the vehicle body after you drive. Regularly inspect your vehicle for scratches on painted surfaces. A scratch on a painted surface can result in body rust. If you find a scratch, promptly repair it.
Washing the Vehicle
Wash the vehicle regularly. Wash more frequently when driving in the following conditions:
- If driving on roads with road salt.
- If driving in coastal areas.
- If tar, soot, bird droppings, insects, or tree sap are stuck to painted surfaces.
Using an Automated Car Wash
Do not use an automated car wash.
Using High Pressure Cleaners
- Keep sufficient distance between the cleaning nozzle and the vehicle body.
- Take particular care around the windows. Standing too close may cause water to enter the vehicle interior.
- Do not spray high pressure water directly into the engine compartment. Instead, use low pressure water and a mild detergent.
Washing the Vehicle
Do not spray water into the air intake vents. It can cause a malfunction.
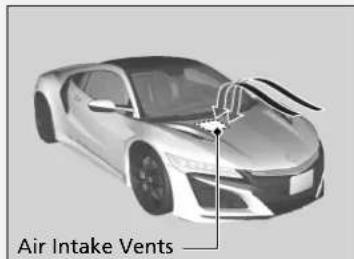
text_image
Air Intake VentsDo not spray water onto the capless unit when the fuel fill door is open. It can cause damage to the fuel system or engine.
If you need to lift the wiper arms away from the windshield, first set the wiper arms to the maintenance position.
Changing the Wiper Blade Rubber P. 404
■ Applying Wax
A good coat of automotive body wax helps protect your vehicle's paint from the elements. Wax will wear off over time and expose your vehicle's paint to the elements, so reapply as necessary.
■ Maintaining the Bumpers and Other Resin Coated Parts
If you get gasoline, oil, engine coolant, or battery fluid on resin coated parts, they may be stained or the coating may peel. Promptly wipe it away using a soft cloth and clean water.
Cleaning the Window
Wipe using a glass cleaner.
■ Maintaining Aluminum Wheels
Aluminum is susceptible to deterioration caused by salt and other road contaminants. When necessary, as early as possible use a sponge and mild detergent to wipe away these contaminants. Do not use a stiff brush or harsh chemicals (including some commercial wheel cleaners). These can damage the protective finish on aluminum alloy wheels, resulting in corrosion. Depending on the type of finish, the wheels also may lose their luster or appear burnished. To avoid water stains, wipe the wheels dry with a cloth while they are still wet.
Applying Wax
NOTICE
Chemical solvents and strong cleaners can damage the paint, metal, carbon fiber ^* , and plastic on your vehicle. Wipe away spills immediately.
Maintaining the Bumpers and Other Resin Coated Parts
Ask an authorized Acura NSX dealer about the correct coating material when you want to repair the painted surface of the parts made of resin.
Fogged Exterior Light Lenses
The inside lenses of exterior lights (headlights, brake lights, etc.) may fog temporarily if you have driven in the rain. Dew condensation also may build up inside the lenses when there is a significant enough difference between the ambient and inside lens temperatures (similar to vehicle windows fogging up in rainy conditions). These conditions are natural processes, not structural design problems in the exterior lights.
Lens design characteristics may result in moisture developing on the light lens frame surfaces. This also is not a malfunction.
However, if you see large amounts of water accumulation, or large water drops building up inside the lenses, have your vehicle inspected by an authorized Acura NSX dealer.
Cast Iron Brakes\*
Keep brake pads and rotors free of substances that are either abrasive or oil based, as these substances can reduce brake system performance.
NSX brake pads and disks have a high metallic content. Under certain conditions these pad and disks may rust to varying degrees, which may cause a clunk noise or rubbing sound if parked when brakes become wet. This is normal for brakes with high friction pads and it does not affect operation of the brakes.
To prevent the iron contained in the brake pads and rotors from rusting and sticking, brakes should be dried before parking the vehicle after driving on wet roads or after washing the vehicle (especially before long-term storage). To dry the brake pads and rotors, drive the vehicle at a low speed and apply the brakes several times.
By regularly applying strong pressure to the brakes, you can reduce corrosion buildup on the brake pads and rotors.
Brake Maintenance
Brake maintenance requires specialized knowledge. We recommend maintenance to be carried out by an authorized Acura NSX dealer.
Maintenance of Brake Surfaces
Brakes can be dried by driving on a dry road for few miles/kilometers, and applying the brake pedal normally, based on traffic and road conditions. These steps help maintain brake system performance.
Carbon Ceramic Brakes\*
Keep the brake pads and rotors free of substances that are either abrasive or oil based, as these substances can reduce braking power. After driving in the presence of salt and/or sand, briefly wash the rotor/pad surfaces with low-pressure water, then allow the brake system to dry. To dry the brake pads and rotors, drive the vehicle at a low speed and apply the brakes several times.
■ Painting the Vehicle
Refer to the color code label and the temperature notice label affixed to the underside of the hood before painting the vehicle.
Painting the Vehicle
U.S. models
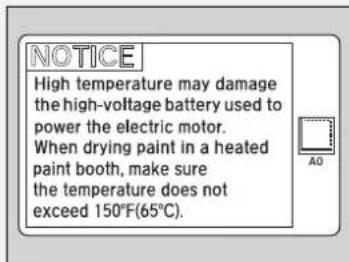
text_image
NOTICE High temperature may damage the high-voltage battery used to power the electric motor. When drying paint in a heated paint booth, make sure the temperature does not exceed 150°F(65°C).Canadian models
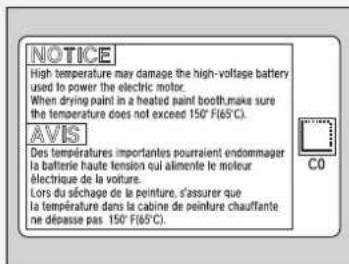
Accessories and Modifications
Accessories
When installing accessories, check the following:
- Do not install accessories on the windshield. They can obstruct your view and delay your reaction to driving conditions.
- Do not install any accessories over areas marked SRS AIRBAG, on the sides or backs of the seats, on front or side pillars, or near the side windows.
Accessories installed in these areas may interfere with proper operation of the vehicle's airbags or may be propelled into you or another occupant if the airbags deploy. - Be sure electronic accessories do not overload electrical circuits or interfere with proper operation of your vehicle.
→ Fuses P. 457 - Before installing any electronic accessory, have the installer contact an authorized Acura NSX dealer for assistance. If possible, have an authorized Acura NSX dealer inspect the final installation.
Accessories and Modifications
WARNING
Improper accessories or modifications can affect your vehicle's handling, stability, and performance, and cause a crash in which you can be seriously hurt or killed.
Follow all instructions in this owner's manual regarding accessories and modifications.
WARNING
Use of improperly designed, engineered or manufactured high-voltage battery assemblies could cause a fire in your vehicle.
A vehicle fire could result in a crash or injury.
Only use a genuine Acura high-voltage battery assembly, or its equivalent, in your vehicle.
Modifications
Do not modify your vehicle in a manner that may affect its handling, stability, or reliability, or install non-genuine Acura parts or accessories that may have a similar effect.
Even minor modifications to vehicle systems can affect overall vehicle performance. Always make sure all equipment is properly installed and maintained, and do not make any modification to your vehicle or its systems that might cause your vehicle to no longer meet federal, state, province, territory, and local regulations.
The on-board diagnostic port (OBD-II/SAE J1962 connector) installed on this vehicle is intended to be used with automobile system diagnostic devices or with other devices that Acura has approved. Use of any other type of device may adversely affect the vehicle's electronic systems or allow them to be compromised, possibly resulting in a system malfunction, drained battery, or other unexpected problems.
Do not modify or attempt to repair your vehicle's high-voltage hybrid power system or otherwise modify vehicle electrical systems. Disassembling or modifying electrical equipment can result in a crash or a fire.
If you ever need to replace your vehicle's high-voltage battery assembly outside of warranty coverage, we highly recommend that you only use a genuine Acura high-voltage battery assembly. Genuine Acura high-voltage battery assemblies are designed to work with your vehicle's hybrid power system and have been designed, engineered and manufactured to avoid overcharging situations. Non-genuine high-voltage battery assemblies may not have been similarly designed, engineered and manufactured, and installation of such assemblies could result in overcharging, fires, loss of power, or other conditions that may increase the likelihood of a crash or injury.
Storage
Vehicle Storage
If you need to park your vehicle for an extended period (more than one month), there are several things you should do to prepare it for storage. This helps reduce possible deterioration of vehicle components and overall condition, which allows you to get the vehicle back on the road with minimal delay. These are:
- If possible, store your NSX in a garage or enclosed area.
- Fill the fuel tank completely.
- Change the engine oil and filter.
- Wash and dry the exterior completely.
- Clean the interior. Make sure the carpeting, floor mats, etc., are completely dry.
- Put the transmission in P. Release the parking brake.
- Leave one window open slightly (if the vehicle is being stored indoors).
- To maintain the low-voltage 12-volt battery, connect it to an accessory battery charger. For more information on how to maintain your 12-volt battery, consult an authorized Acura NSX dealer.
- If the vehicle is to be stored for a longer period of time, it should be supported on jack stands to raise the tires off the ground to prevent tire flat spotting.
- Support the front wiper blade arms with a folded towel or rag so they do not touch the windshield.
- Cover the vehicle with a "breathable" cover, one made from a porous material such as cotton. Nonporous materials (such as plastic sheeting) may trap moisture, which can damage the paint.
- If possible, remove the vehicle from the garage or enclosed area, remove covering, and periodically run the engine until it reaches full operating temperature (the cooling fan cycles on and off twice). Preferably, do this once a month.
→ Checking the 12-Volt Battery P. 417
Handling of the Jack P. 444
- To maintain the High Voltage battery, drive your vehicle for more than 30 minutes at least once every three months.
If road conditions are not suitable or desirable for driving, the following alternate procedure can be used to maintain the vehicle's High Voltage battery if local idling by-laws permit:
- Remove the vehicle from the garage or enclosed area to prevent carbon monoxide accumulation.
Carbon Monoxide Gas P. 67 - Depress the brake pedal and press the ENGINE START/STOP button as you normally would to start the vehicle.
- Allow the vehicle to run for 30 minutes. Time spent at idle stop still counts as part of this 30-minute run.
Handling the Unexpected
This chapter explains how to handle unexpected troubles.
Tools
Types of Tools 432
If a Tire Goes Flat
Temporarily Repairing a Flat Tire..... 433
Handling of the Jack 444
Power System Won't Start
Checking the Procedure.... 445
If the Keyless Access Remote Battery is
Weak 446
Emergency Power System Off...... 447
Jump Starting
Overheating
How to Handle Overheating...... 450
Indicator, Coming On/Blinking
If the 12-Volt Battery Charging System Indicator Comes On .... 452
If the Malfunction Indicator Lamp Comes On or Blinks 452
If the Brake System Indicator (Red) Comes On 453
If the Electric Power Steering (EPS) System Indicator Comes On .... 453
If the Electric Parking Brake System Indicator Comes On .... 454
If the Low Tire Pressure/TPMS Indicator Comes On or Blinks.... 455
If the Transmission System Indicator Blinks along with the Warning Message... 456 If the Low Oil Level Symbol Appears.....456
Fuses
Fuse Locations 457
Inspecting and Changing Fuses..... 461
Emergency Towing 462
When You Cannot Unlock the Fuel Fill Door 46
When You Cannot Open the Hatch .....464
Refueling
Refueling from a Portable Fuel Container ....465
Tools
Types of Tools
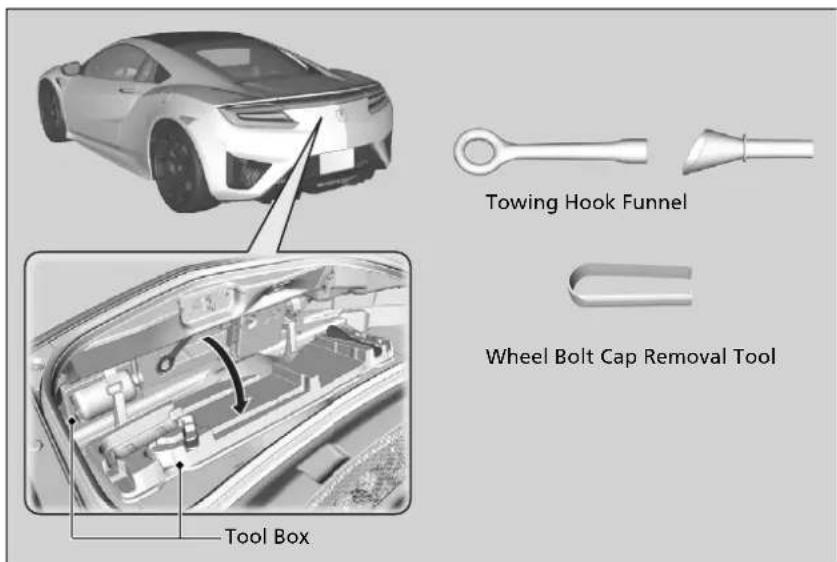
text_image
Towing Hook Funnel Wheel Bolt Cap Removal Tool Tool BoxTypes of Tools
The tools are stored in the trunk.
If a Tire Goes Flat
Temporarily Repairing a Flat Tire
If the tire has a large cut or is otherwise severely damaged, you will need to have the vehicle towed. If the tire only has a small puncture, from a small nail for instance, you can use the temporary tire repair kit so that you can drive to the nearest service station for a more permanent repair.
If a tire goes flat while driving, grasp the steering wheel firmly, and brake gradually to reduce speed. Then stop in a safe place.
- Park the vehicle on a firm, level, and non-slippery surface. Apply the parking brake.
- Put the transmission into P.
- Turn on the hazard warning lights and set the power mode to VEHICLE OFF.
»Temporarily Repairing a Flat Tire
The kit should not be used in the following situations. Instead, contact an authorized Acura NSX dealer or a roadside assistant to have the vehicle towed.
• The tire sealant has expired.
- More than one tire is punctured.
• The puncture or cut is larger than 3/16 inch (4 mm).
- The tire side wall is damaged or the puncture is outside the contact area.
Contact Area
| When the puncture is: Kit Use | |
| Smaller than 3/16 inch (4 mm) | Yes |
| Larger than 3/16 inch (4 mm) | No |
- Damage has been caused by driving with the tire extremely under inflated.
• The tire bead is no longer seated. - The rim is damaged
Do not remove a nail or screw that punctured the tire. If you remove it from the tire, you may not be able to repair the puncture using the kit.
NOTICE
Do not use a puncture-repairing agent other than the one provided in the kit that came with your vehicle. If a different agent is used, you may permanently damage the tire pressure sensor.
Continued
Getting Ready to Temporarily Repair the Flat Tire
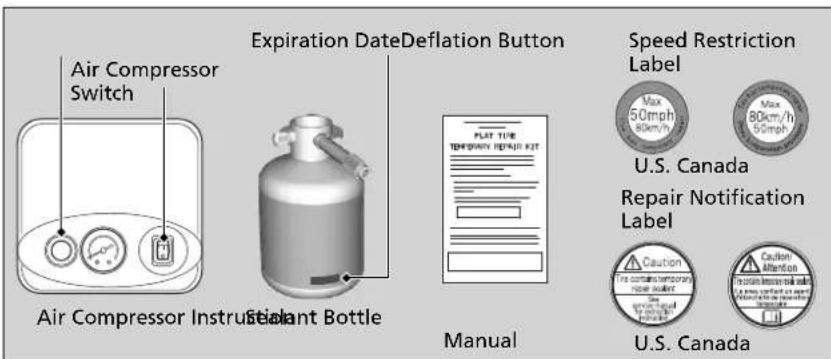
Getting Ready to Temporarily Repair the Flat Tire
When making a temporary repair, carefully read the instruction manual provided with the kit.
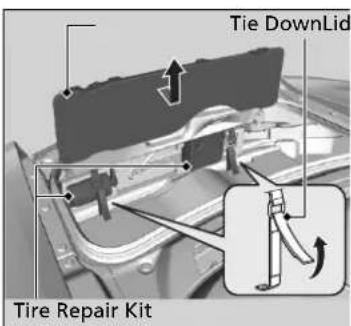
text_image
Tie DownLid Tire Repair Kit- Open the hatch.
- Loosen tool box tie downs.
- Remove tool box lid.
- Take the kit out of the tool box.
- Place the kit face up, on flat ground near the flat tire, and away from traffic. Do not place the kit on its side.
Injecting Sealant and Air
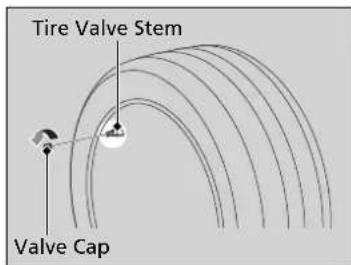
text_image
Tire Valve Stem Valve Cap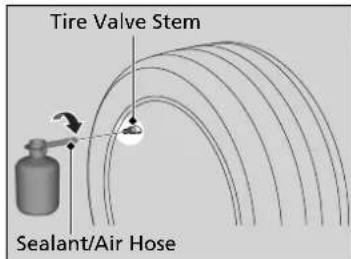
text_image
Tire Valve Stem Sealant/Air Hose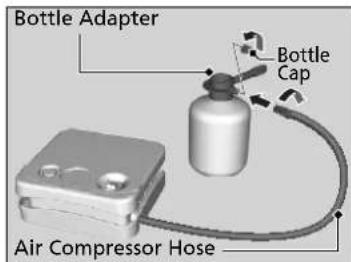
text_image
Bottle Adapter Bottle Cap Air Compressor Hose- Remove the valve cap from the tire valve stem.
- Shake the sealant bottle.
- Attach the sealant/air hose onto the tire valve stem. Screw the sealant/air hose until it is tightly connected to the valve stem.
▶ Make sure the bottle remains upright to ensure all the sealant flows into the tire. - Remove the bottle cap from the bottle adapter.
- Attach the air compressor hose onto the bottle adapter. Screw the air compressor hose until it is tightly connected to the bottle adapter.
Injecting Sealant and Air
WARNING
Tire sealant contains substances that are harmful and can be fatal if swallowed.
If accidentally swallowed, do not induce vomiting. Drink plenty of water and get medical attention immediately.
For skin or eye contact, flush with cool water and get medical attention if necessary.
Keep the sealant bottle out of the reach of children. Do not shake the bottle after the bottle cap removed. If you shake the bottle after the cap is removed, it may spill sealant.
In cold temperatures, the sealant may not flow easily. In this situation, warm it up for five minutes before using.
The sealant is latex based and can permanently stain clothing and other materials. Be careful during handling and wipe up any spills immediately.
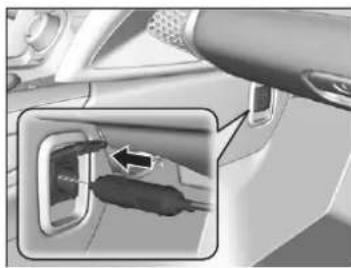
natural_image
Interior view of a car showing a plug inserted into a door panel, with an arrow indicating the insertion point (no text or symbols visible)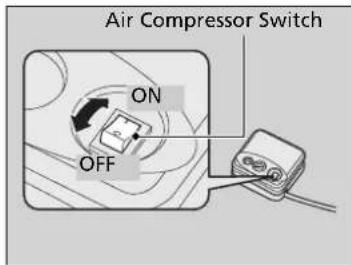
text_image
Air Compressor Switch ON OFF- Plug in the compressor to the accessory power socket.
▶ Be careful not to pinch the cord in a door or window.
→ Accessory Power Socket P. 153
- Turn the power system on.
▶ Keep the power system on while injecting sealant and air.
Carbon Monoxide Gas P. 67
- Turn the air compressor on to inflate the tire.
The compressor starts injecting sealant and air into the tire.
- After the air pressure reaches 32 psi (220 kPa), turn off the compressor.
Injecting Sealant and Air
WARNING
Running the engine with the vehicle in an enclosed or even partly enclosed area can cause a rapid build-up of toxic carbon monoxide.
Breathing this colorless, odorless gas can cause unconsciousness and even death. Only run the engine to power the air compressor with the vehicle outdoors.
NOTICE
Do not operate the temporary tire repair kit compressor for more than 15 minutes. The compressor can overheat and become permanently damaged.
Until the sealant injection is complete, the pressure shown on the pressure gauge will appear higher than actual. After the sealant injection is complete the pressure will drop and then begin to rise again as the tire is inflated with air. This is normal. To accurately measure the air pressure using the gauge, turn the air compressor off only after the sealant injection is complete.
If the required air pressure is not reached within 15 minutes, the tire may be too severely damaged for the kit to provide the necessary seal and your vehicle will need to be towed.
See an authorized Acura NSX dealer for a replacement sealant bottle and proper disposal of an empty bottle.
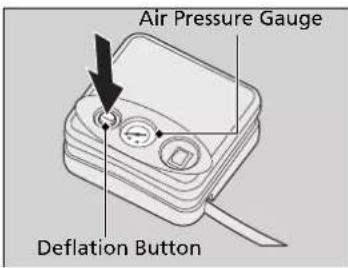
text_image
Air Pressure Gauge Deflation Button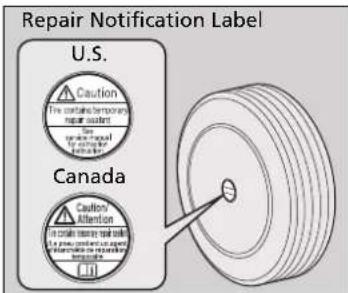
text_image
Repair Notification Label U.S. Caution The contains temporary repair status The contains manual for maintenance of the system Canada Caution Attention To obtain necessary tool with a power control or repair device, which is used to replace the repair status.-
Unplug the kit from the accessory power socket.
-
Unscrew the sealant/air hose from the tire valve stem. Reinstall the valve cap.
-
Push the deflation button until the gauge returns 0 psi (0 kPa).
-
Apply the repair notification label to the flat surface of the wheel.
The wheel surface must be clean to ensure the label adheres properly.
Distributing the Sealant in the Tire
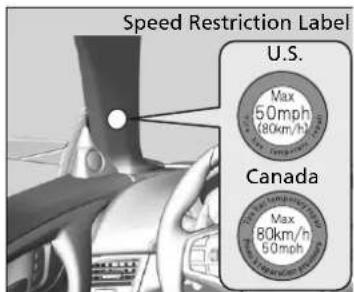
text_image
Speed Restriction Label U.S. Max 50mph (80km/h) Canada Max 80km/h 50mph- Apply the speed restriction label to the location as shown.
- Drive the vehicle for about five minutes. ▶ Do not exceed 50 mph (80 km/h).
- Stop the vehicle in a safe place.
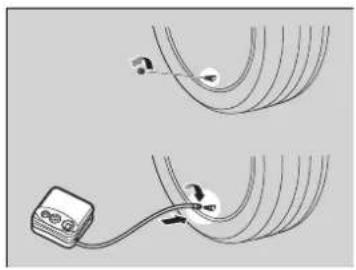
natural_image
Diagram showing two curved cable or wire connections with a small device attached, no text or symbols present.- Recheck the air pressure using the gauge on the air compressor.
▶ Do not turn the air compressor on to check the pressure.
- If the air pressure is:
• Less than 19 psi (130 kPa): Do not add air or continue driving. The leak is too severe. Call for help and have your vehicle towed.
Emergency Towing P. 462
- 32 psi (220 kPa) or more: Continue driving for another five minutes or until you reach the nearest service station if less than five minutes away. Do not exceed 50 mph (80 km/h).
▶ Stop and check the air pressure again. If the air pressure does not go down after the five minute drive, you do not need to check the pressure any more. Drive to the nearest service station to fix or replace the tire.
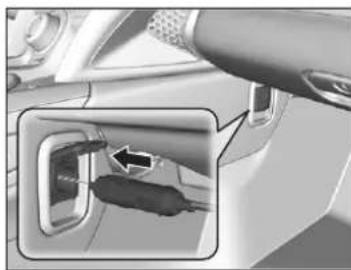
natural_image
Close-up of a car's side panel showing a plug inserted into a socket, with an arrow indicating the insertion direction (no text or symbols visible)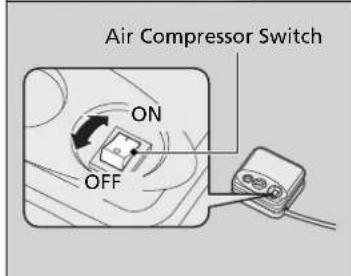
text_image
Air Compressor Switch ON OFF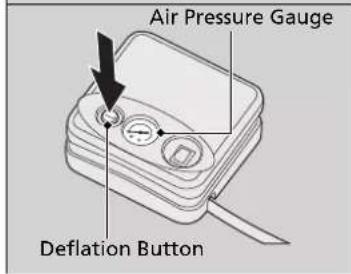
text_image
Air Pressure Gauge Deflation Button- Greater than 19 psi (130 kPa), but less than 32 psi (220 kPa):
Turn the air compressor on to inflate the tire until the tire pressure reaches 32 psi (220 kPa).
Injecting Sealant and Air P. 435
Then drive carefully for five more minutes or until you reach the nearest service station if less than five minutes away.
Do not exceed 50 mph (80 km/h).
▶ You should repeat this procedure as long as the air pressure is within this range.
Distributing the Sealant in the Tire
WARNING
Running the engine with the vehicle in an enclosed or even partly enclosed area can cause a rapid build-up of toxic carbon monoxide.
Breathing this colorless, odorless gas can cause unconsciousness and even death. Only run the engine to power the air compressor with the vehicle outdoors.
Refer to the driver's doorjamb label for the specified pressure.
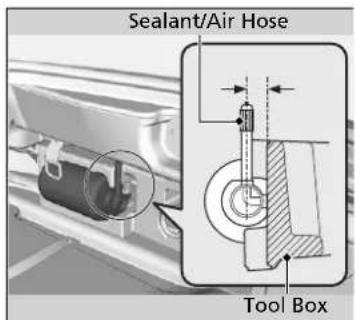
text_image
Sealant/Air Hose Tool Box- Repackage and properly stow the kit.
▶ Ensure the sealant bottle is inserted with the sealant/air hose parallel to the tool box to prevent the bottle/hose damage.
Inflating an Under-inflated Tire
You can use the kit to inflate a non-punctured under-inflated tire.
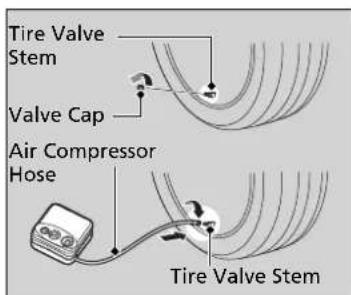
text_image
Tire Valve Stem Valve Cap Air Compressor Hose Tire Valve Stem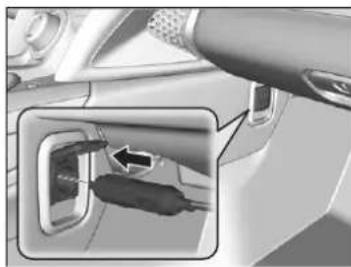
natural_image
Interior view of a car showing a plug inserted into the driver's seat, with a close-up inset highlighting the insertion area (no text or symbols visible)- Take the kit out of the box.
Getting Ready to Temporarily Repair the Flat Tire P. 434
-
Place the kit, face up, on flat ground near the flat tire, away from traffic. Do not place the kit on its side.
-
Remove the valve cap from the tire valve stem.
-
Attach the air compressor hose onto the tire valve stem.
Screw the air compressor hose until it is tightly connected to the valve stem.
- Plug in the compressor to the accessory power socket.
▶ Be careful not to pinch the cord in a door or window.
Accessory Power Socket P. 153
- Turn the power system on.
▶ Keep the power system on while injecting air.
Carbon Monoxide Gas P. 67
Inflating an Under-inflated Tire
WARNING
Running the engine with the vehicle in an enclosed or even partly enclosed area can cause a rapid build-up of toxic carbon monoxide.
Breathing this colorless, odorless gas can cause unconsciousness and even death. Only run the engine to power the air compressor with the vehicle outdoors.
NOTICE
Do not operate the temporary tire repair kit compressor for more than 15 minutes. The compressor can overheat and become permanently damaged.
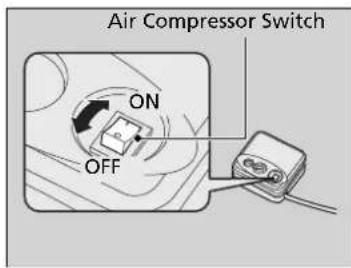
text_image
Air Compressor Switch ON OFF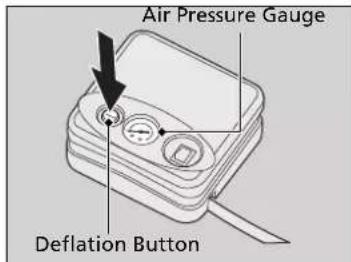
text_image
Air Pressure Gauge Deflation Button- Turn the air compressor switch on to inflate the tire.
The compressor starts to inject air into the tire.
▶ If you have turned the power system on, keep the power system on while injecting air.
-
Inflate the tire to the specified air pressure.
-
Turn off the kit.
▶ Check the pressure gauge on the air compressor.
▶ If overinflated, press the deflation button.
-
Unplug the kit from the accessory power socket.
-
Unscrew the air hose from the tire valve stem. Reinstall the valve cap.
- Push the deflation button until the gauge returns 0 psi (0 kPa).
- Repackage and properly stow the kit.
Handling of the Jack
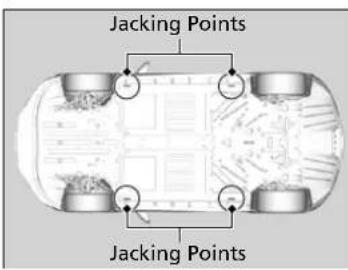
text_image
Jacking Points Jacking PointsYour vehicle has jacking points as shown. When replacing your tires, consult an authorized Acura NSX dealer.
>>Handling of the Jack
Many types of jacks and jack stands, as well as improper lifting procedures, may cause side sill and underbody damage. Please consult an authorized Acura NSX dealer about proper lifting equipment and methods.
Power System Won't Start
Checking the Procedure
When the READY indicator does not come on and the Ready To Drive message does not appear on the driver information interface, check the following items and take appropriate action.
Checking the Procedure
If you must start the vehicle immediately, use an assisting vehicle to jump start it.
→ Jump Starting P. 448
Checklist Condition What to Do
| Check if the related indicator or driver information interface messages come on. | The Temperature Is Too Cold For Vehicle To Operate message appears. | Driver Information Interface Warning and Information Messages P. 83 |
| The To Start, Hold Remote Near Start Button message appears.▶Make sure the keyless access remote is in its operating range. ➕ ENGINE START/STOP Button Operating Range P. 127 | If the Keyless Access Remote Battery is Weak P. 446 | |
| The POWER SYSTEM indicator comes on. | Have your vehicle checked by an authorized Acura NSX dealer. | |
| The transmission system indicator blinks and Transmission Problem Apply Parking Brake When Parked message appears. | The power system can be activated as a temporary measure. ➕ If the Transmission System Indicator Blinks along with the Warning Message P. 456 | |
| Check the brightness of the interior lights. | The interior lights are dim or do not come on at all. | Have the 12-volt battery checked by an authorized Acura NSX dealer. |
| The interior lights come on normally. Check all fuses, or have your vehicle checked by an authorized Acura NSX dealer. ➕ Inspecting and Changing Fuses P. 461 | ||
| Check the gear position. | The transmission is not in P. | Put the transmission into P. |
| Check the immobilizer system indicator. | When the immobilizer system indicator is blinking, the power system cannot be turned on. | Immobilizer System Indicator P. 81 |
▶▶ Power System Won't Start▶ If the Keyless Access Remote Battery is Weak
If the Keyless Access Remote Battery is Weak
If the beeper sounds, the ENGINE START/STOP button flashes, and the READY indicator does not come on.
The To Start, Hold Remote Near Start Button message appears on the driver information interface.
Turn on the power system as follows.
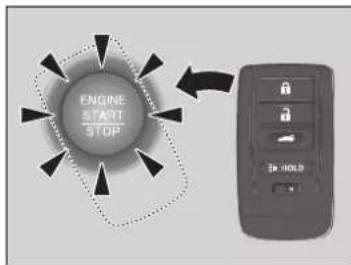
text_image
ENGINE START / STOP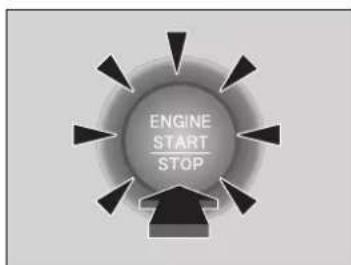
text_image
ENGINE START STOP- Touch the center of the ENGINE START/STOP button with the A logo on the keyless access remote while the ENGINE START/STOP button is flashing. The buttons on the keyless access remote should be facing you.
The ENGINE START/STOP button flashes for about 30 seconds.
- Depress the brake pedal and press the ENGINE START/STOP button within 10 seconds after the beeper sounds and the ENGINE START/STOP button changes from flashing to on.
If you don't depress the pedal, the mode will change to ACCESSORY.
Emergency Power System Off
The ENGINE START/STOP button may be used to turn the power system off due to an emergency situation even while driving. If you must turn the power system off, do either of the following operations:
- Press and hold the ENGINE START/STOP button for about two seconds.
- Firmly press the ENGINE START/STOP button three times.
The steering wheel will not lock. However, because turning off the engine disables the power assist the engine provides to the steering and braking systems, it will require significantly more physical effort and time to steer and slow the vehicle. Use both feet on the brake pedal to slow down the vehicle and stop immediately in a safe place.
The gear position automatically changes to P after the vehicle comes to a complete stop. Then, the power mode changes to VEHICLE OFF.
Emergency Power System Off
Do not press the button while driving unless it is absolutely necessary for the power system to be turned off.
Jump Starting
Jump Starting Procedure
Turn off the power to electric devices, such as audio and lights. Turn off the power system, then open the hood.
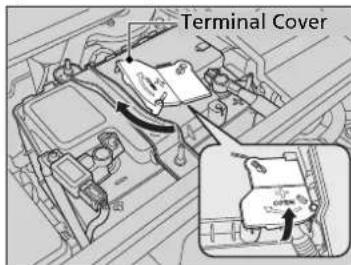
text_image
Terminal Cover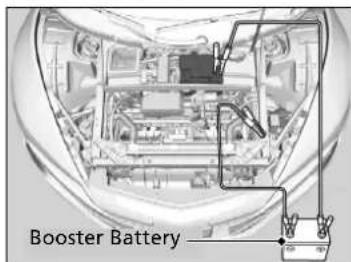
text_image
Booster Battery- Remove the maintenance cover.
→ Checking the 12-Volt Battery P. 417 -
Slide the terminal cover on your vehicle's 12-volt battery positive ⊕ terminal as shown.
-
Connect the first jumper cable to your vehicle's 12-volt battery ⊕ terminal.
-
Connect the other end of the first jumper cable to the booster battery ⊕ terminal.
▶ If you use a booster battery, only use a 12-volt booster battery.
When using an automotive battery charger, select a charging voltage lower than 15-volts. Check the charger manual for the proper setting.
- Connect the second jumper cable to the booster battery ⊖ terminal.
Jump Starting
WARNING
A 12-volt battery can explode if you do not follow the correct procedure, seriously injuring anyone nearby.
Keep all sparks, open flames, and smoking materials away from the 12-volt battery.
Securely attach the jumper cable clips so that they do not come off when the engine vibrates. Also be careful not to tangle the jumper cables or allow the cable ends to touch each other while attaching or detaching the jumper cables.
12-volt battery performance degrades in cold conditions and may prevent the engine from starting.
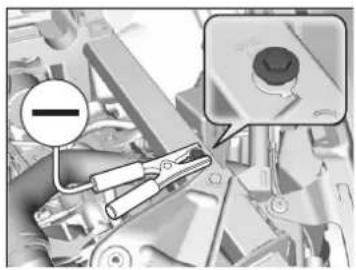
natural_image
Close-up of mechanical tools and components with a magnified inset showing a close-up of a knob (no text or symbols visible)- Connect the other end of the second jumper cable to the front frame as shown. Do not connect this jumper cable to any other part.
- If your vehicle is connected to another vehicle, start the assisting vehicle's engine and increase its rpm slightly.
- Attempt to start your vehicle's engine. If it turns over slowly, check that the jumper cables have good metal-to-metal contact.
What to Do After the Engine Starts
Once your vehicle's engine has started, remove the jumper cables in the following order.
- Disconnect the jumper cable from your vehicle's ground.
- Disconnect the other end of the jumper cable from the booster battery ⊖ terminal.
- Disconnect the jumper cable from your vehicle's 12-volt battery ⊕ terminal.
- Disconnect the other end of the jumper cable from the booster battery ⊕ terminal.
Have your vehicle inspected by a nearby service station or an authorized Acura NSX dealer.
Overheating
How to Handle Overheating
Overheating symptoms are as follows:
- The temperature gauge pointer is at the HMark or the engine suddenly loses power.
- Steam or spray comes out of the engine compartment.
■ First thing to do
- Immediately park the vehicle in a safe place.
▶ Put the transmission into P and set the parking brake. - Turn off all accessories and turn on the hazard warning lights.
▶ No steam or spray present: Keep the power system on and open the hatch.
▶ Steam or spray is present: Turn off the power system and wait until it subsides. Then open the hatch.
How to Handle Overheating
WARNING
Steam and spray from an overheated engine can seriously scald you.
Do not open the hatch if steam is coming out.
NOTICE
Continuing to drive with the temperature gauge pointer at the Hmark may damage the engine.
■ Next thing to do
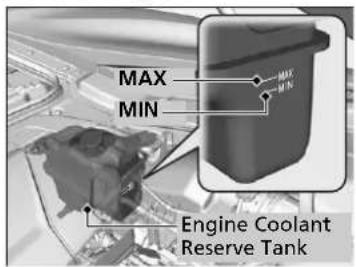
text_image
MAX MIN Engine Coolant Reserve Tank- Check that the cooling fan is operating and turn the power system off once the temperature gauge pointer comes down.
▶ If the cooling fan is not operating, immediately turn the power system off.
- Once the engine has cooled down, inspect the coolant level and check the cooling system components for leaks.
→ Checking the Coolant P. 396
If the coolant level in the reserve tank is low, or no coolant in the tank, check that the radiator is cool. Cover the reserve tank cap with a heavy cloth and open the cap. Add coolant until it reaches the MAX mark, and put the cap back on.
■ Last thing to do
Once the engine has cooled sufficiently, turn the power system on and check the temperature gauge. If the temperature gauge pointer has gone down, resume driving. If it has not gone down, contact an authorized Acura NSX dealer for repairs.
How to Handle Overheating
WARNING
Removing the reserve tank cap while the engine is hot can cause the coolant to spray out, seriously scalding you.
Always let the engine and radiator cool down before removing the reserve tank cap.
If the coolant is leaking, contact an authorized Acura NSX dealer for repairs.
Use water as an emergency/temporary measure only. Have an authorized Acura NSX dealer flush the system with proper antifreeze as soon as possible.
Indicator, Coming On/Blinking
If the 12-Volt Battery Charging System Indicator Comes On

■ Reasons for the indicator to come on
Comes on when the 12-volt battery is not being charged.
■ What to do when the indicator comes on
Turn off the climate control system, rear defogger, and other electrical systems, and immediately contact an authorized Acura NSX dealer for repairs.
If the Malfunction Indicator Lamp Comes On or Blinks

■ Reasons for the indicator lamp to come on or blink
- Comes on when there is a problem with the engine emissions control system.
- Blinks when engine misfiring is detected.
■ What to do when the indicator lamp comes on
Avoid high speeds and immediately get your vehicle inspected at an authorized Acura NSX dealer.
■ What to do when the indicator lamp blinks
Park the vehicle in a safe place with no flammable items and wait at least 10 minutes or more with the engine stopped until it cools.
If the 12-Volt Battery Charging System Indicator Comes On
If you need to stop temporarily, do not turn off the power system. Restarting the power system may rapidly discharge the battery.
If the Malfunction Indicator Lamp Comes On or Blinks
NOTICE
If you drive with the malfunction indicator lamp on, the emissions control system and the engine could be damaged.
If the malfunction indicator lamp blinks again when restarting the engine, drive to the nearest authorized Acura NSX dealer at 31 mph (50 km/h) or less. Have your vehicle inspected.
If the Brake System Indicator (Red) Comes On

■ Reasons for the indicator to come on
• The brake fluid is low.
• There is a malfunction in the brake system.
■ What to do when the indicator comes on while driving
Depress the brake pedal lightly to check pedal pressure.
- If normal, check the brake fluid level the next time you stop.
- If abnormal, take immediate action. If necessary, downshift the transmission to slow the vehicle using regenerative braking.
If the Electric Power Steering (EPS) System Indicator Comes On

■ Reasons for the indicator to come on
Comes on if there is a problem with the EPS system.
■ What to do when the indicator comes on
Stop the vehicle in a safe place and turn on the power system again. If the indicator comes on and stays on, immediately have your vehicle inspected by an authorized Acura NSX dealer.
If the Brake System Indicator (Red) Comes On
Have your vehicle repaired immediately. It is dangerous to drive with low brake fluid. If there is no resistance from the brake pedal, stop immediately in a safe place. If necessary, downshift the gears.
If the brake system indicator and ABS indicator come on simultaneously, the electronic brake distribution system is not working. This can result in vehicle instability under sudden braking.
Have your vehicle inspected by an authorized Acura NSX dealer immediately.
If both red and amber brake system indicators come on, stop the vehicle in a safe place and have it inspected by an authorized Acura NSX dealer immediately.
If the Electric Parking Brake System Indicator Comes On

■ Reasons for the indicator to come on
Comes on when there is a problem with the electric parking brake system.
■ What to do when the indicator comes on
Avoid using the parking brake and immediately get your vehicle inspected at an authorized Acura NSX dealer.
■ What to do when the electric parking brake indicator comes on or blinks at the same time.
Release the parking brake.
→ Parking Brake P. 357
- If the electric parking brake indicator remains on or blinks even after releasing the parking brake, immediately stop the vehicle in a safe place, and call an authorized Acura NSX dealer.
▶ To prevent your vehicle from moving unexpectedly, put the transmission into P.
- If only the electric parking brake indicator goes off, immediately get your vehicle inspected at an authorized Acura NSX dealer.
If the Electric Parking Brake System Indicator Comes On
If you apply the parking brake, it may not release.
If the electric parking brake indicator turns on, the parking brake is still applied.
When the electric parking brake indicator blinks at the same time as the electric parking brake system indicator, the system must be checked. The parking brake may not operate under these conditions.
If the Low Tire Pressure/TPMS Indicator Comes On or Blinks

■ Reasons for the indicator to come on or blink
Tire pressure is significantly low in one or more of the tires. If there is a problem with the TPMS, the indicator blinks for about one minute, and then stays on.
■ What to do when the indicator comes on
Drive carefully, avoid abrupt or sharp cornering, and hard braking. Stop your vehicle in a safe place. Check the tire pressure and adjust the pressure to the specified level. The specified tire pressure is on a label on the driver's side doorjamb.
■ What to do when the indicator blinks
Have the tire inspected by an authorized Acura NSX dealer as soon as possible.
If the Low Tire Pressure/TPMS Indicator Comes On or Blinks
NOTICE
Driving on an extremely underinflated tire can cause it to overheat. An overheated tire can fail. Always inflate your tires to the prescribed level.
If the Transmission System Indicator Blinks along with the Warning Message
■ Reasons for the indicator to blink
The transmission is malfunctioning.
■ What to do when the indicator blinks
- Immediately have your vehicle inspected by an authorized Acura NSX dealer.
- Put the transmission into when you turn the power system on.
▶ Check to verify the N position on the instrument panel is selected and if the indicator on the N button is illuminating or blinking.
The power system cannot be turned on unless the parking brake is set.
→ Turning on the Power P. 321
If the Low Oil Level Symbol Appears

■ Reasons for the symbol to appear
Appears when the engine oil level is low.
■ What to do as soon as the symbol appears
-
Immediately park the vehicle on level ground in a safe place.
-
If necessary, turn the hazard warning lights on.
■ What to do after parking the vehicle
Check the oil level.
Oil Check P. 391
If the Transmission System Indicator Blinks along with the Warning Message
You may not be able to turn on the power system.
Make sure to set the parking brake when parking your vehicle.
Call a professional towing service if you need to tow your vehicle.
Emergency Towing P. 462
If the Low Oil Level Symbol Appears
NOTICE
Running the engine with a low oil level can cause serious mechanical damage almost immediately.
This system activates after the engine warms up. If the outside temperature is extremely low, you may have to drive for a long time until the system senses the engine oil level.
If the symbol appears again, turn the power system off, and contact an authorized Acura NSX dealer for repairs immediately.
Fuses
Fuse Locations
If any electrical devices are not working, set the power mode to VEHICLE OFF, and check to see if any applicable fuse is blown.
Hood Fuse Box
There are two fuse boxes under the hood. Fuse locations are shown on the fuse box cover. Locate the fuse in question by the fuse number and box cover number.
■ Fuse box A
Located near the radiator. Push the tabs to open the box.
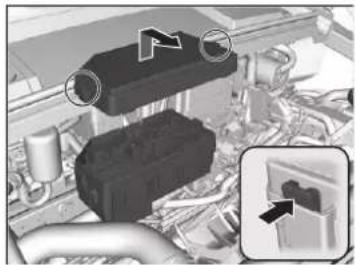
natural_image
Mechanical assembly diagram showing components like a black housing and pipe connection (no visible text or labels)■ Circuit protected and fuse rating
| Circuit Protected Amps | ||
| 1 | EPS 70 A | |
| Cooling Fan 50 A | ||
| ABS/VSA Motor 40 A | ||
| ABS/VSA FSR 20 A | ||
| AS F/B Main 30 A | ||
| Main Fuse 200 A | ||
| 2 | - (50 A) | |
| F/B Main 1 60 A | ||
| - | ( | |
| - | ( | |
| Left Electric Parking Brake Motor | 30 A | |
| Right Electric Parking Brake Motor | 30 A | |
| - | ( | |
| Heater Motor 2 30 A | ||
| Heater Motor 1 30 A | ||
| - | ( | |
| 3 | E-OP 30 A | |
| - (30 A) | ||
| ADS | 30 A | |
| AMP* | (30 A) | |
| 4 | Parking Light 10 A | |
| 5 | IGPS PCS | 7.5 A |
| 6 | Left Headlight High Beam | 10 A |
| 7 | VFP2 | 7.5 A |
| Circuit Protected Amps | ||
| 8 | Left Headlight Low Beam | 10 A |
| 9 | Right Headlight High Beam | 10 A |
| 10 | Right Headlight Low Beam | 10 A |
| 11 | IGPS Fan | 7.5 A |
| 12 | FI Main | 15 A |
| 13 | FI Sub | 20 A |
| 14 | Back Up | 7.5 A |
| 15 | SBW ECU | 7.5 A |
| 16 | DBW1 | 15 A |
| 17 6 | IG Coil0 | 15 A |
| 18 5 | DBW20 | 15 A |
| 19 | Parking Light & Headlight Main | 20 A |
| 20 | Rear Defroster | 20 A |
| 21 | Front Washer | 20 A |
| 22 4 | ISC 0 | 15 A |
| 23 | - | - |
| 24 | ACC/IG2 Main | 10 A |
| 25 | 4 Daytime Running Lights | 10 A |
| 26 | Horn | 10 A |
| 27 | Interior Lights | 7.5 A |
| 28 | IGP2 15 A | |
| 29 | Audio | 10 A |
■ Fuse box B
Located near the 12-volt battery. Remove the maintenance cover, then push the tabs to open the box.
→ Checking the 12-Volt Battery P. 417
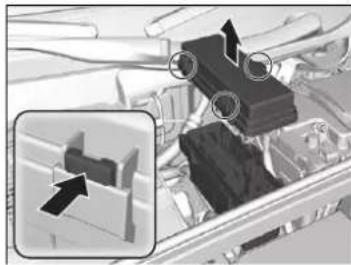
natural_image
Mechanical assembly diagram showing a component with arrows indicating motion or force, no visible text or symbols■ Circuit protected and fuse rating
| Circuit Protected Amps | ||
| 1 | SBW 60 A | |
| - | - | |
| F/B Main 2 60 A | ||
| Wiper 30 A | ||
| Passenger Power Window 30 A | ||
| IG Main 1 30 A | ||
| Driver Power Window 30 A | ||
| ESB 40 A | ||
| 2 IG Main 2 30 A | ||
| 3 IMA Motor 20 A | ||
| 4 | BMS | 7.5 A |
| 5 | Stop | 7.5 A |
| 6 Turbo W/G 20 A | ||
| 7 | Hazard | 7.5 A |
| 8 | A/C W/P | 10 A |
| 9 | -- | |
| 10 | AEV 7.5 A | |
| 11 | FI-ECU Backup | 7.5 A |
| 12 | -- | |
| 13 | -- | |
| 14 | -- | |
| 15 | -- | |
| 16 | -- | |
| 17 | IMA Motor | 10 A |
Driver's Side Interior Fuse Box
Located under the dashboard.
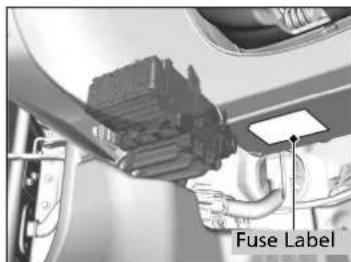
text_image
Fuse LabelFuse locations are shown on the label on the under panel.
Locate the fuse in question by the fuse number and label number.
■ Circuit protected and fuse rating
| Circuit Protected Amps | ||
| 1 Passenger's Door Handle 10 A | ||
| 2 Door Lock 15 A | ||
| 3 SMART 7.5 A | ||
| 4 -- | ||
| 5 | Front Accessory Power Socket | 20 A |
| 6 Fuel Pump 20 A | ||
| 7 MISS SOL 15 A | ||
| 8 ENG | 7.5 A | |
| 9 VSA/ABS 7.5 A | ||
| 10 | SRS | 10 A |
| 11 | Power System 2 | 10 A |
| 12 | -- | |
| 13 | Power System 1 | 10 A |
| 14 | Fuel Lid | 7.5 A |
| 15 | Driver's Power Seat Reclining* | (20 A) |
| 16 | - | (7.5 A) |
| 17 | Seat Heater* | (20 A) |
| 18 | Driver's Door Handle | 10 A |
| 19 | -- | |
| 20 | Passenger's Side Door Unlock | 7.5 A |
| 21 | Daytime Running Lights | 7.5 A |
| 22 Key Lock 7.5 A | ||
| 23 | Air Conditioning | 7.5 A |
| Circuit Protected | Amps | |
| 24 | Feed Back IG1a | 7.5 A |
| 25 | Instrument Panel Lights | 7.5 A |
| 26 | Power Lumbar Support* | (7.5 A) |
| 27 | Parking Lights | 7.5 A |
| 28 | Sub Main | 15 A |
| 29 Meter | 10 A | |
| 30 | DR2 | 7.5 A |
| 31 | Sub Fuel Pump | 15 A |
| 32 | SRS | 10 A |
| 33 | Passenger's Side Door Lock | 7.5 A |
| 34 | Driver's Door Lock | 7.5 A |
| 35 | Driver's Door Unlock | 7.5 A |
| 36 | Driver's Power Seat Sliding* | (20 A) |
| 37 | Right Daytime Running Light | 7.5 A |
| 38 | Left Daytime Running Light | 7.5 A |
| 39 | Feed Back IG1b | 7.5 A |
| 40 | ACC | 7.5 A |
| 41 | -- | |
| 42 | -- |
* Not available on all models
Continued
Passenger's Side Interior Fuse Box
Located inside the passenger's side under cover. Remove the clips using a Phillips-head screwdriver, then open the under cover.
Fuse locations are shown on the label on the under cover.
Locate the fuse in question by the fuse number and label number.
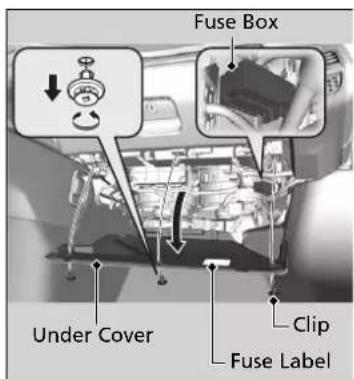
text_image
Fuse Box Under Cover Clip Fuse Label■ Circuit protected and fuse rating
| Circuit Protected Amps | ||
| a | Passenger's Power Seat Sliding* | (20 A) |
| b | Passenger's Power Seat Reclining* | (20 A) |
| c – (10 A) | ||
| d – – | ||
| e Wiper 7.5 A | ||
| f EPS 7.5 A | ||
| g DR1 7.5 A | ||
| h Power System 3 7.5 A | ||
Rear Side Interior Fuse Box
Located near the rear center speaker.
Fuse locations are shown on the hood fuse box A cover.
Have an authorized Acura NSX dealer inspect and replace the fuse.
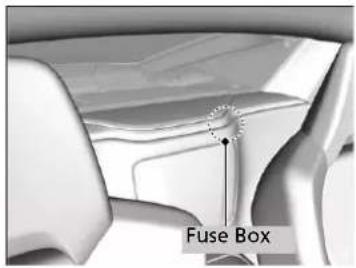
text_image
Fuse Box■ Circuit protected and fuse rating
| Circuit Protected | Amps | |
| 1 | HCA-2 20 A | |
| 2 -- | ||
| 3 -- | ||
| 4 -- | ||
| 5 | HCA-1 20 A | |
| 6 | DI-INJ 20 A | |
| 7 -- | ||
| 8 TCU | 30 A |
Inspecting and Changing Fuses
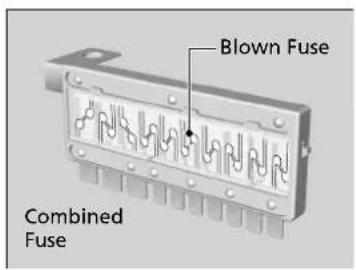
text_image
Blown Fuse Combined Fuse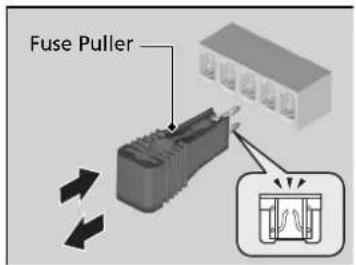
text_image
Fuse Puller- Set the power mode to VEHICLE OFF. Turn headlights and all accessories off.
- Remove the fuse box cover.
- Check the large fuse in the hood.
▶ If the fuse is blown, use a Phillips-head screwdriver to remove the screw and replace it with a new one.
- Inspect the small fuses in the hood and the vehicle interior.
▶ If there is a burned out fuse, remove it with the fuse puller and replace it with a new one.
Inspecting and Changing Fuses
NOTICE
Replacing a fuse with one that has a higher rating greatly increases the chances of damaging the electrical system.
Replace fuse with a spare fuse of the same specified amperage.
Use the charts to locate the fuse in question and confirm the specified amperage on the fuse label.
→ Fuse Locations P. 457
There is a fuse puller on the back of the hood fuse box A cover.
Emergency Towing
Call a professional towing service if you need to tow your vehicle.
■ Flat bed equipment
The operator loads your vehicle on the back of a truck.
This is the only way you can safely transport your vehicle.
Any other towing method will damage the vehicle's drive system.
Emergency Towing
NOTICE
Trying to lift or tow your vehicle by the bumpers will cause serious damage. The bumpers are not designed to support the vehicle's weight.
NOTICE
Improper towing such as towing behind a motorhome or other motor vehicle can damage the transmission.
Never tow your vehicle with a rope or chain.
It is very dangerous since ropes or chains may shift from side to side or break. You will also damage the vehicle's drive system.
When You Cannot Unlock the Fuel Fill Door
What to Do When Unable to Unlock the Fuel Fill Door
If you cannot unlock the fuel fill door, use the following procedure.
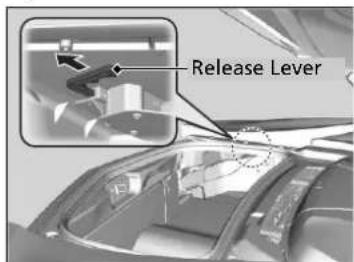
text_image
Release Lever-
Open the hatch.
-
Pull the release lever toward you.
The release lever unlocks the fuel fill door when it is pulled.
When You Cannot Unlock the Fuel Fill Door
After taking these steps, contact an authorized Acura NSX dealer to have your vehicle checked.
When You Cannot Open the Hatch
What to Do When Unable to Open the Hatch
If you cannot open the hatch, use the following procedure.
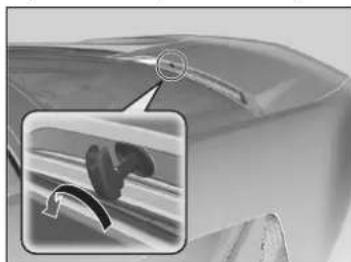
natural_image
Close-up of a car's front bumper with a magnified inset showing the jaw area (no text or symbols visible)- Remove the built-in key.
- Fully insert the key and turn it.
When You Cannot Open the Hatch
After taking these steps, contact an authorized Acura NSX dealer to have your vehicle checked.
If the security system alarm is set and open the hatch with the built-in key, the alarm goes off.
→ Security System Alarm P. 122
Refueling
Refueling from a Portable Fuel Container
If you have run out of fuel and need to refuel your vehicle from a portable fuel container, use the funnel provided with your vehicle.
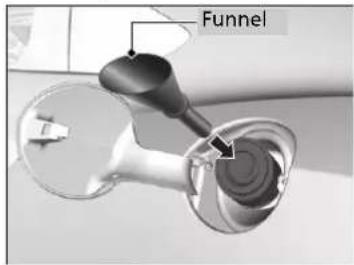
text_image
Funnel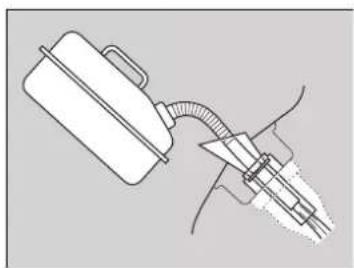
natural_image
Line drawing of a fuel injector with attached hose and valve (no text or symbols)- Turn off the power system.
- Press the fuel fill door release button.
The fuel fill door opens. - Take the funnel out of the tool box in the trunk.
Types of Tools P. 432
- Place the end of the funnel on the lower part of filler opening, then insert it slowly and completely.
▶ Make sure that the end of the funnel goes down along with the filler pipe.
- Fill the tank with fuel from the portable fuel container.
Pour fuel carefully so you do not spill any.
- Remove the funnel from the filler neck.
▶ Wipe up any fuel from the funnel before storing it.
- Shut the fuel fill door by hand.
Refueling from a Portable Fuel Container
WARNING
Gasoline is highly flammable and explosive. You can be burned or seriously injured when handling fuel.
- Turn the power system off, and keep heat, sparks, and flame away.
- Handle fuel only outdoors.
- Wipe up spills immediately.
NOTICE
Do not insert the nozzle of a portable fuel container or any funnel other than the one provided with your vehicle. Doing so can damage the fuel system. Do not try to pry open or push open the filler opening with foreign objects. This can damage the filler opening and its seal.
Make sure the fuel in the portable fuel container is gasoline before you refuel.
Information
This chapter includes your vehicle's specifications, locations of identification numbers, and other information required by regulation.
Specifications 468
Identification Numbers
Vehicle Identification Number (VIN),
Engine Number, Motor Number, and
Transmission Number 470
Devices that Emit Radio Waves..... 471
Reporting Safety Defects...... 472
Emissions Testing
Testing of Readiness Codes...... 473
Warranty Coverages 475
Authorized Manuals.... 477
Client Service Information 478
Specifications
■ Vehicle Specifications
| Model Acura NSX | |
| No. of Passengers: | |
| Front 2 | |
| Rear 0 | |
| Total 2 | |
| Weights: | |
| Gross Vehicle Weight Rating | See the certification label on the driver's doorjamb |
| Gross Axle Weight Rating (Front) | See the certification label on the driver's doorjamb |
| Gross Axle Weight Rating (Rear) | See the certification label on the driver's doorjamb |
Air Conditioning
| Refrigerant Type HFO-1234yf (R-1234yf) | |
| Charge Quantity 14.3 - 16.0 oz (405 - 455 g) | |
| Lubricant Type ND-OIL 11 | |
| Quantity 6.1 - 7.0 cu-in (100 - 115 cm | ^3 ) |
■ Engine Specifications
| Displacement 213 cu-in (3,493 cm) | 3) |
| Spark Plugs NGK SILZKAR8F7S |
Fuel
| Type | Unleaded premium gasoline, Pump octane number of 91 or higher |
| Fuel Tank Capacity | 15.6 US gal (59.0 L) |
Washer Fluid
| Tank Capacity 2.6 US qt (2.5 L) |
Light Bulbs
| Headlights (Low Beam) LED | |
| Headlights (High Beam) | LED |
| Front Turn Signal/Parking Lights | LED |
| Front Side Marker Lights | LED |
| Side Turn Signal Lights(on Door Mirrors) | LED |
| Daytime Running Lights | LED |
| Rear Turn Signal Lights | LED |
| Brake/Taillights | LED |
| Rear Side Marker Lights | LED |
| Taillights | LED |
| Back-Up Lights | LED |
| Rear License Plate Lights | LED |
| High-Mount Brake Light | LED |
| Interior Lights | |
| Map Lights LED | |
| Ambient Lights | LED |
| Door Courtesy Lights LED | |
| Glove Box Light | LED |
| Trunk Light | LED |
Brake Fluid
| Specified Acura Heavy Duty Brake Fluid DOT 4 |
■ Dual Clutch Transmission Fluid
Clutch
| Specified | Acura Automatic Transmission FluidATF DW-1 |
| Capacity Change 2.75 US qt (2.6 L) | |
| Transmission | |
| Specified Acura Gear Oil GO-Type 2.0 | |
| Capacity Change 4.86 US qt (4.6 L) | |
■ Twin Motor Unit Fluid
| Specified | Acura Automatic Transmission Fluid |
| ATF DW-1 | |
| Capacity Change 2.56 US qt (2.42 L) | |
Engine Oil
| Recommended | Ultimate Full Synthetic Motor Oil, Type3, 0W-40 | |
| Change 7.7 US qt (7.3 L) | ||
| Capacity | Change including filter | 8.3 US qt (7.9 L) |
Engine Coolant
| Specified Acura Long Life Antifreeze/Coolant Type2 | |
| Ratio 50/50 with distilled water | |
| Capacity | 4.1 US gal (15.5 L)(change including the remaining0.34 US gal (1.29 L) in the reserve tank and heater) |
Inverter Coolant
| Specified Acura Long Life Antifreeze/Coolant Type2 | |
| Ratio 50/50 with distilled water | |
| Capacity | 0.50 US gal (1.90 L)(change including the remaining0.12 US gal (0.46 L) in the reserve tank) |
Tire
| Regular | Size | Front245/35ZR19 (93Y)Rear305/30ZR20 (103Y) |
| Pressure psi (kPa [kgf/cm2]) | Front32 (220 [2.2])Rear32 (220 [2.2]) | |
| Wheel Size Regular | Front19 X 8 1/2JRear20 X 11J | |
Identification Numbers
Vehicle Identification Number (VIN), Engine Number, Motor Number, and Transmission Number
Your vehicle has a 17-digit vehicle identification number (VIN) used to register your vehicle for warranty purposes, and for licensing and insuring your vehicle. The locations of your vehicle's VIN, engine number, motor number, and transmission number are shown as follows.
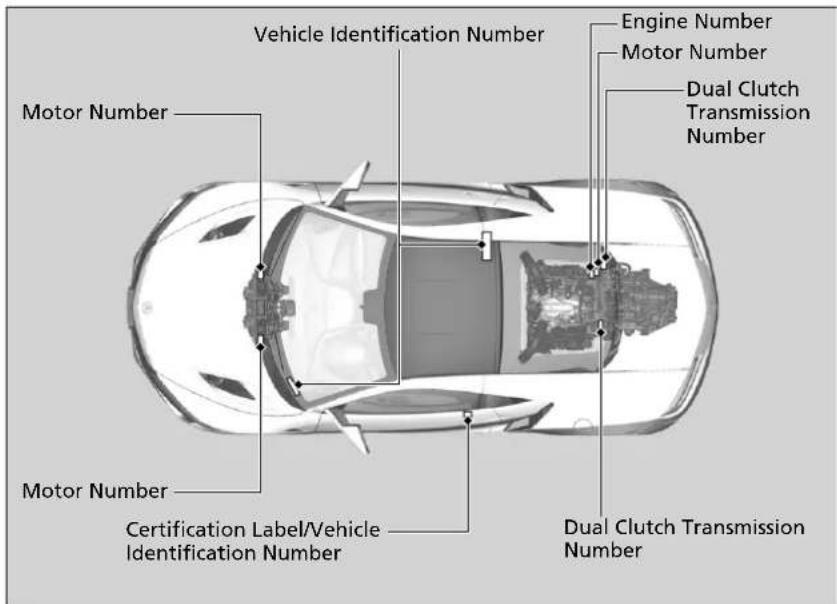
text_image
Vehicle Identification Number Engine Number Motor Number Dual Clutch Transmission Number Motor Number Certification Label/Vehicle Identification Number Dual Clutch Transmission Number»Vehicle Identification Number (VIN), Engine Number, Motor Number, and Transmission Number
The interior vehicle identification number (VIN) is located under the cover.
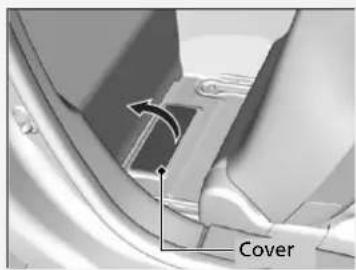
text_image
CoverDevices that Emit Radio Waves
Each radio frequency device installed in the vehicle conforms to the requirements and standards of the regulation listed below:
As required by the FCC:
This device complies with Part 15 of the FCC rules. Operation is subject to the following two conditions: (1) This device may not cause harmful interference, and (2) this device must accept any interference received, including interference that may cause undesired operation.
Changes or modifications not expressly approved by the party responsible for compliance could void the user's authority to operate the equipment.
This device complies with industry Canada licence-exempt RSS standard(s). Operation is subject to the following two conditions: (1) this device may not cause interference, and (2) this device must accept any interference, including interference that may cause undesired operation of the device.
Reporting Safety Defects
In the U.S.
If you believe that your vehicle has a defect which could cause a crash or could cause injury or death, you should immediately inform the National Highway Traffic Safety Administration (NHTSA) in addition to notifying American Honda Motor Co., Inc.
If NHTSA receives similar complaints, it may open an investigation, and if it finds that a safety defect exists in a group of vehicles, it may order a recall and remedy campaign. However, NHTSA cannot become involved in individual problems between you, your dealer, or American Honda Motor Co., Inc.
To contact NHTSA, you may call the Vehicle Safety Hotline toll-free at 1-888-327-4236 (TTY: 1-800-424-9153); go to http://www.safercar.gov; or write to: Administrator, NHTSA, 1200 New Jersey Avenue, SE., Washington, DC 20590. You can also obtain other information about motor vehicle safety from http://www.safercar.gov.
In Canada
If you believe that your vehicle has a defect which could cause a crash or could cause injury or death, you should immediately inform Honda Canada Inc. and you may also inform Transport Canada.
If Transport Canada receives similar complaints, it may open an investigation, and if it finds that a safety defect exists in a group of vehicles, it may lead to a recall and remedy campaign. However, Transport Canada cannot become involved in individual problems between you, your dealer, or Honda Canada Inc.
To contact Transport Canada's Defect Investigations and Recalls Division, you may call 1-800-333-0510. For more information on reporting safety defects or about motor vehicle safety, go to http://www.tc.gc.ca/roadsafety.
Emissions Testing
Testing of Readiness Codes
Your vehicle has readiness codes as part of the onboard self diagnostic system. Some States use these codes for testing to verify whether your vehicle's emissions components are working properly. The codes may not be read properly if testing is performed just after the 12-volt battery has gone dead or been disconnected.
To check if they are set, set the power mode to ON, without turning the power system on. The malfunction indicator lamp will come on for several seconds. If it then goes off, the readiness codes are set. If it blinks five times, the readiness codes are not set.
If you are required to have your vehicle tested before the readiness codes are ready, prepare the vehicle for retesting by doing the following:
- Fill the gas tank to approximately 3/4 full.
- Park the vehicle and leave the power system off for six hours or more.
- Make sure the ambient temperature is between 40°F and 95°F (4°C and 35°C).
- Start the engine without touching the accelerator pedal, and let it idle for 20 seconds.
- Keep the vehicle in P. Increase the engine speed to 2,000 rpm, and hold it there for about three minutes.
- Let the engine idle with your foot off the accelerator for 20 seconds.
Testing of Readiness Codes
The readiness codes are erased when the 12-volt battery is disconnected, and set again only after several days of driving under a variety of conditions.
If a testing facility determines that the readiness codes are not set, you may be requested to return at a later date to complete the test.
If the testing facility determines the readiness codes are still not set, see an authorized Acura NSX dealer.
Continued
- Select a nearby, lightly traveled major highway where you can maintain a speed of 50 mph (80 km/h) over for at least 20 minutes. Drive on the highway in D with SPORT mode. Do not use cruise control.
- Drive in city or suburban traffic for at least 10 minutes. When traffic conditions allow, let the vehicle coast for several seconds without using the accelerator pedal or the brake pedal.
- Park the vehicle and leave the power system off for 40 minutes.
Warranty Coverages
■ U.S.Owners
Your new vehicle is covered by these warranties:
New Vehicle Limited Warranty – covers your new vehicle, except for the emissions control systems and accessories, against defects in materials and workmanship.
Emissions Control Systems Defects Warranty and Emissions Performance
Warranty – these two warranties cover your vehicle's emissions control systems. Time, mileage, and coverage are conditional. Please read your warranty booklet for exact information.
Seat Belt Limited Warranty – a seat belt that fails to function properly is covered by a limited warranty. Please read your warranty booklet for details.
Rust Perforation Limited Warranty – all exterior body panels are covered against rusting from the inside out for the specified time period, regardless of mileage.
Accessory Limited Warranty – Acura accessories are covered under this warranty. Time and mileage limits depend on the type of accessory and other factors. Please read your warranty booklet for details.
Replacement Parts Limited Warranty – covers all Acura replacement parts against defects in materials and workmanship.
Replacement 12-Volt Battery Limited Warranty – provides prorated coverage for a replacement battery purchased from an authorized Acura NSX dealer.
Replacement Muffler Lifetime Limited Warranty – provides coverage for as long as the purchaser of the muffler owns the vehicle.
Restrictions and exclusions apply to all these warranties. Please read the Acura warranty information booklet that came with your vehicle for precise information on warranty coverages. Your vehicle's original tires are covered by their manufacturer. Tire warranty information is in a separate booklet.
■ Canadian Owners
Please refer to the warranty manual that came with your vehicle.
■ EPA Contact Information
An owner may obtain further information concerning emission warranties or report violations of the terms of the emission warranties by contacting:
Director, Light-Duty Vehicle Center, U.S. Environmental Protection Agency, Attention: Warranty Claim 2000 Traverwood Drive, Ann Arbor, MI 48105; complianceinfo@epa.gov
Authorized Manuals
Service Express
For electronic copies of service publications, you can purchase a subscription to Service Express. Visit www.techinfo.honda.com for pricing and options.
■ For U.S. Owners
Manuals can be purchased from Helm Incorporated. You can order a manual by phone at 1 (800) 782-4356 (credit card orders only), or online at www.helminc.com.
■ For Canadian Owners
Please contact an authorized Acura NSX dealer to order any manuals that you may require.
Client Service Information
Authorized Acura NSX dealership personnel are trained professionals who should be able to deal with any problems you may encounter with your vehicle. If, however, you are faced with a problem that they cannot resolve to your satisfaction, contact Acura Client Relations/Services.
U.S. Owners Canadian Owners
American Honda Motor Co., Inc. Honda Canada Inc.
Acura Client Relations Acura Client Services
Mail Stop 100-5E-8F 180 Honda Boulevard
1919 Torrance Blvd. Markham, ON
Torrance, CA 90501-2746 L6C 0H9
Tel: 1-844-68-ACURA Tel: 1-888-9-ACURA-9
(1-844-682-2872) 1-844-9-MYNSX-9 (NSX-
specific)
Fax: 1-877-939-0909
E-mail: acura_cr@ch.honda.com
In Puerto Rico and the U.S. Virgin Islands
Bella International
P.O. Box 190816
San Juan, PR 00919-0816
Tel: 1 (787) 620-7546
>>Client Service Information
When you call or write, please give us the following information:
• Vehicle Identification Number
Vehicle Identification Number (VIN), Engine Number, Motor Number, and Transmission Number P. 470
- Date of purchase
- Odometer reading of your vehicle
- Your name, address, and telephone number
• A detailed description of the problem - Name of the authorized Acura NSX dealer who sold the vehicle to you
Index
Numbers
12-Volt Battery Charging System Indicator 75, 452
A
AAC 208
ABS (Anti-lock Brake System).... 362
Accessories and Modifications 426
Accessory Power Socket.... 153
Acoustic Vehicle Alerting System.... 335
Active Damper System Indicator.... 74
AcuraLink 304
Adding the Coolant 397
Additives Coolant 396, 398 Washer 400
Adjusting Mirrors......141 Seats......144 Steering Wheel......140 Temperature......100
Agile Handling Assist System .... 350 Air Conditioning System (Climate Control
System).... 155 Changing the Mode.... 156 Defrosting the Windshield and Windows.... 157, 158
Dust and Pollen Filters.... 419
Recirculation/Fresh Air Mode 156
Sensors 159
Using Automatic Climate Control 155
Air Pressure 408, 469
Airbags 43
Advanced Airbags 49
Airbag Care.... 57
Driver's Knee Airbag 50
Event Data Recorder 0
Front Airbags (SRS) 46
Indicator 55,78
Passenger Front Airbag Off Indicator ..... 56
Sensors 43
Side Airbags 52
Side Curtain Airbags 54
Android Auto 219
Anti-lock Brake System (ABS) 362
Indicator 78
Apple CarPlay 216
Audio Remote Controls.... 165
Audio System 162
Adjusting the Sound.... 181
Changing the Home Screen Icon
Layout 170
Closing Apps 180
Error Messages 223
General Information 226
Home Screen.... 173
iPod 199
Limitations for Manual Operation 183
MP3/WMA/AAC 208
Reactivating 164
Recommended Devices.... 227
Remote Controls 165
Security Code.... 164
Selecting an Audio Source.... 183
Status Area 179
Theft Protection 164
USB Flash Drives.... 227
USB Ports 163
Wallpaper Setup.... 171
Audio/Information Screen 167
Authorized Manuals 477
Auto Door Locking/Unlocking.... 118
Auto Engine Stop/Start.... 13
Automatic Brake Hold 360
Indicator 72, 360
Automatic Brake Hold System
Indicator.... 72, 360
Automatic Operation (automatic lighting control).... 132
Average Fuel Economy 101
Average Speed 101
B
Battery
12-Volt 417
12-Volt Battery Charging System Indicator 75, 452
Charging (AGM Battery) 417
High Voltage 356
Jump Starting 448
Maintenance (Checking the 12-Volt Battery)....417
Maintenance (Replacing) 418
Battery Types 12
Belts (Seat) 36
Beverage Holders.... 152
Bluetooth® Audio 211
Bluetooth® HandsFreeLink® 270
Booster Seats (For Children).... 66
Brake System 357
Anti-lock Brake System (ABS) 362
Automatic Brake Hold.... 360
Brake Assist System 363
Fluid 400
Foot Brake 359
Parking Brake 357
Brake System (Amber)
Indicator 73
Brake System (Red)
Indicator....70,453
Brake Wear
Indicator 74
Bulb Replacement 401
Back-Up Lights 402
Daytime Running Lights.... 401
Front Side Marker Lights.... 401
Front Turn Signal/Parking Lights 401
Headlights.... 401
High-Mount Brake Light 403
Rear License Plate Lights.... 403
Rear Side Marker Lights.... 402
Rear Turn Signal Lights 402
Side Turn Signal/Emergency Indicator Lights 401 Taillights 402
Bulb Specifications 468
C
Carbon Monoxide Gas 67
Carrying Cargo 311, 313
Certification Label 470
Changing Bulbs 401
Charging System Indicator.... 75, 452
Child Safety 58
Emergency Hatch Opener 121
Child Seat.... 58
Booster Seats 66
Child Seat for Infants.... 60
Child Seat for Small Children.... 61
Installing a Child Seat 63
Larger Children 65
Selecting a Forward-facing Child Seat...... 62
Using a Tether 64
Cleaning the Exterior 422
Cleaning the Interior 420
Client Service Information.... 478
Climate Control System 155
Defrosting the Windshield and Windows 157, 158
Dust and Pollen Filters 419
Recirculation/Fresh Air Mode.... 156
Sensors 159
Using Automatic Climate Control.... 155
Clock 104
Cold Weather 416
Console Compartment.... 151
Controls 103
Coolant (Engine) 396
Adding the Coolant 397
Checking the Coolant 396
Overheating.... 450
Coolant (Inverter) 398
Creeping (Dual Clutch Transmission)..... 325
Cruise Control 343
CRUISE CONTROL Indicator 82
CRUISE MAIN Indicator.... 82
Cup Holders.... 152
Customized Features 244
D
Daytime Running Lights 134
Dead Battery (12-Volt) 448
Defrosting the Windshield and Windows.... 157, 158
Devices that Emit Radio Waves.... 471
Dimming
Headlights .... 131
Rearview Mirror .... 141
Dipstick (Engine Oil) 386, 393
Directional Signals (Turn Signal).... 130
Door Mirrors.... 142
Doors 105
Auto Door Locking.... 118
Auto Door Unlocking 118
Door Open Message 35
Keys.... 105
Locking/Unlocking the Doors from the Inside 115
Locking/Unlocking the Doors from the Outside 107
Lockout Prevention System 114
DOT Tire Quality Grading 410
Driver Information Interface.... 98
Driver's Knee Airbag 50
Driving 309
Braking 357
Cold Weather 416
Cruise Control 343
Dual Clutch Transmission 325
Shifting Gear 326
Turning on the Power 321
Driving Position Memory System 138
Dual Clutch Transmission 325
Creeping 325
Fluids.... 399, 469
Kickdown 325
Operating the Shift Button 23, 328
Shifting 326
Dust and Pollen Filters 419
E
Elapsed Time.... 101
Electric Parking Brake 357 Indicator 71
Electric Parking Brake System Indicator.... 71, 454
Electric Power Steering (EPS) System Indicator.... 78, 453
Electronic Stability Control (ESC) 346
Emergency 462
Emergency Hatch Opener 121
Emissions Testing (Readiness Codes) ..... 473
Energy Efficiency 12
Engine 470 Coolant 396, 469 Jump Starting 448 Oil 390, 469
Engine Compartment Cover 389
Engine Coolant 396
Adding the Coolant.... 397
Checking the Coolant.... 396
Overheating 450
Engine Oil
Adding.... 394
Changing.... 395
Checking.... 391
Displaying Oil Life 380
Low Oil Level Symbol 456
Low Oil Pressure Indicator 70
Recommended Engine Oil 390
Temperature Gauge 97
EPS (Electric Power Steering) System ..... 78
Exhaust Gas Hazard (Carbon Monoxide).... 67
Exterior Care (Cleaning) 422
Exterior Mirrors 142
F
Features 161
Filters
Dust and Pollen 419
Oil 395
Flat Tire 433
Floor Mats 421
Fluids
Brake 400, 469
Dual Clutch Transmission 399, 469
Engine Coolant 396,469
Inverter Coolant 398,469
Twin Motor Unit.... 399, 469
Windshield Washer 400, 468
FM Radio.... 188
Foot Brake 359
Front Airbags (SRS) 46
Fuel 25,371
Economy 373
Gauge 95
Instant Fuel Economy.... 101
Low Fuel Indicator 77
Range.... 101
Refueling.... 371
Requirement.... 371, 468
Fuel Economy.... 373
Fuel Fill Door 25,372
Fuses 457
Inspecting and Changing.... 461
Locations 457, 459, 460
G
Gasoline (Fuel)
Economy 373
Gauge 95
Information 371
Instant Fuel Economy.... 101
Low Fuel Indicator 77
Refueling.... 371
Gauges....95
Gear Position Indicator.... 76, 328
Gear Shift Positions
Dual Clutch Transmission.... 326
Glass (care) 420, 423
Glove Box 151
H
Handling the Unexpected.... 431
HandsFreeLink® (HFL) 270
Automatic Import of Cellular Phonebook and Call History.... 283
Displaying Messages.... 299
HFL Buttons.... 270
HFL Menus 273
HFL Status Display 272
Limitations for Manual Operation 272
Making a Call.... 292
Options During a Call 296
Phone Setup 278
Phonebook Phonetic Modification ..... 287
Receiving a Call 296
Receiving a Text/E-mail Message.... 297
Ring Tone 282
Roadside Assistance 303
Selecting a Mail Account 298
Speed Dial.... 284
To Set Up Text/E-mail Message Options... 281
Hatch.... 119
Unable to Open.... 464
Hazard Warning Button 4
Headlights.... 131
Aiming 401
Automatic Operation (automatic lighting control) 132
Dimming 131, 134
Operating.... 131
Heaters (Seat) 154
HFL (HandsFreeLink ^® ) 270
High Beam Indicator.... 81
High Voltage Battery 356
High-Performance Driving 315
Hill Start Assist System.... 323
HomeLink® Universal Transceiver 267
Honda App License Agreement 228
Hybrid Vehicle
SPORT HYBRID Super Handling All-Wheel-Drive™ (SPORT HYBRID SH-AWD®).... 9
|
Identification Numbers
Engine, Motor, and Transmission 470
Vehicle Identification 470
Immobilizer System.... 122
Indicator 81
Indicators....70
12-Volt Battery Charging System ..... 75, 452
Active Damper System 74
Anti-lock Brake System (ABS) 78
Automatic Brake Hold.... 72, 360
Automatic Brake Hold System 72,360
Brake System (Amber) 73
Brake System (Red) 70,453
Brake Wear.... 74
CRUISE CONTROL 82,344
CRUISE MAIN 82,343
Door and Trunk (Hatch) Open 35
Electric Parking Brake 71
Electric Parking Brake System 71,454
Electric Power Steering (EPS)
System 78,453
Gear Position 76
High Beam.... 81
Immobilizer System 81
Keyless Access System.... 82
Lights On 81
Low Fuel 77
Low Oil Pressure 70
Low Tire Pressure/TPMS .... 80, 352, 354, 455
Malfunction Indicator Lamp 75, 452
POWER SYSTEM 74
READY.... 74
Seat Belt Reminder.... 37, 77
Security System Alarm 82
Supplemental Restraint System 55, 78
System Message 80
Transmission System 76
Turn Signal 81
Vehicle Stability Assist™ (VSA®)
System 79,346
VSA® OFF.... 79,347
Information 467
Instant Fuel Economy 101
Instrument Panel.... 69
Integrated Dynamics System 336
QUIET Mode 339
SPORT Mode 339
SPORT+ Mode 340
TRACK Mode 340
Interior Lights 149
Interior Rearview Mirror 141
Inverter Coolant 398,469
J
Jump Starting 448
K
Key Number Tag.... 106
Keyless Access System.... 107
Keyless Lockout Prevention 114
Keys 105
Lockout Prevention.... 114
Number Tag 106
Remote Transmitter 112
Kickdown (Dual Clutch Transmission) ..... 325
L
Language (HFL) 272
Launch Control 341
Lights.... 131,401
Automatic Operation (automatic lighting control).... 132
Bulb Replacement.... 401
Daytime Running Lights.... 134
High Beam Indicator 81
Interior 149
Light Switches 131
Lights On Indicator 81
Turn Signals 130
Load Limits.... 313
Locking/Unlocking 105
Auto Door Locking/Unlocking.... 118
From Inside 115
From Outside 107
Keys.... 105
Using a Key 114
Lockout Prevention System 114
Low Battery Charge (12-Volt) 452
Low Fuel Indicator.... 77
Low Keyless Access Remote Signal
Strength 106
Low Oil Level 456
Low Oil Pressure Indicator 70
Luggage (Maximum Load Limit) 313
Lumbar Support 145
M
Maintenance 375
12-Volt Battery 417
Brake Fluid 400
Cleaning 420
Climate Control System 419
Coolant.... 396, 398
Cooling System 396
Inverter Coolant 398
Maintenance Minder™ 379
Oil 391
Precautions.... 376
Remote Transmitter 418
Replacing Light Bulbs.... 401
Safety 377
Service Items.... 382
Tires 407
Transmission Fluids 399
Under the Hood and Hatch.... 385
Malfunction Indicator Lamp 75, 452
Map Lights 150
Maximum Load Limit.... 313
Meters, Gauges....95
Mirrors.... 141
Adjusting.... 141
Door 142
Exterior 142
Interior Rearview.... 141
Modifications (and Accessories).... 426
MP3....208
Multi-View Rear Camera 369
N
Numbers (Identification) 470
0
Odometer....100
Oil (Engine) 390, 469
Adding 394
Checking.... 391
Displaying Oil Life 380
Low Oil Level Symbol 456
Low Oil Pressure Indicator 70
Recommended Engine Oil 390,469
Viscosity 390,469
Open Source Licenses 242
Opening
Hatch 119,387,464
Opening/Closing
Hatch 119,387
Hood.... 388
Power Windows 125
Operating the Switches Around the Steering
Wheel 127
Outside Temperature Display.... 100
Overheating 450
P
Paddle Shifters (Sequential Mode).... 334
Pandora ^® 206
Panic Mode 124
Parking 364
Parking Brake 357
Parking Sensor System 365
Passenger Front Airbag Off Indicator ..... 56
Passing Indicators 131
POWER Button 127
Power System
Turning on 321
POWER SYSTEM Indicator.... 74
Power Windows 125
Precautions While Driving
In Snow and Ice 324
Rain 324
Pregnant Women.... 41
Puncture (Tire) 433
R
Radio (FM) 188
Radio (SiriusXM ^® ) 192
Radio Data System (RDS) 191
Range.... 101
RDS (Radio Data System) 191
Readiness Codes (Emissions Testing) ..... 473
READY Indicator 74
Rear Defogger/Heated Door Mirror
Button 136
Rearview Mirror 141
Refueling 371
Fuel Gauge 95
Gasoline 371,468
Low Fuel Indicator.... 77
Regenerative Energy and Regenerative
Braking 12
Regulations 354, 410, 471
Remote Transmitter.... 112
Replacement
Battery 418
Bulbs 401
Fuses 457, 459, 460
Tires.... 413
Wiper Blade Rubber 404
Reporting Safety Defects 472
Resetting a Trip Meter.... 100
Reverse Tilt Door Mirror.... 143
Right Selector Wheel 98
S
Safe Driving 31
Safety Check.... 35
Safety Labels 68
Safety Message 1
Seat Belts 36
Automatic Seat Belt Tensioners 38
Checking 42
Fastening 39
Installing a Child Seat.... 63
Pregnant Women.... 41
Reminder 37,77
Warning Indicator 37, 77
Seat Heaters 154
Seats 144
Adjusting 144
Seat Heaters 154
Security System 122
Immobilizer System Indicator.... 81
Security System Alarm Indicator 82
Selecting a Forward-facing Child Seat..... 62
Sequential Mode 331
Sequential Mode Operation 334
Setting the Clock 104
Shift Button 23,326
Operation 328
Shifting (Transmission).... 23, 326
Side Airbags 52
Side Curtain Airbags.... 54
Siri Eyes Free 215
SiriusXM® Radio 192
Snow Tires 415
Sounds Unique to the SPORT HYBRID SH-AWD® System.... 13
Spark Plugs 468
Specifications 468
Specified Fuel 371,468
SPORT HYBRID Super Handling All-Wheel-Drive™ (SPORT HYBRID SH-AWD®)...... 351
SRS Airbags (Airbags) 46
Steering Wheel Adjusting.... 140
Stopping 364
Storage 428
Summer Tires 415
Supplemental Restraint System (SRS)...... 46
Switches (Around the Steering Wheel) 4, 5, 127
System Message Indicator....80
T
Temperature Gauge 96
Temperature Sensor.... 159
Temporary Tire Repair Kit 433
Time (Setting).... 104
Tire Pressure Monitoring System (TPMS) 352 Indicator 80, 455
Tires.... 407
Air Pressure.... 408, 469
Chains.... 415
Checking and Maintaining 407
Flat Tire (Puncture) 433
Inspection 407
Labeling 408
Regulations 410
Rotation 414
Summer 415
Temporary Tire Repair Kit 433
Wear Indicators 412
Winter 415
Tools 432
Towing a Trailer 320
Towing Your Vehicle 320
Emergency 462
TPMS (Tire Pressure Monitoring System) 352
Transmission 23,326
Dual Clutch.... 23, 325, 326
Fluids 399,469
Gear Position Indicator 76,328
Number...... 470
Sequential Mode 331
TRIP Button 99
Trip Meter 100
Troubleshooting 431
Blown Fuse.... 457, 459, 460
Buzzer Sounds When Opening Door 29
Emergency Towing 462
Flat Tire/Puncture.... 433
Noise When Braking 29
Overheating.... 450
Power System Won't Start 445
Premium Gasoline.... 371, 468
Warning Indicators 70
Trunk Light Bulb 468
Turn Signals.... 130
Indicators (Instrument Panel) 81
Turn-by-Turn Directions 102
Turning on the Power 321
Does Not Activate.... 445
Jump Starting 448
Twin Motor Unit Fluid 399, 469
U
Unlocking the Doors.... 107
Unlocking the Doors from the Inside ..... 115
USB Flash Drives 227
USB Ports 163
Using the Keyless Access System.... 107
V
Vehicle Identification Number 470
Vehicle Stability Assist™ (VSA®) 346
Off Button 347
Off Indicator.... 79,347
System Indicator.... 79, 346
Vehicle Storage 428
Viscosity (Oil) 390,469
Voice Control Operation
Audio Commands 186
Climate Control Commands 187
General Commands 187
Music Search Commands 187
On Screen Commands.... 187
Phone Commands.... 186
Useful Commands.... 186
Voice Portal Screen.... 185
Voice Recognition 184
VSA® (Vehicle Stability Assist™) 346
W
Wallpaper 171
Warning and Information Messages.... 83
Warning Indicator On/Blinking 452
Warning Labels.... 68
Warranties (Warranty Manual provided separately) 475
Watts.... 468
Wear Indicators (Tire) 412
Wi-Fi Connection 213
Window Washers 135
Adding/Refilling Fluid 400
Switch 135
Windows (Opening and Closing) 125
Windshield
Cleaning 420, 423
Defrosting/Defogging 136, 157
Washer Fluid 400, 468
Wiper Blades 404
Wipers and Washers 135
Winter Tires
Snow Tires 415
Tire Chains.... 415
Wipers and Washers 135
Checking and Replacing Wiper Blades..... 404
WMA 208
Worn Tires 407

ACURA
owners.acura.com (U.S.)
acura.ca (Canada)
2020 Acura NSX Owner's Manual
© 2019 Honda Motor Co., Ltd. — All Rights Reserved
31T6N630
OM-12728
00X31-T6N-6300 Printed in U.S.A.