SportCam 720P - Camcorder Talius - Free user manual and instructions
Find the device manual for free SportCam 720P Talius in PDF.


User questions about SportCam 720P Talius
0 question about this device. Answer the ones you know or ask your own.
Ask a new question about this device
Download the instructions for your Camcorder in PDF format for free! Find your manual SportCam 720P - Talius and take your electronic device back in hand. On this page are published all the documents necessary for the use of your device. SportCam 720P by Talius.
USER MANUAL SportCam 720P Talius
text_image
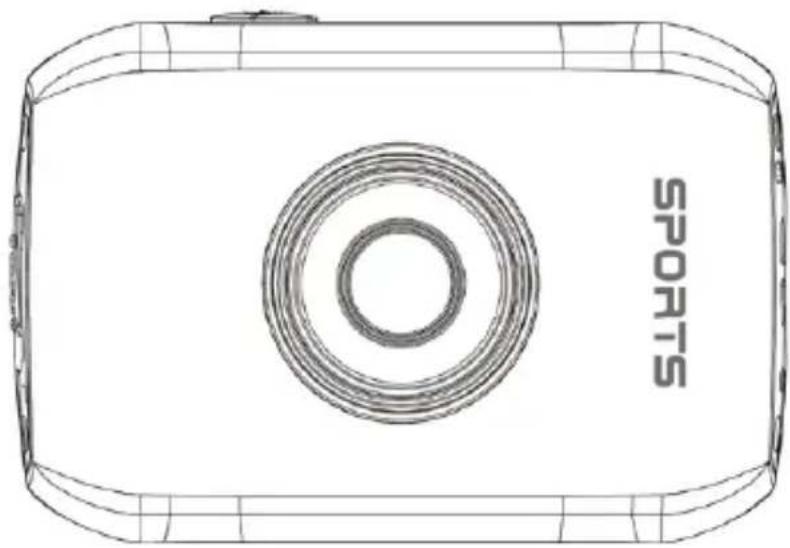
TALIUS TECH4UUSER MANUAL SportCam 720P
natural_image
Top-down line drawing of a sports camera with concentric rings and 'SPORTS' branding (no additional text or symbols)Mounting Accessories
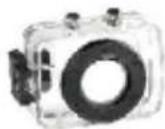
Waterproof Case
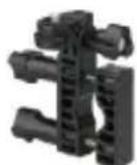
Handlebar
Seatpost
Mount
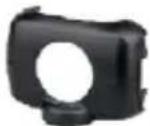
Shield
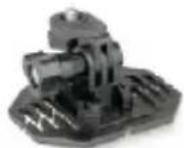
Helmet Mount
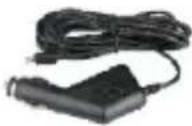
Car Charger
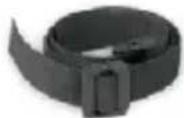
Helmet Belt
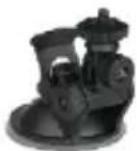
Suction Cup Mount
WATERPROOF CASE
text_image
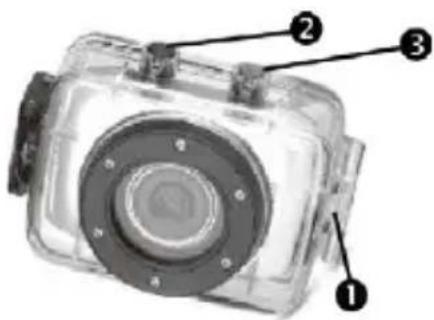
Diagram of a camera module with numbered labels pointing to key components-
Clamp
-
Shutter Release
-
Power Button
-
Insert a finger at the half circle of the Clamp by prying the clamp up away from the case.
- Before sealing the case, inspect the water sealing gasket to be sure it's in good condition. You can test the gasket by closing the case without inserting the camera.
Submerse the case completely in a bowl of water for about a minute. Remove the case from the water, dry off its exterior with a towel, then open the case. If the entire interior is dry, the case and gasket are safe for use under water. - There are just two buttons required for recording video and images: the Shutter Release, and the Power Button.
- Remember to put the Mode Switch in your desired recording position before inserting the camera in the waterproof case. There is no external button for the Mode Switch.
HANDLEBAR SEATPOST MOUNT
text_image
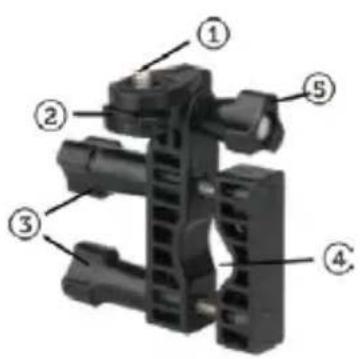
Labeled diagram of a mechanical clamp or bracket assembly with numbered parts-
1/4-20 Screw
-
Locking Wheel
-
Bar Clamp Bolt
-
Bar Clamp
-
Tilt Knob
-
The camera dose not have a standard tripod mount. For all the accessories with a 1/4-20 screw, the camera must be enclosed in with the waterproof case or in the included mounting adapter.
-
Turn the waterproof case (or mounting adapter) clockwise onto the 1/4-20 screw of the handlebar clamp until secure.
-
Turn the Locking Wheel so it applies pressure to the case to keep the connection secure.
-
Loosen the Bar Clamp Bolt until the screw can be pushed 90° upward.
-
The bottom half of the Bar Clamp can be opened to allow you to wrap the Handlebar Clamp around the actual handlebar of your bicycle.
-
After positioning the Handlebar Clamp where you want it, close up the bottom half of the clamp and tighten the Bar Clamp Bolt.
-
Loosen the Tilt Knob, to adjust for the proper aiming angle; then tighten the knob.
- Panning adjustments can be made by loosening the Locking Wheel, adjust the pan angle; then tighten the wheel.
HELMET MOUNTING SYSTEM
natural_image
Close-up of a black wrist strap with a button and label (no text or symbols on the strap itself)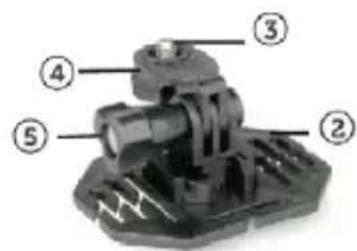
text_image
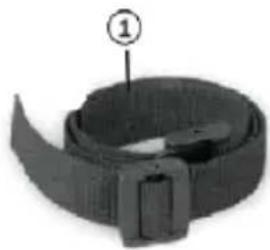
Technical diagram of a mechanical assembly with numbered parts labeled ② to ⑤- Helmet Belt
2.Helmet Mount
-
1/4 -20 Screw
-
Locking Wheel
5.Tilt Knob
- Insert the free end of the Helmet Belt through one of the slots in the base of the Helmet Mount.
- Thread the same end in to the helmet vent and then back up to the Helmet Mount through another vent. Then insert the belt through the other side of the Helmet mount. Then insert the belt back through the helmet vent.
- You should have now both ends of the belt inside the helmet. take both ends of the Belt and pull to tighten and then attach together with the Velcro strap.
- Turn the Waterproof case (or mounting adapter) onto the 1/4-20 screw of the Helmet Mount until secured.
- Turn the Locking Wheel so it applies pressure to the case to keep the connection secure.
-
Loosen the Tilt Knob, to adjust for the proper aiming angle; then tighten the knob.
-
Please note this helmet mount will only work with vented helmets.
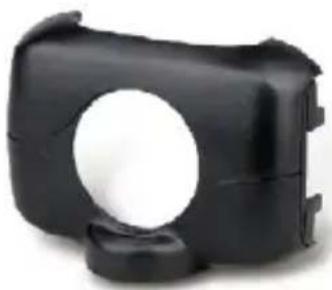
SHIELD
natural_image
Black plastic camera component with circular aperture and side brackets (no text or symbols visible)- This Mounting Adapter allows you to attach mounting accessories that have a 1/4-20 screw.
- The camera will clip right in to this adapter.
text_image
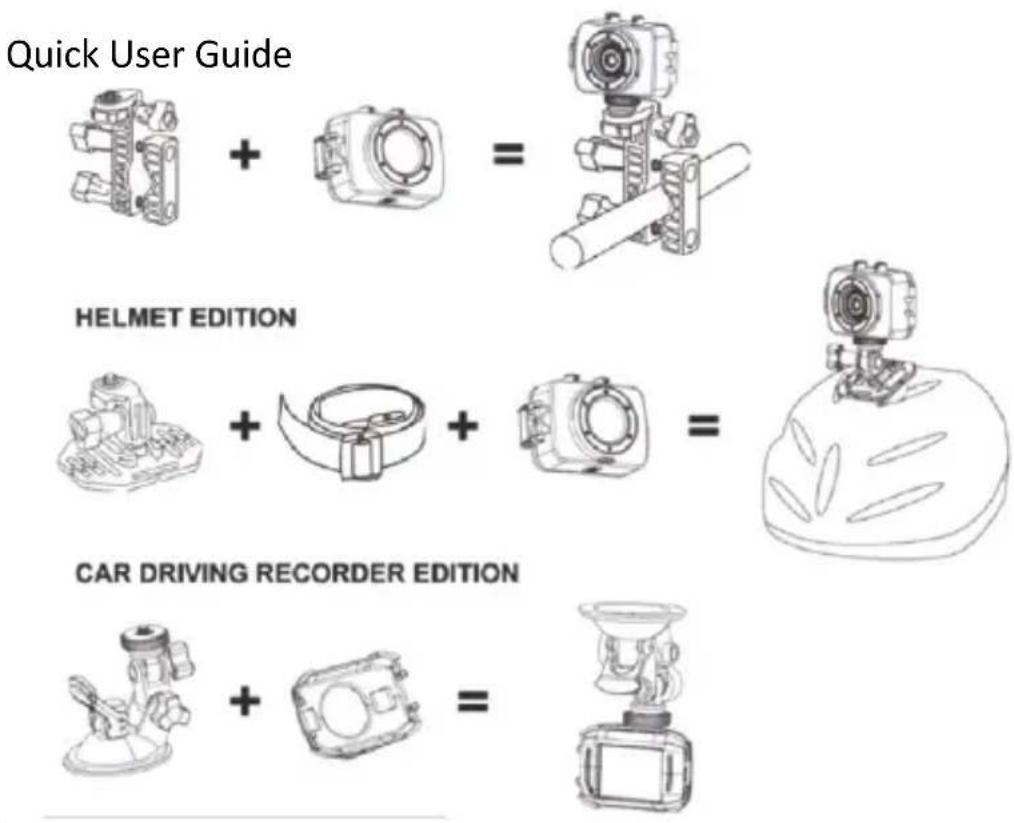
Quick User Guide + = HELMET EDITION + + = CAR DRIVING RECORDER EDITION + =Functions
This user's manual has referred to the latest information we had when this user's manual was made. The screen display and illustrations are used in this user's manual for the purpose of introducing details of this digital camera in a more specific and direct way. Difference may arise between these displays and illustrations and the digital camera actually available for you due to difference in technological development and production batch, under which case, the actual functions of this video camera shall prevail.
Announcements
Please read the Announcements carefully before using this video camera for proper and safe operation, so as to bring its optimum performance into play and extend its service life.
Do not expose the video camera to sunshine directly, nor point its lens to sunlight. Otherwise, the image sensor of the video camera may be damaged.
Take good care of the video camera and prevent water or sand particles from entering the video camera when it is used on the beach or water, because water, sand particles, dust or component containing salt may damage the video camera.
◆ Keep the video camera contaminated free of dust and chemical materials. Place it in a cool, dry and well
ventilated place. Do not place the video camera in a high temperature, moist or dusty place.
◆ Please check if the video camera can operate normally before use.
If dirt or stain is accumulated on the video camera or on its lens, use soft, clean and dry rag to wipe it away gently. If the video camera or its lens is stained with sand particles, blow them away gently. Do not use cloth to wipe arbitrarily. Otherwise, it may scratch the surface of video camera or its lens.
If it is required to clean camera surface, firstly blow away the sand dust accumulated on this surface, and then wipe the camera gently with rag or tissue applicable to optical equipments. Please use the cleaning agent of video camera for wiping if necessary. Do not use organic solvent to clean the video camera.
◆ Do not touch the lens surface with fingers.
◆ Please back up the data if the memory card inside this video camera is used for the first time.
◆ The externally installed memory-cards are manufactured from precise electronic components. Data may be lost or damaged under the following circumstances:
- Improper use of the memory card.
- The memory card is bent, dropped or collided.
-
Place it under high temperature or moist environment or expose to sunshine directly.
-
Electrostatic or electromagnetic field exists around the memory card.
- This memory card is taken out or power supply is interrupted when this video camera or computer is connected to the memory card (i.e. during reading, writing and formatting).
- Touch the metal contact surface of the memory card with fingers or metal materials.
System Requirements
| System Requirements | |
| Operating System | Microsoft Windows2000, XP, Vista, 7 |
| CPU | Intel Pentium III of more than 800MHz or other CPU with equivalent performance |
| Internal Memory | Larger than 512MB |
| Sound Card and Display Card | The sound card and display card shall support DirectX8 or higher version. |
| CD Driver | Speed of 4 times or faster |
| Hard Disk | Free space of more than 500MB |
| Others | One standard USB1.1 or USB2.0 port |
Introduction to Appearance and Keypad
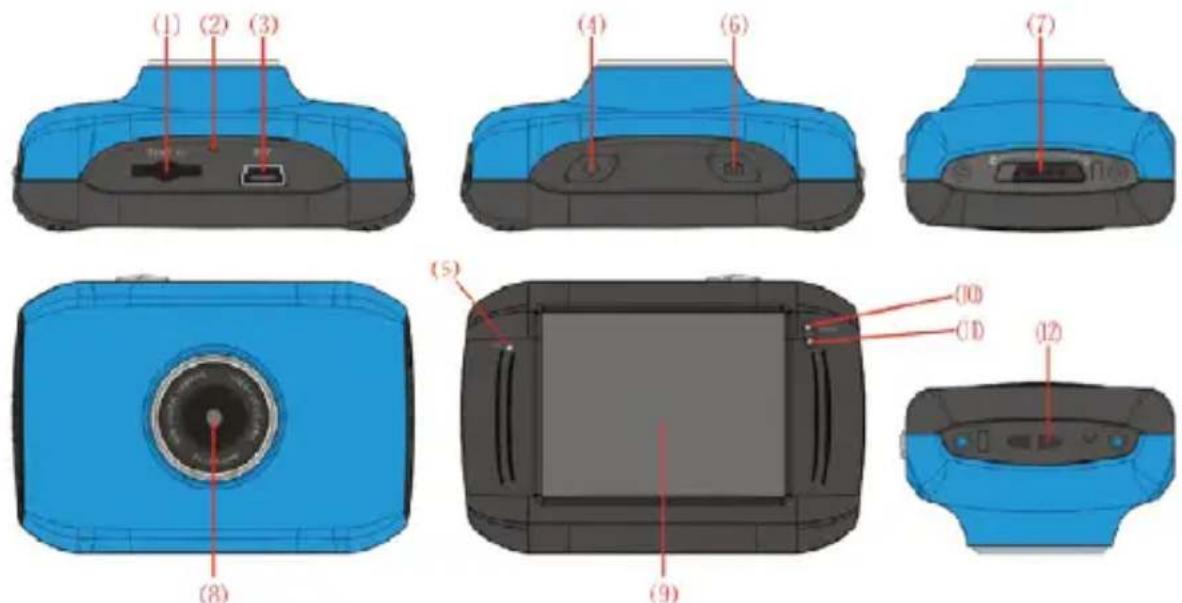
(1) Memory card slot
(2)Reset
(3)USB slot
(4)Power button
(5)MIC
(6)Shutter button
(7) Mode Switch:
(8)Lens
(9)LCD TFT
(10) Working Indicator Light
(11)Indicator Light for charging
(12) Wrist strap eyelet
Usage
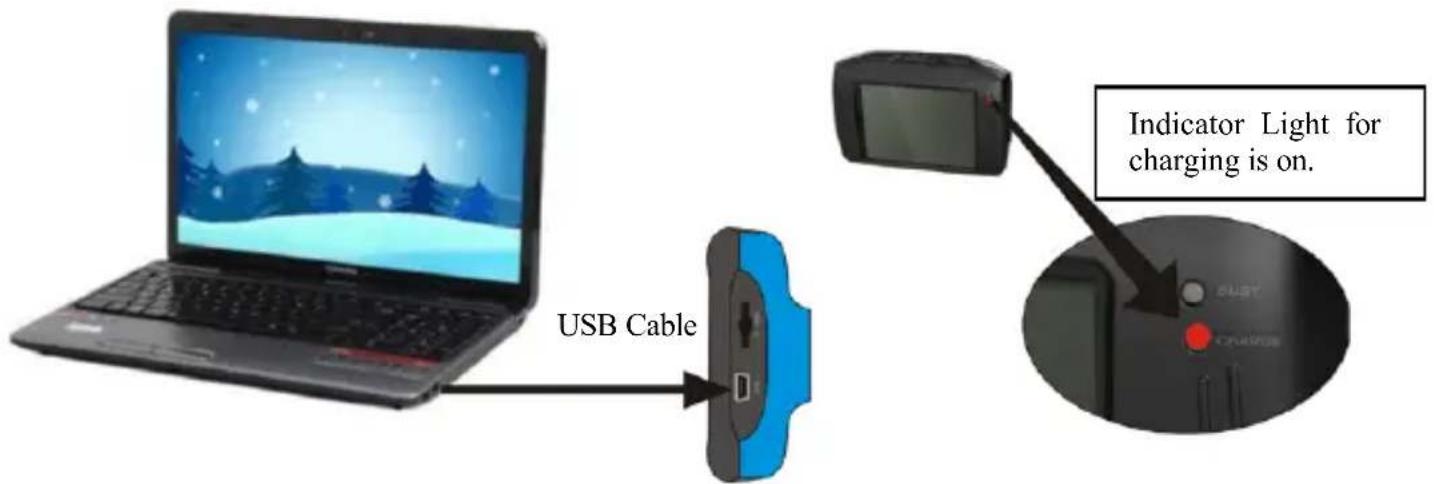
1. Charge the built-in lithium battery
text_image
USB Cable Indicator Light for charging is on.Connect the video camera with computer for charging in the shutdown state. The indicator light for charging is on at this time and will be off after charging. In general, it can be fully charged after 2-4 hours.
2. Use of Memory Card
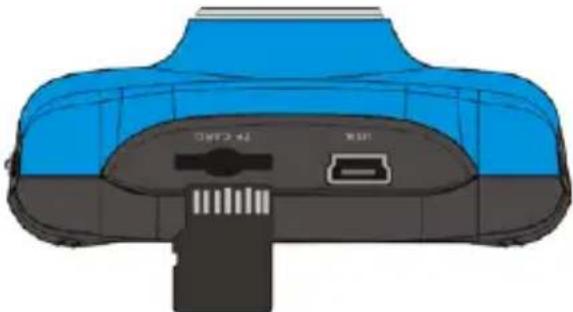
- Push the memory card into the card slot according to the concave lettering beside the slot of memory card till it is completely inserted.
- To take out the memory card, gently press the end of the memory card inward and it will pop up.
natural_image
Top-down view of a blue and black device casing with internal components (no text or symbols visible)Note: No built-in memory is available in this video camera. Make sure to insert memory card before using.
3. Startup/Shutdown
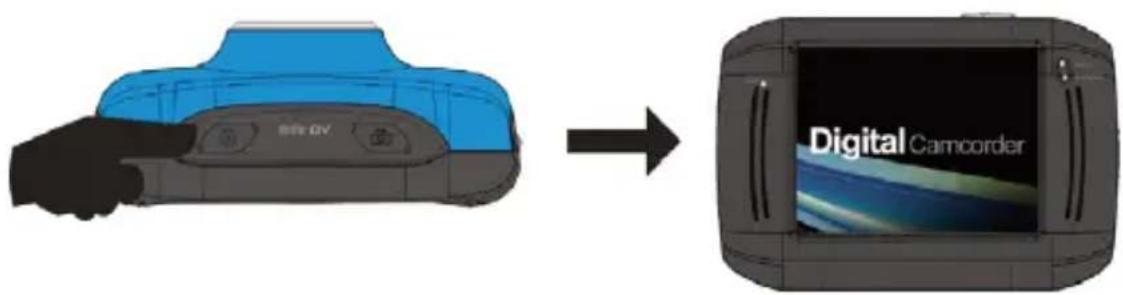
3.1 Startup: Press the POWER button for 3 seconds, the screen is displayed and the camera is on.
text_image
BPF-0V Digital Camcorder3.2. Shutdown: Press the POWER Key, and the camera will be shut down.
Automatic shutdown: when the idle time of the video camera reaches the time for automatic shutdown, it will be shut down automatically to save power. The default time of this camera for automatic shutdown is 5 minutes.
3.3. Shutdown in case of power shortage: when the power of the battery is insufficient, the LCD display screen will display the low power icon. Please charge it in time. When indicate light turns red and flickering, the video camera will be shut down automatically.
4. Conversion between Function Modes
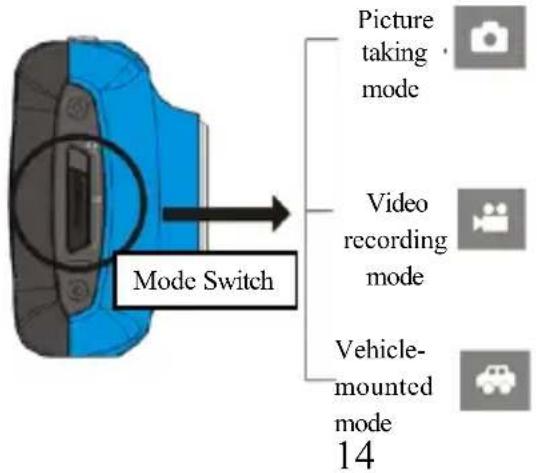
Three modes are available for this video camera, i.e. picture taking mode, video recording mode and vehicle-mounted mode. Conversion is available via the mode switch after startup.
Picture taking mode: pictures can be taken;
Video recording mode: video can be recorded;
Vehicle-mounted mode: videotape can be recorded.
(one section every 5 minutes)
text_image
Picture taking mode Video recording mode Vehicle- mounted mode 145. Indicator light
Busy light: when the camera is busy (such as, recording a film, taking photos, automatic off-screen), the busy light will be on.
Charging light: when the light is on for a long time, it prompts the user that the camera is charging.
6. Video recording mode
When the mode switch is turned to video recording mode, press the shutter button once or click the LCD center once to begin recording under previewing state; press the shutter button once again if you want to stop recording, and the camera will also stop recording, automatically when the memory card is full or the power is insufficient.
1 00:12:18: Timer means that video recording can still last for 12 minutes and 18 seconds.
2 : mode icon, represents that the video camera is in video recording mode.
3 : videoing size, clicks this icon and you can choose 720P/VGA.
text_image
0/1234 1M SET 1.004 : means that the memory card is inserted at present.
5 : digital zoom icon, click it and enlarge it.
6 : digital zoom icon, click and minify it.
7 : visual shutter, touch this visible frame for taking photos or recording.
8 : battery icon, represents the power status of the battery.
9 : represents the status of digital zoom.
10 : click this icon to switch to the playback mode.
11 SET : click this icon to set the date and time, finished setting and press Shutter key to confirm.
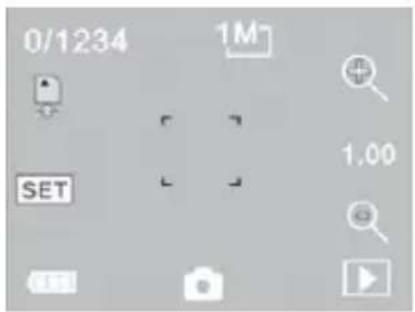
7 Picture taking mode:
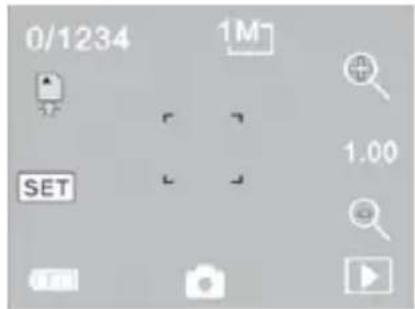
Switch the mode switch into the Picture taking mode, press the shutter button or click the LCD center once under the previewing state to take a photo:
1 0/1234: Counter, indicating current number of photos taken already /number of photos to be taken.
2 : mode icon, indicating that the camera is in photo taking mode.
3 : video size, click this icon to select the photo resolution.
4 : means that the memory is been inserted at present.
5 : digital zoom icon, click it to enlarge.
6 : digital zoom icon, click it to minify.
7 : visual shutter, touch this visible frame for taking photos or recording.
8 : battery icon, indicates the power status of the battery.
9 : represents the status of digital zoom.
10 : click this icon to switch to the playback mode.
text_image
0/1234 1M SET 1.0011 SET : click this icon to set the date and time, finished setting and press Shutter key to confirm.
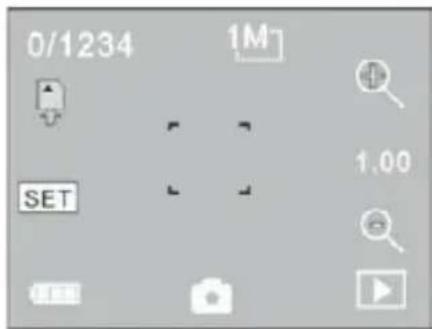
8 Vehicle-mounted mode:
Turn the mode switch to vehicle-mounted mode, press the shutter button or click the LCD center once under the preview state to begin recording, save a segment for recording every 5 minutes, then start to record the next segment of video. When the storage card is full, the earliest segment of video will be deleted to release the corresponding space for continuous recording.
1 00:12:18 timer, indicating that the camera can still record for 12 minutes and 18 seconds.
2 : mode icon, representing that the camera is in vehicle-mounted mode.
3 : video size, click this icon to select 720P, VGA.
4 : represents that the memory card has been inserted.
5 : digital zoom icon, click it to enlarge.
6 : digital zoom icon, click it to minify.
7 : visual shutter, touch this visible frame for taking photos or recording.
8 : battery icon, representing the current power status of the battery.
9 : represents the status of digital zoom.
10 : click this icon to switch into the playback mode.
11 SET : click this icon to set the date and time, finished ting and press Shutter key to confirm.
text_image
0/1234 1M SET 1.00Note: the screen will be off automatically during recording process in order to save power; user can press the power button shortly to start the screen and restore display.
9 Playback mode:
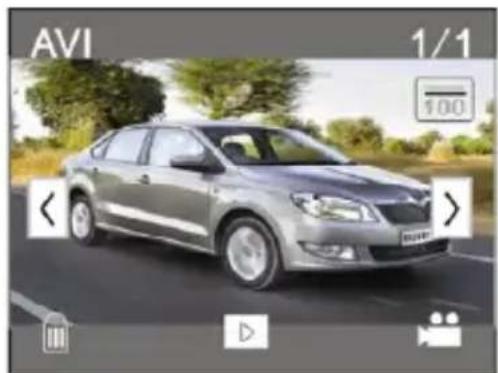
9.1 After starting up and entering the previewing state, click the playback icon (E) at the lower right corner of the LCD to switch to the playback mode:
Click
1 AVI : represents that the current file is an AVI video file. 2 1/1 : represents that there is one file in the current folder/one file in total.
3 : current folder name (such as: I:\DCIM\100MEDIA I: is the movable disk of the device).
4 : Means that clicking can select files frontwards. 5 : Means that clicking can select files backwards.
6 : Means that clicking can activate to confirm the deletion of the current file picture. 7 : Means that clicking can play the current movie clips.
8 : Means that clicking can switch back to the previous photo mode (video mode).
natural_image
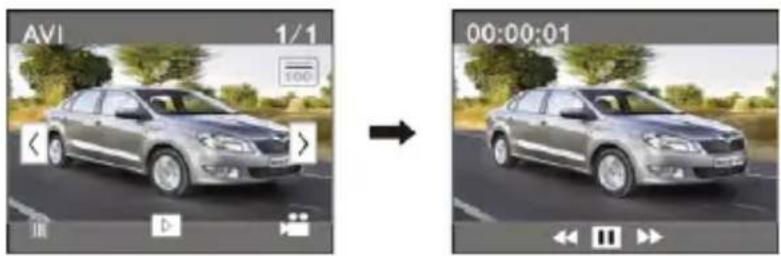
Silver sedan driving on a road with trees and greenery in the background (no visible text or symbols)9.2 Movie clips playing:
text_image
AVI 1/1 0:00 00:00:01Click "to pause playing, click to play forward, and click to play backward"
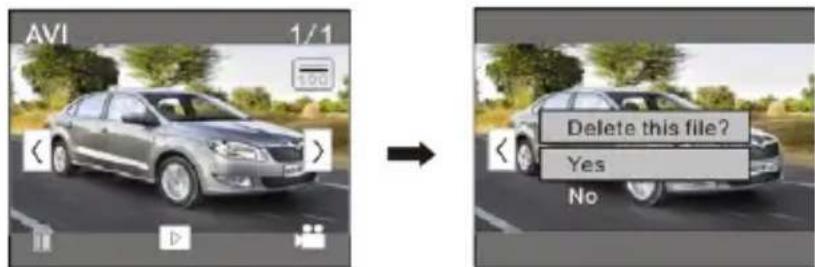
9.3 File deletion:
text_image
AVI 1/1 100 < > > > > > > > > > > > Delete this file? Yes NoClick YES to delete the current file immediately, or click NO to cancel the request of deletion.
Apply on the personal computer
Connect to personal computer
The camera is provided with the plug and play function. Connect the device to the computer with USB line under turning-on state, then it will be switched into the movable hard disk mode.
Icon of movable disk will appear on the window of "my computer". Photos/videos you have taken are saved in folder I:\DCIM\100MEDIA (I is the movable disk of this device) in the movable disk. Files recorded in vehicle-mounted mode are saved in I:\DCIM\RECORDER.
Technical parameters
| Image sensor | 1.3 million pixel (CMOS) | |
| Function mode | videoing, taking photos, vehicle-mounted mode, removable disk | |
| Camera lens | F3.1 f=9.3mm | |
| Digital zooming | 4 times | |
| Shutter | Electronic shutter | |
| LCD display screen | 2.0-inch touch screen | |
| Image resolution | 5M (2592×1944), 3M (2048×1536), 1M(1280×1024) | |
| Video resolution | VGA: 640x480 (60 frames/second), 720P:1280x720 (30 frames/second) | |
| White balance | Automatic | |
| Exposure | Automatic | |
| File formats | Image | JPEG |
| Video | AVI | |
| Storage medium | Micro SD card (Supporting up to 32GB), (without built-in flash memory) | |
| USB interface | High-speed USB 2.0 interface | |
| Power Supply | Built-in 3.7V rechargeable lithium | |
| Dimension (length × width × height) | 66*45*25mm | |
| Weight | about 48 grams | |

natural_image
Simple line drawing of a trash bin with crossed lines indicating no waste or discharge (no text or symbols)This symbol indicates that the relevant electrical product or battery should not be disposed of as general household waste in Europe. To ensure the correct waste treatment of the product and battery, please dispose them in accordance to any applicable local laws of requirement for disposal of
electrical equipment or batteries. In so doing, you will help to conserve natural resources and improve standards of environmental protection in treatment and disposal of electrical waste (Waste Electrical and Electronic Equipment Directive).