C1 - Télécommande à distance Geekoto - Free user manual and instructions
Find the device manual for free C1 Geekoto in PDF.


User questions about C1 Geekoto
0 question about this device. Answer the ones you know or ask your own.
Ask a new question about this device
Download the instructions for your Télécommande à distance in PDF format for free! Find your manual C1 - Geekoto and take your electronic device back in hand. On this page are published all the documents necessary for the use of your device. C1 by Geekoto.
USER MANUAL C1 Geekoto
C1 (Commander) Flash Trigger Operation instruction
Fit for Canon

text_image
A B C D Fn MODE CH TEST OFF ON陣
2.4G SYSTEM
Catalog
Safety instructions 01
Function List 02
Components 03
LCD screen 05
Component instruction 06
Preparation before use 08
Functions description 09
Custom function/FN 11
Sync mode setting 13
Wireless channel setting 14
Assisted focusing light 15
Hot Shoe 16
3 MODES 17
Canon universal mixed mode 18
Canon master control Multi mode 23
Compatible Devices 26
Specification List 27
Safety instructions
Please read this manual carefully before use.
- Please turn off all devices while you connecting them to each other.
- Please prevent dropping hand shaking intensively of the device, it might cause damage to the device.
- Please turn off transmitter and receiver's power, remove the battery when you don't in use or storing.
- Please load the battery properly. Reversed battery might cause battery leaking or explosion
- Do not put it in a high temperature environment, such as near the car, direct sunlight, dashboard and other high temperature environment.
- Please keep it dry. Do not use wet hands to touch products. Products may not be immersed in water or rain, or may cause damage or broken.
- Do not use it in flammable and explosive situations, it might cause explosion or fire.
- The product involves batteries. Regarding the use of batteries, please follow strict relevant regulations, otherwise it will cause property damage or personal injury.
Function List
- Available flash mode: E-TTL, E-TTL(Ⅱ), M, Multi.
- Available for Front curtain sync/back curtain sync/high-speed sync, highest sync speed 1/8000s.
- Exposure compensation available. (FEC)
- Surround expose available. (FEB) 5.Exposure Lock available.(FE LOCK)
- Available for focusing assist lamp.(can be disabled)
- Available for mixed flash mode, such TTL, M.
- Available for setting auto save function.
- Available for 4 groups with the different power output for each flash.
- Can be controlled by multiple receivers.
- Available for M, Multi grouping setting. (Canon series A camera wireless flash)
Components
text_image
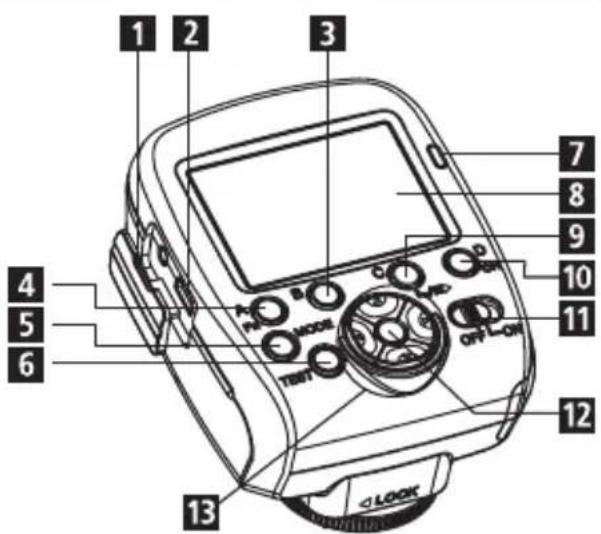
1 2 3 4 5 6 7 8 9 10 11 12 131 Rubber cap
5 Mode
2 Micro USB
6 Test
3 Group B
7 Indicate light
4 Group A/ Custom function setting
8 LCD Screen
Components
text_image
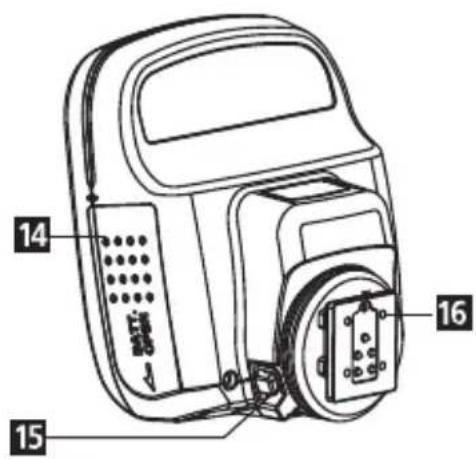
14 15 169 Group C/ Sync mode button
10 Group D/Channel setting
11 Power switch: ON/OFF
12 Setting/restore factory setting
13 Setting (up/down/left/right)
14 Battery door
15 Twist lock
16 Mounting holder
Components
LCD Screen
text_image
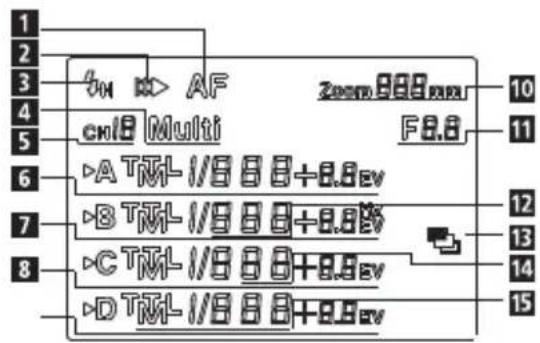
1 2 3 4 5 6 7 8 9 10 11 12 13 14 15 3M > AF cm8 Multi A TM- 1/8 8 8 +0.8ev B TM- 1/8 8 8 +0.8ev C TM- 1/8 8 8 +0.8ev D TM- 1/8 8 8 +0.8ev1 Automatic focusing assist
2 Back curtain sync
3 High-speed sync
4 Manual /strobe flash mode
5 Wireless channel
6 Flash setting for A
7 Flash setting for B
8 Flash setting for C
9 Flash setting for D
10 Focal Distance
11 Aperture
12 Strobe flash
13 FEB logo
14 Times
15 Master control camera series
Component instruction
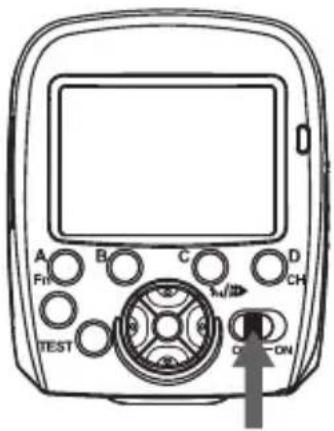
Power Switch:
- Slide to 【ON】 to power on.
- Slide to 【OFF】 to power off
text_image
A B C D F10 TEST CH OFF START ONComponent instruction
Hot Shoe contacts: Use it to connect with camera, compatible with Canon.
Mode: Transmitter mode option
Test: Send flash signal for groups
A:B:C:D Enter/exit flash setting for groups
Indicate light: Power wireless communication or command indicate
Indicate light status
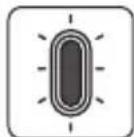
1
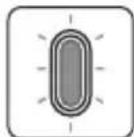
2
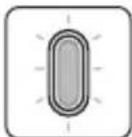
3
Standby - red light flashing
Camera connected - Green light flashing
Test - Both green light & red light always on
Micro USB: System update
Battery bin: 2 AA batteries
Preparation before use
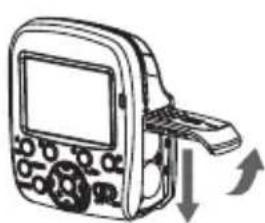
Battery loading
Open the battery hatch. Install two AA batteries according to the positive and negative directions of the battery, when installation completed, close the battery hatch.
- Please remove the batteries before long term storage.
- When replacing batteries, please replace the two sections together.
natural_image
Line drawing of a handheld electronic device with a scroll wheel and directional arrows indicating motion (no text or symbols)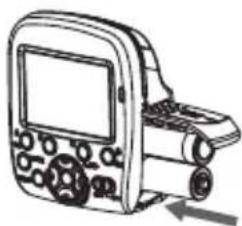
natural_image
Line drawing of a handheld electronic device with a screen and scroll (no text or symbols)Preparation before use Functions description
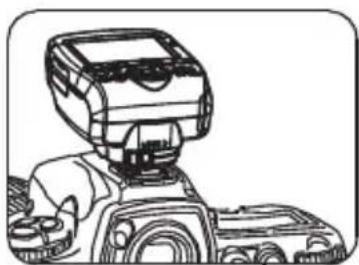
Install the trigger on the hot shoe contact from top of camera.
natural_image
Line drawing of a robot with camera mount (no text or symbols)- Unlock the twist lock by sliding to the left.
- Insert holder completely into camera hot shoe, and push it all the way in contacts.
- Slide the twist lock to the right to lock it, and make sure it sits securely on the hot shoe.
Power on
Load batteries correctly, push the switch to [ON] to turn on the trigger, then LCD screen & 2 color lights are on simultaneously, system check and complete initialization, enter standby mode, red indicator flashing.
Mode options
Turn on the trigger, press 【Mode】, now trigger enter into mode options, after turning on the transmitter, you can cycle through Canon Mix mode, Canon Master Mix mode and Canon Master Multi mode.
Test
Press [TEST], trigger send group modes and settings info to flash lights which in the same channel and flash once to test the transmission.
LCD
Press any button to light LCD, after 10 seconds no operate, LCD light turns off.
Restore Factory settings
Press [ok] for 3 seconds, the trigger will restore to factory settings.
Custom function/FN
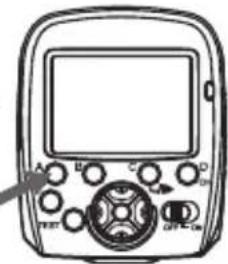
Press [FN] for 2 seconds, system will change between customized settings and flash modes, enter custom mode, press [↑] / [↓] to select options, press [←] / [→] to set option number.
natural_image
Line drawing of a handheld electronic device with control knobs and a screen (no text or symbols visible)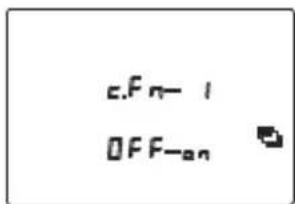
text_image
c.Fn-1 OFF-an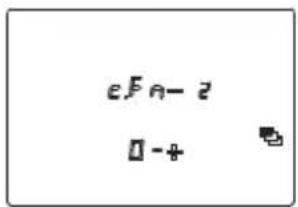
text_image
εFα-2 0-4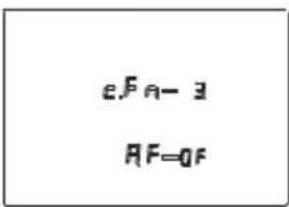
text_image
e,Fn-3 AF=0FWireless channel setting
| Custom function serial number | Functions | Status setting Instruction | |
| c.F n-1 | Flash surrounding exposure automatically cancel | an | Enable |
| F | Disable | ||
| c.F n-2 | Flash surround exposure order | - + | 0 + |
| - + | 0 + | ||
| c.F n-3 | Automatical focusing assist | an | |
| F | |||
PS: The option of Fn number 1-3 can be set by Canon's online status by accessing the "External flash's custom function settings" in the camera
menu.
Sync mode setting
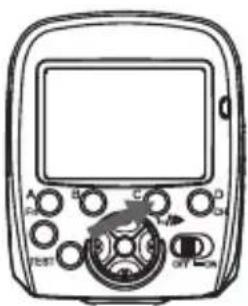
In universal mixed mode, press
【 C 】 button for 2 seconds, the sync mode will change from "high- speed sync _H ",
"back curtain sync ▶", "front curtain sync(no pic)".
In Canon master mixed mode, press switch button for 2 seconds, the sync mode will change from "high-speed
sync "H" and "front curtain sync(no pic)". Achieve different flash effects.
text_image
Diagram of a digital multimeter with labeled buttons and display screen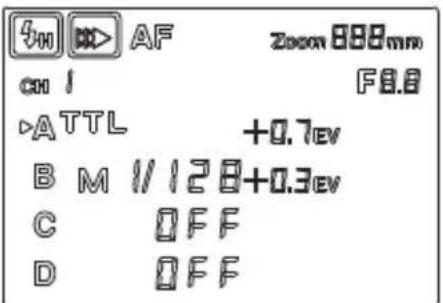
text_image
400 AF Zoom 888mm cu 1 F8.8 →ATTL +0.7ev B M //128+0.3ev C OFF D OFFWireless channel setting
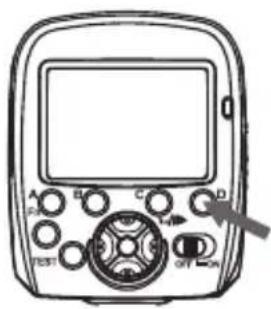
wireless channel light flickers and enters wireless channel setting, press 【←】/【→】 to set channel from 1 to 16.
text_image
A B C D TEST OFF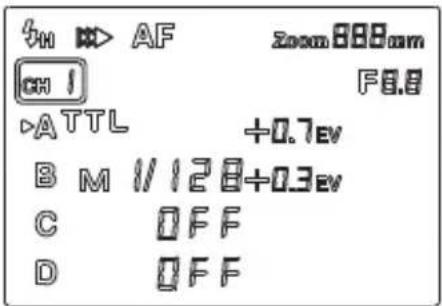
text_image
3N > AF Zoom 888mm CH I F0.8 ATTL +0.7ev B M //128+0.3ev C OFF D OFFAssisted focusing light
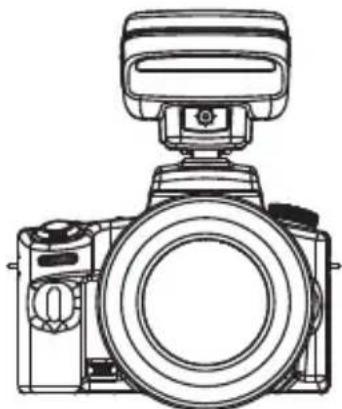
If you enabled "automatic focusing" on transmitter, When the light is not enough to focus automatically, it will enable the assist focusing light in trigger to help to make focusing easier.
natural_image
Line drawing of a DSLR camera with lens and top mount (no text or symbols)To use focusing light correctly, you need to set a camera in automatic mode, turn on the camera lens' autofocus function. Turn on "AF" transmitter and customize (C.Fn3) function.
Hot Shoe
Connecting trigger with Canon Cameras, Press the shutter lightly, trigger will identify the camera automatically, and send the trigger setting status to flash to I-TTL offline flash, the highest sync speed is 1/8000s.
Connecting trigger with other cameras (besides Canon), available for sync trigger, The highest sync speed is 1/250s or lower.
3 MODE
A : Canon mixed mode
B : Canon master control mixed mode
C : Canon master control Multi mode
A: Canon mixed mode
text_image
vM > AF zoom888mm CH I F8.8 ATTL +0.7ev B M 1/128+0.3ev C OFF D OFF1. Grouping mode and parameter setting
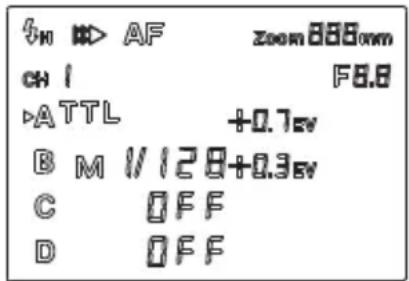
① Press【MODE】button to select transmitter mode as Universal Mixed mode (as pic showed)
Canon mixed mode
② Press 【A】/【B】/【C】/【D】for a few seconds to select or exit flash group setting, The arrow refers to the group you're setting.
③ After selected a group, press 【MODE】button to set the flash mode of the group,every modes, settings are as below:
TTL:
Compatible with E-TTLII, Exposure compensation adjustment available from -3.0EV to +3.0EV, total 22 levels; press [↑] or [↓] button to change Focal distance for different groups.
M:
Flash output range 1/128\~1/1, press [←] / [→] to increase/decrease 0.3EV, 22 levels available. Press [↑] / [↓] to change group focal distance number.
OFF:
Does not engage flash.
Canon mixed mode
④ After you finished the flash setting for the groups, press A/B/C/D button again to exit setting and sent the flash info to the others flash light which in the different groups but the same Channel.
- In this mode, it's available for each flash group to engage expose via different flash mode and power. Flash groups which are set in TTL mode can accomplish E-TTLII flash while connecting Canon cameras.
- Connect series A cameras in this mode, you can't set manual mode while the wireless mode is off, TTL or M mode only can be set by transmitter setting.
- When you need to synchronize the back curtain, please select this mode.
Canon mixed mode
2. Only available for series A cameras, cameras exposure mode need to be P/AV/TV/M.
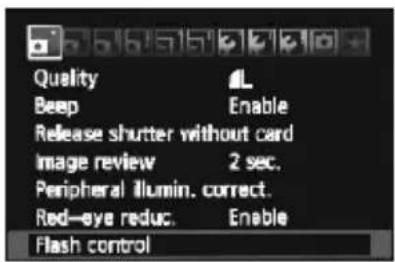
① Press 【Menu】to select flash control-external flash function setting.
text_image
Quality Beep Release shutter without card Image review Peripheral Illumin. correct. Red-eye reduc. Flash control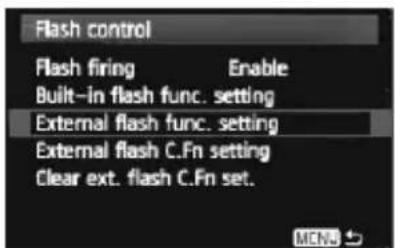
text_image
Flash control Flash firing Enable Built-in flash func. setting External flash func. setting External flash C.Fn setting Clear ext. flash C.Fn set.Canon mixed mode
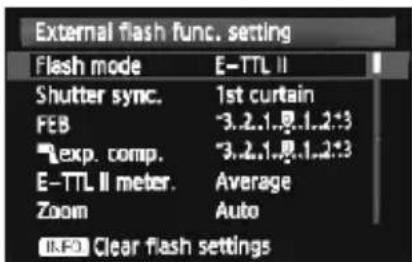
② In this mode, Camera shows info as picture.
text_image
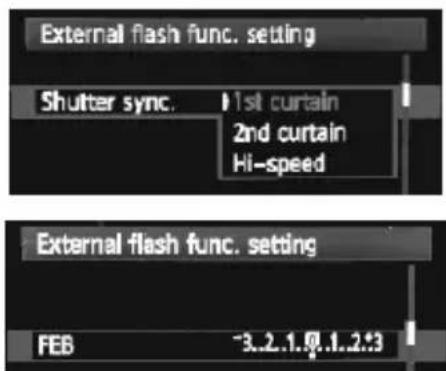
External flash func. setting Flash mode E-TTL II Shutter sync. 1st curtain FEB -3.2.1.8.1.2.3 Exp. comp. -3.2.1.8.1.2.3 E-TTL II meter. Average Zoom Auto IKF0 Clear flash settings③ Via internal menu setting, the user can set the sync speed level for shutter and exit group setting in FEB exposure mixed mode, or press【Test】or the transmitter passes the settings to each group of flash lights on the same channel while the flashes are online, after the flash displays the received modes and parameters, it executes the appropriate operation.
Canon mixed mode
text_image
External flash func. setting Shutter sync. 1st curtain 2nd curtain Hi-speed External flash func. setting FEB -3..2..1..0..1..2..3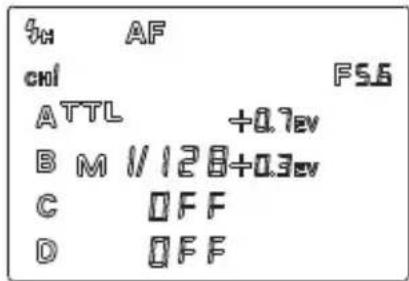
text_image
3H AF cnl F5.6 ATTL +0.7ev B M 1/128+0.3ev C OFF D OFFCanon master control Multi mode
Setting for groups
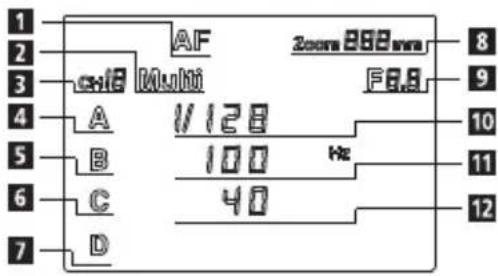
① Press 【MODE】to select transmitter mode as Canon master control Multi mode (as pic showed)
text_image
1 2 3 col E Multi AF Zoom 200mm F8.8 4 A 1/128 B 100 Hz 6 C 40 7 D 8 9 10 11 121 Automatic focusing assis
2 Master Control Multi mode
3 Wireless Channels
4 Group A Switch
5 Group B Switch
6 Group C Switch
7 Group D Switch
8 Focal distance
9 Aperture
10 Strobe flash output power
11 Strobe flash frequency
12 Strobe flash times
Canon master control Multi mode
② In the non-set state, press 【←】/【→】 to set power output for Group A, Press【A】/【B】/【C】 【D】 for a few seconds to select or exit flash group setting. After selected a group, press 【MODE】 button to set the flash mode of the group, every mode.
Press 【A】/【B】/【C】/【D】for a few seconds to select or exit flash group setting, The arrow refers to the group you're setting.
After selected a group, press 【MODE】button to set the flash mode of the group,every modes, settings are as below:
Canon master control Multi mode
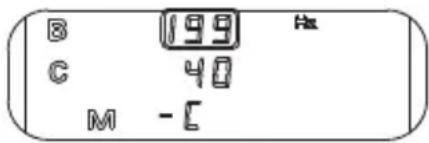
③ Press【OK】button, when Frequency flickered, press【←】/【→】button to set flash frequency from 1-199Hz.
text_image
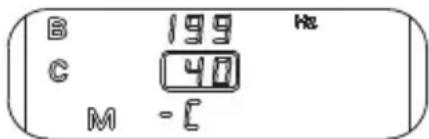
B 199 Hz C 40 M - C④ Strobe flash Press【OK】button, when times flickered, press 【←】/【→】to set flash times, the maximum flash times are influenced by Group A Power.
text_image
B 199 Hz C 40 M -C| Group A Flash power & Flash frequency connection table | ||||||
| Flash power | 1/128 | 1/64 | 1/32 | 1/16 | 1/8 | 1/4 |
| Flash times | 1-40 | 1-20 | 1-12 | 1-8 | 1-4 | 1-2 |
Compatible Devices
- 3 series Canon Camera, based on different functions.
I. Available for Camera-Menu-controlled external flashlight Canon Types (Abbreviated Series A): 450D、500D、550D、600D、650D、700D、1100D、1000D、40D、1DMarkIII、1DarkIV、1DsMarkIII5D、7D、60D、50D、5D MarkII、MarkIII
II. Available for ONLY Camera-Menu-controlled Flash Light Parameters & modes; NOT Available for Camera Menu-controlled external flashlight Canon Types (Abbreviated Series B):10D、20D、30D、300D、350D、1D、1DMarkII、5D
III. Available for other brands Cameras with standard Hot Shoe (Abbreviated Series C)
Specification List
System mode: Digital FSK 2.4G HZ Wireless Trigger
Communication Distance: 50 meter
Wireless Channel: 16
Flash mode: E-TTL, M, Multi.
Synchronous mode: Front synchronize,
Back synchronize, High Speed synchronize.
Group control:A\B\C\D 4 groups (Each group can be
set separately, flash ratio also can be set.
Function: Available for FEB, FE lock and FP
Synchronous speed: 1/8000s
Compatible Flashlight: Studio flashlight, Photo flash, G Series.
Focusing light: Assist focusing light
Input: Available for Hot Shoe
(TTL Triggered or single contact triggered) Suitable
Battery: 2 AA Battery (rechargeable battery accepted)
Standby time: 60 hours
(AA 1.2v 2400mh rechargeable batteries)