VidiU Go - Hi-Fi System Teradek - Free user manual and instructions
Find the device manual for free VidiU Go Teradek in PDF.


User questions about VidiU Go Teradek
0 question about this device. Answer the ones you know or ask your own.
Ask a new question about this device
Download the instructions for your Hi-Fi System in PDF format for free! Find your manual VidiU Go - Teradek and take your electronic device back in hand. On this page are published all the documents necessary for the use of your device. VidiU Go by Teradek.
USER MANUAL VidiU Go Teradek
text_image
A B C D E F H I G VidiU Starting H Q J J K L M N P VidiU Node VidiU Go includes two USB ports designed for VidiU Node (sold separately) or any compatible 3G/4G/LTE USB modem.A: Power button
B: Broadcast button
C: Video status indicator
D: Network status indicator
E: Broadcast status indicator
F: Menu navigation button
G: Detachable plate
H: USB modem port (not shown)
I: Micro SD card slot (not shown)
J: RP-SMA connectors
K: HDMI input
L: SD/HD/3G-SDI input
M: 10/100 Ethernet port
N: Mic/Line stereo input
O: USB-C power input
P: 1/8" headphone output
Q: Thumb screws
R: SMA antennas
TABLE OF CONTENTS
Button Operation 2
Battery 2
Power and Connect ......2
Get Online 3
Core 5
Sharelink....7
Choose a Platform and Quality ...... 8
VidiU App 9
Recording 10
BUTTON OPERATION
Menu Navigation Button
Use the arrow buttons to navigate through the menus. Press the center button to confirm or open selection.

Broadcast/Record Button
Start/stop broadcast or recording.
BATTERY
VidiU Go is equipped with an internal rechargeable Li-polymer battery, providing up to 2.5 hours of duration. To check the battery life while the device is powered off, press any of the Menu Navigation Buttons. The battery life percentage will then be displayed on the front panel.
POWER AND CONNECT
1 Connect power to VidiU Go using the included USB-C A/C adapter or another USB-C power source.
2 Connect the HDMI or SDI output from your video source to VidiU's input connector (H or I).
2 Press the Power button on the front panel (A).
GET ONLINE
You can use the front panel interface, the built-in web UI (see below), or the VidiU app (iOS or Android) to remotely control and configure VidiU Go to connect to a network. Choose one of the following options to get VidiU online.
Access the web UI
From the front panel interface, connect to a network, then select [Info] to reveal the IP address.
2 Enter the network's IP address in your web browser's navigation bar.
Connect via VidiU Node/USB Modem
1 Detach the left and right side panels to expose the USB ports.
2 Insert a VidiU Node or compatible 3G/4G USB modem on each side, turn the thumb screws clockwise (VidiU Node only), then wait for the .■ icon to appear on the front panel display.
Connect via Cellular Data Plan (Hotspot)
1 Connect your mobile phone to VidiU Go's WiFi network: VidiU-Go-XXXXX (XXXXX is the last five digits of VidiU's serial number).
2 Open the VidiU app and select the corresponding VidiU.
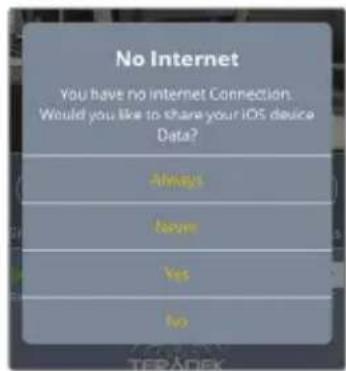
3 When prompted, click Yes to use your cellular data plan.
text_image
No Internet You have no internet Connection. Would you like to share your iOS device Data? Always Yes Yes NoConnect to a WiFi Network
1 Navigate to the WiFi menu and select a mode:
a. Access Point (AP) Mode - Connect your device to VidiU's WiFi network: VidiU-Go-XXXXX (XXXXX is the last [ve digits of VidiU's serial number).
b. Client Mode - Select Client, tap Scan for Networks, then enter your credentials for the network you select.
2 To configure your network settings, navigate to the Network menu, then select Wireless (WiFi if using the front panel or web UI).
Connect via Ethernet
Plug an Ethernet cable from the VidiU's Ethernet port to an Ethernet switch or router.
2 Navigate to the Network menu, then select Wired to verify that Ethernet is set to DHCP and to view VidiU Go's IP address.
CORE
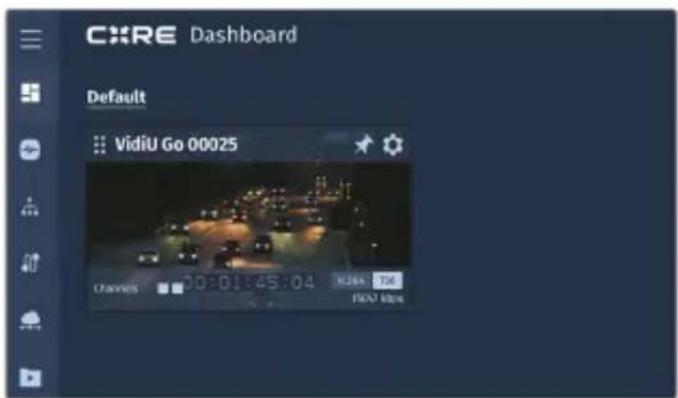
VidiU Go can be remotely accessed, configured, and controlled using Teradek's Core Cloud management and routing service. In addition to offering network bonding, remote management, and streaming to multiple destinations, Core allows you to convert an HEVC stream to H.264. HEVC provides the most efficient encoding for both low bitrate and high quality applications, while H.264 is supported by a wider variety of streaming platforms.
text_image
CXRE Dashboard Default VidiU Go 00025 Channels 00:01:45:04 K264 100 F507 MbpsConnect VidiU to Core
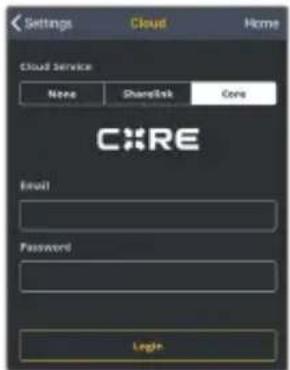
1 From the VidiU app, web UI or front panel, enter the Cloud menu, then select Core.
2 Enter your credentials to log VidiU into your Core account, or visit corecloud.tv to create a new account.
3 Once a connection is established, you can configure VidiU Go from the Core web UI, or the Core app.
text_image
Settings Cloud Home Cloud Service None ShareLink Core CXRE Email Password LoginHEVC and H.264
In situations where bandwidth is limited, using HEVC will preserve the video quality while using lower bitrates. Core has built in transcoding functionality to convert video back to H.264 for delivery to streaming platforms that don't support HEVC. To switch between HEVC to H.264:
From the Core web UI
1 Tap the 📞con to enter the Settings menu.
2 Tap the Codec button and select H.264.
3 Tap Apply at the bottom of the Settings menu.
From the Core App
1 Tap the • icon to enter the Encoder Details menu.
2 Tap the Settings button, then select H.264.
3 Tap Apply at the bottom of the screen.
Once Core is enabled, you can switch between HEVC and H.264 from VidiU's broadcast settings menu on the front panel or the web UI.

text_image
CORE Dashboard Default Ku#o Go 0825 VISA 0825 / FOR ALL ITEMS Encoding CONNECTION PORTS File: USB Photo panels: USB Background: 1 MB View Light/Video: Photo Audio: 500 Audio: 500 Audio: 500 Audio: 500 Audio: 500 Audio: 500 Audio: 500 Audio: 500 Audio: 500 Audio: 500 Audio: 500 Audio: 500 Audio: 500 Audio: 500 Audio: 500 Music Files 500 fps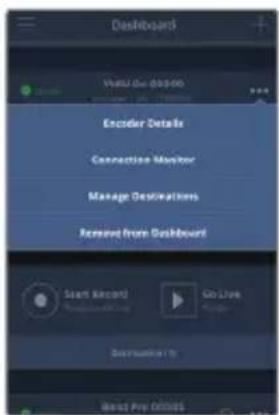
text_image
Dashboard Valid: 00:00:00 Encoder Details Connection Monitor Manage Destinations Remove from Dashboard Start Record Go Live Description By Reset Prev Address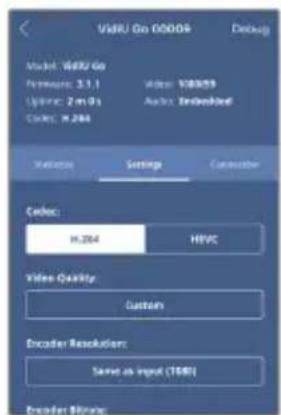
text_image
VidRU Go 00004 Model: VidRU Go Network: 3.1.1 Update: 2 m/s Code: H.264 Video: VH269 Audio: Embedded Settings Settings Cancelator Codes: H.264 HEVC Video Quality: Custom Encoder Resolution: Same as Input (1000) Product Mirrors:SHARELINK™
Sharelink is another cloud service by Teradek that was created specifically for VidiU Go. Sharelink unlocks the full potential of your live streams by offering all the same benefits as Core (network bonding, streaming to multiple platforms, remote management, and cellular tethering), with the exception of transcoding an HEVC stream to H.264. A subscription to Sharelink is required to bond Internet connections.

flowchart
graph LR
    A["RF Device"] --> B["Mobile Phone"]
    B --> C["Cloud Service Cloud"]
    C --> D["Smart TV Platform"]
    D --> E["Computer with Facebook LIVE/Tube icons"]
    E --> F["Desktop with Linux/Tube icons"]
Supported Connections
- Ethernet
- Up to two VidU Go Nodes or two 3G/4G/LTE USB modems.
- WiFi (AP mode) – Up to four cellular devices with the VidiU App
- WiFi (Client mode) – Connect to an existing wireless network or mobile hotspot
To Activate Sharelink
1 Connect your device to VidiU's WiFi network.
2 Enter the Cloud menu, then select Sharelink.
3 Tap Login to access your Sharelink account, or visit sharelink.tv to create an account.
4 After creating an account, return to the login screen and enter your credentials.
CHOOSE A PLATFORM AND QUALITY
If you don't have a subscription to Core or Sharelink, VidiU can be configured to broadcast directly to any compatible video streaming platform. Simply enter your credentials using the VidiU app, web UI (page 3), or the front panel interface.
1 Enter the Broadcast menu.
2 Choose a platform – Ustream, Livestream, YouTube, Facebook, Periscope, Vimeo, Wowza – or select manual RTMP.
3 Enter your credentials or RTMP destination info, then press apply.
4 Select your desired video bitrate and resolution under the Broadcast Quality menu.
5 To go live, press the Broadcast/Record button on the front panel, or the 📄 button on the web UI or the VidiU app.
VIDIU APP
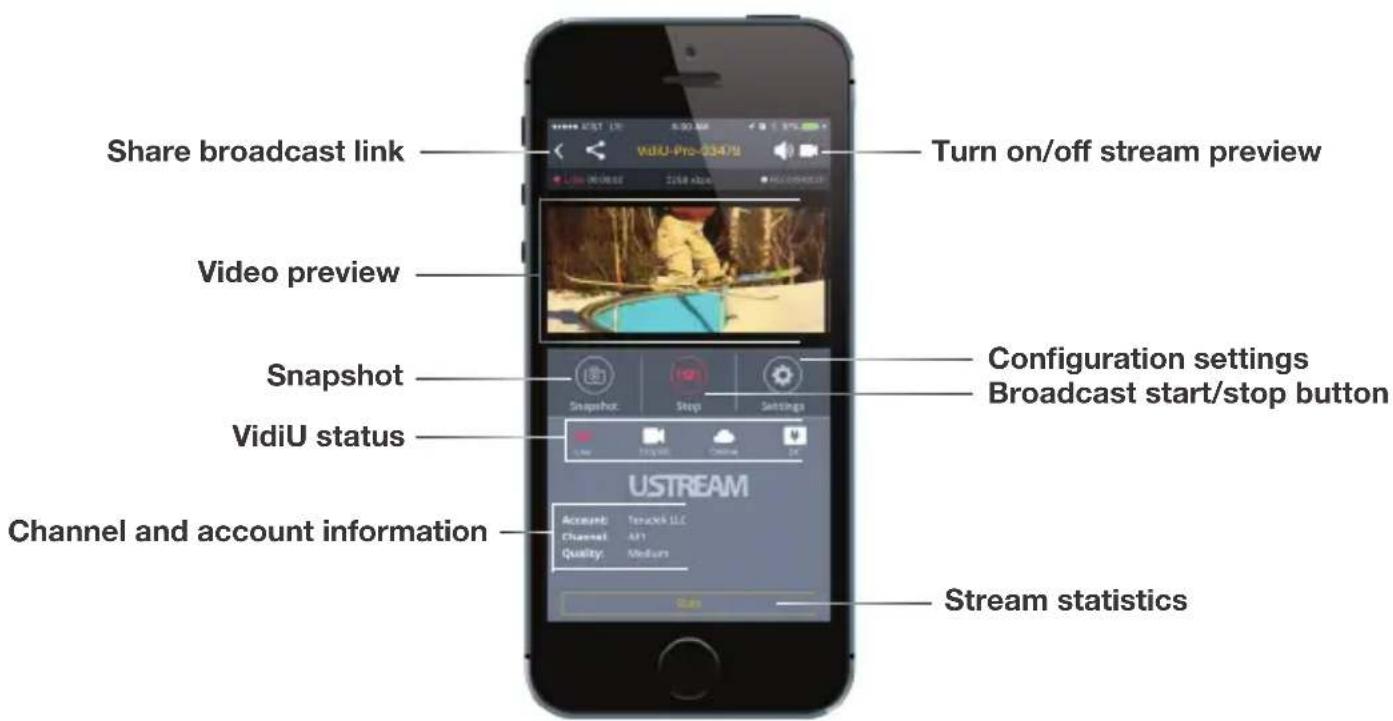
The VidiU app can be used to remotely monitor and configure VidiU, and allows you to broadcast high definition video to any compatible streaming platform directly from your phone or tablet.
text_image
Share broadcast link Video preview Snapshot VidiU status Channel and account information Turn on/off stream preview Configuration settings Broadcast start/stop button USTREAM Account: Terackell LLC Channel: A11 Quality: Medium Stream statisticsRECORDING
VidiU Go supports recording to a micro SD Card or compatible USB thumb drive.
1 Detach the left side plate on VidiU Go and insert a compatible micro SD card or USB drive to the corresponding slot. The front panel will indicate that the media is detected.
2 Enter the Recording menu, and select Enable Recording.
Once enabled, a copy of your broadcast will be saved to the storage media. For best results, use Class 6 or higher SD cards.
Recording Operation
- Recordings are triggered by the broadcast state. When a broadcast starts, a new recording is created.
- If a broadcast is interrupted for connectivity reasons, recording will continue.
- If a recorded file exceeds your storage media's file size limits, a new file will be created and recording will continue.
- Recording resolution and quality match your configured Broadcast settings.
Teradek regularly releases new firmware versions to improve performance, add new features, or to fix vulnerabilities. Press the Firmware button at the bottom of the app's display, or visit teradek.com to update your device with the latest firmware.
NEED MORE HELP?
SUPPORT: http://support.teradek.com > Contains tips, information and all the latest firmware & software updates. TERADEK SUPPORT STAFF: support@teradek.com or call 888-941-2111 ext. 2 (Mon-Fri 6am to 6pm PST)

text_image
TERÅDEK© 2018 Teradek, LLC. All rights reserved.
v.2