
SNB-7004 - Security Camera Hanwha - Free user manual and instructions
Find the device manual for free SNB-7004 Hanwha in PDF.


| Product Type | Network Bullet Camera |
| Model | SNB-7004 |
| Brand | Hanwha |
| Dimensions (W x H x D) | Approx. 70 x 210 x 175 mm |
| Weight | Approx. 0.9 kg |
| Power Supply | PoE (802.3af) or DC 12V |
| Power Consumption | Max. 6.5W |
| Image Sensor | 1/2.8" Progressive CMOS |
| Max Resolution | 1920x1080 (2MP) |
| Frame Rate | Up to 30fps at 1080p |
| Lens | 4mm fixed, F1.6 |
| Field of View | Horizontal: 89°, Vertical: 48° |
| Night Vision | Up to 30m IR (built-in IR LED) |
| Video Compression | H.265, H.264, MJPEG |
| Storage | Micro SD slot (max 128GB), NAS |
| Network | Ethernet 10/100 Base-T, RJ45 |
| Protocols | TCP/IP, UDP, HTTP, HTTPS, RTSP, ONVIF |
| Weather Rating | IP66 (outdoor) |
| Operating Temperature | -30°C to 55°C |
| Cleaning | Wipe with soft cloth; avoid solvents |
| Security | Password protection, HTTPS, IP filtering |
| Spare Parts & Repairability | Contact Hanwha support; limited user-serviceable parts |
| General Information | User manual available in PDF |
Frequently Asked Questions - SNB-7004 Hanwha
User questions about SNB-7004 Hanwha
0 question about this device. Answer the ones you know or ask your own.
Ask a new question about this device
Download the instructions for your Security Camera in PDF format for free! Find your manual SNB-7004 - Hanwha and take your electronic device back in hand. On this page are published all the documents necessary for the use of your device. SNB-7004 by Hanwha.
USER MANUAL SNB-7004 Hanwha
©2014 Samsung Techwin Co., Ltd. All rights reserved.
Trademark

SAMSUNG TECHWIN
is the registered logo of Samsung Techwin Co., Ltd.
The name of this product is the registered trademark of Samsung Techwin Co., Ltd.
Other trademarks mentioned in this manual are the registered trademark of their respective company.
Restriction
Samsung Techwin Co., Ltd shall reserve the copyright of this document. Under no circumstances, this document shall be reproduced, distributed or changed, partially or wholly, without formal authorization of Samsung Techwin.
Disclaimer
Samsung Techwin makes the best to verify the integrity and correctness of the contents in this document, but no formal guarantee shall be provided. Use of this document and the subsequent results shall be entirely on the user's own responsibility. Samsung Techwin reserves the right to change the contents of this document without prior notice.
- Design and specifications are subject to change without prior notice.
The initial administrator ID is "admin" and the password should be set when logging in for the first time.
Please change your password every three months to safely protect personal information and to prevent the damage of the information theft.
Please, take note that it's a user's responsibility for the security and any other problems caused by mismanaging a password.
important Safety inStructionS
- Read these instructions.
- Keep these instructions.
- Heed all warnings.
- Follow all instructions.
-
Do not use this apparatus near water.
-
Clean only with dry cloth.
-
Do not block any ventilation openings, Install in accordance with the manufacturer's instructions.
-
Do not install near any heat sources such as radiators, heat registers, stoves, or other apparatus (including amplifiers) that produce heat.
-
Do not defeat the safety purpose of the polarized or grounding-type plug. A polarized plug has two blades with one wider than the other. A grounding type plug has two blades and a third grounding prong. The wide blade or the third prong are provided for your safety. If the provided plug does not fit into your outlet, consult an electrician for replacement of the obsolete outlet.
-
Protect the power cord from being walked on or pinched particularly at plugs, convenience receptacles, and the point where they exit from the apparatus.
-
Only use attachments/ accessories specified by the manufacturer.
-
Use only with the cart, stand, tripod, bracket, or table specified by the manufacturer, or sold with the apparatus. When a cart is used, use caution when moving the cart/apparatus combination to avoid injury from tip-over.
-
Unplug this apparatus during lighting storms or when unused for long periods of time.

natural_image
Symbolic icon of a person pushing a large object through a circular frame (no text or symbols)-
Refer all servicing to qualified service personnel. Servicing is required when the apparatus has been damaged in any way, such as power-supply cord or plug is damaged, liquid has been spilled or objects have fallen into the apparatus, the apparatus has been exposed to rain or moisture, does not operate normally, or has been dropped.
-
This product is intended to be supplied by a Listed Power Supply Unit marked "Class 2" and rated from 24 Vac (50/60 Hz) min 0.9 A or 12 Vdc, min 0.9 A.
warningG
TO REDUCE THE RISK OF FIRE OR ELECTRIC SHOCK, DO NOT EXPOSE THIS PRODUCT TO RAIN OR MOISTURE. DO NOT INSERT ANY METALLIC OBJECT THROUGH THE VENTILATION GRILLS OR OTHER OPENINGS ON THE EQUIPMENT.
Apparatus shall not be exposed to dripping or splashing and that no objects filled with liquids, such as vases, shall be placed on the apparatus.
To prevent injury, this apparatus must be securely attached to the Wall/ceiling in accordance with the installation instructions.
caution

caution
riSK of eElectric SHocK. Do not open

CAUTION: TO REDUCE THE RISK OF ELECTRIC SHOCK. DO NOT REMOVE COVER (OR BACK). NO USER SERVICEABLE PARTS INSIDE. REFER SERVICING TO QUALIFIED SERVICE PERSONNEL.
eXpLanation of GrapHicaL SymBoLS
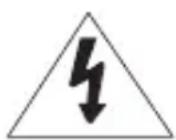
The lightning flash with arrowhead symbol, within an equilateral triangle, is intended to alert the user to the presence of “dangerous voltage” within the product’s enclosure that may be of sufficient magnitude to constitute a risk of electric shock to persons.

The exclamation point within an equilateral triangle is intended to alert the user to the presence of important operating and maintenance (servicing) instructions in the literature accompanying the product.
Class I construction
An apparatus with CLASS I construction shall be connected to a MAINS socket outlet with a protective earthing connection.
Battery
Batteries(battery pack or batteries installed) shall not be exposed to excessive heat such as sunshine, fire or the like.
Disconnection Device
Disconnect the main plug from the apparatus, if it's defected. And please call a repair man in your location.
When used outside of the U.S., it may be used HAR code with fittings of an approved agency is employed.
CAUTION
Risk of explosion if battery is replaced by an incorrect type. Dispose of used batteries according to the instructions.
These servicing instructions are for use by qualified service personnel only. To reduce the risk of electric shock do not perform any servicing other than that contained in the operating instructions unless you are qualified to do so.
The CVBS out terminal of the product is provided for easier installation, and is not recommended for monitoring purposes.
Please use the input power with just one camera and other devices must not be connected.
The ITE is to be connected only to PoE networks without routing to the outside plant.
Please read the following recommended safety precautions carefully.
- Do not place this apparatus on an uneven surface.
- Do not install on a surface where it is exposed to direct sunlight, near heating equipment or heavy cold area.
- Do not place this apparatus near conductive material.
- Do not attempt to service this apparatus yourself.
- Do not place a glass of water on the product.
- Do not install near any magnetic sources.
- Do not block any ventilation openings.
- Do not place heavy items on the product.
User's Manual is a guidance book for how to use the products.
The meaning of the symbols are shown below.
- Reference : In case of providing information for helping of product's usages
- Notice : If there's any possibility to occur any damages for the goods and human caused by not following the instruction
※ Please read this manual for the safety before using of goods and keep it in the safe place.
oveRview
3
3 Important Safety Instructions
9 Product Features
10 Recommended PC Specifications
10 Recommended Micro SD/SDHC/SDXC Memory Card Specifications
11 NAS recommended specs
11 What's Included
15 At a Glance (SNB-7004)
18 At a Glance (SND-7084)
21 At a Glance (SNV-7084)
iINSTALLATioN & CoNNeCTioN
24
24 Mounting the Lens (SNB-7004)
26 Installation (SND-7084)
28 Installation (SNV-7084)
37 Inserting/Removing a Micro SD Memory Card
40 Memory Card Information (Not Included)
41 Connecting with other Device
NeTwoRk CoNNeCTioN AND SeTup
52
52 Connecting the Camera Directly to Local Area Networking
53 Connecting the Camera Directly to a DHCP Based DSL/Cable Modem
54 Connecting the Camera Directly to a PPPoE Modem
55 Connecting the Camera to a Broadband Router with the PPPoE/Cable Modem
56 Buttons used in IP Installer
57 Static IP Setup
61 Dynamic IP Setup
62 Port Range Forward (Port Mapping) Setup
64 Connecting to the Camera from a Shared Local PC
64 Connecting to the Camera from a Remote PC via the Internet
weB vieweR
65
65 Connecting to the Camera
67 Password setting
67 Login
68 Installing STW WebViewer Plugin
70 Using the Live Screen
74 Playing the recorded video
SeTup SCReeN
81
81 Setup
81 Basic Setup
92 Video & Audio setup
112 Network Setup
121 Event Setup
126 NAS (Network Attached Storage) guide
144 System Setup
150 Viewing profile information
AppeNDiX
151
151 Specification
158 Product Overview
161 Troubleshooting
163 Open Source Announcement
• Full HD Video Quality
- Multi-Streaming
This network camera can display videos in different resolutions and qualities simultaneously using different CODECs.
• Web Browser-based Monitoring
Using the Internet web browser to display the image in a local network environment.
- Alarm
When an event occurs, video is either sent to the email address registered by the user, sent to the FTP server, saved in a Micro SD card or NAS, or a signal is sent to the alert output terminal.
- Tampering Detection
Detects tempering attempts on video monitoring.
- Motion Detection
Detects motion from the camera's video input.
• Intelligent Video Analysis
Analyzes video to detect logical events of specified conditions from the camera's video input.
- Face Detection
Detects faces from the camera's video input.
- Audio Detection
Detects sound louder than a certain level specified by user.
- Smart Codec
Adaptively applies codecs for a portion of the camera's field of view to improve the quality of such area specified by user.
• Auto Detection of Disconnected Network
Detects network disconnection before triggering an event.
- ONVIF Compliance
This product supports ONVIF Profile-S.
For more information, refer to www.onvif.org.

NVIF
Driving network video through global standardization
recommenDeD pc SpecificationS
- CPU : Intel Core 2 Duo 2.4 GHz or higher (for using 1920x1080 30 fps) Intel Core i7 2.8 GHz or higher (for using 1920x1080 60 fps)
■ Web Plug-in is optimized to SSE 4.1 Instruction Set.
• Resolution : 1280X1024 pixels or higher (32 bit color)
• RAM : 2GB or higher
• Supported OS : Windows XP / VISTA / 7 / 8 / 8.1, MAC OS X 10.7
• Supported Browser : Microsoft Internet Explorer (Ver. 11 \~ 8)
Mozilla Firefox (Ver. 19 \~ 9)※ Windows Only
Google Chrome (Ver. 25 \~ 15)※ Windows Only
Apple Safari (Ver. 6.0.2(Mac OS X 10.8, 10.7 only), 5.1.7)※ Mac OS X only
■ Windows 8 is supported only in the Desktop mode.
- Neither a beta test version unlike the version released in the company website nor the developer version will be supported.
■ For IPv6 connection, Window 7 or higher is recommended.
■ For Mac OS X, only the Safari browser is supported.
• Video Memory : 256MB or higher

If the driver of the video graphic adapter is not installed properly or is not the latest version, the video may not be played properly.
- For a multi-monitoring system involving at least 2 monitors, the playback performance can be deteriorated depending on the system.
recommenDeD micro SD/SDHc/SDXc memory carD SpecificationS
• Recommended capacity : 4GB \~ 64GB
- For your camera, we recommend you use a memory card from the following manufacturers:
Micro SD/SDHC/SDXC Memory Card : Sandisk, Transcend
- For the framerate below 30 fps, it is recommended to use the specification memory card of Class 6 or higher.
- For the framerate over 31 fps, it is recommended to use the specification memory card of Class 10 UHS or higher.
naS recommendDeD SpecS
- Recommended capacity : 200GB or higher is recommended.
- Simultaneous access : One unit of NAS can accept a maximum of sixteen camera accesses.
- For this camera, you are recommended to use a NAS with the following manufacturer's specs.
| Recommended products Available sizes |
| Netgear NAS A maximum of 16 cameras can access simultaneously. |
| Synology NAS A maximum of 16 cameras can access simultaneously. |

- When you use Netgear's NAS equipment, do not allocate the capacity for use.
If you use NAS equipment for purposes other than video saving, the number of accessible cameras may be reduced.
wHat'S incLuDeD
Please check if your camera and accessories are all included in the product package.
| Appearance Item Name | Quantity | Description Model Name |
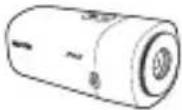 | 1 | |
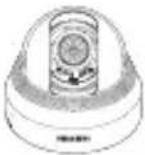 | 1 | |
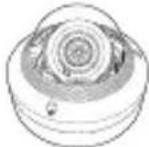 | 1 |
| Appearance Item Name | Quantity | Description Model Name | ||
 | Instruction book, Installer S/W CD | 1 | SNB-7004/ SND-7084/ SNV-7084 | |
 | Quick Guide (Optional) | 1 | SNB-7004/ SND-7084/ SNV-7084 | |
 | Warranty card (Optional) | 1 | SNB-7004/ SND-7084/ SNV-7084 | |
 | Cable for the testing monitor | 1 | Used to test the camera connection to a portable display device | SNB-7004/ SND-7084/ SNV-7084 |
 | Power Terminal Block 1 | Plugged in the power plug | SND-7084/ SNV-7084 | |
 | Template | 1 | Product installation guide | SND-7084/ SNV-7084 |
 | C Mount Adapter 1 | Used to install the C Mount camera lens | SNB-7004 | |
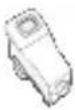 | Automatic Iris Lens Connector | 1 | Useful for camera lens installation | SNB-7004 |
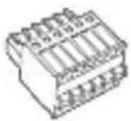 | 6-position Terminal Block | 1 | Used for alarm in/out terminals | SNB-7004 |
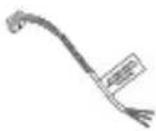 | Alarm Cable 1 Useful for alarm connection SND-7084 | |||
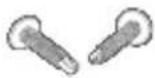 | Tapping Screw 2 | Useful for installation on the ceiling, wall, etc. | SND-7084 | |
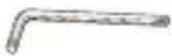 | L Wrench 1 | Used for dome cover disassembly, assembly and camera installation. | SNV-7084 | |
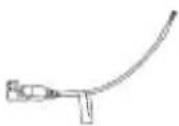 | Power Cable 1 Used to plug into the power port SNV-7084 | |||
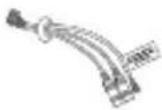 | Audio/alarm cable 1 | Used to connect with the audio and alarm port | SNV-7084 | |
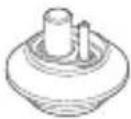 | Cable bush 1 | Used to connect the LAN cable with a diameter of ∅7~8.5. | SNV-7084 | |
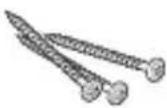 | Tapping Screw 3 | Used for installation on the wall or ceiling | SNV-7084 | |
| Appearance Item Name | Quantity | Description Model Name | |
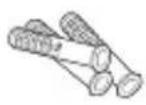 | Plastic Anchor 3 | For fixing a screw, Inserted in a hole (reinforced anchoring force) | SNV-7084 |
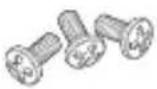 | Machine Screws 3 | Used for assembling the dome case when installing the product on the pipe, wall mount, etc. or blocking a hole. | SNV-7084 |
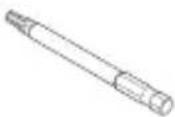 | Drill bit 1 | Used for dome cover disassembly, assembly and camera installation. | SNV-7084 |
| Options (not included) | |||
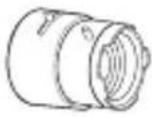 | CS/C Lens | Optional lens to be inserted in a camera | SNB-7004 |
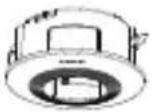 | Indoor Buried Housing | Housing for installing indoor buried type cameras | SND-7084/ SNV-7084 |
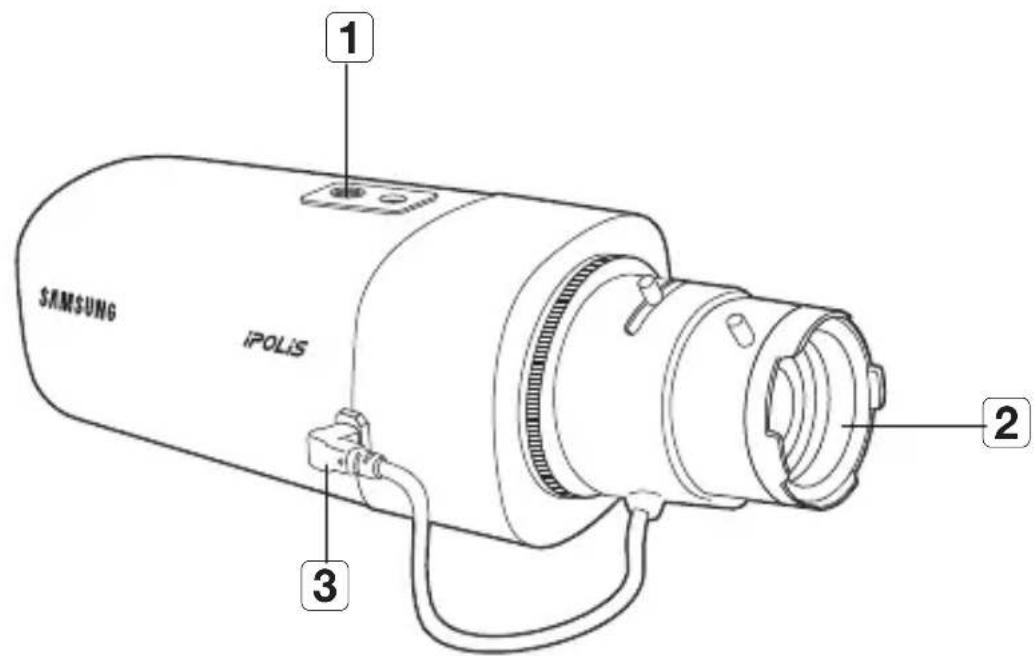
Front Side
text_image
SAMSUNG IPOLIS 1 2 3| Item Description | |
| 1 Mounting Bracket Screw Hole | Used to fix the camera on a mounting bracket.■ The screw size : It is the specification for the screws used to fasten the camera to the support.1/4" - 20 UNCL : 4.5mm±0.2mm (ISO Standard) or 0.197" (ASA Standard) 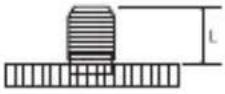 |
| 2 Auto Iris Lens (Optional) | Installed on the lens adaptor. |
| 3 Auto Iris Lens Connector | Used to supply power and output signal to control the iris of the lens. |

■ Wipe out a dirty surface of the lens softly with a lens tissue or cloth to which you have applied ethanol.
- Mounting Bracket is not included.
For more information to use mounting bracket, refer to the product's documentation.
Rear Side
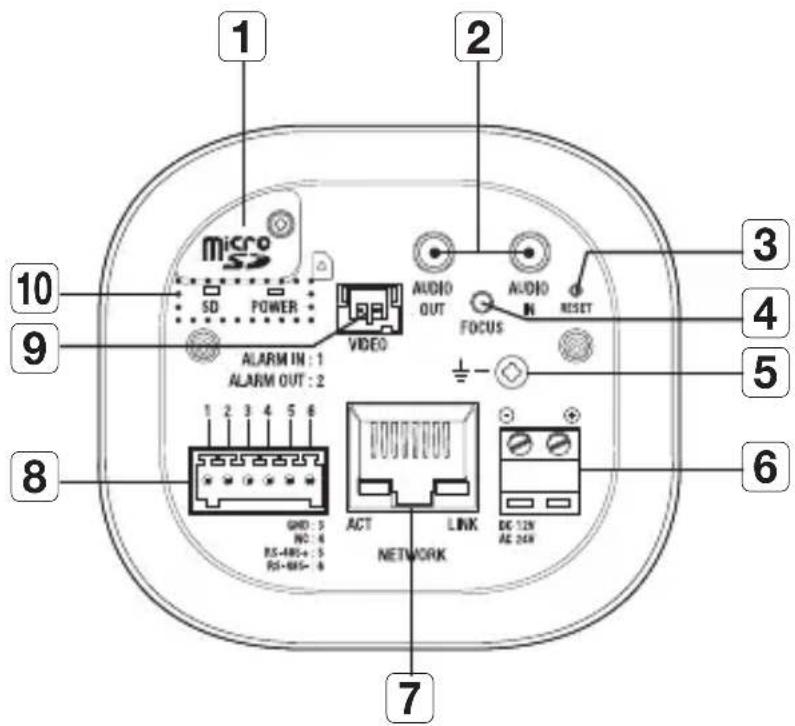
text_image
1 2 3 4 5 6 7 8 9 10 micro SD POWER VIDEO AUDIO OUT AUDIO N RESET FOCUS ALARM IN : 1 ALARM OUT : 2 GND : 5 NC : 4 RS-4RS+ : 5 RS-6RS- 4 ACT LINK NETWORK DC 12N AC 24N| Item Description | ||
| 1 Micro SD Memory Card Compartment | Compartment for the Micro SD memory card. | |
| 2 Audio terminal | AUDIO OUT Used to connect to speakers. | |
| AUDIO IN Used to connect to a microphone. | ||
| 3 Reset Button | The button restores all camera settings to the factory default. Press and hold for about 5 seconds to reboot the system. ! If you reset the camera, the network settings will be adjusted so that DHCP can be enabled. If there is no DHCP server in the network, you must run the IP Installer program to change the basic network settings such as IP address, Subnet mask, Gateway, etc., before you can connect to the network. | |
| 4 Focus Adjustment Button | The button adjusts the focus of image automatically. | |
| 5 Lightning protective grounding port | Used to discharge the lightning current safely outside in order to protect the camera. | |
| 6 Power Port Used to plug the power cable. | ||
| 7 Network Port Used to connect the PoE or Ethernet cable for network connection. | ||
| 8 Alarm I/O Port | ALARM IN | Used to connect the alarm input sensor or external day/night sensor. |
| ALARM OUT Used to connect the alarm output signal. | ||
| GND Used for earth-grounding. | ||
| RS-485+ RS-485 Data line | ||
| RS-485- RS-485 Data line | ||
| 9 Test Monitor Out | Output port for test monitoring the video output. Use the test monitor cable to connect to a mobile display and check the test video. | |
| 10 SD, Power Indicators | SD | ON: A memory card is inserted and operates normally.Flashing: Failed to record, insufficient space, or inserted abnormally.OFF: Camera is off, camera is restarting, memory card is not in place, or when record is off. |
| POWER | ON: While the power is onOFF: If the power is off | |

■ RS-485 port only supports direct connection with pan/tilt driver and external connections of the RS-485 controller is not supported.
AT A GLANCE (SND-7084)
Appearance
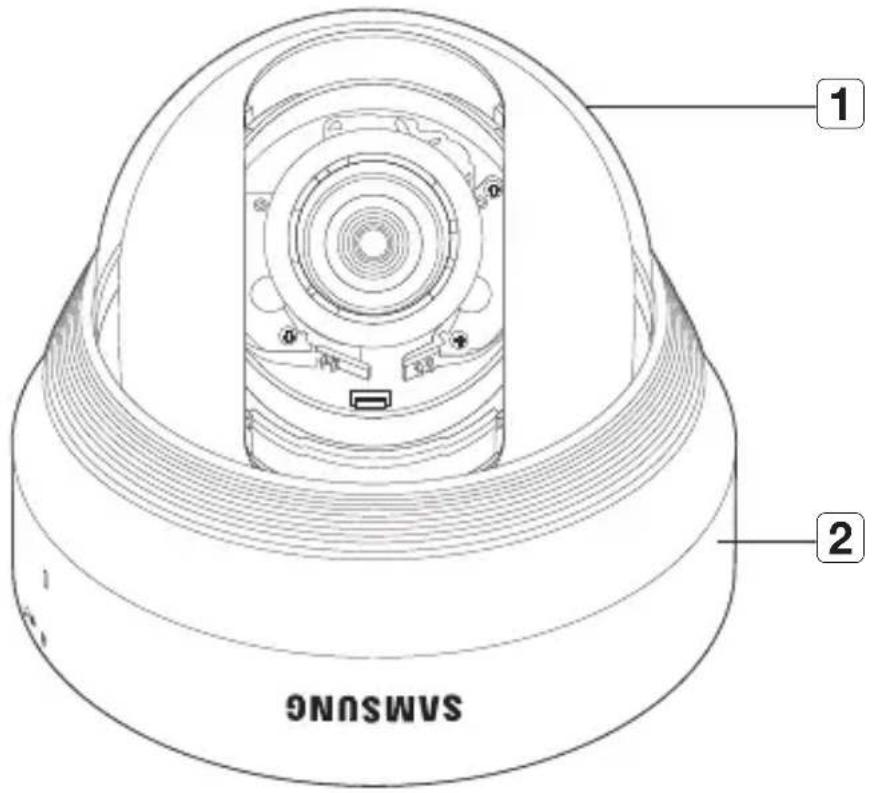
text_image
1 2 SAMSUNG| Item Description | |
| 1 Dome cover | Case cover used to protect the lens and the main unit. |
| 2 Camera Case | Housing part that covers the camera body. |
Components
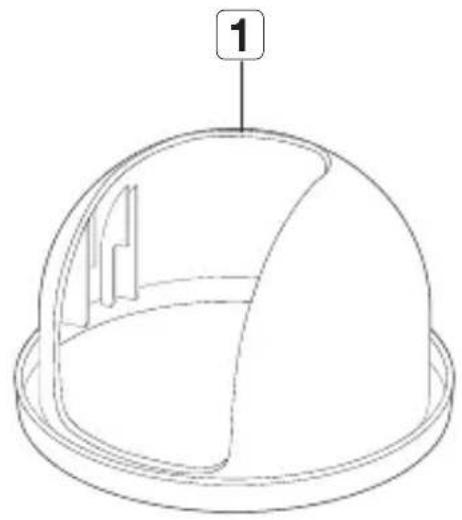
natural_image
Line drawing of a dome-shaped object with a labeled component '1' (no text or symbols on the object itself)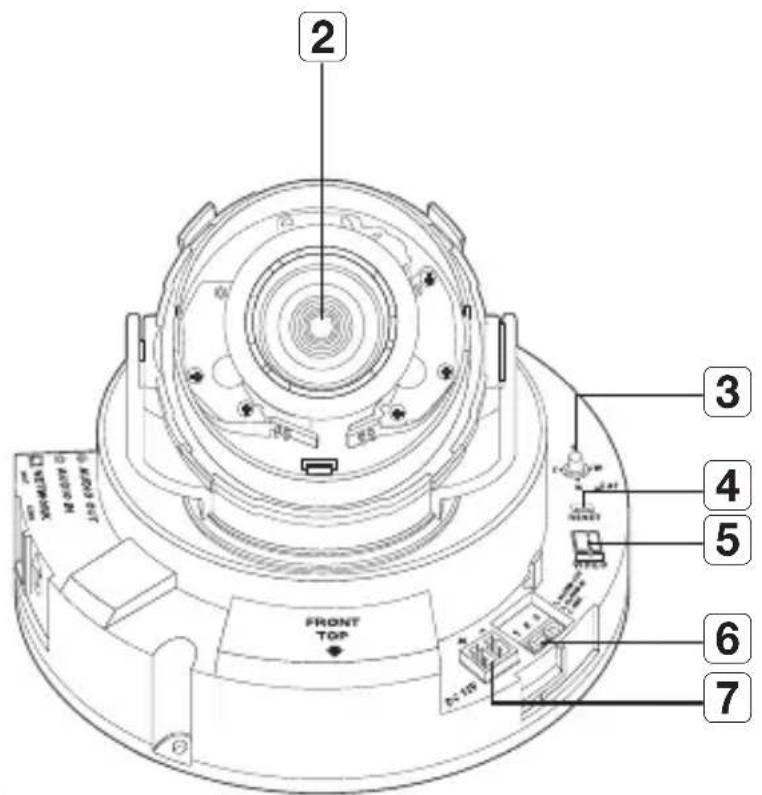
text_image
2 3 4 5 6 7 FRONT TOP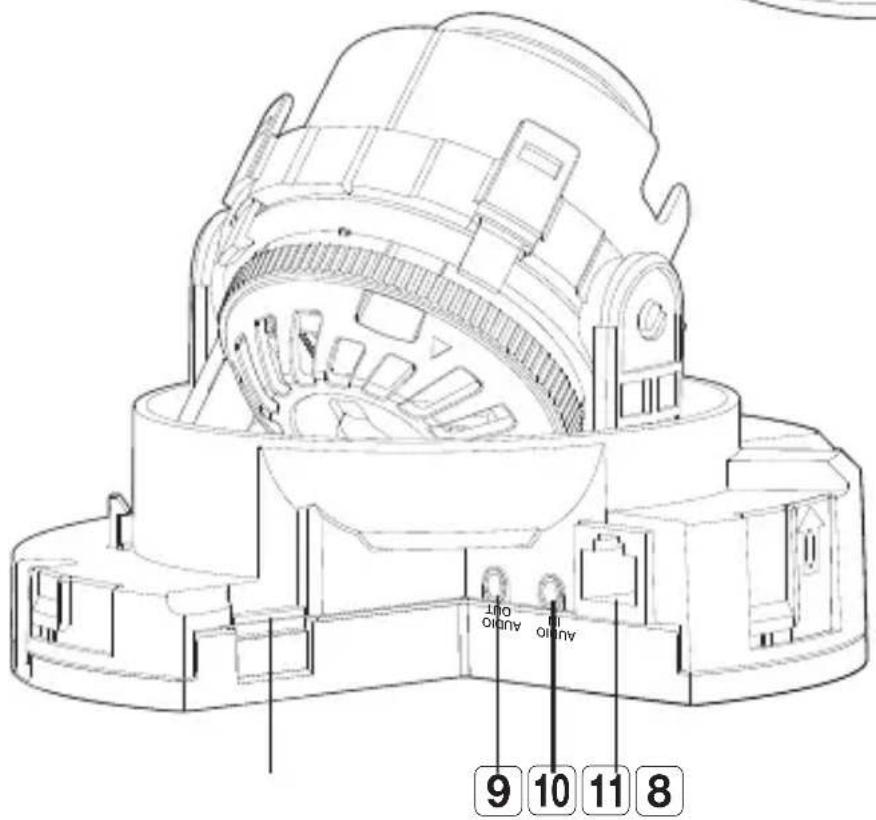
text_image
Auto 9 10 11 8| Item Description | ||
| 1 Internal Cover It is a cover to protect the main body. | ||
| 2 Lens | Lens for the camera. | |
| 3 Zoom/Focus Control Button | T Zoom in (Tele) | |
| W Zoom out (Wide) | ||
| N Focusing on a near object (Near) | ||
| F Focusing on a far object (Far) | ||
| Focus Control Press this button for automatic focus control. | ||
| 4 Reset Button | The button restores all camera settings to the factory default. Press and hold for about 5 seconds to reboot the system.1 If you reset the camera, the network settings will be adjusted so that DHCP can be enabled. If there is no DHCP server in the network, you must run the IP Installer program to change the basic network settings such as IP address, Subnet mask, Gateway, etc., before you can connect to the network. | |
| 5 Test Monitor Out | Output port for test monitoring the video output. Use the test monitor cable to connect to a mobile display and check the test video. | |
| 6 Alarm I/O Port | ALARM IN | Used to connect the alarm input sensor or external day/night sensor. |
| ALARM OUT Used | to connect the alarm output signal. | |
| GND Used for earth-grounding. | ||
| 7 Power Port Used to plug the power cable. | ||
| 8 Micro SD Memory Card Compartment | Compartment for the Micro SD memory card. | |
| 9 Audio Out Jack Used to connect to speakers. | ||
| 10 Audio In Jack Used to connect to a microphone. | ||
| 11 Network Port Used to connect the PoE or Ethernet cable for network connection. | ||
Appearance
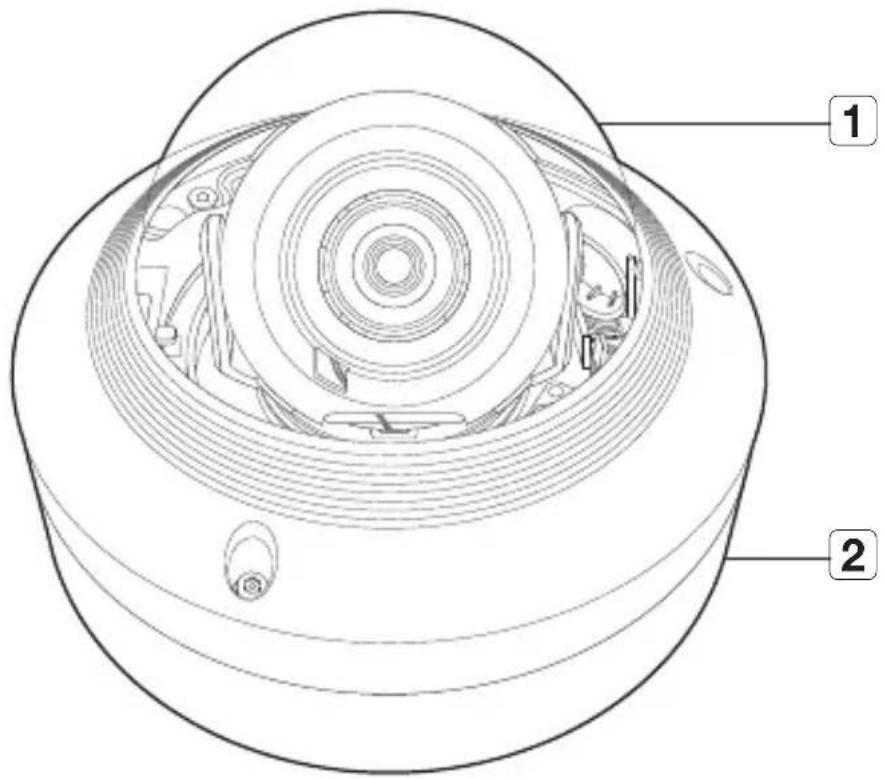
text_image
Technical diagram of a mechanical component with labeled parts 1 and 2| Item Description | |
| 1 Dome cover | Case cover used to protect the lens and the main unit. |
| 2 Camera Case | Housing part that covers the camera body. |
components
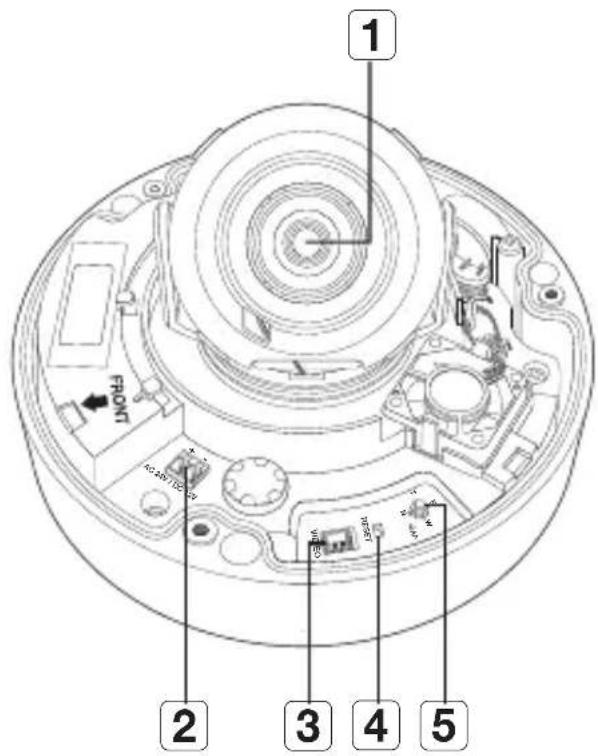
text_image
1 FRONT 2 3 4 5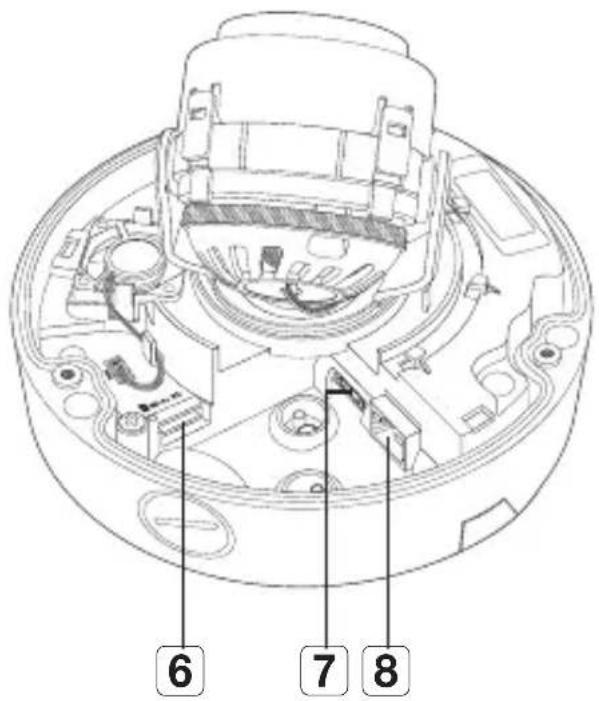
text_image
6 7 8| Item Description | |
| 1 Lens Lens for the camera. | |
| 2 Power Port Port for power terminal block. | |
| 3 Test Monitor Out | Output port for test monitoring the video output. Use the test monitor cable to connect to a mobile display and check the test video. |
| 4 Reset Button | The button restores all camera settings to the factory default. Press and hold for about 5 seconds to reboot the system. ! If you reset the camera, the network settings will be adjusted so that DHCP can be enabled. If there is no DHCP server in the network, you must run the IP Installer program to change the basic network settings such as IP address, Subnet mask, Gateway, etc., before you can connect to the network. |
| Item Description | ||
| 5 Zoom/Focus Control Button | T Zoom in (Tele) | |
| W Zoom out (Wide) | ||
| N Focusing on a near object (Near) | ||
| F Focusing on a far object (Far) | ||
| Focus Control Press this button for automatic focus control. | ||
| 6 Micro SD Memory Card Compartment | Compartment for the Micro SD memory card. | |
| 7 Audio and alarm cable port | Plug in the audio and alarm cable to this port to connect with external alarm device/microphone/speaker. | |
| 8 Network Port Used to connect the PoE or Ethernet cable for network connection. | ||
MOUNTING THE LENS (SNB-7004)
Disconnect the power before proceeding.

- The C lens and CS lens are not included in the product package. It is recommended that megapixel lens are use on this camera to optimise performance.
Mounting the CS lens on a camera
Turn the CS lens clockwise to attach it.
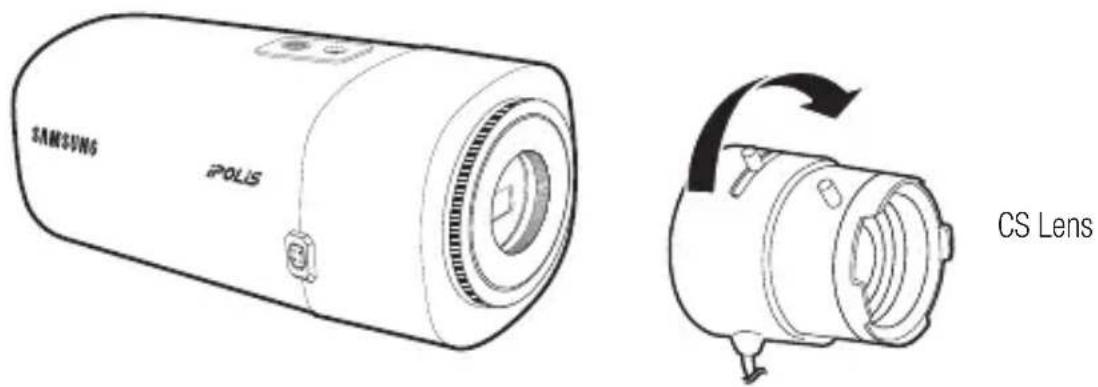
CS Lens
Mounting the C lens on a camera
Turn the C mount adapter included in the product package clockwise and turn the C lens clockwise.
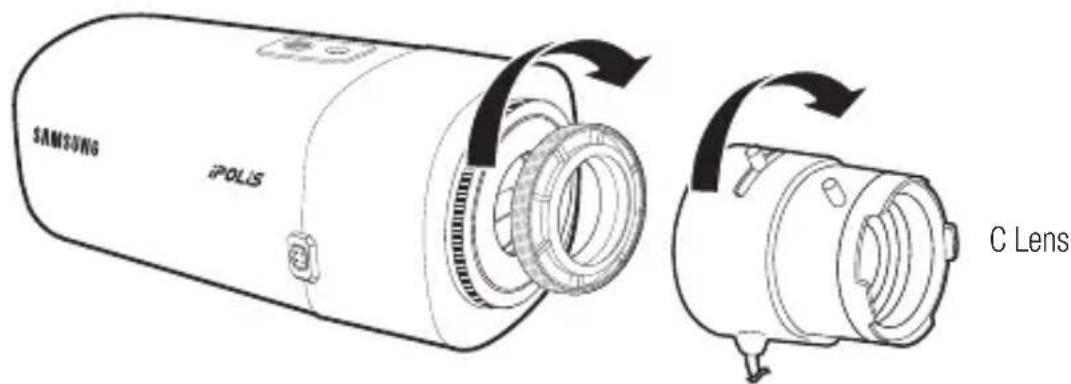
text_image
SAMSON6 iPOLS C LensConnecting the Auto Iris Lens connector
Plug the iris connector of the lens in the camera connecting groove.
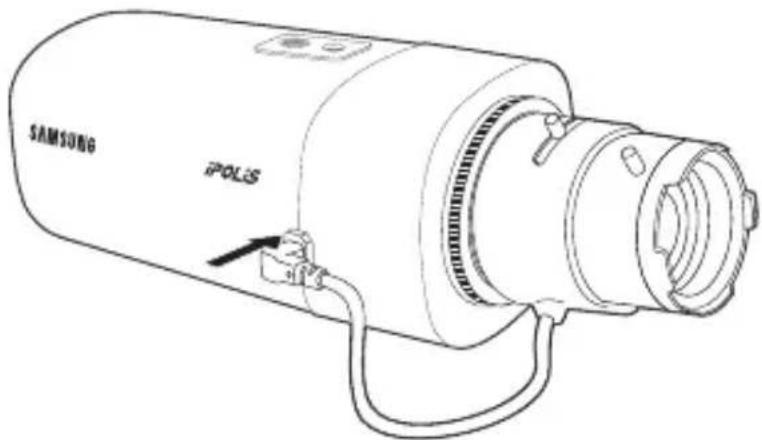
text_image
SAMSUNG iPOLISFocusing
Select a target to film, turn the zoom lever of the lens to adjust the magnification and then focus the lens so that target is clearly displayed.
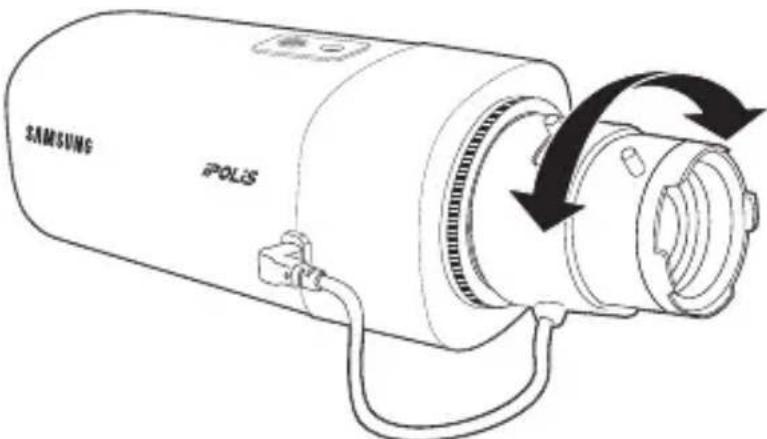
text_image
SAMSUNG iPOLIS
■ After focusing with the zoom lever of the lens, press the [FOCUS] button on the rear of the camera to adjust the lens even more clearly.
INSTALLATION (SND-7084)
Precautions before installation
Ensure you read out the following instructions before installing the camera:
- It must be installed on the area (ceiling or wall) that can withstand 5 times the weight of the camera including the installation bracket.
- Stuck-in or peeled-off cables can cause damage to the product or a fire.
- For safety purposes, keep anyone else away from the installation site. And put aside personal belongings from the site, just in case.
Disassembling
- Use one hand to hold the camera's bottom part and turn the cover counterclockwise with another hand to separate it.
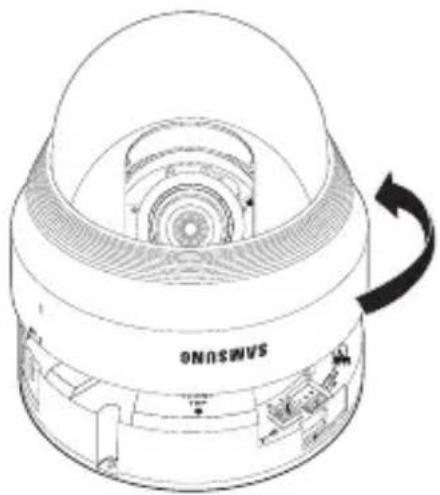
natural_image
Technical line drawing of a Samsung air purifier with internal components and airflow direction (no text or symbols)- Lift up the inner cover to separate it.
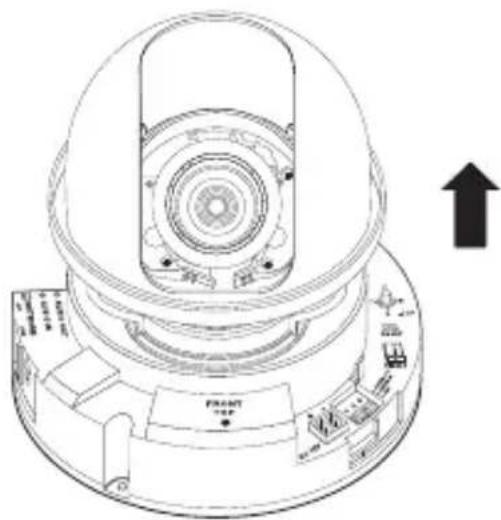
natural_image
Technical line drawing of a mechanical device with labeled components and an upward arrow indicator (no readable text or symbols)Installation
-
Attach the installation template to the selected area and punch 3 holes as shown in the figure.
-
Use the 2 supplied screws to fix the camera to the 2 punched holes.
- Set the
-
Connect the camera internal terminal with the corresponding cable.
-
Refer to "Adjusting the monitoring direction for the camera" to adjust the lens in a desired direction. (page 36)
-
Fasten the dome case (dome cover + camera case) to the main body as shown in the figure.
Pay attention to the direction for assembly.
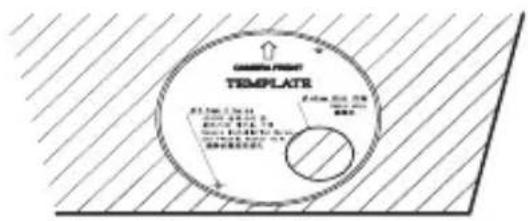
text_image
TEMPLATE 材料: 10000000000000000000000000000000000000000000000000000000000000000000000000000000000000000000000000000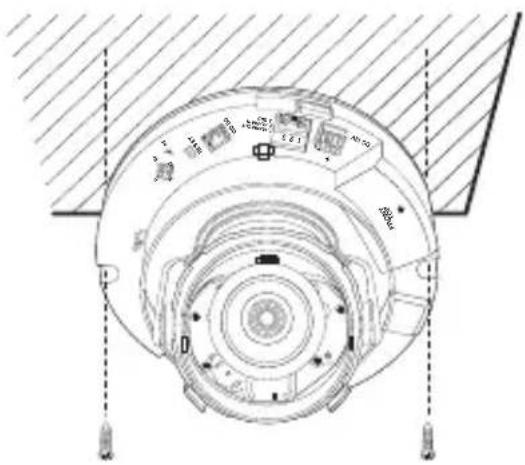
text_image
Technical diagram of a mechanical component with labeled parts and dimension annotations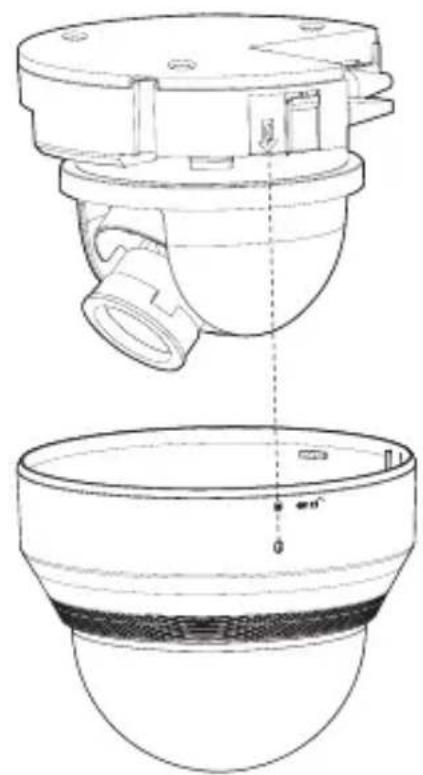
natural_image
Technical line drawing of a mechanical component with a spherical base and a conical top, showing internal structure and alignment (no text or symbols)INSTALLATION (SNV-7084)

This camera is waterproof and in compliance with the IP66 spec, but the jack connected to the external cable is not. You are recommended to install this product below the edge of eaves to prevent the cable from being externally exposed.
Precautions before installation
Ensure you read out the following instructions before installing the camera:
- It must be installed on the area (ceiling or wall) that can withstand 5 times the weight of the camera including the installation bracket.
- Stuck-in or peeled-off cables can cause damage to the product or a fire.
- For safety purposes, keep anyone else away from the installation site. And put aside personal belongings from the site, just in case.
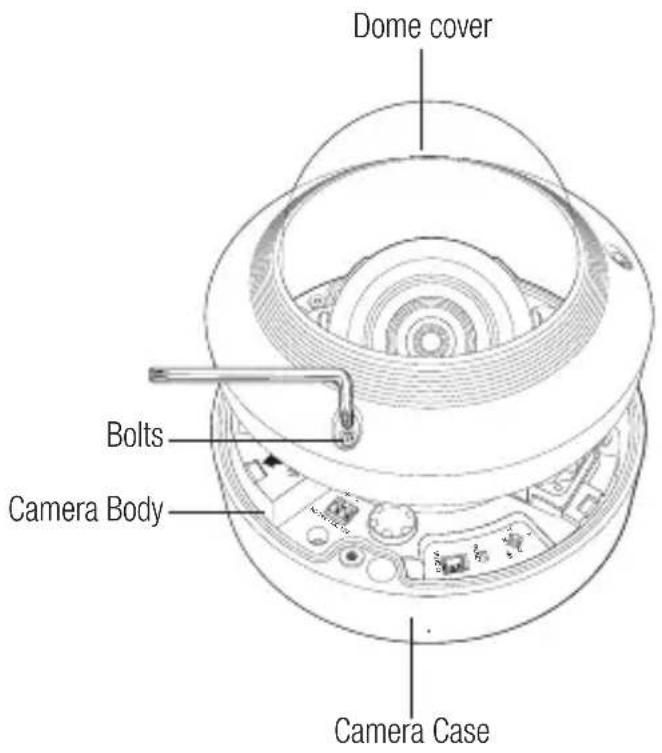
Disassembling
- With the provided L-wrench and drill bit, loosen 3 bolts on the dome cover counter clockwise to remove the cover.
text_image
Dome cover Bolts Camera Body Camera CaseInstallation
-
Using the template provided as an accessory, drill the screw installation hole(diameter of 6mm, minimal depth of 55mm) and firmly insert the plastic anchor provided as an accessory to the end.
-
Fit the bottom hole to the anchor hole and insert and fix the taping screw (M4.5xL50).
-
Connect and arrange the necessary cables lest that they should be damaged or twisted while installing the camera.
-
Adjust the lens in a desired direction by referring to the "Adjusting the monitoring direction for the camera" section. (page 36)
-
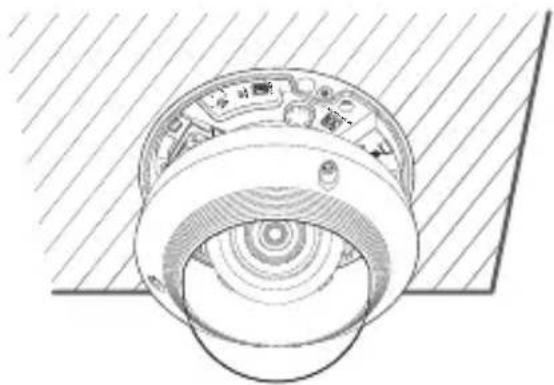
Close the dome cover.
■ To ensure waterproofing, tight up the fixing bolts using the L-wrench and drill bit.
natural_image
Technical line drawing of a mechanical component with concentric rings and a circular base, no visible text or symbolsConnecting waterproof power cable and LAN cable
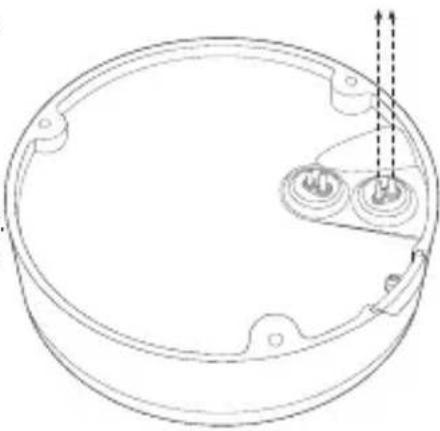
- Remove the dome cover and the case.
- Pull out the long projected part of the rubber plug on the bottom and remove it as shown in the figure.

■ Use an appropriate cable bush for the LAN cable to be connected.
- Basic camera : Use the cable with a diameter of ∅5\~6.5
- Components provided : Use the cable with a diameter of ∅7\~8.5.
natural_image
Technical line drawing of a circular mechanical component with mounting holes and internal features (no text or symbols)-
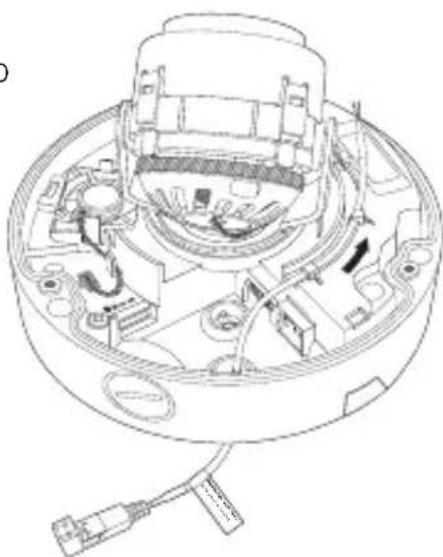
Insert the power cable into the small hole made by removing the projected part of the rubber plug in step 2 above, and lay the cable along the long groove.
-
Connect the power cable with the power terminal block.
natural_image
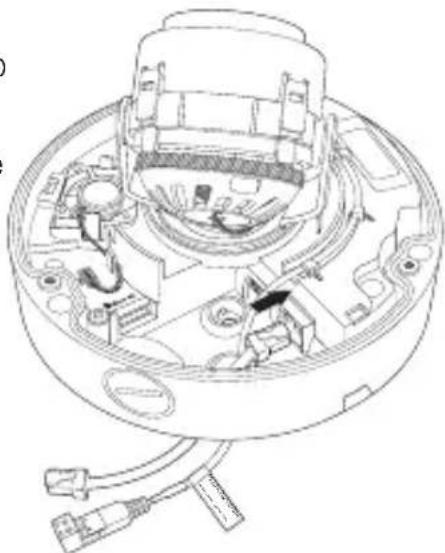
Technical line drawing of a mechanical device interior with no visible text or symbols- Insert the LAN cable into the large hole made by removing the projected part of the rubber plug in step 2 above.
- Remove the sheath with a cable cutter, and align the cables.
- Connect the LAN cable with a LAN connector, and insert it into the LAN tool.
- Connect the finished cable to the Ethernet port.
natural_image
Technical line drawing of a mechanical device with internal components and a black arrow indicating a specific part (no text or symbols present)Connecting alarm cable
- Remove the dome cover and the case.
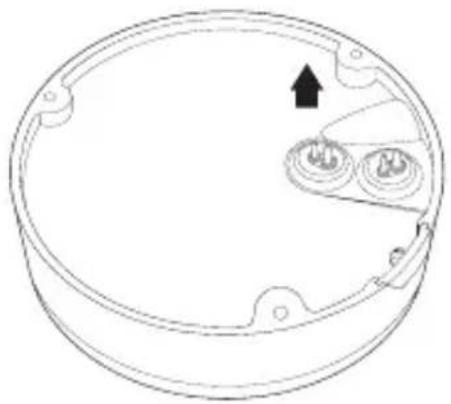
- Pull out the rubber plug on the bottom as shown in the figure.
natural_image
Technical line drawing of a circular mechanical component with mounting holes and internal components (no text or symbols)-
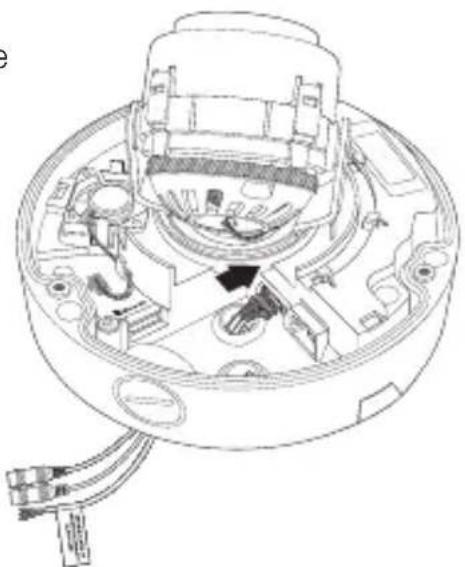
Insert the alarm cable into the hole made by removing the rubber plug in step 2, and connect the cable with the PCB alarm terminal.
-
Align the cable so that it should not be damaged or jammed when installing the camera.
-
Put the rubber plug of the alarm cable into the hole.
-
Adjust the lens in a desired direction by referring to the "Adjusting the monitoring direction for the camera" section. (page 36)
-
Attach the dome cover.
natural_image
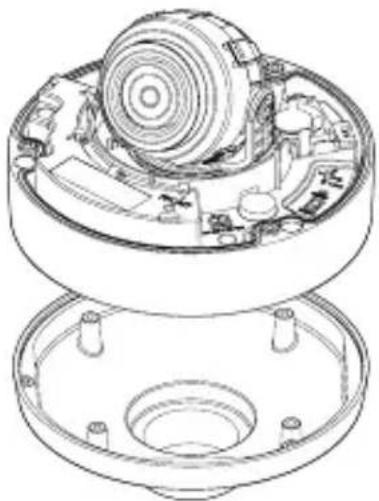
Technical line drawing of a mechanical assembly with no visible text or symbolsAttaching to the unbundled adapter
Choose and purchase a necessary one of the following options (unbundled) that is suitable to the installation site or for your convenience.
- Remove the dome cover from the case by referring to the "Disassembling" section. (page 28)
- Use the provided machine screw to fix the camera case to the unbundled adapter.
- Connect and arrange the necessary cables lest that they should be damaged or twisted while installing the camera.
- Install the camera body in the reverse order of "Disassembling".
-
Adjust the lens in a desired direction by referring to the "Adjusting the monitoring direction for the camera" section. (page 36)
-
Close the dome cover.
■ To ensure waterproofing, tight up the fixing bolts using the L-wrench and drill bit.
natural_image
Technical line drawing of a mechanical device showing internal components and housing (no text or symbols)Outdoor installation
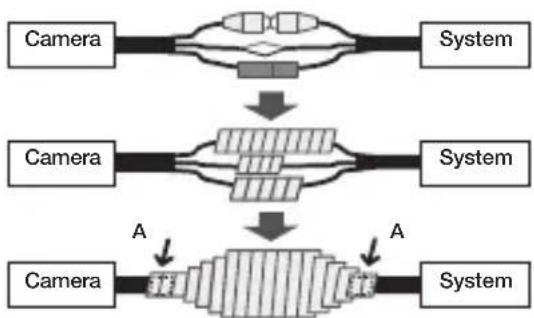
When you install it outside of the building, please waterproof it with waterproof butyl rubber tape (can be purchased in stores) so that water does not leak from the gap of the cable connected to the outside.
- Connect the power, I/O, BNC, and LAN cables.
- Wrap the black cable jacket (Area A) and the cable connection area with waterproof (butyl rubber) tape so that more than half of the butyl rubber tape is overlapped.
flowchart
graph TD
    A["Camera"] --> B["System"]
    B --> C["Camera"]
    C --> D["System"]
    D --> E["Camera"]
    E --> F["System"]
    style A fill:#f9f,stroke:#333
    style B fill:#ccf,stroke:#333
    style C fill:#cfc,stroke:#333
    style D fill:#fcc,stroke:#333
    style E fill:#cff,stroke:#333
    style F fill:#ffc,stroke:#333

If the cable jacket is not waterproofed properly, then it can directly cause leakage. Make sure to protect the cable with a dense layer of taping.
■ Waterproof butyl tape is made of butyl rubber that can be stretched to twice its normal length.
Optional Accessories for Installation
For your easier installation, you can purchase appropriate optional accessories available.
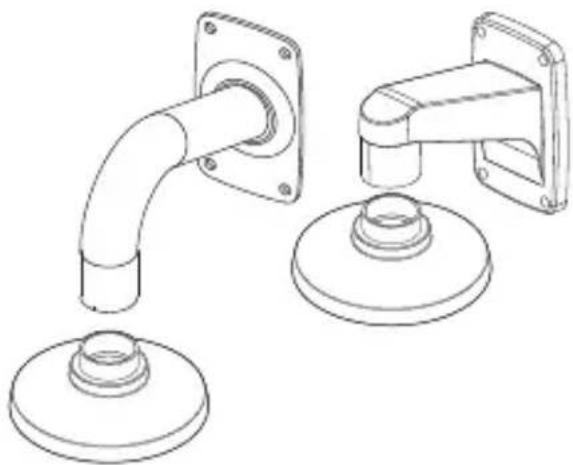
- WALL MOUNT ADAPTOR(SBP-300WM or SBP-300WM1)/HANGING MOUNT (SBP-301HM3)
This adaptor is used when installing the dome camera onto a wall.
natural_image
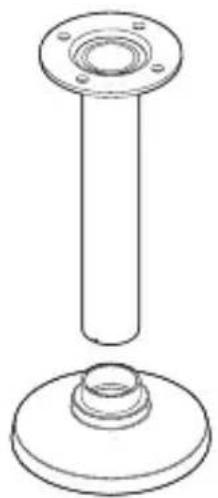
Technical line drawing of three mechanical components with no visible text or symbols- CEILING MOUNT ADAPTOR(SBP-300CM)/HANGING MOUNT(SBP-301HM3)
This adaptor is used when installing the dome camera on a concrete ceiling.
natural_image
Technical line drawing of a flanged bolt and base (no text or symbols)-
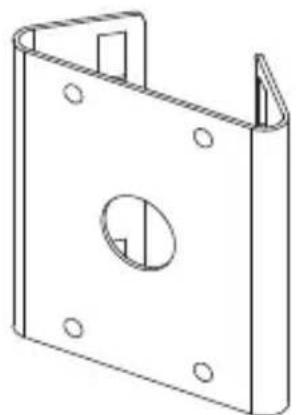
POLE MOUNT ADAPTOR(SBP-300PM) This is an adaptor for WALL MOUNT ADAPTOR (SBP-300WM or SBP-300WM1) installation on a pole whose diameter is bigger than 80mm.
-
CORNER MOUNT ADAPTOR (SBP-300KM) This is an adaptor for WALL MOUNT ADAPTOR (SBP-300WM or SBP-300WM1) installation on the corner of wall joint.
natural_image
Technical line drawing of a mechanical housing or bracket with mounting holes and a circular cutout (no text or symbols)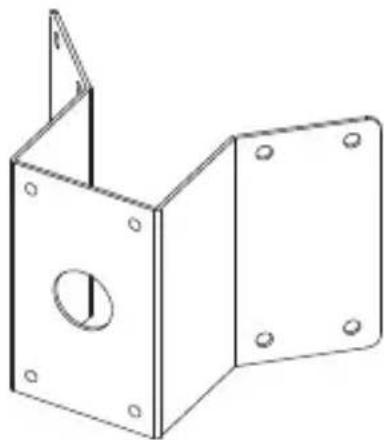
natural_image
Technical line drawing of a metal bracket with mounting holes and a central hole (no text or symbols)Adjusting the monitoring direction for the camera (SND-7084/ SNV-7084)
text_image
Pan Tilt Lens rotation■ Adjusting the monitoring direction
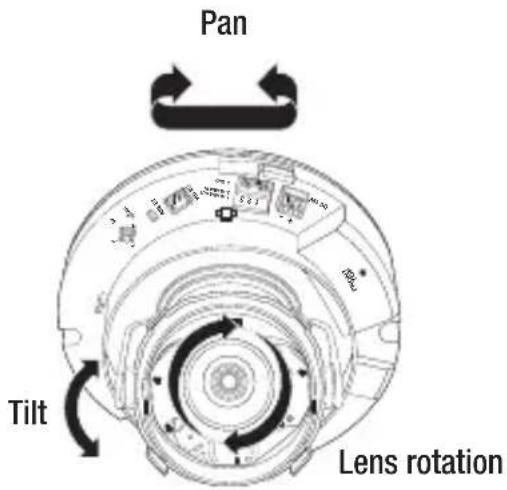
You can adjust the camera direction only when the camera is fixed on the ceiling. Where, rotating the camera unit to the left or right is called Pan, adjusting the tilt is called Tilt, and turning the lens on its axis is called Rotation.
- The effective range of pan is a total of 354 degrees.
- The effective range of rotation is a total of 355 degrees.
- The effective range of tilt is a total of 67 degrees.

■ The image can be covered up by the camera case depending on the angle.
- Do not forcefully turn the focus/zoom lens after the dome case is disassembled. Otherwise, it may cause an incorrect focus due to a motor failure.
■ Methods of adjustment
- After installing the camera, adjust the panning angle in consideration of the monitoring direction.
- Set the horizontal angle so that the image is not reversed.
In case of the SND-7084 model, rotate the lens with the cover on the rear of the lens unit.
- Adjust the tilt angle so that the camera faces toward the monitoring object.
INSERTING/REMOVING A MICRO SD MEMORY CARD

- Disconnect the power cable from the camera before inserting the Micro SD memory card.
- Do not insert the Micro SD memory card while it's upside down by force. Otherwise, it may damage the Micro SD memory card.
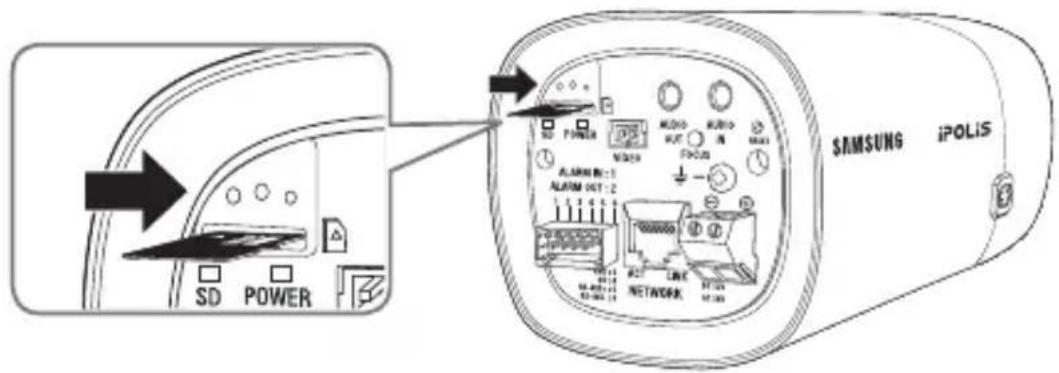
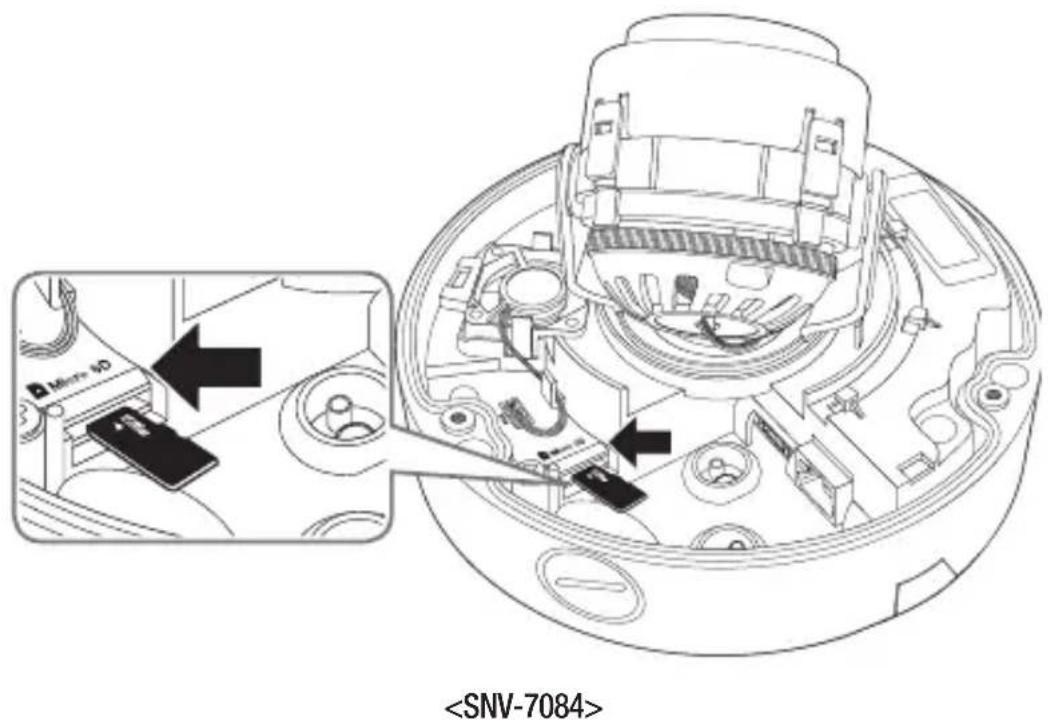
Inserting a Micro SD Memory Card
Push the Micro SD memory card in the direction of the arrow shown in the diagram.
text_image
SD POWER ALARM IN: 1 ALARM OUT: 2 POWER MOSIN V320 MOSIN MOSIN MOSIN MOSIN MOSIN MOSIN MOSIN MOSIN MOSIN MOSIN MOSIN MOSIN MOSIN MOSIN MOSIN MOSIN MOSIN MOSIN MOSIN MOSIN MOSIN MOSIN MOSIN MOSIN MOSIN MOSIM MOSIM MOSIM MOSIM MOSIM MOSIM MOSIM MOSIM MOSIM MOSIM MOSIM MOSIM MOSIM MOSIM MOSIM MOSIM MOSIM MOSIM MOSIM MOSIM MOSIM MOSIM MOSIM MOSIM MOSIM MOSI MOSI MOSI MOSI MOSI MOSI MOSI MOSI MOSI MOSI MOSI MOSI MOSI MOSI MOSI MOSI MOSI MOSI MOSI MOSI MOSI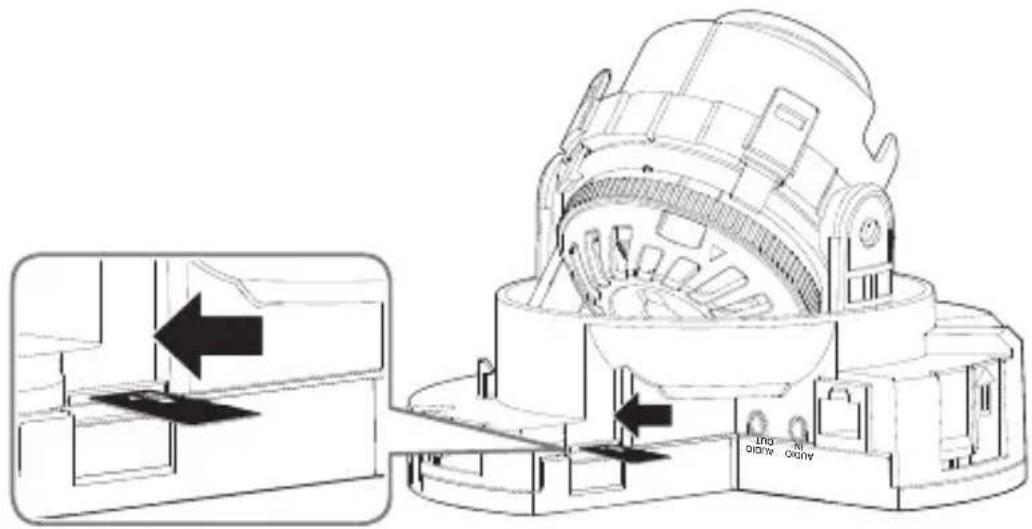
text_image
Technical diagram of a mechanical device with labeled parts and directional arrows indicating process flow or assembly.installation & connection
text_image
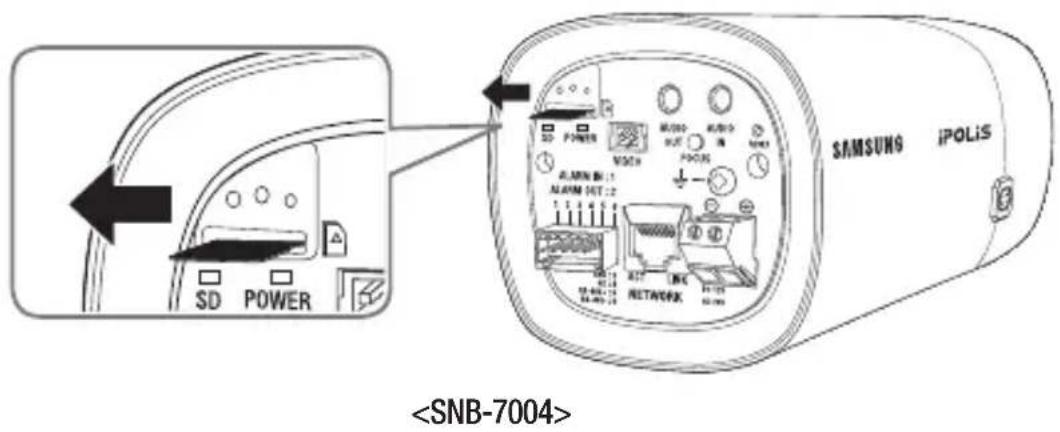
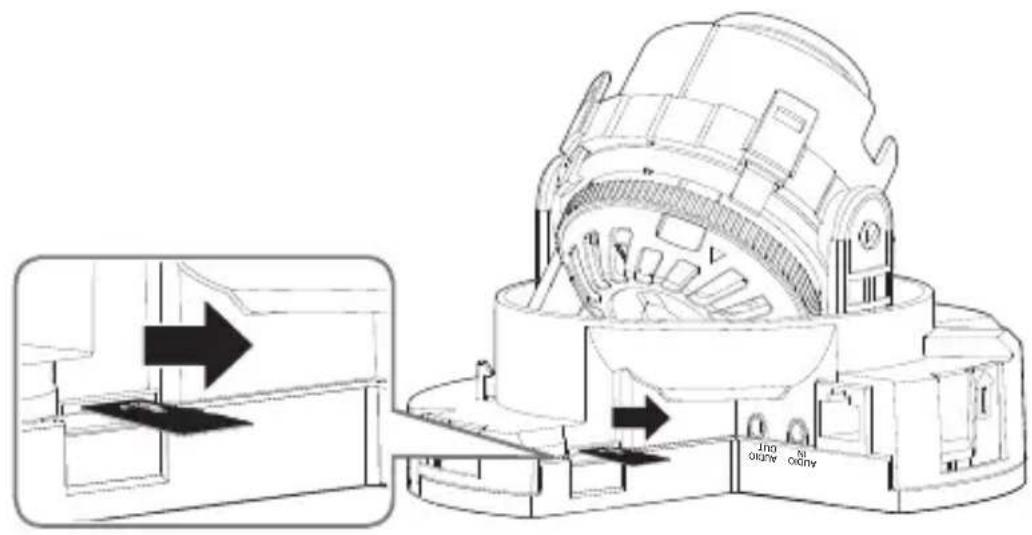
Removing a Micro SD Memory Card
Gently press down on the exposed end of the memory card as shown in the diagram to eject the memory card from the slot.
text_image
text_image
Technical diagram of a mechanical device with labeled components and directional arrows indicating flow or movement.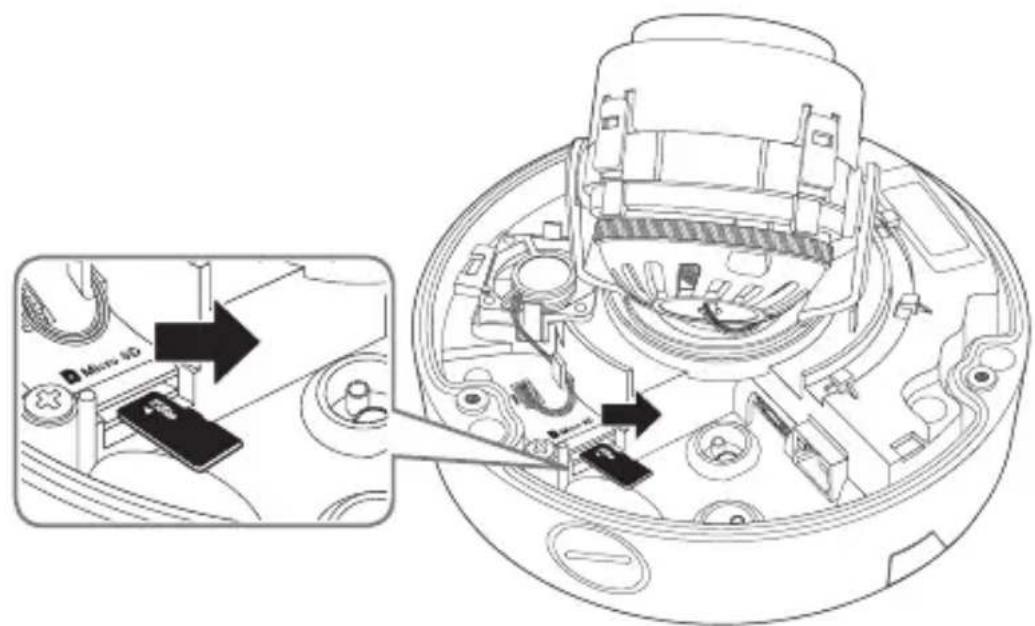
text_image
Micro 4D
- Pressing too hard on the Micro SD memory card can cause the card to shoot out uncontrollably from the slot when released.
Before removing your Micro SD memory card, turn off the camera or go to, turn the device off, and press the [Apply (Apply)] button. (Page 122)
If you turn off the camera or remove the Micro SD memory card that contains data from the product, the data may be lost or damaged.
MEMORY CARD INFORMATION (NOT INCLUDED)
What is a memory card?
The memory card is an external data storage device that has been developed to offer an entirely new way to record and share video, audio, and text data using digital devices.
Selecting a memory card that's suitable for you
Your camera supports Micro SD/SDHC/SDXC memory cards.
You may, however, experience compatibility issues depending on the model and make of the memory card.
For your camera, we recommend you use a memory card from the following
manufacturers:
Micro SD/SDHC/SDXC Memory Card : Sandisk, Transcend
Memory cards of 4GB \~ 64GB is recommended for using with this camera.
Playback performance can be affected depending on the speed of memory card, so use the high-speed memory card.
For the framerate below 30 fps, it is recommended to use the specification memory card of Class 6 or higher.
For the framerate over 31 fps, it is recommended to use the specification memory card of Class 10 UHS or higher.
Memory Card Components
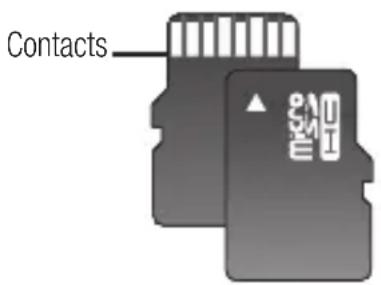
text_image
ContactsMicro SD/SDHC/SDXC
text_image
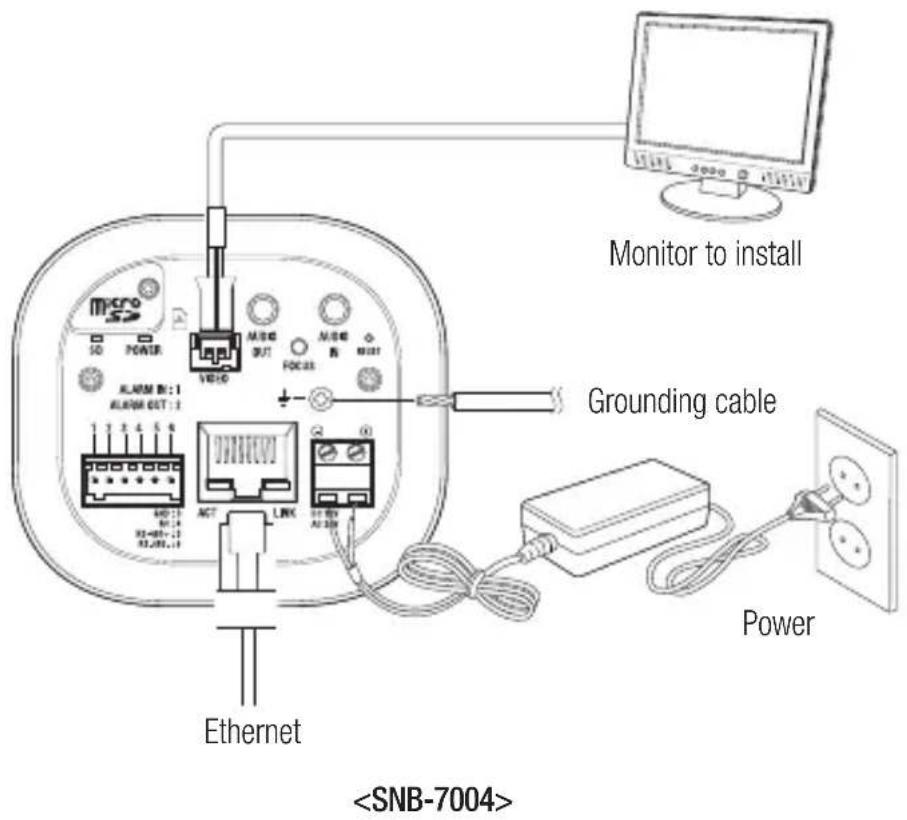
Monitor to install Grounding cable Power Ethernet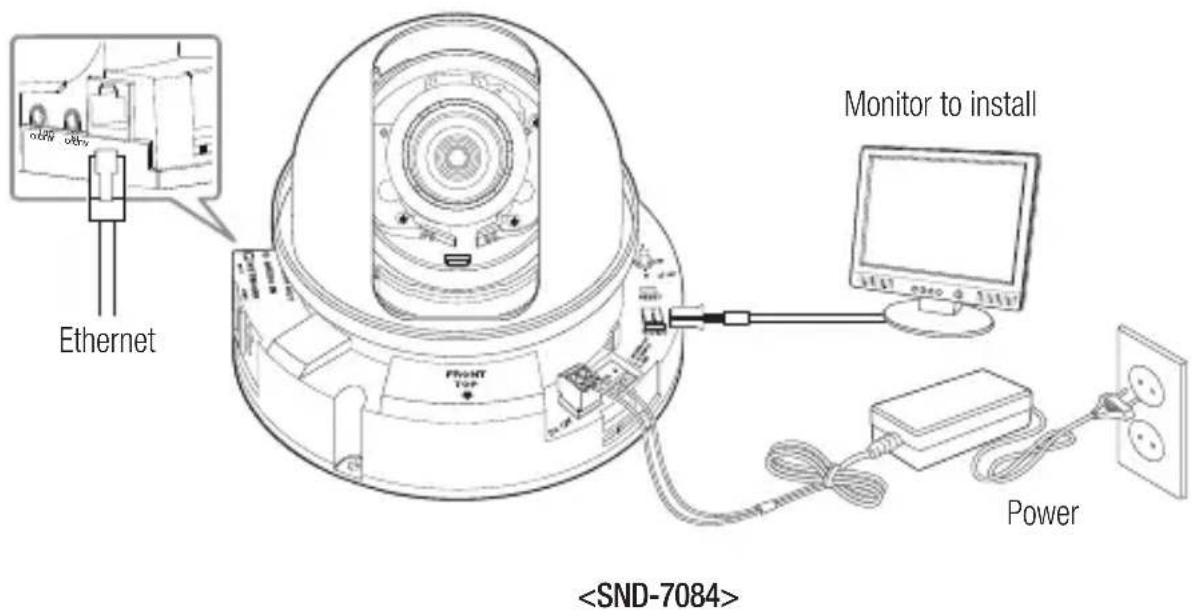
text_image
Ethernet Monitor to installinstallation & connection
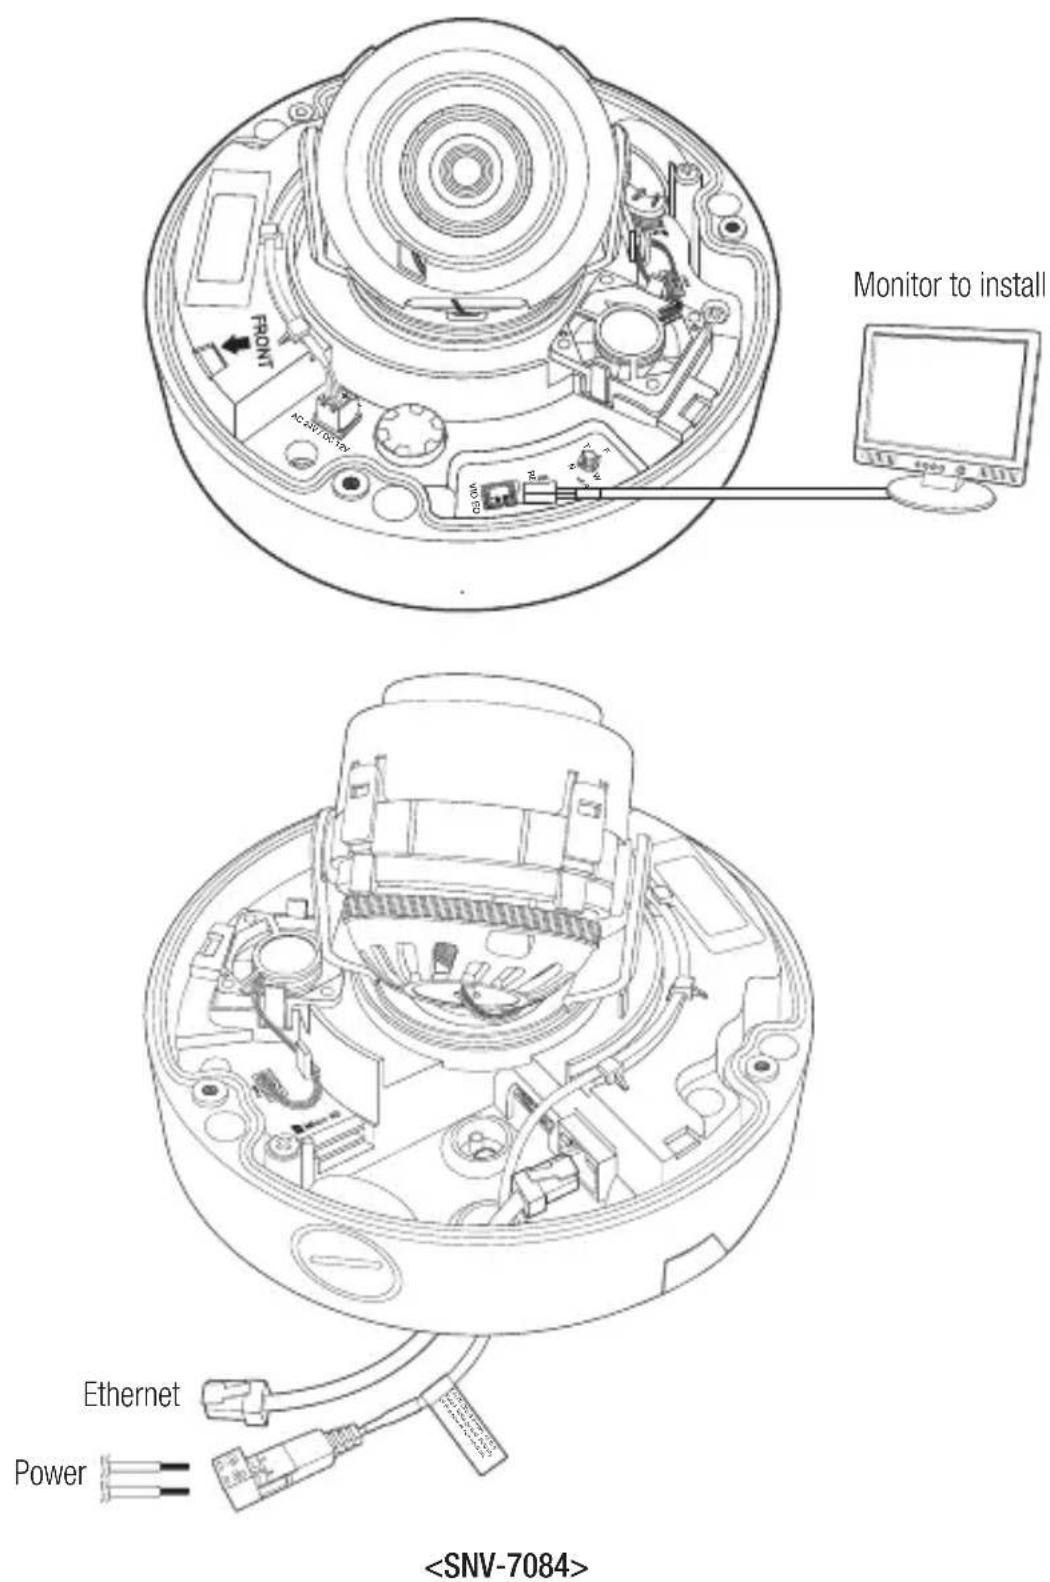

- The CVBS out terminal of the product is provided for easier installation, and is not recommended for monitoring purposes.
Ethernet Connection
Connect the Ethernet cable to the local network or to the Internet.
Power Supply (SNB-7004)
Use the screwdriver to connect each line (+, −) of the power cable to the corresponding power port of the camera.

If you turn on PoE and DC12V and AC24V at the same time, the first applied one will be used as the power source.
- You can also use a router featuring PoE to supply power to the camera. - Use PoE that is compliant with the IEEE802.3af protocols.
- Be careful not to reverse the polarity when you connect the power cable.
■ AC24V can be connected in non-polar union.
If you want to connect an external device, you must turn off the external device before proceeding.
Power Supply (SND-7084)
Use the screwdriver to connect each line (+, -) of the power cable to the corresponding power port of the camera.

If both PoE and DC12V are applied simultaneously, the product will be supplied with power from PoE.
- You can also use a router featuring PoE to supply power to the camera. - Use PoE that is compliant with the IEEE802.3af protocols. - It is advisable to use only one power source from PoE and DC12V.
- Be careful not to reverse the polarity when you connect the power cable.
If you want to connect an external device, you must turn off the external device before proceeding.
Power Supply (SNV-7084)
Use the screwdriver to connect each line (+, -) of the power cable to the corresponding power port of the camera.

If you turn on PoE and DC12V and AC24V at the same time, the first applied one will be used as the power source.
- You can also use a router featuring PoE to supply power to the camera.
- Use PoE that is compliant with the IEEE 802.3af protocols.
- The heater operates at a low temperature environment in all cases that the dome camera is operated by PoE, AC 24V or DC 12V.
- Install the product at the temperature of -35^ or higher.
- The product can be operated down to the temperature of -40^ after it started up.
- Be careful not to reverse the polarity when you connect the power cable.
■ AC 24V can be connected in non-polar union.
If you want to connect an external device, you must turn off the external device before proceeding.
Power Cable Specification for Each Model
In case of DC 12V Input:
| Wire Type (AWG) #22 #20 #18 | ||||
| Cable Length (Max.) | SNB-7004 | 20m 32m 50m | ||
| SND-7084 | ||||
| SNV-7084 24m 38m 60m | ||||
In case of AC 24V Input:
| Wire Type (AWG) #22 #20 #18 | ||||
| Cable Length (Max.) | SNB-7004 | 34m 55m 88m | ||
| SNV-7084 | ||||
Network Cable Specification
| Item Contents Remark | |
| Connector RJ45 | |
| Ethernet 10/100Base-T 10/100 Mbps | |
| Cable UTP Category 5e | |
| Max Distance 100M | |
| PoE Support IEEE 8023af |
Grounding the Product (SNB-7004)
Connect the ground wire to the ground terminal which is located above the power input terminal by using a screwdriver.

■ Grounding protects the product from a surge or lightning.
- When grounding, make sure to turn the product's power off.
Recommended Grounding Cable
- Length: Less than 3M
• Gauge : 18 AWG or bigger
Ex) UL1007 AWG 18/16, UL1015 AWG18/16/14/12, UL2468 AWG18/16/14
installation & connection
Connecting to Audio Input/Output
flowchart
graph TD
    A["Microphone"] --> B["Amp"]
    C["Microphone"] --> D["AmpSpeaker"]
    E["Speaker"] --> F["Radio Station"]
    G["Speaker"] --> H["Amp"]
    I["Speaker"] --> J["Amp"]
    K["Microphone"] --> L["PC"]
    M["Speaker"] --> N["Amp"]
    O["Microphone"] --> P["Microphone"]
    Q["Network"] --> R["Central Display"]
    S["Network"] --> T["Central Display"]
    U["Microphone"] --> V["Amp"]
    W["Microphone"] --> X["Amp"]
    Y["Microphone"] --> Z["Amp"]
flowchart
graph TD
    A["Speaker"] --> B["Amp Amp"]
    C["Microphone"] --> D["PC"]
    B --> E["Network"]
    D --> E
    E --> F["Speaker"]
    E --> G["Microphone"]
    E --> H["Amp Amp"]
    E --> I["Microphone"]
installation & connection
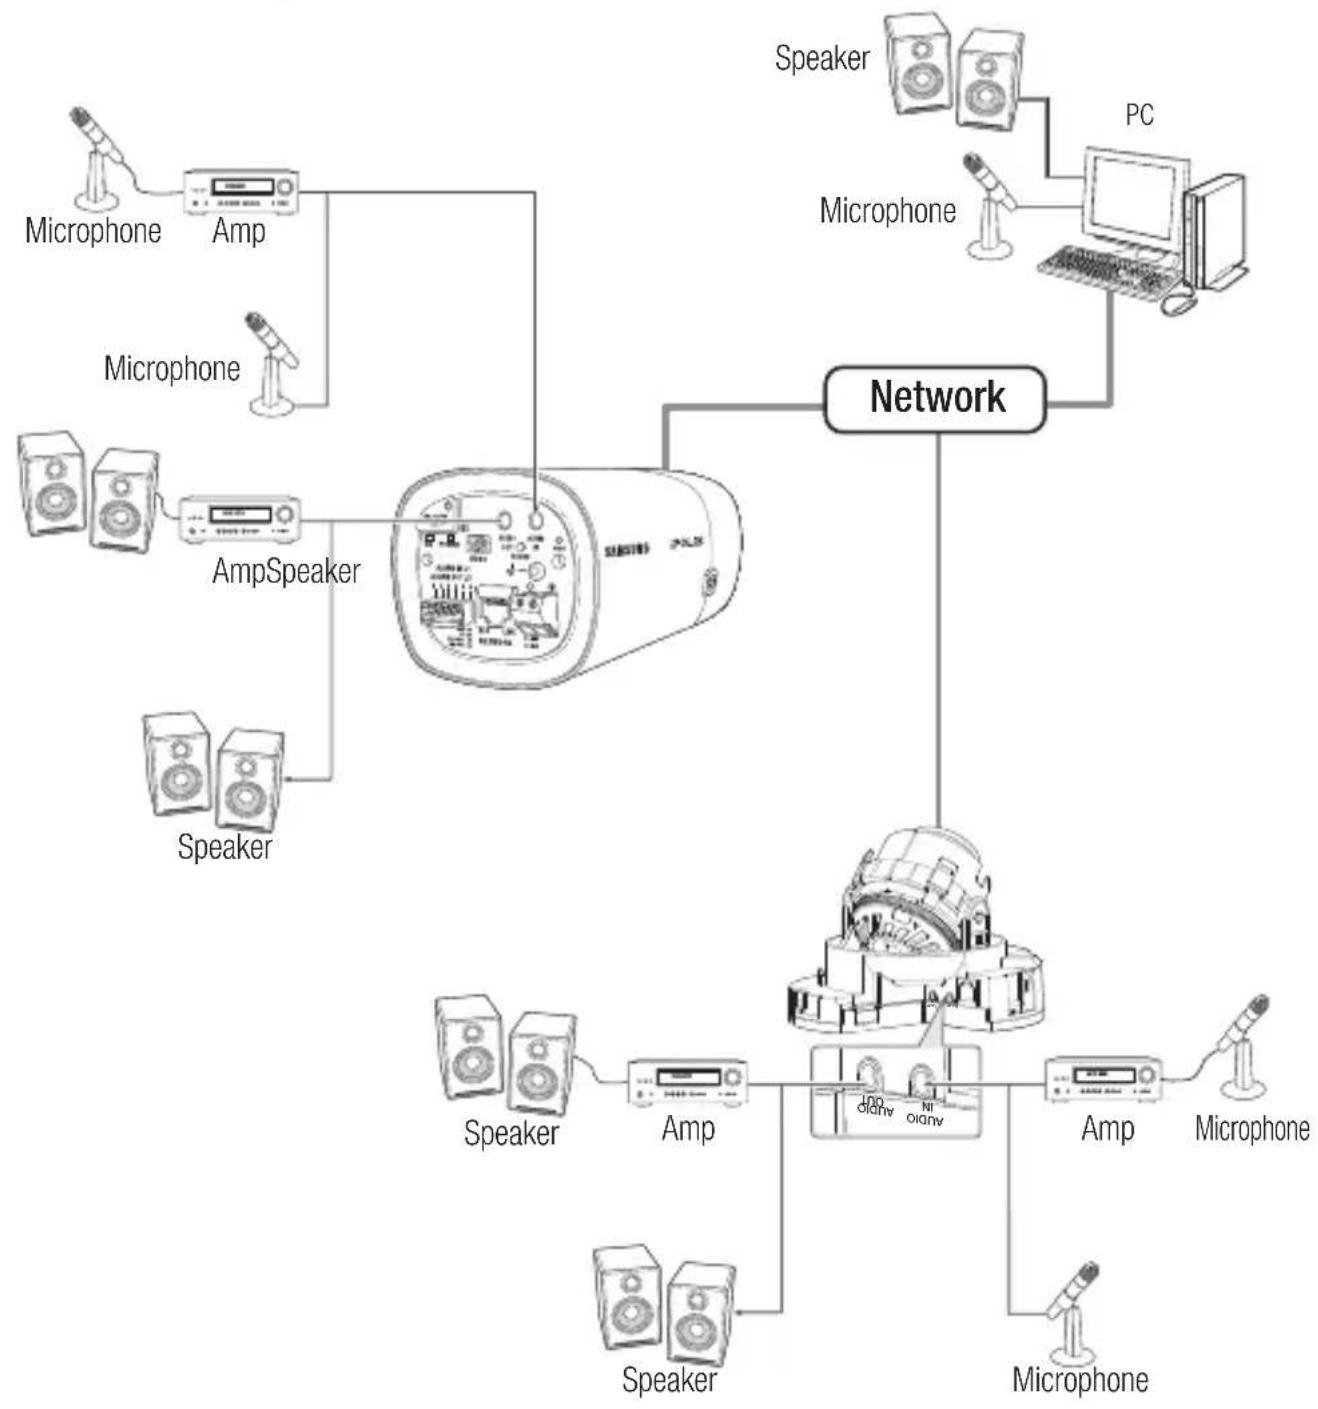
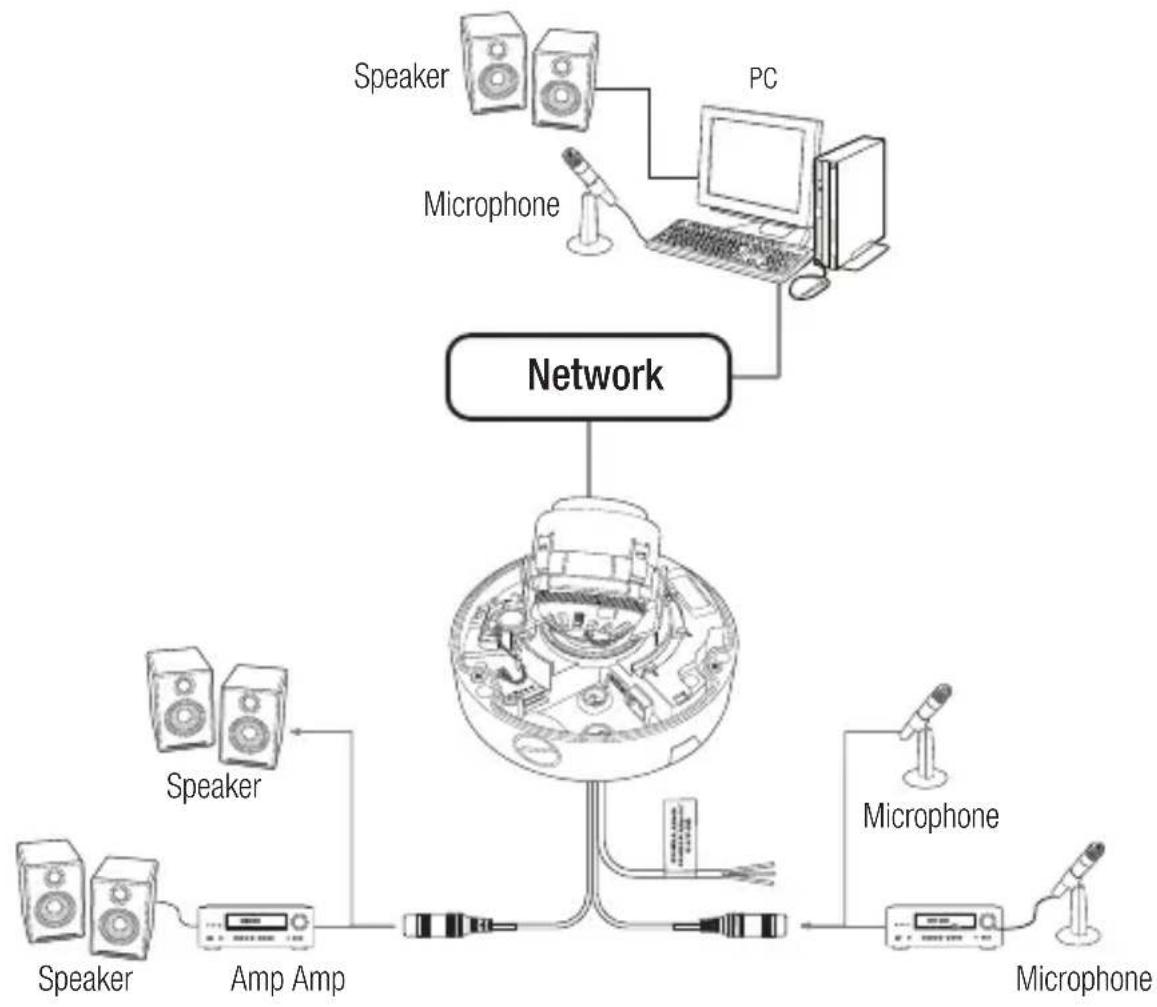
- Connect the AUDIO IN port of the camera with the microphone or LINE OUT port of the amplifier that the microphone is connected to.

As a microphone is built in, you can use the built-in microphone instead of an external one. (It is applicable only to the SNB-7004/SND-7084 model.)
-
Connect the AUDIO OUT port of the camera with the speaker or LINE IN port of the amplifier that the speaker is connected to.
-
Check the specifications for audio input.
- Audio Codec
- Audio In : G.711 PCM (Bit Rate: 64kbps / Sampling Frequency: 8kHz), G.726 ADPCM (Bit Rate: 16Kbps, 24Kbps, 32Kbps, 40Kbps / Sampling Frequency: 8kHz) - Audio Out : G.711 PCM (Bit Rate: 64kbps / Sampling Frequency: 8kHz)
• Full duplex Audio
• Audio in : Mono signal line input (Max.2.4 Vpp)
• Audio out : Mono signal line output (Max.2.4 Vpp)
• Line out impedance : 600Ω
Connecting to the I/O port box (SNB-7004)
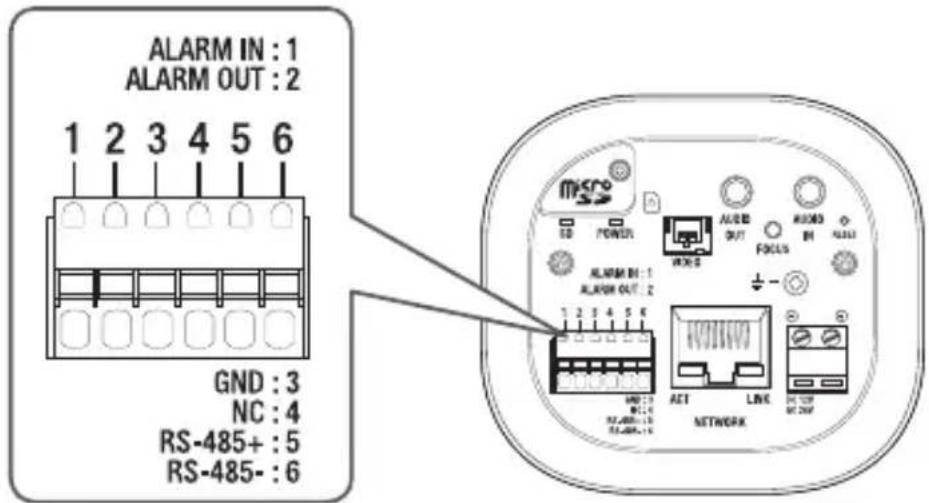
Connect the Alarm I/O signal to the corresponding port of the rear port box.
text_image
ALARM IN : 1 ALARM OUT : 2 1 2 3 4 5 6 GND : 3 NC : 4 RS-485+ : 5 RS-485- : 6 micro SD POWER ALABD OUT AUDIO BI ALABD ALABM BI : 1 ALABM OUT : 2 1 2 3 4 5 K HND:3 BI:4 RS-485+:5 RS-485+:6 ACT LINK NETWORK- ALARM IN : Used to connect the alarm input sensor or external day/night sensor.
• ALARM OUT : Used to connect the alarm output signal.
• GND : Used for earth-grounding.
• RS-485+ : Communication port for RS-485 receiver (+).
• RS-485- : Communication port for RS-485 receiver (-).
Connecting an external RS-485 device (SNB-7004)
Connect the camera with an external device using the [RS-485 +, -] ports.
You can control the pan/tilt operations of the camera via RS-485 communications.
The GND connection is recommended for RS-485 communications. If you encounter a communication failure, connect the GND pin as appropriate to correct the GND level between camera and external device.
Connecting to the I/O port box (SND-7084/SNV-7084)
Connect the Alarm I/O cable to the corresponding port of the inner port box.
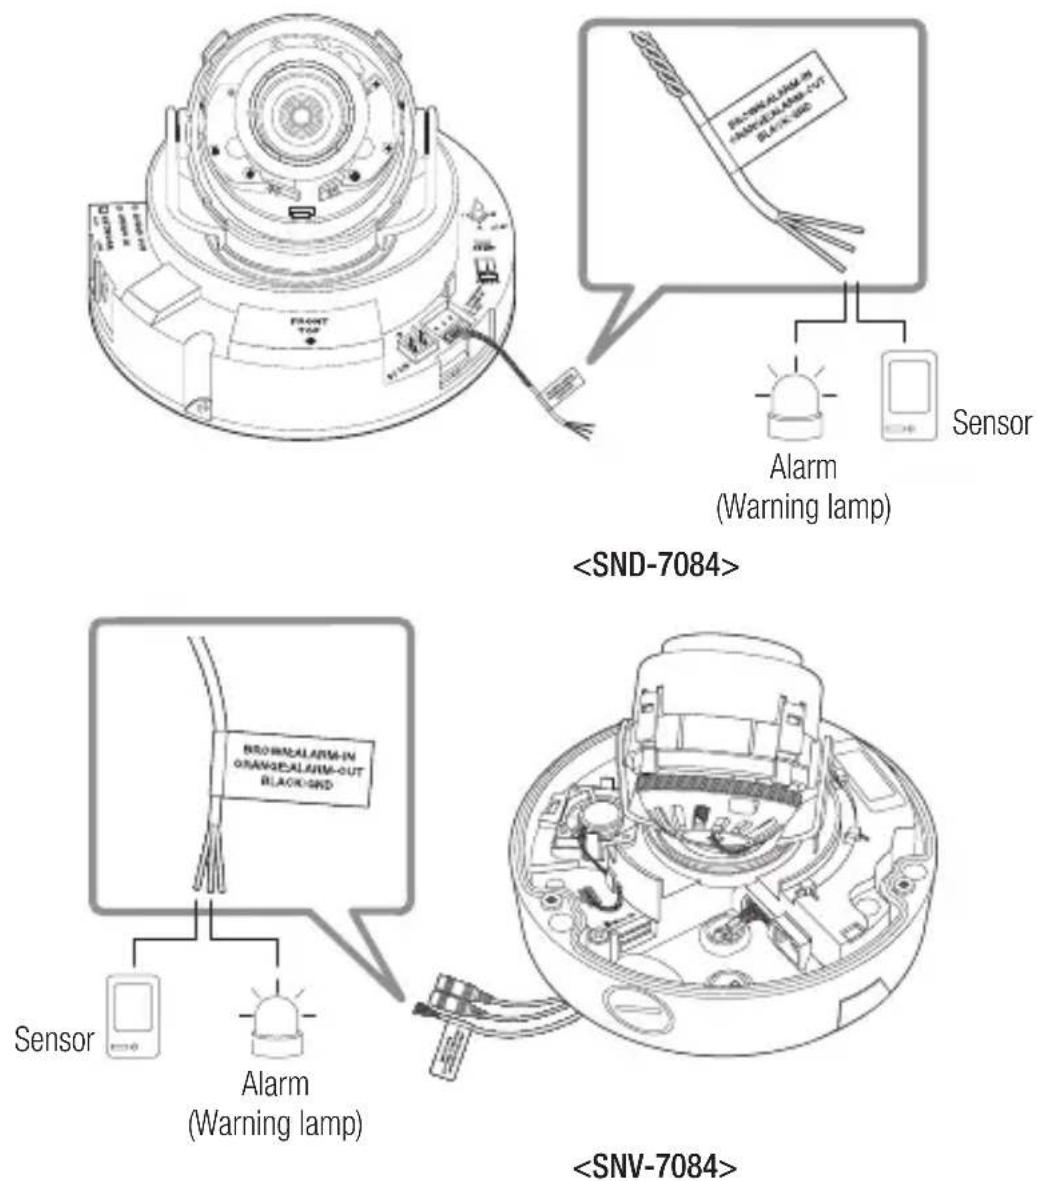
text_image
• ALARM OUT : Used to connect the alarm output signal.
- ALARM IN : Used to connect the alarm input sensor or external day/night sensor.
• GND : Common terminal to connect alarm signals.
To connect the external sensor
Connect one strand of each signal line (2-strand) of the sensors to the [ALARM IN] port, and connect the other strand to the [GND] port.
Alarm In Wiring Diagram
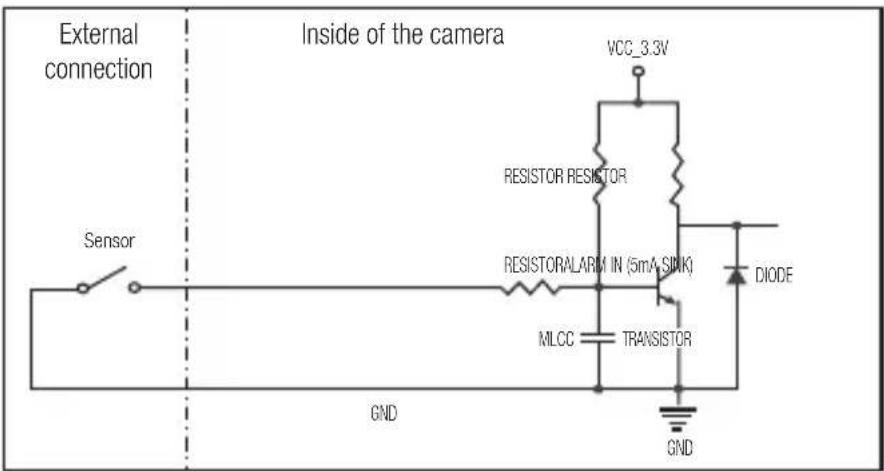
text_image
External connection Inside of the camera Sensor VCC_3.3V RESISTOR RESISTOR RESISTORALARM IN (5mA SINK) MLCC TRANSISTOR DIODE GND GNDTo connect the alarm out
If devices (e.g., flashing light and siren) that exceed the voltage and current specifications are connected by using the open collector method, it may cause malfunction.
Refer to the alarm out connection diagram below when connecting devices that exceed the voltage and current specifications.
Alarm Out Wiring Diagram (SNB-7004/SNV-7084)
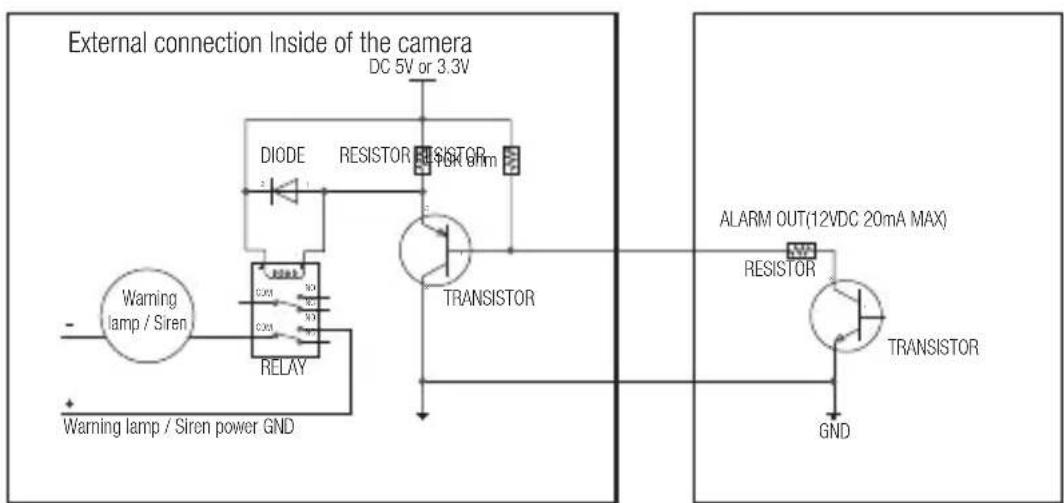
text_image
External connection Inside of the camera DC 5V or 3.3V DIODE RESISTOR RESISTOR DISP 60m Warning lamp / Siren RELAY Warning lamp / Siren power GND TRANSISTOR ALARM OUT(12VDC 20mA MAX) RESISTOR TRANSISTOR GNDAlarm Out Wiring Diagram (SND-7084)
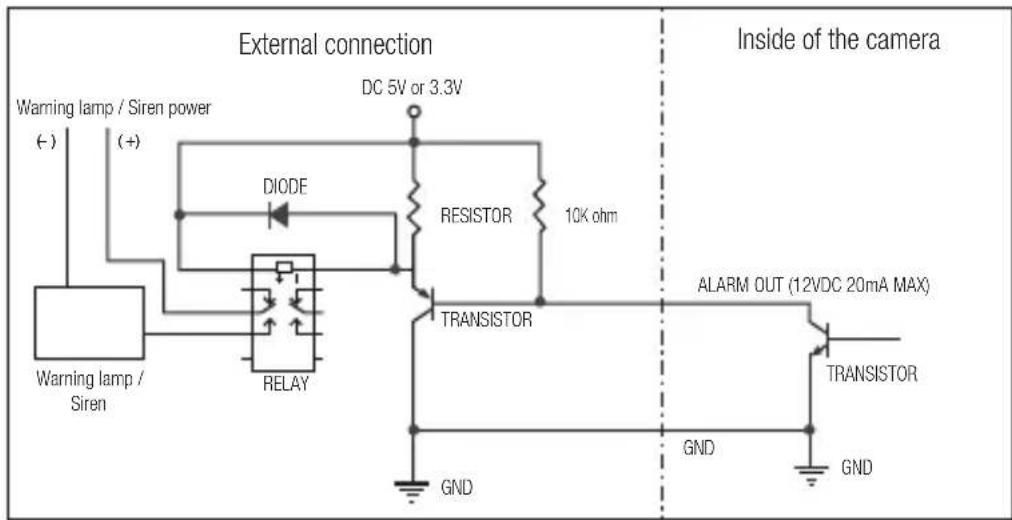
text_image
External connection Warning lamp / Siren power (-) (+) DIODE DC 5V or 3.3V RESISTOR 10K ohm Warning lamp / Siren RELAY TRANSISTOR GND GND Inside of the camera ALARM OUT (12VDC 20mA MAX) TRANSISTOR GND GNDnetwork connection and setup
You can set up the network settings according to your network configurations.
CONNECTING THE CAMERA DIRECTLY TO LOCAL AREA NETWORKING
Connecting to the camera from a local PC in the LAN
- Launch an Internet browser on the local PC.
- Enter the IP address of the camera in the address bar of the browser.
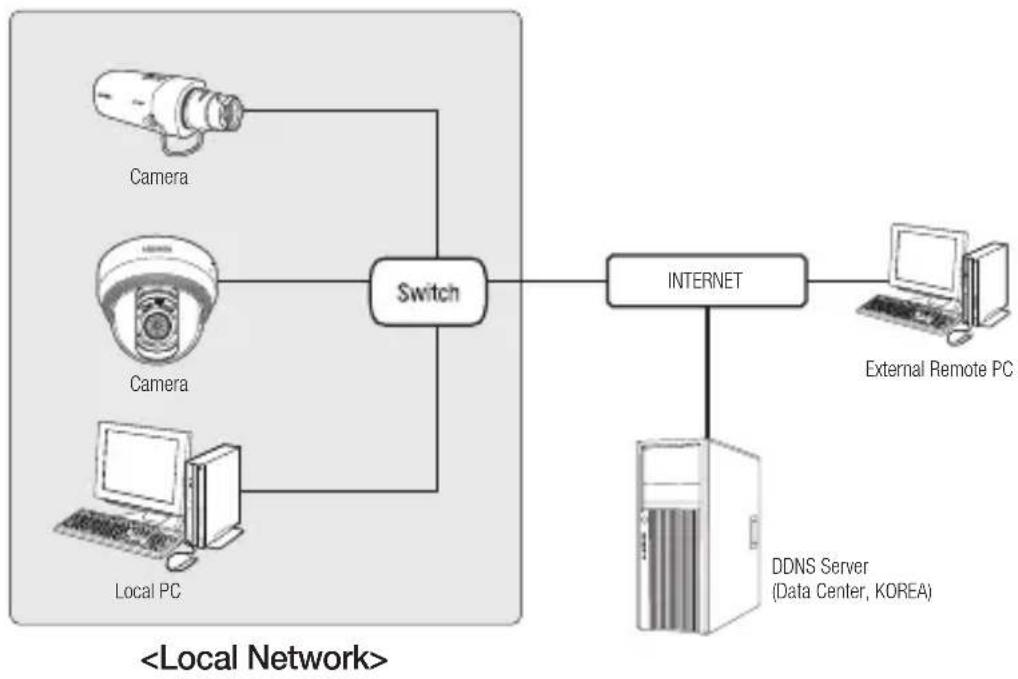
flowchart
graph TD
    A["Camera"] --> B["Switch"]
    C["Camera"] --> B
    D["Local PC"] --> B
    B --> E["INTERNET"]
    E --> F["External Remote PC"]
    E --> G["DDNS Server (Data Center, KOREA)"]
    style A fill:#f9f,stroke:#333
    style C fill:#f9f,stroke:#333
    style D fill:#f9f,stroke:#333
    style E fill:#ccf,stroke:#333
    style F fill:#ccf,stroke:#333
    style G fill:#ccf,stroke:#333

A remote PC in an external Internet out of the LAN network may not be able to connect to the camera installed in the intranet if the port-forwarding is not properly set or a firewall is set. In this case, to resolve the problem, contact your network administrator.
In the IP installer, you can use the initial password, "4321" to set IP Address, Subnet Mask, Gateway, HTTP Port, Device Port, IP type. After changing the network interface, for better security, access the web viewer and change the password.
- By factory default, the IP address will be assigned from the DHCP server automatically. If there is no DHCP server available, the IP address will be set to 192.168.1.100. To change the IP address, use the IP Installer.
For further details on IP Installer use, refer to "Static IP Setup". (Page 57)
CONNECTING THE CAMERA DIRECTLY TO A DHCP BASED DSL/CABLE MODEM
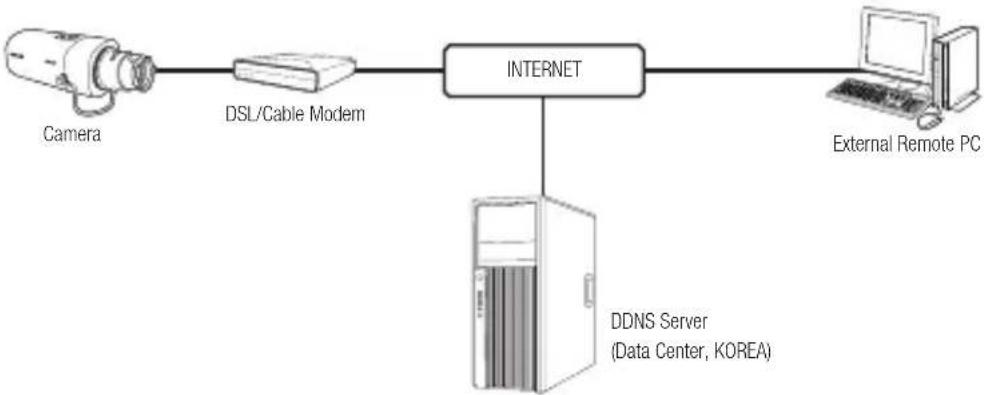
flowchart
graph LR
    A["Camera"] --> B["DSL/Cable Modem"]
    B --> C["INTERNET"]
    C --> D["External Remote PC"]
    C --> E["DDNS Server (Data Center, KOREA)"]
- Connect the user PC directly with the network camera.
- Run the IP Installer and change the IP address of the camera so that you can use the web browser on your desktop to connect to the Internet.
- Use the Internet browser to connect to the web viewer.
- Move to [Setup] page.
- Move to [Network] – [DDNS] and configure the DDNS settings.
- Move to [Basic] - [IP & Port], and set the network type to [DHCP].
- Connect the camera, which was removed from your PC, directly to the modem.
- Restart the camera.

- For registering the DDNS settings, refer to "Registering with DDNS". (page 113)
- For configuring the DDNS settings, refer to "DDNS". (page 112)
■ For setting the network type, refer to "IP & Port". (page 90)
network connection and setup
CONNECTING THE CAMERA DIRECTLY TO A PPPoE MODEM
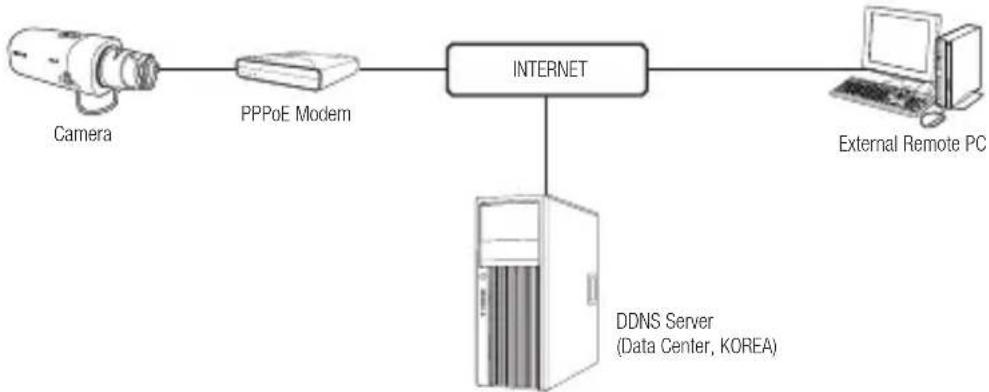
flowchart
graph LR
    A["Camera"] --> B["PPPoE Modem"]
    B --> C["INTERNET"]
    D["External Remote PC"] --> C
    C --> E["DDNS Server (Data Center, KOREA)"]
- Connect the user PC directly with the network camera.
- Run the IP Installer and change the IP address of the camera so that you can use the web browser on your desktop to connect to the Internet.
- Use the Internet browser to connect to the web viewer.
- Move to [Setup] page.
- Move to [Network] - [DDNS] and configure the DDNS settings.
- Move to [Basic] – [IP & Port] Setup Page, set the network type to [PPPoE], and enter the network service's ID and password.
- Connect the camera, which was removed from your PC, directly to the modem.
- Restart the camera.

For registering the DDNS settings, refer to "Registering with DDNS". (page 113)
■ For configuring the DDNS settings, refer to "DDNS". (page 112)
■ For setting the network type, refer to "IP & Port". (page 90)
CONNECTING THE CAMERA TO A BROADBAND ROUTER WITH THE PPPoE/CABLE MODEM
This is for a small network environment such as homes, SOHO and ordinary shops.
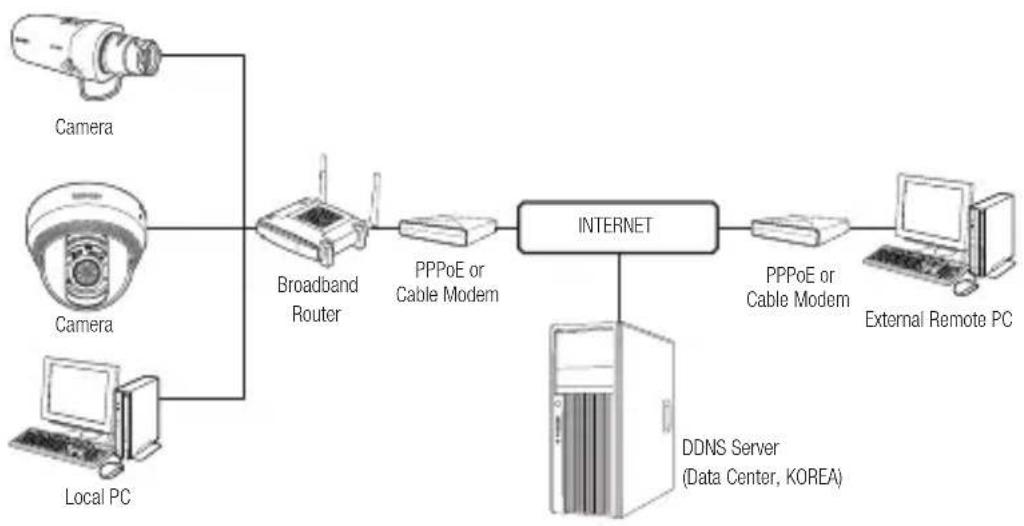
flowchart
graph LR
    A["Camera"] --> B["Broadband Router"]
    C["Camera"] --> B
    D["Local PC"] --> B
    B --> E["PPPoE or Cable Modem"]
    E --> F["INTERNET"]
    F --> G["DDNS Server (Data Center, KOREA)"]
    F --> H["PPPoE or Cable Modem"]
    H --> I["External Remote PC"]
Configuring the network settings of the local PC connected to a Broadband Router
Configuring the network settings of the local PC connected to a Broadband Router, follow the instructions below.
- Select :
- Follow the instructions below if you select
IP address : 192.168.1.100 Subnet Mask : 255.255.255.0 Default Gateway : 192.168.1.1
ex2) If the address (LAN IP) of the Broadband Router is 192.168.0.1
IP address : 192.168.0.100 Subnet Mask : 255.255.255.0 Default Gateway : 192.168.0.1
ex3) If the address (LAN IP) of the Broadband Router is 192.168.xxx.1
IP address : 192.168.xxx.100 Subnet Mask : 255.255.255.0 Default Gateway : 192.168.xxx.1

For the address of the Broadband Router, refer to the product's documentation.
For more information about port forwarding of the broadband router, refer to "Port Range Forward (Port Mapping) Setup". (Page 62)
network connection and setup
ButtonS uSeD in ip inStaLLer
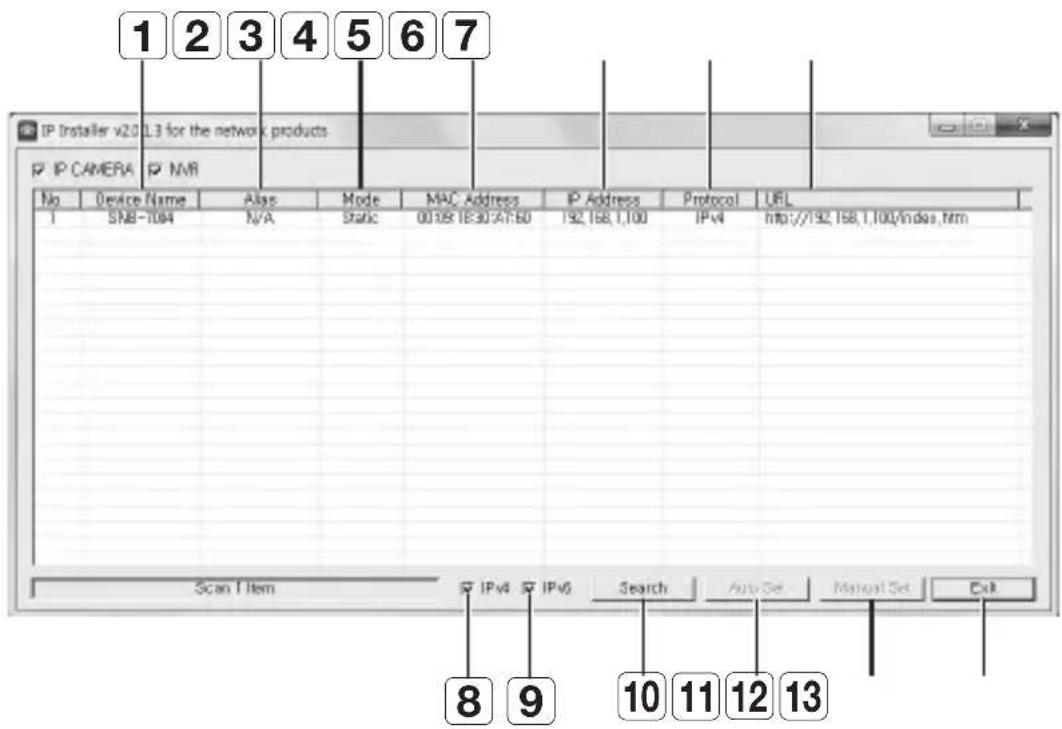
text_image
1 2 3 4 5 6 7 IP Installer v20 L3 for the network products IP CAMERA IP NVR No Device Name Alias Mode MAC Address IP Address Protocol URL 1 SNB-7084 N/A Static 00:05:18:30:47:50 192.168.1.100 IPv http://192.168.1.100/index.htm Scan Item IPv IPv Search Auto Set Manual Set Exit 8 9 10 11 12 13| Item Description | ||
| 1 | Device Name | Model name of the connected camera.Click the column to sort the list by model name.However, search will be stopped if clicked during the search. |
| 2 | Alias This function is not currently implemented. | |
| 3 | Mode | Displays either,,orfor the current network connection status. |
| 4 | MAC(Ethernet) Address | Ethernet address for the connected camera.Click the column to sort the list by Ethernet address.However, search will be stopped if clicked during the search. |
| 5 | IP Address | IP address.Click the column to sort the list by IP address.However, search will be stopped if clicked during the search. |
| 6 | Protocol | Network setting for the camera.The factory default is “IPv4”.Cameras with the IPv6 setting will be displayed “IPv6”. |
| 7 | URL | DDNS URL address enabling access from the external Internet. However, this will be replaced with theof the camera if DDNS registration has failed. |
| 8 | IPv4 Scans for cameras with the IPv4 setting. | |
| 9 | IPv6 | Scans for cameras with the IPv6 setting. Activated in an IPv6 compliant environment only. |
| 10 | Search | Scans for cameras that are currently connected to the network. However, this button will be grayed out if neither IPv4 nor IPv6 is checked. |
| 11 | Auto Set The IP Installer automatically configures the network settings. | |
| 12 | Manual Set You should configure the network settings manually. | |
| 13 | Exit Exits the IP Installer program. | |

For the IP installer, use only the installer version provided in the installation CD or use the latest one if available. You can download the latest version from the Samsung web site (www.samsungcctv.com).
STATIC IP SETUP
Manual Network Setup
Run
At the initial startup, both [Auto Set] and [Manual Set] will be grayed out.

- For cameras found with the IPv6 setting, these buttons will be grayed out as the cameras do not support this function.
-
Select a camera in the search list. Check the MAC address of the camera on the camera's label.
Both the [Auto Set] and [Manual Set] buttons will be activated. -
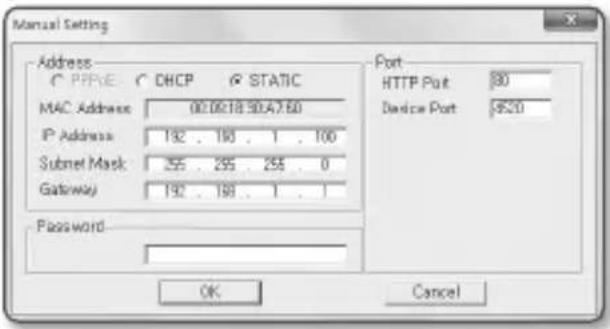
Click [Manual Set].
The Manual Setting dialog appears.
text_image
P. P. 100% (20%) for the version policies P. P. 100% (20%) No. | Change Name | Init | Update | MAC instructions | Performance | Protocol | IPR 1 | 000-700 | 5x3 | 100x | 000X: 100X: 48 | 90:36:1:35 | IPA | 100, 200, 300, 100, 50x36:35 Search Now P. P. 100% Search Save As Tools Helpnetwork connection and setup
- In the pane, provide the necessary information.
- MAC (Ethernet) Address : The MAC address imprinted on the camera label is automatically displayed and requires no user setting.

■ IP related parameters can be set only when DHCP is not checked.
text_image
Manual Setting Address PPRVE DHCP STATIC MAC Address 00:00:18 50:47:50 IP Address 192 . 190 . 1 . 100 Subset Mask 255 . 255 . 255 . 0 Gateway 192 . 190 . 1 . Password Port HTTP Port 30 Device Port $520 OK CancelIf not using a Broadband Router
For setting
-
In the
pane, provide necessary information. -
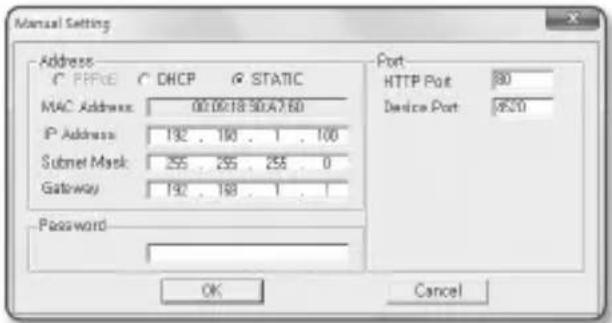
HTTP Port : Used to access the camera using the Internet browser, defaulted to 80.
• Device Port : Used to control the video signal transfer, defaulted to 4520.
text_image
Manual Setting Address PPFCE DHCP STATIC MAC Address: 00.00:18 50.47.60 IP Address: 192 . 190 . 1 . 100 Subset Mask: 255 . 255 . 255 . 0 Gateway: 192 . 190 . 1 . 1 Password: Port HTTP Port 30 Device Port 4520 OK Cancel- Enter the password.
Enter the password of "admin" account, which was used to access the camera.

For the security purposes, you are recommended to use a combination of numbers, alphabets uppercase and lowercase and special characters for your password.
If you want to change the password, refer to "Administrator password change" of the user setup. (page 87)
- Click [OK].
Manual network setup will be completed.
If using a Broadband Router
- IP Address : Enter an address falling in the IP range provided by the Broadband Router.
ex)192.168.1.2\~254, 192.168.0.2\~254, 192.168.XXX.2\~254
- Subnet Mask : The
- Gateway : The
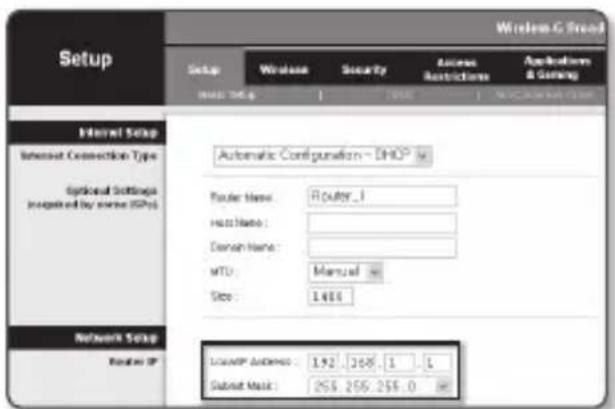
text_image
Setup Windows & Broad Setup Wireless Security Access Restrictions Application & Setting HKEY: DHLG 1 2024 1 NO.COM/THY-500 Internal Setup Internet Connection Type Optional Settings required by some (SPs) Automatic Configuration - DHCP Router Name: Router_1 Host Name: Dancer Name: MTU: Manual Size: 1486 Network Setup Router IP LocalIP Audience: 192.268.1.1 Submit Mask: 265.266.266.0
- The settings may differ depending on the connected Broadband Router model. For more information, refer to the user manual of the applicable router.
For more information about port forwarding of the broadband router, refer to "Port Range Forward (Port Mapping) Setup". (Page 62)
If the Broadband Router has more than one camera connected
Configure the IP related settings and the Port related settings distinctly with each other. ex)
| Category Camera #1 Camera #2 | |||
| IP related settings | IP Address | 192.168.1.100 | 192.168.1.101 |
| Subnet Mask | 255.255.255.0 | 255.255.255.0 | |
| Gateway | 192.168.1.1 | 192.168.1.1 | |
| Port related settings | HTTP Port | 8080 | 8081 |
| Device Port | 4520 | 4521 | |

If the
ex) http://IP address: HTTP Port http://192.168.1.100:8080
network connection and setup
Auto Network Setup
Run
At the initial startup, both [Auto Set] and [Manual Set] will be grayed out.

- For cameras found with the IPv6 setting, these buttons will be grayed out as the cameras do not support this function.
-
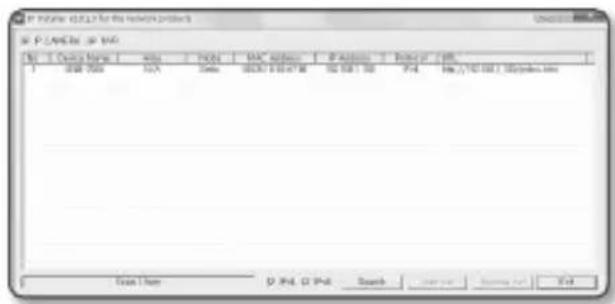
Select a camera in the search list. Check the MAC address of the camera on the camera's label. Both the [Auto Set] and [Manual Set] buttons will be activated.
-
Click [Auto Set]. The Auto Setting dialog appears. The
, , and will be set automatically. -
Enter the password. Enter the password of "admin" account, which was used to access the camera.

- For the security purposes, you are recommended to use a combination of numbers, alphabets uppercase and lowercase and special characters for your password. - If you want to change the password, refer to "Administrator password change" of the user setup. (page 87)
text_image
P: 124000 (C:\17\for the network project) S: P:\ADC#e - SP File | Data Name | type | PDF | MAC address | P address | Period or / PS 1 | 100000 | 10.5 | 30ms | 00:00:00:00 | 10:00:10 | 9:4 | 16:37:00:13\Mydaca.ina Test Time D:\PIL\O\PIL Search Survey Tools Help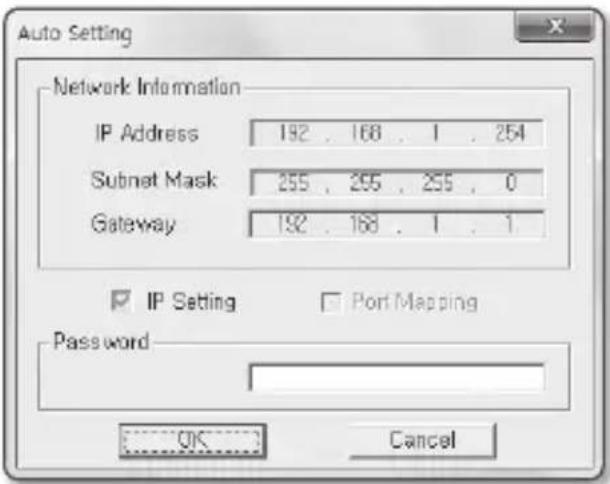
text_image
Auto Setting Network Information IP Address 192 . 168 . 1 . 254 Subnet Mask 255 . 295 . 255 . 0 Gateway 192 . 168 . 1 . 1 IP Setting Port Mapping Password OK Cancel- Click [OK]. Auto network setup will be completed.
Dynamic IP Environment Setup
• Example of the Dynamic IP environment
- If a Broadband Router, with cameras connected, is assigned an IP address by the DHCP server
- If connecting the camera directly to modem using the DHCP protocols
- If IPs are assigned by the internal DHCP server via the LAN
Checking the Dynamic IP
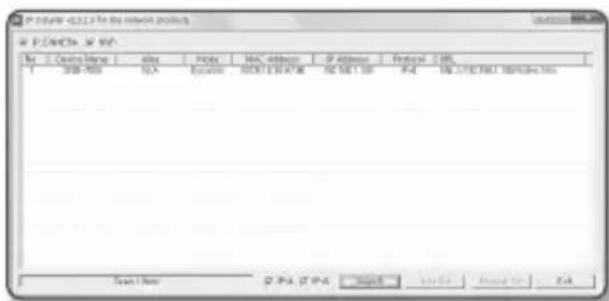
- Run the IP Installer on the user's local computer.
Cameras allocated with
- Select a camera from the search result
- Click the [Manual Set] button and check the camera's
address.
If you uncheck
text_image
P: 10.000 - C:\My device\Proct P: 10.000 - P: 10.000 File Edit View Insert Modify Import Address IP Address Protocol Help 128-988 533 Express FREE FROM NEW New User Open 2 P4, 2 P4 Import New Add New Add Add New Add New Add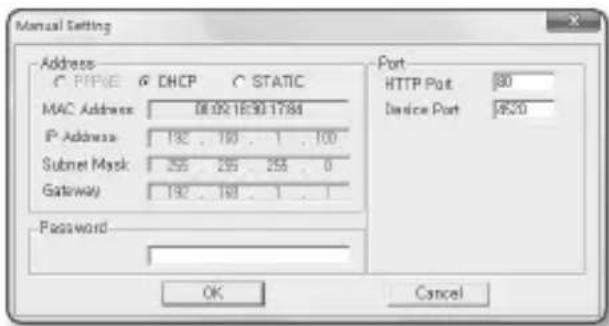
text_image
Manual Setting Address C:\PIP\E 6 DHCP C STATIC MAC Address 08.02.18.30.1784 IP Address 192 . 190 . 1 . 100 Subnet Mask 255 255 255 . 0 Gateway 192 . 190 . 1 . 1 Password Port HTTP Port 80 Device Port $520 OK Cancelnetwork connection and setup
PORT RANGE FORWARD (PORT MAPPING) SETUP
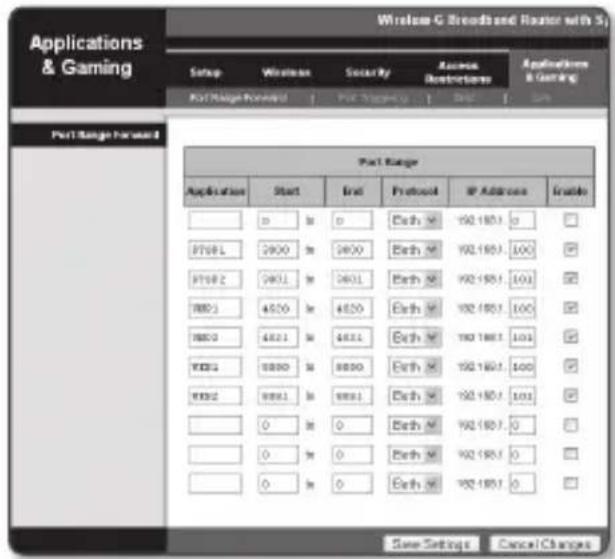
If you have installed a Broadband Router with a camera connected, you must set the port range forwarding on the Broadband Router so that a remote PC can access the camera in it.
Manual Port Range Forwarding
-
From the Setup menu of the Broadband Router, select
- . For setting the port range forward for a third-party Broadband Router, refer to the user guide of that Broadband Router. -
Select
and for each connected camera to the Broadband Router. Each port number for the Broadband Router should match that specified in - - from the camera's web viewer menu. -
When done, click [Save Settings]. Your settings will be saved.
text_image
Applications & Gaming Port Range Forward Port Range Forward Port Range Applications Start End Protocol IP Address Inside 0 0 Each # 192.1851 0 PTSEL 2800 3600 Each # 192.1851 100 PTSLZ 2801 3601 Each # 192.1851 100 WBS 4600 4800 Each # 192.1851 100 WBS 4801 4801 Each # 192.1851 100 WBS 6800 6800 Each # 192.1851 100 WBS 6801 6801 Each # 192.1851 100 0 0 Each # 192.1851 0 0 0 Each # 192.1851 0 0 0 Each # 192.1851 0 Save Settings Cancel Changes
- Above sample instructions are based on the CISCO's Broadband Router.
■ The settings may differ depending on the connected Broadband Router model.
For more information, refer to the user manual of the applicable router.
Setting up Port Range Forward for several network cameras
- You can set a rule of Port Forwarding on the Broadband Router device through its configuration web page.
- A user can change each port using the camera setting screen.
When Camera1 and Camera2 are connected to a router :
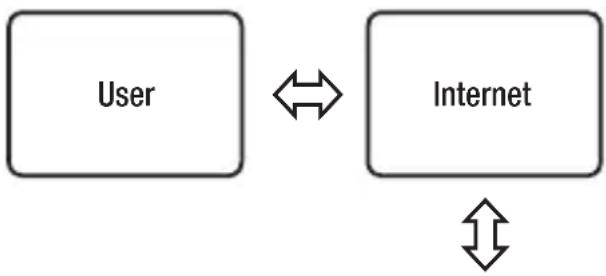
flowchart
graph TD
    A["User"] <--> B["Internet"]
    B <--> A
| Broadband Router | |||
| Start End | Protocol IP | Address | |
| 3000 | 3000 TCP/UDP | 192.168.1.100 | |
| 3001 | 3001 TCP/UDP | 192.168.1.101 | |
| 4520 | 4520 TCP/UDP | 192.168.1.100 | |
| 4521 | 4521 TCP/UDP | 192.168.1.101 | |
| 8080 | 8080 TCP/UDP | 192.168.1.100 | |
| 8081 | 8081 TCP/UDP | 192.168.1.101 | |


| Camera1 (192.168.1.100) | |
| HTTP port 8080 | |
| Device port 4520 | |
| RTSP port 3000 | |
| Camera2 (192.168.1.101) | |
| HTTP port 8081 | |
| Device port 4521 | |
| RTSP port 3001 | |

- Port forwarding can be done without additional router setup if the router supports the UPnP (Universal Plug and Play) function.
After connecting the network camera, set
network connection and setup
connectinG to tHe camera from a SHereD LocaL pc
-
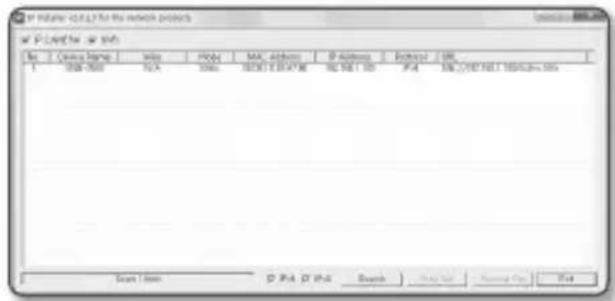
Run the IP Installer. It will scan for connected cameras and display them as a list.
-
Double-click a camera to access. The Internet browser starts and connects to the camera.
text_image
IF DATE = 01.17 for the network project P-Link for -asp No | C:\Users\HKEY | Info | PDF | MAC Address | D Address | Document | OK 1 | 1000-7000 | 70A | 396a | 1000 E:847 A | 92 MB / 30 | IPA | 1000 E:847 A:105/6/26-01-01 Scan Item D IPA D IPG Search Running Out Help
- Access to the camera can also be gained by typing the camera's IP address in the address bar of the Internet browser.
connectinG to tHe camera from a remote pc via tHe internet
Since using the IP Installer on a remote computer that is not in the Broadband Router's network cluster is not allowed, users can access cameras within a Broadband Router's network by using the camera's DDNS URL.
-
Before you can access a camera in the Broadband Router network, you should have set the port range forward for the Broadband Router.
-
From the remote PC, launch the Internet browser and type the DDNS URL address of the camera, or the IP address of the Broadband Router in the address bar. ex) http://www.samsungipolis.com/Product ID

For registering the DDNS settings, refer to "Registering with DDNS". (page 113)
CONNECTING TO THE CAMERA
Normally, you would
- Launch the Internet browser.
- Type the IP address of the camera in the address bar.
ex) • IP address (IPv4) : 192.168.1.100
→ http://192.168.1.100 - the Login dialog should appear.
- IP address (IPv6) : 2001:230:abcd: ffff:0000:0000:ffff:1111
→ http://[2001:230:abcd:ffff:0000
:0000:ffff:1111] - the Login dialog should appear.
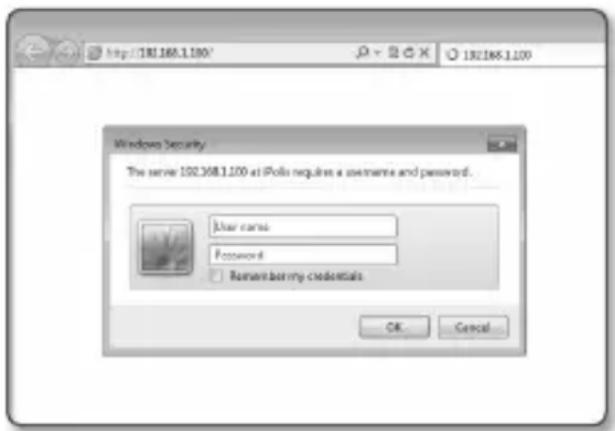
text_image
Windows Security The server 100.368.1.100 at Polis request a username and password. User name Password Remember my credentials OK CancelIf the HTTP port is other than 80
- Launch the Internet browser.
- Type the IP address and HTTP port number of the camera in the address bar. ex) IP address : 192.168.1.100:HTTP Port number(8080)
→ http://192.168.1.100:8080 - the Login dialog should appear.
Using URL
- Launch the Internet browser.
- Type the DDNS URL of the camera in the address bar. ex) URL address : http://www.samsungipolis.com/Product ID - the Login dialog should appear.

■ Network connection is disabled in the LAN only environment.
Connecting via UPnP
- Run the client or operating system in support of the UPnP protocol.
- Click the camera name for search.
In the Windows operating system, click the camera name searched from the network menu.
- The login window is displayed.
Connecting via Bonjour
- Run the client or operating system in support of the Bonjour protocol.
- Click the camera name for search.
In the Mac operating system, click the camera name searched from the Bonjour tab of Safari.
- The login window is displayed.
To check the DDNS address
If the camera is connected directly to the DHCP cable modem, DSL modem, or PPPoE modem, the IP address of your network will be changed each time you try to connect to the ISP (Internet Service Provider) server.
If this is the case, you will not be informed of the IP address changed by DDNS.
Once you register a dynamic IP-based device with the DDNS server, you can easily check the changed IP when you try to access the device.
To register your device to the
DDNS>, as well as providing
PASSWORD SETTING
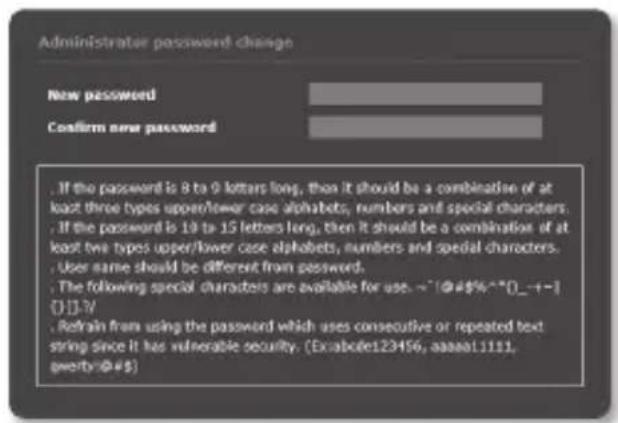
When you access the product for the first time, you must register the login password. When the "Password change" window appears, enter the new password.

For a new password with 8 to 9 digits, you must use at least 3 of the following: uppercase/lowercase letters, numbers and special characters. For a password with 10 to 15 digits, you must use at least 2 types of those mentioned.
-Special characters that are allowed.: \~!@#\$%^*()_-+=|{}].?/
- For higher security, you are not recommended to repeat the same characters or consecutive keyboard inputs for your passwords.
If you lost your password, you can press the [RESET] button to initialize the product. So, don't lose your password by using a memo pad or memorizing it.
text_image
Administrator password change New password Confirm new password . If the password is 8 to 9 letters long, then it should be a combination of at least three types upper/lower case alphabets, numbers and special characters. . If the password is 10 to 15 letters long, then it should be a combination of at least two types upper/lower case alphabets, numbers and special characters. . User name should be different from password. . The following special characters are available for use. ~1@#%^[._-+-] (D)IV . Refrain from using the password which uses consecutive or repeated text string since it has vulnerable security. (Ex:abcde123456, aaaaa1.111, qorby@#$)LOGIN
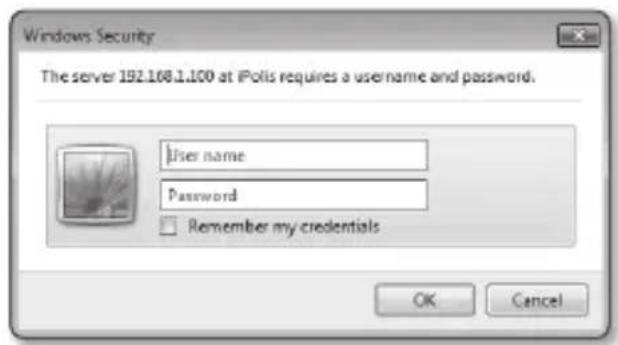
Whenever you access the camera, the login window appears. Enter the User ID and password to access the camera.
- Enter "admin" in the
input box. The administrator ID, "admin", is fixed and can not be changed. - Enter the password in the
input field. - Click [OK]. If you have logged in successfully, you will the Live Viewer screen.
text_image
Windows Security The server 192.108.1.100 at iPolis requires a username and password. User name Password Remember my credentials OK Cancel
- When you access the camera web viewer, pay special attention to the security by checking whether the image data is encrypted.

If you check the "Remember my credentials" option when your input is done, in future you will be logged in automatically without being prompted to enter the login information.
- You will experience the best video quality if the screen size is 100%. Reducing the ratio may cut the image on the borders.
INSTALLING STW WebViewer PLUGIN
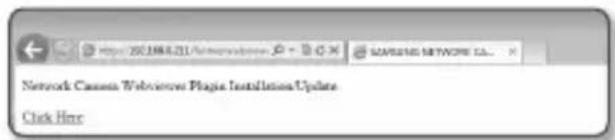
If connecting to a camera for the first time, you will see the installation message. Then, install the required WebViewer Plugin to access the camera and control the video from it in real time.
- When the monitoring page is accessed for the very first time, the installation page is displayed. Click [Click Here] to begin installation.
text_image
Network Camera Web Services Plugin Installation Update Click HereIf the plug-in installation file download status is suspended at 99% in the Internet Explorer browser, retry it after selecting "Release SmartScreen filter" in "Tool→SmartScreen filter".
-
Click [Run] in the message window.
-
Click [Yes] when the notice window saying that all browser windows will be closed.
-
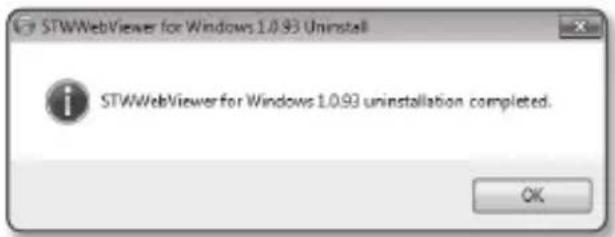
When the old version of the Web Viewer Plug-in is installed, a notice window saying the old version will be deleted is displayed. Click [Yes] when the notice window is displayed.

text_image
STWWebViewer for Windows 1.0.93 Setup All browser windows will be closed. Do you want to proceed? Yes No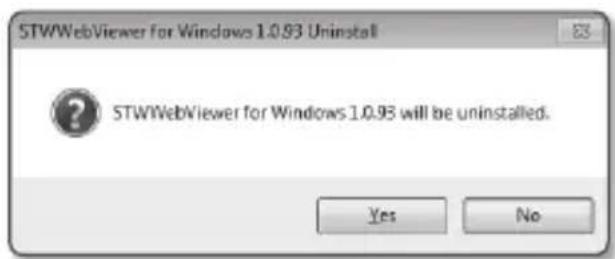
text_image
STWWebViewer for Windows 1.0.93 Uninstall STWWebViewer for Windows 1.0.93 will be uninstalled. Yes No
■ Steps 4 and 5 will be skipped if no Web Viewer Plug-in is installed.
- Click [OK].
The old version of Web Viewer Plug-in is deleted.
- Click [Install] to begin installation of the Web Viewer Plug-in.
text_image
STWWebViewer for Windows 1.0.93 Uninstall STWWebViewer for Windows 1.0.93 uninstallation completed. OK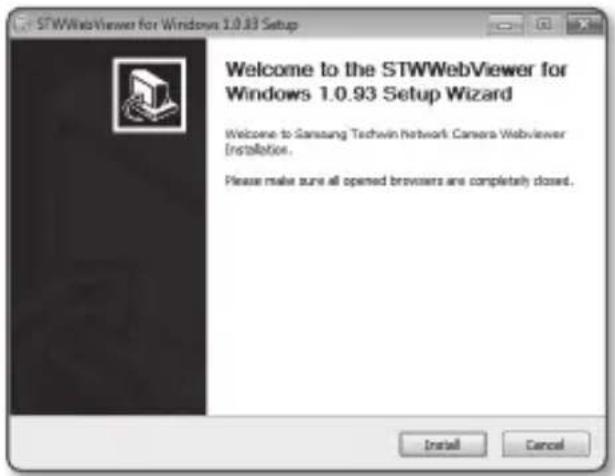
text_image
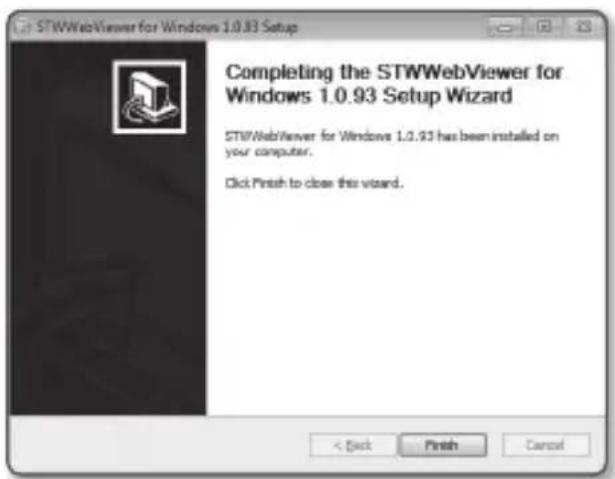
STWWebViewer for Windows 1.0.93 Setup Welcome to the STWWebViewer for Windows 1.0.93 Setup Wizard Welcome to Samsung Techwin Network Camera Webviewer Installation. Please make sure all opened browsers are completely closed. Install Cancel- Click [Finish].
STW Web Viewer Plug-in installation is completed.

In your internet explorer, if you need to move to the installation screen after installing the STW webviewer plugin, check whether webviewer_ activexplugin_lib.control in the "Tool → Additional Function Management" menu is "Activated". If not, and if there is a persisting problem, then select "Tools → Internet Options → General" and delete all the search records.
text_image
STWWebViewer for Windows 1.0.93 Setup Completing the STWWebViewer for Windows 1.0.93 Setup Wizard STWWebViewer for Windows 1.0.93 has been installed on your computer. Click Finish to close this wizard.uSinG tHe Live Screen
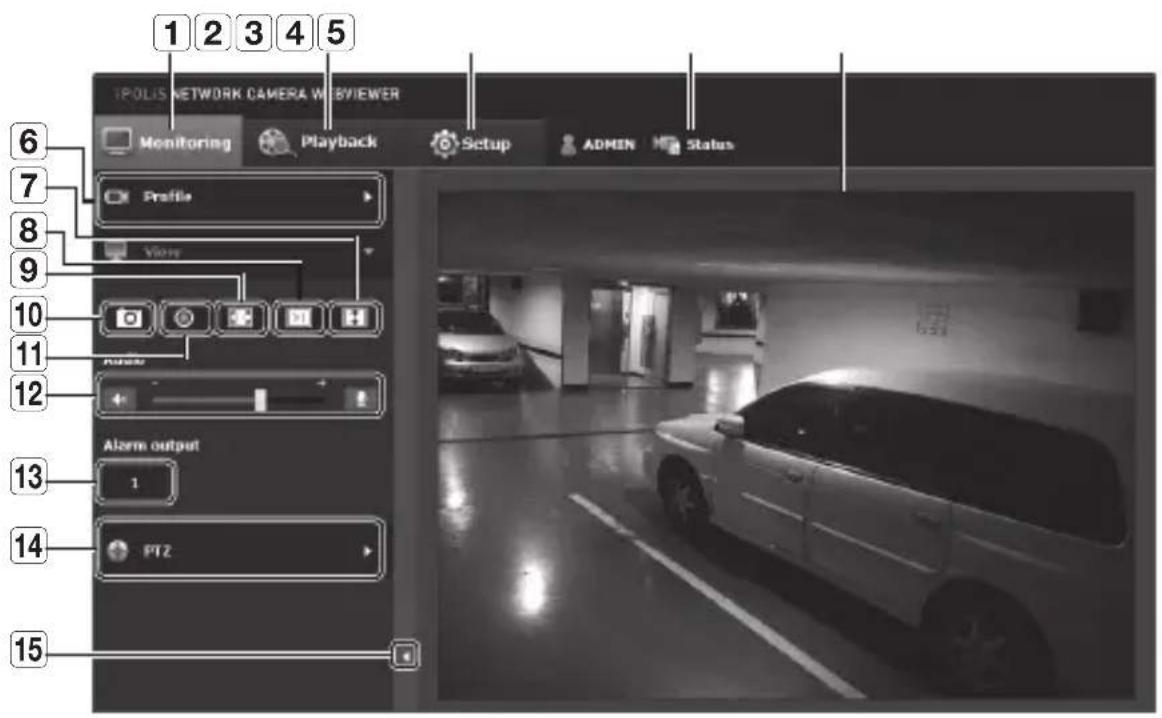
text_image
1 2 3 4 5 I-POLIS NETWORK CAMERA WEBVIEWER Monitoring Playback Setup ADMIN Status 6 7 Profile 8 View 9 10 11 Audio 12 13 Alarm output 1 14 PT2 15| Item Description | ||
| 1 | Monitoring Move to the monitoring screen. | |
| 2 | Playback | Move to the screen where you can search for the video recording saved in your Micro SD memory card or NAS. |
| 3 | Setup Move to the Setup screen. | |
| 4 | Profile access information | You can read the profile information. |
| 5 | Viewer Screen | Displays the Live video on the screen.■ You can use the mouse wheel to activate the digital zooming in Viewer screen. |
| 6 | Profile type | You can select a profile type inunder thesetup menu.■ When the Web Viewer is connected, the profile information currently using is displayed. |
| 7 | Screen Optimization | The video size of the camera will switch to as big as the Web browser. |
| 8 | Fix the resolution | Regardless of the resolution setup configured in the camera, it sets the resolution to 640x480. Press it again to switch back to the default resolution. |
| 9 | Full Screen Switch the current video to the maximum size of the monitor. | |
| 10 | Capture Saves the snapshot as an image file in the .jpg format. | |
| 11 | Manual recording | Users can save their video in the micro SD memory card or NAS on their own.To take video manually, change the recording setting first. Refer to “Storage” for how to set recording (page 122). |
| 12 | Audio/Microphone Control | Enable Audio and Microphone are control the Audio volume.Only the Audio volume can be controlled. |
| 13 | Alarm output Activate the Alarm Out port. | |
| 14 | External PTZ | Connect the external PTZ to the RS-485 terminal and control the PTZ camera lens direction with the arrow keys.Only for SNB-7004.The pan/tilt operations will be enabled only if the camera is connected to a pan/tilt-compliant receiver. |
| 15 | Hide the context menu | The left-corner context menu will disappear but only the menu icon. |
To capture the snapshot
- Click [Capture ( ) on the scene to capture.
- When a captured video is saved, a notification message appears.
When using Internet Explorer, the captured video is saved in My Computer / My Documents / Pictures.
In Mac OS, it is saved in “\~/Pictures” or “/Users/{user account}/Pictures/”.

If you encounter an interrupted video when capturing the image with IE8 on a Windows 7-based PC, deselect "Turn On Protected Mode" from "Tools – Internet Options – Security".
If the screen is not captured by IE browser in Windows 7 or 8, run the IE Browser with the Admin privilege.
How to record videos manually
- Press [Manual recording ( )]
- To end the recording, press [Manual recording (☐)] again.

- After inserting the SD card, go to
To fit the full screen
- Click the [Full Screen (☐)] button.
- This will fit the Viewer to the full screen.
- To exit the full screen mode, press [Esc] on the keyboard.

For the Internet Explorer and Google Chrome browser, you can switch to the full screen.
To Use Audio
- Click [Audio ( )] icon to activate audio communication.
- Use [ ] bar to control the volume.

If there is no sound from pulling in and out the audio jack while it is in operation, click the [Audio ( )] icon to enable it again.
To Use Microphone
Click [Mic (☐)] icon to activate the microphone.
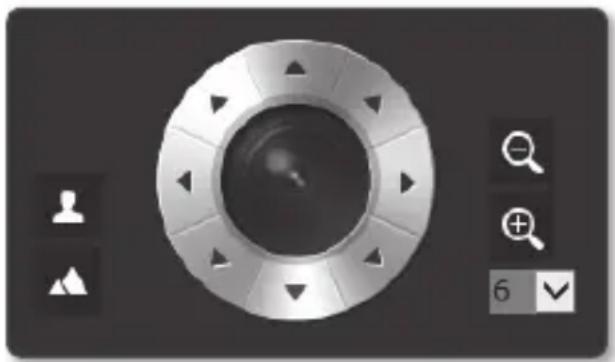
To control the PTZ (SNB-7004)
- Press the [PTZ (☐)] tab.
- When the PTZ icon appears on the screen, use the direction buttons to adjust the camera angle, zoom factor or focus to your preference.

- For further details on PTZ use, refer to "External PTZ setup". (page 109)
natural_image
User interface control panel with circular dial and adjustment icons (no readable text or symbols)PLAYING THE RECORDED VIDEO

Before you can play the video, you must configure the record settings. For details on record settings, refer to "Storage". (page 122)
Name of event search screen and its function
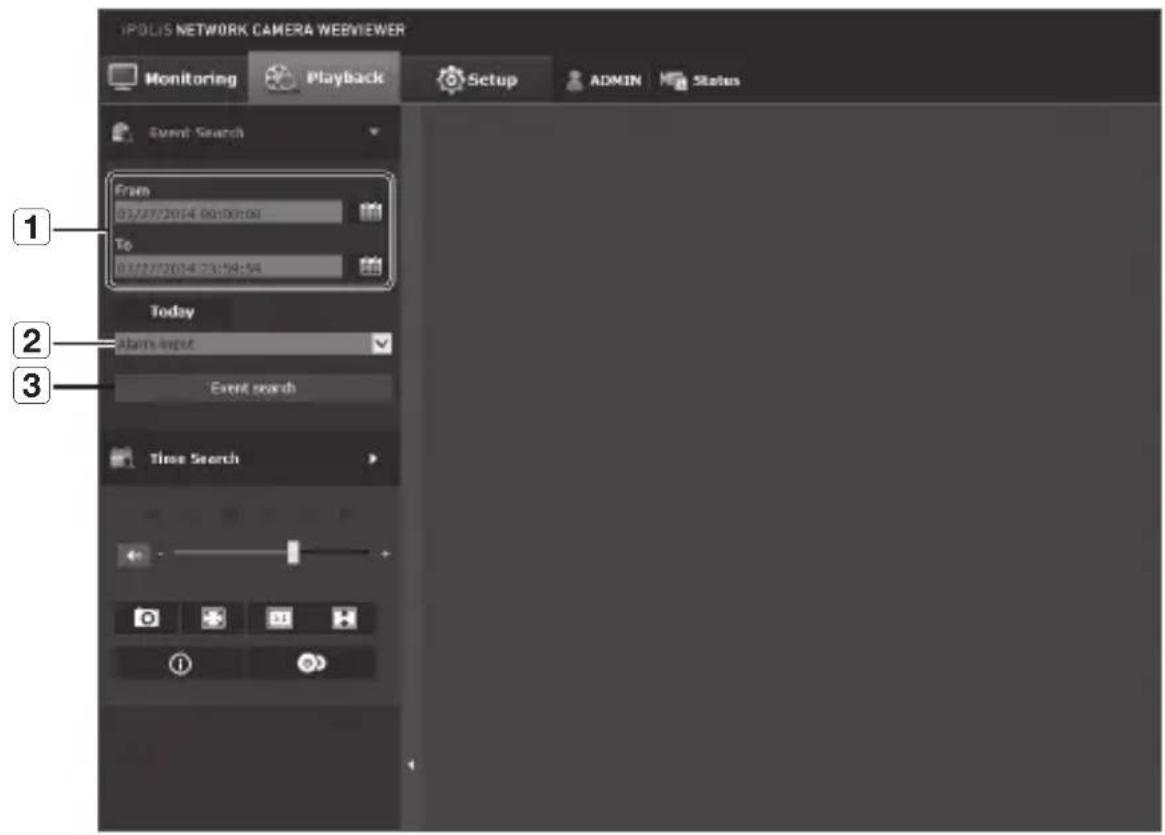
text_image
IPOLIS NETWORK CAMERA WEBVIEWER Monitoring Playback Setup ADMIN Status Event Search From 02/27/2014 00:00:00 To 01/27/2014 23:59:54 Today Alarm input Event search Time Search| Item Description | |
| 1 Search range setting | Set the search date and time range for data saved in your Micro SD memory card or NAS. |
| 2 Search event setting | Set the event type to search within the search period. |
| 3 Event search Run the event search. |
To play the content after searching by event
- Click the [Playback (✗)] button.
- Specify the start time and end time of your search.
- Select an event type for your search within the specified period.
- Click the [Event search] button. The search results will be displayed in the list.
text_image
Multi-Noise Camera Mode Enter Monitoring Playback Setup Action Status Audio Search Photo To: Video Audio Search Audio Search Audio Search
■ If more than 800 events are recorded
within the search period, your search will be limited up to the date when the 800th event is recorded.
For instance, if the search period is between 10th and 15th day of the month, and more than 800 events were recorded 10th through 11th, your search will be limited up to 11th day with a total of 800 events, and events after then (from 12th) will not be found.
- Select a data item to play in the search list.
- Click the [Play (▶)] button.
- To stop playing the video, click [Stop (☐)].
- To return to the search screen, click [Exit (←)].
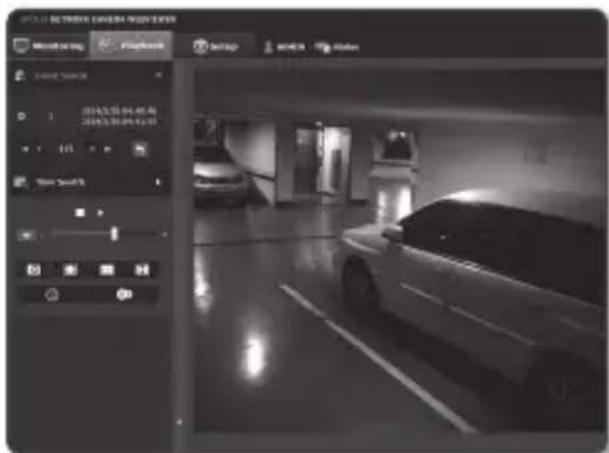
text_image
POLICE NETWORK CABBEG GREEN GENDER WINNING NAME WINNING NAME SETTLE SETTLE WINING NAME WINNING NAME WINNING NAME WINNING NAME WINNING NAME WINNING NAME WINNING NAME WINNING NAME WINNING NAME WINNING NAME WINNING NAME WINNING NAME WINNING NAME WINNING NAME WINNING NAME WINNING NAME WINNING NAME WINNING NAME WINNING NAME WINNING NAME WINNING NAME WINNING NAME WINNING NAME WINNING NAME WINNING NAME WINNING NAME WINNMENT NAME WINNMENT NAME WINNMENT NAME WINNMENT NAME WINNMENT NAME WINNMENT NAME WINNMENT NAME WINNMENT NAME WINNMENT NAME WINNMENT NAME WINNMENT NAME WINNMENT NAME WINNMENT NAME WINNMENT NAME WINNMENT NAME WINNMENT NAME WINNMENT NAME WINNMENT NAME WINNMENT NAME WINNMENT NAME WINNIMENT NAME WINNIMENT NAME WINNIMENT NAME WINNIMENT NAME WINNIMENT NAME WINNIMENT NAME WINNIMENT NAME WINNIMENT NAME WINNIMENT NAME WINNIMENT NAME WINNIMENT NAME WINNIMENT NAME WINNIMENT NAME WINNIMENT NAME WINNIMENT NAME WINNIMENT NAME WINNIMENT NAME WINNIMENT NAME WINNIMENT NAME WINNIMENT NAME WINNINTENANCE NAME WINNINTENANCE NAME WINNINTENANCE NAME WINNINTENANCE NAME WINNINTENANCE NAME WINNINTENANCE NAME WINNINTENANCE NAME WINNINTENANCE NAME WINNINTENANCE NAME WINNINTENANCE NAME WINNINTENANCE NAME WINNINTENANCE NAME WINNINTENANCE NAME WINNINTENANCE NAME WINNINTENANCE NAMEName of time search screen and its function

text_image
POLE'S NETWORK CAMERA MEERVIEWER Monitoring Playback Setup ADMIN Status Event Search Time Search 2014 3 2 3 4 5 6 7 8 9 2:00 4:00 6:00 9:00 12:00 14:00 16:00 19:00 20:00 22:00 1| Item Description | |
| 1 Time bar The section in the specific period is played by moving the time bar. | |
| 2 Search date setting | Set the search date using the calendar.■ If there is data saved in your Micro SD memory card or NAS on the day, it is marked as a box on the calendar. |
| 3 Speaker | To listen to a voice signal (if present) in the recorded video, then activate the voice signal icon when you play it. |
| 4 Screen optimization The camera image is converted to fit the Web browser window. | |
| 5 Fix the resolution | Regardless of the resolution setup configured in the camera, it sets the resolution to 800x600. Press it again to switch back to the default resolution. |
| 6 Capture The current image is saved as a .jpg image file. | |
| 7 Full screen The current image is converted to cover the maximum size of the monitor. | |
| 8 Video information Time data of the replayed video is displayed on the screen. | |
| 9 Backup | Set the desired date to make a backup copy of video data saved in your Micro SD memory card or NAS.Can be set as up to 5 minutes. |
To play after searching by time
- Click [Time Search (☐)].
- Click a desired date in the calendar. The video on the specified date will be played.
- If the video playback is stopped, selected a time and click [Play (▶)].
The video on the selected time will be played.
- While the video is being played, the recording time for the current video will be shown.
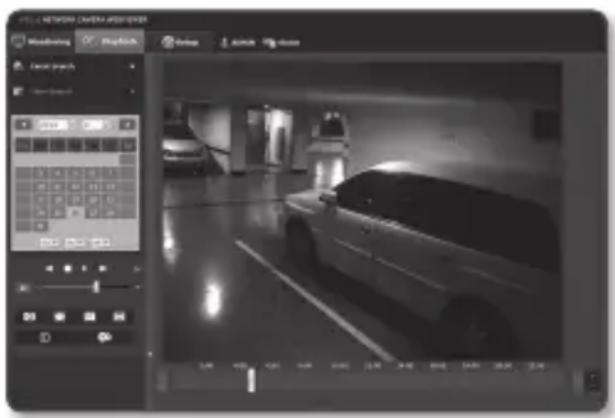
text_image
PULLIN GENDER LEMON RED Monitoring StockUp Search Auto Home Control Auto Control Control Control Control Control Control Control Control Control Control Control Control Control Control Control Control Control Control Control Control Control Control Control Control Control Control Control Control Control Control Control Control Control Control Control Control Control Control Control Control Control Control Control Control Control Control Control Control Control Control 0.00 400 600 800 1000 1200 1400 1600 1800 2000 2200- Search for the video forward or backward, and control the play speed.
- How to Control the Play Interval
▶ : Select this button to move 1 frame forward.
◀: Select this button to move 1 second back.
- To control the play speed
If selecting ▶, the button will switch to x1, x2, x4, x8, and the play speed will increase accordingly.
When the ◀ button is selected, the playing speed is decreased to -1x, -2x, -4x, -8x and the playing speed slows down gradually. Subsequently the quick playing speed is returned to the normal speed and the reverse playing speed increases.
- To control the playback direction
If you see the ▶ button with the play speed displayed, the video will be played forward; Whereas, if you see the ◀ button with the play speed displayed, the video will be played backward.
- How to set the time bar
If you press the + button, the details of the time bar section can be viewed. If you press the - button, you can view a wider range of times and the desired time can be selected more easily.
- Move [Time bar (Ⅱ)] to a desired time point of the video before playing it.
The time containing a normal recoding file will be highlighted in blue; the time with the event recording will be highlighted in red.
To back up the searched video
-
During playback, click [ ] on the scene to back up. The scheduling window for backup start and end time appears.
-
Click [ ] button. The Save As window appears.
-
Confirm the save path and click [Save] button. The screenshot will be backed up to the specified path.
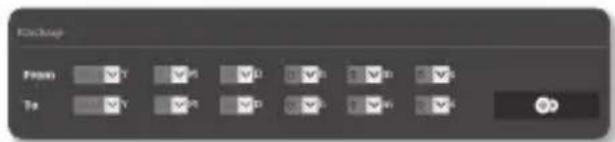
text_image
Backup From To
text_image
File Edit View Picture Properties Picture Library Include: Installations Sample Features Save as type: All Files (Add) Save CancelTo play the backup video
The backed up images are saved in an .avi format. Gom Player, VLC Player, and Window Media Player are recommended as the media player compatible with this format.

In case of Windows Media Player, download the latest codec from www.windows7codecs.com and install it prior to use.
To Play an AVI File
(1) Micro SD memory card
- Separate the Micro SD memory card from the camera.

Before separating the Micro SD memory card, set the
-
Insert the Micro SD memory card into the PC.
-
Play the AVI file in the "\ch00\img\YYYY_mm_DD\AVI" directory, using a media player.

A filename starts with the format "001_YYYYMMDD_HHMMSS.avi" and the file number is incremented by one. YYYYMMDD_HHMMSS indicates the start time of data saving.
- "001_YYYYMMDD_HHMMSS.smi" file is a caption file, and you can view it if it exists in the same directory as its related AVI file.
■ The max recording time per AVI file is 5 minutes.
- Once corrupted, the data in the Micro SD memory card cannot be replayed in the Web Viewer's [Playback].
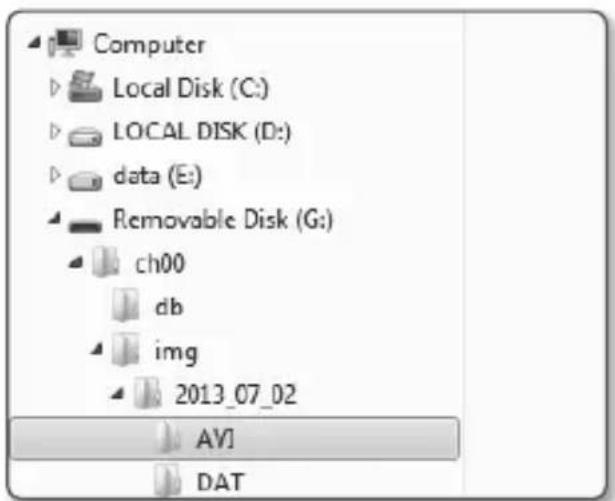
text_image
Computer Local Disk (C:) LOCAL DISK (D:) data (E:) Removable Disk (G:) ch00 db img 2013_07_02 AVI DAT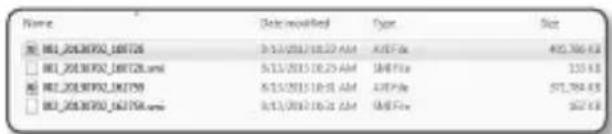
text_image
Name Data modified Type Size #1_013/2013/18:22 AM 457 Fa 402,366 KB #1_013/2013/18:29 AM 184 Fa 155 KB #1_013/2013/18:31 AM 457 Fa 571,984 KB #1_013/2013/18:31 AM 184 Fa 527 KB(2) NAS (Network-Attached Storage)
- In Windows browser, use \
\ to access. ex)\192.168.20.31\defaultfolder\ch01\ img\2013_07_02\AVI - Go to
→ → Enter 1. - Connected to the NAS. The directory structure is same as the directory structure for a Micro SD memory card.

A filename starts with the format "001_YYYYMMDD_HHMMSS.avi" and the file number is incremented by one.
YYYYMMDD_HHMMSS indicates the start time of data saving.
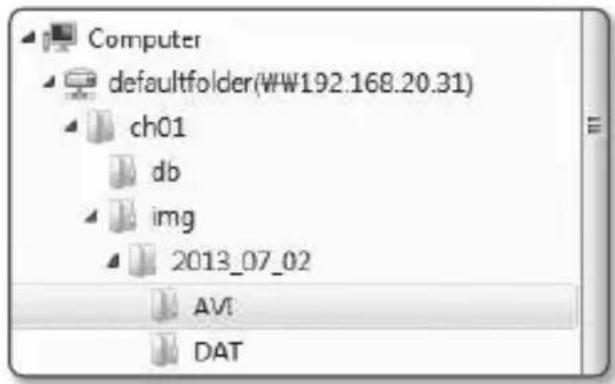
text_image
Computer defaultfolder(WW192.168.20.31) ch01 db img 2013_07_02 AVI DAT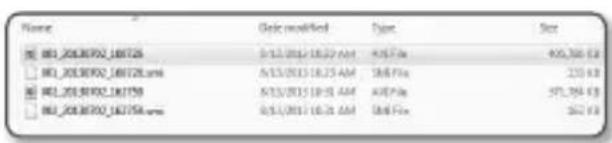
text_image
Name File modified Type Size M1_20130702_161726 M1_20130702_161726.mml M1_20130702_161758 M1_20130702_161758.mml A:13/2013 16.25 AM A:13/2013 16.25 AM A:13/2013 16.25 AM A:13/2013 16.25 AM A:13/2013 16.25 AM A:13/2013 16.25 AM A:13/2013 16.30 AM A:13/2013 16.30 AM A:13/2013 16.30 AM A:13/2013 16.30 AM A:13/2013 16.30 AM A:13/2013 16.30 AM A:13/2013 16,25 AM A:13/2013 16,25 AM A:13/2013 16,25 AM A:13/2013 16,25 AM A:13/2013 16,25 AM A:13/2013 16,25 AM A:13/2013 16.25 AM A:13/2013 16,25 AM A:13/2013 16,25 AM A:13/2013 16,25 AM A:13/2013 16,25 AM A:13/2013 16,25 AM A:13/2013 49,75 AM A:13/2013 49,75 AM A:13/2013 49,75 AM A:13/2013 49,75 AM A:13/2013 49,75 AM A:13/2013 49,75 AM A:13/2013 44,75 AM A:13/2013 44,75 AM A:13/2013 44,75 AM A:13/2013 44,75 AM A:13/2013 44,75 AM A:13/2013 44,75 AM A:13/2013- "001_YYYYMMDD_HHMMSS.smi" file is a caption file, and you can view it if it exists in the same directory as its related AVI file.
■ The max recording time per AVI file is 30 minutes.
If you change or damage the saved data on your own, it will not play back or save properly.
SETUP
On the network, you can set up basic information on the camera, video and audio, network events and system.
- In the Live screen, click[Setup ( Setup )].
- The Setup screen appears.
The setting page for preview video requires the STW web viewer plug-in to be installed on the PC. If it is not installed properly, the installation page automatically appears.
BASIC SETUP
Video profile
- From the Setup menu, select the <Basic ( ) tab.
- Click
- Set the
.
Changing the mode selection displays a confirmation message regarding the resetting the video configurations.
Click [OK] to confirm the changing video settings.
The below configuration items for two/three mega modes are saved independently.
(Video & Audio : video profile/camera setting/privacy/smart codec, Event : tampering detection/motion detection/video analysis/face detection. (But the motion or the motion time setting are not changed.))
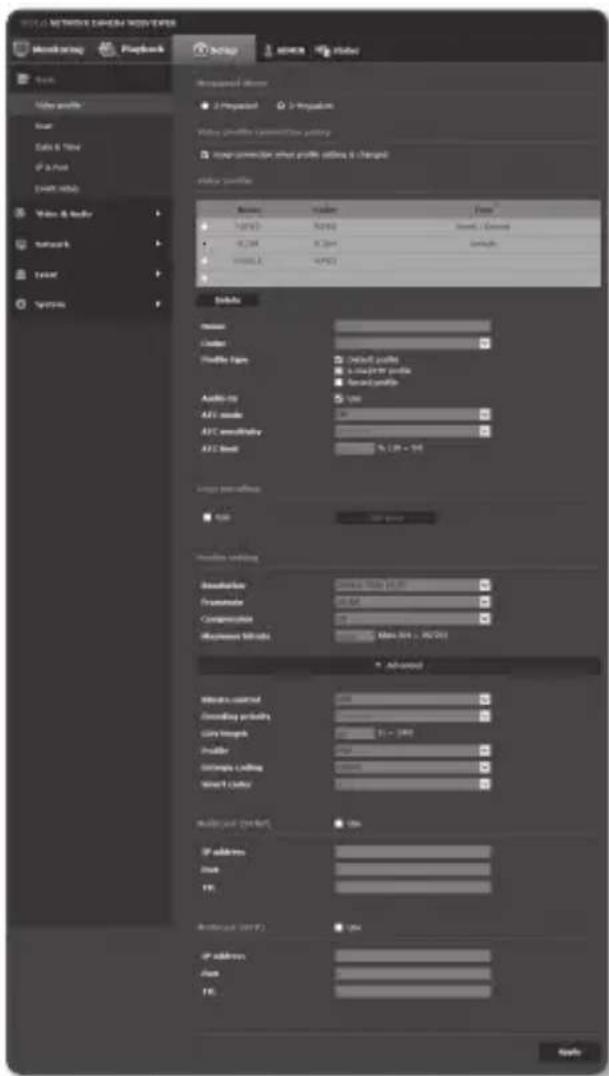
text_image
WELCOME NETWORK NAME SYSTEMS Monitoring Playback setup system Video Tools Video profile View Data & View IF a Post User info Video & Audio Network Target Systems Managed lesson 3 Proposed 3 Impulsion Video Stream generation gridry Top-connector video profile editing & changed Value profile Basic values Form 100% 20% Event / Comment 8.2% 9.2% Length 100% 100% Details Position: Cluster: Profile type: Initial profiles & a cluster profile Base profile Audio on: 500 AVG audio: AVG audio/Hzy: AVG level: % 1.28 - 16 Large dimensions: Size: Incrementing setting: Environment: Grid size (bit) Appearance: 16-bit Compression: 1 Measurement methods: Max Size - Max Value Advanced Materials control: 400 Background filtering: 10000000000000000000000000000000000000000000000000000000000000000000000000000000000000000000000000000 Color intensity: 51.75 - 16.67 Color range: 12.5 - 16.67 Color depth: 12.5 - 16.67 Color width: 12.5 - 16.67 Color spacing: 12.5 - 16.67 Color length: 12.5 - 16.67 Color color: 12.5 - 16.67 Color depth: 12.5 - 16.67 Color width: 12.5 - 16.67 Color depth: 12.5 - 16.67 Color width: 12.5 - 16.67 Color depth: 12.5 - 16.67 Color width: 12.5 - 16.67 Color depth: 12.5 - 16.67 Color width: 14.5 - 16.67 Color depth: 14.5 - 16.67 Color width: 14.5 - 16.67 Color depth: 14.5 - 16.67 Color width: 14.5 - 16.67 Color depth: 14.5 - 16.67 Color width: 14.5 - 16.67 Color depth: 14.5 -16.67 Color width: 14.5 - 16.67 Color depth: 14.5 - 16.67 Color width: 14.5 - 16.67 Color depth: 14.5 - 16.67 Color width: 14.5 - 16.67 Color depth: 14.5 - 16.87 Color width: 14.5 - 16.87 Color depth: 14.5 - 16.87 Color width: 14.5 - 16.87 Color depth: 14.5 - 16.87 Color width: 14.5 - 16.87 Color depth: 14.5 - 16.87 Color width: 14.5 - 16.87 Color deep learning: On Off address: Block: FIS: Original text (ref): On: Off address: Block: FIS: Ready4. Set the
- Keep connection when profile setting is changed: Changing profile properties that is used by existing connection does not affect such connection and remains with old profile setup.
If not selected, changing a profile used by an existing connection resets such connection.
5. Select each profile properties.
For more details, refer to "To Add/Change the Video Profile". (Page 84)
6. Click the input box of each item and enter / select a desired value.
■ The context menu may differ depending on the selected codec type.
- Default profile : If no profile is selected when using the Web Viewer, the default video profile is applied.
- E-mail/FTP profile : Video profile to be transferred to the specified email or FTP site.
■ Only the MJPEG codec can be set as the E-mail/FTP profile.
- Record profile: This is the profile that is applied to video recording.
• Audio-In : Sets whether to use audio for video recordings.
7. According to your situation, set ATC (Auto Transmit Control) mode.
- ATC mode : It adjusts the video properties according to the variance in the network bandwidth, controlling the bit rate. Adjusting the bit rate depends on the ATC mode.
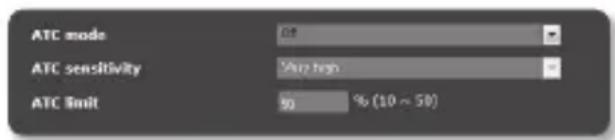
text_image
ATC mode 0% ATC sensitivity Very high ATC limit 50 % (10 ~ 50)- Control framerate : Reduce the frame rate if the network bandwidth drops down.
- Control compression : Control the compression rate if the network bandwidth drops down.
Compression adjustment can cause deterioration of the image quality.
If
| Bitrate control / ATC mode Control | framerate Control compression | |
| CBR Framerate Compression | ||
- ATC sensitivity : Affect the transfer rate according to the variance in the network bandwidth.
The transfer rate will be adjusted to the fastest if the bandwidth is
- ATC limit : If the quality or frame rate is adjusted, the property will be changed to the applied value (%) against the previous setting value (100%).
Note that if you reduce the property value too much, you may encounter flickering on the screen. So it is advisable to adjust the value within the threshold.

It is recommended to apply ATC control only for cameras supporting ATC.
- Set the ATC sensitivity to
If the network connection is unstable, you may encounter flickering on the screen.
- Select Able or Disable for the Crop Encoding function.
For more details, refer to "To Use Crop Encoding". (Page 86)
- Crop encoding : It cuts only the selected area out of the full screen and outputs it at the resolution specified in
The resolution should be less than the Crop Encoding setting area.
- When done, click [Apply (Apply)].
To Add/Change the Video Profile
The profile setup can be added or modified to accommodate various profiles depending on the recording conditions.
- Select one from the
- Provide the name and select a codec.
- Specify the conditions under which the codec will be applied.
- Specify the details of the selected codec including resolution and frame rate. Click
to display the context menu.
• Resolution : Set the video size of the H.264 and MJPEG files.
- Framerate : Set the max number of video frames per sec.

The
| Sensor 25 fps 30 fps 50 fps 60 fps | |||
| Framerate 1~25 fps 1~30 fps 1~50 fps 1~60 fps |
• Compression : Specify the compression rate of the video.
- Maximum bitrate : Set the max bit rate of video when the bit rate control is set to VBR.

As the bit rate can be adjusted limitedly according to the resolution, frame rate and screen complexity, the actual bit rate can be greater than the maximum bit rate. So you must consider the use conditions when setting the value.
- Target bitrate : Set the target bit rate when the bit rate control is set to CBR.
- Bitrate control : You can select one from constant bit rate and variable bit rate for compression. Fixed bitrate means that the network transmission bitrate is fixed while varying the video quality or frame rate, variable bitrate means that a higher priority is placed on the video quality while varying the bitrate.

■ After setting the fixed bit rate for bit control, if you select the video quality priority mode, depending on the complexity of the screen, the actual transmitted frame rate may differ from the frame rate setup in order to guarantee the optimal video quality for the given bit rate.
- Encoding priority : You can set the priority of video transmission to frame rate or compression.
- GOV length : It specifies the distance (in terms of number of frames) between two consecutive I-Frames in a video sequence when H.264 codec was selected. (One I-Frame + 0\~Several P-Frames)
• Profile : You can select the H.264 profiling method. - Entropy coding : Reduce the possible compression loss due to encoding.
- Smart codec : Specify the use of Smart codec.

The Smart Codec will be active only if the codec is of H.264 and the compression system is CBR.
• Multicast(SVNP) : Specify the use of the SVNP protocol.
- IP address : Enter an IPv4 address with which you can connect to the IPv4 network.
- Port : Specify the video communication port.
- TTL : Set the TTL for the SVNP packet.
• Multicast(RTP) : Specify the use of the RTP protocol.
- IP address : Enter an IPv4 address with which you can connect to the IPv4 network.
- Port : Specify the video communication port.
- TTL : You can set the TTL for the RTP packet.

If you set the Multicast address to 224.0.0.0\~224.0.0.255, multicast may not work properly in all environments. In that case, we recommend you change the multicast address.
What is GOV length?
GOV(Group of Video object planes) is a set of video frames for H.264 compression, indicating a collection of frames from the initial I-Frame (key frame) to the next I-Frame. GOV consists of 2 kinds of frames: I-Frame and P-Frame.
I-Frame is the basic frame for the compression, also known as Key Frame, which contains one complete image data. P-Frame contains only the data that has changed from the preceding I-Frame.
For H.264 codec, you can determine the GOV length. If you set a recording profile with H.264 codec, the GOV length will be framerate/2.
To Use Crop Encoding
- Select
- Click
.
The Crop Encoding Area Setup window will pop up.
- Select
.
- Ratio: It sets up the aspect ratio of the user specified area.
- 16:9 : The aspect ratio shall be set to 16:9 as close as to the user specified area. The supporting size ranges from 426X240 to 1280X1024 and supporting output resolutions are 320X180, 640X360, 800X450, and 1280X720.
text_image
Drop scrolling Use Set area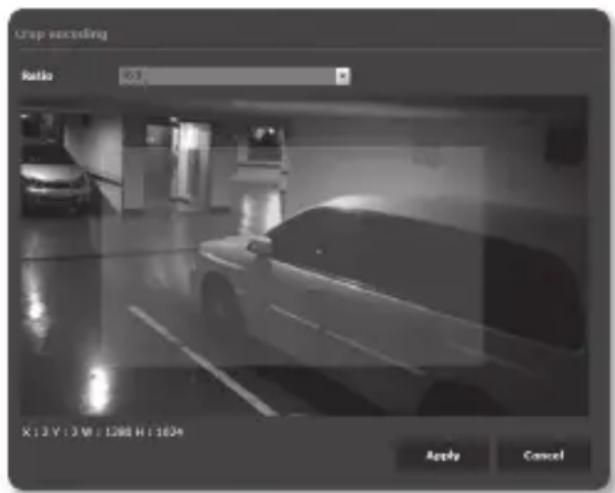
text_image
Crop preceding Ratio 65.3 X:2 Y:3 M:1200 H:1824 Apply Cancel- 4:3 : The aspect ratio shall be set to 4:3 as close as to the user specified area. The supporting size ranges from 320X240 to 1280X960 and supporting output resolutions are 320X240, 640X480, 800X600, 1024X768, and 1280X960.
-
Manual : It sets up the aspect ratio of the user specified area. The supporting size ranges from 320X240 to 1280X1024 and all supporting output resolutions are available except 1920X1080.
-
Drag the mouse on the screen to specify the Crop Encoding area at your discretion.

If set to
- The Crop Encoding area setup can change depending on the DIS setup. Reset the Crop Encoding area when the DIS setup is changed.
User
- From the Setup menu, select the <Basic ( ) tab.
- Click
. - Provide the necessary user information
- Administrator password change : Change the password for the administrator.

For the security purposes, you are recommended to use a combination of numbers, alphabets uppercase and lowercase and special characters for your password.
It is recommended to change your password once every three months.
■ The password length and limits are shown as follows.
-A combination of at least three types of upper case, lower case, numeric, and special characters: 8 to 9 characters.
-A combination of at least two types of upper case, lower case, numeric, and special characters: 10 to 15 characters.
-Should be different from the ID.
-For higher security, you are not recommended to repeat the same characters or consecutive keyboard inputs for your passwords.
-Special characters that are allowed.: \~!@#\$%^*()_-+=|{}].?/
-When you access the camera web page for the first time or access it after the initialization, you will be moved to the admin password setting menu.
-In this menu, you need to login again with the new password before using the camera web page menus.
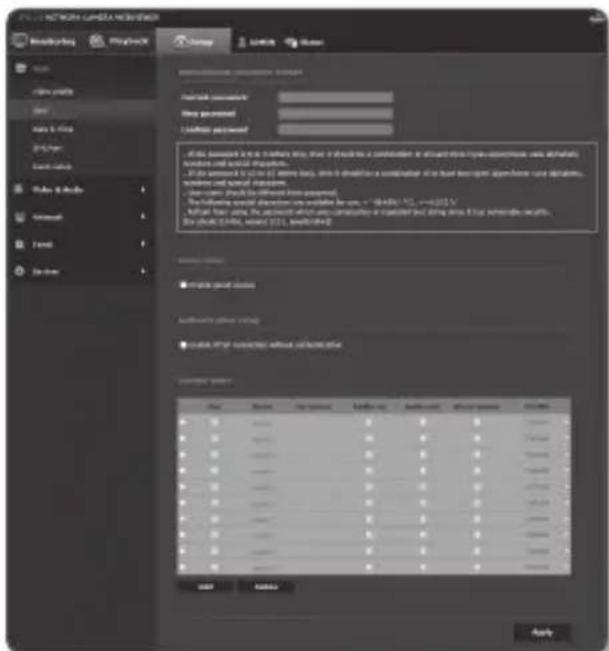
text_image
Networklog MyBlock Storage Switch Name Network parameters New parameters Configuration parameters All the parameters in this network list, that it should be a combination. It is not only one of the same parameters, but additional parameters are special parameters. If the parameter is 0 (if there are only one or both other combinations of the last two types of parameters, respectively, and special parameters) then there should be different from each. The following specific parameters are available for use: "0.45%" (CL=0.025 V) Mitar's data, the parameters which are comparisons are provided but using less than 0.1% otherwise exists. The data includes, measured (CL), normalized to: ■ Create point values Authentication value (value) ■ User IP or connection without connection Connection values: File Name Document Address Address Address Address Address Address Address Address Address Address Address Address Address Address Address Address Address Address Address Address Address Address Address Address Address Address Address Address Address Address Address Address Address Address Address Address Address Address Address Address Address Address Address Address Address Address Address Address Address Address Address Address Address Address Address Address Address Address Address Address Address Address Address Address Address Address Address Address Address Address Address Address Address Address Address Address Address Address Address Address Address Address Address Address Address Address Address Address Address Address Address Address Address Address Address Address Address Address Address Address address address address address address address address address address address address address address address address address address address address address address address address address address address address address address address address address address address address address address address address address address address address address address address address address address address address address address address address address address address address address address address address address address address address address address address address address address address address address address address address address address address address address address address address address address address address address address address address address address address address address addresses Add Remove Apply- If the existing password is not matched, when you change the admin password, you cannot change the password.
- After changing your password, if there is a camera connected to a CMS or NVR client, then you need to re-register it with the newly changed password. If the camera is still connected with the same password, then the account may be locked because a client uses the previous password.
If you try to login with the registered account, 5 or more consecutive password authentication has failed, and then the account may be locked for thirty seconds.
- When the password is changed while multiple connections are active from a PC, the browser may malfunction. In that case, reconnect to the server.
- Guest setup : If you select
The ID/password for the guest account is
- Authentication setup : If you select
, you can access RTSP without logging in and view the video. - Current users: If you select
■ The manager can set up audio input/output and alarm output.
■ Profile : If you select

■ ONVIF functions available to a registered user allowed to use ONVIF functions are limited to those of granted with permission.
■ Video Transfer and Changing Video Information: Set the profile to
■ Video Transfer, Changing Video Information, Alarm Output : Set the profile to
■ PTZ control : Select
- When done, click [Apply (Apply)].
Date & Time
-
From the Setup menu, select the <Basic ( ) tab.
-
Click
. -
Specify the time and date that will be applied to the camera.
- Current system time : Displays the current time settings of your system. - Timezone : Specify the local time zone based on the GMT. - Use daylight saving time : If checked, the time will be set one hour before the local time zone for the specified time period.
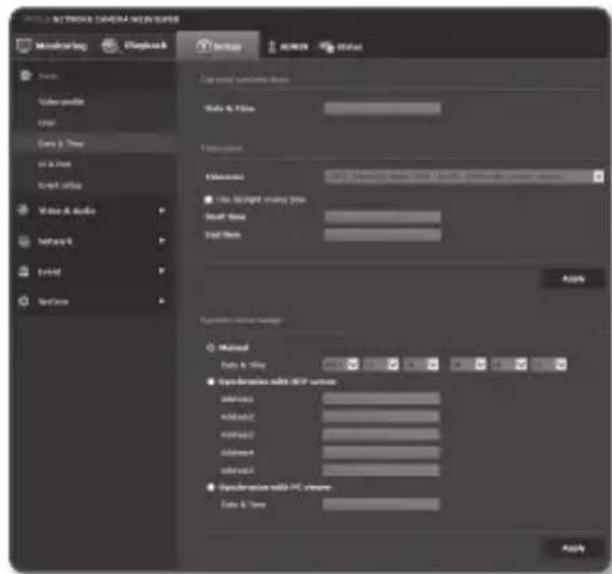
text_image
MODEL NETWORKS CAMERA NEW SERVER Monitoring Playback Setup Active Active Switch User profile Unit Core & Tree on a file Start Office Value & Audio Network B Event NetOne Log name: Windows Server Data & Files Translation Accession: Use Insight using you Data Base Data Item Apply Systematic version setup Method Data & File Super deviations with TCP server reference add/add add/add add/add add/add Super deviations with PC server Data & Items ApplyThis option will be displayed only in areas where DST is applied.
- System time setup : Specify the time and date that will be applied to your system.
- Manual : Specify the time manually.
- Synchronize with NTP server : Sync with the time of the specified server address.
-
Synchronize with PC viewer : Sets to the time of the computer connected.
-
When done, click [Apply (Apply)].

If you select the
IP & Port
- From the Setup menu, select the <Basic ( ) tab.
- Click
. - Set the
.
- IP type : Select an IP connection type.
- Manual : Specify the IP address, Subnet mask, Gateway, DNS1, and DNS2.
- DHCP : Specify the DNS1 and DNS2.
- PPPoE : Specify the DNS1, DNS2 ID and Password.
If you set it to
• MAC address : Shows the MAC address.
• IP address : Displays the current IP address.
- Subnet mask : Displays the
for the set IP. - Gateway : Displays the
for the set IP. -
DNS1/DNS2 : Displays the DNS(Domain Name Service) server address.
-
Set the
. -
Set to
- Default : Use the default IPv6 address.
- DHCP : Display and use the IPv6 address obtained from the DHCP server.
- Manual : Enter IP address and gateway manually and use it.

- The IP addressing system will be defaulted to DHCP. If no DHCP server is found, the previous settings will be restored automatically.
- Once completed with editing, click [Apply (Apply)] to apply changes and the browser exits. After a while, connect again with the changed IP.
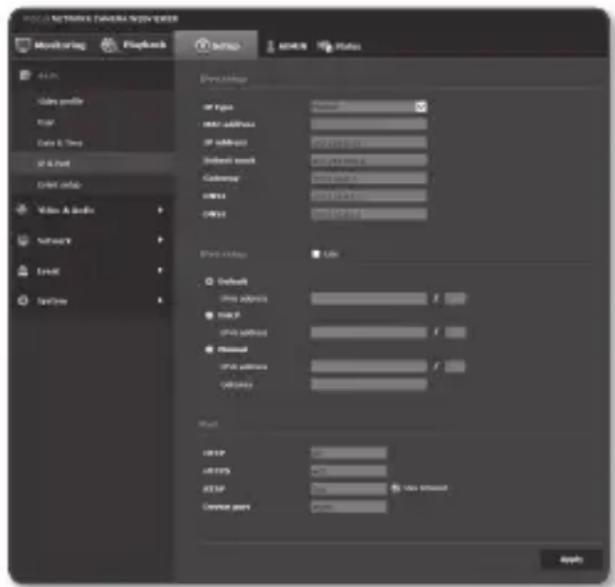
text_image
FCA2.1.0.1534: FCA2.1.0.1534: WatchER Monitoring Playback Action Action Action Analysis Color profile Color Color & Tree IF & Print Print info Video & Audio Software Email NetOne Performance OF type: OFF address: OF address: Default result: Command: OK: OK! Print History: Default Show address: Show Show address: Show Show address: Show Show address: Show Show address: Show Show address: Show Show address: Show Show address: Show Show address: Show Show address: Show Show address: Show Show address: Show Show address: Show Show address: Show Show address: Show Show address: Show Show address: Show Show address: Show Show address: Show Show address: Show Show address: show show show show show show show show show show show show show show show show show show show show show show show show show show show show show show show show show show show show show show show show show show show show show show show show show show show Show Show Show Show Show Show Show Show Show Show- Type in each item in the Port menu as necessary.
■ Neither the port range between 0 and 1023 nor port 3702 is available.
- HTTP : HTTP port used to access the camera via the web browser. The default is 80(TCP).
- Setting the HTTP port for Safari and Google Chrome browsers to 65535 is not allowed by security policy.
- HTTPS : In this version, the security of the web communication protocol HTTP is strengthened. It can be used when you set HTTPS mode in SSL. The initial value is set to 443(TCP).
- The available setting range is 1024\~65535. (For security reasons, in your Safari or Google Chrome browser, you may not use 65535 as your HTTPS port.)
- RTSP : Used to transfer videos in the RTSP mode; the default is 554.
- Use timeout : When connecting to RTSP, this function resets the connection if there's no response for a certain time.
- Device port : Set a port used to transfer video signals with the Samsung protocols.

■ If changed the HTTP port, the browser exits.
Afterwards, address should contain the newly assigned HTTP port trailing the IP. ex) IP address: 192.168.1.100, HTTP port : Assigned 8080 → http://192.168.1.100:8080 (If HTTP port is set to 80, no need to specify the port number)
■ Using RTSP and HTTPS is recommended in order to prevent the image information from being restored.
- When done, click [Apply (Apply)].
Event setup
You can easily set the event detection items, and move to the detailed setting.
- From the Setup menu, select the
tab. - Click
. - Activate desired items on the Event list
- When done, click [Apply (Apply)].

- To make detailed event settings, click on your desired settings. Go to detailed
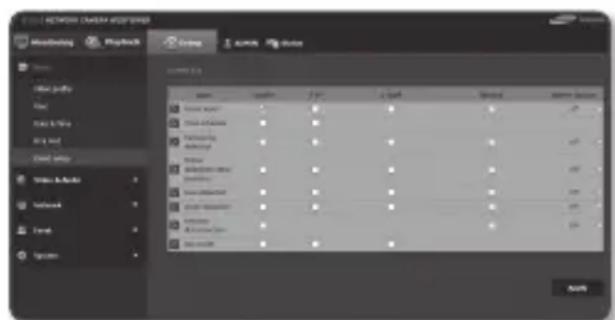
text_image
NETWORK CATCHER & WORKGROUP Marketing Playback Group Action Action Show: View Tools Find View & View View and Close Setup View & Active Network Text Supers Current 12 Name Actions Type A Staff Speed Active Users Show type: ● ● ● ● ● ✓ Show options: ● ● ● ● ● ✓ Performing Default: ● ● ● ● ● ● ✓ Show: Adjustments: ● ● ● ● ● ● ✓ Settings: ● ● ● ● ● ● ✓ Show different: ● ● ● ● ● ○ Show options: ● ● ● ● ● ○ Show: Show options: ● ● ● ● ● ○ Show mode: ● ● ● ● ○ OKVIDEO & AUDIO SETUP
Video setup
- From the Setup menu, select the <Video & Audio ( ) tab.
- Click
-
Select a
-
Flip mode : Turn upside down the image that is captured by the camera.
-
Mirror mode : Flip horizontal the image that is captured by the camera.
-
Select Able or Disable for the analog video output.
- Select the video type.
- Specify the privacy zone.
- When done, click [Apply (Apply)].
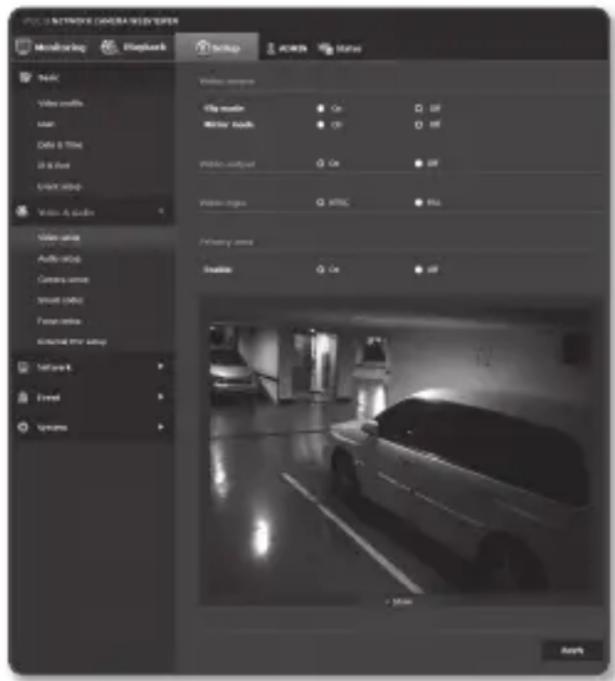
text_image
PULL NETWORK CAMERA-WID ENTER Monitoring Flashbox Setup Actions Status Task Video audio User Data & Info Size & Size Start setup Video & Audio Video audio Audio audio Camera audio Smart audio Power audio electrical user setup Software R Fixed Synapse Video response City mode On Off Motor buttons Off Off Video audio format On Off Video images HTML File Primary area Disable On Off Options ApplyTo set the privacy zone
You can specify a certain area of the camera video to be protected for your privacy.
- Set it to
. - When done, click [Apply (Apply)].
- Select 4 vertices on the screen with your mouse to specify the area.
- Enter the name and select the color, and then click [OK].
- If you want to delete a name in the list, select it and click [Delete (Delete)].
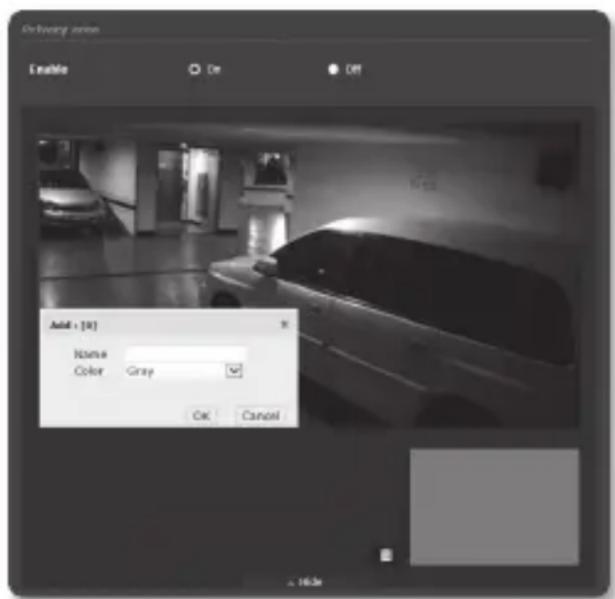
text_image
Delivery window Enable De Off Add - [A] Name Color Gray OK CancelAudio setup
You can configure the I/O settings of the audio source from the camera.
- From the Setup menu, select the
- Click
- Set the audio input value.
• Source : Sets the audio input.
- Line : Connect the cable to the audio device.
- Internal microphone : Microphone that is built-in in the camera. (It is applicable only to the SNB-7004/SND-7084 model.)
- External microphone : 3.5 pi(φ) jack type external MIC.
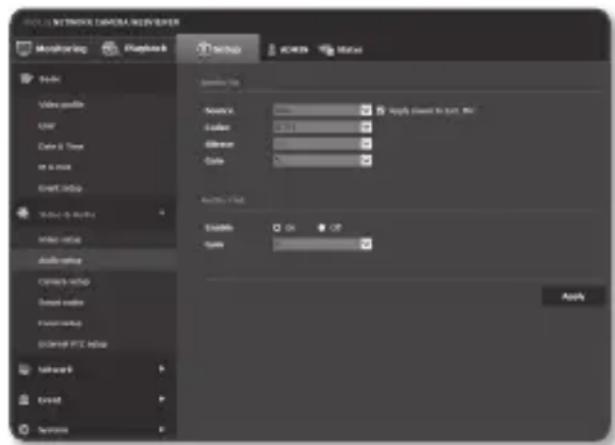
text_image
FOLD NETWORK CAMERA REVIEWER Monitoring Playbox Setup SUBS View Video Video audio User Data & Time on a bus Event setup Show to action View setup Audio video Current setup Smart video Current setup External PTC setup Network Event Service Show to action Show to action Show to action Apply OK Cancel OK Cancel OK Cancel- Apply power to Ext. Mic. : If the external microphone connected has no separate power supply, check this option to set camera to supply power to the connected external microphone. The option is enabled if
is selected. - Codec : Specify the audio codec.
- G.711 : A audio codec standard, it uses 64 Kbps PCM (Pulse Code Modulation) encoding.
ITU standard audio codec that is adequate for digital voice transfer in PSTN network or through a PBX.
- G.726 : ITU standard audio codec applying ADPCM (Adaptive Differential Pulse Code Modulation) for variable bit rates of 40/32/24/16 Kbps to 64 Kbps PCM encoding.
- Bitrate : Set the bit rate to differentiate compression ratio if using G.726 codec.
• Gain : Specify the audio input amplification.
■ Sound quality deterioration or howling may occur if the loudness of the sound source or gain value were set excessively.
-
Set the audio output level.
-
Enable : Sets whether to use audio output.
-
Gain : Specify the audio output amplification.
-
When done, click [Apply (Apply)].
Camera setup
You can change the camera settings according to the environment where the camera is located.
- From the Setup menu, select the
- Click
. - Configure the settings as necessary of : Image preset, Sensor, SSDR, White balance, Back light, Exposure, Day/Night, Special, OSD
- When done, click [Apply (Apply)] If a certain time (timeout: 240s) is elapsed with your not pressing the [Apply (Apply)] button after changing the settings, your changes will not be applied.
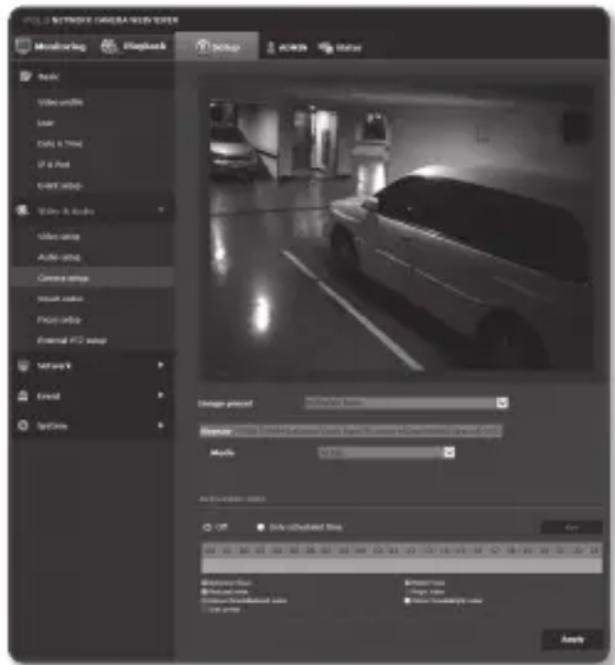
text_image
POLD NETWORK CAMERA/NEW VIEW Monitoring Playback Setup ACRIN Water Book Video clips Lamp Data & Time If a Post Auto setup Video & Audio Video setup Auto setup Camera setup Sound color Photo setup External FCI setup Network Event SpinChin Design preview Solution format Resolution: 2000x1000x1000x1000x1000x1000x1000x1000x1000x1000x1000x1000x1000x1000x1000x1000x1000x1000x1000x1000x1000x Model: 57.736 Auto setting view OK Only installed line Cancel Show name Show size Show thickness color ApplyIf you want to set an image preset
Users can set presets easily.
The selected image preset mode will operate for the active period set by you, and the value assigned to the mode will be used for the non-active period.
-
Select a desired mode from the image presets.
-
Definition focus : This is the factory setting for your camera. Select it for video recording, focusing on reproducibility.
- Motion focus : Record a moving object clearly. If there are many moving objects, such as on a road or in a crowded place like a museum, select this option.
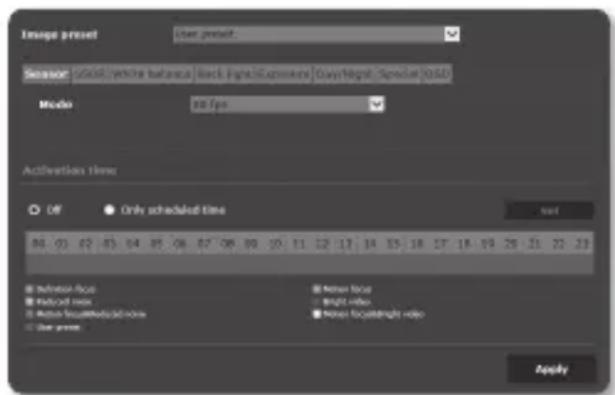
text_image
Image preset User preset Source: solid, white balance, black light/Exposure, Dark/Gray, Spindle/SSD Mode: 50 fps Activation time Off Only scheduled time Next Influence focus Radio focus Noise spectrum/satellite Noise frequency ratio Use areas Apply
- Noise level can increase in a low illumination environment, and sensitivity can go down.
- Reduced noise: Select this when you need a video with low noise in the low illumination environment.
- Bright video: This makes the dark area in a full video brighter.

■ Video contracts effects are reduced.
- Motion focus&Reduced noise: Use this when there are many moving objects, such as on a road or in a crowded place like a museum, or when you need a video with low noise in a low illumination environment.
- Motion focus&Bright video : Use it when there are many moving objects, such as on a road or in a crowded place like a museum, or when you need to make a dark area in full video brighter.
- User preset: Select it if you want to display video with settings chosen by you.

If the user selects something other than the preset mode, they cannot set the shutter speed, AGC, SSDR or SSNR3.
- Set the camera item for each image preset mode.
-
Set the
. -
Off: Your camera will execute a specific image preset operation at all times.
-
Only scheduled time : Your camera will execute a specific image preset operation for the time period set by you on each date.
-
Click the [Set (Set)] button.
- Set the
and - When done, click [Apply (Apply)].
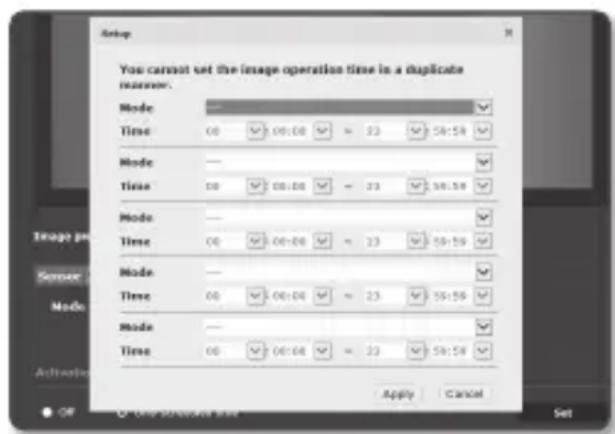
text_image
You cannot set the image operation time in a duplicate monitor. Mode: Time 00 00:00 = 23 58:58 Mode: Time 00 00:00 = 23 58:58 Mode: Time 00 00:00 = 23 58:58 Mode: Time 00 00:00 = 23 58:58 Mode: Time 00 00:00 = 23 58:58 Mode: Time 00 16:46 = 23 58:58 Apply Cancel OK One Software Site SetInitial setting for each image preset mode
| Image preset | Minimum shutter | Maximum shutter | AGC SSDR | SSNR3 | |
| Definition focus (Default)When you change the profile | Default (1/5) | 1/12000 Default (High) | Default (12) | Default (12) | |
| Motion focus 1/30 1/12000 Default (High) Default (12) 4 | |||||
| Reduced noise 1/15 1/12000 Middle | Default (12) Default (12) | ||||
| Bright video Default (1/5) 1/12000 Default 18 Default (12) | |||||
| Motion focus&Reduced noise | 1/30 1/12000 Middle Default (12) 4 | ||||
| Motion focus&Bright video | 1/30 | 1/12000 | Default | 18 | 4 |
| User preset | Manual | Manual | Manual | Manual | Manual |

- The preset setup functions as an aid to users to configure setup. If you don't want the preset function, deactivate it before use.
If you change the image preset, only shutter/AGC/SSDR/SSNR3 will be initialized for each mode.
■ Each preset's "Camera Setup" is not saved.
To Set the Sensor
It specifies how many frames the camera CMOS sensor will capture per second.
- Select
. - Select
.
text_image
Image: image quality balance | media quality / exposure | output quality / output Media 30 fps
- Refer to "Video profile" for the framerate setup range of the
To Set SSDR (Samsung Super Dynamic Range)
In a scene where the difference between bright and dark is severe, you can increase the brightness of the dark area alone to regulate the overall brightness.
- Select
. - Set
to . - Configure the
and settings as necessary.
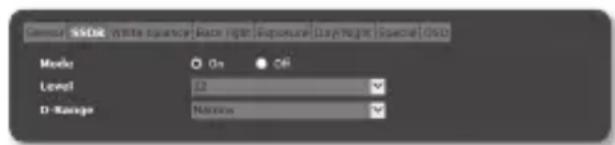
text_image
Sensor S500 Write square Base point Exposure Lyphonic Specior O10 Mode On Off Level 32 D-Range Narrow• Level : Adjust the level of the dynamic range.
• D-Range : Select the amplitude area of the dynamic range.
To Set White Balance
You can correct the image colors based on white under any lighting conditions.
1. Select .
2. Select .
- ATW: Corrects the colors of the camera video automatically.
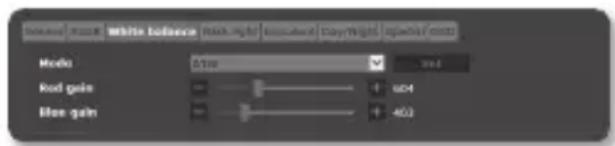
text_image
Source: audio white bores Mode: 0.1Hz Kod gain: 0.04 Blue gain: 0.03 Output: 0.01- Manual : You can adjust the red and blue gains of the camera video manually.
- AWC : Corrects the colors of the camera video to be optimized to the current lighting condition and screen mode.
To obtain the optimal condition for the current lighting, put the focus of the camera to a white paper and press the [Set] button. If the lighting environment is changed, you should readjust the settings accordingly.
- Outdoor : Automatically corrects the video colors of the camera to be optimized to the outdoor environment.
- Indoor : Automatically corrects the video colors of the camera to be optimized to the indoor environment.

In AWC mode, click the [Set] button if you want to keep the white balance level of the current image.

- The white balancing may not work properly in the following conditions: If this is the case, switch to AWC mode.
- If the surrounding condition of the object is out of the temperature correction range ex) Clear sky, sunset
- If the surrounding of the object is dark
- If the focus of the camera directly faces the florescent lighting or if the camera is installed in a place of variable illumination, the white balancing operation may be unstable.
To Set BLC
You can specify a desired area on the video manually and set the area to be displayed more clearly.
- Select
. - Set
to . - Set
.
You can change the level to adjust the brightness of the monitoring area.
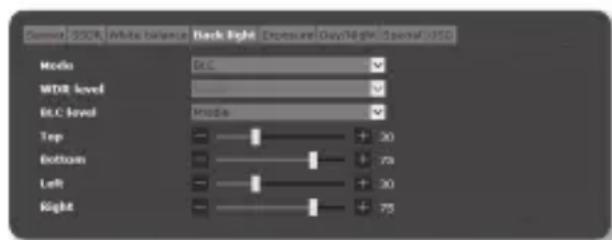
text_image
Summit SSCR White balance Back Light Exposure DayHigh Special USD Mode D.C MDR level D.C level Mode Top +30 Bottom +79 Left +30 Right +75- Set the

- When BLC is set, the green box is displayed on the screen for 15 seconds.
- To prevent malfunction at the time of BLC setup, the vertical space of the BLC area should be over 40 and below 60 while the horizontal space over 30 and below 60.
To Set WDR
It displays a sharp image of the objects in a scene where both bright and dark areas exist.
- Select
. - Set
to . - Specify the
.

- It is recommended to use WDR in the indoor environment.
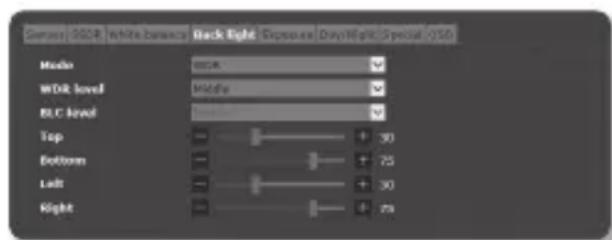
text_image
Sensor: SDR White balance Back Light Exposure DsnLight Special /SIO Mode: WDR level: Middle: BIC level: Top Bottom Left Right- Noise may exist between the dark area and the bright area in the WDR mode.
If themode is set to , the sensor mode cannot be set to 50 fps or 60 fps. - The maximum and minimum shutter values are initialized whenever you turn on or off the WDR mode.
In case of SNB-7004, some of the WDR functions may be restricted when the manual or P-iris lens (manual) is used.
In the case of SND-7084/SNV-7084, if you use a shutter in manual mode, the WDR function may be partially restricted.
To Set Exposure (SNB-7004)
You can adjust the exposure level of the camera.
1. Select .
-
Select each item and set it properly.
-
Brightness: Adjust the screen brightness.
• Minimum shutter : The limit of the longest exposure time.
■ Shutter is the mode to set up the range of
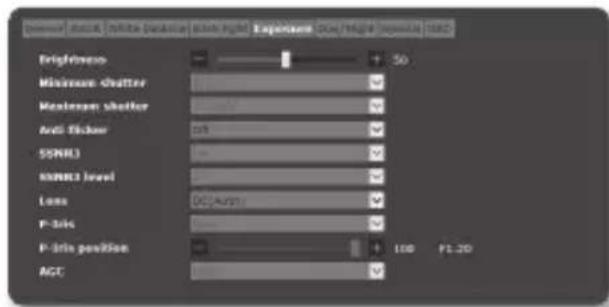
text_image
Brightness Maximum shutter Maximum shutter Anti flicker 50 50MHz 50MHz level Lens DC(Aust) P-axis P-axis position AGT 100 FL 20the sensor exposure time which will specify the upper and lower limits for the electronic shutter movement.
- The framerate may be reduced in the dark condition if Shutter has a lower value than specified in the Sensor mode.
• Maximum shutter : The limit of the shortest exposure time.
- Anti flicker : It prevents screen flickering incurring from the dissonance between the surrounding lighting and the frequency.
- SSNR3 : Select Able or Disable for the video noise elimination function.
• SSNR3 level : Adjust the noise reduction level.
- Lens : Select to set the lens mode of the camera to Manual or Auto.
- DC(Auto) : Select this if you use the DC lens. Only the iris is adjusted automatically, but the focus is not controlled automatically.
- Manual : Select this if you use a lens on which you adjust the iris and focus manually.
- P-Iris : It is selected to use the iris control lens equipped with a step motor. Currently, only 3 types of P-iris lens are supported. (SLA-M3180PN/M13VP288IR/SLA-M2890PN)
• P-Iris : Set up P-Iris.
- Auto : The iris is automatically adjusted to the amount of the surrounding light.
- Manual : Sets the iris manually to the desired position.
• P-Iris position : Set up the P-Iris position.
• AGC : Select AGC Control mode.
Adjust the gain value of the video (that, in particular, was recorded at a low contrast scene and had a lower brightness level than normal) to control the video brightness.

The lens may malfunction if the
The image exposure can be saturated depending on the Shutter setup range.
To Set Exposure (SND-7084/SNV-7084)
You can adjust the exposure level of the camera.
1. Select .
-
Select each item and set it properly.
-
Brightness: Adjust the screen brightness.
• Minimum shutter : The limit of the longest exposure time.
■ Shutter is the mode to set up the range of
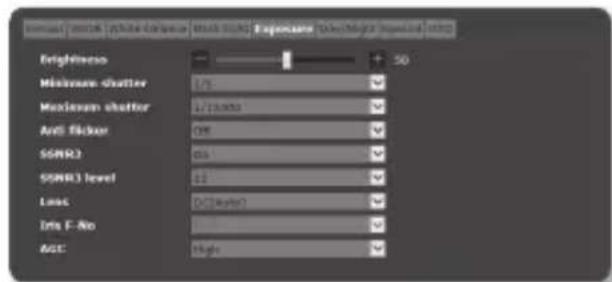
text_image
Brightness Maximum shutter Maximum shutter Anti Flicker SSMR2 SSMR3 level Lens Intra F-Bo AGE 50 1/10.000 0% 0% 0% 0% Highthe sensor exposure time which will specify the upper and lower limits for the electronic shutter movement.
- The framerate may be reduced in the dark condition if Shutter has a lower value than specified in the Sensor mode.
• Maximum shutter : The limit of the shortest exposure time.
- Anti flicker: It prevents screen flickering incurring from the dissonance between the surrounding lighting and the frequency.
- SSNR3 : Select Able or Disable for the video noise elimination function.
• SSNR3 level : Adjust the noise reduction level.
- Lens : Select it to set the camera lens to auto or manual.
- DC(Auto) : The iris is automatically adjusted to the amount of the surrounding light.
- Manual : Sets the iris F-No to manual.
- P-Iris : This is the depth priority mode. You can close the shutter during the day to get good depths and in the nighttime, you can open the shutter to get more lights.
- Iris F-No : Set up the F value of the iris.
• AGC : Select AGC Control mode.
Adjust the gain value of the video (that, in particular, was recorded at a low contrast scene and had a lower brightness level than normal) to control the video brightness.

The image exposure can be saturated depending on the Shutter setup range.
To Set Day/Night (SNB-7004)
1. Select .
- Select each item and set it properly.
- Mode : Mode is used to adjust the color of Color or Black and White.
- Color : The video is always output in color.
- B/W : The video is always output in black and white.
- Auto : Normally, it is set to Color but to B&W under low luminance at night.
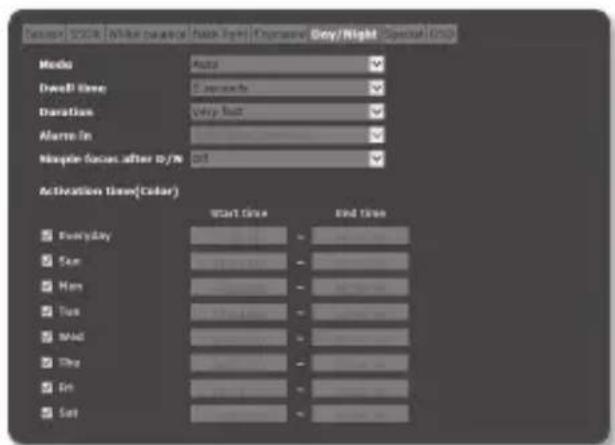
text_image
Video Stock Wide balance Quick Flow Expand Grey/Right Special Grid Media Audio Dwell Time 5 seconds Transition Very fast Alarm In Multiple forces after 10/78 GT Activation Time(Color) Start Time End Time Everyday - - - - - - - - - - - - - - - - - - - - - - - - - - - - - - - - - - - - - - - - - - - - - - - - - - - - - - - -If AGC of the
- External : It controls the color of the video when the alarm input terminal is synchronized with an external device.
- Schedule : Set the time during which the camera is operated in the color mode.
- Dwell Time: It specifies the period for which the selected brightness condition must be maintained to switch the lighting mode from Day to Night or vice versa.
• Duration : It specifies the interval of lighting mode conversion.
- Alarm in : The video is set to Color or B/W as the alarm sensor is open or closed.
If the Day/Night mode is set to External Input, the alarm input function of the Event-Alarm Input page is disabled.
- Simple focus after D/N: The video is automatically focused after the lighting mode changes from Day to Night or vice versa.
- Activation time(Color) : It specifies the schedule for color mode operation.
If it is set, the Color mode is maintained from 00 second of the starting time to 59 second of the ending time.

- When
For more details, refer to "Focus setup". (Page 107)

The Day/Night mode may not operate properly if the lens installed in the camera and the lens set in
If you switch the day/night mode, the MD/VA event cannot be detected.
To Set Day/Night (SND-7084/SNV-7084)
1. Select .
-
Select each item and set it properly.
-
Mode : Mode is used to adjust the color of Color or Black and White.
- Color : The video is always output in color.
- B/W : The video is always output in black and white.
- Auto : Normally, it is set to Color but to B&W under low luminance at night.
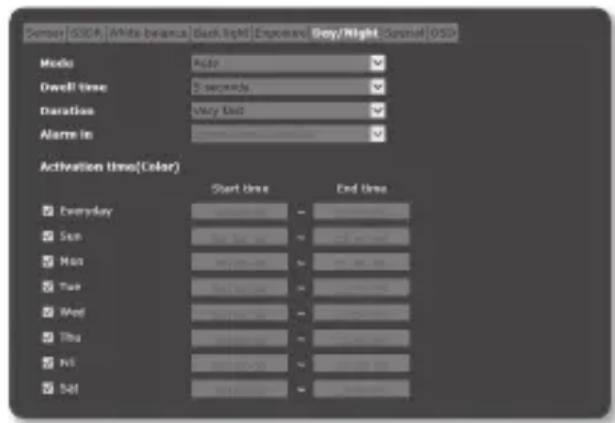
text_image
Sensor OSD A white balance Back Light Exposure Grey/night Secret OSD Mode Auto Dwell time 5 seconds Duration Very fast Alarm In Activation Time(Color) Start Time End Time Everyday Sun Max Tue Wed Thu Fri SatIf AGC of the
- External : It controls the color of the video when the alarm input terminal is synchronized with an external device.
-
Schedule : Set the time during which the camera is operated in the color mode.
-
Dwell Time : It specifies the period for which the selected brightness condition must be maintained to switch the lighting mode from Day to Night or vice versa.
• Duration : It specifies the interval of lighting mode conversion. - Alarm in : The video is set to Color or B/W as the alarm sensor is open or closed.
If the Day/Night mode is set to External Input, the alarm input function of the Event-Alarm Input page is disabled.
- Activation time(Color) : It specifies the schedule for color mode operation.
If it is set, the Color mode is maintained from 00 second of the starting time to 59 second of the ending time.
!
- The Day/Night mode may not operate properly if the lens installed in the camera and the lens set in
of the menu don't match.
If you switch the day/night mode, the MD/VA event cannot be detected.
To Setup Special
1. Select .
- Select each item and set it properly.
• DIS : Compensates the image automatically when it is seen to shake for stable image output.
- Sharpness mode: Adjust the overall sharpness of the image.
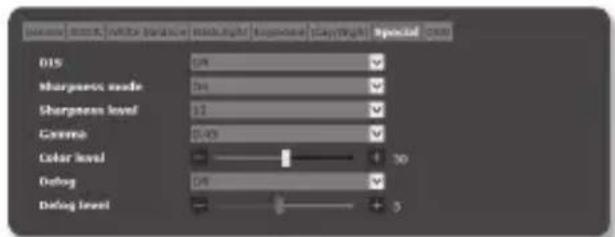
text_image
Image | Light | White | Viscu | Dark | Light | Bevel | Playweight | Special | Color B15 04 Morphous mode 04 Sharpness level 11 Gamma 0.03 Color level 30 Dialog 04 Dialog level 5If selecting
- Sharpness level : The higher the level is, the sharper and clearer the outline of the image becomes.
• Gamma : Adjust the contrast of the image.
• Color level : Adjust the strength of video color.
• Defog : Compensate the video in the foggy or cloudy weather.
It is set to
- Off : Disable the fog elimination function.
- Auto : The image is automatically compensated according to the foggy level.
Adjust
- Manual : The user manually sets the amount of compensation for each image.

If the defog mode is set to
If the manual defog level is high in a thin fog, the image may become too dark.
• Defog level : Control the defog level.

- Mitigate the degree of image vibration when the camera vibrates due to the external factors such as wind.
To Set OSD
1. Select .
- Select each item and set it properly.
- Camera title : It specifies the name of the camera to be displayed on the screen. - Camera title X, Y : It specifies the position of the camera name on the screen.
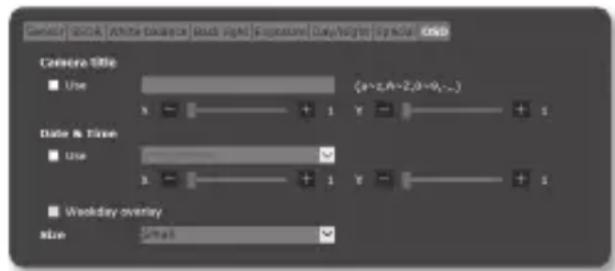
text_image
Camera: 20.0K White took on touch right Sequence Daily/night Solar GND Camera Title Use (a=2,A=2,0=0,-) Date & Time Use 3 Y + 1 Y + 1 Weekday overlay size Small- Date & time : Set the time display and date formats on the screen.
- Date & Time X, Y : Specify the position of time display on the screen.
- Weekday overlay: Specify the use of date display date on the screen.
- Size : It specifies the size of the text displayed on the screen.
A position-adjustable item (Camera title, Date & Time) may not be displayed normally if it overlaps with another fixed OSD item.
Smart codec
Set a desired area of the video incoming from the camera as ROI area and specify the detection sensitivity for the area.
- From the Setup menu, select the
- Click
. - Select ROI Area.
- Face detection : Active if a face is recognized on the monitoring screen

- You can detect max 35 faces on the screen at the same time.
- The minimal face size detectable is 45x45 for 2mega mode with the max resolution and 64x64 for 3 mega mode with the max resolution. But there may be some errors depending on the characteristics of your face or lighting.
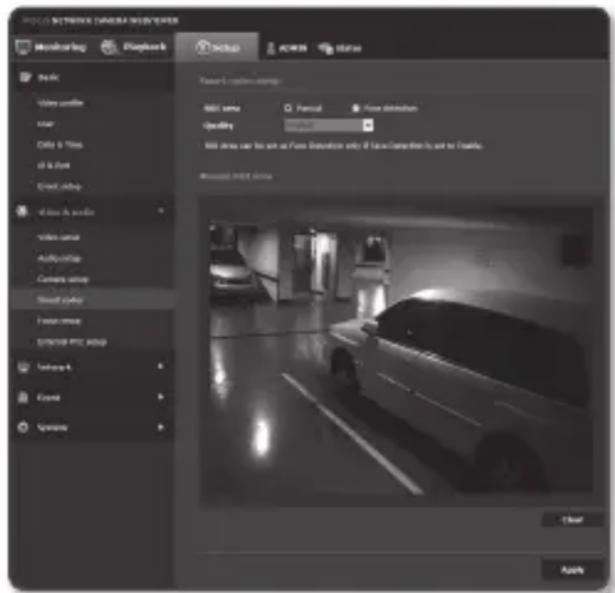
text_image
PICKER NETWORKS CAMERA & VIEWDER Monitoring Playbox Setup Share Video audio User Gifts & Tires of a format Smart Audio Video & video Video name Audio setup Camera setup Smart playbox Faser video Spencer PPC setup Subway A Focal Spinbox Passer L-lookers - 60% 80% size Personal Face detection Quality Model Add frame user to use as Face Detection only if face detection is not to Enable. Microsoft POST Group Clear Apply- Manual : Specify the ROI area to monitor manually.
- Set the image quality.
The ROI area will be displayed in the specified quality. - If manually specifying the ROI area, select a desired area with the mouse pointer and drag it as much as you want.
■ You can specify up to 5 distinct areas. - To cancel all the settings for the area, click the [Clear (Clear)] button.
- When done, click [Apply (Apply)].

The Smart codec will not be active if it is set to
Focus setup (SNB-7004)
You can adjust the focus of video image.
- From the Setup menu, select the
- Click
. - Set up the focus in the following sequence.
1) Focus initialize : Click [ ➕ button to move to the default flange back position.
2) Focus (Adjust Lens): Manually adjusts the Len's focus (Far Near) and ensure the image clear.
3) Simple focus : Drag your mouse on the video to set the location for auto focus. Click [ ] button to fit the focus automatically.
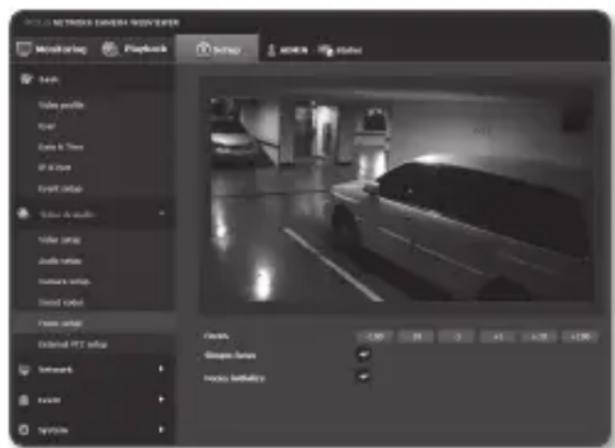
text_image
PECO NETWORK CAMERA VIEWER Monitoring Playback stop stop stop Search Video position View Data & Time IF 3 lanes Event color Video colors Video zoom Audio zoom Camera zoom Sound color Face color Ordered PET info Network Monitor Portfolio Controls Simple lines Photo attributes
■ The Simple focus mode may not fit correctly in the following cases:
-Sudden change to the object in Simple focus mode (sudden movement, appearance or disappearance)
-Radical change to the brightness in Simple focus mode
-Image of a low contrast
-If the camera is exposed to a strong light source in the front or surroundings
In case the focus is inappropriate apart from mentioned above, use [-100, -10, -1, +1, +10, +10] button to manually adjust the focus.
In a situation where Simple focus is hardly applied, try to use the manual focus mode.
focus setup (SnD-7084/Snv-7084)
You can adjust the focus and zoom ratio of video image.
- From the Setup menu, select the
- Click
. -
Set the focus and zoom.
-
Focus : Manually adjusts the lens focus (Far Near).
- Zoom : Manually adjusts the zooming (Wide Tele).
- Simple focus : Drag your mouse on the video to set the location for auto focus. Click [ ] button to fit the focus automatically.
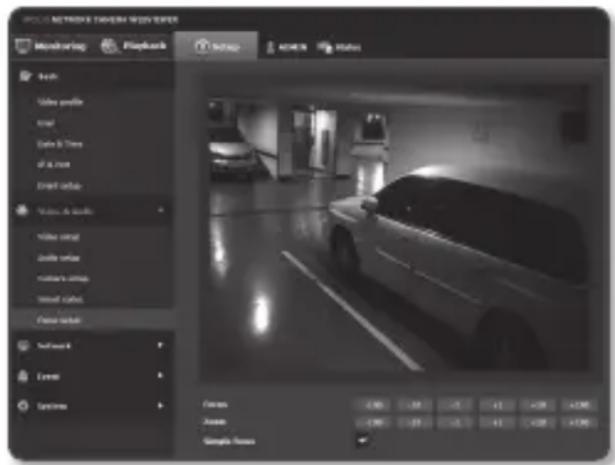
text_image
POLY NETWORK TAGNER WINDOW EXE Monitoring Playback Action Action Action Search Video profile View Video & Time of a car Direct color Video & Video Video color Audio color Radio's crop Signal color Cass color Software Level Settings Focus Aven Simple focus
■ The Simple focus mode may not fit correctly in the following cases:
- Sudden change to the object in Simple focus mode (sudden movement, appearance or disappearance) - Radical change to the brightness in Simple focus mode - Image of a low contrast - If the camera is exposed to a strong light source in the front or surroundings
In case the focus is inappropriate apart from mentioned above, use
+10, +10] button to manually adjust the focus.
In a situation where Simple focus is hardly applied, try to use the manual focus mode.

External PTZ setup (SNB-7004)
Configure the connection settings to the external pan/tilt receiver so that you can control the PTZ operations via the receiver connected to the RS-485 port of the camera.
- Select the
- Click
. - Click <▼ Show>.
- Specify the serial port.
You can set the RS-485 communication mode for pan/tilt-compliant receiver that is connected to the network camera.
- Protocol : From SAMSUNG-T/SAMSUNG-E / PELCO-D/PELCO-P / SUNGJIN / PANASONIC / HONEYWELL / AD / VICON / GE / BOSCH, select the same protocol as that of the receiver.
- Camera ID : Displays the fixed camera ID.
- Baudrate : Transfer rate for RS-485 communications.
• Data bit : Specify the data bit. - Parity bit : Specify the parity bit.
- Stop bit : Specify the stop bit.
-
ONVIF Focus move: Set external camera's focus for ONVIF controls.
-
When done, click [Apply (Apply)].

- All these operations above mentioned will be enabled only if the network camera is properly connected to the pan/tilt-compliant receiver. And the serial port for the pan/tilt operations should be properly specified.

- Check the functions supported by the receiver when it is connected. Some functions may be disabled depending on the receiver or protocol specification. Refer to the following table for more details.
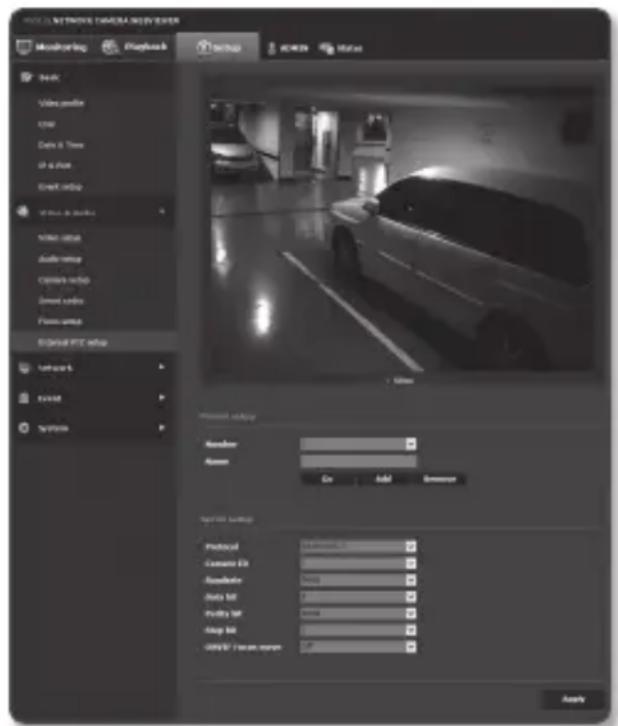
text_image
MODEL NETWORK CAMERA NAME VIEW Monitoring Playback Audio Video audio Audio Data & Time if a free Grip setup View to display Video setup Audio setup Options setup Smart colors Flow setup Optional PTC setup Network Forest System Preview Setup Name: Amm On Add Resource Input Settings Protocol: 100000000000000000000000000000000000000000000000000000000000000000000000000000000000000000000000 Custom Edit: Audio Data set: 1.25 Audio set: 1.25 Audio set: 1.25 Audio set: 1.25 Audio set: 1.25 Audio set: 1.25 Audio set: 1.25 Audio set: 1.25 Audio set: 1.25 Audio set: 1.25 Audio set: 1.25 Audio set: 1.25 Audio set: 1.25 Audio set: 1. Audio set: 1. Audio set: 1. Audio set: 1. Audio set: 1. Audio set: 1. Audio set: 1. Audio set: 1. Audio set: 1. Audio set: 1. Audio set: 1. Audio set: 1. Audio set: 1. Audio set: 1. Audio set: 1. Audio set: 1. Audio set: 1. Audio set: 1. Audio set: 1. Audio set: 1. Audio set: 1.25 Audio set: 1.25 Audio set: 1.25 Audio set: 1.25 Audio set: 1.25 Audio set: 1.25 Audio set: 1.25 Audio set: 1.25 Audio set: 1. Audio set: 1. Audio set: 1. Audio set: 1. Audio set: 1. Audio set: 1. Audio set: 1. Amm/4 (non-Non-Non-Non-Non-Non-Non-Non-Non-Non-Non-Non-Non-Non-Non-Non-Non-Non-Non-Non-Non-Non-Non-Non-Non-Non-Non-Non-Non-Non-Non-Non-Non-Non-Non-Non-Non-Non-Non-Non-Non-Non-Non-Non-Non-Non-Non-Non-Non-Non-Non-Noise ApplyFunctions Supported for Each Protocol
| Protocol P control | P movement speed | T control | T movement speed | Zoom control | Zoom movement speed | Focus control | Focus control speed | Preset Remarks | ||
| SAMSUNG-T | 0 | 0 (1~6) | 0 | 0 (1~6) | 0 | 0 (1~4) | 0 | 0 (1~4) | 0 | |
| SAMSUNG-E | 0 | 0 (1~6) | 0 | 0 (1~6) | 0 | 0 (1~4) | 0 | X | 0 | |
| PELCO-D 0 0 | (1~6) 0 0 (1~6) 0 X 0 X 0 | |||||||||
| PELCO-P 0 0 | (1~6) 0 0 (1~6) 0 X 0 X 0 | |||||||||
| SUNGJIN 0 X | 0 X X X X X 0 | PT direction (Up, down, left, bottom) | ||||||||
| PANASONIC | 0 | 0 (1~6) | 0 | 0 (1~6) | 0 | 0 (1~4) | 0 | 0 (1~4) | 0 | |
| HONEYWELL 0 | 0 (1~6) 0 0 | (1~6) 0 X 0 X 0 | ||||||||
| AD 0 0 (1~6) 0 0 (1~6) 0 x 0 X 0 | ||||||||||
| VICON 0 0 (1~6) 0 0 (1~6) 0 x 0 X 0 | ||||||||||
| GE | 0 | 0 (1~6) | 0 | 0 (1~6) | 0 | 0 (1~4) | 0 | X | 0 | |
| BOSCH | 0 | 0 (1~6) | 0 | 0 (1~6) | 0 | 0 (1~4) | 0 | X | X | |
- Adjust the direction.
- [Change direction to ( )/( )/( )/( )/( )/( )/( )]: The camera direction is adjusted.
- [Moving speed control(▼)] : The bigger the number is, the faster the moving speed becomes.
- Set the zoom and focus.
• [Zoom Inc()] : Zooms in the screen.
• [Zoom Ou €)] : Zooms out the screen.
- [Adjust Focus / Adjusts the focus in the screen.
- [Zoom Speed Control( )]: The bigger the number is, the faster the zoom speed becomes.
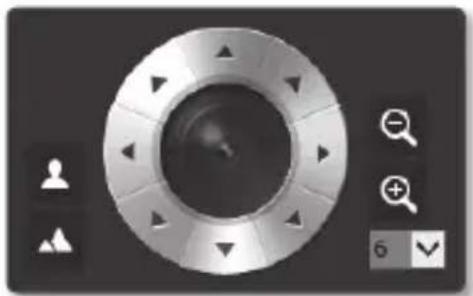
natural_image
User interface control panel with circular dial and adjustment icons (no readable text or symbols)- Set the preset.

- The pan/tilt/zoom operations can be controlled only if the camera is connected to a pan/tilt receiver with a proper
To add a preset
- Select the preset number to add.
- Set the name for the preset.
- Press the [Add] button.
To delete a preset
- Select the preset number to delete.
- Press the [Remove] button.
To move a preset
- Select a preset number that you want to move.
- Press the [Go] button.
NETWORK SETUP
DDNS
DDNS is an abbreviation of Dynamic Domain Name Service that converts the IP address of a camera into a general Host Name so that the user can easily remember it.
You can use the DDNS service only if the internet is connected.
- From the Setup menu, select the
tab. - Click
. - Select the
connection type. - Type in the DDNS items according to the selected type.
- Samsung DDNS : Select this if you use the DDNS server provided by Samsung Techwin.
- Product ID : Enter the product ID that is registered with the Samsung DDNS service.
- Quick connect : It sets port forwarding automatically when used with a UPnP (Universal Plug and Play) supporting router.

If you want to use the DDNS service without using a hub that supports the UPnP function, click Quick connect, then go to the hub menu and activate port forwarding for your hub. For more on how to set port forwarding for your hub, refer to "Port Range Forward (Port Mapping) Setup". (page 62)
- Public DDNS : Select one of provided public DDNS servers when you use a public DDNS server.
- Service : Select desired public DDNS service server.
- Host name : Enter the name of the host that is registered with the DDNS server.
- User name : Enter the user name for the DDNS service.
-
Password : Enter the password for the DDNS service.
-
When done, click [Apply (Apply)].
If selected
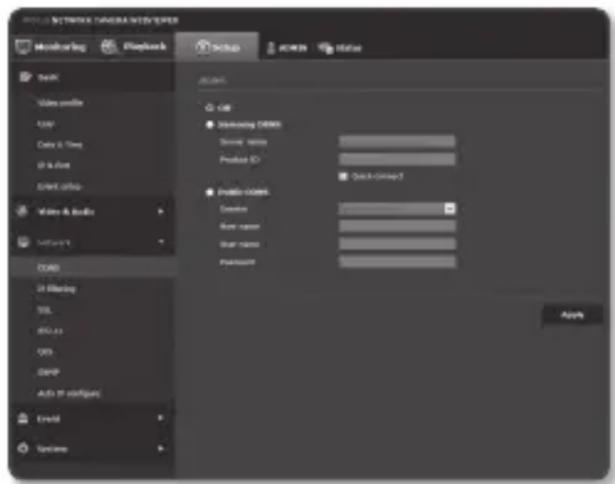
text_image
NETWORKS DRUGARATED ENTER Monitoring Playfork Setup Access Value Switch Video audio USB Data & Tree IF & Data Start: http Water & Tools Software1 DASH IF Flashing SSL BOS US OK GMP Auto IP configues Credit Uniforms Access Database/DBM Server Name: Product ID: Quick Group 7 Disable content: Device: Base name: Base name: Product#:\ ApplyRegistering with DDNS
To register your product with the Samsung DDNS
- Visit the iPOLiS web site (www.samsungipolis.com) and sign in with a registered account.
text_image
Welcome to the IPOUS websites. As offer services for users of Samsung IPOUS network products. To use the services, please replace first. Terms of Service (Terms of Service (and Membership Agreement)) Chapter 1: Parties and Recitals 1.1 Purpose of Terms of Service The following terms and conditions (given: The POUS Membership (www.demonopole.sci.e)) are coded by Samsung Techram Limited Company (the "Company") and the benefits available thereunder (the "Service"). 1.2 Effectuation and Action of Terms of Service 1.3.1 The Terms of Service will be effective by announcement on the Service or notification through email to the individual Partners. 1.3.2 The Company also requires this agreement without prior notice to the Member in case of coordination and the same terms and conditions will be effective with recommendations in the same character described in 1.2.1. 1.3.3 If any Member is disagreement with the related terms and conditions can request permission, otherwise, the Germany will your Member's use as follows of the spatial terms and conditions about their contents to benefit the Agree NEXT >- From the top menu bar, select
- .
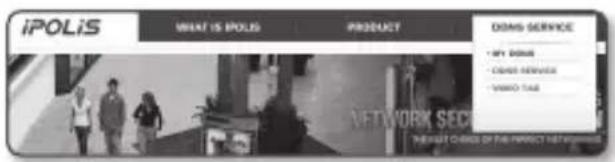
text_image
iPOLiS WHAT IS POLiS PRODUCT DOMS SERVICE • MY DOUG • HOME SERVICE • VARIO TUG NETWORK SEC- Click [PRODUCT REGISTRATION].
- Enter the product ID.
■ You must perform the duplicate check for the ID that you entered.
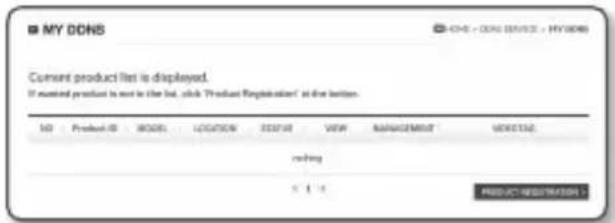
text_image
MY DONS CHG - CHG S1012 - HY006 Current product list is displayed. If needed product is not in the list, click "Product Registration" at the button. NO Product ID BOGS LOGON SEVE VIEW MANAGEMENT NOCTAGE rating 5 1 4 PRODUCT REQUESTOR- Select a
and specify the . - Specify the product location with a description if necessary.
- Click [REGISTRATION]. The product will be added to the product list that you can check.
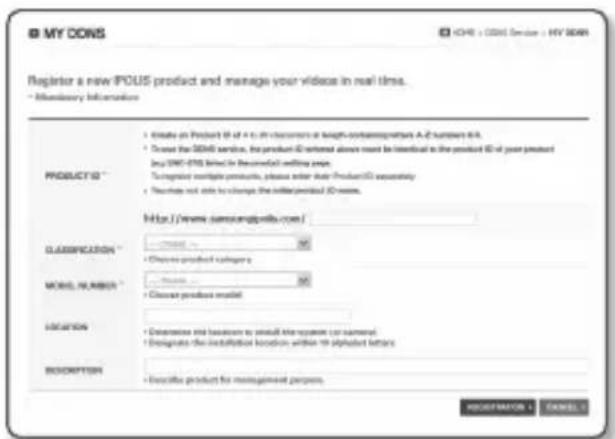
text_image
My CONS Register a new PCUS product and manage your video in real time. * Mandatory information PRODUCTS** • Create an Product ID of 1 to 2 characters or length-contingentures A-C numbers 4A. • Transfer the SEMI service, the product ID (internal) unless must be identical to the product ID of your product (e.g. SEMI IDs) listed in financial software type. To register multiple products, please enter their Product ID as security. • Purchase not able to change the initial product ID name. http://www.samcogpella.com/ CLASSIFICATION** • Choose product category MODEL NUMBER** • Choose product model LOCATION • Description and location to install the system (or normal) • Designate the installation location within the alphabet letters DESCRIPTION • Describe product for management person. REGISTRATOR: C CANCEL:To connect to the Samsung DDNS in camera setup
- From the DDNS setup page, set
to . - Provide the
that you registered product ID with the DDNS site. - Click [Apply (Apply)]. When the connection is successfully made, you will see the message of <(Success)> on the screen.
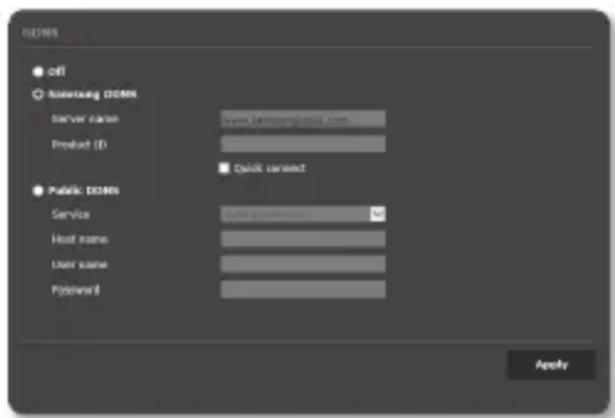
text_image
ISO/INS ● off ○ Aberrung ISO/INS Server class: www.elsevier.com Product ID: ■ Quick connect Public ISO/INS Service: www.elsevier.com Host name: User name: Pcbansell: ApplyConfiguring public DDNS in Camera Settings
- Open the DDNS settings page and select
for . - Enter the corresponding site's host name, user name and password.
- Click [Apply (Apply)] button. If the connection properly establishes, <(Success)> appears.
- When done, click [Apply (Apply)]

To use DDNS service properly, both DDNS setup and the router's port forwarding setup are required.
For port forwarding setup, refer to "Port Range Forward (Port Mapping) Setup". (page 62)
IP filtering
You can create a list of IPs that you want to grant or deny access to them.
- From the Setup menu, select the
tab. - Click
. - Select
.
- Deny : If selecting this, access from those IPs that are added to the filtering will be restricted. - Allow : If selecting this, access from only those IPs that are added to the filtering will be accepted.
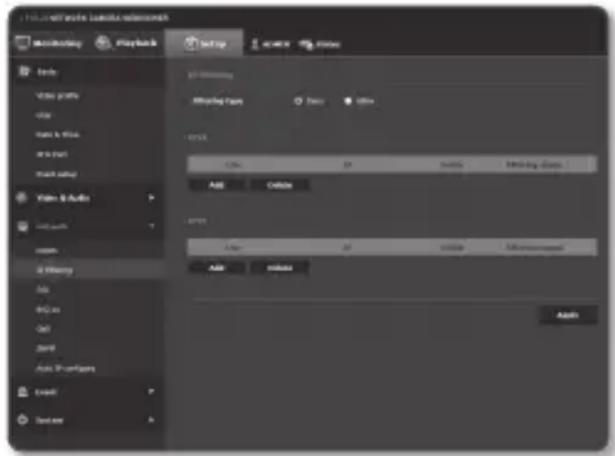
text_image
File Edit View Insert Tools Help Macromedia Playback Setup View Tools Help Tools View profile View View & Info View Path View Path View & Audio Settings Open 2 Options Auto Auto Auto Tools Event Details 10 Dimensions Mying from Down Down OFF: OK Off: Auto Auto Tools Auto Tools Auto Tools Auto Tools Auto Tools Auto Tools Auto Tools Auto Tools Auto Tools Auto Tools Auto Tools Auto Tools Auto Tools Auto Tools Auto Tools Auto Tools Auto Tools Auto Tools Auto Tools Auto Tools Auto Tools Auto Tools Auto Tools Auto Tools Auto Tools Auto Tools Auto Tools Auto Tools Auto Tools Auto Tools Auto Tools Auto Tools Auto Tools Auto Tools- Click the [Add ( Add )] button. The IP list will be created.
- Provide the IP that you want to grant or deny access from. When you enter an IP address and a Prefix, the list of IP addresses available will appear in the right-side filter range column.

If selected
- Select an IP to delete from the list. Click the [Delete ( Delete )] button.
- When done, click [Apply (Apply)].
SSL
You can select a secure connection system or install the public certificate for this purpose.
- From the Setup menu, select the
tab. - Click
. - Select a secure connection system.
- To access the camera using HTTPS mode, you have to type the IP address for the camera in the form of "https://
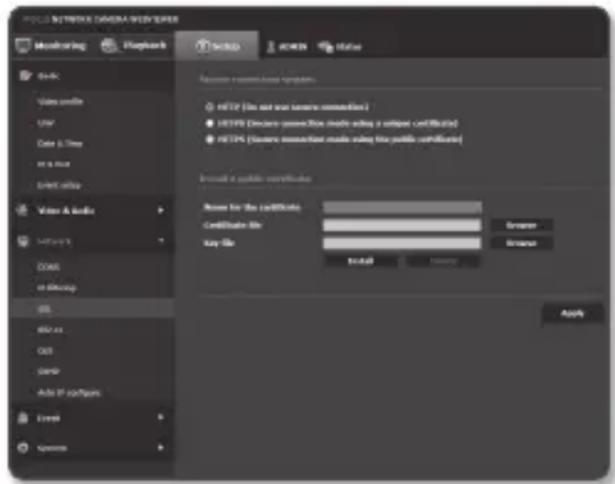
text_image
POST NETWORK CAMERA WEB VIEW Monitoring Playback SAMS HTTPS Value Video profile UAV Data & Tree on a list Direct office Value & info Network COMS or network DNS HTTP as OUT GND Add IP configms Event Commerce Recover certificate symbols HTTP (File set out secure connection) HTTPS (Secure connect box mode using a subset certificate) HTTPS+ (Secure connect box mode using the public certificate) Install a portfolio certificate Base for the certificate Certificate No: Browse Key No: Install Apply- Search for the public certificate that you want to install on the camera.
To install the certificate on the camera, you need to provide a certificate name (it can be arbitrarily assigned by the user), certificate file issued from the certification authority and a key file.
- The
- When done, click [Apply (Apply)].
Installing the certificate
- Enter the certificate name.
- Click the [Browse ( Browse )] button, select the public certificate file and key file to be installed, and then click the [Install ( install )] button.
Deleting the certificate
- Click [Delete (Delete)
- To delete a public certificate, you should access the network video decoder in the mode of
or
802.1x
When connecting network, you can choose whether using 802.1x protocol, and then install the certification.
- From the Setup menu, select the
tab. - Click <802.1x>.
-
Set the
. -
IEEE 802.1x : Specify the use of the 802.1x protocol.
• EAP type : Select EAP-TLS or LEAP
- EAPOL version : Select version 1 or 2.
• ID : Enter the client certificate ID in EAP-TLS and the user ID in LEAP.
- Password : Enter the client private
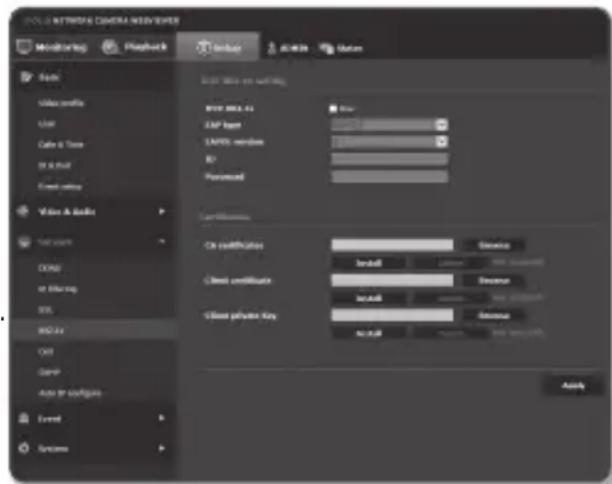
text_image
POLD NETWORK CAMERA VIEWER Monitoring Playback Monitor Auto Status Back Video profile User Cable & Tree BIP User Event setup Value & Audio Service DOSU or Sharing BIL BIO 2x Cell Gard Auto IP configues Event Services IAP Layer: LAP levels: ID: Permitted: On specifications: Install: Close certificate: Install: Close printer key: No. of:\ Applykey password in EAP-TLS and the user password in LEAP. You do not have to enter the password in EAP-TLS if it uses a key file that is not encrypted.
If the connected network device does not support the 802.1x protocol, the protocol will not operate properly even if you set it.
- LEAP is an authentication method with poor security. Use it only in an environment where EAP-TLS is not available.
- Install/remove the certificate.
The certificate is needed only for EAP-TLS.
- CA certificates : Select a public certificate that contains the public key.
- Client certificate : Select a public certificate that contains the client certificate key.
-
Client private Key : Select a public certificate that contains the client private key.
-
When done, click [Apply (Apply)].
To install/remove 802.1x related certificates
- Press the [Browse (Browse)] button for each item and select a certificate to install.
- If no certificate is installed, you will see "Not Available" appearing next to the selected item.
- Press the [Install (Install)] button to start installation with a message of "Installed" next to the item.
- Press the [Delete (Delete)] button to remove the certificate.
QoS
You can specify the priority to secure a stable transfer rate for a specific IP.
- From the Setup menu, select the
tab. - Click
. - Click the [Add ( Add )] button. The IP list will be created.
- Enter an IP address to which you will apply QoS.

■ The default prefix for IPv4 is 32; For DSCP, the default is set to 63.
- Only the IP addresses that are set to
- Select an IP to delete from the list. Click the [Delete (Delete)] button.
- When done, click [Apply (Apply)].
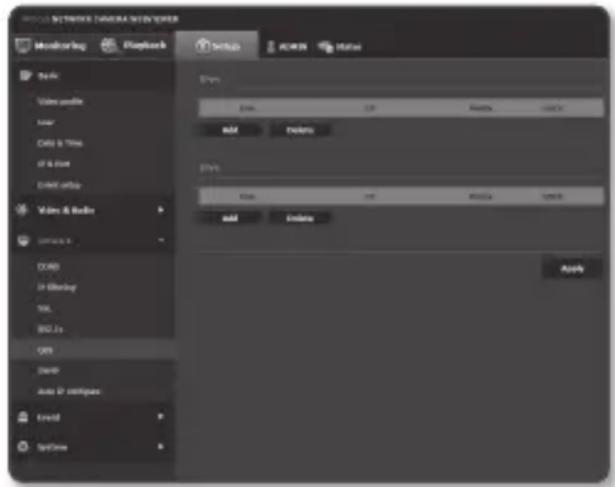
text_image
NETWORKS DIMENSIONS Monitoring Playbox Setup Video audio User COM & Tris if a size Edit activity Video & Audio Details COM IF Blending YSL BIO Jx OK DARF Auto IP configers Event Software Settings Settings Add Delete Add Delete ApplySNMP
With the SNMP protocols, the system or network admin can monitor the network devices on a remote site, and configure the environment settings.
- From the Setup menu, select the
tab. - Click
. -
Specify the
. -
Enable SNMP v1 : SNMP version 1 will be active.
- Enable SNMP v2c : SNMP version 2 will be active.
- Read community : Provide the name of the read community where you can access to the SNMP information.
The default name is
- Write community : Provide the name of the write community where you can access to the SNMP information. The default name is
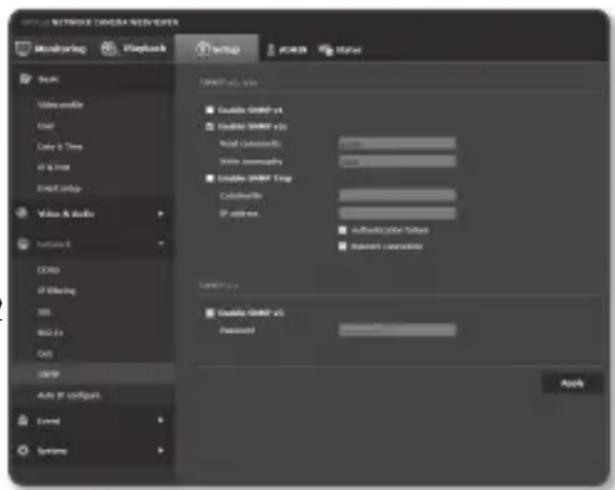
text_image
I/O NETWORK CAMERA NEWS VERSER Monitoring Playback Setup Access Name Book Video editor User Data & Time if a free Direct setup Value & Audio Functions COMS IF Blending SS BIO.2x Out USBP Auto IP configuts Event Systems C:\Users\Windows\1000\V63\* C:\Users\Windows\1000\V63\* C:\Users\Windows\1000\V63\* C:\Users\Windows\1000\V63\* C:\Users\Windows\1000\V63\* C:\Users\Windows\1000\V63\* C:\Users\Windows\1000\V63\* C:\Users\Caternal\V63\* C:\Users\Caternal\V63\* C:\Users\Caternal\V63\* C:\Users\Caternal\V63\* C:\Users\Caternal\V63\* C:\Users\Caternal\V63\* C:\Users\Caternal\V63\* C:\Users\Caternal\V63\* C:\Users\Caternal\V68 Password Apply- Enable SNMP Trap : SNMP trap is used to send important events and conditions to the Admin.
- Community : Enter the trap community name to receive messages.
- IP address : Enter the IP address to which messages will be sent.
- Authentication failure : It specifies whether an event shall be generated when the community information is invalid.
- Network connection : It specifies whether an event shall be generated when the network disconnection is restored.
- Enable SNMP v3 : SNMP version 3 will be active.
- Password : Specify the default password for SNMP version 3. The default password is
- The default password can be exposed to a hacking thread so it is recommended to change the password after installing the product.
Note that the security and other related issues caused by the unchanged password shall be responsible for the user. - Password should be longer than 8 characters, no more than 16 characters.
4. When done, click [Apply (Apply)].
![Hanwha SNB-7004 - When done, click [Apply (Apply)]. - 1](/content/2026/05/813534/images/cc828613c3f3e34b278dd279a6d179667e02a9d6e186d51ce2b083653da43a36.jpg)
SNMP v3 is only able to be set when the secure connection mode is HTTPS. Refer to "SSL". (page 116)
If you don't use SNMP v3, there may be a security issue.
Auto IP configure
You can set the IP available for access and camera searching automatically.
- From the Setup menu, select the
tab. - Click
. -
Set the
. An additional IP address may be assigned to assess the camera from the Link-Local network. -
Auto configure : It specifies Able or Disable for the Link-Local IPv4 address.
- IP address : Display the assigned IP address.
-
Subnet mask : Display the subnet mask of the assigned IP.
-
Set the
.
Cameras can be automatically searched in the client and operating system in support of the UPnP protocol.
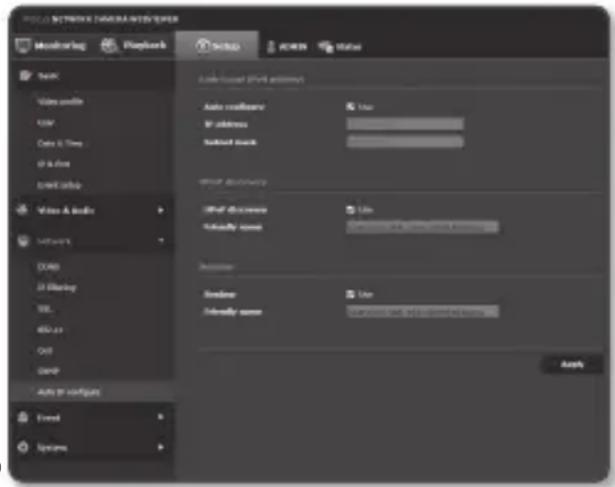
text_image
POST NETWORK DIAGRAMATED WORK Monitoring Playfork Settings Users Value Bank Video audio USB Data & Time of a file Direct link Video & Audio Networks DOOR 21 Blending URL 450 us Out GMP Auto to config Fixed Systems Auto-based (Local authority) Auto core/ware User address Subtotal link User directory What document Use Subfamily name Available and use existing functions Description Sendow Use Subfamily name Available and use existing functions Apply- UPnP discovery : It specifies Able or Disable for UPnP Discovery.
- Friendly name : Display the camera name.
Friendly name is displayed in the format of SAMSUNG-

In the Windows operating system which basically supports UPnP, the cameras connected to the network are displayed.
- Set the
.
Cameras can be automatically searched in the client and operating system in support of the Bonjour protocol.
- Bonjour : It specifies Able or Disable for Bonjour.
- Friendly name : Display the camera name.
Friendly name is displayed in the format of SAMSUNG-

In the Mac operating system, which support Bonjour by default, the connected cameras are automatically displayed in the Bonjour bookmark of the Safari web browser. If the Bonjour bookmark is not displayed, check Bookmarks Setup in the "Preference" menu.
- When done, click [Apply (Apply)].
FTP / E-mail
You can configure the FTP/E-mail server settings so that you can transfer the images taken with camera to your PC if an event occurs.
- From the Setup menu, select the
-
Click
. -
Select
or
- FTP configuration
- Server address : Enter the IP address of the FTP server that you transfer the alarm or event images to.
- ID : Enter the user ID with which you will log in to the FTP server.
- Password : Enter the user account password for logging into the FTP server.
- Upload directory : Specify the FTP path where you will transfer the alarm or event images.
- Port : The default port of the FTP server is 21; however, you can use a different port number according to the FTP server settings.
- Passive mode : Select
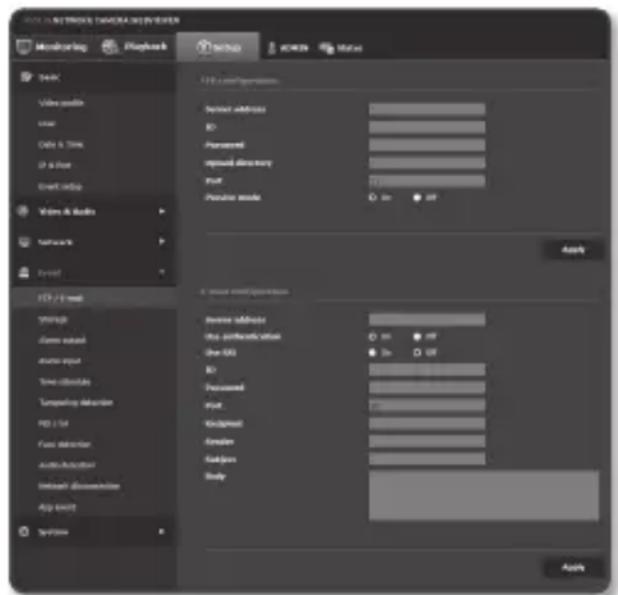
text_image
VOLUME NETRICK TANGUA GROUP VIEWER Monitoring Flashbox setup School Video Data Video audio User Data & Time Up a Post Smart Setup Video & Audio Network Event FTP 2.1 Web Views Zero audio Audio output Time schedule Temping disorder HD 1.14 Face disorder Auto/Accident Internet disconnection App switch Settings USB configuration Sensor address: ID: Password: Input directory: Foot: Perceiver mode: On Off Apply USB configuration Sensor address: Use authentication: See QQ: ID: Password: Foot: Background: Emotion: Emotion: Body: Apply• E-mail configuration
- Server address : Enter the IP address of the email server that you transfer the alarm or event images to.
- Use authentication : Select whether to use authorization.
- Use SSL : Specify the use of SSL.
- ID : Enter the user ID for logging into the email server.
- Password : Enter the user account password for logging into the email server.
- Port : The default port of the email server is 25; however, you can use a different port number according to the email server settings.
- Recipient : Enter the address of the email recipient.
- Sender : Enter the address of the email sender. If the sender address is incorrect, the email from the sender may be classified as SPAM by the email server and thus may not be sent.
- Subject : Enter a subject for your email.
-
Body : Provide the text for the massage. Attach the alarm or event images to the email that you are preparing.
-
When done, click [Apply (Apply)].
Storage
You can activate recording on your device, set the recording conditions, check the saved data capacity and format the device itself.
- From the Setup menu, select the
tab. - Click
. - Select a device to save data in.

If your device is properly recording data, it will display "Recording".
If you see an "Error" message, check the following:
- Check the storage to see if it is connected to the device.
- Check the files in the storage to see if they are damaged.
- Check the storage to see if they are physically damaged.
If the “Error” message does not disappear after following the instructions, replace the Micro SD card.
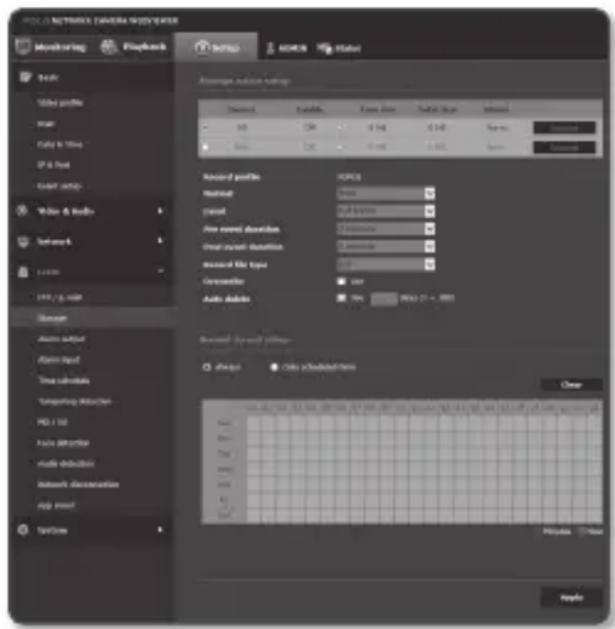
text_image
PCC NETWORK ZAMERA WOODWATER Monitoring Playback Balance Video profile View Data & Info OF a Post User setup Water & Audio Software Local FTP / 3.000 General Audio subair Audio Input Time subrubs Computing Audio HD / HD Auto d控制 Multi duration Network demonstration rip print Satellite Average solution settings Device Length Final Size Total Size Interact 10 CN 4-bit 4-bit Sense Standard Basic 125 125 125 125 125 Advanced profiles RCPD Manual RCA Cpsat Subspace Fire sound distortion Continuous Final sound distortion Continuous Maxical file type 1:1 Convertible minimally Auto buttons Low High Width: 2.0 - 800 Advanced (Top and Top)... Change Only Scheduled Items Clear OK OK OK OK OK OK OK OK OK OK OK OK OK OK OK OK OK OK OK OK OK OK OK OK OK OK OK OK OK OK OK OK OK OK OK OK OK OK OK OK OK OK OK OK OK OK OK OK OK OK OKTo make recording on the Micro SD memory
- Check the memory card's
and . - If there are sufficient free space, set the device to
.
Otherwise, check the stored data and if you find them not important, then click
■ Some frames may be skipped if the Micro SD memory card operates at the lower speed than recommended.
For more details, refer to "Recommended Micro SD/SDHC/SDXC Memory Card Specifications". (Page 10)
For a Micro SD memory card with a large capacity, the formatting will be slowed down accordingly.
- The data traffic will increase when the camera is set to higher resolution, higher bit rate, and/or higher framerate.
If there is too much data traffic, some frame may be skipped although it is stored in a full frame.
- When a frame skip occurs, images are saved at the rate of min. one image per sec.
-
Specify the storage action.
-
Record profile : Shows recording profile's codec type.
• Normal : Make recording at a certain frame rate.
• Event : Set the recording type for a certain event that occurs. -
Pre event duration : Specify the time point before the occurrence of the alarm; starting from the time point, the images will be transferred. You can specify up to 5 seconds before the occurrence of the alarm.
- Post event duration : Specify the time point after the occurrence of the alarm; to the specified time point, the images will be transferred. You can specify up to 120 seconds after the occurrence of the alarm.
- Record file type : It specifies the file format of the recorded images.
- STW : It is Samsung Techwin's unique file format.
- AVI : It is the conventional avi format.
- Overwrite : If the Micro SD memory is full, this will delete old data and store new data in replacement.
- Auto delete : Data for a certain period is deleted, while other data is not deleted. This can be set within the range of one day to 180 days.
If the storage period is expired, data is automatically deleted and new data will be recorded. Once deleted, it cannot be recovered.
- Specify the
.
• Always : Always save recorded video in the Micro SD memory card.
■ If set to Always, the activation time cannot be changed.
- Only scheduled time Records only on the specified time of the specified day of week.
• [Clea Clear] Reset all settings.
- When done, click [Apply (Apply)].
If you want to record in your NAS
- Set the saving operation and basic recording.

■ Auto deletion is supported only if your NAS meets the recommended specifications.
-
Enter the information registered in your NAS.
-
IP address : Unique IP address assigned to the NAS.
• ID : An ID registered in the NAS. - Password : Password registered in the NAS.
-
Default folder : Designate the NAS user folder to save data in.
-
Click the [Test] button to see if you can successfully connect to the NAS.
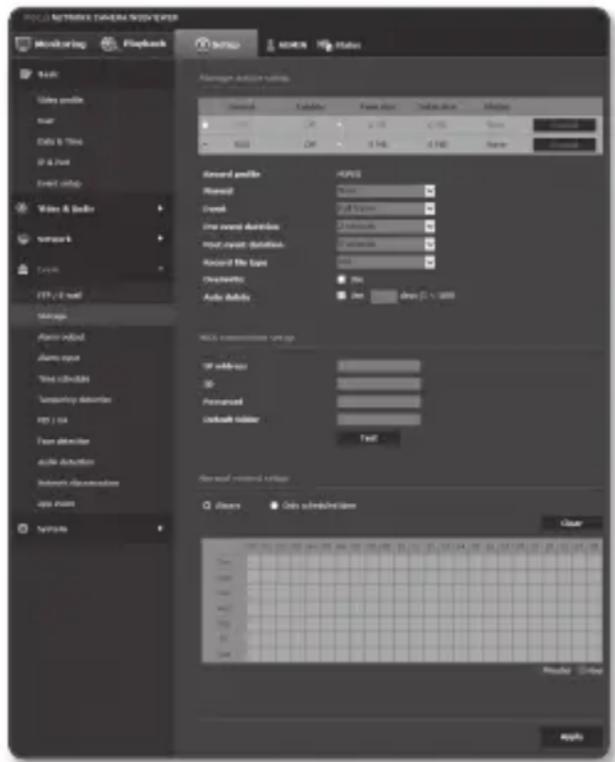
text_image
APOL & NETWORK DATA NAME SYSTEM Monitoring Playback Search Resource Status Access and location settings Current Indicator Fase size Default size Import 0 100 25 35 45 - 1000 Off 3746 3746 Record and file APPS Named None Named Full Texts Line event destinations Unknowns Host event destinations Unknowns Record file type None Address(s) No Auto activity Not clear (1.1.1) MACS communication setup OF address: Formwork Lockout status Text... Remove network settings Show Only scheduling status Clear Model Close Apply
If the success message is displayed, it means that you can successfully save data in the NAS.
■ If the fail message is displayed, check the following.
- Confirm that the IP address of the NAS is valid.
- Confirm that the ID/password of the NAS is valid.
- Confirm that you can access the folder designated as the default folder using the ID of the NAS.
- Confirm that the NAS SMB/CIFS items are unchecked.
-Confirm that the NAS IP address and the camera IP address are in the same format.
ex) The NAS & camera subnet mask initial value is 255.255.255.0.
If the IP address is 192.168.20.32 then the NAS IP address should be in the range of 192.168.20.1\~192.168.20.255.
-Check whether you tried to access as another user without formatting the default folder saved or used.
-Confirm that you used recommended NAS equipment.
-
Once the setting is complete, change the setting of the NAS from
to and click the [Apply (Apply)] button. -
Access the NAS to check the available capacity and the total capacity.
-
If the capacity is insufficient, check the data and click the [Format] button to format the NAS on your own.
■ Since data may not be saved after a temporary network interruption when using NAS, it is recommended that you use SD at the same time to prevent loss of recorded images.
- The data traffic will increase when the camera is set to higher resolution, higher bit rate, and/or higher framerate.
If there is too much data traffic, some frame may be skipped although it is stored in a full frame.
- When a frame skip occurs, images are saved at the rate of min. one image per sec.
NAS (Network Attached Storage) guide

■ Since data may not be saved after a temporary network interruption when using NAS, it is recommended that you use SD at the same time to prevent loss of recorded images.
If the setting allows a Micro SD memory card and the NAS to be simultaneously connected for use, the higher priority for recording goes to the NAS.
If you activate Overwrite to the NAS by setting it to
If you are saving data in the NAS, you might be unable to save it when you insert a Micro SD memory card used by another camera.
■ NAS recommended specs : Refer to "NAS recommended specs". (Page 11)
If you change the NAS saving while saving data in the NAS, it will not be reflected in the system immediately.
If you remove NAS equipment on your own while saving data, or if the network is disconnected, NAS saving operation will be terminated abnormally.
As a rule of thumb, you are recommended to use one NAS sharing directory per camera without duplicated use.
- To save a file in NAS, the folder must be used by only one ID. The file may not be saved if the folder is used by multiple IDs.
The following is a description of how to save data using the NAS according to the Synology NAS method, which is one of the recommended products.
- Access the Synology NAS as an admin. In this example, the NAS IP Address is set to [192.168.20.253] .
text_image
DiskStation Remember me- If you access it as an admin, the following screen will be displayed. Click the [Control Panel].
- Click the
in the file sharing and privilege menu. - Click the [Create] button.
- After entering the shared folder name(ID), click the [OK] button to create a shared folder. In this example, the shared folder name is [testDirectory].
- In Windows, for NAS access, set the privilege for the shared folder as follows. Check the admin's [Read/Write].
- Click on the
in the file sharing and privilege menu.
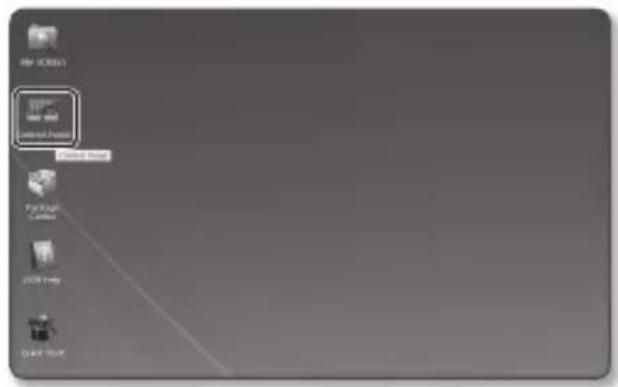
text_image
Bar Chart Bar chart Download Format Print Format Package Settings DASH Help Dashbox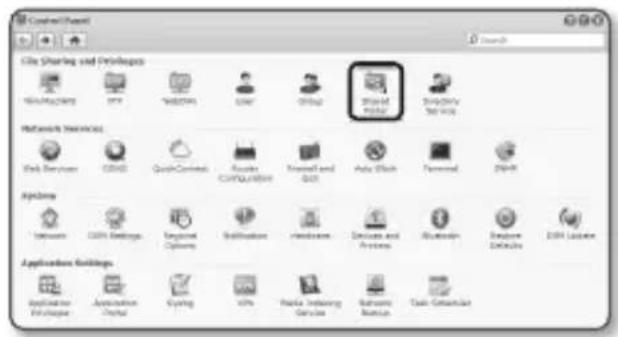
text_image
Control Panel File Sharing and Downloads Manufacturing API Marketing Order Order Stream Stream Manager Network Services Web Services GND QuickContexts Route Computation Travel and Get Auto Watch Terminal Flash Analytics Tensions System Options Settings Instructions Devices and Processes Hardware Images Details Erase Layers Applications Holdings Application Preferences Application Portal Cycling GPS Radio Ordering Services Software Services Task Controls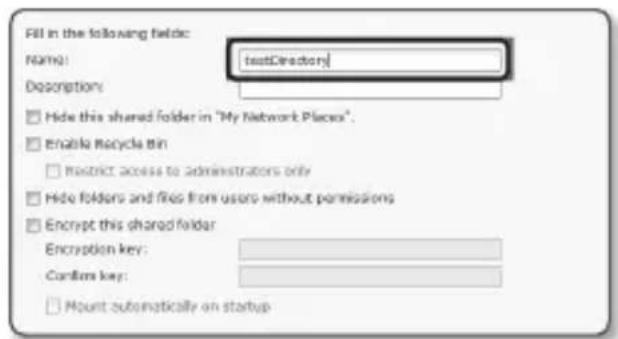
text_image
Fill in the following fields: Name: testDirectory Description: Hide this shared folder in "My Network Places". Enable recycle bin Restrict access to administrators only Hide folders and files from users without permissions Encrypt this shared folder Encryption key: Confirm key: Mount automatically on startup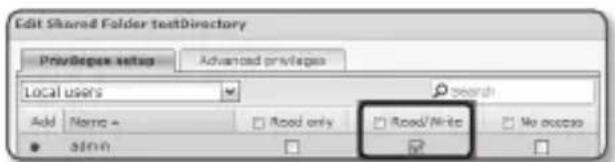
text_image
Edit Stored Folder textDirectory Privileges setup Advanced privileges Local users Search Add Name □ Road only □ Road/Write □ No access • admin □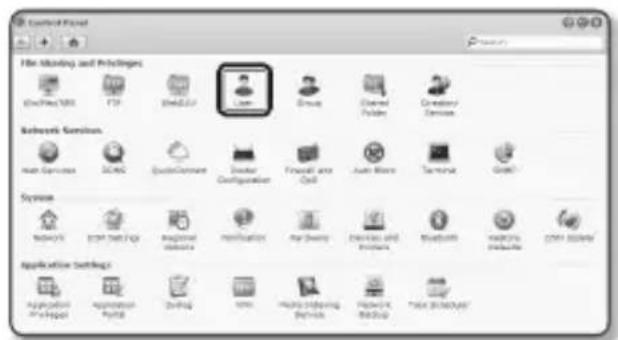
text_image
File Monitoring and Projecting Line Group Created Paper Created Products Network Services Main Services SQLS Quantization Driver Configuration Forward and Cell Auto Tools Terminal Gmail Systems Networks System Help Application Systems Application Settings Application Profile Drawing SMC High Ordering Services Network Backup "Net Software"setup screen
- After clicking the [Create] button, enter name(ID) and password.
In this example, name(ID) is set to [testID] and password is also set to [testID].
According to the NAS recommendations, when you use Netgear's NAS equipment do not allocate the capacity for use.
- In Windows, set the privilege for NAS access.
For the shared folder created in step 4 called "testDirectory" check [Read/Write].
- Basic setting in the NAS is completed. Connect your camera to the actual NAS.
As shown below, enter the NAS connection setting items.
-
After entering item 10, check
. -
Click the [Apply ( Apply )] button. Finish saving by using the NAS.
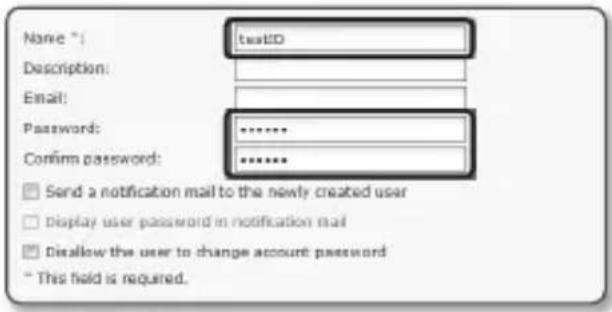
text_image
Name *: testID Description: Email: Password: ****** Confirm password: ****** Send a notification mail to the newly created user Display user password in notification mail Disallow the user to change account password * This held is required.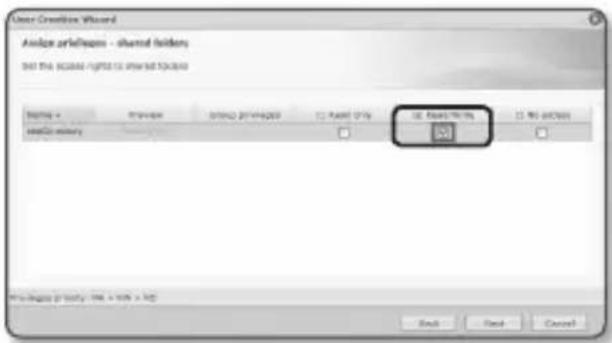
text_image
User Creation Wizard Analog architectures - shared folders Set the following files to your own folder Name: Preview Browse preview Image Only Size Size/Time Size Size/Time Size Size/Time Size Size/Time Size Size/Time Size Size/Time Size Size/Time Size Size/Time Size Size/Time Size Size/Time Size Size/Time Size Size/Time Size Size/Time Size Size/Time Size Size/Time Size Size/Time Size Size/Time Size Bubble Size Bubble Size Bubble Size Bubble Size Bubble Size Bubble Size Bubble Size Bubble Size Bubble Size Bubble Size Bubble Size Bubble Size Bubble Size Bubble Size Bubble Size Bubble Size Bubble Size Bubble Size Bubble Size Bubble Size Bubble Size Bubble Size Bubble Size Bubble Size Bubble Size Bubble Size Bubble Size Bubble Size Bubble Size Bubble Size Bubble Size Bubble Size Bubble Size Bubble Size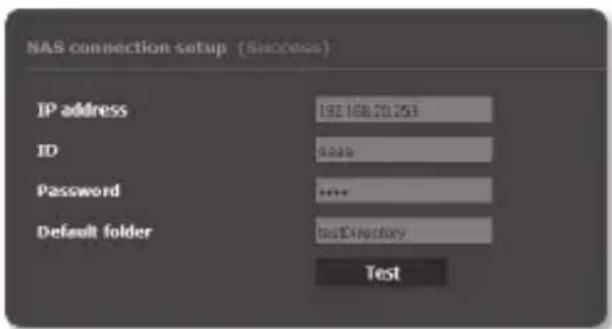
text_image
NAS connection setup (Success) IP address 192.168.20.253 ID 4020 Password ****** Default folder testDirectory Test
text_image
Device File Edit View Date Total date Status 50 Off 0 MB 1 MB Name Format RAS On 741.50 GB 911.45 GB Fax/8360 FormatAlarm output
- From the Setup menu, select the <Event ( □ tab.
- Click
. - Set the camera's type of alarm output.
If you change the alarm output type, the alarm out button on the monitoring page and alarm output type displayed on Event Setup page will be changed accordingly.
- Type
- Normal open : Considers “Open circuit” status of the sensor or alarm input device as normal, and triggers alarm event if becomes “Closed circuit” status.

text_image
FOLD NETRISK CAMERA VIEW INDEX secretary Phybeek OK/OK AC/OK Value Add Video audio Graph Color & Color Image Event status Video & audio Network Cured HTTP / E-mail Change Audio video Audio mode Video colorless Temping video PS 1 Hz Face interaction Audio buttons Network discussion time Add sound Options Add user settings Type: Incorporation: External class Audio-optimized button: Mode: Filter: Audio connection: Selection: Apply- Normal close : Considers “Closed circuit” status of the sensor or alarm input device as normal, and triggers alarm event if becomes “Open circuit” status.
- Set the alarm output button.
• Mode : Sets the alarm output method.
■ There is difference between operations when clicked alarm output button while disabled.
- Pulse : It is activated during the time period specified by the duration (switching interval) and then becomes inactive automatically.
- Active/Inactive : It maintains as activated until the user clicks the button again to make it inactive.
- Duration : Set the alarm duration that maintains activated if the mode is set to pulse, from 1 to 15 seconds.
- When done, click [Apply (Apply)].
Alarm input
You can set the alarm input type, activation time, and operation mode.
- From the Setup menu, select the
tab. - Click
. - Set whether or not to
. -
Select the type.
-
Normal open: It is normally open, but if it is closed, an alarm will be triggered.
-
Normal close: It is normally closed, but if it is open, an alarm will be triggered.
-
Specify the
.
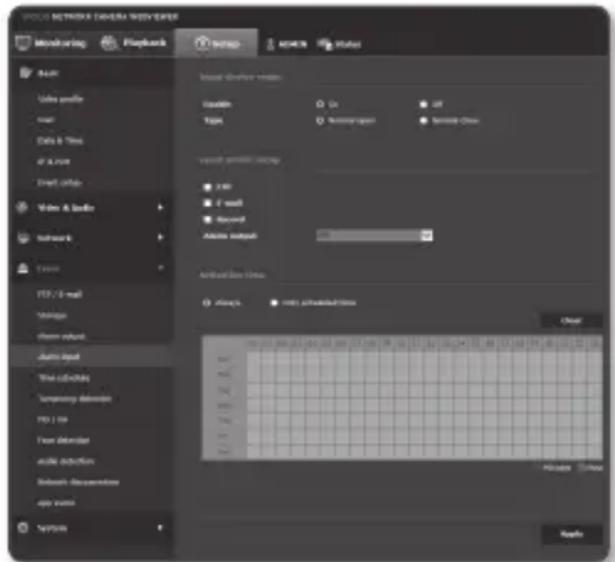
text_image
POLD NETWORK DATA NETS FAPER Monitoring Playback Status CHANGE Status Data Update profile mail Data & Time at a room Direct traffic Video & Audio Networks Text FST / 2 mail Message Show output Auto logd Time downloads Temporary download FST / 10 Time download Audio selection Software Resources Age notes Settings Input filter status: Default On Off Type Nursing point Sentinel Class Vertical precast setup: 3 KB 4 wall Record Active output: Arrival data time: Always with activated time Clear 0x10x10x10x10x10x10x10x10x10x10x10x10x10x10x10x10x10x10x10x10x10x10x10x10x10x10x10x10x10x10x10x10x10x15:36:37:38:39:40:41:42:43:44:45:46:47:48:49:50:51:52:53:54:55:56:57:58:59:60:61:62:63:64:65:66:67:68:69:70:71:72:73:74:75:76:77:78:79:80:81:82:83:84:85:86:87:88:89:90:91:92:93:94:95:96:97:98:99:100:101:102:103:104:105:106:107:108:109:110:111:112:113:114:115:116:117:118:119:120:121:122:123:124:125:126:127:128:129:130:131:132:133:134:135:136:137:138:139:140:141:142:143:144:145:146:147:148:149:150:151:152:153:154:155:156:157:158:159:160:161:162:163:164:165:166:167:168:169:170:171:172:173:174:175:176:177:178:179:180:181:182:183:184:185:186:187:188:189:190:200.00.00.00.00.00.00.00.00.00.00.00.00.00.00.00.00.00.00.00.00.00.00.00.00.00.00.00.00.00.00.00.00.00.25.25.25.25.25.25.25.25.25.25.25.25.25.25.25.25.25.25.25.25.25.25.25.25.25.25.25.25.25.25.25.25.25.25. Access New Open Cancel- Always : Always check if an alarm occurs. It activates in operated mode when the alarm occurs.
If set to
- Only scheduled time : Check if an alarm occurs at a specified day of the week for a specified time period. It activates in operated mode when the alarm occurs.
• [Clear (Clear)]: Reset all settings.
- Minute : Click an area in Activation Time and set the time by minutes.
• Hour : Drag your mouse at Activation Time and set the time by hours.
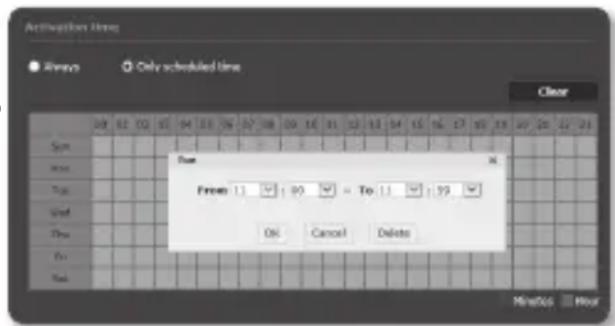
text_image
Acceleration Time Always Only scheduled time Clear 29 32 34 36 38 39 41 43 45 47 49 51 53 55 57 59 Turn Reset Type Used Show View Total True Free From 13:00 = To 11:59 Off Cancel Delete Minutes Hour- Specify an operation that will perform if an alarm occurs.
- FTP : Specify the use of FTP transfer in the alarm input setup.
■ Refer to "FTP / E-mail" for more details. (page 121)
• E-mail : Specify the use of email transfer in the alarm input setup.
■ Refer to "FTP / E-mail" for more details. (page 121)
- Record : Specify the use of recording in the alarm input setup.
- Set
- Alarm output : Select whether to set the alarm output if an alarm is incoming, and specify the alarm output time.
- Goto preset: Moves to the specified preset location when setting the alarm input.
■ Only for SNB-7004.
■ Only if the camera pan/tilt receiver is installed, Goto preset is available.
- When done, click [Apply (Apply)].
Time schedule
You can set to save the video data at a certain interval as scheduled regardless of the actual occurrence of the event.
- From the Setup menu, select the
tab. - Click
- Set whether or not to
. - Specify the
. -
Specify the
. -
Always : Always activates in operated mode at the set interval.
- Only scheduled time : Periodically activates in operated mode at a specified time and date.

- The transfer interval setting value must be smaller than the preset activation interval to succeed in image transmission.
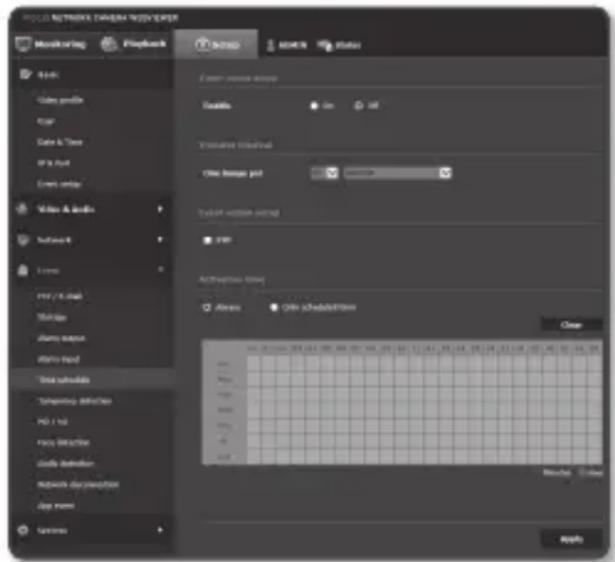
text_image
Network monitoring Monitoring Playback Access Status User access status Status on all Estimate interval One image pick Start version setting USB Active data (I): Aires One channel/Internet Close Windows 100% 200% 300% 400% 500% 600% 700% 800% 900% 1000% 1100% 1200% 1300% 1400% 1500% 1600% 1700% 1800% 1900% 2000% 2100% 2200% 2300% 2400% 2500% 2600% 2700% 2800% 2900% 3000% 3100% 3200% 3300% 3400% 3500% 3600% 3700% 3800% 3900% 4000% 4100% 4200% 4300% 4400% 4500% 4600% 4700% 4800% 4900% 5000% 5100% 5200% 5300% 5400% 5500% 5600% 5700% 5800% 5900% 6000% 6100% 6200% 6300% 6400% 6500% 6600% 6700% 6800% 6900% 7000% 7100% 7200% 7300% 7400% 7500% 7600% 7700% 7800% 7900% 8000% 8100% 8200% 8300% 8400% 8500% 8600% 8700% 8800% 8900% 9000% 9100% 9200% 9300% 9400% 9500% 9600% 9700% 9800% 9900% 100 appb-
Specify the activation conditions.
-
FTP : Specify the use of the FTP transfer if an event occurs.
■ Refer to "FTP / E-mail" for more details. (page 121) -
When done, click [Apply (Apply)].
Tampering detection
You can set to detect tampering attempts and trigger events, such as sudden change of camera's framing direction, blocked lens and other overall change of scenes from the video.
- From the Setup menu, select the
tab. - Click
. - Set whether or not to
. - Set the tampering detection sensitivity. The higher the sensitivity, detects the minutest tampering attempts.
- Specify the activation time and activation condition.
For more information about
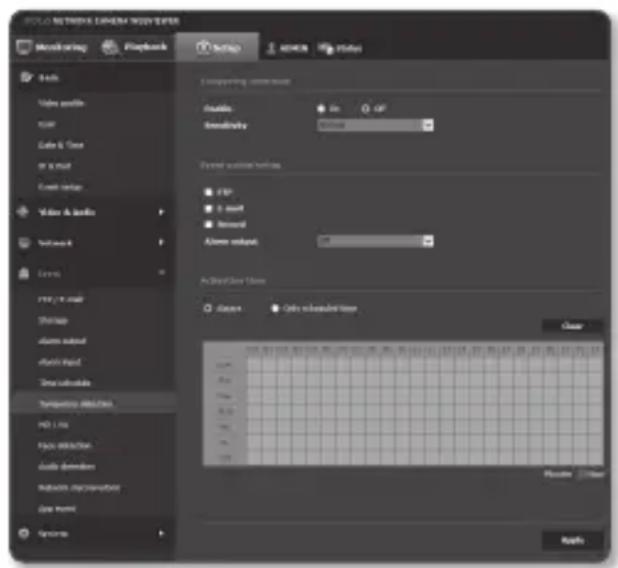
text_image
WOLLO NETWORK CAMERA BODY FILTER Monitoring Playbooks Setup Source Status Basic Video audio color Color & Tone or a mask Event setup Value & volume Volume & F Levels FPU & mask Shortage Alarm output Alarm input Time subscale Temperature attributes HD Line Type attributes Audio dimensions Reduction rendering Size mmol Genome Comparing camera body Details On: OP Sensitivity: 0.0000 Fixed action buttons FTP + mask Reverse Alarm output: An Open/Close User Clear Color selected line Place: Other OK Cancel Help- When done, click [Apply (Apply)].
The default tampering detection function may not work properly in the following cases:
- Under circumstances of simple background or low illumination and night time may lower the detection sensitivity.
-A severe shaking of the camera or a drastic change to the illumination can be considered a tampering by mistake.
-Detection of the tampering may take some time (maximum 5 seconds) right after the tampering was made.
-Once a tampering is detected, the camera will resume a normal operating after a certain stability time (approx. 5 seconds) during which no detection will be performed.
MD / VA
Events of motion detection and video analysis can be set to trigger event signal output.
- From the Setup menu, select the
tab. - Click
. - Set whether or not to
. - According to your purpose, select from motion detection and intelligent video analysis.
-
Set
, and . When selected Intelligent Video Analysis, set too. -
Select use of
. -
Detection result overlay: The detection result is indicated on the video.
• Analytics rule overlay : The analysis rules are displayed on the video. -
Specify the activation time and activation condition.
For more information about
- When done, click [Apply (Apply)].
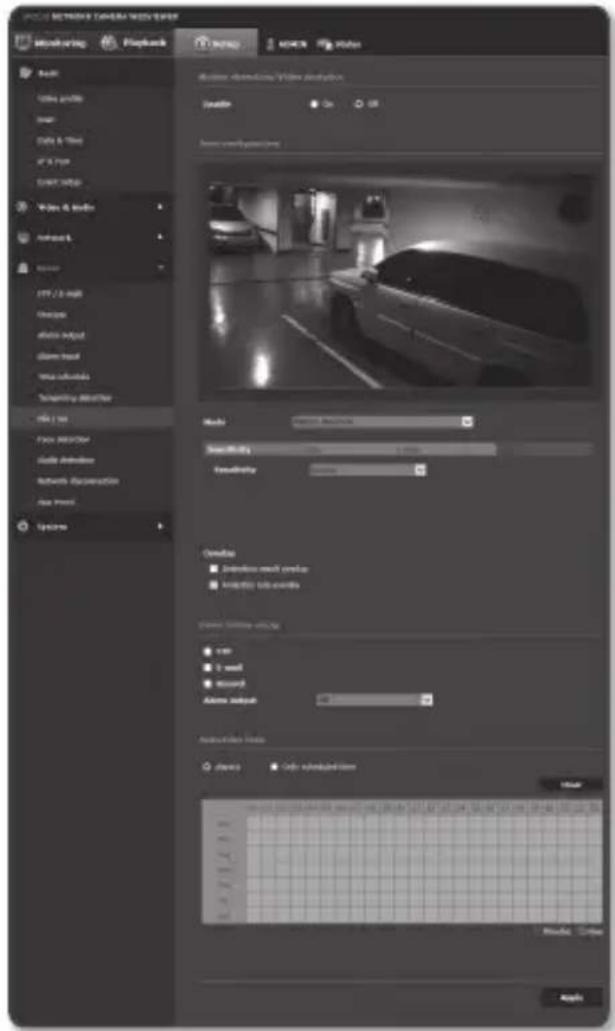
text_image
PULL NETWORK ANALYSIS VERS EDITION Monitoring Playback Audio Video preview Sound Data & Info AT & Post START VIDEO Video & Audio Audio & Audio Audio LPT / 2.0 kHz Audio Input Audio Head Audio output Audio output Audio output Audio output Audio output Audio output Audio output Audio output Audio output Audio output Audio output Audio output Audio output Audio output Audio output Audio output Audio output Audio output Audio output Audio output Audio output Audio output Audio output Audio output Audio output Audio output Audio output Audio output Audio output Audio output Audio output Audio output Audio output Audio output!
■ Before using, set the minimum and maximum motion sizes to suit desired motion range to be detected.
- Detected size of an object may have difference with the actual size according to its shape.
■ Up to 16 objects from the top side of the screen can be displayed.
If camera is capturing a close object, the video analysis capability may degrade.
In the following cases, motion detection and intelligent video analysis function may be degraded or cause improper detection.
-The object color or brightness is similar to the background.
-Small activities around the border area of the camera's field of view.
-Multiple movements continue occurring at random due to a scene change, rapid lighting changes or other reasons.
-A fixed object continues moving in the same position.
-Motions of less position changing such as approaching to the camera or fading away from the camera.
-Moving object approaches to the camera too close
-An object hides other objects behind.
-Two or more objects overlap or one object divides in multiple portions.
- Too fast object (for a proper detection, one object should be found overlapping between contiguous frames).
-Reflection / blur / shadow due to a strong light such as direct sunlight, illumination, or headlamp.
-In severe snow, rain, wind or in dawn / dusk.
To use Motion detection
It detects a motion that meets all conditions specified by sensitivity, size and area.
- Select a motion detection mode.
- Select
tab to set the sensitivity level. You can set the sensor's sensitivity to detect a motion out of the background from the monitoring video.
In a situation that definitely distinguishes objects out of backgrounds, set this to a low sensitivity level. For opposite case that is hard to distinguish objects like low illuminated situation, set this to a high level.
- Select
tab.
You can limit the minimum/maximum size of motion to be detected.
- Minimum Size : To set the minimum size of detected motions, select
and then point and drag to the desired size on the screen using the mouse. - Maximum Size : To set the maximum size of detected motions, select
and then point and drag to the desired size on the screen with your mouse.
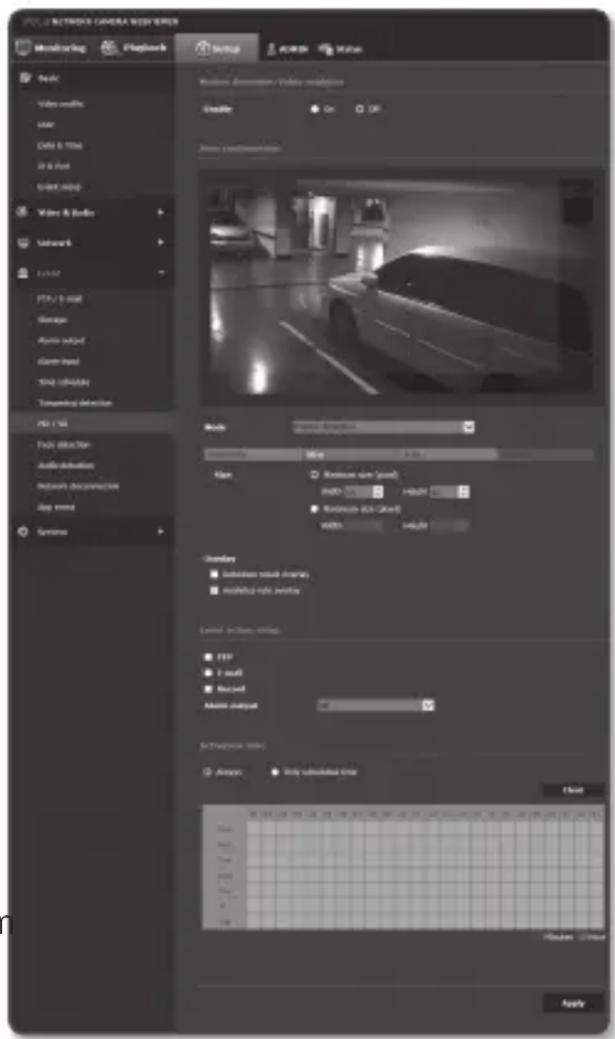
text_image
PULD NETWORK CAMERA WESER Monitoring Playback Setup OK Value Noise Dimension: Policy parameters Details On Off Audio position: 0.000000000000000000000000000000000000000000000000000000000000000000000000000000000000000000000 Noise Video audio Laser Data & Time 2.4 fps GND audio Video & Audio Network 1.5x1.5x1.5x1.5x1.5x1.5x1.5x1.5x1.5x1.5x1.5x1.5x1.5x1.5x1.5x1.5x1.5x1.5x1.5x1.5x1.5x1.5x1.5x1.5x1.5x1.5 FPU / F-Read Grange Audio output Gauss output SPIA output Tuning detection PSI / PSI FPU detection Audio detection Signal documenters Play mode Systems Mode: Audio duration Size: 8.24 Wireless size (width) Width: 96 bytes Height: 96 bytes Wireless size (width) Width: 96 bytes Height: 96 bytes Dimensions: Indicate output settings Modifica output settings Level, in-line, uniting FTP T read Record Audio output: 327 Audio duration time: Time: Number: 248 Number: 248 Number: 248 Number: 248 Number: 248 Number: 248 Number: 248 Number: 248 Number: 248 Number: 248 Number: 248 Number: 248 Number: 248 Number: 248 Number: 248 Number : Filter Apply- Motions smaller than the specified minimum size or bigger than the maximum size are not detected. To avoid unintended detections caused by great and small noises, set minimum/maximum motion sizes appropriately in accordance to your environments.
Note that same motions on the same location can be differently detected in their detection size; it is recommended to consider and include the tolerable difference when setting the minimum/maximum detection sizes.
- Select tab.
You can specify an area on the screen to include or exclude the area to/from detection.
You can specify up to 4 areas.
- Detection area : Sets the entire screen as excluded from detection, and adds specified area as motion detection area. Select 4 vertices in the image with your mouse to specify the detection area.
-
Non detection area: Sets the entire screen as motion detection area, and excludes specified area as not to be detected. Select 4 vertices in the image with your mouse to specify the non-detection area.
-
To delete an area, right click on the screen to open popup context menu and select Delete, and [OK] button.
- When done, click [Apply (Apply)].
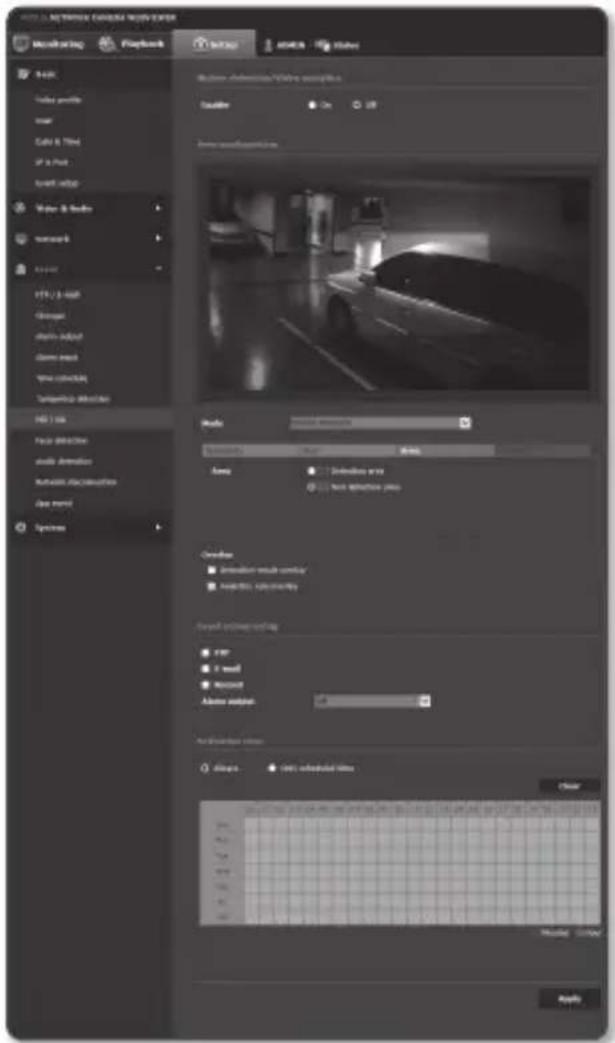
text_image
MODEL: NETWORK CHAPES MAX EXTER Monitoring Playback Auto Auto 1000 Speed profile Speed Cable & Wind Off a Post Event setup Water & Bands Network Flash PTV/2.3 Max Change Delay adjustment Delay result Time scheduling Temporarily selection HD 1.5x Face direction Audio Animation Turnout characteristics Live model Options Motion - Auto mode Speed: 10000000000000000000000000000000000000000000000000000000000000000000000000000000000000000000000000000 Speed: 164.844.976.976.976.976.976.976.976.976.976.976.976.976.976.976.976.976.976.976.976.976.976.976.976.976.976.97 Speed: 164.844.976.976.976.976.976.976.976.976.976.976.976.976.976.976.976.976.976.976.976.976.976.976. Speed: 164.844.976.976.976.976.976.976.976.976.976.976.976.976.976.976.976.976.976.976.976.976. Speed: 164.844.976.976, 1, 2, 3, 4, 5, 6, 7, 8, 9, 10, 11, 12, 13, 14, 15, 16, 17, 18, 19, 20, 21, 22, 23, 24, 25, 26, 27, 28, 29, 30, 31, 32, 33, 34, 35, 36, 37, 38, 39, 40, 41, 42, 43, 44, 45, 46, 47, 48, 49, 50, 51, 52, 53, 54, 55, 56, 57, 58, 59, 60, 61, 62, 63, 64, 65, 66, 67, 68, 69, 70, 71, 72, 73, 74, 75, 76, 77, 78, 79, 80, 81, 82, 83, 84, 85, 86, 87, 88, 89, 90, 91, 92, 93, 94, 95, 96, 97, 98, 99, 100 Speed: 164.844.976.976.976.976.976.976.976.976.976.976.976.976.976.976.976.976.976. Speed: 164.844.976.976.976.976.976-1 Speed: -1 Speed: -2 Speed: -3 Speed: -4 Speed: -5 Speed: -6 Speed: -7 Speed: -8 Speed: -9 Speed: -10 Speed: -11 Speed: -12 Speed: -13 Speed: -14 Speed: -15 Speed: -16 Speed: -17 Speed: -18 Speed: -19 Speed: -20 Speed: -21 Speed: -22 Speed: -23 Speed: -24 Speed: -25 Speed: -26 Speed: -27 Speed: -28 Speed: -29 Speed: -30 Speed: -31 Speed: -32 Speed: -33 Speed: -34 Speed: -35 Speed: -36 Speed: -37 Speed: -38 Speed: -39 Speed: -40 Speed: -41 Speed: -42 Speed: -43 Speed: -44 Speed: -45 Speed: -46 Speed: -47 Speed: -48 Speed: -49 Speed: -50 Speed: -51 Speed: -52 Speed: -53 Speed: -54 Speed: -55 Speed: -56 Speed: -57 Speed: -58 Speed: -59 Speed: -60 Speed: -61 Speed: -62 Speed: -63 Speed: -64 Speed: -65 Speed: -66 Speed: -67 Speed: -68 Speed: -69 Speed: -70 Speed: -71 Speed: -72 Speed: -73 Speed: -74 Speed: -75 Speed: -76 Speed: -77 Speed: -78 Speed: -79 Speed: -80 Speed: -81 Speed: -82 Speed: -83 Speed: -84 Speed: -85 Speed: -86 Speed: -87 Speed: -88 Speed: -89 Speed: -90 Speed: -91 Speed: -92 Speed: -93 Speed: -94 Speed: -95 Speed: -96 Speed: -97 Speed: -98 Speed: -99 Speed: +/- +/- +/- +/- +/- +/- +/- +/- +/- +/- +/- +/- +/- +/- +/- +/- +/- +/- +/- +/- +/- +/- +/- +/- +/- +/- +/- +/- +/- +/- +/- +/- +/- +/- +/- +/- +/- +/- +/- +/- +/- +/- +/- +/- +/- +/- +/- + /- +/- +/- +/- +/- +/- +/- +/- +/- +/- +/- +/- +/- +/- +/- +/- +/- +/- +/- +/- +/- +/- +/- + /- +/- +/- +/- +/- +/- +/- +/- +/- +/- +/- +/- +/- +/- + /- +/- +/- +/- + /- + / - + / - + / - + / - + / - + / - + / - + / - + / - + / - + / - + / - + / - + / - + / - + / - + / - + / - + / - + / - + / - + / - + / - + / - + / - + / - + / - + / - + / - + / - + / - + / - + / - + / - + + / - + / - + / - + / - + / - + / - + / - + / - + / - + / - + / - + / - + / - + / - + / - + / - + / - + / - + / - + / - + / - + / - + / - + / - + / - + / - + / - + / - + / - + / - + / - + / - + / -To use Video analytics
It detects event that meets all conditions specified by sensitivity, size and area and the event condition rules.
- Select the video analysis mode.
-
Set
, and . For further details on settings, refer to "To use Motion detection". (Page 136\~137) -
Select
tab. -
Select the video analysis type.
-
Passing: Detects an object passing by the line set by a user.
- Entering/Exiting : Detects an object entering or exiting into/from the area set by a user.
-
Appearing (Disappearing) : Detects motions of appearing on or disappearing from the user-defined area or the entire screen area.
-
Set the video analysis rules. For further details on settings, refer to "To set the video analysis rules". (page 139\~140)
-
When done, click [Apply (Apply)].
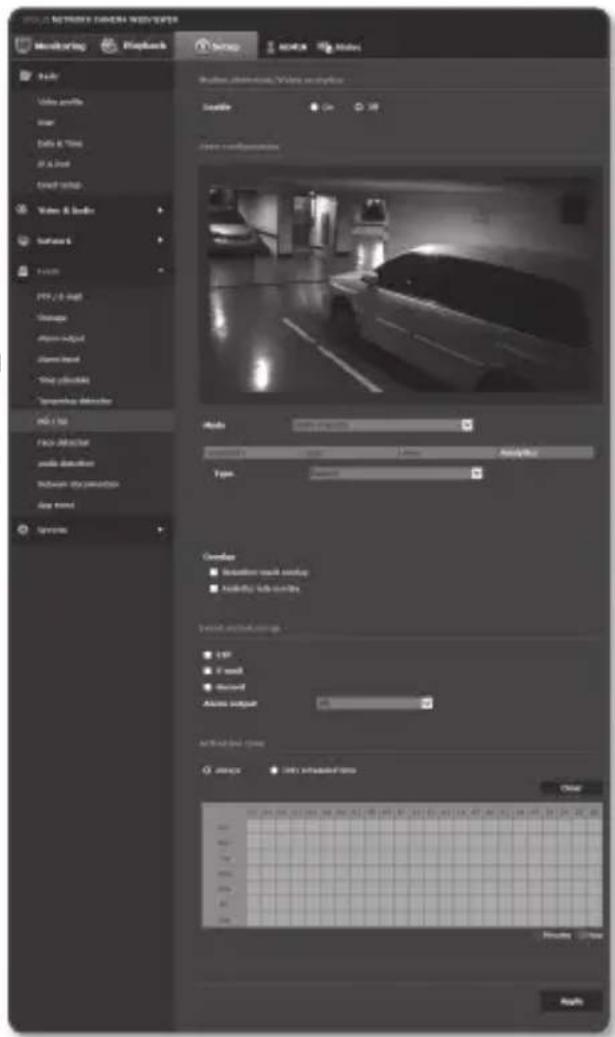
text_image
PULL NETWORK CAMERA WITH WATER Monitoring Playback Temp angle Video Audio Video audio Water Data & Time At A End Sound setup Video & Video Software Fusion PPS 2.0 (Alt) Storage Photo-Input Photo-End *Play buttons *Play buttons RGB / 100 RGB/RESET Audio duration between sound buttons Any end Segments Audio: 500 MHz Audio: 500 MHz Type: JPEG Gender: ■ Direction lock setup ■ Audio key button Initial audio sequence: □ 100 □ If need □ Record Active output: 500 Activated time: ● Image ● Live Simulated Time 确定 OK Cancel Help FinishTo set the video analysis rules
■ Passing
- Set the type to
. - On the screen, click on preferred starting and ending point of the virtual line, then a popup window appears.
-
Select the desired rule:
-
Right: Detects motions of moving from the left to the right, over the virtual line.
- Left: Detects motions of moving from the right to the left, over the virtual line.
text_image
Cable & Tree IF a Point Sport info Video & Audio Network Cable FTP/2.0 mini message flash input flash input The schedule Typing detection F10.1.16 Face detection mask detection Bluetooth Detection App sound Systems Virtual Black button values Right Left Cancel Cancel Mode: None, Offense Settings: 500x 100% Font: Normal Background: Select non-textual settings Enable text markers- Click [OK].
- To remove a defined rule, right click on the displayed virtual line to open popup context menu and select [Delete] button.
- Entering/Exiting
- Set the type to
. - On the screen, click four vertices to define detection area and a popup window appears.
-
Select the desired rule:
-
Entering : Detects motions of moving object whose center point entering into the defined area, from outside of the area.
- Exiting : Detects motions of moving object whose center point exiting from the defined area, from inside of the
text_image
Audio & Infine SP & Post Event setup Video & Audio Network control FTP / 2.0-mail manage eBook addict Alarm Input Stop buttons Temporary identifier PSI / 16 Face detection Audio deflection Remote observation App load Methods Audio output format Audio tab at every Audio output format Audio output format Audio output format Audio output format Audio output format Audio output format Audio output format Audio output format Audio output format Audio output format Audio output format Audio output format Audio output format Audio output format Audio output format Audio output format Audio output format Audio output format Audio output format Audio output format Audio output format Audio output format Audio output format Audio output format Audio output format Audio output formats Audio output formats Audio output formats Audio output formats Audio output formats Audio output formats Audio output formats Audio output formats Audio output formats Audio output formats Audio output formats Audio output formats Audio output formats Audio output formats Audio output formats Audio output formats Audio output formats Audio output formats Audio output formats Audio output formats Audio output formats Audio output formats Audio output formats Audio output formats Audio output formats Audio output patterns Audio output patterns Audio output patterns Audio output patterns Audio output patterns Audio output patterns Audio output patterns Audio output patterns Audio output patterns Audio output patterns Audio output patterns Audio output patterns Audio output patterns Audio output patterns Audio output patterns Audio output patterns Audio output patterns Audio output patterns Audio output patterns Audio output patterns Audio output patterns Audio output patterns Audio output patterns Audio output patterns Audio output patterns Audio output patternings- Click [OK].
- To remove a defined rule, right click on the displayed side lines of the area to open popup context menu and select [Delete] button.
■ Appearing (Disappearing)
-
Set the analysis type to
-
Select the desired event rule:
- Defined area based rules: It detects event of appearing object that appears in the area and remaining for a certain time period while not passing through the area borders, and opposite case of disappearing of objects existed in the area.
On the screen, click four vertices to define detection area.
(Disappearing)> from the popup.
- Entire area based rules : It detects event of appearing object that appears in the entire screen and remaining for a certain time period, and opposite case of disappearing of objects existed in the screen.
Right click on the screen to open the popup context menu and select
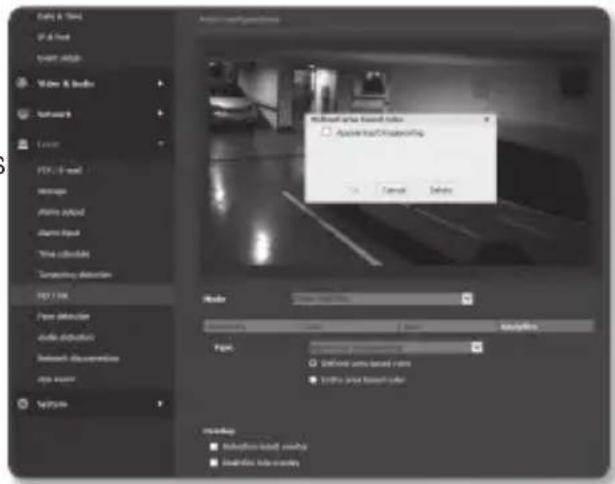
text_image
Audio & Text IF & Fixed font mask Video & Audio Network Locus FOX 2.0 mm Message Play mode Play mode Time schedule Transformed selection POP 1.0K Power selection Audio distribution Network: Disconnection type server Topology Audio Audio export options Audio export options Audio export options Audio export options Audio export options Audio export options Audio export options Audio export options Audio export options Audio export options Audio export options Audio export options Audio export options Audio export options Audio export options Audio export options Audio export options Audio export options Audio export options Audio export options Audio export options Audio export options Audio export options Audio export options Audio export options Audio export option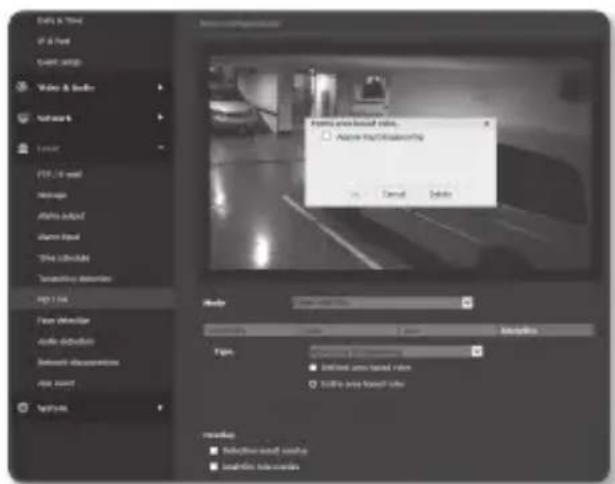
text_image
Data & Time IF A Point Quest setup Video & Buffer Network Local PDF 14-4 mail Manage Alpha output Alarm Signal This is found Termination errors PDF 1.0x Flow error Audio effects Setpoint dimensions Age sensor Methods Form: open view backward rate. Open View Backward Rate Open View Backward Rate OK Cancel Cancel Help Description Type: Endline user based rate To file user based rate Settings: Selective user based rate Location based rate-
Click [OK].
-
To remove a defined rule, right click on the displayed side lines of the area or on the screen to open popup context menu and select [Delete] button.
Face detection
You can set to detect recognized face and trigger an event accordingly.
- From the Setup menu, select the
tab. - Click
. - Set whether or not to
. - Select
tab to set the sensitivity level.
■ As the sensitivity grows, face detection becomes more close and detailed.
- Select the tab and select 4 vertices in the image with your mouse to specify the detection area.
!
- You can detect max 35 faces on the screen at the same time.
The minimal face size detectable is 45x45 for 2mega mode with the max resolution and 64x64 for 3 mega mode with the max resolution. But there may be some errors depending on the characteristics of your face or lighting.
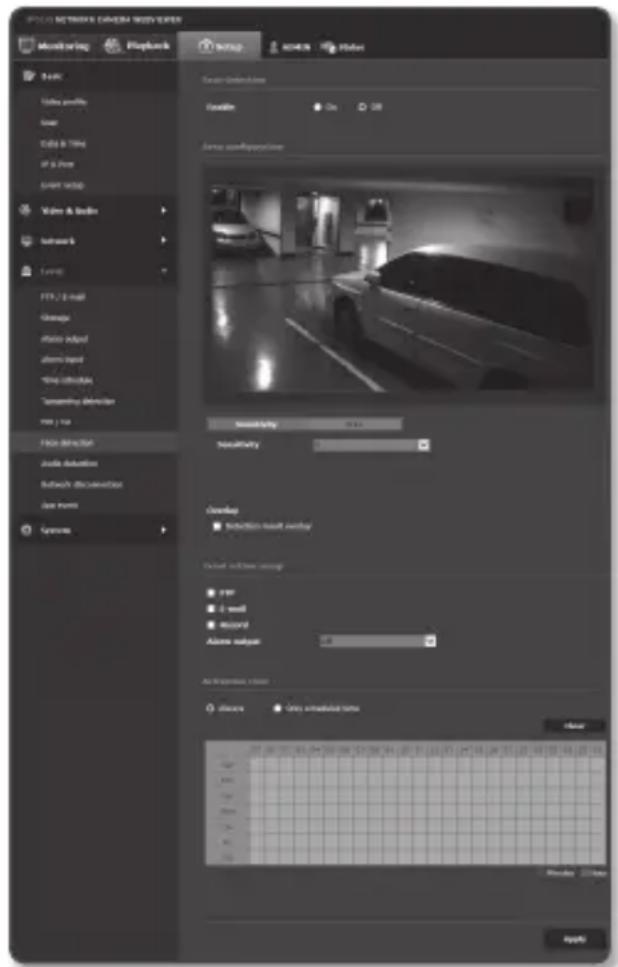
text_image
POLD NETWORK CAMERA WINDOW ENTER Monitoring Playback setup screen lides Basic Video profile Icon Data & Time of a free Event setup Zoom & Zoom Networks Layer1 FTR / 2.0 mm Change Photo Adjust Alarm Impact Time schedule Screening Calendar View Help View Schedule Audio Definition Setup's Description View Music Options Scan-Interactions Enable On OK Camera Configuration Similarity: 100% Similarity: Overlay: Selective Event Window Output settings settings: Size Size model Record Above output: 0% Auto Transparency Filter Shower Drop interaction time Close Preview: Selective Event Window (User) Options (User)... Preview: Selective Event Window (User) Options (User) Preview: Selective Event Window (User) Options (User) Preview: Selective Event Window (User) Options (User) Preview: Selective Event Window (User) Options (User) Preview: Selective Event Window (User) Options (User) Preview: Selective Event Window (User) Options (User) Preview: Selective Event Window (User) Options (User) Preview: Selective Event Window (User) Options (User) Preview: Selective Event Window (User) Preview: Selective Event Window (User) Preview: Selective Event Window (User) Preview: Selective Event Window (User) Preview: Selective Event Window (User) Preview: Selective Event Window (User) Preview: Selective Event Window (User) Preview: Selective Event Window (User) Preview: Selective Event Window (User) Preview: Selective Event Window (User) Preview: Selective Event Window (User) Preview: Selective Event Window(User) Preview: Selective Event Window(User) Preview: Selective Event Window(User) Preview: Selective Event Window(User) Preview: Selective Event Window(User) Preview: Selective Event Window(User) Preview: Selective Event Window(User) Preview: Selective Event Window(User) Preview: Selective Event Window(User) Preview: Selective Event Window(User) Preview: Selective Event Window(User) Preview: Selective Event Window( User)- To delete the specified area, click the right button of your mouse and click [OK] in the popup window.
- Set whether to use
. When faces are detected, their positions and sizes are marked with rectangles on the screen. - Specify the activation time and activation condition.
■ For more information about
and , refer to "Alarm input". (page 130) - When done, click [Apply (Apply)].
setup screen
Audio detection
You can set to detect sound over the specified level and trigger an event accordingly.
- From the Setup menu, select the
tab. - Click
- Set whether or not to
. - Set the audio detection's sound level. The lower the level, the smaller the sound change is detected.

- The audio detection level is designed to normalize the input data to a value between 1 and 100 and detect the signal larger than threshold level. It is unrelated to the decibel (dB) level.
- Specify the activation time and activation condition.
For more information about
- When done, click [Apply ( )].

- Select
- You can use the audio detection function when the camera is connected with an audio input device.
Network disconnection
When the network is physically disconnected, it is considered as an event to be saved.
- From the Setup menu, select the
tab. - Click
. - Set whether or not to
. - Specify the activation time and activation condition.
- For more information about
- When done, click [Apply (Apply)].
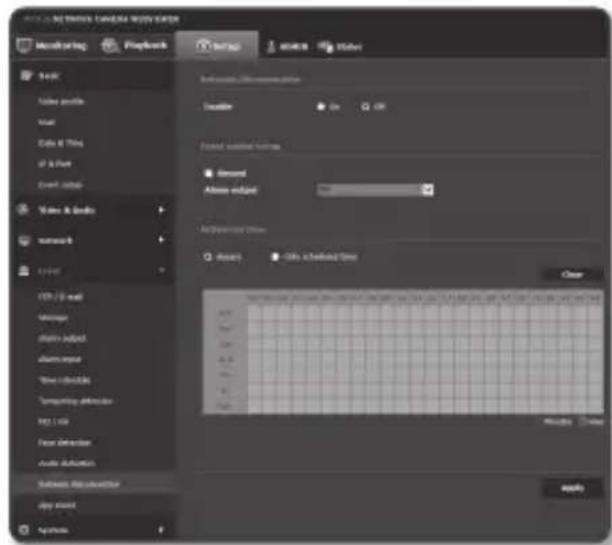
text_image
Monitoring Playback setup write logo File Folder profile Word Color & Thing of a Tree Event: info Video & Studio waveform 0 TCP/IP card Design Share object Alarm app Time collection Temporary attention HDL List Face Detection Auto Allocation Settings: Auto assistant day format Snapchat Software - C:\Users\My\My\My\My\My\My\My\My\My\My\My\My\My\My\My\My\My\My\My\My\My\My\My\My\My\My\My\My\My\My\My\My\My\My\My\My\My\My\My\My\My\My\My\My\My\My\My\My\My\My\Mg Default - C:\Users\My\My\My\My\My\My\My\My\My\My\My\My\My\My\My\My\My\My\My\My\My\My\My\My\My\My\My\My\My\My\My\My\My\My\My\My\My\My\My\My\My\My\My\My\My\My\My\Mg Default available settings Record Address subject Access Time Reset City setting time Open ApplyApp event
You can set the system to generate signals for the events defined on the application. The event signals provided vary depending on the application function.
- From the Setup menu, select the
tab. - Click
. - Set whether or not to
. - Specify the activation time and activation condition.
For more information about
- When done, click [Apply (Apply)].
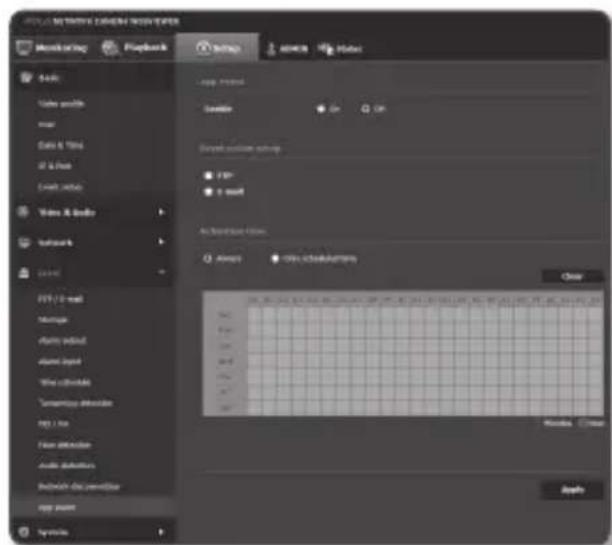
text_image
POSTS BY: STAFFIE EDADEE NAME SYSTEM Monitorlog Playback stop stop stop stop stop stop stop stop stop stop stop stop stop stop stop stop stop stop stop stop stop stop stop stop stop stop stop stop stop stop stop stop stop stop stop stop stop stop stop stop stop stop stop stop stop stop stop stop stop stop 停止 停止 停止 停止 停止 停止 停止 停止 停止 停止 停止 停止 停止 停止 停止 停止 停止 停止 停止 停止 停止 停止 停止 停止 停止 停止 停止 停止 停止 停止 停止 停止 停止 停止 停止 停止 停止 停止 停止 停止 停止 停止 停止 停止 停止 停止 停止 停止 停止 停止 止成功始点 (1) Stop (2) Stop (3) Stop (4) Stop (5) Stop (6) Stop (7) Stop (8) Stop (9) Stop (10) Stop (11) Stop (12) Stop (13) Stop (14) Stop (15) Stop (16) Stop (17) Stop (18) Stop (19) Stop (20) Stop (21) Stop (22) Stop (23) Stop (24) Stop (25) Stop (26) Stop (27) Stop (28) Stop (29) Stop (30) Stop (31) Stop (32) Stop (33) Stop (34) Stop (35) Stop (36) Stop (37) Stop (38) Stop (39) Stop (40) Stop (41) Stop (42) Stop (43) Stop (44) Stop (45) Stop (46) Stop (47) Stop (48) Stop (49) Stop (50) Stop (51) Stop (52) Stop (53) Stop (54) Stop (55) Stop (56) Stop (57) Stop (58) Stop (59) Stop (60) Stop (61) Stop (62) Stop (63) Stop (64) Stop (65) Stop (66) Stop (67) Stop (68) Stop (69) Stop (70) Stop (71) Stop (72) Stop (73) Stop (74) Stop (75) Stop (76) Stop (77) Stop (78) Stop (79) Stop (80) Stop (81) Stop (82) Stop (83) Stop (84) Stop (85) Stop (86) Stop (87) Stop (88) Stop (89) Stop (90) Stop (91) Stop (92) Stop (93) Stop (94) Stop (95) Stop (96) Stop (97) Stop (98) Stop (99) Stop (100)SYSTEM SETUP
Product information
- From the Setup menu, select the <System ( ▶ tab.
- Click
. - Check the camera information, or provide details according to your network environment.
• Model : Model name of the product.
- Serial number : Product serial number.
• Device name : Provide a device name that will be displayed on the Live screen.
- Location : Specify the location where the camera is installed.
- Description : Provide detailed information about the camera location.
- Memo : Provide an explanation about the camera for better understanding.
• Language : Select a preferred language for the Web Viewer OSD.

■ The default language is set to
- When done, click [Apply (Apply)].
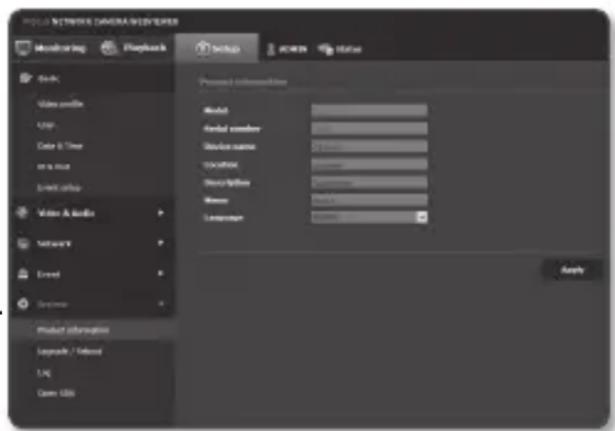
text_image
PULL NETWORK DIAGRAM/VIEWER Monitoring Playback Setup ACCR Status Share Video audio Up Data & Time on a list Event setup Writer & Audio Network Event System Product information Upgrade / Mixed L&I Open UBS Processed information Model Event number Block name: 20000000000000000000000000000000000000000000000000000000000000000000000000000000000000000000000000000 ApplyUpgrade / Reboot
- From the Setup menu, select the <System ( ▶ tab.
- Click
. -
Select a desired item and set it appropriately.
-
Upgrade : Performs upgrading the system.
- Factory default : Resets the system to the factory default.
- Except network parameter & Open
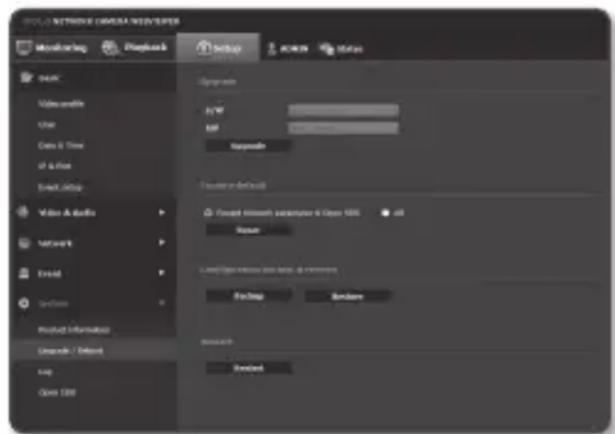
text_image
NETWORK CAMERA NEVER/SPER Monitoring Playback setup Screen status Display Video thumbnail User Data & Time of a file Send Active Video & Audio Network Email System Product Information Unread / Default Log Open 100 Images By W USB Appendix Settings Defaults Forest strength parameter & Open 100% Load Level/Open minimum size range & Parameters Facing Balance Refresh RefreshSDK : Initialize all except for the network setting and lens settings as well as the open SDK installation files and internal settings.
- All : Resets all settings including the camera settings. (however, the log information will not be reset)
- The IP addressing system will be defaulted to DHCP if you reset the camera. If no DHCP server is found, the previous settings will be restored automatically.
- Configuration backup & Restore : Backs up the current system settings before performing the restoration process. The system is automatically restarts after backup or restoration.
- Restart : Restarts the system.
To perform the upgrade
- Click [Upgrade].
-
Click [Browse] and specify a file to upgrade.
-
Click [Send].
-
The "Upgrade" dialog appears where the progression will be shown in the bottom.
-
Once completed upgrading, the browser exits and the camera restarts.

It may take a max of 10 minutes for the upgrade process.
If you forcibly terminate the upgrade process, upgrade will not be completed properly.
■ During restarting the system, accessing with web viewer will not be made.
- You can download the latest version from the Samsung web site (www.samsungcctv.com).
text_image
5/W ISP Browse Send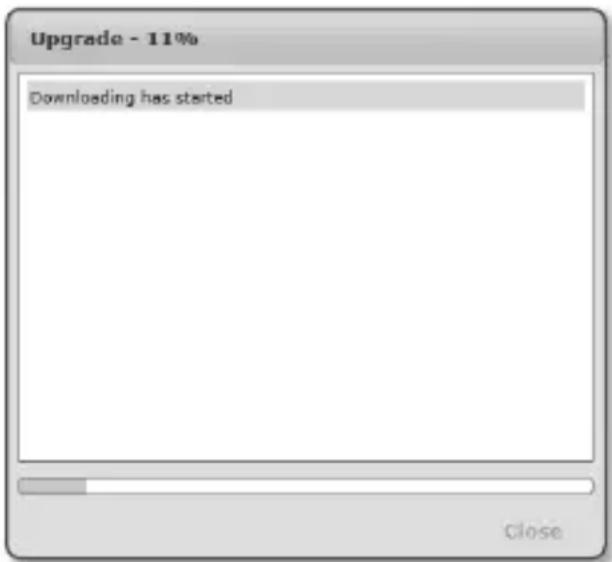
text_image
Upgrade - 11% Downloading has started CloseTo back up the current settings
- Click [Backup]. The Save As dialog should appear.
- Specify the backup path with a proper file name, and click [Save]. The backup file will be saved to the specified path in the format of ".bin".
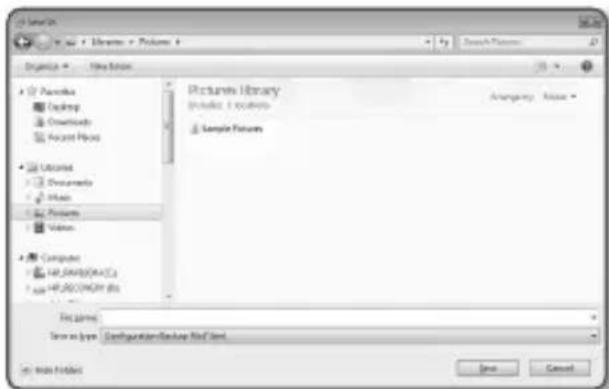
text_image
Pictures Library Includes: 1 instance Sample Features Categories Show as type Configuration/Backup Not/Not Show Portfolio Save CancelTo restore the backup settings
- To restore the backup settings, click [Restore].
- Select a backup file and click [Open].

If you perform the backup or restoration, the web browser will be closed and the camera will reboots.
If you try to recover the config file backed up in other model, some functions may malfunction and you need to change the s
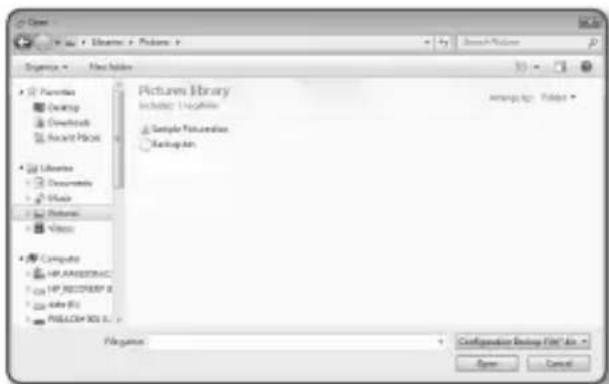
text_image
Picture Library Include: 1000000 Sample Validation Backup.doc Computer HP ACCESSIVE HP ACCESSIVE & File Edit PILACOM XDL & Filename: Configuration Based (FST).doc Save CancelLog
You can check the system log or event log.
- From the Setup menu, select the
tab. - Click
. - Select a log type.
- System : You can check the system logs where any system changes are recorded including the time information.
- Event : You can check the event log including the time information.
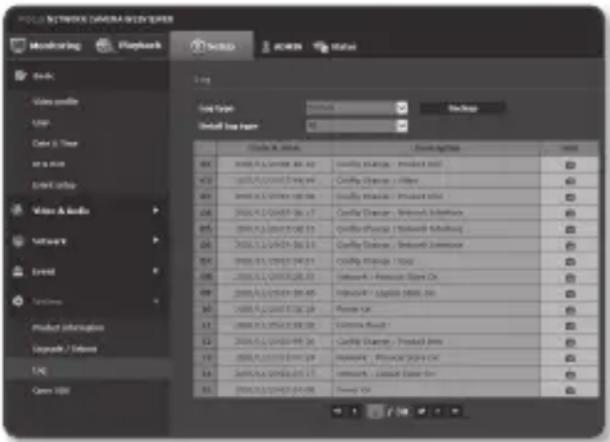
text_image
PULL NETWORK DRAMMA VIEW SERIES Monitoring Playback helpful ACM Status File Video audio USB Color & Filter Audio Event audio Video & Audio Network V Stream Uniform Product information Upgrade / Default LNG Open USB Log Log Type: Download Default Log Form: 10 Code & Style: Downloading 84 2003.5.2/2003.6.20 2003.5.2/2003.6.20 2003.5.2/2003.6.20 2003.5.2/2003.6.20 2003.5.2/2003.6.20 2003.5.2/2003.6.20 2004.5.2/2004.6.17 2004.5.2/2004.6.17 2004.5.2/2004.6.17 2004.5.2/2004.6.17 2004.5.2/2004.6.17 2004.5.2/2004.6.17 2005.5.2/2005.6.15 2005.5.2/2005.6.15 2005.5.2/2005.6.15 2005.5.2/2005.6.15 2005.5.2/2005.6.15 2006.5.2/2006.6.14 2006.5.2/2006.6.14 2006.5.2/2006.6.14 2006.5.2/2006.6.14 2007.5.2/2007.6.13 2007.5.2/2007.6.13 2007.5.2/2007.6.13 2008.5.2/2008.6.13 2008.5.2/2008.6.13 2008.5.2/2008.6.13 2009.5.2/2009.6.13 2010.5.2/2011-1-17 2011-1-17 Download: Product Info Download: Product Info Download: Product Info- From the right log list, select an item to search for.
- If you select
- If one page can not display all the logs available, use the bottom buttons to move to the previous, next, or the last item.
- Click on the
button to save all the log data for the currently selected mode (system, event) in the "time stamp value create by camera in modelname-mode-camera.txt file" in the download folder for the browser.

If you want to view the details of a log, click [Info(☐)] in the right column of the log; the log information will be shown in the bottom pane.
■ Each page displays 15 logs with the latest one displayed at the top.
The event/system log list can contain up to 1000 logs; after that, the existing logs will be deleted from the oldest one each time a new log is created.
Open SDK
A user can install an application on their camera to execute additional functions.
- From the Setup menu, select the
tab. - Click
. - Click the [Browse (Browse)] button to select the *.cap file from the user folder.
- Click the [Install ( install) ] button to install your application.
-
The information of the installed application is displayed in the list.
-
Uninstall : Deletes installed or operating applications.
- Go App : Move to the web page of each application.
- Start : Execute an installed application.
-
Stop : Terminates a running application.
-
Health : Displays the currently running application's resource occupation rate, thread counts and execution time, etc.
- Priority : Sets the priority of running applications.
If the total resource utilization rate of the camera (including main tasks and applications) exceeds 80%, an ongoing application will be forced to stop. In this case, the priority set by the user is used to determine which application should be stopped first.
- Auto start: When the camera's power supply or main task is running, a certain application for which auto execution has been activated will run automatically.
-
Task manager : This displays the resource occupation rate of an application currently running in your camera.
-
Memory Usage (%): This is the memory utilization rate for each application.
- CPU Usage (%): This is the CPU utilization rate for each application.
- Thread count : This is the number of threads created by each application.
- Duration : This is the total execution time of each application.
- Kill Task : Terminates an application.
- Total Usage : This is the total resource occupation rate of the camera (including main tasks and applications).

- For questions about application use or installation, check the Techwin developer website.
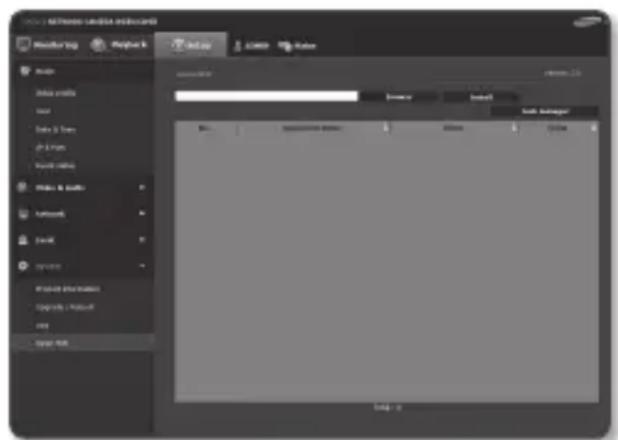
text_image
File Manager File Name Color Size Name Size Color Size Manager Size Size Manager Size Size Size Size Size Size Size Size Size Size Size Size Size Size Size Size Size Size Size Size Size Size Size Size Size Size Size Size Size Size Size Size Size Size Size Size Size Size Size Size Size Size Size Size Size Size Size Size Size Size LargeVIEWING PROFILE INFORMATION
Profile access
You can check the profile information.
- Click [Status (☐)] on the live screen.
- The profile information screen is displayed.
- Profile access : Show the information of the newly added profile.
- Profile : Show the information of the newly added codec.
- Bitrate(kbps) : Show both the actual bit rate and the set bit rate.
- Framerate(fps) : Show both the actual frame rate and the set frame rate.
- ATC(%) : Show the ATC status.
- Concurrent users count : Show the number of concurrent users who access the profile.
- Current users : Shows information on users accessing web viewer and displaying monitoring video.
- Profile : Show the name of the profile accessed by the user.
- Bitrate(kbps) : Show the current bit rate.
- Network connection status : It shows whether the network is working fine.
- IP : Show the IP address of the current user.

- To check information on the profile currently used, click [Status ( )] again to refresh it. It takes a certain time for any changes to be applied.

text_image
POLIS NETWORK CAMERA NEODUCTOR Monitoring Playback Suppl Award Status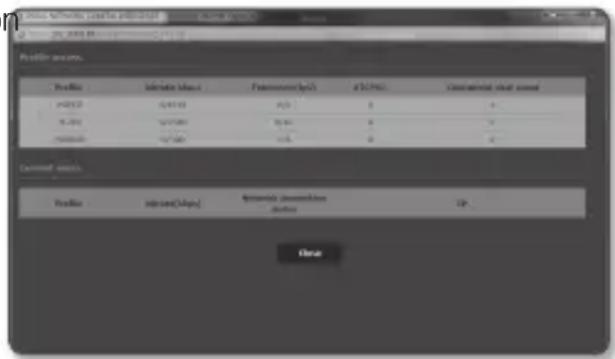
text_image
Profile data Profile: Indicate data Pension(%) 47.0% Consolidated data used #DIV/10 A/B A/C B/C C/C D/C E/C F/C G/C H/C I/C J/C K/C L/C M/C N/C O/C P/C Q/C R/C S/C T/C U/C V/C W/C X/C Y/C Z/C X/S Y/S Z/S Y/Y/Y/Z/Y/Y/Y/Y/Y/Y/Y/Y/Y/Y/Y/Y/Y/Y/Y/Y/Y/Y/Y/Y/Y/Y/Y/Y/Y/Y/Y/Y/Y/Y/Y/Y/Y/Y/Y/Y/Y/Y/Y/Y/Y/Y/Y/Y/Y/Y/Y/Y/Y/Y/Y/Y/Y/Y/Y/Y/Y/Y/Y/Y/Y/Y/Y/Y/Y/Y/Y/Y/Y/Y/Y/Y/Y/Y/Y/Y/Y/Y/Y/Y/Y/Y/Y/Y/Y/Y/Y/Y/Y/Y/Y/Y/Y/Y/Y/Y/Y/Y/Y/Y/y/y/y/y/y/y/y/y/y/y/y/y/y/y/y/y/y/y/y/y/y/y/y/y/y/y/y/y/y/y/y/y/y/y/y/y/y/y/y/y/y/y/y/y/y/y/y/y/y/y/y/y/y/y/y/y/y/y/y/y/y/y/y/y/y/y/y/y/y/y/y/y/y/y/y/y/y/y/y/y/y/y/y/y/y/y/y/y/y/y/y/y/y/y/y/y/y/y/y/y/ Current assets: Profile: spread(%)yoyyoyoyoyoyoyoyoyoyoyoyoyoyoyoyoyoyoyoyoyoyoyoyoyoyoyoyoyoyoyoyoyoyoyoyoyoyoyoyoyoyoyoyoyoyoyoyoyoyoyoyoyoyoyoyoyoyoyoyoyoyoyoyoyoyoyoyoyoyoyoyoyoyoyoyoyoyoyoyoyoyoyoyoyoyoyoyoyoyoyoyoyoyoyoyoyoyoyoyyoyoyyoyoyyoyyoyyoyyoyyoyyoyyoyyoyyoyyoyyoyyoyyoyyoyyoyyoyyoyyoyyoyyoyyoyyoryyoyyoyyoyyoyyoyyoyyoyyoyyoyyoyyoyyoyyoyyoyyoyyoyyoyyonyyonyyonyyonyonyonyonyonyonyonyonyonyonyonyonyonyonyonyonyonyonyonyonyonyonyonyonyonyonyonyonyonyonyonyonyonyonyonyonyonyonyonyonyonyonyonyonyonyonyonyonyonyonyonyonyonyonyonyonyonyonyonyonyonyonyonyonyonyonyonyonyonyonyonyonyonyonyonyonyonyonyonyonyonyonyonyonyonyonyonyonyonyonyonyonyonyonyonyonyonyonyonyonyonyyoryoryoryoryoryoryoryoryoryoryoryoryoryoryoryoryoryoryoryoryoryoryoryoryoryoryoryoryoryoryoryoryoryoryoryoryoryoryoryoryoryoryoryoryoryoryoryoryoryoryoryoryoryoryoryoryoryoryoryoryoryoryoryoryoryoryoryoryoryoryoryoryoryoryoryoryoryoryoryoryoryoryoryoryoryoryoryoryoryoryoryoryoryoryoryoryoryoryoryoryogyoryoryoryoryoryoryoryoryoryoryoryoryoryoryoryoryoryoryoryoryoryoryoryoryoryoryoryoryoryoryoryoryoryoryoryoryoryoryoryoryoryoryoryoryoryoryoryoryoryoryoryoryoryoryoryoryoryoryoryoryoryoryoryoryoryoryoryoryoryoryoryoryoryoryoryoryoryoryoryoryoryoryoryoryoryoryoryoryoryoryoryoryoryoryoryoryoryoryoryoralyyoreyyoreyyoreyyoreyyoreyyoreyyoreyyoreyyoreyyoreyyoreyyoreyyoreyyoreyyoreyyoreyyoreyyoreyyoreyyoreyyoreyyoreyyoreyyoreyyoreyyoreyyoreyyoreyyoreyyoreyyoreyyoreyyoreyyoreyyoreyyoreyyoreyyoreyyoreyyoreyyoreyyoreyyoreyyoreyyoreyyoreyyoreyyoreyyoreyyoreyyoryyoreyyoreyyoreyyoreyyoreyyoreyyoreyyoreyyoreyyoreyyoreyyoreyyoreyyoreyyoreyyoreyyoreyyoreyyoreyyoreyyoreyyoreyyoreyyoreyyoreyyoreyyoreyyoreyyoreyyoreyyoreyyoreyyoreyyoreyyoreyyoreyyoreyyoreyyoreyyoreyyoreyyoreyyoreyyoreyyoreyyoreyyoreyyoreyyorxyryoxyeryoxyeryoxyeryoxyeryoxyeryoxyeryoxyeryoxyeryoxyeryoxyeryoxyeryoxyeryoxyeryoxyeryoxyeryoxyeryoxyeryoxyeryoxyeryoxyeryoxyeryoxyeryoxyeryoxyeryoxyeryoxyeryoxyeryoxyeryoxyeryoxyeryoxyeryoxyeryoxyeryoxyeryoxyeryoxyeryoxyeryoxyeryoxyeryoxyeryoxyeryoxyeryoxyeryoxyeryoxyeryoxyeryoxyeryoxyeryoxyeryoxyeryoxyergyxyeryxyeryxyeryxyeryxyeryxyeryxyeryxyeryxyeryxyeryxyeryxyeryxyeryxyeryxyeryxyeryxyeryxyeryxyeryxyeryxyeryxyeryxyeryxyeryxyeryxyeryxyeryxyeryxyeryxyeryxyeryxyeryxyeryxyeryxyeryxyeryxyeryxyeryxyeryxyeryxyeryxyeryxyeryxyeryxyeryxyeryxyeryxyeryxyeryxyeryxyetyryxryxryxryxryxryxryxryxryxryxryxryxryxryxryxryxryxryxryxryxryxryxryxryxryxryxryxryxryxryxryxryxryxryxryxryxryxryxryxryxryxryxryxryxryxryxryxryxryxryxryzaryxryxryxryxryxryxryxryxryxryxryxryxryxryxryxryxryxryxryxryxryxryxryxryxryxryxryxryxryxryxryxryxryxryxryxryxryxryxryxryxryxryxryxryxryxryxryxryxryxryxtrySpecification
| Items | Description | |||
| SNB-7004 SND-7084 SNV-7084 | ||||
| Video | Imaging Device 1/2.8" PS Exmor 3.20M CMOS | |||
| Total Pixels 2,065(H) x 1,565(V) | ||||
| Effective Pixels 2,065(H) x 1,553(V) | ||||
| Scanning System Progressive | ||||
| Min. Illumination | Color: 0.1 Lux (F1.2, 50IRE), 0.06 Lux (F1.2, 30IRE), 0.0017 Lux (2sec, F1.2, 30IRE) B/W: 0.01 Lux (F1.2, 50IRE), 0.006 Lux (F1.2, 30IRE), 0.00017 Lux (2sec, F1.2, 50IRE) | Color: 0.1 Lux (F1.2, 50IRE), 0.06 Lux (1/30sec, F1.2, 30IRE), 0.0017 Lux (2sec, F1.2, 50IRE) B/W: 0.01 Lux (F1.2, 50IRE), 0.006 Lux (1/30sec, F1.2, 30IRE), 0.00017 Lux (2sec, F1.2, 50IRE) | Color: 0.1 Lux (F1.2, 50IRE), 0.06 Lux (F1.2, 30IRE), 0.0017 Lux (2sec, F1.2, 50IRE) B/W: 0.01 Lux (F1.2, 50IRE), 0.006 Lux (F1.2, 30IRE), 0.00017 Lux (2sec, F1.2, 50IRE) | |
| S / N Ratio 50dB | ||||
| Video Out | CVBS: 1.0 Vp-p / 75Ω composite, 720x480(N), 720x576(P), for installation - DIP connector type | |||
| Lens | Focal Length (Zoom Ratio) | - 3~8.5mm (2.8X) Motorized Vari focal | ||
| Max. Aperture Ratio - F1.2 | ||||
| Angular Field of View - | H: 100.12° (Wide) ~ 35.38° (Tele), V: 73.76° (Wide) ~ 26.58° (Tele) | |||
| Min. Object Distance - 0.5 m (1.64ft) | ||||
| Lens | Focus Control | Simple Focus / Manual - Remote control via network (Manual, Simple Focus, Day&Night) | Simple Focus (Motorized V/F) / Manual - Remote control via network, Button control (Manual, Simple Focus) | |
| Lens Type | Manual / DC Auto Iris, P-Iris | DC Auto Iris, P-Iris | ||
| Mount Type C/CS Mount | Board-in type | |||
| Pan / Tilt / Rotate | Pan Range - 0° ~ + 354° | |||
| Tilt Range - 0° ~ + 67° | ||||
| Rotate Range - 0° ~ + 355° | ||||
| Operational | Camera Title Off / On (Displayed up to 45 characters) | |||
| Day & Night Auto (ICR) / Color / B/W / External / Schedule | ||||
| Backlight Compensation | Off / BLC / WDR | |||
| Wide Dynamic Range Max. 120dB | ||||
| Contrast Enhancement | SSDR (Samsung Super Dynamic Range) (Off / On) | |||
| Digital Noise Reduction | SSNRIII (2D+3D Noise Filter) (Off / On) | |||
| Digital Image Stabilization | Off / On | |||
| Defog | Auto/Manual/Off | |||
| Operational | Motion Detection Off / On (4 zones with 4 points of polygon) | |||
| Privacy Masking Off / On (32 zones with 4 points of polygon) | ||||
| Gain Control Off / Low / Middle / High | ||||
| White Balance ATW / AWC / Manual / Indoor / Outdoor | ||||
| Electronic Shutter Speed | Minimum / Maximum / Anti flicker (1 ~ 1/12,000sec) | |||
| Flip / Mirror Off / On | ||||
| Intelligent Video Analytics | Audio Detection, Face Detection with Metadata, Tampering, Virtual Line, Enter/Exit, Appear / Disappear | |||
| Alarm I/O Input 1ea / Output 1ea | ||||
| Audio In | Selectable (Mic IN/Line IN/Built-in Mic), Supply voltage: 2.5VDC(4mA), Input impedance: approx. 2K Ohm | Selectable (Mic IN/Line IN) Supply voltage: 2.5VDC(4mA), Input impedance: approx. 2K Ohm | ||
| Audio out Line out (Mono, 1Vrms) | ||||
| Serial Interface | RS-485 (Protocol : Samsung-T/E, Pelco-D/P, Sungjin, Panasonic, Honeywell, AD, Vicon, GE, BOSCH) | - | ||
| Operational | Alarm Triggers | Motion detection, Tampering Detection, Audio Detection, Face Detection, Network Disconnection, Video Analytics, Alarm Input | ||
| Alarm events | File upload via FTP, E-MailNotification via E-MailLocal storage(SD/SDHC/SDXC) or NAS recording at EventExternal output | |||
| Network | Ethernet RJ-45 (10/100BASE-T) | |||
| Video Compression Format | H.264(MPEG-4 Part 10/AVC), Motion JPEG | |||
| Resolution | 2048x1536 / 1920x1080 / 1600x1200 / 1280x1024 / 1280x960 / 1280x720 / 1024x768 / 800x600 / 800x450 / 640x480 / 640x360 / 320x240 / 320x180 | |||
| Max. FramerateSmart Codec | [H.264]3M Mode: Max 30fps@2048x1536 / 1920x1080 / 1600x1200 / 1280x1024 / 1280x960 / 1280x720 / 1024x768 / 800x600 / 800x450 / 640x480/ 640x360 / 320x240 / 320x1802M Mode: Max 60fps@1920x1080 / 1280x1024 / 1280x960 / 1280x720 / 1024x768 / 800x600 / 800x450 / 640x480 / 640x360 / 320x240 / 320x180[Motion JPEG]]Max 10fps@2048x1536Max 15fps@1920x1080 / 1600x1200 / 1280x1024 / 1280x960 / 1280x720 / 1024x768Max 30fps@800x600 / 800x450 / 640x480 / 640x360 / 320x240 / 320x180Built-inArea-Based: 5EAFace detection Mode | |||
| Network | ||||
| Video Quality Adjustment | H.264 : Compression Level, Target Bitrate Level ControlMJPEG : Quality Level Control | |||
| Bitrate Control Method | H.264 : CBR or VBRMJPEG : VBR | |||
| Streaming Capability Multiple Streaming (Up to 10 Profiles) | ||||
| Audio Compression Format | G.711 μ-law /G.726 SelectableG.726 (ADPCM) 8KHz, G.711 8KHzG.726 : 16Kbps, 24Kbps, 32Kbps, 40Kbps | |||
| Audio Communication Bi-directional | ||||
| IP IPv4, IPv6 | ||||
| Protocol | TCP/IP, UDP/IP, RTP(UDP), RTP(TCP), RTCP, RTSP, NTP, HTTP, HTTPS, SSL, DHCP, PPPoE, FTP, SMTP, ICMP, IGMP, SNMPv1/v2c/v3(MIB-2), ARP, DNS, DDNS, QoS, PIM-SM, UPnP, Bonjour | |||
| Security | HTTPS(SSL) Login AuthenticationDigest Login AuthenticationIP Address FilteringUser access Log802.1x Authentication | |||
| Network | Streaming Method Unicast / Multicast | |||
| Max. User Access 15 users at Unicast Mode | ||||
| Memory Slot | Micro SD/SDHC/SDXC- motion Images recorded in the SD/SDHC/SDXC memory card can be downloaded. | |||
| Application Programming Interface | ONVIF Profile SHTTP API(SUNAPI) 2.0SVNP 1.2 | |||
| Webpage Language | English, French, German, Spanish, Italian, Chinese, Korean, Russian, Japanese, Swedish, Danish, Portuguese, Czech, Polish, Turkish, Rumanian, Serbian, Dutch, Croatian, Hungarian, Greek, Norway, Finland | |||
| Web Viewer | Supported OS: Windows XP / VISTA / 7 / 8 / 8.1, MAC OS X 10.7Supported Browser: Microsoft Internet Explorer (Ver. 11 ~ 8)Mozilla Firefox (Ver. 19 ~ 9)※ Windows OnlyGoogle Chrome (Ver. 25 ~ 15)※ Windows OnlyApple Safari (Ver. 6.0.2(Mac OS X 10.8, 10.7 only), 5.1.7)※ Mac OS X only | |||
| Central Management Software | SmartViewer | |||
| Environmental | Operating Temperature / Humidity | -10°C ~ +55°C (+14°F ~ +131°F) / Less than 90% RH | -40°C ~ +55°C(-40°F ~ +131°F) /Less than 90% RH* Start up should be done at above -35°C | |
| Storage Temperature / Humidity | -30°C ~ +60°C (-22°F ~ +140°F) / Less than 90% RH | |||
| Ingress Protection | - | IP66 Grade(Waterproof) | ||
| Vandal Resistance | - | IK10 | ||
| Electrical | Input Voltage | AC 24V, DC 12V, PoE (IEEE802.3af class 3) | DC 12V, PoE (IEEE802.3af class 3) | AC 24V, DC 12V, PoE (IEEE802.3af class 3) |
| Power Consumption | Max. 11.1W (DC 12V) Max. 12.6W (PoE, Class3) Max. 13.1W (AC 24V, 50~60Hz) | Max. 9.6W (DC 12V) Max. 11.6W (PoE, Class3) | Max. 9.0W (DC 12V, Heater Off), Max 11.5W (DC 12V, Heater On) Max. 10.0W (PoE, Heater Off), Max 12.5W (PoE, Heater On) Max. 11.0W (AC24V, Heater Off), Max 13.0W (AC24V, Heater On) * Heater works at PoE, DC, AC power input | |
| Mechanical | Color / Material | FRONT (BLACK), BODY (IVORY) / FRONT(Aluminium), BODY(Plastic) | IVORY/Plastic IVORY/Aluminium | |
| Dimension | W73.1 x H66.6 x D147.8mm | ∅132.1 x H107.6mm ∅1 | 60.0 x H118.5mm | |
| Weight 430g (0.95lb) 60 | 5g (1.33lb) 960g (2.11lb) | |||
proDuct overview
SnB-7004
Unit : mm (inch)
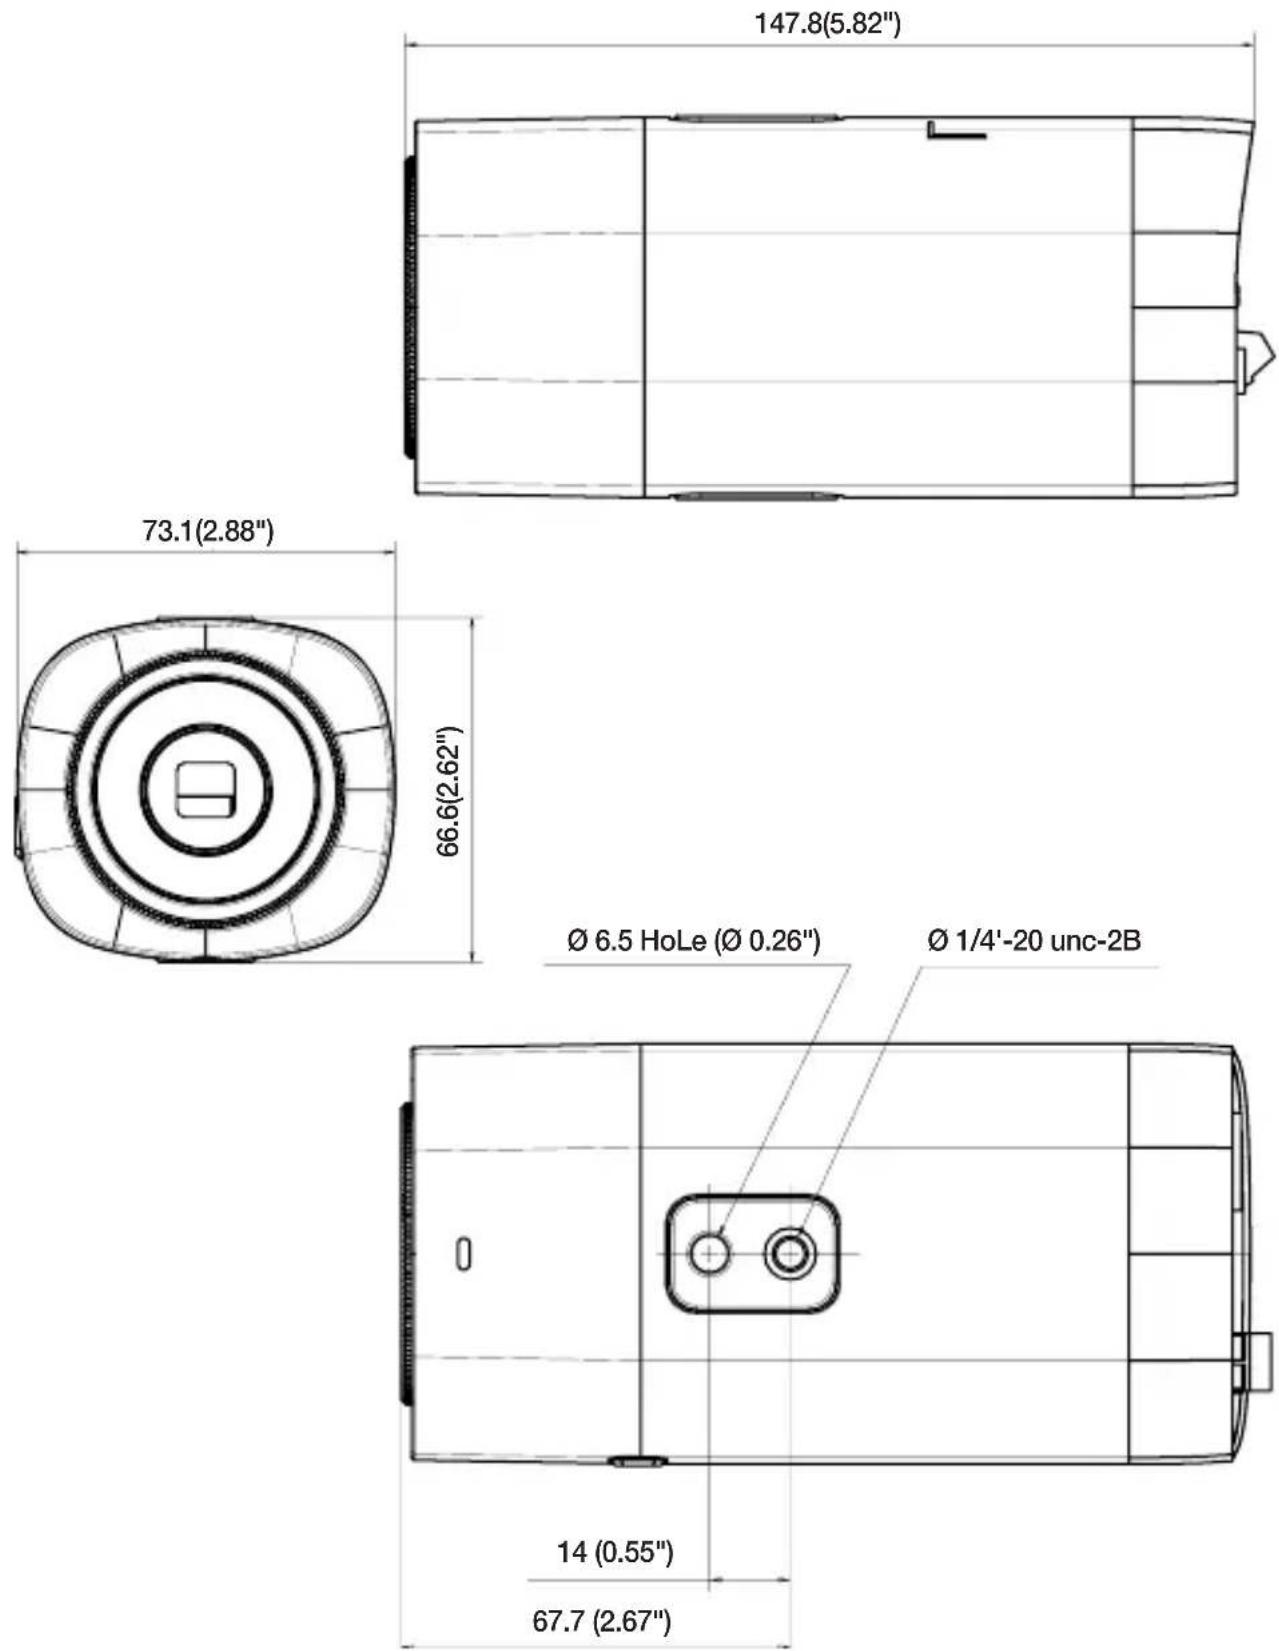
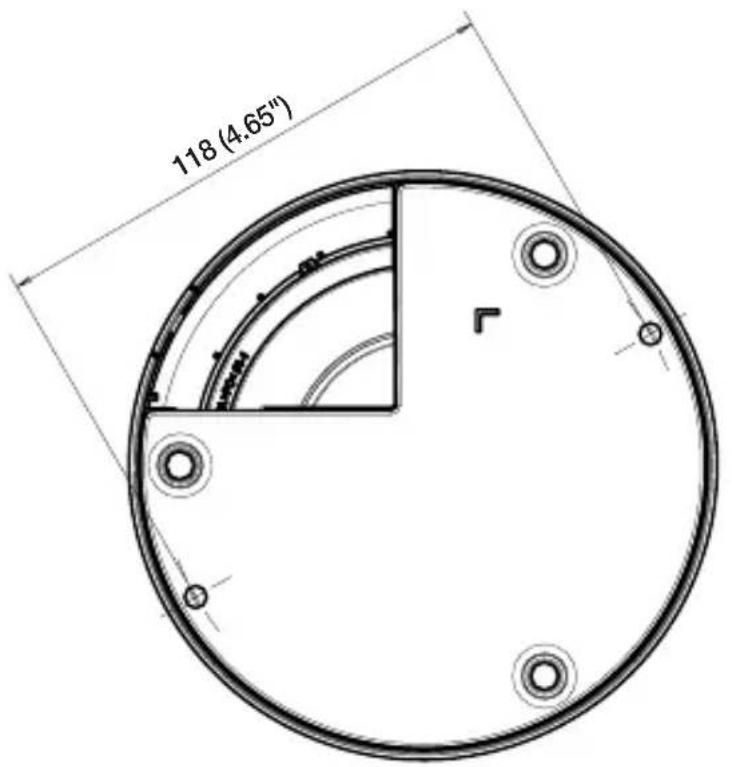
text_image
118 (4.65")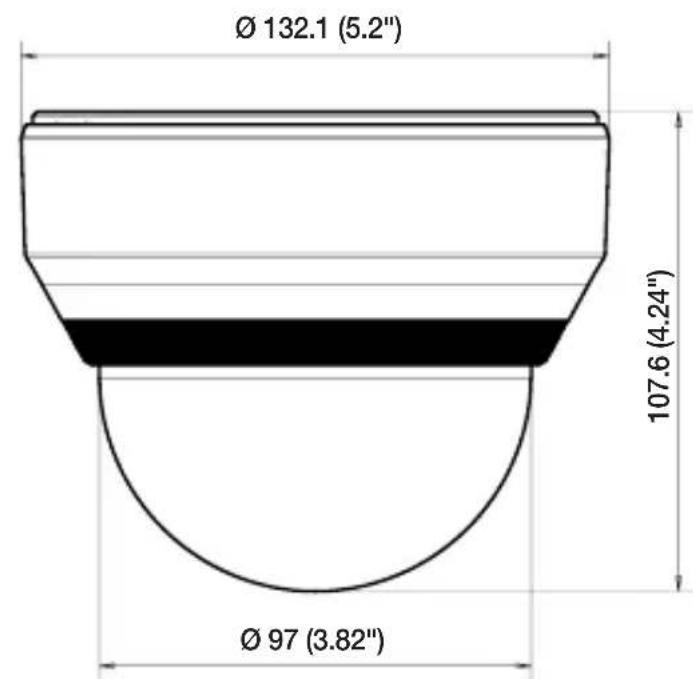
text_image
Ø 132.1 (5.2") 107.6 (4.24") Ø 97 (3.82")Snv-7084
Unit : mm (inch)
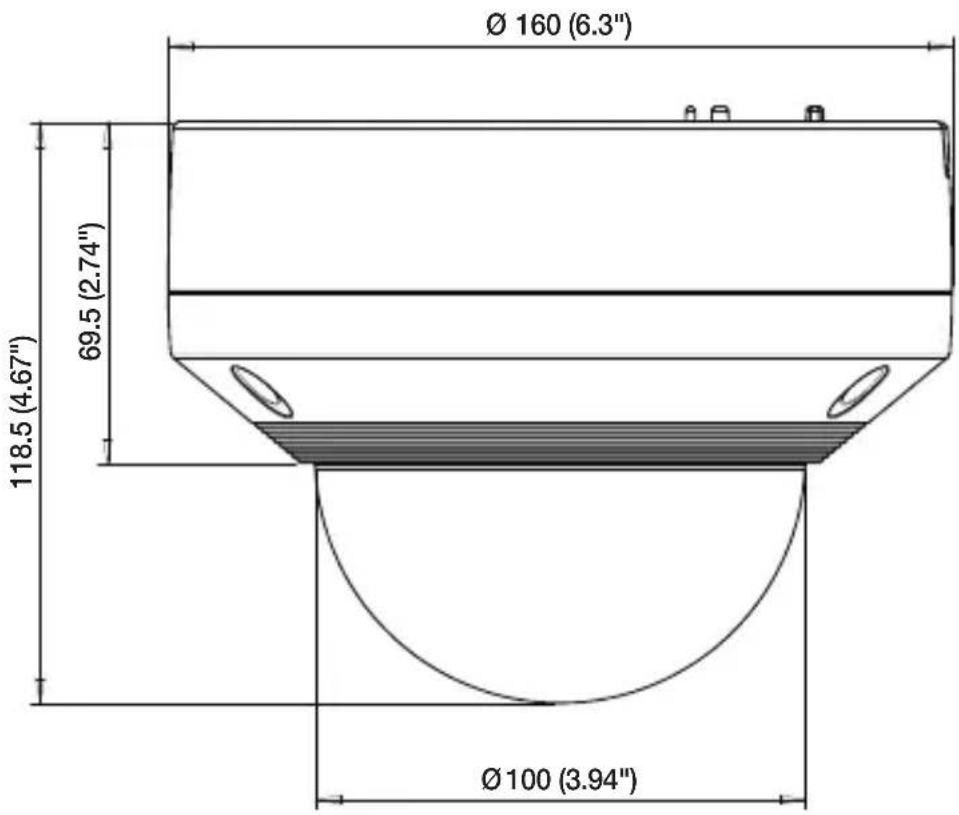
text_image
Ø 160 (6.3") 69.5 (2.74") 118.5 (4.67") Ø 100 (3.94"trouBLeSHootinG
| PROBLEM SOLUTION | |
| I can't access the camera from a web browser. | Check to make sure that the camera's Network settings are appropriate.Check to make sure that all network cables have been connected properly.If connected using DHCP, verify that the camera is able to acquire dynamic IP addresses without any problem.If the camera is connected to a Broadband Router, verify that port forwarding is properly configured. |
| Viewer got disconnected during monitoring. | Connected Viewers become disconnected upon any change to camera or network configurations.Check all network connections.If the camera is connected over an PPPoE network, it's possible for Viewer to disconnect under poor network conditions. |
| I cannot connect to the system using a tab browser of Internet Explorer 7.0. | An error may be generated when connecting with a new window or tab since the cookie data are shared. Do not use a new window or tab, select "File → New session". |
| The camera connected to the network is not detected in the IP installer program. | Turn off the firewall settings on your PC and then search the camera again. |
| Images overlap. | Check whether two or more cameras are set to a single multicast address instead of different addresses. If a single address is used for multiple cameras, the images may overlap. |
| No image appears. | If the transmission method is set to multicast, check whether there is a router that supports multicast in the LAN the camera is connected to. |
| ofis set to, but no notification e-mail reaches me even when an analysis event had occurred. | Verify the settings in the following sequence:A. Checksettings.B. Theshould be set to.C. Check if theoption ofmenu is checked to use. |
| Can I define event rules even when I don't use? | Yes, it can be. You can set rules for events despite of the intelligent video analysis setting. |
| No signal is found at the Alarm Output port even when an intelligent video analysis event is generated. | Check alarm output port settings. |
| Cannot record into the Micro SD memory card. | Check if the memory card is defective. |
| Micro SD memory card is inserted but the camera does not operate properly. | Check if the memory card is inserted in the proper direction. Operation of memory card that is formatted by other devices is not guaranteed with this camera unitFormat the memory card again in → → → menu. |
| Cannot record in the NAS. | Confirm that the information registered in the NAS is correct. |
| It reports that NAS setting has failed. | Confirm that the IP address of the NAS is valid.Confirm that the ID/password of the NAS is valid.Confirm that you can access the folder designated as the default folder using the ID of the NAS.Confirm that the NAS SMB/CIFS items are unchecked.Confirm that the NAS IP address and the camera IP address are in the same format.ex) The NAS & camera subnet mask initial value is 255.255.255.0.If the IP address is 192.168.20.32 then the NAS IP address should be in the range of 192.168.20.1~192.168.20.255.Check whether you tried to access as another user without formatting the default folder saved or used.Confirm that you used recommended NAS equipment. |
GPL/LGPL software license
The software included in this product contains copyrighted software that is licensed under the GPL/LGPL. You may obtain the complete Corresponding Source code from us for a period of three years after our last shipment of this product by sending email to help.cctv@samsung.com
If you want to obtain the complete Corresponding Source code in the physical medium such as CD-ROM, the cost of physically performing source distribution might be charged.
GPL SW
Component Name License URL
| Base Kernel | GPL 3.0 | |
| Busybox | GPL 2.0 | http://www.busybox.net/downloads/snapshots |
| iproute2-3.1.0 | GPL 2.0 | |
| alsa-utils-1.0.24.2 | GPL 2.0 | |
| alsa-lib-1.0.24.1 | GPL 2.0 | |
| iptables-1.4.12.2 | GPL 2.0 | http://ftp.netfilter.org/pub/iptables |
| ethtool-3.2 | GPL 2.0 | |
| mtd-1.4.1 | GPL 2.0 | ftp://ftp.infradead.org/pub/mtd-utils |
| mii-diag-2.11 | GPL 2.0 | |
| rp-pppoe-3.10 | GPL 2.0 | http://www.roaringpenguin.com/pppoe/ |
| wpa_supplicant-0.7.3 | GPL 2.0 | |
| bash-4.2 | GPL 3.0 | |
| zeroconf | GPL 2.0 |
LGPL SW
Component Name License URL
| gLibc | LGPL 2.0 | |
| Inetutils | LGPL 3.0 | |
| neon-0.29.6 | LGPL 2.0 | http://www.webdav.org/neon/ |
| (The Manual and test suite are GPL) |
GNU GENERAL PUBLIC LICENSE
Version 2, June 1991
Copyright (C)1989, 1991 Free Software Foundation, Inc. 51 Franklin Street, Fifth Floor, Boston, MA 02110-1301, USA
Everyone is permitted to copy and distribute verbatim copies of this license document, but changing it is not allowed.
Preamble
The licenses for most software are designed to take away your freedom to share and change it. By contrast, the GNU General Public License is intended to guarantee your freedom to share and change free software-- to make sure the software is free for all its users. This General Public License applies to most of the Free Software Foundation's software and to any other program whose authors commit to using it. (Some other Free Software Foundation software is covered by the GNU Lesser General Public License instead.) You can apply it to your programs, too. When we speak of free software, we are referring to freedom, not price. Our General Public Licenses are designed to make sure that you have the freedom to distribute copies of free software (and charge for this service if you wish), that you receive source code or can get it if you want it, that you can change the software or use pieces of it in new free programs; and that you know you can do these things.
To protect your rights, we need to make restrictions that forbid anyone to deny you these rights or to ask you to surrender the rights. These restrictions translate to certain responsibilities for you if you distribute copies of the software, or if you modify it.
For example, if you distribute copies of such a program, whether gratis or for a fee, you must give the recipients all the rights that you have.
You must make sure that they, too, receive or can get the source code. And you must show them these terms so they know their rights. We protect your rights with two steps:
(1)copyright the software, and (2)offer you this license which gives you legal permission to copy, distribute and/or modify the software. Also, for each author's protection and ours, we want to make certain that everyone understands that there is no warranty for this free software. If the software is modified by someone else and passed on, we want its recipients to know that what they have is not the original, so that any problems introduced by others will not reflect on the original authors' reputations.
Finally, any free program is threatened constantly by software patents. We wish to avoid the danger that redistributors of a free program will individually obtain patent licenses, in effect making the program proprietary. To prevent this, we have made it clear that any patent must be licensed for everyone's free use or not licensed at all. The precise terms and conditions for copying, distribution and modification follow.
TERMS AND CONDITIONS FOR COPYING, DISTRIBUTION AND MODIFICATION
Version 2, June 1991 Copyright (C) 1989, 1991 Free Software Foundation, Inc. 51 Franklin S
- This License applies to any program or other work which contains a notice placed by the copyright holder saying it may be distributed under the terms of this General Public License.
The “Program”, below, refers to any such program or work, and a “work based on the Program” means either the Program or any derivative work under copyright law: that is to say, a work containing the Program or a portion of it, either verbatim or with modifications and/or translated into another language. (Hereinafter, translation is included without limitation in the term “modification”.) Each licensee is addressed as “you”.
Activities other than copying, distribution and modification are not covered by this License; they are outside its scope. The act of running the Program is not restricted, and the output from the Program is covered only if its contents constitute a work based on the Program (independent of having been made by running the Program). Whether that is true depends on what the Program does.
- You may copy and distribute verbatim copies of the Program's source code as you receive it, in any medium, provided that you conspicuously and appropriately publish on each copy an appropriate copyright notice and disclaimer of warranty; keep intact all the notices that refer to this License and to the absence of any warranty; and give any other recipients of the Program a copy of this License along with the Program.
You may charge a fee for the physical act of transferring a copy, and you may at your option offer warranty protection in exchange for a fee.
- You may modify your copy or copies of the Program or any portion of it, thus forming a work based on the Program, and copy and distribute such modifications or work under the terms of Section 1 above, provided that you also meet all of these conditions:
a) You must cause the modified files to carry prominent notices stating that you changed the files and the date of any change.
b) You must cause any work that you distribute or publish, that in whole or in part contains or is derived from the Program or any part thereof, to be licensed as a whole at no charge to all third parties under the terms of this License.
c) If the modified program normally reads commands interactively when run, you must cause it, when started running for such interactive use in the most ordinary way, to print or display an announcement including an appropriate copyright notice and a notice that there is no warranty (or else, saying that you provide a warranty) and that users may redistribute the program under these conditions, and telling the user how to view a copy of this License. (Exception: if the Program itself is interactive but does not normally print such an announcement, your work based on the Program is not required to print an announcement.)
These requirements apply to the modified work as a whole. If identifiable sections of that work are not derived from the Program, and can be reasonably considered independent and separate works in themselves, then this License, and its terms, do not apply to those sections when you distribute them as separate works. But when you distribute the same sections as part of a whole which is a work based on the Program, the distribution of the whole must be on the terms of this License, whose permissions for other licensees extend to the entire whole, and thus to each and every part regardless of who wrote it.
Thus, it is not the intent of this section to claim rights or contest your rights to work written entirely by you; rather, the intent is to exercise the right to control the distribution of derivative or collective works based on the Program. In addition, mere aggregation of another work not based on the Program with the Program (or with a work based on the Program) on a volume of a storage or distribution medium does not bring the other work under the scope of this License.
- You may copy and distribute the Program (or a work based on it, under Section 2) in object code or executable form under the terms of Sections 1 and 2 above provided that you also do one of the following :
a) Accompany it with the complete corresponding machine-readable source code, which must be distributed under the terms of Sections 1 and 2 above on a medium customarily used for software interchange ; or, b) Accompany it with a written offer, valid for at least three years, to give any third party, for a charge no more than your cost of physically performing source distribution, a complete machinereadable copy of the corresponding source code, to be distributed under the terms of Sections 1 and 2 above on a medium customarily used for software interchange ; or,
c) Accompany it with the information you received as to the offer to distribute corresponding source code. (This alternative is allowed only for noncommercial distribution and only if you received the program in object code or executable form with such an offer, in accord with Subsection b above.) The source code for a work means the preferred form of the work for making modifications to it. For an executable work, complete source code means all the source code for all modules it contains, plus any associated interface definition files, plus the scripts used to control compilation and installation of the executable. However, as a special exception, the source code distributed need not include anything that is normally distributed (in either source or binary form) with the major components (compiler, kernel, and so on) of the operating system on which the executable runs, unless that component itself accompanies the executable. If distribution of executable or object code is made by offering access to copy from a designated place, then offering equivalent access to copy the source code from the same place counts as distribution of the source code, even though third parties are not compelled to copy the source along with the object code.
- You may not copy, modify, sublicense, or distribute the Program except as expressly provided under this License. Any attempt otherwise to copy, modify, sublicense or distribute the Program is void, and will automatically terminate your rights under this License.
However, parties who have received copies, or rights, from you under this License will not have their licenses terminated so long as such parties remain in full compliance.
- You are not required to accept this License, since you have not signed it. However, nothing else grants you permission to modify or distribute the Program or its derivative works.
These actions are prohibited by law if you do not accept this License. Therefore, by modifying or distributing the Program (or any work based on the Program), you indicate your acceptance of this License to do so, and all its terms and conditions for copying, distributing or modifying the Program or works based on it.
-
Each time you redistribute the Program (or any work based on the Program), the recipient automatically receives a license from the original licensor to copy, distribute or modify the Program subject to these terms and conditions. You may not impose any further restrictions on the recipients' exercise of the rights granted herein. You are not responsible for enforcing compliance by third parties to this License.
-
If, as a consequence of a court judgment or allegation of patent infringement or for any other reason (not limited to patent issues), conditions are imposed on you (whether by court order, agreement or otherwise) that contradict the conditions of this License, they do not excuse you from the conditions of this License. If you cannot distribute so as to satisfy simultaneously your obligations under this License and any other pertinent obligations, then as a consequence you may not distribute the Program at all.
For example, if a patent license would not permit royalty-free redistribution of the Program by all those who receive copies directly or indirectly through you, then the only way you could satisfy both it and this License would be to refrain entirely from distribution of the Program.
If any portion of this section is held invalid or unenforceable under any particular circumstance, the balance of the section is intended to apply and the section as a whole is intended to apply in other circumstances. It is not the purpose of this section to induce you to infringe any patents or other property right claims or to contest validity of any such claims; this section has the sole purpose of protecting the integrity of the free software distribution system, which is implemented by public license practices. Many people have made generous contributions to the wide range of software distributed through that system in reliance on consistent application of that system; it is up to the author/donor to decide if he or she is willing to distribute software through any other system and a licensee cannot impose that choice. This section is intended to make thoroughly clear what is believed to be a consequence of the rest of this License.
-
If the distribution and/or use of the Program is restricted in certain countries either by patents or by copyrighted interfaces, the original copyright holder who places the Program under this License may add an explicit geographical distribution limitation excluding those countries, so that distribution is permitted only in or among countries not thus excluded. In such case, this License incorporates the limitation as if written in the body of this License.
-
The Free Software Foundation may publish revised and/or new versions of the General Public License from time to time. Such new versions will be similar in spirit to the present version, but may differ in detail to address new problems or concerns. Each version is given a distinguishing version number. If the Program specifies a version number of this License which applies to it and "any later version", you have the option of following the terms and conditions either of that version or of any later version published by the Free Software Foundation. If the Program does not specify a version number of this License, you may choose any version ever published by the Free Software Foundation.
-
If you wish to incorporate parts of the Program into other free programs whose distribution conditions are different, write to the author to ask for permission. For software which is copyrighted by the Free Software Foundation, write to the Free Software Foundation; we sometimes make exceptions for this. Our decision will be guided by the two goals of preserving the free status of all derivatives of our free software and of promoting the sharing and reuse of software generally.
no warranty
-
BECAUSE THE PROGRAM IS LICENSED FREE OF CHARGE, THERE IS NO WARRANTY FOR THE PROGRAM, TO THE EXTENT PERMITTED BY APPLICABLE LAW. EXCEPT WHEN OTHERWISE STATED IN WRITING THE COPYRIGHT HOLDERS AND/OR OTHER PARTIES PROVIDE THE PROGRAM "ASIS" WITHOUT WARRANTY OF ANY KIND, EITHER EXPRESSED OR IMPLIED, INCLUDING, BUT NOT LIMITED TO, THE IMPLIED WARRANTIES OF MERCHANTABILITY AND FITNESS FOR A PARTICULAR PURPOSE. THE ENTIRE RISK AS TO THE QUALITY AND PERFORMANCE OF THE PROGRAM IS WITH YOU. SHOULD THE PROGRAMPROVE DEFECTIVE, YOU ASSUME THE COST OF ALL NECESSARY SERVICING, REPAIR OR CORRECTION.
-
IN NO EVENT UNLESS REQUIRED BY APPLICABLE LAW OR AGREED TO IN WRITING WILL ANY COPYRIGHT HOLDER, OR ANY OTHER PARTY WHO MAY MODIFY AND/OR REDISTRIBUTE DAMAGES, INCLUDING ANY GENERAL, SPECIAL, INCIDENTAL OR CONSEQUENTIAL DAMAGES ARISING OUT OF THE USE OR INABILITY TO USE THE PROGRAM (INCLUDING BUT NOT LIMITED TO LOSS OF DATA OR DATA BEING RENDERED INACCURATE OR LOSSES SUSTAINED BY YOU OR THIRD PARTIES OR A FAILURE OF THE PROGRAM TO OPERATE WITH ANY OTHER PROGRAMS), EVEN IF SUCH HOLDER OR OTHER PARTY HAS BEEN ADVISED OF THE POSSIBILITY OF SUCH DAMAGES.
END OF TERMS AND CONDITIONS
How to Apply These Terms to Your New Programs If you develop a new program, and you want it to be of the greatest possible use to the public, the best way to achieve this is to make it free software which everyone can redistribute and change under these terms. To do so, attach the following notices to the program. It is safest to attach them to the start of each source file to most effectively convey the exclusion of warranty; and each file should have at least the “copyright” line and a pointer to where the full notice is found.one line to give the program’s name and an idea of what it does.
Copyright (C)yyyy name of author
This program is free software ; you can redistribute it and/or modify it under the terms of the GNU General Public License as published by the Free Software Foundation ; either version 2 of the License, or (at your option)any later version.
This program is distributed in the hope that it will be useful, but WITHOUT ANY WARRANTY; without even the implied warranty of MERCHANTABILITY or FITNESS FOR A PARTICULAR PURPOSE. See the GNU General Public License for more details.
You should have received a copy of the GNU General Public License along with this program; if not, write to the Free Software Foundation, Inc.,51 Franklin Street, Fifth Floor, Boston, MA 02110-1301, USA. Also add information on how to contact you by electronic and paper mail. If the program is interactive, make it output a short notice like this when it starts in an interactive mode:
Gnomovision version 69, Copyright (C) year name of author Gnomovision comes with ABSOLUTELY NO WARRANTY; for details type 'show w'. This is free software, and you are welcome to redistribute it under certain conditions; type 'show c' for details.
The hypothetical commands 'show w' and 'show c' should show the appropriate parts of the General Public License. Of course, the commands you use may be called something other than 'show w' and 'show c'; they could even be mouse-clicks or menu items-- whatever suits your program.
You should also get your employer (if you work as a programmer) or your school, if any, to sign a "copyright disclaimer" for the program, if necessary. Here is a sample; alter the names:
Yoyodyne, Inc., hereby disclaims all copyright interest in the program ‘Gnomovision’ (which makes passes at compilers) written by James Hacker. signature of Ty Coon, 1 April 1989 Ty Coon, President of Vice This General Public License does not permit incorporating your program into proprietary programs. If your program is a subroutine library, you may consider it more useful to permit linking proprietary applications with the library. If this is Lwihcaetn ysoeu want to do, use the GNU Lesser General Public instead of this License.
Gnu GeneraL puBLic LicenSe
Version 3, 29 June 2007
Copyright (C) 2007 Free Software Foundation, Inc. http://fsf.org/
Everyone is permitted to copy and distribute verbatim copies of this license document, but changing it is not allowed.
Preamble
The GNU General Public License is a free, copyleft license for software and other kinds of works. The licenses for most software and other practical works are designed to take away your freedom to share and change the works. By contrast, the GNU General Public License is intended to guarantee your freedom to share and change all versions of a program--to make sure it remains free software for all its users.
We, the Free Software Foundation, use the GNU General Public License for most of our software; it applies also to any other work released this way by its authors.
You can apply it to your programs, too. When we speak of free software, we are referring to freedom, not price. Our General Public Licenses are designed to make sure that you have the freedom to distribute copies of free software (and charge for them if you wish), that you receive source code or can get it if you want it, that you can change the software or use pieces of it in new free programs, and that you know you can do these things.
To protect your rights, we need to prevent others from denying you these rights or asking you to surrender the rights. Therefore, you have certain responsibilities if you distribute copies of the software, or if you modify it: responsibilities to respect the freedom of others. For example, if you distribute copies of such a program, whether gratis or for a fee, you must pass on to the recipients the same freedoms that you received. You must make sure that they, too, receive or can get the source code. And you must show them these terms so they know their rights. Developers that use the GNU GPL protect your rights with two steps: (1) assert copyright on the software, and (2) offer you this License giving you legal permission to copy, distribute and/or modify it. For the developers' and authors' protection, the GPL clearly explains that there is no arranty for this free software. For both users' and authors' sake, the GPL requires that modified versions be marked as changed, so that their problems will not be attributed erroneously to authors of previous versions. Some devices are designed to deny users access to install or run modified versions of the software inside them, although the manufacturer can do so. This is fundamentally incompatible with the aim of protecting users' freedom to change the software. The systematic pattern of such abuse occurs in the area of products for individuals to use, which is precisely where it is most unacceptable. Therefore, we have designed this version of the GPL to prohibit the practice for those products. If such problems arise substantially in other domains, we stand ready to extend this provision to those domains in future versions of the GPL, as needed to protect the freedom of users.
Finally, every program is threatened constantly by software patents. States should not allow patents to restrict development and use of software on general-purpose computers, but in those that do, we wish to avoid the special anger that patents applied to a free program could make it effectively proprietary. To prevent this, the GPL assures that atents cannot be used to render the program non-free. he precise terms and conditions for copying, distribution and modification follow.
TERMS AND CONDITIONS
0. Definitions.
"This License" refers to version 3 of the GNU General Public License.
Copyright" also means copyright-like laws that apply to other kinds of works, such as semiconductor masks.
"The Program" refers to any copyrightable work licensed under this License. Each licensee is addressed as "you".
"Licensees" and "recipients" may be individuals or organizations.
To “modify” a work means to copy from or adapt all or part of the work in a fashion requiring copyright permission, other than the making of an exact copy. The resulting work is called a “modified version” of the earlier work or a work “based on” the earlier work.
A “covered work” means either the unmodified Program or a work based on the Program.
To “propagate” a work means to do anything with it that, without permission, would make you directly or secondarily liable for infringement under applicable copyright law, except executing it on a computer or modifying a private copy.
Propagation includes copying, distribution (with or without modification), making available to the public, and in some countries other activities as well.
To “convey” a work means any kind of propagation that enables other parties to make or receive copies. Mere interaction with a user through a computer network, with no transfer of a copy, is not conveying. An interactive user interface displays “Appropriate Legal Notices” to the extent that it includes a convenient and prominently visible feature that (1) displays an appropriate copyright notice, and (2) tells the user that there is no warranty for the work (except to the extent that warranties are provided), that licensees may convey the work under this License, and how to view a copy of this License. If the interface presents a list of user commands or options, such as a menu, a prominent item in the list meets this criterion.
1. Source Code.
The “source code” for a work means the preferred form of the work for making modifications to it. “Object code” means any non-source form of a work.
A “Standard Interface” means an interface that either is an official standard defined by a recognized standards body, or, in the case of interfaces specified for a particular programming language, one that is widely used among developers working in that language.
The “System Libraries” of an executable work include anything, other than the work as a whole, that (a) is included in the normal form of packaging a Major Component, but which is not part of that Major Component, and (b) serves only to enable use of the work with that Major Component, or to implement a Standard Interface for which an implementation is available to the public in source code form. A “Major Component”, in this context, means a major essential component (kernel, window system, and so on) of the specific operating system (if any) on which the executable work runs, or a compiler used to produce the work, or an object code interpreter used to run it.
The "Corresponding Source" for a work in object code form means all the source code needed to generate, install, and (for an executable work) run the object code and to modify the work, including scripts to control those activities.
However, it does not include the work's System Libraries, or general purpose tools or generally available free programs which are used unmodified in performing those activities but which are not part of the work. For example, Corresponding Source includes interface definition files associated with source files for the work, and the source code for shared libraries and dynamically linked subprograms that the work is specifically designed to require, such as by intimate data communication or control flow between those subprograms and other parts of the work.
The Corresponding Source need not include anything that users can regenerate automatically from other parts of the Corresponding Source. The Corresponding Source for a work in source code form is that same work.
2. Basic Permissions.
All rights granted under this License are granted for the term of copyright on the Program, and are irrevocable provided the stated conditions are met. This License explicitly affirms your unlimited permission to run the unmodified Program. The output from running a covered work is covered by this License only if the output, given its content, constitutes a covered work. This License acknowledges your rights of fair use or other equivalent, as provided by copyright law.
You may make, run and propagate covered works that you do not convey, without conditions so long as your license otherwise remains in force. You may convey covered works to others for the sole purpose of having them make modifications exclusively for you, or provide you with facilities for running those works, provided that you comply with the terms of this License in conveying all material for which you do not control copyright. Those thus making or running the covered works for you must do so exclusively on your behalf, under your direction and control, on terms that prohibit them from making any copies of your copyrighted material outside their relationship with you. Conveying under any other circumstances is permitted solely under the conditions stated below.
Sublicensing is not allowed; section 10 makes it unnecessary.
3. Protecting Users' Legal Rights From anti-Circumvention Law.
No covered work shall be deemed part of an effective technological measure under any applicable law fulfilling obligations under article 11 of the WIPO copyright treaty adopted on 20 December 1996, or similar laws prohibiting or restricting circumvention of such measures.
When you convey a covered work, you waive any legal power to forbid circumvention of technological measures to the extent such circumvention is effected by exercising rights under this License with respect to the covered work, and you disclaim any intention to limit operation or modification of the work as a means of enforcing, against the work's users, your or third parties' legal rights to forbid circumvention of technological measures.
4. Conveying Verbatim Copies.
You may convey verbatim copies of the Program's source code as you receive it, in any medium, provided that you conspicuously and appropriately publish on each copy an appropriate copyright notice; keep intact all notices stating that this License and any non-permissive terms added in accord with section 7 apply to the code; keep intact all notices of the absence of any warranty; and give all recipients a copy of this License along with the Program. You may charge any price or no price for each copy that you convey, and you may offer support or warranty protection for a fee.
5. Conveying Modified Source Versions.
You may convey a work based on the Program, or the modifications to produce it from the Program, in the form of source code under the terms of section 4, provided that you also meet all of these conditions:
a) The work must carry prominent notices stating that you modified it, and giving a relevant date.
b) The work must carry prominent notices stating that it is released under this License and any conditions added under section 7. This requirement modifies the requirement in section 4 to “keep intact all notices”.
c) You must license the entire work, as a whole, under this License to anyone who comes into possession of a copy. This License will therefore apply, along with any applicable section 7 additional terms, to the whole of the work, and all its parts, regardless of how they are packaged. This License gives no permission to license the work in any other way, but it does not invalidate such permission if you have separately received it.
d) If the work has interactive user interfaces, each must display Appropriate Legal Notices; however, if the Program has interactive interfaces that do not display Appropriate Legal Notices, your work need not make them do so. A compilation of a covered work with other separate and independent works, which are not by their nature extensions of the covered work, and which are not combined with it such as to form a larger program, in or on a volume of a storage or distribution medium, is called an “aggregate” if the compilation and its resulting copyright are not used to limit the access or legal rights of the compilation’s users beyond what the individual works permit. Inclusion of a covered work in an aggregate does not cause this License to apply to the other parts of the aggregate.
6. Conveying Non-Source Forms.
You may convey a covered work in object code form under the terms of sections 4 and 5, provided that you also convey the machine-readable Corresponding Source under the terms of this License, in one of these ways:
a) Convey the object code in, or embodied in, a physical product (including a physical distribution medium), accompanied by the Corresponding Source fixed on a durable physical medium customarily used for software interchange.
b) Convey the object code in, or embodied in, a physical product (including a physical distribution medium), accompanied by a written offer, valid for at least three years and valid for as long as you offer spare parts or customer support for that product model, to give anyone who possesses the object code either (1) a copy of the Corresponding Source for all the software in the product that is covered by this License, on a durable physical medium customarily used for software interchange, for a price no more than your reasonable cost of physically performing this conveying of source, or (2) access to copy the Corresponding Source from a network server at no charge.
c) Convey individual copies of the object code with a copy of the written offer to provide the corresponding Source. This alternative is allowed only occasionally and noncommercially, and only if you received the object code with such an offer, in accord with subsection 6b.
d) Convey the object code by offering access from a designated place (gratis or for a charge), and offer equivalent access to the Corresponding Source in the same way through the same place at no further charge. You need not require recipients to copy the Corresponding Source along with the object code. If the place to copy the object code is a network server, the Corresponding Source may be on a different server (operated by you or a third party) that supports equivalent copying facilities, provided you maintain clear directions next to the object code saying where to find the Corresponding Source. Regardless of what server hosts the Corresponding Source, you remain obligated to ensure that it is available for as long as needed to satisfy these requirements.
e) Convey the object code using peer-to-peer transmission, provided you inform other peers where the object code and Corresponding Source of the work are being offered to the general public at no charge under subsection 6d. A separable portion of the object code, whose source code is excluded from the Corresponding Source as a System Library, need not be included in conveying the object code work. A "User Product" is either (1) a "consumer product", which means any tangible personal property which is normally used for personal, family, or household purposes, or (2) anything designed or sold for incorporation into a dwelling. In determining whether a product is a consumer product, doubtful cases shall be resolved in favor of coverage. For a particular product received by a particular user, "normally used" refers to a typical or common use of that class of product, regardless of the status of the particular user or of the way in which the particular user actually uses, or expects or is expected to use, the product. A product is a consumer product regardless of whether the product has substantial commercial, industrial or non-consumer uses, unless such uses represent the only significant mode of use of the product.
"Installation Information" for a User Product means any methods, procedures, authorization keys, or other information required to install and execute modified versions of a covered work in that User Product from a modified version of its Corresponding Source. The information must suffice to ensure that the continued functioning of the modified object code is in no case prevented or interfered with solely because modification has been made. If you convey an object code work under this section in, or with, or specifically for use in, a User Product, and the conveying occurs as part of a transaction in which the right of possession and use of the User Product is transferred to the recipient in perpetuity or for a fixed term (regardless of how the transaction is characterized), the Corresponding Source conveyed under this section must be accompanied by the Installation Information. But this requirement does not apply if neither you nor any third party retains the ability to install modified object code on the User Product (for example, the work has been installed in ROM).
The requirement to provide Installation Information does not include a requirement to continue to provide support service, warranty, or updates for a work that has been modified or installed by the recipient, or for the User Product in which it has been modified or installed. Access to a network may be denied when the modification itself materially and adversely affects the operation of the network or violates the rules and protocols for communication across the network. Corresponding Source conveyed, and Installation Information provided, in accord with this section must be in a format that is publicly documented (and with an implementation available to the public in source code form), and must require no special password or key for unpacking, reading or copying.
7. Additional Terms.
"Additional permissions" are terms that supplement the terms of this License by making exceptions from one or more of its conditions. Additional permissions that are applicable to the entire Program shall be treated as though they were included in this License, to the extent that they are valid under applicable law. If additional permissions apply only to part of the Program, that part may be used separately under those permissions, but the entire Program remains governed by this License without regard to the additional permissions. When you convey a copy of a covered work, you may at your option remove any additional permissions from that copy, or from any part of it. (Additional permissions may be written to require their own removal in certain cases when you modify the work.) You may place additional permissions on material, added by you to a covered work, for which you have or can give appropriate copyright permission. Notwithstanding any other provision of this License, for material you add to a covered work, you may (if authorized by the copyright holders of that material) supplement the terms of this License with terms:
a) Disclaiming warranty or limiting liability differently from the terms of sections 15 and 16 of this License; or
b) Requiring preservation of specified reasonable legal notices or author attributions in that material or in the Appropriate Legal Notices displayed by works containing it; or
c) Prohibiting misrepresentation of the origin of that material, or requiring that modified versions of such material be marked in reasonable ways as different from the original version; or
d) Limiting the use for publicity purposes of names of licensors or authors of the material; or
e) Declining to grant rights under trademark law for use of some trade names, trademarks, or service marks; or
f) Requiring indemnification of licensors and authors of that material by anyone who conveys the material (or modified versions of it) with contractual assumptions of liability to the recipient, for any liability that these contractual assumptions directly impose on those licensors and authors. All other non-permissive additional terms are considered "further restrictions" within the meaning of section 10. If the Program as you received it, or any part of it, contains a notice stating that it is governed by this License along with a term that is a further restriction, you may remove that term. If a license document contains a further restriction but permits relicensing or conveying under this License, you may add to a covered work material governed by the terms of that license document, provided that the further restriction does not survive such relicensing or conveying. If you add terms to a covered work in accord with this section, you must place, in the relevant source files, a statement of the additional terms that apply to those files, or a notice indicating where to find the applicable terms. Additional terms, permissive or non-permissive, may be stated in the form of a separately written license, or stated as exceptions; the above requirements apply either way.
8. Termination.
You may not propagate or modify a covered work except as expressly provided under this License. Any attempt otherwise to propagate or modify it is void, and will automatically terminate your rights under this License (including any patent licenses granted under the third paragraph of section 11).
However, if you cease all violation of this License, then your license from a particular copyright holder is reinstated (a) provisionally, unless and until the copyright holder explicitly and finally terminates your license, and (b) permanently, if the copyright holder fails to notify you of the violation by some reasonable means prior to 60 days after the cessation. Moreover, your license from a particular copyright holder is reinstated permanently if the copyright holder notifies you of the violation by some reasonable means, this is the first time you have received notice of violation of this License (for any work) from that copyright holder, and you cure the violation prior to 30 days after your receipt of the notice. Termination of your rights under this section does not terminate the licenses of parties who have received copies or rights from you under this License. If your rights have been terminated and not permanently reinstated, you do not qualify to receive new licenses for the same material under section 10.
9. Acceptance Not Required for Having Copies.
You are not required to accept this License in order to receive or run a copy of the Program. Ancillary propagation of a covered work occurring solely as a consequence of using peer-to-peer transmission to receive a copy likewise does not require acceptance. However, nothing other than this License grants you permission to propagate or modify any covered work. These actions infringe copyright if you do not accept this License. Therefore, by modifying or propagating a covered work, you indicate your acceptance of this License to do so.
10. Automatic Licensing of Downstream Recipients.
Each time you convey a covered work, the recipient automatically receives a license from the original licensors, to run, modify and propagate that work, subject to this License. You are not responsible for enforcing compliance by third parties with this License. An “entity transaction” is a transaction transferring control of an organization, or substantially all assets of one, or subdividing an organization, or merging organizations. If propagation of a covered work results from an entity transaction, each party to that transaction who receives a copy of the work also receives whatever licenses to the work the party’s predecessor in interest had or could give under the previous paragraph, plus a right to possession of the Corresponding Source of the work from the predecessor in interest, if the predecessor has it or can get it with reasonable efforts. You may not impose any further restrictions on the exercise of the rights granted or affirmed under this License. For example, you may not impose a license fee, royalty, or other charge for exercise of rights granted under this License, and you may not initiate litigation (including a cross-claim or counterclaim in a lawsuit) alleging that any patent claim is infringed by making, using, selling, offering for sale, or importing the Program or any portion of it.
11. Patents.
A “contributor” is a copyright holder who authorizes use under this License of the Program or a work on which the Program is based. The work thus licensed is called the contributor’s “contributor version”. A contributor’s “essential patent claims” are all patent claims owned or controlled by the contributor, whether already acquired or hereafter acquired, that would be infringed by some manner, permitted by this License, of making, using, or selling its contributor version, but do not include claims that would be infringed only as a consequence of further modification of the contributor version. For purposes of this definition, “control” includes the right to grant patent sublicenses in a manner consistent with the requirements of this License. Each contributor grants you a non-exclusive, worldwide, royaltyfree patent license under the contributor’s essential patent claims, to make, use, sell, offer for sale, import and otherwise run, modify and propagate the contents of its contributor version.
In the following three paragraphs, a “patent license” is any express agreement or commitment, however denominated, not to enforce a patent (such as an express permission to practice a patent or covenant not to sue for patent infringement). To “grant” such a patent license to a party means to make such an agreement or commitment not to enforce a patent against the party. If you convey a covered work, knowingly relying on a patent license, and the Corresponding Source of the work is not available for anyone to copy, free of charge and under the terms of this License, through a publicly available network server or other readily accessible means, then you must either (1) cause the Corresponding Source to be so available, or (2) arrange to deprive yourself of the benefit of the patent license for this particular work, or (3) arrange, in a manner consistent with the requirements of this License, to extend the patent license to downstream recipients. “Knowingly relying” means you have actual knowledge that, but for the patent license, your conveying the covered work in a country, or your recipient’s use of the covered work in a country, would infringe one or more identifiable patents in that country that you have reason to believe are valid. If, pursuant to or in connection with a single transaction or arrangement, you convey, or propagate by procuring conveyance of, a covered work, and grant a patent license to some of the parties receiving the covered work authorizing them to use, propagate, modify or convey a specific copy of the covered work, then the patent license you grant is automatically extended to all recipients of the covered work and works based on it. A patent license is “discriminatory” if it does not include within the scope of its coverage, prohibits the exercise of, or is conditioned on the non-exercise of one or more of the rights that are specifically granted under this License. You may not convey a covered work if you are a party to an arrangement with a third party that is in the business of distributing software, under which you make payment to the third party based on the extent of your activity of conveying the work, and under which the third party grants, to any of the parties who would receive the covered work from you, a discriminatory patent license
(a) in connection with copies of the covered work conveyed by you (or copies made from those copies), or
(b) primarily for and in connection with specific products or compilations that contain the covered work, unless you entered into that arrangement, or that patent license was granted, prior to 28 March 2007. Nothing in this License shall be construed as excluding or limiting any implied license or other defenses to infringement that may otherwise be available to you under applicable patent law.
12. No Surrender of Others' Freedom.
If conditions are imposed on you (whether by court order, agreement or otherwise) that contradict the conditions of this License, they do not excuse you from the conditions of this License. If you cannot convey a covered work so as to satisfy simultaneously your obligations under this License and any other pertinent obligations, then as a consequence you may not convey it at all. For example, if you agree to terms that obligate you to collect a royalty for further conveying from those to whom you convey the Program, the only way you could satisfy both those terms and this License would be to refrain entirely from conveying the Program.
13. Use with the GNU Affero General Public License.
Notwithstanding any other provision of this License, you have permission to link or combine any covered work with a work licensed under version 3 of the GNU Affero General Public License into a single combined work, and to convey the resulting work. The terms of this License will continue to apply to the part which is the covered work, but the special requirements of the GNU Affero General Public License, section 13, concerning interaction through a network will apply to the combination as such.
14. Revised Versions of this License.
The Free Software Foundation may publish revised and/or new versions of the GNU General Public License from time to time. Such new versions will be similar in spirit to the present version, but may differ in detail to address new problems or concerns.
Each version is given a distinguishing version number. If the Program specifies that a certain numbered version of the GNU General Public License “or any later version” applies to it, you have the option of following the terms and conditions either of that numbered version or of any later version published by the Free Software Foundation. If the Program does not specify a version number of the GNU General Public License, you may choose any version ever published by the Free Software Foundation. If the Program specifies that a proxy can decide which future versions of the GNU General Public License can be used, that proxy’s public statement of acceptance of a version permanently authorizes you to choose that version for the Program. Later license versions may give you additional or different permissions. However, no additional obligations are imposed on any author or copyright holder as a result of your choosing to follow a later version.
15. Disclaimer of Warranty.
THERE IS NO WARRANTY FOR THE PROGRAM, TO THE EXTENT PERMITTED BY APPLICABLE LAW. EXCEPT WHEN OTHERWISE STATED IN WRITING THE COPYRIGHT HOLDERS AND/OR OTHER PARTIES PROVIDE THE PROGRAM "AS IS" WITHOUT WARRANTY OF ANY KIND, EITHER EXPRESSED OR IMPLIED, INCLUDING, BUT NOT LIMITED TO, THE IMPLIED WARRANTIES OF MERCHANTABILITY AND FITNESS FOR A PARTICULAR PURPOSE. THE ENTIRE RISK AS TO THE QUALITY AND PERFORMANCE OF THE PROGRAM IS WITH YOU. SHOULD THE PROGRAM PROVE DEFECTIVE, YOU ASSUME THE COST OF ALL NECESSARY SERVICING, REPAIR OR CORRECTION.
16. Limitation of Liability.
IN NO EVENT UNLESS REQUIRED BY APPLICABLE LAW OR AGREED TO IN WRITING WILL ANY COPYRIGHT HOLDER, OR ANY OTHER PARTY WHO MODIFIES AND/ OR CONVEYS THE PROGRAM AS PERMITTED ABOVE, BE LIABLE TO YOU FOR DAMAGES, INCLUDING ANY GENERAL, SPECIAL, INCIDENTAL OR CONSEQUENTIAL DAMAGES ARISING OUT OF THE USE OR INABILITY TO USE THE PROGRAM (INCLUDING BUT NOT LIMITED TO LOSS OF DATA OR DATA BEING RENDERED INACCURATE OR LOSSES SUSTAINED BY YOU OR THIRD PARTIES OR A FAILURE OF THE PROGRAM TO OPERATE WITH ANY OTHER PROGRAMS), EVEN IF SUCH HOLDER OR OTHER PARTY HAS BEEN ADVISED OF THE POSSIBILITY OF SUCH DAMAGES.
17. Interpretation of Sections 15 and 16.
If the disclaimer of warranty and limitation of liability provided above cannot be given local legal effect according to their terms, reviewing courts shall apply local law that most closely approximates an absolute waiver of all civil liability in connection with the Program, unless a warranty or assumption of liability accompanies a copy of the Program in return for a fee.
The OpenSSL toolkit stays under a dual license, i.e. both the conditions of the OpenSSL License and the original SSLeay license apply to the toolkit.
See below for the actual license texts. Actually both licenses are BSD-style Open Source licenses. In case of any license issues related to OpenSSL please contact openssl-core@openssl.org.
Component Name License URL
openssl-1.0.1g OpenSSL Combined License http://www.openssl.org/source
Copyright (c) 1998-2011 The OpenSSL Project. All rights reserved.
Redistribution and use in source and binary forms, with or without modification, are permitted provided that the following conditions are met:
- Redistributions of source code must retain the above copyright notice, this list of conditions and the following disclaimer.
- Redistributions in binary form must reproduce the above copyright notice, this list of conditions and the following disclaimer in the documentation and/or other materials provided with the distribution.
- All advertising materials mentioning features or use of this software must display the following acknowledgment: "This product includes software developed by the OpenSSL Project for use in the OpenSSL Toolkit. (http://www.openssl.org/)
- The names "OpenSSL Toolkit" and "OpenSSL Project" must not be used to endorse or promote products derived from this software without prior written permission. For written permission, please contact openssl-core@openssl.org.
- Products derived from this software may not be called "OpenSSL" nor may "OpenSSL" appear in their names without prior written permission of the OpenSSL Project.
- Redistributions of any form whatsoever must retain the following acknowledgment: "This product includes software developed by the OpenSSL Project for use in the OpenSSL Toolkit (http://www.openssl.org/)"
THIS SOFTWARE IS PROVIDED BY THE OpenSSL PROJECT "AS IS" AND ANY EXPRESSED OR IMPLIED WARRANTIES, INCLUDING, BUT NOT LIMITED TO, THE IMPLIED WARRANTIES OF MERCHANTABILITY AND FITNESS FOR A PARTICULAR PURPOSE ARE DISCLAIMED. IN NO EVENT SHALL THE OpenSSL PROJECT OR ITS CONTRIBUTORS BE LIABLE FOR ANY DIRECT, INDIRECT, INCIDENTAL, SPECIAL, EXEMPLARY, OR CONSEQUENTIAL DAMAGES (INCLUDING, BUT NOT LIMITED TO, PROCUREMENT OF SUBSTITUTE GOODS OR SERVICES; LOSS OF USE, DATA, OR PROFITS; OR BUSINESS INTERRUPTION) HOWEVER CAUSED AND ON ANY THEORY OF LIABILITY, WHETHER IN CONTRACT, STRICT LIABILITY, OR TORT (INCLUDING NEGLIGENCE OR OTHERWISE) ARISING IN ANY WAY OUT OF THE USE OF THIS SOFTWARE, EVEN IF ADVISED OF THE POSSIBILITY OF SUCH DAMAGE.
This product includes cryptographic software written by Eric Young(eay@cryptsoft.com). This product includes software written by Tim Hudson (tjh@cryptsoft.com).
Original SSLeay License
Copyright (C) 1995-1998 Eric Young (eay@cryptsoft.com) All rights reserved.
This package is an SSL implementation written by Eric Young (eay@cryptsoft.com).
The implementation was written so as to conform with Netscapes SSL.
This library is free for commercial and non-commercial use as long as the following conditions are aheared to. The following conditions apply to all code found in this distribution, be it the RC4, RSA, Ihash, DES, etc., code; not just the SSL code. The SSL documentation included with this distribution is covered by the same copyright terms except that the holder is Tim Hudson (tjh@cryptsoft.com).
Copyright remains Eric Young's, and as such any Copyright notices in the code are not to be removed. If this package is used in a product, Eric Young should be given attribution as the author of the parts of the library used. This can be in the form of a textual message at program startup or in documentation (online or textual) provided with the package. Redistribution and use in source and binary forms, with or without modification, are permitted provided that the following conditions are met:
- Redistributions of source code must retain the copyright notice, this list of conditions and the following disclaimer.
- Redistributions in binary form must reproduce the above copyright notice, this list of conditions and the following disclaimer in the documentation and/or other materials provided with the distribution.
- All advertising materials mentioning features or use of this software must display the following acknowledgement: "This product includes cryptographic software written by Eric Young (eay@cryptsoft.com)" The word 'cryptographic' can be left out if the routines from the library being used are not cryptographic related :-).
- If you include any Windows specific code (or a derivative thereof) from the apps directory (application code) you must include an acknowledgement: "This product includes software written by Tim Hudson (tjh@cryptsoft.com)"
THIS SOFTWARE IS PROVIDED BY ERIC YOUNG "AS IS" AND ANY EXPRESS OR IMPLIED WARRANTIES, INCLUDING, BUT NOT LIMITED TO, THE IMPLIED WARRANTIES OF MERCHANTABILITY AND FITNESS FOR A PARTICULAR PURPOSE ARE DISCLAIMED. IN NO EVENT SHALL THE AUTHOR OR CONTRIBUTORS BE LIABLE FOR ANY DIRECT, INDIRECT, INCIDENTAL, SPECIAL, EXEMPLARY, OR CONSEQUENTIAL DAMAGES (INCLUDING, BUT NOT LIMITED TO, PROCUREMENT OF SUBSTITUTE GOODS OR SERVICES; LOSS OF USE, DATA, OR PROFITS; OR BUSINESS INTERRUPTION) HOWEVER CAUSED AND ON ANY THEORY OF LIABILITY, WHETHER IN CONTRACT, STRICT LIABILITY, OR TORT (INCLUDING NEGLIGENCE OR OTHERWISE) ARISING IN ANY WAY OUT OF THE USE OF THIS SOFTWARE, EVEN IF ADVISED OF THE POSSIBILITY OF SUCH DAMAGE.
The licence and distribution terms for any publicly available version or derivative of this code cannot be changed. i.e. this code cannot simply be copied and put under another distribution licence [including the GNU Public Licence.]
Some software components of this product incorporate source code covered under the BSD license as follows.
Component Name License URL
| net-snmp-5.7.1 | BSD | http://www.net-snmp.org/about/license.html |
| pcre-8.20 | BSD | |
| openssh-5.9p1 | BSD | |
| libcap-1.2.1 | BSD 2.0 | http://www.kernel.org/pub/linux/libs/security/linux-privs/libcap2 |
| lighttpd-1.4.35 | BSD 2.0 | http://www.opensource.org/licenses/bsd-license.html |
| Game-ws | BSD 2.0 | |
| MiniUPnP Project Client | BSD 2.0 | |
| pppd-2.4.5 | BSD 2.0 | http://opensource.org/licenses/BSD-3-Clause |
lighttpd is a secure, fast, compliant, and very flexible webserver that has been optimized for high-performance environments. It has a very low memory footprint compared to other webservers and takes care of cpuload. Its advanced feature-set (FastCGI, CGI, Auth, Output-Compression, URL-Rewriting and many more) make lighttpd the perfect webserver-software for every server that suffers load problems. Simple Network Management Protocol (SNMP) is an Internetstandard protocol for managing devices on IP networks. It is used mostly in network management systems to monitor the devices attached to the network for conditions that need administrative attention. Net-SNMP is a suite of applications used to implement SNMP v1, SNMP v2c and SNMP v3 using both IPv4 and IPv6. For more additional information, send email to help.cctv@samsung.com.
Copyright (C) 2004, Kneschke, incremental
All rights reserved.
Redistribution and use in source and binary forms, with or without modification, are permitted provided that the following conditions are met :
- Redistributions of source code must retain the above copyright notice, this list of conditions and the following disclaimer.
- Redistributions in binary form must reproduce the above copyright notice, this list of conditions and the following disclaimer in the documentation and/or other materials provided with the distribution.
- Neither the name of the 'incremental' nor the names of its contributors may be used to endorse or promote products derived from this software without specific prior written permission.
THIS SOFTWARE IS PROVIDED BY THE COPYRIGHT HOLDERS AND CONTRIBUTORS "AS IS" AND ANY EXPRESS OR IMPLIED WARRANTIES, INCLUDING, BUT NOT LIMITED TO, THE IMPLIED WARRANTIES OF MERCHANTABILITY AND FITNESS FOR A PARTICULAR PURPOSE ARE DISCLAIMED. IN NO EVENT SHALL THE COPYRIGHT OWNER OR CONTRIBUTORS BE LIABLE FOR ANY DIRECT, INDIRECT, INCIDENTAL, SPECIAL, EXEMPLARY, OR CONSEQUENTIAL DAMAGES (INCLUDING, BUT NOT LIMITED TO, PROCUREMENT OF SUBSTITUTE GOODS OR SERVICES; LOSS OF USE, DATA, OR PROFITS; OR BUSINESS INTERRUPTION) HOWEVER CAUSED AND ON ANY THEORY OF LIABILITY, WHETHER IN CONTRACT, STRICT LIABILITY, OR TORT (INCLUDING NEGLIGENCE OR OTHERWISE) ARISING IN ANY WAY OUT OF THE USE OF THIS SOFTWARE, EVEN IF ADVISED OF THE POSSIBILITY OF SUCH DAMAGE.
Copyright (c) 1998-2001 University College London
All rights reserved.
Redistribution and use in source and binary forms, with or without modification, is permitted provided that the following conditions are met :
- Redistributions of source code must retain the above copyright notice, this list of conditions and the following disclaimer.
- Redistributions in binary form must reproduce the above copyright notice, this list of conditions and the following disclaimer in the documentation and/or other materials provided with the distribution.
- All advertising materials mentioning features or use of this software must display the following acknowledgement: This product includes software developed by the Computer Science Department at University College London.
- Neither the name of the University nor of the Department may be used to endorse or promote products derived from this software without specific prior written permission.
THIS SOFTWARE IS PROVIDED BY THE AUTHORS AND CONTRIBUTORS "AS IS" AND ANY EXPRESSED OR IMPLIED WARRANTIES, INCLUDING, BUT NOT LIMITED TO, THE IMPLIED WARRANTIES OF MERCHANTABILITY AND FITNESS FOR A PARTICULAR PURPOSE ARE DISCLAIMED. IN NO EVENT SHALL THE AUTHORS OR CONTRIBUTORS BE LIABLE FOR ANY DIRECT, INDIRECT, INCIDENTAL, SPECIAL, EXEMPLARY, OR CONSEQUENTIAL DAMAGES (INCLUDING, BUT NOT LIMITED TO, PROCUREMENT OF SUBSTITUTE GOODS OR SERVICES; LOSS OF USE, DATA, OR PROFITS; OR BUSINESS INTERRUPTION) HOWEVER CAUSED AND ON ANY THEORY OF LIABILITY, WHETHER IN CONTRACT, STRICT LIABILITY, OR TORT (INCLUDING NEGLIGENCE OR OTHERWISE) ARISING IN ANY WAY OUT OF THE USE OF THIS SOFTWARE, EVEN IF ADVISED OF THE POSSIBILITY OF SUCH DAMAGE.
Copyright (c) 1988, 1989, 1990, 1991, 1993, 1994, 1995, 1996 The Regents of the University of California.
All rights reserved.
Redistribution and use in source and binary forms, with or without modification, are permitted provided that the following conditions are met:
- Redistributions of source code must retain the above copyright notice, this list of conditions and the following disclaimer.
-
Redistributions in binary form must reproduce the above copyright notice, this list of conditions and the following disclaimer in the documentation and/or other materials provided with the distribution.
-
Neither the name of the Regents of the University of California nor the names of its contributors may be used to endorse or promote products derived from this software without specific prior written permission.
THIS SOFTWARE IS PROVIDED BY THE COPYRIGHT HOLDERS AND CONTRIBUTORS "AS IS" AND ANY EXPRESS OR IMPLIED WARRANTIES, INCLUDING, BUT NOT LIMITED TO, THE IMPLIED WARRANTIES OF MERCHANTABILITY AND FITNESS FOR A PARTICULAR PURPOSE ARE DISCLAIMED. IN NO EVENT SHALL THE COPYRIGHT OWNER OR CONTRIBUTORS BE LIABLE FOR ANY DIRECT, INDIRECT, INCIDENTAL, SPECIAL, EXEMPLARY, OR CONSEQUENTIAL DAMAGES (INCLUDING, BUT NOT LIMITED TO, PROCUREMENT OF SUBSTITUTE GOODS OR SERVICES; LOSS OF USE, DATA, OR PROFITS; OR BUSINESS INTERRUPTION) HOWEVER CAUSED AND ON ANY THEORY OF LIABILITY, WHETHER IN CONTRACT, STRICT LIABILITY, OR TORT (INCLUDING NEGLIGENCE OR OTHERWISE) ARISING IN ANY WAY OUT OF THE USE OF THIS SOFTWARE, EVEN IF ADVISED OF THE POSSIBILITY OF SUCH DAMAGE.
Copyright (c) 2006, Creative Labs Inc
All rights reserved.
Redistribution and use in source and binary forms, with or without modification, are permitted provided that the following conditions are met:
- Redistributions of source code must retain the above copyright notice, this list of conditions and the following disclaimer.
- Redistributions in binary form must reproduce the above copyright notice, this list of conditions and the following disclaimer in the documentation and/or other materials provided with the distribution.
- Neither the name of the Creative Labs nor the names of its contributors may be used to endorse or promote products derived from this software without specific prior written permission.
THIS SOFTWARE IS PROVIDED BY THE COPYRIGHT HOLDERS AND CONTRIBUTORS "AS IS" AND ANY EXPRESS OR IMPLIED WARRANTIES, INCLUDING, BUT NOT LIMITED TO, THE IMPLIED WARRANTIES OF MERCHANTABILITY AND FITNESS FOR A PARTICULAR PURPOSE ARE DISCLAIMED. IN NO EVENT SHALL THE COPYRIGHT OWNER OR CONTRIBUTORS BE LIABLE FOR ANY DIRECT, INDIRECT, INCIDENTAL, SPECIAL, EXEMPLARY, OR CONSEQUENTIAL DAMAGES (INCLUDING, BUT NOT LIMITED TO, PROCUREMENT OF SUBSTITUTE GOODS OR SERVICES; LOSS OF USE, DATA, OR PROFITS; OR BUSINESS INTERRUPTION) HOWEVER CAUSED AND ON ANY THEORY OF LIABILITY, WHETHER IN CONTRACT, STRICT LIABILITY, OR TORT (INCLUDING NEGLIGENCE OR OTHERWISE) ARISING IN ANY WAY OUT OF THE USE OF THIS SOFTWARE, EVEN IF ADVISED OF THE POSSIBILITY OF SUCH DAMAGE.
Copyright (c) 2005-2012, Thomas BERNARD
All rights reserved.
Redistribution and use in source and binary forms, with or without modification, are permitted provided that the following conditions are met:
- Redistributions of source code must retain the above copyright notice, this list of conditions and the following disclaimer.
-
Redistributions in binary form must reproduce the above copyright notice, this list of conditions and the following disclaimer in the documentation and/or other materials provided with the distribution.
-
Neither the name of Thomas BERNARD nor the names of its contributors may be used to endorse or promote products derived from this software without specific prior written permission.
THIS SOFTWARE IS PROVIDED BY THE COPYRIGHT HOLDERS AND CONTRIBUTORS "AS IS" AND ANY EXPRESS OR IMPLIED WARRANTIES, INCLUDING, BUT NOT LIMITED TO, THE IMPLIED WARRANTIES OF MERCHANTABILITY AND FITNESS FOR A PARTICULAR PURPOSE ARE DISCLAIMED. IN NO EVENT SHALL THE COPYRIGHT OWNER OR CONTRIBUTORS BE LIABLE FOR ANY DIRECT, INDIRECT, INCIDENTAL, SPECIAL, EXEMPLARY, OR CONSEQUENTIAL DAMAGES (INCLUDING, BUT NOT LIMITED TO, PROCUREMENT OF SUBSTITUTE GOODS OR SERVICES; LOSS OF USE, DATA, OR PROFITS; OR BUSINESS INTERRUPTION) HOWEVER CAUSED AND ON ANY THEORY OF LIABILITY, WHETHER IN CONTRACT, STRICT LIABILITY, OR TORT (INCLUDING NEGLIGENCE OR OTHERWISE) ARISING IN ANY WAY OUT OF THE USE OF THIS SOFTWARE, EVEN IF ADVISED OF THE POSSIBILITY OF SUCH DAMAGE.
Various copyrights apply to this package, listed in various separate parts below. Please make sure that you read all the parts.
Part 1: CMU/UCD copyright notice: (BSD like)
Copyright 1989, 1991, 1992 by Carnegie Mellon University Derivative Work - 1996, 1998-2000
Copyright 1996, 1998-2000 The Regents of the University of California
All Rights Reserved
Permission to use, copy, modify and distribute this software and its documentation for any purpose and without fee is hereby granted, provided that the above copyright notice appears in all copies and that both that copyright notice and this permission notice appear in supporting documentation, and that the name of CMU and The Regents of the University of California not be used in advertising or publicity pertaining to distribution of the software without specific written permission.
CMU AND THE REGENTS OF THE UNIVERSITY OF CALIFORNIA DISCLAIM ALL WARRANTIES WITH REGARD TO THIS SOFTWARE, INCLUDING ALL IMPLIED WARRANTIES OF MERCHANTABILITY AND FITNESS. IN NO EVENT SHALL CMU OR THE REGENTS OF THE UNIVERSITY OF CALIFORNIA BE LIABLE FOR ANY SPECIAL, INDIRECT OR CONSEQUENTIAL DAMAGES OR ANY DAMAGES WHATSOEVER RESULTING FROM THE LOSS OF USE, DATA OR PROFITS, WHETHER IN AN ACTION OF CONTRACT, NEGLIGENCE OR OTHER TORTIOUS ACTION, ARISING OUT OF OR IN CONNECTION WITH THE USE OR PERFORMANCE OF THIS SOFTWARE.
Part 2 : Networks Associates Technology, Inc copyright notice (BSD)
Copyright (c) 2001-2003, Networks Associates Technology, Inc
All rights reserved.
Redistribution and use in source and binary forms, with or without modification, are permitted provided that the following conditions are met: yy Redistributions of source code must retain the above copyright notice, this list of conditions and the following disclaimer. yy Redistributions in binary form must reproduce the above copyright notice, this list of conditions and the following disclaimer in the documentation and/or other materials provided with the distribution. yy Neither the name of the Networks Associates Technology, Inc nor the names of its contributors may be used to endorse or promote products derived from this software without specific prior written permission.
THIS SOFTWARE IS PROVIDED BY THE COPYRIGHT HOLDERS AND CONTRIBUTORS "AS IS" AND ANY EXPRESS OR IMPLIED WARRANTIES, INCLUDING, BUT NOT LIMITED TO, THE IMPLIED WARRANTIES OF MERCHANTABILITY AND FITNESS FOR A PARTICULAR PURPOSE ARE DISCLAIMED. IN NO EVENT SHALL THE COPYRIGHT HOLDERS OR CONTRIBUTORS BE LIABLE FOR ANY DIRECT, INDIRECT, INCIDENTAL, SPECIAL, EXEMPLARY, OR CONSEQUENTIAL DAMAGES (INCLUDING, BUT NOT LIMITED TO, PROCUREMENT OF SUBSTITUTE GOODS OR SERVICES; LOSS OF USE, DATA, OR PROFITS; OR BUSINESS INTERRUPTION) HOWEVER CAUSED AND ON ANY THEORY OF LIABILITY, WHETHER IN CONTRACT, STRICT LIABILITY, OR TORT (INCLUDING NEGLIGENCE OR OTHERWISE) ARISING IN ANY WAY OUT OF THE USE OF THIS SOFTWARE, EVEN IF ADVISED OF THE POSSIBILITY OF SUCH DAMAGE.
Part 3: Cambridge Broadband Ltd. copyright notice (BSD)
Portions of this code are copyright (c) 2001-2003, Cambridge Broadband Ltd.
All rights reserved.
Redistribution and use in source and binary forms, with or without modification, are permitted provided that the following conditions are met: yy Redistributions of source code must retain the above copyright notice, this list of conditions and the following disclaimer. yy Redistributions in binary form must reproduce the above copyright notice, this list of conditions and the following disclaimer in the documentation and/or other materials provided with the distribution. yy The name of Cambridge Broadband Ltd. may not be used to endorse or promote products derived from this software without specific prior written permission.
THIS SOFTWARE IS PROVIDED BY THE COPYRIGHT HOLDER "AS IS" AND ANY EXPRESS OR IMPLIED WARRANTIES, INCLUDING, BUT NOT LIMITED TO, THE IMPLIED WARRANTIES OF MERCHANTABILITY AND FITNESS FOR A PARTICULAR PURPOSE ARE DISCLAIMED. IN NO EVENT SHALL THE COPYRIGHT HOLDER BE LIABLE FOR ANY DIRECT, INDIRECT, INCIDENTAL, SPECIAL, EXEMPLARY, OR CONSEQUENTIAL DAMAGES (INCLUDING, BUT NOT LIMITED TO, PROCUREMENT OF SUBSTITUTE GOODS OR SERVICES; LOSS OF USE, DATA, OR PROFITS; OR BUSINESS INTERRUPTION) HOWEVER CAUSED AND ON ANY THEORY OF LIABILITY, WHETHER IN CONTRACT, STRICT LIABILITY, OR TORT (INCLUDING NEGLIGENCE OR OTHERWISE) ARISING IN ANY WAY OUT OF THE USE OF THIS SOFTWARE, EVEN IF ADVISED OF THE POSSIBILITY OF SUCH DAMAGE.
Part 4: Sun Microsystems, Inc. copyright notice (BSD)
Copyright (c) 2003 Sun Microsystems, Inc., 4150 Network
Circle, Santa Clara, California 95054, U.S.A.
All rights reserved.
Use is subject to license terms below. This distribution may include materials developed by third parties. Sun, Sun Microsystems, the Sun logo and Solaris are trademarks or registered trademarks of Sun Microsystems, Inc. in the U.S. and other countries. Redistribution and use in source and binary forms, with or without modification, are permitted provided that the following conditions are met: yy Redistributions of source code must retain the above copyright notice, this list of conditions and the following disclaimer. yy Redistributions in binary form must reproduce the above copyright notice, this list of conditions and the following disclaimer in the documentation and/or other materials provided with the distribution. yy Neither the name of the Sun Microsystems, Inc. nor the names of its contributors may be used to endorse or promote products derived from this software without specific prior written permission.
THIS SOFTWARE IS PROVIDED BY THE COPYRIGHT HOLDERS AND CONTRIBUTORS "AS IS" AND ANY EXPRESS OR IMPLIED WARRANTIES, INCLUDING, BUT NOT LIMITED TO, THE IMPLIED WARRANTIES OF MERCHANTABILITY AND FITNESS FOR A PARTICULAR PURPOSE ARE DISCLAIMED. IN NO EVENT SHALL THE COPYRIGHT HOLDERS OR CONTRIBUTORS BE LIABLE FOR ANY DIRECT, INDIRECT, INCIDENTAL, SPECIAL, EXEMPLARY, OR CONSEQUENTIAL DAMAGES (INCLUDING, BUT NOT LIMITED TO, PROCUREMENT OF SUBSTITUTE GOODS OR SERVICES; LOSS OF USE, DATA, OR PROFITS; OR BUSINESS INTERRUPTION) HOWEVER CAUSED AND ON ANY THEORY OF LIABILITY, WHETHER IN CONTRACT, STRICT LIABILITY, OR TORT (INCLUDING NEGLIGENCE OR OTHERWISE) ARISING IN ANY WAY OUT OF THE USE OF THIS SOFTWARE, EVEN IF ADVISED OF THE POSSIBILITY OF SUCH DAMAGE.
Part 5: Sparta, Inc copyright notice (BSD)
Copyright (c) 2003-2009, Sparta, Inc
All rights reserved.
Redistribution and use in source and binary forms, with or without modification, are permitted provided that the following conditions are met: yy Redistributions of source code must retain the above copyright notice, this list of conditions and the following disclaimer. yy Redistributions in binary form must reproduce the above copyright notice, this list of conditions and the following disclaimer in the documentation and/or other materials provided with the distribution. yy Neither the name of Sparta, Inc nor the names of its contributors may be used to endorse or promote products derived from this software without specific prior written permission.
THIS SOFTWARE IS PROVIDED BY THE COPYRIGHT HOLDERS AND CONTRIBUTORS "AS IS" AND ANY EXPRESS OR IMPLIED WARRANTIES, INCLUDING, BUT NOT LIMITED TO, THE IMPLIED WARRANTIES OF MERCHANTABILITY AND FITNESS FOR A PARTICULAR PURPOSE ARE DISCLAIMED. IN NO EVENT SHALL THE COPYRIGHT HOLDERS OR CONTRIBUTORS BE LIABLE FOR ANY DIRECT, INDIRECT, INCIDENTAL, SPECIAL, EXEMPLARY, OR CONSEQUENTIAL DAMAGES (INCLUDING, BUT NOT LIMITED TO, PROCUREMENT OF SUBSTITUTE GOODS OR SERVICES; LOSS OF USE, DATA, OR PROFITS; OR BUSINESS INTERRUPTION) HOWEVER CAUSED AND ON ANY THEORY OF LIABILITY, WHETHER IN CONTRACT, STRICT LIABILITY, OR TORT (INCLUDING NEGLIGENCE OR OTHERWISE) ARISING IN ANY WAY OUT OF THE USE OF THIS SOFTWARE, EVEN IF ADVISED OF THE POSSIBILITY OF SUCH DAMAGE.
Part 6: Cisco/BUPTNIC copyright notice (BSD)
Copyright (c) 2004, Cisco, Inc and Information Network
Center of Beijing University of Posts and Telecommunications.
All rights reserved.
Redistribution and use in source and binary forms, with or without modification, are permitted provided that the following conditions are met: yy Redistributions of source code must retain the above copyright notice, this list of conditions and the following disclaimer. yy Redistributions in binary form must reproduce the above copyright notice, this list of conditions and the following disclaimer in the documentation and/or other materials provided with the distribution. yy Neither the name of Cisco, Inc, Beijing University of Posts and Telecommunications, nor the names of their contributors may be used to endorse or promote products derived from this software without specific prior written permission.
THIS SOFTWARE IS PROVIDED BY THE COPYRIGHT HOLDERS AND CONTRIBUTORS "AS IS" AND ANY EXPRESS OR IMPLIED WARRANTIES, INCLUDING, BUT NOT LIMITED TO, THE IMPLIED WARRANTIES OF MERCHANTABILITY AND FITNESS FOR A PARTICULAR PURPOSE ARE DISCLAIMED. IN NO EVENT SHALL THE COPYRIGHT HOLDERS OR CONTRIBUTORS BE LIABLE FOR ANY DIRECT, INDIRECT, INCIDENTAL, SPECIAL, EXEMPLARY, OR CONSEQUENTIAL DAMAGES (INCLUDING, BUT NOT LIMITED TO, PROCUREMENT OF SUBSTITUTE GOODS OR SERVICES; LOSS OF USE, DATA, OR PROFITS; OR BUSINESS INTERRUPTION) HOWEVER CAUSED AND ON ANY THEORY OF LIABILITY, WHETHER IN CONTRACT, STRICT LIABILITY, OR TORT (INCLUDING NEGLIGENCE OR OTHERWISE) ARISING IN ANY WAY OUT OF THE USE OF THIS SOFTWARE, EVEN IF ADVISED OF THE POSSIBILITY OF SUCH DAMAGE.
Part 7: Fabasoft R&D Software Software GmbH & Co KG copyright Notice (BSD)
Copyright (c) Fabasoft R&D Software GmbH & Co KG, 2003oss@fabasoft.com
Author: Bernhard Penz
Redistribution and use in source and binary forms, with or without modification, are permitted provided that the following conditions are met: yy Redistributions of source code must retain the above copyright notice, this list of conditions and the following disclaimer. yy Redistributions in binary form must reproduce the above copyright notice, this list of conditions and the following disclaimer in the documentation and/or other materials provided with the distribution. yy The name of Fabasoft R&D Software GmbH & Co KG or any of its subsidiaries, brand or product names may not be used to endorse or promote products derived from this software without specific prior written permission.
THIS SOFTWARE IS PROVIDED BY THE COPYRIGHT HOLDER "AS IS" AND ANY EXPRESS OR IMPLIED WARRANTIES, INCLUDING, BUT NOT LIMITED TO, THE IMPLIED WARRANTIES OF MERCHANTABILITY AND FITNESS FOR A PARTICULAR PURPOSE ARE DISCLAIMED. IN NO EVENT SHALL THE COPYRIGHT HOLDER BE LIABLE FOR ANY DIRECT, INDIRECT, INCIDENTAL, SPECIAL, EXEMPLARY, OR CONSEQUENTIAL DAMAGES (INCLUDING, BUT NOT LIMITED TO, PROCUREMENT OF SUBSTITUTE GOODS OR SERVICES; LOSS OF USE, DATA, OR PROFITS; OR BUSINESS INTERRUPTION) HOWEVER CAUSED AND ON ANY THEORY OF LIABILITY, WHETHER IN CONTRACT, STRICT LIABILITY, OR TORT (INCLUDING NEGLIGENCE OR OTHERWISE) ARISING IN ANY WAY OUT OF THE USE OF THIS SOFTWARE, EVEN IF ADVISED OF THE POSSIBILITY OF SUCH DAMAGE.
Part 8: Apple Inc. copyright notice (BSD)
Copyright (c) 2007 Apple Inc.
All rights reserved.
Redistribution and use in source and binary forms, with or without modification, are permitted provided that the following conditions are met:
- Redistributions of source code must retain the above copyright notice, this list of conditions and the following disclaimer.
- Redistributions in binary form must reproduce the above copyright notice, this list of conditions and the following disclaimer in the documentation and/or other materials provided with the distribution. 3. Neither the name of Apple Inc. ("Apple") nor the names of its contributors may be used to endorse or promote products derived from this software without specific prior written permission.
THIS SOFTWARE IS PROVIDED BY APPLE AND ITS CONTRIBUTORS "AS IS" AND ANY EXPRESS OR IMPLIED WARRANTIES, INCLUDING, BUT NOT LIMITED TO, THE IMPLIED WARRANTIES OF MERCHANTABILITY AND FITNESS FOR A PARTICULAR PURPOSE ARE DISCLAIMED. IN NO EVENT SHALL APPLE OR ITSCONTRIBUTORS BE LIABLE FOR ANY DIRECT, INDIRECT, INCIDENTAL, SPECIAL, EXEMPLARY, OR CONSEQUENTIAL DAMAGES (INCLUDING, BUT NOT LIMITED TO, PROCUREMENT OF SUBSTITUTE GOODS OR SERVICES; LOSS OF USE, DATA, OR PROFITS; OR BUSINESS INTERRUPTION) HOWEVER CAUSED AND ON ANY THEORY OF LIABILITY, WHETHER IN CONTRACT, STRICT LIABILITY, OR TORT (INCLUDING NEGLIGENCE OR OTHERWISE) ARISING IN ANY WAY OUT OF THE USE OF THIS SOFTWARE, EVEN IF ADVISED OF THE POSSIBILITY OF SUCH DAMAGE.
Part 9: ScienceLogic, LLC copyright notice(BSD)
Copyright (c) 2009, ScienceLogic, LLC
All rights reserved.
Redistribution and use in source and binary forms, with or without modification, are permitted provided that the following conditions are met: yy Redistributions of source code must retain the above copyright notice, this list of conditions and the following disclaimer. yy Redistributions in binary form must reproduce the above copyright notice, this list of conditions and the following disclaimer in the documentation and/or other materials provided with the distribution. yy Neither the name of ScienceLogic, LLC nor the names of its contributors may be used to endorse or promote products derived from this software without specific prior written permission.
THIS SOFTWARE IS PROVIDED BY THE COPYRIGHT HOLDERS AND CONTRIBUTORS "AS IS" AND ANY EXPRESS OR IMPLIED WARRANTIES, INCLUDING, BUT NOT LIMITED TO, THE IMPLIED WARRANTIES OF MERCHANTABILITY AND FITNESS FOR A PARTICULAR PURPOSE ARE DISCLAIMED. IN NO EVENT SHALL THE COPYRIGHT HOLDERS OR CONTRIBUTORS BE LIABLE FOR ANY DIRECT, INDIRECT, INCIDENTAL, SPECIAL, EXEMPLARY, OR CONSEQUENTIAL DAMAGES (INCLUDING, BUT NOT LIMITED TO, PROCUREMENT OF SUBSTITUTE GOODS OR SERVICES; LOSS OF USE, DATA, OR PROFITS; OR BUSINESS INTERRUPTION) HOWEVER CAUSED AND ON ANY THEORY OF LIABILITY, WHETHER IN CONTRACT, STRICT LIABILITY, OR TORT (INCLUDING NEGLIGENCE OR OTHERWISE) ARISING IN ANY WAY OUT OF THE USE OF THIS SOFTWARE, EVEN IF ADVISED OF THE POSSIBILITY OF SUCH DAMAGE
Some software components of this product incorporate source code covered under the MIT license as follows
MIT License 2.0
- Acewidget, bettermeans, jquery-ui, libxml, libxml2, Mesa3D-MesaLib,mwEmbed,OpenGL Samples Pack, Wide Studio, xorg-server, dropbear-2012.55, ncurses-5.7
Copyright (c) 2011, The Dojo Foundation
Copyright 2010, AUTHORS.txt (http://jqueryui.com/about)
Dual licensed under the MIT or GPL Version 2 licenses.
- http://jquery.org/license
- http://docs.jquery.com/UI/Widget
Copyright Daniel Veillard
Copyright Igor Zlatovic igor@zlatkovic.com
Copyright Aleksey Sanin
Copyright Gary Pennington Gary.Pennington@uk.sun.com
Copyright Alfred Mickautsch alfred@mickautsch.de
Copyright Bjorn Reese bjorn.reese@systematic.dk
Copyright Joel W. Reed
Copyright William Brack wbrack@mmm.com.hk
Copyright (c) 2007-2010 The Khronos Group Inc.
Copyright Atish Kumar Patra
Copyright (c) 2006 Free Software Foundation, Inc.
Permission is hereby granted, free of charge, to any person obtaining a copy of this software and associated documentation files (the "Software"), to deal in the Software without restriction, including without limitation the rights to use, copy, modify, merge, publish, distribute, sublicense, and/or sell copies of the Software, and to permit persons to whom the Software is furnished to do so, subject to the following conditions:
The above copyright notice and this permission notice shall be included in all copies or substantial portions of the Software.
THE SOFTWARE IS PROVIDED "AS IS", WITHOUT WARRANTY OF ANY KIND, EXPRESS OR IMPLIED, INCLUDING BUT NOT LIMITED TO THE WARRANTIES OF MERCHANTABILITY, FITNESS FOR A PARTICULAR PURPOSE AND NONINFRINGEMENT. IN NO EVENT SHALL THE AUTHORS OR COPYRIGHT HOLDERS BE LIABLE FOR ANY CLAIM, DAMAGES OR OTHER LIABILITY, WHETHER IN AN ACTION OF CONTRACT, TORT OR OTHERWISE, ARISING FROM, OUT OF OR IN CONNECTION WITH THE SOFTWARE OR THE USE OR OTHER DEALINGS IN THE SOFTWARE.
Mozilla Public License
Since we, at Samsung Techwin, used the Mozilla Firefox component without modifying the source code according to the MOZILLA Public license 1.1, we are not obliged to provide the source code of the corresponding component.
- Version 1.1
1. Definitions.
1.0.1. "Commercial Use" means distribution or otherwise making the Covered Code available to a third party.
1.1. "Contributor" means each entity that creates or contributes to the creation of Modifications.
1.2. "Contributor Version" means the combination of the Original Code, prior Modifications used by a Contributor, and the Modifications made by that particular Contributor.
1.3. "Covered Code" means the Original Code or Modifications or the combination of the Original Code and Modifications, in each case including portions thereof.
1.4. "Electronic Distribution Mechanism" means a mechanism generally accepted in the software development community for the electronic transfer of data.
1.5. "Executable" means Covered Code in any form other than Source Code.
1.6. "Initial Developer" means the individual or entity identified as the Initial Developer in the Source Code notice required by Exhibit A.
1.7. "Larger Work" means a work which combines Covered Code or portions thereof with code not governed by the terms of this License.
1.8. "License" means this document.
1.8.1. "Licensable" means having the right to grant, to the maximum extent possible, whether at the time of the initial grant or subsequently acquired, any and all of the rights conveyed herein.
1.9. "Modifications" means any addition to or deletion from the substance or structure of either the Original Code or any previous Modifications. When Covered Code is released as a series of files, a Modification is:
A. Any addition to or deletion from the contents of a file containing Original Code or previous Modifications.
B. Any new file that contains any part of the Original Code or previous Modifications.
1.10. "Original Code" means Source Code of computer software code which is described in the Source Code notice required by Exhibit A as Original Code, and which, at the time of its release under this License is not already Covered Code governed by this License.
1.10.1. "Patent Claims" means any patent claim(s), now owned or hereafter acquired, including without limitation, method, process, and apparatus claims, in any patent Licensable by grantor.
1.11. "Source Code" means the preferred form of the Covered Code for making modifications to it, including all modules it contains, plus any associated interface definition files, scripts used to control compilation and installation of an Executable, or source code differential comparisons against either the Original Code or another well known, available Covered Code of the Contributor's choice. The Source Code can be in a compressed or archival form, provided the appropriate decompression or de-archiving software is widely available for no charge.
1.12. "You" (or "Your") means an individual or a legal entity exercising rights under, and complying with all of the terms of, this License or a future version of this License issued under Section 6.1. For legal entities, "You" includes any entity which controls, is controlled by, or is under common control with You. For purposes of this definition, "control" means (a) the power, direct or indirect, to cause the direction or management of such entity, whether by contract or otherwise, or (b) ownership of more than fifty percent (50%) of the outstanding shares or beneficial ownership of such entity.
2. Source Code License.
2.1. The Initial Developer Grant. The Initial Developer hereby grants You a world-wide, royalty-free, non-exclusive license, subject to third party intellectual property claims:
(a) under intellectual property rights (other than patent or trademark) Licensable by Initial Developer to use, reproduce, modify, display, perform, sublicense and distribute the Original Code (or portions thereof) with or without Modifications, and/or as part of a Larger Work; and
(b) under Patents Claims infringed by the making, using or selling of Original Code, to make, have made, use, practice, sell, and offer for sale, and/or otherwise dispose of the Original Code (or portions thereof).
(c) the licenses granted in this Section 2.1(a) and (b) are effective on the date Initial Developer first distributes Original Code under the terms of this License.
(d) Notwithstanding Section 2.1(b) above, no patent license is granted: 1) for code that You delete from the Original Code; 2) separate from the Original Code; or 3) for infringements caused by: i) the modification of the Original Code or ii) the combination of the Original Code with other software or devices.
2.2. Contributor Grant. Subject to third party intellectual property claims, each Contributor hereby grants You a world-wide, royalty-free, non-exclusive license
(a) under intellectual property rights (other than patent or trademark) Licensable by Contributor, to use, reproduce, modify, display, perform, sublicense and distribute the Modifications created by such Contributor (or portions thereof) either on an unmodified basis, with other Modifications, as Covered Code and/or as part of a Larger Work; and
(b) under Patent Claims infringed by the making, using, or selling of Modifications made by that Contributor either alone and/or in combination with its Contributor Version (or portions of such combination), to make, use, sell, offer for sale, have made, and/or otherwise dispose of: 1) Modifications made by that Contributor (or portions thereof); and 2) the combination of Modifications made by that Contributor with its Contributor Version (or portions of such combination).
(c) the licenses granted in Sections 2.2(a) and 2.2(b) are effective on the date Contributor first makes Commercial Use of the Covered Code.
(d) Notwithstanding Section 2.2(b) above, no patent license is granted: 1) for any code that Contributor has deleted from the Contributor Version; 2) separate from the Contributor Version; 3) for infringements caused by: i) third party modifications of Contributor Version or ii) the combination of Modifications made by that Contributor with other software (except as part of the Contributor Version) or other devices; or 4) under Patent Claims infringed by Covered Code in the absence of Modifications made by that Contributor.
3. Distribution Obligations.
3.1. Application of License. The Modifications which You create or to which You contribute are governed by the terms of this License, including without limitation Section 2.2. The Source Code version of Covered Code may be distributed only under the terms of this License or a future version of this License released under Section 6.1, and You must include a copy of this License with every copy of the Source Code You distribute. You may not offer or impose any terms on any Source Code version that alters or restricts the applicable version of this License or the recipients' rights hereunder. However, You may include an additional document offering the additional rights described in Section 3.5.
3.2. Availability of Source Code. Any Modification which You create or to which You contribute must be made available in Source Code form under the terms of this License either on the same media as an Executable version or via an accepted Electronic Distribution Mechanism to anyone to whom you made an Executable version available; and if made available via Electronic Distribution Mechanism, must remain available for at least twelve (12) months after the date it initially became available, or at least six (6) months after a subsequent version of that particular Modification has been made available to such recipients. You are responsible for ensuring that the Source Code version remains available even if the Electronic Distribution Mechanism is maintained by a third party.
3.3. Description of Modifications. You must cause all Covered Code to which You contribute to contain a file documenting the changes You made to create that Covered Code and the date of any change. You must include a prominent statement that the Modification is derived, directly or indirectly, from Original Code provided by the Initial Developer and including the name of the Initial Developer in (a) the Source Code, and (b) in any notice in an Executable version or related documentation in which You describe the origin or ownership of the Covered Code.
3.4. Intellectual Property Matters
(a) Third Party Claims. If Contributor has knowledge that a license under a third party's intellectual property rights is required to exercise the rights granted by such Contributor under Sections 2.1 or 2.2, Contributor must include a text file with the Source Code distribution titled "LEGAL" which describes the claim and the party making the claim in sufficient detail that a recipient will know whom to contact. If Contributor obtains such knowledge after the Modification is made available as described in Section 3.2, Contributor shall promptly modify the LEGAL file in all copies Contributor makes available thereafter and shall take other steps (such as notifying appropriate mailing lists or newsgroups) reasonably calculated to inform those who received the Covered Code that new knowledge has been obtained.
(b) Contributor APIs. If Contributor's Modifications include an application programming interface and Contributor has knowledge of patent licenses which are reasonably necessary to implement that API, Contributor must also include this information in the LEGAL file.
(c) Representations.
Contributor represents that, except as disclosed pursuant to Section 3.4(a) above, Contributor believes that Contributor's Modifications are Contributor's original creation(s) and/or Contributor has sufficient rights to grant the rights conveyed by this License.
3.5. Required Notices. You must duplicate the notice in Exhibit A in each file of the Source Code. If it is not possible to put such notice in a particular Source Code file due to its structure, then You must include such notice in a location (such as a relevant directory) where a user would be likely to look for such a notice. If You created one or more Modification(s) You may add your name as a Contributor to the notice described in Exhibit A. You must also duplicate this License in any documentation for the Source Code where You describe recipients' rights or ownership rights relating to Covered Code. You may choose to offer, and to charge a fee for, warranty, support, indemnity or liability obligations to one or more recipients of Covered Code. However, You may do so only on Your own behalf, and not on behalf of the Initial Developer or any Contributor. You must make it absolutely clear than any such warranty, support, indemnity or liability obligation is offered by You alone, and You hereby agree to indemnify the Initial Developer and every Contributor for any liability incurred by the Initial Developer or such Contributor as a result of warranty, support, indemnity or liability terms You offer.
3.6. Distribution of Executable Versions. You may distribute Covered Code in Executable form only if the requirements of Section 3.1-3.5 have been met for that Covered Code, and if You include a notice stating that the Source Code version of the Covered Code is available under the terms of this License, including a description of how and where You have fulfilled the obligations of Section 3.2. The notice must be conspicuously included in any notice in an Executable version, related documentation or collateral in which You describe recipients' rights relating to the Covered Code. You may distribute the Executable version of Covered Code or ownership rights under a license of Your choice, which may contain terms different from this License, provided that You are in compliance with the terms of this License and that the license for the Executable version does not attempt to limit or alter the recipient's rights in the Source Code version from the rights set forth in this License. If You distribute the Executable version under a different license You must make it absolutely clear that any terms which differ from this License are offered by You alone, not by the Initial Developer or any Contributor. You hereby agree to indemnify the Initial Developer and every Contributor for any liability incurred by the Initial Developer or such Contributor as a result of any such terms You offer.
3.7. Larger Works. You may create a Larger Work by combining Covered Code with other code not governed by the terms of this License and distribute the Larger Work as a single product. In such a case, You must make sure the requirements of this License are fulfilled for the Covered Code.
4. Inability to Comply Due to Statute or Regulation.
If it is impossible for You to comply with any of the terms of this License with respect to some or all of the Covered Code due to statute, judicial order, or regulation then You must: (a) comply with the terms of this License to the maximum extent possible; and (b) describe the limitations and the code they affect. Such description must be included in the LEGAL file described in Section 3.4 and must be included with all distributions of the Source Code. Except to the extent prohibited by statute or regulation, such description must be sufficiently detailed for a recipient of ordinary skill to be able to understand it.
5. Application of this License.
This License applies to code to which the Initial Developer has attached the notice in Exhibit A and to related Covered Code.
6. Versions of the License.
6.1. New Versions. Netscape Communications Corporation ("Netscape") may publish revised and/or new versions of the License from time to time. Each version will be given a distinguishing version number.
6.2. Effect of New Versions. Once Covered Code has been published under a particular version of the License, You may always continue to use it under the terms of that version. You may also choose to use such Covered Code under the terms of any subsequent version of the License published by Netscape. No one other than Netscape has the right to modify the terms applicable to Covered Code created under this License.
6.3. Derivative Works. If You create or use a modified version of this License (which you may only do in order to apply it to code which is not already Covered Code governed by this License), You must (a) rename Your license so that the phrases "Mozilla", "MOZILLAPL", "MOZPL", "Netscape", "MPL", "NPL" or any confusingly similar phrase do not appear in your license (except to note that your license differs from this License) and (b) otherwise make it clear that Your version of the license contains terms which differ from the Mozilla Public License and Netscape Public License. (Filling in the name of the Initial Developer, Original Code or Contributor in the notice described in Exhibit A shall not of themselves be deemed to be modifications of this License.)
7. DISCLAIMER OF WARRANTY.
COVERED CODE IS PROVIDED UNDER THIS LICENSE ON AN "AS IS" BASIS, WITHOUT WARRANTY OF ANY KIND, EITHER EXPRESSED OR IMPLIED, INCLUDING, WITHOUT LIMITATION, WARRANTIES THAT THE COVERED CODE IS FREE OF DEFECTS, MERCHANTABILITY, FIT FOR A PARTICULAR PURPOSE OR NON-INFRINGEMENT. THE ENTIRE RISK AS TO THE QUALITY AND PERFORMANCE OF THE COVERED CODE IS WITH YOU. SHOULD ANY COVERED CODE PROVE DEFECTIVE IN ANY RESPECT, YOU (NOT THE INITIAL DEVELOPER OR ANY OTHER CONTRIBUTOR) ASSUME THE COST OF ANY NECESSARY SERVICING, REPAIR OR CORRECTION. THIS DISCLAIMER OF WARRANTY CONSTITUTES AN ESSENTIAL PART OF THIS LICENSE. NO USE OF ANY COVERED CODE IS AUTHORIZED HEREUNDER EXCEPT UNDER THIS DISCLAIMER.
8. TERMINATION.
8.1. This License and the rights granted hereunder will terminate automatically if You fail to comply with terms herein and fail to cure such breach within 30 days of becoming aware of the breach. All sublicenses to the Covered Code which are properly granted shall survive any termination of this License. Provisions which, by their nature, must remain in effect beyond the termination of this License shall survive.
8.2. If You initiate litigation by asserting a patent infringement claim (excluding declaratory judgment actions) against Initial Developer or a Contributor (the Initial Developer or Contributor against whom You file such action is referred to as "Participant") alleging that:
(a) such Participant's Contributor Version directly or indirectly infringes any patent, then any and all rights granted by such Participant to You under Sections 2.1 and/or 2.2 of this License shall, upon 60 days notice from Participant terminate prospectively, unless if within 60 days after receipt of notice You either: (i) agree in writing to pay Participant a mutually agreeable reasonable royalty for Your past and future use of Modifications made by such Participant, or (ii) withdraw Your litigation claim with respect to the Contributor Version against such Participant. If within 60 days of notice, a reasonable royalty and payment arrangement are not mutually agreed upon in writing by the parties or the litigation claim is not withdrawn, the rights granted by Participant to You under Sections 2.1 and/or 2.2 automatically terminate at the expiration of the 60 day notice period specified above.
(b) any software, hardware, or device, other than such Participant's Contributor Version, directly or indirectly infringes any patent, then any rights granted to You by such Participant under Sections 2.1(b) and 2.2(b) are revoked effective as of the date You first made, used, sold, distributed, or had made, Modifications made by that Participant.
8.3. If You assert a patent infringement claim against Participant alleging that such Participant's Contributor Version directly or indirectly infringes any patent where such claim is resolved (such as by license or settlement) prior to the initiation of patent infringement litigation, then the reasonable value of the licenses granted by such Participant under Sections 2.1 or 2.2 shall be taken into account in determining the amount or value of any payment or license.
8.4. In the event of termination under Sections 8.1 or 8.2 above, all end user license agreements (excluding distributors and resellers) which have been validly granted by You or any distributor hereunder prior to termination shall survive termination.
9. LIMITATION OF LIABILITY.
UNDER NO CIRCUMSTANCES AND UNDER NO LEGAL THEORY, WHETHER TORT (INCLUDING NEGLIGENCE), CONTRACT, OR OTHERWISE, SHALL YOU, THE INITIAL DEVELOPER, ANY OTHER CONTRIBUTOR, OR ANY DISTRIBUTOR OF COVERED CODE, OR ANY SUPPLIER OF ANY OF SUCH PARTIES, BE LIABLE TO ANY PERSON FOR ANY INDIRECT, SPECIAL, INCIDENTAL, OR CONSEQUENTIAL DAMAGES OF ANY CHARACTER INCLUDING, WITHOUT LIMITATION, DAMAGES FOR LOSS OF GOODWILL, WORK STOPPAGE, COMPUTER FAILURE OR MALFUNCTION, OR ANY AND ALL OTHER COMMERCIAL DAMAGES OR LOSSES, EVEN IF SUCH PARTY SHALL HAVE BEEN INFORMED OF THE POSSIBILITY OF SUCH DAMAGES. THIS LIMITATION OF LIABILITY SHALL NOT APPLY TO LIABILITY FOR DEATH OR PERSONAL INJURY RESULTING FROM SUCH PARTY'S NEGLIGENCE TO THE EXTENT APPLICABLE LAW PROHIBITS SUCH LIMITATION. SOME JURISDICTIONS DO NOT ALLOW THE EXCLUSION OR LIMITATION OF INCIDENTAL OR CONSEQUENTIAL DAMAGES, SO THIS EXCLUSION AND LIMITATION MAY NOT APPLY TO YOU. 10. U.S. GOVERNMENT END USERS.
The Covered Code is a "commercial item," as that term is defined in 48 C.F.R. 2.101 (Oct. 1995), consisting of "commercial computer software" and "commercial computer software documentation," as such terms are used in 48 C.F.R. 12.212 (Sept. 1995). Consistent with 48 C.F.R. 12.212 and 48 C.F.R. 227.7202-1 through 227.7202-4 (June 1995), all U.S. Government End Users acquire Covered Code with only those rights set forth herein.
11. MISCELLANEOUS.
This License represents the complete agreement concerning subject matter hereof. If any provision of this License is held to be unenforceable, such provision shall be reformed only to the extent necessary to make it enforceable. This License shall be governed by California law provisions (except to the extent applicable law, if any, provides otherwise), excluding its conflictof-law provisions. With respect to disputes in which at least one party is a citizen of, or an entity chartered or registered to do business in the United States of America, any litigation relating to this License shall be subject to the jurisdiction of the Federal Courts of the Northern District of California, with venue lying in Santa Clara County, California, with the losing party responsible for costs, including without limitation, court costs and reasonable attorneys' fees and expenses. The application of the United Nations Convention on Contracts for the International Sale of Goods is expressly excluded. Any law or regulation which provides that the language of a contract shall be construed against the drafter shall not apply to this License.
12. RESPONSIBILITY FOR CLAIMS.
As between Initial Developer and the Contributors, each party is responsible for claims and damages arising, directly or indirectly, out of its utilization of rights under this License and You agree to work with Initial Developer and Contributors to distribute such responsibility on an equitable basis. Nothing herein is intended or shall be deemed to constitute any admission of liability.
13. MULTIPLE-LICENSED CODE.
Initial Developer may designate portions of the Covered Code as Multiple-Licensed. Multiple-Licensedmeans that the Initial Developer permits you to utilize portions of the Covered Code under Your choice of the MPL or the alternative licenses, if any, specified by the Initial Developer in the file described in Exhibit A.
EXHIBIT A -Mozilla Public License.
The contents of this file are subject to the Mozilla Public License Version 1.1 (the "License"); you may not use this file except in compliance with the License. You may obtain a copy of the License at http://www.mozilla.org/MPL/Software distributed under the License is distributed on an "AS IS" basis, WITHOUT WARRANTY OF ANY KIND, either express or implied. See the License for the specific language governing rights and limitations under the License.
The Original Code is ____.
The Initial Developer of the Original Code is ____. Portions created by ____ are Copyright (C) ____. All Rights Reserved.
Contributor(s): ____.
Alternatively, the contents of this file may be used under the terms of the ____ license (the [____] License), in which case the provisions of [____] License are applicable instead of those above. If you wish to allow use of your version of this file only under the terms of the [____] License and not to allow others to use your version of this file under the MPL, indicate your decision by deleting the provisions above and replace them with the notice and other provisions required by the [____] License. If you do not delete the provisions above, a recipient may use your version of this file under either the MPL or the [____] License."
[NOTE: The text of this Exhibit A may differ slightly from the text of the notices in the Source Code files of the Original Code. You should use the text of this Exhibit A rather than the text found in the Original Code Source Code for Your Modifications
The software included in this product contains copyrighted software that is licensed under the JPEG license.
- JPEG license
- Code project. Generating Outline OpenGL, Libjpeg
This distribution contains the sixth public release of the Independent JPEG Group's free JPEG software. You are welcome to redistribute this software and to use it for any purpose, subject to the conditions under LEGAL ISSUES, below.
Serious users of this software (particularly those incorporating it into larger programs) should contact IJG at jpeg-info@uunet.uu.net to be added to our electronic mailing list. Mailing list members are notified of updates and have a chance to participate in technical discussions, etc.
This software is the work of Tom Lane, Philip Gladstone, Jim Boucher, Lee Crocker, Julian Minguillon, Luis Ortiz, George Phillips, Davide Rossi, Guido Vollbeding, Ge' Weijers, and other members of the Independent JPEG Group.
IJG is not affiliated with the official ISO JPEG standards committee.
LEGAL ISSUES
In plain English:
- We don't promise that this software works. (But if you find any bugs, please let us know!)
- You can use this software for whatever you want. You don't have to pay us.
- You may not pretend that you wrote this software. If you use it in a program, you must acknowledge somewhere in your documentation that you've used the IJG code.
In legalese:
The authors make NO WARRANTY or representation, either express or implied, with respect to this software, its quality, accuracy, merchantability, or fitness for a particular purpose. This software is provided "AS IS", and you, its user, assume the entire risk as to its quality and accuracy.
This software is copyright (C) 1991-1998, Thomas G. Lane. All Rights Reserved except as specified below.
Permission is hereby granted to use, copy, modify, and distribute this software (or portions thereof) for any purpose, without fee, subject to these conditions:
(1) If any part of the source code for this software is distributed, then this README file must be included, with this copyright and no-warranty notice unaltered; and any additions, deletions, or changes to the original files must be clearly indicated in accompanying documentation.
(2) If only executable code is distributed, then the accompanying documentation must state that "this software is based in part on the work of the Independent JPEG Group".
(3) Permission for use of this software is granted only if the user accepts full responsibility for any undesirable consequences; the authors accept NO LIABILITY for damages of any kind.
These conditions apply to any software derived from or based on the IJG code, not just to the unmodified library. If you use our work, you ought to acknowledge us.
Permission is NOT granted for the use of any IJG author's name or company name in advertising or publicity relating to this software or products derived from it. This software may be referred to only as "the Independent JPEG Group's software".
We specifically permit and encourage the use of this software as the basis of commercial products, provided that all warranty or liability claims are assumed by the product vendor.
ansi2knr.c is included in this distribution by permission of L. Peter Deutsch, sole proprietor of its copyright holder, Aladdin Enterprises of Menlo Park, CA. ansi2knr.c is NOT covered by the above copyright and conditions, but instead by the usual distribution terms of the Free Software Foundation; principally, that you must include source code if you redistribute it. (See the file ansi2knr.c for full details.) However, since ansi2knr.c is not needed as part of any program generated from the IJG code, this does not limit you more than the foregoing paragraphs do.
The Unix configuration script "configure" was produced with GNU Autoconf. It is copyright by the Free Software Foundation but is freely distributable. The same holds for its supporting scripts (config.guess, config.sub, ltconfig, ltmain.sh). Another support script, install-sh, is copyright by M.I.T. but is also freely distributable.
It appears that the arithmetic coding option of the JPEG spec is covered by patents owned by IBM, AT&T, and Mitsubishi. Hence arithmetic coding cannot legally be used without obtaining one or more licenses. For this reason, support for arithmetic coding has been removed from the free JPEG software. (Since arithmetic coding provides only a marginal gain over the unpatented Huffman mode, it is unlikely that very many implementations will support it.) So far as we are aware, there are no patent restrictions on the remaining code.
The IJG distribution formerly included code to read and write GIF files. To avoid entanglement with the Unisys LZW patent, GIF reading support has been removed altogether, and the GIF writer has been simplified to produce "uncompressed GIFs". This technique does not use the LZW algorithm; the resulting GIF files are larger than usual, but are readable by all standard GIF decoders.
We are required to state that
"The Graphics Interchange Format(c) is the Copyright property of CompuServe Incorporated. GIF(sm) is a Service Mark property of CompuServe Incorporated."
- This Product uses the Source Code of T-Kernel under T-License granted by the T-Engine Forum(www.t-engine.org)
T-License [License Agreement for Source Code of T-Kernel]
established by T-Engine Forum
on January 23, 2004
revised on June 17, 2004
revised on December 21, 2006
revised on March 24, 2009
Article 1. Scope of License Agreement
- This License Agreement sets forth copyrights and the terms and conditions of use applicable to the source code of T-Kernel distributed by T-Engine Forum and any derivative work created therefrom.
Article 2. Definition
- "T-Kernel" means a real-time operating system controlled and distributed by T-Engine Forum on behalf of the copyright holder thereof.
- "Source Code" means a source program, including related comments and documentations, for the T-Kernel and the Ported Source Code defined in Article 2.8 which is registered with T-Engine Forum.
- "Hardware-dependent Part" means the part of the Source Code which depends on hardware and needs to be changed when the Source Code is ported and operated on the target hardware, and is designated and separated as such part.
- "Compiler-dependent Part" means the part of the Source Code which depends on compiler and needs to be changed when the Source Code is ported and operated on the target hardware, and is designated and separated as such part.
- "Header File" means the part of the Source Code which contains definitions necessary to develop application programs.
- "T-Engine Hardware" means the hardware which is manufactured in accordance with the T-Engine Hardware specifications or the μT-Engine Hardware specifications issued by T-Engine Forum, and registered with T-Engine Forum.
- "Similar Hardware to T-Engine Hardware" means any hardware (including software which emulates hardware) other than that defined in Article 2.6 above, on which the T-Kernel can be operated.
- "Ported Source Code" means a source program produced from the Source Code by modifying only its Hardware-dependent Part and/or Compiler-dependent Part to enable it to be operated on the T-Engine Hardware or the Similar Hardware to T-Engine Hardware. The Ported Source Code which is registered with T-Engine Forum shall be included in the Source Code.
-
"Modified Source Code" means a source program modified from the Source Code for the purpose of improving its performance, increasing or decreasing its function, and the like. The Ported Source Code shall not be included in the Modified Source Code.
-
"Binary Code" means an executable code form which is created by compiling programs, which include all or part of the Source Code or the Modified Source Code.
- "Derivative Work" means the Modified Source Code or the Binary Code.
- "Embedded Product" means any product which operates with executable code form of the Source Code, the Modified Source Code or the Binary Code loaded on its hardware.
- "End User" means a consumer who uses the Embedded Product.
- "System Developer" means any person who develops the Embedded Product by itself or has a third party develop the same, and provides, whether with or without payment, the End User with the Embedded Product.
- "Distributor of Modification" means any person who produces the Modified Source Code and, whether with or without payment, distributes the same to any third party.
- "Patch for Modification" means a difference, program, system, or the like in order to create the Modified Source Code from the Source Code or the Binary Code thereof.
- "Vicarious Execution of Patch Processing" means vicarious execution service to create the Modified Source Code applying the Patch for Modification to the Source Code or the Binary Code thereof.
- "Source Code User" means a person who uses the Source Code.
-
"Distribution" means any of the following acts:
-
to transmit a work to a large number of specific persons through the Internet communication, broadcasting, and the like;
-
to transmit a work to the general public through the Internet communication, broadcasting, and the like automatically in response to a request from the public; and
-
to distribute a copy of a work to the general public or a large number of specific persons.
Article 3. Copyright
- The copyrights of the Source Code shall be owned by Ken Sakamura.
Article 4. License of Source Code
- As provided for in this Article, T-Engine Forum shall provide, and grant a license to use, the Source Code free of charge to any person who has taken the necessary procedure for registration as prescribed by T-Engine Forum and agreed to the T-License.
- The Source Code shall be distributed exclusively by T-Engine Forum. Any person who obtains the Source Code under Article 4.1 above shall not make any re-Distribution of the Source Code.
-
In accordance with the license granted under Article 4.1 above, the Source Code User may perform the following acts:
-
to copy and/or modify the Source Code provided by T-Engine Forum hereunder for its own research, development and the like.
- to run the Source Code provided by T-Engine Forum hereunder for its own research, development and the like.
- to run the Source Code modified in accordance with the provision of Article 4.3 (1) above for its own research, development and the like.
- to distribute the Binary Code created from the Source Code provided by T-Engine Forum hereunder or from the Source Code modified in accordance with the provision of Article 4.3 (1) above.
- In accordance with the license granted under Article 4.1 above, the System Developer may perform the following acts:
- to perform any and all acts set forth in the Article 4.3 above.
- to develop and manufacture the Embedded Product containing the Binary Code, and, whether with or without payment, provide the End User with the same and make the Binary Code available to the End User on the Embedded Product.
- The Source Code User and the System Developer shall be obligated to give a notice that the Source Code is used, in such a way as separately specified by T-Engine Forum, when they use the Source Code or the Binary Code, or make the Binary Code available for the End User on the Embedded Product.
Article 5. Distribution of Modified Source Code
- Any of A- members of T-Engine Forum may become the Distributor of Modification by obtaining the approval of T-Engine Forum through the registration procedure as prescribed by the Forum provided that only the department of the A- member which has taken the registration procedure may distribute the Modified Source Code in such a way as provided for in this Article as long as it holds the Amembership.
- The Distributor of Modification may create the Modified Source Code based on the Source Code provided by T-Engine Forum and the Patch for Modification to be applied to create such Modified Source Code from the Source Code.
-
The Distributor of Modification shall, prior to the distribution, inform T-Engine Forum of and register a name and description of the Modified Source Code in such a way as specified by T-Engine Forum.
-
The Distributor of Modification shall determine the name of the Modified Source Code subject to the rules separately established by T-Engine Forum and publish an appropriate notice as required by the rules on the Patch for Modification and the Modified Source Code.
- The Distributor of Modification may distribute the Modified Source Code to a third party, whether with or without payment, provided that the Distributor of Modification shall take the necessary measures to prohibit the third party from making the re-Distribution of the Modified Source Code.
- Developer with the Patch for Modification. Provided, however, that the Distributor of Modification shall be obligated to confirm that the System Developer is the Source Code User duly licensed under Article 4.1.
- The Distributor of Modification may perform the Vicarious Execution of Patch Processing for the System Developer.
- The System Developer shall not distribute the Modified Source Code in further modified form to any third party as a stand-alone software product.
- The System Developer may, under the same obligation as imposed in Article 4.5, make the Embedded Product available for the End User through use of the Patch for Modification distributed by the Distributor of Modification or the Derivative Works obtained through the Vicarious Execution of Patch Processing.
Article 6. Distribution and Registration of the Ported Source Code
- The Source Code User and the System Developer may, whether with or without charge, distribute to any third party only the following parts of the Ported Source Code on the T-Engine Hardware or the Similar Hardware to T-Engine Hardware:
- The Hardware-dependent Part and/or Compiler-dependent Part; provided that the Source Code User and the System Developer shall inform T-Engine Forum of, and T-Engine Forum may publish, a method for distributing said Part(s) to third parties.
- The Header File; provided that the Header File shall be distributed together with the Binary Code of the Ported Source Code.
- Any member of T-Engine Forum may request T-Engine Forum to register and distribute, as an original source code for T-Kernel, the Ported Source Code on the T-Engine Hardware or the Similar Hardware to T-Engine Hardware.
-
Any member of T-Engine Forum who requests the distribution mentioned in the preceding paragraph shall accede to the following conditions:
-
The member shall confirm that the object hardware is the T-Engine Hardware or the Similar Hardware to T-Engine Hardware.
- The member shall provide T-Engine Forum with a complete set of operational environment for the object hardware and T-Kernel free of charge when requesting the distribution.
- The member shall submit test results of the Ported Source Code to T-Engine Forum when requesting the distribution.
- In the event that T-Engine Forum accepts the request mentioned in Article 6.2, T-Engine Forum shall register and
distribute the Ported Source Code as the Source Code for T-Kernel. Provided, however, that the Ported Source Code may be treated in the same way as the Modified Source Code until the time of registration hereunder.
- The provision set forth in Article 3 shall apply to the Ported Source Code registered in accordance with this Article.
Article 7. Use for Other Purpose
- Any use of the Source Code, the Modified Source Code or the Ported Source Code other than those stipulated in Articles 4, 5 and 6 shall be subject to the prior approval of T-Engine Forum.
Article 8. Limited Warranty
- T-Engine Forum and the copyright holder of the Source Code warrant that the Source Code does not infringe third party's copyrights. Provided, however, that T-Engine Forum and the copyright holder of the Source Code make no warranty as to the Hardware-dependent Part and/or Compiler-dependent Part set forth in Article 6.2 in the Ported Source Code by any third party.
- Neither T-Engine Forum nor the copyright holder of the Source Code warrants that the Source Code will fit for any particular purpose of the Source Code User.
- Neither T-Engine Forum nor the copyright holder of the Source Code warrants that the Source Code does not infringe any third party's industrial property rights. In no event shall T-Engine Forum and the copyright holder of the Source Code be liable for any dispute which may arise between the Source Code User and a third party in connection with the third party's industrial property rights.
Article 9. Indemnity
- Neither T-Engine Forum nor the copyright holder of the Source Code shall be liable for any damages (including, but not limited to, damages resulting from loss of profit, business interruption, loss of business information or any other pecuniary damage) arising out of use or impossibility of use of the Source Code, even if T-Engine Forum and the copyright holder have been informed of the possibility of such damages.
Article 10. Breach of Agreement
- In case that T-Engine Forum considers that this License Agreement is breached or that the popularization of T-Kernel is obstructed, T-Engine Forum shall take measures to correct such breach or such obstruction, take measures on the ground of copyright infringement, or take any other necessary measures against the breaching person or the obstructing person, regardless of whether or not the said person is a member of T-Engine Forum.
- In case of breach of this License Agreement by a member of T-Engine Forum, T-Engine Forum may take appropriate measures against the member; for example, the member is disqualified from membership, depending on what kind of breach has been committed by it.
- Any legal dispute which may arise in relation to any breach of this License Agreement shall be subject to the exclusive jurisdiction of the Tokyo District Court.
Article 11. Governing Law and Language
- This License Agreement shall be governed by and interpreted under the laws of Japan.
- This License Agreement is executed in both Japanese text and English text provided that the Japanese text shall govern the interpretation and performance of this License Agreement.
Apache License 2.0
Component Name License URL
mDNSResponder_bonjour Apache License 2.0 http://www.apache.org/licenses/LICENSE-2.0
TERMS AND CONDITIONS FOR USE, REPRODUCTION, AND DISTRIBUTION
- Definitions.
"License" shall mean the terms and conditions for use, reproduction, and distribution as defined by Sections 1 through 9 of this document.
"Licensor" shall mean the copyright owner or entity authorized by the copyright owner that is granting the License.
"Legal Entity" shall mean the union of the acting entity and all other entities that control, are controlled by, or are under common control with that entity. For the purposes of this definition, "control" means (i) the power, direct or indirect, to cause the direction or management of such entity, whether by contract or otherwise, or (ii) ownership of fifty percent (50%) or more of the outstanding shares, or (iii) beneficial ownership of such entity.
"You" (or "Your") shall mean an individual or Legal Entity exercising permissions granted by this License. "Source" form shall mean the preferred form for making modifications, including but not limited to software source code, documentation source, and configuration files.
"Object" form shall mean any form resulting from mechanical transformation or translation of a Source form, including but not limited to compiled object code, generated documentation, and conversions to other media types.
"Work" shall mean the work of authorship, whether in Source or Object form, made available under the License, as indicated by a copyright notice that is included in or attached to the work (an example is provided in the Appendix below).
"Derivative Works" shall mean any work, whether in Source or Object form, that is based on (or derived from) the Work and for which the editorial revisions, annotations, elaborations, or other modifications represent, as a whole, an original work of authorship. For the purposes of this License, Derivative Works shall not include works that remain separable from, or merely link (or bind by name) to the interfaces of, the Work and Derivative Works thereof.
"Contribution" shall mean any work of authorship, including the original version of the Work and any modifications or additions to that Work or Derivative Works thereof, that is intentionally submitted to Licensor for inclusion in the Work by the copyright owner or by an individual or Legal Entity authorized to submit on behalf of the copyright owner. For the purposes of this definition, "submitted" means
any form of electronic, verbal, or written communication sent to the Licensor or its representatives, including but not limited to communication on electronic mailing lists, source code control systems, and issue tracking systems that are managed by, or on behalf of, the Licensor for the purpose of discussing and improving the Work, but excluding communication that is conspicuously marked or otherwise designated in writing by the copyright owner as "Not a Contribution." "Contributor" shall mean Licensor and any individual or Legal Entity on behalf of whom a Contribution has been received by Licensor and subsequently incorporated within the Work.
- Grant of Copyright License. Subject to the terms and conditions of this License, each Contributor hereby grants to You a perpetual, worldwide, non-exclusive, no-charge, royalty-free, irrevocable copyright license to reproduce, prepare Derivative Works of, publicly display, publicly perform, sublicense, and distribute the Work and such Derivative Works in Source or Object form.
- Grant of Patent License. Subject to the terms and conditions of this License, each Contributor hereby grants to You a perpetual, worldwide, non-exclusive, no-charge, royaltyfree, irrevocable (except as stated in this section) patent license to make, have made, use, offer to sell, sell, import, and otherwise transfer the Work, where such license applies only to those patent claims licensable by such Contributor that are necessarily infringed by their Contribution(s) alone or by combination of their Contribution(s) with the Work to which such Contribution(s) was submitted. If You institute patent litigation against any entity (including a crossclaim or counterclaim in a lawsuit) alleging that the Work or a Contribution incorporated within the Work constitutes direct or contributory patent infringement, then any patent licenses granted to You under this License for that Work shall terminate as of the date such litigation is filed.
- Redistribution. You may reproduce and distribute copies of the Work or Derivative Works thereof in any medium, with or without modifications, and in Source or Object form, provided that You meet the following conditions:
(a) You must give any other recipients of the Work or Derivative Works a copy of this License; and
(b) You must cause any modified files to carry prominent notices stating that You changed the files; and
(c) You must retain, in the Source form of any Derivative Works that You distribute, all copyright, patent, trademark, and attribution notices from the Source form of the Work, excluding those notices that do not pertain to any part of the Derivative Works; and
(d) If the Work includes a "NOTICE" text file as part of its distribution, then any Derivative Works that You distribute must include a readable copy of the attribution notices contained within such NOTICE file, excluding those notices that do not pertain to any part of the Derivative Works, in at least one of the following places: within a NOTICE text file distributed as part of the Derivative Works; within the Source form or documentation, if provided along with the Derivative Works; or, within a display generated by the Derivative Works, if and wherever such third-party notices normally appear. The contents of the NOTICE file are for informational purposes only and do not modify the License. You may add Your own attribution notices within Derivative Works that You distribute, alongside or as an addendum to the NOTICE text from the Work, provided that such additional attribution notices cannot be construed as modifying the License.
You may add Your own copyright statement to Your modifications and may provide additional or different license terms and conditions for use, reproduction, or distribution of Your modifications, or for any such Derivative Works as a whole, provided Your use, reproduction, and distribution of the Work otherwise complies with the conditions stated in this License.
- Submission of Contributions. Unless You explicitly state otherwise, any Contribution intentionally submitted for inclusion in the Work by You to the Licensor shall be under the terms and conditions of this License, without any additional terms or conditions. Notwithstanding the above, nothing herein shall supersede or modify the terms of any separate license agreement you may have executed with Licensor regarding such Contributions.
- Trademarks. This License does not grant permission to use the trade names, trademarks, service marks, or product names of the Licensor, except as required for reasonable and customary use in describing the origin of the Work and reproducing the content of the NOTICE file.
- Disclaimer of Warranty. Unless required by applicable law or agreed to in writing, Licensor provides the Work (and each Contributor provides its Contributions) on an "AS IS" BASIS, WITHOUT WARRANTIES OR CONDITIONS OF ANY KIND, either express or implied, including, without limitation, any warranties or conditions of TITLE, NONINFRINGEMENT, MERCHANTABILITY, or FITNESS FOR A PARTICULAR PURPOSE. You are solely responsible for determining the appropriateness of using or redistributing the Work and assume any risks associated with Your exercise of permissions under this License.
- Limitation of Liability. In no event and under no legal theory, whether in tort (including negligence), contract, or otherwise, unless required by applicable law (such as deliberate and grossly negligent acts) or agreed to in writing, shall any Contributor be liable to You for damages, including any direct, indirect, special, incidental, or consequential damages of any character arising as a result of this License or out of the use or inability to use the Work (including but not limited to damages for loss of goodwill, work stoppage, computer failure or malfunction, or any and all other commercial damages or losses), even if such Contributor has been advised of the possibility of such damages.
- Accepting Warranty or Additional Liability. While redistributing the Work or Derivative Works thereof, You may choose to offer, and charge a fee for, acceptance of support, warranty, indemnity, or other liability obligations and/or rights consistent with this License. However, in accepting such obligations, You may act only on Your own behalf and on Your sole responsibility, not on behalf of any other Contributor, and only if You agree to indemnify, defend, and hold each Contributor harmless for any liability incurred by, or claims asserted against, such Contributor by reason of your accepting any such warranty or additional liability.
enD of termS anD conDitionS
APPENDIX: How to apply the Apache License to your work.
To apply the Apache License to your work, attach the following boilerplate notice, with the fields enclosed by brackets "[]" replaced with your own identifying information. (Don't include the brackets!) The text should be enclosed in the appropriate comment syntax for the file format. We also recommend that a file or class name and description of purpose be included on the same "printed page" as the copyright notice for easier identification within third-party archives.
Copyright [yyyy] [name of copyright owner]
Licensed under the Apache License, Version 2.0 (the "License"); you may not use this file except in compliance with the License. You may obtain a copy of the License at http://www.apache.org/licenses/LICENSE-2.0
Unless required by applicable law or agreed to in writing, software distributed under the License is distributed on an "AS IS" BASIS, WITHOUT WARRANTIES OR CONDITIONS OF ANY KIND, either express or implied. See the License for the specific language governing permissions and limitations under the License.
This program, "bzip2", the associated library "libbzip2", and all documentation, are copyright (C) 1996-2007 Julian R Seward. All rights reserved.
Component Name License URL
bzip2-1.0.5 Bzip2 http://www.bzip.org/
Redistribution and use in source and binary forms, with or without modification, are permitted provided that the following conditions are met:
- Redistributions of source code must retain the above copyright notice, this list of conditions and the following disclaimer.
- The origin of this software must not be misrepresented; you must not claim that you wrote the original software. If you use this software in a product, an acknowledgment in the product documentation would be appreciated but is not required.
- Altered source versions must be plainly marked as such, and must not be misrepresented as being the original software.
- The name of the author may not be used to endorse or promote products derived from this software without specific prior written permission.
THIS SOFTWARE IS PROVIDED BY THE AUTHOR "AS IS" AND ANY EXPRESS OR IMPLIED WARRANTIES, INCLUDING, BUT NOT LIMITED TO, THE IMPLIED WARRANTIES OF MERCHANTABILITY AND FITNESS FOR A PARTICULAR PURPOSE ARE DISCLAIMED. IN NO EVENT SHALL THE AUTHOR BE LIABLE FOR ANY DIRECT, INDIRECT, INCIDENTAL, SPECIAL, EXEMPLARY, OR CONSEQUENTIAL DAMAGES (INCLUDING, BUT NOT LIMITED TO, PROCUREMENT OF SUBSTITUTE GOODS OR SERVICES; LOSS OF USE, DATA, OR PROFITS; OR BUSINESS INTERRUPTION) HOWEVER CAUSED AND ON ANY THEORY OF LIABILITY, WHETHER IN CONTRACT, STRICT LIABILITY, OR TORT (INCLUDING NEGLIGENCE OR OTHERWISE) ARISING IN ANY WAY OUT OF THE USE OF THIS SOFTWARE, EVEN IF ADVISED OF THE POSSIBILITY OF SUCH DAMAGE.
Julian Seward, jseward@bzip.org
bzip2/libbzip2 version 1.0.5 of 10 December 2007
University of Illinois / NCSA Open Source License
Copyright (c) 1999-2007, The Board of Trustees of the University of Illinois All Rights Reserved.
Component Name License
iperf-2.0.5 University of Illinois / NCSA Open Source
Iperf performance test
Mark Gates
Ajay Tirumala
Jim Ferguson
Jon Dugan
Feng Qin
Kevin Gibbs
John Estabrook
National Laboratory for Applied Network Research
National Center for Supercomputing Applications
University of Illinois at Urbana-Champaign
http://www.ncsa.uiuc.edu
Permission is hereby granted, free of charge, to any person obtaining a copy of this software (lperf) and associated documentation files (the "Software"), to deal in the Software without restriction, including without limitation the rights to use, copy, modify, merge, publish, distribute, sublicense, and/or sell copies of the Software, and to permit persons to whom the Software is furnished to do so, subject to the following conditions:
Redistributions of source code must retain the above copyright notice, this list of conditions and the following disclaimers.
Redistributions in binary form must reproduce the above copyright notice, this list of conditions and the following disclaimers in the documentation and/or other materials provided with the distribution.
Neither the names of the University of Illinois, NCSA, nor the names of its contributors may be used to endorse or promote products derived from this Software without specific prior written permission. THE SOFTWARE IS PROVIDED "AS IS", WITHOUT WARRANTY OF ANY KIND, EXPRESS OR IMPLIED, INCLUDING BUT NOT LIMITED TO THE WARRANTIES OF MERCHANTABILITY, FITNESS FOR A PARTICULAR PURPOSE AND NONINFRINGEMENT. IN NO EVENT SHALL THE CONTRIBUTORS OR COPYRIGHT HOLDERS BE LIABLE FOR ANY CLAIM, DAMAGES OR OTHER LIABILITY, WHETHER IN AN ACTION OF CONTRACT, TORT OR OTHERWISE, ARISING FROM, OUT OF OR IN CONNECTION WITH THE SOFTWARE OR THE USE OR OTHER DEALINGS IN THE SOFTWARE.
The PHP License, version 3.01 Copyright (c) 1999 - 2010 The PHP Group. All rights reserved.
Component Name License URL
php-5.2.17 PHP 3.01 http://www.php.net/distributions
Redistribution and use in source and binary forms, with or without modification, is permitted provided that the following conditions are met:
- Redistributions of source code must retain the above copyright notice, this list of conditions and the following disclaimer.
- Redistributions in binary form must reproduce the above copyright notice, this list of conditions and the following disclaimer in the documentation and/or other materials provided with the distribution.
- The name "PHP" must not be used to endorse or promote products derived from this software without prior written permission. For written permission, please contact group@php.net.
- Products derived from this software may not be called "PHP", nor may "PHP" appear in their name, without prior written permission from group@php.net. You may indicate that your software works in conjunction with PHP by saying "Foo for PHP" instead of calling it "PHP Foo" or "phpfoo"
-
The PHP Group may publish revised and/or new versions of the license from time to time. Each version will be given a distinguishing version number. Once covered code has been published under a particular version of the license, you may always continue to use it under the terms of that version. You may also choose to use such covered code under the terms of any subsequent version of the license published by the PHP Group. No one other than the PHP Group has the right to modify the terms applicable to covered code created under this License.
-
Redistributions of any form whatsoever must retain the following acknowledgment: "This product includes PHP software, freely available from http://www.php.net/software/".
THIS SOFTWARE IS PROVIDED BY THE PHP DEVELOPMENT TEAM "AS IS" AND ANY EXPRESSED OR IMPLIED WARRANTIES, INCLUDING, BUT NOT LIMITED TO, THE IMPLIED WARRANTIES OF MERCHANTABILITY AND FITNESS FOR A PARTICULAR PURPOSE ARE DISCLAIMED. IN NO EVENT SHALL THE PHP DEVELOPMENT TEAM OR ITS CONTRIBUTORS BE LIABLE FOR ANY DIRECT, INDIRECT, INCIDENTAL, SPECIAL, EXEMPLARY, OR CONSEQUENTIAL DAMAGES (INCLUDING, BUT NOT LIMITED TO, PROCUREMENT OF SUBSTITUTE GOODS OR SERVICES; LOSS OF USE, DATA, OR PROFITS; OR BUSINESS INTERRUPTION) HOWEVER CAUSED AND ON ANY THEORY OF LIABILITY, WHETHER IN CONTRACT, STRICT LIABILITY, OR TORT (INCLUDING NEGLIGENCE OR OTHERWISE) ARISING IN ANY WAY OUT OF THE USE OF THIS SOFTWARE, EVEN IF ADVISED OF THE POSSIBILITY OF SUCH DAMAGE.
This software consists of voluntary contributions made by many individuals on behalf of the PHP Group. The PHP Group can be contacted via Email at group@php.net.
For more information on the PHP Group and the PHP project, please see http://www.php.net. PHP includes the Zend Engine, freely available at http://www.zend.com.
zlib / libpng License
This software is provided 'as-is', without any express or implied warranty. In no event will the authors be held liable for any damages arising from the use of this software.
Component Name License URL
zlib-1.2.5 zlib / libpng http://zlib.net/
Copyright (C) 1995-2010 Jean-loup Gailly and Mark Adler
Permission is granted to anyone to use this software for any purpose, including commercial applications, and to alter it and redistribute it freely, subject to the following restrictions:
- The origin of this software must not be misrepresented; you must not claim that you wrote the original software. If you use this software in a product, an acknowledgment in the product documentation would be appreciated but is not required.
-
Altered source versions must be plainly marked as such, and must not be misrepresented as being the original software.
-
This notice may not be removed or altered from any source distribution.
Jean-loup Gailly Mark Adler
jloup@gzip.org madler@alumni.caltech.edu
The data format used by the zlib library is described by RFCs (Request for Comments) 1950 to 1952 in the files http://www.ietf.org/rfc/rfc1950.txt (zlib format), rfc1951.txt (deflate format) and rfc1952.txt (gzip format).

text_image
F© CEThis equipment has been tested and found to comply with the limits for a Class A digital device, pursuant to part 15 of the FCC Rules. These limits are designed to provide reasonable protection against harmful interference when the equipment is operated in a commercial environment. This equipment generates, uses, and can radiate radio frequency energy and, if not installed and used in accordance with the instruction manual, may cause harmful interference to radio communications. Operation of this equipment in a residential area is likely to cause harmful interference in which case the user will be required to correct the interference at his own expense.

Samsung Techwin cares for the environment at all product manufacturing stages, and is taking measures to provide customers with more environmentally friendly products. The Eco mark represents Samsung Techwin's devotion to creating environmentally friendly products, and indicates that the product satisfies the EU RoHS Directive.
natural_image
Simple line drawing of a trash bin with crossed lines indicating no waste or discharge (no text or symbols)Correct Disposal of This Product (Waste Electrical & Electronic Equipment)
(Applicable in the European Union and other European countries with separate collection systems)
This marking on the product, accessories or literature indicates that the product and its electronic accessories (e.g. charger, headset, USB cable) should not be disposed of with other household waste at the end of their working life. To prevent possible harm to the environment or human health from uncontrolled waste disposal, please separate these items from other types of waste and recycle them responsibly to promote the sustainable reuse of material resources.
Household users should contact either the retailer where they purchased this product, or their local government office, for details of where and how they can take these items for environmentally safe recycling.
Business users should contact their supplier and check the terms and conditions of the purchase contract. This product and its electronic accessories should not be mixed with other commercial wastes for disposal.

Correct disposal of batteries in this product
(Applicable in the European Union and other European countries with separate battery return systems.)
This marking on the battery, manual or packaging indicates that the batteries in this product should not be disposed of with other household waste at the end of their working life. Where marked, the chemical symbols Hg, Cd or Pb indicate that the battery contains mercury, cadmium or lead above the reference levels in EC Directive 2006/66. If batteries are not properly disposed of, these substances can cause harm to human health or the environment.
To protect natural resources and to promote material reuse, please separate batteries from other types of waste and recycle them through your local, free battery return system.

SALES NETWORK
SAMSUNG TECHWIN CO., LTD.
6, Pangyo-ro 319beon-gil, Bundang-gu, Seongnam-si, Gyeonggi-do, SEOUL 463-400 Rep. of KOREA
Tel: +82-70-7147-8753, 8764 Fax: +82-31-8018-3740
www.samsungsecurity.com
100 Challenger Rd. Suite 700 Ridgefield Park, NJ 07660
Toll Free : +1-877-213-1222 Direct : +1-201-325-6920
Fax: +1-201-373-0124
www.samsung-security.com
SAMSUNG TECHWIN EUROPE LTD.
2nd Floor, No. 5 The Heights, Brooklands, Weybridge,
Surrey, KT13 ONY, UK
Tel: +44-1932-82-6700 Fax: +44-1932-82-6701
www.samsungsecurity.co.uk