Gift Xpress - Uncategorized DgFlick - Free user manual and instructions
Find the device manual for free Gift Xpress DgFlick in PDF.


| Product Type | Gift design software (non-physical) |
| System Requirements (Windows) | Pentium 4, 2.8 GHz processor or above; 1 GB RAM; 1 GB free disk space; CD/DVD-ROM drive; USB port; Windows XP SP2 / Windows 7 / Windows 8 |
| System Requirements (Mac) | Mac Intel 1 GHz or higher; Mac OS X 10.6.5 Leopard and above; 1 GB RAM; 1 GB free disk space; CD/DVD-ROM drive; USB port |
| Supported Gift Categories | Mug, Conical Mug, Mousepad, T-Shirt, Key-Chain, Cap, Water Bottle, Pillow, Puzzle, Laptop Sleeve, iPhone Cover |
| Included Presets | Over 100 ready-to-use presets and designs |
| Photo Editing Features | Basic filters (BCG, RGB, curve, level, blur, colorize, feather, opacity), crop, rotate |
| Design Customization | Add backgrounds, borders, cliparts, masks, titles; rotate, flip, arrange, group/ungroup objects |
| Export Formats | JPEG, PNG |
| Save Project Format | Proprietary Gift Xpress project file |
| Multilingual Support | Yes, Unicode support; downloadable language dictionaries |
| Online Registration | Enter name, address, serial number; requires internet connection |
| Offline Registration | Generate DgKey, obtain registration key via phone, email, or web |
| Shortcut Keys | Comprehensive set for object manipulation, alignment, zoom, etc. |
| Photo Quality Indicator | Color-coded warnings (yellow = okay, orange = poor, red = unsuitable) |
| Multi-Photo Multi-Gift Creation | Yes, with custom frames and masks |
| Template Sharing (PRO only) | Save and build templates; share via DgFlick website |
| Facebook Integration | Import photos from Facebook; share designs directly |
| Custom Category and Size Creation | Yes, add, edit, delete categories and sizes |
| Undo/Redo | Available with Ctrl+Z / Ctrl+Y (Win) or Command+Z / Command+Y (Mac) |
| Help and Support | Phone: +91-22-29686868 (India), +1-732-543-7676 (US); Email: support@dgflick.com |
Frequently Asked Questions - Gift Xpress DgFlick
User questions about Gift Xpress DgFlick
0 question about this device. Answer the ones you know or ask your own.
Ask a new question about this device
Download the instructions for your Uncategorized in PDF format for free! Find your manual Gift Xpress - DgFlick and take your electronic device back in hand. On this page are published all the documents necessary for the use of your device. Gift Xpress by DgFlick.
USER MANUAL Gift Xpress DgFlick
text_image
Gift xpressUSER MANUAL
Gi Xpress User Manual CONTENTS
| 1. Hello | ||
| 1.1 | Introducon | |
| 1.2 | System Requirements | |
| 2. Opening the Tool Box – Geng Started | ||
| 2.1 | Registraon | |
| 2.1.1 | Online Registraon | |
| 2.1.2 | Oine Registraon | |
| 2.2 | Know Your Soware | |
| 2.2.1 | General Features | |
| 2.2.2 | Controls and Navigaons | |
| 2.2.3 | Shortcut Tools | |
| 2.2.4 | Preferences | |
| 3. Geng Into the Job – Using the Soware | ||
| 3.1 | Predened Categories and Sizes | |
| 3.2 | Creang and Modifying Categories and Sizes | |
| 3.2.1 | Creang a Category and Size | |
| 3.2.2 | Eding a Category and Size | |
| 3.2.3 | Deleng a Category and Size | |
| 3.3 | Creang Your Gi | |
| 3.3.1 | Fast Way of Creang Gi | |
| 3.3.2 | Easy Way of Creang GiReady Page Composion | |
| 3.3.3 | Smart Way of Creang GiThe Tool BarBlank Page Composion | |
| 3.3.4 | Manage Your Photos | |
| 3.4 | How To Create Mul-Photo Mul-Gi? | |
| 3.4.1 | Create Frame and Mask for Mul-Photo Mul-Gi | |
| 3.4.2 | Creang a Category and Size | |
| 3.4.3 | Eding a Category and Size | |
| 3.4.4 | Deleng a Category and Size | |
| 3.4.5 | Creang Your Gi in Mul-Photo Mul-Gi | |
| 3.4.6 | Save, Build and Share Template * | |
| 3.4.7 | Get More, Import and Delete Template | |
| 3.4.8 | Saving and Exporng Mul-Photo Mul-Gi | |
| 3.5 | How to Create Special Design Gis? | |
| 3.5.1 | Create Frame and Templates for Special Design Gi | |
| 3.5.2 | Creang a Category and Size | |
| 3.5.3 | Eding a Category and Size | |
| 3.5.4 | Deleng a Category and Size | |
| 3.5.5 | Creang Your Gi in Special Design Gi | |
| 3.5.6 | Saving and Exporng Special Design Gi | |
| 4. Fine Tuning – Photo Eding | ||
| 4.1 | Basic Filters | |
| 4.2 | Other Tools on Basic Filter PageCorrecon ToolOriginal and Before and Aer ImageSaving the Changes | |
| 5. Nuts and Bolts – Customize Design | ||
| 5.1 | Get More and Import | |
| 5.2 | Save and Build * | |
| 5.3 | Share * | |
| 5.4 | Delete | |
| 6. Job’s Done! – Saving and Exporng | ||
| 6.1 | Saving | |
| 6.2 | Exporng | |
| 6.2.1 | Exporng in JPEG Format | |
| 6.2.2 | Exporng in PNG Format | |
| 7. Open Saved Project | ||
| 8. Troubleshoot | ||
| 9. Support | ||
Note: Topics marked with * are only for PRO Versions users.
Gi Xpress User Manual
1.0 Hello
Congratulaons on buying Gi Xpress! This Manual will guide you on how to use this soware eecvely.
1.1 Introducon
Gi Xpress is a soware where you can design gi in easy way with ready designs provided in the soware. This soware provides various categories of gis like Mug, Conical Mug, Mousepad, T-Shirt, Key-Chain, Cap, Water Bole, Pillow, Puzzle, Laptop Sleeve and i-phone Cover with various sizes.
Choose or make your own design with your own messages and photos of you and your loved ones on it. Your Gi will always stand out, stored for life, seen and shown many mes guaranteed.
1.2 System Requirements
MAC Systems
Mac Intel, min 1 GHz
Mac OS X 10.6.V Leopard and above
1 GB RAM
1 GB free disk space
CD/DVD-ROM drive
USB Port *
Windows Systems
➢ Penum 4, 2.8 GHz Processor and above
1 GB RAM
▶ 1 GB free disk space
CD/DVD-ROM drive
Microso Windows XP (service pack 2) / Microso Windows 7 / Microso Windows 8
USB Port*
2.0 Opening the Tool Box- Geng Started
This secon deals with online and oine registraon process and other tools like shortcuts, preferences and help.
2.1 Registraon
Once you have installed the Gi Xpress soware on your computer, you need to proceed to Registraon. This ensures that all features of the soware are made available to you. Registraon is very easy and the user-friendliness of the soware makes the process quick and simple.
The Process
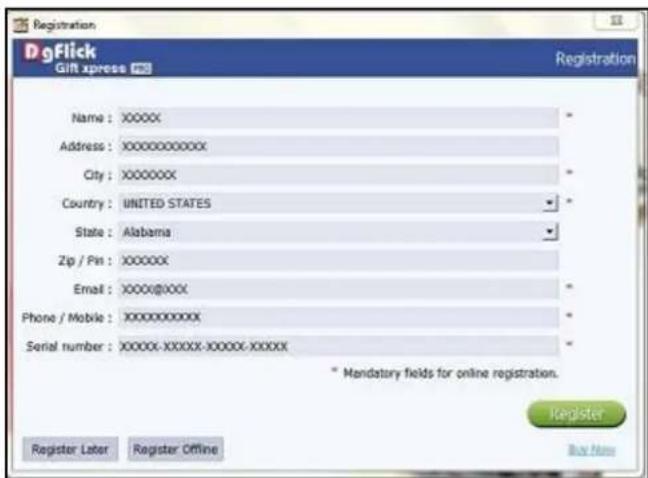
On installaon of Gi Xpress, the Registraon window appears as shown in Image 2.1.0. Relevant details such as the Owner Name, Address, City, Country, State, Zip/Pin, Email and Phone or Mobile Number need to be entered; some elds are mandatory (marked by an asterisk *). Fill in the details and proceed as per the instrucons in this secon.
The soware enables you to complete the registraon process while you are connected to the Internet and also while you are oine. It also allows you to register at a later date.
text_image
DgFlick Gift xpress Registration Name: XXXXX Address:XXXXXXXXX City: XXXXXXXX Country: UNITED STATES State: Alabama Zip / Pin: XXXXXX Email: XXXX@XXX Phone / Mobile:XXXXXXXXX Serial number: XXXXX-XXXXX-XXXXX-XXXXX * Mandatory fields for online registration. Register Register Later Register Offline Buy NowImage 2.1.0: The Registraon Window
2.1.1 Online Registraon
- The screen that you rst see on starng the registraon process (Image 2.1.0) needs to be completed as a rst step. Here is how:
- Enter your details in the relevant elds. These are Name, Address, City, Country, State, Zip/Pin, Email and Phone or Mobile number.
- Fields marked with an asterisk (*) are mandatory and cannot be le incomplete.
- In the last eld- Serial Number (XXXXX-XXXXX-XXXXX-XXXXX), if you are registering the Professional version (PRO) of the soware then the Serial number will be automatically generated in the serial number text box. You will also nd the serial number inside the soware box pack.
OR
If you are registering the Standard version (STD) of the soware, then you will get the Serial Number inside the box as well as behind the box pack, enter this Serial Number in the serial number text box.
- Aer ensuring that all the elds are lled correctly, click on corner.

the lower right-hand
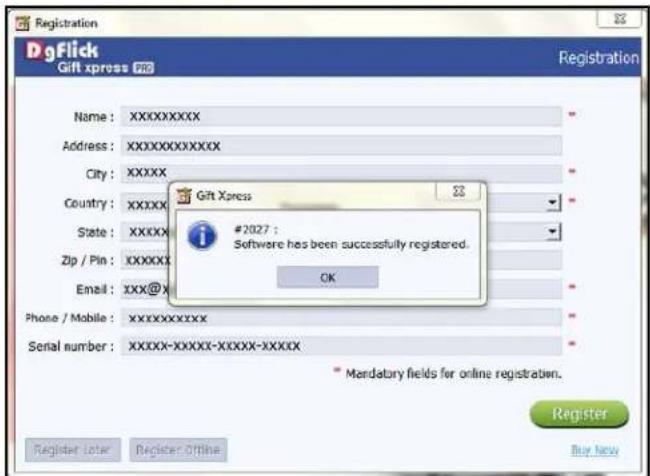
- The message conming compleon of the registraon process appears on the screen (Image 2.1.1.1).
- You are now registered and can use the soware.
text_image
Registration DgFlick Gift xpress PC Registration Name: XXXXXXXXX Address: XXXXXXXXXXXX City: XXXXX Country: XXXXX State: XXXXX Zip / Pin: XXXXXX Email: XXX@X Phone / Mobile: XXXXXXXXXXXX Serial number: XXXXX-XXXXX-XXXXX-XXXXX #2027 : Software has been successfully registered. OK Mandatory fields for online registration. Register Register Later Register Online Buy NewImage 2.1.1.1: Successful compleon of online registraon
2.1.2 Oine Registraon
- If you do not have Internet access on your computer, you can proceed as follows:
- Enter your details in the relevant elds. These are Name, Address, City, Country, State, Zip/Pin, Email and Phone or Mobile number.
- Fields marked with an asterisk (*) are mandatory and cannot be le incomplete.
- In the last eld- Serial Number (XXXXX-XXXXX-XXXXX-XXXXX), if you are registering the Professional version (PRO) of the soware then the Serial number will be automatically generated in the serial number text box. You will also nd the serial number inside the soware box pack.
OR
If you are registering the Standard version (STD) of the soware, then you will get the Serial Number inside the box as well as behind the box pack, enter this Serial Number in the serial number text box.
- Aer ensuring that all the elds are lled correctly, click on 'Register Oine' at the lower le-hand corner of the page, aer which you move on to the next page.
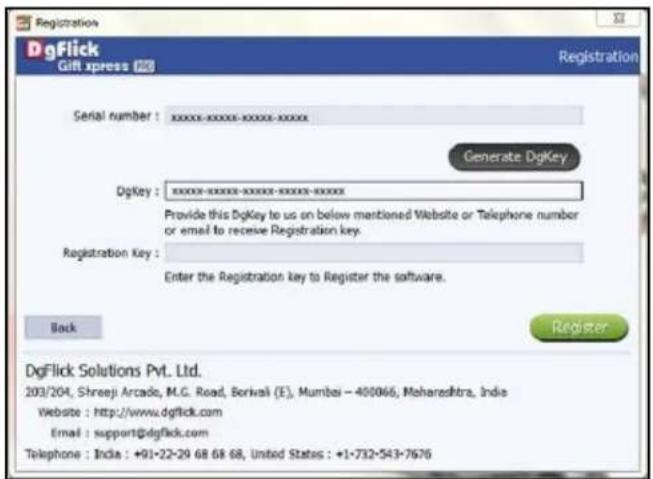
- The next page (Image 2.1.2.1) has boxes for 'Serial number', 'DgKey' and 'Registraon Key'.
- If the serial number (XXXXX-XXXXX-XXXXX-XXXXX) is not already there in the serial number text box, then enter the number provided by the vendor on purchasing the pack or, alternatively, found on the soware box pack.
text_image
Registration DgFlick Gift xpress Registration Serial number : xxxxx-xxxx-xxxx-xxxxx Generate DgKey DgKey : xxxxx-xxxx-xxxx-xxxxx-xxxxx Provide this DgKey to us on below mentioned Website or Telephone number or email to receive Registration key. Registration Key : Enter the Registration key to Register the software. Back Register DgFlick Solutions Pvt. Ltd. 203/204, Shreeji Arcade, M.G. Road, Borival (E), Mumbai – 400066, Maharashtra, India Website : http://www.dgflick.com Email : support@dgflick.com Telephone : India : +91-22-29 68 68 68, United States : +1-732-543-7676Image 2.1.2.1: Registering Oine
- Click on the Generate DgKey buon below the serial number text box.
- The DgKey appears on the screen in the appropriate text box.
- Next, a registraon key is required to complete the process. There are three ways of obtaining this key:
Telephone: Call +91 22 2968 68 68 and the support execuve will provide you with the registraon key corresponding to your DgKey.
○ Email: Email us at support@dgick.com to receive your registraon key via Email.
○ Web: Log on to www.dgick.com to receive the key.
- Once you have your registraon key, enter it in the corresponding text box.
- Click on to octave the soware.
Note: To get a feel of Gi Xpress, You can download the soware from our website www.dgick.com and use as Trial.
Some of the features may not be available in trial version.
OR
Click on the 'Buy Now' buon to buy the complete version of Gi Xpress.
Note: If you are an exisng user, ll in details such as your email id and password and the registraon key is generated for your use.
2.2 Know Your Soware
This secon gives you a basic understanding of Gi Xpress before you actually start working on the soware. Running through this secon will enhance your understanding of the opons available and will help you to make opmal use of the soware.
2.2.1 General Features
Gi Xpress comes with several features, which are discussed in this secon:
- Ready-to-Use Designs and Presets: Gi Xpress has various inbuilt designs. In addition, new downloadable designs are released by DgFlick on a regular basis. Exisng designs can be altered as per your speciaons and saved ^ ; you could also build new designs and share ^ them with or sell them to other Gi Xpress users worldwide. Moreover, more than 100 presets are also available along with the Gi Xpress soware.
- Online Cropping: The online photo crop feature allows you to trim out any part of the source photo that you don't need. You can crop your photo to give it the desired height and width before incorporating it in your gi.
- In-built Standard Gi Sizes: Gi Xpress comes loaded with several in-built gi types predened according to the standard industry prinng and binding specicaons.
- Design Creaon and Alteraon: You can create new designs or alter existing ones for the gi of your choice. You may also create a completely new page design using your own Decor and save the design for future use.
- Photo Eding: Gi Xpress enhances the quality of the photos used.
- Mullingual: Gi Xpress is already loaded with mulple languages. Gi Xpress supports Unicode. DgFlick keeps adding to its list of languages that Gi Xpress works on. You could download the latest dictionary, which may include the language you are looking for. Else, you could add the language of your choice to DgFlick's dictionary for your own use.
- Available on Windows and Mac: Gi Xpress works on both Mac and Windows systems. The updates for both versions are released simultaneously by DgFlick.
- Interactive User Interface: Navigaon through the soware is simplified by user-friendly controls and virtually no training is required before use. Moreover, all control panels are dock able and expandable and can be moved to the posion of your choice.
Note: Some features are available only for the Gi Xpress PRO version Users.
2.2.2 Controls and Navigaon
text_image
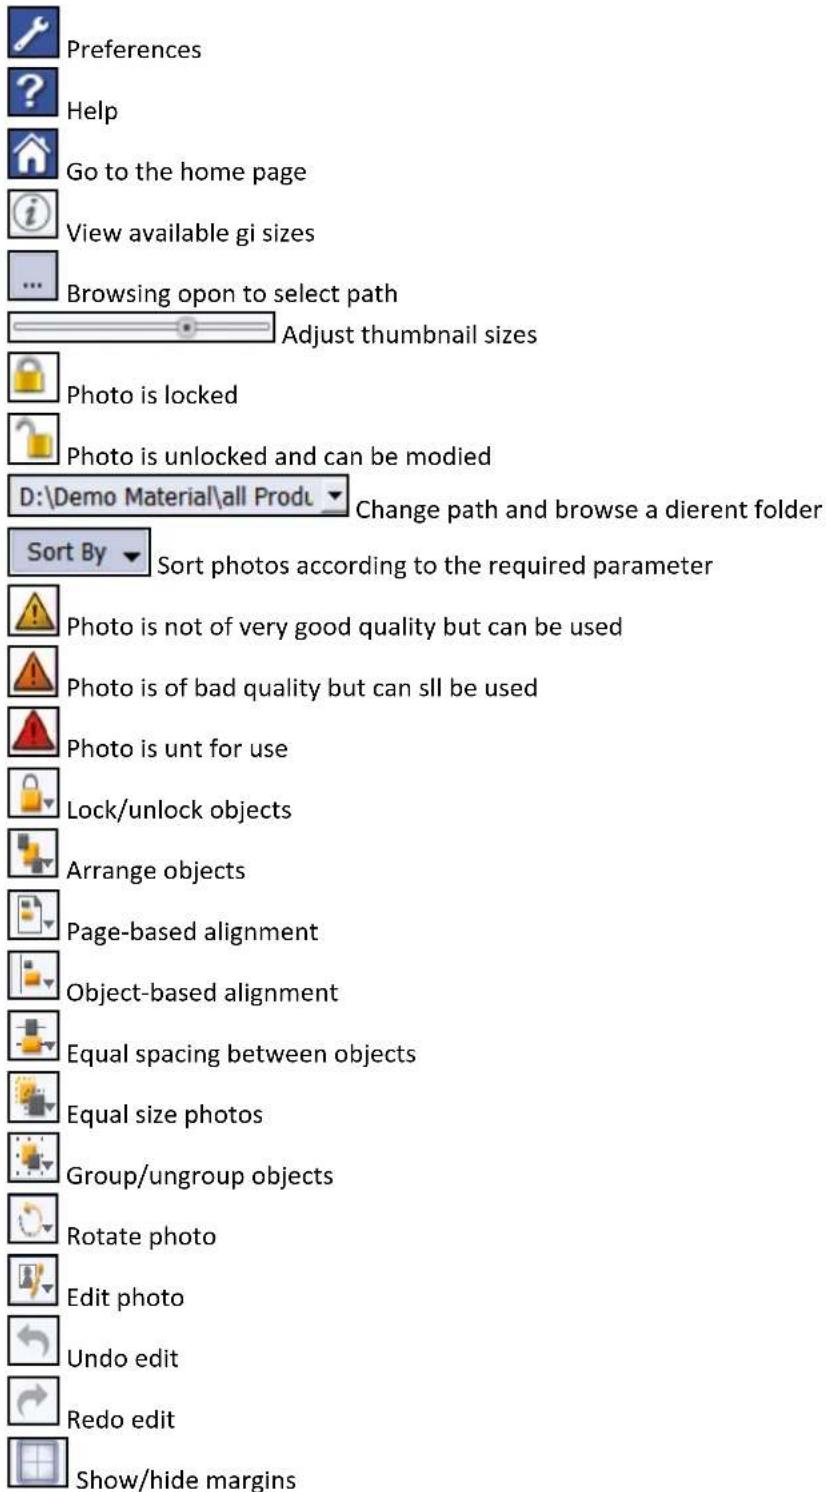
Preferences Help Go to the home page View available gi sizes Browsing opon to select path Adjust thumbnail sizes Photo is locked Photo is unlocked and can be modified D:\Demo Material\all ProdL Change path and browse a dierent folder Sort By Sort photos according to the required parameter Photo is not of very good quality but can be used Photo is of bad quality but can sll be used Photo is unt for use Lock/unlock objects Arrange objects Page-based alignment Object-based alignment Equal spacing between objects Equal size photos Group/ungroup objects Rotate photo Edit photo Undo edit Redo edit Show/hide margins
Show/hide gridlines

Zoom in

Zoom out

Fit to screen

Actual size

Save the work

Save a copy of the changes

Load original image

Reset all

Helps you to move back to the previous page

Helps you go to the next page

border 90°, 180°, 270°

Flip horizontally

Flip vercally

Create a new category for Gi Creaon

Edit a category

Delete a category

Swap photo

Panning
2.2.3 Shortcut Tools
| Gi Xpress – Shortcut Keys | |||
| Object Type | Acons | Windows | Mac |
| All | Move – Le | Le Arrow key | Le Arrow key |
| Move – Right | Right Arrow key | Right Arrow key | |
| Move – Top | Top Arrow key | Top Arrow key | |
| Move – Boom | Boom Arrow key | Boom Arrow key | |
| Move – Le + Snap | CTRL + Le Arrow key | COMMAND + Le Arrow key | |
| Move – Right + Snap | CTRL + Right Arrow key | COMMAND + Right Arrow key | |
| Move – Top + Snap | CTRL + Top Arrow key | COMMAND + Top Arrow key | |
| Move – Boom + Snap | CTRL + Boom Arrow key | COMMAND + Boom Arrow key | |
| Photo | Crop – Zoom In | ALT + ‘+’ | ALT + ‘+’ |
| Crop – Zoom Out | ALT + ‘-’ | ALT + ‘-’ | |
| Crop – Le Pan | ALT + Le Arrow key | ALT + Le Arrow key | |
| Crop – Right Pan | ALT + Right Arrow key | ALT + Right Arrow key | |
| Crop – Top Pan | ALT + Top Arrow key | ALT + Top Arrow key | |
| Crop – Boom Pan | ALT + Boom Arrow key | ALT + Boom Arrow key | |
| Crop – Before | Page Up | Page Up | |
| Crop – Aer | Page Down | Page Down | |
| All | Rotate X Increase | ALT + X | ALT + X |
| Rotate X Decrease | ALT + CTRL + X | ALT + COMMAND + X | |
| Rotate Y Increase | ALT + Y | ALT + Y | |
| Rotate Y Decrease | ALT + CTRL + Y | ALT + COMMAND + Y | |
| Rotate Z Increase | ALT + Z | ALT + Z | |
| Rotate Z Decrease | ALT + CTRL + Z | ALT + COMMAND + Z | |
| All | Arrange Object – Bring To Front | SHIFT + Top Arrow Key | SHIFT + Top Arrow Key |
| Arrange Object – Bring Forward | SHIFT + Right Arrow key | SHIFT + Right Arrow key | |
| Arrange Object – Send to Back | SHIFT + Boom Arrow key | SHIFT + Boom Arrow key | |
| Arrange Object – Send Backward | SHIFT + Le Arrow key | SHIFT + Le Arrow key | |
| All | Align Page based – Top Le | CTRL + 7 | COMMAND + 7 |
| Align Page based – Top Center | CTRL + 8 | COMMAND + 8 | |
| Align Page based – Top Right | CTRL + 9 | COMMAND + 9 | |
| Align Page based – Center Le | CTRL + 4 | COMMAND + 4 | |
| Align Page based – Center | CTRL + 5 | COMMAND + 5 | |
| Align Page based – Center Right | CTRL + 6 | COMMAND + 6 | |
| Align Page based – Boom Le | CTRL + 1 | COMMAND + 1 | |
| Align Page based – Boom Center | CTRL + 2 | COMMAND + 2 | |
| Align Page based – Boom Right | CTRL + 3 | COMMAND + 3 | |
| Align Page based – Top | CTRL + T | COMMAND + T | |
| Align Page based – Boom | CTRL + B | COMMAND + B | |
| Align Page based – Le | CTRL + L | COMMAND + L | |
| Align Page based – Right | CTRL + R | COMMAND + R | |
| All | Align Object based – Top Le | CTRL + SHIFT + 7 | COMMAND + SHIFT + 7 |
| Align Object based – Top Center | CTRL + SHIFT + 8 | COMMAND + SHIFT + 8 | |
| Align Object based – Top Right | CTRL + SHIFT + 9 | COMMAND + SHIFT + 9 | |
| Align Object based - Center Le | CTRL + SHIFT + 4 | COMMAND + SHIFT + 4 | |
| Align Object based - Center | CTRL + SHIFT + 5 | COMMAND + SHIFT + 5 | |
| Align Object based - Center Right | CTRL + SHIFT + 6 | COMMAND + SHIFT + 6 | |
| Align Object based - Boom Le | CTRL + SHIFT + 1 | COMMAND + SHIFT + 1 | |
| Align Object based - Boom Center | CTRL + SHIFT + 2 | COMMAND + SHIFT + 2 | |
| Align Object based - Boom Right | CTRL + SHIFT + 3 | COMMAND + SHIFT + 3 | |
| Align Object based - Top | CTRL + SHIFT + T | COMMAND + SHIFT + T | |
| Align Object based - Boom | CTRL + SHIFT + B | COMMAND + SHIFT + B | |
| Align Object based - Le | CTRL + SHIFT + L | COMMAND + SHIFT + L | |
| Align Object based - Right | CTRL + SHIFT + R | COMMAND + SHIFT + R | |
| All | Equal Spacing Horizontally | CTRL + SHIFT + H | COMMAND + SHIFT + H |
| Equal Spacing Vercally | CTRL + SHIFT + V | COMMAND + SHIFT + V | |
| All | Move Selecon to Next Object | TAB | TAB |
| Move Selecon to Previous Object | SHIFT + TAB | SHIFT + TAB | |
| Add Next Object to current Selecon | CTRL + TAB | COMMAND + TAB | |
| Add Previous Object to current Selecon | CTRL + SHIFT + TAB | COMMAND + SHIFT + TAB | |
| All | Select All Objects on page | CTRL + A | COMMAND + A |
| Cut Object(s) | CTRL + X | COMMAND + X | |
| Copy Object(s) | CTRL + C | COMMAND + C | |
| Paste Object(s) | CTRL + V | COMMAND + V | |
| Delete Object(s) | DEL | DEL | |
| Undo Object(s) | CTRL + Z | COMMAND + Z | |
| Redo Object(s) | CTRL + Y | COMMAND + Y | |
| Show Photo Informaon | CTRL + SHIFT + I | COMMAND + SHIFT + I | |
| All | Increase the size of Object from - Top Le | ALT + 7 | ALT + 7 |
| Increase the size of Object from - Top Center | ALT + 8 | ALT + 8 | |
| Increase the size of Object from - Top Right | ALT + 9 | ALT + 9 | |
| Increase the size of Object from - Center Le | ALT + 4 | ALT + 4 | |
| Increase the size of Object from - Center | ALT + 5 | ALT + 5 | |
| Increase the size of Object from - Center Right | ALT + 6 | ALT + 6 | |
| Increase the size of Object from - Boom Le | ALT + 1 | ALT + 1 | |
| Increase the size of Object from - Boom Center | ALT + 2 | ALT + 2 | |
| Increase the size of Object from - Boom Right | ALT + 3 | ALT + 3 | |
| All | Decrease the size of Object from - Top Le | CTRL + ALT + 7 | COMMAND + ALT + 7 |
| Decrease the size of Object from – Top Center | CTRL + ALT + 8 | COMMAND + ALT + 8 | |
| Decrease the size of Object from – Top Right | CTRL + ALT + 9 | COMMAND + ALT + 9 | |
| Decrease the size of Object from – Center Le | CTRL + ALT + 4 | COMMAND + ALT + 4 | |
| Decrease the size of Object from – Center | CTRL + ALT + 5 | COMMAND + ALT + 5 | |
| Decrease the size of Object from – Center Right | CTRL + ALT + 6 | COMMAND + ALT + 6 | |
| Decrease the size of Object from – Boom Le | CTRL + ALT + 1 | COMMAND + ALT + 1 | |
| Decrease the size of Object from – Boom Center | CTRL + ALT + 2 | COMMAND + ALT + 2 | |
| Decrease the size of Object from – Boom Right | CTRL + ALT + 3 | COMMAND + ALT + 3 | |
| Page | Flip Page composition Horizontally | ALT + H | ALT + H |
| Flip Page composition Vercally | ALT + V | ALT + V | |
| View | Fit to Screen | CTRL + F12 | COMMAND + F12 |
| Actual Size (1:1) | CTRL + SHIFT + F12 | COMMAND + SHIFT + F12 | |
| Zoom In | + | + | |
| Zoom Out | - | - | |
| Screen | Toggle Full Screen | CTRL + SHIFT + F11 | COMMAND + SHIFT + F11 |
2.2.4 Preferences
Gi Xpress allows you great exibility in usages while working on your Gi. You could
- Change to the language of your choice,
- Select the desired Theme for your soware.
- Dock and undock, expand and move the opon panels to the desired locaon.
Aer installaon, click on the Gi Xpress shortcut icon in your specied path to start the soware. The rst screen shows the predened categories.
! For the PRO version, do not forget to insert the dongle into your USB drive.
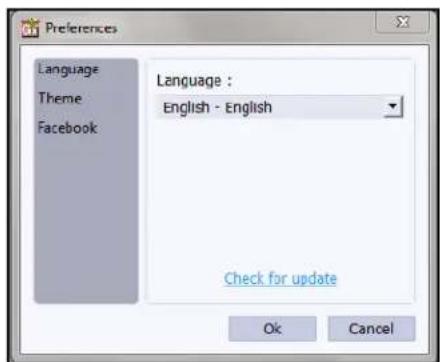
- Clicking on the 'on the top right-hand corner, displays the 'Preferences' window (Image 2.2.4.1).
text_image
Preferences Language Theme Facebook Language : English - English Check for update Ok CancelImage 2.2.4.1: The 'Preferences' window
text_image
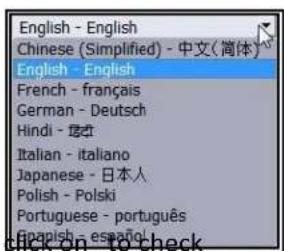
English - English Chinese (Simplified) - 中文(简体) English - English French - français German - Deutsch Hindi - 培立 Italian - italiano Japanese - 日本人 Polish - Polski Portuguese - português Spanish - español
- Choose your preferred language from; for the updated list of languages.
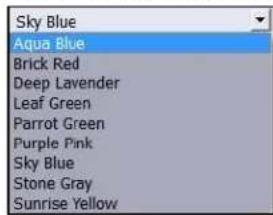
- Select the dierent color in which you want your soware to be displayed from
text_image
Sky Blue Aqua Blue Brick Red Deep Lavender Leaf Green Parrot Green Purple Pink Sky Blue Stone Gray Sunrise Yellowclick on to get more Themes from Dgick website.
- The history which was generated at the me of imporg photos from Facebook will be deleted by clicking on the checkbox from Facebook upon. OR
- If you want to work oine and want to access the photos from Facebook in future which are already accessed then keep the checkbox unchecked.
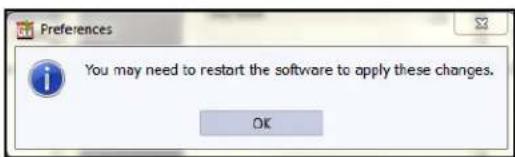
- Clicking on OK will accept your choices but you might need to restart your soware for the changes to take eect. Click on 'OK' when the following dialog box appears:
text_image
Preferences You may need to restart the software to apply these changes. OK- Click on 🔒 to get the help menu. This has a complete list of shortcut keys that you will nd useful while using the soware (refer secon 2.2.3).
- All opon panels can be docked, undocked, expanded or moved to create an interface that gives you maximum working comfort.
3.0 Geng Into The Job – Using The Soware
In previous secon we learnt about soware funconality. Now in this secon we will learn how to use this soware to create Gis. We will see various available categories and sizes and various ways to create gis.
3.1 Predened Categories and Sizes
Gi Xpress is versale soware that lets you go with the ow or use its made-to-standard, predened categories and sizes or create your own gi the way you choose to.
The ready-to-use gi types, which conform to industry standards, come in ten major variants. Each of these categories has mulple size opons and you can choose the size that suits your choice. Besides, these sizes conform to standard prinng industry requirements.
Categories for Gis are as follow:
- Mug: Makes Customized and Personalized gis with inbuilt products such as Tea Mug, Coee Mug, Color inside Mug, Juice Mug, Animal Mug, Lovers Mug, Golden Silver Mug, Glass Mug, Magical Mug, Mirror Mug, Travel Mug, BW Mug, Musical Mug, Radium Mug and Piggy Bank Mug.
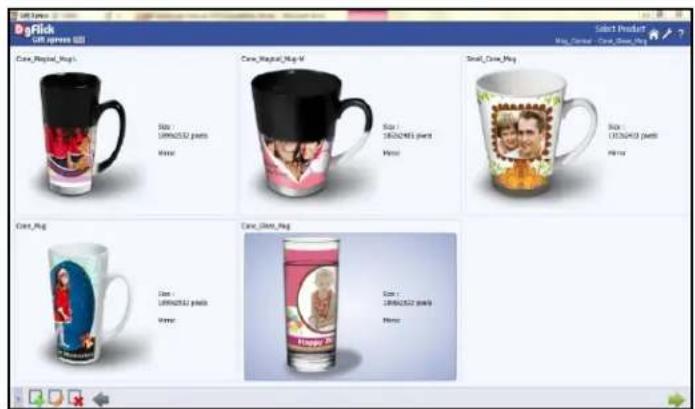
- Conical Mug: Makes Customized and Personalized gis with inbuilt products such as Cone Magical Mug-L, Cone Magical Mug-M, Small Cone Mug, Cone Mug and Cone Glass Mug.
- Mouse pad: Makes Customized and Personalized gis with inbuilt standard product size 2370 X 2778 pixels with inbuilt products such as mousepad and circular mousepad.
- T-Shirt: Makes Customized and Personalized gis with inbuilt standard product size 3000 X 2400 Pixels.
- Key-Chain: Makes Customized and Personalized gis with inbuilt products such as Small Oval Key chain, Big Oval key chain, Rectangle key chain, Heart key chain.
- Cap: Makes Customized and Personalized gis with inbuilt standard product size 600 X 600 Pixels for all product types.
- Water Bole: Makes Customized and Personalized gis with inbuilt standard product size 1243 X 2250 pixels.
- Pillow: Makes Customized and Personalized gis with inbuilt products such as Square Pillow cover in 2400 X 2400 pixels, Heart Pillow cover in 2400 X 2400 pixels and Rectangle Pillow Cover3000 X 2400 pixels.
-
Puzzle: Makes Customized and Personalized gifts with inbuilt product size 2910 X 2310 pixels.
-
Laptop Sleeve: Makes Customized and Personalized gis with inbuilt product size 14 inch in 3140 X 4160 pixels and 17 inch 3800 X 4820 pixels.
-
I-Phone Cover: Makes Customized and Personalized gis with inbuilt standard product size 1350 X 674 pixels
3.2 Creang and Modifying Categories and Sizes
Gi Xpress has a wide variety of predened categories and sizes. However, in case the gi size you have in your mind is not among the standard sizes, you could create your own category and size, edit it or delete it as per your requirement.
3.2.1 Creang a Category and Size
Creang a Category
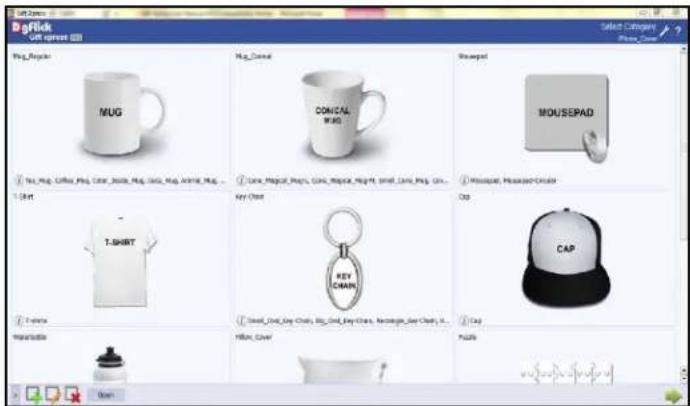
- Click on > at the lower le-hand corner of the screen to view the 'Add', 'Edit' and 'Delete' opons.
- Click on to 'Add' a new category (Image 3.2.1.1) on the 'Select Category' window.
text_image
DogClick Get spread Pick Regular MUG Mug_Dencil CONICAL PAD Mousepad MOUSEPAD T-Shirt T-SHIRT Key Chant KEY CHAIN Small_Out_Key_Chart, Big_Out_Key_Chart, ReLUge_Say_Chart, It... Footbox Hilln_Cover Puzzle Select Cigarettes Plesse Chant Mousepad, Plessech-Cinder Cap CAPImage 3.2.1.1: The 'Select Category' window with the 'Add', 'Edit' and 'Delete' opons
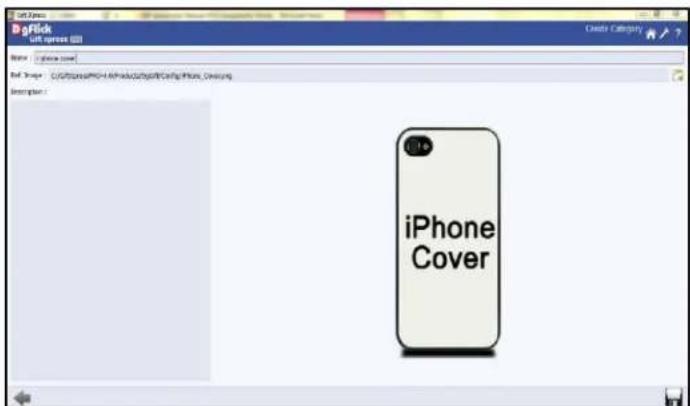
- On the next window – 'Create Category' (Image 3.2.1.2) – ll in the elds corresponding to:
(a) 'Name': The name you want for your new category,
(b) 'Ref. Image': The image you want for your category, clicking on the icon to the right of this eld lets you choose the reference image from the path in which you saved it.

(c) 'Descripon': Give a descripon of the category you are creang.
text_image
iPhone CoverImage 3.2.1.2: The 'Create Category' window
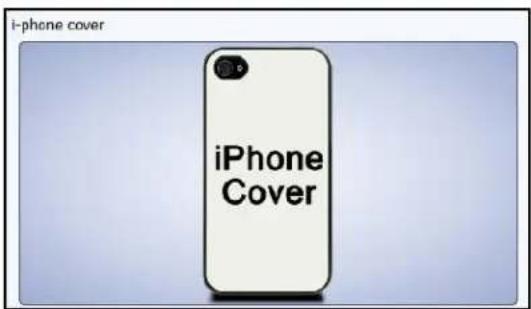
- Click, on the lower right-hand corner to save the category you created (Image 3.2.1.3).
! Leaving either the 'Name' or the 'Ref. Image' eld blank will not allow you to save the category.
text_image
i-phone cover iPhone CoverImage 3.2.1.3: The category created
- The new category is created and can be viewed in 'Select Category' Window.
! At any point during the process, you could click on the back button ← to go back to the previous window. On clicking this buon, you are oered the chance to save/not save your changes or cancel the
'Back' command. You could also click on to go back to the home page.
Adding a Gi Size
To view the gi size under a category, double click on the category. Alternatively, you could select the
category and then click on in the lower right-hand corner.
- Click on to 'Add' a new size on the 'Select Product' window (Image 3.2.1.4).
text_image
DogClick Get screen 100 Select Product Show your ? / ?Image 3.2.1.4: Creang new Size in new Category
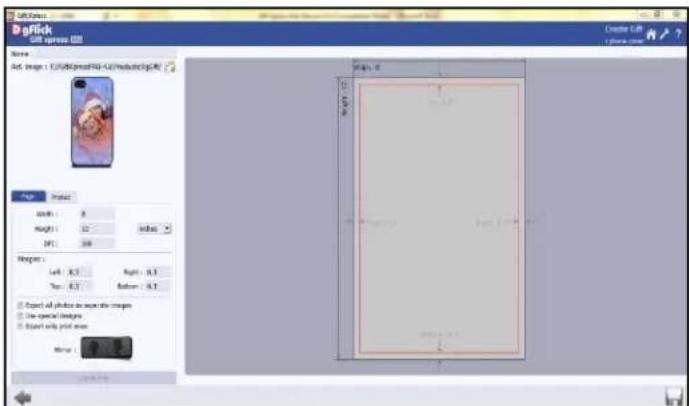
- On the next window: 'Create Gi' (Image 3.2.1.5) – ll in the elds corresponding to
(a) 'Name': The name you want for your new size,
(b) 'Ref. Image': The image you want for your size, clicking on the icon to the right of this eld lets you choose the reference image from the path in which you saved it.
text_image
DigFlick Gift express 023 Name: Set: Image - C:\GIFpress\FD-4\Industic\digFlick Page Model Width: 9 Height: 12 Index DT: 368 Notes: Left: 0.7 Right: 0.7 Bottom: 0.7 □ Export all photos are open to the images. □ Use special images. □ Export only print areas NoneImage 3.2.1.5: The 'Create Gi' window
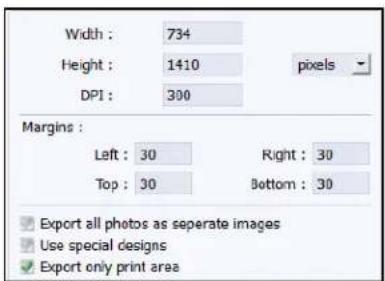
- Fill in the parameters under the 'Page' tab. These are: Width and Height. Margins (Le, Right, Top and Boom). DPI and Units.
- Checking the 'Export all photos as separate images' check box will allow you to export all the images separately.
text_image
Width : 734 Height : 1410 pixels DPI : 300 Margins : Left : 30 Right : 30 Top : 30 Bottom : 30 Export all photos as separate images Use special designs Export only print area- Checking the 'Use Special Designs' check box will allow you to view the designs in design area.
- Check the Export only print area check box to export only the design area.
- Give Mirror eect from .
text_image
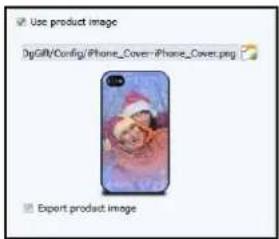
Use product image DgGIR/Config/iPhone_Cover-iPhone_Cover.png Export product image• Dene the product from .
- Check the Use product image check box to insert the over lay image of the product.
- Dene the reference image, clicking on the icon to the right of this eld lets you choose the reference image from the path in which you saved it.
- Check the Export product image check box to export the Over Lay Image of the product.
- You could add your comments by clicking on the 'Comment' buon.
- Click 📋 on the lower le-hand corner to save the size you created.
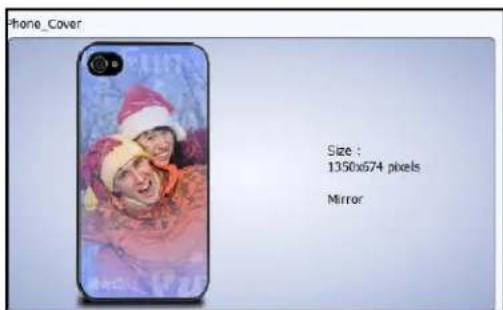
- The new gi size is created and can be viewed in 'Select Category' window (Image 3.2.1.6).
text_image
Phone Cover Size : 1350x674 pixels MirrorImage 3.2.1.6: The new size added
3.2.2 Eding a Category and Size
Eding a Category
- Click on □ at the lower le-hand corner of the screen to view the 'Add', 'Edit' and 'Delete' opons.

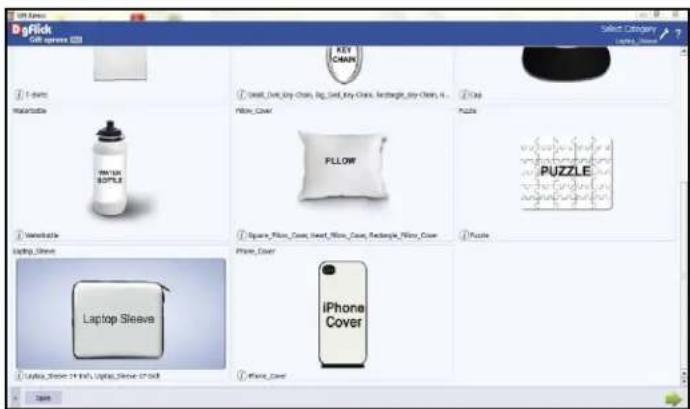
- Aer selecng the category you wish to modify on the 'Select Category' window, (Image 3.2.2.1) click on to 'edit' the category as per your requirements.
text_image
DogClick Dog Express 233 KEY CHAIN Select Category Lives, Save 1. New Habitable WAT LICK BOTTLE 2. Top Pillow, Clover PULLOW Puzzle PUZZLE 1. Square, Pillow, Cover, Heart, Pillow, Cover, Redouble, Pillow, Cover 2. Puzzle Laptop Sleeve iPhone Cover Laptop Sleeve iPhone Cover 1. New Lives, Cover & Live, Light Sleeve & Print SaveImage 3.2.2.1: The 'Select Category' window
- On the next page: 'Edit Category' (Image 3.2.2.2) – you can add your edits to the,
(a) 'Name': Edit the name as per your choice.
(b) 'Ref. Image': Edit the Ref. image as per your choice by clicking on the icon to the right of this eld lets you choose the reference image from the path in which you saved it.
(c) 'Descripon': Give a descripon of the size you are creang.
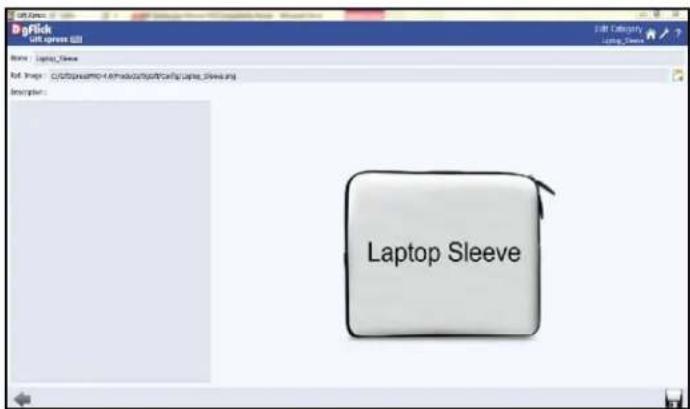
text_image
DGPlick Gift sleeve 3.0 Name: Laptop Sleeve File Image: C:\Users\amc-1\mada\outp\cell\cup\cup\cup\cup\cup\cup\cup\cup\cup\cup\cup\cup\cup\cup\cup\cup\cup\cup\cup\cup\cup\cup\cup\cup\cup\cup\cup\cup\cup\cup\cup\cup\cup\cup\cup\cup\cup\cup\cup\nDescription: Laptop SleeveImage 3.2.2.2: The 'Edit Category' window
- Save the changes by clicking 📄 on the lower right hand corner.
! At any point during the process, you could click on the back buon to go back to the previous window. On clicking this buon, you are oered the chance to save/not save your changes or cancel the 'Back' command. You could also click on to go back to the home page.
Eding a Size
To view the gi sizes under a category, double click on the category. Alternatively, you could select the category and then click on in the lower right-hand corner.
- On the 'Select Product' window, select the gi size you need to edit and then click on
- On the next page: 'Edit Gi' (Image 3.2.2.3) – you can make changes to the Name and Reference Image elds.

(a) 'Name': Edit the name as per your choice.
(b) 'Ref. Image': Edit the Ref. image as per your choice by clicking on the icon to the right of this eld lets you choose the reference image from the path in which you saved it.
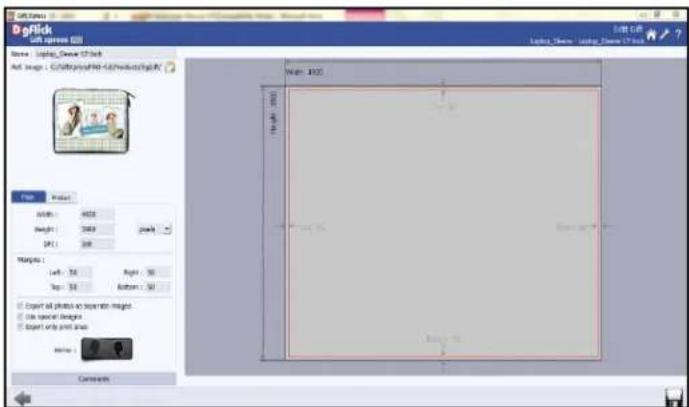
text_image
DgGlick Left: Express 021 Name: Lings, Clean 021 Art. Image - C:\Users\My4-5\Products\gdp.kv Width: 100% Height: 300 px Size: 50 px Margins: Left: 50 Right: 50 Top: 50 Bottom: 50 □ Export all photos on separate images. □ Use special images. □ Export only post areas Home CommentsImage 3.2.2.3: The 'Edit Gi' window
- You could edit the parameters under the 'Page' tab.
These are: Width and Height. Margins (Le, Right, Top and Boom). DPI and Units.
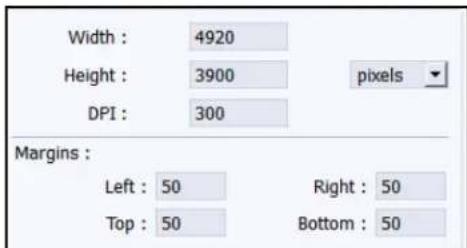
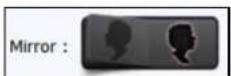
• Give Mirror effect from
- You could add/edit your comments by clicking on the 'Comment' buon.
- Click 📄 on the lower right-hand corner to save the changes you made to the category.
• The changes done get saved.
3.2.3 Deleng a Category and Size
Deleng a Category
- Click on > at the lower le-hand corner of the screen to view the 'Add', 'Edit' and 'Delete' opons.
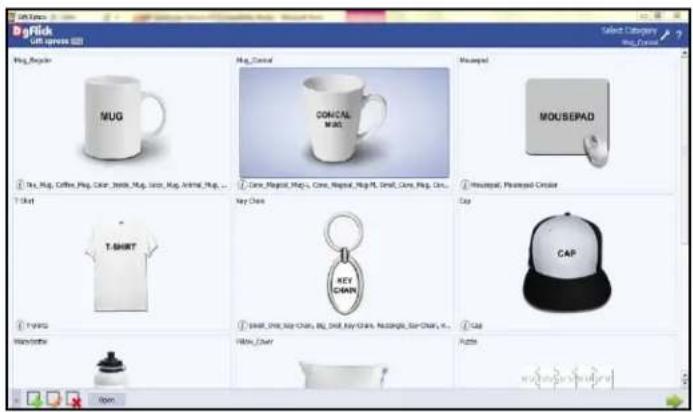
- Aer selecng the category you wish to delete on the 'Select Category' window (Image 3.2.3.1), click on to delete it.
text_image
Big Pink Gift offers 3D Pick Regular MUG Mug_Cancel CONCAL MUG Mousepad MOUSEPAD T-Shirt T-SHIRT Key Chain KEY CHAIN Footy Cover Puzzle CAP mygufen@food.orgImage 3.2.3.1: The 'Select Category' window
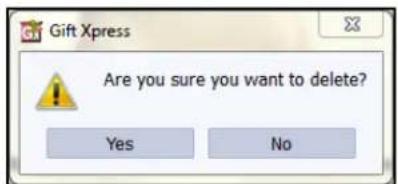
- A dialog box asking if you are sure you want to delete it appears on the screen.
- Clicking on 'Yes' deletes the category; clicking on 'No' aborts the operaon.
text_image
Gift Xpress Are you sure you want to delete? Yes NoDeleng a Size
- To view the gi sizes under a category, double click on the category. Alternatively, you could select the category and then click on in the lower right-hand corner.
- On the 'Select Product' window (Image 3.2.3.2), select the size you need to delete and then click on

to delete it.
text_image
DogClick Golf expires 100 Select Product Buy, Create - Get, Save, Buy Care_Magal_Mag Size : 250K/352 pixels Name : None Care_Magal_Mag-M Size : 250K/352 pixels Name : None Small_Carge_Mag Size : 250K/352 pixels Name : None Care_Mag Size : 250K/352 pixels Name : None Care_Carge_Mag Size : 250K/352 pixels Name : NoneImage 3.2.3.2: The 'Select Product' window
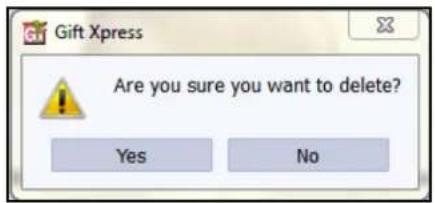
- A dialog box asking if you are sure you want to delete it appears on the screen.
- Clicking on 'Yes' deletes the size; clicking on 'No' aborts the operaon.
text_image
Gift Xpress Are you sure you want to delete? Yes No3.3 Creang Your Gi
Once you have modified or customized categories according to your requirements (secon 3.2), it is me to move on to the actual process of gi creaon. Gi Xpress gives you the opon of designing your gi either in a Fast or Easy way. You could also go in for a Smart way for a wider array of opons while creang your gi.
3.3.1 Fast way of Creang Gi
Gi Xpress is a fast and user-friendly process, with an interactive interface, that gives you the exibility of selecng the category and size. It is supported by wizard, which makes your task simpler.
Common Features
- ...: This lets you change to the path of your choice to select photos, backgrounds, clip-arts, borders and masks. In most instances, the last 15 paths accessed will be displayed for use and reference, once this opon is selected.
• : Can be used for adjusng thumbnail sizes.
- [G]: Can be used to reset the changes done.
- Select the photos to be swapped using the control key and then click on the icon to swap them.
- ☐ ☐: Move the scroll wheel of the mouse on the photo for zooming in/out.
- On-board panning: placing the cursor on changes it to, this can then be clicked and dragged to pan the photo.
- Rotate Photo: click on 📋 and drag the mouse to rotate the image.
- Any change can be undone or redone using and respectively.
- Color indicator on the photo: On clicking the 'Photo' tab on the left of the screen, the photos to be used for the gi is displayed. The number on the tab indicates the number of mes the photo has been used in the gi.
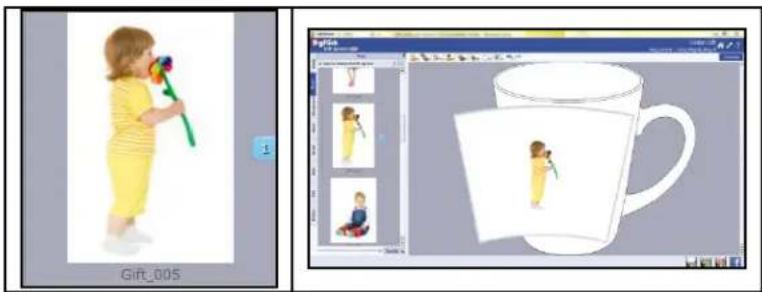
natural_image
Two-panel image showing a child in a yellow dress and a mug with cartoon figures, displayed in a design software interface (no text or symbols on the main objects)- Photo Quality Indicator: The quality of photos used in the gi must be good to ensure clarity in the nal product. Gi Xpress has an in-built 'Quality Indicator', which warns you whenever the photo quality goes below the required standards.
The Process
Select Category
- On the select category window (Image 3.3.1.1), select the category you would like to use for your gi: Mug, Conical Mug, Mousepad, T-Shirt, Key-Chain, Cap, Water Bottle, Pillow, Puzzle, Laptop Sleeve and i-phone Cover. The opons available for each category are displayed in the Select Category window.
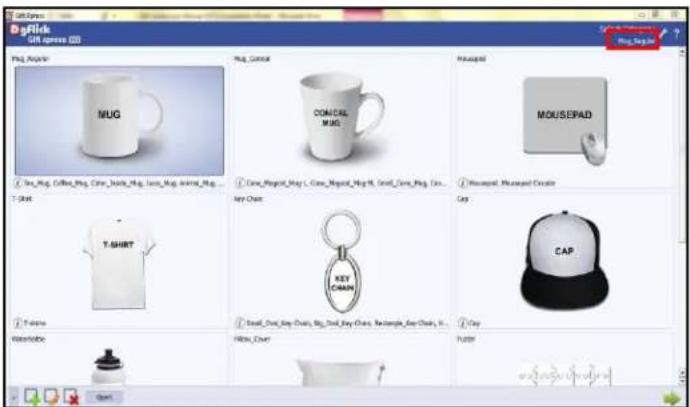
text_image
BigPick Gift space (3) Mag_People MUG Mag_Cancel COMCAL MUG Pragard MOUSEPAD T-Shirt T-SHIRT Key Chain KEY CHAIN CAP CAP Waterpipe White_Clear Puzzle www.puolepie.org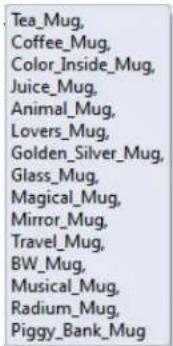
text_image
Tea_Mug, Coffee_Mug, Color_Inside_Mug, Juice_Mug, Animal_Mug, Lovers_Mug, Golden_Silver_Mug, Glass_Mug, Magical_Mug, Mirror_Mug, Travel_Mug, BW_Mug, Musical_Mug, Radium_Mug, Piggy_Bank_MugImage 3.3.1.1: The 'Select Category' window and various Gi Sizes
- The category that you have selected is seen on the top, right-hand corner.
- You can view a drop down list of various gi sizes, available under the category (refer secon 3.1) by keeping your mouse pointer on
- Double click on the category or select the category and click 📄 on the lower, right-hand corner to select the category.
- On the 'Select Product' window (Image 3.3.1.2), select the desired gi size.
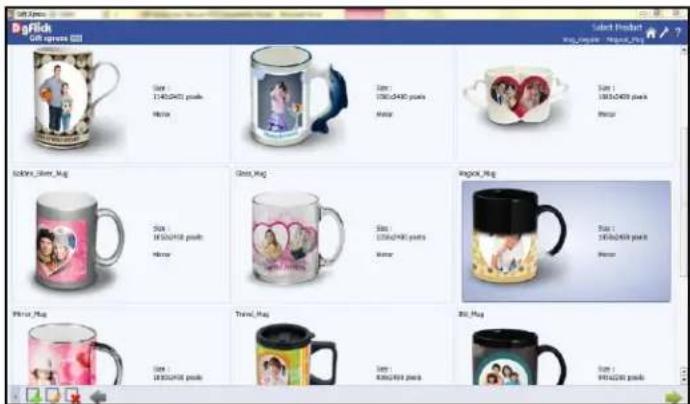
text_image
PdGlick Gift express Select Product Mg_Series - Mfgs_2019 Size : 130,0400 pixels Honor Size : 130,0400 pixels Honor Size : 130,0400 pixels Honor Solder_Mg Size : 130,0400 pixels Honor Size : 130,0400 pixels Honor Mag Size : 130,0400 pixels Honor Size : 130,0400 pixels Honor Mag Size : 130,0400 pixels Honor Size : 130,0400 pixels Honor Mag Size : 130,0400 pixels Honor Size : 130,0400 pixels Humor Size : 130,0400 pixels Honor Size : 130,0400 pixels Honor Size : 130,0400 pixels Honor Size : 130,0400 pixels Honor Size : 130,0400 pixels Honor Size : 130,0400 pixels Honor Size : 130,0400 pixels Honor Size : Mfgs_2019Image 3.3.1.2: The 'Select Product' window
- Aer selecng the desired size, click window.

the lower, right-hand corner to go to 'Design Gi'
! At any point during the process, you could click on the

buon to go back to the previous page. You could
also click on to go back to the home page.
Design Gi
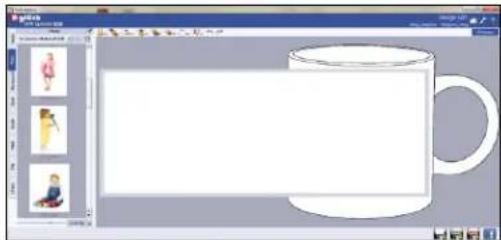
The 'Design Gi' window gives you a blank 'canvas' along with the mug design to work on. 'Help tools' are listed at the top of the page (dened earlier) and the opon bar is to your le (image 3.3.1.3).
natural_image
Illustration of a mug with a blank design interface, displayed in a graphics editing software interface (no text or symbols on the mug itself)Image 3.3.1.3: Design Gi
Design

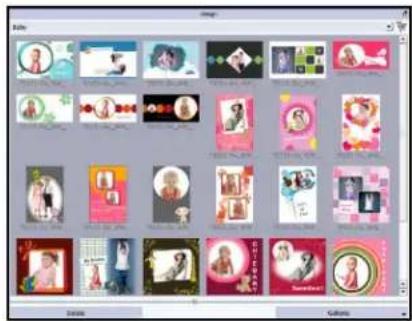
- Click on tab on the opon bar to insert the design of your choice.
text_image
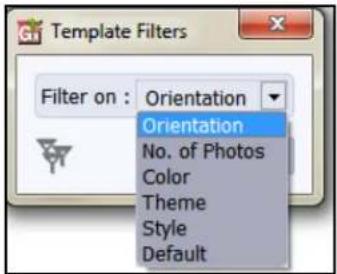
Screenshot of a mobile app interface displaying a grid of image thumbnails with Chinese labels and icons.- Click on to refer the designs according to the Orientaon, No. of photos, Color, Theme, Style and Default.
- Select the desired Itraon type and click on 'OK.'
- Double click on the desired design to be applied.
text_image
Template Filters Filter on : Orientation Orientation No. of Photos Color Theme Style Default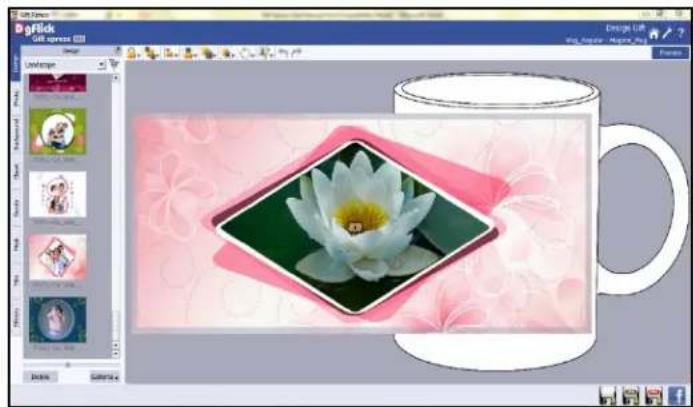
natural_image
Screenshot of a design software interface showing a white lotus flower on a pink floral background with a mug in the corner (no text or symbols on the flower or mug itself)Image 3.3.1.4: Design Inserted
Add Photo

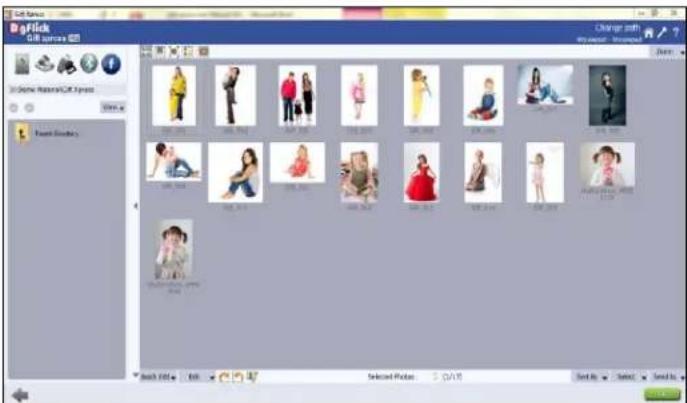
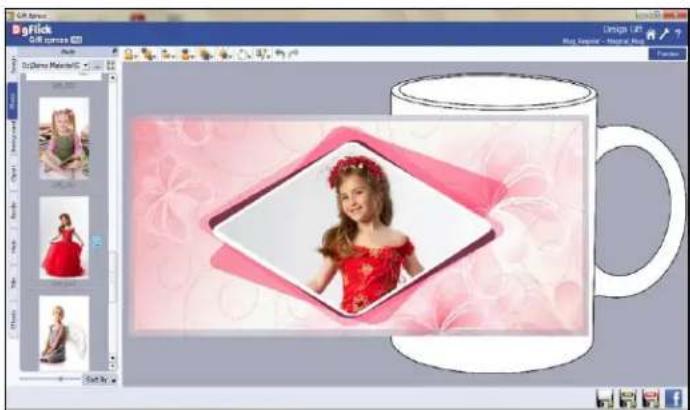
- Click on the ☐ tab in the le panel to insert photos. Double click on the photo to be inserted or drag and drop the photo as required.
- You can add photos from your hard disk or take photos from Facebook through 📄 buon from Photo Tab.
text_image
DaFlick Gill camera 80 31. Online NaturalCAT Express Event Display Change with Dissuat - Newspool Add: 25 Add: 25 Add: 25 Add: 25 Add: 25 Add: 25 Add: 25 Add: 25 Add: 25 Add: 25 Add: 25 Add: 25 Add: 25 Add: 25 Add: 25 Add: 25 Add: 25 Add: N/A Add: N/A Add: N/A Add: N/A Add: N/A Add: N/A Add: N/A Add: N/A Add: N/A Add: N/A Add: N/A Add: N/A Add: N/A Add: N/A Add: N/A Add: N/A Add: N/A Add: N/A Add: N/A Add: N/A Add: N/N/A Add: N/A Add: N/A Add: N/A Add: N/A Add: N/A Add: N/A Add: N/A Add: N/A Add: N/A Add: N/A Add: N/A Add: N/A Add: N/A Add: N/A Add: N/A Add: N/A Add: N/A Add: N/A Add: N/A Add:N/AImage 3.3.1.5: 'Change Path' window
- Aer clicking on ☐ tab you will be redirected to Change Path Window (Image 3.3.1.5) where you can manage your photos, edit them, give them desire eect, resize them or rename them. (for details refer Secon 3.3.4 Manage Your Photos)
text_image
Big Pink 3D Image Big Pink 3D Image Big Pink 3D Image Big Pink 3D Image Big Pink 3D Image Big Pink 3D Image Big Pink 3D Image Big Pink 3D Image Big Pink 3D Image Big Pink 3D Image Big Pink 3D Image Big Pink 3D Image Big Pink 3D Image Big Pink 3D Image Big Pink 3D Image BigPink 3D Image BigPink 3D Image BigPink 3D Image BigPink 3D Image BigPink 3D Image BigPink 3D Image BigPink 3D Image BigPink 3D Image BigPink 3D Image BigPink 3D Image BigPink 3D Image BigPink 3D Image BigPink 3D Image BigPink 3D Image BigPink 4D Image 80000000000000000000000000000000000000000000000000000000000000000000000000000000000000000000000000000 12.12.25.26.27.28.29.30.31.32.33.34.35.36.37.38.39.40.41.42.43.44.45.46.47.48.49.50.51.52.53.54.55.56.57.58.59.60.61.62.63.64.65.66.67.68.69.70.71.72.73.74.75.76.77.78.79.80.81.82.83.84.85.86.87.88.89.90.91.92.93.94.95.96.97.98.99.10.11.12.13.14.15.16.17.18.19.20.21.22.23.24.25.26.27.28.29.30.31.32.33.34.35.36.37.38.39.40.41.42.43.44.45.46.47.48.49.50. Start by: 12,12,12,12,12,12,12,12,12,12,12,12,12,12,12,12,12,12,12,12,12,12,12,12,12,12,12,12,12,12,12,12,12,12, 12,12,12,12,12,12,12,12,12,12,12,12,12,12,12,12, 12,12,12,12,12,12,12,12,12,12, 12,12,12,12,12,12,12,12, 12,12,12,12,12,12,12,12, 12,12,12,12,12,12,12, 12,12,12, 12,12, 12, 12, 12, 12, 12, 12, 12, 12, 12, 12, 12, 12, 12Image 3.3.1.6: Photo inserted
natural_image
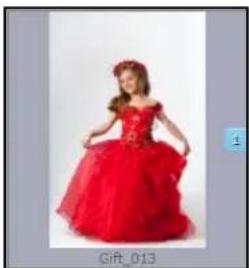
Woman in a red evening gown posing against a plain background (no text or symbols visible)• Gift_013: The number on the photo indicates the count of the photo being used.
text_image
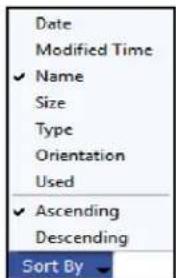
Date Modified Time ✓ Name Size Type Orientation Used ✓ Ascending Descending Sort By- Sort the photos by clicking on
Photo Quality Indicator:
The quality of photos used in the gi must be good to ensure clarity in the nal product. Gi Xpress has an in-built 'Quality Indicator', which warns you whenever the photo quality goes below the required standards. Once a photo has been placed into the frame the indicator warns you if the resoluon is inappropriate for the desired output size. The warning symbols and their interpretaons are presented in Table 3.3.1.7.
Table no. 3.3.1.7: Photo Quality Indicator
| Indicator and color | Interpretaon | |
 Yellow Yellow | The photo quality is not good; however, the nal output will be sasfactory. | |
 Orange Orange | The photo quality is poor and will not yield good results on prinng. | |
 | The photo is unsuitable for prinng. | |
- Your gi is ready in a fast way and now can be sent for exporng or can be shared on your Facebook account.
3.3.2 Easy way of Creang Gi
Once you create your gi design, gi xpress allows you to edit it in easy way. We can call it as ready page composition.
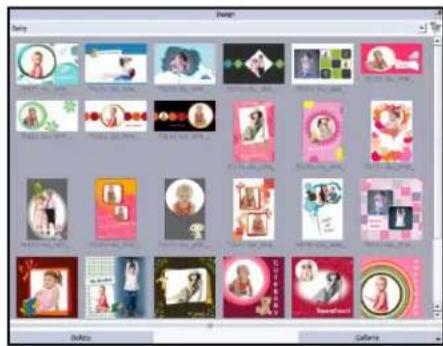
Ready Page Composition Change Design

- Click on the tab on the open bar to change the design of your choice.
text_image
Design Make the new image. Make the new image. Make the new image. Make the new image. Make the new image. Make the new image. Make the new image. Make the new image. Make the new image. Make the new image. Make the new image. Make the new image. Make the new image. Make the new image. Make the new image. Make the new image. Make the new image. Make the new image. Make the new image. Make the new image. Make the new image.
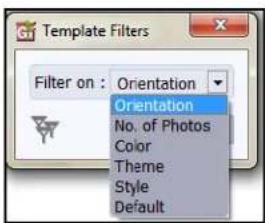
- Click on to refer the designs according to the Orientaon, No. of photos, Color, Theme, Style and Default.
- Select the desired Itraon type and click on 'OK'.
- Double click on the desired design to be applied.
text_image
Template Filters Filter on : Orientation Orientation No. of Photos Color Theme Style Default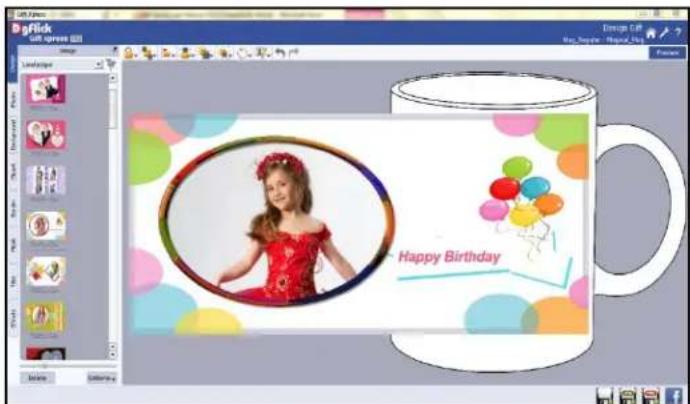
text_image
dgFlick gift spread Image Engage Call Map_Sayper - Hangar_Fing Features Happy BirthdayImage 3.3.2.1: Change Design
Change Photo
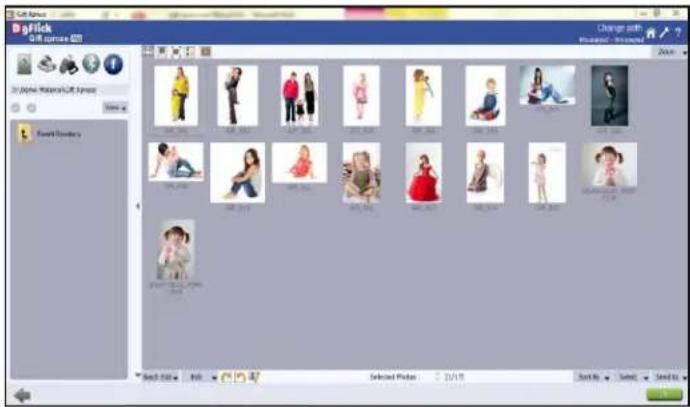
- Click on the tab in the le panel to change photos. Double click on the photo to be inserted or drag and drop the photo as required.
- You can add photos from your hard disk or take photos from Facebook through button from Photo Tab.
text_image
BpFlick Gift comes 2000 Change with Planned - Options 2000 31 March 2000 Search Search Results Search Search Results Search Search Results Search Search Results Search Search Results Search Search Results Search Search Results Search Search Results Search Search Results Search Search Results Search Search Results Search Search Results Search Search Results Search Search Results Search Search Results Search Search Results Search Search Results Search Search Results Search Search Results Search Search Results Search Search Values Search Value Search Value Search Value Search Value Search Value Search Value Search Value Search Value Search Value Search Value Search Value Search Value Search Value Search Value Search Value Search Value Search Value Search Value Search Value Search Value Search Value Search Value Search Value Search Value Search Value Search Value Search Value Search Value Search Value Search Value Search Value Search Value Search Value Search ValueImage 3.3.2.2: 'Change Path' window
- Aer clicking on 📄 tab you will be redirected to Change Path Window (Image 3.3.2.2) where you can manage your photos, edit them, give them desire eect, resize them or rename them. (for details refer Secon 3.3.4 Manage Your Photos)
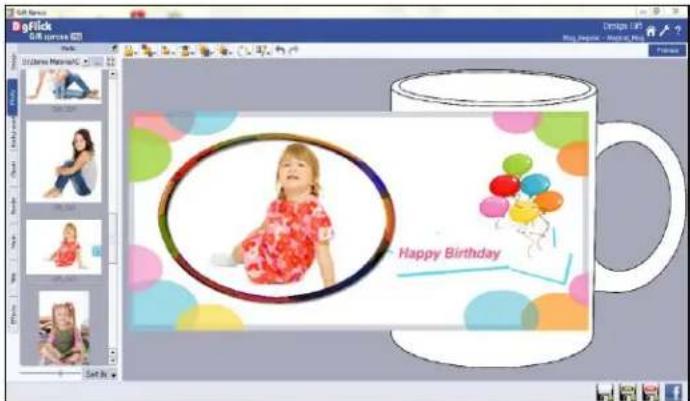
text_image
GIF KISS Gift Services Get Up Sikieni Personal Happy BirthdayImage 3.3.2.3: Photo Changed
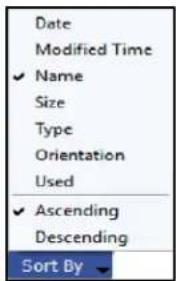
text_image
Date Modified Time ✓ Name Size Type Orientation Used ✓ Ascending Descending Sort By- Sort the photos by clicking on
Add Eects
• To edit effects to your gift, click tab on the le-hand opon bar.
- There are 10 dierent opons under this category. They are: Colorize, Blur, Opacity, Feather, Shadow, Glow, Outline, Rotaon, Presets and Blend.
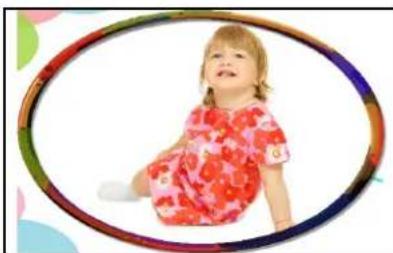
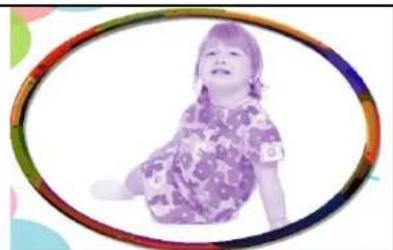
Colorize: Click on the photo to be modified and then click on the colorize preset to apply the effect to the photo. (Image 3.3.2.4)
To manually make changes or customize, click on Custom and change the color, opacity and
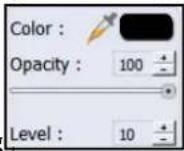
level using
natural_image
A young child in a red floral dress sitting inside an oval frame, against a white background (no text or symbols visible)(a)
natural_image
Portrait of a young child in a patterned dress, framed within an oval frame (no text or symbols visible)(b)
Image 3.3.2.4: Applying the 'Colorize' eect. (a) Before and (b) Aer
Blur: You could give a blurred appearance to some photos to make the page more visually appealing. Click on the photo you need to blur and then select the preset of your choice under this opon.
Click on Custom to increase or decrease the level or blurriness using the slider.
Opacity: Add opacity to the photos by selecng the presets available under this opon. You could also manually choose the level of opacity by clicking on Custom
Feather: Apply the feather eect to your photos by clicking on the photo and then selecng the preset of your choice.
Click on Custom to manually change the values of the feather using the slider.
Shadow: To apply the shadow effect to your photos, click on 'Shadow' and then choose from the available presets.
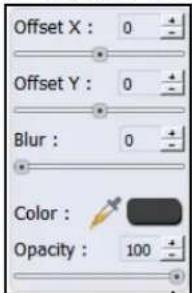
You could customize your 'shadow' by clicking on and then applying the shadow
text_image
Offset X : 0 Offset Y : 0 Blur : 0 Color : Opacity : 100sengs manually using
Glow: Apply the required presets under the 'Glow' opon by clicking on the photo and then
clicking on the preset. Apply your own sengs by clicking on the changing your blur, color and opacity values.
Custom buon and
Outline: Select the photo and click on the preset of your choice to apply the outline.
To customize the outline, click on. Then, create the outline of your choice by lling
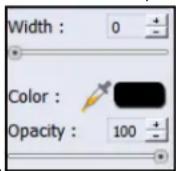
in the values in these elds:
➢ Rotaon: The photos on the gi can be rotated using the predened presets under the 'Rotaon opon.
Click on to change the values for the x, y and z axes and give the photo a 3-D eect.
You could also ip the photo horizontally and vercally by using and, respectively.
➢ Presets: This opon gives you certain in-built eects that you could use for your photos. Click on the photo and then click on the desired preset to apply it.
Blend: There are 13 blending modes that help you achieve the desired eect for your photo. Click on the photo and then select the blend opon of your choice to apply.
- Your gi is ready in an easy way and now can be sent for exporng or can be shared on your Facebook account.
3.3.3 Smart way of Creang Gi
Gi Xpress is versale soware that caters to those who require instant results and also to those wishing to have more control in the designing of their gi and use their creavity. Its tools and opons help one to manipulate and edit designs, photos, backgrounds and the layout to get the desired output.
The Tool Bar
The tool bar at the top of the screen has a variety of opons that makes Gi Xpress user friendly and easy to work with. These opons are explained below.
Table 3.3.3.1: The Tool Bar
| Icon | Use |
| Can be used to lock or unlock the photos as per the requirement.The four opons in this tool – Send to Back, Send Backward, Bring to Front, Bring Forward – help in moving objects forward and backward depending on the design. Click on the object and then choose the opon required to move the photo accordingly. | |
| This opon can be used to move the object around with respect to the page. Click on the object and then select the opon on the bar to apply the changes. | |
| This opon can be used to move the object around with respect to the other objects on the page. Click on the object and then select the opon on the bar to apply the changes. | |
| Helps to equalize the horizontal and vercal spacing between objects. Select the object for which you wish to equalize spacing. Click on the tool and select either ‘Vercal’ or ‘Horizontal’ as per your choice. | |
| Helps to equalize the size of photos on a page. Select the photos for which you wish to make size changes. Then click on this tool and select the parameter for equalizing: Width, Height and Size. | |
| Groups and ungroups elements on the page. Grouping (select objects to be grouped and then click on the tool and select ‘Group’ opon) ensures that the photos that are grouped move together as one unit with the spacing intact. To move an element of a group individually you need to ungroup the elements (click on the grouped photo and select ‘Ungroup’ opon). | |
| Rotates the object. To rotate the object as per your requirements, click on the tool and alter the x, y and z axes. You could also rotate it by 90 or 270 degrees and ip them vertically or horizontally . You could also rotate the image manually by using and entering the value of your choice or using the slider. | |
| Helps you to use enhance or color correct the photos. | |
| To reset the change you made to the page. | |
| To redo a change you made to the page. | |
| Shows/hides the margins on the page. | |
| Shows/hides the gridlines on the page. | |
| For zooming the page in. | |
| For zooming the page out. | |
| Adjusts the page size such that the page ts the screen. | |
| Shows the actual size of the page. |
Blank Page Composition
Select Category
- On the select category window (Image 3.3.3.2), select the category you would like to use for your gi: Mug, Conical Mug, Mouse pad, T-Shirt, Key Chain, Cap, Water Bottle, Pillow, Puzzle, Laptop Sleeve and i-phone cover. The opons available for each category are displayed in the Select Category window.
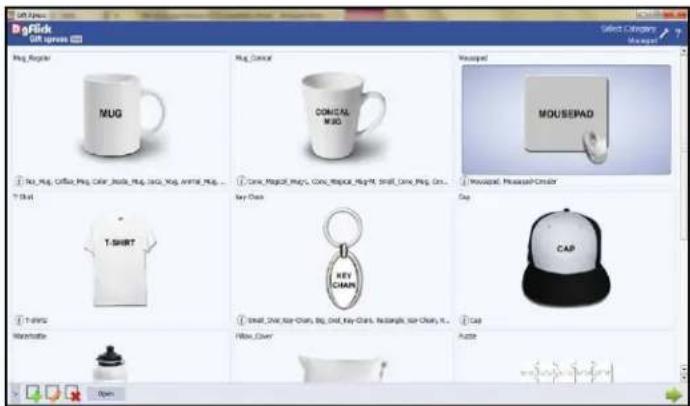
text_image
PogFlip Gift spreads Pick Regular MUG Mug_Cancel COMICAL MUG Mapped MOUSEPAD T-Shirt T-SHIRT Key Chain Personal, Personal/Cancel Gap CAP T-Prints Washtable Email, One, Six-Chain, Big, One, Key-Chain, No change, Six-Chain, It... Paste Fillet_Clear Aute OpenImage 3.3.3.2: The 'Select Category' window
- The category that you have selected is seen on the top, right-hand corner.
- Double click on the category or select the category and click 📋 on the lower, right-hand corner to select the category.
- On the 'Select Product' window (Image 3.3.3.3), select the desired gi size.
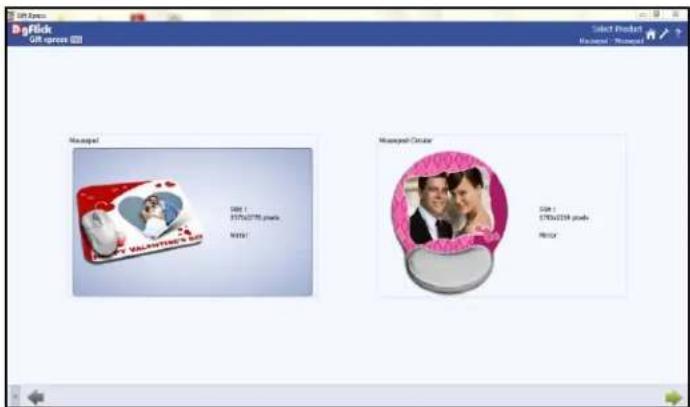
text_image
DogClick GIR-GREEN Select Product Rearner - Managist Managed Sire 1 $750,000 pack. Merry! Managed Circular Sire 1 $750,000 pack. Merry!Image 3.3.3.3: The 'Select Product' window
- Aer selecng the desired size, click window.

the lower, right-hand corner to go to 'Design Gi'
! At any point during the process, you could click on the ← buon to go back to the previous page. You could also click on → to go back to the home page.
Design Gi
The 'Design Gi' window gives you a blank 'canvas' to work on. 'Help tools' are listed at the top of the page (dened earlier) and the opon bar is to your le.
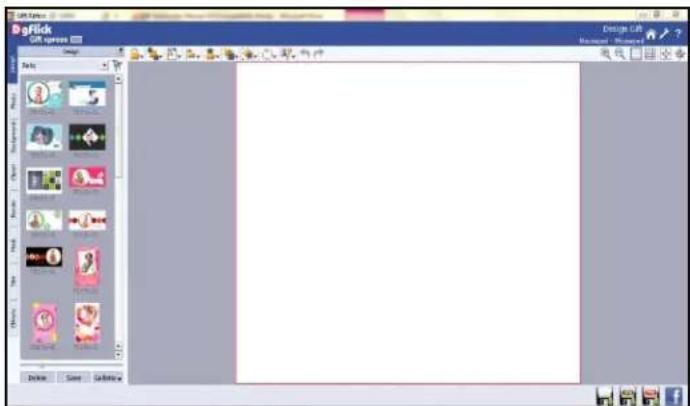
text_image
BigClick Big Clicks Design File Edit View Insert Tools Help Window Help Window Help Window Help Window Help Window Help Window Help Window Help Window Help Window Help Window Help Window Help Window Help Window Help Window Help Window Help Window Help Window Help Window Help Window Help Window Help Window Help Window Help Window Help Window Help Window Help Window Help Window Help Window Help Window Help Window Help Window Help Window Help Window Help Window Help Window Help Window Help Window Help Window Help Window Help Window Help Window Help Window Help Window Help Window Help Window Help Window Help Window Help Window Help Window Help Window Help Option Help Window Help Window Help Window Help Window Help Window Help Window Help Window Help Window Help Window Help Window Help Window Help Window Help Window Help Window Help Window Help Window Help Window Help Window Help Window Help Window Help Window Help Window Help Window Help Window Help Window Help Window Help Window Help Window Help Window Help Window Help Window Help Window Help Window Help Window Help Window Help Window Help Window Help Window Help Window Help Window Help Window Help Window Help Window Help Window Help Window Help Window Help Window Help Window Help Window Help Panel BigClick Big Clicks Big Clicks Big Clicks Big Clicks Big Clicks Big Clicks Big Clicks Big Clicks Big Clicks Big Clicks Big Clicks Big Clicks Big Clicks Big Clicks Big Clicks Big Clicks Big Clicks Big Clicks Big Clicks Big Clicks Big Clicks Big Clicks Big Clicks Big Clicks Big Clicks Big Click Big Clicks Big Clicks Big Clicks Big Clicks Big Clicks Big Clicks Big Clicks Big Clicks Big Clicks Big Clicks Big Clicks Big Clicks Big Clicks Big Clicks Big Clicks Big Clicks Big Clicks Big Clicks Big Clicks Big Clicks Big Clicks Big Clicks Big Clicks Big Clicks Big Click sImage 3.3.3.4: 'Select Design' Window
Add Background

- Click on the ☐ tab on the opon bar to select the background for your gi or to ll it with any solid color.
- Besides the in-built backgrounds, you could access and select backgrounds that you have saved elsewhere by clicking on the browse buon. The last 15 paths used can be viewed.
• To use a background, double click on it or drag and drop it on the canvas from the opon bar.
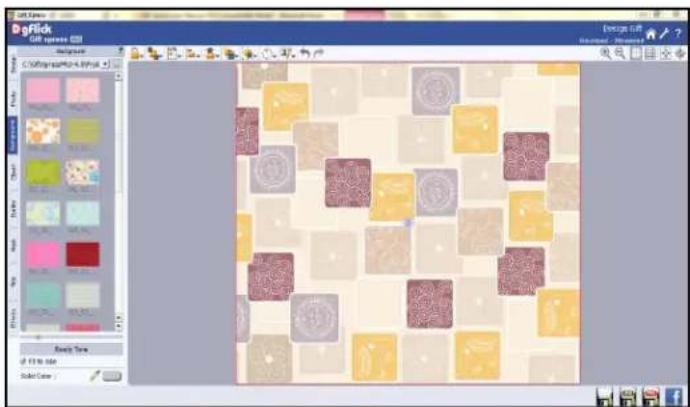
Image 3.3.3.5: The page with the selected background
- Uncheck the √ Fit to size check box on the le to expand the background on the page.
- To ll the canvas with one single solid color, click on and place it on the color you wish to use as background for your gi. The whole page now gets a background of that color.
- Click on the Ready Tone button on the le panel to select from a range of 18 ready tones available for each background.
• To change the tone, double click on the chosen tone.
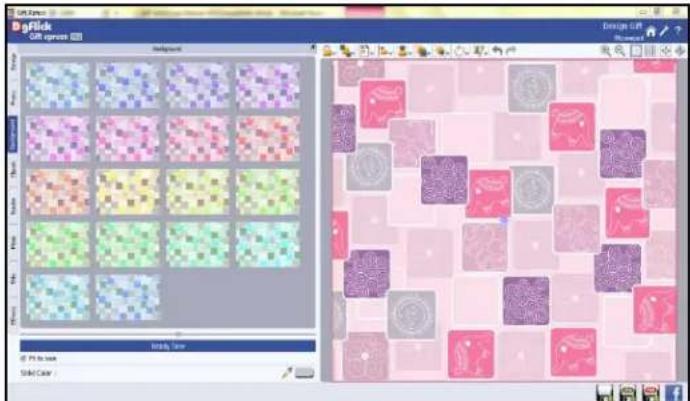
text_image
DgPick Golf frames Background Design: GIF Model1 File Edit View Slide ColorImage 3.3.3.6: The background with its ready tone changed
- You could also use a photo of your choice as the background for your Gi. To do this, click

on the Ltab to view the selected photos. Select the photo and click on the 'Set Photo as Background' buon. The photo now serves as a background to the page (Image 3.3.3.7).

text_image
Sweet MomentsImage 3.3.3.7: A photo as the background
Add Photo

- Click on the tab on the le panel to access the photos of your choice.
- You could browse photos and even access the last 15 paths you have used.
- You can add photos from your hard disk or take photos from Facebook through 📄 buon from Photo Tab.
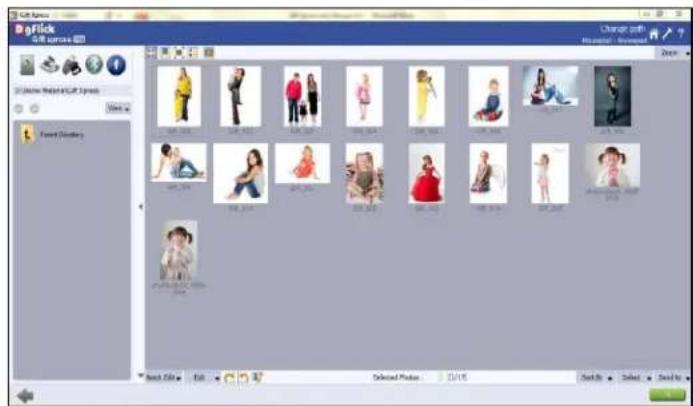
text_image
gFlick Golf product Change gift Residual - Summary Zoom 31 June 2014 31 June 2015 31 June 2016 31 June 2017 31 June 2018 31 June 2019 31 June 2020 31 June 2021 31 June 2022 31 June 2023 31 June 2024 31 June 2025 31 June 2026 31 June 2027 31 June 2028 31 June 2029 31 June 2030 31 June 2031 31 June 2032 31 June 2033 31 June 2034 31 June 2035 31 June 2036 31 June 2037 31 June 2038 31 June 2039 31 June 2040 31 June 2041 31 June 2042 31 June 2043 31 June 2044 31 June 2045 31 June 2046 31 June 2047 31 June 2048 31 June 2049 31 June 2050 31 June 2051 31 June 2052 31 June 2053 31 June 2054 31 June 2055 31 June 2056 31 June 2057 31 June 2058 31 June 2059 31 June 2060 31 June 2061 31 June 2062 31 June 2063 31 June 2064 31 June 2065 31 June 2066 31 June 2067 31 June 2068 31 June 2069 31 June 2070 31 June 2071 31 June 2072 31 June 2073 31 June 2074 31 June 2075 31 June 2076 31 June 2077 31 June 2078 31 June 2079 31 June 2080 31 June 2081 31 June 2082 31 June 2083 31 June 2084 31 June 2085 31 June 2086 31 June 2087 31 June 2088 31 June 2089 31 June 2090 31 June 2091 31 June 2092 31 June 2093 31 June 2094 31 June 2095 31 June 2096 31 June 2097 31 June 2098 31 June 2099 31 June 2100Image 3.3.3.8: 'Change Path' window
- Aer clicking on 📄 tab you will be redirected to Change Path Window (Image 3.3.3.8) where you can manage your photos, edit them, give them desire eect, resize them or rename them. (for details refer Secon 3.3.4 Manage Your Photos)
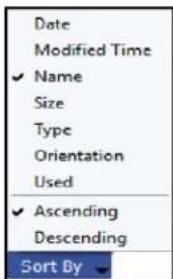
text_image
Date Modified Time ✓ Name Size Type Orientation Used ✓ Ascending Descending Sort By- Sort the photos by clicking on
• To use a photo, either double click on it or drag and drop it on the canvas (Image 3.3.3.9).
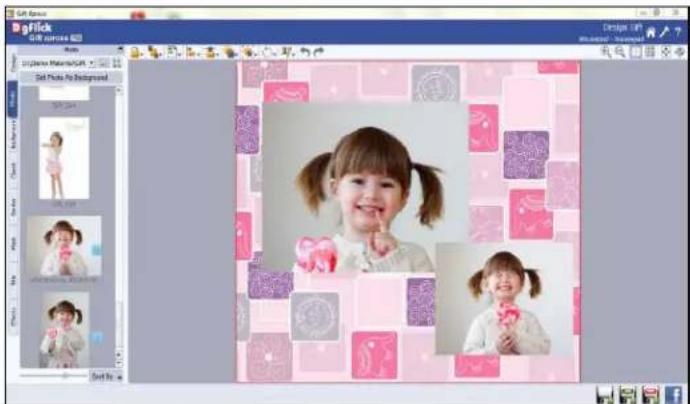
text_image
Gift Service GIF: 2016-023 Design: GIF Model: - Microsoft Edit Tools: No Background Send to: Get ToolsImage 3.3.3.9: Photo added to page
Rotang Photos
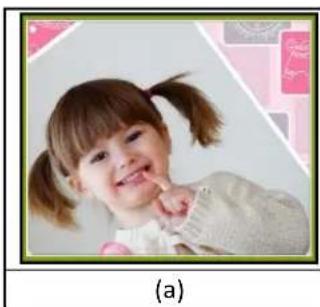
Rotang photos by keeping the creave design in mind adds to the overall presentaon of the pages. Gi Xpress gives you the opon of either rotang the photo within the frame or rotang the whole picture along with the frame.
To rotate the photo within the frame: keep your cursor on the rotate icon which is visible when you select a photo. Once the 'hand' symbol appears use the mouse to rotate it in the direcon of your choice.
To rotate the photo along with the frame: 'Unlock' the photo by clicking on. Now keep your cursor on and use the mouse to rotate the photo with the frame when the 'hand' appears.
natural_image
Portrait of a smiling young girl with pigtails, wearing a light-colored top (no text or symbols visible)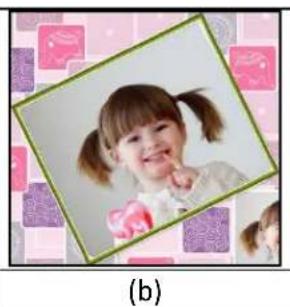
natural_image
Portrait photo of a smiling girl with pigtails, framed within a green border (no text or symbols)Image 3.3.3.10: Rotang: (a) the photo in the frame; (b) the photo with the frame
Zooming In/Out
While working on your gi designing you can focus aenon on a specie area of the page by zooming in or take a look at the 'larger picture' by zooming out. You can use a combinaon of these opons to obtain the desired level of accuracy on the page.
How to: Click on the photo you want to work on and then use the scroll wheel of the mouse to zoom in or zoom out as per your requirement.
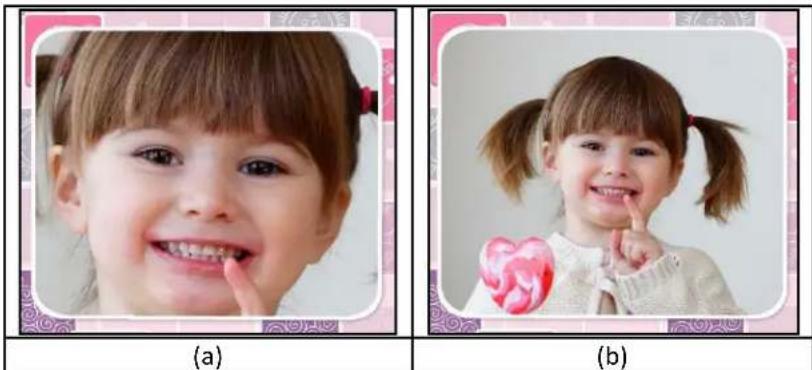
Image 3.3.3.11: (a) Zooming in; (b) zooming out
Panning
Panning lets you view specific areas of the photo by moving the photo up or down and sideways in the document window. This gives access to the areas that would otherwise remain obscure given the size of the photo.
How to: Place the cursor over, which then changes to or the 'Hand Symbol'. Now use your mouse to take hold of the photo and move it around to get to the area you wish to work on.
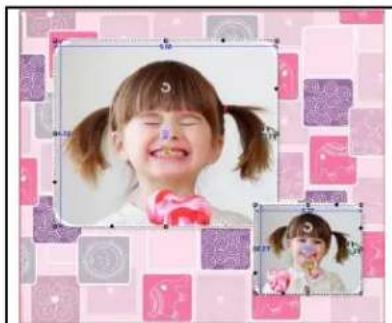
Swapping Photos
Many a mes you need to swap photos on a page as you go along to. However, the borders if applied to the photos do not get swapped.
How to: Select the photos you wish to swap by keeping the ctrl key pressed. When both the photos are
selected the 'Swap' icon appears. Click on the icon to swap the photos.
natural_image
Two children's face photos with pigtails, one smiling and the other looking up (no text or symbols visible)(a)

natural_image
Two young girls with pigtails holding a pink heart, set against a patterned background (no text or symbols)(b)
Image 3.3.3.12: Swap Photos (a) Before (b) Aer
Right Clicking
While working on Gi Xpress, you could use the right click buon to get several opons right then and there.
Right clicking outside photos: As seen in Image 3.3.3.13, right clicking outside photos lets you access the following opons directly:
- The 'Eects' opon- Give eects like Colorize, Blur, Opacity, Feather, Shadow, Glow, Outline, Rotaon, Presets and Blend.
- The 'Flip' opon to ip the page either vercally or horizontally
- The 'Find' opon to nd the source of the object.

text_image
Cut Ctrl+X Copy Ctrl+C Paste Ctrl+V Delete Del Copy Effect Paste Effect Clear Effect Effects Arrange Align to Page Align to Objects Equal Spacing Equal Flip Page ✓ Horizontal Alt+H Find ✓_Vertical Alt+VImage 3.3.3.13: Right clicking outside photos
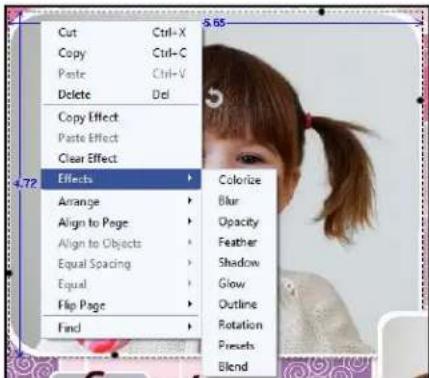
Right clicking on the photos: Using right click aer selecng a photo (Image 3.3.3.14) lets you access the following opons directly:
- Cut, copy, paste (in case an element has been copied) and delete. - The 'Eects' opon- Give effects like Colorize, Blur, Opacity, Feather, Shadow, Glow, Outline, Rotaon, Presets and Blend.
• Copy Eect opon - Copy Eect of the photo.
- Paste Eect opon- paste copied Eect.
• Clear Eect opon- Clear Effect of any photo.
- Arrange objects- Send to Back, Send Backward, Bring to Front and Bring Forward.
- Align to page- Top Le, Top Center and so on.
- The 'Flip' opon to ip the page either vercally or horizontally
- The 'Find' opon to nd the source of the object.
text_image
Cut Ctrl+X Copy Ctrl+C Paste Ctrl+V Delete Del Copy Effect Paste Effect Clear Effect Effects Colorize Arrange Blur Align to Page Opacity Align to Objects Feather Equal Spacing Shadow Equal Glow Flip Page Outline Find Rotation Presets BlendImage 3.3.3.14: Right clicking on the photos
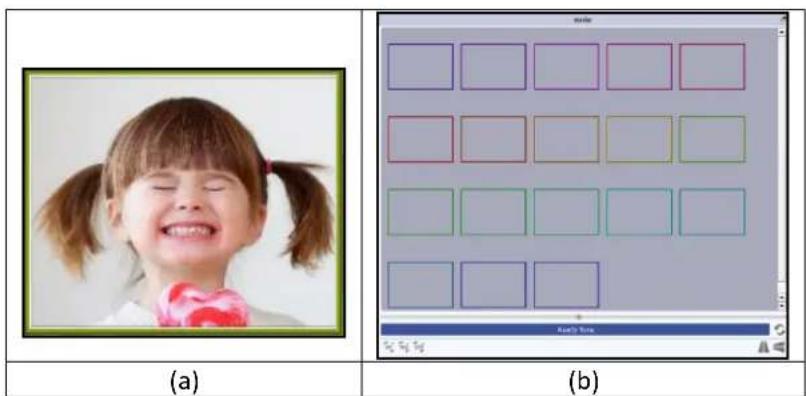
Add Border

- Click on the tab on the le panel to select the border that you want for your photo.
- You could select a border from the opons, Gi Xpress displays for you on the le panel or you could browse and select a border of your choice from the path in which you have saved it (the previous 15 paths are available here also).
- Double click on the border or drag and drop the border on the photo to apply to it.
- You could change the color of the border to better suit your photo by clicking on the
- Choose the ready tone you want and double click on it to apply it to the photo border.
text_image
(a) (b)Image 3.3.3.15: Applying a ready tone to the border: (a) The original border; (b) the ready tones
! Additional icon on the 'Design Gi' – Border screen:
(i) To reset the changes.
(ii) To rotate the border 90 degrees.
(iii) To rotate the border 180 degrees.
(iv) To rotate the border 270 degrees.
(v) To ip the border vercally.
(vi) To p the border horizontally.
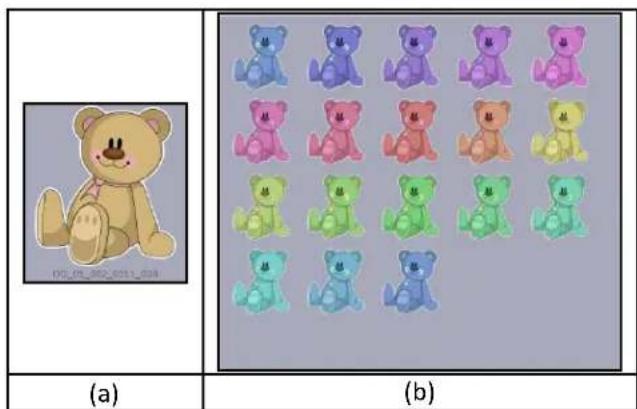
Add Clipart

- Click on the tab on the opon bar for a lisng on the available cliparts.
- Double click on the clip-art of your choice or drag and drop it onto the canvas to use it on the page.
- You could even use your own clip-arts by accessing them using..., where the last 15 paths accessed are available.
- Click on Ready Tone to access the ready tones for the cliparts. There are 18 ready tones available for each clipart and you could use the color of your choice depending on your design by double clicking on the ready tone (Image 3.3.3.16).
text_image
(a) (b)Image 3.3.3.16: (a) A clip-art. (b) Ready Tone of Clipart
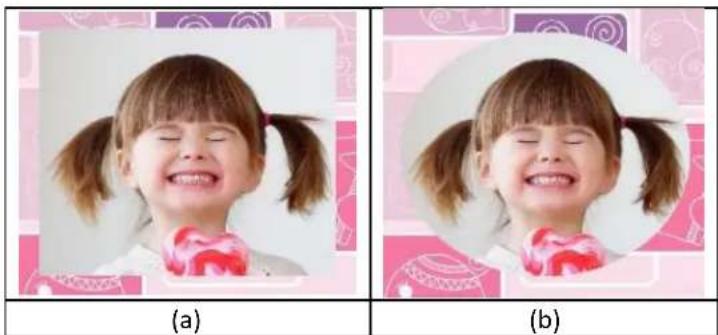
Add Mask

- Click on the tab on the le-hand panel to select the mask of your choice.
- Select the photo to which you want to apply the mask and double click on the mask or drag and drop the mask on the photo to apply it. You could even access the previous 15 paths (Image 3.3.3.17).
- You could rotate the mask by 90 degrees, 180 degrees or 270 degrees and can ip it horizontally and vertically by using the and, respectively.
natural_image
Two side-by-side photos of a smiling girl with pigtails, labeled (a) and (b), against a patterned background (no text or symbols on the image itself)Image 3.3.3.17: Applying a 'mask' to the photo (a) Original (b) Mask applied
Add Title

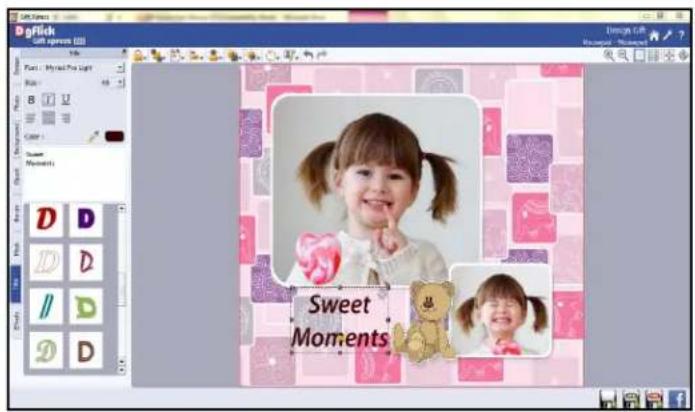
- Click on the □ tab to add or amend a tle to your gi.
- The empty white eld can be used to type in the tle you wish to add to your gi.
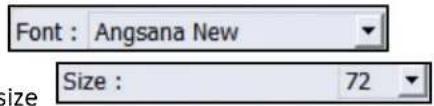
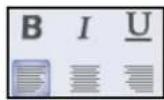
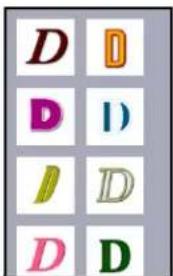
• You can change the following parameters for the tle:
(i) Font
text_image
Font : Angsana New Size : 72(ii) Font size
(iii) Style
(iv) Font Color

text_image
D D I) J D D D(v) Ready presets can be availed from
text_image
Dg flick Gift frames (0) Page 1 Myriced Pro Light Color 1 Sweet Moments Sweet MomentsImage 3.3.3.18: Adding a tle for your photo
- Your gi is ready in a smart way and now can be sent for exporng or can be shared on your Facebook account. (Image 3.3.3.19)

text_image
Sweet MomentsImage 3.3.3.19: Your Gi is Ready
3.3.4 Manage Your Photos

- Click on the tab on the le panel to access the photos of your choice.
• You could browse photos and even access the last 15 paths you have used.
- You can add photos from your hard disk, CD-Drive, Pen Drive, Bluetooth or take photos from Facebook through 📄 on from Photo Tab.
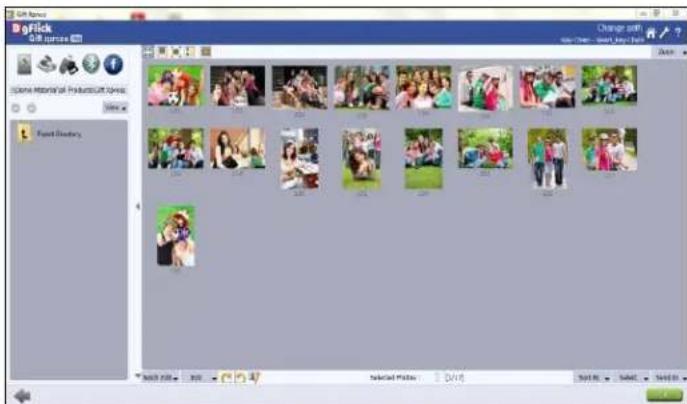
- Aer clicking on ☐ tab you will be redirected to Change Path Window where you can manage your photos, edit them, give them desire eect, resize them or rename them as follow:
- On the 'Change Path' window select the photos for which you want to create your Gi. (Image 3.3.4.1)
text_image
gPick File Source: Name: Material & Product/Cost Summary Save As Forest History Change with New - Change - New / New / New Add Add Add Add Add Add Add Add Add Add Add Add Add Add Add Add Add Add Add Add Add Add Add Add Add Add Add Add Add Add Add Add Add Add Add Add Add Add Add Add Add Add Add Add Add Add Add Add Add Add Add Add Add Add Add Add Add Add Add Add Add Add Add Add Add Add Add Add AddImage 3.3.4.1: Change Path Window
- You have the opon of selecng the photos from the
Hard disk
CD/DVD


USB

Bluetooth


- Select any of the media where your photos are been saved.
- Go forward or backward with

• Icon view your folders in list or icon style.
• Zoom the buon on the top right corner of the window to zoom in/out your photos.
- The top opon bar helps you to view the photos in 5 dierent ways
○ thumbnail style
- to get a full view of the photo.
○ Imstrip view.
○ get the photos list wise
○ Navigate the photos from □ and □.
○ starts the slide show
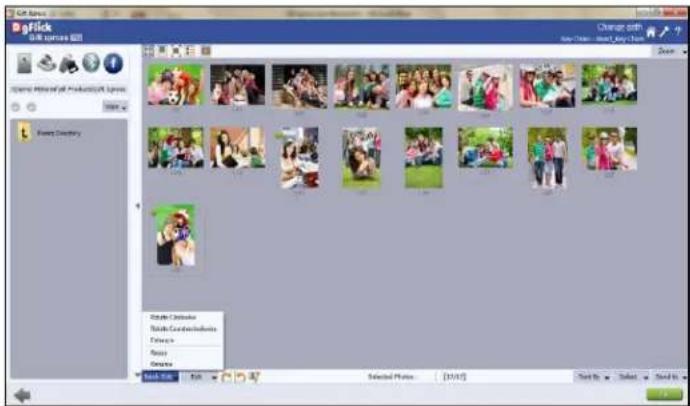
- Click on Batch Edit *at the lower opon bar to edit mulple photos at a me.
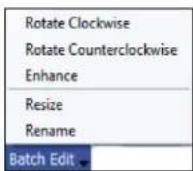
- Select the photos to be edited and click on
• Here you can rotate, color correct, resize and rename your photos.
- Select Rotate Clockwise or Rotate Counterclockwise to rotate your photos clockwise or counter clock wise. *
- Select the photos to be edited and click on Enhance opon to color correct your mulple photos. (Image 3.3.4.2) *
text_image
File Search Search engine: 10.0000 Change width: 5 px Save... Share Photo of Product/Work spaces Save as Save History Delete Document Delete Document/Workbox Delete Copy Paste to Web Selected Files [2019] HelpImage 3.3.4.2: Select mulple photos
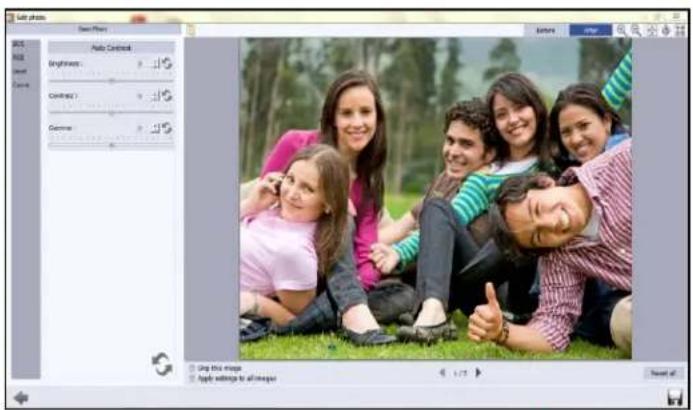
- On the 'Edit Photo' window (Batch Edit▼), (Image 3.3.4.3) select Enhance click on BCG to adjust the brightness, contrast and gamma; RGB to adjust the color tones; to adjust the input and output levels of the photo and Curve to adjust the RGB color.*
- If you do not wish to apply the changes on the current photo, click on Skip this image.
- To apply changes to all the selected photos, click on Apply settings to all images
- Click on to save all the changes made.
- Clicking on Save will create a folder for original image and will save the changes made on the copy of the image, without aecng the original image.
text_image
Auto Contrast Brightness: Contrast 1: Custom: Auto Contrast 确定 this image Apply settings to all images Reset ofImage 3.3.4.3: Edit Photo window*
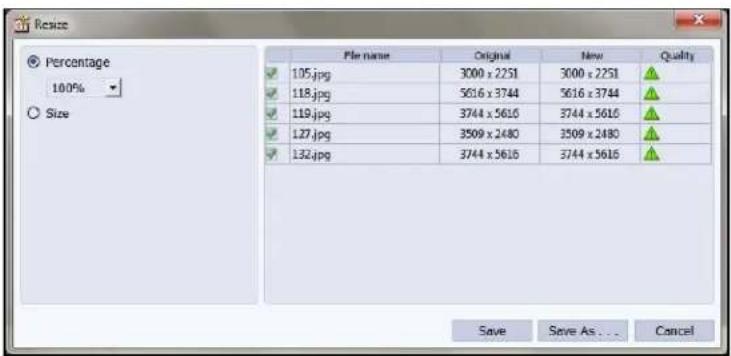
- Select Resize opon to change the size of your photos. *
text_image
Resize Percentage 100% Size File name Original New Quality 105.jpg 3000 x 2251 3000 x 2251 118.jpg 5616 x 3744 5616 x 3744 119.jpg 3744 x 5616 3744 x 5616 127.jpg 3509 x 2480 3509 x 2480 132.jpg 3744 x 5616 3744 x 5616 Save Save As... Cancel- Click on the checkbox of the photos to be resized and select the desired percentage from
tab if you want to resize your photos percentage wise.
| File name | Original | New | Quality | |
| √ | 105.jpg | 3000 x 2251 | 3000 x 2251 | |
| √ | 118.jpg | 5616 x 3744 | 5616 x 3744 |
Original and tab you can see the changes applied. The tab Quality
indicates the quality of the photo. The quality of photos used here must be good to ensure clarity in the nal product.
Gi Xpress has an in-built 'Quality Indicator', which warns you whenever the photo quality goes below the required standards.
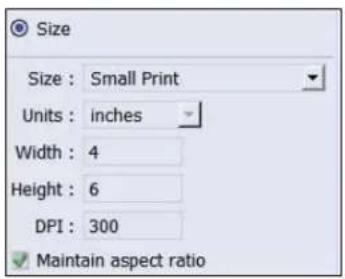
- Click on if you want to resize the photos size wise.
text_image
Size Size : Small Print Units : inches Width : 4 Height : 6 DPI : 300 Maintain aspect ratio- Select the desired size from
- Select the custom opon from size tab if you want to give your customized size to the photo.
- Aer resizing the photo click on Save to overwrite the changes over the existing photos.
- Clicking on Save As... will save the changes done on the photo with a dierent name.
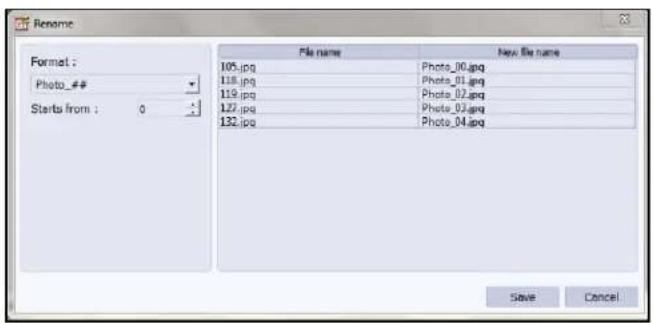
- Select the Rename opon to rename your photos. *
text_image
Rename Format : Photo_## Starts from : 0 105.jpg 118.jpg 119.jpg 127.jpg 132.jpg New file name Photo_00.jpg Photo_01.jpg Photo_02.jpg Photo_03.jpg Photo_04.jpg Save Cancel- Manually change the photo name from OR

Starts from : 0
• from here you can change the count of the photos.
- Click on to save the changes made.
- From buon you can edit your photos individually.
- As that of batch editor you can rotate, resize, rename and enhance your individual photos.
- For Enhance opon (refer secon 4.0 Photo Eding)

• : Rotate photo clockwise.

• : Rotate photo counter clockwise.

• : Edit photos.
text_image
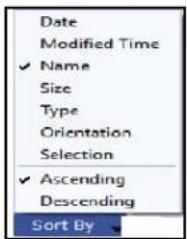
Date Modified Time ✓ Name Size Type Orientation Selection ✓ Ascending Descending Sort By- Sort the photos by clicking on.
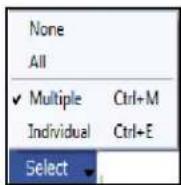
- Click on Select to select mulple photos, all photos or individual photos.

• shows the number of photos selected.

• indicates the photo highlighted.
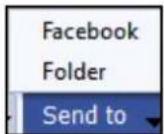
- Send to lets you to send the photos to your Facebook account or send it to your hard drive.
- Aer selecng the photos and seng its arrangement click on to go to 'Design Gi' window, where you can view the selected photos ready with the selected parameters and can also make any changes if required with the help of various tabs available.
Note: Topics marked with * are only for Pro version Users.
3.4 How to Create Mul-Photo Mul-Gi
In this secon you will learn how to create Mul Photo Gis in Gi Xpress.
3.4.1 Create Frame and Mask for Mul-Photo Mul-Gi
To create a parcular gi rst we need to create frame for that gi if we want new sizes.
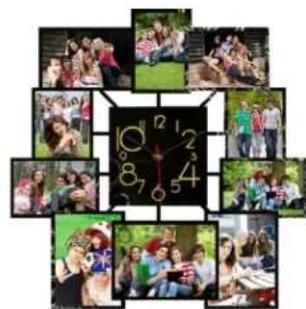
natural_image
Collage of family photos arranged around a central clock face, no visible text or symbolsImage 3.4.1.1: Frame for Gi
How to Create Frame:
• Measure the width and height of the actual frame with ruler.
- According to the gi size select the canvas area in the Photoshop.
- Create outer border of the frame.
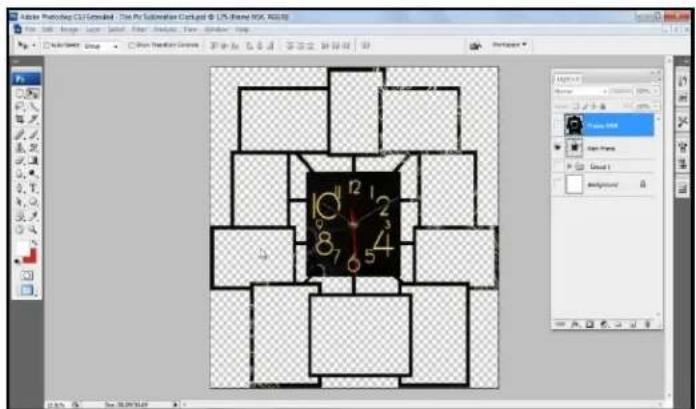
text_image
Adobe Photoshop CS2 Simulink - 70 Pro Sublinear Compact & © 25 (Frame 904, RGB/8) File Edit View Insert Layer Select Filter Analysis View Window Help AutoCAD Group View Refresh Graph Page 103 Image 103 View Preset Gross 1 BackgroundImage 3.4.1.2: Creang Frame
- Save the created frame in PNG format.
- Dene the transparency of the frame to t the photos in the desired mask.
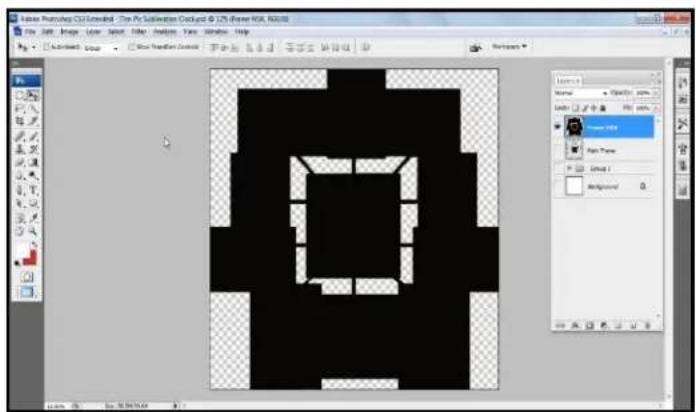
text_image
File Edit View Insert View Insert Filter Edit View Insert Help Auto Sketch Group Window Transition Draw Name: Image 100% Name: Image 1 BackgroundImage 3.4.1.3: Creang Frame
- Save the frame in msk format.
Note: The le name of the frame in *.png and *.msk format should be similar Size and Name.
How to Create Mask:
• Measure the width and height of the photo frame for individual masks.
- Create mask only for odd shapes.
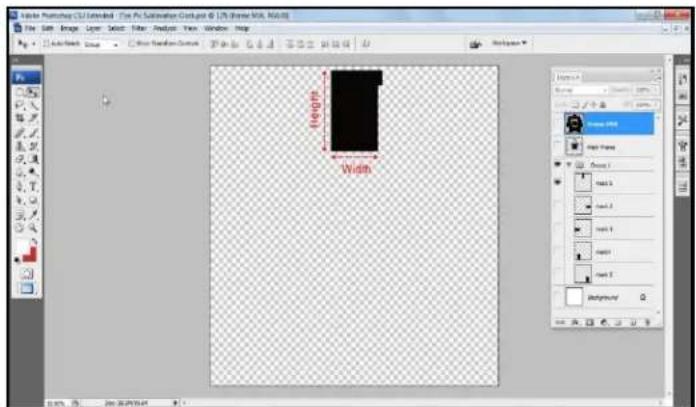
text_image
Width HeightImage 3.4.1.4: Creang Mask
- Create the mask according to the photos.
- Save the mask in PNG format.
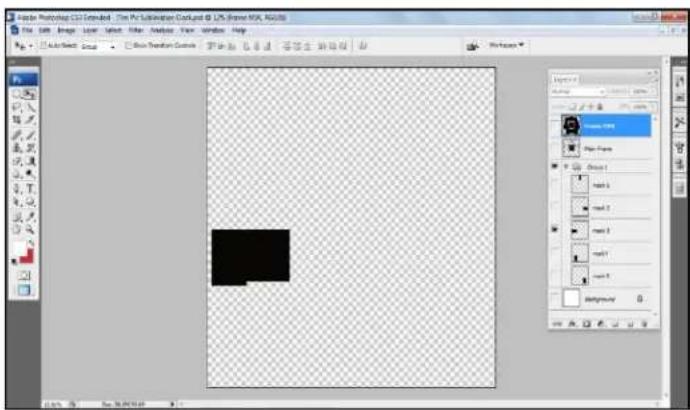
text_image
Adobe Photoshop CSJ Extended - The PC Subscription Catalog @ UCS (Shenke MQL AGUSS) File Edit View Insert Local Select Filter Window Help Auto Sketch Group Box Transition Control Properties Movie: 1997 Plan Frame Box 1 box 2 box 3 box 4 box 5 BackgroundImage 3.4.1.5: Creang Mask
Save the created frame in the applicaon folder
Right click on the soware folder.
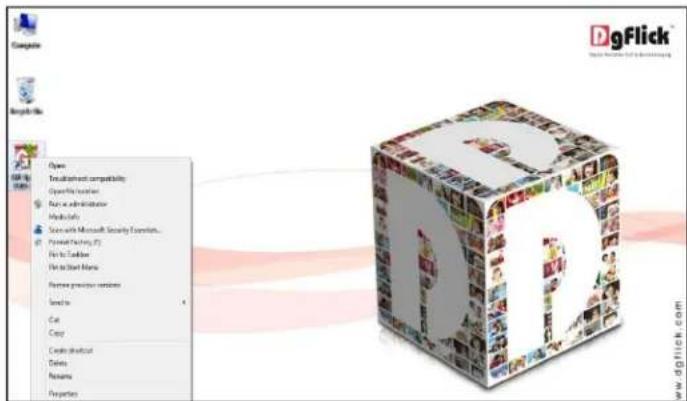
text_image
DgFlick www.dgFlick.comImage 3.4.1.6: Saving Created Frame and Mask
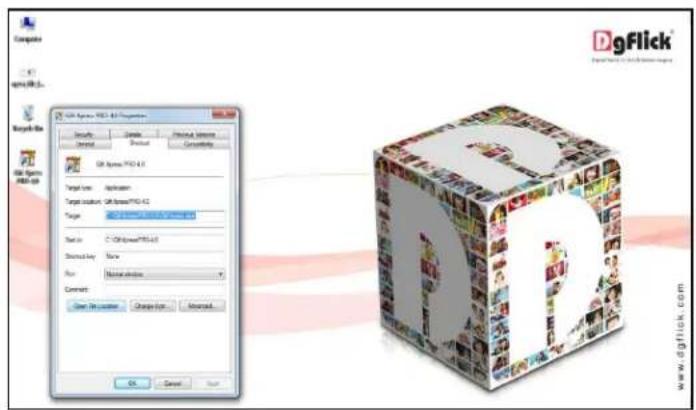
Click on properes.
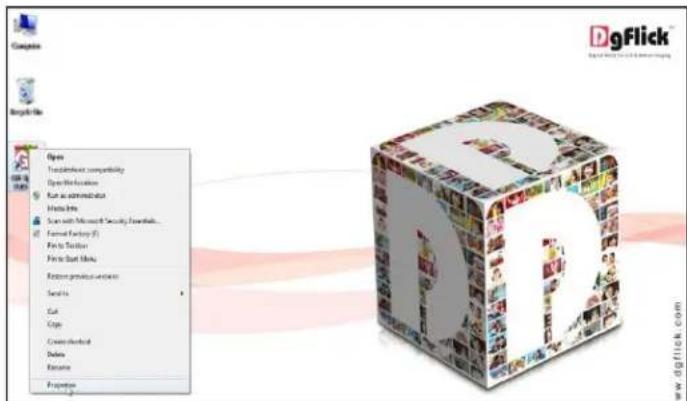
text_image
DgFlick DgGris File Open Print/Print compatibility Open Workload Run as administration Delete Info Start with Microsoft Security Annals... Format Factory (F) File to Textiles Print to Start Menu Export previous version Serials Cut Copy Create Desktop Delete Rename Properties www.dgflick.comImage 3.4.1.7: Saving Created Frame and Mask ..... Properes Opon
Click on Open File Locaon.
text_image
Computer sgf-fk sgf-fk sgf-fk sgf-fk sgf-fk sgf-fk sgf-fk sgf-fk sgf-fk sgf-fk sgf-fk sgf-fk sgf-fk sgf-fk sgf-fk sgf-fk sgf-fk sgf-fk sgf-fk sgf-fk sgf-fku sgf-fku sgf-fku sgf-fku sgf-fku sgf-fku sgf-fku sgf-fku sgf-fku sgf-fku sgf-fku sgf-fku sgf-fku sgf-fku sgf-fku sgf-fku sgf-fku sgf-fku sgf-fku sgf-fku sgf-fk sgf-fk sgf-fk sgf-fk sgf-fk sgf-fk sgf-fk sgf-fk sgf-fk sgf-fk sgf-fk sgf-fk sgf-fk sgf-fk sgf-fk sgf-fk sgf-fk sgf-fk sgf-fk sgf-fkk sgf-fkk sgf-fkk sgf-fkk sgf-fkk sgf-fkk sgf-fkk sgf-fkk sgf-fkk sgf-fkk sgf-fkk sgf-fkk sgf-fkk sgf-fkk sgf-fkk sgf-fkk sgf-fkk sgf-fkk sgf-fkk sgf-fkk sgf-fikk sgf-fkk sgf-fkk sgf-fkk sgf-fkk sgf-fkk sgf-fkk sgf-fkk sgf-fkk sgf-fkk sgf-fkk sgf-fkk sgf-fkk sgf-fkk sgf-fkk sgf-fkk sgf-fkk sgf-fkk sgf-fkk sgf-fkk sgf-fkx10000000000000000000000000000000000000000000000000000000000000000000000000000000000000000000000000000Image 3.4.1.8: Saving Created Frame and Mask .... Open File Locaon Opon
Click on Products.
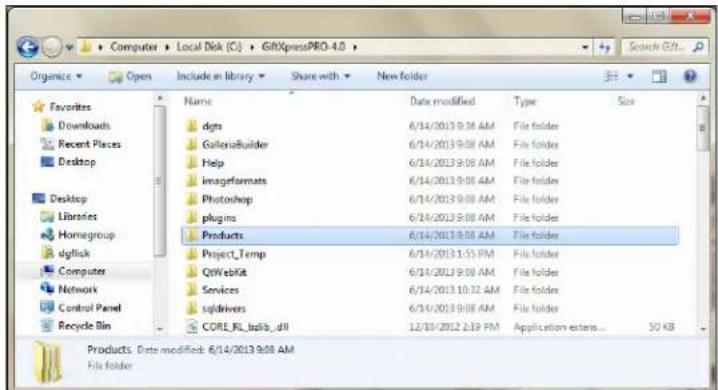
text_image
Computer > Local Disk (C:) > GiftXpressPRO-4.0 Organize Open Include in library Share with New folder Favorites Downloads Recent Places Desktop Desktop Libraries Homegroup dgflick Computers Network Control Panel Recycle Bin Name Date modified Type Size dpts 6/14/2013 9:34 AM File folder GalleriaBuilder 6/14/2013 9:08 AM File folder Help 6/14/2013 9:08 AM File folder imageformats 6/14/2013 9:08 AM File folder Photoshop 6/14/2013 9:08 AM File folder plugins 6/14/2013 9:08 AM File folder Products 6/14/2013 9:08 AM File folder Project_Temp 6/14/2013 1:53 PM File folder QWebKit 6/14/2013 9:08 AM File folder Services 6/14/2013 10:32 AM File folder sqldrivers 6/14/2013 9:08 AM File folder CORE_RL_bzipid_dll 12/10/2012 2:19 PM Application esters... 50 KB Products Date modified: 6/14/2013 9:08 AM File folderImage 3.4.1.9: Saving Created Frame and Mask ... File Locaon Product Folder
Click on DgGi.
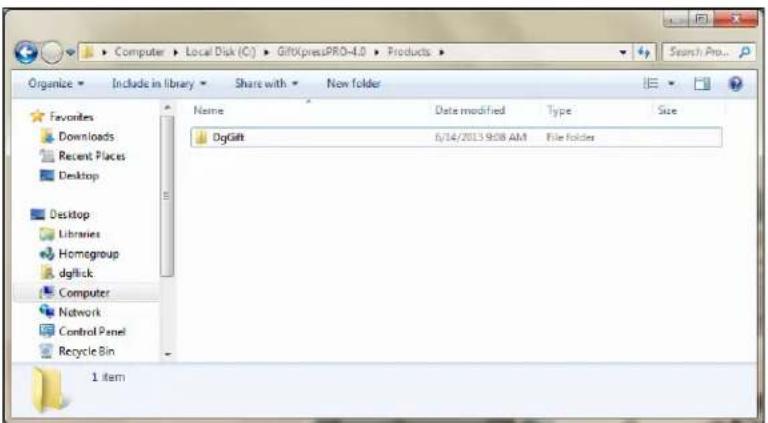
text_image
Computer > Local Disk (C:) > GiftXpressPRO-4.0 > Products > Organize > Include in library > Share with > New folder Favorites Downloads Recent Places Desktop Desktop Libraries Homegroup dgflick Computer Network Control Panel Recycle Bin Name Data modified Type Size DgGift 6/14/2013 9:08 AM File folders 1 itemImage 3.4.1.10: Saving Created Frame and Mask ... DgGi Folder
Click on Theme folder and paste the created frame in .png and .msk les in frame folder.
Click on Theme folder and paste the created mask in .png and .msk les in mask folder.
3.4.2 Create Category and Size in Mul-Photo Mul-Gi
Create Category
- Click on > at the lower le-hand corner of the screen to view the 'Add', 'Edit' and 'Delete' opons.
- Click on to 'Add' a new category (Image 3.4.2.1) on the 'Select Category' window.
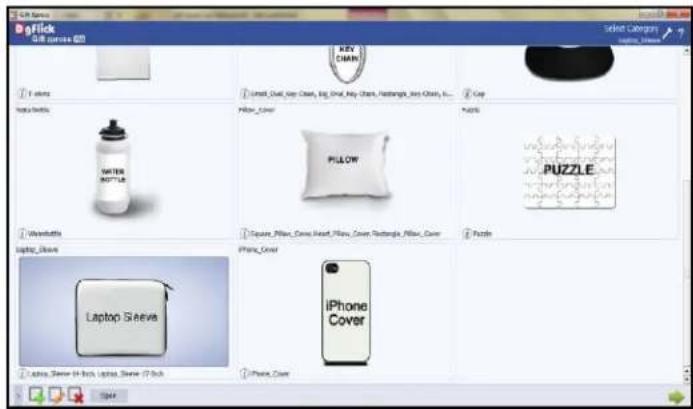
text_image
e.g.Plick 3D Camera 6D Select Camera Camera Image Key CHAIN 1. Top view Water Bottle 2. Top view Water Bottle 3. Top view Water Bottle 4. Top view Water Bottle 5. Top view Water Bottle 6. Top view Water Bottle 7. Top view Water Bottle 8. Top view Water Bottle 9. Top view Water Bottle 10. Top view Water Bottle 11. Top view Water Bottle 12. Top view Water Bottle 13. Top view Water Bottle 14. Top view Water Bottle 15. Top view Water Bottle 16. Top view Water Bottle 17. Top view Water Bottle 18. Top view Water Bottle 19. Top view Water Bottle 20. Top view Water Bottle 21. Top view Water Bottle 22. Top view Water Bottle 23. Top view Water Bottle 24. Top view Water Bottle 25. Top view Water Bottle 26. Top view Water Bottle 27. Top view Water Bottle 28. Top view Water Bottle 29. Top view Water Bottle 30. Top view Water Bottle 31. Top view Water Bottle 32. Top view Water Bottle 33. Top view Water Bottle 34. Top view Water Bottle 35. Top view Water Bottle 36. Top view Water Bottle 37. Top view Water Bottle 38. Top view Water Bottle 39. Top view Water Bottle 40. Top view Water Bottle 41. Top view Water Bottle 42. Top view Water Bottle 43. Top view Water Bottle 44. Top view Water Bottle 45. Top view Water Bottle 46. Top view Water Bottle 47. Top view Water Bottle 48. Top view Water Bottle 49. Top view Water Bottle 50. Top view Water Bottle 51. Top view Water Bottle 52. Top view Water Bottle 53. Top view Water Bottle 54. Top view Water Bottle 55. Top view Water Bottle 56. Top view Water Bottle 57. Top view Water Bottle 58. Top view Water Bottle 59. Top view Water Bottle 60. Top view Water Bottle 61. Top view Water Bottle 62. Top view Water Bottle 63. Top view Water Bottle 64. Top view Water Bottle 65. Top view Water Bottle 66. Top view Water Bottle 67. Top view Water Bottle 68. Top view Water Bottle 69. Top view Water Bottle 70. Top view Water BottleImage 3.4.2.1: The 'Select Category' window with the 'Add', 'Edit' and 'Delete' opons
- On the next window – 'Create Category' (Image 3.4.2.2) – II in the elds corresponding to:
(a) 'Name': The name you want for your new category.
(b) 'Ref. Image': The image you want for your category, clicking on the icon to the right of this eld lets you choose the reference image from the path in which you saved it.
(c) 'Descripon': Give a descripon of the category you are creang.
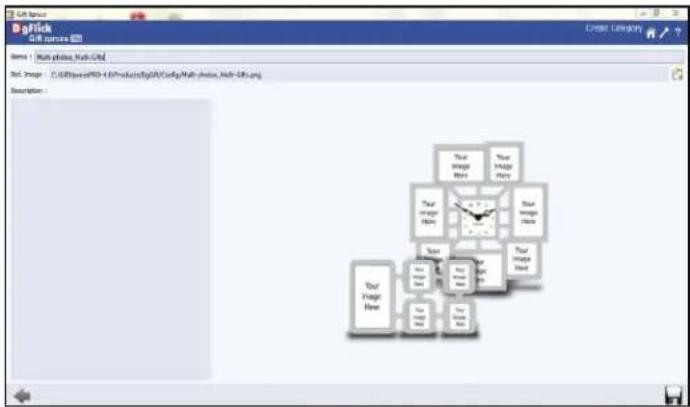
flowchart
graph TD
    A["Input Image"] --> B{Decision}
    B -->|Yes| C["Output Image"]
    B -->|No| D["End"]
    C --> E["Final Output"]
Image 3.4.2.2: The 'Create Category' window
- Click, on the lower right-hand corner to save the category you created (Image 3.4.2.3).
! Leaving either the 'Name' or the 'Ref. Image' eld blank will not allow you to save the category.
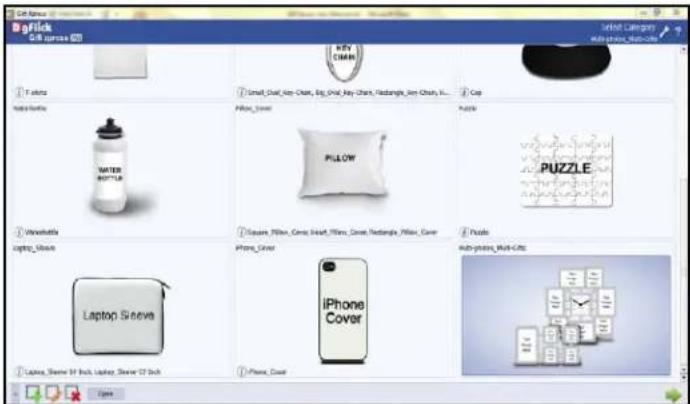
text_image
Boblick Gift covers (1) Gifts Gift categories http://www.ship.com/ Pilgrim WATER BUTTER Pillow Puzzle Puzzle Laptop Sleeve Laptop Sleeve iPhone Cover iPhone Cover iPhone Cover Multi-phone Multi-Gifts HomeImage 3.4.2.3: The Category Created
- The new Category is created and can be viewed in 'Select Category' Window.
! At any point during the process, you could click on the back buon to go back to the previous window. On clicking this buon, you are oered the chance to save/not save your changes or cancel the 'Back' command. You could also click on to go back to the home page.
Adding a Gi Size
To view the gi size under a category, double click on the category. Alternatively, you could select the category and then click on in the lower right-hand corner.
- Click on to 'Add' a new size on the 'Select Product' window (Image 3.4.2.4).
text_image
DgClick Gill spines 320 Select Product - 100% freeImage 3.4.2.4: Creang new Size in new Category
- On the next window: 'Create Gi' (Image 3.4.2.5) – ll in the elds corresponding to
(a) 'Name': The name you want for your new size,
(b) 'Ref. Image': The image you want for your size, clicking on the icon to the right of this edge lets you choose the reference image from the path in which you saved it.
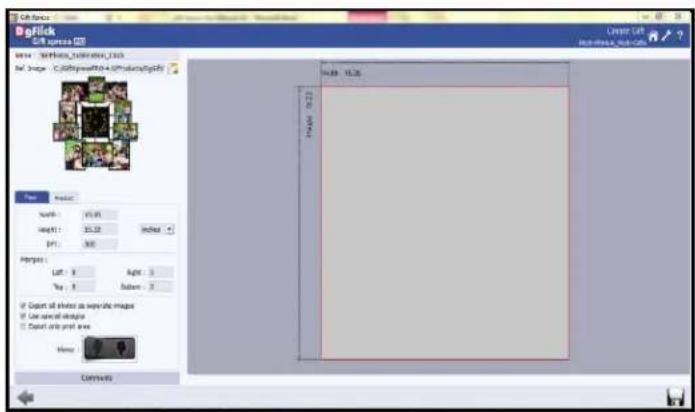
text_image
3D Flash 3D Flash Name: Size: 15.00 Height: 35.00 Center P1: 300 Merge: Left: 3 Right: 3 Top: 3 Bottom: 3 □ Copy of shares as separate images □ Use saved images □ Copy only print area None CommentsImage 3.4.2.5: The 'Create Gi' window
- Fill in the parameters under the 'Page' tab.
These are: Width and Height. Margins (Le, Right, Top and Boom). DPI and Units.
- Check the Export all photos as separate images check box, if you want to export all the photos separately.
- Check the check box, Use special designs
if you want to view the designs in design area.
- Give Mirror eect from
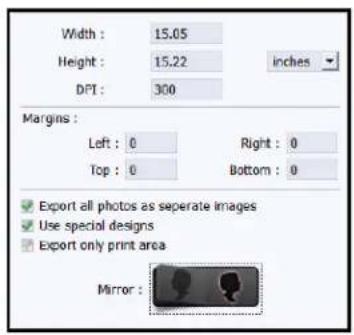
text_image
Width : 15.05 Height : 15.22 inches DPI : 300 Margins : Left : 0 Right : 0 Top : 0 Bottom : 0 Export all photos as separate images Use special designs Export only print area Mirror :- Check the √ Use product image check box to insert the over lay image of the product.
- Dene the reference image, clicking on the icon to the right of this eld lets you choose the reference image from the path in which you saved it.
- Check the Export product image check box to export the Over Lay Image of the product.
- You could add your comments by clicking on the 'Comment' buon.
- Click 📋 on the lower le-hand corner to save the size you created.
- The new gi size is created and can be viewed in 'Select Category' window (Image 3.4.2.6).
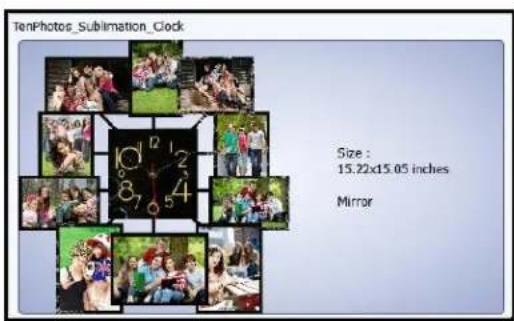
text_image
TenPhotos_Sublimation_Clock Size : 15.22x15.05 inches MirrorImage 3.4.2.6: The new size added
3.4.3 Eding a Category and Size in Mul-Photo Mul-Gi
Eding a Category
- Click on □ at the lower le-hand corner of the screen to view the 'Add', 'Edit' and 'Delete' opons.
- Aer selecng the category you wish to modify on the 'Select Category' window, (Image 3.4.3.1) click on ☐ to 'edit' the category as per your requirements.
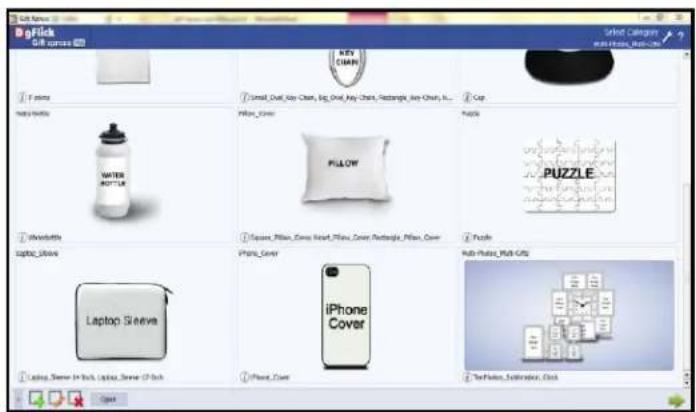
text_image
BigClick BigClick Selected Categories BIG Clicks_Multi-Clicks 1. Top view Honeyette 2. Small, One, Key Chain, Big, One, Key Chain, Rectangle, Key Chain, It... 3. Cap Honeyette 4. Pocket 5. Apple 6. Bubble 7. Puzzle 8. Multi-Clicks_Multi-Gifts 9. Mobile Toucher_Clicks 10. Phone Cover 11. Phone Cover 12. Phone Cover 13. Phone Cover 14. Phone Cover 15. Phone Cover 16. Phone Cover 17. Phone Cover 18. Phone Cover 19. Phone Cover 20. Phone Cover 21. Phone Cover 22. Phone Cover 23. Phone Cover 24. Phone Cover 25. Phone Cover 26. Phone Cover 27. Phone Cover 28. Phone Cover 29. Phone Cover 30. Phone Cover 31. Phone Cover 32. Phone Cover 33. Phone Cover 34. Phone Cover 35. Phone Cover 36. Phone Cover 37. Phone Cover 38. Phone Cover 39. Phone Cover 40. Phone Cover 41. Phone Cover 42. Phone Cover 43. Phone Cover 44. Phone Cover 45. Phone Cover 46. Phone Cover 47. Phone Cover 48. Phone Cover 49. Phone Cover 50. Phone Cover 51. Phone Cover 52. Phone Cover 53. Phone Cover 54. Phone Cover 55. Phone Cover 56. Phone Cover 57. Phone Cover 58. Phone Cover 59. Phone Cover 60. Phone Cover 61. Phone Cover 62. Phone Cover 63. Phone Cover 64. Phone Cover 65. Phone Cover 66. Phone Cover 67. Phone Cover 68. Phone Cover 69. Phone Cover 70. Phone Cover 71. Phone Cover 72. Phone Cover 73. Phone Cover 74. Phone Cover 75. Phone Cover 76. Phone Cover 77. Phone Cover 78. Phone Cover 79. Phone Cover 80. Phone Cover 81. Phone Cover 82. Phone Cover 83. Phone Cover 84. Phone Cover 85. Phone Cover 86. Phone Cover 87. Phone Cover 88. Phone Cover 89. Phone Cover 90. Phone Cover 91. Phone Cover 92. Phone Cover 93. Phone Cover 94. Phone Cover 95. Phone Cover 96. Phone Cover 97. Phone Cover 98. Phone Cover 99. Phone CoverImage 3.4.3.1: The 'Select Category' window
- On the next page: 'Edit Category' (Image 3.4.3.2) – you can add your edits to the,
(a) 'Name': Edit the name as per your choice.
(b) 'Ref. Image': Edit the Ref. image as per your choice by clicking on the icon to the right of this eld lets you choose the reference image from the path in which you saved it.
(c) 'Descripon': You may edit Descripon if needed.
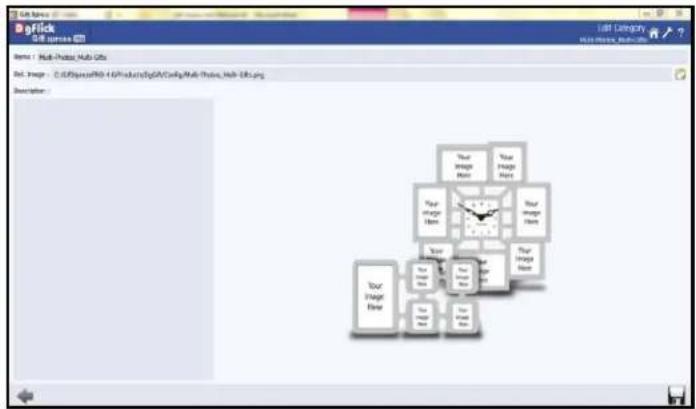
text_image
File Edit View Insert Remove Help Edit Category Web Publisher: Web Jobs Name: Web Product Hub Jobs Dist. Image - C:\G0\Image\R0-4\GProducts\g0\C\Config\Web\Users\Web Jobs.png Description: Your Image Item Your Image Item Your Image Item Your Image Item Your Image Item Your Image Item Your Image Item Your Image Item Your Image Item Your Image Item Your Image Item Your Image Item Your Image Item Your Image Item Your Image Item Your Image Item Your Image Item Your Image Item Your Image Item Your Image Item Your Image Item Your Image Item Your Image Item Your Image Item Your Image Item Your Image ItemImage 3.4.3.2: The 'Edit Category' window
- Save the changes by clicking 📄 on the lower right hand corner.
! At any point during the process, you could click on the back buon to go back to the previous window. On clicking this buon, you are oered the chance to save/not save your changes or cancel the 'Back' command. You
could also click on to go back to the home page.
Eding a Size
To view the gi sizes under a category, double click on the category. Alternatively, you could select the
category and then click on in the lower right-hand corner.
- On the 'Select Product' window, select the gi size you need to edit and then click on

- On the next page: 'Edit Gi' (Image 3.4.3.3) – you can make changes to the Name and Reference Image elds.
(a) 'Name': Edit the name as per your choice.
(b) 'Ref. Image': Edit the Ref. image as per your choice by clicking on the icon to the right of this eld lets you choose the reference image from the path in which you saved it.
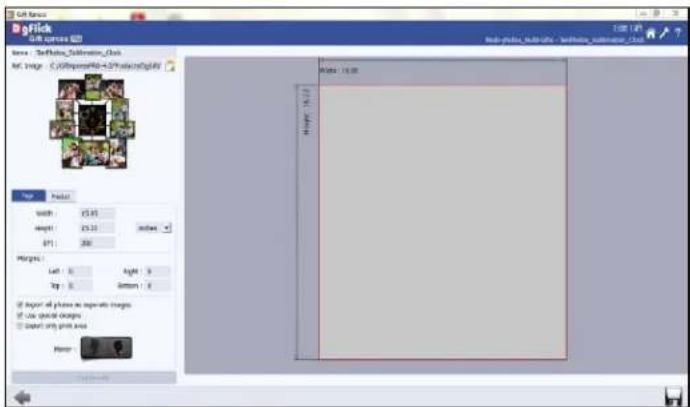
text_image
File File name: File name: File name: File name: File name: File name: File name: File name: File name: File name: File name: File name: File name: File name: File name: File name: File name: File name: File name: File name: File name: File name: File name: File name: File name: File name: View: 10.00 Width: 25.00 Height: 25.20 Size: 250 Margins: Left: Right: Bottom: Top: Bottom: All layers as follows images Use special images Use only print text Hamp: 10.00Image 3.4.3.3: The 'Edit Size' window
- You could edit the parameters under the 'Page' tab.
These are: Width and Height. Margins (Le, Right, Top and Boom). DPI and Units.
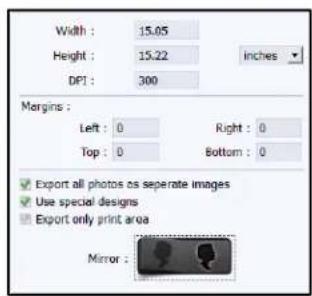
text_image
Width : 15.05 Height : 15.22 inches DPI : 300 Margins : Left : 0 Right : 0 Top : 0 Bottom : 0 Export all photos as separate images Use special designs Export only print area Mirror :- Give Mirror eect from
- You could add/edit your comments by clicking on the 'Comment' buon.
- Click 📄 on the lower right-hand corner to save the changes you made to the category.
• The changes done get saved.
3.4.4 Deleng a Category and Size in Mul-Photo Mul-Gi
Deleng a Category
- Click on > at the lower le-hand corner of the screen to view the 'Add', 'Edit' and 'Delete' opons.
- Aer selecng the category you wish to delete on the 'Select Category' window (Image 3.4.4.1), click on to delete it.
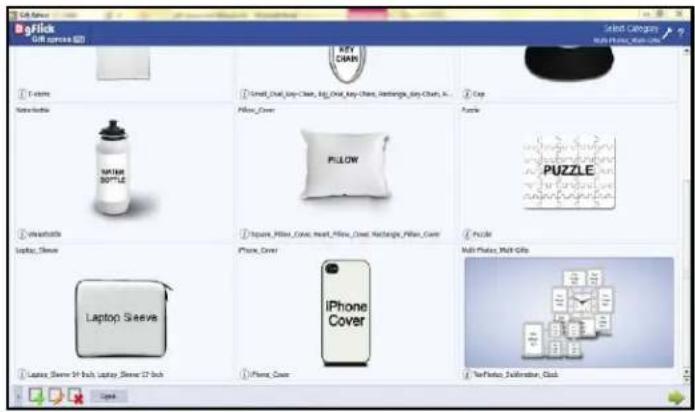
text_image
e-Flick Key Chain Selected Category: New York Times ● Colors New York Times ● Water Bottle ● Washable Laptop Sleeve ● Laptop Sleeve 34 Inch, Laptop Sleeve 27 Inch ● Pocket ● Pocket_Oval_Skip-Chair, Big,Oval_Key-Chair, Holdings_Key-Chair, L... ● Pillow Cover PULLOW ● Square_Flower_Cove, Pocket_Flower_Cove, Holdings_Flower_Cove Phone Cover iPhone Cover ● Pocket Multi-Puzzle, Multi-Gifts New York Times, New York Times, New York Times, New York Times, New York Times, New York Times, New York Times, New York Times, New York Times, New York Times, New York Times, New York Times, New York Times, New York Times, New York Times, New York Times, New York Times, New York Times, New York Times, New York Times, New York Times, New York Times, New York Times, New York Times, New York Times, New York Times, NImage 3.4.4.1: The 'Select Category' window
- A dialog box asking if you are sure you want to delete it appears on the screen.
- Clicking on 'Yes' deletes the category; clicking on 'No' aborts the operaon.
text_image
Gift Xpress Are you sure you want to delete? Yes NoDeleng a Size
- To view the gi sizes under a category, double click on the category. Alternatively, you could select the category and then click on in the lower right-hand corner.
- On the 'Select Product' window (Image 3.4.4.2), select the size you need to delete and then click on to delete it.
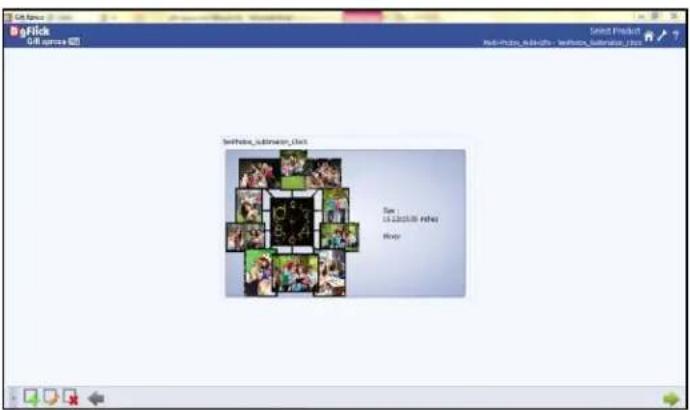
text_image
Send to the other to the other Send to the other Send to the other Send to the other Send to the other Send to the other Send to the other Send to the other Send to the other Send to the other Send to the other Send to the other Send to the other Send to the other Send to the other Send to the other Send to the other Send to the other Send to the other Send to the other Send to the other Send in the other Send in the other Send in the other Send in the other Send in the other Send in the other Send in the other Send in the other Send in the other Send in the other Send in the other Send in the other Send in the other Send in the other Send in the other Send in the other Send in the other Send in the other Send in the other Send in the other Send out the other Send out the other Send out the other Send out the other Send out the other Send out the other Send out the other Send out the other Send out the other Send out the other Send out the other Send out the other Send out the other Send out the other Send out the other Send out the other Send out the other Send out the other Send out the other Send out the other Send to the other Send to the other Send to the other Send to the other Send to the other Send to the other Send to the other Send to the other Send to the other Send to the other Send to the other Send to the other Send to the other Send to the other Send to the other Send to the other Send to the other Send to the other Send to the other Send out the other Send out the otherImage 3.4.4.2: The 'Select Product' window
- A dialog box asking if you are sure you want to delete it appears on the screen.
- Clicking on 'Yes' deletes the size; clicking on 'No' aborts the operaon.
text_image
Gift Xpress Are you sure you want to delete? Yes No3.4.5 Creang Your Gi in Mul-Photo Mul-Gi
- Click on to go to design window.
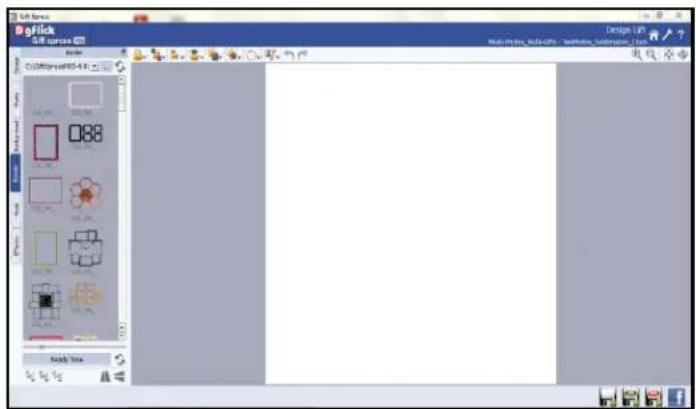
text_image
3D Flash 3D Flash 3D Flash 3D Flash 3D Flash 3D Flash 3D Flash 3D Flash 3D Flash 3D Flash 3D Flash 3D Flash 3D Flash 3D Flash 3D Flash 3D Flash 3D Flash 3D Flash 3D Flash 3D Flash 3D Flash 3D Flash 3D Flash 3D Flash 3D Flash 3D FlashImage 3.4.5.1: 'Design' Window
- Click on the Le Panel to select the border.
• To apply border double click on the border or drag and drop the border needed from the Le panel.
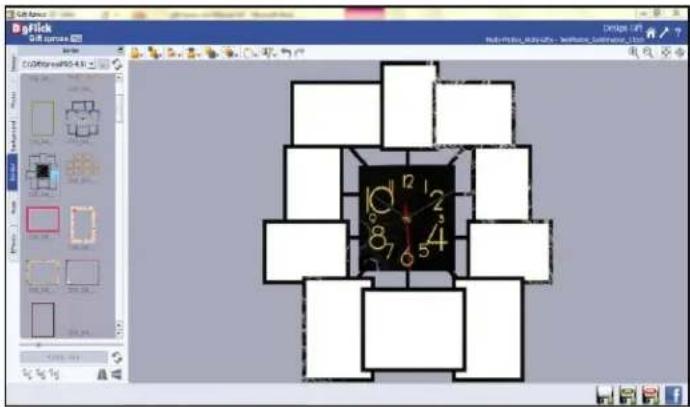
text_image
bglick Shift frames AutoCAD/2016.4.1 AutoCAD/2016.4.1 AutoCAD/2016.4.1 AutoCAD/2016.4.1 AutoCAD/2016.4.1 AutoCAD/2016.4.1 AutoCAD/2016.4.1 AutoCAD/2016.4.1 AutoCAD/2016.4.1 AutoCAD 2016.4.1 AutoCAD 2016.4.1 AutoCAD 2016.4.1 AutoCAD 2016.4.1 AutoCAD 2016.4.1 AutoCAD 2016.4.1 AutoCAD 2016.4.1 AutoCAD 2016.4.1 AutoCAD 2017.4.1 AutoCAD 2017.4.1 AutoCAD 2017.4.1 AutoCAD 2017.4.1 AutoCAD 2017.4.1 AutoCAD 2017.4.1 AutoCAD 2017.4.1 AutoCAD 2017.4.1 AutoCAD 2017.4.2 AutoCAD 2017.4.2 AutoCAD 2017.4.2 AutoCAD 2017.4.2 AutoCAD 2017.4.2 AutoCAD 2017.4.2 AutoCAD 2017.4.2 AutoCAD 2017.4.3 AutoCAD 2017.4.3 AutoCAD 2017.4.3 AutoCAD 2017.4.3 AutoCAD 2017.4.3 AutoCAD 2017.4.3 AutoCAD 2017.4.3 AutoCAD 2017.4.3 AutoCAD 2017.4.3 AutoCAD/2017-03-08 AutoCAD/2017-03-09 AutoCAD/2017-03-10 AutoCAD/2017-03-11 AutoCAD/2017-03-12 AutoCAD/2017-03-13 AutoCAD/2017-03-14 AutoCAD/2017-03-15 AutoCAD/2017-03-16 AutoCAD/2017-03-17 AutoCAD/2017-03-18 AutoCAD/2017-03-19 AutoCAD/2017-03-20 AutoCAD/2017-03-21 AutoCAD/2017-03-22 AutoCAD/2017-03-23 AutoCAD/2017-03-24 AutoCAD/2017-03-25 AutoCAD/2017-03-26 AutoCAD/2017-03-27 AutoCAD/2017-03-28 AutoCAD/2017-03-29 AutoCAD/2017-03-30 AutoCAD/2017-03-31 AutoCAD/2017-03-32 AutoCAD/2017-03-33 AutoCAD/2017-03-34 AutoCAD/2017-03-35 AutoCAD/2017-03-36 AutoCAD/2017-03-37 AutoCAD/2017-03-38 AutoCAD/2017-03-39 AutoCAD/2017-03-40 AutoCAD/2017-03-41 AutoCAD/2017-03-42 AutoCAD/2017-03-43 AutoCAD/2017-03-44 AutoCAD/2017-03-45 AutoCAD/2017-03-46 AutoCAD/2017-03-47 AutoCAD/2017-03-48 AutoCAD/2017-03-49 AutoCAD/2017-03-50 AutoCAD/2017-03-51 AutoCAD/2017-03-52 AutoCAD/2017-03-53 AutoCAD/2017-03-54 AutoCAD/2017-03-55 AutoCAD/2017-03-56 AutoCAD/2017-03-57 AutoCAD/2017-03-58 AutoCAD/2017-03-59 AutoCAD/2017-03-60 AutoCAD/2017-03-61 AutoCAD/2017-03-62 AutoCAD/2017-03-63 AutoCAD/2017-03-64 AutoCAD/2017-03-65 AutoCAD/2017-03-66 AutoCAD/2017-03-67 AutoCAD/2017-03-68 AutoCAD/2017-03-69 AutoCAD/2017-03-70 AutoCAD/2017-03-71 AutoCAD/2017-03-72 AutoCAD/2017-03-73 AutoCAD/2017-03-74 AutoCAD/2017-03-75 AutoCAD/2017-03-76 AutoCAD/2017-03-77 AutoCAD/2017-03-78 AutoCAD/2017-03-79 AutoCAD/2017-03-80 AutoCAD/2017-03-81 AutoCAD/2017-03-82 AutoCAD/2017-03-83 AutoCAD/2017-03-84 AutoCAD/2017-03-85 AutoCAD/2017-03-86 AutoCAD/2017-03-87 AutoCAD/2017-03-88 AutoCAD/2017-03-89 AutoCAD/2017-03-90 AutoCAD/2017-03-91 AutoCAD/2017-03-92 AutoCAD/2017-03-93 AutoCAD/2017-03-94 AutoCAD/2017-03-95 AutoCAD/2017-03-96 AutoCAD/2017-03-97 AutoCAD/2017-03-98 AutoCAD/2017-03-99 AutoCAD/2017-04: 9:55:55:55:55:55:55:55:55:55:55:55:55:55:55:55:55:55:55:55:55:55:55:55:55:55:55:55:55:55:55:55:55:55:55 : 9:55:55:55:55:55:55:55:55:55:55:55:55:55:55:55:55:55:5Image 3.4.5.2: Add Border
- Click on the Le Panel to open the Photos folder.
- Select the dummy photo to be inserted on the page & double click on the photo.
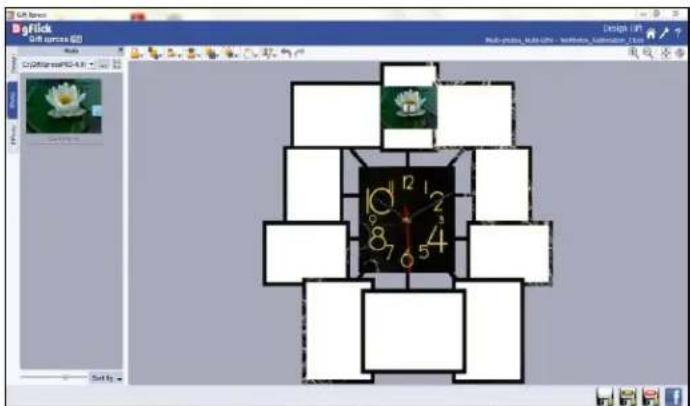
text_image
3D Flash 3D view (0) Multi-visual, multi-visual, multi-visual, multi-visual, multi-visual 3D Flash (0) Multi-visual, multi-visual, multi-visual, multi-visual, multi-visualImage 3.4.5.3: Add Dummy Photo

- Click on the Le Panel to Select the Mask
• To apply the mask double click on the mask needed from the Le panel or drag and drop the mask.
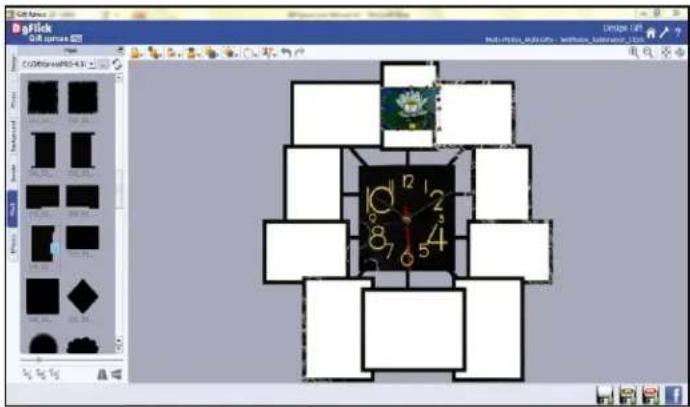
text_image
bgflick GIR currently C:\Users\GIR\1.3\1 AutoCAD\GIR\1.3\1 AutoCAD\GIR\1.3\1 AutoCAD\GIR\1.3\1 AutoCAD\GIR\1.3\1 AutoCAD\GIR\1.3\1 AutoCAD\GIR\1.3\1 AutoCAD\GIR\1.3\1 AutoCAD\GIR\1.3\1 AutoCAD\GIR \u00e6g AutoCAD\GIR \u00e6g AutoCAD\GIR \u00e6g AutoCAD\GIR \u00e6g AutoCAD\GIR \u00e6g AutoCAD\GIR \u00e6g AutoCAD\GIR \u00e6g AutoCAD\GIR \u00e6g AutoCAD\GIR \u2094 AutoCAD\GIR \u2094 AutoCAD\GIR \u2094 AutoCAD\GIR \u2094 AutoCAD\GIR \u2094 AutoCAD\GIR \u2094 AutoCAD\GIR \u2094 AutoCAD\GIR \u2094 AutoCAD\GIR \u2094 AutoCAD GIR \u2094 AutoCAD GIR \u2094 AutoCAD GIR \u2094 AutoCAD GIR \u2094 AutoCAD GIR \u2094 AutoCAD GIR \u2094 AutoCAD GIR \u2094 AutoCAD GIR \u2094 AutoCAD GIR \u2094 AutoCAD GIB AutoCAD GIB AutoCAD GIB AutoCAD GIB AutoCAD GIB AutoCAD GIB AutoCAD GIB AutoCAD GIB AutoCAD GIB AutoCAD GIB AutoCAD GIB AutoCAD GIB AutoCAD GIB AutoCAD GIB AutoCAD GIB AutoCAD GIB AutoCAD GIB AutoCAD GIB AutoCAD GIB AutoCAD GIB AutoCAD GIG AutoCAD GIG AutoCAD GIG AutoCAD GIG AutoCAD GIG AutoCAD GIG AutoCAD GIG AutoCAD GIG AutoCAD GIG AutoCAD GIG AutoCAD GIG AutoCAD GIG AutoCAD GIG AutoCAD GIG AutoCAD GIG AutoCAD GIG AutoCAD GIG AutoCAD GIG AutoCAD GIG AutoCAD GIG AutoCAD GIC AutoCAD GIC AutoCAD GIC AutoCAD GIC AutoCAD GIC AutoCAD GIC AutoCAD GIC AutoCAD GIC AutoCAD GIC AutoCAD GIC AutoCAD GIC AutoCAD GIC AutoCAD GIC AutoCAD GICImage 3.4.5.4: Add Mask to Dummy Photo
• To t the photo in the photo area, scroll the mouse wheel to zoom in and zoom out on the photo.
- For On-board Panning—Move the cursor on 📄, the mouse pointer changes to now click and drag.
- Resize the Dummy Photo to t in Photo Area.(Image 3.4.5.5)

Image 3.4.5.5: Resize Photo to Photo Area
• Similarly insert other photos and masks.
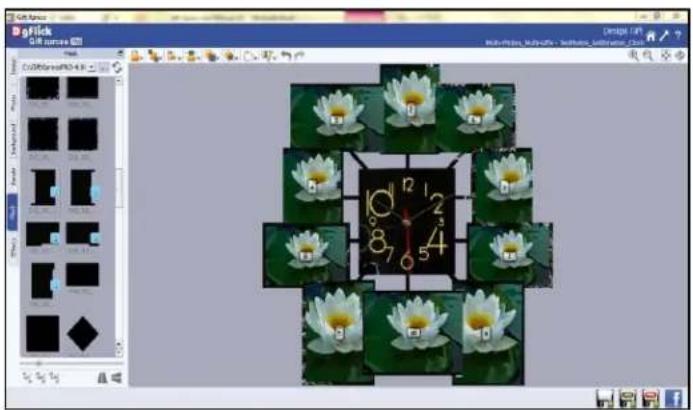
natural_image
Screenshot of a photo editing software interface showing a grid of white water lilies arranged around a clock face, with no visible text or symbols on the objects themselves.Image 3.4.5.6: Add Other Photos and Mask
- Now Your Template with dummy photo is ready to save.
3.4.6 Save, Build and Share Template \*
- Click on Save to save the template *
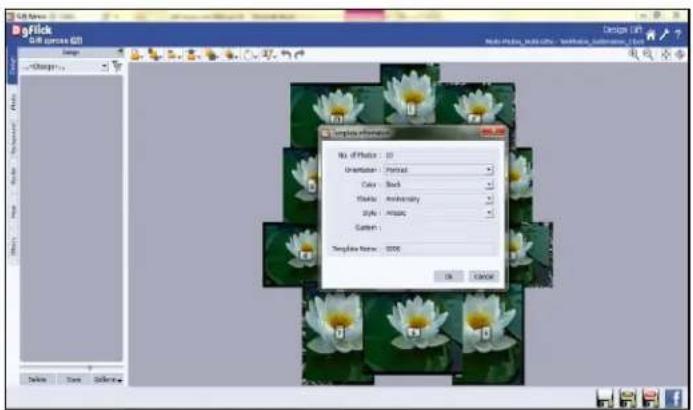
text_image
File File format: 100% Design Change... Name of Photo: 10 Orientation: Portrait Color: Black Flatten: Anniversary Style: Images Pattern: Template Name: 2006 OK CancelImage 3.4.6.1: Saving the Template
- No. of photos: Automacally detects the number of photos on the page and displays the number by default. No. of Photos : 10
- Orientaon: Automacally detects the orientaon of the page. Preferred orientaons are Cover, Landscape, Portrait, Panoramic and Square. If entered the above orientaon then the saved templates will be displayed in that parcular category and easy to search the templates by orientation
- Template is saved as per the given informaon.
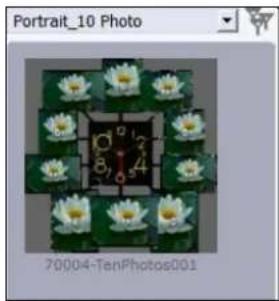
natural_image
Photograph of a flower arrangement with white and green petals, no visible text or symbols- Template volume can be build, share, Import & get more with
• Build own created templates through
Build

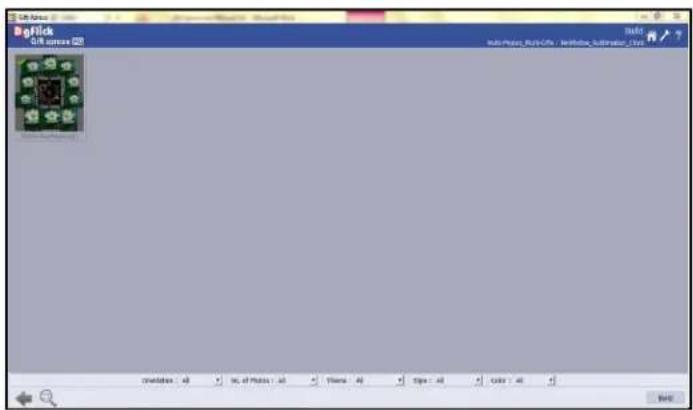
text_image
BigClick 3.01 seconds 200 Multi-Pointer-Bio-Cells - Multi-Pointer-Bio-Cells Untitled - All No. of Photo - All Theme - All Tips - All Color - All HelpImage 3.4.6.2: Build Template - 1
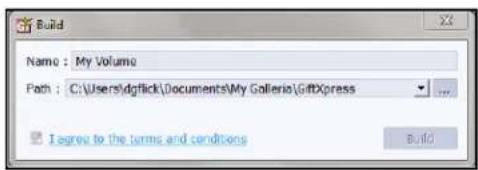
text_image
Build Name : My Volume Path : C:\Users\dgffk\Documents\My Galeria\GiftXpress I agree to the terms and conditions BuildImage 3.4.6.3: Build Template - 2
- Specify the name Name : My Volume
- Browse the path for saving the volume OR by default the volume is saved in "My documents\myGalleria\GiXpress"
- Accept the terms and conditions I agree to the terms and conditions
• To build own templates click on Build * - The Soware will display a message that our Template is Build Successfully.
- You can see your Template by clicking on 'Open' or you can proceed to creang Gi by selecng 'OK'.
- Share own created templates through Share. *
- Templates will be shared on DgFlick's website
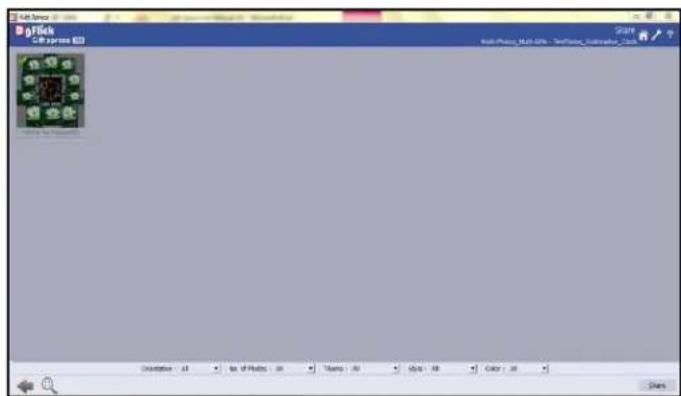
text_image
3D Flash 3D Flash (1) Start 3D Flash (2) Start 3D Flash (3) Start 3D Flash (4) Start 3D Flash (5) Start 3D Flash (6) Start 3D Flash (7) Start 3D Flash (8) Start 3D Flash (9) Start 3D Flash (10) Start 3D Flash (11) Start 3D Flash (12) Start 3D Flash (13) Start 3D Flash (14) Start 3D Flash (15) Start 3D Flash (16) Start 3D Flash (17) Start 3D Flash (18) Start 3D Flash (19) Start 3D Flash (20) Start 3D Flash (21) Start 3D Flash (22) Start 3D Flash (23) Start 3D Flash (24) Start 3D Flash (25) Start 3D Flash (26) Start 3D Flash (27) Start 3D Flash (28) Start 3D Flash (29) Start 3D Flash (30) Start 3D Flash (31) Start 3D Flash (32) Start 3D Flash (33) Start 3D Flash (34) Start 3D Flash (35) Start 3D Flash (36) Start 3D Flash (37) Start 3D Flash (38) Start 3D Flash (39) Start 3D Flash (40) Start 3D Flash (41) Start 3D Flash (42) Start 3D Flash (43) Start 3D Flash (44) Start 3D Flash (45) Start 3D Flash (46) Start 3D Flash (47) Start 3D Flash (48) Start 3D Flash (49) Start 3D Flash (50) Start 3D Flash (51) Start 3D Flash (52) Start 3D Flash (53) Start 3D Flash (54) Start 3D Flash (55) Start 3D Flash (56) Start 3D Flash (57) Start 3D Flash (58) Start 3D Flash (59) Start 3D Flash (60) Start 3D Flash (61) Start 3D Flash (62) Start 3D Flash (63) Start 3D Flash (64) Start 3D Flash (65) Start 3D Flash (66) Start 3D Flash (67) Start 3D Flash (68) Start 3D Flash (69) Start 3D Flash (70) Start 3D Flash (71) Start 3D Flash (72) Start 3D Flash (73) Start 3D Flash (74) Start 3D Flash (75) Start 3D Flash (76) Start 3D Flash (77) Start 3D Flash (78) Start 3D Flash (79) Start 3D Flash (80) StartImage 3.4.6.4: Sharing Your Template
- Login is required to share the template.
- If you are an Exisng User then you can Sign In with your Username and password to Share your Template on DgFlick Website.
- If you are a new user, then you need to register yourself on DgFlick Website. For that click on Sign Up and Register yourself with DgFlick By Iling up a form to Share template.
- Aer Login the following window is displayed.
text_image
Login Username : Password : Sign In Sign Up
text_image
I agree to the terms and conditions Share- Accept the terms and conditions if you agree and proceed.
• To share own created templates click on Share *
3.4.7 Get More, Import and Delete Template
Get More
- If you want to add new Designss to your soware then you need to use 'Get More' opon on Design Tab.
- To Get More designs go to 'Design' tab on 'Design Gi' Window.
- Click on Galleria.
- Click on 'Get More'.
- You will be redirected to DgFlick Website where you can download new designs uploaded by DgFlick.
Import
- You can import Templates which you have downloaded or saved on your hard disk.
- To Import new Designs or Templates in this soware go to Design tab on Design Gi window.
- Click on Galleria.
- Select 'Import'.
- A new 'Import' window will get opened.
- To Browse through your Hard Disk click on ... and Select desired path for Templates.
- The Last 15 path selected for Designs folders will be saved in the path list box.
- Click 'OK' to import the designs.
- Your Templates are imported and can be viewed in 'Design' tab.
Delete Template
- If you don't want any template and want to remove it permanently then you need to delete that template.
- For that go to 'Design' tab on Design Gi window.
- Select the template you want to delete.
- Select 'Delete' opon from 'Design' tab.
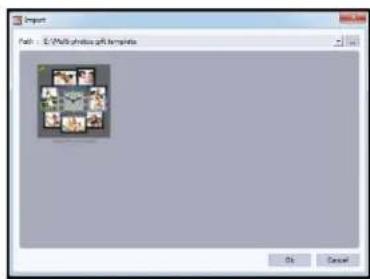
text_image
File - 3-Diagrams gift templates OK Cancel- A dialog Box asking for permission to delete the template permanently will appear on screen.
- Select 'Yes' if you want to delete any template permanently or select 'No' to cancel the delete request.
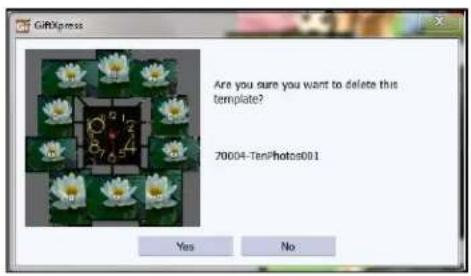
text_image
Are you sure you want to delete this template? 70004-TenPhotos001 Yes No3.4.8 Saving and Exporng Mul-Photo Mul-Gi
- You can create new Gi in new template.
- For that Click on 'Design' Tab.
- Select newly created Template.

- Then click on the Le Panel to open the Photos folder.
- Select the photo to be inserted on the page & double click on the photo.
- You can add photos from your hard disk or take photos from Facebook through 📄 buon from Photo Tab.
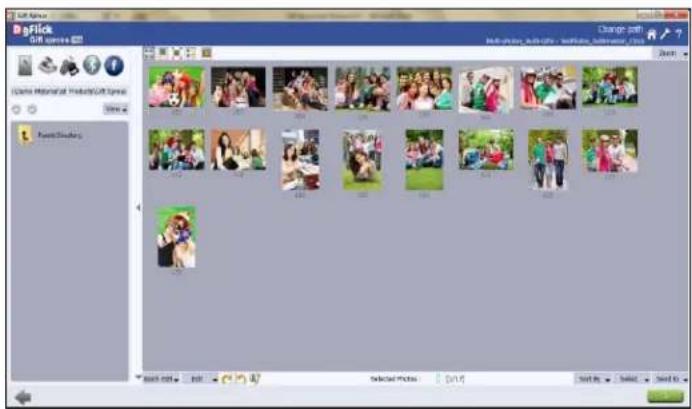
text_image
Boglick 3D content Change post Boglick_3D content - Boglick_3D content Share Historical Products/Get Spain Name: C# Name: C# Name: C# Name: C# Name: C# Name: C# Name: C# Name: C# Name: C# Name: C# Name: C# Name: C# Name: C# Name: C# Name: C# Name: C# Name: C# Name: C# Name: C# Name: C# Name: C# Name: C# Name: C# Name: C# Name: C# Name: C#Image 3.4.8.1: 'Change Path' window
- Aer clicking on 📄 tab you will be redirected to Change Path Window (Image 3.4.8.1) where you can manage your photos, edit them, give them desire eect, resize them or rename them. (for details refer Secon 3.3.4 Manage Your Photos)
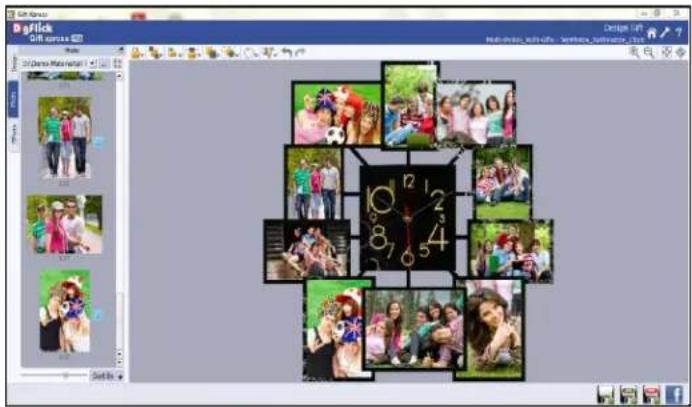
text_image
Doflick Gift access 12 File 30+ Devices Make info 10 2 4 6 8 10 12 14 16 18 20 22 24 26 28 30 32 34 36 38 40 42 44 46 48 50 52 54 56 58 60 62 64 66 68 70 72 74 76 78 80 82 84 86 88 90 92 94 96 98 100Image 3.4.8.2: Add Photos to Template
• You have to save your project to export it in JPEG or PNG.
- Click on to save the project.
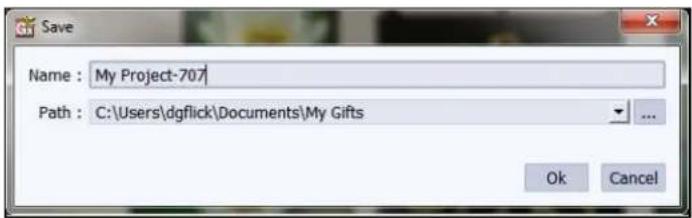
text_image
Name : My Project-707 Path : C:\Users\dgflick\Documents\My Gifts Ok Cancel- Default path for saving the gi is "My Documents\My Gis"
- Click 'OK' to save the Gi Project.
Export with JPG
- Save the Gi in JPG format with .

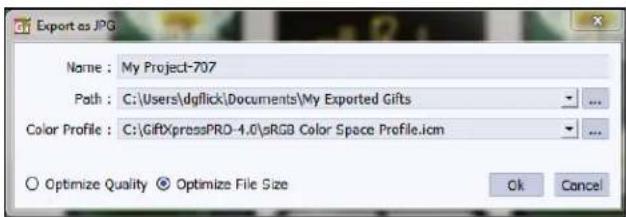
text_image
Export as JPG Name : My Project-707 Path : C:\Users\dgflick\Documents\My Exported Gifts Color Profile : C:\GiftXpressPRO-4.0\sRGB Color Space Profile.icm Optimize Quality Optimize File Size Ok Cancel- Default path for saving the JPG is "My Documents\My Exported Gi"
- Click 'OK' to save the JPG.
Output
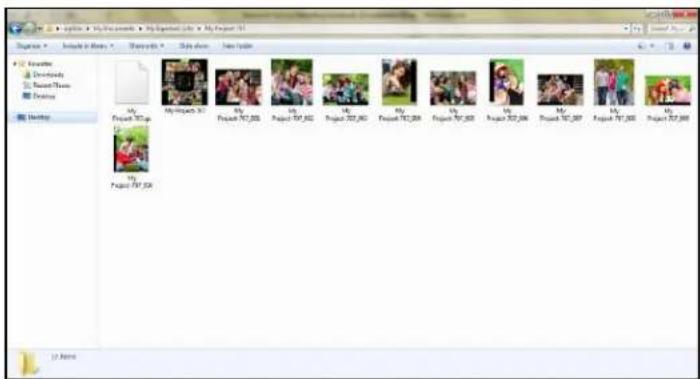
text_image
My Project 50.0p My Project 50.0p My Project 50.0p My Project 50.0p My Project 50.0p My Project 50.0p My Project 50.0p My Project 50.0p My Project 50.0p My Project 50.0p My Project 50.0p My Project 50.0p 12 ItemsImage 3.4.8.1: Final Output Window of JPEG
• Here you can preview the actual gi with photos.
• The Gi saves its images separately according to the frame design.
• The gi get's saved as MulPhoto Gi.JPEG
Export with PNG
- Save the Gi in PNG format with .


text_image
Export as PNG Name : My Project 006 Path : C:\Users\dgflick\Documents\My Exported Gifts Ok Cancel- Default path for saving PNG is "My Documents\My Exported Gis"
- Click 'OK' to save the PNG.
Output
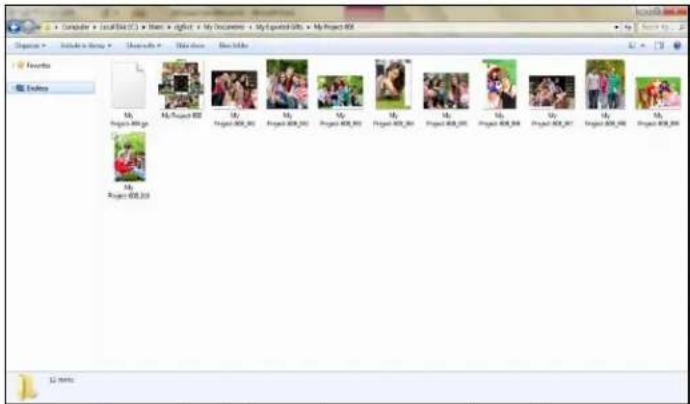
text_image
Computer + Local Box (C:) - Items = right + My Documents + My Exported Gifts + My Project 800 Options Favorites Endings M3 Project 800 M4 Project 800 M5 Project 800 M6 Project 800 M7 Project 800 M8 Project 800 M9 Project 800 M10 Project 800 M11 Project 800 M12 Project 800 M13 Project 800 M14 Project 800 M15 Project 800 M16 Project 800 M17 Project 800 M18 Project 800 M19 Project 800 M20 Project 800 M21 Project 800 M22 Project 800 M23 Project 800 M24 Project 800 M25 Project 800 M26 Project 800 M27 Project 800 M28 Project 800 M29 Project 800 M30 Project 800 M31 Project 800 M32 Project 800 M33 Project 800 M34 Project 800 M35 Project 800 M36 Project 800 M37 Project 800 M38 Project 800 M39 Project 800 M40 Project 800 M41 Project 800 M42 Project 800 M43 Project 800 M44 Project 800 M45 Project 800 M46 Project 800 M47 Project 800 M48 Project 800 M49 Project 800 M50 Project 800 M51 Project 800 M52 Project 800 M53 Project 800 M54 Project 800 M55 Project 800 M56 Project 800 M57 Project 800 M58 Project 800 M59 Project 800 M60 Project 800 M61 Project 800 M62 Project 800 M63 Project 800 M64 Project 800 M65 Project 800 M66 Project 800 M67 Project 800 M68 Project 800 M69 Project 800 M70 Project 800 M71 Project 800 M72 Project 800 M73 Project 800 M74 Project 800 M75 Project 800 M76 Project 800 M77 Project 800 M78 Project 800 M79 Project 800 M80 Project 800Image 3.4.8.2: Final Output Window of PNG
• Here you can view the mulphoto gi with photos in PNG format
• The gi gets saved as MulPhoto Gi.PNG.
3.5 How to Create Special Design Gis?
Gi Xpress soware provides you the opon of creang special design Gis. In this secon we will learn how to create Special Design Gi with the Help of Gi Xpress.
3.5.1 Create Frame and Mask for Special Design Gi
To create a parcular gi
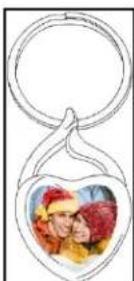
How to Create Frame:
• Measure the width and height of the gi size.
- According to the gi size select the canvas area in the Photoshop.
- Create outer border of the frame.
- Save the created frame in PNG format.
• Measure the top, bottom, le and right area of the frame for creang mask.
- Dene these measurements in the Create new category window in Gi Xpress.
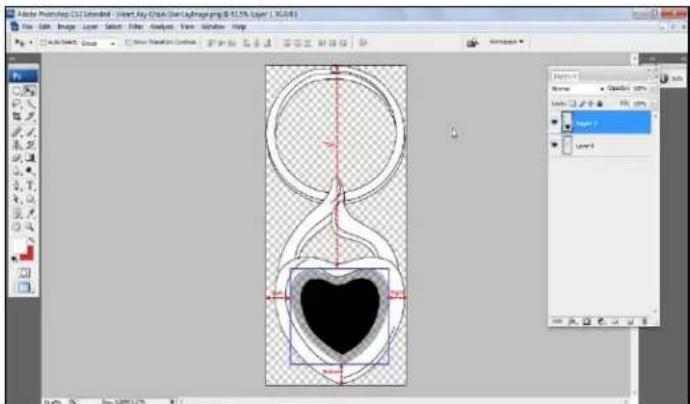
text_image
Adobe Photoshop CS: Extended - Insert Fly-Click Over Lyr ago Layer 1 (10.0%) File Edit Image Layer Select Filter Analysis View Window Help Auto Sketch Group New Transition Control Layers Open Lock: Layer 1 Layer 2 Layer 3 OK CancelImage 3.5.1.1: Create Frame
How to Create Mask:
- Create mask only for odd shapes.
- Create the mask according to the photo placement area.
- Save the mask in PNG format.
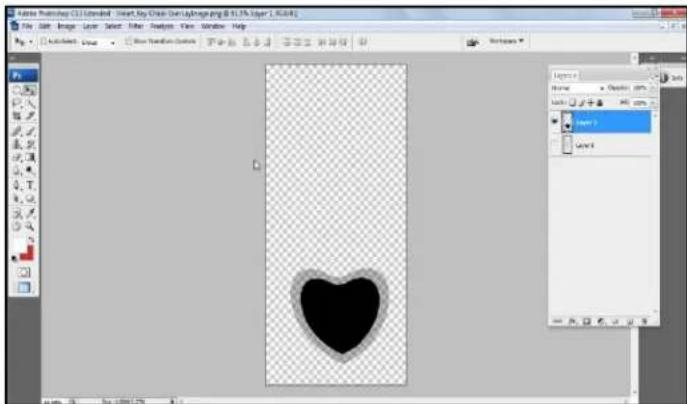
text_image
Adobe Photoshop CS133 Chart, by Chain (Defaultimage.png 8.17a, Layer 1, RGB) File Edit Image Layer Select Filter Preview View Window Help AutoCADs Style Show Transition Controls Layer 1 Layer 2Image 3.5.1.2: Create Mask
- Dene the transparency of the mask to t the photos in the desired shape or mask.
- Save the mask in msk format.
Note: The le name of the Frame in png and msk format should be similar.
- Save the created frame in the applicaon folder of Gift Xpress.
3.5.2 Create Category and Size for Special Design Gi
Creang a Category

- Click on □ at the lower le-hand corner of the screen to view the 'Add', 'Edit' and 'Delete' opons.
- Click on to 'Add' a new category (Image 3.5.2.1) on the 'Select Category' window.
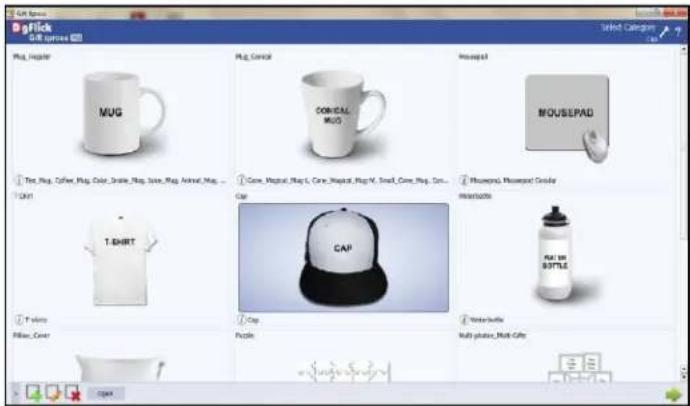
text_image
Pick 5/8 times 20 Pick MUG MUG COM-CAI MUG Mousepad T-Bug, Color, Bug, Color_Drain, Bug, Size_Mag, Animal_Mug... Cone, Magical, BugS, Care_Magual, BugN, Snail_Cone_Mug_Can... Mousepad, Mousepad Cover T-BHRT Cap CAP Interchange POT & BOTTLE T-size Pillow Cover Cap Puzzle Water bottles Multi-plastic_Multi-GiftyImage 3.5.2.1: The 'Select Category' window with the 'Add', 'Edit' and 'Delete' opons
- On the next window – 'Create Category' (Image 3.5.2.2) – ll in the elds corresponding to:
(a) 'Name': The name you want for your new category,
(b) 'Ref. Image': The image you want for your category, clicking on the icon to the right of this eld lets you choose the reference image from the path in which you saved it.
(c) 'Descripon': Give a descripon of the category you are creang.
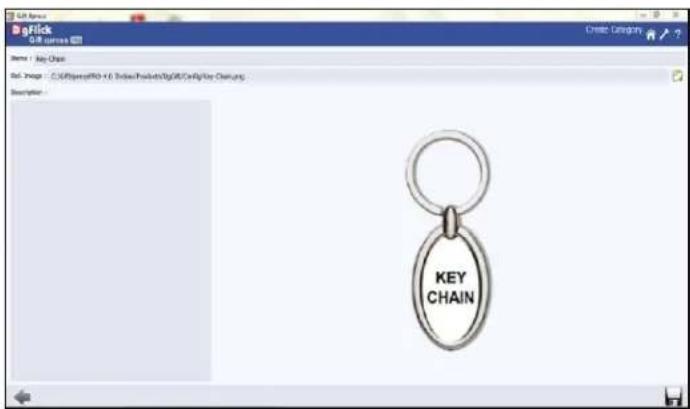
text_image
Key Chain KEY CHAINImage 3.5.2.2: The 'Create Category' window
- Click, on the lower right-hand corner to save the category you created (Image 3.5.2.3).
! Leaving either the 'Name' or the 'Ref. Image' eld blank will not allow you to save the category.
text_image
Key-Chain KEY CHAINImage 3.5.2.3: The Category Created
- The new category is created and can be viewed in 'Select Category' Window.
! At any point during the process, you could click on the back button to go back to the previous window. On clicking this buon, you are oered the chance to save/not save your changes or cancel the 'Back' command. You could also click on to go back to the home page.
Adding a Gi Size
To view the gi size under a category, double click on the category. Alternatively, you could select the category and then click on in the lower right-hand corner.
- Click on to 'Add' a new size on the 'Select Product' window (Image 3.5.2.4).
text_image
Get Tools (1): 100% Get Tools (2): 100% Get Tools (3): 100% Get Tools (4): 100% Get Tools (5): 100% Get Tools (6): 100% Get Tools (7): 100% Get Tools (8): 100% Get Tools (9): 100% Get Tools (10): 100% Select Product Key-CheckImage 3.5.2.4: Creang new Size in new Category
- On the next window: 'Create Gi' (Image 3.5.2.5) – ll in the elds corresponding to
(a) 'Name': The name you want for your new size,
(b) 'Ref. Image': The image you want for your size, clicking on the icon to the right of this edge, lets you choose the reference image from the path in which you saved it.
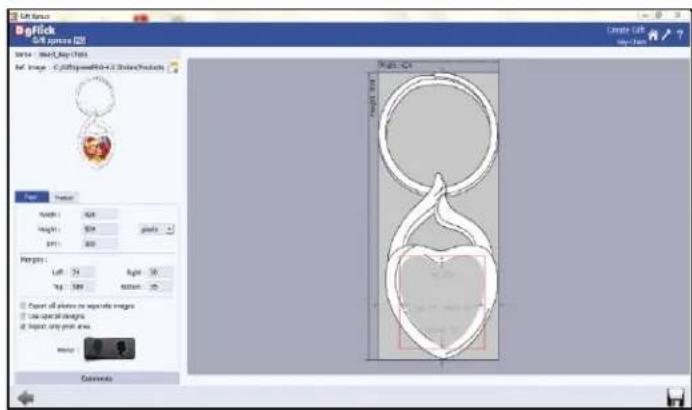
text_image
Big Pink 3/8 frames (2) Name: March_May_Tells Ref: Image - C:\Image\Milk14.2\ShinyProducts Page Format width: 50% height: 50% pixels SPT: 600 Patterns: Left 74 Right 50 Top 500 Bottom 50 □ Count all shares or separate images □ Use external image. □ Input any pink area Message CommentsImage 3.5.2.5: The 'Create Gi' window
- Fill in the parameters under the 'Page' tab. These are: Width and Height. Margins (Le, Right, Top and Boom). DPI and Units.
-
Checking the 'Export all photos as separate images' check box will allow you to export all the images separately.
-
Checking the 'Use Special Designs' check box will allow you to view the designs in design area.
- Check the Export only print area check box to export only the design area.
- Give Mirror eect from
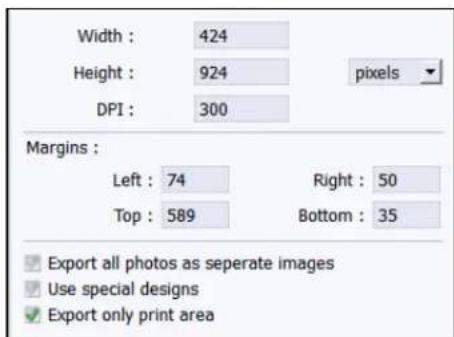
text_image
Width : 424 Height : 924 pixels DPI : 300 Margins : Left : 74 Right : 50 Top : 589 Bottom : 35 Export all photos as separate images Use special designs Export only print area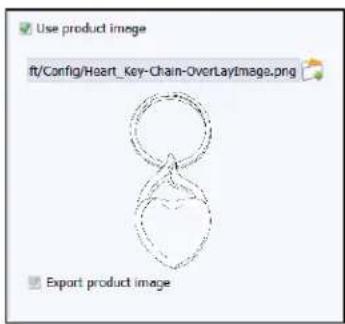
text_image
Use product image ft/Config/Heart_Key-Chain-OvertLayImage.png Export product image• Dene the product from
- Check the √ Use product image check box to insert the over lay image of the product.
- Dene the reference image, clicking on the icon to the right of this eld lets you choose the reference image from the path in which you saved it.
- Check the Export product image check box to export the Over Lay Image of the product.
- You could add your comments by clicking on the 'Comment' buon.
- Click 📄 on the lower le-hand corner to save the size you created.
- The new gi size is created and can be viewed in 'Select Category' window (Image 3.5.2.6).
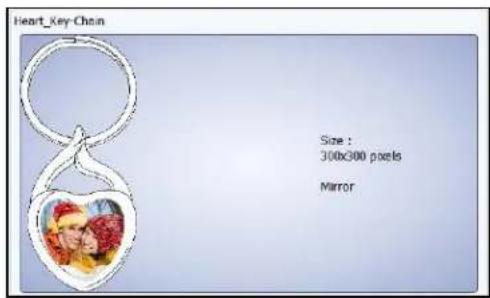
text_image
Heart_Key-Chain Size : 300x300 pixels MirrorImage 3.5.2.6: The new size added
3.5.3 Eding a Category and Size
Eding a Category
- Click on □ at the lower le-hand corner of the screen to view the 'Add', 'Edit' and 'Delete' opons.
- Aer selecng the category you wish to modify on the 'Select Category' window, (Image 3.5.3.1)
click on to 'edit' the category as per your requirements.
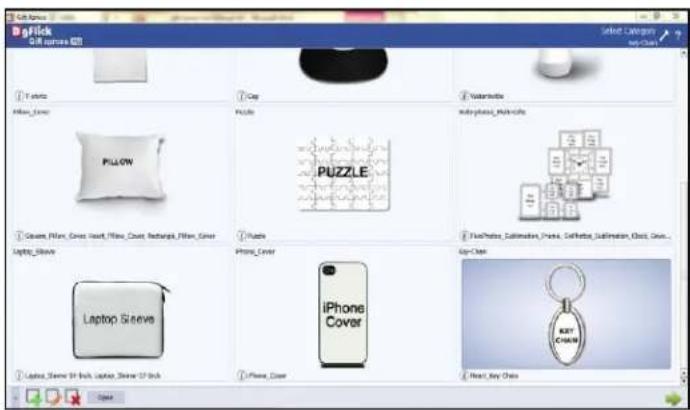
text_image
BigPick Gift covers 80 Selected Category New Chats T-shirt Pillow Pielle Cover PUZZLE Watercolors Indespheric Minerals Claves, Planes, Cover Insert, Planes, Coat, Redrugs, Plines, Cover Laptop Sleeve iPhone Cover Facts/Photoc, Satimation, Paints, Diffraction, Satimation, Coat, Cover... Laptop Sleeve iPhone Cover Up-Down KEY CHAIN Next Key ChatsImage 3.5.3.1: The 'Select Category' window
- On the next page: 'Edit Category' (Image 3.5.3.2) – you can add your edits to the,
(a) 'Name': Edit the name as per your choice.
(b) 'Ref. Image': Edit the Ref. image as per your choice by clicking on the icon to the right of this eld lets you choose the reference image from the path in which you saved it.
(c) 'Descripon': You may Edit the Descripon if needed.
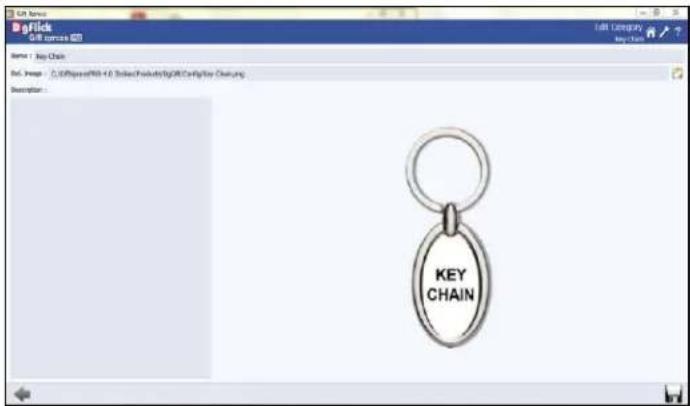
text_image
Boflick GIF corex 80 Name: Top Chain File Edit View Insert Tools Tools Help Tools Help Tools Help Tools Help Tools Help Tools Help Tools Help Tools Help Tools Help Tools Help Tools Help Tools Help Tools Help Tools Help Tools Help Tools Help Tools Help Tools Help Tools Help Tools Help Tools Help Tools Help Tools Help Tools Help Tools Help Tools Help Tools Help Tools Help Tools Help Tools Help Tools Help Tools Help Tools Help Tools Help Tools Help Tools Help Tools Help Tools Help Tools Help Tools Help Tools Help Tools Help Tools Help Tools Help Tools Help Tools Help Tools Help Tools Help Tools Help Tools Help Tools help Description: KEY CHAINImage 3.5.3.2: The 'Edit Category' window
- Save the changes by clicking 📁 on the lower right hand corner.
! At any point during the process, you could click on the back buon to go back to the previous window. On clicking this buon, you are oered the chance to save/not save your changes or cancel the
'Back' command. You could also click on to go back to the home page.
Eding a Size
To view the gi sizes under a category, double click on the category. Alternatively, you could select the
category and then click on in the lower right-hand corner.
- On the 'Select Product' window, select the gi size you need to edit and then click on

- On the next page: 'Edit Gi' (Image 3.5.3.3) – you can make changes to the Name and Reference Image elds.
(a) 'Name': Edit the name as per your choice.
(b) 'Ref. Image': Edit the Ref. image as per your choice by clicking on the icon to the right of this eld lets you choose the reference image from the path in which you saved it.
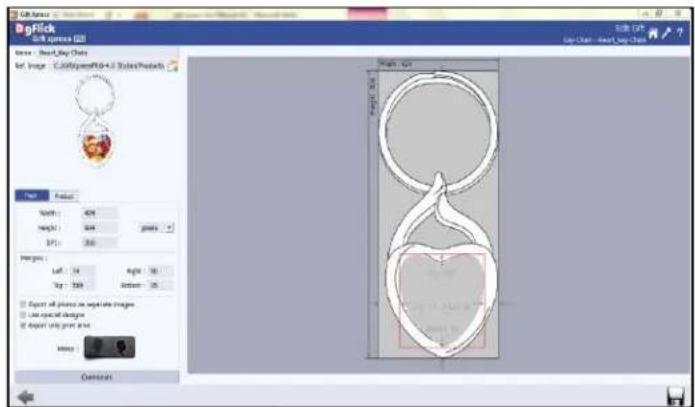
text_image
3D Flash 3.0/8.jpg (2) Show - Start Day Chain Set Image - C:\GIF\golf910-4.0\TicketProducts Type Feature Width: 40% Height: 5mm pixels SP: 366 Dimensions: Left: 14 Right: 16 Top: 166 Bottom: 26 □ Export all pieces on separate images □ Use special designs □ Export only pairs and ≡ ≡ ≡ ≡ ≡ ≡ ≡ ≡ ≡ ≡ ≡ ≡ ≡ ≡ ≡ ≡ ≡ ≡ ≡ ≡ ≡ ≡ ≡ ≡ ≡ ≡ ≡ ≡ ≡ ≡ ≡ ≡ ≡ ≡ ≡ ≡ ≡ ≡ ≡ ≡ ≡ ≡ ≡ ≡ ≡ ≡ ≡ ≡ ≡ ≡ ■ Export all pieces on separate images □ Use special designs □ Export only pairs and ≡ ≡Image 3.5.3.3: The 'Edit Gi' window
- You could edit the parameters under the 'Page' tab.
These are: Width and Height. Margins (Le, Right, Top and Boom). DPI and Units.
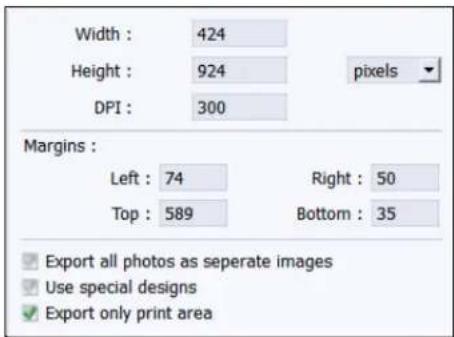
text_image
Width : 424 Height : 924 pixels DPI : 300 Margins : Left : 74 Right : 50 Top : 589 Bottom : 35 Export all photos as separate images Use special designs Export only print area
• Give Mirror effect from
- You could add/edit your comments by clicking on the 'Comment' buon.
- Click on the lower right-hand corner to save the changes you made to the category.
• The changes done get saved.
3.5.4 Deleng a Category and Size
Deleng a Category
- Click on > at the lower le-hand corner of the screen to view the 'Add', 'Edit', and 'Delete' opons.
- Aer selecng the category you wish to delete on the 'Select Category' window (Image 3.5.4.1), click on to delete it.
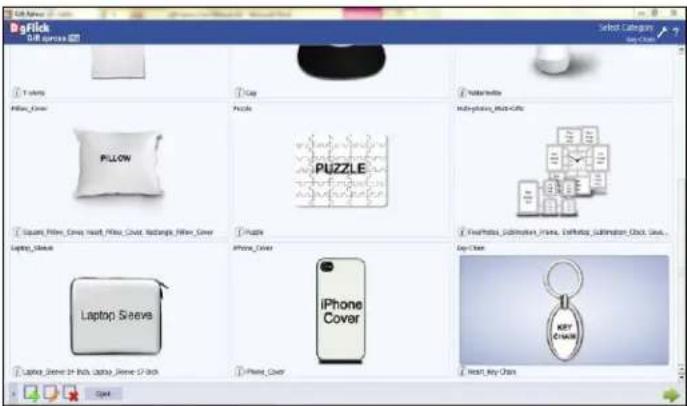
text_image
BePlick 3D image Pixel PiΠΛΠΠΠΠΠΠΠΠΠΠΠΠΠΠΠΠΠΠΠΠΠΠΠΠΠΠΠΠΠΠΠΠΠΠΠΠΠΠΠΠΠΠΠΠΠΠΠΠΠΠΠΠΠΠΠΠΠΠΠΠΠΠΠΠΠΠΠΠΠΠΠΠΠΠΠΠΠΠΠΠΠΠΠΠΠΠΠΠΠΠΠΠΠΠΠΠΠΠΠΠII Pixel PiΠΛΠΠΠΠΠΠΠΠΠΠΠΠΠΠΠΠΠΠΠΠΠΠΠΠΠΠΠII PiΠΛΠΠII PiΠΛΠII PiΣI PiΣI PiΣI PiΣI PiΣI PiΣI PiΣI PiΣI PiΣI PiΣI PiΣI PiΣI PiΣI PiΣI PiΣI PiΣI PiΣI PiΣI PiΣI PiΣI PiΣI PiΣI PiΣI PiΣI PiΣI PiΣ1 PiΣ1 PiΣ1 PiΣ1 PiΣ1 PiΣ1 PiΣ1 PiΣ1 PiΣ1 PiΣ1 PiΣ1 PiΣ1 PiΣ1 PiΣ1 PiΣ1 PiΣ1 PiΣ1 PiΣ1 PiΣ1 PiΣ1 PiΣ1 PiΣ1 PiΣ1 PiΣ1 PiΣ1 PiΣ2 PiΣ2 PiΣ2 PiΣ2 PiΣ2 PiΣ2 PiΣ2 PiΣ2 PiΣ2 PiΣ2 PiΣ2 PiΣ2 PiΣ2 PiΣ2 PiΣ2 PiΣ2 PiΣ2 PiΣ2 PiΣ2 PiΣ2 PiΣ2 PiΣ2 PiΣ2 PiΣ2 PiΣ2 PiΣ3 PiΣ3 PiΣ3 PiΣ3 PiΣ3 PiΣ3 PiΣ3 PiΣ3 PiΣ3 PiΣ3 PiΣ3 PiΣ3 PiΣ3 PiΣ3 PiΣ3 PiΣ3 PiΣ3 PiΣ3 PiΣ3 PiΣ3 PiΣ3 PiΣ3 PiΣ3 PiΣ3 PiΣ3 PiΣ4 PiΣ4 PiΣ4 PiΣ4 PiΣ4 PiΣ4 PiΣ4 PiΣ4 PiΣ4 PiΣ4 PiΣ4 PiΣ4 PiΣ4 PiΣ4 PiΣ4 PiΣ4 PiΣ4 PiΣ4 PiΣ4 PiΣ4 PiΣ4 PiΣ4 PiΣ4 PiΣ4 PiΣ4 PiΣ5 PiΣ5 PiΣ5 PiΣ5 PiΣ5 PiΣ5 PiΣ5 PiΣ5 PiΣ5 PiΣ5 PiΣ5 PiΣ5 PiΣ5 PiΣ5 PiΣ5 PiΣ5 PiΣ5 PiΣ5 PiΣ5 PiΣ5 PiΣ5 PiΣ5 PiΣ5 PiΣ5 PiΣ5 PiΣ6 PiΣ6 PiΣ6 PiΣ6 PiΣ6 PiΣ6 PiΣ6 PiΣ6 PiΣ6 PiΣ6 PiΣ6 PiΣ6 PiΣ6 PiΣ6 PiΣ6Image 3.5.4.1: The 'Select Category' window
- A dialog box asking if you are sure you want to delete it appears on the screen.
- Clicking on 'Yes' deletes the category; clicking on 'No' aborts the operaon.
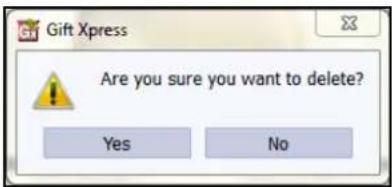
text_image
Gift Xpress Are you sure you want to delete? Yes NoDeleng a Size
- To view the gi sizes under a category, double click on the category. Alternatively, you could select the category and then click on in the lower right-hand corner.
- On the 'Select Product' window (Image 3.5.4.2), select the size you need to delete and then click on to delete it.
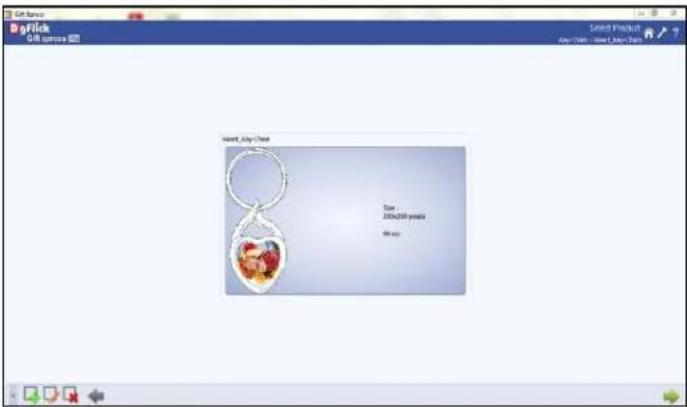
text_image
Gift menu Gift menu Gift Product Buy Chat - Gift Apply Chain Gift Apply Chain Turn - 20000 pixels MboxImage 3.5.4.2: The 'Select Product' window
- A dialog box asking if you are sure you want to delete it appears on the screen.
- Clicking on 'Yes' deletes the size; clicking on 'No' aborts the operaon.
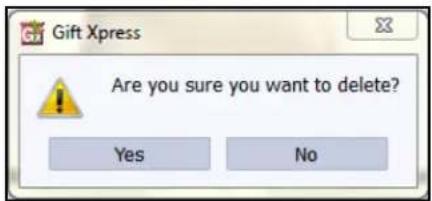
text_image
Gift Xpress Are you sure you want to delete? Yes No3.5.5 Creang Your Gi in Special Design Gi
• Aer selecng Category and Size, click on

go to design window.
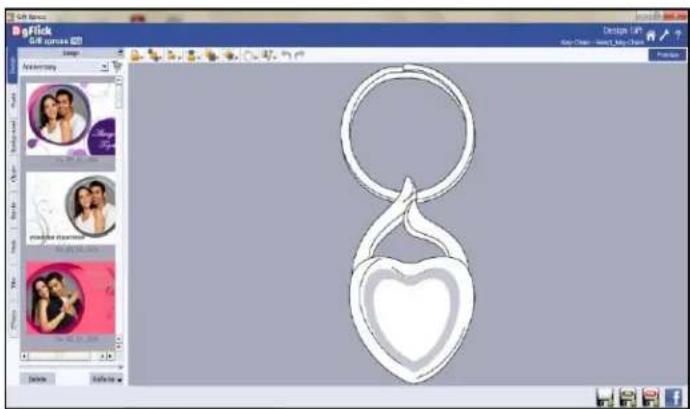
text_image
BigPick 3/8 spring 2017 Design Accessory BigPick 3/8 spring 2017 BigPick 3/8 spring 2017 BigPick 3/8 spring 2017 BigPick 3/8 spring 2017 BigPick 3/8 spring 2017 BigPick 3/8 spring 2017 BigPick 3/8 spring 2017 BigPick 3/8 spring 2017 BigPick 3/8 spring BigPick 3/8 spring BigPick 3/8 spring BigPick 3/8 spring BigPick 3/8 spring BigPick 3/8 spring BigPick 3/8 spring BigPick 3/8 spring BigPick 3/8 spring BigPick 3/8 spring BigPick 3/8 spring BigPick 3/8 spring BigPick 3/8 spring BigPickImage 3.5.5.1: 'Design Gi' Window

- Click on the Le Panel to open the Photos folder
- Select the photo to be inserted on the page & double click on the photo.
- You can add photos from your hard disk or take photos from Facebook through buon from Photo Tab.
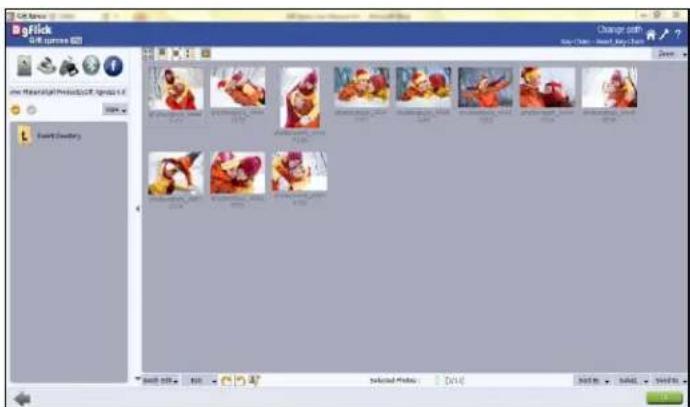
text_image
Big Fiji File Explorer 6.0 New Research Products & Products list File Edit View Help Change add on change - new Key-Tot Add Add Add Add Add Add Add Add Add Add Add Add Add Add Add Add Add Add Add Add Add Add Add Add Add Add Add Add Add Add Add Add Add Add Add Add Add Add Add Add Add Add Add Add Add Add Add Add Add Add Add Add Add Add Add Add Add Add Add Add Add Add Add Add Add Add Add Add AddImage 3.5.3.2: 'Change Path' window
- Aer clicking on 📄 tab you will be redirected to Change Path Window (Image 3.5.3.2) where you can manage your photos, edit them, give them desire eect, resize them or rename them. (for details refer Secon 3.3.4 Manage Your Photos)
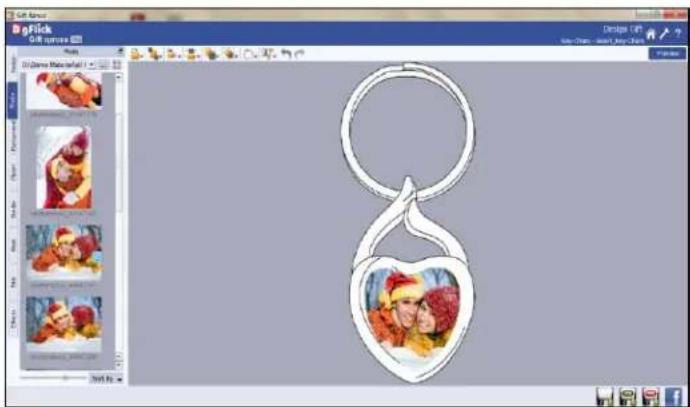
natural_image
Digital photo editing interface showing a heart-shaped keychain design with photo frames (no text or symbols on the keychain itself)Image 3.5.5.3: Add Photo to Gi
3.5.6 Saving and Exporng Special Design Gi
Save Gi
- Click on

- Default path for saving the gi is "My Documents\My Gis"
- Click 'OK' to save the Gi Project.
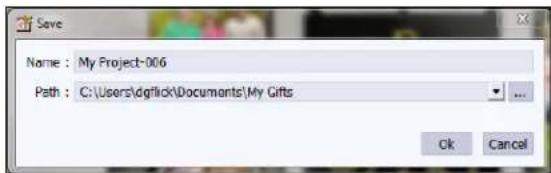
text_image
Name : My Project-006 Path : C:\Users\dgflick\Documents\My Gifts Ok CancelExport with JPG
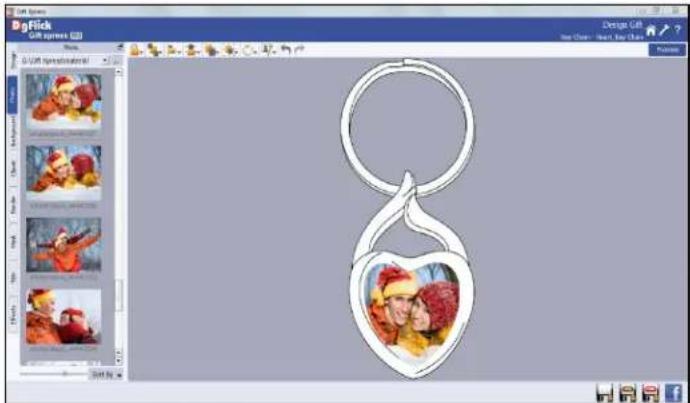
natural_image
Screenshot of a 3D design software interface displaying a heart-shaped keychain with two embedded photos (no text or symbols on the main image)Image 3.5.6.1: Project is Ready to Export
- Save the Gi in JPG format with

- Default path for saving the JPG is "My Documents\My Exported Gi"
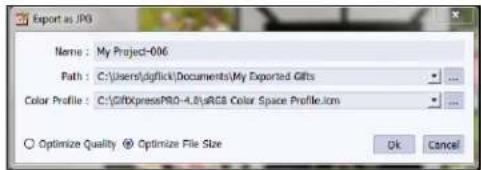
text_image
Export as JPG Name : My Project-006 Path : C:\Users\glffick\Documents\My Exported Gifts Color Profile : C:\GltXpressPRO-4.01\rRGB Color Space Profile.htm Optimize Quality Optimize File Size Ok Cancel- Click 'OK' to save the JPG.
Output
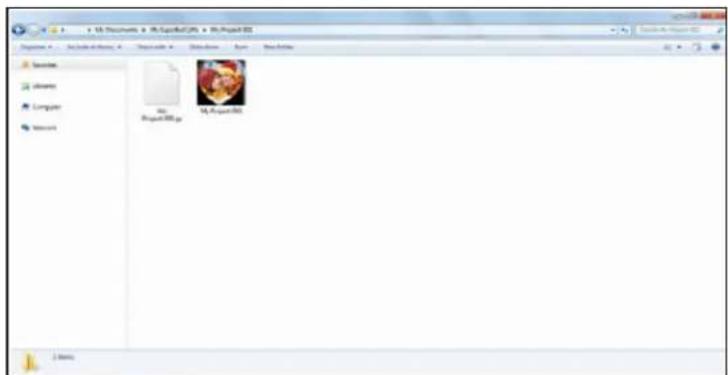
text_image
12 Documents - Project103 - Project203 File Edit View Insert Tools Help Tools Help Sapiere Observe Computer Network Project103 Project103Image 3.5.6.2: Final Output Window
• Here you can preview the actual gi with photos in JPEG format.
• The gi gets saved as My KeyChain.JPEG
Export with PNG
- Save the Gi in PNG format with .

- Default path for saving PNG is "My Documents\My Exported Gis"
- Click 'OK' to save the PNG.
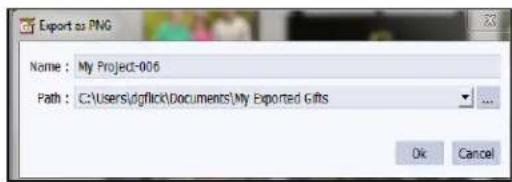
text_image
Export as PNG Name : My Project-006 Path : C:\Users\dgflick\Documents\My Exported Gifts Ok CancelOutput
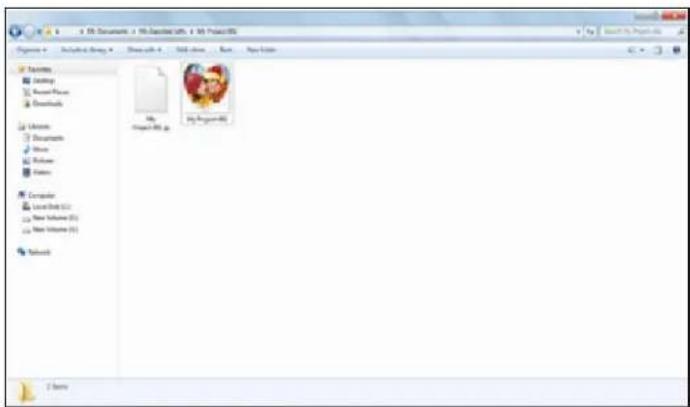
text_image
My Documents - My Document40 - My Project40 My Project40 My Image40 My History My History My History My History My History My History My History My History My History My History My History My History My History My History My History My History My History My History My History My History My History My History My History My History My History My History My History My History My History My History My History My History My History My HistoryImage 3.5.6.3: Final Output Window
• Here you can view the gi with photos in PNG format.
• The gi gets saved as My Keychain.PNG
4.0 Fine Tuning – Photo Eding
Gi Xpress has Basic Filters that help in the eding of photos to be used. Each of these Iters includes several opons that help you modify the photos to suit your requirements and they add value to the Gi Design without much eort. This secon deals with the additional features in Basic Filters.
4.1 Basic Filters
Features such as BCG correcon, RGB color modicaon, Curve, Level, Crop, and Rotaon and so on will
be explained in detail in this secon. You could access these opons by clicking on opons bar. This secon deals with the Iters one by one.
BCG (Brightness, Contrast, Gamma) Color Correcon
- To adjust the brightness, contrast and gamma of your photo, click on the 'BCG' buon on the 'Edit Photo window (Image 4.1.1).
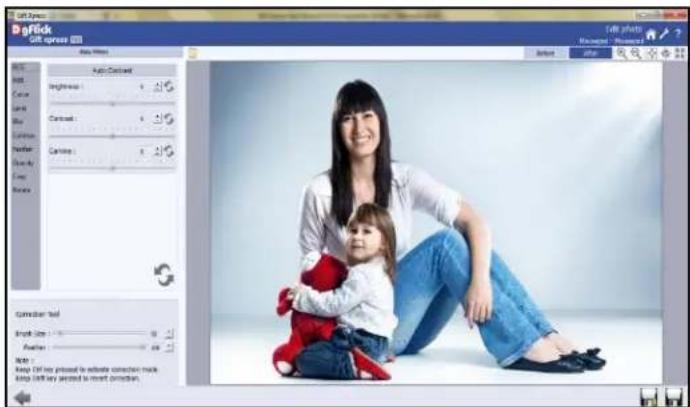
text_image
Get�新 Get�新 (1) Auto-Corset Brightness: 0 % Cosine: 0 % Curvature: 0 % Cosine: 0 % Corrected text Graph Size: 0 % Flatten: 0 % OK: Keep Off any ignored to activate corrected tracks. Keep Off any secreted to insert frames.Image 4.1.1: The 'BCG' opon on the 'Edit Photo' window
- Move the sliders for the three parameters up and down to achieve the desired eect.
- Alternatively, you could enter the values for the parameters in the value boxes above the respective sliders.
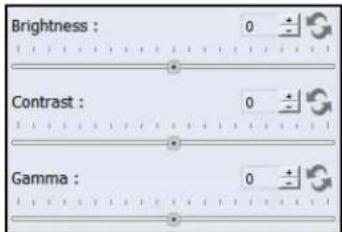
text_image
Brightness : 0 Contrast : 0 Gamma : 0Image 4.1.2: The 'BCG' opon
-
Clicking on the 'Auto Contrast' buon at the top will adjust the contrasts automacally.
-
The changes can be reset by clicking on

RGB (Red, Green, Blue) Color Correcon
- To adjust the color tones of your photos, you could use the color correcon opon (Image 4.1.3).
- Modify the color tone by altering the degree of 'Red', 'Green', and 'Blue' on the color sliders.
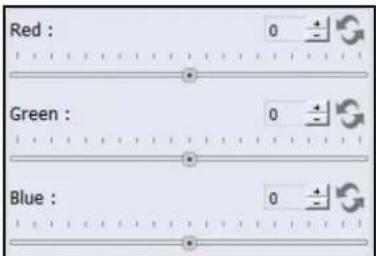
-
Alternatively, you could enter the values manually in the value boxes above the respective sliders.
-
Clicking on the 'Auto Color' buon at the top will adjust the color automacally.
-
The changes can be reset by clicking on

Curve
- Color intensities can be adjusted by clicking on the 'RGB' buon on the opons bar of the 'Edit Photo' window (Image 4.1.4).
- Select the color to be adjusted (RGB i.e. red, green or blue) from the drop list under the 'Channel' buon.
- Adjust the intensity by clicking on the curve and moving it as per your requirement.
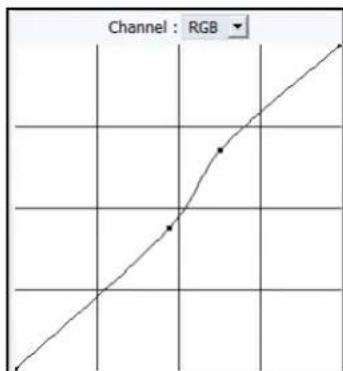
text_image
Channel : RGBImage 4.1.4: The 'Curve' opon
Level
- To adjust the input and output levels of the photo, click on the 'Level' buon on the opons bar of the 'Edit Photo' window (Image 4.1.5).
- Select the color for which the input and output levels need to be modified (RGB i.e. red, green or blue) from the drop list under the 'Channel' buon.
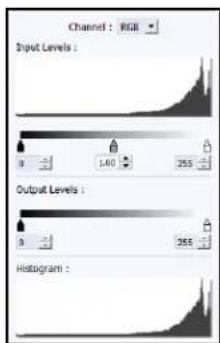
text_image
Channel : RGB Input Levels : 0 1.40 255 Output Levels : 0 255 Histogram :Image 4.1.5: The 'Level' opon
- Modify the 'Input' and 'Output' level values in the value boxes as required.
Blur
- To give the photo a blurred eect, click on the 'Blur' buon on the opons bar of the 'Edit Photo' window (Image 4.1.6).
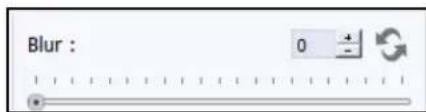
text_image
Blur : 0 + -Image 4.1.6: The 'Blur' opon
-
Move the slider buon up and down to achieve the desired degree of blurring.
-
To reset the changes, click on

Colorize
-
To give a colorize-Im eect on the photo, click on buon on the opon bar under 'Basic Filters' (Image 4.1.7).
-
Click on to select a color from anywhere on the screen to be used as a lm on the enre photo.
- You could also select a color by clicking on the color bar next to the dropper icon (Image 4.1.7).
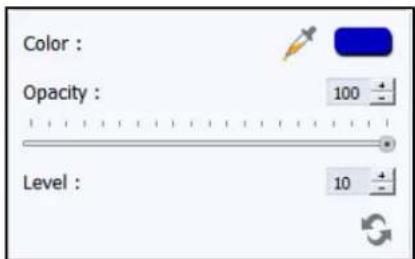
text_image
Color : Opacity : 100 Level : 10Image 4.1.7: The 'Colorize' opon
- Select the color from the color palee and click on 'OK' to apply the color tone to the photo. To
Opacity : 100 adjust the opacity, move the slider on
- To reset the changes, click on
Feather
- Click on the 'Feather' buon to give the feather eect to a photo (Image 4.1.8).
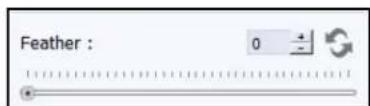
text_image
Feather : 0 +Image 4.1.8: The 'Feather' opon
- Adjust the feather eect by moving the slider up and down or by inserng the value in the value box (Image 4.1.9).

natural_image
Woman and child sitting together on a plain background, no text or symbols visibleImage 4.1.9: The 'Feather' eect applied to the photo
- To reset the changes, click on

Opacity
- Click on to adjust the opacity of the photo (Image 4.1.10).
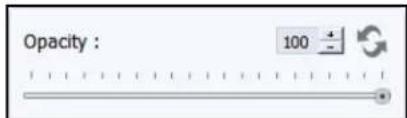
text_image
Opacity : 100 + -Image 4.1.10: The 'Opacity' opon
- Adjust the opacity by moving the slider up and down or by inserng the value in the value box.
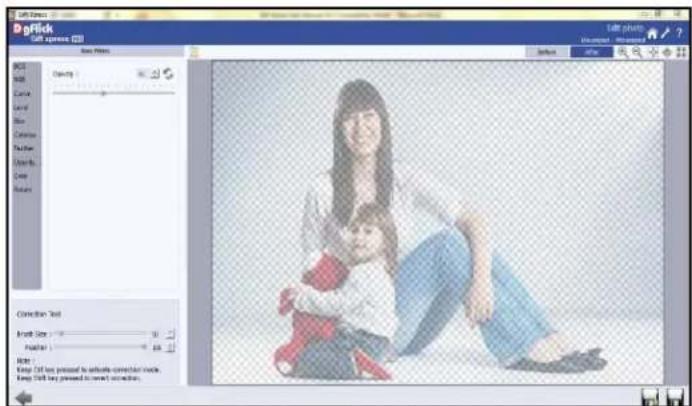
text_image
3D GpFlick Gpt splenos (20) Save Pixels OK Add Cancel Level Size Customs Texture Balance Deep Balance Edit photos Show color: 100% Fill color: 100% Fill color: 100% Fill color: 100% Fill color: 100% Fill color: 100% Fill color: 100% Fill color: 100% Fill color: 100% Fill color: 100% Fill color: 100% Fill color: 100% Fill color: 100% Fill color: 50% Fill color: 50% Fill color: 50% Fill color: 50% Fill color: 50% Fill color: 50% Fill color: 50% Fill color: 50% Fill color: 50% Fill color: 50% Fill color: 50% Fill color: 50% Fill color: 50% Fill color: 50% Fill color: 50%Image 4.1.11: Applying 'opacity' to the photo
- To reset the changes, click on

Crop
-
To crop the photo to the desired dimensions and orientaon, click on the 'Crop' buon on the 'Edit Photo' window (Image 4.1.12).
-
Change the aspect rao by clicking on the 'Aspect Rao' box and select the required value.
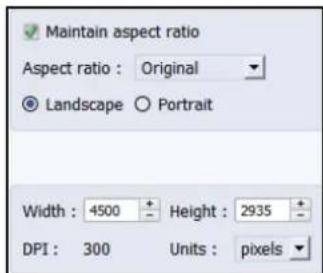
text_image
Maintain aspect ratio Aspect ratio : Original ● Landscape ○ Portrait Width : 4500 Height : 2935 DPI : 300 Units : pixelsImage 4.1.12: The 'Crop' opon
- Select the orientaon you desire by selecng either 'Landscape' or 'Portrait' (Image 4.1.13).
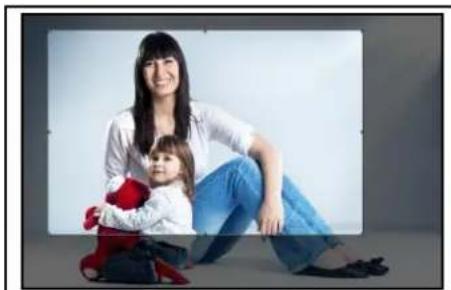
natural_image
Woman and child sitting together, one holding a red plush toy (no text or symbols visible)(a)
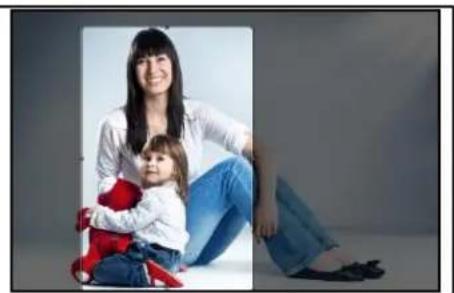
natural_image
Woman and child posing together in a seated pose against a plain background (no text or symbols visible)(b)
Image 4.1.13: Cropping: (a) Landscape; (b) portrait
- You can enter the values for the width and height aer selecng the unit you want to work with
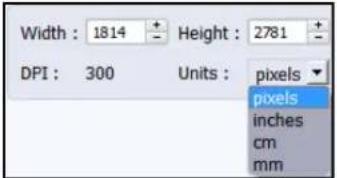
text_image
Width : 1814 Height : 2781 DPI : 300 Units : pixels pixels inches cm mm- Uncheck the Maintain aspect ratio opon if you would like to proceed with free-hand cropping of the photo.
Rotate
- Select the 'Rotate' opon on the opons bar and then rotate the photo to the desired angle using the slider.
- You also have the opon of using grid lines on the photo to help align it beer while rotang. You could acvate the grid lines by
clicking on the box next to
'Show Grid' below the rotaon slider (Image 4.1.15).
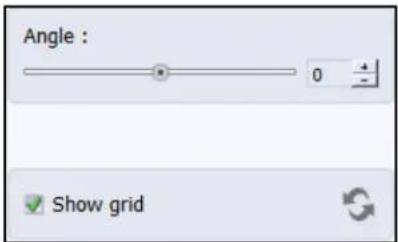
text_image
Angle : 0 Show gridImage 4.1.14: The rotaon slider
- Uncheck the box to remove the grid lines.
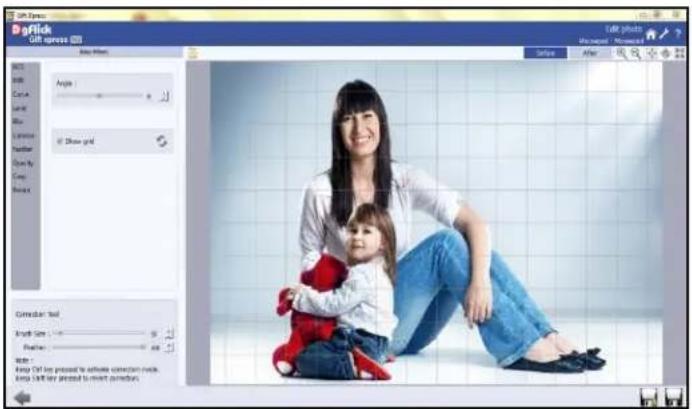
text_image
Get Image Get image (0) Main Filter Action Cock Lunch Lock Lock Lock Show grid Cancel: 1.0 Width: 5 px Position: 0 px Inner: Keep OK log pressed to activate connection key. Inner: Shift key pressed to insert button.Image 4.1.15: Using grid lines on the photo
! You could undo the changes by clicking on 📄 or load the original image by clicking on 📄 at any point in the process.
4.2 Other Icons on Basic Filter Pages
Apart from the opons that are available under Basic Iters, there are few other 'aids' on the page that help you as you proceed. These are discussed below.
Correcon Tool
The correcon tool appears with all opons and can be used to 'correct' any error that might happen while using the Iters or add to the eects already created.
The brush size and feather eect can be altered by using the respective slider or by entering the value of your choice in the value box.
! Remember to keep the Ctrl key pressed to acvate the correcon mode and to keep the Shi key pressed to undo the change.
Original and Before and Aer Images
Original Image: In the course of working on your photos, you might decide to retain an original image or make a fresh set of changes. In such cases, you could load the original image once
again by clicking on
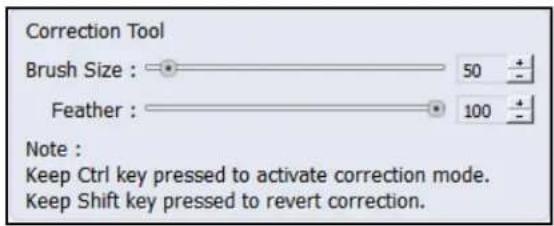
text_image
Correction Tool Brush Size : 50 Feather : 100 Note : Keep Ctrl key pressed to activate correction mode. Keep Shift key pressed to revert correction.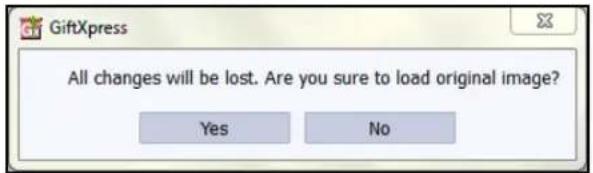
text_image
All changes will be lost. Are you sure to load original image? Yes NoOnce the icon is clicked the soware asks for conrmaon by displaying a text box. This text box warns that all changes made on the photo so far will be lost. You could click on 'Yes' to proceed. Clicking on 'No' will take you back to your photo with changes.
Before and Aer Images: Aer making a change, you could view how the photo looked just before the change was made by clicking on and how the photo looks aer the change by clicking on

This aids in beer decision-making.
Saving the Changes
There are two 'Save' icons on the lower right-hand corner of the page.

: Clicking on this icon will allow you to save a copy of your work. A text box allowing you to name the copy appears, and clicking on 'Ok' aer entering the name creates a new copy of your work.

: Clicking on this icon causes the old le to be rewrien and the new copy now exists for your reference.
5.0 Nuts and Bolts – Customize Design
The versatility of Gi Xpress lies in the fact that it gives you a wide range of ready-to-use designs to choose from besides leng you create or modies designs according to your choice. Moreover, designs can be imported from other locaons and built and shared with other Gi Xpress users worldwide. This secon explains how designs can be saved, imported, built, deleted or shared in Gi Xpress.
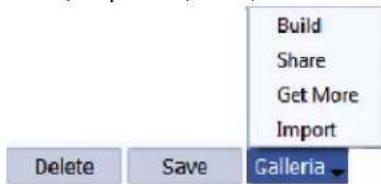
text_image
Build Share Get More Import Delete Save Galleria! Save, Build and Share opons are available in the PRO version and not in the Standard one.
5.1 Get More and Import
Get More
- On the 'Design Gi' window, click on the 'Design' tab to access the Design page.
- Click on 'Get More' and select Get More opon to access more designs from the DgFlick website.
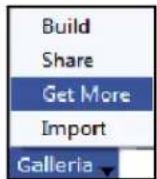
Image5.1.1: The 'Get More' buon
- You are now routed to www.dgick.com, from where you can download the design of your choice and proceed to creang your gi.
Import
- To import designs, click on 'Galleria' select Import opon.
- Access the folder containing your designs by clicking on the browse buon (), and selecng the locaon.
- The 15 paths accessed immediately before this instance are saved in the path list box and can be accessed by clicking on the path.
- Now select the designs from the locaon and apply them to your creaon.
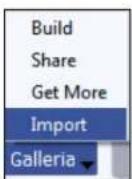
Image 5.1.2: The 'Import' buon
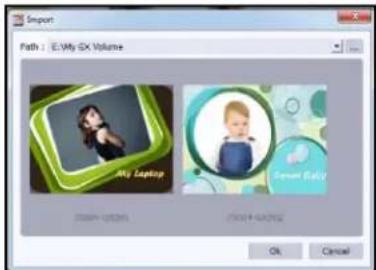
text_image
Import Path 1: E:\My EX Volume My Laptop Smart Baby OK CancelImage 5.1.3: The 'Import' design text box
5.2 Save and Build\*
Gi Xpress gives you the opon of building designs of your own and also sharing them. This opon is available only to the users of the Gi Xpress PRO version.
- To start with the building process, you need to rst save the design that you want to build.
- Select the design and click on Save at the bottom of the opon bar to save the design.
- In the textbox that appears (Image5.2.1); enter the design informaon pertaining to the parameters (except the parameter according to which the design has been Itered). These include: No. of Photos, Orientaon, Color, Theme, Style and Custom. Depending on the no. of photos and orientaon used in the design, here the no. of photos and orientaon gets detected automatically. You can also enter a name for your design in the relevant box.
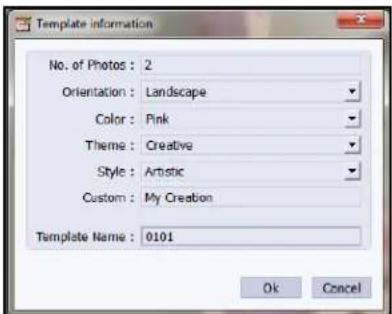
text_image
Template information No. of Photos : 2 Orientation : Landscape Color : Pink Theme : Creative Style : Artistic Custom : My Creation Template Name : 0101 Ok CancelImage 5.2.1: Design informaon while saving your design
- Click on 'Ok' to proceed and on 'Cancel' to quit the process.
- To proceed with the building of your designs, click on Galena and select the Build opon.
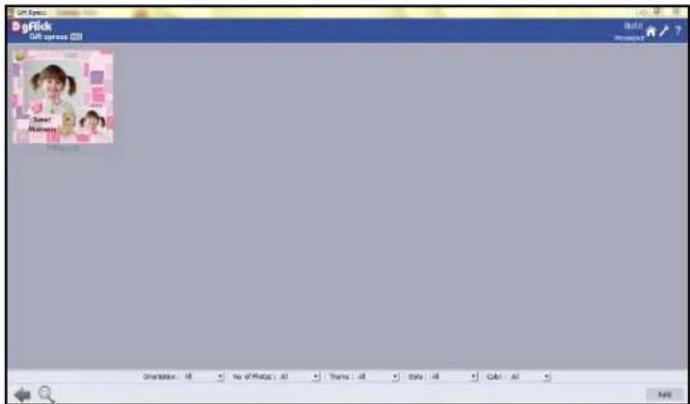
text_image
DogClick Dog click On: 12 To: 0.0000 To: 0.0000 To: 0.0000 To: 0.0000 To: 0.0000 To: 0.0000 To: 0.0000 To: 0.0000 To: 0.0000 To: 0.0000 To: 0.0001 To: 0.0001 To: 0.0001 To: 0.0001 To: 0.0001 To: 0.0001 To: 0.0001 To: 0.0001 To: 0.0001 To: 0.0001 To: 0.0002 To: 0.0002 To: 0.0002 To: 0.0002 To: 0.0002 To: 0.0002 To: 0.0002 To: 0.0002 To: 0.0011 To: 0.0111 To: 1.1111 To: 1.1111 To: 1.1111 To: 1.1111 To: 1.1111 To: 1.1111 To: 1.1111 To: 1.1111 To: 1.1111 To: 1.1111 To: 1.2666 To: 2.6666 To: 3.6666 To: 4.6666 To: 5.6666 To: 6.6666 To: 7.6666 To: 8.6666 To: 9.6666 To: 1.2666 To: 2.2666 To: 3.2666 To: 4.2666 To: 5.2666 To: 6.2666 To: 7.2666 To: 8.2666 To: 9.2666 To: 1.3288 To: 2.3288 To: 3.3288 To: 4.3288 To: 5.3288 To: 6.3288 To: 7.3288 To: 8.3288 To: 9.3288Image 5.2.2: Building your design - 1
- On the 'Build' window, select the designs and then click on Build
- In the text box that appears next (Image 5.2.3), specify the name of the folder in which you wish to save it (1), and the path where you want to place it.
- If the path is not specied, the built volume is saved in the following path by default: My Documents\My Galleria\Gi Xpress.
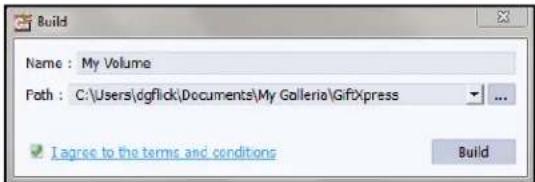
text_image
Build Name : My Volume Path : C:\Users\dgflick\Documents\My Gallerio\GiftXpress I agree to the terms and conditions BuildImage 5.2.3: Building your design - 2
- Check the box next to 'I agree to the terms and conditions' and proceed to click on Build
! If you do not agree to the terms and conditions, close the textbox and quit the building process.
• The following text box appears on screen:
- Click on the 'OK' buon to connue with saving, else click on 'Open' to access the created design.
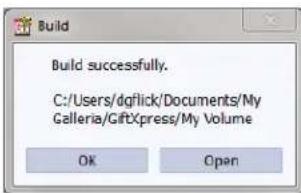
text_image
Build successfully. C:/Users/dgfllick/Documents/My Galleria/GiftXpress/My Volume OK Open! At any point during the process, you could click on the ←buon to go back to the previous page.
Note: Some features are available only for the Gi Xpress PRO users.
5.3 Share\*
Design that has been created can be shared with other users by means of the 'Share' opon available with Gi Xpress. This opon is available only to the users of the Gi Xpress PRO version.
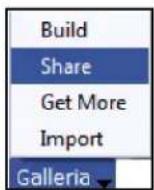
- Click on Galleria and select the Share opon to share the design that you have created.
- Select the design you wish to share and then click Share on the 'Share' page.
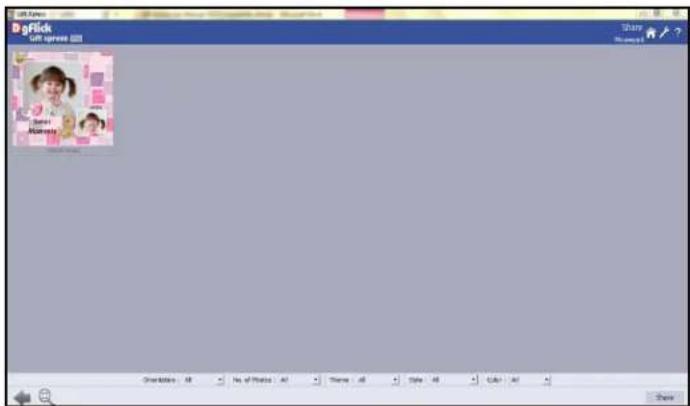
text_image
DogClick Dog click 100 Share Share Share Share Share Share Share Share Share Share Share Share Share Share Share Share Share Share Share Share Share Share Share Share Share Share Share Share Share Share Share Share Share Share Share Share Share Share Share Share Share Share Share Share Share Share Share Share Share Share SharesImage 5.3.1: Sharing your design
- The designs are shared on DgFlick's website.
- You need to log into your account using your username and password (Image 5.3.2) to be able to share the designs.
text_image
Login Username : Password : Sign In Sign UpImage 5.3.2: Sharing your design – login page
- Aer entering your details, click on the 'Sign In' buon to access your account. If you do not have a username and password, click on 'Sign Up' to start an account with DgFlick.
- On compleon of the login process, a textbox asking if you agree to the terms and conditions of design sharing appears
- If yes, accept the terms and conditions and
then click on to share the designs you have created and selected for sharing.
text_image
Share I agree to the terms and conditions Share! If you do not agree to the terms and conditions, close the textbox and quit the sharing process.
! At any point during the process, you could click on the ←buon to go back to the previous page.
Note: Some features are available only for the Gi Xpress PRO version users
5.4 Delete
Besides building and sharing, Gi Xpress also gives you the opon of deleng any design that you no longer wish to retain in your design bank. To delete a design:
- Select the design that you wish to delete.
- Click on Delete at the boom of the opons bar.
- A textbox asking for conrmaon for deleon appears.
- Click on 'Yes' to proceed with the deleon, else click on 'No' to abort the process.
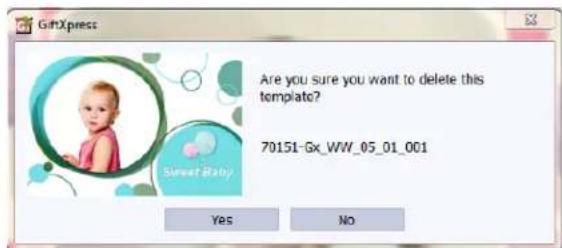
text_image
GiftXpress Are you sure you want to delete this template? 70151-Gx_WW_05_01_001 Yes NoImage 5.4.1: Deleng your design
6.0 Job's Done! – Saving and Exporng
Gi Xpress not only supports create on of gi but also allows you to save the le for future use and export it as required. These features add to the versality of the soware and also simplify working on it to a great extent. This secon deals with the saving, opening, and exporng of les once the gi is created.
6.1 Saving
- Aer the project is done, the next step is saving the project by clicking on

-
The default path for saving the project is displayed in the textbox as 'My Documents\My Gis'. You could either save the project in this path or provide the path of your choice to save the project.
-
Click on 'Ok' to save a copy of the project or on 'Cancel' to abort the process.
6.2 Exporng
This Secon will guide you on how to render your saved project into the printable le.
6.2.1 Exporng in JPEG Format
-
To save the project in a jpg format, click on it the lower right-hand corner. The default path for saving the jpg le appears in the textbox that is now visible on screen. The path is 'My Documents\My Exported Gis'. However, you could change the path and save it in any locaon of your choice.
-
Set the color prole by clicking on Color Prole opon.
-
You could optimize the quality or the le size by selecng 'Optimize the Quality' or 'Optimize File Size' opon as per your requirement.
-
Click on 'Ok' to proceed with the exporng or on 'Cancel' to abort the process.
-
Once the project has been exported you get the conrmaon dialog box.
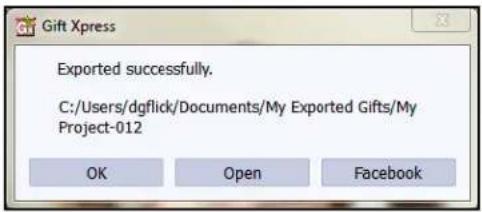
text_image
Gift Xpress Exported successfully. C:/Users/dgflf/documents/My Exported Gifts/My Project-012 OK Open Facebook6.2.2 Exporng in PNG Format
-
To save the project in a PNG format, click on 📂 at the lower right-hand corner.
-
The default path for saving the PNG le appears in the textbox that is now visible on screen. The path is 'My Documents\My Exported Gis'. However, you could change the path and save it in any locaon of your choice.
-
Clicking on 'OK' will create a PNG le. Clicking on 'Cancel' will abort the process.
-
Once the project has been exported you get the conrmaon dialog box.
-
If you wish to share the Gi Design on your Facebook account then click on

7.0 Open Saved Project
- To open a project that has been saved and exported, click on the Home icon of Gi Xpress.
- You will be redirected to Home page where you can see 'Open' opon at le boom side.
- Click on 'Open' opon.
- The projects you have saved are now displayed on the screen (Image 7.1)
- Select the project you wish to open and then click on 'Open'.
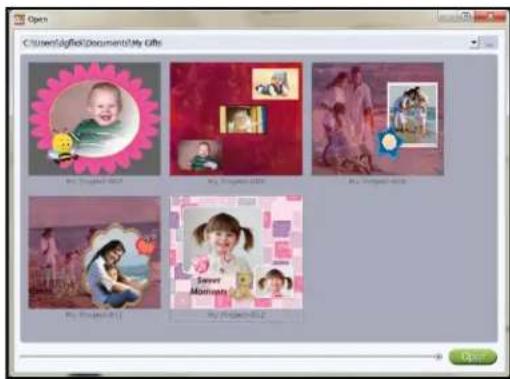
text_image
Open Citizen@filed Documents/My Gifts My Gifted 007 My Gifted 016 My Gifted 028 My Gifted 039 My Gifted 040 My Gifted 041 My Gifted 042 My Gifted 043 My Gifted 044 My Gifted 045 My Gifted 046 My Gifted 047 My Gifted 048 My Gifted 049 My Gifted 050 My Gifted 051 My Gifted 052 My Gifted 053 My Gifted 054 My Gifted 055 My Gifted 056 My Gifted 057 My Gifted 058 My Gifted 059 My Gifted 060 My Gifted 061 My Gifted 062 My Gifted 063 My Gifted 064 My Gifted 065 My Gifted 066 My Gifted 067 My Gifted 068 My Gifted 069 My Gifted 070 My Gifted 071 My Gifted 072 My Gifted 073 My Gifted 074 My Gifted 075 My Gifted 076 My Gifted 077 My Gifted 078 My Gifted 079 My Gifted 080 My Gifted 081 My Gifted 082 My Gifted 083 My Gifted 084 My Gifted 085 My Gifted 086 My Gifted 087 My Gifted 088 My Gifted 089 My Gifted 090 My Gifted 091 My Gifted 092 My Gifted 093 My Gifted 094 My Gifted 095 My Gifted 096 My Gifted 097 My Gifted 098 My Gifted 099 My Gifted 100Image 7.1: The saved projects in the path
8.0 TROUBLESHOOT
1. How many mes I can install the soware on the same machine?
Ans: You can install the soware on the same machine for as many mes as you needed but subject no change in components such as Hard disk drive, Motherboard etc.
If components changes then you would face an issue in registraon, the soware will consider you as a new user.
2. Can I install the soware from the same DVD/CD on MAC as well as on Windows?
Ans: The installaon DVD/CD comes with dual installaon setup exe les of both MAC & Windows so you can easily install on both operang systems with the same DVD/CD.
3. What if I misplaced the dongle?
Ans: In that case you have to inform us about the same by sending an E-mail to support@dgick.com and we will provide you the new dongle for that new dongle, you have to bare some cost which include dongle cost+ shipment +courier charges if any.
4. Can I create Mul Photo Gis in Gi Xpress?
Ans: Yes. You can create Mul Photo Gi in Gi Xpress. For detail procedure please Refer Gi Xpress User Manual-4.0.
5. Can I create my own Gi sizes?
Ans: Yes, you can create as many sizes you want. Soware gives you complete freedom to create, save and share* your creaons.
9.0 SUPPORT
For additional technical support or claricaon, please contact DgFlick oces/support via:
DgFlick Soluons Pvt. Ltd.,
203/204,
Shreeji Arcade,
M.G. Road,
Borivali (E),
Mumbai - 400066
Email: support@dgick.com
Telephone: India +91 22 2968 68 68,
US +1-732-543-7676.