SecureDrive BT - External hard drive SecureData - Free user manual and instructions
Find the device manual for free SecureDrive BT SecureData in PDF.


User questions about SecureDrive BT SecureData
0 question about this device. Answer the ones you know or ask your own.
Ask a new question about this device
Download the instructions for your External hard drive in PDF format for free! Find your manual SecureDrive BT - SecureData and take your electronic device back in hand. On this page are published all the documents necessary for the use of your device. SecureDrive BT by SecureData.
USER MANUAL SecureDrive BT SecureData
text_image
Street photo showing a hand interacting with a smartphone displaying a secure drive interface, alongside a blue secured drive device.Hardware Encrypted External Portable Drive


reddot design award winner 2019



TABLE OF CONTENTS
SECUREDRIVE BT OVERVIEW 2
Safety Information 2
SecureDrive BT Features 4
Icon Interpretations .... 5
Installing SecureData Lock App....6
Passwords and Procedures......6
Password Requirements.... 6
Procedural Conventions 6
Adding the Drive to the App (Pairing)....7
Unlocking the Drive....7
Disconnecting the Drive from Your Computer.... 8
Locking without Unplugging from the Computer 8
Setting Options 9
Entering Settings Mode....9
Password Options 10
Access Options and Locking Options 14
Managing the Drive....19
Removing a Drive 19
Brute Force Hacking Detection.... 19
Resetting (Deleting) the Drive 20
Creating a Password after a Reset (Blank Drive).... 21
Reformatting the Drive.... 22
CONTACT AND WARRANTY INFORMATION ......26
Troubleshooting.... 27
Warranty and RMA Information.... 28
SECUREDRIVE BT OVERVIEW
Thank you for purchasing the SecureDrive™-BT Model ('Drive' hereafter). It's an easy to use, hardware encrypted USB 3.0, password activated external Drive. This Bluetooth® capable model uses an application via wireless user-authentication on a smartphone—iOS and Android. (Apple iOS includes Apple watch and iPad.)
The Drive uses military grade XTS-AES 256-bit hardware encryption, which encrypts all data stored on it in real-time. It works on all computer and embedded systems that support standard USB protocol.
Should your Drive get lost or stolen, rest assured that all data on it is protected by military grade encryption and cannot be accessed without entering the password via the SecureData Lock App.
Note: For extra security with multiple users, the Remote Management Model allows a User and an Admin password as well as allowing the admin to remotely make settings to Users' Drives. This makes it perfect for corporate and government deployment (not covered in this manual.)
Your Drive may have Cloud Backup and built-in Antivirus features installed. For more information, please contact Support at SecureData™.
Requirements
The Drive must be connected to a computer for use. It works on Windows, Mac, Android, Linux, or Chrome operating system, or any host such as an embedded system. The computer/host must have a USB 2.0 port, minimum.
Included: • 1 Drive • 1 Quick Start Guide • 1 USB 3.0 cable
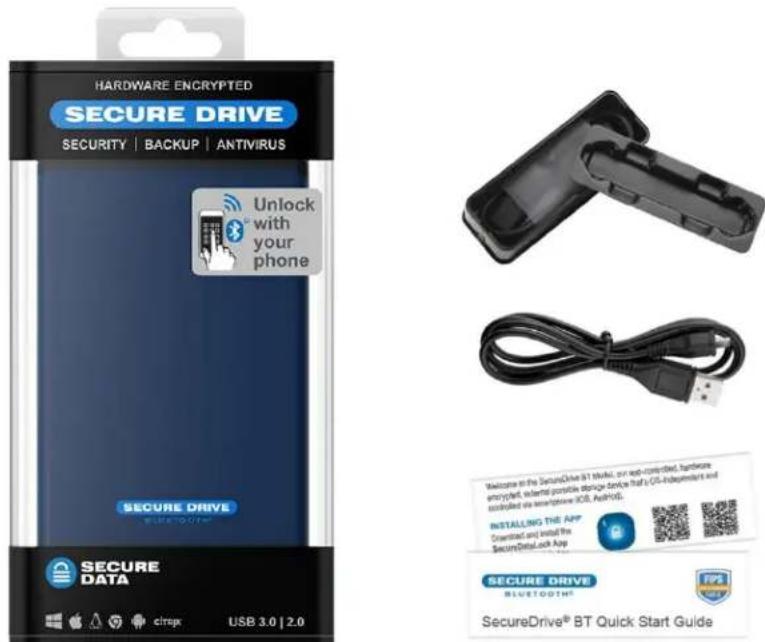
text_image
HARDWARE ENCRYPTED SECURE DRIVE SECURITY | BACKUP | ANTIVIRUS Unlock with your phone SECURE DRIVE BEUTOUTHE SECURE DATA USB 3.0 | 2.0 Welcome in the SecurityDrive BT Module, our web-controlled, hardware encrypted, specialized portable storage device that's iOS-independent and controlled via smartphone iOS, Android. INSTALLING THE APP Downloaded and installed the SecureDriveLock App SECURE DRIVE BLUETOOTH® FPS BUTOUTHE SecureDrive® BT Quick Start GuideSafety Information
This icon indicates important information regarding the safety of the product (Cautions). Please be mindful of these messages. Contact support if you have questions.
Precaution
Do not expose the Drive to water or moisture.
Resetting the Drive will delete all stored data as well as all passwords.
Forgetting your password will render the Drive inaccessible. There is no 'backdoor.'
Any changes or modifications not expressly approved by the party responsible for compliance could void the user's authority to operate the device.
EMI Cautions
This equipment has been tested and found to comply with the limits for a Class B digital device, pursuant to part 15 of the FCC Rules. These limits are designed to provide reasonable protection against harmful interference in a residential installation. This equipment generates, uses and can radiate radio frequency energy and, if not installed and used in accordance with the instructions, may cause harmful interference to radio communications. However, there is no guarantee that interference will not occur in a particular installation.
If this equipment does cause harmful interference to radio or television reception, which can be determined by turning the equipment off and on, the user is encouraged to try to correct the interference by one or more of the following measures:
■ Reorient or relocate the receiving antenna.
- Increase the separation between the equipment and receiver.
- Connect the equipment into an outlet on a circuit different from that to which the receiver is connected.
- Consult the dealer or an experienced radio/TV technician for help.
Cautions
Changes or modifications not expressly approved by the party responsible could void the user's authority to operate this device. The normal function of the product may be disturbed by strong Electro Magnetic Interference. If so, simply reset the product to resume normal operation by following the instruction manual. In case the function could not resume, please use the product in other location.
This device complies with part 15 of the FCC Rules. Operation is subject to the following two conditions:
(1) This device may not cause harmful interference, and (2) This device must accept any interference received, including interference that may cause undesired operation.
RF Exposure Statement
This equipment complies with FCC radiation exposure limits set forth for an uncontrolled environment.
SecureDrive BT Features
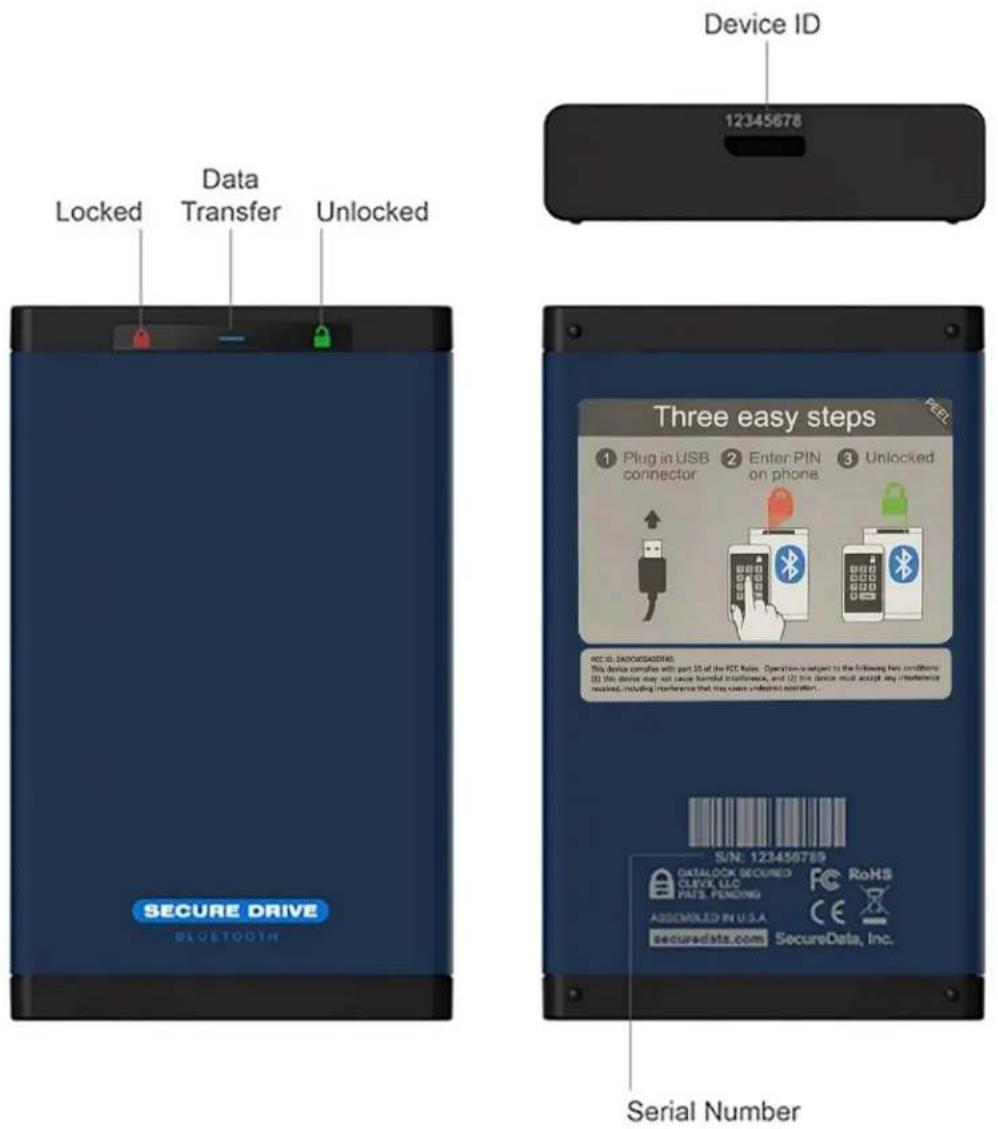
text_image
Device ID 12345678 Locked Data Transfer Unlocked Three easy steps ① Plug in USB connector ② Enter PIN on phone ③ Unlocked RCC ID: 24000540703 This device consists with part 33 of the RCC failure. Operation is subject to the following two conditions: (1) This device may not cause harmful interference, and (2) This device must accept any interference received, including interference that may cause invalid operation. SECURE DRIVE BLUETOOTH S/N: 123456789 DATALOCK SECURED CLEVICE LLC PAITS, PENDING ASSOCIATED IN U.S.A. SecureData, Inc. RoHS ECAHES.COM SecureData, Inc. Serial NumberFigure 1.1: SecureDrive BT layout showing LEDs and ID numbers
Icon Interpretations
On the Drive:
| LED | Meaning |
| (one blink) | Plugged into computer; LED test |
| = Red solid | Powered and locked but not BT-connected |
| = Red blinking | Powered and locked and BT-connected |
| Blue solidBlue blinking | The Drive is unlocked and accessed (Drive is transferring data).Note: The blue LED may be on or blinking during any procedure after the Drive is unlocked. |
| = Green solid | Powered and Unlocked. Settings operation was successful. |
On the App:
| App Icon | Meaning |
| Drive is locked | |
| Drive is unlocked | |
| Drive is blank such as when not formatted | |
| The Drive is BT-connected to the app and Authenticated. If you don't see this icon, the Drive is BT-connected but not Authenticated which means that if the Drive is unlocked you can access your files but cannot access the Settings Menu or swipe right to lock. | |
| Change the password | |
| Touch ID | |
| Face ID | |
| App will remember the password | |
| Inactivity AutoLock | |
| Step-away AutoLock | |
| Read-Only Mode | |
| Enable Apple Watch® | |
| Reset the USB (erase all data and settings) | |
| Password Recovery | |
| Remote Wipe |
Installing SecureData Lock App
The app, named SecureData Lock User, for your new Drive must be installed on an iOS or Android device to control all the Drive's functions.
Only one app is required to control multiple Drives.
Download the app for an iOS device from the Apple App Store or for an Android device from Google Play.
It can be installed just like any other app, clicking Download then Install.

text_image
Available on the App Store
Download the SecureData Lock User App and then install it.
Passwords and Procedures
text_image
SECUREDATA LOCKThe SecureDrive-BT Model is shipped with password 11223344. We strongly suggest changing the password for security.
CAUTION: Risk of loss of data. If you forget your password all data will be inaccessible and reformatting will be required. There is no ‘backdoor.’
Password Requirements
Your password must:
■ be 7-15 characters in length, letters or numbers. Special characters are okay.
■ not contain only repetitive numbers or letters, e.g. (3333333) or (ccccccc)
■ not contain only consecutive numbers or letters, e.g. (1234567), (7654321), (abcdefg)
Procedural Conventions
All actions require the Drive to be connected to a computer with the USB cable. The procedures in this manual show LED status that you should see after performing each step. Next to it is what the app displays at some point during the procedure.
Adding the Drive to the App (Pairing)
The eight-digit Device ID is required; is it printed on the Drive.
To add the drive, follow these steps:
| Adding the Drive | LED | APP |
| 1. Connect the Drive to a computer with the USB cable. | 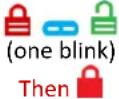 | - |
| 2. Start the SecureData Lock App on your device. Note: Ensure your device is BT enabled. | [8867] | - |
| 3. Tap if you don’t see the new Drive’s SN in the list. | [14447] | |
| 4. Tap the Drive name that appears and follow the app instructions. |  | - |
| 5. Tap Continue and follow the app instructions. | [SK08] | - |
Unlocking the Drive

CAUTION: Possible loss of data. After ten failed attempts to unlock the Drive, the password, all data, and the formatting will be deleted. Refer to Brute Force Hacking Detection on page 19.
Until the Drive is unlocked it does not display in your computer's File Manager (Explorer or Finder).
To unlock the drive, follow these steps:
| Unlock the Drive – When NOT Connected | LED | APP |
| 1. Connect the Drive to a computer with the USB cable. | 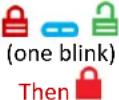 | - |
| 2. Start the SecureData Lock App on your device. | - | |
| 3. Tap the Drive name. | ||
| 4. Type in the password^1 and tap Unlock. | ||
| Unlock the Drive – After waking up from sleep | LED | APP |
| 1. Open the app. | ||
| 2. Tap the Drive name. | - | |
| 3. Type in the password1. | - | |
| 4. Tap Unlock. |
Note: The password on new Drives is 11223344. We strongly suggest changing the password after unlocking. If the Drive still doesn't appear in your computer's file manager, refer to Troubleshooting on page 27.
Disconnecting the Drive from Your Computer
Generally, you can just unplug the USB cable.
Note: Some computer systems may require clicking the Safely Remove Hardware/Eject icon on your system prior to unplugging the cable from the computer. Wait for the red LED to come on indicating it is locked and ready to disconnect from the computer.
Locking without Unplugging from the Computer
The two methods shown below (A & B) allow for the two states the app could be in: Authenticated (logged in) or not.
| A: Lock without Unplugging – App is connected to drive and unlocked | LED | APP |
| 1. In the app, swipe the desired Drive name to the left. Note: If it does not swipe left, it needs to be authenticated. See B below. | 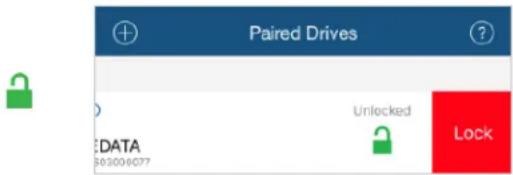 | |
| 2. Tap Lock. The Drive locks. |  | |
| B: Lock without Unplugging – App is connected to drive but not authenticated. Does not appear. | LED | APP |
| 1. In the app, tap the desired Drive name. Note: If Remember Password is on, skip the next step. | 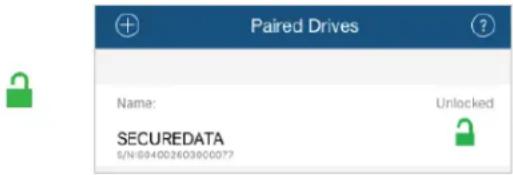 | |
| 2. Type in the password and tap Re-Authenticate. | 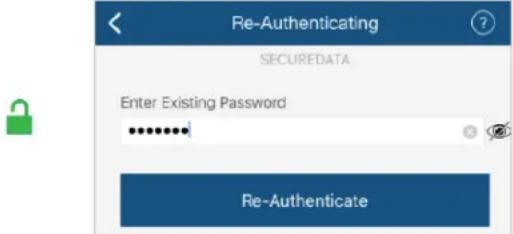 | |
| 3. Lock the Drive—refer to the steps in part A above. |  |
Setting Options
The following headings describe enabling options and features.
For Remote Management options and corporate administrators, see our website for the Remote Management BT Model.
Note: All actions require the Drive to be connected to a computer with the USB cable.
Unless otherwise noted, procedures listed below assume the Drive has already been unlocked and authenticated
Entering Settings Mode
The Settings Mode allows functions such as enabling and disabling different settings available like the Read Only feature and an automatic Step-away AutoLock.
Access the Settings Mode by tapping the desired Drive name anytime it's unlocked and authenticated.
The image is an example of settings that may appear. Depending on the type of biometric settings available on the phone, these settings may vary.
The below sub-sections describe how to utilize these settings. If you have any questions, contact Technical Support.

text_image
Settings CHANGE NAME Change Name SECUREDATA> PASSWORD/ACCESS Change Password > 2-Factor Authentication Password Recovery Remember Password Activate Face ID LOCKING OPTIONS Inactivity AutoLock Never> Step-away AutoLock Read Only DEVICES TO WORK WITH Enable Apple Watch RESetting/DELETEING Reset Drive > Remote WipePassword Options
Changing the Password
With your Drive connected to a computer, follow these steps to change an existing password.
| Change the Password | LED | APP |
| 1. With the Drive unlocked, tap the desired Drive name. | 024401 | - |
| 2. Tap Change Password and enter your current password. | 024401 | Refer to Settings image above. |
| 3. Enter your old password, then new password and retype it into the Confirm field. | 024401 | - |
| 4. Tap Change Password. | 024401 | 024401 |
Note: If a mistake was made while defining a new password or the procedure was not completed, the Drive will retain the old password.
Setting to Remember Password
To skip entering your password every time, you can have the password field auto-fill.

CAUTION: Security risk. The application will not require a password to unlock your Drive. With this setting we strongly suggest that you enable a passcode on your iOS/Android device. Also,
if the Step-away AutoLock feature is on, the Drive will authenticate and unlock automatically as soon as the app is opened and within BT range.
| Remember Password | LED | APP |
| 1. With the Drive unlocked and authenticated (logged in), tap the desired Drive name. | ### | ### |
| 2. Tap the Remember Password button to the ON position (green). | ### | ### Remember Passw ### |
| 3. Tap Yes to confirm. |
Enabling the Password Recovery Feature
The Password Recovery feature will send a recovery code to your registered mobile number as a text message. There are two places where you can enable the Password Recovery:
■ After creating password
■ From the Settings menu
| Enabling Password Recovery | APP |
| 1. Make sure the Drive is unlocked and authorized (logged-in) via the SecureData Lock app. | 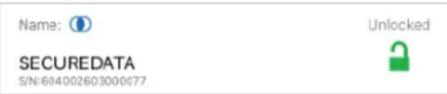 |
| 2. Tap the Drive name to access Settings. | - |
| 3. Tap the Password Recovery button (green is ON). |  |
| 4. Read the Password Recovery message and tap Continue. | - |
| 5. Enter your mobile phone number. | 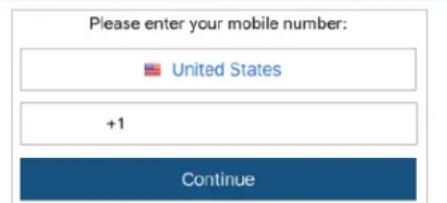 |
| 6. Tap Continue. | - |
| 7. Confirm your mobile phone number. | - |
| 8. Wait for a text message and enter the confirmation code received. (This is an example only.) Click Continue. | 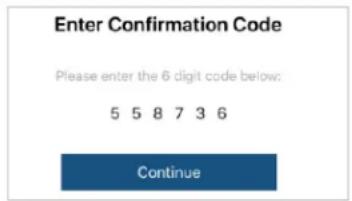 |
You should get a confirmation that Password Recovery is Activated. To recover your password, see the next heading.
Recovering a Forgotten Password
Part A: If you have previously enabled the Password Recovery feature, follow these steps, otherwise skip down to part B.
Note: To receive password recovery code by text message you must be able to receive text messages to the phone number from where Password Recovery was enabled.
Part A: Recovering Forgotten Password
APP
- Tap the Drive name.
Name:

Unlocked
SECUREDATA
S/N:604002603000077

-
Tap Forgot Password.
-
Tap Yes on the Forgot Your Password dialog.
-
Wait for the text message and then enter received confirmation code. (Example code used in image.)
Enter Confirmation Code
Please enter the 6 digit code below:
5 5 8 7 3 6
Continue
- If entered correctly, you will see a Change Password dialog. Just create a new password. Once complete, your Drive should be unlocked.
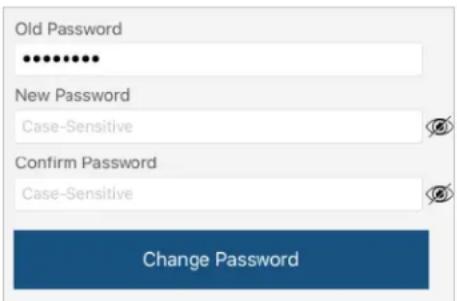
text_image
Old Password ************ New Password Case-Sensitive Confirm Password Case-Sensitive Change PasswordPart B: If you previously did not enable Password Recovery and forgot your password, resetting the Drive is the only way to make it usable again. Although your data will be erased from the Drive, this ensures that it is not breached or compromised. The SecureDrive BT Device ID is printed on the Drive to allow resetting the Drive. You will need the Serial Number of the Drive.

CAUTION: Data will be deleted. After performing a Drive RESET, it reverts to the default state: unformatted AND ALL USER DATA AND SETTINGS WILL BE DELETED. Also, all settings (such as name, password, step-away, inactivity timer) will be set to default values.
Make sure the Drive is authorized (logged-in) via the app.
Part B: Recovering Forgotten Password
APP
- Tap the Drive name.
Name:

SECUREDATA
S/N:604002603000077
Unlocked

-
Tap Reset Drive.
-
Read the warning and tap Reset.
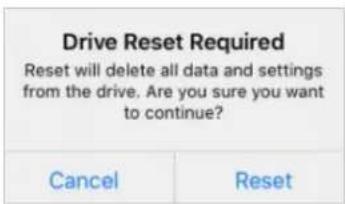
text_image
Drive Reset Required Reset will delete all data and settings from the drive. Are you sure you want to continue? Cancel ResetThe Drive reverts back to the default state. The default state is blank (has no password) and locked. Please see Changing the Password to initialize your Drive.
If, or when, the reset (unformatted) Drive is unlocked, this message appears:
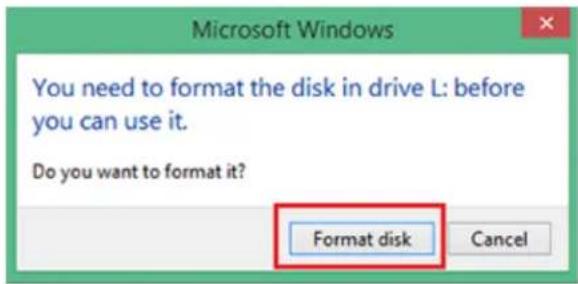
text_image
Microsoft Windows You need to format the disk in drive L: before you can use it. Do you want to format it? Format disk CancelFormat Settings
The following are formatting settings:
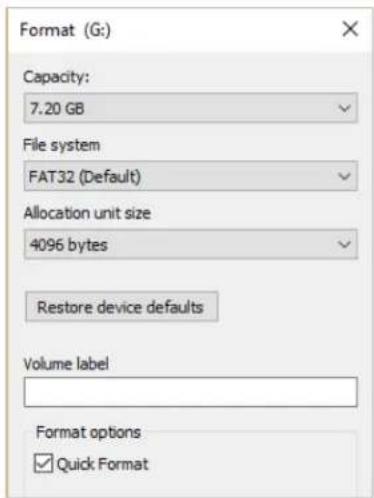
text_image
Format (G:) Capacity: 7.20 GB File system FAT32 (Default) Allocation unit size 4096 bytes Restore device defaults Volume label Format options ✓ Quick FormatAccess Options and Locking Options
Below are the three features for locking or restricting usage (and undoing them).
Enabling Read-Only
Once Read-Only is set, access prevents writing or changing data and saving or deleting files until Read/Write is enabled.
| Enable Read-Only | LED | App |
| 1. With the Drive unlocked and authenticated, tap the desired Drive name. |  |  |
| 2. Tap the Read Only button to the ON position (green). | [844Z] |  |
| 3. Tap Lock Now to the message about relocking. The Drive will be in R-O Mode when unlocked. | [06A2] | [12V7] |
Enabling Read/Write
Read-Only can be turned off restoring read and write access.
| Enable Read/Write | LED | App |
| 1. With the Drive unlocked and authenticated (logged in), tap the desired Drive name. | [0H8T] | [H3BG] |
| 2. Tap the Read Only button to the OFF position (not green). |  | [T26G]  |
| 3. Tap Lock Now to confirm disabling Read-Only. The Drive will be in Read/Write mode when unlocked. | [4A5Y] |  |
Setting the Inactivity Lock
To protect against unauthorized access when the Drive is connected to a host computer and unattended, the Drive can be set to automatically lock after a pre-set amount of time.
The default state of the Inactivity Lock is OFF. This feature can be set to activate (lock) at predefined times between 1 and 60 minutes.
| Enable Inactivity Lock | LED | APP |
| 1. With the Drive unlocked and authenticated, tap the desired Drive name. | [8C38] |  |
| 2. Tap Inactivity Lock. | [8B57] | - |
| 3. Tap the desired inactivity interval after which time the Drive will automatically lock. |  | A checkmark displays. √ |
Note: The Inactivity Lock is now set for subsequent Drive use, until changed. When it locks, the red Drive LED lights.
Disabling the Inactivity Lock
| Disable the Inactivity Lock | LED | APP |
| 1. With the Drive unlocked and authenticated, tap the desired Drive name. | [870K] | [CSW2] |
| 2. Tap Inactivity Lock. | [ZWY3] | - |
| 3. Tap Never. The Inactivity Lock is now disabled. |  | A checkmark displays. √ |
Setting the Step-away AutoLock On and Off
The Step-away AutoLock will lock the Drive (disappear from the File Explorer/Finder) when the iOS/Android device is moved about 3m away from the Drive for longer than 5 seconds. When returned to the Drive vicinity, the Drive unlocks automatically when Remember Password option is ON.
| Set the Step-away AutoLock | LED | APP |
| 1. With the Drive unlocked and authenticated, tap the desired Drive name. | (KCTY) | (BWWA) |
| 2. Tap theStep-away AutoLockbutton to the ON position (green). | (TCK7) | (AY4D) |
| 3. TapYesto confirm. The Step-away AutoLock is now on. | (THD1) | - |
Note: To disable the Step-away AutoLock, tap the Step-away AutoLock button OFF (not green).
Set to Activate Biometric (Touch ID, Face ID, Facial Recognition)
Requirement: Android/iOS. Depending on the available biometric settings on the device, options for settings may vary. The following is an example.
To use the Face ID feature of your iPhone to unlock the Drive, enable the setting:
| Remember Touch ID | APP |
| 1. Make sure the Drive is unlocked and authorized (logged-in) via the app. | Name: UrSECUREDATAS/N-694002603000677  |
| 2. Tap theDrive nameto access Settings. | - |
| 3. Tap theActivate Face IDbutton (green is ON). | Activate Face ID  |
Unlock the Drive with an Apple Watch
You can unlock your Drive with an Apple Watch® if used with iPhone 5S or newer.
| Unlock Drive with Apple Watch | APP |
| 1. Make sure the Drive is unlocked and authorized (logged-in) via the app. | 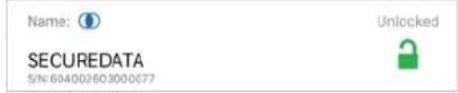 |
| 2. Tap theDrive nameto access Settings. | - |
| 3. Make sure SecureData Lock app is installed on your Apple Watch. | 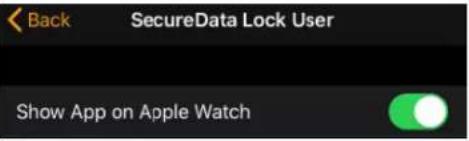 |
| 4. Turn ON Enable Apple Watch. |  |
| 5. Start SecureData Lock app on your Apple Watch. |  |
Note: Your Drive's password must contain numbers only to unlock with Apple Watch. If your current password contains letters then you will be redirected to the Change Password dialog.
You should be able to lock and unlock your Drive from your Apple Watch.
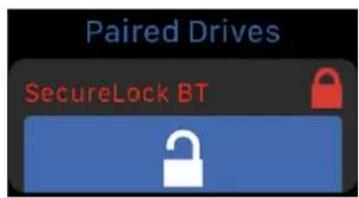
text_image
Paired Drives SecureLock BT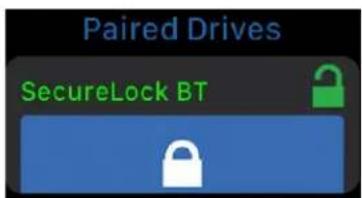
text_image
Paired Drives SecureLock BT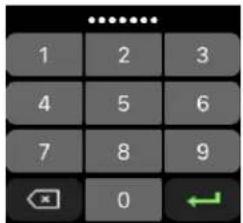
text_image
1 2 3 4 5 6 7 8 9 0Enabling Remote Wipe
To enhance protection for your Drive in case it becomes lost, you can enable the Remote Wipe feature that will allow you to Remote Wipe (Reset) your lost Drive.
| Enabling Remote Wipe | APP | |
| 1. Make sure the Drive is unlocked and authorized (logged-in) via the app. | Name: [IMAGE] SECUREDATA S/N:694002603000077 | Unlocked [IMAGE] |
| 2. Tap theDrive nameto access Settings. | - | |
| 3. Tap theRemote Wipebutton (green is ON). | [IMAGE] Remote Wipe [IMAGE] | |
| 4. TapEnableon theRemote Wipedialog. You should see a confirmation that Remote Wipe is enabled. | Remote Wipe EnabledTo prevent leaving critical content vulnerable if you should lose a drive...You can safeguard your drive by allowing remote wiping (erasing) all content and credentials. | |
| Cancel | Enable | |
Note: The Remote Wipe feature is only enabled, it is not turned on. To turn it on, see the next heading.
Activating Remote Wipe if you lost your Drive
The Remote Wipe option must have been enabled prior to losing the Drive. (Ref. Enabling Remote Wipe on page 17.) If it has not been enabled, rest assured that your data on the Drive cannot be accessed by whomever finds it. Follow this Remote Wipe activation procedure:

CAUTION: Possible inadvertent loss of data. Once activated, there is no way to disable it. The next time the Drive is discovered by the SecureData Lock app, it will be immediately wiped even if it is you who finds and attempts to use it. Please be sure you are ready to commit.
| Enabling Remote Wipe | APP |
| 1. In the app, copy the Drive’s Serial Number which is displayed below the Drive’s name. | Name:SECUREDATASIN:694002603000677 |
| 2. Swipe theDrive’s nameto the right and tap Wipe. | 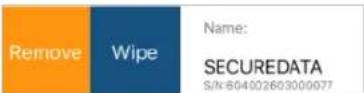 |
| 3. As a validation, you must enter your Drive’s Serial Number and tapRemote Wipe. | 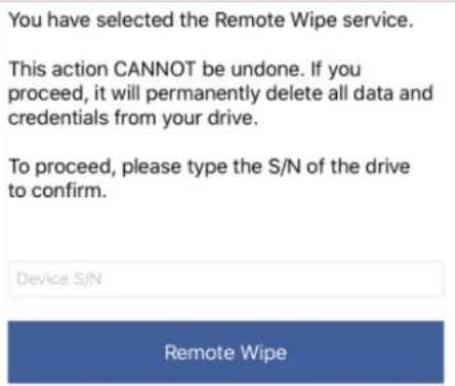 |
| 4. You should see a confirmation that Remote Wipe is Activated. TapOK. | Remote Wipe ActivatedYour drive will be erased (reset) the next time it is connected to any mobile device. |
| Ok |
The next time the Drive is discovered by any mobile device with the SecureData Lock app installed, it will be immediately wiped (reset).
Managing the Drive
The following headings discuss important, though less common, actions for managing your Drive.
Removing a Drive
If you don't want to use a previously paired Drive with your smartphone app, you can remove this Drive from the app. You can always add it back again by clicking at the Home window. To add a Drive, see Adding the Drive to the App on page 7.

CAUTION: Risk of unprotected data. Removing the Drive from your device when it's unlocked will leave the Drive unlocked. Anyone will be able to access your data without a password until plugged from the computer which will lock it.
| Remove a Drive | LED | APP |
| 1. With the Drive locked or unlocked, touch the desiredDrive nameand swipe right. (If unlocked, see the caution message above.) |  |  |
| 2. TapRemove. If the drive does not have content on it, the ‘Wipe’ option will not be available. | - | 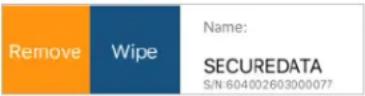 |
| 3. TapRemoveto confirm. |  |  |
Brute Force Hacking Detection
Entering an incorrect password ten consecutive times, the Drive brute force hacking detection triggers and the password, all data, and format will be deleted. To re-use the Drive see Creating a Password after a Reset (Blank Drive) on page 21. The data is not recoverable.
Resetting (Deleting) the Drive

CAUTION: Resetting the Drive will delete all data stored on it including password and formatting. After resetting it, the Drive must be formatted. See Creating a Password after a Blank Drive) on page 21.
If your password has been forgotten, or you want to delete all data stored on the Drive including the password, you can perform the following Reset function. It also removes the encryption, requiring the Drive to be reformatted to generate new encryption. To reformat the Drive after resetting it, see the heading Reformatting the Drive on page 22.
| Reset the Drive | LED | APP |
| 1. With the Drive unlocked and authenticated (logged in), tap the desired Drive name. | boxed | boxed |
| 2. Tap Reset Drive. | boxed | boxed Reset Drive > |
| 3. Tap Reset Drive. | boxed | - |
| 4. Tap Reset to confirm. | boxed | - |
| 5. Type in the Device ID (find it next to the USB port) and tap OK. All data is now removed from the Drive. | boxed | boxed |
Reset Drive
Creating a Password after a Reset (Blank Drive)
Perform this procedure after the Drive has been reset. This password procedure is required to format the Drive and must be performed after the app has been installed on your phone (or other device) to use the Drive.
| Create a Password | LED | APP |
| 1. Connect the Drive to a computer with the USB cable. | 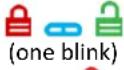 then [IMAGE] then [IMAGE] | - |
| 2. Start the app. |  | |
| 3. If the Drive name doesn’t appear, tap (upper left) and then tap the Drive name. | [weird] | Note:If the Drive is not blank you’ll see [IMAGE]. Refer to page 19. |
| 4. Tap the Drive name. | [weird] | - |
| 5. Type in password and confirm it. | [weird] | 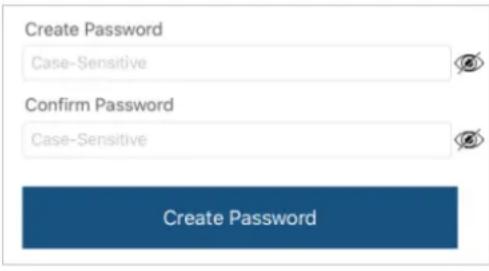 |
| 6. Tap Create Password. To continue, your Drive now requires formatting. SeeReformatting the Drive below. | [weird] | [weird] |

CAUTION: If a mistake was made while defining a new password or the procedure was not completed, the red LED will come on. The Drive is unusable without a password.
Reformatting the Drive
In the event that hacking detection has been triggered or the Drive has been reset, all data on the Drive has been deleted. The Drive must then be initialized and reformatted.
To initialize your Drive, do the following:
For a Windows OS
Admin permissions for the PC is required for this procedure.
- Connect the Drive to your computer with the USB cable.
- Create User Password if you have not already done so (see Creating a Password after a Reset (Blank Drive) page 21).
- Open Explorer.
- Right-click This PC > Left-click Manage.
- In the Computer Management dialog's left column, click Storage > Disk Management and wait for it to populate.
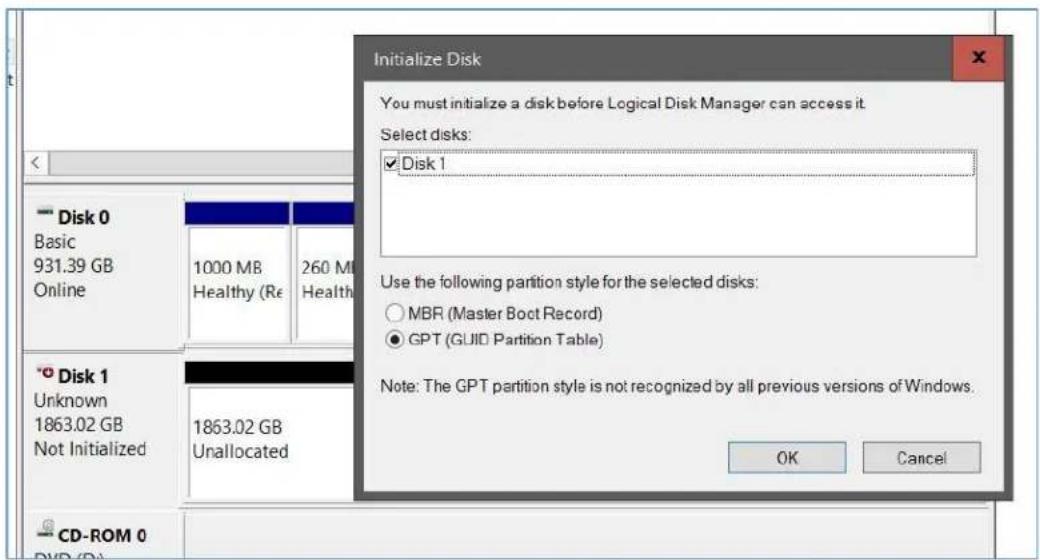
- If Initialize Disk dialog doesn't popup, R-click the 'Unknown' disk, usually Disk 1, and click Initialize disk.
text_image
Initialize Disk You must initialize a disk before Logical Disk Manager can access it. Select disks: Disk 1 Use the following partition style for the selected disks: MBR (Master Boot Record) GPT (GUID Partition Table) Note: The GPT partition style is not recognized by all previous versions of Windows. OK Cancel Disk 0 Basic 931.39 GB Online 1000 MB Healthy (Re) 260 MB Health Disk 1 Unknown 1863.02 GB Not Initialized 1863.02 GB Unallocated CD-ROM 0Figure 1: Initializing the SecureDrive disk (shown here as Disk 1).
- Make sure GPT is selected and then click OK.
| Computer Management ✓ System Tools > Task Scheduler > Event Viewer > Shared Folders > Performance Device Manager Storage Disk Management Services and Applicat | Volume | Layout | Type | File System | Status | Capacity | Free Space | % Free | |
| Simple | Basic | Healthy (Recovery Partition) | 1000 MB | 1000 MB | 100 % | ||||
| Simple | Basic | Healthy (EFI System Partition) | 260 MB | 260 MB | 100 % | ||||
| Simple | Basic | Healthy (OEM Partition) | 500 MB | 500 MB | 100 % | ||||
| Simple | Basic | Healthy (Recovery Partition) | 350 MB | 350 MB | 100 % | ||||
| Simple | Basic | Healthy (Recovery Partition) | 24.41 GB | 24.41 GB | 100 % | ||||
| Windows8_OS (C:) | Simple | Basic | NTFS | Healthy (Boot, Page File, Crash Dump, Primary Partition) | 904.91 GB | 754.12 GB | 83 % | ||
Figure 2: The SecureDrive is shown here as Disk 1. It is Online but not yet allocated.(Windows 10 shown here.)
- After Unknown changes to Online, right-click near Unallocated > New Simple Volume.
- Follow the Wizard prompts. Select a Drive letter (it generally defaults to the next available letter) and then follow the prompts in the Wizard.
- At the Format Removable Disk dialog, select a Volume Label, and select NTFS.
- Continue to follow the prompts. While the Drive is formatting, the blue LED blinks.
- Click Finish to end and close the Wizard.
- Close the Computer Management dialog if it's still open.
When finished, the New Volume (usually E) reads Healthy and a second Explorer window opens to display the Drive contents. The SATA blue LED lights.
For Mac OS
- Connect to a Mac computer's USB port.
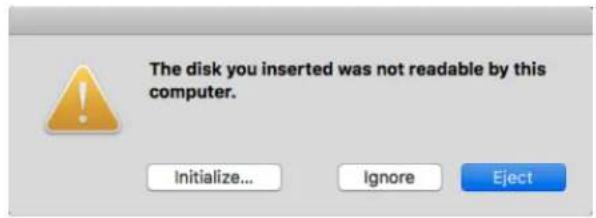
- Click Initialize in the popup message (shown below). The Disk Utility Dialog displays.
text_image
The disk you inserted was not readable by this computer. Initialize... Ignore Eject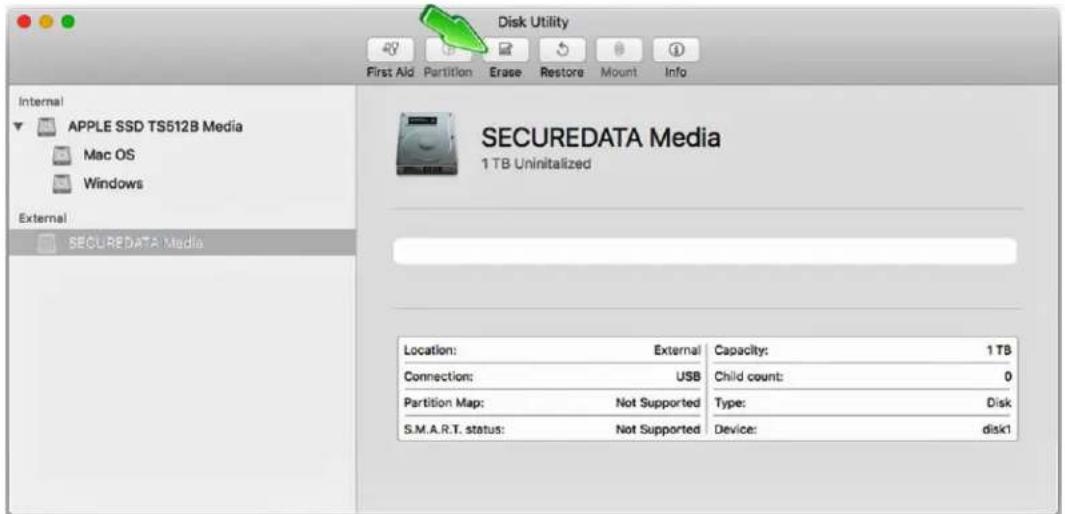
text_image
Disk Utility First Aid Partition Erase Restore Mount Info Internal APPLE SSD TS512B Media Mac OS Windows External SECUREDATA Media SECUREDATA Media 1 TB Uninitialized Location: External Capacity: 1 TB Connection: USB Child count: 0 Partition Map: Not Supported Type: Disk S.M.A.R.T. status: Not Supported Device: disk1Figure 3: The Disk Utility Dialog.
- Click Erase to open the dialog box.
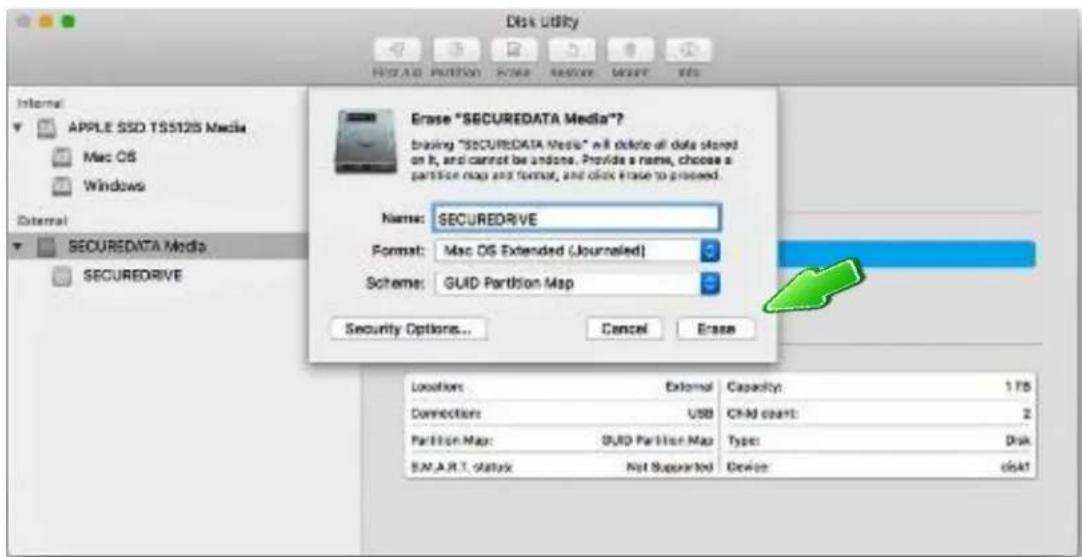
- Ensure your Drive displays in the Name field and click Erase. The system begins erasing the external Drive and renaming it SECUREDRIVE.
text_image
Disk Utility Internal APPLE SSD TS5125 Media Mac OS Windows External SECUREDATA Media SECUREDRIVE Erase "SECUREDATA Media"? Brasing "SECUREDATA Media" will delete all data stored on it, and cannot be undone. Provide a name, choose a partition map and format, and click erase to proceed. Name: SECUREDRIVE Format: Mac OS Extended (Journeled) Scheme: GUID Partition Map Security Options... Cancel Erase Locations External Capacity: 178 Connections USB Ctrl count: 2 Partition Map: GUID Partition Map Type: Disk S.W.A.R.T. Status Not Supported Device: disk1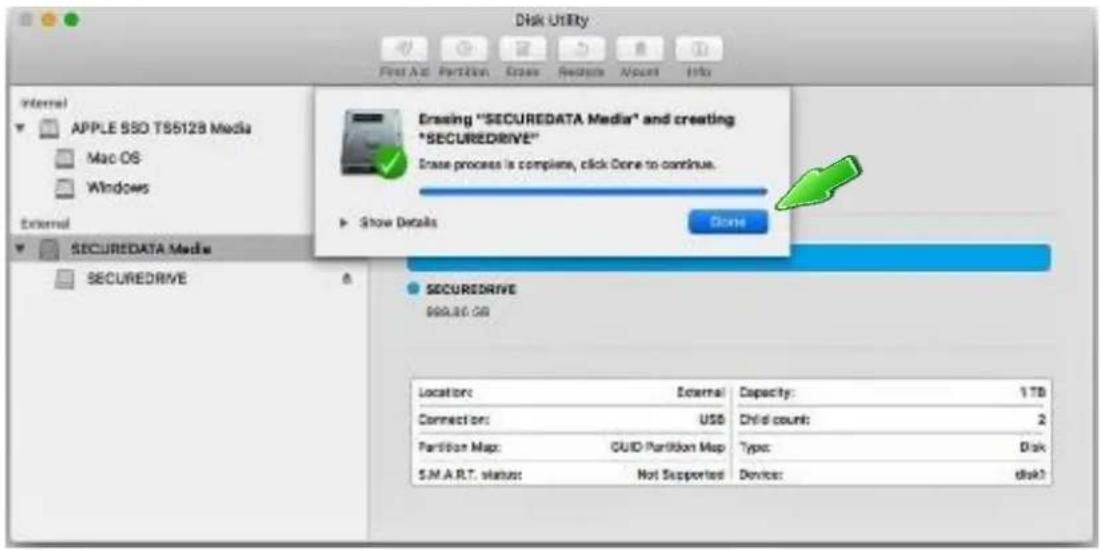
text_image
Disk Utility First Aid Part24v3 Erase Reducts Amount Info Internal APPLE SSD TS5128 Media Mac OS Windows External SECUREDATA Media SECUREDRIVE Drasing "SECUREDATA Media" and creating "SECUREDRIVE" Drase process is complete, click Done to continue. Show Details Done SECUREDRIVE $90.00 GB Location: External Capacity: 1TB Connection: USD Child count: 2 Partition Map: GUID Partition Map Type: Disk S.M.A.R.T. status: Not Supported Device: disk?Figure 4: SecureDrive displays under the list of External Drive when done (as well as on the desktop).
- Click Done in the message dialog when available. The Drive is now displayed under External in the left column.
- Close the Disk Utility.
CONTACT AND WARRANTY INFORMATION
Contact Information

SecureData, Inc.
3255 Cahuenga Blvd. West #301
Los Angeles, CA 90068-1178
www.securedrive.com
US: 1-800-875-3230
International: 1-323-944-0822
Technical Support email: help@securedrive.com
Prior to contacting SecureData Inc., please have the following information ready:
■ The Drive Firmware Version Number (refer to the next heading)
■ The Software Version Number (refer to the next heading)
- Serial Number (S/N) on the back of the device
Finding the Version Numbers
The Drive firmware version number is at the bottom of the Settings window. Unlock the Drive and tap the Drive name to display the Settings window.
Reset Drive
Firmware version : 2.0.8
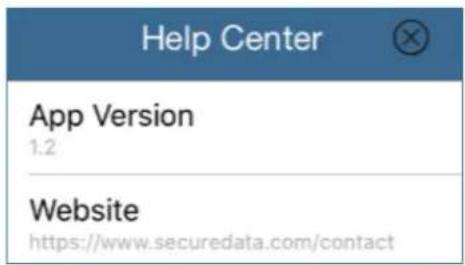
The App (software) version number is displayed in a dialog by tapping the [ ? ] for Help.
text_image
Help Center App Version 1.2 Website https://www.securedata.com/contactTroubleshooting
| Issue | Solution |
| After unlocking the Drive, your computer shows that the external drive is connected (icon displays) but you cannot access the Drive data (it doesn’t display in Explorer (Windows) or Finder (Mac). | The Drive is not initialized and needs to be formatted—no data exists. It may have been reset. To format, seeReformatting the Drive on page 22. |
| I can’t swipe right to lock the Drive in the SecureData Lock App even though the Drive name and unlock-icon display. | The Drive is not authenticated (does not display). Simply tap the Drive name, enter the password and tap Re-Authenticate. |
| Tapping the Drive name in the app doesn’t do anything. | If you’ve used a different Drive prior to the current one, that old one may still display in the app. With the Drive plugged in, and with Bluetooth on your iOS/Android device turned on, tap the plus sign to add your current Drive.You’ll need the Drive Device ID number. |
| I tried to reprovision my Drive, but it doesn’t seem to be working. | You may not have the latest version of the app, or a late enough version of the iOS. |
Warranty and RMA Information
(Returned Merchandise Authorization)
Two Year Limited Warranty
As explained below, SecureData, Inc. offers a two-year limited warranty on the SecureDrive™ against defects in materials and workmanship under normal use. The limited warranty period is effective from the date of purchase either directly from SecureData, Inc. or an authorized reseller.
Disclaimer and terms of warranty
THIS LIMITED WARRANTY BECOMES EFFECTIVE ON THE DATE OF PURCHASE AND MUST BE VERIFIED WITH YOUR SALES RECEIPT OR INVOICE CLEARLY DISPLAYING THE DATE AND SOURCE OF PRODUCT PURCHASE. SECUREDATA, INC. WILL, AT NO ADDITIONAL CHARGE (EXCEPT FOR ANY DELIVERY CHARGES, WHICH REMAIN THE CUSTOMER'S RESPONSIBILITY), REPAIR OR REPLACE DEFECTIVE PARTS WITH NEW PARTS OR SERVICEABLE USED PARTS THAT ARE EQUIVALENT TO NEW IN PERFORMANCE. SECUREDATA, INC. SHALL HAVE SOLE AND COMPLETE DISCRETION ON WHETHER TO USE NEW PARTS OR SERVICEABLE USED PARTS. ALL EXCHANGED PARTS AND PRODUCTS REPLACED UNDER THIS WARRANTY WILL BECOME THE PROPERTY OF SECUREDATA, INC.
THIS WARRANTY DOES NOT EXTEND TO ANY PRODUCT NOT PURCHASED DIRECTLY FROM SECUREDATA, INC. OR AN AUTHORIZED RESELLER OR TO ANY PRODUCT THAT HAS BEEN DAMAGED OR RENDERED DEFECTIVE: 1. AS A RESULT OF ACCIDENT, MISUSE, NEGLECT, ABUSE OR FAILURE AND/OR INABILITY TO FOLLOW THE WRITTEN INSTRUCTIONS PROVIDED IN THIS INSTRUCTION GUIDE: 2. BY THE USE OF PARTS NOT MANUFACTURED OR SOLD BY SECUREDATA, INC.; 3. BY MODIFICATION OF THE PRODUCT; OR 4. AS A RESULT OF SERVICE, ALTERATION OR REPAIR BY ANYONE OTHER THAN SECUREDATA, INC. IN THE EVENT OF ANY OF THESE SITUATIONS, THIS WARRANTY SHALL BE VOID. THIS WARRANTY DOES NOT COVER NORMAL WEAR AND TEAR.
EXCEPT AS EXPRESSLY PROVIDED ABOVE, NO OTHER WARRANTY, EITHER EXPRESSED OR IMPLIED, INCLUDING ANY WARRANTY OF MERCHANTABILITY AND FITNESS FOR A PARTICULAR PURPOSE, HAS BEEN OR WILL BE MADE BY OR ON BEHALF OF SECURED DATA, INC. OR BY OPERATION OF LAW WITH RESPECT TO THE PRODUCT OR ITS INSTALLATION, USE, OPERATION, REPLACEMENT OR REPAIR.
Limitation of Liability
SECUREDATA, INC. SHALL NOT BE LIABLE BY VIRTUE OF ANY WARRANTY, PROMISE OR OTHERWISE, FOR ANY INDIRECT, INCIDENTAL, SPECIAL, CONSEQUENTIAL OR PUNITIVE OR MULTIPLE DAMAGES, INCLUDING WITHOUT LIMITATION ANY DAMAGES RESULTING FROM ANY LOSS OF DATA RESULTING FROM THE USE OR OPERATION OF THE PRODUCT, LOSS OF USE, LOSS OF BUSINESS, LOSS OF REVENUE, OR LOSS OF PROFITS, WHETHER OR NOT SECUREDATA, INC. WAS APPRISED OF THE POSSIBILITY OF SUCH DAMAGES. SECUREDATA, INC.'S LIABILITY SHALL BE LIMITED TO THE ACTUAL COST OF THE PRODUCT OR \$1,000.00, WHICHEVER IS GREATER. THE FOREGOING LIMITATION OF LIABILITY SHALL APPLY REGARDLESS OF THE CAUSE OF ACTION UNDER WHICH SUCH DAMAGES ARE SOUGHT.
Copyright © 2019 SecureData, Inc. All rights reserved.
SecureDrive and SecureUSB products are developed and manufactured by SecureData and are based on SecureData Lock technology licensed from ClevX, LLC. U.S. Patent. www.clevx.com/patents
SecureDrive™ and SecureData™ are trademarks of SecureData, Inc.
All other trademarks and copyrights referred to are the property of their respective owners.
Distribution of the work or derivative work in any standard (paper) book form for commercial purposes is prohibited unless prior permission is obtained from the copyright holder.
DOCUMENTATION IS PROVIDED AS IS AND ALL EXPRESS OR IMPLIED CONDITIONS, REPRESENTATIONS AND WARRANTIES, INCLUDING ANY IMPLIED WARRANTY OF MERCHANTABILITY, FITNESS FOR A PARTICULAR PURPOSE OR NON-INFRINGEMENT, ARE DISCLAIMED, EXCEPT TO THE EXTENT THAT SUCH DISCLAIMERS ARE HELD TO BE LEGALLY INVALID.