
PXL2230MW - Monitor Planar - Free user manual and instructions
Find the device manual for free PXL2230MW Planar in PDF.


| Product Type | Monitor |
| Brand | Planar |
| Model | PXL2230MW |
| Screen Size | 21.5 inches (diagonal) |
| Resolution | 1920 x 1080 (Full HD) |
| Panel Type | IPS (In-Plane Switching) |
| Aspect Ratio | 16:9 |
| Brightness | 250 cd/m² |
| Contrast Ratio | 1000:1 |
| Response Time | 5 ms (gray-to-gray) |
| Connectivity | VGA, DVI, HDMI |
| Power Supply | AC 100-240V, 50/60Hz |
| Power Consumption | Typical 25W, Standby <0.5W |
| Dimensions (W x H x D) | 508 x 365 x 180 mm (with stand) |
| Weight | Approx. 4.5 kg (with stand) |
| Tilt Angle | -5° to 20° |
| VESA Mount | 100 x 100 mm |
| On-Screen Display (OSD) | Brightness, Contrast, Color Temperature, Language |
| Cleaning Instructions | Wipe with a soft dry cloth; do not use abrasive cleaners. |
| Safety Notes | Do not open the casing; unplug before cleaning. |
| Spare Parts Available | Power adapter, VGA/DVI cable (included), stand |
Frequently Asked Questions - PXL2230MW Planar
User questions about PXL2230MW Planar
0 question about this device. Answer the ones you know or ask your own.
Ask a new question about this device
Download the instructions for your Monitor in PDF format for free! Find your manual PXL2230MW - Planar and take your electronic device back in hand. On this page are published all the documents necessary for the use of your device. PXL2230MW by Planar.
USER MANUAL PXL2230MW Planar
Operation Instructions....1
Unpacking Instructions ....3
Safety Precautions....3
Front View of the Product 6
Rear View of the Product ....7
Quick Installation 8
Basic Operation and Calibration/Reset Instructions....9
Advanced Operation—OSD Menu....11
Supporting Timing Modes 15
Technical Information 16
Wall-Mount Installation Instructions....17
Troubleshooting....18
Planar Support 18
Operation Instructions
Thank you for purchasing the PXL2230MW multi-touch LED LCD monitor. Please read this guide thoroughly before installation.
FCC RADIO FREQUENCY INTERFERENCE STATEMENT WARNING: (FOR FCC CERTIFIED MODELS)
This TFT LED LCD monitor has been tested and found compliant with the limits for a Class B digital device, pursuant to part 15 of the FCC Rules. These limits are designed to provide proper protection against harmful interference to a residential installation. This TFT Touchscreen LED LCD monitor generates, uses, and can radiate radio frequency energy. Harmful interference to radio communication may be the result if it's not properly installed and used. However, there is no guarantee that interference will not occur in a particular installation. If this TFT Touchscreen LED LCD monitor does cause serious interference to radio or television reception, resetting may correct it. Moreover, users are encouraged to reduce interference by doing one or more of the following:
● Reorient or relocate the receiving antenna.
- Move the TFT Touchscreen LED LCD monitor and the receiver further away from each other.
- Connect the TFT Touchscreen LED LCD monitor into an outlet on a circuit different from that to which the receiver is connected.
- Consult your local dealer or a qualified technician.
FCC Warning:
To assure a continued FCC compliance, a user must use a grounded power supply cord and the provided shielded video interface cable with bonded ferrite cores. Also, any unauthorized changes or modifications to this TFT Touchscreen LED LCD monitor would void the user's authority to operate this device.
Note: If necessary, shielded interface cables and AC power cord must be used to meet the emission level limits.
COMMUNIQUE D'AVERTISSEMENT DE LA FCC CONCERNANT LES INTERFERENCE DE FREQUENCE RADIO: (SEULEMENT POUR MODELES CERTIFIE PAR LA FCC)
Please recycle or dispose of all electronic waste in accordance with local, state, and federal laws. Additional resources can be found online at http://www.planar.com/about/green/.
The crossed-out wheelie bin symbol is to notify consumers in areas subject to Waste Electrical and Electronic Equipment (WEEE) Directive 2012/19/EU that the product was placed on the market after August 13, 2005 and must not be disposed of with other waste. Separate collection and recycling of electronic waste at the time of disposal ensures that it is recycled in a manner that minimizes impacts to human health and the environment. For more information about the proper disposal of electronic waste, please contact your local authority, your household waste disposal service, or the seller from whom you purchased the product.

Unpacking Instructions
- Move the LED LCD monitor out of the package and take off the plastic bag and Polystyrene Foam.
- Pull the base from Parallel versus Panel to Vertical.
- Adjust the Panel between 0^ leaning forward and 20^ leaning backward.
Safety Precautions
Follow all warnings, precautions and maintenance as recommended in this user's manual to maximize the life of your unit.
Do:
● Turn off the product before cleaning.
- Touch screen surface may be cleaned using a soft clean cloth moistened with mild window glass commercial cleaners or 50/50 mixture of water and isopropyl alcohol.
● Use a soft cloth moistened with mild detergent to clean the display housing.
- Disconnect the power plug from AC outlet if the product is not going to be used for an extended period of time.
Don't:
- Do not touch the LED Display screen surface with sharp or hard objects.
- Do not use abrasive cleaners, waxes or solvents for your cleaning.
-
Do not operate the product under the following conditions:
-
Over 16 hours per day.
- Extremely hot, cold or humid environment.
- Areas susceptible to excessive dust and dirt.
o Near any appliance generating a strong magnetic fi eld. -
In direct sunlight.
-
If smoke, abnormal noise or odor emits from your TFT Touchscreen LED LCD monitor, remove the power cord immediately and call your service center.
- Never remove the rear cover of your TFT Touchscreen LED LCD monitor. The display unit inside contains high-voltage parts and may cause electric shock.
- Never try to repair your TFT Touchscreen LED LCD monitor yourself. Always call your service center or a qualified technician to fix it.
- Due to safety concerns, if the VESA mounting kit is purchased separately, please make sure the mounting kit is UL-listed, and replaceable only by service personnel.
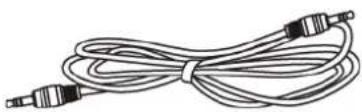
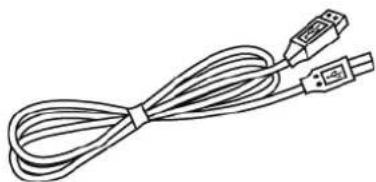
Congratulations on your purchase of this high performance edge lit LED LCD monitor. This LED LCD monitor comes with the following accessories:
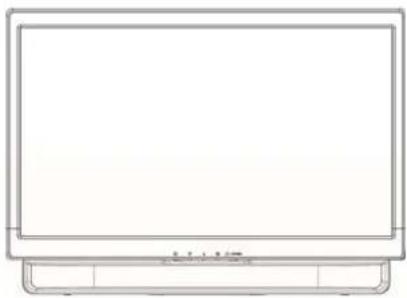
natural_image
Line drawing of a flat-screen monitor with no text or symbols on the screen or sideTouchscreen LED Monitor
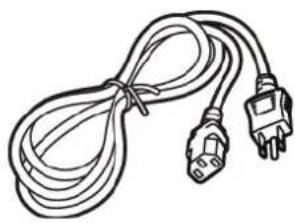
natural_image
Line drawing of a cord with two connectors (no text or symbols)Power Cord
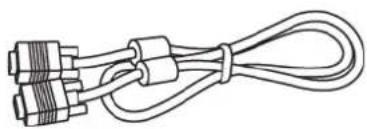
natural_image
Line drawing of a multi-pin cable with connectors and coiled ends (no text or symbols)VGA Signal Cable
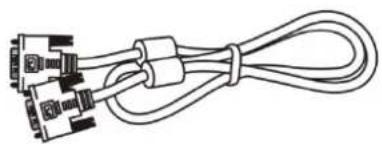
natural_image
Line drawing of a multi-pin cable with multiple connectors (no text or symbols)DVI Cable
natural_image
Coiled audio cable with two connectors (no text or symbols visible)Audio-in Cable
text_image
PLANAR THE YATOMAN LEE Bockholder Yateman ——User's Guide
natural_image
Line drawing of a USB cable with connector port (no text or symbols)USB Cable (A to B)
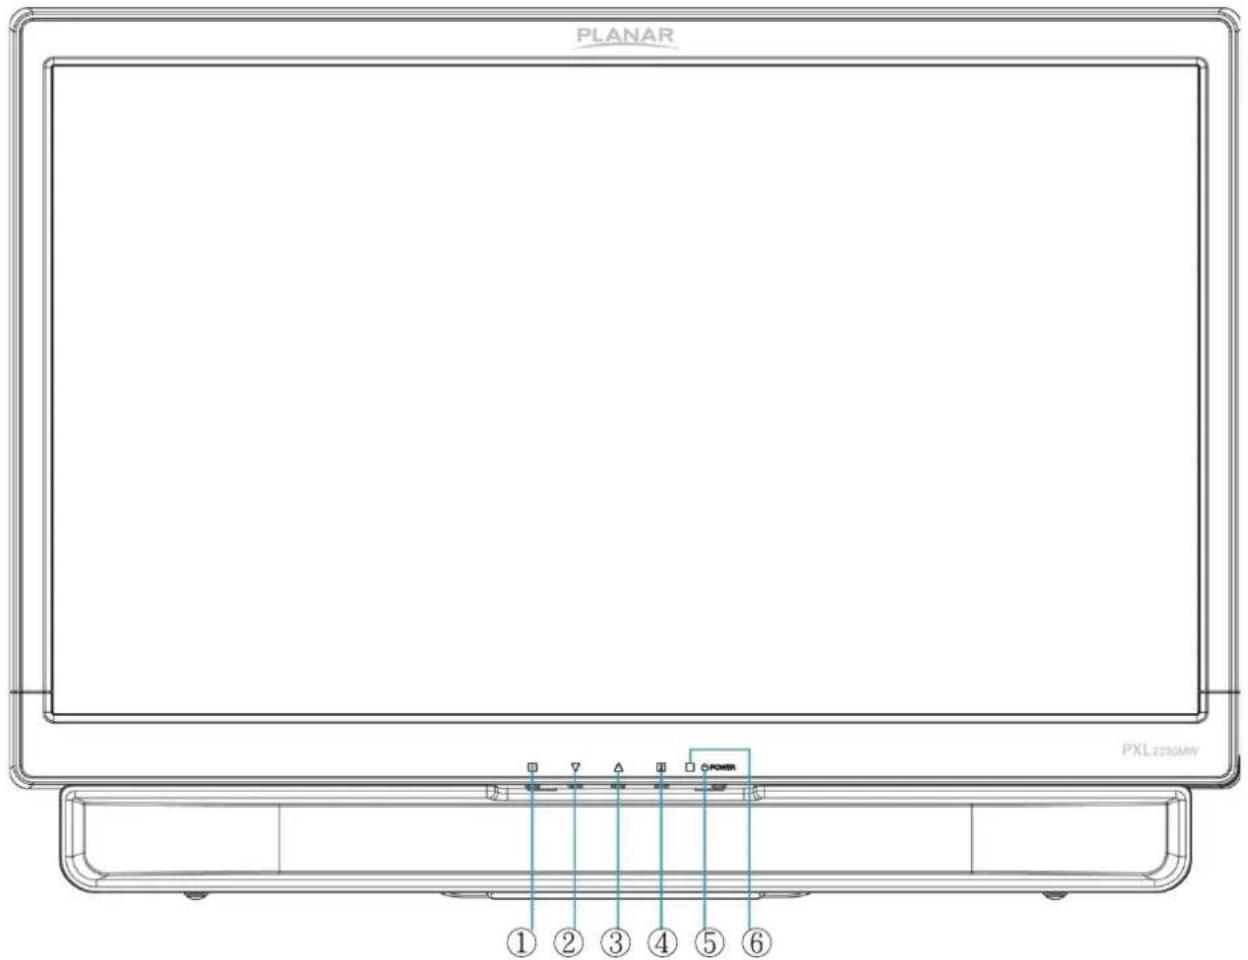
Front View of the Product
text_image
PLANAR PXL220MV ① ② ③ ④ ⑤ ⑥| 1 | OSD Turn On/ Off |
| 2 | Brightness */ Scroll Down/ Adjust Decrease |
| 3 | Blue Light Reducer */ Scroll UP/ Adjust Increase |
| 4 | Input select/ Confirm Selection |
| 5 | Power On/ Off |
| 6 | LED Indicator |
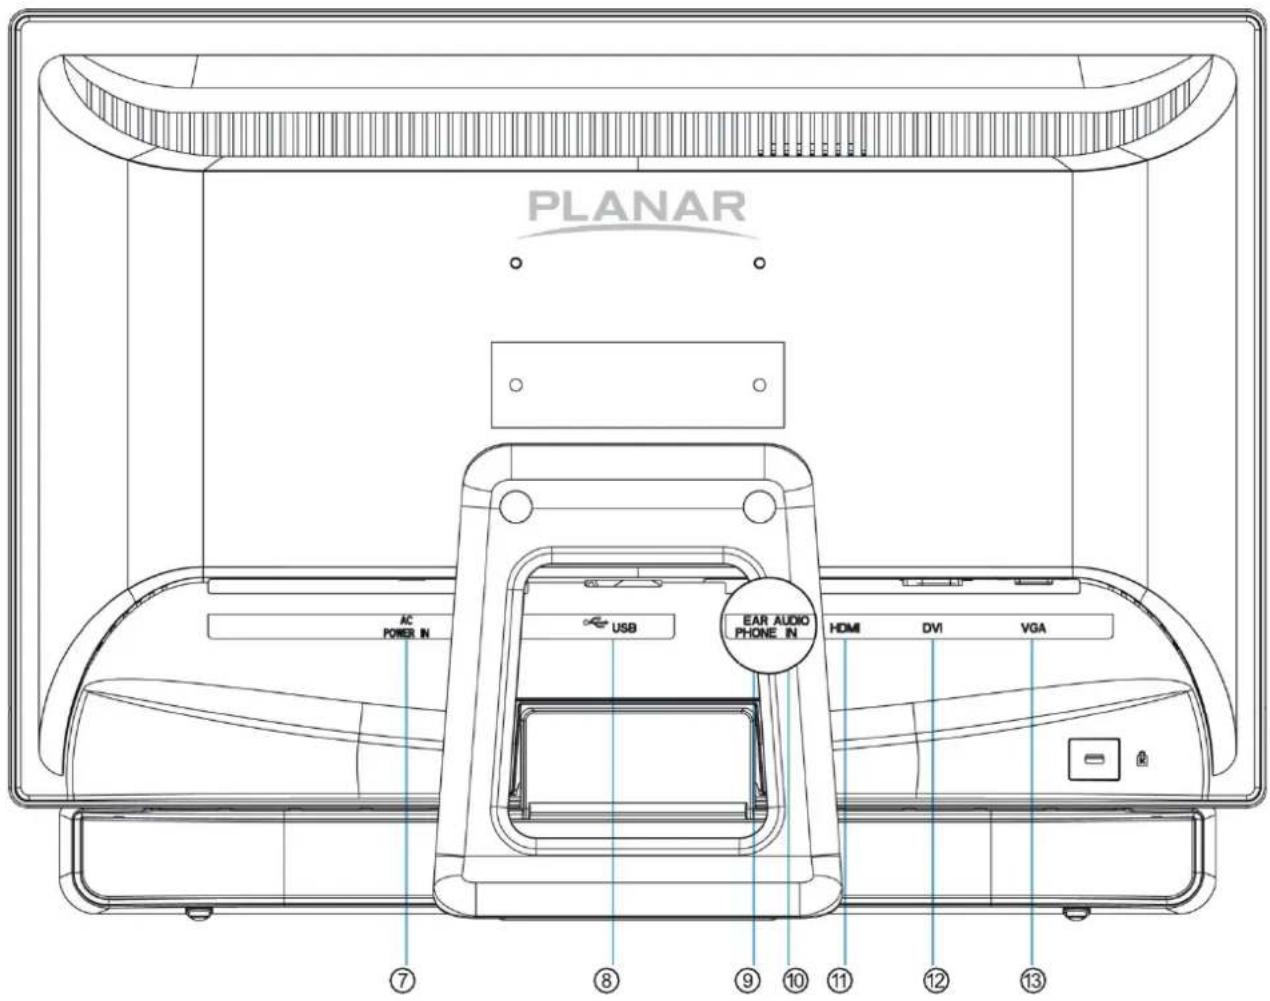
Rear View of the Product
text_image
PLANAR AC POWER IN USB EAR AUDIO PHONE IN HDMI DVI VGA ⑦ ⑧ ⑨ ⑩ ⑪ ⑫ ⑬ ⑬| 7 | Power Input |
| 8 | USB – Type A to B |
| 9 | Headphone Jack |
| 10 | Audio Input |
| 11 | HDMI Input(HDMI 19 pin) |
| 12 | DVI Input (DVI 24 pin) |
| 13 | VGA Input (D-Sub 15 pin) |
Quick Installation
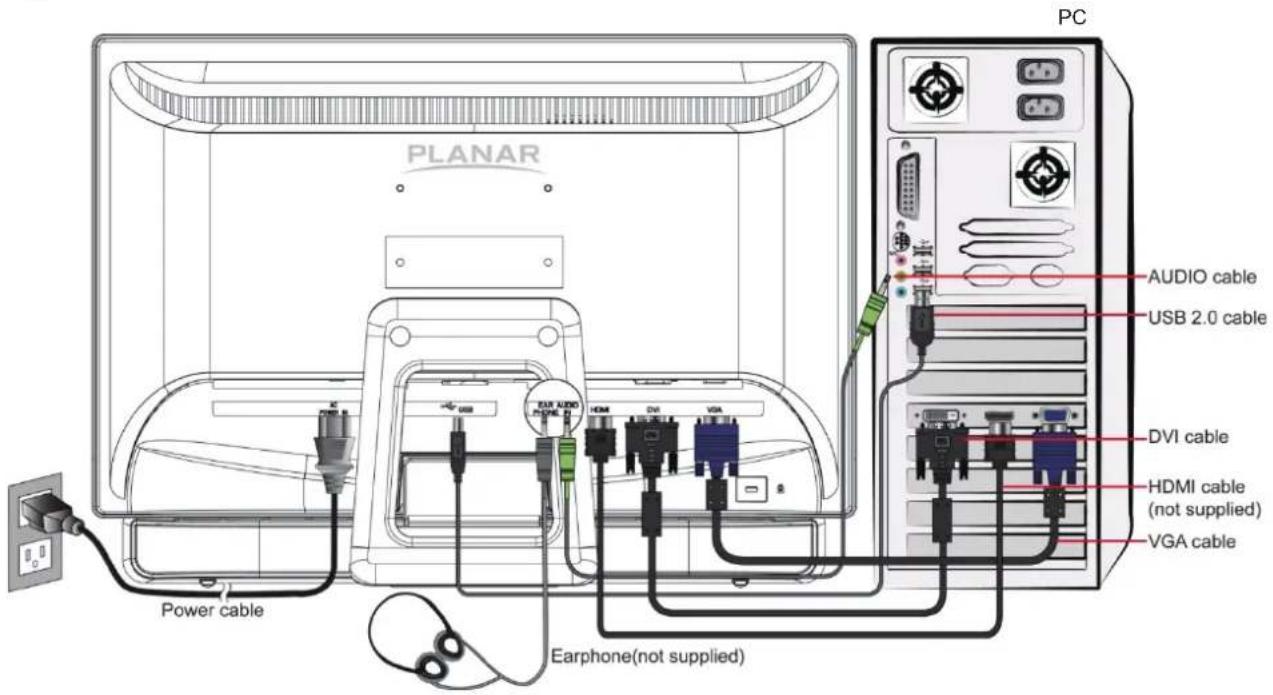
- Connect either VGA, DVI or HDMI Video Source from the monitor to the computer. Make sure both monitor and computer are powered OFF.
- Connect the audio cable from audio output of computer to the audio input of the monitor.
- Connect the USB cable from the computer to the monitor.
- Connect power cord to a properly grounded AC outlet, and then to the monitor.
- Power-ON computer and then POWER-ON the monitor
- Set the timing mode on your computer. Recommended resolution and refresh rate is 1920 x 1080 @ 60Hz.
Figure 1:
text_image
PLANAR PC AUDIO cable USB 2.0 cable DVI cable HDMI cable (not supplied) VGA cable Power cable Earphone(not supplied)Basic Operation and Calibration/Reset Instructions
Before using the TFT Touchscreen LED LCD monitor:
- Connect external equipment properly.
- Insert the power plug, and the power LED indicator will light orange.
Power On/Off
To turn the TFT Touchscreen LED LCD monitor on/off:
Press POWER button on the front. The power LED indicator light will be blue when the TFT Touchscreen LED LCD monitor is on.
Using the OSD Menu
Use OSD menus to adjust settings by using the menu button on the front of the TFT Touchscreen LED LCD monitor.
| 1 | Displays main menu |
| Exits from OSD menu | |
| 2 Selects between VGA, DVI, HDMI or Auto mode | |
| ▼ | Select the desired item when in OSD menu |
| When not in OSD menu, directly enters BRIGHTNESS Menu, press 3 seconds enters AUTO IMAGE ADJUST | |
| ▲ | Select the desired item when in OSD menu |
| When not in OSD menu, directly toggles Blue Light. (OFF, VIDEO, WEB BROWSING, READING, LOW LIGHT) | |
| ▼ + ▲Recalls both Contrast and Brightness (when not in OSD menu) | |
OSD Lock Out Function
When Touchscreen LED Monitor is in normal mode, the "OSD Lock Out" function can be enabled.
Option 1: OSD lock – all 4 buttons are locked except the "POWER" button.
Press and hold the 1 button and the ▲ button for 3 seconds to lock the OSD buttons.
The Touchscreen LED Monitor will show an "OSD Lock Out" message for 3 seconds and the message will disappear automatically.

OSD Locked
Repeat this step to unlock.
Option 2: OSD & Power button lock – all 5 buttons including the "POWER" button are locked. Press and hold the 1 button and the ▼ button for 3 seconds to lock all 5 buttons.
The Touchscreen LED Monitor will show a "Lock Out" message for 3 seconds and the message will disappear automatically.

Power Button Locked
Repeat this step to unlock.
PXL2230MW Calibration/Reset Instructions:
The PXL2230MW is available with USB connection. It is Microsoft® Windows® 7 HID (Human Interface Device) compatible if you use the USB touch screen interface. No additional software driver is required. Calibration is a simple process and can be invoked by running Tablet PC Settings from Control Panel and clicking the Calibrate button.
Click the Reset button to reset the touchscreen to the factory calibration settings. To reset the existing calibration data, click "Reset" in the Tablet PC Settings window.
Advanced Operation—OSD Menu
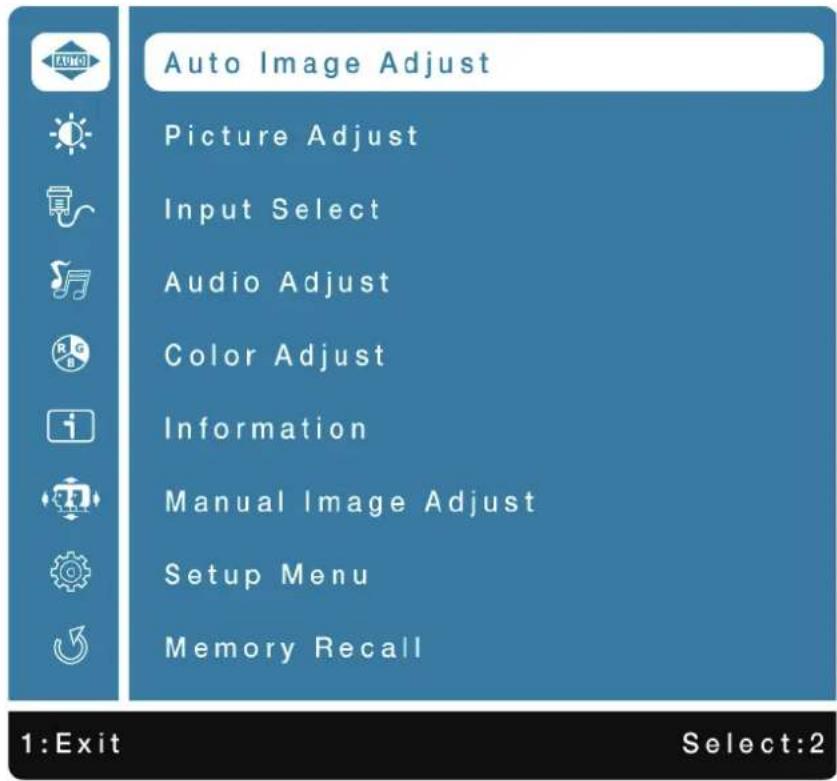
You can use the OSD menu to adjust various settings for your TFT Touchscreen LED LCD monitor. Press the 1 button to display the OSD Menu, and use ▲▼ to select the desired OSD menu.
text_image
Auto Image Adjust Picture Adjust Input Select Audio Adjust Color Adjust Information Manual Image Adjust Setup Menu Memory Recall 1:Exit Select:2Short Cuts Function from the button(s)

Auto Image Adjust: To auto adjust Horizontal Position, Vertical Position, Phase (Fine Tune) and Clock (H. Size) of the screen.

Contrast: To adjust the foreground white level of screen image.
▲: increase contrast, ▼decrease contrast.
Brightness: To adjust the luminance of the video.
▲: increase brightness, ▼decrease brightness.
ECO Mode: Allows the user to turn the ECO On or Off. Contrast and Brightness adjustment disabled when ECO is active.
Over Drive: Allows the user to turn the Over Drive On or Off. Improve the quality of the motion pictures.

Input Select: When Input Select is pressed, change Input signal to VGA, DVI, HDMI or Auto.

Audio Adjust: To adjust the audio functions.
Volume: To adjust the volume of speaker output.
Mute: To turn the Mute ON/OFF.
Audio Input: When in HDMI input, select where the audio source comes from Line-In or HDMI.

Color Adjust: To select the color for improving brightness and color saturation between Cool, Normal, Warm, User Color and Preset Mode.
Cool: Adds blue to screen image for cooler white.
Normal: Adds red to screen image for warmer white and richer red.
Warm: Adds green to screen image for a darker color.
User Color: Individual adjustments for red (R), green (G), blue (B).
- Press button 2 to select the desired color.
- Press ▼ or button to adjust selected color.
Preset Mode: Provides an optimum display environment depending on the contents displayed. It contains 5 user-selectable presets.
- Standard is for general windows environment and monitor default setting.
- Game optimized for PC game environment.
• Cinema optimized for movie and video environment. - Scenery optimized for displaying outdoor scenery images.
- Text optimized for text editing and viewing in a word processing environment.

Information: To display the information, regarding the current input signal coming from the graphic card in your computer.
Note: See your graphic card user guide for more information about changing the resolution and refresh rate.

Manual Image Adjust: To manually adjust the H. / V. position, Clock, Phase, Sharpness, Video Mode adjust and Blue light reducer.
H. / V. Position: To adjust the horizontal and vertical position of the video.
H. Position: ▲: move screen to the right, ▼move screen to the left.
V. Position: ▲: move screen up, ▼: move screen down.
Clock: To adjust the width of the screen image.
▲: increase the width of screen image, ▼: decrease the width of screen image.
Phase: To adjust the delay time of data and clock.
Press ▲ or to adjust to your preference.
Sharpness: To adjust the clarity of a non-Full HD Resolution (1920x1080) signal with ▼
or ▲ button.
Video Mode Adjust: To select the video mode from Full Screen or Aspect Ratio.
Aspect Ratio : To select input timing image size.
Full Screen: To select full-screen size image.
BLUE LIGHT REDUCER: To decrease the blue light emitted from the display to reduce the risk of blue light exposure to your eyes. (Contrast, Color Temperature-Cool, Normal, Warm, User Color and Preset Mode adjustment will be disabled when Blue Light Reducer is active.)
Press ▲ or ▼ey to adjust the Blue Light Reducer strength.
- VIDEO - Ideal for watching videos (15% reduction)
- WEB BROWSING - Ideal for web browsing (30% reduction)
- READING -deal for reading (50% reduction)
- LOW LIGHT - Ideal for low ambient lighting environments (70% reduction)

Setup Menu: To set up Language Select, OSD Position, OSD Time Out, OSD Background and Power Indicator.
Language Select: To allow users to choose from available languages.
OSD Position: Press ▼ or ▲ button to select between horizontal and vertical OSD Position adjustment.
OSD H. Position: To horizontally adjust the OSD position.
▲: move OSD to the right, ▼move OSD to the left.
OSD V. Position: To vertically adjust the OSD position.
▲: move OSD up, ▼move OSD down.
OSD Time Out: To automatically turn off On Screen Display (OSD) after a preset period of time.
OSD Background: Allows the user to turn the OSD background On or Off.
Power Indicator: Allows the user to turn the LED Indicator On or Off.

Memory Recall: To recall factory settings for Video & Audio controls. Press button 2 to select the Memory Recall menu option.
Note:
When you adjust the OSD, the following message will be displayed.
Changing OSD settings may increase power consumption.
Accept?
1: No 2: Yes
Supporting Timing Modes
| STANDARD RESOLUTION | |
| VGA | 720 x 400 @ 70Hz |
| VGA | 640 x 480 @ 60Hz |
| MAC | 640 x 480 @ 67Hz |
| VESA | 640 x 480 @ 72Hz |
| VESA | 640 x 480 @ 75Hz |
| VESA | 800 x 600 @ 56Hz |
| VESA | 800 x 600 @ 60Hz |
| VESA | 800 x 600 @ 72Hz |
| VESA | 800 x 600 @ 75Hz |
| MAC | 832 x 624 @ 75Hz |
| VESA | 1024 x 768 @ 60Hz |
| VESA | 1024 x 768 @ 70Hz |
| VESA | 1024 x 768 @ 75Hz |
| VESA | 1280 x 960 @ 60Hz |
| VESA | 1152 x 864 @ 75Hz |
| MAC | 1152 x 870 @ 75Hz |
| VESA | 1280 x 1024 @ 60Hz |
| VESA | 1280 x 1024 @ 75Hz |
| VESA | 1440 x 900 @ 60Hz |
| VESA | 1440 x 900 @ 75Hz |
| CVT | 1400 x 1050 @ 60Hz |
| VESA | 1600 x 1200 @ 60Hz |
| VESA | 1680 x 1050 @ 60Hz |
| VESA | 1920 x 1080 @ 60Hz |
Note:
- DVI supports 480i, 480p, 576i, 576p, 720p, 1080i, and 1080p.
- Simultaneously press 1 and 2 keys on monitor panel to switch between similar PC timings.
Similar PC Timing on list below:
- 720 x 400 @ 70Hz / 640 x 400 @70Hz
• 1400 x 1050 @ 60Hz / 1680 x 1050 @ 60Hz
- 720 x 480 @ 60Hz / 640 x 480 @ 60Hz
Warning: Do not set the graphic card in your computer to exceed these maximum refresh rates. Doing so may result in permanent damage to your monitor.
Wall-Mount Installation Instructions
Wall Mount Arm not included
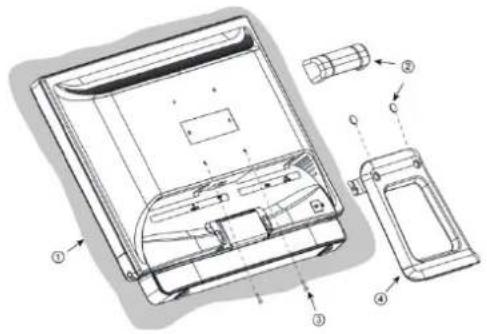
Turn the power OFF then disconnect the cables from the TFT Touchscreen LED LCD monitor before performing the procedure below.
- Lay the TFT Touchscreen LED LCD monitor face down on a soft surface.
- Remove the 4 screws holding the stand to the hinge.
- Remove the stand.
- Follow instructions included with the Wall Mount Kit.
NOTE
100mmx100mm VESA hole pattern (n=4), M4, pitch =0.7 mm
text_image
Technical diagram of a device with numbered components, likely illustrating assembly or installation steps.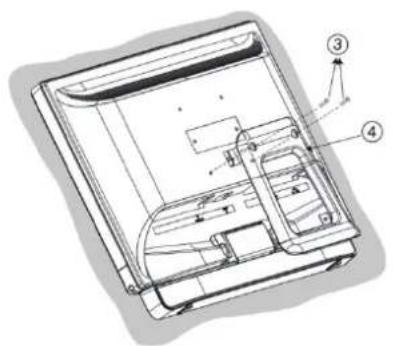
text_image
Technical diagram of a computer monitor with labeled parts and directional arrows indicating assembly or movement.100mm x 100mm Screw Mounting Options
Troubleshooting
No power
● Make sure A/C power cord is securely connected to the power adapter and the power supply is firmly connected to the TFT Touchscreen LED LCD monitor.
- Plug another electrical device into the power outlet to verify that the outlet is supplying proper voltage.
● Make sure all signal cables are installed.
Power on but no screen image
● Make sure the video cable supplied with the TFT Touchscreen LED LCD monitor is tightly secured to the video output port on back of the computer. If not, tightly secure it.
- Adjust brightness.
Wrong or abnormal colors
- If any colors (red, green, blue) are missing, check the video cable to make sure it is securely connected. Loose or broken pins in the cable connector could cause an improper connection.
- Connect the TFT Touchscreen LED LCD monitor to another computer.
Planar Support
Cables, Replacement Lamps, Accessories
To find cables, replacement lamps and accessories for your LED LCD monitor, touch screen or other Planar products visit our online store at www.PlanarOnline.com or find other stores who carry Planar products at http://www.planar.com/howtobuy
Technical Support
Visit Planar at http://www.planar.com/support for product registration, operations manuals, touch screen drivers, warranty information and access to Planar's Technical Library for online troubleshooting. To speak with Planar Customer Support please have you model and serial number available and dial:
Planar Support
Tel: 1-866-PLANAR1 (866-752-6271) or +1 503-748-5799 outside the US.
Hours: 24 hours a day, 7 days a week.
Toll or long distance charges may apply.
European Product Database for Energy Labeling (EPREL)
PXL2230MW Registration number: 457749
Planar Systems, Inc.
Customer Service
24x7 Online Technical Support: http://www.planar.com/support
1195 NE Compton Drive
Hillsboro, OR 97006
Tel: 1-866-PLANAR1(866-752-6271), or+1 503-748-5799 outside the United States,
Hours: 24 hours a day, 7 days a week
© 05/2020 Planar Systems, Inc.
Planar is a registered trademark of Planar Systems, Inc. Other brands and names are the property of their respective owners. Technical information in this document is subject to change without notice.
020-1024-01F
90101-24551