
HFX85W20C - Air purifier DELONGHI - Free user manual and instructions
Find the device manual for free HFX85W20C DELONGHI in PDF.


| Product Type | Air Purifier with Heater and Cooling Fan |
| Brand | DeLonghi |
| Model | HFX85W20C |
| Functions | Air purification (continuous), heating (10-28°C), cooling fan (10 speeds) |
| Fan Speeds | 10 levels in cooling mode; 6 levels in heating mode |
| Oscillation | Yes, left-right oscillation |
| Timer | Delayed start and shut-off: 0.5h, 1h, 2h, 4h, 6h, 8h, 12h |
| ECO Mode | Energy-saving heating mode reducing power consumption |
| Airflow Direction | High (H) and Low (L) positions |
| Filter Type | Replaceable purification filter (lifespan approx. 9 months at 8h/day) |
| Filter Maintenance | Vacuum clean regularly; replace when CF indicator appears |
| Filter Replacement Indicator | CF message on display |
| Control | Remote control (CR2032 battery) and control panel with ON/STAND-BY button |
| Display | Digital display with 3 brightness levels (L1, L2, L3) |
| Temperature Scale | Celsius or Fahrenheit selectable |
| Safety Features | Tip-over switch, overheat protection, safety device for overheating |
| No Beep Function | Yes, can deactivate buzzer |
| Minimum Room Area | 4 m² |
| Minimum Distance from Walls | 50 cm |
| Minimum Distance from Flammable Materials | 1 m from air outlet |
| Suitable For | Well-insulated spaces or occasional use |
Frequently Asked Questions - HFX85W20C DELONGHI
User questions about HFX85W20C DELONGHI
0 question about this device. Answer the ones you know or ask your own.
Ask a new question about this device
Download the instructions for your Air purifier in PDF format for free! Find your manual HFX85W20C - DELONGHI and take your electronic device back in hand. On this page are published all the documents necessary for the use of your device. HFX85W20C by DELONGHI.
USER MANUAL HFX85W20C DELONGHI
Proudly distributed by
De'Longhi Australia Pty Limited
P.O. BOX 4540
CASULA MALL NSW 2170
Customer Service Ph: 1800 126 659
Fax: 1800 706932
www.delonghi.com.au
e-mail: info.au@delonghigroup.com
De'Longhi New Zealand Limited
99 Khyber Pass Road
Grafton 1023
Auckland, New Zealand
P.O. Box 58-056 Botany
MANUKAU 2163
Customer Service Ph: 0508 200 300
Fax: 0508 200 301
www.delonghi.co.nz
e-mail: info.nz@delonghigroup.com
Register Now
www.delonghi.com/register

AIR PURIFIER, HEATER AND COOLING FAN Instructions for use
natural_image
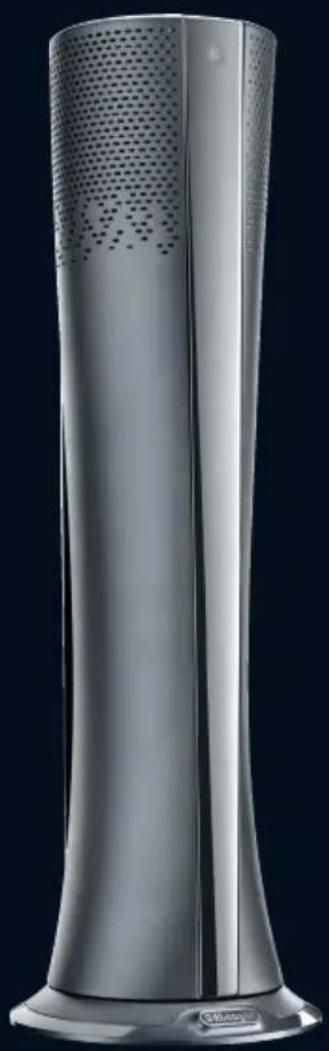
Modern stainless steel air purifier with perforated grille and side-mounted base (no visible text or symbols)This product is only suitable for well insulated spaces or occasional use
DeLonghi
Safety warnings

Danger!
Failure to observe the warning may result in life threatening injury by electric shock.
- Do not locate the heater immediately below a socket-outlet.
- Do not use this heater in the immediate surroundings of a bath, a shower or a swimming pool.
- If the supply cord is damaged, it must be replaced by the manufacturer or its service agent or a similarly qualified person in order to avoid a hazard.

Important!
Failure to observe the warning could result in injury or damage to the appliance.
- The appliance is not intended for use by persons (including children) with reduced physical, sensory or mental capabilities, or lack of experience and knowledge, unless they have been given supervised or instruction concerning use of the appliance by a responsible person for their safely.
Young children should be supervised to ensure that they do not play with the appliance.
- CAUTION: To avoid the safety system resetting accidentally, this appliance must not be powered through an external on/off device such as a timer, or connected to a circuit which is turned off and on regularly by the energy supplier.
- WARNING: Do not use this heater in small rooms when they are occupied by persons not capable of leaving the room on their own, unless constant supervision is provided.

Danger of burns!!
Failure to observe the warning could result in burns or scalds.
- WARNING: In order to avoid overheating, do not cover the heater during operation as this would lead to a dangerous rise in temperature.
- WARNING: to reduce the risk of fire, keep textiles, curtains, or any other flammable material a minimum distance of 1 m from the air outlet.
Safety functions
- Safety device: the appliance is fitted with a safety device which switches it off in the event of accidental overheating (e.g. obstruction of air intake and outlet grilles, motor turning slowly or not at all).
To reset, unplug the appliance from the mains socket for a few minutes, remove the cause of overheating then plug in again. If the appliance doesn't work please contact the De'Longhi Customer Service.
- Tip over safety device: Certain models are fitted with a tip-over switch which turns the appliance off if it falls over. To restart the appliance, simply place it upright again.

Please note:
This symbol indicates recommendations and important information for the user.
- Use this heater on a horizontal and stable surface.
- Always use the appliance in an upright position.
- Do not use this heater if it has been dropped.
- Do not use if there are visible signs of
damage to the heater.
- The use of extension leads is not recommended.
However if they cannot be avoided, follow the instructions accompanying the extension lead and never exceed the power limit marked on the extension. - The heater must be positioned at least 50 cm from furniture or other objects.
- Do not use the appliance near walls, furniture, curtains, etc.
- Do not use the appliance in rooms with a floor area of less than 4m^2 .
- Before putting the appliance away, make sure it is completely off and unplugged from the mains socket.
Do not store in dusty atmospheres. - Do not rest anything on the appliance.
- Do not use the appliance to dry laundry. Do not obstruct the air intake and outlet area (danger of overheating).
- The appliance must not be hung.
- Some models are supplied with a device which delays of few seconds the fan shut off.

Important!
- WARNING - KEEP BATTERIES OUT OF REACH OF CHILDREN.
- Swallowing may lead to serious injury in as little as 2 hours or death, due to chemical burns and potential perforation of the oesophagus.
- Examine devices and make sure the battery compartment is correctly secured. Do not use if compartment is not secure.
- Dispose of used button batteries immediately and safely. Flat batteries can still be dangerous.
INTRODUCTION
Thank you for choosing a De'Longhi product. Please take a few minutes to read these instructions. This will avoid all risks and damage to the appliance.
DESCRIPTION
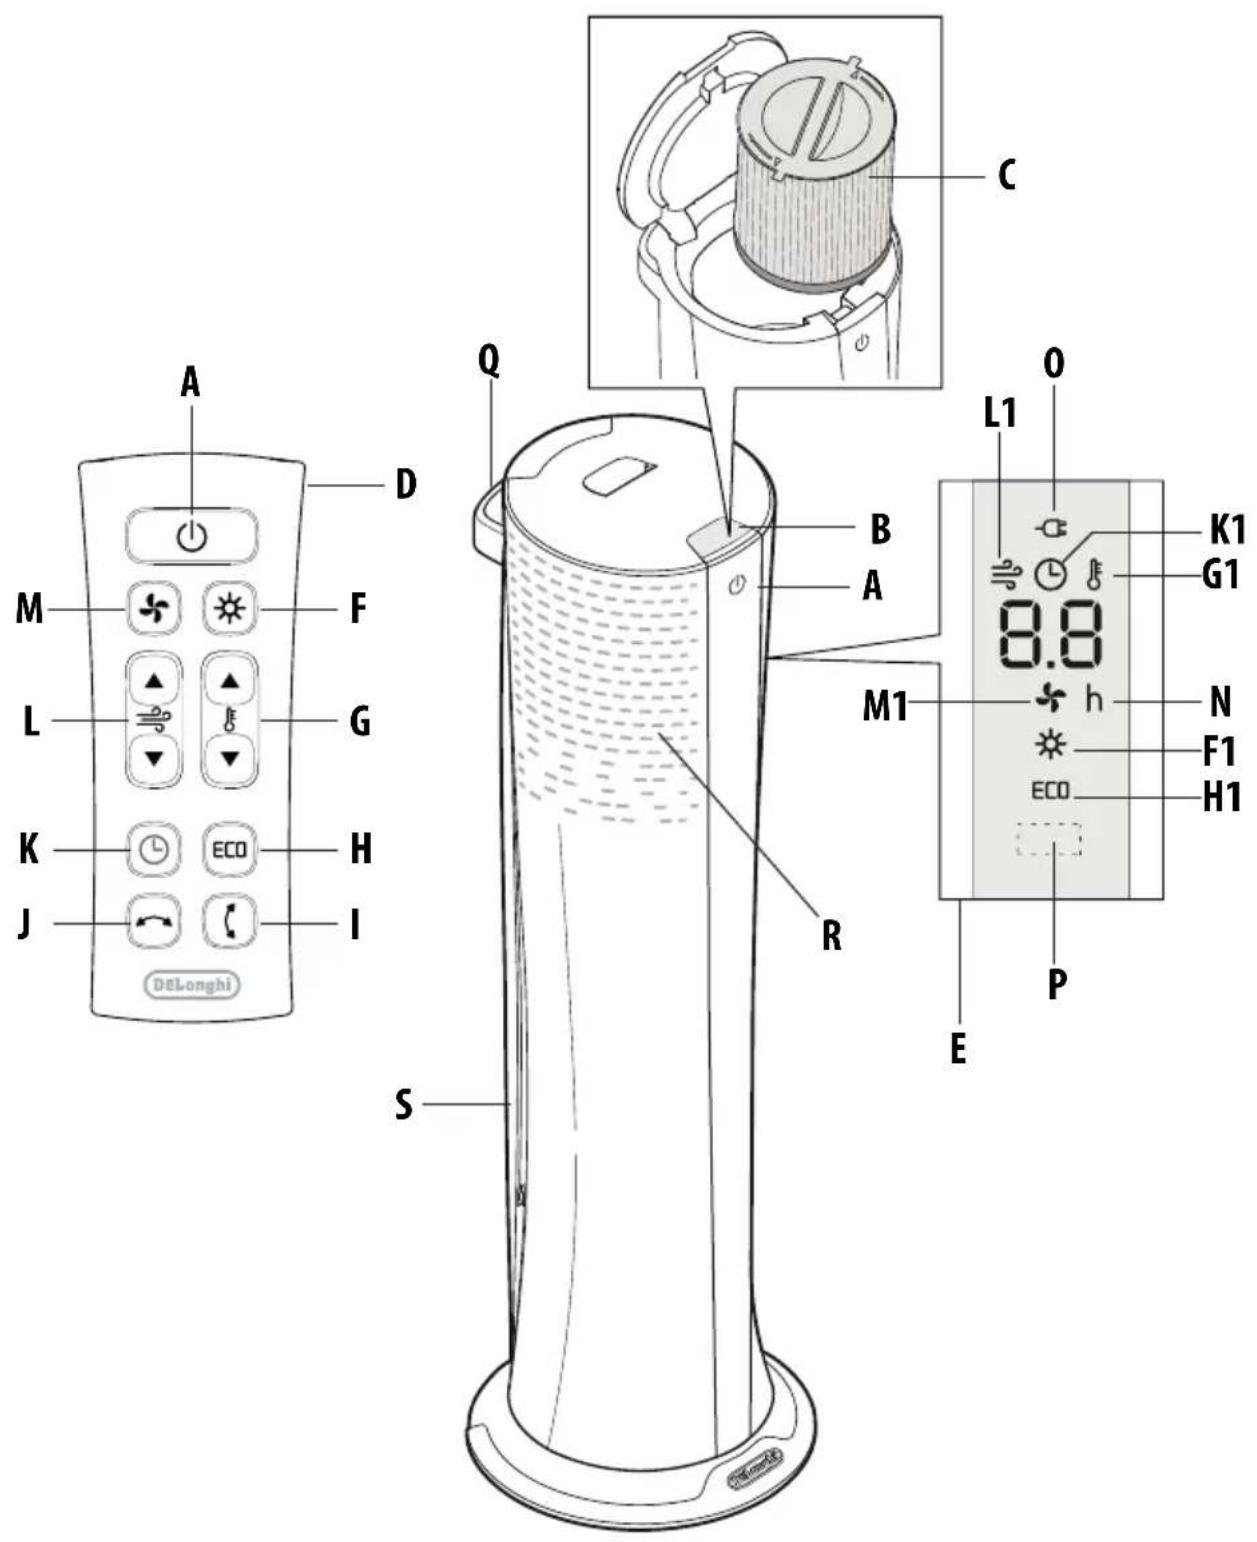
A ON/STAND-BY button
B Lid release button
C Air purification filter
D Remote control
E Control panel
F Heating button
F1 Heating mode
G Temperature buttons
G1 Temperature indicator (C° and F°)
H ECO button
H1 ECO function
Airflow direction button
J Oscillation button
K Timer button
K1 Timer function
L Fan speed buttons
L1 Fan speed indicator
P Receiver for remote control
▲ Increase button
Decrease button
Q Handle
R Air inlet
S Air outlet
OPERATION AND USE
Electrical connection
Before plugging the appliance into the mains socket, check that the mains power supply corresponds to the value indicated on the rating plate and that the mains power supply is adequate for the load.
Installation
The appliance can be used on any horizontal stable surface. Do not overload the electrical circuit.
Avoid using the same socket for other appliances.

Please note: the appliance can be easily moved carring it by the handle. Before moving it remember to turn it off.
Starting instructions

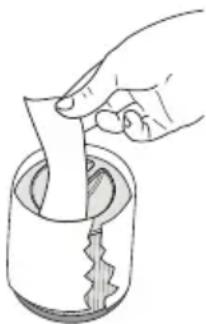
Please note: the filter is provided with a protective er around it that needs to be removed before first use.
- Before turning on the appliance extract the filter from its housing as explained in the filter maintenance section.
- Remove the wrapper covering the filter (fig.1).
natural_image
Hand using a tool to cut or spread material in a cylindrical container (no text or symbols visible)fig.1
- Replace the filter in its housing as explained in the filter maintenance section.
- Connect the appliance to the power outlet.
- The appliance emits three beeps and the power indicator light (0) also comes on and remains lit while power to the appliance is on. The appliance goes into STAND-BY.
OPERATING MODES
Turn on the appliance
- Press/touch the ON/STAND-BY button (A) to turn on the appliance.
There are two buttons to select the operating modes of the appliance: heating (€) and cooling fan (M€) - To turn off the appliance press/touch button ON/STAND-BY (A). The display could show the count down for about 10 seconds. After that, to completely turn off the appliance, remove the plug from the socket.

Please note: never turn off the appliance by only pulling the plug. Press/touch the ON/STAND-BY button (A) and wait a few minutes before pulling the plug. In this manner, the appliance can perform the operating status checks.
Air purification
The product is designed to offer constant air purification from allergens and pollutants.
The purification function is automatically activated both in heating and cooling fan modes.
If air purification is desired regardless of the need for heating or ventilation, it is advisable to set the product in cooling fan
mode using ventilation levels 1 through 5.
Heating mode
-
To select this operating mode, press the heating button (F) on the remote control, the display shows the symbol (F1); the temperature can be set by pressing the temperature buttons (▲ or ▼(G) on the remote control.
At first pressing, the display will show the current set-point for some seconds (approx 4-5) together with the symbol; the temperature can be increased or decreased by pressing button or respectively. -
The minimum setting is 10^ C ( 50^ F) and the maximum is 28^ C ( 82^ F).
- In this mode it is possible to increase or decrease the fan speed by pressing respectively the speed button ▲ or ▼L) on remote control; the minimum fan speed available in heating mode is 1, the maximum is 6.
- At first pressing, the display will show the current fan speed for some seconds (approx 4-5) together with the symbol.

Please note: the appliance will operate for few seconds with a reduced airflow to allow the preheating in order to guarantee the best comfort.

Please note: When the set temperature is reached, the appliance will automatically stop heating, but it may keep working for a preset time at reduced airflow speed.
The appliance will restart heating again, at the previous heating settings, as long as needed to maintain the desired set temperature.
Examples: heating mode
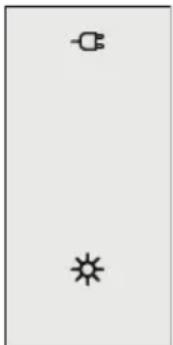
natural_image
Simple diagram with three symbols: a circle, a star, and a plus sign, arranged vertically (no text or labels)- Press heating button (F), the display shows.
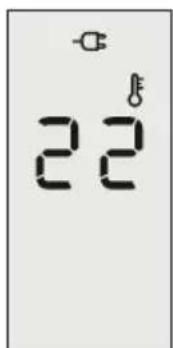
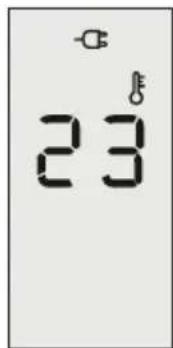
- Press the temperature button ▲ or ▼ (G) to select desired temperature (within 4/5 seconds).
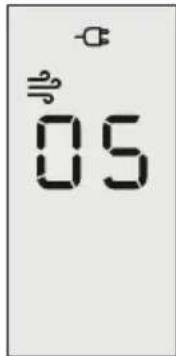
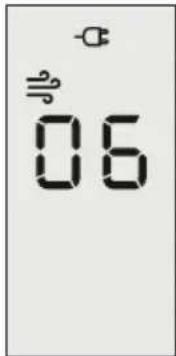
- Press the speed button ▲ (L)▼to increase or decrease the fan speed (within 4/5 seconds).
ECO function
This function can be activated only inside the heating operating mode.
To activate this function, press the ECO button (H) on the remote control, the display shows ECO
The appliance will automatically set the power level to guarantee the best comfort reducing the energy consumption.
Cooling fan mode
In this operating mode only the fan operates, so the appliance does not heat the room. This is ideal during summer days because it moves cool air in a room, creating a cool draft instead of stale air.
- To select this operating mode, press the cooling fan button ✗ (M) on the remote control, the display shows the symbol ✗M1).
- In cooling fan mode 10 fan speeds are available. It's possible to increase or decrease the fan speed by pressing respectively the speed button ▲ or (▼) on the remote control. The value changes of 1 speed at a time.
- At first pressing, the display will show the current fan speed.
natural_image
Simple diagram with three symbols: a circle, a cross, and a plus sign, arranged vertically (no text or labels)- Press cooling fan button (✗, the display shows the symbol ✗)
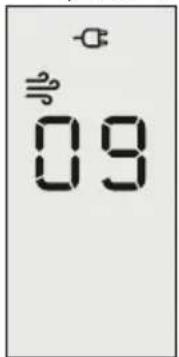
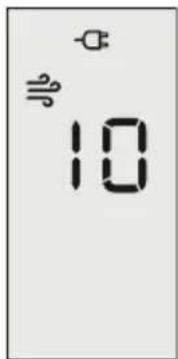
- Press the speed button ⚠ (L)▼to increase or decrease the fan speed (within 4/5 seconds) the display will show the fan speed.
TIMER operation
The timer can be used to delay appliance start up or shutdown. This avoids wasting electricity by not operating the appliance when it is not needed.
This function can be activated from any operating mode.
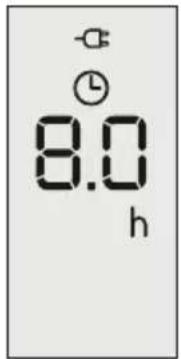
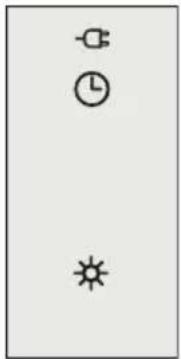
- DELAYED SWITCH-ON: with the appliance in the STAND-BY position, press the timer button (K) on the remote control, the display shows the symbol (K1) together with "h" (N). The time can be set pressing the timer button again. The available values are the following: 0.5h; 1h; 2h; 4h; 6h; 8h; 12h.
Once having set the desired time, to confirm wait about 4-5 seconds.
When the programmed time has been reached, the appliance turns on with the same settings it had during the previous operation.
Once the function has been set, if you want to go back to operation without the timer, press the timer button (K) twice. The timer symbol disappears from the display.
- DELAYED SHUT-OFF: With the appliance on, press the timer button (K) on the remote control, the display shows the symbol (K1) together with "h" (N). The time can be set pressing the timer button again. The
available values are the following: 0.5h; 1h; 2h; 4h; 6h; 8h; 12h. Once having set the desired time, to confirm wait about 4-5 seconds. When the programmed time has been reached, the appliance shuts off automatically.
Once the function has been set, if you want to go back to operation without the timer, press the timer button (K) twice. The timer symbol disappears from the display.

Please note: while the timer is active, the operating g_s of the unit can be modified.

Please note: while this function is active, if the timer button is pressed one time, the remaining time will be shown on the display.

Please note: if a power failure occurs, the timer function is reset and the appliance goes to standby.

Please note: if the ON/STAND-BY button is pressed while the timer function is active, the unit changes its status (for example it goes in ON from STAND-BY or vice versa) and timer function will be deactivated.
Examples: timer function
natural_image
Simple diagram with three symbols: sun, lightning bolt, and gear (no text or labels)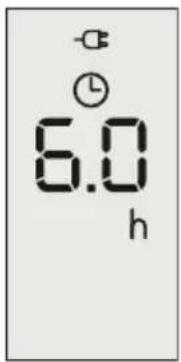
natural_image
Simple diagram with clock, sun, and gear symbols (no text or labels)- In heating mode press one time the timer button, 6h appears on display, press again the timer button to the desired value within 4/5 seconds. Then wait approx 4/5 seconds for saving.
Oscillation button
If you want the appliance to distribute the airflow over a larger area, press the oscillation button (J) on remote control. The appliance will then oscillate right and left.
To stop the oscillation in the desired position, just press oscillation button (J) again.

Please note: never try to rotate the appliance lly.

Please note: when changing the settings, the oscillation temporarily stops.
Airflow
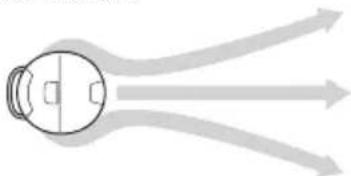
The airflow moves around the surface of the appliance spreading uniformly throughout the room, ensuring a perfect comfort in the room.
natural_image
Diagram of a human head with arrows indicating airflow or movement (no text or symbols)
Important! NEVER put your hands or any foreign objects e.g. a knife or foil, into the air outlet (S).
Airflow direction
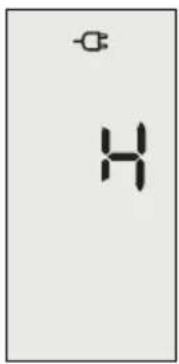
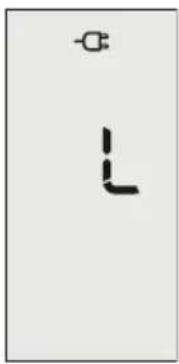
This function allows to orientate the airflow in the best way. There are two positions, "H" and "L" (high and low direction). Once the button airflow direction (I) is pressed, the buzzer emits a sound and the display shows "H" or "L" for a few seconds.
Examples of the display of airflow direction:
natural_image
Simple line drawing of a right angle with a small symbol above it (no text or labels)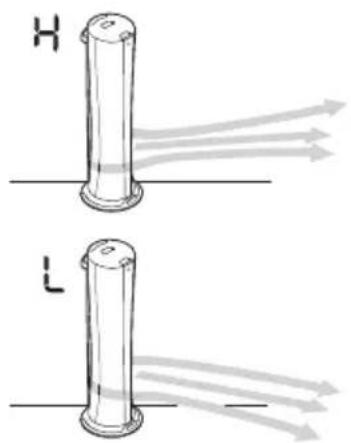
natural_image
Two identical diagrams showing a cylindrical object with arrows indicating flow or direction, labeled H and L (no text or symbols on the objects themselves)Change the temperature scale
To change the temperature scale press together the ▲ of temperature buttons (G) and ▲ of speed buttons (L) on remote control, an acoustic signal will be emitted and the display will show for 3 seconds "F" (Fahrenheit) or "E" (Celsius) with the simbol
No beep function
This function allows to activate or deactivate the buzzer placed on the control panel.
Press together airflow direction button (I) and oscillation button (J).
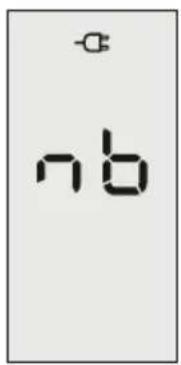
The display shows the script "nb" for a few seconds, then the normal visualization reappears. This function is available in any operating mode, including standby.
Examples: no beep function
i Please note: the buzzer shall generate the sounds related to the commands "stand-by" and "turning on" regardless of this function.
Brightness of the display
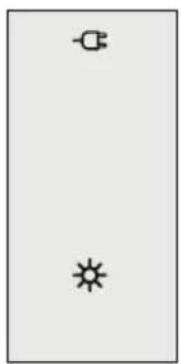
The appliance allows two different brightness settings for the display. The highest is active when any key button is pressed. After a few seconds of keyboard inactivity, the brightness will decrease to the operating brightness level.
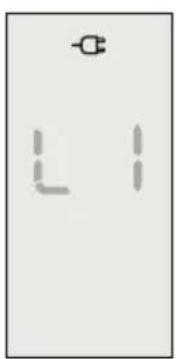
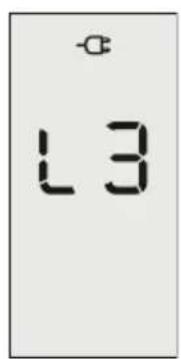
To change the operating brightness level, press the eco button (H) and timer button (K) together; three brightness levels are available, the display shows: "L1", "L2", "L3" for 4-5 seconds, and within this time is possible increase or decrease the brightness level using the speed buttons (L), ▲ or ▼ respectively.
Elapsed the 4-5 seconds, the last level of brightness selected will be shown on the display.
Examples: brightness of the display:
natural_image
Simple diagram with a small electrical plug and two connected lines, no text or symbols present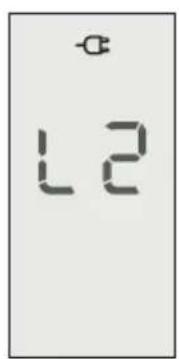
Remote control: inserting or replacing the batteries
- The remote control is provided with a lithium button battery CR2032. To let the appliance function, remove the battery cover strip, by pulling it.
- To replace the batteries, remove the
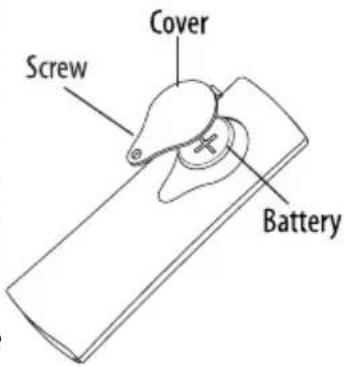
battery cover by rotating the screw counterclockwise with a screwdriver. Replace the battery paying attention to respect the right polarity as shown in figure.
- Replace the cover rotating the screw clockwise.
- Old batteries must be removed and disposed off in accordance with current legislation as they are harmful to the environment.
WARNING: DO NOT DISPOSE OF BATTERIES IN FIRE. BATTERIES MAY EXPLODE OR LEAK.
Operating from the control panel
To use the unit the remote control is needed.
If the remote control is not available, it's possible to switch the operating mode between cooling fan and heating by means of the ON/STAND-BY button (A) on the control panel. While the unit is in STAND-BY mode, keeping touched the ON/STAND-BY button for approx. 10 seconds, the unit is turned on with predefined setting.
The appliance comes on with the opposite function set before it was shut off with a predefined temperature set in case of heating and a predefined speed in cooling fan.
MAINTENANCE
General product maintenance
Before carrying out any maintenance, always unplug from the mains socket.

Please note: during the season when the appliance is in use, clean the air intake and outlet grilles regularly using a vacuum cleaner.

Please note: never use abrasive powders or solvents to clean the appliance.
Use only a soft damp cloth to clean the appliance.
Air purification filter maintenance
It is good practice to clean the filter at regular intervals to remove accumulation of dust on the surface of the filter.
To clean the filter, it is necessary to remove it from its housing as explained below:
- Open the lid by pushing the lid release button (B).
- Rotate the filter cover anticlockwise until the pointer on the cover matches the symbol (Fig.2).
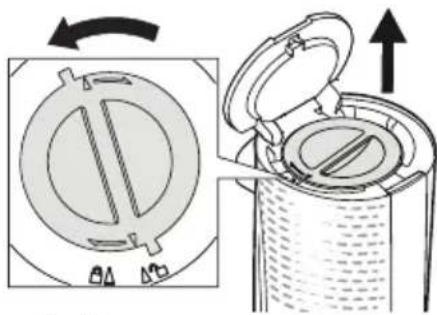
natural_image
Diagram showing a circular component being open while a container is filled with liquid, with an arrow indicating rotation (no text or symbols present)fig.
- Remove the filter.
- Use a vacuum cleaner to remove the dust collected.
- Then put the filter back in its housing by rotating the cover clockwise until the pointer on the cover matches the symbol (Fig.3).

Please note: never close lid forcibly, when filter is set improperly.
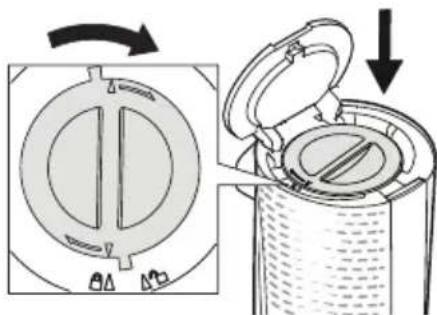
fig.
The unit is automatically programmed to remind you to change the filter.
After a predefined number of working hours the unit will display CF message cyclically, indicating that the filter must be replaced. Always use original De'Longhi filters.
To reset the CF alarm, in rapid succession insert the plug and touch and hold the ON/STAND-BY (A) button on the unit for at least 10 seconds until you hear a long beep.
The filter is designed to last up to 9 months, based on 8 hours usage a day, at medium working load.

Please note: the indicator is a guide and you may need to replace the filter more frequently, depending on the air quality conditions.
TECHNICAL CHARACTERISTICS
Supply voltage
See rating plate
Absorbed power
2
3
TROUBLESHOOTING
| PROBLEM CAUSE SOLUTION | ||
The display shows "PF" and emits a beep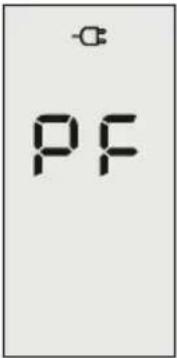 | Temperature sensors are not working properly | Please contact Customer Service |
| Product doesn't turn on Check that the plug is connected to the outletThe set temperature has been reached or the time set on the timer has elapsed | Plug inUse the "+" button to increase the set temperature | |
| The appliance goes off unexpectedly Check that the plug is connected to the outletThe set temperature has been reached or the time set on the timer has elapsed | Plug in | |
A dot is flashing on display, emits a beep and unit is off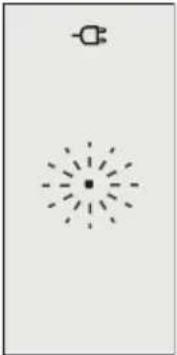 | The tip-over switch has been activated | Make sure the appliance is standing upright on a flat surface. If the appli-ance doesn't work please contact Cus-tomer Service |
The display shows "CF"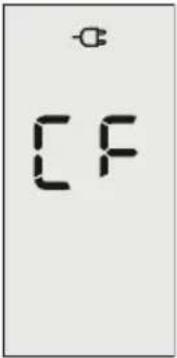 | The filter has reached the predefined number of hours | Replace the filter and reset the alarm.To reset the CF alarm, in rapid succession insert the plug and touch and hold the ON/STAND-BY (A) button on the unit for at least 10 seconds until you hear a long beep. |
The display shows "Ht" or "It" blinking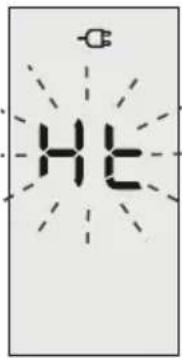 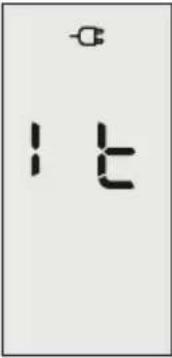 | The internal temperature is too high.The air intake or outlet grille is obstructed | Check the appliance is correctly positioned respecting the minum distances from the wall, or objects, as indicated on the instruction manual, if not, position the appliance correctlyRemove the obstructionDisconnect the plug from the outlet and let the appliance cool down. After few minutes plug the appliance again. If the appliance doesn't work please contact Customer Service |
The display shows "Fl"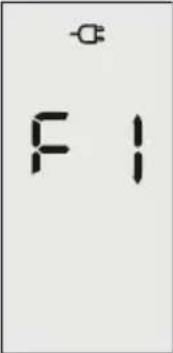 | The fan motor does not work Disconnect | the plug from the outlet.After few minutes plug the appliance again. If the problem persists please contact Customer Service |

- AIR PURIFIER, HEATER AND COOLING FAN Instructions for use
- Safety warnings
- Danger!
- Important!
- Danger of burns!!
- Safety functions
- Please note:
- INTRODUCTION
- DESCRIPTION
- OPERATION AND USE
- Electrical connection
- Installation
- Starting instructions
- OPERATING MODES
- Turn on the appliance
- Air purification
- Heating mode
- ECO function
- Cooling fan mode
- TIMER operation
- Oscillation button
- Airflow
- Airflow direction
- Change the temperature scale
- No beep function
- Brightness of the display
- Remote control: inserting or replacing the batteries
- Operating from the control panel
- MAINTENANCE
- General product maintenance
- Air purification filter maintenance
- TECHNICAL CHARACTERISTICS
Brand : DELONGHI
Model : HFX85W20C
Category : Air purifier