
KHIAS 10900 - Cooker KITCHENAID - Free user manual and instructions
Find the device manual for free KHIAS 10900 KITCHENAID in PDF.


| Product Type | Freestanding Cooker |
| Brand | KitchenAid |
| Model | KHIAS 10900 |
| Dimensions (H x W x D) | 90 cm x 60 cm x 60 cm |
| Weight | Approx. 60 kg |
| Power Supply | 220-240 V, 50-60 Hz, 10.4 kW |
| Cooking Zones | 4 gas burners or induction zones (depending on variant) |
| Oven Type | Electric fan-assisted oven |
| Oven Capacity | 65 L |
| Oven Functions | Grill, fan bake, base heat, defrost, pizza mode |
| Control Type | Front knobs and digital display |
| Cleaning Features | Easy-clean enamel interior, removable door glass |
| Safety Features | Flame failure safety device (gas model), child lock, automatic shut-off |
| Spare Parts Availability | Knobs, burners, oven door hinges, heating elements |
| Repairability Index | 7.5 / 10 (estimated) |
Frequently Asked Questions - KHIAS 10900 KITCHENAID
User questions about KHIAS 10900 KITCHENAID
0 question about this device. Answer the ones you know or ask your own.
Ask a new question about this device
Download the instructions for your Cooker in PDF format for free! Find your manual KHIAS 10900 - KITCHENAID and take your electronic device back in hand. On this page are published all the documents necessary for the use of your device. KHIAS 10900 by KITCHENAID.
USER MANUAL KHIAS 10900 KITCHENAID
“ Cooking gestures are invisible ingredients. They turn inspiration into emotions and emotions into a masterpiece. It’s all about artisanality, that’s why we take it so seriously. ”
Thanks for choosing
Index
EN......page 3
IT....pag. 17
KitchenAid Induction Hob
Quick reference guide

“ Cooking gestures are invisible ingredients. They turn inspiration into emotions and emotions into a masterpiece. It’s all about artisanality that’s why we take it so seriously.”
Thanks for choosing
Quick Guide

THANK YOU FOR BUYING A KITCHENAID PRODUCT
In order to receive a more complete assistance, please register your product on www.kitchenaid.eu/register

Before using the appliance carefully read the Safety Instruction.
Product description
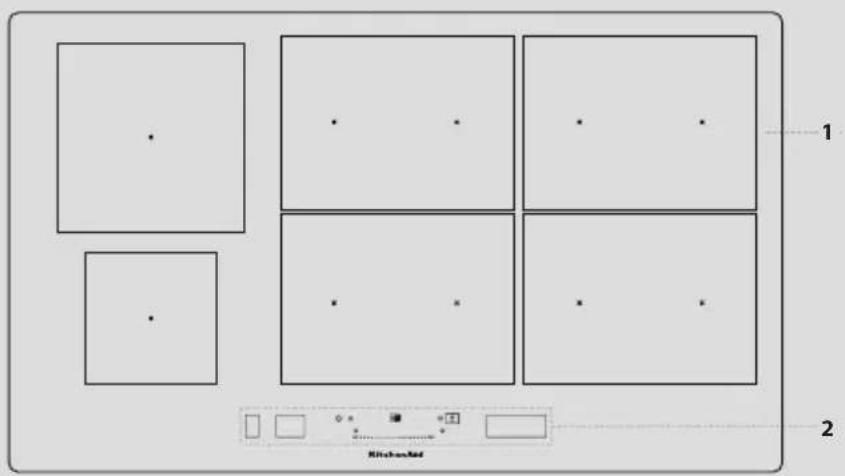
-
Hob
-
Control panel
Control Panel
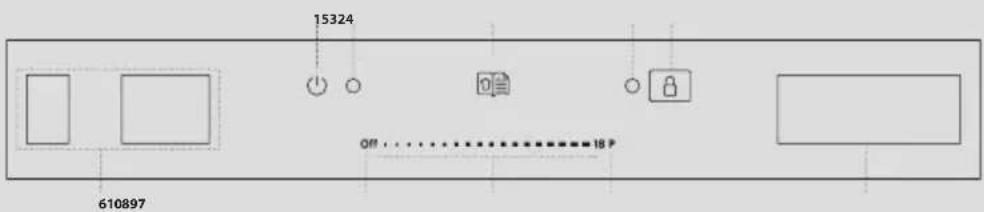
-
On/off button
-
Indicator light - hob switched on
-
"Gourmet Library" button (special functions)
-
Indicator light - key lock active
-
Key lock
-
Cooking zone selection display
-
Cooking zone off button
-
Slide touchscreen
-
Fast heating button
-
"Manage functions" display
Accessories
POTS AND PANS
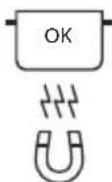
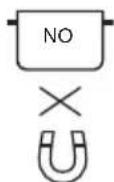
Only use pots and pans made from ferromagnetic material which are suitable for use with induction hobs. To determine whether a pot is suitable, check for the symbol (usually stamped on the bottom). A magnet may be used to check whether pots are magnetic.
The quality and the structure of the pot base can alter cooking performance. Some indications for the diameter of the base do not correspond to the actual diameter of the ferromagnetic surface.
EMPTY POTS OR POTS WITH A THIN BASE
Do not use empty pots or pans when the hob is on.
The hob is equipped with an internal safety system that constantly monitors the temperature, activating the "automatic off" function where high temperatures are detected. When used with empty pots or pots with thin bases, the temperature may rise very quickly, and the "automatic off" function may be triggered with a slight delay, damaging the pot or pan. If this occurs, do not touch anything, and wait for all components to cool down.
If any error messages appear, call the service centre.
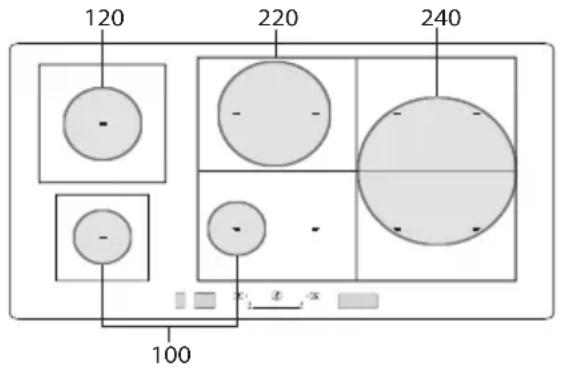
MINIMUM DIAMETER OF POT/PAN BASE FOR THE DIFFERENT COOKING AREAS
To ensure that the hob functions properly, the pot must cover one or more of the reference points indicated on the surface of the hob, and must be of a suitable minimum diameter.
First time use
The hob settings can be changed at any time. To change the settings, click on the symbol that appears on the manage functions display.
From the settings menu, you can:
- select the language;
- adjust the brightness;
- adjust the volume of the sound alerts;
- adjust the button tones;
- adjust the power of the hob;
- restore the factory settings of the hob;
- check the software version installed.
If a power failure occurs, the settings are maintained.
ADJUSTING THE POWER OF THE HOB
The maximum power level of the hob can be set from the settings menu, in accordance with requirements, or with the timer duration.
The power levels available are: 4.0kW – 6.0kW – 7.4kW – 11kW.
Daily use

SWITCHING THE HOB ON/OFF
To switch the hob on, press the on button for approx. 1 second until the displays light up.
The hob will be automatically deactivated after 30 seconds if you do not select a function within this time.
To switch off, press the same button until the displays switch off. All the cooking zones are deactivated. The hob turns off if you press any button for more than 10 seconds.
If the hob has been in use, when you switch it off, all cooking zones will be deactivated, and the residual heat indicator "H" will remain lit until the cooking zones have cooled down.
SELECTING THE COOKING ZONE
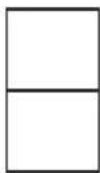
The desired cooking zone can be selected from the left-hand display, by pressing the corresponding pane. The selected zones are highlighted.

natural_image
Hand cursor icon pressing a button on a grid background (no text or symbols)SELECTING THE FLEXIBLE AREA
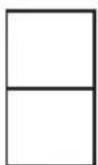
The flexible area is the area in which several of the cooking zones overlap, and can be used as a single cooking zone.
To create a flexible area:
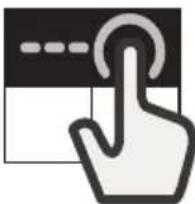
Select multiple panes or slide your finger across, gradually joining the panes together.
natural_image
Icon of a hand pressing a button with a circular button (no text or symbols)To divide a flexible area:
Press and hold the pane corresponding to the zone that you want to separate for 3 seconds. Alternatively, press the "divide zone" button that appears in the manage functions display.
When the cooking zone is divided, the same level of power is set for each of the separate zones.
If all the selected cooking zones are not covered by the pot in 30 seconds, a dense striped will appear on the left-hand display. It's possible to reactivate that area with the "Add pot" command using the right-hand display.
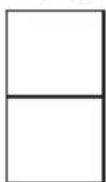
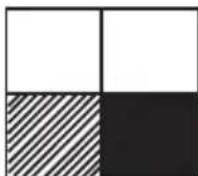
ACTIVATING/DEACTIVATING COOKING ZONES AND ADJUSTING POWER To activate the cooking zones:
-
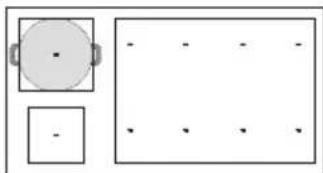
Switch on the hob. If a recipient is already in place, the hob automatically detects it. Select the suggested zone to choose the power.
-
Place the pot in the chosen cooking zone, ensuring that it is covering one or more of the reference points on the surface of the hob.
natural_image
Simple diagram with a circular element and two squares, no text or symbols present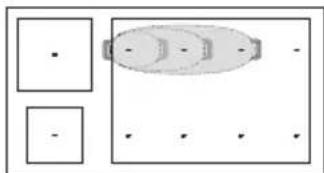
natural_image
Simple diagram with two rectangular boxes and a central oval shape, no text or symbols present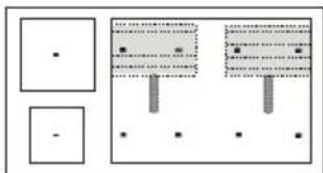
flowchart
graph TD
    A["Input 1"] --> B["Output 1"]
    C["Input 2"] --> D["Output 2"]
    E["Output 3"] --> F["Output 3"]
natural_image
Simple diagram with two rectangles and three oval shapes, no text or symbols present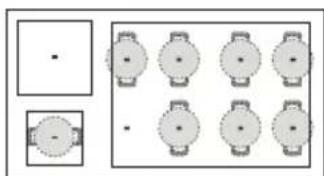
natural_image
Diagram showing two identical rectangular shapes with circular elements arranged in a grid, no text or symbols present.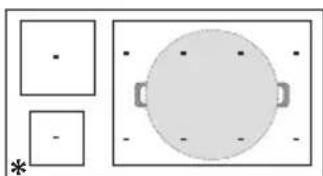
natural_image
Simple diagram with two squares and a central circle, no text or symbols present* Using this position will allow you to benefit from maximum power output.
Please note: Do not cover the display or the slide touch screen with accessories. If a utensil is covering one of the displays, the hob may not function properly. On the right display, the message «CHECK TOUCH AREA, remove the object within one minute» will appear. Remove the object and wait until the message disappears. If the message persists, switch the hob off then on again or unplug it for 20 seconds.
In the cooking zones close to the control panel, it is advisable to keep pots and pans inside the markings (taking both the bottom of the pan and the upper edge into consideration, as this tends to be larger).
This prevents excessive overheating of the touch pad. When grilling or frying, please use the rear cooking zones wherever possible.

natural_image
Pure electrical circuit lines without any symbols- Select the cooking zone or flexible area from the left-hand display.
- Set the desired power level by pressing or moving your finger horizontally across the slide touch screen.
Off 18 P
The power level set will appear in the pane of the cooking zone selected.
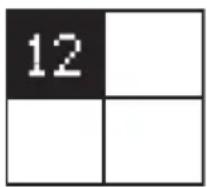
Each cooking zone offers a range of different heat settings, from "1" (minimum power) to "18" (maximum power).
Using the slide touch screen, you can also select the Fast heating function, which will appear on the display with the letter "P".
Please note: The cooking zone pane will flash, if the pot is not suitable for induction cooking, is not positioned correctly or is not of an appropriate size. If no pot is detected within 30 seconds of making the selection, the cooking zone switches off.
To deactivate the cooking zones:
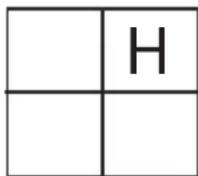
Select the cooking zone in the left-hand display and press the "OFF" button at the top of the slide touch screen. If the cooking zone is still hot, the residual heat indicator "H" will appear in the corresponding pane.
ADD POT
When using a cooking area composed of several zones, the pot can be placed anywhere on the active area.
The hob will automatically recognise the actual positioning of the pot.
If you wish to add an additional pot to the active cooking area, use the "Add pot" + command to allow the hob to detect the new pot.

KEY LOCK
To prevent accidental activation of the hob during cleaning, or to prevent the controls from being changed accidentally whilst cooking, press the "Key lock" 🔒 button for 3 seconds: a beep and a warning light indicate that this function has been activated.
The control panel will be locked, with the exception of the off button.
To reactivate the controls, press the "Key Lock" button again for 3 seconds. The warning light switches off and the hob is active again.

TIMER
When the hob is off, you can use the right-hand display as a timer.
To activate the timer:
- Switch on the hob.
- Press the hourglass icon ☒ that appears on the manage functions display.
- Use the "+"/"-" buttons to set the time.
- When the set time has elapsed, an acoustic signal sounds.
To change or deactivate the timer:
- Press the hourglass icon ☒ that appears on the manage functions display.
- Use the "+" and "-" buttons to reset the desired time, or press the "STOP" button to turn off the timer.

SETTING THE COOKING TIME
The cooking zones can be programmed to switch off automatically.
To set the cooking time:
- Select the cooking zone and set the required power level.
- Press the stopwatch icon ⏻ that appears on the manage functions display.
- Use the "+"/"-" buttons to set the time.
- Once the set time has elapsed, an acoustic signal sounds and the cooking zone switches off automatically.
To change or deactivate the cooking timer:
- Select the active cooking zone.
- Press the stopwatch icon ⏻ that appears on the manage functions display.
- Use the "+" and "-" buttons to reset the desired time, or press the "STOP" button to cancel the set cooking time.
A cooking time can be set for each zone or flexible area by following the same steps.

RESIDUAL HEAT INDICATOR
When the letter "H" appears in one of the cooking zone selection display panes, this means that the corresponding cooking zone is still hot. When the cooking zone has cooled, the "H" disappears.
Special functions

GOURMET LIBRARY
The "Gourmet Library" button allows users to access a number of special features:
- Sous Chef
- French Plaque
- Dynamic Surface
In the right-hand manage functions display, you can navigate between the special functions and select the option you want.
With the arrows, you can scroll through the available options.
Use the button OK to confirm your choice, and the double arrow to return to the previous menu.
SOUS CHEF
This function allows you to select one of the pre-set functions which help you to cook a range of different types of food in the best possible manner.
The hob assists the user by providing ideal conditions for heating and seasoning the pot. It also provides instructions to be followed during the different stages of cooking, in order to achieve optimum results.
To activate the Sous Chef function:
-
Press the "Gourmet Library" button.
-
Select "Sous Chef" from the manage functions display and confirm.
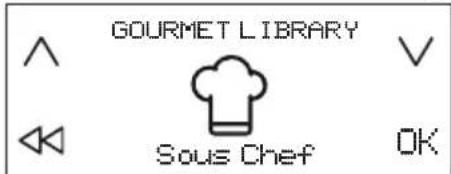
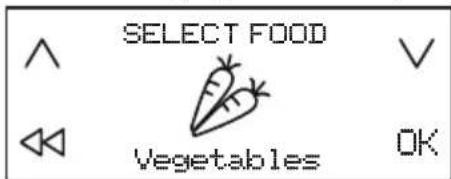
- Select the category of food that you plan to cook and confirm.
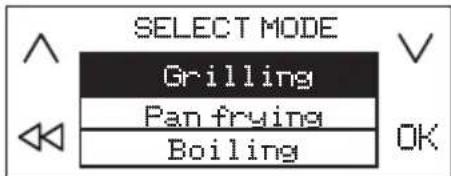
- Select the cooking method and confirm.
- Select the cooking conditions and confirm.
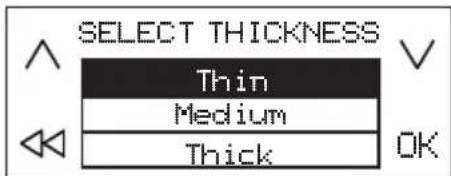
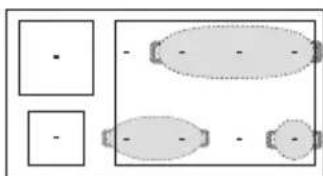
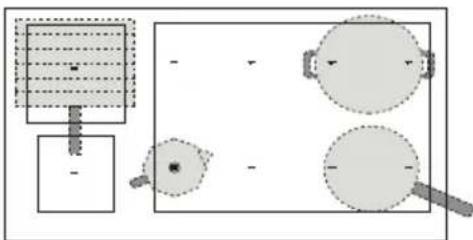
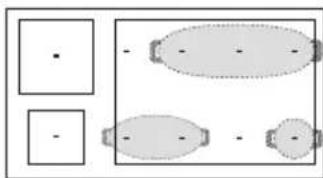
- Four cooking zones will now be available. Place the pot in position, ensuring that it is covering at least two of the reference points on the surface of the hob.
The "Moka" cooking mode is the only one which allows just one reference point to be covered.
Below is an example of positioning for a number of accessories.
natural_image
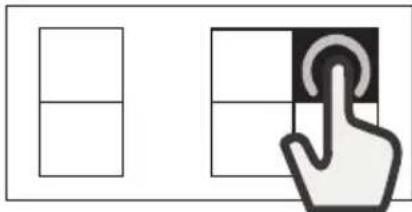
Pure diagram of abstract geometric shapes with no text, numbers, or symbols- Select the desired cooking zone from the left-hand display. An "A" will appear in the selected zone. The available zones that are recommended for positioning the utensil appear on the display.
natural_image
Simple diagram showing a grid and a hand cursor clicking a button (no text or symbols)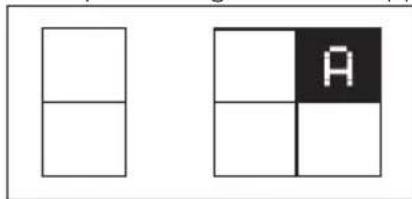
-
In the right-hand display, the instructions to follow will appear (e.g. "Add Oil" or "Add food"). At the end of each stage, the user must confirm in order to proceed with cooking.
-
If necessary, the pre-set power level can be changed at any time, using the "+" and "-" buttons.
-
When cooking is complete, press the "STOP" button to turn off the cooking zone. If multiple zones have been used during cooking, you must first select the cooking zone you want to switch off.
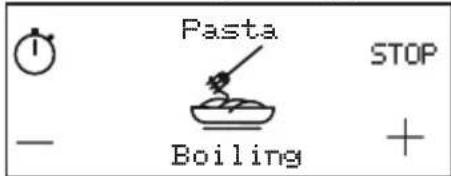
Please note: The "Sous Chef" function can be activated even when one or more cooking zones are already active.
To activate the Sous Chef function for more than one cooking zone:
After activating the "Sous Chef" function for the first cooking zone, press the "Gourmet Library" button again, and repeat the activation process for a new cooking zone. Zones that are already active cannot be selected.
Please note: You can use up to 6 zones with the "Sous Chef" function, provided that the power level setting selected allows for this.
The zones cannot be combined to form a larger area.
To cook traditionally when the Sous Chef function is active:
When the "Sous Chef" function is active, you can select the cooking zone that you wish to activate from the left-hand display, and set the power level for this zone, before proceeding with using this in the normal way.
Selectable options
| FOOD CATEGORY COOKING METHOD | ||
 | Meat Grilling, Pan frying, Boiling | |
 | Fish Grilling, Pan frying, Boiling | |
 | Vegetables Grilling, Pan frying, Boiling | |
 | Sauces and soups | Sauces (Tomato, Béchamel)Soups (Searing, Simmering, Creamy soups) |
 | Desserts Custard, Panna cotta, Melted chocolate, Pancake, Rice pudding | |
 | Eggs | Fried eggs, Omelette, Boiling (Boiled eggs, Soft-boiled), Frittata, Scrambled |
 | Cheese Grilling, Pan frying, Fondue | |
 | Pasta Boiling, Pan frying, Risotto, Rice pudding | |
 | Beverages Milk, Water, Moka | |
 | Custom Boiling, Grilling, Pan frying, Simmering, Melting | |
MAIN COOKING METHODS
(Each method may include additional options)
MELTING
To bring food to the ideal temperature for melting and to maintain the condition of the food without risk of burning.
This method does not damage delicate foods such as chocolate, and prevents them from sticking to the pot. The rate of cooking can be adjusted at any time using the "+" and "-" buttons on the right-hand display.
SIMMERING
For slow-cook dishes and for slowly evaporating liquid, maintaining the condition of the food without risk of burning. This method does not damage food, and prevents it from sticking to the pot.
The quality and type of pot can affect performance or cooking times.
The rate of cooking can be adjusted at any time using the "+" and "-" buttons on the right-hand display.

BOILING\*
To efficiently heat water and alert the user when it begins to boil, via an audible and visual signal.
While awaiting confirmation from the user, the system keeps the water at a controlled simmer, preventing spills and wasted energy. Whilst this function is active, an audible alarm warns the user if the pot is empty (no water) or if it has boiled dry.
Only add salt after the boiling alert has sounded.

PAN FRYING\*
To preheat or season an empty pot or pan. An audible and visual signal indicates that the ideal temperature has been reached for food to be added to the pot or pan. While awaiting confirmation from the user, the system keeps the accessory at a controlled heat, preventing the pan from reaching damaging temperatures and avoiding energy wastage.
For optimum conditions, use this function with pots and seasoning at room temperature.
Dedicated accessories must be used for this function.
Do not use the lid - to protect against splashes, a splash guard is recommended.
It is advisable to use oils that are suitable for frying when cooking with this function, such as seed oils of various types. When using different oils, always take extra care to supervise cooking during first use.

GRILLING\*
This function allows for optimum grilling of a range of foods, according to their thickness. When the ideal temperature has been reached for food to be added, the hob beeps. The hob then stabilises the temperature throughout cooking, keeping it constant. Once the user has confirmed that food has been added, cooking begins.
It is advisable to prepare the food during the heating stage, adding it as soon as you hear the beep.
For optimum conditions, use this function with pots and seasoning at room temperature.
If you are not using the wire rack designed for this purpose, take extra care when first using the grill function, as the quality of the base may affect heating times. Accessories with very thin bases can reach very high temperatures in a short time.

MOKA\*
This function allows "moka" stove-top coffee makers to be heated automatically. The heating cycle can be activated by selecting the function in the menu, and a beep will sound when the coffee is ready. The function is programmed to switch off automatically, preventing spills. When using for the first time, always check that the conditions described are met. For optimum conditions, use this function with the coffee maker and water at room temperature.
* For these functions, the use of dedicated accessories is recommended:
• for boiling: WMF SKU: 07.7524.6380
• for pan frying: WMF SKU: 05.7528.4021
• for grilling: WMF SKU: 05.7650.4291
• for Moka, Bialetti: MOKA INDUZIONE 3TZ ANTRACITE
Please note: Try not to move the pot or pan during the first minute of heating, in order to allow the hob to function optimally.
FRENCH PLAQUE
This function divides the hob into four cooking zones, activating these simultaneously at a pre-set power level. It allows you to move pots from one area to another, to allow you to continue cooking at different temperatures.
To activate the French Plaque function:
- Place the pot in position.
- Press the "Gourmet Library" button.
- Select "French Plaque" from the manage functions display and confirm.
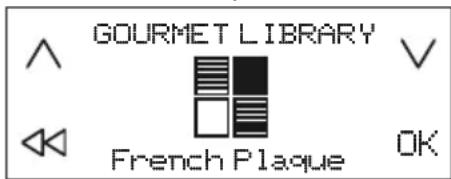
-
The four cooking zone panes appear on the left-hand display, with the corresponding power level (low, medium, high).
-
If you wish to add more pots, use the "Add pot" command .L+
-
To exit this function, press "STOP".
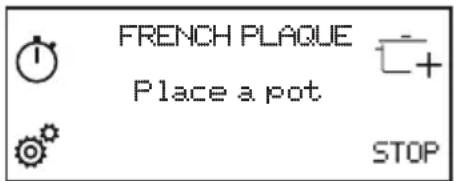
To change the power of a cooking zone:
- Select cooking zone.
- Select the desired power level by dragging your finger across the slide touch screen, which will remain visible for 1 second.
- The word corresponding to the power level selected (low, medium, high) reappears.
Please note: The changed settings are saved until you change them again or reset them.
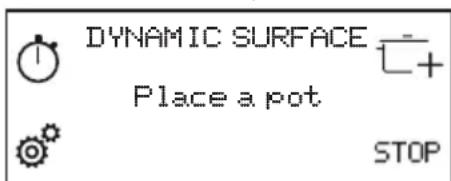
DYNAMIC SURFACE
This function allows you to use the entire hob as a single cooking area.
To activate the Dynamic Surface function:
- Place the pot in position.
- Press the "Gourmet Library" button.
- Select "Dynamic Surface" from the manage functions display and confirm.
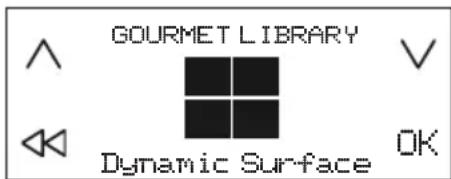
-
Set the desired power level from the slide touch screen. The power level set appears on the left-hand display.
-
If you wish to add more pots, use the "Add pot" command .
-
To exit this function, press "STOP".
Cooking table
| POWER LEVEL TYPE OF COOKING | RECOMMENDED USEIndicating cooking experience and habits | ||
| Max. heat setting | P Fast heating | ||
| 14 - 18 | Frying, boiling | Ideal for rapidly increasing the temperature of food to a fast boil (for water) or for rapidly heating cooking liquids. | |
| Browning, sautéing, boiling, grilling | Ideal for sautéing, maintaining a lively boil, cooking and grilling. | ||
| 10 - 14 | Browning, cooking, stewing, sautéing, grilling | Ideal for sautéing, maintaining a gentle boil, cooking and grilling, and preheating accessories. | |
| Cooking, stewing, sautéing, grilling, cooking until creamy | Ideal for stewing, maintaining a gentle boil, cooking and grilling (for longer periods). | ||
| 5 - 9 | Cooking, simmering, thickening, creaming | Ideal for slower-cook recipes (rice,sauces,roast, fish) with liquids (e.g. water, wine, broth, milk), and for creaming pasta. | |
| Ideal for slow-cook recipes (quantities under 1 litre: rice, sauces, roasts, fish) with liquids (e.g. water,wine,broth,milk). | |||
| 1 - 4 | Melting, thawing | Ideal for softening butter, gently melting chocolate, thawing small items. | |
| Keeping food warm, creaming risotto | Ideal for keeping small portions of just-cooked food or serving dishes warm and for creaming risotto. | ||
| Zero power Off - | Hob in stand-by or off mode (possible end-of-cooking residual heat, indicated by an “H”). | ||
Maintenance and cleaning

WARNING
- Do not use steam cleaning equipment.
- Before cleaning, make sure the cooking zones are switched off and that the residual heat indicator ("H") is not displayed.
Important:
- Do not use abrasive sponges or scouring pads as they may damage the glass.
• After each use, clean the hob (when it is cool) to remove any deposits and stains from food residue. - Sugar or foods with a high sugar content can damage the hob and must be immediately removed.
- Salt, sugar and sand could scratch the glass surface.
- Use a soft cloth, absorbent kitchen paper or a special hob cleaner (follow the Manufacturer's instructions).
- Spills of liquid in the cooking zones can cause the pots to move or vibrate.
• After cleaning the hob, dry thoroughly.
The hob has been treated with a finish that makes it easy to clean and keeps the surface shiny for a long time.
To clean Kitchenaid hobs, follow these recommendations:
• Use a soft cloth (microfibre is best) dampened with water or with everyday glass cleaning detergent.
- For best results, leave a wet cloth on the glass hob surface for a few minutes.
Troubleshooting
- Check that the electricity supply has not been shut off.
- If you are unable to turn the hob off after using it, disconnect it from the power supply.
- If alphanumeric codes appear on the display when the hob is switched on, consult the following table for instructions.
Please note: The presence of water, liquid spilled from pots or any objects resting on any of the hob buttons can accidentally activate or deactivate the control panel lock function.
| ERROR CODE | DESCRIPTION POSSIBLE CAUSE | SOLUTION | |
| C81, C82 | The control panel switches off because of excessively high temperatures. | The internal temperature of electronic parts is too high. | Wait for the hob to cool down before using it again. |
| F02, F04 | The connection voltage is wrong. | The sensor detects a discrepancy between the appliance voltage and that of the mains supply. | Disconnect the hob from the mains and check the electrical connection. |
| F01, F06, F12, F13, F25, F34, F35, F36, F37, F41, F47, F58, F61, F76 | Disconnect the hob from the power supply. Wait a few seconds then reconnect the hob to the power supply. If the problem persists, call the service centre and specify the error code that appears on the display. | ||
Sounds produced during operation
Hobs may produce noises during normal operation.
During the pot recognition phase, the hob produces a click sound, while during cooking, hissing or crackling sounds may be heard. Hisses and crackles actually come from the pots, and are produced by specific features of the base of the pot being used (for example, when a base is made from several layers of material, or is irregular). These noises may vary depending on the accessories used and the amount of food that these contain, and do not indicate any type of defect.
Verified cooking
A table below has been created specially to make it possible for inspection bodies to use our products.
| Verified cooking Verified cooking positions | |
| Heat distribution, "Pancakes" test acc. to EN 60350-2 §7.3 | |
| Heat performance, "French fries" test acc. to EN 60350-2 §7.4 | |
| Melting and keep warm, "chocolate" | |
| Simmering, "rice pudding" |
ECO-DESIGN: The test was carried out in accordance with regulations, by selecting all of the cooking zones on the hob to form a single area, or by using the Dynamic Surface function.
Please refer to our website www.kitchenaid.eu for complete instructions for use.
In addition, you will find a lot more useful information about your products, such as inspiring recipes created and tested by our brand ambassadors or the nearest KitchenAid cookery school.
KitchenAid
“ Cooking gestures are invisible ingredients. They turn inspiration into emotions and emotions into a masterpiece. It’s all about artisanality that’s why we take it so seriously.”
natural_image
Simple diagram with a circular element, square, and rectangular shapes (no text or symbols)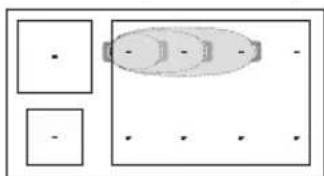
natural_image
Simple diagram with two rectangles and a central oval shape, no text or symbols present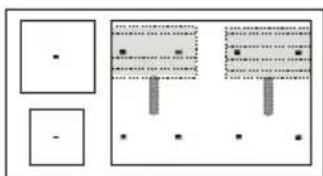
flowchart
graph TD
    A["Process Block 1"] --> B{Decision}
    B -->|Yes| C["Output"]
    B -->|No| D["Process Block 2"]
    D --> E["Result"]
    C --> F["Feedback to Process Block 3"]
    F --> G["Output"]
natural_image
Simple diagram with two rectangles and three oval shapes, no text or symbols present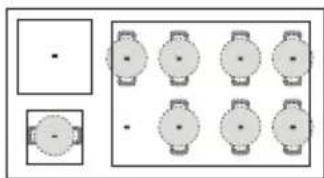
natural_image
Two identical rectangular panels with circular patterns, each containing a minus sign and a central dot (no text or symbols)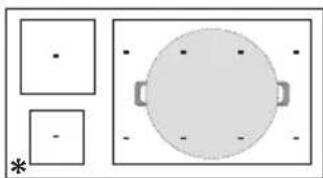
natural_image
Simple diagram with two squares and a circle, no text or symbols presentnatural_image
Pure electrical circuit lines without any symbolsnatural_image
Pure diagram of abstract geometric shapes with no text, numbers, or symbolsnatural_image
Simple diagram showing a grid and a hand pressing a button (no text or symbols)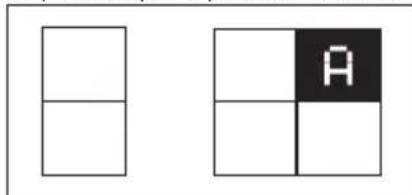

- Index
- KitchenAid Induction Hob
- Quick Guide
- THANK YOU FOR BUYING A KITCHENAID PRODUCT
- Product description
- Control Panel
- Accessories
- POTS AND PANS
- EMPTY POTS OR POTS WITH A THIN BASE
- MINIMUM DIAMETER OF POT/PAN BASE FOR THE DIFFERENT COOKING AREAS
- First time use
- ADJUSTING THE POWER OF THE HOB
- Daily use
- SWITCHING THE HOB ON/OFF
- SELECTING THE COOKING ZONE
- SELECTING THE FLEXIBLE AREA
- To create a flexible area:
- To divide a flexible area:
- ACTIVATING/DEACTIVATING COOKING ZONES AND ADJUSTING POWER To activate the cooking zones:
- To deactivate the cooking zones:
- ADD POT
- KEY LOCK
- TIMER
- To activate the timer:
- To change or deactivate the timer:
- SETTING THE COOKING TIME
- To set the cooking time:
- To change or deactivate the cooking timer:
- RESIDUAL HEAT INDICATOR
- Special functions
- GOURMET LIBRARY
- SOUS CHEF
- To activate the Sous Chef function:
- To activate the Sous Chef function for more than one cooking zone:
- To cook traditionally when the Sous Chef function is active:
- MAIN COOKING METHODS
- MELTING
- SIMMERING
- BOILING\*
- PAN FRYING\*
- GRILLING\*
- MOKA\*
- FRENCH PLAQUE
- To activate the French Plaque function:
- To change the power of a cooking zone:
- DYNAMIC SURFACE
- To activate the Dynamic Surface function:
- Cooking table
- Maintenance and cleaning
- WARNING
- Important:
- To clean Kitchenaid hobs, follow these recommendations:
- Troubleshooting
- Sounds produced during operation
- Verified cooking
Brand : KITCHENAID
Model : KHIAS 10900
Category : Cooker