
DA-3000 - Media player TASCAM - Free user manual and instructions
Find the device manual for free DA-3000 TASCAM in PDF.


| Product Type | Media Player / Audio Recorder |
| Brand | TASCAM |
| Model | DA-3000 |
| Dimensions (W x H x D) | 483 x 88 x 306 mm (19-inch rackmount, 2U) |
| Weight | 5.5 kg |
| Power Supply | AC 100-240 V, 50/60 Hz |
| Playback Formats | WAV, FLAC, MP3, AIFF, DSF, DFF (DSD) |
| Recording Formats | PCM up to 192 kHz/24-bit, DSD 5.6/2.8 MHz |
| Storage Media | SD/SDHC/SDXC card (up to 128 GB recommended) |
| Analog Inputs | Balanced XLR (2), Unbalanced RCA (2) |
| Analog Outputs | Balanced XLR (2), Unbalanced RCA (2) |
| Digital Inputs | AES/EBU (XLR), Coaxial (RCA), Optical (TOSLINK) |
| Digital Outputs | AES/EBU (XLR), Coaxial (RCA), Optical (TOSLINK) |
| Headphone Output | 6.3 mm stereo jack, with volume control |
| Display | Large backlit LCD (2.8 inch) |
| Remote Control | Included (RC-10) |
| Clock Source | Internal, Word Clock In/Out (BNC) |
| Maintenance | Clean exterior with a dry soft cloth; avoid solvents. Keep vents unobstructed. |
| Safety | Do not expose to rain or moisture. Use only supplied power cord. No user-serviceable parts inside. |
| Spare Parts / Repairability | Contact TASCAM service center. SD card slot and internal power supply module are replaceable by qualified technician. |
| General Information | Professional-grade master recorder/player for studio and audiophile use. Supports DSD and high-resolution PCM. |
Frequently Asked Questions - DA-3000 TASCAM
User questions about DA-3000 TASCAM
0 question about this device. Answer the ones you know or ask your own.
Ask a new question about this device
Download the instructions for your Media player in PDF format for free! Find your manual DA-3000 - TASCAM and take your electronic device back in hand. On this page are published all the documents necessary for the use of your device. DA-3000 by TASCAM.
USER MANUAL DA-3000 TASCAM
IMPORTANT SAFETY PRECAUTIONS

CAUTION: TO REDUCE THE RISK OF ELECTRIC SHOCK, DO NOT REMOVE COVER (OR BACK). NO USER-SERVICEABLE PARTS INSIDE. REFER SERVICING TO QUALIFIED SERVICE PERSONNEL.

The lightning flash with arrowhead symbol, within equilateral triangle, is intended to alert the user to the presence of uninsulated “dangerous voltage” within the product’s enclosure that may be of sufficient magnitude to constitute a risk of electric shock to persons.

The exclamation point within an equilateral triangle is intended to alert the user to the presence of important operating and maintenance (servicing) instructions in the literature accompanying the appliance.
WARNING: TO PREVENT FIRE OR SHOCK HAZARD, DO NOT EXPOSE THIS APPLIANCE TO RAIN OR MOISTURE.
For U.S.A.
This equipment complies with Part 15 of FCC Rules. Operation is subject to the following two conditions:
1) This device may not cause interference and
2) This device must accept any interference, including interference that may cause undesired operation of the device.
INFORMATION TO THE USER
This equipment has been tested and found to comply with the limits for a Class A digital device, pursuant to Part 15 of the FCC Rules. These limits are designed to provide reasonable protection against harmful interference when the equipment is operated in a commercial environment. This equipment generates, uses, and can radiate radio frequency energy and, if not installed and used in accordance with the instruction manual, may cause harmful interference to radio communications.
Operation of this equipment in a residential area is likely to cause harmful interference in which case the user will be required to correct the interference at his own expense.
CAUTION
Changes or modifications to this equipment not expressly approved by TEAC CORPORATION for compliance could void the user's authority to operate this equipment.
IN USA/CANADA, USE ONLY ON 120 V SUPPLY.
This appliance has a serial number located on the rear panel. Please record the model number and serial number and retain them for your records.
Model number ____
Serial number ____
For Canada
THIS CLASS A DIGITAL APPARATUS COMPLIES WITH CANADIAN ICES-003.CET
APPAREIL NUMERIQUE DE LA CLASSE A EST CONFORME A LA NORME NMB-003 DU CANADA.
CE Marking Information
a) Applicable electromagnetic environment: E4
b) The average half-cycle r.m.s. inrush current
-
On initial switch-on : 0.49 Arms
-
After a supply interruption of 5s: 0.23 Arms
For the customers in Europe
WARNING
This is a Class A product. In a domestic environment, this product may cause radio interference in which case the user may be required to take adequate measures.
DECLARATION OF CONFORMITY
We, TEAC EUROPE GmbH. Bahnstrasse 12, 65205 Wiesbaden-Erbenheim, Germany declare in own responsibility, the TEAC product described in this manual is in compliance with the corresponding technical standards.

IMPORTANT SAFETY INSTRUCTIONS
1 Read these instructions.
2 Keep these instructions.
3 Heed all warnings.
4 Follow all instructions.
5 Do not use this apparatus near water.
6 Clean only with dry cloth.
7 Do not block any ventilation openings. Install in accordance with the manufacturer's instructions.
8 Do not install near any heat sources such as radiators, heat registers, stoves, or other apparatus (including amplifiers) that produce heat.
9 Do not defeat the safety purpose of the polarized or grounding-type plug. A polarized plug has two blades with one wider than the other. A grounding type plug has two blades and a third grounding prong. The wide blade or the third prong are provided for your safety. If the provided plug does not fit into your outlet, consult an electrician for replacement of the obsolete outlet.
10 Protect the power cord from being walked on or pinched particularly at plugs, convenience receptacles, and the point where they exit from the apparatus.
11 Only use attachments/accessories specified by the manufacturer.
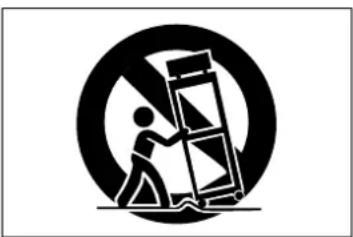
12 Use only with the cart, stand, tripod, bracket, or table specified by the manufacturer, or sold with the apparatus. When a cart is used, use caution when moving the cart/apparatus combination to avoid injury from tip-over.
natural_image
Symbolic icon of a person using a tool inside a circle with a diagonal line (no text or symbols)13 Unplug this apparatus during lightning storms or when unused for long periods of time.
14 Refer all servicing to qualified service personnel. Servicing is required when the apparatus has been damaged in any way, such as power-supply cord or plug is damaged, liquid has been spilled or objects have fallen into the apparatus, the apparatus has been exposed to rain or moisture, does not operate normally, or has been dropped.
- The apparatus draws nominal non-operating power from the AC outlet with its POWER or STANDBY/ON switch not in the ON position.
- The mains plug is used as the disconnect device, the disconnect device shall remain readily operable.
- Caution should be taken when using earphones or headphones with the product because excessive sound pressure (volume) from earphones or headphones can cause hearing loss.
- If you are experiencing problems with this product, contact TEAC for a service referral. Do not use the product until it has been repaired.
CAUTION
• Do not expose this apparatus to drips or splashes.
- Do not place any objects filled with liquids, such as vases, on the apparatus.
- Do not install this apparatus in a confined space such as a book case or similar unit.
- The apparatus should be located close enough to the AC outlet so that you can easily grasp the power cord plug at any time.
- If the product uses batteries (including a battery pack or installed batteries), they should not be exposed to sunshine, fire or excessive heat.
- CAUTION for products that use replaceable lithium batteries: there is danger of explosion if a battery is replaced with an incorrect type of battery. Replace only with the same or equivalent type.
WARNING
- Products with Class I construction are equipped with a power supply cord that has a grounding plug. The cord of such a product must be plugged into an AC outlet that has a protective grounding connection.
RICK-MOUNTING THE UNIT
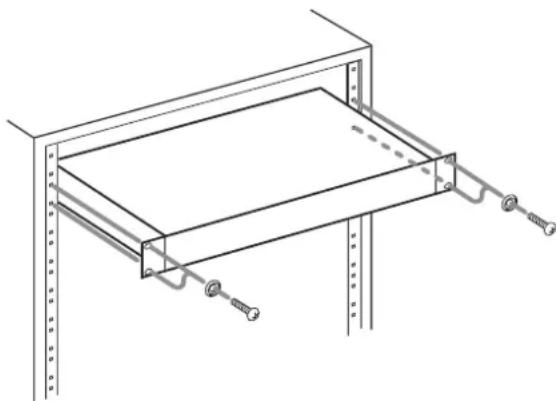
Use the supplied rack-mounting kit to mount the unit in a standard 19-inch rack, as shown below.
Remove the feet of the unit before mounting.
natural_image
Technical line drawing of a mechanical assembly with bolts and a rectangular frame (no text or symbols)CAUTION
• Leave 1U of space above the unit for ventilation.
- Allow at least 10 cm (4 in) at the rear of the unit for ventilation.
Safety Information
CAUTIONS ABOUT BATTERIES
This product uses batteries. Misuse of batteries could cause a leak, rupture or other trouble. Always abide by the following precautions when using batteries.
- Never recharge non-rechargeable batteries. The batteries could rupture or leak, causing fire or injury.
- When installing batteries, pay attention to the polarity indications (plus/minus (+/-) orientation), and install them correctly in the battery compartment as indicated. Putting them in backward could make the batteries rupture or leak, causing fire, injury or stains around them.
- When you store or dispose batteries, isolate their terminals with insulation tape or something like that to prevent them from contacting other batteries or metallic objects.
- When throwing used batteries away, follow the disposal instructions indicated on the batteries and the local disposal laws.
- Do not use batteries other than those specified. Do not mix and use new and old batteries or different types of batteries together. The batteries could rupture or leak, causing fire, injury or stains around them.
- Do not carry or store batteries together with small metal objects. The batteries could short, causing leak, rupture or other trouble.
- Do not heat or disassemble batteries. Do not put them in fire or water. Batteries could rupture or leak, causing fire, injury or stains around them.
- If the battery fluid leaks, wipe away any fluid on the battery case before inserting new batteries. If the battery fluid gets in an eye, it could cause loss of eyesight. If fluid does enter an eye, wash it out thoroughly with clean water without rubbing the eye and then consult a doctor immediately. If the fluid gets on a person's body or clothing, it could cause skin injuries or burns. If this should happen, wash it off with clean water and then consult a doctor immediately.
- The unit power should be off when you install and replace batteries.
- Remove the batteries if you do not plan to use the unit for a long time. Batteries could rupture or leak, causing fire, injury or stains around them. If the battery fluid leaks, wipe away any fluid on the battery compartment before inserting new batteries.
- Do not disassemble a battery. The acid inside the battery could harm skin or clothing.
For European Customers
Disposal of electrical and electronic equipment
(a) All electrical and electronic equipment should be disposed of separately from the municipal waste stream via designated collection facilities appointed by the government or the local authorities.
(b) By disposing of the electrical and electronic equipment correctly, you will help save valuable resources and prevent any potential negative effects on human health and the environment.
(c) Improper disposal of waste equipment can have serious effects on the environment and human health as a result of the presence of hazardous substances in electrical and electronic equipment.
(d) The crossed out wheeled dust bin symbol indicates that electrical and electronic equipment must be collected and disposed of separately from household waste.
(e) The return and collection systems are available to the end users. For more detailed information about disposal of old electrical and electronic equipment, please contact your city office, waste disposal service or the shop where you purchased the equipment.
Disposal of batteries and/or accumulators
(a) Waste batteries and/or accumulators should be disposed of separately from the municipal waste stream via designated collection facilities appointed by the government or the local authorities.
(b) By disposing of waste batteries and/or accumulators correctly, you will help save valuable resources and prevent any potential negative effects on human health and the environment.
(c) Improper disposal of waste batteries and/or accumulators can have serious effects on the environment and human health as a result of the presence of hazardous substances in batteries and/or accumulators.
(d) The crossed out wheeled dust bin symbol indicates that batteries and/or accumulators must be collected and disposed of separately from household waste.
If the battery or accumulator contains more than the specified values of lead (Pb), mercury (Hg), and/or cadmium (Cd) defined in the Battery Directive (2006/66/EC), then the chemical symbols for lead (Pb), mercury (Hg) and/or cadmium (Cd) will be indicated beneath the crossed out wheeled dust bin symbol.
(e) The return and collection systems are available to the end users. For more detailed information about disposal of waste batteries and/or accumulators, please contact your city office, waste disposal service or the shop where you purchased them.

China

Conventions used in this manual....8
Trademarks....9
Precautions for placement and use....9
Power supply 9
Beware of condensation....9
Cleaning the unit....9
Using the TEAC Global Site....9
User registration....9
About TASCAM customer support service....9
SD cards, CF cards and USB flash drives....10
Precautions for use....10
Media that has been confirmed for use with this unit ....10
SD card write protection 10
SD card and CF card formatting ....10
2 – Names and Functions of Parts ...... 11
Wireless remote control (TASCAM RC-10) ......14
Home Screen 14
Menu structure....15
Menu screen operation basics....15
Menu operation procedures....16
3 – Preparations......17
Preparing the remote control....18
Installing the battery 18
When to change the battery....18
Warnings about battery use....18
Using the wireless remote control....18
Turning the power on and off 19
Setting the date and time....19
Adjusting the brightness....19
Inserting and ejecting SD and CF cards....20
Inserting SD and CF cards....20
Ejecting SD and CF cards....20
SD card write protection ....20
Connecting/disconnecting USB flash drives.....21
Connecting USB flash drives....21
Disconnecting USB flash drives ....21
Selecting the media used 21
Preparing SD/CF cards and USB flash drives .....21
4 - Recording 22
Unexpected power interruptions....22
Selecting the input source 22
Showing the input source....22
Setting the recording file format ....23
Using the sampling rate converter....23
Monitoring the input signal 24
Adjusting the input signal level....24
Setting the peak hold indicators....24
Setting the master clock....25
Setting the reference level 25
Using this unit as an AD/DA converter 26
Basic recording operations....26
Sync recording 27
Activating and setting sync recording .....27
Sync recording operation 27
Creating new higher-numbered tracks
automatically 28
Creating a higher numbered track manually....28
Setting the automatic mark function....29
Adding marks manually during recording .....29
Adding marks when recording 29
Using the oscillator (OSC)....29
Setting the pause mode....30
Setting the file name format ....30
Inputting and editing characters ....31
Media capacities and recording times ....31
5 - Folder and file operations (BROWSE screen)....32
Opening the BROWSE screen 32
BROWSE screen navigation 32
Icons on the BROWSE screen....32
Folder operations....33
File operations 33
Editing folder and file names....34
Deleting folders and files....34
Moving and copying folders and files....35
Registering folders and files in a playlist ....35
Viewing folder and file information....36
Creating new folders 36
Dividing files....37
Undoing file division (UNDO/REDO)....38
6 - Playback ....39
playable file types....39
Files and tracks....39
Basic playback operations 39
Playback....39
Selecting tracks 39
Skipping to the previous or next track....39
Selecting tracks directly 39
Searching backward and forward....39
Locating to specific positions....40
Locating to a position after partial entry.....40
Contents
Adding marks manually during playback....40
Adding marks during playback....40
Locating to marks 40
Deleting marks....40
Setting the PLAY Mode....41
Repeat playback....41
Setting gapless playback mode ....41
7 - Recording/playback with cascade connections ....42
Overview of the cascade function 42
Connections and preparations 42
Preparing media....42
Selecting the media 42
Preparing cables....42
Setting the recording file format ....42
Connecting and setting the devices....43
Setting master and slave units....44
Using cascaded units....45
8 - Editing playlists....46
Overview of playlist editing 46
Opening the playlist screen 46
Registering tracks in a playlist....46
Using the playlist menu 46
Moving around playlists 47
Changing playlist names 47
Deleting playlists....47
Creating a new playlist....48
Playlist track menu operations....48
Changing the playlist track order....49
Removing tracks from playlists....49
9 – Miscellaneous functions......50
INFO button and indicator 50
Copying files between media (backing up) .....50
Viewing information about the media....51
Restoring the factory settings....51
Using a USB keyboard 51
Setting the keyboard type....51
Using a keyboard to input text ....52
Keyboard operation list 52
10 - Message Lists....53
11 - Troubleshooting ....55
12 - Specifications ....56
Media and formats 56
Inputs and outputs....56
Analog inputs....56
Analog outputs....56
Digital input 56
Digital output 56
Other connectors....56
Audio performance....57
Recording....57
Playback....57
Control input 57
General 57
Dimensional drawings 58
Block diagram....59
1 - Introduction
Thank you very much for purchasing a TASCAM DA-3000 2ch Audio Recorder AD/DA Converter.
Before connecting and using the unit, please take time to read this manual thoroughly to ensure you understand how to properly set up and connect the unit, as well as the operation of its many useful and convenient functions. After you have finished reading this manual, please keep it in a safe place for future reference.
You can also download the Owner's Manual from the TEAC Global Site (http://teac-global.com/).
Features
• 2-channel PCM recording at up to 192kHz/24-bit resolution
• 2-channel DSD recording at up to 5.6MHz
• SD card slot (supports SDHC standard for 4GB-32GB cards)
• CF card slot (supports UDMA)
- USB device port (for USB flash drives) supports playback and copying to and from SD/CF cards
- USB keyboard port allows a keyboard to be connected for text input and external control
• 24-dot level meters have excellent visibility and their brightness can be adjusted
- 128x64-dot OLED display with high visibility and a wide viewing angle
• RC-10 wireless remote control included
• Analog audio balanced and unbalanced connectors
• PCM digital audio AES-EBU/SPDIF connectors
• DSD digital audio SDIF-3/DSD-raw connectors
- WORD IN/OUT/THRU supported (OUT/THRU set with dedicated switch)
- ADDA DIRECT mode that enables use as a standalone AD/DA converter
- CASCADE function allows synchronized operation of multiple units (including clock and recording/playback timing synchronization)
• Temperature-compensated crystal oscillator (TCXO) enables high frequency precision (1 ppm or less)
• 1U rackmount size
Included items
This product includes the following items.
Take care when opening the package not to damage the items. Keep the packing materials for transportation in the future.
Please contact the retailer where you purchased this unit if any of these items are missing or have been damaged during transportation.
- Main unit .... 1
• Power cord....1 - Wireless remote control unit (TASCAM RC-10)....x1
• Lithium coin cell battery for remote control (CR2025 preinstalled in remote control) ..... x1 - A rack-mounting screw kit....x1
- Warranty card ....x1
- Owner's Manual (this manual)....x1
Conventions used in this manual
The following conventions are used in this manual.
- Buttons, connectors and other physical parts of this unit are indicated like this: MENU button
- Text displayed on the display of the unit and external devices appears like this: MENU.
- The item or character shown highlighted (colors inverted) on the display is referred to as the "cursor" in some cases.
• "CompactFlash card" is abbreviated as "CF card". - "SD memory card" is abbreviated as "SD card".
- Additional information is provided as necessary as tips, notes and cautions.
TIP
These are tips about how to use the unit.
NOTE
These provide additional explanations and describe special cases.
CAUTION
Failure to follow these instructions could result in injury, damage to equipment or lost recording data, for example.
Trademarks
• TASCAM is a registered trademark of TEAC Corporation.
• SDHC Logo is a trademark of SD-3C, LLC.

- CompactFlash is a trademark of SanDisk Corporation, registered in the United States and other countries.
- Other company names, product names and logos in this document are the trademarks or registered trademarks of their respective owners.
Any data, including, but not limited to information, described herein are intended only as illustrations of such data and/or information and not as the specifications for such data and/or information. TEAC Corporation disclaims any warranty that any use of such data and/or information shall be free from infringement of any third party's intellectual property rights or other proprietary rights, and further, assumes no liability of whatsoever nature in the event of any such infringement, or arising from or connected with or related to the use of such data and/or information.
This product is designed to help you record and reproduce sound works to which you own the copyright, or where you have obtained permission from the copyright holder or the rightful licensor. Unless you own the copyright, or have obtained the appropriate permission from the copyright holder or the rightful licensor, your unauthorized recording, reproduction or distribution thereof may result in severe criminal penalties under copyright laws and international copyright treaties. If you are uncertain about your rights, contact your legal advisor. Under no circumstances will TEAC Corporation be responsible for the consequences of any illegal copying performed using the recorder.
Precautions for placement and use
- The operating temperature should be between 0°C and 40°C (32°F and 104°F).
- Do not install in the following types of places. Doing so could degrade the sound quality and/or cause malfunctions.
- Places with significant vibrations or that are otherwise unstable
• Near windows or other places exposed to direct sunlight - Near heaters or other extremely hot places
• Extremely cold places - Places with bad ventilation or high humidity
• Very dusty locations - In order to assure good heat dissipation, do not place any object on top of the unit.
- Do not install this unit on top of any heat-generating electrical device such as a power amplifier.
Power supply
Connect the unit to the standard power outlet. Hold the plug when connecting and disconnecting the power cord.
Beware of condensation
If the unit is moved from a cold to a warm place, or used immediately after a cold room has been heated or otherwise exposed to a sudden temperature change, condensation could occur. Should this happen, leave the unit for one or two hours before turning the unit on.
Cleaning the unit
To clean the unit, wipe it gently with a soft dry cloth. Do not wipe with chemical cleaning cloths, paint thinner, ethyl alcohol or other chemical agents to clean the unit as they could damage the surface.
Once every five years, please contact the retailer where you purchased the unit or a TASCAM customer support service for internal cleaning. If the unit is not cleaned for a long time and dust is allowed to accumulate inside it, fire or malfunction could result. Cleaning is more effective when conducted before the humid season. Please check with us about the cost of internal cleaning.
Using the TEAC Global Site
You can download the Owner's Manual necessary for this unit from the TEAC Global Site (http://teac-global.com/).
- Open the TEAC Global Site (http://teac-global.com/).
- In the TASCAM Downloads section, click the desired language to open the Downloads website page for that language.
NOTE
If the desired language does not appear, click Other Languages.
-
Click the product name in the "Search by Model Name" section to open the Downloads page for that product.
-
Select and download the Owner's Manual that are needed.
User registration
Customers in the USA, please visit the TASCAM website (http://tascam.com/) to register as a user online.
About TASCAM customer support service
TASCAM products are supported and warranted only in their country/region of purchase.
To receive support after purchase, on the TASCAM Distributors list page of the TEAC Global Site (http://teac-global.com/), search for the local company or representative for the region where you purchased the product and contact that organization.
When making inquiries, the address (URL) of the shop or web shop where it was purchased and the purchase date are required. Moreover, the warranty card and proof of purchase might also be necessary.
1 - Introduction
SD cards, CF cards and USB flash drives
This unit can use SD cards, CF cards and USB flash drives for playback and SD/CF cards for recording.
A list of SD cards, CF cards and USB flash drives that have been confirmed to operate with this unit can be found on the TEAC Global Site (http://teac-global.com/).
Precautions for use
SD cards, CF cards and USB flash drives are built with high precision. In order to prevent damage to a flash drive or card, follow these precautions when handling them.
• Do not leave them in extremely hot or cold places.
• Do not leave them in extremely humid places.
• Do not let them get wet.
• Do not put things on top of them or twist them.
• Do not allow them to be struck with force.
- Do not insert or remove them during recording, playback, data transfer or other operations that access them.
- When transporting cards, carry them inside a memory card case or similar protection.
Media that has been confirmed for use with this unit
This unit uses SD cards, CF cards and USB flash drives for playback and SD/CF cards for recording.
Microdrives cannot be used with this unit.
Moreover, some SD cards, CF cards and USB flash drives, especially older ones, use slower flash memory components or smaller internal buffers. When using an SD card, CF card or USB flash drive like this, the unit might not operate properly.
A list of SD cards, CF cards and USB flash drives that have been confirmed to operate with this unit can be found on our web site. Please access to a product page of this product from the TEAC Global Site (http://teac-global.com) to find the list or contact the TASCAM customer support service.
SD card write protection
This unit writes track data to the media in order to improve performance. Since track data cannot be written to write-protected SD cards, media reading will take longer and performance could otherwise be affected.
SD card and CF card formatting
SD cards, CF cards and USB flash drives that have been formatted by this unit have been optimized to improve performance during recording. For this reason, you should use this unit to format the SD cards, CF cards and USB flash drives that you will use with it. Using an SD card, CF card or USB flash drive that has been formatted by a computer or other device might result in errors when recording with this unit.
2 – Names and Functions of Parts
Front panel

① POWER switch
Use to turn the unit on and off.
CAUTION
Before turning the power on, minimize the volume of other equipment that is connected to this unit. Failure to do so might cause sudden loud noises, which could harm your hearing or result in other trouble.
② Level meters
These show the levels of the input sound, the playback sound or the oscillator (OSC).
Levels less than the set reference level light green.
Levels greater than the set reference level light orange. (See "Setting the reference level" on page 25.)
NOTE
When recording in PCM format, +3dB will not light.
③ Display
This shows a variety of information.
④ INFO button/indicator
Press this button when the INFO indicator is lit blue to show the operation status of the unit on the display and light the set reference level on the level meters. In addition, pressing this button when the INFO indicator is lit red will cause a message to appear on the display. (See "INFO button and indicator" on page 50.)
⑤ HOME/DISPLAY button
When a menu screen is open, press to return to the Home Screen.
Press when the Home Screen is open to change the display mode.(See "Home Screen" on page 14.)
Turn the MULTI JOG dial while pressing this button to adjust the brightness of the display and the indicators. (See "Adjusting the brightness" on page 19.)
⑥ MULTI JOG dial
This functions both as a dial and as a button.
Dial functions
When the Home Screen is open, use to skip between marks.
When in menu mode, use to select menu items and setting values.
When editing names, use to select characters.
While pressing and holding the HOME/DISPLAY button, turn to adjust the display and indicator brightness.
Turn when the BROWSE screen is open to select subfolders and files in the same folder. (See "BROWSE screen navigation" on page 32.)
Button functions
Use to confirm selections and settings (ENTER function). When the BROWSE screen is open, press to open a pop-up menu for the selected folder or file. (See "Folder operations" on page 33.) (See "File operations" on page 33.)
Press when stopped, in playback standby, playing back or recording to add a mark. (See "Adding marks manually during recording" on page 29.) (See "Adding marks manually during playback" on page 40.)
⑦ ◀◀[◀◀] / ▶▶ [▶▶] buttons
Press briefly to skip to the previous or next track.
Press and hold to search backward or forward.
Press when the BROWSE screen is open to move up or down one level in the folder structure. (See "BROWSE screen navigation" on page 32.)
⑧ PHONES jack/knob
Use this standard stereo jack to connect stereo headphones. Use an adapter when connecting headphones with a mini plug.
Use this knob to adjust the headphones output level.
CAUTION
Before connecting headphones, minimize the volume with the PHONES knob. Failure to do so might cause sudden loud noises, which could harm your hearing or result in other trouble.
⑨ KEYBOARD connector
You can connect a USB keyboard here and use it to input folder and file names, for example, as well as to control the unit.
By default, the recorder is set use Japanese keyboards, which are arranged differently from English keyboards. To use an English keyboard, change the setting in the KEYBOARD TYPE screen. (See "Setting the keyboard type" on page 51.)
2 – Names and Functions of Parts
⑩ DEVICE connector
Use to connect a USB flash drive. (See "Connecting/disconnecting USB flash drives" on page 21.)
Connect a USB flash drive here to play back files on it and copy files between it and SD/CF cards. (See "Copying files between media (backing up)" on page 50.)
⑪ SD and CF card slots
Insert and eject SD and CF cards from here. (See "Inserting and ejecting SD and CF cards" on page 20.)
⑫ Remote sensor
Receives signals from the included remote control (TASCAM RC-10). When using the remote point it here.
⑬ MENU button
When the Home Screen is open, press to access the menu screens. (See "Menu structure" on page 15.) (See "Menu screen operation basics" on page 15.)
⑭ EXIT/CANCEL [PEAK CLEAR] Button
Press this when a settings screen is open to go back one level in the menu.
When a confirmation pop-up message is open, press this to answer "NO".
When the Home Screen is open, press this to clear the level meter peak hold indicators.
⑮ STOP button
Stops playback and recording.
⑯ PLAY button/indicator
Press when stopped or in playback standby to start playback.
Press in recording standby to start recording.
During playback or recording, this button lights.
⑰ PAUSE button/indicator
Press when stopped or during playback to switch to playback standby.
Press when recording to switch to recording standby.
The button lights when in playback standby and recording standby.
⑱ RECORD [TRK INC] button/indicator
Press when stopped to start recording standby.
Press when recording to start a new track and continue recording without interruption. (See "Creating a higher numbered track manually" on page 28.)
The button lights when recording and in recording standby.
Press when there is no media in the current device to activate input monitoring, causing the currently selected input signal to be output. The button blinks during input monitoring.
Rear panel
![INPUTS (BALANCED) [UNBALANCED] OUTPUTS (BALANCED) IN OUT PENF/ SCADE IN AES/EBU DIGITAL IN SDIF-3 R R L L R OUT THRU WORD OUT WORD SYNC THRU OUT WORD SYNC IN 19 20 21 22 23 24 25 26 27 28 29 30 31](/content/2026/05/811152/images/f70a88c42fcd2f9b9ce7517d09e419bbf200394d673ec85130854d55f9ba8ea0.jpg)
⑲ L/R ANALOG INPUTS (BALANCED)
These balanced analog XLR input connectors have a default nominal input level of +4 dBu, but it can also be set to +6 dBu.
(1: GND, 2: HOT, 3: COLD)
(See "Setting the reference level" on page 25.)
⑳ L/R ANALOG INPUTS (UNBALANCED)
These analog RCA pin input jacks have a nominal input level of -10 dBV.
②1 L/R ANALOG OUTPUTS (UNBALANCED)
These analog RCA pin output jacks have a nominal output level of -10 dBV.
②2 L/R ANALOG OUTPUTS (BALANCED)
These balanced analog XLR output jacks have a nominal output level of +4 dBu, but it can also be set to +6 dBu. (1: GND, 2: HOT, 3: COLD)
(See "Setting the reference level" on page 25.)
②3 DIGITAL IN(S/PDIF / CASCADE)
These are digital audio input connectors.
This digital input jack has a sampling rate converter that supports 32 —192 kHz. (See "Using the sampling rate converter" on page 23.)
When connecting this unit to cascade multiple units, connect the DIGITAL OUT(S/PDIF / CASCADE) jack of another unit to this jack. (See "Connections and preparations" on page 42.)
⑳ DIGITAL OUT(S/PDIF / CASCADE)
This digital output jack can output digital audio in IEC60958-3 (S/PDIF) format.
To connect multiple DA-3000 units, connect the DIGITAL IN (S/PDIF / CASCADE) jack of another unit to this jack. (See "Connections and preparations" on page 42.)
⑳ DIGITAL IN (AES/EBU)
This balanced XLR digital audio input jack supports the input of AES3-2003/IEC60958-4 (AES/EBU) format digital audio. This digital input jack has a sampling rate converter that supports 32—192 kHz. (See "Setting the reference level" on page 25.)
②6 DIGITAL OUT (AES/EBU)
This balanced XLR digital audio output jack can output digital audio in AES3-2003/IEC60958-4 (AES/EBU) format.
CAUTION
When the DIGITAL IN/OUT (SDIF-3) connectors are connected, the DIGITAL IN/OUT (S/PDIF / CASCADE) and DIGITAL IN/OUT (AES/EBU) connectors cannot be used to input and output digital audio signals.
⑳ DIGITAL IN/OUT(SDIF-3) connectors
These are digital audio input and output connectors for DSD signals.
These are digital audio input and output connectors for the SDIF-3 (DSD-raw) format.
Each connector carries either the left or right channel of the stereo signal.
CAUTION
When the DIGITAL IN/OUT (SDIF-3) connectors are connected, all digital audio devices (including this unit) in the system must be synchronized to the same clock source. To sync this unit to an external clock, input a 44.1kHz clock signal through its WORD SYNC IN connector.
If the clock master within the system is set to 44.1kHz, DSD audio sources will become clock slaves. For details see, "Setting the master clock" on page 25.
28 WORD SYNC IN connector
Use to input a word clock signal.
When syncing this unit to an external clock signal, the word clock signal input through this connector is used.
⑲ WORD SYNC THRU/OUT connector
This is a BNC word clock through/output connector that can output a word clock signal (thru or 44.1kHz, 48kHz, 88.2kHz, 96kHz, 176.4kHz or 192kHz).
Use the THRU/WORD OUT switch to change between thru and word output.
③0 75Ω ON/OFF [THRU/WORD OUT] switch
Use to make the following settings.
- Whether or not the WORD SYNC IN connector has termination resistance (75 Ω)
- WORD SYNC THRU/OUT connector THRU/OUT setting
③1 AC IN connector
Connect the included power cord here.
Wireless remote control (TASCAM RC-10)
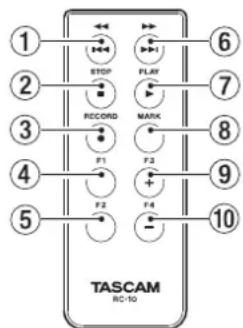
① ◀◀/|◀◀ button
During playback, press briefly to skip to the beginning of the track.
When near the beginning of a track, press briefly to skip to the beginning of the previous track.
Press and hold to search backward.
Press when the BROWSE screen is open to move up one level in the folder structure.
② STOP [■] button
Press to stop playback and recording.
③ RECORD [●] button
Press when stopped to start recording standby.
Press during recording to create a new higher-numbered track and continue recording without interruption. (See "Creating a higher numbered track manually" on page 28.)
④ F1 button
Press when stopped or during playback to switch to playback standby.
Press when recording to switch to recording standby.
⑤ F2 button
When a menu screen is open, press to return to the Home Screen.
Press when the Home Screen is open to change the display mode. (See "Home Screen" on page 14.)
⑥ ▶▶/▶▶ button
Press briefly to skip to the next track.
Press and hold to search forward.
Press when the BROWSE screen is open to move down one level in the folder structure.
⑦ PLAY [▶] button
Press when stopped or in playback standby to start playback.
Press in recording standby to start recording.
⑧ MARK button
Press when stopped, recording, in playback standby or during playback to manually add a mark. (See "Adding marks manually during recording" on page 29.) (See "Adding marks manually during playback" on page 40.)
⑨ F3 [+] button
Skip to the next mark.
Press when the BROWSE screen is open to move the cursor up. (See "BROWSE screen navigation" on page 32.)
⑩ F4 [-] button
Skip to the previous mark.
Press when the BROWSE screen is open to move the cursor down. (See "BROWSE screen navigation" on page 32.)
Home Screen
The main unit display shows the following information.
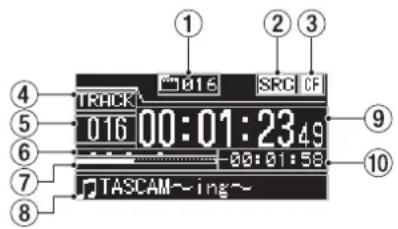
① Total number of tracks
This shows the total number of tracks in the playback area.
② SRC operation indicator
When the sampling rate converter is on, an "SRC" indicator appears here. When SRC is off, nothing appears here. (See "Using the sampling rate converter" on page 23.)
③ Current device
This icon shows the currently selected device.
④ Display mode
This is the current Home Screen display mode.
The unit has two display modes. The TRACK mode shows the elapsed time and remaining time of the current file, and the TOTAL mode shows the elapsed time and remaining time of all tracks.
⑤ Track number
This is the number of the track that is playing.
⑥ Mark indicators
These are the locations of marks in the track.
⑦ Track playback position
This shows the current playback position as a bar. As playback advances, the bar extends from the left to the right.
⑧ Track title
This is the file name of the track that is playing.
⑨ Track elapsed time
Depending on the display mode, this shows the elapsed time (hours: minutes: seconds) of all the tracks in the current playback area or of the currently playing track.
⑩ Track remaining time
This is the remaining time (hours: minutes: seconds) of the current track or all the tracks in the current playback area. Depending on the display mode, this shows the remaining time (hours: minutes: seconds) of all the tracks in the current playback area or of the currently playing track. During recording, this shows the remaining available recording time on the current media.
Menu structure
Press the MENU button to open the GENERAL menu screen.
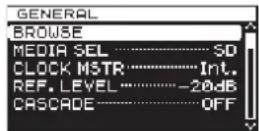
There are eight menu screens organized by menu item type.
GENERAL: General function settings
REC FILE: Recording file format settings
I/O SETTINGS Input and output settings
REC FUNC Recording function settings
PLAY FUNC Playback function settings
M E DIFMedia operations
TRACK EDIT Current file editing
UTILITY: System settings and other functions
The menu items are as follows.
| Menu item Function | Pages | |
| BROWSE | Open the BROWSE screen | page 32 |
| MEDIA SEL | Media selection | page 21 |
| CLOCK MSTR | Master clock settings | page 25 |
| REF. LEVEL | Reference level settings | page 25 |
| CASCADE | Cascade function settings | page 44 |
| FILE | Recording file format settings page | 23 |
| SAMPLE | Sampling frequency settings | page 23 |
| CHANNEL | Recording mode settings | page 23 |
| NAME | File name format settings | page 30 |
| INPUT SEL. | Input source selection | page 22 |
| INPUT VOL. | Input volume setting | page 24 |
| SRC | Sampling rate converter settings | page 23 |
| ADDA DIRECT | AD/DA DIRECT mode settings page | 26 |
| IN MONITOR | Input monitoring function settings | page 24 |
| SYNC REC | Synchronized recording function settings | page 27 |
| AUTO TRACK | Automatic track incrementing function settings | page 28 |
| AUTO MARK | Automatic mark function settings | page 29 |
| PAUSE MODE | Pause mode settings page 30 | |
| PLAY MODE Play Mode setting | page 41 | |
| REPEAT | Repeat playback function settings | page 41 |
| TRACK GAP | Gapless Playback mode setting | page 41 |
| FORMAT | Media formatting | page 21 |
| COPY | Media copy type selection | page 50 |
| INFO. | View media information | page 51 |
| RENAME | Edit folder and file names | page 34 |
| DELETE Delete folders and files | page 34 | |
| DIVIDE | Divide files | page 37 |
| UNDO/REDO | Undo/redo DIVIDE operations* | page 38 |
| F. PRESET Restore the factory settings | page 51 | |
| OSC | Oscillator settings | page 29 |
| KEYBOARD | Keyboard type setting | page 51 |
| PEAK HOLD | Level meter peak hold time setting | page 24 |
| CLOCK ADJST | Time setting | page 19 |
* "UNDO" only appears after a DIVIDE operation has been conducted. REDO only appears after UNDO has been used in place of the UNDO option.
NOTE
The settings made in all the menus are retained even when the unit is turned off.
Menu screen operation basics
You can operate the menu screens in the following manner.
To change the menu page:
Press the MENU button repeatedly until the menu page that you want appears

Pushing the button cycles through the menu pages in the following order.

flowchart
graph LR
    A["GENERAL"] --> B["REC FILE"]
    B --> C["I/O SETTINGS"]
    C --> D["REC FUNC"]
    D --> E["UTILITY"]
    E --> F["TRACK EDIT"]
    F --> G["MEDIA"]
    G --> H["PLAY FUNC"]
NOTE
You can turn the MULTI JOG dial to move between the GENERAL menu screen BROWSE item and the UTILITY menu CLOCK ADJST item one item at a time.
However, it is not possible to move from the UTILITY menu CLOCK ADJST item to the GENERAL menu BROWSE item or from the GENERAL page BROWSE item to the UTILITY menu CLOCK ADJST item this way.
To select an item (vertically on the screen):
Turn the MULTI JOG dial.

To confirm the selection:
Press the MULTI JOG dial.

To open a submenu that is not shown on the display:
Press the MULTI JOG dial.

To move up one level in the menu:
Press the EXIT/CANCEL [PEAK CLEAR] button.
To return directly to the Home Screen from menu mode:
Press the HOME/DISPLAY button.
Menu operation procedures
This example explains how to set the AUTO MARK function.
- Press the MENU button to open the GENERAL menu.
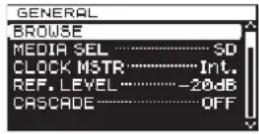
- Press the MENU button to cycle through the menus.
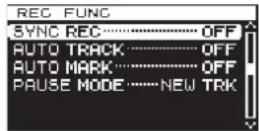
REC FUNC menu is open
- Turn the MULTI JOG dial to the item to set.
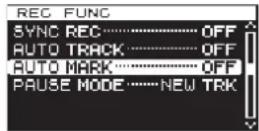
AUTO MARKitem selected
- Press the MULTI JOG dial to open the setting screen.
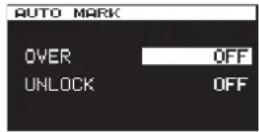
AUTO MARK screen open
- Turn the MULTI JOG dial to change the setting.
- To change the setting of a different item on the same screen, press the MULTI JOG dial to move the cursor to the next setting.
- Turn the MULTI JOG dial to change the setting.
- Repeat steps 5–7 as necessary to set other items.
- Press the MULTI JOG dial to return to the menu. Press the HOME/DISPLAY button to return to the Home Screen.
NOTE
- Press the EXIT/CANCEL [PEAK CLEAR] button to cancel the menu operation and return to the menu screen.
- In step 9 above, pressing the MULTI JOG dial reopens the Home Screen in some cases.
Making connections
The following example shows connections with an DA-3000.
Recautions before making connections
• Before making connections, read the operation manuals of the other equipment carefully and connect each one correctly.
Turn OFF (or put in standby) the power of this unit and all other devices before connecting them.
- Connect all the devices to the same power supply line. When using a power strip, for example, use a thick cable with a high current capacity to minimize variation in the power voltage.
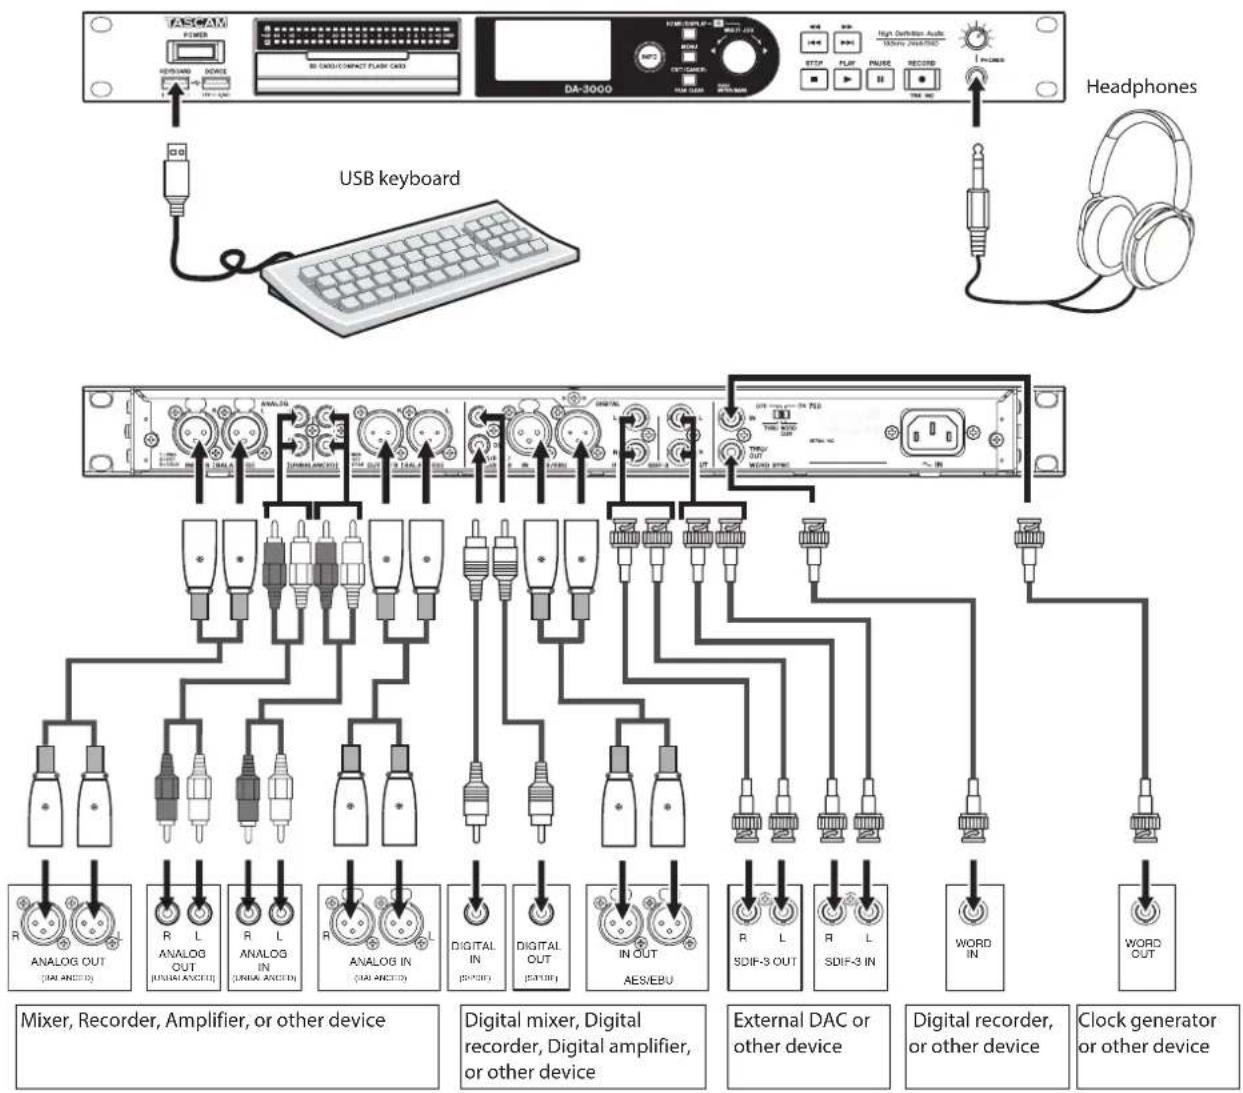
Preparing the remote control
Installing the battery
NOTE
At the time of purchase, this remote control comes with a lithium-ion coin battery (CR2025) installed. Before using the remote control, pull the isolation sheet out of the battery compartment.
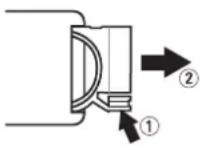
- Remove the battery holder. While pressing ①, pull in direction ②.
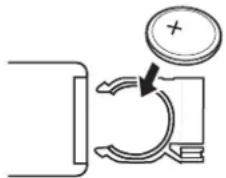
- Install a coin-shaped lithium ion battery (CR2025) into the holder with the correct / orientation.
- Reinsert the battery holder into the remote control.
When to change the battery
Replace the battery with a new one if the remote control operation range is reduced or if the buttons become unresponsive.
Use a coin-shaped lithium-ion battery (CR2025).
Warnings about battery use
The accidental swallowing of a battery by a small child is extremely dangerous. Keep batteries and remote controls out of reach of small children. Consult a physician immediately if a child should swallow a battery.
Misuse of a battery could cause it to leak, rupture or otherwise be damaged. Please read and abide by the cautions related to batteries. (See "CAUTIONS ABOUT BATTERIES" on page 4.)
• Install the coin-shaped lithium-ion battery with the correct orientation.
• Do not recharge the coin-shaped lithium-ion battery.
- Do not heat or disassemble the coin-shaped lithium-ion battery or put it into fire or water.
- Do not carry or store the coin-shaped lithium-ion battery with small metal objects. Doing so could short the battery and cause leakage or rupture, for example.
- When storing or disposing of batteries, cover the contacts with tape to prevent them from touching other batteries or metal objects.
- Follow the disposal instructions written on the battery or given by the local government when you are done using it.
Using the wireless remote control
Refer to page 14 for details about the functions of each button.
When using the remote control, point it at the remote control receiver on the unit within the angle shown below.
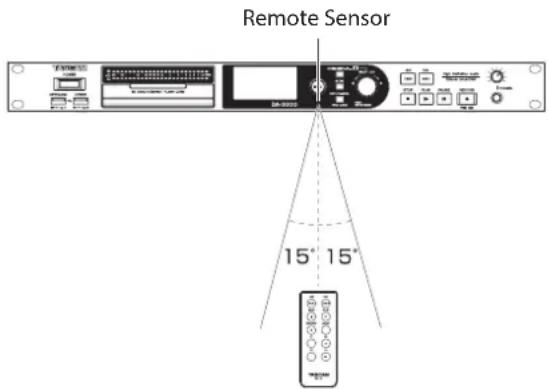
Operation distance
Directly in front: Within 7 meters
15° left or right: Within 7 meters
CAUTION
• The operation distance varies depending on the angle.
• If anything is between the remote control and the sensor, operation might not work.
- Remove the battery if you will not use the remote control for a long time (one month or more).
• If the battery should leak, thoroughly clean any residue from inside the battery compartment and install a new battery.
- When using other devices controlled by infrared rays, use of this remote control might operate these devices by mistake.
Turning the power on and off
Press the front panel POWER switch.
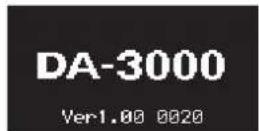
Startup Screen
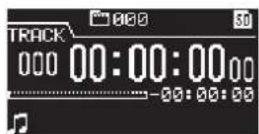
Home Screen
After the unit starts up and the startup screen is shown, the Home Screen appears.
If no media is loaded in the current device, no track number or time will be shown on the Home Screen.
Turning the power OFF
Press the POWER switch to turn the power OFF.
No special shutdown procedures are necessary.
CAUTION
- Do not turn the power OFF when the unit is in use (recording, playing back, writing data to SD/CF/USB media, etc.). Doing so could cause recording to fail, recorded data to be damaged, sudden loud noise to be output from monitoring equipment, damage to equipment and harm to hearing.
- When the unit is turned ON for the first time after purchase, and also if the unit has been stored OFF for such a long time that the internal battery has discharged, the CLOCK ADJUST screen will appear immediately, so that the Time can be corrected.
Setting the date and time
The date and time are added to recorded files based on the unit's built-in clock.
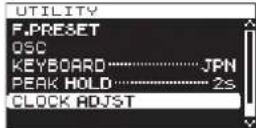
- Press the MENU button repeatedly to open the UTILITY page, and turn the MULTI JOG dial to select CLOCK ADJST
- Press the MULTI JOG dial to open the CLOCK ADJUST screen.
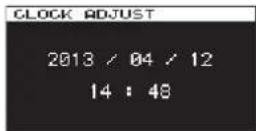
- Press the MULTI JOG dial again to enter setting mode. The cursor will appear at the item to be changed.
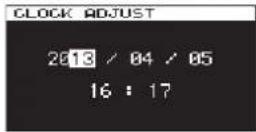
-
Turn the MULTI JOG dial to change the value and then press it to confirm and move the cursor to the next item.
-
After changing the year, month, date, hour and minute, the cursor disappears and the date and time setting ends.
NOTE
While setting the date and time, you can press the EXIT/CANCEL [PEAK CLEAR] button to cancel any changes and return to the menu screen.
- Press the EXIT/CANCEL [PEAK CLEAR] button to return to the menu screen.
Adjusting the brightness
While pressing and holding the HOME/DISPLAY button, turn the MULTI JOG dial to adjust the display and indicator brightness.

3 - Preparations
Inserting and ejecting SD and CF cards
Inserting SD and CF cards
Insert an SD card or CF card into the appropriate card slot on the front panel to use it for playback and recording.
NOTE
You can insert SD and CF cards regardless of whether the power is ON or OFF.
- Pull the card slot door forward to open it.
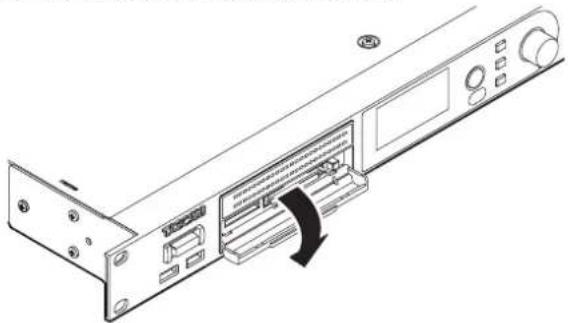
natural_image
Diagram of a computer rack with an open drive and a black arrow indicating rotation (no text or symbols present)- Insert the SD/CF card with the correct orientation. The label should be facing up and the contacts facing in.
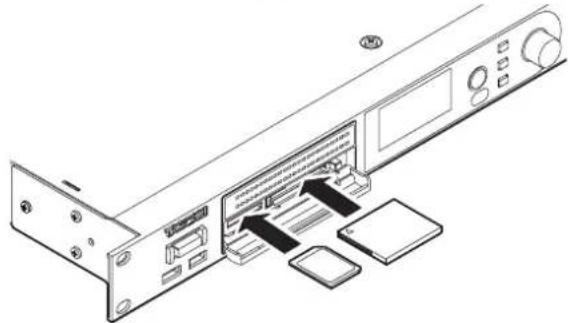
natural_image
Diagram of an electronic device showing internal components and a close-up view of a rack-mounted unit (no text or symbols present)- Close the card slot door.
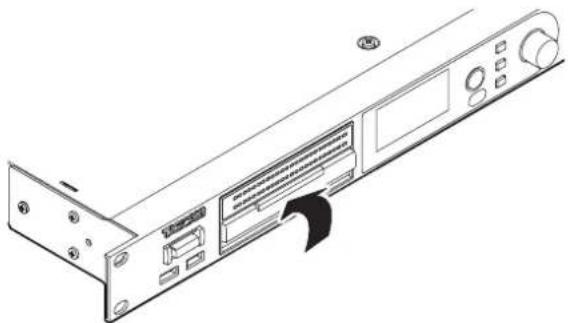
natural_image
Line drawing of a server rack unit with ports and ventilation slots (no text or symbols)NOTE
If the SD/CF card slot door will not close, remove the card, and then insert it once again. To remove an SD card, pull it. To remove a CF card, pull it and press the square button located to the right of the slot.
Ejecting SD and CF cards
Turn the unit off or stop operation before ejecting an SD or CF card.
CAUTION
Never remove an SD or CF card when the unit is in use (recording, playing back, writing data to a card, etc.). Doing so could cause recording to fail, recorded data to be damaged, sudden loud noise to be output from monitoring equipment, damage to equipment and harm to hearing.
- Pull the card slot door forward to open it.
- To eject an SD card, press the SD card in slightly. To eject a CF card, press the square button located to the right of the CF card slot to eject the CF card partially.
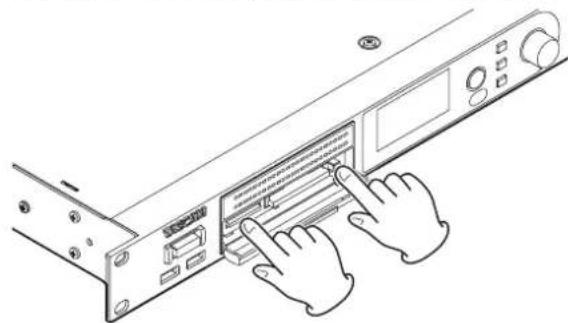
natural_image
Illustration of hands inserting a CD into a rack-mounted device (no text or symbols visible)- Pull the SD or CF card out the rest of the way.
SD card write protection
SD cards have write-protection switches.
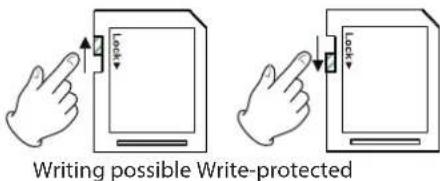
If the protection switch is slid into the "LOCK" position, adding and editing files will not be possible. To record, erase or otherwise change files, disable write protection.
CAUTION
If a protected SD card is loaded, the unit will check all of the audio files on it each time the device is changed. For this reason, changing devices takes time. Moreover, editing the playlist and other operations are not possible.
Connecting/disconnecting USB flash drives
Connecting USB flash drives
To use a USB flash drive with this unit for playback and dubbing, insert it into the DEVICE connector on the front of the unit.
NOTE
You can insert a USB flash drive anytime regardless of whether the power is ON or OFF.
Disconnecting USB flash drives
Turn the power OFF or stop operation before disconnecting a USB flash drive.
CAUTION
Never remove a USB flash drive when the unit is in use (recording, playing back, writing data to the drive, etc.). Doing so could cause recording to fail, recorded data to be damaged, sudden loud noise to be output from monitoring equipment, damage to equipment and harm to hearing.
Selecting the media used
Before starting to work with the unit, select the media that you want to use (SD card, CF card or USB flash drive).
To select the media used, follow these procedures.
- Press the MENU button to open the GENERAL menu screen, and turn the MULTI JOG dial to select (highlight) M E DIA SEL.
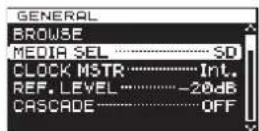
- Press the MULTI JOG dial to open the MEDIA SELECT screen.
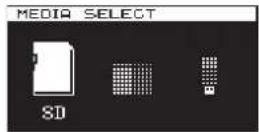
- Turn the MULTI JOG dial to select the media used, and press the MULTI JOG dial to confirm the selection.
NOTE
During selection, press the EXIT/CANCEL [PEAK CLEAR] button to cancel the selection and return to the menu screen.
- The name of the currently selected media appears at the top right of the Home Screen.
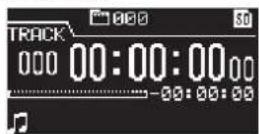
SD SD card selected
CF CF card selected
USB flash drive selected
Preparing SD/CF cards and USB flash drives
You must use this unit to format SD cards, CF cards and USB flash drives in order to make them usable by the unit.
CAUTION
• Formatting will erase all data on an SD card, CF card or USB flash drive.
• Always format with this unit. If an SD card, CF card or USB flash drive is formatted by another device or a computer, it could affect operation of the unit.
-
Use the MENU button and MULTI JOG dial to open the MEDIA SELECTscreen and select the media to format. (See "Selecting the media used" on page 21.)
-
Press the MENU button to open the M E D menu, and turn the MULTI JOG dial to select FORMAT.
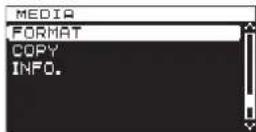
- Press the MULTI JOG dial to open the format type selection pop-up.
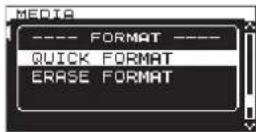
- Turn the MULTI JOG dial to select QUICK FORMAT or ERASE FORMAT and press the MULTI JOG dial. A confirmation pop-up message appears.
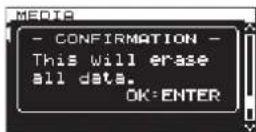
NOTE
To cancel formatting, press the EXIT/CANCEL [PEAK CLEAR] button.
- Press the MULTI JOG dial to start formatting.
While formatting, - QUICK FORMAT - or - ERASE FORMAT - appears in a pop-up.
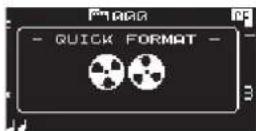
Pop-up when QUICK FORMATselected
- After formatting completes, the pop-up disappears and the menu reopens.
4 - Recording
This unit can record to SD and CF cards in the following formats.
PCM recording
WAV (BWF) format (44.1/48/88.2/96/176.4/192kHz sampling frequency, 16/24-bit)
DSD recording
DSDIFF, DSF formats (2.8224/5.6448MHz sampling frequency)
The following explanations assume that you have loaded a recordable SD card or CF card, completed the necessary connections and turned the unit on.
NOTE
- The maximum numbers of folders and tracks that can be recorded by this unit on an SD card or CF card are as follows. Maximum tracks: 999 tracks per folder Maximum folders: 3000 per card
- When using media with a capacity of 2 GB or less, recording the maximum number of tracks or creating the maximum number of folders in the root folder as shown above might not be possible due to file system limitations. (The actual numbers depend on other conditions.)
- If a write-protected SD card is loaded in the unit, recording will not be possible. (See "SD card write protection" on page 20.)
- This unit cannot record directly to a USB flash drive due to system limitations. It can, however, format USB flash drives and write and erase data on them, for example. (See "Preparing SD/CF cards and USB flash drives" on page 21.) (See "5 – Folder and file operations (BROWSE screen)" on page 32.) (See "8 – Editing playlists" on page 46.)
- You can copy audio files between an SD card, a CF card and a USB flash drive. For details, see "Copying files between media (backing up)" on page 50.
- The largest file that this unit will create during record is 2GB. If a recording is about to exceed this size, a new file is automatically created, but the audio is processed so there is seamless continuity between the current and new file. On playback, in order to hear the audio seamlessly, please set the TRACK GAP mode setting to "GAPLESS". (See "Setting gapless playback mode" on page 41.)
Unexpected power interruptions
If an unexpected power interruption occurs when recording to an SD or CF card, the unit has a protection function that might prevent the complete loss of all track recording data. Data recorded up to about 25 seconds before the interruption occurs is saved.
CAUTION
- Even with this protection function, due to the characteristics of SD cards, CF cards and USB flash drives, if the unit is writing to the system area when the power is interrupted or the media is removed from the unit, all the files on the media could be damaged or lost. For this reason, you should try as much as possible to avoid power interruptions during recording and playback.
- This function was not created for the purpose of use with an external timer, for example, turning off the power.
Selecting the input source
Set the input source (recording source) to one of 6 types of input (balanced analog, unbalanced analog, PCM-SPDIF digital, PCM-AES/EBU digital, DSD-SDIF-3 digital, DSD-DSD-raw digital). Follow the procedures below to select the input source.
NOTE
• You cannot change the input source when recording.
- Press the MENU button repeatedly to open the I/O SETTINGS menu, and turn the MULTI JOG dial to select INPUT SEL.
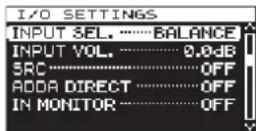
- Press the MULTI JOG dial to open the INPUT SELECT screen.
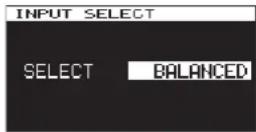
- Turn the MULTI JOG dial to select the input source. Options:
● PCM recording: BALANCED (default), UNBALANCED, AES/EBU, SPDIF
● DSD recording: BALANCED (default), UNBALANCED, SDIF-3, DSD-raw
- Press the MULTI JOG dial to confirm the selection and return to the menu screen.
Showing the input source
Use the procedures in "Selecting the input source" above to check the current input source. The Home Screen does not have any input source indication.
Setting the recording file format
You can set the recording file format, as well as sampling rate and stereo/mono mode.
For PCM recording, you can set the format to WAV-16 or WAV-24. For DSD recording, you can set it to DSDIFF or DSF.
When stopped, use the menu to set the file format.
- Press the MENU button repeatedly to open the REC FILE menu, and turn the MULTI JOG dial to selectFILE.
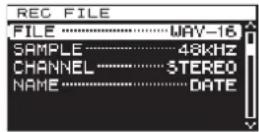
- Press the MULTI JOG dial to open the FILE TYPEscreen.
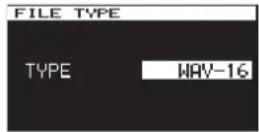
- Turn the MULTI JOG dial to set the recording file format. Options:
● PCM recording: WAV-16(16-bit, Default value), WAV-24(24-bit)
● DSD recording: DSDIFF, DSF
-
Press the MULTI JOG dial to confirm the selection and return to the menu screen.
-
Turn the MULTI JOG dial to select SAMPLE.
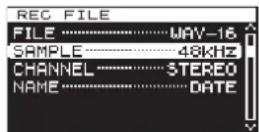
- Press the MULTI JOG dial to open the SAMPLING RATE screen.
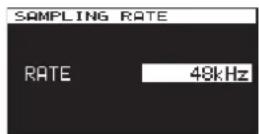
- Turn the MULTI JOG dial to set the sampling rate. Options:
● PCM recording: 44.1kHz, 48kHz (default), 88.2kHz, 96kHz, 176.4kHz, 192kHz
● DSD recording: 2.8MHz, 5.6MHz
-
Press the MULTI JOG dial to confirm the selection and return to the menu screen.
-
Turn the MULTI JOG dial to select CHANNEL.
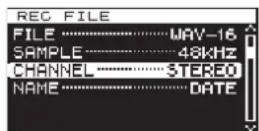
- Press the MULTI JOG dial to open the CHANNEL screen.
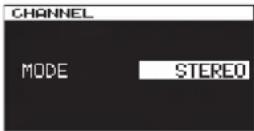
- Turn the MULTI JOG dial to set the Recorded file's channel type (Stereo File or Dual Mono File). Options: STEREO (default), MONOx2
- Press the MULTI JOG dial to confirm the selection and return to the menu screen.
Using the sampling rate converter
Since this unit has a built-in sampling rate converter, you can record at a sampling frequency that is different from the sampling frequency of the digital input source.
Use the menu to turn the sampling rate converter (SRC) ON/OFF.
- Press the MENU button repeatedly to open the I/O SETTINGS menu, and turn the MULTI JOG dial to select SRC.
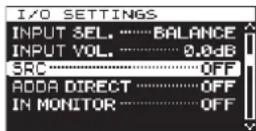
- Press the MULTI JOG dial to open the SRC screen.
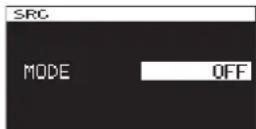
- Turn the MULTI JOG dial to turn the sampling rate converter on or off. Options: OFF (default), ON
- Press the MULTI JOG dial to confirm the selection and return to the menu screen.
NOTE
- If you try to record when the digital signal input through the DIGITAL IN connector has a sampling frequency that is different from that set on the SAMPLING RATEscreen and the sampling rate converter (SRC) is off, a "-- DIN ERROR -- Digital input is illegal." pop-up message will appear. (See "Setting the recording file format" on page 23.)
• The sampling rate converter (SRC) will not operate on SDIF-3/DSD-raw input.
• The sampling rate converter can accept incoming data at rates of 32kHz to 216kHz.
Monitoring the input signal
Input signal monitoring is usually only on during recording and when in recording standby. You can, however, also enable input monitoring when the unit is stopped.
When Input signal monitoring is turned ON, playback is not possible but Recording can be performed. In order to listen to previously recorded audio, please turn the Input monitor OFF.
Follow the procedures below to make this setting.
- Press the MENU button repeatedly to open the I/O SETTINGS menu, and turn the MULTI JOG dial to select IN MONITOR
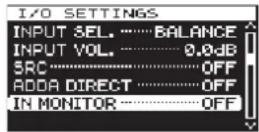
- Press the MULTI JOG dial to open the INPUT MONITOR screen.
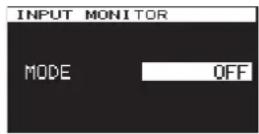
- Turn the MULTI JOG dial to turn input monitoring on or off. Options: OFF (default), ON
- Press the MULTI JOG dial to confirm the selection and return to the menu screen.
NOTE
Monitoring cannot be turned on during playback or when paused.
Adjusting the input signal level
You can use the menu to adjust the level of the input signal.
- Press the MENU button repeatedly to open the I/O SETTINGS menu, and turn the MULTI JOG dial to select INPUT UOL.
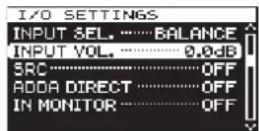
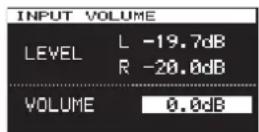
- Press the MULTI JOG dial to open the INPUT VOLUME screen.
NOTE
The LEVEL item shows the input levels.
- Turn the MULTI JOG dial to adjust the VOLUME item, which is the input signal level.
Options: MUTE, -60dB - +12dB (default: 0.0dB)
CAUTION
The level meter OVER indicators will light at the following levels. If the DSD mode is set to +3, though, they will light at +3dB and higher.
• PCM recording and playback: 16-bit full-scale
• DSD recording and playback: 0dB
- Press the MULTI JOG dial to confirm the selection and return to the menu screen.
NOTE
The input signal level setting is retained even when the unit is off.
Setting the peak hold indicators
You can set how long the peak hold indicators appear on the level meters.
- Press the MENU button repeatedly to open the UTILITY menu, and turn the MULTI JOG dial to select PEAK HOLD
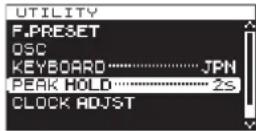
- Press the MULTI JOG dial to open the PEAK HOLD screen.
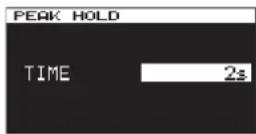
- Turn the MULTI JOG dial to set how long the peak hold indicators appear.
Options:
"OFF": No Peak Hold indicators are shown.
"1s" - "10s": The peak hold indicator will remain shown for the selected number of seconds. (default: "2s")
"INF.": Peak Hold indicators are shown until the EXIT/CANCEL [PEAK CLEAR] button is pushed.
- Press the MULTI JOG dial to confirm the selection and return to the menu screen.
Setting the master clock
You can set the master clock used by this unit.
CAUTION
When multiple digital audio devices are connected in the same system, make certain that they all use the same master clock.
- Press the MENU button to open the GENERAL menu, and turn the MULTI JOG dial to select CLOCK MSTR
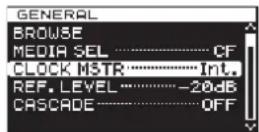
- Press the MULTI JOG dial to open the CLOCK screen.
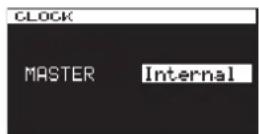
- Turn the MULTI JOG dial to select the master clock. Options:
Internal (default): Use the unit's built-in master clock.
WORD: Use the clock signal input through the WORD SYNC IN connector as the master clock.
DIN (DIGITAL IN): Use the clock signal of the currently selected digital audio input source as the master clock.
- Press the MULTI JOG dial to confirm the selection and return to the menu screen.
NOTE
- If a "CLOCK LOST..." pop-up error message appears, press the EXIT/CANCEL [PEAK CLEAR] button to return to the Menu Screen, and change the master clock setting.
- If the unit cannot lock to the set master clock, it will automatically switch to the internal clock and a star (*) will appear at the end of the selected setting.
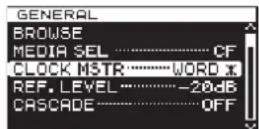
- When using WORD CLOCK and recording in DSD format, please use a 44.1kHz signal.
Setting the reference level
You can set the reference level for analog input and output to a dB value less than the maximum level (0dB).
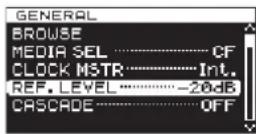
- Press the MENU button to open the GENERAL menu screen, and turn the MULTI JOG dial to select (highlight) REF. LEVEL.
- Press the MULTI JOG dial to open the REFERENCE LEVEL screen.
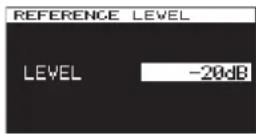
- Turn the MULTI JOG dial to set the reference level.
| Options Details | |
| -9dB | Standard level: +6 dBuMaximum level: +15 dBu |
| -14dB | Standard level: +4 dBuMaximum level: +18 dBu |
| -16dB (default) | Standard level: +4 dBuMaximum level: +20 dBu |
| -18dB | Standard level: +4 dBuMaximum level: +22 dBu |
| -20dB | Standard level: +4 dBuMaximum level: +24dBu |
- Press the MULTI JOG dial to confirm the selection and return to the menu screen.
Using this unit as an AD/DA converter
This unit can also be used as an AD/DA converter when connected to another recorder or DAW, for example.
To use this unit as an AD/DA converter, setADDA DIRECT mode to ON. When ON, the INPUT SELECTscreen setting does not function, and setting the input selection for the analog and digital inputs separately is necessary. In addition, when ADDA DIRECTmode is ON, playback is not possible, but recording the analog input signal is possible. To play back a recording, setADDA DIRECTmode to OFF.
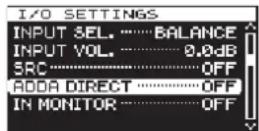
- Press the MENU button repeatedly to open the I/O SETTINGS menu, and turn the MULTI JOG dial to select ADDA DIRECT
- Press the MULTI JOG dial to open the ADDA DIRECT screen.
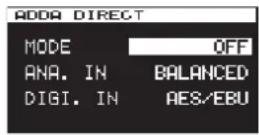
- Turn the MULTI JOG dial to turn AD/DA DIRECT ON or OFF. Options: OFF (default), ON
- Press the MULTI JOG dial to confirm the setting. The cursor will move to the ANA. IN setting.
- Turn the MULTI JOG dial to select the ANA. IN. Options:
BALANCED (default): balanced XLR input jacks UNBALANCED: unbalanced RCA input jacks
- Press the MULTI JOG dial to confirm the setting. The cursor will move to the DIGI. IN setting.
- Turn the MULTI JOG dial to select the DIGI. IN. Options:
For PCM recording: AES/EBU, SPDIF For DSD recording: SDIF-3, DSD-raw
NOTE
The selected options will change automatically according to the recording file format selected on the FILE TYPE screen. (See "Setting the recording file format" on page 23.)
- Press the MULTI JOG dial to confirm the setting and return to the menu screen.
CAUTION
When ADDA Direct Mode is ON, the input signal level setting will only affect the Analog Input.
Basic recording operations
You can begin recording after you have finished making the settings described previously, including input source selection, recording file format, sampling rate converter activation and input level adjustment.
To start recording standby from a stopped state:
Press the front panel or remote control RECORD button to put the unit in recording standby (The RECORD [TRK INC] and PAUSE buttons on the main unit light).
To start recording from recording standby:
Press the front panel or remote control PLAY button.
To switch from recording to recording standby:
Press the main unit PAUSE button or the remote control F1 button.
To stop recording:
Press the front panel or remote control STOP button. When the unit stops recording, the recorded data will be written and an audio file will be created.
NOTE
- On the FILE NAMEscreen, you can set the format of the names automatically given to audio files when they are created. (See "Setting the file name format" on page 30.)
• The maximum file size for each track is 2 GB. - Recorded tracks will be created in the current folder. (See "Folder operations" on page 33.)
CAUTION
While the recording is being written to the current media, "WRITING FILE ..." will appear the display.
While this message is shown, do not move the unit, turn off the power or remove the current media. The recorded content cannot be saved correctly if writing is interrupted.
Sync recording
If the sync recording function is on, recording will begin automatically when the input signal exceeds the level set in advance (SYNC REC LEVEL).
Activating and setting sync recording
Use the menu to turn the sync recording function on and off and to set the sync recording level.
- Press the MENU button repeatedly to open the REC FUNC menu, and turn the MULTI JOG dial to select SYNC REC
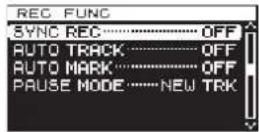
- Press the MULTI JOG dial to open the SYNC REC screen.
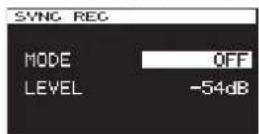
- Turn the MULTI JOG dial to turn the sync recording function on or off. Options: OFF (default), ON
- Press the MULTI JOG dial to confirm the setting. If set to ON, the cursor will move to the LEVEL item. If set to OFF, the REC FUNC menu screen will reopen.
- Turn the MULTI JOG dial to select the sync level. Options: -24dB, -30dB, -36dB, -42dB, -48dB, -54dB (default), -60dB, -66dB, -72dB
- Press the MULTI JOG dial to confirm the setting and return to the menu screen.
NOTE
- After recording starts, if the signal stays below the sync level continuously for 5 seconds, the unit automatically enters recording standby.
• Sync recording starts as soon as the level is detected.
Sync recording operation
When the sync recording function is on and the unit is in recording standby, recording will automatically start or stop in response to the level of the input source.
- When a signal higher than the sync level is input, recording will begin automatically. Recording will automatically stop when the signal stays below the sync level continuously for 5 seconds. However, recording will not begin even if input is detected unless there has been at least one second in which the signal was below the SYNC LEVEL after entering recording standby.
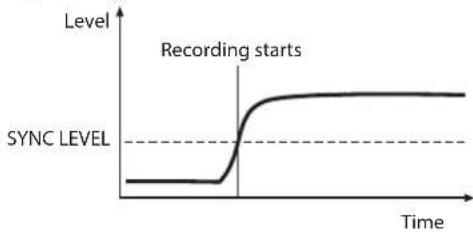
line
| Time | Level | |------|-------| | 0 | 0 | | 1 | 0 | | 2 | 1 | | 3 | 2 | | 4 | 3 | | 5 | 4 | | 6 | 5 | | 7 | 6 | | 8 | 7 | | 9 | 8 | | 10 | 9 | | 11 | 10 | | 12 | 11 | | 13 | 12 | | 14 | 13 | | 15 | 14 | | 16 | 15 | | 17 | 16 | | 18 | 17 | | 19 | 18 | | 20 | 19 | | 21 | 20 | | 22 | 21 | | 23 | 22 | | 24 | 23 | | 25 | 24 | | 26 | 25 | | 27 | 26 | | 28 | 27 | | 29 | 28 | | 30 | 29 | | 31 | 30 | | 32 | 31 | | 33 | 32 | | 34 | 33 | | 35 | 34 | | 36 | 35 | | 37 | 36 | | 38 | 37 | | 39 | 38 | | 40 | 39 | | 41 | 40 | | 42 | 41 | | 43 | 42 | | 44 | 43 | | 45 | 44 | | 46 | 45 | | 47 | 46 | | 48 | 47 | | 49 | 48 | | 50 | 49 | | 51 | 50 | | 52 | 51 | | 53 | 52 | | 54 | 53 | | 55 | 54 | | 56 | 55 | | 57 | 56 | | 58 | 57 | | 59 | 58 | | 60 | 59 | | 61 | 60 | | 62 | 61 | | 63 | 62 | | 64 | 63 | | 65 | 64 | | 66 | 65 | | 67 | 66 | | 68 | 67 | | 69 | 68 | | 70 | 69 | | 71 | 70 | | 72 | 71 | | 73 | 72 | | 74 | 73 | | 75 | 74 | | 76 | 75 | | 77 | 76 | | 78 | 77 | | 79 | 78 | | 80 | 79 | | 81 | 80 | | 82 | 81 | | 83 | 82 | | 84 | 83 | | 85 | 84 | | 86 | 85 | | 87 | 86 | | 88 | 87 | | 89 | 88 | | 90 | 89 | | 91 | 90 | | 92 | 91 | | 93 | 92 | | 94 | 93 | | 95 | 94 | | 96 | 95 | | 97 | 96 | | 98 | 97 | | 99 | 98 | | | |● To stop sync recording, set the SYNC REC screen MODE item to OFF.
If the sync level is too high
If the sync level setting is too high, the beginning of a song that starts with a low volume might not be captured.
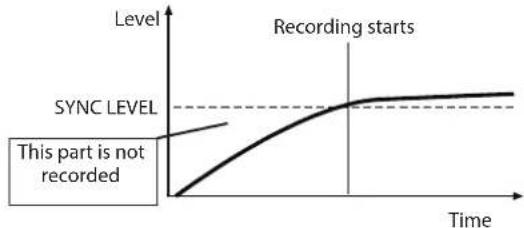
line
| Time | Level | |------|-------| | 0 | 0 | | Recordings start | SYNC LEVEL | | Recordings start | This part is not recorded |If the sync level is too low
Sync recording will not begin from recording standby if the source you are recording has a background noise level that is higher than the sync level.
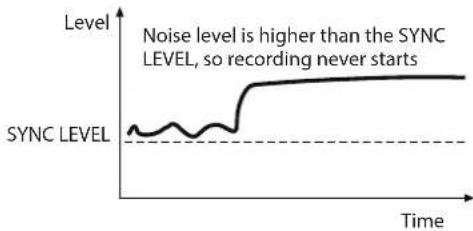
line
| Time | Level | |------|-------| | 0 | SYNC LEVEL | | 1 | ~0.2 | | 2 | ~0.3 | | 3 | ~0.4 | | 4 | ~0.5 | | 5 | ~0.6 | | 6 | ~0.7 | | 7 | ~0.8 | | 8 | ~0.9 | | 9 | ~1.0 | | 10 | ~1.1 | | 11 | ~1.2 | | 12 | ~1.3 | | 13 | ~1.4 | | 14 | ~1.5 | | 15 | ~1.6 | | 16 | ~1.7 | | 17 | ~1.8 | | 18 | ~1.9 | | 19 | ~2.0 | | 20 | ~2.1 | | 21 | ~2.2 | | 22 | ~2.3 | | 23 | ~2.4 | | 24 | ~2.5 | | 25 | ~2.6 | | 26 | ~2.7 | | 27 | ~2.8 | | 28 | ~2.9 | | 29 | ~3.0 | | 30 | ~3.1 | | 31 | ~3.2 | | 32 | ~3.3 | | 33 | ~3.4 | | 34 | ~3.5 | | 35 | ~3.6 | | 36 | ~3.7 | | 37 | ~3.8 | | 38 | ~3.9 | | 39 | ~4.0 | | 40 | ~4.1 | | 41 | ~4.2 | | 42 | ~4.3 | | 43 | ~4.4 | | 44 | ~4.5 | | 45 | ~4.6 | | 46 | ~4.7 | | 47 | ~4.8 | | 48 | ~4.9 | | 49 | ~5.0 | | 50 | ~5.1 | | 51 | ~5.2 | | 52 | ~5.3 | | 53 | ~5.4 | | 54 | ~5.5 | | 55 | ~5.6 | | 56 | ~5.7 | | 57 | ~5.8 | | 58 | ~5.9 | | 59 | ~6.0 | | 60 | ~6.1 | | 61 | ~6.2 | | 62 | ~6.3 | | 63 | ~6.4 | | 64 | ~6.5 | | 65 | ~6.6 | | 66 | ~6.7 | | 67 | ~6.8 | | 68 | ~6.9 | | 69 | ~7.0 | | 70 | ~7.1 | | 71 | ~7.2 | | 72 | ~7.3 | | 73 | ~7.4 | | 74 | ~7.5 | | 75 | ~7.6 | | 76 | ~7.7 | | 77 | ~7.8 | | 78 | ~7.9 | | 79 | ~8.0 | | 80 | ~8.1 | | 81 | ~8.2 | | 82 | ~8.3 | | 83 | ~8.4 | | 84 | ~8.5 | | 85 | ~8.6 | | 86 | ~8.7 | | 87 | ~8.8 | | 88 | ~8.9 | | 89 | ~9.0 | | 90 | ~9.1 | | 91 | ~9.2 | | 92 | ~9.3 | | 93 | ~9.4 | | 94 | ~9.5 | | 95 | ~9.6 | | 96 | ~9.7 | | 97 | ~9.8 | | 98 | ~9.9 | | 99 | ~10.0 | | Note: The 'SYNC LEVEL' label indicates the data series is not explicitly provided in the code snippet.Creating new higher-numbered tracks automatically
When using the Auto Track function during recording, the unit automatically creates a new track with a higher number when a set condition is met.
Use the menu to enable the Auto Track function and set its mode.
- Press the MENU button repeatedly to open the REC FUNC menu, and turn the MULTI JOG dial to select AUTO TRACK
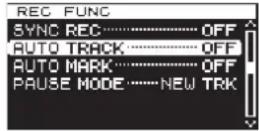
- Press the MULTI JOG dial to open the AUTO TRACK screen.
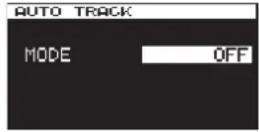
- Turn the MULTI JOG dial to set the auto track function mode. Options:
OFF (default)
New tracks will not be created automatically.
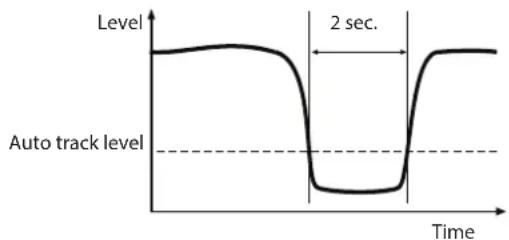
LEVEL
A new track with a higher number will be created when the signal exceeds the auto track level (AUTO TRACK screen LEVEL item value) after having stayed below it for at least two seconds.
line
| Time Segment | Level | | ------------ | ----- | | 0 | High | | 1 | Low | | 2 | Low | | 3 | High | | 4 | High | | 5 | High | | 6 | High | | 7 | High | | 8 | High | | 9 | High | | 10 | High | | 11 | High | | 12 | High | | 13 | High | | 14 | High | | 15 | High | | 16 | High | | 17 | High | | 18 | High | | 19 | High | | 20 | High | | 21 | High | | 22 | High | | 23 | High | | 24 | High | | 25 | High | | 26 | High | | 27 | High | | 28 | High | | 29 | High | | 30 | High | | 31 | High | | 32 | High | | 33 | High | | 34 | High | | 35 | High | | 36 | High | | 37 | High | | 38 | High | | 39 | High | | 40 | High | | 41 | High | | 42 | High | | 43 | High | | 44 | High | | 45 | High | | 46 | High | | 47 | High | | 48 | High | | 49 | High | | 50 | High | | 51 | High | | 52 | High | | 53 | High | | 54 | High | | 55 | High | | 56 | High | | 57 | High | | 58 | High | | 59 | High | | 60 | High | | 61 | High | | 62 | High | | 63 | High | | 64 | High | | 65 | High | | 66 | High | | 67 | High | | 68 | High | | 69 | High | | 70 | High | | 71 | High | | 72 | High | | 73 | High | | 74 | High | | 75 | High | | 76 | High | | 77 | High | | 78 | High | | 79 | High | | 80 | High | | Note: The 'Auto track level' is marked as '2 sec.' between the two segments of the 'High' and 'Low' segments of the 'High' segments.DD
When recording a digital source (CD, DAT or MD) via a DIGITAL IN jack, a new track will be created when a track division is detected in the source. However, when recording an analog source or a digital source other than the types listed above, this will work in the same way as LEVEL mode, and new tracks will be created in response to the input level.
TIME
A new track with a higher number will be created at the set time interval (AUTO TRACKscreen TIME item value).
SIZE
A new track with a higher number will be created when the set size is reached (AUTO TRACK screen SIZE item value).
NOTE
If you choose the LEVEL, TIME or SIZE option, the parameter to be set appears beneath the MODE item.
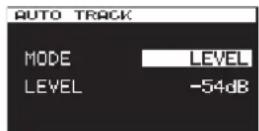
-
Press the MULTI JOG dial to confirm the setting. The cursor will move to the LEVEL item.
-
Turn the MULTI JOG dial to set the parameter value. LEVEL (level mode)
Options: -24dB, -30dB, -36dB, 42dB, -48dB, -54dB (default), -60dB, -66dB, -72dB
DD (digital direct mode)
Options: No options
TIME (time mode)
- Press the MULTI JOG dial to confirm the setting and return to the menu screen.
Creating a higher numbered track manually
When recording, press the front panel or remote control RECORD button to create a new track (with a higher number) without interrupting recording. You cannot, however, create a track of 4 seconds or less.
NOTE
You can also divide a track after recording using the editing function. (See "Dividing files" on page 37.)
Setting the automatic mark function
By turning the AUTO MARK options ON, marks can be added automatically whenever the OVER indicator lights or an external clock synchronization error occurs. Use of this function allows you to quickly find and check problems that occurred in the system during recording.
- Press the MENU button repeatedly to open the REC FUNC menu, and turn the MULTI JOG dial to select AUTO MARK
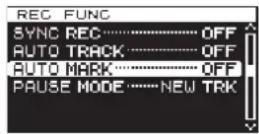
- Press the MULTI JOG dial to open the AUTO MARK screen.
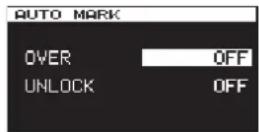
- Turn the MULTI JOG dial to select the OVER item. (When OVER is ON, a mark is added automatically whenever an OVER level meter indicator lights.)
Options: OFF (default), ON
- Press the MULTI JOG dial to confirm the setting.
The cursor moves to the UNLOCK item.
- Turn the MULTI JOG dial to select UNLOCK. (When ON, marks will be added when the unit unlocks from the external clock.)
Options: OFF (default), ON
- Press the MULTI JOG dial to confirm the selection and return to the menu screen.
NOTE
- When an OVER occurs, the Mark name is "OVERxxx" *
- When an UNLOCK even occurs, the Mark name is "UNLKxxx" *. * "xxx" is a number that increments through all MARKs in this track.
Adding marks manually during recording
You can add marks at the positions you want while recording and use those marks to change positions quickly during track playback.
NOTE
During recording, adding marks is possible, but moving to and deleting those marks is not possible. Moving to and deleting marks is only possible when the track is stopped, in playback standby or playing back. (See "Locating to marks" on page 40.) (See "Deleting marks" on page 40.)
Adding marks when recording
During track recording, press the MULTI JOG dial (or remote control MARK button) at any point where you want to add a mark.
NOTE
- A maximum of 99 marks can be added to each track. Mark information is stored in the track file.
- You can also add marks during track playback. (See "Adding marks manually during playback" on page 40.)
- When adding a mark manually, the Mark Name "MARKxxx" * is used.
* "xxx" is a number that increments through all MARKs in this track.
Using the oscillator (OSC)
The unit can output a sine wave at a standard level.
You can choose from three output frequencies for the sine wave.
Use this to check connections, for example.
- Press the MENU button to open the UTILITY menu, and turn the MULTI JOG dial to selectOSC.
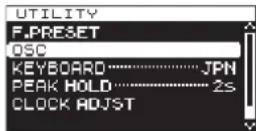
- Press the MULTI JOG dial to open the OSCILLATOR screen.
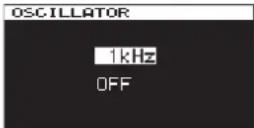
- Turn the MULTI JOG dial to select the frequency of the oscillator.
Options: 440Hz, 1kHz (default), 10kHz
- Press the MULTI JOG dial to confirm the oscillator frequency, and turn the oscillator ON. A sine wave is output, and the level meters show the level of the oscillator.
Press the MULTI JOG dial again to turn the sine wave output OFF or ON again as necessary.
- Press the EXIT/CANCEL [PEAK CLEAR] button or MENU button to return to the menu screen.
Setting the pause mode
You can set whether or not a new track with a higher number is created when switching from recording to recording standby
- Press the MENU button repeatedly to open the REC FUNC menu, and turn the MULTI JOG dial to select PAUSE MODE
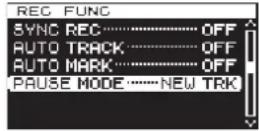
- Press the MULTI JOG dial to open the PAUSE MODE screen.
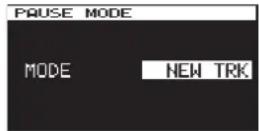
- Turn the MULTI JOG dial to set the pause mode. Options:
NEW TRK (default) New track with higher number created when switching from recording to recording standby
SAME TRK No new track created when switching from recording to recording standby
- Press the MULTI JOG dial to confirm the selection and return to the menu screen.
Setting the file name format
You can specify the type of file name that is automatically given to files when recorded.
- Press the MENU button to open the REC FILE menu, and turn the MULTI JOG dial to select NAME.
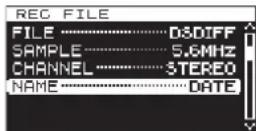
- Press the MULTI JOG dial to open the FILE NAMEscreen.
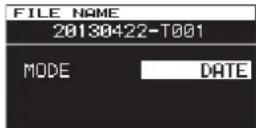
- Turn the MULTI JOG dial to set the file name format. Options:
DATE (default) The date and time of the built-in clock will become the file name.
USER1 – USER3 The file will be named according to eight characters set by the user.
- Press the MULTI JOG dial to return to the menu screen after selecting DATE or after selecting USER1 - USER3 if you do not want to change the file name given. After selecting USER1 - USER3, if you want to change the file name given, press the ▶▶ [▶▶] button to open the RENAME screen.
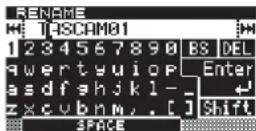
-
Edit the file name. See "Inputting and editing characters" on page 31 for details about how to edit a file name.
-
When you are done setting the file name, turn the MULTI JOG dial to select Enter. Then, press the MULTI JOG dial to confirm the changes to the characters and return to the FILE NAMEscreen.
-
Press the MULTI JOG dial again to return to the menu screen.
Inputting and editing characters
Use the following operations to edit characters.
To move the cursor (editing position):
Use the ◀◀[I◀◀]/▶▶[▶▶▶] buttons on the main unit.
To change the character at the cursor position:
Turn the MULTI JOG dial.
To insert a space:
Turn the MULTI JOG dial to select SPACE, and press the MULTI JOG dial.
To delete a character:
Turn the MULTI JOG dial to select DEL (when you want to delete a character after the cursor) or BS (when you want to delete a character before the cursor), and press the MULTI JOG dial.
To delete all characters after the cursor position:
Turn the MULTI JOG dial to select DEL, and press and hold the MULTI JOG dial.
To delete all characters before the cursor position:
Turn the MULTI JOG dial to select BS, and press and hold the MULTI JOG dial.
To switch between uppercase and lowercase:
Turn the MULTI JOG dial to select Shift, and press the MULTI JOG dial.
This also switches between numbers and symbols at the same time.
To cancel editing:
Press the EXIT/CANCEL [PEAK CLEAR] button.
CAUTION
- You can also directly access SD and CF cards from a computer to change the names of files, but doing so could change the playback order of the files.
- Names that contain characters other than letters of the alphabet, numbers and symbols cannot be edited. (Such names cannot be shown on the RENAME screen.)
- The following symbols and punctuation marks cannot be used in names.
$$ \yen \backslash /;:, ^ {*}? ^ {\prime \prime} < > | $$
NOTE
You can also use a USB keyboard to edit text. (See "Using a keyboard to input text" on page 52.)
Media capacities and recording times
This table shows maximum total recording times for different media capacities and file formats.
| Recording mode settings SD/CF card (per GB) | |||
| PCM | WAV-16 | 44.1 kHz 90 | min. |
| 48 kHz 85 | min. | ||
| 88.2 kHz 45 | min. | ||
| 96 kHz 42 | min. | ||
| 176.4 kHz 22 | min. | ||
| 192 kHz 21 | min. | ||
| WAV-24 | 44.1 kHz 60 | min. | |
| 48 kHz 55 | min. | ||
| 88.2 kHz 30 | min. | ||
| 96 kHz 25 | min. | ||
| 176.4 kHz 15 | min. | ||
| 192 kHz 13 | min. | ||
| DSD | DSDIFF | 2.8 MHz 22 | min. |
| 5.6 MHz 11 | min. | ||
| DSF | 2.8 MHz 22 | min. | |
| 5.6 MHz 11 | min. | ||
5 – Folder and file operations (BROWSE screen)
This unit manages audio files on SD cards, CF cards and USB flash drives in a folder structure.
You can select the folder or file that you want to work with on the BROWSE screen and open file or folder menu pop-up.
In these menus, you can create folders, delete folders and files, change their names and add files to playlists, for example.
Moreover, you can also move and copy folders and files between folders using a direct operation from the BROWSE screen.
TIP
- By using a card reader or other interface to read files on SD/CF/USB media from a computer, you will be able to use your computer to modify the folder structure, edit folder and file names, and delete folders and files.
- If you perform this type of editing from your computer, be aware that the playback order of the files on the unit may have changed.
Opening the BROWSE screen
The following operation example assumes that an SD card has been loaded and selected as the current media.
- Press the MENU button to open the GENERAL page of the menu screen, and turn the MULTI JOG dial to select BROWSE.
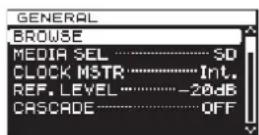
- Press the MULTI JOG dial to open the BROWSE screen.
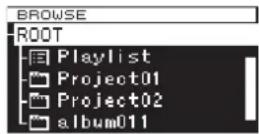
NOTE
During selection, press the EXIT/CANCEL [PEAK CLEAR] button to cancel the selection and return to the menu screen.
BROWSE screen navigation
Folders and music files appear on the BROWSE screen in a hierarchical structure much as they would appear on a computer.
When the BROWSE screen is open, use the main unit MULTI JOG dial or ◀◀ [I◀◀]/▶▶ [▶▶] buttons (or or remote control F3/F4 or ◀◀ [I◀◀]/▶▶ [▶▶] buttons) to select folders and files that you want to work with.
- Press the MULTI JOG dial to open the folder or file menu pop-up. (See "Folder operations" on page 33.) (See "File operations" on page 33.)
- Press the EXIT/CANCEL [PEAK CLEAR] button to move up one level in the file structure. When using the folder or file menu, press this to go back one step.
- Turn the MULTI JOG dial, or use the remote control F3/F4 buttons to select a subfolder or file inside the same folder.
- When a folder or a file is selected, press the main unit or remote control ◀◀ [I◀◀] button to move up a level in the file structure, or press the ▶▶ [▶▶I] button to move down a level. When a folder is selected, you can press the MULTI JOG dial to change levels even when the folder menu pop-up SELECT item is selected. When the top line on the BROWSE screen is selected, press the MULTI JOG dial to move up one level. When any other line is selected press the MULTI JOG dial to move down one level.
- When a folder or file is selected, press the main unit HOME/ DISPLAY button (or remote control F1 button) to return to the Home Screen.
- When a folder or a file is selected, press the main unit or remote control PLAY button to return to the Home Screen and start playback of the selected folder or file.
- When a folder or a file is selected, press the PAUSE button to return to the Home Screen and put the unit into a playback pause state at the beginning of that folder or file.
Icons on the BROWSE screen
The meanings of icons that appear on the BROWSE screen are as follows.
Playlist (圃)
The playlist 📂 on is followed by the playlist name. (See "Opening the playlist screen" on page 46.)
Folder (
The folder ☐tion is followed by the folder name.
Audio file (
The audio file fon is followed by the audio file name.
NOTE
The current folder does not have a special icon. The current folder always appears at the top of the BROWSE screen.
5 – Folder and file operations (BROWSE screen)
Folder operations
Select the desired folder on the BROWSE screen and press the MULTI JOG dial to open the folder menu pop-up.
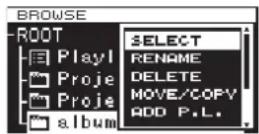
Turn the MULTI JOG dial to select the item that you want, and press the MULTI JOG dial to execute the operation.
NOTE
When a protected SD card is loaded, the RENAME, DELETE, ADD P.L. and CREATE items cannot be used. (See "SD card write protection" on page 20.)
SELECT
Open the selected folder.
NOTE
When a folder is selected, you can also press the main unit or remote control ▶▶ [▶▶] button to open a folder.
RENAME
Open the RENAME screen where you can edit the name of the selected folder. (See "Editing folder and file names" on page 34.)
DELETE
Delete the selected folder. (See "Deleting folders and files" on page 34.)
MOVE/COPY
Move/copy the selected subfolder to a different folder. (See "Moving and copying folders and files" on page 35.)
ADD P.L.
Register all the files in the selected folder in the desired playlist. (See "Registering folders and files in a playlist" on page 35.)
INFO
Show information (total number of files, total time/size and last change date) about the selected folder in a pop-up. (See "Viewing folder and file information" on page 36.)
CREATE
Creates a new folder. (See "Creating new folders" on page 36.)
CANCEL
Do not conduct any operation on the selected folder, and close the folder menu.
File operations
Select the desired file on the BROWSE screen and press the MULTI JOG dial to open the file menu pop-up.
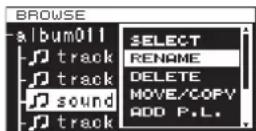
Turn the MULTI JOG dial to select the item that you want, and press the MULTI JOG dial to execute the operation.
NOTE
When a protected SD card is loaded, theRENAME, DELETE, ADD P.L.and MOVE/COPY items cannot be used. (See "SD card write protection" on page 20.)
SELECT
Open the selected file, and return to the Home Screen.
RENAME
Open the RENAME screen where you can edit the name of the selected file. (See "Editing folder and file names" on page 34.)
DELETE
Delete the selected file. (See "Deleting folders and files" on page 34.)
MOVE/COPY
Move the selected file to a different position in the same folder, or move/copy it to a different folder. (See "Moving and copying folders and files" on page 35.)
ADD P.L.
Add the selected file to the desired playlist. (See "Registering folders and files in a playlist" on page 35.)
INFO
Show information about the selected file. (See "Viewing folder and file information" on page 36.)
File information is shown on two pages. Press the MULTI JOG dial to open the second page.
1st page: Total track time/file size File format/recording mode (stereo/mono)
Sampling frequency
2nd page: Creation date
DIVIDE
Divide the selected file into two files. (See "Dividing files" on page 37.)
UNDO
Immediately after dividing a file, you can undo the operation, restoring files to their previous state. (See "Undoing file division (UNDO/REDO)" on page 38.)
REDO
This option appears only immediately after undoing a file division. Use it to execute the same division again, restoring the files to the state before the undo operation. (See "Undoing file division (UNDO/REDO)" on page 38.)
CANCEL
Do not conduct any operation on the selected file, and close the file menu.
5 – Folder and file operations (BROWSE screen)
Editing folder and file names
- Select the folder or file with the name that you want to edit, and press the MULTI JOG dial to open the folder or file menu pop-up.
- Turn the MULTI JOG dial to select RENAME.
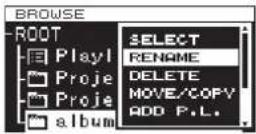
Folder menu
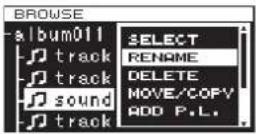
File menu
- Press the MULTI JOG dial to open the RENAME screen.
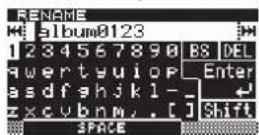
- Edit the name of the folder or file.
For details about editing folder and file names, see "Inputting and editing characters" on page 31.
- When you are done editing the folder or file name, turn the MULTI JOG dial to select Enter, and press the MULTI JOG dial to confirm the name change.
"RENAMING..." appears in a pop-up, and the folder or file name is changed.
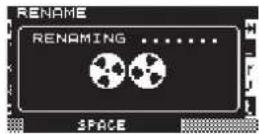
After the folder or file name is changed, the BROWSE screen reopens.
CAUTION
- You can also directly access SD/CF/USB media from a computer to change the names of files, but doing so could change the previous playback order of the files.
- Names that contain characters other than the letters of the alphabet, numbers and symbols cannot be edited (the name will not appear when the RENAME function is being used).
- The following symbols and punctuation marks cannot be used in names.
$$ \yen \backslash /; \therefore , ^ {*}? ^ {\prime \prime} < > | $$
NOTE
In addition to using the BROWSE screen to select a folder or file to change its name, you can also use the RENAME item on the TRACK EDITpage of the menu screen to edit the name of the selected folder or file.
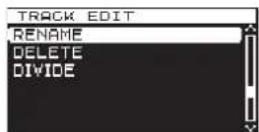
Deleting folders and files
You can delete folders and files from SD cards, CF cards and USB flash drives.
If you delete a folder, all the files in it will also be deleted.
- Select the folder or file that you want to delete, and press the MULTI JOG dial to open the folder or file menu pop-up.
- Turn the MULTI JOG dial to select DELETE.
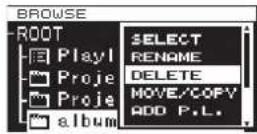
Folder menu
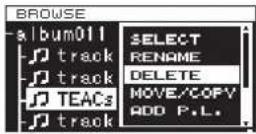
File menu
- Press the MULTI JOG dial.
A confirmation pop-up message appears.
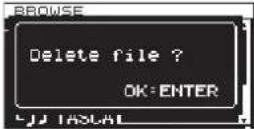
NOTE
Press the EXIT/CANCEL [PEAK CLEAR] button to cancel deletion.
- Press the MULTI JOG dial again to delete the selected folder or file from the SD card, CF card or USB flash drive. While the folder or file is being deleted, "DELETING FILE..." appears in a pop-up.
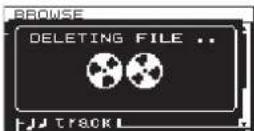
After deletion completes, the BROWSE screen reopens.
NOTE
In addition to using the BROWSE screen to select a folder or file to delete, you can also use the DELETE item on the TRACK EDITpage of the menu screen to delete the selected folder or file.
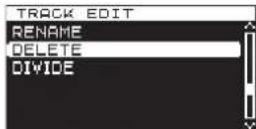
Moving and copying folders and files
- Select the folder or file that you want to move or copy, and press the MULTI JOG dial to open the folder or file menu pop-up.
- Turn the MULTI JOG dial to select MOVE/COPY.
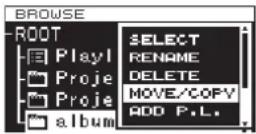
Folder menu
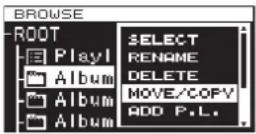
File menu
- Press the MULTI JOG dial.
The name of the folder or file that will be moved or copied blinks on the BROWSE screen.
- Use the MULTI JOG dial to open the destination folder for the item to be moved or copied on the BROWSE screen. To move to a location at a higher level in the folder structure, choose the higher folder (at the top of the list).
If you move the cursor to a place where folder and file names are shown, the name of the folder or file that will be moved or copied blinks.
- Press the MULTI JOG dial to open the MOVE OR COPY selection pop-up.
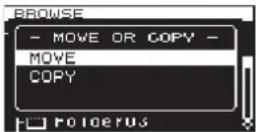
NOTE
If the destination is in the same folder as the sub folder or file selected, copying is not possible so the MOVE OR COPY pop-up will not appear Only moving is possible within the same folder.
- Select MOVE to move the folder or file from its previous location. Select COPY to copy the folder or file. Then, press the MULTI JOG dial to confirm the move or copy operation. Depending on the selected item, "MOVING..." or "COPYING..." appears in a pop-up, and the folder or file is moved or copied.
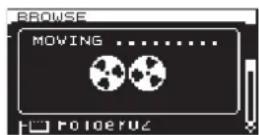
After selecting MOVE
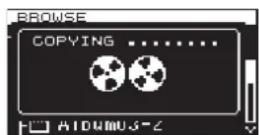
After selecting COPY
After moving or copying completes, the BROWSE screen reopens.
NOTE
After using MOVE, the moved folder or file will not remain in its original folder location.
After using COPY, the copied folder or file will also remain in its original folder location.
Registering folders and files in a playlist
You can add folders and files to the playlist that you want.
- Select the folder or file that you want to add to the playlist, and press the MULTI JOG dial to open the folder or file menu pop-up.
- Turn the MULTI JOG dial to select ADD P.L.
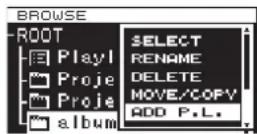
Folder menu
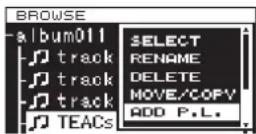
File menu
- Press the MULTI JOG dial to add the folder or file to the current playlist, and return to the BROWSE screen.
NOTE
• If you select a folder, all the files in the folder will be added to the playlist. Files in subfolders, however, will not be added.
• A maximum of 100 tracks can be added to a playlist.
- If you attempt to add more than 100 tracks, a P.LIST FULL warning message pop-up will appear, and the track(s) will not be added.
• The files will be inserted at the end of the current playlist*.
*Current playlist: This will be "Playlist001" if the media is new. If other playlists have been created, the last opened playlist will be the current playlist. For details, see "Opening the playlist screen" on page 46.
5 – Folder and file operations (BROWSE screen)
Viewing folder and file information
You can view folder and file information.
- Select the folder or file that you want to check, and press the MULTI JOG dial to open the folder or file menu pop-up.
- Turn the MULTI JOG dial to select INFO.
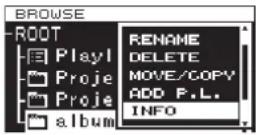
Folder menu
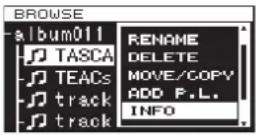
File menu
- Press the MULTI JOG dial to open the folder or file information pop-up.
File information is shown on two pages. Press the MULTI JOG dial again to switch to the second information page.
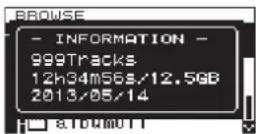
Folder menu
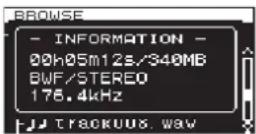
File menu
- After checking the information, press the MULTI JOG dial or EXIT/CANCEL [PEAK CLEAR] button to return to the BROWSE screen.
Creating new folders
- Select the folder where you want to create a new subfolder, and press the MULTI JOG dial to open the folder menu pop-up.
- Turn the MULTI JOG dial to select CREATE.
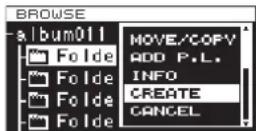
- Press the MULTI JOG dial to open the CREATE screen.
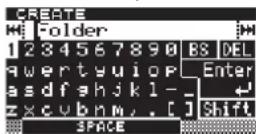
4 Input the folder name. For details about how to input a folder name, see "Inputting and editing characters" on page 31.
5. After inputting the folder name, turn the MULTI JOG dial to select Enter, and press the MULTI JOG dial to confirm the name.
A confirmation pop-up message appears.
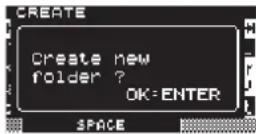
NOTE
To cancel the creation of a folder, press the EXIT/CANCEL [PEAK CLEAR] button.
- Press the MULTI JOG dial to create the new folder. "CREATING..." appears in a pop-up, and the new folder is created.
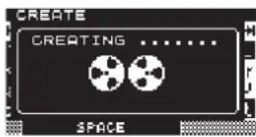
After the new folder is created, the BROWSE screen reopens.
NOTE
- The maximum number of folders that can be created on a single SD card, CF card or USB flash drive is 3000.
- When using media with a capacity of 2 GB or less, creating the maximum number of folders in the root folder as shown above might not be possible due to file system limitations. (The exact number depends on use conditions.)
5 – Folder and file operations (BROWSE screen)
Dividing files
You can divide a file into two files at any position you like.
-
Select the file that you want to divide, and press the MULTI JOG dial to open the file menu pop-up.
-
Turn the MULTI JOG dial to select DIVIDE.
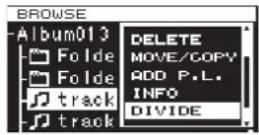
- Press the MULTI JOG dial to open the DIVIDE screen.
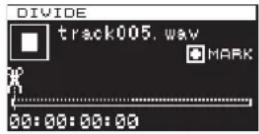
- Use the following controls to set the DIVIDE point.
PressthePLAY button to play the file
PresstheSTOP button to stop playback
Press and hold the ◀◀[I◀◀]/▶▶ [▶▶I] button to search
TurntheMULTI JOG dial to move between mark positions
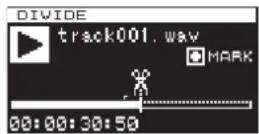
- After finding the approximate position where you want to divide the file using the above operations, press the PAUSE button to enter scrub playback mode.
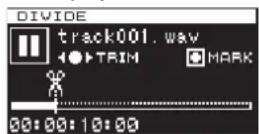
In scrub playback mode, you can turn the MULTI JOG dial to move 20 msec at a time.
- After confirming the division point, press the MULTI JOG dial. A confirmation pop-up message appears.
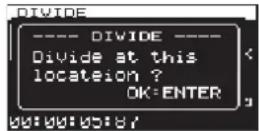
NOTE
To cancel the division of a file, press the EXIT/CANCEL [PEAK CLEAR] button.
- Press the MULTI JOG dial to divide the file.
"DIVIDING..." appears in a pop-up, and the file is divided.
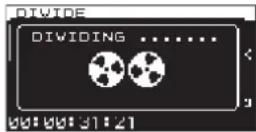
After dividing completes, the BROWSE screen reopens.
NOTE
- When stopped, you can press the EXIT/CANCEL [PEAK CLEAR] button to return to the BROWSE screen without dividing.
- You cannot move to the beginning or end of a track by using the ◀◀[1◀◀]/▶▶[▶▶1] buttons. You can only make fine adjustments with the MULTI JOG dial when in scrub playback mode. By pressing and holding the ◀◀[1◀◀]/▶▶[▶▶1] buttons, you can move the division point continuously.
• After dividing a file, two new files with "_a" and "_b" added to the end of the original file name are created.
Example:
File name before division
TASCAM_0000.wav
File names after division
TASCAM_0000_a.wav (part before division point)
TASCAM_0000_b.wav (part after division point)
- In addition to using the BROWSE screen to select a file for division, you can also use the DIVIDE item on the TRACK E DIPage of the menu screen to divide the selected file.
CAUTION
- Division is not be possible if the full file path and file name would have a total of more than 255 characters.
- If the name of a file after division would be the same as that of an existing file, division is not possible and a "- CANNOT DIVIDE - Duplicate name error." pop-up message will appear.
TIP
- You can add a mark during recording at a position where you want to divide a file. (See "Adding marks when recording" on page 29.)
5 – Folder and file operations (BROWSE screen)
Undoing file division (UNDO/REDO)
This function can only be used after dividing a file.
Immediately after dividing a file, you can undo the operation, restoring the file to its previous state.
Immediately after undoing a file division, the UNDO option becomes REDO. Use it to execute the same division again, restoring the files to the state before the undo operation. (The division point setting will be the same as when the DIVIDE operation was first conducted.)
UNDO and REDO options only appear after a file has been divided.
-
Select the file that was divided, and press the MULTI JOG dial to open the file menu pop-up.
-
Turn the MULTI JOG dial to select UNDO.
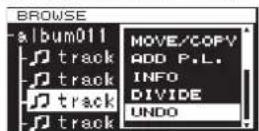
- Press the MULTI JOG dial.
A confirmation pop-up message appears.
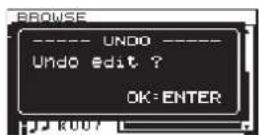
NOTE
To cancel an UNDO operation, press the EXIT/CANCEL [PEAK CLEAR] button.
- Press the MULTI JOG dial to undo the file division.
"UNDO WORKING..." appears in a pop-up, and the file division is undone.
After completing the undo, the BROWSE screen reopens. The file that the undo operation was conducted on will be selected.
-
After undoing a file division, if you want to redo the division, you can execute the REDO menu item. Press the MULTI JOG dial to open the file menu pop-up.
-
Turn the MULTI JOG dial to select REDO.
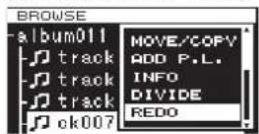
- Press the MULTI JOG dial to open a confirmation pop-up message.
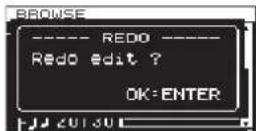
NOTE
To cancel an REDO operation, press the EXIT/CANCEL [PEAK CLEAR] button.
- You can press the MULTI JOG dial to REDO the operation. "REDO WORKING..." appears in a pop-up, and the file is divided again.
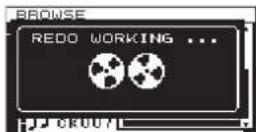
After the redo operation completes, the BROWSE screen reopens.
NOTE
The division of the currently selected file cannot be undone or redone from the BROWSE screen. To undo or redo file division, use the UNDO and REDO items on the TRACK E DI menu page.
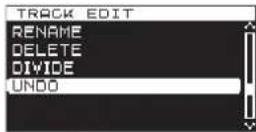
To UNDO file division
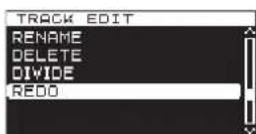
To REDO file division
In this chapter we explain the playback functions for audio files stored on SD cards, CF cards and USB flash drives.
The following explanations assume that an SD card, CF card or USB flash drive that contains an audio file is loaded in the unit, that the unit is on and that the current media is set appropriately. (See "Selecting the media used" on page 21.)
playable file types
This unit can play files with the following formats.
- WAV and BWF formats (wav extension)
(44.1/48/88.2/96/176.4/192kHz sampling frequency, 16/24-bit)
• DSDIFF format (dff extension) (2.8224/5.6448MHz sampling frequency)
• DSF format (dsf extension) (2.8224/5.6448MHz sampling frequency)
TIP
This unit can play back a file even if it did not record it if the file is in one of the above formats. For example, if you use a computer or another audio device to copy a file that meets the above conditions to an SD card, CF card or USB flash drive and load that media in this unit, playing that file should be possible. In other words, you can efficiently prepare materials for playback on this unit.
Files and tracks
Audio data is saved on media in "files."
If the MODE item on the CHANNEL screen is set to STEREO, one stereo file will be used as one track. If set to MONOx2, two mono files will be used as one track. (See "Setting the recording file format" on page 23.)
When explaining recording and playback in this manual, we usually refer to audio files as "tracks" (or sometimes as "songs"). We mainly use the term "files" when explaining media management. In any case, these terms refer to the same thing.
Basic playback operations
This section explains basic operations including starting playback, playback standby and stopping.
The following explanation assume that you have completed the necessary connections, that the unit power is ON, the current device is set, media containing audio files is loaded in that device and the Home Screen is open.
Playback
To start playback, press the PLAY button (or remote control PLAY button).
If no audio file that can be played back by this unit is on the current media, the Home Screen will appear as follows.
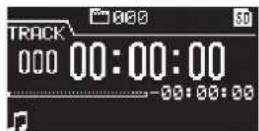
To stop playback:
Press the STOP button.
To pause playback and enter playback standby:
Press the PAUSE button.
Selecting tracks
If the play area has more than one track, you can either skip backward or forward to the track or enter the track number directly to select a track for playback.
Skipping to the previous or next track
Use the ◀◀[1◀◀]/▶▶[▶▶] buttons on the main unit or remote control to skip tracks.
Selecting tracks directly
On the BROWSE screen, you can turn the MULTI JOG dial to select a track, and press the PLAY button to start playing it.
Searching backward and forward
You can search forward or backward in a track while listening to the audio.
- Play the desired track or put it into playback standby.
- Press and hold the ◀◀[◀◀]/▶▶[▶▶] button on the front panel or remote control to start searching backward or forward.
The usual backwards / forwards speed is 10x normal playback, but pressing the ▶▶ [▶▶] button when searching backward or pressing the ◀◀ [I◀◀] button when searching forward at the same time will increase the speed to 100x for as long as that button is kept pressed. - To stop searching, release the button you are holding. The unit will return to the state it was in before searching (playback standby or playback).
NOTE
- If you search forward to the end of a track, searching will skip to the beginning of the next track and continue.
- If you search forward to the end of the last track, the unit will enter playback standby unless the repeat setting is ON, in which case searching will skip to the beginning of the first track and continue. (See "Repeat playback" on page 41.)
- If you search backward to the beginning of a track, searching will skip to the end of the previous track and continue.
- If you search backward to the beginning of the first track, the unit will enter playback standby unless the repeat setting is ON, in which case searching will skip to the end of the last track and continue. (See "Repeat playback" on page 41.)
Locating to specific positions
If you use a USB keyboard with a number pad or a USB number pad, you can locate to specific positions when the unit is stopped, playing back or in playback standby.
Press the * (asterisk) key to clear the track number and time display and prepare the unit to receive numeric input.
Use the numeric keypad to enter numbers in the following order.
● Track number: 3 digits
● Elapsed time from track beginning: 2 digits each for hours, minutes, seconds
For example, if you want to specify a location that is 1 minute 30 seconds from the beginning of track 2, you would press keys in the following order.
$$ 0 \rightarrow 0 \rightarrow 2 \rightarrow 0 \rightarrow 0 \rightarrow 0 \rightarrow 1 \rightarrow 3 \rightarrow 0 $$
When you finish entering the nine digits, the unit will automatically locate to the specified position.
After locating to the new position, the unit will resume the same status as before (stopped, in playback standby or playing back).
This means playback will start automatically from the located position only during playback
Locating to a position after partial entry
If you press the press the MULTI JOG dial, PLAY button or PAUSE button on the front panel (or remote control PLAY button or F1 button) before you finish entering the time, you will locate to the position that is specified at that point.
For example, suppose you input only:
$$ 0 \rightarrow 0 \rightarrow 2 \rightarrow 0 \rightarrow 0 \rightarrow 1 \rightarrow 2 $$
Then, if you press the MULTI JOG dial, PLAY button or PAUSE button, the unit will locate to 12 minutes after the beginning of track 2.
The button pressed when locating determines what happens after locating.
MULTI JOG dial pressed:
The unit resumes playback or playback standby according to the status before locating.
PLAY button pressed:
Playback starts.
PAUSE button pressed:
The unit enters playback standby.
Remote control PLAY button pressed:
If playing back before locating, playback pauses after locating.
If stopped or in playback standby before locating, playback starts after locating.
Adding marks manually during playback
When stopped, when in playback standby or during playback, you can add marks manually to the track in any positions you like. During track playback, you can move quickly to marks.
Adding marks during playback
When a track is stopped, playing back or in playback standby, press the MULTI JOG dial (or remote control MARK button) at any point where you want to add a mark.
NOTE
• Each track can store information for a maximum of 99 added marks.
- You can also add marks during recording. (See "Adding marks manually during recording" on page 29.)
- When adding a mark manually, the Mark Name "MARKxxx" * is used.
* "xxx" is a number that increments through all MARKs in this track.
Locating to marks
When a track is stopped, playing back or in playback standby, you can turn the MULTI JOG dial (or use the remote control F3[+]/F4[-] buttons) to locate to marks.
Turn the MULTI JOG dial right to locate to the nearest later mark or left to locate to the nearest previous mark from the current position.
When locating to a MARK point, that MARK point's name is displayed in the button section of the HOME screen. Also, if a MARK point is passed during playback, that MARK point's name is also displayed.
By pressing the HOME/DISPLAY button, the MARK Point name for the current position is also displayed.
Deleting marks
You can delete an added mark when stopped or when in playback standby.
- Move to the mark that you want to delete. (See "Locating to marks" on page 40.)
- Press the MULTI JOG dial to open the DELETE MARKS pop-up.
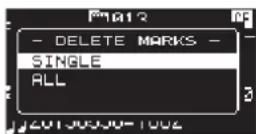
- Turn the MULTI JOG dial to select whether to delete one mark or all marks in a file.
Options:
SINGLE: Delete only the selected mark.
ALL: Delete all the marks added to the current file.
- Press the MULTI JOG dial to delete the mark or marks. If you selected SINGLE, the Home Screen will reappear after the selected mark is deleted.
If you selected ALL, a confirmation pop-up message will appear.
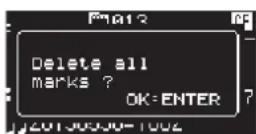
Press the MULTI JOG dial again to delete all the marks added to the current file.
The Home Screen will reappear after all the marks are deleted.
NOTE
To cancel marked deletion, press the EXIT/CANCEL [PEAK CLEAR] button.
Setting the PLAY Mode
Setting the PLAY mode.
- Press the MENU button to open the menu screen PLAY FUNC page, and turn the MULTI JOG dial to selectPLAY MODE.
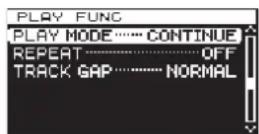
- Press the MULTI JOG dial to open the PLAY MODE screen.
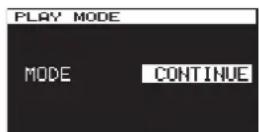
- Turn the MULTI JOG dial to select the Play mode.
Options: "CONTINUE" (default) - Continues to play all tracks from track 1 through to the last one.
"SINGLE" - Plays only the currently selected track.
- Press the MULTI JOG dial to confirm the selection and return to the menu screen.
NOTE
By using the combination of Repeat Playback and Play Mode = SINGLE, a single track can be looped endlessly.
Repeat playback
You can set the unit to play tracks repeatedly.
- Press the MENU button repeatedly to open the PLAY FUNC menu, and turn the MULTI JOG dial to selectREPEAT.
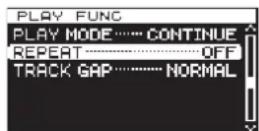
- Press the MULTI JOG dial to open the REPEAT screen.
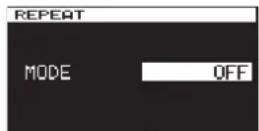
- Turn the MULTI JOG dial to select the repeat playback mode. Options:
OFF (default): Repeat playback disabled ON: Repeat playback enabled
- Press the MULTI JOG dial to confirm the selection and return to the menu screen.
- After completing the setting, press the HOME/DISPLAY button (or remote control F2 button) to return to the Home Screen.
- Select the track that you want to play back repeatedly and start playback.
Setting gapless playback mode
You can set the unit so that gaps (silent intervals) between tracks during playback are eliminated.
If you want audio data, including tracks recorded using the auto track and track increment functions, to play back continuously without gaps between tracks, set the track gap mode to GAPLESS. When the track gap mode is NORMAL, brief silences will occur between tracks.
- Press the MENU button to open the menu screen PLAY FUNC page, and turn the MULTI JOG dial to select TRACK GAP.
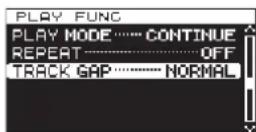
- Press the MULTI JOG dial to open the TRACK GAP screen.
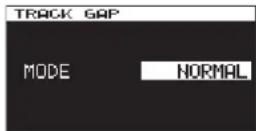
- Turn the MULTI JOG dial to select the track gap mode. Options: NORMAL (default), GAPLESS
- Press the MULTI JOG dial to confirm the selection and return to the menu screen.
CAUTION
- If GAPLESS is selected during DSD file playback Depending on the status of the audio data, noise might occur at the division between tracks due to the nature of DSD files. If the noise is bothersome, set the track gap mode to NORMAL to avoid it. (Noise will not occur during the gapless playback of audio from tracks created using this unit's auto track and track increment functions, for example.)
- When using the cascade function Set both the master and slave units to the same track mode. If the units do not have the same setting, they will not be able to synchronize when tracks change. When the track gap mode is set to NORMAL, since the slave unit waits for a playback start signal from the master unit after each track ends, if the slave unit is played by itself, each time a track ends, playback will pause at beginning of the next track.
7 - Recording/playback with cascade connections
Overview of the cascade function
Using the cascade connection capability of the DA-3000, multiple DA-3000 units can be controlled simultaneously.
A multichannel system can be realized by synchronizing recording and playback.
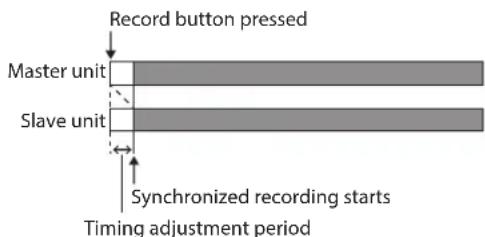
Recording and playback with cascade connections involves the following two types of synchronization (timing and clock).
Timing synchronization
Depending on the cascade setting, slave units will synchronize to the master unit when recording/playback starts.
Clock synchronization
During recording and playback, the internal clock of the master unit or an external clock generator is used to synchronize.
CAUTION
The following functions cannot be used during synchronized recording/playback using cascade connections.
- The included RC-10 remote control cannot control slave units.
• PCM recording using the DIGITAL IN (AES/EBU) jacks is not possible.
• PCM recording using the DIGITAL IN (S/PDIF / CASCADE) jacks is not possible.
• Sync recording functions are unavailable. - LEVEL, DD and TIME mode auto track functions are disabled.
• Auto mark functions are unavailable.
Connections and preparations
Preparing media
When conducting synchronized recording and playback, use identical media (same brand, capacity and model number) in the master and slave units. Use of different media could cause media access speed differences, resulting in synchronization discrepancies and other unpredictable problems.
We have posted a list of media that we have confirmed for use with cascade operation on the TEAC Global Site (http://teac-global.com/).
Selecting the media
Set the media for the devices (master and slave) to be cascaded. Select the same type of media for all devices (CF or SD).
See "Selecting the media used" on page 21 for details.
Preparing cables
Use high-quality digital coaxial cables (75Ω impedance) for cascade connections. (Do not use analog RCA cables. Doing so could cause malfunction.)
When using word clock, connect with high-quality BNC cables(75Ω impedance).
Setting the recording file format
When recording, set the master and slave units to use the same recording file format. (Recording and playback is possible with the units that are using different file formats and sampling frequencies, but synchronization will not occur with sampling frequency precision.) (See "Setting the recording file format" on page 23.)
CAUTION
During cascade operation, do not record files with different file formats or sampling frequencies inside the same folder or copy such files from a computer. Doing so could cause malfunction.
7 - Recording/playback with cascade connections
Connecting and setting the devices
Connect the master and slave devices.
Connect the devices in the following manner according to the synchronization method.
CAUTION
When installing units on top of each other, leave space between units to allow good heat dispersal.
When mounting them in a rack, leave at least 1U open above each unit.
Synchronizing using S/PDIF with the master unit as the clock master
Connections
Use a coaxial digital cable to connect the master unit DIGITAL OUT to the slave unit DIGITAL IN (S/PDIF / CASCADE).
When connecting a second slave unit, use a coaxial digital cable to connect the first slave unit DIGITAL OUT to the second slave unit DIGITAL IN (S/PDIF / CASCADE).
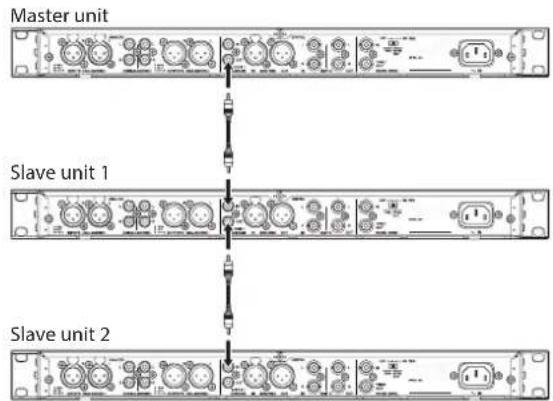
Settings
Press the MENU button to open the GENERAL page of the menu screen. Set the CLOCK MSTRand CASCADE items as follows. (See "Setting the master clock" on page 25.) (See "Setting master and slave units" on page 44.)
| GENERAL Page | ||
| CLOCK MSTR setting | CASCADE setting | |
| Master unit | Internal MASTER | |
| Slave unit D | IN SLAVE | |
Using the master unit as the clock master for word clock synchronization
Connections
Use a coaxial digital cable to connect the master unit DIGITAL OUT to the slave unit DIGITAL IN (S/PDIF / CASCADE) and a BNC cable to connect the WORD SYNC THRU/OUT to the slave unit WORD SYNC IN.
When connecting a second slave unit, use a coaxial digital cable to connect the first slave unit DIGITAL OUT to the second slave unit DIGITAL IN (S/PDIF / CASCADE) and a BNC cable to connect the first slave unit WORD SYNC THRU/OUT to the second slave unit WORD SYNC IN.
Master unit
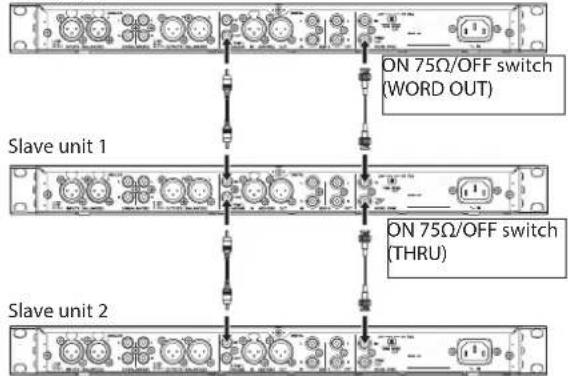
In addition, set the 75Ω ON/OFF [THRU/WORD OUT] switches on the master and slave units as follows.
| ON 75Ω/OFF [THRU/WORD OUT] switch | ||
| ON 75Ω/OFF THRU/WORD OUT | ||
| Master unit | ON WORD OUT | |
| Slave unit OFF THRU | ||
| Slave unit (last) | ON WORD OUT | |
Settings
Press the MENU button to open the GENERAL page of the menu screen. Set the CLOCK MSTR and CASCADE items as follows. (See "Setting the master clock" on page 25.) (See "Setting master and slave units" on page 44.)
| GENERAL page | ||
| CLOCK MSTR setting | CASCADE setting | |
| Master unit | Internal | MASTER |
| Slave unit | WORD | SLAVE |
7 – Recording/playback with cascade connections
■ing an external clock generator as the clock master
Connections
Use coaxial cables to connect the master and slave unit DIGITAL IN/OUT (S/PDIF / CASCADE) connectors as shown below.
Use BNC cables to connect the external clock generator word clock output connectors to the master and slave unit WORD SYNC IN connectors.
Set their 75Ω ON/OFF [THRU/WORD OUT] switches to ON 75Ω/WORD OUT.
External clock generator
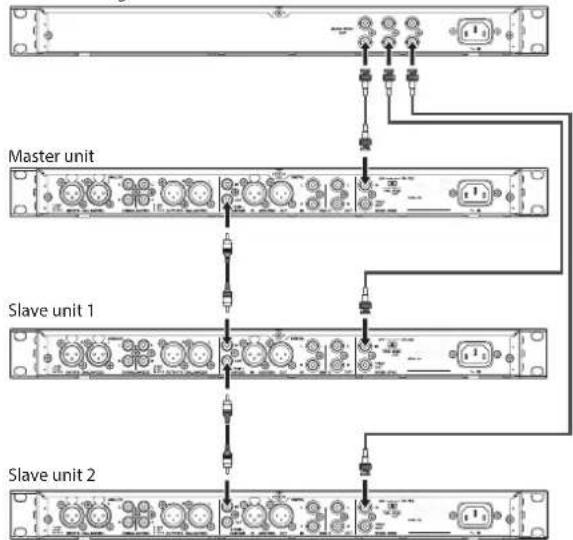
flowchart
graph TD
    A["Master unit"] --> B["Terminal Block"]
    C["Slave unit 1"] --> D["Terminal Block"]
    E["Slave unit 2"] --> F["Terminal Block"]
    B --> G["Terminal Block"]
    D --> H["Terminal Block"]
    F --> I["Terminal Block"]
    style A fill:#f9f,stroke:#333
    style C fill:#f9f,stroke:#333
    style E fill:#f9f,stroke:#333
Settings
Press the MENU button to open the GENERAL page of the menu screen. Set the CLOCK MSTRand CASCADE items as follows. (See "Setting the master clock" on page 25.) (See "Setting master and slave units" on page 44.)
| GENERAL | ||
| CLOCK MSTR setting | CASCADE setting | |
| Master unit | WORD MASTER | |
| Slave unit | WORD SLAVE | |
Setting master and slave units
- Press the MENU button to open the GENERAL page of the menu screen, and turn the MULTI JOG dial to select CASCADE
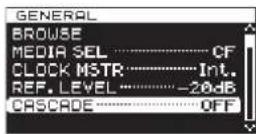
- Press the MULTI JOG dial to open the CASCADE screen.
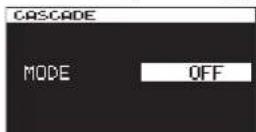
-
Turn the MULTI JOG dial to set the unit to MASTER or SLAVE. Options: OFF (default), MASTER, SLAVE
-
Press the MULTI JOG dial to confirm the setting and return to the menu screen.
7 – Recording/playback with cascade connections
Using cascaded units
When operating cascaded units, the following general rules apply to recording and playback.
Playing back both master and slave units
Synchronized playback from both the beginnings and the middles of tracks is possible.
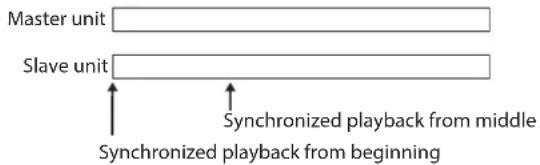
Operation:
- Press the master unit PLAY button to start playback of both master and slave units and its STOP button to stop synchronized playback.
- During synchronized playback, press the master unit PAUSE button to pause playback.
- Use the master unit ◀◀[I◀◀]/▶▶[▶▶I] buttons to skip tracks, and press and hold the ◀◀[I◀◀]/▶▶[▶▶I] buttons to search backward/forward. (See "Skipping to the previous or next track" on page 39.) (See "Searching backward and forward" on page 39.)
- Press the master unit MULTI JOG dial to add marks to the master and slave units. (See "Adding marks during playback" on page 40.)
- Turn the MULTI JOG dial to move to marks set on the master unit. (See "Locating to marks" on page 40.)
NOTE
- When searching backward/forward, differences in operation speed might occur between the master and slave units.
- Moving to marks set on a slave unit is not possible.
Recording to both master and slave units
Synchronized recording from the beginnings of tracks is possible.
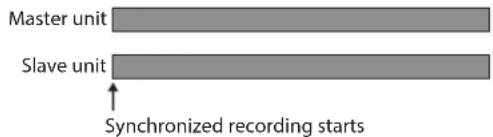
Operation:
- Press the master unit RECORD [TRK INC] button to put both the master and slave units into recording standby. Then, press the master unit PLAY button to start recording. Press the STOP button to stop synchronized recording.
- During synchronized recording, press the master unit PAUSE button to pause recording.
- During synchronized recording, press the master unit RECORD [TRK INC] button to increment the track number (create a new track and continue recording).
- During synchronized recording, if the master unit auto track function is set to SIZE, tracks will be incremented automatically. (See "Creating a higher numbered track manually" on page 28.)
- Press the master unit MULTI JOG dial to add marks to both the master and slave units. (See "Adding marks when recording" on page 29.)
Playing back with the master unit and recording with a slave unit
Playing a track on the master unit from its beginning and simultaneous recording on a slave unit is possible.
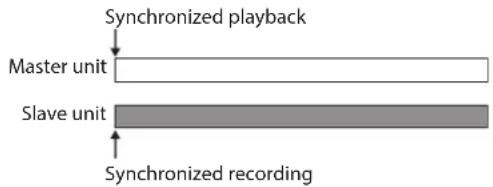
flowchart
graph TD
    A["Synchronized playback"] --> B["Master unit"]
    B --> C["Slave unit"]
    C --> D["Synchronized recording"]
Operation:
Press the slave unit RECORD [TRK INC] button to put it in recording standby. Then press the master unit PLAY button to start master unit playback and synchronized slave unit recording.
CAUTION
During the above synchronized operation, a recording slave unit will not synchronize with the following operations
- Pressing a ◀◀[1◀◀]/▶▶[▶▶] button to skip tracks
- Pressing and holding a ◀◀[1◀◀]/▶▶[▶▶] button to search backward/forward
• Turning the MULTI JOG dial to move to a mark
8 – Editing playlists
Overview of playlist editing
Whenever you load an SD card, CF card or USB flash drive into this unit for the first time, one empty playlist is automatically created on that media. You can also create new playlists.
Opening the playlist screen
You can view playlists from the BROWSE screen.
When you have format media using this unit, a file named "Playlist001" will be created automatically in the Playlist folder, which is in the first level of the ROOT folder. You can also create new playlists inside the Playlist folder. (See "Creating a new playlist" on page 48.)
The following procedures explain how to view "Playlist001," which was automatically created when the media was formatted.
- Press the MENU button to open the GENERAL page of the menu screen, and turn the MULTI JOG dial to select BROWSE.
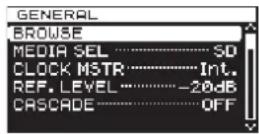
- Press the MULTI JOG dial to open the BROWSE screen.
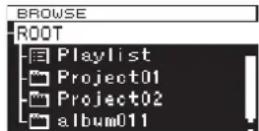
- Select the ROOT folder and turn the MULTI JOG dial to select the Playlist folder.
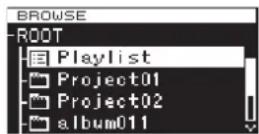
Press the ▶▶ [▶▶] button to enter the Playlist folder, and show Playlist001 that was automatically created.
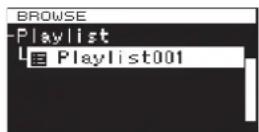
- Press the ▶▶ [▶▶1] button to show the tracks that have been added to Playlist001. If no tracks have been added, it will appear empty.
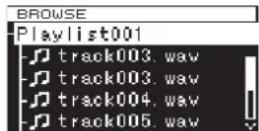
NOTE
With newly formatted media, "Playlist001" will be the current playlist. After other playlists have been created, the last open playlist will be the current playlist.
Registering tracks in a playlist
You can register tracks in a playlist. In addition, you can register a folder to add all the tracks in that folder at one time.
For details, see "Registering folders and files in a playlist" on page 35.
Using the playlist menu
With the "Playlist" folder or a playlist selected, press the MULTI JOG dial to open the playlist pop-up menu. This is the menu to use when you want to work with the "Playlist" folder or a playlist.
NOTE
If you select the "Playlist" folder or the current playlist and open the pop-up menu, the RENAME and DELETE items will not be shown.
SELECT
Set the selected playlist as the current playlist, and show the files that have been added to it. (See "Moving around playlists" on page 47.)
If you select this when the files registered in the playlist are shown, the "Playlist" folder will reopen.
RENAME
Change the playlist name. (See "Changing playlist names" on page 47.)
DELETE
Delete the playlist. (See "Deleting playlists" on page 47.)
INFO
Shows the number of tracks included in the playlist and their total playback time, as well as the playlist creation date in a pop-up.
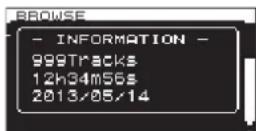
CREATE
Create a new playlist. (See "Creating a new playlist" on page 48.)
NOTE
When a protected SD card is loaded, the RENAME, DELETE and CREATE items cannot be used. (See "SD card write protection" on page 20.)
CANCEL
Do nothing with the currently selected playlist and close the playlist menu.
Moving around playlists
Press the ◀◀[I◀◀] button to move up one level from the current position, and press the ▶▶[▶▶] button to move down one level. You can also press the MULTI JOG dial to open the pop-up playlist menu and select the SELECT item to move up or down a level in the same manner.
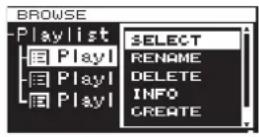
Changing playlist names
- Select the folder that you want to change the name of, and press the MULTI JOG dial to open the playlist pop-up menu.
- Turn the MULTI JOG dial to select RENAME.
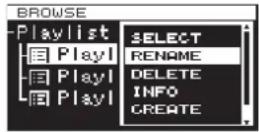
- Press the MULTI JOG dial to open the RENAME screen.
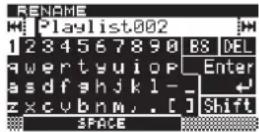
- Edit the playlist name.
See "Inputting and editing characters" on page 31 for details about editing text.
- After you finish editing the playlist name, turn the MULTI JOG dial to select Enter, and press the MULTI JOG dial to confirm the name.
"RENAMING..." appears in a pop-up, and the playlist name is changed.
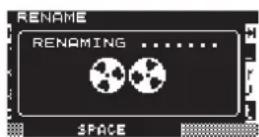
After the playlist name is changed, the BROWSE screen reopens.
CAUTION
- Names that contain characters other than the letters of the alphabet, numbers and symbols cannot be edited (the name will not appear when the RENAME function is being used).
- The following symbols and punctuation marks cannot be used in names.
$$ \yen \backslash /;:, ^ {*}? ^ {\prime \prime} < > | $$
Deleting playlists
Playlists can be deleted.
NOTE
You cannot delete the current playlist.
- Select the playlist that you want to delete and press the MULTI JOG dial to open the playlist pop-up menu.
- Turn the MULTI JOG dial to select DELETE.
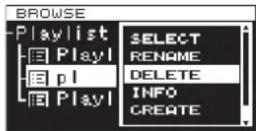
- Press the MULTI JOG dial.
A confirmation pop-up message appears.
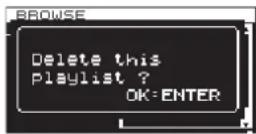
NOTE
To cancel the deletion of a playlist, press the EXIT/CANCEL [PEAK CLEAR] button.
- Press the MULTI JOG dial to delete the selected playlist. During playlist deletion, "DELETING P.LIST." appears in a pop-up.
After deletion completes, the BROWSE screen reopens.
NOTE
When you delete a playlist, the audio files themselves are not deleted. Only the playlist information is deleted.
To delete actual audio files, refer to the instructions in "Deleting folders and files" on page 34.
Creating a new playlist
You can create a new playlist in the current folder.
- On the BROWSE screen, select the "Playlist" folder or a playlist, and press the MULTI JOG dial to open the playlist pop-up menu.
- Turn the MULTI JOG dial to select CREATE.
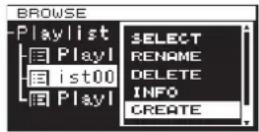
- Press the MULTI JOG dial to open the CREATE screen.
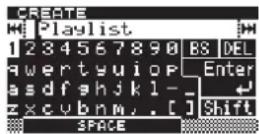
- Input the name that you want to give the playlist. See "Inputting and editing characters" on page 31 for details about editing text.
- After you finish inputting the playlist name, turn the MULTI JOG dial to select Enter, and press the MULTI JOG dial to confirm it.
A confirmation pop-up message appears.
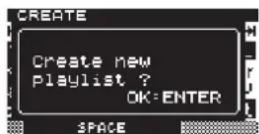
NOTE
To cancel creation of a playlist, press the EXIT/CANCEL [PEAK CLEAR] button.
- Press the MULTI JOG dial to create the new playlist. "CREATING ..." appears in a pop-up, and the new playlist is created.
After creation, the BROWSE screen reopens.
Playlist track menu operations
When a track that has been added to the playlist is selected, press the MULTI JOG dial to open the pop-up playlist track menu.
Use this menu to work with a track that has been added to a playlist.
SELECT
Open a track that has been added to the current playlist, and return to the Home Screen.
ORDER
Change the order of tracks that are already in the playlist. (See "Changing the playlist track order" on page 49.)
REMOVE
Remove a track from the playlist. (See "Removing tracks from playlists" on page 49.)
INFO
The following information is shown for the track that has been added to a playlist.
This information is shown on two pages. Press the MULTI JOG dial to open the second page.
1st page: Total track time/file size
File format/recording mode (stereo/mono)
Sampling frequency
2nd page: Creation date
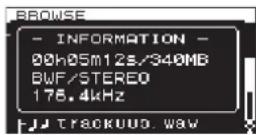
NOTE
When a protected SD card is loaded, the ORDER and REMOVE items cannot be used. (See "SD card write protection" on page 20.)
CANCEL
Do not conduct any operation related to the currently selected playlist track and close the playlist track menu.
Changing the playlist track order
You can change the order of tracks that have been added to a playlist one at a time.
- Select the track that you want to rearrange on the BROWSE screen, and press the MULTI JOG dial to open the playlist track pop-up menu.
- Turn the MULTI JOG dial to select ORDER
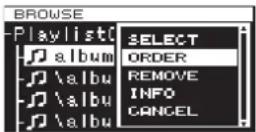
- Press the MULTI JOG dial. The track to be reordered blinks.
- Turn the MULTI JOG dial to move that track to the position in the order where you want it, and press the MULTI JOG dial to confirm the new position. When the "MOVING ..." pop-up appears, the track is being moved.
After completion, the BROWSE screen reopens.
Removing tracks from playlists
To remove a track from a playlist, use the track menuREMOVE item.
This operation only removes tracks from playlists. It does not delete the audio files themselves.
- Choose the track in the playlist that you want to delete and press the MULTI JOG dial to open the playlist track menu pop-up.
- Turn the MULTI JOG dial to select REMOVE.
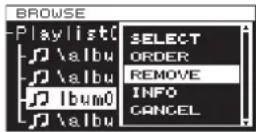
- Press the MULTI JOG dial.
A confirmation pop-up message appears.
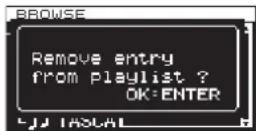
NOTE
To cancel removal, press the EXIT/CANCEL [PEAK CLEAR] button.
- Press the MULTI JOG dial to remove the file from the playlist. "REMOVING ..." appears in a pop-up and the track is removed.
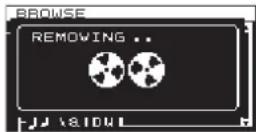
After the track is removed, the BROWSE screen reopens.
NOTE
If you want to delete the audio file itself, see the instructions in "Deleting folders and files" on page 34.
9 – Miscellaneous functions
INFO button and indicator
If you press the INFO button, which is in the middle of the front panel, when its indicator is lit blue, the current operation status of the unit is shown on the display. If you press the INFO button when its indicator is lit red, an error message will appear on the display.
Operation status display (indicator blue)
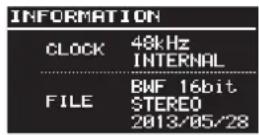
Information shown:
CLOCK Sampling frequency/clock source
FILE File type/quantization bit rate
Recording mode (stereo/mono)
Recording
date
When the indicator is lit blue, each time you press the INFO button, the display will alternate between the operation status and the Home Screen.
Alert display (indicator red)
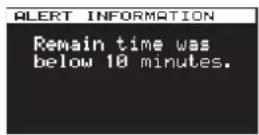
Displayed alert (1)
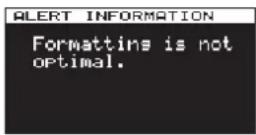
Displayed Alert (2)
Information shown:
(1) The remaining record time is less than 10 minutes. This alert is displayed when a recording has continued past the point that only 10 minutes worth of data will fit on the media.
(2) The media was formatted on a different product or computer. It is possible that recording or playback errors may occur, so it is recommended to re-format the media on this unit.
Once the alert is displayed and acknowledged, Alert (1) will not re-appear until after recording is stopped, and Alert (2) will not re-appear until a different media is inserted.
Error message (indicator red)
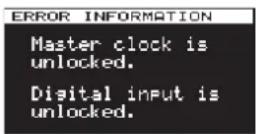
Information shown:
Master clock/digital input error
Pressing the INFO button toggles the display in the order ALERT information → Error Information → Operational Status → Home Screen. The ALERT information and Error displays are only viewable when such an event has occurred and the INFO button is red.
Copying files between media (backing up)
You can copy all the contents of one medium to another (creating a backup).
CAUTION
Before copying (backing up) the destination media is automatically formatted.
- Press the MENU button to open the MEDIA menu, and turn the MULTI JOG dial to select COPY.
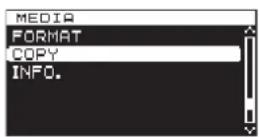
- Press the MULTI JOG dial to open a pop-up with copy (backup) destination options.
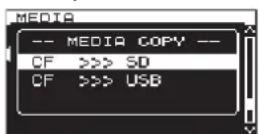
- Turn the MULTI JOG dial to select copy destination. Options:
When the current media is an SD card: SD>>>CF (default), SD>>>USB
When the current media is a CF card:
$$ C F > > > S D, \quad C F > > > U S B $$
When the current media is a USB card:
$$ \text { USB } > > > \text { SD }, \quad \text { USB } > > > \text { CF } $$
- Press the MULTI JOG dial to open a confirmation pop-up message.
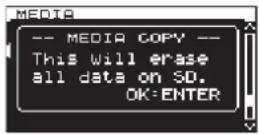
NOTE
To cancel copying (backing up), press the EXIT/CANCEL [PEAK CLEAR] button.
- Press the MULTI JOG dial again to start copying (backing up).
While copying (backing up), "COPYING MEDIA..." appears in a pop-up. When copying (backing up) completes, the menu screen will reopen.
Viewing information about the media
You can view information about the media in the current device.
- Press the MENU button repeatedly to open the M E DIA menu, and turn the MULTI JOG dial to select INFO..
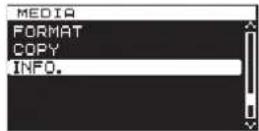
- Press the MULTI JOG dial to open the MEDIA INFORMATION screen.
Information about the current media is shown. You can check its total capacity, open space and total number of folders.
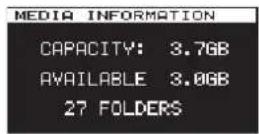
Restoring the factory settings
You can restore all the settings that are stored in the unit's backup memory to the values that they had when shipped from the factory.
Follow these steps using the menu to restore the settings.
- Press the MENU button repeatedly to open the UTILITY menu, and turn the MULTI JOG dial to select F. PRESET
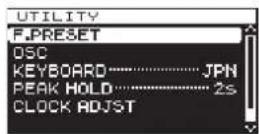
- Press the MULTI JOG dial to open a confirmation pop-up message.
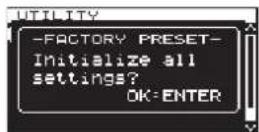
NOTE
To cancel, press the EXIT/CANCEL [PEAK CLEAR] button.
- Press the MULTI JOG dial again to restore the unit settings to their factory defaults.
"READING MEDIA ..." appears in a pop-up.
When restoration completes, the menu screen reappears.
Using a USB keyboard
By connecting a Windows-compatible USB keyboard or numeric keypad to the KEYBOARD connector on the front panel of the main unit, you can use it to operate this unit.
Various types of control are possible, but using a keyboard is particularly efficient for inputting text.
Setting the keyboard type
Set the keyboard type to match the one you have connected.
- Press the MENU button repeatedly to open the UTILITY menu, and turn the MULTI JOG dial to select KEYBOARD.
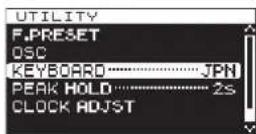
- Press the MULTI JOG dial to open the KEYBOARD TYPE screen.
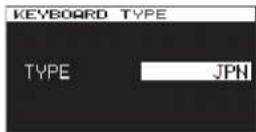
-
Turn the MULTI JOG dial to select US (US English keyboard) or JPN (Japanese keyboard). Options: JPN (default), US
-
Press the MULTI JOG dial to confirm the setting and return to the menu screen.
Using a keyboard to input text
You can input and edit folder and file names in the same way you would type text on a computer.
In character input mode:
You can use and directly input characters with ordinary number, character and symbol keys.
To move the cursor:
Use the ordinary arrow ( and ) keys.
To delete a character:
Delete key: Delete the character at the cursor position.
Backspace key: Delete the character to the left of the cursor position.
To insert a character:
You can input a characters at the desired position (in default insert mode).
If the character input mode is not the default insert mode, press the Insert key to switch to insert mode before inputting the character.
To edit a character:
Press the Insert key to enter overtype mode, and then move the cursor to the character you want to edit and input the new character.
CAUTION
- The following symbols and punctuation marks cannot be used in names.
$$ \yen \backslash /;:, *,? ^ {\prime \prime} < > | $$
• Japanese katakana cannot be input.
Keyboard operation list
You can use the keyboard not only for entering text, but also for other operations such as controlling the transport and editing.
The keys on the keyboard have functions that correspond to the buttons on the front panel of the main unit as shown below. Moreover, character input mode is activated automatically according to the current operation of the unit.
Full keyboard
| Keyboard key(s) Operation | |
| Esc key | Same as the EXIT/CANCEL [PEAK CLEAR] button |
| F1 key Same as the HOME/DISPLAY button | |
| F2 key Same as the INFO button | |
| F3 key Same as the MENU button | |
| F12 key Same as the RECORD button | |
| R key Search backward | |
| P key Skip to the previous track | |
| S key Stop | |
| F key Search forward | |
| N key Skip to the next track | |
| Enter key | Same as pressing the MULTI JOG dial (Add/delete a mark) |
| Space bar | Same as the PLAY button and PAUSE button |
| ↑ key | Same as the ►►1 button during transport operation. Moves the cursor up at other times. |
| ↓ key | Same as the ◀◀ button during transport operation. Moves the cursor down at other times. |
| ← key | Same as turning the MULTI JOG dial left during transport operation (move to the next earlier mark). Moves the cursor left at other times. |
| → key | Same as turning the MULTI JOG dial right during transport operation (move to the next later mark). Moves the cursor left at other times. |
Numeric keypad (transport operation only)
| Keyboard key(s) Operation | |
| .(period) key STOP button | |
| 0 key | Same as the PLAY button and PAUSE button |
| 1 key Same as the ◀ button | |
| 2 key Same as the ► button | |
| 3 key Same as the RECORD button | |
| 7 key Same as the I◄ button | |
| 8 key Same as the ►► button | |
| - key | Same as turning the MULTI JOG dial left (move to earlier mark in track) |
| + key | Same as turning the MULTI JOG dial right (move to later mark in track) |
| Enter key | Same as pressing the MULTI JOG dial (add a mark) |
The following is a list of the pop-up messages that might appear on the DA-3000 under certain conditions. Refer to this list if one of these pop-up messages appears and you want to check the meaning or determine a proper response.
| Message Meaning | |
| Cannot set Mark. Limit reached. | The maximum number of marks that can be set has been reached, so a new mark cannot be added. |
| Create Playlist failed. | The creation of a new playlist failed. |
| Divide failed. Division was not possible. | |
| Operation Failed. The execution of some operation failed. | |
| Operation Failed. Folder limit. | The maximum number of folders has been reached so a new folder could not be created. |
| Operation Failed. long name Path Name is too long. | The total number of characters in the full file path and file name exceeds 255. |
| Rename failed. The RENAME operation could not be executed. | |
| SD Card Locked. The SD card is locked. | |
| This file already exists. | When RENAME or another operation was conducted, another file with the same name already existed. |
| This folder already exists. | When RENAME or another operation was conducted, another folder with the same name already existed. |
| Un/Redo failed. The REDO operation failed. | |
| CLOCK LOST ..... Switched to internal. | Master clock synchronization became unlocked. The unit switched to its internal clock. |
| - CANNOT COPY - Not Enough space on Media. | Not enough open space is available on the media, so copying is not possible. |
| - CANNOT INC. - Media full or too short interval. | Incrementing the track was not possible because either the interval was too short or the media does not have enough space. |
| - CANNOT MOVE - Mono file is not supported. | Moving mono × 2 files is not supported, so moving is not possible. |
| - CANNOT MOVE - This name already exists. | Moving is not possible because another file already has the same name. |
| --- CAUTION --- Cannot execute. Media Full. | Editing is not possible because the media does not have enough open space. |
| --- CAUTION --- Formatting not optimal for Recording/Search | This media format is not recommended. |
| --- CAUTION --- Not possible now Please Stop first. | Stop the unit before executing this function |
| --- CAUTION --- Not recommended type for Recording/Search | This media is not recommended. |
| --- CAUTION --- RECORD stopped. ABS time limit. | Recording stopped because more than 24 hours elapsed. |
| --- CAUTION --- RECORD stopped. Media Full. | Recording stopped because the media ran out of open space. |
| -- COPY FAILED -- Copying failed. | |
| - DEVICE ERROR - An error occurred with the device. | |
| -- DIN ERROR -- An error occurred during digital input. | |
10 - Message Lists
| Message Meaning | |
| --- ERROR ---INFO WRITING. | An error occurred at the end of recording. |
| --- ERROR ---General Error needs to STOP. | A general error occurred. |
| --- ERROR ---Unsupported File.(too many tracks) | This file is not supported. |
| --- ERROR ---Unsupported Fs. | The sampling rate is not supported. |
| - MEDIA ERROR - A media error occurred. | |
| -- PLAY ERROR -- A playback error occurred. | |
| -- PLAY ERROR --Buffer underrun. | A buffer underrun error occurred. |
| -- READ ERROR -- An error occurred while reading. | |
| -- REC ERROR -- Recording stopped because an error occurred during recording. | |
| -- REC ERROR --Buffer overflow. | Recording stopped because a buffer overflow error occurred. |
| - WRITE ERROR - An error occurred while writing. | |
| - CANNOT DIVIDE -Duplicate name error. | Division was not possible because a file already exists with a name that would be used by a new file after division. |
| -CANNOT RECORD-Media Full. | Recording is not possible because there is no open space on the media. |
| -CANNOT RECORD-Take limit reached. | Recording is not possible because the maximum number of files has been reached |
| - PLAYLIST ERROR -There are some unusable entries | There is a problem with the playlist entry information. |
| --- CAUTION ---Cannot play while input monitoring. | When the Input signal monitoring function is ON, and ADDA Direct mode is also ON, it is not possible to Play any tracks. |
| --- CAUTION ---Cannot turn on.Cascade mode is not off. | When Cascade mode is ON, this function is unavailable (ADDA Direct Mode) |
| --- CAUTION ---Cannot select as cascade mode.ADDA DIRECT - ON. | The Cascade Mode cannot be turned ON because ADDA Direct Mode is already ON. |
| --- CAUTION ---There is no entry. | The unit attempted to Play, etc, but the Playlist has no entries in it, so there is nothing to play. |
| --- CAUTION ---Cannot select as master clock.Fs convert on. | The Sample Rate Converter (SRC) is already ON, so the Digital Input (DIN) cannot be selected as the Master Clock. |
| --- CAUTION ---Cannot turn on.D-IN is already Master Clock. | The Master Clock is already set to the Digital Input "DIN", so the Sample Rate Converter cannot be enabled. |
| --- CAUTION ---Must stop first. | This function or setting cannot be changed right now. Please STOP the unit, then it can be changed. |
If the unit is not functioning properly, please check the following items before calling for service. If these measures do not solve the problem, please contact the store where you purchased this unit or TASCAM customer support service.
Power does not turn on.
→ Confirm that the power plug is inserted securely.
Media is not detected.
→ Confirm that the SD card, CF card or USB flash drive is inserted securely.
→ Stop playback or recording once.
Playback is not possible.
If you are trying to play a WAV file, confirm that it uses a sampling frequency (44.1, 48, 88.2, 96, 176.4 or 192 kHz) and bit depth (16/24-bit) that are supported by this unit. If you are trying to play a DFF/DSF file, confirm that it uses a sampling frequency (2.8224 or 5.6448 MHz) supported by this unit.
No sound.
→ Check the connections with the monitoring system and check the volume of the amplifier.
→ If you cannot hear the input signal, confirm that the INPUT MONITOR screen setting is ON.
→ If you cannot hear the playback signal, confirm that the INPUT MONITORscreen setting is OFF.
Unable to record.
→ Check the connections.
→ Adjust the recording level.
If the media does not have enough open space, erase unneeded data to make more space or change the media.
If the folder already contains a large number of entries (the total number of files, folders and other items), change the recording folder.
Changed settings are not saved.
This unit backs up settings whenever you change them. This backup could fail if you turn the power off while this data is being written, so do not turn the power off immediately after changing a setting.
I hear noise.
→ Check if any connecting cable might have a bad connection.
When editing text, "Name Full" appears.
Due to file system limitations, a maximum of 255 characters (halfwidth) can be used for items such as file and folder names. Moreover, the file path on the BROWSE screen is also limited to 255 characters.
Operation using the remote control (RC-10) is not possible.
→ Confirm that a battery is installed in the remote control and that it still has a charge.
Media and formats
Recording media
SD cards: 512MB-2GB SD supported
4GB-32GB SDHC supported
Media ejection: push-push type
CF cards: 1GB-64GB Type I supported
USB flash drives: 2GB-64GB supported
Recording/playback formats
PCM mode
Fs: 44.1, 48, 88.2, 96, 176.4 and 192 kHz
Bit depth: 16 and 24-bit
Playback: BWF (.wav extension)
Recording: BWF and WAV (both .wav extension)
DSD mode
Fs: 2.8224 and 5.6448MHz
Playback and recording: DSDIFF (.dff extension)
DSF (.dsf extension)
Number of channels
2 mono/1 stereo
Inputs and outputs
Analog inputs
Unbalanced
Connectors: RCA pin jacks
Reference input level: -10 dBV
Maximum input level: +6 dBV
Input impedance: 22 kΩ or higher
Minimum input level: -22 dBV
Balanced
Connectors: XLR-3-31 (1: GND, 2: HOT, 3: COLD)
Reference input level: +4 dBu or +6 dBu (only when maximum input level is +15 dBu)
Maximum input level: +24 dBu, +22 dBu, +20 dBu, +18 dBu or +15 dBu (use menu to set)
Input impedance: 10 kΩ or higher
Minimum input level: -8 dBu or -6 dBu (only when maximum input level is +15 dBu)
Analog outputs
Unbalanced
Connectors: RCA pin jacks
Reference output level: -10 dBV
Maximum output level: +6 dBV
Output impedance: 200 Ω or less
Balanced
Connector: XLR-3-32 (1: GND, 2: HOT, 3: COLD)
Reference output level: +4 dBu or +6 dBu (only when maximum input level is +15 dBu)
Maximum output level: +24 dBu, +22 dBu, +20 dBu, +18 dBu or +15 dBu (set in menu)
Output impedance: 100 Ω or less
PHONES jack
Connector: 6.3mm (1/4") standard stereo jack
Maximum output: 45 mW + 45 mW (32Ω load, 0.1% distortion)
Digital input
S/PDIF / CASCADE (unbalanced)
Connector: RCA pin jack
Format: IEC60958-3 (S/PDIF)
Input frequency: 44.1, 48, 88.2, 96, 176.4 or 192 kHz
(when SRC OFF)
32 kHz–216 kHz (when SRC ON)
Allowable frequency deviation: ±100 ppm (when SRC OFF)
AES/EBU (balanced)
Connector: XLR-3-31 (1: GND, 2: HOT, 3: COLD)
Format: AES3-2003/IEC60958-4 (AES/EBU)
Input frequency: 44.1, 48, 88.2, 96, 176.4 and 192 kHz
(when SRC OFF)
32–216 kHz (when SRC ON)
Allowable frequency deviation: ±100 ppm (when SRC OFF)
SDIF-3 (unbalanced)
Connectors: BNC connector × 2 (L, R)
Format: SONY SDIF-3/DSD-raw
Clock sync frequency: 44.1 kHz (when 2.8 MHz or 5.6 MHz)
Digital output
S/PDIF / CASCADE (unbalanced)
Connector: RCA pin jack
Format: IEC60958-3 (S/PDIF)
AES/EBU (balanced)
Connector: XLR-3-32 (1: GND, 2: HOT, 3: COLD)
Format: AES3-2003/IEC60958-4 (AES/EBU)
SDIF-3 (unbalanced)
Connectors: BNC connector × 2 (L, R)
Format: SONY SDIF-3/DSD-raw
Clock sync frequency: 44.1 kHz (when 2.8 MHz or 5.6 MHz)
Other connectors
WORD SYNC IN jack
Connector: BNC
Input level: equivalent to 5V TTL
Input impedance: 75 Ω ±10%
(includes terminal on/off switch)
Input frequency: 44.1, 48, 88.2, 96, 176.4 or 192 kHz
Allowable frequency deviation: ±100 ppm
WORD SYNC THRU/OUT
Connector: BNC
Output level: equivalent to 5V TTL
Output impedance: 75 Ω ±10%
Output frequency: 44.1, 48, 88.2, 96, 176.4 or 192 kHz
(includes THRU/OUT on/off switch)
Frequency stability: ±1 ppm or less (Ta=25°C)
USB (DEVICE)
Connector: USB A-type 4-pin
Protocol: USB 2.0 HIGH SPEED (480 Mbps)
Power supply rating: DC 5.0V 0.5A
USB (KEYBOARD)
Connector: USB A-type 4-pin
Protocol: USB 1.1 FULL SPEED (12 Mbps)
Power supply rating: DC 5.0V 0.2A
Audio performance
Recording
Distortion (THD+N, 1kHz)
PCM 24bit mode and DSD mode
0.003% or less (Ref: -16dB/BALANCED, JEITA)
0.005% or less (UNBALANCED, JEITA)
S/N
PCM 24bit mode
113 dB or higher (Ref: -20dB/BALANCED, JEITA)
111 dB or higher (UNBALANCED, JEITA)
DSD mode
106 dB or higher (Ref: -20dB/BALANCED, AES-17 20k LPF)
104 dB of higher (UNBALANCED, AES-17 20k LPF)
Frequency response
PCM mode
Fs = 44.1 or 48 kHz
20 Hz-20 kHz: +0.1 dB, -0.5 dB (JEITA)
Fs = 88.2 or 96 kHz
20 Hz-40 kHz: +0.1 dB, -1 dB (JEITA)
Fs = 176.4 or 192 kHz
20 Hz-80 kHz: +0.1 dB, -6 dB (JEITA)
DSD mode
20 Hz-50 kHz: +0.1 dB, -3 dB (JEITA)
20 Hz-100 kHz: +0.1 dB, -12 dB (JEITA)
Crosstalk (1kHz)
PCM 24bit mode and DSD mode
105 dB or higher (JEITA)
Playback
Distortion (THD+N, 1kHz)
PCM 24bit mode and DSD mode
0.003% or less (BALANCED, JEITA)
0.001% or less (UNBALANCED, JEITA)
S/N
PCM 24bit mode
118 dB or higher (Ref: -20dB/BALANCED, JEITA)
116 dB or higher (UNBALANCED, JEITA)
DSD mode
116 dB or higher (Ref: -20dB/BALANCED, AES-17 20k LPF)
114 dB of higher (UNBALANCED, AES-17 20k LPF)
Frequency response
PCM mode
Fs = 44.1 or 48 kHz
20 Hz–20 kHz: ±0.1 dB (JEITA)
Fs = 88.2 or 96 kHz
20 Hz-40 kHz: +0.1 dB, -0.3 dB (JEITA)
Fs = 176.4 or 192 kHz
20 Hz–80 kHz: +0.1 dB, -3 dB (JEITA)
DSD mode
20 Hz-50 kHz: +0.1 dB, -3 dB (JEITA)
20 Hz-100 kHz: +0.1 dB, -12 dB (JEITA)
Control input
Infrared sensor
RC-10 wireless remote control
General
Power
AC 120 V, 60 Hz (U.S.A./Canada)
AC 220 V–240 V, 50 Hz–60 Hz (U.K./Europe/Australia)
Power consumption
24 W
Dimensions(W × H × D)
483 × 45 × 305 (mm) / 19 × 1.75 × 12 (in)
Weight
4.2 Kg (9.26 lb)
Operating temperature range
0-40°C (32-104°F)
12 - Specifications
Dimensional drawings
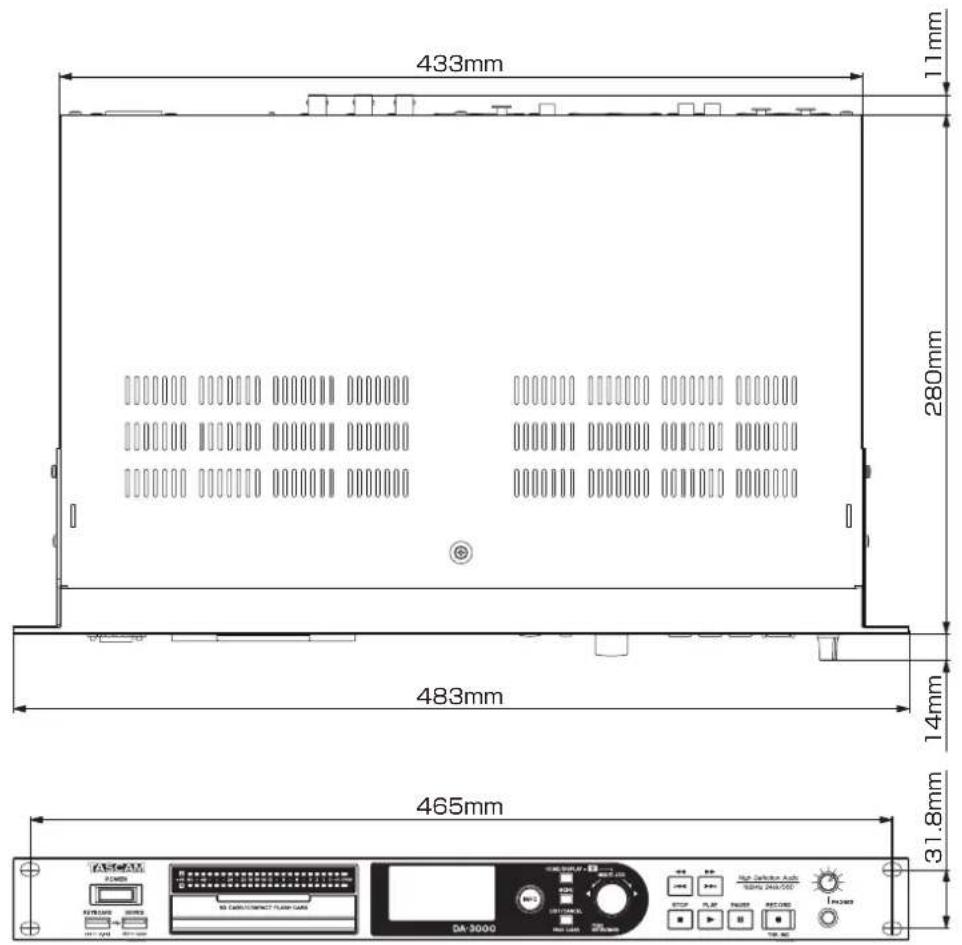
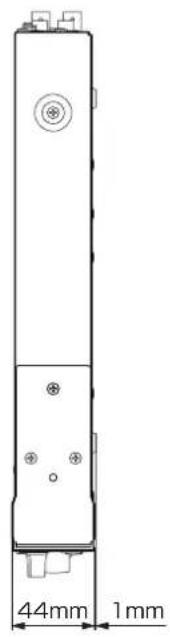
• Illustrations and other depictions may differ in part from the actual product.
- Specifications and external appearance may be changed without notification to improve the product.
Block diagram
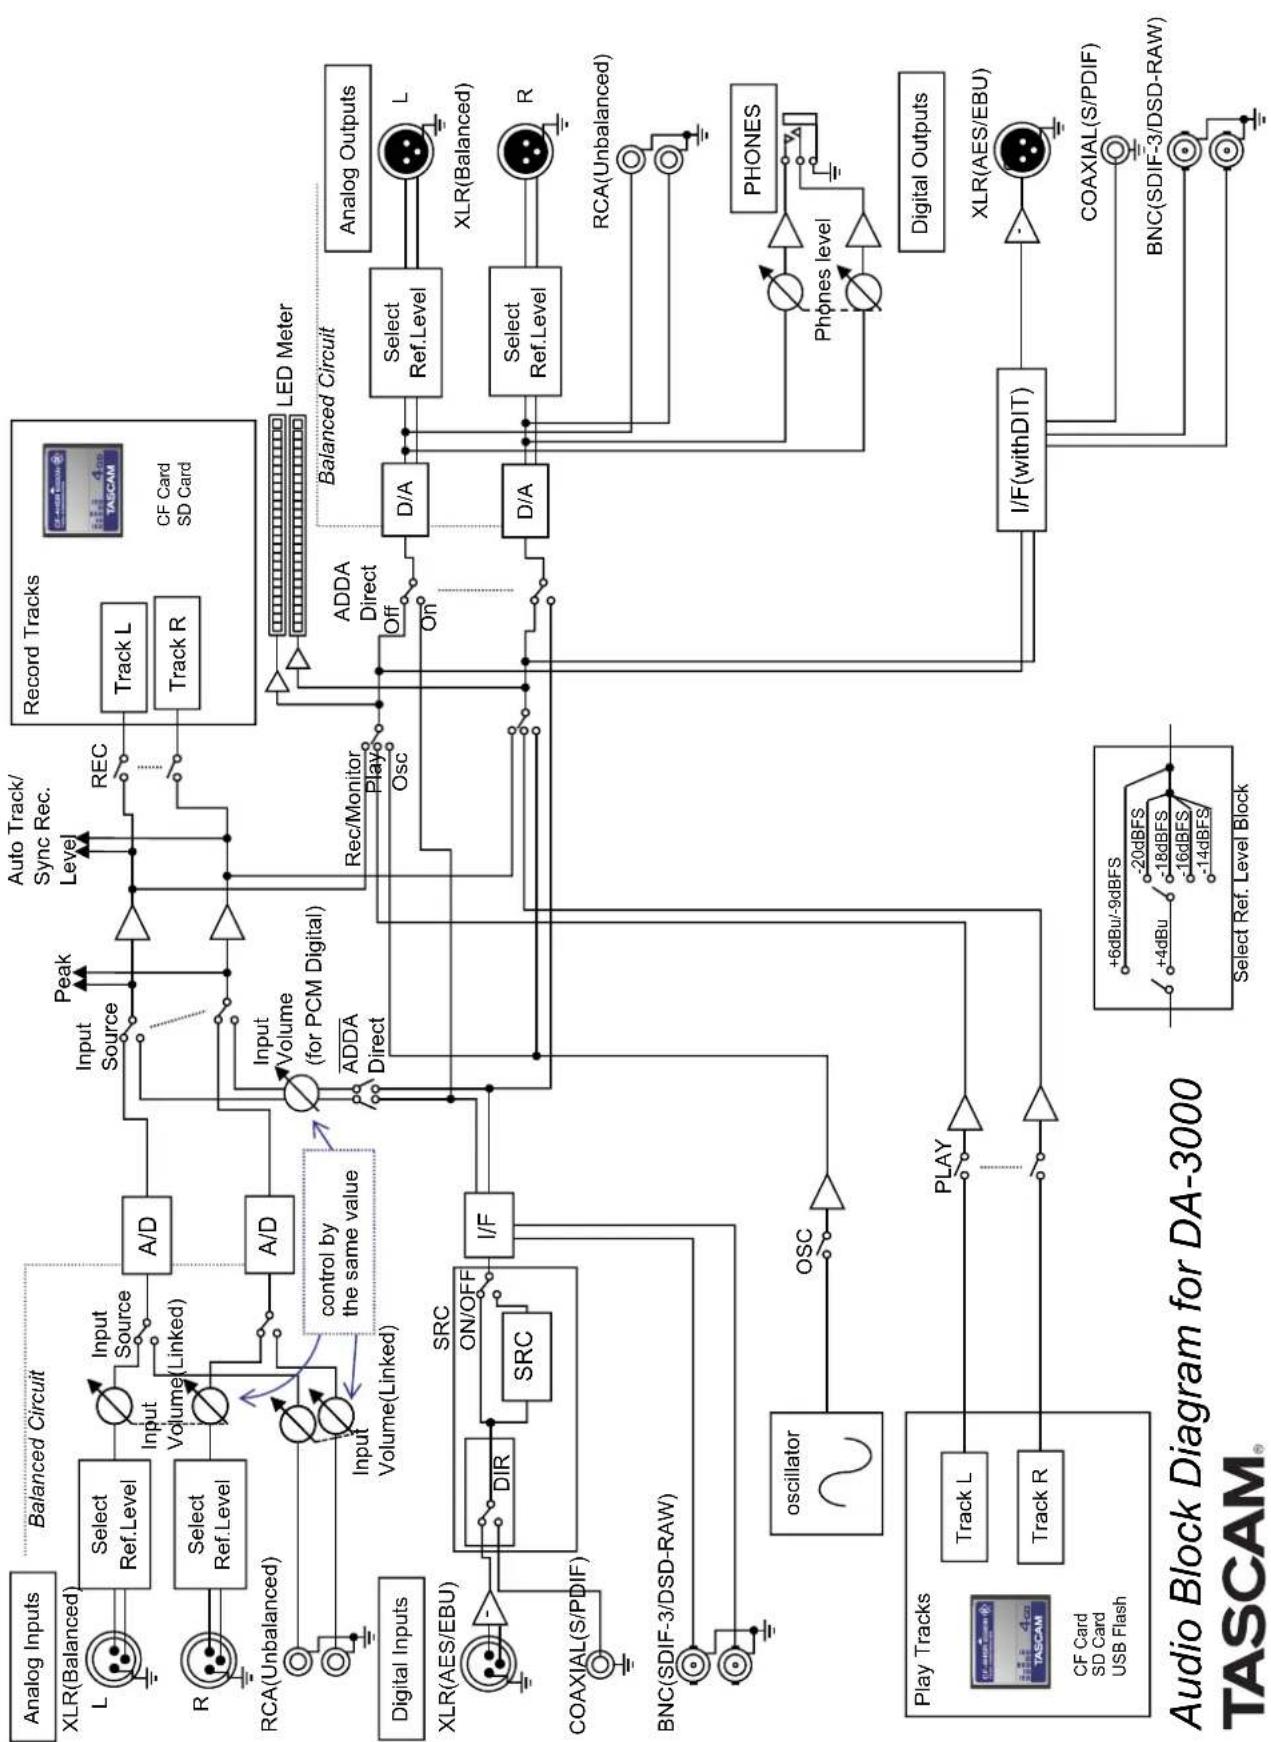
flowchart
graph TD
    A["Analog Inputs"] --> B["XLR(Balanced)"]
    B --> C["L"]
    C --> D["Select Ref.Level"]
    D --> E["Input Source (Linked)"]
    E --> F["A/D"]
    F --> G["Input Source"]
    G --> H["Peak"]
    H --> I["Auto Track/Sync Rec. Level"]
    I --> J["REC"]
    J --> K["Record Tracks"]
    K --> L["Track L"]
    K --> M["Track R"]
    N["RCA(Unbalanced)"] --> O["Select Ref.Level"]
    O --> P["Input Volume(Linked)"]
    P --> Q["A/D"]
    Q --> R["Input Volume (for PCM Digital)"]
    R --> S["ADD A Direct"]
    S --> T["Rec/Monitor Play"]
    T --> U["Osc"]
    U --> V["LED Meter"]
    W["Digital Inputs"] --> X["XLR(AES/EBU)"]
    X --> Y["DIR"]
    Y --> Z["SRC ON/OFF SRC"]
    Z --> AA["I/F"]
    AA --> AB["Oscillator"]
    AB --> AC["OSC"]
    AC --> AD["Play"]
    AD --> AE["I/F(withDIT)"]
    AE --> AF["XLR(AES/EBU)"]
    AE --> AG["COAXIAL(S/PDIF)"]
    AE --> AH["BNC(SDIF-3/DSD-RAW)"]
    AI["Play Tracks"] --> AJ["CF Card SD Card USB Flash"]
    AK["Track L"] --> AL["Track R"]
    AL --> AM["Select Ref.Level Block"]
    AM --> AN["+6dBu/-9dBFS -20dBFS -18dBFS -16dBFS -14dBFS"]
    AN --> AO["I/F(withDIT)"]
    AO --> AP["XLR(AES/EBU)"]
    AO --> AQ["BNC(SDIF-3/DSD-RAW)"]
TASCAM
DA-3000
TEAC CORPORATION https://tascam.jp/jp/
Phone: +81-42-356-9143
1-47 Ochiai, Tama-shi, Tokyo 206-8530 Japan
TEAC AMERICA, INC. https://tascam.com/us/
Phone: +1-323-726-0303
10410 Pioneer Blvd. Suite #1 and #4, Santa Fe Springs, California 90670, U.S.A.
TEAC UK Ltd. https://tascam.eu/
Phone: +44-1923-797205
Meridien House, Ground Floor,69 - 71, Clarendon Road, Watford, Hertfordshire, WD17 1DS, United Kingdom
Room 817, Xinian Center A, Tairan Nine Road West, Shennan Road, Futian District, Shenzhen, Guangdong Province 518040, China
http://tascam.cn/

- IMPORTANT SAFETY PRECAUTIONS
- WARNING: TO PREVENT FIRE OR SHOCK HAZARD, DO NOT EXPOSE THIS APPLIANCE TO RAIN OR MOISTURE.
- For U.S.A.
- INFORMATION TO THE USER
- CAUTION
- For Canada
- For the customers in Europe
- WARNING
- DECLARATION OF CONFORMITY
- IMPORTANT SAFETY INSTRUCTIONS
- RICK-MOUNTING THE UNIT
- Safety Information
- CAUTIONS ABOUT BATTERIES
- For European Customers
- Disposal of electrical and electronic equipment
- Disposal of batteries and/or accumulators
- China
- – Names and Functions of Parts ...... 11
- – Preparations......17
- - Recording 22
- - Folder and file operations (BROWSE screen)....32
- - Playback ....39
- Contents
- - Recording/playback with cascade connections ....42
- - Editing playlists....46
- – Miscellaneous functions......50
- - Message Lists....53
- - Troubleshooting ....55
- - Specifications ....56
- - Introduction
- Features
- Included items
- Conventions used in this manual
- TIP
- NOTE
- Trademarks
- Precautions for placement and use
- Power supply
- Beware of condensation
- Cleaning the unit
- Using the TEAC Global Site
- User registration
- About TASCAM customer support service
- SD cards, CF cards and USB flash drives
- Precautions for use
- Media that has been confirmed for use with this unit
- SD card write protection
- SD card and CF card formatting
- – Names and Functions of Parts
- Front panel
- ① POWER switch
- ② Level meters
- ③ Display
- ④ INFO button/indicator
- ⑤ HOME/DISPLAY button
- ⑥ MULTI JOG dial
- Dial functions
- Button functions
- ⑦ ◀◀[◀◀] / ▶▶ [▶▶] buttons
- ⑧ PHONES jack/knob
- ⑨ KEYBOARD connector
- ⑩ DEVICE connector
- ⑪ SD and CF card slots
- ⑫ Remote sensor
- ⑬ MENU button
- ⑭ EXIT/CANCEL [PEAK CLEAR] Button
- ⑮ STOP button
- ⑯ PLAY button/indicator
- ⑰ PAUSE button/indicator
- ⑱ RECORD [TRK INC] button/indicator
- Rear panel
- ⑲ L/R ANALOG INPUTS (BALANCED)
- ⑳ L/R ANALOG INPUTS (UNBALANCED)
- ②1 L/R ANALOG OUTPUTS (UNBALANCED)
- ②2 L/R ANALOG OUTPUTS (BALANCED)
- ②3 DIGITAL IN(S/PDIF / CASCADE)
- ⑳ DIGITAL OUT(S/PDIF / CASCADE)
- ⑳ DIGITAL IN (AES/EBU)
- ②6 DIGITAL OUT (AES/EBU)
- ⑳ DIGITAL IN/OUT(SDIF-3) connectors
- WORD SYNC IN connector
- ⑲ WORD SYNC THRU/OUT connector
- ③0 75Ω ON/OFF [THRU/WORD OUT] switch
- ③1 AC IN connector
- Wireless remote control (TASCAM RC-10)
- Home Screen
- Menu structure
- Menu screen operation basics
- To change the menu page:
- To select an item (vertically on the screen):
- To confirm the selection:
- To open a submenu that is not shown on the display:
- To move up one level in the menu:
- To return directly to the Home Screen from menu mode:
- Menu operation procedures
- Making connections
- Recautions before making connections
- Preparing the remote control
- Installing the battery
- When to change the battery
- Warnings about battery use
- Using the wireless remote control
- Turning the power on and off
- Turning the power OFF
- Setting the date and time
- Adjusting the brightness
- - Preparations
- Inserting and ejecting SD and CF cards
- Inserting SD and CF cards
- Ejecting SD and CF cards
- Connecting/disconnecting USB flash drives
- Connecting USB flash drives
- Disconnecting USB flash drives
- Selecting the media used
- Preparing SD/CF cards and USB flash drives
- - Recording
- PCM recording
- DSD recording
- Unexpected power interruptions
- Selecting the input source
- Showing the input source
- Setting the recording file format
- Using the sampling rate converter
- Monitoring the input signal
- Adjusting the input signal level
- Setting the peak hold indicators
- Setting the master clock
- Setting the reference level
- Using this unit as an AD/DA converter
- Basic recording operations
- To start recording standby from a stopped state:
- To start recording from recording standby:
- To switch from recording to recording standby:
- To stop recording:
- Sync recording
- Activating and setting sync recording
- Sync recording operation
- If the sync level is too high
- If the sync level is too low
- Creating new higher-numbered tracks automatically
- Creating a higher numbered track manually
- Setting the automatic mark function
- Adding marks manually during recording
- Adding marks when recording
- Using the oscillator (OSC)
- Setting the pause mode
- Setting the file name format
- Inputting and editing characters
- To move the cursor (editing position):
- To change the character at the cursor position:
- To insert a space:
- To delete a character:
- To delete all characters after the cursor position:
- To delete all characters before the cursor position:
- To switch between uppercase and lowercase:
- To cancel editing:
- Media capacities and recording times
- – Folder and file operations (BROWSE screen)
- Opening the BROWSE screen
- BROWSE screen navigation
- Icons on the BROWSE screen
- Playlist (圃)
- Folder (
- Audio file (
- Folder operations
- SELECT
- RENAME
- DELETE
- MOVE/COPY
- ADD P.L.
- INFO
- CREATE
- CANCEL
- File operations
- DIVIDE
- UNDO
- REDO
- Editing folder and file names
- Deleting folders and files
- Moving and copying folders and files
- Registering folders and files in a playlist
- Viewing folder and file information
- Creating new folders
- Dividing files
- Undoing file division (UNDO/REDO)
- playable file types
- Files and tracks
- Basic playback operations
- Playback
- Selecting tracks
- Skipping to the previous or next track
- Selecting tracks directly
- Searching backward and forward
- Locating to specific positions
- Locating to a position after partial entry
- MULTI JOG dial pressed:
- PLAY button pressed:
- PAUSE button pressed:
- Remote control PLAY button pressed:
- Adding marks manually during playback
- Adding marks during playback
- Locating to marks
- Deleting marks
- Setting the PLAY Mode
- Repeat playback
- Setting gapless playback mode
- - Recording/playback with cascade connections
- Overview of the cascade function
- Timing synchronization
- Clock synchronization
- Connections and preparations
- Preparing media
- Selecting the media
- Preparing cables
- Connecting and setting the devices
- Connections
- Settings
- – Recording/playback with cascade connections
- Setting master and slave units
- Using cascaded units
- Playing back both master and slave units
- Operation:
- Recording to both master and slave units
- Playing back with the master unit and recording with a slave unit
- – Editing playlists
- Overview of playlist editing
- Opening the playlist screen
- Registering tracks in a playlist
- Using the playlist menu
- Moving around playlists
- Changing playlist names
- Deleting playlists
- Creating a new playlist
- Playlist track menu operations
- ORDER
- REMOVE
- Changing the playlist track order
- Removing tracks from playlists
- – Miscellaneous functions
- INFO button and indicator
- Operation status display (indicator blue)
- Alert display (indicator red)
- Error message (indicator red)
- Copying files between media (backing up)
- Viewing information about the media
- Restoring the factory settings
- Using a USB keyboard
- Setting the keyboard type
- Using a keyboard to input text
- In character input mode:
- To move the cursor:
- To insert a character:
- To edit a character:
- Keyboard operation list
- - Message Lists
- Power does not turn on.
- Media is not detected.
- Playback is not possible.
- No sound.
- Unable to record.
- Changed settings are not saved.
- I hear noise.
- When editing text, "Name Full" appears.
- Operation using the remote control (RC-10) is not possible.
- Media and formats
- Recording media
- Recording/playback formats
- PCM mode
- DSD mode
- Number of channels
- Inputs and outputs
- Analog inputs
- Unbalanced
- Balanced
- Analog outputs
- PHONES jack
- Digital input
- S/PDIF / CASCADE (unbalanced)
- AES/EBU (balanced)
- SDIF-3 (unbalanced)
- Digital output
- Other connectors
- WORD SYNC IN jack
- WORD SYNC THRU/OUT
- USB (DEVICE)
- USB (KEYBOARD)
- Audio performance
- Recording
- Distortion (THD+N, 1kHz)
- S/N
- Frequency response
- Crosstalk (1kHz)
- Control input
- General
- - Specifications
- Dimensional drawings
- Block diagram
- TASCAM
- DA-3000
Brand : TASCAM
Model : DA-3000
Category : Media player