AK380 - Hi-Fi System Astell&Kern - Free user manual and instructions
Find the device manual for free AK380 Astell&Kern in PDF.


User questions about AK380 Astell&Kern
0 question about this device. Answer the ones you know or ask your own.
Ask a new question about this device
Download the instructions for your Hi-Fi System in PDF format for free! Find your manual AK380 - Astell&Kern and take your electronic device back in hand. On this page are published all the documents necessary for the use of your device. AK380 by Astell&Kern.
USER MANUAL AK380 Astell&Kern
Getting Started \_01
Package Contents 02
AK380 at a Glance 03
Power Management 04
Connections 06
Firmware Upgrade 11
Using the Device \_02
Basic Operations 12
Home Screen 14
Notification Bar Screen 15
AK Connect 18
Listening to Music 24
Playlist Management 30
USB DAC Installation 33
Using Bluetooth 38
Setup 40
Connecting to a Wireless Network 45
Equalizer Setup 46
Miscellaneous \_03
Safety Precautions 49
Troubleshooting 51
Copyright 52
Certifications 53
Registered Trademarks 53
Disclaimers 53
Specifications 54
Package Contents
Components may be changed without prior notice to improve the performance or quality of the product.
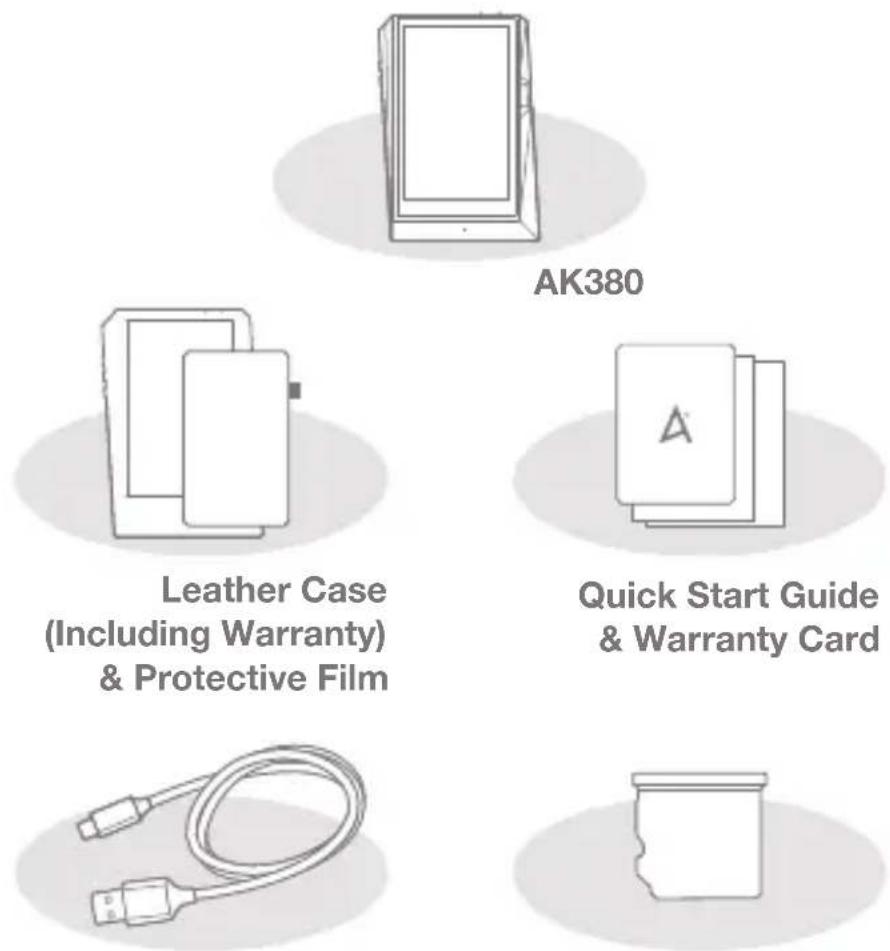
microSD Card Slot CoverMicro-USB
Leather Case & Protective Film: Protect the device and its screen. Warranty for the Leather Case guarantees the quality of the leather. Micro-USB Cable: Connect the device to a computer or charge the device. Quick Start Guide: Basic overview of device functionality. Warranty Card: The warranty card is required for customer & technical support. Do not misplace the card.
User Guide: The User Guide can be downloaded from the Astell&Kern website. [http://www.astellinkern.com/ > Support > Download]. microSD Card Slot Cover : The cover is used to protect the microSD card slot when not in use. It is installed on the product by default.
AK380 at a Glance
The appearance of the product as well as printed and engraved information may vary depending on the model.
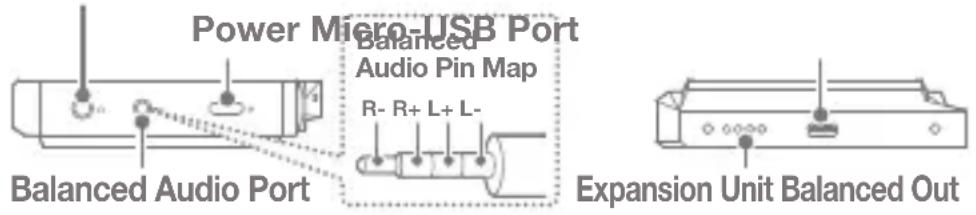
Earphones / Optical Port
text_image
Power Micro-USB Port Balanced Audio Pin Map R- R+ L+ L- Balanced Audio Port Expansion Unit Balanced Out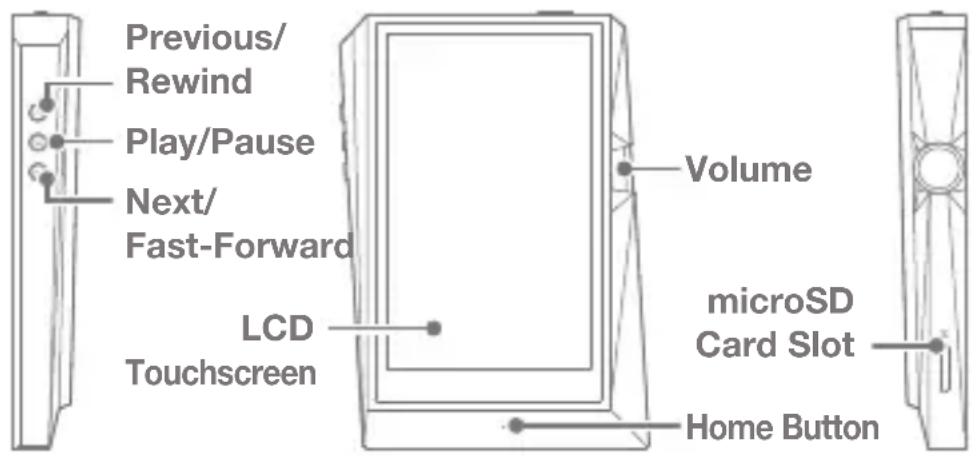
text_image
Previous/ Rewind Play/Pause Next/ Fast-Forward LCD Touchscreen Volume microSD Card Slot Home ButtonEarphones / Optical Port: Output sound to connected earphones. Music can be played back on an S/PDIF-capable external device by using an optical cable.
Power: Turn the screen on and off.
Long press - Turn the device on and off.
Balanced Out: Output sound to earphones or headphones that support balanced audio connections. Connect to an external audio device by using both the earphone port (ground) and balanced audio port (LR) in conjunction.
Micro-USB Port: Connect to a computer or recharge the device.
Expansion Unit Balanced Out: Output sound to an expansion device that supports balanced audio connections.
Previous/Rewind: Play the previous song or restart the song. Long press - Rewind.
Play/Pause: Play or Pause a song.
Next/Fast-Forward: Skip to the next song.
Long press - Fast-forward.
LCD Touchscreen: Display with touch control.
Volume: Control the volume by turning the wheel.
microSD Card Slot: Insert a microSD card and access its files.
Home Button: Show the home screen.
Power Management
Turn the Device On/Off
- Long-press the [Power ☐] button to turn on the device.
- While the device is on, long-press the [Power ☐] button to display a shutdown confirmation message.
- Press [Confirm] to turn off the device.

This device has an automatic shutdown feature to reduce battery consumption. The device will turn off after a defined period when there is no user input. [ ◎ - Power - Auto Power Off] (See p. 43)
Turn the Screen On/Off
- While the screen is on, press the [Power ⏻] button to turn off the screen.
- Press the [Power ☐] button again to turn off the screen.

This device has an automatic timeout feature to reduce battery consumption. The screen will turn off after a defined period when there is no user input. [☐ - Power - Auto Power Off] (See p. 43)
Reset Function
- In cases of unexpected device failure or freeze, press the [Power ☐]*button for 12 seconds to force a shutdown. The device can be restarted after a shutdown.

Resetting the device will not affect the stored data or time setting.
Do not use the reset function while the product is in use. Doing so may corrupt the data on the device.
Charging
- Turn on the computer.
- The device will charge automatically when connected to a computer via the Micro-USB cable.

When charging via PC connection, the charging time may vary depending on whether the device is turned On or Off. The maximum charge time with a 5V 2A charging adapter is 4 hours. (Fully discharged battery and power Off.)
If the device is On and/or being used while charging, the charging time may be longer or the battery may not fully charge. Charging with the device turned Off is recommended. The device may not charge if the PC or USB connection goes into standby or sleep mode.
The device may charge slowly or not charge at all in extreme temperatures. Charging in a room-temperature setting is recommended.
The built-in battery will gradually lose capacity over time according to the number of charges/discharges.
Be sure to use a high-powered USB 2.0 port. A low-powered USB port (e.g. keyboard or USB hub without a dedicated power supply) will increase the charging time.
Do not use any Micro-USB cable other than the one supplied with the device. Doing so may cause a malfunction.
Connec- tions
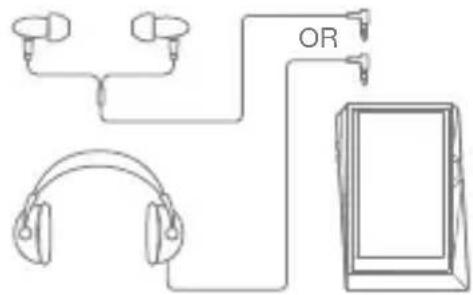
Earphones/Headphones
- Connect earphones or headphones to the earphones port.
text_image
ORBalanced Earphones/Headphones
- Connect supported earphones or headphones to the balanced port.
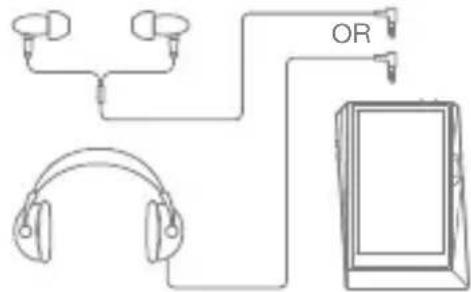
text_image
ORBalanced Audio Device
- Connect to an external audio device by using both the Earphones port and Balanced port in conjunction.
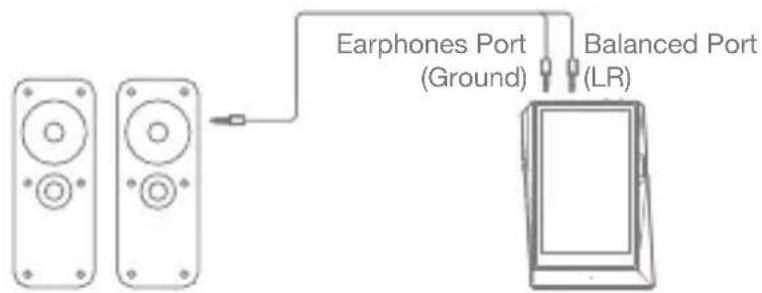
text_image
Earphones Port (Ground) Balanced Port (LR)Optical Out
- Music can be played back on an S/PDIF-capable external audio device by using an optical cable.
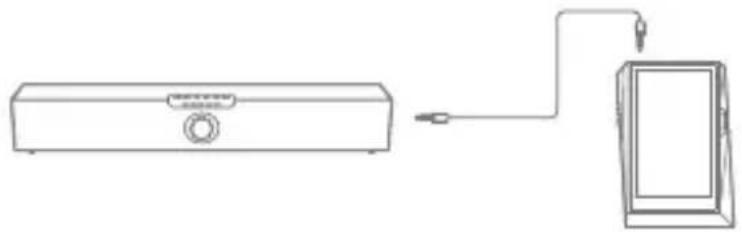
natural_image
Simple line drawing of a device with a box and a monitor, connected by a cable (no text or symbols)
DSD format is converted to PCM when using Optical Out. The volume will be fixed at the maximum level.
Connecting to a Computer
- Turn on the device and your PC.
- Connect the device to your PC as a standard USB
device by using a Micro-USB cable. [ ◦ Connect USB].
Media Device (USB Drive): Transfer files from the PC to the device.
DAC Input: Listen to music from the PC on the device. (See pp. 33-37)
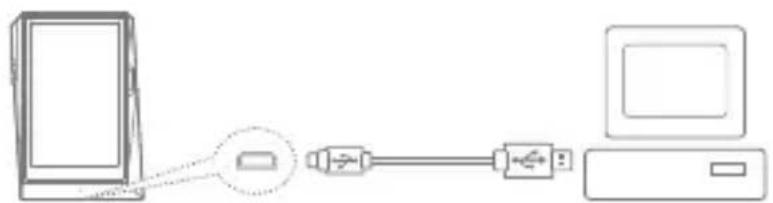
natural_image
Diagram showing connection between a computer and a device via USB cable (no text or symbols)
Mac users need to download and install the MTP program from the Astell&Kern website. [http://www.astellnkern.com > Support > Download]
For an optimal connection, quit any unnecessary programs before connecting the device to the computer.
Do not use any Micro-USB cable other than the one supplied with the device.
Windows XP users require Service Pack 2 and Windows Media Player 10 to be installed for the computer to recognize the USB device. Download Windows Media Player and required Service Packs from the Microsoft website. http://www.microsoft.com
Disconnecting from the Computer
- Verify that all operations have completed before attempting to disconnect the device from the computer.

Disconnecting the device from the computer during an operation (e.g. file transfer) may corrupt data on the device.
Copy Files/Folders to the Device
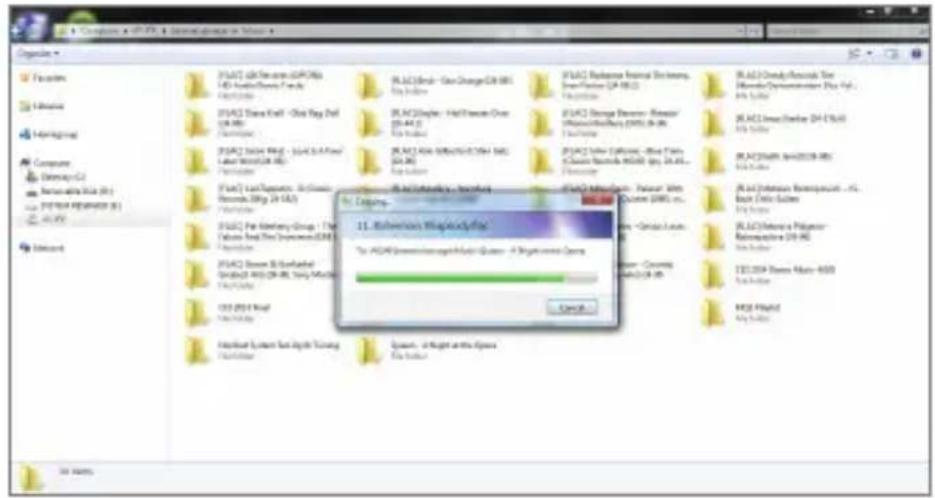
- To copy files/folders from your computer, select the desired files/folders and drag & drop them into the USB device.
text_image
11. Subscription Files To ADOI: 2003-06-20 Current
Make sure that the Micro-USB cable is securely connected. Please note that removing the Micro-USB cable or turning off the device or computer during a file transfer may corrupt data on the device.
File transfer speeds may be affected by the computer and/or the OS environment.
Delete Files/Folders on the Device
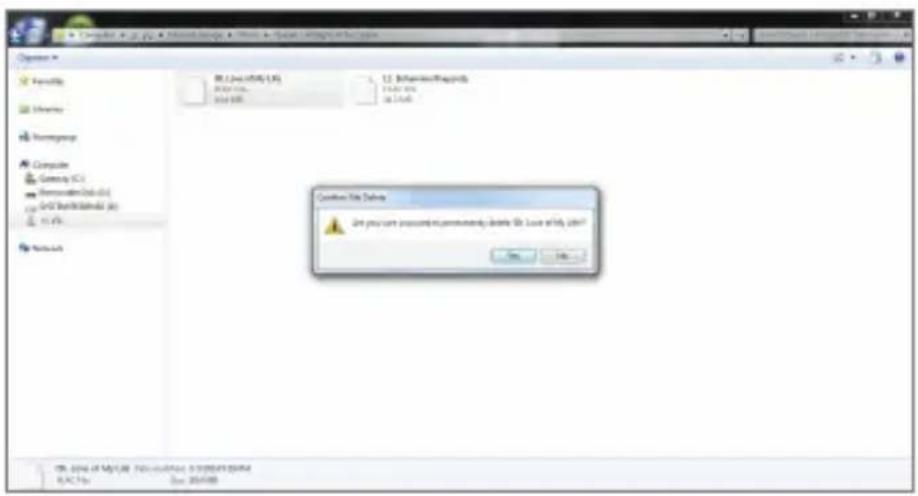
- Right-click the desired file/folder, and then select [Delete].
- Select [Yes] in the [Confirm File/Folder Deletion] window to delete the selected files/folders.
text_image
Computer - 2.0.jpg - Microsoft Internet Explorer File Edit View Insert Help Browse Help Importing Compute Google (C) Microsoft Excel (E) Excel Backsheet (E) 11 Web Network R:\Users\Microsoft\Microsoft\Microsoft\Microsoft\Microsoft\Microsoft\Microsoft\Microsoft\Microsoft\Microsoft\Microsoft\Microsoft\Microsoft\Microsoft\Microsoft\Microsoft\Microsoft\Microsoft\Microsoft\Microsoft\Microsoft\Microsoft\Microsoft\Microsoft\Microsoft\Microsoft\Microsoft\Microsoft\Microsoft\Microsoft\Microsoft\Microsoft\Microsoft\Microsoft\Microsoft\Microsoft\Microsoft\Microsoft\Microsoft\Microsoft\Microsoft\Microsoft\Microsoft\Microsoft\Microsoft\Microsoft\Microsoft\Microsoft\Microsoft\Microsoft\ Microsoft Excel Get your own project to recommend you to create a new project Cancel File Delete Are you can you continue to recommend you to create a new project OK CancelInsert/Remove a microSD Card
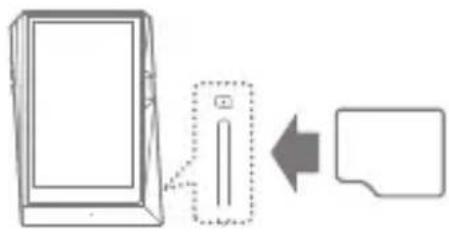
- Refer to the diagram and gently insert a microSD card into the microSD card slot.
flowchart
graph LR
    A["Device"] --> B["Arrow"]
    B --> C["Document"]
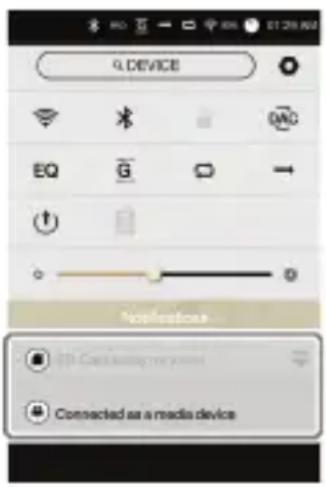
- To safely remove a microSD card, select [Safely remove SD card] from the Notification Bar or select [Unmount SD card] from
[ System Information].
- Gently press the microSD card to release it from the slot.
text_image
9 DEVICE EQ G ↑ → Notifications ● Can't bring my own ● Connected as a media deviceRecommended microSD Cards
Brand: SanDisk, Transcend

Maximum applicable storage capacity of microSD card: 128 GB
Notes on inserting a microSD card
• Do not force the microSD card into the slot. Doing so may cause damage to the device and/or the microSD card.
• Do not repeatedly insert/remove the microSD card.
- If the microSD card is improperly inserted, it may become immovable or cause damage to the device.
Notes on removing a microSD card
- Be sure to safely unmount and remove the microSD card from the device. Not following the proper procedure may corrupt data and cause serious damage to the system.
- Do not remove the microSD card while it's in use. Doing so may cause data corruption/deletion, malfunction, and damage to the microSD card.
Miscellaneous
- If the device malfunctions or is unable to recognize the micro SD card, format the memory card as FAT32 before use.
- Using microSD cards other than the recommended brands may cause the device to malfunction.
- A microSD card is not included with this device. Please purchase separately.
Firmware Upgrade
Wi-Fi Update / OTA (Over-the-Air)
- Connect to a wireless network.
- When a new firmware version is found, a Firmware Update Guide window will be displayed on the screen.
- Select [Update] and choose the items for update.
- Follow the on-screen instructions and proceed with the firmware upgrade.
Refer to page 45 for connecting to a wireless network. The firmware upgrade may not initialize if the battery level is too low. (A minimum battery level of 50% is required.) Moving to another screen during the file download will cancel the download. Do not disconnect from the wireless network while downloading a firmware upgrade. Doing so may cause data corruption and/or damage to the system. If an error occurs or the notice in the Notification Bar disappears during an upgrade, download the firmware upgrade again through [ - Update - System Update].
Basic
Operations
Using the LCD Touchscreen
- This device features an LCD touchscreen that allows you to perform operations by touching the screen. Interact with the device by touching the screen to access various features.

To prevent damage to the screen, do not use a sharp object or excessive force.
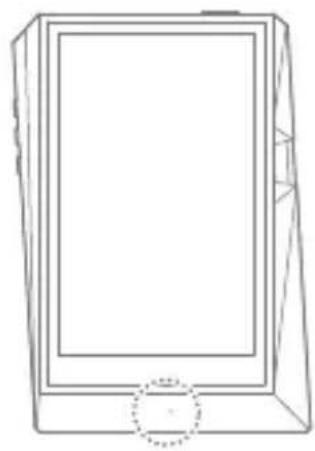
Return to the Home Screen
- Press the [Home] button at any time to return to the Home Screen.
natural_image
Line drawing of a rectangular frame with a circular base and dotted outline (no text or symbols)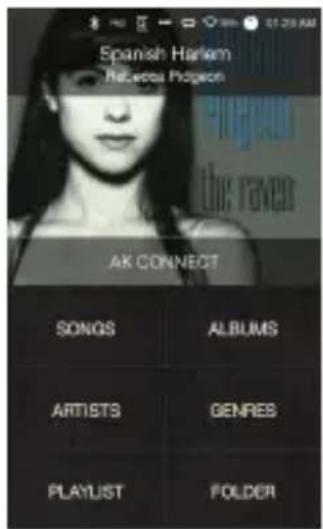
text_image
Spanish Harlem Nelcetra Pdpeon AK CONNECT SONGS ALBUMS ARTISTS GENRES PLAYLIST FOLDERHome Screen

The [Home] button on the AK380 is pressure-sensitive and can be operated with light pressure.
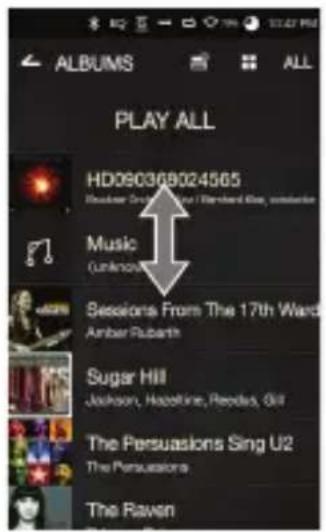
Moving up/down in the list
- You can scroll through the list by dragging the list screen [up] and [down].
text_image
ALBUMS ALL PLAY ALL HD090368024565 Music Unknown Sessions From The 17th Ward Amber Rubarth Sugar Hill Jackson, Hazeline, Reido, Oil The Persuasions Sing U2 The Persuasions The RavenHome Screen
text_image
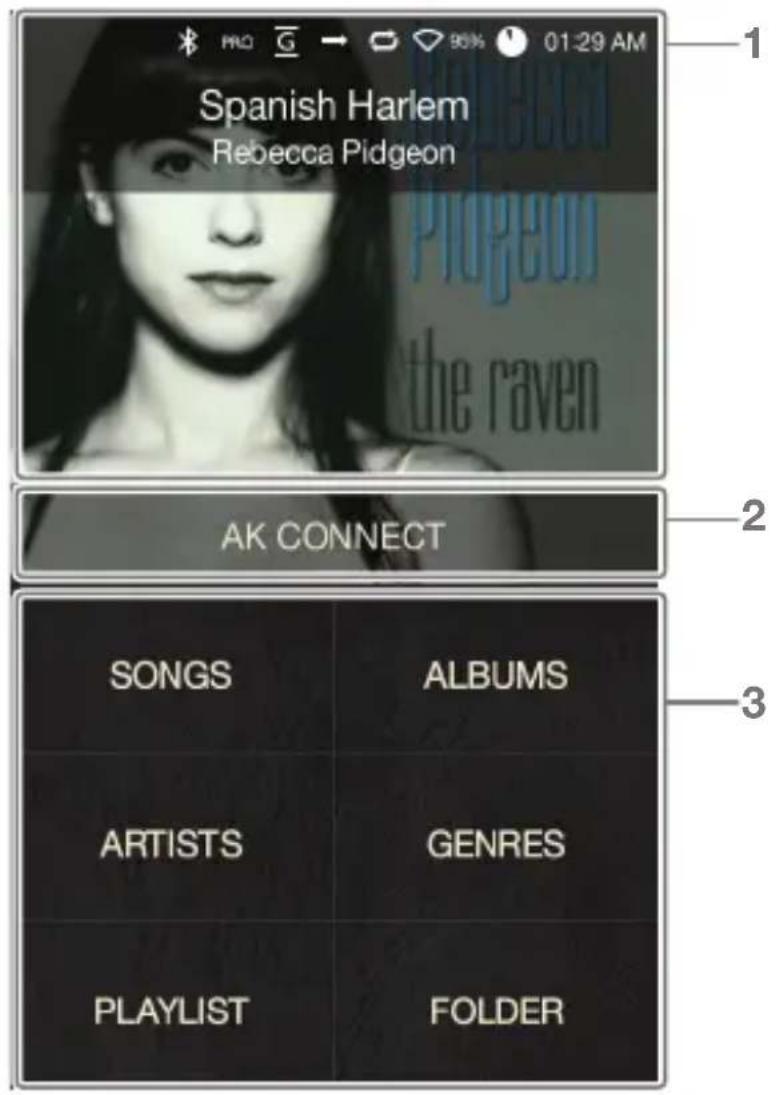
Spanish Harlem Rebecca Pidgeon the raven AK CONNECT SONGS ALBUMS ARTISTS GENRES PLAYLIST FOLDER| 1 | Current Song | Currently-playing song information. |
| 2 | AK Connect | Launches AK Connect. |
| 3 | Search Options | View the list of songs by different search options. |

The search options can be long-pressed and dragged to change their locations.
Notification Bar Screen

text_image
1 PRO G → 90% 01:29 AM Q L DEVICE 2 3 4 5 6 7 8 9 10 11 DAC 12 13 14 15 Notifications SD Card safely removed Connected as a media device PLAYLIST FOLDER| 1 | Notification Bar | Expand or collapse the notification bar by dragging the bar down or up, respectively. | |
| 2 |  | Wi-Fi | Press [ [IMAGE] to turn Wi-Fi on or off. |
| 3 |  | Bluetooth | Press [ [IMAGE] to turn Bluetooth on or off. |
| 4 |  | EQ | Press [ [EQ] to turn the EQ on or off. The most recent EQ settings are applied by default. |
| 5 | [KXH6] | Gapless Playback | Press [ [G] to turn gapless playback on or off. |
| 6 | [XDH9] | Line Out | Turn Line Out on or off. |
| 7 | [A2H9] | Wi-Fi Speakers | Turn Wi-Fi speaker functionality on or off. (Enabled when speakers are connected.) |
| 8 | Notifications Display | Notification contents are displayed in this area. | |
| 9 |  | File Search | Enter keywords to display a list of items containing the search terms. |
| 10 | [28V6] | Settings | Displays a list of settings. |
| 11 | [XATC] | PC Connection Mode | Select the appropriate mode when connected to a computer. DISK : USB drive mode for transferring media files. DAC : Listen to music from the PC through the device. |
| 12 | Screen Lock | Press [ ] to turn the screen lock on or off. The volume wheel is disabled when the screen is locked. |
| 13 | → Play Mode | Press [ →] to cycle through different play modes.→ : Sequential playback.→ : Shuffle playback. |
| 14 | Repeat Mode | Press [ ] to cycle through different repeat modes.→ : Repeat the entire playlist.→ : Repeat the current song.→ : Disable repeat mode. |
| 15 | Screen Brightness | Use the adjustment bar to control the display brightness. |

Long press [ / EQ / ] to move to the corresponding screen.
AK CONNECT
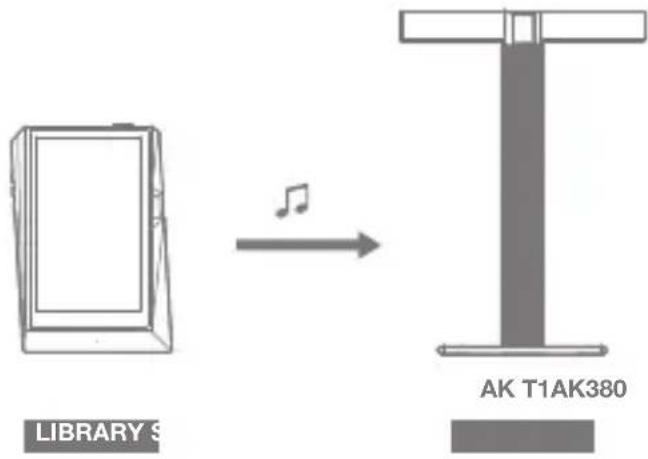
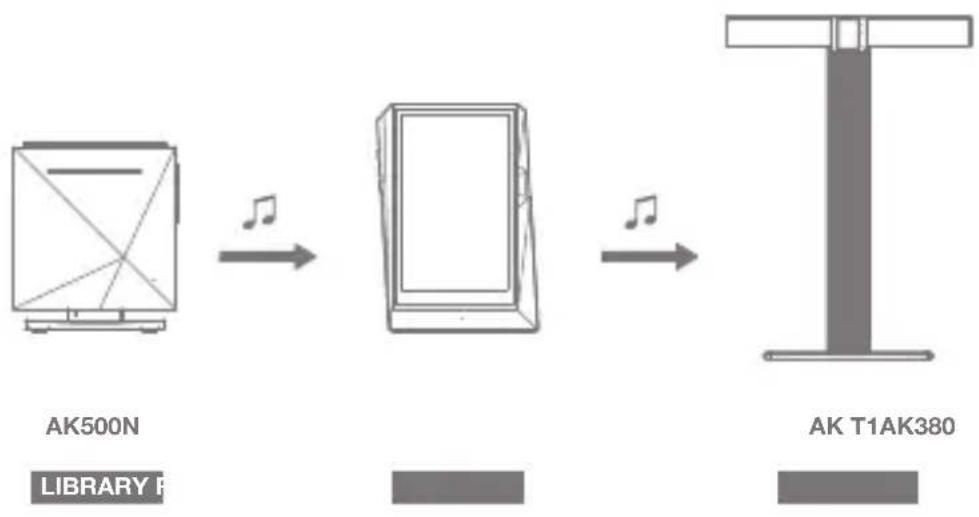
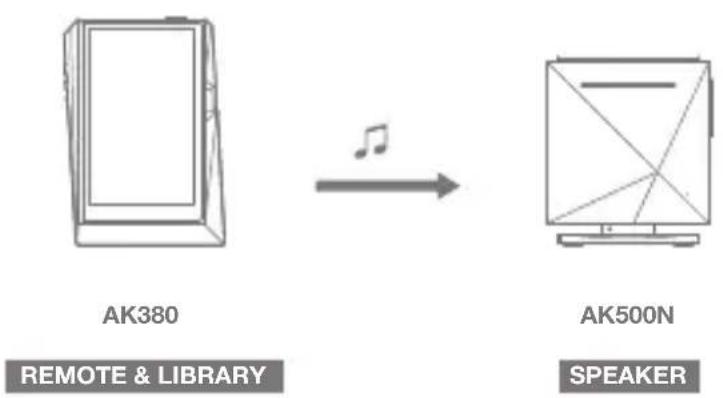
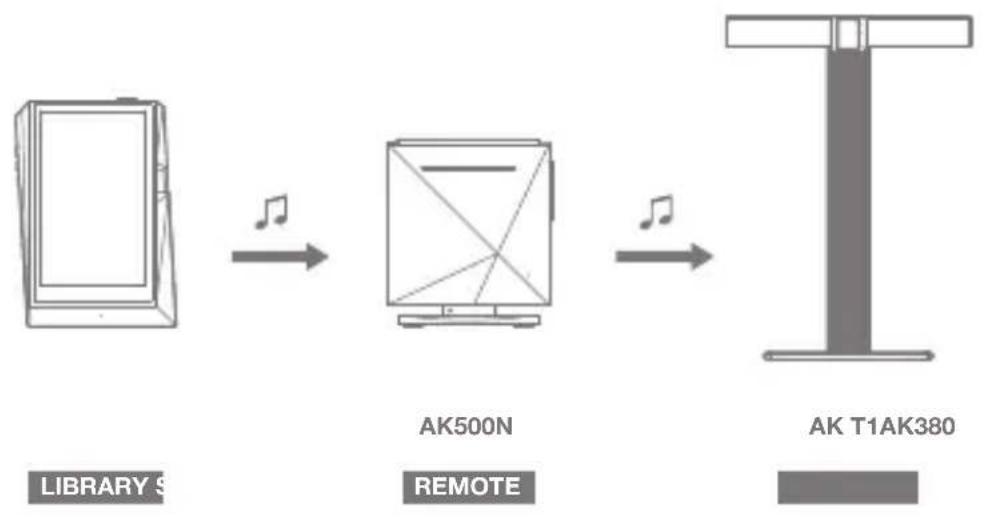
The AK380 can access or download music files stored on a computer on the same network. Music can be played through Astell&Kern speakers.
MQS Streaming Server Installation
- Visit the Astell&Kern website and download the server installer that corresponds to your operating system. [http://www.astellinkern.com > Support > Download]
- Run the downloaded installer and follow the on-screen instructions.
- Check the help menu within the MQS Streaming Server for detailed information.

Please refer to the following PC/Mac minimum system requirements.
PC Minimum System Requirements
• OS : Windows XP, Windows 7/8 (32 & 64-bit)
Mac Minimum System Requirements
• Mac OS X Lion (10.7) or later
Connecting to the MQS Streaming Server
-
Turn on the MQS Streaming Server and connect to the same network to which the AK380 is connected.
Run the MQS Streaming Server from the PC. -
Turn on [AK Connect] from the device settings.
-
Press [AK Connect] from the home screen.
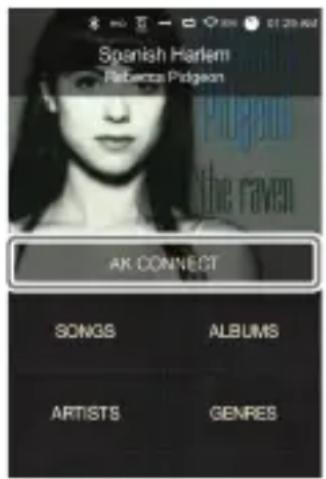
text_image
Spanish Harlem Rebecca Penguin Piggin the raven AK CONNECT SONGS ALBUMS ARTISTS GENRES- A list of servers on the same network as the AK380 will be displayed.
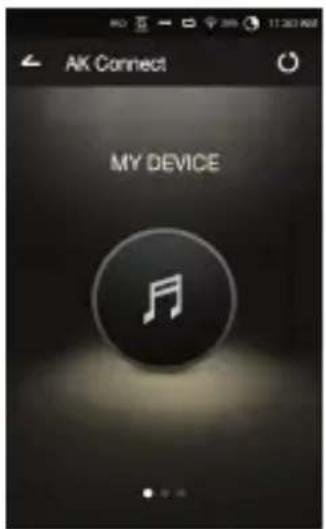
text_image
AK Connect MY DEVICE- Scroll the screen left and right to select a server. The selected server will be connected and the server home screen will be displayed.
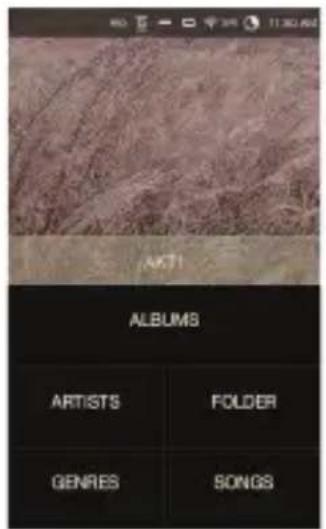
text_image
AKT1 ALBUMS ARTISTS FOLDER GENRES SONGS- Select a search option at the bottom of the server home screen to display a list of music.
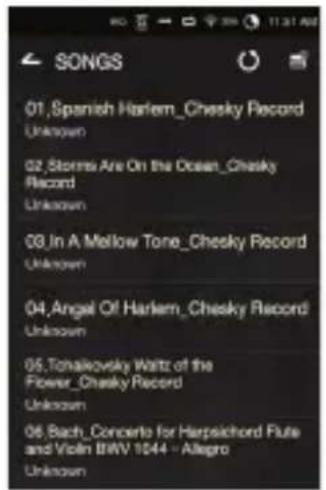
text_image
SONGS 01, Spanish Harlem_Chesky Record Unknown 02, Storms Are On the Ocean_Chesky Record Unknown 03, In A Mellow Tone_Chesky Record Unknown 04, Angel Of Harlem_Chesky Record Unknown 05, Tohaleovsky Waltz of the Flower_Chesky Record Unknown 06, Bach_Concerto for Harpsichord Flute and Violin BTW 1044 - Allegro Unknown
Refer to page 45 for connecting to a wireless network.
Music Streaming and Download
- Select a search option from the server Home Screen to display a list of music.
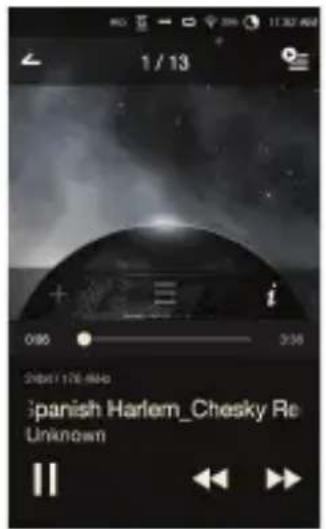
- Select a song to begin streaming.
text_image
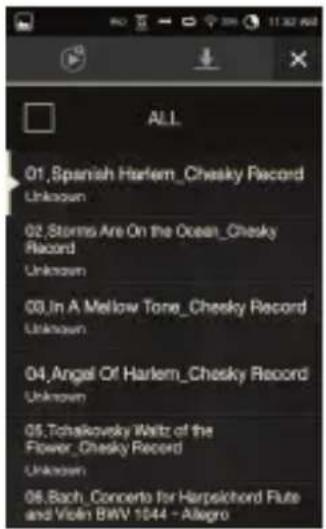
1 / 13 096 338 2007/17E-04 Spanish Harlem_Chesky Re Unknown- Press the [ ] button at the upper-right corner of the music list.
- Select the music to be downloaded, and then press the [ ↓] button at the top of the screen to begin downloading.
A message on the Notification Bar will indicate a completed download.
text_image
ALL 01,Spanish Harlem_Chesky Record Unknown 02,Storms Are On the Ocean_Chesky Record Unknown 03,In A Mellow Tone_Chesky Record Unknown 04,Angel Of Harlem_Chesky Record Unknown 05,Tohakovsky Waltz of the Flower_Chesky Record Unknown 06,Bach_Concerto for Harpschord Flute and Violin BWV 1844 - Allegro
Depending on network conditions, song loading may be slow or streaming may stutter.
Server response may be slow when the server computer is under load.
Depending on network conditions and server status, the AK380's performance may be affected when streaming and downloading at the same time.
Terminating music streaming or pressing the item being downloaded within the Notification Bar will stop the downloading.
Selecting Speakers
- Turn on the speaker(s) to be connected, and then connect it to the same network as the AK380.
- Turn on [AK Connect] from the device settings.
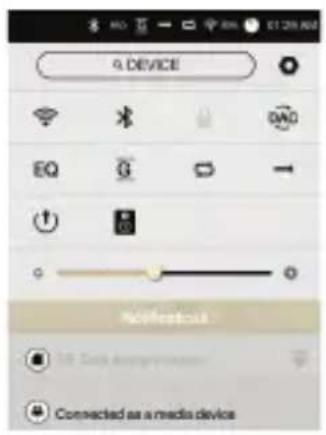
- Press [ ] from the notification bar to display a list of speakers available on the same network as the AK380.
- Scroll the screen left and right to select a speaker. The selected speaker will be connected, and music will be played back through the speaker.
text_image
9 DEVICE EQ G - + - - - - - - - - - - - - - - - - - - - - - - - - - - - - - - - - - - - - - - - - - - - - - - - - - - - - - - - - - - - - - - - - - - -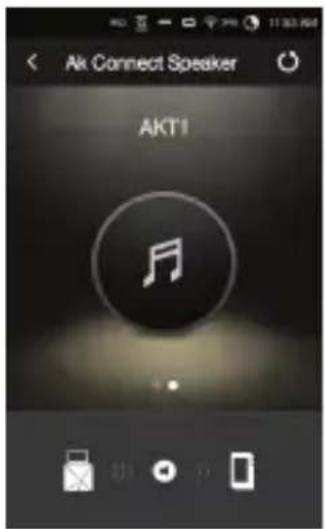
text_image
Ak Connect Speaker AKTIAK Connect Usage Example
Case 1
text_image
LIBRARY S AK T1AK380Case 2
flowchart
graph LR
    A["AK500N"] -->|Note| B["Add"]
    B -->|Note| C["Add"]
    C --> D["AK T1AK380"]
Case 3
text_image
AK380 REMOTE & LIBRARY AK500N SPEAKERCase 4
flowchart
graph LR
    A["LIBRARY $"] --> B["→"]
    B --> C["AK500N REMOTE"]
    C --> D["→"]
    D --> E["AK T1AK380"]
Case 5
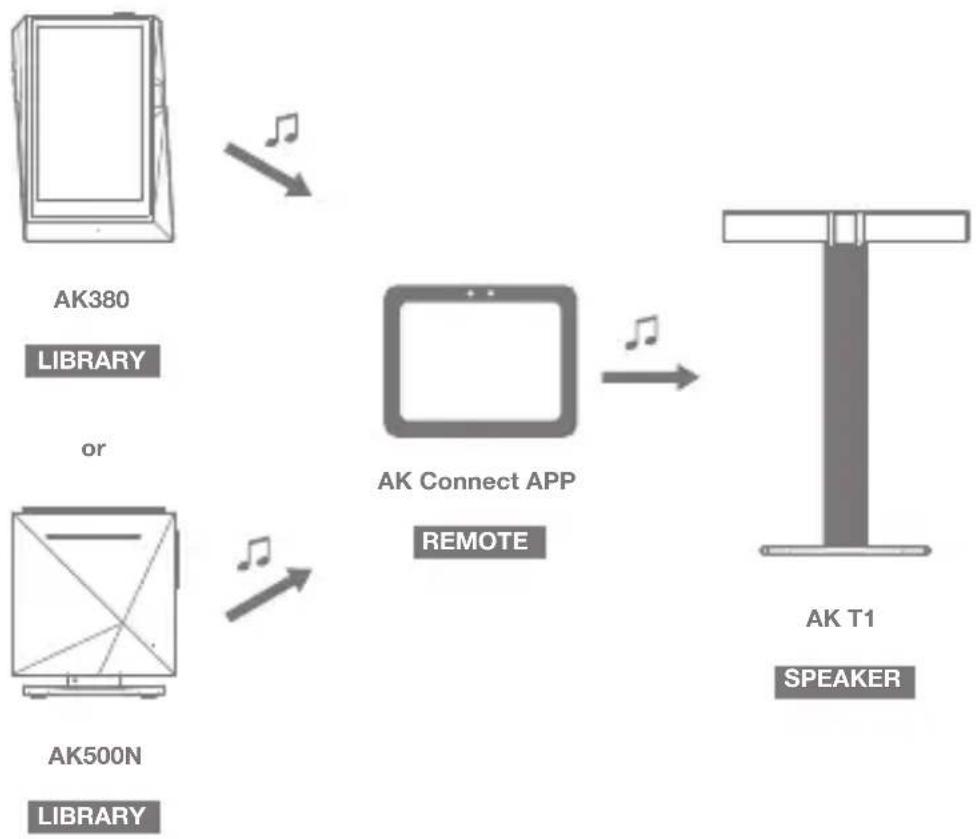
flowchart
graph LR
    A["AK380<br>LIBRARY"] -->|→| B["AK Connect APP<br>REMOTE"]
    C["AK500N<br>LIBRARY"] -->|→| B
    B -->|→| D["AK T1<br>SPEAKER"]
Listening to Music
Selecting Music
- Select a search option at the bottom of the home screen to display the playlist.
- Select a song from the list to begin playback.

Select [Folder] to search music by folder.
Continuous Playback: Approximately 10 hours (Basis: FLAC, 16-bit, 44 kHz, unbalanced output, volume 80, EQ Off, LCD Off)
Supported Formats: PCM [8 - 384 kHz (8/16/24/32-bit)] DSD [2.8/5.6 MHz]
Listening to Music
- Press [ ] at the top of the music list to display music options.

Add the selected file after the current/last song of the current playlist.

Add the selected file to the playlist.

Delete the selected file.

Copy the selected file.

Move the selected file.
- Select an album cover from the home screen to begin playback.
- Turn the [volume wheel] to adjust the volume.
- Press [ ] during playback to pause and [ ] to resume playback.
You can also pause/resume playback by pressing the [ ] button on the device.
- Press [ ◀◀/ ▶▶] during playback for the previous/next song.
You can also play the previous/next song by pressing the [ / ] button on the device.
- Long-press [ ◀◀ ▶▶] during playback to rewind/fast-forward.
- You can also rewind/fast-forward by pressing the [ / ] button on the device.
- Drag the progress bar to the desired location during playback.
- Press the [Home] button on the device to go to the Home Screen.
- Press the album cover during playback to display an additional screen.
◀: Display the previous screen.
Display the current playlist.
- Press [ ≡ next to the playlist to edit the playlist order.
Press [ ] at the top of the music list to display music options.
Add the selected file to the playlist. Delete the selected file.
+: Add the current song to the playlist.
≡ Display lyrics for the current song.
t: Display current song information.
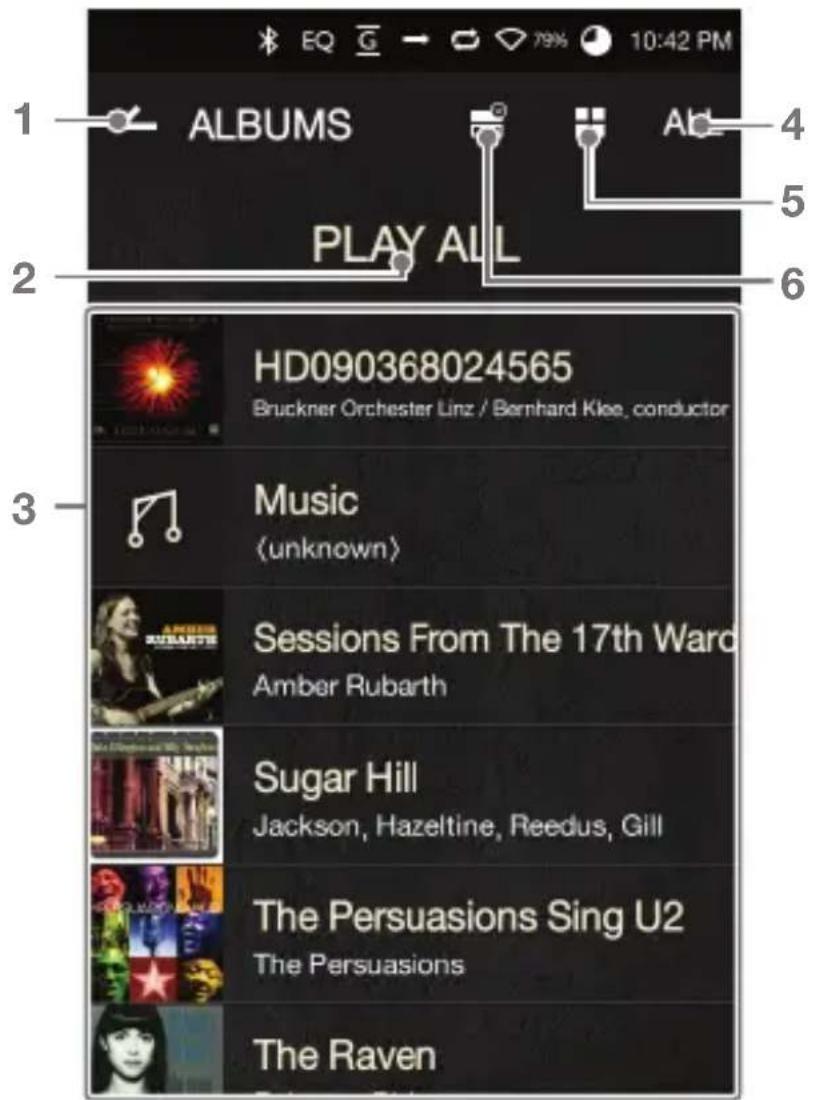
Playlist Screen
text_image
1 ALBUMS 2 PLAY ALL 3 HD090368024565 Bruckner Orchester Linz / Bernhard Klee, conductor 4 5 6 Music (unknown) Sessions From The 17th Ward Amber Rubarth Sugar Hill Jackson, Hazeltine, Reedus, Gill The Persuasions Sing U2 The Persuasions The Raven| 1 | Current Location | Indicates the current location. Press to return to the previous screen. | |
| 2 | Play All | Play all songs from the current playlist. | |
| 3 | Playlist | Displays the playlist for the current location. Long-press a song to add it to or remove it from the playlist. | |
| 4 | List Sorting | Select a method for sorting the playlist. |  |
| 5 | List View | Select a view type for the list of albums. | |
| 6 | Music Options | Select the checkbox to apply playlist options. | |
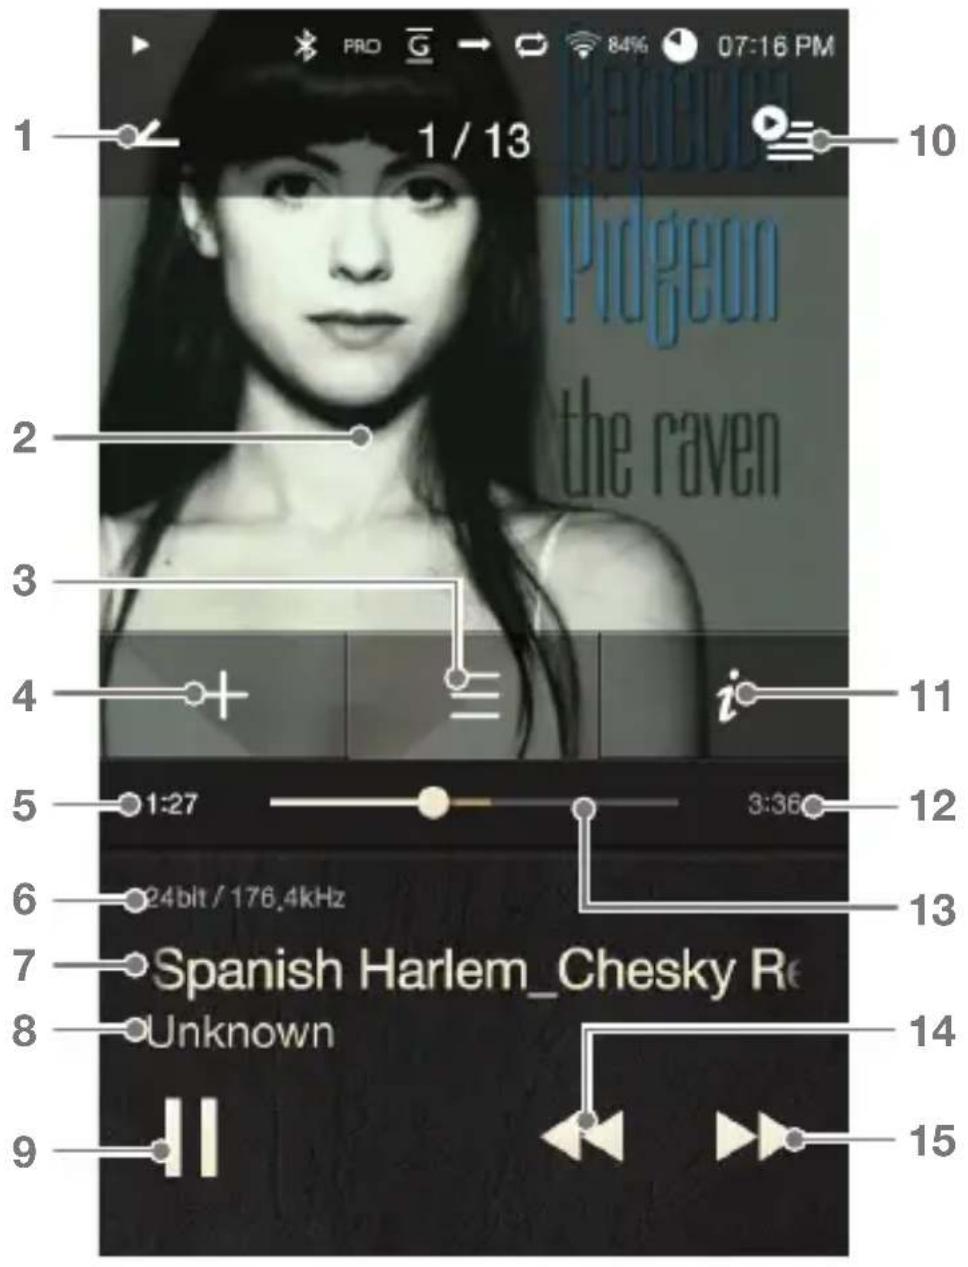
Music Player Screen
text_image
1 / 13 10 2 3 4 i 11 5 1:27 3:36 12 6 24bit / 176,4kHz 13 7 Spanish Harlem_Chesky Re 8 Unknown 14 9 151 △ Previous Screen Return to the previous screen.
2 Album Cover Displays album covers. Press the album cover to show lyrics, add the current song to a playlist, or view song information
| 3 | ≡ | Lyrics | Lyrics for the current song. |
| 4 | + | Add to Playlist | Add the current song to a playlist. |
| 5 | Song Progress | Indicates song duration. | |
| 6 | Details | Displays bitrate and sampling frequency data. | |
| 7 | Title | Song title information. File name is displayed when ID3 metadata is unavailable. | |
| 8 | Artist | Artist name. | |
| 9 | ▶/II | Play/Pause | Play or pause the current song. |
| 10 | ○≡ | Playlist | Displays the current playlist. |
| 11 | i | Details | Displays current song information. |
| 12 | Song Duration | Indicates the song's total duration. Press to switch from elapsed time to remaining time. | |
| 13 | Progress Bar | Indicates song progress. Drag the indicator to move to the desired time. | |
| 14 | ◀◀ | Previous/ Rewind | Short press: Previous song. Long press: Rewind the current song. |
| 15 | ▶▶ | Next/ Fast-Forward | Short press: Next song. Long press: Fast-forward the current song. |
Playlist Manage- ment
Creating a Playlist
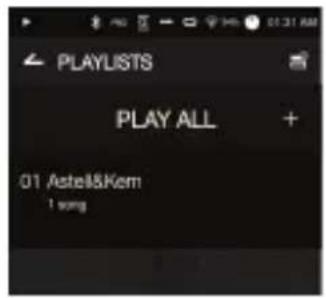
- Press [Playlist - Playlists] from the home screen to display a list of playlists.
- Press [+] at the upper-right corner of the screen.
- Enter a name for the playlist, and then press [Add] to create a new playlist.
text_image
PLAYLISTS PLAY ALL + 01 Astel&Kem ! song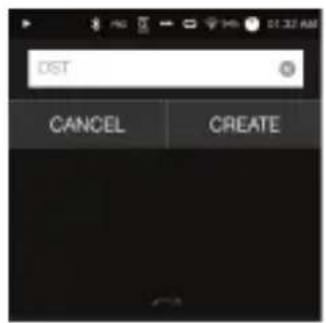
text_image
DST CANCEL CREATEAdding a Song to a Playlist
- Press [Playlists] to display a list of playlists.
- Select a playlist and press [+ Add] to display a list of songs.
- Select the desired song, and then press [+ Add] to add the song to the selected playlist.

text_image
OST ALL CANCEL ADD 06 Bach Concerto for Harpsichord Flute and Violin BMW 1044 - Allegro (unknown) 07 Vivati Concerto in Dminor opus 4 no. 8 - Allegro (unknown) 08 Scarlet's Sonata in C major, K, 420 - Allegro (unknown) 09 the master album_Alegro assai shace ma serido (unknown) 10. Touched by Tango_Five Tango Sensations - Anxiety (unknown) Angel Of HarlemRemoving a Song from a Playlist
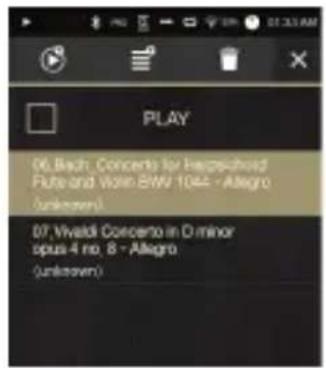
- Press [Playlists] to display a list of playlists.
- Select the desired playlist, and then press [ ] at the top of the screen.
- Select the desired song, and then press [ ] to remove the song from the selected playlist.
text_image
PLAY 06 Bach. Concerto for Recognised Flute and Violin BMW 1044 - Allegro (unknown) 07 Vivaldi Concerto in D minor opus 4 no. 8 - Allegro (unknown)Editing the Playlist Order
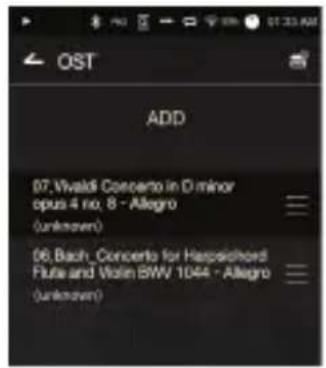
- Press [≡] next to the playlist to modify the playlist order.
text_image
OST ADD 07, Vitaldi Concerto in D minor opus 4 no. 8 - Allegro (unknown) 06, Bach _Concerto for Hapshichordi Flute and Violin BWV 1044 - Allegro (unknown)Playing a Playlist
- Press [Playlists] to display a list of playlists, and then press [ ] at the top of the screen.
- Select the desired playlist for playback.
- Press [播放] at the top of the screen to add the selected playlist after the current/last song of the current playlist.
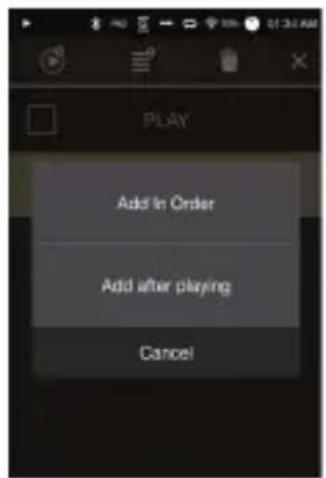
text_image
Add In Order Add after playing CancelRenaming a Playlist
- Press [Playlists] to display a list of playlists, and then press [ ] at the top of the screen.
- Select a playlist to be renamed.
- Press [ ] at the top of the screen to display a rename window.
- Enter a name for the playlist, and then press [Rename] to save the playlist under a new name.
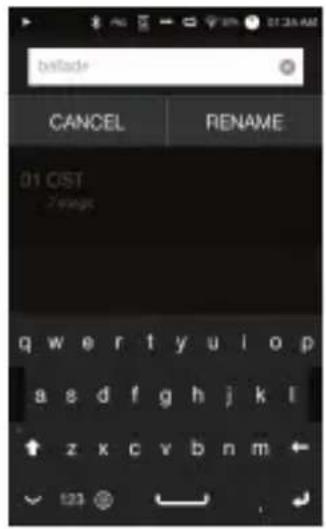
text_image
balance CANCEL RENAME 01 CST 2 weeks qwertyuiop asdfghjkl zxcvbnm 123Deleting a Playlist
- Press [Playlists] to display a list of playlists, and then press [ ] at the top of the screen.
- Select the playlist to be deleted.
- Press [icon] at the top of the screen to delete the selected playlist.
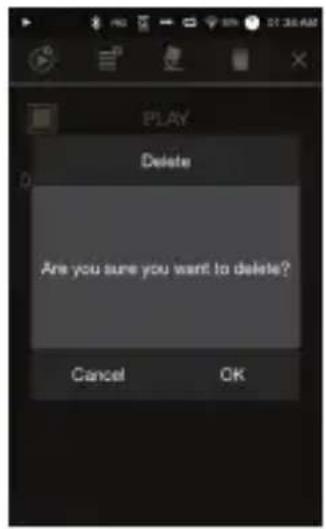
text_image
PLAY Delete Are you sure you want to delete? Cancel OKUSB DAC Installation
The USB DAC functionality allows the AK380 to be recognized as a sound card on the computer. Music from the computer is played through the device's earphones port for an enhanced listening experience.
USB DAC Specifications
•USB DAC Supported OS
Windows XP (32 bit) / Windows 7(32 & 64 bit) /
Windows 8 (32 & 64bit)
•USB DAC Support Specifications
Supported formats: PCM [8 – 384 kHz (8/16/24/32-bit)]
DSD [2.8/5.6 MHz]
•Control the volume with the AK380's volume wheel.

Playback is unavailable when settings exceed the support formats.
Volume control is unavailable when the LCD screen is turned off during USB DAC connection.
The Previous, Play, and Next buttons are unavailable during USB DAC connection.
Playback may stutter when computer performance is slow or the USB connection is experiencing heavy usage.
There may be issues with audio-to-video synchronization during video playback depending on the sound quality and operating environment.
Optical output (S/PDIF) is unavailable during USB DAC connection.
Volume cannot be adjusted via the Windows volume control. The volume wheel on the device or volume control on the appropriate program must be used to adjust the volume.
USB DAC Installation
- Set [DAC Input] from [○- Connect USB].
- Connect the device to the PC using the supplied Micro-USB cable.
- Run 'Setup.exe' from Drivers.
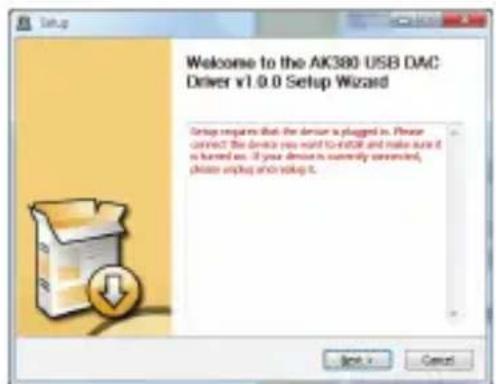
- Press [Next] when the below screen is displayed.
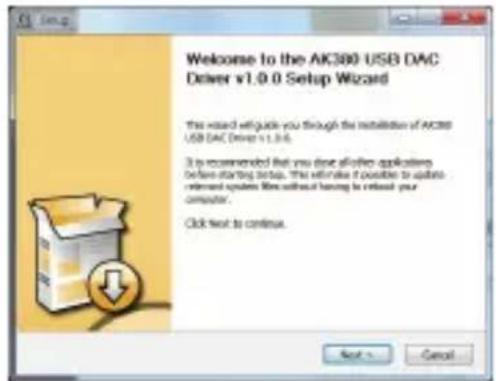
text_image
Welcome to the AK300 USB DAC Driver v1.0.0 Setup Wizard This wizard will guide you through the installation of AK300 USB DAC Driver v1.0.0. It is recommended that you dose all other applications before starting setup. This will make it possible to update revised updates like without having to release your computer. Click next to continue.However, when the following screen is displayed, verify that [DAC Input] is selected under [Connect USB].
text_image
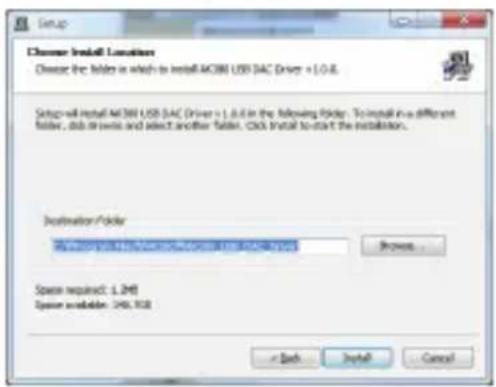
Setup Welcome to the AK380 USB DAC Driver v1.0.0 Setup Wizard Setup requires that the device is plugged in. Please connect the device you want to install and make sure it is turned on. If your device is currently connected, please stop and setup it. Next > Cancel- Click [Browse] to select the driver destination folder and click [Install].
text_image
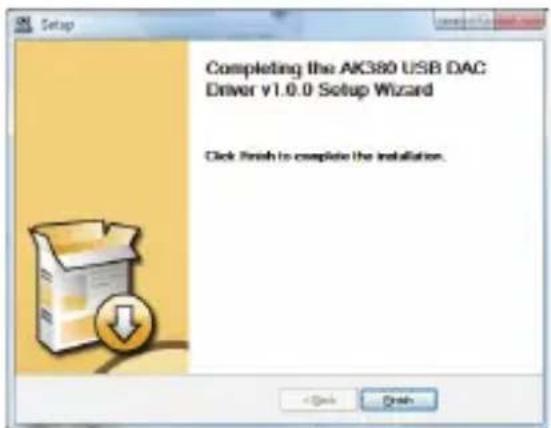
Setup Chower Install Locations Choose the folder in which to install ACOMI USB SAC Driver +1.0.8. Setup will install ACOMI USB SAC Driver + 1.0.8 in the following folder. To install in a different folder, this drives and select another folder. Click to install to start the installation. Installation Folder My device is available at the beginning of the installation folder (1.0.8) Browse... Space request: 1.04M System available: 196.108 + Back Install Cancel- When the following screen is displayed, click [Finish] to complete the installation.
text_image
Setup Completing the AK380 USB DAC Driver v1.0.0 Setup Wizard Click finish to complete the installation.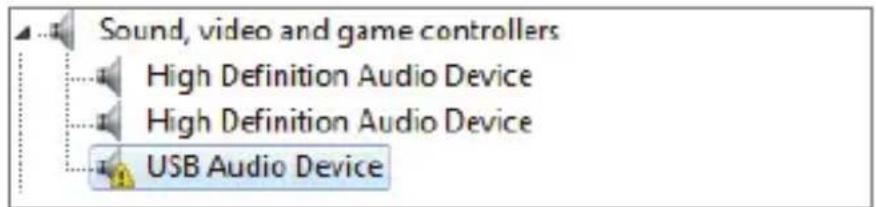
text_image
Sound, video and game controllers High Definition Audio Device High Definition Audio Device USB Audio Device< Before driver installation >
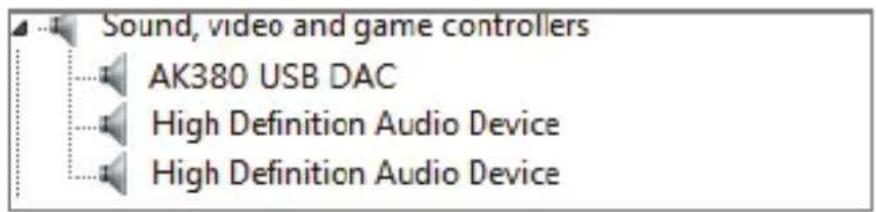
text_image
Sound, video and game controllers AK380 USB DAC High Definition Audio Device High Definition Audio Device< After driver installation >
- Change the default 'Sound Output' device according to the operating system as seen in the images below.
Windows XP: Control Panel > Sound and Audio Devices > Audio tab > Change the default audio device under 'Sound playback' to [AK380 USB DAC].
Windows 7/8: Control Panel > Hardware and Sound > Manage Audio Devices > Right-click [AK380 USB DAC] and select [Set as default device].
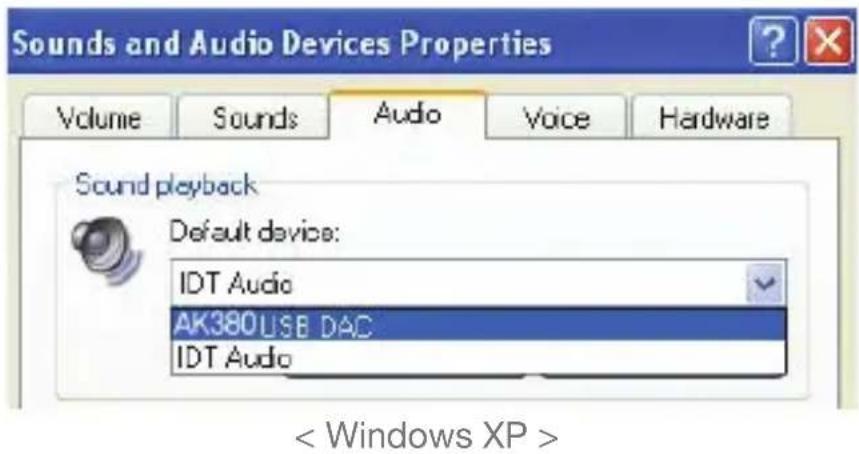
text_image
Sounds and Audio Devices Properties Volume Sounds Audio Voice Hardware Sound playback Default device: IDT Audio AK380USB DAC IDT Audio < Windows XP >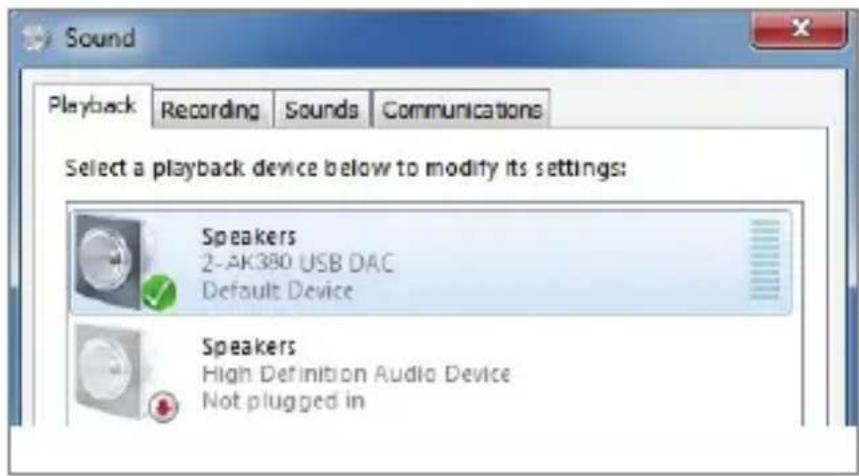
text_image
Sound Playback Recording Sounds Communications Select a playback device below to modify its settings: Speakers 2-AK380 USB DAC Default Device Speakers High Definition Audio Device Not plugged in
Hi-Fi audio playback on Windows 7/8: Control Panel > Hardware and Sound > Manage Audio Devices > Double-click [AK380 USB DAC] > Advanced tab > Default format > Select [24-bit, 192000 Hz] (Recommended)
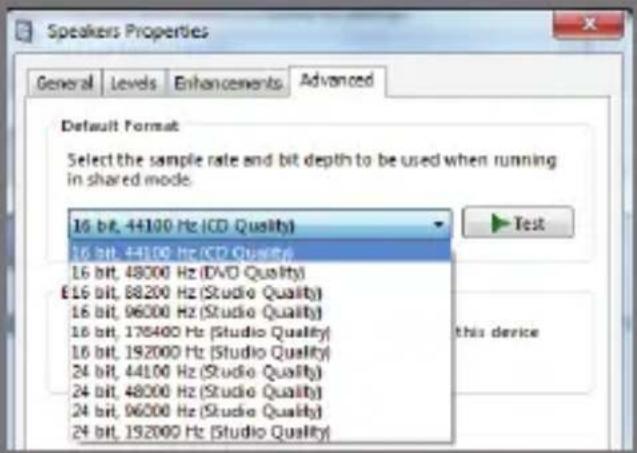
text_image
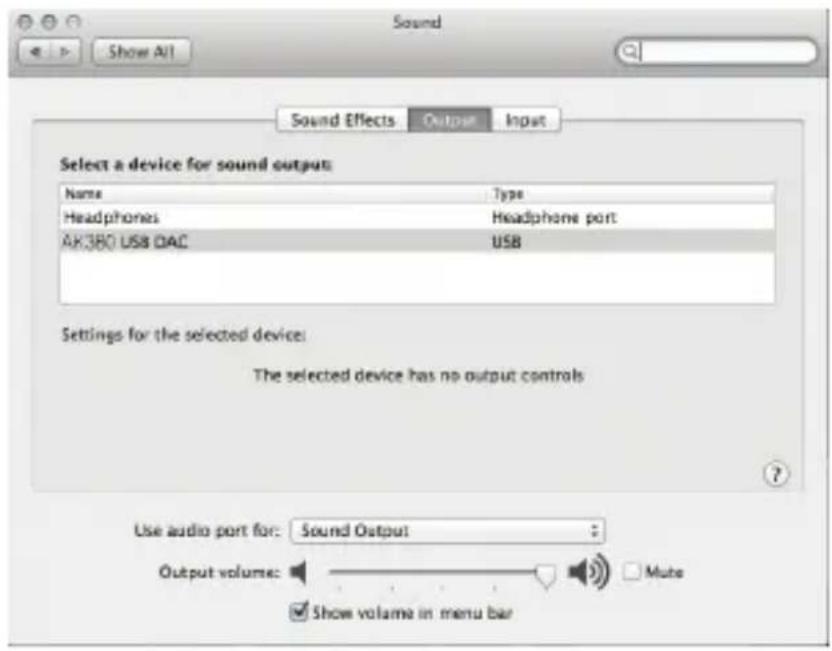
Speakers Properties General Levels Enhancements Advanced Default Format Select the sample rate and bit depth to be used when running in shared mode. 16 bit, 44100 Hz (CD Quality) 16 bit, 44100 Hz (CD Quality) 16 bit, 48000 Hz (DVD Quality) £16 bit, 88200 Hz (Studio Quality) 16 bit, 96000 Hz (Studio Quality) 16 bit, 178400 Hz (Studio Quality) 16 bit, 192000 Hz (Studio Quality) 24 bit, 44100 Hz (Studio Quality) 24 bit, 48000 Hz (Studio Quality) 24 bit, 96000 Hz (Studio Quality) 24 bit, 192000 Hz (Studio Quality)Mac OS X: System Preferences > Sound > Output tab > Select [AK380 USB DAC].
text_image
Sound Show All Sound Effects Output Xi Input Select a device for sound output: Name Way Headphones Headphone port AK380 USB DAC USB Settings for the selected device: The selected device has no output controls Use audio port for: Sound Output Output volume: Mute Show volume in menu bar
This step is only required for the initial setup procedure. No additional steps are necessary after selecting the AK380.
Using Bluetooth
Connect a Bluetooth device to listen to music wirelessly.
Turning Bluetooth On/Off
A Bluetooth device must be paired with the AK240 prior to use. Refer to the Bluetooth device's instruction manual for details.
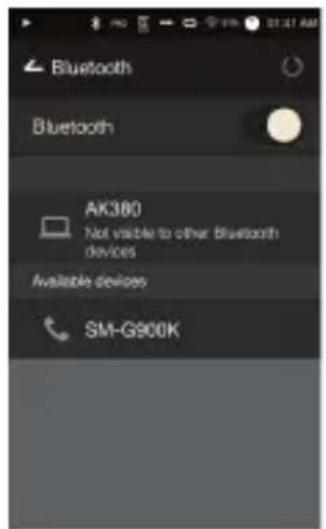
- Select [ ] from the home screen, or select [On/Off] from [ Bluetooth].
text_image
Bluetooth Bluetooth AK380 Not visible to other Bluetooth devices Available devices SM-G900KBluetooth Pairing
- Select the appropriate Bluetooth device from the list of available devices.

Refer to the Bluetooth device's instruction manual for details.
Terminating a Bluetooth Connection
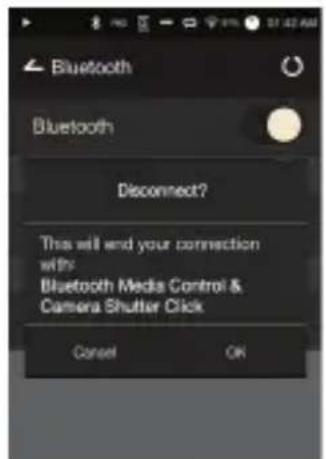
- Press the connected Bluetooth device and confirm the message prompt to disconnect the device.
text_image
Bluetooth Bluetooth Disconnect? This will end your connection with: Bluetooth Media Control & Camera Shutter Click Cancel OKRemoving a Bluetooth Pairing
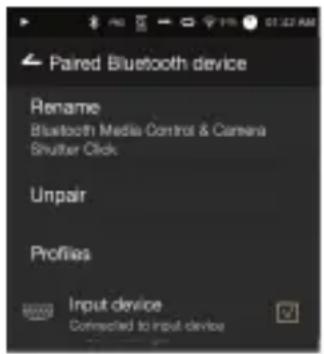
- Press [≡] on the right side of the paired device to be directed to the settings screen.
- Select [Remove Pairing] to complete the process.
text_image
Paired Bluetooth device Rename Bluetooth Media Control & Camera Shutter Click Unpair Profiles Input device Connected to input device
Bluetooth Support Specifications
Profile: A2DP
- Device performance may be affected during Hi-Fi playback. (48 kHz or lower is recommended) DSD playback is unavailable via Bluetooth.
Do not turn off the device while connected to Bluetooth. Power cycle the Bluetooth device in case of malfunction. Pairing methods may differ for each individual Bluetooth device. Always refer to the respective instruction manual for details. When connecting the product to a Bluetooth device, the distance between the two must be within 20 cm.
Audio quality will degrade with longer distances, and the pairing may disconnect at a distance of 2 m (6.5 ft) or more. (Distances may vary depending on device and environment.) Crosstalk may be heard while using Bluetooth.
For multipoint devices, make the necessary connections prior to use.
Car audio Bluetooth connections are not supported. Malfunction, noise, and other undesirable effects may occur due to the device's battery level and the environment.
- Signal interference affects data transmission. (e.g. holding the device while wearing a Bluetooth device, holding the device while holding another electronic device, etc.)
- The device or Bluetooth headset's radio transmitters are affected by touching parts of the body.
• Transmission strength is affected by walls, corners, partitions, etc.
• Devices using the same frequencies may cause interference. (e.g. medical devices, microwave ovens, Wi-Fi, etc.)
- Areas with an excessive amount of interference or weak signals (e.g. elevators, underground, etc.) affect performance.
Settings
Set up the device according to the user's needs. The settings menu may vary depending on the firmware version.
Setup
- Select [ ] from the home screen notification bar.
- Select the desired item for setup.
Wi-Fi
- Change wireless network settings and turn Wi-Fi on or off.

Refer to page 45 for more information on connecting to a wireless network.
Bluetooth
- Connect a Bluetooth device to listen to music wirelessly.

Refer to [Using Bluetooth] on page 38 of the manual for more information on setting up a Bluetooth connection.
AK CONNECT
- Set whether to use AK Connect
Equalizer
- Set the equalizer according to the user's preferences.
- Pro EQ: EQ preset recommended by professionals.
-User EQ: Adjust the frequencies according to the user's preferences.

EQ Supported Formats : PCM [8 \~ 192kHz(8/16/24bit)] Equalizer is not supported during DSD, 32bit playback. Using the equalizer may negatively affect device performance. Refer to pages 46-48 of the manual for more information on using the equalizer.
Gapless Playback
- Play the next song without any interruption/silence.
- Gapless playback is only supported between two files with identical bitrate, sampling rate, and channels.
Line Out
- Turn Line Out on or off.
- Enabling Line Out and pressing [Line Out] in the volume control window will lock the volume level at maximum and therefore cannot be adjusted.

Do not use earphones with the Line Out feature enabled. Doing so may cause permanent hearing loss.
Left-Right Balance
- Adjust the Left-Right Balance for earphones/headphones.
AMP
- Set the amplification level for amp connection.
Screen Brightness
- Adjust screen brightness settings.
Theme
- Change the theme.
Date & Time
- Set the current date, time, and region.
Device Name
- Designate the device name.
- You can set up to 30 characters.
Language
- Select a language.
- English, Korean, Japanese, Chinese (Simplified / Traditional)
Keyboard
- Select a language for the keyboard.
- English, Korean, Japanese, Chinese (Simplified / Traditional)
Power
•Automatic Shutdown: The device will turn off after a defined period when there is no user input.
- Screen Timeout: The screen will turn off after a defined period when there is no user input.
- Sleep Timer: Music playback will stop, and the device will turn off after a defined period.
USB Connection
- Media Device (USB Drive) : Connect to a computer to transfer media files.
• DAC Input: Listen to music on a PC through the device.
Download
- Select a folder for downloaded files.

The default folder is set when using AK Connect to download files. When [Select Folder] is selected, the user is prompted to choose a download folder each time a file is downloaded.
Update
- System Update: Update the system when a new version is found.
- Application Update: Update the default applications (including the Store) when new versions are found.
System Information
- System Information: View model number, firmware version, and data storage information. The microSD card can be mounted/dismounted, and data can be deleted.

Formatting the microSD card will delete all data on the memory card. Be sure to backup any important files before formatting.
When formatting the microSD card from a computer, be sure to select the FAT32 system.
System Restore
- Database Initialization: Reset the internal database.
The database initialization time may vary depending on the number of files stored on the device. - Default Settings: Revert all user settings back to their original settings.
- Factory Reset: Delete all user data and restore the device to its original factory settings.
Connecting to a Wireless Network
Connecting to a Network
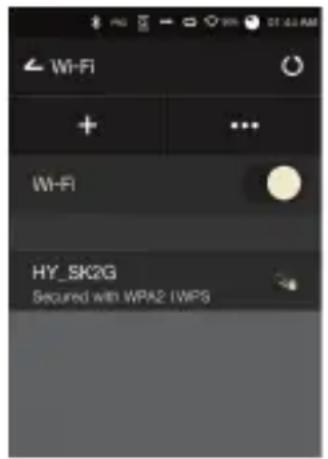
- Long-press [WiFi] from the Notification Bar or select [Wi-Fi] to display a list of access points (AP).
text_image
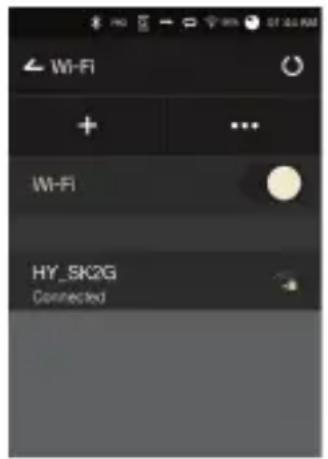
Wi-Fi + ... Wi-Fi HY_SK2G Secured with WPA2 IWPS- Select the desired AP to connect to the wireless network.
Additional information (encryption key, index, etc.) may be required depending on the network settings.
text_image
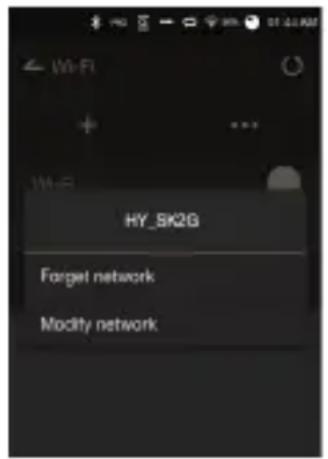
Wi-Fi + ... Wi-Fi HY_5K2G Connected- Long-press the network name and select [Network Settings] to edit specific network settings.
text_image
HY_SK2G Forget network Modify network
Networks requiring browser or other additional certifications are not supported.
Channels 1 through 11 are supported.
Equalizer Setup
Equalizer Setup
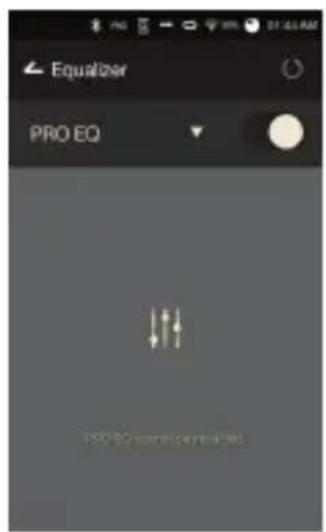
- Long-press [EQ] from the Notification Bar, or turn on the feature from [ - Equalizer].
text_image
Equalizer PRO EQ ↓ ↑ ↓ 150000000000000000000000000000000000000000000000000000000000000000000- Press [Pro EQ] at the upper-left corner of the screen and select [ + ].
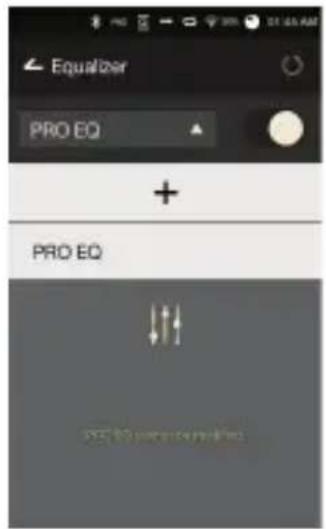
text_image
Equalizer PRO EQ + PRO EQ ↓↑↑ PRO EQ- Enter a name for the custom EQ settings and select [Add].
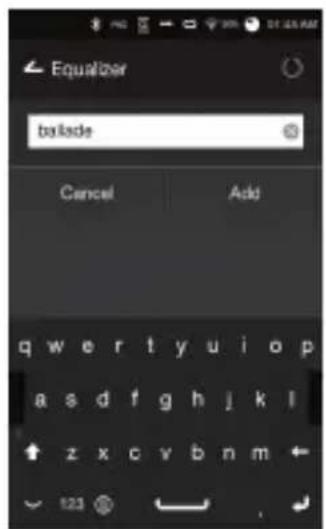
text_image
Equalizer balade Cancel Add qwertyuiop asdfghjkl zxcvbnm 123-
Adjust the frequencies left and right according to the user's preferences.
-
The number values at the lower-left corner of the screen can be adjusted for fine-tuning.
-
Press [Ⅲ] at the lower-right corner of the screen to display the PEQ settings screen. The frequency, gain, and Q values can be adjusted according to the user's preferences.
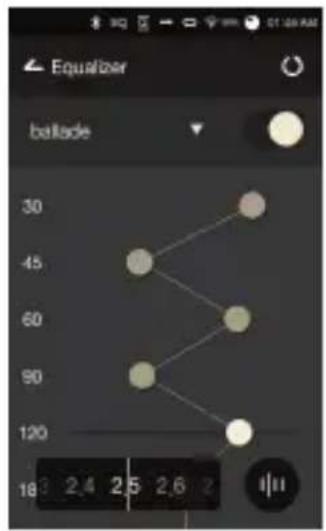
text_image
Equalizer ballade 30 45 60 90 120 18 2.4 2.5 2.6 2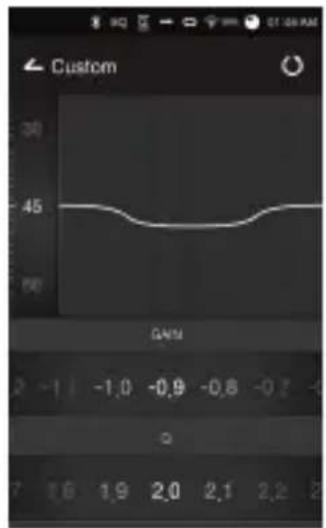
text_image
Custom GWHM 0 -1 1 -1.0 -0.9 -0.8 -0.7 -0 0 16 1.9 2.0 2.1 2.2 2Resetting the Equalizer
- Select the desired EQ setting and press [ ] at the bottom of the screen to revert the EQ to its default settings.
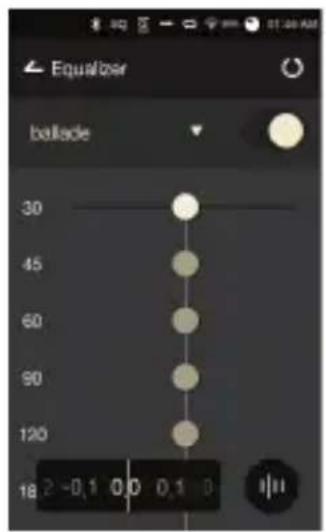
text_image
Equalizer ballele 30 45 60 90 120 18 2 -0,1 0,0 0,1 0Deleting an Equalizer
- Press [Pro EQ] at the upper-left corner of the screen.
- Press [ ∅] next to the desired item to delete the selected equalizer.
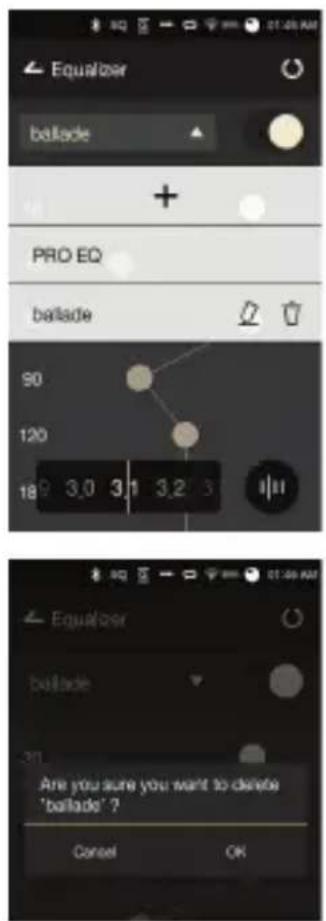
text_image
Equalizer ballade + PRO EQ ballade 90 120 18 3.0 3.1 3.2 3 Equalizer ballade Are you sure you want to delete 'ballade' ? Cancel OKRenaming an Equalizer
- Press [Pro EQ] at the upper-left corner of the screen.
- Press [O] next to the desired item and enter a new name for the selected equalizer.
- Press [Rename] to apply the changes.
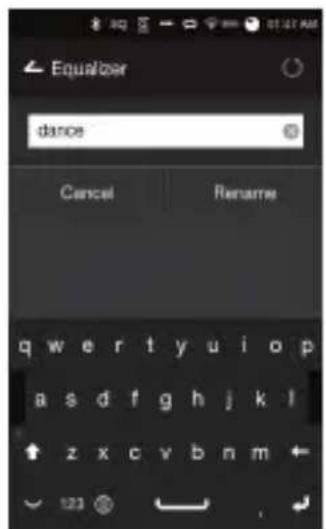
text_image
Equalizer dance Cancel Rename qwertyuiop asdfghjkl zxcvbnm 123Safety Precautions
Device
- When a plug is inserted into the earphones, balanced, or USB port, do not apply any force or shock to the plug.
- Do not insert any metal objects (coins, hairpins, etc.) or flammable debris into the device.
- Do not place heavy objects on the device.
- In case the device gets wet (water, chemicals, medicine, cosmetics, sweat, etc.), do not power on the device. Allow it to dry thoroughly and then contact the nearest iriver Customer Support Center. (Malfunctions due to exposure to liquids will be repaired for a fee regardless of the warranty period and such damage may not be repairable.)
- Avoid using or storing the device in direct sunlight (e.g. inside a car in the summer).
- Do not use or store the device in hot and humid areas.
- Do not use or store the device areas with excess dust, smoke, or debris.
- Avoid placing the device on blankets, heated mats, or carpets for extended periods of time during use.
- Do not place the device near a fire, heat source, or in a microwave.
- Never attempt to disassemble, repair, or alter the product.
- Do not store the device in confined spaces with the power on for extended periods of time.
- Do not place the device near magnetic objects (magnets, televisions, monitors, speakers, etc.).
- Never use chemicals or cleaning products on the device as they can alter the paint and surface coating.
- Avoid dropping or subjecting the device to a strong impact (excessive vibration, etc.).
- Do not press multiple buttons simultaneously.
- Do not disconnect the Micro-USB cable during data transfer.
- When connecting the Micro-USB cable, use a USB port on the back of the PC. Connecting to a defective or damaged USB port may damage the device.
- Displaying one image for an extended period may cause screen burn-in (afterimage).
- Using poor quality protective films or adhesive stickers on the screen may cause damage.
- Do not insert any foreign objects into the earphones port.
Other
- Do not use earphones/headphones or operate the product while controlling any type of vehicle. It is not only dangerous but may be a violation of the law in certain regions.
- Do not use the product during physical activities (driving, walking, hiking, etc.).
• Always use in a safe environment to avoid the risk of accidents. - Always be aware of your surroundings when using the device while moving.
- Avoid using the device during thunderstorms to reduce the possibility of electric shock.
- If there is a ringing in the ears during or immediately after use, reduce the volume or discontinue using the product and consult a medical professional.
- Do not listen to music at excessive volumes for extended periods.
- Do not use the earphones/headphones at excessive volumes.
- Be careful not to get the earphones/headphones caught in other objects.
- Do not sleep with earphones in your ears or leave them in for extended periods.
Trouble-shooting
Check for solutions to common problems.
- The device won't turn on.
The battery may need to be recharged. Charge the device for at least one hour and try again.
Reset the device and try again. (See p. 5)
- The device will not charge when connected to a computer via USB cable.
Use a USB port on the back of the computer, and check that the USB port is functioning properly.
Check that the USB cable is connected correctly
- The computer won't recognize the device or an error occurs when connected.
Use a USB port on the back of the computer.
Check that the USB cable is connected correctly.
For Windows XP, verify that Service Pack 2 (or higher) and Windows Media Player 10 (or higher) are installed.
- Check if the device connects properly on a different computer.
- The screen turns off repeatedly.
The screen turns off automatically after a defined period to reduce battery consumption. Set the time at [
Power Saving - Screen Timeout].
- The screen does not display images properly.
Check the screen for debris.
- There is no sound, or there is static/interference.
Check that the volume setting is above [0].
Check that the earphones are plugged in properly, and make sure debris isn't obstructing the port connection.
Check if the music file is corrupted.
Verify that the audio settings have been properly set. (balanced, line out, etc.)
- A file does not play, or the product is unstable when a certain file is used.
The following may occur due to the condition of the file:
Playback is unstable or difficult.
The device may not function properly.
The file may sound different from a computer.
There may be a difference in the performance of playback or other functions.
- The file may not be compatible with playback specifications.
A file conversion or use of a different file is recommended.
Copyright
iriver Limited retains the rights to patents, trademarks, copyrights, and other intellectual property rights related to this manual. No contents of this user manual may be duplicated or reproduced in any format or by any means without the prior approval of iriver. Using or reproducing, in whole or part, the contents of this document is subject to penalties. Software, audio, video, and any other copyrighted contents are protected in accordance with relevant copyright laws.
Unauthorized reproduction or distribution of the copyrighted contents from this product is the legal responsibility of the user. Companies, organizations, products, people, and events used in the examples are not based on actual data. iriver has no intention to be associated with any company, institution, product, person, or incident through this instruction manual, and no such inference should be made. It is the responsibility of the user to comply with all applicable copyright laws.
©1999-2015 iriver Limited. All rights reserved.
The AK380 was designed and audio-tuned under the advisement of MSD.
Certifications
KC / FCC / CE / TELEC
Class B Device (Communication equipment for residential use): This is a Class B Device and is registered for EMC requirements for residential use. This device can be used in residential areas and all other areas.

FCCID: PPF21
This device complies with Part 15 of the FCC Rules, Operation is subject to the following two conditions: (1) this device may not cause harmful interference, and (2) this device must accept any interference received, including interference that may cause undesired operation.
Registered Trademarks
Windows 2000, Windows XP, Windows 7, Windows 8, and Windows Media Player are trademarks of Microsoft Corp.
Disclaimers
The manufacturer, importer, and distributor shall not be liable for damages including accidental and personal injury due to the improper use or operation of this product. The information in this user manual was written based on current product specifications. The manufacturer, iriver Limited, is adding new complementary features and will continue to apply new technologies in the future. All specifications may be changed without prior notice. There is no warranty against data loss due to the use of this product.
Specifications
General Specifications
| Product Name | AK380 |
| Model | PPF21 |
| Body Color | Meteoric Titan |
| Body Material | Aircraft Grade Duralumin |
| Display | 4inch WVGA(480x800) Touch Screen |
| Supported Audio Formats | WAV, FLAC, WMA, MP3, OGG, APE(Normal, High, Fast), AAC, ALAC, AIFF, DFF, DSF |
| Sample rate | PCM: 8kHz ~ 384kHz (8/16/24/32bits per Sample)DSD Native: DSD64(1bit 2.8MHz), Stereo/ DSD128(1bit 5.6MHz), Stereo |
| Output Level | Unbalance 2.2 Vrms/ Balance 2.3 Vrms (Condition No Load) |
| DAC | AKM AK4490 x 2(Dual DAC) |
| Decoding | Support up to 32bit / 384kHz Bit to Bit Decoding |
| Input | USB Micro-B input(for charging & data transfer [PC & MAC])/Connection Mode: MTP(Media Device) |
| Outputs | PHONES(3.5mm)/ Optical Out(3.5mm)/Balanced Out(2.5mm, only 4-pole supported) |
| Wi-Fi | 802.11 b/g/n(2.4GHz) |
| Bluetooth | V4.0 (A2DP, AVRCP) |
| Dimensions | 3.14"(79.8 mm)[W] x 4.42"(112.4 mm)[H] x 0.70"(17.9 mm)[D] |
| Weight | 8.11oz. (230g) |
| Feature Enhancements | Firmware upgrade supported(OTA) |
| Audio Specifications | |
| Frequency Response | ±0.053dB (Condition: 20Hz~20kHz) Unbalance / ±0.053dB (Condition: 20Hz~20kHz) Balance ±0.56.dB (Condition: 10Hz~70kHz) Unbalance / ±0.55.dB (Condition: 10Hz~70kHz) Balance |
| S/N | 116dB @ 1kHz, Unbalance/ 117dB @ 1kHz, Balance |
| Crosstalk | 130dB @ 1kHz, Unbalance/ 135dB @ 1kHz, Balance |
| THD+N | 0.0008% @ 1kHz, Unbalance/ 0.0007% @ 1kHz, Balance |
| IMD SMPTE | 0.0007% 800Hz 10kHz(4:1) Unbalance/0.0006% 800Hz 10kHz(4:1) Balance |
| Output impedance | Balanced out 2.5mm (1ohm) / PHONES 3.5mm (2ohm) |
| Clock Jitter | 30ps(Typ) / Reference Clock Jitter (VCXO Clock) 0.2ps(Typ) |
| Reference Clock Jitter | 0.2ps(VCXO Clock) |
| Storage Capacity | |
| Built-in Memory | 256GB[NAND] |
| External Memory | microSD(Max. 128GB) x 1 |
| Battery | |
| Capacity | 3,400mAh 3.7V Li-Polymer Battery |
| Supported OS | |
| Supported OS | Windows XP, Windows 7,8(32/64bit)MAC OS X 10.7. and up |