A&futura SE200 - Hi-Fi System Astell&Kern - Free user manual and instructions
Find the device manual for free A&futura SE200 Astell&Kern in PDF.


User questions about A&futura SE200 Astell&Kern
0 question about this device. Answer the ones you know or ask your own.
Ask a new question about this device
Download the instructions for your Hi-Fi System in PDF format for free! Find your manual A&futura SE200 - Astell&Kern and take your electronic device back in hand. On this page are published all the documents necessary for the use of your device. A&futura SE200 by Astell&Kern.
USER MANUAL A&futura SE200 Astell&Kern
Getting Started \_01
Package Contents 02
Product Overview 03
Power Management 05
Charging 06
Connections 07
Firmware Updates 13
Using the Device \_02
Basic Operations 14
Home Screen 18
Notification Bar 20
Using Open APP Service 23
AK CONNECT 24
Listening to Music 30
Playlist Management 33
USB DAC Installation 36
How to Use USB Audio 37
CD Ripping 38
AK CD-Player 40
Car Mode 41
Bookmark Function 42
Favorites Function 43
Settings 42
Connecting to Wi-Fi 52
Using Bluetooth 53
Equalizer Setup 55
Miscellaneous \_03
Safety Pre-Cautions 58
Troubleshooting 60
Copyright 61
Certifications 62
Registered Trademarks 64
Disclaimers 65
Specifications 66
Package Contents
Contents may be changed without prior notice to improve the performance or quality of the product.
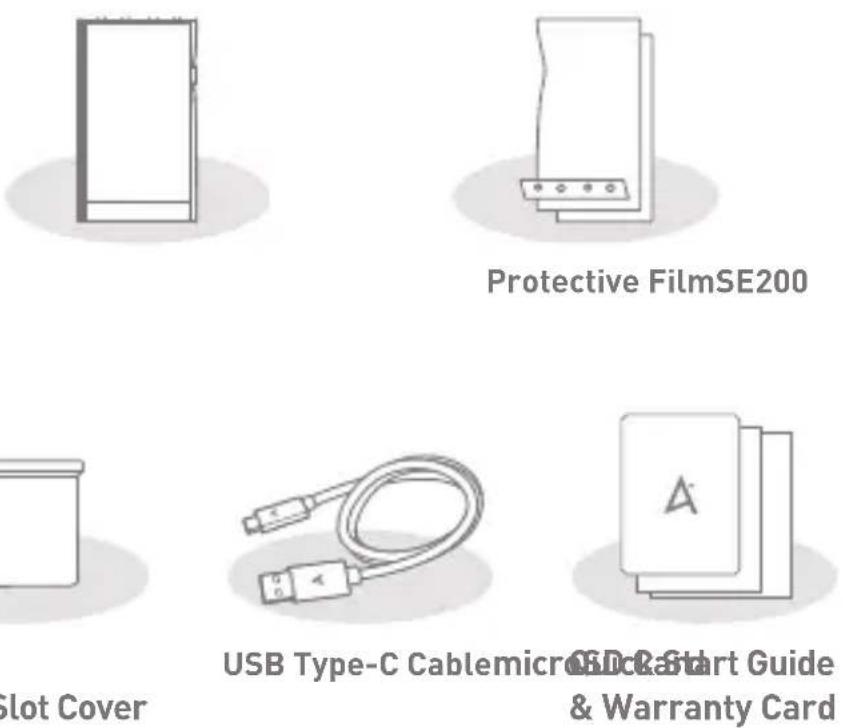
natural_image
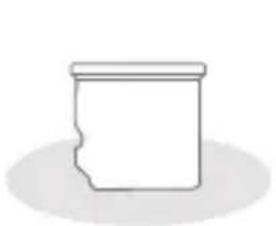
Simple line drawing of a cylindrical object with a flat top and shadow (no text or symbols)Slot Cover
Protective Film: Protect the device and its screen.
microSD Card Slot Cover: The cover is used to protect the microSD card slot when not in use. It is installed in the product by default.
USB Type-C Cable: For charging and data transfer.
Quick Start Guide: Basic overview of device functionality.
Warranty Card: Provides warranty details for your device. Maintain a copy of this card as it may be required for future technical support requests.
User Guide: The User Guide can be downloaded from the Astell&Kern website.
[http://www.astellnkern.com > Support > Download]
Product Overview
The appearance of the product, as well as the printed and engraved information, may vary depending on the model.
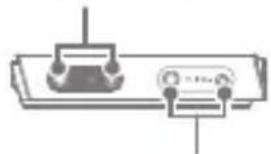
AKM 3.5mm Unbalanced Port / 2.5mm Balanced Port
natural_image
Pure mechanical assembly diagram without any text, numbers, or symbolsESS 3.5mm Unbalanced Port / 2.5mm Balanced Port
text_image
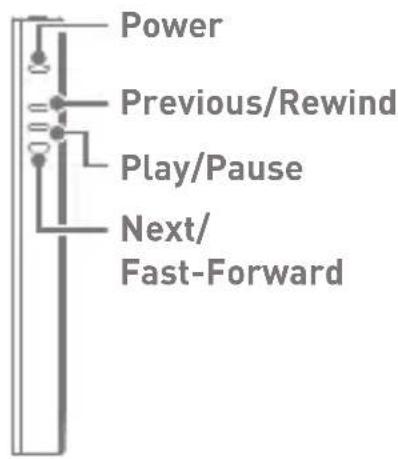
Power Previous/Rewind Play/Pause Next/ Fast-Forward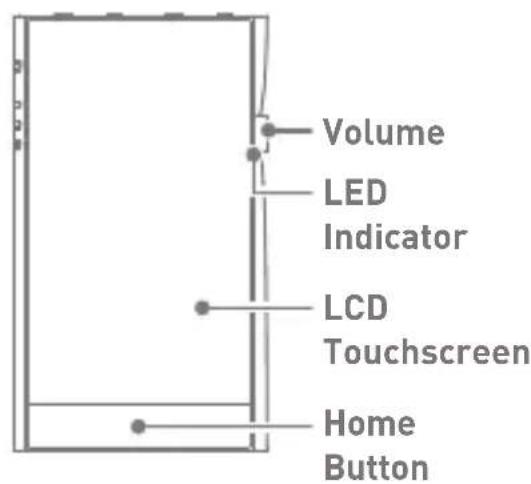
text_image
Volume LED Indicator LCD Touchscreen Home Button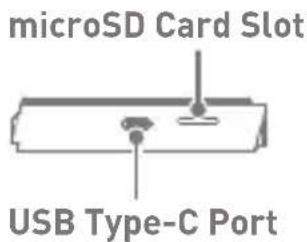
text_image
microSD Card Slot USB Type-C Port3.5mm Unbalanced Port:
- 3.5mm Unbalanced Port symbol.
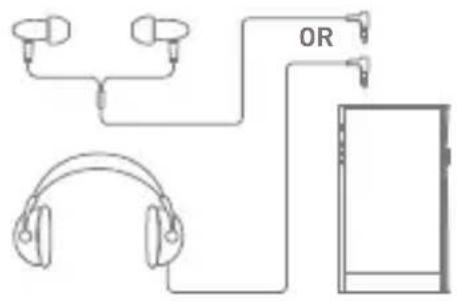
For audio output, connect earphones or headphones that utilize a 3.5mm jack.
2.5mm Balanced Port: BAL. - 2.5mm Balanced Port symbol.
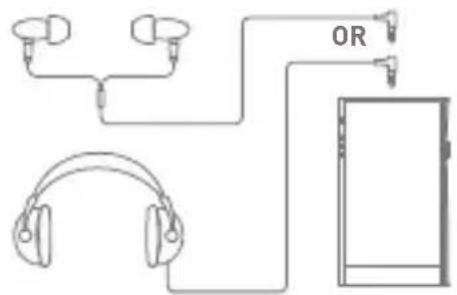
For audio output, connect earphones or headphones that utilize a 2.5mm jack.
Power: ⏻ - Power symbol.
Short press - Turns the screen on or off.
Press and hold - Turns the device on or off.
Volume: Turn the wheel to adjust the playback output volume level.
LED Indicator: Displays information on the currently playing music, the volume status, and DAC information.
microSD Card Slot: - microSD Card Slot symbol.
Insert a microSD card to access its files.
LCD Touchscreen: Display screen with touch control features.
Home Button: Press to return to the Home Screen.
Play/Pause: Play or pause the current song.
Previous/Rewind:
Short press - Play the previous song or restart the current song.
Press and hold - Rewind the current song.
Next/Fast-Forward: Short press - Play the next song.
Press and hold - Fast-forward the current song.
USB Type-C Port: 9V=1.67A - DC Power symbol.
For charging and data transfer.
Power Management
Powering the Device On/Off
- Press and hold the [Power] button to turn on the device.
- While the device is on, press and hold the [Power] button to shut down the device. A confirmation message will appear.
- Press [OK] to turn off the device.

This device has an automatic shutdown feature to save battery power. The device will turn off if there is no user input during the period defined in [Menu - Settings - Timer Settings - Auto Power Off] (See Page 49)
Turning the Screen On/Off
- While the screen is on, press the [Power] button to turn off the screen.
- Press [Power] button again to turn it on.

This device has an automatic timeout feature to save battery power. The screen will turn off if there is no user input during the period defined in [Menu - Settings - Timer Settings - Screen Timeout]. (See Page 49)
Reset Function
- In case of unexpected device failure or freeze, press and hold [Power] for 7 seconds to force a shutdown. The device can then be restarted after the shutdown is complete.

Resetting the device will not affect stored data or time settings. Do not use the reset function while the product is in use. Doing so may corrupt the data on the device.
Charging
Charging via USB Wall Adapter
- Commercially available 9V 1.67A output adapters may be used for charging.

Fast charging time: Approx. 2 hours 30 minutes (Fully discharged, Power-off, 9V 1.67A adapter) / Normal charging: Approx. 5 hours (Fully discharged, Power-off, 5V 2A adapter)
A fast charger of 9V 1.67A may be used. Using a 12V adapter will not charge the device and may cause malfunction.
The manufacturer shall not be responsible for problems caused by the use of adapters that do not adhere to the recommended specifications.
Connec- tions
3.5mm Unbalanced Port
- Connect earphones or headphones to the 3.5mm unbalanced port.
text_image
OR2.5mm Balanced Port
- Connect earphones or headphones to the 2.5mm balanced port.
flowchart
graph TD
    A["Headphones"] --> B["Device"]
    C["OR"] --> B
    D["Headphones"] --> B
    B --> E["Earphone"]
Connecting to a Balanced Audio Device
- Connect to an external audio device by using the 3.5mm unbalanced port and 2.5mm balanced port.
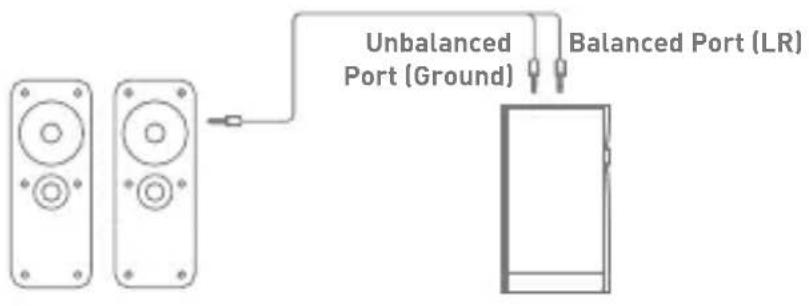
text_image
Unbalanced Port (Ground) Balanced Port (LR)Connecting to a Computer
- Turn on the device and your computer.
- Use the USB Type-C cable to connect the device to a computer in accordance with settings in [Menu - Settings - USB Mode].
[Default] Media Device (USB Drive): Transfer files from a computer to the device.
DAC Input: Listen to music on a connected computer through the device. (See Page 37)
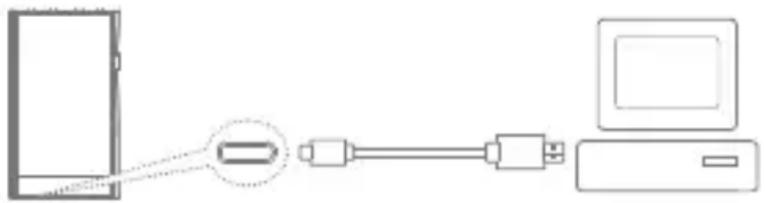
natural_image
Diagram showing connection between a device and a computer monitor (no text or symbols present)
Mac users need to download and install Android File Transfer from the Astell&Kern website. [http://www.astellnkern.com > Support > Download]
For an optimal connection, quit any unnecessary programs before connecting the device to the computer.
Do not use cables other than the USB Type-C cable provided with the device. Doing so may cause malfunctions.
Use USB 2.0 only on Mac.
Type-C-to-Type-C cable is recommended when connecting with a MAC that supports Type-C port.
Copy Files (Folders) to the Device
- To copy files/folders from your computer, select the desired files/folders and drag & drop them into the device folder.
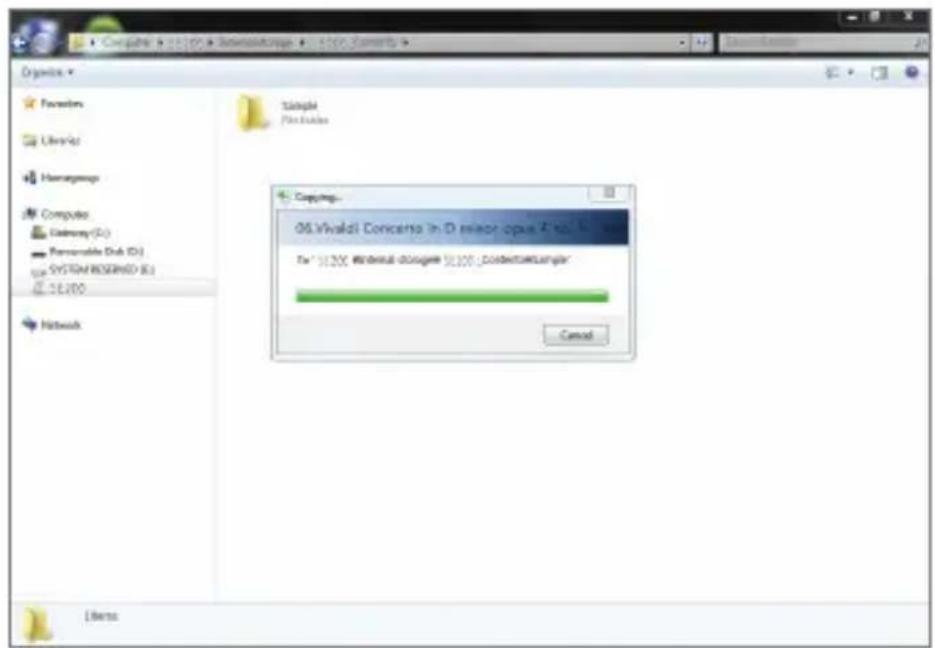
text_image
Coproc 06.Vivaldi Concerta in D seminar opus X v.1 For: 36.200 Webresult Osgave 56.100 - CordentiaLanger Cancel Libens
Ensure the USB Type-C cable is properly connected.
Turning off the device, computer or disconnecting the USB Type-C cable while copying or moving files/folders may corrupt files or device memory.
File transfer speeds may be affected by the computer and/or the OS environment.
Delete Files (or Folders) from the Device
- Select the file/folder to delete, right-click the mouse, and then select [Delete].
- Select [Yes] in the [Confirm File/Folder Deletion] window to delete the selected files/folders.

text_image
Organize Families Libraries Homogeneity Computer Gateway (G1) Removable Disk (G2) SYSTEM RESOURCES (G1) C:\E2D0 Network 31 Scramath Home's_Checky Record FLAC File LDSMB 31 Impiant 4 Autumn.mcg FLAC File 32 JDMB 35 Each Concerts for Huesichord Plate and Vitter SNV LEAM - AL_ D41 Fdiv 32 In A Mellow Store_Checky Record FLAC File 64 Larnestrence.mcg FLAC File 80 JMM 66 Visual Concerts in D minor opus 4 no. 8 -- Allegro COS Cog Custom Req Devers. Are you love you want to permanently delete the Visual Concerts in D minor opus & tab. X - Allegro 017 Yes No... 06 Visual Concerts in D minor opus 4 ... Data modified: Id:02p9139-Rmf DPTFile Site: 124KBDisconnecting from the Computer
- Disconnect the USB Type-C cable after the transfer between the device and computer is complete.

Disconnecting the device from the computer during a file transfer may corrupt data on the device.
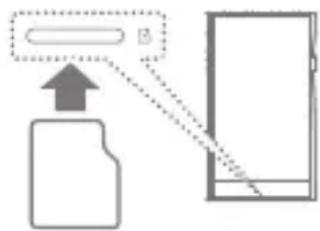
Insert/Remove a microSD Card
- Refer to the diagram and gently insert a microSD card into the microSD card slot.
- To safely remove a microSD card, on the Home Screen, select [Safely remove SD card] from the Notification Bar or select [Unmount SD card] from [Menu - Settings - System Information].
- Gently press the microSD card in to unlock and release it from the slot.
flowchart
graph TD
    A["Input"] --> B["Device"]
    B --> C["Output"]
    style A fill:#f9f,stroke:#333
    style C fill:#bbf,stroke:#333
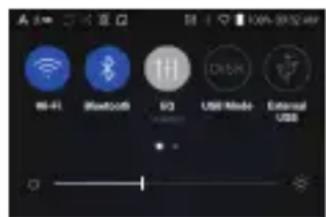
text_image
Wi-Fi Bluetooth V3 USB Mode External USB
text_image
Unknown Song Title Unknown content - Unknown contentRecommended microSD Cards
SAMSUNG, SANDISK

Maximum Capacity: 1TB
Notes on Inserting a microSD Card
- Do not force the microSD card into the slot. Doing so may cause malfunction of the product and damage to the card.
- Do not repeatedly insert/remove the microSD card.
- If not inserted properly, the microSD card may cause product malfunctions and may become lodged in the product.
Notes on Removing a microSD Card
- Be sure to safely remove the microSD card from the device. Not following the proper procedure may corrupt data and cause serious damage to the both the card and device.
- Do not remove the microSD card during use. Doing so may cause malfunction, delete data and damage the microSD card.
Notes on Using a microSD Card
- If the microSD card is not recognized or functions improperly, format the card, preferably in the FAT32 system.
- Using cards other than the recommended microSD card types may cause malfunctions.
- A microSD card is not included in the product package. Please purchase separately.
Firmware Updates
Wi-Fi Update / OTA (Over-the-Air)
- Connect to a wireless network.
- If a new firmware update is available, the screen will display a Firmware Update Guide window.
- Select [Update].
- Follow the on-screen instructions to proceed with the firmware update.

For Wi-Fi connections, see Page 52.
The firmware update may not start if the battery level is too low. (A minimum battery level of 20% is required.)
Do not disconnect from the wireless network while downloading the update file. Doing so may cause data corruption and/or damage to the system.
If an error occurs or the notice in the Notification Bar disappears during an update, download the firmware update again through [Menu - Settings - Update - System].
Moving to another screen during a file download will cancel the download.
Basic Operations
LCD Touchscreen
- This device features a LCD touchscreen that allows you to perform operations by touch.
Use the touchscreen to access various features on the device.

To prevent damage to the screen, do not use a sharp object or excessive force.
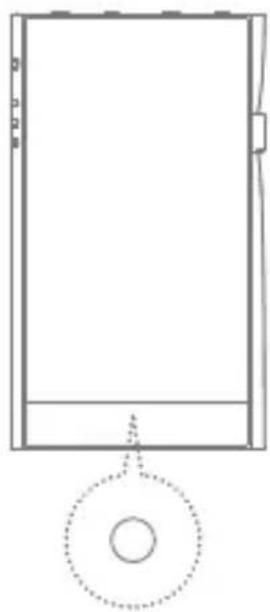
Return to the Home Screen
- Press [○] at any time to return to the Home Screen.
natural_image
Simple line drawing of a rectangular frame with a circular base and dotted outline (no text or symbols)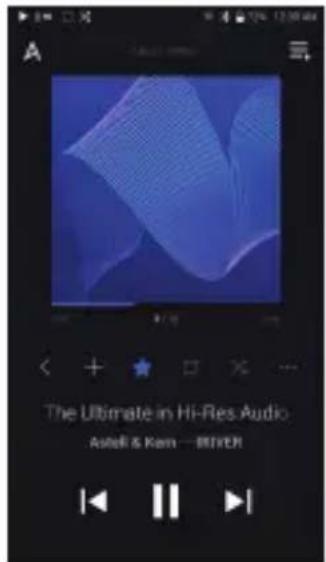
text_image
The Ultimate in Hi-Res Audio Ashefi & Kam — BIRYENHome Screen
From the Home Screen, swipe your finger to the left, right, up or down from any edge of the touchscreen to access display menus. Each side of the Home Screen will activate a different display menu.
Main Menu
- From the left edge of the touchscreen, swipe your finger right to display the Main Menu, or tap the "A" icon in the upper left corner of the screen.
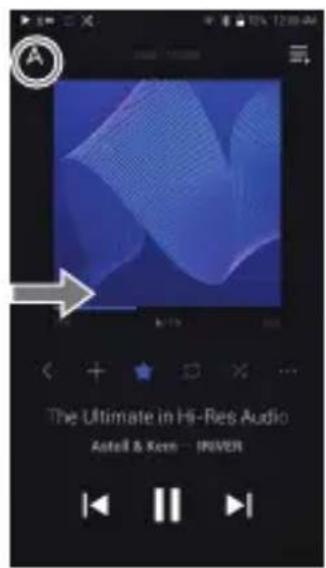
text_image
The Ultimate in Hi-Res Audio Astell & Korn - IMVER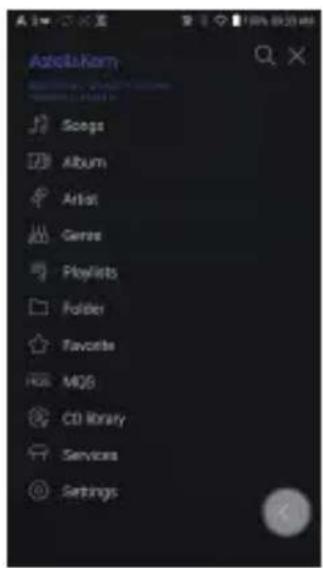
text_image
Adobe Premiere Songs Album Artist Genre Playlists Folder Favorite MQS CD Library Services Settings
Music files extracted using the AK CD-Ripper accessory that are stored in the Ripping folder of the internal memory will be displayed in the CD library menu.
Notification Bar
- From the top edge of the touchscreen, swipe your finger down to display the Notification Bar.
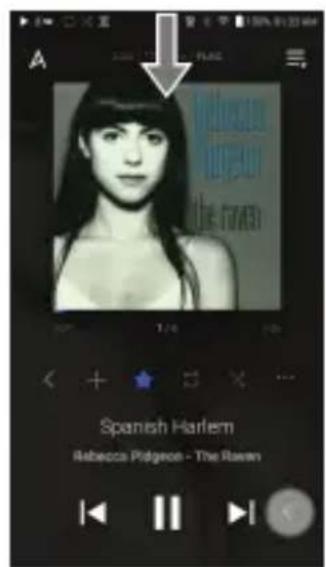
text_image
Spanish Harlem Rebecca Ridgeon - The Room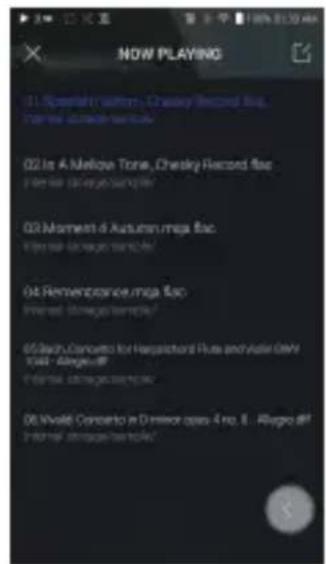
text_image
NOW PLAYING 01 Spanish radio, Chevy Record file. Tommy 2008 stereo match 02 In A Mellow Tone, Chevy Record file. For the stereo match 03 Moment d Autumn mega file. For the stereo match 04 Remembrance mega file. For the stereo match 05 Jack Concerto for Harapichard Flute and Vialer GMV 1048 - Allegro off For the stereo match 06 Vivale Concerto in Dimer class 4 no. 8 - Allegro off For the stereo matchView Current Playlist
- From the right edge of the touchscreen, swipe your finger left to display the Now Playing menu.
text_image
The Ultimate in Hi-Res Audio Astell & Kein — J#VER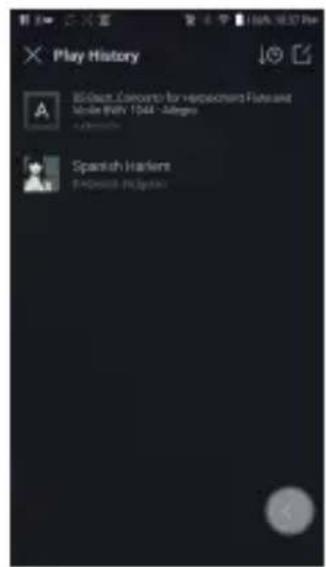
text_image
Play History Blosses Concepts for Herpochard Features Made by: 1946 - Allegos Spanish Markers P-Access-PCsolarView Play History
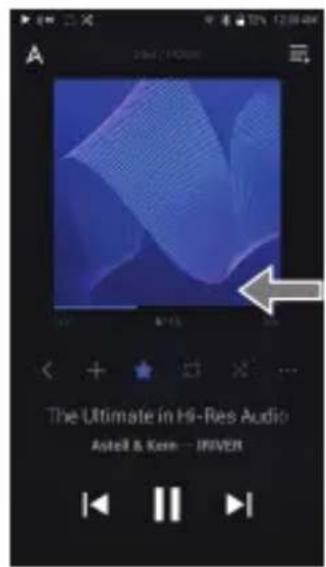
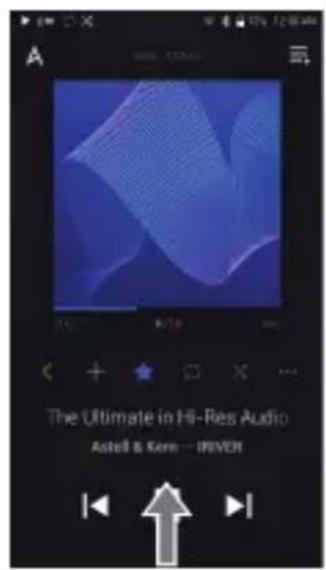
- From the bottom edge of the touchscreen, swipe your finger up to display the Play History menu.
text_image
The Ultimate in Hi-Res Audio Astell & Kern — IINVER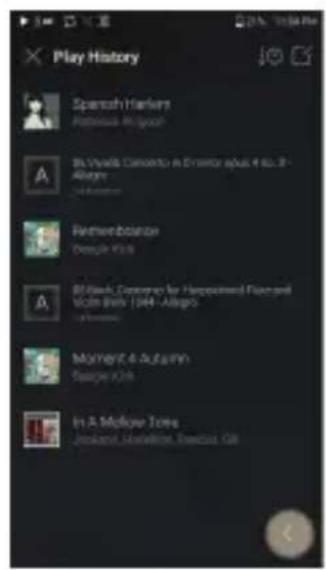
text_image
Play History Spanish Markers Porttoua R-Grace B.Vivella Concerto: A Director's 400-300 Allogis A Perthewolander Dengle Kish B.Bank Conveno for Hauppinen Flapand Vick Benk 1044 - Allegis A Moment 4 Autumn Saoje Kish In A Moklow Jones Jereland Moklowes, Reduzus GBMoving Up/Down on a List
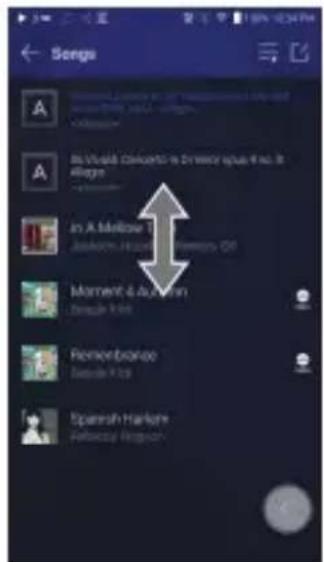
- Scroll through a list by dragging your finger up or down.
text_image
Songs A B: World Concerts in Director space for all Allegos An A Melrose Jahkorn House Fremors Of Moment & Action Dingler Kit Remontbrance Saman Kit Spanish Harlors Ferracay FergsonHome Screen
text_image
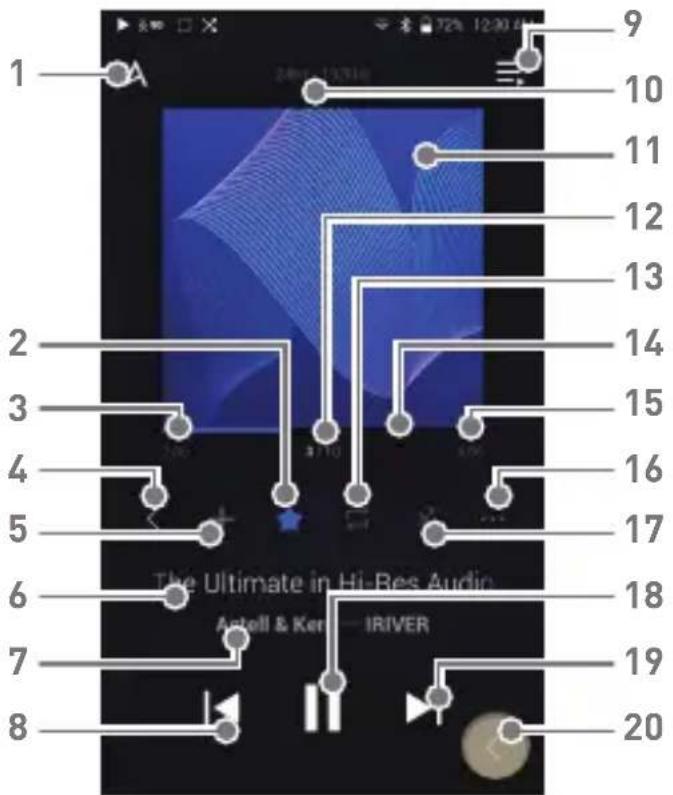
1 2 3 4 5 6 7 8 9 10 11 12 13 14 15 16 17 18 19 20 The Ultimate in Hi-Bes Audio Aetell & Ker—IRIVER| 1 | A | Menu | Displays the Main Menu. |
| 2 | ★ | Favorites | Add to or remove music from the Favorites. |
| 3 | Song Progress | Indicates song duration. | |
| 4 | < | Recent Menu List | Go to the last displayed menu list. |
| 5 | + | Add to Playlist | Add the current song to a playlist. |
| 6 | Title | Song title information. File name is displayed when the title is unavailable. | |
| 7 | Artist/Album | Displays the artist and album info. | |
| 8 | ◀ | Previous/Rewind | Short press: Play the previous song or restart the current song. Press and hold: Rewind the current song. |
| 9 | ≡ | Playlist | Display current playlist. |
| 10 | Format Information | Displays the bit rate and sampling frequency data. | |
| 11 | Album Cover | Displays album cover of current song. Tap image to view the song lyrics. | |
| 12 | Now Playing Song Count | Displays the current song number playing/ total number of songs in Now Playing. | |
| 13 | ↔ | Repeat Mode | Press [ ↔ ] to set the Repeat mode. ↔ : Repeat entire playlist. ↔ : Repeat current track. ↔ : Repeat mode off. |
| 14 | Playback Progress Bar | Shows the current track playback progress. Drag the Playback Progress Bar to move to the desired track time. | |
| 15 | Song Duration | Indicates the song's total duration. Press to switch from elapsed time to remaining time. | |
| 16 | ... | Details | Displays current song information. |
| 17 | ✕ | Shuffle Mode | Press [✕] to set track sequence for playback.✕ : Shuffle mode on.✕ : Shuffle mode off. |
| 18 | ▶/|| | Play/Pause | Play or pause the current song. |
| 19 | ▶| | Next/FF | Short press: Play the next song. Press and hold: Fast-forward the current song. |
| 20 | ◀ | Back button | Press the floating back button to return to a previous menu/screen. |
Notification Bar
text_image
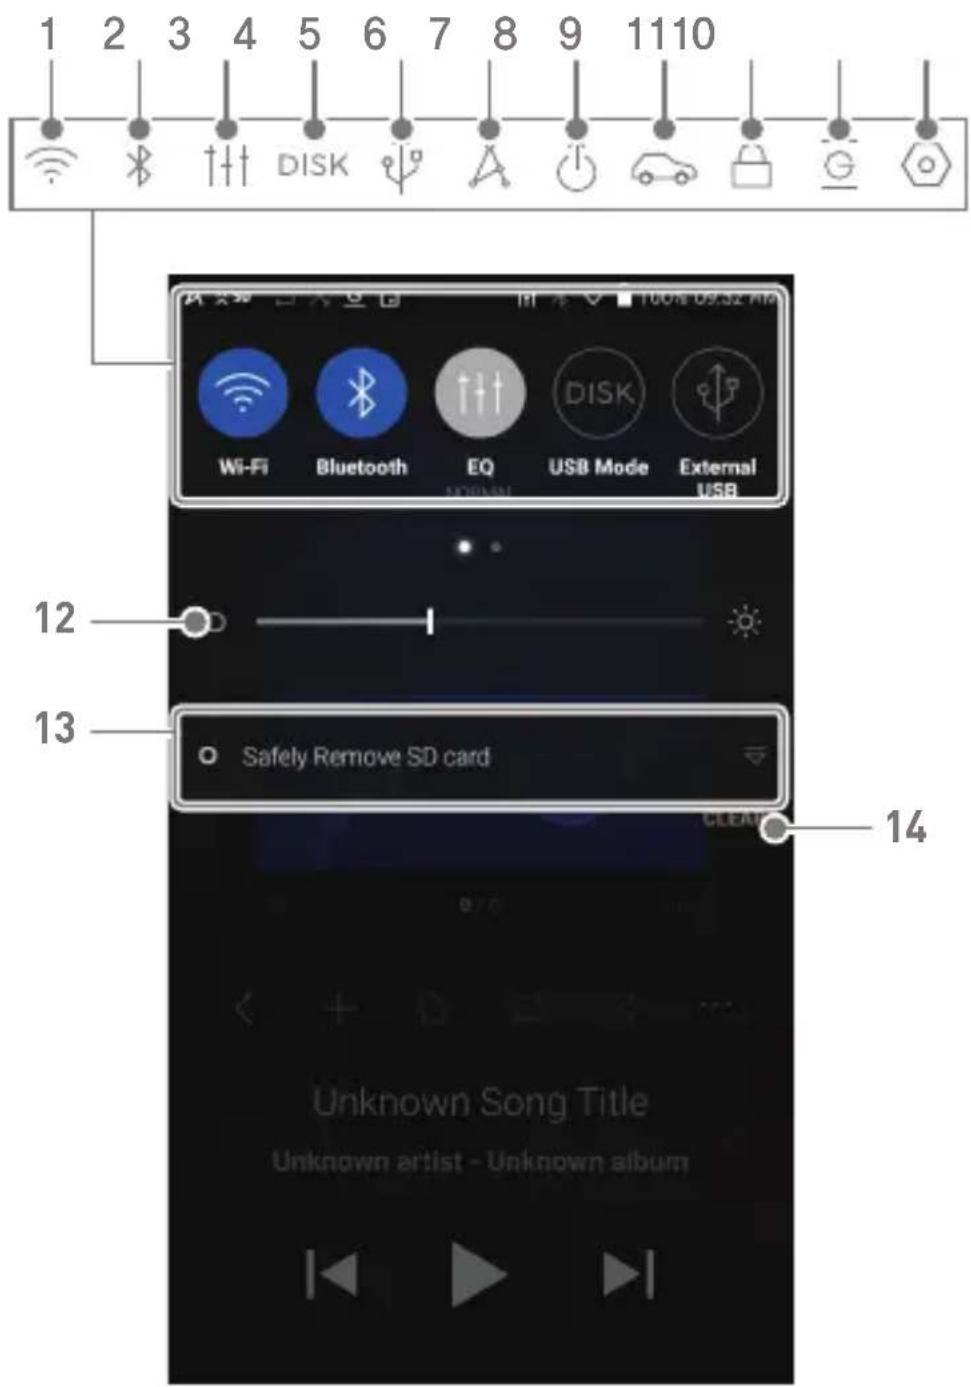
1 2 3 4 5 6 7 8 9 11 10 DISK Wi-Fi Bluetooth EQ DISK External NORMAL USB 12 13 Safely Remove SD card 14 Unknown Song Title Unknown artist - Unknown album| 1 |  | Wi-Fi | Press [ [ ] to turn Wi-Fi on/off. |
| 2 | [082Y] | Bluetooth | Press [ [ ] to turn Bluetooth on/off. |
| 3 | [86CZ] | EQ | Press [ ↑↑↑ ] to turn the EQ on/off. The most recent EQ settings are applied by default. |
| 4 |  | Computer Connection Mode | Select the mode to use when connected to a computer.[Default] D I Enables transfer of media files.DAC: Listen to music on a connected computer through the device. |
| 5 | [GBTA] | USB Audio | After connecting the device to a portable USB DAC, press [ [ ] to connect or disconnect the device. Turn CD ripping function on/off. |
| CD Ripping | |||
| 6 |  | AK CONNECT | Press [ [ ] to turn AK Connect on/off. |
| 7 |  | Line-out | Press [ [ ] to turn line-out on/off. |
| 8 |  | Car Mode | Press [ [ ] to turn Car Mode on/off. |
| 9 | [AR2S] | Wheel Lock | Press [ [ ] to turn Wheel lock on/off. When turned on, the volume wheel will be disabled when the screen is locked. |
| 10 | Gapless Playback | Press [ G ] to turn Gapless Playback on/off. |
| 11 | Settings | Press [ O ] to display the full settings menu. |
| 12 | Brightness | Use the adjustment bar to control the display brightness. |
| 13 | Notifications Display | Device notifications are displayed in this area. |
| 14 | Clear Notifications | Clear notifications. |

Long-press an icon [ 📞 / ✉ / ††† / A / ⏻ ] to navigate to the corresponding full settings menu screen.
Using Open APP Service
The Open APP Service enables the user to install specific APK music streaming apps to the device. Copy the desired APK into the Open Service folder of the product and install the relevant App in the [Menu-Service] of the product.

The source of the app you are trying to install is unknown. Be aware that if the app is installed, the device may be damaged and personal data compromised. Depending on the APP, some functions may not work. If you install an app from an unknown source, despite this warning, the company is not responsible for any damages to the device and data resulting from the app's installation, and downloading and installing such apps may limit the scope of after-sales services provided under the manufacturer warranty.
For more information and full instructions on how to install music streaming services, please visit the Astell&Kern website [http://www.astellnkern.com > Support > FAQ > Using Open APP Service].
AK CONNECT
Access and play back music files stored on a computer, NAS drive or AK Device on the same network, as well as output sound through compatible speakers with AK Connect.
AK Connect is available on your AK device and also available as an app for your smartphone or tablet via Apple's App store or Google Play Store.
Using AK Connect to Link Music Libraries/Speakers
- Turn on the music library device and/or speaker and AK player.
- Connect all devices to the same Wi-Fi network.
- Turn on the AK CONNECT feature by pressing and holding [ ] in the Notification Bar or selecting [Menu-Settings-AK CONNECT].
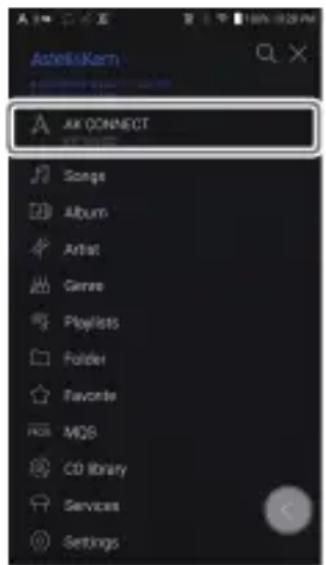
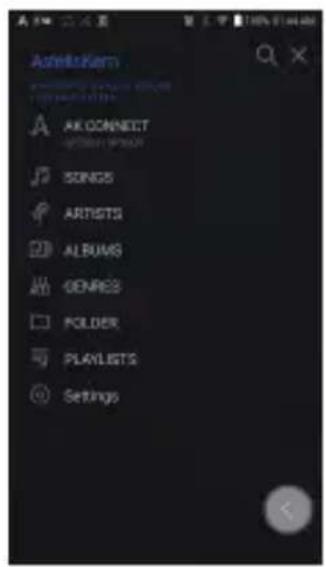
- Press [AK CONNECT] on the Main Menu.
- A list of libraries / speakers that are on the same network with the AK player will be displayed.
- Select a library / speaker to connect.
text_image
ActivityKern AK CONNECT Songs Album Artist Genre Playlists Folder Favorite MOS CD library Services Settings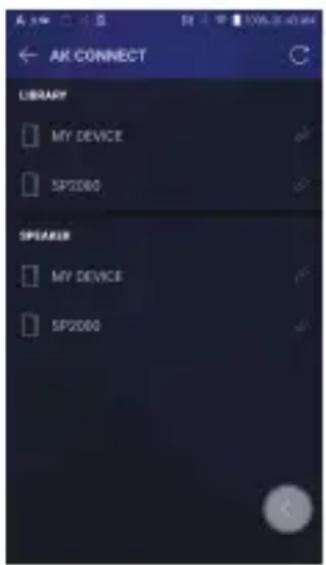
text_image
AK CONNECT LIBRARY MY DEVICE SP2000 SPEAKER MY DEVICE SP2000- After selecting a library / speaker, select a category from the menu to display the corresponding music list.
text_image
AzelsKill AK CONNECT SONDS ARTISTS ALBUMS GENRES POLDER PLAYLISTS Settings
For Wi-Fi connections, see Page 52.
Streaming Music from Your Library
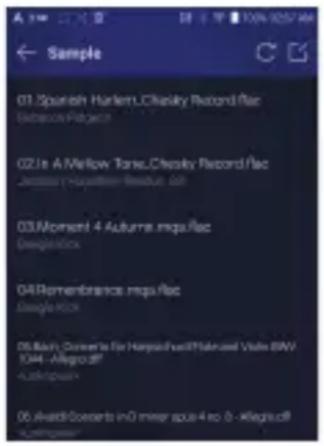
- Select a category from the library menu to see your list of music.
- Select a song to begin streaming.
text_image
01 Spanish Harlem,Chesky Record/Rec Gazooia Palpach 02 In A Mellow Tone,Chesky Record/Rec January Hugashman Residus.68 03 Moment 4 Autumn.mqo./Rec Google QQ 04 Remembrance.mqo./Rec Google QQ 05 Bach, Concerts for Hangzhou/Hai Ke and Video BAV 1044 - Allegro.pdf Aulipahou 06 Avardi Scents in 9 meer spie 4 so 0 - Allegro.pdfDownloading Music from Your Library
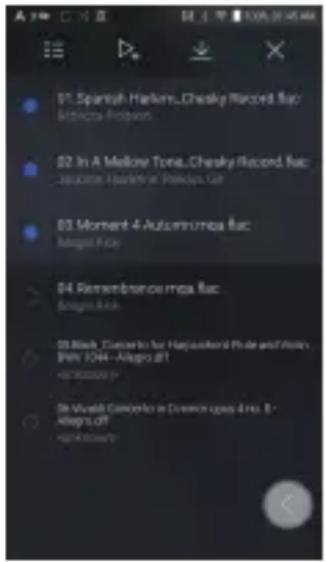
- Select a category from the library menu to see your list of music.
- Press [ ] button at the upper-right corner of the music list.
- Select the desired music and press [ ↓] to initiate the download.
A message on the Notification Bar will indicate when the download is complete.
text_image
01. Spanish-Harlem, Chesky Record, Rac Bologna-Program 02. In A Mellow Tone, Chesky Record, Rac: Jacquino Haimler in Peralou, GA 03. Moment 4 Autolumba Rac: Magna Price 04. Remembrance mosa Rac: Magna Price 05. Black, Converto for Haqoshiford Rule and Rollin Bath 1044 - Allego dft <0.0000> 06. Viadish Converto in Diverse ups 4 mo. 8 - Allego dft <0.0000>
Depending on network conditions, song loading may be slow and streaming may stutter.
Using a library for other processes can slow down the response time of the library.
If you stream and download at the same time, it may slow the device's response time depending on the speed of the Wi-Fi network or server.
To stop a download in progress, tap the notification in the Notification Bar to go to the download screen. Then, select the items to pause or delete.
AK Connect Usage Examples
Case 1
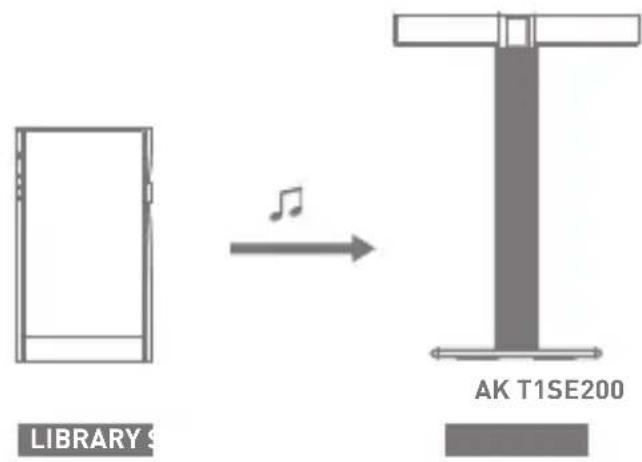
text_image
LIBRARY S AK T1SE200Case 2
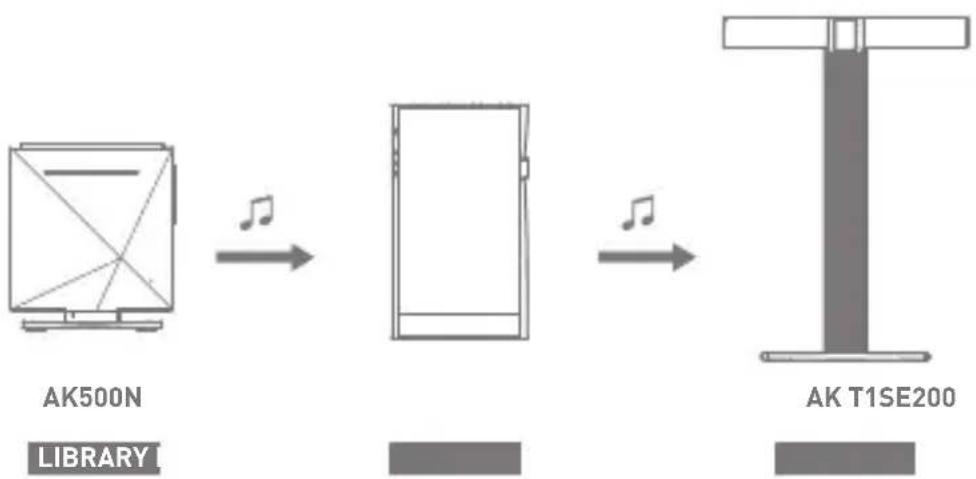
flowchart
graph LR
    A["Device with CD/CD/CD/CD/CD"] -->|Music| B["Device with LCD screen"]
    B -->|Music| C["Electronic device with T1SE200"]
Case 3
SE200
AK500N
SPEAKER
REMOTE & LIBRARY
Case 4
LIBRARY
AK500N
REMOTE
natural_image
Simple line drawing of a T-shaped object with a vertical bar and base (no text or symbols)AK T1SE200
Case 5
natural_image
Simple line drawing of a rectangular object with a musical note and arrow, no text or symbols present.SE200
LIBRARY
or
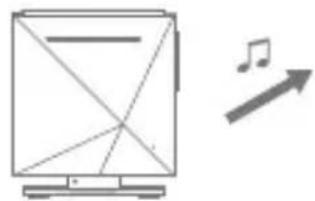
natural_image
Simple line drawing of a computer monitor with diagonals and a musical note icon, next to an arrow (no text or symbols)AK500N
LIBRARY
natural_image
Simple icon showing a blank square with a musical note and right-pointing arrow (no text or symbols)AK Connect APP
REMOTE
natural_image
Simple line drawing of a T-shaped structure with vertical and horizontal bars (no text or symbols)AK T1
SPEAKER
Listening to Music
Selecting Music
-
Select a category from the Main Menu to display the corresponding music list.
-
Select a song from the list to begin playback.

Select [Folder] to search music by folder.
Continuous Playing Time: AKM - Approx. 10 hours, ESS - Approx. 14 hours (Music: FLAC, 16bit, 44.1kHz, Unbalanced, Volume 50, EQ Off, LCD Off)
Supported Formats: PCM [8\~384kHz(8/16/24/32bit)] DSD [2.8/5.6/11.2MHz]
Listening to Music
- To search, press [Q] on the menu list and enter the title. The search result will be displayed.
- At the top of the Play History menu, press [ ↓/ ↓] to sort the music list in order of most recently played/most played.
- After selecting the [MQS] category, from the Main Menu press [ = / _z^] at the top to sort the music list in order of high quality/alphabetical order.
- In the [MQS] category, the MQS tab shows MQA files and PCM files of 24 bits or more, and the DSD tab shows DSD files.
MQS: MQA [44.1-384kHz(24bit)]
- MQS: PCM [8-384kHz(24/32bit)]
DSD: DSD [2.8/5.6/11.2MHz]
- Select the [Folder] category to check the internal / external memory capacity and number of files / folders, and copy / move music.
- Press [≡] on the music list to add all music to the current playlist.
- Press [ ] on top of the music list to view the options:
三: Select / deselect entire list
_+ Add the selected list at the top / bottom / after the current song of Now Playing
≡: Add selected list to a playlist
Delete selected list
X: Exit
- Turn the [Volume] wheel to adjust the volume.
- Press [Ⅱ] during playback to pause and [▶] to resume playback.
- Press [ |◀/▶] during playback for the previous/next track.
- Press and hold [|◀/▶] to rewind/fast-forward the track.
- Drag the indicator on the Playback Progress Bar to a desired location of a track during playback.
- Press the album art on the Home Screen to display the song lyrics.
- Press the [ ○ ] to go to Home Screen.
- Press [X] at the top of the menu list to hide the menu list.
- After selecting [ALBUM] or [CD LIBRARY] category, press [☐/☐/☐] at the top to sort by different viewing options.
- You can connect AKM and ESS DAC and play at the same time.
- When AKM and ESS are played at the same time, they are synchronized with a low output.
- LED light indicates information of the music currently playing, the volume status, and DAC information.
- 16-bit: Red / 24-bit: Green / 32-bit: Blue / DSD: Purple
- AKM: Orange / ESS: Mint / Connecting AKM and ESS together: Yellow

Turn LED Indicator ON/OFF in [Menu-Settings-LED Indicator].
Playlist Screen
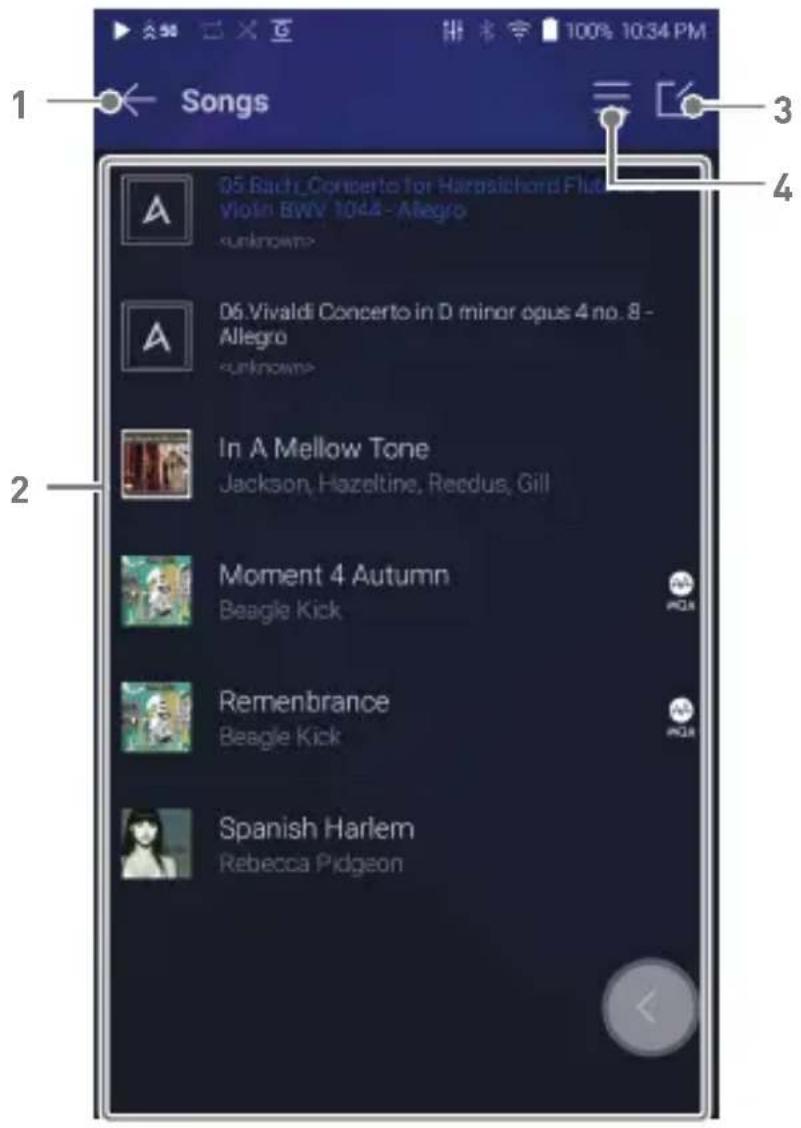
text_image
Songs 05 Bach Concerto for Harasichord Flue Violin BWV 1044 - Allegro unknown> 06 Vivaldi Concerto in D minor opus 4 no. 8 - Allegro unknown> In A Mellow Tone Jackson, Hazeltine, Reedus, Gill Moment 4 Autumn Beagle Kick Remenbrance Beagle Kick Spanish Harlem Rebecca Pidgeon| 1 | Previous | Return to the previous screen. |
| 2 | Playlist | Display the current playlist. |
| 3 | Edit mode | Display the editing options for the music list. |
| 4 | Play All | Play all songs in the current list. |
Playlist Manage- ment
Creating a Playlist
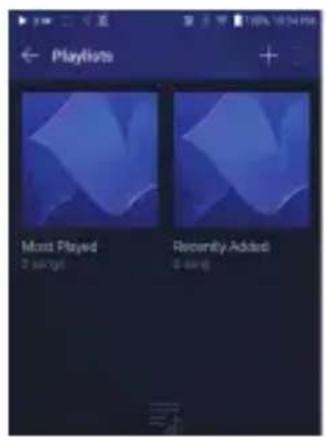
- Press [Playlists] on the menu to view the playlists.
- Select [ + ] in the upper right corner of the screen.
- Enter a name for the playlist and then press [Add] to create a new playlist.
text_image
Playlists Most Played 2 seconds Recently Added 0 seconds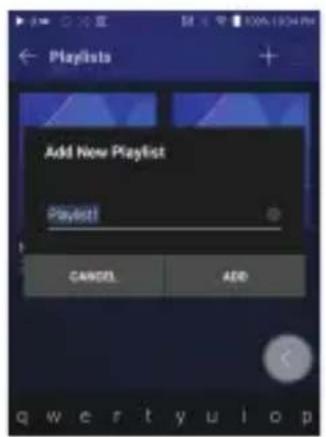
text_image
Add New Playlist Paylist! CANCEL ADDAdding a Song to a Playlist
- Press [Playlists] to display the list of playlists.
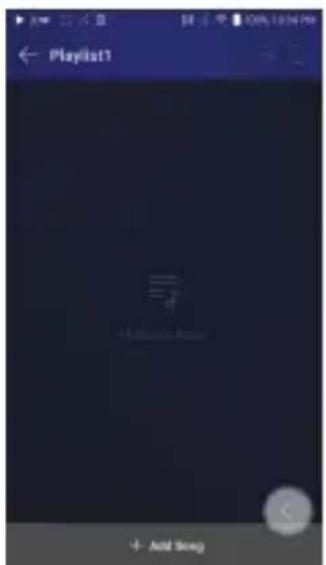
- Select a playlist and press [+ Add Song] to display a list of songs by album.
- Select a song and press [Add] to add the song to the selected playlist.
text_image
← Playlist1 + Add BeegRemoving a Song from a Playlist
- Press [Playlists] to display the list of playlists.
- Select the playlist to edit.
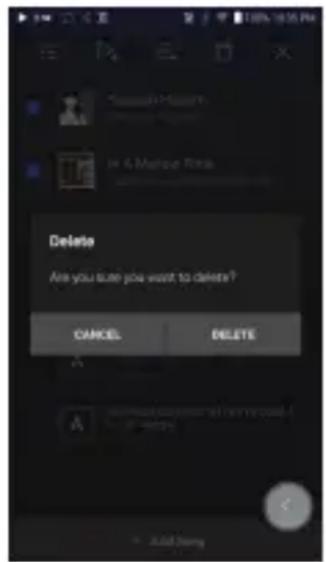
- Press [ ] at the top, then select the song you want to delete from the playlist.
- Press [ ] on top of the screen.
- Press [DELETE] to remove the song from the selected playlist.
text_image
Delete Are you sure you want to delete? CANCEL DELETE Add here
This action will only remove the song from the selected playlist, not the memory.
Playing a Playlist
- Select the desired playlist for playback.
- Press [≡] at the top right of the screen to play the entire playlist.
- To playback part of the playlist or add it to a current Now Playing playlist, press [ ] at the top of the playlist, select the music you want to play and press [ ] to add the selected list to the top / bottom / after the current song of Now Playing.
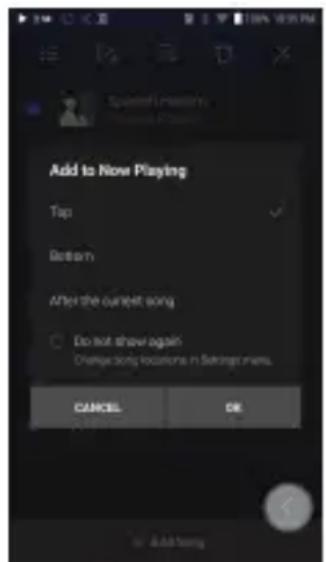
text_image
Add to Now Playing Tap Return After the current song. Do not show again Change song locations in Settings menu. CANCEL OKRenaming a Playlist
- Press [Playlists] to view the playlists, then press [ ]
- Select a playlist to be renamed.
- Press [T] at the top of the screen to display the RENAME window.
- Enter a name for the playlist and then press [RENAME] to confirm the change.
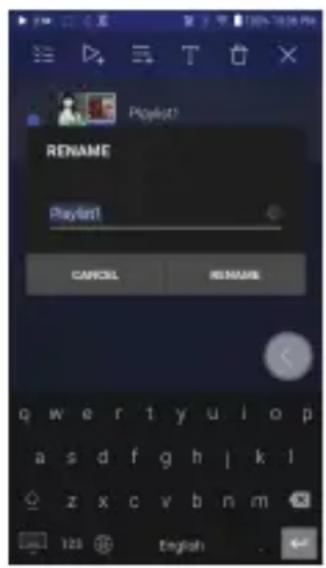
text_image
Playlist RENAME Playlist CANCEL RENAME qwertyuiop asdfghjkl zxcvbnm 120 EnglishDeleting a Playlist
- Press [Playlists] to view the playlists, then press [ ]
- Select the playlist to be deleted.
- Press [☐] at the top of the screen.
- Press [DELETE] to delete the selected playlist.
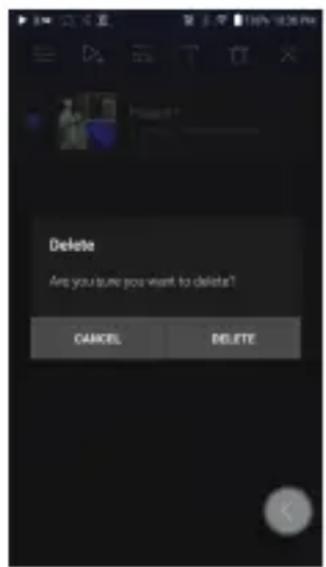
text_image
Delete Are you sure you want to delete? CANCEL DELETEUSB DAC Installation
The USB DAC function allows the device to be recognized as a sound card on a computer. Music from the computer is played through the device's headphone port for an enhanced listening experience.
USB DAC Specifications
• Supported OS
Windows 7(32bit/64bit) / Windows 8(32bit/64bit) /
Windows 10(32/64bit)
MAC OS 10.7(Lion) or later
•USB DAC Support Specifications
Supported Formats: PCM [8\~384kHz(8/16/24/32bit)]
DSD [2.8/5.6/11.2MHz]
- Control the volume with the AK device's volume wheel.

Playback is unavailable when settings exceed the supported formats. The Previous, Play, and Next buttons are unavailable when connected as a USB DAC.
Playback may stutter when computer performance is slow or the USB connection is experiencing heavy usage.
There may be issues with audio-to-video synchronization during video playback depending on the sound quality and operating environment.
Volume cannot be adjusted via the Windows volume control. The volume wheel on the device or volume control on the appropriate program must be used to adjust the volume.
Install a dedicated driver to use the AK device as a USB DAC.
The driver file is located in SE200\Internal_Storage\SE200_Contents\Driver. Before installing the driver, set device to USB DAC mode and connect to the computer.
How to Use USB Audio
Connect the device to a portable amp or DAC using USB Audio Out.
How to Connect a Portable USB DAC
- Connect the portable USB DAC to the AK device's USB Type-C port with a dedicated cable.
- Press [ ] in the Notification Bar.
- Once [ ] is activated, you can enjoy music stored on the device through the connected portable USB DAC.

The USB Type-C cable that comes packaged with the device is only to be used for computer data transfer or to charge the device.
The type of dedicated cable needed to connect to the portable DAC varies; please refer to USB DAC manufacturer instructions for correct cable type.
A USB DAC cable is not included with the device and must be purchased separately.
Depending on the OTG cable used, the connection may be unstable.
How to Change USB Audio DSD Output Type
You can change the type of DSD data that is outputted through the USB audio out.
- Select a DSD output type in [Menu - Settings - USB Audio].
PCM : DSD audio is converted into PCM before being outputted through the USB audio out.
DoP : DSD audio is converted into DoP before being outputted through the USB audio out.
MQA : Optional activation of S/W MQA decoding. Options may differ depending on the connected external device. Please refer to the specifications of each device.

The portable USB DAC must be able to receive digital input through the micro-USB's OTG.
Audio output may vary widely depending on the digital input specs of the portable USB DAC used. This is not a defect in the device output and not a reason for exchange or refund.
When using DoP as a DSD output type, no sound may be outputted except noise depending on the portable USB DAC.
CD Ripping
CDs can be ripped directly to the device using the AK CD-RIPPER (sold separately).
Connecting the AK CD-RIPPER
- Connect the AK CD-RIPPER to USB Type-C port of the device using the proper cable.
- In the Notification Bar press [ ] to link the devices and activate the CD Ripping Menu.
- When ripping is complete, before disconnecting, press [ ] on the Notification Bar to unlink/disconnect the devices.

The USB Type-C cable provided with the device is to be used to connect to the computer or to charge the product.
Depending on the CD-Ripper model the dedicated USB Type-C OTG cable may not be provided in the product package.
Depending on the OTG cable used, the connection may be unstable.
Automatically select the CD ripper function.
- Select the function to automatically execute in [Menu-Settings-CD Ripper-Default run].
- Select the [CD Player] / [CD Ripping] function.
- When [Ask every time] is selected, the function selection popup will be displayed each time a CD is inserted.
CD Ripping
- Select the ripping function in [Menu-Settings-CD Ripper-Default run-CD Ripping].
- Connect the AK CD-Ripper to the device and select CD Ripping if not set as the default run function.
- Insert a CD and metadata (ID3 tags) for the inserted CD will be retrieved via Gracenote if Wi-Fi is turned on.
- CD ripping will begin automatically after the metadata has been downloaded.
- When finished, press [OK] when prompted to complete the automatic CD ripping process.
CD Ripping Results
- Indicates that CD ripping is complete, or that CD ripping was successfully completed after correcting an error via error correction.
- ✗Indicates that the song currently being ripped can be canceled by user.
- ! Indicates that CD ripping failed due to an error that can't be corrected, such as a scratched CD, or that CD ripping was canceled by user.

To search the Gracenote database, the device must be connected to Wi-Fi. Database access time may vary depending on the network environment.
Please note that metadata for certain CDs may not be available on the Gracenote database.
You cannot access the Home Screen while CD ripping is in progress. The AK Connect service will be disabled during CD ripping. The service will automatically restart when CD ripping is completed. Music playback is disabled during ripping.
You can set the desired file format and ripping speed from the [Menu - Settings - CD Ripping] menu.
Several attempts at correction will be made for data with errors when the feature is enabled under [Menu - Settings - CD Ripping - Error Correction]. Please note that the CD ripping speed will be affected when this feature is enabled.
AK CD-Player
Using the AK CD-Player Function
- Connect the AK CD-Ripper to the device and select CD Player if not set as the default run function.
- Insert a CD and metadata (ID3 tags) for the inserted CD will be retrieved via Gracenote if Wi-Fi is turned on.
- Once the metadata has downloaded, press play.

The USB Type-C cable provided with the device is to be used to connect to the computer or to charge the product.
Depending on the CD-Ripper model the dedicated USB Type-C OTG cable may not be provided in the product package.
Depending on the OTG cable used, the connection may be unstable. To search the Gracenote database, the device must be connected to Wi-Fi. Database access time may vary depending on the network environment.
Please note that metadata for certain CDs may not be available on the Gracenote database.
General audio CD and MQA-CD playback is supported, but MP3-CD won't play.
Car Mode
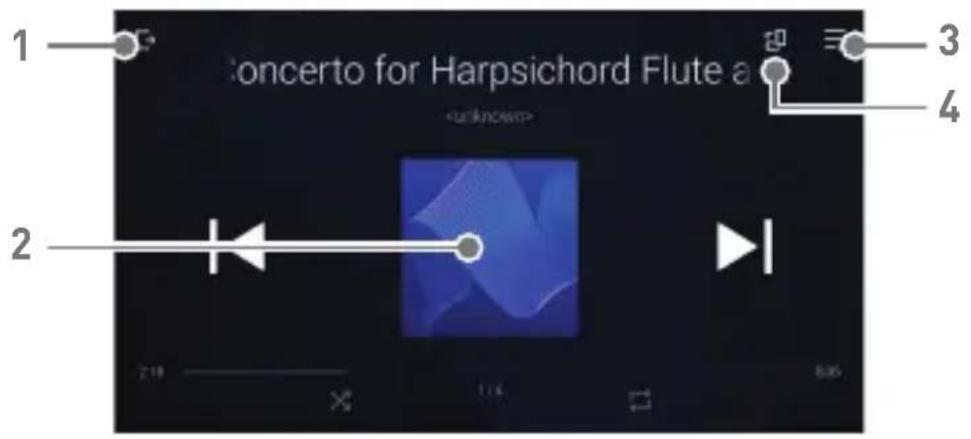
text_image
1 Concerto for Harpsichord Flute a unknown> 2 3 4| 1 | Exit | Exit car mode. |
| 2 | Play/Pause | Play or pause music. |
| 3 | Playlist | Display current playlist. |
| 4 | Screen Rotation | Switch the screen orientation to horizontal mode/vertical mode. |
Bookmark Function
Allows user to select up to five folders for display on the top of the screen.
Setting a bookmark
- Select [ ] at the top of the music list.
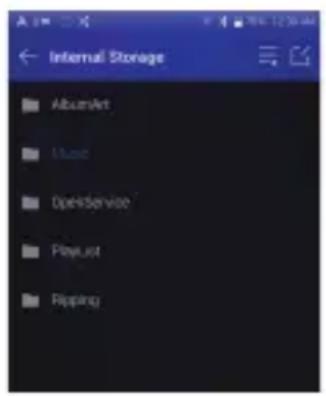
text_image
Internal Storage AlbumArt Music OpenService PlayList Fipping- Select the desired folder from the music list and select [ ] at the bottom to display the selected folder at the top of the music list.
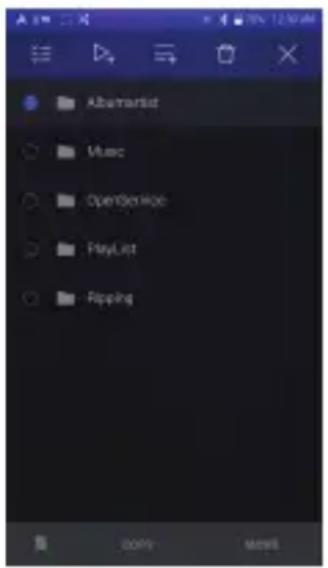
text_image
Abarmartist Music OpenService PlayList Fipping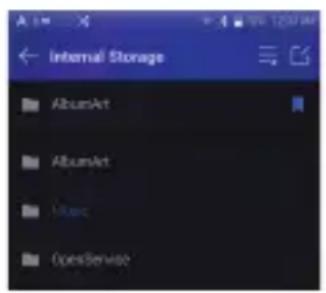
text_image
Internal Storage AlbumArt AlbumArt Music OpenService
Up to 5 bookmarks can be set.
Favorites Function
Favorites function allows users to mark a currently playing song as a favorite and add it to the Favorites folder.
Setting favorites
- Press [★] on the home screen to add / remove the song being played to the favorites list.
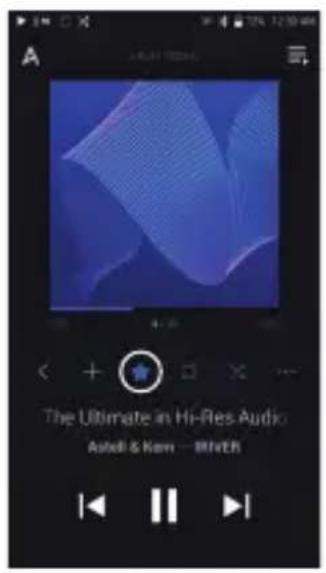
text_image
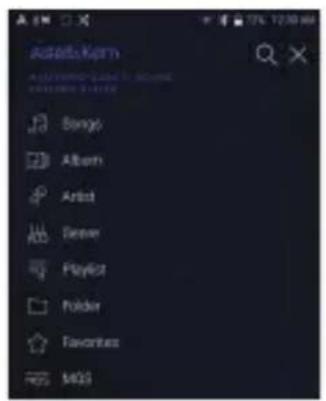
The Ultimate in Hi-Res Audio Asidi & Kam — Hi/ER- From the Home Screen, swipe [Left -Right] direction to display Main Menu. Press [Favorites] to display the list of favorite songs.
text_image
AutoMaker AUTOKOMO-2023 - 50000 DINJAMER 2023 Song Album Artist Server Playlist Folder Favorites MOS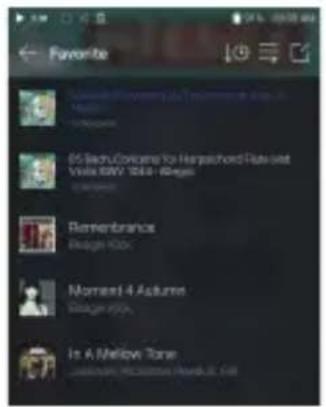
text_image
Favorite 65 Tech Concourse for Harpschored Galaset Vista BMW 2014 - Rege Remembrance Image Book Moment 4 Autumn Image Book Is A Melieve ToneSettings
The settings menu allows users to customize the device. The settings menu may vary depending on the firmware version.
Setup
- Select [Main Menu - Settings] or select [ ◎ ] from the Notification Bar menu.
- Select the feature to view setting options.
Wi-Fi
- Change wireless network settings and turn Wi-Fi on/off.

See page 52 for more information on connecting to Wi-Fi.
Bluetooth
- Connect a Bluetooth device to listen to music wirelessly.

See page 53 for more information on using Bluetooth.
AK CONNECT
- Turn AK Connect on/off and set AK Connect options.
Equalizer
- Set the equalizer according to the user's preferences.
dUSER EQ: Adjust the frequencies according to the user's preferences.

Supported Formats for EQ: PCM [8 \~ 192kHz(8/16/24bit)] Using the equalizer may negatively affect device performance. See pages 55 - 57 for more information on using the equalizer.
EQ Sync
- Share or receive Custom User EQ files.
To access custom EQ files, connect the device to the computer. Internal Storage -> EqLists -> "User EQ.dat"
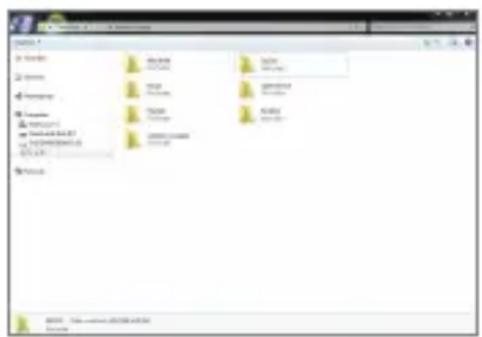
Shared User EQ files can only be shared between the same model. User EQ of SE200 is not compatible with the SE100.
If the User EQ file is modified or changed externally it will no longer be recognized.
User EQ.dat will not display in the SE200, however it can be viewed when connected to the computer.
Up to 20 User EQs can be displayed.
Gapless
- Plays the next song without any interruption.
Gapless playback is only supported between two files with identical bit rates, sample rates, and channels.
Line Out
- Set the voltage value generated when Line Out is activated.

Do not use earphones with the Line Out feature enabled. Doing so may cause permanent hearing loss.
When AKM and ESS are played at the same time, they are synchronized with a low output.
LR Balance
- Adjust the left-right balance for earphones/headphones.
Playback Settings
- Set how to add a song to Now Playing when a song is selected from a music list.
Notification Panel
- Add, delete, or reorganize Quick Settings buttons on the notification bar.
Drag and drop icons to add quick settings buttons or change the preferred order.
CD Ripper
- Set the automatic CD ripping function as well as the file format and ripping speed.
USB Mode
• Media Device (USB Drive): When connected to a computer, device appears as a removable drive.
- DAC Input: Output sound from a connected computer to the device.
USB Audio
- Select the type of DSD sound being outputted through USB Audio Out to a connected portable DAC.
Enable/Disable MQA decoding software.
Car mode
•Turn the car mode on/off.
•Double Tap Wake function
If the screen is off, tap the screen twice to turn it back on.
When the device is connected to a charger, the screen will remain on.
If the power button is used to turn off the screen, the Double Tap Wake function will remain enabled.
DAC Filter
- Sets up the DAC filter provided by a DAC manufacturer
When playing MQA, the DAC Filter set by a user is not applied.
Volume Limit
- Displays a warning when the volume reaches a certain level and sets related options.
Screen Brightness
- Adjust screen brightness settings.
LED Indicator
•Turn LED Indicator on/off.
LED Option: turn volume control or song details LED Indicator on/off individually.
Date & Time
- Set the current date and time.
Device Name
- Set the name of the device.
The maximum name length is 50 characters.
Language
- Select the display language.
Supported languages are English, Korean, Japanese, French, Russian, German, and Spanish.
Input Method
- Back Button: the Floating Back Button will be displayed on the screen.
Move the Back Button to the desired position by dragging and dropping the icon with your finger.
Move the button to the center of the screen to deactivate it. To reactivate the button, turn it on from [Menu-Settings-Input Method] - Keyboard: Select a language for the keyboard.
Supported languages are English, Korean, Japanese, Chinese (Simplified/Traditional), French, Russian, German, and Spanish.

Supported languages may vary depending on your location.
Screen Theme
- Change the screen theme to your preference.
Timer Settings
• Auto Power Off: The device will automatically power off after the selected amount of time of no user and device activity.
- Screen Timeout: The screen will turn off after the selected amount of time of no user activity.
- Sleep Timer: Music playback will stop and the device will turn off after the selected amount of time.
Downloads
- Select a folder for downloaded files to be saved by default.

When using AK Connect to download music, if the [Default folder] is selected in Settings, downloading will automatically begin to the pre-set Downloads folder. When [Select Folder] is selected, the user is prompted to choose a download folder each time a file is downloaded.
Update
- System Update: Update the device when a new firmware version is available.
- Application Update: Update the default applications when new versions are available.
•Automatic updates for Open APP Service applications are not available through the Settings Menu of the device.
System Information
- System Information: View model number, firmware version, MAC address and memory usage information. The microSD card can be mounted/dismounted and data can be deleted.
- Legal information: Check open source licenses and regulations.

Formatting the microSD card will delete all data on the memory card. Be sure to backup any important files before formatting. When formatting the microSD card on a computer, use of the FAT32 system is recommended.
System Reset
- Initialize Media Scan: Resets and rescans the internal database. Database initialization time may vary depending on the number of files stored on the device.
- Settings Reset: Resets all user settings back to the default settings.
- Factory Data Reset: Deletes all user data and resets all user settings back to the default setting.
Connecting to Wi-Fi
Connecting to a Wi-Fi Network
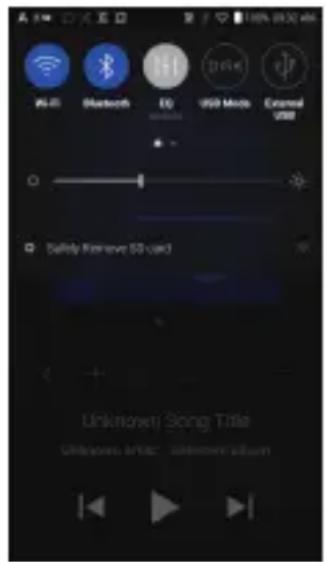
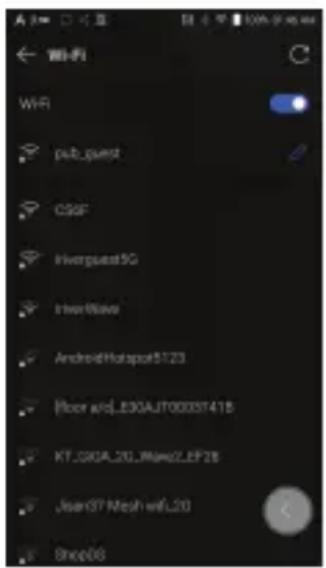
- Press and hold [💡] from the Notification Bar or select [Menu - Settings - Wi-Fi] to display a list of available Wi-Fi networks.
text_image
Wi-Fi Bluetooth IO USB Modis External 2000 Safety Remove 50 um Unknown! Song Title Unknown: Music album- Select the desired AP to connect to the wireless network.
Additional information such as Wi-Fi password may be required depending on Wi-Fi settings.
text_image
WIR pub_guest CSSF Hirripuest9G InterWave AndroidHotspot5123 Floor wJL30AJT0000ST418 KT30A.20_MN02LEP28 JeanGT Mesh wfL20 Shop08
Networks requiring browser or other additional certifications are not supported.
Wi-Fi Channels 1 through 13 supported, except in the USA, channels 12 and 13 are disabled.
Using Bluetooth
Connect a Bluetooth device to listen to music wirelessly.
Turning Bluetooth On/Off
A Bluetooth device must be paired with the device prior to use. Refer to the Bluetooth device's instruction manual for details.
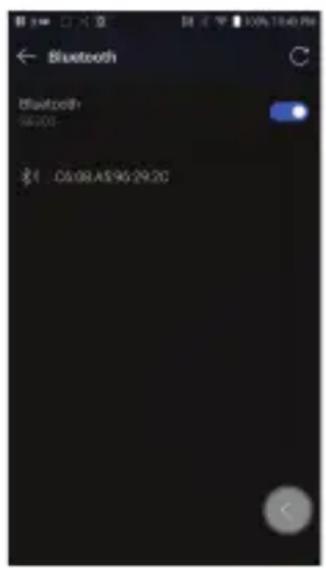
- Select [✗] from the Notification Bar menu or select [On/Off] from [Menu - Settings - Bluetooth].
text_image
Bluetooth Bluetooth: 06:00 1 05:08 A95 29:20Bluetooth Pairing
- In the Settings Menu, select the appropriate Bluetooth device from the list of available devices.
Disconnect a Bluetooth Device
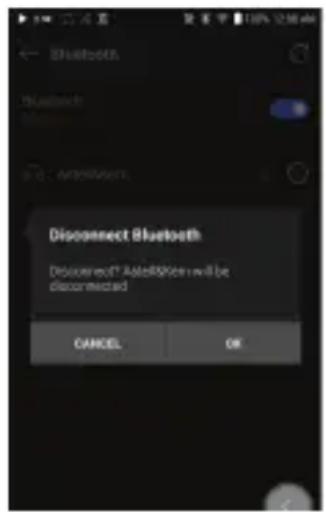
- Press the connected Bluetooth device and confirm the message prompt to disconnect the device.
text_image
Bluetooth Bluetooth DISCONNECT Bluetooth DISCONNECT! AsterRSKen will be discontinued CANCEL OKRemoving a Bluetooth Pairing
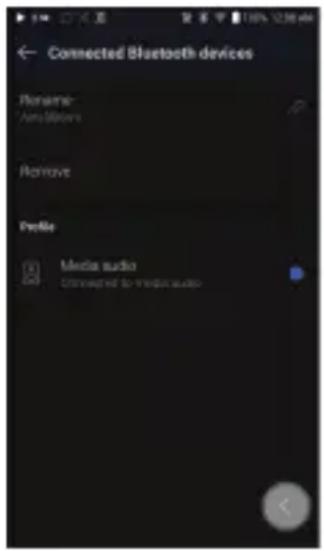
- Press [i] to the right of the paired device to go to settings.
- Select [Remove] to complete the process.
text_image
Connected Bluetooth devices Rename: AmsStom Remove Profile Media audio Connected to Inspec audio
Bluetooth Support Specifications
Profile: A2DP, AVRCP, Qualcomm® aptX™ HD
•Device performance may be affected during Hi-Res playback.
Do not turn off the device while connected to Bluetooth.
Turn the Bluetooth device off then on in case of issue.
Pairing methods may differ for each individual. Bluetooth device.
Always refer to the respective instruction manual for details.
When connecting the product to a Bluetooth device, the distance between the two must be within 20 cm.
Audio quality will degrade with longer distances and the pairing may disconnect at a distance of 2 m (6.5 ft.) or more. (Distances may vary depending on device and environment.)
Crosstalk may be heard while using Bluetooth.
For multipoint devices, make the necessary connections prior to use.
Malfunction, noise, and other undesirable effects may occur due to the device's battery level and the environment.
- If signal interference affects data transmission. (e.g., holding the device while wearing a Bluetooth device, holding the device while holding another electronic device, etc.)
- If the device or Bluetooth headset's radio transmitters are touching parts of the body.
- If the transmission strength is affected by walls, corners, partitions, etc.
• If devices using the same frequencies cause interference. (e.g., medical devices, microwave ovens, Wi-Fi, etc.)
- Areas with an excessive amount of interference or weak signals. (e.g., elevators, underground, etc.)
Equalizer Setup
Equalizer Setup
- Press and hold [ ↑] on the Notification Bar or turn on [Menu - Settings - Equalizer].
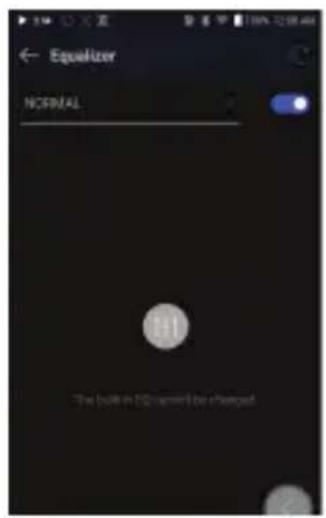
text_image
Equalizer NORMAL The built-in D:\Named be changed- Press [NORMAL EQ], then select [+].
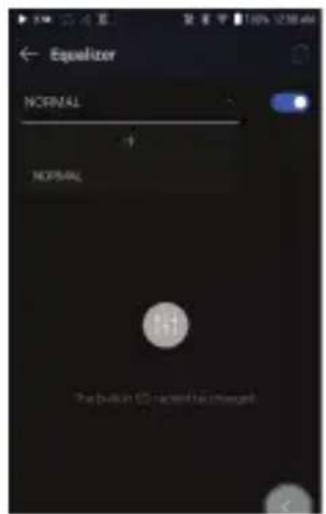
text_image
Equalizer NORMAL NORMAL The build in CD selected is changed- Enter a name for the custom EQ settings and select [SAVE].
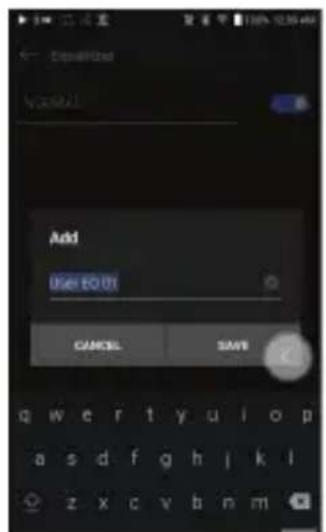
text_image
Add User TO OUT CANCEL SAVE-
Adjust the frequencies up and down according to the user's preferences.
-
The number values at the lower-left corner of the screen can be adjusted for fine-tuning.
-
Press the [Advanced] tab on the top to display PEQ settings screen. Adjust Freq/Gain/Q.
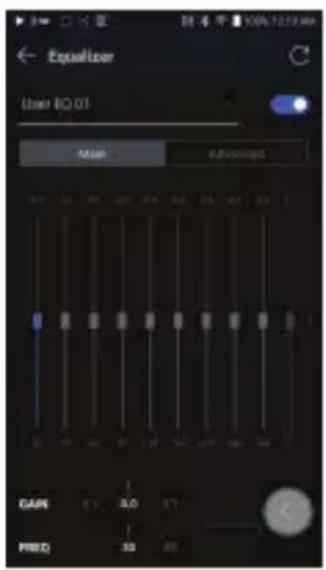
text_image
Equation User EQ 01 Main Advanced GAR 3.0 PROD 30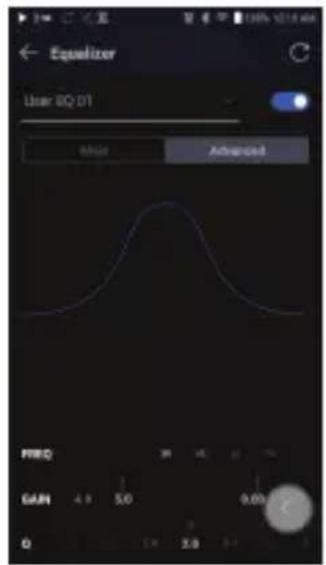
text_image
Equalizer User EQ 01 ✓✓✓ Advanced FREQ GAN 4.9 5.0 9.00 0 10 2.0 3.0 4.0Deleting a Custom Equalizer Setting
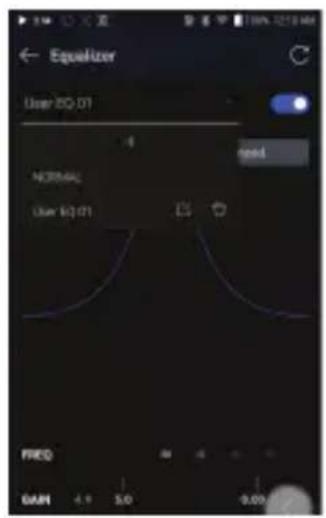
- Press [the drop down menu] in the upper left of the equalizer.
- Press [icon] next to the EQ name to be deleted.
- Press [OK] to delete the selected EQ setting.
text_image
Equalizer User EQ 01 NCRMC User EQ 01 need FRED GAIN 4.9 5.0 0.00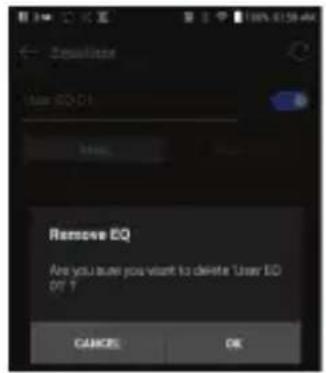
text_image
Remove EQ Are you save you want to delete User EQ OKRenaming a Custom Equalizer Setting
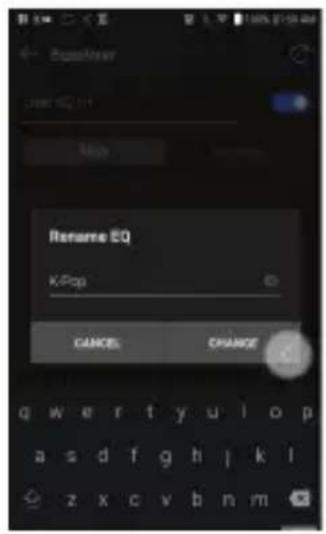
- Press [the drop down menu] in the upper left of the equalizer.
- Press [ ] next to the EQ setting name you wish to change and enter a new name for the selected EQ.
- Press [CHANGE] to save.
text_image
Rename EQ K/Pop CANCE CHANGESafety Pre- Cautions
Device
- When a plug is inserted into the 3.5mm unbalanced, 2.5mm balanced, or USB port, do not apply any force or impact to the plug.
- Do not insert any metal objects (coins, hairpins, etc.) or flammable debris into the device.
- Do not put heavy objects on the device.
- If the device gets wet (rain, water, chemicals, medicine, cosmetics, sweat, moisture, etc.), allow the device to dry thoroughly before powering on. (Damage may not be repairable, however if deemed repairable, any damage due to liquid exposure will be repaired for an additional fee even if the device is under warranty.)
- Avoid exposing the device to direct sunlight or extreme temperatures (0°C - +40°C) such as the inside of a car during the summer.
- Do not store or use in hot and humid places such as saunas.
- Avoid places with excessive dust or smoke.
- Do not use for extended periods on blankets, electric blankets, or carpet.
- Do not place near a fire or in a microwave.
- Never disassemble, repair, or alter the product.
- Do not store for extended periods in a confined space with the power on.
- Do not place the device near magnetic objects (magnets, televisions, monitors, speakers, etc.).
- Do not let chemicals or detergents come in contact with the product since they may damage the surface and paint.
- Do not drop or expose the product to strong impacts (places where there is strong vibration, etc.).
- Do not press multiple buttons simultaneously.
- Do not disconnect the USB Type-C cable during data transfer.
-
When connecting the device to a computer with the USB Type-C cable, use a USB port on the back of the computer for best results.
-
Connecting the cable to a defective or damaged USB port on a computer may damage the device.
- Displaying one image for an extended period may cause screen burn-in (afterimage).
- Using poor quality protective films or adhesive stickers on the screen may cause damage.
- Do not insert any foreign objects into the device ports.
- The device may become warm while playing and charging, so handle it carefully.
- Product's corners may be sharp, so handle carefully.
- Note that the device can become heated when AKM and ESS DAC are played at the same time, so use caution when handling.
Other
- Do not use earphones/headphones or use the device while operating any type of vehicle. It is not only dangerous, but may be a violation of the law in certain regions.
- Do not use the product during physical activities (driving, walking, hiking, etc.).
- Always use in a safe environment to avoid the risk of an accident.
- When using the device while moving, make sure the area is free of obstacles.
- Avoid using the device during thunderstorms to reduce the possibility of electric shock.
- If there is a ringing in the ears, reduce the volume or stop using the device.
- Do not listen to music at excessive volumes for extended periods.
- Do not use earphones/headphones at excessive volumes.
- Make sure that the headphone/earphone does not get stuck in another object or get caught between other objects.
- Do not sleep with earphones in your ears or leave them in for extended periods.
Trouble-shooting
Solutions to Common Issues
- The device won't turn on.
The battery may need to be recharged. Charge the device for at least one hour and try again.
Reset the device. (See Page 5)
- The device will not charge when connected to a computer via USB cable.
Connect to the computer using the provided USB Type-C cable. Charging may not occur depending on the condition and specifications of your computer.
(In this case, charging via computer is not recommended.)
- Connect the device to a USB wall adapter using the provided USB Type-C cable to charge directly from a wall outlet.
- The computer won't recognize the device or an error occurs when connected.
Use a USB port on the back of the computer.
Check if the USB Type-C cable is connected correctly.
For Mac, check to ensure the MTP program is installed properly.
- Check if the device connects properly on a different computer.
- The screen turns off repeatedly.
The screen turns off automatically after a defined period to reduce battery consumption. Set the time at [Menu-Settings - Timer Settings - Screen Timeout].
- The screen does not display images properly.
Check the screen for debris.
- There is no sound or there is static/interference.
Check that the volume setting is above [0].
Check that the earphones are plugged in properly and make sure nothing is obstructing the port connection.
Verify that the music file is not corrupt.
- Verify that the audio settings have been set properly. (Balanced out, line out, etc.)
- A file does not play or the product becomes unstable when a certain file is played.
File may be damaged or corrupt if the following occurs:
Playback stops or freezes.
Device may act erratically or freeze.
File may sound different on another device.
There may be a difference in the performance of playback or other functions.
There may be differences in the file specs.
- Converting the file to a different format or use of a different file is recommended.
Copyright
Dreamus Company retains the rights to patents, trademarks, copyrights, and other intellectual property rights related to this manual. No contents of this user manual may be duplicated or reproduced in any format or by any means without the prior approval of Dreamus Company.
Using or reproducing, in whole or part, the contents of this document is subject to penalties. Software, audio, video, and any other copyrighted contents are protected in accordance with relevant copyright laws.
The user accepts all legal responsibility for the unauthorized reproduction or distribution of the copyrighted contents from this product.
Companies, organizations, products, people, and events used in the examples are fictional. Dreamus Company has no intention to be associated with any company, institution, product, person, or incident through this instruction book, and no such inference should be made. It is the responsibility of the user to comply with applicable copyright laws.
©1999\~2020 Dreamus Company. All rights reserved.
Certifications
KC / FCC / CE / TELEC
Class B Device (Communication equipment for residential use): This is a Class B Device and is registered for EMC requirements for residential use. This device can be used in residential areas and all other areas.
Check information about KC/FCC/CE TELEC certification at [settings - system information - regulations]

FCC ID: QDMPPR21
This device complies with Part 15 of the FCC Rules, Operation is subject to the following two conditions: (1) this device may not cause harmful interference, and (2) this device must accept any interference received, including interference that may cause undesired operation.
FCC Caution: Any changes or modifications not expressly approved by the party responsible for compliance could void the user's authority to operate this equipment.
Instruction of E-Label
You can view the FCC ID of the device. To view the FCC ID, tap Settings → System Information → Regulatory
(b) For a Class B digital device or peripheral, the instructions furnished to the user shall include the following or similar statement, placed in a prominent location in the text of the manual: NOTE: This equipment has been tested and found to comply with the limits for a Class B digital device, pursuant to part 15 of the FCC Rules. These limits are designed to provide reasonable protection against harmful interference in a residential installation.
This equipment generates, uses and can radiate radio frequency energy and, if not installed and used in accordance with the instructions, may cause harmful interference to radio communications. However, there is no guarantee that interference will not occur in a particular installation. If this equipment does cause harmful interference to radio or television reception, which can be determined by turning the equipment off and on, the user is encouraged to try to correct the interference by one or more of the following measures:
- Reorient or relocate the receiving antenna.
- Increase the separation between the equipment and receiver.
- Connect the equipment into an outlet on a circuit different from that to which the receiver is connected.
- Consult the dealer or an experienced radio/TV technician for help.
Body-Worn Operation
This device was tested for typical body-worn operations with the back of the portable music player kept 5mm from the body. To maintain compliance requirements, use only belt-clips, holsters or similar accessories that maintain a 5mm separation distance between the user's body and the back of the portable music player, including the antenna. The use of belt-clips, holsters and similar accessories should not contain metallic components in its assembly. The use of accessories that do not satisfy these requirements may not comply with CE RF exposure requirements and should be avoided.
Body-worn accessory exposure conditions “Specific information must be included in the operating manuals to enable users to select body-worn accessories that meet the minimum test separation distance requirements. Users must be fully informed of the operating requirements and restrictions, to the extent that the typical user can easily understand the information, to acquire the required body-worn accessories to maintain compliance. Instructions on how to place and orient a device in body-worn accessories, in accordance with the test results, should also be included in the user instructions. All supported body-worn accessory operating configurations must be clearly disclosed to users through conspicuous instructions in the user guide and user manual to ensure unsupported operations are avoided. All body-worn accessories containing metallic components must be tested for compliance and clearly identified in the operating manual. The instruction must inform users to avoid using other body-worn accessories containing metallic components to ensure RF exposure compliance.”
Registered Trademarks
Windows 7, Windows 8, Windows 10, and Windows Media Player are registered trademarks of Microsoft Corp.
Qualcomm ^* aptX\~HD
Qualcomm aptX is a product of Qualcomm Technologies, Inc. and/or its subsidiaries.
Qualcomm is a trademark of Qualcomm Incorporated, registered in the United States and other countries.
aptX is a trademark of Qualcomm Technologies International, Ltd., registered in the United States and other countries.

MQA
MQA (Master Quality Authenticated) is an award-winning British technology that delivers the sound of the original master recording. The master MQA file is fully authenticated and is small enough to stream or download. Visit mga.co.uk for more information.
Astell&Kern SE200 includes MQA technology, which enables you to play back MQA audio files and streams, delivering the sound of the original master recording.
The SE200 Now Playing status shows a green or blue light to indicate that the unit is decoding and playing a MQA stream or file, and denotes provenance to ensure that the sound is identical to that of the source material. A blue light indicates it is playing a MQA Studio file, which has either been approved in the studio by the artist/producer or has been verified by the copyright owner.
MQA and the Sound Wave Device are registered trademarks of MQA Limited.© 2016
text_image
Egor Remance sp. 51 and i: Pogewinder - Wijian General Player Living Jin (Gennar Hall) LUNNEDisclaimers
The manufacturer, importer, and distributor shall not be liable for damages including accidental and personal injury due to the improper use or operation of this product. The information in this user manual was written based on current product specifications. The manufacturer, Dreamus Company, regularly adds new features via OTA updates and will continue to apply new technologies in the future. Product specifications may be changed without prior notice. There is no warranty against data loss due to the use of this product.
The device must be used a minimum of 5mm away from the body in normal use conditions.
CAUTION
RISK OF EXPLOSION IF BATTERY IS REPLACED
BY AN INCORRECT TYPE.
DISPOSE OF USED BATTERIES ACCORDING
TO THE INSTRUCTIONS
The excessive sound pressure from earphones and headphones can cause hearing loss.
Specifications
General Specifications
| Product Name | SE200 |
| Model | PPR21 |
| Body Material | Aluminum |
| Display | 5.0inch 720x1280 touch display |
| Supported Audio Formats | WAV, FLAC, WMA, MP3, OGG, APE, AAC, ALAC, AIFF, DFF, DSF, MQA |
| MQA Playback | Services (Tidal Masters), Local files, External USB, MQA-CD(ripped) |
| Sample Rate | PCM: 8kHz - 384kHz [8/16/24/32bits per Sample]DSD Native: DSD64[1bit 2.8MHz], Stereo /DSD128(1bit 5.6MHz), Stereo / DSD256(1bit 11.2MHz), Stereo |
| Output Level | Unbalanced | AKM: 3.0Vrms, ESS: 2.0Vrms (Condition No Load)Balanced | AKM: 6.0Vrms, ESS: 4.0Vrms (Condition No Load) |
| DAC | Multi DAC: AKM AK4499EQ DAC (Single DAC) / ESS ES9068AS DAC (Dual DAC) |
| Decoding | Support up to 32bit / 384kHz Bit-to-Bit playback |
| Input | USB Type-C input (for PC & MAC) |
| Outputs | Unbalanced Out (3.5mm) x 2 |Balanced Out (2.5mm, only 4-pole supported) x 2 |
| Charging | 9V =1.67A / 5V =2A |
| Wi-Fi | 802.11 b/g/n (2.4GHz) |
| Bluetooth | V4.2 (A2DP, AVRCP, Qualcomm® aptXTM HD) |
| Dimensions | 3.02"(76.9mm)[W] x 5.20"(132.2mm)[H] x 0.62"(15.8mm)[D] |
| Weight | 9.66oz (274g) |
| Feature Enhancements | Firmware upgrade supported(OTA) |
| SAR | Body 10g SAR (W/Kg) _ WLAN 2.4Ghz : 0.024 |
| Audio Specifications | |
| Frequency Response | Unbalanced | AKM: ±0.015dB, ESS: ±0.023dB (Condition: 20Hz~20kHz) /Balanced | AKM: ±0.010dB, ESS: ±0.015dB (Condition: 20Hz~20kHz),Unbalanced | AKM: ±0.050dB, ESS: ±0.065dB (Condition: 20Hz~70kHz) /Balanced | AKM: ±0.030dB, ESS: ±0.10dB (Condition: 20Hz~70kHz) |
| S/N | Unbalanced | AKM: 124dB, ESS: 121dB @ 1kHz /Balanced | AKM: 125dB, ESS: 123dB @ 1kHz |
| Crosstalk | Unbalanced | AKM: -138dB, ESS: -138dB @ 1kHz /Balanced | AKM: -144dB, ESS: -144dB @ 1kHz |
| THD+N | Unbalanced | AKM: 0.0003%, ESS: 0.0006% @ 1kHz /Balanced | AKM: 0.0004%, ESS: 0.0006% @ 1kHz |
| IMD SMPTE | Unbalanced | AKM: 0.0003%, ESS: 0.0003% 800Hz 10kHz (4:1) /Balanced | AKM: 0.0003%, ESS: 0.0003% 800Hz 10kHz (4:1) |
| Output Impedance | Unbalanced | Out 3.5mm (AKM: 0.7ohm, ESS: 1ohm) /Balanced | Out 2.5mm (AKM: 1.3ohm, ESS: 1.6ohm) |
| Clock Jitter | 25ps(Typ) |
| Reference Clock Jitter | 200 Femto Seconds |
| Memory | |
| External Memory | microSD(Max. 1TB) x 1 |
| Battery | |
| Capacity | 3,700mAh 3.8V Li-Polymer Battery |
| Supported OS | |
| Supported OS | Windows 7,8,10(32/64bit) Mac OS X 10.7 and up |
Limited Warranty Statement NORTH AMERICA ENGLISH
THIS WARRANTY CARD IS VALID ONLY FOR SERVICE ON PRODUCTS PURCHASED IN NORTH AMERICA.
For other countries, please contact the store/dealer where the product was purchased.
Thank you for purchasing a Dreamus Company product. All Dreamus Company products come with a one year limited time warranty against material or workmanship defects starting from the original date of purchase from an authorized dealer.
Dreamus Company warranty covers defects that arise only as a result of normal use of the product. The product will not be covered under the warranty if:
- The product is repaired or altered, unless approved or completed by Dreamus Company.
- The defect or issue is a result of violating operating or handling instructions provided by Dreamus Company.
- The problem is caused by unusual physical or electrical stress, misuse, abuse, power shortage, or negligence.
- The problem is caused by a fire or other natural calamity.
- The warranty period" has expired.
Warranty Period
| Dreamus Company product | Duration of Limited Warranty |
| North America | |
| Player console | 1 Year |
| Accessories | 90 Days |
| Refund or Exchange | 14 Days |
For customer or technical support, please see the following website for contact information:
URL: us.astellnkern.com