
CP70_CP52011 - Vacuum Cleaner HOOVER - Free user manual and instructions
Find the device manual for free CP70_CP52011 HOOVER in PDF.


User questions about CP70_CP52011 HOOVER
0 question about this device. Answer the ones you know or ask your own.
Ask a new question about this device
Download the instructions for your Vacuum Cleaner in PDF format for free! Find your manual CP70_CP52011 - HOOVER and take your electronic device back in hand. On this page are published all the documents necessary for the use of your device. CP70_CP52011 by HOOVER.
USER MANUAL CP70_CP52011 HOOVER
text_image
HOOVER HOOVER HOOVER HOOVER HOOVER HOOVER HOOVER HOOVER HOOVER HOOVER HOOVER HOOVER HOOVER HOOVER HOOVER HOOVER HOOVER HOOVER HOOVER HOOVER HOOVER HOOVER HOOVER HOOVER HOOVER HOOVER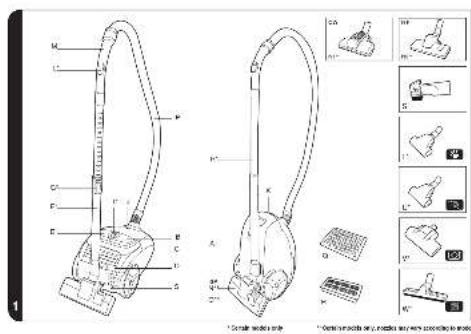
text_image
Technical diagram of a vacuum cleaner with labeled parts and corresponding exploded view views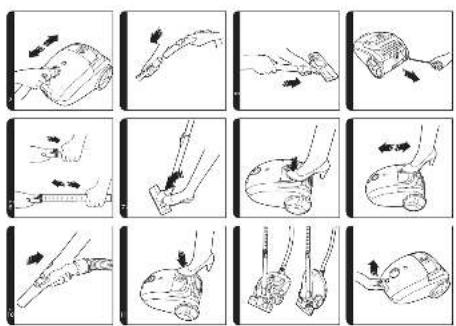

CHINESE
“中国长安汽车集团有限公司”
INSTRUCTIONS FOR SAFE USE
This appliance should only be used for domestic cleaning, as described in this user guide. Please ensure that this guide is fully understood before operating the appliance.
Do not leave the appliance plugged in. Always switch off and remove the plug from the socket after use, or before cleaning the appliance or any maintenance task.
This appliance can be used by children aged from 8 years and above and persons with reduced physical, sensory or mental capabilities or lack of experience and knowledge if they have been given supervision or instruction concerning use of the appliance in a safe way and understand the hazards involved. Children shall not play with the appliance. Cleaning and user maintenance shall not be made by children without supervision.
If the power cord is damaged stop using the appliance immediately. To avoid a safety hazard, an authorised HOOVER service engineer must replace the power cord.
Keep hands, feet, loose clothing and hair away from rotating brushes.
Use only attachments, consumables or spares recommended or supplied by HOOVER.
Static electricity: Some carpets can cause a small build up of static electricity. Any static discharge is not hazardous to health.
Do not use your appliance out of doors or on any wet surface or for wet pick up.
Do not pick up hard or sharp objects, matches, hot ashes, cigarette ends or other similar items.
Do not spray with or pick up flammable liquids, cleaning fluids, aerosols or their vapours.
Do not run over the power cord when using your appliance or remove the plug by pulling on the power cord.
Do not continue to use your appliance if it appears faulty.
HOOVER service: To ensure the continued safe and efficient operation of this appliance we recommend that any servicing or repairs are only carried out by an authorised HOOVER service engineer.
Do not stand on or wrap the cord around arms or legs when using your appliance.
Do not use the appliance to clean animals or people.
Do not position the appliance above you when cleaning the stairs.
The Environment
The symbol on this appliance indicates that this appliance may not be treated as household waste. Instead it must be handed over to the applicable collection point for the recycling of electrical and electronic equipment. Disposal must be carried out in accordance with local environmental regulations for waste disposal. For more detailed information about treatment, recovery and recycling of this appliance, please contact your local city office, your household and waste disposal service or the shop where you purchased the appliance.

This appliance complies with the European Directives 2006/95/EC, 2004/108/EC and 2011/65/EU.
HOOVER Limited, Pentrebach, Merthyr Tydfil, Mid Glamorgan, CF48 4TU, UK
GETTING TO KNOW YOUR CLEANER
A. Main Cleaner
B. Cord Rewind Pedal
C. Carry Handle
D. Exhaust Filter Cover
E. On/Off Pedal
F. Telescopic Tube*
G. Telescopic Tube Release Button*
H. Standard Tube ^®
I. Variable Power Control Roller®
J. Bag Check Indicator
K. Bag Door Release Latch
L. Suction Regulator*
M. Handle
N. Carpet and Floor nozzle(GP)**
N1. Carpet Nozzle (CA)**
N2. Hard Floor Nozzle (HF)**
O. Surface selector Peda **
P. Hose
Q. Pre motor filter
R. Exhaust filter
S. 2 in 1 Tool
T. Pet Hair Remover Mini Turbo Nozzle*
U. Allergen Remover Mini Turbo Nozzle*
V. Grand Turbo Nozzle*
W. Parquet nozzle*
ASSEMBLING YOUR CLEANER
Remove all components from the packaging.
1. Connect the hose to the cleaner main body, ensuring it clips and locks into position. To release: simply press the two buttons on the hose end and pull [2].
2. Connect the tube upper end to the handle. [3].
3. Connect the tube lower end to the carpet and floor nozzle [4].
USING YOUR CLEANER
- Extract power cord and plug it into the power supply. Do not pull the cord beyond the red marker [5].
- Adjust the length of the telescopic tube* by moving the telescopic release button* up and raise or lower the handle to the most comfortable cleaning position [6].
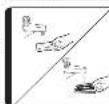
- Carpet & Floor Nozzle. Press the pedal on the nozzle [7] to select the ideal cleaning mode for the floor type.
Hard Floor: The brushes are lowered to protect the floor
Carpet: With lifted brushes for the deepest clean
- Switch the cleaner on by pressing the On/Off pedal on the cleaner main body. [8]
- Adjust the power level by rotating the variable power control roller*. [9]
- Adjust the suction regulator* to the desired level. [10].
- Switch off at the end of use by pressing the On/Off pedal. Unplug and press the cord rewind pedal to wind the power cord back into the cleaner [11].
- Parking and Storage - The tube can be parked for temporary storage while in use, or in the storage position when not in use [12].
*Certain Models Only
** Certain models only, nozzles may vary according to model
CLEANER MAINTENANCE
Replacing The Dust Bag
If the bag check indicator is red please check and, if necessary, replace the bag.
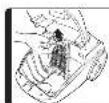
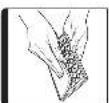
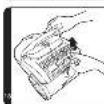
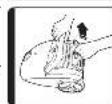
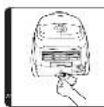
- Lift the bag door release latch [13] to open the cover, pull the bag holder [14] and pull the bag collar to remove the bag [15].
- Apply the peel and seal sticker, located on the bag collar, to the bag inlet. The full dust bag should be disposed of correctly and carefully.
- Fold a new bag as shown on the bag and fit by inserting the collar into the bag holder.
- Refit the bag holder and close the bag door.
Warning - The bag door will NOT close if the dust bag and/or the bag holder are not assembled to the cleaner. Always ensure the bag and bag holder are present when closing the bag door.
Remember: The bag check Indicator may also be red if an obstruction has occurred. In this case refer to 'Removing A Blockage From the System'.
Cleaning the Filters
To maintain optimum performance of your cleaner, please wash the filters after each 5 bag changes.
Cleaning the pre-motor filter:
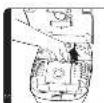
- Lift the bag door release latch [13] to open the cover and remove the bag holder.
- To remove the pre-motor filter slide the pre-motor filter frame from the cleaner. [16]
- Remove the filter from the holder. [17]
- Wash it in hand warm water, [20] and allow it to dry thoroughly before replacing to the cleaner [21].
Cleaning the exhaust filter:
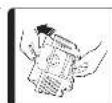
- To remove the exhaust filter, unclip the exhaust filter cover [18] and remove the filter pack. [19]
- Wash the filter in hand warm water [20] and allow it to dry thoroughly before replacing to the cleaner. [21].
Remember: Do not use hot water or detergents. In the unlikely event of the filters becoming damaged, fit a Genuine Hoover replacement. Do not try and use the product without a dust bag or filter fitted.
Cleaning the permanent cloth dust bag\*
To maintain optimum performance we recommend that you wash the permanent cloth dust bag under hand warm water after every 5 full bags. Remove excess water and leave to dry fully before replacing.
Removing a Blockage From The System
If the bag check indicator is illuminated or flashing:
1. Check if the bag is full. If so refer to 'Replacing The Dust Bag'
2. If it is not full, then;
A. Do the filters need cleaning? If so refer to 'Cleaning the Filter'.
B. Check if there is any other blockage in the system - Use a rod or a pole to remove any blockage from the Teletube or flexible hose.
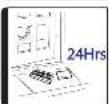
Warning - The bag check indicator will turn red if the cleaner is used when full, if there is a blockage or if the filters are dirty. If the cleaner is used for a significant period of time with the bag check indicator is red, a thermal cut out will switch the cleaner off to prevent overheating. The bag check indicator turn green once the cleaner has switched off to signal that the thermal cut out has been activated. If this should happen, switch the cleaner off, unplug and correct the fault. It will take about 30 minutes for the cut out to automatically reset.
ACCESSORIES AND NOZZLES
To obtain the best performance and energy efficiency ^#1 it is recommended that the correct nozzles are used for the main cleaning operations. These nozzles are indicated in the diagrams by the letters GP, HF or CA.
A nozzle type GP can be used to clean both carpet and hard floor.
A nozzle type HF is suitable for use only on hard floor.
A nozzle of type CA is suitable for use only on carpet.
The other nozzles are accessories for specialist cleaning tasks and are recommended for occasional use only.
It is important to note that this vacuum cleaner is supplied with an Energy Label as required by European Regulation (EU) 665/2013.
If the label shows a red prohibition circle on the left covering the carpet symbol, then this indicates that the vacuum cleaner is not suitable use on carpets.
If the label shows a red prohibition circle on the right covering the hard floor symbol, then this indicates that the vacuum cleaner is not suitable for use on hard floors.
1 NOTE: Dust pick up ability carpet, dust pick up ability hard floor, and energy efficiency in accord with Commission Regulations (EU) 665/2013 and (EU) 666/2013.
All accessories can be fitted to the end of the handle or the end of the tube. [23]
2 in 1 tool – Combines two functions in one, the 2 in 1 tool can be connected as a crevice tool. By rotating the end piece converts to a dusting brush. The 2 in 1 tool can be stored neatly at the rear of the cleaner. [22]
Crevice Tool – For corners and hard to reach areas.
Dusting Brush – For bookshelves, frames, keyboards and other delicate areas. To extend the brushes push the button on the body of the tool.
Pet Hair Remover Mini Turbo Nozzle* - Use the mini turbo nozzle on stairs or for deep cleaning on textile surfaces and other hard to clean areas [1T].
Allergen Remover Mini Turbo Nozzle* - Use the mini turbo nozzle on stairs or for deep cleaning on textile surfaces and other hard to clean areas. [1U]
Grand Turbo Nozzle* - Use the turbo nozzle for deep cleaning on carpets. [1V]
Parquet Nozzle ^® – For wooden floors and other delicate floors. [1W]
IMPORTANT: Do not use the grand turbo nozzle or mini turbo nozzles on rugs with long fringes, animal hides and carpet pile deeper than 15mm. Do not keep the nozzle stationary while the brush is rotating.
USER CHECKLIST
Should you have a problem with the product, complete this simple user checklist before calling your local Hoover service.
- Is there a working electricity supply to the cleaner? Please check with another electrical appliance
*Certain Models Only ** Certain models only, nozzles may vary according to model
• Is the dust bag over-filled? Please refer to 'Cleaner Maintenance'
• Is the Filter blocked? Please refer to 'Cleaning the filter'
- Is the hose or nozzle blocked? Please refer to 'Removing a blockage from the system'
- Has the cleaner overheated? If so, it will take approximately 30 minutes to automatically reset
IMPORTANT INFORMATION
Hoover spares and Consumables
Always replace parts with genuine Hoover spares. These are available from your local Hoover dealer or direct from Hoover. When ordering parts always quote your model number.
| Microfiber Bag | H63 | 35600536 | ||
| Pre-Motor Filter & Exhaust Filter Kit U63 35601193 | ||||
| Complete Flexible Hose D128 35601194 | ||||
| Carpet & Floor Extra Nozzle G221EE 35601635 | ||||
| Carpet & Floor Smart Nozzle G200SE 35601593 | ||||
| Hard Floor Smart Nozzle G222SE 35601636 | ||||
| Easy Parquet Nozzle G131PC 35601196 | ||||
| Mini Turbo Nozzle | J46 | 35601116 | ||
Hoover Service
Should you require service at any time, please contact your local Hoover Service Office.
Quality
BSI ISO 9001
Hoover's factories have been independently assessed for quality. Our products are made using a quality system which meets the requirements of ISO 9001.
Your Guarantee
The guarantee conditions for this appliance are as defined by our representative in the country in which it is sold. Details regarding these conditions can be obtained from the dealer from whom the appliance was purchased. The bill of sale or receipt must be produced when making any claim under the terms of this guarantee.
Subject to change without notice.