
CI 580 - Hi-Fi NAD - Free user manual and instructions
Find the device manual for free CI 580 NAD in PDF.


| Product Type | Network Audio Preamplifier with Multi-Zone Streaming |
| Brand | NAD |
| Model | CI 580 |
| Dimensions (WxHxD) | 480 x 46 x 234 mm (18-15/16 x 1-13/16 x 9-3/4 inches) |
| Shipping Weight | 3.8 kg (8.4 lbs) |
| Power Supply | 100-240V, 50/60Hz |
| Standby Power Consumption | 6W (Network standby mode) |
| Audio Inputs | 1x Analog RCA stereo, 1x Optical (TOSLINK), 1x USB Type A (storage), 1x USB Type B (computer audio) |
| Audio Outputs | 4x Analog RCA (preamplifier), 4x Optical (TOSLINK), 4x Coaxial (digital) |
| Network Connectivity | Ethernet RJ45 Gigabit (wired required for setup) |
| Supported Audio Formats | MP3, AAC, WMA, OGG, FLAC, ALAC, WAV, AIFF |
| Streaming Services | WiMP, Slacker Radio, Qobuz, HighResAudio, JUKE, Deezer, Murfie, HDTracks, Spotify, TIDAL, Napster, Rhapsody |
| Internet Radio | TuneIn Radio, iHeartRadio |
| MQA Decoding | Yes (Master Quality Authenticated) |
| Control Methods | BluOS App (iOS/Android), front panel button, IR input, +12V trigger |
| Special Features | Multi-zone (4 zones), doorbell interrupt, IR repeater support |
| Cleaning Instructions | Unplug unit, use damp cloth only; no liquid or aerosol cleaners |
| Safety Precautions | Follow all warnings in manual; do not expose to rain or moisture; ensure proper ventilation (10 cm clearance) |
| Repair and Spare Parts | Use manufacturer-specified replacement parts; service only by qualified personnel |
Frequently Asked Questions - CI 580 NAD
User questions about CI 580 NAD
0 question about this device. Answer the ones you know or ask your own.
Ask a new question about this device
Download the instructions for your Hi-Fi in PDF format for free! Find your manual CI 580 - NAD and take your electronic device back in hand. On this page are published all the documents necessary for the use of your device. CI 580 by NAD.
USER MANUAL CI 580 NAD
Owner's Manual
SAVE THESE INSTRUCTIONS FOR LATER USE.
FOLLOW ALL WARNINGS AND INSTRUCTIONS MARKED ON THE AUDIO EQUIPMENT.
1 Read instructions - All the safety and operating instructions should be read before the product is operated.
2 Retain instructions - The safety and operating instructions should be retained for future reference.
3 Heed Warnings - All warnings on the product and in the operating instructions should be adhered to.
4 Follow Instructions - All operating and use instructions should be followed.
5 Cleaning - Unplug this product from the wall outlet before cleaning. Do not use liquid cleaners or aerosol cleaners. Use a damp cloth for cleaning.
6 Attachments - Do not use attachments not recommended by the product manufacturer as they may cause hazards.
7 Water and Moisture - Do not use this product near water-for example, near a bath tub, wash bowl, kitchen sink, or laundry tub; in a wet basement; or near a swimming pool; and the like.
8 Accessories - Do not place this product on an unstable cart, stand, tripod, bracket, or table. The product may fall, causing serious injury to a child or adult, and serious damage to the product. Use only with a cart, stand, tripod, bracket, or table recommended by the manufacturer, or sold with the product. Any mounting of the product should follow the manufacturer's instructions, and should use a mounting accessory recommended by the manufacturer.
9 A product and cart combination should be moved with care. Quick
stops, excessive force, and uneven surfaces may cause the product and cart combination to overturn.
10 Ventilation - Slots and openings in the cabinet are provided for ventilation and to ensure reliable operation of the product and to protect it from overheating, and these openings must not be blocked or covered. The openings should never be blocked by placing the product on a bed, sofa, rug, or other similar surface. This product should not be placed in a built-in installation such as a bookcase or rack unless proper ventilation is provided or the manufacturer's instructions have been adhered to.
11 Power Sources - This product should be operated only from the type of power source indicated on the marking label. If you are not sure of the type of power supply to your home, consult your product dealer or local power company. The primary method of isolating the amplifier from the mains supply is to disconnect the mains plug. Ensure that the mains plug remains accessible at all times. Unplug the AC power cord from the AC outlet if the unit will not be used for several months or more.
12 Grounding or Polarization - This product may be equipped with a polarized alternating-current line plug (a plug having one blade wider than the other). This plug will fit into the power outlet only one way. This is a safety feature. If you are unable to insert the plug fully into the outlet, try reversing the plug. If the plug should still fail to fit, contact your electrician to replace your obsolete outlet. Do not defeat the safety purpose of the polarized plug.
13 Power - Cord Protection - Power-supply cords should be routed so that they are not likely to be walked on or pinched by items placed upon or against them, paying particular attention to cords at plugs, convenience receptacles, and the point where they exit from the product.
14 Outdoor Antenna Grounding - if an outside antenna or cable system is connected to the product, be sure the antenna or cable system is grounded so as to provide some protection against voltage surges and built-up static charges. Article 810 of the National Electrical Code, ANSI/NFPA 70, provides information with regard to proper grounding of the mast and supporting structure, grounding of the lead-in wire to an antenna discharge unit, size of grounding conductors, location of antenna discharge unit, connection to grounding electrodes, and requirements for the grounding electrode.
NOTE TO CATV SYSTEM INSTALLER
This reminder is provided to call the CATV system installer's attention to Section 820-40 of the NEC which provides guidelines for proper grounding and, in particular, specifies that the cable ground shall be connected to the grounding system of the building, as close to the point of cable entry as practical.
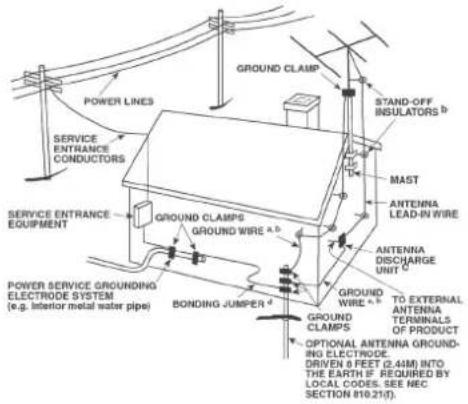
15 Lightning - For added protection for this product during a lightning storm, or when it is left unattended and unused for long periods of time, unplug it from the wall outlet and disconnect the antenna or cable system. This will prevent damage to the product due to lightning and power-line surges.
16 Power Lines - An outside antenna system should not be located in the vicinity of overhead power lines or other electric light or power circuits, or where it can fall into such power lines or circuits. When installing an outside antenna system, extreme care should be taken to keep from touching such power lines or circuits as contact with them might be fatal.
17 Overloading - Do not overload wall outlets, extension cords, or integral convenience receptacles as this can result in a risk of fire or electric shock.
18 Object and Liquid Entry - Never push objects of any kind into this product through openings as they may touch dangerous voltage points or short-out parts that could result in a fire or electric shock. Never spill liquid of any kind on the product.
WARNING: THE APPARATUS SHOULD NOT BE EXPOSED TO DRIPPING OR SPLASHING, AND OBJECTS FILLED WITH LIQUIDS, SUCH AS VASES, SHOULD NOT BE PLACED ON THE APPARATUS. AS WITH ANY ELECTRONIC PRODUCTS, USE CARE NOT TO SPILL LIQUIDS INTO ANY PART OF THE SYSTEM. LIQUIDS CAN CAUSE A FAILURE AND/OR A FIRE HAZARD.
19 Damage Requiring Service - Unplug this product from the wall outlet and refer servicing to qualified service personnel under the following conditions:
a) When the power-supply cord or plug is damaged.
b) If liquid has been spilled, or objects have fallen into the product.
c) If the product has been exposed to rain or water.
d) If the product does not operate normally by following the operating instructions. Adjust only those controls that are covered by the operating instructions as an improper adjustment of other controls may result in damage and will often require extensive work by a qualified technician to restore the product to its normal operation.
e) If the product has been dropped or damaged in any way.
f) when the product exhibits a distinct change in performance—this indicates a need for service.
20 Replacement Parts When replacement parts are required, be sure the service technician has used replacement parts specified by the manufacturer or have the same characteristics as the original part. Unauthorized substitutions may result in fire, electric shock, or other hazards.
21 Safety Check - Upon completion of any service or repairs to this product, ask the service technician to perform safety checks to determine that the product is in proper operating condition.
22 Wall or Ceiling Mounting - The product should be mounted to a wall or ceiling only as recommended by the manufacturer.
23 Heat - The product should be situated away from heat sources such as radiators, heat registers, stoves or other products (including amplifiers) that produce heat.
WARNING
TO REDUCE THE RISK OF FIRE OR ELECTRIC SHOCK, DO NOT EXPOSE THIS PRODUCT TO RAIN OR MOISTURE.
CAUTION
TO PREVENT ELECTRIC SHOCK, MATCH WIDE BLADE OF PLUG TO WIDE SLOT, FULLY INSERT.

THE LIGHTNING FLASH WITH ARROWHEAD SYMBOL, WITHIN AN EQUILATERAL TRIANGLE, IS INTENDED TO ALERT THE USER TO THE PRESENCE OF UNINSULATED "DANGEROUS VOLTAGE" WITHIN THE PRODUCT'S ENCLOSURE THAT MAYBE OF SUFFICIENT MAGNITUDE TO CONSTITUTE A RISK OF ELECTRIC SHOCK TO PERSONS.

THE EXCLAMATION POINT WITHIN AN EQUILATERAL TRIANGLE IS INTENDED TO ALERT THE USER TO THE PRESENCE OF IMPORTANT OPERATING AND MAINTENANCE (SERVICING) INSTRUCTIONS IN THE LITERATURE ACCOMPANYING THE APPLIANCE.
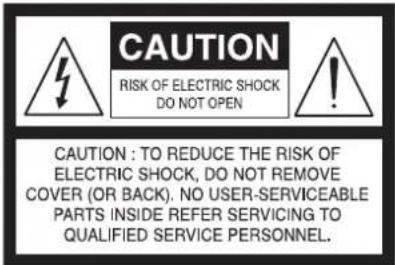
The socket outlet shall be installed near the apparatus and shall be easily accessible.
CAUTION
Changes or modifications to this equipment not expressly approved by NAD Electronics for compliance could void the user's authority to operate this equipment.
CAUTION REGARDING PLACEMENT
To maintain proper ventilation, be sure to leave a space around the unit (from the largest outer dimensions including projections) that is equal to or greater than shown below.
Left and Right Panels: 10 cm
Rear Panel: 10 cm
Top Panel: 10 cm
NOTES ON ENVIRONMENTAL PROTECTION

At the end of its useful life, this product must not be disposed of with regular household waste but must be returned to a collection point for the recycling of electrical and electronic equipment. The symbol on the product, user's manual and packaging, point this out.

The materials can be reused in accordance with their markings.
Through re-use, recycling of raw materials or other forms of recycling of old products, you are making an important contribution to the protection of our environment. Your local administrative office can advise you of the responsible waste disposal point.
INFORMATION ABOUT COLLECTION AND DISPOSAL OF WASTE BATTERIES (DIRECTIVE 2006/66/EC OF THE EUROPEAN PARLIAMENT AND THE COUNCIL OF EUROPEAN UNION) (FOR EUROPEAN CUSTOMERS ONLY)
Pb
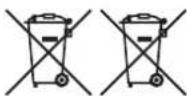
Batteries bearing any of these symbols indicate that they should be treated as "separate collection" and not as municipal waste. It is encouraged that necessary measures are implemented to maximize the separate collection of waste batteries and to minimize the disposal of batteries as mixed municipal waste.
Hg
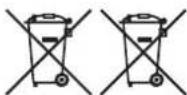
End-users are exhorted not to dispose waste batteries as unsorted municipal waste. In order to achieve a high level of recycling waste batteries, discard waste batteries separately and properly through an accessible collection
point in your vicinity. For more information about collection and recycling of waste batteries, please contact your local municipality, your waste disposal service or the point of sale where you purchased the items.
By ensuring compliance and conformance to proper disposal of waste batteries, potential hazardous effects on human health is prevented and the negative impact of batteries and waste batteries on the environment is minimized, thus contributing to the protection, preservation and quality improvement of the environment.
RECORD YOUR MODEL NUMBER (NOW, WHILE YOU CAN SEE IT)
The model and serial number of your new CI 580 are located on the back of the cabinet. For your future convenience, we suggest that you record these numbers here:
Packed with your CI 580 you will find
- Two detachable mains power cord
• Terminal connector block - Quick Setup Guide
NOTE
Follow enclosed Quick Setup Guide to help you get started with your CI 580.
SAVE THE PACKAGING
Please save the box and the packaging that came with the CI 580. Should you move or need to transport your CI 580, this is the safest container to use. We've seen too many otherwise perfect components damaged in transit for lack of a proper shipping carton. So please, save that box!
IDENTIFICATION OF CONTROLS
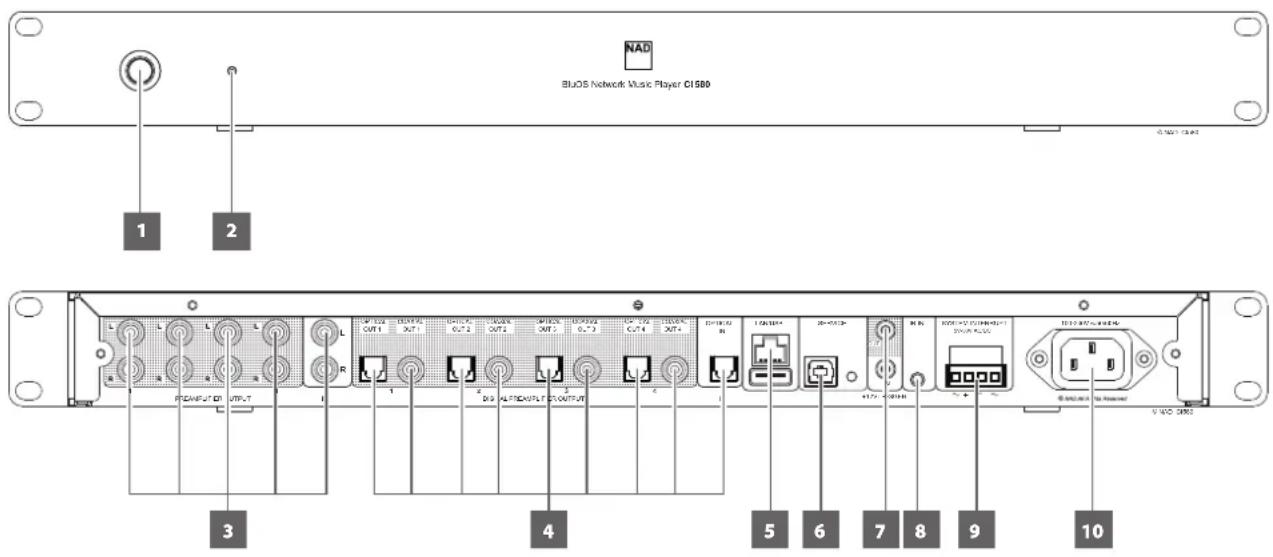
1 STANDBY BUTTON
- Press and hold this button to bring the CI 580 to standby mode.
2 STATUS INDICATOR
- This is an indicator of network connectivity. Below is a table of the LED blink codes and their corresponding descriptions.
| LED BLINK CODE DESCRIPTION | |
| Short red flash, then flashing green Powering up, rebooting | |
| Solid red Booting up | |
| Solid red Cannot boot up; drive error | |
| Solid white Indexing | |
| Solid blue Connected to network – ready to use with Bluesound App | |
| Flashing green No internet gateway | |
| Alternate flashing red and green Upgrade mode | |
| Flashing red Factory reset in progress | |
3 ANALOG IN
- Input for line level sources such as CD player, tuner or any compatible devices. Use a twin RCA-to-RCA lead to connect the source device's left and right "Audio Output" to this input. The source will appear as an "Analog Input" in the navigation drawer of the BluOS App.
PREAMPLIFIER OUTPUT (1-4)
- Connect any or all preamplifier output ports to corresponding audio input ports of compatible amplifiers, receivers or processors.
- Use a twin RCA-to-RCA lead to connect the left and right "Audio Input" of a power amplifier or processor to a particular PREAMPLIFIER OUTPUT port.
- Audio output for each preamplifier output is dependent upon the current or selected source of the particular Player. This is configurable via the BluOS App.
- Refer to the sample table below showing selected sources for particular Players and their corresponding preamplifier or optical/coaxial audio output. The selected Source shown is an example only. The Source can be any media available from the BluOS App's navigation drawer.
| SELECTED SOURCE FROM NAVIGATION DRAWER | PLAYER | PREAMPLIFIER OUTPUT | OPTICAL/COAXIAL OUTPUT | |||||||
| 1 | 2 | 3 | 4 | 1 | 2 | 3 | 4 | |||
| Analog input | CI580-XXXX | √ | √ | |||||||
| Optical input | CI580-XXXX-2 | √ | √ | |||||||
| Library | CI580-XXXX-3 | √ | √ | |||||||
| Music Streaming Service | CI580-XXXX-4 | √ | √ | |||||||
4 OPTICAL IN
- Connect to the corresponding optical digital output of sources such as CD or BD/DVD players, digital cable box, digital tuners or any compatible devices. The source will appear as an "Optical Input" in the navigation drawer of the BluOS App.
DIGITAL PREAMPLIFIER OUTPUT (OPTICAL/COAXIAL 1-4)
- Connect any or all digital preamplifier output ports to corresponding optical or coaxial input ports of compatible amplifiers, receivers or processors.
- Audio output for each digital preamplifier output is dependent upon the current or selected source of the particular Player. This is configurable via the BluOS App.
- Refer to the same sample table above showing selected sources for particular Players and their corresponding preamplifier or optical/coaxial audio output.
5 LAN
- A wired Ethernet connection is required to setup the CI 580. Using an Ethernet cable (not supplied), connect one end to CI 580's LAN port and the other end to the corresponding LAN port of your wired Ethernet broadband router.
USB (Type A)
- Connect a USB mass storage device to the USB input. Typical USB mass storage device compatible with CI 580 include portable flash memory devices and external hard drives (FAT32 recommended).
- A notification will be shown in the BluOS App if a USB device is inserted. Click on "USB" in the navigation drawer to browse and playback content.
6 SERVICE
- This is not for consumer use. Only authorized service personnel can access this SERVICE port.
7 +12V TRIGGER OUT
- The +12V TRIGGER OUT is used for controlling external equipment equipped with a +12V trigger input.
- Connect this +12V TRIGGER OUT to the other equipment's corresponding +12V DC input jack using a mono cable with 3.5mm male plug.
- This output will be 12V when the CI 580 is ON and 0V when it is either OFF or in standby mode.
+12V TRIGGER IN
- With this input triggered by a 12V DC supply, the CI 580 can be switched ON remotely from standby mode by compatible devices such as amplifiers, preamplifiers, receivers, etc. If the 12V DC supply is cut off, CI 580 will return to standby mode.
- Connect this +12V Trigger input to the remote device's corresponding +12V DC output jack using a mono cable with 3.5mm male plug. The controlling device must be equipped with a +12V trigger output to use this feature.
8 IR IN
- This input is connected to the output of an IR (infrared) repeater (Xantech or similar) or the IR output of another component to allow control of the CI 580 from a remote location.
- To program IR Remote commands into your CI 580 via IR IN, go to the Settings menu of the BluOS App, select Player and then IR remote. Simply select the function desired from the IR Remote menu, point an IR remote control at the IR repeater and press the button to perform that function. Once successful, a check-mark will appear beside the programmed function.
9 SYSTEM INTERRUPT
- Doorbells or fire alarms can be hooked-up via the supplied terminal connector block. Refer to your doorbell or fire alarm installation procedure for proper connection with the CI 580.
- Once installed and connected, doorbell or fire alarm activation will immediately interrupt current source and buzzer or alarm will be heard.
10 AC MAINS INPUT
- The CI 580 comes supplied with two separate AC mains power cords. Select the AC mains power cord appropriate for your region. An adaptor may be necessary in certain regions.
- Always disconnect the plug from the wall outlet first, before disconnecting the other end from CI 580's AC mains input socket.
MASTER QUALITY AUTHENTICATED

MOA
Master Quality Authenticated (MQA) is a revolutionary end-to-end technology built into CI 580 that captures and delivers master quality audio. CI 580 includes a powerful
decoder and audio renderer for the MQA system. This ensures that MQA-encoded audio files sound exactly like the source.
In the BluOS app, the MQA indicator displays green or blue to indicate that the unit is decoding and playing an MQA file. It displays green to indicate decoding and playback of a MQA file and denotes provenance to ensure that the sound is identical to that of the source material. It displays blue to indicate playback of MQA Studio file that has either been approved in the studio by the artist/ producer or has been verified by the copyright owner.
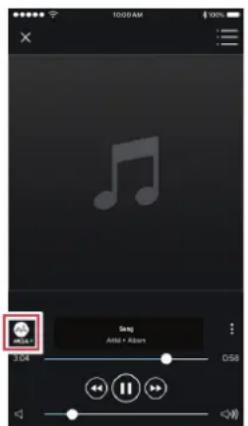
Green Indicator - Original MQA file Blue Indicator - MQA Studio file
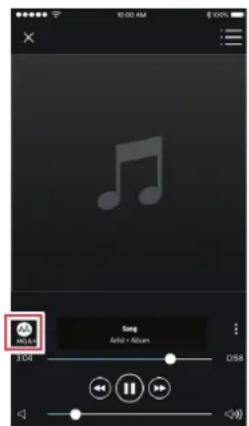
MQA Studio file
MQA ^9 is a trademark of MQA Limited.
MAKING THE MOST OF YOUR CI 580
Download the BluOS Controller App from the respective App stores of Apple iOS devices (iPad, iPhone and iPod), Android devices, Kindle Fire and Windows or Mac desktops.
Launch the BluOS Controller App and explore everything from your streaming music services, internet radio stations, networked music collections and favorites with quick and easy single-search discovery.
Visit https://support.bluesound.com for more information about setup and operation guidelines of your CI 580.
RESTORING CI 580 TO ITS FACTORY DEFAULT SETTINGS
Presets, renaming, file shares, playlists and other settings or configurations will be lost when CI 580 is restored to its factory default settings. Factory reset is recommended only if CI 580 experiences malfunctioning, becomes non-responsive or exhibits other abnormal and static conditions. Follow below procedure to restore CI 580 to its factory default settings.
1 Unplug CI 580 from the mains power outlet.
2 After at least 30 seconds, press and hold front panel Standby button and then plug-in CI 580 to the mains power outlet again.
3 LED status indicator will turn Red, Green and then Red again - do not let go of the front panel Standby button.
4 Hold on to the front panel Standby button until the LED status indicator begins to flash in Red - the front panel Standby button can now be released.
5 LED status indicator will eventually turn to solid Red, flashing green and finally solid blue – factory reset is completed.
IMPORTANT
Maintain wired Ethernet/LAN connection when initiating factory reset. Flashing green at Step 5 above will not stop in the absence of wired Ethernet/LAN connection.
AUDIO
| Rated distortion ≤0.005% | |
| Signal-to-noise ratio 110 dB | |
| Sample rate 32 - 192 kHz | |
| Bit depth 16-24 bit | |
| Supported file formats MP3, AAC, WMA, OGG, WMA-L, FLAC, ALAC, WAV, AIFF | |
| Supported Cloud Services | WiMP, Slacker Radio, Qobuz, HighResAudio, JUKE, Deezer, Murfie, HDTracks, Spotify, TIDAL, Napster, Rhapsody |
| Free Internet Radio TuneIn Radio, iHeartRadio | |
CONNECTIVITY
| Input Analog: RCA stereo | |
| SPDIF: Optical (TOSLINK) | |
| USB: Type A (for USB memory stick and supported peripherals - FAT32 formatted) Type B (for computer audio interface) | |
| +12V Trigger IN: 12V ± 20% | |
| IR IN | |
| Doorbell interrupt | |
| Output Analog: RCA Stereo x 4 | |
| SPDIF: Optical x 4 (TOSLINK), Coaxial x 4 | |
| +12V Trigger OUT: 12V ± 20% | |
| Network Ethernet/LAN: Ethernet RJ45, GigE | |
| User interface Free Android and iOS App available at Google Play and Apple App Store | |
| Front panel button | |
| Supported operating systems Microsoft Windows XP, 2000, Vista, 7, 8, and macOS | |
GENERAL
| AC power supply | 100 - 240V 50/60 Hz |
| Standby power | 6W (Network standby mode) |
| Unit dimensions (L x W x D) | 480 x 46 x 234 mm |
| 18^15/16 × 1^13/16 × 9^3/4 inches | |
| Shipping weight | 3.8 kg (8.4 lbs) |
The C1580 specifications may be subject to change without prior notice. Check out www.nadelectronics.com for the latest specifications and features of the C1580.

www.NADelectronics.com
©2018 NAD ELECTRONICS INTERNATIONAL A DIVISION OF LENBROOK INDUSTRIES LIMITED
All rights reserved. NAD and the NAD logo are trademarks of NAD Electronics International, a division of Lenbrook Industries Limited.
No part of this publication may be reproduced, stored or transmitted in any form without the written permission of NAD Electronics International.
While every effort has been made to ensure the contents are accurate at the time of publication, features and specifications may be subject to change without prior notice.
- SAVE THESE INSTRUCTIONS FOR LATER USE.
- FOLLOW ALL WARNINGS AND INSTRUCTIONS MARKED ON THE AUDIO EQUIPMENT.
- NOTE TO CATV SYSTEM INSTALLER
- WARNING: THE APPARATUS SHOULD NOT BE EXPOSED TO DRIPPING OR SPLASHING, AND OBJECTS FILLED WITH LIQUIDS, SUCH AS VASES, SHOULD NOT BE PLACED ON THE APPARATUS. AS WITH ANY ELECTRONIC PRODUCTS, USE CARE NOT TO SPILL LIQUIDS INTO ANY PART OF THE SYSTEM. LIQUIDS CAN CAUSE A FAILURE AND/OR A FIRE HAZARD.
- WARNING
- CAUTION
- CAUTION REGARDING PLACEMENT
- NOTES ON ENVIRONMENTAL PROTECTION
- INFORMATION ABOUT COLLECTION AND DISPOSAL OF WASTE BATTERIES (DIRECTIVE 2006/66/EC OF THE EUROPEAN PARLIAMENT AND THE COUNCIL OF EUROPEAN UNION) (FOR EUROPEAN CUSTOMERS ONLY)
- RECORD YOUR MODEL NUMBER (NOW, WHILE YOU CAN SEE IT)
- SAVE THE PACKAGING
- IDENTIFICATION OF CONTROLS
- STANDBY BUTTON
- STATUS INDICATOR
- ANALOG IN
- PREAMPLIFIER OUTPUT (1-4)
- OPTICAL IN
- DIGITAL PREAMPLIFIER OUTPUT (OPTICAL/COAXIAL 1-4)
- LAN
- USB (Type A)
- SERVICE
- +12V TRIGGER OUT
- +12V TRIGGER IN
- IR IN
- SYSTEM INTERRUPT
- AC MAINS INPUT
- MASTER QUALITY AUTHENTICATED
- MAKING THE MOST OF YOUR CI 580
- RESTORING CI 580 TO ITS FACTORY DEFAULT SETTINGS
- IMPORTANT
- ©2018 NAD ELECTRONICS INTERNATIONAL A DIVISION OF LENBROOK INDUSTRIES LIMITED
Brand : NAD
Model : CI 580
Category : Hi-Fi