
Crossfire 10033288 - Grill Klarstein - Free user manual and instructions
Find the device manual for free Crossfire 10033288 Klarstein in PDF.


| Product type | Electric table grill |
| Brand | Klarstein |
| Model | Crossfire 10033288 |
| Dimensions (L x W x H) | Approx. 40 x 30 x 15 cm |
| Weight | Approx. 3.5 kg |
| Power supply | 220-240 V ~ 50/60 Hz |
| Power | 2000 W |
| Plate material | Stainless steel with non-stick coating |
| Cooking surface | Approx. 30 x 25 cm |
| Temperature control | Adjustable thermostat with indicator light |
| Main functions | Grilling, cooking, reheating, contact function for meat and vegetables |
| Care and cleaning | Removable plates dishwasher-safe; removable fat collection tray |
| Safety | Automatic shut-off, cool handle, non-slip base |
| Spare parts and repairability | Replacement plates available; repairability index estimated at 7.5/10 |
| Included accessories | Grooved and smooth plates, grease tray, wooden spatula |
| Color | Black and silver |
| Warranty | 2 years |
Frequently Asked Questions - Crossfire 10033288 Klarstein
User questions about Crossfire 10033288 Klarstein
0 question about this device. Answer the ones you know or ask your own.
Ask a new question about this device
Download the instructions for your Grill in PDF format for free! Find your manual Crossfire 10033288 - Klarstein and take your electronic device back in hand. On this page are published all the documents necessary for the use of your device. Crossfire 10033288 by Klarstein.
USER MANUAL Crossfire 10033288 Klarstein
text_image
QR code image containing encoded data, no visible human-readable textINHALT
text_image
Exploded view diagram of a microwave oven with labeled components including tray, grating, and control knobs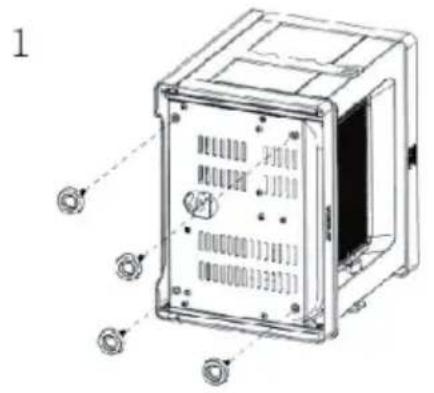
text_image
1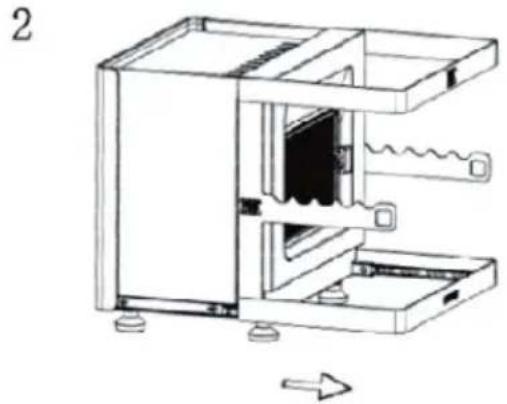
natural_image
Technical line drawing of a mechanical device with internal components and mounting base (no text or symbols)natural_image
Technical line drawing of a mechanical device with internal components and a downward arrow indicating motion (no text or symbols)natural_image
Technical line drawing of a mechanical device with internal components and a downward arrow indicating motion (no text or symbols)natural_image
Technical diagram of a mechanical device with internal components and an inset showing a grid-like structure (no text or symbols)natural_image
Technical line drawing of a mechanical device with internal components and mounting base (no text or symbols)natural_image
Technical line drawing of a mechanical device with internal components and a circular inset view (no text or symbols)natural_image
Technical line drawing of an electronic device with internal components and a rotating button (no text or symbols)natural_image
Pure technical line drawing of a mechanical component or bracket (no text or symbols)natural_image
Technical line drawing of a mechanical device with internal components and a rotating housing (no text or symbols)natural_image
Pure electrical circuit symbols without any text or labelsPiezo-Zündung
Gaskopf
natural_image
Technical illustration of three mechanical assembly steps showing gear meshing and shaft alignment (no text or symbols)WARTUNG
Congratulations on purchasing this equipment. Please read this manual carefully and take care of the following hints to avoid damages. Any failure caused by ignoring the mentioned items and cautions mentioned in the instruction manual are not covered by our warranty and any liability. Scan the QR code to get access to the latest user manual and other information about the product.

text_image
QR code image containing encoded data, no visible human-readable textCONTENTS
Safety Instructions 14
Installation 15
Connecting a Gas Cartridge 17
Operation 18
Maintenance 20
Technical Data 22
SAFETY INSTRUCTIONS
Read the following safety hints carefully. Keep this manual for later reference
Use outdoors only
• This appliance is forbidden to use as heater anywhere
• Temperature at ceramic burner 800°C
- Accessible parts may be very hot
- Keep young children away
- This appliance must be kept away from inflammable materials at least 0.6m du ring use
- Use appliance always on horizontal solid surface
- Do not move the appliance during use or when still hot
- Turn off the gas supply at the gas cylinder after use
- Do not use the appliance if it is damaged or has a worn gas-seal
- Only operate the grill handle or hot parts, when wearing protective-gloves
• Air-Vents and -holes must be kept clean and open all times
- Do not modify the appliance. The parts sealed by the manufacturer shall not be manipulated by the user
- Change the gas cartridge outside. Changing the gas cartridge must be carried out away from any source of ignition
- Avoid twisting the flexible hose
- Check that burners are extinguished before disconnecting the gas cartridge.
- Check the gas - seals before connecting a new gas cartridge to the appliance.
- When using this appliance in wet weather, humidity will condense below the gas cartridge. To avoid the accumulation of water on the table, it is recommended that a solid pan is placed under the gas cartridge when in use.
- Adequate ventilation is vital for combustion and efficiency performance of the Beef Chef rotisserie grill. Never use the appliance in any enclosed or covered area.
- When the wind speed is above 2 m/s, don't use gas grill facing the wind and move to sheltered areas.
INSTALLATION
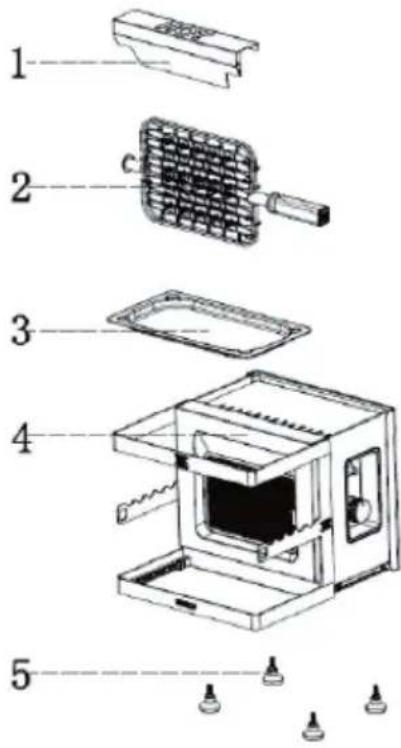
Scope of supply
| 1 | 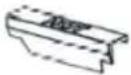 | *1 | 4 | 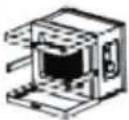 | *1 |
| 2 | 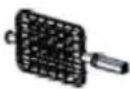 | *1 | 5 | *4 | |
| 3 |  | *1 | |||
Assembly
text_image
Exploded view diagram of a microwave oven with labeled components including tray, grating, and control knobs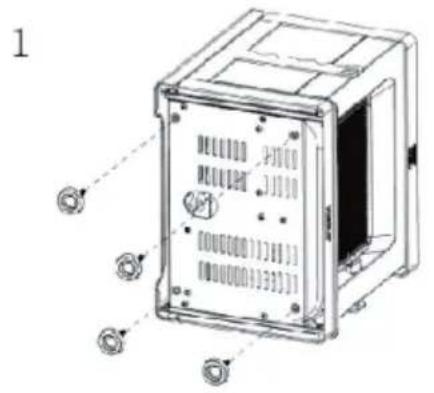
text_image
1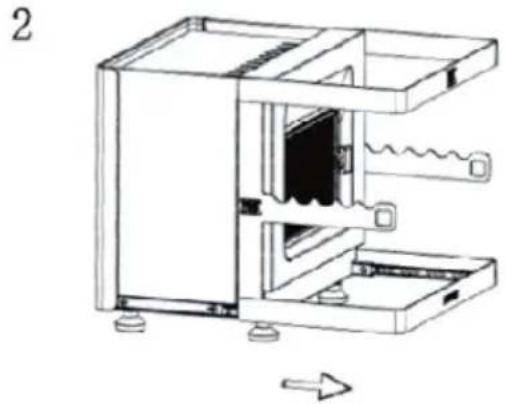
natural_image
Technical line drawing of a mechanical device with internal components and a directional arrow (no text or symbols)Install feet at the bottom. Pull out grill frame
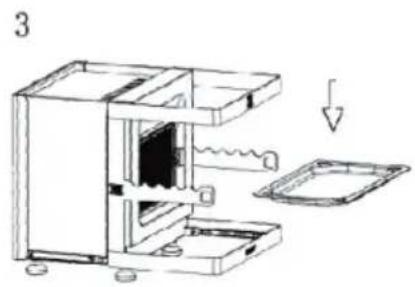
natural_image
Technical line drawing of a mechanical device with internal components and a downward arrow indicating motion (no text or symbols)Insert flavour tray
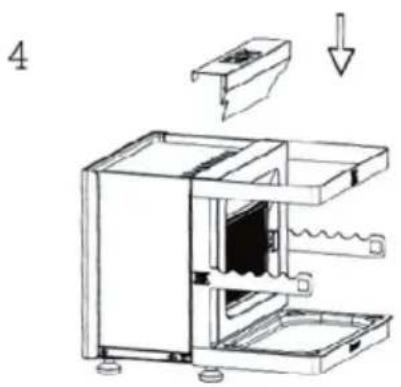
natural_image
Technical line drawing of a mechanical device with internal components and a downward arrow indicating motion (no text or symbols)Insert neat shield
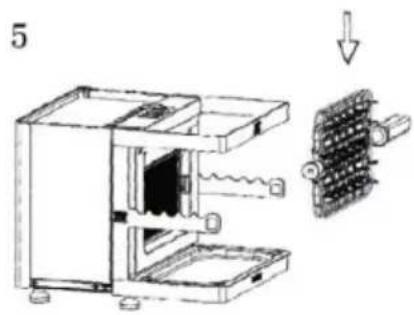
natural_image
Technical diagram of a mechanical device with internal components and an inset showing a grid-like structure (no text or symbols)Insert grill basket
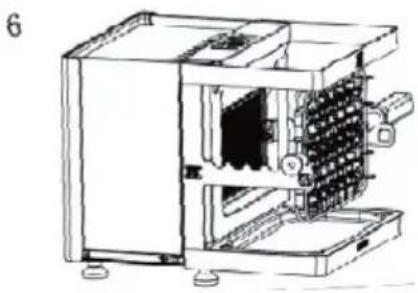
natural_image
Technical line drawing of a mechanical device with internal components and mounting base (no text or symbols)Operate on horizontal solid surface only.
CONNECTING A GAS CARTRIDGE
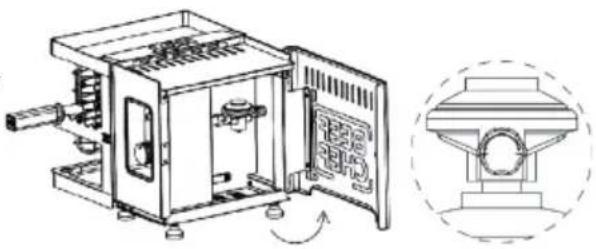
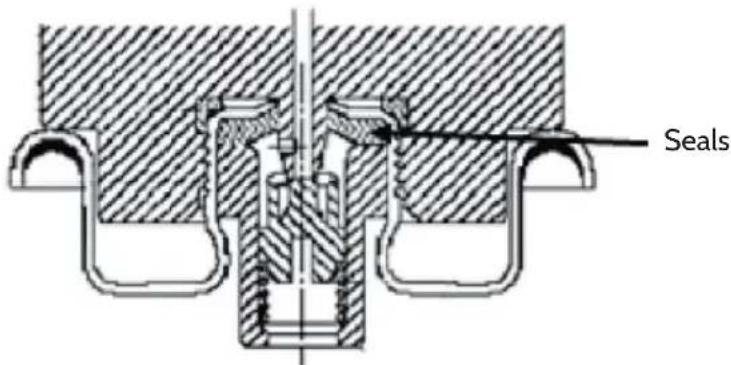
This appliance is only suitable for use with low-pressure butane-propane mix gas and fitted with the appropriate low-pressure regulator via a flexible hose. (Regulator certified to BSEN 16129:2013). If the regulator seals are missing or leaking, it is prohibited to continue to use. Check the seals before connecting a new gas cartridge to the appliance.
- Open the back door, turn the regulator switch knob clockwise "-" to min position.
natural_image
Technical line drawing of a mechanical device with internal components and a circular inset view (no text or symbols)-
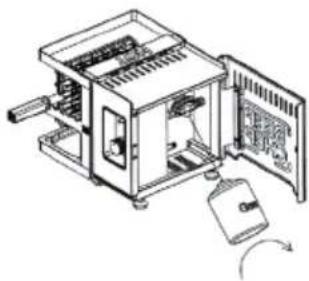
Turn gas cartridge clockwise to connect the gas pressure-valve regulator.
-
Turn the regulator switch knob anticlockwise "+" to max position to open the gas and turn the regulator switch knob clockwise "-" to min position to close the gas.
-
To change the gas-cartridges, turn the regulator switch knob clockwise "-" to min position and then turn empty gas cartridge anticlockwise to disconnect from gas regulator.
natural_image
Technical line drawing of an electronic device with internal components and a rotating button (no text or symbols)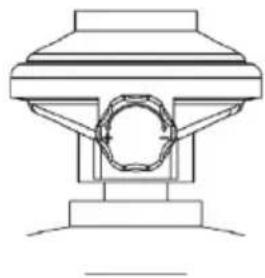
natural_image
Technical line drawing of a mechanical component with no visible text or symbols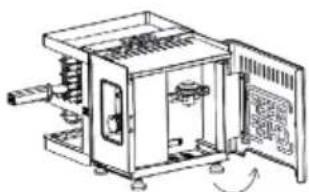
natural_image
Technical line drawing of a mechanical device with internal components and a rotating housing (no text or symbols)IMPORTANT: Cartridges must be stored outdoors in an upright position and out of the reach of children. The cartridge must never be stored where temperatures can reach over 50 °C. Do not store the cartridge near flames or other sources of heat.
OPERATION
Lighting the grill
- Turn control knob to the 'OFF' position.
- Connect the gas cartridge to the rotisserie grill following the instructions.
- Turn on the gas supply at the regulator switch knob anti-clockwise "+" to max position.
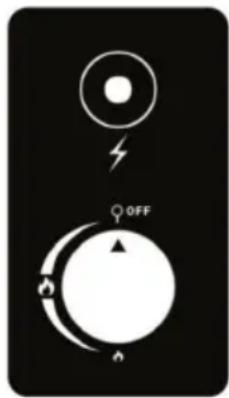
- To light the burner, push down and turn the burner control knob to 9 o'clock position, wait for maximum 5 seconds and press the piezoelectric igniter button once. Keep the control knob pushed for further 5-20 seconds until the burner starts to glow.
natural_image
Pure electrical circuit symbols without any text or labelsPiezoelectric igniter
Control knob
- If the burner has not lit after two attempts, turn off the control knob and wait 5 minutes before retrying the ignition sequence.
- When the burner has lit, the burner rate can be adjusted by turning the burner control knob anti-clockwise to any position between MAX (A) and MIN( ) positions.
- To turn off the grill, turn the regulator switch knob clockwise "-" to min position. Once the burner has extinguished, turn the control knob to the "OFF" position.
IMPORTANT: If the burner has not lit after several attempts, consult your gas dealer, or the store where you purchased the rotisserie grill, or a qualified service provider for assistance or repair. Never try to rectify the problem yourself.
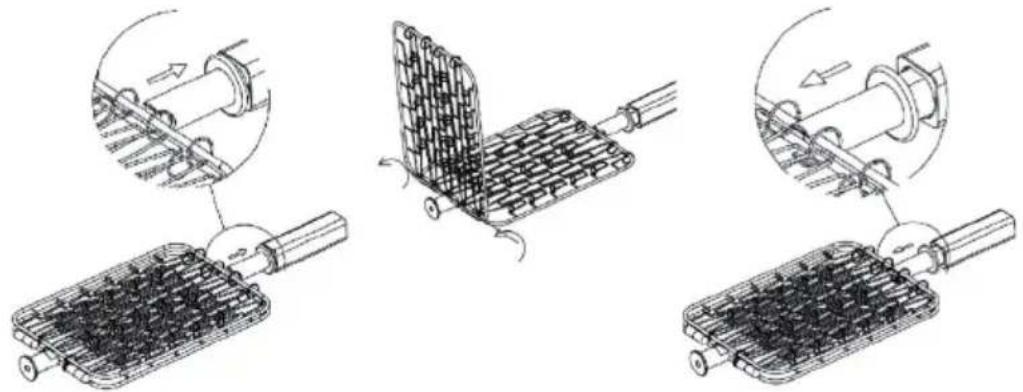
Using the grill basket

Warning: Danger of scalding
Use protective gloves when touching the hot cooking grill handle during operation.
Locking- slider- clamp
natural_image
Technical line drawings of mechanical components with no visible text or symbolsMAINTENANCE
Cleaning, care and storage of the appliance
All cleaning and maintenance should be carried out when the rotisserie is cool and with the gas supply turned OFF at the gas cartridge.
Remove gas cartridge from gas compartment when not using it for long periods. Before storing, clean the appliance of excess fat, with a damp cloth using a mild detergent solution as the cleaning agent. Store the appliance in a clean dry environment. Do not store your gas cartridge indoors. Store in a ventilated area and keep away from direct sunlight.
Plastic surfaces: Wash with a soft cloth and hot soapy water solution. Rinse with water. Do not use abrasive cleaners, degreasers or a concentrated grill cleaner on plastic parts.
Rotisserie grill basket and DRIP PAN: Use a mild soapy water solution. Non-abrasive scouring powder
can be used on stubborn stains then rinse with water. It is suitable for dishwashers.
To check for leaks
Before use, please check for leaks!
Never check for leaks with a naked flame, always use a soapy water solution.
- If there is a leak on your appliance (smell of gas), take it away immediately into a ventilated flame free location.
• If you check for leaks on your appliance, do it outside. - Make 4-6 tablespoons of leak detecting solution by soapy water (mixing 1 part washing up liquid with 3 parts water).
- Ensure the switch knob is OFF"-". Connect the cartridge to the regulator and then turn on the gas.
- Brush the soapy water on to the hose and all joints. If bubbles appear, you have a leak, which must be rectified before use.
- Retest after fixing the fault. Turn off the gas after testing.
- If a problem is found and you cannot solve it yourself, do not attempt to cure leakage but consult your dealer.
Regulator and hose
- Use only regulators and hose approved for LPG at the above pressures 50 mbar. The life expectancy of the regulator is estimated as 10 years. It is recommended that the regulator is changed within 10 years of the date of manufacture. Please check production date on your instructions.
- The use of the wrong regulator or hose is unsafe; always check that you have the correct items before operating.
- The hose and regulator used must conform to the relevant standard for the country of use. The length of the horse must be 0.3 m(maximum). Warn or damaged hose must be replaced. Ensure that the hose is not obstructed, kinked, or in contact with any part of the rotisserie grill other than at its connection.
Regulator seals
text_image
SealsTECHNICAL DATA
| Model number 10033288 | |||
| Countries DE - AT - CH - SK | |||
| Heat input 3.35 kW | CE | 0359-18PIN: 0359CS02552a | |
| Consumption 239 g/h | |||
| Types of gas Butan-ProPan Mix | |||
| Outlet pressure of the regulator 50 mbar | |||
| Injector size 0.85 mm | |||
| Gas cartridges Vapour pressure- Butane-propane mix | |||
| Use cartridge with EN417 thread only. The following models shall be used only: Campingaz-CV470PLUS / Coleman-3000004541 / Weber-26100 / Cadac-CA445-N / Optimus-8019963 / PRIMUS - P220261, P220251 / JETBOIL - JETPWR-450 /EDELRID - 733074500000. It may be hazardous to attempt to fit other types of gas cartridge. | |||
| USE OUTDOORS ONLY | |||
| The surface temperature of the fuel element can be more than 800°C.When used, safety distance to flammable objects must be at least 0.6 m.Only use this device on horizontal solid surfaces.Accessible parts can be very hotKeep children awayThe appliance must not be moved when grilling or cooling down.After use, close the valve on the pressure regulator on the cartridge or gas bottle.In case of damage or leaking rubber valve seal, DO NOT put the device into operation.ALWAYS use grill gloves when operating the grill basket/hot surfaces Ventilation slots and air supply must always remain clean and open.Do not make any structural changes to the appliance. | |||
| Chal-Tec GmbH, Wallstr 16, 10179 Berlin, Germany | |||
Chère cliente, cher client,
text_image
QR code image containing encoded data, no visible human-readable textSOMMAIRE
text_image
Exploded view diagram of a microwave oven with labeled parts including tray, grating, and control knobs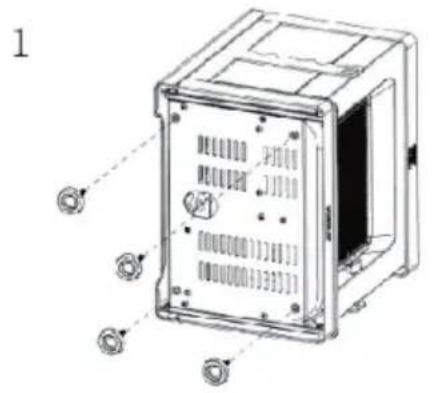
text_image
1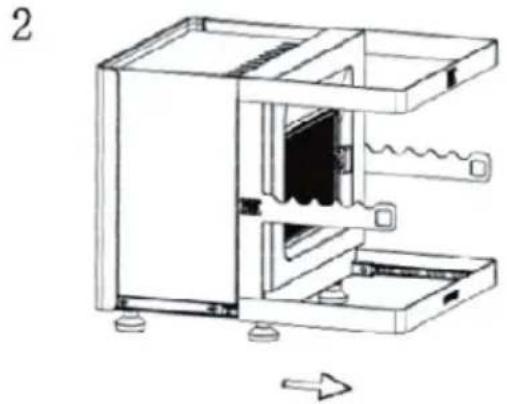
natural_image
Technical line drawing of a mechanical device with internal components and mounting base (no text or symbols)natural_image
Technical line drawing of a mechanical device with internal components and a downward arrow indicating motion (no text or symbols)natural_image
Technical line drawing of a mechanical device with internal components and a downward arrow indicating motion (no text or symbols)natural_image
Technical diagram of a mechanical device with internal components and an inset showing a grid-like structure (no text or symbols)natural_image
Technical line drawing of a mechanical device with internal components and mounting base (no text or symbols)natural_image
Technical line drawing of a mechanical device with internal components and a circular inset view (no text or symbols)natural_image
Technical line drawing of an electronic device with internal components and a rotating button (no text or symbols)natural_image
Pure technical line drawing of a mechanical component or bracket (no text or symbols)natural_image
Technical line drawing of a mechanical device with internal components and a rotating housing (no text or symbols)natural_image
Pure electrical circuit symbols without any text or labelsAllumage Piézo
Bouton de gaz
natural_image
Technical illustration of three mechanical assembly steps showing gear meshing and shaft alignment (no text or symbols)MAINTENANCE
text_image
QR code image containing encoded data, no visible human-readable textÍNDICE
text_image
Exploded view diagram of a microwave oven with labeled parts including tray, grating, and control knobs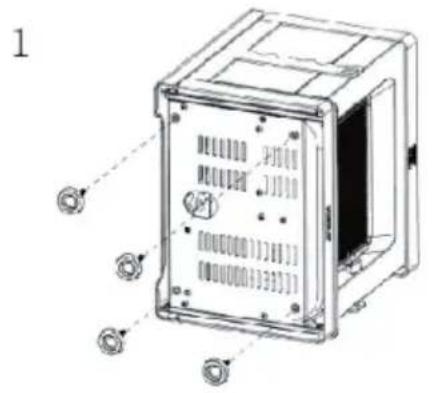
text_image
1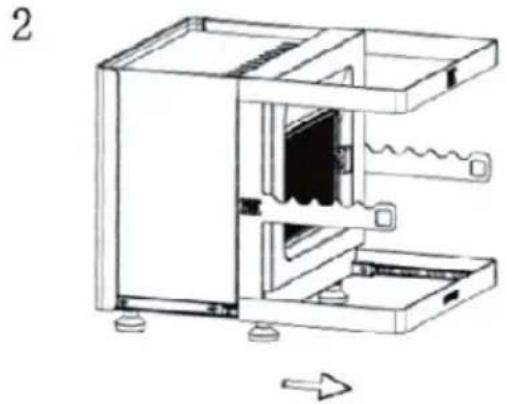
natural_image
Technical line drawing of a mechanical device with internal components and mounting base (no text or symbols)natural_image
Technical line drawing of a mechanical device with internal components and a downward arrow indicating motion (no text or symbols)natural_image
Technical line drawing of a mechanical device with internal components and a downward arrow indicating motion (no text or symbols)natural_image
Technical diagram of a mechanical device with internal components and an inset showing a grid-like structure (no text or symbols)natural_image
Technical line drawing of a mechanical device with internal components and mounting base (no text or symbols)natural_image
Technical line drawing of a mechanical device with internal components and a circular inset view (no text or symbols)natural_image
Technical line drawing of an open industrial machine with internal components and a rotating base (no text or symbols)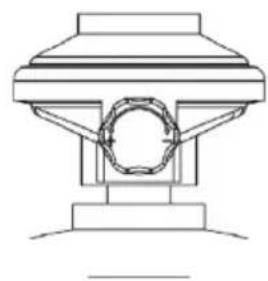
natural_image
Technical line drawing of a mechanical component with no visible text or symbols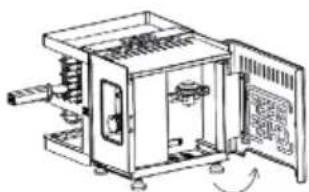
natural_image
Technical line drawing of a mechanical device with internal components and a rotating housing (no text or symbols)natural_image
Pure electrical circuit symbols without any text or labelsnatural_image
Technical illustration of three mechanical assembly steps showing gear meshing and shaft alignment (no text or symbols)MANTENIMIENTO
text_image
QR code image containing encoded data, no visible human-readable textINDICE
text_image
Exploded view diagram of a microwave oven with labeled parts including tray, grating, and control knobs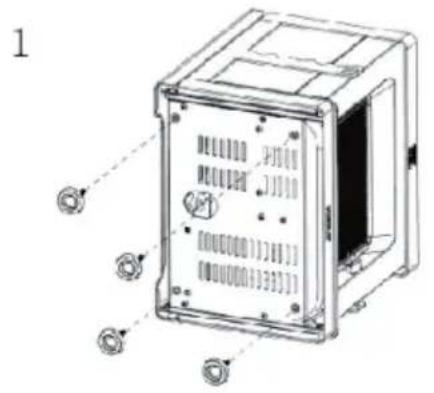
text_image
1
natural_image
Technical line drawing of a mechanical device with internal components and mounting base (no text or symbols)natural_image
Technical line drawing of a mechanical device with internal components and a downward arrow indicating motion (no text or symbols)natural_image
Technical line drawing of a mechanical device with internal components and a downward arrow indicating motion (no text or symbols)natural_image
Technical diagram of a mechanical device with internal components and an inset showing a grid-like structure (no text or symbols)natural_image
Technical line drawing of a mechanical device with internal components and mounting base (no text or symbols)natural_image
Technical line drawing of a mechanical device with internal components and a circular inset view (no text or symbols)natural_image
Technical line drawing of an open industrial machine with internal components and a rotating housing (no text or symbols)natural_image
Technical line drawing of a mechanical component with no visible text or symbolsnatural_image
Technical line drawing of a mechanical device with internal components and a rotating arm (no text or symbols)natural_image
Pure electrical circuit symbols without any text or labelsAccensione piezo
Manopola del gas