
DFH 3360 BR - Range hood BAUKNECHT - Free user manual and instructions
Find the device manual for free DFH 3360 BR BAUKNECHT in PDF.


| Product Type | Range hood |
| Brand | Bauknecht |
| Model | DFH 3360 BR |
| Installation Type | Wall-mounted, convertible (external exhaust or recirculation) |
| Exhaust Outlet Positions | Upper and rear |
| Grease Filter Type | Metal (washable) and/or disposable paper/sponge |
| Metal Grease Filter Cleaning | Monthly by hand or dishwasher at 60°C |
| Paper Grease Filter Replacement | Monthly (or every 2 months with indicator) |
| Carbon Filter Type | Rectangular or circular (non-washable) |
| Carbon Filter Replacement | Every 6 months (rectangular), every 4 months (circular) |
| Lighting | Replaceable bulbs (wattage not specified) |
| Voltage | 220-240 V |
| Frequency | 50/60 Hz |
| Control Type | Mechanical push buttons |
| Number of Speeds | 3 (assumed) |
| Steam Deflector | Yes, pull-out type |
| Safety Features | Disconnect power before cleaning; comply with local regulations |
| Compliance | Low Voltage Directive 73/23, EMC Directive 89/336 |
| After-Sales Service | Contact with model, service code, and problem description |
| Exhaust Mode | External exhaust (ducting) or recirculation (with carbon filter) |
Frequently Asked Questions - DFH 3360 BR BAUKNECHT
User questions about DFH 3360 BR BAUKNECHT
0 question about this device. Answer the ones you know or ask your own.
Ask a new question about this device
Download the instructions for your Range hood in PDF format for free! Find your manual DFH 3360 BR - BAUKNECHT and take your electronic device back in hand. On this page are published all the documents necessary for the use of your device. DFH 3360 BR by BAUKNECHT.
USER MANUAL DFH 3360 BR BAUKNECHT
GENERAL TIPS AND SUGGESTIONS PAGE 8
HOW TO USE THE HOOD PAGE 9
CARE AND MAINTENANCE PAGE 9
TROUBLESHOOTING GUIDE PAGE 9
AFTER SALES SERVICE PAGE 10
INSTALLATION PAGE 10
To get the best performance from the hood, please read these user instructions carefully
BEFORE USING THE HOOD
- To get the best performance from the hood, please read these user instructions carefully.
-
Packaging materials must be kept out of children's reach as they are potentially dangerous. Keep the packaging material (plastic bags, polystyrene, etc.) well out of their reach.
-
Make sure the hood has not been damaged during transportation.
- Installation and connection to the mains and exhaust ducts must be carried out by a qualified technician, in accordance with the manufacturer's instructions and local safety regulations.
PROTECTING THE ENVIRONMENT
1. Packaging
The packaging is marked with the recycling symbol, signifying that it can be 100% recycled. Dispose of the packaging in conformity with environmental regulations. Packaging materials must be kept out of children's reach as they are potentially dangerous. Keep the packaging material (plastic bags, polystyrene, etc.) well out of their reach.
2. Appliance
The appliance is made from recyclable materials and must be scrapped in accordance with local waste disposal regulations. Make the appliance inoperable by unplugging it and cutting off the power cable. Follow local waste disposal regulations when scrapping.

natural_image
Simple blue tree icon on light background, no text or symbols presentGENERAL TIPS AND SUGGESTIONS
- Always disconnect the hood by switching off the electrical power supply before cleaning or carrying out maintenance.
- Exhaust air must not be conveyed through the same flue used by the heating system or other non-electrical appliances.
- Do not flambé food under the hood since the flames generated could cause a fire.
- Never leave the pan unattended when frying as the cooking oil could ignite.
-
Regular maintenance guarantees smooth hood operation and high performance.
-
If the hood is used together with non-electrically powered appliances, ambient negative pressure must not exceed 4 pa ( 4 × 10^-5 bar). For this reason, make sure the room is well ventilated.
- Regularly remove dirt deposits. Regularly clean or replace filters. Never use flammable materials to convey exhaust air.
Declaration of conformity

This appliance has been designed, built and marketed in compliance with:
- the safety requirements of the "Low Voltage" EEC Directive 73/23;
- the protection requirements of the "EMC" EEC Directive 89/336 amended by EEC Directive 93/68.
HOW TO USE THE HOOD
Switch on the hood a few minutes before starting to cook and leave it running for at least 5 minutes after you have finished.
-
Pull out the steam deflector (depending on model). This improves hood performance.
-
Turn the speed selector to the required speed setting according to the quantity of fumes and steam to be extracted.
-
Switch off the hood 5 minutes after you have finished cooking.
-
Close the steam deflector (where fitted).
CARE AND MAINTENANCE
Always disconnect the hood by switching off the electrical power supply before cleaning or carrying out maintenance.
Grease filter
- The sponge grease filter should be washed in hot soapy water once a month (soak for 1-2 hours, do not wring. If necessary, repeat the process. Replace with a new filter every 5-6 washes).
- The grease filter paper should be replaced at least once a month.
- Grease filter paper with indicator should be replaced at least every two months or whenever the colour becomes visible through the holes of the grille. The paper filter is coloured on one side. This colour should not be visible through the grille holes when the filter is installed.
- The metal grease filter has an unlimited life and should be washed once a month by hand or in a dishwasher (60°C) with appropriate detergents. Leave filter to dry, handling it carefully before remounting it.
Whenever cleaning or replacing the grease filters, clean all other exposed parts of the hood.
Carbon filter
("Air recirculation mode", see following page)
The carbon filter cannot be washed or regenerated.
Replace the carbon filter (normal usage) every 6 months (Rectangular carbon filter) every 4 months (Circular carbon filter)
Replacing the bulbs
- Pull out the steam deflector (depending on model).
- Open the grille or light fixture and remove the grease filter.
- Remove the burnt-out bulb and replace it with a new one of the same wattage. Close the grille, light fixture or metal grease filter.
Cleaning the hood
Use a soft cloth with methylated spirits or a mild liquid detergent. Never use abrasives.
Warning! Failure to observe the instructions for cleaning the appliance and replacing or washing the filters may cause a fire.
TROUBLESHOOTING GUIDE
Hood does not work:
• Is the electrical power supply switched on?
• Is there a power failure?
- Has the fuse blown?
Insufficient suction power:
• Did you set the right speed?
- Do the filters need to be cleaned or replaced?
- Are the air outlets blocked?
Light does not work:
- Does the bulb need to be replaced?
• Is the bulb correctly fitted? - Has the fuse blown?
Never try to carry out any repair yourself other than fixing the above-mentioned problems.
AFTER SALES SERVICE
Before calling After Sales Service:
- Check to see if you can fix the problem yourself (see "Troubleshooting guide").
- Switch off the hood for a few minutes and re-start it to see if the problem has cleared itself.
- If the malfunction persists, call After-Sales Service.
Specify:
• The nature of the problem.
- The model.
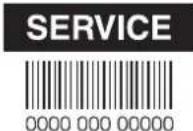
• The service code (number below the word SERVICE on the rating plate inside the hood behind the grease filter).
- Your full address.
- Your telephone number and area code.
INSTALLATION
When installing the hood, the minimum distances from the cooktop must be respected, and the numerical sequence and additional instructions must be followed exactly as indicated on the Installation sheet.
EXTERNAL EXHAUST MODE
(A - see also instruction sheet)
Cooking fumes and vapours are conveyed outside through a duct connected to the hood by means of a collar.
The outlet duct diameter must be the same as that of the collar.
If a flue-damper is to be installed, check that it can open and close freely when installation of the exhaust duct is complete.
The hood can be supplied with one (upper) or two (upper and rear) exhaust outlet holes.
The hood is usually set up for using the upper exhaust outlet.
- The collar must be seated in the upper exhaust outlet.
Use the rear exhaust outlet (where present).
- Where fitted, remove the cover closing off the rear outlet and collar.
- Some models are fitted with a plastic deflector that closes off the rear outlet. If fitted, remove it.
- Fit the collar in the rear outlet.
- Put the cover (if fitted) in the upper outlet.
Warning! If the hood has a carbon filter, this should be removed.
Check that the switch inside the hood (if fitted) is in position "A" Extractor; if not, set it to this position.
AIR CIRCULATION MODE
(F - see also installation sheet)
The air is filtered by a carbon filter and recycled into the surrounding atmosphere. The filtered air is released towards the kitchen ceiling.
Warning! If the hood does not have a carbon filter, order one and fit it before use.
Check that the switch inside the hood (if fitted) is on position "F" Filter; if not, set it to this position. If the plug is provided, close off the upper exhaust hole.
ELECTRICAL CONNECTION
Before connecting the hood, make sure the voltage indicated on the rating plate corresponds to the voltage in your home.
The plate is located inside the hood behind the grille.
For GB this appliance is supplied without a plug and is intended for direct connection to fixed wiring in accordance with national wiring regulations. An all-pole disconnection switch with a minimum contact separation of 3 mm must be included in the fixed wiring in an easily accessible position.
The Manufacturer shall not be liable for any damage or problem arising from the failure to comply with the above-mentioned instructions.