
DPF-D95 - Digital photo frame SONY - Free user manual and instructions
Find the device manual for free DPF-D95 SONY in PDF.



| Product Type | Digital Photo Frame |
| Brand | Sony |
| Model | DPF-D95 |
| Display Size | 9 inches (diagonal) |
| Display Resolution | 800 x 480 pixels |
| Dimensions (Approx.) | 200 x 150 x 25 mm |
| Weight (Approx.) | 500 g |
| Power Supply | AC adapter (5V, 1A) |
| Supported Memory Cards | Memory Stick, SD/SDHC, MMC |
| USB Port | USB 2.0 for PC connection and USB memory |
| Slideshow Features | Transition effects, interval setting, clock/calendar display |
| Image Formats | JPEG, TIFF, BMP, RAW (limited) |
| Built-in Memory | Approx. 256 MB (storage for images) |
| Care Instructions | Clean with a soft, dry cloth; avoid liquids and abrasive cleaners |
| Safety Precautions | Use only the specified AC adapter; do not disassemble; avoid extreme temperatures |
| Spare Parts & Repairability | Spare parts are not available; contact Sony support for service |
| General Information | Digital photo frame for displaying photos with slideshow, calendar, and clock functions |
Frequently Asked Questions - DPF-D95 SONY
User questions about DPF-D95 SONY
0 question about this device. Answer the ones you know or ask your own.
Ask a new question about this device
Download the instructions for your Digital photo frame in PDF format for free! Find your manual DPF-D95 - SONY and take your electronic device back in hand. On this page are published all the documents necessary for the use of your device. DPF-D95 by SONY.
USER MANUAL DPF-D95 SONY
Digital Photo Frame Handbook
Before operation
Basic operations
Advanced operations
Using with a computer
Error messages
Troubleshooting
Additional information
Table of Contents
Before operation
Enjoying your photo frame in various ways ....4
Features 5
Identifying the parts .....7
Digital photo frame 7
Remote control 8
Basic operations
Preparing the remote control .....9
Setting the stand 10
To exchange a panel (DPF-E75 only) ....11
Turning the photo frame on .....12
Setting the current time .....13
Inserting a memory card .....14
Changing the display 15
Slideshow display ....17
Clock and calendar display .....18
Single view mode (single image display) 19
Index image display ....20
Advanced operations
Enjoying a slideshow ....22
Changing the settings of the slideshow ....22
Importing images from a memory card to the internal memory .....24
Specifying the playback device .....26
Exporting an image from the internal memory to a memory card ....26
Deleting an image ....28
Registering a mark 29
Sorting images (Filtering) .....30
Adjusting image size and orientation ....31
Enlarging/reducing an image .....31
Rotating an image 32
Changing the settings of the auto power on/off function ....32
Changing the settings ....34
Setting procedure ....34
Items to set 35
Using with a computer
Connecting to a computer ....37
System requirements ....37
Connecting to a computer to exchange images ....37
Disconnecting your computer .....38
Error messages
If an error message appears ......39
Troubleshooting
If trouble occurs ....41
Additional information
About memory cards ....45
"Memory Stick" 45
SD memory card 46
xD-Picture Card 46
Notes on using a memory card .....46
Index 47
On the illustrations and screen shots used in this manual
The illustrations and screen shots used in this manual are of the DPF-D75 unless noted otherwise.
The illustrations and screen shots used in this manual may not be identical to those actually used or displayed.
Enjoying your photo frame in various ways
The Sony DPF-D75/D85/D95/E75 is a digital photo frame for easily displaying images taken with a digital camera or other device, without using a computer.
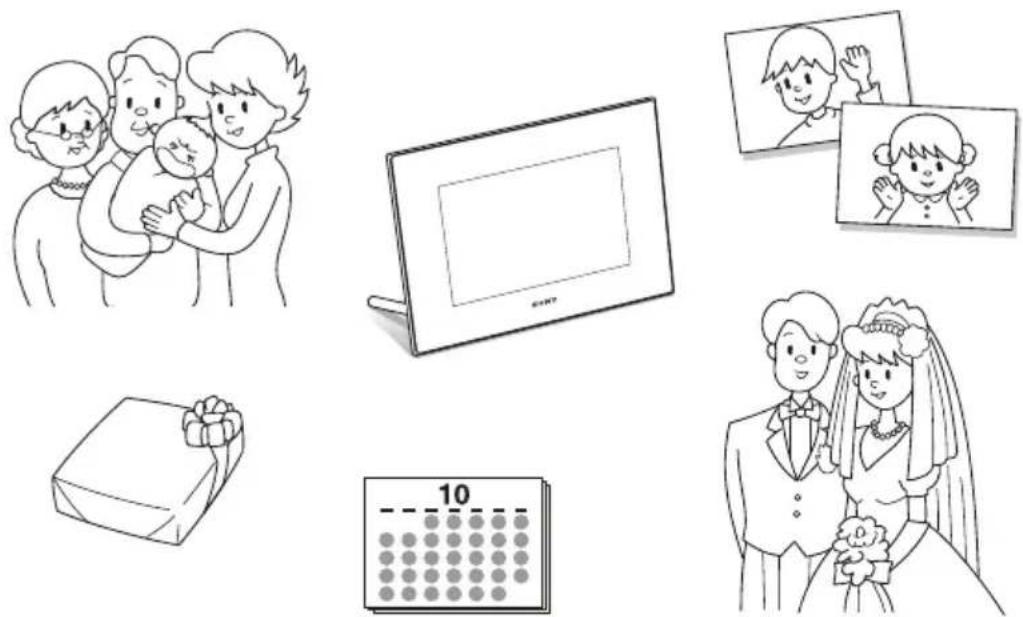
Features
■Support for various memory cards
Supports various memory cards, such as a "Memory Stick", SD memory card, and xD-Picture Card. Just insert a memory card removed from a digital camera or other device, and you will be able to view the images immediately. (→page 14, 45)

■Various display functions
You can enjoy various viewing modes, such as the slideshow display, Clock and calendar display, Single view mode, and Index image display. (→page 15)

■Various slideshow styles
The displayed image can be switched automatically as though you are turning the pages of an album yourself. You can select from various slideshow styles, including the ones displaying a clock or calendar. You can also change playback settings such as the playback order. (→page 22)

■Importing images to internal memory
You can import and save the images in the internal memory. (→page 24)
![graph TD A["Screen Screen"] --> B{Switch} B -->|Yes| C["Add Battery Pack"] B -->|No| D["Modify Battery Pack"] C --> E["Final Battery Pack"] D --> F["Remove Battery Pack"]](/content/2026/05/805399/images/18cb879bd5dce5f7c0f530c7e086a2d2ed415330b30c427da4b68ebbbe4e1274.jpg)
* When using a miniSD/miniSDHC①, microSD/microSDHC ② or “Memory Stick Micro” media ③, be sure to insert it in an appropriate adaptor.
■Exporting images
You can export images in the internal memory to your memory card.
(→page 26)
![graph TD A["Device with battery module"] --> B["Initial State"] B --> C{Cell Segment} C --> D["Cell Segment 1"] C --> E["Cell Segment 2"] C --> F["Cell Segment 3"] D --> G["Cell Segment 4"] E --> H["Cell Segment 5"] F --> I["Cell Segment 6"]](/content/2026/05/805399/images/80aa26d4ce07a2ee3f6c27d730d2d3aa73518c761c333396c85b26aa0de17d9e.jpg)
* When using a miniSD/miniSDHC①, microSD/microSDHC ② or “Memory Stick Micro” media ③, be sure to insert it in an appropriate adaptor.
■Sorting function
You can sort images by the date, folder, image direction, and mark. (→page 30)
■Automatic rotation of images
The photo frame automatically rotates images to their proper orientation. Images are also automatically rotated when the photo frame is set in either the portrait or landscape position. (→page 10)
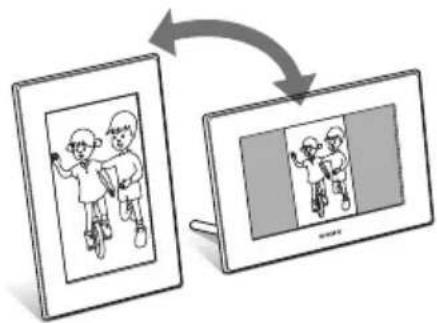
■Displaying images on a wall
You can hang the photo frame on the wall. (→ supplied Operating Instructions, page 11)

Identifying the parts
■ Digital photo frame
Front
Rear


■ Remote control

About descriptions in this manual
The operations described in this manual are based on remote control operation.
When an operation is performed differently, for example, with the remote control and the buttons on the photo frame, it will be explained in a tip.
Preparing the remote control
The supplied lithium battery (CR2025) has already been inserted into the remote control. Pull out the protective sheet before use as shown in the figure.
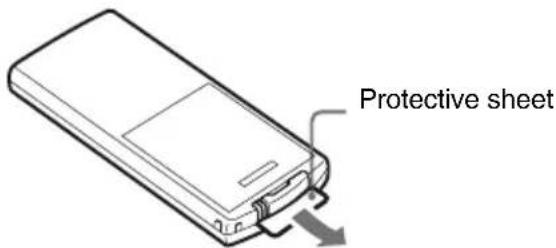
Using the remote control
Point the top end of the remote control towards the remote sensor on the photo frame.

Note
The photo frame may fall if you use the buttons on the photo frame when it is hanging on the wall. Operate the photo frame using the remote control.
Replacing the battery of the remote control
If the remote control stops working, replace the battery (CR2025 lithium battery) with a new one.
1 Press the tab in.

2 Pull the battery holder out.

3 Insert a new battery and slide the battery holder back into the remote control.
Insert the battery so that “+” is facing upwards.
Notes
• Using a battery other than the specified one may result in the battery rupturing. - Dispose of used batteries as specified by the local authorities. - Do not leave the remote control in a very hot and humid place. • Take care that no foreign objects get inside the remote control when you, for example, replace the battery.
- Incorrect use of the battery may cause leaking and corrosion.
- Do not recharge the battery.
- When the remote control will not be used for a long period of time, remove the battery from the remote control to prevent leaking and corrosion.
- Incorrectly inserting, shorting, dismantling, or heating the battery, or throwing it into a fire may cause the battery to rupture or leak.
Setting the stand
1 Hold the photo frame tightly and insert the stand straight into the screw hole on the rear panel.

2 Screw the stand into the screw hole firmly until the stand stops turning.

Setting to portrait or landscape orientation
You can set the photo frame to portrait or landscape orientation by rotating it without moving the stand.

When the photo frame is placed vertically, the display is also automatically rotated to the portrait orientation.

Notes
- Check whether the stand is stable. If the stand is not set properly, the photo frame may fall over.
- The Sony logo does not light up when the photo frame is placed vertically or turned off (DPF-D75/D85/D95 only).
- You can also rotate the image manually (page 32).
- A magnet is contained in the space for storing the stand. Do not keep anything that is easily affected by magnetism, such as a cash card or credit card, near the photo frame. If you place the photo frame near a cathode-ray tube television, the colors of the television screen may be affected.
Tip
It is easier to turn the stand if you wind or wrap a rubber band tightly around the stand when you remove the stand from the photo frame.
To exchange a panel (DPF-E75 only)
You can exchange the original panel with an exchangeable panel supplied.
1 Insert a long, thin object such as a pin into the hole next to the space for storing stand on the rear of the photo frame and lift up the front panel.

2 Remove the panel.
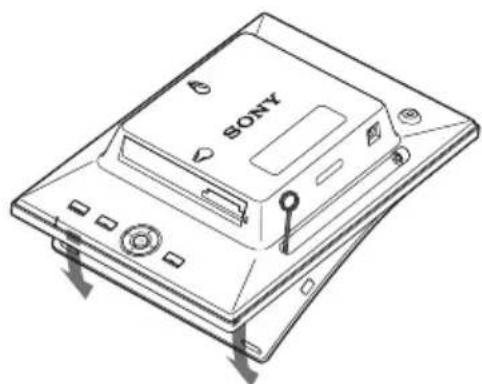
3 Place an exchangeable panel to the photo frame, while aligning the hole on an exchangeable panel to the remote sensor of the photo frame.

4 Press the four corners of the exchangeable panel to snap it into the photo frame.

Turning the photo frame on
When you have already turned on your photo frame by connecting it to the AC power source, skip to the next section.
Turning on the power
Press ⏻ (on/standby) on the photo frame or remote control to turn on the power. The standby indicator turns to green from red. The Sony logo on the front panel lights up (DPF-D75/D85/D95 only).

Turning off the power
Hold ⏻ (on/standby) on the photo frame or remote control until the power turns off. The standby indicator turns to red from green.
Note
Do not turn the photo frame off or disconnect the AC adaptor from the photo frame before the standby indicator turns red. Doing so may damage the photo frame.
Operations in an initial state
When the photo frame is turned on without a memory card inserted, the initial display below appears on the screen.

If the photo frame is not operated for 10 seconds, the demo mode is displayed. If any other button than the power button is pressed, the screen returns to the initial display.
First, press MENU during the initial display, and then set the date and time.
Setting the current time
1 Press MENU.
2 Press ◀/▶ to select the (Settings) tab.
Tip
You can use the ◀/▶ buttons only when the demo mode is not displayed, and the Clock and calendar view mode (page 18) is not selected.
3 Press ▼/▲ to select [Date/time Settings] and then press

4 Adjust the date.
①Press ▼/▲ to select [Date], and then press -♦-.
②Press ◀/▶ to select month, day, and year, and then press ▼/▲ to select a value, then press -♦-
5 Adjust the time.
① Press ↓/↑ to select [Time], then press -♦-.
② Press ◀/► to select hour, minute, and second, then press ↓/♠ to select a value, then press -♦-.
6 Select the format of the date.
① Press ↓/↑ to select [Date Display Order], then press -♦-.
② Press ↓/↑ to select a format, then press -♦-.
• Y - M - D
• M - D - Y
• D - M - Y
7 Set the day to start the week for the calendar.
You can set the day that appears on the very left when the calendar is displayed.
① Press ↓/↑ to select [First day of the week], then press -♦-. ② Press ↓/↑ to select [Sunday] or [Monday], then press -♦-.
8 Select the time display.
① Press ↓/↑ to select [12hr/24hr display], then press -♦-. ② Press ↓/↑ to select [12 hours] or [24 hours], then press -♦-.
9 Press MENU.
The menu screen is closed.
Inserting a memory card
Insert the memory card firmly into the corresponding slot with its label side facing toward you (when you are facing the back side of the photo frame).
The access lamp flashes when the memory card is inserted correctly. Reinsert the memory card after checking the label side of the memory card if the access lamp does not flash.

Note
When using a miniSD/miniSDHC ①, microSD/microSDHC ② or “Memory Stick Micro” media ③, be sure to insert it in an appropriate adaptor.
![graph TD A["Initial State"] --> B["Step 1: Initial State"] B --> C["Step 2: Initial State"] C --> D["Step 3: Final Product"] style A fill:#f9f,stroke:#333 style B fill:#ccf,stroke:#333 style C fill:#cfc,stroke:#333 style D fill:#fcc,stroke:#333](/content/2026/05/805399/images/03255f23e0ff0c580a4db0d5c193a144aa1b7fa9f89e48bdf4aee91dae14b2d1.jpg)
For details on compatible memory cards, see pages 45 to 46. For supported file formats, see the Operating Instructions, page 27.
When you insert a memory card
When you insert a memory card, the images on it are automatically displayed. If you switch off the power while they are being displayed and then switch the power back on, the same images continue to be displayed.
Note
In “Clock and calendar” display, change to “Slideshow”, “Single image display” or “Index” (See next section).
To change the playback device
Press the SELECT DEVICE (page 26).
To remove a memory card
Remove the memory card from its slot in the opposite direction from which it was inserted. Do not remove the memory card while the access lamp is flashing.
When the Clock and calendar view mode is selected, the access lamp does not flash.
Notes
- The slot is both a “Memory Stick” standard and Duo size compatible slot, so you do not need a “Memory Stick” adaptor.
- The “Memory Stick” (Standard/Duo)/SD memory card/MMC/xD-Picture Card multi-purpose slot automatically detects the card type.
- Do not insert multiple memory cards into Ⓐ, Ⓑ slots simultaneously. If multiple memory cards are inserted, the photo frame will not work properly.
Changing the display
You can change the view style by pressing the VIEW MODE buttons.
1 Press the button corresponding to view mode you want to select.

The display changes to selected view mode.
①

Slideshow
(→page 17)
②

Clock and
calendar
(see page 18)
③
SINGLE
Single image
display
(see page 19)
④

Index
(see page 20)
Tips
- When using the buttons on the photo frame, press VIEW MODE on the upper back of the LCD screen, press ↑ to move the cursor to the display selection area and press ←/→ to select a display.
- You can also repeatedly press VIEW MODE on the photo frame, move the cursor within the display selection area and select any view mode.
Display selection area
2 Select a style with ⇔/⇔/⇔/⇔ and press ⇔.
The display changes to the selected view style.
Tips
- If the cursor is in the display selection area, move it to the style selection area by pressing ↓.
- You can move the cursor within the style selection area by pressing the button corresponding to the currently selected view mode.
mode


Press VIEW MODE on the photo frame repeatedly.
Note
If you have not operated the photo frame for an extended period of time, the style the cursor is on will be selected automatically.
Slideshow display
| Display Style Description | ||
| Slideshow |  Single view Single view | Images are displayed on a single screen, one after another. |
 Multi image view Multi image view | Displays multiple images at the same time. | |
 Clock view Clock view | Displays images, one after another, while showing the current date and time. | |
 Calendar view Calendar view | Displays images, one after another, while showing a calendar. The current date and time are displayed. | |
 Time Machine Time Machine | Displays images, one after another, while showing the shooting date and time. The current date and time are not displayed. | |
 Random view Random view | Displays images while randomly switching between a number of different slideshow styles and effects.When displaying images randomlyThis is available when [Shuffle] of [Slideshow Settings] is set to [ON] (→page 23). | |
Tips
- You can set the interval, effect, listing order, or color effect when you select the slideshow display. Refer to “Changing the settings of the slideshow” (page 22).
- If you press during slideshow, the display changes to the Single image display.
- If you turn the photo frame off during slideshow and back on, the slideshow restarts from the last image viewed.
Clock and calendar display


Clock1 Clock2 Clock3 Clock4 Clock5

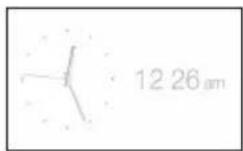


Clock6 Clock7 Clock8 Clock9 Clock10 Clock11


Lunar Calendar (when you select [Simplified Chinese] in [Language Setting])
Arabic Calendar (when you select [Arabic] in [Language Setting])
Farsi Calendar (when you select [Persian] in [Language Setting])
Note
You can select only the Settings tab when the Clock and calendar are displayed.
Single view mode (single image display)
| Display Style Description | ||
| SINGLE |  Entire image Entire image | Displays an entire image in the screen.You can switch the images to be displayed by pressing ◀/►. |
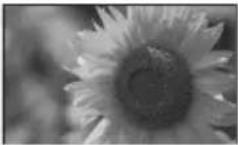 Fit to screen Fit to screen | Displays an image over the whole screen.(Depending on the aspect ratio of the recorded image, the border of the image may only be partially displayed.)You can switch the images to be displayed by pressing ◀/►. | |
 Entire image (with Exif) Entire image (with Exif) | Displays image information, such as the image number, file name, and shooting date while displaying the entire image.You can switch the images to be displayed by pressing ◀/►.See “About the information displayed on the LCD screen”(page 21) for details on the image information. | |
 Fit to screen (with Exif) Fit to screen (with Exif) | Displays image information, such as the image number, file name, and shooting date in fit to screen mode.(Depending on the aspect ratio of the recorded image, the border of the image may only be partially displayed.)You can switch the images to be displayed by pressing ◀/►.See “About the information displayed on the LCD screen”(page 21) for details on the image information. | |
Index image display
| Display Style Description | ||
| Index |  Index 1 Index 1 | Displays a list of large thumbnails. You can select an image by pressing ◀/⇨/↓/♠. |
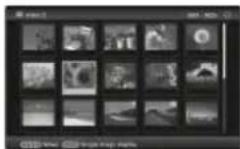 Index 2 Index 2 | Displays a list of thumbnails. You can select an image by pressing ◀/⇨/↓/♠. | |
 Index 3 Index 3 | Displays a list of small thumbnails. You can select an image by pressing ◀/⇨/↓/♠. | |
Tips
- A thumbnail is a small-sized image for index use that is recorded in the pictures taken by a digital camera.
- In the index image display, you can press the left/right/up/down arrow keys to select an image; the display changes to the single view mode.
About the information displayed on the LCD screen

The following information is displayed.
① Display type (in the Single view mode)
- Entire image
- Fit to screen
- Entire image (with Exif)
- Fit to screen (with Exif)
②Ordinal number of the displayed image/Total number of images
Input media indication for the displayed image is shown as follows:
Icons Meaning
| Internal memory input | |
| "Memory Stick" input | |
| SD Memory Card input | |
| xD-Picture Card input |
③Image details
- File format (JPEG(4:4:4), JPEG(4:2:2), JPEG(4:2:0), BMP, TIFF, RAW)
- Number of pixels (width × height) – Manufacturer name of image input device
- Model name of image input device
- Shutter speed (e.g.: 1/8)
- Aperture value (e.g.: F2.8)
- Exposure value (e.g.: +0.0EV)
- Rotation information
④Setting information
Icons Meaning
| Protect indication | |
| Associated file indication(Displayed when there is an associated file such as a motion file or a miniature e-mail image file.) | |
| Displays when you have registered a mark. |
⑤ Image number (folder-file number)
This is displayed if the image is DCF compliant.
If the image does not comply with DCF, its file name is displayed.
If you named or renamed the file on your computer and the file name includes characters other than alphanumeric characters, the file name may not be able to be displayed properly on the photo frame.
Also, for a file created on a computer or other device, a maximum of 10 characters from the beginning of the file name can be displayed.
Note
Only alphanumeric characters can be displayed.
⑥ Shooting date/time
Enjoying a slideshow
1 Press (SLIDE-SHOW).
Tips
- When using the buttons on the photo frame, press VIEW MODE on the upper back of the LCD screen, press ↑ to move the cursor to the display selection area and press ↓/→ to select (Slideshow).
- When the cursor is in the display selection area, move it to the style selection area with ↓.
- When the cursor is in the style selection area, you can move it by pressing VIEW MODE repeatedly.

2 Press ◀/→/↓/↑ to select the style you want, and then press →
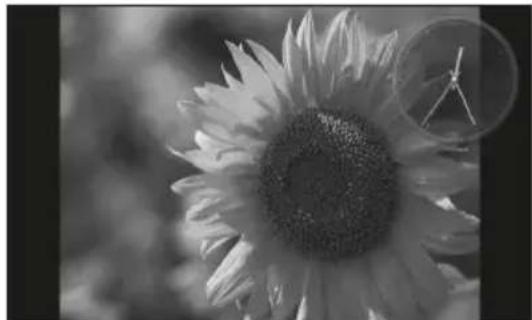
See “Slideshow display” (page 17) for details on the slideshow styles.
Changing the settings of the slideshow
1 Press MENU. 2 Press ◀/→ to select the (Settings) tab. 3 Press ↓/↑ to select [Slideshow Settings], and then press
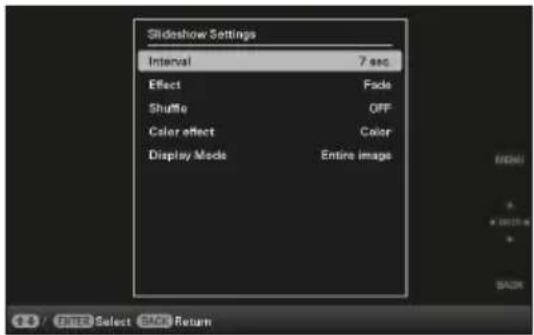
4 Press ↓/↑ to select the item and then press -
Refer to the tables on the next page for details on the setting items.
Notes
- Note the following when you select a slideshow using the image stored on the memory card.
- Due to the characteristics of memory card devices, images may be subject to data error when read too often.
- Do not run a slideshow for a long time with a small number of images. This may cause data error.
- We recommend you back up images on the memory card often.
- When the photo frame is, for instance, displaying a slideshow, changes to the settings of some items are unavailable. These items are shown in gray and cannot be selected.
- The slideshow starts from the first image if you turn off the photo frame, or if you reset the photo frame.
- When the screen is too bright, it may make you feel nauseous. Be careful not to set the brightness too high when using the photo frame.
*: Factory default settings
| Item Setting | Description | ||
| Slideshow Settings | Interval | Set a value from 3 sec., 7 sec.*, 20 sec., 1 min., 5 min., 30 min., 1 hour, 3 hours, 12 hours, 24 hours for the interval between images. Note An image may not switch at the intervals you set on the menu, depending on the style of the slideshow, color effect, or image size. | |
| Effect Center cross | Transitions to the next image as though the previous image is being pushed from the center to the four corners. | ||
| Vert. blinds Transitions to the next image as though blinds are being lowered vertically. | |||
| Horiz. blinds Transitions to the next image as though blinds are being pulled horizontally. | |||
| Fade* Transitions to the next image by fading out the current image and fading in the next image. | |||
| Wipe Transitions to the next image as though the current image is being wiped off the screen to reveal the next image. | |||
| Random Uses the above five effects randomly. | |||
| Shuffle ON Displays images randomly. | |||
| Color effect Color* Displays an image in color. | |||
| Display Mode | Select the desired display size from the following: Note The original image data will not change. | ||
| Entire image* | Displays an entire image enlarged to proper size. (An image may be displayed with margins on the top, bottom, left and right.) | ||
| Fit to screen Zooms in at the center of the image enough to fill the whole screen. Note An image may not be displayed with the display size you set on the menu, depending on the style of the slideshow. | |||
Importing images from a memory card to the internal memory
You can use the photo frame as a digital album, saving important images in the internal memory.
Tips
- When saving images to the internal memory, you can use [Image import size] in the menu to preset whether to resize images to the optimum size or save them as they are without compressing them (page 35).
- When [Image import size] is set to [Resize], up to approximately 500 images can be saved in the internal memory. When set to [Original], the number of images that can be saved may vary, depending on the original image file size.
1 Press (IMPORT) when an image stored on the memory card is displayed on the screen.
Tip
If using the buttons on the photo frame, press MENU, select the ☐ (Editing) tab with ◀/→, select [Import] with ↓/↑, and press -♦-.
Single view mode
(Single image display)
Slideshow display
Index image display

2 Press ↓/↑ to select [Import this image], [Import multiple images] or [Import all images] and then press
If you select [Import this image], the image currently displayed is imported to the internal memory. Go to step 5. (This item cannot be selected on the slideshow display.)
If you select [Import multiple images], you can select the image you want to import from the image list. Go to step 3. If you select [Import all images], the image list is displayed. A check mark is attached to the check box of all the images. Go to step 4.
3
Use ←/→/↓/↑ to select the image from the image list to be imported and press
“√” is added to the selected image. If you want to import multiple images at a time, repeat this step.

If you want to clear the selection, select the image and press -♦“√” disappears from the image.
About image sorting in the image list
During a sort:
Lists all images that meet the sorting criteria.
Not during a sort:
Lists all images in the device that contains the image currently displayed.
See “Sorting images (Filtering)” (page 30).
4
Press MENU.
The confirmation screen used for selecting a folder is displayed.
5
Press ↓/↑ to select the folder you want and press
The confirmation screen used to decide whether to import an image or not to the internal memory is displayed.

Tip
A new folder is created automatically when you select [New folder].
6
Press ↓/↑ to select [Yes] and then press -.
The image is saved in the specified folder in the internal memory.
7
Press when the confirmation screen is displayed.
Notes
- “Import to the internal memory” is not available for images in the internal memory.
- Avoid doing the following while images are being imported to the internal memory. Doing so may damage photo frame, memory card, or the data:
- Turning off the power
- Removing a memory card
- Inserting another card
Tip
You can change the thumbnail size using [⊕/⊕] in the image list.
Specifying the playback device
You can specify whether to display a memory card or the internal memory.
1 Press SELECT DEVICE.

Tips
- When operating from the main unit, press the MENU and press the ⇔/→ buttons to select the (Select device) tab.
- If the memory card you want to select is not inserted, insert it now.
Note
During Clock and calendar display, you cannot select the Select device) tab.
2 Press ↓/↑ to select the device you want to display and then press -♦ The images of the selected device are displayed.
Tip
The search is cancelled automatically when you change the playback device during a search.
Exporting an image from the internal memory to a memory card
You can export the images in the internal memory to a memory card.
1 Press MENU when an image stored on the internal memory is displayed on the screen. 2 Press the left/right arrow keys to select the (Editing) tab. 3 Press the down/up arrow keys to select [Export] and then press the OK button. (Single view mode: Single image display)

4 Press the down/up arrow keys to select [Export this image], [Export multiple images], or [Export all images] and then press the OK button.
If you select [Export this image], the image currently displayed is exported to the device. Go to step 7. (This item cannot be selected on the slideshow display.) If you select [Export multiple images], you can select the image you want to export from the image list. Go to step 5. If you select [Export all images], the image list is displayed. A check mark is attached to the check box of all the images. Go to step 6.
5 Press the left/right/down/up arrow keys to select the image from the image list to be exported, and then press the OK button.
A check mark (√) is added to the selected image.
If you want to export multiple images at a time, repeat this step.
If you want to clear the selection, select the image and press the OK button. The check mark (√) disappears from the image.
About image sorting in the image list
During a sort:
Lists all images that meet the sorting criteria.
Not during a sort:
Lists all images in the internal memory.
See “Sorting images (Filtering)” (page 30).
6 Press MENU.
The screen used for selecting the memory card to which to export is displayed.
7 Press ↓/↑ to select a memory card to export the image to, and then press -♦-.

8 Press ↓/↑ to select a destination folder, and then press
The confirmation screen used to decide whether to export or not is displayed.

Tip
A new folder is created automatically when you select [New folder].
9 Press ↓/↑ to select [Yes] and then press -♦-.
The exporting is finished.
10 Press - when the confirmation screen is displayed.
The image is copied to the specified memory card.
Note
Avoid doing the following while an image is being exported. Doing so may damage the photo frame, memory card, or the data:
- Turning off the power
- Removing an memory card
- Inserting another card
Tips
- You can also use the MENU button on the photo frame.
- You can change the thumbnail size using [⊕/⊖] in the image list.
- Any device that is not recognized by the photo frame is shown in gray and you cannot select it.
Deleting an image
1 Press (DELETE) when an image is displayed on the screen.
Tip
If using the buttons on the photo frame, press MENU, select the ☐ (Editing) tab with ←/→, select [Delete] with ↓/↑, and press -♦-.
2 Press ↓/↑ to select [Delete this image], [Delete multiple images] or [Delete all images] and then press
- ◆ -
If you select [Delete this image], the image currently displayed is deleted. Go to step 5. (This item cannot be selected on the slideshow display.)
If you select [Delete multiple images], you can select the image you want to delete from the image list. Go to step 3.
If you select [Delete all images], the image list is displayed. A check mark is attached to the check box of all the images. Go to step 4.
3 Press ←/→/↓/↑ to select the image from the image list to be deleted, and then press
“√” is added to the selected image.
If you want to delete multiple images at a time, repeat this step.
If you want to clear the selection, select the image and press “√” disappears from the image.
About image sorting in the image list
During a sort:
Lists all images that meet the sorting criteria.
Not during a sort:
Lists all images in the device that contains the image currently displayed.
See “Sorting images (Filtering)” (page 30).
4 Press MENU.
The delete confirmation screen is displayed.
5 Press ↓/↑ to select [Yes], and then press --.
The image is deleted.
6 Press when the confirmation screen is displayed.
Notes
- Avoid doing the following while an image is being deleted. Doing so may damage the photo frame, memory card, or the data:
- Turning off the power
- Removing a memory card
- Inserting another card
- When the message [Cannot delete a protected file.] appears on the screen, the image file was set to "Read Only" on a computer. In this case, connect the photo frame to a computer, and delete this file using the computer.
- The total capacity of the internal memory is not equal to the remaining capacity, even immediately after initialization.
- If deletion has started, the deleted image cannot be recovered even if you stop deletion. Delete images only after confirming you actually want to delete them.
Tip
You can change the thumbnail size using [⊕/⊕] in the image list.
To format the internal memory
1 Press MENU.
2 Press ◀/▶ to select the 🔊 (Settings) tab.
3 Press ↓/↑ to select [Initialize], and then press -♦-.
4 Press ↓/↑ to select [Format internal memory], and then press ⚙️ The confirmation screen used for initializing the internal memory is displayed.
5 Press ↓/↑ to select [Yes], then press -♦-.
Registering a mark
You can produce a slideshow only with images which have been selected beforehand and have been marked. You can easily check for images with marks using the index image display or single view mode.
1 Press (MARKING) when an image is displayed on the screen.
Tip
If using the buttons on the photo frame, press MENU, select the ☐ (Editing) tab with ◀/→, select [Marking] with ↓/↑, and press -♦-.
2 Press ↓/↑ to select the mark you want and then press ✦

3 Press ↓/↑ to select [Mark this image], [Mark/Unmark multiple images] or [Mark all images] and then press
If you select [Mark this image], the image currently displayed will be marked and showed in the future. (This item cannot be selected on the slideshow display.)
If you select [Mark/Unmark multiple images], you can select the image to which you want to attach a mark from the image list. Go to step 4.
If you select [Mark all images], the image list is displayed. A check mark is attached to the check box of all the images. Go to step 5.
4 Press ←/→/↓/↑ to select the image from the image list to be marked, and press
“√” is added to the selected image.
If you want to mark multiple images at a time, repeat this step.
If you want to clear the selection, select the image and press “√” disappears from the image.
About image sorting in the image list
During a sort:
Lists all images that meet the sorting criteria.
Not during a sort:
Lists all images in the device that contains the image currently displayed.
Refer to "Sorting images (Filtering)" (page 30).
5 Press MENU.
The confirmation screen appears.
6 Press ↓/↑ to select [Yes] and then press -•-.
The mark is attached to the selected image.
To delete the registration of a mark
Select [Unmark this image] or [Unmark all images] and then press - in step 3. You can also cancel the selection when you remove the check mark from the check box.
• [Unmark this image]:
Removes a mark from the image currently displayed. (This item cannot be selected on the slideshow display.)
• [Unmark all images]:
During a sort:
Unmarks all images that meet the sorting criteria.
Not during a sort:
Unmarks all images in the device that contains the image currently displayed.
Note
A mark is saved only when it is registered with an image in the internal memory. A mark registered with an image on a memory card is removed when the power is turned off, or if you change the device being displayed.
Tips
- You can select a mark from among 3 types.
- You can change the thumbnail size using [⊕/⊖] in the image list.
Sorting images (Filtering)
You can sort for images stored in the internal memory or on a memory card according to date, folder, image orientation or marks.
1 Press SORT when an image is displayed on the screen.
Tip
If using the buttons on the photo frame, press MENU, select the ☐ (Editing) tab with ◀/→, select [Sort] with ↓/↑, and press ♦.
2 Select a sort style using ↓/↑ and press ✦.

- [Sort by date]: Filters by the shooting date.
- [Sort by folder]: Filters by the folder.
- [Sort by vertical/horizontal]: Filters by the image orientation.
- [Sort by mark]: Filters by the mark.
3 Press ←/→/↓/↑ to select the item you want and then press
To cancel the sort
Press MENU while the sorted images are displayed, select [Exit sort (show all photos)] and press
To change the sort style
Press BACK while the sorted images are displayed.
Notes
- Do not turn the photo frame off or remove the memory card during sort. Doing so may damage the photo frame or the memory card or corrupt the data.
- Sort is automatically canceled in the following cases:
- When the playback device is changed
- When images on a memory card are sorted and the memory card is removed.
Adjusting image size and orientation
Enlarging/reducing an image
You can enlarge or reduce an image in single view mode.
To enlarge an image, press ⊕ (zoom in) on the remote control. To reduce an enlarged image, press ⊖ (zoom out). Each press of the ⊕ button enlarges the image further. You can enlarge an image to a maximum of 5 times the original scale. You can move an enlarged image up, down, left, and right.
To save an enlarged or a reduced image (Crop and save)
① Press MENU while the enlarged or reduced image is displayed. ② Press ↓/↑ to select the saving method. If you select [Save as new image], a copy of the image is saved. Proceed to step ③. If you select [Overwrite], the new image overwrites the old image. Proceed to step ⑤. ③ Press ↓/↑ to select the device on which to save the image and press ④ Press ↓/↑ to select a destination folder, and press -♦-. ⑤ Press ↓/↑ to select [Yes], and press -♦-. The image is saved. ⑥ When the confirmation screen appears after you finish saving the image, press
Tip
If you move the enlarged image with ◀/⇨/▼/♠ and press MENU in step ①, the image is trimmed into the displayed image size and saved.
Notes
- You cannot overwrite files except for a JPEG file (extension: JPG).
- Enlarging an image may reduce the quality depending on the image size.
Continued
- It is not possible to enlarge an image using the buttons on the photo frame.
Rotating an image
You can rotate an image during single view mode.
Operate from the menu of the photo frame
1 Press MENU in single view mode. 2 Press ←/→ to select the (Editing) tab. 3 Press ↓/↑ to select [Rotate] and then press →

4 Press ↓/↑ to select the direction to rotate and then press
- Rotates the image 90 degrees clockwise. - Rotates the image 90 degrees counterclockwise.
5 Press ↓/↑ to select [OK] and then press --.
Tips
- You can also rotate an image with (ROTATE) on the remote control. The image rotates 90 degrees counterclockwise every time you press the button.
- For an internal memory image, image rotation data will be retained even after the power is turned off.
- You can rotate the image of the index image display.
Changing the settings of the auto power on/off function
You can use the timer function to turn the photo frame on or off automatically when the photo frame is turned on.
1 Press MENU. 2 Press ↔ to select the (Settings) tab. 3 Press ↓/↑ to select [Auto Power ON/OFF], and press - The screen used for setting a value for [Auto Power ON/OFF] is displayed.

4 Press ↓/↑ to select [Setup method] and press →. Then, press ↓/↑ to select [Simple] or [Advanced], and press →.
[Simple]: Sets the auto power on/off function finely in one minute increments.
[Advanced]: Sets the auto power on/off function according to a day of the week by one hour units.
5 Press ↓/↑ to select [Time Setting], and press
[Simple]

① Select an item for which you want to set the time.
Press ↓/↑ to select [Power-ON timer] or [Power-OFF timer] and press.
Then, press ↓/↑ to select [Enable] and press -♦-.
② Set the time at which you want to activate the Power-ON timer or Power-OFF timer.
Press ↓/↑ to select [Auto ON time] or [Auto OFF time] and press.
Press ←/→ to select the hour or minute, press ↓/↑ to set the hour or minute, and press -♦-.
③ Set the day of the week on which you want to activate the timer.
Press ↓/↑ to select [Auto ON day] or [Auto OFF day] and press.
Press ↓/↑ to select the day on which you want to activate the timer and press -♦- to make it checked.
Press ↓/↑ to move the cursor to [OK] and press.
[Advanced]

① Press ←/→/↑/↓ to select the time you want to use the auto power on/off function.
You can set this function according to a day of the week by one hour units. The color of the selected time zone changes to blue after you press -♦-. The power supply of the photo frame will be turned on when the blue time zone time occurs. The color of the selected time zone changes to gray, after you select the blue time zone and then press -♦-. The power supply of the photo frame is turned off while it is in the gray time zone.
Tip
The power is turned off automatically at the time you set for [Power-OFF timer] when you are using the photo frame.
The power is turned on automatically at the time you set for [Power-ON timer] during the standby mode.
② Press ←/→/↓/↑ to select [OK] and then press -◆.
6 Press MENU.
Changing the settings
You can change the following settings.
- Slideshow Settings
- Auto Power ON/OFF
- Date/time Settings
- General Settings (Listing Order, Sony logo ON/OFF* etc.,) * Turning on the Sony logo is the function only available for DPF-D75/D85/D95.
- Language Setting
- Initialize
Setting procedure
1 Press MENU. 2 Press ◀/→ to select the (Settings) tab.

3 Press ↓/↑ to select the item you want to change and then press -The setting screen of the selected item is displayed.

For example, when [Slideshow Settings] is selected.
4 Press ↓/↑ to select the item you want to change and then press ➕ This enables you to set each of the items (page 35).
Note
When the photo frame is, for instance, displaying a slideshow, some settings of some items cannot be changed. They are displayed in gray and cannot be selected.
5 Press ↓/↑ to select a setting value and then press
Each time you press ↓/↑, the setting value changes. In the case of a numerical value, press ↑ to increase the value and press ↓ to decrease the value.
If you press, the setting is confirmed.
6 Press MENU.
The menu closes.
To reset to factory default settings
1 Press MENU and then select Settings) - [Initialize] by pressing ←/→/→/→/↑. 2 Press ↓/↑ to select [Initialize settings] and then press → All adjusted values, except for the clock settings, are reset to the default settings.
Tip
You can also use the MENU button on the photo frame.
Items to set
*: Factory default settings
| Item Setting | Description | ||
| Slideshow Settings | Refer to “Enjoying a slideshow” (page 22). | ||
| Auto Power ON/OFF | Sets the timer function which turns the power supply of the photo frame on or off automatically. You can use this function with the following settings. (→ page 32) | ||
| Simple Power-ON | timer | You can set the timer (time/day) and input time for the power to turn on automatically, when you set this function to enable. | |
| Power-OFF | You can set the timer (time/day) and input time for the power to turn off automatically, when you set this function to enable. | ||
| Advanced OK | Returns to the previous screen after confirming the operation. | ||
| Cancel Returns to the previous screen after cancelling the operation. | |||
| Reset all Deletes all the selected times. | |||
| Setup method Advanced* Sets the auto power on/off function according to a day of the week by one hour units. | |||
| Simple Sets the auto power on/off function finely in one minute increments. | |||
| Date/time Settings | Sets the date, time, First day of the week, etc. (→ page 13) | ||
| General Settings | Listing Order Sets the display order of images. This setting affects the order in [Slideshow Settings]. | ||
| Auto display orientation | ON*/OFF: You can set the photo frame to automatically detect and rotate the orientation of images. | ||
| LCD backlight Allows you to set the brightness of the LCD screen to a level from 1 to 10*. | |||
| Image import size | Resize* | When importing images from a memory card, this setting resizes the images and saves them to the internal memory. You can save more images, but deterioration in image quality compared to the original images is noticeable when the images are displayed on a large monitor via a computer or other device. | |
| Original | Saves images to the internal memory without compressing them. There is no deterioration, but you can save fewer images. | ||
| Sony logo ON/OFF (DPF-D75/D85/D95 only) | ON*/OFF: You can set whether the photo frame's Sony logo lights or not. | ||
Continued
*: Factory default settings
| Item Setting | Description | ||
| System Information | Version Displays | the version of the firmware of the photo frame. | |
| Internal memory | Memory capacity | Indicates the maximum amount of space available in internal memory in the initial state. | |
| Remaining capacity | Indicates the amount of free space currently available in internal memory. | ||
| Language Setting | Sets the display language on the LCD screen.Japanese, English*, French, Spanish, German, Italian, Russian, Korean, Simplified Chinese, Traditional Chinese, Dutch, Portuguese, Arabic, Persian, Hungarian, Polish, Czech, Thai, Greek, Turkish, Malay, Swedish, Norwegian, Danish, FinnishNoteDefault language setting may vary in some regions. | ||
| Initialize Format | internal memory | You can format the internal memory.NotesAll the images added to the internal memory will be deleted.Do not format the internal memory by using a connection to a computer. | |
| Initialize settings | Returns all settings to their factory defaults except for the current date and time setting of the [Date/time Settings]. | ||
Connecting to a computer
You can connect to a computer to view and copy images from the internal memory of the photo frame to the computer, and copy images from the computer to the photo frame.
System requirements
To connect a computer to the photo frame, your computer must satisfy the following recommended system requirements.
Windows
Recommended OS: Microsoft Windows 7/Windows Vista SP2 /Windows XP SP3
Port: USB port
■Macintosh
Recommended OS: Mac OS X (v10.4 or later) Port: USB port
Notes
- If multiple USB devices are connected to a computer or if a hub is used, a problem may occur. In such a case, simplify the connections.
- You cannot operate the photo frame from another USB device being used simultaneously.
- Do not disconnect the USB cable during data communication.
- Operation with all computers that satisfy the recommended system requirements is not guaranteed.
- The photo frame has been demonstrated as operable when connected to a computer or Sony digital photo printer. When other devices are connected to the photo frame, these devices may not recognize the internal memory of the photo frame.
Connecting to a computer to exchange images
Note
This section shows an example for a connection for Windows Vista. Depending on the OS you use, the screen display and procedures may vary.
1 Connect the photo frame to the AC power source. (→ supplied Operating Instructions, page 12) 2 Connect the computer and photo frame with a commercially available USB cable.

Note
Use a B-Type USB cable that is less than 3 meters long.
3 Turn the photo frame on. (→page 12)
4 When the [AutoPlay] window appears on the computer display, click [Open folder to view files].
If the [AutoPlay] window does not appear, click [Computer (My Computer)] in the Start menu, and then open the removable disc.
5 Move the cursor in this window and right click, and then click [New] - [Folder].
Name this new folder. In this manual, the folder name "sony" is used as an example.
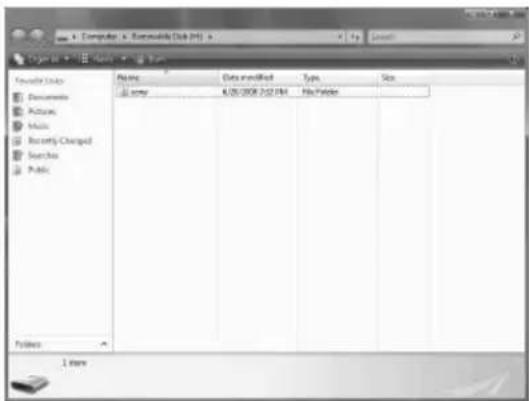
6 Double click to open this "sony" folder.
7 Open the folder that contains the image files you want to copy, and then copy the image files by using drag-and-drop.
Notes
- When saving images from a computer in the internal memory, make a folder in the internal memory and save the images in this folder. If you do not make a folder, you can only save up to 512 images. In addition, the number of images may be reduced depending on the file name length or character type.
- If you edit or save an image file on a computer, the date that the file was modified is changed. In this case, images may not be displayed in order by the shooting date in the index image display or other display mode because the shooting date of the image is changed.
- When images from the computer are saved in the internal memory of the photo frame, the image files are saved without being compressed. As a result,
fewer images may be able to be saved to the internal memory of the photo frame.
- Image files made or edited on a computer may not be displayed. Image files set to "Read Only" on a computer cannot be deleted on the photo frame.
Cancel "Read Only" before saving image files from a computer on the photo frame.
Disconnecting your computer
Disconnect the USB cable or turn the photo frame off after disconnecting it from your computer.
1 Double-click on the Task Tray.
2 Click (USB Mass Storage Device) -> [Stop].
3 Click [OK] after checking the drive you want to remove.
If an error message appears
If an error occurs, one of the following error messages may be displayed on the LCD screen of the photo frame. Follow the corresponding solution below to solve the problem.
| Error message Meaning/Solutions | |
| No Memory Stick. / No SD Memory Card. / No xD-Picture Card. | A memory card is not inserted in a slot.Insert a memory card in the corresponding slot.(→page 14) |
| An incompatible Memory Stick is inserted. / An incompatible SD Memory Card is inserted. / An incompatible xD-Picture Card is inserted. | An unsupported memory card is inserted. Use a memory card that is supported by the photo frame. |
| No images on file. • There is no image file that can be displayed on the screen of the photo frame on the memory card. Use a memory card containing image files that can be displayed with the photo frame. | |
| Cannot delete a protected file. • To delete a protected file, cancel the protection on your digital camera or computer. | |
| Memory card is protected. Remove protection then try again. | The memory card is write-protected. Slide the write-protect switch to the enable position. (→page 45) |
| The Memory Stick is full. / The SD Memory Card is full. / The xD-Picture Card is full. /The internal memory is full. | No more data can be saved because the memory card or the internal memory is full. Delete images, or use a memory card with free space available. |
| Error reading the Memory Stick. / Error reading the SD Memory Card. / Error reading the xD-Picture Card. / Error reading the internal memory. | For a memory card:An error has occurred. Check that the memory card is inserted correctly. If this error message is displayed frequently, check the status of the memory card with a device other than the photo frame.For the internal memory:Initialize the internal memory.NoteWhen you initialize the internal memory, please note that all the image files imported to the internal memory are deleted. |
| Write error on the Memory Stick. / Write error on the SD Memory Card. / Write error on the xD-Picture Card. / Write error on the internal memory. | |
| The Memory Stick is read only. • A “Memory Stick-ROM” is inserted. To save the images, use the “Memory Stick” recommended. | |
| The Memory Stick is protected. • A protected “Memory Stick” is inserted. To edit and save the images, use to remove protection. | |
| Memory card format not supported. • | For a memory card, use your digital camera or other device to format the memory card.NoteWhen you initialize the memory card, all the files on the memory card will be deleted. |
| Cannot open the image. • The photo frame cannot display or open an image file whose format is not supported. | |
If trouble occurs
Before submitting the photo frame for repair, try using the following guidance to solve the problem. If the problem persists, consult with your Sony dealer or Sony service facilities.
Power supply
| Symptom Check | item Cause/Solutions | |
| The power cannot be turned on. | • Is the AC power plug inserted correctly? | →Insert the power plug properly. |
Displaying images
If the power is turned on but images are not displayed or the settings of the operation screen cannot be configured, confirm the following check items.
| Symptom Check | item Cause/Solutions | |
| No images are displayed on the screen. | • Is a memory card inserted connected properly? | →Insert a memory card properly.(→page 14) |
| • Does the memory card contain images saved with a digital camera or other device? | →Insert a memory card containing images.→Check the file formats that can be displayed. (→See Operating Instructions, page 27) | |
| • Is the file format compatible with DCF? | →A file that is not compatible with DCF may not be able to be displayed with the photo frame, even if it can be displayed with a computer. | |
| • Is the photo frame in Clock and calendar display mode? | →Set the photo frame to other than Clock and calendar display mode. (→page 15) | |
| Images are not played back in the order of shooting date. | • Were these images saved from a computer?• Were these images edited on a computer? | →If you edit or save an image file on a computer, the date that the file was modified is changed. Images are thus displayed in order of by the date the files were modified instead of by the shooting date. |
| Some images are not displayed. | Are the images displayed in the index view? | →If the image is displayed in the index view but cannot be displayed as single image, the image file may be damaged even though its thumbnail preview data is fine.→A file that is not compatible with DCF may not be able to be displayed with the photo frame, even if it can be displayed with a computer. |
Does the mark displayed below appear in the index view? Were the images created with an application on a computer? Were the images created with an application on a computer? | →If the mark shown on the left is displayed, the image file may not be supported by the photo frame because, for example, it is a JPEG file that was created with your computer. Also, the image file may be supported, but not contain thumbnail data. Select the mark and press → change the screen to the single image display. If the mark on the left is displayed again, the image cannot be displayed because the image file is not supported by the photo frame. | |
Does the mark displayed below appear in the index view? | →If the mark shown on the left is displayed, the image file is supported by the photo frame, but the thumbnail data or image itself cannot be opened. Select the mark and press →If the mark shown on the left is displayed again, the image cannot be displayed. | |
| Are there more than 4,999 images in the memory card? | →The photo frame can play, save, delete, or otherwise handle up to 4,999 image files. | |
| Did you rename the file with a computer or other device? | →If you named or renamed the file on your computer and the file name includes characters other than alphanumeric characters, the image may not be able to be displayed on the photo frame. | |
| Is there a folder with more than 5 levels in its hierarchy on the memory card? | →The photo frame cannot display images saved in a folder that is more than 5 levels deep. | |
| The file name is not displayed properly. | Did you rename the file with a computer or other device? | →If you named or renamed the file on your computer and the file name includes characters other than alphanumeric characters, the file name may not be able to be displayed properly on the photo frame. Also, for a file created on a computer or other device, a maximum of 10 characters from the beginning of the file name can be displayed.NoteOnly alphanumeric characters can be displayed. |
Saving and deleting images
| Symptom Check | item Cause/Solutions | |
| Cannot save an image. | Is the memory card write-protected? | →Cancel write-protection and try saving again. |
| Is the write-protect switch of the memory card in the [LOCK] position? | →Slide the write-protect switch to the enable position. | |
| Is the memory card full? | →Replace the memory card with one with sufficient free space. Or, delete any unwanted images. (→page 28) | |
| Is the internal memory full? | →Delete any unwanted images. (→page 28) | |
| Did you save images from a computer to the internal memory without making a folder in the internal memory? | →If you do not make a folder, you can only save up to 512 images. In addition, the number of images may be reduced depending on the file name length or character type. When you save images in the internal memory from a computer, be sure to make a folder in the internal memory and save the images in this folder. | |
| Cannot delete an image. | • Is the memory card write-protected? | →Use the device you are using to cancel write-protection and try deleting again. |
| • Is the write-protect switch of the memory card in the [LOCK] position? | →Slide the write-protect switch to the enable position. | |
| • Are you using a “Memory Stick-ROM”? | →It is not possible to delete an image from or format a “Memory Stick-ROM”. | |
| • Is this image protected? | →Check the image information from the single view mode. (→page 21)→An image with a mark is set to “Read Only”. You cannot delete it on the photo frame. | |
| An image was deleted accidentally. | — | →An image cannot be recovered once it is deleted. |
Photo frame
| Symptom Check | item Cause/Solutions | |
| Nothing happens even if you operate the photo frame. | — | →Turn off and then turn on the power.(→page 12) |
Remote control
| Symptom Check | item Cause/Solutions | |
| Nothing happens even if you operate the remote control. | • Is the battery inserted in the remote control properly? | →Replace the battery. (→page 9)→Insert a battery. (→page 9)→Insert a battery in the proper orientation. (→page 9) |
| — | →Point the top end of the remote control towards the remote sensor on the photo frame. (→page 9)→Remove any obstruction between the remote control and the remote sensor. | |
| • Is there a protective sheet inserted? | →Remove the protective sheet. (→page 9) |
About memory cards
"Memory Stick"
Types of “Memory Stick” that the photo frame can use
With the photo frame, you can use the following types of “Memory Stick”*1:
| Type of “Memory Stick” | Displaying De | Leiting/ Saving |
| “Memory Stick”*2(Not compatible with “MagicGate”) | OK OK | |
| “Memory Stick”*2(Compatible with “MagicGate”) | OK*5 | OK*5 |
| “MagicGate Memory Stick”*2 | OK*5 | OK*5 |
| “Memory Stick PRO”*2 | OK*5 | OK*5 |
| “Memory Stick PRO-HG”*2 | OK*5*6 | OK*5*6 |
| “Memory Stick Micro”*3 (“M2”*4) | OK*5 | OK*5 |
*1 The photo frame supports FAT32. The photo frame has been demonstrated as operable with a “Memory Stick” with a capacity of 32 GB or less manufactured by Sony Corporation. However, we do not guarantee the operations of all the “Memory Stick” media. *2 The photo frame is equipped with a slot compatible with both standard-size and Duo-size media. Without a “Memory Stick Duo” adaptor, you can use both a standard-size “Memory Stick” and the compact-size “Memory Stick Duo”. *3 When using a “Memory Stick Micro” with the photo frame, always insert it into an M2 adaptor. *4 “M2” is an abbreviation for “Memory Stick Micro”. In this section, “M2” is used to describe a “Memory Stick Micro”. *5 Data reading/recording that requires “MagicGate” copyright protection cannot be performed. “MagicGate” is the general name of a copyright
protection technology developed by Sony using authentication and encryption.
*6 The photo frame does not support 8 bit parallel data transfer.
Notes on use
- For the latest information on the “Memory Stick” types that the photo frame supports, see the “Memory Stick” compatibility information on the Sony web site: http://www.memorystick.com/en/support/support.html (Select the area where you use your photo frame, and then select “Digital Photo Frame” from each area page.)
- Do not insert more than one “Memory Stick” at the same time, or this may cause trouble with the photo frame.
- If you use a “Memory Stick Micro” with the photo frame, the “Memory Stick Micro” needs to be inserted into an “M2” adaptor.
- If you insert a “Memory Stick Micro” into the photo frame without an “M2” adaptor, you may be unable to remove the “Memory Stick Micro”.
- If you insert a “Memory Stick Micro” into an “M2” adaptor, and insert the “M2” adaptor into a “Memory Stick Duo” adaptor, the photo frame may not operate properly.
- When you initialize a “Memory Stick”, use the initialization function of your digital camera. If you initialize it with your computer, images may not be displayed properly.
- When you perform initialization, all the protected images are erased. To avoid erasing important data by accident, make sure to check the contents of the “Memory Stick” before initialization.
- You cannot record, edit, or delete data if you slide the write-protect switch to LOCK.
- Do not attach any other material than the supplied label on the labelling position. When you attach the supplied label, be sure to attach it to the labelling position. Be careful that the label does not stick out.
SD memory card
The SD memory card slot of the photo frame allows you to use the following:
- SD memory card *1
- miniSD card, microSD card (An adaptor is necessary.) *2
- SDHC memory card *3
- miniSDHC card, microSDHC card (An adaptor is necessary.) *2
- MMC standard memory card *4
We do not guarantee proper operations for all types of SD memory cards and MMC standard memory cards.
*1 The photo frame has been demonstrated as operable with an SD memory card with a capacity of 2 GB or smaller. *2 Some commercially available card adaptors have projected terminals on the back. This type of adaptor may not work properly with the photo frame. *3 The photo frame has been demonstrated as operable with an SDHC memory card with a capacity of 32 GB or less. *4 The photo frame has been demonstrated as operable with an MMC standard memory card with a capacity of 2 GB or less.
Notes on use
Data reading/recording that requires copyright protection cannot be performed.
xD-Picture Card
With the xD-Picture Card slot of the photo frame, you can use an xD-Picture Card *5. Not all the memory card operations are supported and we do not guarantee proper operations for all types of xD-Picture Card.
*5 The photo frame has been demonstrated as operable with an xD-Picture Card with a capacity of 2 GB or less.
Notes on using a memory card
- When using a card, make sure to check the correct insertion direction of the card and the correct insertion slot.
- When inserting the memory card, it will only insert part of the way, so do not try to force it, as this could damage the memory card and/or photo frame.
- Do not remove a card or turn off the photo frame while the photo frame is reading or writing data, or the access indicator is flashing. Otherwise, data may be rendered unreadable or be erased.
- We recommend that you save a backup of important data.
- Data processed with the computer may not be displayed with the photo frame.
- When you carry or store a card, put it in the case supplied with it.
- Do not touch the terminal of a card with your hand or a metal object.
- Do not strike, bend or drop a card.
- Do not disassemble or modify a card.
- Do not expose a card to water.
- Do not use or store a card under the following conditions:
- Locations beyond the required operational conditions including locations such as the hot interior of a car parked in the sun and/or in the summer, the outdoors exposed to direct sunlight, or a place near a heater.
- Humid locations or locations with corrosive substances present - Locations subject to static electricity or electrical noise
Index
A
Access lamp 7, 14
Associated file 21
Auto Power ON/OFF 32, 35
C
Changing the settings 34
Clock and calendar display 18
Connecting
Computer 37
D
Date/time settings 13, 35
Deleting an image 28
E
Enlarge and reducing an image size 31
Error messages 39
Exchanging a panel 11
Exporting an image 26
F
Factory default settings 34, 35
Features 5
Format internal memory 28, 36
G
General Settings 35
Image import size 35
Importing to the internal memory 24
Index image display 20
Information display 21
Initialize 36
Initialize settings 36
Inserting a memory card 14
L
Language setting 36
Listing Order 35
M
Marking 29
Memory card slot 14
Memory cards 45
"Memory Stick" 45
Notes on use 46
SD memory card 46
xD-Picture Card 46
P
Placing to portrait or landscape orientation 10
Playback device 26
Power on/off 12
R
Remote control 9
Removing a memory card 15
Replacing the battery of the remote control 9
Rotating an image 32
Rotating an image 32
S
Setting the stand 10
Single view mode 19
Slideshow display 17
Slideshow Settings 23
Color effect 23
Display Mode 23
Effect 23
Interval 23
Shuffle 23
Sorting images 30
System Information 36
System requirements
Macintosh 37
Windows 37
T
Troubleshooting 41
U
USB B connector 37
W
Write-protect switch 45


- TABLE OF CONTENTS
- BEFORE OPERATION
- BASIC OPERATIONS
- ADVANCED OPERATIONS
- USING WITH A COMPUTER
- ERROR MESSAGES
- TROUBLESHOOTING
- ADDITIONAL INFORMATION
- ON THE ILLUSTRATIONS AND SCREEN SHOTS USED IN THIS MANUAL
- ENJOYING YOUR PHOTO FRAME IN VARIOUS WAYS
- FEATURES
- SUPPORT FOR VARIOUS MEMORY CARDS
- VARIOUS DISPLAY FUNCTIONS
- VARIOUS SLIDESHOW STYLES
- IMPORTING IMAGES TO INTERNAL MEMORY
- EXPORTING IMAGES
- SORTING FUNCTION
- AUTOMATIC ROTATION OF IMAGES
- DISPLAYING IMAGES ON A WALL
- IDENTIFYING THE PARTS
- DIGITAL PHOTO FRAME
- REMOTE CONTROL
- ABOUT DESCRIPTIONS IN THIS MANUAL
- PREPARING THE REMOTE CONTROL
- USING THE REMOTE CONTROL
- NOTE
- REPLACING THE BATTERY OF THE REMOTE CONTROL
- NOTES
- SETTING THE STAND
- SETTING TO PORTRAIT OR LANDSCAPE ORIENTATION
- TIP
- TO EXCHANGE A PANEL (DPF-E75 ONLY)
- TURNING THE PHOTO FRAME ON
- TURNING ON THE POWER
- TURNING OFF THE POWER
- OPERATIONS IN AN INITIAL STATE
- SETTING THE CURRENT TIME
- INSERTING A MEMORY CARD
- WHEN YOU INSERT A MEMORY CARD
- TO CHANGE THE PLAYBACK DEVICE
- TO REMOVE A MEMORY CARD
- CHANGING THE DISPLAY
- PRESS THE BUTTON CORRESPONDING TO VIEW MODE YOU WANT TO SELECT
- SINGLE
- TIPS
- SELECT A STYLE WITH ⇔/⇔/⇔/⇔ AND PRESS ⇔
- SLIDESHOW DISPLAY
- CLOCK AND CALENDAR DISPLAY
- SINGLE VIEW MODE (SINGLE IMAGE DISPLAY)
- INDEX IMAGE DISPLAY
- ABOUT THE INFORMATION DISPLAYED ON THE LCD SCREEN
- ENJOYING A SLIDESHOW
- PRESS (SLIDE-SHOW)
- PRESS ◀/→/↓/↑ TO SELECT THE STYLE YOU WANT, AND THEN PRESS →
- CHANGING THE SETTINGS OF THE SLIDESHOW
- IMPORTING IMAGES FROM A MEMORY CARD TO THE INTERNAL MEMORY
- ABOUT IMAGE SORTING IN THE IMAGE LIST
- PRESS MENU
- SPECIFYING THE PLAYBACK DEVICE
- PRESS SELECT DEVICE
- PRESS ↓/↑ TO SELECT THE DEVICE YOU WANT TO DISPLAY AND THEN PRESS -♦ THE IMAGES OF THE SELECTED DEVICE ARE DISPLAYED
- EXPORTING AN IMAGE FROM THE INTERNAL MEMORY TO A MEMORY CARD
- PRESS THE DOWN/UP ARROW KEYS TO SELECT [EXPORT THIS IMAGE], [EXPORT MULTIPLE IMAGES], OR [EXPORT ALL IMAGES] AND THEN PRESS THE OK BUTTON
- DELETING AN IMAGE
- TO FORMAT THE INTERNAL MEMORY
- REGISTERING A MARK
- TO DELETE THE REGISTRATION OF A MARK
- SORTING IMAGES (FILTERING)
- TO CANCEL THE SORT
- TO CHANGE THE SORT STYLE
- ADJUSTING IMAGE SIZE AND ORIENTATION
- ENLARGING/REDUCING AN IMAGE
- TO SAVE AN ENLARGED OR A REDUCED IMAGE (CROP AND SAVE)
- ROTATING AN IMAGE
- OPERATE FROM THE MENU OF THE PHOTO FRAME
- CHANGING THE SETTINGS OF THE AUTO POWER ON/OFF FUNCTION
- [SIMPLE]
- [ADVANCED]
- CHANGING THE SETTINGS
- SETTING PROCEDURE
- TO RESET TO FACTORY DEFAULT SETTINGS
- ITEMS TO SET
- CONNECTING TO A COMPUTER
- SYSTEM REQUIREMENTS
- WINDOWS
- MACINTOSH
- CONNECTING TO A COMPUTER TO EXCHANGE IMAGES
- DISCONNECTING YOUR COMPUTER
- IF AN ERROR MESSAGE APPEARS
- IF TROUBLE OCCURS
- DISPLAYING IMAGES
- PHOTO FRAME
- ABOUT MEMORY CARDS
- MEMORY STICK
- TYPES OF “MEMORY STICK” THAT THE PHOTO FRAME CAN USE
- NOTES ON USE
- SD MEMORY CARD
- XD-PICTURE CARD
- NOTES ON USING A MEMORY CARD
- INDEX
- A
- C
- D
- E
- F
- G
- L
- M
- P
- S
- T
- U
- W
Brand : SONY
Model : DPF-D95
Category : Digital photo frame