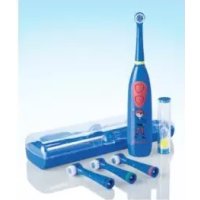
DAZ 2.4 B2 - Toothbrush DENTALUX - Free user manual and instructions
Find the device manual for free DAZ 2.4 B2 DENTALUX in PDF.


User questions about DAZ 2.4 B2 DENTALUX
0 question about this device. Answer the ones you know or ask your own.
Ask a new question about this device
Download the instructions for your Toothbrush in PDF format for free! Find your manual DAZ 2.4 B2 - DENTALUX and take your electronic device back in hand. On this page are published all the documents necessary for the use of your device. DAZ 2.4 B2 by DENTALUX.
USER MANUAL DAZ 2.4 B2 DENTALUX
natural_image
Exterior view of a dental plusor with a toothbrush and control panel (no visible text or symbols on the bottle itself)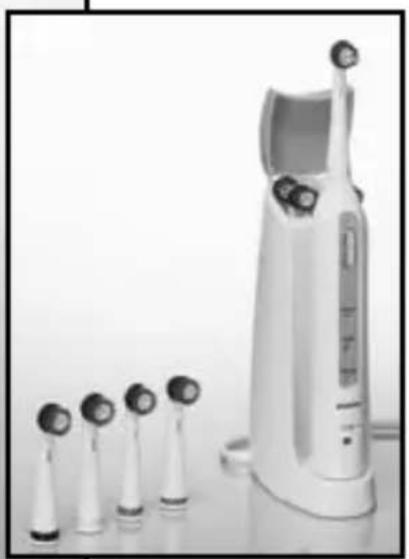
natural_image
Electric toothbrush with multiple charging stations arranged in a row (no visible text or labels)
text_image
www.lidl-service.com PDF onlineOperating instructions
text_image
iDE AT CH
Before reading, unfold the page containing the illustrations and familiarise yourself with all functions of the device.
natural_image
Illustration of a toothbrush touching a tooth with a tooth inserted, showing no text or symbols.natural_image
Diagram of a medical or surgical tool interacting with a curved anatomical structure (no text or symbols present)KOMPERNASS HANDELS GMBH
BURGSTRASSE 21
44867 BOCHUM
GERMANY
www.kompernass.com
Bestellkarte
DAZ 2.4 B2
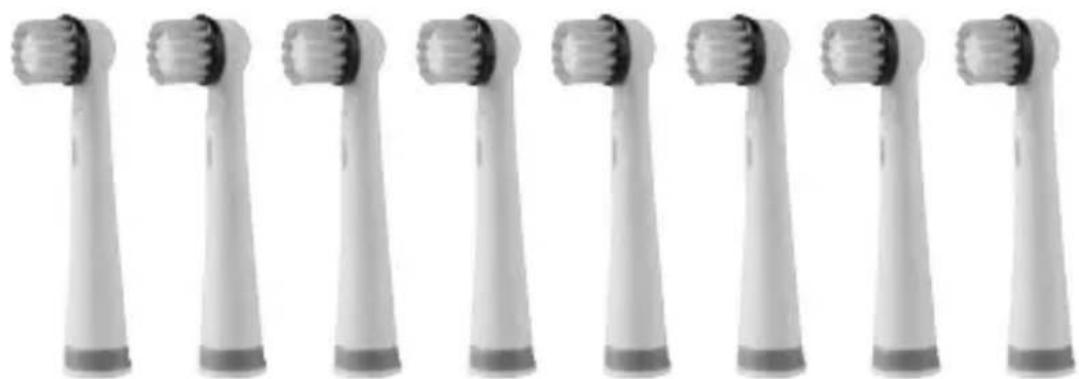
natural_image
Row of eight identical toothbrushes with black filter caps, arranged in a row (no text or symbols visible)natural_image
Row of eight identical toothbrushes with black caps, arranged in two rows (no text or symbols visible)natural_image
Row of eight identical toothbrushes with black filter caps, arranged in a row (no text or symbols visible)(laadstation): IP X7
natural_image
Illustration of a toothbrush touching a tooth with a tooth removed, showing no text or symbolsnatural_image
Illustration of a medical procedure showing a tool interacting with a curved anatomical structure (no text or symbols present)KOMPERNASS HANDELS GMBH
BURGSTRASSE 21
44867 BOCHUM, GERMANY
www.kompernass.com
Bestelkaart
DAZ 2.4 B2
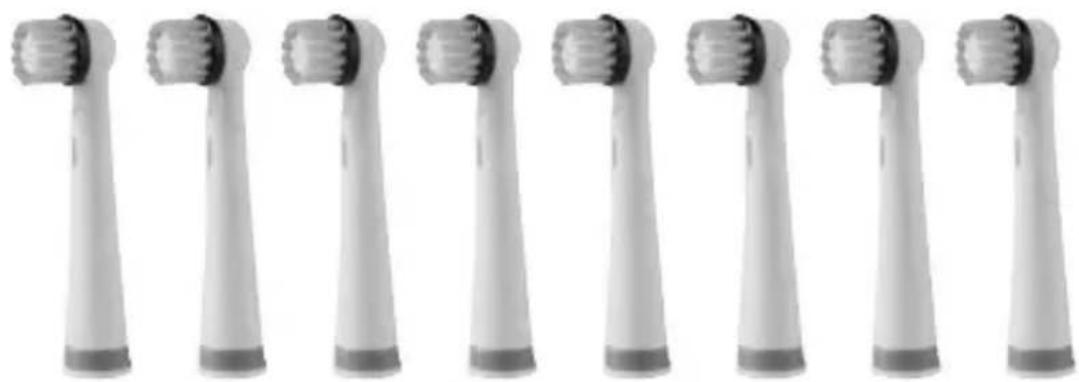
natural_image
Row of eight identical toothbrushes with black caps, arranged in a row (no text or symbols visible)SWIFT (BIC): PBNKDEFF 440
| Index | Page |
| Introduction | 42 |
| Intended use 42 | |
| Items supplied 42 | |
| Appliance description 43 | |
| Technical data 43 | |
| Safety Notices 44 | |
| Set-up / Wall holder 46 | |
| First use 46 | |
| Fitting / removing brush heads 47 | |
| Operation | 48 |
| Brushing one's teeth 48 | |
| Cleaning and care 51 | |
| Travelling case 52 | |
| Disposal | 52 |
| Warranty and Service 54 | |
| Importer | 54 |
Read these operating instructions carefully before using the appliance for the first time and preserve this booklet for later reference. Pass this booklet on to whoever might acquire the appliance at a future date.
Introduction
Congratulations on the purchase of your new appliance.
You have clearly decided in favour of a quality product. These operating instructions are a part of this product. They contain important information in regard to safety, use and disposal.
Before using the product, familiarise yourself with all of these operating and safety instructions. Use the product only as described and only for the specified areas of application. In addition, pass these documents on, together with the product, to any future owner.
Intended use
This appliance is intended for personal dental care in domestic situations. The appliance is not intended for use in commercial, industrial or medical environments. It is not suitable for animal care.
Items supplied
Before using the appliance for the first time, check to ensure that the following items are available and undamaged.
Hand element
8 Brush heads
Charging station
Travelling case
2 Screws
2 Plugs
Operating instructions
Remove all packaging materials and foils from the appliance.
Appliance description
① Brush head
② Brush holder
③ Charging station
4 Wall holder
⑤ Charge indicator
6 Pulse LED (yellow)
⑦ Soft LED (green)
8 Clean LED (orange)
⑨ On/Off switch
10 Travelling case
Technical data
Power supply: 100 - 240 V \~, 50 - 60 Hz
Power consumption : 2 W
Protectionrating
(Charging station): IP X7
Protection class: II /
Charging time: approx. 14 - 16 hours
(fi rst
Protection type
(Hand element): IP X4
Safety Notices
- Toothbrushes may be used by children and persons with reduced physical, sensory or mental capabilities or lack of experience and / or knowledge, provided that they are being supervised or have been instructed how to use the appliance safely and have understood the potential risks.
Risk of electric shock!
- Ensure that the power cable can never become wet or damp during operation.
Route the power cable in such a way that it cannot become trapped or damaged in any other way. Risk of electric shock! - In the event of malfunctions or obvious damage, please contact our Customer Service department
- The mains cable of this appliance cannot be replaced. If the cable is damaged, the whole appliance must be disposed of.
- Never touch the charging station if it has fallen into water. Remove the plug from the wall socket first! Risk of electric shock!

Risk of injury!
- Cleaning and user maintenance should not be performed by children unless they are under supervision.
• Children must not play with the appliance.

Attention! Damage to property!
- To avoid damage to the appliance, do not allow it to become penetrated by liquids and do not submerge it in water.
- Avoid penetration by foreign objects.
- The electric toothbrush may only be recharged with the supplied charging station. The appliance could otherwise be irreparably damaged!
- Do not submerge the handle or the charging station in water or other liquids. This will cause irreparable damage to the appliance!
- The appliance must not come into contact with hot surfaces.
Set-up / Wall holder
The charging station ③ may only be operated free-standing in dry rooms.
In moist rooms, especially in the vicinity of water (bath), the charging station ③ must be firmly fixed to the wall, to protect it from falling into water.
- Pull the wall holder ④ downwards from underneath the charging station ③.
- Using the screw openings of the wall holder ④, mark the spacing for the boreholes on the wall. Check to ensure that there is a mains power socket in close vicinity.
- Before boring the holes, check to ensure that there are no electrical or water conduits behind the markings.
- Using a 5 mm drill, drill the marked holes and insert the supplied wall plugs.
- Secure the wall holder ④ using the screws.
- When you have attached the wall holder ④, guide the power cable through the right or left recess in the wall holder ④ (see magnifi cation on the fold-out side). Using the guide rails, slide the charging station ③ onto the wall holder ④.
- Ensure that the power cable is not trapped and that it lies properly in the recesses.
First use
Before taking the appliance into use check to ensure that it is in a fault-free condition. If it is not, it may not be used.
- Insert the power plug into a wall socket.
- Before the first use, clean the new brush heads ① with clear water.
-
Place a replacement brush head on the brush holder ②, open the cover of the charging station ③ and slide the brush holder ② in.
-
Place the hand element on the charging station ③ so that it slides onto the spike in the base.
- Allow the hand element to charge up for approx. 14 - 16 hours before using it for the first time. The charging indicator ⑤ on the front of the hand appliance glows red during the charging process.
- Use the hand element repeatedly, and without charging the battery, until the performance is noticeably weaker or the toothbrush stops working and the charge indicator ⑤ blinks red. First then recharge the battery for 14 - 16 hours. When the appliance is fully charged, the charge indicator ⑤ glows green.
- Charge and discharge the toothbrush completely 3 times. The battery will have then reached its full capacity.
- You can now leave the hand element in the charging station ③ after every use, so as to always have full power available.
For care of the batteries, we recommend the following:
When the hand element is fully charged, remove the plug of the charging station ③ from the mains power socket. First reinsert the plug into the mains power socket and recharge the hand element when the movement of the toothbrush is noticeably weaker or the charge indicator ⑤ blinks.
Fitting / removing brush heads
To remove the brush head ①, turn it clockwise and then pull it upwards.
To fit the brush head ① place it slightly offset on the hand element and then turn it anti-clockwise.
The brush head ① must engage on being put back on. To avoid damage to the appliance, use only original brush heads.
(For replacement brush heads, see the order card)
Operation
This toothbrush has 3 different performing levels:
- "Clean": normal speed level, orange Clean LED ⑧: For cleaning the teeth.
- "Soft": slow speed level, green Soft LED ⑦: For cleaning the teeth of people with sensitive gums.
-
"Pulse": variable speed levels, yellow Pulse LED ⑥: For massaging the gums.
-
Press the on/off switch ⑨ once to switch the level "Clean" on. The Clean LED ⑧ glows.
- Press once more to switch to the level "Soft". The Soft LED ⑦ glows.
- Press it a third time to switch to the level "Pulse". The Pulse LED ⑥ glows.
- To switch the toothbrush off, press once more on the on/off switch ⑨.
Brushing one's teeth

Warning:
Due to the unaccustomed operation some gum bleeding may initially occur, this is normal. Should this continue for more than two weeks, consult your dentist.
- Place the brush head ① on the hand element.
- Moisten the brush under flowing water.
- Apply some toothpaste to the moistened brush.
Notice
Wait until the appliance is in the mouth before switching it on, to avoid spray.
- With the on/off switch ⑨ select the desired operating level.
Notice
This toothbrush has a 30 second interval timer, so that all four jaw quadrants can be cleaned equally.
- Divide your jaw into four sections (quadrants): upper left, upper right, lower left and lower right.
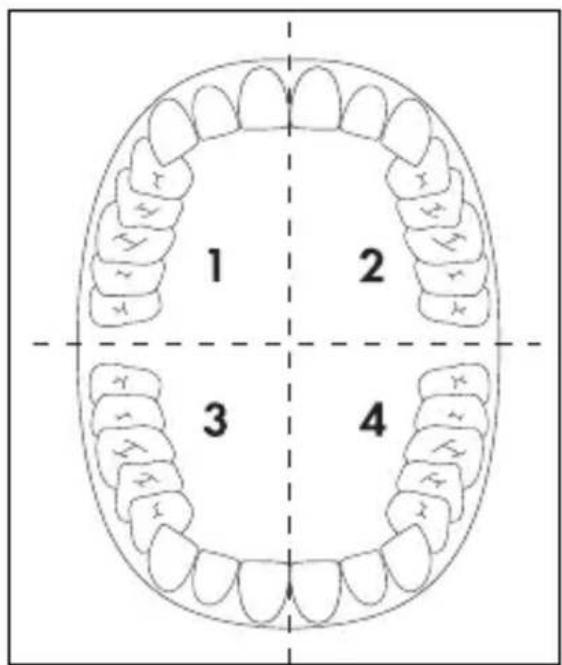
text_image
1 2 3 4- Begin in one quadrant:
Place the brush head ① on your gums and move the brush upwards / downwards from the gums to over the crown of the tooth.
Proceed in this manner on both the inside and the outside surfaces of the tooth. Start again from the gums for each individual tooth.
Do not forget the back surfaces of the rear molars.
To clean the chewing surfaces, direct the rotating brush head with light pressure over the chewing surfaces.
- After 30 seconds the toothbrush interrupts its operation briefly twice, to signalise to you that you should start to clean the next quadrant. Clean all jaw quadrants with the same technique.
- After two minutes the toothbrush stops its operation briefly 4 times. This informs you that you have complied with the dental recommendation of two minutes cleaning.
- Press the on/off switch ⑨ repeatedly until the toothbrush stops.
- First take the toothbrush out of your mouth when it has stopped.
- After use, clean the brush head ① thoroughly under running water.
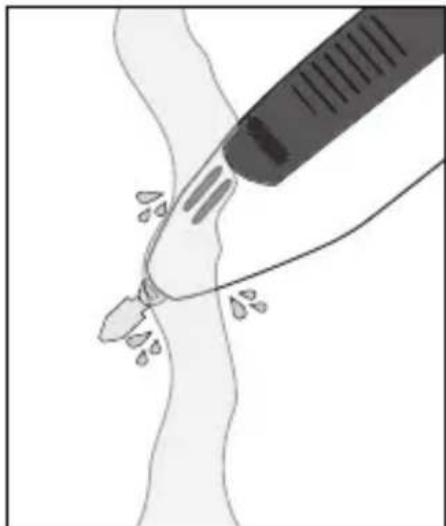
- Remove the brush head ① from the hand element. Clean the drive shaft on the hand element, into which the brush head is inserted, under running water. Hold the hand element so that the water from the top can drip out of the rear outlet openings.
- Afterwards, clean the rear outlet openings: Let the water run over the handle from the rear, so that the outlet openings are free of contamination.
Notice
Regularly massage your gums. This promotes blood circulation and thus the health preservation of the gums. Set the level at "Pulse" and guide the moistened brush over your gums with a light pressure.

Warning:
First remove the plug from the mains power socket before cleaning the charging station ③. There is a risk of receiving an electric shock!
- NEVER open the housing of the charging station ③ or the toothbrush (Exception: removal of rechargeable battery for disposal)! They cannot be resealed in a water-tight manner.
- Clean the charging station ③ only with a soft, lightly moistened cloth. Do not use detergents or solvents. They can damage the plastic surfaces.
- Remove the brush head ① from the hand element. After use, clean the brush heads ① thoroughly under running water. We recommend cleaning the brush heads ① in a standard commercial cleaning fluid for dental prosthetics every 2 - 4 weeks. After about 3 months, at the latest however when the bristles bend outwards, you should fit a new brush head ①.
- Clean the drive shaft on the hand element, into which the brush head is inserted, under running water. Hold the hand element so that the water from the top can drip out of the rear outlet openings:
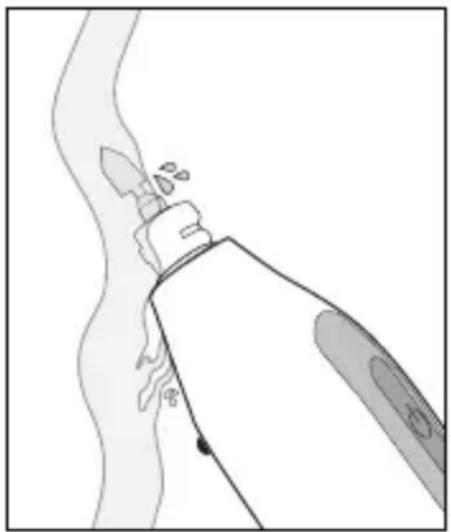
natural_image
Illustration of a toothbrush touching a tooth with visible teeth and surrounding surface (no text or symbols)- Afterwards, clean the rear outlet openings: Let the water run over the handle from the rear, so that the outlet openings are free of contamination:
natural_image
Illustration of a medical or surgical tool interacting with a curved anatomical structure (no text or symbols present)- The brush holder ② can be cleaned without problem with water and a little liquid soap. To do this, simply pull the brush holder ② upwards out of the charging station ③.
Travelling case
Should you wish to take the toothbrush with you on a tour, you can pack both the hand element and two brush heads ① in the travelling case ⑩.
Disposal
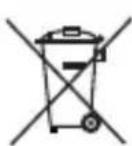
Do not dispose of the appliance in your normal domestic waste. This product is subject to the provisions of European Directive 2012/19/EU.
Dispose of the appliance through a registered specialist disposal firm or through your community waste disposal department. Observe the currently applicable regulations. In case of doubt, contact your local waste disposal facility.
Disposal of batteries / accumulators
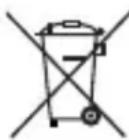
Used batteries / rechargeable batteries may not be disposed of in household waste. Every consumer is statutorily obliged to dispose of batteries at a collection site of his community / city district or at a retail store. The purpose of this obligation is to ensure that batteries are disposed of in a non-polluting manner. Only dispose of batteries / cells when they are fully discharged.

Attention! Damage to property!
If you remove the rechargeable battery from the appliance, the appliance is defective and you will no longer be able to use it!
To remove the rechargeable battery from the handle, proceed as follows:
- Undo the screw on the bottom section of the handle.
- Prise off the cover using a fl at-head screwdriver, for example.
- Remove the coil.
- Push in the two catches that hold the motor block to the housing. This can also be done using a fl at-head screw-driver.
- Pull the motor block out of the housing using a pair of pliers.
- Bend the plastic tab away from the rechargeable battery.
- Prise out the rechargeable battery using the fl at-head screwdriver.
You can now dispose of the rechargeable battery separately.

Dispose of the packaging materials in an environmentally responsible manner.
Warranty and Service
The warranty for this appliance is for 3 years from the date of purchase. The appliance has been manufactured with care and meticulously examined before delivery.
Please retain your receipt as proof of purchase. In the event of a warranty claim, please make contact by telephone with our Service Department. Only in this way can a post-free despatch for your goods be assured. The warranty covers only claims for material and manufacturing defects, but not for transport damage, for wearing parts or for damage to fragile components, e.g. buttons or batteries. This product is for private use only and is not intended for commercial use. The warranty is void in the case of abusive and improper handling, use of force and internal tampering not carried out by our authorized service branch. Your statutory rights are not restricted in any way by this warranty.
The warranty period will not be extended by repairs made under warranty. This applies also to replaced and repaired parts. Any damage and defects extant on purchase must be reported immediately after unpacking the appliance, at the latest, two days after the purchase date. Repairs made after the expiration of the warranty period are subject to payment.

Service Great Britain
Tel.: 0871 5000 720 (£ 0.10/Min.)
E-Mail: kompernass@lidl.co.uk
IAN 42776
Hotline availability:
Monday to Friday 08:00 - 20:00 (CET)
Importer
KOMPERNASS HANDELS GMBH
BURGSTRASSE 21
44867 BOCHUM, GERMANY
www.kompernass.com
KOMPERNASS HANDELS GMBH
BURGSTRASSE 21
44867 BOCHUM
DEUTSCHLAND / GERMANY
www.kompernass.com
Stand der Informationen · Stand van de informatie
Last Information Update:
10 / 2013 · Ident.-No.: DAZ2.4B2-092013-2