005-061 - Sausage Stuffer Menuett - Free user manual and instructions
Find the device manual for free 005-061 Menuett in PDF.


| Product Type | Vacuum Sealer |
| Brand | Menuett |
| Model | 005-061 |
| Dimensions (W x H x D) | 394 x 87 x 164 mm |
| Weight | Approx. 2 kg |
| Rated Voltage | 230 V ~ 50 Hz |
| Power Output | 150 W |
| Working Width | 300 mm |
| Noise Level | 70 dB |
| Cord Length | 0.9 m |
| Safety Class | II |
| Control Panel | Digital touch screen with Dry, Moist, Seal Only, Pulse, Canister buttons |
| Vacuum Modes | Dry and Moist food vacuum settings |
| Sealing Only Mode | Yes, for custom bags |
| Pulse Mode | Yes, for soft foods |
| Canister Port | Yes, for vacuum canisters (sold separately) |
| Bag Cutter | Integrated on back for straight cuts |
| Overheat Protection | Automatic shut-off; cool 25 minutes |
| Maintenance | Wipe with damp cloth; dry vacuum chamber; no abrasives |
| Suitable For | Sous-vide cooking, food preservation |
| Accessories | Canisters and hoses sold separately |
Frequently Asked Questions - 005-061 Menuett
User questions about 005-061 Menuett
0 question about this device. Answer the ones you know or ask your own.
Ask a new question about this device
Download the instructions for your Sausage Stuffer in PDF format for free! Find your manual 005-061 - Menuett and take your electronic device back in hand. On this page are published all the documents necessary for the use of your device. 005-061 by Menuett.
USER MANUAL 005-061 Menuett
natural_image
Exterior view of a black and silver portable printer (no visible text or symbols)
SE VAKUUMFÖRPACKARE
Operating instructions (Translation of the original instructions) Important! Read the user instructions carefully before use. Save them for future reference.
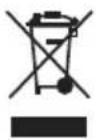
Värna om miljön!
Care for the environment!
Must not be discarded with household waste! This product contains electrical or electronic components that should be recycled. Leave the product for recycling at the designated station e.g. the local authority's recycling station.
Jula reserves the right to make changes. In the event of problems, please contact our customer service.
www.jula.com
Tillverkare/ Produsent/ Producenci/ Manufacturer
Jula AB, Box 363, 532 24 SKARA
Distributör/ Distributør/ Dystrybutor/ Distributor
Jula Poland Sp. z o.o., ul.
natural_image
3D rendering of a printer with paper being inserted (no visible text or symbols)4

flowchart
graph LR
    A["Dry"] --> B["Moist"]
    B --> C["Seal Only"]
    C --> D["Pulse"]
    D --> E["Canister"]
    E --> F["User icon"]
SÄKERHETSANVISNINGAR
This appliance can be used by children from 8 years and upwards and by persons with physical, sensorial or mental disabilities, or persons who lack experience or knowledge, if they are supervised or receive instructions concerning the safe use of the appliance and understand the risks involved with its use. Do not allow children to play with the appliance. Do not allow children to clean or maintain the appliance without supervision.
- Do not use the vacuum sealer if the power cord or plug are damaged.
- Do not put or use the vacuum sealer on a wet surface or near sources of heat.
- Only use the vacuum sealer on a level and stable surface.
- Do not immerse the vacuum sealer, the power cord or plug, in water or any other liquid – risk of electric shock.
- Do not pull the power cord to unplug the plug. Pull out the plug before cleaning – risk of electric shock.
• and when the vacuum sealer is not in use. - Pull out the plug before cleaning. Do not immerse the vacuum sealer in water or any other liquid.
- Do not dismantle the vacuum sealer, or attempt to modify or repair it.
-
Servicing must only carried out by an authorised service centre or qualified personnel.
-
The vacuum sealer has a short power cord to prevent it fastening, or someone tripping over it. Do not use an extension cord unless absolutely necessary. The cross section of the extension cord must be dimensioned for the power supply to the vacuum sealer. An extension cord should be placed so that it does not hang over the edge of a table or worktop, and so that there is no risk of tripping over it.
• Vacuum packaging is not a substitute for refrigerated/frozen storage. Delicate foods must be refrigerated or frozen after vacuum packaging.
• Vacuum pack fresh food to extend the shelf life. Vacuum packaging cannot prevent decomposition, it only slows it down.
• Vacuum packaging does not prevent mould growth. - Disease-causing microorganisms can also grow in oxygen-poor environments and may require other measures to be eliminated.
- Never vacuum pack soft cheeses – risk of growth of anaerobic bacteria.
- Never vacuum pack fresh mushrooms, onions or garlic – risk of growth of anaerobic bacteria.
• Always puncture the vacuum bag before heating in a microwave, otherwise the bag may burst.
SYMBOLS
 | Safety class II. |
 | Approved as per applicable directives. |
| Recycle discarded product in accordance with local regulations. | |
 | Read the instructions. |
TECHNICAL DATA
| Rated voltage 230 V | ~ 50 Hz |
| Output | 150 W |
| Safety class II | |
| Working width 300 mm | |
| Noise level 70 dB | |
| Cord length 0.9 m | |
| Dimensions W394 x H87 x D164 mm | |
DESCRIPTION
PARTS
FIG. 1
- Touch button "Dry"
- Touch button "Moist"
- Touch buttons "Seal Only" and "Cancel"
- Touch button "Pulse"
- Touch button "Canister / Lock/Unlock"
- Port for vacuum pumping of canisters
- Bag cutter
- Lock buttons
FIG. 2
- Rubber sealing strip
- Top seal
- Bottom seal
- Vacuum chamber
- Sealing strip with heater
USE
FEATURES
• Digital control panel (touch screen).
- Pulse button, ideal for packaging soft food.
- Different vacuum processes for dry and moist food.
- Can be used with vacuum canisters.
- Unique bag cutter.
• Max sealing width 30 cm.
- For sous-vide cooking.
USE
- Wait at least 25 minutes after sealing 20 bags one after the other before using the vacuum sealer again.
- Leave the lid on the vacuum sealer unlocked when the appliance is not is use.
- The vacuum sealer is only intended for domestic use.
FOOD SAFETY
TIPS
Cooking, thawing and heating
Allow the food to simmer in water in the vacuum bag (max 75°C), it preserves the flavours and helps with the washing-up.
NOTE:
Thaw perishable foods in the refrigerator or microwave, not at room temperature.
Meat and fish
- Put meat and fish be in the freezer for 1-2 hours before vacuum packaging. This helps to maintain the juices and shape,
and makes sealing easier.
- If you do not have the possibility to freeze foods, place a piece of paper towel between the food and the opening, below the sealing area. The paper towel remains in the bag to absorb moisture during packaging.
Cheese
Vacuum pack cheese after each meal. Use a bag that is longer than necessary, so you can reseal it several times.
Vegetables
Parboil vegetables before vacuum packing. This interrupts the enzyme processes that can degrade the flavour, colour and texture. Place the vegetables in boiling water or in a microwave and cook until they are well cooked, but not soft. Examples of parboiling times:
- Leafy greens and peas: 1–2 minutes.
- French beans, sliced squash and broccoli: 3–4 minutes.
- Carrots: 5 minutes.
- Corn on the cob: 7–11 minutes.
Rinse the vegetables with cold water after parboiling, to stop the process.
NOTE:
Vegetables produce gas during storage and should therefore be stored frozen after parboiling.
Put the parboiled vegetables in the freezer for 1-2 hours and then separate them into suitable portions. Vacuum pack the vegetables in portions and put them in the freezer again.
Powder
Powdered foods such as flour should be vacuum packed by placing the entire package in a vacuum bag. Otherwise, the powder can be drawn up into the vacuum sealer and cause damage.
Liquid
Soups and other liquid foods must be frozen solid in a suitable container prior to vacuum packing. Take out the frozen liquid from the container and vacuum pack in a suitable vacuum bag. The frozen food can be stacked in the freezer. When cooking, cut off one corner of the bag and heat in a microwave or let the entire vacuum bag simmer in water at no more than 75^ C.
CUTTING BAGS
The bag cutter is on the back of the vacuum sealers and is used to easily cut bags straight and uniformly. Skew, curved and torn edges can prevent vacuum bags from sealing properly.
- Open the bag cutter by pressing the black handles on each side of the cutting edge, on the back of the vacuum sealer.
- Place the bag between the cutting edge and the base of the vacuum sealer. Press down the cutting edge so that it locks with a click.
- Move the blade along the cutting edge to the other side.
- Pull out the bag.
Suitable sizes of bags
- Roll out an suitable length for the food to be packaged + 5 cm. Cut the bag to the required length with the bag cutter. Make sure to cut straight. Plug in the plug.
- Open the lid. Place one end of the bag on the sealing strip. It does not matter if the material comes on the seal.
FIG. 3
- Close the lid on the vacuum sealer by pressing both sides. Check that the lid is properly closed and will not open. The lid is properly closed when both sides lock with a click.
NOTE:
The sealing process will not work properly if the lid is not closed. Make sure to close the lid properly on both sides by pressing the lock buttons.
- Press the Seal Only button to seal the bag. The status lamp goes on during the sealing process.
- The status lamp goes off when the sealing is complete.
- Press the lock buttons on the sides of the vacuum sealer to release the lid and remove the bag.
- The bag is now ready for the vacuum packing.
WARNING!
Make sure to give the vacuum sealer time to cool. Wait at least 20 seconds between seals. The vacuum sealer has overheating protection, which automatically switches it off if it overheats. If the overheating protection trips, allow the vacuum sealer to cool for 25 minutes.
VACUUM SEALING OF BAGS
- Place the food to be vacuum packed in a vacuum bag. Leave at least 5 cm between the contents and the edge of the bag.
- Open the lid and place the bag opening downwards in the vacuum chamber.
- Close the lid on the vacuum sealer by pressing the lock buttons on both sides. Check that the lid is properly closed and will not open. The lid is properly closed when both sides lock with a click.
- Start the vacuum process by pressing the Dry button for dry food or the Moist button for moist food. The vacuum sealer draws out the air.
- When the status lamp has gone off, press the lock buttons on the sides of the
vacuum sealer to release the lid.
NOTE:
The vacuum function works in intervals of 30 seconds for moist food.
VACUUM SEALING OF CANISTERS
NOTE:
Canisters and hoses sold separately.
- Make sure the rim of the canister and lid are clean and dry.
- Put the food in the canister. Leave at least 2.5 cm between the food and the lid.
- Put the lid on the canister and insert one end of the tube into the port on the vacuum sealer. Insert the other end of the tube into the port on the lid of the canister and press down to seal the connection.
- Close the lid on the vacuum sealer by pressing the lock buttons on both sides. The lid is properly closed when both sides lock with a click.
- Press the touch button "Canister". The vacuum sealer pumps out the air.
- When the status lamp goes off, release the tube from the vacuum sealer and canister.
QUICK-START GUIDE
FIG. 4
VACUUM & SEAL (DRY)
Vacuum pumping and sealing for dry food.
VACUUM & SEAL (MOIST)
Vacuum pumping and sealing for moist food. The vacuum function works in intervals of 30 seconds for moist food to prevent overheating.
SEAL ONLY/CANCEL
- Press the touch button "Seal Only" to seal without vacuum.
- Press the touch button "Cancel" to stop the process.
PULSE
- Press the touch button "Pulse" to start the vacuum pump.
- Release to stop.
CANISTER / LOCK/UNLOCK
- Press the touch button "Canister" for vacuum pumping of canisters.
- Keep the touch button "Canister" pressed to lock the control panel.
- Repeat to unlock.
PORT FOR VACUUM PUMPING OF CANISTERS
Canisters and hoses sold separately.
- Connect the other end of the hose to this port.
- Connect the other end to the port on the canister.
- Press the touch button "Canister" to pump the air out of the canister.
MAINTENANCE
- Do not use abrasive detergents.
- Wipe the vacuum sealer with a soft, damp cloth.
- Wipe off any scraps of food, liquid etc. from inside the appliance with paper towels.
- Wipe all the parts dry before using the vacuum sealer.
- Liquid that has been drawn out of the bags can collect in the vacuum chamber. Wipe up with a cloth moistened with a mild detergent when necessary. Make sure it is dry.
TROUBLESHOOTING
| Problem Possible cause Action | ||
| Nothing happens after pressing the Vacuum & Seal button | Check that the plug is plugged in. | |
| Check that the power cord or plug is not damaged. | ||
| Use another appliance to check that the power point is live. If the power point is not live, check the fuses. | ||
| Check that the vacuum bag has been correctly placed in the vacuum chamber. | ||
| Press the lock buttons on both sides and close the lid. | ||
| Allow the vacuum sealer to cool for 25 minutes and try again. | ||
| Air does not pump out of the bag | Check that the bag is not creased and that there are no holes, etc. | |
| Check that the top and bottom seals on the vacuum chamber are not loose, cracked or worn. | ||
| Food with a high liquid content can cause the bag not to seal properly. Open the bag, wipe the top inside clean and seal again. | ||
| Check that the bag is correctly inserted in the vacuum chamber. | ||
| Check that the bag has been put in right. When sealing bags on a roll, check that the cut off end is placed on the sealing strip. | ||
| The bag melts | The sealing strip gets too hot when sealing. | Allow the vacuum sealer to cool for at least 20 seconds between seals. If the bag still melts, allow the vacuum sealer to cool for 25 minutes with the lid open and try again. |
| The sealed bag fills with air again | Check the seal. There may be a hole or crease that causes the seal to leak. | Cut open the bag and seal again, or use a new bag. |
| Check that there is no liquid in the bag near the seal. | Cut open the bag and seal again, or use a new bag. Put food with a high liquid content in the freezer for 1–2 hours before vacuum packing. | |
| Check that there are no sharp edges or tips on the food that could have punctured the bag. | If the bag is punctured, use a new bag. | |
| Check that the top and bottom seals on the vacuum chamber are not loose, cracked or worn. | ||
| Food with a high liquid content can cause the bag not to seal properly. | Open the bag, wipe the top inside clean and seal again. | |
| The bag does not seal | Check that the seal is not creased and there are no holes, etc. | |
| Food with a high liquid content can cause the bag not to seal properly. | Open the bag, wipe the top inside clean and seal again. | |
| The bag is not not correctly positioned | When sealing bags on a roll, check that the cut off end is placed on the sealing strip. | |
| The vacuum sealer has not cooled. Wait at least 20 seconds between each sealing. | ||
- SE VAKUUMFÖRPACKARE
- SÄKERHETSANVISNINGAR
- DESCRIPTION
- PARTS
- 1
- 2
- USE
- FEATURES
- FOOD SAFETY
- TIPS
- Cooking, thawing and heating
- NOTE:
- Meat and fish
- Cheese
- Vegetables
- Vegetables produce gas during storage and should therefore be stored frozen after parboiling.
- Powder
- Liquid
- CUTTING BAGS
- Suitable sizes of bags
- 3
- WARNING!
- VACUUM SEALING OF BAGS
- VACUUM SEALING OF CANISTERS
- Canisters and hoses sold separately.
- QUICK-START GUIDE
- VACUUM & SEAL (DRY)
- VACUUM & SEAL (MOIST)
- SEAL ONLY/CANCEL
- PULSE
- CANISTER / LOCK/UNLOCK
- PORT FOR VACUUM PUMPING OF CANISTERS
- MAINTENANCE
Brand : Menuett
Model : 005-061
Category : Sausage Stuffer