
WorkForce Pro WF-C8690DTWFC - Printer EPSON - Free user manual and instructions
Find the device manual for free WorkForce Pro WF-C8690DTWFC EPSON in PDF.


User questions about WorkForce Pro WF-C8690DTWFC EPSON
0 question about this device. Answer the ones you know or ask your own.
Ask a new question about this device
Download the instructions for your Printer in PDF format for free! Find your manual WorkForce Pro WF-C8690DTWFC - EPSON and take your electronic device back in hand. On this page are published all the documents necessary for the use of your device. WorkForce Pro WF-C8690DTWFC by EPSON.
USER MANUAL WorkForce Pro WF-C8690DTWFC EPSON
Using the Manual to Search for Information.....7
Marks and Symbols....
Descriptions Used in this Manual..
Operating System References.....
Important Instructions
Safety Instructions....
Printer Advisories and Warnings..
Advisories and Warnings for Setting Up/
Using the Printer....
Advisories and Warnings for Using the
Printer with a Wireless Connecti
Advisories and Warnings for Using the
Touchscreen....
Advisories and Warnings for Using the
Optional Cabinet....
Protecting Your Personal Informa
Printer Basics
Part Names and Functions....
Control Panel....
Basic Screen Configuration.....
Icons displayed in the LCD Screen
Touch Screen Operations.....
Entering Characters....
Job / Status Screen Configuration.
Viewing Animations....
Preparing the Printer
Loading Papers....
Available Paper and Capacities..
Paper Handling Precautions.....
Loading Paper in the Paper Casse
Loading Paper in the Rear Paper
Loading Envelopes and Precautio
Loading long papers and Precauti
List of Paper Type....
List of Detected Paper Sizes.....
Placing Originals....
Detecting the Original Size Automatically.....37
Available Originals for the ADF..
Placing Originals on the ADF....
Placing Originals on the Scanner Glass. . . . . . . 40
Inserting an External USB Device.....
Inserting and Removing an External USB
Device....42
Accessing an External USB Device From a
C o m p u t e r . . . . . . . . . . . . . . . . . . . . . . . . . . . . . . . . . . . 4 2
·M·a n·a g·i·h⁹g C o n t a c t s . . . . . . . . . . . . . . . . . . . . . . . . . . . . . . . . . . 4 3
Registering or Editing Contacts......
Registering or Editing Grouped Contacts..... 44
Registering Frequently Used Contacts.
Register Contacts on a Computer......
BackingUp Contacts using a Computer..
Registering Your Favorite Settings as a Pr
Menu Options for Presets......
Menu Options for Settings....
Menu Options for General Settings.....
Menu Options for Print Counter......
Menu Options for Supply Status.....
Menu Options for Maintenance.....
o n M e.n u. O p.t.ilo4n s for Language....
Menu Options for Printer Status/Print.
Menu Options for Contacts Manager....
Menu Options for User Settings.....
Menu Options for Authentication Device Status. 57
Menu Options for Epson Open Platform
Information....58
Saying. Power....58
S.av.i2n2g Power - Control Panel....
... 2 3
Printing ^24 . 24
Printing from the Printer Driver on Windows....59
Accessing the Printer Driver......
Printing Basics....59
Printing on 2 - Sides....6
Printing Several Pages on One Sheet....
Printing and Stacking in Page Order (Reverse
Order Printing)....63
e d. Printi ng3a2 Reduced or Enlarged Docume
Printing One3Image on Multiple Sheets for
Enlargement (Creating a Poster)....
P_3 rinting with a Header and Footer......
Printj 8a Watermark....7
Printing Password-Protected Files.....
Printing Multiple Files Together......
Printing Using the Color Universal Print
Feature 73
'Adjusting the Print Color....
Contents
Printing to Emphasize Thin Lines|...S.cann.i7n4g to a Memory Device......
Printing Clear Bar Codes....|....S.cañ5ning to the Cloud....11
Canceling Printing....S.c7a5nning to a Computer (WSD)....
Menu Options for the Printer Drive Scanning From a Computer....
Printing from the PostScript Printer Driver on
Windows....78 Using Access Control....12
Menu Options for the PostScript Printer Driver..79 Scanning Using Epson Scan 2....
Canceling Printing....Scanning from Smart Devices....
Printing from the Printer Driver on M Connecting from Smart Device by Wi-Fi Direct 124
Printing Basics....I8n1stalling Epson i Print....1
Printing on 2 - Sides....Scanning Using Epson iPrint....
Printing Several Pages on One Sheet Scanning.by. Toaching Smart Devices to the
Printing and Stacking in Page Order (Reverse N - Mark 126
Order Printing)....83
Printing a Reduced or Enlarged Document....84 Faving
Adjusting the Print Color....85
Canceling Printing......Before Using Fax Features......
Menu Options for the Printer DriveSending.Fases Using the Printer......
Making Operation Settings for the Mac OS | Sending Faxes Using the Control Panel..
Printer Driver....87Sending Faxes Dialing from the External
inting from the PostScript Printer Driver on | Phone Device....130
Mac OS \$ 8 Sending Faxes On Demand (Using Polling
Menu Options for the PostScript Printer Driver..89 | Send / Bulletin Board Box)....
Canceling Printing......|......Various Ways of Sending Faxes......
Printing Files from a Memory DeviceReceiving Taxes on the Printer....
Printing JPEG Files from a Memory Device....90 | Receiving Incoming Faxes....
Printing PDF or TIFF Files from a Memory | Receiving Faxes by Making a Phone Call
Device....91 Saving and Forwarding Received Faxes....141
Menu Options for Memory Device....Viewing Received Faxes Saved in the Printer
rinting from Smart Devices.... on the LCD Screen....142
Printing from Smart Devices.... on the LCD Screen....142
Using Epson iPrint....|Menu Options for Faxing....1
Using Epson Print Enabler.... Recipient.... 143
Using AirPrint....Fax Settings....143
anceling Ongoing or Queued Jobs More 99 145
Canceling Ongoing or Queued Jobs......145
Copying Basics....14
Copying on 2 - Sides....C'hle0c0king the Status or Logs for Fax Jobs..
Copying Multiple Originals onto One Sheet. . . . . 101 Displaying Information when Received Faxes
Basic Menu Options for Copying...|...are Unprocessed (Unread/Not Printed/Not
Advanced Menu Options for Copying.Saved/NotForwarded)....1
Scanning Using the Control Panel... | . Send i ngla0 Fax from a Computer....
Scanning to a Network Folder or FTP Server. . . 105 | Sending Documents Created Using an
Scanning to an Email....Application (Windows)....1
Scanning Using the Settings Registered on | Sending Documents Created Using an
the Computer (Document Capture PrAp) plicatibn (Mac OS)....15
Copying
Scanning
Contents
| Receiving Faxes on a Computer.... | ...Cleaning the Paper Path for Paper Feeding |
| Saving Incoming Faxes on a Computer | Problems (Paper Cassette).... |
| Canceling the Feature that Saves Incoming | Cleaning the ADF....183 |
| Faxes to the Computer.... | Cleaning the Scanner Glass.... |
| Checking for New Faxes (Windows).... | 158 |
| Checking for New Faxes (Mac OS).... | 159 |
Replacing Ink Cartridges and Other Consumables
| Checking the Status of the Remaining Ink and the Maintenance Box...... |
| Checking the Status of the Remaining Ink and the Maintenance Box - Control Panel.... 161 |
| Checking the Status of the Remaining Ink and the Maintenance Box - Window |
| Checking the Status of the Remaining Ink and the Maintenance Box - Mac O |
| Ink Cartridge Codes...... |
| Ink Cartridge Handling Precaution |
| Replacing Ink Cartridges...... |
| Maintenance Box Code...... |
| Maintenance Box Handling Precautions...... 165 |
| Replacing a Maintenance Box...... |
| Maintenance Rollers Codes...... |
| Replacing Maintenance Rollers in Paper |
| Cassette 1...... |
| Replacing Maintenance Rollers in Paper |
| Cassette 2 to 4...... |
| Temporarily Printing with Black In |
| Temporarily Printing with Black Ink - Control Panel...... |
| Temporarily Printing with Black Ink - Windows 177 |
| Temporarily Printing with Black Ink - Mac OS..178 |
| Conserving Black Ink when the Black Ink Is Low (for Windows Only)...... |
Maintaining the Printer
| Checking and Cleaning the Print H |
| Checking and Cleaning the Print Head - |
| Control Panel...... |
| Checking and Cleaning the Print Head - |
| Windows...... |
| Checking and Cleaning the Print Head - Mac |
| OS......181 |
| Aligning Ruled Lines...... |
| Cleaning the Paper Path...... |
| Cleaning the Paper Path for Ink S |
Network Service and Software Information
| Application for Configuring Printer Operations(Web Config)....187 |
| Running Web Config on a Web Browser....187 |
| ··R ^16 nning Web Config on Windows.... |
| Running Web Config on Mac OS.... |
| Application for Scanning Documents andImages (Epson Scan 2)....18 |
| s.A'dding the Network Scanner.... |
| Application for Configuring Scanning from the Computer (Document Capture Pro).... |
| Application for Configuring Fax Operations and Sending Faxes (FAX Utility).... |
| Application for Sending Faxes (PC-FAX Driver).. 191 |
| Application for Printing Web Pages (E-Web Print) 191 |
| Software Update Tools (Software Updater). . . . . . 192 |
| Tn's'talling the Latest Applications. . . . . . . . . . . . . . . . . . . . . . . . . . . . . . . . . . . . . . . . . . . . . . . . . . . . . . . . . . . . . . . . . . . . . . . . . . . . . . . . . . . . . . . . . . . . . . . . . . . . . |
| Installing a PostScript Printer Driver.... |
| Installing a PostScript Printer Driver - |
| Windows....194 |
| Installing a PostScript Printer Driver - Mac OS. 194 |
| 171 |
| Installing the Epson Universal Printer Driver |
| (·for·Windb ^7 w ^6 s Only)....19 |
| Uninstalling Applications.... |
| 176 |
| Uninstalling Applications - Windows.. |
| Uninstalling Applications - Mac OS.... |
| Printing Using a Network Service...... |
| .... 178 |
Solving Problems
| Checking the Printer Status.... | |
| d.... | Checking Messages on the LCD Screen....198 |
| Error Code on the Status Menu.... | |
| .180 | Checking the Printer Status - Windows. |
| Checking the Printer Status - Mac OS... | |
| Checking the Software Status....206 | |
| Removing Jammed Paper......20 |
| Paper Does Not Feed or Eject Correctly... |
| ·s Paper Jams......207 |
| ·s Pap82 Feeds at a Slant......20 |
| e aSeveral.Sheets of Paper are Fed at a Time....208 |
Contents
| Paper Does Not Feed from the Optional Paper Cassette Units.... | Moire (Cross-Hatch) Patterns Appear in the C. 08ed Image....222 |
| Paper Does Not Feed Correctly After Replacing the Maintenance Rollers.. | An Image of the Reverse Side of the Original Appear 308 the Copied Image.... |
| Paper Out Error Occurs.... | The Pointout Problem Could Not be Cleared...222 |
| Original Does Not Feed in the ADF....208 | Other Printing Problems....2 |
| Paper is Not Stacked in Order.... | Printing Is Too Slow....22 |
| Paper is Ejected in an Unexpected Direction...209 | Printing Slows Down Dramatically During... |
| Power and Control Panel Problems | Continuous Printing....2 |
| Power Does Not Turn On.... | Cancel Cancel Printing from a Computer |
| Power Does Not Turn Off.... | Running Mac OS x v10.6.8....2 |
| Printer Turns Off During Use.... | PostScript Printer Driver Problems.... |
| Power Turns Off Automatically.... | Printer Does Not Print While Using... |
| LCD Screen Gets Dark.... | Print Script Printer Driver.... |
| Touch Screen Does Not Respond.... | Printer Does Not Print Correctly While Using PostScript Printer Driver.... |
| Cannot Operate from the Control Panel....210 | Print Quality Is Poor While Using PostScript |
| Cannot Print from a Computer.... | Printer Driver....224 |
| Checking the Connection (USB). | Printing Is Too Slow While Using PostScript |
| Checking the Connection (Network) | Printer Driver....224 |
| Checking the Software and Data....211 | Cannot Start Scanning....2 |
| Checking the Printer Status from the Computer (Windows)... | Scanned Image Problems....2 |
| Checking the Printer Status from the Computer (Mac OS)... | Uneven Colors, Dirt, Spots, and so on Appear |
| Checking Other Problems.... | When Scanning from the Scanner Glass... |
| Cannot Print from an iPhone or iPad... | Straight Lines Appear when Scanning from A.D.F....214....226 |
| Printout Problems.... | The Image Quality Is Rough....2 |
| Adjusting the Print Quality.... | Offset Appears in the Background of Images...226 |
| Adjusting the Print Quality for Each Paper Type....216 | Text is Blurred....226 |
| Printout is Scuffed or Color is Missing | Moire Patterns (Web-Like Shadows) Appear...227 |
| Banding or Unexpected Colors Appear....216 | Cannot Scan the Correct Area on the Scanner Glass....227 |
| Colored Banding Appears at Intervals of Approximately 3.3 cm.... | Text is Not Recognized Correctly when Saving as a Searchable PDF.... |
| Blurry Prints, Vertical Banding, or Misalignment.... | Cannot Solve Problems in the Scanned Image...228 |
| Print Quality is Poor.... | Other Scanning Problems.... |
| Paper Is Smeared or Scuffed.... | Scaming Speed Is Slow....2 |
| Paper is Smeared During Automatic 2-Sided Printing.... | Cannot Send the Scanned Image by Email...229 |
| Printed Photos are Sticky.... | Scanning Stops when Scanning to PDF/220 Multi-TIFF....229 |
| Images or Photos are Printed in Unexpected Colors....2 | Problems When Sending and Receiving Faxes...229 |
| The Position, Size, or Margins of the Printout Are Incorrect.... | Cannot Send or Receive Faxes....2 |
| Printed Characters Are Incorrect or Garbled...221 | Cannot Send Faxes....231 |
| The Printed Image Is Inverted.... | Cannot Send Faxes at a Specified Time... |
| Mosaic-Like Patterns in the Prints....221 | Cannot Receive Faxes....2 |
| Unintentionally Printing on 2-Sides | Cannot Save Received Faxes to a Memory Device....232 |
| Uneven Colors, Smears, Dots, or Straight Lines Appear in the Copied Image.... | Memory P#211 Error Occurs....2 |
| Sent Fax Quality Is Poor....2 | |
| Faxes Are Sent at the Wrong Size.... |
Contents
Received Fax Quality Is Poor....|...Inst.a214ng the Optional Cabinet....
Cannot Receive A3 Size Faxes....|....Opti2n4al Paper Cassette Unit Code....
Received Faxes Are Not Printed...Installing the Optional Paper Cassette Units... 257
Pages are Blank or only a Small Amount of
Text is Printed on the Second Page in
Received Faxes
Other Faxing Problems....Restictions on Copying
Cannot Make Calls on the Connected
Telephone
Answering Machine Cannot Answer Voice
Calls....2 3 5
Sender's Fax Number Not Displayed on
Received Faxes or the Number is Wrong. ..... 235
Other Problems....2,35 Transporting the Printer
Slight Electric Shock when Touching the
Printer....|2 3 5
Operation Sounds Are Loud.
The Date and Time Are Incorrect...
Memory Device Is not Recognized
Cannot Save Data to a Memory De
Forgot Your Password....236
Application Is Blocked by a Firewall (for
Windows Only) .237
"×" Is Displayed on the Photo Selection Screen. .237
Appendix
Technical Specifications. 238
Printer Specifications....238
Scanner Specifications....239
Interface Specifications....239
Fax Specifications....239
Network Function List....240
Wi - Fi Specifications....241
Ethernet Specifications....241
Security Protocol....242
PostScript Level 3 Compatibility|....242
Supported Third Party Services...|....242
External USB Device Specifications.....242
Supported Data Specifications....243
Dimensions....|243
Electrical Specifications....244
Environmental Specifications....|.....244
Installation Location and Space. 245
System Requirements....246
Font Information....247
Available Fonts for PostScript....|.....247
Available Fonts for PCL (URW)....248
List of Symbol Sets....249
Installing the Optional Units....252
Optional Cabinet Code....252
About This Manual
Introduction to the Manuals
The following manuals are supplied with your Epson printer. As well as the manuals, check the various types of help information available from the printer itself or from the Epson software applications.
☐ Important Safety Instructions (paper manual)
Provides you with instructions to ensure the safe use of this printer.
□Start Here (paper manual)
Provides you with information on setting up the printer and installing the software.
□User's Guide (digital manual)
This manual. Provides overall information and instructions on using the printer and on solving problems.
☐Administrator's Guide (digital manual)
Provides network administrators with information on management and printer settings.
You can obtain the latest versions of the above manuals with the following methods.
□Paper manual
Visit the Epson Europe support website at http://www.epson.eu/Support, or the Epson worldwide support website at http://support.epson.net/.
Digital manual
Start EPSON Software Updater on your computer. EPSON Software Updater checks for available updates of Epson software applications and the digital manuals, and allows you to download the latest ones.
Related Information
→“Software Update Tools (Software Updater)” on page 192
Using the Manual to Search for Information
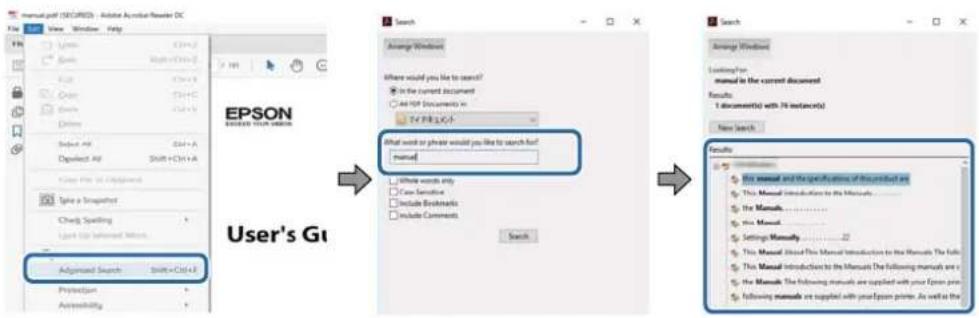
The PDF manual allows you to search for information you are looking for by keyword, or jump directly to specific sections using the bookmarks. You can also print only the pages you need. This section explains how to use a PDF manual that has been opened in Adobe Reader X on your computer.
About This Manual
Searching by keyword
Click Edit > Advanced Search. Enter the keyword (text) for information you want to find in the search window, and then click Search. Hits are displayed as a list. Click one of the displayed hits to jump to that page.
text_image
User's Gi Advanced Search Shift+Ctrl+A Printed Run Accessibility Search Arrange Window Where would you like to search? In the current document An PDF Document is What word or phrase would you like to search for? manual Whole words only Free dashed Include Bookmarks Include Comments Search Search Arrange Window Looking for manual in the current document Results: 1. document(s) with 76 instar()c New Search Results This manual and the specifications of this product are This Manual Introduction to the Manuals... The Manuals... The Manual. Settings Manuals... This Manual. Utilized Free Manual Introduction to the Manuals The full This Manual Introduction to the Manuals The following manuals are the Manuals. The following manuals are supplied with your Epsom print following manuals are supplied with your Epsom printer. As well as theJumping directly from bookmarks
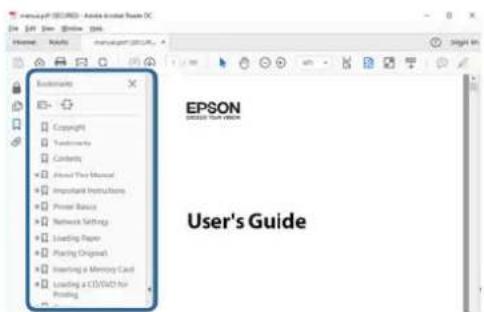
Click a title to jump to that page. Click + or > to view the lower level titles in that section. To return to the previous page, perform the following operation on your keyboard.
☐ Windows: Hold down Alt, and then press ←.
☐ Mac OS: Hold down the command key, and then press ←.
text_image
EPSON GOLDEN NEW VISION User's GuidePrinting only the pages you need
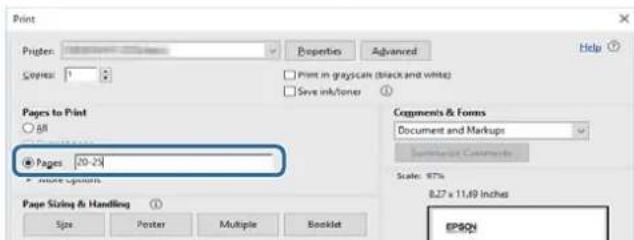
You can extract and print only the pages you need. Click Print in the File menu, and then specify the pages you want to print in Pages in Pages to Print.
☐ To specify a series of pages, enter a hyphen between the start page and the end page.
Example: 20-25
☐To specify pages that are not in series, divide the pages with commas.
Example: 5, 10, 15
text_image
Print Pages: 10-24 Pages to Print All Pages & Forms Document and Markups Soldering Comments Scale: 87% 8.27 x 11.49 Inches Page Sizing & Handling ① Size Poster Multiple Booklet EPSONMarks and Symbols

Caution:
Instructions that must be followed carefully to avoid bodily injury.

Important:
Instructions that must be observed to avoid damage to your equipment.
Note:
Provides complementary and reference information.
Related Information
→Links to related sections.
Descriptions Used in this Manual
☐ Screenshots of the printer driver and the Epson Scan 2 (scanner driver) screens are from Windows 10 or macOS High Sierra. The content displayed on the screens varies depending on the model and situation.
☐ Illustrations used in this manual are examples only. Although there may be slight differences depending on the model, the method of operation is the same.
☐Some of the menu items on the LCD screen vary depending on the model and settings.
Operating System References
Windows
In this manual, terms such as "Windows 10", "Windows 8.1", "Windows 8", "Windows 7", "Windows Vista", "Windows XP", "Windows Server 2016", "Windows Server 2012 R2", "Windows Server 2012", "Windows Server 2008 R2", "Windows Server 2008", "Windows Server 2003 R2", and "Windows Server 2003" refer to the following operating systems. Additionally, "Windows" is used to refer to all versions.
☐Microsoft ® Windows ® 10 operating system
□Microsoft ^® Windows ^® 8.1 operating system
□ Microsoft® Windows ® 8 operating system
☐Microsoft ^® Windows ^® 7 operating system
□Microsoft® Windows Vista ® operating system
☐ Microsoft® Windows ® XP operating system
□Microsoft® Windows® XP Professional x64 Edition operating system
☐Microsoft ^® Windows Server ^® 2016 operating system
□ Microsoft® Windows Server ® 2012 R2 operating system
□Microsoft® Windows Server® 2012 operating system
About This Manual
☐Microsoft ^® Windows Server ^® 2008 R2 operating system
□ Microsoft® Windows Server ® 2008 operating system
□Microsoft® Windows Server® 2003 R2 operating system
□Microsoft® Windows Server® 2003 operating system
Mac OS
In this manual, "Mac OS" is used to refer to macOS High Sierra, macOS Sierra, OS X El Capitan, OS X Yosemite, OS X Mavericks, OS X Mountain Lion, Mac OS X v10.7.x, and Mac OS X v10.6.8.
Important Instructions
Safety Instructions
Read and follow these instructions to ensure safe use of this printer. Make sure you keep this manual for future reference. Also, be sure to follow all warnings and instructions marked on the printer.
☐ Some of the symbols used on your printer are to ensure safety and proper use of the printer. Visit the following Web site to learn the meaning of the symbols.
http://support.epson.net/symbols
☐ Use only the power cord supplied with the printer and do not use the cord with any other equipment. Use of other cords with this printer or the use of the supplied power cord with other equipment may result in fire or electric shock.
☐Be sure your AC power cord meets the relevant local safety standard.
☐ Never disassemble, modify, or attempt to repair the power cord, plug, printer unit, or options by yourself, except as specifically explained in the printer's manuals.
☐ Unplug the printer and refer servicing to qualified service personnel under the following conditions:
The power cord or plug is damaged; liquid has entered the printer; the printer has been dropped or the casing damaged; the printer does not operate normally or exhibits a distinct change in performance. Do not adjust controls that are not covered by the operating instructions.
Place the printer near a wall outlet where the plug can be easily unplugged.
☐ Do not place or store the printer outdoors, near excessive dirt or dust, water, heat sources, or in locations subject to shocks, vibrations, high temperature or humidity.
☐ Take care not to spill liquid on the printer and not to handle the printer with wet hands.
☐ Keep the printer at least 22 cm away from cardiac pacemakers. Radio waves from this printer may adversely affect the operation of cardiac pacemakers.
☐ If the LCD screen is damaged, contact your dealer. If the liquid crystal solution gets on your hands, wash them thoroughly with soap and water. If the liquid crystal solution gets into your eyes, flush them immediately with water. If discomfort or vision problems remain after a thorough flushing, see a doctor immediately.
☐ Avoid using a telephone during an electrical storm. There may be a remote risk of electric shock from lightning.
☐Do not use a telephone to report a gas leak in the vicinity of the leak.
Important Instructions
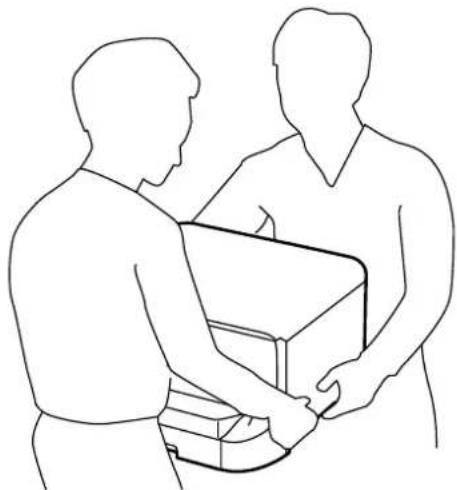
☐ The printer is heavy and should not be lifted or carried by less than two people. When lifting the printer, two or more people should assume the correct positions as shown below.
natural_image
Line drawing of two people exchanging a box together (no text or symbols)☐ Be careful when you handle used ink cartridges, as there may be some ink around the ink supply port.
☐ If ink gets on your skin, wash the area thoroughly with soap and water.
☐ If ink gets into your eyes, flush them immediately with water. If discomfort or vision problems continue after a thorough flushing, see a doctor immediately.
□If ink gets into your mouth, see a doctor right away.
☐ Do not disassemble the ink cartridge and the maintenance box; otherwise ink may get into your eyes or on your skin.
☐ Do not shake ink cartridges too vigorously; otherwise ink may leak from the cartridge.
□Keep ink cartridges and maintenance box out of the reach of children.
Printer Advisories and Warnings
Read and follow these instructions to avoid damaging the printer or your property. Make sure you keep this manual for future reference.
Advisories and Warnings for Setting Up/Using the Printer
☐Do not block or cover the vents and openings in the printer.
☐Use only the type of power source indicated on the printer's label.
☐ Avoid using outlets on the same circuit as photocopiers or air control systems that regularly switch on and off.
☐ Avoid electrical outlets controlled by wall switches or automatic timers.
- Keep the entire computer system away from potential sources of electromagnetic interference, such as loudspeakers or the base units of cordless telephones.
Important Instructions
☐ The power-supply cords should be placed to avoid abrasions, cuts, fraying, crimping, and kinking. Do not place objects on top of the power-supply cords and do not allow the power-supply cords to be stepped on or run over. Be particularly careful to keep all the power-supply cords straight at the ends and the points where they enter and leave the transformer.
☐ If you use an extension cord with the printer, make sure that the total ampere rating of the devices plugged into the extension cord does not exceed the cord's ampere rating. Also, make sure that the total ampere rating of all devices plugged into the wall outlet does not exceed the wall outlet's ampere rating.
☐ If you plan to use the printer in Germany, the building installation must be protected by a 10 or 16 amp circuit breaker to provide adequate short-circuit protection and over-current protection for the printer.
☐ When connecting the printer to a computer or other device with a cable, ensure the correct orientation of the connectors. Each connector has only one correct orientation. Inserting a connector in the wrong orientation may damage both devices connected by the cable.
Place the printer on a flat, stable surface that extends beyond the base of the printer in all directions. The printer will not operate properly if it is tilted at an angle.
☐ When storing or transporting the printer, avoid tilting it, placing it vertically, or turning it upside down; otherwise ink may leak.
☐Allow space above the printer so that you can fully raise the document cover.
Leave enough space in front of the printer for the paper to be fully ejected.
☐ Avoid places subject to rapid changes in temperature and humidity. Also, keep the printer away from direct sunlight, strong light, or heat sources.
☐Do not insert objects through the slots in the printer.
☐Do not put your hand inside the printer during printing.
☐Do not touch the white flat cable inside the printer.
☐ Do not use aerosol products that contain flammable gases inside or around the printer. Doing so may cause fire.
☐Do not move the print head by hand; otherwise, you may damage the printer.
☐Be careful not to trap your fingers when closing the document cover.
☐Do not press too hard on the scanner glass when placing the originals.
□Always turn the printer off using the ⏻ button. Do not unplug the printer or turn off the power at the outlet until the ⏻ light stops flashing.
Before transporting the printer, make sure that the print head is in the home (far right) position and the ink cartridges are in place.
☐ If you are not going to use the printer for a long period, be sure to unplug the power cord from the electrical outlet.
Advisories and Warnings for Using the Printer with a Wireless Connection
☐ Radio waves from this printer may negatively affect the operation of medical electronic equipment, causing them to malfunction. When using this printer inside medical facilities or near medical equipment, follow directions from the authorized personnel representing the medical facilities, and follow all posted warnings and directions on the medical equipment.
☐ Radio waves from this printer may negatively affect the operation of automatically controlled devices such as automatic doors or fire alarms, and could lead to accidents due to malfunction. When using this printer near automatically controlled devices, follow all posted warnings and directions on these devices.
Important Instructions
Advisories and Warnings for Using the Touchscreen
☐ The LCD screen may contain a few small bright or dark spots, and because of its features it may have an uneven brightness. These are normal and do not indicate that it is damaged in any way.
☐Only use a dry, soft cloth for cleaning. Do not use liquid or chemical cleaners.
☐ The exterior cover of the touchscreen could break if it receives a heavy impact. Contact your dealer if the panel surface chips or cracks, and do not touch or attempt to remove the broken pieces.
☐ Press the touchscreen gently with your finger. Do not press force or operate with your nails.
☐ Do not use sharp objects such as ball point pens or sharp pencils to perform operations.
☐ Condensation inside the touchscreen due to abrupt changes in temperature or humidity may cause performance to deteriorate.
Advisories and Warnings for Using the Optional Cabinet
☐ This cabinet is exclusively designed to install this printer on top as well as the optional paper cassette units. Do not install any other products except for the specified printer and paper cassette unit.
☐Do not climb on the cabinet or place heavy object on it.
☐ Make absolutely sure both stands are attached securely, otherwise the printer may fall.
☐ Secure the printer or the optional paper cassette unit to the cabinet using the two attachments and screws supplied with the cabinet.
□When using the printer, make sure you lock the casters at the front of the cabinet.
☐Do not move the cabinet when the casters are locked.
☐ When moving the cabinet with the printer or the optional paper cassette unit installed, avoid moving over uneven or rough surfaces.
Protecting Your Personal Information
When you give the printer to someone else or dispose of it, erase all the personal information stored in the printer's memory by selecting the menus on the control panel as described below.
Settings > General Settings > System Administration > Restore Default Settings > Clear All Data and Settings
Printer Basics
Part Names and Functions
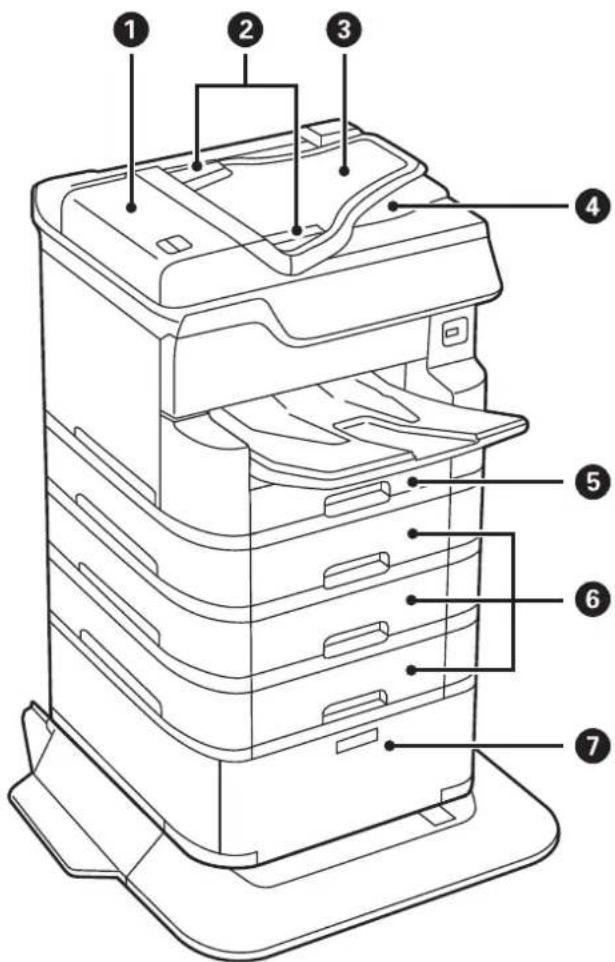
text_image
Technical diagram of a multi-tiered printer with numbered parts labeled 1 through 7| 1 | ADF (Automatic Document Feeder) cover (F) Open when removing jammed originals in the ADF. |
| 2 | ADF edge guides Feed originals straight into the printer. Slide to the edges of the originals. |
| 3 | ADF input tray (F) Feeds originals automatically. |
| 4 | ADF output tray Holds originals ejected from the ADF. |
| 5 | Paper cassette 1 (C1) Loads paper. |
| 6 | Paper cassette 2, Paper cassette 3, Paper cassette 4 (C2, C3, C4) |
| 7 | Cabinet Optional cabinet. Stores paper or other consumables. |
Printer Basics
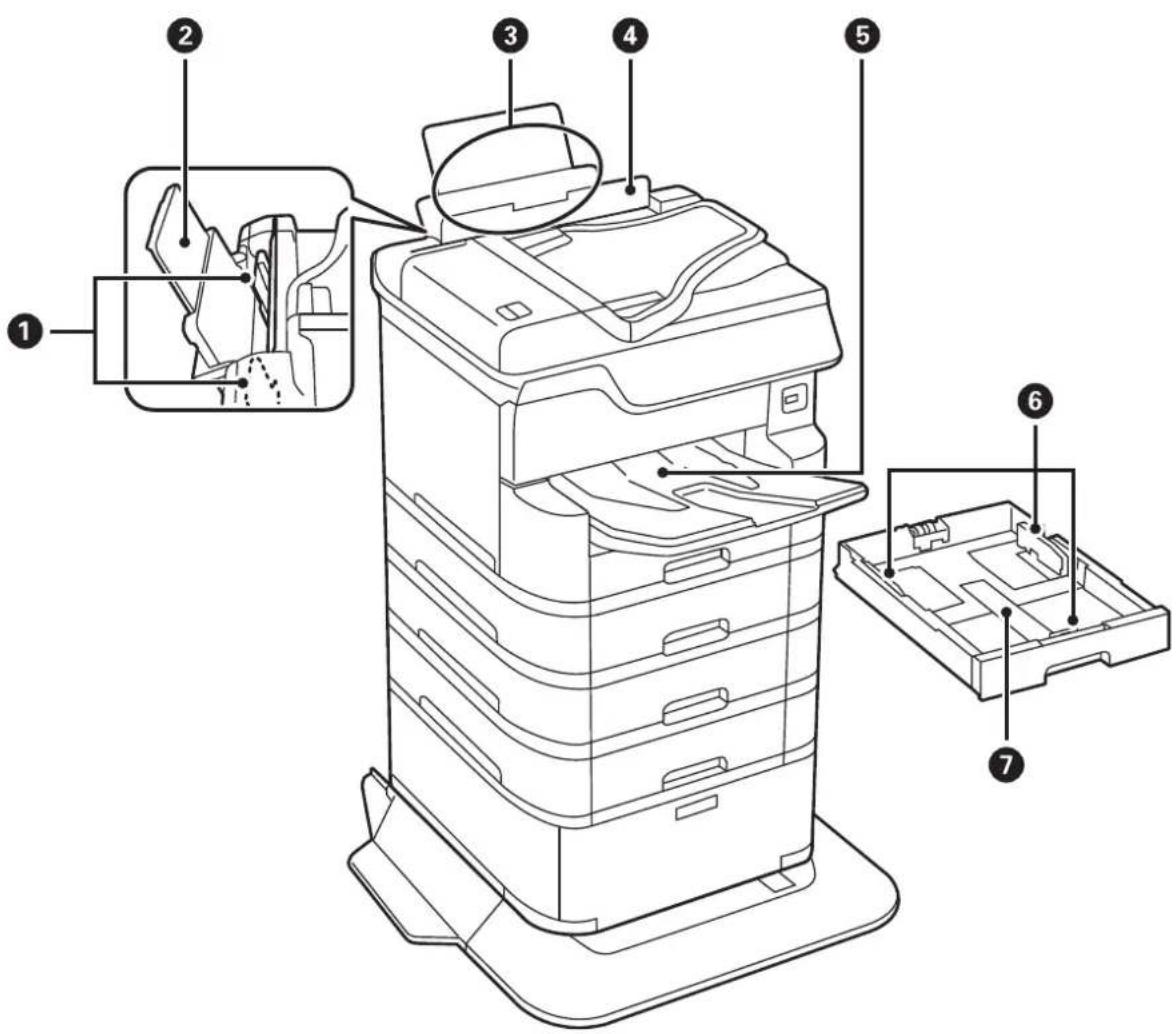
text_image
Technical diagram of a printer with numbered parts for identification and assembly reference| 1 | Edge guides Feed the paper straight into the printer. Slide to the edges of the paper. |
| 2 | Paper support Supports loaded paper. |
| 3 | Rear paper feed (B1) Loads paper. |
| 4 | Feeder guard Prevents foreign substance from entering the printer. Usually keep this guard closed. |
| 5 | Output tray Holds the ejected paper. |
| 6 | Edge guides Feed the paper straight into the printer. Slide to the edges of the paper. |
| 7 | Paper cassette Loads paper. |
Printer Basics
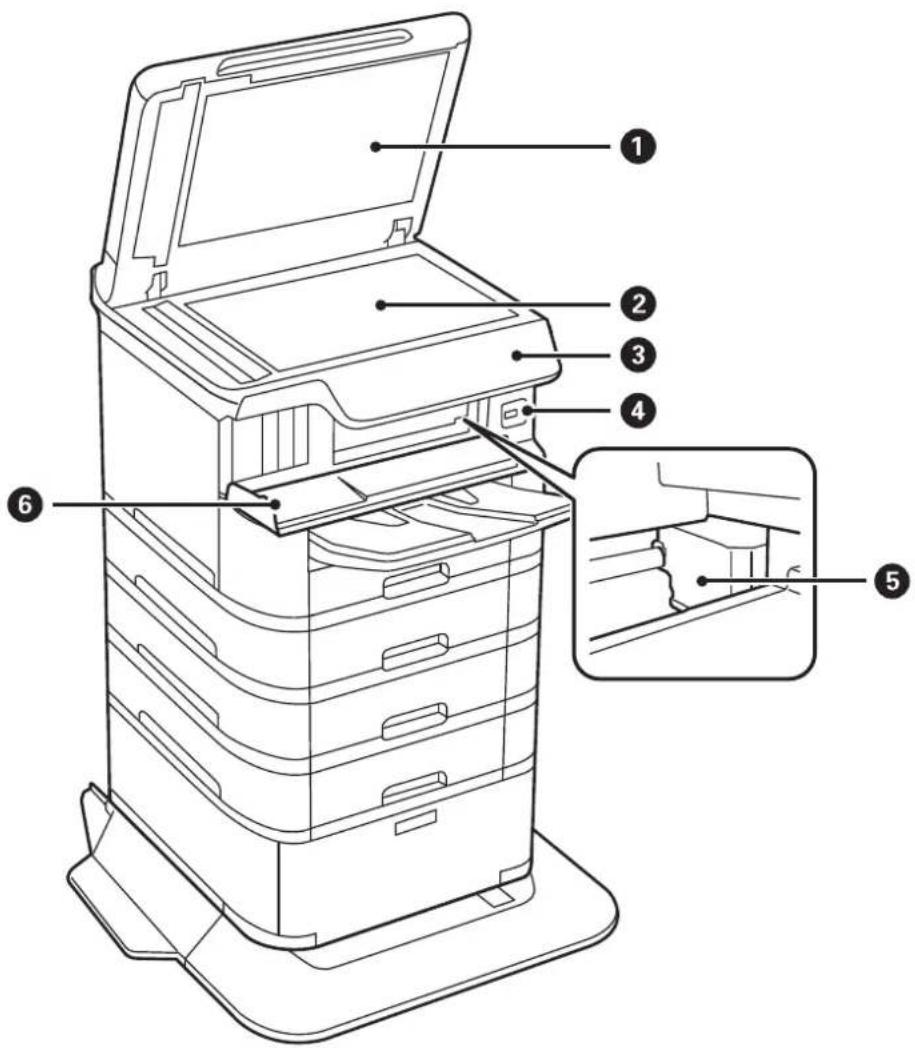
text_image
Technical diagram of a multi-compartment filing cabinet with numbered parts and an inset view showing internal structure.| 1 | Document cover Blocks external light while scanning. | |
| 2 | Scanner glass Scans placed originals. | |
| 3 | Control panel Indicates the printer's status and allows you to make print settings. | |
| 4 | External interface USB port Connects memory devices. | |
| 5 | Print head Fires ink. | |
| 6 | Front cover (A) Open when removing jammed paper inside the printer. |
Printer Basics
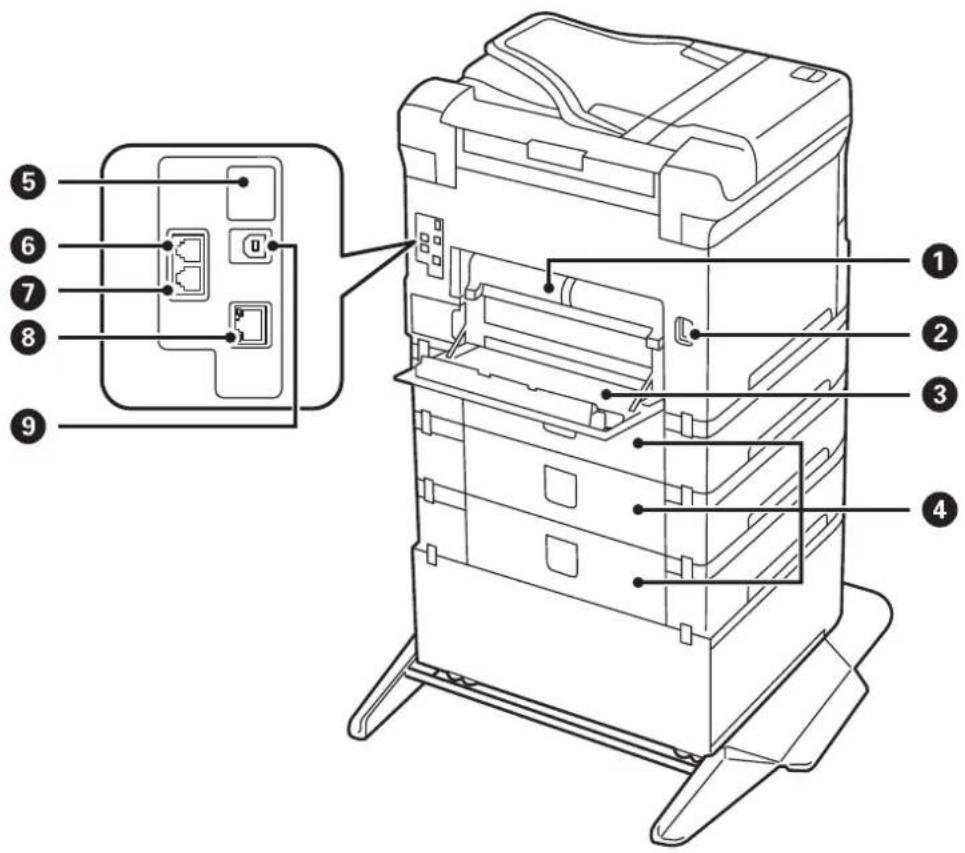
text_image
Technical diagram of a printer rack with numbered components and an inset view showing internal structure.
Important:
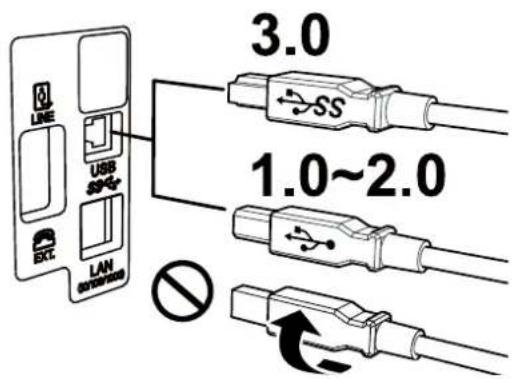
Note the insertion direction when using a USB 1.0 to 2.0 cable, otherwise the printer may be damaged.
text_image
LINE USB SS+ EC. LAN STATION 3.0 1.0~2.0 No| 1 | Rear cover 2 (D2) Remove when removing jammed paper. | |
| 2 | AC inlet Connects the power cord. | |
| 3 | Rear cover 1 (D1) Open when replacing the maintenance box or maintenance rollers, or removing jammed paper. | |
| 4 | Cassette unit cover (E) Cover for optional paper cassette units. | Open when replacing the maintenance rollers or removing jammed paper. |
Printer Basics
| 5 | Service USB port USB port for future use. | Do not remove the sticker. |
| 6 | LINE port Connects a phone line. | |
| 7 | EXT. port Connects external phone devices. | |
| 8 | LAN port Connects a LAN cable. | |
| 9 | USB port Connects a USB cable. |
Control Panel
text_image
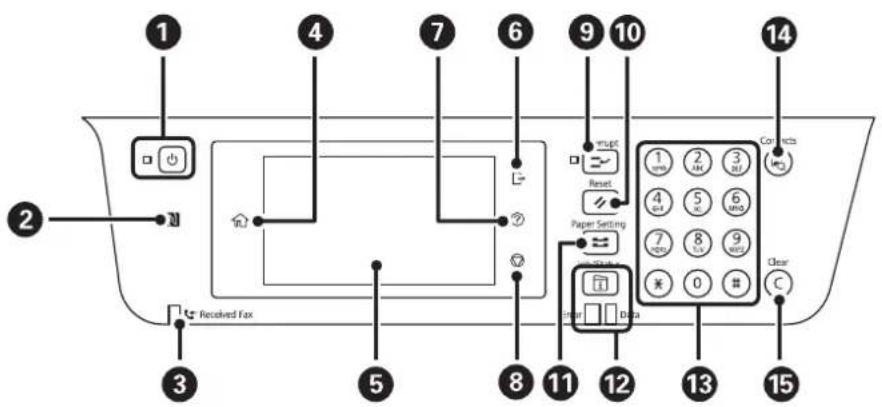
1 2 3 4 5 6 7 8 9 10 11 12 13 14 Received Fax Received Fax Input Reset Paper Setting Data Connects OK OK OK OK OK OK OK OK OK OK OK OK OK OK OK OK OK OK OK OK OK OK OK OK OK| 1 | Turns the printer on or off.Unplug the power cord after checking that the power light is off. |
| 2 | Pass a smart device over this mark to print or scan from the smart device directly. |
| 3 | Turns on when received documents that have not yet been read, printed, or saved, are stored in the printer's memory. |
| 4 | Displays the home screen. |
| 5 | Displays menus and messages. |
| 6 | Logs off from the printer when Access Control is enabled.When Access Control is disabled, this is also disabled. |
| 7 | Displays the Help screen.You can check solutions to problems from here. |
| 8 | Stops the current operation. |
| 9 | Pauses the current printing job and allows you to interrupt another job. However, you cannot interrupt a new job from the computer.Press this button again to restart a paused job. |
| 10 | Resets the current settings to user default settings. If user default settings have not been made, resets to the factory default. |
| 11 | Displays the Paper Setting screen. You can select the paper size and paper type settings for each paper source. |
Printer Basics
| 12 | Displays theJob/Statusmenu. You can check the printer's status and job history.The error light on the left flashes or turns on when an error occurs.The data light on the right flashes when the printer is processing data. It turns on when there are queued jobs. |
| 13 | Enters numbers, characters, and symbols. |
| 14 | Displays theContactslist. You can register, edit or delete the contacts. |
| 15 | Clears number settings such as the number of copies. |
Basic Screen Configuration
text_image
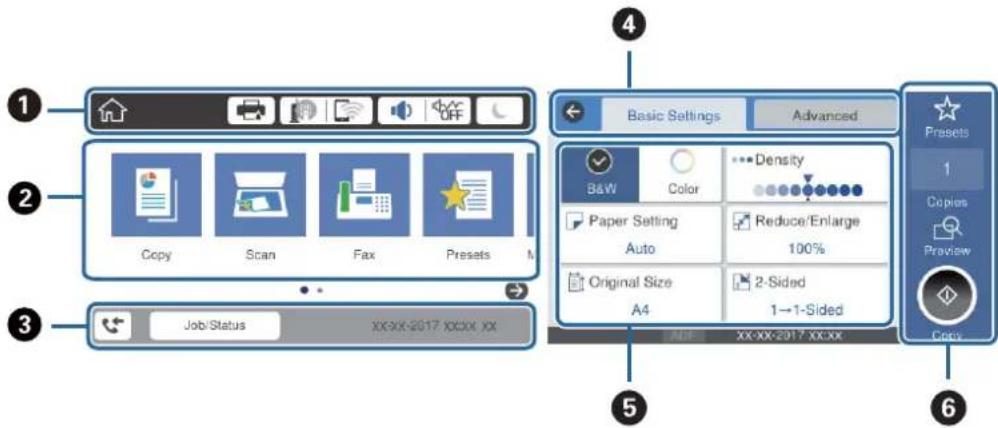
1 2 3 Job/Status XX-XX-2017 XX-XX XX Copy Scan Fax Presets 4 Basic Settings Advanced B&W Color Density Paper Setting Auto Reduce/Enlarge 100% Original Size A4 2-Sided 1→1-Sided ADD XX-XX-2017 XX-XX 5 Cows 1 Copies Preview 6| 1 | Indicates items that have been setup for the printer as icons. Select each icon to check the current settings or access each setting menu. |
| 2 | Displays each menu. You can add or change the sequence. |
| 3 | Indicates an ongoing job and the printer's status. Select message to display theJob/Statusmenu.Displays the date and time when the printer is not working or there are no errors. |
| 4 | Switch tabs. |
| 5 | Indicates the setting items. Select each item to set or change the settings.The grayed out items are not available. Select the item to check why they are unavailable. |
| 6 | Execute the current settings. Available functions vary depending on each menu. |
Icons displayed in the LCD Screen
The following icons are displayed on the LCD screen depending on the printer's status.
 | Displays the Printer Status screen.You can check the approximate ink levels and the approximate service life of the maintenance box. |
Printer Basics
 | Indicates the network connection status.Select the icon to check and change the current settings. This is the shortcut for the following menu.Settings > General Settings > Network Settings > Wi-Fi Setup | |
| The printer is not connected to a wired (Ethernet) network or unset it. | ||
| The printer is connected to a wired (Ethernet) network. | ||
| The printer is not connected to a wireless (Wi-Fi) network. | ||
| The printer is searching for SSID, unset IP address, or having a problem with a wireless (Wi-Fi) network. | ||
| The printer is connected to a wireless (Wi-Fi) network.The number of bars indicates the signal strength of the connection. The more bars there are, the stronger the connection. | ||
| The printer is not connected to a wireless (Wi-Fi) network in Wi-Fi Direct (Simple AP) mode. | ||
| The printer is connected to a wireless (Wi-Fi) network in Wi-Fi Direct (Simple AP) mode. | ||
 | Displays theDevice Sound Settings screen. You can setMuteand Quiet Mode.You can also access theSoundmenu from this screen. This is the shortcut for the following menu.Settings > General Settings > Basic Settings > Sound | |
| Indicates whether or notQuiet Modeis set for the printer. When this feature is enabled, the noise made by printer operations is reduced, but print speed may slow down. However, noises may not be reduced depending on the selected paper type and print quality. | ||
| Indicates thatMuteis set for the printer. | ||
 | Select the icon to enter sleep mode. When the icon is grayed out, the printer cannot enter sleep mode. | |
 | Indicates that the user restriction feature is enabled. Select this icon to log in to the printer. You need to select a user name and then enter a password. Contact your printer administrator for login information. | |
 | Indicates that a user with access permission has logged in.Select the icon to logout. | |
 | Displays theFax Data Informationscreen. | |
| [4820] | Indicates that the settings have been changed from the user default or the factory default. | |
| [H545] | Indicates that there is additional information. Select the icon to displays the message. | |
| [7270] | Indicates a problem with the items. Select the icon to check how to solve the problem. | |
| [064D] | Indicates that there is data that has not yet been read, printed, or saved. The number displayed indicates the number of data items. | |
Related Information
→“Network Settings” on page 52
→“Sound:” on page 46
Printer Basics
Touch Screen Operations
The touchscreen is compatible with the following operations.
| TapPress or select the item |  | |
| Flick | 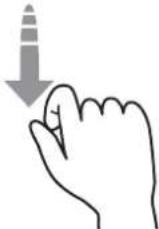 | Scroll the screen swiftly. |
| Slide | 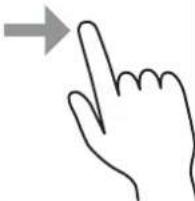 | Hold and move the items around. |
| Pinch in Pinch out |   | Zoom in or zoom out of the preview image on the control panel. |
Printer Basics
Entering Characters
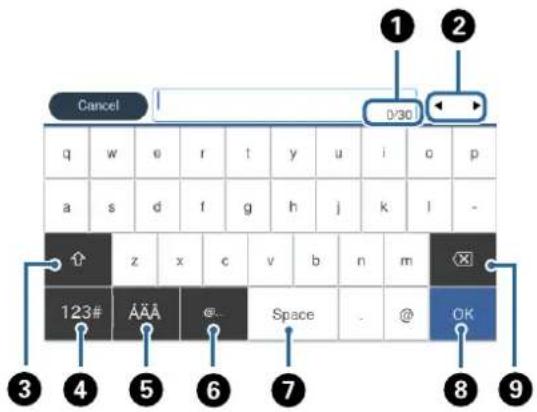
You can enter characters and symbols by using on-screen keyboard when you register a contact, make network settings, and so on.
text_image
Cancel q w e r t y u i o p a s d f g h j k l - 123# AAA Space @ OK 3 4 5 6 7 8 9Note:
Available icons vary depending on the setting item.
| 1 | Indicates the character count. |
| 2 | Moves the cursor to the input position. |
| 3 | Switches between upper case and lower case or numbers and symbols. |
| 4 | Switches the character type.123#: You can enter numbers and symbols.ABC: You can enter letters. |
| 5 | Switches the character type. You can enter alphanumerics and special characters such as umlauts and accents. |
| 6 | Enters frequently used email domain addresses or URLs by simply selecting the item. |
| 7 | Enters a space. |
| 8 | Confirms the entered characters. |
| 9 | Deletes a character to the left. |
Printer Basics
Job/Status Screen Configuration
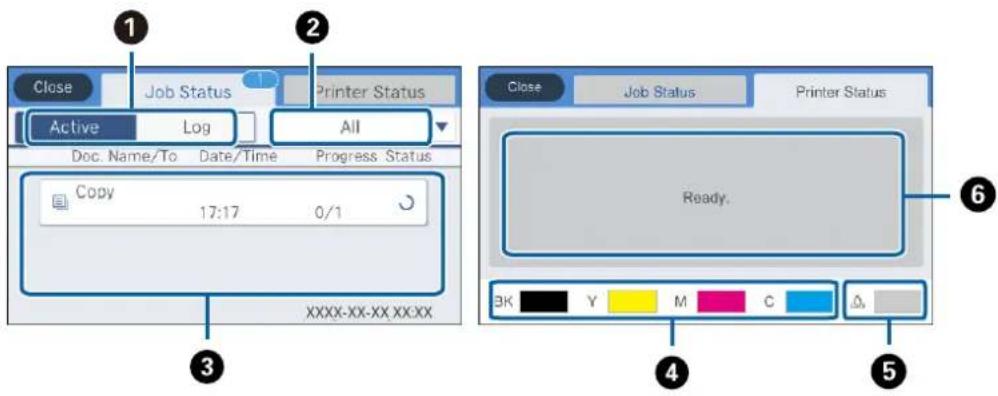
Press the ⓘ button to display the Job/Status menu. You can check the status of the printer or the jobs.
text_image
1 2 Close Job Status Printer Status Active Log All Doc. Name/To Date/Time Progress Status Copy 17:17 0/1 XXXX-XX-XX XXXX 3 6 Ready. 5 3K Y M C Δ| 1 | Switches the displayed lists. |
| 2 | Filter the jobs by functional. |
| 3 | When Active is selected, displays the list of ongoing jobs and jobs waiting to be processed.When Log is selected, displays the job history.You can cancel jobs or check the error code displayed in the history when the job has failed. |
| 4 | Indicates the approximate ink levels. |
| 5 | Indicates the approximate service life of the maintenance box. |
| 6 | Displays any errors that have occurred in the printer. Select the error from the list to display the error message. |
Related Information
→“Error Code on the Status Menu” on page 200
Viewing Animations
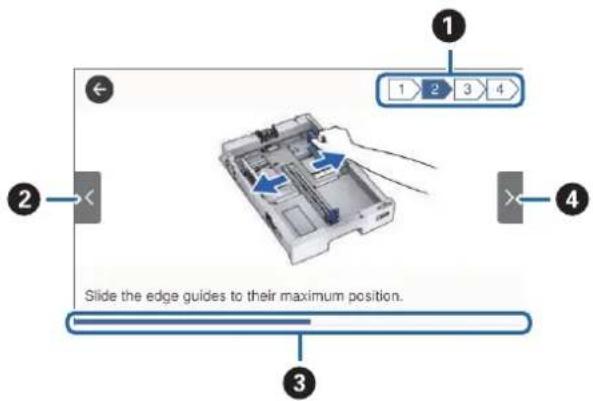
You can view animations of operating instructions such as loading paper or removing jammed paper on the LCD screen.
☐Tap ☐ on the right of the LCD screen: Displays the help screen. Tap How To and select the items that you want to view.
Printer Basics
☐ Select How To at the bottom of the operation screen: Displays the context-sensitive animation.
text_image
1 2 3 4 Slide the edge guides to their maximum position. 2 3 4| 1 | Indicates the total number of steps and the current step number.In the example above, it shows step 2 from 4 steps. |
| 2 | Returns to the previous step. |
| 3 | Indicates your progress through the current step. The animation repeats when the progress bar reaches the end. |
| 4 | Moves to next step. |
Preparing the Printer
Loading Papers
Available Paper and Capacities
Note:
☐The meaning of the symbols are as follows.

2-Sided Print Setting

Copy or Print from the Control Panel
☐The paper size displayed differs depending on the driver.
Genuine Epson Paper
Epson recommends using genuine Epson paper to ensure high-quality printouts.
Note:
☐ Genuine Epson paper is not available when printing with the Epson universal printer driver.
☐ The availability of paper varies by location. For the latest information on paper available in your area, contact Epson support.
☐ When printing on genuine Epson paper at a user defined size, only Standard or Normal print quality settings are available. Although some printer drivers allow you to select a better print quality, the printouts are printed using Standard or Normal.
Paper suitable for printing documents
| Media Name Size Loading Capacity (Sheets) | |||||
| C1 C2 to C4 | Rear | Paper Feed | |||
| Epson Bright White Ink Jet Paper A4 200 400 50 √ | √ | ||||
Paper suitable for printing photos
| Media Name Size Loading Capacity (Sheets) | |||||
| C1 C2 to C4 | Rear | Paper Feed | |||
| Epson Ultra Glossy Photo Paper A4 | 13×18 cm (5×7 in.)10×15 cm (4×6 in.) | - | - | 2 | 0 |
Preparing the Printer
| Media Name Size Loading Capacity (Sheets) | ||||||
| C1 C2 to C4 Rear | Paper Feed | |||||
| Epson Premium Glossy Photo Paper | A3+A3 | - | - | 1 | 0 | - |
| A413×18 cm (5×7 in.)16:9 wide size(102×181 mm)10×15 cm (4×6 in.) | - | - | 20 | |||
| Epson Premium Semigloss Photo Paper | A3+A3 | - | - | 1 | 0 | - |
| A410×15 cm (4×6 in.) | - | - | 20 | |||
| Epson Photo Paper Glossy A3+--1 | 0 - √ | |||||
| A413×18 cm (5×7 in.)10×15 cm (4×6 in.) | - | - | 20 | |||
| Epson Matte Paper-Heavyweight | A3+A3 | - | - | 1 | 0 | - |
| A4 | -- 20 | |||||
| Epson Photo Quality Ink Jet Paper | A3 | -- 50 - √ | ||||
| A4 | -- 70 | |||||
Related Information
→ "Part Names and Functions" on page 15
→ “Technical Support Web Site” on page 271
Commercially Available Paper
Note:
8.5×13 in, 8K (270×390 mm), 16K (195×270 mm) and the half letter sizes are not available when printing with the PostScript printer driver.
Preparing the Printer
Plain papers
| Media Name Size Loading Capacity (Sheets or Envelopes) | *1 | *2 | ||||
| Plain paperCopy paperLetterheadRecycled paperColor paperPreprinted paperHigh quality plain paper | A3+--50√√ | |||||
| A3, B4 Up to the line indicated by the triangle symbol on the edge guide. | 50 | |||||
| Legal, 8.5×13 in, Letter, A4, Executive, B5, A5, 16K(195×270 mm), 8K(270×390 mm) | 85 | |||||
| Half letter, B6, A6 Up to the line indicated by the triangle symbol on the edge guide. | - | 85 | ||||
| User Defined (mm)55×127 to 329×1200 | - | - | 1 | |||
| User Defined (mm)100×148 to 297×431.8 | Up to the line indicated by the triangle symbol on the edge guide. | - | - | |||
| User Defined (mm)148×210 to 297×431.8 | Up to the line indicated by the triangle symbol on the edge guide. | 50 | ||||
*1 2-sided printing is not available depending on the combination of paper type and size.
*2 User defined sizes are not available.
Thick papers
| Media Name | Size | Loading Capacity (Sheets or Envelopes) |  |  2 2 | ||
| C1 | C2 to C4 | Rear Paper Feed | ||||
| Thick paper(91 to 150 g/m2) | A3, B4, Legal, 8K (270×390 mm) | 150 | 250 | 20 | √ | √ |
| 8.5×13 in, Letter, A4, Executive,B5, A5, 16K (195×270 mm) | 300 | 40 | ||||
| Half letter, B6, A6 | 150 | - | 40 | |||
| User Defined (mm)55×127 to 329×1200 | - | - | 1 | |||
| User Defined (mm)100×148 to 297×431.8 | 150 | - | - | |||
| User Defined (mm)148×210 to 297×431.8 | 150 | 250 | 20 | |||
Preparing the Printer
| Media Name Size Loading Capacity (Sheets or Envelopes) | ||||||
| C1 C2 to C4 Rear Paper | Feed | |||||
| Thick paper(151 to 200 g/m2) | A3, B4, Legal, 8K (270×390 mm) 120 200 15 - √ | |||||
| 8.5×13 in, Letter, A4, Executive,B5, A5, 16K (195×270 mm) | 250 30 | |||||
| Half letter, B6, A6 120 - 30 | ||||||
| User Defined (mm)55×127 to 329×1200 | - | - | 1 | |||
| User Defined (mm)100×148 to 297×431.8 | 120 -- | |||||
| User Defined (mm)148×210 to 297×431.8 | 120 200 15 | |||||
| Thick paper(201 to 256 g/m2) | A3, B4, Legal, 8K (270×390 mm) - - 10 - √ | |||||
| 8.5×13 in, Letter, A4, 16K(195×270 mm), Executive, B5,A5, Half letter, B6, A6 | - | - | 20 | |||
| User Defined (mm)55×127 to 329×1200 | - | - | 1 | |||
*1 2-sided printing is not available depending on the combination of paper type and size.
*2 User defined sizes are not available.
Envelopes
| Media Name | Size | Loading Capacity (Sheets or Envelopes) | ||||
| C1 | C2 to C4 | Rear Paper Feed | ||||
| Envelope | Envelope #10,Envelope DL,Envelope C6 | - | - | 10 | - | √ |
| Envelope C4 | - | - | 1 | |||
Related Information
→ "Part Names and Functions" on page 15
Paper Handling Precautions
☐ Read the instruction sheets supplied with the paper.
Preparing the Printer
☐ To achieve high-quality printouts with genuine Epson paper, use the paper in the environment stated on the sheets supplied with the paper.
☐Do not use short-grain paper with a width of less than 105 mm.
☐ Fan and align the edges of the paper before loading. Do not fan or curl photo paper. Doing so may damage the printable side.
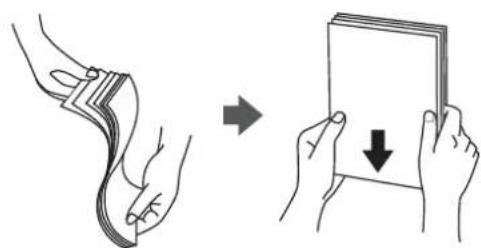
text_image
Illustration showing a hand holding a folded garment and then folding a stack of papers with a downward arrow indicating the process.☐ If the paper is curled, flatten it or curl it slightly in the opposite direction before loading. Printing on curled paper may cause paper jams and smears on the printout.

text_image
Two pictograms showing a prohibition symbol over stacks of papers, indicating no restrictions or exclusion.☐ Do not use paper that is wavy, torn, cut, folded, damp, too thick, too thin, or paper that has stickers stuck to it. Using these types of paper causes paper jams and smears on the printout.
☐ Make sure you are using long-grain paper. If you are not sure what type of paper you are using, check the paper packaging or contact the manufacturer to confirm the paper specifications.
Related Information
→“Printer Specifications” on page 238
Loading Paper in the Paper Cassette
Note:
If the optional cabinet and the paper cassette units are installed, do not pull out two or more paper cassettes at the same time.
Preparing the Printer
- Check that the printer is not operating, and then pull out the paper cassette.
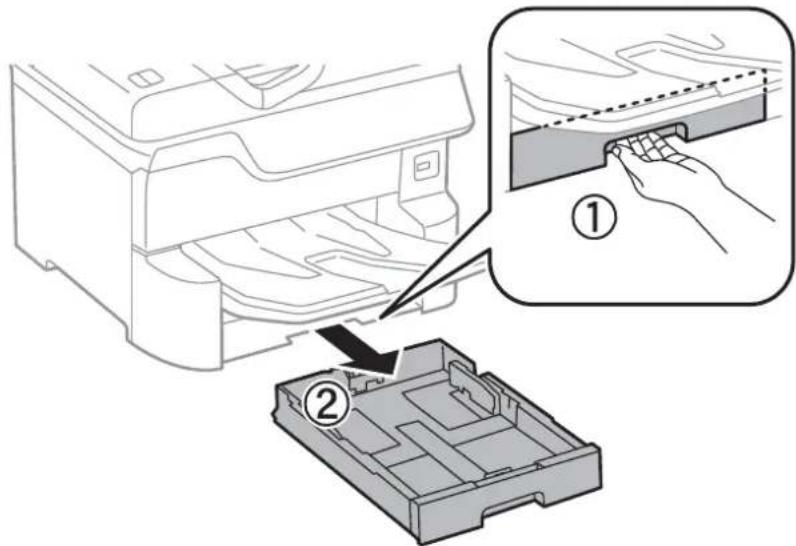
text_image
Diagram showing a printer's internal structure and its application to a component, with labeled parts ① and ②.- Slide the front edge guide to its maximum position, and then slide the side edge guides to adjust to the paper size you want to use.
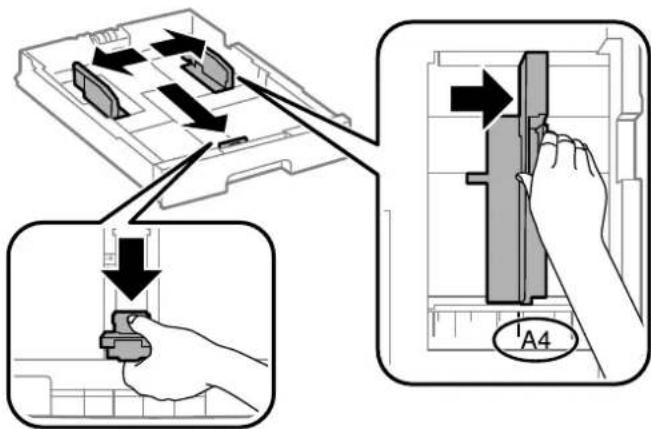
text_image
Diagram illustrating a mechanical assembly process with labeled parts and directional arrows indicating movement or assembly.- Load paper with the printable side facing down, and then slide the front edge guide to the edge of the paper.
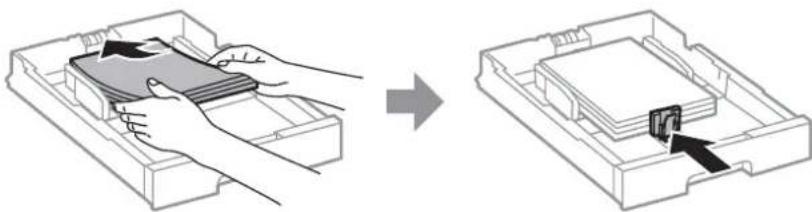
natural_image
Diagram showing two steps of inserting a device into a plastic tray (no text or symbols present)
Important:
Do not load more than the maximum number of sheetsspecified for the paper. For plain paper, do not load above the line just under the triangle symbol inside the edge guide.
Preparing the Printer
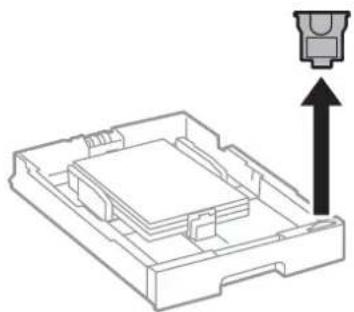
- Check that the paper size label matches the size of the paper loaded in the paper cassette. If it does not match, remove the holder and change the paper size indicated on the label.
natural_image
Technical line drawing of a mechanical component with an upward arrow indicating force or direction (no text or symbols present)-
Insert the paper cassette all the way.
-
When loading a paper type that differs from the last time, set the paper type on the control panel.
Press the ☐ button, select the paper cassette in which you loaded the paper, and then set the paper type.
Note:
You also need to set the paper size when loading paper other than the following sizes.
A3, B4, A4, B5, A5, B6, A6
Related Information
→“Paper Handling Precautions” on page 29
→“Available Paper and Capacities” on page 26
→ "List of Paper Type" on page 35
Loading Paper in the Rear Paper Feed
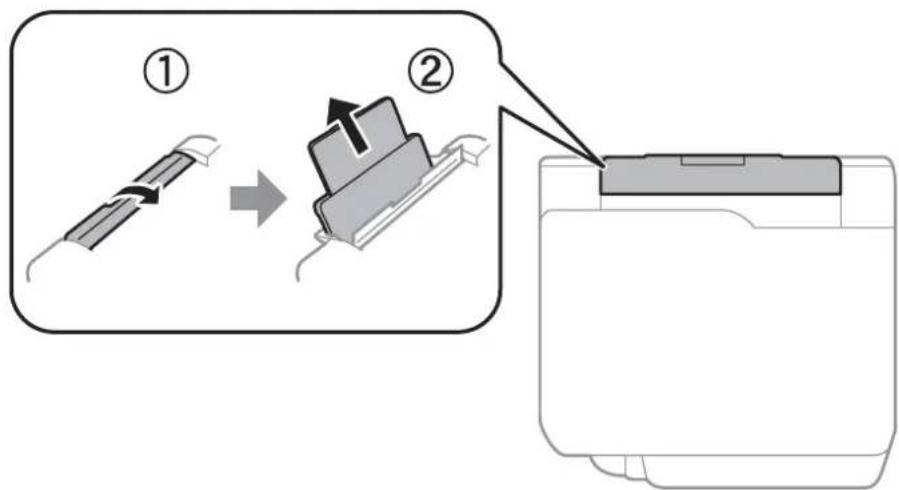
- Open the feeder guard and pull out the paper support.
text_image
Diagram illustrating the process of inserting a component into a printer, labeled with steps ① and ②.Preparing the Printer
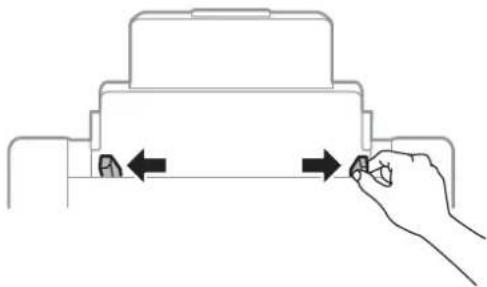
- Slide the edge guides.
natural_image
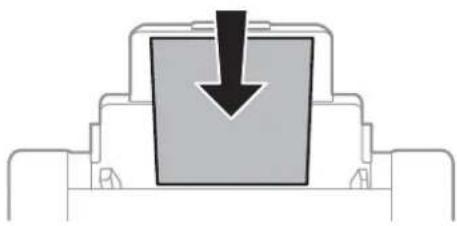
Line drawing of a hand pressing down on a mechanical component with arrows indicating motion (no text or symbols)- Load paper at the center of the rear paper feed with the printable side facing up.
natural_image
Pure diagram of a mechanical component with a downward arrow, no text or symbols present
Important:
☐ Do not load more than the maximum number of sheets specified for the paper. For plain paper, do not load above the line just under the triangle symbol inside the edge guide.
☐ Load paper short edge first. However, when you have set the long edge as the width of the user defined size, load paper long edge first.
Pre-punched paper
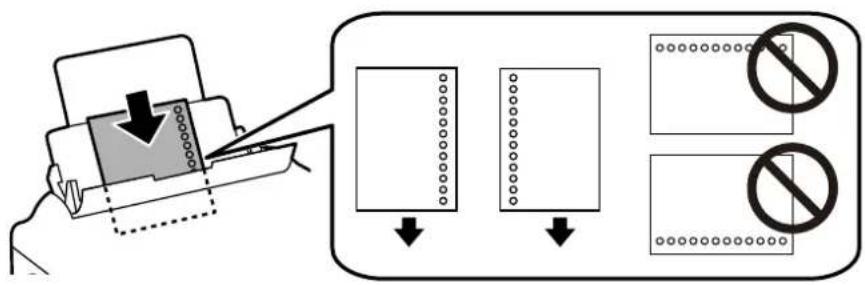
text_image
Diagram illustrating a document processing workflow with directional arrows and prohibition symbols indicating no restrictions.Note:
☐ Load a single sheet of defined size plain paper with binding holes at the left or right.
☐Adjust the print position of your file to avoid printing over the holes.
☐Automatic 2-sided printing is not available for pre-punched paper.
Preparing the Printer
- Slide the edge guides to the edges of the paper.
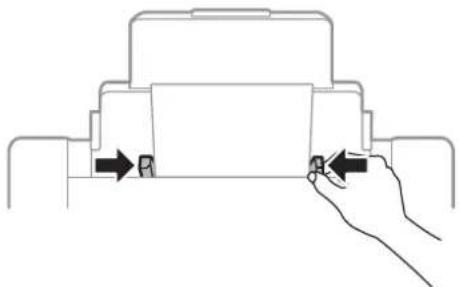
natural_image
Line drawing of a hand holding a component with arrows indicating movement (no text or symbols)- On the control panel, set the size and type of the paper you loaded in the rear paper feed.
Note:
☐You can also display the paper size and paper type settings screen by pressing the ☐ button on the control panel.
☐ Return the remaining paper to its package. If you leave it in the printer, the paper may curl or the print quality may decline.
Related Information
→"Paper Handling Precautions" on page 29
→“Available Paper and Capacities” on page 26
→“List of Paper Type” on page 35
→“Loading Envelopes and Precautions” on page 34
→“Loading long papers and Precautions” on page 35
Loading Envelopes and Precautions
Load envelopes in the center of the rear paper feed short edge first with the flap facing down, and slide the edge guides to the edges of the envelopes.
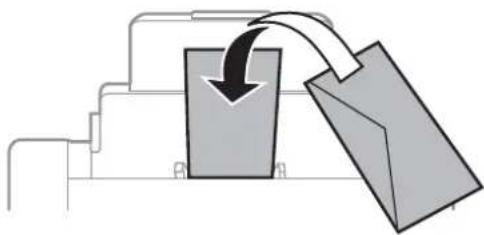
flowchart
graph TD
    A["Input"] --> B["Processing Box"]
    B --> C["Output"]
    style B fill:#ccc,stroke:#333
☐ Fan and align the edges of the envelopes before loading. When the stacked envelopes are puffed up with air, press them down to flatten them before loading.
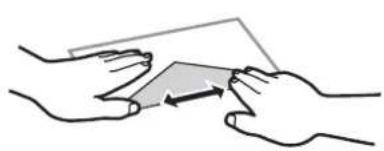
natural_image
Illustration of two hands exchanging a rectangular object with an arrow indicating direction (no text or symbols)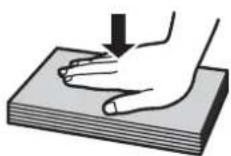
☐ Do not use envelopes that are curled or folded. Using these envelopes causes paper jams and smears on the printout.
User's Guide
Preparing the Printer
Do not use envelopes with adhesive surfaces on the flaps or window envelopes.
☐ Avoid using envelopes that are too thin, as they may curl during printing.
Related Information
→“Commercially Available Paper” on page 27
→“Loading Paper in the Rear Paper Feed” on page 32
Loading long papers and Precautions
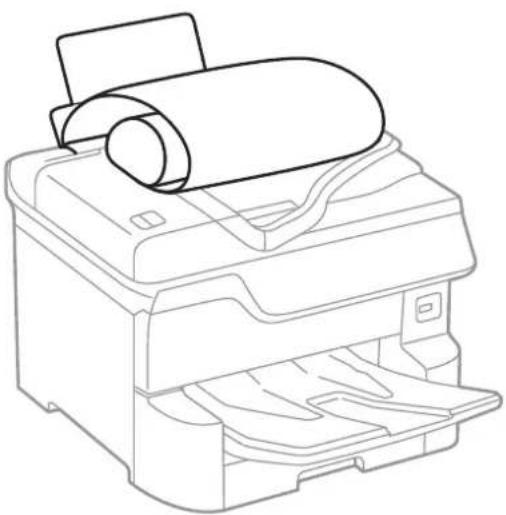
Load long paper in the rear paper feed by allowing the leading edge of the paper to roll over. Select User-Defined as the paper size setting.
natural_image
Line drawing of a printer with paper roll and paper tray (no text or symbols)☐ Long paper cannot be held in the output tray. Prepare a box and so on to make sure that paper does not fall on the floor.
☐ Do not touch paper that is being fed or ejected. It could injure your hand or cause print quality to decline.
Related Information
→“Available Paper and Capacities” on page 26
→“Loading Paper in the Rear Paper Feed” on page 32
List of Paper Type
To obtain optimum printing results, select the paper type that suits the paper.
| Media Name Media Type | ||||
| Control Panel Printer | Driver PostScript Printer | Driver | Epson Universal Printer Driver | |
| Epson Bright White Ink Jet Paper | Plain paper plain papers | Plain Plain | ||
Preparing the Printer
| Media Name Media Type | ||||
| Control Panel Printer | Driver PostScript Printer | Driver | Epson Universal Printer Driver | |
| Epson Ultra Glossy Photo Paper | Ultra Glossy Epson Ultra Glossy | Glossy Epson Ultra Glossy - | ||
| Epson Premium Glossy Photo Paper | Prem. Glossy Epson Premium Glossy | Glossy | Epson Premium Glossy | - |
| Epson Premium Semigloss Photo Paper | Prem. Semigloss Epson | Premium Semigloss | Epson Premium Semigloss | - |
| Epson Photo Paper Glossy | Glossy Photo Paper Glossy | Photo Paper Glossy - | ||
| Epson Matte Paper-Heavyweight | Matte Epson Matte Epson Matte - | |||
| Epson Photo Quality Ink Jet Paper | Matte Epson Matte Photo Quality Ink | Jet Paper | - | |
| Thick paper (91 to 150 g/m2) | Thick paper1 Thick-Paper1 | Thick-Paper1 Thick-Paper1 | Paper1 | |
| Thick paper (151 to 200 g/m2) | Thick paper2 Thick-Paper2 | Thick-Paper2 Thick-Paper2 | Paper2 | |
| Thick paper (201 to 256 g/m2) | Thick paper3 Thick-Paper3 | Thick-Paper3 Thick-Paper3 | Paper3 | |
List of Detected Paper Sizes
When you enable Paper Size Auto Detect, the following paper sizes are detected automatically when they are loaded in the paper cassette.
A6, B6, A5, Half letter, B5, A4, Letter, B4, Legal, A3, Ledger
Similar paper sizes such as A4 and Letter may not be detected correctly. If Half letter, Letter, Legal, and Leger sizes are detected as A5, A4, B4, and A3 sizes, press the button and then set the correct size.
If the sizes cannot be automatically detected, press the button, disable the Paper Size Auto Detect feature, and then set the paper size that you loaded.
Placing Originals
Place originals on the scanner glass or the ADF.
You can scan multiple originals and both sides of the originals at the same time with the ADF.
Preparing the Printer
Detecting the Original Size Automatically
When you select Auto Detectas the paper setting, the following types of paper size are identified automatically.
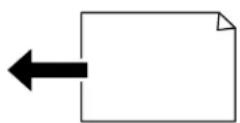
☐Placing vertically: A3, B4, A4, B5, A5 (scanner glass only)
Place the short edge of the original toward the paper feed entrance of the ADF or the left side of the scanner glass.
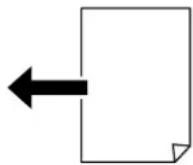
□Placing horizontally: A4, B5, A5
Place the long edge of the original toward the paper feed entrance of the ADF or the left side of the scanner glass.
Note:
The sizes for the following originals may not be detected correctly. If the sizes are not detected, set the size manually on the control panel.
☐Originals that are torn, folded, wrinkled, or curled (if the originals are curled, flatten the curl before placing the originals.)
☐Originals with a lot of binder holes
☐OHPs, translucent originals, or glossy originals
Available Originals for the ADF
| Available Paper Sizes A6 landscape to A3/Ledger (Maximum 297×431.8 mm) |
| Paper Type Plain paper, High-quality paper, Recycled paper |
| Paper Thickness (Weight of Paper) 52 to 128 g/m2 |
| Loading Capacity 50 sheets or 5.5 mm |
Even when the original meets the specifications for media that can be placed in the ADF, it may not feed from the ADF or the scan quality may decline depending on the paper properties or quality.

Important:
Do not feed photographs or valuable original artwork into the ADF. Misfeeding may wrinkle or damage the original. Scan these documents on the scanner glass instead.
To prevent paper jams, avoid placing the following originals in the ADF. For these types, use the scanner glass.
☐ Originals that are torn, folded, wrinkled, deteriorated, or curled
Preparing the Printer
☐Originals with binder holes
☐Originals held together with tape, staples, paper clips etc.
☐Originals that have stickers or labels stuck to them
☐Originals that are cut irregularly or not right angled
□Originals that are bound
☐OHPs, thermal transfer paper, or carbon backs
Placing Originals on the ADF
- Align the edges of the originals.
- Slide the ADF edge guides.
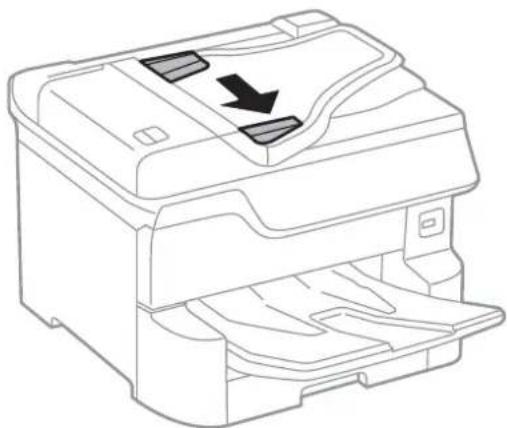
natural_image
Line drawing of a printer with a paperclip and arrow indicating print direction (no text or symbols)- Place the originals in the center of the ADF, facing up.
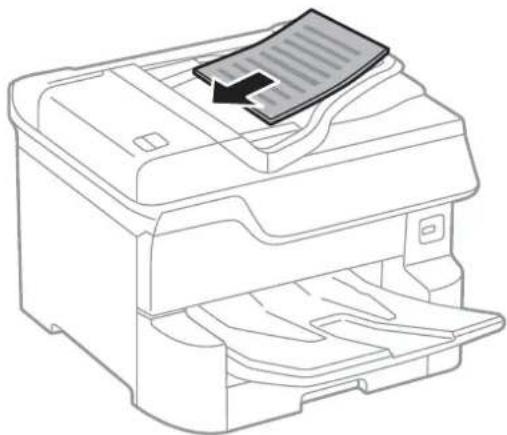
natural_image
Line drawing of a printer with paper lid and paper outlet (no text or symbols)Preparing the Printer

Important:
☐ Do not load originals above the line just under the triangle symbol inside the ADF edge guide.
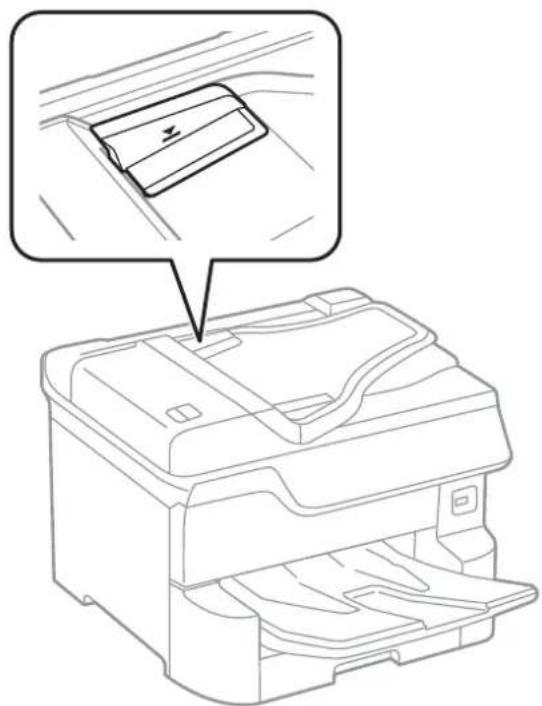
natural_image
Line drawing of a printer with an inset showing a close-up of the cover area (no text or symbols present)☐Do not add originals while scanning.
Note:
You can place originals smaller than A4 size with the long edge facing toward the ADF.
- Slide the ADF edge guides to the edges of the originals.
The size of the originals is automatically detected.
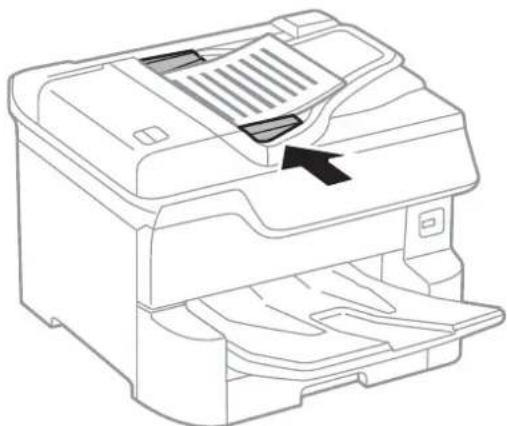
natural_image
Line drawing of a printer with paper feed and paper slot, showing internal structure without any text or symbolsNote:
Some sizes may not be automatically detected. In this situation, manually select the size of the originals.
Preparing the Printer
Related Information
→“Available Originals for the ADF” on page 37
Placing Originals on the ADF for 2-up Copying
Place the originals in the direction shown in the illustration, and then select the orientation setting.
☐ Placing the originals in the up direction: Select Up Direction on the control panel as described below.
Copy > Advanced > Orientation (Original) > Up Direction
Place the originals on the ADF in the direction of the arrow.
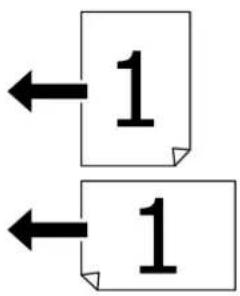
flowchart
graph TD
    A["1"] --> B["1"]
    B --> C["1"]
☐ Placing the originals in the left direction: Select Left Direction on the control panel as described below.
Copy > Advanced > Orientation (Original) > Left Direction
Place the originals on the ADF in the direction of the arrow.
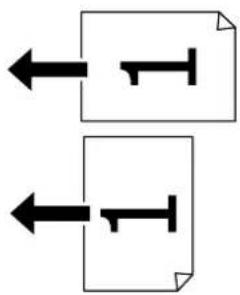
flowchart
graph TD
    A["1"] --> B["Document Icon"]
    C["1"] --> D["Document Icon"]
Placing Originals on the Scanner Glass

Caution:
Be careful not to trap your fingers when closing the document cover. Otherwise you may be injured.

Important:
When placing bulky originals such as books, prevent exterior light from shining directly onto the scanner glass.
Preparing the Printer
- Open the document cover.
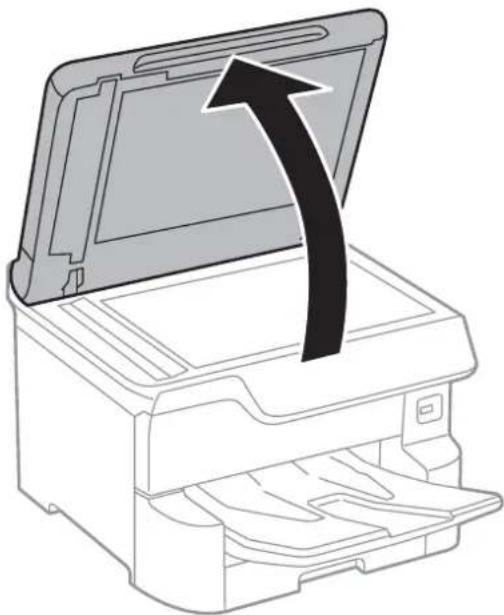
natural_image
Line drawing of a printer with an open lid and arrow indicating compression or shift (no text or symbols)-
Remove any dust or stains on the scanner glass.
-
Place the original face-down and slide it to the corner mark.
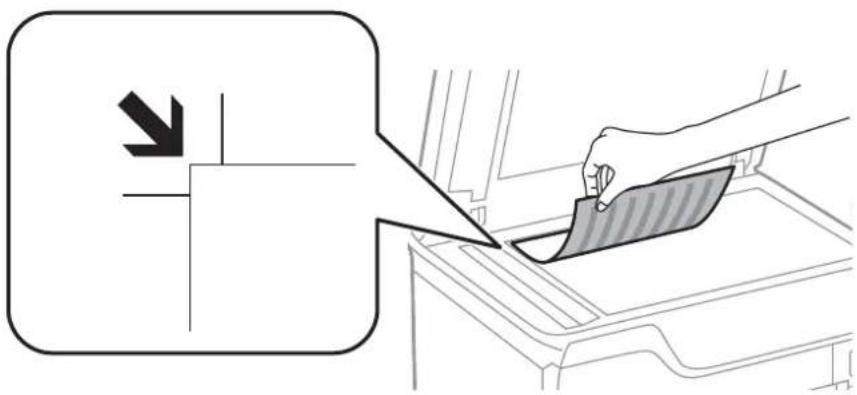
text_image
Diagram showing a hand holding a tray with a shaded area, pointing to a directional arrow and a box, indicating a process or operation.Note:
☐A range of 1.5 mm from the top edge or left edge of the scanner glass is not scanned.
☐ When originals are placed in the ADF and on the scanner glass, priority is given to the originals in the ADF.
- Close the cover gently.
The size of the originals is automatically detected. If the size is not detected, place the originals again.

Important:
Do not apply too much force to the scanner glass or the document cover. Otherwise, they may be damaged.
Note:
Some sizes may not be automatically detected. In this situation, manually select the size of the originals.
Preparing the Printer
- Remove the originals after scanning.
Note:
If you leave the originals on the scanner glass for a long time, they may stick to the surface of the glass.
Inserting an External USB Device
Inserting and Removing an External USB Device
- Insert an external USB device into the printer.
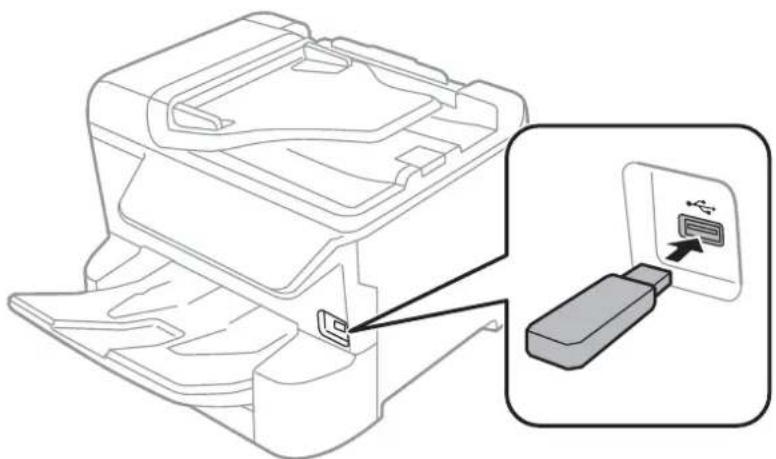
natural_image
Line drawing of a printer with a close-up inset showing a device labeled 'USB' (no text or symbols on the diagram itself)- When you have finished using the external USB device, remove the device.
Related Information
→“External USB Device Specifications” on page 242
→“Accessing an External USB Device From a Computer” on page 42
Accessing an External USB Device From a Computer
You can write or read data on an external USB device such as a USB flash drive that has been inserted in the printer from a computer.

Important:
When sharing an external device inserted in the printer between computers connected over USB and over a network, write access is only allowed to the computers that are connected by the method you selected on the printer. To write to the external USB device, select a connection method from the following menu on the printer's control panel.
Settings > General Settings > Printer Settings > Memory Device Interface > File Sharing.
Note:
It takes a while to recognize data from a computer if a large capacity external storage USB device, such as a device that is 2 TB, is connected.
Preparing the Printer
Windows
Select an external USB device in Computer or My Computer. The data on the external USB device is displayed.
Note:
If you connected the printer to the network without using the software disc or Web Installer, map a USB port as a network drive. Open Run and enter a printer name \XXXXX or a printer's IP address \XXX.XXX.XXX.XXX to Open:. Right-click a device icon displayed to assign the network. The network drive appears in Computer or My Computer.
Mac OS
Select a corresponding device icon. The data on the external USB device is displayed.
Note:
☐ To remove an external USB device, drag and drop the device icon to the trash icon. Otherwise, data in the shared drive may not be displayed correctly when another external USB device is inserted.
☐ To access an external storage device through the network, select Go > Connect to Server from the menu on the desktop. Enter a printer name cifs://XXXXX or smb://XXXXX (Where "xxxxx" is the printer name) in the Server Address, and then click Connect.
Managing Contacts
Registering a contacts list allows you to easily enter destinations. You can register up to 2,000 entries, and you can use the contacts list when you enter a fax number, enter a destination for attaching a scanned image to an email, and saving a scanned image to a network folder.
You can also use contacts in the LDAP server.
See the Administrator's Guide to use contacts in the LDAP server.
Registering or Editing Contacts
Note:
Before registering contacts, make sure you have also configured the email server settings to use the email address.
- Select Settings on the home screen.
- Select Contacts Manager, and then select Register/Delete.
- Do one of the following.
☐ To register a new contact, select Add Entry, and then select Add Contact.
☐ To edit a contact, select the target contact, and then select Edit.
☐ To delete a contact, select the target contact, select Delete, and then select Yes. You do not have to perform following procedures.
Note:
You can register an address that is registered in the LDAP server in the local contacts list of the printer. Display an entry, and then select Register to Contacts.
- When registering a new contact, select the type of contact you want to register. Skip this procedure when you want to edit or delete a contact.
☐Fax: Register a contact (fax number) to send a fax.
Preparing the Printer
☐ Email: Register an email address to send a scanned image or to forward the received fax.
☐ Network Folder/FTP: Register a network folder to save a scanned image or to forward the received fax.
- Enter the information of the address to register. Enter the required items, and then make other settings if necessary.
Note:
When entering a fax number, enter an external access code at the beginning of the fax number if your phone system is PBX and you need the access code to get an outside line. If the access code has been set in the Line Type setting, enter a hash (#) instead of the actual access code. To add a pause (pause for three seconds) during dialing, enter a hyphen (-).
- Select OK.
Registering or Editing Grouped Contacts
Adding contacts to a group allows you to send a fax or send a scanned image by an email to multiple destinations at the same time.
- Select Settings on the home screen.
- Select Contacts Manager, and then select Register/Delete.
- Do one of the following.
☐ To register a new group, select Add Entry, and then select Add Group.
☐ To edit a group, select the target group, and then select Edit.
☐ To delete a group, select the target group, select Delete, and then select Yes. You do not have to perform following procedures.
- When registering a new group, select the type of group you want to register. Skip this procedure when you want to edit a group.
☐Fax: Register a contact (fax number) to send a fax.
☐ Email: Register an email address to send a scanned image or to forward the received fax.
- Enter or edit the Group Name (Required) for the group.
- Select Contact(s) Added to the Group (Required).
- Select the contacts that you want to register in the group.
Note:
☐You can register up to 200 contacts.
☐To deselect a contact, tap it again.
-
Select Close.
-
Make the other necessary settings.
☐Registry Number: Set the number for a group.
☐Index Word: Set index word for the group.
☐ Assign to Frequent Use: Register as a frequently used group. The group is displayed at the top of the screen where you specify the address.
Preparing the Printer
- Select OK.
Registering Frequently Used Contacts
When you register frequently used contacts, the contacts are displayed at the top of the screen where you specify the address.
- Select Settings on the home screen.
- Select Contacts Manager, and then select Frequent.
-
Select the type of contact you want to register.
-
Select Edit.
Note:
To edit the order of the contacts, select Sort.
- Select frequently used contacts that you want to register, and then select OK.
Note:
☐To deselect a contact, tap it again.
☐ You can search for addresses from the contacts list. Enter the search keyword into the box on the top of the screen.
- Select Close.
Register Contacts on a Computer
Using Web Config, you can create a contact list on your computer and import it to the printer.
See the Administrator's Guide for details.
Backing up Contacts using a Computer
Using Web Config, you can back up the contact data stored in the printer to the computer.
See the Administrator's Guide for details.
Contacts data may be lost due to a printer malfunction. We recommend that you make a backup of the data whenever you update the data. Epson shall not be responsible for the loss of any data, for backing up or recovering data and/or settings even during a warranty period.
Registering Your Favorite Settings as a Preset
You can register frequently used copy, fax, and scan settings as presets. You can register up to 50 entries. If you cannot edit the presets, they may have been locked by the administrator. Contact your printer administrator for assistance.
To register a preset, select Presets from the home screen, select Add New, and then select the feature for which you want to register a preset. Make the necessary settings, select ☆, and then enter a name for the preset.
To load a registered preset, select the preset from the list.
Preparing the Printer
You can also register the current address and settings to select on the screen of each feature.
To change the registered settings, change the settings on the screen for each feature and select ★. Select Save as Preset, and then select the target that you want to overwrite.
Menu Options for Presets
Select > on the registered preset to display the details of the registered settings. You can change the registered name by selecting the name on the details screen.

Delete the registered preset.
Add /Remove:
Add or clear the registered preset to the home screen as a short-cut icon.
Use This Setting:
Load the registered preset.
Menu Options for Settings
Select Settings on the home screen of the printer to make various settings.
Menu Options for General Settings
Select the menus on the control panel as described below.
Settings > General Settings
Basic Settings
Select the menus on the control panel as described below.
Settings > General Settings > Basic Settings
You cannot change settings that have been locked by your administrator.
LCD Brightness:
Adjust the brightness of the LCD screen.
Sound:
Adjust the volume and select the type of the sound.
Sleep Timer:
Adjust the time period to enter a sleep mode (energy saving mode) when the printer has not performed any operations. The LCD screen turns black when the setting time passes.
Preparing the Printer
Power Off Timer:
Your product may have this feature or the Power Off Settings feature depending on the location of purchase.
Select this setting to turn the printeroff automatically when it is not used for a specified period of time. You can adjust the time before power management is applied. Any increase will affect the product's energy efficiency. Please consider the environment before making any change.
Power Off Settings:
Your product may have this feature or the Power Off Timer feature depending on the location of purchase.
Power Off If Inactive
Select this setting to turn the printer off automatically if it is not used for a specified period of time. Any increase will affect the product's energy efficiency. Please consider the environment before making any change.
Power Off If Disconnected
Select this setting to turn the printer off after 30 minutes when all network ports including the LINE port are disconnected. This feature may not be available depending on your region.
Date/Time Settings:
Date/Time
Enter the current date and time.
□Daylight Saving Time
Select the summer time setting that applies to your area.
□Time Difference
Enter the time difference between your local time and UTC (Coordinated Universal Time).
Country/Region:
Select the country or region in which you are using your printer. If you change the country or region, your fax settings return to their defaults and you must select them again.
Language:
Select the language used on the LCD screen.
Start-up Screen:
Specify the initial menu displayed on the LCD screen when the printer turns on and Operation Time Out is enable.
Edit Home:
Change the layout of the icons on the LCD screen. You can also add, delete, and replace icons.
Wall Paper:
Change the background color of the LCD screen.
Operation Time Out:
Select On to return to the initial screen when no operations have been performed for the specified time. When user restrictions have been applied and no operations are performed for the specified time, you are logged out and returned to the initial screen.
Preparing the Printer
Keyboard:
Change the layout of the keyboard on the LCD screen.
Color Print Count Alert:
Select On to display a confirmation message that asks if you want to continue printing when a print job with grayscale is counted as a color print job.
Default Screen(Job/Status):
Select the default information you want to display when you press the button.
Related Information
→“Saving Power” on page 58
→“Entering Characters” on page 23
Printer Settings
Select the menus on the control panel as described below.
Settings > General Settings > Printer Settings
You cannot change settings that have been locked by your administrator.
Paper Source Settings:
Paper Setting:
Select the paper source to specify the paper size and paper type you loaded. When Paper Size Auto Detect is enabled, the printer detects the paper size you loaded.
Rear Paper Feed Priority:
Select On to give printing priority to paper loaded in the rear paper feed.
A4/Letter Auto Switching:
Select On to feed paper from the paper source set as A4 size when there is no paper source set as Letter, or feed from the paper source set as Letter size when there is no paper source set as A4.
Auto Select Settings:
Select On for any of following settings to automatically print on paper from any source containing paper that matches your paper settings.
□Copy
Fax
□Other
Error Notice:
Select On to display an error message when the selected paper size or type does not match the loaded paper.
Preparing the Printer
Paper Setup Auto Display:
Select On to display the Paper Setting screen when loading paper in the paper source. If you disable this feature, you cannot print from an iPhone or iPad using AirPrint.
Printing Language:
Select the printing language for the USB interface or the network interface.
Universal Print Settings:
These print settings are applied when you print by an external device without using the printer driver.
Top Offset:
Adjust the top margin of the paper.
Left Offset:
Adjust the left margin of the paper.
Top Offset in Back:
Adjust the top margin for the back of the page when performing 2-sided printing.
Left Offset in Back:
Adjust the left margin for the back margin of the page when performing 2-sided printing.
Check Paper Width:
Select On to check the paper width before printing. This prevents printing beyond the edges of the paper when the paper size setting is incorrect, but this may lower the print speed.
Skip Blank Page:
Skips blank pages in the print data automatically.
PDL Print Configuration:
Select the PDL Print Configuration options you want to use for PCL or PostScript printing.
Common Settings:
□Paper Size Select the default paper size for PCL or PostScript printing.
☐Paper Type Select the default paper type for PCL or PostScript printing.
☐Orientation Select the default orientation for PCL or PostScript printing.
☐Quality Select the print quality for PCL or PostScript printing.
☐Ink Save Mode Select On to save ink by reducing the print density.
Preparing the Printer
Print Order
Last Page on Top:
Starts printing from the first page of a file.
First Page on Top:
Starts printing from the last page of a file.
Number of Copies
Set the number of copies to print.
□Binding Margin
Select the binding position.
□Auto Paper Ejection
Select On to eject paper automatically when printing is stopped during a print job.
□2-Sided Printing
Select On to perform 2-sided printing.
PCL Menu:
□Font Source
Resident
Select to use a font preinstalled on the printer.
Download
Select to use a font you have downloaded.
□Font Number
Select the default font number for the default font source. The available number varies depending on the settings you made.
Pitch
Set the default font pitch if the font is scalable and of fixed-pitch. You can select from 0.44 to 99.99 cpi (characters per inch), in 0.01 increments.
This item may not appear depending on the font source or font number settings.
□Height
Set the default font height if the font is scalable and proportional. You can select from 4.00 to 999.75 points, in 0.25 increments.
This item may not appear depending on the font source or font number settings.
□Symbol Set
Select the default symbol set. If the font that you selected in the font source and the font number setting is not available in the new symbol set setting, the font source and the font number settings are automatically replaced with the default value, IBM-US.
Form
Set the number of lines for the selected paper size and orientation. This also causes a line spacing (VMI) change, and the new VMI value is stored in the printer. This means that later changes in the page size or orientation settings cause changes in the Form value based on the stored VMI.
□CR Function
Select the line feed command when printing with a driver from a specific operating system.
Preparing the Printer
LF Function
Select the line feed command when printing with a driver from a specific operating system.
□Paper Source Assign
Set the assignment for the paper source select command. When 4 is selected, the commands are set as compatible with the HP LaserJet 4. When 4K is selected, the commands are set as compatible with the HP LaserJet 4000, 5000, and 8000. When 5S is selected, the commands are set as compatible with the HP LaserJet 5S.
PS3 Menu:
Error Sheet
Select On to print a sheet showing the status when an error occurs during PostScript or PDF printing.
□Coloration
Select the color mode for PostScript printing.
Binary
Select On when printing data that contains binary images. The application may send the binary data even if the printer driver setting is set to ASCII, but you can print the data when this feature is enabled.
PDF Page Size
Select the paper size when printing a PDF file. If Auto is selected, the paper size is determined based on the size of the first page.
Auto Error Solver:
Select an action to perform when a 2-sided printing error or a memory full error occurs.
□On
Displays a warning and prints in single-sided mode when a 2-sided printing error occurs, or prints only what the printer could process when a memory full error occurs.
□Off
Displays an error message and cancels printing.
Memory Device Interface:
□Memory Device:
Select Enable to allow the printer to access an inserted memory device. If Disable is selected, you cannot save data to the memory device with the printer. This prevents confidential documents from being removed illegally.
□File Sharing:
Select whether to give write access to the memory device from a USB-connected computer or a network-connected computer.
Thick Paper:
Select On to prevent ink from smearing on your printouts, however, this may lower the print speed.
Quiet Mode:
Select On to reduce noise during printing, however, this may lower the print speed. Depending on the paper type and print quality settings you selected, there may be no difference in the printer's noise level.
Preparing the Printer
Ink Drying Time:
Select the ink drying time you want to use when performing 2-sided printing. The printer prints the other side after printing one side. If your printout is smeared, increase the time setting.
Bidirectional:
Select On to change the print direction; Prints while the print head moves to the left and to the right. If vertical or horizontal ruled lines on your printout look blurred or misaligned, disabling this feature may solve the problem; however, doing so may reduce print speed.
PC Connection via USB:
Select Enable to allow a computer to access the printer when connected by USB. When Disable is selected, printing and scanning that is not sent over a network connection is restricted.
USB I/F Timeout Setting:
Specify the length of time in seconds that must elapse before ending USB communication with a computer after the printer receives a print job from a PostScript printer driver or PCL printer driver. If the job ending is not clearly defined from a PostScript printer driver or PCL printer driver, it can cause endless USB communication. When this occurs, the printer ends communication after the specified time has elapsed. Enter 0 (zero) if you do not want to end communication.
Related Information
→“Loading Papers” on page 26
→“Printing JPEG Files from a Memory Device” on page 90
→“Printing PDF or TIFF Files from a Memory Device” on page 91
Network Settings
Select the menus on the control panel as described below.
Settings > General Settings > Network Settings
You cannot change settings that have been locked by your administrator.
Wi-Fi Setup:
Set up or change wireless network settings. Choose the connection method from the following and then follow the instructions on the LCD panel.
Router
Wi-Fi Direct
Wired LAN Setup:
Set up or change a network connection that uses a LAN cable and router. When this is being used, Wi-Fi connections are disabled.
Network Status:
Displays or prints the current network settings.
□WiredLAN/Wi-FiStatus
□Wi-Fi Direct Status
Preparing the Printer
Email Server Status
□Print Status Sheet
Connection Check:
Checks the current network connection and prints a report. If there are any problems with the connection, see the report to solve the problem.
Advanced:
Make the following detailed settings.
□Device Name
TCP/IP
Proxy Server
Email Server
□IPv6 Address
□MS Network Sharing
NFC
Link Speed & Duplex
☐Redirect HTTP to HTTPS
□Disable IPsec/IP Filtering
□Disable IEEE802.1X
Web Service Settings
Select the menus on the control panel as described below.
Settings > General Settings > Web Service Settings
You cannot change settings that have been locked by your administrator.
Epson Connect Services:
Displays whether the printer is registered and connected to Epson Connect.
You can register to the service by selecting Register and follow the instructions.
When you have registered, you can change the following settings.
□Suspend/Resume
□Unregister
For details, see the following web site.
https://www.epsonconnect.com/
http://www.epsonconnect.eu (Europe only)
Google Cloud Print Services:
Displays whether the printer is registered and connected to Google Cloud Print services.
When you have registered, you can change the following settings.
Preparing the Printer
Enable/Disable
□Unregister
For details on registering to Google Cloud Print services, see the following web site.
https://www.epsonconnect.com/
http://www.epsonconnect.eu (Europe only)
Related Information
→ "Printing Using a Network Service" on page 197
Fax Settings
Select the menu on the control panel as described below.
Settings > General Settings > Fax Settings
Administrators use this feature. See the Administrator's Guide for details.
Scan Settings
Select the menu on the control panel as described below.
Settings > General Settings > Scan Settings
See Related Information below.
Related Information
→“Scanning to a Network Folder or FTP Server” on page 105
→“Scanning to a Memory Device” on page 115
→“Scanning to the Cloud” on page 117
System Administration
Select the menu on the control panel as described below.
Settings > General Settings > System Administration
Administrators use this feature. See the Administrator's Guide for details.
Menu Options for Print Counter
Select the menus on the control panel as described below.
Settings > Print Counter
Displays the total number of prints, B&W prints, and color prints from the time you purchased the printer.
Preparing the Printer
Menu Options for Supply Status
Select the menu on the control panel as described below.
Settings > Supply Status
Displays the approximate level of the ink and service life of the maintenance box.
When ⚙ is displayed, ink is running low or the maintenance box is nearly full. When ✗ is displayed, you need to replace the item as ink is expended or the maintenance box is full.
You can replace ink cartridges or print supply status information from this screen.
Menu Options for Maintenance
Select the menus on the control panel as described below.
Settings > Maintenance
Print Quality Adjustment:
Select this feature if there are any problems with your print outs. You can check for clogged nozzles and clean the print head if necessary, and then adjust some parameters to improve print quality.
Print Head Nozzle Check:
Select this feature to check if the print head nozzles are clogged. The printer prints a nozzle check pattern.
Print Head Cleaning:
Select this feature to clean clogged nozzles in the print head.
Ruled Line Alignment:
Select this feature to align vertical lines.
Paper Guide Cleaning:
Select this feature if there are ink stains on the internal rollers. The printer feeds paper to clean the internal rollers.
Remove Paper:
Select this feature if there are still some torn pieces of paper inside the printer even after removing jammed paper. The printer makes more space between the print head and the surface of the paper to easily remove the torn pieces of paper.
Maintenance Roller Information:
□Maintenance Roller Status
Displays the status of the maintenance rollers for the selected paper cassette.
☐Reset Maintenance Roller Counter
After replacing maintenance rollers, reset the counter for the paper cassette in which you replaced the maintenance rollers.
Preparing the Printer
Print Quality Adjustment per Paper:
Depending on the paper type, ink feathering isdiffers. Select this feature if there is banding in the print outs or misalignment for a specific paper type.
Related Information
→“Adjusting the Print Quality” on page 215
→“Checking and Cleaning the Print Head” on page 180
→ "Aligning Ruled Lines" on page 181
→“Adjusting the Print Quality for Each Paper Type” on page 216
→“Cleaning the Paper Path for Ink Smears” on page 182
Menu Options for Language
Select the menus on the control panel as described below.
Settings > Language
Select the language used on the LCD screen.
Menu Options for Printer Status/Print
Select the menus on the control panel as described below.
Settings > Printer Status/Print
Print Status Sheet:
Configuration Status Sheet:
Print information sheets showing the current printer status and settings.
Supply Status Sheet:
Print information sheets showing the status of consumables.
Usage History Sheet:
Print information sheets showing the usage history of the printer.
PS3 Font List:
Print a list of fonts that are available for a PostScript printer.
PCL Font List:
Print a list of fonts that are available for a PCL printer.
Network:
Displays the current network settings.
Preparing the Printer
Menu Options for Contacts Manager
Select the menus on the control panel as described below.
Settings > Contacts Manager
Register/Delete:
Register and/or delete contacts for the Fax, Scan to Email, and Scan to Network Folder/FTP menus.
Frequent:
Register frequently used contacts to access them quickly. You can also change the order of the list.
Print Contacts:
Print your contact list.
View Options:
Change the way the contact list is displayed.
Search Options:
Change the method for searching contacts.
Menu Options for User Settings
Select the menus on the control panel as described below.
Settings > User Settings
You cannot change settings that have been locked by your administrator.
You can change the default settings of the following menus.
□Scan to Network Folder/FTP
□Scan to Email
□Scan to Memory Device
□Scan to Cloud
□Copy Settings
Fax
Menu Options for Authentication Device Status
Select the menus on the control panel as described below.
Settings > Authentication Device Status
Displays the status of the authentication device.
Preparing the Printer
Menu Options for Epson Open Platform Information
Select the menus on the control panel as described below.
Settings > Epson Open Platform Information
Displays the status of the Epson Open Platform.
Saving Power
The printer enters sleep mode or turns off automatically if no operations are performed for a set period. You can adjust the time before power management is applied. Any increase will affect the product's energy efficiency. Please consider the environment before making any change.
Depending on the location of purchase, the printer may have a feature that turns it off automatically if it is not connected to the network for 30 minutes.
Saving Power - Control Panel
- Select Settings on the home screen.
- Select General Settings > Basic Settings.
- Do one of the following.
☐ Select Sleep Timer or Power Off Settings >PowerOff If Inactive or Power Off If Disconnected, and then make settings.
☐ Select Sleep Timer or Power Off Timer, and then make settings.
Note:
Your product may have the Power Off Settings or Power Off Timer feature depending on the location of purchase.
Printing
Printing from the Printer Driver on Windows
If you cannot change some of the printer driver settings, they may have been restricted by the administrator. Contact your printer administrator for assistance.
Accessing the Printer Driver
When accessing the printer driver from the computer's control panel, the settings are applied to all of the applications.
Accessing the printer driver from the control panel
□Windows 10/Windows Server 2016
Right-click the start button or press and hold it, and then select Control Panel > View devices and printers in Hardware and Sound. Right-click on your printer, or press and hold it and then select Printing preferences.
☐Windows 8.1/Windows 8/Windows Server 2012 R2/Windows Server 2012
Select Desktop > Settings > Control Panel > View devices and printers in Hardware and Sound. Right-click on your printer, or press and hold it and then select Printing preferences.
□Windows 7/Windows Server 2008 R2
Click the start button, and select Control Panel > View devices and printers in Hardware and Sound. Right-click on your printer and select Printing preferences.
□Windows Vista/Windows Server 2008
Click the start button, and select Control Panel > Printers in Hardware and Sound. Right-click on your printer and select Select printing preferences.
☐Windows XP/Windows Server 2003 R2/Windows Server 2003
Click the start button, and select Control Panel > Printers and Other Hardware > Printers and Faxes. Right-click on your printer and select Printing preferences.
Accessing the printer driver from the printer icon on the task bar
The printer icon on the desktop task bar is a shortcut icon allowing you to quickly access the printer driver.
If you click the printer icon and select Printer Settings, you can access the same printer settings window as the one displayed from the control panel. If you double-click this icon, you can check the status of the printer.
Note:
If the printer icon is not displayed on the task bar, access the printer driver window, click Monitoring Preferences on the Maintenance tab, and then select Register the shortcut icon to the taskbar.
Printing Basics
Note:
Operations may differ depending on the application. See the application's help for details.
Printing
- Open the file you want to print.
Load paper in the printer if it has not already been loaded.
-
Select Print or Page Setup from the File menu.
-
Select your printer.
-
Select Preferences or Properties to access the printer driver window.
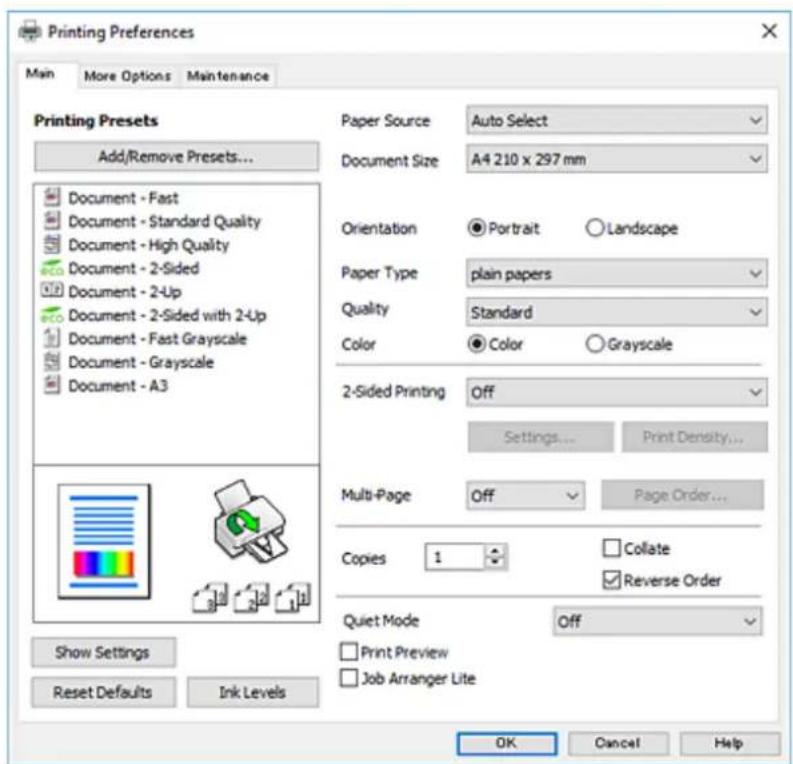
text_image
Printing Preferences Main More Options Maintenance Printing Presets Add/Remove Presets... Document - Fast Document - Standard Quality Document - High Quality Document - 2-Sided Document - 2-Up Document - 2-Sided with 2-Up Document - Fast Grayscale Document - Grayscale Document - A3 Show Settings Reset Defaults Ink Levels Paper Source Auto Select Document Size A4 210 x 297 mm Orientation Portrait Landscape Paper Type plain papers Quality Standard Color Color Grayscale 2-Sided Printing Off Settings... Print Density... Multi-Page Off Page Order... Copies 1 Collate Reverse Order Quiet Mode Off Print Preview Job Arranger Lite OK Cancel Help- Change the settings as necessary.
See the menu options for the printer driver for details.
Note:
☐ You can also see the online help for explanations of the setting items. Right-clinking an item displays Help.
☐ When you select Print Preview, you can see a preview of your document before printing.
-
Click OK to close the printer driver window.
-
Click Print.
Note:
When you select Print Preview, a preview window is displayed. To change the settings, click Cancel, and then repeat the procedure from step 2.
Related Information
→“Available Paper and Capacities” on page 26
→“Loading Paper in the Paper Cassette” on page 30
→ "Loading Paper in the Rear Paper Feed" on page 32
→ "List of Paper Type" on page 35
Printing
→“Main Tab” on page 76
Printing on 2-Sides
You can print on both sides of the paper. You can also print a booklet that can be created by re-ordering the pages and folding the printout.
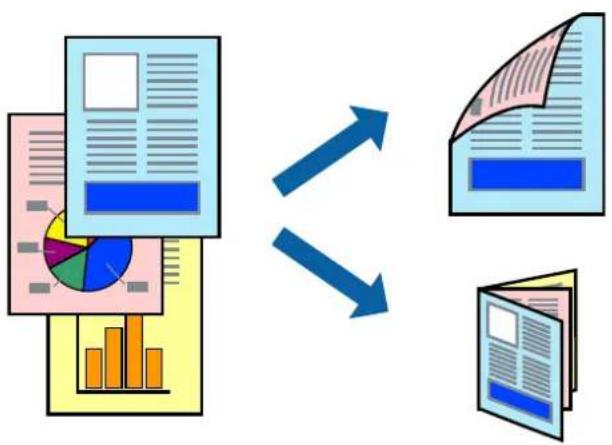
flowchart
graph TD
    A["Document Submission"] --> B["Data Collection"]
    B --> C["Output"]
    D["Document Export"] --> E["Document Review"]
    E --> F["Output"]
Note:
☐ You can use automatic and manual 2-sided printing. During manual 2-sided printing, flip the paper over to print on the other side when the printer has finished printing the first side.
☐ If you do not use paper that is suitable for 2-sided printing, the print quality may decline and paper jams may occur.
☐ Depending on the paper and the data, ink may bleed through to the other side of the paper.
Related Information
→ "Available Paper and Capacities" on page 26
Print Settings
Manual 2-sided printing is available when EPSON Status Monitor 3 is enabled. However, it may not be available when the printer is accessed over a network or is used as a shared printer.
Note:
To enable EPSON Status Monitor 3, click Extended Settings on the Maintenance tab, and then select Enable EPSON Status Monitor 3.
-
On the printer driver's Main tab, select an option from 2-Sided Printing.
-
Click Settings, make the appropriate settings, and then click OK.
Make settings for Print Density if necessary. This setting is not available when you select manual 2-sided printing.
Note:
☐ To print a folded booklet, select Booklet.
☐ When setting Print Density, you can adjust print density according to the document type.
☐ Printing may be slow depending on the combination of options selected for Select Document Type in the Print Density Adjustment window and for Quality on the Main tab.
User's Guide
Printing
3. Click Print.
For manual 2-sided printing, when the first side has finished printing, a pop-up window is displayed on the computer. Follow the on-screen instructions.
Related Information
→“Printing Basics” on page 59
→“Main Tab” on page 76
Printing Several Pages on One Sheet
You can print two or four pages of data on a single sheet of paper.
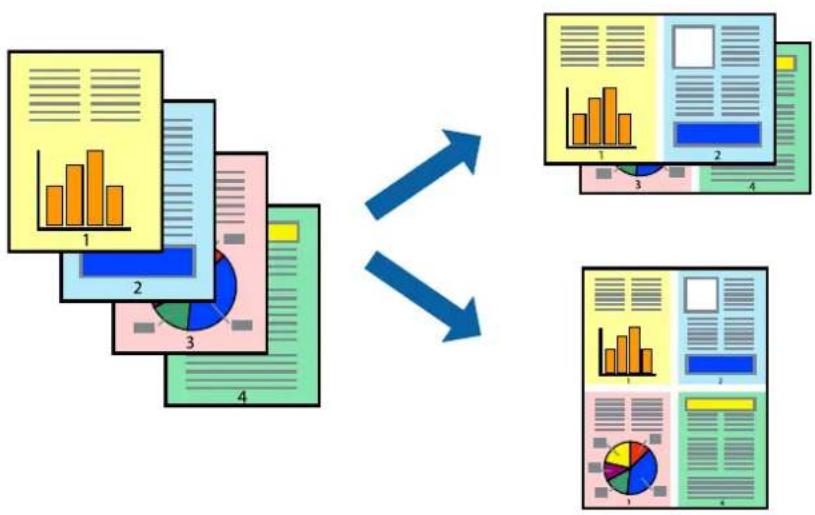
flowchart
graph TD
    A["Input Data"] --> B["Processing Step 1"]
    B --> C["Processing Step 2"]
    C --> D["Processing Step 3"]
    D --> E["Output Format 1"]
    D --> F["Output Format 2"]
    D --> G["Output Format 3"]
    style A fill:#f9f,stroke:#333
    style B fill:#ccf,stroke:#333
    style C fill:#cfc,stroke:#333
    style D fill:#fcc,stroke:#333
    style E fill:#ffc,stroke:#333
    style F fill:#fcc,stroke:#333
    style G fill:#ffc,stroke:#333
Print Settings
On the printer driver's Main tab, select 2-Up or 4-Up as the Multi-Page setting.
Related Information
→ "Printing Basics" on page 59
→“Main Tab” on page 76
Printing
Printing and Stacking in Page Order (Reverse Order Printing)
You can print from the last page so that the documents are stacked in page order.
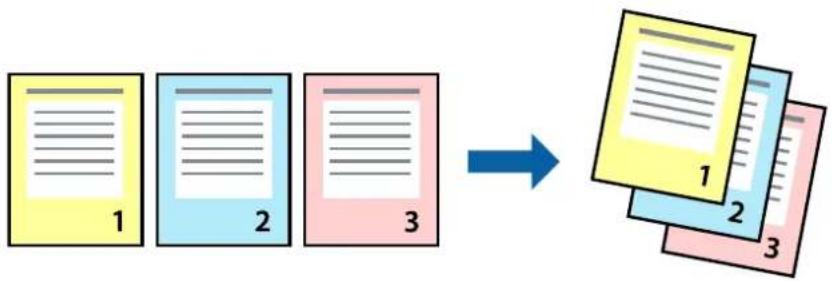
flowchart
graph LR
    A["1"] --> B["2"]
    B --> C["3"]
    D["1"] --> E["2"]
    E --> F["3"]
Print Settings
On the printer driver's Main tab, select Reverse Order.
Related Information
→“Printing Basics” on page 59
→“Main Tab” on page 76
Printing a Reduced or Enlarged Document
You can reduce or enlarge the size of a document by a specific percentage or to fit the paper size you loaded in the printer.
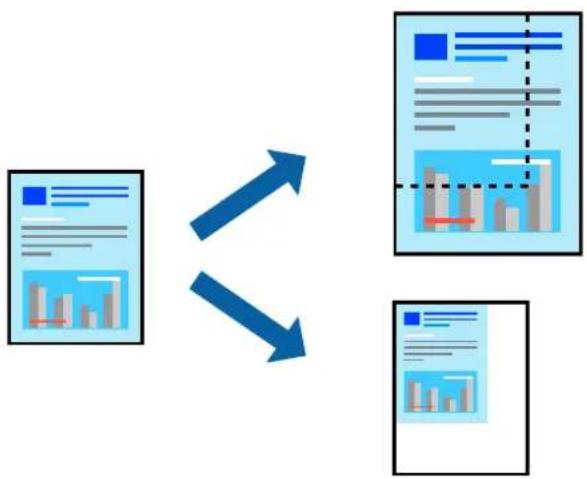
flowchart
graph TD
    A["Input Image"] --> B["Processing Step"]
    B --> C["Output Image"]
    A <--> B
Print Settings
On the printer driver's More Options tab, select the document size from the Document Size setting. Select the paper size you want to print on from the Output Paper setting. Select Reduce/Enlarge Document, and then select Fit to Page or Zoom to. When you select Zoom to, enter a percentage.
Select Center to print the images in the center of the page.
Printing
Related Information
→“Printing Basics” on page 59
→“More Options Tab” on page 77
Printing One Image on Multiple Sheets for Enlargement (Creating a Poster)
This feature allows you to print one image on multiple sheets of paper. You can create a larger poster by taping them together.

flowchart
graph LR
    A["Document Image"] --> B["Representation"]
    B --> C["Text Blocks"]
    C --> D["Output Text Blocks"]
Print Settings
On the printer driver's Main tab, select 2x1 Poster, 2x2 Poster, 3x3 Poster, or 4x4 Poster as the Multi-Page setting. If you click Settings, you can select the panels that you do not want to print. You can also select the cutting guide options.
Related Information
→“Printing Basics” on page 59
→“Main Tab” on page 76
Printing
Making Posters Using Overlapping Alignment Marks
Here is an example of how to make a poster when 2x2 Poster is selected, and Overlapping Alignment Marks is selected in Print Cutting Guides.
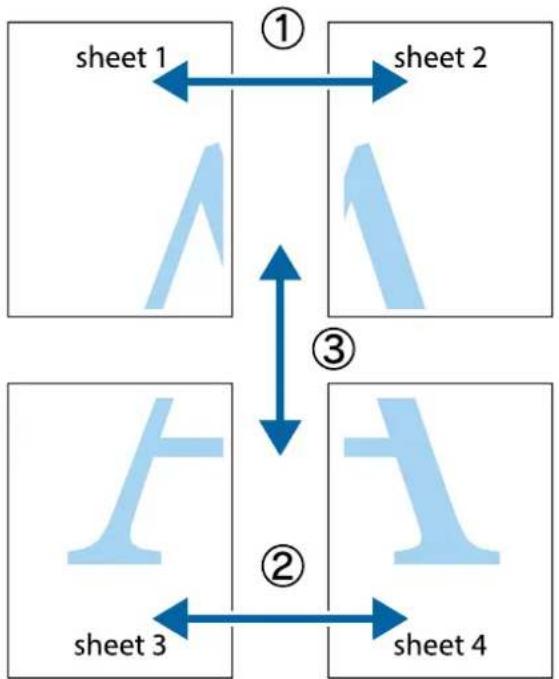
flowchart
graph TD
    A["① sheet 1"] --> B["② sheet 3"]
    C["③ sheet 2"] --> D["② sheet 4"]
    E["④ sheet 1"] --> F["③ sheet 3"]
    G["⑤ sheet 2"] --> H["② sheet 4"]
- Prepare Sheet 1 and Sheet 2. Cut off the margins of Sheet 1 along the vertical blue line through the center of the top and bottom cross marks.
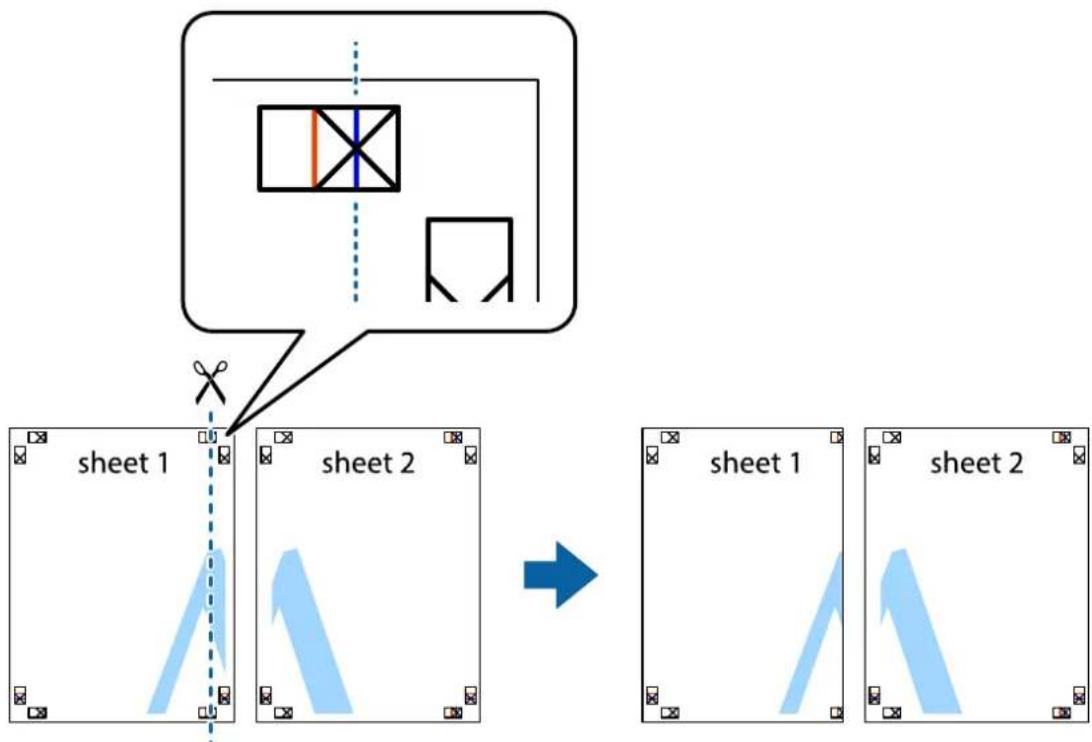
flowchart
graph TD
    A_sheet1["sheet 1"] --> B sheet2 sheet2 sheet2
    style A fill:#f9f,stroke:#333
    style B fill:#bbf,stroke:#333
    subgraph A
        C["Diagram: Cutting scissors"]
        D["Diagram: Vertical lines within rectangle"]
        E["Diagram: Vertical line within rectangle"]
    end
    subgraph B
        F["Arrow pointing right"]
    end
    subgraph C
        G["Arrow pointing left"]
    end
    subgraph D
        H["Arrow pointing left"]
    end
    subgraph E
        I["Arrow pointing right"]
    end
Printing
- Place the edge of Sheet 1 on top of Sheet 2 and align the cross marks, then temporarily tape the two sheets together from the back.
text_image
sheet 1 sheet 2- Cut the taped sheets in two along the vertical red line through the alignment markers (this time, the line to the left of the cross marks).
flowchart
graph TD
    A["Speech Bubble"] --> B["Arrow pointing to Sheet 1"]
    B --> C["Sheet 1: Vertical line with cross at center"]
    B --> D["Sheet 2: Vertical line with cross at center"]
    C --> E["Blank Sheet Layout"]
    D --> F["Blank Sheet Layout"]
User's Guide
Printing
- Tape the sheets together from the back.
text_image
sheet 1 sheet 2-
Repeat steps 1 to 4 to tape Sheet 3 and Sheet 4 together.
-
Cut off the margins of Sheet 1 and Sheet 2 along the horizontal blue line through the center of the left and right side cross marks.
text_image
sheet 1 sheet 2Printing
- Place the edge of Sheet 1 and Sheet 2 on top of Sheet 3 and Sheet 4 and align the cross marks, and then temporarily tape them together from the back.
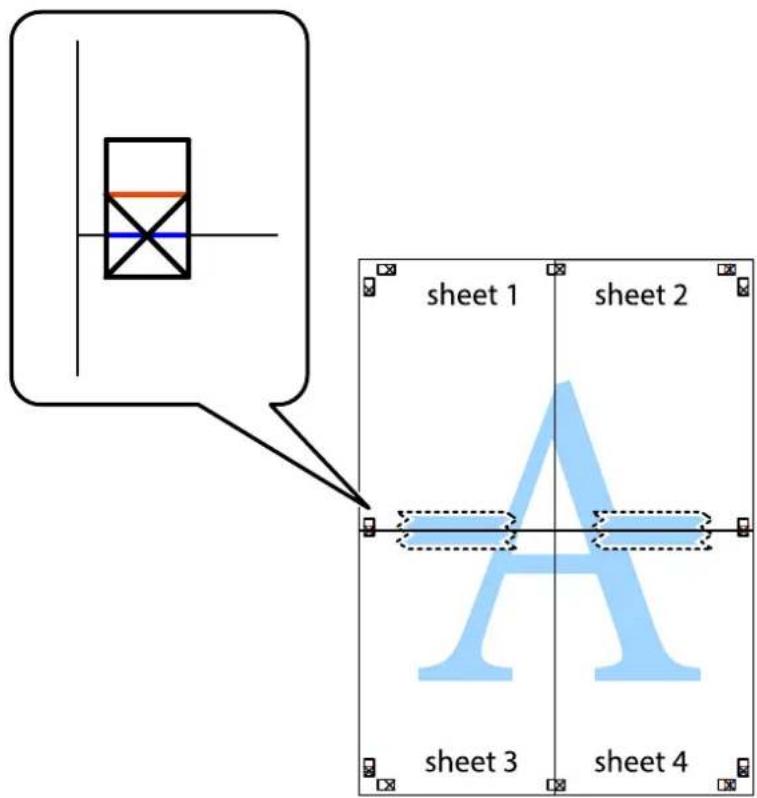
text_image
sheet 1 sheet 2 A sheet 3 sheet 4Printing
- Cut the taped sheets in two along the horizontal red line through the alignment markers (this time, the line above the cross marks).
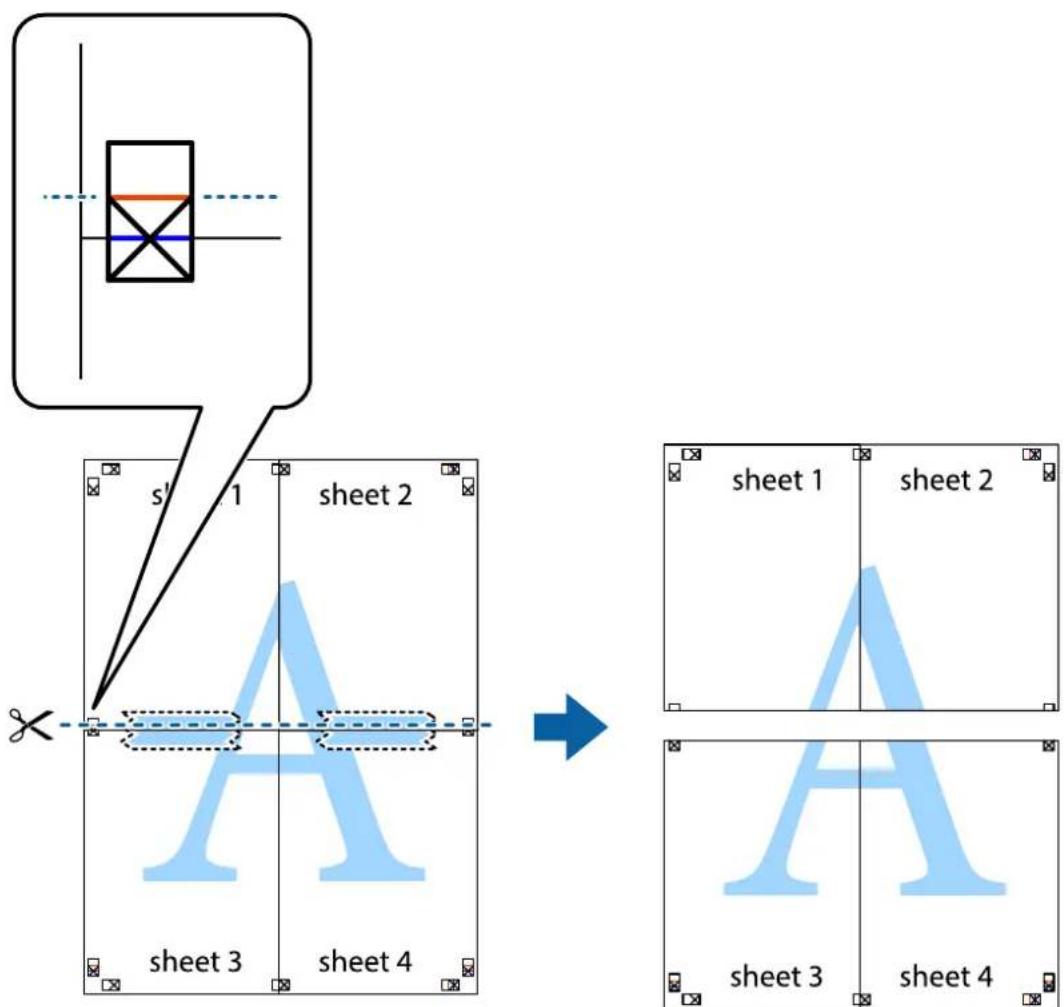
text_image
s' 1 sheet 2 sheet 1 sheet 2 sheet 3 sheet 4 sheet 3 sheet 4- Tape the sheets together from the back.
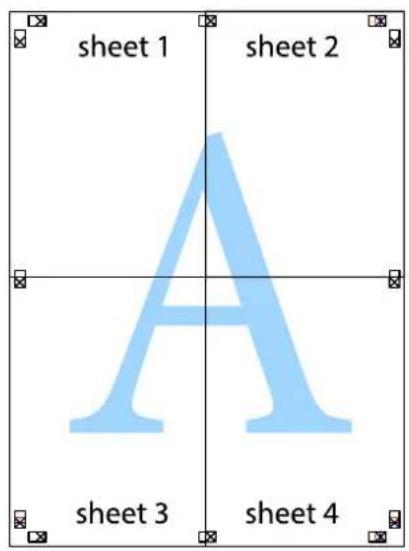
text_image
sheet 1 sheet 2 A sheet 3 sheet 4Printing
- Cut off the remaining margins along the outer guide.
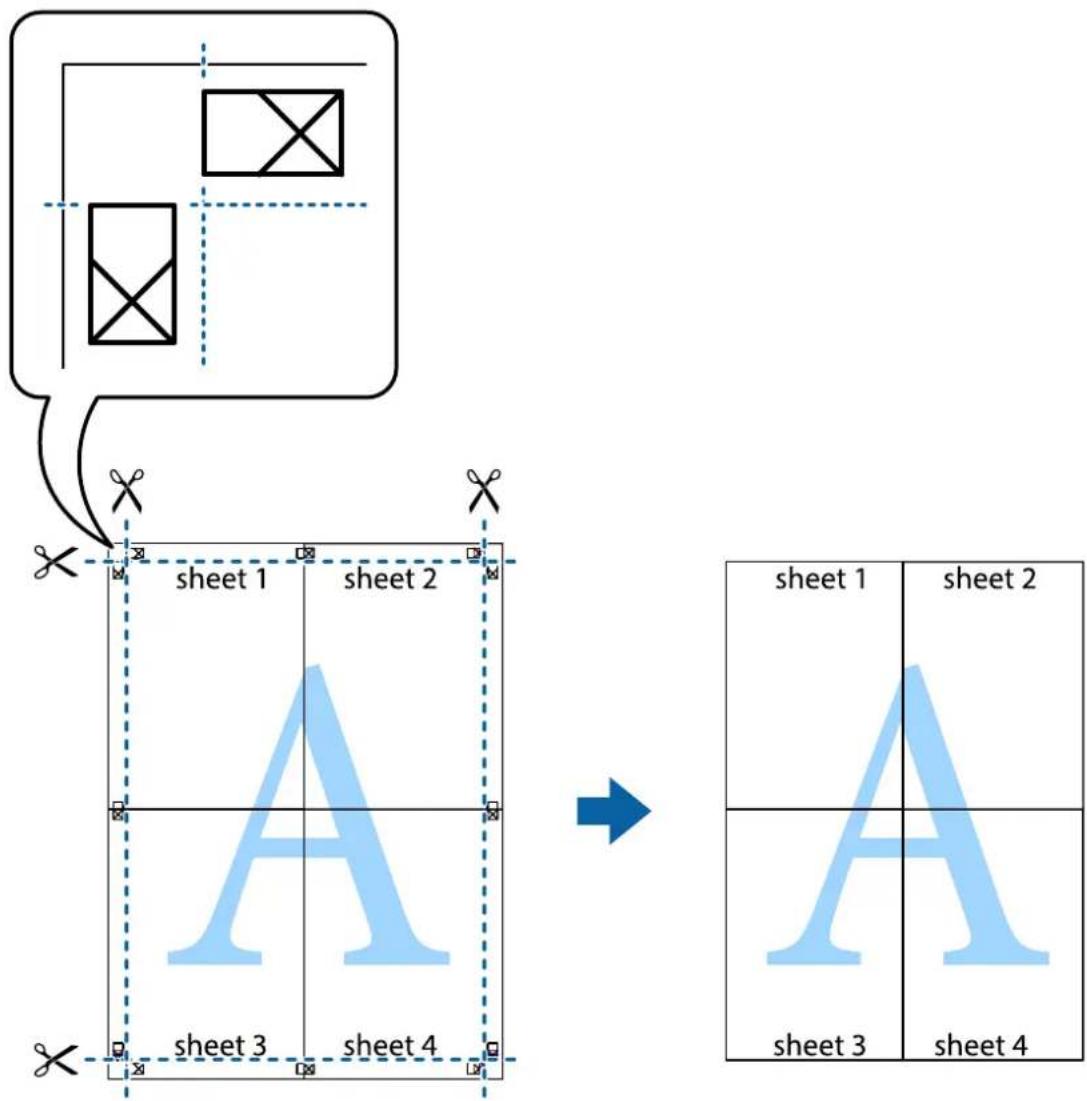
text_image
sheet 1 sheet 2 sheet 3 sheet 4 sheet 1 sheet 2 sheet 3 sheet 4Printing with a Header and Footer
You can print information such as a user name and printing date in headers or footers.
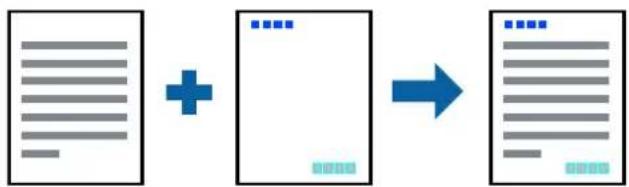
flowchart
graph LR
    A["Document Input"] --> B["Add +"]
    B --> C["Output"]
    style A fill:#f9f,stroke:#333
    style C fill:#bbf,stroke:#333
Print Settings
On the printer driver's More Options tab, click Watermark Features, and then select Header/footer. Click Settings, and then select the items you want to print.
Printing
Related Information
→“Printing Basics” on page 59
→“More Options Tab” on page 77
Printing a Watermark
You can print a watermark such as "Confidential" or an anti-copy pattern on your printouts. If you print with an anti-copy pattern, the hidden letters appear when photocopied in order to distinguish the original from the copies.
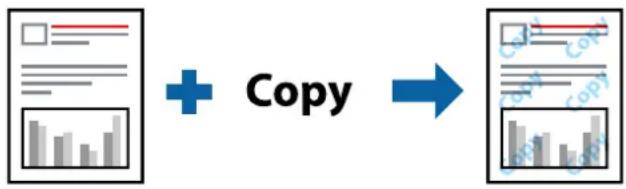
flowchart
graph LR
    A["Document"] -->|+ Copy| B["Copy"]
    B --> C["Output"]
Anti-Copy Pattern is available under the following conditions:
☐ Paper: Plain paper, Copy paper, Letterhead, Recycled paper, Colored paper, Preprinted paper, or High quality plain paper
□Quality: Standard
□Automatic 2-sided printing: Not selected
□Color Correction: Automatic
□Short Grain Paper: Not selected
Note:
You can also add your own watermark or anti-copy pattern.
Print Settings
On the printer driver's More Options tab, click Watermark Features, and then select Anti-Copy Pattern or Watermark. Click Settings to change details such as the size, density, or position of the pattern or the mark.
Related Information
→“Printing Basics” on page 59
→“More Options Tab” on page 77
Printing
Printing Password-Protected Files
Yon can set a password for a print job so that it starts printing only after entering the password on the printer's control panel.
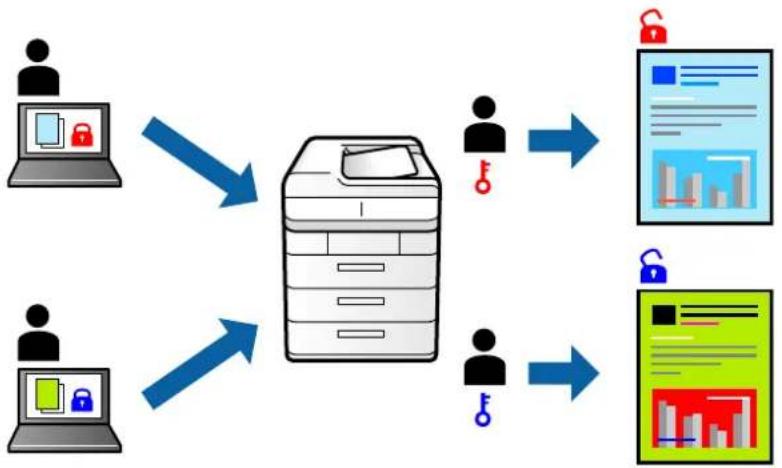
flowchart
graph TD
    A["User Device"] --> B["Server"]
    C["User Device"] --> B
    D["User Device"] --> B
    B --> E["Document Icon"]
    B --> F["Security Icon"]
    B --> G["Report Icon"]
Print Settings
On the printer driver's More Options tab, select Confidential Job, and then enter a password.
To print the job, select Confidential Job on the home screen of the printer's control panel. Select the job you want to print, and then enter the password.
Related Information
→“Printing Basics” on page 59
→“More Options Tab” on page 77
Printing Multiple Files Together
Job Arranger Lite allows you to combine several files created by different applications and print them as a single print job. You can specify the print settings for combined files, such as multi-page layout, and 2-sided printing.
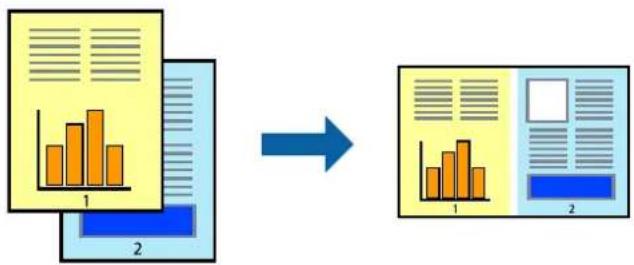
flowchart
graph LR
    A["Document Input"] --> B["Transformation"]
    B --> C["Output Section 1"]
    B --> D["Output Section 2"]
Print Settings
On the printer driver's Main tab, select Job Arranger Lite. When you start printing, the Job Arranger Lite window is displayed. With the Job Arranger Lite window opened, open the file that you want to combine with the current file, and then repeat the above steps.
Printing
When you select a print job added to Print Project in the Job Arranger Lite window, you can edit the page layout.
Click Print from the File menu to start printing.
Note:
If you close the Job Arranger Lite window before adding all the print data to the Print Project, the print job you are currently working on is canceled. Click Save from the File menu to save the current job. The extension of the saved files is "ecl".
To open a Print Project, click Job Arranger Lite on the printer driver's Maintenance tab to open the Job Arranger Lite window. Next, select Open from the File menu to select the file.
Related Information
→“Printing Basics” on page 59
→“Main Tab” on page 76
Printing Using the Color Universal Print Feature
You can enhance the visibility of texts and images in printouts.
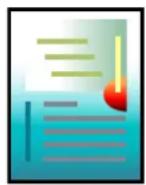


Color Universal Print is only available when the following settings are selected.
☐ Paper Type: Plain paper, Copy paper, Letterhead, Recycled paper, Colored paper, Preprinted paper, High quality plain paper
☐ Quality: Standard or a higher quality
Print Color:Color
□Applications: Microsoft® Office 2007 or later
☐Text Size: 96 pts or smaller
Print Settings
On the printer driver's More Options tab, click Image Options in the Color Correction setting. Select an option from the Color Universal Print setting. Click Enhancement Options to make further settings.
Note:
☐ Certain characters may be altered by patterns, such as "+" appearing as "±".
☐ Application-specific patterns and underlines may alter content printed using these settings.
☐ Print quality may decrease in photos and other images when using Color Universal Print settings.
□Printing is slower when using Color Universal Print settings.
Related Information
→“Printing Basics” on page 59
→“More Options Tab” on page 77
Printing
Adjusting the Print Color
You can adjust the colors used in the print job.
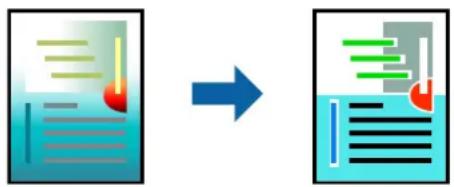
flowchart
graph LR
    A["Document with text and error bars"] --> B["Output with error bars and arrows"]
Note:
These adjustments are not applied to the original data.
Print Settings
On the printer driver's More Options tab, select Custom as the Color Correction setting. Click Advanced to open the Color Correction window, and then select the method of color correction.
Note:
☐ Automatic is selected as default on the More Options tab. With this setting, the colors are automatically adjusted to match the paper type and print quality settings.
☐ PhotoEnhance on the Color Correction window adjusts the color by analyzing the location of the subject. Therefore, if you have changed the location of the subject by reducing, enlarging, cropping, or rotating the image, the color may change unexpectedly. If the image is out of focus, the tone may be unnatural. If the color is changed or becomes unnatural, print in a mode other than PhotoEnhance.
Related Information
→“Printing Basics” on page 59
→“More Options Tab” on page 77
Printing to Emphasize Thin Lines
You can thicken thin lines that are too thin to print.
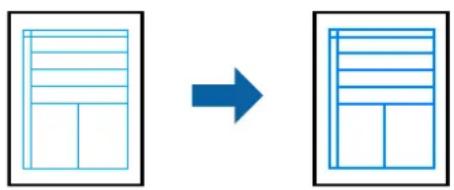
flowchart
graph LR
    A["Rectangular File"] --> B["Grid Layout"]
Print Settings
On the printer driver's More Options tab, click Image Options in the Color Correction setting. Select Emphasize Thin Lines.
Related Information
→“Printing Basics” on page 59
Printing
→“More Options Tab” on page 77
Printing Clear Bar Codes
You can print a bar code clearly and make it easy to scan. Only enable this feature if the bar code you printed cannot be scanned.
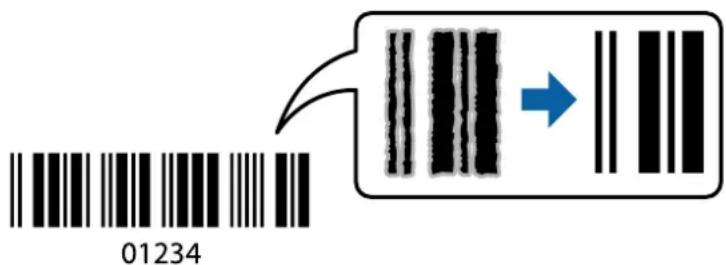
text_image
01234You can use this feature under the following conditions.
☐ Paper: Plain paper, Copy paper, Letterhead, Recycled paper, Colored paper, Preprinted paper, High quality plain paper, Thick paper with a thickness of 91 to 256g/m², or Envelope
☐ Quality: Standard, High (not available for paper with a thickness of 151 to 256 g/m ^4 )
Note:
Deblurring may not always be possible depending on the circumstances.
Print Settings
On the printer driver's Maintenance tab, click Extended Settings, and then select Barcode mode.
Related Information
→“Printing Basics” on page 59
→“Maintenance Tab” on page 77
Canceling Printing
You can cancel a print job from the computer. However, you cannot cancel a print job from the computer once it has been completely sent to the printer. In this case, cancel the print job by using the printer's control panel.
Canceling
On your computer, right-click on your printer in Devices and Printers, Printer, or in Printers and Faxes. Click See what's printing, right-click on the job you want to cancel, and then select Cancel.
Menu Options for the Printer Driver
Open the print window in an application, select the printer, and then access the printer driver window.
Printing
Note:
Menus vary depending on the option you selected.
Main Tab
| Printing Presets | Add/Remove Presets | You can add or remove your own presets for frequently used print settings. Select the preset you want to use from the list. |
| Show Settings | Displays a list of items currently set on the Main and More Options tabs. | |
| Reset Defaults | Return all settings to their factory default values. The settings on the More Options tab are also reset to their defaults. | |
| Ink Levels Displays the approximate ink levels. | ||
| Paper Source | Select the paper source from which the paper is fed. Select Auto Select to automatically select the paper source selected in Paper Setting on the printer. | |
| Document Size | Select the paper size on which you want to print. If you select User-Defined, enter the paper width and height. | |
| Orientation Select the orientation you want to use to print. | ||
| Paper Type Select the type of paper on which you print. | ||
| Quality | Select the pint quality you want to use for printing. Available settings depend on the paper type you select. | |
| Color Select the color for your print job. | ||
| 2-Sided Printing Allows you to perform 2-sided printing. | ||
| Multi-Page | Allows you to print several pages on one sheet or perform poster printing. Click Page Order to specify the order in which pages are printed. | |
| Copies Set the number of copies you want to print. | ||
| Quiet Mode | Reduces the noise the printer makes. However, enabling this may reduce print speed. | |
| Print Preview | Displays a preview of your document before printing. | |
| Job Arranger Lite | Select to print using the Job Arranger Lite feature. | |
Printing
More Options Tab
| Printing Presets | Add/Remove Presets | You can add or remove your own presets for frequently used print settings. Select the preset you want to use from the list. |
| Show Settings | Displays a list of items currently set on the Main and More Options tabs. | |
| Reset Defaults | Return all settings to their factory default values. The settings on the Main tab are also reset to their defaults. | |
| Document Size Select the size of your document. | ||
| Output Paper | Select the paper size on which you want to print. If the Output Paper differs from Document Size, Reduce/Enlarge Document is selected automatically. You do not have to select Output Paper when printing documents without changing the size. | |
| Reduce/Enlarge Document | Allows you to reduce or enlarge the size of a document. | |
| Fit to Page Automatically reduce or enlarge the document to fit to the paper size selected in Output Paper. | ||
| Zoom to Prints with a specific percentage. | ||
| Center Prints images in the center of the paper. | ||
| Color Correction Automatic Adjusts the colors of images automatically. | ||
| Watermark Features Allows you to make settings for anti-copy patterns or watermarks. | ||
| Confidential Job Password-protect confidential documents when printing. If you use this feature, the print data is stored in the printer and can only be printed after the password has been entered using the printer's control panel. Click Settings to change the settings. | ||
| Additional Settings | Rotate 180° | Rotates pages 180 degrees before printing. This feature is helpful when printing on paper such as envelopes that are loaded in fixed direction in the printer. |
| High Speed | Prints when the print head moves in both directions. The print speed is faster, but the quality may decline. | |
| Mirror Image | Inverts the image so that it prints as it would appear in a mirror. | |
Maintenance Tab
| Nozzle Check | Prints a nozzle check pattern to check if the print head nozzles are clogged. |
| Head Cleaning | Cleans the clogged nozzles in the print head. Because this feature uses some ink, clean the print head only if the nozzles are clogged. |
| Job Arranger Lite | Opens the Job Arranger Lite window. You can save and edit data. |
| EPSON Status Monitor 3 | Opens the EPSON Status Monitor 3 window. Here you can confirm the status of the printer and the consumables. |
Printing
| Monitoring Preferences | Allows you to make settings for items on the EPSON Status Monitor 3 window. |
| Extended Settings | Allows you to make a variety of settings. Right-click each item to view the Help for more details. |
| Print Queue | Displays the jobs waiting to be printed. You can check, pause, or resume print jobs. |
| Printer and Option Information | You can register user accounts. If access control is set on the printer, you must register your account. |
| Language | Changes the language to be used on the printer driver window. To apply the settings, close the printer driver, and then open it again. |
| Software Update Starts | EPSON Software Updater to check for the latest version of applications on the Internet. |
| Technical Support Allows you to access the Epson technical support website. | |
Printing from the PostScript Printer Driver on Windows
A PostScript Printer Driver is a driver that outputs printing commands to a printer using a PostScript Page Description Language.
- Open the file you want to print.
Load paper in the printer if it has not already been loaded.
-
Select Print or Print Setup from the File menu
-
Select your printer.
-
Select Preferences or Properties to access the printer driver window.
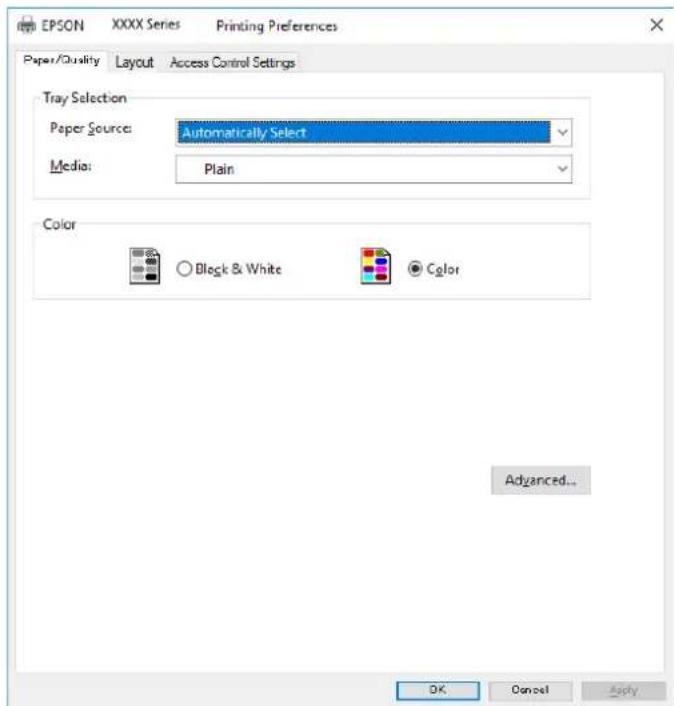
text_image
EPSON XXXX Series Printing Preferences Paper/Quality Layout Access Control Settings Tray Selection Paper Source: Automatically Select Media: Plain Color Block & White Color Advanced... OK Cancel ApplyPrinting
- Change the settings as necessary.
See the menu options for the printer driver for details.
-
Click OK to close the printer driver for details.
-
Click Print.
Related Information
→“Available Paper and Capacities” on page 26
→“Loading Paper in the Paper Cassette” on page 30
→“Loading Paper in the Rear Paper Feed” on page 32
→ "List of Paper Type" on page 35
→ "Paper/Quality Tab" on page 79
→ "Layout Tab" on page 79
Menu Options for the PostScript Printer Driver
Open the print window on an application, select the printer, and then access the printer driver window.
Note:
Menus vary depending on the option you selected.
Paper/Quality Tab
| Tray Selection Paper Source Select the paper source from which the paper is fed. | |
| Media Select the type of paper on which you print. | |
| Color Select the color for your print job. |
Layout Tab
| Orientation Select | the orientation you want to use to print. | ||
| Print on Both Sides | Allows you to perform 2-sided printing. | ||
| Page Order | Select to print from the top or the last page. If you select Back to Front, the pages are stacked in the correct order based on page number after printing. | ||
| Page Format Pages | per Sheet Allows you to print several pages on one sheet. | ||
| Booklet Select to create a booklet. | |||
Printing
Access Control Settings Tab
Printer usage may have been restricted by the administrator. Printing is available after registering your account to the printer driver. Contact the administrator for details on your user account.
| Access Control Settings User Registration Allows you to enter a user name and password. | |
| User Name Enter a user name. | |
| Password Enter a password. |
Advanced Options
| Paper/Output Paper Size | Size Select the paper size on which you want to print. | |
| Copies Set the number of copies you want to print. | ||
| Graphic Print Quality Select the pint quality you want to use for printing. | ||
| TrueType Font Sets the font substitute to TrueType Font. | ||
| Document Options Advanced Printing Features | Allows you to make detailed settings for printing features. | |
| PostScript Options Allows you to make optional settings. | ||
| Printer Features Color Mode Select whether to print in color or in monochrome. | ||
Canceling Printing
You can cancel a print job from the computer. However, you cannot cancel a print job from the computer once it has been completely sent to the printer. In this case, cancel the print job by using the printer's control panel.
Canceling
On your computer, right-click on your printer in Devices and Printers, Printer, or in Printers and Faxes. Click See what's printing, right-click on the job you want to cancel, and then select Cancel.
Printing from the Printer Driver on Mac OS
Printing Basics
Note:
Operations differ depending on the application. See the application's help for details.
- Open the file you want to print.
Load paper in the printer if it has not already been loaded. - Select Print from the File menu or another command to access the print dialog.
If necessary, click Show Details or ▼ to expand the print window. - Select your printer.
- Select Print Settings from the pop-up menu.
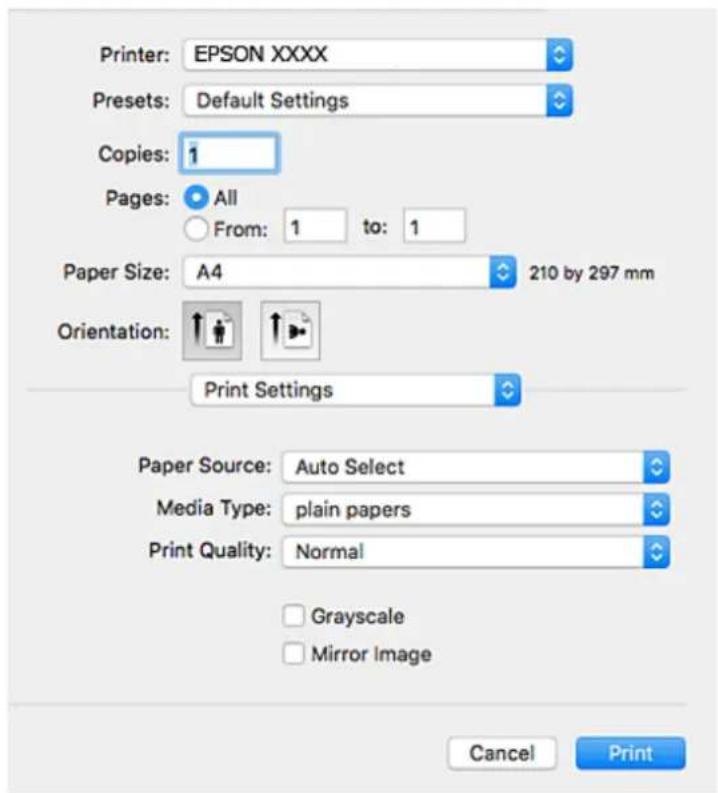
text_image
Printer: EPSON XXXX Presets: Default Settings Copies: 1 Pages: All From: 1 to: 1 Paper Size: A4 210 by 297 mm Orientation: Print Settings Paper Source: Auto Select Media Type: plain papers Print Quality: Normal Grayscale Mirror Image Cancel PrintNote:
On OS X Mountain Lion or later, if the Print Settings menu is not displayed, the Epson printer driver has not been installed correctly.
Select System Preferences from the menu > Printers & Scanners (or Print & Scan, Print & Fax), remove the printer, and then add the printer again. See the following to add a printer.
http://epson.sn
Printing
- Change the settings as necessary.
See the menu options for the printer driver for details.
- Click Print.
Related Information
→“Available Paper and Capacities” on page 26
→“Loading Paper in the Paper Cassette” on page 30
→“Loading Paper in the Rear Paper Feed” on page 32
→“List of Paper Type” on page 35
→"Menu Options for Print Settings" on page 86
Printing on 2-Sides
You can print on both sides of the paper.
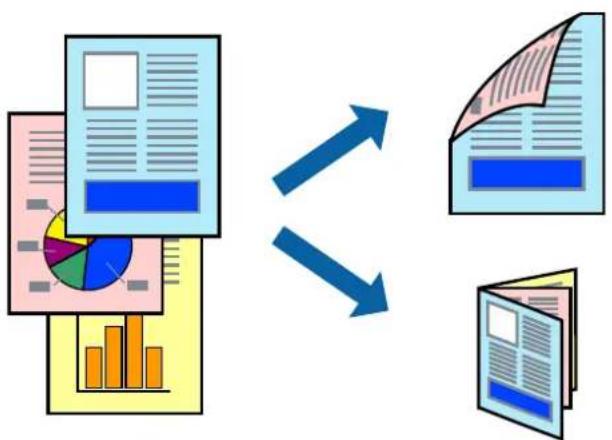
flowchart
graph TD
    A["Document Submission"] --> B["Pie Chart"]
    B --> C["Output"]
    D["Document Paper"] --> E["Output"]
    style A fill:#f9f,stroke:#333
    style B fill:#ccf,stroke:#333
    style C fill:#cfc,stroke:#333
Note:
☐ If you do not use paper that is suitable for 2-sided printing, the print quality may decline and paper jams may occur.
☐ Depending on the paper and the data, ink may bleed through to the other side of the paper.
Related Information
→“Available Paper and Capacities” on page 26
Print Settings
Select Two-sided Printing Settings from the pop-up menu. Select the method of 2-sided printing, and then make the Document Type settings.
Note:
□Printing speed may be reduced depending on the document type.
When printing photos with dense data, select Text & Graphics or Text & Photos in the Document Type setting. If the printouts are smeared or ink bleeds through to the other side of the paper, adjust the Print Density and Increased Ink Drying Time in Adjustments.
Printing
Related Information
→“Printing Basics” on page 81
→“Menu Options for Two-sided Printing Settings” on page 87
Printing Several Pages on One Sheet
You can print two or four pages of data on a single sheet of paper.
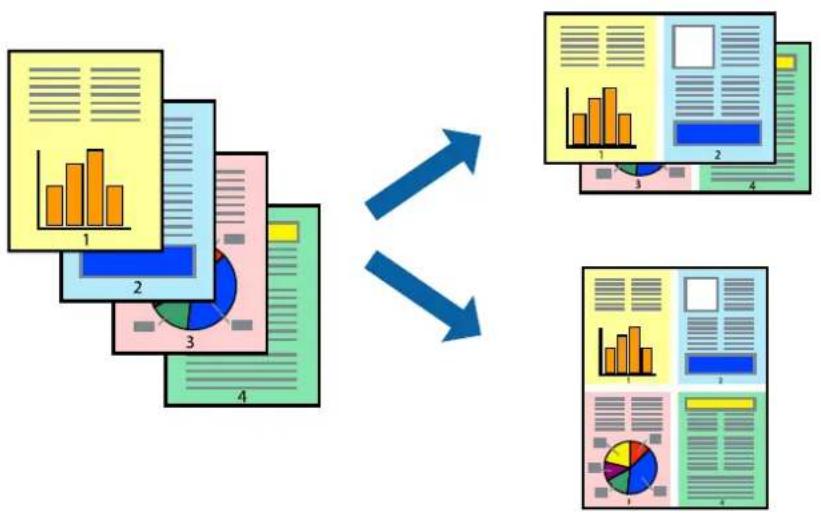
flowchart
graph TD
    A["Input Data"] --> B["Processing Step 1"]
    B --> C["Processing Step 2"]
    C --> D["Processing Step 3"]
    D --> E["Output Format 1"]
    D --> F["Output Format 2"]
    D --> G["Output Format 3"]
    style A fill:#f9f,stroke:#333
    style B fill:#ccf,stroke:#333
    style C fill:#cfc,stroke:#333
    style D fill:#fcc,stroke:#333
    style E fill:#ffc,stroke:#333
    style F fill:#fcc,stroke:#333
    style G fill:#ffc,stroke:#333
Print Settings
Select Layout from the pop-up menu. Set the number of pages in Pages per Sheet, the Layout Direction (page order), and Border.
Related Information
→ "Printing Basics" on page 81
→ "Menu Options for Layout" on page 86
Printing and Stacking in Page Order (Reverse Order Printing)
You can print from the last page so that the documents are stacked in page order.

flowchart
graph LR
    A["1"] --> B["2"]
    B --> C["3"]
    D["1"] --> E["2"]
    E --> F["3"]
Printing
Print Settings
Select Paper Handling from the pop-up menu. Select Reverse as the Page Order setting.
Related Information
→“Printing Basics” on page 81
→"Menu Options for Paper Handling" on page 86
Printing a Reduced or Enlarged Document
You can reduce or enlarge the size of a document by a specific percentage or to fit the paper size you loaded in the printer.
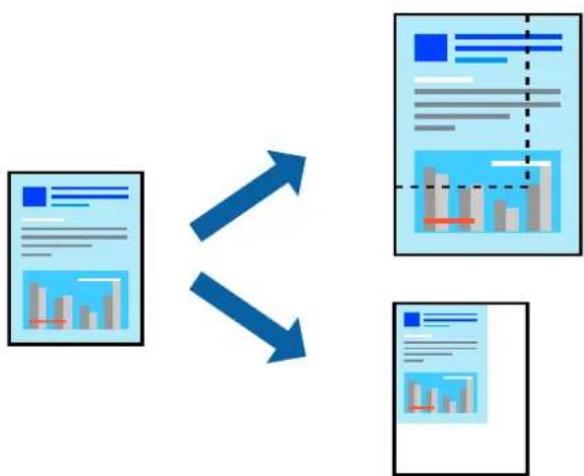
flowchart
graph TD
    A["Document Input"] --> B["Data Output"]
    B --> C["Output Data"]
    A <--> B
Print Settings
When printing to fit to the paper size, select Paper Handling from the pop-up menu, and then select Scale to fit paper size. Select the paper size you loaded in the printer in Destination Paper Size. When reducing the size of the document, select Scale down only.
When printing at a specific percentage, do one of the following.
☐ Select Print from the File menu of the application. Select Printer, enter a percentage in Scale, and then click Print.
☐ Select Page Setup from the File menu of the application. Select your printer in Format For, enter a percentage in Scale, and then click OK.
Note:
Select the paper size you set in the application as the Paper Size setting.
Related Information
→“Printing Basics” on page 81
→“Menu Options for Paper Handling” on page 86
Printing
Adjusting the Print Color
You can adjust the colors used in the print job.
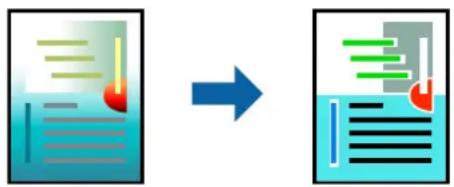
flowchart
graph LR
    A["Document with text and error bars"] --> B["Output with error bars and arrows"]
Note:
These adjustments are not applied to the original data.
Print Settings
Select Color Matching from the pop-up menu, and then select EPSON Color Controls. Select Color Options from the pop-up menu, and then select one of the available options. Click the arrow next to Advanced Settings, and then make more detailed settings.
Related Information
→“Printing Basics” on page 81
→ "Menu Options for Color Matching" on page 86
→ "Menu Options for Color Options" on page 87
Canceling Printing
You can cancel a print job from the computer. However, you cannot cancel a print job from the computer once it has been completely sent to the printer. In this case, cancel the print job by using the printer's control panel.
Canceling
Click the printer icon in the Dock. Select the job you want to cancel, and then do one of the following.
☐OS X Mountain Lion or later
Click ✗ next to the progress meter.
□Mac OS X v10.6.8 to v10.7.x
Click Delete.
Menu Options for the Printer Driver
Open the print window in an application, select the printer, and then access the printer driver window.
Note:
Menus vary depending on the option you selected.
Printing
Menu Options for Layout
| Pages per Sheet Select | the number of pages to be printed on one sheet. |
| Layout Direction Specify | the order in which the pages will be printed. |
| Border Prints a border around the pages. | |
| Reverse page orientation | Rotates pages 180 degrees before printing. Select this item when printing on paper such as envelopes that are loaded in fixed direction in the printer. |
| Flip horizontally Inverts | an image to print as it would appear in a mirror. |
Menu Options for Color Matching
| ColorSync Select the method for color adjustment. These options adjusts colors between the printer and the computer display to minimize the difference in color. | |
| EPSON Color Controls | |
Menu Options for Paper Handling
| Collate pages Prints multi-page documents collated in order and sorted into sets. | ||
| Pages to Print Select to print only odd pages or even pages. | ||
| Page Order Select to print from the top or the last page. | ||
| Scale to fit paper size Prints to fit to the paper size you loaded. | ||
Menu Options for Cover Page
| Print Cover Page | Select whether or not to print a cover page. When you want to add a back cover, select After document. |
| Cover Page Type Select | the contents of the cover page. |
Menu Options for Print Settings
| Paper Source Select the paper source from which the paper is fed. If the printer has only one paper source, this item is not displayed. Selecting Auto Select selects the paper source that matches the Paper Setting on the printer automatically. |
| Media Type Select the type of paper on which you print. |
| Print Quality Select the pint quality you want to use for printing. The options vary depending on the paper type. |
Printing
| Grayscale Select when you want to print in black or shades of gray. | |
| Mirror Image Inverts an image to print as it would appear in a mirror. |
Menu Options for Color Options
| Manual Settings | Adjusts the color manually. In Advanced Settings, you can select detailed settings. |
| PhotoEnhance | Produces sharper images and more vivid colors by automatically adjusting the contrast, saturation, and brightness of the original image data. |
| Off (No Color Adjustment) | Print without enhancing or adjusting the color in any way. |
Menu Options for Two-sided Printing Settings
Two-sided Printing Prints on both sides of the paper.
Making Operation Settings for the Mac OS Printer Driver
Accessing the Operation Settings Window of the Mac OS Printer Driver
Select System Preferences from the menu > Printers & Scanners (or Print & Scan, Print & Fax), and then select the printer. Click Options & Supplies > Options (or Driver).
Operation Settings of the Mac OS Printer Driver
☐ Thick paper and envelopes: Prevents the ink from smearing when printing on thick paper. However, this may reduce print speed.
☐Skip Blank Page: Avoids printing blank pages.
☐Quiet Mode: Reduces the noise the printer makes, however, may reduce print speed.
☐Permit temporary black printing: Prints only with black ink temporarily.
☐ High Speed Printing: Prints when the print head moves in both directions. The print speed is faster, but the quality may decline.
☐ Output documents for filing: Feed the paper so that it is easy to file when printing landscape data or 2-sided printing. Envelope printing is not supported.
☐Warning Notifications: Allows the printer driver to display warning notifications.
☐ Establish bidirectional communication: Usually, this should be set to On. Select Off when acquiring the printer information is impossible because the printer is shared with Windows computers on a network or for any other reason.
☐Lower Cassette: Add the optional paper cassette units to the paper source.
Printing from the PostScript Printer Driver on Mac OS
A PostScript Printer Driver is a driver that outputs printing commands to a printer using a PostScript Page Description Language.
- Open the file you want to print.
Load paper in the printer if it has not already been loaded.
- Select Print or Print Setup from the File menu.
If necessary, click Show Details or ▼ to expand the print window.
-
Select your printer.
-
Select Print Features from the pop-up menu.
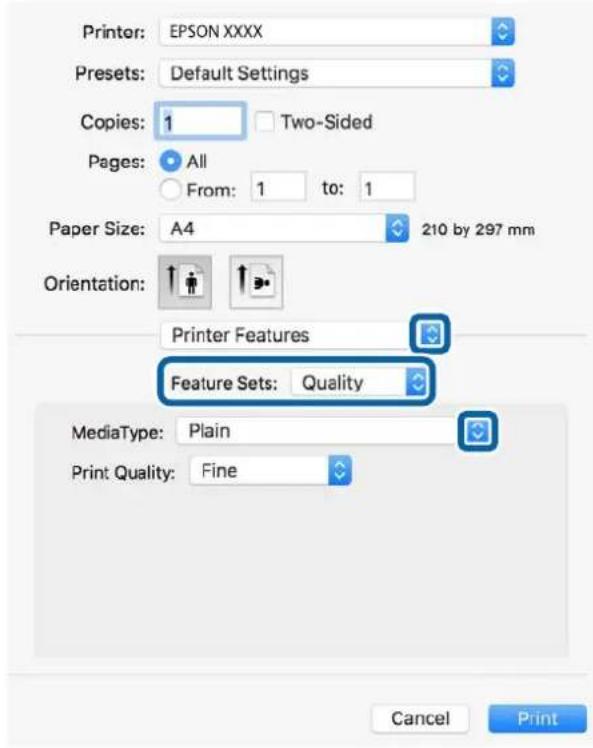
text_image
Printer: EPSON XXXX Presets: Default Settings Copies: 1 Two-Sided Pages: All From: 1 to: 1 Paper Size: A4 210 by 297 mm Orientation: Printer Features Feature Sets: Quality MediaType: Plain Print Quality: Fine Cancel Print- Change the settings as necessary.
See the menu options for the printer driver for details.
- Click Print.
Related Information
→“Available Paper and Capacities” on page 26
→“Loading Paper in the Paper Cassette” on page 30
→“Loading Paper in the Rear Paper Feed” on page 32
→“List of Paper Type” on page 35
→“Menu Options for Printer Features” on page 90
Printing
Menu Options for the PostScript Printer Driver
Open the print window on an application, select the printer, and then access the printer driver window.
Note:
Menus vary depending on the option you selected.
Menu Options for Layout
| Pages per Sheet Select | the number of pages to be printed on one sheet. |
| Layout Direction Specify | the order in which the pages will be printed. |
| Border Prints a border around the pages. | |
| Two-Sided Allows you to perform 2-sided printing. | |
| Reverse page orientation | Rotates pages 180 degrees before printing. |
| Flip horizontally Inverts | the image so that it prints as it would appear in a mirror. |
Menu Options for Color Matching
| ColorSync Select the method for color adjustment. These options adjusts color between the printer and the computer display to minimize the difference in color. | |
| In Printer | |
Menu Options for Paper Handling
| Collate pages Prints multi-page documents collated in order and sorted into sets. | ||
| Pages to Print Select to print only odd pages or even pages. | ||
| Page Order Select to print from the top or the last page. | ||
| Scale to fit paper size Prints to fit to the paper size you loaded. | ||
Menu Options for Paper Feed
| All Pages From Select the First Page From/ Remaining From | paper source from which the paper is fed.SelectingAuto Selectselects the paper source that matches thePaper Settingon the printer automatically.You can also select the paper source for page. |
Printing
Menu Options for Cover Page
| Print Cover Page | Select whether or not to print a cover page. When you want to add a back cover, select After document. |
| Cover Page Type Select | the contents of the cover page. |
Menu Options for Printer Features
| Feature Sets Quality | MediaType Select the type of paper on which you print. | |
| Color Color Mode Select whether to print in color or in monochrome. | ||
| Press Simulation You can select a CMYK ink color to simulate when you print by reproducing the CMYK ink color of the offset press. | ||
| Others Ink Save Mode Conserves ink by reducing the print density. | ||
Canceling Printing
You can cancel a print job from the computer. However, you cannot cancel a print job from the computer once it has been completely sent to the printer. In this case, cancel the print job by using the printer's control panel.
Canceling
Click the printer icon in the Dock. Select the job you want to cancel, and then do one of the following.
☐OS X Mountain Lion or later
Click ✗ next to the progress meter.
□Mac OS X v10.6.8 to v10.7.x
Click Delete.
Printing Files from a Memory Device
You can print JPEG, PDF, and TIFF files from a memory device connected to the printer.
Printing JPEG Files from a Memory Device
Note:
If you have more than 999 images on your memory device, images are automatically divided into groups and the group selection screen is displayed. Images are sorted by the date they were taken.
- Connect the memory device to the printer's external interface USB port.
Printing
-
Select Memory Device on the home screen.
-
Select JPEG.
The images on the memory device are displayed as thumbnails.
Select ☐ to change the Display order or make settings for Select All Images, Cancel Image Selection, and Select Group.
- Select the files you want to print.
Selected images have check marks on them.
To preview one image, select Single View. You can enlarge the image by using ⏻. You can also pinch out to enlarge the image and pinch in to reduce it. Use < or > to preview the previous or next image.
-
Select Proceed to Print to make the print settings.
-
Set the paper source and the color mode that you want to use on the Basic Settings tab.
-
Set the other items on the Advanced tab as necessary.
For more information on detailed settings, see the menus for Memory Device.
-
Enter the number of copies.
-
Tap ◆ to start printing.
-
Remove the memory device from the printer.
Related Information
→“JPEG Settings” on page 92
Printing PDF or TIFF Files from a Memory Device
-
Connect the memory device to the printer's external interface USB port.
-
Select Memory Device on the home screen.
-
Select PDF or TIFF.
The files on the memory device are displayed as a list.
To change the order of the files, select ↓↑.
-
Select the file you want to print.
-
Set the paper source and the color mode that you want to use on the Basic Settings tab.
-
Set the other items on the Advanced tab as necessary.
For more information on detailed settings, see the menus for Memory Device.
- Enter the number of copies.
Printing
-
Tap ◆ to start printing.
-
Remove the memory device from the printer.
Related Information
→ "PDF Settings" on page 93
→ "TIFF Settings" on page 93
Menu Options for Memory Device
Select Memory Device on the printer's home screen to make various print settings for the file on the memory device.
JPEG Settings

(Options):
Make settings for ordering, selecting, and deselecting image data.
Basic Settings:
Paper Setting
Specify the paper source settings which you want to print on.
□Color Mode
Select a color setting whether you normally print in B&W or Color.
Advanced:
Layout
Select how to layout the JPEG files. 1-up is for printing one file per sheet. 20-up is for printing 20 files on one sheet. Index is for making index printing with information.
□Fit Frame
Select On to crop the image to fit into the selected print layout automatically. If the aspect ratio of the image data and the paper size is different, the image is automatically enlarged or reduced so that the short sides match the short sides of the paper. The long side of the image is cropped if it extends beyond the long side of the paper. This feature may not work for panorama photos.
Quality
Select Best for higher quality printing, but the printing speed may be slower.
Date
Select the format of the date the photo was taken or saved. The date is not printed for some layouts.
□Fix Photo
Select this mode to improve the brightness, contrast, and saturation of the photo automatically. To turn off automatic improvement, select Enhance Off.
Printing
□Fix Red-Eye
Select On to automatically fix the red-eye effect in photos. Corrections are not applied to the original file, only to the printouts. Depending on the type of photo, parts of the image other than the eyes may be corrected.
PDF Settings
You can make print settings for PDF format files on your memory devices.

(Display order):
Select a sort setting to display the files on the LCD screen.
Basic Settings:
□Paper Setting
Specify the paper source settings which you want to print on.
□Color Mode
Select a color setting whether you normally print in B&W or Color.
Advanced:
□2-Sided
Select On to print PDF files using 2-Sided printing. You can also select the binding method by selecting Binding(Copy).
Print Order
Select the order for printing multi-page PDF files.
TIFF Settings
You can make print settings for TIFF format files in you memory devices.

(Display order):
Changes the order of the files.
Basic Settings:
□Paper Setting
Specify the paper source settings which you want to print on.
□Color Mode
Select a color setting whether you normally print in B&W or Color.
Advanced:
Layout
Select how to layout the Multi-TIFF file. 1-up is for printing one page per sheet. 20-up is for printing 20 pages on one sheet. Index is for making index printing with information.
Printing
Fit Frame
Select On to crop the photo to fit into the selected photo layout automatically. If the aspect ratio of the image data and the paper size is different, the image is automatically enlarged or reduced so that the short sides match the short sides of the paper. The long side of the image is cropped if it extends beyond the long side of the paper. This feature may not work for panorama photos.
Quality
Select Best for higher quality printing, but the printing speed may be slower.
Print Order
Select the order for printing multi-page TIFF files.
Date
Select the format of the date the photo was taken or saved. The date is not printed for some layouts.
Printing from Smart Devices
Using Epson iPrint
Epson iPrint is an application that allows you to print photos, documents, and web pages from a smart device such as a smartphone or tablet. You can use local print, printing from a smart device that is connected to the same wireless network as your printer, or remote print, printing from a remote location over the Internet. To use remote print, register your printer in the Epson Connect service.

EPSON
Related Information
→“Printing Using a Network Service” on page 197
Connecting from Smart Device by Wi-Fi Direct
You need to connect the smart device to the printer to print from the smart device.
Wi-Fi Direct allows you to connect the printer directly to devices without an access point. The printer acts as an access point.

Important:
When you connect from a smart device to the printer using the Wi-Fi Direct (Simple AP) connection, the printer is connected to the same Wi-Fi network (SSID) as the smart device and the communication is established between them. Since the smart device is automatically connected to the other connectable Wi-Fi network if the printer is turned off, it is not connected to the previous Wi-Fi network again if the printer is turned on. Connect to the printer's SSID for Wi-Fi Direct (Simple AP) connection from the smart device again.
1. Tap

Printing
- Select Wi-Fi Direct.
- Tap Start Setup.
If you have made Wi-Fi settings, the detailed connection information is displayed. Go to step 5.
- Tap Start Setup.
- Check the SSID and password displayed on the printer's control panel. On the smart device's Wi-Fi screen, select the SSID shown on the printer's control panel to connect.
Note:
You can check the connection method on the Web site. To access the Web site, scan the QR code displayed on the printer's control panel using the smart device, and then go to Setup.
- Enter the password displayed on the printer's control panel on the smart device.
- After the connection is established, tap OK or Close on the printer's control panel.
- Close the screen.
Installing Epson iPrint
You can install Epson iPrint on your smart device from the following URL or QR code.
http://ipr.to/c

Printing Using Epson iPrint
Start Epson iPrint from your smart device and select the item you want to use from the home screen.
Printing
The following screens are subject to change without notice. The contents may vary depending on the product.
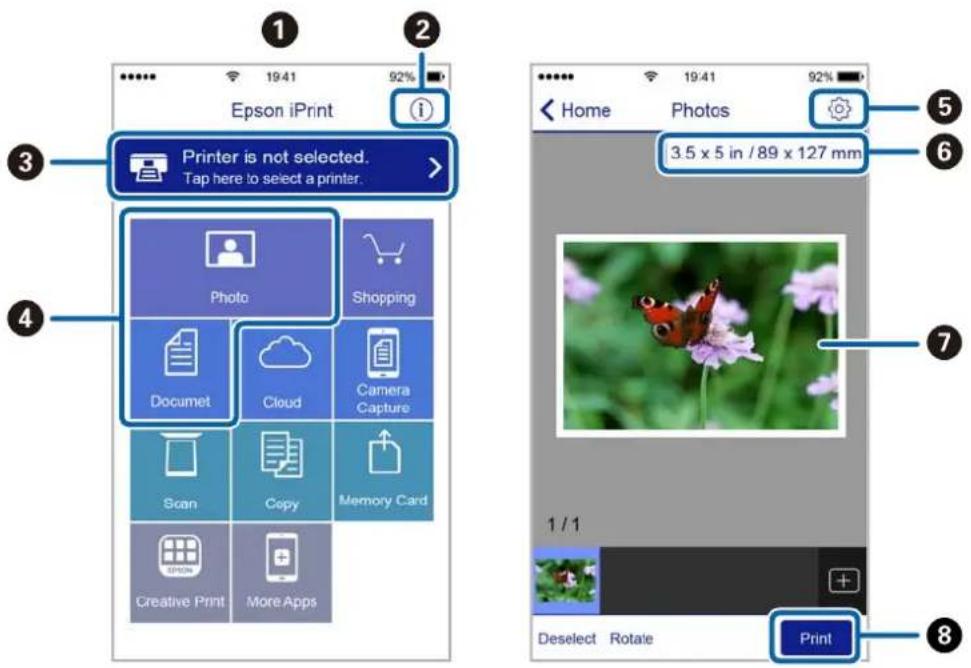
text_image
Epson iPrint Printer is not selected. Tap here to select a printer. Photo Shopping Documet Cloud Camera Capture Scan Copy Memory Card Creative Print More Apps Home Photos 3.5 x 5 in / 89 x 127 mm 1 / 1 Deselect Rotale Print| 1 | Home screen displayed when the application is started. |
| 2 | Displays information on how to setup the printer and a FAQ. |
| 3 | Displays the screen where you can select the printer and make printer settings. Once you have selected the printer, you do not need to select it again from the next time. |
| 4 | Select what you want to print such as photos and documents. |
| 5 | Displays the screen to make print settings such as paper size and paper type. |
| 6 | Displays the paper size. When this is displayed as a button, press it to display the paper settings currently set on the printer. |
| 7 | Displays photos and documents you selected. |
| 8 | Starts printing. |
Note:
To print from the document menu using iPhone, iPad, and iPod touch running iOS, start Epson iPrint after transferring the document you want to print using the file sharing function in iTunes.
Printing by Touching Smart Devices to the N-Mark
You can simply connect and print by touching your smart device to the printer's N-Mark.
Make sure that you prepare the following before using this feature.
□Enable the NFC function on your smart device.
Only Android 4.0 or later supports NFC (Near Field Communication).
The location and NFC functions vary depending on the smart device. See the documentation provided with your smart device for details.
Printing
☐Install Epson iPrint on your smart device.
Touch your smart device to the printer's N-Mark to install it.
□Enable Wi-Fi Direct on your printer.
See the Administrator's Guide for details.
-
Load paper in the printer.
-
Touch your smart device to the printer's N-Mark.
Epson iPrint starts.
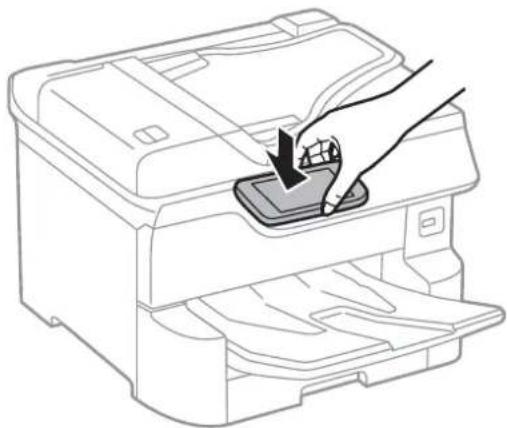
natural_image
Line drawing of a printer with a hand inserting a component into the top panel (no text or symbols)Note:
☐ The printer may not be able to communicate with the smart device when there are obstacles such as metal between the printer's N-Mark and the smart device.
□ Administrators may block this feature. In this case, smart devices only make a sound and do not start any applications even if you touch them to the printer's N-Mark.
-
Select the file you want to print in Epson iPrint.
-
On the preview screen with the Print icon, touch the smart device to the printer's N-Mark.
Printing starts.
Related Information
→“Loading Paper in the Paper Cassette” on page 30
→“Loading Paper in the Rear Paper Feed” on page 32
Using Epson Print Enabler
You can wirelessly print your documents, emails, photos, and web pages right from your Android phone or tablet (Android v4.4 or later). With a few taps, your Android device will discover an Epson printer that is connected to the same wireless network.
-
Load paper in the printer.
-
Set up your printer for wireless printing.
-
On your Android device, install the Epson Print Enabler plug-in from Google Play.
Printing
- Connect your Android device to the same wireless network as your printer.
- Go to Settings on your Android device, select Printing, and then enable Epson Print Enabler.
- From an Android application such as Chrome, tap the menu icon and print whatever is on the screen.
Note:
If you do not see your printer, tap All Printers and select your printer.
Related Information
→“Loading Paper in the Paper Cassette” on page 30
→“Loading Paper in the Rear Paper Feed” on page 32
Using AirPrint
AirPrint enables instant wireless printing from iPhone, iPad, and iPod touch with the latest version of iOS, and Mac with the latest version of OS X or macOS.
text_image
AirPrintNote:
If you disabled paper configuration messages on your product control panel, you cannot use AirPrint. See the link below to enable the messages, if necessary.
- Load paper in your product.
- Set up your product for wireless printing. See the link below.
http://epson.sn
- Connect your Apple device to the same wireless network that your product is using.
- Print from your device to your product.
Note:
For details, see the AirPrint page on the Apple website.
Related Information
→ "Loading Paper in the Paper Cassette" on page 30
→“Loading Paper in the Rear Paper Feed” on page 32
Canceling Ongoing or Queued Jobs
Note:
You can also cancel the ongoing jobs by tapping on the printer's control panel.
- Press the ⓘ button to display Job/Status.
- Select Active on the Job Status tab.
Ongoing print jobs and jobs that are standing by are shown in the list. - Select the job that you want to cancel.
- Select Cancel.
Copying
Copying Basics
This section explains the steps for basic copying.
- Place the originals.
If you want to copy multiple originals or make 2-sided copies, place all of the originals on the ADF.
-
Select Copy on the home screen.
-
Check the settings in Basic Settings tab.
Select the setting item to change it as necessary.
Note:
☐ If you select Advanced tab, you can make settings such as Multi-Page or Original Type.
☐If you select ☆, you can register frequently used copy settings as presets.
☐If the combination of settings you require is not available, ⚠️ is displayed. Select the icon to check the details, and then change the settings.
☐Select ☐ to check the scanned image before start copying.
This is only available when you placing the original on the scanner glass.
-
Enter the number of copies.
-
Tap ◇.
Related Information
→“Placing Originals” on page 36
→“Basic Menu Options for Copying” on page 101
→“Advanced Menu Options for Copying” on page 103
Copying on 2-Sides
You can copy multiple originals or 2-sided documents on both sides of the paper.
- Select Copy on the home screen.
- Select 2-Sided, and then select 1→2-Sided or 2→2-Sided.
You can also specify the orientation and binding position of the original and the copy result.
- Set the other items as necessary.
- Tap ◊.
Related Information
→“Copying Basics” on page 100
Copying Multiple Originals onto One Sheet
You can copy two or four originals onto a single sheet of paper.
- Select Copy on the home screen.
-
Select Advanced tab > Multi-Page, and select 2-up or 4-up.
You can also specify the layout order and orientation of the original. -
Tap ◊.
Related Information
→“Copying Basics” on page 100
Basic Menu Options for Copying
Note:
The items may not be available depending on other settings you made.
Color Mode:
Select whether to copy in color or in monochrome.
B&W
Copies the original in black and white (monochrome).
□Color
Copies the original in color.
Density:
Increase the level of density when the copying results are faint. Decrease the level of density when ink smears.
Paper Setting:
Select the paper source that you want to use. When Auto is selected, a suitable size is fed automatically depending on the auto detected original size and the specified magnification ratio.
Reduce/Enlarge:
Configures the magnification ratio of the enlargement or reduction. Tap the value and specify the magnification used to enlarge or reduce the original within a range of 25 to 400%.
Copying
Auto
Detects the scan area and automatically enlarges or reduces the original to fit to the paper size you selected. When there are white margins around the original, the white margins from the corner mark (↘) of the scanner glass are detected as the scan area, but the margins at the opposite side may be cropped.
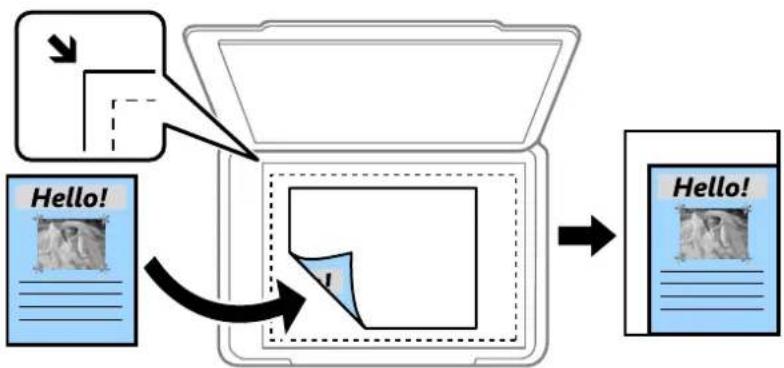
flowchart
graph TD
    A["Hello!"] -->|Message Flow| B["Document"]
    B --> C["Hello!"]
□Reduce to Fit Paper
Copies the scanned image at a smaller size than the Reduce/Enlarge value to fit within the paper size. If the Reduce/Enlarge value is larger than the paper size, data may be printed beyond the edges of the paper.
□Actual Size
Copies at 100 % magnification.
□A3→A4 and others
Automatically enlarges or reduces the original to fit to a specific paper size.
Original Size:
Select the size of your original. When you select Auto Detect, the size of your original is automatically detected. When copying non-standard size originals, select the size closest to your original.
2-Sided:
Select 2-sided layout.
□1→1-Sided
Copies one side of an original onto a single side of paper.
□2→2-Sided
Copies both sides of a double-sided original onto both sides of a single sheet of paper. Select the orientation of your original and the binding position of the original and the paper.
□1→2-Sided
Copies two single-sided originals onto both sides of a single sheet of paper. Select the orientation of your original and the binding position of the paper.
□2→1-Sided
Copies both sides of a double-sided original onto one side of two sheets of paper. Select the orientation of your original and the binding position of the original.
Advanced Menu Options for Copying
Note:
The items may not be available depending on other settings you made.
Multi-Page:
Select the copy layout.
Single Page
Copies a single-sided original onto a single sheet.
□2-up
Copies two single-sided originals onto a single sheet in 2-up layout. Select the layout order and the orientation of your original.
4-up
Copies four single-sided originals onto a single sheet in 4-up layout. Select the layout order and the orientation of your original.
Original Type:
Select the type of your original. Copies in optimal quality to match the type of original.
Finishing:
Select how to eject the paper for multiple copies of multiple originals.
□Group (Same Pages)
Copies the originals by page as a group.
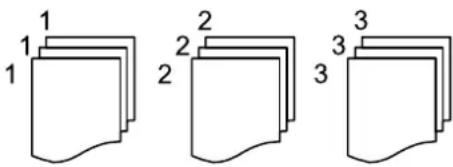
text_image
1 1 1 2 2 2 3 3 3Collate (Page Order)
Copies the originals collated in order and sorted into sets.
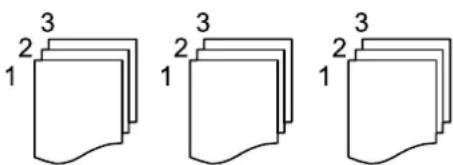
text_image
1 2 3 1 2 3 1 2 3 1Mixed Size Originals:
You can place the following combination of sizes in the ADF at the same time. A3 and A4; B4 and B5. When using these combinations, originals are copied at the actual size of the originals. Place your originals by aligning the width of the originals as shown below.
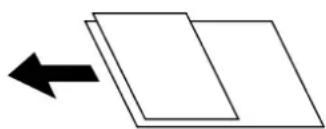
natural_image
Simple diagram showing two overlapping rectangles with a black arrow pointing left (no text or symbols)Copying
Orientation (Original):
Select the orientation of your original.
Book →2Pages:
Copies two facing pages of a booklet onto separate sheets of paper.
Select which page of a booklet to scan.
Image Quality:
Adjust image settings.
Contrast
Adjust the difference between the bright and dark parts.
Saturation
Adjust the vividness of the colors.
☐Red Balance, Green Balance, Blue Balance
Adjust the density for each color.
Sharpness
Adjust the outline of the image.
□Hue Regulation
Adjust the color tone of the skin. Tap + to make it cold (increase green) and tap - to make it warm (increase red).
Remove Background
Adjust the density of the background color. Tap + to make it bright (white) and tap - to make it dark (black).
Binding Margin:
Select the binding position, margin, and orientation of your original for 2-sided copy.
Reduce to Fit Paper:
Copies the scanned image at a smaller size than the Reduce/Enlarge value to fit within the paper size. If the Reduce/Enlarge value is larger than the paper size, data may be printed beyond the edges of the paper.
Remove Shadow:
Removes shadows that appear around copies when copying thick paper or that appear in the center of copies when copying a booklet.
Remove Punch Holes:
Removes the binding holes when copying.
ID Card Copy:
Scans both sides of an ID card and copies onto one side of paper.
Scanning
Scanning Using the Control Panel
You can send scanned images from the printer's control panel to the following destinations.
Network Folder/FTP
You can save the scanned image to a folder on a network. You can specify a shared folder on the computer, created using SMB protocols, or a folder on an FTP sever. Before scanning, you need to set a shared folder or FTP server.
You can send scanned image files by email directly from the printer through a pre-configured email server. Before scanning, you need to configure the email server.
Document Capture Pro
You can perform jobs created by the scanning software Document Capture Pro from the printer's control panel. When you create a job that saves the scanned image to the computer, you can run the job from the printer and save the scanned image to your computer. Before scanning, install Document Capture Pro on your computer and create a job.
Memory Device
You can save the scanned image to a memory device. You need not set any settings before scanning.
Cloud
You can send scanned images to cloud services. Before scanning, make settings on the Epson Connect.
Computer (WSD)
You can save the scanned image to a computer connected to the printer, using WSD feature. If you are using the Windows 7/Windows Vista, you need to make WSD settings on your computer before scanning.
Related Information
→ "Scanning to a Network Folder or FTP Server" on page 105
→ "Scanning to an Email" on page 109
→ “Scanning Using the Settings Registered on the Computer (Document Capture Pro)” on page 112
→“Scanning to a Memory Device” on page 115
→“Scanning to the Cloud” on page 117
Scanning to a Network Folder or FTP Server
You can save the scanned image to a specified folder on a network. You can specify the folder by entering a folder path directly, but it may be easier if you register the folder information in the contacts list first.
Before scanning, you need to set a shared folder or FTP server. See the Administrator's Guide for details.
Scanning
Note:
Before you use this feature, make sure the printer's Date/Time and Time Difference settings are correct. Access the menus from Settings > General Settings > Basic Settings > Date/Time Settings.
☐ You can check destination before scanning. Select Settings > General Settings > Scan Settings, and then enable Confirm Recipient.
- Place the originals.
Note:
If you want to scan multiple originals or make a 2-sided scan, place all of the originals on the ADF.
- Select Scan on the home screen.
- Select Network Folder/FTP.
- Specify the folder.
☐To select from frequently used addresses: Select the icons displayed on the screen.
☐ To enter the folder path directly: Select Keyboard. Select Communication Mode, enter the folder path as the Location (Required), and then make other folder settings.
Enter the folder path in the following format.
When using SMB as the communication mode: \host name\folder name
When using FTP as the communication mode: ftp://host name/folder name
☐ To select from the contacts list: Select Contacts, select a contact, and then select Close.
You can search for a folder from the contacts list. Enter the search keyword into the box at the top of the screen.
Note:
You can print the history of the folder in which documents are saved, by selecting menu.
- Select Scan Settings, and then check settings such as the save format, and change them if necessary.
Note:
Select to save your settings as a preset.
- Tap ◇.
Related Information
→“Managing Contacts” on page 43
→“Placing Originals” on page 36
→“Registering Your Favorite Settings as a Preset” on page 45
Destination Menu Options for Scanning to a Folder
Keyboard:
Open the Edit Location screen. Enter the folder path and set each item on the screen.
□Communication Mode
Select the communication mode.
Scanning
☐ Location (Required)
Enter a folder path in which to save the scanned image.
☐User Name
Enter a user name for the specified folder.
☐Password
Enter a password for the specified folder.
☐Connection Mode
Select the connection mode.
☐Port Number
Enter a port number.
Contacts:
Select a folder in which to save the scanned image from the contacts list. You do not need to make location settings when you have selected a folder from the contacts list.
Scan Menu Options for Scanning to a Folder
Note:
The items may not be available depending on other settings you made.
Color Mode:
Select whether to scan in color or in monochrome.
File Format:
Select the format in which to save the scanned image.
☐Compression Ratio Select how much to compress the scanned image.
☐PDF Settings When you have selected PDF as the save format setting, use these settings to protect PDF files. To create a PDF file that requires a password when opening, set Document Open Password. To create a PDF file that requires a password when printing or editing, set Permissions Password.
Resolution:
Select the scanning resolution.
2-Sided:
Scan both sides of the original.
☐Orientation (Original) Select the orientation of the original.
☐Binding(Original) Select the binding direction of the original.
Scanning
Scan Area:
Select the scan area. To crop the white space around the text or image when scanning, select Auto Cropping. To scan at the maximum area of the scanner glass, select Max Area.
Orientation (Original)
Select the orientation of the original.
Original Type:
Select the type of your original.
Mixed Size Originals:
You can place the following combination of sizes in the ADF at the same time. A3 and A4; B4 and B5. When using these combinations, originals are scanned at the actual size of the originals. Place your originals by aligning the width of the originals as shown below.
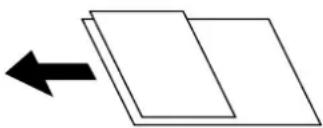
natural_image
Simple diagram showing two overlapping rectangles with a black arrow pointing left (no text or symbols)Density:
Select the contrast of the scanned image.
Remove Shadow:
Remove the shadows of the original that appear in the scanned image.
□Surround
Remove the shadows at the edge of the original.
Center
Remove the shadows of the binding margin of the booklet.
Remove Punch Holes:
Remove the punch holes that appear in the scanned image. You can specify the area to erase the punch holes by entering a value in the box on the right.
□Erasing Position
Select the position to remove the punch holes.
Orientation (Original)
Select the orientation of the original.
File Name:
Filename Prefix
Enter a prefix for the name of the images in alphanumeric characters and symbols.
□Add Date
Add the date to the file name.
□Add Time
Add the time to the file name.
Scanning
Scanning to an Email
You can send scanned image files by email directly from the printer through a pre-configured email server. Before using this feature, you need to configure the email server.
See the Administrator's Guide for details.
You can specify the email address by entering directly, but it may be easier if you register the email address in the contacts list first.
Note:
Before you use this feature, make sure the printer's Date/Time and Time Difference settings are correct. Access the menus from Settings > General Settings > Basic Settings > Date/Time Settings.
By using the Document Capture Pro function on the control panel instead of this function, you can send emails directly. Before using this function, make sure you have registered a job to send emails in Document Capture Pro and that the computer is turned on.
☐ You can check destination before scanning. Select Settings > General Settings > Scan Settings, and then enable Confirm Recipient.
1. Place the originals.
Note:
If you want to scan multiple originals or make 2-sided scans, place all of the originals in the ADF.
2. Select Scan on the home screen.
3. Select Email.
4. Specify the addresses.
☐To select frequently used addresses: Select the icons displayed on the screen.
☐ To enter the email address manually: Select Keyboard, enter the email address, and then select OK.
☐ To select from the contacts list: Select Contacts, select a contact or a group, and then select Close.
You can search for the address from the contacts list. Enter the search keyword into the box at the top of the screen.
☐ To select from the history list: Select History, select a contact, and then select Close.
Note:
☐ The number of recipients you selected is displayed on the right of the screen. You can send emails to up to 10 addresses and groups. If groups is included in recipients, you can select up to 200 individual addresses in total, taking addresses in the groups into account.
☐ Select the address box at the top of the screen to display the list of selected addresses.
☐Select ☐to display or print the sending history, or change the email server settings.
5. Select Scan Settings, and then check settings such as the save format, and change them if necessary.
Note:
Select to save your settings as a preset.
6. Tap ◊.
Scanning
Related Information
→“Managing Contacts” on page 43
→“Placing Originals” on page 36
→“Registering Your Favorite Settings as a Preset” on page 45
Menu Options for Scanning to an Email
Note:
The items may not be available depending on other settings you made.
Color Mode:
Select whether to scan in color or in monochrome.
File Format:
Select the format in which to save the scanned image.
□Compression Ratio
Select how much to compress the scanned image.
PDF Settings
When you have selected PDF as the save format setting, use these settings to protect PDF files. To create a PDF file that requires a password when opening, set Document Open Password. To create a PDF file that requires a password when printing or editing, set Permissions Password.
Resolution:
Select the scanning resolution.
2-Sided:
Scan both sides of the original.
Orientation (Original)
Select the orientation of the original.
Binding(Original)
Select the binding direction of the original.
Scan Area:
Select the scan area. To crop the white space around the text or image when scanning, select Auto Cropping. To scan at the maximum area of the scanner glass, select Max Area.
Orientation (Original)
Select the orientation of the original.
Original Type:
Select the type of your original.
Scanning
Mixed Size Originals:
You can place the following combination of sizes in the ADF at the same time. A3 and A4; B4 and B5. When using these combinations, originals are scanned at the actual size of the originals. Place your originals by aligning the width of the originals as shown below.

natural_image
Simple diagram showing two overlapping rectangles with a black arrow pointing left (no text or symbols)Density:
Select the contrast of the scanned image.
Remove Shadow:
Remove the shadows of the original that appear in the scanned image.
□Surround
Remove the shadows at the edge of the original.
Center
Remove the shadows of the binding margin of the booklet.
Remove Punch Holes:
Remove the punch holes that appear in the scanned image. You can specify the area to erase the punch holes by entering a value in the box on the right.
□Erasing Position
Select the position to remove the punch holes.
Orientation (Original)
Select the orientation of the original.
Subject:
Enter a subject for the email in alphanumeric characters and symbols.
Attached File Max Size:
Select the maximum file size that can be attached to the email.
File Name:
Filename Prefix
Enter a prefix for the name of the images in alphanumeric characters and symbols.
□Add Date
Add the date to the file name.
Add Time
Add the time to the file name.
Scanning
Scanning Using the Settings Registered on the Computer (Document Capture Pro)
You can register a series of operations as a job using Document Capture Pro. Registered jobs can be performed from the printer's control panel.
If you create the job to save the scanned image to the computer, you can perform the job from the printer and save the scanned image to the computer.
Set the operation mode on the control panel before scanning.
Note:
Operations may vary depending on the operating system and the software version. See the software help for details on using the features.
Related Information
→ “Application for Configuring Scanning from the Computer (Document Capture Pro)” on page 190
Setting a Job
Set the job on the computer using Document Capture Pro.
Note:
Operations may vary depending on the operating system and the software version. See the software help for details on using the features.
Creating and Registering a Job (Windows)
Note:
Operations may vary depending on the operating system and the software version. See the software help for details on using the features.
- Start Document Capture Pro.
- Click Job Settings on the top screen.
The Job List is displayed.
- Click New Job.
The Job Settings screen is displayed.
- Make job settings on the Job Settings screen.
☐ Job Name: Enter the name of the job you want to register.
☐ Scan Settings: Make scan settings such as the size of the originals or the resolution.
☐ Save Settings: Set the saving destination, the saving format, the naming rules of the files, and so on.
☐ Destination Settings: Select the destination of the scanned images.
- Click OK to return to the Job List screen.
The created job is registered in the Job List.
- Click OK to return to the top screen.
Scanning
Creating and Registering a Job (Mac OS)
Note:
Operations may vary depending on the operating system and the software version. See the software help for details on using the features.
-
Start Document Capture.
-
Click the icon on the main window.
The Job List window is displayed.
- Click the + icon.
The Job Settings window is displayed.
- Make the job settings on the Job Settings window.
□Job Name: Enter the name of the job to register.
☐ Scan: Make the scan settings such as the size of the originals or the resolution.
☐ Output: Set the saving destination, the saving format, the naming rules of the files, and so on.
☐ Destination: Select the destination of the scanned images.
- Click OK to return to the Job List window.
The job created is to be registered in the Job List.
- Click OK to return to the main window.
Set the Computer Name to Display on the Printer's Control Panel
You can set the computer name (alphanumeric) to display on the printer's control panel using Document Capture Pro.
Note:
Operations may vary depending on the operating system and the software version. See the software help for details on using the features.
-
Start Document Capture Pro.
-
On the menu bar of the main screen, select Option > Network Scanning Settings.
Note:
On windows, Option is only displayed in standard view. If you are in simple view, click Switch to Standard View.
-
On the Network Scanning Settings screen, enter the computer name in Your PC Name (alphanumeric).
-
Click OK.
Setting Operation Mode
Before scanning, set the operation mode on the control panel to match the computer on which Document Capture Pro is installed.
- Select Settings from the home screen.
Scanning
-
Select General Settings > Scan Settings > Document Capture Pro.
-
Select the operation mode.
☐Client Mode: Select this if Document Capture Pro is installed on Windows or Mac OS.
☐ Server Mode: Select this if Document Capture Pro is installed on a Windows Server. Next, enter the server address.
- If you have changed the operation mode, check that the settings are correct, and then select OK.
Scanning Using the Document Capture Pro Settings
Before scanning, prepare the followings.
☐Install Document Capture Pro on your computer (server) and create the job.
☐Connect the printer and the computer (server) to the network.
☐Set the operation mode on the control panel.
- Place the originals.
Note:
If you want to scan multiple originals or make 2-sided scans, place all of the originals in the ADF.
- Select Scan on the home screen.
- Select Document Capture Pro.
- Select Select Computer., and then select the computer on which you created the job in Document Capture Pro.
Note:
☐ The printer's control panel displays up to 100 computers on which Document Capture Pro is installed.
☐ If you have selected Option > Network Scanning Settings, and enabled Protect with password in Document Capture Pro or Document Capture, enter a password.
☐ If Server Mode is set as the operation mode, you do not need to perform this step.
- Select Select Job., and then select the job.
Note:
☐ If you have selected Protect with password in the settings in Document Capture Pro Server, enter a password.
☐ If you have set only one job, you do not need to select the job. Proceed to the next step.
-
Select the area in which the job content is displayed, and then check the job details.
-
Tap ◊.
Related Information
→“Placing Originals” on page 36
Scanning
Scanning to a Memory Device
You can save the scanned image to a memory device.
- Insert a memory device into the printer's external interface USB port.
- Place the originals.
Note:
If you want to scan multiple originals or make 2-sided scans, place all of the originals in the ADF.
- Select Scan on the home screen.
-
Select Memory Device.
-
Set items on Basic Settings such as the save format.
-
Select Advanced, and then check settings, and change them if necessary.
Note:
Select to save your settings as a preset.
- Tap ◊.
Related Information
→“Part Names and Functions” on page 15
→“Placing Originals” on page 36
→“Registering Your Favorite Settings as a Preset” on page 45
Basic Menu Options for Scanning to a Memory Device
Note:
The items may not be available depending on other settings you made.
B&W/Color:
Select whether to scan in color or in monochrome.
File Format:
Select the format in which to save the scanned image.
□Compression Ratio
Select how much to compress the scanned image.
PDF Settings
When you have selected PDF as the save format setting, use these settings to protect PDF files.
To create a PDF file that requires a password when opening, set Document Open Password. To create a PDF file that requires a password when printing or editing, set Permissions Password.
Resolution:
Select the scanning resolution.
Scanning
2-Sided:
Scan both sides of the original.
Orientation (Original)
Select the orientation of the original.
Binding(Original)
Select the binding direction of the original.
Scan Area:
Select the scan area. To crop the white space around the text or image when scanning, select Auto Cropping. To scan at the maximum area of the scanner glass, select Max Area.
Orientation (Original)
Select the orientation of the original.
Original Type:
Select the type of your original.
Advanced Menu Options for Scanning to a Memory Device
Note:
The items may not be available depending on other settings you made.
Mixed Size Originals:
You can place the following combination of sizes in the ADF at the same time. A3 and A4; B4 and B5. When using these combinations, originals are scanned at the actual size of the originals. Place your originals by aligning the width of the originals as shown below.
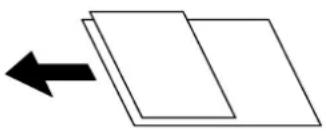
natural_image
Simple diagram showing two overlapping rectangles with a black arrow pointing left (no text or symbols)Density:
Select the contrast of the scanned image.
Remove Shadow:
Remove the shadows of the original that appear in the scanned image.
Surround
Remove the shadows at the edge of the original.
Center
Remove the shadows of the binding margin of the booklet.
Remove Punch Holes:
Remove the punch holes that appear in the scanned image. You can specify the area to erase the punch holes by entering a value in the box on the right.
□Erasing Position
Select the position to remove the punch holes.
Scanning
Orientation (Original)
Select the orientation of the original.
File Name:
□Filename Prefix
Enter a prefix for the name of the images in alphanumeric characters and symbols.
Add Date
Add the date to the file name.
□Add Time
Add the time to the file name.
Scanning to the Cloud
You can send scanned images to cloud services. Before using this feature, make settings using Epson Connect. See the following Epson Connect portal website for details.
https://www.epsonconnect.com/
http://www.epsonconnect.eu (Europe only)
-
Make sure that you have made settings using Epson Connect.
-
Place the originals.
Note:
If you want to scan multiple originals or make a 2-sided scan, place all of the originals on the ADF.
-
Select Scan on the home screen.
-
Select Cloud.
-
Select + on the top of the screen, and then select a destination.
-
Set items on Basic Settings such as the save format.
-
Select Advanced, and then check settings, and change them if necessary.
Note:
Select ★ to save your settings as a preset.
- Tap ◊.
Related Information
→“Placing Originals” on page 36
Basic Menu Options for Scanning to the Cloud
Note:
The items may not be available depending on other settings you made.
Scanning
B&W/Color:
Select whether to scan in color or in monochrome.
JPEG/PDF:
Select the format in which to save the scanned image.
2-Sided:
Scan both sides of the original.
Orientation (Original)
Select the orientation of the original.
Binding(Original)
Select the binding direction of the original.
Scan Area:
Select the scan area. To crop the white space around the text or image when scanning, select Auto
Cropping. To scan at the maximum area of the scanner glass, select Max Area.
Orientation (Original)
Select the orientation of the original.
Advanced Menu Options for Scanning to the Cloud
Note:
The items may not be available depending on other settings you made.
Original Type:
Select the type of your original.
Density:
Select the contrast of the scanned image.
Remove Shadow:
Remove the shadows of the original that appear in the scanned image.
□Surround
Remove the shadows at the edge of the original.
Center
Remove the shadows of the binding margin of the booklet.
Remove Punch Holes:
Remove the punch holes that appear in the scanned image. You can specify the area to erase the punch holes by entering a value in the box on the right.
□Erasing Position
Select the position to remove the punch holes.
Orientation (Original)
Select the orientation of the original.
Scanning
Scanning to a Computer (WSD)
Note:
☐ This feature is only available for computers running Windows 10/Windows 8.1/Windows 8/Windows 7/Windows Vista.
☐ If you are using Windows 7/Windows Vista, you need to setup your computer in advance using this feature.
- Place the originals.
Note:
If you want to scan multiple originals, place all of the originals on the ADF.
-
Select Scan on the home screen.
-
Select Computer (WSD).
-
Select a computer.
-
Tap ◊.
Setting Up a WSD Port
This section explains how to set up a WSD port for Windows 7/Windows Vista.
Note:
For Windows 10/Windows 8.1/Windows 8, the WSD port is set up automatically.
The following is necessary to set up a WSD port.
☐The printer and the computer are connected to the network.
☐The printer driver is installed on the computer.
- Turn the printer on.
- Click start, and then click Network on the computer.
- Right-click the printer, and then click Install.
Click Continue when the User Account Control screen is displayed.
Scanning
Click Uninstall and start again if the Uninstall screen is displayed.
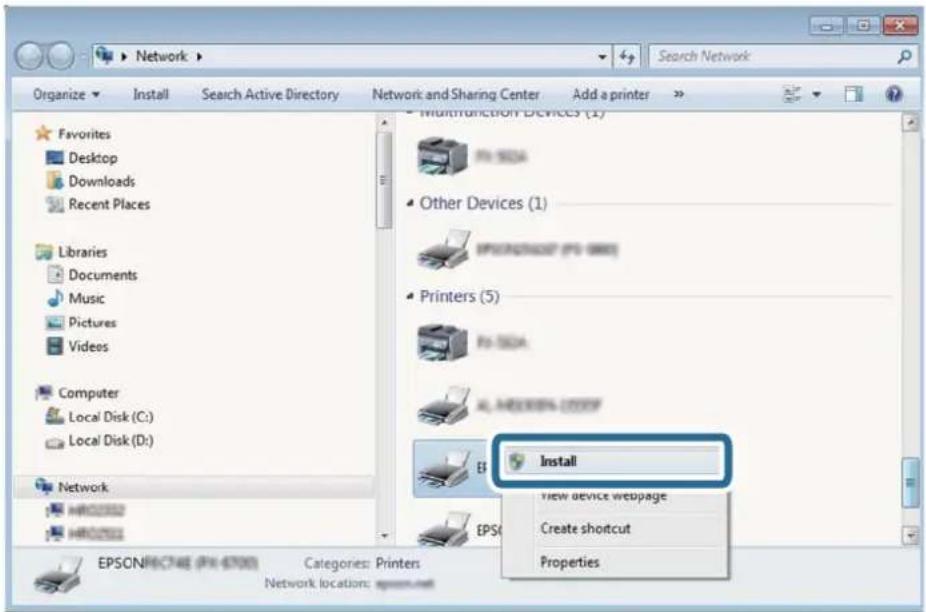
text_image
Network Organize Install Search Active Directory Network and Sharing Center Add a printer Favorites Desktop Downloads Recent Places Libraries Documents Music Pictures Videos Computer Local Disk (C:) Local Disk (D:) Network HRC02552 HRC02553 EPSON/EC74E (FX-6700) Categories: Printers Network location: spssnn.net Multifunction Devices (1) Other Devices (1) Printers (5) FX-670A FX-670B ALL AND/ORS 2000F Install VIEW device webpage Create shortcut PropertiesNote:
The printer name you set on the network and model name (EPSON XXXXXX (XX-XXXX)) are displayed on the network screen. You can check the printer's name set on the network from the printer's control panel or by printing a network status sheet.
- Click Your device is ready to use.
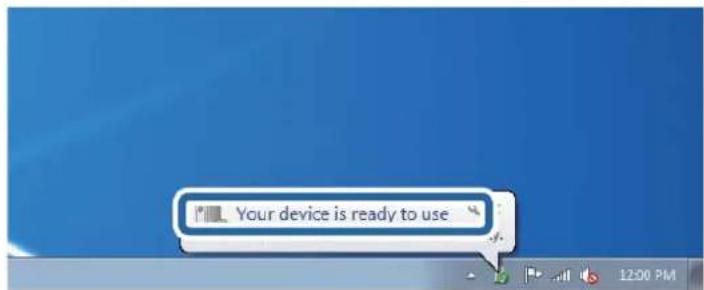
text_image
Your device is ready to use- Check the message, and then click Close.
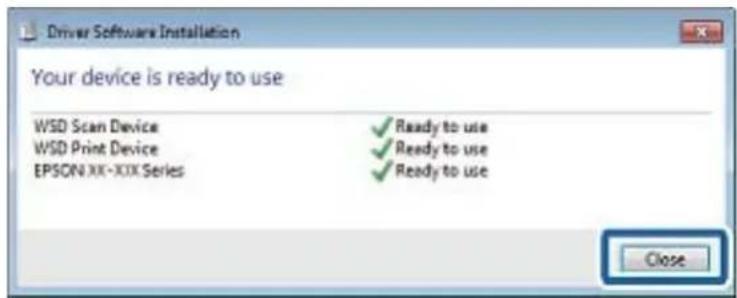
text_image
Driver Software Installation Your device is ready to use WSD Scan Device WSD Print Device EPSON XX-XIX Series Ready to use Ready to use Ready to use Close- Open the Devices and Printers screen.
Windows 7
Click start > Control Panel > Hardware and Sound (or Hardware) > Devices and Printers.
Scanning
Windows Vista
Click start > Control Panel > Hardware and Sound > Printers.
- Check that an icon with the printer's name on the network is displayed.
Select the printer name when using with WSD.
Scanning from a Computer
Authenticating Users on Epson Scan 2 when Using Access Control
When the access control function is enabled for a printer, you need to register a user name and password when scanning using Epson Scan 2. If you do not know the password, contact your printer administrator.
- Start Epson Scan 2.
- On the Epson Scan 2 screen, make sure that your printer is selected in the Scanner list.
- Select Settings from the Scanner list to open the Scanner Settings screen.
- Click Access Control.
- On the Access Control screen, enter the User Name and the Password for an account that has permission to scan.
- Click OK.
Scanning Using Epson Scan 2
You can scan using the scanner driver "Epson Scan 2". You can scan originals using detailed settings that are suitable for text documents.
See the Epson Scan 2 help for an explanation of each setting item.
- Place the original.
Note:
If you want to scan multiple originals, place them in the ADF.
- Start Epson Scan 2.
Scanning
- Make the following settings on the Main Settings tab.
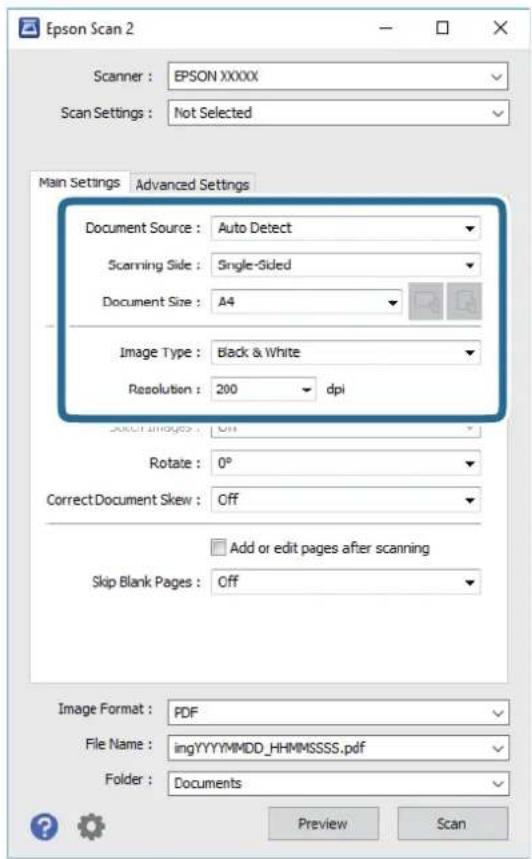
text_image
Epson Scan 2 Scanner : EPSON XXXXX Scan Settings : Not Selected Main Settings Advanced Settings Document Source : Auto Detect Scanning Side : Single-Sided Document Size : A4 Image Type : Black & White Resolution : 200 dpi Select Images : Off Rotate : 0° Correct Document Skew : Off Skip Blank Pages : Off Add or edit pages after scanning Image Format : PDF File Name : ingYYYYMMDD_HHMMSSSS.pdf Folder : Documents Preview Scan□Document Source: Select the source where the original is placed.
☐ Scanning Side: Select the side of the original you want to scan when scanning from ADF.
☐Document Size: Select the size of the original you placed.

(Original orientation) buttons: Select the set orientation of the original you placed.
Depending on the size of the original, this item may be set automatically and cannot be changed.
☐Image Type: Select the color for saving the scanned image.
☐Resolution: Select the resolution.
- Make other scan settings if necessary.
☐ You can preview the scanned image by clicking the Preview button. The preview window opens, and the previewed image is displayed.
When you preview using the ADF, the original is ejected from the ADF. Place the ejected original again.
Scanning
☐ On the Advanced Settings tab, you can make detailed image adjustment settings that are suitable for text documents, such as the following.
☐Remove Background: Remove the background of the originals.
☐Text Enhancement: You can make blurred letters in the original clear and sharp.
☐ Auto Area Segmentation: You can make letters clear and images smooth when performing black and white scanning for a document that contains images.
☐ Color Enhance: You can enhance the color specified for the scanned image, and then save it in grayscale or black and white.
☐ Threshold: You can adjust the border for monochrome binary (black and white).
□Unsharp Mask: You can enhance and sharpen the outlines of the image.
☐ Descreening: You can remove moiré patterns (web-like shadows) that appear when scanning printed papers such as a magazine.
☐Edge Fill: You can remove the shadow created around the scanned image.
☐ Dual Image Output (Windows Only): You can scan once and save two images with different output settings at the same time.
Note:
The items may not be available depending on other settings you made.
- Set the file saving settings.
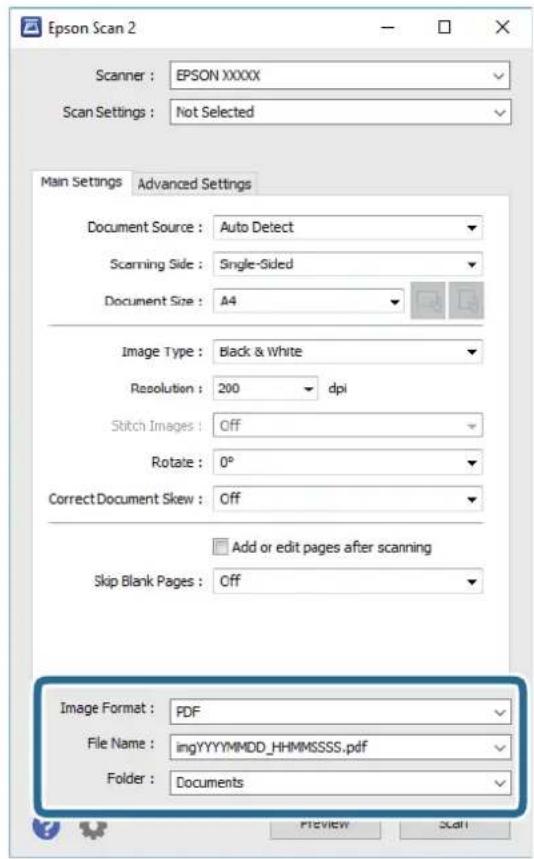
text_image
Epson Scan 2 Scanner : EPSON XXXXX Scan Settings : Not Selected Main Settings Advanced Settings Document Source : Auto Detect Scanning Side : Single-Sided Document Size : A4 Image Type : Black & White Resolution : 200 dpi Stitch Images : Off Rotate : 0° Correct Document Skew : Off Skip Blank Pages : Off Add or edit pages after scanning Image Format : PDF File Name : imgYYYYMMDD_HHMMSSSS.pdf Folder : Documents Preview ScanScanning
☐Image Format: Select the save format from the list.
You can make detailed settings for each save format except BITMAP and PNG. Select Options from the list after selecting the save format.
☐File Name: Confirm the save file name displayed.
You can change settings for the file name by selecting Settings from the list.
☐Folder: Select the save folder for the scanned image from the list.
You can select another folder or create a new folder by selecting Select from the list.
6. Click Scan.
Related Information
→ "Placing Originals" on page 36
→ “Application for Scanning Documents and Images (Epson Scan 2)” on page 188
Scanning from Smart Devices
Epson iPrint is an application that allows you to scan photos and documents from a smart device, such as a smartphone or tablet, that is connected to the same wireless network as your printer. You can save the scanned data on a smart device or to Cloud services, send it by email, or print it.

EPSON
Connecting from Smart Device by Wi-Fi Direct
You need to connect the smart device to the printer to print from the smart device.
Wi-Fi Direct allows you to connect the printer directly to devices without an access point. The printer acts as an access point.

Important:
When you connect from a smart device to the printer using the Wi-Fi Direct (Simple AP) connection, the printer is connected to the same Wi-Fi network (SSID) as the smart device and the communication is established between them. Since the smart device is automatically connected to the other connectable Wi-Fi network if the printer is turned off, it is not connected to the previous Wi-Fi network again if the printer is turned on. Connect to the printer's SSID for Wi-Fi Direct (Simple AP) connection from the smart device again.
-
Tap on the home screen.
-
Select Wi-Fi Direct.
-
Tap Start Setup.
If you have made Wi-Fi settings, the detailed connection information is displayed. Go to step 5.
Scanning
-
Tap Start Setup.
-
Check the SSID and password displayed on the printer's control panel. On the smart device's Wi-Fi screen, select the SSID shown on the printer's control panel to connect.
Note:
You can check the connection method on the Web site. To access the Web site, scan the QR code displayed on the printer's control panel using the smart device, and then go to Setup.
- Enter the password displayed on the printer's control panel on the smart device.
- After the connection is established, tap OK or Close on the printer's control panel.
- Close the screen.
Installing Epson iPrint
You can install Epson iPrint on your smart device from the following URL or QR code.
http://ipr.to/c

Scanning Using Epson iPrint
Start Epson iPrint from your smart device and select the item you want to use from the home screen.
Scanning
The following screens are subject to change without notice.
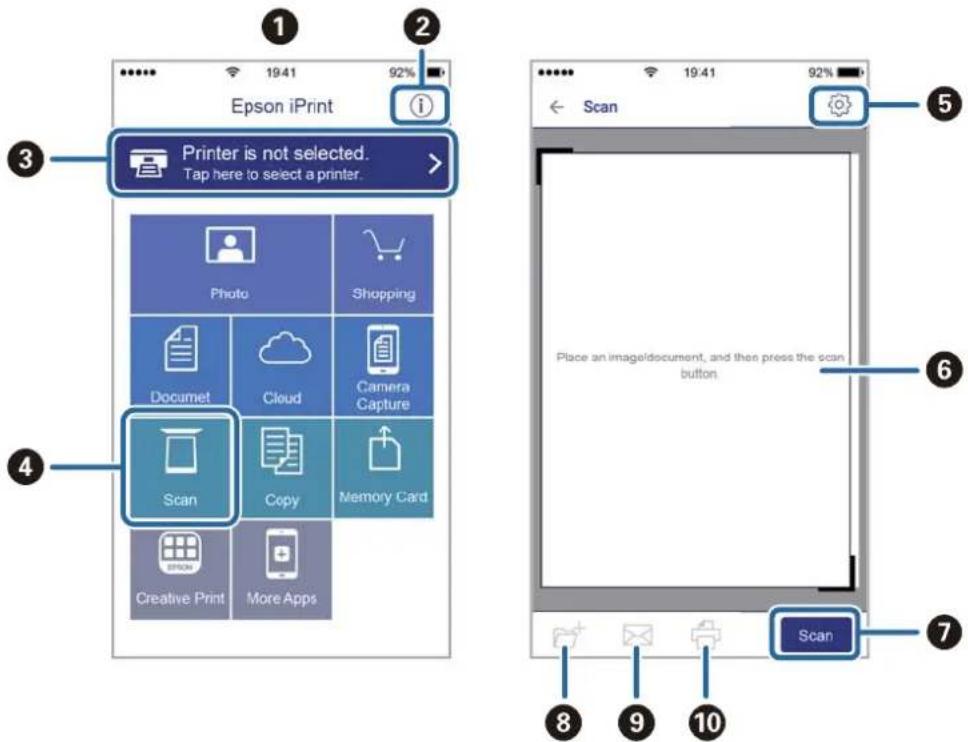
text_image
Epson iPrint Printer is not selected. Tap here to select a printer. Photo Shopping Documet Cloud Camera Capture Scan Copy Memory Card Creative Print More Apps Place an image/document, and then press the scan button Scan| 1 | Home screen displayed when the application is started. |
| 2 | Displays information on how to setup the printer and a FAQ. |
| 3 | Displays the screen where you can select the printer and make printer settings. Once you have selected the printer, you do not need to select it again from the next time. |
| 4 | Displays the scanning screen. |
| 5 | Displays the screen where you can make scan settings such as resolution. |
| 6 | Displays scanned images. |
| 7 | Starts scanning. |
| 8 | Displays the screen where you can save scanned data to a smart device or Cloud services. |
| 9 | Displays the screen where you can send scanned data by email. |
| 10 | Displays the screen where you can print scanned data. |
Scanning by Touching Smart Devices to the N-Mark
You can simply connect and scan by touching your smart device to the printer's N-Mark.
Make sure that you prepare the following before using this feature.
Scanning
Enable the NFC function on your smart device.
Only Android 4.0 or later supports NFC. (Near Field Communication)
The location and NFC functions vary depending on the smart device. See the documentation provided with your smart device for details.
□Installed Epson iPrint on your smart device.
Touch your smart device to the printer's N-Mark to install it.
□Enable the Wi-Fi Direct on your printer.
-
Place the originals in the printer.
-
Touch your smart device to the printer's N-Mark.
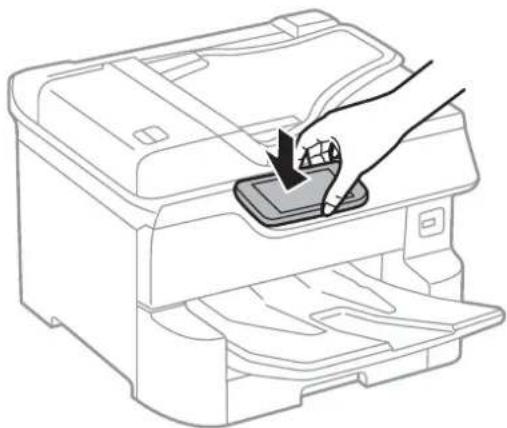
natural_image
Line drawing of a printer with a hand inserting a button into the top panel (no text or symbols)Note:
The printer may not be able to communicate with the smart device when there are obstacles such as metal between the printer's N-Mark and the smart device.
Epson iPrint starts.
-
Select the scan menu in Epson iPrint.
-
Touch the smart device to the printer's N-Mark again.
Scanning starts.
Faxing
Before Using Fax Features
Check with your administrator that the following settings have been completed.
☐ The phone line, the printer, and (if necessary) the telephone have been connected correctly
☐ Fax basic settings (at least Fax Setting Wizard) have been completed
Sending Faxes Using the Printer
Sending Faxes Using the Control Panel
Related Information
→“Sending Faxes Automatically Using the Control Panel” on page 128
→ "Sending Faxes Manually After Confirming the Recipient's Status" on page 130
Sending Faxes Automatically Using the Control Panel
You can send faxes by entering fax numbers for recipients on the control panel.
Note:
☐ When sending a fax in monochrome, you can preview the scanned image on the LCD screen before sending.
☐ You can reserve up to 50 monochrome fax jobs even while the phone line is in use for a voice call, sending another fax, or receiving a fax. You can check or cancel reserved fax jobs from i.
1. Place the originals.
You can send up to 100 pages in one transmission; however depending on the remaining amount of memory, you may not be able to send faxes even with less than 100 pages.
2. Select Fax on the home screen.
3. Specify the recipient.
You can send the same monochrome fax to up to 200 recipients. However, a color fax can only be sent to one recipient at a time.
☐ To enter manually: Select Keypad, enter a fax number on the screen displayed, and then tap OK.
- To add a pause (pause for three seconds during dialing), enter a hyphen(-).
- If you have set an external access code in Line Type, enter "#" (hash) instead of the actual external access code at the beginning of the fax number.
Note:
If you cannot manually enter a fax number, Direct Dialing Restrictions in Security Settings is set to On. Select fax recipients from the contacts list or the sent fax history.
Faxing
☐ To select from the contacts list: Select Contacts and select recipients you want to send. If the recipient you want to send to has not been registered in Contacts yet, tap 🧐 to register it.
☐ To select from the sent fax history: Select Recent, and then select a recipient.
☐ To select from the list on the Recipient tab: Select a recipient from the list registered in Settings > Contacts Manager > Frequent.
Note:
To delete recipients you entered, display the list of recipients by tapping on the field of a fax number or the number of recipients on the LCD screen, select the recipient from the list, and then select Remove.
- Select the Fax Settings tab, and then make settings such as the resolution and the sending method as necessary.
Note:
☐ To send 2-sided originals, enable ADF 2-Sided. You can send them in monochrome. You cannot send in color with this setting.
☐Tap (Presets) on the fax top screen to save the current settings and the recipients in Presets. Recipients may not be saved depending on how you specified the recipients, such as entering a fax number manually.
- Send the fax.
☐To send without checking the scanned document image: Tap ◊.
☐ To scan, check the scanned document image, and then send (when sending a fax in monochrome only): Tap 📄 on the fax top screen.
To send the fax as is, select Start Sending. Otherwise, select Cancel, and then go to step 3.
- ← → ↑ ↓ : Moves the screen in the direction of the arrows.
- : Reduces or enlarges.
- < > : Moves to the previous or the next page.
Note:
☐You cannot send the fax in color after previewing.
☐ When Direct Send is enabled, you cannot preview.
☐ When the preview screen is left untouched for 20 seconds, the fax is sent automatically.
☐ The image quality of a sent fax may be different from what you previewed depending on the capability of the recipient machine.
- When sending is complete, remove the originals.
Note:
☐ If the fax number is busy or there is some problem, the printer automatically redials after one minute.
☐To cancel sending, tap ☑.
☐ It takes longer to send a fax in color because the printer performs scanning and sending simultaneously. While the printer is sending a fax in color, you cannot use the other features.
Related Information
→“Managing Contacts” on page 43
→“Registering Your Favorite Settings as a Preset” on page 45
Faxing
→“Placing Originals” on page 36
→“Menu Options for Faxing” on page 143
→“Checking the Status or Logs for Fax Jobs” on page 151
Sending Faxes Manually After Confirming the Recipient's Status
You can send a fax while listening to sounds or voices through the printer's speaker while dialing, communicating, and transmitting.
- Place the originals.
- Select Fax on the home screen.
You can send up to 100 pages in one transmission. -
Select the Fax Settings tab, and then make settings such as the resolution and the sending method as necessary. When you have finished making settings, select the Recipient tab.
-
Tap and then specify the recipient.
Note:
You can adjust the sound volume of the speaker.
- When you hear a fax tone, select Send/Receive at the upper right corner of the LCD screen, and then select Send.
Note:
When receiving a fax from a fax polling service, and you hear the audio guidance, follow the guidance to make the printer operations.
-
Tap ◇.
-
When sending is complete, remove the originals.
Related Information
→“Placing Originals” on page 36
→“Menu Options for Faxing” on page 143
Sending Faxes Dialing from the External Phone Device
You can send a fax by dialing using the connected telephone when you want to talk over the phone before sending a fax, or when the recipient's fax machine does not switch to the fax automatically.
-
Place the originals.
You can send up to 100 pages in one transmission. -
Pick up the handset of the connected telephone, and then dial the recipient's fax number using the phone.
Note:
When the recipient answers the phone, you can talk with the recipient.
- Select Fax on the home screen.
Faxing
-
Select the Fax Settings tab, and then make settings such as the resolution and the sending method as necessary.
-
When you hear a fax tone, tap ◊, and then hang up the handset.
Note:
When a number is dialed using the connected telephone, it takes longer to send a fax because the printer performs scanning and sending simultaneously. While sending the fax, you cannot use the other features.
- When sending is complete, remove the originals.
Related Information
→ "Placing Originals" on page 36
→ "Fax Settings" on page 143
Sending Faxes On Demand (Using Polling Send/Bulletin Board Box)
If you store a monochrome document which has up to 100 pages in the Polling Send box or one of the bulletin board boxes, the stored document can be sent upon request from another fax machine that has a polling receive feature.
You can store one document in the Polling Send box.
You can register up to 10 bulletin boards, and store one document in each registered bulletin board. Note that the fax machine of the recipient must support the subaddress/password feature.
Related Information
→“Setting the Polling Send Box” on page 131
→“Registering a Bulletin Board Box” on page 132
→“Storing a Document in the Polling Send/Bulletin Board Box” on page 132
→“Sending a Fax with a Subaddress(SUB) and Password(SID)” on page 135
Setting the Polling Send Box
You can store a document in the Polling Send Box without registering. Make the following settings as necessary.
-
Select Fax Box > Polling Send/Board from the home screen.
-
Select Polling Send, tap 📋, and then select Settings.
Note:
If a password entry screen is displayed, enter the password.
- Make the appropriate settings, such as Notify Send Result.
Note:
If you set a password in Box Open Password, you will be asked to enter the password from the next time you open the box.
- Select OK.
Faxing
Related Information
→“Storing a Document in the Polling Send/Bulletin Board Box” on page 132
→“Polling Send/Board” on page 148
Registering a Bulletin Board Box
You must register a bulletin board box for storing a document beforehand. Follow the steps below to register the box.
- Select Fax Box > Polling Send/Board from the home screen.
-
Select one of the boxes named Unregistered Bulletin Board.
Note:
If a password entry screen is displayed, enter the password. -
Make settings for the items on the screen.
☐Enter a name in Name (Required)
☐Enter a subaddress in Subaddress(SEP)
☐Enter a password in Password(PWD)
- Make the appropriate settings such as Notify Send Result.
Note:
If you set a password in Box Open Password, you will be asked to enter the password from the next time you open the box.
- Select OK.
To display the screen for changing settings or deleting registered boxes, select the box you want to change/delete, and then tap ☐.
Related Information
→“Storing a Document in the Polling Send/Bulletin Board Box” on page 132
→“Polling Send/Board” on page 148
Storing a Document in the Polling Send/Bulletin Board Box
- Select Fax Box on the home screen, and then select Polling Send/Board.
-
Select Polling Send or one of the bulletin board boxes that have already been registered. If the password entry screen is displayed, enter the password to open the box.
-
Tap Add Document.
-
On the fax top screen that is displayed, check the fax settings, and then tap ◇ to scan and store the document.
To check the document you stored, select Fax Box > Polling Send/Board, select the box containing the document you want to check, and then tap Check Document. On the screen that is displayed, you can view, print or delete the scanned document.
Faxing
Related Information
→“Placing Originals” on page 36
→“Polling Send/Board” on page 148
→“Checking the Status or Logs for Fax Jobs” on page 151
Various Ways of Sending Faxes
Related Information
→ “Sending Many Pages of a Monochrome Document (Direct Send)” on page 133
→ "Sending a Fax Preferentially (Priority Send)" on page 133
→“Sending Faxes in Monochrome at a Specified Time (Send Fax Later)” on page 134
→ “Sending Different Size Documents Using ADF (Continuous Scan(ADF))” on page 135
→“Sending a Fax with a Subaddress(SUB) and Password(SID)” on page 135
→“Sending the Same Documents Multiple Times” on page 136
Sending Many Pages of a Monochrome Document (Direct Send)
When sending a fax in monochrome, the scanned document is temporarily stored in the printer's memory. Therefore, sending a lot of pages may cause the printer to run out of memory and stop sending the fax. You can avoid this by enabling the Direct Send feature, however, it takes longer to send the fax because the printer performs scanning and sending simultaneously. You can use this feature when there is only one recipient.
- Place the originals.
- Select Fax on the home screen.
- Specify the recipient.
- Select the Fax Settings tab, and then tap Direct Send to set this to On.
You can also make settings such as the resolution and the sending method as necessary. - Send the fax.
Related Information
→“Placing Originals” on page 36
→“Sending Faxes Automatically Using the Control Panel” on page 128
→“Fax Settings” on page 143
Sending a Fax Preferentially (Priority Send)
You can send an urgent document ahead of the other faxes waiting to be sent.
Faxing
Note:
You cannot send your document preferentially while one of the following is in progress because the printer cannot accept another fax.
☐ Sending a monochrome fax with Direct Send enabled
□Sending a color fax
□Sending a fax using a connected telephone
□Sending a fax sent from the computer
- Place the originals.
- Select Fax on the home screen.
- Specify the recipient.
- Select the Fax Settings tab, and then tap Priority Send to set this to On.
You can also make settings such as the resolution and the sending method as necessary.
- Send the fax.
Related Information
→ "Placing Originals" on page 36
→“Sending Faxes Automatically Using the Control Panel” on page 128
→“Fax Settings” on page 143
→“Checking the Status or Logs for Fax Jobs” on page 151
Sending Faxes in Monochrome at a Specified Time (Send Fax Later)
You can set to send a fax at a specified time. Only monochrome faxes can be sent when the time to send is specified.
- Place the originals.
- Select Fax on the home screen.
- Specify the recipient.
- Make settings to send faxes at a specified time.
① Select the Fax Settings tab, and then select Send Fax Later
② Tap Send Fax Later to set this to On.
③ Tap the Time box, enter the time you want to send the fax, and then select OK.
④ Select OK to apply the settings.
You can also make settings such as the resolution and the sending method as necessary.
- Send the fax.
Note:
To cancel the fax, cancel it from ⓘ.
Faxing
Related Information
→“Placing Originals” on page 36
→“Sending Faxes Automatically Using the Control Panel” on page 128
→“Fax Settings” on page 143
→“Checking the Status or Logs for Fax Jobs” on page 151
Sending Different Size Documents Using ADF (Continuous Scan(ADF))
Sending faxes by placing originals one by one, or by placing originals by size, you can send them as one document at their original sizes.
If you place different sized originals in the ADF, all of the originals are sent at the largest size among them. To send originals at their original sizes, do not place originals with mixed sizes.
- Place the first batch of originals at the same size.
- Select Fax on the home screen.
- Specify the recipient.
-
Select the Fax Settings tab, and then tap Continuous Scan(ADF) to set this to On.
You can also make settings such as the resolution and the sending method as necessary. -
Tap ◇ (Send).
-
When scanning the first originals is complete and the message Scan complete. Scan the next page? is displayed on the control panel, select Yes, set the next originals, and then select Start Scanning.
Note: If you leave the printer untouched for 20 seconds after prompted to set the next originals, the printer stops storing and starts sending the document.
Related Information
→“Placing Originals” on page 36
→“Sending Faxes Automatically Using the Control Panel” on page 128
→“Fax Settings” on page 143
Sending a Fax with a Subaddress(SUB) and Password(SID)
You can send faxes to the confidential boxes or the relay boxes in the recipient's fax machine when the recipient's fax machine has the feature to receive confidential faxes or relay faxes. The recipients can receive them securely, or can forward them to specified fax destinations.
- Place the originals.
- Select Fax on the home screen.
- Select Contacts and select a recipient with a registered subaddress and password.
You can also select the recipient from Recent if it was sent with a subaddress and password.
Faxing
- Select the Fax Settings tab, and then make settings such as the resolution and the sending method as necessary.
- Send the fax.
Related Information
→“Managing Contacts” on page 43
→“Placing Originals” on page 36
→“Sending Faxes Automatically Using the Control Panel” on page 128
→ "Fax Settings" on page 143
Sending the Same Documents Multiple Times
Related Information
→“Storing a Fax Without Specifying a Recipient (Store Fax Data)” on page 136
→“Sending Faxes Using the Stored Document Feature” on page 137
Storing a Fax Without Specifying a Recipient (Store Fax Data)
Since you can send faxes using documents stored in the printer, you can save the time spent scanning documents when you need to send the same document frequently. You can store up to 100 pages of a single document in monochrome. You can store 10 documents in the printer's stored documents box.
Note:
Saving 10 documents may not be possible depending on the usage conditions such as the file size of stored documents.
- Place the originals.
- Select Fax Box on the home screen.
- Select Stored Documents, tap ☐ (Box Menu), and then select Store Fax Data.
- In the Fax Settings tab that is displayed, make settings such as the resolution as necessary.
- Tap ◇ to store the document.
After storing a document is complete, you can preview the scanned image by selecting Fax Box > Stored
Documents and then tapping the box for the document, or you can delete it by tapping 📋 on the right of the box for the document.
Related Information
→“Placing Originals” on page 36
→ "Stored Documents" on page 147
→ "Checking the Fax Job History" on page 153
Faxing
Sending Faxes Using the Stored Document Feature
- Select Fax Box on the home screen, and then select Stored Documents.
- Select the document you want to send, check the content of the document, and then select Start Sending. When the message Delete this document after sending? is displayed, select Yes or No.
- Specify the recipient.
- Select the Fax Settings tab, and then make settings such as the sending method as necessary.
- Tap ◊.
Related Information
→“Stored Documents” on page 147
Receiving Faxes on the Printer
If the printer is connected to the phone line and basic settings have been completed using the Fax Setting Wizard, you can receive faxes.
There are two ways of receiving faxes.
□Receiving an incoming fax
□Receiving a fax by making a call (Polling Receive)
Received faxes are printed in the printer's initial settings.
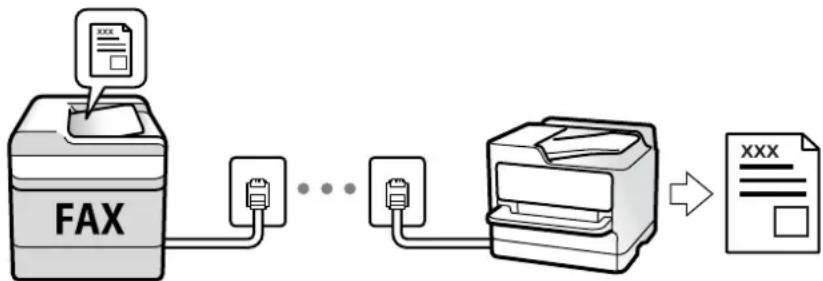
flowchart
graph LR
    A["FAX"] --> B["Processing Unit"]
    B --> C["Output"]
    style A fill:#f9f,stroke:#333
    style B fill:#ccf,stroke:#333
    style C fill:#cfc,stroke:#333
You can save received faxes, check them on the printer screen, and forward them. Check with the administrator for the status of the printer settings. For details, see the Administrator's Guide.
To check the status of the fax settings, you can print a Fax Settings List by selecting Fax >Menu (More) >Fax Report >Fax Settings List.
Related Information
→“More” on page 145
Receiving Incoming Faxes
There are two options in Receive Mode.
Faxing
Related Information
→“Usage of Auto Mode” on page 138
→“Usage of Manual Mode” on page 138
Usage of Manual Mode
This mode is mainly for making phone calls, but is also for faxing.
Receiving Faxes
When the telephone rings, you can answer the ringing manually by picking up the handset.
☐When you hear a fax signal (baud):
Select Fax on the printer's home screen, select Send/Receive > Receive, and then tap ◊. Next, hang up the handset.
☐If the ringing is for a voice call:
You can answer the phone as normal.
Receiving Faxes Using only the Connected Telephone
When Remote Receive is set, you can receive faxes by simply entering the Start Code.
When the telephone rings, pick up the handset. When you hear a fax tone (baud), dial the two digit Start Code, and then hang up the handset. If you do not know the start code, ask the administrator.
Usage of Auto Mode
This mode allows you to use the line for the following uses.
☐Using the line for faxing only (external telephone is not necessary)
□Using the line for faxing mainly, and sometimes phoning
Receiving Faxes Without an External Phone Device
The printer automatically switches to receive faxes when the number of rings you set in Rings to Answer is complete.
Receiving Faxes With an External Phone Device
A printer with an external phone device works as follows.
☐ When the answering machine answers within the number of rings set in Rings to Answer:
- If the ringing is for a fax: The printer automatically switches to receive faxes.
- If the ringing is for a voice call; The answering machine can receive voice calls and record voice messages.
☐ When you pick up the handset within the number of rings set in Rings to Answer:
- If the ringing is for a fax: You can receive the fax using the same steps as for Manual. Select Fax on the home screen, and then select Send/Receive >Receive. Next, select ◊, and then hang up the handset.
- If the ringing is for a voice call: You can answer the phone as normal.
Faxing
☐When the ringing stops and the printer automatically switches to receive faxes:
- If the ringing is for a fax: The printer starts receiving faxes.
- If the ringing is for a voice call: You cannot answer the phone. Ask the person to call you back.
Note:
Set the number of rings to answer for the answering machine to a lower number than the number set in Rings to Answer. Otherwise, the answering machine cannot receive voice calls to record voice messages. For details on setting up the answering machine, see the manual supplied with the answering machine.
Related Information
→“Usage of Manual Mode” on page 138
Receiving Faxes by Making a Phone Call
You can receive a fax stored on another fax machine by dialing the fax number.
Related Information
→ "Receiving Faxes by Polling (Polling Receive)" on page 139
→ "Receiving Faxes from a Board with a Subaddress (SEP) and Password (PWD) (Polling Receive)" on page 140
Receiving Faxes by Polling (Polling Receive)
You can receive a fax stored on another fax machine by dialing the fax number. Use this feature to receive a document from a fax information service.
Note:
☐ If the fax information service has an audio guidance feature that you need to follow to receive a document, you cannot use this feature.
☐ To receive a document from a fax information service that uses audio guidance, just dial the fax number using the On Hook feature or the connected telephone, and operate the phone and the printer following the audio guidance.
- Select Fax on the home screen.
- Tap ☐Menu (More).
- Select Extended Fax.
- Tap the Polling Receive box to set this to On.
- Tap Close, and then tap Close again.
- Enter the fax number.
Note:
If you cannot manually enter a fax number, Direct Dialing Restrictions in Security Settings is set to On. Select fax recipients from the contacts list or the sent fax history.
- Tap ◊.
Faxing
Related Information
→“Sending Faxes Dialing from the External Phone Device” on page 130
→“Receiving Faxes After Confirming the Sender's Status” on page 140
→“More” on page 145
Receiving Faxes After Confirming the Sender's Status
You can receive a fax while listening to sounds or voices through the printer's speaker while dialing, communicating, and transmitting. You can use this feature when you want to receive a fax from a fax information service by following an audio guide.
-
Select Fax on the home screen.
-
Tap 📞, and then specify the sender.
Note:
You can adjust the sound volume of the speaker.
- Wait until the sender answers your call. When you hear a fax tone, select Send/Receive at the upper right corner of the LCD screen, and then select Receive.
Note:
When receiving a fax from a fax information service, and you hear the audio guidance, follow the guidance to make the printer operations.
- Tap ◊.
Receiving Faxes from a Board with a Subaddress (SEP) and Password (PWD) (Polling Receive)
By dialing to a sender, you can receive faxes from a board stored on sender's fax machine with a subaddress (SEP) and password (PWD) feature. To use this feature, register the contact with the subaddress (SEP) and password (PWD) in the contacts list in advance.
-
Select Fax on the home screen.
-
Select Nenu (More).
-
Select Extended Fax.
-
Tap Polling Receive to set this to On.
-
Tap Close, and then tap Close again.
-
Select Contacts, and then select the contact with the registered subaddress (SEP) and password (PWD) to match the destination board.
-
Tap ◊.
Faxing
Related Information
→“Managing Contacts” on page 43
→“Sending Faxes Dialing from the External Phone Device” on page 130
→“Receiving Faxes After Confirming the Sender's Status” on page 140
→“More” on page 145
Saving and Forwarding Received Faxes
Summary of the Features
Check with the administrator for the status of the printer settings. For details, see the Administrator's Guide.
Saving Received Faxes in the Printer
The received faxes can be saved in the printer, and you can view them on the printer's screen. You can print only the faxes you want to print or delete unnecessary faxes.
Saving and/or Forwarding Received Faxes to Destinations Other than the Printer
The following can be set as destinations.
☐Computer (PC-FAX reception)
External memory device
□Email address
☐Shared folder on a network
Another fax machine
Note:
☐The fax data is saved as PDF format.
☐ Color documents cannot be forwarded to another fax machine. They are processed as documents that failed to be forwarded.
Sorting Received Faxes by Conditions such as Subaddress and Password
You can sort and save received faxes to your Inbox or bulletin board boxes. You can also forward received faxes to destinations other than the printer.
Email address
☐Shared folder on a network
Another fax machine
Faxing
Note:
☐The fax data is saved as PDF format.
☐ Color documents cannot be forwarded to another fax machine. They are processed as documents that failed to be forwarded.
☐ You can print the save/forward conditions set in the printer. Select Fax on the home screen, and then select ☐ (More) > Fax Report > Conditional Save/Forward list.
- Contact your administrator to set or change the save/forward conditions. For details on how to set the conditions, see the Administrator's Guide.
Related Information
→“More” on page 145
→“Viewing Received Faxes Saved in the Printer on the LCD Screen” on page 142
Viewing Received Faxes Saved in the Printer on the LCD Screen
- Select Fax Box on the home screen.
Note:
When there are received faxes that have not been read, the number of unread documents is displayed on the home screen.
- Select Inbox/Confidential.
- Select the inbox or the confidential box you want to view.
- If the inbox, or the confidential box has been password protected, enter the inbox password, the confidential box password, or the administrator password.
- Select the fax you want to view from the list.
The contents of the fax are displayed.
☐ : Rotates the image to the right by 90 degrees.
□ ← → ↑ ↓ : Moves the screen in the direction of the arrows.
☐ : Reduces or enlarges.
☐ < > : Moves to the previous or the next page.
☐ Menu : Displays menus such as save and forward.
☐ To hide the operation icons, tap anywhere on the preview screen except for the icons. Tap again to display the icons.
- Select whether to print or delete the document you have viewed, and then follow the on-screen instructions.

Important:
If the printer runs out of memory, receiving and sending faxes is disabled. Delete documents that you have already read or printed.
Related Information
→“Inbox and Confidential Boxes” on page 146
Menu Options for Faxing
Recipient
Select the menus on the control panel as described below:
Fax > Recipient
| Keypad Manually enter a fax number. | |
| Contacts Select a recipient from the contacts list. You can also add or edit a contact. | |
| Recent | Select a recipient from the sent fax history. You can also add the recipient to the contacts list. |
Fax Settings
Select the menus on the control panel as described below:
Fax > Fax Settings
Quick Operation Button
Assigning up to three frequently used items such as Transmission Log and Original Type in Settings > General Settings > Fax Settings > Quick Operation Button, displays the items at the top of the Fax Settings tab.
Scan Settings
| Original Size (Glass) Select the size and orientation of the original you placed on the scanner glass. | |
| Original Type Select the type of your original. | |
| Color Mode Select whether to scan in color or in monochrome. | |
| Resolution | Select the resolution of the outgoing fax. If you select a higher resolution, the data size becomes larger and it takes time to send the fax. |
| Density Sets the density of the outgoing fax. + makes the density darker, and - makes it lighter. | |
| Remove Background | Detects the paper color (background color) of the original document, and removes or lightens the color. Depending on the darkness and vividness of the color, it may not be removed or lightened |
| Sharpness Enhances or defocuses the outline of the image. + enhances the sharpness, and - defocuses the sharpness. | |
| ADF 2-Sided Scans both sides of originals placed in the ADF and sends a monochrome fax. | |
| Continuous Scan(ADF) | Sending faxes by placing originals one by one, or by placing originals by size, you can send them as one document at their original sizes. See the related information below on this topic. |
Faxing
Fax Send Settings
| Direct Send Sends a monochrome fax while scanning the originals. Since scanned originals are not stored temporarily in the printer's memory even when sending a large volume of pages, you can avoid printer errors due to a lack of memory. Note that sending using this feature takes longer than not using this feature. See the related information below on this topic.You cannot use this feature when:Sending a fax using the ADF 2-Sided optionSending a fax to multiple recipients | |
| Priority Send Sends the current fax before other faxes waiting to be sent. See the related information below on this topic. | |
| Send Fax Later Sends a fax at a time you specified. Only a monochrome fax is available when using this option.See the related information below on this topic. | |
| Add Sender Information Add Sender InformationSelect the position where you want to include the header information (sender name and fax number) in the outgoing fax, or not to include the information.-Off: Sends a fax with no header information.-Outside of Image: Sends a fax with header information in the top white margin of the fax. This keeps the header from overlapping with the scanned image, however, the fax received by the recipient may be printed across two sheets depending on the size of the originals.-Inside of Image: Sends a fax with header information approximately 7 mm lower than the top of the scanned image. The header may overlap with the image, however, the fax received by the recipient will not be split into two documents.Fax HeaderSelect the header for the recipient. To use this feature, you should register multiple headers in advance.Additional InformationSelect the information you want to add. You can select one from Your Phone Number and Destination List. | |
| Notify Send Result Sends a notification after you send a fax. | |
| Transmission Report Prints a transmission report after you send the fax.Print on Error prints a report only when an error occurs. | |
| Backup Saves a backup of the sent fax that is scanned and saved to the printer's memory automatically.The backup feature is available when:Sending a fax in monochromeSending a fax using the Send Fax Later featureSending a fax using the Batch Send featureSending a fax using the Store Fax Data feature |
Related Information
→ “Sending Different Size Documents Using ADF (Continuous Scan(ADF))” on page 135
→ “Sending Many Pages of a Monochrome Document (Direct Send)” on page 133
→ “Sending a Fax Preferentially (Priority Send)” on page 133
→ “Sending Faxes in Monochrome at a Specified Time (Send Fax Later)” on page 134
Faxing
More
Selecting ☐ in Fax on the home screen displays the More menu.
Transmission Log
You can check the history of sent or received fax jobs.
Note that you can also check the history of sent or received fax jobs from Job/Status.
Fax Report
| Last Transmission Prints a report for the previous fax that was sent or received through polling. | |
| Fax Log Prints a transmission report. You can set to print this report automatically using the following menu.Settings > General Settings > Fax Settings > Report Settings > Fax Log Auto Print | |
| Stored Fax Documents | Prints a list of fax documents stored in the printer's memory, such as unfinished jobs. |
| Fax Settings List Prints the current fax settings. | |
| Conditional Save/Forward list | Prints the Conditional Save/Forward List. |
| Protocol Trace Prints a detailed report for the previous fax that was sent or received. | |
Extended Fax
| Polling Receive | When this is set toOnand you call the sender's fax number, you can receive documents from the sender's fax machine. See the related information below for details on how to receive faxes usingPollingReceive.When you leave the Fax menu, the setting returns toOff(default). |
| Polling Send/Board | When this is set toOnby selecting the polling send box or a bulletin board box, you can scan and store documents to the box you selected by tapping◇on theFax Settingstab.You can store one document to the polling send box. You can store up to 10 documents to up to 10 bulletin boards in the printer, but you must register them fromFax Boxbefore storing documents. See the related information below for details on how to register a bulletin board box.When you leave the Fax menu, the setting returns toOff(default). |
| Store Fax Data | When this is set toOn, and you tap◇on theFax Settingstab, you can scan and store documents to theStored Documentsbox. You can store up to 10 documents.You can also scan and save documents to theStored Documentsbox fromFax Box. See the related information below for details on how to store documents fromFax BoxWhen you leave the Fax menu, the setting returns toOff(default). |
Fax Box
Accesses the Fax Box on the home screen.
Faxing
Fax Settings
Accesses Settings > General Settings > Fax Settings. Access the setting menu as an administrator.
Related Information
→“Receiving Faxes by Polling (Polling Receive)” on page 139
→“Setting the Polling Send Box” on page 131
→“Registering a Bulletin Board Box” on page 132
→“Storing a Document in the Polling Send/Bulletin Board Box” on page 132
→“Polling Send/Board” on page 148
→“Storing a Fax Without Specifying a Recipient (Store Fax Data)” on page 136
→“Stored Documents” on page 147
→“Checking the Status or Logs for Fax Jobs” on page 151
→“Checking the Fax Job History” on page 153
Menu Options for Fax Box
Inbox/Confidential
You can find Inbox/Confidential in Fax Box on the home screen.
Inbox and Confidential Boxes
Inbox and confidential boxes are in Fax Box > Inbox/Confidential.
You can save up to 100 documents in the inbox and the confidential box in total.
You can use one Inbox and register up to 10 confidential boxes. The box name is displayed on the box.
Confidential XX is the default name for each confidential box.
Inbox and Confidential Boxes
Displays the received faxes list by date received, sender name, and pages.
Tapping one of the faxes from the list opens the preview screen, and you can check the contents of the fax. You can print or delete the fax while you are previewing.
| preview screen | ☐ ☑ ☑: Reduces or enlarges.☐ ☐: Rotates the image to the right by 90 degrees.☐ ← → ↑ ↓: Moves the screen in the direction of the arrows.☐ < >: Moves to the previous or the next page.To hide the operation icons, tap anywhere on the preview screen except for the icons. Tap again to display the icons. |
Faxing
| (Preview menu) | Save to Memory DeviceForward(Email)Forward(Folder)Send FaxDetailsWhen the message Delete When Complete is displayed, select On to delete faxes after completing processes such as Save to Memory Device or Forward(Email). |

(Box Menu)
| Print All This is displayed only when there are stored faxes in the box. Prints all faxes in the box. SelectingOn in Delete When Complete deletes all faxes when printing is complete. | |
| Save All to Memory Device | This is displayed only when there are stored faxes in the box. Saves all faxes to external memory devices in the box. Selecting On in Delete When Complete deletes all documents when saving is complete. |
| Delete All This is displayed only when there are stored faxes in the box. Deletes all faxes in the box. | |
| Settings | The following items are displayed when you select Inbox > Box Menu > Settings.☐ Options when memory is full: Select one option to print or to decline incoming faxes after the Inbox is full.☐Inbox Password Settings: You can set a password or change it.The following items are displayed when you select a confidential box and select Box Menu > Settings.☐Name: Enter a name for the confidential box.☐Box Open Password: You can set a password or change it. |
| Delete Box | This item is displayed only when you select a confidential box and select Box Menu. Clears the current settings for Confidential Boxes and deletes all stored documents. |
Related Information
“Viewing Received Faxes Saved in the Printer on the LCD Screen” on page 142
→“More” on page 145
→“Checking the Fax Job History” on page 153
Stored Documents
You can find Stored Documents in Fax Box on the home screen.
You can store up to 100 pages of a single document in monochrome, and up to 10 documents in the box. This allows you to save time spent scanning documents when you need to send the same document frequently.
Note:
You may not be able to save 10 documents depending on the usage conditions such as the size of saved documents.
Stored Documents Box
Displays the stored documents list with stored dates and pages.
Faxing
Tapping one of the stored documents from the list displays the preview screen. Tap Start Sending to go to the fax sending screen, or tap Delete to delete the document while you are previewing.
| preview screen | ☐ ☑ ☑: Reduces or enlarges.☐ ☑: Rotates the image to the right by 90 degrees.☐ ← → ↑ ↓: Moves the screen in the direction of the arrows.☐ < >: Moves to the previous or the next page.To hide the operation icons, tap anywhere on the preview screen except for the icons. Tap again to display the icons. |
 (Preview menu) (Preview menu) | ☐Save to Memory Device☐Forward(Email)☐Forward(Folder)☐PrintWhen the message Delete When Complete is displayed, select On to delete faxes after completing processes such as Save to Memory Device or Forward(Email). |

(Box Menu)
| Store Fax Data | Displays the screen for the Fax >Fax Settings tab . Tapping ◊ on the screen starts scanning documents to store to the Stored Documents Box. |
| Print All | This item is displayed only when there are stored documents in the box. Prints all documents in the box. Selecting On in Delete When Complete deletes all documents when printing is complete. |
| Save All to Memory Device | This item is displayed only when there are stored documents in the box. Saves all documents in the box to external memory devices. Selecting On in Delete When Complete deletes all documents when printing is complete. |
| Delete All This item is displayed only when there are stored documents in the box. Deletes all documents in the box. | |
| Settings Box Open Password: You can set a password or change it. | |
Related Information
→“Sending the Same Documents Multiple Times” on page 136
→“Polling Send” on page 149
→“More” on page 145
→“Checking the Fax Job History” on page 153
Polling Send/Board
You can find Polling Send/Board in Fax Box on the home screen.
There is a Polling Send Box and 10 bulletin boards. You can store up to 100 pages of a single document in monochrome, and one document in each box.
Faxing
Related Information
→“Sending Faxes On Demand (Using Polling Send/Bulletin Board Box)” on page 131
Polling Send
You can find Polling Send in Fax Box > Polling Send/Board.
Polling Send Box
Displays the setting items and values in Settings in Nenu (Menu).
Add Document
Displays the screen for the Fax > Fax Settings tab. Tapping ◇ on the screen starts scanning documents to store them in the box.
When a document is in the box, Check Document is displayed instead.
Check Document
Displays the preview screen when a document is in the box. You can print or delete the document while you are previewing.
| preview screen | See the explanation for Fax Box > Stored Documents. |
| (Preview menu) | Save to Memory DeviceForward(Email)Forward(Folder)Send FaxWhen the message Delete When Complete is displayed, select On to delete faxes after completing processes such as Save to Memory Device or Forward(Email). |

(Menu)
| Delete Document This item is displayed only when there is a stored document in the box. Deletes the document stored in the box. | |
| Settings | Box Open Password: You can set a password or change it.Delete Document After Sending: Setting this toOndeletes the document in the box when the next request from a recipient to send the document (Polling Send) is completed.Notify Send Result: WhenEmail Notificationsis set toOn, the printer sends a notification to the destination specified inRecipientwhen a request to send the document (Polling Send) is completed. |
Related Information
→“Stored Documents” on page 147
→“More” on page 145
→“Checking the Fax Job History” on page 153
Faxing
Unregistered Bulletin Board
You can find Unregistered Bulletin Board in Fax Box > Polling Send/Board. Select one of the Unregistered Bulletin Board boxes. After registering a board, the registered name is displayed on the box instead of Unregistered Bulletin Board.
You can register up to 10 bulletin boards.
Bulletin Board Box Settings
| Name (Required) Enter a name for the bulletin board box. | |
| Subaddress(SEP) Make or change the conditions for a | recipient to receive the fax. |
| Password(PWD) | |
| Box Open Password Set or change the password used to open the box. | |
| Delete Document After Sending | Setting this toOn deletes the document in the box when the next request from a recipient to send the document (Polling Send) is completed. |
| Notify Send Result | WhenEmail Notificationsis set toOn, the printer sends a notification to theRecipientwhen a request to send the document (Polling Send) is completed. |
Related Information
→“Each Registered Bulletin Board” on page 150
Each Registered Bulletin Board
You can find bulletin boards in Fax Box > Polling Send/Board. Select the box for which the registered name is displayed. The name displayed on the box is the name registered in Unregistered Bulletin Board.
You can register up to 10 bulletin boards.
(Registered Bulletin Board Name)
Displays the setting values of the items in Settings in ☐Menu (Menu).
Add Document
Displays the screen for the Fax > Fax Settings tab. Tapping ◊ on the screen starts scanning documents to store to the box.
When a document is in the box, Check Document is displayed instead.
Check Document
Displays the preview screen when a document is in the box. You can print or delete the document while you are previewing.
| preview screen | See the explanation for Fax Box > Stored Documents. |
 (Preview menu) (Preview menu) | See the explanation for Polling Send > Check Document >Menu (Preview menu). |
Faxing

(Menu)
| Delete Document This item is displayed only when there is a stored document in the box. Deletes the document stored in the box. | |
| Settings | Menus such as Name (Required) and Subaddress(SEP) are displayed. See the explanation for Unregistered Bulletin Board > Bulletin Board Box Settings |
| Delete Box Deletes the stored document and changes the box status to unregistered. | |
Related Information
→“Stored Documents” on page 147
→“Polling Send” on page 149
→“Unregistered Bulletin Board” on page 150
→“More” on page 145
→“Checking the Fax Job History” on page 153
Checking the Status or Logs for Fax Jobs
Displaying Information when Received Faxes are Unprocessed (Unread/Not Printed/Not Saved/Not Forwarded)
When there are unprocessed received documents, the number of unprocessed jobs is displayed on the home screen. See the table below for a definition of the "unprocessed".

Important:
When the inbox is full, receiving faxes is disabled. You should delete the documents from the inbox once they have been checked.
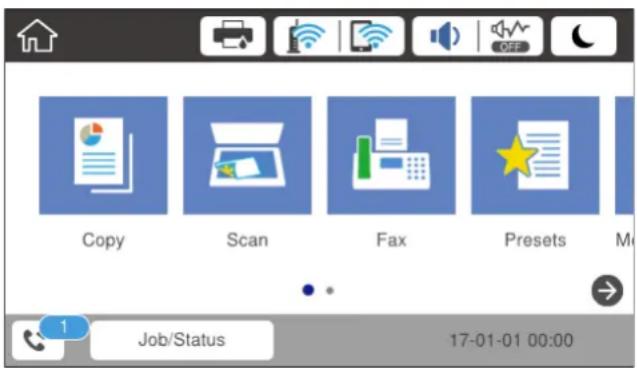
text_image
Copy Scan Fax Presets M Job/Status 17-01-01 00:00| Received Fax Save/Forward Setting | Unprocessed Status |
| Printing *1 | There are received documents waiting to be printed or printing is in progress. |
Faxing
| Received Fax Save/Forward Setting | Unprocessed Status |
| Saving in the inbox or the confidential box | There are unread received documents in the inbox or the confidential box. |
| Saving in an external memory device | There are received documents that have not been saved in the device because there is no device containing a folder specifically created to save received documents connected to the printer or for other reasons. |
| Saving on a computer There are received | received documents that have not been saved on the computer because the computer is in sleep mode or for other reasons. |
| Forwarding | There are received documents that have not been forwarded or failed to be forwarded *2. |
*1 : When you have not set any of the fax save/forward settings, or when you have set to print received documents while saving them to an external memory device or a computer.
*2 : When you have set to save documents that could not be forwarded in the inbox, there are unread documents that failed to be forwarded in the inbox. When you have set to print documents that failed to be forwarded, printing is not complete.
Note:
If you are using more than one of the fax save/forward settings, the number of unprocessed jobs may be displayed as "2" or "3" even if only one fax has been received. For example, if you have set to save faxes in the inbox and on a computer and one fax is received, the number of unprocessed jobs is displayed as "2" if the fax has not been saved to the inbox and on a computer.
Related Information
→“Viewing Received Faxes Saved in the Printer on the LCD Screen” on page 142
→“Checking Fax Jobs in Progress” on page 152
Checking Fax Jobs in Progress
You can display the screen to check fax jobs for which processing is incomplete. The following jobs are displayed on the check screen. From this screen, you can also print documents that have not yet been printed, or you can resend documents that have failed to send.
□Received fax jobs below
□Not printed yet (When the jobs are set to be printed)
☐Not saved yet (When the jobs are set to be saved)
□Not forwarded yet (When the jobs are set to be forwarded)
☐ Outgoing fax jobs that have failed to be sent (If you have enabled Save Failure Data)
Follow the steps below to display the check screen.
- Tap Job/Status on the home screen.
- Tap the Job Status tab, and then tap Active.
- Select the job you want to check.
Faxing
Related Information
→ “Displaying Information when Received Faxes are Unprocessed (Unread/Not Printed/Not Saved/Not Forwarded)” on page 151
Checking the Fax Job History
You can check the history of sent or received fax jobs, such as the date, time and result for each job.
- Tap Job/Status on the home screen.
-
Select Log on the Job Status tab.
-
Tap ▼ on the right, and then select Send or Receive.
The log for sent or received fax jobs is displayed in reverse chronological order. Tap a job you want to check to display the details.
You can also check the fax history by printing Fax Log by selecting Fax > [Menu] (More) > Fax Report > Fax Log.
Related Information
→“More” on page 145
Reprinting Received Documents
You can reprint received documents from the logs of printed fax jobs.
Note that the printed received documents are deleted in chronological order when the printer runs out of memory.
- Tap Job/Status on the home screen.
- Select Log on the Job Status tab.
-
Tap ▼ on the right, and then select Print.
The history of sent or received fax jobs is displayed in reverse chronological order. -
Select a job with from the history list.
Check the date, time, and result to determine if it is the document you want print.
- TapPrint Again to print the document.
Sending a Fax from a Computer
You can send faxes from the computer by using the FAX Utility and PC-FAX driver.
Note:
To install the FAX Utility, use the EPSON Software Updater. See Related Information below for details. For Windows users, you can install using the software disc supplied with the printer.
Faxing
Related Information
→“Software Update Tools (Software Updater)” on page 192
→“Installing the Latest Applications” on page 192
Sending Documents Created Using an Application (Windows)
By selecting a printer fax from the Print menu of an application like Microsoft Word or Excel, you can directly transmit data such as documents, drawings, and tables you have created, with a cover sheet.
Note:
The following explanation uses Microsoft Word as an example. The actual operation may differ depending on the application you use. For details, see the application's help.
- Using an application, create a document to transmit by fax.
- Click Print from the File menu.
The application's Print window appears.
- Select XXXXX (FAX) (where XXXXX is your printer name) in Printer, and then check the settings for fax sending.
☐ Specify 1 in Number of copies. Fax may not be transmitted correctly if you specify 2 or more.
☐ You cannot use functions such as Print to File that change the output port.
☐You may transmit up to 100 pages including cover sheet in one fax transmission.
-
Click Printer Properties or Properties if you want to specify Paper Size, Orientation, Color, Image Quality, or Character Density. For details, see the PC-FAX driver help.
-
Click Print.
Note:
When Using FAX Utility for the first time, a window for registering your information is displayed. Enter the necessary information, and then click OK. FAX Utility uses Nickname to manage fax jobs internally. Other information is automatically added to the cover sheet.
Recipient Settings screen of FAX Utility is displayed.
- Specify a recipient and click Next.
☐ Selecting a recipient (name, fax number and so on) from PC-FAX Phone Book:
If the recipient is saved in the phone book, do the steps below.
① Click the PC-FAX Phone Book tab.
② Select the recipient from the list and click Add.
Faxing
☐ Selecting a recipient (name, fax number and so on) from the contacts on the printer:
If the recipient is saved in the contacts on the printer, do the steps below.
① Click the Contacts on Printer tab.
Note:
If your printer has a security function that allows administrators to restrict users from changing the printer's fax settings, you may need to enter an administrator password to continue.
② Select contacts from the list and click Add to proceed to Add to Recipient window.
3 Select the contacts from the list displayed, and then click Edit.
4 Add the personal data such as Company/Corp. and Title as necessary, and then click OK to return to the Add to Recipient window.
⑤ As necessary, select the checkbox of Register in the PC-FAX Phone Book to save the contacts to PC-FAX Phone Book.
⑥ Click OK.
☐Specifying a recipient (name, fax number and so on) directly:
Do the steps below.
① Click the Manual Dial tab.
② Enter the necessary information.
③ Click Add.
Furthermore, by clicking Save to Phone Book, you can save the recipient in the list under the PC-FAX Phone Book tab.
Note:
☐ If your printer's Line Type is set to PBX and the access code has been set to use # (hash) instead of entering the exact prefix code, enter # (hash). For details, see Line Type in Basic Settings from related information link below.
☐ If you have selected Enter fax number twice in the Option settings on the FAX Utility main screen, you need to enter the same number again when you click Add or Next.
The recipient is added to the Recipient List displayed in the upper part of the window.
- Specify the content of the cover sheet.
① To attach a cover sheet, select one of the samples from Cover Sheet. Enter the Subject and Message. Note that there is no function to create an original cover sheet or to add an original cover sheet to the list.
If you do not want to attach a cover sheet, select No cover sheet from Cover Sheet.
② Click Cover Sheet Formatting if you want to change the order of the items on the cover sheet. You can select the cover sheet size in Paper Size. You can also select a cover sheet at a different size to the document being transmitted.
③ Click Font if you want to change the font or font size used for the text on the cover sheet.
④ Click Sender Settings if you want to change the sender information.
5 Click Detailed Preview if you want to check the cover sheet with the subject and the message you entered.
⑥ Click Next.
- Check the transmission content and click Send.
Make sure the name and fax number of the recipient are correct before transmitting. Click Preview to preview the cover sheet and document to transmit.
Once transmission starts, a window displaying the transmission status appears.
Faxing
Note:
☐ To stop transmitting, select the data, and click Cancel ✗. You can also cancel using the printer's control panel.
☐ If an error occurs during transmission, the Communication Error window appears. Check the error information and retransmit.
☐ The Fax Status Monitor screen (the screen mentioned above where you can check the transmission status) is not displayed if Display Fax Status Monitor During Transmission is not selected in the Optional Settings screen of the FAX Utility main screen.
Sending Documents Created Using an Application (Mac OS)
By selecting a fax-capable printer from the Print menu of a commercially available application, you can send data such as documents, drawings, and tables, you have created.
Note:
The following explanation uses Text Edit, a standard Mac OS application as an example.
- Create the document you want to send by fax in an application.
- Click Print from the File menu.
The application's Print window is displayed.
- Select your printer (fax name) in Name, click ▼ to display the detailed settings, check the print settings, and then click OK.
- Make settings for each item.
☐ Specify 1 in Number of copies. Even if you specify 2 or more, only 1 copy is sent.
☐You can send up to 100 pages in one fax transmission.
Note:
The page size of documents you can send is the same as the paper size you can fax from the printer.
- Select Fax Settings from the popup menu, and then make settings for each item.
See the PC-FAX driver's help for explanations on each setting item.
Click at the bottom left of the window to open the PC-FAX driver's help.
- Select the Recipient Settings menu, and then specify the recipient.
☐Specifying a recipient (name, fax number, and so on) directly:
Click the Add item, enter the necessary information, and then click +. The recipient is added to the Recipient List displayed in the upper part of the window.
If you have selected "Enter fax number twice" in the PC-FAX driver settings, you need to enter the same number again when you click ✦.
If your fax connection line requires a prefix code, enter External Access Prefix.
Note:
If your printer's Line Type is set to PBX and the access code has been set to use # (hash) instead of entering the exact prefix code, enter # (hash). For details, see Line Type in Basic Settings from Related Information link below.
Faxing
☐ Selecting a recipient (name, fax number, and so on) from the phone book:
If the recipient is saved in the phone book, click 📁. Select the recipient from the list, and then click Add > OK.
If your fax connection line requires a prefix code, enter External Access Prefix.
Note:
If your printer's Line Type is set to PBX and the access code has been set to use # (hash) instead of entering the exact prefix code, enter # (hash). For details, see Line Type in Basic Settings from Related Information link below.
7. Check the recipient settings, and then click Fax.
Sending starts.
Make sure the name and fax number of the recipient are correct before transmitting.
Note:
☐ If you click the printer icon in Dock, the transmission status check screen is displayed. To stop sending, click the data, and then click Delete.
☐ If an error occurs during transmission, the Sending failed message is displayed. Check the transmission records on the Fax Transmission Record screen.
□Mixed paper size documents may not be sent correctly.
Receiving Faxes on a Computer
You can receive faxes and save them as PDF files to the computer connected to the printer. The FAX Utility comes with features including how to specify a folder to save the faxes. Install the FAX Utility before using this feature.
Note:
You can use one of the following methods to install the FAX Utility.
□Using the EPSON Software Updater (application for updating software)
□Using the disc supplied with your printer. (Windows users Only)

Important:
To receive faxes on a computer, the Receive Mode on the printer's control panel must be set to Auto. Contact your administrator for information on the printer settings status. For details, see the Administrator's Guide.
The computer set to receive faxes should always be on. Received documents are saved in the printer's memory temporarily before the documents are saved on the computer. If you turn off the computer, the printer's memory might become full as it cannot send the documents to the computer.
☐ The number of documents that have been temporarily saved to the printer's memory are displayed on the home screen.
☐ To read the received faxes, you need to install a PDF viewer such as Acrobat Reader in the computer.
Related Information
→“Software Update Tools (Software Updater)” on page 192
→“Installing the Latest Applications” on page 192
Faxing
Saving Incoming Faxes on a Computer
You can make settings to save incoming faxes on a computer by using the FAX Utility. Install the FAX Utility on the computer in advance.
For details, see Basic Operations in the FAX Utility help (displayed on the main window). If the password entry screen is displayed on the computer screen while you are making settings, enter the password. If you do not know the password, contact your administrator.
Note:
You can receive faxes on a computer and print from the printer at the same time. Contact your administrator for details on the printer settings status. For details, see the Administrator's Guide.
Related Information
→“Application for Configuring Fax Operations and Sending Faxes (FAX Utility)” on page 190
Canceling the Feature that Saves Incoming Faxes to the Computer
You can cancel saving faxes to the computer by using the FAX Utility.
For details, see Basic Operations in the FAX Utility help (displayed on the main window).
Note:
☐ If there are any faxes that have not been saved to the computer, you cannot cancel the feature that saves faxes on the computer.
☐You cannot change settings that have been locked by your administrator.
☐ You can also change the settings on the printer. Contact your administrator for information on canceling settings to save received faxes on the computer. For details, see the Administrator's Guide.
Related Information
→“Application for Configuring Fax Operations and Sending Faxes (FAX Utility)” on page 190
Checking for New Faxes (Windows)
By setting up a computer to save faxes received by the printer, you can check the processing status of received faxes, and whether or not there are any new faxes using the fax icon on the Windows task bar. By setting up the computer to display a notification when new faxes are received, a notification screen pops up near the Windows system tray, and you can check the new faxes.
Note:
□Received fax data saved to the computer is removed from the printer's memory.
☐ You need Adobe Reader to view the received faxes because they are saved as PDF files.
Using the Fax Icon on the Task Bar (Windows)
You can check for new faxes and the operation status by using the fax icon displayed on the Windows taskbar.
- Check the icon.
□ : Standing by.
Faxing
☐: Checking for new faxes.
☐ Importing new faxes is complete.
- Right-click the icon, and then click Open the received fax folder.
The received fax folder is displayed. Check the date and the sender in the file name, and then open the PDF file.
While the fax icon indicates that it is standing by, you can check for new faxes instantly by selecting Check new faxes.
Note:
Received faxes are automatically renamed using the following naming format.
YYYYMMDDHHMMSS_xxxxxxxxxxx_nnnnn (Year/Month/Day/Hour/Minute/Second_sender's number)
Using the Notification Window (Windows)
When you set to notify you the new faxes exist, a notification window is displayed near the task bar for each the fax.
- Check the notification screen displayed on your computer screen.
Note:
The notification screen disappears if no operation is performed for a given length of time. You can change the notification settings such as the display time.
- Click anywhere in the notification screen, except for the button.
The folder you specified to save new faxes opens. Check the date and the sender in the file name, and then open the PDF file.
Note:
Received faxes are automatically renamed using the following naming format.
YYYYMMDDHHMMSS_xxxxxxxxxxx_nnnnn (Year/Month/Day/Hour/Minute/Second_sender's number)
Checking for New Faxes (Mac OS)
You can check for new faxes using one of the following methods. This is available only on computers set to "Save" (save faxes on this computer).
☐ Open the received fax folder (specified in Received Fax Output Settings.)
☐ Open the Fax Receive Monitor and click Check new faxes.
☐Notification that new faxes have been received
Select the Notify me of new faxes via a dock icon in the Fax Receive Monitor > Preferences in the FAX Utility, the fax receive monitor icon on the Dock jumps to notify you that new faxes have arrived.
Open the Received Fax Folder from Received Fax Monitor (Mac OS)
You can open the save folder from the computer specified to receive faxes when selecting "Save" (save faxes on this computer).
Faxing
-
Click the received fax monitor icon on the Dock to open Fax Receive Monitor.
-
Select the printer and click Open folder, or double click the printer name.
-
Check the date and the sender in the file name, and then open the PDF file.
Note:
Received faxes are automatically renamed using the following naming format.
YYYYMMDDHHMMSS_xxxxxxxxxxx_nnnnn (Year/Month/Day/Hour/Minute/Second_sender's number)
Information sent from the sender is displayed as the sender's number. This number may not be displayed depending on the sender.
Replacing Ink Cartridges and Other Consumables
Checking the Status of the Remaining Ink and the Maintenance Box
You can check the approximate ink levels and the approximate service life of the maintenance box from the control panel or the computer.
Note:
You can continue printing while the ink low message is displayed. Replace the ink cartridges when required.
Checking the Status of the Remaining Ink and the Maintenance Box - Control Panel
-
Press the button on the control panel.
-
Select Printer Status.
Note:
The indicator on the far right indicates the available space in the maintenance box.
Checking the Status of the Remaining Ink and the Maintenance Box - Windows
-
Access the printer driver window.
-
Click EPSON Status Monitor 3 on the Maintenance tab, and then click Details.
Note:
If EPSON Status Monitor 3 is disabled, click Extended Settings on the Maintenance tab, and then select Enable EPSON Status Monitor 3.
Checking the Status of the Remaining Ink and the Maintenance Box - Mac OS
-
Select System Preferences from the menu > Printers & Scanners (or Print & Scan, Print & Fax), and then select the printer.
-
Click Options & Supplies > Utility > Open Printer Utility.
-
Click EPSON Status Monitor.
Ink Cartridge Codes
Epson recommends the use of genuine Epson ink cartridges. Epson cannot guarantee the quality or reliability of non-genuine ink. The use of non-genuine ink may cause damage that is not covered by Epson's warranties, and under certain circumstances, may cause erratic printer behavior. Information about non-genuine ink levels may not be displayed.
The following are the codes for genuine Epson ink cartridges.
Note:
☐ Ink cartridge codes may vary by location. For the correct codes in your area, contact Epson support.
☐Not all cartridges are available in all regions.
For Europe
| Size | Black | Cyan | Magenta | Yellow |
| XXL * T04A1 T04A2 T04A3 T04A4 | ||||
| XL* T04B1 T04B2 T04B3 T04B4 | ||||
| L * T04C1 | T04C2 | T04C3 | T04C4 |
Note:
For users in Europe, visit the following website for information on Epson's ink cartridge yields.
http://www.epson.eu/pageyield
For Asia
| Product | Black | Cyan | Magenta | Yellow |
| WF-8690 | T01A1 | T01A2 T01A3 T01A4 | ||
| WF-8690a | T01B1 | T01B2 T01B3 T01B4 |
Ink Cartridge Handling Precautions
Read the following instructions before replacing ink cartridges.
Handling precautions
☐ Store ink cartridges at normal room temperature and keep them away from direct sunlight.
☐ Epson recommends using the ink cartridge before the date printed on the package.
☐ For best results, use up ink cartridge within six months of installation.
☐ After bringing an ink cartridge inside from a cold storage site, allow it to warm up at room temperature for at least three hours before using it.
Replacing Ink Cartridges and Other Consumables
☐ Do not touch the sections shown in the illustration. Doing so may prevent normal operation and printing.
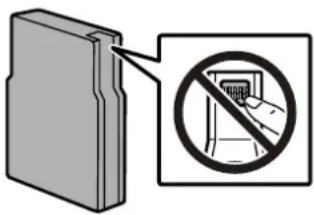
text_image
Diagram showing a device with a prohibition symbol indicating no protection or disapproval.☐Install all ink cartridges; otherwise you cannot print.
☐Do not move the print head by hand; otherwise, you may damage the printer.
☐ Do not turn off the printer during ink charging. If the ink charging is incomplete, you may not be able to print.
☐ Do not leave the printer with the ink cartridges removed; otherwise, ink remaining in the print head nozzles may dry out and you may not be able to print.
☐ If you need to remove an ink cartridge temporarily, make sure you protect the ink supply area from dirt and dust. Store the ink cartridge in the same environment as the printer. Because the ink supply port is equipped with a valve designed to contain the release of excess ink, there is no need to supply your own covers or plugs.
☐ Removed ink cartridges may have ink around the ink supply port, so be careful not to get any ink on the surrounding area when removing the cartridges.
☐ This printer uses ink cartridges equipped with a green chip that monitors information such as the amount of remaining ink for each cartridge. This means that even if the cartridge is removed from the printer before it is expended, you can still use the cartridge after reinserting it back into the printer.
☐ To ensure you receive premium print quality and to help protect your print head, a variable ink safety reserve remains in the cartridge when your printer indicates to replace the cartridge. The yields quoted for you do not include this reserve.
☐ Although the ink cartridges may contain recycled materials, this does not affect printer function or performance.
☐ Specifications and appearance of the ink cartridge are subject to change without prior notice for improvement.
☐ Do not disassemble or remodel the ink cartridge, otherwise you may not be able to print normally.
☐Do not drop or knock it against hard objects; otherwise, the ink may leak.
☐You cannot use the cartridges that came with the printer for the replacement.
☐ Quoted yields may vary depending on the images that you are printing, the paper type that you are using, the frequency of your prints and environmental conditions such as temperature.
Consumption of Ink
☐ To maintain optimum print head performance, some ink is consumed from all cartridges during maintenance operations such as print head cleaning. Ink may also be consumed when you turn on the printer.
☐ When printing in monochrome or grayscale, color inks instead of black ink may be used depending on the paper type or print quality settings. This is because a mixture of color inks is used to create black.
☐ The ink in the ink cartridges supplied with your printer is partly used during initial setup. In order to produce high quality printouts, the print head in your printer will be fully charged with ink. This one-off process consumes a quantity of ink and therefore these cartridges may print fewer pages compared to subsequent ink cartridges.
Replacing Ink Cartridges
- Open the front cover.
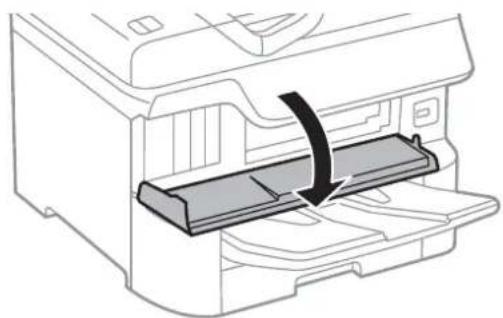
natural_image
Diagram of a printer's internal structure showing paper feeding into a slot (no text or symbols)- Push the ink cartridge that you want to replace. The ink cartridge will pop out slightly.
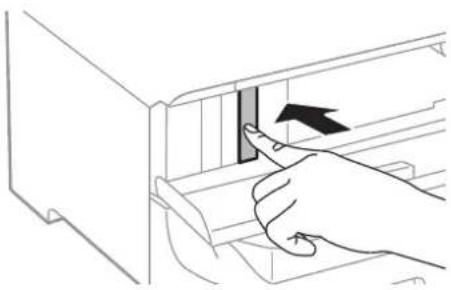
natural_image
Line drawing of a hand pressing a button into a file drawer (no text or symbols)- Remove the ink cartridge from the printer.
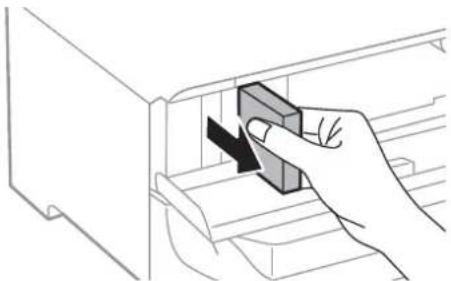
natural_image
Line drawing of a hand inserting a rectangular object into a filing cabinet (no text or symbols)- Remove the new ink cartridge from its package.
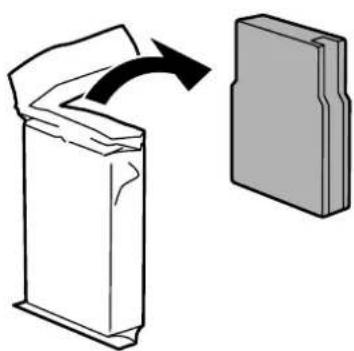
natural_image
Diagram showing a folded paper or plastic box being rotated by an arrow, next to a gray 3D block (no text or symbols)Replacing Ink Cartridges and Other Consumables

Important:
Do not touch the sections shown in the illustration. Doing so may prevent normal operation and printing.
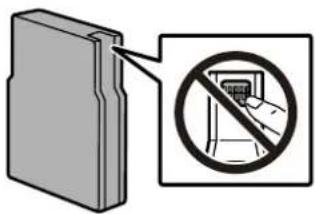
text_image
Diagram showing a device with a prohibition symbol, indicating no file access or disassembly.- Shake the ink cartridge horizontally for 5 seconds. (Move it back and forth about 10 cm 15 times.)
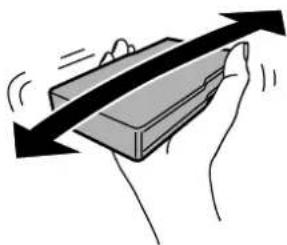
natural_image
Illustration of a hand holding a rectangular object with an upward arrow, indicating motion or force (no text or symbols)-
Insert the cartridge into the printer until it clicks.
-
Close the front cover.
Related Information
→ "Ink Cartridge Handling Precautions" on page 162
Maintenance Box Code
Epson recommends the use of a genuine Epson maintenance box.
Maintenance box code: T6714

Important:
Once a maintenance box has been installed in a printer it cannot be used with other printers.
Maintenance Box Handling Precautions
Read the following instructions before replacing the maintenance box.
☐ Do not touch the green chip on the side of the maintenance box. Doing so may prevent normal operation and printing.
☐Do not remove the film on the top of the box; otherwise ink may leak.
☐Do not tilt the used maintenance box until after it is sealed in the plastic bag; otherwise ink may leak.
□Keep the maintenance box out of direct sunlight.
Replacing Ink Cartridges and Other Consumables
☐Do not replace the maintenance box during printing; otherwise, ink may leak.
☐Do not reuse a maintenance box which has been removed and left detached for a long period. Ink inside the box will have solidified and no more ink can be absorbed.
Replacing a Maintenance Box
In some print cycles a very small amount of surplus ink may be collected in the maintenance box. To prevent ink leakage from the maintenance box, the printer is designed to stop printing when the absorbing capacity of the maintenance box has reached its limit. Whether and how often this is required will vary according to the number of pages you print, the type of material that you print and the number of cleaning cycles that the printer performs.
When a message is displayed prompting you to replace the maintenance box, refer to the animations displayed on the control panel. The need for replacement of the box does not mean that your printer has ceased to operate in accordance with its specifications. The Epson warranty does not cover the cost of this replacement. It is a user-serviceable part.
Note:
When it is full, you cannot print until the maintenance box is replaced to avoid ink leakage. However, non-printing features are available.
Related Information
→ "Maintenance Box Code" on page 165
→“Maintenance Box Handling Precautions” on page 165
Maintenance Rollers Codes
Epson recommends the use of genuine Epson maintenance rollers.
The following are the codes.
Maintenance rollers of paper cassette 1: S210048
Maintenance rollers of paper cassette 2 to 4: S210049
Replacing Maintenance Rollers in Paper Cassette 1
There are two places for replacing the maintenance rollers: on the back of the printer (two rollers) and on the paper cassette (one roller).
Replacing Ink Cartridges and Other Consumables
- Turn off the printer by pressing the ⏻ button, and then unplug the power cord.
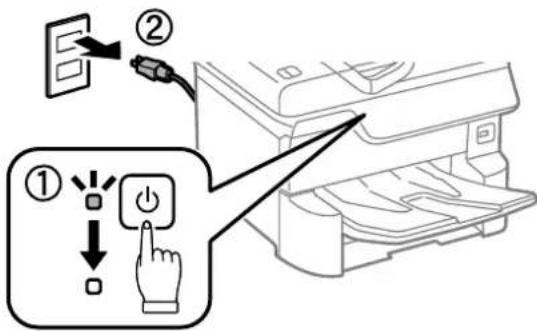
text_image
Diagram illustrating a printer power switch operation with labeled steps and directional arrows- Remove the new maintenance rollers from their package.

Important:
☐ The maintenance rollers for the paper cassette 1 and paper cassette 2 to 4 are different. Check the direction of the arrow at the center of the maintenance rollers, and make sure the maintenance rollers are the ones for paper cassette 1. If you attach the wrong rollers, the printer may not feed the paper.
natural_image
Diagram showing concentric circles with a curved arrow pointing to the center (no text or symbols)☐ Be careful not to stain the surface of the maintenance rollers. If dust collects on the surface of the maintenance rollers, clean the rollers by using asoft and moist cloth. Using a dry cloth may damage the surface of the rollers.
- Pull out paper cassette 1.
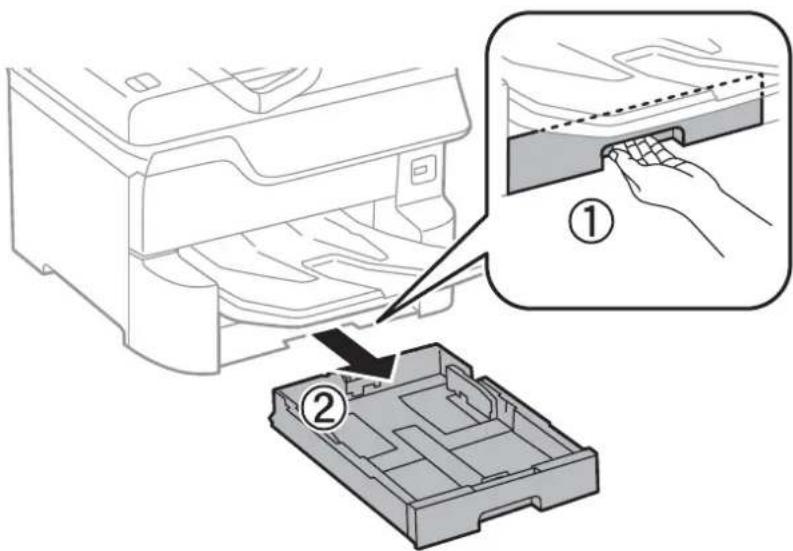
text_image
Diagram illustrating the process of inserting a printer into a plastic case, with labeled steps ① and ②.User's Guide
Replacing Ink Cartridges and Other Consumables
- Turn the printer around, and open rear cover 1.

natural_image
Diagram of a device's internal structure showing a highlighted component with a black arrow indicating direction (no text or symbols present)- Pull out rear cover 2.
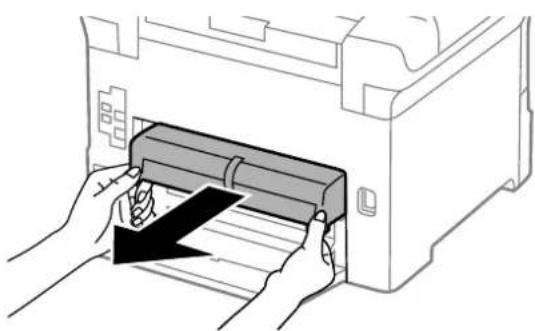
natural_image
Illustration of hands inserting a printer into a machine (no text or symbols visible)- Remove the cover inside the back of the printer.
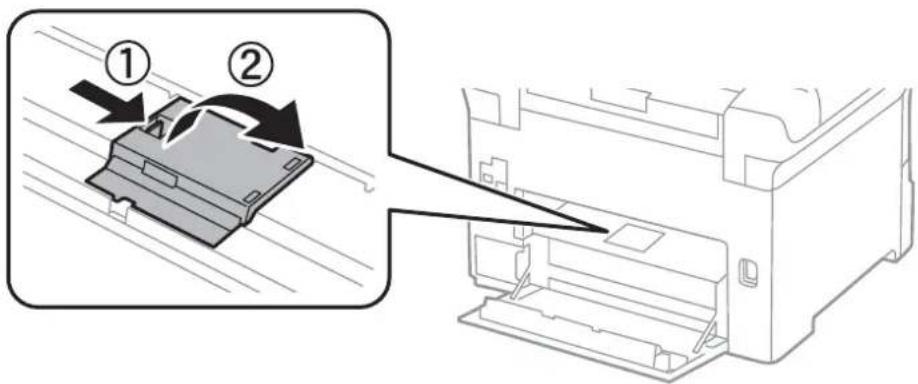
text_image
Diagram showing two steps of printer or printer assembly process with numbered annotations- Slide out the two used maintenance rollers, and remove them.
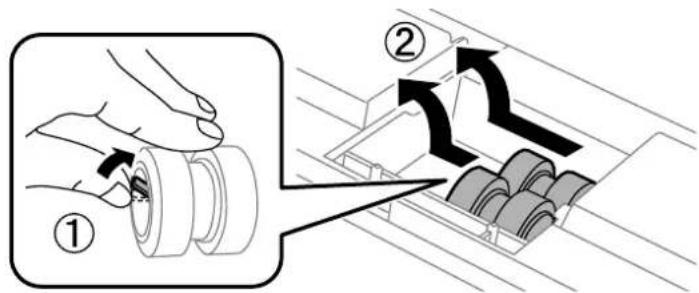
text_image
Diagram illustrating a mechanical assembly process with labeled steps ① and ②, showing hand positioning and directional arrows.User's Guide
Replacing Ink Cartridges and Other Consumables
- Insert two new maintenance rollers until they click into place.
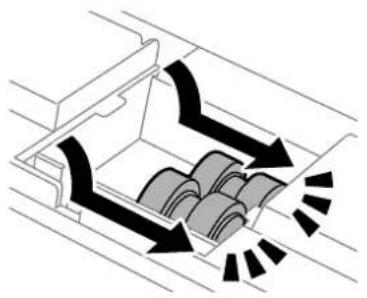
natural_image
Diagram of a mechanical device with arrows indicating flow or movement, no text or symbols presentNote:
Insert the maintenance rollers by rolling them so that you can insert them smoothly.
- Reattach the cover inside the back of the printer.
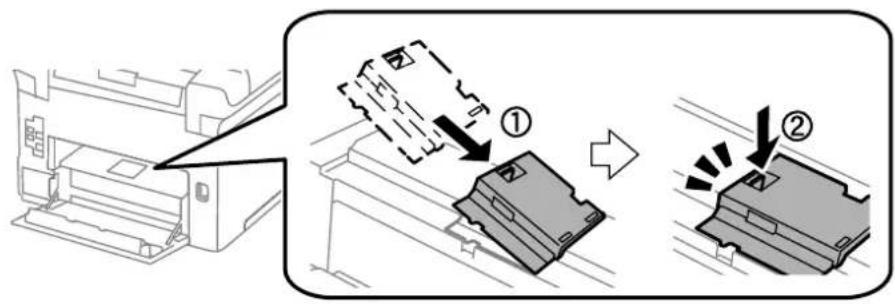
text_image
Diagram illustrating printer operation steps with labeled components and directional arrows- Insert rear cover 2.
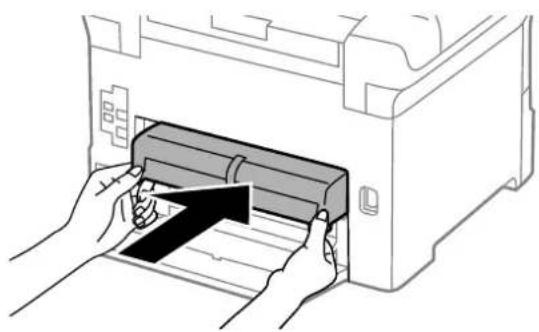
natural_image
Illustration of hands inserting a printer into a paper holder (no text or symbols visible)- Close rear cover 1.
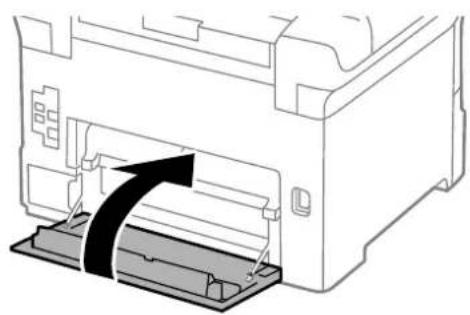
natural_image
Diagram of a printer with an arrow indicating compression or disassembly process (no text or symbols present)Replacing Ink Cartridges and Other Consumables
- Release the lever of the paper cassette.
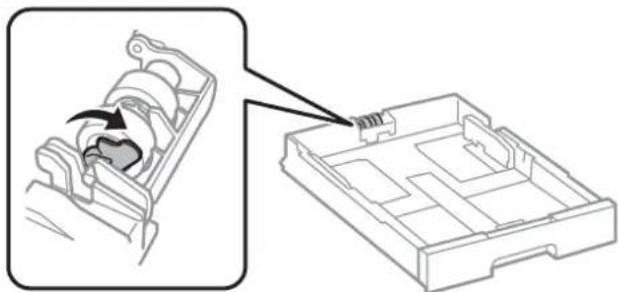
natural_image
Diagram showing a mechanical component being inserted into a housing, with no visible text or symbols.- Slide the maintenance roller toward the lever, and then remove them by taking the shaft out of the holder.
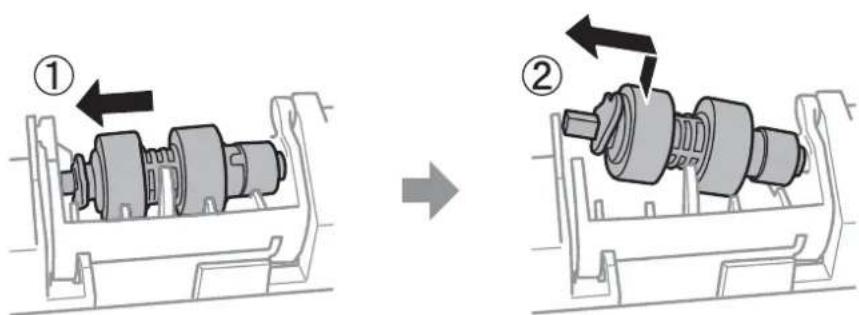
text_image
Technical diagram showing mechanical assembly before and after disassembly, labeled with components ① and ②- Insert the shaft of the new maintenance roller into the hole in the holder, and then slide the shaft on the lever side along the slot while it is facing the flat surface at the front.
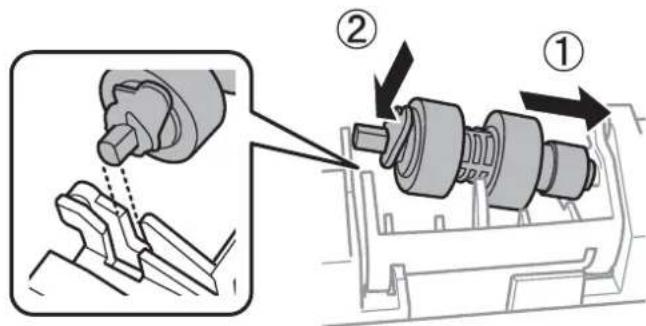
text_image
Technical diagram showing mechanical assembly steps with numbered annotations- Lock the lever.
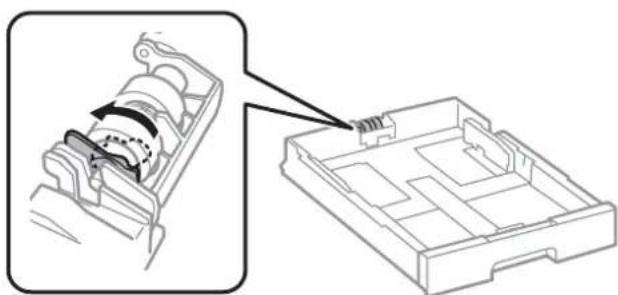
natural_image
Technical illustration of a mechanical assembly with a close-up view of internal components (no text or symbols)- Insert the paper cassette.
Replacing Ink Cartridges and Other Consumables
- Turn on the printer, select Settings > Maintenance > Maintenance Roller Information>Reset Maintenance Roller Counter, and then select the paper cassette in which you replaced the maintenance rollers.
Related Information
→“Maintenance Rollers Codes” on page 166
Replacing Maintenance Rollers in Paper Cassette 2 to 4
There are two places for replacing the maintenance rollers: on the back of the printer (two rollers) and on the paper cassette (one roller).
- Turn off the printer by pressing the ⏻ button, and then unplug the power cord.
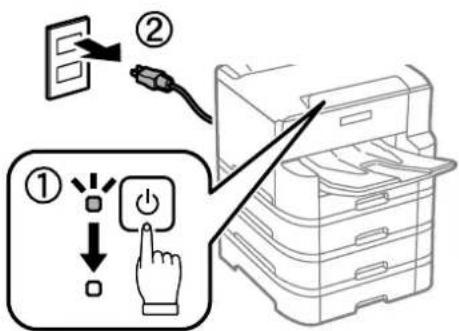
text_image
Diagram illustrating a printer operation step with labeled instructions for inserting a power button and clicking the next hand.- Remove the new maintenance rollers from their package.

Important:
☐ The maintenance rollers for the paper cassette 1 and paper cassette 2 to 4 are different. Check the direction of arrow on the center of the maintenance rollers, and make sure the maintenance rollers are the ones for paper cassette 2 to 4. If you attach the wrong rollers, the printer may not feed the paper.
natural_image
Diagram showing a circular target with radial lines and an arrow pointing to a rectangular button (no text or symbols)☐ Be careful not to stain the surface of the maintenance rollers. If the dust collects on the surface of the maintenance rollers, clean the rollers by using asoft and moist cloth. Using a dry cloth may damage the surface of the rollers.
Replacing Ink Cartridges and Other Consumables
- Pull out the paper cassette for which you want to replace the rollers.
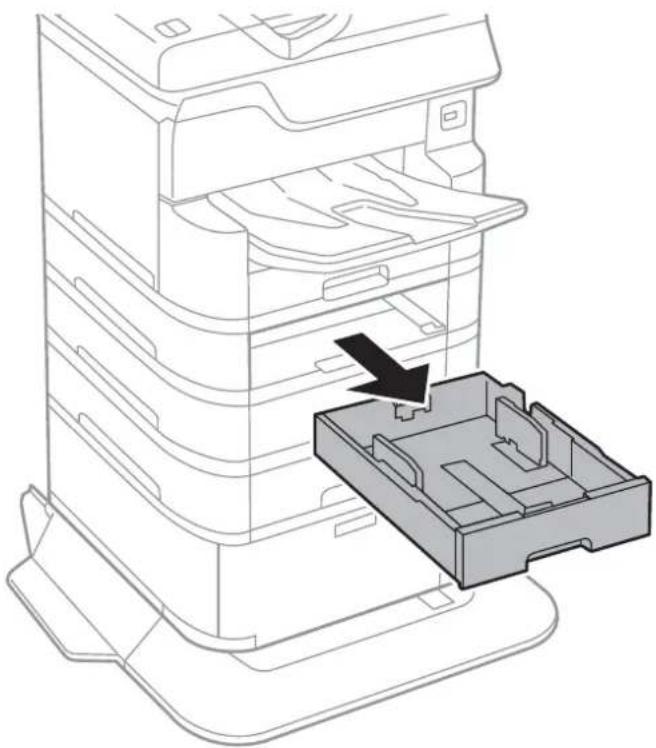
natural_image
Technical line drawing of a printer's internal structure showing a base case and top view with an arrow indicating assembly (no text or symbols present)- Turn the printer around, and then open the printer's cassette unit cover.
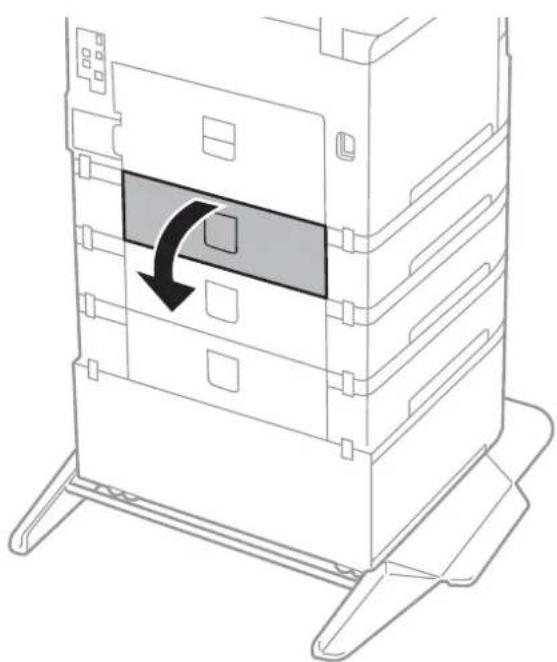
natural_image
Diagram of a multi-tiered storage unit with a black arrow indicating rotation or movement, no text or symbols present.Replacing Ink Cartridges and Other Consumables
- Remove the screws by a screwdriver and remove the cover on the rear of inside the printer.
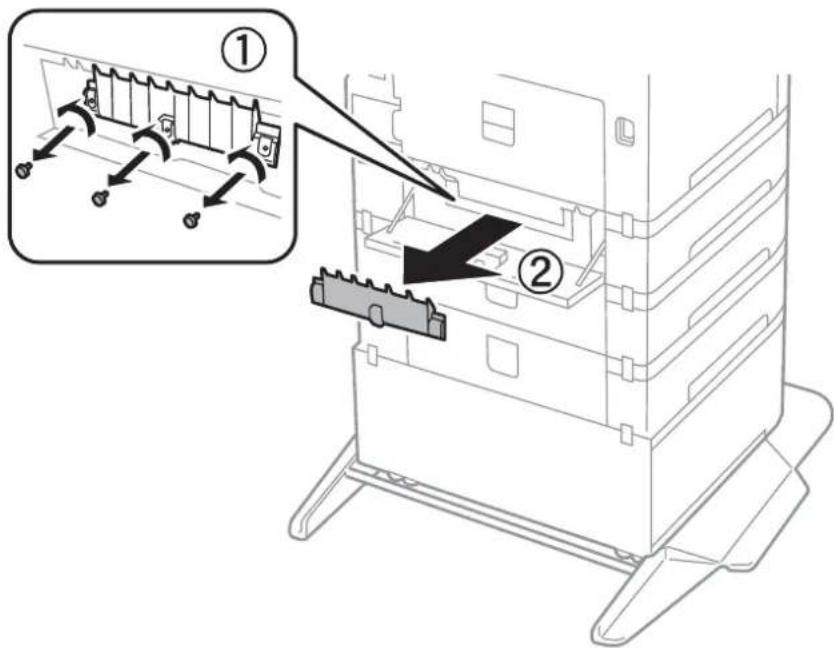
text_image
Diagram showing a device's internal structure with labeled parts and directional arrows indicating assembly or movement.- Slide out two used maintenance rollers, and remove both of them.
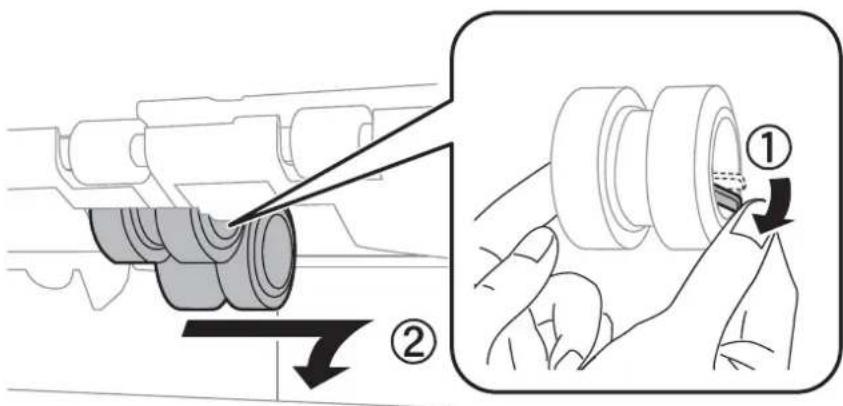
text_image
Technical diagram showing mechanical assembly steps with numbered instructions for component identification- Insert two new maintenance rollers until they click into place.
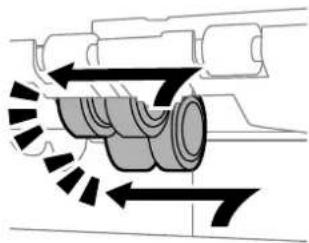
natural_image
Mechanical diagram showing gear meshing with directional arrows indicating motion (no text or symbols)Note:
Insert the maintenance rollers by rolling them so that you can insert them smoothly.
Replacing Ink Cartridges and Other Consumables
- Tighten the screws to re-attach the cover.
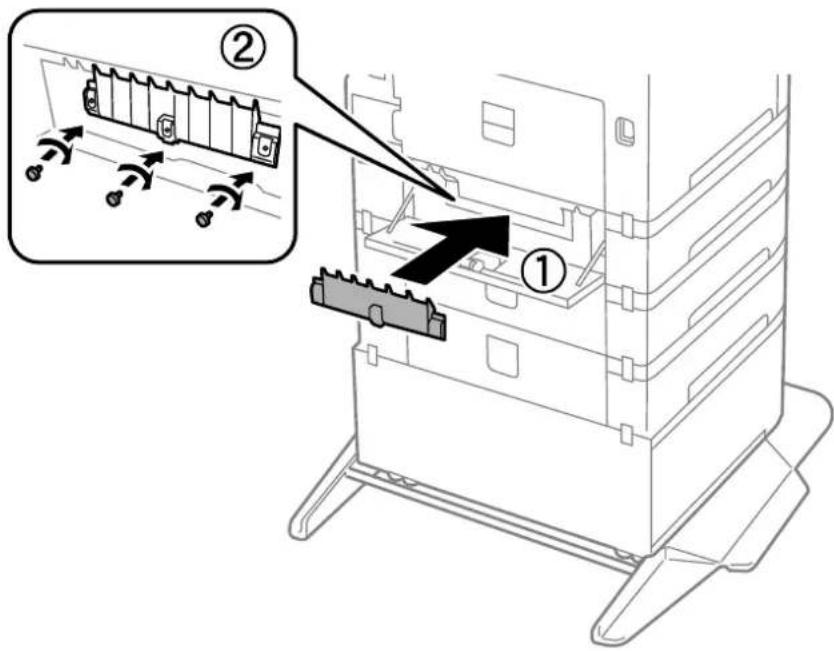
text_image
Diagram showing a device assembly with labeled parts and directional arrows indicating motion or movement.- Close the cassette unit cover.
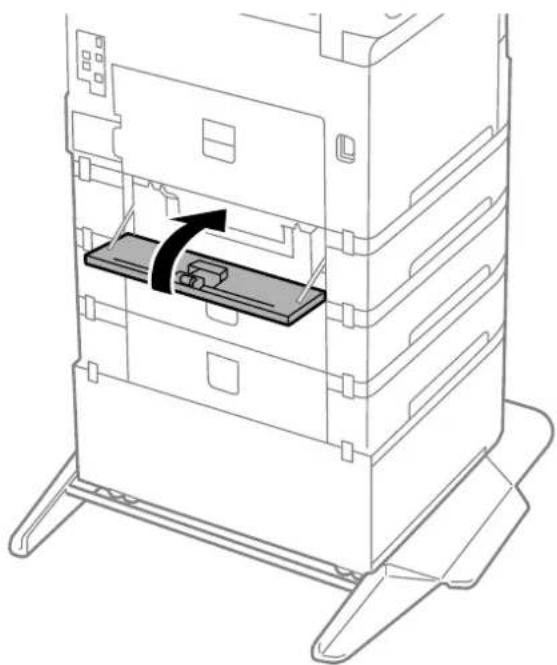
natural_image
Technical line drawing of a multi-tiered storage unit with a central component and directional arrow indicating motion (no text or symbols)Replacing Ink Cartridges and Other Consumables
- Release the lever of the paper cassette.
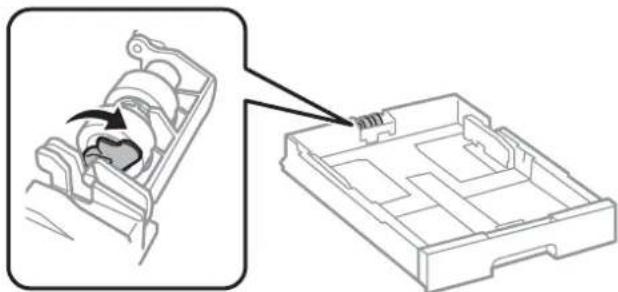
natural_image
Diagram showing a mechanical component being inserted into a housing, with no visible text or symbols.- Slide the maintenance roller toward the lever, and then remove them by taking the shaft out of the holder.
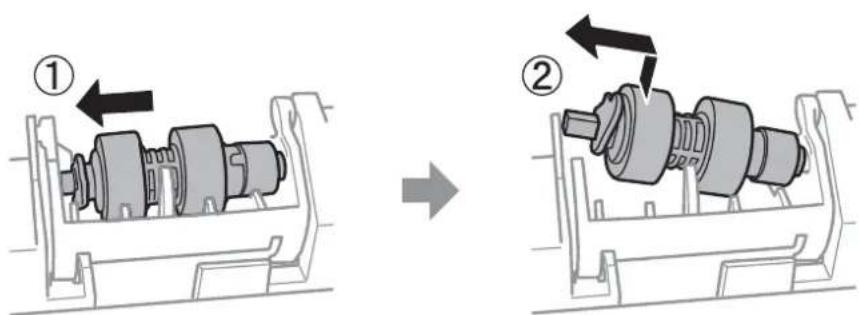
text_image
Technical diagram showing mechanical assembly before and after disassembly, labeled with components ① and ②- Insert the shaft of the new maintenance roller into the hole in the holder, and then slide the shaft on the lever side along the slot while it is facing the flat surface at the front.
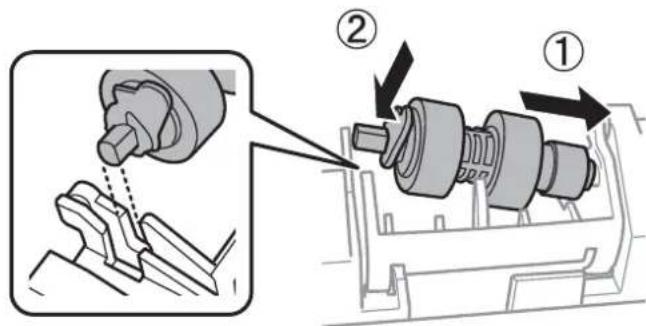
text_image
Technical diagram showing mechanical assembly steps with numbered annotations- Lock the lever.
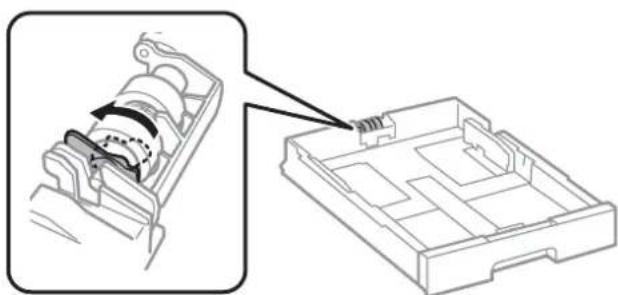
natural_image
Technical line drawing of a mechanical component with a close-up view showing internal structure (no text or symbols)- Insert the paper cassette.
Replacing Ink Cartridges and Other Consumables
- Turn on the printer, select Settings > Maintenance > Maintenance Roller Information > Reset Maintenance Roller Counter, and then select the paper cassette in which you replaced the maintenance rollers.
Related Information
→“Maintenance Rollers Codes” on page 166
Temporarily Printing with Black Ink
When color ink is expended and black ink still remains, you can use the following settings to continue printing for a short time using only black ink.
☐Type of paper: plain papers, Envelope
☐Color: B&W or Grayscale
☐ EPSON Status Monitor 3: Enabled (When printing from the printer driver on Windows.)
Because this feature is only available for approximately five days, replace the expended ink cartridge as soon as possible.
Note:
☐ If EPSON Status Monitor 3 is disabled, access the printer driver, click Extended Settings on the Maintenance tab, and then select Enable EPSON Status Monitor 3.
☐The available period varies depending on the usage conditions.
Temporarily Printing with Black Ink - Control Panel
- When a message is displayed prompting you to replace the ink cartridges, select Proceed. A message is displayed telling you that you can temporarily print with black ink.
- Check the message, and then select Proceed.
- If you want to print in monochrome, select No, remind me later. The ongoing job is canceled.
- Now you can copy originals or print received faxes on plain paper in monochrome. Select the feature you want to use on the home screen.
Replacing Ink Cartridges and Other Consumables
Temporarily Printing with Black Ink - Windows
- When the following window is displayed, cancel printing.
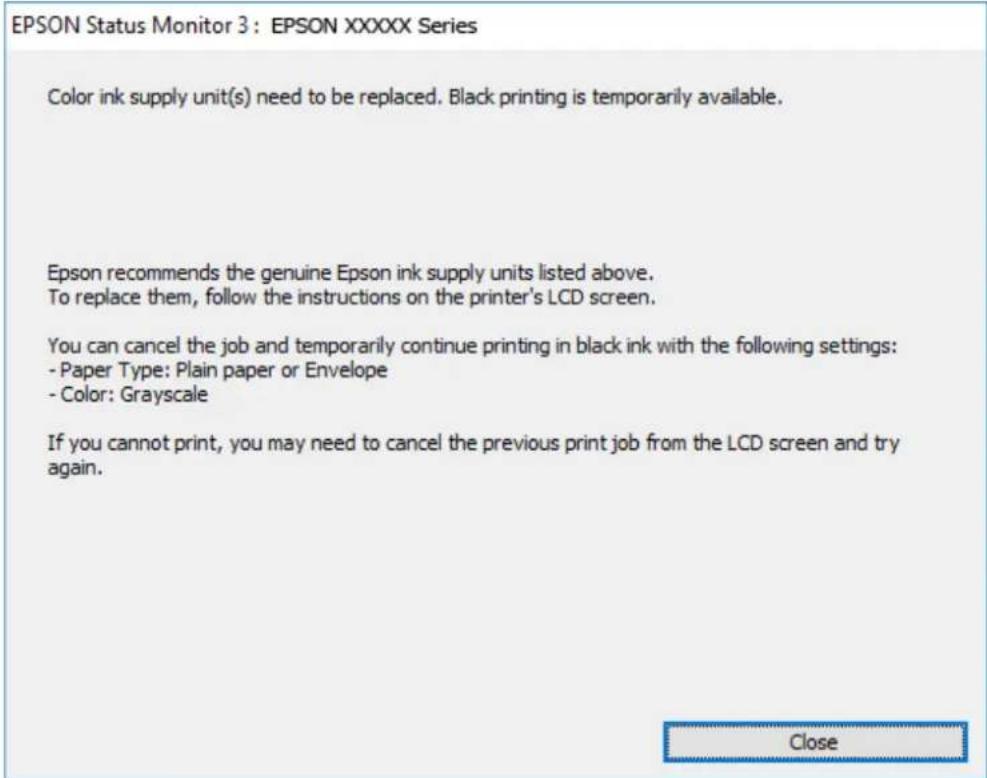
text_image
EPSON Status Monitor 3 : EPSON XXXXX Series Color ink supply unit(s) need to be replaced. Black printing is temporarily available. Epson recommends the genuine Epson ink supply units listed above. To replace them, follow the instructions on the printer's LCD screen. You can cancel the job and temporarily continue printing in black ink with the following settings: - Paper Type: Plain paper or Envelope - Color: Grayscale If you cannot print, you may need to cancel the previous print job from the LCD screen and try again. Close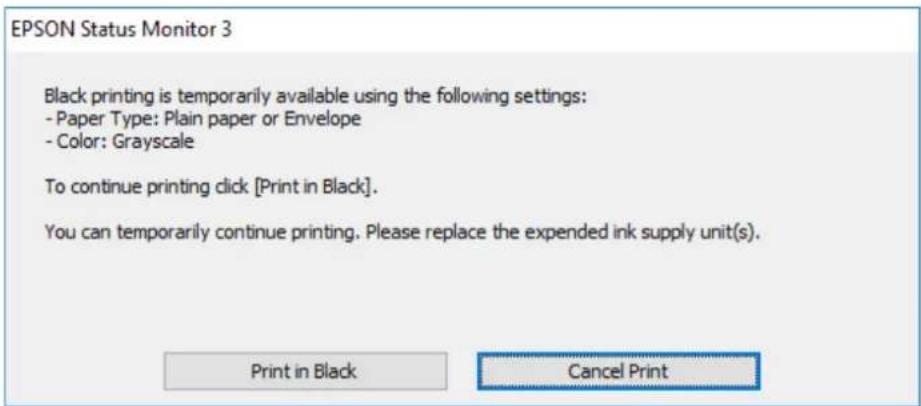
text_image
EPSON Status Monitor 3 Black printing is temporarily available using the following settings: - Paper Type: Plain paper or Envelope - Color: Grayscale To continue printing click [Print in Black]. You can temporarily continue printing. Please replace the expended ink supply unit(s). Print in Black Cancel PrintNote:
If you cannot cancel printing from the computer, cancel using the printer's control panel.
- Access the printer driver window.
- Select plain papers or Envelope as the Paper Type setting on the Main tab.
- Select Grayscale.
- Set the other items on the Main and More Options tabs as necessary, and then click OK.
- Click Print.
Replacing Ink Cartridges and Other Consumables
- Click Print in Black in the window displayed.
Temporarily Printing with Black Ink - Mac OS
Note:
To use this feature through a network, connect with Bonjour.
-
Click the printer icon in the Dock.
-
Cancel the job.
Note:
If you cannot cancel printing from the computer, cancel using the printer's control panel.
- Select System Preferences from the menu > Printers & Scanners (or Print & Scan, Print & Fax), and then select the printer. Click Options & Supplies > Options (or Driver).
- Select On as the Permit temporary black printing setting.
- Access the print dialog.
- Select Print Settings from the pop-up menu.
- Select plain papers or Envelope as the Media Type setting.
- Select Grayscale.
- Set the other items as necessary.
- Click Print.
Conserving Black Ink when the Black Ink Is Low (for Windows Only)
When black ink is running low and there is enough color ink remaining, you can use a mixture of color inks to create black. You can continue printing while preparing a replacement black ink cartridge.
This feature is only available when you select the following settings in the printer driver.
□Paper Type: plain papers
Quality: Standard
□EPSON Status Monitor 3: Enabled
Replacing Ink Cartridges and Other Consumables
Note:
☐ If EPSON Status Monitor 3 is disabled, access the printer driver, click Extended Settings on the Maintenance tab, and then select Enable EPSON Status Monitor 3.
☐ Composite black looks slightly different from pure black. In addition, the print speed is reduced.
☐To maintain the quality of the print head, black ink is also consumed.
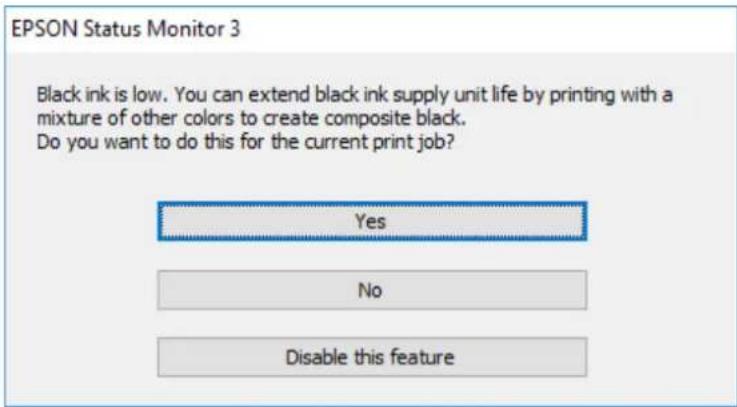
text_image
EPSON Status Monitor 3 Black ink is low. You can extend black ink supply unit life by printing with a mixture of other colors to create composite black. Do you want to do this for the current print job? Yes No Disable this feature| Options Description | |
| Yes Select to use a mixture of color inks to create black. This window is displayed the next time you print a similar job. | |
| No | Select to continue using the remaining black ink. This window is displayed the next time you print a similar job. |
| Disable this feature | Select to continue using the remaining black ink. This window is not displayed until you replace the black ink cartridge and it runs low again. |
Maintaining the Printer
Checking and Cleaning the Print Head
If the nozzles are clogged, the printouts become faint, there is visible banding, or unexpected colors appear. When print quality has declined, use the nozzle check feature and check if the nozzles are clogged. If the nozzles are clogged, clean the print head. You can perform a nozzle check and head cleaning from the control panel or the computer.

Important:
Do not open the front cover or turnoff the printer during head cleaning. If the head cleaning is incomplete, you may not be able to print.
Note:
☐ Because print head cleaning uses some ink, clean the print head only if quality declines.
☐When ink is low, you may not be able to clean the print head.
☐ To prevent the print head from drying out, do not unplug the printer while the power is on.
☐ If print quality has not improved after repeating nozzle check and head cleaning about four times, wait for at least six hours without printing, and then run the nozzle check again and repeat the head cleaning if necessary. We recommend to turn off the printer. If print quality has still not improved, contact Epson support.
Checking and Cleaning the Print Head - Control Panel
- Load A4-size plain paper in the printer.
- Select Settings on the home screen.
- Select Maintenance > Print Head Nozzle Check.
- Follow the on-screen instructions to print the nozzle check pattern.
- Examine the printed pattern. If there are broken lines or missing segments as shown in the "NG" pattern, the print head nozzles may be clogged. Go to the next step. If you cannot see any broken lines or missing segments as in the following "OK" pattern, the nozzles are not clogged. Select to close the nozzle check feature.
OK
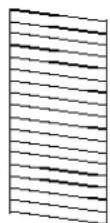
NG
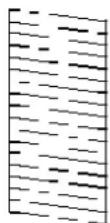
- Select, and then follow the on-screen instructions to clean the print head.
Maintaining the Printer
- When cleaning is finished, print the nozzle check pattern again. Repeat cleaning and printing the pattern until all lines are printed completely.
Related Information
→“Loading Paper in the Paper Cassette” on page 30
Checking and Cleaning the Print Head - Windows
- Load A4-size plain paper in the printer.
- Access the printer driver window.
- Click Nozzle Check on the Maintenance tab.
- Follow the on-screen instructions.
Related Information
→“Loading Paper in the Paper Cassette” on page 30
→“Accessing the Printer Driver” on page 59
Checking and Cleaning the Print Head - Mac OS
- Load A4-size plain paper in the printer.
- Select System Preferences from the then select the printer.
- Click Options & Supplies > Utility > Open Printer Utility.
- Click Nozzle Check.
- Follow the on-screen instructions.
menu > Printers & Scanners (or Print & Scan, Print & Fax), and
Related Information
→“Loading Paper in the Paper Cassette” on page 30
Aligning Ruled Lines
If vertical lines look misaligned, align the ruled lines.
- Load A4-size plain paper in the printer.
- Select Settings on the home screen.
- Select Maintenance > Ruled Line Alignment.
Maintaining the Printer
-
Follow the on-screen instructions to print an alignment pattern.
-
Follow the on-screen instructions to align the ruled lines. Find and enter the number for the pattern that has the least misaligned vertical line.
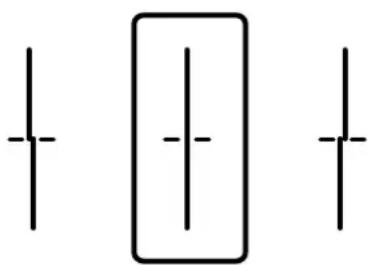
natural_image
Pure electrical circuit lines without any symbolsRelated Information
→“Loading Paper in the Paper Cassette” on page 30
Cleaning the Paper Path
When the printouts are smeared or paper does not feed correctly, clean the roller inside.

Important:
Do not use tissue paper to clean the inside of the printer. The print head nozzles may be clogged with lint.
Cleaning the Paper Path for Ink Smears
When the printouts are smeared or scuffed, clean the roller inside.

Important:
Do not use tissue paper to clean the inside of the printer. The print head nozzles may be clogged with lint.
- Load A3-size plain paper in the paper source that you want to clean.
- Select Settings on the home screen.
-
Select Maintenance > Paper Guide Cleaning.
-
Select the paper source, and then follow the on-screen instructions to clean the paper path.
Note:
Repeat this procedure until the paper is not smeared with ink. If the printouts are still smeared, clean the other paper sources.
Related Information
→“Loading Paper in the Paper Cassette” on page 30
Maintaining the Printer
Cleaning the Paper Path for Paper Feeding Problems (Paper Cassette)
When paper is not fed from paper cassette correctly, clean the roller inside.
- Pull out the paper cassette.
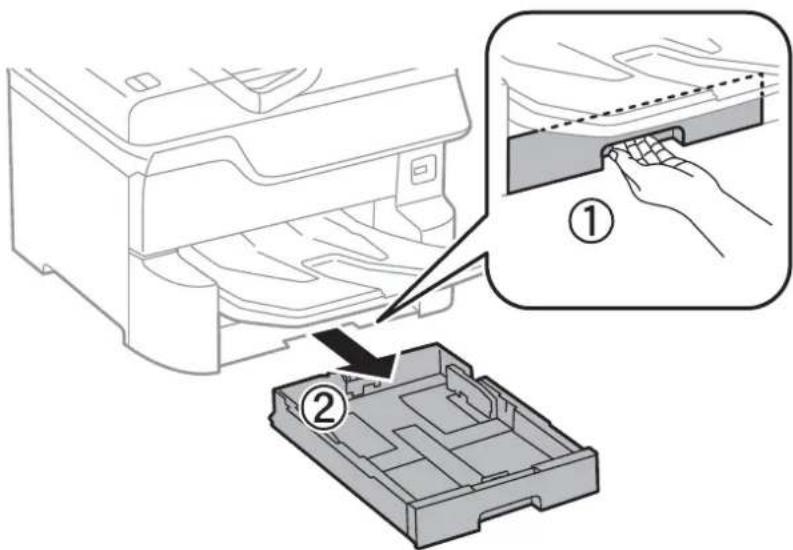
text_image
Diagram illustrating the process of inserting a printer into a device, with labeled steps ① and ② showing step ① and step ② respectively.- Wipe the roller using a soft, moist cloth.
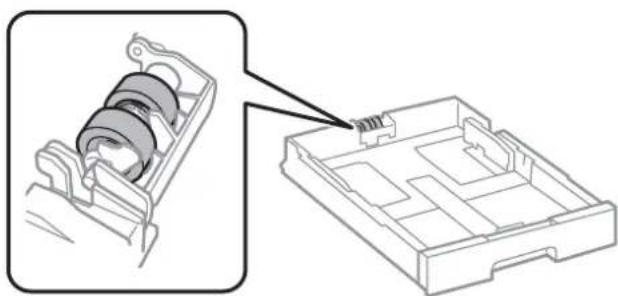
natural_image
Technical illustration of a mechanical component with a magnified inset showing internal structure (no text or symbols)
Important:
Using a dry cloth may damage the surface of the roller.
- Insert the paper cassette.
Cleaning the ADF
When the copied or scanned images from the ADF are smeared or the originals do not feed in the ADF correctly, clean the ADF.

Important:
Never use alcohol or thinner to clean the printer. These chemicals can damage the printer.
Maintaining the Printer
- Open the ADF cover.
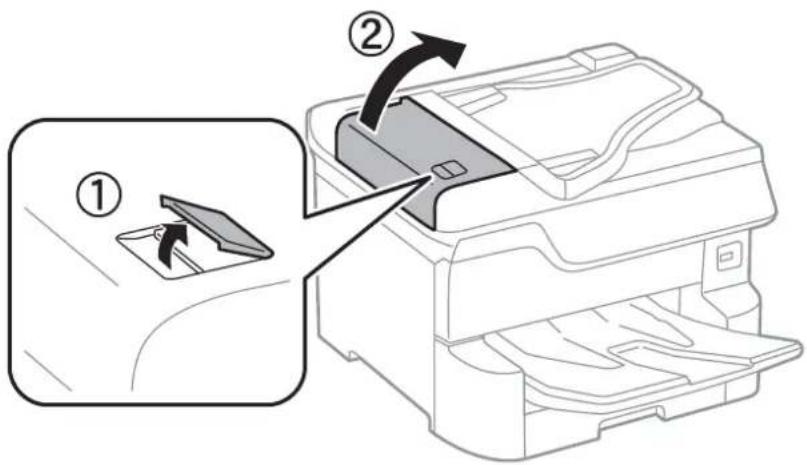
text_image
Diagram showing printer operation steps with numbered instructions for file transfer or print handling- Use a soft, moist cloth to clean the roller and the interior of the ADF.
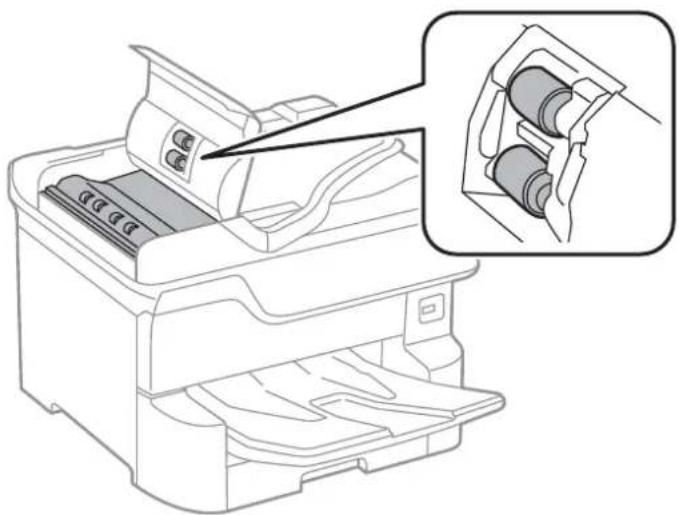
natural_image
Line drawing of a printer with internal components and a magnified inset showing internal cylindrical parts (no text or symbols)
Important:
☐ Using a dry cloth may damage the surface of the roller.
☐ Use the ADF after the roller has dried.
Maintaining the Printer
- Open the document cover.
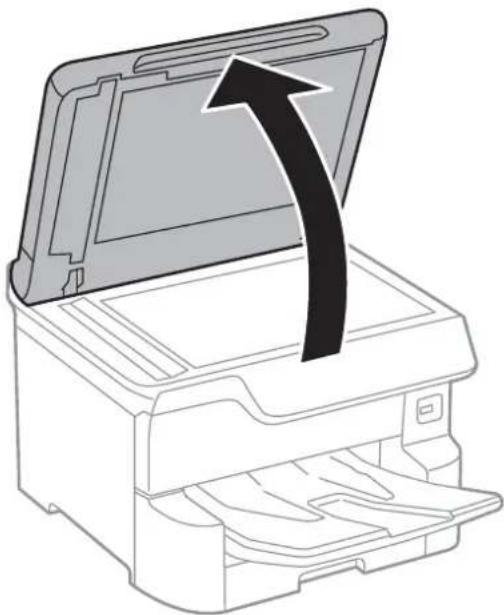
natural_image
Line drawing of a printer with an open lid and arrow indicating compression or shift (no text or symbols)- Clean the part that is shown in the illustration.
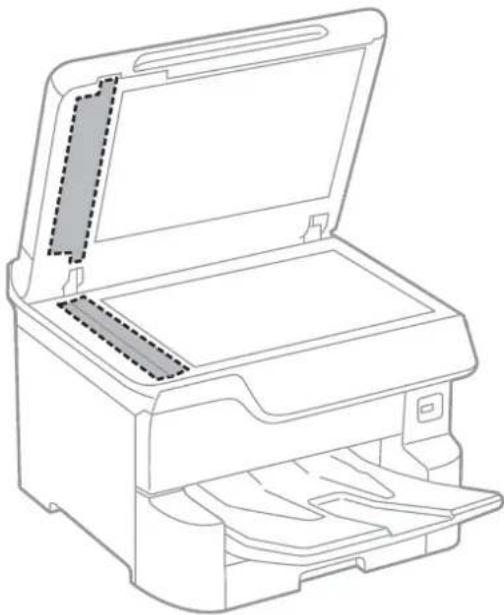
natural_image
Line drawing of a printer with open lid and internal structure (no text or symbols)
Important:
☐ If the glass surface is stained with grease or some other hard-to-remove material, use a small amount of glass cleaner and a soft cloth to remove it. Wipe off all remaining liquid.
☐Do not press the glass surface too hard.
☐ Be careful not to scratch or damage the surface of the glass. A damaged glass surface can decrease the scan quality.
Maintaining the Printer
Cleaning the Scanner Glass
When the copies or scanned images are smeared, clean the scanner glass.

Caution:
Be careful not to trap your hand or fingers when opening or closing the document cover. Otherwise you may be injured.

Important:
Never use alcohol or thinner to clean the printer. These chemicals can damage the printer.
- Open the document cover.
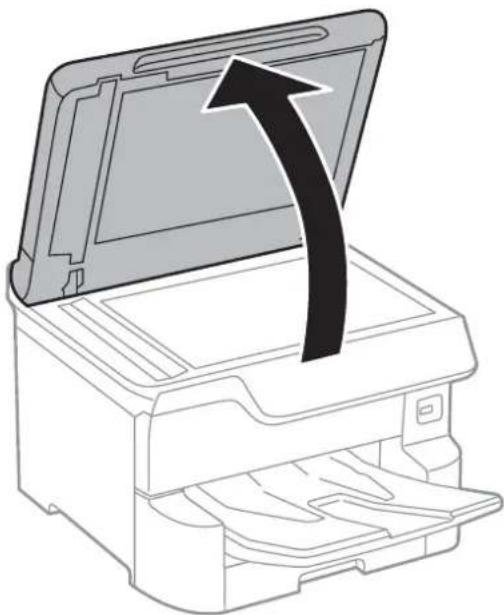
natural_image
Line drawing of a printer with an open lid and arrow indicating compression or shift (no text or symbols)- Use a soft, dry, clean cloth to clean the surface of the scanner glass.

Important:
☐ If the glass surface is stained with grease or some other hard-to-remove material, use a small amount of glass cleaner and a soft cloth to remove it. Wipe off all remaining liquid.
☐Do not press the glass surface too hard.
☐ Be careful not to scratch or damage the surface of the glass. A damaged glass surface can decrease the scan quality.
Network Service and Software Information
This section introduces the network services and software products available for your printer from the Epson website or the supplied software disc.
Application for Configuring Printer Operations (Web Config)
Web Config is an application that runs in a web browser, such as Internet Explorer and Safari, on a computer or smart device. You can confirm the printer status or change the network service and printer settings. To use the Web Config, connect the printer and the computer or device to the same network.
The following browsers are supported.
| OS Browser | |
| Windows XP SP3 or later | Internet Explorer 8 or later, Firefox*, Chrome* |
| Mac OS X v10.6.8 or later | Safari*, Firefox*, Chrome* |
| iOS* | Safari* |
| Android 2.3 or later Default browser | |
| Chrome OS* | Default browser |
* U set the la t es t ve r s i o n .
Running Web Config on a Web Browser
- Check the printer's IP address.
Tap the network icon on the printer's home screen, and then tap the active connection method to confirm the printer's IP address.
Note:
You can also check the IP address by printing the network connection report.
- Launch a Web browser from a computer or smart device, and then enter the printer's IP address.
Format:
IPv4: http://the printer's IP address/
IPv6: http://[the printer's IP address]/
Examples:
IPv4: http://192.168.100.201/
IPv6: http://[2001:db8::1000:1]/
Network Service and Software Information
Note:
Using the smart device, you can also run Web Config from the maintenance screen of Epson iPrint.
Related Information
→“Using Epson iPrint” on page 94
→ "Network Settings" on page 52
Running Web Config on Windows
When connecting a computer to the printer using WSD, follow the steps below to run Web Config.
- Access the devices and printers screen in Windows.
□Windows 10/Windows Server 2016
Right-click the start button or press and hold it, and then select Control Panel > View devices and printers in Hardware and Sound.
□Windows 8.1/Windows 8/Windows Server 2012 R2/Windows Server 2012
Select Desktop > Settings > Control Panel > View devices and printers in Hardware and Sound (or Hardware).
□Windows 7/Windows Server 2008 R2
Click the start button, and select Control Panel > View devices and printers in Hardware and Sound.
□Windows Vista/Windows Server 2008
Click the start button, and select Control Panel > Printers in Hardware and Sound.
- Right-click on your printer and select Properties.
- Select the Web Service tab and click the URL.
Running Web Config on Mac OS
- Select System Preferences from the menu > Printers & Scanners (or Print & Scan, Print & Fax), and then select the printer.
- Click Options & Supplies> Show Printer Webpage.
Application for Scanning Documents and Images (Epson Scan 2)
Epson Scan 2 is an application for controlling scanning. You can adjust the size, resolution, brightness, contrast, and quality of the scanned image. You can also start Epson Scan 2 from a TWAIN-compliant scanning application. See the application's help for details.
Network Service and Software Information
Starting on Windows
Note:
For Windows Server operating systems, make sure the Desktop Experience feature is installed.
□Windows 10/Windows Server 2016
Click the start button, and then select EPSON > Epson Scan 2.
☐Windows 8.1/Windows 8/Windows Server 2012 R2/Windows Server 2012
Enter the application name in the search charm, and then select the displayed icon.
☐ Windows 7/Windows Vista/Windows XP/Windows Server 2008 R2/Windows Server 2008/Windows Server 2003 R2/Windows Server 2003
Click the start button, and then select All Programs or Programs > EPSON > Epson Scan 2> Epson Scan 2.
Starting on Mac OS
Note:
Epson Scan 2 does not support the Mac OS fast user switching feature. Turn off fast user switching.
Select Go > Applications > Epson Software > Epson Scan 2.
Related Information
→“Scanning Using Epson Scan 2” on page 121
→“Installing the Latest Applications” on page 192
Adding the Network Scanner
Before using Epson Scan 2, you need to add the network scanner.
- Start the software, and then click Add on the Scanner Settings screen.
Note:
☐ If Add is grayed out, click Enable Editing.
☐ If the main screen of Epson Scan 2 is displayed, it has already been connected to the scanner. If you want to connect to another network, select Scanner > Settings to open the Scanner Settings screen.
- Add the network scanner. Enter the following items, and then click Add.
☐Model: Select the scanner you want to connect to.
☐Name: Enter the scanner name within 32 characters.
☐ Search for Network: When the computer and the scanner are on the same network, the IP address is displayed. If it is not displayed, click the button. If the IP address is still not displayed, click Enter address, and then enter the IP address directly.
- Select the scanner on the Scanner Settingsscreen, and then click OK.
Application for Configuring Scanning from the Computer (Document Capture Pro)
Document Capture Pro ^+ is an application that allows you to configure settings for scanned images sent from the printer to a computer over a network.
After checking the scanned image, you can configure various scan settings on the computer such as the file saving format, where to save the scanned image, and the forwarding destination. See the Document Capture Pro help for details on using the application.
*The names are for Windows. For Mac OS, the name is Document Capture. For Windows Server, the name is Document Capture Pro Server.
Starting on Windows
□Windows 10/Windows Server 2016
Click the start button, and then select Epson Software > Document Capture Pro.
Windows 8.1/Windows 8/Windows Server 2012 R2/Windows Server 2012
Enter the application name in the search charm, and then select the displayed icon.
☐ Windows 7/Windows Vista/Windows XP/Windows Server 2008 R2/Windows Server 2008/Windows Server 2003 R2/Windows Server 2003
Click the start button, and select All Programs or Programs > Epson Software > Document Capture Pro.
Starting on Mac OS
Select Go > Applications > Epson Software > Document Capture.
Related Information
→ “Scanning Using the Settings Registered on the Computer (Document Capture Pro)” on page 112
→“Installing the Latest Applications” on page 192
Application for Configuring Fax Operations and Sending Faxes (FAX Utility)
FAX Utility is an application that allows you to configure various settings for sending faxes from a computer. You can create or edit the contacts list to be used when sending a fax, configure to save received faxes in PDF format on the computer, and so on. See the application's help for details.
Note:
☐ Windows Server operating systems are not supported.
Before installing the FAX Utility, make sure you have installed the printer driver for this printer; this does not include the PostScript printer driver and Epson universal printer driver.
Starting on Windows
Windows 10
Click the start button, and select Epson Software > FAX Utility.
Network Service and Software Information
Windows 8.1/Windows 8
Enter the application name in the search charm, and then select the displayed icon.
□Windows 7/ Windows Vista/ Windows XP
Click the start button, and select All Programs (or Programs) > Epson Software > FAX Utility.
Starting on Mac OS
Select System Preferences from the menu > Printers & Scanners (or Print & Scan, Print & Fax), and then select the printer (FAX). Click Options & Supplies > Utility > Open Printer Utility.
Related Information
→“Receiving Faxes on a Computer” on page 157
→“Installing the Latest Applications” on page 192
Application for Sending Faxes (PC-FAX Driver)
PC-FAX driver is an application that allows you to send a document created on a separate application as a fax directly from the computer. PC-FAX driver is installed when you install FAX Utility. See the application's help for details.
Note:
☐ Windows Server operating systems are not supported.
☐ The operation differs depending on the application you used to create the document. See the application's help for details.
Accessing from Windows
In the application, select Print or Print Setup from the File menu. Select your printer (FAX), and then click Preferences or Properties.
Accessing from Mac OS
In the application, select Print from the File menu. Select your printer (FAX) as the Printer setting, and then select Fax Settings or Recipient Settings from the pop-up menu.
Related Information
→“Sending a Fax from a Computer” on page 153
→ “Application for Configuring Fax Operations and Sending Faxes (FAX Utility)” on page 190
Application for Printing Web Pages (E-Web Print)
E-Web Print is an application that allows you to easily print web pages with various layouts. See the application's help for details. You can access the help from the E-Web Print menu on the E-Web Print tool bar.
Note:
☐ Windows Server operating systems are not supported.
☐Check for supported browsers and the latest version from the download site.
Starting
When you install E-Web Print, it is displayed in your browser. Click Print or Clip.
Software Update Tools (Software Updater)
EPSON Software Updater is an application that checks for new or updated software on the internet and installs it. You can also update the printer's manual.
Note:
Windows Server operating systems are not supported.
Installing Method
Install Software Updater from the supplied software disc or download the latest version from the Epson website.
http://www.epson.com
Starting on Windows
Windows 10
Click the start button, and then select Epson Software > EPSON Software Updater.
□Windows 8.1/Windows 8
Enter the application name in the search charm, and then select the displayed icon.
□Windows 7/ Windows Vista/Windows XP
Click the start button, and then select All Programs (or Programs) > Epson Software > EPSON Software Updater.
Note:
You can also start EPSON Software Updater by clicking the printer icon on the task bar on the desktop, and then selecting Software Update.
Starting on Mac OS
Select Go > Applications > Epson Software > EPSON Software Updater.
Installing the Latest Applications
Note:
When reinstalling an application, you need to uninstall it first.
- Make sure the printer and the computer are available for communication, and the printer is connected to the Internet.
Network Service and Software Information
2. Start EPSON Software Updater.
The screenshot is an example on Windows.
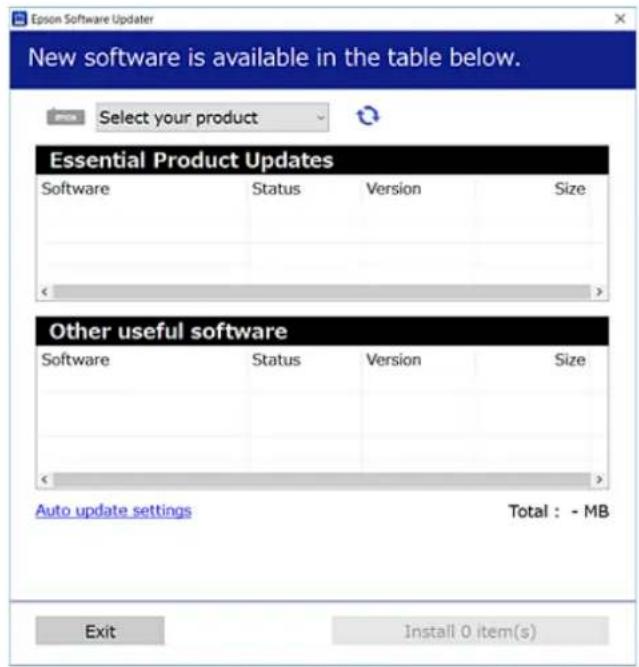
text_image
Epson Software Updater New software is available in the table below. Select your product Essential Product Updates Software Status Version Size < Other useful software Software Status Version Size < Auto update settings Total : - MB Exit Install 0 item(s)-
For Windows, select your printer, and then click 🔒 to check for the latest available applications.
-
Select the items you want to install or update, and then click the install button at the lower right of the screen.

Important:
Do not turn off or unplug the printer until the update is complete; otherwise, the printer may malfunction.
Note:
☐You can download the latest applications from the Epson website.
http://www.epson.com
☐ If you use Windows Server operating systems, you cannot use Epson Software Updater. Download the latest applications from the Epson website.
☐ Document Capture Pro cannot be installed from Epson Software Updater. Install it from the website below.
http://support.epson.net/ (outside Europe)
http://assets.epson-europe.com/gb/en/document_capture_pro/index.html (Europe)
Related Information
→“Software Update Tools (Software Updater)” on page 192
Installing a PostScript Printer Driver
Installing a PostScript Printer Driver - Windows
- Start the installation process from one of the following options.
☐Use the software disc supplied with the printer.
Insert the software disc into the computer, access the following folder path, and then run SETUP64.EXE (or SETUP.EXE).
Driver\PostScript\WINX64 (or WINX86)\SETUP\SETUP64.EXE ( or SETUP.EXE)
□Use the website.
Access your printer page from the following website, download the PostScript3 printer driver, and then run the execution file.
http://www.epson.eu/Support (Europe)
http://support.epson.net/ (outside Europe)
-
Select your printer.
-
Follow the on-screen instructions.
-
Select the connection method from the network connection or USB connection.
☐For network connection.
A list of available printers in the same network is displayed.
Select the printer you want to use.
☐For USB connection.
Follow the on-screen instructions to connect the printer to the computer.
- Follow the on-screen instructions to install the PostScript printer driver.
Installing a PostScript Printer Driver - Mac OS
Download the printer driver from the Epson Support website, and then install it.
http://www.epson.eu/Support (Europe)
http://support.epson.net/ (outside Europe)
You need the IP address of the printer while installing the printer driver.
Select the network icon on the printer's home screen, and then select the active connection method to confirm the printer's IP address.
Adding the Printer Driver (for Mac OS Only)
-
Select System Preferences from the menu > Printers & Scanners (or Print & Scan, Print & Fax).
-
Click +, and then select Add Other Printer or Scanner.
-
Select your printer, and then click Add.
Note:
☐ If your printer is not listed, check that it is correctly connected to the computer and that the printer is on.
☐ For a USB, IP, or Bonjour connection, set the optional paper cassette unit manually after adding the printer driver.
Installing the Epson Universal Printer Driver (for Windows Only)
The Epson universal printer driver is the universal PCL6 compatible print driver. Once you install this printer driver ^* , you can print from every Epson printer that supports this printer driver.
* Since this is a generic printer driver, printing features are limited compared to the printer driver specifically designed for this printer.
Connect the printer to the same network as the computer, and then follow the procedure below to install the printer driver.
- Download the executable file of the driver from the Epson support website.
http://www.epson.eu/Support (Europe only)
http://support.epson.net/
- Double-click the executable file.
- Follow the on-screen instructions for the rest of the installation.
Note:
If you are using a Windows computer and you cannot download the driver from the website, install it from the software disc that came with the printer. Access "Driver\Universal".
Uninstalling Applications
Log in to your computer as an administrator. Enter the administrator password if the computer prompts you.
Uninstalling Applications - Windows
- Press the ⏻ button to turn off the printer.
- Quit all running applications.
- Open Control Panel:
□Windows 10/Windows Server 2016
Right-click the start button or press and hold it, and then select Control Panel.
□Windows 8.1/Windows 8/Windows Server 2012 R2/Windows Server 2012
Select Desktop > Settings > Control Panel.
Network Service and Software Information
☐ Windows 7/Windows Vista/Windows XP/Windows Server 2008 R2/Windows Server 2008/Windows Server 2003 R2/Windows Server 2003
Click the start button and select Control Panel.
- Open Uninstall a program (or Add or Remove Programs):
☐ Windows 10/Windows 8.1/Windows 8/Windows 7/Windows Vista/Windows Server 2016/Windows Server 2012 R2/Windows Server 2012/Windows Server 2008 R2/Windows Server 2008
Select Uninstall a program in Programs.
□Windows XP/Windows Server 2003 R2/Windows Server 2003
Click Add or Remove Programs.
- Select the application you want to uninstall.
You cannot uninstall the printer driver if there is any print jobs. Delete or wait to be printed the jobs before uninstalling.
- Uninstall the applications:
☐ Windows 10/Windows 8.1/Windows 8/Windows 7/Windows Vista/Windows Server 2016/Windows Server 2012 R2/Windows Server 2012/Windows Server 2008 R2/Windows Server 2008
Click Uninstall/Change or Uninstall.
☐Windows XP/Windows Server 2003 R2/Windows Server 2003
Click Change/Remove or Remove.
Note:
If the User Account Control window is displayed, click Continue.
- Follow the on-screen instructions.
Uninstalling Applications - Mac OS
- Download the Uninstaller using EPSON Software Updater.
Once you have downloaded the Uninstaller, you do not need to download it again each time you uninstall the application.
-
Press the ⏻ button to turn off the printer.
-
To uninstall the printer driver or PC-FAX driver, select System Preferences from the menu > Printers & Scanners (or Print & Scan, Print & Fax), and then remove the printer from the enabled printers list.
-
Quit all running applications.
-
Select Go > Applications > Epson Software > Uninstaller.
-
Select the application you want to uninstall, and then click Uninstall.

Important:
The Uninstaller removes all drivers for Epson inkjet printers on the computer. If you use multiple Epson inkjet printers and you only want to delete some drivers, delete all of them first, and then install the necessary printer driver again.
Network Service and Software Information
Note:
If you cannot find the application you want to uninstall in the application list, you cannot uninstall using the Uninstaller. In this situation, select Go >Applications >Epson Software, select the application you want to uninstall, and then drag it to the trash icon.
Printing Using a Network Service
By using Epson Connect service available on the Internet, you can print from your smartphone, tablet PC, or laptop, anytime and practically anywhere. To use this service, you need to register the user and the printer in Epson Connect.
The features available on the Internet are as follows.
Email Print
When you send an email with attachments such as documents or images to an email address assigned to the printer, you can print that email and the attachments from remote locations such as your home or office printer.
□Epson iPrint
This Application is for iOS and Android, and allows you to print or scan from a smart phone or tablet. You can print documents, images, and websites by sending them directly to a printer on the same wireless LAN.
□Scan to Cloud
This application allows you to send the scanned data you want to print to another printer. You can also upload the scanned data to available Cloud services.
Remote Print Driver
This is a shared driver supported by Remote Print Driver. When printing using a printer in a remote location, you can print by changing the printer on the usual applications window.
See the Epson Connect web portal for details.
https://www.epsonconnect.com/
http://www.epsonconnect.eu (Europe only)
Related Information
→“Using Epson iPrint” on page 94
Solving Problems
Checking the Printer Status
Checking Messages on the LCD Screen
If an error message is displayed on the LCD screen, follow the on-screen instructions or the solutions below to solve the problem.
| Error Messages Solutions | |
| Printer error. Turn the power off and on again. If the problem persists, contact Epson Support. | ☐Remove any paper or protective material in the printer and the paper cassette. If the error message is still displayed after turning the power off and on again, contact Epson support.☐When the following error codes are displayed, check the paper for the maximum number of sheets that can be loaded in each paper source.000181, 000184, 000201, 000204, 000221, 000224 |
| Printer error. Contact Epson Support. Non-printing features are available. | The printer may be damaged. Contact Epson support or an authorised Epson service provider to request repairs. However, non-printing features such as scanning are available. |
| Printer error. For details, see your documentation. | The printer may be damaged. Contact Epson support or an authorised Epson service provider to request repairs. |
| Paper out in XX. Load paper. Paper Size: XX/Paper Type: XX | Load paper, and then insert the paper cassette all the way. |
| Too many paper cassette units are installed. Turn the power off and uninstall the extra units. See your documentation for details. | You can install up to three optional paper cassette units. For other optional paper cassette units, uninstall them by following the reverse steps to installation. |
| Unsupported Paper Cassette Units have been installed. Turn the power off and uninstall. For details, see your documentation. | Unsupported optional paper cassette units have been installed.Uninstall them by following the reverse steps to installation. |
| Cannot print because XX is out of order. You can print from another cassette. | Turn the power off and on again, and then reinsert the paper cassette. If the error message is still displayed, contact Epson support or an authorised Epson service provider to request repairs. |
| Maintenance Roller in XX is nearing the end of its service life. | ☐Paper cassetteThe maintenance rollers need to be replaced periodically. Paper is not fed correctly from the paper cassette when it is time for replacement. Prepare new maintenance rollers.☐Rear paper feedPaper is not fed correctly from the rear paper feed when it is time for replacement. Contact Epson support or an authorized Epson service provider to request replacement of the maintenance rollers. |
| Maintenance Roller in XX is at the end of its service life. Replace it and reset the maintenance roller counter. | Replace the maintenance rollers. After replacing the rollers, select Settings > Maintenance > Maintenance Roller Information > Reset Maintenance Roller Counter, and then select the paper cassette for which you replaced the maintenance rollers. |
Solving Problems
| Error Messages Solutions | |
| Maintenance roller in the Rear Paper Feed is at the end of its service life. For details, see your documentation. | Contact Epson support or an authorized Epson service provider to request replacement of the maintenance rollers for the rear paper feed. |
| You need to replace Ink Cartridge(s). To ensure you | receive premium print quality and to help protect your print head, a variable ink safety reserve remains in the cartridge when your printer indicates it is time to replace the cartridge. Replace the cartridge when you are prompted to do so. |
| The time for maintenance is approaching. Contact Epson Support. | Customers must not perform maintenance. Contact Epson or an authorised Epson service provider for maintenance. |
| This printer may need service to keep print quality. Contact Epson Support. | Customers must not perform maintenance. Contact Epson or an authorised Epson service provider for maintenance. |
| Paper Setup Auto Display is set to Off. Some features may not be available. For details, see your documentation. | If Paper Setup Auto Display is disabled, you cannot use AirPrint. |
| No dial tone is detected. | This problem might be resolved by selecting Settings > General Settings > Fax Settings > Basic Settings > Line Type, and then selecting PBX. If your phone system requires an external access code to get an outside line, set the access code after selecting PBX. Use # (hash) instead of the actual access code when entering an outside fax number. This makes connection more secure.If the error message is still displayed, set the Dial Tone Detection settings to disabled. However, disabling this feature may drop the first digit of a fax number and send the fax to the wrong number.For details on Fax Settings, see the Administrator's Guide. |
| Failed to receive faxes because the fax data capacity is full. Touch the Job/Status at the bottom of the Home Screen for details. | Received faxes may accumulate without being processed due to the following reasons.Cannot print because a printer error has occurred.Clear the printer error. To check the details and solutions to the error, press the button and then select Printer Status.Cannot save in the computer or the memory device.To check whether or not received faxes have been saved, press the button and then select Job Status. To save received faxes, turn on the computer or connect a memory device to the printer. |
| The combination of the IP address and the subnet mask is invalid. See your documentation for more details. | Enter the correct IP address or default gateway. Contact your network administrator for assistance. See the Administrator's Guide for details. |
| To use cloud services, update the root certificate from the Epson Web Config utility. | Run Web Config, and then update the root certificate. See the Administrator's Guide for details. |
| Check that the printer driver is installed on the computer and that the port settings for the printer are correct. | Make sure the printer port is selected correctly in Property > Port from the Printer menu as follows.Select "USBXXX" for a USB connection, or "EpsonNet Print Port" for a network connection. |
Solving Problems
| Error Messages Solutions | |
| Recovery Mode The printer has started in recovery | mode because the firmware updatefailed. Follow the steps below to try to update the firmware again.1. Connect the computer and the printer with a USB cable. (During recovery mode, you cannot update the firmware over a network connection.)2. Visit your local Epson website for further instructions.See the Administrator's Guide for details. |
Related Information
→“Contacting Epson Support” on page 272
→ "Software Update Tools (Software Updater)" on page 192
→ "Installing the Latest Applications" on page 192
Error Code on the Status Menu
If a job does not complete successfully, check the error code displayed on the history of each job. You can check the error code by pressing the ⓘ button, and then selecting Job Status. See the following table to find the problem and its solution.
For details on Fax Settings, see the Administrator's Guide.
| Code Problem Solution | ||
| 001 The product was turned off by a power failure. - | ||
| 101 The memory is full. Try the methods below to reduce the size of the print job.☐Lower the print quality and the resolution.☐Change the format setting.☐Reduce the number of images, letters or fonts used in the print job. | ||
| 102 Collated printing has failed due to a lack of available memory. | ☐ Select Settings > General Settings > System Administration > Clear Internal Memory Data > PDL Font, Macro, and then clear the fonts and the macros that you have downloaded.☐Try the methods below to reduce the size of the print job. If you do not want to use these methods, try printing one copy at a time.☐Lower the print quality and the resolution.☐Change the format setting.☐Reduce the number of images, letters or fonts used in the print job. |
Solving Problems
| Code Problem Solution | ||
| 103 Printing | quality has been lowered due to a lack of available memory. | If you do not want to lower the print quality, try the following methods to reduce the size of the print job.☐Change the format setting.☐Reduce the number of images, letters or fonts used in the print job. |
| 104 Reverse | printing has failed due to a lack of available memory. | ☐ Select Settings > General Settings > System Administration > Clear Internal Memory Data > PDL Font, Macro, and then clear the fonts and the macros that you have downloaded.☐If you want to print in reverse, try the following methods to reduce the size of the print job.☐Lower the print quality and the resolution.☐Change the format setting.☐Reduce the number of images, letters or fonts used in the print job. |
| 106 Cannot | print from the computer due to the access control settings. | Contact your printer administrator. |
| 107 User authentication failed. The job has been canceled. | ☐Make sure that the user name and password are correct.☐ Select Settings > General Settings > System Administration > Security Settings > Access Control. Enable the user restriction function, and then allow the job without an authentication information. | |
| 108 Confidential job data was deleted when the printer was turned off. | - | |
| 109 The received fax was already deleted. - | ||
| 110 The job | was printed on one side only because the paper loaded does not support double sided printing. | If you want to perform 2-sided printing, load paper that supports 2-sided printing. |
| 111 Available memory is running low. Try the methods below to reduce the size of the print job.☐Lower the print quality and the resolution.☐Change the format setting.☐Reduce the number of images, letters or fonts used in the print job. | ||
| 120 Cannot communicate with the server that is connected using an open platform. | Make sure there are no errors on the server or the network. | |
Solving Problems
| Code Problem Solution | ||
| 201 The memory is full. | Print received faxes fromJob Statusin Job/Status.Delete received faxes saved in the inbox fromJob Statusin Job/Status.If you are sending a monochrome fax to a single destination, you can send it by using Direct Send.Divide your originals in two or more to send them in several batches. | |
| 202 The line was disconnected by the recipient machine. Wait for a while and then try again. | ||
| 203 | The product cannot detect the dial tone. | Make sure that the phone cable is connected correctly and the phone line is working.When the printer is connected to the PBX or the terminal adapter, change theLine Typesetting to PBX.SelectSettings>General Settings>Fax Settings>Basic Settings>Dial Tone Detection, and then disable the dial tone setting. |
| 204 | The recipient machine is busy. | Wait for a while and then try again.Check the recipient's fax number. |
| 205 The recipient machine does not answer. Wait for a while and then try again. | ||
| 206 The phone cable is incorrectly connected to the LINE and EXT. port of the product. | Check the connection of the LINE port and the EXT. port of the printer. | |
| 207 The product is not connected to the phone line. Connect the phone cable to the phone line. | ||
| 208 The fax could not be sent to some of the specified recipients. | Print aFax LogorLast Transmissionreport for previous faxes fromFax Reportin the Fax menu to check the failed destination. When theSave Failure Datasetting is enabled, you can resend a fax fromJob Statusin Job/Status. | |
| 301 There is not enough storage space available to save the data in the memory device. | Increase the storage space in the memory device.Reduce the number of documents.Lower the scanning resolution or increase the compression ratio to reduce the size of the scanned image. | |
| 302 The memory device is write-protected. Disable write protection on the memory device. | ||
| 303 No folder has been created to save the scanned image. | Insert another memory device. | |
| 304 The memory device has been removed. Reinsert the memory device. | ||
| 305 An error occurred while saving the data to the memory device. | If the external device is accessed from a computer, wait for a while and then try again. | |
| 306 The memory is full. Wait until other ongoing jobs are finished. | ||
Solving Problems
| Code Problem Solution | ||
| 311 A DNS error has occurred. | Select Settings > General Settings > Network Settings > Advanced > TCP/IP, and then check the DNS settings.Check the DNS settings for the server, the computer, or the access point. | |
| 312 An authentication error has occurred. | Select Settings > General Settings > Network Settings > Advanced > Email Server > Server Settings, and then check the server settings. | |
| 313 | A communication error has occurred. | Print a network connection report to check if the printer is connected to the network.Select Settings > General Settings > Network Settings > Advanced > Email Server > Server Settings to check the email server settings. You can check the cause of the error by running connection check.The authentication method of the settings and the email server may not match. When you select Off as the authentication method, make sure the authentication method of the email server is set to None. |
| 314 The data size exceeds the maximum size for attached files. | Increase the Attached File Max Size setting in the scan settings.Lower the scanning resolution or increase the compression ratio to reduce the size of the scanned image. | |
| 315 The memory is full. Retry after other ongoing jobs are finished. | ||
| 321 A DNS error has occurred. | Select Settings > General Settings > Network Settings > Advanced > TCP/IP, and then check the DNS settings.Check the DNS settings for the server, the computer, or the access point. | |
| 322 An authentication error has occurred. | Check the Location settings. | |
| 323 A communication error has occurred. | Check the Location settings.Print a network connection report to check if the printer is connected to the network. | |
| 324 A file with the same name already exists in the specified folder. | Delete the file with the same name.Change the file name prefix in File Settings. | |
| 325326 | There is not enough storage space available in the specified folder. | Increase the storage space in the specified folder.Reduce the number of documents.Lower the scanning resolution or increase the compression ratio to reduce the size of the scanned image. |
| 327 The memory is full. Wait until other ongoing jobs are finished. | ||
| 328 The destination was wrong or the destination does not exist. | Check the Location settings. | |
Solving Problems
| Code Problem Solution | ||
| 331 A communication error occurred. Print a network connection report to check if the printer is connected to the network. | ||
| 332 There is not enough storage space available to save the scanned image in the destination storage. | Reduce the number of documents. | |
| 333 The destination could not be found because the destination information was uploaded to the server before sending the scanned image. | Select the destination again. | |
| 334 An error occurred while sending the scanned image. - | ||
| 341 | A communication error has occurred. | ☐ Check the connections for the printer and the computer. If you are connecting over a network, print a network connection report to check if the printer is connected to the network.☐Make sure that Document Capture Pro is installed on the computer.☐If the problem cannot be cleared, contact your printer administrator. |
| 401 There is not enough storage space available to save the data in the memory device. | Increase the storage space in the memory device. | |
| 402 The memory device is write-protected. Disable write protection on the memory device. | ||
| 404 The memory device has been removed. Reinsert the memory device. | ||
| 405 An error occurred while saving the data to the memory device. | ☐Reinsert the memory device.☐Use a different memory device on which you have created a folder using the Create a folder to save fax data function. | |
| 411 A DNS error has occurred. | ☐ Select Settings > General Settings > Network Settings > Advanced > TCP/IP, and then check the DNS settings.☐Check the DNS settings for the server, the computer, or the access point.☐If the problem cannot be cleared, contact your printer administrator. | |
| 412 An authentication error has occurred. | Select Settings > General Settings > Network Settings > Advanced > Email Server > Server Settings, and then check the server settings. If the problem cannot be cleared, contact your printer administrator. | |
Solving Problems
| Code Problem Solution | ||
| 413 A communication error has occurred. | Select Settings > General Settings > Network Settings > Advanced > Email Server > Server Settings to check the email server settings. You can check the cause of the error by running connection check.The authentication method of the settings and the email server may not match. When you select Off as the authentication method, make sure the authentication method of the email server is set to None.Print a network connection report to check if the printer is connected to the network.If the problem cannot be cleared, contact your printer administrator. | |
| 421 A DNS error has occurred. | Select Settings > General Settings > Network Settings > Advanced > TCP/IP, and then check the DNS settings.Check the DNS settings for the server, the computer, or the access point.If the problem cannot be cleared, contact your printer administrator. | |
| 422 An authentication error has occurred. | Select Settings > General Settings > Fax Settings >Receive Settings > Save/Forward Settings, and then check the settings of the folder selected in Destination. | |
| 423 | A communication error has occurred. | Print a network connection report to check if the printer is connected to the network.Select Settings > General Settings > Fax Settings >Receive Settings > Save/Forward Settings, and then check the settings of the folder selected in Destination.If the problem cannot be cleared, contact your printer administrator. |
| 425 There is not enough storage space available in the forwarding destination folder. | Increase the storage space in the forwarding destination folder. | |
| 428 The destination was wrong or the destination does not exist. | Select Settings > General Settings > Fax Settings >Receive Settings > Save/Forward Settings, and then check the settings of the folder selected in Destination. | |
Related Information
→“Network Settings” on page 52
→“Printing Using a Network Service” on page 197
→“Available Paper and Capacities” on page 26
Solving Problems
Checking the Printer Status - Windows
- Access the printer driver window.
- Click EPSON Status Monitor 3 on the Maintenance tab, and then click Details.
You can check the printer status, ink levels, and error status.
Note:
If EPSON Status Monitor 3 is disabled, click Extended Settings on the Maintenance tab, and then select Enable EPSON Status Monitor 3.
Related Information
→“Accessing the Printer Driver” on page 59
Checking the Printer Status - Mac OS
- Select System Preferences from the menu > Printers & Scanners (or Print & Scan, Print & Fax), and then select the printer.
- Click Options & Supplies > Utility > Open Printer Utility.
- Click EPSON Status Monitor.
You can check the printer status, ink levels, and error status.
Checking the Software Status
You may be able to clear the problem by updating the software to the latest version. To check the software status, use the software update tool.
Related Information
→ "Software Update Tools (Software Updater)" on page 192
→“Installing the Latest Applications” on page 192
Removing Jammed Paper
Follow the on-screen instructions on the printer's control panel to locate and remove the jammed paper including any torn pieces. The LCD screen displays an animation that shows you how to remove jammed paper.

Caution:
Never touch the buttons on the control panel while your hand is inside the printer. If the printer starts operating, it could cause an injury. Be careful not to touch the protruding parts to avoid injury.
Solving Problems

Important:
Remove the jammed paper carefully. Removing the paper vigorously may cause damage to the printer.
Note:
If any torn pieces of paper remain, select Settings > Maintenance > Remove Paper after clearing the paper jam error. This helps you to remove the remaining pieces of paper.
Paper Does Not Feed or Eject Correctly
Check the following points, and then take the appropriate actions to solve the problem.
Place the printer on a flat surface and operate in the recommended environmental conditions.
□Use paper supported by this printer.
□Follow the paper handling precautions.
☐ Do not load more than the maximum number of sheets specified for the paper. For plain paper, do not load above the line indicated by the triangle symbol on the edge guide.
☐ Make sure the paper size and paper type settings match the actual paper size and paper type loaded in the printer.
□Clean the roller inside the printer.
Related Information
→“Installing the Optional Paper Cassette Units” on page 257
→"Paper Handling Precautions" on page 29
→“Available Paper and Capacities” on page 26
→“List of Paper Type” on page 35
Paper Jams
☐ Load paper in the correct direction, and slide the edge guides against the edges of the paper.
☐Do not open the rear cover while printing. This causes a paper jam.
Related Information
→“Removing Jammed Paper” on page 206
→“Loading Paper in the Paper Cassette” on page 30
→“Loading Paper in the Rear Paper Feed” on page 32
Paper Feeds at a Slant
Load paper in the correct direction, and slide the edge guides against the edges of the paper.
Related Information
→“Loading Paper in the Paper Cassette” on page 30
Solving Problems
→“Loading Paper in the Rear Paper Feed” on page 32
Several Sheets of Paper are Fed at a Time
When several sheets of paper are fed at a time during manual 2-sided printing, remove any paper which is loaded in the printer before you reload the paper.
Paper Does Not Feed from the Optional Paper Cassette Units
If you have added optional paper cassette units, you need to make settings in the printer driver.
Related Information
→ “Setting the Optional Paper Cassette Unit in the Printer Driver - Windows” on page 262
→ “Setting the Optional Paper Cassette Unit in the Printer Driver - Mac OS” on page 263
Paper Does Not Feed Correctly After Replacing the Maintenance Rollers
The maintenance rollers may not have been replaced correctly. Check if they have been installed correctly.
Paper Out Error Occurs
When a paper out error occurs although paper is loaded in the rear paper feed, reload paper in the center of the rear paper feed.
Original Does Not Feed in the ADF
☐Use originals supported by the ADF.
☐ Load originals in the correct direction, and slide the ADF edge guides against the edges of the originals.
□Clean the inside of the ADF.
Solving Problems
☐Do not load originals above the line indicated by the triangle symbol on the ADF.
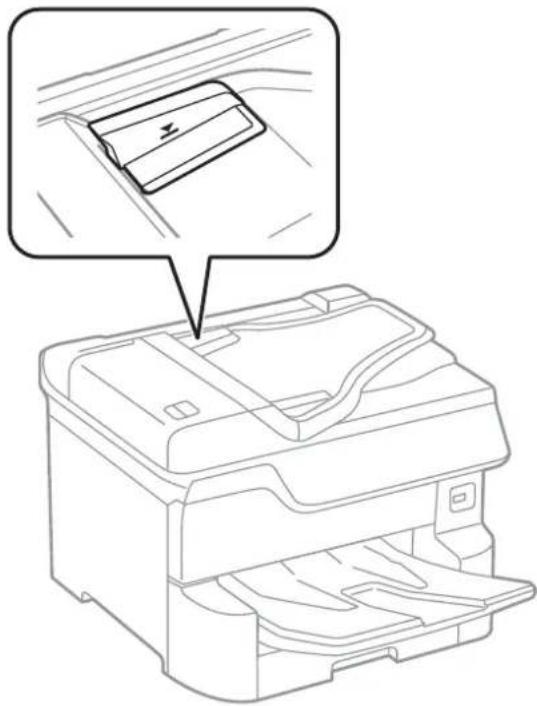
natural_image
Line drawing of a printer with an inset showing a slot on the cover (no text or symbols)☐ Check that the ADF icon is on at the bottom of the screen. If it is off, place the originals again.
Related Information
→“Available Originals for the ADF” on page 37
→“Placing Originals on the ADF” on page 38
→“Cleaning the ADF” on page 183
Paper is Not Stacked in Order
If you pull the lever on the center of the output tray, the problem may be improved, but the holding capacity will be reduced.
Paper is Ejected in an Unexpected Direction
If paper is ejected in an unexpected direction when landscape pages and portrait pages are mixed, or 2-sided printing and 1-sided printing are mixed, enable the Output documents for filing setting in the printer driver. This ejects pages in the same direction for easy filing.
Windows
Select Output documents for filing in Extended Settings on the Maintenance tab.
□Mac OS
Select System Preferences from the menu > Printers & Scanners (or Print & Scan, Print & Fax), and then select the printer. Click Options & Supplies > Options (or Driver). Select On as the Output documents for filing setting.
Power and Control Panel Problems
Power Does Not Turn On
☐Make sure the power cord is securely plugged in.
☐Hold down the ⏻ button for a little longer.
Power Does Not Turn Off
Hold down the ⏻ button for a little longer. If you still cannot turn off the printer, unplug the power cord. To prevent the print head from drying out, turn the printer back on and turn it off by pressing the ⏻ button.
Printer Turns Off During Use
Unplug and plug in the power cord, and then turn the printer back on. If the problem cannot be cleared, contact Epson support.
Power Turns Off Automatically
☐ Select Settings > General Settings > Basic Settings > Power Off Settings, and then disable the Power Off If Inactive and Power Off If Disconnected settings.
☐ Select Settings > General Settings > Basic Settings, and then disable the Power Off Timer setting.
Note:
Your product may have the Power Off Settings or Power Off Timer feature depending on the location of purchase.
LCD Screen Gets Dark
The printer is in sleep mode. Tap anywhere on the LCD screen to return it to its former state.
Touch Screen Does Not Respond
☐ If you stick a protective label on the touchscreen, the optical touch screen may not respond.
☐ Turn off the printer, and then wipe the screen using a soft, dry cloth. If the screen is smeared, it may not respond.
Cannot Operate from the Control Panel
When the user feature restriction is enabled, a user ID and password are required to print. If you do not know the password, contact your printer administrator.
Cannot Print from a Computer
Checking the Connection (USB)
☐Connect the USB cable securely to the printer and the computer.
☐If you are using a USB hub, try to connect the printer directly to the computer.
☐If the USB cable cannot be recognized, change the port, or change the USB cable.
☐If the printer cannot print using a USB connection, try the following.
Disconnect the USB cable from the computer. Right-click on the printer icon displayed on the computer, and then select Remove Device. Next, connect the USB cable to the computer and try a test print.
Re-set the USB connection by following the steps in this manual for changing the connection method to a computer. See the related information link below for details.
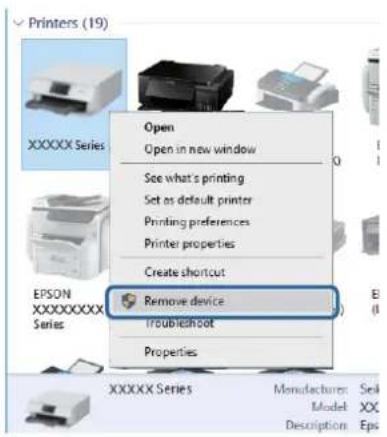
text_image
Printers (19) Open Open in new window See what's printing Set as default printer Printing preferences Printer properties Create shortcut Remove device Troubleshoot PropertiesChecking the Connection (Network)
☐ Select Settings > General Settings > Network Settings > Connection Check, and then print the network connection report. If the report shows that network connection has failed, check the network connection report and then contact your printer administrator.
☐If the problem cannot be cleared, contact your printer administrator.
Checking the Software and Data
☐ Make sure that a genuine Epson printer driver is installed. If a genuine Epson printer driver is not installed, the available functions are limited. We recommend using a genuine Epson printer driver. See the related information link below for details.
☐ If you are printing a large data size image, the computer may run out of memory. Print the image at a lower resolution or a smaller size.
Related Information
→“Checking for Genuine Epson Printer Drivers” on page 212
Solving Problems
Checking for Genuine Epson Printer Drivers
You can check if a genuine Epson printer driver is installed on your computer by using one of the following methods.
Windows
Select Control Panel > View devices and printers (Printers, Printers and Faxes), and then do the following to open the print server properties window.
☐ Windows 10/Windows 8.1/Windows 8/Windows 7/Windows Server 2016/Windows Server 2012 R2/Windows Server 2012/Windows Server 2008 R2
Click the printer icon, and then click Print server properties at the top of the window.
□Windows Vista/Windows Server 2008
Right-click on the Printers folder, and then click Run as administrator > Server Properties.
☐Windows XP/Windows Server 2003 R2/Windows Server 2003
From the File menu, select Server Properties.
Click the Driver tab. If your printer name is displayed in the list, a genuine Epson printer driver is installed on your computer.
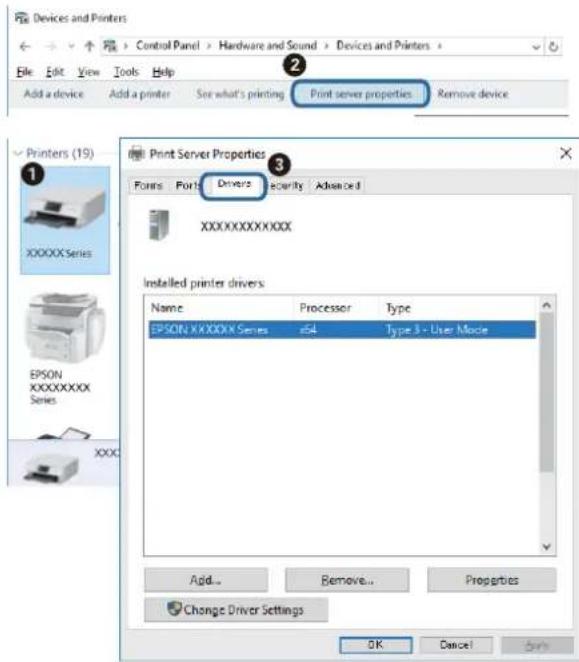
text_image
Devices and Printers Control Panel > Hardware and Sound > Devices and Printers File Edit View Tools Help Add a device Add a printer See what's printing Print server properties Remove device Print Server Properties Forms Ports Drivers Security Advanced XXXXXXXXXX Installed printer drivers Name Processor Type EPSON XXXXXX Series x54 Type 3 - User Mode Add... Remove... Properties Change Driver Settings OK CancelSolving Problems
Mac OS
Select System Preferences from the menu > Printers & Scanners (or Print & Scan, Print & Fax), and then select the printer. Click Options & Supplies, and if the Options tab and Utility tab are displayed on the window, a genuine Epson printer driver is installed on your computer.
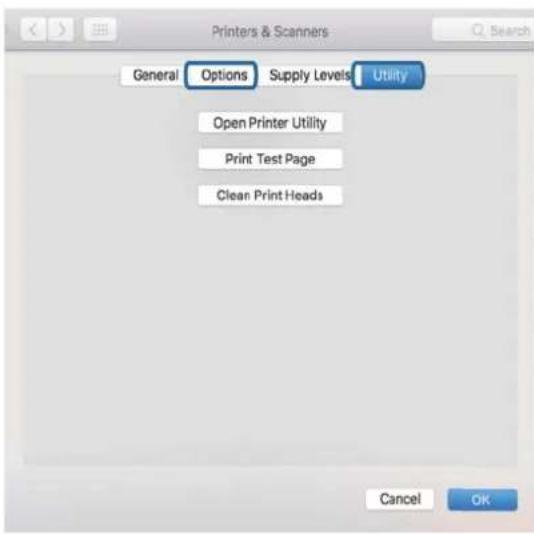
text_image
Printers & Scanners General Options Supply Levels Utility Open Printer Utility Print Test Page Clean Print Heads Cancel OKRelated Information
→ "Installing the Latest Applications" on page 192
Checking the Printer Status from the Computer (Windows)
Click Print Queue on the printer driver's Maintenance tab, and then check the following.
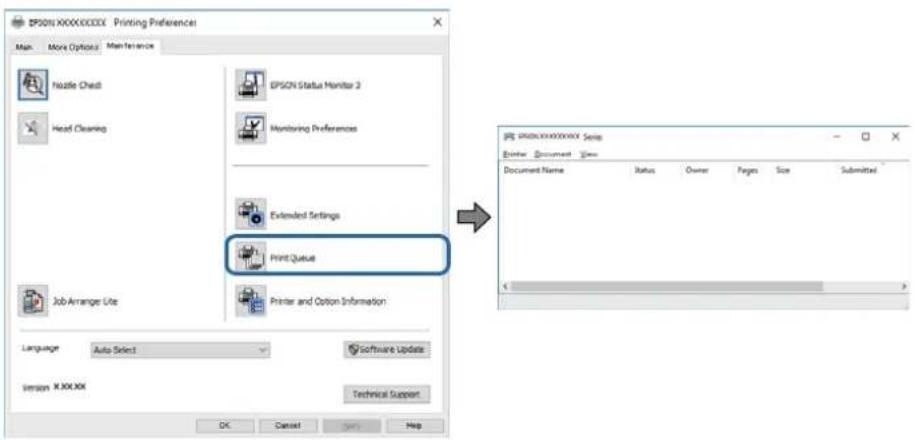
text_image
EPSON XXXX.XXXX Printing Preferences Main More Options Maintenance Hazel Check EPSON Status Monitor 2 Head Cleaning Monitoring Preferences Extended Settings Print Queue Job Arranger Lite Printer and Option Information Language Auto Select software Update Version XXXXX Technical Support OK Cancel Help Document Name Status Owner Pages Size Submitted☐Check if there are any paused print jobs.
If unnecessary data remains, select Cancel all documents from the Printer menu.
Solving Problems
Make sure the printer is not offline or pending.
If the printer is offline or pending, clear the offline or pending setting from the Printer menu.
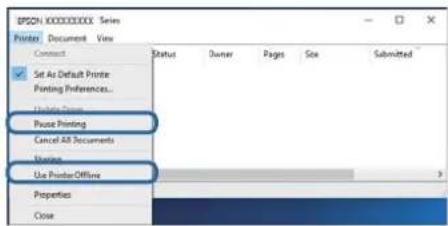
text_image
EPSON XXXXXXXXXX Series Printer Document View Connect Set As Default Printer Printing Preferences... Pause Printing Cancel All Documents Use Printer Offline Properties Close Status Owner Pages Size Submitted☐ Make sure the printer is selected as the default printer from the Printer menu (there should be a check mark on the menu item).
If the printer is not selected as the default printer, set it as the default printer. If there are multiple icons in Control Panel > View devices and printers (Printers, Printers and Faxes), see the following to select the icon.
Example)
USB connection: EPSON XXXX Series
Network connection: EPSON XXXX Series (network)
If you install the printer driver multiple times, copies of printer driver may be created. If copies such as "EPSON XXXX Series (copy 1)" are created, right-click the copied driver icon, and then click Remove Device.
☐ Make sure the printer port is selected correctly in Property > Port from the Printer menu as follows.
Select "USBXXX" for a USB connection, or "EpsonNet Print Port" for a network connection.
Checking the Printer Status from the Computer (Mac OS)
☐ The printer may not print when the user feature restriction is enabled. Contact your printer administrator.
☐ Make sure the printer status is not Pause.
Select System Preferences from the menu > Printers & Scanners (or Print & Scan, Print & Fax), and then double-click the printer. If the printer is paused, click Resume (or Resume Printer).
Checking Other Problems
If you connect the printer to a SuperSpeed USB port using a USB 2.0 cable, a communication error may occur on some computers. In this case, re-connect the printer using one of the following methods.
□Use a USB 3.0 cable.
☐Connect to a Hi-Speed USB port on the computer.
☐ Connect to a SuperSpeed USB port other than the port that generated the communication error.
Cannot Print from an iPhone or iPad
☐Connect the iPhone or iPad to the same network (SSID) as the printer.
☐ Enable Paper Setup Auto Display in the following menus.
Settings > General Settings > Printer Settings > Paper Source Settings > Paper Setup Auto Display
Solving Problems
□Enable the AirPrint setting on Web Config.
Related Information
→“Application for Configuring Printer Operations (Web Config)” on page 187
Printout Problems
Adjusting the Print Quality
If you notice a misaligned vertical lines, blurred images, or horizontal banding, adjust the print quality.
- Load A4-size plain paper in the printer.
- Select Settings on the home screen.
- Select Maintenance > Print Quality Adjustment.
- Follow the on-screen instructions to check the printer to improve print quality.
If a message is displayed recommending that you clean the print head, perform print head cleaning.
- Follow the on-screen instructions to print the patterns for print head alignment, and then align the print head.
☐ This pattern allows you to perform alignment if vertical ruled lines appear misaligned or your printouts look blurry.
Find and enter the number for the pattern that has the least misaligned vertical line.
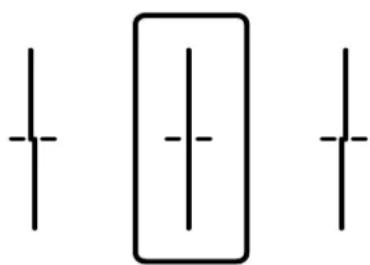
natural_image
Pure electrical circuit lines without any symbols☐ This pattern allows you to perform alignment if you see horizontal banding at regular intervals.
Find and enter the number for the least separated and overlapping pattern.
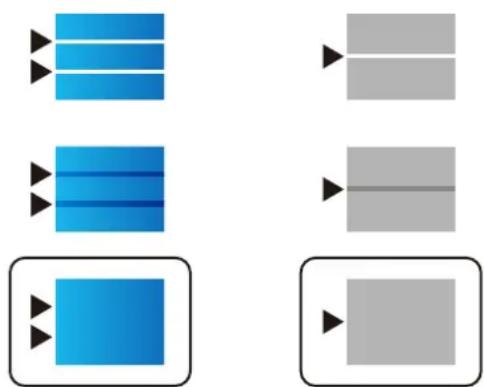
flowchart
graph TD
    A["Blue Block 1"] --> B["Gray Block 1"]
    C["Blue Block 2"] --> D["Gray Block 2"]
    E["Blue Block 3"] --> F["Gray Block 3"]
Solving Problems
Related Information
→“Loading Paper in the Paper Cassette” on page 30
Adjusting the Print Quality for Each Paper Type
If print quality does not improve after using the Print Quality Adjustment feature, you can adjust the print quality for each paper type. See the Administrator's Guide for details.
Printout is Scuffed or Color is Missing
If you have not used the printer for a long time, the print head nozzles may be clogged and ink drops may not be discharged. Perform a nozzle check, and then clean the print head if any of the print head nozzles are clogged.
Related Information
→“Checking and Cleaning the Print Head” on page 180
Banding or Unexpected Colors Appear

natural_image
Street view with a road lined up under a blue sky with clouds, no visible text or symbolsThe print head nozzles may be clogged. Perform a nozzle check to check if the print head nozzles are clogged. Clean the print head if any of the print head nozzles are clogged.
Related Information
→“Checking and Cleaning the Print Head” on page 180
Colored Banding Appears at Intervals of Approximately 3.3 cm

natural_image
Small brown and white dog sitting on grass, no text or symbols visibleSolving Problems
☐ Select the appropriate paper type setting for the type of paper loaded in the printer.
☐ Align the print head using the Print Quality Adjustment feature.
☐When printing on plain paper, print using a higher quality setting.
Related Information
→ "List of Paper Type" on page 35
→ "Adjusting the Print Quality" on page 215
Blurry Prints, Vertical Banding, or Misalignment

natural_image
Close-up of yellow banana flowers with green background (no text or symbols)Align the print head using the Print Quality Adjustment feature.
Related Information
→“Adjusting the Print Quality” on page 215
Print Quality Does Not Improve Even After Aligning the Print Head
During bidirectional (or high speed) printing, the print head prints while moving in both directions, and vertical lines may be misaligned. If print quality does not improve, disable the bidirectional (or high speed) setting. Disabling this setting may slow down printing speed.
☐Control panel Disable Bidirectional in Settings > General Settings > Printer Settings.
Windows Clear High Speed on the printer driver's More Options tab.
Mac OS
Select System Preferences from the menu > Printers & Scanners (or Print & Scan, Print & Fax), and then select the printer. Click Options & Supplies > Options (or Driver). Select Off as the High Speed Printing setting.
Related Information
→“Menu Options for Memory Device” on page 92
Solving Problems
Print Quality is Poor
Check the following if the print quality is poor due to blurry prints, banding, missing colors, faded colors, and misalignment in the prints.
Checking the printer
Use the Print Quality Adjustment feature.
☐ Perform a nozzle check, and then clean the print head if any of the print head nozzles are clogged.
□Align the print head.
Checking the paper
□Use paper supported by this printer.
☐Do not print on paper that is damp, damaged, or too old.
☐If the paper is curled or the envelope is puffed up, flatten it.
☐Do not stack the paper immediately after printing.
☐ Dry the printouts completely before filing or displaying them. When drying the printouts, avoid direct sun light, do not use a dryer, and do not touch the printed side of paper.
☐ When printing images or photos, Epson recommends using genuine Epson paper rather than plain paper. Print on the printable side of the genuine Epson paper.
Checking the print settings
☐ Select the appropriate paper type setting for the type of paper loaded in the printer.
☐Print using a higher quality setting.
☐ If you have selected Standard-Vivid as the quality setting on the Windows printer driver, change to Standard. If you have selected Normal-Vivid as the quality setting on the Mac OS printer driver, change to Normal.
Checking the ink cartridge
☐Epson recommends using the ink cartridge before the date printed on the package.
☐For best results, use up ink cartridge within six months of opening the package.
☐ Try to use genuine Epson ink cartridges. This product is designed to adjust colors based on the use of genuine Epson ink cartridges. The use of non-genuine ink cartridges may cause print quality to decline.
Related Information
→“Adjusting the Print Quality” on page 215
→“Available Paper and Capacities” on page 26
→“List of Paper Type” on page 35
→“Paper Handling Precautions” on page 29
Solving Problems
Paper Is Smeared or Scuffed
☐ When horizontal banding appears or the top or bottom of the paper is smeared, load paper in the correct direction and slide the edge guides to the edges of the paper.

☐When vertical banding appears or the paper is smeared, clean the paper path.

Place the paper on a flat surface to check if it is curled. If it is, flatten it.
☐ When printing on thick paper, the print head is close to the printing surface and the paper may be scuffed. In this case, enable the reduce scuff setting. If you enable this setting, print quality may decline or printing may slow down.
□Control panel
Select Settings > General Settings > Printer Settings from the home screen, and then enable Thick Paper.
Windows
Click Extended Settings on the printer driver's Maintenance tab, and then select Thick Paper and Envelopes.
If the paper is still scuffed after selecting the Thick Paper and Envelopes setting, select Short Grain Paper in the Extended Settings window of the printer driver.
□Mac OS
Select System Preferences from the menu > Printers & Scanners (or Print & Scan, Print & Fax), and then select the printer. Click Options & Supplies > Options (or Driver). Select On as the Thick paper and envelopes setting.
☐ When performing manual 2-sided printing, make sure that the ink is completely dry before reloading the paper.
Related Information
→“Loading Paper in the Paper Cassette” on page 30
→“Loading Paper in the Rear Paper Feed” on page 32
→“Cleaning the Paper Path for Ink Smears” on page 182
Solving Problems
Paper is Smeared During Automatic 2-Sided Printing
When using the automatic 2-sided printing feature and printing high density data such as images and graphs, set the print density to lower and the drying time to longer.
Related Information
→“Printer Settings” on page 48
Printed Photos are Sticky
You may be printing on the wrong side of the photo paper. Make sure you are printing on the printable side. When printing on the wrong side of the photo paper, you need to clean the paper path.
Related Information
→“Cleaning the Paper Path for Ink Smears” on page 182
Images or Photos are Printed in Unexpected Colors
When printing from the control panel or from the Windows printer driver, the Epson auto photo adjustment setting is applied by default depending on the paper type. Try change the setting.
□Control panel
Change the Fix Photo setting from Auto to any other option. If changing the setting does not work, select Enhance Off as the Fix Photo setting.
□Windows printer driver
On the More Options tab, select Custom in Color Correction, and then click Advanced. Change the Scene Correction setting from Auto Correct to any other option. If changing the setting does not work, use any color correction method other than PhotoEnhance in Color Management.
Related Information
→ "Menu Options for Memory Device" on page 92
→“Adjusting the Print Color” on page 74
The Position, Size, or Margins of the Printout Are Incorrect
☐ Load paper in the correct direction, and slide the edge guides against the edges of the paper.
☐ When placing the originals on the scanner glass, align the corner of the original with the corner indicated by a symbol on the frame of the scanner glass. If the edges of the copy are cropped off, move the original slightly away from the corner.
☐ When placing the originals on the scanner glass, clean the scanner glass and the document cover. If there is dust or stains on the glass, the copy area may extend to include the dust or stains, resulting in the wrong copying position or small images.
☐ Select the appropriate Original Size in the copy settings.
☐Select the appropriate paper size setting.
Solving Problems
☐ Adjust the margin setting in the application so that it falls within the printable area.
Related Information
→“Loading Paper in the Paper Cassette” on page 30
→“Loading Paper in the Rear Paper Feed” on page 32
→“Placing Originals on the Scanner Glass” on page 40
→“Cleaning the Scanner Glass” on page 186
→“Printable Area” on page 238
Printed Characters Are Incorrect or Garbled
☐Connect the USB cable securely to the printer and the computer.
☐If there are any paused print jobs, printed characters may be corrupted.
☐ Do not put the computer manually into the Hibernate mode or the Sleep mode while printing. Pages of garbled text may be printed next time you start the computer.
☐ If you use the printer driver you had previously used, printed characters may be garbled. Make sure that the printer driver you are using is for this printer. Check the printer name on the top of the printer driver window.
The Printed Image Is Inverted
Clear any mirror image settings in the printer driver or the application.
Windows
Clear Mirror Image on the printer driver's More Options tab.
□Mac OS
Clear Mirror Image from the print dialog's Print Settings menu.
Mosaic-Like Patterns in the Prints
When printing images or photos, print using high-resolution data. Images on websites are often low resolution although they look good enough on the display, and so print quality may decline.
Unintentionally Printing on 2-Sides
Clear any 2-sided printing settings in the printer driver.
Windows
Select Off from 2-Sided Printing on the printer driver's Main tab.
□Mac OS
Select Off from Two-sided Printing on the print dialog's Two-sided Printing Settings menu.
Solving Problems
Uneven Colors, Smears, Dots, or Straight Lines Appear in the Copied Image
□Clean the paper path.
□Clean the scanner glass.
□Clean the ADF.
☐ Do not press too hard on the original or the document cover when you are placing the originals on the scanner glass.
☐When the paper is smeared, lower the copy density setting.
Related Information
→“Cleaning the Paper Path for Ink Smears” on page 182
→“Cleaning the Scanner Glass” on page 186
→“Cleaning the ADF” on page 183
→“Basic Menu Options for Copying” on page 101
Moiré (Cross-Hatch) Patterns Appear in the Copied Image
Change the reduce and enlarge setting or place the original at a slightly different angle.
Related Information
→“Basic Menu Options for Copying” on page 101
An Image of the Reverse Side of the Original Appears in the Copied Image
☐ For a thin original, place the original on the scanner glass and then place a piece of black paper over it.
☐Lower the copy density setting on the control panel.
Related Information
→“Basic Menu Options for Copying” on page 101
The Printout Problem Could Not be Cleared
If you have tried all of the solutions and have not solved the problem, try uninstalling and then reinstalling the printer driver.
Related Information
→“Uninstalling Applications” on page 195
→“Installing the Latest Applications” on page 192
Other Printing Problems
Printing Is Too Slow
☐Close any unnecessary applications.
☐Lower the quality setting. High quality printing slows down the printing speed.
☐ Enable the bidirectional (or high speed) setting. When this setting is enabled, the print head prints while moving in both directions, and the printing speed increases.
□Control Panel
From the home screen, select Settings > General Settings > Printer Settings > Bidirectional, and then enable it.
Windows
Select High Speed on the printer driver's More Options tab.
□Mac OS
Select System Preferences from the menu > Printers & Scanners (or Print & Scan, Print & Fax), and then select the printer. Click Options & Supplies > Options (or Driver). Select On as the High Speed Printing setting.
☐Disable quiet mode. This feature slows down the printing speed.
□Control Panel
Select ON on the home screen, and then disable Quiet Mode.
Windows
Select Off as the Quiet Mode setting on the printer driver's Main tab.
□Mac OS
Select System Preferences from the menu > Printers & Scanners (or Print & Scan, Print & Fax), and then select the printer. Click Options & Supplies > Options (or Driver). Select Off as the Quiet Mode setting.
☐ For 2-sided printing, one side of paper is printed and dried, and then the other side is printed. Because the drying time differs depending on the environment, such as temperature or humidity, or the print data, the printing speed may be slower.
Printing Slows Down Dramatically During Continuous Printing
Printing slows down to prevent the printer mechanism from overheating and being damaged. However, you can continue printing. To return to normal printing speed, leave the printer idle for at least 30 minutes. Printing speed does not return to normal if the power is off.
Cannot Cancel Printing from a Computer Running Mac OS X v10.6.8
If you want to stop printing from your computer, make the following settings.
Solving Problems
Run Web Config, and then select Port9100 as the Top Priority Protocol setting in AirPrint Setup. Select System Preferences from the menu > Printers & Scanners (or Print & Scan, Print & Fax), remove the printer, and then add the printer again.
PostScript Printer Driver Problems
Note:
The menu items and text on the printer driver vary depending on your computer's environment.
Printer Does Not Print While Using PostScript Printer Driver
☐ Set the Printing Language setting to Auto or PS3 on the control panel.
☐ In Windows, if a large number of jobs are sent, the printer may not print. Select Print directly to the printer on the Advanced tab in the printer properties.
Related Information
→“Printer Settings” on page 48
Printer Does Not Print Correctly While Using PostScript Printer Driver
☐If the file is created in an application that allows you to change the data format, such as Adobe Photoshop, make sure that the settings in the application match the settings in the printer driver.
☐ EPS files made in binary format may not be printed correctly. Set the format to ASCII when making EPS files in an application.
☐ For Windows, the printer cannot print binary data when it is connected to the computer using a USB interface. Set the Output Protocol setting on the Device Settings tab in the printer properties to ASCII or TBCP.
☐ For Windows, select the appropriate substitution fonts on the Device Settings tab in the printer properties.
Print Quality Is Poor While Using PostScript Printer Driver
You cannot make color settings on the Paper/Quality tab in the printer driver. Click Advanced, and then set the Color Mode setting.
Printing Is Too Slow While Using PostScript Printer Driver
Set the Print Quality setting to Fast in the printer driver.
Cannot Start Scanning
☐ When the access control function is enabled for a printer, you need to enter a user ID and password when scanning. If you do not know the password, contact your system administrator.
☐ When the access control function is enabled, Mac OS might not be able to scan. Contact your system administrator.
☐ If you are scanning with the ADF, check that the document cover and ADF cover are closed.
☐ Connect the USB cable securely to the printer and the computer. If you are using a USB hub, try to connect the printer directly to the computer.
☐ If you scan at a high resolution over a network, a communication error may occur. Lower the resolution.
☐Make sure that the correct printer (scanner) is selected on Epson Scan 2.
Check whether or not the printer is recognized when using Windows
In Windows, make sure the printer (scanner) is displayed in Scanner and Camera. The printer (scanner) should be displayed as "EPSON XXXXX (printer name)". If the printer (scanner) is not displayed, uninstall and then reinstall Epson Scan 2. See the following to access Scanner and Camera.
Windows 10
Right-click the start button or press and hold it, select Control Panel, enter "Scanner and Camera" in the search charm, click View scanners and cameras, and then check if the printer is displayed.
Windows 8.1/Windows 8/Windows Server 2012 R2/Windows Server 2012
Select Desktop > Settings > Control Panel, enter "Scanner and Camera" in the search charm, click Show Scanner and Camera, and then check if the printer is displayed.
□Windows 7/Windows Server 2008 R2
Click the start button and select Control Panel, enter "Scanner and Camera" in the search charm, click View scanners and cameras, and then check if the printer is displayed.
□Windows Vista/Windows Server 2008
Click the start button, select Control Panel > Hardware and Sound > Scanners and Cameras, and then check if the printer is displayed.
☐Windows XP/Windows Server 2003 R2/Windows Server 2003
Click the start button, select Control Panel > Printers and Other Hardware > Scanner and Cameras, and then check if the printer is displayed.
Related Information
→“Uninstalling Applications” on page 195
→“Installing the Latest Applications” on page 192
Scanned Image Problems
Uneven Colors, Dirt, Spots, and so on Appear when Scanning from the Scanner Glass
□Clean the scanner glass.
Solving Problems
☐Remove any trash or dirt that adheres to the original.
☐ Do not press with too much force on the original or the document cover. If you press with too much force, blurring, smudges, and spots may occur.
Related Information
→“Cleaning the Scanner Glass” on page 186
Straight Lines Appear when Scanning from ADF
□Clean the ADF.
Straight lines may appear in the image when trash or dirt gets into the ADF.
☐Remove any trash or dirt that adheres to the original.
Related Information
→“Cleaning the ADF” on page 183
The Image Quality Is Rough
☐ In Epson Scan 2, adjust the image using items on the Advanced Settings tab, and then scan.
☐If the resolution is low, try increasing the resolution and then scanning.
Related Information
→ “Application for Scanning Documents and Images (Epson Scan 2)” on page 188
Offset Appears in the Background of Images
Images on the back of the original may appear in the scanned image.
☐ In Epson Scan 2, select the Advanced Settings tab, and then adjust the Brightness.
This feature may not be available depending on the settings on the Main Settings tab > Image Type or other settings on the Advanced Settings tab.
☐ In Epson Scan 2, select the Advanced Settings tab, and then Image Option > Text Enhancement.
☐ When scanning from the scanner glass, place black paper or a desk pad over the original.
Related Information
→“Application for Scanning Documents and Images (Epson Scan 2)” on page 188
→“Placing Originals” on page 36
Text is Blurred
☐ In Epson Scan 2, select the Advanced Settings tab, and then Image Option > Text Enhancement.
Solving Problems
☐ In Epson Scan 2, when Image Type on the Main Settings tab is set to Black & White, adjust the Threshold on the Advanced Settings tab. When you increase the Threshold, black becomes stronger.
☐If the resolution is low, try increasing the resolution and then scanning.
Related Information
→“Application for Scanning Documents and Images (Epson Scan 2)” on page 188
Moiré Patterns (Web-Like Shadows) Appear
If the original is a printed document, moiré patterns (web-like shadows) may appear in the scanned image.
☐ On the Advanced Settings tab in Epson Scan 2, set Descreening.
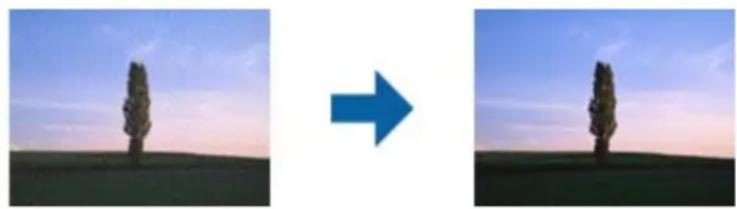
natural_image
Two side-by-side photos of a tree on a hill under a twilight sky, with a blue arrow pointing from the right image to the left image.☐Change the resolution, and then scan again.
Related Information
→“Application for Scanning Documents and Images (Epson Scan 2)” on page 188
Cannot Scan the Correct Area on the Scanner Glass
☐Make sure the original is placed correctly against the alignment marks.
☐ If the edge of the scanned image is missing, move the original slightly away from the edge of the scanner glass.
☐ When scanning from the control panel and selecting the auto scan area cropping function, remove any trash or dirt from the scanner glass and document cover. If there is any trash or dirt around the original, the scanning range expands to include it.
Related Information
→“Placing Originals” on page 36
→“Cleaning the Scanner Glass” on page 186
Text is Not Recognized Correctly when Saving as a Searchable PDF
☐ On the Image Format Options window in Epson Scan 2, check that Text Language is set correctly on the Text tab.
☐Check that the original is placed straight.
Solving Problems
☐ Use an original with clear text. Text recognition may decline for the following types of originals.
☐Originals that have been copied a number of times
☐Originals received by fax (at low resolutions)
☐Originals on which the letter spacing or line spacing is too small
☐Originals with ruled lines or underlining over the text
☐Originals with hand-written text
☐Originals with creases or wrinkles
☐ In Epson Scan 2, when Image Type on the Main Settings tab is set to Black & White, adjust the Threshold on the Advanced Settings tab. When you increase the Threshold, the black color area becomes larger.
☐ In Epson Scan 2, select the Advanced Settings tab, and then Image Option > Text Enhancement.
Related Information
→ “Application for Scanning Documents and Images (Epson Scan 2)” on page 188
Cannot Solve Problems in the Scanned Image
If you have tried all of the solutions and have not solved the problem, initialize the Epson Scan 2 settings using Epson Scan 2 Utility.
Note:
Epson Scan 2 Utility is an application that comes with Epson Scan 2.
- Start Epson Scan 2 Utility.
□Windows 10/Windows Server 2016
Click the start button, and then select EPSON > Epson Scan 2 Utility.
☐Windows 8.1/Windows 8/Windows Server 2012 R2/Windows Server 2012
Enter the application name in the search charm, and then select the displayed icon.
☐ Windows 7/Windows Vista/Windows XP/Windows Server 2008 R2/Windows Server 2008/Windows Server 2003 R2/Windows Server 2003
Click the start button, and then select All Programs or Programs > EPSON > Epson Scan 2 > Epson Scan 2 Utility.
□Mac OS
Select Go > Applications > Epson Software > Epson Scan 2 Utility.
- Select the Other tab.
- Click Reset.
Note:
If initialization does not solve the problem, uninstall and re-install Epson Scan 2.
Related Information
→“Uninstalling Applications” on page 195
→“Installing the Latest Applications” on page 192
Other Scanning Problems
Scanning Speed Is Slow
☐ Lower the resolution, and then scan again. When the resolution is high, scanning may take some time.
☐ The scanning speed may be reduced depending on the image adjustment features in Epson Scan 2.
☐On the Configuration screen which is displayed by clicking the ⚙ button in Epson Scan 2, if you set Quiet Mode on the Scan tab, the scanning speed may be reduced.
Related Information
→ "Scanning Using Epson Scan 2" on page 121
Cannot Send the Scanned Image by Email
Make sure you have configured the email server settings.
Scanning Stops when Scanning to PDF/Multi-TIFF
☐ When scanning using Epson Scan 2, you can continuously scan up to 999 pages in PDF format and up to 200 pages in Multi-TIFF format. When scanning using the control panel, you can continuously scan up to 50 pages in single-sided scanning using the ADF, and up to 100 pages in 2-sided scanning using the ADF and when scanning using the scanner glass.
☐When scanning large volumes, we recommend scanning in grayscale.
- Increase the free space on the computer's hard disk. Scanning may stop if there is not enough free space.
☐ Try scanning at a lower resolution. Scanning stops if the total data size reaches the limit.
Related Information
→“Scanning Using Epson Scan 2” on page 121
Problems when Sending and Receiving Faxes
Describes how to troubleshoot faxing.
Note:
If you need to perform troubleshooting for the following, see the Administrator's Guide for details.
□Connections -- phone line, external phone, and other devices
☐ Fax Settings in Settings > General Settings
Solving Problems
Cannot Send or Receive Faxes
☐ Use Check Fax Connection on the control panel to run the automatic fax connection check. Try the solutions printed on the report.
☐ Check the error code displayed for the failed fax job, and try the solutions described in the error code list.
☐ Check the Line Type setting. Setting to PBX may solve the problem. If your phone system requires an external access code to get an outside line, register the access code to the printer, and enter # (hash) at the beginning of a fax number when sending.
☐ If a communication error occurs, change the Fax Speed setting to Slow(9,600bps) on the control panel.
☐ Check that the telephone wall jack works by connecting a phone to it and testing it. If you cannot make or receive calls, contact your telecommunication company.
☐ To connect to a DSL phone line, you need to use a DSL modem equipped with a built-in DSL filter, or install a separate DSL filter to the line. Contact your DSL provider.
☐ If you are connecting to a DSL phone line, connect the printer directly to a telephone wall jack to see if the printer can send a fax. If it works, the problem may be caused by the DSL filter. Contact your DSL provider.
☐ Enable the ECM setting on the control panel. Color faxes cannot be sent or received when ECM is off.
☐ To send or receive faxes using the computer, make sure that the printer is connected using a USB cable or a network, and that the PC-FAX Driver have been installed on the computer. The PC-FAX Driver is installed together with FAX Utility.
☐ In Windows, make sure the printer (fax) is displayed in Devices and Printers, Printer, or Printers and Other Hardware. The printer (fax) is displayed as "EPSON XXXXX (FAX)". If the printer (fax) is not displayed, uninstall and then re-install the FAX Utility. See the following to access Devices and Printers, Printer, or Printers and Other Hardware.
□Windows 10
Right-click on the start button, or press and hold it and then select Control Panel > View devices and printers in Hardware and Sound.
□Windows 8.1/Windows 8
Select Desktop > Settings > Control Panel > View devices and printers in Hardware and Sound or Hardware.
□Windows7
Click the start button, and select Control Panel > View devices and printers in Hardware and Sound or Hardware.
□Windows Vista
Click the start button, and select Control Panel > Printers in Hardware and Sound.
□Wind ow s XP
Click the start button, and select Settings > Control Panel > Printers and Other Hardware > Printers and Faxes.
☐In Mac OS, check the following.
☐ Select System Preferences from the menu > Printers & Scanners (or Print & Scan, Print & Fax), and then make sure the printer (fax) is displayed. The printer (fax) is displayed as "FAX XXXX (USB)" or "FAX XXXX (IP)". If the printer (fax) is not displayed, click [+] and then register the printer (fax).
☐ Select System Preferences from the menu > Printers & Scanners (or Print & Scan, Print & Fax), and then double-click the printer (fax). If the printer is paused, click Resume (or Resume Printer).
Solving Problems
Related Information
→“Error Code on the Status Menu” on page 200
→“Uninstalling Applications” on page 195
→“Installing the Latest Applications” on page 192
Cannot Send Faxes
☐ If the user restriction feature has been enabled, a user name and password are required to operate the printer. Contact your administrator if you do not know the password.
☐ If the user restriction feature has been enabled, and you send a fax from a computer, user authentication is performed using the user name and password set in the printer driver. When you cannot send a fax due to an authentication error, contact your administrator.
☐ Set up the header information for outgoing faxes on the control panel. Some fax machines automatically reject incoming faxes that do not include header information.
☐ If you have blocked your caller ID, unblock it. Some phones or fax machines automatically reject anonymous calls.
☐ Ask the recipient if the fax number is correct and the recipient's fax machine is ready to receive a fax.
☐ Check if you accidentally sent a fax using the subaddress feature. If you select a recipient with a subaddress from the contact list, the fax may be sent using the subaddress feature.
☐ When sending faxes using the subaddress feature, ask the recipient if their fax machine is capable of receiving faxes using the subaddress feature.
☐ When sending faxes using the subaddress feature, check that the subaddress and password are correct. Check with the recipient that the subaddress and password match.
Related Information
→ "Cannot Send or Receive Faxes" on page 230
→ "Sending a Fax with a Subaddress(SUB) and Password(SID)" on page 135
→ “Sending Faxes On Demand (Using Polling Send/Bulletin Board Box)” on page 131
Cannot Send Faxes to a Specific Recipient
Check the following if you cannot send faxes to a specific recipient due to an error.
☐ If the recipient machine does not pick up your call within 50 seconds after the printer has finished dialing, the call ends with an error. Dial using the 📞 (On Hook) feature or using a connected telephone to check how long it takes before you hear a fax tone. If it takes more than 50 seconds, add pauses after the fax number to send the fax. Tap ⏻ to enter the pause. A hyphen is entered as the pause mark. One pause is about three seconds. Add multiple pauses as needed.
☐ If you have selected the recipient from the contacts list, verify that the registered information is correct. If the information is correct, select the recipient from the contacts list, tap Edit and change Fax Speed to Slow(9,600bps).
Related Information
→ "Sending Faxes Manually After Confirming the Recipient's Status" on page 130
Solving Problems
→“Sending Faxes Dialing from the External Phone Device” on page 130
→“Managing Contacts” on page 43
→“Cannot Send or Receive Faxes” on page 230
Cannot Send Faxes at a Specified Time
Set the date and the time correctly on the control panel.
Related Information
→“Sending Faxes in Monochrome at a Specified Time (Send Fax Later)” on page 134
→“Basic Settings” on page 46
Cannot Receive Faxes
☐ If you have subscribed to a call forwarding service, the printer may not be able to receive faxes. Contact the service provider.
☐ If you have not connected a telephone to the printer, set the Receive Mode setting to Auto on the control panel.
☐ Under the following conditions, the printer runs out of memory and cannot receive faxes. See the troubleshooting for information on handling a memory full error.
☐ 100 received documents have been saved in the inbox and the confidential box in total.
□The printer's memory is full (100%).
☐ When receiving faxes using the subaddress feature, check that the subaddress and password are correct. Check with the sender that the subaddress and password match.
☐ Check if the sender's fax number has been registered to the Rejection Number List. Faxes sent from numbers that have been added to this list are blocked when Rejection Number List in Rejection Fax is enabled.
☐ Check if the sender's fax number is registered in the contact list. Faxes sent from numbers that have not been registered to this list are blocked when Unregistered Contacts in Rejection Fax is enabled.
☐ Ask the sender if header information is setup on their fax machine. Faxes that do not include header information are blocked when Fax Header Blank in Rejection Fax is enabled.
Related Information
→“Cannot Send or Receive Faxes” on page 230
→“Memory Full Error Occurs” on page 233
“Receiving Faxes from a Board with a Subaddress (SEP) and Password (PWD) (Polling Receive)” on page 140
Cannot Save Received Faxes to a Memory Device
Check if the memory device is connected to the printer, and then check the Receive Settings.
Solving Problems
Memory Full Error Occurs
☐ If the printer has been set to save received faxes in the inbox or the confidential box, delete faxes you have already read from the inbox or the confidential box.
☐ If the printer has been set to save received faxes on a computer, turn on the computer that is set to save the faxes. Once the faxes are saved in the computer, they are deleted from the printer's memory.
☐ If the printer has been set to save received faxes on a memory device, connect the device, in which you have created a folder to save faxes, to the printer. Once the faxes are saved in the device, they are deleted from the printer's memory. Make sure that the device has enough available memory and is not write protected.
☐ Even though the memory is full, you can send a fax by using one of the following solutions.
☐ Send a fax by using the Direct Send feature when sending a monochrome fax.
☐Send a fax by dialing from the external phone device.
☐Send a fax by using the 📞 (On Hook) feature.
☐ Send a fax by dividing your originals into two or more to send them in several batches.
☐ If the printer cannot print a received fax due to a printer error, such as a paper jam, the memory full error may occur. Clear the printer problem, and then contact the sender and ask them to send the fax again.
Related Information
→ "Sending Many Pages of a Monochrome Document (Direct Send)" on page 133
→ "Sending Faxes Dialing from the External Phone Device" on page 130
→ "Sending Faxes Manually After Confirming the Recipient's Status" on page 130
→ “Removing Jammed Paper” on page 206
Sent Fax Quality Is Poor
□Clean the scanner glass.
□Clean the ADF.
☐ Change the Original Type setting on the control panel. If your originals contain both text and photos, select Photo.
☐ Change the Density setting on the control panel.
☐ If you are not sure about the capabilities of the recipient fax machine, enable the Direct Send feature or select Fine as the Resolution setting.
If you select Super Fine or Ultra Fine for a monochrome fax, and send the fax without using the Direct Send feature, the printer may automatically lower the resolution.
☐ Enable the ECM setting on the control panel.
Related Information
→ "Fax Settings" on page 143
→“Cleaning the Scanner Glass” on page 186
→“Cleaning the ADF” on page 183
Solving Problems
Faxes Are Sent at the Wrong Size
Before you send an A3 size document, ask the recipient if the recipient's machine supports A3 size. If you see OK (Reduced Size) in the fax transmission report, the recipient's fax machine does not support A3 size.
☐ When sending a fax using the scanner glass, place the original correctly aligning its corner with the origin mark. Select your original size on the control panel.
☐ Clean the scanner glass and the document cover. If there is dust or stains on the glass, the scanning area may extend to include the dust or stains, resulting in the wrong scanning position or small images.
Related Information
→“Fax Settings” on page 143
→“Placing Originals” on page 36
→“Cleaning the Scanner Glass” on page 186
Received Fax Quality Is Poor
☐ Enable the ECM setting on the control panel.
☐Contact the sender and ask them to send using a higher quality mode.
☐ Reprint the received fax. Select Log from Job/Status to reprint the fax.
Related Information
→“Checking the Fax Job History” on page 153
Cannot Receive A3 Size Faxes
☐ Check that the paper size setting of the paper source that contains A3 paper has been set to A3, and that the paper source is set for use with the fax feature. Select Settings > General Settings > Printer Settings > Paper Source Settings > Auto Select Settings > Fax, and then check the enabled paper source(s).
☐ Check that A3 is selected in Receiving Paper Size. Select Settings > General Settings > Fax Settings > Basic Settings > Receiving Paper Size, and then check that A3 is selected.
Received Faxes Are Not Printed
☐ If an error has occurred on the printer, such as a paper jam, the printer cannot print received faxes. Check the printer.
☐ If the printer has been set to save received faxes in the inbox or the confidential box, the received faxes are not automatically printed. Check the Receive Settings.
Related Information
→“Checking the Printer Status” on page 198
→“Removing Jammed Paper” on page 206
Solving Problems
Pages are Blank or only a Small Amount of Text is Printed on the Second Page in Received Faxes
You can print on one page by using the Delete Print Data After Split feature in Split Page Settings.
Select Delete Top or Delete Bottom in Delete Print Data After Split, and then adjust Threshold. Increasing the threshold increases the amount deleted; a higher threshold gives you a higher possibility of printing on one page.
Other Faxing Problems
Describes troubleshooting problems related to faxing.
Note:
If you need to perform troubleshooting for the following, see the Administrator's Guide for details.
☐Connections -- phone line, external phone, and other devices
☐ Fax Settings in Settings > General Settings
Cannot Make Calls on the Connected Telephone
Connect the telephone to the EXT. port on the printer, and pick up the receiver. If you cannot hear a dial tone through the receiver, connect the phone cable correctly.
Answering Machine Cannot Answer Voice Calls
On the control panel, set the printer's Rings to Answer setting to a number higher than the number of rings for your answering machine.
Sender's Fax Number Not Displayed on Received Faxes or the Number is Wrong
The sender may have not set the fax header information or have set it incorrectly. Ask the sender.
Other Problems
Slight Electric Shock when Touching the Printer
If many peripherals are connected to the computer, you may feel a slight electric shock when touching the printer. Install a ground wire to the computer that is connected to the printer.
Operation Sounds Are Loud
If operations sounds are too loud, enable Quiet Mode. Enabling this feature may reduce printing speed.
Solving Problems
Control panel
Select OFF on the home screen, and then enable Quiet Mode.
□Windows printer driver
Enable Quiet Mode on the Main tab.
□Mac OS printer driver
Select System Preferences from the menu > Printers & Scanners (or Print & Scan, Print & Fax), and then select the printer. Click Options & Supplies > Options (or Driver). Select On as the Quiet Mode setting.
□Epson Scan 2
Click the ⚙ button to open the Configuration window. Next, set the Quiet Mode on the Scan tab.
The Date and Time Are Incorrect
Set the date and the time correctly on the control panel. After a power failure caused by a lightning strike or if the power is left off for a long time, the clock may show the wrong time.
Related Information
→“Basic Settings” on page 46
Memory Device Is not Recognized
Enable the memory device in the Memory Device Interface settings on the control panel.
Related Information
→“Printer Settings” on page 48
Cannot Save Data to a Memory Device
☐Check that the memory device is not write protected.
☐ Check that the memory device has enough available memory. If the available memory is low, data cannot be saved.
Related Information
→“External USB Device Specifications” on page 242
Forgot Your Password
If you forget the administrator's password, contact Epson support.
Related Information
→“Contacting Epson Support” on page 272
Solving Problems
Application Is Blocked by a Firewall (for Windows Only)
Add the application to the Windows Firewall allowed program in security settings on the Control Panel.
"x" Is Displayed on the Photo Selection Screen
“×” is displayed on the LCD screen when the image file is not supported by the product.
Related Information
→“Supported Data Specifications” on page 243
Appendix
Technical Specifications
Printer Specifications
| Print Head Nozzle Placement Black ink nozzles: 800Color ink nozzles: 800 for each color | ||
| Weight of Paper * | Plain Paper 64 to 90 g/m2(17 to 24lb) | |
| Thick Paper 91 to 256 g/m2(25 to 68 lb) | ||
| Envelopes Envelope #10, DL, C6: 75 to 90 g/m2(20 to 24 lb)Envelope C4: 80 to 100 g/m2(21 to 26 lb) | ||
* Even when the paper thickness is within this range, the paper may not feed in the printer or print result may adversely affected depending on the paper property or quality.
Printable Area
Printable Area for Single Sheets
Print quality may decline in the shaded areas due to the printer's mechanism.
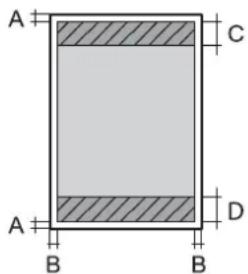
text_image
A C A D B B| A 3.0 mm (0.12 in.) |
| B 3.0 mm (0.12 in.) |
| C 49.0 mm (1.93 in.) |
| D 54.0 mm (2.13 in.) |
Printable Area for Envelopes
Print quality may decline in the shaded areas due to the printer's mechanism.
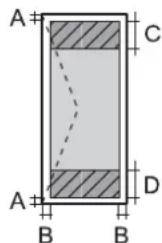
text_image
A C A D B B| A 3.0 mm (0.12 in.) |
| B 5.0 mm (0.20 in.) |
| C 54.0 mm (2.13 in.) |
| D 49.0 mm (1.93 in.) |
Appendix
Scanner Specifications
| Scanner Type Flatbed | |
| Photoelectric Device CIS | |
| Effective Pixels 14040×20400 pixels (1200 dpi) | |
| Maximum Document Size 297×431.8 mm (11.7×17 in.)A3,Ledger | |
| Scanning Resolution 1200 dpi (main scan)2400 dpi (sub scan) | |
| Output Resolution 50 to 9600 dpi in 1 dpi increments | |
| Color Depth Color | ☐30 bits per pixel internal (10 bits per pixel per color internal)☐24 bits per pixel external (8 bits per pixel per color external)Grayscale☐16 bits per pixel internal☐8 bits per pixel externalBlack and white☐16 bits per pixel internal☐1 bits per pixel external |
| Light Source LED | |
Interface Specifications
| For Computer SuperSpeed USB | |
| For External USB Devices Hi-Speed USB |
Fax Specifications
| Fax Type Walk-up black and white and color fax capability (ITU-T Super Group 3) | |
| Supported Lines Standard analogue telephone lines, PBX (Private Branch Exchange) telephone systems | |
| Speed | Up to 33.6 kbps |
Appendix
| Resolution Monochrome | Standard: 8 pel/mm×3.85 line/mm (203 pel/in.×98 line/in.)Fine: 8 pel/mm×7.7 line/mm (203 pel/in.×196 line/in.)Super Fine: 8 pel/mm×15.4 line/mm (203 pel/in.×392 line/in.)Ultra Fine: 16 pel/mm×15.4 line/mm (406 pel/in.×392 line/in.)Color200×200 dpi |
| Page Memory Up to 550 pages (when received ITU-T No.1 chart in monochrome draft mode) | |
| Redial^* | 2 times (with 1 minute intervals) |
| Interface RJ-11 Phone Line, RJ-11 Telephone set connection |
* T specifications may differ by country or region.
Network Function List
Network Functions and IPv4/IPv6
| Functions Supported Remarks | ||||
| Network Printing EpsonNet Print (Windows) IPv4 √- | ||||
| Standard TCP/IP (Windows) | IPv4, IPv6 | √ | ||
| WSD Printing (Windows) | IPv4, IPv6 | √ | ||
| Bonjour Printing (Mac OS) | IPv4, IPv6 | √ | ||
| IPP Printing (Windows, Mac OS) | IPv4, IPv6 | √- | ||
| UPnP Printing | IPv4 - | Information | ||
| PictBridge Printing (Wi-Fi) | IPv4 - | Digital camera | ||
| Epson Connect (Email Print, Remote Print) | IPv4 √- | |||
| AirPrint (iOS, Mac OS) | IPv4, IPv6 | √ | ||
| Google Cloud Print | IPv4, IPv6 | √ | ||
Appendix
| Functions Supported Remarks | ||||
| Network Scanning Epson Scan 2 IPv4, IPv6 √- | ||||
| AirPrint (Scan) IPv4, IPv6 √OS X Mavericks or | later | |||
| ADF (2-sided scanning) √- | ||||
| Fax Send a fax IPv4 √- | ||||
| Receive a fax IPv4 √- | ||||
| AirPrint (Faxout) | IPv4, IPv6 | √ | OS X Mountain Lion or later | |
Wi-Fi Specifications
| Standards | IEEE802.11b/g/n*1 |
| Frequency Range 2.4 GHz | |
| Maximum Radio-Frequency Power Transmitted | 20 dBm (EIRP) |
| Coordination Modes | Infrastructure, Wi-Fi Direct (Simple AP)*2 |
| Wireless Securities*3 | WEP (64/128bit), WPA2-PSK (AES)*4, WPA2-Enterprise (AES) |
*1 IEEE802.11n is only available for the HT20.
*2 Not supported for IEEE 802.11b.
*3 Wi-Fi Direct supports WPA2-PSK (AES) only.
*4 Complies with WPA2 standards with support for WPA/WPA2 Personal.
Ethernet Specifications
| Standards | IEEE802.3i (10BASE-T)*1IEEE802.3u (100BASE-TX)IEEE802.3ab (1000BASE-T)*1IEEE802.3az (Energy Efficient Ethernet)*2 |
| Communication Mode | Auto, 10Mbps Full duplex, 10Mbps Half duplex, 100Mbps Full duplex, 100Mbps Half duplex |
| Connector | RJ-45 |
*1 Use a category 5e or higher STP (Shielded twisted pair) cable to prevent risk of radio interference.
Appendix
*2 The connected device should comply with IEEE802.3az standards.
Security Protocol
| IEEE802.1X* | |
| IPsec/IP Filtering | |
| SSL/TLS HTTPS Server/Client | |
| IPPS | |
| SMTPS (STARTTLS, SSL/TLS) | |
| SNMPv3 | |
* You need to use a device for connection that complies with IEEE802.1X.
PostScript Level 3 Compatibility
The PostScript used on this printer is compatible with PostScript Level 3.
Supported Third Party Services
| AirPrint Print iOS 5 or later/Mac OS X v10 | 7.x or later | |
| Scan OS X Mavericks or later | ||
| Fax OS X Mountain Lion or later | ||
| Google Cloud Print | ||
External USB Device Specifications
| Devices Maximum Capacities | |
| USB Flash Drive 2 TB (formatted in FAT, | FAT32, or exFAT.) |
You cannot use the following devices:
☐A device that requires a dedicated driver
☐A device with security settings (password, encryption, and so on)
Epson cannot guarantee all operations of externally connected devices.
Appendix
Supported Data Specifications
| File Format | JPEGs (*JPG) with the Exif Version 2.31 standard taken by digital cameras DCF*1version 1.0 or 2.0*2 compliantTIFF 6.0 compliant images as belowRGB full color images (not compressed)Binary images (not compressed or CCITT encoded)PDF Version 1.7 compliant data file |
| Image Size Horizontal: 80 to 10200 pixels | Vertical: 80 to 10200 pixels |
| File Size Less than 2 GB | |
| Maximum Number of Files | JPEG: 9990*3TIFF: 999PDF: 999 |
*1 Design rule for Camera File system.
*2 Photo data stored on digital cameras with a built-in memory is not supported.
*3 Up to 999 files can be displayed at a time. (If the number of files exceeds 999, the files are displayed in groups.)
Note:
"×" is displayed on the LCD screen when the printer cannot recognize the image file. In this situation, if you select a multiple image layout, blank sections will be printed.
Dimensions
Only the printer
| Dimensions Storage | Width: 613 mm (24.1 in.)Depth: 755 mm (29.7 in.)Height: 493 mm (19.4in.)PrintingWidth: 613 mm (24.1 in.)Depth: 866 mm (34.1 in.)Height: 571 mm (22.5 in.) |
| Weight * | Approx. 45.8 kg (101.0 lb) |
* Without the ink cartridges and the power cord.
Printers with options
These are the dimensions of printers with 3 optional paper cassette units and an optional cabinet.
Appendix
| Dimensions Storage | Width: 772 mm (30.4 in.)Depth: 873 mm (34.4 in.)Height: 1162 mm (45.7 in.)PrintingWidth: 772 mm (30.4 in.)Depth: 873 mm (34.4 in.)Height: 1240 mm (48.8in.) |
| Weight* | Approx. 104.8 kg (231.0 lb) |
* Without the ink cartridges and the power cord.
Electrical Specifications
| Model 100 to 240 V Model 220 to 240 V Model | ||
| Rated Frequency Range 50 to 60 Hz 50 to 60 Hz | ||
| Rated Current 1.3 to 0.7 A 0.8 A | ||
| Power Consumption (with USB Connection) | Standalone copying: Approx. 39.0 W (ISO/IEC24712)Ready mode: Approx. 18.0 WSleep mode: Approx. 1.3 WPower off: Approx. 0.2 W | Standalone copying: Approx. 39.0 W (ISO/IEC24712)Ready mode: Approx. 18.0 WSleep mode: Approx. 1.4 WPower off: Approx. 0.25 W |
Note:
☐Check the label on the printer for its voltage.
☐For European users, see the following Website for details on power consumption.
http://www.epson.eu/energy-consumption
Environmental Specifications
| Operation Use the printer within the range shown in the following graph. | 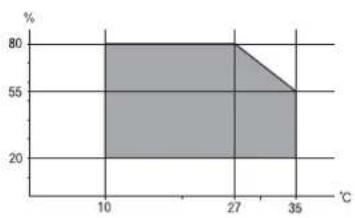 Temperature: 10 to 35°C (50 to 95°F)Humidity: 20 to 80% RH (without condensation) Temperature: 10 to 35°C (50 to 95°F)Humidity: 20 to 80% RH (without condensation) |
Appendix
| Storage | Temperature: -20 to 40°C (-4 to 104°F)* Humidity: 5 to 85% RH (without condensation) |
* You can store for one month at 40°C (104°F).
Environmental Specifications for Ink Cartridges
| Storage Temperature | -20 to 40 °C (-4 to 104 °F)* |
| Freezing Temperature -23 °C (-9.4 °F) | Ink thaws and is usable after approximately 3 hours at 25 °C (77 °F). |
* You can store for one month at 40 °C (104 °F).
Installation Location and Space
To ensure safe use, place the printer in a location that meets the following conditions.
☐A flat, stable surface that can support the weight of the printer
□Well-ventilated location
Locations that do not block or cover the vents and openings in the printer
Locations where a dedicated electrical outlet can be secured
□Locations where you can load paper and remove paper easily
□ Locations that meet the conditions in the "Environmental Specifications" in this manual

Important:
Do not place the printer in the following locations; otherwise a malfunction may occur.
□Subject to direct sunlight
Subject to rapid changes in temperature and humidity
Subject to fire
□Subject to volatile substances
□Subject to shocks or vibrations
□Near a television or a radio
□Near excessive dirt or dust
□Near water
□Near air-conditioning or heating equipment
□Near a humidifier
Use a commercially available anti-static mat to prevent static generation in locations prone to generating static electricity.
Appendix
Secure enough place to install and operate the printer correctly.
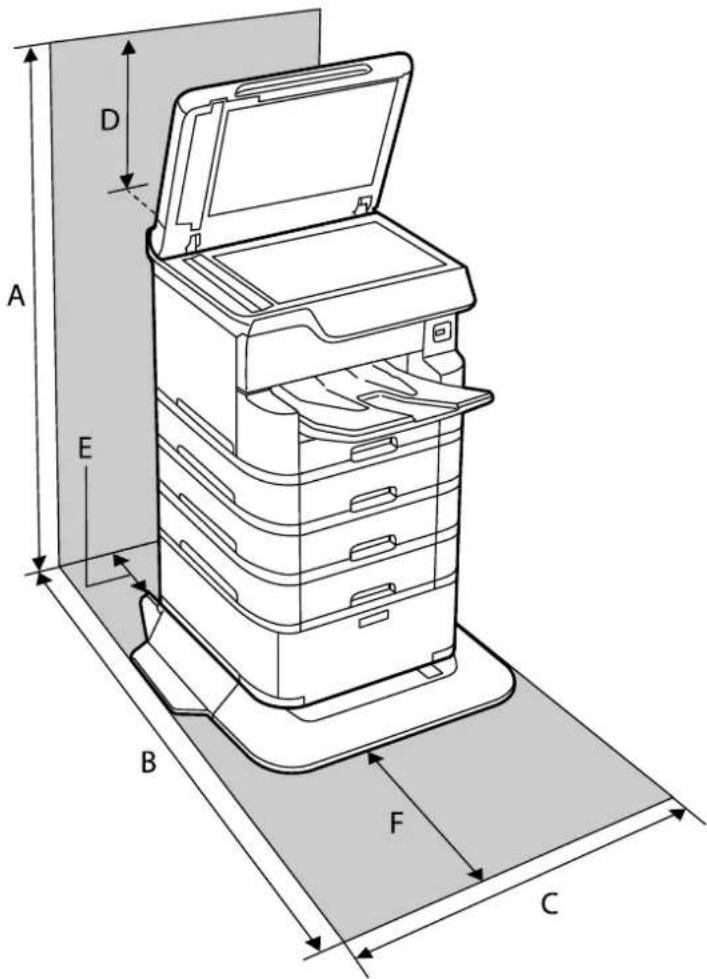
text_image
A D E B F C| A 1516mm | |
| B 1378mm | |
| C 772mm | |
| D 345mm | |
| E 179mm | |
| F 523mm |
System Requirements
Windows 10 (32-bit, 64-bit)/Windows 8.1 (32-bit, 64-bit)/Windows 8 (32-bit, 64-bit)/Windows 7 (32-bit, 64-bit)/Windows Vista (32-bit, 64-bit)/Windows XP SP3 or later (32-bit)/Windows XP Professional x64 Edition SP2 or later/Windows Server 2016/Windows Server 2012 R2/Windows Server 2012/Windows Server 2008 R2/Windows Server 2008/Windows Server 2003 R2/Windows Server 2003 SP2 or later
☐ macOS High Sierra/macOS Sierra/OS X El Capitan/OS X Yosemite/OS X Mavericks/OS X Mountain Lion/Mac OS X v10.7.x/Mac OS X v10.6.8
Appendix
Note:
☐Mac OS may not support some applications and features.
☐The UNIX File System (UFS) for Mac OS is not supported.
Font Information
Available Fonts for PostScript
| Font Name Family HP Equivalent | ||
| Nimbus Mono Medium, Bold, Italic | Bold Italic Courier | |
| Letter Gothic Medium, Bold, Italic | Letter Gothic | |
| Nimbus Mono PS Regular, Bold, Oblique, Bold Oblique CourierPS | ||
| Nimbus Roman No4 Medium, Bold, | Italic, Bold Italic CG Times | |
| URW Classico Medium, Bold, Italic, | Bold Italic CG Omega | |
| URW Coronet - | Coronet | |
| URW Clarendon Condensed | - | Clarendon Condensed |
| URW Classic Sans Medium, Bold, | Italic, Bold Italic Univers | |
| URW Classic Sans Condensed | Medium, Bold, Italic, Bold Italic | Univers Condensed |
| Antique Olive | Medium, Bold, Italic Antique Olive | |
| Garamond | Antiqua, Halbfett, Kursiv, Kursiv Halbfett | Garamond |
| Mauritius | - | Marigold |
| Algiers | Medium, Extra Bold | Albertus |
| NimbusSansNo2 | Medium, Bold, Italic, Bold Italic Arial | |
| Nimbus Roman No9 Medium, Bold, | Italic, Bold Italic Times New Roman | |
| Nimbus Sans | Medium, Bold, Oblique, Bold Oblique | Helvetica |
| Nimbus Sans Narrow | Medium, Bold, Oblique, Bold Oblique | Helvetica Narrow |
| Palladio | Roman, Bold, Italic, Bold Italic | Palatino |
| URW Gothic Book, Demi, Book Oblique, Demi Oblique | ITC Avant Garde | |
| URW Bookman | Light, Demi, Light Italic, Demi Italic | ITC Bookman |
| URW Century Schoolbook | Roman, Bold, Italic, Bold Italic | New Century Schoolbook |
| Nimbus Roman | Medium, Bold, Italic, Bold Italic Times | |
| URW Chancery Medium Italic | - | ITC Zapf Chancery Italic |
| Symbol | - | Symbol |
Appendix
| Font Name Family HP Equivalent | ||
| URW Dingbats - Wingdings | ||
| Dingbats - ITC Zapf Dingbats | ||
| Standard Symbol - SymbolPS |
Available Fonts for PCL (URW)
Scalable Font
| Font Name Family HP Equivalent Symbol | Set for PCL5 | ||
| Nimbus Mono Medium, Bold, | italic, Bold Italic Courier 1 | ||
| Letter Gothic Medium, Bold, | Italic Letter Gothic 1 | ||
| Nimbus Mono PS | Regular, Bold, Oblique, Bold Oblique | CourierPS | 3 |
| Nimbus Roman No4 | Medium, Bold, Italic, Bold Italic CG Times | 2 | |
| URW Classico | Medium, Bold, Italic, Bold Italic CG Omega | 3 | |
| URW Coronet | - | Coronet | 3 |
| URW Clarendon Condensed | - | Clarendon Condensed | 3 |
| URW Classic Sans | Medium, Bold, Italic, Bold Italic Univers | 2 | |
| URW Classic Sans Condensed | Medium, Bold, Italic, Bold Italic Univers Condensed | 3 | |
| Antique Olive | Medium, Bold, Italic | Antique Olive | 3 |
| Garamond | Antiqua, Halbfett, Kursiv, Kursiv Halbfett | Garamond | 3 |
| Mauritius | - | Marigold | 3 |
| Algiers | Medium, Extra Bold | Albertus | 3 |
| NimbusSansNo2 | Medium, Bold, Italic, Bold Italic | Arial | 3 |
| Nimbus Roman No9 | Medium, Bold, Italic, Bold Italic Times New | 3 | |
| Nimbus Sans | Medium, Bold, Oblique, Bold Oblique | Helvetica | 3 |
| Nimbus Sans Narrow | Medium, Bold, Oblique, Bold Oblique | Helvetica Narrow | 3 |
| Palladio | Roman, Bold, Italic, Bold Italic | Palatino | 3 |
| URW Gothic | Book, Demi, Book Oblique, Demi Oblique | ITC Avant Garde Gothic | 3 |
| URW Bookman Light, Demi, Light | Italic, Demi Italic ITC Bookman | 3 | |
| URW Century Schoolbook | Roman, Bold, Italic, Bold Italic | New Century Schoolbook | 3 |
| Nimbus Roman | Medium, Bold, Italic, Bold Italic Times | 3 | |
Appendix
| Font Name Family HP Equivalent Symbol | Set for PCL5 | ||
| URW Chancery Medium Italic | - | | Italic | 3 |
| Symbol - Symbol 4 | |||
| URW Dingbats - Wingdings 5 | |||
| Dingbats - ITC Zapf Dingbats 6 | |||
| Standard Symbol - SymbolPS 4 | |||
| URW David | Medium, Bold | HP David 7 | |
| URW Narkis | Medium, Bold | HP Narkis | 7 |
| URW Miryam | Medium, Bold, Italic | HP Miryam | 7 |
| URW Koufi | Medium, Bold | Koufi | 8 |
| URW Naskh | Medium, Bold | Naskh | 8 |
| URW Ryadh | Medium, Bold | Ryadh | 8 |
T
Bitmap Font
| Font Name | Symbol Set |
| Line Printer | 9 |
OCR/Barcode Bitmap Font (for PCL5 only)
| Font Name | Family | Symbol Set |
| OCR A | - | 10 |
| OCR B | - | 11 |
| Code39 | 9.37cpi, 4.68cpi | 12 |
| EAN/UPC | Medium, Bold | 13 |
Note:
Depending on the print density, or on the quality or color of the paper, OCR A, OCR B, Code39, and EAN/UPC fonts may not be readable. Print a sample and make sure the fonts can be read before printing large quantities.
List of Symbol Sets
Your printer can access a variety of symbol sets. Many of these symbol sets differ only in the international characters specific to each language.
When you are considering which font to use, you should also consider which symbol set to combine with the font.
Appendix
Note:
Since most software handles fonts and symbols automatically, you will probably never need to adjust the printer's settings. However, if you are writing your own printer control programs, or if you are using oldersoftware that cannot control fonts, refer to the following sections for symbol set details.
List of Symbol Sets for PCL 5
| Symbol Set Name | Attribute Font Classification | ||||||||||||
| 1 2 3 | 4 5 6 7 | 8 9 10 | 11 12 | 13 | |||||||||
| Norweg1 0D √ | √ √ | - | - | - | - | - | - | - | - | - | - | ||
| Roman Extension | 0 E | - | - | - | - | - | - | - | - | √- | - | - | |
| Italian 0I √ | √ √ - | - | - | - | - | - | - | - | - | - | - | ||
| ECM94-1 | 0N | √ | √ | √ | - | - | - | - | - | √ | - | - | - |
| Swedis2 | 0S √ √ | √ | - | - | - | - | - | - | - | - | - | - | |
| ANSI ASCII | 0U | √ | √ | √ | - | - | - | √ | √ | - | - | - | - |
| UK | 1E √ √ | √ | - | - | - | - | - | - | - | - | - | - | |
| French2 | 1F | √ | √ | √ | - | - | - | - | - | - | - | - | - |
| German | 1G √ √ | √ | - | - | - | - | - | - | - | - | - | - | |
| Legal | 1U | √ | √ | √ | - | - | - | - | - | √ | - | - | - |
| 8859-2 ISO | 2N | √ | √ | √ | - | - | - | - | - | √ | - | - | - |
| Spanish | 2S √ √ | √ | - | - | - | - | - | - | - | - | - | - | |
| ISO 8859/4 Latin 4 | 4N √ √ | √ | - | - | - | - | - | - | - | - | - | - | |
| Roman-9 | 4U √ √ | √ | - | - | - | - | - | - | - | - | - | - | |
| PsMath | 5M | √ | √ | √ | - | - | - | √ | √ | - | - | - | - |
| 8859-9 ISO | 5N | √ | √ | √ | - | - | - | - | - | √ | - | - | - |
| WiTurkish | 5T √ √ | √ | - | - | - | - | - | - | - | - | - | - | |
| MsPublishin | 6J | √ | √ | √ | - | - | - | - | - | - | - | - | - |
| VeMath | 6M | √ | √ | √ | - | - | - | - | - | - | - | - | - |
| 8859-10ISO | 6N | √ | √ | √ | - | - | - | - | - | √ | - | - | - |
| DeskTop | 7J | √ | √ | √ | - | - | - | - | - | - | - | - | - |
| Math-8 | 8M | √ | √ | √ | - | - | - | √ | √ | - | - | - | - |
| Roman-8 | 8U | √ | √ | √ | - | - | - | - | - | √ | - | - | - |
| WiE.Europe | 9E | √ | √ | √ | - | - | - | - | - | - | - | - | - |
| Pc1004 | 9J | √ | √ | √ | - | - | - | - | - | - | - | - | - |
Appendix
| Symbol Set Name | Attribute Font Classification | |||||||||||||
| 1 2 3 | 4 5 6 7 | 8 9 10 | 11 12 | 13 | ||||||||||
| 8859-15ISO | 9N | ✓ | ✓ | ✓ | - | - | - | - | - | ✓ | - | - | - | - |
| PcTk437 9T ✓ | ✓ ✓ | - | - | - | - | - | - | - | - | - | - | - | ||
| Windows 9U ✓ | ✓ ✓ | - | - | - | - | - | - | - | - | - | - | - | ||
| PsText 10J ✓ | ✓ ✓ | - | - | - | - | - | - | - | - | - | - | - | ||
| IBM-US | 10U | ✓ | ✓ | ✓ | - | - | - | - | - | ✓ | - | - | - | - |
| IBM-DN | 11U | ✓ | ✓ | ✓ | - | - | - | - | - | ✓ | - | - | - | - |
| McText 12J ✓ | ✓ ✓ | - | - | - | - | - | - | - | - | - | - | - | ||
| PcMultiling | 12U | ✓ | ✓ | ✓ | - | - | - | - | - | ✓ | - | - | - | - |
| VeInternati | 13J ✓ ✓ | ✓ | - | - | - | - | - | - | - | - | - | - | - | |
| PcEur858 | 13U | ✓ | ✓ | ✓ | - | - | - | - | - | - | - | - | - | - |
| VeUS | 14J ✓ ✓ | ✓ | - | - | - | - | - | - | - | - | - | - | - | |
| PiFont | 15U | ✓ | ✓ | ✓ | - | - | - | - | - | - | - | - | - | - |
| PcE.Europe | 17U | ✓ | ✓ | ✓ | - | - | - | - | - | - | - | - | - | - |
| Unicode 3.0 | 18N | ✓ | ✓ | ✓ | - | - | - | ✓ | ✓ | - | - | - | - | - |
| WiBALT | 19L | ✓ | ✓ | ✓ | - | - | - | - | - | - | - | - | - | - |
| WiAnsi | 19U | ✓ | ✓ | ✓ | - | - | - | - | - | - | - | - | - | - |
| PcBlt775 | 26U | ✓ | ✓ | ✓ | - | - | - | - | - | - | - | - | - | - |
| Pc866Cyr | 3R | ✓ | ✓ | - | - | - | - | - | - | - | - | - | - | - |
| Greek8 | 8G ✓ ✓ | - | - | - | - | - | - | - | - | - | - | - | - | |
| WinGrk 9G ✓ | ✓ - | - | - | - | - | - | - | - | - | - | - | |||
| WinCyr 9R | ✓ ✓ | - | - | - | - | - | - | - | - | - | - | - | - | |
| Pc851Grk | 10G | ✓ | ✓ | - | - | - | - | - | - | - | - | - | - | - |
| ISOCyr | 10N | ✓ | ✓ | - | - | - | - | - | - | ✓ | - | - | - | - |
| Pc8Grk | 12G | ✓ | ✓ | - | - | - | - | - | - | - | - | - | - | - |
| ISOGrk | 12N | ✓ | ✓ | - | - | - | - | - | - | - | - | - | - | - |
| Pc866Ukr | 14R | ✓ | ✓ | - | - | - | - | - | - | - | - | - | - | - |
| Hebrew7 | 0H | ✓ | - | - | - | - | - | ✓ | - | - | - | - | - | - |
| 8859-8 ISO | 7H | ✓ | - | - | - | - | - | ✓ | - | - | - | - | - | - |
| Hebrew8 | 8H | ✓ | - | - | - | - | - | ✓ | - | - | - | - | - | - |
| Pc862Heb | 15H | ✓ | - | - | - | - | - | ✓ | - | - | - | - | - | - |
Appendix
| Symbol Set Name | Attribute Font Classification | ||||||||||||
| 1 2 3 | 4 5 6 7 | 8 9 10 | 11 12 | 13 | |||||||||
| PC-862, Hebrew | 15Q | √ | - | - | - | - | - | √ | - | - | - | - | - |
| A r a | b i | c | 8 | 8 | V | - | - | - | - | - | - | ||
| H P W | A R | A | 9 | V | - | - | - | - | - | - | √ | ||
| Pc864Ara 10V--- | ----√- | - | - | - | - | ||||||||
| Symbol | 19M | - | - | - | √ | - | - | - | - | - | - | - | - |
| Wingdings | 579L | - | - | - | - | √ | - | - | - | - | - | - | - |
| ZapfDigbats | 14L | - | - | - | - | - | √ | - | - | - | - | - | - |
| OCR A | 0O | - | - | - | - | - | - | - | - | - | √ | - | - |
| OCR B | 1O | - | - | - | - | - | - | - | - | - | - | √ | - |
| OCR B Extension | 3Q | - | - | - | - | - | - | - | - | - | - | √ | - |
| Code3-9 | 0Y | - | - | - | - | - | - | - | - | - | - | - | √ |
| EAN/UPC | 8Y | - | - | - | - | - | - | - | - | - | - | - | √ |
Installing the Optional Units
Optional Cabinet Code
The following is the code for the optional cabinet.
Optional Cabinet (C12C932891)
Installing the Optional Cabinet
The cabinet can be attached to the printer and the optional paper cassette units.
Appendix

Caution:
☐ Make sure you turn off the printer, unplug the power cord from the printer, and disconnect any cables before starting installation. Otherwise, the power cord may be damaged resulting in fire or electric shock.
☐ Lock the casters of the cabinet before starting installation. If the cabinet moves unexpectedly, you may be injured.
☐ When lifting the printer, place your hands in the positions shown below. If you lift the printer holding other positions, the printer may fall or you may trap your fingers when placing the printer.
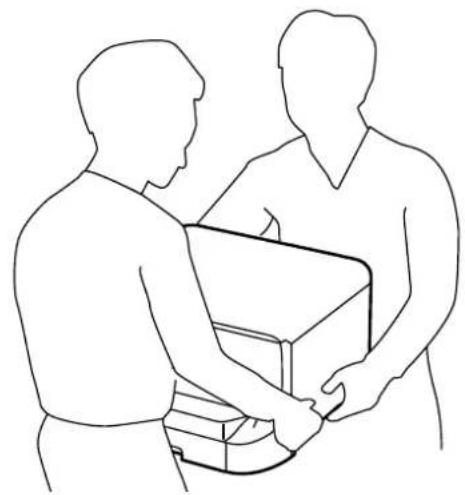
natural_image
Line drawing of two people exchanging a box together (no text or symbols)-
Turn off the printer by pressing the ⏻ button, and then unplug the power cord.
-
Disconnect any connected cables.
Note:
if the optional paper cassette unit has been installed, uninstall it as well.
- Remove the output tray.
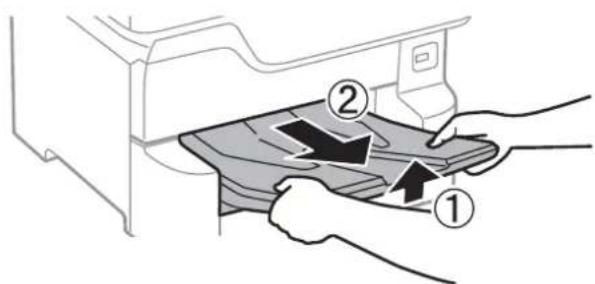
text_image
Diagram showing two hands inserting a device into a printer, labeled with arrows indicating process steps.- Remove the cabinet from the box, and then remove any protective materials.
Appendix
- Check the items supplied.
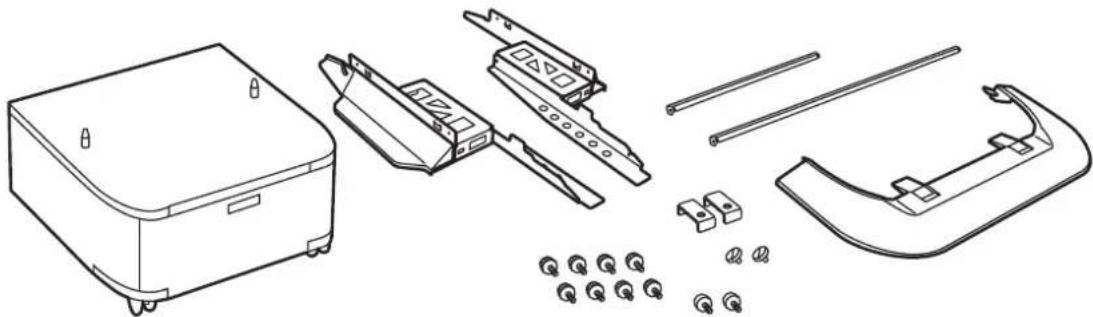
natural_image
Technical line drawing of a mechanical assembly with components like a box, housing, and bracket (no text or symbols)Note:
The shape of the stands may differ from this illustration.
- Place the stands inside the cabinet's casters.
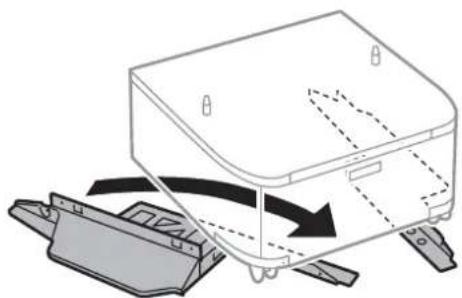
natural_image
Diagram of a printer or printer device with a paper holder and arrow indicating rotation (no text or symbols present)- Secure the stands with the attachments and screws.
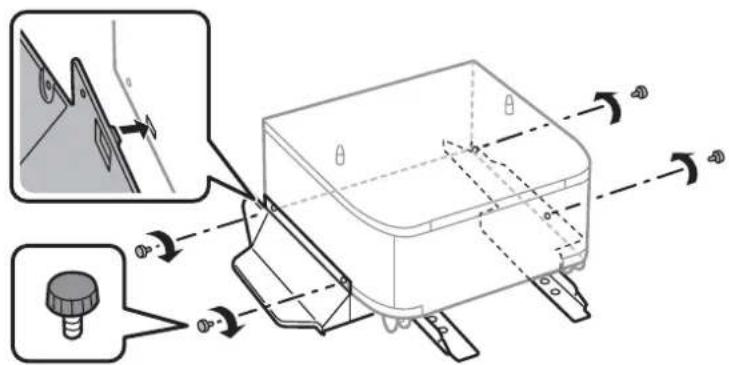
text_image
Technical diagram showing mechanical assembly with labeled components and directional arrows indicating motion or force vectors.
Important:
Make absolutely sure both stands are attached securely, otherwise the printer may fall.
User's Guide
Appendix
- Secure the reinforcing bars with the attachments and screws.
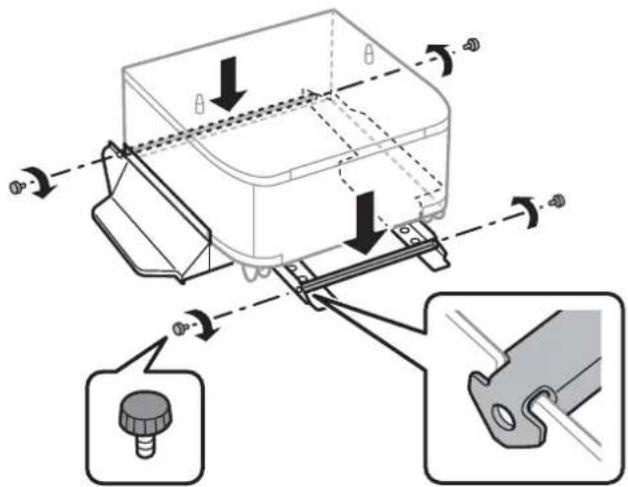
text_image
Technical diagram showing mechanical assembly with labeled components and directional arrows, including a knob and tool.- Place the cabinet on a flat surface and lock the casters at the front.
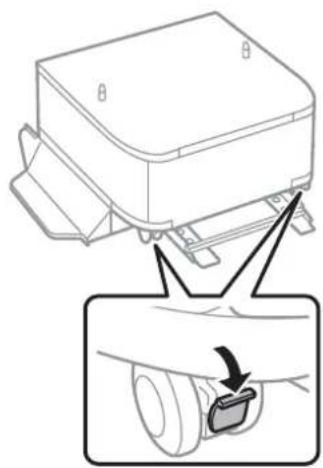
natural_image
Diagram of a vehicle electronic component with a close-up view showing a cable or connector (no text or symbols present)- Seucre the cover to the stands.
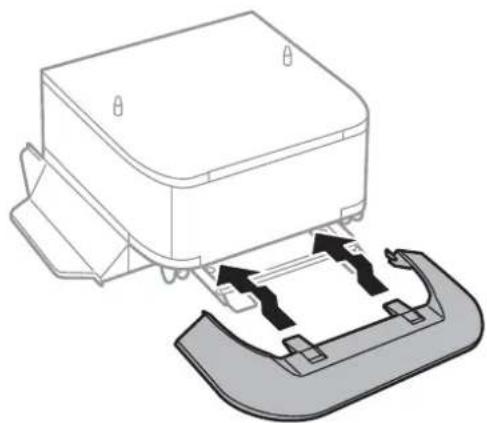
natural_image
Diagram of a printer with base and cover components, showing mechanical assembly (no text or symbols)Appendix
- Pull out the paper cassette.
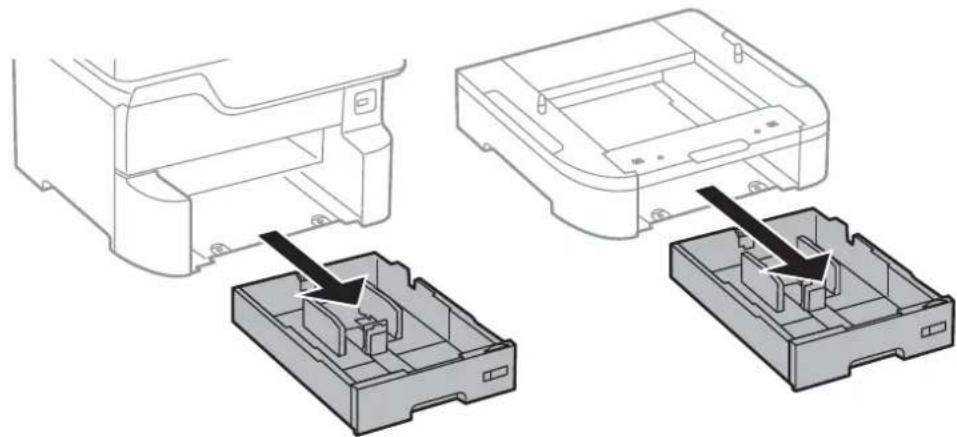
natural_image
Technical illustration showing two views of a printer's internal structure with arrows indicating assembly or component (no text or symbols present)- Lower the printer or an optional paper cassette unit gently onto the cabinet aligning the corners, and then secure them with the screws.
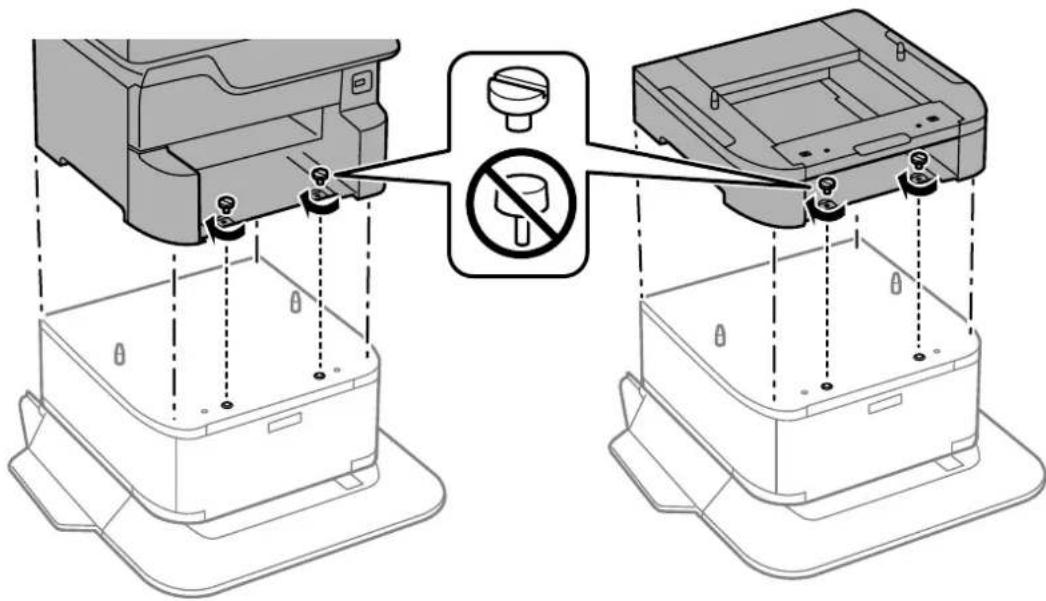
text_image
Technical diagram showing assembly of a printer with labeled components and a prohibition symbol for disassembly.Note:
Some screws will be left over after assembly.
- Secure the printer or an optional paper cassette unit at the back with the attachments and screws.
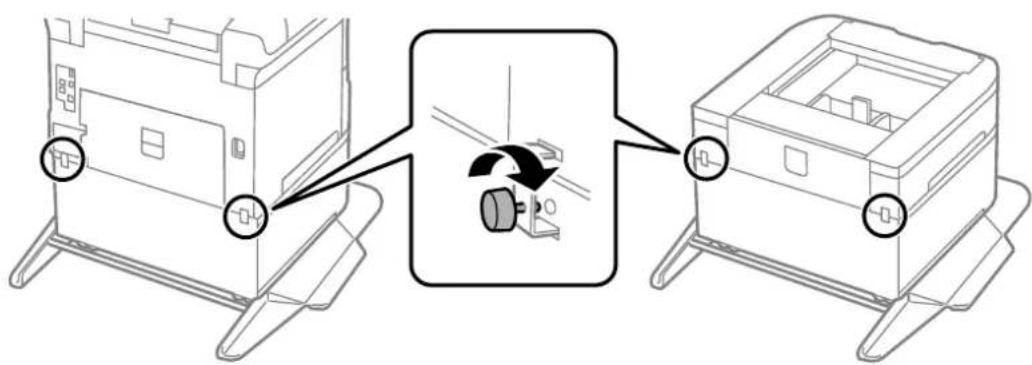
text_image
Technical diagram showing assembly steps of a printer or printer device with labeled parts and a close-up view of the component.Appendix
- Insert the paper cassette.
- Insert the output tray.
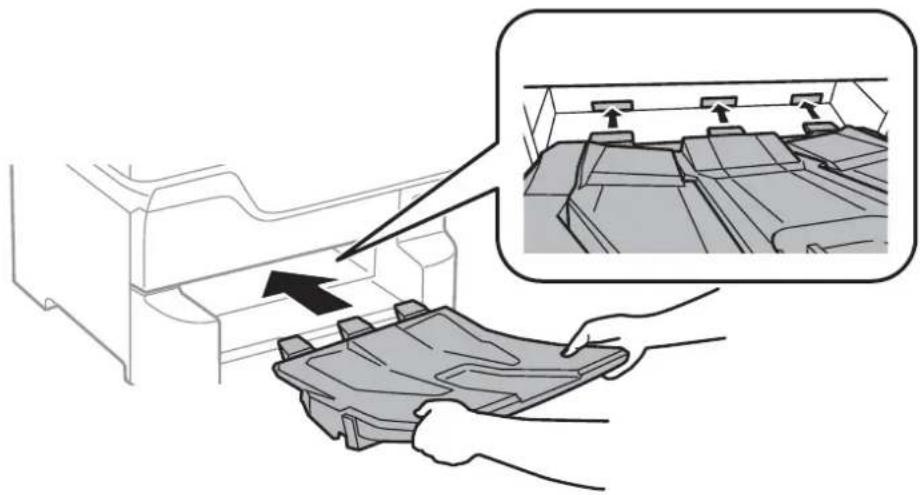
natural_image
Illustration of a hand placing a plastic tray into a machine component with an inset showing internal components (no text or symbols)- Connect the cables and plug in the printer.
Note:
When uninstalling the cabinet, turn off the printer, unplug the power cord, disconnect any cables, and then perform the installation procedure in reverse.
Related Information
→“Optional Cabinet Code” on page 252
Optional Paper Cassette Unit Code
The following is the code for the optional paper cassette unit.
Optional Cassette Unit (C12C932611)
Installing the Optional Paper Cassette Units
You can install up to 3 paper cassette units.
Appendix

Caution:
☐ Make sure you turn off the printer, unplug the power cord from the printer, and disconnect any cables before starting installation. Otherwise, the power cord may be damaged resulting in fire or electric shock.
☐ When lifting the printer, place your hands in the positions shown below. If you lift the printer holding other positions, the printer may fall or you may trap your fingers when placing the printer.
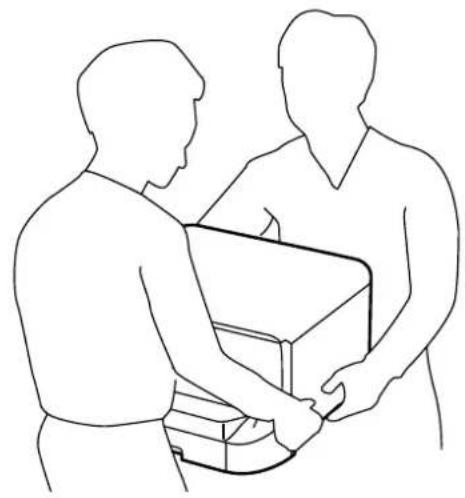
natural_image
Line drawing of two people exchanging a box together (no text or symbols)
Important:
If you are using the optional cabinet, install it under the bottom of the paper cassette unit in advance.
-
Turn off the printer by pressing the ⏻ button, and then unplug the power cord.
-
Disconnect any connected cables.
Note:
If other optional paper cassette units have been installed, uninstall them as well.
- Remove the output tray.
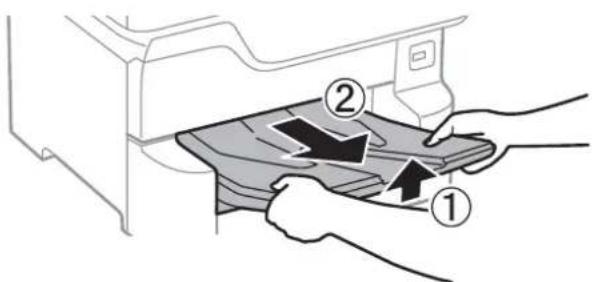
text_image
Diagram showing two hands inserting a device into a printer, labeled with arrows indicating process steps.- Remove the optional paper cassette unit from its box, and then remove any protective materials.
Appendix
- Check the items supplied.
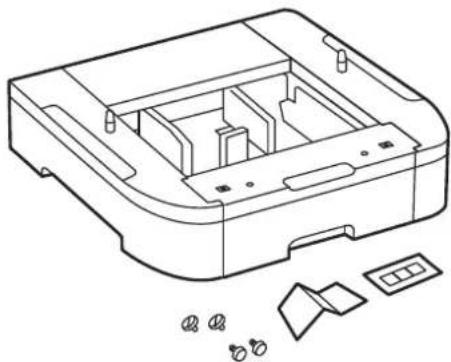
natural_image
Technical line drawing of a device casing with internal compartments and exploded view (no text or symbols)-
Place the optional paper cassette unit where you want to set up the printer.
-
Pull out the paper cassette.
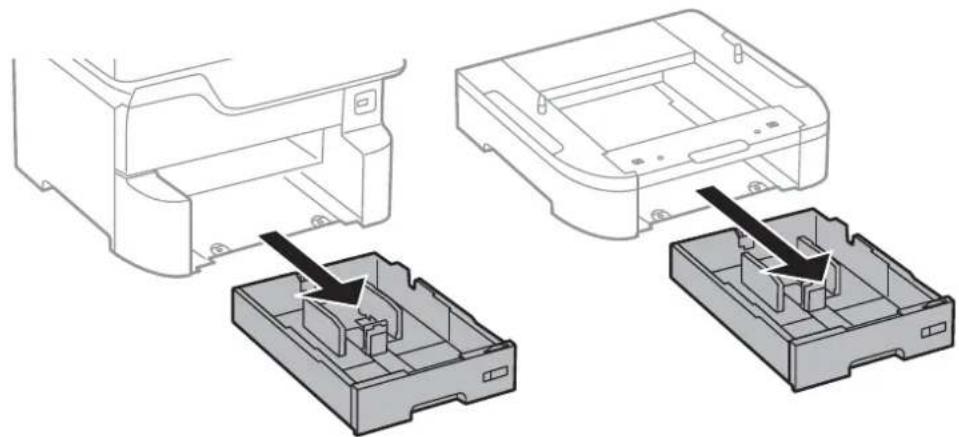
natural_image
Technical line drawing showing two views of a printer's internal structure, one with an arrow indicating assembly (no text or symbols present)- If you use multiple optional cassette units, stack all optional paper cassette units on top of each other, and then secure them with the screws.
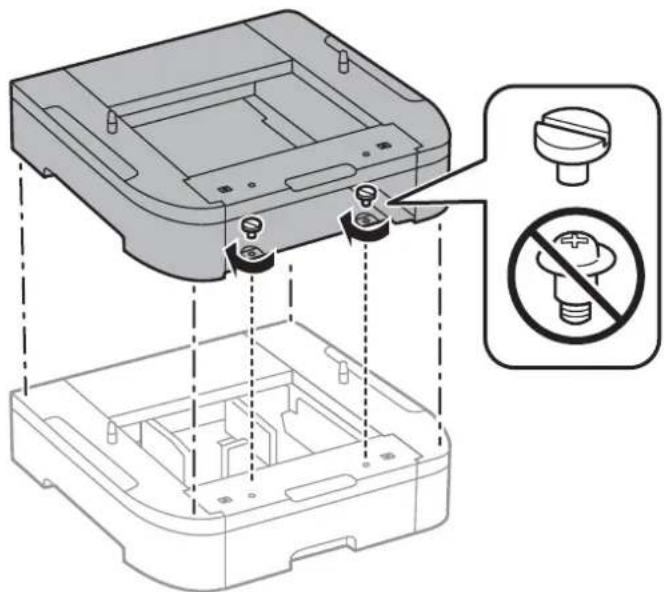
text_image
Technical diagram showing assembly of a device with labeled components and a prohibition symbol for disassembly.Appendix
- Lower the printer gently onto the optional paper cassette aligning the corners, and then secure them with the screws.
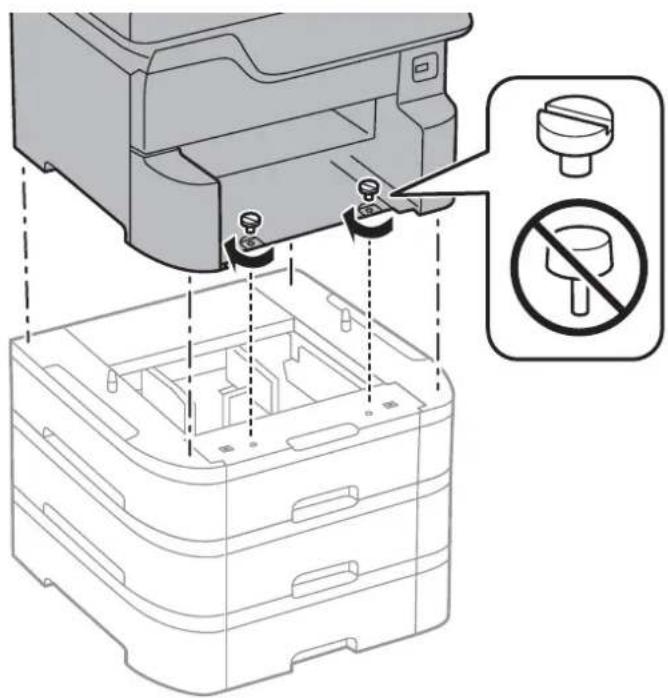
text_image
Diagram showing a device with labeled components and a prohibition symbol indicating no plastic bottle.Note:
Some screws will be left over after assembly.
- Secure the optional paper cassette unit and the printer at the back with the attachments and screws.
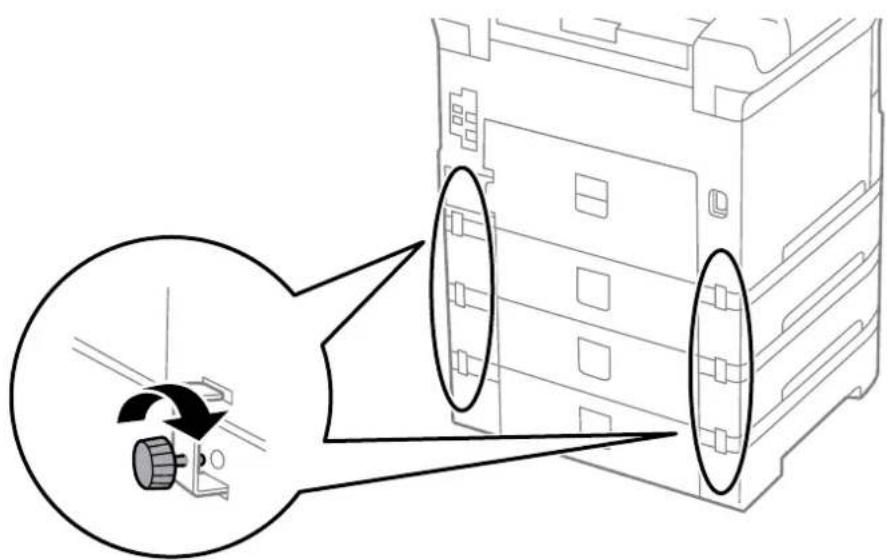
text_image
Diagram showing a device with a magnified view of its internal structure, highlighting a mechanical component and directional arrows.Appendix
- Insert a label showing the size of the paper to be loaded in the cassette into the holder.
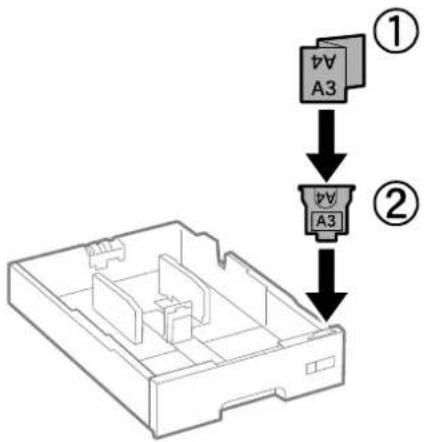
flowchart
graph TD
    A["①: vA A3"] --> B["②: vA A3"]
    style A fill:#f9f,stroke:#333
    style B fill:#ccf,stroke:#333
- Insert the paper cassette.
- Place the sticker indicating the cassette number.
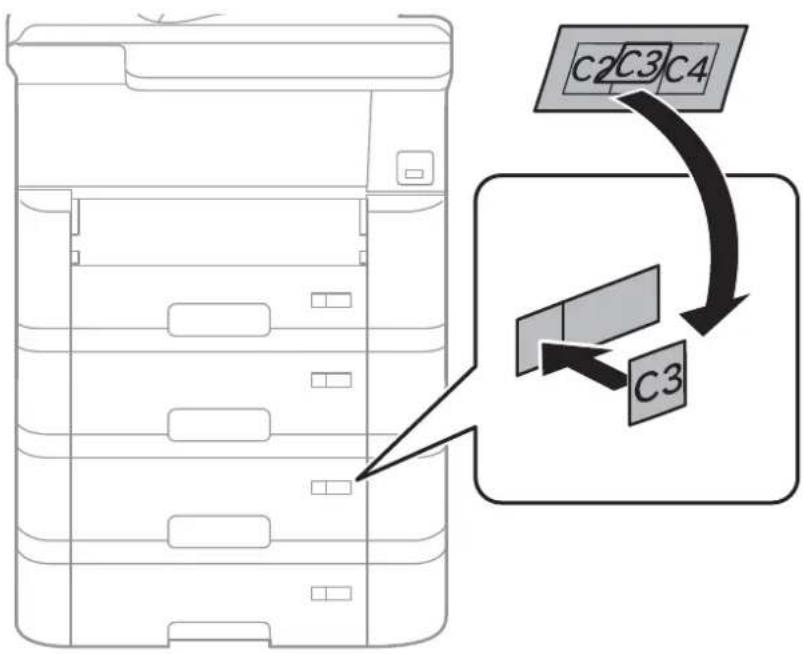
text_image
C2 C3 C4 C3Appendix
- Insert the output tray.
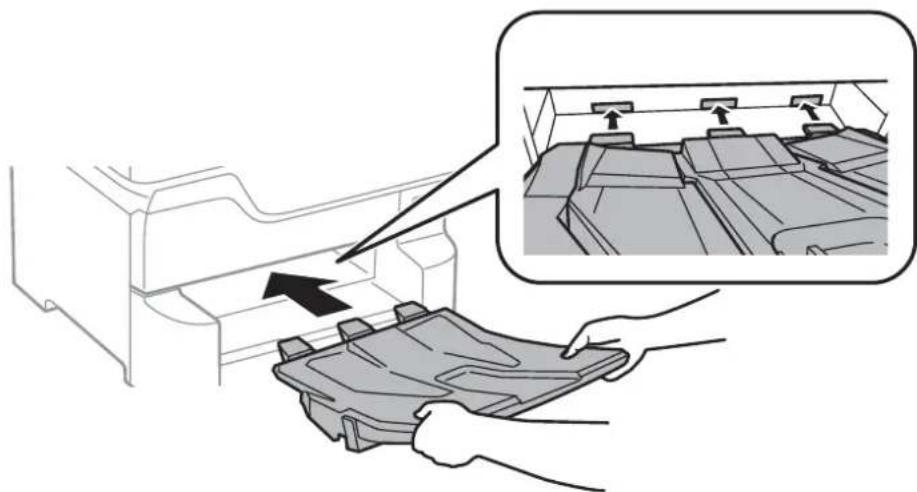
natural_image
Illustration of a hand holding a plastic tray with an arrow pointing to a component, alongside a magnified inset showing internal components (no text or symbols)-
Reconnect the power cord and any other cables, and then plug in the printer.
-
Turn on the printer by pressing the ⏻ button.
-
Press the button, and check that the optional cassette unit that you installed is displayed on the Paper Setting screen.
Note:
When uninstalling the optional paper cassette unit, turn off the printer, unplug the power cord, disconnect any cables, and then perform the installation procedure in reverse.
Proceed with the printer driver settings.
Related Information
→“Optional Paper Cassette Unit Code” on page 257
→“Installing the Optional Cabinet” on page 252
Setting the Optional Paper Cassette Unit in the Printer Driver
To use the installed optional paper cassette unit, the printer driver needs to acquire the necessary information.
Setting the Optional Paper Cassette Unit in the Printer Driver - Windows
Note:
Log on to your computer as an administrator.
- Open the Optional Settings tab from the printer properties.
□Windows 10/Windows Server 2016
Right-click on the start button, or press and hold it and then select Control Panel > View devices and printers in Hardware and Sound. Right-click on your printer, or press and hold it, select Printer properties, and then click the Optional Settings tab.
Appendix
☐Windows 8.1/Windows 8/Windows Server 2012 R2/Windows Server 2012
Select Desktop > Settings > Control Panel > View devices and printers in Hardware and Sound. Right-click on your printer, or press and hold it, select Printer properties, and then click the Optional Settings tab.
□Windows 7/Windows Server 2008 R2
Click the start button, and select Control Panel > View devices and printers in Hardware and Sound. Right-click on your printer, select Printer properties, and then click the Optional Settings tab.
□Windows Vista/Windows Server 2008
Click the start button, and then select Control Panel > Printers in Hardware and Sound. Right-click on your printer, select Property, and then click Optional Settings.
☐Windows XP/Windows Server 2003 R2/Windows Server 2003
Click the start button, and select Control Panel > Printers and Other Hardware > Printers and Faxes. Right-click on your printer, select Property, and then click the Optional Settings tab.
- Select Acquire from Printer, and then click Get.
Optional Paper Sources information is displayed in Current Printer Information.
- Click OK.
Setting the Optional Paper Cassette Unit in the Printer Driver - Mac OS
-
Select System Preferences from the menu > Printers & Scanners (or Print & Scan, Print & Fax), and then select the printer. Click Options & Supplies > Options (or Driver).
-
Set Lower Cassette according to the number of paper cassettes.
-
Click OK.
Regulatory Information
Standards and Approvals
Standards and Approvals for U.S. Model
| Safety UL60950-1 | CAN/CSA-C22.2 No.60950-1 |
| EMC FCC Part 15 Subpart B Class B | CAN/CSA-CEI/IEC CISPR 22 Class B |
This equipment contains the following wireless module.
Manufacturer: Seiko Epson Corporation
Type: J26H006
Appendix
This product conforms to Part 15 of the FCC Rules and RSS-210 of the IC Rules. Epson cannot accept responsibility for any failure to satisfy the protection requirements resulting from a non-recommended modification of the product. Operation is subject to the following two conditions: (1) this device may not cause harmful interference, and (2) this device must accept any interference received, including interference that may cause undesired operation of the device.
To prevent radio interference to the licensed service, this device is intended to be operated indoors and away from windows to provide maximum shielding. Equipment (or its transmit antenna) that is installed outdoors is subject to licensing.
This equipment complies with FCC/IC radiation exposure limits set forth for an uncontrolled environment and meets the FCC radio frequency (RF) Exposure Guidelines in Supplement C to OET65 and RSS-102 of the IC radio frequency (RF) Exposure rules. This equipment should be installed and operated so that the radiator is kept at least 7.9 inches (20 cm) or more away from a person's body (excluding extremities: hands, wrists, feet and ankles).
Standards and Approvals for European Model
For European users
Hereby, Seiko Epson Corporation declares that the following radio equipment model is in compliance with Directive 2014/53/EU. The full text of the EU declaration of conformity is available at the following website.
http://www.epson.eu/conformity
C523A
For use only in Ireland, UK, Austria, Germany, Liechtenstein, Switzerland, France, Belgium, Luxembourg, Netherlands, Italy, Portugal, Spain, Denmark, Finland, Norway, Sweden, Iceland, Croatia, Cyprus, Greece, Slovenia, Malta, Bulgaria, Czech, Estonia, Hungary, Latvia, Lithuania, Poland, Romania, and Slovakia.
Epson cannot accept responsibility for any failure to satisfy the protection requirements resulting from a non-recommended modification of the products.
CE
German Blue Angel
See the following website to check whether or not this printer meets the standards for the German Blue Angel. http://www.epson.de/blauerengel
Restrictions on Copying
Observe the following restrictions to ensure the responsible and legal use of the printer.
Copying of the following items is prohibited by law:
☐ Bank bills, coins, government-issued marketable securities, government bond securities, and municipal securities
☐ Unused postage stamps, pre-stamped postcards, and other official postal items bearing valid postage
□Government-issued revenue stamps, and securities issued according to legal procedure
Exercise caution when copying the following items:
Appendix
Private marketable securities (stock certificates, negotiable notes, checks, etc.), monthly passes, concession tickets, etc.
Passports, driver's licenses, warrants of fitness, road passes, food stamps, tickets, etc.
Note:
Copying these items may also be prohibited by law.
Responsible use of copyrighted materials:
Printers can be misused by improperly copying copyrighted materials. Unless acting on the advice of a knowledgeable attorney, be responsible and respectful by obtaining the permission of the copyright holder before copying published material.
Moving and Transporting the Printer

Caution:
☐ When carrying the printer, lift it using a stable position. Lifting the printer using an unstable position may result in injury.
Because this printer is heavy, it should always be carried by two or more people when unpacking and transporting.
☐ When lifting the printer, place your hands in the positions shown below. If you lift the printer holding other positions, the printer may fall or you may trap your fingers when placing the printer.
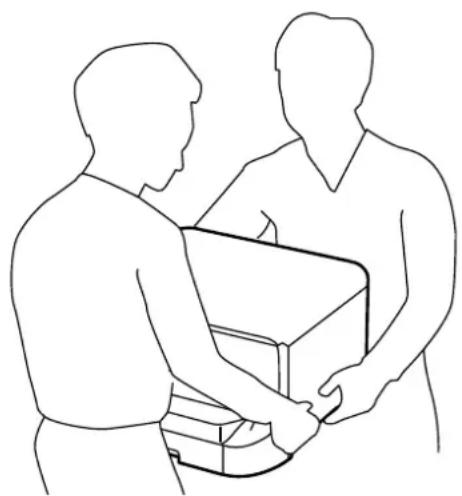
natural_image
Line drawing of two people exchanging a box together (no text or symbols)☐ When carrying the printer, do not tilt it more than 10 degrees; otherwise the printer may fall.
☐ When installing the printer on the optional cabinet, lock the casters before starting installation. If the cabinet moves unexpectedly, you may be injured.
Preparing to Move the Printer
- Turn off the printer by pressing the ⏻ button.
Appendix
- Make sure the power light turns off, and then unplug the power cord.

Important:
Unplug the power cord when the power light is off. Otherwise, the print head does not return to the home position causing the ink to dry, and printing may become impossible.
- Disconnect all cables such as the power cord and USB cable.
- If the printer supports external storage devices, make sure they are not connected.
- Remove the output tray.

Caution:
Do not place the removed output tray on the printer as it is unstable. If the output tray falls while the printer is being moved, you may be injured.
- Remove all of the paper from the printer.
- Make sure there are no originals on the printer.
- Store the paper support.
The printer is ready to be moved.
Related Information
→“Part Names and Functions” on page 15
Appendix
When Moving the Printer on the Cabinet's Casters
Before moving the printer, uninstall the cabinet's stands. Complete the steps in Preparing to Move the Printer, and then perform the steps in the following images.
①
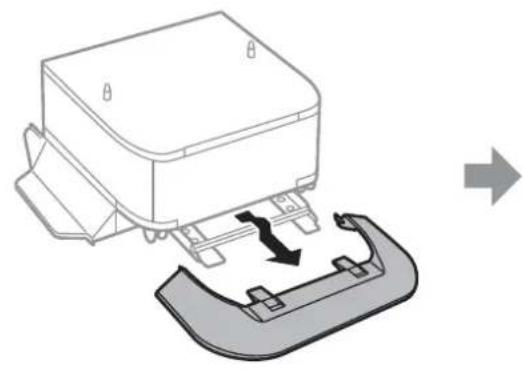
natural_image
Diagram of a printer or printer with a base cover and arrow indicating process (no text or symbols present)②
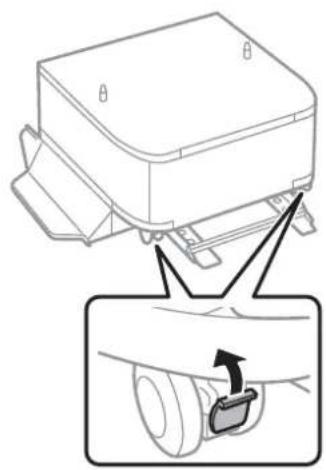
natural_image
Diagram of a mechanical device with a close-up inset showing a hand holding a small component (no text or symbols present)③
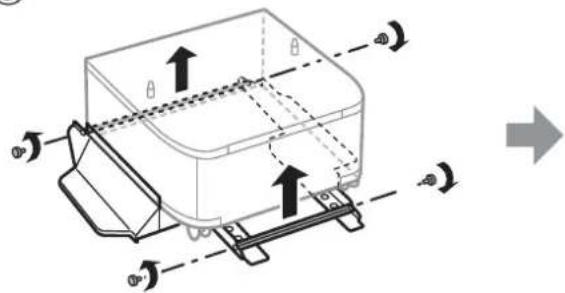
text_image
Technical diagram showing a 3D mechanical assembly with labeled angles θ and directional arrows indicating motion or force.④
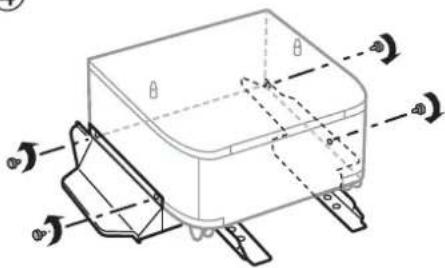
text_image
Technical diagram of a mechanical housing with labeled components and directional arrows indicating motion or force vectors.⑤
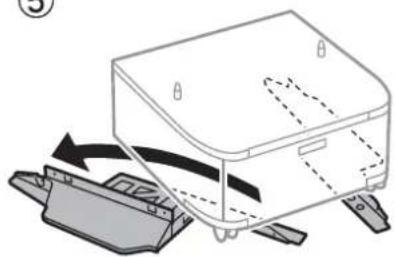
natural_image
Diagram of a device with a lid and arrow indicating rotation or movement (no text or symbols)Related Information
→“Preparing to Move the Printer” on page 265
Appendix
When Moving the Printer with Optional Paper Cassette Units Attached
Complete the steps in Preparing to Move the Printer, and then pull out paper cassettes 1 to 4. Next, perform the steps in the following images.
①
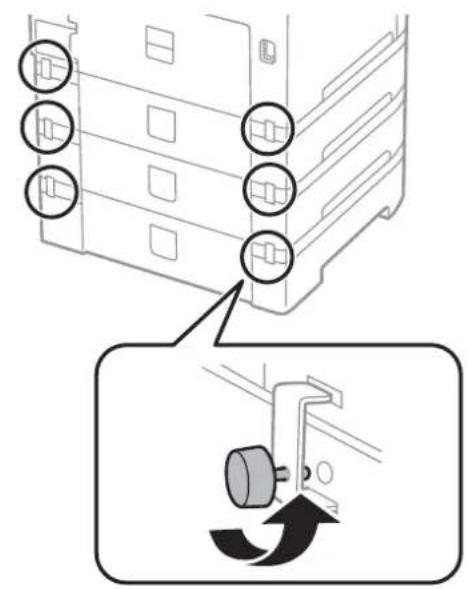
text_image
Diagram showing a mechanical assembly with three circular components and an arrow indicating rotational motion or adjustment.②
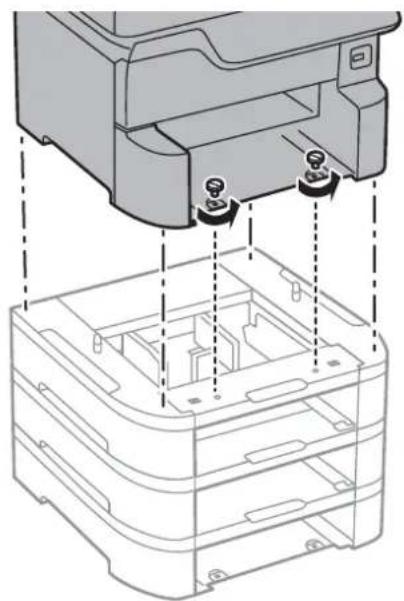
natural_image
Technical line drawing of a mechanical assembly with internal components and mounting points (no text or symbols)Related Information
→“Preparing to Move the Printer” on page 265
Transporting the Printer
When you need to transport the printer to move or for repairs, follow the steps below to pack the printer.

Important:
☐ When storing or transporting the printer, avoid tilting it, placing it vertically, or turning it upside down; otherwise ink may leak.
Leave the ink cartridges installed. Removing the cartridges can dry out the print head and may prevent the printer from printing.
Leave the maintenance box installed; otherwise ink may leak during transporting.
- Follow the steps in Preparing to Move the Printer.
- Uninstall the optional cabinet and the paper cassette units if they are installed.
Note:
When unstalling the optional cabinet and the paper cassette units, perform the installation procedure in reverse.
- Pack the printer in its box, using the protective materials.
If print quality has declined the next time you print, clean and align the print head.
Appendix
Related Information
→“Preparing to Move the Printer” on page 265
→“Installing the Optional Cabinet” on page 252
→“Installing the Optional Paper Cassette Units” on page 257
→“Checking and Cleaning the Print Head” on page 180
→“Aligning Ruled Lines” on page 181
Copyright
No part of this publication may be reproduced, stored in a retrieval system, or transmitted in any form or by any means, electronic, mechanical, photocopying, recording, or otherwise, without the prior written permission of Seiko Epson Corporation. No patent liability is assumed with respect to the use of the information contained herein. Neither is any liability assumed for damages resulting from the use of the information herein. The information contained herein is designed only for use with this Epson product. Epson is not responsible for any use of this information as applied to other products.
Neither Seiko Epson Corporation nor its affiliates shall be liable to the purchaser of this product or third parties for damages, losses, costs, or expenses incurred by the purchaser or third parties as a result of accident, misuse, or abuse of this product or unauthorized modifications, repairs, or alterations to this product, or (excluding the U.S.) failure to strictly comply with Seiko Epson Corporation's operating and maintenance instructions.
Seiko Epson Corporation and its affiliates shall not be liable for any damages or problems arising from the use of any options or any consumable products other than those designated as Original Epson Products or Epson Approved Products by Seiko Epson Corporation.
Seiko Epson Corporation shall not be held liable for any damage resulting from electromagnetic interference that occurs from the use of any interface cables other than those designated as Epson Approved Products by Seiko Epson Corporation.
© 2018 Seiko Epson Corporation
The contents of this manual and the specifications of this product are subject to change without notice.
Trademarks
☐EPSON ^® is a registered trademark, and EPSON EXCEED YOUR VISION or EXCEED YOUR VISION is a trademark of Seiko Epson Corporation.
□ PRINT Image Matching™ and the PRINT Image Matching logo are trademarks of Seiko Epson Corporation. Copyright © 2001 Seiko Epson Corporation. All rights reserved.
☐Epson Scan 2 software is based in part on the work of the Independent JPEG Group.
Appendix
libtiff
Copyright © 1988-1997 Sam Leffler
Copyright © 1991-1997 Silicon Graphics, Inc.
Permission to use, copy, modify, distribute, and sell this software and its documentation for any purpose is hereby granted without fee, provided that (i) the above copyright notices and this permission notice appear in all copies of the software and related documentation, and (ii) the names of Sam Leffler and Silicon Graphics may not be used in any advertising or publicity relating to the software without the specific, prior written permission of Sam Leffler and Silicon Graphics.
THE SOFTWARE IS PROVIDED "AS-IS" AND WITHOUT WARRANTY OF ANY KIND, EXPRESS, IMPLIED OR OTHERWISE, INCLUDING WITHOUT LIMITATION, ANY WARRANTY OF MERCHANTABILITY OR FITNESS FOR A PARTICULAR PURPOSE.
IN NO EVENT SHALL SAM LEFFLER OR SILICON GRAPHICS BE LIABLE FOR ANY SPECIAL, INCIDENTAL, INDIRECT OR CONSEQUENTIAL DAMAGES OF ANY KIND, OR ANY DAMAGES WHATSOEVER RESULTING FROM LOSS OF USE, DATA OR PROFITS, WHETHER OR NOT ADVISED OF THE POSSIBILITY OF DAMAGE, AND ON ANY THEORY OF LIABILITY, ARISING OUT OF OR IN CONNECTION WITH THE USE OR PERFORMANCE OF THIS SOFTWARE.
□Microsoft ^® , Windows ^® , and Windows Vista ^® are registered trademarks of Microsoft Corporation.
☐ Apple, Macintosh, macOS, OS X, Bonjour, ColorSync, Safari, AirPrint, the AirPrint Logo, iPad, iPhone, iPod touch, and iTunes are trademarks of Apple Inc., registered in the U.S. and other countries.
☐Google Cloud Print, Chrome, Chrome OS, and Android are trademarks of Google Inc.
☐ Albertus, Arial, Coronet, Gill Sans, Joanna and Times New Roman are trademarks of The Monotype Corporation registered in the United States Patent and TrademarkOffice and may be registered in certain jurisdictions.
☐ ITC Avant Garde Gothic, ITC Bookman, Lubalin Graph, Mona Lisa, ITC Symbol, Zapf Chancery and Zapf Dingbats are trademarks of International Typeface Corporation registered in the U.S. Patent and Trademark Office and may be registered in certain other jurisdictions.
☐ Clarendon, Eurostile and New Century Schoolbook are trademarks of Linotype GmbH registered in the U.S. Patent and Trademark Office and may be registered in certain other jurisdictions.
□ Wingdings is a registered trademark of Microsoft Corporation in the United States and other countries.
☐ CG Omega, CG Times, Garamond Antiqua, Garamond Halbfett, Garamond Kursiv, Garamond Halbfett Kursiv are trademarks of Monotype Imaging, Inc. and may be registered in certain jurisdictions.
Antique Olive is a trademark of M. Olive.
☐Marigold and Oxford are trademarks of AlphaOmega Typography.
☐ Helvetica, Optima, Palatino, Times and Univers are trademarks of Linotype Corp. registered in the U.S. Patent and Trademark Office and may be registered in certain other jurisdictions in the name of Linotype Corp. or its licensee Linotype GmbH.
☐PCL is the registered trademark of Hewlett-Packard Company.
□Adobe, the Adobe logo, Acrobat, Photoshop, PostScript ^® 3 ^™ , and Reader are either registered trademarks or trademarks of Adobe Systems Incorporated in the United States and/or other countries.
Appendix
Arcfour
This code illustrates a sample implementation of the Arcfour algorithm.
Copyright © April 29, 1997 Kalle Kaukonen. All Rights Reserved.
Redistribution and use in source and binary forms, with or without modification, are permitted provided that this copyright notice and disclaimer are retained.
THIS SOFTWARE IS PROVIDED BY KALLE KAUKONEN AND CONTRIBUTORS "AS IS" AND ANY EXPRESS OR IMPLIED WARRANTIES, INCLUDING, BUT NOT LIMITED TO, THE IMPLIED WARRANTIES OF MERCHANTABILITY AND FITNESS FOR A PARTICULAR PURPOSE ARE DISCLAIMED. IN NO EVENT SHALL KALLE KAUKONEN OR CONTRIBUTORS BE LIABLE FOR ANY DIRECT, INDIRECT, INCIDENTAL, SPECIAL, EXEMPLARY, OR CONSEQUENTIAL DAMAGES (INCLUDING, BUT NOT LIMITED TO, PROCUREMENT OF SUBSTITUTE GOODS OR SERVICES; LOSS OF USE, DATA, OR PROFITS; OR BUSINESS INTERRUPTION) HOWEVER CAUSED AND ON ANY THEORY OF LIABILITY, WHETHER IN CONTRACT, STRICT LIABILITY, OR TORT (INCLUDING NEGLIGENCE OR OTHERWISE) ARISING IN ANY WAY OUT OF THE USE OF THIS SOFTWARE, EVEN IF ADVISED OF THE POSSIBILITY OF SUCH DAMAGE.
□microSDHC Logo is a trademark of SD-3C, LLC.
Note: microSDHC is built into the product and cannot be removed.

Intel ^® is a registered trademark of Intel Corporation.
☐ The N-Mark is a trademark or registered trademark of NFC Forum, Inc. in the United States and in other countries.
☐ The SuperSpeed USB Trident Logo is a registered trademark of USB Implementers Forum, Inc.
☐ QR Code is a registered trademark of DENSO WAVE INCORPORATED in Japan and other countries.
☐ General Notice: Other product names used herein are for identification purposes only and may be trademarks of their respective owners. Epson disclaims any and all rights in those marks.
Where to Get Help
Technical Support Web Site
If you need further help, visit the Epson support website shown below. Select your country or region and go to the support section of your local Epson website. The latest drivers, FAQs, manuals, or other downloadables are also available from the site.
http://support.epson.net/
http://www.epson.eu/Support (Europe)
If your Epson product is not operating properly and you cannot solve the problem, contact Epson support services for assistance.
Appendix
Contacting Epson Support
Before Contacting Epson
If your Epson product is not operating properly and you cannot solve the problem using the troubleshooting information in your product manuals, contact Epson support services for assistance. If Epson support for your area is not listed below, contact the dealer where you purchased your product.
Epson support will be able to help you much more quickly if you give them the following information:
□Product serial number
(The serial number label is usually on the back of the product.)
□Product model
□Product software version
(Click About, Version Info, or a similar button in the product software.)
☐Brand and model of your computer
☐Your computer operating system name and version
□ Names and versions of the software applications you normally use with your product
Note:
Depending on the product, the dial list data for fax and/or network settings may be stored in the product's memory. Due to breakdown or repair of a product, data and/or settings may be lost. Epson shall not be responsible for the loss of any data, for backing up or recovering data and/or settings even during a warranty period. We recommend that you make your own backup data or take notes.
Help for Users in Europe
Check your Pan-European Warranty Document for information on how to contact Epson support.
Help for Users in Taiwan
Contacts for information, support, and services are:
World Wide Web
http://www.epson.com.tw
Information on product specifications, drivers for download, and products enquiry are available.
Epson HelpDesk
Phone: +886-2-80242008
Our HelpDesk team can help you with the following over the phone:
□Sales enquiries and product information
☐Product usage questions or problems
□Enquiries on repair service and warranty
User's Guide
Appendix
Repair service center:
http://www.tekcare.com.tw/branchMap.page
TekCare corporation is an authorized service center for Epson Taiwan Technology & Trading Ltd.