
BS8060-3V - Barcode Reader Newland - Free user manual and instructions
Find the device manual for free BS8060-3V Newland in PDF.


User questions about BS8060-3V Newland
0 question about this device. Answer the ones you know or ask your own.
Ask a new question about this device
Download the instructions for your Barcode Reader in PDF format for free! Find your manual BS8060-3V - Newland and take your electronic device back in hand. On this page are published all the documents necessary for the use of your device. BS8060-3V by Newland.
USER MANUAL BS8060-3V Newland
text_image
SCAN Delete NewlandDisclaimer
© 2016-2019 Fujian Newland Auto-ID Tech. Co., Ltd. All rights reserved.
Please read through the manual carefully before using the product and operate it according to the manual. It is advised that you should keep this manual for future reference.
Do not disassemble the device or remove the seal label from the device, doing so will void the product warranty provided by Fujian Newland Auto-ID Tech. Co., Ltd.
All pictures in this manual are for reference only and actual product may differ. Regarding to the product modification and update, Fujian Newland Auto-ID Tech. Co., Ltd. Reserves the right to make changes to any software or hardware to improve reliability, function, or design at any time without notice. The information contained herein is subject to change without prior notice.
The products depicted in this manual may include software copyrighted by Fujian Newland Auto-ID Tech. Co., Ltd or third party. The user, corporation or individual, shall not duplicate, in whole or in part, distribute, modify, decompile, disassemble, decode, reverse engineer, rent, transfer or sublicense such software without prior written consent from the copyright holders.
This manual is copyrighted. No part of this publication may be reproduced, distributed or used in any form without written permission from Newland.
Fujian Newland Auto-ID Tech. Co., Ltd. Reserves the right to make final interpretation of the statement above.
Fujian Newland Auto-ID Tech. Co., Ltd.
3F, Building A, No.1, Rujiang West Rd., Mawei, Fuzhou, Fujian, China 350015
http://www.newlandaidc.com
Revision History
| Version | Description | Date |
| V1.0 | Initial release. | March 18, 2015 |
| V1.1 | Added the content concerning the 2D version. | May 19, 2015 |
| V1.2 | 1. Added the Enable/Disable USB HID-KBW feature in Chapter 2.2. Added barcode parameters in Chapter 3. | September 16, 2015 |
| V1.3 | Added the USB country keyboard types in Chapter 2.Note: Firmware version V1.00.006 or later is required for the new feature above. | October 13, 2015 |
| V1.4 | 1. Added Chapter 4 Prefix & Suffix.2. Added the “Code ID Table (1D Scanner)” and “Code ID Table (2D Scanner)” sections in Appendix.Note: Firmware version V1.00.011 or later is required for the new feature above. | January 21, 2016 |
| V1.4.1 | Updated the programming barcodes in the “Digit Barcodes (1D Scanner)” and “Save/Cancel Barcodes (1D Scanner)” sections in Appendix. | May 5, 2016 |
| V2.0.0 | User Guide V2.0.0 or higher is written for the NLS-BS8060 only. | September 26, 2016 |
| V2.0.1 | 1. Modified the description of the Product Serial Number and Time Stamp features in Chapter 2.2. Added the EAN-13 Beginning with 290 Add-On Code Required, EAN-13 Beginning with 378/379 Add-On Code Required, EAN-13 Beginning with 414/419 Add-On Code Required, EAN-13 Beginning with 434/439 Add-On Code Required, EAN-13 Beginning with 977 Add-On Code Required, EAN-13 Beginning with 978 Add-On Code Required, EAN-13 Beginning with 979 Add-On Code Required, Code 32 (Italian Pharma Code), Code 32 Prefix, Transmit Code 32 Check Character and Transmit Code 32 Start/Stop Character features for 1D & 2D scanners in Chapter 3.3. Changed the default settings of the following parameter to:Time Stamp DisabledNote: Firmware version V3.00.002 or later is required for the new features above. | November 28, 2016 |
| V2.0.2 | 1. Added the 0ms option for the Inter-Character Delay for Bluetooth HID feature in Chapter 2.2. Modified the firmware upgrade procedure in Chapter 2.Note: Firmware version V3.00.004 or later is required for the new feature above. | February 14, 2017 |
| V2.1.0 | 1. Added the Bluetooth Device Name, Barcode Separator, Packet Mode, ACK/NAK Retry Count and ACK/NAK Timeout features, and modified the Inter-Keystroke Delay for KBW options in Chapter 2.2. Added Chapter 6 Data Formatter.3. Modified the “Factory Defaults Table”, and added the “Digit Barcodes”, “Save/Cancel Barcodes” and “Symbology ID Number” sections in Appendix.4. Modified the “Parameters of USB HID-KBW/ Bluetooth HID” section in Chapter 2.Note: Firmware version BS80+_V3.00.005 or later is required for the new features above. For the Data Formatter feature, scan engine firmware version EM1300_BS80_V1.00.000/ EM3396_BS80_V1.00.001 or later is also required. | October 11, 2017 |
| V2.1.1 | Added the Response for Invalid Host Data feature in Chapter 2.Note: Firmware version BS80+_V3.00.012 or later is required for the new feature above. | January 4, 2019 |
Table of Contents
Revision History .... - 3 -
Preface....1
Introduction....1
Chapter Descriptions....1
Safety Instructions....2
Chapter 1 Getting Started....3
Introduction....3
Unpacking 3
BS80 Scanner 4
Button Functions 5
Charging the Battery 6
Connecting the BS80 to Smartphone/Tablet 7
LED Notifications....9
Turning the BS80 On/Off....10
Scanning Instructions....11
Scanning 1D Barcode....11
Scanning 2D Barcode....11
Chapter 2 System Settings....12
Introduction....12
Restore Factory Defaults 12
Operating Modes....12
Bluetooth Mode....13
USB Mode....15
Query Product Information....17
Query/Delete Stored Data in Flash....17
Sound Notifications 18
Vibration Notifications 19
Delete Bluetooth Pairing 19
Automatic/Manual Power-Off 20
Bluetooth Device Name 21
Response for Invalid Host Data 22
Barcode Separator 22
Packet Mode 23
NAK/ACK Retry Count....24
NAK/ACK Timeout 24
Product Serial Number....25
Time Stamp 25
Set Date Format....25
Set Date & Time....26
Parameters of USB HID-KBW/ Bluetooth HID....27
Keyboard Types 27
Character Encoding 30
Convert Case 30
Emulate ALT+Keypad 31
Emulate Numeric Keypad....32
Code Page 33
Inter-Character Delay for Bluetooth HID 34
Inter-Keystroke Delay for USB HID-KBW 35
Upgrading BS80 Firmware....37
Upgrading System Firmware 37
Upgrading Scan Engine Firmware....40
Chapter 3 Symbologies ....42
Introduction....42
1D Scanner 42
Enable/Disable All Symbologies 42
Code 128 43
Restore Factory Defaults....43
Enable/Disable Code 128....43
Set Length Range for Code 128....44
UCC/EAN-128....45
Restore Factory Defaults....45
Enable/Disable UCC/EAN-128....45
Set Length Range for UCC/EAN-128....46
AIM 128....47
Restore Factory Defaults....47
Enable/Disable AIM 128 47
Set Length Range for AIM 128....48
EAN-8....49
Restore Factory Defaults....49
Enable/Disable EAN-8....49
2-Digit Add-On Code 50
5-Digit Add-On Code 51
EAN-8 Extension 52
Transmit Check Character....52
EAN-13....53
Restore Factory Defaults....53
Enable/Disable EAN-13....53
Transmit Check Character....53
2-Digit Add-On Code 54
5-Digit Add-On Code 55
EAN-13 Beginning with 290 Add-On Code Required 56
EAN-13 Beginning with 378/379 Add-On Code Required 56
EAN-13 Beginning with 414/419 Add-On Code Required ....57
EAN-13 Beginning with 434/439 Add-On Code Required ....57
EAN-13 Beginning with 977 Add-On Code Required 58
EAN-13 Beginning with 978 Add-On Code Required 58
EAN-13 Beginning with 979 Add-On Code Required 59
ISSN....60
Restore Factory Defaults....60
Enable/Disable ISSN....60
ISBN 61
Restore Factory Defaults....61
Transmit Check Character....62
2-Digit Add-On Code 63
5-Digit Add-On Code 64
Transmit Preamble Character 65
UPC-E Extension....65
UPC-A....66
Restore Factory Defaults....66
Enable/Disable UPC-A 66
Transmit Check Character....66
Transmit Preamble Character 67
2-Digit Add-On Code 68
5-Digit Add-On Code 69
Interleaved 2 of 5....70
Restore Factory Defaults....70
Enable/Disable Interleaved 2 of 5....70
Check Character Verification....70
Set Length Range for Interleaved 2 of 5....71
ITF-6....72
ITF-14....73
Deutsche 14....74
Restore Factory Defaults....74
Enable/Disable Deutsche 14....74
Deutsche 12....75
Restore Factory Defaults....75
Enable/Disable Deutsche 12....75
COOP 25 (Japanese Matrix 2 of 5) 76
Restore Factory Defaults....76
Enable/Disable COOP 25....76
Check Character Verification....76
Set Length Range for COOP 25....77
Matrix 2 of 5 (European Matrix 2 of 5)....78
Restore Factory Defaults....78
Enable/Disable Matrix 2 of 5 ....78
Check Character Verification....78
Set Length Range for Matrix 2 of 5....79
Industrial 25 80
Restore Factory Defaults....80
Enable/Disable Industrial 25....80
Check Character Verification....80
Set Length Range for Industrial 25 81
Standard 25 82
Restore Factory Defaults....82
Enable/Disable Standard 25....82
Check Character Verification....82
Set Length Range for Standard 25 83
Code 39....84
Restore Factory Defaults....84
Enable/Disable Code 39....84
Check Character Verification....84
Transmit Start/Stop Character 85
Enable/Disable Code 39 Full ASCII 85
Set Length Range for Code 39....86
Enable/Disable Code 32....87
Code 32 Prefix....87
Transmit Code 32 Check Character....88
Transmit Code 32 Start/Stop Character....88
Codabar 89
Restore Factory Defaults....89
Enable/Disable Codabar 89
Check Character Verification....89
Transmit Start/Stop Character....90
Set Length Range for Codabar 91
Code 93....92
Restore Factory Defaults....92
Enable/Disable Code 93....92
Check Character Verification....92
Set Length Range for Code 93....93
Code 11....94
Restore Factory Defaults....94
Enable/Disable Code 11 94
Check Character Verification....95
Set Length Range for Code 11....96
Plessey....97
Restore Factory Defaults....97
Enable/Disable Plessey....97
Check Character Verification....97
Set Length Range for Plessey....98
MSI-Plessey 99
Restore Factory Defaults....99
Enable/Disable MSI-Plessey 99
Check Character Verification....100
Set Length Range for MSI-Plessey....101
GS1 Databar....102
Restore Factory Defaults....102
Enable/Disable GS1 Databar 102
2D Scanner 103
Global Settings....103
Enable/Disable All Symbologies....103
Enable/Disable 1D Symbologies....103
Enable/Disable 2D Symbologies....103
Video Reverse 104
Code 128 105
Restore Factory Defaults....105
Enable/Disable Code 128....105
Set Length Range for Code 128....106
GS1-128 (UCC/EAN-128)....107
Restore Factory Defaults....107
Enable/Disable GS1-128....107
Set Length Range for GS1-128....108
AIM-128....109
Restore Factory Defaults....109
Enable/Disable AIM-128....109
Set Length Range for AIM-128.... 110
EAN-8....111
Restore Factory Defaults....111
Enable/Disable EAN-8....111
Transmit Check Character....111
Add-On Code....112
Add-On Code Required.... 113
EAN-8 Extension 113
EAN-13.... 114
Restore Factory Defaults.... 114
Enable/Disable EAN-13.... 114
Transmit Check Character.... 114
Add-On Code....115
Add-On Code Required.... 115
EAN-13 Beginning with 290 Add-On Code Required (For BS8060-2T).... 116
EAN-13 Beginning with 378/379 Add-On Code Required (For BS8060-2T)....116
EAN-13 Beginning with 414/419 Add-On Code Required (For BS8060-2T)....117
EAN-13 Beginning with 434/439 Add-On Code Required (For BS8060-2T)....117
EAN-13 Beginning with 977 Add-On Code Required (For BS8060-2T).... 118
EAN-13 Beginning with 978 Add-On Code Required (For BS8060-2T).... 118
EAN-13 Beginning with 979 Add-On Code Required (For BS8060-2T).... 119
ISSN....120
Restore Factory Defaults....120
Enable/Disable ISSN 120
Add-On Code....121
Add-On Code Required....121
ISBN 122
Restore Factory Default....122
Transmit Check Character....124
Add-On Code....125
Add-On Code Required....125
Transmit System Character "0" 126
UPC-E Extension....126
UPC-A....127
Restore Factory Defaults....127
Enable/Disable UPC-A 127
Transmit Check Character....127
Add-On Code....128
Add-On Code Required....128
Transmit Preamble Character 129
Interleaved 2 of 5....130
Restore Factory Defaults....130
Enable/Disable Interleaved 2 of 5 130
Set Length Range for Interleaved 2 of 5 ....131
Check Character Verification....132
ITF-14....133
ITF-6....134
Matrix 2 of 5 .... 135
Restore Factory Defaults....135
Enable/Disable Matrix 2 of 5 135
Set Length Range for Matrix 2 of 5 .... 136
Check Character Verification....137
Industrial 2 of 5 138
Restore Factory Defaults....138
Enable/Disable Industrial 2 of 5....138
Set Length Range for Industrial 2 of 5 .... 139
Check Character Verification....140
Standard 25 (IATA 2 of 5)....141
Restore Factory Defaults....141
Enable/Disable Standard 25....141
Set Length Range for Standard 25 142
Check Character Verification....143
Code 39....144
Restore Factory Defaults....144
Enable/Disable Code 39....144
Transmit Start/Stop Character....144
Set Length Range for Code 39....145
Check Character Verification.... 146
Enable/Disable Code 39 Full ASCII 146
Enable/Disable Code 32 (For BS8060-2T) 146
Code 32 Prefix (For BS8060-2T)....147
Transmit Code 32 Check Character (For BS8060-2T) 147
Transmit Code 32 Start/Stop Character (For BS8060-2T)....147
Codabar 148
Restore Factory Defaults....148
Enable/Disable Codabar 148
Set Length Range for Codabar 149
Check Character Verification....150
Transmit Start/Stop Character....150
Start/Stop Character Format 151
Code 93....152
Restore Factory Defaults....152
Enable/Disable Code 93....152
Set Length Range for Code 93....153
Check Character Verification....154
GS1-Databar (RSS) 155
Restore Factory Defaults....155
Enable/Disable GS1 Databar 155
Transmit Application Identifier "01" 155
Code 11....156
Restore Factory Defaults....156
Enable/Disable Code 11....156
Set Length Range for Code 11....157
Transmit Check Character.... 158
Check Character Verification....158
Plessey....159
Restore Factory Defaults....159
Enable/Disable Plessey....159
Set Length Range for Plessey....160
Check Character Verification....161
MSI-Plessey....162
Restore Factory Defaults....162
Enable/Disable MSI-Plessey 162
Set Length Range for MSI-Plessey....163
Transmit Check Character....164
Check Character Verification....164
PDF 417....165
Restore Factory Defaults....165
Enable/Disable PDF 417....165
Set Length Range for PDF 417....166
PDF 417 Twin Code .... 167
QR Code 168
Restore Factory Defaults....168
Enable/Disable QR Code 168
Micro QR....168
Set Length Range for QR Code 169
QR Twin Code 170
Data Matrix....171
Restore Factory Defaults....171
Enable/Disable Data Matrix....171
Set Length Range for Data Matrix....172
Rectangular Barcode....173
Mirror Image 173
Data Matrix Twin Code 174
Chinese Sensible Code 175
Restore Factory Defaults....175
Enable/Disable Chinese Sensible Code 175
Set Length Range for Chinese Sensible Code 176
Chapter 4 Prefix & Suffix ....177
1D Scanner 177
Prefix Sequence....177
Custom Prefix 178
Enable/Disable Custom Prefix....178
Set Custom Prefix....178
AIM ID Prefix....179
Code ID Prefix....180
Restore All Default Code IDs....180
Modify Code ID....180
Custom Suffix....184
Enable/Disable Custom Suffix....184
Set Custom Suffix....184
Terminating Character Suffix 185
Enable/Disable Terminating Character Suffix....185
Set Terminating Character Suffix....185
2D Scanner 186
Prefix Sequences....186
Custom Prefix 187
Enable/Disable Custom Prefix....187
Set Custom Prefix....187
AIM ID Prefix....188
Code ID Prefix....189
Restore All Default Code IDs....189
Modify Code ID 189
Custom Suffix....193
Enable/Disable Custom Suffix....193
Set Custom Suffix....193
Terminating Character Suffix 194
Enable/Disable Terminating Character Suffix....194
Set Terminating Character Suffix....195
Chapter 5 Scanning Preferences (For 2D Scanner Only)....196
Introduction....196
Decode Area 196
Whole Area Decoding....196
Specific Area Decoding....196
Specify Decoding Area....197
Chapter 6 Data Formatter....199
Introduction....199
Add a Data Format....199
Programming with Barcodes....200
Programming with Serial Commands....202
Enable/Disable Data Formatter....203
Non-Match Error Beep....204
Enable Data Format....204
Change Data Format for a Single Scan....205
Clear Data Format....205
Query Data Formats....206
Formatter Command Type 6....207
Send Commands 207
Move Commands....210
Search Commands 212
Miscellaneous Commands....215
Appendix 219
Factory Defaults Table 219
Digit Barcodes (1D Scanner)....231
Digit Barcodes (2D Scanner) 233
Digit Barcodes....235
Save/Cancel Barcodes (1D Scanner)....237
Save/Cancel Barcodes (2D Scanner)....238
Save/Cancel Barcodes 239
AIM ID Table (1D Scanner) 240
AIM ID Table (2D Scanner) 241
Code ID Table (1D Scanner)....243
Code ID Table (2D Scanner)....244
ASCII Table 245
ASCII Function Key Mapping Table 249
Symbology ID Number 251
Preface
Introduction
This manual provides detailed instructions for setting up and using the NLS-BS80 barcode scanner (hereinafter referred to as “the BS80” or “the scanner”).
Chapter Descriptions
✨ Chapter 1, Getting Started
: This chapter provides information on getting the scanner up and running for the first time.
✨ Chapter 2, System Settings
: This chapter describes the barcode programming procedure and shows you how to configure system parameters.
✨ Chapter 3, Symbologies
: This chapter lists all compatible symbologies and describes how to configure the relevant parameters.
✨ Chapter 4, Prefix & Suffix
: This chapter describes how to use prefix and suffix to customize scanned data.
✨ Chapter 5, Scanning Preferences
: This chapter describes how to adapt your scanner to various applications with preference setting.
✨ Chapter 6, Data Formatter
: This chapter explains how to customize scanned data with the data formatter.
Appendix
: This chapter offers factory defaults table and a bunch of frequently used programming barcodes.
Safety Instructions
Read the operating instructions carefully and especially observe the safety information. If you do not follow the safety instructions on proper handling in this manual, we assume no liability for any resulting personal injury or damage to property.
Don't put the scanner in places with excessively high temperatures, such as exposure to direct sunlight.
Don't use the scanner in extremely humid area or drastic temperature change.
The rechargeable battery is permanently built into the scanner and cannot be replaced.
✿ Never damage the rechargeable battery. Damaging the casing of the rechargeable battery might cause an explosion or a fire!
Chapter 1 Getting Started
Introduction
The BS80 is a wireless pocket barcode scanner equipped with 1D or 2D scan engine to meet different needs. It is a great space-saver for busy or limited workspaces. It also supports iOS, Android, and Windows devices through Bluetooth HID or SPP or BLE communication.
An illustrated introduction to the BS80 is included in this chapter. If you have the scanner at hand, make good use of it to develop a better understanding of this manual. This chapter is written for normal users, maintenance staff and software developers.
Unpacking
Open the package and take out the scanner and its accessories. Check to make sure everything on the packing list is present and intact. If any contents are damaged or missing, please keep the original package and contact your dealer immediately for after-sales service.
BS80 Scanner
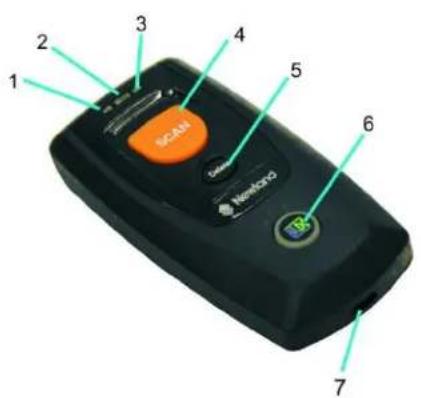
text_image
1 2 3 4 5 6 Scan Newforce IR 7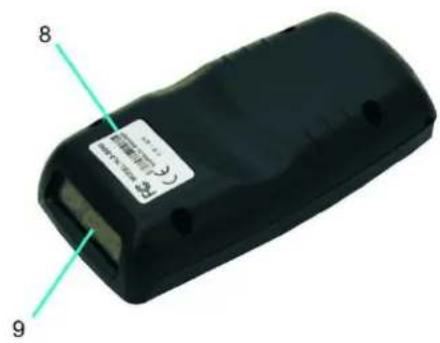
text_image
8 9| 1 | Charging/Battery LED | 2 | Good Read LED |
| 3 | Data LED | 4 | Scan/Power Button |
| 5 | Delete/Reset Button | 6 | Function Button/Function LED |
| 7 | Micro USB Port | 8 | Product Label |
| 9 | Scan Window* |
*Note: Please peel off the protective film from the scan window before reading barcodes.
Button Functions
| Scan/Power Button |
| *Press the button to scan barcode.*Hold down the button for 3 seconds to power the scanner on. |
| Delete/Reset Button |
| *Press the button to remove the corresponding data from the flash memory in one of the following conditions before scanning the barcode to be deleted: (i) Bluetooth mode enabled but no Bluetooth connection established; (ii) Bluetooth mode & Batch Transmission enabled; (iii) USB mode enabled but no USB cable connection made; or (iv) USB mode & Batch Transmission enabled.*Hold down the button for 7 seconds to reset it. |
| Function Button |
| *Press the button to turn on or off the HID keyboard of the connected iOS device in the Bluetooth mode.*Hold down the button for 3s to start data transmission in either of the following conditions: (i) Bluetooth mode & Batch Transmission enabled; or (ii) USB mode enabled and the scanner connected to PC via USB cable. |
| Scan/Power Button + Function Button |
| *Hold down the two buttons at the same time for 3 seconds to toggle between the Bluetooth mode and USB mode. |
| Delete/Reset Button + Function Button |
| *Press the two buttons at the same time to unpair the paired Bluetooth device from the scanner in Bluetooth mode and to make the scanner discoverable by other Bluetooth device.*Hold down the two buttons at the same time until the green Good Read LED lights up to enable the scanner to enter the update status.Note: If the update fails or you accidentally enter the update status, you need to hold down the Delete/Reset button for 7s to reset the scanner. |
| Scan/Power Button + Delete/Reset Button |
| *Press the two buttons at the same time to check the battery level with the Charging/Battery LED.*Hold down the two buttons at the same time for 3s to delete all stored data in the flash memory in either of the conditions: (i) Bluetooth mode enabled, Bluetooth connection established, and Batch Transmission & Require Data Transmission Confirmation enabled; or (ii) USB mode enabled, the scanner connected to PC via USB cable and Require Data Transmission Confirmation enabled. |
Charging the Battery
Charge the scanner by connecting it to a host device with Micro USB cable, as shown below.
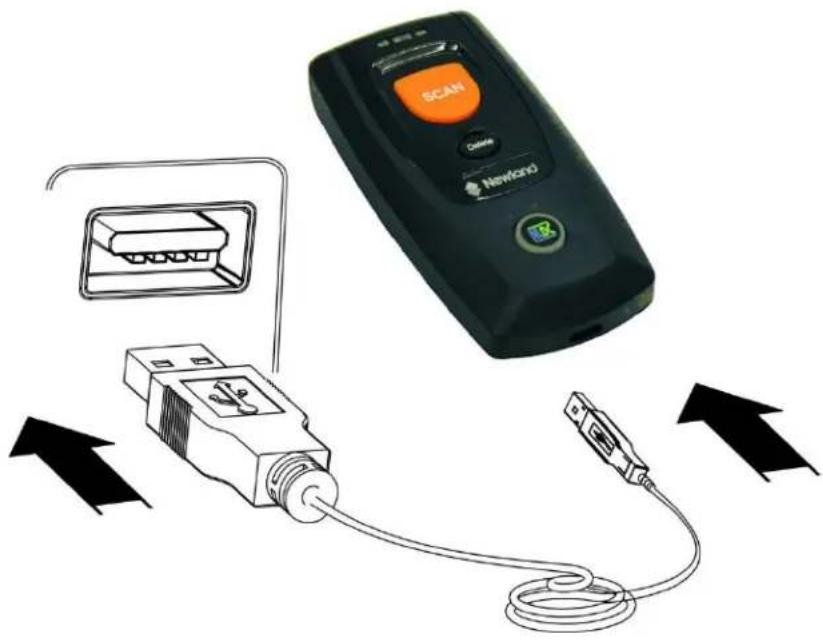
text_image
Diagram showing connections between a device with a scan and a USB cable, labeled with 'Newlord' branding.Note: Low battery may result in failure or misoperation of the scanner. Before your first use, charge the battery for 3-4 hours.
Connecting the BS80 to Smartphone/Tablet
- Make sure your device has HID or SPP or BLE profile.
- If the red Function LED on the scanner is on, hold down the Scan/Power button and Function button at the same time for 3 seconds or scan the Bluetooth Mode barcode to switch to the Bluetooth mode. Hold down the Delete/Reset button and Function button at the same time or scan the Delete Bluetooth Pairing barcode to remove existing pairing information from the scanner.
text_image
Black and white barcode image with vertical lines above and below the barsBluetooth Mode
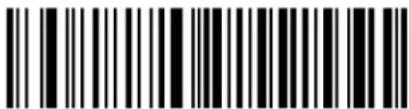
text_image
Black and white barcode image with vertical lines and a horizontal bar at the bottomDelete Bluetooth Pairing
- Turn off the Power-Saving mode on your smartphone/tablet.
- Scan the appropriate barcode below to choose HID or SPP or BLE profile before connecting the scanner to smartphone/tablet. If you don't know what profile your device is using, please try HID profile first, then SPP, at last BLE profile.
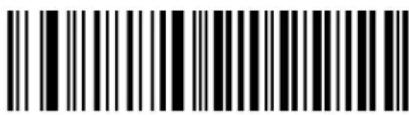
text_image
Black and white barcode image with vertical lines above and below the barsHID (default)
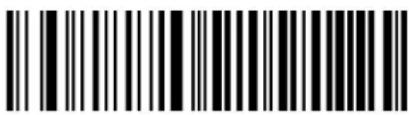
text_image
Black and white barcode image with vertical lines and a central dotSPP
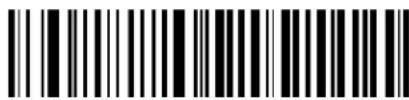
text_image
Black and white barcode image with vertical lines and a small number '1' at the bottom right.BLE
- Complete the following connection procedure (example: pairing with iPhone).
(1) Click "Settings".
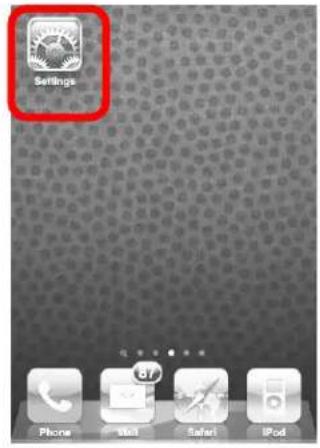
text_image
Settings Phone Mail Safari iPod(4) Turn it on and search the devices.
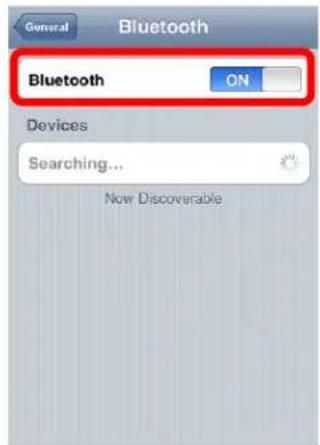
text_image
General Bluetooth Bluetooth ON Devices Searching... Now Discoverable(2) Click "General".
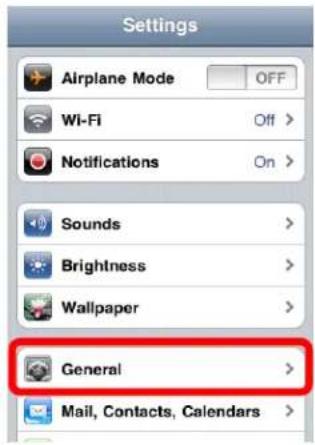
text_image
Settings Airplane Mode OFF Wi-Fi Off > Notifications On > Sounds > Brightness > Wallpaper > General > Mail, Contacts, Calendars >(5) Select "BS80XXXX" to connect.

text_image
General Bluetooth ON Devices BS80XXXX Not Paired Now Discoverable(3) Click "Bluetooth".
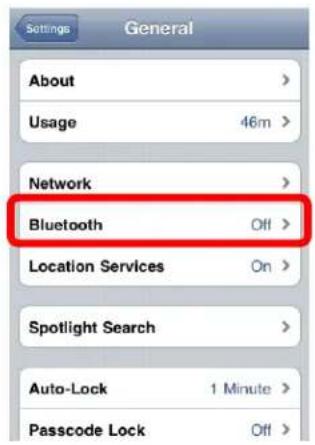
text_image
Settings General About > Usage 46m > Network > Bluetooth Off > Location Services On > Spotlight Search > Auto-Lock 1 Minute > Passcode Lock Off >(6) The "Connected" message means the connection is OK.
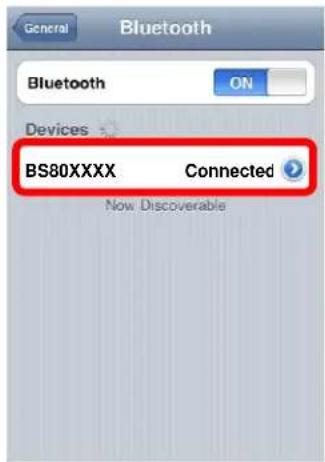
text_image
General Bluetooth Bluetooth ON Devices BS80XXXX Connected Now Discoverable- After the connection is completed, the blue Function LED on the scanner will illuminate.
- Before using WordPad file or relative APP, set keyboard language of the device to US English. Then, scan barcodes and the barcode data will show before current cursor position. If the data cannot be sent to smartphone/tablet, please scan the Restore Factory Defaults barcode (see Chapter 2).
Note: This product complies with Bluetooth standards. The device that communicates with this product must support the same SPP or HID or BLE. For other Bluetooth devices with other profiles, we cannot guarantee a connection before the product has been tested.
The communication speed and range of the product may vary due to obstacles and radio wave condition between the product and device to which it is connected. Condition on the host device may also affect the communication speed and range of the scanner.
LED Notifications
| Charging/Battery LED | |
| Red LED on | Charging in progress. |
| Green LED on | Fully charged. |
| Red and green LEDs flash alternately | Battery not found. |
| Red LED flashes | Low battery alert. |
| When the scanner is on, pressing the Scan/Power button and Delete/Reset button at the same time for 3 seconds can display the battery level with the Charging/Battery LED. | |
| Green LED on | Battery level is high. |
| Red and green LEDs on | Battery level is medium. |
| Red LED on | Battery level is low. |
When the battery voltage is too low, the scanner will beep with flashing red Charging/Battery LED. Please charge it immediately before the scanner shuts down mandatorily. When it shuts down, please charge it fully before turning it back on.
| Good Read LED | |
| Green LED flashes | Good read. |
| Data LED | |
| Red LED flashes | There is data in flash memory. |
| Red LED on | Flash memory depleted. |
| Function LED | |
| Blue LED flashes slowly with long OFF state | Bluetooth mode enabled, but no Bluetooth connection established and the BS80 undiscoverable. |
| Blue LED flashes slowly with long ON state | Bluetooth mode enabled, but no Bluetooth connection established and the BS80 discoverable. |
| Blue LED on | Bluetooth connection established. |
| Blue LED flashes quickly | Data transmission via Bluetooth in progress. |
| Red LED on | USB mode enabled. |
| Red LED flashes quickly | Data transmission via USB in progress. |
Turning the BS80 On/Off
Turn the scanner on: Press the Scan/Power button for 3 seconds.
Turn the scanner off: By default, the scanner automatically powers off if no operation is performed on the scanner for 30 minutes. You can adjust the auto power-off timer. You can also turn off the scanner by scanning the Power Off barcode. For more information, see the “Automatic/Manual Power-Off” section in Chapter 2.
Scanning Instructions
Scanning 1D Barcode
Adjust the scan angle (Do not read barcode at vertical degree) or the distance between barcode and the scanner to ensure that the length of the scan line is roughly 8mm greater than that of the barcode, as shown below.
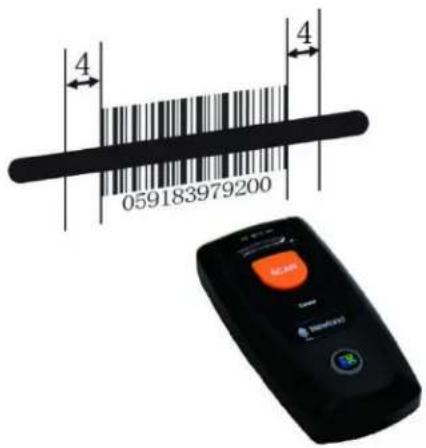
text_image
4 059183979200 4| Right | Wrong |
 | |
 | |
 | |
Scanning 2D Barcode
Adjust the scan angle and the distance between barcode and the scanner to make them fall into the following ranges:
- Aim the scan line across the center of the barcode.
- Optimum scan distances: 5-20cm.
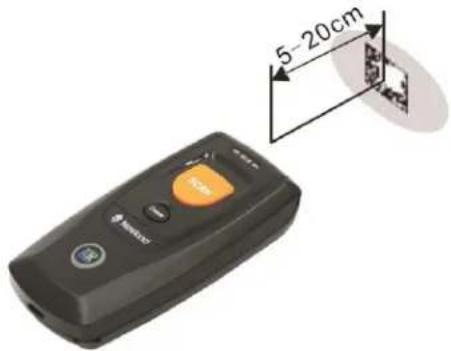
text_image
5-20cmChapter 2 System Settings
Introduction
This chapter describes how to configure the basic system parameters on the scanner.
text_image
Barcode image containing encoded digital informationThe scanner provides two operating modes: Bluetooth mode and USB mode. To switch between these two modes, press the Scan/Power and Function buttons for 3 seconds at the same time or scan the USB Mode or Bluetooth Mode barcode.
Bluetooth Mode
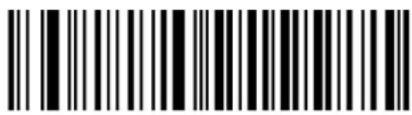
text_image
Black and white barcode image with vertical lines and a central barBluetooth Mode (default)
When the scanner is in the Bluetooth mode, you can select a desired profile by scanning the appropriate barcode below.
text_image
Black and white barcode image with vertical lines and a central dotHID (default)
text_image
Black and white barcode image with vertical lines above and below the barsSPP
text_image
Black and white barcode image with vertical lines and a horizontal bar at the bottomBLE
There are three types of data transmission via Bluetooth: Synchronous transmission, Asynchronous transmission and Batch transmission.
(1) Synchronous transmission (default): When you scan barcodes, the data will be sent to smartphone/tablet directly. If you are out of Bluetooth service range, scanned data will be lost.
(2) Asynchronous transmission: When you are out of Bluetooth service range, scanned data will be stored in the flash memory. Once you are back to service range, the data will be sent to smartphone/tablet automatically. The scanner will automatically remove it from the flash memory after smartphone/tablet receives the data.
(3) Batch transmission: Scanned data will be stored in the flash memory no matter whether you are in Bluetooth service range or not. You may send the stored data to smartphone/tablet in one of the following ways: (i) hold down the Function button on the scanner for 3 seconds (Note: To suspend/resume data transmission, press the Function button briefly.); (ii) scan the Transmit Stored Data barcode; or (iii) send the corresponding serial command to the scanner (See the "Serial Programming Commands" manual).
text_image
Synchronous Transmission, Bluetooth (default)
text_image
Asynchronous Transmission, Bluetooth
text_image
Batch Transmission, Bluetooth
text_image
Transmit Stored DataThe following feature is enabled automatically when the scanner is in Bluetooth Batch mode.
Verify Receipt of Data: The scanner will keep all the stored data after transmission, which offers users the opportunity to verify if the data is properly received and to resend the data when needed. To delete all stored data in the flash memory, hold down the Scan/Power Button and Delete/Reset Button at the same time for 3 seconds or scan the Clear All Stored Data barcode or send the corresponding serial command to the scanner.
USB Mode
text_image
Barcode image with black and white vertical bars on white backgroundUSB Mode
When the scanner is in the USB mode, you can select a desired protocol by scanning the appropriate barcode below.
text_image
Black and white barcode image with vertical lines above and below the barsUSB HID-KBW (default)
text_image
Barcode image containing encoded digital informationUSB CDC
There are two types of data transmission via USB: Asynchronous transmission and Batch transmission.
(1) Asynchronous transmission (default): When the scanner is not connected to PC via USB cable, scanned data will be stored in the flash memory. When the scanner is connected to PC via USB cable, scanned data will be sent to PC directly.
(2) Batch transmission: Scanned data will be stored in the flash memory no matter whether the scanner is connected to PC or not.
You can sync the data from the flash memory to your PC via USB by following the procedure described below.
Step 1: If USB CDC is enabled, download UFCOM driver from Newland website at www.newlandaidc.com and Install it on your PC; If USB HID-KBW is enabled, no driver is needed.
Step 2: Connect the scanner to your PC with USB cable. The scanner beeps when the connection between them is established.
Step 3: If USB CDC is enabled, open a COM tool on your PC and make sure that your cursor is always positioned in it; If USB HID-KBW is enabled, open Notepad or Office Word on your PC and make sure that your cursor is always positioned in it. Hold down the Function button on the scanner for 3 seconds or scan the Transmit Stored Data barcode to start data transmission from the flash memory to your PC. The scanner beeps when the transmission is completed.
text_image
Barcode image with black and white vertical bars on both sidesBatch Transmission, USB

text_image
Barcode image with black and white vertical bars, no visible text or symbols beyond the patternAsynchronous Transmission, USB (default)
text_image
Barcode image containing encoded digital informationTransmit Stored Data
The following feature is enabled automatically when the scanner is in USB Batch mode. Moreover, you can scan the appropriate barcode below to enable or disable this feature for USB Asynchronous mode.
Verify Receipt of Data: The scanner will keep all the stored data after transmission, which offers users the opportunity to verify if the data is properly received and to resend the data when needed. To delete all stored data in the flash memory, hold down the Scan/Power Button and Delete/Reset Button at the same time for 3 seconds or scan the Clear All Stored Data barcode or send the corresponding serial command to the scanner.
Do Not Verify Receipt of Data: All the stored data will be automatically deleted after transmission.
text_image
Black and white barcode image with vertical lines and a central dotDo Not Verify Receipt of Data (default)
Verify Receipt of Data
Notes:
- When the scanner switches from one operating mode to the other, it beeps along with corresponding LED notification (For more information, see the "LED Notifications" section in Chapter 1)
- Besides the method mentioned above, you can also hold down the Scan/Power button and Function button at the same time for 3 seconds to toggle between the Bluetooth mode and USB mode.
Query Product Information
text_image
Black and white barcode image with vertical lines and a central dotQuery the Firmware Version of Embedded Scan Engine
text_image
Black and white barcode image with vertical lines on both sidesQuery the Manufacture Date of Product
text_image
Black and white barcode image with vertical lines above and below the barsQuery the Serial Number of Product
Query the Firmware & Hardware Versions of Product
Query/Delete Stored Data in Flash
text_image
Black and white barcode image with vertical lines and a central dotQuery the Number of Stored Barcodes
Clear All Stored Data
Sound Notifications
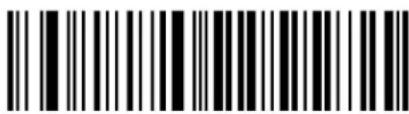
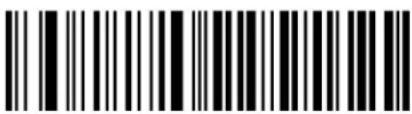
Turn sound notifications on or off by scanning the appropriate barcode below. After this feature is enabled, the scanner beeps when one of the following events occurs:
- The scanner is turned on.
- The scanner resets.
- A barcode is decoded (including good read for removing barcode data from the flash memory).
- The scanner switched to the Bluetooth mode or USB mode.
- Transmitting data over Bluetooth failed.
- iOS soft keyboard is turned on or off.
- Batch data transmission via Bluetooth or USB starts.
- Batch data transmission via Bluetooth or USB is interrupted.
- Batch data transmission via Bluetooth or USB is completed.
- The paired Bluetooth device is unpaired from the scanner.
- The scanner is turned off.
- USB connection between the scanner and the host device established.
- USB connection between the scanner and the host device lost.
- Bluetooth connection between the scanner and the host device established or lost.
text_image
Barcode image containing machine-readable data, with vertical black and white lines representing the pattern of a barcode.Sound Notifications On (default)
text_image
Black and white barcode image with vertical lines and a horizontal bar at the bottomSound Notifications Off
Vibration Notifications
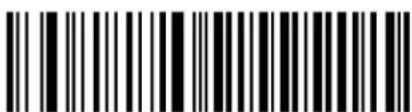
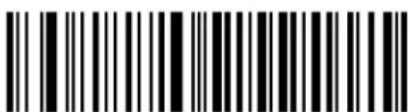
Turn vibration notifications on or off by scanning the appropriate barcode below. After this feature is enabled, the scanner vibrates when one of the following events occurs:
- The scanner switched to the Bluetooth mode or USB mode.
- iOS soft keyboard is turned on or off.
- The paired Bluetooth device is unpaired from the scanner.
- Batch data transmission via Bluetooth or USB starts.
-
The scanner is turned off.
-
A barcode is decoded (including good read for removing barcode data from the flash memory).
text_image
Black and white barcode image with vertical lines and a central patternVibration Notifications On
text_image
Black and white barcode image with vertical lines and a central barVibration Notifications Off (default)
Delete Bluetooth Pairing
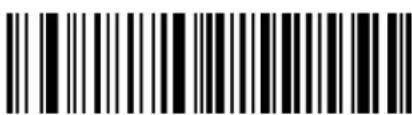
text_image
Black and white barcode image with vertical lines on both sidesDelete Bluetooth Pairing
Automatic/Manual Power-Off
By default, the scanner automatically powers off if no operation is performed on the scanner for 30 minutes. This feature can help to extend battery life.
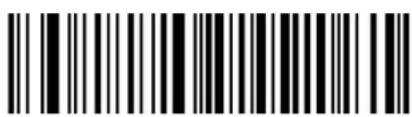
text_image
Black and white barcode image with vertical lines and a central dotQuery Auto Power-Off Timer
Set the auto power-off timer: Scan the Set Auto Power-Off Timer barcode then one of the timers listed below.
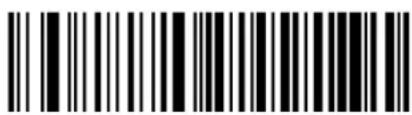
text_image
Black and white barcode image with vertical lines above and below the barsSet Auto Power-Off Timer
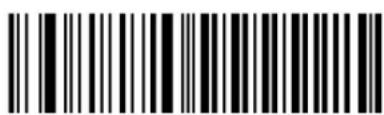
text_image
Black and white barcode image with vertical lines and a central dot5 Minutes
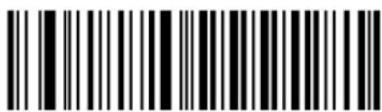
text_image
Black and white barcode image with vertical lines and a central pattern10 Minutes

text_image
Barcode image containing encoded digital information20 Minutes
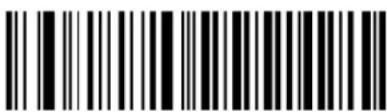
text_image
Black and white barcode image with vertical lines and a central bar30 Minutes (default)
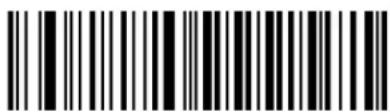
text_image
Black and white barcode image with vertical lines and a central pattern60 Minutes
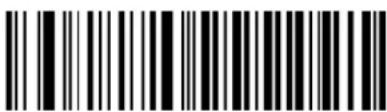
text_image
Black and white barcode image with vertical lines and a small number '1' at the bottom right.Permanent
You can power off your scanner manually by scanning the barcode below.
text_image
Black and white barcode image with vertical lines and a central dotPower Off
Note: After the Power Off barcode is scanned, the scanner emits a long beep and then turns off.
Bluetooth Device Name
The default Bluetooth device name for a BS80 scanner combines the model name “BS80+” (user-programmable) with the last 4 characters of the MAC address of the device (for example, BS80+E4AC). You can configure the model name with length up to 20 characters. To change the model name, scan the Change Bluetooth Device Name barcode, the numeric barcodes that represent the hexadecimal value of each character contained in your desired name and the Save barcode.
Change Bluetooth Device Name
Example: Change the Bluetooth device name (model name) to "NLS1" (Hex: 0x4E/0x4C/0x53/0x31)
- Scan the Change Bluetooth Device Name barcode.
- Scan the numeric barcodes “4”, “E”, “4”, “C”, “5”, “3”, “3” and “1” from the “Digit Barcodes” section in Appendix.
- Scan the Save barcode from the Save/Cancel Barcodes" section in Appendix.
Response for Invalid Host Data
By default, the scanner returns \r\n\\%\~ER\r\n when receiving an invalid command from the host. You may disable the scanner from sending this message by scanning the appropriate barcode below.
For the list of supported commands, refer to the BS80 Serial Programming Commands.
** Enable Response for Invalid Host Data
text_image
Black and white barcode image with vertical lines and a small number '1' at the bottom right.Disable Response for Invalid Host Data
Barcode Separator
A separator with length up to 10 characters (default: none) can be inserted between barcodes. This feature is only available when the following two conditions are met: Bluetooth or USB batch transmission is selected and Packet mode is off. Scan the appropriate barcode below to enable or disable this feature. When barcode separator is enabled, the preset separator will be inserted between barcodes and it will be sent three times after batch transmission is completed.
Enable Barcode Separator
Disable Barcode Separator (default)
To set the barcode separator, scan the Set Barcode Separator barcode, the numeric barcodes that represent the hexadecimal value of each character contained in your desired separator and the Save barcode.
Set Barcode Separator
Query Barcode Separator
Example: Set the barcode separator to “\*” (Hex: 0x2A)
- Scan the Set Barcode Separator barcode.
- Scan the numeric barcodes "2" and "A" from the "Digit Barcodes" section in Appendix.
- Scan the Save barcode from the Save/Cancel Barcodes" section in Appendix.
Packet Mode
When Packet mode is off, data is sent in raw format (unpacketed).
When Packet mode is on, data is sent with the packet format defined below to ensure integrity of data when received by the host or the scanner. For batch transmission, the scanner sends 0x7E, 0x01, 0x30, 0x30, 0x30, 0x30, 0x00, 0x00, 0x3B, 0x03, 0x00 to notify the host of the completion of batch transmission.
Note that this feature is only available when using Bluetooth SPP/BLE or USB CDC.
Packet format: {Header} {LEN} {DATA} {Trailer} {Checksum}
Header: 0x7E 0x01 0x30 0x30 0x30 0x30
LEN: Length of DATA, 2 bytes
DATA: Barcode data sent by the scanner or programming command sent by the host device
Trailer: 0x3B 0x03
Checksum: Computation sequence: 0x00+DATA; computation method is XOR, byte by byte
Host Response: {Header} {Response Value} {Response Method} {Trailer}
Header: 0x02 0x01
Response Value: 0x06 (ACK) or 0x15 (NAK)
Response Method: 0x00 (No operation), or
0x01 (2 short high-frequency beeps for ACK; 1 low-frequency beep for NAK), or 0x02 (200ms-long vibration for ACK; 1s-long vibration for NAK)
Trailer: 0x3B 0x03
Scanner Response: {Header} {Response Value} {Trailer}
Header: 0x02 0x01
Response Value: 0x06 (ACK) or 0x15 (NAK)
Trailer: 0x3B 0x03
Packet Mode On
Packet Mode Off (default)
NAK/ACK Retry Count
This parameter specifies the number of times the scanner retries a barcode transmission when it awaits an ACK response from the host. Note that Packet mode must be turned on for this parameter to function. The selection range is from 1 to 8 retries. The default value is 2 (retries).

Set ACK/NAK Retry Count
Example: Set the ACK/NAK retry count to 1
- Scan the Set ACK/NAK Retry Count barcode.
- Scan the numeric barcode "1" from the "Digit Barcodes" section in Appendix.
- Scan the Save barcode from the Save/Cancel Barcodes" section in Appendix.
NAK/ACK Timeout
This parameter specifies the amount of time the scanner waits for an ACK response from the host following a barcode transmission. It is programmable in 1ms increments from 0ms to 15,000ms. A selection of 0 disables the timeout. The default timeout is 200ms. Note that Packet mode must be turned on for this parameter to function.
Set ACK/NAK Timeout
Example: Set the ACK/NAK timeout to 100ms
- Scan the Set ACK/NAK Timeout barcode.
- Scan the numeric barcodes "1", "0" and "0" from the "Digit Barcodes" section in Appendix.
- Scan the Save barcode from the Save/Cancel Barcodes" section in Appendix.
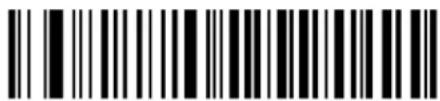
Product Serial Number
You can select whether to send product serial number or not by enabling or disabling it.
text_image
Barcode image containing machine-readable data, with vertical black and white lines representing the pattern of a barcode.Enable Product Serial Number
text_image
Black and white barcode image with vertical lines and a small number '1' at the bottomDisable Product Serial Number (default)
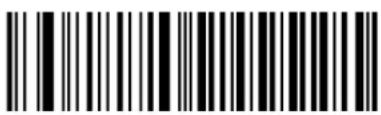
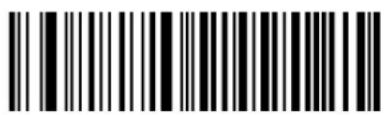
Time Stamp
You can select whether to send date & time or not by enabling or disabling time stamp.
text_image
Black and white barcode image with vertical lines and a central patternEnable Time Stamp
text_image
Black and white barcode image with vertical lines on both sidesDisable Time Stamp (default)
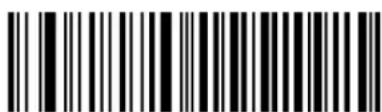
Set Date Format
text_image
Black and white barcode image with vertical lines and a central patternFormat 1: mm/dd/yyyy
(example: 01/23/2011)
text_image
Black and white barcode image with vertical lines and a central dotFormat 2: dd/mm/yyyy
(example: 23/01/2011)

text_image
Black and white barcode image with vertical lines and a central patternFormat 3: yyyy/mm/dd (default)
(example: 2011/01/23)

Query Current Date & Time
Set Date & Time
Step 1: Double click on BS80Setting.exe to run BS80 Date&Time Setting Tool. Then check the "Auto-sync date and time with the host" item on it.
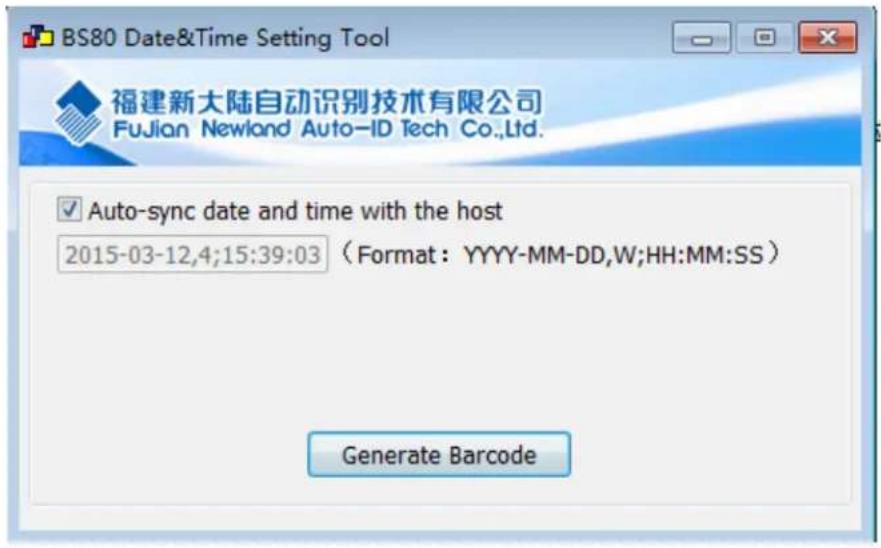
text_image
BS80 Date&Time Setting Tool 福建新大陆自动识别技术有限公司 Fujian Newland Auto-ID Tech Co.,Ltd. ✓ Auto-sync date and time with the host 2015-03-12,4;15:39:03 (Format: YYYY-MM-DD,W;HH:MM:SS) Generate BarcodeStep 2: After the time in the box is in sync with the system clock, click the "Generate Barcode" button.
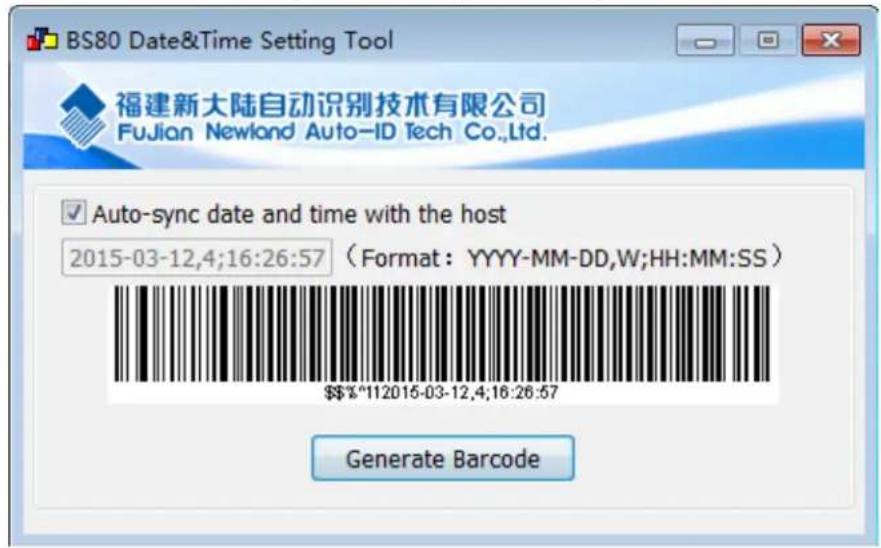
text_image
BS80 Date&Time Setting Tool 福建新大陆自动识别技术有限公司 Fujian Newland Auto-ID Tech Co.,Ltd. ✓ Auto-sync date and time with the host 2015-03-12,4;16:26:57 (Format: YYYY-MM-DD,W;HH:MM:SS) $$$"112015-03-12,4;16:26:57 Generate BarcodeStep 3: Scan the barcode generated to set the date and time on the scanner.
Note: You need to run this tool on the Windows XP or WIN7 operating system.
Parameters of USB HID-KBW/ Bluetooth HID
Keyboard Types
text_image
Barcode image containing encoded digital informationUS English (default)
text_image
Black and white barcode image with vertical lines and a horizontal bar at the bottomBelgium
text_image
Barcode image containing encoded digital informationBrazil
text_image
Barcode image with black and white vertical bars, no visible text or symbols beyond the patternCanada
text_image
Black and white barcode image with vertical lines and a central patternCzech
text_image
Barcode image containing encoded digital informationDanmark
text_image
Barcode image containing encoded digital informationFinland
text_image
Black and white barcode image with vertical lines and a small symbol in the bottom-right cornerFrance
text_image
Black and white barcode image with vertical lines and a small number '1' at the bottom right.Germany, Austria
text_image
Black and white barcode image with vertical lines and a central barGreece
text_image
Barcode image with black and white vertical bars, no visible text or symbols beyond the patternHungary
text_image
Barcode image containing encoded digital informationIsrael
text_image
Barcode image containing encoded digital informationItaly
text_image
Black and white barcode image with vertical lines and a central barLatin America, South America
text_image
Barcode image containing encoded digital informationNetherland
text_image
Barcode image containing encoded digital informationNorway
text_image
Barcode image containing encoded digital informationPoland
text_image
Black and white barcode image with vertical lines above and below the barsPortugal
text_image
Black and white barcode image with vertical lines and a central bar patternRomania
text_image
Black and white barcode image with vertical lines above and below the barsRussia
text_image
Barcode image containing machine-readable data, no human-readable text visibleSlovakia

text_image
Black and white barcode image with vertical lines above and below the barsSpain
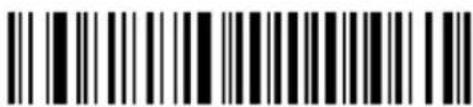
text_image
Black and white barcode image with vertical lines above and below the barsSweden
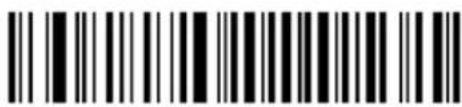
text_image
Barcode image containing machine-readable data, no human-readable text visibleSwitzerland
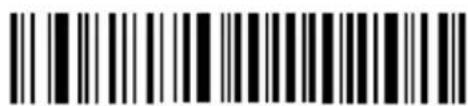
text_image
Black and white barcode image with vertical lines above and below the barsTurkey_F
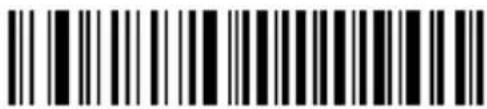
text_image
Barcode image containing machine-readable data, with vertical black and white lines representing the number 10Turkey_Q
text_image
Barcode image containing machine-readable data, no human-readable text visibleUK
text_image
Barcode image containing machine-readable data, no human-readable text visibleJapan
Character Encoding
text_image
Black and white barcode image with vertical lines and a central dotISO-8859-1 (default)
text_image
Barcode image containing machine-readable data, no human-readable text visibleUTF-8
Convert Case
text_image
Black and white barcode image with vertical lines and a central dotNo Case Conversion (default)
text_image
Black and white barcode image with vertical lines and a central dotConvert All to Upper Case
text_image
Black and white barcode image with vertical lines and a central dotConvert All to Lower Case
text_image
Black and white barcode image with vertical lines and a central dotInvert Upper and Lower Case Characters
Emulate ALT+Keypad
This feature allows any ASCII character (0x00 - 0xFF) to be sent over the numeric keypad no matter which keyboard type is selected. Since sending a character involves multiple keystroke emulations, this method appears less efficient. This feature is not available for Android/ iOS devices.
The following options are available:
- Disable: No ASCII character is sent in the ALT+Keypad way.
- Mode 1: ASCII characters not supported by the selected keyboard type but falling into 0x20\~0xFF are sent in the ALT+Keypad way.
• Mode 2: ASCII characters falling into 0x20\~0xFF are sent in the ALT+Keypad way. - Mode 3: ASCII characters falling into 0x00\~0xFF are sent in the ALT+Keypad way.
Note: In the event of a conflict between Function Key Mapping and Mode 3, Function Key Mapping shall govern.
text_image
Black and white barcode image with vertical lines and a central dotDisable (default)
text_image
Black and white barcode image with vertical lines and a central barMode 1
text_image
Barcode image with black and white vertical bars, no visible text or symbols beyond the patternMode 2
text_image
Black and white barcode image with vertical lines and a central barMode 3
Example: Supposing US keyboard is selected, barcode data "ADF" (65/208/70) is sent as below:
(1) Mode 1 is enabled:
"A" -- Keystroke "A"
“D” -- “ALT Make” + “208” + “ALT Break”
“F” -- Keystroke “F”
(2) Mode 3 is enabled:
"A" – "ALT Make" + "065" + "ALT Break"
“D” -- “ALT Make” + “208” + “ALT Break”
“F” -- “ALT Make” + “070” + “ALT Break”
When Function Key Mapping is enabled, function characters (0x00 - 0x1F) are sent as ASCII sequences over the keypad. For more information, see the "ASCII Function Key Mapping Table" in Appendix. This feature is not available for Android/ iOS devices.
text_image
Barcode image containing machine-readable data, no human-readable text visibleEnable Function Key Mapping
text_image
Barcode image containing machine-readable data, with vertical black and white lines on both sidesDisable Function Key Mapping (default)
Example: Barcode data 0x16
 T T | Enable Function Key Mapping | Ctrl+V |
| Disable Function Key Mapping | F1 |
Emulate Numeric Keypad
When this feature is disabled, sending barcode data is emulated as keystroke(s) on main keyboard.
To enable this feature, scan the Emulate Numeric Keypad barcode. Sending a number (0-9) is emulated as keystroke(s) on numeric keypad, whereas sending other characters like "+" or "-" and "-" is still emulated as keystrokes on main keyboard.
This feature is not available for Android/ iOS devices.
text_image
Barcode image containing encoded digital informationEmulate Numeric Keypad
text_image
Barcode image containing encoded digital informationDo Not Emulate Numeric Keypad (default)
Code Page
The Code Page programming feature is provided to support more international characters. This feature is only effective when ASCII characters are sent in the ALT+Keypad way.
text_image
Barcode image containing encoded digital informationWindows 1252 (Latin I) (default)
text_image
Black and white barcode image with vertical lines above and below the barsWindows 1251 (Cyrillic)
Example 1: Set the scanner to get proper output for Russian encoded with ISO-8859-1
- Scan the Windows 1251 (Cyrillic) barcode.
- Scan the Mode 3 barcode from the "Emulate ALT+Keypad" section in this chapter.
- Scan the ISO-8859-1 barcode from the "Character Encoding" section in this chapter.
Example 2: Set the scanner to get proper output for Russian encoded with UTF-8
- Scan the Windows 1251 (Cyrillic) barcode.
- Scan the Mode 3 barcode from the "Emulate ALT+Keypad" section in this chapter.
- Scan the UTF-8 barcode from the "Character Encoding" section in this chapter.
Inter-Character Delay for Bluetooth HID
Select an appropriate inter-character delay to avoid data loss during transmission. This parameter is only valid in the Bluetooth HID mode.
text_image
Black and white barcode image with vertical lines and a central dot0ms
text_image
Black and white barcode image with vertical lines and a central dot5ms
text_image
Black and white barcode image with vertical lines and a small number 'n' in the bottom right corner.15ms (default)
text_image
Black and white barcode image with vertical lines and a small number 'n' in the center.25ms
text_image
Black and white barcode image with vertical lines on both sides35ms
text_image
Black and white barcode image with vertical lines and a small number 'n' in the center.45ms
text_image
Black and white barcode image with vertical lines and a central patternQuery Inter-Character Delay
Inter-Keystroke Delay for USB HID-KBW
To set the inter-keystroke delay, scan the Set Inter-Keystroke Delay barcode and a desired value barcode below.
text_image
Barcode image containing machine-readable data, no human-readable text visibleSet Inter-Keystroke Delay
0ms (default)
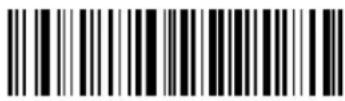
1ms
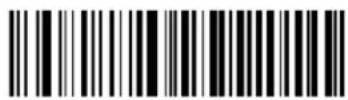
2ms
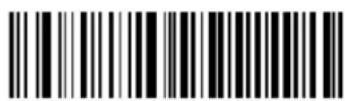
3ms
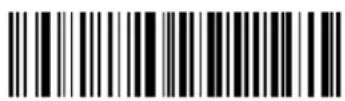
4ms
5ms
text_image
Barcode image with black and white vertical bars on white background6ms
7ms
8ms
9ms
10ms
11ms
12ms
13ms
14ms
15ms
Upgrading BS80 Firmware
Upgrading BS80 firmware includes upgrading system firmware and scan engine firmware.
Upgrading System Firmware
Step 1: Contact the technical support to get the BS80 Firmware Upgrade Utility and the latest system firmware.
Step 2: Download UFCOM driver from the Newland website at www.newlandaidc.com. Install it on PC by following the on-screen instructions. (Skip this step if it is already installed on your PC.) Make sure that the driver is properly installed. You cannot upgrade the firmware without it.
Step 3: Turn on the scanner. Hold down the Function button and the Delete/Reset button on the scanner at the same time until the green Good Read LED lights up.
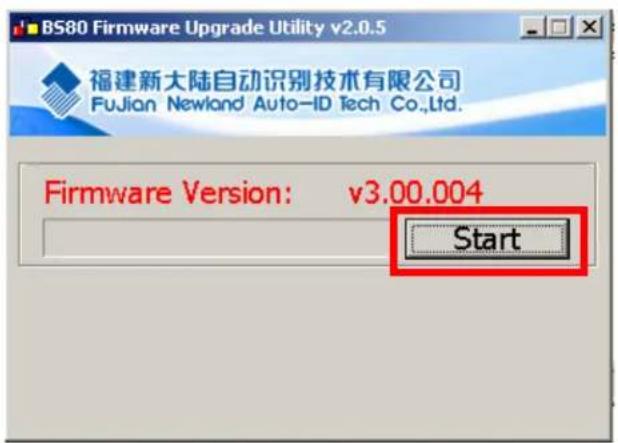
Step 4: Run the BS80Update program. Then click "Start".
text_image
BS80 Firmware Upgrade Utility v2.0.5 福建新大陆自动识别技术有限公司 FuJian Newland Auto-ID Tech Co.,Ltd. Firmware Version: v3.00.004 StartStep 5: Connect the scanner to your PC with the USB cable. Then the update begins. The red and blue Function LEDs flash alternately during the updating process.
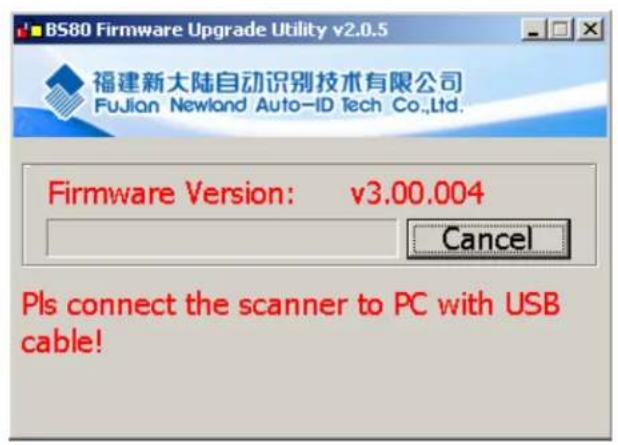
text_image
BS80 Firmware Upgrade Utility v2.0.5 福建新大陆自动识别技术有限公司 FuJian Newland Auto-ID Tech Co.,Ltd. Firmware Version: v3.00.004 Cancel Pls connect the scanner to PC with USB cable!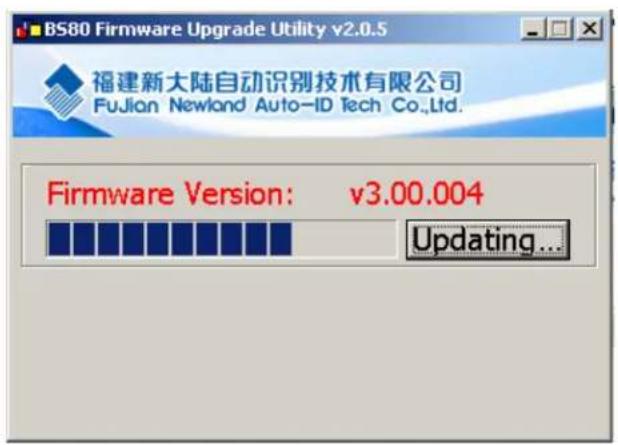
text_image
BS80 Firmware Upgrade Utility v2.0.5 福建新大陆自动识别技术有限公司 FuJian Newland Auto-ID Tech Co.,Ltd. Firmware Version: v3.00.004 Updating...Step 6: Wait for the "Firmware upgraded!" window to pop up and click "OK" to exit the program.
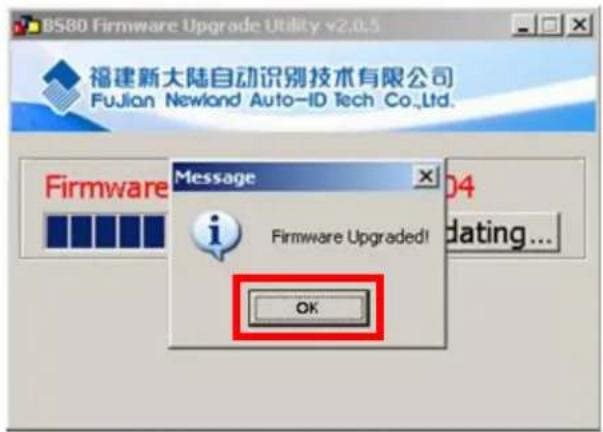
text_image
BS80 Firmware Upgrade Utility v2.0.5 福建新大陆自动识别技术有限公司 FuJian Newland Auto-ID Tech Co.,Ltd. Message D4 Firmware Upgraded! dating... OKNotes:
- If this utility does not operate normally, check to see if the FirmwarePath in the UpdataTool.ini file is correct (its value should be identical with the name of the .bin file). If there is a higher version of firmware, replace the .bin file.
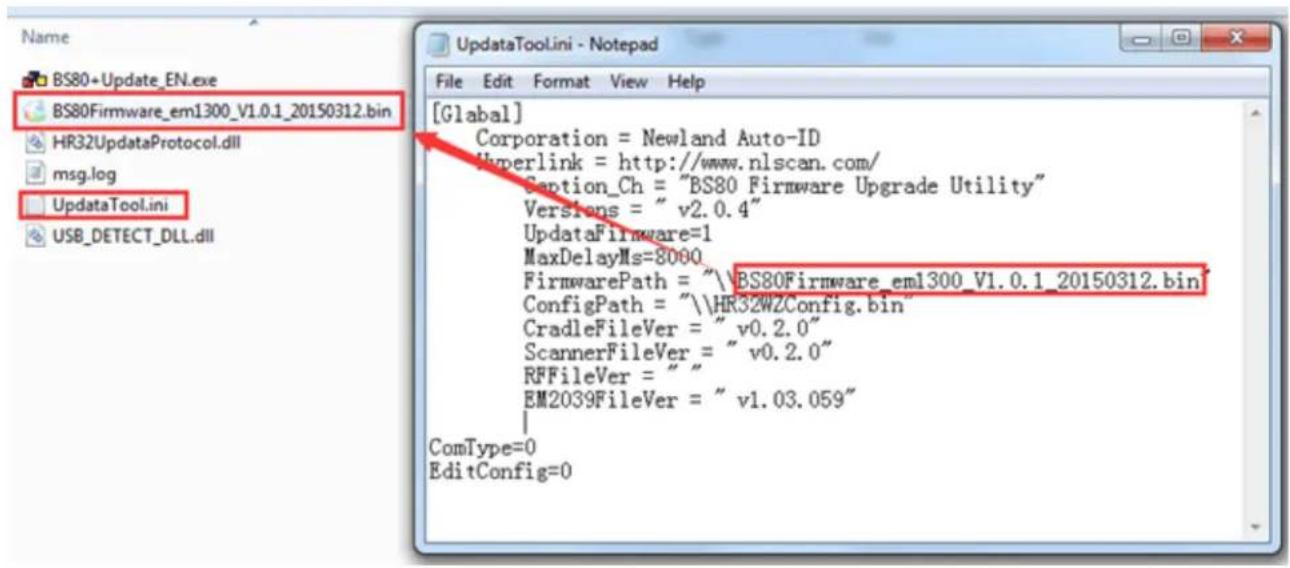
text_image
Name BS80+Update_EN.exe BS80Firmware_em1300_V1.0.1_20150312.bin HR32UpdateProtocol.dll msg.log UpdataTool.ini USB_DETECT_DLL.dll File Edit Format View Help [Glabal] Corporation = Newland Auto-ID Hyperlink = http://www.nlscan.com/ Caption_Ch = "BS80 Firmware Upgrade Utility" Versions = " v2.0.4" UpdataFirmware=1 MaxDelayMs=8000 FirmwarePath = "\"BS80Firmware_em1300_V1.0.1_20150312.bin ConfigPath = "\"HR32WZConfig.bin CradleFileVer = " v0.2.0" ScannerFileVer = " v0.2.0" RFFileVer = "" EM2039FileVer = " v1.03.059" | ComType=0 EditConfig=0- If the update fails or you accidentally enter the update status, you need to hold down the Delete/Reset button for 7s to reset the scanner.
Upgrading Scan Engine Firmware
Step 1: Contact the technical support to get the MCU Kernel Update Tool (McuUpdateTool.exe) and the latest scan engine firmware for BS80 (.pak).
Step 2: Download UFCOM driver from the Newland website at www.newlandaidc.com. Install it on PC by following the on-screen instructions. (Skip this step if it is already installed on your PC.) Make sure that the driver is properly installed. You cannot upgrade the firmware without it.
Step 3: Ensure that your BS80's system firmware version is V3.00.005 or later. Scan the following barcode. Then the red and blue Function LEDs flash alternately.
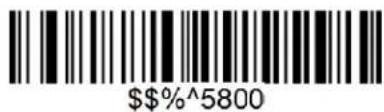
text_image
%^5800Step 4: Connect the scanner to your PC with the USB cable.
Step 5: Double-click the McuUpdateTool.exe file to run the firmware upgrade tool. Click 📄 and choose the firmware file (.pak). Check your device manager for the COM port connected to the scanner and set the COM port on the tool accordingly.
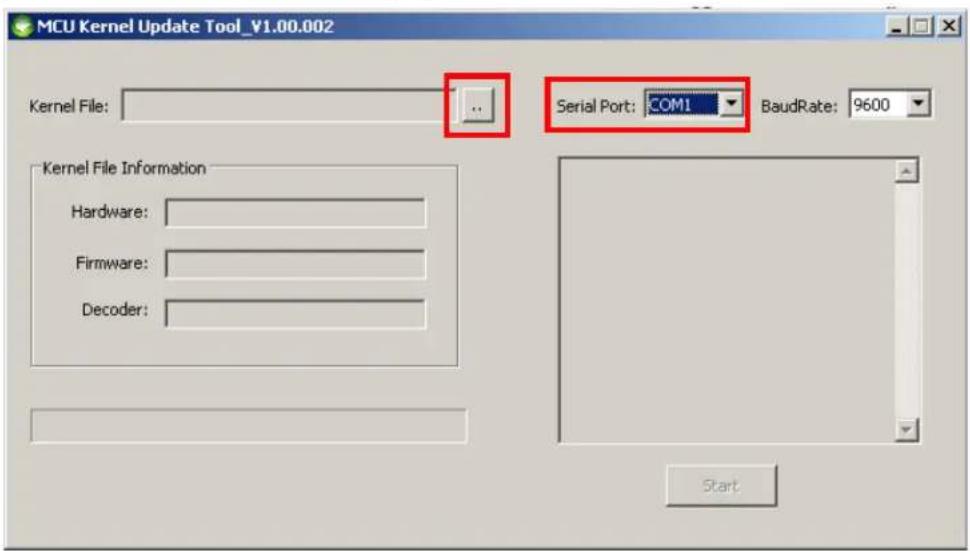
text_image
MCU Kernel Update Tool_¥1.00.002 Kernel File: ... Serial Port: COM1 BaudRate: 9600 Kernel File Information Hardware: Firmware: Decoder: StartStep 6: Click the Start button to start upgrading the firmware.
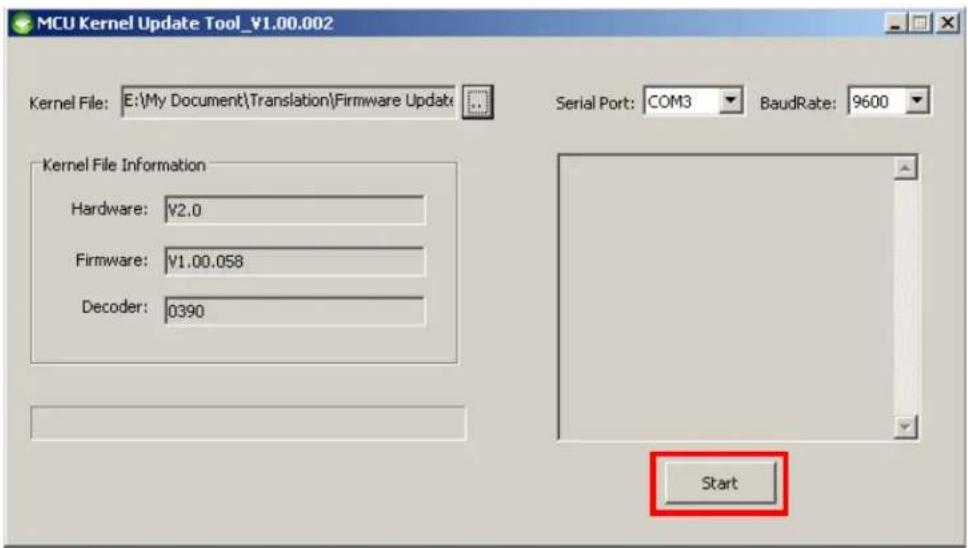
text_image
MCU Kernel Update Tool_¥1.00.002 Kernel File: E:\My Document\Translation\Firmware Update Serial Port: COM3 BaudRate: 9600 Kernel File Information Hardware: ¥2.0 Firmware: ¥1.00.058 Decoder: 0390 StartStep 7: Wait for the upgrading to complete (Warning: It is NOT allowed to turn off your device or cut off the power when the upgrading is in progress). When the “Update Completed” message occurs, the upgrade has been done successfully. Note that the BS80 will automatically reboot after the update.
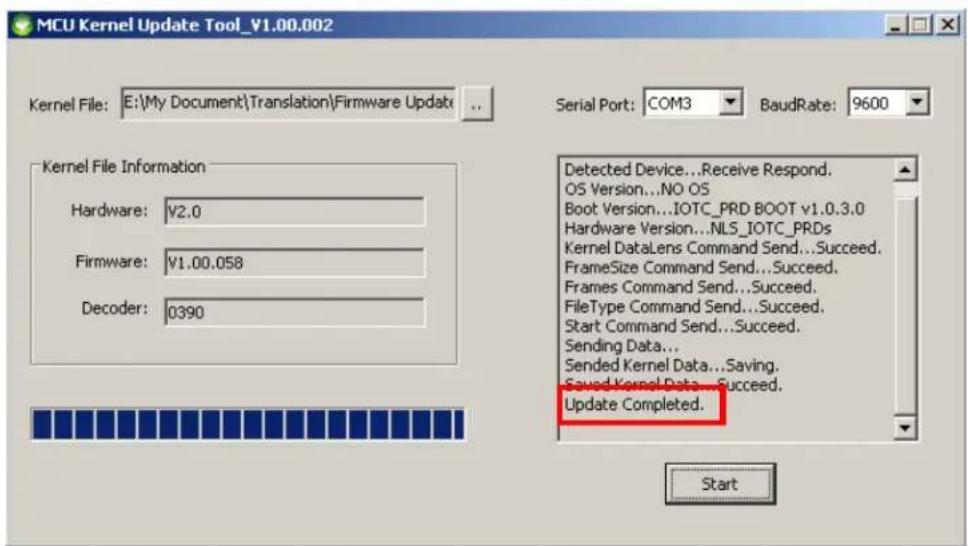
text_image
MCU Kernel Update Tool_V1.00.002 Kernel File: E:\My Document\Translation\Firmware Update Serial Port: COM3 BaudRate: 9600 Kernel File Information Hardware: V2.0 Firmware: V1.00.058 Decoder: 0390 Detected Device...Receive Respond. OS Version...NO OS Boot Version...IOTC_PRD BOOT v1.0.3.0 Hardware Version...NLS_IOTC_PRDs Kernel DataLens Command Send...Succeed. FrameSize Command Send...Succeed. Frames Command Send...Succeed. FileType Command Send...Succeed. Start Command Send...Succeed. Sending Data... Sended Kernel Data...Saving. Saved Kernel Data...Succeed. Update Completed. StartChapter 3 Symbologies
Introduction
Every symbology (barcode type) has its own unique attributes. This chapter provides programming barcodes for configuring the scanner so that it can identify various barcode symbologies. It is recommended to disable those that are rarely used to increase the efficiency of the scanner.
Note: Maximum barcode length supported by the scanner is 3072 bytes.
1D Scanner
Enable/Disable All Symbologies
text_image
Black and white barcode image with vertical lines and a small number 'n' in the center.Enable All Symbologies
Disable All Symbologies
Code 128
Set Length Range for Code 128
The scanner can be configured to only decode Code 128 barcodes with lengths that fall between (inclusive) the minimum and maximum lengths. To accomplish it, you need to set the minimum and maximum lengths.
If minimum length is set to be greater than maximum length, the scanner only decodes Code 128 barcodes with either the minimum or maximum length. If minimum length is same as maximum length, only Code 128 barcodes with that length are to be decoded.
Set the Minimum Length
Set the Maximum Length
Example: Set the scanner to decode Code 128 barcodes containing between 8 and 12 characters
- Scan the Set the Minimum Length barcode.
- Scan the numeric barcode "8" from the "Digit Barcodes (1D Scanner)" section in Appendix.
- Scan the Save barcode from the "Save/Cancel Barcodes (1D Scanner)" section in Appendix.
- Scan the Set the Maximum Length barcode.
- Scan the numeric barcodes "1" and "2" from the "Digit Barcodes (1D Scanner)" section in Appendix.
- Scan the Save barcode from the "Save/Cancel Barcodes (1D Scanner)" section in Appendix.
UCC/EAN-128
Restore the Factory Defaults of UCC/EAN-128
Enable/Disable UCC/EAN-128
Enable UCC/EAN-128 (default)
Disable UCC/EAN-128
Set Length Range for UCC/EAN-128
The scanner can be configured to only decode UCC/EAN-128 barcodes with lengths that fall between (inclusive) the minimum and maximum lengths. To accomplish it, you need to set the minimum and maximum lengths.
If minimum length is set to be greater than maximum length, the scanner only decodes UCC/EAN-128 barcodes with either the minimum or maximum length. If minimum length is same as maximum length, only UCC/EAN-128 barcodes with that length are to be decoded.
Set the Minimum Length
Set the Maximum Length
Example: Set the scanner to decode UCC/EAN-128 barcodes containing between 8 and 12 characters
- Scan the Set the Minimum Length barcode.
- Scan the numeric barcode "8" from the "Digit Barcodes (1D Scanner)" section in Appendix.
- Scan the Save barcode from the "Save/Cancel Barcodes (1D Scanner)" section in Appendix.
- Scan the Set the Maximum Length barcode.
- Scan the numeric barcodes "1" and "2" from the "Digit Barcodes (1D Scanner)" section in Appendix.
- Scan the Save barcode from the "Save/Cancel Barcodes (1D Scanner)" section in Appendix.
AIM 128
Set Length Range for AIM 128
The scanner can be configured to only decode AIM128 barcodes with lengths that fall between (inclusive) the minimum and maximum lengths. To accomplish it, you need to set the minimum and maximum lengths.
If minimum length is set to be greater than maximum length, the scanner only decodes AIM128 barcodes with either the minimum or maximum length. If minimum length is same as maximum length, only AIM128 barcodes with that length are to be decoded.
Set the Minimum Length
Set the Maximum Length
Example: Set the scanner to decode AIM 128 barcodes containing between 8 and 12 characters
- Scan the Set the Minimum Length barcode.
- Scan the numeric barcode "8" from the "Digit Barcodes (1D Scanner)" section in Appendix.
- Scan the Save barcode from the "Save/Cancel Barcodes (1D Scanner)" section in Appendix.
- Scan the Set the Maximum Length barcode.
- Scan the numeric barcodes "1" and "2" from the "Digit Barcodes (1D Scanner)" section in Appendix.
- Scan the Save barcode from the "Save/Cancel Barcodes (1D Scanner)" section in Appendix.
EAN-8
An EAN-8 barcode can be augmented with a two-digit add-on code to form a new one.
Disable 2-Digit Add-On Code: The scanner decodes EAN-8 and ignores the add-on code when presented with an EAN-8 plus 2-digit add-on barcode. It can also decode EAN-8 barcodes without 2-digit add-on codes.
Enable 2-Digit Add-On Code: The scanner decodes a mix of EAN-8 barcodes with and without 2-digit add-on codes.
Decode EAN-8 + 2-Digit Add-On Code Only: The scanner only decodes EAN-8 barcodes that contain 2-digit add-on codes.
Disable 2-Digit Add-On Code (default)
Enable 2-Digit Add-On Code
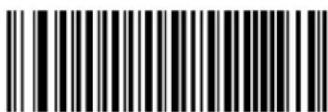
Decode EAN-8 + 2-Digit Add-On Code Only
5-Digit Add-On Code
An EAN-8 barcode can be augmented with a five-digit add-on code to form a new one.
Disable 5-Digit Add-On Code: The scanner decodes EAN-8 and ignores the add-on code when presented with an EAN-8 plus 5-digit add-on barcode. It can also decode EAN-8 barcodes without 5-digit add-on codes.
Enable 5-Digit Add-On Code: The scanner decodes a mix of EAN-8 barcodes with and without 5-digit add-on codes.
Decode EAN-8 + 5-Digit Add-On Code Only: The scanner only decodes EAN-8 barcodes that contain 5-digit add-on codes.
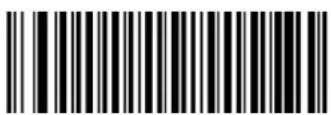
Disable 5-Digit Add-On Code (default)
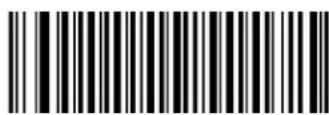
Enable 5-Digit Add-On Code
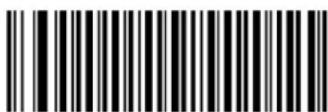
Decode EAN-8 + 5-Digit Add-On Code Only
EAN-8 Extension
✿ Disable EAN-8 Zero Extend: Transmit EAN-8 barcodes as is.
✿ Enable EAN-8 Zero Extend: Add five leading zeros to decoded EAN-8 barcodes to extend to13 digits.
Convert EAN-8 to EAN-13: Add five leading zeros to decoded EAN-8 barcodes to make them compatible in format to EAN-13 barcodes.
Disable EAN-8 Zero Extend (default)
Enable EAN-8 Zero Extend
Convert EAN-8 to EAN-13
Transmit Check Character
EAN-8 is 8 digits in length with the last one as its check character used to verify the integrity of the data.
Transmit EAN-8 Check Character (default)
Do Not Transmit EAN-8 Check Character
EAN-13
Enable/Disable EAN-13
Enable EAN-13 (default)
Disable EAN-13
Transmit Check Character
EAN-13 is 13 digits in length with the last one as its check character used to verify the integrity of the data.
Transmit EAN-13 Check Character (default)
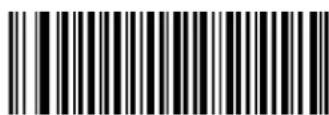
Do Not Transmit EAN-13 Check Character
2-Digit Add-On Code
An EAN-13 barcode can be augmented with a two-digit add-on code to form a new one.
Disable 2-Digit Add-On Code: The scanner decodes EAN-13 and ignores the add-on code when presented with an EAN-13 plus 2-digit add-on barcode. It can also decode EAN-13 barcodes without 2-digit add-on codes.
✿ Enable 2-Digit Add-On Code: The scanner decodes a mix of EAN-13 barcodes with and without 2-digit add-on codes.
Decode EAN-13 + 2-Digit Add-On Code Only: The scanner only decodes EAN-13 barcodes that contain 2-digit add-on codes.
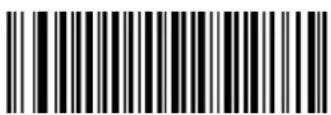
Disable 2-Digit Add-On Code (default)
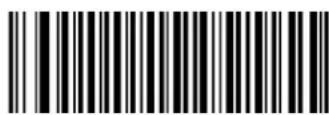
Enable 2-Digit Add-On Code
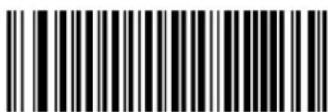
Decode EAN-13 + 2-Digit Add-On Code Only
5-Digit Add-On Code
An EAN-13 barcode can be augmented with a five-digit add-on code to form a new one.
Disable 5-Digit Add-On Code: The scanner decodes EAN-13 and ignores the add-on code when presented with an EAN-13 plus 5-digit add-on barcode. It can also decode EAN-13 barcodes without 5-digit add-on codes.
✿ Enable 5-Digit Add-On Code: The scanner decodes a mix of EAN-13 barcodes with and without 5-digit add-on codes.
Decode EAN-13 + 5-Digit Add-On Code Only: The scanner only decodes EAN-13 barcodes that contain 5-digit add-on codes.
Disable 5-Digit Add-On Code (default)
Enable 5-Digit Add-On Code
Decode EAN-13 + 5-Digit Add-On Code Only
EAN-13 Beginning with 290 Add-On Code Required
This setting programs the scanner to require an add-on code (2-digit or 5-digit) on EAN-13 barcodes that begin with "290". The following settings can be programmed:
Require Add-On Code: All EAN-13 barcodes that begin with "290" must have a 2-digit or 5-digit add-on code. The EAN-13 barcode with the add-on code is then transmitted. If the required add-on code is not found, the EAN-13 barcode is discarded.
Do Not Require Add-On Code: If you have selected Require Add-On Code, and you want to disable this feature, scan Do Not Require Add-On Code. EAN-13 barcodes are handled, depending on your selection for the "2 or 5-Digit Add-On Code" feature.
Do Not Require Add-On Code (default)
Require Add-On Code
EAN-13 Beginning with 378/379 Add-On Code Required
This setting programs the scanner to require an add-on code (2-digit or 5-digit) on EAN-13 barcodes that begin with a "378" or "379". The following settings can be programmed:
Require Add-On Code: All EAN-13 barcodes that begin with a "378" or "379" must have a 2-digit or 5-digit add-on code. The EAN-13 barcode with the add-on code is then transmitted. If the required add-on code is not found, the EAN-13 barcode is discarded.
Do Not Require Add-On Code: If you have selected Require Add-On Code, and you want to disable this feature, scan Do Not Require Add-On Code. EAN-13 barcodes are handled, depending on your selection for the "2 or 5-Digit Add-On Code" feature.
Do Not Require Add-On Code (default)
Require Add-On Code
EAN-13 Beginning with 414/419 Add-On Code Required
This setting programs the scanner to require an add-on code (2-digit or 5-digit) on EAN-13 barcodes that begin with a "414" or "419". The following settings can be programmed:
Require Add-On Code: All EAN-13 barcodes that begin with a "414" or "419" must have a 2-digit or 5-digit add-on code. The EAN-13 barcode with the add-on code is then transmitted. If the required add-on code is not found, the EAN-13 barcode is discarded.
Do Not Require Add-On Code: If you have selected Require Add-On Code, and you want to disable this feature, scan Do Not Require Add-On Code. EAN-13 barcodes are handled, depending on your selection for the "2 or 5-Digit Add-On Code" feature.
Do Not Require Add-On Code (default)
Require Add-On Code
EAN-13 Beginning with 434/439 Add-On Code Required
This setting programs the scanner to require an add-on code (2-digit or 5-digit) on EAN-13 barcodes that begin with a "434" or "439". The following settings can be programmed:
Require Add-On Code: All EAN-13 barcodes that begin with a "434" or "439" must have a 2-digit or 5-digit add-on code. The EAN-13 barcode with the add-on code is then transmitted. If the required add-on code is not found, the EAN-13 barcode is discarded.
Do Not Require Add-On Code: If you have selected Require Add-On Code, and you want to disable this feature, scan Do Not Require Add-On Code. EAN-13 barcodes are handled, depending on your selection for the "2 or 5-Digit Add-On Code" feature.
Do Not Require Add-On Code (default)
Require Add-On Code
EAN-13 Beginning with 977 Add-On Code Required
This setting programs the scanner to require an add-on code (2-digit or 5-digit) on EAN-13 barcodes that begin with "977". The following settings can be programmed:
Require Add-On Code: All EAN-13 barcodes that begin with "977" must have a 2-digit or 5-digit add-on code. The EAN-13 barcode with the add-on code is then transmitted. If the required add-on code is not found, the EAN-13 barcode is discarded.
Do Not Require Add-On Code: If you have selected Require Add-On Code, and you want to disable this feature, scan Do Not Require Add-On Code. EAN-13 barcodes are handled, depending on your selection for the "2 or 5-Digit Add-On Code" feature.
Do Not Require Add-On Code (default)
Require Add-On Code
EAN-13 Beginning with 978 Add-On Code Required
This setting programs the scanner to require an add-on code (2-digit or 5-digit) on EAN-13 barcodes that begin with "978". The following settings can be programmed:
Require Add-On Code: All EAN-13 barcodes that begin with "978" must have a 2-digit or 5-digit add-on code. The EAN-13 barcode with the add-on code is then transmitted. If the required add-on code is not found, the EAN-13 barcode is discarded.
Do Not Require Add-On Code: If you have selected Require Add-On Code, and you want to disable this feature, scan Do Not Require Add-On Code. EAN-13 barcodes are handled, depending on your selection for the "2 or 5-Digit Add-On Code" feature.
Do Not Require Add-On Code (default)
Require Add-On Code
EAN-13 Beginning with 979 Add-On Code Required
This setting programs the scanner to require an add-on code (2-digit or 5-digit) on EAN-13 barcodes that begin with "979". The following settings can be programmed:
Require Add-On Code: All EAN-13 barcodes that begin with "979" must have a 2-digit or 5-digit add-on code. The EAN-13 barcode with the add-on code is then transmitted. If the required add-on code is not found, the EAN-13 barcode is discarded.
Do Not Require Add-On Code: If you have selected Require Add-On Code, and you want to disable this feature, scan Do Not Require Add-On Code. EAN-13 barcodes are handled, depending on your selection for the "2 or 5-Digit Add-On Code" feature.
Do Not Require Add-On Code (default)
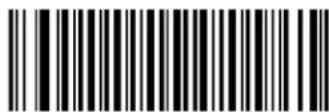
Require Add-On Code
ISSN
UPC-E is 8 digits in length with the last one as its check character used to verify the integrity of the data.
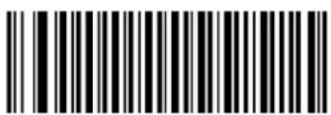
Transmit UPC-E Check Character (default)
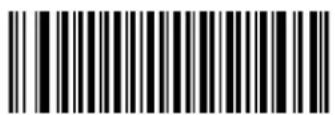
Do Not Transmit UPC-E Check Character
2-Digit Add-On Code
A UPC-E barcode can be augmented with a two-digit add-on code to form a new one.
Disable 2-Digit Add-On Code: The scanner decodes UPC-E and ignores the add-on code when presented with a UPC-E plus 2-digit add-on barcode. It can also decode UPC-E barcodes without 2-digit add-on codes.
✿ Enable 2-Digit Add-On Code: The scanner decodes a mix of UPC-E barcodes with and without 2-digit add-on codes.
Decode UPC-E + 2-Digit Add-On Code Only: The scanner only decodes UPC-E barcodes that contain 2-digit add-on codes.
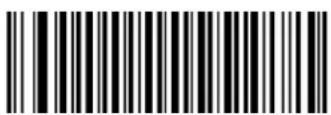
Disable 2-Digit Add-On Code (default)
Enable 2-Digit Add-On Code
Decode UPC-E + 2-Digit Add-On Code Only
5-Digit Add-On Code
A UPC-E barcode can be augmented with a five-digit add-on code to form a new one.
✿ Disable 5-Digit Add-On Code: The scanner decodes UPC-E and ignores the add-on code when presented with a UPC-E plus 5-digit add-on barcode. It can also decode UPC-E barcodes without 5-digit add-on codes.
✿ Enable 5-Digit Add-On Code: The scanner decodes a mix of UPC-E barcodes with and without 5-digit add-on codes.
Decode UPC-E + 5-Digit Add-On Code Only: The scanner only decodes UPC-E barcodes that contain 5-digit add-on codes.
Disable 5-Digit Add-On Code (default)
Enable 5-Digit Add-On Code
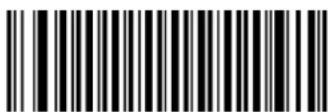
Decode UPC-E + 5-Digit Add-On Code Only
Transmit Preamble Character
Preamble characters (Country Code and System Character) can be transmitted as part of a UPC-E barcode. Select one of the following options for transmitting UPC-E preamble to the host device: transmit system character only, transmit system character and country code ("0" for USA), or transmit no preamble.
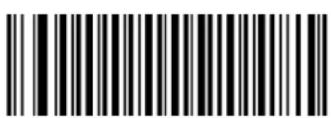
No Preamble (default)
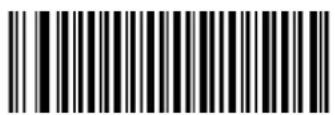
System Character
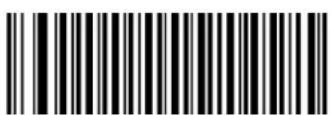
System Character & Country Code
UPC-E Extension
✿ Disable UPC-E Extend: Transmit UPC-E barcodes as is.
✿ Enable UPC-E Extend: Extend UPC-E barcodes to make them compatible in length to UPC-A.
✿ Convert UPC-E to UPC-A: Extend UPC-E barcodes to make them compatible in format to UPC-A.
Disable UPC-E Extend (default)
Enable UPC-E Extend
Convert UPC-E to UPC-A
UPC-A
UPC-A is 13 digits in length with the last one as its check character used to verify the integrity of the data.
Transmit UPC-A Check Character (default)
Do Not Transmit UPC-A Check Character
Transmit Preamble Character
Preamble characters (Country Code and System Character) can be transmitted as part of a UPC-A barcode. Select one of the following options for transmitting UPC-A preamble to the host device: transmit system character only, transmit system character and country code ("0" for USA), or transmit no preamble.
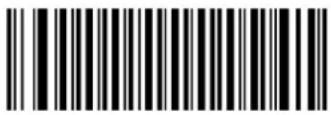
No Preamble
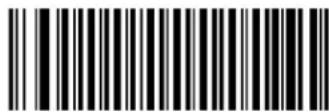
System Character (default)
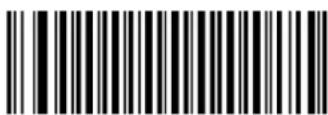
System Character & Country Code
2-Digit Add-On Code
A UPC-A barcode can be augmented with a two-digit add-on code to form a new one.
Disable 2-Digit Add-On Code: The scanner decodes UPC-A and ignores the add-on code when presented with a UPC-A plus 2-digit add-on barcode. It can also decode UPC-A barcodes without 2-digit add-on codes.
✿ Enable 2-Digit Add-On Code: The scanner decodes a mix of UPC-A barcodes with and without 2-digit add-on codes.
Decode UPC-A + 2-Digit Add-On Code Only: The scanner only decodes UPC-A barcodes that contain 2-digit add-on codes.
Disable 2-Digit Add-On Code (default)
Enable 2-Digit Add-On Code
Decode UPC-A + 2-Digit Add-On Code Only
5-Digit Add-On Code
A UPC-A barcode can be augmented with a five-digit add-on code to form a new one.
✿ Disable 5-Digit Add-On Code: The scanner decodes UPC-A and ignores the add-on code when presented with a UPC-A plus 5-digit add-on barcode. It can also decode UPC-A barcodes without 5-digit add-on codes.
✿ Enable 5-Digit Add-On Code: The scanner decodes a mix of UPC-A barcodes with and without 5-digit add-on codes.
Decode UPC-A + 5-Digit Add-On Code Only: The scanner only decodes UPC-A barcodes that contain 5-digit add-on codes.
Disable 5-Digit Add-On Code (default)
Enable 5-Digit Add-On Code
Decode UPC-A + 5-Digit Add-On Code Only
Interleaved 2 of 5

Restore the Factory Defaults of Interleaved 2 of 5
Enable/Disable Interleaved 2 of 5
Enable Interleaved 2 of 5 (default)
Disable Interleaved 2 of 5
Check Character Verification
Disable
Do Not Transmit Check Character After Verification
(default)
Transmit Check Character After Verification
Set Length Range for Interleaved 2 of 5
The scanner can be configured to only decode Interleaved 2 of 5 barcodes with lengths that fall between (inclusive) the minimum and maximum lengths. To accomplish it, you need to set the minimum and maximum lengths.
If minimum length is set to be greater than maximum length, the scanner only decodes Interleaved 2 of 5 barcodes with either the minimum or maximum length. If minimum length is same as maximum length, only Interleaved 2 of 5 barcodes with that length are to be decoded.
Set the Minimum Length
Set the Maximum Length
Example: Set the scanner to decode Interleaved 2 of 5 barcodes containing between 8 and 12 characters
- Scan the Set the Minimum Length barcode.
- Scan the numeric barcode "8" from the "Digit Barcodes (1D Scanner)" section in Appendix.
- Scan the Save barcode from the "Save/Cancel Barcodes (1D Scanner)" section in Appendix.
- Scan the Set the Maximum Length barcode.
- Scan the numeric barcodes "1" and "2" from the "Digit Barcodes (1D Scanner)" section in Appendix.
- Scan the Save barcode from the "Save/Cancel Barcodes (1D Scanner)" section in Appendix.
ITF-6
ITF-6 is a special kind of Interleaved 2 of 5 with a length of 6 characters and the last character as the check character.

Restore the Factory Defaults of ITF-6
Disable ITF-6 (default)
Enable ITF-6, Do Not Transmit Check Character
Enable ITF-6, Transmit Check Character
Note: It is advisable not to enable ITF-6 and Interleaved 2 of 5 at the same time.
ITF-14
ITF-14 is a special kind of Interleaved 2 of 5 with a length of 14 characters and the last character as the check character.
Restore the Factory Defaults of ITF-14
Enable ITF-14, Do Not Transmit Check Character
Disable ITF-14 (default)
Enable ITF-14, Transmit Check Character
Note: It is advisable not to enable ITF-14 and Interleaved 2 of 5 at the same time.
Deutsche 14
Enable Deutsche 14, Do Not Transmit Check Character
Disable Deutsche 14 (default)
Enable Deutsche 14, Transmit Check Character
Note: It is advised not to enable Deutsche 14 unless necessary, because Deutsche 14, ITF-14 and Interleaved 2 of 5 use the same encoding method and enabling them at the same time can easily cause confusion with each other when decoding.
Deutsche 12
Enable Deutsche 12, Do Not Transmit Check Character
Disable Deutsche 12 (default)
Enable Deutsche 12, Transmit Check Character
Note: It is advised not to enable Deutsche 12 unless necessary, because Deutsche 12, ITF-12 and Interleaved 2 of 5 use the same encoding method and enabling them at the same time can easily cause confusion with each other when decoding.
COOP 25 (Japanese Matrix 2 of 5)
Check Character Verification
Disable (default)
Transmit Check Character After Verification
Do Not Transmit Check Character After Verification
Set Length Range for COOP 25
The scanner can be configured to only decode COOP 25 barcodes with lengths that fall between (inclusive) the minimum and maximum lengths. To accomplish it, you need to set the minimum and maximum lengths.
If minimum length is set to be greater than maximum length, the scanner only decodes COOP 25 barcodes with either the minimum or maximum length. If minimum length is same as maximum length, only COOP 25 barcodes with that length are to be decoded.
Set the Minimum Length
Set the Maximum Length
Example: Set the scanner to decode COOP 25 barcodes containing between 8 and 12 characters
- Scan the Set the Minimum Length barcode.
- Scan the numeric barcode "8" from the "Digit Barcodes (1D Scanner)" section in Appendix.
- Scan the Save barcode from the "Save/Cancel Barcodes (1D Scanner)" section in Appendix.
- Scan the Set the Maximum Length barcode.
- Scan the numeric barcodes "1" and "2" from the "Digit Barcodes (1D Scanner)" section in Appendix.
- Scan the Save barcode from the "Save/Cancel Barcodes (1D Scanner)" section in Appendix.
Matrix 2 of 5 (European Matrix 2 of 5)
Restore the Factory Defaults of Matrix 2 of 5
Enable/Disable Matrix 2 of 5
Enable Matrix 2 of 5 (default)
Disable Matrix 2 of 5
Check Character Verification
Disable (default)
Transmit Check Character After Verification
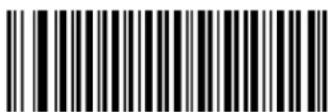
Do Not Transmit Check Character After Verification
Set Length Range for Matrix 2 of 5
The scanner can be configured to only decode Matrix 2 of 5 barcodes with lengths that fall between (inclusive) the minimum and maximum lengths. To accomplish it, you need to set the minimum and maximum lengths.
If minimum length is set to be greater than maximum length, the scanner only decodes Matrix 2 of 5 barcodes with either the minimum or maximum length. If minimum length is same as maximum length, only Matrix 2 of 5 barcodes with that length are to be decoded.
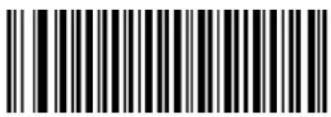
Set the Minimum Length
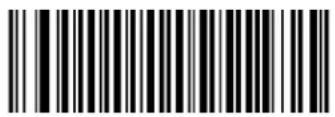
text_image
Black and white barcode image with vertical lines and a small number 'n' in the center.Set the Maximum Length
Example: Set the scanner to decode Matrix 2 of 5 barcodes containing between 8 and 12 characters
- Scan the Set the Minimum Length barcode.
- Scan the numeric barcode "8" from the "Digit Barcodes (1D Scanner)" section in Appendix.
- Scan the Save barcode from the "Save/Cancel Barcodes (1D Scanner)" section in Appendix.
- Scan the Set the Maximum Length barcode.
- Scan the numeric barcodes "1" and "2" from the "Digit Barcodes (1D Scanner)" section in Appendix.
- Scan the Save barcode from the "Save/Cancel Barcodes (1D Scanner)" section in Appendix.
Industrial 25
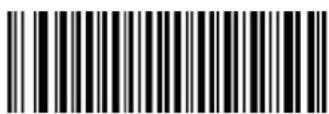
Restore the Factory Defaults of Industrial 25
Enable/Disable Industrial 25
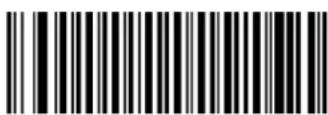
Enable Industrial 25 (default)
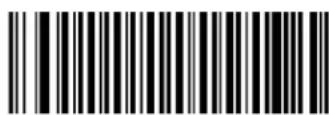
Disable Industrial 25
Check Character Verification
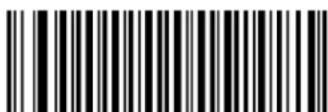
Disable (default)
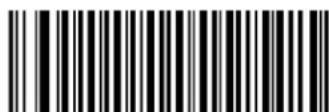
Transmit Check Character After Verification
Do Not Transmit Check Character After Verification
Set Length Range for Industrial 25
The scanner can be configured to only decode Industrial 25 barcodes with lengths that fall between (inclusive) the minimum and maximum lengths. To accomplish it, you need to set the minimum and maximum lengths.
If minimum length is set to be greater than maximum length, the scanner only decodes Industrial 25 barcodes with either the minimum or maximum length. If minimum length is same as maximum length, only Industrial 25 barcodes with that length are to be decoded.
Set the Minimum Length
text_image
Black and white barcode image with vertical lines and a small number 'n' in the center.Set the Maximum Length
Example: Set the scanner to decode Industrial 25 barcodes containing between 8 and 12 characters
- Scan the Set the Minimum Length barcode.
- Scan the numeric barcode "8" from the "Digit Barcodes (1D Scanner)" section in Appendix.
- Scan the Save barcode from the "Save/Cancel Barcodes (1D Scanner)" section in Appendix.
- Scan the Set the Maximum Length barcode.
- Scan the numeric barcodes "1" and "2" from the "Digit Barcodes (1D Scanner)" section in Appendix.
- Scan the Save barcode from the "Save/Cancel Barcodes (1D Scanner)" section in Appendix.
Standard 25
Transmit Check Character After Verification
Do Not Transmit Check Character After Verification
Set Length Range for Standard 25
The scanner can be configured to only decode Standard 25 barcodes with lengths that fall between (inclusive) the minimum and maximum lengths. To accomplish it, you need to set the minimum and maximum lengths.
If minimum length is set to be greater than maximum length, the scanner only decodes Standard 25 barcodes with either the minimum or maximum length. If minimum length is same as maximum length, only Standard 25 barcodes with that length are to be decoded.
Set the Minimum Length
text_image
Black and white barcode image with vertical lines and a small number 'n' in the center.Set the Maximum Length
Example: Set the scanner to decode Standard 25 barcodes containing between 8 and 12 characters
- Scan the Set the Minimum Length barcode.
- Scan the numeric barcode "8" from the "Digit Barcodes (1D Scanner)" section in Appendix.
- Scan the Save barcode from the "Save/Cancel Barcodes (1D Scanner)" section in Appendix.
- Scan the Set the Maximum Length barcode.
- Scan the numeric barcodes "1" and "2" from the "Digit Barcodes (1D Scanner)" section in Appendix.
- Scan the Save barcode from the "Save/Cancel Barcodes (1D Scanner)" section in Appendix.
Code 39
Check Character Verification
Disable (default)
Transmit Check Character After Verification
Do Not Transmit Check Character After Verification
Transmit Start/Stop Character
Code 39 uses an asterisk (*) for both the start and the stop characters. You can choose whether or not to transmit the start/stop characters by scanning the appropriate barcode below.
Transmit Start/Stop Character (default)
Do Not Transmit Start/Stop Character
Enable/Disable Code 39 Full ASCII
The scanner can be configured to identify all ASCII characters by scanning the appropriate barcode below.
Disable Code 39 Full ASCII
Enable Code 39 Full ASCII (default)
Set Length Range for Code 39
The scanner can be configured to only decode Code 39 barcodes with lengths that fall between (inclusive) the minimum and maximum lengths. To accomplish it, you need to set the minimum and maximum lengths.
If minimum length is set to be greater than maximum length, the scanner only decodes Code 39 barcodes with either the minimum or maximum length. If minimum length is same as maximum length, only Code 39 barcodes with that length are to be decoded.
Set the Minimum Length
text_image
Black and white barcode image with vertical lines and a small number 'n' in the center.Set the Maximum Length
Example: Set the scanner to decode Code 39 barcodes containing between 8 and 12 characters
- Scan the Set the Minimum Length barcode.
- Scan the numeric barcode "8" from the "Digit Barcodes (1D Scanner)" section in Appendix.
- Scan the Save barcode from the "Save/Cancel Barcodes (1D Scanner)" section in Appendix.
- Scan the Set the Maximum Length barcode.
- Scan the numeric barcodes "1" and "2" from the "Digit Barcodes (1D Scanner)" section in Appendix.
- Scan the Save barcode from the "Save/Cancel Barcodes (1D Scanner)" section in Appendix.
Enable/Disable Code 32
Code 32 is a variant of Code 39 used by the Italian pharmaceutical industry. Scan the appropriate bar code below to enable or disable Code 32. Code 39 must be enabled and Code 39 check character verification must be disabled for this parameter to function.
Disable Code 32 (default)

Enable Code 32
Code 32 Prefix
Scan the appropriate bar code below to enable or disable adding the prefix character "A" to all Code 32 barcodes. Code 32 must be enabled for this parameter to function.
Disable Code 32 Prefix (default)
Enable Code 32 Prefix
Transmit Code 32 Check Character
Code 32 must be enabled for this parameter to function.
Do Not Transmit Code 32 Check Character (default)
Transmit Code 32 Check Character
Transmit Code 32 Start/Stop Character
Code 32 must be enabled for this parameter to function.
Do Not Transmit Code 32 Start/Stop Character (default)
Transmit Code 32 Start/Stop Character
Codabar
Check Character Verification
Disable (default)
Transmit Check Character After Verification
Do Not Transmit Check Character After Verification
Transmit Start/Stop Character
Do Not Transmit Start/Stop Character
Transmit Start/Stop Character (default)
ABCD/ABCD as the Start/Stop Character (default)
ABCD/TN*E as the Start/Stop Character
abcd/abcd as the Start/Stop Character
abcd/tn*e as the Start/Stop Character
Set Length Range for Codabar
The scanner can be configured to only decode Codabar barcodes with lengths that fall between (inclusive) the minimum and maximum lengths. To accomplish it, you need to set the minimum and maximum lengths.
If minimum length is set to be greater than maximum length, the scanner only decodes Codabar barcodes with either the minimum or maximum length. If minimum length is same as maximum length, only Codabar barcodes with that length are to be decoded.
Set the Minimum Length
text_image
Black and white barcode image with vertical lines and a small number 'n' in the bottom right corner.Set the Maximum Length
Example: Set the scanner to decode Codabar barcodes containing between 8 and 12 characters
- Scan the Set the Minimum Length barcode.
- Scan the numeric barcode "8" from the "Digit Barcodes (1D Scanner)" section in Appendix.
- Scan the Save barcode from the "Save/Cancel Barcodes (1D Scanner)" section in Appendix.
- Scan the Set the Maximum Length barcode.
- Scan the numeric barcodes "1" and "2" from the "Digit Barcodes (1D Scanner)" section in Appendix.
- Scan the Save barcode from the "Save/Cancel Barcodes (1D Scanner)" section in Appendix.
Code 93
Check Character Verification
Disable
Transmit Check Character After Verification
Do Not Transmit Check Character After Verification
(default)
Set Length Range for Code 93
The scanner can be configured to only decode Code 93 barcodes with lengths that fall between (inclusive) the minimum and maximum lengths. To accomplish it, you need to set the minimum and maximum lengths.
If minimum length is set to be greater than maximum length, the scanner only decodes Code 93 barcodes with either the minimum or maximum length. If minimum length is same as maximum length, only Code 93 barcodes with that length are to be decoded.
Set the Minimum Length
text_image
Black and white barcode image with vertical lines and a central dotSet the Maximum Length
Example: Set the scanner to decode Code 93 barcodes containing between 8 and 12 characters
- Scan the Set the Minimum Length barcode.
- Scan the numeric barcode "8" from the "Digit Barcodes (1D Scanner)" section in Appendix.
- Scan the Save barcode from the "Save/Cancel Barcodes (1D Scanner)" section in Appendix.
- Scan the Set the Maximum Length barcode.
- Scan the numeric barcodes "1" and "2" from the "Digit Barcodes (1D Scanner)" section in Appendix.
- Scan the Save barcode from the "Save/Cancel Barcodes (1D Scanner)" section in Appendix.
Code 11
Check Character Verification
text_image
Black and white barcode image with vertical lines and a central dotDisable
One Check Character, MOD11 (default)
Two Check Characters, MOD11/MOD11
Two Check Characters, MOD11/MOD9
One Check Character, MOD11 (Len <= 10)
Two Check Characters, MOD11/MOD11 (Len > 10)
One Check Character, MOD11 (Len <= 10)
Two Check Characters, MOD11/MOD9 (Len > 10)
Do Not Transmit Check Character (default)
Transmit Check Character
Set Length Range for Code 11
The scanner can be configured to only decode Code 11 barcodes with lengths that fall between (inclusive) the minimum and maximum lengths. To accomplish it, you need to set the minimum and maximum lengths.
If minimum length is set to be greater than maximum length, the scanner only decodes Code 11 barcodes with either the minimum or maximum length. If minimum length is same as maximum length, only Code 11 barcodes with that length are to be decoded.
Set the Minimum Length
Set the Maximum Length
Example: Set the scanner to decode Code 11 barcodes containing between 8 and 12 characters
- Scan the Set the Minimum Length barcode.
- Scan the numeric barcode "8" from the "Digit Barcodes (1D Scanner)" section in Appendix.
- Scan the Save barcode from the "Save/Cancel Barcodes (1D Scanner)" section in Appendix.
- Scan the Set the Maximum Length barcode.
- Scan the numeric barcodes "1" and "2" from the "Digit Barcodes (1D Scanner)" section in Appendix.
- Scan the Save barcode from the "Save/Cancel Barcodes (1D Scanner)" section in Appendix.
Plessey
Check Character Verification
Disable
Transmit Check Character After Verification
Do Not Transmit Check Character After Verification
(default)
Set Length Range for Plessey
The scanner can be configured to only decode Plessey barcodes with lengths that fall between (inclusive) the minimum and maximum lengths. To accomplish it, you need to set the minimum and maximum lengths.
If minimum length is set to be greater than maximum length, the scanner only decodes Plessey barcodes with either the minimum or maximum length. If minimum length is same as maximum length, only Plessey barcodes with that length are to be decoded.
Set the Minimum Length
Set the Maximum Length
Example: Set the scanner to decode Plessey barcodes containing between 8 and 12 characters
- Scan the Set the Minimum Length barcode.
- Scan the numeric barcode "8" from the "Digit Barcodes (1D Scanner)" section in Appendix.
- Scan the Save barcode from the "Save/Cancel Barcodes (1D Scanner)" section in Appendix.
- Scan the Set the Maximum Length barcode.
- Scan the numeric barcodes "1" and "2" from the "Digit Barcodes (1D Scanner)" section in Appendix.
- Scan the Save barcode from the "Save/Cancel Barcodes (1D Scanner)" section in Appendix.
MSI-Plessey
Check Character Verification
Disable
One Check Character, MOD10 (default)
Two Check Characters, MOD10/MOD10
Two Check Characters, MOD10/MOD11
Do Not Transmit Check Character (default)

Transmit Check Character
Set Length Range for MSI-Plessey
The scanner can be configured to only decode MSI-Plessey barcodes with lengths that fall between (inclusive) the minimum and maximum lengths. To accomplish it, you need to set the minimum and maximum lengths.
If minimum length is set to be greater than maximum length, the scanner only decodes MSI-Plessey barcodes with either the minimum or maximum length. If minimum length is same as maximum length, only MSI-Plessey barcodes with that length are to be decoded.
Set the Minimum Length

Set the Maximum Length
Example: Set the scanner to decode MSI-Plessey barcodes containing between 8 and 12 characters
- Scan the Set the Minimum Length barcode.
- Scan the numeric barcode "8" from the "Digit Barcodes (1D Scanner)" section in Appendix.
- Scan the Save barcode from the "Save/Cancel Barcodes (1D Scanner)" section in Appendix.
- Scan the Set the Maximum Length barcode.
- Scan the numeric barcodes "1" and "2" from the "Digit Barcodes (1D Scanner)" section in Appendix.
- Scan the Save barcode from the "Save/Cancel Barcodes (1D Scanner)" section in Appendix.
GS1 Databar
If the Disable All Symbologies feature is enabled, the scanner will not be able to read any non-programming barcodes except the programming barcodes.
Enable All Symbologies
Disable All Symbologies
Enable/Disable 1D Symbologies
If the Disable 1D Symbologies feature is enabled, the scanner will not be able to read any 1D barcodes.
Enable 1D Symbologies
Disable 1D Symbologies
Enable/Disable 2D Symbologies
If the Disable 2D Symbologies feature is enabled, the scanner will not be able to read any 2D barcodes.
Enable 2D Symbologies
Disable 2D Symbologies
Video Reverse
The Video Reverse feature only applies to 2D barcodes.
Regular barcode: Dark image on a bright background.
Inverse barcode: Bright image on a dark background.
The examples of regular barcode and inverse barcode are shown below.
text_image
Black and white QR code image containing encoded dataRegular Barcode
text_image
QR code image containing encoded data, no visible human-readable textInverse Barcode
Video Reverse allows the scanner to read barcodes that are inverted.
Video Reverse ON: Read both regular barcodes and inverse barcodes.
Video Reverse OFF: Read regular barcodes only.
The scanner shows a slight decrease in scanning speed when Video Reverse is ON.
Video Reverse ON
Video Reverse OFF (default)
Code 128
Set Length Range for Code 128
The scanner can be configured to only decode Code 128 barcodes with lengths that fall between (inclusive) the minimum and maximum lengths. To accomplish it, you need to set the minimum and maximum lengths.
If minimum length is set to be greater than maximum length, the scanner only decodes Code 128 barcodes with either the minimum or maximum length. If minimum length is same as maximum length, only Code 128 barcodes with that length are to be decoded.
Set the Minimum Length
Set the Maximum Length
Example: Set the scanner to decode Code 128 barcodes containing between 8 and 12 characters
- Scan the Set the Minimum Length barcode.
- Scan the numeric barcode "8" from the "Digit Barcodes (2D Scanner)" section in Appendix.
- Scan the Save barcode from the "Save/Cancel Barcodes (2D Scanner)" section in Appendix.
- Scan the Set the Maximum Length barcode.
- Scan the numeric barcodes "1" and "2" from the "Digit Barcodes (2D Scanner)" section in Appendix.
- Scan the Save barcode from the "Save/Cancel Barcodes (2D Scanner)" section in Appendix.
GS1-128 (UCC/EAN-128)
Set Length Range for GS1-128
The scanner can be configured to only decode GS1-128 barcodes with lengths that fall between (inclusive) the minimum and maximum lengths. To accomplish it, you need to set the minimum and maximum lengths.
If minimum length is set to be greater than maximum length, the scanner only decodes GS1-128 barcodes with either the minimum or maximum length. If minimum length is same as maximum length, only GS1-128 barcodes with that length are to be decoded.
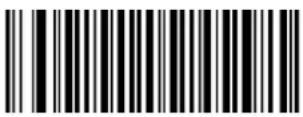
Set the Minimum Length
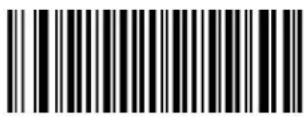
Set the Maximum Length
Example: Set the scanner to decode GS1-128 barcodes containing between 8 and 12 characters
- Scan the Set the Minimum Length barcode.
- Scan the numeric barcode "8" from the "Digit Barcodes (2D Scanner)" section in Appendix.
- Scan the Save barcode from the "Save/Cancel Barcodes (2D Scanner)" section in Appendix.
- Scan the Set the Maximum Length barcode.
- Scan the numeric barcodes "1" and "2" from the "Digit Barcodes (2D Scanner)" section in Appendix.
- Scan the Save barcode from the "Save/Cancel Barcodes (2D Scanner)" section in Appendix.
AIM-128
Set Length Range for AIM-128
The scanner can be configured to only decode AIM-128 barcodes with lengths that fall between (inclusive) the minimum and maximum lengths. To accomplish it, you need to set the minimum and maximum lengths.
If minimum length is set to be greater than maximum length, the scanner only decodes AIM-128 barcodes with either the minimum or maximum length. If minimum length is same as maximum length, only AIM-128 barcodes with that length are to be decoded.
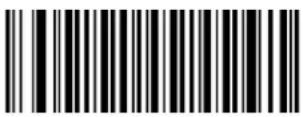
Set the Minimum Length
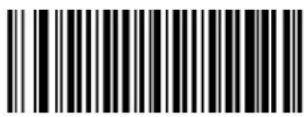
Set the Maximum Length
Example: Set the scanner to decode AIM-128 barcodes containing between 8 and 12 characters
- Scan the Set the Minimum Length barcode.
- Scan the numeric barcode "8" from the "Digit Barcodes (2D Scanner)" section in Appendix.
- Scan the Save barcode from the "Save/Cancel Barcodes (2D Scanner)" section in Appendix.
- Scan the Set the Maximum Length barcode.
- Scan the numeric barcodes "1" and "2" from the "Digit Barcodes (2D Scanner)" section in Appendix.
- Scan the Save barcode from the "Save/Cancel Barcodes (2D Scanner)" section in Appendix.
EAN-8
EAN-8 is 8 digits in length with the last one as its check character used to verify the integrity of the data.
Transmit EAN-8 Check Character (default)
Do Not Transmit EAN-8 Check Character
Add-On Code
An EAN-8 barcode can be augmented with a two-digit or five-digit add-on code to form a new one. In the examples below, the part surrounded by blue dotted line is an EAN-8 barcode while the part circled by red dotted line is add-on code.
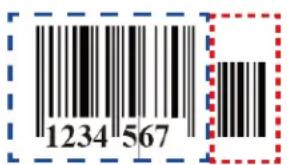
text_image
1234 567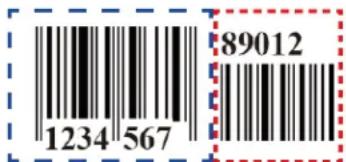
text_image
1234 567 89012
Enable 2-Digit Add-On Code

Disable 2-Digit Add-On Code (default)
Enable 5-Digit Add-On Code
Disable 5-Digit Add-On Code (default)
Enable 2-Digit Add-On Code/ Enable 5-Digit Add-On Code: The scanner decodes a mix of EAN-8 barcodes with and without 2-digit/5-digit add-on codes.
Disable 2-Digit Add-On Code/ Disable 5-Digit Add-On Code: The scanner decodes EAN-8 and ignores the add-on code when presented with an EAN-8 plus add-on barcode. It can also decode EAN-8 barcodes without add-on codes.
Add-On Code Required
When EAN-8 Add-On Code Required is selected, the scanner will only read EAN-8 barcodes that contain add-on codes.
EAN-8 Add-On Code Required
EAN-8 Add-On Code Not Required (default)
EAN-8 Extension
Disable EAN-8 Zero Extend: Transmit EAN-8 barcodes as is.
Enable EAN-8 Zero Extend: Add five leading zeros to decoded EAN-8 barcodes to extend to 13 digits.
Enable EAN-8 Zero Extend
Disable EAN-8 Zero Extend (default)
EAN-13
Enable/Disable EAN-13
Enable EAN-13 (default)
Disable EAN-13
Transmit Check Character

Transmit EAN-13 Check Character (default)
Do Not Transmit EAN-13 Check Character
Add-On Code
An EAN-13 barcode can be augmented with a two-digit or five-digit add-on code to form a new one.
Enable 2-Digit Add-On Code
Disable 2-Digit Add-On Code (default)
Enable 5-Digit Add-On Code
Disable 5-Digit Add-On Code (default)
Enable 2-Digit Add-On Code/ Enable 5-Digit Add-On Code: The scanner decodes a mix of EAN-13 barcodes with and without 2-digit/5-digit add-on codes.
Disable 2-Digit Add-On Code/ Disable 5-Digit Add-On Code: The scanner decodes EAN-13 and ignores the add-on code when presented with an EAN-13 plus add-on barcode. It can also decode EAN-13 barcodes without add-on codes.
Add-On Code Required
When EAN-13 Add-On Code Required is selected, the scanner will only read EAN-13 barcodes that contain add-on codes.
EAN-13 Add-On Code Required
EAN-13 Add-On Code Not Required (default)
EAN-13 Beginning with 290 Add-On Code Required (For BS8060-2T)
This setting programs the scanner to require an add-on code (2-digit or 5-digit) on EAN-13 barcodes that begin with "290". The following settings can be programmed:
Require Add-On Code: All EAN-13 barcodes that begin with "290" must have a 2-digit or 5-digit add-on code. The EAN-13 barcode with the add-on code is then transmitted. If the required add-on code is not found, the EAN-13 barcode is discarded.
Do Not Require Add-On Code: If you have selected Require Add-On Code, and you want to disable this feature, scan Do Not Require Add-On Code. EAN-13 barcodes are handled, depending on your selection for the "Add-On Code Required" feature.
Do Not Require Add-On Code (default)
Require Add-On Code
EAN-13 Beginning with 378/379 Add-On Code Required (For BS8060-2T)
This setting programs the scanner to require an add-on code (2-digit or 5-digit) on EAN-13 barcodes that begin with a "378" or "379". The following settings can be programmed:
Require Add-On Code: All EAN-13 barcodes that begin with a "378" or "379" must have a 2-digit or 5-digit add-on code. The EAN-13 barcode with the add-on code is then transmitted. If the required add-on code is not found, the EAN-13 barcode is discarded.
Do Not Require Add-On Code: If you have selected Require Add-On Code, and you want to disable this feature, scan Do Not Require Add-On Code. EAN-13 barcodes are handled, depending on your selection for the "Add-On Code Required" feature.
Do Not Require Add-On Code (default)
Require Add-On Code
EAN-13 Beginning with 414/419 Add-On Code Required (For BS8060-2T)
This setting programs the scanner to require an add-on code (2-digit or 5-digit) on EAN-13 barcodes that begin with a "414" or "419". The following settings can be programmed:
Require Add-On Code: All EAN-13 barcodes that begin with a "414" or "419" must have a 2-digit or 5-digit add-on code. The EAN-13 barcode with the add-on code is then transmitted. If the required add-on code is not found, the EAN-13 barcode is discarded.
Do Not Require Add-On Code: If you have selected Require Add-On Code, and you want to disable this feature, scan Do Not Require Add-On Code. EAN-13 barcodes are handled, depending on your selection for the "Add-On Code Required" feature.
Do Not Require Add-On Code (default)
Require Add-On Code
EAN-13 Beginning with 434/439 Add-On Code Required (For BS8060-2T)
This setting programs the scanner to require an add-on code (2-digit or 5-digit) on EAN-13 barcodes that begin with a "434" or "439". The following settings can be programmed:
Require Add-On Code: All EAN-13 barcodes that begin with a "434" or "439" must have a 2-digit or 5-digit add-on code. The EAN-13 barcode with the add-on code is then transmitted. If the required add-on code is not found, the EAN-13 barcode is discarded.
Do Not Require Add-On Code: If you have selected Require Add-On Code, and you want to disable this feature, scan Do Not Require Add-On Code. EAN-13 barcodes are handled, depending on your selection for the "Add-On Code Required" feature.
Do Not Require Add-On Code (default)
Require Add-On Code
EAN-13 Beginning with 977 Add-On Code Required (For BS8060-2T)
This setting programs the scanner to require an add-on code (2-digit or 5-digit) on EAN-13 barcodes that begin with "977". The following settings can be programmed:
Require Add-On Code: All EAN-13 barcodes that begin with "977" must have a 2-digit or 5-digit add-on code. The EAN-13 barcode with the add-on code is then transmitted. If the required add-on code is not found, the EAN-13 barcode is discarded.
Do Not Require Add-On Code: If you have selected Require Add-On Code, and you want to disable this feature, scan Do Not Require Add-On Code. EAN-13 barcodes are handled, depending on your selection for the "Add-On Code Required" feature.
Do Not Require Add-On Code (default)
Require Add-On Code
EAN-13 Beginning with 978 Add-On Code Required (For BS8060-2T)
This setting programs the scanner to require an add-on code (2-digit or 5-digit) on EAN-13 barcodes that begin with "978". The following settings can be programmed:
Require Add-On Code: All EAN-13 barcodes that begin with "978" must have a 2-digit or 5-digit add-on code. The EAN-13 barcode with the add-on code is then transmitted. If the required add-on code is not found, the EAN-13 barcode is discarded.
Do Not Require Add-On Code: If you have selected Require Add-On Code, and you want to disable this feature, scan Do Not Require Add-On Code. EAN-13 barcodes are handled, depending on your selection for the "Add-On Code Required" feature.
Do Not Require Add-On Code (default)
Require Add-On Code
EAN-13 Beginning with 979 Add-On Code Required (For BS8060-2T)
This setting programs the scanner to require an add-on code (2-digit or 5-digit) on EAN-13 barcodes that begin with "979". The following settings can be programmed:
Require Add-On Code: All EAN-13 barcodes that begin with "979" must have a 2-digit or 5-digit add-on code. The EAN-13 barcode with the add-on code is then transmitted. If the required add-on code is not found, the EAN-13 barcode is discarded.
Do Not Require Add-On Code: If you have selected Require Add-On Code, and you want to disable this feature, scan Do Not Require Add-On Code. EAN-13 barcodes are handled, depending on your selection for the "Add-On Code Required" feature.
Do Not Require Add-On Code (default)
Require Add-On Code
ISSN
An ISSN barcode can be augmented with a two-digit or five-digit add-on code to form a new one.
Enable 2-Digit Add-On Code
Disable 2-Digit Add-On Code (default)
Enable 5-Digit Add-On Code

Disable 5-Digit Add-On Code (default)
Enable 2-Digit Add-On Code/ Enable 5-Digit Add-On Code: The scanner decodes a mix of ISSN barcodes with and without 2-digit/5-digit add-on codes.
Disable 2-Digit Add-On Code/ Disable 5-Digit Add-On Code: The scanner decodes ISSN and ignores the add-on code when presented with an ISSN plus add-on barcode. It can also decode ISSN barcodes without add-on codes.
Add-On Code Required
When ISSN Add-On Code Required is selected, the scanner will only read ISSN barcodes that contain add-on codes.
ISSN Add-On Code Required
ISSN Add-On Code Not Required (default)
ISBN
Add-On Code Required
When ISBN Add-On Code Required is selected, the scanner will only read ISBN barcodes that contain add-on codes.
ISBN Add-On Code Required
ISBN Add-On Code Not Required (default)
UPC-E
A UPC-E barcode can be augmented with a two-digit or five-digit add-on code to form a new one.
Enable 2-Digit Add-On Code
Disable 2-Digit Add-On Code (default)
Enable 5-Digit Add-On Code
Disable 5-Digit Add-On Code (default)
Enable 2-Digit Add-On Code/ Enable 5-Digit Add-On Code: The scanner decodes a mix of UPC-E barcodes with and without 2-digit/5-digit add-on codes.
Disable 2-Digit Add-On Code/ Disable 5-Digit Add-On Code: The scanner decodes UPC-E and ignores the add-on code when presented with a UPC-E plus add-on barcode. It can also decode UPC-E barcodes without add-on codes.
Add-On Code Required
When UPC-E Add-On Code Required is selected, the scanner will only read UPC-E barcodes that contain add-on codes.
UPC-E Add-On Code Required
UPC-E Add-On Code Not Required (default)
Transmit System Character "0"
The first character of UPC-E barcode is the system character "0".
Transmit System Character "0" (default)
Do Not Transmit System Character "0"
UPC-E Extension
Disable UPC-E Extend: Transmit UPC-E barcodes as is.
Enable UPC-E Extend: Extend UPC-E barcodes to make them compatible in length to UPC-A.
Enable UPC-E Extend
Disable UPC-E Extend (default)
UPC-A
A UPC-A barcode can be augmented with a two-digit or five-digit add-on code to form a new one.
Enable 2-Digit Add-On Code
Disable 2-Digit Add-On Code (default)
Enable 5-Digit Add-On Code
Disable 5-Digit Add-On Code (default)
Enable 2-Digit Add-On Code/ Enable 5-Digit Add-On Code: The scanner decodes a mix of UPC-A barcodes with and without 2-digit/5-digit add-on codes.
Disable 2-Digit Add-On Code/ Disable 5-Digit Add-On Code: The scanner decodes UPC-A and ignores the add-on code when presented with a UPC-A plus add-on barcode. It can also decode UPC-A barcodes without add-on codes.
Add-On Code Required
When UPC-A Add-On Code Required is selected, the scanner will only read UPC-A barcodes that contain add-on codes.
UPC-A Add-On Code Required
UPC-A Add-On Code Not Required (default)
Transmit Preamble Character
Preamble characters (Country Code and System Character) can be transmitted as part of a UPC-A barcode. Select one of the following options for transmitting UPC-A preamble to the host device: transmit system character only or transmit system character and country code ("0" for USA).
System Character & Country Code
System Character (default)
Interleaved 2 of 5
Restore the Factory Defaults of Interleaved 2 of 5
Enable/Disable Interleaved 2 of 5
Enable Interleaved 2 of 5 (default)
Disable Interleaved 2 of 5
Set Length Range for Interleaved 2 of 5
The scanner can be configured to only decode Interleaved 2 of 5 barcodes with lengths that fall between (inclusive) the minimum and maximum lengths. To accomplish it, you need to set the minimum and maximum lengths.
If minimum length is set to be greater than maximum length, the scanner only decodes Interleaved 2 of 5 barcodes with either the minimum or maximum length. If minimum length is same as maximum length, only Interleaved 2 of 5 barcodes with that length are to be decoded.
Set the Minimum Length
Set the Maximum Length
Example: Set the scanner to decode Interleaved 2 of 5 barcodes containing between 8 and 12 characters
- Scan the Set the Minimum Length barcode.
- Scan the numeric barcode "8" from the "Digit Barcodes (2D Scanner)" section in Appendix.
- Scan the Save barcode from the "Save/Cancel Barcodes (2D Scanner)" section in Appendix.
- Scan the Set the Maximum Length barcode.
- Scan the numeric barcodes "1" and "2" from the "Digit Barcodes (2D Scanner)" section in Appendix.
- Scan the Save barcode from the "Save/Cancel Barcodes (2D Scanner)" section in Appendix.
Check Character Verification
A check character is optional for Interleaved 2 of 5 and can be added as the last character. It is a calculated value used to verify the integrity of the data.
Disable: The scanner transmits Interleaved 2 of 5 barcodes as is.
Do Not Transmit Check Character After Verification: The scanner checks the integrity of all Interleaved 2 of 5 barcodes to verify that the data complies with the check character algorithm. Barcodes passing the check will be transmitted except the last digit, whereas those failing it will not be transmitted.
Transmit Check Character After Verification: The scanner checks the integrity of all Interleaved 2 of 5 barcodes to verify that the data complies with the check character algorithm. Barcodes passing the check will be transmitted, whereas those failing it will not be transmitted.
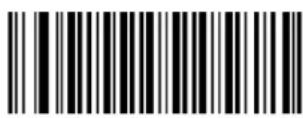
Disable (default)
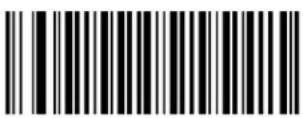
Do Not Transmit Check Character After Verification
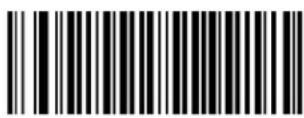
Transmit Check Character After Verification
ITF-14
ITF-14 is a special kind of Interleaved 2 of 5 with a length of 14 characters and the last character as the check character.
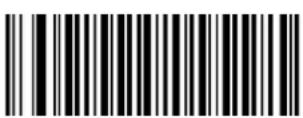
Restore the Factory Defaults of ITF-14
Disable ITF-14
Enable ITF-14 But Do Not Transmit Check Character (default)
Enable ITF-14 and Transmit Check Character
Note: It is advisable not to enable ITF-14 and Interleaved 2 of 5 at the same time.
ITF-6
ITF-6 is a special kind of Interleaved 2 of 5 with a length of 6 characters and the last character as the check character.
Restore the Factory Defaults of ITF-6
Disable ITF-6 (default)
Enable ITF-6 But Do Not Transmit Check Character
Enable ITF-6 and Transmit Check Character
Note: It is advisable not to enable ITF-6 and Interleaved 2 of 5 at the same time.
Matrix 2 of 5
Restore the Factory Defaults of Matrix 2 of 5
Enable/Disable Matrix 2 of 5

Enable Matrix 2 of 5
Disable Matrix 2 of 5 (default)
Set Length Range for Matrix 2 of 5
The scanner can be configured to only decode Matrix 2 of 5 barcodes with lengths that fall between (inclusive) the minimum and maximum lengths. To accomplish it, you need to set the minimum and maximum lengths.
If minimum length is set to be greater than maximum length, the scanner only decodes Matrix 2 of 5 barcodes with either the minimum or maximum length. If minimum length is same as maximum length, only Matrix 2 of 5 barcodes with that length are to be decoded.
Set the Minimum Length
Set the Maximum Length
Example: Set the scanner to decode Matrix 2 of 5 barcodes containing between 8 and 12 characters
- Scan the Set the Minimum Length barcode.
- Scan the numeric barcode "8" from the "Digit Barcodes (2D Scanner)" section in Appendix.
- Scan the Save barcode from the "Save/Cancel Barcodes (2D Scanner)" section in Appendix.
- Scan the Set the Maximum Length barcode.
- Scan the numeric barcodes "1" and "2" from the "Digit Barcodes (2D Scanner)" section in Appendix.
- Scan the Save barcode from the "Save/Cancel Barcodes (2D Scanner)" section in Appendix.
Check Character Verification
Disable
Do Not Transmit Check Character After Verification
(default)
Transmit Check Character After Verification
Industrial 2 of 5
Restore the Factory Defaults of Industrial 2 of 5
Enable/Disable Industrial 2 of 5
Enable Industrial 2 of 5 (default)
Disable Industrial 2 of 5
Set Length Range for Industrial 2 of 5
The scanner can be configured to only decode Industrial 25 barcodes with lengths that fall between (inclusive) the minimum and maximum lengths. To accomplish it, you need to set the minimum and maximum lengths.
If minimum length is set to be greater than maximum length, the scanner only decodes Industrial 25 barcodes with either the minimum or maximum length. If minimum length is same as maximum length, only Industrial 25 barcodes with that length are to be decoded.
Set the Minimum Length
Set the Maximum Length
Example: Set the scanner to decode Industrial 25 barcodes containing between 8 and 12 characters
- Scan the Set the Minimum Length barcode.
- Scan the numeric barcode "8" from the "Digit Barcodes (2D Scanner)" section in Appendix.
- Scan the Save barcode from the "Save/Cancel Barcodes (2D Scanner)" section in Appendix.
- Scan the Set the Maximum Length barcode.
- Scan the numeric barcodes "1" and "2" from the "Digit Barcodes (2D Scanner)" section in Appendix.
- Scan the Save barcode from the "Save/Cancel Barcodes (2D Scanner)" section in Appendix.
Check Character Verification
Disable (default)
Transmit Check Character After Verification
Do Not Transmit Check Character After Verification
Standard 25 (IATA 2 of 5)
Set Length Range for Standard 25
The scanner can be configured to only decode Standard 25 barcodes with lengths that fall between (inclusive) the minimum and maximum lengths. To accomplish it, you need to set the minimum and maximum lengths.
If minimum length is set to be greater than maximum length, the scanner only decodes Standard 25 barcodes with either the minimum or maximum length. If minimum length is same as maximum length, only Standard 25 barcodes with that length are to be decoded.
Set the Minimum Length
Set the Maximum Length
Example: Set the scanner to decode Standard 25 barcodes containing between 8 and 12 characters
- Scan the Set the Minimum Length barcode.
- Scan the numeric barcode "8" from the "Digit Barcodes (2D Scanner)" section in Appendix.
- Scan the Save barcode from the "Save/Cancel Barcodes (2D Scanner)" section in Appendix.
- Scan the Set the Maximum Length barcode.
- Scan the numeric barcodes "1" and "2" from the "Digit Barcodes (2D Scanner)" section in Appendix.
- Scan the Save barcode from the "Save/Cancel Barcodes (2D Scanner)" section in Appendix.
Check Character Verification
Disable (default)
Transmit Check Character After Verification
Do Not Transmit Check Character After Verification
Code 39
Set Length Range for Code 39
The scanner can be configured to only decode Code 39 barcodes with lengths that fall between (inclusive) the minimum and maximum lengths. To accomplish it, you need to set the minimum and maximum lengths.
If minimum length is set to be greater than maximum length, the scanner only decodes Code 39 barcodes with either the minimum or maximum length. If minimum length is same as maximum length, only Code 39 barcodes with that length are to be decoded.
Set the Minimum Length
Set the Maximum Length
Example: Set the scanner to decode Code 39 barcodes containing between 8 and 12 characters
- Scan the Set the Minimum Length barcode.
- Scan the numeric barcode "8" from the "Digit Barcodes (2D Scanner)" section in Appendix.
- Scan the Save barcode from the "Save/Cancel Barcodes (2D Scanner)" section in Appendix.
- Scan the Set the Maximum Length barcode.
- Scan the numeric barcodes "1" and "2" from the "Digit Barcodes (2D Scanner)" section in Appendix.
- Scan the Save barcode from the "Save/Cancel Barcodes (2D Scanner)" section in Appendix.
Check Character Verification
Disable (default)
Transmit Check Character After Verification

Do Not Transmit Check Character After Verification
Enable/Disable Code 39 Full ASCII
The scanner can be configured to identify all ASCII characters by scanning the appropriate barcode below.
Enable Code 39 Full ASCII (default)
Disable Code 39 Full ASCII
Enable/Disable Code 32 (For BS8060-2T)
Code 32 is a variant of Code 39 used by the Italian pharmaceutical industry. Scan the appropriate bar code below to enable or disable Code 32. Code 39 must be enabled and Code 39 check character verification must be disabled for this parameter to function.
Disable Code 32 (default)
Enable Code 32
Code 32 Prefix (For BS8060-2T)
Scan the appropriate bar code below to enable or disable adding the prefix character "A" to all Code 32 barcodes. Code 32 must be enabled for this parameter to function.
Disable Code 32 Prefix (default)
Enable Code 32 Prefix
Transmit Code 32 Check Character (For BS8060-2T)
Code 32 must be enabled for this parameter to function.
Do Not Transmit Code 32 Check Character (default)
Transmit Code 32 Check Character
Transmit Code 32 Start/Stop Character (For BS8060-2T)
Code 32 must be enabled for this parameter to function.
Do Not Transmit Code 32 Start/Stop Character (default)
Transmit Code 32 Start/Stop Character
Codabar
Set Length Range for Codabar
The scanner can be configured to only decode Codabar barcodes with lengths that fall between (inclusive) the minimum and maximum lengths. To accomplish it, you need to set the minimum and maximum lengths.
If minimum length is set to be greater than maximum length, the scanner only decodes Codabar barcodes with either the minimum or maximum length. If minimum length is same as maximum length, only Codabar barcodes with that length are to be decoded.
Set the Minimum Length
Set the Maximum Length
Example: Set the scanner to decode Codabar barcodes containing between 8 and 12 characters
- Scan the Set the Minimum Length barcode.
- Scan the numeric barcode "8" from the "Digit Barcodes (2D Scanner)" section in Appendix.
- Scan the Save barcode from the "Save/Cancel Barcodes (2D Scanner)" section in Appendix.
- Scan the Set the Maximum Length barcode.
- Scan the numeric barcodes "1" and "2" from the "Digit Barcodes (2D Scanner)" section in Appendix.
- Scan the Save barcode from the "Save/Cancel Barcodes (2D Scanner)" section in Appendix.
Check Character Verification
Disable (default)
Transmit Check Character After Verification
Do Not Transmit Check Character After Verification
Transmit Start/Stop Character
Transmit Start/Stop Character
Do not Transmit Start/Stop Character (default)
Start/Stop Character Format
You can choose your desired start/stop character format by scanning the appropriate barcode below.
ABCD/ABCD as the Start/Stop Character (default)
ABCD/TN*E as the Start/Stop Character
Start/Stop Character in Uppercase
Start/Stop Character in Lowercase
Code 93
Set Length Range for Code 93
The scanner can be configured to only decode Code 93 barcodes with lengths that fall between (inclusive) the minimum and maximum lengths. To accomplish it, you need to set the minimum and maximum lengths.
If minimum length is set to be greater than maximum length, the scanner only decodes Code 93 barcodes with either the minimum or maximum length. If minimum length is same as maximum length, only Code 93 barcodes with that length are to be decoded.
Set the Minimum Length
Set the Maximum Length
Example: Set the scanner to decode Code 93 barcodes containing between 8 and 12 characters
- Scan the Set the Minimum Length barcode.
- Scan the numeric barcode "8" from the "Digit Barcodes (2D Scanner)" section in Appendix.
- Scan the Save barcode from the "Save/Cancel Barcodes (2D Scanner)" section in Appendix.
- Scan the Set the Maximum Length barcode.
- Scan the numeric barcodes "1" and "2" from the "Digit Barcodes (2D Scanner)" section in Appendix.
- Scan the Save barcode from the "Save/Cancel Barcodes (2D Scanner)" section in Appendix.
Check Character Verification
Disable
Do Not Transmit Check Character After Verification
(default)
Transmit Check Character After Verification
GS1-Databar (RSS)
Transmit Application Identifier "01"
Transmit Application Identifier "01" (default)
Do Not Transmit Application Identifier "01"
Code 11
Set Length Range for Code 11
The scanner can be configured to only decode Code 11 barcodes with lengths that fall between (inclusive) the minimum and maximum lengths. To accomplish it, you need to set the minimum and maximum lengths.
If minimum length is set to be greater than maximum length, the scanner only decodes Code 11 barcodes with either the minimum or maximum length. If minimum length is same as maximum length, only Code 11 barcodes with that length are to be decoded.
Set the Minimum Length
Set the Maximum Length
Example: Set the scanner to decode Code 11 barcodes containing between 8 and 12 characters
- Scan the Set the Minimum Length barcode.
- Scan the numeric barcode "8" from the "Digit Barcodes (2D Scanner)" section in Appendix.
- Scan the Save barcode from the "Save/Cancel Barcodes (2D Scanner)" section in Appendix.
- Scan the Set the Maximum Length barcode.
- Scan the numeric barcodes "1" and "2" from the "Digit Barcodes (2D Scanner)" section in Appendix.
- Scan the Save barcode from the "Save/Cancel Barcodes (2D Scanner)" section in Appendix.
Transmit Check Character
Transmit Check Character
Do Not Transmit Check Character (default)
Check Character Verification
Disable
One Check Character, MOD11 (default)
Two Check Characters, MOD11/MOD11
Two Check Characters, MOD11/MOD9
One Check Character, MOD11 (Len<=10)
One Check Character, MOD11 (Len<=10)
Two Check Characters, MOD11/MOD11 (Len>10)
Two Check Characters, MOD11/MOD9 (Len>10)
Plessey
Set Length Range for Plessey
The scanner can be configured to only decode Plessey barcodes with lengths that fall between (inclusive) the minimum and maximum lengths. To accomplish it, you need to set the minimum and maximum lengths.
If minimum length is set to be greater than maximum length, the scanner only decodes Plessey barcodes with either the minimum or maximum length. If minimum length is same as maximum length, only Plessey barcodes with that length are to be decoded.
Set the Minimum Length
Set the Maximum Length
Example: Set the scanner to decode Plessey barcodes containing between 8 and 12 characters
- Scan the Set the Minimum Length barcode.
- Scan the numeric barcode "8" from the "Digit Barcodes (2D Scanner)" section in Appendix.
- Scan the Save barcode from the "Save/Cancel Barcodes (2D Scanner)" section in Appendix.
- Scan the Set the Maximum Length barcode.
- Scan the numeric barcodes "1" and "2" from the "Digit Barcodes (2D Scanner)" section in Appendix.
- Scan the Save barcode from the "Save/Cancel Barcodes (2D Scanner)" section in Appendix.
Check Character Verification
Disable
Do Not Transmit Check Character After Verification
(default)
Transmit Check Character After Verification
MSI-Plessey
Set Length Range for MSI-Plessey
The scanner can be configured to only decode MSI-Plessey barcodes with lengths that fall between (inclusive) the minimum and maximum lengths. To accomplish it, you need to set the minimum and maximum lengths.
If minimum length is set to be greater than maximum length, the scanner only decodes MSI-Plessey barcodes with either the minimum or maximum length. If minimum length is same as maximum length, only MSI-Plessey barcodes with that length are to be decoded.
Set the Minimum Length
Set the Maximum Length
Example: Set the scanner to decode MSI-Plessey barcodes containing between 8 and 12 characters
- Scan the Set the Minimum Length barcode.
- Scan the numeric barcode "8" from the "Digit Barcodes (2D Scanner)" section in Appendix.
- Scan the Save barcode from the "Save/Cancel Barcodes (2D Scanner)" section in Appendix.
- Scan the Set the Maximum Length barcode.
- Scan the numeric barcodes "1" and "2" from the "Digit Barcodes (2D Scanner)" section in Appendix.
- Scan the Save barcode from the "Save/Cancel Barcodes (2D Scanner)" section in Appendix.
Transmit Check Character
Transmit Check Character
Do Not Transmit Check Character (default)
Check Character Verification
Disable
One Check Character, MOD10 (default)
Two Check Characters, MOD10/MOD10
Two Check Characters, MOD10/MOD11
PDF 417
Set Length Range for PDF 417
The scanner can be configured to only decode PDF 417 barcodes with lengths that fall between (inclusive) the minimum and maximum lengths. To accomplish it, you need to set the minimum and maximum lengths.
If minimum length is set to be greater than maximum length, the scanner only decodes PDF 417 barcodes with either the minimum or maximum length. If minimum length is same as maximum length, only PDF 417 barcodes with that length are to be decoded.
Set the Minimum Length
Set the Maximum Length
Example: Set the scanner to decode PDF 417 barcodes containing between 8 and 12 characters
- Scan the Set the Minimum Length barcode.
- Scan the numeric barcode "8" from the "Digit Barcodes (2D Scanner)" section in Appendix.
- Scan the Save barcode from the "Save/Cancel Barcodes (2D Scanner)" section in Appendix.
- Scan the Set the Maximum Length barcode.
- Scan the numeric barcodes "1" and "2" from the "Digit Barcodes (2D Scanner)" section in Appendix.
- Scan the Save barcode from the "Save/Cancel Barcodes (2D Scanner)" section in Appendix.
PDF 417 Twin Code
PDF417 twin code is 2 PDF417 barcodes paralleled vertically or horizontally. They must both be either regular or inverse barcodes. They must have similar specifications and be placed closely together.
There are 3 options for reading PDF417 twin codes:
Single PDF417 Only: Read either PDF417 code.
Twin PDF417 Only: Read both PDF417 codes.
Both Single & Twin: Read both PDF417 codes. If successful, transmit as twin PDF417 only. Otherwise, try single PDF417 only.
Single PDF417 Only (default)
Twin PDF417 Only
Both Single & Twin
QR Code
Set Length Range for QR Code
The scanner can be configured to only decode QR Code barcodes with lengths that fall between (inclusive) the minimum and maximum lengths. To accomplish it, you need to set the minimum and maximum lengths.
If minimum length is set to be greater than maximum length, the scanner only decodes QR Code barcodes with either the minimum or maximum length. If minimum length is same as maximum length, only QR Code barcodes with that length are to be decoded.
Set the Minimum Length
Set the Maximum Length
Example: Set the scanner to decode QR Code barcodes containing between 8 and 12 characters
- Scan the Set the Minimum Length barcode.
- Scan the numeric barcode "8" from the "Digit Barcodes (2D Scanner)" section in Appendix.
- Scan the Save barcode from the "Save/Cancel Barcodes (2D Scanner)" section in Appendix.
- Scan the Set the Maximum Length barcode.
- Scan the numeric barcodes "1" and "2" from the "Digit Barcodes (2D Scanner)" section in Appendix.
- Scan the Save barcode from the "Save/Cancel Barcodes (2D Scanner)" section in Appendix.
QR Twin Code
QR twin code is 2 QR barcodes paralleled vertically or horizontally. They must both be either regular or inverse barcodes. They must have similar specifications and be placed closely together.
There are 3 options for reading QR twin codes:
Single QR Only: Read either QR code.
Twin QR Only: Read both QR codes.
Both Single & Twin: Read both QR codes. If successful, transmit as twin QR only. Otherwise, try single QR only.
Single QR Only (default)
Twin QR Only
Both Single & Twin
Data Matrix
Set Length Range for Data Matrix
The scanner can be configured to only decode Data Matrix barcodes with lengths that fall between (inclusive) the minimum and maximum lengths. To accomplish it, you need to set the minimum and maximum lengths.
If minimum length is set to be greater than maximum length, the scanner only decodes Data Matrix barcodes with either the minimum or maximum length. If minimum length is same as maximum length, only Data Matrix barcodes with that length are to be decoded.
Set the Minimum Length
Set the Maximum Length
Example: Set the scanner to decode Data Matrix barcodes containing between 8 and 12 characters
- Scan the Set the Minimum Length barcode.
- Scan the numeric barcode "8" from the "Digit Barcodes (2D Scanner)" section in Appendix.
- Scan the Save barcode from the "Save/Cancel Barcodes (2D Scanner)" section in Appendix.
- Scan the Set the Maximum Length barcode.
- Scan the numeric barcodes "1" and "2" from the "Digit Barcodes (2D Scanner)" section in Appendix.
- Scan the Save barcode from the "Save/Cancel Barcodes (2D Scanner)" section in Appendix.
Rectangular Barcode
Enable Rectangular Barcode (default)
Disable Rectangular Barcode
Mirror Image
Decode Mirror Images (default)
Do Not Decode Mirror Images
Data Matrix Twin Code
Data Matrix twin code is 2 Data Matrix barcodes paralleled vertically or horizontally. They must both be either regular or inverse barcodes. They must have similar specifications and be placed closely together.
There are 3 options for reading Data Matrix twin codes:
Single Data Matrix Only: Read either Data Matrix code.
Twin Data Matrix Only: Read both Data Matrix codes. Transmission order: Data Matrix code on the left (in the upper position) followed by the one on the right (in the lower position).
Both Single & Twin: Read both Data Matrix codes. If successful, transmit as twin Data Matrix only. Otherwise, try single Data Matrix only.

Single Data Matrix Only (default)
Twin Data Matrix Only
Both Single & Twin
Chinese Sensible Code
Restore the Factory Defaults of Chinese Sensible Code
Enable/Disable Chinese Sensible Code
Enable Chinese Sensible Code
Disable Chinese Sensible Code (default)
Set Length Range for Chinese Sensible Code
The scanner can be configured to only decode Chinese Sensible Code barcodes with lengths that fall between (inclusive) the minimum and maximum lengths. To accomplish it, you need to set the minimum and maximum lengths.
If minimum length is set to be greater than maximum length, the scanner only decodes Chinese Sensible Code barcodes with either the minimum or maximum length. If minimum length is same as maximum length, only Chinese Sensible Code barcodes with that length are to be decoded.
Set the Minimum Length
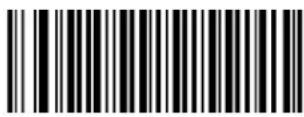
Set the Maximum Length
Example: Set the scanner to decode Chinese Sensible Code barcodes containing between 8 and 12 characters
- Scan the Set the Minimum Length barcode.
- Scan the numeric barcode "8" from the "Digit Barcodes (2D Scanner)" section in Appendix.
- Scan the Save barcode from the "Save/Cancel Barcodes (2D Scanner)" section in Appendix.
- Scan the Set the Maximum Length barcode.
- Scan the numeric barcodes "1" and "2" from the "Digit Barcodes (2D Scanner)" section in Appendix.
- Scan the Save barcode from the "Save/Cancel Barcodes (2D Scanner)" section in Appendix.
Chapter 4 Prefix & Suffix
1D Scanner
After a successful barcode reading, a string containing numbers, letters or symbols will be returned.
In real applications, barcode data may be found insufficient for your needs. You may wish to include additional information such as barcode type, data acquisition time or delimiter in data being scanned.
Adding extra information to printed barcodes does not seem like a sensible solution since that will increase the barcode size and make them inflexible. Instead, we come up with the idea of appending prefix and suffix to the data without making any change to barcodes. We will show you how to conduct the configuration in the following sections.
The scanner can be configured to transmit barcode data in the following format:
[Code ID] + [Custom Prefix] + [DATA] + [Custom Suffix] + [Terminating Character]
Note: [DATA] must be transmitted while user can decide whether to transmit any of the rest parts.
Prefix Sequence
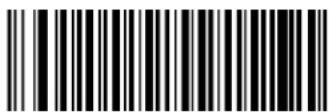
Code ID+Custom+AIM ID (default)
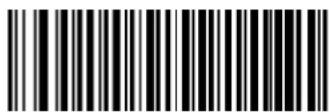
Custom+Code ID+AIM ID
Custom Prefix
Enable/Disable Custom Prefix
If custom prefix is enabled, you are allowed to append to the data a user-defined prefix that cannot exceed 11 characters.
For example, if barcode data is "123" and custom prefix is "AB", the host device will receive "AB123".
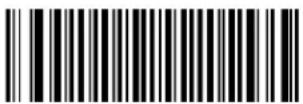
Disable Custom Prefix (default)
Enable Custom Prefix
Set Custom Prefix
To set a custom prefix, scan the Set Custom Prefix barcode, the numeric barcodes that represent the hexadecimal value of desired prefix(es) and the Save barcode.
Note: A custom prefix cannot exceed 11 characters.
Set Custom Prefix
Example: Set the custom prefix to "CODE" (Hex: 0x43/0x4F/0x44/0x45)
- Scan the Set Custom Prefix barcode.
- Scan the numeric barcodes "4", "3", "4", "F", "4", "4", "4" and "5" from the "Digit Barcodes (1D Scanner)" section in Appendix.
- Scan the Save barcode from the Save/Cancel Barcodes (1D Scanner)" section in Appendix.
AIM ID Prefix
AIM (Automatic Identification Manufacturers) ID defines symbology identifier (For the details, see the "AIM ID Table (1D Scanner)" section in Appendix). If AIM ID prefix is enabled, the scanner will add the symbology identifier before the scanned data after decoding.
text_image
Black and white barcode image with vertical lines and a central patternEnable AIM ID Prefix
text_image
Black and white barcode image with vertical lines on both sidesDisable AIM ID Prefix(default)
Code ID Prefix
Code ID can also be used to identify barcode type. Unlike AIM ID, Code ID is user programmable. Code ID can only consist of one or two English letters.
Disable Code ID Prefix (default)
Enable Code ID Prefix
Restore All Default Code IDs
For the information of default Code IDs, see the "Code ID Table (1D Scanner)" section in Appendix.
Restore Default Code IDs
Modify Code ID
Code ID of each symbology can be programmed separately. See the following example to learn how to program a Code ID.
Example: Set the Code ID of Code 128 to "p"
- Check the hex value of "p" in the ASCII Table. ("p": 70)
- Scan the Modify Code 128 Code ID barcode.
- Scan the numeric barcodes "7" and "0" from the "Digit Barcodes (1D Scanner)" section in Appendix.
- Scan the Save barcode from the "Save/Cancel Barcodes (1D Scanner)" section in Appendix.
Modify Code 128 Code ID
Modify UCC/EAN 128 Code ID
Modify AIM 128 Code ID
Modify EAN-8 Code ID
Modify EAN-13 Code ID
Modify ISSN Code ID
Modify ISBN Code ID
Modify UPC-E Code ID
Modify UPC-A Code ID
Modify Interleaved 2 of 5 Code ID
Modify ITF-6 Code ID
Modify ITF-14 Code ID
Modify Deutsche 14 Code ID
Modify Deutsche 12 Code ID
Modify COOP25 Code ID
Modify Matrix 2 of 5 Code ID
Modify Industrial 25 Code ID
Modify Standard 25 Code ID
Modify Code 39 Code ID
Modify Codabar Code ID
Modify Code 93 Code ID
Modify Code 11 Code ID
Modify Plessey Code ID
Modify MSI-Plessey Code ID
Modify GS1 Databar Code ID
Custom Suffix
Enable/Disable Custom Suffix
If custom suffix is enabled, you are allowed to append to the data a user-defined suffix that cannot exceed 11 characters.
For example, if barcode data is "123" and custom suffix is "AB", the host device will receive "123AB".
Disable Custom Suffix (default)
Enable Custom Suffix
Set Custom Suffix
To set a custom suffix, scan the Set Custom Suffix barcode, the numeric barcodes that represent the hexadecimal value of desired suffix(es) and the Save barcode.
Note: A custom suffix cannot exceed 11 characters.

Set Custom Suffix
Example: Set the custom suffix to "CODE" (Hex: 0x43/0x4F/0x44/0x45)
- Scan the Set Custom Suffix barcode.
- Scan the numeric barcodes "4", "3", "4", "F", "4", "4", "4" and "5" from the "Digit Barcodes (1D Scanner)" section in Appendix.
- Scan the Save barcode from the "Save/Cancel Barcodes (1D Scanner)" section in Appendix.
Terminating Character Suffix
Enable/Disable Terminating Character Suffix
A terminating character such as carriage return (CR) or carriage return/line feed pair (CRLF) can only be used to mark the end of data, which means nothing can be added after it. A terminating character suffix cannot exceed 7 characters.
Disable Terminating Character Suffix (default)
Enable Terminating Character Suffix
Set Terminating Character Suffix
To set a terminating character suffix, scan the Set Terminating Character Suffix barcode, the numeric barcodes that represent the hexadecimal value of desired terminating character(s) and the Save barcode.
You can also quickly set the terminating character suffix to 0x0D (CR) or 0x0D,0x0A (CRLF) and enable the transmission of it by scanning the Terminating Character 0x0D (CR) or Terminating Character 0x0D,0x0A (CRLF) barcode below.
Terminating Character 0x0D (CR)
Terminating Character 0x0D,0x0A (CRLF)
Set Terminating Character Suffix
Example: Set the terminating character to "0x0A" (LF)
- Scan the Set Terminating Character Suffix barcode.
- Scan the numeric barcodes "0" and "A" from the "Digit Barcodes (1D Scanner)" section in Appendix.
- Scan the Save barcode from the "Save/Cancel Barcodes (1D Scanner)" section in Appendix.
2D Scanner
In many applications, barcode data needs to be edited and distinguished from one another.
Usually AIM ID and Code ID can be used as identifiers, but in some special cases customized prefix and terminating character suffix like Carriage Return or Line Feed can also be the alternatives.
Data formatting may include:
Append AIM ID/Code ID/custom prefix before the decoded data
✨ Append custom suffix after the decoded data
Append terminating character to the end of the data
The following formats can be used when editing barcode data:
◇ [Code ID] + [Custom Prefix] + [AIM ID] + [DATA] + [Custom Suffix] + [Terminating Character]
◇ [Custom Prefix] + [Code ID] + [AIM ID] + [DATA] + [Custom Suffix] + [Terminating Character]
Prefix Sequences
Code ID+Custom Prefix+AIM ID
Custom Prefix+Code ID+AIM ID (default)
Custom Prefix
Enable/Disable Custom Prefix
If custom prefix is enabled, you are allowed to append to the data a user-defined prefix that cannot exceed 11 characters.
Enable Custom Prefix
Disable Custom Prefix (default)
Set Custom Prefix
To set a custom prefix, scan the Set Custom Prefix barcode and the numeric barcodes representing the hexadecimal values of a desired prefix and then scan the Save barcode. Refer to the "ASCII Table" in Appendix for hexadecimal values of characters.
Note: A custom prefix cannot exceed 11 characters.
Set Custom Prefix
Example: Set the custom prefix to "CODE"
- Check the hex values of "CODE" in the ASCII Table. ("CODE": 43, 4F, 44, 45)
- Scan the Set Custom Prefix barcode.
- Scan the numeric barcodes "4", "3", "4", "F", "4", "4", "4" and "5" from the "Digit Barcodes (2D Scanner)" section in Appendix.
- Scan the Save barcode from the "Save/Cancel Barcodes (2D Scanner)" section in Appendix.
AIM ID Prefix
AIM (Automatic Identification Manufacturers) IDs and ISO/IEC 15424 standards define symbology identifiers and data carrier identifiers. (For the details, see the "AIM ID Table (2D Scanner)" section in Appendix. If AIM ID prefix is enabled, the scanner will add the symbology identifier before the scanned data after decoding.
text_image
Black and white barcode image with vertical lines and a central patternEnable AIM ID Prefix
text_image
Black and white barcode image with vertical lines above and below the barsDisable AIM ID Prefix(default)
Code ID Prefix
Code ID can also be used to identify barcode type. Unlike AIM ID, Code ID is user programmable. Code ID can only consist of one or two English letters.
Enable Code ID Prefix
Disable Code ID Prefix (default)
Restore All Default Code IDs
For the information of default Code IDs, see the "Code ID Table (2D Scanner)" section in Appendix.
Restore All Default Code IDs
Modify Code ID
Code ID of each symbology can be programmed separately. See the following example to learn how to program a Code ID.
Example: Set the Code ID of PDF417 to "p"
- Check the hex value of "p" in the ASCII Table. ("p": 70)
- Scan the Modify PDF417 Code ID barcode.
- Scan the numeric barcodes "7" and "0" from the "Digit Barcodes (2D Scanner)" section in Appendix.
- Scan the Save barcode from the "Save/Cancel Barcodes (2D Scanner)" section in Appendix.
Modify PDF417 Code ID
Modify Data Matrix Code ID
Modify QR Code ID
Modify Chinese Sensible Code ID
Modify Code 128 Code ID
Modify GS1-128 Code ID
Modify AIM-128 Code ID
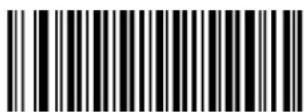
Modify EAN-8 Code ID
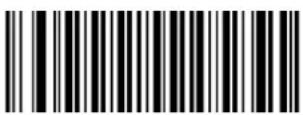
Modify EAN-13 Code ID
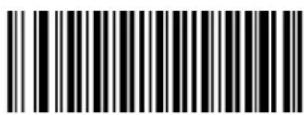
Modify UPC-E Code ID
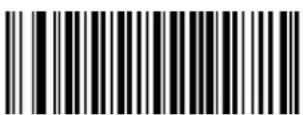
Modify UPC-A Code ID
Modify ISBN Code ID
Modify ISSN Code ID
Modify Code 39 Code ID
Modify Code 93 Code ID
Modify Interleaved 2 of 5 Code ID
Modify ITF-14 Code ID
Modify ITF-6 Code ID
Modify Codabar Code ID
Modify Industrial 25 Code ID
Modify Standard 25 Code ID
Modify Matrix 25 Code ID
Modify COOP 25 Code ID
Modify Code 11 Code ID

Modify Plessey Code ID
Modify MSI/Plessey Code ID
Modify GS1 Databar Code ID
Custom Suffix
Enable/Disable Custom Suffix
If custom suffix is enabled, you are allowed to append to the data a user-defined suffix that cannot exceed 11 characters.
Enable Custom Suffix
Disable Custom Suffix (default)
Set Custom Suffix
To set a custom suffix, scan the Set Custom Suffix barcode and the numeric barcodes representing the hexadecimal values of a desired suffix and then scan the Save barcode. Refer to the "ASCII Table" in Appendix for hexadecimal values of characters.
Note: A custom suffix cannot exceed 11 characters.
Set Custom Suffix
Example: Set the custom suffix to "CODE"
- Check the hex values of "CODE" in the ASCII Table. ("CODE": 43, 4F, 44, 45)
- Scan the Set Custom Suffix barcode.
- Scan the numeric barcodes "4", "3", "4", "F", "4", "4", "4" and "5" from the "Digit Barcodes (2D Scanner)" section in Appendix.
- Scan the Save barcode from the "Save/Cancel Barcodes (2D Scanner)" section in Appendix.
Terminating Character Suffix
A terminating character can be used to mark the end of data, which means nothing can be added after it. A terminating character suffix can contain 1-7 characters.
Enable/Disable Terminating Character Suffix
To enable/disable terminating character suffix, scan the appropriate barcode below.
Enable Terminating Character Suffix (default)
Disable Terminating Character Suffix
Set Terminating Character Suffix
The scanner provides a shortcut for setting the terminating character suffix to CR (0x0D) or CRLF (0x0D, 0x0A) and enabling it by scanning the appropriate barcode below.
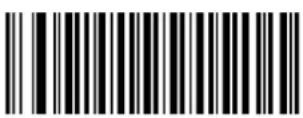
Terminating Character CR (0x0D) (default)
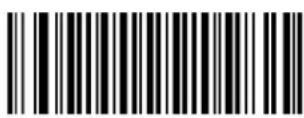
Terminating Character CRLF (0x0D,0x0A)
To set a terminating character suffix, scan the Set Terminating Character Suffix barcode and the numeric barcodes representing the hexadecimal value of a desired terminating character and then scan the Save barcode. Refer to the "ASCII Table" in Appendix for hexadecimal values of terminating characters.
Note: A terminating character suffix cannot exceed 7 characters.
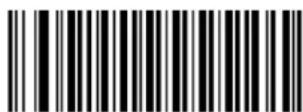
Set Terminating Character Suffix
Example: Set the terminating character suffix to 0x0A
- Scan the Set Terminating Character Suffix barcode.
- Scan the numeric barcodes "0" and "A" from the "Digit Barcodes (2D Scanner)" section in Appendix.
- Scan the Save barcode from the "Save/Cancel Barcodes (2D Scanner)" section in Appendix.
Chapter 5 Scanning Preferences (For 2D Scanner Only)
Introduction
This chapter contains information as to how to adapt your scanner to various applications with preference setting. For instance, to narrow the field of view of the scanner to make sure it reads only those barcodes intended by the user.
Decode Area
Whole Area Decoding
When this option is enabled, the scanner attempts to decode barcode(s) within its field of view, from the center to the periphery, and transmits the barcode that has been first decoded.
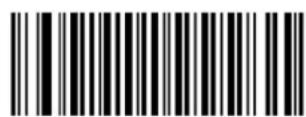
Whole Area Decoding (default)
Specific Area Decoding
The scanner attempts to decode barcode(s) within a specified decoding area and transmits the barcode that has been first decoded. This option allows the scanner to narrow its field of view to make sure it reads only those barcodes intended by the user. For instance, if multiple barcodes are placed closely together, specific area decoding in conjunction with appropriate pre-defined decoding area will insure that only the desired barcode is read.
Specific Area Decoding
Specify Decoding Area
If Specific Area Decoding is enabled, the scanner only reads barcodes that intersect the predefined decoding area.
The default decoding area is an area of 40% top, 60% bottom, 40% left and 60% right of the scanner's field of view, as shown in the figure below. In the following example, the white box is the decoding area. Since Barcode 1 passes through the decoding area, it will be read. Barcode 2 does not pass through the decoding area, so it will not be read.
You can define the decoding area using the Top of Decoding Area, Bottom of Decoding Area, Left of Decoding Area and Right of Decoding Area barcodes as well as numeric barcode(s) that represent(s) a desired percentage (0-100).
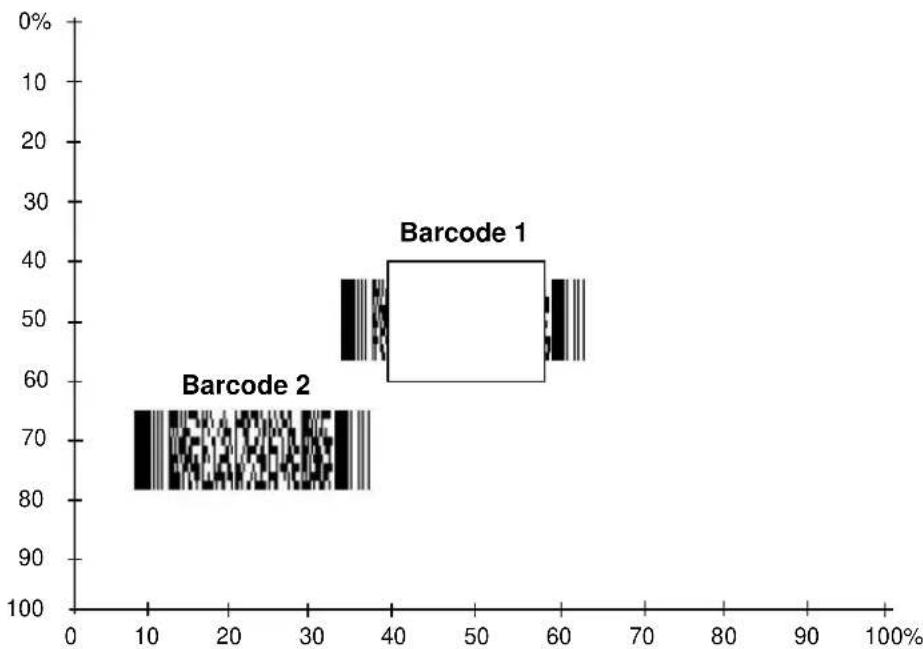
bar
| Category | Value (%) | |---|---| | Barcode 1 | 45 | | Barcode 2 | 70 |
Top of Decoding Area
Bottom of Decoding Area
Left of Decoding Area
Right of Decoding Area
Example: Set the decoding area to 20% top, 80% bottom, 20% left and 80% right:
- Scan the Specific Area Decoding barcode.
- Scan the Top of Decoding Area barcode.
- Scan the numeric barcodes "2" and "0" from the "Digit Barcodes (2D Scanner)" section in Appendix.
- Scan the Save barcode from the "Save/Cancel Barcodes (2D Scanner)" section in Appendix.
- Scan the Bottom of Decoding Area barcode.
- Scan the numeric barcodes "8" and "0" from the "Digit Barcodes (2D Scanner)" section in Appendix.
- Scan the Save barcode from the "Save/Cancel Barcodes (2D Scanner)" section in Appendix.
- Scan the Left of Decoding Area barcode.
- Scan the numeric barcodes "2" and "0" from the "Digit Barcodes (2D Scanner)" section in Appendix.
- Scan the Save barcode from the "Save/Cancel Barcodes (2D Scanner)" section in Appendix.
- Scan the Right of Decoding Area barcode.
- Scan the numeric barcodes "8" and "0" from the "Digit Barcodes (2D Scanner)" section in Appendix.
- Scan the Save barcode from the "Save/Cancel Barcodes (2D Scanner)" section in Appendix.
Chapter 6 Data Formatter
Introduction
You may use the Data Formatter to modify the scanner's output. For example, you can use the Data Formatter to insert characters at certain points in barcode data or to suppress/replace/send certain characters in barcode data as it is scanned.
Normally, when you scan a barcode, it gets outputted automatically; however, when you create a format, you must use a "send" command (see the "Send Commands" section in this chapter) within the format programming to output data. The maximum size of formatter commands in a data format is 128 characters. By default, the data formatter is disabled. Enable it when required. If you have changed data format settings, and wish to clear all formats and return to the factory defaults, scan the Default Data Format code below.

Default Data Format
Add a Data Format
Data format is used to edit barcode data only. You can program up to four data formats, i.e. Format_0, Format_1, Format_2 and Format_3. When you create a data format, you must specify the application scope of your data format (such as barcode type and data length) and include formatter commands. When scanned data does not match your data format requirements, you will hear the non-match error beep (if the non-match error beep is ON).
There are two methods to program a data format: Programming with barcodes and programming with serial commands.
Programming with Barcodes
The following explains how to program a data format by scanning the specific barcodes. Scanning any irrelevant barcode or failing to follow the setting procedure will result in programming failure. To find the alphanumeric barcodes needed to create a data format, see the "Digit Barcodes" section in Appendix.
Step 1: Scan the Add Data Format barcode.
Add Data Format
Step 2: Select data format.
Scan a numeric barcode 0 or 1 or 2 or 3 to set this to Format_0 or Format_1 or Format_2 or Format_3.
Step 3: Select formatter command type.
Specify what type of formatter commands will be used. Scan a numeric barcode "6" to select formatter command type 6. (See the "Formatter Command Type 6" section in this chapter for more information)
Step 4: Set interface type
Scan 999 for any interface type.
Step 5: Set Symbology ID Number
Refer to the “Symbology ID Number” section in Appendix and find the ID number of the symbology to which you want to apply the data format. Scan three numeric barcodes for the symbology ID number. If you wish to create a data format for all symbologies, scan 999.
Step 6: Set barcode data length
Specify what length of data will be acceptable for this symbology. Scan the four numeric barcodes that represent the data length. 9999 is a universal number, indicating all lengths. For example, 32 characters should be entered as 0032.
Step 7: Enter formatter command
Refer to the "Formatter Command Type 6" section in this chapter. Scan the alphanumeric barcodes that represent the command you need to edit data. For example, when a command is F141, you should scan F141. A command can contain up to 112 characters.
Step 8: Scan the Save barcode from the "Save/Cancel Barcodes" section in Appendix to save your data format.
Example: Program format_0 using formatter command type 6, Code 128 containing 10 characters applicable, send all characters followed by "A".
- Scan the Add Data Format barcode
- Scan the 0 barcode
- Scan the 6 barcode
- Scan the 9 barcode three times
- Scan the barcodes 002
- Scan the barcodes 0010
- Scan the alphanumeric barcodes F141
- Scan the Save barcode
Add a data format
Select format_0
Select formatter command type 6
All interface types applicable
Only Code 128 applicable
Only a length of 10 characters applicable
Send all characters followed by "A" (HEX: 41)
Save the data format
Programming with Serial Commands
A data format can also be created by serial commands sent from the host device. The maximum size of a command string is 128 characters. The syntax consists of the following elements:
Add Data Format Command: \$%^5917 (8 characters).
Data format: 0\~3 (1 character). 0, 1, 2 and 3 represent Format_0, Format_1, Format_2 and Format_3 respectively.
Formatter command type: 6 (1 character).
Interface type: 999 (3 characters).
Symbology ID Number: The ID number of the symbology to which you want to apply the data format (3 characters). 999 indicates all symbologies.
Data length: The length of data that will be acceptable for this symbologyrs (4 characters). 9999 indicates all lengths. For example, 32 characters should be entered as 0032.
Formatter commands: The command string used to edit data (max. 128 characters). For more information, see the "Formatter Command Type 6" section.
Note: Serial command used to create a data format must conform to the syntax above. Returning "\r\n\%\~OK" indicates success; returning "\%\~ER\r\n" indicates failure.
Example: Program format_0 using formatter command type 6, Code 128 containing 10 characters applicable, send all characters followed by "A".
Serial command: \$\%^5917069990020010F141
Enable/Disable Data Formatter
When Data Formatter is disabled, the data format you have enabled becomes invalid.
** Disable Data Formatter
You may wish to require the data to conform to a data format you have created. The following settings can be applied to your data format:
Enable Data Formatter, Required, Keep Prefix/Suffix: Scanned data that meets your data format requirements is modified accordingly and gets outputted along with prefixes and suffixes (if prefix and suffix are enabled). Any data that does not match your data format requirements generates an error beep (if Non-Match Error Beep is turned ON) and the data in that barcode is not transmitted.
Enable Data Formatter, Required, Drop Prefix/Suffix: Scanned data that meets your data format requirements is modified accordingly and gets outputted without prefixes and suffixes (even if prefix and suffix are enabled). Any data that does not match your data format requirements generates an error beep (if Non-Match Error Beep is turned ON) and the data in that barcode is not transmitted.
Enable Data Formatter, Not Required, Keep Prefix/Suffix: Scanned data that meets your data format requirements is modified accordingly and gets outputted along with prefixes and suffixes (if prefix and suffix are enabled). Barcode data that does not match your data format requirements is transmitted as read along with prefixes and suffixes (if prefix and suffix are enabled).
Enable Data Formatter, Not Required, Drop Prefix/Suffix: Scanned data that meets your data format requirements is modified accordingly and gets outputted without prefixes and suffixes (even if prefix and suffix are enabled). Barcode data that does not match your data format requirements is transmitted as read along with prefixes and suffixes (if prefix and suffix are enabled).
Enable Data Formatter, Required, Keep Prefix/Suffix
Enable Data Formatter, Required, Drop Prefix/Suffix
Enable Data Formatter, Not Required, Keep Prefix/Suffix
Enable Data Formatter, Not Required, Drop Prefix/Suffix
Non-Match Error Beep
If Non-Match Error Beep is turned ON, the scanner generates an error beep when a barcode is encountered that does not match your required data format.
** Non-Match Error Beep ON

Non-Match Error Beep OFF
Enable Data Format
After enabling the Data Formatter, you may select a data format you want to use by scanning the appropriate barcode below.
text_image
Black and white barcode image with vertical lines and a central dot** Format_0
text_image
Black and white barcode image with vertical lines and a small number 'n' in the center.Format_1
text_image
Barcode image with black and white vertical bars, no visible text or symbolsFormat_2
Format_3
Change Data Format for a Single Scan
You can switch between data formats for a single scan. The next barcode is scanned using the data format selected here, then reverts to the format you have selected above. For example, you may have set your scanner to the data format you saved as Format_3. You can switch to Format_1 for a single trigger pull by scanning the Single Scan – Format_1 barcode below. The next barcode that is scanned uses Format_1, then reverts back to Format_3.
Note: This setting will be lost by removing power from the scanner, or turning off/rebooting the device.
text_image
Black and white barcode image with vertical lines and a central dotSingle Scan - Format_0
text_image
Black and white barcode image with vertical lines and a small number 'n' in the bottom right corner.Single Scan - Format_1
Single Scan - Format_2
text_image
Black and white barcode image with vertical lines and a small number 'n' in the bottom right corner.Single Scan - Format_3
Clear Data Format
To delete all data formats, scan the barcode below.
Clear All
Query Data Formats
You may scan the following barcode to get the information of data format(s) you have created. For instance, if you have added Format_0 as per the example in the "Programming with Barcodes" section in this chapter, then the query result will be Data Format 0:069990020010F141;.
Query Data Formats
Formatter Command Type 6
When working with the Data Formatter, a virtual cursor is moved along your input data string. The following commands are used to both move this cursor to different positions, and to select, replace, and insert data into the final output. For the hex value of ASCII characters involved in the commands, refer to the "ASCII Table" in Appendix.
Send Commands
F1 Send all characters
Syntax=F1xx (xx: The insert character's hex value)
Include in the output message all of the characters from the input message, starting from current cursor position, followed by an insert character.
F2 Send a number of characters
Syntax=F2nnxx (nn: The numeric value (00-99) for the number of characters; xx: The insert character's hex value)
Include in the output message a number of characters followed by an insert character. Start from the current cursor position and continue for "nn" characters or through the last character in the input message, followed by character "xx."
F2 Example: Send a number of characters

text_image
Barcode image containing machine-readable data, no human-readable text visible1234567890ABCDEFGHIJ
Send the first 10 characters from the barcode above, followed by a carriage return.
Command string: F2100D
F2 is the "Send a number of characters" command
10 is the number of characters to send
0D is the hex value for a CR
The data is output as: 1234567890
F3 Send all characters up to a particular character
Syntax=F3ssxx (ss: The particular character's hex value; xx: The insert character's hex value)
Include in the output message all characters from the input message, starting with the character at the current cursor position and continuing to, but not including, the particular character "ss," followed by character "xx." The cursor is moved forward to the "ss" character.
F3 Example: Send all characters up to a particular character

text_image
1234567890ABCDEFGHIJUsing the barcode above, send all characters up to but not including "D," followed by a carriage return.
Command string: F3440D
F3 is the "Send all characters up to a particular character" command
44 is the hex value for a "D"
0D is the hex value for a CR
The data is output as: 1234567890ABC
E9 Send all but the last characters
Syntax=E9nn (nn: The numeric value (00-99) for the number of characters that will not be sent at the end of the message)
Include in the output message all but the last "nn" characters, starting from the current cursor position. The cursor is moved forward to one position past the last input message character included.
F4 Insert a character multiple times
Syntax=F4xxnn (xx: The insert character's hex value; nn: The numeric value (00-99) for the number of times it should be sent)
Send "xx" character "nn" times in the output message, leaving the cursor in the current position.
E9 and F4 Example: Send all but the last characters, followed by 2 tabs

text_image
1234567890ABCDEFGHIJSend all characters except for the last 8 from the barcode above, followed by 2 tabs.
Command string: E908F40902
E9 is the "Send all but the last characters" command
08 is the number of characters at the end to ignore
F4 is the "Insert a character multiple times" command
09 is the hex value for a horizontal tab
02 is the number of times the tab character is sent
The data is output as: 1234567890AB
B3 Insert symbology name
Insert the name of the barcode's symbology in the output message, without moving the cursor.
B4 Insert barcode length
Insert the barcode's length in the output message, without moving the cursor. The length is expressed as a numeric string and does not include leading zeros.
B3 and B4 Example: Insert the symbology name and length

text_image
Barcode image containing machine-readable data, no human-readable text visible1234567890ABCDEFGHIJ
Send the symbology name and length before the barcode data from the barcode above. Break up these insertions with spaces. End with a carriage return.
Command string: B3F42001B4F42001F10D
B3 is the "Insert symbology name" command
F4 is the "Insert a character multiple times" command
20 is the hex value for a space
01 is the number of time the space character is sent
B4 is the "Insert barcode length" command
F4 is the "Insert a character multiple times" command
20 is the hex value for a space
01 is the number of time the space character is sent
F1 is the "Send all characters" command
0D is the hex value for a CR
The data is output as: Code128 20 1234567890ABCDEFGHIJ
Move Commands
F5 Move the cursor forward a number of characters
Syntax=F5nn (nn: The numeric value (00-99) for the number of characters the cursor should be moved ahead)
Move the cursor ahead "nn" characters from current cursor position.
F5 Example: Move the cursor forward and send the data

text_image
Barcode image containing machine-readable data, no human-readable text visible1234567890ABCDEFGHIJ
Move the cursor forward 3 characters, then send the rest of the barcode data from the barcode above. End with a carriage return.
Command string: F503F10D
F5 is the "Move the cursor forward a number of characters" command
03 is the number of characters to move the cursor
F1 is the "Send all characters" command
0D is the hex value for a CR
The data is output as: 4567890ABCDEFGHIJ
F6 Move the cursor backward a number of characters
Syntax=F6nn (nn: The numeric value (00-99) for the number of characters the cursor should be moved back)
Move the cursor back "nn" characters from current cursor position.
F7 Move the cursor to the beginning
Syntax=F7
Move the cursor to the first character in the input message.
EA Move the cursor to the end
Syntax=EA
Move the cursor to the last character in the input message.
Search Commands
F8 Search forward for a character
Syntax=F8xx (xx: The search character's hex value)
Search the input message forward for "xx" character from the current cursor position, leaving the cursor pointing to the "xx" character.
F8 Example: Send barcode data that starts after a particular character

text_image
1234567890ABCDEFGHIJSearch for the letter "D" in barcodes and send all the data that follows, including the "D". Using the barcode above:
Command string: F844F10D
F8 is the "Search forward for a character" command
44 is the hex value for "D"
F1 is the "Send all characters" command
0D is the hex value for a CR
The data is output as: DEFGHIJ
F9 Search backward for a character
Syntax=F9xx (xx: The search character's hex value)
Search the input message backward for "xx" character from the current cursor position, leaving the cursor pointing to the "xx" character.
B0 Search forward for a string
Syntax=B0nnnnS (nnnn: The string length (up to 9999); S: The ASCII hex value of each character in the string)
Search forward for "S" string from the current cursor position, leaving cursor pointing to "S" string. For example, B0000454657374 will search forward for the first occurrence of the 4-character string "Test."
B0 Example: Send barcode data that starts after a string of characters

text_image
1234567890ABCDEFGHIJSearch for the letters "FGH" in barcodes and send all the data that follows, including "FGH." Using the barcode above:
Command string: B00003464748F10D
B0 is the "Search forward for a string" command
0003 is the string length (3 characters)
46 is the hex value for "F"
47 is the hex value for "G"
48 is the hex value for "H"
F1 is the "Send all characters" command
0D is the hex value for a CR
The data is output as: FGHIJ
B1 Search backward for a string
Syntax=B1nnnnS (nnnn: The string length (up to 9999); S: The ASCII hex value of each character in the string)
Search backward for "S" string from the current cursor position, leaving cursor pointing to "S" string. For example, B1000454657374 will search backward for the first occurrence of the 4-character string "Test."
E6 Search forward for a non-matching character
Syntax=E6xx (xx: The search character's hex value)
Search the input message forward for the first non-“xx” character from the current cursor position, leaving the cursor pointing to the non-“xx” character.
E6 Example: Remove zeros at the beginning of barcode data
text_image
300037692This example shows a barcode that has been zero filled. You may want to ignore the zeros and send all the data that follows. E6 searches forward for the first character that is not zero, then sends all the data after, followed by a carriage return. Using the barcode above:
Command string: E630F10D
E6 is the "Search forward for a non-matching character" command
30 is the hex value for 0
F1 is the "Send all characters" command
0D is the hex value for a CR
The data is output as: 37692
E7 Search backward for a non-matching character
Syntax=E7xx (xx: The search character's hex value)
Search the input message backward for the first non-"xx" character from the current cursor position, leaving the cursor pointing to the non-"xx" character.
Miscellaneous Commands
FB Suppress characters
Syntax=FBnnxxyy..zz (nn: The numeric value (00-15) for the number of suppressed characters; xxyy..zz: The hex value of the characters to be suppressed)
Suppress all occurrences of up to 15 different characters, starting at the current cursor position, as the cursor is advanced by other commands.
FB Example: Remove spaces in barcode data
text_image
345 678 90This example shows a barcode that has spaces in the data. You may want to remove the spaces before sending the data. Using the barcode above:
Command string: FB0120F10D
FB is the "Suppress characters" command
01 is the number of the characters to be suppressed
20 is the hex value for a space
F1 is the "Send all characters" command
0D is the hex value for a CR
The data is output as: 34567890
E4 Replace characters
Syntax=E4nnxx1xx2yy1yy2...zz1zz2 (nn: The total count of the number of characters (characters to be replaced plus replacement characters; xx1: The characters to be replaced, xx2: The replacement characters, continuing through zz1 and zz2)
Replace up to 15 characters in the output message, without moving the cursor.
E4 Example: Replace zeros with CRs in barcode data
text_image
1234056780ABCIf the barcode has characters that the host application does not want included, you can use the E4 command to replace those characters with something else. In this example, you will replace the zeros in the barcode above with carriage returns.
Command string: E402300DF10D
E4 is the "Replace characters" command
02 is the total count of characters to be replaced, plus the replacement characters (0 is replaced by CR, so total characters=2)
30 is the hex value for 0
0D is the hex value for a CR (the character that will replace the 0)
F1 is the "Send all characters" command
0D is the hex value for a CR
The data is output as: 1234
5678
ABC
BA Replace a string with another
Syntax=BAnnNN 1 SS 1 NN 2 SS 2
nn: The count of replacements to be made, if nn=00 or nn>=the number of occurrences of a string to be replaced, then replace all occurrences of that string.
NN_1 : The length of the string to be replaced, NN_1>0 .
SS1: The ASCII hex value of each character in the string to be replaced.
NN_2 : The length of replacement string, NN_2>=0 . To replace string “ SS_1 ” with NUL (i.e. delete string “ SS_1 ”), you should set NN_2 to 00 and leave out SS_2 .
SS₂: The ASCII hex value of each character in the replacement string
From the current cursor position, search forward for the occurrence of “SS 1” string (of length “NN 1”) and replace the string with “SS 2” string (of length “NN 2”) in the output message until every “SS 1” string is replaced or the count of replacements made reaches “nn” times, without moving the cursor.
BA Example: Replace "23"s with "ABC"s in barcode data
cd123abc23bc12ab232
If the barcode has a string of characters that the host application does not want included, you can use the BA command to replace the string with something else. In this example, you will replace the "23"s in the barcode above with "ABC"s.
Command string: BA0002323303414243F100
BA is the "Replace a string with another" command
00 is the count of replacements to be made, 00 means to replace all occurrences of that string
02 is the length of the string to be replaced
32 is the hex value for 2 (character in the string to be replaced)
33 is the hex value for 3 (character in the string to be replaced)
03 is the length of the replacement string
41 is the hex value for A (character in the replacement string)
42 is the hex value for B (character in the replacement string)
43 is the hex value for C (character in the replacement string)
F1 is the "Send all characters" command
00 is the hex value for a NUL
The data is output as: cd1ABCabcABCbc12abABC2
BA Example: Remove only the first occurrence of "23"s in barcode data
If the barcode has a string of characters that the host application wants removed, you can use the BA command to replace the string with NUL. In this example, you will remove the first occurrence of "23" in the barcode above.
Command string: BA0102323300F100
BA is the "Replace a string with another" command
01 is the count of replacements to be made
02 is the length of the string to be replaced
32 is the hex value for 2 (character in the string to be replaced)
33 is the hex value for 3 (character in the string to be replaced)
00 is the length of the replacement string, 00 means to replace the string to be replaced with NUL
F1 is the "Send all characters" command
00 is the hex value for a NUL
The data is output as: cd1abc23bc12ab232
Appendix
Factory Defaults Table
| Parameter | Factory Default | Remark |
| System Settings | ||
| Operating Mode | Bluetooth mode | |
| Bluetooth Profile | HID | |
| Data Transmission via Bluetooth | Synchronous transmission | |
| USB Interface Type | USB HID-KBW | |
| Data Transmission via USB | Asynchronous transmission | |
| Verify Receipt of Data | Disabled | |
| Sound Notifications | Enabled | |
| Vibration Notifications | Disabled | |
| Bluetooth Device Name | “BS80+” with the last 4 characters of MAC address | |
| Response for Invalid Host Data | Enabled | |
| Barcode Separator | Disabled, None | |
| Packet Mode | Disabled | |
| ACK/NAK Retry Count | 2 | |
| ACK/NAK Timeout | 200ms | |
| Auto Power-Off Timer | 30 minutes | |
| Product Serial Number | Disabled | |
| Time Stamp | Disabled | |
| Date Format | Format 3: yyyy/mm/dd | |
| Keyboard Types | US English | USB HID-KBW/ BT HID |
| Character Encoding | ISO-8859-1 | USB HID-KBW/ BT HID |
| Convert Case | No case conversion | USB HID-KBW/ BT HID |
| Emulate ALT + Keypad | Disabled | USB HID-KBW/ BT HID |
| Function Key Mapping | Disabled | USB HID-KBW/ BT HID |
| Emulate Numeric Keypad | Disabled | USB HID-KBW/ BT HID |
| Code Page | Windows 1252 (Latin I) | USB HID-KBW/ BT HID |
| Inter-Character Delay for Bluetooth HID | 15ms | BT HID |
| Inter-Keystroke Delay for USB HID-KBW | 0ms | USB HID-KBW |
| Parameter | Factory Default | Remark |
| Prefix & Suffix | ||
| 1D Scanner | ||
| Prefix Sequence | Code ID+Custom Prefix+AIM ID | |
| AIM ID Prefix | Disabled | |
| Code ID Prefix | Disabled | 1 or 2 English letters |
| Custom Prefix | Disabled | Max: 11 characters |
| None | ||
| Custom Suffix | Disabled | Max: 11 characters |
| None | ||
| Terminating Character Suffix | Disabled | Max: 7 characters |
| None | ||
| 2D Scanner | ||
| Prefix Sequence | Custom Prefix+Code ID+AIM ID | |
| Custom Prefix | Disabled | Max: 11 characters |
| None | ||
| AIM ID Prefix | Disabled | |
| Code ID Prefix | Disabled | 1 or 2 English letters |
| Custom Suffix | Disabled | Max: 11 characters |
| None | ||
| Terminating Character Suffix | Enabled | Max: 7 characters |
| 0x0D (CR) | ||
| Scanning Preferences (For 2D scanner only) | ||
| Decode Area | Whole Area Decoding | |
| Specify Decoding Area | 40% top, 60% bottom, 40% left, 60% right | |
| Data Formatter | ||
| Data Formatter | Disabled | |
| Data Format | Format_0 | |
| Non-Match Error Beep | On | |
| Symbologies | ||
| 1D Scanner | ||
| Code 128 | ||
| Code 128 | Enabled | |
| Maximum Length | 255 | |
| Minimum Length | 1 | |
| UCC/EAN-128 | ||
| UCC/EAN-128 | Enabled | |
| Maximum Length | 255 | |
| Minimum Length | 1 | |
| AIM 128 | ||
| AIM 128 | Disabled | |
| Maximum Length | 255 | |
| Minimum Length | 1 | |
| EAN-8 | ||
| EAN-8 | Enabled | |
| Check Character | Transmit | |
| 2-Digit Add-On Code | Disabled | |
| 5-Digit Add-On Code | Disabled | |
| Decode EAN-8 + 2-digit Add-On Code Only | Disabled | |
| Decode EAN-8 + 5-digit Add-On Code Only | Disabled | |
| Extend to EAN-13 | Disabled | |
| Convert to EAN-13 | Disabled | |
| EAN-13 | ||
| EAN-13 | Enabled | |
| Check Character | Transmit | |
| 2-Digit Add-On Code | Disabled | |
| 5-Digit Add-On Code | Disabled | |
| Decode EAN-13 + 2-digit Add-On Code Only | Disabled | |
| Decode EAN-13 + 5-digit Add-On Code Only | Disabled | |
| EAN-13 Beginning with 290 Add-On Code Required | Do Not Require Add-On Code | |
| EAN-13 Beginning with 378/379 Add-On Code Required | Do Not Require Add-On Code | |
| EAN-13 Beginning with 414/419 Add-On Code Required | Do Not Require Add-On Code | |
| EAN-13 Beginning with 434/439 Add-On Code Required | Do Not Require Add-On Code | |
| EAN-13 Beginning with 977 Add-On Code Required | Do Not Require Add-On Code | |
| EAN-13 Beginning with 978 Add-On Code Required | Do Not Require Add-On Code | |
| EAN-13 Beginning with 979 Add-On Code Required | Do Not Require Add-On Code | |
| ISSN | ||
| ISSN | Disabled | |
| ISBN | ||
| ISBN | Disabled | |
| ISBN Format | ISBN-13 | |
| UPC-E | ||
| UPC-E | Enabled | |
| Check Character | Transmit | |
| 2-Digit Add-On Code | Disabled | |
| 5-Digit Add-On Code | Disabled | |
| Decode UPC-A + 2-digit Add-On Code Only | Disabled | |
| Decode UPC-A + 5-digit Add-On Code Only | Disabled | |
| Extend to UPC-A | Disabled | |
| Convert to UPC-A | Disabled | |
| System Character | Do not transmit | |
| Country Code | Do not transmit | |
| UPC-A | ||
| UPC-A | Enabled | |
| Check Character | Transmit | |
| 2-Digit Add-On Code | Disabled | |
| 5-Digit Add-On Code | Disabled | |
| Decode UPC-A + 2-digit Add-On Code Only | Disabled | |
| Decode UPC-A + 5-digit Add-On Code Only | Disabled | |
| System Character | Transmit | |
| Country Code | Do not transmit | |
| Interleaved 2 of 5 | ||
| Interleaved 2 of 5 | Enabled | |
| Check Character Verification | Enabled | |
| Check Character | Do not transmit | |
| Maximum Length | 255 | |
| Minimum Length | 6 | No less than 2 |
| ITF-6 | ||
| ITF-6 | Disabled | |
| Check Character | Do not transmit | |
| ITF-14 | ||
| ITF-14 | Disabled | |
| Check Character | Do not transmit | |
| Deutsche 14 | ||
| Deutsche 14 | Disabled | |
| Check Character | Do not transmit | |
| Deutsche 12 | ||
| Deutsche 12 | Disabled | |
| Check Character | Do not transmit | |
| COOP 25 (Japanese Matrix 2 of 5) | ||
| COOP 25 | Disabled | |
| Check Character Verification | Disabled | |
| Check Character | Do not transmit | |
| Maximum Length | 255 | |
| Minimum Length | 6 | No less than 3 |
| Matrix 25 (European Matrix 2 of 5) | ||
| Matrix 25 | Enabled | |
| Check Character Verification | Disabled | |
| Check Character | Do not transmit | |
| Maximum Length | 255 | |
| Minimum Length | 6 | No less than 3 |
| Industrial 25 | ||
| Industrial 25 | Enabled | |
| Check Character Verification | Disabled | |
| Check Character | Do not transmit | |
| Maximum Length | 255 | |
| Minimum Length | 6 | No less than 4 |
| Standard 25 | ||
| Standard 25 | Enabled | |
| Check Character Verification | Disabled | |
| Check Character | Do not transmit | |
| Maximum Length | 255 | |
| Minimum Length | 6 | No less than 4 |
| Code 39 | ||
| Code 39 | Enabled | |
| Check Character Verification | Disabled | |
| Check Character | Do not transmit | |
| Start/Stop Character | Transmit | |
| Code 39 Full ASCII | Enabled | |
| Code 32 | Disabled | |
| Code 32 Prefix | Disabled | |
| Code 32 Check Character | Do not transmit | |
| Code 32 Start/Stop Character | Do not transmit | |
| Maximum Length | 255 | |
| Minimum Length | 4 | No less than 1 |
| Codabar | ||
| Codabar | Enabled | |
| Check Character Verification | Disabled | |
| Check Character | Do not transmit | |
| Start/Stop Character | ABCD/ABCD formatTransmit | |
| Maximum Length | 255 | |
| Minimum Length | 4 | No less than 2 |
| Code 93 | ||
| Code 93 | Enabled | |
| Check Character Verification | Enabled | |
| Check Character | Do not transmit | |
| Maximum Length | 255 | |
| Minimum Length | 2 | No less than 1 |
| Code 11 | ||
| Code 11 | Disabled | |
| Check Character | Do not transmit | |
| Check Character Verification | Enabled1 Check Character, MOD11 | |
| Maximum Length | 255 | |
| Minimum Length | 4 | No less than 3 |
| Plessey | ||
| Plessey | Disabled | |
| Check Character Verification | Enabled | |
| Check Character | Do not transmit | |
| Maximum Length | 255 | |
| Minimum Length | 4 | No less than 4 |
| MSI-Plessey | ||
| MSI-Plessey | Disabled | |
| Check Character | Do not transmit | |
| Check Character Verification | Enabled1 Check Character, MOD10 | |
| Maximum Length | 255 | |
| Minimum Length | 4 | No less than 4 |
| GS1 Databar (RSS) | ||
| GS1 Databar | Enabled | |
| Maximum Length | 255 | |
| Minimum Length | 1 | |
| Parameter | Factory Default | Remark |
| 2D Scanner | ||
| Video Reverse | Disabled | Applicable to all symbologies. |
| Code 128 | ||
| Code 128 | Enabled | |
| Maximum Length | 127 | |
| Minimum Length | 1 | |
| GS1-128 (UCC/EAN-128) | ||
| GS1-128 | Enabled | |
| Maximum Length | 127 | |
| Minimum Length | 1 | |
| AIM 128 | ||
| AIM 128 | Enabled | |
| Maximum Length | 127 | |
| Minimum Length | 1 | |
| EAN-8 | ||
| EAN-8 | Enabled | |
| Check Character | Transmit | |
| 2-Digit Add-On Code | Disabled | |
| 5-Digit Add-On Code | Disabled | |
| Add-On Code | Not required | |
| Extend to EAN-13 | Disabled | |
| EAN-13 | ||
| EAN-13 | Enabled | |
| Check Character | Transmit | |
| 2-Digit Add-On Code | Disabled | |
| 5-Digit Add-On Code | Disabled | |
| Add-On Code | Not required | |
| EAN-13 Beginning with 290 Add-On Code Required | Do Not Require Add-On Code | For BS8060-2T |
| EAN-13 Beginning with 378/379 Add-On Code Required | Do Not Require Add-On Code | For BS8060-2T |
| EAN-13 Beginning with 414/419 Add-On Code Required | Do Not Require Add-On Code | For BS8060-2T |
| EAN-13 Beginning with 434/439 Add-On Code Required | Do Not Require Add-On Code | For BS8060-2T |
| EAN-13 Beginning with 977 Add-On Code Required | Do Not Require Add-On Code | For BS8060-2T |
| EAN-13 Beginning with 978 Add-On Code Required | Do Not Require Add-On Code | For BS8060-2T |
| EAN-13 Beginning with 979 Add-On Code Required | Do Not Require Add-On Code | For BS8060-2T |
| ISSN | ||
| ISSN | Disabled | |
| 2-Digit Add-On Code | Disabled | |
| 5-Digit Add-On Code | Disabled | |
| Add-On Code | Not required | |
| ISBN | ||
| ISBN | Enabled | |
| ISBN Format | ISBN-13 | |
| 2-Digit Add-On Code | Disabled | |
| 5-Digit Add-On Code | Disabled | |
| Add-On Code | Not required | |
| UPC-E | ||
| UPC-E | Enabled | |
| Check Character | Transmit | |
| 2-Digit Add-On Code | Disabled | |
| 5-Digit Add-On Code | Disabled | |
| Add-On Code | Not required | |
| Extend to UPC-A | Disabled | |
| System Character “0” | Transmit | |
| UPC-A | ||
| UPC-A | Enabled | |
| Check Character | Transmit | |
| 2-Digit Add-On Code | Disabled | |
| 5-Digit Add-On Code | Disabled | |
| Add-On Code | Not required | |
| System Character | Transmit | |
| Country Code | Do not transmit | |
| Interleaved 2 of 5 | ||
| Interleaved 2 of 5 | Enabled | |
| Check Character Verification | Disabled | |
| Check Character | Do not transmit | |
| Maximum Length | 100 | |
| Minimum Length | 6 | |
| ITF-6 | ||
| ITF-6 | Disabled | |
| Check Character | Do not transmit | |
| ITF-14 | ||
| ITF-14 | Enabled | |
| Check Character | Do not transmit | |
| Matrix 2 of 5 | ||
| Matrix 2 of 5 | Disabled | |
| Check Character Verification | Disabled | |
| Check Character | Do not transmit | |
| Maximum Length | 127 | |
| Minimum Length | 6 | |
| Industrial 25 | ||
| Industrial 25 | Enabled | |
| Check Character Verification | Disabled | |
| Check Character | Do not transmit | |
| Maximum Length | 127 | |
| Minimum Length | 6 | |
| Standard 25 | ||
| Standard 25 | Enabled | |
| Check Character Verification | Disabled | |
| Check Character | Do not transmit | |
| Maximum Length | 127 | |
| Minimum Length | 6 | |
| Code 39 | ||
| Code 39 | Enabled | |
| Check Character Verification | Disabled | |
| Check Character | Do not transmit | |
| Start/Stop Character | Do not transmit | |
| Code 39 Full ASCII | Enabled | |
| Code 32 | Disabled | For BS8060-2T |
| Code 32 Prefix | Disabled | For BS8060-2T |
| Code 32 Check Character | Do not transmit | For BS8060-2T |
| Code 32 Start/Stop Character | Do not transmit | For BS8060-2T |
| Maximum Length | 127 | |
| Minimum Length | 2 | |
| Codabar | ||
| Codabar | Enabled | |
| Check Character Verification | Disabled | |
| Check Character | Do not transmit | |
| Start/Stop Character | Do not transmit | |
| Start/Stop Character Format | ABCD/ABCD | |
| Maximum Length | 127 | |
| Minimum Length | 2 | |
| Code 93 | ||
| Code 93 | Enabled | |
| Check Character Verification | Enabled | |
| Check Character | Do not transmit | |
| Maximum Length | 127 | |
| Minimum Length | 3 | |
| Code 11 | ||
| Code 11 | Enabled | |
| Check Character Verification | Enabled1 check character, MOD11 | |
| Check Character | Do not transmit | |
| Maximum Length | 127 | |
| Minimum Length | 2 | |
| Plessey | ||
| Plessey | Enabled | |
| Check Character Verification | Enabled | |
| Check Character | Do not transmit | |
| Maximum Length | 127 | |
| Minimum Length | 1 | |
| MSI-Plessey | ||
| MSI-Plessey | Enabled | |
| Check Character Verification | Enabled1 check character, MOD10 | |
| Check Character | Do not transmit | |
| Maximum Length | 127 | |
| Minimum Length | 2 | |
| PDF417 | ||
| PDF417 | Enabled | |
| Maximum Length | 2710 | |
| Minimum Length | 1 | |
| PDF 417 Twin Code | Read single PDF417 only | |
| QR Code | ||
| QR Code | Enabled | |
| Micro QR | Enabled | |
| Maximum Length | 7089 | |
| Minimum Length | 1 | |
| QR Twin Code | Read single QR only | |
| Data Matrix | ||
| Data Matrix | Enabled | |
| Rectangular Barcodes | Enabled | |
| Mirror Images | Decode | |
| Maximum Length | 3116 | |
| Minimum Length | 1 | |
| DM Twin Code | Read single DM only | |
| Chinese Sensible Code | ||
| Chinese Sensible Code | Disabled | |
| Maximum Length | 7827 | |
| Minimum Length | 1 | |
Digit Barcodes (1D Scanner)
0 \~ 9
text_image
Barcode image with black and white vertical bars, no visible text or symbols0
text_image
Black and white barcode image with vertical lines and a horizontal bar at the bottom1
text_image
Black and white barcode image with vertical lines and a central dot2
3
text_image
Black and white barcode image with vertical lines and a horizontal bar at the bottom4
text_image
Black and white barcode image with vertical lines and a central bar5
text_image
Black and white barcode image with vertical lines and a small number 'n' in the center.6
text_image
Black and white barcode image with vertical lines and a central dot7

text_image
Black and white barcode image with vertical lines8
text_image
Black and white barcode image with vertical lines and a central bar9
A \~ F
text_image
Black and white barcode image with vertical lines and a central dotA
text_image
Black and white barcode image with vertical lines and a central dotB
text_image
Black and white barcode image with vertical lines and a small number 'n' in the center.C
text_image
Black and white barcode image with vertical lines and a small number 'n' in the center.D
text_image
Black and white barcode image with vertical lines and a small number 'n' in the center.E
text_image
Barcode image containing encoded digital informationF
Digit Barcodes (2D Scanner)
0 \~ 9
0
5
1
6
2
7
3
8
4
9
A \~ F
A
B
C
D
E
F
Digit Barcodes
0 \~ 9
text_image
Black and white barcode image with vertical lines and a central dot0
5
1
6
2
7
3
8
4
9
A \~ F
A
B
C
D
E
F
Save/Cancel Barcodes (1D Scanner)
After reading numeric barcode(s), you need to scan the Save barcode to save the data. If you scan the wrong digit(s), you can either scan the Cancel barcode and then start the configuration all over again, or scan the Delete the Last Digit barcode and then the correct digit, or scan the Delete All Digits barcode and then the digits you want.
For instance, after reading the Set the Maximum Length barcode and numeric barcodes "1", "2" and "3", you scan:
Delete the Last Digit: The last digit "3" will be removed.
Delete All Digits: All digits "123" will be removed.
✨ Cancel: The maximum length configuration will be canceled.
text_image
Barcode image with black and white vertical bars, no visible text or symbolsSave
text_image
Black and white barcode image with vertical lines and a central dotCancel
Delete the Last Digit
Delete All Digits
Save/Cancel Barcodes (2D Scanner)
After reading numeric barcode(s), you need to scan the Save barcode to save the data. If you scan the wrong digit(s), you can either scan the Cancel barcode and then start the configuration all over again, or scan the Delete the Last Digit barcode and then the correct digit, or scan the Delete All Digits barcode and then the digits you want.
For instance, after reading the Maximum Length barcode and numeric barcodes "1", "2" and "3", you scan:
Delete the Last Digit: The last digit "3" will be removed.
Delete All Digits: All digits "123" will be removed.
✿ Cancel: The maximum length configuration will be cancelled. And the scanner is still in the setup mode.
Save
Delete the Last Digit
Delete All Digits
Cancel
Save/Cancel Barcodes
Save
Cancel
Delete the Last Digit
Delete All Digits
AIM ID Table (1D Scanner)
| Symbology | AIM ID | Possible AIM ID Modifiers (m) |
| Code 128 | ]C0 | |
| UCC/EAN-128 | ]C1 | |
| AIM 128 | ]C2 | |
| ISBT 128 | ]C4 | |
| EAN-8 | ]E4 | |
| EAN-13 | ]E0 | |
| EAN-13 with Addon | ]E3 | |
| ISSN | ]X0 | |
| ISBN | ]X0 | |
| UPC-E | ]E0 | |
| UPC-E with Addon | ]E3 | |
| UPC-A | ]E0 | |
| UPC-A with Addon | ]E3 | |
| Interleaved 2 of 5 | ]Im | 0,1,3 |
| ITF-6 | ]Im | 1,3 |
| ITF-14 | ]Im | 1,3 |
| Deutsche 14 | ]X0 | |
| Deutsche 12 | ]X0 | |
| COOP 25 (Japanese Matrix 2 of 5) | ]X0 | |
| Matrix 2 of 5(European Matrix 2 of 5) | ]X0 | |
| Industrial 25 | ]S0 | |
| Standard 25 | ]R0 | |
| Code 39 | ]Am | 0,1,3,4,5,7 |
| Codabar | ]Fm | 0,2,4 |
| Code 93 | ]G0 | |
| Code 11 | ]Hm | 0,1,3 |
| Plessey | ]P0 | |
| MSI-Plessey | ]Mm | 0,1 |
| GS1 Databar | ]e0 | |
| PDF417 | ]Lm | 0,1,2 |
| MicroPDF417 | ]Lm | 3,4,5 |
Note: "m" represents the AIM modifier character. Refer to ISO/IEC 15424:2008 Information technology – Automatic identification and data capture techniques – Data Carrier Identifiers (including Symbology Identifiers) for AIM modifier character details.
AIM ID Table (2D Scanner)
| Symbology | AIM ID | Remark |
| EAN-13 | ]E0 | Standard EAN-13 |
| ]E3 | EAN-13 + 2/5-Digit Add-On Code | |
| EAN-8 | ]E4 | Standard EAN-8 |
| ]E4...]E1... | EAN-8 + 2-Digit Add-On Code | |
| ]E4...]E2... | EAN-8 + 5-Digit Add-On Code | |
| UPC-E | ]E0 | Standard UPC-E |
| ]E3 | UPC-E + 2/5-Digit Add-On Code | |
| UPC-A | ]E0 | Standard UPC-A |
| ]E3 | UPC-A + 2/5-Digit Add-On Code | |
| Code 128 | ]C0 | Standard Code 128 |
| GS1-128 (UCC/EAN-128) | ]C1 | FNC1 is the character right after the start character |
| AIM-128 | ]C2 | FNC1 is the 2nd character after the start character |
| ISBT-128 | ]C4 | |
| Interleaved 2 of 5 | ]I0 | No check character verification |
| ]I1 | Transmit check character after verification | |
| ]I3 | Do not transmit check character after verification | |
| ITF-6 | ]I1 | Transmit check character |
| ]I3 | Do not transmit check character | |
| ITF-14 | ]I1 | Transmit check character |
| ]I3 | Do not transmit check character | |
| Industrial 2 of 5 | ]S0 | Not specified |
| Standard 2 of 5 | ]R0 | No check character verification |
| ]R8 | MOD10; do not transmit check character | |
| ]R9 | MOD10; transmit check character | |
| Code 39 | ]A0 | Transmit barcodes as is; Full ASCII disabled; no check character verification |
| ]A1 | MOD43; transmit check character | |
| ]A3 | MOD43; do not transmit check character | |
| ]A4 | Full ASCII enabled; no check character verification | |
| ]A5 | Full ASCII enabled; transmit check character | |
| ]A7 | Full ASCII enabled; do not transmit check character | |
| Codabar | ]F0 | Standard Codabar |
| ]F2 | Transmit check character after verification | |
| ]F4 | Do not transmit check character after verification | |
| Code 93 | ]G0 | Standard Code 93 |
| Code 11 | ]H0 | MOD11; transmit check character |
| ]H1 | MOD11/MOD11; transmit check character | |
| ]H3 | Do not transmit check character after verification | |
| ]H9 | No check character verification | |
| GS1-DataBar (RSS) | ]e0 | Standard GS1-DataBar |
| Plessey | ]P0 | Standard Plessey |
| MSI-Plessey | ]M0 | MOD10; transmit check character |
| ]M1 | MOD10; do not transmit check character | |
| ]M7 | MOD10/ MOD11; do not transmit check character | |
| ]M8 | MOD10/ MOD11; transmit check character | |
| ]M9 | No check character verification | |
| Matrix 2 of 5 | ]X0 | Specified by the manufacturer |
| ]X1 | No check character verification | |
| ]X2 | MOD10; transmit check character | |
| ]X3 | MOD11; do not transmit check character | |
| ISBN | ]X4 | Standard ISBN |
| ISSN | ]X5 | Standard ISSN |
| PDF417 | ]L0 | Comply with 1994 PDF417 specifications |
| Data Matrix | ]d0 | ECC000 - ECC140 |
| ]d1 | ECC200 | |
| ]d2 | ECC200, FNC1 is the 1st or 5th character after the start character | |
| ]d3 | ECC200, FNC1 is the 2nd or 6th character after the start character | |
| ]d4 | ECC200, ECI included | |
| ]d5 | ECC200, FNC1 is the 1st or 5th character after the start character,ECI included | |
| ]d6 | ECC200, FNC1 is the 2nd or 6th character after the start character,ECI included | |
| QR Code | ]Q0 | QR1 |
| ]Q1 | 2005 version, ECI excluded | |
| ]Q2 | 2005 version, ECI included | |
| ]Q3 | QR Code 2005, ECI excluded, FNC1 is the 1st character after the start character | |
| ]Q4 | QR Code 2005, ECI included, FNC1 is the 1st character after the start character | |
| ]Q5 | QR Code 2005,ECI excluded,FNC1 is the 2nd character after the start character | |
| ]Q6 | QR Code 2005, ECI included, FNC1 is the 2nd character after the start character | |
| Chinese Sensible Code | ]X0 |
Reference: ISO/IEC 15424:2008 Information technology – Automatic identification and data capture techniques – Data Carrier Identifiers (including Symbology Identifiers).
Code ID Table (1D Scanner)
| Barcode | Code ID |
| Code 128 | j |
| UCC/EAN-128 | u |
| AIM 128 | f |
| EAN-8 | g |
| EAN-13 | d |
| ISSN | n |
| ISBN | B |
| UPC-E | h |
| UPC-A | c |
| Interleaved 2 of 5 | e |
| ITF-6 | r |
| ITF-14 | q |
| Deutsche 14 | w |
| Deutsche 12 | l |
| COOP 25 (Japanese Matrix 2 of 5) | o |
| Matrix 2 of 5(European Matrix 2 of 5) | v |
| Industrial 25 | i |
| Standard 25 | s |
| Code 39 | b |
| Codabar | a |
| Code 93 | y |
| Code 11 | z |
| Plessey | p |
| MSI-Plessey | m |
| GS1 Databar | R |
Code ID Table (2D Scanner)
| Symbology | Code ID |
| Code 128 | j |
| GS1-128(UCC/EAN-128) | j |
| AIM-128 | f |
| EAN-8 | d |
| EAN-13 | d |
| ISSN | n |
| ISBN | B |
| UPC-E | c |
| UPC-A | c |
| Interleaved 2 of 5 | e |
| ITF-6 | e |
| ITF-14 | e |
| Matrix 2 of 5 | v |
| Industrial 2 of 5 | D |
| Standard 2 of 5 | s |
| Code 39 | b |
| Codabar | a |
| Code 93 | i |
| Code 11 | H |
| Plessey | p |
| MSI-Plessey | m |
| GS1 Databar | R |
| PDF417 | r |
| QR Code | Q |
| Data Matrix | u |
| Chinese Sensible Code | h |
ASCII Table
| Hex | Dec | Char | |
| 00 | 0 | NUL | (Null char.) |
| 01 | 1 | SOH | (Start of Header) |
| 02 | 2 | STX | (Start of Text) |
| 03 | 3 | ETX | (End of Text) |
| 04 | 4 | EOT | (End of Transmission) |
| 05 | 5 | ENQ | (Enquiry) |
| 06 | 6 | ACK | (Acknowledgment) |
| 07 | 7 | BEL | (Bell) |
| 08 | 8 | BS | (Backspace) |
| 09 | 9 | HT | (Horizontal Tab) |
| 0a | 10 | LF | (Line Feed) |
| 0b | 11 | VT | (Vertical Tab) |
| 0c | 12 | FF | (Form Feed) |
| 0d | 13 | CR | (Carriage Return) |
| 0e | 14 | SO | (Shift Out) |
| 0f | 15 | SI | (Shift In) |
| 10 | 16 | DLE | (Data Link Escape) |
| 11 | 17 | DC1 | (XON) (Device Control 1) |
| 12 | 18 | DC2 | (Device Control 2) |
| 13 | 19 | DC3 | (XOFF) (Device Control 3) |
| 14 | 20 | DC4 | (Device Control 4) |
| 15 | 21 | NAK | (Negative Acknowledgment) |
| 16 | 22 | SYN | (Synchronous Idle) |
| 17 | 23 | ETB | (End of Trans. Block) |
| 18 | 24 | CAN | (Cancel) |
| 19 | 25 | EM | (End of Medium) |
| 1a | 26 | SUB | (Substitute) |
| 1b | 27 | ESC | (Escape) |
| 1c | 28 | FS | (File Separator) |
| 1d | 29 | GS | (Group Separator) |
| 1e | 30 | RS | (Request to Send) |
| 1f | 31 | US | (Unit Separator) |
| 20 | 32 | SP | (Space) |
| 21 | 33 | ! | (Exclamation Mark) |
| 22 | 34 | " | (Double Quote) |
| 23 | 35 | # | (Number Sign) |
| 24 | 36 | $ | (Dollar Sign) |
| 25 | 37 | % | (Percent) |
| 26 | 38 | & | (Ampersand) |
| 27 | 39 | ` | (Single Quote) |
| 28 | 40 | ( | (Left/ Opening Parenthesis) |
| 29 | 41 | ) | (Right / Closing Parenthesis) |
| 2a | 42 | * | (Asterisk) |
| 2b | 43 | + | (Plus) |
| 2c | 44 | , | (Comma) |
| 2d | 45 | - | (Minus / Dash) |
| 2e | 46 | . | (Dot) |
| 2f | 47 | / | (Forward Slash) |
| 30 | 48 | 0 | |
| 31 | 49 | 1 | |
| 32 | 50 | 2 | |
| 33 | 51 | 3 | |
| 34 | 52 | 4 | |
| 35 | 53 | 5 | |
| 36 | 54 | 6 | |
| 37 | 55 | 7 | |
| 38 | 56 | 8 | |
| 39 | 57 | 9 | |
| 3a | 58 | : | (Colon) |
| 3b | 59 | ; | (Semi-colon) |
| 3c | 60 | < | (Less Than) |
| 3d | 61 | = | (Equal Sign) |
| Hex | Dec | Char |
| 3e | 62 | (Greater Than) |
| 3f | 63 | (Question Mark) |
| 40 | 64 | (AT Symbol) |
| 41 | 65 | A |
| 42 | 66 | B |
| 43 | 67 | C |
| 44 | 68 | D |
| 45 | 69 | E |
| 46 | 70 | F |
| 47 | 71 | G |
| 48 | 72 | H |
| 49 | 73 | I |
| 4a | 74 | J |
| 4b | 75 | K |
| 4c | 76 | L |
| 4d | 77 | M |
| 4e | 78 | N |
| 4f | 79 | O |
| 50 | 80 | P |
| 51 | 81 | Q |
| 52 | 82 | R |
| 53 | 83 | S |
| 54 | 84 | T |
| 55 | 85 | U |
| 56 | 86 | V |
| 57 | 87 | W |
| 58 | 88 | X |
| 59 | 89 | Y |
| 5a | 90 | Z |
| 5b | 91 | (Left / Opening Bracket) |
| 5c | 92 | (Back Slash) |
| 5d | 93 | (Right / Closing Bracket) |
| 5e | 94 | ^ (Caret / Circumflex) |
| 5f | 95 | _ (Underscore) |
| 60 | 96 | ' (Grave Accent) |
| 61 | 97 | a |
| 62 | 98 | b |
| 63 | 99 | c |
| 64 | 100 | d |
| 65 | 101 | e |
| 66 | 102 | f |
| 67 | 103 | g |
| 68 | 104 | h |
| 69 | 105 | i |
| 6a | 106 | j |
| 6b | 107 | k |
| 6c | 108 | l |
| 6d | 109 | m |
| 6e | 110 | n |
| 6f | 111 | o |
| 70 | 112 | p |
| 71 | 113 | q |
| 72 | 114 | r |
| 73 | 115 | s |
| 74 | 116 | t |
| 75 | 117 | u |
| 76 | 118 | v |
| 77 | 119 | w |
| 78 | 120 | x |
| 79 | 121 | y |
| 7a | 122 | z |
| 7b | 123 | { (Left/ Opening Brace) |
| 7c | 124 | | (Vertical Bar) |
| 7d | 125 | } (Right/Closing Brace) |
| 7e | 126 | ~ (Tilde) |
| 7f | 127 | DEL (Delete) |
ASCII Function Key Mapping Table
| ASCII Function | ASCII Value (HEX) | No Function Key Mapping | Function Key Mapping | |
| NUL | (Null char.) | 00 | Null | Ctrl+2 |
| SOH | (Start of Header) | 01 | Keypad Enter | Ctrl+A |
| STX | (Start of Text) | 02 | Caps Lock | Ctrl+B |
| ETX | (End of Text) | 03 | Null | Ctrl+C |
| EOT | (End of Transmission) | 04 | Null | Ctrl+D |
| ENQ | (Enquiry) | 05 | Null | Ctrl+E |
| ACK | (Acknowledgment) | 06 | Null | Ctrl+F |
| BEL | (Bell) | 07 | Enter | Ctrl+G |
| BS | (Backspace) | 08 | Left Arrow | Ctrl+H |
| HT | (Horizontal Tab) | 09 | Horizontal Tab | Ctrl+I |
| LF | (Line Feed) | 0A | Down Arrow | Ctrl+J |
| VT | (Vertical Tab) | 0B | Vertical Tab | Ctrl+K |
| FF | (Form Feed) | 0C | Delete | Ctrl+L |
| CR | (Carriage Return) | 0D | Enter | Ctrl+M |
| SO | (Shift Out) | 0E | Insert | Ctrl+N |
| SI | (Shift In) | 0F | Esc | Ctrl+O |
| DLE | (Data Link Escape) | 10 | F11 | Ctrl+P |
| DC1 | (XON) (Device Control 1) | 11 | Home | Ctrl+Q |
| DC2 | (Device Control 2) | 12 | Print Screen | Ctrl+R |
| DC3 | (XOFF) (Device Control 3) | 13 | Backspace | Ctrl+S |
| DC4 | (Device Control 4) | 14 | tab+shift | Ctrl+T |
| NAK | (Negative Acknowledgment) | 15 | F12 | Ctrl+U |
| SYN | (Synchronous Idle) | 16 | F1 | Ctrl+V |
| ETB | (End of Trans. Block) | 17 | F2 | Ctrl+W |
| CAN | (Cancel) | 18 | F3 | Ctrl+X |
| EM | (End of Medium) | 19 | F4 | Ctrl+Y |
| SUB | (Substitute) | 1A | F5 | Ctrl+Z |
| ESC | (Escape) | 1B | F6 | See the following table |
| FS | (File Separator) | 1C | F7 | |
| GS | (Group Separator) | 1D | F8 | |
| RS | (Request to Send) | 1E | F9 | |
| US | (Unit Separator) | 1F | F10 | |
ASCII Function Key Mapping Table (Continued)
The function key mappings of the last five characters in the previous table differ from one keyboard layout to another.
| Country/Keyboard Layout | Function Key Mapping | ||||
| 1B | 1C | 1D | 1E | 1F | |
| United States | Ctrl+[ | Ctrl+\ | Ctrl+] | Ctrl+6 | Ctrl+- |
| Belgium | Ctrl+[ | Ctrl+< | Ctrl+] | Ctrl+6 | Ctrl+- |
| Scandinavia | Ctrl+8 | Ctrl+< | Ctrl+9 | Ctrl+6 | Ctrl+- |
| France | Ctrl+^ | Ctrl+8 | Ctrl+$ | Ctrl+6 | Ctrl+= |
| Germany | Ctrl+Ä | Ctrl++ | Ctrl+6 | Ctrl+- | |
| Italy | Ctrl+\ | Ctrl++ | Ctrl+6 | Ctrl+- | |
| Switzerland | Ctrl+< | Ctrl+. | Ctrl+6 | Ctrl+- | |
| United Kingdom | Ctrl+[ | Ctrl+ ¢ | Ctrl+] | Ctrl+6 | Ctrl+- |
| Denmark | Ctrl+8 | Ctrl+\ | Ctrl+9 | Ctrl+6 | Ctrl+- |
| Norway | Ctrl+8 | Ctrl+\ | Ctrl+9 | Ctrl+6 | Ctrl+- |
| Spain | Ctrl+[ | Ctrl+\ | Ctrl+] | Ctrl+6 | Ctrl+- |
Symbology ID Number
| Symbology | ID Number |
| Code 128 | 002 |
| UCC/EAN-128 | 003 |
| EAN-8 | 004 |
| EAN-13 | 005 |
| UPC-E | 006 |
| UPC-A | 007 |
| Interleaved 2 of 5, Febraban | 008 |
| ITF-14 | 009 |
| ITF-6 | 010 |
| Matrix 2 of 5 | 011 |
| Code 39, Code 32 | 013 |
| Codabar | 015 |
| Code 93 | 017 |
| AIM-128 | 020 |
| COOP 25 | 022 |
| ISSN | 023 |
| ISBN | 024 |
| Industrial 25 | 025 |
| Standard 25 | 026 |
| Plessey | 027 |
| Code 11 | 028 |
| MSI-Plessey | 029 |
| GS1 Databar | 031 |
| PDF417 | 032 |
| QR Code | 033 |
| Data Matrix | 035 |
| Chinese Sensible Code | 039 |
| Deutsche 14 | 128 |
| Deutsche 12 | 129 |

Newland
SCANNING MADE SIMPLE
Newland EMEA HQ
+31 (0) 345 87 00 33
info@newland-id.com
newland-id.com
D-A-CH
0049 (0) 6182 82916-16
info@newland-id.de
Benelux
+31 (0) 345 87 00 33
benelux@newland-id.com
Italy
+39 (0) 342 0562227
italy@newland-id.com
United Kingdom
+44 (0) 7771 631387
sales@newland-id.co.uk
South Africa
Gauteng: +27 (0) 11 553 8010
Cape Town: +27 (0) 21 9140819
info@newland-id.co.za
Turkey
+90 (0) 544 538 40 49
turkey@newland-id.com
France
+39 (0) 345 8804096
france@newland-id.com
Ibérica
+34 (0) 93 303 74 66
info@newland-id.es
Nordic & Baltic
+46 (0) 70 88 47 767
nordic@newland-id.com
Russia
+7 (495) 120-23-85
russia@newland-id.com
Middle East
+39 (0) 345 8804096
middleeast@newland-id.com
Iran
+90 (0) 544 538 40 49
iran@newland-id.com