
46007 - Vacuum Sealer Gastroback - Free user manual and instructions
Find the device manual for free 46007 Gastroback in PDF.


| Product Type | Vacuum Sealer |
| Model | Design Vacuum Sealer Basic Plus (Art. No. 46007) |
| Brand | Gastroback |
| Power Supply | 220-240 V AC, 50 Hz |
| Power Consumption | 170 Watt |
| Dimensions (W x D x H) | Approx. 39.0 cm x 16.5 cm x 9.5 cm |
| Weight | Approx. 1.6 kg |
| Power Cord Length | Approx. 80 cm |
| Sealing Band | Integrated heating element |
| Vacuum Pump | Internal, for bags and containers |
| Control Panel | Vacuum Seal button, Seal Only button, STOP button |
| Indicators | Green vacuum pump indicator, red sealing indicator |
| Max. Bag Width | Up to 30 cm (not explicitly stated, typical for home sealers) |
| Vacuum Port | For use with vacuum containers (hose included) |
| Accessories Included | Foil cutter, vacuum hose, dripping tray |
| Safety Features | Thermal cut-out (overheat protection), automatic shut-off |
| Cooling Time Between Seals | Approx. 30 seconds with lid open; 2 minutes with lid closed |
| Cleaning | Detachable dripping tray (dishwasher safe); wipe exterior with damp cloth; do not immerse |
| Warranty | 2 years (against manufacturing defects) |
| Suitable for | Vacuum packing food, marinating, preserving, and non-food items (e.g., camping supplies) |
Frequently Asked Questions - 46007 Gastroback
User questions about 46007 Gastroback
0 question about this device. Answer the ones you know or ask your own.
Ask a new question about this device
Download the instructions for your Vacuum Sealer in PDF format for free! Find your manual 46007 - Gastroback and take your electronic device back in hand. On this page are published all the documents necessary for the use of your device. 46007 by Gastroback.
USER MANUAL 46007 Gastroback
natural_image
Exterior view of a black and white electronic device with horizontal stripes and control buttons (no visible text or symbols)natural_image
Close-up of a computer monitor with visible lens and screen (no text or symbols)natural_image
Close-up of a hand holding a black electronic component (no visible text or symbols)natural_image
Close-up of a mechanical component with black and white surfaces (no visible text or symbols)VERSIEGELN EINES FOLIENBEUTELS - DEN BEUTELBODEN VERSCHLIESSEN
natural_image
Close-up of a white striped electronic device with a black base and a small circular button (no text or symbols visible)Abbildung A
natural_image
Close-up of diagonal black and white stripes on a light background (no text or symbols)Abbildung B
natural_image
Top-down view of a white electronic device with two downward arrows indicating measurement or orientation (no text or symbols)Abbildung C
Abbildung D
natural_image
Close-up of a white striped electronic device with a black base and circular button (no text or symbols visible)Abbildung E
natural_image
Close-up of metallic sheets with reflective surfaces (no text or symbols visible)Abbildung F
natural_image
White rectangular electronic device with two downward arrows indicating measurement or orientation (no text or symbols)Abbildung G
Abbildung H
natural_image
Close-up of a white striped object with a black base and circular mark, no visible text or symbolsAbbildung I
natural_image
Close-up of a black mechanical component with a white sheet, possibly a tool or device (no visible text or symbols)Abbildung J
Abbildung K
natural_image
Exterior view of a black and white electronic device with horizontal stripes and control buttons (no visible text or symbols)Art.-No. 46007 »Design Vacuum Sealer Basic Plus«
Read all provided instructions before first usage!
Model and attachments are subject to change
For household use only!
TABLE OF CONTENTS
KNOWING YOUR DESIGN VACUUM SEALER BASIC PLUS....27
IMPORTANT SAFEGUARDS 29
Important Safeguards for Electrical Appliances 30
Hot Sufaces – Risks of Burns 31
TECHNICAL SPECIFICATIONS.... 32
ADVANTAGES OF VACUUM PACKING 32
IMPORTANT INSTRUCTIONS 33
TIPS FOR BEST RESULTS 34
SHELF LIFE TIMETABLES 35
OVERHEAT PROTECTION 36
OPERATION 36
Getting the Appliance Ready for Use 36
Using the Foil Cutter 37
Sealing a plastic bag - closing the bottom of the bag.... 37
How to vacuum-pack in a plastic bag/foil 39
How to vacuum seal a container 40
SOLVING PROBLEMS 42
CARE AND CLEANING 44
STORAGE 44
NOTES FOR DISPOSAL 45
INFORMATION UND SERVICE 45
WARRANTY 45
DEAR CUSTOMER!
Congratulations! Your new Design Vacuum Sealer Basic Plus will help you to preserve freshness and taste for an elongated time when storing your food. Additionally, in home and leisure time the vacuum sealer will be a useful assistant, protecting delicate objects from water and dirt.
These instructions for use will inform you about the various functions and features which makes it easy to take pleasure in your new vacuum sealer.
We hope that you will enjoy your new vacuum sealer.
Your Gastroback GmbH
KNOWING YOUR NEW VACUUM SEALER
Vacuum Seal button:
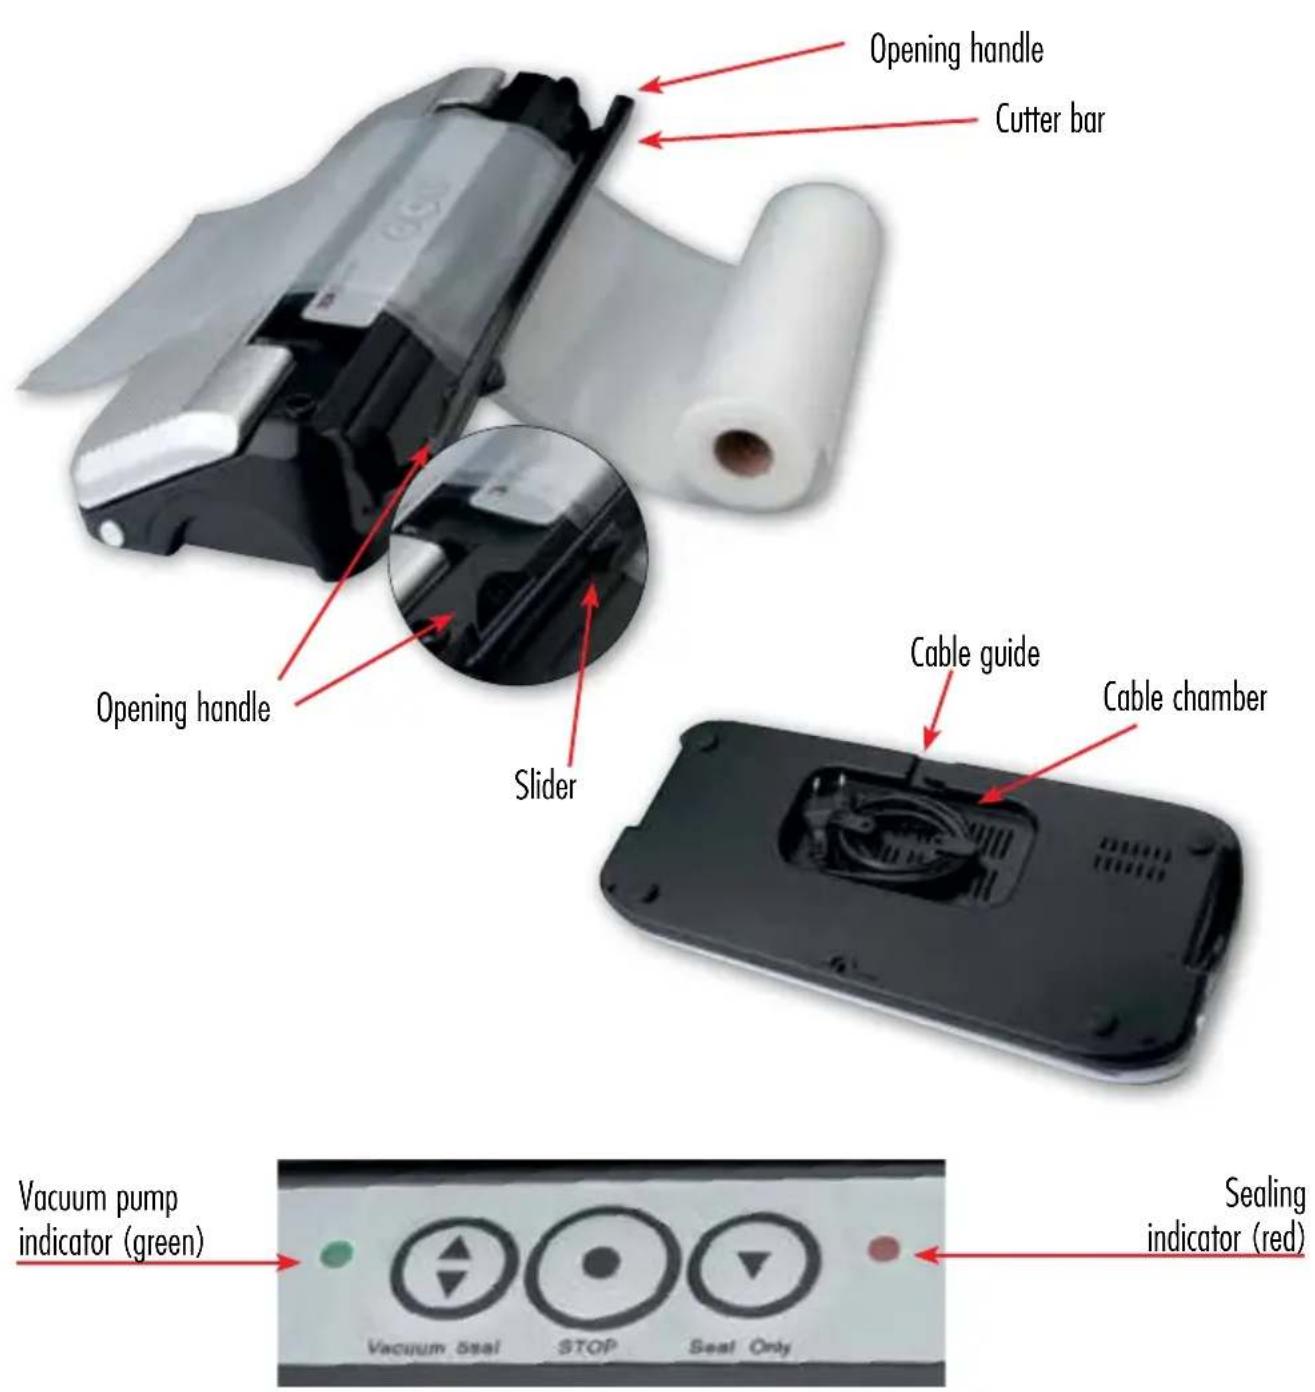
Insert bag and push this button: indicator illuminates green, vacuum pump is working
Sealing indicator illuminates additionally: sealing is in progress
Both indicators go out: vacuum sealing completed.
STOP-button,
cancels the ongoing process immediately.
Seal Only button:
Insert bag and push this button: indicator illuminates red, sealing is in progress indicator goes out: sealing completed.
IMPORTANT SAFEGUARDS
Carefully read all instructions before operating this appliance and save for further reference. Do not attempt to use this appliance for any other than the intended use, described in these instructions. Any other use, especially misuse, can cause severe injuries or damage by electric shock, moving parts, heat or fire.
Any operation, repair and technical maintenance of the appliance or any part of it other than described in these instructions may only be performed at an authorised service centre. Please contact your vendor.
- This appliance is for household use only and NOT intended for use in moving vehicles. Do not operate or store the appliance in humid or wet areas or outdoors. Any use of accessories, attachments or spare parts not recommended by the manufacturer may result in damage and/or injuries to persons.
- Check the entire appliance and its accessories regularly for proper operation—especially the power cord. Do not operate the appliance, when the appliance or any part of it is likely to be damaged, to avoid risk of fire, electric shock or any other damage and/or injuries to persons. The appliance is likely to be damaged if the appliance has been subject to inadmissible strain (e.g. overheating, mechanical or electric shock), or if there are any cracks, excessively frayed or melted parts, or distortions, or if the appliance is not working properly. In this case, immediately unplug the appliance and return the entire appliance (including all parts and accessories) to an authorised service centre for examination and repair.
- This appliance is NOT intended for use by persons (including children) with reduced physical, sensory or mental capabilities, or lack of experience and knowledge, unless they have been given supervision or instruction concerning use of the appliance by a person responsible for their safety. Children must be supervised to ensure that they do not play with the appliance or any parts of the appliance or the packaging. Always keep the appliance where it is dry and clean and where young children cannot reach it. Do not leave the appliance unattended, when it is in reach of young children or when the appliance is connected to the power supply.
- Risk of suffocation! Do not let young children play with the foils or bags or packaging.
- Never place heavy or hard objects on the appliance or any part of it. Take care that no one will pull the appliance by the power cord.
- The work space has to be easily accessible, solid, even, dry and of sufficient size. Immediately wipe off spilled liquids. The sealing band could get very hot as a result of repeated sealing processes. Avoid touching the sealing band immediately after operation with any parts of your body or heat-sensitive items.
- Do not place the appliance near the edge of the table or counter or
on sloping or wet surfaces or where it can fall. During operation free space of 20 cm to the sides and 1 m above the appliance should be left for sufficient ventilation. Do not place any cloth or tissue under or on the appliance, to avoid any risk of fire, electric shock or overheating. Do not use the appliance in wet or humid areas.
- After each sealing process let the appliance cool down for approximately 30 seconds (with lid left open) before starting again. Only use the designated foils, bags and containers with the appliance to avoid damage. Ensure that the appliance will not suck in any liquid or powder.
- Do not vacuum pack inflammable liquids (e.g. alcoholic beverages, solvents). Caused by low pressure, large amounts of liquid will evaporate, thus building-up a hazardous explosive mixture. Additionally, the appliance will get damaged.
- Containers used for vacuuming may not have any cracks and scratches. Thus, carefully check all containers used with the appliance for perfect condition. Do not use any other than the designated containers. Damaged or unsuited containers can burst under vacuum with splinters hurled about! Always handle containers under vacuum with special care, to avoid bursting. Do not consume any food from a crushed container, because splinters could be in the food, thus causing severe injuries.
- Do not leave the appliance unattended while connected to the power supply. Always unplug the appliance, and wait until the sealing band cooled down, before moving, or cleaning, or when the appliance is not in use. Do not grasp the appliance at the open lid or power cord for moving the appliance.
- Always unplug and wait for the appliance to cool down, before cleaning or storing. Close the lid to protect sealing band and gaskets for moving or storing.
- Do not use any abrasive cleaners, cleaning pads (e.g. metal scouring pads), or any corrosive chemicals (e.g. bleach) for cleaning. Do not immerse the appliance or power cord in water or any other liquid. Do not spill or drip any liquids on the appliance, or on the power cord to avoid risk of fire and electric shock. When liquids are spilled in the motor housing or sucked in, immediately switch OFF the appliance (STOP button), unplug the appliance, and wait for the appliance to cool down. Thereafter, clean and dry the appliance thoroughly. (See: Care and Cleaning)
- DO NOT place the appliance or any parts in an automatic dishwasher.
IMPORTANT SAFEGUARDS FOR ELECTRICAL APPLIANCES
The appliance is driven electrically. Place the appliance near a suitable wall power socket to connect the appliance directly to a protected mains power supply with protective conductor (earth/ground) connected properly. Ensure that the voltage rating of your mains power supply corresponds to the voltage requirements of the appliance (220-240 V, 50 Hz, AC, rated for at least 8 A).
The installation of a residual current operated circuit breaker (r.c.c.b.) with a maximum rated residual operating current of 30 mA in the supplying electrical circuit is strongly recommended. If in doubt, contact your electrician for further information.
- Do not use multiple electrical adapters. We recommend avoiding the usage of extension cords. However, if you wish to use an extension cord, ensure that the protective conductor is connected properly.
- Do not leave the appliance unattended while connected to the power supply. Always immediately unplug the appliance after use and before cleaning. Always grasp the plug when disconnecting the appliance from the power outlet.
- Always handle the power cord with care. Do not place the appliance on a power cord. Do not let the power cord hang over the edge of the table or counter. Keep the cable away from any hot surfaces (e.g. sealing band of the appliance). Never pull, rip, bend, clamp, squish or knot the power cord. Attend to nobody getting caught in loops of the power cord or pulling the appliance off the work space. When pulling the plug always catch hold of the enclosure of the plug. Do not attempt to repair the power cord!
- Do not place or immerse the appliance or power cord in water or any other liquid. Do not pour or drip any liquids on the appliance or power cord. When liquids are spilled on the appliance, immediately unplug the appliance and dry it to avoid risk of electric shock or fire (see >Care and cleaning<). Do not attempt to operate the appliance, when liquids are on or in the electrical section of the appliance.
- The appliance is not intended for continuous operation. Please wait approximately 30 seconds with the lid open (approximately 2 minutes with the lid closed) after each sealing process before switching on again. For additional safety the appliance is fitted with a thermal cut out. In the event of overheating (possible with room temperature of 35^ or more, or overvoltage of the power supply) the appliance will automatically shut down to prevent damage. In this case, unplug and let the appliance cool down for approximately 20 minutes before operating the appliance again.
HOT SURFACES - RISKS OF BURNS
The Design Vacuum Sealer Basic Plus is designed for vacuum packing food and other items. The sealing band and vacuum pump are electrically driven. The sealing band gets hot during operation.
- The sealing band will be still hot, even a short time after sealing. This holds especially after repeated operation. The heating starts as soon as the sealing indicator is illuminated. Only use the designated foils and bags with the appliance. Do not place any foreign substances (such as papers, unsuitable plastics, textiles or the like) on the sealing surfaces, to avoid risk of fire and damage to the appliance.
- The appliance needs some time to cool down after each sealing procedure: approximately 30 seconds with the lid open; approximately 2 minutes with the lid closed. Do not touch the hot sealing band with any parts of your body or heat-sensitive items shortly after operation.
- Always unplug the appliance and let the sealing band cool down before cleaning the appliance.
TECHNICAL SPECIFICATIONS
| Model: | Art. No. 46007 Design Vacuum Sealer Basic Plus |
| Power supply: | 220-240 V AC, 50 Hz |
| Power consumption: | 170 Watt |
| Length of power cord: | ca. 80 cm |
| Weight: | ca. 1.6 kg |
| Dimensions: | ca. 39.0 cm x 16.5 cm x 9.5 cm (width x depth x height) |
| Certification: |   |
ADVANTAGES OF VACUUM PACKING
Air, light and temperature above 0 °C make food easily perishable. The process of vacuum packing removes up to 90% of air inside the bag or container and seals it air-tight. However, please note that perishable food must still be cooled or cooked. But in most cases vacuum packing elongates shelf life considerably.
- The vacuum prevents oxidation of food almost. Additionally, it reduces growth of micro-organisms and bacteria.
- It blocks scent and preserves food's distinct taste, colour, nutrient and freshness. It reduces bad odours in the refrigerator.
- It lengthens food's freshness up to 5 times, compared with otherwise same storage conditions.
- It preserves the natural colour of frozen food and protects frozen food from freezer-burn.
IMPORTANT INSTRUCTIONS
- Do not use damaged or unsuited containers for vacuum packing. Always handle containers under vacuum with special care. This is crucial to avoid bursting. Do not consume any food that has been in a damaged container, because splinters could cause severe injuries.
- Only use the designated foils or bags with the appliance. Any other plastic bags will melt on the sealing band. Leftover plastic on the sealing band damage the sealing band and prevent the generation of vacuum.
- The appliance is not suited for continuous operation. Please wait after each vacuum procedure until the appliance has cooled down before starting again.
- When vacuum packing pay attention that no food particles, liquids, or grease are in the sealing section of the plastic bag or container. The brim of the foil or container must be smooth and clean. Otherwise no vacuum can be generated.
- For best results do not overfill the plastic bag or containers. Leave about 8 cm free space (foils) or 3 cm (containers) above the food. Otherwise the appliance cannot generate a vacuum or liquids or small parts of food can be sucked in (especially if powdery or finely ground) and damage the vacuum pump. Always work with special care, when vacuum packing runny food or beverages.
- Pre-freeze moist food before vacuum sealing (1 – 2 hours). This way no liquids can get sucked into the appliance and the food will not get pressed.
- The lid must be properly closed after inserting the foil to make the appliance ready for use. You will hear a clicking sound, when the lid snaps shut.
- Only vacuum pack edible foods that are not off and not over-stored. Only use food that is really fresh! After packing, store foods as usual. The appliance cannot reverse the process of deterioration, but can slow down the process of decay.
TIPS FOR BEST RESULTS
- Before vacuum packing fish remove its innards.
- Do not leave too much air inside the bag. Reduce air in the bag by squeezing it out carefully before vacuum sealing. Too much air inside the bag may overload the vacuum pump and avoid the generation of vacuum.
- There are many non-food uses for the appliance. Keep camping supplies such as matches, first aid kits and clothing clean and dry. Keep silver and collectibles untarnished.
CAUTION: Do not vacuum pack inflammable liquids (e.g. alcoholic beverages, solvents). Caused by low pressure, large amounts of liquid will evaporate and build-up a hazardous explosive mixture. Additionally, the appliance could be damaged.
- When vacuum packing objects with sharp edges and points like fish bones and hard shells, carefully pack these objects with kitchen cloth! Sharp edges and points may penetrate and tear the bag! Alternatively use a container.
- You cannot generate side seams with the appliance. The pre-sealed seams of the designated foils are welded in a special way for usage with the appliance.
- Only a container OR a bag can be vacuum sealed at a time. These modes of operation cannot be used simultaneously.
- Place a filter bag on top of powdery or fine ground food, before vacuum packing. This way the vacuum pump cannot suck in the particles.
- Fill a bag about 2/3 full with water, and thereafter seal the end, but don't use the Vacuum Seal button. Freeze the bag and use for ice in the cooler, or ice packs for sports injuries.
CAUTION: Only use the Seal Only button for this. Ensure not to spill the water on or in the appliance.
- Frothy food and beverages are not suited at all for vacuum packing. Example: cookies made from beaten egg white.
SHELF LIFE TIMETABLES
| Food Item Standard Storing* Vacuum-Packed* | |
| fresh raw meet 3 days 9 days | |
| cooked meet 5 days 15 days | |
| fresh fish 2 days 5 days | |
| fruit and vegetables 5 days 15-21 days | |
| sausage/ham 7 days 20 days | |
| soup 2 days 10 days | |
| cookies with cream 2 days 8 days | |
| bread 2 days 8 days | |
| rice/pasta/coffee/tea 180 days | 365 days |
* storage under refrigeration (between 3-5 °C)
| Food Item Storage Type | Standard Storing | Vacuum-Packed | |
| fresh berries | refrigerator | 1-2 days | 10 days |
| cheese, hard (opened) | refrigerator | 3-4 months | 6-8 months |
| coffee beans | refrigerator | 2 weeks | 2 years |
| ground coffee | pantry | 2 years | 3 years |
| cookies (packaged) | pantry | 2 months | 6 months |
| fish (lean) | freezer | 6-8 months | 2 years |
| meat (beef stew type) | freezer | 6-9 months | 3 years |
| poultry (whole chicken) | freezer | 12 months | 3 years |
| ground beef | freezer 2-3 months | 1 years | |
| nuts freezer 6-12 months | 2 years | ||
| pasta (uncooked) | pantry | 2 years | 3 years |
| rice (uncooked) | pantry | 6 months | 2 years |
| sugar | pantry | 2 years | 3 years |
| fresh vegetables | freezer | 10 months | 3 years |
OVERHEAT PROTECTION
A thermal cut-out (overheat protection) will switch OFF the appliance automatically, when overheated. In this case, the appliance will be out of work. This could happen, if you started too much sealing processes in a too short time. Additionally, room temperature higher than 35 °C or overvoltage could set the thermal cut-out active. In this case, just unplug the appliance. Let the appliance cool down for at least 20 minutes. Thereafter, you can start working again.
OPERATION
WARNING—Risk of suffocation! Do not let young children play with the foils or bags or packaging, or the appliance, or any part of it.
When vacuum packing liquids (beverage, sauces, soups) freeze the liquid before vacuum sealing. Always ensure that the appliance will not suck any liquid into the vacuum pump. If any liquid is sucked in, IMMEDIATELY press the STOP button and unplug the appliance, to avoid risk of electric shock and damage to the appliance. Thereafter clean and dry the appliance thoroughly.
Do not spill or drip any liquids on the appliance. Do not operate the appliance on wet or damp surfaces. When liquids are spilled on or under the appliance, immediately unplug the appliance and dry the appliance to avoid risk of electric shock or fire.
Only use the designated foils and containers for vacuum packing. Unsulted foils will melt on the sealing band and/or carbonize. Unsulted or damaged containers could burst with splinters hurled around. Additionally, food will be inedible, when contaminated with splinters. Always check the containers for perfect condition, before each use.
GETTING THE APPLIANCE READY FOR USE
WARNING: Do not let young children play with the appliance or any part of it or the foils/bags.
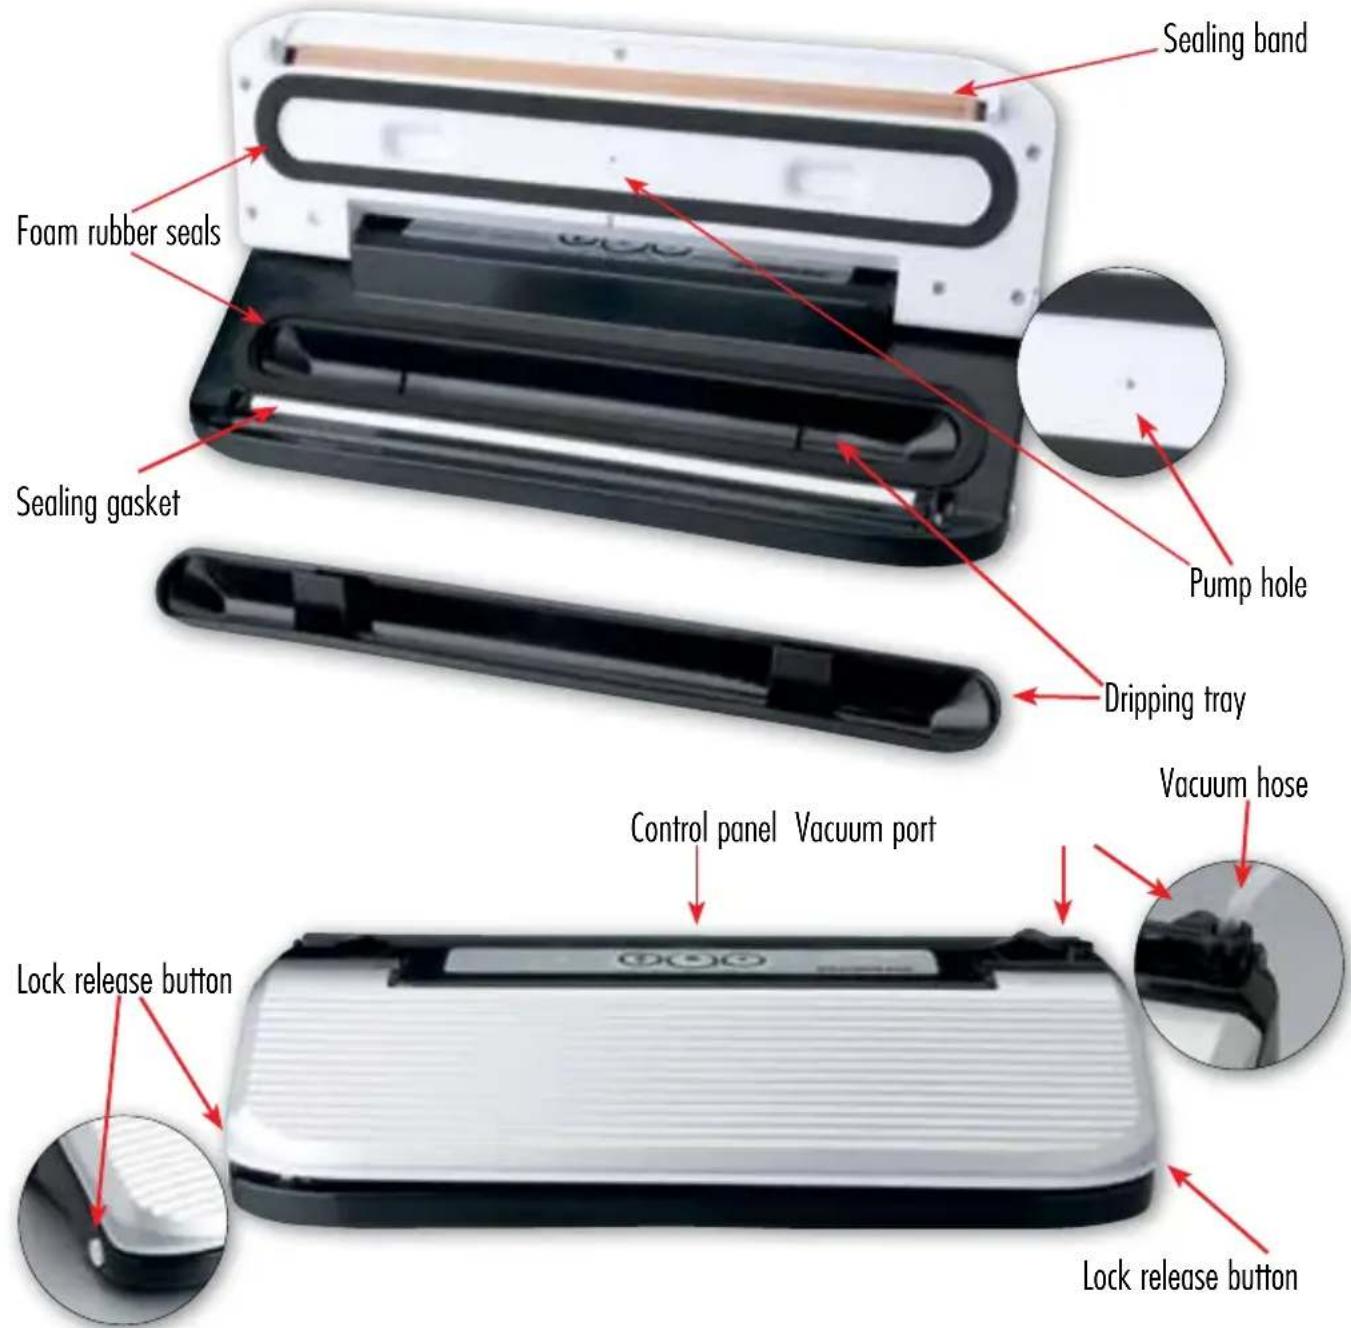
- Unpack the appliance and remove all promotional materials and packaging. DO NOT remove any warning labels or the model label. Ensure that there are no foreign objects (e.g. packaging) in the interior of the appliance. Pay attention that the foam rubber seals (in the base and lid of the appliance) as well as the sealing band and sealing gasket are level and clean. Otherwise, the appliance cannot generate a vacuum and/or close the bags air-tight.
- The power cord is placed in a chamber in the base plate of the appliance. Unwind the power cord and insert it in the cable guide at the rear of the base plate.
- Place the appliance on a convenient and dry surface. (See: >Important Safegu-
ards). Ensure to have enough space in front of the appliance to lay down the bags.
- Connect the appliance directly to a mains power supply wall socket with protective conductor (earth/ground; 220-240 V, 50 Hz, AC, rated for at least 8 A). The appliance is now ready for use.
USING THE FOIL CUTTER
natural_image
Close-up of a computer monitor with a scroll wheel and indicator lights (no visible text or symbols)At the back of the appliance a foil cutter is mounted. You should prefer to use this accessory for easily getting an even and neat cut. Frayed and lopsided, crooked edges could avoid the generation of vacuum and interfere with the sealing process.
natural_image
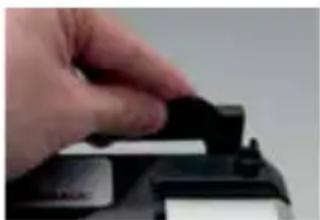
Close-up of a hand holding a black object on a device (no visible text or symbols)- Open the cutter bar. For this, push the black handles at both sides of the cutter bar to the rear of the appliance.
- Insert the foil/bag between cutter bar and the base of the appliance. Then press the cutter bar in place again, until it firmly engages audibly.
- Push the slider of the cutting bar to the opposite end of the cutter bar.
- Pull the bag/foil out from under the cutter bar.
natural_image
Close-up of a mechanical component with black and white surfaces (no visible text or symbols)SEALING A PLASTIC BAG—CLOSING THE BOTTOM OF THE BAG
Note:
Always let the appliance cool down for approximately 30 seconds with the lid left open after each sealing process to avoid overheating.
Note:
Only use the designated foils or bags for vacuum packing. Any other foils/bags melt on the sealing band, thus damaging the sealing band and/or sealing gasket.
- Cut the foil to a desired length (not too short!). For getting an even and smooth cut, you should use the foil cutter of the appliance (See: >Using the Foil Cutter).
natural_image
Close-up of a white striped object with a black base and small circular mark (no text or symbols visible)picture A
TIP: Make sure to leave approximately 8 cm of foil above the food for being able to seal the bag. When starting with a plain foil roll, at least 2 cm of foil will be necessary additionally for the lower seam of the bag.
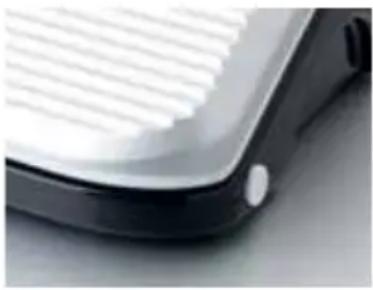
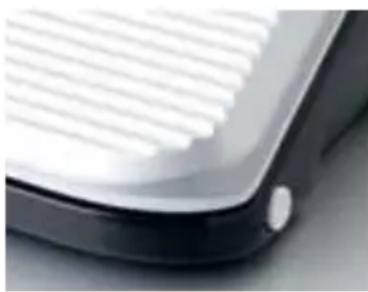
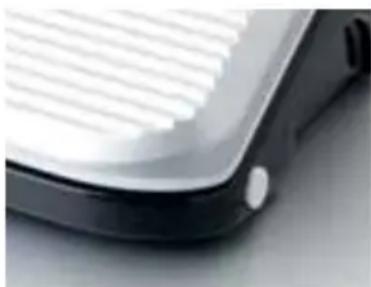
- Get the appliance ready for use as described in >Getting the Appliance Ready for Use>. Press the lock release buttons on both sides of the appliance to open the lid (picture A).
natural_image
Close-up of parallel dark and light diagonal striped fabric or material (no text or symbols visible)picture B
-
Ensure the gaskets (foam rubber seal, sealing gasket) are clean and no foreign substances stick on the sealing band. Ensure that the dripping tray is inserted properly.
-
Place one open end of the foil on the white sealing gasket (picture B). The end of the foil does not need to extend over the black foam rubber seal into the vacuum chamber, because there is no need to operate the vacuum pump for sealing the bottom of the bag.
natural_image
White rectangular electronic device with two downward arrows pointing to its side (no text or symbols visible)picture C
Note:
To get an air-tight seam, the foil must be completely clean and dry, and lay smooth and unlined on the sealing gasket.
picture D
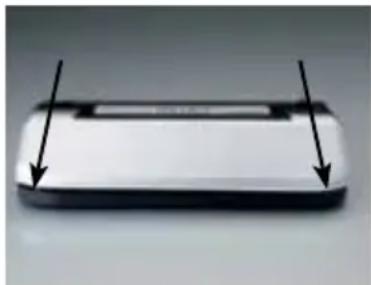
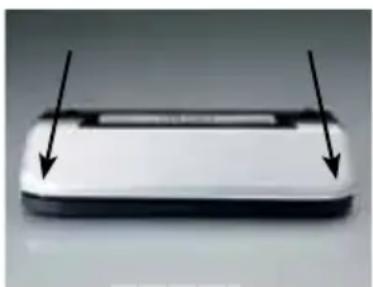
- Close the lid and press the lid down on the marked lines (picture C). Ensure that the lid is securely locked and the lock has engaged at both sides (you will hear a clicking sound when the lid snaps shut). The appliance is now ready for use.
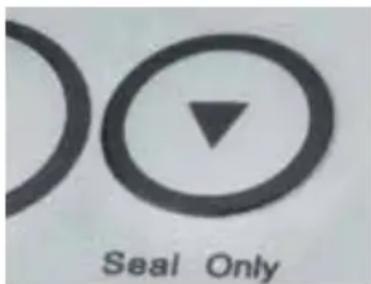
- Press the Seal Only button (picture D). The appliance starts to operate, and the red sealing indicator illuminates. If the bottom of the bag is sealed the indicator switches off.
TIP: If the sealing indicator does not lit after pressing the Seal Only button, check whether the lid is closed properly.
natural_image
Close-up of a white striped object with a black base and small circular mark, no visible text or symbolspicture E
- Press the lock release buttons on both sides of the appliance to open the lid (picture E) and take out the foil.
IMPORTANT: The sealing band could get hot after repeated sealing processes. Do not touch the sealing band with an parts of your body or heat-sensitive items immediately
after sealing.
- Check if the seam is even and smooth. The bottom of the bag is sealed properly, if there is a smooth line with no interruption and crease on the seam. If in doubt, just place another seal near the first one.
HOW TO VACUUM-PACK IN A PLASTIC BAG/FOIL
- After sealing the bottom of the bag and ensuring that the seam is air-tight, you can fill the bag. For this, observe the hints and tips, given in section >Tipps for Best Results<.
TIP: Do not overload the plastic bag. Leave approximately 8 cm of free space above the food. Otherwise the appliance cannot generate a vacuum. Pre-freeze moist food before vacuum packing. This way no liquids can get sucked into the appliance and the food will not get squashed.
- Check the proper installation of the dripping tray. The brim of the dripping tray may not protrude the foam rubber seal of the vacuum chamber.
natural_image
Close-up of a transparent plastic sheet with reflective surfaces, no visible text or symbolspicture F
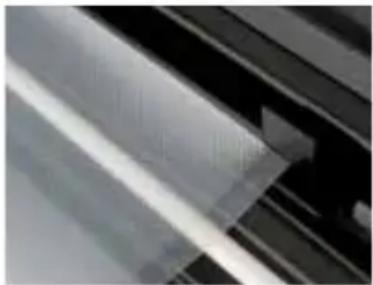
- Place the open end of the bag in the middle of the sealing gasket. If you wish to generate a vacuum, the bag must reach into the vacuum chamber (picture F).
TIP: Ensure that no food particles, liquids, or grease are in the sealing section of the bag. Otherwise the seam could be leaking.
natural_image
White rectangular object with two downward arrows indicating measurement or alignment (no text or symbols)picture G
- Close the lid and press the lid down at the marked lines (picture G). Ensure that the lid is securely locked and the lock has engaged (you will hear a clicking sound when the lid snaps shut). The appliance is now ready for use.
picture H
-
Press the Vacuum Seal button (picture H). The vacuum pump indicator illuminates in green. The vacuum pump is audibly working and the foil clings to the content of the bag. As soon as the vacuum procedure is finished the sealing indicator illuminates in red. The complete process is finished as soon as both indicators switch off.
-
Press the lock release buttons on either side of the appliance to open the lid and take out the bag (picture 1).
IMPORTANT: The sealing band could get hot after repeated sealing processes. Do not touch the sealing band with any parts of your body or heat-sensitive items immediately after sealing.
picture I
- Check if the seam is even and smooth. The bag is sealed properly, if there is a smooth line with no interruption and crease on the seam. If in doubt, just place another seal near the first one. For this, use the Seal Only button.
If the desired vacuum is not reached, the vacuum system will shut down automatically after 30 seconds without entering the sealing process. In this case, check whether the bag has a leak, or the bag was not placed properly. The appliance is not intended for continuous operation. Please wait for approximately 30 seconds with the lid open, before starting a new sealing process.
- If there are any liquids (e.g. condensate) or parts of the food in the dripping tray, clean the dripping tray, before starting the vacuum pump again. For this, you can take out the dripping tray.
- Unplug the appliance, when you have finished operating.
HOW TO VACUUM SEAL A CONTAINER
Suitable vacuum containers are available on the market.
WARNING: Only use special containers suited for vacuum packing. Always check the container carefully for any damage (cracks or scratches) before vacuum sealing. Damaged or unsuitable container (glass or plastic) cannot resist the pressure and could implode, causing severe injuries. Do not consume any food that has been in a damaged container. Splinters in the food could cause severe injuries.
- Get the appliance ready for use. Close the lid tightly. The lid must audibly engage at each sides of the appliance.
natural_image
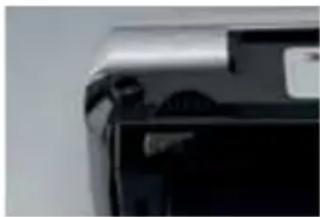
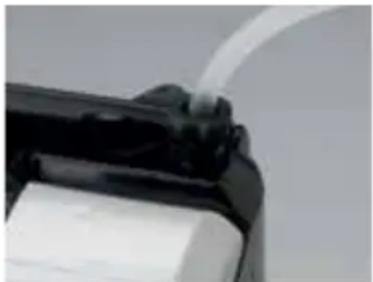
Close-up of a black mechanical component with a white sheet, possibly a tool or device (no visible text or symbols)- Take the provided vacuum hose and connect the narrow adapter plug to the vacuum port at the right side of the appliance (see picture J). The adapter plug must be attached securely and should not be able to slip off.
- Fill the container with its contents.
Abbildung J
Note:
Do not overfill the container. When vacuum sealing food in a container leave 3 cm of free space underneath the lid of the container.
- Place the wide adapter of the vacuum hose over the black rubber seal on the lid of the container. Press the adapter slightly down. The connection must be sealed tightly (picture J).
Note:
Ensure that the adapter lies correctly in the recess of the container and is flush with the surface of the lid.
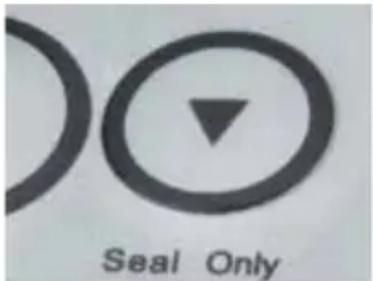
Abbildung K
-
Press the Vacuum Seal button (picture K). The vacuum pump starts to operate audibly. The vacuum pump indicator illuminates in green. The appliance is generating a vacuum. After some seconds, the sealing indicator illuminates in red. As soon as the vacuum procedure is finished, both indicators switch off. The food is now vacuum-packed.
-
Remove the vacuum hose from the container. If you wish to vacuum seal another container, wait approximately 2 minutes to let the appliance cool down. Thereafter, repeat the process.
TIP: If you wish to open the container, push the rubber seal outwards until you hear a hissing sound of air. Hold the seal for 2-3 seconds and then open the lid.
- When you have finished vacuum sealing, just pull the small adapter of the vacuum hose upwards to remove it from the vacuum port.
SOLVING PROBLEMS
If any problems occur during operation, you will find solutions in the following table.
| Problem The Easy Solution | |
| The appliance does not operate when trying to start it | ● Check, whether the appliance is properly connected to a power outlet and check if the power outlet does work. Therefore connect another appliance to the same power outlet. |
| ● Check, whether the power cord and the plug are defective. Contact an authorised service centre, if they are defective. | |
| ● The appliance shuts off automatically to prevent overheating. Let the appliance cool down for 20 minutes and try again. | |
| The appliance does not seal the bag | ● Check whether the bag is in proper position (see: 'Sealing the Plastic Bag'), and check, whether the bag is clean and dry in the sealing section and lies evenly. |
| The appliance does not generate a full vacuum | ● Check, whether:- the bag is in proper position (see: >Sealing the Plastic Bag<) and whether the end of the bag extends into the vacuum chamber.- the gaskets are clean and in perfect condition.- little pieces of food are inside the plastic bag on the section of the sealing band.- the bag is leaking. You can proof this by dipping the sealed bag into water. In case of leaking, air would escape when you put slight pressure on the bag. Seal the bag again or use a new one. |
| The appliance does not seal the plastic bag properly | ● Check, whether:- the bag is in proper position (see: >Sealing the Plastic Bag<) and whether the end of the bag extends into the vacuum chamber.- something sticks to the sealing band or gaskets.- little pieces of food are inside the plastic bag on the section of the sealing band. |
| ● In case of an overheated sealing band the bag would melt. Open the appliance and let it cool down for a few minutes. | |
| ● In the event of overheating the appliance will automatically shut down (thermal cut out) to prevent damage. Let the appliance cool down for 20 minutes and try again. | |
| The appliance does not generate a vacuum inside the container | ● Check, whether:- the vacuum hose is connected properly to the vacuum port and container (see: >How to Vacuum Seal a Container<).- the lid of the container is closed properly and the black rubber seal on the lid of the container is properly attached to the lid.- the black rubber seal of the vacuum chamber is porous and/or leaking.- the vacuum hose is defective.- the container is overfilled. Leave 3 cm of free space underneath the lid! |
| After the sealing process is finished the plastic bag is losing its vacuum | ● Folds, crumbs, grease or humidity on the sealing section of the bag can cause leaking. Open the bag, clean the interior of the bag in the section where you wish to seal it and seal the bag again. |
| ● Naturally, some food (e.g. fresh fruits and vegetables) can ferment and gases can escape. | |
| ● Lack of refrigeration or changing temperatures can cause food to deteriorate. | |
| ● Check, whether the bag is leaking. You can proof this by dipping the sealed bag into water. In case of a leak, air would escape when you put slight pressure on the bag. Seal the bag again or use a new one. | |
| The container is losing its vacuum | ● Check, whether:- the foam rubber seal of the vacuum chamber is worn out and brittle or damaged.- the seal at the brim of the container lid is not in place, dirty or damaged. |
CARE AND CLEANING
⚠ WARNING: Always unplug the appliance and wait some minutes to let the appliance cool down, before moving or cleaning the appliance. Do not touch the sealing band shortly after operation. Ensure that the appliance is always out of reach of young children.
Always ensure that no liquids get into the interior of the appliance. Do not place the appliance or power cord in an automatic dishwasher. Do not immerse the appliance or power cord in any liquids or spill any liquids on it. Do not pour or drip any liquids on the appliance or power cord. Always wipe off spilled liquids immediately. Do not place the appliance on wet or damp surfaces.
Do not use any abrasive cleaners, cleaning pads (e.g. metal scouring pads), or any corrosive chemicals (e.g. bleach) for cleaning. For easy cleaning clean the appliance immediately after each use. This way no leftover food will stick, burn-in or carbonise to the sealing band. Especially ensure not to damage the gaskets and sealing band when cleaning the appliance.
- Take out the dripping tray and clean it in warm dishwater.
- If necessary carefully clean the exterior of the vacuum sealer and power cord. Take care not to spill or drip water or any other liquids on the appliance.
- Special care is necessary when cleaning the sealing band and the gaskets with a soft cloth, moistened with warm dishwater.
- Wipe the appliance and all parts thoroughly dry and let dry naturally.
- Replace the dripping tray and close the lid.
STORAGE
⚠ WARNING: Always unplug the appliance, let the appliance cool down and clean it and all its parts before storing. (See: >Care and Cleaning).
Always handle the power cord with care. Power cords may never be knotted, twisted, pulled, strained or squeezed. There is a cable chamber in the bottom of the appliance. It is best to loosely wind the power cord around the mountings in the cable chamber.
Ensure to store the appliance where it is clean, dry and safe from frost, direct sunlight and inadmissible strain (mechanical or electric shock, heat, moisture) and where it is out of reach of young children. Place the appliance on a clean and stable surface, where it cannot fall. Do not place any hard or heavy objects on the appliance or any part of it. Do not use any parts or tools of the appliance for any other purpose than operating the appliance. It is good advice to store the parts and accessories of the appliance with the appliance.
NOTES FOR DISPOSAL
Dispose of the appliance and packaging must be effected in accordance with the corresponding local regulations and requirements for electrical appliances and packaging. Please contact your local disposal company.
Do not dispose of electrical appliances as unsorted municipal waste, use separate collection facilities. Contact your local government for information regarding the collection systems available. If electrical appliances are disposed of in landfills, dumps, or refuse incineration, hazardous substances can leak into the groundwater or can be emitted into air, thus getting into the food chain, and damaging your health and well-being as well as poisoning flora and fauna. When replacing old appliances with new once, the vendor is legally obligated to take back your old appliance for disposal at least for free of charge.
INFORMATION AND SERVICE
Please check www.gastroback.de for further information. For technical support, please contact Gastroback Customer Care Center by phone: +49 (0)4165/22 25-0 or e-mail info@gastroback.de.
Please refer to our home page for a copy of these operating instructions in pdf format.
WARRANTY
We guarantee that all our products are free of defects at the time of purchase. Any demonstrable manufacturing or material defects will be to the exclusion of any further claim and within 2 years after purchasing the appliance free of charge repaired or substituted. There is no Warranty claim of the purchaser if the damage or defect of the appliance is caused by inappropriate treatment, over loading or installation mistakes. The Warranty claim expires if there is any technical interference of a third party without a written agreement. The purchaser has to present the sales slip in assertion-of-claim and has to bear all charges of costs and risk of the transport.
Note:
Customers from Germany and Austria: For repair and service, please send Gastroback products to the following address: Gastroback GmbH, Gewerbestr. 20, D-21279 Hollenstedt, Germany.
Customers from other countries: Please contact your dealer.
Please agree that we cannot bear the charge of receipt. Submission of appliances: Please ensure packing the appliance ready for shipment without accessories. Add the sales slip and a short fault description. The processing time after receipt of the defective appliance will be approx. 2 weeks; we will inform you automatically. After the warranty period, please send defective appliances to the given address. You will get a free quotation and, thereafter, can decide, whether we shall repair the appliance to the costs possibly accrued, send back the defective appliance for free of charge, or dispose of the appliance for free of charge.
The appliance is intended for household use only and NOT suited for commercial usage. Do not attempt to use this appliance in any other way or for any other purpose than the intended use, described in these instructions. Any other use is regarded as unintended use or misuse, and can cause severe injuries or damage. There is no warranty claim of the purchaser if any injuries or damages are caused by unintended use.
GASTROBACK GmbH

- VERSIEGELN EINES FOLIENBEUTELS - DEN BEUTELBODEN VERSCHLIESSEN
- TABLE OF CONTENTS
- DEAR CUSTOMER!
- Vacuum Seal button:
- STOP-button,
- Seal Only button:
- IMPORTANT SAFEGUARDS
- IMPORTANT SAFEGUARDS FOR ELECTRICAL APPLIANCES
- HOT SURFACES - RISKS OF BURNS
- ADVANTAGES OF VACUUM PACKING
- IMPORTANT INSTRUCTIONS
- TIPS FOR BEST RESULTS
- OVERHEAT PROTECTION
- OPERATION
- WARNING—Risk of suffocation! Do not let young children play with the foils or bags or packaging, or the appliance, or any part of it.
- GETTING THE APPLIANCE READY FOR USE
- WARNING: Do not let young children play with the appliance or any part of it or the foils/bags.
- USING THE FOIL CUTTER
- SEALING A PLASTIC BAG—CLOSING THE BOTTOM OF THE BAG
- Note:
- HOW TO VACUUM-PACK IN A PLASTIC BAG/FOIL
- HOW TO VACUUM SEAL A CONTAINER
- SOLVING PROBLEMS
- CARE AND CLEANING
- STORAGE
- NOTES FOR DISPOSAL
- INFORMATION AND SERVICE
- WARRANTY
- GASTROBACK GmbH
Brand : Gastroback
Model : 46007
Category : Vacuum Sealer