
ES-2211 - Razor PANASONIC - Free user manual and instructions
Find the device manual for free ES-2211 PANASONIC in PDF.
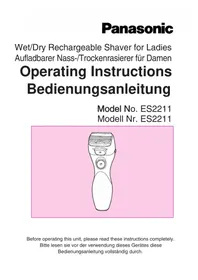


| Product Type | Ladies' Wet/Dry Shaver |
| Brand | Panasonic |
| Model | ES-2211 |
| Power Source | Rechargeable (built-in battery) |
| Charging Time | 8 hours for full charge |
| Usage Time per Charge | Approximately 5 shaves (5 minutes per shave) |
| Wet/Dry Use | Yes, can be used with shaving lather or dry, and in the shower |
| Pop-up Trimmer | Yes, for trimming longer hairs |
| Suitable for | Underarm, legs, arms, and bikini area |
| Cleaning Method | Rinse under running water or in a basin; do not use boiled water, detergent, or sea water |
| Outer Foil Replacement | Recommended every year |
| Inner Blade Replacement | Recommended every two years |
| Charging Indicator | Yes, lamp glows during charging |
| Watertight | Yes, design allows use in shower and cleaning in water |
| Safety Lock | Lock button prevents accidental operation |
| Accessories Included | Protective cap, charging adaptor (model RE3-97) |
Frequently Asked Questions - ES-2211 PANASONIC
User questions about ES-2211 PANASONIC
0 question about this device. Answer the ones you know or ask your own.
Ask a new question about this device
Download the instructions for your Razor in PDF format for free! Find your manual ES-2211 - PANASONIC and take your electronic device back in hand. On this page are published all the documents necessary for the use of your device. ES-2211 by PANASONIC.
USER MANUAL ES-2211 PANASONIC


This Ladies Wet/Dry shaver can be used for wet shaving with shaving lather or for dry shaving. You can use this watertight shaver in the shower and clean it in water. Our research has shown that you can enjoy closer and smoother shaves using warm water and shaving lather. Treat yourself to wet lather shaves for at least three weeks and notice the difference. And our pop-up trimmer will be able to cut longer hairs with ease. Cleaning is so simple. Just rinse out the shaving head under the tap or shower. No mess, no fuss!
Parts Identification
(see fig. 1)
Ⓐ Protective cap ® Outer foil © Pop-up trimmer (D) Pop-up trimmer switch E Outer foil frame ⑤ Inner blade © Inner blade mount H Outer foil frame release buttons ① Lock button J Switch © End cap L Charging indicator lamp M Charging adaptor
Charging
Charge the shaver fully for 8 hours before using it for the first time, when it seems to be losing speed, or when it has not been used for an extended period. If not used regularly, the shaver should be recharged every six months to preserve battery life.
Charging once a week is recommended. A full charge will supply enough power for about 5 shaves (five minutes per shave).
Make sure the switch is in the O position during recharging. Insert the shaver into the charging adaptor. Keep the adaptor level. Plug the adaptor into an AC outlet.
The charging indicator lamp (L) will glow and it will stay on until the plug is removed from the AC outlet.
Using your shaver
(see fig. 6 through 10)
Remove the protective cap, then keep pressing the lock button (①) and slide the switch up to operate.
Apply shaving lather generously on the skin. For the best results, move the shaver in back and forth directions, while keeping the shaver head flat against the skin surface so that the two trimmers and outer foil work together at the same time. Use the pop-up trimmer to cut long hairs before shaving. Apply a small amount of baby oil to the trimmer blade every third use to ensure sharp cutting performance.
• Underarm (see fig. 7) Hold your arm up enough to stretch your skin and shave from back and forth. - Legs (see fig. 8) Be sure to move the shaver from ankle to knee. - Arms (see fig. 9) Be sure to move the shaver from outside to inside.
- Bikini (see fig. 10)
It is recommended for a proper shave to use the pop-up trimmer, sliding the pop-up trimmer switch up to make the trimmer pop up to shave extra long hair.
Cleaning
(After every shaving, you should clean it.)
Press the outer foil frame release buttons to remove the outer foil frame (see fig. 2). Rinse the inner blade with the switch on under running water or in a basin, and rinse the outer foil separately (see fig. 5).
DO NOT USE BOILED WATER.
Next, switch the shaver off, close the outer foil frame and dry it gently. After the shaving head is dry, place the protective cap.
Replacing shaving head components
It is recommended that you replace the outer foil at least every year and the inner blade at least every two years to maintain your shaver's cutting performance.
Replacing the outer foil
Press the outer foil frame release buttons to remove the outer foil frame (see fig. 2).
Then, squeeze the front and the back side of the foil frame and lift up one of the two knobs on the outer foil (see fig. 3).
Inserting the new outer foil
Slip the foil into the frame and guide the plastic edges onto the hooks in the foil frame until it clicks into place.
Replacing the inner blade (see fig. 4)
Squeeze the outer foil frame release buttons and lift the outer foil frame upward to remove it. Remove the inner blade by grasping it firmly at both ends and pulling straight away from the shaver. To insert the new inner blade, hold the blade at both ends and press downward until it snaps into place.
How to remove the built-in rechargeable battery before disposal of shaver
The battery in this shaver is not intended to be replaced by consumers. However, the battery may be replaced at an authorized service center. The procedure described below is intended only for removal of the rechargeable battery for the purpose of proper disposal.
WARNING:
Do not attempt to replace the battery for the purpose of reusing the shaver. This could result in the risk of fire or electric shock.
- Remove four screws (a). (see fig. 11)
- Remove two screws (b). (see fig. 12)
- Pull the housing (c) out of the end cap (d). (see fig. 13)
- Remove two screws (e) inside of the end cap and pull the battery. (see fig. 14)
- Using a flat screwdriver (f), and insert into the space (g) to remove the battery. (see fig. 15)
ATTENTION:
The laws of various municipalities restrict disposal of rechargeable batteries (and products from which such batteries have not been removed) in ordinary household waste. Please comply with your local laws. If you are not certain as to proper disposal, please contact your local sanitation department.
Caution
- Do not reach for the appliance that has fallen into water.
- Do not place or store charging adaptor where it can fall into a tub or sink. Do not place in or drop into water or other liquid.
- Before charging the shaver, wipe off any moisture from the shaver and charging adaptor. Always handle with dry hands.
- Except when charging, always unplug the charging adaptor from the electrical outlet.
- Unplug this appliance before cleaning.
- Close supervision is necessary when this shaver is used by, on or near children or invalids.
- Use this appliance only for its intended use as described in this manual. Do not use attachments not recommended by the manufacturer.
- Never operate this appliance if it is not working properly, if it has been dropped or damaged. Return the appliance to a service center for examination and repair.
- Never drop or insert any object into any opening.
- Do not use outdoors or operate where aerosol (spray) products are being used or where oxygen is being administered.
- Do not use an extension cord to connect the charging adaptor to an outlet.
- Do not charge the shaver where the temperature is below 0°C or above 40°C, where it will be exposed to direct sunlight or a heat source, or where there is much moisture.
- To prevent damage to the shaver housing, do not leave the shaver where the temperature may be extremely hot, or where it will be exposed to sunlight or a heat source.
- Use only the adaptor RE3-97 to charge the ES2211 shaver.
- The shaver may not immediately begin to charge after being placed on the charging adaptor after use. Allow the shaver to sit on the charging adaptor for a few minutes and check again to make sure that it is being charged.
- Do not place any metal objects like coins or paper clips on the charging adaptor as they will become warm.
- Grip the plug when disconnecting the charging adaptor from an outlet, tugging on the cord may damage it.
- Store the charging adaptor and its cord in a dry area where it will be protected from damage.
- The outer foils are very thin. If handled improperly, they can be easily damaged. To avoid personal injury, do not use the shaver if it has damaged foils or inner blades.
- Do not submerge the shaver for long time.
- Do not use paste-type shaving cream as it may stick to the inner blade. Use foam or lather. Wash the shaver in tap water.
- Do not use sea water, detergent or boiled water. Do not take the housing apart as this can affect the watertight construction.
- Do not wipe any part of the shaver with thinner, benzine or alcohol. Clean it by using a cloth dampened with soapy water.
- Rinse shaver under running tap water for those using deodorant.
- The supply cord of the charging adaptor cannot be replaced; if the cord is damaged, the entire charger should be discarded.
READ ALL INSTRUCTIONS BEFORE USE.


- PARTS IDENTIFICATION
- CHARGING
- USING YOUR SHAVER
- CLEANING
- REPLACING SHAVING HEAD COMPONENTS
- REPLACING THE OUTER FOIL
- INSERTING THE NEW OUTER FOIL
- REPLACING THE INNER BLADE (SEE FIG. 4)
- HOW TO REMOVE THE BUILT-IN RECHARGEABLE BATTERY BEFORE DISPOSAL OF SHAVER
- WARNING
- ATTENTION
- CAUTION
- READ ALL INSTRUCTIONS BEFORE USE
Brand : PANASONIC
Model : ES-2211
Category : Razor