
GE76V-BBH - Uncategorized SAMSUNG - Free user manual and instructions
Find the device manual for free GE76V-BBH SAMSUNG in PDF.


User questions about GE76V-BBH SAMSUNG
0 question about this device. Answer the ones you know or ask your own.
Ask a new question about this device
Download the instructions for your Uncategorized in PDF format for free! Find your manual GE76V-BBH - SAMSUNG and take your electronic device back in hand. On this page are published all the documents necessary for the use of your device. GE76V-BBH by SAMSUNG.
USER MANUAL GE76V-BBH SAMSUNG
Owner's Instructions & Cooking Guide
imagine the possibilities
Thank you for purchasing this Samsung product. Please register your product at
www.samsung.com/register

100 % Recycled Paper
This manual is made with 100 % recycled paper.




USING THIS INSTRUCTION BOOKLET
You have just purchased a SAMSUNG microwave oven. Your Owner's Instructions contain valuable information on cooking with your microwave oven:
- Safety precautions
• Suitable accessories and cookware
• Useful cooking tips - Cooking tips
IMPORTANT SAFETY INFORMATION
IMPORTANT SAFETY INSTRUCTIONS. READ CAREFULLY AND KEEP FOR FUTURE REFERENCE.
Before using the oven, confirm that the following instructions are followed.
- Use this appliance only for its intended purpose as described in this instruction manual. Warnings and Important Safety Instructions in this manual do not cover all possible conditions and situations that may occur. It is your responsibility to use common sense, caution, and care when installing, maintaining, and operating your appliance.
- Because these following operating instructions cover various models, the characteristics of your microwave oven may differ slightly from those described in this manual and not all warning signs may be applicable. If you have any questions or concerns, contact your nearest service centre or find help and information online at www.samsung.com.
- This microwave oven is supposed for heating food. It is intended for domestic home-use only. Do not heat any type of textiles or cushions filled with grains, which could cause burns and fire. The manufacturer cannot be held liable for damage caused by improper or incorrect use of the appliance.
- Failure to maintain the oven in a clean condition could lead to deterioration of the surface that could adversely affect the life of the appliance and possible result in a hazardous situation.
LEGEND FOR SYMBOLS AND ICONS

WARNING

CAUTION
Warning; Fire hazard
Hazards or unsafe practices that may result in severe personal injury or death.
Hazards or unsafe practices that may result in minor personal injury or property damage.

Warning; Fire hazard
Warning: hot surface

Warning; Electricity Warning; Explosive material

Do NOT attempt. Follow directions explicitly.

Do NOT disassemble.

Do NOT touch.

Important

Call the service center for help.

sive material

explicitly.

Unplug the power plug from the wall socket.

Make sure the machine is grounded to prevent electric shock.

Note
PRECAUTIONS TO AVOID POSSIBLE EXPOSURE TO EXCESSIVE MICROWAVE ENERGY.
Failure to observe the following safety precautions may result in harmful exposure to microwave energy.
(a) Under no circumstances should any attempt be made to operate the oven with the door open or to tamper with the safety interlocks (door latches) or to insert anything into the safety interlock holes.
(b) Do NOT place any object between the oven door and front face or allow food or cleaner residues to accumulate on sealing surfaces. Ensure that the door and door sealing surfaces are kept clean by wiping after use first with a damp cloth and then with a soft dry cloth.
(c) Do NOT operate the oven if it is damaged until it has been repaired by a qualified microwave service technician trained by the manufacturer. It is particularly important that the oven door closes properly and that there is no damage to the:
(1) Door (bent)
(2) Door hinges (broken or loose)
(3) Door seals and sealing surfaces
(d) The oven should not be adjusted or repaired by anyone other than a properly qualified microwave service technician trained by the manufacturer.
This product is a Group 2 Class B ISM equipment. The definition of group 2 which contains all ISM equipment in which radio-frequency energy is intentionally generated and/or used in the form of electromagnetic radiation for the treatment of material, and EDM and arc welding equipment.
For Class B equipment is equipment suitable for use in domestic establishments and in establishments directly connected to a low voltage power supply network which supplies buildings used for domestic purposes.
2




ImportTaNT SafETy INSTrUcTloNS
Make sure that these safety precautions are obeyed at all times.
| warNING | ||||
| Only qualified staff should be allowed to modify or repair the microwave oven. | √ | √ | √ | |
| Do not heat liquids and other food in sealed containers for microwave function. | √ | √ | √ | |
| For your safety, do not use high-pressure water cleaners or steam jet cleaners. | √ | √ | √ | |
| Do not install this appliance; near heater, inflammable material; in a humid, oily or dusty location, in a location exposed to direct sunlight and water or where gas may leak; on un level ground. | √ | √ | √ | |
| This appliance must be properly grounded in accordance with local and national codes. | √ | √ | √ | |
| Remove all foreign substances such as dust or water from the power plug terminals and contact points using a dry cloth on a regular basis. | √ | √ | √ | |
| Do not pull or excessively bend or place heavy objecton the power cord. | √ | √ | √ | |
| In the event of a gas leak (such as propane gas, LP gas, etc.), ventilate immediately without touching the power plug. | √ | √ | √ | |
| Do not touch the power plug with wet hands. | √ | √ | √ | |
| Do not turn the appliance off by unplugging the power plug while an operation is in progress. | √ | √ | √ | |
| Do not insert fingers or foreign substances, if any foreign substance such as water has entered the appliance, unplug the power plug and contact your nearest service centre. | √ | √ | √ | |
| Do not apply excessive pressure or impact to the appliance. | √ | √ | √ | |
| Do not place the oven over a fragile object such as a sink or glass object. (Counter top model only) | √ | √ | ||
| Do not use benzene, thinner, alcohol, steam cleaner or high pressure cleaner to clean the appliance. | √ | √ | √ | √ | |
| Ensure that the power voltage, frequency and current are the same as those of the product specifications. | √ | √ | √ | ||
| Plug the power plug into the wall socket firmly. Do not use a multiple plug adapter, an extension cord or an electric transformer. | √ | √ | √ | ||
| Do not hook the power cord on a metal object, insert the power cord between the objects or behind the oven. | √ | √ | √ | ||
| Do not use a damaged power plug, damaged power cord or loose wall socket. When the power plug or power cord is damaged, contact your nearest service centre. | √ | √ | √ | √ | |
| Appliances are not intended to be operated by means of an external timer or separate remote-control system. | √ | √ | |||
| Do not pour or directly spray water onto the oven. | √ | √ | |||
| Do not place objects on the oven, inside or on the door of the oven. | √ | √ | √ | ||
| Do not spray volatile material such as insecticide onto the surface of the oven. | √ | √ | |||
| Children should be supervised to ensure that they do not play with the appliance. Keep children away from the door when opening or closing it as they may bump themselves on the door or catch their fingers in the door. | √ | √ | √ | √ | |
| The appliance is not intended for installing in road vehicles, caravans and similar vehicles etc. | √ | √ | √ | √ | |
| Do not store flammable materials in the oven. Take special care when heating dishes or drinks that contain alcohol as alcohol vapours may contact a hot part of the oven. | √ | √ | √ | ||
| The microwave oven is intended to be used on the counter or counter top use only, the microwave oven shall not be placed in a cabinet. (Counter top model only) | √ | √ | √ | √ | |
| warNING: The appliance and its accessible parts become hot during use. Care should be taken to avoid touching heating elements. Children less than 8 years of age shall be kept away unless continuously supervised. | √ | √ | √ | √ |
3




ENGLISH
| ★ | warNING: Only allow children to use the oven without supervision when adequate instructions have been given so that the child is able to use the oven in a safe way and understands the hazards of improper use. | √ | √ | √ | √ |
| ★ | This appliance can be used by children aged from 8 years and above and persons with reduced physical, sensory or mental capabilities or lack of experience and knowledge if they have been given supervision or instruction concerning use of the appliance in a safe way and understand the hazards involved. Children shall not play with the appliance. Cleaning and user maintenance shall not be made by children without supervision. | √ | √ | √ | √ |
| warNING: If the door or door seals are damaged, the oven must not be operated until it has been repaired by a competent person. | √ | √ | √ | √ | |
| warNING: It is hazardous for anyone other than a competent person to carry out any service or repair operation that involves the removal of a cover which gives protection against exposure to microwave energy. | √ | √ | √ | √ | |
| warNING: Ensure that the appliance is switched off before replacing the lamp to avoid the possibility of electric shock. | √ | √ | √ | ||
| warNING: Liquids and other foods must not be heated in sealed containers since they are liable to explode. | √ | √ | √ | ||
| warNING: Accessible parts may become hot during use. To avoid burns young children should be kept away. | √ | √ | |||
| ★ | warNING: Microwave heating of beverages can result in delayed eruptive boiling, therefore care must be taken when handling the container; To prevent this situation ALWAYS allow a standing time of at least 20 seconds after the oven has been switched off so that the temperature can equalize. Stir during heating, if necessary, and ALWAYS stir after heating.In the event of scalding, follow these FIRST AID instructions:Immerse the scaled area in cold water for at least 10 minutes.Cover with a clean, dry dressing.Do not apply any creams, oils or lotions. | √ | √ | √ | √ |
| ★ | During use the appliance becomes hot. Care should be taken to avoid touching heating elements inside the oven. | √ | √ | √ |
| ★ warNING: The contents of feeding bottles and baby food jars shall be stirred or shaken and the temperature checked before consumption, in order to avoid burns; | √ | |||
| ★ The appliance is not intended for use by persons (including children) with reduced physical, sensory or mental capabilities, or lack of experience and knowledge, unless they have been given supervision or instruction concerning use of the appliance by a person responsible for their safety. | √ | √ | √ | √ |
| ★ This oven should be positioned proper direction and height permitting easy access to cavity and control area. | √ | √ | √ | √ |
| ★ Before using the your oven first time, oven should be operated with the water during 10 minute and then used. | √ | √ | √ | √ |
| ★ This microwave oven has to be positioned so that plug is accessible. If the oven generates a strange noise, a burning smell, or smoke is emitted, unplug the power plug immediately and contact your nearest service center. | √ | √ | √ | √ |
| □ during cleaning conditions the surfaces may get hotter than usual and children should be kept away (Cleaning function model only) | √ | √ | ||
| □ Excess spillage must be removed before cleaning and utensils which state in cleaning manual can be left in the oven during cleaning. (Cleaning function model only) | √ | √ | √ | √ |
| ★ Appliance should allow to disconnection of the appliance from the supply after installation. The disconnection may be achieved by having the plug accessible or by incorporating a switch in the fixed wiring in accordance with the wiring rules. (Built-in model only.) | √ | √ | √ | √ |
| □ If the supply cord is damaged, it must be replaced by the manufacturer, its service agent or similarly qualified persons in order to avoid a hazard. | √ | |||
| □ warNING: When the appliance is operated in the combination mode, children should only use the oven under adult supervision due to the temperatures generated. | √ | |||
| □ The temperature of accessible surfaces may be high when the appliance is operating. | √ |
4




| The door or the outer surface may get hot when the appliance is operating. | √ | |||
| CAUTION | ||||
| Only use utensils that are suitable for use in microwave ovens;DO NOT use any metallic containers, Dinnerware with gold or silver trimmings, Skewers, forks, etc.Remove wire twist ties from paper or plastic bags.Reason: Electric arcing or sparking may occur and may damage the oven. | √ | √ | ||
| When heating food in plastic or paper containers, keep an eye on the oven due to the possibility of ignition; | √ | √ | ||
| Do not use your microwave oven to dry papers or clothes. | √ | √ | ||
| Use shorter times for smaller amounts of food to prevent overheating and burning food. | √ | √ | ||
| If smoke is observed, switch off or unplug the appliance and keep the door closed in order to stifle any flames; | √ | √ | ||
| The oven should be cleaned regularly and any food deposits removed; | √ | √ | ||
| Do not immerse the power cable or power plug in water and keep the power cable away from heat. | √ | √ | ||
| Eggs in their shell and whole hard-boiled eggs should not be heated in microwave ovens since they may explode, even after microwave heating has ended; Also do not heat airtight or vacuum-scaled bottles, jars, containers, nuts inshells, tomatoes etc. | √ | |||
| Do not cover the ventilation slots with cloth or paper. They may catch fire as hot air escapes from the oven. The oven may also overheat and switch itself off automatically, and will remain off until it cools sufficiently. | √ | √ | ||
| Always use oven mitts when removing a dish from the oven to avoid unintentional burns. | √ | |||
| Do not touch heating elements or interior oven walls until the oven has cooled down. | √ | |||
| ★ | Stir liquids halfway during heating or after heating ends and allow the liquid stand at least 20 seconds after heating to prevent eruptive boiling. | √ | |||
| ★ | Stand at arms length from the oven when opening the door to avoid getting scalded by escaping hot air or steam. | √ | |||
| ☐ | Do not operate the microwave oven when it is empty. The microwave oven will automatically shut down for 30 minutes for safety purposes. We recommend placing a glass of water inside the oven at all times to absorb microwave energy in case the microwave oven is started accidentally. | √ | √ | ||
| ☐ | Do not use harsh abrasive cleaners or sharp metal scrapers to clean the oven door glass since they can scratch the surface, which may result in shattering of the glass. | √ | √ | ||
| ★ | Install the oven in compliance with the clearances stated in this manual (See Installing Your Microwave Oven) | √ | √ | ||
| ★ | Take care when connecting other electrical appliances to sockets near the oven. | √ | √ | √ |

CORRECT DISPOSAL OF THIS PRODUCT (WASTE ELECTRICAL & ELECTRONIC EQUIPMENT)
(Applicable in countries with separate collection systems)
This marking on the product, accessories or literature indicates that the product and its electronic accessories (e.g. charger, headset, USB cable) should not be disposed of with other household waste at the end of their working life. To prevent possible harm to the environment or human health from uncontrolled waste disposal, please separate these items from other types of waste and recycle them responsibly to promote the sustainable reuse of material resources.
Household users should contact either the retailer where they purchased this product, or their local government office, for details of where and how they can take these items for environmentally safe recycling.
Business users should contact their supplier and check the terms and conditions of the purchase contract. This product and its electronic accessories should not be mixed with other commercial wastes for disposal.




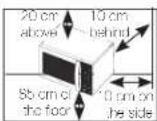
Place the oven on a flat level surface 85 cm above the floor. The surface should be strong enough to safely bear the weight of the oven.
- When you install your oven, make sure there is adequate ventilation for your oven by leaving at least 10 cm (4 inches) of space behind and, on the sides of the oven and 20 cm (8 inches) of space above.
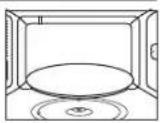
- Remove all packing materials inside the oven. Install the roller ring and turntable. Check that the turntable rotates freely.
- This microwave oven has to be positioned so that plug is accessible.
If the supply cord is damaged, it must be replaced by a special cord or assembly available from the manufacturer or its service agent. For your personal safety, plug the cable into a 3-pin, 230 Volt, 50 Hz, AC earthed socket. If the power cable of this appliance is damaged, it must be replaced by a special cable.
Do not install the microwave oven in hot or damp surroundings like next to a traditional oven or radiator. The power supply specifications of the oven must be respected and any extension cable used must be of the same standard as the power cable supplied with the oven. Wipe the interior and the door seal with a damp cloth before using your microwave oven for the first time.
The following parts of your microwave oven should be cleaned regularly to prevent grease and food particles from building up:
• Inside and outside surfaces
• Door and door seals
• Turntable and Roller rings

ALWAYS ensure that the door seals are clean and the door closes properly.

Failure to maintain the oven in a clean condition could lead to deterioration of the surface that could adversely affect the life of the appliance and possibly result in a hazardous situation.
- Clean the outside surfaces with a soft cloth and warm, soapy water. Rinse and dry.
- Remove any splashes or stains on the inside surfaces or on the roller ring with a soapy cloth. Rinse and dry.
-
To loosen hardened food particles and remove smells, place a cup of diluted lemon juice on the tumble and heat for ten minutes at maximum power.
-
Wash the dishwasher-safe plate whenever necessary.
DO NOT spill water in the vents. NEVER use any abrasive products or chemical solvents. Take particular care when cleaning the door seals to ensure that no particles:
- Accumulate
• Prevent the door from closing correctly

Clean the microwave oven cavity right after each use with a mild detergent solution, but let the microwave oven cool down before cleaning in order to avoid injury.




CONTENTS SETTING THE TIME
Setting the time ....7
Quick look-up guide 8
Oven 8
Control panel....9
Accessories 9
What to do if you are in doubt or have a problem....10
Cooking/Reheating....10
Power levels 11
Adjusting the cooking time....11
Stopping the cooking 11
Setting the energy save mode 11
Using the auto reheat/cook feature 12
Auto reheat/Cook settings....12
Using the auto power defrost feature 13
Auto power defrost settings 13
Grilling 14
Combining microwaves and the grill 14
Using the memory feature....15
Switching the beeper off....15
Safety-locking your microwave oven 15
Cookware guide 16
Cooking guide....17
Storing and repairing your microwave oven....24
Installation & Wiring Instructions 24
Wiring instructions....25
Cooking instructions on food packaging....25
Cooking instructions....26
Technical specifications 26
Your microwave oven has an inbuilt clock. When power is supplied, ":0", "88:88" or "12:00" is automatically displayed on the display. Please set the current time. The time can be displayed in either the 24-hour or 12-hour notation. You must set the clock;
- When you first install your microwave oven
• After a power failure
Do not forget to reset the clock when you switch to and from summer and winter time.
Auto energy saving function(only for applicable models)
If you do not select any function when appliance is in the middle of setting or operating with temporary stop condition, function is canceled and clock will be displayed after 25 minutes.
Oven Lamp will be turned off after 5 minutes with door open condition.
- To display the time in the...
24-hour notation
12-hour notation
Press the Clock (2) button once or twice.
- Press the (—) and (■buttons to set the hour.
①
O
- Press the ⏻ button.
- +
①
O
- Press the (—) and (■buttons to set the minute.
- +
- Press the (④) button.
①
O




QUICK LOOK-UP GUIDE
If you want to cook some food.
- Place the food in the oven. Select the power level by pressing the ( # ) button one or more times.
- Set the cooking time by pressing the (—) and (+) buttons as required.
- Press the (◇) button.
Result: Cooking starts. The oven beeps four times when cooking is over.
If you want to auto Power defrost some food.
- Place the frozen food in the oven. Select the type of food that you are cooking by pressing the Power button one or more times.
- Select the food weight by pressing the (—) and (+) buttons.
- Press the (◇) button.
If you want to add extra 30 seconds.
Leave the food in the oven.
Press +30s one or more times for each extra 30 seconds that you wish to add.
If you want to grill some food.
1. Press the (∞) button.


Power


- Set the cooking time by pressing the (+ and () + buttons.
- Press the (◇) button

OVEN
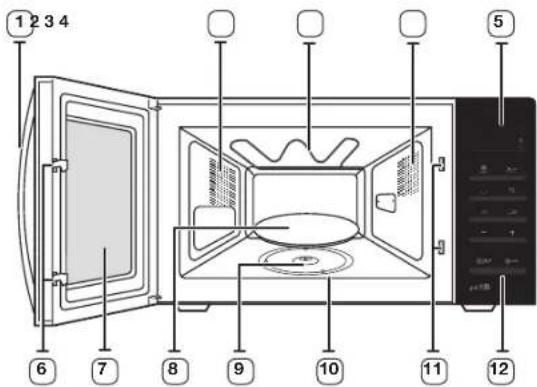
text_image
1 2 3 4 5 6 7 8 9 10 11 12- DOOR HANDLE
- VENTILATION HOLES
- GRILL
- LIGHT
- DISPLAY
-
DOOR LATCHES
-
DOOR
- TURNTABLE
- COUPLER
- ROLLER RING
- SAFETY INTERLOCK HOLES
- CONTROL PANEL




CONTROL PANEL
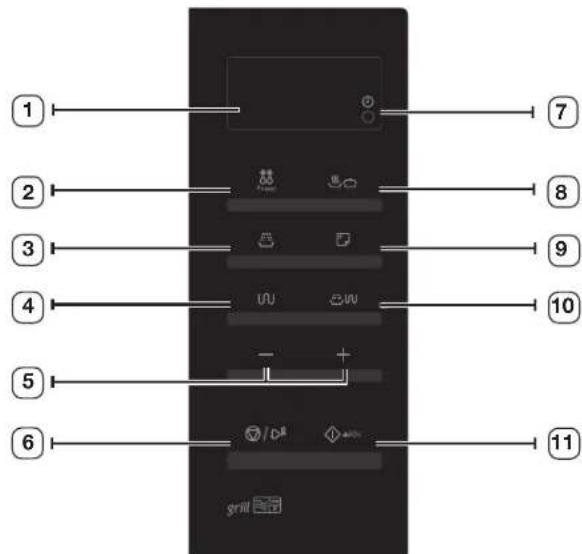
text_image
① ② ③ ④ ⑤ ⑥ ⑦ ⑧ ⑨ ⑩ ⑪ grill- DISPLAY
- POWER DEFROST BUTTON
- AUTO COOK BUTTON
- GRILL MODE SELECTION
-
UP (+)/DOWN (+)BUTTON (cook time, weight and serving size)
-
STOP/ENERGY SAVE BUTTON
- CLOCK SETTING
- AUTO REHEAT/COOK SELECTION
- MEMORY BUTTON
- COMBI MODE SELECTION
- START BUTTON
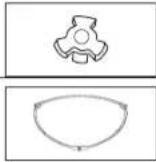
ACCESSORIES
Depending on the model that you have purchased, you are supplied with several accessories that can be used in a variety of ways.
- Coupler, already placed over the motor shaft in the base of the oven.
Purpose: The coupler rotates the turntable. - Roller ring, to be placed in the centre of the oven.
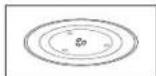
Purpose: The roller ring supports the turntable. - Turntable, to be placed on the roller ring with the centre fitting to the coupler.
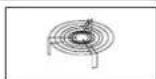
Purpose: The turntable serves as the main cooking surface; it can be easily removed for cleaning. - Grill rack, to be placed on the turntable.
Purpose: The metal rack can be used in grill and combination cooking.




WHAT TO DO IF YOU ARE IN DOUBT OR HAVE A PROBLEM
If you have any of the problems listed below try the solutions given.
This is normal.
• Condensation inside the oven.
• Air flow around the door and outer casing.
• Light reflection around the door and outer casing.
• Steam escaping from around the door or vents.
The oven does not start when you press the (◇) button.
• Is the door completely closed?
The food is not cooked at all.
• Have you set the timer correctly and/or pressed the ⏻ button?
• Is the door closed?
- Have you overloaded the electric circuit and caused a fuse to blow or a breaker to be triggered?
The food is either overcooked or undercooked.
• Was the appropriate cooking length set for the type of food?
• Was an appropriate power level chosen?
Sparking and cracking occur inside the oven (arcing).
• Have you used a dish with metal trimmings?
• Have you left a fork or other metal utensil inside the oven?
• Is aluminum foil too close to the inside walls?
The oven causes interference with radios or televisions.
- Slight interference may be observed on televisions or radios when the oven is operating. This is normal. To solve this problem, install the oven away from televisions, radios and aerials.
- If interference is detected by the oven's microprocessor, the display may be reset. To solve this problem, disconnect the power plug and reconnect it. Reset the time.
If the above guidelines do not enable you to solve the problem, contact your local dealer or SAMSUNG after-sales service.
COOKING/REHEATING
The following procedure explains how to cook or reheat food. ALWAYS check your cooking settings before leaving the oven unattended. First, place the food in the centre of the turntable. Then, close the door.
- Press the (☐) button.
Result: The 750 W (maximum cooking power) indications are displayed: Select the appropriate power level by pressing the (#) button again until the wattage is displayed. Refer to the pc
-
Set the cooking time by pressing the (一) and (+) buttons as required.
-
Press the (◇) button.
Result: The oven light comes on and the turntable starts rotating.
1) Cooking starts and when it has finished the oven beeps four times.
2) The end reminder signal will beep 3 times (once every minute).
3) The current time is displayed again.
Never switch the microwave oven on when it is empty.
If you wish to heat a dish for a short period of time at maximum power (750 W), simply press the +30s button once for each 30 seconds of cooking time. The oven starts immediately.




POWER LEVELS
You can choose among the power levels below.
| Power level | Output | |
| MWO GRILL | ||
| HIGH 750 W - | ||
| MEDIUM HIGH 600 W - | ||
| MEDIUM 450 W - | ||
| MEDIUM LOW 300 W - | ||
| DEFROST (88) | 180 W - | |
| LOW/KEEP WARM 100 W - | ||
| GRILL - 1100 W | ||
| COMBI I (88) | 600 W 1100 W | |
| COMBI II (88) | 450 W 1100 W | |
| COMBI III (88) | 300 W 1100 W | |
If you select higher power level, the cooking time must be decreased.
If you select lower power level, the cooking time must be increased.
ADJUSTING THE COOKING TIME
You can increase the cooking time by pressing the +30s button once for each 30 seconds to be added.
Press the +30s button once for each 30 seconds to be added.
STOPPING THE COOKING
You can stop cooking at any time to check the food.
- To stop temporarily; Open the door.
Result: Cooking stops. To resume cooking, close the door and press (◇) again.
- To stop completely; Press the (☑) button.
Result: The cooking stops. If you wish to cancel the cooking settings, press the Stop (☐) button again.
You can also cancel any setting before starting by simply pressing Stop (☐).
SETTING THE ENERGY SAVE MODE
The oven has an energy save mode. This facility saves electricity when the oven is not in use.
- Press the Energy Save button.
- To remove energy save mode, open the door and then display shows current time. The oven is ready for use.




USING THE AUTO REHEAT/COOK FEATURE
The Auto Reheal/Cook feature has five pre-programmed cooking time. You do not need to set either the cooking times or the power level. You can adjust the number of servings by pressing the ( ) and ( ) buttons. First, place the food in the centre of the turntable and close the door.
- Select the type of food that you are cooking by pressing the Auto Reheat/Cook (💡/💡) button once or more times.
- Select the size of the serving by pressing the (—) and (†buttons. (Refer to the table on the side).
- Press the (◇) button.
Result: Cooking starts. When it has finished.
1) The oven beeps four times.
2) The end reminder signal will beep 3 times (once every minute).
3) The current time is displayed again.
Use only recipients that are microwave-safe.
AUTO REHEAT/COOK SETTINGS
The following table presents the various Auto Reheal/Cock Programmes, quantities, standing times and appropriate recommendations.
| Food Portion | Standing Time | Recommendations | |
| 1. Drinks(coffee, milk,tea, waterwith roomtemperature) | 150 ml(1 cup)250 ml(1 mug) | 1-2 min. | Pour in to a ceramic cup andreheat uncovered. Place cup(150ml) or mug (250ml) in thecentre of turntable, Stir carefullybefore and after standing time. |
| 2. Ready meals(chilled) | 300-350 g400-450 g | 3 min. | Put on a ceramic plate and coverwith microwave cling film. Thisprogramme is suitable for mealsconsisting of 3 components (e.g.meat with sauce, vegetables anda side dish like potatoes, rice or pasta). |
| 3. Frozen ready meals(frozen) | 300-350 g400-450 g | 4 min. | Take frozen ready meal and checkif dish is suitable for microwave.Pierce film of ready meal. Put thefrozen ready meal in the centre.This programme is suitable forfrozen ready meals consisting of3 components (e.g. meat withsauce, vegetables and a side dishlike potatoes, rice or pasta). |
| 4. Frozen fishGratin (frozen) | 200 g400 g | 2-3 min. | Put the frozen fish gratin into asuitable sized glass pyrex dish.Put the dish on the rack. Thisprogramme is suitable for frozenready products consisting of fishfillets topped with vegetables and sauce. |
| 5. Frozen miniquich/Minipizza (frozen) | 150 g(4-6 pcs)250 g(7-9 pcs) | - | Put the frozen mini-quiches orminipizzas evenly on the rack. |


USING THE AUTO POWER DEFROST FEATURE
The Auto Power Defrost feature enables you to defrost meat, poultry, fish and fruit/berry. The defrost time and power level are set automatically. You simply select the programme and the weight.
Use only dishes that are microwave-safe.
First, place the frozen food in the centre of the turntable and close the door.
- Select the type of food that you are cooking by pressing the Power Defrost (按钮) button one or more times. (Refer to the table on the side).
- Select the food weight by pressing the (—) and (+) buttons. It is possible to set up to a maximum of 1500 g.
- Press the (◇) button.
Result :
• Defrosting begins.
- The oven beeps half way through defrosting to remind you to turn the food over.
- Press (◆) button again to finish defrosting.
You can also defrost food manually. To do so, select the microwave cooking/reheating function with a power level of 180 W. Refer to the section entitled "Cooking/Reheating" on page 10 for further details.

AUTO POWER DEFROST SETTINGS
The following table presents the various Auto Power Defrost programmes, quantities, standing times and appropriate recommendations. Remove all kinds of package material before defrosting. Place meat, poultry, fish and fruit berry on a ceramic plate.
| Food Portion | Standing time | Recommendations |
| 1. Meat 200-1500 g 20-90 min. Shield the edges with aluminium foil. Turn the meat over, when the oven beeps.This programme is suitable for beef, lamb, pork, steaks, chops, minced meat. | ||
| 2. Poultry 200-1500 g 20-90 min. Shield the leg and wing tips with aluminium foil. Turn the poultry over, when the oven beeps. This programme is suitable for whole chicken as well as for chicken portions. | ||
| 3. Fish 200-1500 g 20-80 min. Shield the tail of a whole fish with aluminium foil. Turn the fish over, when the oven beeps. This programme is suitable for whole fishes as well as for fish fillets. | ||
| 4. Fruit/Berry 100-600 g 5-20 min. Spread fruits evenly into a flat glass dish.This programme is suitable for all kind of fruits. | ||
Select the Manual Defrosting function with a power level of 180 W if you want to defrost food manually. For further details on manual defrosting and defrosting time, refer to the page 21.




GRILLING
The grill enables you to heat and brown food quickly, without using microwaves. To this aim, a grill rack is supplied with your microwave oven.
- Preheat the grill to the required temperature, by pressing the Grill (∩), set the time by pressing the (+) and () buttons as required and Start () button.
- Open the door and place the food on the rack.
- Place the food on the rack in the oven. Press the Grill (∩) button. Set the cooking time by pressing the (+ and (-) + buttons as required. (The maximum grilling time is 60 minute.)
- Press the Start ( ◆ ) button.
Result: The oven light comes on and the turntable starts rotating.
1) Cooking starts and when it has finished the oven beeps four times.
2) The end reminder signal will beep 3 times (once every minute).
3) The current time is displayed again.
Do not worry if the heater turns off and on while grilling. This system is designed to prevent overhealing of the oven.
Always use oven gloves when touching the dishes in the oven, as they will be very hot.
COMBINING MICROWAVES AND THE GRILL
You can also combine microwave cooking with the grill, to cook quickly and brown at the same time.
ALWAYS use microwave-safe and oven-proof cookware. Glass or ceramic dishes are ideal as they allow the microwaves to penetrate the food evenly.
ALWAYS use oven gloves when touching the recipients in the oven, as they will be very hot.
- Open the oven door by pushing the large button in the bottom right-hand corner of the control panel. Place the food on the rack and the rack on the tumtable. Close the door.
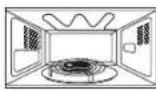
- Press the Combi (☐) button.
Result: The following indications are displayed: 600 W (microwave and grill mode) 600 W (out power)
Select the appropriate power level by pressing the Combl (☐) button again until the corresponding power level is displayed.
You cannot set the temperature of the grill.
- Set the cooking time by pressing the (—) and (+) buttons as required. The maximum cooking time is 60 minutes.
- Press the Start (◇) button.
Result: Combination cooking starts. When it has finished.
1) The oven beeps four times.
2) The end reminder signal will beep 3 times (once every minute).
3) The current time is displayed again.
The maximum microwave power for the combined microwave and grill mode is 600 W.




USING THE MEMORY FEATURE
If you often cook or reheat the same types of dishes, you can store the cooking times and power levels in the oven's memory, so that you do not have to reset them each order.
You can store two different setting.
Storing the Setting.
1. To programme the... Then press the Memory
(☐) button...
First setting
Once (Display is P1)
Second setting
Twice (Display is P2)
- Set your cooking programme as usual (cooking time and power level) see if necessary.
- Press (◇) button.
Result: Your setting are now stored in the oven's memory.
Using the settings.
First, place the food in the centre of the turntable and close the door.
1. To select the...
Then press the Memory (☐) button...
First setting
Once (Display is P1)
Second setting
Twice (Display is P2)
- Press (button.
Result: The food is cooked as requested.
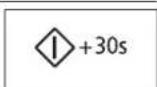
SWITCHING THE BEEPER OFF
You can switch the beeper off whenever you want.
- Press the (○) and (●) buttons at the same time.
Result :
• The following indication is displayed.
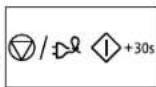

• The oven does not beep each time you press a button.
- To switch the beeper back on, press the (⑦) and (④) buttons again at the same time.
Result :
• The following indication is displayed.
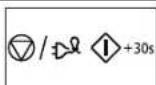

• The oven operates with the beeper on again.
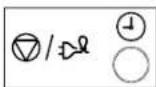
Your microwave oven is fitted with a special Child Safety programme, which enables the oven to be "locked" so that children or anyone unfamiliar with it cannot operate it accidentally. The oven can be locked at any time.
- Press the (⊗) and (◆) buttons at the same time.
Result :
- The oven is locked (no functions can be selected).
• The display shows "L".

- To unlock the oven, press the (⑦) and (④) buttons again at the same time.
Result: The oven can be used normally.
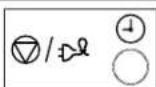




COOKWARE GUIDE
To cook food in the microwave oven, the microwaves must be able to penetrate the food, without being reflected or absorbed by the dish used. Care must therefore be taken when choosing the cookware. If the cookware is marked microwave-safe, you do not need to worry. The following table lists various types of cookware and indicates whether and how they should be used in a microwave oven.
| Cookware | Microwave-safe | Comments |
| Aluminum foil | √ x | Can be used in small quantities to protect areas against overcooking.Arcing can occur if the foil is too close to the oven wall or if too much foil is used. |
| Browning plate | √ | Do not preheat for more than eight minutes. |
| China and earthenware | √ | Porcelain, pottery, glazed earthenware and bone china are usually suitable, unless decorated with a metal trim. |
| Disposable polyester cardboard dishes | √ | Some frozen foods are packaged in these dishes. |
| Fast-food packagingPolystyrene cups containersPaper bags or newspaperRecycled paper or metal trims | √xx | Can be used to warm food.Overheating may cause the polystyrene to melt.May catch fire.May cause arcing. |
| GlasswareOven-to-table wareFine glasswareGlass jars | √√√ | Can be used, unless decorated with a metal trim.Can be used to warm foods or liquids. Delicate glass may break or crack if heated suddenly.Must remove the lid. Suitable for warming only. |
| Cookware | Microwave-safe | Comments |
| MetalDishesFreezer bag twist ties | ✗✗ | May cause arcing or fire. |
| PaperPlates, cups, napkins and kitchen paperRecycled paper | √✗ | For short cooking times and warming. Also to absorb excess moisture.May cause arcing. |
| PlasticContainers | √ | Particularly if heat-resistant thermoplastic. Some other plastics may warp or discolour at high temperatures. Do not use Melamine plastic. |
| Cling film | √ | Can be used to retain moisture.Should not touch the food. Take care when removing the film as hot steam will escape. |
| Freezer bags | √✗ | Only if boilable or oven-proof.Should not be airtight. Prick with a fork, if necessary. |
| Wax or grease-proof paper | √ | Can be used to retain moisture and prevent spattering. |
√ : Recommended
√X : Use Caution
X : Unsafe
16




COOKING GUIDE
MICROWAVES
Microwave energy actually penetrates food, attracted and absorbed by its water, fat and sugar content.
The microwaves cause the molecules in the food to move rapidly. The movement of these molecules creates friction and the resulting heat cooks the food.
COOKING
Cookware for microwave cooking:
Cookware must allow microwave energy to pass through it for maximum efficiency. Microwaves are reflected by metal, such as stainless steel, aluminium and copper, but they can penetrate through ceramic, glass, porcelain and plastic as well as paper and wood. So food must never be cooked in metal containers.
Food suitable for microwave cooking:
Many kinds of food are suitable for microwave cooking, including fresh or frozen vegetables, fruit, pasta, rice, grains, beans, fish, and meat. Sauces, custard, soups, steamed puddings, preserves, and chutneys can also be cooked in a microwave oven. Generally speaking, microwave cooking is ideal for any food that would normally be prepared on a hob. Melting butter or chocolate, for example (see the chapter with tips, techniques and hints).
Covering during cooking
To cover the food during cooking is very important, as the evaporated water rises as steam and contributes to cooking process. Food can be covered in different ways: e.g. with a ceramic plate, plastic cover or microwave suitable cling film.
Standing times
After cooking is over food the standing time is important to allow the temperature to even out within the food.
Cooking Guide for frozen vegetables
Use a suitable glass pyrex bowl with lid. Cook covered for the minimum time - see table. Continue cooking to get the result you prefer. Stir twice during cooking and once after cooking. Add salt, herbs or butter after cooking. Cover during standing time.
| Food Portion | Power | Time (min.) | Standing time (min.) | Instructions | |
| Spinach 150 g 600 | W 512 - 612 | 2-3 Add 15 ml (1 | tbsp.) cold water. | ||
| Broccoli 300 g 600 | W 10-11 | 2-3 Add 15 ml (1 | tbsp.) cold water. | ||
| Peas 300 g 600 W 8-9 | 2-3 Add 15 ml (1 | tbsp.) cold water. | |||
| Green beans 300 g 600 W 10- | 11 2-3 Add 15 ml (1 | tbsp.) cold water. | |||
| Mixed vegetables (carrots/peas/corn) | 300 g 600 W 9-10 | 2-3 Add 15 ml (1 | tbsp.) cold water. | ||
| Mixed vegetables (chinese style) | 300 g 600 W 812 - 912 | 2-3 Add 15 ml (1 | tbsp.) cold water. |



Cooking Guide for rice and pasta
Rice: Use a large glass pyrex bowl with lid - rice doubles in volume during cooking. Cook covered. After the cooking time is over, stir before standing time and salt or add herbs and butter. Remark: the rice may not have absorbed all water after the cooking time is finished.
Pasta: Use a large glass pyrex bowl. Add boiling water, a pinch of salt and stir well. Cook uncovered. Stir occasionally during and after cooking. Cover during standing time and drain thoroughly afterwards.
| Food Portion Power | Time (min.) | Standing time (min.) | Instructions | ||
| White rice (Parboiled) | 250 g | 750 W 17-18 5 Add 500 ml | cold water. | ||
| Brown rice (Parboiled) | 250 g | 750 W 22-23 5 Add 500 ml | cold water. | ||
| Brown rice 250 g 750 W 22-23 10 Add 600 ml | cold water. | ||||
| Mixed rice (Rice + wild rice) | 250 g | 750 W 18-19 5 Add 500 ml | cold water. | ||
| Mixed corn (Rice + grain) | 250 g | 750 W 19-20 5 Add 400 ml | cold water. | ||
| Pasta 250 g | 750 W 11-12 5 Add 1000 ml | hot water. | |||
Cooking Guide for fresh vegetables
Use a suitable glass pyrex bowl with lid. Add 30-45 ml cold water (2-3 tbsp.) for every 250 g unless another water quantity is recommended - see table. Cook covered for the minimum time - see table. Continue cooking to get the result you prefer. Stir once during and once after cooking. Add salt, herbs or butter after cooking. Cover during a standing time of 3 minutes.
Hint: Cut the fresh vegetables into even sized pieces. The smaller they are cut, the quicker they will cook.
All fresh vegetables should be cooked using full microwave power (750 W).
| Food Portion | Time (min.) | Standing time (min.) | Instructions | |
| Broccoli 250 g | 5-5 12 8 12 -9 | 3 Prepare even sized florets. Arrange the stems to the centre. | ||
| Brussels sprouts | 250 g | 6 12 -7 12 | 3 Add 60-75 ml (5-6 tbsp.) water. | |
| Carrots 250 g | 5-6 | 3 Cut carrots into even sized slices. | ||
| Cauliflower | 250 g500 g | 5 12 -69 12 -10 | 3 Prepare even sized florets. Cut big florets into halves. Arrange stems to the centre. | |
| Courgettes | 250 g | 4-4 12 | 3 Cut courgettes into slices. Add 30 ml (2 tbsp.) water or a knob of butter.Cook until just tender. | |
| Egg plants | 250 g | 4 12 -5 | 3 Cut egg plants into small slices and sprinkle with 1 tablespoon lemon juice. | |
| Leeks | 250 g | 5-5 12 | 3 Cut leeks into thick slices. | |
| Mushrooms | 125 g250 g | 1 12 -23 12 -4 | 3 Prepare small whole or sliced mushrooms. Do not add any water.Sprinkle with lemon juice. Spice with salt and pepper. Drain before serving. | |
| Onions | 250 g | 5-6 | 3 Cut onions into slices or halves. Add only 15 ml (1 tbsp.) water. | |
| Pepper | 250 g | 4 12 -5 | 3 Cut pepper into small slices. | |
| Potatoes | 250 g500 g | 5-69-10 | 3 Weigh the peeled potatoes and cut them into similar sized halves or quarters. | |
| Turnip cabbage | 250 g | 5-5 12 | 3 Cut turnip cabbage into small cubes. | |



REHEATING
Your microwave oven will reheat food in a fraction of the time that conventional ovens hobs normally take.
Use the power levels and reheating times in the following chart as a guide. The times in the chart consider liquids with a room temperature of about +18 to +20 °C or a chilled food with a temperature of about +5 to +7 °C.
Arranging and covering
Avoid reheating large items such as joint of meat - they tend to overcook and dry out before the centre is piping hot. Reheating small pieces will be more successful.
Power levels and stirring
Some foods can be reheated using 750 W power while others should be reheated using 600 W, 450 W or even 300 W.
Check the tables for guidance. In general, it is better to reheat food using a lower power level, if the food is delicate, in large quantities, or if it is likely to heat up very quickly (mince pies, for example).
Stir well or turn food over during reheating for best results. When possible, stir again before serving.
Take particular care when heating liquids and baby foods. To prevent eruptive boiling of liquids and possible scalding, stir before, during and after heating. Keep them in the microwave oven during standing time. We recommend putting a plastic spoon or glass stick into the liquids. Avoid overheating (and therefore spoiling) the food.
It is preferable to underestimate cooking time and add extra heating time, if necessary.
Heating and standing times
When reheating food for the first time, it is helpful to make a note of the time taken - for future reference.
Always make sure that the reheated food is piping hot throughout.
Allow food to stand for a short time after reheating - to let the temperature even out.
The recommended standing time after reheating is 2-4 minutes, unless another time is recommended in the chart.
Take particular care when heating liquids and baby food. See also the chapter with the safety precautions.
REHEATING LIQUIDS
Always allow a standing time of at least 20 seconds after the oven has been switched off to allow the temperature to even out. Stir during heating, if necessary, and ALWAYS stir after heating. To prevent eruptive boiling and possible scalding, you should put a spoon or glass stick into the beverages and stir before, during and after heating.
REHEATING BABY FOOD
baby fooD: Empty into a deep ceramic plate. Cover with plastic lid. Stir well after reheating! Let stand for 2-3 minutes before serving. Stir again and check the temperature. Recommended serving temperature: between 30-40 °C.
baby mILk: Pour milk into a sterilised glass bottle. Reheat uncovered. Never heat a baby's bottle with teat on, as the bottle may explode if overheated. Shake well before standing time and again before serving! Always carefully check the temperature of baby milk or food before giving it to the baby. Recommended serving temperature: ca. 37 °C.
rEmark: Baby food particularly needs to be checked carefully before serving to prevent burns.
Use the power levels and times in the next table as a guide lines for reheating.

Reheating liquids and food
Use the power levels and times in this table as a guide lines for reheating.
| food portion power | Time (min.) | Standing time (min.) | Instructions | ||
| Drinks(coffee, tea and water) | 150 ml(1 cup)250 ml(1 mug) | 750 W | 112-2 | 1-2 Pour into cups and reheat uncovered:Put cup/ mug in the centre of turntable. Keep in microwave oven during standing time and stir well. | |
| Soup(chilled) | 250 g450 g | 750 W | 3-312 4-412 | 2-3 Pour into a deep ceramic plate. Cover with plastic lid.Stir well after reheating. Stir again before serving. | |
| Stew(chilled) | 350 g | 600 W | 5-6 | 2-3 Put stew in a deep ceramic plate. Cover with plastic lid. Stir occasionally during reheating and again before standing and serving. | |
| Pasta with sauce(chilled) | 350 g | 600 W | 4-5 | 3 Put pasta (e.g. spaghetti or egg noodles) on a flat ceramic plate. Cover with microwave cling film. Stir before serving. | |
| Filled pasta with sauce(chilled) | 350 g | 600 W | 412-512 | 3 Put filled pasta (e.g. ravioli, tortellini) in a deep ceramic plate. Cover with plastic lid. Stir occasionally during reheating and again before standing and serving. | |
| Ready meal(chilled) | 300 g400 g | 600 W | 5-6 612-712 | 3 Plate a meal of 2-3 chilled components on a ceramic plate or use microwave proof dish. Cover with microwave cling-film. | |
| Frozen ready meal | 300 g400 g | 600 W | 1112-1212 13-14 | 4 Put microwave proof dish with frozen ready meal (-18 °C) on the turntable.Pierce film or cover with microwave cling film.After reheating stand for 4 minutes. | |
Reheating baby food and milk
Use the power levels and times in this table as guide lines for reheating.
| food portion power Time | Standing time (min.) | Instructions | |||
| Baby food (vegetables + meat) | 190 g | 600 W | 30 sec. | 2-3 | Empty into ceramic deep plate. Cook covered. Stir after cooking time. Stand for 2-3 minutes.Before serving, stir well and check the temperature carefully. |
| Baby porridge (grain + milk + fruit) | 190 g | 600 W | 20 sec. | 2-3 | Empty into ceramic deep plate. Cook covered. Stir after cooking time. Stand for 2-3 minutes.Before serving, stir well and check the temperature carefully. |
| Baby milk | 100 ml200 ml | 300 W | 30-40 sec.1 min. to 1 min. 10 sec. | 2-3 | Stir or shake well and pour into a sterilized glass bottle. Place into the centre of turn-table. Cook uncovered. Shake well and stand for at least 2 minutes.Before serving, shake well and check the temperature carefully. |



DEFROSTING
Microwaves are an excellent way of defrosting frozen food. Microwaves gently defrost frozen food in a short period of time. This can be of great advantage, if unexpected guests suddenly show up.
Frozen poultry must be thoroughly thawed before cooking. Remove any metal ties and take it out of any wrapping to allow thawed liquid to drain away.
Put the frozen food on a dish without cover. Turn over half way, drain off any liquid and remove any giblets as soon as possible.
Check the food occasionally to make sure that it does not feel warm.
If smaller and thinner parts of the frozen food start to warm up, they can be shield by wrapping very small strips of aluminium foil around them during defrosting.
Should poultry start to warm up on the outer surface, stop thawing and allow it to stand for 20 minutes before continuing.
Leave the fish, meat and poultry to stand in order to complete defrosting.
The standing time for complete defrosting will vary depending on the quantity defrosted. Please refer to the table below.
Hint: Flat food defrosts better than thick and smaller quantities need less time than bigger ones. Remember this hint while freezing and defrosting food.
For defrosting of frozen food with a temperature of about -18 to -20 °C, use the following table as a guide.
All frozen food should be defrosted using defrosting power level (180 W).
| food portion Time | (min.) | Standing time (min.) | Instructions | |
| MeatMinced beef 500 gPork steaks 250 g | 10-12 56-8 | 20 Place the meat on a | flatceramic plate. Shield thinner edges with aluminium foil.Tum over after half of defrosting time! | |
| PoultryChicken piecesWhole chicken 1000 g | 500 g(2 pcs)25-28 | 12-14 15-40 First, put | chicken piecesfirst skin-side down, whole chicken first breast-side-down on a flat ceramic plate.Shield the thinner parts like wings and ends with aluminium foil. Tum over after half of defrosting time! | |
| FishFish fillets 200 g | (2 pcs)400 g(4 pcs) | 6-711-13 | 5-20 Put | frozen fish in the middle of a flat ceramic plate.Arrange the thinner parts under the thicker parts.Shield narrow ends with aluminium foil. Tum over after half of defrosting time! |
| FruitsBerries | 250 g | 6-7 | 5-10 | Distribute fruits on a flat, round glass dish (with a large diameter). |
| BreadBread rolls(each ca. 50 g)Toast/sandwichGerman bread(wheat + rye flour) | 2 pcs4 pcs250 g500 g | 1 12 -23-44-58-10 | 5-10 Arrange rolls in a circle or bread horizontally on kitchen paper in the middle of tumtable.Tum over after half of defrosting time! | |



GRILL
The grill-heating elements are located underneath the ceiling of the cavity. They operates while the door is closed and the turntable is rotating. The turntable's rotation makes the food brown more evenly. Preheating the grill for 2-3 minutes will make the food brown more quickly.
Cookware for grilling:
Should be flameproof and may include metal. Do not use any type of plastic cookware, as it can melt.
Food suitable for grilling:
Chops, sausages, steaks, hamburgers, bacon and gammon rashers, thin fish portions, sandwiches and all kinds of toast with toppings.
Important remark:
Whenever the grill only mode is used, make sure that the grill-heating element is under the ceiling in the horizontal position and not on the back-wall in the vertical position. Please remember that food must be placed on the high rack, unless another instruction is recommended.
MICROWAVE + GRILL
This cooking mode combines the radiant heat that is coming from the grill with the speed of microwave cooking. It operates only while the door is closed and the turntable is rotating. Due to the rotation of the turntable, the food browns evenly.
Three combination modes are available with this model: 600 W + Grill, 450 W + Grill and 300 W + Grill.
Cookware for cooking with microwave + grill
Please use cookware that microwaves can pass through. Cookware should be flameproof. Do not use metal cookware with combination mode. Do not use any type of plastic cookware, as it can melt.
Food suitable for microwave + grill cooking:
Food suitable for combination mode cooking include all kinds of cooked food which need reheating and browning (e.g. baked pasta), as well as foods which require a short cooking time to brown the top of the food. Also, this mode can be used for thick food portions that benefit from a browned and crispy top (e.g. chicken pieces, turning them over half way through cooking). Please refer to the grill table for further details.
Important remark:
Whenever the combination mode (microwave + grill) is used, make sure that the grill heating element is under the ceiling in the horizontal position and not on the back-wall in the vertical position. The food should be placed on the high rack, unless another instruction is recommended. Otherwise it has to be placed directly on the turntable. Please refer to the instructions in the following chart.
The food must be turned over, if it is to be browned on both sides.

22




Grill guide
We recommend to pre-heat the grill when grilling fresh food. Use the power levels and times in this table as guide lines for grilling. Use oven gloves when taking out food.
| Fresh food | Portion | Preheat time (min.) | Cooking mode | 1st side time (min.) | 2nd side time (min.) |
| Toast slices | 4 pcs(4 x 25 g) | 3 Grill | only 6-7 5-6 | ||
| < Instructions > | |||||
| Put the toast slices side by side on the rack. | |||||
| Bread rolls(already baked) | 2-4 pcs 3 | Grill only 3-4 12 -3 | |||
| < Instructions > | |||||
| Put bread rolls first with the bottom side up in a circle directly on the rack. | |||||
| Grilled tomatoes | 250 g(2 pcs) | 3 | 300 W + Grill | 512 - 612 - | |
| < Instructions > | |||||
| Cut tomatoes into halves. Put salt, pepper and some cheese on top. Arrange in a circle in a flat glass pyrex dish. Place dish on the rack. | |||||
| Toast hawaii | 2 pcs(300 g) | 3 | 300 W + Grill | 7-9 - | |
| < Instructions > | |||||
| Toast the bread slices first. Put the toast with topping (ham, pineapple, cheese slices) side by side on the rack. After cooking stand for 2-3 minutes. | |||||
| Chicken wings(chilled) | 400-500 g(6 pcs) | 3 | 300 W + Grill | 12-14 11-13 | |
| < Instructions > | |||||
| Prepare chicken pieces such as chicken wings or drumsticks with oil and spices. Put them in a circle on the rack with the bones to the middle. After grilling stand for 2-3 minutes. | |||||
| Fresh food | Portion | Preheat time (min.) | Cooking mode | 1st side time (min.) | 2nd side time (min.) |
| Baked potatoes | 500 g 3 | 450 W + Grill | 10-12 - | ||
| < Instructions > | |||||
| Cut potatoes into halves and put in a circle on the rack with the cut side to the grill. Brush cut side with olive oil and spices. After grilling stand for 3 minutes. | |||||
| Frozen pasta | 400 g - | 600 W + Grill | 16-18 - | ||
| < Instructions > | |||||
| Put the frozen pasta (-18°C), e.g. lasagne, tortellini or caneloni in a suitable sized glass pyrex dish and set on rack. | |||||
| Frozen fish gratin | 400 g - | 450 W + Grill | 20-22 - | ||
| < Instructions > | |||||
| Put the frozen fish gratin (-18°C) in a suitable sized glass pyrex dish and set on rack. | |||||
| Frozen pizza snacks | 250 g (8 pcs) | - | 300 W + Grill | 10-12 - | |
| < Instructions > | |||||
| Put the frozen pizza snacks (-18 °C) or mini quiches in a circle on the rack. | |||||
| Frozen streusel cake | 200-250 g (1-2 pcs) | - | 300 W + Grill | 4-6 - | |
| < Instructions > | |||||
| Put the frozen cake pieces (-18 °C) side by side on rack. After defrosting stand for 5 minutes. | |||||



SPECIAL HINTS
MELTING BUTTER
Put 50 g butter into a small deep glass dish. Cover with plastic lid. Heat for 30-40 seconds using 750 W, until butter is melted.
MELTING CHOCOLATE
Put 100 g chocolate into a small deep glass dish. Heat for 3-5 minutes, using 450 W until chocolate is melted. Stir once or twice during melting. Use oven gloves while taking out!
MELTING CRYSTALLIZED HONEY
Put 20 g crystallized honey into a small deep glass dish. Heat for 20-30 seconds using 300 W until honey is melted.
MELTING GELATINE
Lay dry gelatine sheets (10 g) for 5 minutes into cold water. Put drained gelatine into a small glass pyrex bowl. Heat for 1 minute using 300 W. Stir after melting.
COOKING GLAZE/ICING (FOR CAKE AND GATEAUX)
Mix instant glaze (approximately 14 g) with 40 g sugar and 250 ml cold water.
Cook uncovered in a glass pyrex bowl for 3½ to 4½ minutes using 750 W, until glaze/icing is transparent. Stir twice during cooking.
COOKING JAM
Put 600 g fruits (for example mixed berries) in a suitable sized glass pyrex bowl with lid. Add 300 g preserving sugar and stir well. Cook covered for 10-12 minutes using 750 W.
Stir several times during cooking. Empty directly into small jam glasses with twist-off lids. Stand on lid for 5 minutes.
COOKING PUDDING
Mix pudding powder with sugar and milk (500 ml) by following the manufacturers instructions and stir well. Use a suitable sized glass pyrex bowl with lid. Cook covered for 6½ to 7½ minutes using 750 W. Stir several times well during cooking.
BROWNING ALMOND SLICES
Spread 30 g sliced almonds evenly on a medium sized ceramic plate. Stir several times during browning for 3½ to 4½ minutes using 600 W. Let it stand for 2-3 minutes in the oven. Use oven gloves while taking out!
STORING AND REPAIRING YOUR MICROWAVE OVEN
A few simple precautions should be taken when storing or having your microwave oven serviced.
The oven must not be used if the door or door seals are damaged:
- Broken hinge
• Deteriorated seals
• Distorted or bent oven casing
Only a qualified microwave service technician should perform repair.
NEVER remove the outer casing from the oven. If the oven is faulty and needs servicing or you are in doubt about its condition:
• Unplug it from the wall socket
- Contact the nearest after-sales service centre
If you wish to store your oven away temporarily, choose a dry, dust-free place.
Reason : Dust and damp may adversely affect the working parts in the oven.
This microwave oven is not intended for commercial use.
INSTALLATION & WIRING INSTRUCTIONS
IMPORTANT NOTE :
The mains lead on this equipment is supplied with a moulded plug incorporating a fuse.
The value of the fuse is indicated on the pin face of the plug and, if it requires replacing, a fuse approved to BS1363 of the same rating must be used.
Never use the plug with the fuse cover omitted if the cover is detachable. If a replacement fuse cover is required, it must be of the same colour as the pin face of the plug.
Replacement covers are available from your Dealer. If the fitted plug is not suitable for the power points in your house or the cable is not long enough to reach a power point, you should obtain a suitable safety approved extension lead or consult your Dealer for assistance. However, if there is no alternative to cutting off the plug, remove the fuse and then safely dispose of the plug. Do not connect the plug to a mains socket, as there is a risk of shock hazard from the bared flexible cord.
24




WIRING INSTRUCTIONS
WARNING THIS APPLIANCE MUST BE EARTHED.
This appliance must be earthed. In the event of an electrical short circuit, earthing reduces the risk of electric shock providing an escape wire for the electric current. The appliance is equipped with a mains lead which includes an earth wire for connecting to the earth terminal of your mains plug. The plug must be plugged into a socket that is properly installed and earthed.

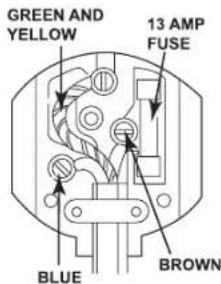
The wires in this mains lead are coloured in accordance with the following code:
• Green and yellow : Earth
- Blue : Neutral
- Brown : Live
As the colours of the wires in the mains lead of this appliance may not correspond with the coloured markings indentifying the terminals in your plug, proceed as follows.
Connect the green and yellow wire to the terminal in the plug marked with the letter E or the earth symbol (±) or coloured green or green-and-yellow.
Connect the blue wire to the terminal marked with the letter N or coloured black.

Consult a qualified electrician or service technician if in doubt about any of these instructions.
The manufacturer of this oven will not accept any liability for damage to persons or material for non observance of these requirements.
There are no user-serviceable parts inside the oven and if the mains lead of this appliance is damaged, it must only be replaced by qualified service personnel approved by the manufacturer because special tools are required.

WARNING: Ensure that the plug and
power cord are not damaged before use. If you have any reason to remove the moulded plug from this appliance, immediately remove the fuse and dispose of the plug.
Do not connect the plug to a mains socket under any circumstances as there is a danger of electric shock.

CIRCUITS: Your microwave oven should be operated on a separate circuit from other appliances. Failure to do this may cause the circuit breaker to trip, the fuse to blow, or the food to cook more slowly.
text_image
GREEN AND YELLOW 13 AMP FUSE BLUE BROWNCOOKING INSTRUCTIONS ON FOOD PACKAGING
Microwave Symbols
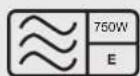
On the front of your oven there is a microwave oven symbol, as shown below.
This symbol has been introduced for your benefit when cooking or reheating packaged food.
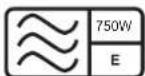
Packaged food is also, increasingly, using a microwave symbol similar to the one below. When you see this
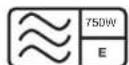
Symbol on food packaging, the cooking instructions are based on either the IEC Power Output Rating, or the Reheating Categories A, B, C, D or E.




COOKING INSTRUCTIONS
The IEC Power Output rating is an internationally standardised rating, so all microwave manufacturers now use the same method of measuring power output.
If food packaging gives cooking instructions based on IEC Power ratings, set cooking times according to the IEC Power of your oven.
For example :
If the cooking instructions are based on a 650 W oven, then you will need to reduce some cooking time for the GE76V (750 W)
Ready meals are now very convenient and popular. These are meals which are already prepared and cooked by the food manufacturer, and then frozen, chilled or vacuum sealed for long life.
Increasingly, heating times for such ready meals are being based on the Heating Categories A, B, C, D and E.
On this instance, simply match the heating category of your oven to the instructions on the food package, and set your timer accordingly.
For example :
If the heating instructions are 3 minutes on HIGH for a D category oven, then you will need to set your timer for less than 3 minutes on HIGH for the GE76V (E category).

Always remember that cooking instructions are intended only as a guide. If you have followed the instructions and the food is still not piping hot throughout, simply return it to the oven and cook it until it is.
TECHNICAL SPECIFICATIONS
SAMSUNG strives to improve its products at all times. Both the design specifications and these user instructions are thus subject to change without notice.
| Model GE76V | |
| Power source 230 V ~ 50 Hz | |
| Power consumption | |
| Microwave | 1150 W |
| Grill | 1100 W |
| Combined mode | 2250 W |
| 100 W / 750 W (IEC-705) | |
| - 240 V : 750 W | |
| Output power | - 230 V : 700 W |
| Operating frequency 2450 MHz | |
| Magnetron OM75S(31) | |
| Cooling method Cooling fan motor | |
| Dimensions (W x H x D) | |
| Outside | 489 x 275 x 379 mm |
| Oven cavity | 330 x 211 x 309 mm |
| Volume 20 liter | |
| Weight | |
| Net 12.5 kg approx | |

bar
| Category | Value | |---|---| | mEmomEmo | 27 | | ENGLISH | 1:45.41 PM |


SAMSUNG
QUESTIONS OR COMMENTS
| COUNTRY | CALL | OR VISIT US ONLINE AT |
| AUSTRIA 0810 - SAMSUNG (7267864, € 0.07/min) | www.samsung.com | |
| BELGIUM 02-201-24-18 | www.samsung.com/be (Dutch)www.samsung.com/be_fr (French) | |
| DENMARK 70 70 19 70 | www.samsung.com | |
| FINLAND 09 856350 50 | ||
| FRANCE 01 48 63 00 00 | ||
| 0180 5 SAMSUNG bzw.GERMANY267864* (*0, 14 €/Min. aus dem dt.Festnetz, aus dem Mobilfunk max. 0,42 €/Min.) | ||
| ITALIA 800-SAMSUNG(726-7864) | ||
| CYPRUS 8009 4000 only from landline(+30) 210 6897691 from mobile and land line | ||
| GREECE(+30) 210 6897691 from mobile and land line | ||
| LUXEMBURG 261 03 710 | ||
| NETHERLANDS | 0900-SAMSUNG (0900-7267864) (€ 0,10/Min) | |
| NORWAY | 815 56480 | |
| PORTUGAL | 808 20-SAMSUNG(808 20 7267) | |
| SPAIN 902 - 1 - SAMSUNG (902 172 678) | ||
| SWEDEN 0771 726 7864 (SAMSUNG) | ||
| SWITZERLAND | 0848 - SAMSUNG(7267864, CHF 0.08/min) | www.samsung.com/ch (German)www.samsung.com/ch_fr (French) |
| U.K | 0330 SAMSUNG (7267864) | www.samsung.com |
| EIRE | 0818 717100 | |
code No.: DE68-03928f