
Bild 4 - TV LOEWE - Free user manual and instructions
Find the device manual for free Bild 4 LOEWE in PDF.


User questions about Bild 4 LOEWE
0 question about this device. Answer the ones you know or ask your own.
Ask a new question about this device
Download the instructions for your TV in PDF format for free! Find your manual Bild 4 - LOEWE and take your electronic device back in hand. On this page are published all the documents necessary for the use of your device. Bild 4 by LOEWE.
USER MANUAL Bild 4 LOEWE
The screengraphics used are only exemplary. Depending on the device type, the available hardware/software components may be different.
The information in this document is subject to change without notice and does not constitute any obligation on the part of Loewe Technologies GmbH.
All rights including translation, technical modifications and errors reserved.

text_image
les GmbH. All rights including translation, technical modifications and errors reserved. LOEWE. LOEWE.Loewe bild
User handbook
Table of contents
Imprint 2
Welcome 5
About this user handbook 5
Safety/Warning......6
Technical information....8
Remote control button mapping....10
Operating controls on the TV set....11
Function of the connections ....12
Preparing the TV set ....13
Installing the eTV set 13
Set covers....13
Cable fixing 13
Connecting the TV set 14
Switching the TV set ON/OFF 16
General information on menu operation....17
On-screen displays....20
Explanation of keys....20
Explanation of symbols 20
Automatic menu info 20
Permanent dock display 20
Initial installation 21
Initial installation wizard 21
TVset as a monitor 33
Home view 34
Home view - EPG search 34
Home view - Favourites 35
TV....36
Setting the volume 36
Select channel 36
Status display/Info key 38
Menu options....39
Electronic Programme Guide - EPG 40
Freeview Play 44
Telctext 46
HbbTV/MedaText 48
Picture in Picture(PI') 49
Rotating the TV sd 50
Vogels Motion Mount 51
Recordings 53
Digital Recorder 53
TV viewing with time shift 53
Archive recording....54
Multi recording 55
DR+archive 56
DR+ Streaming 61
Follow me function 61
Muitroom 62
Timer 63
Sources 66
Video 68
Video playback....68
Additional functions for DR+ archive playback 71
Audio 74
Audio playback 74
Photo 76
Photo playback 76
Apps....78
App Gallery 78
Browser 80
DVB radio 81
Internet radio 82
Screen Mirroring 83
System settings 84
Picture 85
Sound....89
Surround modus 90
Mimi Defined ^™ 91
Channels 94
Automatic scan TV+Radio 95
Manual Scan TV / Radio 96
Channel lists TV / Radio 98
Compose/edit Personal list 99
Update channel list automatically....100
Transfer all channel lists 100
Control 101
Language 102
EPG 102
Parental lock....103
Energy efficiency 104
Quick start mode....104
Software update....105
On-screen displays 110
Time and date 110
DVB settings 111
PIP 111
DR+ 112
Standard Teletext 113
HbbTV 114
Asterisk key function 114
Rotate TV 115
Display kinematics 116
Hard disks....117
Export log file 118
Multimedia/Network 119
Network settings 120
Multimedia settings....123
Home Automation 123
Renderer 123
Mobile Recording....124
Bluetooth 125
Amazon Alexa login 127
Loewe old
User handbook
Table of contents
System settings (continuation)....128
Connections....128
Sound components 129
Antenna DVB 134
AV connection settings 134
Digital Link....135
HDMI 135
Extras 136
DR+Streaming....136
Integrated features....137
Reset to factory settings....137
Dealer mode....138
Legal matters....138
Conditional Access module (CA module) 139
External devices 141
Devices to the HDMI connections....141
Digital Link HD 142
Devices on AV 143
Connecting the speaker system (AUDIO OUT)....145
Connecting the speaker system (DAL) 145
Connecting active loudspeakers....146
Connecting the HiFi/AV amplifier 146
Audio playback from external devices 147
IR-Link 147
Serial interface RS-2320 (RJ12) 147
Setting the remote control 148
Teaching the remote control ....149
Loewe app ....151
Technical data ....155
bild 9....155
Connections rear side of the device (bild 9.65/bild 9.55)....155
Equipment features (bild 9.65/bild 9.55)....157
bild 7 158
Connections rear side of the device (bild 7.77/bild 7.65/bild 7.55) ... 158
Technical data (bild 7.77/bild 7.65/bild 7.55)....159
Equipment features (bild 7.77/bild 7.65/bild 7.55)....160
bild 5 oled....161
Connections rear side of the device (bild 5.65 oled/bild 5.55 oled) ..161
Connections rear side of the device (bild 4.55)....168
Technical data (bild 4.55) 169
Equipment features (bild 4.55)....170
bild 3 (2017)....171
Connections rear side of the device (bild 3.65 oled/bild 3.55 oled) .. 171
Connections rear side of the device (bild 3.49/bild 3.43)....172
Technical data (bild 3.65 oled/bild 3.55 oled/bild 3.49/bild 3.43) ....173
Equipment features (bild 3.65 oled/bild 3.55 oled)....174
Equipment features (bild 3.49/bild 3.43)....175
bild 3....176
Connections rear side of the device (bild 3.55/bild 3.48/bild 3.40) ..176
Technical data (bild 3.55/bild 3.48/bild 3.40/bild 3.40 FHD) .....17
Equipment features (bild 3.55 dal/bild 3.48 dal/bild 3.40 dal) .....178
Equipment features (bild 3.55/bild 3.48/bild 3.40/bild 3.40 FHD) .. 179
bild 3....180
Position and function of the connections (bild 2.55 oled)....180
Position and function of the connections (bild 2.49 / bild 2.43) .....181
Technical data (bild 2.55 oled/bild 2.49/bild 2.43)....182
Equipment features (bild 2.55 oled/bild 2.49/bild 2.43) 183
bild 1....184
Connections rear side of the device (bild 1.65/55)....184
Connections rear side of the device (bild 1.40/32) 185
Technical data (bild 1.65/bild 1.55/bild 1.40/bild 1.32)....186
Equipment features (bild 1.65/bild 1.55/bild 1.40/bild 1.32).... 187
bild (across sets) 188
Signals via HDMI/AV (PC IN) 188
Signal input groups 191
Accessories....192
Upgrade kits / conversion kits / cables 192
Mounting options (bild 9.65/bild 9.55) 193
Mounting options (bild 7.77/bild 7.65/bild 7.55)....194
Mounting options (bild 5.65 oled/bild 5.55 oled)....195
Mounting options (bild 5.55/bild 5.48/bild 5.40/bild 5.32) .....196
Mounting options (bild 4.55)....197
Mounting options (bild 3.65 oled/bild 3.55 oled/bild 3.49/bild 3.43) ...198
Mounting options (bild 3.55/bild 3.48/bild 3.40)....199
Mounting options (bild 2.55 oled/bild 2.49/bild 2.43)....200
Mounting options (bild 1.65/bild 1.55/bild 1.40/bild 1.32) ......201
VESA standard....202
Environmental 203
Disposal....203
Licences 203
Troubleshooting 205
CA module error codes 212
Glossary 213
EC Declaration of Conformity.... 217
Index 218
Service 222
Code page 223
Loewe bild
User handbook
Welcome
Thank you,
for choosing a Loewe product and having placed your trust in us.
With Loewe you have not simply decided on a modern and technically innovative TV set, but for timeless design, sharp picture quality, brilliant sound for movies and music as well as intuitive operation with the Loewe remote control unit, smart phone or tablet. In short, Loewe is perfect for home entertainment.
We look forward to welcome you as our customer and hope that you enjoy your Premium Home Entertainment made by Loewe.
Many features, one result: perfect Home Entertainment.

Just more entertainment.
The Loewe os user interface is intuitive and graphically optimised. This is how you quickly find your desired content – from TV set to online.
See chapter: Home view.

Perfectly networked.
Thanks to its numerous connections, your Loewe TV becomes your entertainment centre. Connect it to the Internet, DVD/Blu-ray player, external speakers, etc.

Hard disk for your TV archive.
Record the TV programme or pause it and continue watching it at a later date.
Depending on the set type, on an externally connected USB hard drive or the hard drive installed in the TV set ^4 .
With DR+ (Digital Recording), all this is no problem for your Loewe TV set.
See chapter: Digital Recorder.

Your contact person.
We are happy to help you with any questions regarding your TV set and other Loewe products.
In the user handbook refer to Service.
About this user handbook
For best results regarding safety and the longevity of the set, we recommend you read the chapter Safety/Warning before switching the TV set on for the first time.
This user handbook can be used for all current Loewe bild TV sets. The equipment and function scope varies according to set type.
The Technical data chapter is structured according to set lines and gives you information about the features of your TV set.
For differences in the functional descriptions, refer to the features in the Technical data chapter.
The chapter glossary gives explanations of certain terms used in the TV set and the user handbook.
Paragraphs which begin with the symbol indicate important instructions, tips or conditions for the following settings.
Terms which you will find in the menus or printed on the remote control or TV set are written in bold type.
The necessary control elements are shown in the descriptions to the left of the text containing the instructions for action.
Depending on the connected accessory equipment the menus in the TV set can differ from those described here. The screen graphic displayed is only an example. Depending on the device type, the available hardware/software components may be different.
All the channel names, programme contents, the illustrated photos, titles, albums and album covers in this user handbook are examples.
In addition to the remote control, a PC keyboard can be connected to one of the USB ports on your TV and then used to control your TV set.

In the user handbook, this symbol indicates places in which the use of a keyboard is particularly advantageous.
With the Loewe app, you can also comfortably enter addresses or search terms. Simply mark the input field for this, the Loewe app displays automatically a keyboard symbol. Open Loewe app keyboard, enter and confirm.
The user handbook is updated at irregular intervals. We recommend an occasional examination on the Support Portal of the Loewe homepage.
General information on the operation of the TV set
For further information on the user interface and the general operation of your TV set see chapter General information on the operation.
Important information
Loewe does not accept any liability for the nature and content of receivable Internet services. This also applies to the Loewe MediaNet portal. With its devices, Loewe provides the technical platform that fundamentally enables such material to be received. Loewe cannot make any guarantees regarding changes in scope and content, particularly with regard to the future and after going to press. The receivable online services are not included in the delivery and can vary depending on the product and country.
Safety/Warning
For your safety, and to avoid unnecessary damage to your unit, please read and follow the safety instructions below.
Key

This symbol indicates risks caused by high voltages.

This symbol indicates dangers caused by the development of fire.

This symbol should alert the user to other, more specific risks.

This symbol indicates dangers caused by sharp edges.
Do not remove set rear panel
Warning: When opening or removing the rear panel, there is the danger of electric shock and the risk of serious injury from high voltages.
Never open the rear panel yourself. Leave repairs and servicing work on your TV set to qualified, authorised television technicians.
Please contact your dealer or our customer service.
Intended use and environmental conditions

This TV set is intended exclusively for the reception and playback of picture and sound signals.

The TV set is designed for dry rooms (living rooms and office spaces). It must not be operated in spaces with high humidity (for example, near or in a bath or sauna).
We point out that our TV sets can react sensitively to dust and soot particles in the ambient air.
Excessive amounts of these can lead to damage to the set, up to loss of function.
Ensure a clean environment, so that your set will not be damaged.
High humidity and dust concentrations lead to power leaks in the set. This can lead to danger of injury and damage to the set by electric tensions or a fire.
If the set is used outdoors, make sure therefore that it is protected against moisture (rain, dripping or splashing water or condensation).
If you've brought the set from the cold into a warm environment, leave it off for around an hour due to the formation of condensation.
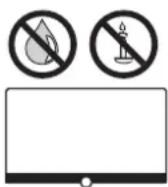
Do not place objects filled with liquid on the set. Protect the set from dripping and splashing water.
Candles and other open flames must be kept away from the set at all times, to prevent the spread of fire.
Transport

Improper handling during transportation can lead to damage to the display and risks of injury.

The screen consists of glass or plastic and can break if handled improperly.
Only transport the set in a vertical position.
No pressure should be applied to the glass or the plastic during transport.
For TV sets with OLED screen:
Only handle the TV set at the display corners. The correct handling is shown in operating instructions 1, which are enclosed with the TV set.
Do not place it on the lower edge so as to reduce the danger of damage and contamination.
For TV sets with Loewe Eye:
Make sure that the Loewe Eye is not damaged when transporting / handling the TV set.
The TV sets with OLED screen of the set product lines bild 3, bild 4 and bild 5 have a different packaging concept from bild 7 and bild 9.
With these sets you can, as a protective box is located in front of the display. after unpacking the device, also place this on this protective box, also on the front side.
The TV sets of the device product lines bild 9 and bild 7 must not be placed on the front side (display surface).
For TV sets with LCD screen:
Grasp the set by the edges of the housing at the bottom and at the top.
Do not place it on the lower edge so as to reduce the danger of damage and contamination.
For TV sets with Loewe Eye:
Make sure that the Loewe Eye is not damaged when transporting / handling the TV set.
If the set needs to be stored during packing / unpacking, place the TV set with the entire surface of the front side on a soft underlay. Use as an underlay, for example a blanket or fleece from the packaging material.
In the event of damage to the LCD screen and any leaking liquid crystal, be sure to use rubber gloves to remove the set.
In case of skin contact with the fluid, clean immediately with plenty of water.
Mains cable/power supply

Incorrect voltages can damage the set.
This set may only be connected to a mains power supply with the voltage and frequency indicated on the rating plate using the existing ^4 / enclosed mains cable.
The mains power plug of the TV set must be easily accessible so that the set can be disconnected from the mains at any time.
When pulling the mains power plug out, do not pull the cable but the plug housing. The cables in the mains power plug could be damaged and cause a short circuit when plugged in again.
A mains power cable with a damaged insulation can lead to electric shock and presents a fire hazard. Never use a damaged mains cable.
Lay the mains cables so that they cannot be damaged. Do not tread on the mains cable.
The mains cable must not be kinked or laid over sharp edges.
Loewe bild
User handbook
Safety/Warning
Air circulation and high temperatures

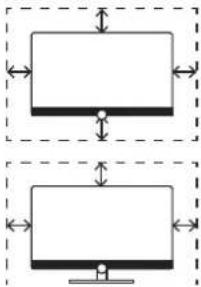
Like any electronic device, your TV set requires air for cooling. If air circulation is impeded, it may result in a fire.
The ventilation slots on the rear panel of the set must therefore remain free. Please do not cover the set.
Wall mounting: Leave at least 10 cm of space all around the set at the side, above and below.
Table / stand foot: Leave at least 10 cm clear space around the set at the side and at the top.
natural_image
Two identical diagrams showing a monitor with bidirectional arrows, enclosed in dashed rectangular boundaries (no text or symbols)Foreign bodies

Foreign bodies inside of the set can lead to short circuits and fires.
Danger of injury and damage exists
Therefore avoid metal parts, needles, paper clips, liquids, wax or similar passing through the ventilation slits of the rear panel into the interior of the set.
Should something get into the interior of the appliance, immediately pull out the mains power plug of the set and inform the customer service department for checking.
Installation

Opting for an incorrect or wrongly mounted installation can lead to danger of accidents. Rolling or falling sets can cause injuries or damage.
Loewe TV sets are specified for Loewe accessories. We strongly recommend the use of original Loewe installation options. Do not use any installation options that are not approved for your TV set!
Note the instructions regarding the mounting for the different possible installation options! A corresponding documentation is included with every Loewe product.
Check before the installation of the set, whether the final location with regard to the surface (pressure sensitivity) and stability (static) is designed for the load from the set! This applies in particular to high-gloss lacquered surfaces and surfaces made of real wood, real wood veneer and plastic surfaces.
Only place the TV set on a levelled, stable, horizontal base with table or stand foot! The set should especially not protrude at the front when installing in or on furniture.
Not placing the television set on cloth or other materials that may be located between television set and supporting furniture. Educating children about dangers of climbing on furniture to reach the television set or its controls.
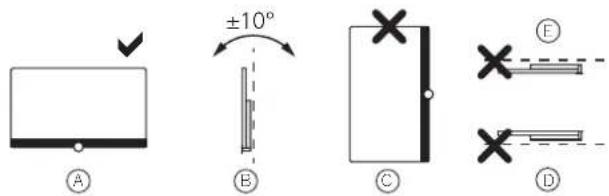
The usual usage position of the TV set should be followed. The TV set can only be operated horizontally upright A. The inclination can amount to a maximum of 10 degrees for wall mounting B. The TV set must never be operated in portrait orientation, C, horizontal D or overhead on the ceiling E.
text_image
±10° A B C D EPosition the set so that it is not exposed to direct sunlight and additional heating from radiators!
Do not place the TV in a location where vibrations can arise! This can lead to damage.
In the case of installation options for third-party manufacturers with a motor drive, it is to be ensured that the adjustment of the TV set does not occur manually. It is generally not advisable to use the installation options of other manufacturers with locking devices in certain positions.
When using accessories from third-party manufacturers, it is to be ensured that the TV set is easily adjusted for the respective installation option.
When adjusting the TV set, ensure that the pressure applied to the set frame is not too great. Especially in large format displays, there is the danger of damaging the display.
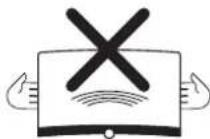
For TV sets with OLED:
OLED technology allows for a design with an extremely thin display. When you have mounted your TV set on a non-motorized installation option, avoid over excessive force when rotating the TV set.
For TV sets with VESA mounting points:
The mounting of a TV set on a On a holder according to the VESA standard requires mandatory use of the VESA adapter bolts. Otherwise, damage to the TV may result.
The Vesa adapter bolts must be attached to the TV set with a torque of circa 4 Nm. You can obtain these from your Loewe dealer (you can find further information in chapter Miscellaneous section VESA standard).
Make sure that after unpacking and setting up the TV set the packaging material (TV box, Styrofoam shells and protective fleece) does not fall carelessly into the hands of children.
Please also note the disposal instructions for packaging and carton (see chapter Environment / Legal information, section Disposal).
Loewe bild
User handbook
Safety/Warning
Supervision

Do not let unsupervised children handle the TV set nor let them play immediately around the TV set!
The set could be knocked over, moved or pulled down from the stand surface and injure people.
Do not leave the TV set when switched on unattended!
Volume

Loud music can lead to hearing damage. Avoid extreme sound volume, especially over extended periods of time and when using headphones!
Thunderstorms

During thunderstorms, pull out the mains power plug and all connected antenna cables from the TV set!
If you have connected a network cable to the LAN port, remove this as well!
Over-voltages due to lightning strike can damage the set both via the antenna system and via the mains power supply.
Even in the case of prolonged absence, the mains power plug and all connected antenna cables should be disconnected from the TV set.
Cleaning and care/chemicals

Before cleaning, switch the TV set off using the mains power switch!

Damages caused by chemicals can lead to adverse effects and development of fire.
Never expose the set or accessories to aggressive (for example, corrosive) chemicals such as alkalis or acids!
Only clean the TV set, the front screen and the remote control with a damp, soft, clean and colour neutral cloth, without any aggressive or scouring cleaning agents!
For TV sets with textile-covered speaker panel:
Hoover the surface regularly with a soft brush attachment!
On stains or dirt, moisten a soft, colour neutral cloth with detergent solution or commercially available stain remove and rub the stain gently away! You can also treat the stain directly with a commercial dry stain remover spray (hoover up the dust).
Do not moisten the covering fabric directly with detergent solution or stain remover (risk of stain circle formation)! Do not use solvents to clean the fabric!
Note the usage instructions of the manufacturer when using stain remover!
When cleaning loudspeaker panels which have been exposed to nicotine, there is an increased risk of stain circle formation.
TV sets with 3D function ^(1)

Read the following safety instructions before using the 3D function of your TV set.
Please use the Loewe 3D TV sets only with the Loewe 3D glasses which can be purchased as an accessory from your Loewe dealer.
People with a visual disorder may not be able to perceive 3D effects or may only be able to perceive them to a limited extent. People who are sensitive to flickering images (e.g. those with epilepsy) should only use the 3D function after having consulted their doctor.
It might take some time for you to get used to the 3D glasses and before you can perceive the 3D effects properly.
Stop using the 3D function immediately if you experience any feelings of nausea, dizziness or malaise when viewing 3D content.
Supervise children whilst they are viewing 3D content, as they can be particularly sensitive to it.
Allow more time for a break after having watched 3D movies, so that you are able to relax. Failure to do so could result in headaches, fatigue, dizziness or malaise.
Position yourself comfortably in front of the 3D TV set and ensure that you are seated firmly. By doing this, you will avoid any injuries that may occur due to reacting to extreme 3D content.
Technical information
Instructions on the built-in / connected hard drive
Switching off the TV set with the mains switch during operation or an inadvertent disruption to the power supply (e.g., power failure) can cause damage to the hard disk file system and hence loss of the recorded broadcasts.
Never ever disconnect the USB storage device from the TV set during a copy process. Before switching off the set with the mains switch, we recommend you to switch it to standby mode.
If, contrary to expectation, you are still experiencing problems with the operation of the hard drive, you can first carry out a test. In addition, a formatting of the hard disk can be remedy. In the process, however, all content on the hard disk is deleted. You can find the corresponding menu items under System settings → Control → more ... → Hard disks.
Loewe are not liable for the loss of data on the integrated hard disk ^1 of your TV set. To avoid data loss, we recommend copying important recordings to an external storage medium.
Loewe bild
User handbook
Safety/Warning
Notes on the LCD / OLED screen
The TV set with LCD screen or OLED screen purchased by you meets the highest quality standards and has been checked for pixel errors.
Despite of thorough care when manufacturing the display, it cannot be 100% guaranteed that no subpixel defects will occur due to technical reasons.
Please understand that these types of effects, as long as they are within the limits specified in the standard, cannot be considered as a device defect in terms of the guarantee.
For TV sets with LCD:
Avoid displaying static images over a longer period. Image persistence errors may arise.
For TV sets with OLED:
Organic Light Emitting Diodes are an image technology based on self-luminous pixels that offer clear benefits in terms of image quality and performance.
Under certain conditions, persistent, one-sided loads on the OLED material can result in persistence image faults which are irreversible. Residual image issues can arise by using static image content over a longer period, such as static images, subtitles or ticker displays, looping dia-shows or video sequences, static displays serving as presentation monitors or with video games, black bars in some screen formats.
These residual image issues are not defects within the meaning of the warranty.
To minimise such issues, Loewe has developed a special algorithm for detecting image content.
If static images are displayed for too long, the TV set automatically switches to a screen-friendly contrast mode. After a new user operation, the device immediately returns to its normal state. In addition, menu insertions are gradually reduced or displayed transparently after one minute.
Under normal viewing conditions, such residual image issues do not arise.
Notes on Kinematics
The Loewe TV sets types bild 9 and bild 7 are equipped with a kinematics that moves the TV set upwards or downwards when switching it on and off, whereby the speaker cover is visible or is hidden.
Please make sure that there is no externally applied force opposing the movement. You have the option to fix the position of the kinematics from the menu, or disable the function.
You can find further information in the chapter System settings, section Control – Display kinematics.
Software update
It is possible to update the software on your Loewe TV set.
In the software update (package update) all the software releases in the TV set are scanned and updated as required.
You can find further information in the chapter System settings. section Control – Software update.
Information about OLED calibration
i Only for set types with OLED display ^1 .
To maintain the high quality of picture display permanently, your Loewe TV set calibrates itself automatically at regular intervals. In this way, excess TFT capacitors are discharged and so-called image sticking effects / „ghost images“ are eliminated.
When switching off the TV set from the remote control, where necessary, the calibration process is started and lasts for a maximum of thirty minutes.
During this period, the power supply to the TV set must not be interrupted.
After the calibration is complete, the TV set switches to Standby mode. Calibration does not take place during normal TV operation and so will not have any negative impact on usage of the TV set.
If calibration is terminated by switching the set back on prematurely, the TV-set will attempt to perform a recalibration again the next time the TV is switched off.
You still have the possibility to start a refresh procedure manually by means of the user menu of your Locwe TV set.
Call OLED calibration

HOME: Call Home view.

◀ ▶ ▲ ▼ Select System settings.
OK call System settings.
▼ ▲ Select Picture.
▶ go to next column.
▼ ▲ Select more ...,
▶ call other settings.
▼▲ Select OLED calibration.
OK Call.
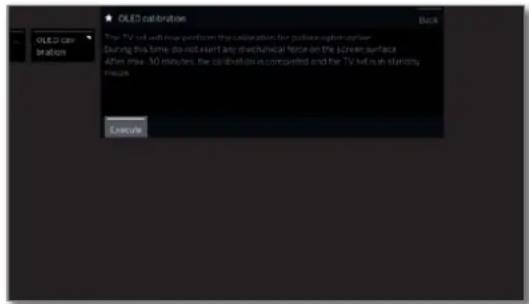
text_image
OLED calibration True TV hit with more perform the calibration for pulse response During this time, do not start any mechanical force on the screen surface After miss - 30 minutes, the calibration is completed and the TV hit is an elasticity measure ExecuteA calibration of the OLEDs is required every 1500 hours. This also starts automatically when the TV set is switched off using the remote control.
Calibration lasts one hour maximum. If calibration was not finished properly, an on-screen image will indicate this.
After the calibration is complete, the TV set switches to Standby mode.
Remote control button mapping
Depending on the selected operating mode (TV/Video/Audio/Photo/Apps) and function (e.g. DR+, EPG, PIP, Teletext, HbbTV, etc.), the key assignment may differ from the assignment described here (see the corresponding chapter).
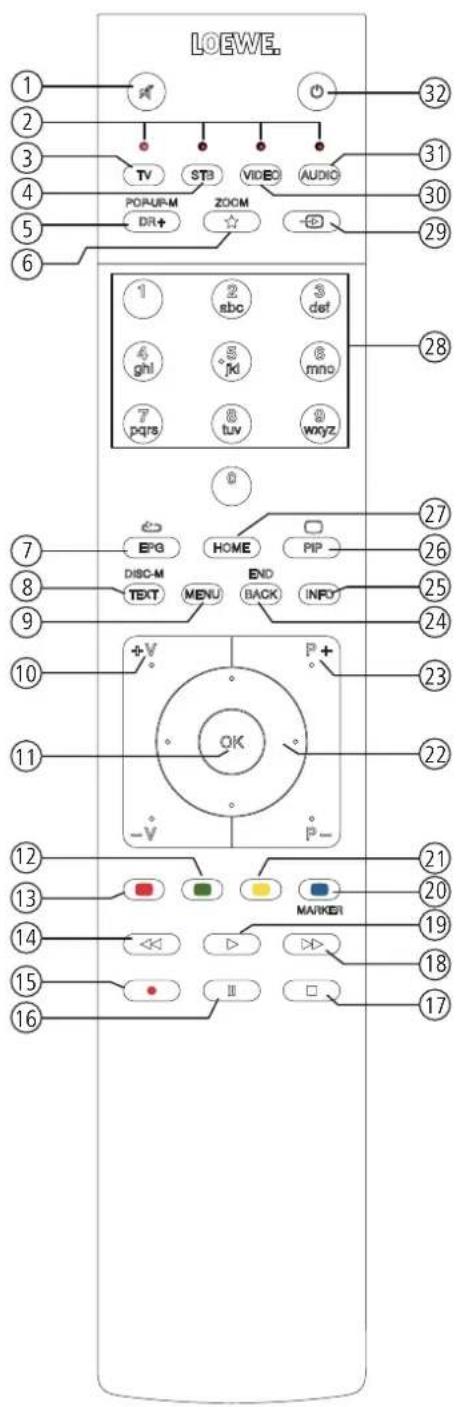
text_image
LOEWE. 1 2 3 4 5 6 TV STB VIDEO AUDIO POPUR-M DR+ ZOOM - ED 32 31 30 29 1 2 sbc 3 def 6 ghl 5 M 8 mno 7 pqrs 8 tuv 9 woyz 28 0 7 EPG HOME PIP 27 8 DISC-M END INFO 26 TEXT MENU BACK 25 9 10 +V P+ 23 11 OK 22 - V P- 12 21 13 20 MARKER 14 << >>> 15 II 16① Sound mute/on.
② LED display for currently operated device.
③ Call the TV mode.
④ Reassign remote control to Set-Top-Box (presetting: Apple TV).
⑤ Pressing briefly Open the DR+ archive. Pressing longer. Call timer.
⑥ Pressing briefly Add current object to Home favourites. Pressing longer Open App Gallery. (standard assignment)
⑦ EPG (Electronic Programme Guide) on/off.
⑧ Teletext/MediaText ^2 on/off.
⑨ Pressing briefly Call menu options for the active operating mode. Pressing longer Call System settings.
⑩ V+/V- increase/reduce volume.
⑪ Pressing briefly Call channel list.
Pressing longCall expanded channel list.
In the menu: confirm/call up.
⑫ Green coloured key: screen on/off in Audio/Radio mode.
⑬ Red coloured key: call preferred value-added network service, if available ^2 .
⑭ Pressing briefly: skip backwards. Pressing longer: winding backwards.
⑮ Pressing briefly: direct recording (with determination of recording duration) ^3 . Pressing longer: One Touch Recording ^4 .
⑯ Pause / Start/pause the timeshift television ^13 .
⑰ Stop / End timeshift (return to live image) ^3
⑱ Pressing briefly: skip forwards.
Pressing longer: winding forwards.
⑲ Play / Start/continue timeshift television ^9 .
20 Blue coloured key: call channel menu options (selection of language/sound, subtitles or channel/video track).
②1 Pressing briefly: Yellow coloured key: call history. Pressing longer: Yellow coloured key: call last channel.
⑳ Navigation on the user interface, select objects. In the menu / lists: select/set.
②3 P+/P- next/previous channel.
②4 Pressing briefly: step / level back. Pressing long: close all displays.
25 Press briefly during an on-screen display: info display. Info text appropriate to the content that can assist you further, should you have any questions about your TV set.
Press briefly, without on-screen display: access status display. With status display open and repeatedly pressing the key call the detailed information on the broadcast.
Press longer: show Explanation of keys.
②6 PIP (picture in picture) on/off.
⑳ Call up the Home view.
⑳ Select channels with numeric buttons directly. In the menu: enter numbers or letters
29 Call Sources.
③0 Reassign remote control to video device-(presetting: BluTech Vision 3D).
③1 Call radio mode (standard assignment) ^7 .
③2 Switches the TV set on (mains switch must be turned on) or switches to standby mode. Press briefly while TV set is switched on: TV set and all CEC-enabled devices connected to the HDMI ports will be switched off to standby (System Standby).
Loewe bild
User handbook
Operating controls on the TV set
Operating controls on the TV set ^1
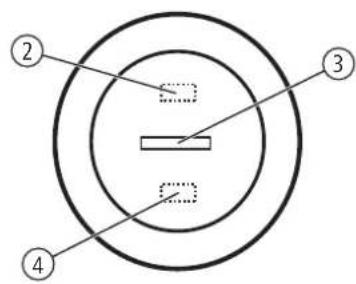
text_image
② ③ ④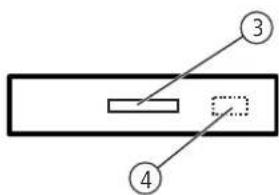
text_image
Diagram showing a rectangular object with two labeled parts: numbered 3 and 4, and a dashed box inside.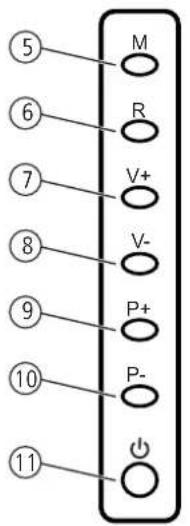
text_image
5 6 7 8 9 10 11 M R V+ V- P+ P-
① Mains switch:
Always return the TV set to Standby mode before switching it off with the main switch.
The position of the mains supply switch for your TV set can be found in the chapter Technical data.
② Infrared transmitter:
When showing 3D content ^1 , the 3D glasses Loewe Active Glasses 3D are controlled via the infrared sensor.
③ Display:
white TV set in standby.
Depending on the ambient brightness, the
white LED display is dimmed and lights up with a different degree of brightness (OPO) ^4 .
If the TV set is in quick start mode, the
white LED display is not dimmable and starts with full brightness.

white, intermittent: TV set starts.

TV sel switched on.

her recording active.

bludTV set in standby and background operation active (EPG data updating, software update or streaming server function ^1 , OLED calibration ^1 ).
④ IR receiver:
Infrared receiver for receiving the remote control commands.
⑤ Key M / joystick direction M:
TV set in standby mode: switch on TV set with the last selected mode (TV/Radio).
TV set switched on: call direct control on TV set.
Direct control on TV set: up ▲.
⑥ Key R / joystick direction R:
TV set in standby mode: switch on TV set with the last selected mode (TV/Radio).
TV set switched on: toggle TV mode and radio mode.
Direct control on TV set: down ▼
⑦ Key V+ /joystick direction +:
TV set in standby mode: switch on TV set with the last selected mode (TV/Radio).
TV set switched on: Increase volume.
Direct control on TV set: to the right ▶.
⑧ Key V- /joystick direction - :
TV set in standby mode: switch on TV set with the last selected mode (TV/Radio).
TV set switched on: Reduce volume.
Direct control on TV set: to the left ◀.
⑨ Key P +:
TV set switched on: Programmme + (next channel).
⑩ Key P -:
TV set switched on: Programme - (previous channel).
⑪ On/Off button / Press joystick:
Switching on in standby mode
Switching off to the standby mode
Loewe bild
User handbook
Function of the connections
Function of the connections
The position, availability and number of connections on your TV set vary depending on the set type.
Detailed information on the position and function of the connections for your TV set type can be found in the chapter Technical data.
| Connection: Labelling: Function: | ||
 | AC IN | Mains connection |
 | LAN | Network connection |
 | HDMI 1 ARC | HDMI input 1 (with Audio Return Channel) |
| HDMI 2 | HDMI input 2 | |
| HDMI 3 | HDMI input 3 | |
| HDMI 4 | HDMI input 4 | |
 | ANT TV | Antenna/cable analogue / DVB-T/T2 / DVB-C |
 | ANT SAT 1 | Satellite antenna (Sat tuner 1) DVB-S/S2 |
| ANT SAT 2 | Satellite antenna (Sat tuner 2) DVB-S/S2 | |
| [ms] | SPDIF OUT | Audio output (digital) |
 | USB 3.0 | USB connection |
| USB | USB connection | |
| [mm] | HEADPHONE | Headphone connection |
| [mm] | AUDIO OUT | Audio output (analogue) L/R |
| [ms] | RS-232C | Serial interface |
| [ms] | AV | Micro AV socket |
| [mm] | MOTOR UNIT | Rotating stand control |
| [ms] | DIGITAL AUDIO LINK | Surround audio outputs (digital) |
 | COMMON INTERFACE | CI slot |
 | Slot for Kensington lock | |
Loewe old
User handbook
Preparing the TV set
Installing the TV set
Mounting options / Installation notes
Your Loewe dealer can also assist you in finding other mounting options. Look for the corresponding directions in the installation instruction.
Choose a place for installing your TV set where no bright light or sunlight shines directly onto the screen. This could cause reflections which impair the picture.
3 times the screen diagonal can be taken as a guide value for the viewing distance (e.g., for a 55-inch set approx. 4.2 m for SD signal). The viewing distance can be reduced with an HD/UHD signal.
Set covers
Covers for rear and side connections ^1
In order to remove the rear side cable covers pull them simply from the device.
To fit the cover, insert the lugs at the top edge of the cover into the corresponding cut-outs in the rear panel and push up the cover until it snaps in.
The side cover of the TV set can also be completely removed. For this, open it as far as it will go and gently pull on the open cover.
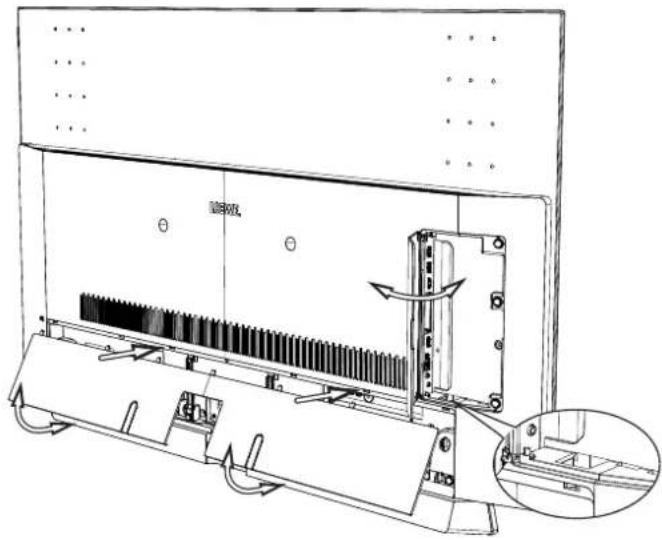
natural_image
Technical line drawing of a device with internal components and a magnified inset showing a component detail (no text or symbols)The cover detaches from the holder and gives free access to the connection area. To insert the cover, simply push it back onto the holders.
A cable bushing connects the lateral and posterior terminal region. In this way you can pass the cables of the lateral connections through and lay them out together with the rear connecting cables.
Cable fixing
Using the Velcro cable tie supplied, you can fix the rear cables.
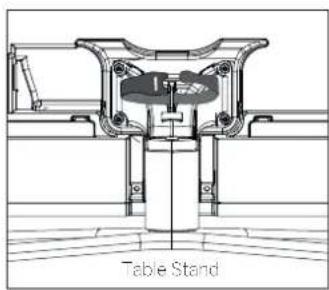
When the TV set is mounted on the Table Stand, the connection cables are fixed to the Table Stand (see figure).
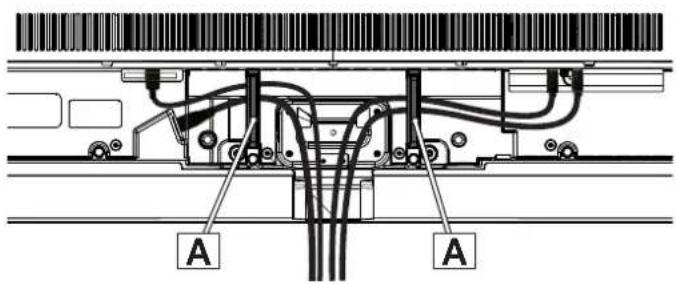
When using a wall bracket (Wall Mount is available as an accessory from your specialist dealer), the connection cables are fixed to the two recesses on the rear of the set (see figure).
text_image
Table Stand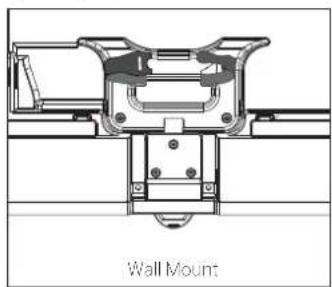
natural_image
Technical diagram of a wall-mounted mechanical assembly (no text or symbols)If the set type ^1 is equipped Ⓐ with a removable cable holder, you can additionally fix the rear connection cables to the rear wall of the housing.
text_image
A ALoewe bild
User handbook
Preparing the TV set
Connecting the TV set
Connecting to the mains supply
Remove the cover for the connections.
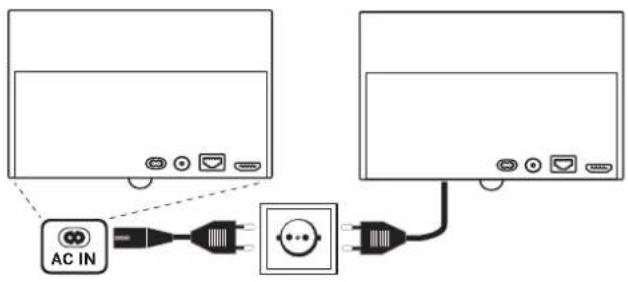
Connect the TV set to a 220-240V mains socket:
With built in mains cable: Connect the mains supply plug of the mains supply cable attached to the TV to a power outlet.
With external mains cable: First plug the smaller plug (small set plug) of the mains supply cable into the mains supply connector (AC IN) of the TV set and then connect the larger plug (Euro plug) to a mains supply socket.
text_image
AC INConnecting antennas ^(1)
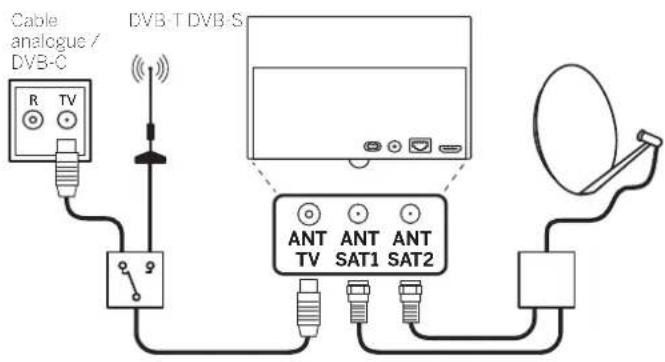
Cable (analogue)/DVB-C/DVB-T antenna:
Plug the cable of antenna, cable TV system or room antenna into the ANT TV socket.
If you want to use analogue cables/DVB-C connection and a DVB-T antenna together, use an external antenna switch (available from your dealer).
Satellite antenna DVB-S:
Depending on the used satellite system, connect a connecting cable from the multi-switch or directly from the LNC to the ANT SAT1 and ANT SAT2 sockets of the TV set respectively.
When connecting the TV set to a single cable community antenna, connect the ANT SAT1 and ANT SAT2 sockets directly to the appropriate SAT antenna socket.
text_image
Cable analogue / DVB-C R TV DVB-T DVB-S ANT ANT ANT TV SAT1 SAT2When connecting the TV set to a DiSEqC single cable community antenna (in accordance with EN 50494), connect the ANT SAT1 socket directly to the appropriate SAT antenna socket.
For a DiSEqC single-cable shared system, you only need in principal only one antenna cable. The further sub-division of the signal to the two reception pathways is transferred by the satellite tuner of the TV set.
If you want to use two transmission channels of the DiSEqC single-cable shared system (for example, for different channels main picture / PIP picture), both channels are received on a SAT antenna cable.
In the antenna configuration one antenna cable must be provided.
It is possible to reuse an existing SAT cabling with two connection cables on a DiSEqC single-cable shared system. However, the system components used (sockets, distributors, etc.) must be designed for DiSEqC operation.
If you want to use two channels of the DiSEqC single-cable shared system (for example, for a different channels main picture / PIP picture), then one channel will be received per SAT antenna cable. In the antenna configuration, two antenna cables and the number of used channels thus also must be set to "two".
Ask your dealer in this regard.
Connecting the TV set to the Home network
You may link your TV set to the home network by a wired connection (Ethernet, Powerline adapters separately available) or by a wireless radio connection (WLAN). For wireless connections, the TV set has an internal WLAN antenna.
In order to play back data from your home network your Loewe TV supports the UPnP AV standard.
You call the network wizard to configure the network adaptor (System settings → Multimedia/Network → Network settings → Networking).
1 Under no circumstances may the TV set be wired and at the same time connected by a wireless connection to the same network, e.g., router. This may cause severe operational faults!
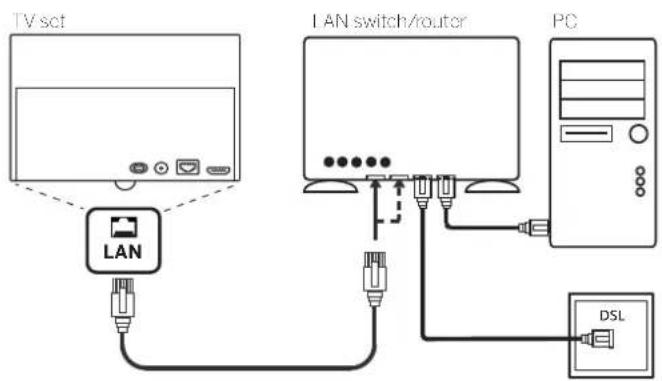
Example for a wired connection
Connect the LAN socket of your TV set to the LAN switch/router of your home network with a network cable (available from your dealer).
flowchart
graph TD
    A["TV set"] --> B["LAN"]
    B --> C["LAN switch/router"]
    C --> D["PC"]
    D --> E["DSL"]
Loewe bild
User handbook
Preparing the TV set
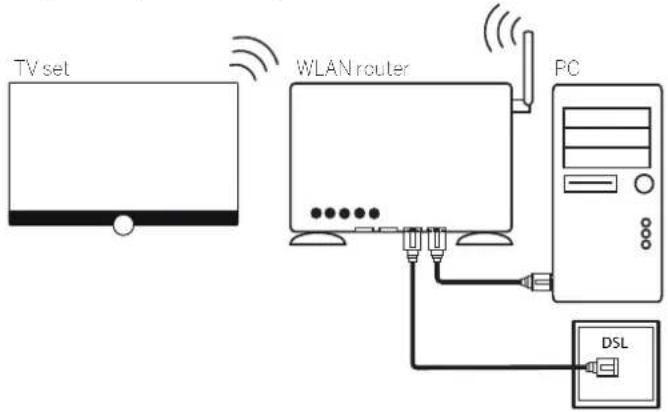
Example for a wireless connection
You can connect the TV set to your home network by a wireless radio connection via the WLAN antenna inside the set.
■ Shadow effects of various materials, such as reinforced concrete, metal surfaces, etc., attenuate the WIFI signal sometimes significantly or completely.
flowchart
graph LR
    A["TV set"] --> B["WLAN router"]
    B --> C["PC"]
    C --> D["DSL"]
    style A fill:#f9f,stroke:#333
    style B fill:#ccf,stroke:#333
    style C fill:#cfc,stroke:#333
    style D fill:#fcc,stroke:#333
Help for configuration problems
Loewe cannot provide any support for PC hardware and software or network components owing to the diverse configuration options with home networks.
Please contact the administrator of your home network and/or specialist dealer for support when setting up and for maintenance of network connections, storage media, media server software and network devices such as routers.
Preparing the remote control unit
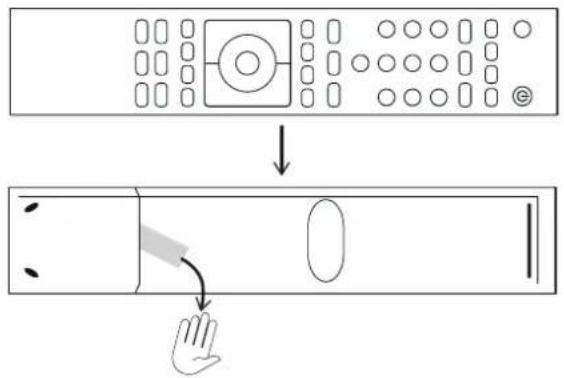
Removing the battery protection
The remote control is supplied with batteries. To make them ready for use, remove the plastic flag out as shown below.
flowchart
graph TD
    A["Input: Device Icon"] --> B["Processing: Hand Touch"]
    B --> C["Output: Hand Pull"]
Inserting or replacing batteries
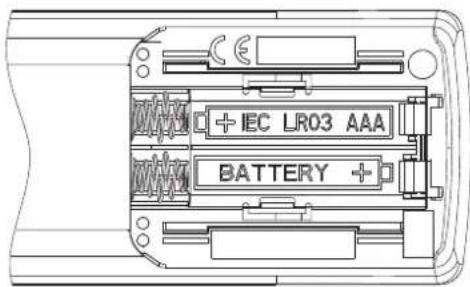
Press on the embossed arrow whilst pushing the battery cover down. Only use leak-proof micro-cells of the LR 03 (AAA) Alkali-Manganese type. Do not use different types of batteries and old and new batteries together.
Make sure that the batteries do not get into the hands of children.
The batteries used must not be exposed to excessive heat such as sunlight, fire or similar!
The position of the batteries is indicated in the battery compartment (in opposite directions). Pay attention to the correct polarity of + and - when inserting the batteries. Do not be guided by the battery contacts (springs), but by the illustration at the bottom of the battery compartment.
text_image
IEC LR03 AAA BATTERY +If the batteries are too weak after longer use, the TV set prompts you to change the batteries. Dispose of used batteries in an environmentally friendly way (see chapter Environment/Legal information).
Push the cover back on from below after having inserted the batteries.
Adjusting the remote control unit for operating the TV set

Press the TV key.
Loewe bild
User handbook
Switching the TV set ON/OFF
Switching the TV set ON/OFF
Switching TV set to the standby mode
Put the mains supply switch into Pos I
The LED display lights up white for a short time. The set now finds itself in the standby mode.
Meaning of the LED colours:
white TV set in standby.
Depending on the ambient brightness, the
white LED display is dimmed and lights up with a different degree of brightness (OPC) ^1 .
If the TV set is in quick start mode, the
white LED display is not dimmable and starts with full brightness.
white, intermittent: TV set starts.
green TV set switched on.
red later recording active.
blue:
TV set in standby and background operation active (EPG data updating, software update or streaming server function ^1 , OLED Calibration ^2 ).
After switching on the TV set, it takes a few seconds for further operating commands to be processed (Exception: Quick start mode, see chapter System settings, section Control – Quick start mode). Your TV set is ready for operation once the LED display lights green.
Switching the TV set on by means of the remote control

Press the on/off key
Or:

Press the TV key.
The previously watched channel will be called.
Or:

Press numerical keys 1-9.
The corresponding channel will be called.
After switching on the TV set, it takes a few seconds for further operating commands to be processed (Exception: Quick start mode, see chapter System settings, section Control – Quick start mode). Your TV set is ready for operation once the LED display lights green.
Switching the set off with the remote control (Standby)

Press the on/off key.
Switch TV set and all CEC-capable devices connected to the HDMI interfaces OFF to Standby mode.
Before switching off the set with the mains switch, we recommend you to switch it to standby mode.
Quick start mode
If you choose to activate the quick start mode, you will see the TV screen immediately after each switching on of the TV set and without any waiting time. You can specify the times at which your device will be in the Quick Start Mode (see chapter System settings, section Control – Quick start mode).
In this case, please note the higher power consumption (see chapter Technical data) and thus a higher annual energy consumption.
Default setting for the Quick Start Mode: off.
Loewe old
User handbook
General information on menu operation
General information on menu operation
The most important keys for navigation will be explained in general. The numbers in the text refer to the figure showing the remote control in chapter Remote control.
The arrow keys ② help you to navigate in the menus and lists of the TV set and for selecting menu items. They are arranged in the middle of the remote control in a circle around the OK key ⑪. Later in this user handbook they will be represented as follows:

◀ ▶ ▲ ▼ Select the desired item.
The OK key ⑪ is used to confirm a selection, for calling the highlighted menu item and for opening the channel list. In this user handbook, an instruction for this key looks like the following:

OK confirm.
Using the numerical keys of your remote control (29) you enter programme channels and teletext pages directly. With key (→) you open the source menu. In this user handbook, entering numbers with numerical keys is shown as follows:

Entering programme channel directly.
The numerical keys are also used to enter text (see chapter General information on menu operation, section Entry of characters by remote control).
The Home view is the central overview page for all of your TV set's operating modes. You reach Home view with the HOME key 27.

HOME: Call Home view.
A short key stroke on the BACK 24 key takes you back one level in a menu. A longer pressing of the BACK key closes all opened windows. An example for the BACK key in this user manual:

BACK: Stop text entry and exit entry box.
With the keys ▶⑱ and ◀⑭, you can jump back and forth in the various wizards (for example, initial start up, etc.).

Call up next step.

Call up previous step.
Pressing longer on the INFO key 25 displays an explanation of the most important key functions of the current operating mode (e.g. TV mode, teletext, PIP, etc.).
Structure of the Menu screen
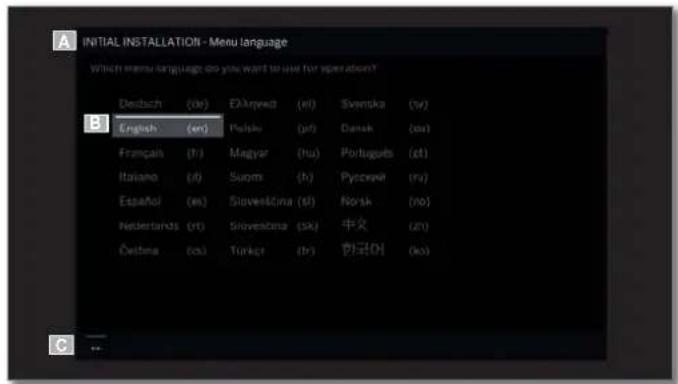
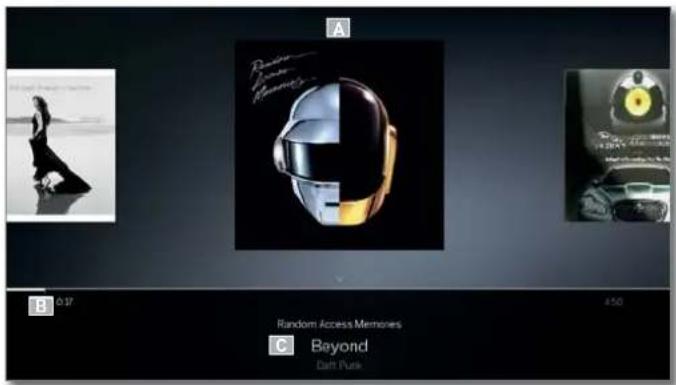
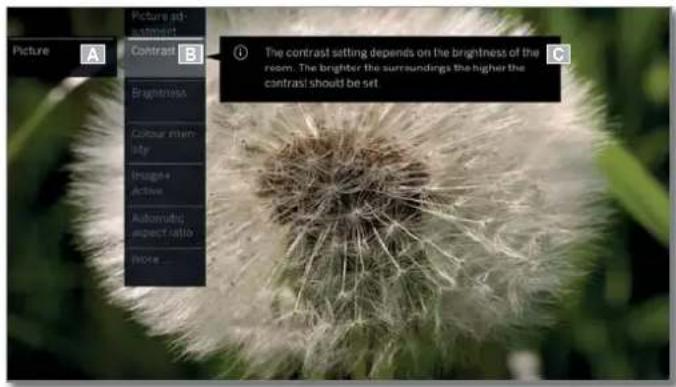
Basically, the structure of the different menu screens is similar, depending on the fact if a wizard, rendering media content or a setup menu are concerned. The structure is explained by means of three different illustrations.
Screen structure: Wizard
text_image
INITIAL INSTALLATION - Menu language Which menu language do you want to use for operation? Deutsch (dr) EA#pyed (et) Svantska (sv) English (en) Polski (pt) Danak (an) Français (ft) Magyar (hu) Português (dt) Italiano (dt) Suomi (h) Pyccypé (ru) Español (es) Slovenikčina (sl) Norsk (no) Nederlands (rt) Slovenistina (sk) 中文 (zh) Čebina (cs) Türkej (tr) Hankouy (ko)(A) Title bar with name of the wizard and the current operating step.
(B) Selected items, whose number can be different according to the operating step.
(C) Bottom line showing the available operating controls.
Screen structure: Rendering of media content (example: Audio player)
text_image
A Random Access Memories Beyond Datt Purk(A) Cover display (if available).
(B) Time line.
(C) Album selection or track selection.
Loewe bild
User handbook
General information on menu operation
Screen structure: Setup (example: picture)
text_image
Picture A Picture set a Contrast B Brightness Colour intensity Image+Active Automated aspect ratio Move... i The contrast setting depends on the brightness of the room. The brighter the surroundings the higher the contrast should be set.(A) Selected function in the Home overview (here: system settings)
(B) Home Menu System settings, with selected menu item Picture.
(C) Menu items Picture focusing on Contrast.
(D) Help text for the selected menu item Picture > Contrast
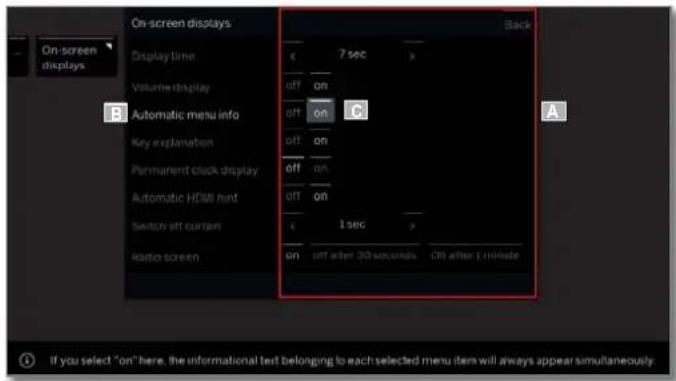
Navigation: Selection of elements (example: On-screen displays)
Highlighting and thus selecting the symbols/clements or menu items on the screen can be effected by the arrow keys on the remote control. So you can see all the time where you are. As soon as there is a bar above a symbol or text, this is a selected element.
text_image
On-screen displays Display time Volume display Automatic menu info Key explanation Permanent clock display Automatic HDMI hint Switch off curtain Radio screen 7 sec off on on on off on on on 1 sec off after 30 seconds Off after 1 minute Back If you select "on" here, the informational test belonging to each selected menu item will always appear simultaneously.(A) Selectable elements / menu items.
(B) The writing of the line in which the relevant selectable menu item can be found is white.
(C) Move the selection marking by means of the arrow keys ◀ ▶ ▲ ▼ to the menu item to be set.
The position of the marking is to see by a grey rectangle.
The newly selected menu item must be confirmed by selecting OK. The previously active item's text colour will change to grey; the newly selected item will change to white.
Navigation: Wizards
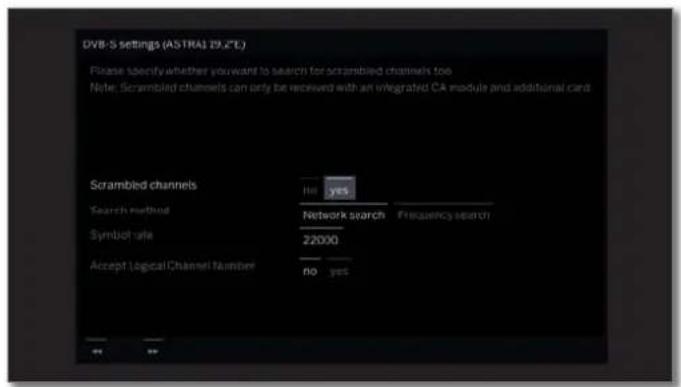
text_image
DVB-S settings (ASTRA) 19.2°C) Please identify whether you want to search for scrambled channels too Note: Scrambled channels can only be received with an integrated CA module and additional card. Scrambled channels Search method Symbol rate Accept Logical Channel Number No yes yes yesIf the menu item(s) (marked while) is/are already correctly preset:

Go to next step.
Otherwise:

◀ ▶ ▲ ▼ Mark menu point which should be changed. OK confirm.
The font colour of the prior active point changes to grey.

Go to next step.
Navigation: Element selection in lists using initials
Using the numerical keys of the remote control you can jump into list, e.g., Internet radio channel lists.
If the list is sorted in alphabetical order, you jump to the entered letter. For example, when pressing the key 7 three times you jump to the first list element starting with letter R.
In case of numerical sorting, you can directly select the channels with the numerical keys.
Loewe bild
User handbook
General information on menu operation
Entering characters with on-screen keyboard
For certain functions, entering letters or characters is required. An on-screen keyboard appears for entering text.
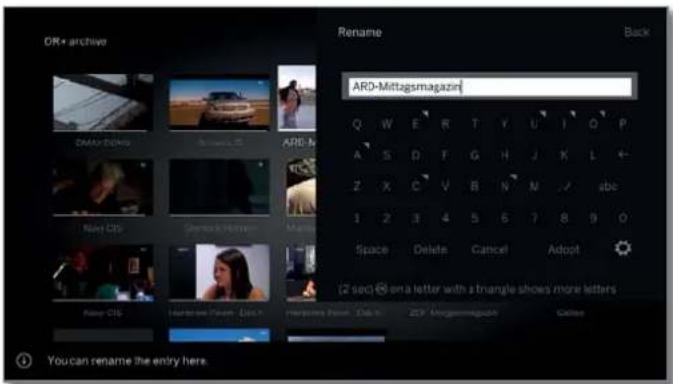
text_image
OR+ archive ARM-ARTAGSMagazine ARM-Mirtagsmagazine Q W E R T Y U J Q P A S D F G H J K L + Z X C V B N M / a b c 1 2 3 4 5 6 7 8 9 0 Space Delete Cancel Adopt (2 sec) (6) on a letter with a triangle shows more letters Rainer GIS Features Puree Doc to Features Puree Doc to ZEF Antagmasagazine Calendar You can rename the entry here.
◀ ▶ ▲ ▼ Select character/on-screen button.
OK Adopt character.
If a small symbol is displayed next to a letter, further long letters can be selected by pressing the OK button (2 seconds).
For the selection of special characters use the ./ field.
To conclude the entry:
Select Adopt,
OK confirm the selection.
1 With the Loewe app, you can also comfortably enter addresses or search terms. Simply mark the input field for this, the Loewe app displays automatically a keyboard symbol. Open Loewe app keyboard, enter and confirm.
Entry of characters by remote control
Alternatively to the on-screen keyboard you can also enter the desired characters by means of the remote control (as with the keypad of a mobile phone).

◀ ▶ ▲ ▼ Select text entry field.
Under the 1st letter of the name you will see a line indicating the current input position.
▶ Input position one character to the right (also for blanks).
Input position one character to the left.

Input the letters one after another. When using the remote control, press the numerical keys just as on a mobile phone keypad (0-9) until the desired symbol is displayed. The available letters are printed on the individual numeric buttons.
You find the exact key assignment in the character table in the right column.
To conclude the entry:

Select Adopt
OK confirm the selection.
Table of characters for entering text by means of the remote control
The menu options, where available will open when clicked on. The list of the menu options contains Settings and Additional Options.
Depending on when the menu options is selected (e.g. channel is displayed, channel list activated, DVB Radio is used, etc.), the selectable menu items of the menu options may vary.
The menu items of the menu options are described in the respective chapters.
An example of a menu options of the used channel list:

OK call channel list,

MENU: call menu options.
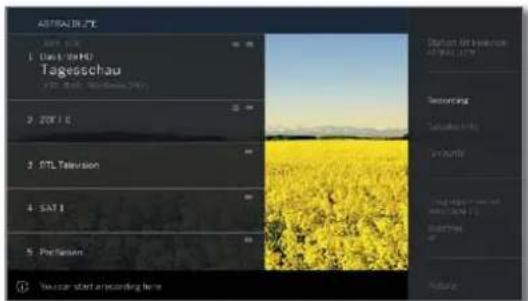
text_image
ASTRAUL 27E 1: User: BeHD Tagesschau 2: 20F 1 C 3: RTL Television 4: SAT 1 5: Profession You can start an recording here
▲▼ Select menu option, OK confirm the selection.
Loewe bild
User handbook
On-screen displays
Explanation of keys
An explanation of the main operating keys that can be used at the moment, can be displayed.
The availability of the key explanation is dependent on the currently active operating situation.

INFO press longer: show Explanation of keys.
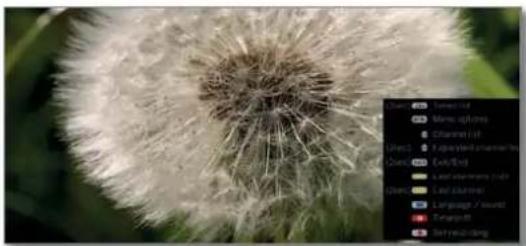
natural_image
Close-up of a dandelion seed head with visible fine hairs and color gradient legend (no text or symbols on the flower itself)

INFO or BACK: hide Explanation of keys.
Explanation of symbols
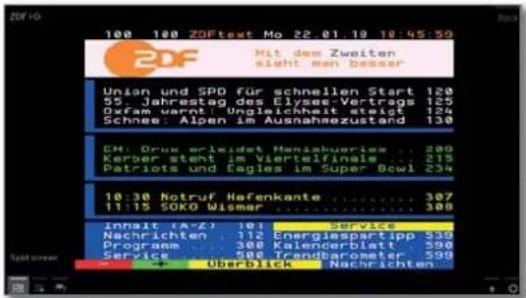
A text box will temporarily be displayed for screen pages with remote control symbols in the footnotes (for instance, teletext) as soon as the symbol is selected.
The automatic menu info provides an info text for the selected menu item appropriate to the on-screen display that can assist you further with the operation of your TV set.
1 An on-screen display is displayed.
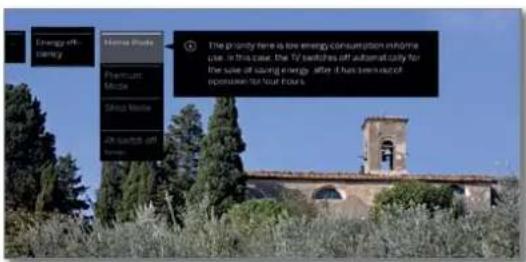
text_image
Energy efficiency Home Phone Premium Mode Stop Home On Switch off Energy The property here is low energy consumption information use. In this case, the TV switches off automatic daily for the use of saving energy after it has been sold operation for your hours.
The factory setting is that the info display is shown automatically for each menu item. In this case you can temporarily hide the info texts with the INFO key.
Permanent clock display
The clock display can be permanently shown. It is always visible as long as no other display is made.
You can switch the permanent clock display on or off in Home view under System Settings → Control → more ... → On-screen displays.
Initial installation wizard
Initial installation after switching on for the first time
The Initial installation wizard starts automatically with an initial installation. It may be called repeatedly again (see chapter System settings, section Extras – Repeat initial installation).
If a parental lock is activated, the access code must be entered before repeating initial installation (see chapter System settings, section Control – Parental lock).
For information on navigation within the wizard refer to chapter General information on menu operation.
First installation wizard routine
The selected settings affect the routine of the Initial installation wizard.
Menu language
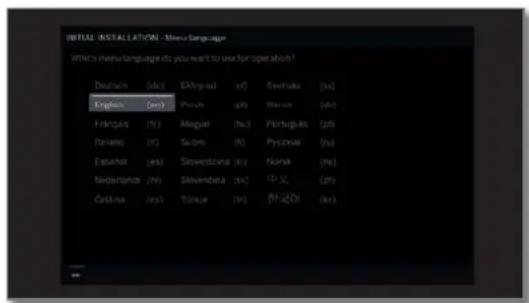
text_image
INITIAL INSTALLATION - Nueva language IFNICS menu language do you want to use for operation¹ Deutsche (dc) English (en) Spanish (p) Brasilic (br) Fingkans (f) Magyat (hu) Portuguese (pt) Itanam (c) Sarom (h) Pyccuwa (pu) Españan (es) Saywestiana (s) Norak (nk) Noverland (nh) Stevendika (tv) 中义 (vt) Casta (ca) Turkur (ru) (1) 20% (0) (###)
▲▼◄► Select desired Menu language OK Confirm selection.
Selecting the language of the user guidance is the wizard's first step. Then you simply follow the instructions on your TV screen.
▶ Proceed to next step.

A licence agreement will be displayed.

▲▼◀▶ Select Confirm. OK Confirm the licence agreement and proceed to the next step.
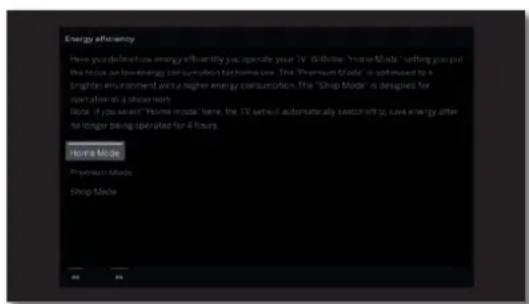
Energy efficiency
text_image
Energy efficiency Here you define how energy effectively you operate your TV will like "Home Mode" setting you put the focus on low-energy consumption to home use. The "Thermost Mode" is advanced by a brighter environment with a higher energy consumption. The "Shop Mode" is designed for operation at a slower work. Note: If you select "Home mode" here, the TV serial automatically switching to home energy after no longer being operated for 4 hours. Home Mode Premium Mode Shop Mode
▲▼ Select Energy efficiency. OK Confirm selection.
Determine how energy efficient your TV set shall be. The value for the contrast (and thus the brightness of the background lighting) is adapted and the automatic dimmer activated or deactivated depending on the presetting.
The automatic shutdown is active in the mode Home Mode and Premium mode.
Energy efficiency (continued)
Home mode:
The emphasis for home use is on low energy consumption. The automatic dimmer is activated.
Premium mode:
This mode optimises the settings to a brighter environment at a higher energy consumption. The automatic dimmer is activated. The use of this energy efficiency setting must be confirmed afterwards once again.
Shop mode:
The picture settings are aligned to operation in the presentation room. The automatic dimmer is deactivated. If the ambient brightness diminishes, the energy consumption is not reduced. The use of this energy efficiency setting must be confirmed afterwards once again.
i Not all image and sound settings will be stored in the shop mode. These settings will be reset to the factory default settings after re-starting.
The presetting can be changed later in the System settings under Control → Energy efficiency.

▶ Proceed to next step.
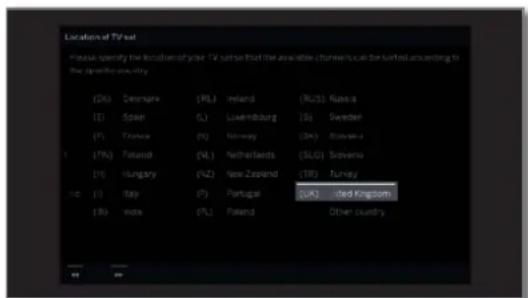
Location of TV set
text_image
Location of TV set Please specify the location of your TV set so that the available channel location is furthest according to the open world country. (2K) Denmark (RL) Ireland (RU.S) Russia (1) Spain (L) Luxembourg (S) Sweden (1) France (F) Norway (DK) Sweden (7K) Finland (NL) Netherlands (SLG) Slovenia (16) Hungary (HZ) New Zealand (TR) Turkey no (1) Italy (P) Portugal (UK) United Kingdom (8a) index (PL) Poland Other country
▲▼◀▶ Select Location of TV set (national defaults are adopted). OK Confirm selection.
For certain locations (e.g., Australia), there is finally a selection screen where you can indicate in which state/territory the device is being operated.

▶ Proceed to next step.
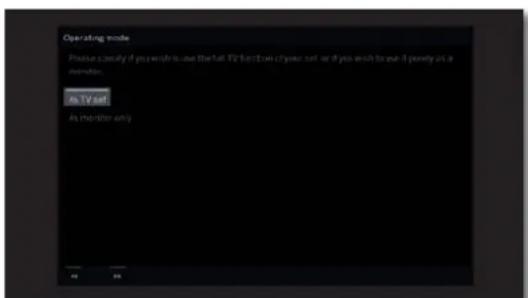
Operating mode
text_image
Operating mode Please check if you wish to use the full TV function or your set or play much to use it poorly as a monitor. As TV out As monitor only
▲▼ Select the Operating mode. OK Confirm selection.
Use the TV set as a TV set: Continued with Connect antennas cable(s) (see next page).
Use the TV set just as a monitor: see chapter Initial installation, section TV set as a monitor.
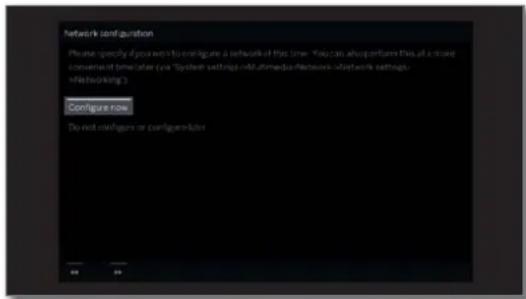
Network configuration
text_image
Network configuration Please specify if your network to configure a network of the time. You can also perform this at a stake conversion of timer/laters (or "System settings-of-Multimedia Networks-of-network settings- Networking") Configure now Do not configure or configure else
▲▼ Select option.
OK Confirm selection.
With the selection, specify whether you want to configure the available network adaptor now.
Configure now: Make settings for network adaptor and proxy server (see chapter System settings.section Multimedia / Network - Network settings).
Do not configure or configure later: Skip network adaptor configuration.

▶ Proceed to next step.
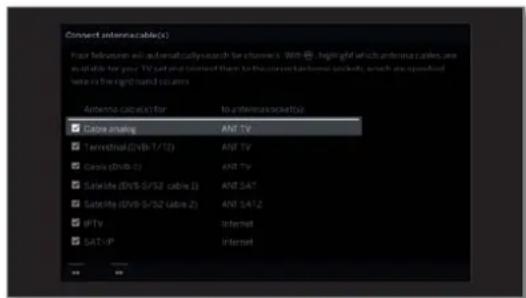
Connect antennas cable(s)
text_image
Connect intermable(s) Prior televisions will automatically search for channels in. With @; highlighted which antenna cables are available for your TV set and opened then to choose connected packets, which are specified late in the right-hand system. Antenna cable(s) for to antenna/socket(s): □ Cable analog ANT TV □ Terrestrial (DVB-1/12) ANT TV □ Cable (DVB-5) ANT TV □ Satellite (DVB-5/52 cable 1) ANT SAT □ Satellite (DVB-5/52 cable 2) ANT SAT2 □ IPTV Internet □ SAT-IP Internet
▲▼ Select antenna cable.
OK Connect/disconnect antenna cable.
Select the antenna cables that are connected to your TV.
Ahead of each selected antenna, the symbol appears.

Cable analog: analogue channels viacable
Terrestrial (DVB-T/T2): digital channels via antenna
Cable (DVB-C): digital channels via cable
Satellite (DVB-S/cable 1): digital channels via satellite
Satellite (DVB-S/cable 2): digital channels via satellite
IPTV: Streaming via network (In-
SAT>IP:
digital channel via local net- work
With the connection sockets ANT SAT 1 / ANT SAT 2 ^1 , when the TV set is switched on, it is automatically detected whether an antenna cable is connected. The symbol appears in the menu dialogue behind the respective antenna cable.
i IPTV / SAT>IP can only be selected if a network-connection has been configured in a previous step.
▶ Proceed to next step.
The rest of the initial installation wizard routine depends on the selected antennas (Cable analogue, DVB-T/T2, DVB-C, DVB-S/S2, IPTV, SAT>IP(ASTRA)) in step Connect antennas cable(s).
The different antennas/types of reception are described in the following sections of initial installation.
Setting options for reception via Cable analog:
If you have not selected Cable analog in step Connect antenna cable(s) in the initial installation, proceed to the next section Setting options for reception via SAT>IP.
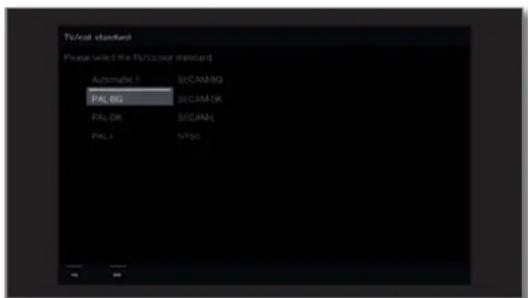
TV/col. standard
text_image
TV/TV0 standard Please select the TV/TV0 standard Automatic: 50CAMS-RG PAL-BG 50CAMS-DR PAL-DR 50CAMS- PAL3 NTSC 48The selection of a Colour standard is only required when the Location of TV set Other country was selected. Otherwise, the country-specific default settings will be preset when selecting the Location of TV set. This step will be skipped then

▲▼◄► Select appropriate colour standard. OK Confirm selection.

▶ Proceed to next step.
Loewe bild
User handbook
Initial installation
Setting options for reception via SAT>IP:
If you have not selected SAT>IP in step Connect antenna cable(s) in the initial installation, proceed to the next section Setting options for IPTV reception.
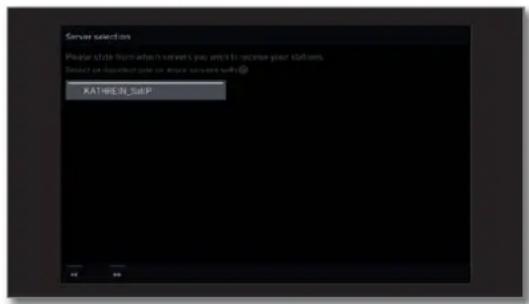
Server selection
text_image
Server selection Provider should then choose your server's you will be returned to your status. Select an additional user or more servers built! KATHREN_SatP
▲▼ Select server.
OK Select / deselect the server.
State from which servers you wish to receive your channels.
Before each selected server, the symbol √ appears.
The server converts the antenna television signals from the reception system into IP signals and provides them in an existing local IP network.

▶ Proceed to next step.
Setting options for reception via IPTV:
If you have not selected IPTV in step Connect antenna cable(s) in the initial installation, proceed to the next section Setting options for DVB-T reception.
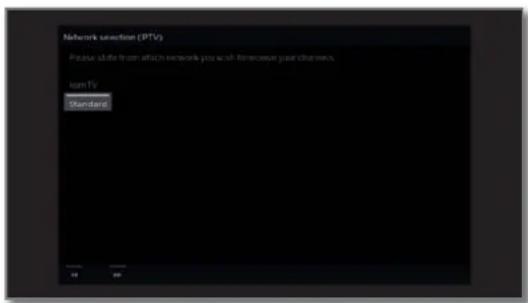
Network selection (IPTV)
text_image
Network connection (PTV) Please submit from which network you will receive your channel. Up TV StandardIf more than one receive network is available via IPTV, you can select the network from which you want to receive your channels.

▲▼ Select network.
OK Confirm selection.

▶ Proceed to next step.
Loewe bild
User handbook
Initial installation
Setting options for DVB-T reception:
If you have not selected Terrestrial (DVB-T) in step Connect antenna cable(s) in the initial installation, proceed to the next section Setting options for DVB-C reception.
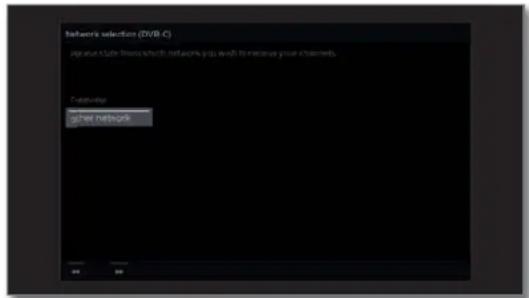
Network selection
text_image
network selection (DVB-C) get user a Linux server to select network type as well to receive your channels. Feature Map other networksIf several networks are available via DVB-T, you can decide which network you want to receive your channels from.

▲▼ Select network, OK Confirm selection.

▶ Proceed to next step.
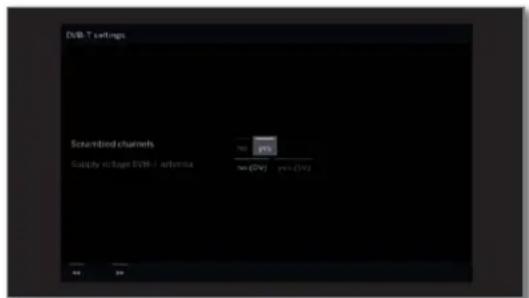
Settings
text_image
DVB-T settings Serviceed channels 90% Supply voltage DVB-T antenna 90% (50%) 70% (50%)
▲▼◄► Select and adapt settings for DVB-T reception. OK Confirm selection.
Scrambled channels
You can state whether coded channels are to be searched for in the search/update.
Select yes to save all found scrambled channels. However, these channels can only be received in connection with a CA module and the appropriate Smart Card.
The handling of the CA module is described in the chapter System settings, section Extras - CA module.
Accept Logical Channel Number
In various countries, digital channels (DVB-T) are transmitted with a preset channel number per channel, known as Logical Channel Numbers (LCN).
If you select yes here, these default channel slots will be used and the channels of the preferred signal source will be sorted as per LCN. The channels in the channel list can no longer be shifted.
Supply Select supply voltage no (0V) / yes (5V).
voltage
DVB-T If you use a DVB-T antenna that requires a supply antenna voltage (active antenna) and which is not already
supplied via a power adaptor, then select yes (5V) for the antenna's power supply.
How to align your DVB-T antenna is described in chapter System settings, section Connections – Antenna DVB.

▶ Proceed to next step.
Loewe old
User handbook
Initial installation
Setting options for DVB-C reception:
If you have not selected Cable (DVB-C) in step Connect antenna cable(s) in the initial installation, proceed to the next section Setting options for DVB-S reception.
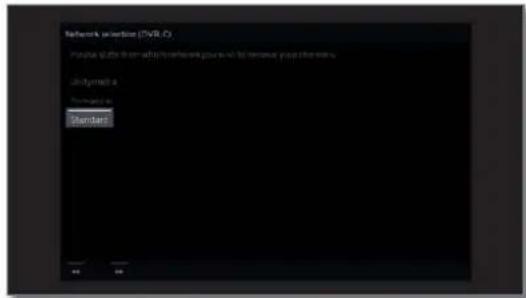
Network selection
text_image
Network selection (DVB, C) Please click the user to any network you will be removed from this menu. Utility (U) is Recommended to StandardIf several networks are available via DVB-C, you can decide which network you want to receive your channels from.
The normal DVB-C settings are derived from the selection of the location or network and do not need to be changed.
Exactly which of the following settings are present is dependent on which network is selected.

▲▼ Selectnetwork. OK Confirm selection.

▶ Proceed to next step.
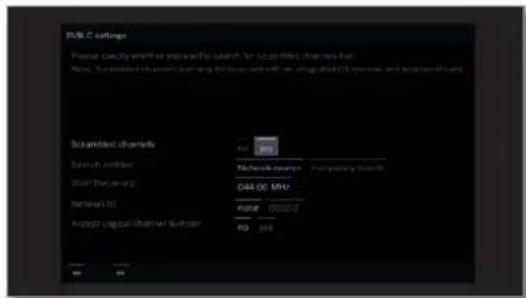
Settings
text_image
BMC C settings Please identify what or you want to search for scanning channels from Note: Screened channels are using the extracted OS modules and image channels Scanmitted channels DOS Network search Pre-pulsory search Real (Regular) 048.00 MHz Network ID Route 000001 Accept logical Channel number FOS OK
▲▼◀▶ Select and adapt settings for DVB-C reception.
OK Confirm selection.
Scrambled channels
You can state whether coded channels are to be searched for in the search/update.
Select yes to save all found scrambled channels. However, these channels can only be received in connection with a CA module and the appropriate Smart Card.
The handling of the CA module is described in the chapter System settings, section Extras - CA module.
Search method
If you select Frequency search here, a search is performed for all receivable channels.
With Network search, only the channels which the networks supply are searched - either for all receivable networks or only for the particular network specified under Network ID.
Start frequency
The DVB channels are only searched for in the frequency range above the start frequency.
Network ID
If you select none here, DVB signals of all current transmitter networks are searched automatically (recommended for most cable networks).
If, on the other hand, you specify a certain network ID (necessary in the cable networks of some countries), only DVB signals of this broadcasting network are searched for automatically.
Your cable provider has the information you need.
Accept Logical Channel Number
In various countries, digital channels (DVB-C) are transmitted with a preset channel number per channel, known as Logical Channel Numbers (LCN).
If you select yes here, these default channel slots will be used and the channels of the preferred signal source will be sorted as per LCN. The channels in the channel list can no longer be shifted.

▶ Proceed to next step.
Loewe bild
User handbook
Initial installation
Setting options for DVB-S reception:
If you have not selected Satellite (DVB-S/cable x) in step Connect antenna cable(s) in the initial installation, proceed to the next section Setting options for all types of reception.
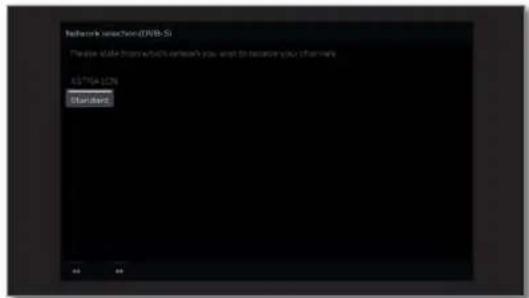
Network selection
text_image
Network switch (CWB-S) Please link to network switch when we want to become your information CWB-S 1276 StartboxIf several networks are available via DVB-S, you can decide which network you want to receive your channels from.

▲▼ Select network.
OK Confirm selection.

▶ Proceed to next step.
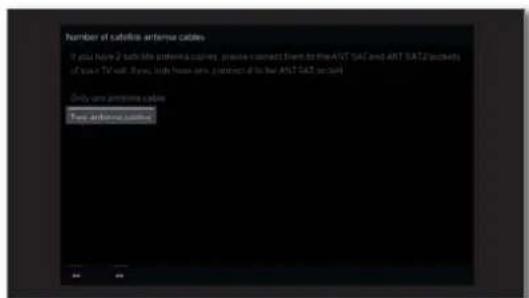
Number of satellite antenna cables
text_image
Number of subfaids antenna cables If you have 2 suitable antennas, please contact them to the ANT SAT and ANT SAT2 activities of your TV wall. If you have new partitions of the ANT SAT2 system. Only some previous cables: New antenna cables
▲▼Select Only one antenna cable or Two antenna cables.
OK Confirm selection.
Select here whether you have one or two satellite antenna cables available. If two satellite antenna cables are available, please connect them to the ANT SAT1 and ANT SAT2 sockets of the TV set. If only one is available, please connect it to the ANT SAT1 socket.

▶ Proceed to next step.
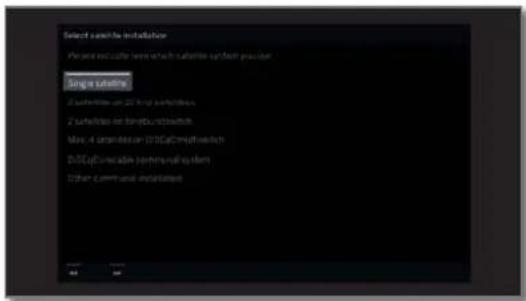
Select satellite installation
text_image
Select name the installation Please check the name that any subling is closed previous Zurig a Subling 2 subling numbers are 2x higher subling numbers 2 subling numbers are lower subling numbers Max. 4 subling numbers (10x) are lower subling numbers D/DC of Universal systems are lower subling numbers Other commercial subling numbers
▲▼ Selecting the satellite system. OK Confirm selection.
Specify how you receive which satellite(s) (single satellite or type of satellite system). Ask your dealer in this regard.
The normal DVB-S settings are derived from the selection of the location and do not need to be changed in most cases.
Single Reception of a single satellite via a connected LNC satellite (LNB).
2 satellites Reception of two different satellites with two LNCs on 22 kHz (LNBs) which are connected to the TV set by a 22 switchbox kHz switchbox.
2 satellites Reception of two different satellites with two LNCs on toneburst (LNBs) which are connected to the TV set by a switch toneburst switch.
Max. 4 The TV set controls a DiSEqC multiswitch to which satellites up to four LNCs (LNBs) for different satellites are connected. on DiSEqC multiswitch
DiSEqC Select setting if the TV set is connected to a DiSEqC one cable single-cable system (according to EN 50494). Several communal Sat receivers can be connected to one Sat cable.
other communal installation Select setting if the TV set is connected to a single-cable system (without DiSEqC). Several Sat receivers can be connected to one Sat cable. Contrary to a DiSEqC one cable communal system there are restrictions in the range of certain reception frequencies in "common" single-cable community systems.

▶ Proceed to next step.
The rest of the initial installation wizard routine depends on the selected satellite system in step Select satellite installation.
The different satellite systems are described in the following sections of initial installation.
Loewe old
User handbook
Initial installation
Setting options for the satellite system (single satellite):
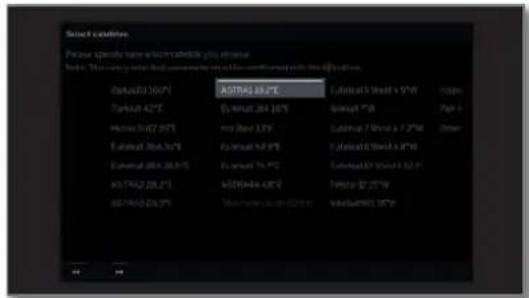
Select single satellite
text_image
Select conditions Please specify how to communicate you to use Help. This setting is what we want to use the configuration with the following: Output: 210 V Output: 42 V Output: 542 V Output: 263 V Output: 284 V Output: 285 V Output: 286 V Output: 287 V Output: 288 V Output: 289 V Output: 290 V Output: 291 V Output: 292 V Output: 293 V ASTRAI 69.07E Output: West v 5V Output: West v 7V Output: West v 7.2V Output: West v 8V Output: West v 8.1V Output: West v 8.2V Output: West v 8.3V Output: West v 8.4V Output: West v 8.5V Output: West v 8.6V Output: West v 8.7V Output: West v 8.8V Output: West v 8.9V Output: West v 9.0V Output: West v 9.1V Output: West v 9.2V Output: West v 9.3V Output: West v 9.4V Output: West v 9.5V Output: West v 9.6V Output: West v 9.7V Output: West v 9.8V Output: West v 9.9V Output: West v 10.0V

▲▼◄► Select satellite. OK Confirm selection.
▶ Proceed to next step.
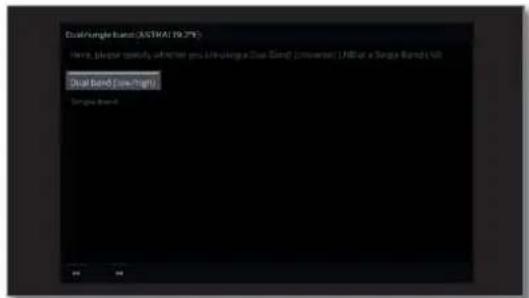
Dual/single band
text_image
Dual-Single Brand (AUTOMAT 19.2%) Here, Player must say whether you live using a Dual-Brand Converse (AFT) or a Single-Brand UIt Dual-Single Brand (Full) Single Brand
▲▼ Select Dual band (low/high) or Single band. OK Confirm selection.
Here you specify if you use a Dual Band (Universal) LNB or a Single LNB.
▶ Proceed to next step.
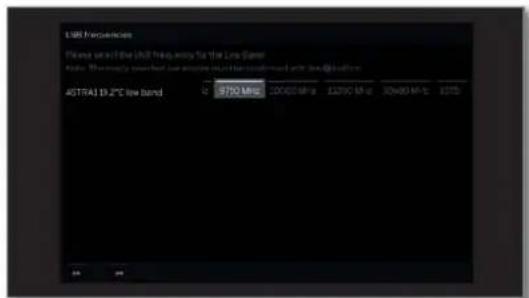
LNC frequencies
text_image
USB Frequencies Please select the I/O frequency for the Low Band Radio: The network's power input can access any of the confirmed web at http://www. ASTRA1D 2°C low band $750 MHz 10000 MHz 13200 MHz 30000 MHz 1275
▲▼◄► Set LNB frequencies. OK Adopt settings.
The setting of the LNB frequency is only called when you have used the setting Single band in step Dual / single band.
Normally, you do not need to change the values for high and low band, unless the LNC (LNB) of your satellite system uses a different oscillator frequency (important for the frequency display).

▶ Proceed to next step.
Proceed to section Setting options for DVB-S reception (continued).
Setting options for the satellite system (2 satellites on 22 kHz switchbox / 2 satellites on toneburst switch):
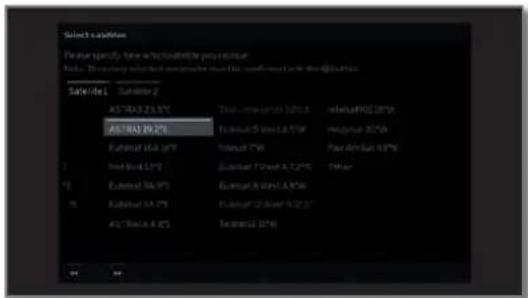
Satellite selection
text_image
Select solution Please specify how to locate the provider. Note: The following what is not available on the website is available: Save/del Subtotal 2 ASTRA 23.0% ATRA 19.2% Output 16.0% Output 15.0% Output 14.0% Output 13.0% Output 12.0% Output 11.0% Output 10.0% Output 9.0% Output 8.0% Output 7.0% Output 6.0% Output 5.0% Output 4.0% Output 3.0% Output 2.0% Output 1.0% Output 0.5% Output 0.2% Output 0.1% Output 0.0%
▲▼◄► Mark Satellite 1 / Satellite 2.
▲▼◄► select satellite.
OK Adopt settings.

▶ Proceed to next step.
Proceed to section Setting options for DVB-S reception (continued).
Setting options for the satellite system (max. 4 satellites on DiSEqC multiswitch):
Automatic DiSEqC multiswitch configuration
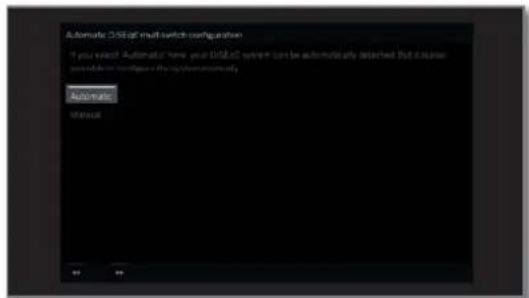
text_image
Automatic DSE of multi-switch configuration If you want: Automatic name - your DSE of system can be automatically selected. But this is allowed to register the DSE configuration. Automatic Manual
▲▼ Select Automatic or Manual depending on whether your DiSEqC system should be configured automatically or manually.
OK Accept settings.

▶ Proceed to next step.
For manual configuration, continue in the next column. Search for available satellites occurs via automatic configuration.
Automatic DiSEqC multiswitch configuration
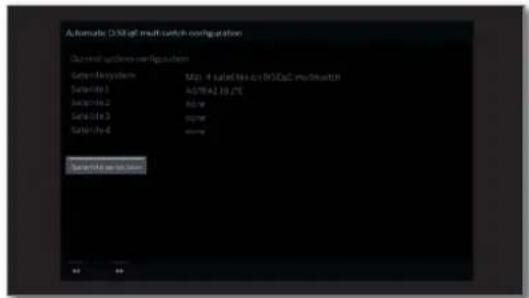
text_image
Automatic D:\MgE multi-set configuration Auto-set configuration System-Mysystem System-1 System-2 System-3 System-4 Map: 4 (data:0.6.0.0.0)D:\multi-set A(0.0.0.0) 10, 10% Name Name Name: D:\MgE multi-set configuration
▶ Proceed to next step.
Or:

▲▼◄► Select Satellite selection to select the satellites used from the list.
Proceed to section Setting options for all types of reception.
Settings DiSEqC multiple switch
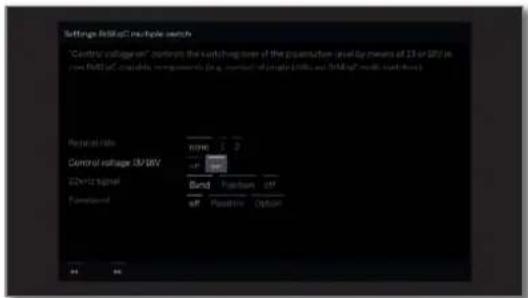
text_image
Settings 350pC multiple switch "Control voltage" contains the switching power of the parameter level for means of 13 or 18V in row 350pC capacitive components (e.g. nominal of single voltage, as 350pC multi switch volt) Reset value: now 1.2 Control voltage 3V/18V 22kHz signal: Bund Position off Forward: off Positive Option OK
▲▼▶ Select and adapt settings for the DiSEqC multiswitch.
OK Adopt settings.
Repeat rate
The refresh rate determines how often a DiSEqC command is output. A refresh is only necessary with cascaded systems.
Control voltage
The control voltage controls the switching of the polarisation level (horizontal/vertical) in non-DiSEqC capable components (e.g., control of single LNBs via DiSEqC multiswitch).
22kHz signal
The 22 kHz signal controls the switching between high and low band in the Band setting. The Position setting controls the selection of the satellites in non-DiSEqC capable components.
Toneburst
The Toneburst controls the selection of the satellites in non-DiSEqC but Toneburst capable components with the Position and Option settings.

▶ Proceed to next step.
Satellite selection
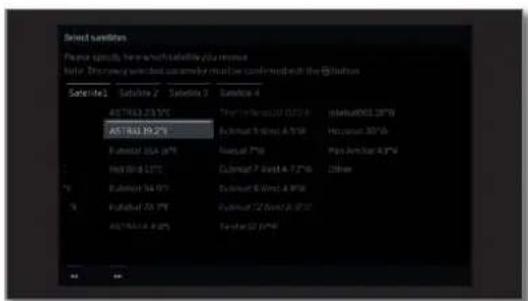
text_image
Selected filters Please specify here which p-value you miss? Note: The new selected parameter must be confirmed with the @Nutsun Sansketo1 Satellite 2 Satellite 3 Satellite 4 AUSTRA 19.2% AUSTRA 19.2% Extrust 0 (W) 0.75% Extrust 0 (W) 0.75% Extrust 0 (W) 0.75% Extrust 0 (W) 0.75% Extrust 0 (W) 0.75% Extrust 0 (W) 0.75% Extrust 0 (W) 0.75% Extrust 0 (W) 0.75% Infer Extrust 0 (W) 0.75% Extrust 0 (W) 0.75% Extrust 0 (W) 0.75% Extrust 0 (W) 0.75% Extrust 0 (W) 0.75% Extrust 0 (W) 0.75% Extrust 0 (W) 0.75% Exter Exter Exter Exter Exter Exter Exter Exter Exter Exter Exter Exter Exter Exter Exter Exter Exter Exter Exter Exter Exter Exter Exter Exter Exter Exter Exter Exter Exter Exter Exter Exter Exter Exter Infer Infer Infer Infer Infer Infer Infer Infer Infer Infer Infer Infer Infer Infer Infer Infer Infer Infer Infer Infer Infer Infer Infer Infer Infer Infer Infer Infer Infer Infer Infer Infer Infer Infer
▲▼◄► Mark Satellite 1 ... Satellite 4.
▲▼◄► Select satellite.
OK Adopt settings.

▶ Proceed to next step.

▲▼◄► Set LNB frequencies. Normally, you do not need to change the values. OK Adopt settings.

▶ Proceed to next step.
Proceed to section Setting options for DVB-S reception (continued).
Setting options for the satellite system (DiSEqC one cable communal system):
Number of system channel used
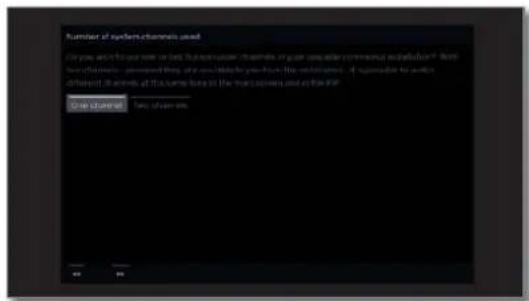
text_image
Number of system channels used Do you account more than the number of channels in your own order communication database? This is not available, but you can also help you from the website. If applicable to access different channels of this name here to the availability and the PDF. One channel: Two of users
◀ ▶ Select One channel or Two channels. OK Confirm selection.
Here you specify if you use one or two transmission channels in your one cable communal system. In case of two channels - as far as they are available in your system - different channels can be simultaneously viewed on the main picture and on PIP.
You get more information on your system from your dealer.

▶ Proceed to next step.
DiSEqC one cable communal installation
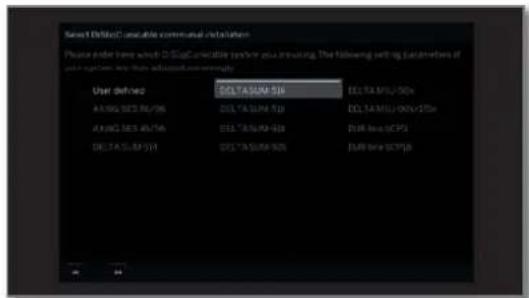
text_image
Reset DOS/ASM virtual communal installation Please order here which 2DOS virtual system you are using. The following setting parameters of user system will then adjust them currently. User defined: DOLTASUM-S16 A1800 325 84/96 A1800 325 85/96 DOLTASUM-S17 DOLTASUM-S18 DOLTASUM-S19/20/25x DOLTASUM-S20/25x DOLTASUM-S21/25x DOLTASUM-S22/25x DOLTASUM-S23/25x DOLTASUM-S24/25x DOLTASUM-S25/25x DOLTASUM-S26/25x DOLTASUM-S27/25x DOLTASUM-S28/25x DOLTASUM-S29/25x DOLTASUM-S30/25x DOLTASUM-S31/25x DOLTASUM-S32/25x DOLTASUM-S33/25x DOLTASUM-S34/25x DOLTASUM-S35/25x DOLTASUM-S36/25x DOLTASUM-S37/25x DOLTASUM-S38/25x DOLTASUM-S39/25x DOLTASUM-S40/25x DOLTASUM-S41/25x DOLTASUM-S42/25x DOLTASUM-S43/25x DOLTASUM-S44/25x DOLTASUM-S45/25x DOLTASUM-S46/25x DOLTASUM-S47/25x DOLTASUM-S48/25x DOLTASUM-S49/25x DOLTASUM-S50/25x DOLTASUM-S51/25x DOLTASUM-S52/25x DOLTASUM-S53/25x DOLTASUM-S54/25x DOLTASUM-S55/25x DOLTASUM-S56/25x DOLTASUM-S57/25x DOLTASUM-S58/25x DOLTASUM-S59/25x DOLTASUM-S60/25x DOLTASUM-S61/25x DOLTASUM-S62/25x DOLTASUM-S63/25x DOLTASUM-S64/25x DOLTASUM-S65/25x DOLTASUM-S66/25x DOLTASUM-S67/25x DOLTASUM-S68/25x DOLTASUM-S69/25x DOLTASUM-S70/25x DOLTASUM-S71/25x DOLTASUM-S72/25x DOLTASUM-S73/25x DOLTASUM-S74/25x DOLTASUM-S75/25x DOLTASUM-S76/25x DOLTASUM-S77/25x DOLTASUM-S78/25x DOLTASUM-S79/25x DOLTASUM-S80/25x DOLTASUM-S81/25x DOLTASUM-S82/25x DOLTASUM-S83/25x DOLTASUM-S84/25x DOLTASUM-S85/25x DOLTASUM-S86/25x DOLTASUM-S87/25x DOLTASUM-S88/25x DOLTASUM-S89/25x DOLTASUM-S90/25x DOLTASUM-S91/25x DOLTASUM-S92/25x DOLTASUM-S93/25x DOLTASUM-S94/25x DOLTASUM-S95/25x DOLTASUM-S96/25x DOLTASUM-S97/25x DOLTASUM-S98/25x DOLTASUM-S99/25x DOLTASUM-S100/25x
▲▼▶ Select DiSEqC single cable communal installation.
OK Confirm selection.

▶ Proceed to next step.
Satellite selection
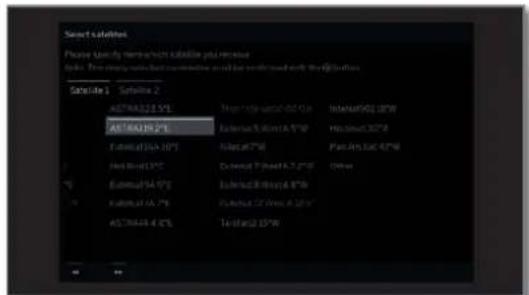
text_image
Select Satellite Please specify remote/other satellite you receive Subs. This entry will be further available to be installed with the @Soflox Satellite 1 Satellite 2 AT#04328 SYI AT#04356 SYI Satellite(01-10)* Satellite(01-10)* Satellite(01-10)* Satellite(01-10)* Satellite(01-10)* Satellite(01-10)* Satellite(01-10)* Satellite(01-10)* Satellite(01-10)* Satellite(01-10)* Satellite(01-10)Y Satellite(01-10)Y Satellite(01-10)Y Satellite(01-10)Y Satellite(01-10)Y Satellite(01-10)Y Satellite(01-10)Y Satellite(01-10)Y Satellite(01-10)Y Satellite(01-10)Y
▲▼◄► Select satellites from list, OK Confirm selection.

▶ Proceed to next step.
LNB frequencies
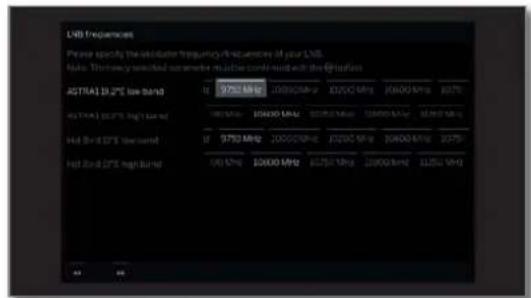
text_image
LHS frequencies Please specify the minimum frequency/ efficiencies of your LHS. Note: The newly selected streamer must be could not with the @tartlos AGTRA10 27°C low band 9.750 MHz 10.000 MHz 10.000 MHz 10.000 MHz 10.750 MHz 10.750 MHz 10.750 MHz 10.750 MHz 10.750 MHz 10.750 MHz 10.750 MHz 10.750 MHz 10.750 MHz 10.750 MHz 10.750 MHz 10.750 MHz 10.750 MHz Holt Band DTE low band 9.750 MHz 10.000 MHz 10.000 MHz 10.000 MHz 10.750 MHz 10.750 MHz 10.750 MHz 10.750 MHz
Set LNB frequencies. Normally, you do not need to change the values unless the LNC (LNB) of your satellite system uses a different oscillator frequency (important for the frequency display).
OK Adopt settings.

▶ Proceed to next step.
Manual registration (for socket ANT SAT)
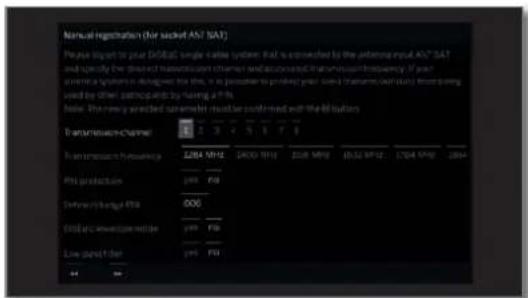
text_image
Natural registration (for socket ASI SAT) Please log to your DSOAT simple cable system that is connected by the physical input ASI SAT and specially the direct transmission channel and accessed transmission frequency. If your system system is designed for this, it is permitted to protect your own I/O channel (AI/RT) or being used by other participants by having a 9%. Note: The new selected customer must be valid must with the B/S tariff. Transmission Channel 2 3 4 5 6 7 8 Transmission Frequency 2024 MHz 2025 MHz 2026 MHz 18:52 PM:12 17:04 PM:50 2024 Prior production pm PM Current (kcal/mol) 006 DCB's current rate pm PM Low power factor pm PM
▲▼◄► Select and adjust settings for the DiSEoC single cable communal installation.
OK Adopt settings.
The manual registration must be made for both ANT SAT jacks when either two DVB-S antenna cables or two system channels are used.
Transmission channel
Select the desired transmission channel.
Transmission frequency
Select the corresponding transmission frequency.
PIN protection
If your system is designed for it, it is possible to protect your used transmission data from use by other subscribers with a PIN.
DiSEqC envelope mode
Should your DiSEqC system occasionally show problems during channel switching, you can switch on the DiSEqC envelope mode to test whether the switching problems then will no longer occur.
Define/ change PIN
Here you can determine and change the PIN for PIN protection. Only possible, when yes has been selected for PIN protection.

▶ Proceed to next step.
Proceed to section Setting options for DVB-S reception (continued).
Loewe bild
User handbook
Initial installation
Setting options for the satellite system (other communal installation):
Select single satellite
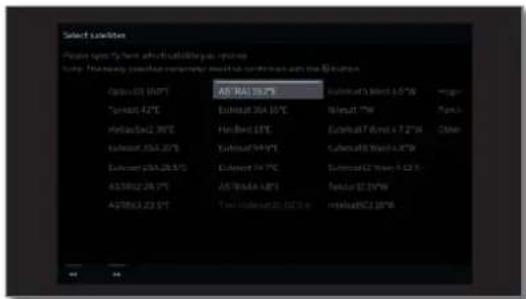
text_image
Select conditions Please specify that short-wellable thermal insulation. Supply: New energy, plasma, temperature, and temperature on the 80% scale. A##-01 10.0°C AS#WAL 19.0°C Eutectal 354.10°C Eutectal 354.10°C Eutectal 354.10°C Eutectal 354.10°C Eutectal 354.10°C Eutectal 354.10°C Eutectal 354.10°C Eutectal 354.10°C Eutectal 26.25°C AS#RJ2 26.25°C AS#RJ2 26.25°C AS#RJ2 26.25°C AS#RJ2 26.25°C AS#RJ2 26.25°C AS#RJ2 26.25°C AS#RJ2 26.25°C AS#RJ2 26.25°C Eutectal 354.10°C Eutectal 354.10°C Eutectal 354.10°C Eutectal 354.10°C Eutectal 354.10°C Eutectal 354.10°C Eutectal 354.10°C Eutectal 30.10°C Eutectal 30.10°C Eutectal 30.10°C Eutectal 30.10°C Eutectal 30.10°C Eutectal 30.10°C Eutectal 30.10°C Eutectal 30.10°C Eutectal 30.10C Eutectal 30.10C Eutectal 30.10C Eutectal 30.10C Eutectal 30.10C Eutectal 30.10C Eutectal 30.10C Eutectal 30.10C Eutectal 30.10C Eutecel21.25°C Eutecel21.25°C Eutecel21.25°C Eutecel21.25°C Eutecel21.25°C Eutecel21.25°C Eutecel21.25°C Eutecel21.25°C
▲▼◄► Select satellite. OK Confirm selection.

▶ Proceed to next step.
LNB frequencies, Supply voltage
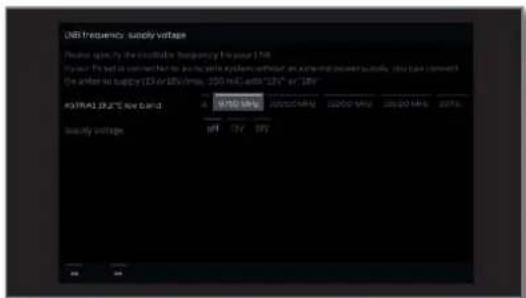
text_image
USB Frequency supply voltage Please open by the circuitable frequency for your 1/16 user: I'll be connected to the write circuit with an external power source. Our base connection the order to supply 10V or 25V/16A, 100 mW in "10V" or "25V" KEYRAI 19.2°C low band Output voltage uPT CIF DPY Output voltage UCCDC MVA UCCDC NVA UCCDC NVA UCCDC NVA Output uT CIF DPY
▲▼◄► Select and adapt settings. OK Confirm selection.
LNC frequency
Normally, you do not need to change the values for high and low band, unless the LNC (LNB) of your satellite system uses a different oscillator frequency (important for the frequency display).
Supply voltage
If your set is connected to a single-cable system without external voltage supply, you can connect the antenna supply (13V or 18V / max. 500mA).

▶ Proceed to next step.
Proceed to section Setting options for all types of reception.
Loewe bild
User handbook
Initial installation
Setting options for DVB-S reception (continued):
Test reception
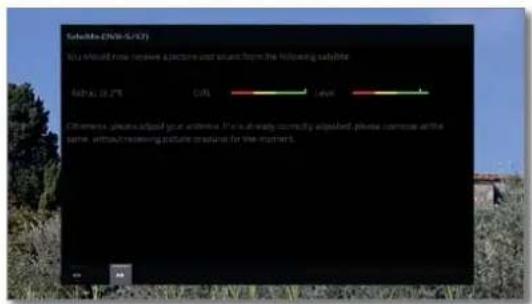
text_image
Schedule (2016-05-23) To be found now receive a picture and image from the following subject: Date: 19.27 P Color Level Alternative, unless offset your attention. It is already correctly adjusted, private common within the same, without receiving picture creation for the subject.After you have made the previous settings, you should receive picture and sound of the selected satellites (only possible for Astral and HOTBIRD).

▶ Proceed to next step.
Settings
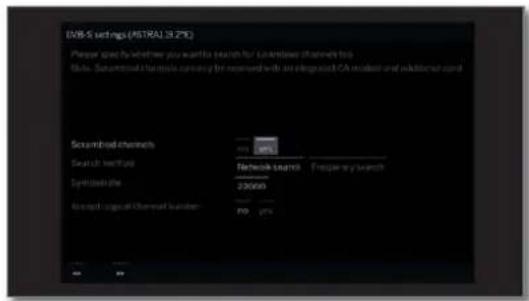
text_image
USB-5 settings (ASTRA) 31.2%? Please go to whether you want to reach for scanning channels this file. Scannical threads can be opened with an algorithm CA model and addition card Scanband channels Search interface Symbolize the Access logical channel number: 200 Network switch Frequency switch 230000 NO yes
▲▼◄► Select and adapt settings.
OK Confirm selection.
If several satellites are received, the following settings must be made for every satellite. The type of settings available may differ depending on the selected satellite or network.
Scrambled channels
You can state whether coded channels are to be searched for in the search/update.
Select yes to save all found scrambled channels. However, these channels can only be received in connection with a CA module and the appropriate Smart Card.
Handling of the CA module is described in chapter
System settings, section Extras - CA module.
Search method
If you select Frequency search here, a search is performed for all receivable channels. With Network search, from all receivable networks all the channels are searched which are supplied by these networks.
Depending on the selected network, this step might possibly be skipped.
Accept Logical Channel Number
In various countries, digital channels (DVB-S) are transmitted with a preset channel number per channel, known as Logical Channel Numbers (LCN).
If you select yes here, these default channel slots will be used and the channels of the preferred signal source will be sorted as per LCN. The channels in the channel list can no longer be shifted.

▶ Proceed to next step.
Proceed to section Setting options for all types of reception.
Loewe bild
User handbook
Initial installation
Setting options for all types of reception:
Check search settings
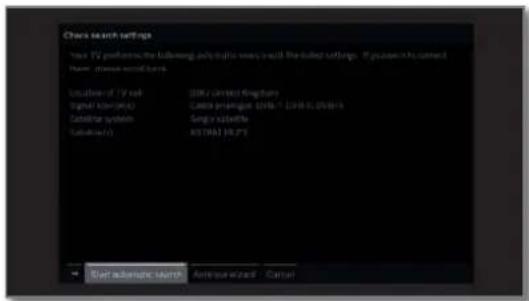
text_image
Other search settings TV: 27.10.1986 (the following audio rights was built the tablet settings. If you were in account Home: www.ewert.com Location of TV sub ISO / Cimlics Kingdoms Signal type(s): Cable prengue, Sable - Litter & Sliding Catalator system Single xylabita Saturation(s): ISO/ISA 19.27 Data collection search Access wizard Cancel
You will see a list of the selected settings. You can go back step by step with the key ◀ to make any changes to the settings.

OK Start automatic search.
Now, the TV set searches for TV and radio channels. It searches successively for channels from the selected signal sources. The progress of search is shown by a progress bar.
In case of a repeated initial installation routine (via Home view under System settings → Extras) all stored channels will be first deleted here.
Info station search
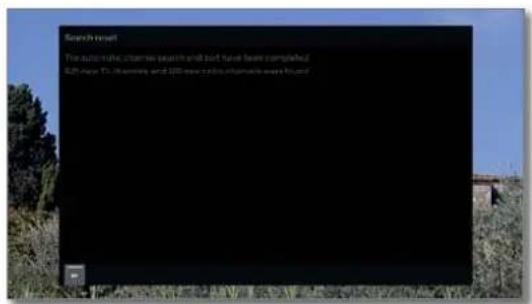
text_image
Search result The automatic otherwise available and next menu has completed 820 rows. On 12 minutes and 120 new radio, automatic were foundThe number of TV and radio channels found is displayed.

▶ Proceed to next step.
Age-related lock
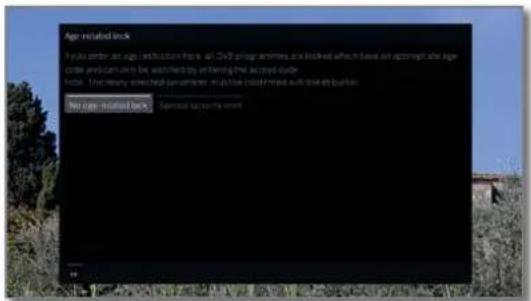
text_image
Age - installed book If you enter and sign it will be created here, all 2015 things must have been finished when it has been updated after age order and can only be installed by ensuring that the system is better. Note: This new, useful, best parameter must have could not need auto-shaking. Please change the next step. No age - installed book Comment frequently saved
◀ ▶ Select Age-related lock. OK Confirm selection.
You can specify an age limit for your TV set here. DVB broadcasts which have an appropriate age identification are locked and can only be watched after entering the access code.
In some countries, the yes/no option does not exist for some channels, and a compulsory age check must be entered.

▶ Proceed to next step.
Time and date
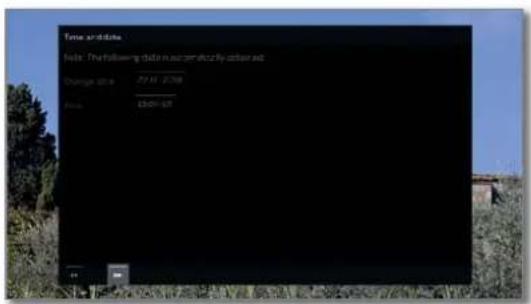
text_image
Time parameters Note: The following data is currently obtained. Change rate 27.10 - 2.706 Price £3.00-5.57The data capture for time and date is set to automatic ex factory.
If time and date are automatically obtained via the receive path, no entry is necessary.
For more information, see the chapter System settings, section Control – Time and Date.

▶ Proceed to next step.
Loewe bild
User handbook
Initial installation
Sound playback via ...
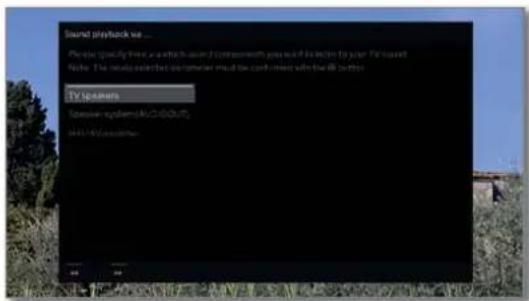
text_image
Sound playback we... Please specify this user who has issued commonwith you would be listed by your. For sound Note: The audio switched audio when you could switch to the right button. TV programs Options system (AVG/001) AVG/001
▲▼ Select sound components.
OK Confirm selection.
This selection indicates which sound components you want to use to hear your TV sound. Depending on the selection, the sound component wizard starts with which you can make further settings.
The sound component wizard is described in chapter System settings, section Connections – Sound components and can also be started at any time beyond the initial installation.

▶ Proceed to next step.
Inform about new software
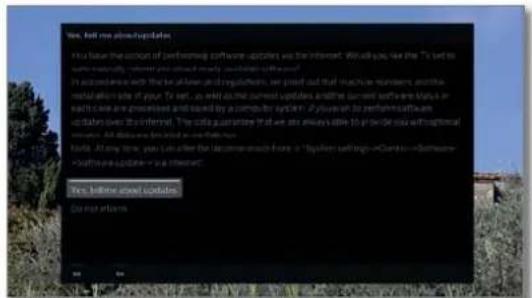
text_image
Yes, but we above updates It has been the action of performing software updates we then inform. We will you like that "I'll get to some naturally, where you should only create a software." In accordance with the law of being established, we plant out that structure transformers and their installed site of your "to set," as well as the current updates and the current software features are processed and stored by a computer system. If you can to perform software updates over the internet. The data guarantee that we are always able to use this software or optional services. All data are listed in the following: Note: All any time you call after the last one made there is "Software settings - Windows - Software updates - or a website." Yes, before updated updates Do you inform.
Select option.
OK Confirm selection.
When selecting Information on new software updates, your TV set checks at definite intervals whether a newer software than the one installed in the TV set is available in the Internet. A screen message appears when a new software update is found.

Exit wizard.
The initial installation wizard is complete.
TV set as a monitor
You can also use your TV set just as a monitor, i.e. if you only use it with a PC. The tuner in the TV set cannot be used in this mode.
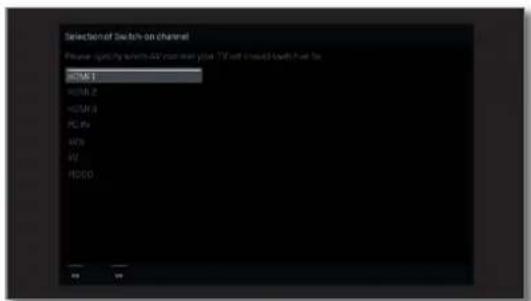
text_image
Selection of Switch on channel Please specify which:400 mm rear pixel (72 off channel) switch can be HDMI 1 HDMI 2 HDMI 3 PCI Rx VSS VSS F8000
▲▼ Select AV connection.
OK Confirm selection.
The selected AV connection is shown when switching the TV on.

▶ Proceed to next step.
Initial setup continues with the Time and date setup.
Loewe bild
User handbook
Home view
Home view
The Home view is the central overview page of your TV set.
Via the selection list on the left, you can select the menu items: Home, TV, Recordings, Sources, and Apps. Via System settings 📍 you have access to more functions and you can configure your TV set.
The right section of the display shows, depending on the selected menu item, the current channel list, favourites (also see right column) and the available sources and/or apps.
Depending on the device configuration, network connection, media/media servers available and the connected devices, the number of selectable items may vary.
Call Home view

HOME: Calling the Home view.
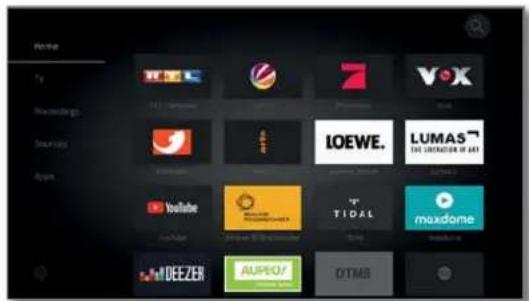
text_image
Normal Ty Blockings Sources Apps LOEWE. LUMAS™ THE CREATER OF ART YouTube TIDAL maxdome DEEZER AUPECY DTMS
▼▲◀▶ Select menu item / Favourite. OK call.
Description of the individual menu items:
Home Under the item Home all favourites of the different sections are summarized.
TV Via the Menuitem TV you can change the TV mode in the event that another operating mode (e.g. radio, etc.) is selected. In the right half of the screen, you can access the channel of the currently selected channel list.
See chapter TV for further information.
Recordings Via the menu item Recordings you have access to DR+ archive (local/DR+ streaming where available) videos and connected USB storage media. The timer (timer overview and timer services) is likewise accessible via the menu item Recordings.
See chapter Recordings for further information.
Sources Via the item Sources in the Home view, you can change to sources in order to play back something from them. You can access devices that are locally connected to the TV set (e.g. to AV, HDMI, USB) as well as devices available via the home network.
See chapter Sources for further information.
Apps Via the menu item Apps you can find multimedia content on the Internet (App Gallery), Internet and DVB radio and a full-featured browser.
See chapter Apps for further information.
In menu item System settings you find the configuration menu of the TV set e.g., with settings for picture, sound, connections or sound components. In the right half of the screen, you can access the most important points.
See chapter System settings for further information.
Home view - EPG search
You can use the magnifying glass icon at the top of the Home view or the Search function in the menu options to search the EPG for keywords (according to whether TV or Radio EPG mode is selected). For more information, please refer to the chapter TV, section Electronic Program Guide - EPG search.
The EPG search function is only available after once-off pairing of the TV set with the Loewe app. Next, confirm the activation in the screen dialogue.
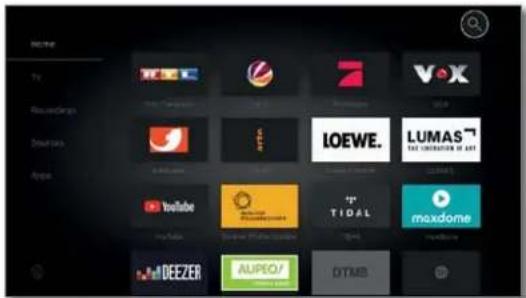
text_image
HOTAI TV Recordings Sounders Appos YouTube TIDAL maxdone DEEZER AUPEO/ DTMSLoewe old
User handbook
I come view
Home view - Favourites
Under the menu items Home and Apps you will find your Favourites on the right-hand side.
By selecting the individual menu items, your Favourites will be filtered accordingly. When selecting Home the Favourites of both menu items, will be displayed together.
■ After an initial installation, some favourites will already be automatically created depending on the installation site of the TV set and of existing Internet links (e.g. TV channels, online links).
Creating favourites
In the operating modes of the TV set you can define the current object (e.g. channel, music title, teletext page, website, photo, etc.) as favourite.

Create favourite.
The active object is added as a favourite and placed at the bottom of the Home view under the menu items Home or Apps.
In the instance that there are more favourites than can fit onto one screen page, they will be displayed via a scroll list.

P+/P− Scrolling through the individual pages.
Editing favourites
You can edit the existing favourites in Home view. Change the sequence of your favourites as you wish or delete favourites you do not need any more.
Moving favourites

HOME: Calling the Home view.

◀ ▶ ▲ ▼ Select the favourite to be changed.

MENU: call menu options.
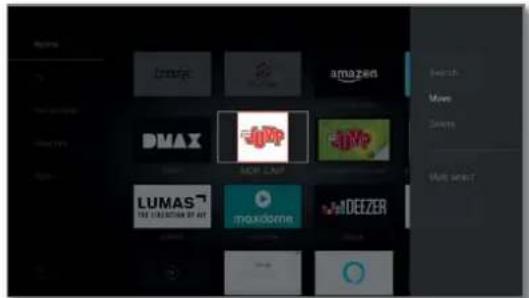
text_image
R Results My The company Dmax LUMAS THE CREATION OF ART amazon amazon.com amazon.com amazon.com amazon.com amazon.com amazon.com amazon.com amazon.com amazon.com amazon.com amazon.com amazon.com amazon.com amazon.com amazon.com amazon.com amazon.com amazon.com amazon.com amazon.com amazon.com amazon.com amazon.com amazon.com amazon.com amazon.com amazon.com amazon.com amazon.com amazon.com amazon.com amazon.com amazon.com amazon.com
▼▲Select Move.
OK call.
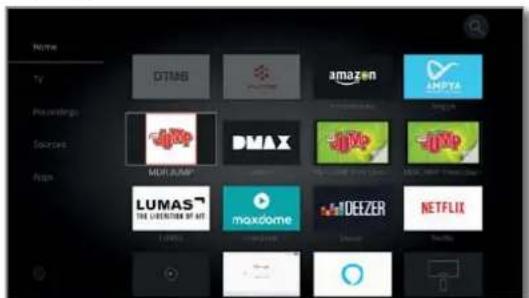
text_image
Home Ty Playtime Sources App OTMAS Amazon DMAX LUMAS maxdome DEEZER NETFLIX◄ ►▲▼ Move favourite to new position.

BACK: Finish procedure.
Delete Favourites (individual)

HOME: Calling the Home view.

◀ ▶ ▲ ▼ Select the favourite to be changed.

MENU: call menu options.

▼▲Select Delete. OK call.
Delete Favourites (multiple selection)
i Edit Favourites menu options is retrieved.

▼ ▲ Select Multi select. OK call.
▶ ▶ ▶ Select favourite OK highlight (highlighted item changes to blue), where applicable apply to other favourites.
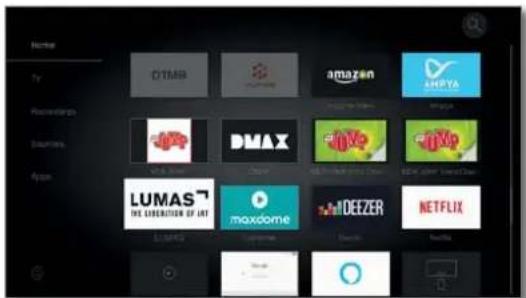
text_image
Normal By Routings Daimler App OTMAS Amazon Shopta DMAX Maxdome DEEZER NETFLIX
MENU: call menu options.

▼▲ Select Delete. OK call.
Loewe old
User handbook
TV
Volume / channels
TV
Via the menu item TV, which is selectable via the Home view, one channel can be selected from the current channel list. By selecting a channel you will arrive in the TV mode. In the TV mode there are a number of functions, such as Teletext, PIP, EPG available to you. Via the individual menu options you can select additional options and settings surrounding the TV operation.
Setting the volume
Switching sound off/on

Sound off.
Sound on: Press key again or increase the volume using V+.
Setting the volume
V+/V- Volume up/down.
The volume indicator will be displayed in the center of the screen.
The volume control bar can be deactivated in the menu System settings → Control → more ... → On-screen displays.
Select channel
Select channel with P+ / P-
When using Instant Channel Zapping, you can very quickly switch to other channels. The instant channel zapping ^® technology uses the second tuner in the background in order to pre-select the next channels. Due to this pre-selection, you can now switch to this channel within a very short time.
While using the digital recorder DR+4 (timeshift operation, archive recording, multi recording) or in PIP mode. Instant Channel Zapping is not available. Switching is done at "normal" speed.
For encrypted channels Instant Channel Zapping is only possible to a limited extent.

P+/P- Channel up/down.
The number and the name of the channel along with the title of the programme and that of the next programme will be briefly shown. Also, the status display with time/date and programme-dependent symbols appears.
The symbols of the status display are described in chapter TV. section Status display.
Select channel using the numerical keys
If you select an unoccupied channel position, the next available channel is selected.

long
1-digit channels
Press the numerical key a little bit longer; The channel will change immediately or press the numerical key briefly, the channel changes after 2 seconds (changes immediately if up to 9 channels are stored).
short short long
2-digit and 3-digit channels
Press first (and second) numerical key briefly. Keep the last numerical key depressed a little bit longer: The channel will change immediately on press all the numerical keys briefly, the channel changes two seconds after the last number has been entered (with up to 99 or 999 saved channels it will change immediately).
all short
4-digit channels
Press all four numerical keys briefly, the channel changes immediately.
Selecting a channel out of the channel list

In normal TV mode, without other displays:
OK Call channel list.
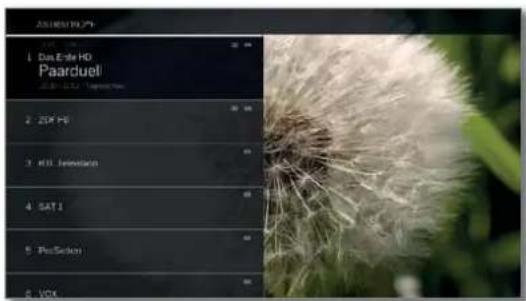
text_image
1. Dan Ersle HD Paarduell 2. ZDF HD 3. K8. Newland 4. SAT 1 5. PostSlection 6. V0K
▲▼ Mark channels.
OK The marked channel will be called.
Changing the channel list

In normal TV mode, without other displays:
OK Call channel list,

MENU: Call menu options.
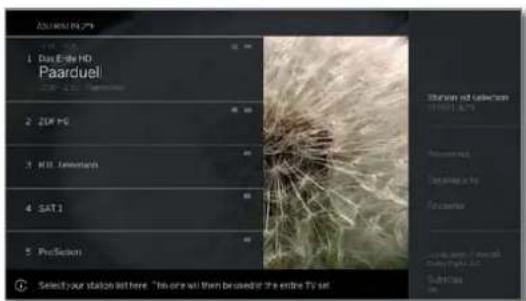
text_image
1 Das Eide HD Paarduell 2 ZDP FG 3 K8. Teelwartz 4 SAT 1 5 Prosecution ① Select your station set here "I'm one will then be used for the entire TV set
▲▼ Mark channel list selection.
OK Call.
▲▼ Mark desired channel list.
OK Call.
The channel list is amended according to selection.

BACK: a long press: Close overlay.
Explanations of the channel lists:
The number and the names of the possible channel lists depend on the available signal sources (antennas, TV reception networks, etc.).
ASTRA LON Only channels from the selected source / reception Analogue network are indicated in the channel list.
DVB-C
DVB-T
Personal list Only channels of the selected personal list are indicated in the channel list. The name of the list may be changed.
AV list Exclusively AV inputs are shown in the channel list.
Manage list Call up the channel list editing menu (System settings → Channels → Channel lists TV).
Loewe bild
User handbook
TV
Channel
Selecting channels by means of the expanded channel list

i In normal TV mode, without other displays:
OK Press long to call expanded channel list.
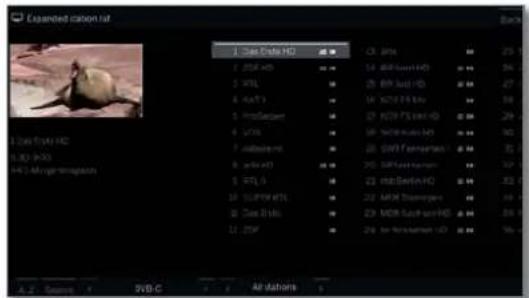
text_image
Expanded cation fat J. Cine Data HD 2 .DSF HD 3 .RTL 4 .KAT1 5 .ProScaner 6 .UTS 7 .Mallowsch 8 .eWHD 9 .RTL 10 .SUPW HTL 11 .Cine Btu C1 .JPA 12 .BR-Neu HD 13 .BR-MU HD 14 .NCT-FF-EV 15 .HSP-FUS-HD 16 .NOR-KU-HD 17 .SWI Companet 18 .SPXCompanet 19 .mB-Delta HD 20 .MDI Tisopogan 21 .MDI Sustur HD 22 .In-Insuran HD Back A 2 Seconds F DVD-C All Mathons
▲▼◄► Mark channels.
OK The marked channel will be called.

Or:
For numerical sorting: Enter the channel number. The marker will jump to the selected channel.

OK The marked channel will be called.

For alphabetical sorting: Enter the first letter. The first channel for the specified letters is marked.

▲▼◄► Mark the channel.
OK The marked channel will be called.
Filter and sort options of the expanded channel list
Using the on-screen buttons on the bottom line of the expanded channel list you can filter and sort the channel list by various options.

MENU: Switching between list and bottom line.
0.9 Numerical sorting of the channel list.
A..Z Alphabetical sorting of the channel list.
Searching
This allows you to do targeted searches for channels. The channel name is to be entered via the on-screen keyboard. The entry is described in chapter General information on the operation.
Channel list Select the list, the channels of which are to be displayed in the extended channel list (e.g., Analogue, DVB-C, DVB-T, ASTRA LCN, Personal channel list, AV list).
All channels Here you can filter the content of the channel list according to various criteria. Shall All Channels, only HD channels, channels that are Locked or Scrambled or Unscrambled. CI+ Protected channels be indicated.
Selecting channels by personal lists
You can save your preferred channels in personal lists (e.g., for several users). Each personal list can contain up to 99 channels.

i Personal list available (creating a new personal list via Manage list → New personal list).
In normal TV mode, without other displays.
OK Call channel list.
MENU: Call menu options.
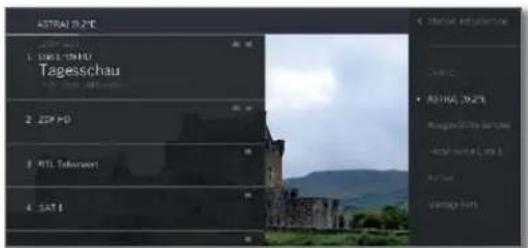
text_image
ASTRAI 12.27E 1. LIME CHAU Tagesschau 2. ZDP HD 3. RTL Tokenwort 4. SATS • ISO 100, 2025 Ausgewinne (Jahres) Verka Abrete, Loss 3 Air Post Voltage Level
▲▼ Mark channel list selection. OK Call.
Mark the desired personal list, OK Call. The channel list is amended according to selection.

BACK: a long press: Close overlay.

OK Call personal list.
▲▼ Mark channels. OK The marked channel will be called.
Explanation of the icons following the channel names:
[NO TEXT]
Locked channel.
HD
HDTV channel.
T
DVB-T channel (digital terrestrial via antenna).
C
DVB-C channel (digital via cable).
S
DVB-S channel (digital via satellite).
Oπ
Scrambled channel.
History
Recently selected channels are saved in History.
In normal TV mode, without other displays:

Yellow button: call History.
text_image
SAT.1 V VOX arte HD HD
▲▼ Selectentry, OK call.
The last channel can also be accessed directly:

Yellow button press longer: Call last channel.
Loewe bild
User handbook
TV
Status display/info key
Status display/Info key

In normal TV mode, without other displays.
INFO: Show status display.
Below you see the number and the name of the channel and (if available) the title of the current programme. The bar (if available) indicates the progress of the current programme. If information about the current programme is available, this can be called by pressing the INFO key again.
The field at the top shows various additional pieces of information, if available, which are represented by symbols.
A window with button descriptions is displayed in the bottom right corner. The automatic display of the Explanation of keys with status display can be switched off via System settings → Control → more ... → On-screen displays → Key explanation.
By pressing the INFO key longer the Explanation of keys can be displayed regardless of the status display (see also chapter On-screen displays, section Explanation of keys).
The status display is shown automatically every time you change channels.
The status display is hidden automatically at the end of the display time.
If you want to hide the status display manually before the display time ends, you can do this with the BACK key.
Explanations of the symbols in the status display:
General symbols:

Language/sound selection available.

Subtitles available.

Channel selection for multi-channel providers.

HbbTV mode available from this channel.
TTX Teletext available on this channel.

Mimi Defined ^™ : Individual sound personalisation enabled.
General symbols (continued):
T DVB-T channel (digital terrestrial via antenna).
C DVB-C channel (digital via cable).
S DVB-S channel (digital via satellite).
Coded station.
3D programme ^1 .
HD TV HDTV programme.
ULTRA HD UHD programme ^1 .
HLG HLG programme ^1 .
HDR 10 HDR 10 programme

Dolby Vision programme ^1 .
Transmitted audio signal:
Mono Mono audio transmission analogue.
Dual channel Dual channel sound transmission (Sound1/ Sound2) analogue.
1+1 Dual channel sound transmission (Sound1/ Sound2) digital.
① Stereo sound transmission digital (PCM).

Dolby Audio ^® transmission.
MPEG MPEG sound transmission.
Selected listening mode:
1 Playback of centre sound or mono (left/right).
2 Playback of front sound (L/R stereo).
3 Playback of front and centre sound.
4 Playback of front and surround sound.
5 Playback of front, surround and centre sound.
Sound projector Playback of sound via sound projector.
External speakers Playback of sound via speakers connected to an external amplifier.
If the number of speakers appears in brackets, the sound of missing speakers is transmitted by the existing speakers (virtually). The Dolby Virtual speaker (VS mode) developed by Dolby is activated for the virtual sound reproduction in sound mode (4) and (5). Here you can choose between Dolby Virtual and Cinema Surround ^2 . In sound mode (3), proprietary settings of Loewe are used for the virtual reproduction.
Loewe old
User handbook
TV
Menu options
Menu options
The menu options contain various selection and setting options.
Depending on the set type and equipment of the TV set (motorized rotary foot, built-in hard drive or connected USB hard drive, Feature Drive, etc.) and application (TV mode, EPG, Teletext, apps, Media player, etc.), various menu options can be called up.
In the following, the individual menu options for the current channel and for the selected channel list are briefly explained in TV mode.
Menu options for the current channel:

MENU: Call menu options.
natural_image
Golden field under clear sky with distant mountains, no visible text or symbols
▲▼ Select menu option.
OK call.
Menu items in the menu options for the current channel:
| Channel list selection | Exchanging the channel lists. |
| Recordings | Here you can call up a recording dialogue. |
| Detailed info | Calling additional information on the current programme. |
| Search | Search for any keyword in the EPG to find a program. |
| Favourite | Storing the current channel as a favourite. |
| Multiroom playback | This function allows you to synchronise the play-back on multiple Loewc TV devices that support this function. |
| Language/ sound | Selecting other languages and audio formats (if available). |
| Subtitles | Display programme subtitles (if available). |
| Picture | Make frequently used picture settings. |
| Sound | Adjusting all available audio settings. |
| Headphone volume | Here you can regardless of the volume of the device speakers, adjust the headphone volume. |
| Screen off | Here you can switch off the screen. You can turn the screen on again with the arrow button on the remote control. |
| Store channel | Here you can save the current channel to a list that is selected in the following step. |
| Expanded channel list | Here, you can open the entire channel list in full screen mode. You can filter it according to various criteria. |
| More settings | You can apply all the settings on your TV set here. |
Menu options for the selected channel list:


OK Call channel list,
MENU: Call menu options.
text_image
Personalist at | 5. For Sastem Two and a Half Men 2000/1999 / 2000/1999 6. After Ender Ended Dornne 13 7. All, too Die Rutter galinger 8. Dill Deminion Soc (ID) In place of Pogunsthaft (SDV) 9. NORESHAIC You can adjust all of the oval table settings for the sound system here
▲▼ Select menu option.
OK call.
Menu items in the menu option for the current channel list:
| Channel list selection | Exchanging the channel lists. |
| Recordings | Here you can call up a recording dialogue. |
| Detailed info | Calling additional information on the current programme. |
| Search | Search for any keyword in the EPG to find a program. |
| Favourite | Storing the current channel as a favourite. |
| Multiroom playback | This function allows you to synchronise the play-back on multiple Loewe TV devices that support this function. |
| Language / sound | Selecting other languages and audio formats (if available). |
| Subtitles | Display programme subtitles (if available). |
| Picture | Make frequently used picture settings. |
| Sound | Adjusting all available audio settings. |
| Headphone volume | Here you can regardless of the volume of the device speakers, adjust the headphone volume. |
| Screen off | Here you can switch off the screen. You can turn the screen on again with the arrow button on the remote control. |
| Edit channel list | Here you can change your current channel list (for example, add channel, reorder channel, delete channel). |
| Store channel | Here you can save the current channel to a list that is selected in the following step. |
| Expanded channel list | Here, you can open the entire channel list in full screen mode. You can filter it according to various criteria. |
| Sorting | Here you can sort your current channel list alphabetically or numerically. |
| More settings | You can apply all the settings on your TV set here. |
Loewe bild
User handbook
TV
Electronic Programme Guide
Electronic Programme Guide - EPG
EPG stands for Electronic Programme Guide and provides you with on-screen programme details. With the system, as with a printed programme guide, you can learn about the current programme. In addition programmes can be memorised and also recordings can be programmed.
Starting and ending EPG

EPG: Switch EPG on / off.
text_image
2. ZMH HD heute - in Deutschland Auswasser Sachanlache - 10% und Vorzugsagenen Geizoafer Bilanzgurten Sachanlache - Deutsche und Auswasser beizierter Kördel Friday 5th January 14:30 14:30 14:30 14:30 14:30 14:30 14:30 14:30 14:30 14:30 14:30 14:30 14:30 14:30 14:30 14:30 14:30 14: 14: 14: 14: 14: 14: 14: 14: 14: 14: 14: 14: 14: 14: 14: 14: 14: 14: 14: 14: 14: 14: 14: 14: 14: 14: 14: 14: 14: 14: 14: 14: 14: 14: 27:00 Rete Rassen (2006) Tagi Sturm der Liebe (2050) Tajis Verhödt Rete Rassen (2006) Tagi Sturm der Liebe (2050) Tajis Verhödt Rete Rassen (2006) Tagi Sturm der Liebe (2050) Tajis Verhödt Rete Rassen (2006) Tagi Sturm der Liebe (2050) Tajis Verhödt Rete Rassen (2009) Verhödt Seres für Rares Rete Rassen (2009) Verhödt Rete Rassen (2009) Verhödt Rete Rassen (2009) Verhödt Rete Rassen (2009) Verhödt Rete Rassen (2009) Verhödt Rete Rassen (2009) Verhödt Rete Rassen (2009) Verhödt Rete Rassen (2008) Verhödt Rete Rassen (2008) Verhödt Rete Rassen (2008) Verhödt Rete Rassen (2008) Verhödt Rete Rassen (2008) Verhödt Rete Rassen (2008) Verhödt Rete Rassen (2008) Verhödt Rete Ratten an Betan - Die Post Auf Seite Kärlik am Südler The red at 6:30 Two red at 6:30 The Moore The Mouse The Big Dan The Big Dani EPG is only available for DVB channels.
■ Depending on the number of channels selected for EPG, it may take some time until the programme information is displayed.
In the left column is a list of the channel of the selected source / channel list (for example DVB-S, DVB-C, personal list etc.).
The right side shows the program overview. The programs currently running are highlighted by lighter fields. A white line marks the current time in the running program.
The white box marks the selected program whose program information is displayed at the top.
In the upper left corner, the live image of the currently selected channel is displayed. When using Premium EPG, the window for the live image will be displayed on the right side.
EPG Operation


P+/P-Scrolling in the channel list page by page.
◀ ▲ Scrolling in the channel list.
▶▶ Scrolling through the programmes.
OK short: (nighlighted TV programme is running): EPG will be closed and the programme is selected.
short: (highlighted programme not yet started): Detailed information on the selected programme will be called.
long: Change preview image to the channel of the highlighted programme.


short: Scroll a screen width forward/backward.
long: Scroll 24 hours forward / backward.

INFO: short: Call detailed information on the selected programme (see next page).
long: show Explanation of keys.

REC: Schedule the recording of the highlighted programme.
EPG menu options
i EPG called

MENU: Call menu options.

▲▼ Select menu option
OK call.
Menu items in the EPG menu options:
Channel list Select channel list to be displayed in the EPG. selection
Recording Programme recording of the selected programme.
Detailed info Bring up detailed information on the selected programme.
View View selected TV programme (for programmes currently running).
Memorise Make a note of selected TV programme (for programmes that have not yet begun).
Date Jump to a desired date.
Entry of Jump directly to a time or channel. channel/time
Change view Change EPG view between standard and concise.
Adapting the EPG view
1 EPG called.

PIP: Change EPG view between standard and concise.
EPG view Standard:
text_image
2. ZER HO heute - in Deutschland Kaufschen: Stärkshafen - 10% und Dresst begonnen Ergebnische Hörsenzen-Gütttem: Deutsche Bank und konspläte beziehungen 2016-12-2017 2016 2015 1996 1995 1994 1993 1992 1991 1990 1989 1988 1987 1986 1985 1984 1983 1982 1981 1980 1979 1978 1977 1976 1975 1974 1973 1972 1971 1970 1969 1968 1967 1966 1965 1964 1963 1962 1961 1960 1959 1958 1957 1956 1955 1954 1953 1952 1951 1950 1949 1948 1947 1946 1945 1944 1943 1942 1941 1940 1939 1938 1937 1936 1935 1934 1933 1932 1931 1930 1929 1928 1927 1926 1925 1924 1923 1922 1921 1920 1919 1918 1917 1916 1915 1914 1913 1912 1911 1910 1909 1908 1907 1906 1905 1904 1903 1902 1901 1900 after the next week of the next week of the next week of the next week of the next week of the next week of the next week of the next week of the next week of the next week of the next week of the next week of the next week of the next week of the next week of the next week of the next week of the next week of the next week of the next week of the next week of the next week of the next week of the next week of the next week of the next weekEPG view Concise:
Change channel for live image

i EPG called.
▲▼ Mark a currently running broadcast in the channel list.
OK press long: switch to the selected program.
In the top left window, the current programme of the selected channel is displayed now. When using Premium EPG (see next page), the window for the live image will be displayed on the right side.
When leaving EPG the channel is displayed in the preview thumbnail in the full picture.
Jumping to time or channel
The marking must be in the channel list.

Press the numerical key (0 through 9). The window Select Time/Channel is shown.
text_image
2. ZOR HD heute - in Deutschland Kaufmanns Deutsche Bank und Umsatz Begröhen Deutsche Bonnungs-Deutschland - Deutsche und Kauflösche Beizahlen Gewichtete 00:00 13.75 13.75 Top Sturm der Liebe (2030) Top Verpflicht Top Top Top Top Top Top Top Top Top Top Top Top Top Top Top Top Top Top Top Top Top Top Top Top Top Top Top Top Top Top Top Top Top Top Top Top Top Top Top Top Top Top Top Top Top Top Top Top Top Top Top Bottom 140 140 140 140 140 140 140 140 140 140 140 140 140 140 140 140 140 140 140 140 140 140 140 140 140 145 145 145 145 145 145 145 145 145 145 145 145 145 145 145 145 145 145 145 145 145 145 145 145 145 146 146 146 146 146 146 146 146 146 146 146 146 146 146 146 146 146 146 146 146 146 146 146 146 146 147 147 147 147 147 147 147 147 147 147 147 147 147 147 147 147 147 147 147 147 147 147 147 147 147 148 148 148 148 148 148 148 148 148 148 148 148 148 148 148 148 148 148 148 148 148 148 148 148 148 149 149 149 149 149 149 149 149 149 149 149 149 149 149 149 150

▲▼ Select time or channel, Enter numbers.
When entering a time, you always jump to the next occurrence of the entered time (24-hour window). If the time is already passed today, the time entered will appear on the following day.

OK Activate jump.
Switching to the current broadcast

i EPG called.
▲▼◄► Mark current broadcast.
OK press briefly: switch to current broadcast.
The electronic programme guide will be closed.
Calling additional information about the programmes
1 EPG called.

INFO: Call up detailed information.
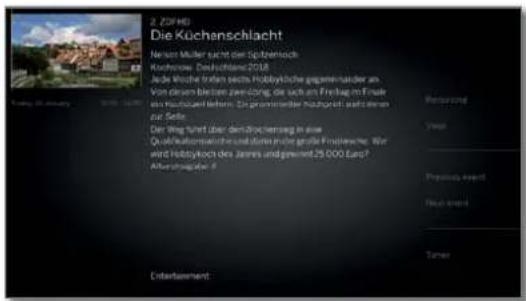
If there is more information on the selected programme, it will be indicated here.
You will find further options for the displayed channel in the menu options menu.

▶ Change to menu options.
or:

MENU: change between detailed information and menu options.

▼▲ Select menu option. OK call.
or:

BACK: Leave detailed information and go back to EPG.
Menu items in the EPG menu options:
Recording Schedule the recording of the selected broadcast for a time.
View/
Selected TV broadcast:
Memorise
View for live broadcasts.
Memorise for broadcasts that have not yet started.
Previous Information on the previous broadcast event
Next Event Information on the next broadcast
Timer Call up the timer list so as to programme further recordings.
Loewe bild
User handbook
TV
Electronic Programme Guide
Recording a programme via EPG
You can programme timer recordings of TV programmes conveniently using the EPG.

EPG called.
▲▼◄► Select the desired broadcast.
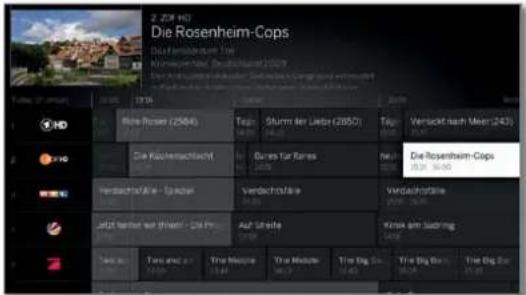
RECORD key: Programme timer recording for the TV programme.
Timer data dialogue is opened.
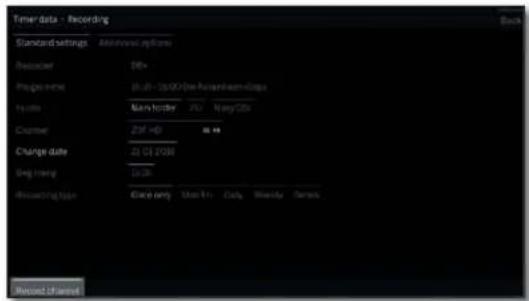
text_image
Timer data - Recording Standard settings Added to systems Reactor: 08+ Properties: (0-01 - 30/00)Use random number Units: Number factor PC Navy GBs Course: ZNF HD 56.99 Charge date: 21-01-2008 Reg time: 1st-08 Record status: Once only Month 4th Day Weekly Series Record channel

Check the timer data and update it if necessary (e.g. directory, start, end, recording type).
See chapter Recordings, section Timer for explanations of the setting options in the Timer data menu.

◀ ▶ ▼ ▲ Select Record channel, OK adopt.
Or:

MENU: Call menu options

▼▲ Select Recording. OK adopt.
When a program is currently running, a recording is started immediately.
For programs that have not yet started, a timer recording is entered in the timer list.
In the EPG a recording symbol ● is placed behind the title of the programme.
Memorising a programme via the EPG
A programme that has not started yet can be memorised. For memorised programmes, the TV set will ask at the beginning of a programme if it should change the channel accordingly or switch on from the stand-by mode if this is activated in the menu System settings → Control → EPG → TV on when memorised.
i EPG called.
◀ ▶ ▼ ▲ Mark the desired programme. OK Call up detailed information.
◀ ▶ ▼ ▲ Mark Memorise. OK Memorise programme.
In the EPG, a memorise symbol is placed behind the title of the programme ♥.
After a software update, it is likely that Memos of programmes are deleted. After a software update, please check your timer list(see chapter Recordings, section Timer).
Activate Premium EPG Services
In conjunction with the Loewe app, you have the option of accessing an additional service that provides you with a preview image of the relevant program from the Gracenoto database.
A prerequisite for this is a current version of the Loewe app on a smart device that is in the same network as your TV set. The TV must also be connected to the internet.
When pairing app and TV, your set will announce the availability of Premium EPG Services. Confirm the activation in the screen dialogue. At the next call of the EPG function, the new preview images are available, depending on the respective channel.
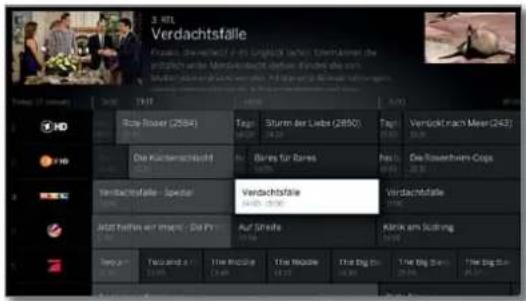
The additional function can be deactivated at any time. Under System settings → Control → EPG → Expanded info select for this no.
Configuring EPG
You can find the EPG settings in the chapter System settings, section Control – EPG).
Loewe bild
User handbook
TV
Electronic Programme Guide
EPG search
The EPG search function is only available after once-off pairing of the TV set with the Loewe app. Next, confirm the activation in the screen dialogue.


HOME: Calling the Home view.
▲▼◄► Select magnifying glass icon.
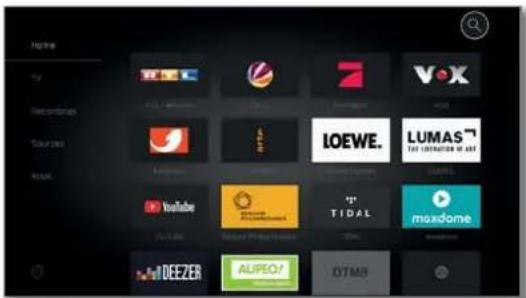
text_image
Home My Ratios Sources Applic BBC VX LOEWE. LUMAS THE CREATER OF ART YouTube TIDAL mazdome DEEZER AUPEOY OTMB
OK Call up search.
Select the desired character.
OK apply the character.
Search suggestions are made from the second character and adjusted for each additional character entered. If wanted, these can be selected directly.
text_image
Top Left Left Left Right Right Left Left Right Right OK OK
The characters can also be entered from a USB keyboard or the numeric buttons on the remote control.
ABC/abc Switch between upper and lower case.
=/#
Switch to special characters.

Switch the on-screen keyboard to English, German or Russian.
Space Enter space.

Delete characters to the left of the cursor.
Clear Delete all characters.
Enter Accept search term and start search.

Cancel entry. If search suggestions are already displayed, the input window is closed and you jump to previous search suggestions. If there are no search suggestions, you are immediately returned to the Home view.

Switch between on-screen keyboard (below) and the displayed search terms (above).
Once the search term has been confirmed via the field in the keypad or selected in the list, the search results are displayed.
text_image
taorit The Metast! Japan Times Japan Times China News China News China News China News China News China News China News China News China News China News China News China News China News China News China News China News China News China News China News China News China News China News China News China News China News China News China News China News China News China News China News China News China News China News
▶ ▶ ▲ ▼ Highlight desired program.
OK call up info text.
▶ Switch to menu options.
For explanations, refer to the chapter EPG section Calling additional information about the programmes.

◀ ▶ ▲ ▼ Select the desired program.

MENU: Call up menu options.

▼▲ Select menu options.
OK call up menu options.
Menu options in the EPG search:
Channel list Here you can select the list of channels to be included selection in the search.
Only channels that are marked in the channel selection for recording EPG data are included in the selected list (see chapter System settings, section Control – EPG).
Search mode Here you can specify in which part of the EPG information you want to search. The choices are Title & Info, Only title and Only info. The number of search results will vary depending on the search mode you selected. If the search mode is changed, this change remains in place until the next time the TV is switched on.
The default setting after switching on the TV set is Title & Info.
Recording The selected program is bookmarked for recording. An entry is created in the Timer list. The program is marked with the symbol.
Memorise The selected program is bookmarked for viewing. An entry is created in the Timer list. The program is marked with the symbol♡.
Timer If there are any entries in the Timer list, these are displayed, otherwise the Timer services appear.
Loewe old
User handbook
TV
Freeview Play
Freeview Play
The Freeview Play service gives you access to programs that have already been broadcast. In conjunction with the electronic program guide – the EPG – you can immediately access the additional content from the relevant channel's media library.
You need to accept the Terms of Use the first time you use this service. If you have accidentally rejected the Terms of Use and still want to make use of this service, you can also accept them later.
There is an active connection to the Internet.
When you use the respective player for the first time, you must log in to receive an activation code. Registering with the service providers is free of charge for you.
If your TV set has been reset to factory settings, you will need to re-activate the player.


HOME: Calling the Home view.
▲▼◄► Select Freeview Play.
text_image
Home My Recordings Solutions Apps Freeview Play iLtv3 YouTube Google Amazon NETFLIX MIDEZER iTIDAL
OK Call up the Terms of Use.
text_image
Freeview Play - Terms and Conditions 1. The user must accept addressissuability for any use of the Compliant Device and/or Freeview Play. Certain is received through this device. 2. The Compliant Dememnity only be used for public non-compliance as: The user's license of the Company will provide an important copy. 3. Use the Freeview Play formwork on any content services for public or correspondents, to example, by changing others for accessing them. 4. Must No. 0000000000000000000000000000000000000000000000000000000000000000000000000000000000000000000000000000 Adapt Control
▼ ▲ SelectAdopt.
OK confirm selection.
This changes the Home view. You now you have access to the media libraries of several TV channels. The tile Freeview Explore now appears (see next page/column).
text_image
Name My Recordings Sources App 4 5 itv2 Sv 5 UK Play Freeview Explore itv3 4 More EEM YouTubeProgram archive:
In the program archive, you can watch programs again that have already been broadcast.
The programs are stored for seven days.
■ EPG called up.
i The Terms of Use must be accepted.
The Detail Info displays "OD Available" or "OD".

▲▼◄► Select channel.
text_image
6.192 The Ellen DeGeneres Show Start of the Good House Higher Girl's Saturday her was several Abemphishing: Deserts Marthy Taylor and Johnny Peters, who had a special movie season of the December 1st Friday 10 September 2007 4/2 Fraser Undercover Boss USA Fernsey/Michison Nightmare 5 Jeremy Vie Can't Pay? We'll Take it A The Ellen DeGeneres Show What's Doing the Dimes? Dress Tolmress 4/2 Justice July Justice July Agatha Christie's Pequot 4/2 Comphony I Fraser Fraser Undercover Boss USA
MENU: Call up menu options.

▼ ▲ Select Backwards EPG. OK confirm.
Or:

MENU: Call up menu options.

▼▲ Select date. OK confirm.

▼▲ Select date in the past, OK confirm.
Or:

Use the navigation key to move the selection window to the left until the program archive appearst.
text_image
01/02 Morning 17h Evening 48h Midnight 20h Hate 20h 4 5 uv2 uv3 4Loewe old
User handbook
TV
Freeview Play
Notes on the program archive:
The channel currently selected is displayed in the channel list on the right. This is marked with a white border.
The channel can only be changed when you are in this list.
If the border is greyed out, you are in the channel selection on the left.
If you want to change the channel, you must move the selection window back to the channel list. The selected channel is again marked with a white border.
Use the INFO button to open detailed information about the selected program.
Press the OK/PLAY button to start playback of the program in the Program Archive. The program starts after a short delay.
Freeview Explore:
The Freeview Explore function combines all the media libraries of the active channels. For example, you can use Freeview Explore to search for sports events, movies or documentaries that have already been broadcast.
The Terms of Use must be accepted.
i There is an active connection to the Internet.


HOME: Call up Home view.
Select Freeview Explore.
OK call up Freeview Explore.
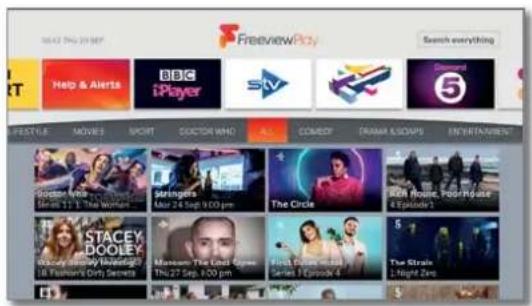
text_image
FREEVIEWPlay Help & Alerts BBC iPlayer siv Gzond 5 PUESTYLE MOVIES SHORT DOCTOR WHO ALL COMEDY DRAMA GROUPS ENTERTAINMENT Spectris Moore 17 Sep 9:00 pm Strangers Max 24 Sept 9:00 pm The Circle You're a Tour House 4 Episode 1 STACEY DOOLEY Washly Sunday Breakfast 18 Fashion's City Servers Museum The God's Name Thu 27 Sep, 100 pm First Online Music Series 1 Episode 4 The Strain L Night ZeroLoewe bild
User handbook
TV
Telelex
Teletext
Your TV set supports the two operating systems TOP text and FLOF. Up to 2000 pages are stored in order to get quick access.
Starting and ending Teletext

TEXT: Call teletext.
The function of the TEXT key can be set under System settings → Control → more ... → HbbTV → Function of the TEXT key.
The factory default is Standard teletext first (see also chapter System settings, section Control - HbbTV).
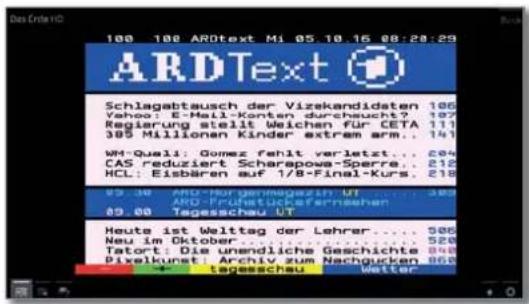
TEXT: Switching between Standard Teletext and MediaTek.
If no MediaTek is available → Teletext off. Otherwise:

Pressing the BACK key ends Teletext.
Key functions for Standard Teletext operation

INFO press longer: Show Explanation of keys.


IINFO or BACK: Hide Explanation of keys.


0-9: Directly enter the page number.
0: Stop self changing pages.
9: Zoom in the page (press several times).
Page selection with the coloured keys


Red key: One page back or back to previous page (depending on Teletext provider).
Green key: Advance one page.
Yellow key: To next topic.
Blue key: To next range of topics.
The coloured bars (with TOP text) or the coloured writing (with FLOF text) in the last to bottom line show you which colour button you need to use to select which topic areas and topics.
Page selection with P+/P-

P+ call next Teletext page.
P— call previous Teletext page.
Additional page selection possibilities

First possibility:
INFO: Call overview page 100.
Second possibility:
Directly enter the page number.
Third possibility:

The page includes 3-digit page numbers.
Mark desired page number.
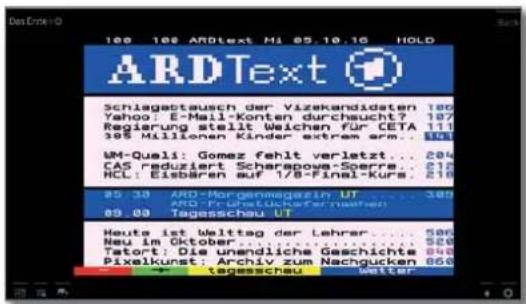
The page consists of several sub-pages, indicated by the symbol Ⓧ and the arrows in the bottom line.
▼ ▲ Go to bottom line.
Mark < or >,
OK select previous / next sub-page.
The number of the current sub-page is shown between the arrows.
Explanation of the symbols in the Teletext bottom line
| Symbol (icon) | Remote control key | Description |
| < | - | For Teletext pages with sub-pages: Show previous sub-page. |
| > | - | For Teletext pages with sub-pages: Show next sub-page. |
| PIP | Hide TV picture (Teletext as full screen). | |
| PIP | Insert TV picture (Split screen Teletext/ TV Picture). | |
| - | Activate Newsflash mode. | |
| - | Show hidden information on the Teletext page. | |
| - | Hide information on the Teletext page again. | |
| ★ | Add current Teletext page to the favourites in Home view. | |
| MENU | Call menu options with Teletext settings. |
Loewe bild
User handbook
TV
Telelex
Newsflash
Some text pages, e.g., live tickers, will be permanently updated. In order to keep track of changes and also to be able to watch the TV programme at the same time you may hide the Teletext temporarily and can still remain informed on updates of the page.

◀ ▶ ▲ ▼ Mark Newsflash
OK confirm.
The future behaviour of the News function depends on the type of the Teletext page:
In case of Full screen Teletext pages the Teletext will be hidden. In the bottom right corner, there will be a symbol for the activated news function.
natural_image
Exterior view of a historic stone building with arched windows, surrounded by trees under a clear blue sky (no signage or text visible)A screen message appears when the contents of the page has changed.
text_image
The Trafent page has been updated. Would you like to see it now? yes, but
Show updated page.
◀ ▶ Select yes or no. OK Confirm selection.
In case of Teletext pages which cover only a part of the Teletext page, e.g., News tickers, the respective part will be faded in and permanently updated.
End News function

OK show Teletext again.
Or:

BACK: exit Teletext.
Loewe old
User handbook
TV
HbbTV/MediaText
HbbTV / MediaTek
HbbTV ^® (Hybrid broadcast broadband television) offers the user comprehensive multimedia contents, e.g., media centres or additional information on the current programme as far as they are provided by the channel (Value-added service).
MediaText helps you to use the next generation of teletext/videotext for HbbTV.
MediaText/HbbTV text can either be started directly or through an HbbTV application.
Dependent on the selected TV channel, buttons on your remote control can be locked via MediaText / HbbTV text.
The TV must be connected to the Internet to use HobTV/MediaText. A connection speed of at least 6,000 kbit/s (DSL 6000 or equivalent) is recommended for smooth playback of videos.
Opening an HbbTV application
If an HbbTV application is available for the chosen channel after changing channels, this will be loaded during the automatic start process and a red key symbol will appear. When starting manually, the application will be loaded not until you press the red key. The start behaviour can be set under System settings → Control → more... → HbbTV → Start behaviour of HbbTV stations.
HbbTV is offered by the selected channel.
■ Connection to the Internet established.
HbbTV mode is set to on.
Red key: Load / display HbbTV application.
The appearance, key assignment and available functions of the HbbTV applications are dependent on the provider.
Under certain circumstances, the recording and bookmarking functions of the applications may not be supported.
Loewe do not guarantee the accessibility, functionality or content of HbbTV applications.
Hide / Close HbbTV application
Red key: Fade out HbbTV application.

Press BACK for a long time: Close HbbTV application.
Opening HbbTV text directly
Depending on the programme provider, the direct Call of MediaTek may not be possible. MediaTek must then be opened by means of the HbbTV application.
■ MediaTek/HbbTV text is offered by the selected channel.
■ Connection to the Internet established.

TEXT: Call up "standard" Teletext (see chapter TV, section Teletext).
By pressing the TEXT key a second time the Media-Text/HbbTV Text will be called up.
The function of the TEXT key can be set.
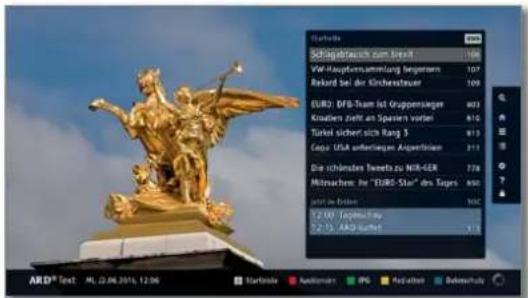
Navigation within the HbbTV Text and how the coloured keys are assigned can vary depending on the provider.
Terminating the HbbTV Text

Press BACK for a long time: End HbbTV text.
HbbTV services for DVB radio
Various DVB radio channels also offer HbbTV text/media text. The functionality is the same as in TV mode.
Loewe old
User handbook
TV
PIP
Picture in Picture (PIP)
The concurrent display of two different images is referred to as Picture in Picture.
Restrictions with PIP operation:
In PIP mode, it is generally not possible to use analogue channels and analogue sources (AV, PC IN etc.) for main/PIP picture.
1 Picture change and channel selection are restricted during recording.
The PIP mode cannot be operated via the colour buttons while an HbbTV application is active.
The iPIP menu item is not available for non-dual-channel devices or when selecting an AV interface (HDMI, etc.).
The selection and combination options for the main display/PIP display depends on the version of your set or on the number of available tuners for the TV set and the image signal (SDTV / HDTV / UHD-TV) the set receives.
| Simultaneous display of... | ● (yes)/− (no) |
| a digitally broadcast channel (DVB-T/C/S) and picture from a digital AV source (e.g. HDMI1) | ● |
| a digitally broadcast channel DVB-T/C/S and a channel over analogue cable television | - |
| a digitally broadcast channel over DVB-T/C and a satellite broadcaster (DVB-S) | ● (-/−2 |
| two channels over analogue cable television | - |
| two digitally broadcast channels (DVB-T/C/S) | ● (-/−2 |
| a free-to-air and an encrypted digitally broadcast channel (DVB-T/C/S)■ A CA module with corresponding smartcard is required for decryption. | ● (-/−2 |
| two encrypted channels■ Two CA modules with corresponding smartcards are required for decryption. | ● (-/−2 |
| an SDTV channel and an HDTV channel (DVB-T/C/S) | ● (-/−2 |
| two HDTV channels (DVB-T/C/S) | ● (-/−2 |
| a channel in the HEVC / H.265 standard and any other channel. | - |
| two channels in the HEVC / H.265 standard. | -2 |
PIP functionality Standard PIP/iPIP:
Standard PIP:
Within the scope of the display options, the channels for PIP and TV display can be selected and interchanged at will.
A green frame around the PIP display indicates that the channel selection affects the PIP display. A white frame means that the operation refers to the main display. If the frame is blue, Play channel is active in the PIP display.
iPIP:
When the iPIP mode starts up, the channel shown in the TV display is moved into the PIP display. You can now select any other channel for the TV display. When exiting iPIP mode, the PIP display becomes the TV display again and the PIP window is closed.
An orange frame around the PIP display indicates iPIP functionality.
Start and end iPIP mode

PIP: Move the current TV display to the PIP display.
You can choose other channels for the TV display and still keep an eye on the PIP display. This allows you to temporarily move advertising or parts of programs to the PIP display.

PIP: Move the PIP display back to the TV display (PIP off).
Start and end standard PIP mode

PIP: Show/hide PIP display.
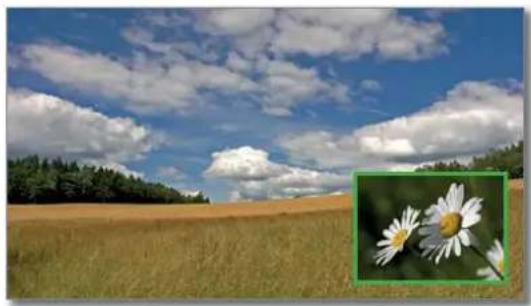
natural_image
Scenic landscape with golden grass field, blue sky with white clouds, and a close-up of daisies under a blue sky (no text or symbols)Selecting the channel of the PIP picture
If the frame colour of the PIP picture is not green, press the green key.
Select the channel as usual. (see also chapter TV, section Select channel or chapter Sources).
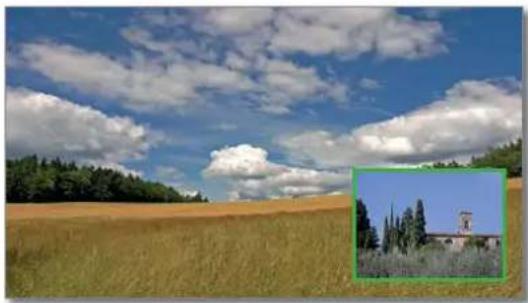
natural_image
Landscape photo of a golden wheat field under a blue sky with scattered clouds, featuring a small inset image of a white tower and trees (no text or symbols visible)Loewe old
User handbook
TV
PIP / Rotating the TV set.
Select the channel for the main picture
i If the frame colour of the PIP picture is not white, press the green key.
Select the channel as usual. (see also chapter TV, section Select channel or chapter Sources).
Coloured key functions
If the frame colour of the PIP picture is not green, press the green key.

Yellow key: Swaps contents of TV picture and PIP picture.

Blue key: Start/stop PIP scan in the PIP picture.
Change PIP position
i PIP image is displayed.
◀ ▶ ▲ ▼ Move PIP image to one of the screen corners.
PIP Settings
- PIP image is displayed.
MENU: Call up menu options.


▲▼ Select PIP, OK call.
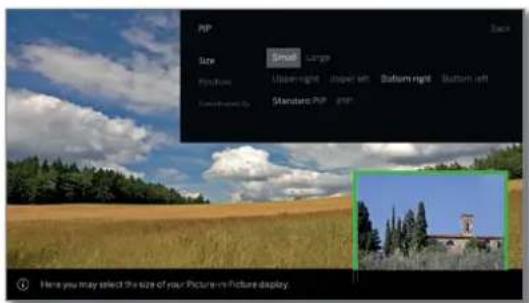
text_image
PIP Size Small Large Properties Up/down right Up/down left Bottom right Bottom left Environment By Standers PIP 2000 Here you may select the size of your Picture in Picture display.The size, position and mode of the PIP display can also be changed in System settings under Control → more ... → PIP (see also the chapter System settings, section Control – PIP).
Rotating the TV set ^(1)
If you have a Loewe motorised rotary foot attached, you have the option of automatically turning your TV set via remote control.
To connect a motorized rotary foot, you need the Motor unit connection. This is found at the rear of your TV set.
Menu item Rotate TV will only be displayed when a motorised stand is connected to the TV set.
The range of rotation and the switch-off position you can set under System Settings → Control → more ... → Rotate TV. For more information, see chapter System Settings, section Control – Rotate TV.
Rotating the TV set with Loewe motorised rotary foot
i The TV set may be positioned within the set range of rotation.
In normal TV mode, without other displays:
- Rotate TV set to the desired position.
Or:


MENU: Call menu options.
▲▼ Select Rotate TV. OK call.
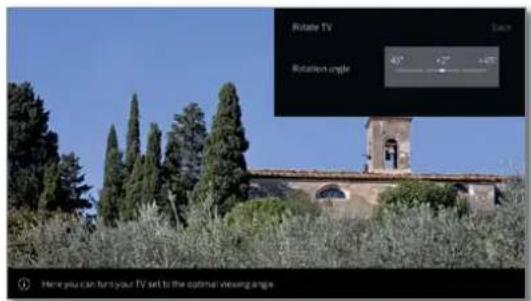
text_image
Rotate TV Rotation angle 40° 62° 145° Here you can turn your TV set to the optimal viewing angle

- Rotate TV set to the desired position.
BACK: exit Rotate TV.
Loewe old
User handbook
TV
Vogels Motion Mount
Vogels Motion Mount
The motorised, adjustable Vogel's MotionMount wall mount system makes it possible for you to change the position of your TV by remote control, including changing the distance between the TV and the wall. Not only can MotionMount be controlled via Vogel's own MotionMount app, it can also conveniently be operated via the TV menu using the Loewe assist remote control. The wall bracket and the TV set communicate via Bluetooth.
Please check the instructions included with Vogel's MotionMount to determine if the weight of your TV is suitable for the wall mount system. Mount the MotionMount as described in the original Vogel's manual.
Loewe does not guarantee the availability and functioning of Vogel's MotionMount. For support with the motorised wall mount system, please contact Vogel's directly.
Mounting a Loewe TV set with VESA attachment points to Vogel's MotionMount requires the use of Loewe Vesa adapter bolts.
If Loewe Vesa adapter bolts are not used, the TV set may be damaged.
Your dealer will supply you with the appropriate Vesa adapter bolts for your TV set. The item numbers are listed in the chapter Accessories
To control Vogel's motorised adjustable MotionMount wall mount system directly via your TV set, your TV ^1 must have Bluetooth functionality.
Connecting Vogel's MotionMount system to the TV
Vogel's MotionMount is correctly mounted and ready for use.


HOME: Calling the Home view.
SelectSystem settings.
OK call System settings.
▼▲ Select Multimedia / Network.
▶ go to next column.
▼▲ Select Bluetooth.
OK call.
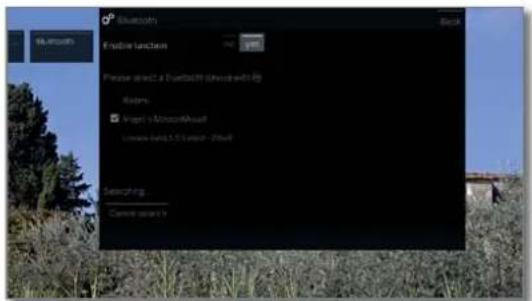
text_image
Bluetooth Enable functions Please select a Bluetooth (Bluetooth®) Relays: ■ Project's Bluetooth License build: 3.5 GB / 200 GB Searching Cancel sensitivityThe system automatically starts searching for Bluetooth devices in the vicinity for 2 min. If Vogel's MotionMount is available, it will be displayed in the list.

Mark Vogel's MotionMount
OK select.
The TV set and Vogel's MotionMount are now paired. No new pairing is required after switching the TV on/off. It occurs automatically when the turning functionality is called up.
Adjusting Vogel's MotionMount manually


i In normal TV operation, without further displays:
MENU: Call up menu options.
◀ ▶ Call up the Rotate TV menu directly.
The following message appears: Connection is being established to wall mount. Please allow some seconds ....
Once the connection is established, the Turn TV menu appears.
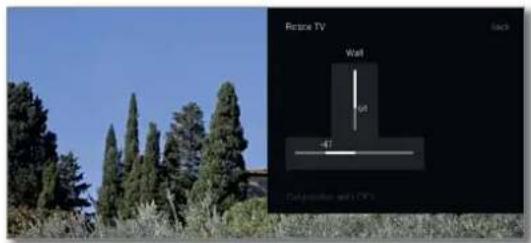
text_image
Picture TV Wall -60 -47 Corporation with CP's
▲▼Reduce/increase the distance between the wall/TV.
▶ Turn the TV set left/right or swivel it.
While turning, the wall bracket may automatically increase the distance between the TV set and the wall to provide enough room to rotate the TV.
The TV can be rotated through the entire turning range when the wall bracket is at maximum distance from the wall.
If the wall mount is manually adjusted, this position can also be saved via the position menu.


REC: Call up the position menu (see next page).
BACK: Exit Rotate TV.
Loewe bild
User handbook
TV
Vogels Motion Mount
Moving Vogel's MotionMount to a defined position
i Call up the Position menu.
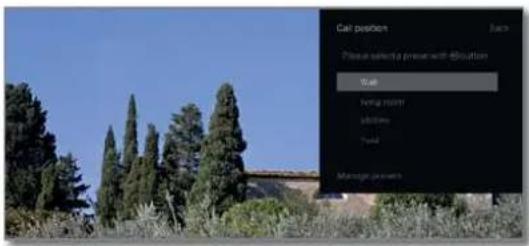
text_image
Car position Back Please select a press with location Walk Hemp room Indoor Tread Manage windows
▼▲ Select Position,
OK call.
The Vogel's MotionMount moves to the saved position.
Managing Vogel's MotionMount positions
■ Call up the Position menu.
The position Wall is fixed and cannot be changed (renaming, deleting not possible).

▼ ▲ Select Manage presets.
OK call.
text_image
Call position Text Please help to press with BB button Text Hiring room Wishes Push Manage problems
▼▲ Select Position.
OK call. A check mark appears before the position.
◀ ▶ ▲ ▼ Select menu option.
OK call.
Menu options in the Positions preferences:
save If you previously selected New position as the selected position and use the menu option Save, a new position with the current position of the wall mount will be inserted in the list.
rename You can rename the previously selected position here.
delete You can delete the previously selected position here.
Switching the TV on/off
When the TV is switched off, the Vogel's MotionMount moves from any position to the wall position - i.e. in the centre, at the closest position to the wall.
When the TV is switched on, the Vogel's MotionMount returns from the wall position to the last position it was in before it was switched off.
Loewe old
User handbook
Recordings
Digital Recorder
TV viewing with time shift
A TV program or DVB radio program that you watch or listen to is recorded in the background in the time shift buffer.
You can stop recording the program at any time and play it later with a time delay (time shift operation). The maximum Time offset amounts to three hours.
On time shift operation, the program is not stored in the long term.
If you change the channel (switch over program), the current recording is discarded, the time shift buffer being emptied.
If you want to save programs for a longer period use the archive recording (see next page).
The recording in the time shift buffer is automatically started on TV sets with integrated hard drive ^2 .
For TV sets without an integrated hard drive, the recording on the externally connected USB hard drive only starts when the pause key is pressed.
i Recording of analogue channels is not possible.
Time-shifted operation is perhaps not possible or only to a limited extent for programmes of channels working with CI Plus encryption (see also chapter Sytem settings. section Extras – Common Interface).
A seen and already finished program in the time shift buffer can be transferred to the DR+ archive, provided no channel change has taken place in the meantime.
The operation of time shift operation in DVB radio programs is identical to the time shift operation in TV operation.
Interrupt watching (start timeshift television)

Press PAUSE key.
natural_image
Golden statue of a figure with wings and arms, mounted on a pedestal under a blue sky with clouds (no visible text or symbols)The pause icon is briefly displayed and TV picture becomes a still picture. Time shift operation is started.
Continue (time shift viewing)

Press PLAY key.
natural_image
Scenic riverside scene with traditional yellow buildings and boats, mountains in background (no visible text or symbols)The playback symbol will be shown briefly, now you will see the TV program delayed in time from the moment you had pressed the PAUSE key.
Time shift status display
In time shift operation, without further displays.

INFO: ShowTime shift status display.
In the lower area, you will see the number and name of the channel, the beginning, the end and the title of the current program as well as the title of the next program.
The grey progress bar indicates how far the time shift buffer is filled with the content of the current program. The white bar shows the current position in the time shift buffer or how far the program has already been viewed.
The time in the bar indicates the remaining time of the current program.
For further options of time-shift watching see chapter
Sources, section Video playback
Returning to live picture (end timeshift television)

Press STOP key.
You see the channel's live picture again.
Switch to a different channel
If you switch to another station, the display appears on the TV set: End timeshift and switch over. If you confirm this, the current recording is discarded (time shift buffer is emptied).
The recording in the time shift buffer is automatically restarted on TV sets with integrated hard drive after a change of channels.
For TV sets without an integrated hard drive, recording on the externally connected USB hard drive only starts after pressing the Pause key after a channel change.
When switching between encrypted and unencrypted contents of the same channel the timeshift buffer is also cleared.
When doing this, the timeshift television is interrupted and you see the live picture of the broadcast.
As a precaution, start archive recording of interesting broadcasts when watching channels with changing coding.
Setting bookmarks
You can manually set bookmarks during time-shift TV watching. For this, the time shift recording is converted into an archive recording.

Press Play button longer: Delete bookmark.
Loewe old
User handbook
Recordings
Digital Recorder
Archive recording
Programs that you want to save permanently or view at a later time, place in the digital recorderarchive (DR+ Archive).
On TV sets with integrated hard drive, this is done on the internal hard drive, on TV sets without an integrated hard drive on an externally connected USB hard drive.
A recording can be made manually (instant recording / direct recording) or as timer recording. The timer data can again be entered manually or more comfortably, for example, via EPG.
If EPG or teletext data is available, the Digital Recorder stores the title and additional information on each programme in the archive.
If additional languages are being transmitted for a DVB broadcast, these will also be recorded. DVB subtitles can also be recorded.
You can watch another programme or playback a recorded TV programme from the archive while recording a TV programme into the archive. But you can also play back the programme that you are just recording with time-shift.
With multi recording ^1 two programmes can be recorded simultaneously (see chapter Recordings, section Digital Recorder – Multi recording).
During the archive recording, the bar showing the recording progress is red.
i Recording of analogue channels is not possible.
Recordings of CI Plus encrypted programmes (e.g. RTL HD, Sat 1 HD, Pro 7 HD, etc.) are perhaps not possible or only to a limited extent.
In order to use the full DR + functionality, two antenna cables. ANT-SAT 1 and ANT-SAT 2 must be ^1 connected or 2 channels must be configured for a DiSEqC single-cable system.
Instant recording (One touch recording) / Direct recording
If the broadcast was watched right from its start, it will be saved from the beginning in the DR+ archive. Otherwise, recording begins at the point from which viewing of the broadcast began.
One Touch Recording: The recording is started immediately with a single keystroke.

Press REC key longer: The current programme is recorded immediately.
Direct recording: The timer data is called up. If required, it can be adapted and the recording subsequently started.

Press REC key briefly.
If desired, adjust timer data (e.g. directory, start, end, recording type).

◀ ▶ ▼ ▲ Select Record channel.
OK adopt.
Watching other channels during archive recording
After you have started the recording, you can switch to another channel.
The second channel can be watched in time-shift TV whilst a recording is taking place (Time shift during archive recording).
On TV sets without Dual Channel ^4 switching to another channel is only possible if the second channel is located on the same transponder as the program you are recording.
Viewing another programme from the archive during archive recording
After you have started the recording, you can also watch a programme you have already recorded.

Open the DR+ archive.

◀ ▶ ▲ ▼ Mark the recorded programme, OK view programme.
The recording process is continued in the background.
Time shift viewing during archive recording
Whilst an archive recording is taking place you can play back the programme that is being recorded or watch a programme on another channel using time delay.

PAUSE key: Switch to freeze picture. The recording is continued in the background.

PLAY key: Continue playback. You will now see the time-shift archive recording.

INFO: Show Time shift status display.
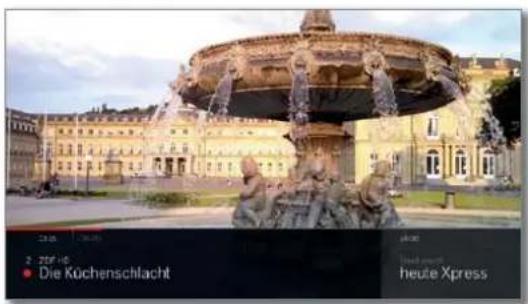
natural_image
Exterior view of a grand European palace with a fountain and columns, featuring classical architecture (no signage)For further options of time-shift watching see chapter Sources, section Video playback.

STOP key: End time shift and return to the live picture of the current archive recording.
Subsequent archive recording
You can also save an already viewed and finished broadcast in the archive provided there has been no change of channel in between. Skip or wind back to the desired broadcast and start the recording.
Setting bookmarks during archive recording
During a running archive recording you can create bookmarks (by pressing the PLAY key a little longer). You will see a message on the screen. Bookmarks also serve as starting and end points of intervals.
Function of the coloured buttoned when archiving
Yellow key: Jump to the previous bookmark.
Blue key: Jump to the next bookmark.
Loewe bild
User handbook
Recordings
Digital Recorder
Subtitles
Subtitles (DVB subtitles) of a program can also be saved during recording.
The recording of subtitles in DR+ continuous mode must be activated in the settings.
It is not possible to record teletext or HbbTV subtitles.
Calling up the subtitles during a later playback is similar to calling subtitles in TV mode.
Timer-controlled recording
Comfortably select your favourite programme for recording from the EPG. The timer overview has room for 50 entries.
You will find further information on timer-recording in chapter Recordings. section Timer.
Switching off the TV set during recording
You can switch off the TV to standby whilst recording. The recording is continued in the standby mode.
Never switch the TV set off at the mains and do not pull the plug of the TV set out of the socket. Otherwise the recording will be lost!
Stop recording early
You can end a current archive recording prematurely.

Press STOP key
A message appears in the right upper corner of the screen.
natural_image
Scenic view of a lakeside town with colorful buildings and boats, mountains in background (no visible text or signage)
OK Stop recording.
The recording process is ended. The portion of the TV broadcast recorded up to this point is saved on the hard disk and can be played back via the DR+ archive.
If two archive recordings are active (multi recording ^(1) ), the recording stops that started first.
You can also end a running recording by deleting the corresponding Timer entry in the Timer overview (see chapter Recordings, section Timer).
Multi recording ^(1)
The Multi Recording function makes it possible to record two programmes at the same time and still watch a third one as well.
Generally speaking: each recording, each selected channel requires one transponder stream. With dual channel devices, two separate streams are available.
An ideal scenario is to record from two channels sharing one transponder, so that any third programme can be watched.
While simultaneously recording from two programmes that are on two different transponders, only those channels are selectable for the third programme, which are transmitted by one of the two transponders. All channels that are on other transponders appear in the channel list in dark grey and cannot be selected.
In order to use the full range of functions of multi-recording, two antenna cables must be connected when using DVB-S or 2 channels must be configured for a DiSEqC single-cable system.
i Recording of analogue channels is not possible.
1 Recordings of CI Plus encrypted programmes (e.g. RTL HD, Sat 1 HD, Pro 7 HD, etc.) are perhaps not possible or only to a limited extent. In order to use the full range of functions of the multi-recording, two CA modules must be used.
The examples shown in the following table for channel combinations are valid only for DVB-S. For DVB-T or DVB-C, other combinations may apply.
The channel / recording combination that can be used, depends on the respective channel group / transponder group. You get the assignment from your network provider or the respective broadcasting channels.
Examples of DVB-S recording combinations:
| Broadcasting channel combinations: | Possible: | Info |
| Recording Sat 1Recording Pro 7Watching any of the channels | Yes Transponder 1: Sat 1, Pro 7Transponder 2: vacant for selecting any channel | |
| Recording Sat 1Recording RTLWatching any of the channels | No Transponder 1: Sat 1Transponder 2: RTLYou can not choose any channel, only one channel or one of the transponders used e.g. Vox, Pro7, RTL2 | |
| Recording ARD HDRecording ZDF HDWatching arte HD | Yes Transponder 1: ARD, arte HDTransponder 2: ZDF HD | |
| Recording RTLRecording RTL IIWatching ARD HD | Yes Transponder 1: RTL, RTL2Transponder 2: ARD HD | |
| Recording RTIWatching ARD HDWatching ZDF HD | No Transponder 1: RTLTransponder 2: ARD HZDF HD is on a different transponder, and therefore can not be displayed. | |
Loewe bild
User handbook
Recordings
Digital Recorder
DR+ archive
Via the DR+ archive, you can call up your recorded TV / radio programs and start playback. In the DR+ archive you can create your own directories and sort your records accordingly.
Open the DR+ archive

Open DR+ archive.
If a DR+ archive is present on a connected storage medium or the integrated fixed drive, this is displayed.

▶ ▶ ▲ Select the desired DR+ archive if several available.
OK Display archive entries.
The archive's name and/or storage medium, as well as the free remaining capacity of the storage medium are indicated in the title list.
The current marked archive entry is indicated by a white selection frame.
Existing folders are identified by a folder symbol.

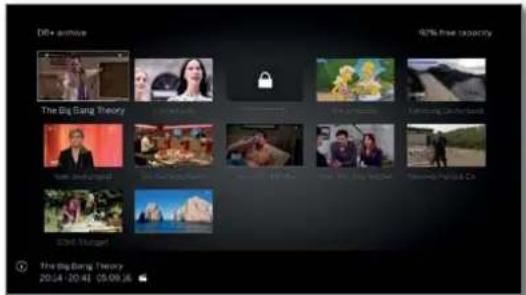
text_image
Diff+ archive 92% free capacity The Big Bang Theory The Big Bang Theory 20/24-20:41 05:09:26
PIP: Change DR+ Archive view between standard and concise.
The progress bar under the title image (standard view) or the complete archive entry (concise view) shows how far the archive entry has already been viewed.
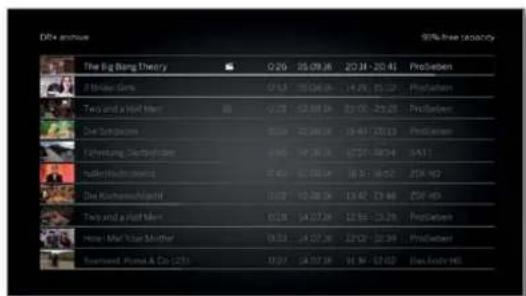
text_image
Dife annou The Big Bang Theory 8:20 05:09:36 20:34 - 20:41 ProSieben 8 Middle Gen. 07:53 10:04:34 14:26 - 21:07 ProSieben Two and a Half Man 8:27 02:08:34 21:02 - 23:25 ProSieben One September 05:59 02:08:34 19:41 - 20:13 ProSieben 14 The Evening Department 8:55 14:30:34 27:02 - 30:24 SATT udience in the world 8:40 02:08:34 18:51 - 18:57 JON HD One Richness/Sophid 13:07 12:38:34 13:42 - 23:46 CAF HD Two and a Half Man 03:54 14:07:34 12:56 - 13:29 ProSieben Hose Man's Tour Mother! 05:53 14:07:36 22:02 - 23:39 ProSieben Rummond Puma & Co (201) 05:57 14:07:36 01 M - 02:02 Las Andra HDPlaying from the DR+ archive

◀ ▶ ▼ ▲ Select the required archive entry (programme or directory).
If directory selected:
OK Open directory.
◀ ▶ ▼ ▲ Select the desired broadcast in the directory.
OK Start or continue playback of the selected programme.
See chapter Sources, section Video playback for further information.

During playback:
P+ call next programme.
P— call previous programme.
i Directories are skipped in this case.
DR+ archive menu options
The menu options of the DR+ archive contains the individual function for its archive entries.
The menu items available in the menu options depend on the selected entry from archive (programme or directory).

An archive entry has been selected.

MENU: Call menu options.
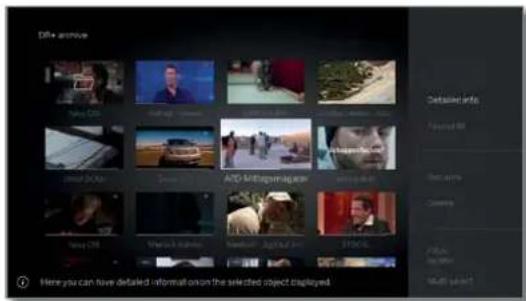
text_image
Diff+ archive Selected info Advanced MI Recycle Country Public Newspaper Multi panel Here you can have detailed information on the selected object displayed
▼ ▲ Select desired menu option, OK Confirm selection.
Loewe old
User handbook
Recordings
Digital Recorder
Explanations of the DR + Archive menu options:
Detailed info Show detailed information on the marked archive entry (see next column).
Favourite Add archive entry to Home favourites.
See chapter Home view for further information.
Multiroom playback This function allows you to synchronise the playback on multiple Loewe TV devices that support this function.
Rename Changing title of the record or of directory.
Delete Delete archive entry from hard disk and recover disk space.
Filler Select the desired filter (audio or video) and thus hide the other files.
The filter is automatically reset after leaving the archives.
Multi select Marking multiple archive entries is possible (see next page).
Move internal Here, you can move recordings in the DR+ archive to a directory and create new directories (see chapter Recordings, section Digital Recorder – Moving of archive entries).
Copy/move Copy/move archive entries to an externally connected external USB storage device or to the hard disk of compatible Loewe TV sets in the home network.
If no target medium is available, the menu item is shown in dark grey.
Export With Exporting, you can move the archive entries to externally connected USB storage media. Then you can easily view the archive entries with another playback device.
Delete Activate or deactivate protection against automatic protection deletion by the Delete Manager.
Symbol for activated delete protection:
i The menu item only appears if your TV set has an internal hard drive.
Parental lock Protect recorded broadcast by a four digit PIN against unauthorised playback.
Symbol for the set parental lock: 🔒
This menu item appears only when a PIN has already been defined (see chapter System settings, section Control – Parental lock).
Sorting Sort archive entries according to certain criteria, ascending A-Z or descending Z-A) or according to recording date (newest entries first).
Change view Change DR+ Archive view between standard and concise.
Displaying detailed information on the recording
If detailed information exists on the recorded broadcast from the EPG, you can deploy it.

The desired entry in the DR+ archive is marked.
INFO: Display detailed information for programme. Or:

MENU: Call menu options.

▼ ▲ Mark Detailed info.
OK Display detailed information on the broadcast.
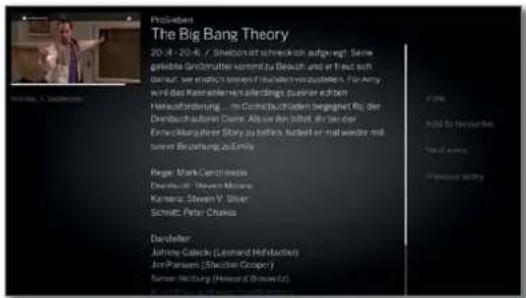
On the right next to the preview thumbnail you will see, if present, the channel name, the title of the program, the recording time as well as a short synopsis.
Under the preview thumbnail you will see the progress bar which indicates how much of the programme has already been viewed.
Changing the title of an archive recording or folder
Desired entry (programme or folder) is highlighted in the DR+ archive.

MENU: Call menu options.

▼ ▲ Mark Rename.
OK Call.
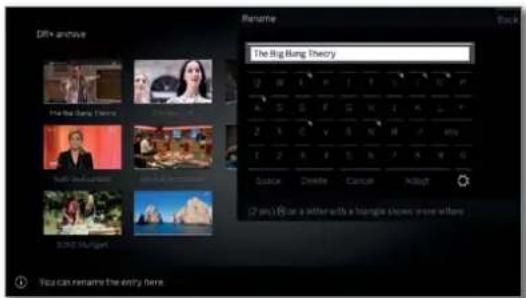
text_image
Dify archive The Big Bang Theory 20:00 PM/8PM 20:00 PM/8PM You can rename the entry here.

◀ ▶ ▲ ▼ Select characters.
OK Move character to input line.
For further information on character input see chapter General information on menu operation.
End input with Adopt. This saves the change permanently.
Or:

BACK: Cancel renaming.
Loewe bild
User handbook
Recordings
Digital Recorder
Deleting recordings from the archive
i The desired entry in the DR+ archive is marked.

STOP key: Call delete dialogue.

OK Confirm deletion. The DR+ archive will be displayed again.
Or:

MENU: Call menu options.

▼ ▲ Mark Delete
OK call.
OK Confirm deletion. The DR+ archive will be displayed again.
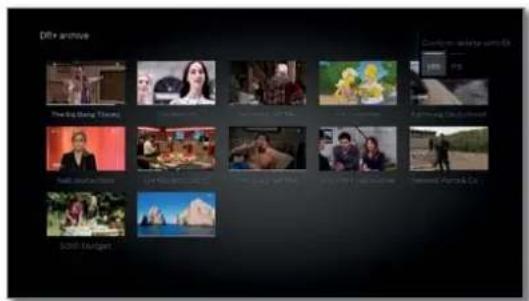
text_image
DIF+ archive The Big Bang (Tianjin) A new video story A growing video story Big Bang (Tianjin) Big Bang (Tianjin) Bidi Bang (Tianjin) Bidi Bang (Tianjin) Bidi Bang (Tianjin)It may take some time to delete recordings from external hard disks, depending on the length of the programme and recording quality.
To delete a folder, all archive entries in the folder need to be deleted.
Multi select
Multiple selection allows to mark several archive entries and then perform a desired action via the menu options (e.g. export, delete).
The DR+ archive is opened, multiple selection was called in the DR+ archive menu options.

◀ ▶ ▼ ▲ Select archive entry.
OK Confirm selection (archive entry becomes blue). Repeat as often as desired.
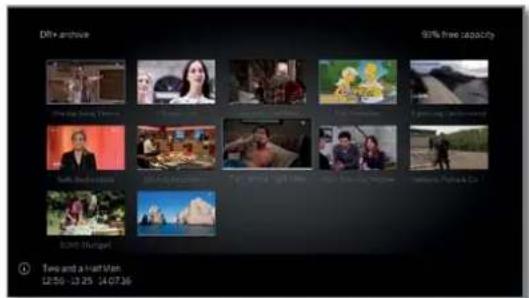
text_image
DRI+archive 95% free capacity One Day: 10:30 AM One Day: 10:30 PM One Day: 10:30 PM One Day: 10:30 PM One Day: 10:30 PM Two and a fast Man 12:56-13:25 14:07:36
MENU: Call menu options.

▼▲ Select desired function (e.g. delete), OK Confirm selection.
The marked archive entries will be deleted.
Moving of archive entries (folder management)
In the DR+ archive, you can create new directories when using the function move.
Into these directories you can move existing archive entries or do a new recording directly there.
For this purpose you simply choose the desired directory in the recording control (timer data).
You can determine the name of the new directory yourself. The DR archive root directory has the fixed designation main directory.
It is not possible to nest several directories into one another.
i With multiple selection it is possible to move several archive entries simultaneously to a folder.
Moving an archive entry to a new folder
i The desired entry in the DR+ archive is marked.

MENU: Call menu options.

▼ ▲ Mark Move internal, OK call.
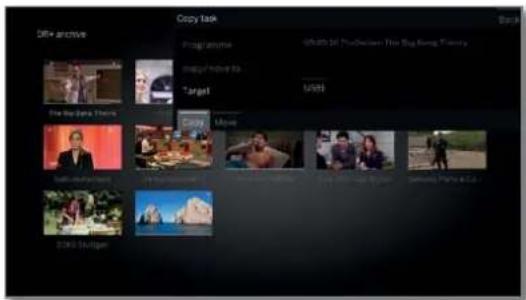
text_image
Copy task DR+ archive Project archive 09:00 Of The Decision The Big Being Funny Target UOOS The Big eyes Movie BMOO 2015 Bullgen▼▲ Select New folder, OK call.
The on-screen keyboard will be displayed to enter the folder names.
◀ ▶ ▲ ▼ Select character. OK Move character to input line.
For further information on character input see chapter General information on menu operation.
If the name of the folder is completely entered, complete with Adopt The new folder is created in the DR+ archive and the selected archive entry is moved into the folder.
Moving an archive entry into an existing folder
1 Archive entry to be moved to a folder is highlighted in the DR+ archive.

MENU: Call menu options.

▼▲ Mark Move internal, OK call.
◀ ▶ ▶▼ Select Target (folder name) if several are available. OK adopt.
◀ ▶ ▲ ▼ Mark Execute, OK adopt.
The selected archive entry is moved to the selected folder.
Loewe bild
User handbook
Recordings
Digital Recorder
Copy/move external of archive entries
You can copy/move archive entries to an externally connected USB storage device or to the hard disk of compatible Locwe TV sets in the home network.
If no target medium is available, the menu item is shown in dark grey.
- Copying/moving recordings, which originate from a CI Plus encrypted channel, is perhaps not possible or only to a limited extent.
The desired entry in the DR+ archive is marked.


MENU: Call menu options.
▼ ▲ Mark Copy/move external. OK call.
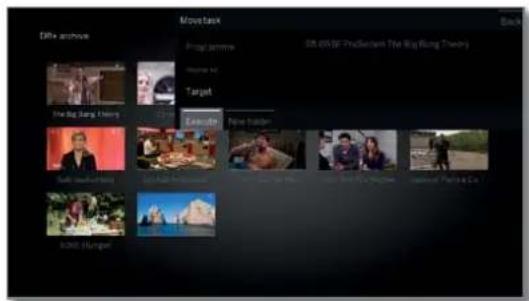
text_image
MoveTask Back Dife archive Prop Fromme 58.09 OF Projection The Big Bang Theory Target Execute New Builder BANK (Hungart)
▶ Select Target if several are available, OK adopt.
◀ ▶ ▲ ▼ Select Copy or Move. OK Start the procedure.
i After a successful moving, the recording is automatically deleted from the source.
1 Copying to an external hard disk takes place in the background and at a significantly higher speed. You see a screen message, when copying has finished. The status of copying assignments in progress/ pending can be seen in the timer list.
The TV set must not be switched off with the mains switch during the copying process!
Export archive entries
With the export function, you can move the archive entries to externally connected USB storage media. Then you can easily view and save the archive entries with a computer.
If no target medium is available, the menu item is shown in dark grey.
- Exporting recordings, which originate from a CI Plus encrypted channel, is perhaps not possible or only to a limited extent.
i The desired entry in the DR+ archive is marked.


MENU: Call menu options.
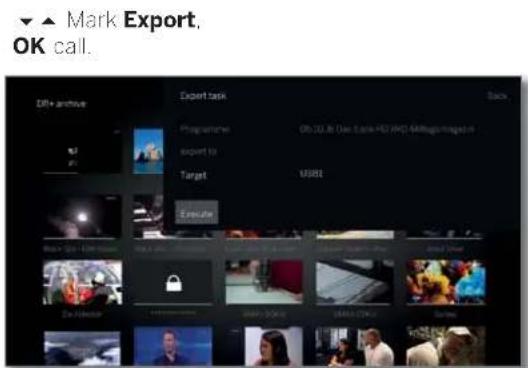
text_image
Mark Export, OK call. Off+ archive Export task Back Programming GB 20.8: Data Bank HD (HG) 440Regu/Regus it Export to Target US$51 Execute Mark > Go - On-Store Buy on the Home Save in the Home Save in the Home Done Store Ex-Store Accessories Get Store Get Store Take Up Take Up
▶ Select Target if several are available. OK adopt.
◀ ▶ ▲ ▼ Select Export OK Start the procedure.
■ Copying to an external hard disk takes place in the background and at a significantly higher speed. You see a screen message, when copying has finished. The status of copying assignments in progress/pending can be seen in the timer list.
The TV set must not be switched off with the mains switch during the copying process!
- HD archive entries (H264) are exported as ...mkv" files.
Export archive entries (MPEG2) are exported as ".mpg" files.
Export radio archive entries are exported as ".mpg" files. The TV screen remains dark when playing back the mpg filo.
For UHD archive entries, the export is restricted depending on the transport stream of the program or in some cases not possible.
Loewe old
User handbook
Recordings
Digital Recorder
Setting/cancelling delete protection
1 The menu item only appears if your TV set has an internal hard drive. ^4
You can provide films with a delete protection to prevent an automatic deletion by the delete manager.
i The desired entry in the DR+ archive is marked.


MENU: Call menu options.
▼▲ Mark Delete protection, OK Call.
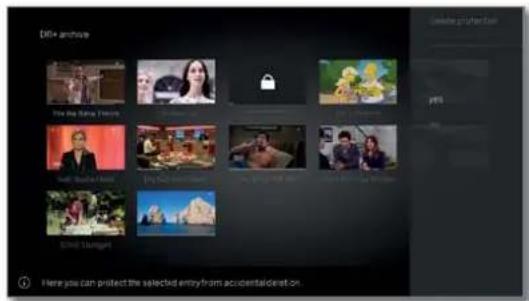
text_image
D4+ archive File the Baby Times You can protect the selected entry from accidentia@ret-on. Where you can protect the selected entry from accidentia@ret-on.▼▲ Mark yes / no, OK Adopt settings
Delete manager
The menu item only appears if your TV set has an internal hard drive.
The Delete Manager always makes sure there is enough memory space on the hard disk for new recordings.
If the capacity on the hard disk is nearly fully exhausted, the oldest recording(s) are automatically deleted in order to create space on the hard disc.
Recordings which have been protected with a delete protection are not deleted by the Delete Manager. However, you can still delete these recordings manually.
To avoid data loss, we recommend copying important recordings to an external USB hard disk (see Export of archive entries).
Loewe are not liable for data loss from the Digital Recorder's hard disk.
Locking/unlocking a movie (Parental lock)
You can lock movies that your children are not permitted to view, for instance. Playback is then only possible after entering a PIN.
In order to activate the Parental lock, a code number (PIN) must have been defined beforehand (see chapter System settings, section Control - Parentol lock).
i The desired entry in the DR+ archive is marked.
MENU: Call menu options.
▼ ▲ Mark Parental lock. OK Call.
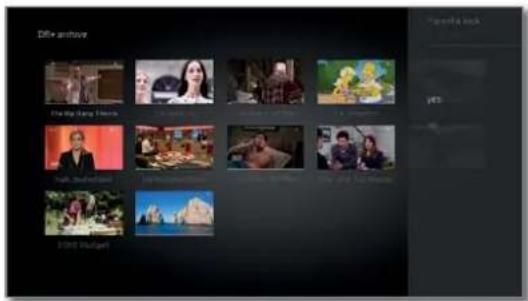
text_image
Dife archive The Big Bang Movies 0000 Budget▼ ▲ Select yes / no. OK Adopt.
The titles of locked films in the DR+ archive will be replaced by asterisks * when a parental lock is active and thus cannot be read anymore. The detailed information for the recording cannot be called up. The cover of the recording will be replaced by a picture of a lock. In addition, the entry will be labelled with the symbol 🔒.
Viewing a locked movie
The desired locked entry in the DR+ archive is marked.
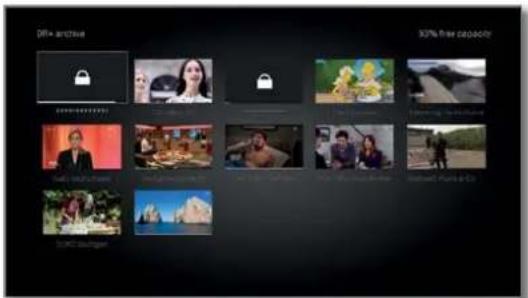
text_image
DIF+ archive 30% new capsule 10% new videoWhen the access code of the parental lock has not been entered yet:
OK call entry of PIN.
Enter your PIN.
i After the access code has been entered, the lock of the archive entries will be temporarily released.

OK View film.
Loewe old
User handbook
Recordings
Digital Recorder
DR+ Streaming
Using the DR+ streaming function, you can view films via your home network from the DR archives of other Loewe TVs that have been set up for this function, as long as these units make their DR archives accessible.
Also, you can make the DR archive of your TV set available to any other TV sets and UPnP clients equipped with this feature. They will then be able to access the archive via your home network.
To use DR streaming, at least two Loewe TV sets are required, of these, at least one TV set with integrated hard disk (with Chassis SL1xx, SL2xx, SL3xx, SL4xx as DR+ Streaming Server).
The TV sets also need to be connected via a network (wireless connection via Wi-Fi or cable connection via Ethernet, PowerLine).
1 Archive entries can only be provided or released in the network by TV sets with integrated hard disks (DR+)
In case of these TV sets which are used as DR+ Streaming Servers, the DR+ archive must be made available for other TV sets:
System settings → Control → more ... → DR+ → DR+ Streaming → Share DR+ archive with other devices → yes.
Archive entries released in the network can be replayed by all TV sets with chassis SL1xx, SL2xx, SL3xx, SL4xx and Chassis MB180. In case of these TV sets used as DR+ Streaming Clients, access to other DR+ archives must be enabled:
System Settings → Control → more ... → DR+ → DR+ Streaming → Also use other archives → yes.
1 Functions requiring write access to a device that enables the recording to be viewed are not available when viewing a DR+ archive entry over the network.
Such functions are, for example, child protection, delete protection, renaming, deleting entry or bookmark, setting bookmark, deleting or hiding parts of the recording.
Playback of DR+ archive entry via the network


Open the DR+ archive.
▼▲◀▶ Select desired archive of the corresponding device,
OK Display archive entries.
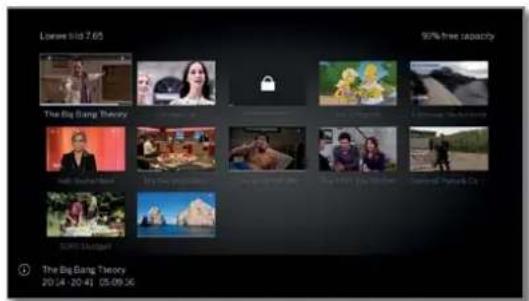
text_image
Longest 7.65 90% free capacity The Big Bang Theory The Big Bang Theory 20:24 -20:41 13:09:36
▼▲ Select the required archive entry. OK Play archive entry.
See chapter Sources, section Video playback for further information.
Follow me function
The Follow me function enables you to interrupt a current programme in a TV set (main device) with integrated hard disk and to continue viewing it with a TV (secondary device) set from the point of interruption.
To use Follow me function, at least two Loewe TV sets are required, of these, at least one TV set with integrated hard disk (with Chassis SL1xx, SL2xx, SL3xx, SL4xx).
The TV sets also need to be connected via a network (wireless connection via WLAN or cable connection via Ethernet, PowerLine).
i On the main TV set, the function must be enabled:
System settings → Control → more ... → DR+ → DR+ Streaming → Share DR+ archive with other devices → yes.
On the target TV set (secondary device), the function must be enabled:
System Settings → Control → more ... → DR+ → DR+ Streaming → Also use other archives → yes.
Start Follow me function on main device

Press PAUSE key.
The TV image becomes a freeze frame.

MENU: Call menu options.
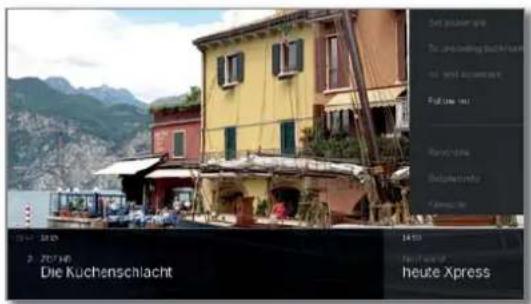
text_image
Set ausgewinn To: 2000-2001 to: 2000-2001 Fall (One Day) Hand-on-line Dietekontelnor Fremdkontelnor Die Kuchenschlacht 14:53 Heute Xpress Heute Xpress
▼▲ Activate Follow me. OK Adopt.
You will see a message on the screen.
The archive recording starts in approximately 20 seconds without an entry. The TV set switches itself off after starting the recording. The broadcast is adopted into the DR archive.
The recording TV set will make the broadcast available to the network from now.
You can indicate the beginning of a Follow me recording at the target TV sets in your network by a screen display.
Continue viewing the programme at the second device
Call on the TV set, where you want to view the broadcast, the DR archive of the recording TV set.

Open the DR+ archive.

▼▲ Select archive of the recording TV set (main device),
▶ Display archive entries.
▼▲ Select Follow me recording. OK View recording.
Loewe old
User handbook
Recordings
Mullroom
Multiroom ^(1)
Using the Multiroom function, you can transmit content over the network from a TV (Master TV) simultaneously to up to two other Loewe TV sets, which are in different rooms.
The content may be live TV, DR + recordings, DVB radio, internet radio or music files.
With the wake on WLAN/LAN function the master TV set can switch on the selected TV sets before the playback starts.
To use Multiroom TV, at least two devices with SL3xx/SL4xx chassis must exist. For the device type Reference, the multiroom function is available ex factory; all other types of devices must be equipped with the feature upgrade stick SL3xx/SL4xx.
All TV sets must be connected to the home network. It is recommended to use a wired connection (LAN). In case of a wireless connection (WiFi), technical limitations (e.g. liability to interferences, bandwidth limitations) can cause disruptions in the playback right up to a complete breakdown of the playback.
To switch on the devices with the wake on WLAN/LAN function, the function must be enabled. Adjustable in the System settings under Multimedia / Network → Network settings → Wake on LAN/WiFi.
In order to provide DR+ recordings via the Multiroom function in the network, your TV set must possess an internal hard drive.
Multiroom playback
Choose your desired content, for example, a TV or DVB radio program or a DR+ recording from the internal DR+ archive.
The TV set on which the content is selected, is for this time the Master TV.
Example for Multiroom playback from the current TV programme:

MENU: Call menu options.
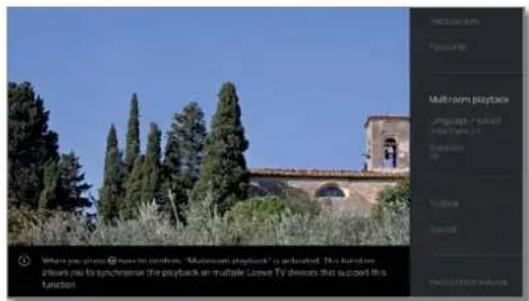
text_image
Multi-rom playback https://www.muroom.org/10.1.1 Video Video Video Where you choose @ new to continue. "Multi-rom playback" is activated. This function inerts you to synthesize the playback on multiple Leave TV devices that support this function
▲▼ Select Multiroom playback . OK call.
With Multiroom TV Streaming, only channels that transmit unencrypted TV content can be used.
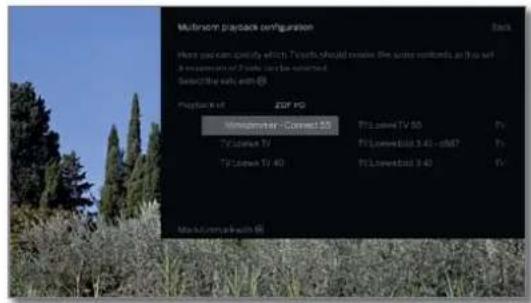
text_image
Multihome playback configuration Here you can qualify which, TVath should receive the audio packets as this will A resolution of 2 PS on the next page. Select the safe path! Playback of ZDF PC Windower - Connect 53 TVath TV TVath TV 40 P/Leave TV 53 P/Leavebox 3.43 - c867 P/Leavebox 3.43 P/Leavebox 3.43 Maculumpack with @
▶ ▶ ▶▼ Select set(s) on which the content is to be displayed (maximum 2 sets or 4 sets in Multiroom audio playback).
OK confirm selection. Behind the selected devices, a check mark √ is set.
◀ ▶ ▲ ▼ Select Confirm,
OK confirm selection.
The current TV programme is simultaneously replayed on the selected ^2 devices.
The Multiroom playback of a DR+ recording from the internal DR+ archive or a running DVB radio program follows the same pattern as described above using Multiroom TV streaming as an example.
In multiroom streaming, there are limitations in the playback controls, for example (pause and winding are not available).
Ending the Multiroom playback
If you select a different content on an individual Multiroom TV, the Multiroom playback on this TV set is terminated
Adapting the TV set names
The default name of your TV set in the network is Loewe bild X.XX (X: device name ex factory, XX is the screen size).
The device name can be set in the System Settings under Multimedia / Network → Network settings → Host name.
Multiroom Bluetooth Music Player
For the functionality of the Multiroom Bluetooth Music Player, please refer to the corresponding section (see chapter System settings, section Multimedia/Network – Bluetooth).
Loewe old
User handbook
Recordings
Timer
Timer
In the timer menu you will find the Timer List and the Timer Services. All programmed recordings, earmarked programmes and copy jobs are listed in the timer list.
The timer services menu offers you convenient alarm services see chapter Recordings, section Timer - Timer Services).
Calling the timer menu

HOME: Calling the Home view.

Select Recordings.
◀ ▶ ▼ ▲ select Timer. OK call.
Or:

press longer: call the timer menu.

◀ ▶ ▼ ▲ Select Timer list.
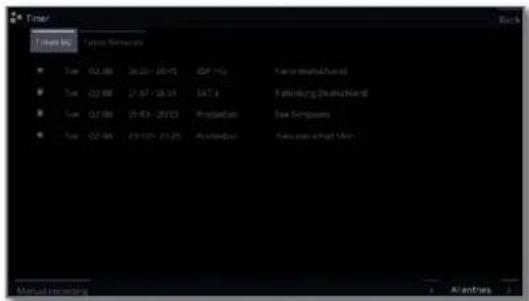
text_image
Timer Tremes Inc. / Tresen Schemas • Tue 02-08 26:00 - 20:45 GBP +42 • Tue 02-08 27:07 - 18:34 GBP • Tue 02-08 29:03 - 20:03 PostSession • Tue 02-08 29:03 - 21:25 PostSession Fahrierung Steuhand Die Schemas Kanzen, eine High-Men Manual Monograph All entries
◀ ▶ ▼ ▲ Select Manual recording,
OK Timer data are retrieved (see right column).
When you have programmed timer recordings, the TV set can only be switched off to the standby mode. Never switch the TV set off at the mains and do not pull out the plug of the TV set out of the socket. Otherwise no timer recordings can be made.
When a software update occurs it may happen that timer entries and memorised programmes are deleted. After such a software update, check your timer list.
Explanation of the symbols in the timer list:
Recording
Recording in progress
Marked programme
Repeated recording (daily, weekly or Mon-Fri)
Serial recording
Entering the Timer data
The setting options for the timer data differ depending on the way (EPG or manual recording) the recording has been programmed.
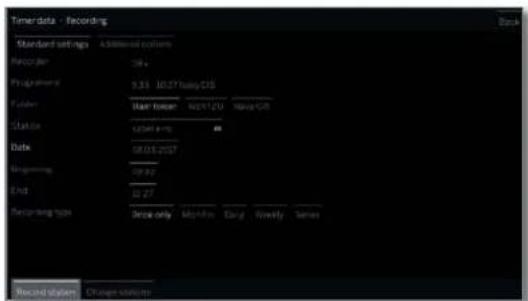
text_image
Timer data - Recording Standard settings 4.08 percent cycles Record time: 28 s Programm: 9.33-10.37 busy CIS Catalen: Hour tower 50/11/20 New CGB Cluster: 12564 m/s Data: 08.05.2057 Beginning: 08:32 End: 32 p7 Recording type: Draw only Monthly Daily Weekly Series Record system Change version
▲▼◄► Update timer data, if required. or press OK for confirmation.
Please also read the instructions in chapter System settings, section Extras – CA module concerning the recording of encoded programmes.
Explanations of the setting options in the menu Timer data – Standard settings
Folder If available, select the directory into which the recording will be directly saved. The DR+ archive root directory has the fixed designation Main folder. Default setting: Main folder.
Channel Channel for which the recording is carried out.
Date Day of recording.
Beginning Starting time of the recording.
End End time of the recording.
Recording Programmes can be recorded in different ways:
type Once only: The programme will be recorded at the specified time.
Mon-Fri: The programme will always be recorded from Monday to Friday at the specified time.
Daily: The programme will be recorded every day at the specified time.
Weekly: The programme will be recorded every week at the specified time.
Serial ^1 : A programme running regularly, but with different start times, can be conveniently programmed. In this case, the TV set is checking every day at the specified time, whether the programme is available in the EPG data. If so, the program is recorded, if not, the next review will be made the following day.
Loewe bild
User handbook
Recordings
Timer
Explanations of the setting options in the menu Timer data – Additional options
Lock Only allow later playback of this recording after recording entering the PIN number (Parental lock).
If a PIN still has not been entered under System settings → Control → Parental lock, the Parental lock will at first be activated. See chapter System settings, section Control – Parental lock for further information.
Delete Safeguard the recording from being deleted auto-protection automatically by using the delete manager.
Auto time control ^1 Your TV set can use the automatic time control (Accurate Recording) for recording a programme. The automatic time control takes control of the corresponding monitoring of the start and end time for DVB channels. The recording is started at the beginning of the broadcast and switched off at the end, even if the start and/or end time have been changed by the programme provider.
The automatic time control is not supported by all channels.
If yes is selected and automatic time control is not supported by the recorded channel then no recording is made.
If the programme information (Event-ID) should not be available any more for the recording of a programmed broadcast, e.g., due to a programme change or because the Event-ID has been changed by the channel, the programme cannot be recorded. The broadcasters alone are responsible for the transfer of this data for using automatic time control. The availability of the appropriate data cannot be guaranteed by Loewe.
Recording Subtitles Select whether broadcast subtitles are to be recor- ded too.
In case of a direct recording the presetting is taken from System settings → Control → more ... → DR+ → Recording subtitles.
Favourite When selecting yes the recording will be added to the Home favourites.
Record conflict
Despite the possibility of multi recording, it can happen when programming a new recording that there will be an overlapping with already stored timer recordings. In this case, the recording conflict dialogue will open.
Here you can determine which of the recordings you want to be executed, and you must eventually specify which of the programmes shall be fully recorded and which are cut.

▲▼ Select recording.
OK change status.
The symbol before the recording shows you what happens to the recording.
If the status for each recording is ok:

▲ ▶ ▲ ▼ Mark store recordings.
OK call.
The timer data of the recordings will be adjusted accordingly.
Explanation of the symbols in the conflict manager:
√
TV programme is completely recorded.

Recording is cut off (at the beginning and/or end). Pay attention to the start and end time of the recording.

The recording is deleted.
Delete/change programmed timer instruction
Use this function in the timer list if you want to delete recordings already programmed, to end a running timer recording or to change a timer instruction.

The Timer list is displayed.
▼▲ Mark desired timer instruction.
The text of a currently active timer instruction is red. If you delete this timer instruction, the recording is stopped.
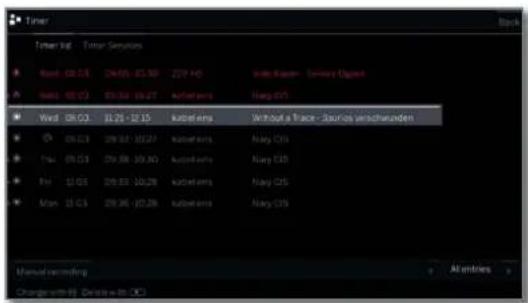
text_image
Timer Tuner Info - Timer Services Word: 08.03 124.05 - 05.90 257 HD Wang Kalan - Dinarz Object Wang: 08.03 256.04 - 05.27 Kaufsens Huang CDS Word: 08.03 11.29 - 12.15 Kaufsens Without a Trace - Saurias versicherungen Wang: 08.03 109.07 - 102.27 Kaufsens Navy CDS Yue: 08.03 259.08 - 103.30 Kaufsens Navy CDS Fui: 11.03 259.03 - 103.28 Kaufsens Navy CDS Man: 11.03 259.06 - 102.28 Kaufsens Navy CDS Manual rendering Changransmit: Dinarz-08.03 (C)
OK Change marked timer instruction.
The timer instruction will be displayed.
Or

STOP: Delete marked timer instruction.

OK Confirm delete.
Timer instruction will be deleted.
Loewe bild
User handbook
Recordings
Timer
Timer Services
This menu offers you convenient alarm services. Programmed alarms are also active when the TV set has been switched off to standby. If the TV set is switched on from the standby mode by alarm, a screen message appears. If this is not confirmed within 5 minutes with the OK key, the TV set switches automatically off again for safety reasons. The TV set can also be switched off automatically at certain times. A screen warning appears one minute before automatic switch off. The automatic switch off can be interrupted by pressing any key.
Call Timer Services


HOME: Calling the Home view.
◀ ▶ ▼ ▲ Select Recordings.
◀ ▶ ▼ ▲ select Timer.
OK call.
Or:


press longer: call the timer menu.
◀ ▶ ▼ ▲ Select Timer Services.
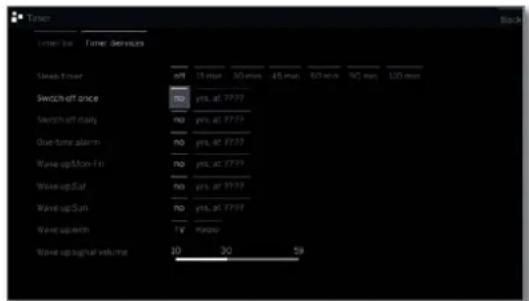
text_image
Terminal Time Services Switch User on 15 min 30 min 45 min 80 min 90 min 120 min Switch off once no yes at 17:37 Switch off daily no yes at 17:37 One-time alarm no yes at 17:37 Wave up/Non-Fit no yes at 17:37 Wave up/Sat no yes at 17:37 Wave up/Sun no yes at 17:37 Wave up/orth TV radio Wave up digital volume 10 30 59
◀ ▶ ▲ ▼ Select the desired setting.
OK change.
OK adopt.
Explanations of the setting options:
Sleep timer After expiration of the indicated time, the device automatically turns into Standby mode.
Switch off once The set switches to the standby mode automatically at the specified time.
If a time is specified which has already passed on the same day, the set switches off at this time the next day.
Switch off The set switches to the standby mode automatically daily every day at the specified time.
One time alarm The set alerts you once today at the specified time. If a time was specified which has already passed on the same day, the alarm is saved for the next day.
Wake up The set regularly alerts you from Monday to Friday Mon-Fri at the set time.
Wake up Sat The TV set alerts on Saturdays or Sundays regularly Wake up Sun at the specified time.
Wake up with Indicate whether the TV set should enter the TV or radio mode from stand-by during an alarm. The channel, which was last active, is activated.
Wake up signal Enter the volume at which the alarm sounding should take place.
Loewe bild
User handbook
Sources
Sources
You will receive access to all devices connected to the TV set locally via the Sources point in the Home view (e.g. to AV, HDMI, USB), as well as all available devices on the home network in order to playback multimedia content on the TV set.
Selecting the content source
i In normal TV mode, without other displays.

Open Sources.
Or:

HOME: Calling the Home view.

Call Sources
text_image
Rearer To Recordings Sources Apport CAM CAM CAM CAM CAM CAM CAM CAM CAM CAM
◀ ▶ ▲ ▼ Select source,
OK call.
If you have selected, for example, an HDMI connection, it will change over to the respective connection. The TV set is ready to present the content of the source.
Where the selected source delivers a signal, this should now be visible.
When selecting a connected USB hard disk or a media server, you must select another playable file in the file structure.
The structure and the presentation of the files/folders are dependent on the selected source.

◀ ▶ ▲ ▼ If applicable, select the desired folder,
OK then open the folder.
If required, repeat.
▲▼ Select the desired file.
OK start playback of the selected file.
Possible sources
i The media sources displayed depend on your devices.

HDMI
Source on HDMI connection of the TV set.
Depending on the content being played back from the external source, see chapter Sources, section Video-, Audio- and Photo playback.
For the connection and the configuration of external devices, see the section External devices. Section Devices to the HDMI connections.

PCIN
Source on the AV connection (with VGA adapter) of the TV set.
Depending on the content being played back from the external source, see chapter Sources, section Video-, Audio- and Photo playback.
For the connection and the configuration of external devices, see the section External devices, section Devices on AV.

AVS
AV
Source on the AV connection (with scart adapter) of the TV set.
Depending on the content being played back from the external source, see chapter Sources, section Video-, Audio- and Photo playback.
For the connection and the configuration of external devices, see the section External devices, section Devices on AV.

VIDEO
Source on the ANT TV connection of the TV set.
When selecting VIDEO, you switch to the signal source Cable analogue, channel E36. The TV set can display the signal from an external source via the antenna input TV ANT.

USB
Source (e.g. USB hard disk, USB stick) to an USB connection of the TV set.
The exact description is dependent on the respective storage medium.
Depending on the content being played back from the external source, see chapter Sources, section Video-, Audio- and Photo playback.
Please also refer to the chapter System settings section Control - Software update for the USB sticks!

Network
Source (e.g. media server, NAS), which is available via the Home network.
Depending on the content being played back from the external source, see chapter Sources, section Video-, Audio- and Photo playback.
The exact description is dependent on the respective storage medium.
Loewe old
User handbook
Sources
Explanation of the source menu options
i A source has been selected.
The menu items available in the menu options depend on the currently marked object (data source, directory, file).

MENU: Call menu options.
text_image
TOSHISA EXT Favorites Multi-rom program Starting A A A A Click: Happy Where: Crossroads - Crazy City: Citation History & Distant Picture Here you can specify the current selected item as your favourite
▼▲ Select desired menu option. OK Confirm selection.
Favourite Add marked media file to the Favourites in Home view.
Sorting Sort media files in the opened directory in alphabetical (ascending A-Z or descending Z-A) order, file size or date (newest entries first).
Filter Select the desired filter (Audio-Titles, Audio-Artists, Audio-Album, Photo or Video) and thus hide the other files.
The filter is automatically reset after leaving the archives.
Log off The current selected USB source can be safely logged off from the TV set via this menu option before disconnecting it.
Exchange thumbnail of the HDMI input
A separate thumbnail can be defined for each HDMI input in the source selection. A selection of different thumbnails (for instance, Blu-Ray players, game consoles and set top boxes) are available.

HOME: Calling the Home view.

◀ ▶ ▲ ▼ Call Sources.
◀ ▶ ▼ ▲ Select HDMI entry.
text_image
App Hz Recordings Sources HDMI Sound Soundhead Soundhead Soundhead Soundhead Soundhead
MENU: Call menu options.

▼ ▲ Select Change thumbnail.
OK call.
text_image
Smartbox HDMI DTV Pro-View Pro Ultrate Chromatext DTMB fireTV NOW™ SHIELD PlayWorks Roku sky TalkTalk Wii Wii XBOX Webcom
▼▲ Select desired thumbnail.
OK Confirm selection.
Loewe old
User handbook
Sources
Video
Video playback
The description of the following functions applies to the playback of videos from the DR+ archive as well as for videos from USB storage media or from media servers in the home network.
For playback of DR+ archive entries you have additional playback and editing capabilities. The explanation of these functions you find in chapter Sources, section Additional functions for DR+ archive playback.
Video menu options
The menu options provide you with further options for the current playback.
A video is being played back. Selection of the video via the menu item Sources (see chapter Sources) or, where available, the DR+ Archive via the menu item Recordings (see chapter Recordings, section Digital Recorder).

MENU: Call up menu options.
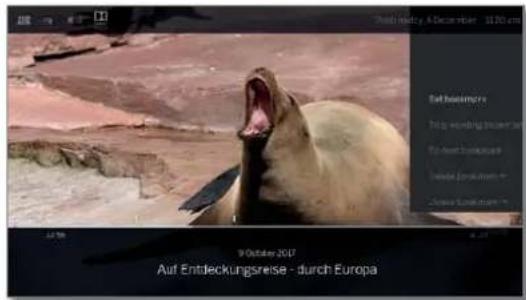
Explanation of the menu options for video playback
The number of available items in the menu options depends on the video and video source selected (DR + Archive, USB and Home Network).
Remote operation key

Call up menu options with video settings

Call up detailed information on current playback.
■ Key INFO: Display detailed information if status display appears, otherwise call status display.

Call up lists view (select video)

Set bookmark
1 Only with DR + archive playback.

JumpTo previous bookmark.
■ Only with DR + archive playback.

JumpTo next bookmark
■ Only with DR + archive playback.

Delete bookmark ←/→
■ Only with DR + archive playback. The function is only available if a bookmark set manually is within five seconds of the current playback position (only valid for deleting with the remote control key).
Remote operation key
Menu option
- Go to. Use this menu item to jump to a specific point in time during playback.
- Start Follow me recording.
With the Follow me function, you can interrupt a program in progress and resume playback on another Loewe TV set at the point of interruption.
1 Only during time-shifted playback (time shift operation).
- Hide. Use this menu item to hide parts in archived recordings.
- Delete to start. Use this menu item to delete the section of an archived recording from the current position to the start of the recording.
1 Only with DR + archive playback.
1 Only selectable in pause mode.
- Delete to end. Use this menu item to delete the section of an archived recording from the current position to the end of the recording.
Only with DR + archive playback.
1 Only selectable in pause mode.
Take over as track image. Apply current standard image as track image in the DR + archive.
1 Only with DR 1 archive playback.
■ Only selectable in pause mode.
- Activate / again deactivate Repeat of the currently played directory or archive entry.
Only with DR + archive playback.

Favourite. Add the currently played video to favourites in Home view.
- The Multi-room playback item starts the synchronous playback of the currently playing video on several Loewe TV sets that support this function.
- Language/sound. You can select other film languages and other sound formats here.
- The Sub-title menu point is shown, if the recording contains subtitles.
■ Only with DR + archive playback.
i Subtitles are recorded (see chapter Recordings section Timer – Entering the timer data).
- Image. The Image menu item contains the most important settings for adjusting the video playback. Further information see chapter System settings, section Picture.
Sound. The menu item sound contains the most important settings for adjusting the sound reproduction.
Further information see chapter System settings, section Sound.
Loewe old
User handbook
Sources
Video
Remote operation key Menu option
The Headphone volume is adjustable independently of the set volume of the set loudspeakers.
- With Image off, you can switch off the screen of your TV set. The navigation keys further activate the screen. V+/V- does not activate the screen.
■ Only with DR + archive playback.
- With Further settings access the system settings of your TV set.
Further information, see chapter System settings.
Explanation of keys

INFO (press longer): show Explanation of keys.

INFO or BACK: hide Explanation of keys
Pause playback (freeze picture)

PAUSE key: Switch to freeze picture.

PLAY key: Continue playback.
Jump
By briefly pressing the ◀ or ▶ keys you can skip forwards and backwards in the movie.
The jump distance can be set in the System settings under Control → more ... → DR+ → Jump distance (see also chapter System settings, section Control - DR+).

Skip forwards.
Skipping with Smart jump
The Smart jump function ensures that the jump width is halved each time the jump direction is changed or doubled after three jumps in the same direction (max. 8 minutes). This way you can quickly find a certain spot of the recording.
The settings for Smart Jump you find in the System settings under Control → more ... → DR+ → Smart Jump (see also chapter System settings, section Control - DR+).
natural_image
Close-up of green plant parts with dew drops, captured in October 2017 (no text or symbols on the main subject)You are looking for a particular scene in a running programme:
Depending on your needs, press the key ◀ (backwards) or ▶ (forwards) briefly several times, to roughly jump to the area of the programme you are looking for.
If you skipped the desired scene of the programme, jump in the opposite direction. This jump is executed in halfs of the jump distance.
If you skipped the desired scene of the programme again, jump again in the opposite direction. In the process, the jump distance is cut in half again.
By halving the jump distance again when changing direction you can gradually approach the desired location.
Jumping by entering a time
You can enter a time to jump to any position in the video.

MENU: Call up the menu options.

▼ ▲ Select Go to... OK Call.
natural_image
Close-up of green plant buds with dew drops, captured in a video frame (no text or symbols on the main subject)
Use the number keys to enter the time.

OK to jump.
Loewe bild
User handbook
Sources
Video
Wind
To search for desired scenes in movies you can fast forward and rewind at three different speeds. Sound is not audible during winding.


◀ or ▶ press a little bit longer.
By each brief pressing of ◀ or ▶ the speed will increase until you switch back to the first speed.
◀◀▶
◀◀▶▶×4
◀▶×8
The different winding speeds are represented by the symbols shown below.
In case of time-shift viewing, playback is automatically activated when the end of the recording is reached. You are then about 10 seconds behind the live picture or when rewinding at the beginning of the time shift recording.
In case of Fast forward of archive entries, playback will finish at the end of the recording. The DR+ archive is displayed again.

PLAY key: Continue playback.
In the case of Internet videos, please wait until these are buffered in the memory. This can take a few seconds, depending on the bit rate of the film and Internet speed.
Repeat
Videos can be repeated, i.e., replayed in an endless loop.
Repeated playback of DR+ archive entries

MENU: Call up menu options.

Mark Repeat
OK confirm.
MarkTitle
OK confirm.
The current archive entry will be replayed repeatedly. The repetition setting remains active for this archive entry even when the playback is finished.
To deactivate playback again:

MENU: Call up menu options.

Mark Repeat
OK confirm.
▼ ▲ Markoff.
OK confirm.
Select language/sound
Videos, especially those recorded from TV broadcasts, can contain several sound tracks.
Select sound track/language:

MENU: Call up menu options.

Mark Language/sound. OK call Language/Sound selection.
▲▼ mark desired sound or desired language. OK select sound track.
Loewe old
User handbook
Sources
Video
Changing the picture format
i Function is not available for all videos.

MENU: Call up menu options.

▼ ▲ Mark Change Picture format.
OK set picture format.
You can choose between small or full image settings.
Small image setting shows the video close to the original resolution. The video status bar is permanently shown below the image.
The full image setting enlarges the image to fit the entire screen. The status bar can be set to visible or hidden.
Additional functions for DR+ archive playback
When playing back recorded channels from the internal DR+ archive on an of the DR+ archive of an attached USB hard drive, there are additional editing and playback functions.
Setting bookmarks
To retrieve interesting scenes in a movie later, you can manually set the bookmarks. In addition, there are also automatically set bookmarks for the start/end of a programme.
In programmes sent in Dolby Digital 5.1 format, the commercials are detected and automatically bookmarked at the beginning and end of the advertising block.
In case of a running time-shift recording (timeshift television), this will be converted into an archive recording when a blank is set.

PLAY key (press longer): Set bookmark.
You will see a screen message at the top right edge of the TV set.
The bookmarks set automatically appear as black or white marking in the time line. The bookmarks set manually appears as white marking via the time line.
Jumping to Bookmarks

MENU: Call up menu options.

▼▲ Mark To next bookmark. OK Jump to next bookmark.
Mark To preceding bookmark. OK Jump to next bookmark.
Or:
Blue key: Skip to next bookmark.
Yellow key: Skip to previous bookmark.
Loewe bild
User handbook
Sources
Video
Deleting individual bookmarks
Jump to the manually set bookmark to be deleted.
Press PLAY key for a little bit longer: Delete bookmark.
Deleting the Bookmark during playback
You can delete your manually set bookmarks during the playback of the DR+ Archive entry.
The bookmarks set automatically appear as black or white marking in the time line. The bookmarks set manually appears as white marking via the time line.


MENU: Call up menu options.
Mark Delete bookmark
OK the manually set bookmark left from the current position is deleted.
Mark Delete bookmark→
OK the manually set bookmark left from the current position is deleted.
Intervals between manually or automatically set bookmarks (intervals) can be hidden for future playback. This can be useful for example To hide advertising blocks in an archive entry.
The interval functions can also be used to delete unwanted passages at the beginning or end of your recorded broadcasts.
Hiding the interval
An archive entry is played back.
Control the required interval by jumping or spooling.
PAUSE: Pause playback.

▼▲ Select Hide. OK to hide the current interval.
This interval will be skipped when the archive entry is played back in future.
Displaying a hidden interval
If a hidden interval is skipped when playing a DR+ archive entry, a message appears on screen.
In the System settings → Control → more ... → DR+ → Notify hidden sections make sure a yes is set.

In the screen prompt, choose yes. OK to confirm.
The hidden interval will be shown again in future play-back.
Deleting intervals
You can delete intervals by deleting the bookmark at the beginning or end of the interval.
Loewe bild
User handbook
Sources
Video
Deleting part of a recording
i Playback an archive entry.

Press the PAUSE button from which point you want to delete the recording to the end or the beginning.
▼ ▲ Select Delete to start or Delete to end, OK Confirm with.
▶ Select Yes OK Delete part of a recording.
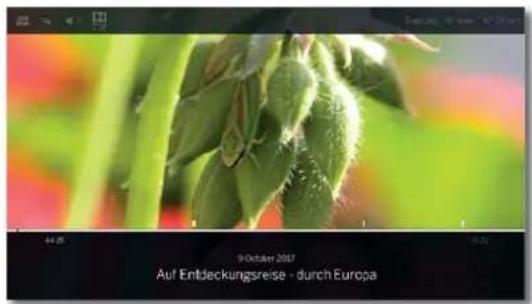
natural_image
Close-up of green plant buds with dew drops, captured in October 2017 (no text or symbols on the main subject)Determine cover picture
The covers for the display of the entry in the DR+ archive can be freely determined by you during an archive replay:
Jump / wind to the desired position in the recording.

PAUSE key: Switch to freeze picture.

MENU: Call up menu options.

▼▲ Mark Adopt as cover picture. OK confirm.
You will see a message on the screen. The image will be displayed next to the broadcast in the DR archive in future.

PLAY key: Resume play.
Subtitles
When recording a programme, any existing subtitles can be recorded as well and displayed when playing back.
i An archive entry is replayed.
Subtitles were recorded too (see chapter TV, section Recordings – Entering the Timer data).
MENU: Call up menu options.

Mark Subtitles
OK call up available subtitles.

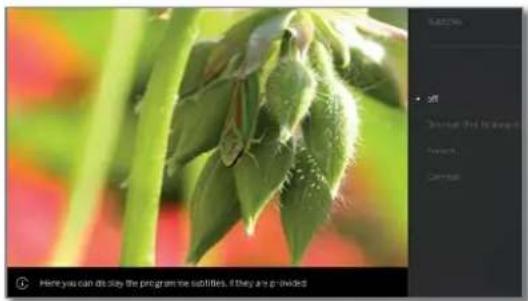
natural_image
Close-up of green plant leaves with water droplets, no visible text or symbols
▼ ▲ Mark the desired subtitles.
OK show/hide subtitles.
Loewe old
User handbook
Sources
Audio
Audio playback
Explanation of the menu options for audio playback
An audio file is being played back. Selection of the audio file via the menu item Sources (see chapter Sources).

MENU: Call up menu options.
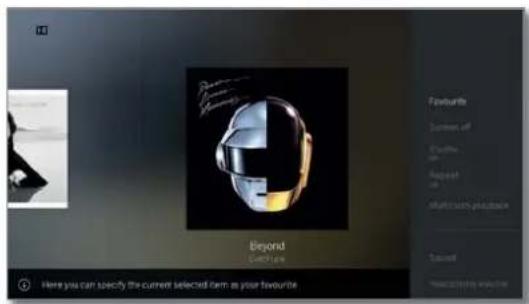
text_image
Beyond Couch! From Here you can specify the current selected item as your favourite
BACK: Hide menu options again.
Remote operation key

Call up menu options for audio playback.

Call up file view (select music title / channel).

Display EPG detailed information on current program.
■ Only for DVB radio.
Call up detailed information on played back music title.
■ Only when playing tracks via USB / home network.

Favourite. Add currently played channel / music track to favourites in the Home view.

Screen off. Switch off screen of the TV set
- Switch on/off Shuffle replay of the tracks of the current folder.
■ Only when playing tracks via USB / home network.
- Switch on/off Repeat, (endless reply) all tracks of the current folder / directory or the current track.
■ Only when playing tracks via USB / home network.
- The Multiroom playback item starts the synchronous playback of the currently playing video on several Loewe TV sets that support this function.

Sound. The menu item sound contains the most important settings for adjusting the sound reproduction.
Further information see chapter System settings, section Sound.
Remote operation key
Menu option

The Headphone volume is adjustable independently of the set volume of the set loudspeakers.

With Other settings, access the system settings of your TV set.
Further information, see chapter System settings.
Explanation of keys

INFO (press longer): show Explanation of keys.


INFO or BACK: hide Explanation of keys.
Pause playback

PAUSE key: Stop current playback.

PLAY key: Continue playback.
Wind
You can fast forward music titles at four different speeds. Sound is not audible during winding.

Press ▶ a little bit longer.
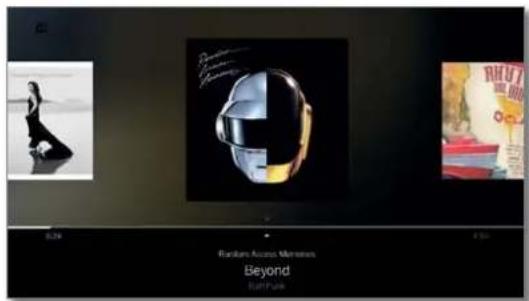
text_image
Random Access Minutes Beyond BeyondWith each brief pressing of ▶ the speed will increase until you switch back to the first speed. Available speeds: 2x, 4x, 8x, 16x.
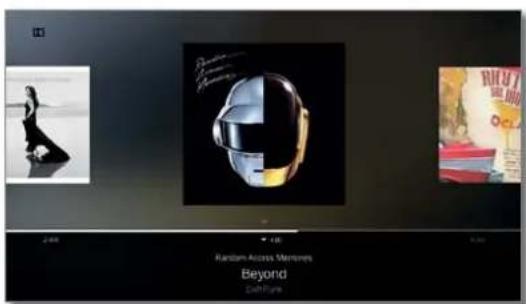
text_image
Random Access Memories Beyond Cash Play
PLAY key: Continue playback.
Loewe old
User handbook
Sources
Audio
Select another title / play current title from start

BACK: Call music selection.
Select Music Titles as described in the chapter Sources.
Or:

Press P+ or ▶ briefly:
Play next title of current album / directory.
Press P—or ▶ briefly:
Play current title from start.
Press P—or ▶ briefly again:
Play previous title of the current album / directory.

Or:
◀ ▶ Scroll in music titles.
text_image
JIO INDUSTRIES INDUSTRIES ClocksPlayback of the selected track starts automatically after approx. 2 seconds.
Repeat
Music titles can be repeated, i.e., replayed in an endless loop.

MENU: Call up menu options.

Mark Repeat.
OK Call up repeat.
Mark Title
OK Turn on repeat of the single music track.
The repeat setting remains until it will be deactivated or another music title is replayed.
Or;

Mark All
OK Turn on repeat of all music tracks in the current folder/directory.
The repeat setting remains until it will be deactivated or another directory in the overview is selected.
■ Repeat Title and repeat All cannot be activated at the same time.
The setting one of the two functions deactivates the other.
Repeat and Shuffle (see right column) cannot be activated at the same time. Activating a repeat operation deactivates shuffle.
Shuffle playback
The music titles of your current medium are replayed in random order.

MENU: Call up menu options.

Mark Shuffle playback.
OK Switch shuffle playback of the titles in current album / directory ON/OFF.
■ Repeat and Shuffle (see left column) cannot be activated at the same time. Activating the shuffle playback deactivates repeat.
Switching the screen ON/OFF

Green key: Switch screen OFF.
Or.

MENU: Call up menu options:
text_image
HO the my the my the my the my the my the my the my the my the my the my the my the my the my the my the my the my the my the my the my the my the my the my the my the my the my the My the My the My the My the My the My the My the My the My the My the My the My the My the My the My the My the My the My the My the My the My the My the My the My the My the MY
Mark Screen off.
OK Switch screen off.
1 Switching off the screen reduces the power consumption of the TV set.
Switch on the screen with the remote control:

Press green key
Ending playback

STOP key: End playback and return to music selection.
Loewe old
User handbook
Sources
Photo
Photo playback
Explanation of menu options when displaying photos
A photo is being displayed. Selection of the photo via the menu item Sources (see chapter Sources).

MENU: Call up menu options.
natural_image
Landscape photo of a green field under a cloudy sky, with no visible text or symbols.
BACK: Hide menu options again.
Remote operation key

Menu option
Call up menu options for photo playback.

Call up file view (select photograph).

short
Display previous photograph.

short
Display next photograph.

Favourite. Add the currently displayed photograph to favourites in Home view.

Start slide show.

Pause slide show which is running.
Rotate photo by 90 degrees to the left. (Rotate left)
Rotate photo by 90 degrees to the right. (Rotate right)
- With the Photo menu item, you can make frequently used picture settings.
Picture. The menu item image contains the most important settings for adjusting the image reproduction.
Further information see chapter System settings, in section Picture.
Pause background music.
The menu item only appears when playing music tracks in the background.
Remote operation key
Menu option

Sound. The menu item sound contains the most important settings for adjusting the sound reproduction.
Further information see System settings chapter, section on Sound.

The Headphone volume is adjustable independently of the set volume of the set loudspeakers.

Use Detailed info to display the file size, the recording date and the file name of the image.
With Other settings, access the system settings of your TV set.
Further information, see chapter System settings.
Explanation of keys

INFO (press longer): show Explanation of keys.


INFO or BACK: hide Explanation of keys.
Full-screen mode
i A photo is highlighted in the selection (Folder view).
natural_image
Landscape photo showing a green field with distant hills and cloudy sky, alongside a small pink flower in the corner (no text or symbols)
OK View photo in full-screen mode.


Show previous / next photo.
Rotating the photo

MENU: Call up menu options.

▲▼ Mark Rotate left or Rotate right. OK Rotate photo by 90 degrees to the left/right.
natural_image
Landscape photo of a green field under a cloudy sky, with no visible text or symbols.Loewe bild
User handbook
Sources
Photo
Slide show

MENU: Call up menu options.

▼ ▲ Mark Start slideshow.
OK start slide show.
text_image
Start slide show Available Left Picture Export Show to Picture Show to (start view)Or:

PLAY key: Start slide show.

PAUSE key: Pause slide show.

PLAY key: Continue paused slide show.
Photo in full-screen mode / exit slide show

STOP key: Full-screen mode/end slide show and return to photo selection.
Loewe bild
User handbook
Apps
App Gallery
Apps
Here you have access to multimedia content on the Internet (App Gallery), a full-fledged web browser and other apps.
Calling the Web selection

HOME: Calling the Home view.

Select Apps
text_image
Home TV Recordings Sources Apps LUMAS NETWORKS OF ART YouTube TIDAL amazon.com amazon.com amazon.com amazon.com amazon.com amazon.com amazon.com amazon.com amazon.com amazon.com amazon.com amazon.com amazon.com amazon.com amazon.com amazon.com amazon.com amazon.com amazon.com amazon.com amazon.com amazon.com amazon.com amazon.com amazon.com amazon.com amazon.com amazon.com amazon.com amazon.com amazon.com amazon.com amazon.com amazon.com
◀ ▶ ▲ ▼ Select favourite (if any) or source, OK call.
Possible Web sources
App Gallery Under the menu item App Gallery you will find a continually expanding platform for interactive TV applications from the Internet (see next column). All applications are optimised for use on the TV.
Browser Call Web browser of the TV set.
For further information see chapter Apps, section Browser.
DVB radio The TV set can receive digital radio channels via DVB. For more information, see chapter Apps, section DVB radio.
Internet radio The TV can receive digital radio channels over Internet. For more information, see chapter Apps. section Internet radio.
Screen Here you can mirror the content of your Android mirroring mobile device (Smartphone, tablet) on the TV set. Further information, see chapter Apps, section Screen mirroring.
Mimi You can see a quick introduction on setting up this Defined™ feature under the Mimi Defined™ tile ^4 . For further information, please refer to the chapter System settings, section Sound - Mimi Defined™.
Apps Numerous apps for video, audio or images portals such as YouTube, Amazon Video, Netflix, Tidal, Deezer, or Lumas etc.
App Gallery
Call App Gallery
To use the full functionality of App Gallery, the TV set must be connected to the Internet.

HOME: Call Home view.

◀ ▶ ▼ ▲ Select Apps. ◀ ▶ ▼ ▲ SelectApp Gallery. OK call.

text_image
App Global - Hanoi Name: LUMAS® THE CANTERA OF ART XIMTELDB GAMES FRO TOMO GROUPS AED® RESEARCH EMPTA POWERDAYS Recommendations: GROWL AMIDEXUS HOTEL WALMART SAPACOS SAPACOS SAPACOSThe upper portion of the App Gallery home screen contains new online content. The lower portion of the App Gallery home screen contains Recommendations given by Loewe.
The given content may change from time to time without prior notice.

▲▼ SelectHome. OK go to the right to choose the online content. ◀ ▶ ▲ ▼ Mark the desired online content. OK Display/play content.
The navigation within the various applications depends on the provider.
Functions in the App Gallery home screen
Home Displays the App Gallery home screen with a choice of new online content and recommendations.
Browse Under Browse you can list and call the online content by subjects.
Settings In the Settings for App Gallery you can select countries, for example, to take advantage of various services.
Imprint Providing the legally required information on the parties responsible for the content.
Exit App Gallery

HOME: Call Home view and select another function.
Loewe old
User handbook
Apps
App Gallery
App Gallery – Browse
Under the item Browse, you browse the full range of applications by topic.
■ App Gallery-Browse is called.

text_image
MediaHoot - Dimension AVI Gastreemematerials Video Photo License Games InternetSmart Names MediaHoot - Dimension AVI Gastreemematerials Video Photo License Games InternetSmart NamesFiltering applications

▼▲ Select the genre / topic,
OK call applications of the genre.
text_image
MediaPlayer - Browser Games materap Game1
◀ ▶ ▼ ▲ Select desired application.
OK open application
Change filter

Go to column with genres / topics.
▼▲ Select another genre / topic.
OK call applications of the selected genre.
Exit Browse

BACK: Return to the App Gallery home screen.
Or:

Go to column with genres / topics.
▲▼ Select Back
OK return to the App Gallery home screen.
Define application as favourite

Mark the desired application.

Add the marked application to the Home favourites.
The favourite is added to view Home of web favourites and queued at the end.
App Gallery – Settings
Here, you can find setting options for App Gallery.
i App Gallery settings are called.
text_image
Country Selection Select Country to display Language Services Germany Netherlands Hungary Austria Luxembourg Norway Switzerland UK Poland France Denmark Russia Italy Sweden Slovakia Spain Finland Turkey Portugal Australia Belgium Czech Republic
▼ ▲ Select the desired setting.
OK call.
Country Select countries from which you want to get Selection information on services (see below).
Imprint Providing the legally required information on the parties responsible for the content.
Country Selection

Mark country,
OK select / deselect country.
Various services (applications, etc.) from countries that are marked with a tick ☑ are offered in App Gallery.
Exit Settings

BACK: Return to the App Gallery home screen.
Or:

Go to column with settings.
▼ ▲ Select Back
OK return to the App Gallery home screen.
Loewe bild
User handbook
Apps
Browser
Browser
You can access Internet sites directly using the integrated Opera browser. The web browser can also be used without an Internet connection. Thus you can access local devices which provide a web interface (e.g., router, home control, home network server).
Calling the Web browser

HOME: Calling the Home view.

Select Apps
◀ ▶ ▼ ▲ Select Browser,
OK call.
Start page will be opened.
text_image
Menu LOEWE. VISION Lemonel BHA 2 SEPTEMBER 2016 unaudited by: E. R. 3 Loewe Reference.
INFO: display browser status.
Explanation of the symbols in the browser status

Update the displayed Internet site. (Reload site)

Select as start page.
100% Change zoom factor of the displayed site / browser.

Add displayed Web site as favourite to Home screen.
Navigation on Web sites

P+/P- Scroll page vertically.


◀ / ▶ Scroll page horizontally.

◀ ▶ ▲ ▼ Select link or text entry field with mouse cursor faded in.
OK o. TEXT open link or confirm text input.

For the entry of text, press a numerical key (0-9) repeatedly as with a mobile phone until the desired character appears. The available letters are printed on the individual numerical keys.

Yellow key: Delete character.

BACK: Stop text entry and exit entry box.
Entering a URL (Internet address)
i Browser status is displayed.

◀ ▶ ▶ ▶ Mark the URL (Internet address) of the indicated Internet site. OK Open address entry box.
text_image
Pur. Perfekt. Start 10/23 HOME BIRD HOME SLABS 364 Adapt
◀ ▶ ▲ ▼ Select required character. OK Accept character.
If a small symbol is displayed next to a letter, with a long press on the OK button (2 seconds), further letters can be selected.

Delete character to the left of the cursor.

The selection switches to special characters.
ABC/abc
Switch between upper/lower case.

Switch key assignment of the on-screen keyboard between English, German or Russian.
Space
Enter blank space.
Clear Delete all characters.

Cancel input. The entry box will be closed and the previous Internet site will be displayed again.
Enter
Accept address and open new Internet site.

The characters may also be entered by the USB keyboard or the numerical keys of the remote control (see left column).
Use of an external mouse
It is possible to connect an external USB mouse to a free USB interface of the TV set.
This allows you to move the mouse pointer comfortably over the TV screen.
Loewe does not warrant the functionality of any USB input devices on the market.
Exit Browser
i Web site is displayed. Browser status is hidden

HOME: Call Home view and select another function.
Loewe bild
User handbook
Apps
DVB radio
DVB radio
The TV set can receive digital radio channels via DVB.
The AUDIO key has been preset to radio mode in the factory.
Switching Radio mode on

AUDIO key on the remote control.
Or:

HOME: Calling the Home view.

◀ ▶ ▼ ▲ Select Apps.
◀ ▶ ▼ ▲ Select DVB radio, OK call.
For the first use of DVB-Radio the first channel in the radio channel list is called, otherwise the channel last used.
text_image
2 ANTEONE BAYERYIf the HbbTV mode is active (see Chapter System settings, Control - HbbTV), section, certain radio stations display a station logo instead of the symbol shown above.
Channel switching

The radio mode is switched on and a radio channel has been selected (see above).
P+/P- Channel up/down.
The number and the channel name are displayed briefly. Also, the status display with time/date and programme-dependent symbols appears.

Or:
Enter the channel directly using the numerical keys.

Or:
OK call channel list.
text_image
ASTRA129.2"E 16 RTL RMSO 17 instructions 18 tm 20 Radio Frequency 20 Radio/HR
▼▲ Select channel.
OK call.
Explanation of keys

INFO (press longer): show Explanation of keys.


INFO or BACK: hide Explanation of keys.
DVB radio menu options

MENU: Call menu options.
Or:

OK Call channel list.
▶ call menu options.
▲▼ Select menu option.
OK call.
See chapter TV, section Menu options for further information.
HbbTV services for DVB radio
Various DVB radio channels also offer HbbTV text/media text. The functionality is the same as in TV mode, (see chapter TV, section HbbTV / MediaTek).
Switching the screen on/off


Green key: Switch screen OFF.
i Switching off the screen reduces the power consumption of the TV set.
Switch on the screen with the remote control:


Press green key
Archive recording in the DVB radio operation
In DVB radio mode, just like in TV mode, it is possible to record DVB radio channels on a built-in hard drive or connected USB hard drive. The procedure for recording a DVB radio channel is identical to recording a TV channel (see chapter Recordings, section Digital Recorder – Archive recording).
Time shift in the DVB radio operation
The operation of time shift operation in DVB radio programs is identical to the time shift operation in TV mode (see chapter Recordings, section Digital Recorder – TV viewing with time shift).
Exit radio mode

TV key: TV mode is called.
Or:


HOME: Calling the Home view.

◀ ▶ ▼ ▲
OK call.
Loewe bild
User handbook
Apps
Internet radio
Internet radio
The TV set can receive digital radio channels via the Internet.
The names of the directories and channels in the Internet radio mode are given by the provider vTuner. Changing the order of channels or renaming them is not possible here.
Internet radio is only accessible if a connection to the Internet has been established.
Switching Radio mode on


HOME: Calling the Home view.
Select Apps.
▶ ▶ ▶ Select Internet radio, OK call.
You see the radio channel list.
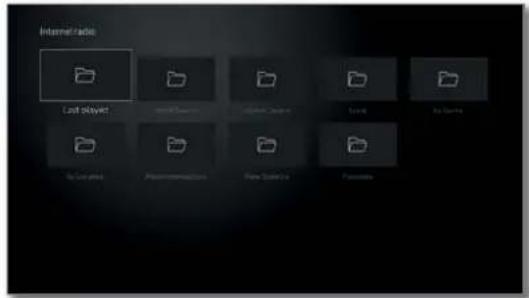
text_image
Internet radio Last tray! Current Settings Current Settings New Settings New Settings
▼ ▲ Mark desired directory.
OK open directory. Repeat procedure if necessary.
▼▲ Select channel. OK call.
For further information on the control of the Internet radio see chapter Sources, section Audio playback.
Channel switching


BACK: call channel list.
Select channels as described above. Or:
P+/P- Scroll through the current Internet radio directory to look for channels. Or:
Keys 2-9: Input the first letter. The channel list will jump to the first channel of the corresponding letter.
Explanation of keys


INFO (press longer): show Explanation of keys.
INFO or BACK: hide Explanation of keys.
Internet radio menu options


MENU: Call menu options.
▲▼ Select menu option. OK call.
See chapter TV, section Menu options for further information.
Search for artists
By means of the search for artists, you can quickly and easily see all radio channels that just play music by this artist. The result list is sorted for now and most played.

1 Internet radio channel list is opened.
▼▲ Select Artist Search. OK call.
◀ ▶ ▼ ▲ Select New search. OK on-screen keyboard is opened.
Enter name of the band or singer using the keyboard (see also chapter General information on the operation, section Entering characters with on-screen keyboard).
OK adopt, search is started.
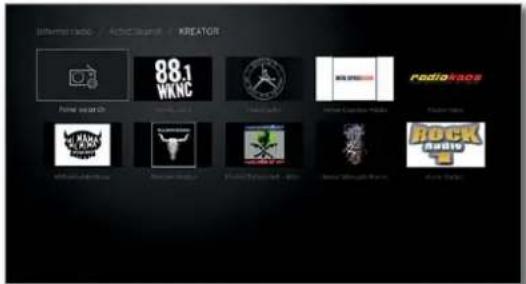
text_image
88.1 WKNC Radio/nas 88.1 WKNC Radio/Nas RCK Rock Radio/Nas Radio/Nas Radio/Nas Radio/Nas Radio/Nas Radio/Nas Radio/Nas Radio/Nas Radio/Nas Radio/Nas Radio/Nas Radio/Nas Radio/Nas Radio/Nas Radio/Nas Radio/Nas Radio/Nas Radio/Nas Radio/Nas Radio/Nas Radio/Nas Radio/Nas Radio/Nas Radio/Nas Radio/Nas Radio/NAS Radio/Nas Radio/Nas Radio/Nas Radio/Nas Radio/Nas Radio/Nas Radio/Nas Radio/Nas Radio/Nas Radio/Nas Radio/Nas Radio/Nas Radio/Nas Radio/Nas Radio/Nas Radio/Nas Radio/Nas Radio/Nas Radio/Nas Radio/Nas Radio/Nas Radio/Nas Radio/Nas Radio/Nas Radio/NAs
▼▲ Select channel, OK call.
Channel search
You can search an Internet radio channel directly by name using the menu item Channel search. The procedure is similar to the Artist Search described above.
Switching the screen on/off
Green key: Switch screen OFF.
1 Switching off the screen reduces the power consumption of the TV set.
Switch on the screen with the remote control:
Press green key.
Exit radio mode

TV key: TV mode is called.
Or:

HOME: Calling the Home view.

OK call. Select another operating mode.
Loewe bild
User handbook
Apps
Screen Mirroring
Screen Mirroring
With screen mirroring, you can mirror the content of your Android mobile device (Smartphone, tablet) on the TV set.
The Android mobile device must support screen mirroring. Depending on the manufacturer, the designation for this feature may vary.
The Loewe TV and Android mobile devices must be on the same network.
Call Screen Mirroring


HOME: Calling the Home view.
Select Apps.
◀ ▶ ▼ ▲ Select Screen Mirroring.
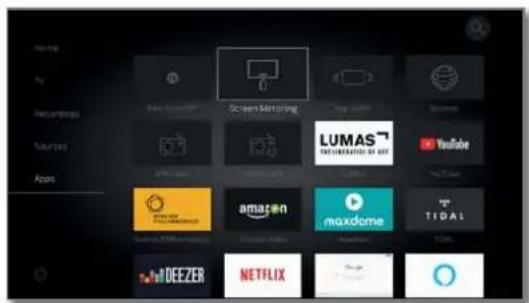
text_image
Home My Recumbents Yourself App Screen Mirroring LUMAS INTERNATIONAL OF 2007 YouTube Amazon maxdome TIDAL DEEZER NETFLIX
OK call.
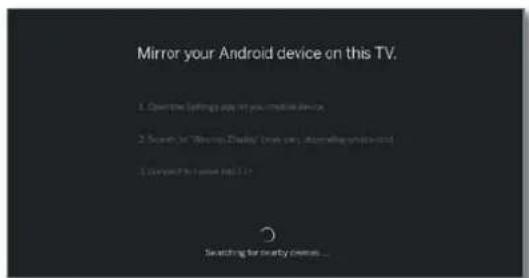
text_image
Mirror your Android device on this TV. 1. Open the Settings play on your mobile device 2. Select the "Windows" device (I am sure, according to this) 3. Select the Internet (I am sure, but not Searching for any other devices...The TV set waits for the connection with the mobile device.
Open the settings on your mobile device.
Search in the settings for the Screen mirroring function and select this. Depending on the manufacturer, the designation for this feature may vary.
The mobile device searches for available devices and lists them.
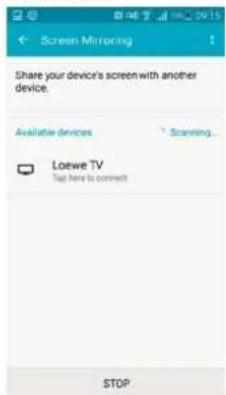
text_image
Share your device's screen with another device. Available devices Scanning... Loewe TV Tag here to connect STOP
Select the found TV set on the mobile device.
TV and mobile device are connected.
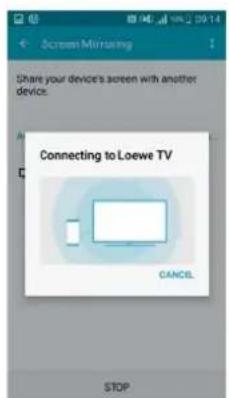
text_image
Share your device's screen with another device. Connecting to Loewe TV CANCEL STOPThe display content of the mobile device is mirrored on the TV set.
text_image
Google 5System settings
Under the menu item System settings ⚙ in the Home menu you find all settings and adaptabilities of your TV set.
i Availability varies according to device type (see chapter Technical data - equipment features for your TV set).
Calling System settings


HOME: Call Home view.
◀ ▶ ▼ ▲ Select System settings ⚙️.
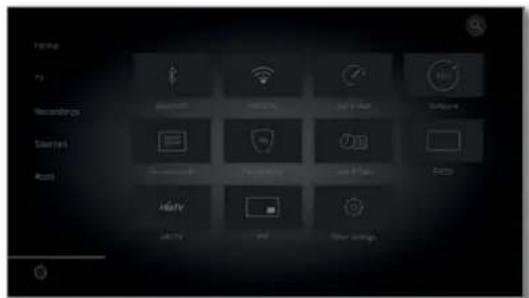
text_image
Home TV Recordings Starters Acres Bluetooth Wireless Self-Act Connects Smartwatch Play button Use Open Audio Audio Play Show optionsYou can find the selection of the most used functions on the right side.

◀ ▶ ▲ ▼ Selectsettings. OK call.
Or;

Press MENU key longer: call System settings.
Explanations of the setting options:
Picture Here you do the settings referring to the representation of the picture signal on your TV set.
Menu items Picture:
Picture adjustment, Contrast, Brightness, Colour intensity, Image+ Active, Picture format, Automatic aspect ratio.
Menu items Picture → more ...:
3D ^0 , Colour temperature, Sharpness, Move picture up/down, Auto dimming, Film quality improvement (DMM), Digital Noise Control (DNC), Skin tone, Gamma brightness correction, OLED calibration ^2 , Deblocking filter.
For more information refer to chapter System settings, section Picture.
Sound Under this menu item you find the settings for sound playback.
Menu items Sound:
Mimi Defined ^TM,9 , Sound via ^3 , Sound mode ^4 , Sound adjustment, Loudness, Surround mode ^8 , Sound picture synchronisation, Volume adjustment.
Menu items Sound → more ...:
Auto volume, AV output signal, Maximum volume, Maximum switch on volume, Balance, Auto speech detection, Dynamic SPDIF sync.
The available menu items may vary and depend on the connected audio component.
For more information refer to chapter System settings, section Sound.
Channels Move and delete TV and radio channels. In addition to that you can automatically and manually update the complete channel list. Your channels can also be arranged and optionally sorted in personal lists.
Menu items Channels:
Automatic scan TV+Radio, Manuell scan (incl. antenna status), Channel lists TV, Channel lists Radio, Update channel list automatically. Transfer all channel lists.
For more information refer to chapter System settings, section Channels.
Control In this menu you find settings for additional functions of your TV set like EPG, picture in picture (PIP), digital recorder (DR+) as well as interfunctional settings like time and date, parental lock or software update.
Menu items Control:
Language. Parental lock, EPG, Energy efficiency. Quick start mode, Software update.
Menu items Control → more ...:
On-screen displays, Time and date, DVB settings, PIP, DR+, Standard Teletext, HbbTV, Rotate TV, Display kinematics ^15 , Hard disks, Export log file, Asterisk key function.
For more information refer to chapter System settings, section Control.
Multimedia / By means of the Multimedia / Network menu you Network configure your network adaptor and network access.
By means of the menu item renderer you can allow external devices to access your TV set (renderer) via app to render (play back) contents there.
Menu items Multimedia / Network:
Network settings, Multimedia settings, Home Automation, Renderer, Mobile Recording, Bluetooth ^1 , TIDAL login. Streaming server standby ^7 . Amazon Alexa Login.
For more information refer to chapter System settings, section Multimedia / Network.
Connections Use this menu to configure the TV set for operation with external devices.
The sound component wizard leads you comfortably through the configuration of your used audio equipment such as speaker systems or HiFi/AV amplifiers.
For more information, refer to the instruction manuals of the equipment used.
Menu items Connections:
Sound components, Antenna DVB, AV connecting settings, Digital Link, HDMI.
For more information refer to chapter System settings, section Connections.
Extras Under this menu item you can display the features of your TV set, repeat the initial startup or reset the device to the factory settings.
Menu items Extras:
Integrated features. Repeat initial installation, Reset to factory settings, Dealer Mode, Legal matters.
For more information refer to chapter System settings, section Extras.
Picture
Here you do the settings referring to the representation of the picture signal on your TV set.
Calling picture settings


HOME: Call Home view.
Mark System settings.
OK call System settings.
▼▲ Mark Picture.
go to next column.
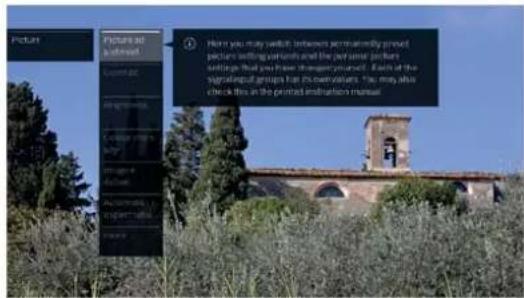
text_image
Picture Picture and feedback How you may wait all, between permanently present present waiting periods and the print/privacy settings that you have the explicit instructions. Also of the registrational groups has its own values. The may also check this in the print/indicators manual
▲▼ Select desired picture function.
▶ proceed to next column.
Explanations of the picture settings:
| Picture adjustment | You can switch between several fixed picture adjustment modes and the personal picture values that you have set here. See chapter System settings, section Picture - Picture adjustment for further information. |
| Contrast | The contrast setting depends on the brightness of the room. The brighter the surroundings the higher the contrast should be set.The power consumption of the TV set depends directly on the value set here. |
| Brightness | Set the brightness so that the black areas of the picture only just appear black. |
| Colour intensity | Set the colour intensity to suit your personal taste.The colours should appear natural.You can pinpoint this by the colour of peoples' faces for example. |
| Image1 Active | Image+ Active is a special picture improvement developed by LOEWE which provides a detailed and contrasting, sharper, natural and true colored picture which is rich in detail and contrast. |
| Picture format | Select the format so that the screen is used to the fullest possible extent without affecting the natural proportions.See chapter System settings, section Picture - Selecting the picture format for further information.Menu item is only available if Automatic aspect ratio - off is selected. |
| Automatic aspect ratio | When automatic aspect ratio is switched on, the TV set recognizes the aspect ratio for Cinemascope or wide-screen movies and adjusts itself accordingly. |
| more ... | call with OK. |
| 3D^d | Do the settings for your TV set's 3D display (see next page). |
| Colour temperature | Here, you can give the TV picture a warmer or colder hue according to your personal taste. |
| Sharpness | Here you can adjust picture sharpness to obtain the best definition. |
| Move picture up/down | In various picture formats, font or graphic insertions are not or only partially visible at the bottom or at the top.You can move the picture up or down with the up/ down menu control keys to make the displays visible.■ Menu item only available in the picture formats panorama or zoom. |
| Auto dimming | Two automatic dimming functions are available here which enable you to adapt the TV picture to the room brightness, improve the visual contrast and reduce the power consumption of your TV.Depending on video (VBD+)6:The display lighting is reduced depending on the current video content and the video signal is simultaneously amplified in order to get an improved contrast of your TV picture (Video compensated Backlight Dimming - VBD).Depending on the environment (OPC)4:The contrast of your TV picture is automatically reduced vs. decreasing room brightness (Optical Power Control - OPC).■ Due to a reduction in the luminance in 3D mode for technical reasons, this function is deactivated when showing 3D content. |
| Film quality improvement (DMM) | DMM reduces jolt in rapid picture object movements and rolling text displays. This applies especially for movies. |
| Digital Noise Control (DNC) | With active DNC (Digital Noise Control) you can eliminate or reduce picture noise. |
| Skin tone | Adjust the skin tone so that the most natural facial skin colour is achieved. |
| Gamma brightness correction | If image seems over- or underexposed, you can adjust it here accordingly. |
| OLED calibration1 | Herewith you start an OLED calibration to ensure an consistently high picture quality. |
| OLED protection2 | The displayed image content is continuously analysed by an algorithm which partly fades out static areas of the image (e.g. broadcaster logo, etc).This is done to prevent any potential issues. |
| Deblocking filter | To minimise the visible interference to the picture caused by modern compression methods for images and image sequences (formation of small blocks), a so-called deblocking filter can be activated which counteracts this interference. |
| PC IN display | For some PC image formats, horizontal as well as vertical position and the phase position of the image can be corrected.For more information, see chapter System settings, section Picture - Selecting the picture format.■ Menu item only available if there is a valid PC signal via the VGA adapter at the AV connection. |
Loewe bild
User handbook
System settings
Picture
3D function ^(1)
You can use the 3D functionality of your TV set to display 3D material transmitted by a channel or from an external player that is connected. To make full use of 3D functionality, you need Loewe 3D glasses (see chapter Accessories). Please read the operating instructions included with the 3D glasses.
3D mode ^(1)
For 3D content that is being played back from an external HDMI player, the 3D display format is normally recognised correctly when the factory setting 3D mode → Automatic is selected. You may need to set the 3D mode manually to view 3D content from broadcasters.
Owing to a reduction in the luminance in 3D mode for technical reasons, Auto-dimming - Room and Auto-Dimming - Video (VBD+) are deactivated when 3D contents is displayed.
If the TV set is operated with the remote control during a 3D playback, flicker effects can occur in the 3D glasses when doing this.
Calling 3D mode ^(1)


HOME: Call Home view.
Mark System settings.
OK call System settings.
Mark Picture.
go to next column.
Mark more...
go to next column.
Mark3D
go to next column.
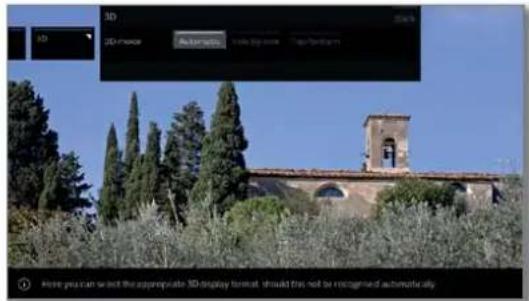
text_image
3D 3D mode Automatics Auto Top None Auto Bottom Here you can select the appropriate 3D-display format: should first not be recognized automatically.
▲▼ Select 3D mode.
Explanations concerning the 3D mode ^(1)
Automatic If the TV is set to this setting (factory setting), then the TV set automatically switches over to the correct 3D mode, if this is possible and supported by the broadcaster. Only change the setting if the 3D content is not displayed correctly.
side by side To display 3D content in side by side format. When viewing 3D content with this setting, two almost identical images are displayed next to each other and put together correctly by the TV set.
The 3D mode is Automatic reset the next time you switch on the TV set.
top/bottom To display 3D content in top/bottom format. When viewing 3D content with this option, two almost identical images are displayed one above the other and put together correctly by the TV set.
The 3D mode is Automatic reset the next time you switch on the TV set.
Picture format / 3D mode ^(1)
If 3D contents are recognised by the TV device, the picture format cannot be subsequently changed. The picture format when in 3D operation is always 16:9 PC.
Instruction / Symbol ^(1)
If 3D content is detected by the TV set, a corresponding message appears. The instruction text will disappear after the display time has elapsed.
text_image
The following images will be deployed in 3D mode for the part, put the 3D glasses on and then set back them on. Revealing 3D images for extended periods of time can fire out the eyes and/or cause feelings of citizens.In the status display, 3D content is indicated by an icon.
natural_image
Close-up photo of a dragonfly perched on a wooden surface, with green foliage in the background (no text or symbols visible)Loewe bild
User handbook
System settings
Picture
Picture adjustment
By the selection of one of the pre-set picture adjustment variants, the image settings for the immediately active signal input groups are set to predefined values.
You can use Personal Mode to specify individual settings for contrast, colour intensity, colour temperature, sharpness and digital noise suppression. Here you can enter your own specifications for each signal input group.
You find a listing of the various signal input groups in chapter Technical Data, section Signal input groups.
Calling picture adjustment


HOME: Call Home view.
Mark System settings.
OK call System settings.
Mark Picture.
go to next column.
◀ ▶ Mark Picture adjustment
▶ go to next column.
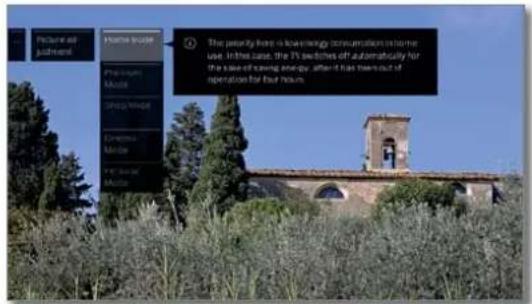
text_image
Picture and Judgment Home Store Premium Music Single Mode Continuous Music PSC Home Music The penalty term is low energy consumption in terms Use in this case, the 21 switches off automatically for the sale of rising energy, after it has turned out of operation for four hours.
▼ ▲ Selectmode,
OK adopt selected mode.
On the selection of one of the three pre-set picture adjustment variants. It is also necessary to specify whether the mode should be set for the current signal source, for example Only for HD Digital or for the entire TV.
Explanations for the picture adjustment variants:
If a change is made in the selected mode in image adjustment (e.g. Contrast, Brightness, Definition, etc.) when carrying out the image adjustment you are always in Personal mode. The selected energy efficiency mode is unaffected.
Home Mode The emphasis for the picture settings is here on low energy consumption for home use. In this case, the TV set switches automatically off after 4 hours of unattended time. In this mode, the TV set switches off automatically for the sake of saving energy, after it has been out of operation for 4 hours.
Premium Mode The picture settings in Premium Mode are optimised for a brighter environment at the cost of higher energy consumption. In this mode, the TV set switches off automatically for the sake of saving energy, after it has been out of operation for 4 hours.
Shop Mode The picture settings in Shop Mode are adjusted to operation in the presentation room. The automatic dimming is deactivated. Any changes made (e.g. to contrast, etc.) are reset to the defaults after 30 minutes.
Cinema The cinema mode is optimised for video and photo Mode playback.
Personal Mode Here, you can recall your last personal picture settings. In this mode, the TV set switches off automatically for the sake of saving energy, after it has been out of operation for 4 hours.
Depending on set type ^1 different HDR-Standards (Dolby Vision, HDR 10, HLG) are supported. There are further picture adjustment variants depending on the image material presented.
Dolby Vision-Content:
DOLBY Picture settings for a brighter environment defined VISION by DOLBY. Bright
DOLBY Picture settings for a dark environment (home the- VISION atre) defined by DOLBY. Dark
Premium HDR Picture settings defined by DOLBY, which, however, use additionally Loewe algorithms for motion compensation or the automatic adjustment to the ambient light.
HDR10 Content:
HDR10 The picture settings are optimized for playback in a Bright brighter environment.
HDR10 Dark The picture settings are optimized for playback in a dark environment (home theatre). The picture settings in the premium mode are optimized for a brighter environment with higher energy consumption.
HDR10 Image settings that use additional algorithms for Premium motion compensation or automatic adjustment to the ambient light.
HLG-Content:
HDR10 The picture settings are optimized for playback in a Bright brighter environment.
HDR10 Dark The picture settings are optimized for playback in a dark environment (home theatre). The picture settings in the premium mode are optimized for a brighter environment with higher energy consumption.
HDR10 Image settings that use additional algorithms for Premium motion compensation or automatic adjustment to the ambient light.
Loewe bild
User handbook
System settings
Picture
Selecting the picture format
i The setting options depend on the transmitted picture content.
i Menu item is only available if Automatic aspect ratio – off is selected.


HOME: Call Home view.
◀ ▶ ▲ ▼ Mark System settings, OK call System settings.
▼ ▲ Mark Picture,
▶ go to next column.
▼ ▲ Mark Picture format
go to next column.
text_image
Appearance Pro Hue 16.0 fps 16.0 fps 20.0 fps 4.5 fps 8.5 fps 0.5 fps This is to be made custom as proportionally created in display of 36-37fps. It is selected this mode when the picture signal is not supplied by a PC (normal case).
▼ ▲ Selectformat,
OK adopt selected format.
Explanations of the picture formats for HD signals:
4:3 TV Proportionally correct display of 4:3 or 16:9 broadcasts. You select this mode when the signal is not supplied by a PC (normal case). A small part of the picture is truncated. This may be necessary to hide possible interference at the edge of the picture, which arises from the signal supplied.
4:3 PC Proportionally correct display of 4:3 or 16:9 broadcasts without loss of information. 16:9 PC You select this mode when the signal is supplied by a PC.
4:3 Zoom Proportionally correct display. Maximum picture magnification. Displayed text may get lost.
Explanations of the picture formats for SD signals:
16:9 Proportionally correct display of 16:9 broadcasts.
4:3 Proportionally correct display of 4:3 broadcasts.
Panorama 1 Proportionally correct display of 4:3 broadcasts on the 16:9 screen. Channel logo and subtitles remain visible.
Panorama 2 Format filling display (factory default) of 4:3 broadcasts on the 16:9 screen. Channel logo and subtitles remain visible.
Zoom Proportionally correct display. Maximum picture magnification. Displayed text may get lost.
PALplus Is a 4:3-compatible 16:9 picture broadcast supplied by the channel which is detected automatically.
Sound
Calling the sound settings
The selectable menu items depend on the selected channel and the connected sound components.


HOME: Call Home view.
Mark System settings.
OK call System settings.
▼▲ Mark Sound
go to next column.
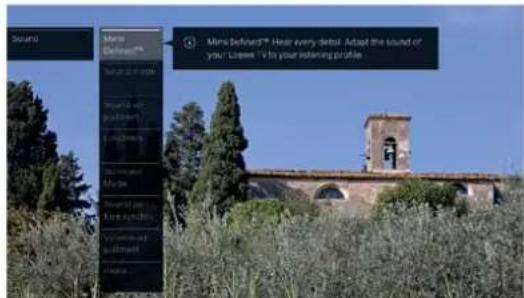
text_image
Mire Belowert™ Hear every detail. Adapt the sound of you: Limer TV to your listening profile.
▲▼ Select sound function,
▶ proceed to next column.
Explanations of the sound settings:
Mimi WithMimi Defined™ you can adapt the sound of your Defined™ Loewe TV set ^3 to your listening profile.
For further information, please refer to the chapter System settings, section Sound – Mimi Defined™)
Sound mode ^1 Depending on the supplied audio signal of your TV programme or audio source (DVD, Blu-ray, etc.) you can select the speakers you want to listen here. The subwoofer is always active if connected (exception: listening mode is set to 1).
If more audio channels are supplied than the connected speakers are able to reproduce, the missing speakers can be added virtually (this case is represented respectively by brackets).
In the "optimal" position, always the best quality sound is output with the ideal number of speakers for the currently played audio signal.
Optimum The momentarily reproduced audio signal is output with the ideal number of speakers.
1 Play centre sound or mono (left/right).
2 Play front sound (L/R stereo).
3 Play front and centre sound.
4 Play front and surround sound.
5 Play front, surround and centre sound.
HiFi/AV Play via an external HiFi amplifier. Selection is only amplifier possible if an amplifier has been selected in the sound components wizard.
Explanations of the sound settings (continued):
Dolby PLII Here you can select/adapt preset sound mode ^1 characteristics (movie, music, matrix) in case of Dolby Pro Logic II coded broadcasts.
The movie mode is „movie focused“, that is, the centre sound is dominant, as we are used to it in a movie.
In music mode, you can set 3 parameters:
Width: center sound is mixed with left/right.
Change in dimension: rear and centre are mixed with left/right.
Panorama: distance between the speakers is increased artificially.
In matrix mode, the front speakers are „mirrored" to the rear speakers. Front left is mixed with left rear, right front with right rear and the centre sound is distributed to all channels.
The menu item appears when a multi-channel system (speaker system) is connected and loudspeakers are simulated (e.g. DVB signal with 2.0 sound, listening mode to 5).
Sound via Playback over the TV speakers or an external hi-fi amplifier.
The menu item Sound over appears only if a different system has been selected in the sound component wizard (see chapter System settings, section Connections – Sound components).
Sound adjustment Here, you can adapt preset sound characteristics of the respective broadcast. Selectable are, e.g., Speech, Classical, Pop. Custom music and Film soundtracks. For personal music and film sound you can do the settings for pitch and bass sound (high and low frequencies).
Loudness Proper boost of bass and treble tones at low volume.
Surround- Here you can choose between different surround Modus ^2 sound simulations (see next page).
Sound picture synchronisation If the sound and picture are not precisely in sync, you may correct this here. Move the mark on the bar downwards, slowing down the sound compared with the picture. Move the mark upwards, speeding it up compared with the picture. Time adjustment of the sound occurs in steps of 10 ms in each case.
■ only available for DVB channels.
Volume adjustment The volume can differ according to the individual channels. If the sound is too loud or too quiet in relation to other channels, adjust the volume.
more ... call with OK (see next page).
Loewe old
User handbook
System settings
Sound
Explanations of the sound settings (continued):
more ...
Loudspeaker/ Selection options for Mono/ Stereo or Sound 1 or Headphone Sound 2 for bilingual programmes, separately for sound the loudspeakers and the headphones.
■ The menu item appears only for analogue channels.
Auto volume The volume may vary when receiving channels with different standards, when switching from channel to channel or during commercials.
You can reduce these differences in volume by selecting auto volume on. For music and live broadcasts you get a better sound spectrum with auto volume off.
Maximum volume You can limit the volume adjustment of the loud-speakers. This prevents selecting a volume which is too loud.
Maximum switch on volume Set the sound level to be heard after switching on the TV set with the mains switch or after a power failure. When switching on the TV set in standby mode, the volume last used is retained unless it was above this switch-on level. Otherwise it is limited by this.
Balance Set stereo balance so that the volume impression is identical on the left and right.
Dynamic Audio synchronization with external devices is SPDIF sync achieved by dynamically adjusting the SPDIF frequency.
Some AVRs (Audio/video receivers) do not tolerate any adjustment of the frequency of +/- 1000ppm and show sound drop-outs or no sound at all. Only in this case, please select here off.
Surround modus ^(1)
In the Surround mode menu point, two special virtualiser modes are found that offer the possibility to simulate virtual surround sound via the built-in TV loudspeakers.
Selecting the Surround mode
The choice is available for sound component - TV speakers. All other audio components do not support this mode.
Adjustable in the System settings under Connections → Sound components.
The selection of surround modes is available when sound mode (4) or (5) is used.
Adjustable in the System settings under Sound → Sound mode or in the current TV programme via the menu options (see chapter TV, section Menu options).

HOME: Call Home view.

◀ ▶ ▲ ▼ Select System settings. OK call System settings.
▼ ▲ Select Sound, ▶ go to next column.
▶ Select Surround Mode, OK call.
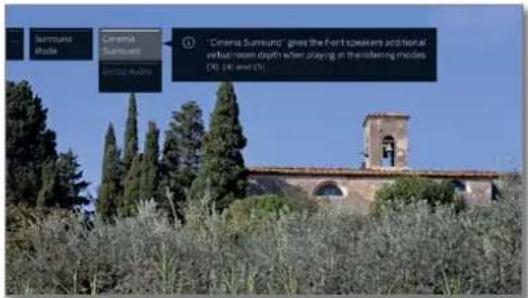
text_image
Serruata Mode Cinema Surround Girius Aviva "Cinema Surround" gives the Fort observers optimal virtual room depth when playing in transferring modics (10, 14) and (5)▲▼ Select the desired mode.

Explanation of the setting options:
Cinema Surround
For the Cinema Surround mode an advanced Virtualizer technology is used that is developed by Loewe. This one improves speech intelligibility while simultaneously widening the 3D sound.
Default setting ex factory.
Dolby Virtual
Dolby Virtual simulates the hearing impression of a 5.1 surround sound system via the built-in TV speakers.
Loewe old
User handbook
System settings
Sound
Mimi Defined™
Every user's perception of sound is individual and changes in certain frequency ranges with age.
With Mimi Defined™ you can adjust the sound of your Loewe TV set to your personal, age-specific hearing in three simple steps.
First, you create a personal profile or choose a setting for a whole group of listeners. Depending on the age or age group, an algorithm then determines the ideal frequency response curve for the best listening experience.
Mimi Defined ^™ is the result of state-of-the-art hearing research and has been developed and validated in cooperation with Charité - Universitätsmedizin Berlin, the largest university hospital in Europe.
Mimi Defined ^™ is currently only available for TV sets with chassis generation SL4xx and software from version V5.x.
Mmi Defihean be activated retroactively with compatible device types with chassis generation SL4xx using an activation code.
This can be purchased through the specialised trade or in the Loewe online shop. Further information can be obtained from your specialist dealer or in the Loewe online shop.
The activation code is entered under the menu item Activate package (see chapter System settings, section Extras – Integrated features).
According to your settings, Mirmi Defined ^® also increases speech intelligibility at sound setting 5.1. This may result in surround effects not always sounding as originally intended.
Personalised sound settings may affect the effectiveness of Mimi Defined™. You may need to reset your personal sound settings.
i With input signals via HDMI, only Dolby signals are processed.
Calling up Mimi Defined™


i In normal TV operation, without further displays:
MENU: Call up Menu options.
▲▼ Select Sound. OK call.
▲▼ Select Mimi Defined ^M . OK call.
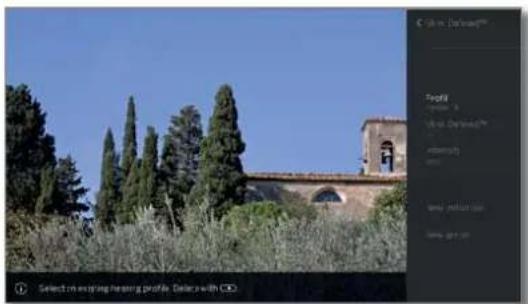
natural_image
Exterior view of a historic stone building with surrounding trees under a clear blue sky (no signage or text visible)
▲▼ Select the desired menu option, OK call.
Notes on the settings options:
Profile If audio profiles have been created, you can select them here and switch between the individual or group profiles that have been created.
Mimi To enjoy the Mimi Defined ^15 listening experience, Defined ^™ enable the feature by selecting the option on.
Intensity The intensity with which Mimi Defined ^M optimises the sound of the TV can be changed according to personal preference.
New person Here you can create a new hearing profile for one person. Further information, see column on the right
New group Here you can create a new hearing profile for a group.
Turning on Mimi Defined™

i Menu options for Mimi Defined ^™ are opened:
▲▼ Select Mimi Defined™. OK call.
▲▼ Select on. OK call.
Loewe bild
User handbook
System settings
Sound
Creating a profile for Mimi Defined™

i Menu options for Mimi Defined ^M are opened:
▲▼ SelectNew person
OK call.
▲▼ SelectProfile,
OK call.
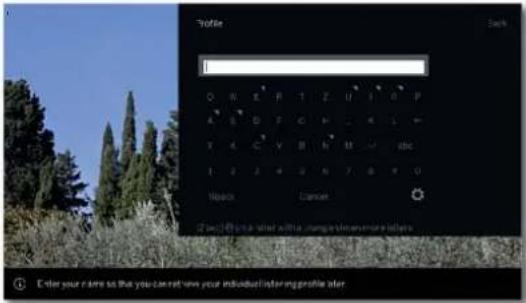
text_image
Profile Back I D H E R T Z U I J K L M N O P A B C D E F G H I J K L M T A B C D E F G H I J K L M 1 2 3 4 5 6 7 8 9 10 Marker Cancel © this image is also within a range of more images. Enter your name so that you can not use your individual sharing profile later.
◀ ▶ ▲ ▼ Select the desired character.
OK apply the character.
After entering the name of the profile:
SelectEnter.
OK adopt.
▲▼ SelectYear of birth
OK call.
text_image
Year of birth Back 1 2 3 4 5 6 7 8 9 10 Cancel Enter your birth year. Miss DefinedTM will create your individual listening profile based on your age.
Select the desired number.
OK adopt.
After entering the year of birth:
SelectEnter.
OK adopt. profile is created.
Alternatively, you can create a group profile for multiple users of the same age group by selecting New group. Again, a name can be assigned. For the age, select the decade of birth that applies to the members of the group.
Selecting a profile for Mimi Defined™

■ Menu options for Mimi Defined ^M are opened:
▲▼ SelectProfile,
OK call.
▲▼ Select the desired Mimi Defined profile.
OK adopt.
Deleting a profile for Mimi Defined™

Menu options for Mimi Defined ^™ are opened:
▲▼ SelectProfile,
OK call.
▲▼ Select the Mimi Definiéprofile to be deleted.

STOP: Delete profile.
▶ Selectyes.
OK confirm.
Setting the intensity for Mimi Defined™

i Menu options for Mimi Defined™ are opened:
▲▼ SeledIntensity
OK call.
natural_image
Exterior view of a historic stone building with surrounding trees under a clear blue sky (no signage or text visible)
▲▼ Set the desired Mimi Definēdntensity.
The intensity with which Mimi Defined ^TM optimises the sound of the TV set can be changed according to personal preference.
You can set the intensity on a scale of 0 to 100 percent. The change is immediately noticeable. The intensity setting affects all listening profiles that have been created.
Switching Mimi Defined™ on/off with the star key
You can assign the Mimi Defined ^™ function to the star key. This makes it possible to turn Mimi Defined ^™ on or off quickly.
For instructions on how to reassign the star key, please refer to the chapter System settings, section Control - Asterisk key function.

i Asterisk key reserved for Mimi Defined ^4 .
press and hold: Call up Mimi Defined ^TM menu.

◀ ▶ Selectn or off,
OK confirm.
Loewe bild
User handbook
System settings
Sound
Calling up Mimi Defined™ via System settings


HOME: Call Home view.
◀ ▶ ▲ ▼ Select System settings. OK call up System settings.
▼ ▲ Select Sound
go to next column.
▼▲ Select Mimi Defined OK call.
text_image
Mars Beforecd®: Hear every detail. Adapt the sound of your Loeve TV to your following profile.
▲▼ Select the desired menu option. OK call.
Loewe old
User handbook
System settings
Channels
Channels
Under the item Channels you find all settings concerned with channel search for TV and DVB radio as well as functions for creating and editing the various channel lists.
■ Channel management is not possible as long as a programmed timer recording is active.
If at least one channel is locked, the access code must be entered prior to automatic search
The procedure for radio channels or Channel lists Radio is similar to that for TV channels or Channel lists TV. Therefore, this procedure is described only for TV channels.
Call Channels menu


HOME: Call Home view.
◀ ▶ ▲ ▼ Mark System settings OK call System settings.
- ▲ Mark Channels. - go to next column.
text_image
U2-APPRO Automatic and TV-Ro Instructions on 100% or 50% Accessable TV Accessable Radio Options Options list To access all Channel lists Magazine Programs In Firemade you come a entertainment which automatically searches and saves all TV and radio channels. Please follow the instructions at the dinner are below
- Select desired function. - proceed to next column.
Explanations of setting possibilities in the Channels menu:
Automatic scan TV+Radio
Here you start the wizard that searches and stores all TV and DVB radio channels (see chapter System settings, section Channels – Automatic scan TV+Radio).
Manual scan (incl. antenna status)
Here, you can enter all the settings available for a TV channel (see chapter System settings. section Channels – Manual Scan TV / Radio).
Channel lists TV Channel lists Radio
Here you can move and delete TV channels/ DVB radio channels in all lists. You can put together your most frequently watched programmes in one or more lists of personal favourites (see chapter System settings, section Channels – Channel lists TV / Radio).
Update channel list automatically
If the channel list is not up to date, it will be updated automatically, provided the parameter Allow is selected (see chapter System settings, section Channels – Update channel list automatically).
Transfer all channel lists
Here you can export or import all channel lists of this TV set (see chapter System settings, section Channels – Transfer all channel lists).
Loewe old
User handbook
System settings
Channels
Automatic scan TV+Radio
For automatic scan TV+Radio, a search wizard will be started that searches for new channels which are not yet stored.
You have to repeat the initial installation and automatically search for new channels if you want to delete all the existing channels and automatically search for new ones.
HOME: Call Home view.
▼ ▲ Mark System settings.
OK call System settings.
Mark Channels.
go to next column.
Mark Automatic scan TV+Radio.
go to next column.
In the upper info text the current search settings will now be displayed:
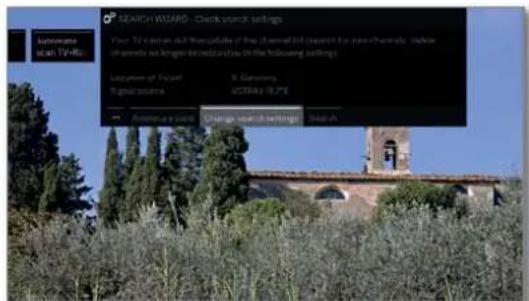
text_image
USEMATE scan TV-Ru SEARCH WARD - Check search Settings Your TV button will be transferred to the channel file (search for non-channelly, static channels no longer be indicated in the following settings) Location of Event & Geometry Signal source qTRay 15.27 Commerce user Change search settings HelpIf you want to change these search settings:

▶ Select Change search settings.
OK wizard guides you through the search settings (see column on the right).
If you agree with these settings:
Select Start search/update
OK start scan.

BACK: Cancel current search/update.
Explanations of some search settings:
Signal source
Select here cable analogue, terrestrial (DVB-T / T2), cable (DVB-C), satellite (DVB-S / S2) or IPTV depending on the signal source you wish to use to search for new channels.
Use the Antenna wizard to call the configuration of the DVB-T and DVB-S antennas.
Calling up the DVB antenna configuration causes the Change search settings dialogue to be quit. You must call up the dialogue again after finishing the configuration.
Cable (analogue)
TV/colour standard
With the selection of TV set location the conventional TV standard/colour standard is the default.
It should only be changed if channels with other standards are to be searched.
Explanations of some search settings (continued):
DVB-T/C/S IPTV Network selection If several networks are available, you can decide which network you want to receive your channels from.
DVB-T/C/S With the selection of set location the conventional settings will be preset. Only change these defaults if you are familiar with other parameters.
Scrambled channels: (DVB-T/C/S)
You can state whether scrambled channels are to be searched for in the search/update. If you select yes, coded channels will also be searched for. However, these channels can only be received in connection with a CA module and the appropriate Smart Card. Ask your dealer which Smart Card you need to receive certain channels.
Search method: (DVB-T)
If you want to run the channel search independently of the channel grid, select Frequency search for the search method.
Search method: (DVB-C)
If you select Frequency search here, a search is performed for all receivable channels. With Network search, only the channels which the networks supply are searched - either for all receivable networks or only for the particular network specified under Network ID.
Network ID: (DVB-C)
If you select none here, DVB signals of all current broadcasting networks are scanned automatically (recommended for most cable networks). If, on the other hand, you specify a certain network ID (necessary in the cable networks of some countries), only DVB signals of this broadcasting network are searched for automatically. Your cable provider has the information you need.
Search method: (DVB-S)
If you select Frequency search here, a search is performed for all receivable channels. With Network search, from all receivable networks all the channels are searched which are supplied by these networks.
Accept Logical Channel Number: (DVB-T/C/S) In various countries, digital channels (DVB-T/C/S) are transmitted with a preset channel number per channel, known as Logical Channel Numbers (LCN). If you select yes here, these default channel slots will be used and the channels of the preferred signal source will be sorted as per LCN. The channels in the channel list can no longer be shifted.
Loewe bild
User handbook
System settings
Channels
Search for/update channels – handling of new and no longer found channels
After the automatic search/update has been concluded, the number of newly found TV and radio channels is shown.

▶ Call list of new TV channels found.
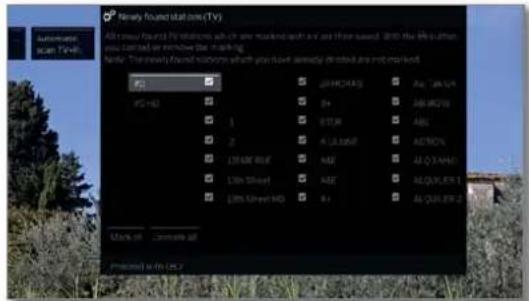
text_image
Newly installed stations (TV) All new installed stations which are masked such as 5 or more based. With the file displayed, you cannot be removed to the masking. Note: The newly installed stations which you have already deleted are not marked. PS PS-HD 1 2 L1600 Blue L1600 Silver L1850 Sheet HD SPRCHAD B+ BTRM A LUBAR ABE ABE AQUILER 1 AQUILER 2 Mark on Remove all Processed with CMS
▲▼◄► Select channel.
OK Mark / unmark channel.

Stores the marked TV channels.
Afterwards, a list of the channels which are saved but which are temporarily not broadcasting or no longer exist is displayed, if available.
The number of the memory location used is displayed in front of the channel. Please select the channels you really want to delete.
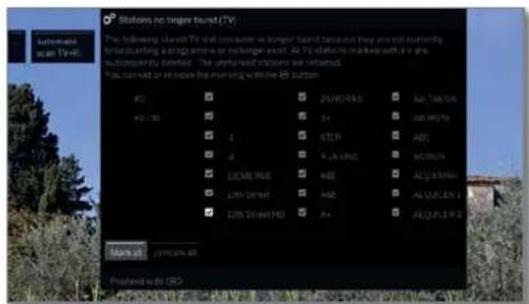
text_image
Stations no longer launch (TV) Pre following shared TV chat commands no longer launch because they are not currently forward launching a program or longer launch. All TV statics make with a pre subsequently installed. The unmanaged stations are returned. To can be re-lease the running within the 65 button. ID: ID: ID ID: ID ID: ID ID: ID ID: ID ID: ID ID: ID ID: ID ID: ID ID: ID ID: ID ID: ID ID: ID ID: ID ID: ID ID: ID ID: ID ID: ID ID: ID ID: ID ID: ID ID: ID ID: ID ID: ID ID: ID ID: ID
▲▼◄► Select channel.
OK Mark / unmark channel.

▶ Proceed. The marked TV channels will be deleted.
Subsequently the process of Newly found channels/Channels no longer found shall be carried out in the same way for the radio channels.

Back: Close search assistant.
Manual Scan TV / Radio
Here, you can enter all the settings available for a channel. However, this requires detailed knowledge.
The manual search of radio channels is similar to that of TV channels. Therefore, the manual search for radio channel is not dealt with separately.
Calling manual search

HOME: Call Home view.

▼ ▲ Mark System settings.
OK call System settings.
MarkChannels
go to next column.
Mark Manual Scan (incl. antenna status) OK call Manual Scan.
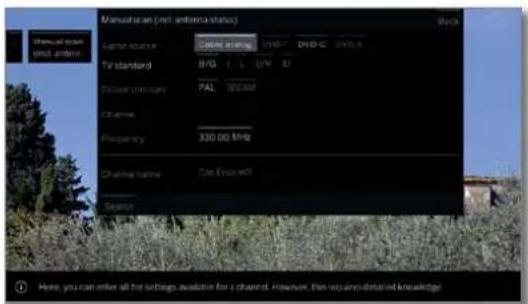
text_image
Manual name (incl antenna status) Signal source: Cable audio VPS-1 DVD-C DVD-S TV standard B/G I L U M V Digital unit count PAL 50000 Channel: Frequency 330.00 MHz Channel name Cas Eric HD Source Here, you can enter all the settings available for a channel. However, then require detailed knowledgeSelect the menu item Signal source to decide in which area you want to search for channels.
Depending on the selected source, various setting possibilities will be available.
On the next page, the settings for analogue cable and DVB-T/C/S sources are described separately.
Status bar for manual search
Status bars are displayed for manual search, which show the reception quality of the individual channels during the channel scan. The markers in all bars should preferably be in the green area.
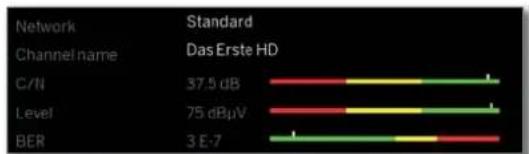
bar
| Channel name | Standard (dB) | Das Erste HD (dB) | |---|---|---| | C/N | 37.5 | | | Level | 75 | | | BER | 3 | 7 |C/N: (Carrier/Noise) The bar shows the signal-to-noise ratio. The value indicated in dB should be preferably high.
Level: The bar shows the receiving level of the channel. The value displayed in dBμV should be preferably high.
BER: (Bit Error Rate) The bar shows the bit error rate of the channel. The value for BER should be as low as possible.
Loewe bild
User handbook
System settings
Channels
Manual search for cable analogue (analogue cable reception):
i Manual search is called.
Cable analogue has been selected as signal source.
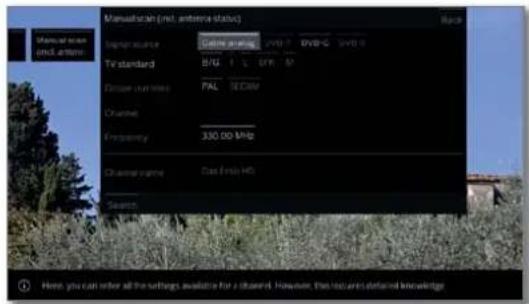
text_image
Manualization (incl. antenna status) Design source: Digital analysis TV standard: BFG 1.5 GHz Center coordinates: PAL SEOM Channel: Frequency: 330.00 MHz Character name: Gas Field H0 Search: Here you can refer all the settings available for a channel. However, this requires detailed knowledge
▲▼◄► Mark and adjust settings.
OK confirm as the case may be.
▲▼◄► Mark Search.
OK start search.
If a channel has been found:
▲▼◄► Mark Store/Overwrite.
OK store channel.
Explanations on the search settings for cable analogue:
Signal source Selection of range in which you want to search for the channel.
TV standard If necessary, ask your dealer which standard to select for specific channels or AV equipment.
Colour If necessary, ask your dealer which standard to standard select for specific channels or AV equipment.
Channel Direct input of channel.
Frequency Direct input of channel frequency. Range for entry: 044.75 MHz - 859.25 MHz.
Name Here, the name of the found channel is displayed. You can change the name of the channel.
Manual DVB-T/C/S search:
Manual search is called.
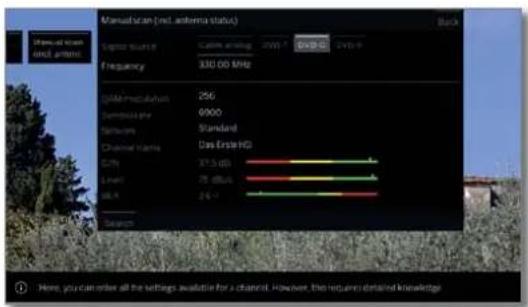
text_image
Manual scan incl. antenna status) Signal Source: Cable analog 2019-7 Frequency: 330.00 MHz QAM-modulation: 256 Sensitivity: 0000 Translation: Standard Channel Kanta: Das Erst HG City: 37.5 dB Linear: 25 dB U.S.: 21.7 Source: Back Here, you can order all the settings available for a channel. However, this required detailed knowledge
▲▼◀▶ Mark and adjust settings, OK confirm as the case may be.
▲▼◀▶ Mark Search.
OK start search.
When a DVB transponder has been found:
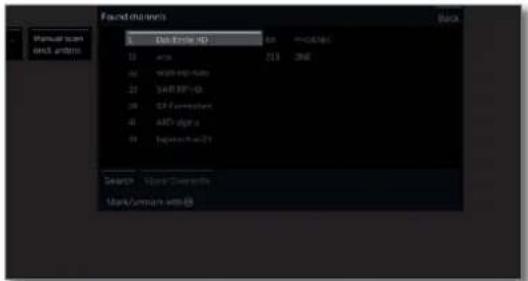
text_image
Find results 1. Auto Endo HD 10. area 213 266 40. size-HP-Safe 21. size-HP-D3 28. size-Parameters 41. size-digits 39. size-skip-27 Search User Samples MarkSummit with GB
▲▼◀ ▶ Mark the channel,
OK Channel will be ticked with √ If necessary,
repeat for several channels.
1 Channels that already exist in the channel overview will be displayed with their channel number on the left.
Mark Store/Overwrite.
OK Channels marked with √ will be stored.
Explanations of some search settings:
Signal source Selection of range in which you want to search for the channel. (DVB-T/C/S)
Channel Direct input of channel. (DVB-T)
Satellite Here you can select the satellite where the channels (DVB-S) are to be searched for.
Band Here you can select the frequency band in which (DVB-S) shall be searched. Setting ranges: horiz/low 10694 - 11906 MHz horiz/high 11544 - 12756 MHz vert/low 10694 - 11906 MHz vert/high 11544 - 12756 MHz
Frequency DVB-T/C: Direct input of channel frequency. (DVB-T/C/S) DVB-S: Direct input of LNC frequency
Symbol rate Here you can specify the symbol rate (DVB-S) Range: 1000-45000
Loewe old
User handbook
System settings
Channels
Channel lists TV / Radio
Under the menu item Channel lists TV or Channel lists Radio you can edit (delete block, move block, restore deleted channels, delete list) various lists, e.g., DVB-T, ASTRA LCN, DVB-C, etc. You can also create and edit new Personal lists.
The function of Channel lists Radio is similar to that of Channel lists TV. Therefore, editing of Channel lists Radio will not be dealt with separately.
Change channel list
If at least one channel is locked, the access code must be entered before changing channels.


HOME: Call Home view.
▼ ▲ Mark System settings.
OK call system settings.
Mark Channels.
go to next column.
▼ ▲ Select Channel lists TV.
go to next column.
▼ ▲ Mark desired channel list.
▶ call list.
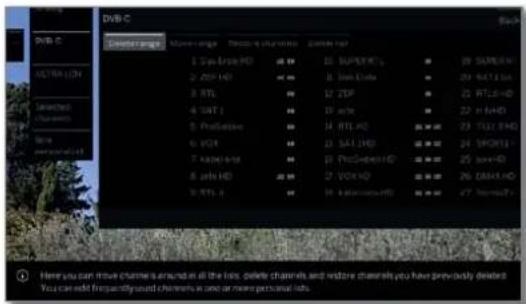
text_image
DVB C DCB C Delete range 1. San Jose HD 2. ZIP HD 3. RTL 4. S&T 5. Poststation 6. VCK 7. Kandran 8. pdy HD 9. RTL 4 Previous channels in one or more personal lists Previous channels in one or more personal lists Previous channels in one or more personal lists Previous channels in one or more personal lists Previous channels in one or more personal lists Previous channels in one or more personal lists Previous channels in one or more personal lists Previous channels in one or more personal lists Previous channels in one or more personal lists Previous channels in one or more personal lists Previous channels in one or more personal lists Previous channels in one or more personal listsHere, you can delete and move channel blocks as well as restore deleted channels.
The following section describes how to proceed if you wish to Delete block. Move block, Restore channels and Delete list.
Delete block

Select Delete Block.
move to list.
◀ ▶ ▲ ▼ Select beginning of block,
OK mark beginning of block.
◀ ▶ ▲ ▼ Select end of block.
OK mark end of block (selected channels are coloured blue).
◀ ▶ ▲ ▼ Select Execute delete
OK block will be deleted.
Or:
← ▶ ▲ ▼ select Cancel procedure.
OK cancel delete.
Move block / Change order
1 Channels with LCN cannot be reordered. In this case, the function Move block is hidden.

Select Move block.
▼ move to list.
▶ ▶ ▲ ▼ Select beginning of block.
OK mark beginning of block.
◀ ▶ ▲ ▼ Select end of block,
OK mark end of block (selected channels are coloured blue).
◀ ▶ ▲ ▼ Select insert position,
OK Confirm insert position.
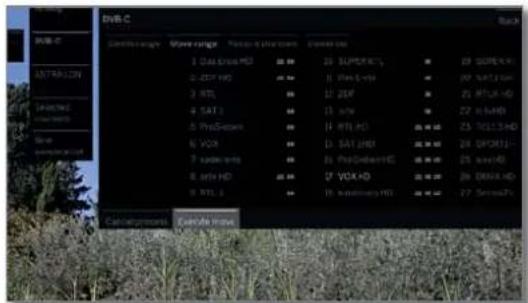
text_image
DV8 C Signal energy Wave range Voltage Range Current range 1. Data frame HD 2. 20V HD 3. RTS 4. SAT1 5. ProScan 6. VIX 7. xband 8. xDH 9. RTL-1 20 SUPERX 21 PLS-1 22 SATEHD 23 RFLA HD 24 HUA HD 25 HUA HD 26 SPOH11- 27 SPOHD 28 DDX HD 29 SWEHD 30 SWEHD 31 SWEHD 32 SWEHD 33 SWEHD 34 SWEHD 35 SWEHD 36 SWEHD 37 SWEHD 38 SWEHD 39 SWEHD 40 SWEHD 41 SWEHD 42 SWEHD 43 SWEHD 44 SWEHD 45 SWEHD 46 SWEHD 47 SWEHD 48 SWEHD 49 SWEHD 50 SWEHD 51 SWEHD 52 SWEHD 53 SWEHD 54 SWEHD 55 SWEHD 56 SWEHD 57 SWEHD 58 SWEHD 59 SWEHD 60 SWEHD 61 SWEHD 62 SWEHD 63 SWEHD 64 SWEHD 65 SWEHD 66 SWEHD 67 SWEHD 68 SWEHD 69 SWEHD 70 SWEHD 71 SWEHD 72 SWEHD 73 SWEHD 74 SWEHD 75 SWEHD 76 SWEHD 77 SWEHD
Select Execute move
OK block will be moved.
Or:
select Cancel procedure.
OK cancel move.
Restore channels

Select Restore channels.
▼ move to list.
◀ ▶ ▲ ▼ Select beginning of block.
OK mark beginning of block.
◀ ▶ ▲ ▼ Select end of block,
OK mark end of block (selected channels are coloured blue).
Select Restore channels.
OK channels will be added again to the channel list.
Or:
◀ ▶ ▲ ▼ select Cancel procedure,
OK cancel restore.
Delete list

Select Delete list.
OK confirm delete list.
OK Confirm delete.
Loewe bild
User handbook
System settings
Channels
Compose / edit Personal list
Each personal list can contain up to 99 channels. You can compose the personal lists to suit your convenience (e.g., topic lists). Other persons using this TV set can create their own personal lists.
Creating and updating personal channel lists is not possible as long as a programmed timer recording is active.
Create / edit New personal list


HOME: Call Home view.
▼ ▲ Mark System settings.
OK call System settings.
▼ ▲ Mark Channels.
go to next column.
▼ ▲ Mark Channel lists TV
go to next column.
▼ ▲ Mark New personal list,
OK New personal list x will be created.
■ x stands for the number of the personal list. The number depends on how many list were already created.
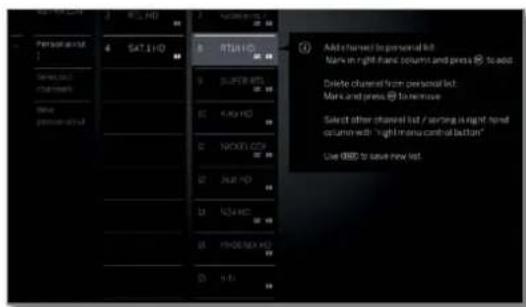
text_image
Personal list 4 SAT1HD 8 RT1HD 9 SUPER 800 10 500 HD 11 NODOL 600 12 ALB HD 13 M24 HD 14 PHOEMEX HD Add channels to personal list Mark on right-hand column and press @ to add Delete channels from personal list Mark and press @ to remove Select other channels list / starting in right-hand column with "right-hand central button" Use OED to save new list.
Mark the channel in the channel list which is to be added to the personal list.
OK adds the channel to the personal list. The new channel will be added at the end of the personal list. Proceed in the same way with additional channels.
▶ Call up additional options.
ASTRA LCN Examples of channel lists. Select the channel list from DVB-T which you add channels to the personal list. In the DVB-C personal list you can store channels from different sources.
Sorting The sorting procedure for the source channel list may be changed between numerical and alphabetical.

BACK: Store and close channel list.
Adding channels to Personal list

The Personal list must be opened to add new channels to it.
- Select Add/remove Channels in the menu options.
How to add channels is described in the left column.
Deleting channels from the Personal list

i The Personal list must be opened to delete channels in it.
▼ ▲ Select Add/remove Channels in the menu options,
OK activate.
go to personal list.
▲ Mark the channel to be deleted in the personal list.
OK activate. Function of the coloured keys in standard PIP functionality.

BACK: Store and close channel list.
Move / reorder channels in the Personal list
i The personal list must be opened to move channels in it.

▼ ▲ Select Move channels in the menu options.
OK activate.
▲▼ Select channel to be moved in the Personal list.
OK mark (channel will be coloured blue).
▲▼ Select insert position (insert position will be marked with a blue line),
OK Execute move. Proceed in the same way with additional channels.

BACK: Store and close channel list.
Renaming the Personal list

1 The Personal list to be renamed must be opened.
▼ ▲ Select Rename list in the menu options.
OK activate.


Enter new name.

◀ ▶ ▲ ▼ Select Adopt.
OK New name for the personal list will be adopted.
Delete Personal list
The Personal list to be deleted must be opened. Deleting of the list is irrevocable.

▼ ▲ Select Delete list in the menu options.
OK activate.
Loewe old
User handbook
System settings
Channels
Update channel list automatically
Some programme providers offer an automatic update of the channel lists (Dynamic Channel Management). You may Allow or Block an automatic channel list update. If automatic updating is allowed, a screen message about an available update appears whenever the list is changed.
Allow/block updates


HOME: Call Home view.
▼ ▲ Mark System settings.
OK call System settings.
▼▲ Mark Channels.
▶ go to next column.
Mark Update channel list automatically
▶ go to next column.

text_image
Update dt-wned aid Aime If the character(s) is not up to date, it will be automatically updated or modified the parameter "Altus" is selected.
▼ ▲ Select Allow or Block,
OK adopt
If the channel list is not up to date, it will be updated automatically, provided the option Allow is selected.
Updating the channel list
A message appears whenever the TV is switched on if the network provider changes their channel list.
In Update channel list automatically, Allow must be selected.
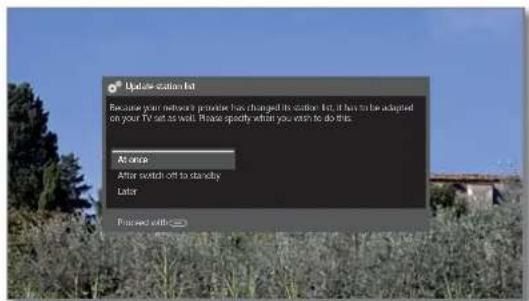
text_image
Update station list Because your network provides has changed its station list, it has to be adapted on your TV set as well. Please specify when you want to do this. At once After switch off to standby Later Present with
▲▼ Select the desired procedure.
At once
The channel list will be immediately updated. Normally this occurs in the background without interfering further with the TV's operation. In exceptional cases, it is however possible that during this process an automatic channel change may be necessary.
After switch off to standby
The channel list will be updated the next time the TV set is switched off into standby mode.
Later
Updating the channel list will be postponed to a later date. When the TV set is switched on and off, the update message will appear again.

OK Confirm selection.
Transfer all channel lists
You can export all channel lists of your TV set to a USB storage device or import channel lists.
Calling Transfer all channel lists

HOME: Call Home view.

▼▲ Mark System settings. OK call System settings.
Mark Channels
▶ go to next column.
Mark Transfer all channel lists. OK call.
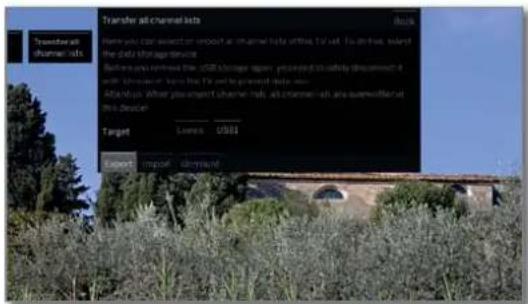
text_image
Transfer all channels lists Here you can access or download as an email body within the TV set. You can use, allow the data transfer device. Before you remove the USB/transfer app, please call safety disconnect it with a message, keep the TV set up your device. Access: When you export a channel list, all channels are somewhere at this device. Target: Lunes: US$1 Export: Import:
◀ ▶ ▲ ▼ Select a target if several USB storage media are available.
◀ ▶ ▲ ▼ Mark Export or Import. OK confirm selection.
When you import channel lists, all channel lists are overwritten in this device.
Before you remove the USB storage again, you need to safely disconnect it with 'Unmount' from the TV set to prevent data loss.
Loewe old
User handbook
System settings
Control
Control
In the chapter Control you find settings for the various operating modes like PIP and DR+ as well as settings referring in an interfunctional way to your TV set like, for example, time and date and on-screen displays.
Calling Control

HOME: Call Home view.

◀ ▶ ▲ ▼ Mark System settings. OK call System settings.
- Select Control. - go to next column.
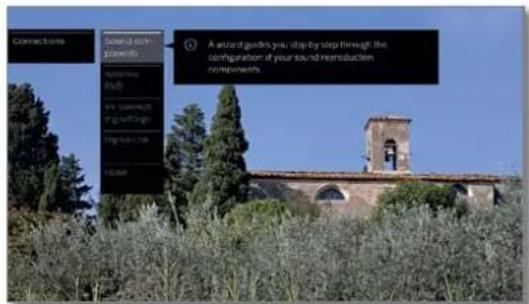
text_image
Connections Selection Selection A sound guide you stop by step through the configuration if your sound reproduction components.
- Select desired menu item, - go to next column.
Explanations of setting possibilities in the Control menu:
Language
Here you can define the menu language and for DVB channels also the subtitle and audio language. See chapter System settings, section Control – Language for further information.
Parental lock
With the parental lock you can bar access to all channels immediately or daily for a certain period of time. The channels can also be locked individually. Age-dependent locking of programs with an appropriate age code is also possible.
See chapter System settings, section Control – Parental lock for further information.
EPG
Here you can do all EPG settings.
See chapter System settings, section Control – EPG for further information.
Energy efficiency
Here you can determine how energy efficient your TV set shall be.
See chapter System settings, section Control – Energy efficiency for further information.
Quick start mode
Here you can activate the quick start mode. The TV set will turn on immediately and without waiting time.
See chapter System settings, section Control – Quick start mode for further information.
Software update
Here you can download new software from a USB storage medium or from the Internet (as far as requirements exist for this).
See chapter System settings, section Control – Software update for further information.
more ...
After confirmation with the OK key you will be offered additional not so frequently used sub items for the current menu item.
On-screen displays
Here you can make settings for the duration, position and existence of special on-screen displays.
See chapter System settings, section Control – On-screen displays for further information.
Time and date
The time and date are normally obtained automatically from the TV.
See chapter System settings, section Control – Time and date for further information.
DVB settings
Here you can make settings which only refer to DVB channels (subtitles and audio mode, DVB character set).
See chapter System settings, section Control – DVB settings for further information.
PIP
In this menu you can make all adjustments for the picture-in-picture display.
See chapter System settings, section Control – PIP for further information.
DR+
Here you can do all the settings for the digital recorder.
See chapter System settings, section Control - DR+ for further information.
Standard Teletext
Here you can do all Standard Teletext settings. See chapter System settings, section Control – Standard Teletext for further information.
HbbTV
Here you can do all settings for the HbbTV mode. See chapter System settings, section Control – HbbTV for further information.
Hard disks
Here you find tools to format or check the hard disks. See chapter System settings, section Control – Hard disks for further information.
Export log file
The log file available in the system is exported to a USB storage device.
See chapter System settings, section Control - Export log file.
☆ key function
Here you can assign another function to the Asterisk key. The selected function will then be called directly when the key is pressed.
See chapter System settings, section Control – Asterik key function for further information.
Loewe old
User handbook
System settings
Control
Language
Specify the language for all menus in the TV set in the language menu. The language for the DVB subtitles and the film language can be set for DVB programmes.
Call language


HOME: Call Home view.
◀ ▶ ▲ ▼ Mark System settings. OK call System settings.
Mark Control
▶ go to next column.
Mark Language
go to next column.
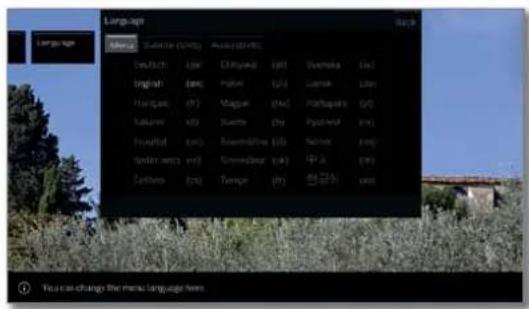
text_image
Language Name: Language (SMM) Language(s): English (8) Chinese (8) English (2) Hungary (9) Hungarian (9) Italian (6) Portugal (10) French (10) Spanish (10) German (10) German (10) German (10) German (10) German (10) German (10) German (10) German (10) German (10) German (10) German (10) German (10) German (10) German (10) German (10) German (10) German (10) German (10) German (10) German (10) Human (7) Human (7) Human (7) Human (7) Human (7) Human (7) Human (7) Human (7) Human (7) Human (7) Human (7) Human (7) Human (7) Human (7) Human (7) Human (7) Human (7) Human (7) Human (7) Human (7) Human (7) Human (7) Human (7) Human (7) Human (7) Human (6) Human (6) Human (6) Human (6) Human (6) Human (6) Human (6) Human (6) Human (6) Human (6) Human (6) Human (6) Human (6) Human (6) Human (6) Human (6) Human (6) Human (6) Human (6) Human (6) Human (6) Human (6) Human (6) Human (6) Human (6) Human (5)
◀ ▶ ▲ ▼ Select desired setting and make changes. OK Adopt settings.
Explanations of setting possibilities in the Language menu:
Menu You can change the menu language here.
Subtitle If subtitles are provided by the DVB channel, you can set your desired language in advance here. If this is included in the range of languages of the channel, it will be shown automatically.
You can also specify an alternative language under this menu item, in case your chosen language is not offered by the channel.
Audio (DVB) Specify your desired film language in advance here. If this is included in the range of languages of the channel, it will be shown automatically.
You can also specify an alternative language under this menu item, in case your chosen language is not offered by the channel.
EPG
Calling EPG settings


HOME: Call Home view.
Mark System settings, OK call System settings.
Mark Control
go to next column.
▼▲ Mark EPG
▶ go to next column.
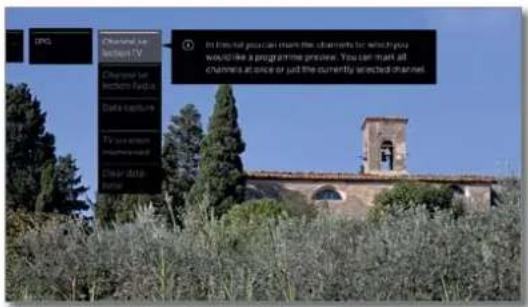
text_image
DPG Channel to Internet TV Channel to Internet Cyprus Data capture To use email Clear data below On list call you can make the channels to which you would like a programme course. You can start all channels at once or just the currently selected channel.Explanation of the EPG setting options:
Channel selection TV
Channel selection Radio
In the Channel selection you can determine for which channel in the programme guide, information is to be displayed. Programme information is only displayed for channels with √ in the EPG list. Using the on-screen buttons in the bottom line you can mark all channels or unmark the channels or select channels from specific (e.g., personal) lists. Further information on EPG channel selection you find in chapter TV, section Electronic Programme Guide – EPG wizard.
Due to the large number of receivable channels you should restrict the channel selection. This reduces the data entry time and increases the clarity in the EPG.
Data capture
Here you can switch the data entry for the electronic programme guide (EPG) on and off. If the data capture is switched on, your TV set tries to update the database overnight (normally between 2 and 5 am) or, if required, two minutes after switching to stand-by mode. The TV set must be on stand-by for this and not switched off at the mains switch. The indicator on the TV set lights blue during data capture in stand-by mode.
The data are also updated while you are watching the EPG channel.
TV on when memorised
When yes is selected in the setting, the switched off TV switches on automatically in standby mode at the beginning of a memorised programme. A screen message appears when switching on. If this is not confirmed within 5 minutes with the OK key, the TV switches automatically off again for safety reasons.
Clear data base
This menu item allows you to remove all data from EPG database. It will take some time to retrieve this data again.
Loewe old
User handbook
System settings
Control
Parental lock
You can select and set various security options to prevent unauthorised use of the TV set and to protect your children from unsuitable programmes.
Call Parental lock menu


HOME: Call Home view.
Mark System settings.
OK call System settings.
▼ ▲ Mark Control
go to next column.
▼ ▲ Mark Parental lock.
go to next column.
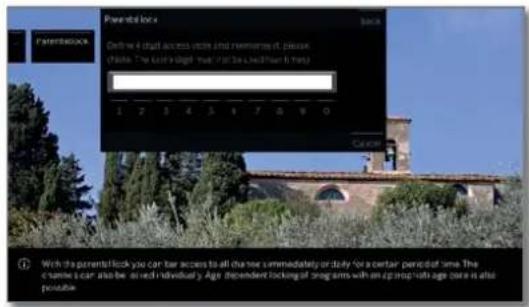
text_image
Parental loc Define 4 that access with and remember it please (While: The child's right, there is the second help in help) 1 2 3 4 5 6 7 8 9 0 Cancel ① With the parental look you can fear access to all these immediately or study for a certain period of time. The same is a car also be called individually. Age dependent looking of programs with an appropriate age care is also possible
Define a four digit access code (PIN) the first time you open it. Note the access code (PIN) well.
The access code must not consist of the same four digits.

Mark Adopt
OK activate.
The new PIN must be entered and confirmed again.
The Parental lock menu will be opened.
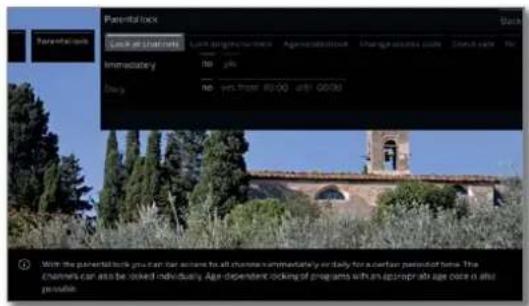
text_image
Parental box Send all emails Imnacatory day Last target number: 100 Password: 000-800-000 Email: 000-800-000 Yes from 40:00 after 00:00 With the parental lock program can reach to all channels immediately or daily for a certain period of time. The channel can also be locked individually. Age-dependent locking of programs with an appropriate age code is also possible.
The four-digit access code (PIN) must be entered when the parental lock is opened in future. For security reasons, it appears encrypted (****) when entering.
Note for unlocking
As soon as the PIN has once been entered to unlock your TV set, all currently set parental locks will be disabled temporarily. Besides of the general locks described in this chapter, this is also valid for parental lock of DR+ archive entries. Parental locks will only be re-enabled when the TV set is switched off.
Explanations of setting possibilities in the Parental lock menu:
Lock all channels The TV set is locked immediately the menu is exited. All programmes can then only be watched after entering the access code. The lock can be activated both Immediately and for a Daily defined period. The lock remains active until it is switched off in the menu.
Lock single channels You can lock/unlock individual or all of the channels in the channel list specifically. The lock remains active until it is switched off in the menu.
Age-related lock Some DVB channels also broadcast an age classification. If the age set here is below the broadcast age limit, the programme can only be watched after entering the access code.
Change You can change your access code at any time. Enter access code the new access code in place of the old one.
Deactivate All set parental locks (locked channels, age-dependent locks, locked films in the DR+ archive) are cancelled. The current secret code is deleted. When the parental lock is reactivated all the previous parental locks are set again automatically.
Reset All currently set parental locks are finally cancelled. The access code is deleted.
Protection of minors for CI Plus programmes
Youth-protected broadcasts of programme providers with CI Plus encoding possibly require you to enter the secret number (PIN) of the CA module.
1 The Parental lock PIN of the CA module can be stored in the TV set. So that you only have to remember one PIN number, we recommend that you select the PIN number of the TV set according to the CA module PIN number.
Code number
The code number cancels all entered access codes. It can be used for example if you have forgotten your PIN. In the supplied operating manual you find a note on the access code number. Remove this one from the operating manual and keep it in a safe place.
Loewe old
User handbook
System settings
Control
Energy efficiency
Determine how energy efficient your TV set shall be. The value for the contrast (and thus the brightness of the background lighting) is adapted and the automatic dimmer activated or deactivated depending on the presetting.
Call Energy efficiency


HOME: Call Home view.
◀ ▶ ▲ ▼ Mark System settings.
OK call System settings.
▼▲ Mark Control
go to next column.
▼ ▲ Mark Energy efficiency.
▶ go to next column.
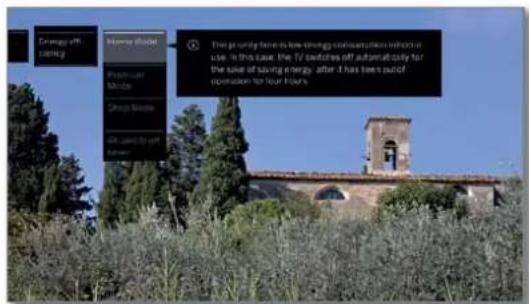
text_image
Energy off money Income Offset Business Mode Energy Offset with, used to off Energy The priority time is how energy communication without it use. In this case, the TV provides off automatic daily for the use of saving energy after it has been proof operation for hour hours.
◀ ▶ ▲ ▼ Select desired setting and make changes.
OK Adopt settings.
Explanations of the setting options in the energy efficiency menu:
Home Mode The emphasis for home use is on low energy consumption. The automatic dimmer is activated. The TV set switches off automatically for the sake of saving energy, after it has been out of operation for 4 hours.
Premium Mode This mode optimises the settings to a brighter environment at a higher energy consumption. The automatic dimmer is activated. The TV set switches off automatically for the sake of saving energy, after it has been out of operation for 4 hours.
Shop Mode The picture settings are aligned to operation in the presentation room. The automatic dimmer is deactivated. If the ambient brightness diminishes, the energy consumption is not reduced. Any changes made are reset to the defaults after 30 minutes.
4h switch-off timer If you disable the timer, the TV set will no longer automatically switch off after 4h without operation to limit the increased energy consumption.
Quick start mode
If you choose to activate the quick start mode, you will see the TV screen immediately after each switching on of the TV set and without any waiting time. You can specify the times at which your device will be in the Quick Start Mode.
In this case, please note the higher power consumption (see chapter Technical data) and thus a higher annual energy consumption
Default setting for the Quick Start Mode: no
Call Quick start mode


HOME: Call Home view.
◀ ▶ ▲ ▼ Mark System settings. OK call System settings.
- ▲ Mark Control. - go to next column. - ▲ Mark Quick start - go to next column.
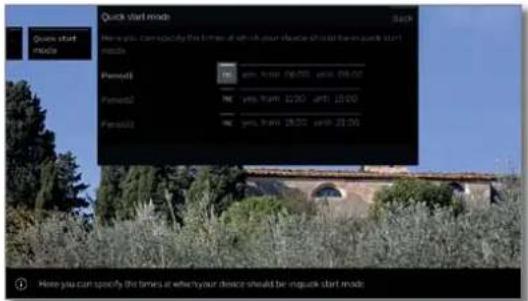
text_image
Quick start mode Here you can specify the times at which your device should be quick start mode. Preset1: yes, turn 06:00, until 08:00 Preset2: yes, turn 12:00, until 15:00 Preset3: yes, turn 18:00, until 21:00 Here you can specify the times at which your device should be quick start mode.
Select desired setting and make changes. You can individually change the suggested times. OK Adopt settings.
Loewe bild
User handbook
System settings
Control
Software update
It is possible to update the software on your Loewe TV set.
In the software update (package update) all the software releases in the TV are scanned and updated as required.
Here you can download a new piece of software from different sources (if existing).
Current software versions can be downloaded from the Loewe Internet site (see below) and installed on your TV set using a USB stick.
If your TV set is connected to the Internet, the TV set can be updated directly via the Internet (see chapter System settings, section Control – Manual update via the Internet).
- Updating the software is not possible as long as a programmed timer recording is active.
When a software update occurs it may happen that timer entries and memorised programmes are deleted. After such a software update, check your timer list (see chapter Recordings, section Timer - Timer list).
i Please be aware of the requirements of your USB stick in section Technical data – Media.
Software download from the Loewe Internet site for update via USB
Where available, you can download new software for your TV set from our homepage.
To do this, visit our homepage at:
www.loewe.tv/int/support
You can select your product on the Support Homepage under the point Software.
Then you can select and download under Select software the software available for your TV set.
Unpack the downloaded file into the main directory of your USB stick.
Then carry out the software update as described below.
USB stick - requirements
USB sticks tested by Loewe and compatible in type and format can be ordered from the Loewe dealer using the article no. 90456.900.
If you would like to use your own USB stick, please follow these tips/conditions:
- Formatting in FAT32.
- Just one partition.
- Do not use encrypted USB sticks.
- Do not use USB sticks that simulate a CD ROM drive.
• There may be no hidden files on the device.
- For some types of device, the construction of the USB stick is significant. Maximum dimensions in mm: 70x20x10.
- If in doubt, the USB stick should be formatted as "FAT32" without "extended attributes".
In order to avoid problems during the software update of the tv set the USB stick in use should meet the requirements.
Loewe bild
User handbook
System settings
Control
Software update via USB storage device
To do this, plug the USB stick with the downloaded software into a free USB port of the TV set.
Calling Software update

HOME: Call Home view.

Mark System settings.
OK call System settings.
▼ ▲ Mark Control,
▶ go to next column.
▼▲ Mark Software update.
▶ go to next column.
Mark Via USB
▶ call Software update.
The version of the software package that is currently installed will be displayed.
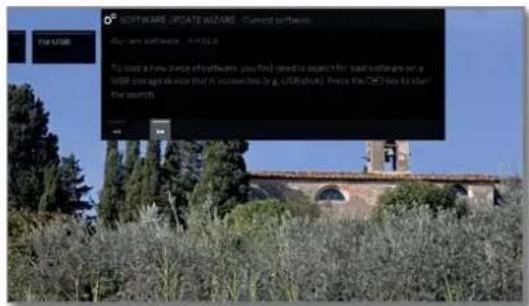
text_image
SOFTWARE UPDATE WIZARD - Current software Our own software: 4-12.0 To want a new service software, you find need to search for your software on a USB storage device that it is recommended (e.g. USBcheck). Please the CEO let us start the search.
▶ Proceed
The TV set searches for a new software package on the USB stick.
If a new software version is available after the search, an on-screen message appears (see right hand column).
If several different software packages are found on the USB stick, the latest software package is always used.
If no new software package was found in the search:

← End of wizard
New software package found
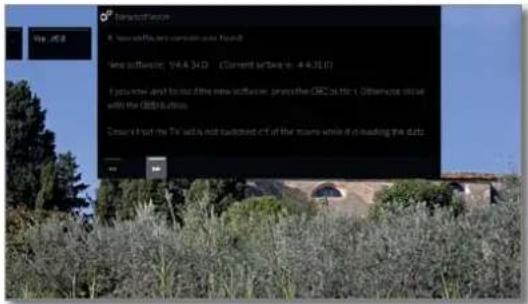
text_image
New software 4. New software can continue to find? New software: 19.4.34.0 (Current software is: 4.4.35.0) I you know any but not the new software: press the CBC on file, otherwise close with the ODBC button. Close it from the file is not switched off of the frame while it is loading the data.
▶ Proceed starts loading of the new software.
Or:

← End of wizard.
The update will then not be carried out.
Load new software package
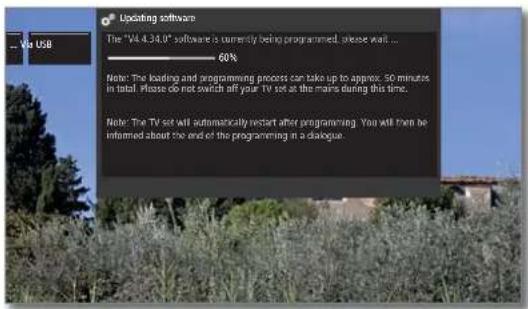
text_image
Updating software The "V4.4.38.0" software is currently being programmed, please wait ... —— 60% Note: The loading and programming process can take up to approve, 50 minutes in total. Please do not switch all your TV set at the main during this time. Note: The TV set will automatically restart after programming. You will then be informed about the end of the programming in a dialogue.The software is loaded in several steps. The total loading and programming process can take up to approx. 50 minutes in total.
Please do not switch off your TV set with the mains switch during the entire loading and programming process.
After the update, the TV set is automatically powered off and on again.
1 Depending on the software loaded, it is possible that the device may not turn off automatically after the update. Therefore, please supervise the update process.
When the TV set is switched on again, a message is displayed.
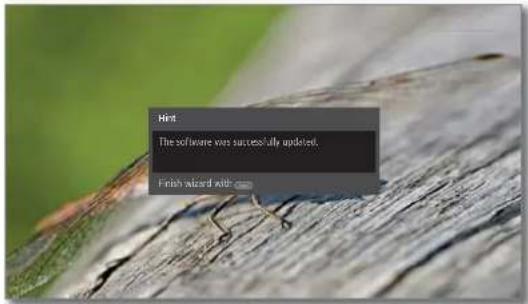
text_image
Hint The software was successfully updated. Finish wizard with error
BACK: End of wizard
Loewe bild
User handbook
System settings
Control
Manual update via the Internet
If an Internet connection is available, new software can be downloaded directly and installed onto the TV set.
Calling Software update


HOME: Call Home view.
◀ ▶ ▲ ▼ Mark System settings. OK call System settings.
▼▲ Mark Control
go to next column.
▼▲ Mark Software update.
▶ go to next column.
Mark Via Internet
go to next column.
You will see a message on the screen regarding data protection.
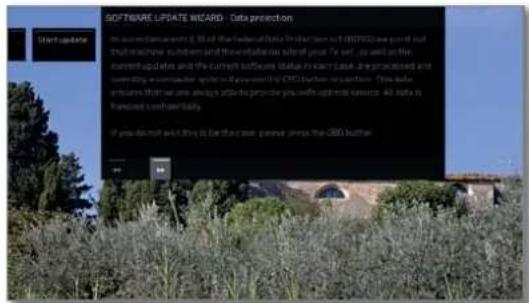
text_image
SOFTWARE LICENSE WICARD - Data protection Start update In accordance with it, the following data is extracted out (ORUS) are provided and the machine number and the verification site of your file. We will be the current updates and the current software status in each case are protected and the existing certificate is approved by the CBO button permission. This code encour that we are always valid to provide you with optimal services. All data is 传递到 confidentiality. If you do not wish this is for their use, please press the CBO buttonIf you are not in agreement with the relevant data being passed on:

Exit the update process.
The update will then not be carried out.

Otherwise: Confirm data protection message by pressing ▶.
The version of the software package that is currently installed will be displayed.
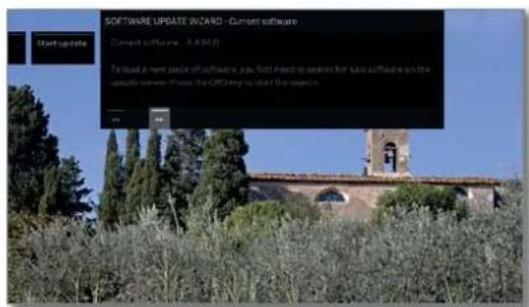
text_image
SOFTWARE UPDATE WIZARD - Current software Current software: 0.0 (M) To load a new piece off software, you first want to search for Auto software in the software system. Please click any to select the software.
▶ Proceed
The TV set connects to the Internet and scans the update server for new software.
If a new software version is available after the search, an on-screen message appears (see right hand column).
If no new software package was found in the search:

BACK: End of wizard.
New software package found
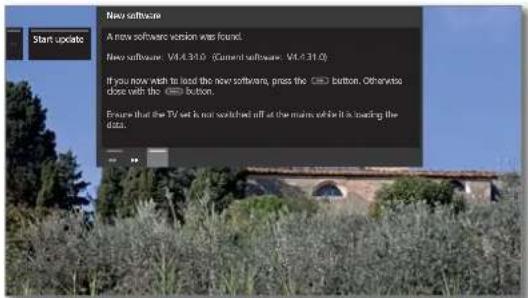
text_image
New software A new software version was found. New software: V4.4.31.0 (Current software: V4.4.31.0) If you now wish to load the new software, press the CBO button. Otherwise close with the CBO button. Ensure that the TV set is not switched off at the mains while it is trading the data.
▶ Proceed starts loading of the new software.
Or:

← End of wizard
The update will then not be carried out.
Load new software package
Only the parts of the software package that are not up to date will be automatically downloaded from the Internet and updated.
Each part of the software is downloaded individually from the Internet and is then programmed.
The total time required for all the software parts to be downloaded from the Internet is dependent on the speed of data transfer that is being used.
The total programming process can take up to 50 minutes in total.
Please do not switch off your TV set with the mains switch during the entire loading and programming process.
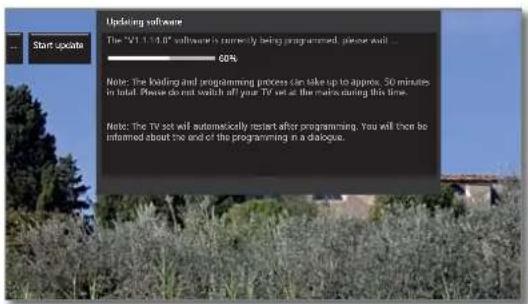
text_image
Updating software The "TV 1.1-14.0" software is currently being programmed, please wait ... 60% Note: The loading and programming process can take up to approx, 50 minutes in total. Please do not watch off your TV set at the mains during this time. Note: The TV set will automatically restart after programming. You will then be informed about the end of the programming in a dialogue.After the update, the TV set is automatically powered off and on again.
Depending on the software loaded, it is possible that the device may not turn off automatically after the update. Therefore, please supervise the update process.
When the TV set is switched on again, a message is displayed.

BACK: End of wizard
Loewe bild
User handbook
System settings
Control
Software update via Antenna
A software update via antenna is only available for channels of the Freeview DVB-T platform in the UK and Ireland.
Calling Software update


HOME: Call Home view.
Mark System settings.
OK call System settings.
▼ ▲ Mark Control
go to next column.
▼▲ Mark Software update.
▶ go to next column.
Mark Via Antenna.
▶ call Software update.
You will see a message on the screen regarding data protection.
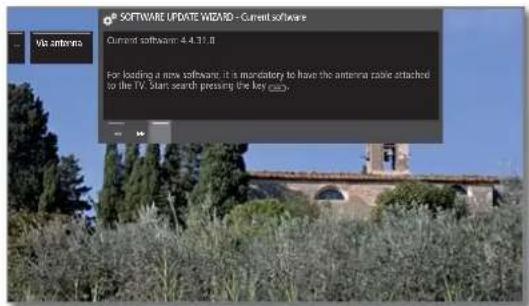
text_image
Software UPDATE Wizard - Current software Current software: 4.4.31.8 For loading a new software, it is mandatory to have the antenna cable attached to the TV. Start search pressing the key GEO.
Proceed
The TV set searches for a new software package.
If a new software version is available after the search, an on-screen message appears (see below).
If no new software package was found in the search:

BACK: End of wizard.
New software package found
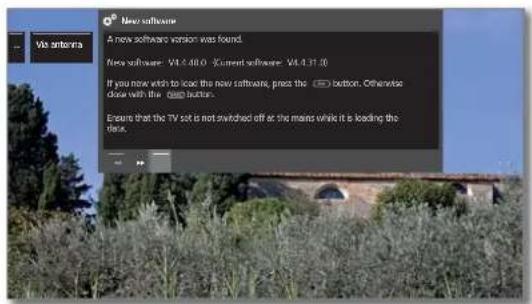
text_image
New software A new software version was found. New software: V4.0.48.0 - Current software: V4.0.31.0 If you now wish to load the new software, press the button. Otherwise close with the down button. Ensure that the TV set is not switched off at the means while it is loading the disk.
▶ Proceed starts loading of the new software.
Or:

BACK: End of wizard
The update will then not be carried out.
Load new software package
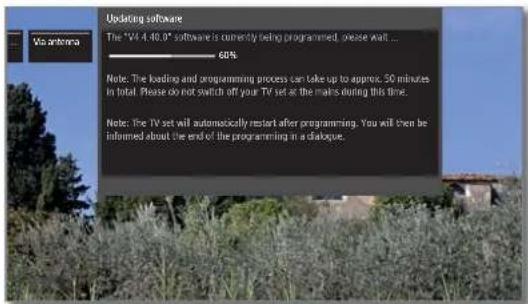
text_image
Updating software The "TV 4.40.0" software is currently being programmed, please wait ... ——— 60% Note: The loading and programming process can take up to approve 30 minutes in total. Please do not switch off your TV set at the mains during this time. Note: The TV set will automatically restart after programming. You will then be informed about the end of the programming in a dialogue.The software is downloaded in several steps. The total downloading and programming process can take up to approx. 50 minutes in total.
Please do not switch off your TV set with the mains switch during the entire loading and programming process.
After the update, the TV set is automatically powered off and on again.
1 Depending on the software loaded, it is possible that the device may not turn off automatically after the update. Therefore, please supervise the update process.
When the TV set is switched on again, a message is displayed.
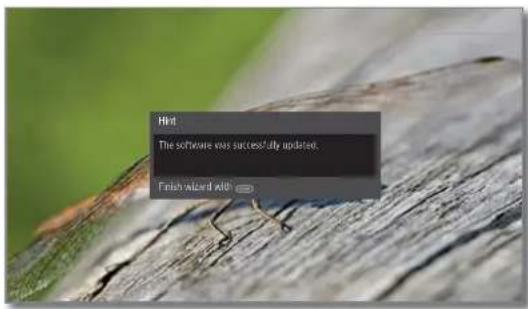
text_image
Hint The software was successfully updated. Finish wizard withBACK: End of wizard.
Loewe old
User handbook
System settings
Control
Automatic update via the internet
Your TV set checks at definite intervals whether a newer software than the one installed in the TV set is available in the Internet. If this is the case, you can find this out by a screen message.
In order to get informed about the new software, the TV set must be connected to the Internet.
The Inform about new software item can also be switched on/off at the end of initial installation.
Showing/Hiding information on new software


HOME: Call Home view.
Mark System settings.
OK call System settings.
▼ ▲ Mark Control
go to next column.
▼ ▲ Mark Software update.
go to next column.
Mark Via Internet.
go to next column.
▼ ▲ Mark Inform about new software
▶ go to next column.
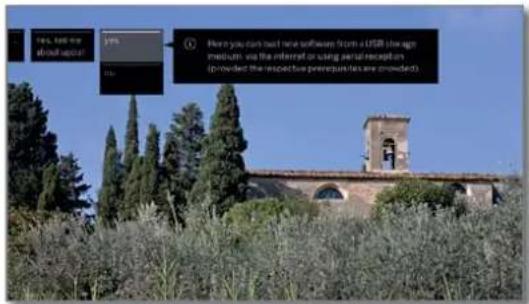
text_image
Yes, but me about up? Yes No. Here you don't read new software from a USB low-ago medium on the interest or using serial recognition (provided the respective keypoints are needed)
▼ ▲ Select yes / no.
OK Adopt.
New software package found
For the menu item Inform about new software, yes is selected (see left column).
If the TV set has found a new software version during the check, you will be informed about this via a screen message.

▲▼ Select the desired procedure.
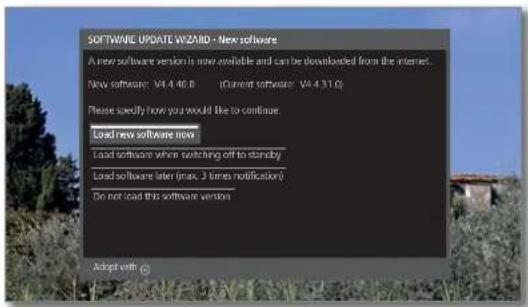
text_image
SOFTWARE UPDATE WIZMARD - New software A new software version is now available and can be downloaded from the internet. New software: V4.4.40.0 Current software: V4.4.31.0 Please specify how you would like to continue. Load new software now Load software when switching off to standby Load software later (max. 2 times notification) Do not load this software version Adopt with ©Load the software now After confirmation, the new TV software will be loaded from the internet and then programmed.
Load the software will be loaded and programmed after the TV set has been switched off into standby mode when for the next time. The display on the control panel switch off to will light up blue during the update.
standby The TV set must not be switched off at the mains before the downloading process is complete (control panel display lights up white)!
Load the loading the software will be postponed to a later date. software The new software message will be displayed the next later (at time the TV set is switched on.
most If the loading process is postponed three times then three-fold notification) the message will only be shown again once the next software version is available.
Do not load this software. The new software will not be loaded. The on-screen message will only be shown again for the next software version.

Confirm selection.
Loewe bild
User handbook
System settings
Control
On-screen displays
You can select different settings in this menu which affect the on-screen displays.
Call On-screen displays


HOME: Call Home view.
◀ ▶ ▲ ▼ Mark System settings. OK call System settings.
▼ ▲ Mark Control
▶ go to next column.
▼ ▲ Mark more ...
▶ call other settings.
▼ ▲ Mark On-screen displays,
▶ go to next column.

text_image
On screen displays Display time Duration: 0% Magnitude: 0% Key: 0% Performance: 0% Maximum: 0% Upper limit display "No output" maximum display Select off current Up to current up and down until the current Back on main mode Back on main mode Back on main mode Back on main mode Back on main mode Back on main mode Back on main mode Back on main mode Back on main mode Back on main mode Back on main mode Back on main mode Back on main mode Back on main mode Back on main mode Back on main mode Back on main mode Back on main mode Back on main mode Back on main mode Back on main modes Back on main modes Back on main modes Back on main modes Back on main modes Back on main modes Back on main modes Back on main modes Back on main modes Back on main modes Back on main modes Back on main modes Back on main modes Back on main modes Back on main modes Back on main modes Back on main modes Back on main modes Back on main modes Back on main modes Back on main mode Back on main mode Back on main mode Back on main mode Back on main mode Back on main mode Back on main mode Back on main mode Back on main mode Back on main mode Back on main mode Back on main mode Back on main mode Back on main mode Back on main mode Back on main mode Back on main mode Back on main mode Back on main mode Back on main Mode Back on main Mode Back on main Mode Back on main Mode Back on main Mode Back on main Mode Back on main Mode Back on main Mode Back on main Mode Back on main Mode Back on main Mode Back on main Mode Back on main Mode Back on main Mode Back on main Mode Back on main Mode Back on main Mode Back on main Mode Back on main Mode Back on main Mode Back on main mode
▶ ▶ ▲ ▼ Select desired setting and make changes. OK Adopt settings.
Explanations of setting possibilities in the On-screen displays menu:
Display time Here you set the duration of the display, e.g. for the volume or the channel display when changing channels.
Volume display Here you set whether a volume change is also to be indicated visibly on the screen.
Automatic Herewith you activate/deactivate the info text menu info displays for the currently selected menu item.
Key If yes is set, the assignment of special remote control explanation keys is indicated together with the TV status display.
Permanent The time display can be permanently shown. It is always visible as long as no other display is made.
Automatic HDMI hint If yes is set here, a message about the adapted function of the remote control is shown whenever you switch over to an HDMI channel position to which a Digital Link HD capable TV set is connected.
Upper info This activates the upper additional on-screen display display in the status bar when switching stations on or off.
"No Signal" This allows you to suppress the 'No signal' message. notification
Switch off curtain Here you can specify whether there is a switch-off curtain (0 = no curtain) and how long this one needs for closing.
Radio screen If on is set here, the screen remains permanently switched on in radio mode. When off after 30 seconds/1 minute/2 minute, the screen is switched off.
Time and date
The time and date are normally acquired automatically by the TV set. If the data is missing or wrong, you can adjust it via the time and date menu.
Call Time and date


HOME: Call Home view.
◀ ▶ ▲ ▼ Mark System settings. OK call System settings.
- ▲ Mark Control. - go to next column. - ▲ Mark more ... - call other settings.
▶ Mark Time and date. ▶ go to next column.
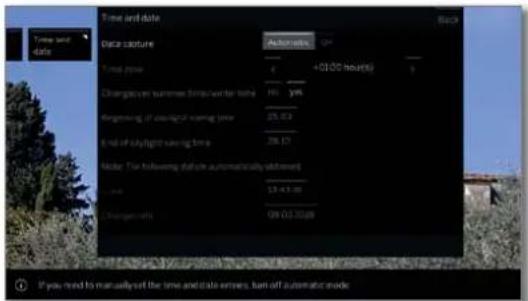
text_image
Time and date Data capture Automatic Time type: 4 +01:00 hours Changwon summer timeframe time: 76.9% Beginning of automatic saving time: 25.8% End of daylight saving time: 28.12 Note: The following status automatically adjustment: Time: 13:43:00 Change rate: 08:05:00ph If you need to manualise the time and date entries, turn off automatic mode
◀ ▶ ▲ ▼ Select desired setting and make changes. OK Adopt settings.
Explanations of setting possibilities in the Time and date menu:
Data capture If you need to set the time and date entries manually, turn off the automatic setting here.
Time zone The current time at the Greenwich Meridian 0 is to be understood as world time. The time shift in relation to this time must be given in hours (-11 to +13).
Changeover If the summer time in your country is changed to summer time Daylight-saving time, select yes please. / winter time
Beginning of daylight-saving time Enter the date on which the time is switched over to summer time if it deviates from the automatically calculated date. This menu item appears only if yes was selected for Daylight-saving time.
1 Only possible when changeover summer time/winter time – yes has been selected.
End of daylight-saving time Enter the date on which the summer time ends if it deviates from the automatically calculated date. This menu item appears only if yes was selected for Daylight-saving time.
1 Only possible when changeover summer time/winter time – yes has been selected.
Time Enter the time (00:00 to 23:59) / date (day.month. Date year) with the numerical keys of the remote control.
1 Only possible when Data capture - off or when time has not been automatically acquired.
Loewe old
User handbook
System settings
Control
DVB settings
You can make general pre-settings for DVB channels.
Calling DVB settings


HOME: Call Home view.
◀ ▶ ▲ ▼ Mark System settings, OK call System settings.
Mark Control.
go to next column.
▼ ▲ Mark more ...,
▶ call other settings.
▶ Mark DVB settings
▶ go to next column.
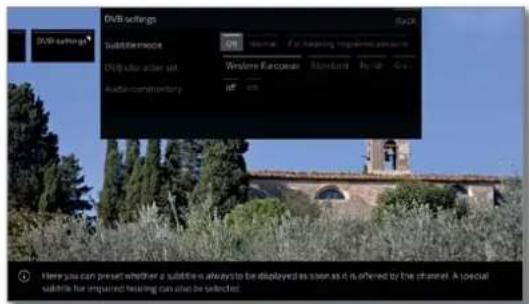
text_image
DVD settings Subttemerose Digital character set Audio commentary Western European Standard Focal GPs Back Here you can present whether a subtitle is always to be displayed as soon as it is offered by the channel. A special subtitle for impaired hearing can also be selected.Explanation of the DVB setting options:
Subtitle mode Here you can preset whether a subtitle is always to be displayed as soon as it is offered by the channel. A special subtitle for impaired hearing can also be selected. Subtitles are not offered by all channels. Many channels only broadcast subtitles by teletext.
DVB Select the DVB character set so that the title of the character set broadcast of your favourite received channel or the texts of your CA module are displayed correctly.
Audio commentary You can preset the system here to always play a special soundtrack for the visually impaired whenever one is available. This soundtrack uses an audio commentary to describe the action taking place on-screen.
PIP
Adjust size of the PIP image


HOME: Call Home view.
◀ ▶ ▲ ▼ Mark System settings, OK call System settings.
Mark Control, go to next column.
Mark more ..., call other settings.
Mark PIP.
go to next column.
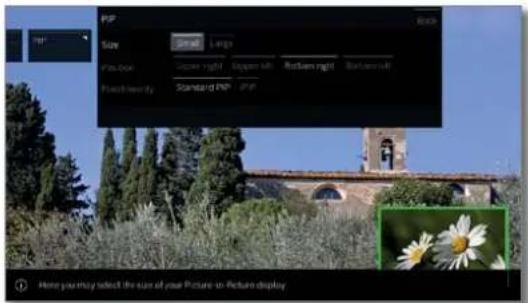
text_image
PDF Size Normal Large View point Upper right Upper left Bottom right Bottom left Position priority Standard PDF - PDF Here you may select the size of your Picture-to-Picture display
▶ ▶ ▶ Select desired setting and make changes. OK Adopt settings.
Explanations of setting possibilities in the PIP Settings menu:
Size You can choose if your second picture faded in (picture in picture) shall be displayed small or large.
Position Here you can set the position of the second inserted picture (picture in picture). You can position the second picture on the top right, top left, bottom right and bottom left.
Functionality Here you can change the PIP functionality between standard PIP and iPIP.
The iPIP menu item is not available for non-dual-channel devices ^1 or when selecting an AV interface (HDMI, etc.).
Loewe old
User handbook
System settings
Control
DR+
You can adapt the Digital Recorder to your requirements.
Call settings for the digital recorder


HOME: Call Home view.
Mark System settings.
OK call System settings.
▼ ▲ Mark Control
go to next column.
▼ ▲ Mark more ...
▶ call other settings.
▼ ▲ Mark DR+
▶ go to next column.
text_image
recording You may get the live record and print record of images Bags.
▼▲ Mark desired setting.
go to next column.
▼ ▲ Make settings.
OK confirm setting.
Explanation of the DR+ setting options
Recording
You can set a pre-record and post-record time for timer recordings made without auto time control. This minimizes the risk that a part of the broadcast is not recorded due to the broadcast starting earlier and/or finishing later.
Factory setting: pre-record time: 1 min. post-record time: 5 min.
Notify hidden sections
If an entry has been hidden in an archive recording, you can get informed by a screen message when skipping a hidden area.
Factory setting: yes.
Jump distance
Set the standard jump distance (in minutes) used for jumping forwards or backwards in the movie by briefly pressing the ◀ or ▶ keys.
Factory setting: 2 min.
Smart jump
If the "Smart jump" mode is activated you can approach a desired place by pressing the ▶ and ◀ buttons alternately and halving the jump width. After every 3rd jump in the same direction the jump width is doubled (up to a maximum of 8 minutes).
If off is set you always jump the same currently set jump width (time) with the ▶ and ◀ buttons.
Factory setting: on
Serial The serial recording tolerance is necessary to recording avoid recording a serial more than once when it is tolerance broadcast more than once a day.
It is only recorded when it begins within the given time interval (start time +- series recording tolerance).
Use the numeric button on the remote control to enter the time (always two-digit for 01 to 60 min.).
Factory setting: ± 30 min
Recording Select here whether subtitles are to be recorded for subtitles DVB channels.
Factory setting: no ^1
DR+ With this, all the settings are activated to make all Streaming the films on your DR+ archive available to other LOEWE TVs using your home network ^(2) (or vice-versa, e.g. allowing you to use the DR+ archive of other LOEWE TVs).
See next page for further information.
Loewe old
User handbook
System settings
Control
Call DR+ streaming settings
i The DR+ settings are called (see previous page).

▼ ▲ Mark DR+ Streaming
▶ go to next column.
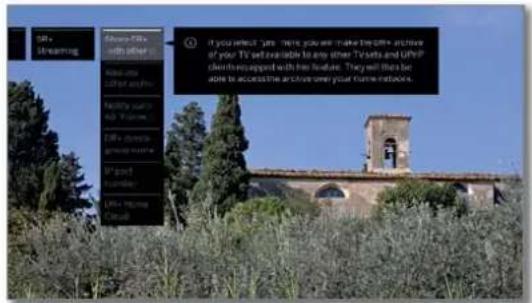
text_image
i#+ Streaming Choose TV's with other I'll get new content. I'll get new content. I'll get new content. I'll get new content. I'll get new content. I'll get new content. I'll get new content. I'll get new content. I'll get new content. I'll get new content. I'll get new content. I'll get new content. I'll get new content. I'll get new content. I'll get new content. I'll get new content. I'll get new content. I'll get more than 10 minutes. You will make the time to access or use your TV's website to any other TV sites and other clients attached with his website. They will then be able to access or serve your online networks.
Mark desired setting.
▶ go to next column.
▼▲ Makesettings.
OK confirm setting.
Explanation of the setting options for DR+ streaming
Share DR+ archive with other devices ^1
Specify here whether recorded broadcasts within your TV set's DR+ archive are to be accessible for viewing from other TV sets (server function).
Enabled programmes can also be played on other UPnP-AV clients in the same network.
Also use other archives.
Setting yes enables you, via the archive, to also view recordings from other TV sets that have accessible movies within the home network (client function).
Notify started „Follow me“ recording
Your TV set can issue a message if a follow-me recording has been started on another TV set, which you can view on this TV set.
DR+ device group name
Give a name for your TV set group.
Using different group names enables you to group your TV sets as required. Only TV sets under the same group name can exchange data.
IP port number
IP port numbers are preset ex-factory. Under normal circumstances they do not require amending.
Standard Teletext
In the Standard Teletext menu you can configure the Teletext.
Call Teletext settings

HOME: Call Home view.

Mark System settings. OK call System settings.
Mark Control, go to next column.
Mark more ...
call other settings.
Mark Standard Teletext
go to next column.
text_image
Mainbox Tidobest Character Set Here you can convert the Textset into the specified languages.Explanations of the Standard Teletext menu functions:
Character set
Teletext character set can be switched to other languages (Russian, Greek, Polish and Turkish).
Loewe bild
User handbook
System settings
Control
HbbTV
Here you can do all settings for the HbbTV mode.
Call HbbTV settings


HOME: Call Home view.
◀ ▶ ▲ ▼ Mark System settings.
OK call System settings.
▼ ▲ Mark Control
go to next column.
▼ ▲ Mark more ...
▶ call other settings.
Mark HbbTV
go to next column.
text_image
View the HBS/FV video-(hybrid broadcast unifCore) (FV mode) is active, additional services and further information (e.g. from the screen) can be viewed if these are offered by the current channel.
▼ ▲ Mark desired setting,
▶ go to next column.
▼ ▲ Make settings.
OK confirm setting.
Explanation of the setting options for HbbTV
HbbTV mode
When the HbbTV mode is active (factory setting), additional services and further information (e.g., also from the Internet) can be viewed if these are offered by the current channel.
Start behaviour of HobTV-stations
If HbbTV mode - on has been selected, you can specify if an available HbbTV application should be loaded automatically after the channel has been changed or if this should only occur manually after the red key has been pressed once. The startup behaviour can be set for TV and radio channels.
After loading the HbbTV application, an on screen message is displayed (depending on the channel that is being viewed).
Function of the TEXT key
With the setting Standard Teletext first (factory setting), the standard Teletext is opened when the TEXT key is pressed for the first time. Pressing the TEXT key for a second time will then display the MediaTek. Pressing the TEXT key for a third time will bring you back to the TV picture. If MediaTek first is selected, the TEXT key will do the exact opposite.
Depending on the programme provider, the direct Call of MediaTek may not be possible. MediaTek must then be opened by means of the HbbTV application.
Asterisk key function
You can assign the asterisk key on the remote control unit a particular function (App Gallery, picture/sound menu, sound mode, etc.).
The selected function is then called directly at a long keypress (approx. 2 sec.).
The assignment of the star key with Save object as favorite for the short keypress remains unaffected.
Call Asterisk key settings
Default setting: Call App Gallery

HOME: Call Home view

▶ ▶ ▶ Select System settings OK call System settings.
▼ ▲ Select Control
▶ go to next column.
▼ ▲ Select more ...
▶ call other settings.
▼▲ Select☆ key function.
go to next column.
text_image
OK/Hey function Aqua Gallery Description: Page name Document type Products for Mail New architecture Software Internet Help Showing You can assign the CFD custom custom function items (Long press). The selected function is then selected directs where the function is pressed. Adjust it to help
▼▲ Select function, OK Adopt.
Loewe bild
User handbook
System settings
Control
Rotate TV
Here you can set the turning range for a Loewe motorised rotary foot and set the switched off position of your TV set.
To connect a motorized rotary foot, you need the Motor unit connection. This is found at the rear of your TV set ^1 .
Menu item Rotate TV appears only if you have an installation with motorized stand.
Setting the range of rotation (rotation wizard)
By means of the rotation wizard you can define the rotation range of the TV set (maximum +/- 45 degrees) by setting the maximum right and left stop position.


HOME: Call Home view.
Mark System settings.
OK call System settings.
Mark Control.
▶ go to next column.
▼ ▲ Mark more ...
▶ call other settings.
▼ ▲ Mark Rotate TV.
go to next column.
Select Basic adjustments.
▶ call Basic adjustment.

text_image
RIFICATION WORKING, Maximum Right Vision Positive Turnover TV to the RHOFT as far as video call on location after. This is the maximum right timing position in hours +50° +18° +45°
▶ Basic adjustments (to the right)
Rotate your TV set to the right as far as the installation site allows.
This will be the maximum right rotation position in future.

▶ proceed.
text_image
Maximum - 100% resolution Primary: 100% to the LIF15 as true on the installed free seconds after. This is also infty and 100% for missing pixels in future. 40° 2.5° 143°
Basic adjustments (to the left)
Turn your TV set to the left as far as the installation site of your set allows.
This will be the maximum left rotation position in future.

▶ End of wizard.
Specifying the switch-off position
This is where you specify the position that the TV will take when it is switched off. In order for the TV set to return to the determined switchoff position when switching it off, this must be activated (see below).


HOME: Call Home view.
◀ ▶ ▲ ▼ Mark System settings. OK call System settings.
- ▲ Mark Control.
- go to next column.
- ▲ Mark more ...,
- call other settings.
▶ Mark Rotate TV. ▶ go to next column. - Select Set switch-off position.
- call Set switch-off position.
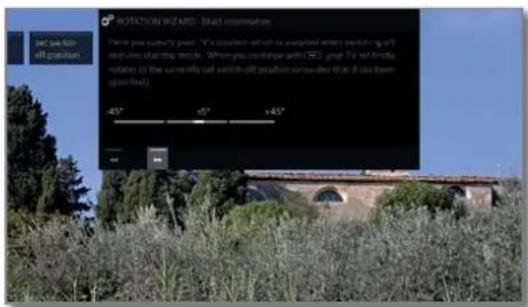
text_image
ROTATION WIZARDS - Start incommence Take action off position 45° 5° +45°
▶ Call dialogue for setting the new switch-off position.

- Set desired switch-off position.
The switch off position can only be defined within the set rotation range (see left column).

▶ End of wizard.
Activating the switch-off position
If the TV set is switched off with the on/off key on the remote control or at the control panel then it will turn to the defined switch-off position. When it is switched back on, it returns to the position last set.

HOME: Call Home view.

◀ ▶ ▲ ▼ Mark System settings. OK call System settings.
▶ Mark Control.
▶ go to next column.
▶ ▲ Mark more ...,
▶ call other settings.
Mark Rotate TV.
go to next column.
- Select Activate switch-off position.
- go to the next menu line below.
▼▲ Select yes.
OK adopt.
Loewe bild
User handbook
System settings
Control
Set switch-on position
Here you can specify the period of time in which your TV set turns to a specific switch-on position. The suggested times and the position can be changed individually.


HOME: Call Home view.
◀ ▶ ▲ ▼ Mark System settings.
OK call System settings.
Mark Control
▶ go to next column.
▼ ▲ Mark more ...
▶ call other settings.
▼ ▲ Mark Rotate TV
go to next column.
Mark Specify switch-on position
▶ Call specify switch-on position.
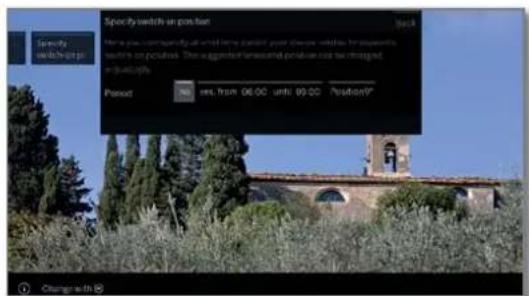
text_image
Specify switch in position Name: you could pay up what time is fixed, your choice window for payments switch on position. The suggested transaction price not was traded on public info. Preset: no, yes, from 06:00, until 09:00 Position?

▶ Select the desired setting and make changes. OK Accept settings.
▶ End of wizard.
Adjust 0 position
Here you can set the 0-position of the TV set.


HOME: Call Home view.
◀ ▶ ▲ ▼ Mark System settings.
OK call System settings.
▼ ▲ Mark Control
go to next column.
▼ ▲ Mark more ...
▶ call other settings.
▼ ▲ Mark Rotate TV
go to next column.
Mark Adjust 0 position.
▶ Call adjust 0 position.
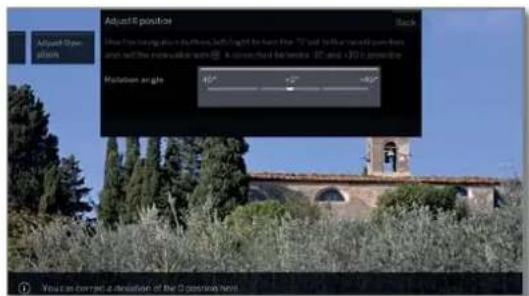
text_image
Adjust Position Show from navigation to these left light to find the 70° and blue next position and will then be converted to 25°. It is corrected by rotation: 30° and 10° is constant. Rotation angle 40° -25° -80° You can correct a deviation of the C design text.

Set desired O-Position
▶ End of wizard.
Display kinematics
■ Only for set types bild 9 and bild 7.
The Loewe TV sets types bild 9 and bild 7 are equipped with a kinematics that moves the TV set upwards or downwards when switching it on and off, whereby the speaker cover is visible or is hidden.
Please make sure that there is no externally applied force opposing the movement. You have the option to fix the position of the kinematics from the menu, or disable the function.
Call Display kinematics settings


HOME: Call Home view.
◀ ▶ ▲ ▼ Select System settings.
OK call System settings.
▼ ▲ Select Control.
▶ go to next column.
▼ ▲ Select more ...
▶ call other settings.
▼ ▲ Select Display kinematics.
OK Call.
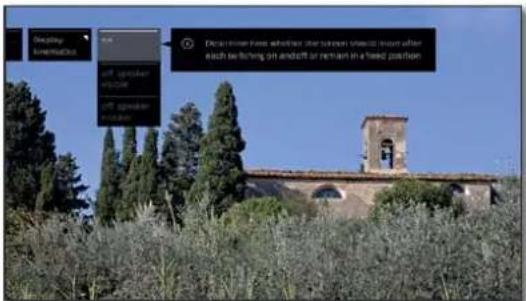
text_image
Display Information All open Open All open Open Description: how to switch the window when after each setting on and off or remain in a fixed position
▼ ▲ Select the desired setting.
OK confirm selection.
on off, speaker visible Determine here whether the screen should move after each switching on and off or remain in a fixed position.
off, speaker hidden
Transport
Before you transport the TV set, in the Screen cinematics menu (see above), set the speaker to be visible after switching off the TV set. The screen is now in the top position. Secure the monitor into this position with the transport fixing bolt. The screen is now in the top position. Secure the monitor into this position with the transport fixing bolt.
Also, attach the original stabilizer parts to prevent damage. Your dealer will provide you with all packaging materials if necessary.
Loewe old
User handbook
System settings
Control
Hard disks
Checking the hard disk ^(1)
You should launch a check of the integrated hard disk once a year or if problems arise when starting recordings (e.g. when transferring to time-shift playback).
Call hard disk settings


HOME: Call Home view.
Mark System settings.
OK call System settings.
Mark Control
▶ go to next column.
Mark more ...
▶ call other settings.
▼ ▲ Mark Hard disks,
go to next column.
▼ ▲ Mark Check integrated one.
OK Call.
A warning note will be displayed.
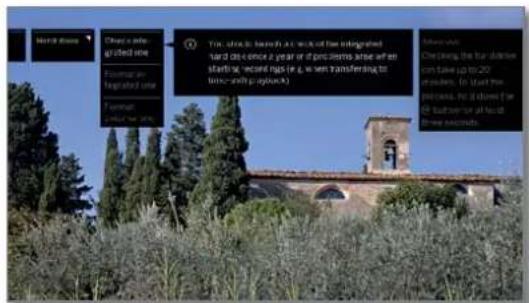
text_image
Home access Check a info-glassed one From an integrated one From an integrated one You do not be able to use all information and do once a year or if problems are often starting, record risks (e.g. is when transferring to time—only up/week) Check your details for details can take up to 20 seconds. In trust the process, but it closed at the bottom on all head three seconds

OK Press at least for three seconds to start the checking.
Or:
BACK: Cancel procedure.
- Checking the hard disk (check disk) may take up to 20 min. Never ever switch off the TV set during a check disk process.
After the check, a message will appear on the screen showing the results of the check and tips on how to resolve any problems that are present, should there be any.
i After checking of the hard disk the TV set must be switched off and on again.
Formatting the hard disk
If problems were detected when the hard disk was being tested (see left column), re-formatting may be able to remedy the problem. Additionally, you can re-format the hard disk in order to quickly and easily delete all the data stored on it.
Warning!
Formatting the hard disk will erase all data stored on it! The station logos stored on the internal ^1 hard disk are deleted and only reloaded when the internet connection is established.


HOME: Call Home view.
Mark System settings.
OK call System settings.
Mark Control
▶ go to next column.
▼ ▲ Mark more ...
▶ call other settings.
▼ ▲ Mark Hard disks.
go to next column.
▲ Mark Format integrated one or Format external one.
OK Call
A warning note will be displayed.
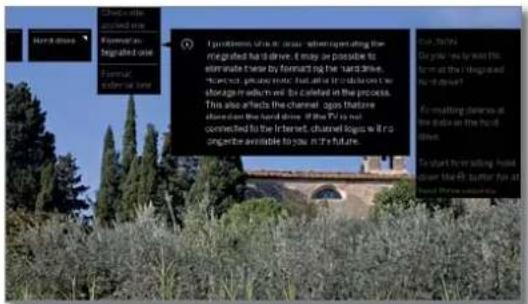
text_image
Channel code accessed site Formal an segraded case Formal an external zone I Palestine that is clear when operating the integrated field drive, it may be possible to eliminate these by formart's the hard drive. How not get any music, but still be introduced on the storage in which will be called in the process. This also affects the channel: ogs that are shared the hard drive. If the PV is not connected to the Internet, channel logos will go organize available to low in the future. For your new user, we need this. for me at the I integrated no device? If waiting devices at the state or the no of otherwise. To start to write a local down the PV, better than at used them as a good

OK Press at least for three seconds to start formatting.
Or:
BACK: Cancel procedure
Never ever switch off the TV set during a formatting process.
After the formatting, a message will appear on the screen showing the results of the formatting and tips on how to resolve any problems that exist, should there be any.
After the formatting the TV set must be switched off and on again.
Note on formatting external USB disks:
The TV set supports the two hard disk file systems FAT 32 and NTFS. External hard disks are formatted by the TV in the FAT32 file system to full capacity.
i With FAT32, the maximum size of a file is 4 GB.
For a parallel use of TV and PC, we recommend that you reformat the hard disk on a PC to NTFS.
Loewe old
User handbook
System settings
Control
Export log file
To resolve problems, a log file can be provided for the service. The log file can be exported to a USB storage device or manually or automatically transferred via the Internet.
The log file can be transferred via the Internet only when an online connection exists.
The transferred data is anonymous and purely of technical nature without reference to person, location or IP address. Browser history or login details are not stored or transferred.
Only if the user actively reports to the Loewe service with the reference number (see right column) and specifies the time and error will a targeted processing result.
Call export of the log file


HOME: Call Home view.
◀ ▶ ▲ ▼ Mark System settings
OK call System settings.
Mark Control.
go to next column.
▼ ▲ Mark more ...
▶ call other settings.
▼ ▲ Mark Export log file,
go to next column.
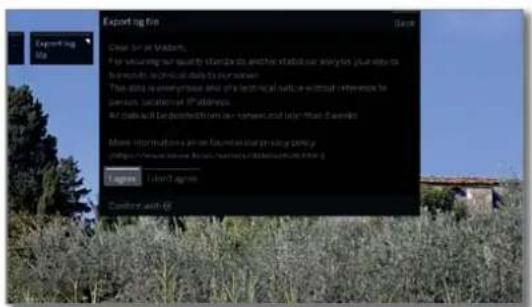
text_image
Exporting file Clear for an export. For viewing our quarterly conditions, another related use is likely your data to measure technical data for your user. This data is ambiguous and is not useful but it is without reference to persons, localization IP address. All data will be described from the relevant tool that Experiences More information can be found in our existing policy. https://www.elsevier.com/sales/1038526743/2 Agree I don't agree Condition with 65
▶ ▶ ▲ ▼ Select I agree, if you accept the privacy policies.
OK Confirm selection.
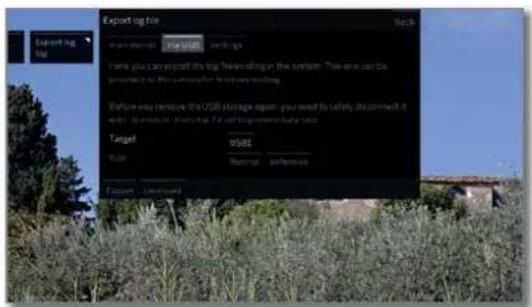
text_image
Export log file Back Importing Normal Settings Name you can protect the log forwarding on the system. This are can be generated by the summary after this version testing. Before you remove the USB storage agent, you need to satisfy download of user "Normal" or "Moderate" for download status. Target: USB1 Status: Normal essential Export: Unknown
▶ ▶ ▲ ▼ Select Via Internet, Via USB or Settings.

When selecting Via Internet:
Mark Export log files now.
OK confirm selection.
This transfers all stored log files to the Loewe server.
After successful transmission, a reference number will be displayed that you can specify as a reference when making inquiries.

When selecting Via USB:
◀ ▶ ▲ ▼ Select a target if several USB storage media are available. ◀ ▶ ▲ ▼ Select the size of the log file. You can choose between Normal and extensive.
Mark Export.
OK confirm selection.
Before you remove the USB storage again, you need to safely disconnect it with Unmount from the TV set to prevent data loss.
When selecting Settings.
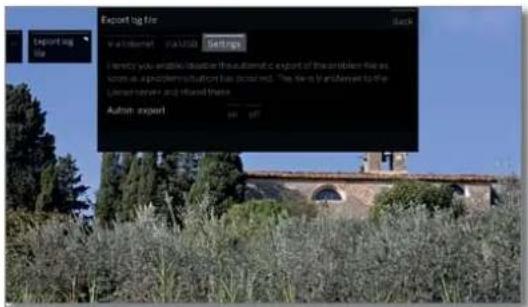
text_image
Export by file In a Internet - In local Settings I hereby you enable disaster the automatic export of the problem file as soon as a problem solution has occurred. The next is an export to the language server and released there. Auton export OK OFF◀ ▶ ▲ ▼ Mark the desired setting.
Autom. Herewith you enable/disable the automatic export Export of the problem file as soon as a problem situation has occurred.
When set to on, the file is automatically transferred to the Locwe server and stored as soon as a problem situation has occurred.
Loewe bild
User handbook
System settings
Multimedia / Network
Multimedia/Network
Under the Multimedia/Network item, you can make all multimedia and network settings for your TV set.
Select Multimedia/Network


HOME: Call Home view.
◀ ▶ ▲ ▼ Mark System settings. OK call System settings.
Mark Multimedia/Network go to next column.
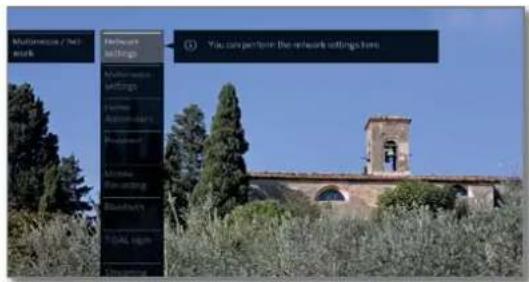
text_image
Multimedia / Network Hotspot settings Multimedia settings Home Appodays Mobile Mobile Mobile Global You can partition the network settings from
- Select desired menu item. - go to next column.
Explanation of the setting options in the Multimedia/Network menu:
Network Under Network settings make the settings for your settings network adapters.
For more information, see chapter System settings section Multimedia/Network - Network settings.
Multimedia Here you can make multimedia settings.
settings For more information, see chapter System settings section Multimedia/Network – Multimedia settings.
Home Here you can make settings for a home control server Automation if this exists.
For more information, see chapter System settings, section Multimedia/Network – Home Automation.
Renderer You can allow external devices here and access your television (renderer) via an app to play content there. For more information, see chapter System settings section Multimedia/Network – Renderer.
Mobile With this function, you can program recordings on Recording your TV set from outside your home network.
For more information, see chapter System settings. section Multimedia/Network – Mobile Recording.
Bluetooth Here you can activate the Bluetooth function of your TV set. This allows other Bluetooth devices to use your TV set as a playback device. You can also use a Bluetooth headset as a TV sound playback device. For more information, see chapter System settings, section Multimedia/Network – Bluetooth.
TIDAL login TIDAL is a subscription-based music streaming service that has over 40 million tracks. Register at TIDAL.com.
Streaming Enter the time period that your television should server remain ready for further streaming after the last standby active streaming (DR +, DLNA).
The time period always starts again after the last use by other devices.
Loewe bild
User handbook
System settings
Multimedia / Network
Network settings
Under Network settings make the settings for your network adapters.
Call network settings

HOME: Call Home view.

◀ ▶ ▲ ▼ Mark System settings.
OK call System settings.
▼▲ Mark Multimedia / Network
▶ go to next column.
▼ ▲ Mark Network settings,
▶ go to next column.
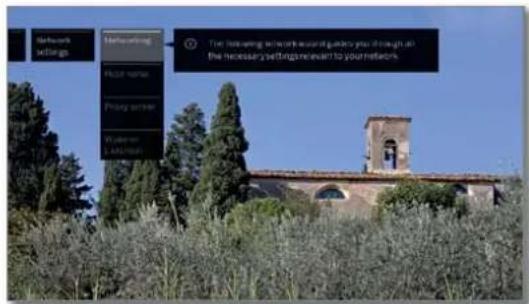
text_image
Network settings Methinking Hotel name Proxy server Walker L. M. H. N. The following website was created by your instructions the necessary routing panel to your reflections
▼ ▲ Select desired menu item.
go to next column.
Explanations of the setting options in the network menu:
Networking Here, the network wizard starts that guides you through all necessary settings to your network (see right hand column).
Host name Give your TV set a name so that it can be uniquely identified in the network.
Proxy server Do the settings for using a proxy server. The proxy server wizard will be called.
See chapter System settings, section Multimedia
/ Network – Proxy server for further information.
Wake on LAN/WiFi Here you can specify whether it is permitted to access your TV set by LAN/WLAN in standby mode. This allows you to switch on your TV, for example. Please note that the TV set consequently uses more power in standby mode.
After switching off the TV set into standby mode, it takes minimum 30 seconds for the TV set to be ready for reception of a signal (Wake on LAN/WLAN) to power on via LAN/WLAN.
If you want to switch on your TV set via the Loewe app by Wake on WLAN, you have to configure in your router's encryption permanently on WPA2. Setting WPA / WPA2 may not be used.
Network
The network wizard guides you through all the necessary settings relevant to your network
At the beginning you see the current network status.
Network status
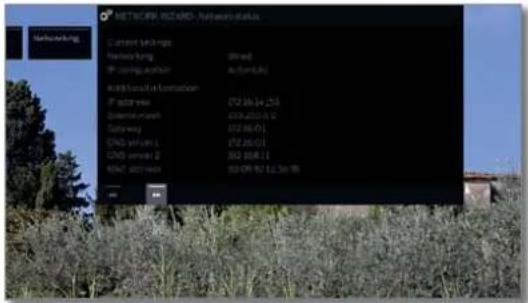
text_image
NETWORK HAZARD - Anband status Netweckung Content settings Network long IP configuration Add contact information IP address 02.06.14.253 System name 019-2010 8 2 Gutweig 07.06.01 DNS version 1 02.06.01 DNS version 2 362 108.11 MAC system 09.09.92 12:30:15
▶ Proceed to next step.
Security hint
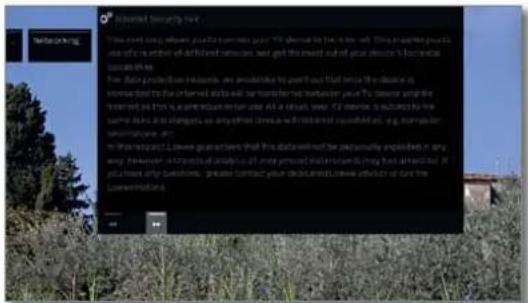
text_image
How much more? We have been done in the environment. We have to be able to use the system to fill the environment you can get the most out of your device's biological processes. For data production resources are available by part out that since the decision is announced to the limited status will be transferred whenever you're always and the interest as this is a pre-provisional event. As a result, we'll receive a subset by the same status and change as any other device will be delivered or updated on, computer, software, or other. In this report, these guarantees that this document must be personally exploited in any way. However, otherwise, you may present all services having been introduced. If purchases only decisions, greater contract your documents, one advisor or care the Lowesolutions.
▶ Proceed to next step.
Network mode
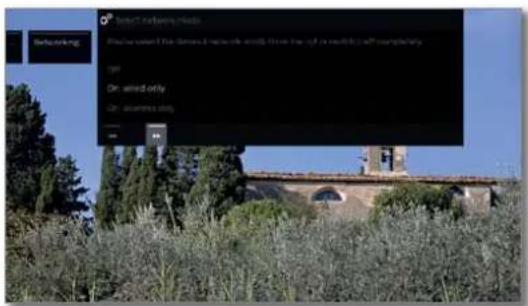
text_image
Select windows, check Show how to select window, check the off or without it completely OK OK allowed only OK allowed only
▶ Select network mode. Select how you want to connect your TV set to your network. OK Confirm selection.
Off Deactivates all existing network adaptors of your TV set.
On, wired Access to the network only via a network cable. Only The wireless access is deactivated.
On, wireless Access to the network only via WLAN. only The access via a network cable is deactivated.
Depending on which type of network (wireless or wired) was selected, the appropriate settings appear below.
Loewe bild
User handbook
System settings
Multimedia / Network
Configuration of the built-in LAN adaptor
As network operation was selected On, wired only.
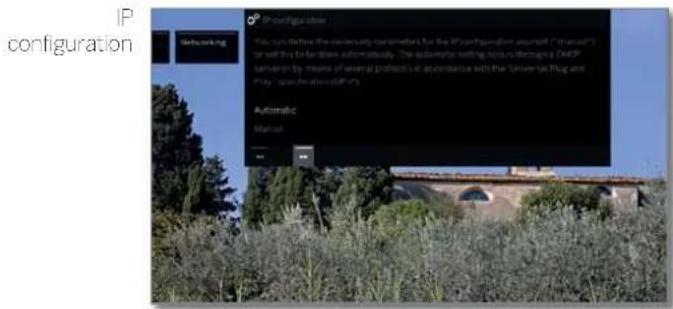
text_image
IP configuration Networking IP configuration You can define the necessary parameters for the IP configuration server. "Internet" or web is to be drawn automatically. The automatic writing format is designed as a Desktop server on by means of several protocols at accordance with the "Universal Plug and Play" configuration (PMP).
automatic
▶ Select type of IP configuration.
Automatic configuration of the IP address via DHCP server or via multiple protocols according to UPnP specification (including DHCP).
After selecting IP configuration – automatic proceed to the network status.
manual Enter your fixed IP addresses manually.
If manual has been selected under IP configuration:
Manual IP- configuration
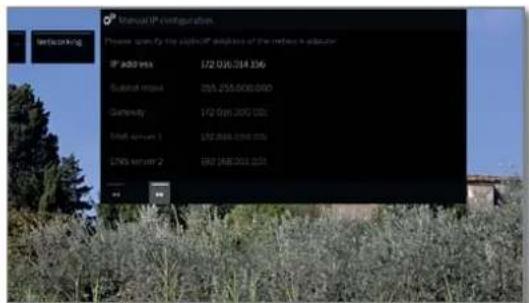
text_image
Manual IP configuration Please scan for the alphaIP properties of the internet in editor IP: 320.953 1/2 010.014 336 Subtotal mask 785.255.000.000 Gateway 1/2 010.300 GB Mail server 1 176.868.016.015 1200 server 2 662.668.001.031

▲ Enter IP, Subnet mask, Gateway and DNS server addresses in succession with the numerical keys on the remote control.

▶ Proceed to network status.
Network status

text_image
NETWORK HAZARD - Partnerships status Network trip Current trip counts Rushing/Count IP (number of users) Additional information IP (user count) Subtotal number CDS server 1 DNS server 2 MACS (user count) Spread Spread Spread Spread Spread Spread Spread Spread Spread Spread Spread Spread Spread Spread Spread Spread Spread Spread Spread Spread Spread Spread Spread Spread Spread Spread Spread Spread Spread Spread Spread Spread Spread Spread Spread Spread Spread Spread Spread Spread Spread Spread Spread Spread Spread Spread Spread Spread Spread Spread SpreadYou see the current network status again.

BACK: End of wizard.
Configuration of the built-in WLAN bridge adaptor
As network operation was selected On, wireless only. The TV set now searches for wireless routers.
Access point selection
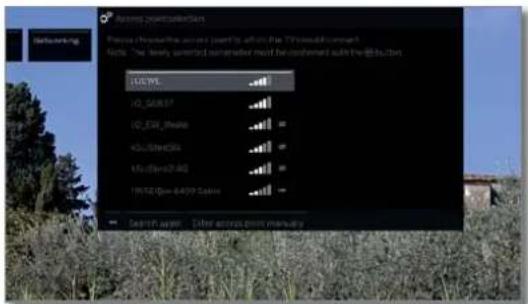
text_image
Access point selection Previous non-axial line scored point to within the 70% should match Note: The yearly scored point selected must be confirmed with the @ button. 12.0000 10.50837 10.0000 40.0000 10.0000 19.0000 Search again: Under access point management
After the end of the search:
▲▼ Select a base channel to which the TV shall be connected.
OK Confirm selection and proceed to the entry of the Wi-Fi password.
If the desired access point is not found:

◀ ▶ ▼ ▲ Mark Search again.
OK repeat search for wireless routers.
Or:

◀ ▶ ▼ ▲ Mark Enter access point manually.
OK enter manually the SSID of the desired access point, e.g., when the SSID of the access point is not transferred.
WPA passphrase
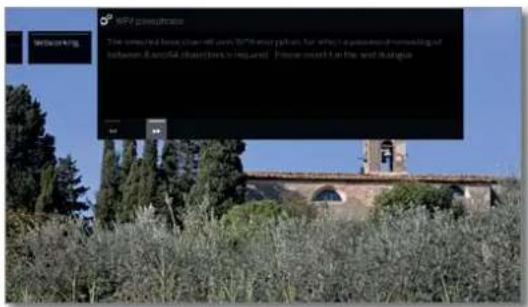
text_image
SPD powerptake The selected hardware tool uses SPD powerptake, but this is a powertrain remodeling of between 800% objects to request. Power record is the next solution.The TV set automatically detects the type of encryption used and informs you. You will find the supported encryption types in chapter Technical data.
If your wireless network is not encrypted; Proceed to IP configuration.
▶ Proceed to password entry.
Enter WLAN password.
In case of an unknown WLAN key, contact your network administrator.
For WEP encryption

Select the WEP index.
OK proceed to IP configuration.
▶ Select type of IP configuration
For the further workflow of the network wizard see left column under IP configuration.
Loewe old
User handbook
System settings
Multimedia / Network
Explanation of the settings in the network status:
Network shows the current type of connection (wireless or wired).
IP The current assignment method for the IP address configuration of your TV set (automatic or manual).
IP address Your current IP address.
Subnet mask Your current subnet-mask IP address.
Gateway The IP address of your gateway.
DNS server 1 Your current first DNS server IP address.
DNS server 2 Your current second DNS server IP address.
Network (for wireless connection only) SSID The name of your network.
MAC address (for wired connection only) (TV) Indicates the MAC address that is built into the hardware of your TV set's wired network adaptor (LAN).
MAC address (for wireless connection only) (WLAN) Indicates the MAC address that is built into the hardware of your TV set's wireless network adaptor (WLAN).
Connection status Gives you information about the current status of your wireless connection (save settings, connecting, login failed, access point not found, not connected, connection established).
Link quality Specifies the signal strength as a percentage.
Proxy server
In the proxy server wizard you make arrangements for your TV set for a connection with a home network with proxy server.
i A proxy server is not necessary for most home networks.
Contact your home network administrator if you are unclear about the proxy server settings.
Use proxy server
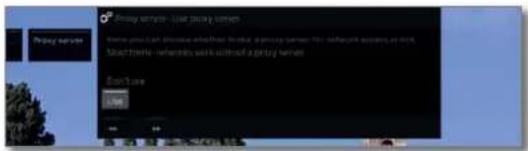
text_image
Proxy server Form you can't missense whether the local agency server, http://network.assessv.up birth. Must have permission will address a proxy server. Don't care Use
Specify if a Proxy server is used in your home network.
Mark Use or Don't use.
The following settings will only be requested after the selection of Use.

▶ Proceed to next step.
Proxy server name
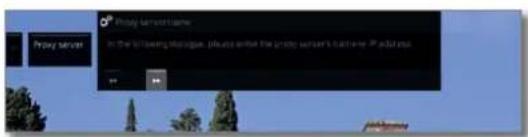
text_image
Proxy server-name In the following database, please enter the proxy server's home-in IP portal
▶ Proceed to entry of the proxy server name.

Specify the name or IP address of the proxy server used.

▶ Proceed to next step.
Proxy port number
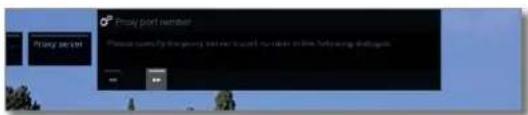
text_image
Proxy port member Please query the proxy port user to access your server to the following dialog
▶ Proceed to entry of the proxy port number.
Specify the network port number of the proxy server.

▶ Proceed to next step.
Proxy server login
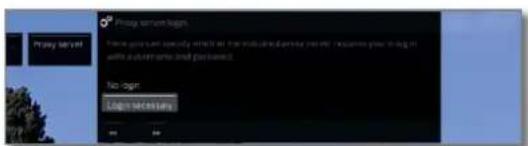
text_image
Proxy server login None you want to use your own IP address. You can access your IP address to the website or your email. No login No login without login
Specify whether your proxy server requires a special login.

Mark No login or Login necessary.
▶ Proceed to next step.

Enter your login data for the proxy server.
i User name and password are requested only after selecting Proxy server login.
Loewe bild
User handbook
System settings
Multimedia / Network
Multimedia settings
Under this menu item you find further settings for Audio, Video and Photo.
Calling the Multimedia settings menu


HOME: Call Home view.
◀ ▶ ▲ ▼ Mark System settings. OK call System settings.
▼ ▲ Mark Multimedia / Network
go to next column.
▼▲ Mark Multimedia settings.
▶ go to next column.
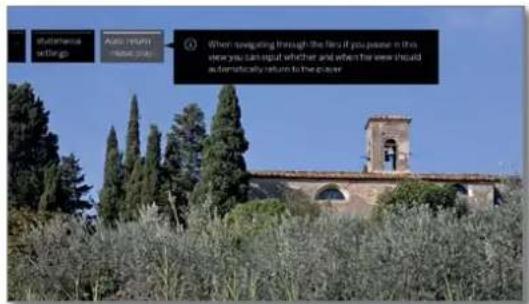
text_image
statements settings Auto return When navigating through the files if you please in this view you can signal whether and when the view would a successfully return to the power.
▼▲ Select desired settings.
Explanations of the setting options in the Multimedia settings menu:
Auto return to music player
The music player will reappear whenever another dialogue, e.g., music selection is called during playback, and no keys are pressed for the set time period.
You can specify if and after which time the music player reappears (selection options are No. After 1 min. After 5 min).
Home Automation
Under this menu item, you can send an ID to your Home Automation Server.
Call up home automation menu


HOME: Call Home view.
◀ ▶ ▲ ▼ Mark System settings. OK call System settings.
- ▲ Mark Multimedia / Network
- go to next column.
Mark Home Automation. go to next column.
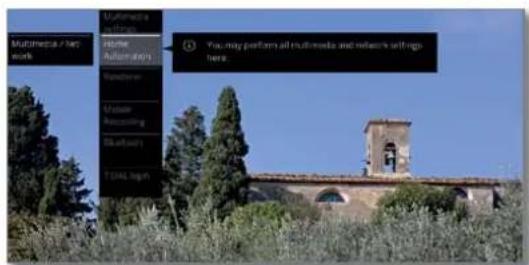
text_image
Multimedia / New work Home Automation Security User Accounting Software TOTAL login You may perform all multimedia and networks settings here.Explanation of the setting options in the Home Automation menu:
Send SDDP-identification Here you can assign an ID to the SDDP (Simple Device Discovery Protocol) in your Home Network. By doing this your TV set can be displayed in the device list of your Home Automation Server.
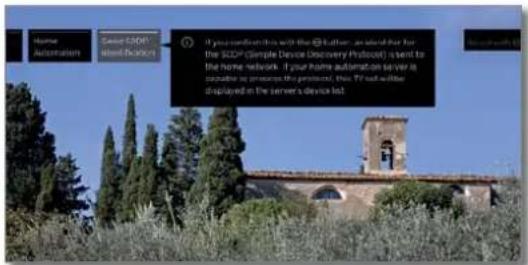
text_image
Home Automation Smart SODI® all-Iskostos If you confirm this with the E2Button, an ideal for the SODI® (Simple Device Discovery Podcast) is sent to the home network. If your home automation server is possible to ensure the protocol, thus IT will be displayed in the server's device list.Renderer
Here you can allow external devices to access your TV set (renderer) via app to render (play back) contents there.
Call up renderer menu


i Default setting: on
HOME: Call Home view.
Mark System settings. OK call System settings.
Mark Multimedia / Network go to next column.
- ▲ Mark Renderer. - go to next column.
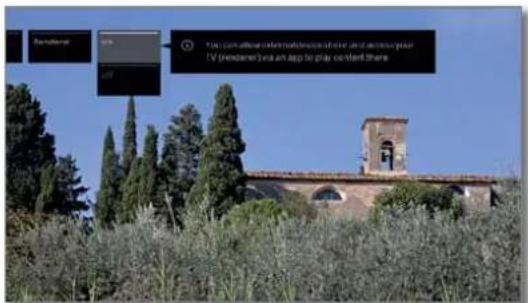
text_image
Sendalter You will allow alternatives where you are your IV (rendenter) you can app to play on/entire there
▼ ▲ Select the setting on or off. OK Confirm selection.
Loewe bild
User handbook
System settings
Multimedia / Network
Mobile Recording ^(1)
Mobile recording enables you to program recordings on your TV from far away.
Basically, the function is based on a simple e-mail correspondence. If the mobile recording function is activated and set, the TV set scans an e-mail account at regular intervals.
If a record command is sent by the Loewe app, this command reaches a connecting server.
From here, a short text email is sent to the appropriate email account. The TV set can receive this information and program / start a recording accordingly.
You can download the Loewe app for free for iOS and Android in the appropriate app store.
The TV set must not be switched off using the power switch, otherwise the email mailbox can not be scanned.
i The TV set must be connected to the Internet.
The programmed timer recordings of the Mobile Recording function are handled by the TV set with highest priority.
If at this time other recordings are programmed for the same recording period, they will be overwritten by the new recording or parts of the recording cut off.
Open settings for Mobile Recording


HOME: Call Home view.
◀ ▶ ▲ ▼ Select System settings.
OK call System settings.
- Select Multimedia / Network.
- go to next column.
▼ ▲ Select Mobile Recording.
OK call.
The Mobile Recording wizard is started.
▶ Select yes for Function enabled.
▶ ▶ ▲ ▼ Select Configure email account → Automatic / Manual.
When selecting Configure email account → Manual, enter your own settings for personal mailbox account (see right column).
When selecting Configure email account → Automatic, the system mailbox will be used. In the next step, the TV set displays the email address and the security PIN of the system mailbox.


▶ Continue until the setting of scanning times.
Carry out settings.
Settings of scanning times
When the TV set is in standby mode, you can determine the times at which the TV automatically checks the defined mailbox for remote programming.
If the TV set is switched on or in the Quick Start mode, a fixed inspection interval of 10 minutes applies permanently.
Scanning period
Here you can specify the period during which the TV set checks the email account.
Inspection interval
Here you can specify the time interval at which the TV set checks the email account in the specified period.
Start/end of Here, the start and end times are displayed the scanning depending on the scanning period.
If you wish to enter start / end of the scanning period individually, you must select user defined for scanning period.
In the last step it is checked whether the email account is accessible with the set data.
On successful test the configuration is completed.
Settings of personal email account
If the mailbox defined by the system was selected as the default email account, the account is automatically created on the server. You do not need to make further settings.
When selecting Configure email account → Manual you need to adjust the factory defaults and enter the settings of your existing personal email account.
You will find the necessary parameters in the menu dialogues Settings/Options of your email programme you are using (e.g. Outlook, Thunderbird) or from the relevant provider of your email accounts.
Default settings page 1:
| Email address: | tv-xxxxxxxxxx@loewe-dialogue.com |
| Account type: | POP3 or (MAP) |
| Incoming mail server: | mail.loewe-dialogue.com |
| Outgoing mail server (SMTP): | mail.loewe.dialogue.com |
| Username: | tv-xxxxxxxxxx@loewe-dialogue.com |
| Password: | ********** |
| Secure PIN: | xxxx |
Default settings page 2:
| Incoming mail server port: | 995 (POP3),0 993 (IMAP) |
| Incoming encryption: | 'no', 'SSL', 'StartTSL' |
| Server equires authenification: | 'no' |
| Outgoing mail server port: | '25' (no), '587' (StartTSL), '465' (SSL) |
| Outgoing encryption: | 'no', 'SSL', 'StartTSL' |
| Delete mail from server: | 'no' |
| Email account settings: | Reset |
Remote programming via any email client
In case of a manual e-mail account, you can perform the remote programming of recordings by means of any e-mail client.
The subject line of the email must include the defined four-digit secure pin, the broadcasting time and the channel:
PIN BROADCASTING TIME OF CHANNEL
Timer programming of a broadcast, which runs on the current day around 20:45 on the tv channel Das Erste HD. An exact specification of start and end time of the programme is not required.
The channel name must not be 100% accurate, the name is compared by means of a certain algorithm. It is advisable, however, to store the channel name as a note in the smartphone.
If the recording time is more than 24 hours in the future, the date must also be specified in the subject line:
You will get an e-mail response as confirmation from the TV set to the address of the manual e-mail account with the current list of programmed timer recordings.
Loewe bild
User handbook
System settings
Multimedia / Network
Bluetooth ^1
With the Bluetooth functionality, you can use a wireless connection between your TV set and a Bluetooth-enabled audio source, such as smartphone, tablet, etc. and use the TV set as a playback device (Bluetooth music player).
When pairing a Bluetooth keyboard you can comfortably enter your characters, e.g. to search for your favourite artists.
The TV set can be connected to several Bluetooth devices. However, only one active link is possible at the same time.
The distance between your TV set and the Bluetooth device should not exceed 10 m (line of sight).
i Your Bluetooth audio source must support the A2DP standard.
1 Your Bluetooth Keyboard must support the HID standard.
Calling the Bluetooth function

HOME: Call Home view.
◀ ▶ ▲ ▼ Select System settings.
OK call System settings.
▶ Select Multimedia / Network.
▶ go to next column.
◀ ▶ Select Bluetooth.
OK call.
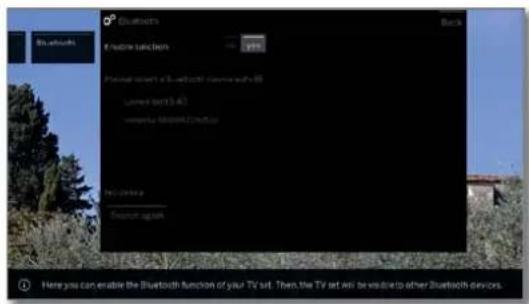
text_image
Bluetooth E:\Users\Launch\1000 Planned insert a 3-USB/CCD device with 86 Layer: 24(13.4) Server: 000000000000000 Hi: 24.966 Bluetooth app Back Here you can enable the Bluetooth function of your TV set. Then, the TV set will be visited to other Bluetooth devices.Enable function
Here you enable the Bluetooth function of your TV set. Then, the TV set is visible to other Bluetooth devices.
i Default setting: yes.
The search for Bluetooth devices in the nearby area starts automatically for 2 min. If Bluetooth devices are available, they are displayed in a list.
Coupling starting from the TV set

Select required device.
OK Connect the device. Before the connected device a check mark √ is set.
In the event that a code is needed, the TV set will generate a connection PIN. This one must be entered on the Bluetooth device and confirmed if required.
Proceed to Bluetooth music player, see right column.
Coupling starting from the Bluetooth device
Enable the Bluetooth function of your audio source. If necessary, get help from the instruction manual of your audio source.
If necessary, use the Bluetooth search function of the audio source. Now, Bluetooth devices will be searched near the audio source.
Select loewetv_x (device name ex-factory, where x is a character string).
The device name appearing in Bluetooth search can be set in the System settings under Multimedia / Network → Network settings → Host name.
Proceed to Bluetooth music player, see below.
Confirm the code specified for the coupling. The Bluetooth device is connected to the TV set.
Proceed to Bluetooth music player, see below
Bluetooth Music Player
To use the TV set as a playback device for audio streaming, your smartphone, tablet (audio source) must be paired with the TV set. After successful coupling of your audio source, you can start the audio playback on your audio source.
The sound is played back on the TV set.
For some audio sources, the link must be explicitly enabled before music playback can be heard from the TV set.
Volume setting on the Bluetooth music player
With the keys V+/V- on the remote control the volume can be adjusted for the TV set as usual.
According to manufacturer/type of your Bluetooth device, the volume can be adjusted directly on the playback device.
If you listen to your music during the Bluetooth playback with volume 60, then this volume generally applies also to your TV sound.
It is recommended to set the volume of the audio source to high values and to adjust the actual volume of the TV set by means of the remote control unit.
Sending the sound from the TV set to a Bluetooth headset
i Your end device must support the A2DP standard.
According to manufacturer/type of your Bluetooth device, the volume can be adjusted directly on the playback device.
The coupling of the Bluetooth headset is carried out as described in the left column.
After successful pairing, you will hear the TV sound on your Bluetooth headset via the wireless connection.
The volume of TV speakers and headphones can be controlled independently.
Loewe bild
User handbook
System settings
Multimedia / Network
Bluetooth Keyboard
To use a Bluetooth keyboard as an input device, it must be coupled to the TV set.

i Bluetooth function menu opened.
Select required device.
OK Connect the device. Before the connected device a check mark √ is set.
In the event that a code is needed, the TV set will generate a connection PIN. If your Bluetooth device uses the PIN code 0000, there will be an automatic connection. If your Bluetooth device uses a different code, this must be entered on the Bluetooth device and also confirmed, if necessary.

After successful pairing, you can simply type all the characters that can be entered using the on-screen keyboard or the remote control unit independently with your Bluetooth keyboard.
Most remote control key functions can be accessed using the keyboard. An overview of the key assignments is shown in the table.
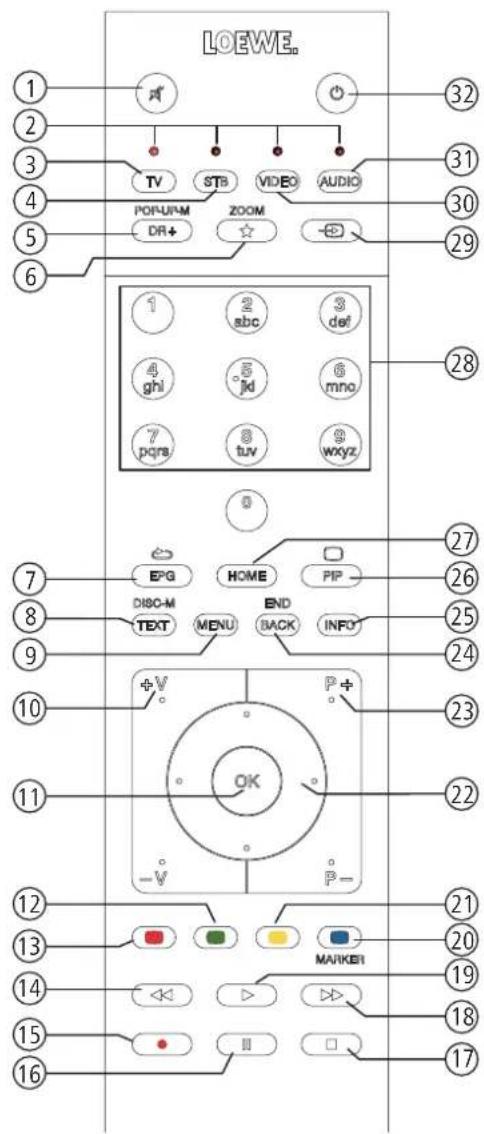
text_image
LOEWE. 1 2 3 4 5 6 TV STB VIDEO AUDIO POR-UP-M DR+ ZOOM - ED 1 2 abc 3 def 4 ghi 5 jd 6 mno 7 pqrs 8 tuv 9 wxyz 0 7 EPG HOME PIP DISC-M END INFO 8 TEXT MENU BACK INFO* 10 +V P+ OK 23 11 -V P- 12 21 13 MARKER 20 14 ◀◀ ▶ ▶◀ 15 ● II □ 16Key assignment
| No. Remote control Keyboard | ||
| 1 Sound On/Off key ---- | ||
| 2 TV key Alt + F | ||
| 3 STB key ---- | ||
| 4 DR+ key Alt + W | ||
| 5 Favourites key Alt + Z | ||
| 6 EPG key Alt + E | ||
| 7 TEXT key Alt + T | ||
| 8 MENU key Alt + M | ||
| 9 V+ key ---- | ||
| 10 | OK key Enter | |
| 11 | V- koy ---- | |
| 12 | Green key ---- | |
| 13 | Red key ---- | |
| 14 | ◄ koy ---- | |
| 15 | RECORD key F5 | |
| 16 | PAUSE key ---- | |
| 17 | STOP koy ---- | |
| 18 | ► key ---- | |
| 19 | PLAY key ---- | |
| 20 | Blue key F4 | |
| 21 | Yellow key F3 | |
| 22 | Directional keys ◀ ▶ ▶▼ Arrow button | |
| 23 | P+ key ---- | |
| 24 | BACK key Alt + ESC | |
| 25 | INFO key Alt + I | |
| 26 | PIP key ---- | |
| 27 | HOME key Alt + A | |
| 28 | Number keys 0 ... 9 | |
| 29 | Source key/Sources Alt + H | |
| 30 | VIDEO key ---- | |
| 31 | AUDIO key Alt + R | |
| 32 | On/Off key ---- | |
Loewe bild
User handbook
System settings
Multimedia / Network
Amazon Alexa login
It is possible to connect your Loewe TV set to the Amazon Alexa loudspeaker and to operate the TV set via voice. For this function, use the Loewe TV for Smart Home skill (supported from TV software version 4.4.64 and up) in the Amazon Alexa app.
The Loewe TV for Smart Home skill is currently available with language options German and English in Germany, Austria, Switzerland and the United Kingdom.
The Loewe TV and Amazon Alexa must be in the same network and installed.
So that Amazon Alexa can switch on the Loewe TV on its own, the quick start mode must be activated (System settings → Control → Quick start mode).
When the TV set is connected to Amazon Alexa, there is a data exchange between the TV set and Amazon. More terms of use for Alexa and Alexa devices can be found on Amazon.com.
Loewe guarantees insofar that no use of personal data is made. However, a statistical analysis of anonymised data sets is possible.
Call Amazon Alexa login


HOME: Call Home view.
◀ ▶ ▲ ▼ Mark System settings.
OK call System settings.
▼ ▲ Mark Multimedia/Network
go to next column.
Mark Amazon Alexa login
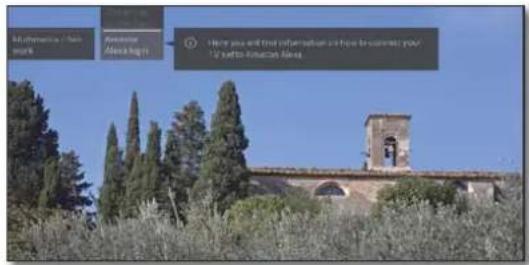
text_image
My attention of work Ameristar Alexa bigh How you will find information on how to create your 12 and 10 Italian cities.
OK Call.
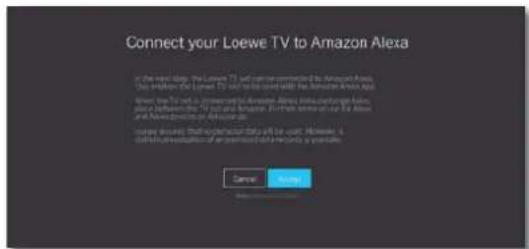
text_image
Connect your Loewe TV to Amazon Alexa In the next edition, the Loewe TV will come connected to Amazon Alexa. This version of the Loewe TV will be used to sell with the Amazon Alexa App and then to send it to Amazon Alexa. It is also connected to the Loewe TV and Amazon. Further, we will use the Loewe and Amazon Alexa as an email client. Current usage: The open account data will not available. However, a default resolution of an email account data should be provided.
Mark Accept.
OK Call.
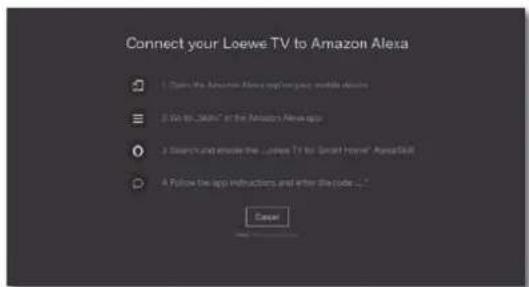
text_image
Connect your Loewe TV to Amazon Alexa 1. Click the Amazon Alexa app via your mobile address 2. Get to "360" in the Amazon Alexa app 3. Search and send the "Loewe TV for Smart Home" Alexa488 4. Follow the app instructions and enter the code ... CancelConnect TV set with Amazon Alexa
Start the Amazon Alexa app on your smartphone.
Select Skills in the Amazon Alexa app.
Find and install the Loewe TV for Smart Home skill.
Enter the code displayed on the TV into the Loewe TV for Smart Home skill. The TV is then connected to Amazon Alexa.
Controlling the TV with Amazon Alexa
Your Loewe TV will be integrated into the Alexa Smart Home Standard.
With the Loewe TV for Smart Home skill, you can connect up to three Loewe TV sets in your household simultaneously with Amazon Alexa. The devices are managed in the Alexa app.
You can choose your own name for the individual TV set (default: TV).
To be able to execute the commands, the TV set must be selected once with the command Alexa, activate TV.
The TV set can be controlled using the signal word of the Alexa loudspeaker in combination with the following commands:
"Alexa, ...

Power
... turn on / off."
... power on / off."

Volume
... mute / unmute."
... volume 20."
... turn up volume."
... turn down volume."

Channel
... next channel."
... previous channel."
... channel fourteen."
... change channel to seven."

Sources
... switch Input to H.D.M.I.1."
A current list of commands for controlling your Loewe TV set with Amazon Alexa can be found on the Loewe website at:
https://www.loewe.tv/int/plus/alexa
Loewe old
User handbook
System settings
Connections
Connections
Settings for the connection of external appliances are made in this menu.
The menu item Connections is not available while a timer recording is active.
Calling the connections menu


HOME: Call Home view.
◀ ▶ ▲ ▼ Mark System settings.
OK call System settings.
▼ ▲ Mark Connections.
▶ go to next column.
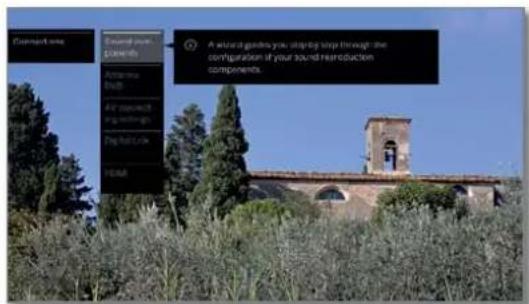
text_image
Ecosystem area Ecosystem view COMMENTS A natural garden you, stayed step through the configuration if your sound reroduction components. A natural garden you, stayed step through the configuration if your sound reroduction components.
▼ ▲ Select desired settings.
Explanations of setting possibilities in the Connections menu:
Sound components The sound components wizard helps you to configure the components that are used to reproduce the TV sound.
See chapter System settings, section Connections
– Sound components for further information.
Antenna DVB Here you can adjust the parameters of the terrestrial and satellite antenna with the antenna assistant, as well as select the server at SAT>IP.
See chapter System settings. section Connections
- Antenna DVB for further information.
AV In the AV connecting settings the parameters for the connecting AV connection socket can be adapted.
See chapter System settings, section Connections
- AV connecting settings for further information.
Digital Link All settings for Digital Link are made here.
See chapter System settings, section Connections
- Digital Link for further information.
HDMI Here you can set the modes for the individual HDMI connections. Here you will also find the gaming mode.
See chapter System settings, section Connections – Gaming mode for further information.
Loewe old
User handbook
System settings
Connections
Sound components
The sound components wizard helps you to configure the components that are used to reproduce the TV sound.
The DAL device variants are equipped with an integrated digital multi-channel audio decoder. Sound signals with up to six channels (5.1 surround sound) can be emitted through the DIGITAL AUDIO LINK interface, irrespective of whether the sound signal comes from an external device (DVD player, Blu-ray player) or from a DVB channel.
For sound formats supported by the digital audio decoder, see chapter Technical data.
Calling the sound components wizard
For information on navigation within the wizard, see chapter General information on menu operation.

HOME: Call Home view.

◀ ▶ ▲ ▼ Mark System settings. OK call System settings.
▲▼ SelectConnections.
go to next column.
▲▼ Select Sound components.
go to next column.
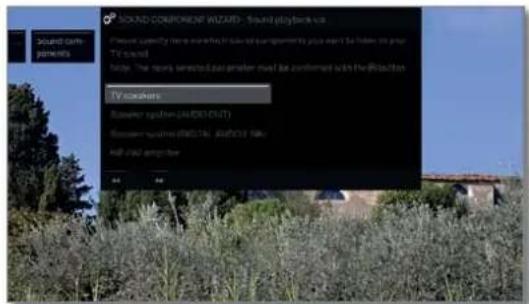
text_image
SOUND COMPONENT WIZARD - Sound playback kit Please identify the audio which is required to play, but it's not to have any TV sound. Note: The songs are stopped, can be continued with the Flashon TV sounders Recover player (A/100/100) Recover music (B/100/100), 24/03/15:46 All live seconds
▲▼ Select Sound component.
For selectable items see right hand column. OK Confirm selection.

▶ Proceed to next step.
Sound playback via ...
i Some sound components can only be selected when the respective device is connected to the TV set.
TV Sound reproduction via the built-in TV speakers speakers (factory setting).
With the selection of TV speakers the wizard will end.
Speaker Sound reproduction via a loudspeaker system or system active loudspeakers (connection to AUDIO OUT). (AUDIO OUT) How to connect a speaker system to AUDIO OUT
How to connect a speaker system to AUDIO OUT, see chapter External devices, section Connecting the speaker system (AUDIO OUT).
How to configure a speaker system at AUDIO OUT, see chapter System settings, section Connections – Adjusting the speaker system (AUDIO OUT).
If a speaker system is connected to AUDIO OUT and you want to return to selecting TV speakers, switch the subwoofer of the speaker system off before you select the TV speakers. At the AUDIO OUT connection, the audio signal is output with maximum volume setting in the TV speaker selection.
Speaker Sound reproduction via a loudspeaker system or system active loudspeakers (connection to DIGITAL AUDIO (DIGITAL LINK).
AUDIO LINK) ^a How to connect a speaker system to DIGITAL AUDIO LINK, see chapter External devices, section Connecting the speaker system (DAL).
How to connect active speakers to DIGITAL AUDIO LINK, see chapter External devices, section Connecting active loudspeakers (DAL).
How to configure a speaker system at DIGITAL AUDIO LINK, see chapter System settings, section Connections – Adjusting the speaker system (DAL).
HiFi/AV Sound reproduction via an external analogue or amplifier digital audio amplifier.
How you connect a HiFi/AV amplifier see chapter External devices, section Connecting the HiFi/AV amplifier.
How you configure a HiFi/AV amplifier see chapter System settings. section Connections - Adjusting the HiFi/AV amplifier.
Loewe bild
User handbook
System settings
Connections
Adjusting the speaker system (AUDIO OUT)
Sound playback via ... - Speaker system (AUDIO OUT)
Enter here that you want to hear the TV sound via a speaker system connected to AUDIO OUT.
For information on navigation within the wizard, see chapter General information on menu operation.
■ Speaker system (AUDIO OUT) was selected in the Sound components wizard. Afterwards you can switch on the power switch of the subwoofer.
Connect speakers
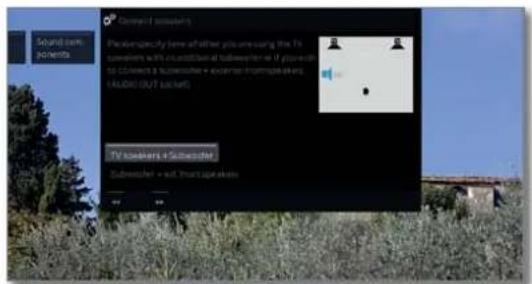
text_image
Cancel account Please specify here additional accounts using the TV answers with an additional subscriber or if you want to connect a subscriber + subscriber from subscribers. VALID OUT BACKS TV asking 4 Subscribers Subscribers + out front speakers
▶ Select TV speakers + Subwoofer or Subwoofer + ext. front speakers.
OK Confirm selection.
Specify here whether you want to operate the speakers of the TV set with an additional subwoofer or a subwoofer with external front speakers at the AUDIO OUT socket of the TV set.

▶ Continue with the appropriate selection.
TV speakers + Subwoofer
Adjust subwoofer level
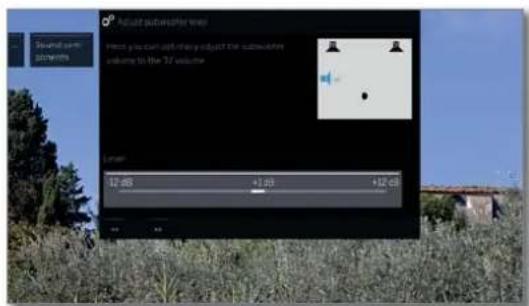
text_image
Actual audiofilter help Meet you can't identify object the audiofilm volume to the 72 volume Lower 12.00 +1.00 +32.00
Adjust the volume for the subwoofer.

▶ Finish wizard.
This ends the sound components wizard for connecting and setting up a speakers system.
Subwoofer + ext. front speakers
TV loudspeakers as centre speaker
text_image
TV multiplasement is worth's speaker Present text abwidths Present text, performance presented to use your back of TV language as a user in the speaker will use your right character language system.
▶ Here select yes, if the built-in TV loudspeakers should work in addition to the external loudspeakers.
If you here select no, no sound is output from the TV loudspeakers.
OK Confirm selection.

▶ Proceed to Adjust ext. Speakers level.
Adjust ext. Speakers level
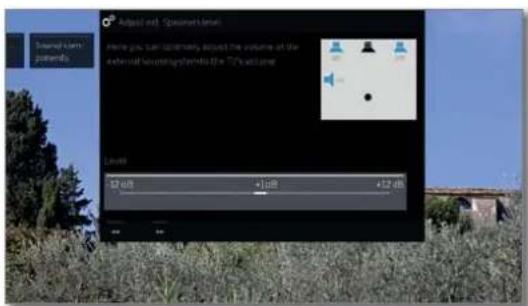
text_image
Adapted out: Spasarset's sound General User playmets Pine you can automatically adjust the volume at the user-in set up something into the TC's sound frame Level: 52 dB +1 dB +12 dB
Adjust the volume of the ext. sound system optimally to the TV volume.
An audio broadband signal is transmitted via the AUDIO OUT jack. Therefore, the level of the front speakers and the subwoofer varies uniformly with the volume setting.

▶ Finish wizard.
This ends the sound components wizard for connecting and setting up a speakers system.
Loewe bild
User handbook
System settings
Connections
Adjusting the speaker system (DAL) ^1
Sound playback via ... - Speaker system (DIGITAL AUDIO LINK)
Enter here that you want to hear the TV sound via a speaker system connected to Digital Audio Link. If you connect active speakers, please use the setting Speaker system (DIGITAL AUDIO LINK).
For information on navigation within the wizard see chapter General information on menu operation.
When setting up the speaker system for the first time, the configuration starts with the step Connect front speakers.
i Speaker system (DIGITAL AUDIO LINK) was selected in the Sound components wizard.
Configuration/modification
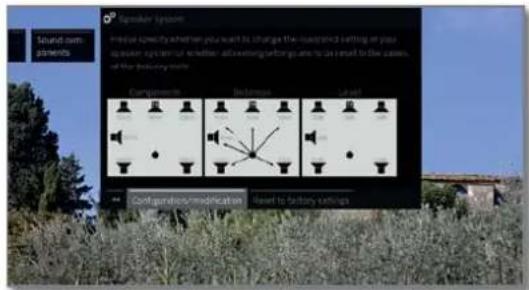
text_image
Sprouter Options Prepaid currency whether you want to change the uncontrolled setting or plan to make any terminal or neither allowing settings are to be sent to the users of the factory's website. Settings Settings Settings Settings Settings Settings Settings Settings Settings Settings Settings Settings Settings Settings Settings Settings Settings Settings Settings Settings Settings Settings Settings Settings Settings Settings Settings Settings Settings Settings Settings Settings Settings Settings Settings Settings Settings Settings Settings Settings Settings Settings Settings Settings Settings Settings Settings Settings Settings Settings SettingsIf you want to set up or change a speaker system:
Select Configuration/modification. If nothing has been set yet, the factory settings or otherwise the last set values are displayed. OK Confirm selection.
Configuration/modification
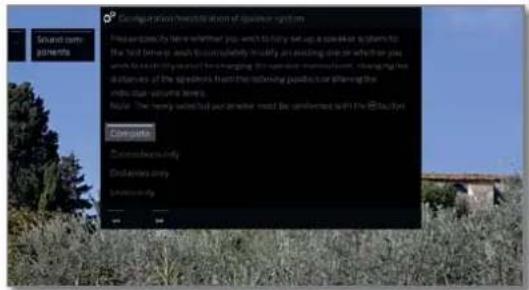
text_image
Can be ignored immediately about the speaker's screen Please do you check the name or whether you want to fly up a speaker to plan to. The last drive-up, each is completely totally just existing one for whether you which has been able to be engaging this open-in-theoretic work. It changing the distance of the speakers from the listening speaker offering the index clear volume level. Make the very useful but your answer must be answered with the E-mail key Conception Conception only Conception only Conception only▼▲ Select Complete. OK Confirm selection.


Connect front speakers
▶ Proceed to connect and set the front speakers.
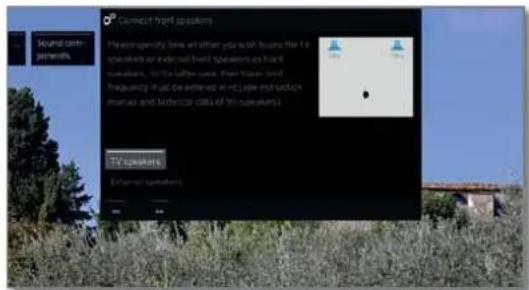
text_image
Connect Front Speakers Please specify time as either you wish to ensure that the speakers on external front speakers can first appear, so the letter now, from Korean land frequency must be entered in local instructions manual and technical data of the speakers. TV Speakers External speakers
▼ ▲ Select External speakers or TV speakers OK Confirm selection.
For External speaker go to the frequency bar below and
- set the lower limit frequency of the external front speakers in steps of 10 Hz.
1 Select the start value of the frequency response of the speakers for the correct setting (e.g., 50Hz for the specification "Frequency response 50-20,000Hz"). See the technical data of the speakers for the value.
You can replace the external front speakers by the TV speakers if necessary. In this case, TV speakers. Then, the TV speakers transmit the sound of the front speakers.
▶ Proceed to connect and set the surround speakers.

Connect surround speakers
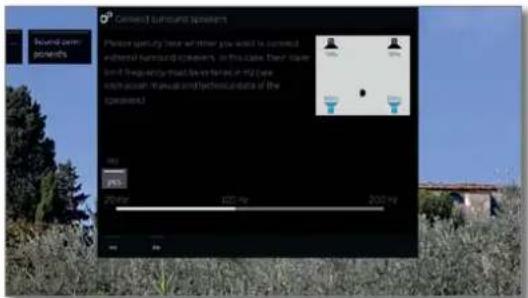
text_image
Connect Sunbound Splitters Plastic splatters have either you solid to connect external surround splitters. In this case, they have solid thickness or width measurements of the core with respect to the spatial and spectral data of the splitters. 100 250nm 1000 nm 2000 nm
▼ ▲ Select yes or no for the external surround speakers. OK Confirm selection.
In case, external speakers were chosen as surround speakers:
- Select frequency bar - set the lower limit frequency of the surround speakers in 10 Hz steps.
1 Select the start value of the frequency response of the speakers for the correct setting.

▶ Proceed to connect and set the centre speaker.
Connect centre speaker
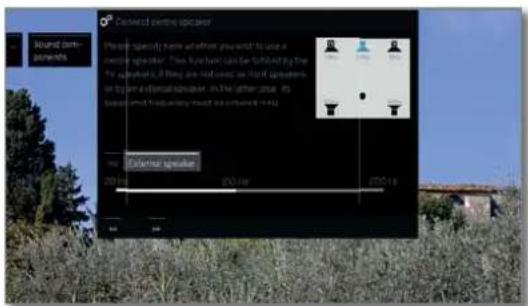
text_image
Camera control speaker Please specify how whether you want to use a microphone speaker. This should have been turned by the 74 superphones, if they are not used as their speakers, or try to add a microphone speaker. In the latter case, this should be a frequency unit is performed in Hz. 100 MHz External speaker 200 Hz 600 Hz 200 Hz
- Select whether the TV speakers or an External speaker is to reproduce the centre sound or no if no centre speaker is connected.
OK Confirm selection.
If no centre speaker is connected, the front speakers also transmit the centre sound parts additionally.
For External speaker go to the frequency bar below and
set the Lower Limit Frequency of the external front speakers in steps of 10 Hz.
1 Select the start value of the frequency response of the speakers for the correct setting.
▶ Proceed to connect the Subwoofer.
continued on the next page →
Loewe bild
User handbook
System settings
Connections
Connect subwoofer
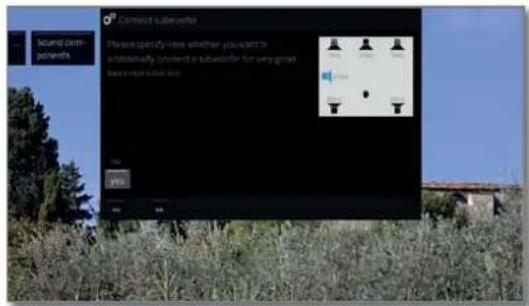
text_image
Connect Subwoofer Please specify how whether you want to or independently contain a subsuoffer for very good helps up your own. Yes No OK Help
▼ ▲ Select yes or no for Subwoofer. OK Confirm selection.
If no subwoofer is connected, the front speakers additionally transmit the sound parts intended for the subwoofer as far as possible.
▶ Proceed to Distance to left hand front speaker.
Distance to left front speaker
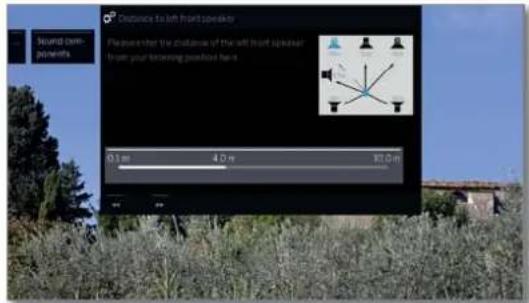
text_image
Distance to left front perimeter Placement the distance of the left front perimeter from your following positions hand. 0.3 m 4.0 m 10.0 m
▶ Set the distance between the left front speaker and your listening position in 10 cm steps.
1 Measure the distances from your listening position to the front, surround, and centre speakers respectively. The digital audio decoder calculates delay times from this for the loudspeaker signals, so that these reach the listener simultaneously.

Proceed to the respective other speakers (right front speaker, left surround speaker, right surround speaker, centre speaker and subwoofer) and also

The selected speaker will be coloured blue.
After setting the distance to the subwoofer.

▶ Proceed to Adjust speaker level.
Adjust speaker level
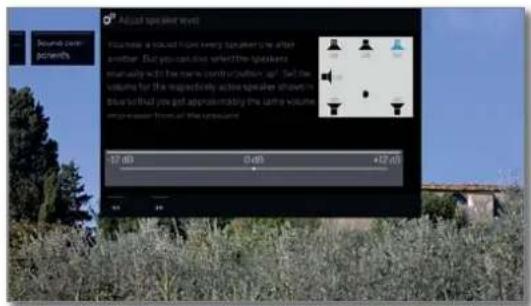
text_image
Adjusted speedometer level You must be found from every speaker the other another. But you cannot use specific speedometers. manually will the name contribution up! Set the volume for the respectively active speaker shows in this way that you got approximately the entire volume in response from the speedometer 57 dB 0 dB +22 dB
▶ Adjust the volume for the speaker.
▶ Proceed to next speaker or
▲▼ select speakers manually.
For balanced audio reproduction all speakers should be set to the same volume level. A noise signal will be reproduced automatically on each speaker in succession. Adjust every speaker to equal perceived volume from your listening position. The selected speaker will be coloured blue.
After adjustment of the last speaker.

Subwoofer phase
▶ Proceed to Subwoofer phase
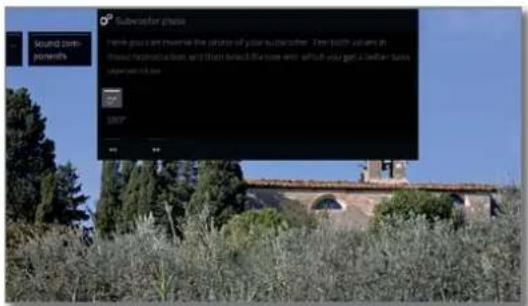
text_image
Sound content Subscribers please Hands you can rewrite the phrase of your subscriber. Then justifies users in house, desktop, and other settings that will help you get a better taste app your job. SHOP
Switch a channel or a DVD player playing music to music playback.
Test both values (0° and 180°) and select the one with which you get a clearer bass reproduction from your listening position.
OK Confirm selection.

▶ Finish wizard.
This ends the sound components wizard for connecting and setting up a speakers system.
Loewe old
User handbook
System settings
Connections
Adjusting the HiFi/AV amplifier
Sound playback via ... - HiFi/AV amplifier
The sound components wizard permits configuration of different audio amplifiers (stereo amplifiers, surround amplifiers, analogue or digital) with different digital audio formats (Dolby Digital, MPEG, and stereo/PCM). See the user guide of the audio amplifier for more information.
For information on navigation within the wizard see chapter General information on menu operation.


HOME: Call Home view.
◀ ▶ ▲ ▼ Mark System settings. OK call System settings.
▲▼ SelectConnections. ► go to next column.
▲▼ Select Sound components. ► Call sound components wizard.
Sound reproduction via ...
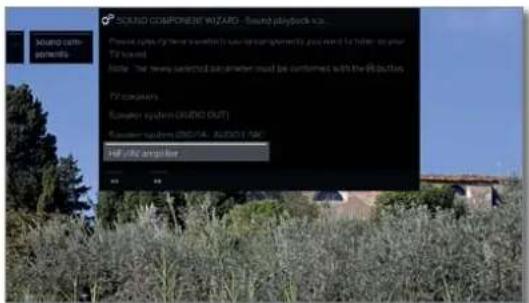
text_image
SOUND COMPONENT WIZARD - Sound playback up... Present audio system will be used to generate sound playback up. You need to help you your TV command. Note: The new selected parameter must be confirmed with the Objective. TV command Audio system (DRIVE OUT) Audio system (DRIVE) AUDIO START Help audio amplifier

▼▲ Mark HiFi/AV amplifier, OK Confirm selection.
▶ Proceed to next step.
Type of sound transmission
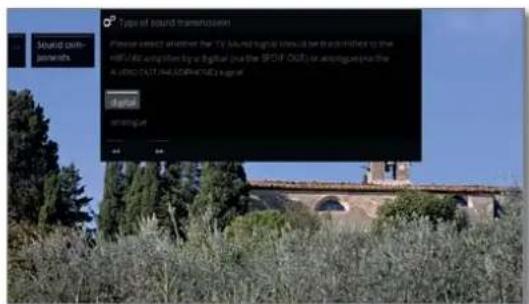
text_image
Sound com- tements Type of sound transmission Please select whether the TV sound/night will be transmitted to the milli-1400 microphone by digital (or the SPOV, O2R) or audio/video (or the A 600x100x100x100x100x100x) Output Output
▶ Select whether the sound is to be transmitted digitally or analogue to the the amplifier (see right hand column): OK Confirm selection.
digital: Proceed to Sound formats. analogue: proceed to Type of amplifier.
Sound formats

text_image
Secure Tomatics Please specify: what level of visual norms must be prescribed by your HIF/AVI modified and check them by the button Secure Tomatics MPES Daisy Audio
▶ Select sound formats which can be decoded with the digital amplifier (see operating manual of the used amplifier).
OK adopt sound formats.

▶ Proceed to next step.
Amplifier Type
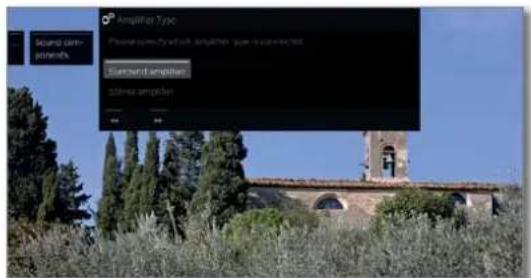
text_image
Amplifier Type Preview fully filled with amplifier, pure audio output. Supercritical amplifier Distinct amplifier
▲▼ Select which amplifier you have connected, OK Confirm selection.

▶ Finish wizard.
Loewe bild
User handbook
System settings
Connections
Antenna DVB
Here you can make settings for the DVB-T antenna and call the antenna wizard for the DVB-S antenna.
Call Antenna DVB


HOME: Call Home view.
◀ ▶ ▲ ▼ Mark System settings. OK call System settings.
▶ ▲ Mark Connections,
▶ go to next column.
▶▲ Mark Antenna DVB.
▶ go to next column.
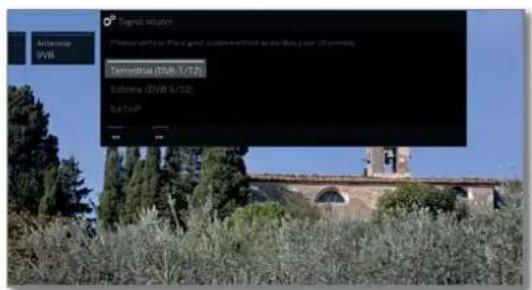
text_image
Standard Model Standard Model (STAM-7/2) Baseline (STAM-5/32) STATUS: 00 01 02 03 04 05 06 07 08 09 10 11 12 13 14 15 16 17 18 19 20 21 22 23 24 25 26 27 28 29 30 31 32 33 34 35 36 37 38 39 40 41 42 43 44 45 46 47 48 49 50 51 52 53 54 55 56 57 58 59 60 61 62 63 64 65 66 67 68 69 70 71 72 73 74 75 76 77 78 79 80 81 82 83 84 85 86 87 88 89 90 91 92 93 94 95 96 97 98 99 Antenna WVB
▼▲ Select the desired setting. ▶ call.
Explanations of the setting options in the antenna DVB menu:
Terrestrial Here you can set whether your DVB-T antenna needs (DVB-T/T2) a supply voltage.
Antennas with an integrated amplifier need a supply voltage on the antenna line. In this case, select Supply voltage 5V and confirm with OK.
Otherwise, select No supply voltage and confirm also with OK.
Satellite Here the antenna wizard starts guiding you through all the settings relevant to the DVB-S antenna. The settings of the DVB-S antenna wizard are explained in the procedure of initial installation.
SAT>IP Here you can select from which servers you wish to receive your channels.
Positioning/aligning DVB-T antenna
If you are receiving one or more DVB-T channels with picture and sound interference then you should change the installation location and alignment of the antenna. Find out online which channels are broadcasting the DVB-T channels in your region.
A DVB-T channel is received and selected. Calling manual search (see chapter System settings, section Channels – Manual TV/Radio scan).
Due to the preset channels, the signal source is already selected as DVB-T. Position and align the antenna so that maximum C/N values and levels are reached.
Search for DVB-T channels one after the other and compare values for C/N and Level. Then position/align the antenna to the weakest channel so that maximum values for C/N and Level are obtained. The value for BER should be as low as possible.
Thereafter, perform an automatic search for all DVB-T channels.
AV connection settings
In the AV connection settings menu the parameters for the AV connection socket can be adapted.
Calling the connections menu


HOME: Call Home view.
Mark System settings, OK call System settings.
- ▲ Mark Connections. ▶ go to next column. - ▲ Mark AV connecting settings. ▶ go to next column.
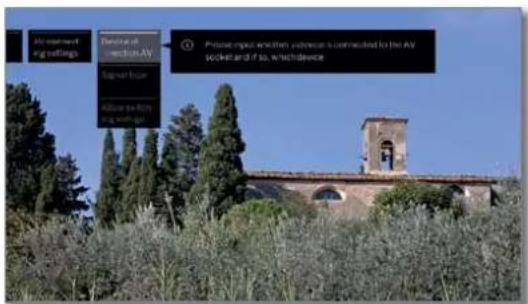
text_image
My command ing settings Debit of access AV Super box Allow to buy ing windows! Please open and then access is connected to the AV socket and if so, which device- Select the desired setting. - call.

Explanations of setting possibilities in the AV connecting settings menu:
Device at connection AV Indicate here whether a set and, if yes, which one is connected to the AV socket.
Signal type You set the signal type of the device connected to AV here. You can find out more from your dealer.
Allow switching voltage If this function is activated, the video and audio of an external unit connected to the AV connector (not at AVS) will immediately be reproduced on all TV broadcast sites when playback is started up, provided that the external unit supplies a switching voltage.
Loewe old
User handbook
System settings
Connections
Digital Link
In the digital link menu you make further setting for comfortably linking external devices to the TV set.
Call Digital Recorder Link menu


HOME: Call Home view.
◀ ▶ ▲ ▼ Mark System settings.
OK call System settings.
▼ ▲ Mark Connections.
go to next column.
▼ ▲ Mark Digital Link
OK call Digital Link.
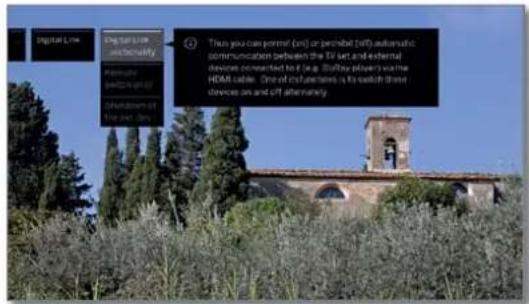
text_image
Digital Link Digital Link and uniquely Please note that this is an additional communication between the UI set and external devices connected to it (e.g. Burley Player) via the HTML cable. One of its functions is to switch these devices on and off alternately.
▼▲ Select the desired setting.
call.
Explanations of the setting options in the Digital Link menu:
Digital Link HD functionality
Herewith you can allow or forbid the automatic communication between the TV set and linked external devices (e.g., BluRay player). Among other things, it's role is that these devices switch mutually on and off.
Remote switch on of the TV set
Here you can select whether the TV set is to switch on automatically from Standby mode, if Digital Link HD or Digital Link Plus capable devices connected to an HDMI or to AV inputs start playback or display a screen menu.
Menu item only available if at Digital Link HD - Functionality → on has been selected.
Shutdown of the ext. device via TV button
You can select here whether the external Digital Link HD device that is currently playing back should be automatically shut down as soon as you switch back to the TV or another AV channel.
i Menu item only available if at Digital Link HD - Functionality → on has been selected.
HDMI
In the HDMI menu, you can make additional settings for the HDMI connections.
Call HDMI menu

HOME: Call Home view.

Mark System settings
OK call System settings.
▼ ▲ Mark Connections.
▶ go to next column.
Mark HDMI
OK call HDMI.
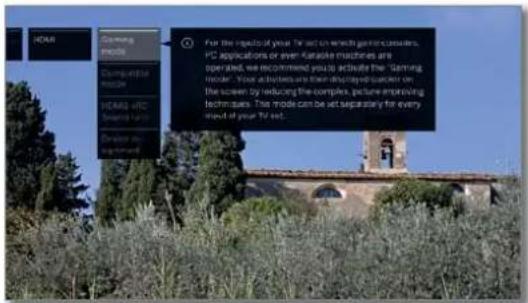
text_image
For the image of your TV set on which participants, PC applications or even Karaoke machines are operated, we recommend you to activate the 'Game mode'. You activities are then displayed faster on the screen by reducing the complex, picture improving techniques. This mode can be set separately for every input of your TV set.
▼▲ Select the desired setting.
call.
Explanations of the setting options in the HDMI menu:
Gaming mode
For the inputs of your TV set on which game consoles, PC applications or even Karaoke machines are operated, we recommend you to activate the Gaming mode.
Your activities are then displayed quicker on the screen by reducing the complex picture improving techniques.
This mode can be set separately for every input of your TV set.
You can recognise AV connections with set Gaming mode by the symbol ☑ after the connection name. A dice icon 🔗 is shown in the extended channel list behind the corresponding AV input when filtering on the AV list.
Compatible mode
In this menu item you can activate the "compatible mode". It optimizes communication with older HDMI devices. For the use of the latest generation of HDMI devices, please deactivate the mode.
In SL4xx sets, the compatible mode for HDMI 1-3 ports is set by default.
HDMI-ARC Sound format
Here, you can set whether the TV audio signal is always available as a PCM (2-channel) or in the best possible sound format (optimal) for the connected device at the HDMI 1 socket.
Device assignment
Here set the modes for the individual HDMI connections for special devices.
Loewe old
User handbook
System settings
Extras
Extras
Extras contains additional functions and settings (e.g., Integrated features, Repeat initial installation, CA module settings).
Call Extras


HOME: Call Home view.
◀ ▶ ▲ ▼ Mark System settings. OK call System settings.
▼ ▲ Mark Extras.
▶ go to next column.
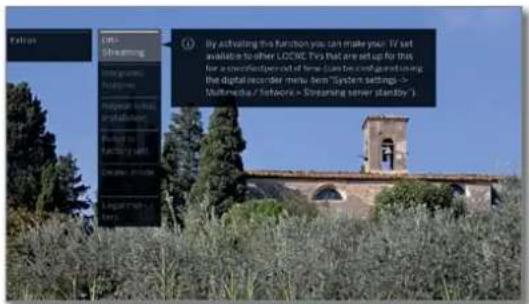
text_image
Extray CPU Streaming By interacting the function you can make your. If not available to other LOGWE, they that are set up for this for a specific period of new data can be configured using the digital recorder menu item "System settings -> Multimedia / network > Streaming server standby".
▼ ▲ Select the desired setting. ▶ call.
Explanation of the subitems of Extras
DR+ Switch off the TV set to be in an advanced standby Streaming ^4 mode (server function, see column on right hand side).
Integrated Call information on the integrated features of the TV features set (see next page).
Repeat initial installation You can repeat the Initial installation again at any time. You are guided through the various menus where i.a. an automatic TV/radio channel search is automatically carried out.
Caution: All stored channels and all created personal lists will be deleted by this!
i If a parental lock is activated, the access code must be entered before repeating initial installation.
Reset to factory settings Resetting various settings to their factory defaults (see next page).
CA module Make settings for your CA modules.
This menu item appears only it at least one CA module is plugged in.
The exact designation of the menu item and available subitems depends on your CA module(s).
See chapter System settings, section Extras – CA module for further information.
Dealer mode Here activate/deactivate the dealer mode.
See chapter System settings, section Extras – Dealer mode for further information.
Legal Matters Here you can find the Terms of Use: the License Agreement and the Data Protection Statement for your Loewe TV set.
DR+ Streaming ^(1)
By switching off an accessible TV set ends access to its DR+ archive in the network.
You can, however, switch your TV set to an advanced standby mode to enable access to the DR+ archive even when the TV set is switched off (server function).
Call DR+ Streaming

HOME: Call Home view.

◀ ▶ ▲ ▼ Mark System settings. OK call System settings.
- ▲ Mark Extras. - go to next column. - ▼ Mark DR+ Streaming OK confirm.
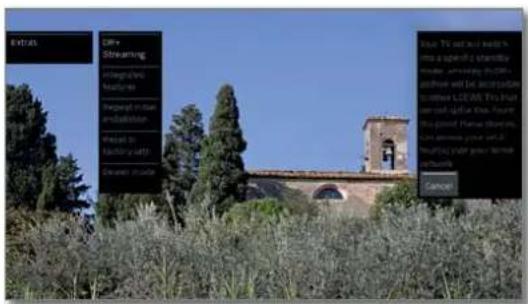
text_image
Details LRI+ Streaming Integrated Molecular Target in the environment Target by Holding site Desired music View: TV set out less than more a special 2 standard mode, advertising in LRI- address will be accessible to other LRI. TV set with detail on this figure the grand French oblique. It's more your set it reputing your new network CanonThe TV set switches after a short time into the extended standby mode.
The DR+ archive will now be accessible within the network for the period set in the DR+ Streaming Settings.
You find the setting of the period under System settings → Multimedia/Network → Streaming server standby.
After the preset time has elapsed, the TV set switches to "normal" standby mode.
Loewe old
User handbook
System settings
Extras
Integrated features
Here you can obtain information on the integrated features of the TV set.
See the rating plate on the rear of the set for the precise product designation.
Call Integrated features


HOME: Calling the Home view.
Mark System settings
OK call System settings.
Mark Extras
go to next column.
▲▼ Mark Integrated features
OK call Integrated features ^[1] .

text_image
Integrated features Back Manufacturer LOWE Serial service 0 Active number Channel 16.427 CT Plus PRODUCTION Macram Auto 00/CD/CD HD/MP/D/AK/C/D/MP Port Digital effects (DIF) Channel 1 4/7/CD/CD/CD/CD Channel 2 T/CD/CD/CD/CD Wi-Fi module MAC address (FV) 00.00 KB/22.89 Move contact up and down with the curve Here you can obtain information on the integrated features of your TV set.
▶ ▶ ▲ ▼ Select category (e.g. hardware, software, etc.).
▲▼ If necessary, scroll content up/down.
Hardware Under the Hardware item, you can find the article and serial number of your TV set, the MAC address and the chassis type with all existing hardware components.
Software Under the item software, the current software version and the installed software features of your TV set are displayed.
Upgrade Under the item Upgrade you can find the installed software features with their respective status.
Activated: software feature is installed and can be used.
Not active: software feature is installed, but can not be used.
Activate package Under the Activate package item, you can enter an acquired unlock code to enable new features, if available.
After entering the activation code with the numeric keys, you must confirm the code with OK.
Reset to factory settings
Here you can reset some of the settings to the factory default values.
Call Reset to factory settings

HOME: Calling the Home view.

◀ ▶ ▲ ▼ Mark System settings, OK call System settings.
- ▲ Mark Extras. - go to next column.
▲▼ Mark Reset to factory settings. OK call.
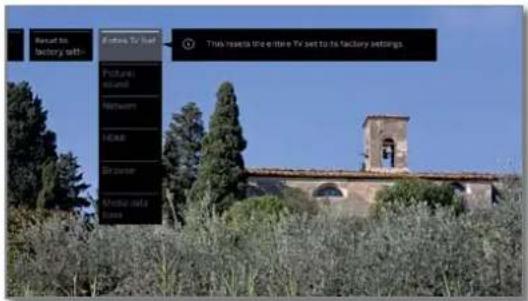
text_image
Result to factory self- if extra To set Picture uland Network MOS Browser Media data box This resets the entire TV set to its factory settings.
▲▼ Select a category you want to reset. OK call.
▶ Select Start reset OK call.
Entire TV Set This resets the entire TV set to factory defaults. By resetting the entire TV set to the factory default state, all the settings you made and all stored channels will be deleted.
Saved recordings in the DR archive are not deleted. Thereafter, an initial installation of the TV set is carried out again (see chapter Initial installation).
Picture/ The current image and sound parameters of your TV sound set will be deleted and reset to the factory defaults.
Network: The current network settings of your TV set will be deleted and reset to the factory defaults.
HDMI The HDMI setting is reset to the factory settings.
Browser The current browser settings of your TV set will be deleted and reset to the factory defaults. All data stored in the course of use are deleted.
Media data base Your current media database is deleted because the database is reinitialised. The information from the removable media (USB) and possibly the DR+ archive are then re-read.
The system then automatically performs a system reset.
Loewe old
User handbook
System settings
Extras
Dealer mode
Here you can activate a dealer mode which automatically plays a presentation from the USB stick or a hard drive.
Call Dealer mode


HOME: Call Home view.
◀ ▶ ▲ ▼ Mark System settings
OK call System settings.
▼ ▲ Mark Extras.
go to next column.
▲▼ Mark Dealer mode,
OK call.

text_image
Dealer mode Back Active button to the device mode with the following elements: The device starts automatically after PowerOn • The product status achieved when there is no interaction with the hardware 3 minutes. All settings are reset to the device users of this mode after 5 minutes • If a USB will progress in which a presentation can be enabled, it helps you to continue the device's operation back entirely. • This is not intended to use the device's own or more active devices (or more highly efficient) The product is always when interacting with the device. Active button to the device mode here. This automatically plays a presentation from the mounted USB lock or hand drive in an endless loop. This mode is not intended for use by the customer.
▲▼ Select on or off.
OK call.
When this setting is on the following functions are available:
After the mains switch is turned on, the TV set starts automatically.
If a USB stick containing a presentation is inserted, this will start automatically in a continuous loop after 5 minutes of non-use.
If this is not the case, the system looks for a hard drive with a presentation and if one is found, this is played in a continuous loop.
After 5 minutes all settings are set to the defaults in Dealer mode.
Pressing any key on the remote control pauses the presentation.
The presentation resumes after 5 minutes of inactivity.
This mode is designed for use by dealers.
Legal matters
Calling up legal questions

HOME: Call Home view.

◀ ▶ ▲ ▼ Mark System settings. OK call System settings.
▲▼ Mark Extras.
▶ go to next column.
▲▼ Mark Legal matters. OK call.
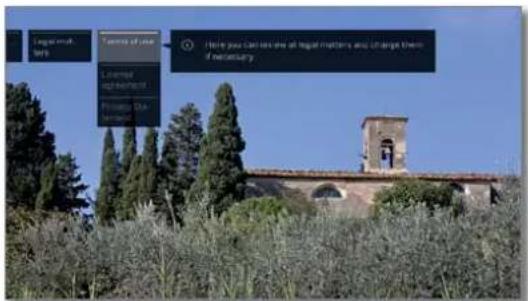
text_image
Logarithm bets Terms of use Licensed representation Primary Use Bertified How to Can Have the all legal matters and change them if necessary
▲▼ Choose category. OK call.
Here you can find the Terms of Use, the License Agreement and the Privacy Statement for your Loewe TV set.
Loewe bild
User handbook
System settings
Extras
Common Interface (CI/CI Plus)
Common Interface, also called CI, is a interface in the TV set, into which a Conditional Access Module (CA module, see right column) can be plugged. The CA module and the smartcard from a corresponding Pay TV supplier enable reception of encrypted channels.
CI Plus is an advanced development of the DVB Common Interface Standard. CI Plus slots are in principle downward compatible to the previous CI standard, i.e. CA modules and Smart Cards according to the past CI standard can continue to be used in CI Plus slots, as far as the programme provider permits this.
Programme providers who use the CI Plus standard can assign different rights for their broadcast programmes.
For instance, the programme provider can restrict or completely prevent recording or later watching of an encoded programme.
If there are such regulations, these also apply to timeshift television accordingly.
A screen message informs you of this fact, if you would like to record such a programme. Recording is carried out in such a case (an appropriate entry is displayed in the DR+ archive), later watching of the programme, it is then, however, depending on the program provider, no longer possible or only for a limited time.
It is then, however, depending on the program provider, no longer possible or only for a limited time.
A possible time limitation of the playback will also appear in the corresponding entry in the DR+ archive.
All restrictions mentioned here are the responsibilities of the broadcaster. The TV simply values the signalling set by the broadcaster as neutral.
Furthermore, the programme provider can prevent external copying of protected programmes.
It could be necessary to enter the youth protection PIN of the CA module when programming the data, if you want to record a CI Plus protected programme, which has been protected against viewing by minors.
The Parental lock PIN can also be stored in the TV set. The access code of the TV set is required for watching the programme later.
Software update for CI Plus capable CA modules
From time to time, there will be new system software for your CA module software. There are two software update types.
Recommended update:
Information on an available update is displayed. You can either run this or cancel the procedure. If you do not install the update, the information will reappear in regular intervals until the update has been installed.
Forced update:
Information on an available update is displayed. The module does no longer decode until the update has been successfully implemented.
Conditional Access module (CA module)
In order to receive coded digital channels, a Conditional Access module (CA module) and a Smart Card must be inserted in the CI slot of your TV set.
The CA module and the Smart Card are not part of the set of equipment supplied with the TV set. They are usually available from your dealer. Loewe does not provide any guarantee for the functioning of the CA module.
The TV set must first recognise and set up the CA module during initial operation. Therefore, it can take up to a minute until decoding starts during initial operation.
Inserting the Smart Card into the CA module
Push the Smart Card into the CA module as far as it will go. The side of the card with the gold chip on it should be pointing towards the thicker side of the insertion slot (see illustration). Note the direction of the arrow printed on the Smart Card.
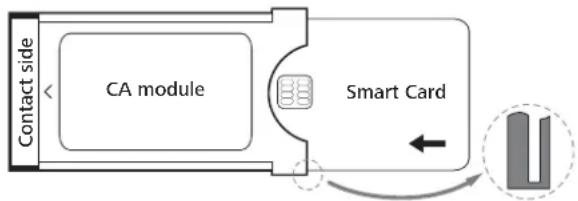
flowchart
graph LR
    A["Contact side"] --> B["CA module"]
    B --> C["Smart Card"]
    C --> D["Arrow right"]
    style A fill:#f9f,stroke:#333
    style C fill:#ccf,stroke:#333
Inserting the CA module into the TV set's CI slot
i Switch off TV set using the mains switch.
Remove the cover from the rear of the set.
Insert the CA module carefully into one of the two ^4 CI slots, ensuring that the contact side goes in first. Do not use force. Make sure the module is not twisted in the process. Push the CA module in as far as it will go.
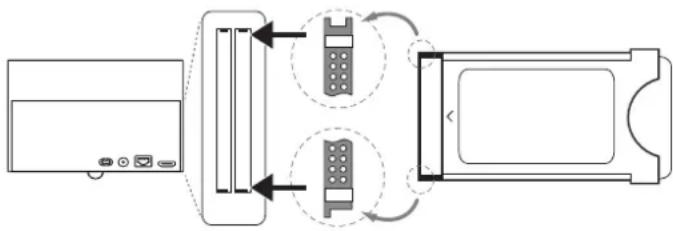
flowchart
graph TD
    A["Device 1"] --> B["Port 1"]
    B --> C["Port 2"]
    C --> D["Port 3"]
    D --> E["Port 4"]
    style A fill:#f9f,stroke:#333
    style B fill:#ccf,stroke:#333
    style C fill:#cfc,stroke:#333
    style D fill:#fcc,stroke:#333
    style E fill:#ffc,stroke:#333
Finally, close the side cover.
Troubleshooting (CA module)
The following information can help, if problems should occur when running a CA module:
Switch the TV set off to the standby mode. Remove the CA-module from the TV set. Switch the TV set off completely. Wait a few seconds. Reinsert the CA module. Switch the TV set on again.
Should errors continue to occur, you will get further information resulting from the two-digit error code (only with CI Plus capable CA modules). You will find the table with the error codes in chapter
Miscellaneous, section CA module error codes. If in doubt, contact your dealer.
Loewe old
User handbook
System settings
Extras
Searching for scrambled channels
If no search for encrypted channels was performed during initial startup, this can be done later using the search wizard.


HOME: Call Home view.
▶ ▶ ▲ Select System settings
OK call System settings.
▼▲ Mark Channels.
▶ go to next column.
▼▲ Automatic scan TV+Radio
▶ go to next column.
Select Change search settings
OK wizard guides you through the search settings.
i Under scrambled channels you have to select yes.
▶ Next select Start search/update.
OK start updating the channel list.
Calling CA module information
This menu is only available when a CA module is plugged in.


HOME: Call Home view.
Mark System settings
OK call System settings.
▼ ▲ Mark Extras.
go to next column.
▼▲ Select desired CA module.
The indicated name depends on the inserted CA module.
▶ go to next column.
▼ ▲ Select Module menu,
OK call information.
The content of this menu depends on the provider of the CA module.
Smartcard rights
If two ^1 CA modules are used in parallel to decode channels, you specify here the rights of both smartcards.

▼▲ MarkSmartcard rights
▶ go to next column.
▼ ▲ Select Same rights or Different rights
If you select Same rights, the TV set assumes that both smartcards have the same rights and can be used for Dual Recording in parallel. In this case, the Channel mapping function is not available.
When selecting Different rights, you can assign the channels to be decoded to the respective CA module.
Channel mapping
If two CA modules are both used for the decoding of channels, you decide here which channel shall be decoded by which CA module.
The channel mapping settings will only be taken into account, if two CA modules are plugged.
This menu item is only available if under Smartcard rights the item Different rights was selected.
This statement refers explicitly to the CI slots of the TV set and not to the modules plugged into it! When the modules are exchanged, the mapping must be repeated.

▼ ▲ Mark Channel Mapping
▶ call channel list.
◀ ▶ ▼ ▲ Select CA module for mapping.
◀ ▶ ▼ ▲ Mark channel.
OK map channel to the selected CA module / cancel mapping.
Behind the assigned channel is the number of the corresponding CI slot.
Storage the PIN for recordings
Store the programme provider PIN belonging to your CA module in order to decode CI plus programmes with parental lock for recording.
The menu option is available only if the plugged CA module supports storing the parental lock PIN.

▼ ▲ Mark Storage of PIN for recordings.
▶ call PIN entry box.
Mark the desired CA module in the headline.
- Go to the PIN input line, use the numerical keys to enter the programme provider PIN.
Or:

◀ ▶ ▼ ▲ Markfigure.
OK adopt figure to input line.
To conclude the entry:
MarkAdopt.
OK save PIN.
Removing the CA module
■ Switch off TV set using the mains switch.
Remove the cover from the rear of the set.
Pull the CA module out of the CI slot.
Replace the cover.
Loewe bild
User handbook
External devices
Devices to the HDMI connections
The HDMI connections (High Definition Multimedia Interface) allow the transmission of digital video and audio signals from a player (e.g. DVD player, Blu-ray player, game console, camcorder, set-top box) via a single cable.
The digital video and audio data are transmitted without data compression digitally and therefore lose none of their quality.
A maximum of five devices can be connected in cascade to every HDMI socket. The devices are arranged in the AV list and in the channel list below the appropriate HDMI socket. If the respective device sends its own device name, this appears in place of the connection name.
Connecting the device
Switch off all devices before connecting them.
Connect the device by an HDMI cable (Type A. 19-pole) to one of the HDMI sockets of the TV set.
An HDMI device is connected to the side HDMI socket (e.g. camcorder) in the same way as shown in the figure.
If you use HDMI sources providing UHD content, they should be connected to the HDMI 4 ^q port.
Please note that not all signals may be represented on any HDMI socket (see chapter Technical Data, section Signals via AV (PC IN) / HDMI)
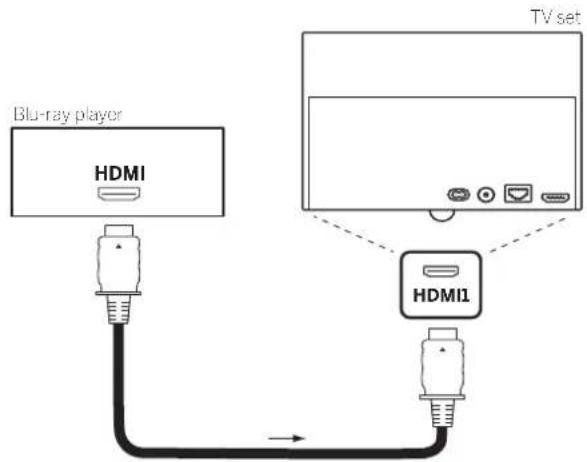
text_image
Blu-ray player HDMI TV set HDMI1Connection example of an HDMI device (e.g. Blu-ray Player)
Playback from the device
If the set supports on HDMI the functionality Digital Link HD, if selected in the settings, the TV automatically switches to the corresponding HDMI input after starting playback on the HDMI device.
For further information on Digital Link HD, see chapter External devices, section Digital Link HD.
The HDMI input can also be called up manually:

In normal TV mode, without other displays:
Call Sources.
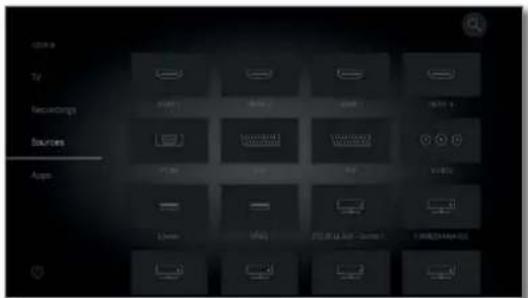
text_image
Camera TV Receivings Sources Apps Video Audio Image Video Video Video Video Video Video Video Video Video Video Video Video Video Video Video Video Video Video Video Video Video Video Video Video Video Video Video Video Video Video Video Video Video Video Video Video Video Video Video Video Video Video Video Video Video Video Video Video Video Video Movie VISA FCA (12.00 - 2000) C:8873444444
Select HDMI socket.
With Digital Link HD capable devices the device name may possibly appear in place of the connection name.
OK switch over.
Start playback on the connected HDMI device. The best possible format for the picture is detected and set automatically.
Renaming the HDMI port designation
The port designation of the HDMI jacks can be renamed manually.

Call Sources

◀ ▶ ▲ ▼ Select desired HDMI socket. OK switch over.

MENU: Call menu options.

▲▼ SelectRename. OK call.


Enter new name (information on how to enter characters, see also section General information on operation, section Entering characters with on-screen keyboard).

◀ ▶ ▲ ▼ Select adopt. OK New name for the HDMI jack is adopted.
Loewe bild
User handbook
External devices
Digital Link HD
Operation of Digital Link HD (HDMI CEC) enabled devices
The Digital Link HD (HDMI CEC) function allows Loewe television sets to transmit the remote control signals via the HDMI connection of the TV set to compatible HDMI devices (such as Loewe BluTechVision 3D). You can therefore set up and use a concealed CEC capable HDMI device.
Thus, you can install a concealed CEC-enabled HDMI device and operate it easily.
You can select and operate the CEC-capable HDMI device in two different ways. On the one hand, by using a device key (STB, VIDEO
or AUDIO) to switch to the operation of the HDMI device. On the other hand, by using the TV key to switch between HDMI device and the TV set.
For third-party devices, the description (Digital Link HD / HDMI CEC) for controlover the HDMI connection may vary depending on the manufacturer
Even if this control is available, a reliable function in conjunction with the Loewe TV set cannot be guaranteed.
Switching between operation of TV set and HDMI device using a device key
Assign the HDMI CEC function (code 22) to the desired device key (STB, VIDEO or AUDIO). The assignment is described in chapter External devices, section Setting the remote control – Setting the remote control for other Loewe devices
Subsequently, the assignment of the HDMI device used to the preset device key will be done.
The CEC capable HDMI device is connected to one of the HDMI sockets of the TV set and switched on.
STB VIDEO AUDIO
Press required button for 5 seconds.
A selection menu appears on the TV set.
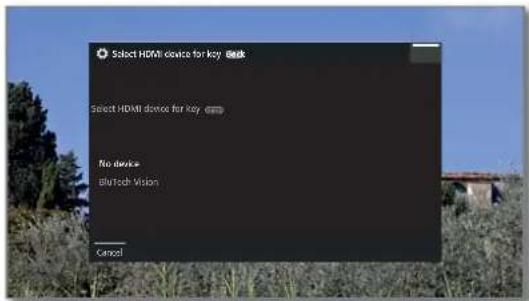
text_image
Select HDMI device for key Key Select HDMI device for key No device Bluetooth Vision Cancel
▲▼ Select required device from the list.
OK Accept.
The assignment of the device key and the assignment of the HDMI device are completed.
STB VIDEO AUDIO
Press the corresponding device key to switch to the operation of the HDMI device.
The remote control commands are routed from the TV set to the HDMI device.
TV
Press the TV key to switch to the operation of the TV set.
If the Auto off function (see right column) is enabled, the HDMI device switches off.
Switching between operation of TV set and HDMI device using the TV key
Switching the control via the TV key is only possible when no device key is assigned to the HDMI device you are using.
→
Call Quellen.

▲▼ Select a HDMI socket to which the HDMI device is connected.
TV
Pressing TV for a longer period: switch remote control commands between HDMI and TV operation.
A message on the screen informs you about the currently selected mode.
TV
PressingbrieflyTV: Switch to TV mode (back to previous channel).
Automatically switching off external devices
When returning to TV mode by briefly pressing the TV key the external device can be switched off.
You can find the settings in the System settings → Connections → Digital Link → Shutdown of the ext. device via TV button.
Menu item only available if at Digital Link HD - Functionality → on has been selected.
Remote switch on of the tv set
You can select whether the TV set is to switch on automatically from Standby mode if a disc is played or a screen menu displayed on a Digital Link HD-enabled device.
You can find the settings in the System settings → Connections → Digital Link → Remote switch on of the tv set.
i Menu item only available if at Digital Link HD - Functionality → on has been selected.
Switching off the TV set and connected devices (system standby)
i The operation of the TV set must be enabled (see above).
○
Press the key briefly: TV set and all CEC-enabled devices connected to the HDMI ports will be switched off to standby (system standby).
Loewe bild
User handbook
External devices
Devices on AV
The AV connection socket offers the possibility to connect e.g. a DVD player, video/DVD recorder or PC via two different adapters.
The required adapters (Scart or VGA adapter) are available as an accessory from your Loewe dealer (see chapter Accessories).
The AV sockets can process different signal types. Which signal type your accessory device provides can be found in the operating manual of the appropriate device.
Owing to the large number of AV devices available on the market, we can only mention a few examples for the connection of accessory equipment to the AV socket here.
Remote TV switch on via Digital Link
You can select whether the TV set is to switch on automatically from Standby mode if a disc is played or a screen menu displayed on a Digital Link Plus-enabled device connected to AV.
You can find the settings in the System settings → Connections → Digital Link → Remote switch on of the TV set.
Connecting a DVD player to the TV set
A DVD player has been selected in the System settings → AV connecting settings → Device at connection AV.
Switch off all devices before connecting them.
Connect the Scart output of the DVD player to the TV set's AV socket using the Scart adaptor ^1 .
Use a fully equipped Scart cable (available from your dealer) for this.
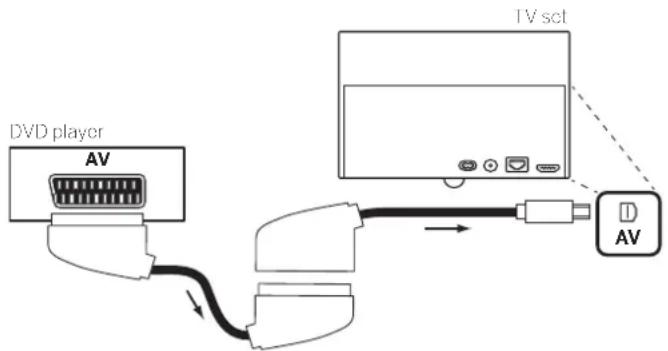
text_image
DVD player AV TV set AVConnection example of a DVD player
Playback from AV device
If the device at AV supports the Digital Link Plus functionality or if in the System settings → Connections → AV connecting settings → Allow switching voltage → yes, the TV set will automatically switch to the corresponding AV input after starting the replay at the AV device. The AV input can also be called manually, however.

Call Sources.
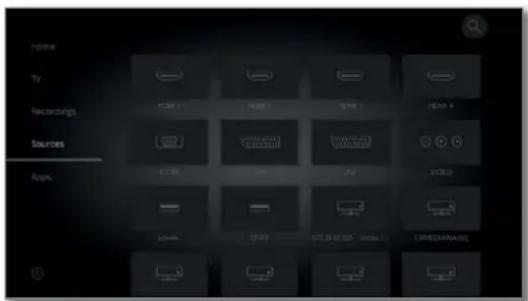
text_image
Items TV Recordings Sources Apps REC
Select AV.
OK switch over.
Start playback on the connected device.
Loewe bild
User handbook
External devices
Connecting a DVD recorder to the TV set
A DVD recorder has been selected in the System settings → Connections → AV connecting settings → Device at connection AV.
Switch off all devices before connecting them.
Connect the Scart output of the DVD player to the TV set's AV socket using the Scart adaptor ^1 . Use a fully equipped Scart cable (available from your dealer) for this.
If you want to receive and record analogue channels with the receiver (tuner) built into the recorder, the recorder must be looped into the aerial cable.
Connect the DVD recorder as shown in the connection example below.
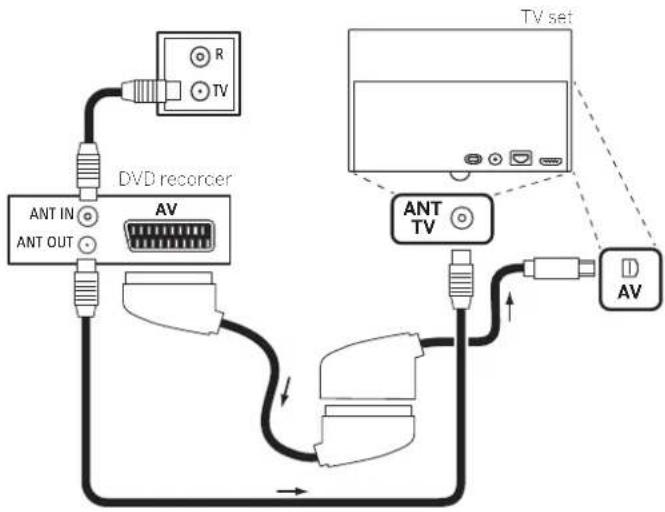
text_image
R TV DVD recorcer ANT IN ANT OUT AV TV set ANT TV D AVConnection example of a DVD recorder
Playback from AV device

Call Sources.
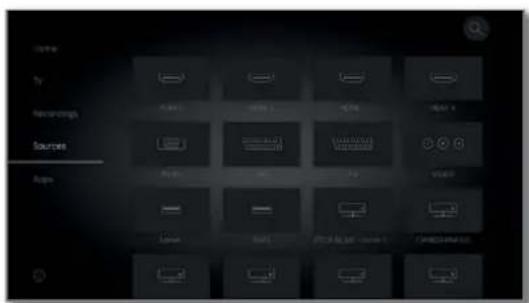
text_image
Source App My Recordings Sources App App App VOLUME
Select AV.
OK switch over.
Start playback on the connected device.
Connecting PC / Set-top box
You can connect a PC and thus use the TV screen as a monitor.
When connecting a PC or auxiliary device to the AV socket of the TV set, adjust the output signal on your PC first so that it matches one of the signals in the table in chapter Technical data, section Signals via AV (PC IN) / HDMI.
Switch off all devices before connecting them.
Connect the device to the TV set's AV socket with a VGA cable and the VGA adaptor.
Connect the analogue audio signal of the PC to the VGA adaptor via the jack plug socket.
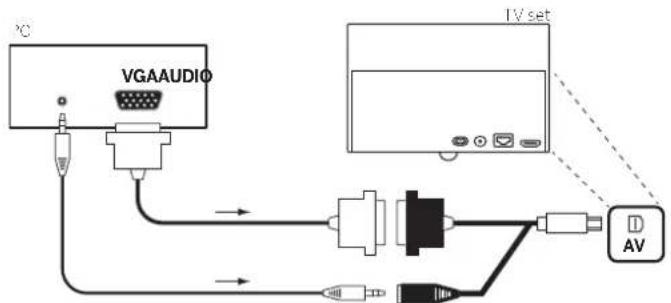
text_image
VGA AUDIO TV set AVConnection example of a PC
Playback from the device

Call Sources.
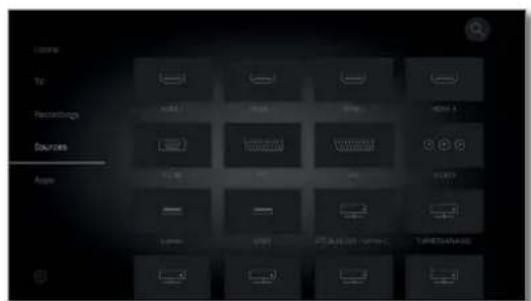
text_image
Camera Airline Airbox Airbox HDRS Recordings Sources Airline Airbox HDRS 12.00 12.00 12.00 12.00 12.00 12.00 12.00 12.00 12.00 12.00 12.00 12.00 12.00 12.00 12.00 12.00 12.00 12, 12, 12, 12, 12, 12, 12, 12, 12, 12, 12, 12, 12, 12, 12, 12, 12, 12, 12, 12, 12, 12, 12, 12, 12, 12,
Select PC IN.
OK switch over.
Adjusting the geometry of the PC picture
You can set the position (vertical, horizontal) and the phase position of your PC. The settings you find under System settings → Picture → more ... → PC IN - Display.
Connecting devices with component connection (YPbPr / YUV)
External units with component connection YPbPr (often informally referred to as YUV; see also Glossary) can be connected to the AV socket of the TV set using two adaptors. In addition to the VGA adaptor, a component VGA adaptor is required (available from your dealer).
The other units are connected as described in the left column.
Loewe bild
User handbook
External devices
Connecting the speaker system (AUDIO OUT)
You can easily connect a speaker system using the AUDIO OUT interface of your TV set.
Switch off all devices before connecting the speaker system.
The subwoofer is connected to the TV set via the AUDIO OUT interface.
Connect the analogue audio output AUDIO OUT of the TV set with a stereo cinch/jack adapter cable to the Line IN audio inputs left/right of the subwoofer.
Further information on the wiring of the speakers you find in the instruction manual of the subwoofer or the speakers.
1 Only turn in the power switch of the subwoofer after having selected the menu item Speaker system (AUDIO OUT) in the Sound Component Wizard. Otherwise, the sound system will operate with maximum volume.
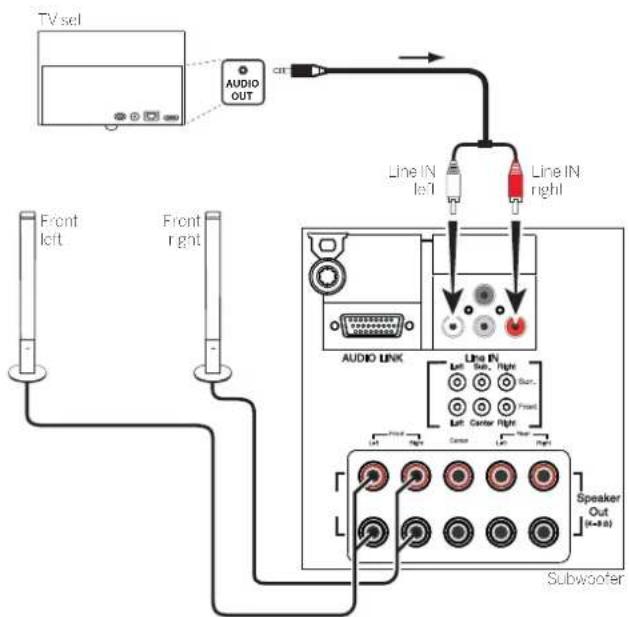
text_image
TV sel AUDIO OUT Front left Front right Line IN left Line IN right AUDIO LINK Line IN right Left Center Right Speaker Out (0-80) SubwooferExample of connecting a speaker system to your TV set
Configuration of the speaker system (AUDIO OUT)
When configuring the sound system in the sound components wizard enter if you want to use e.g. external front speakers or how the TV speaker is used (see chapter System settings, section Connections – Sound components).
1 Only turn in the power switch of the subwoofer after having selected the menu item Speaker system (AUDIO OUT) in the Sound Component Wizard. Otherwise, the sound system will operate with maximum volume.
Connecting the speaker system (DAL) ^1
You can easily connect a Loewe speaker system using the DIGITAL AUDIO LINK interface (DAL) of your TV set.
Switch off all devices before connecting the speaker system.
The subwoofer is connected to the TV set via the DIGITAL AUDIO LINK interface. Plug a network cable (Category 5e or higher) to the DIGITAL AUDIO LINK port of the TV set.
If you are using a subwoofer with DIGITAL AUDIO LINK interface (for example klang 1 subwoofer or klang 5 subwoofer), connect the network cable directly to the subwoofer.
For subwoofers with AUDIO LINK interface (see picture below), connect the Ethernet cable to the RJ45 jack of the optionally available Digital Audiolink / Audiolink converter.
Connect the converter to the AUDIO LINK socket of the Subwoofer.
Further information on the wiring of the speakers you find in the instruction manual of the subwoofer or the speakers.
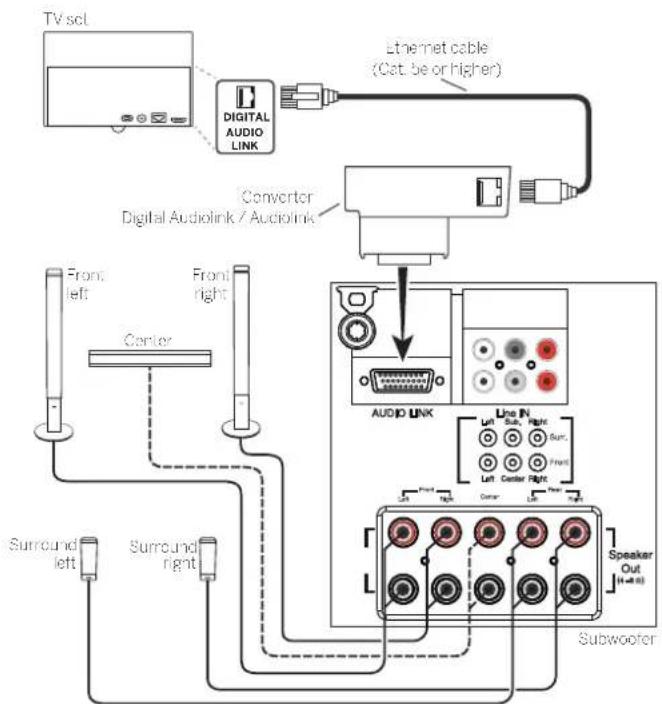
text_image
TV scl DIGITAL AUDIO LINK Ethernet cable (Cat. be or higher) Converter Digital Audiolink / Audiolink Front left Front right Center Surrend left Surrend right AUDIO LINK Use IN Left Side Right Surc. Left Center Right Speaker Out (4-48) SubwooferExample of connecting a speaker system (Subwoofer with AUDIO LINK) to your TV set
Configuration of the speaker system (DAL)
When configuring the sound system in the Sound Component Wizard, you can eg enter the distances of each speaker corresponding to your listening position or adjust the level of each speaker individually.
This guarantees a natural spatial image of the sound (see chapter System settings, section Connections – Sound components).
Loewe bild
User handbook
External devices
Connecting active loudspeakers ^1
If you want to use active speakers, you can connect them with an adapter cable to the TV set.
Plug a network cable (Category 5e or higher) to the AUDIO LINK port of the TV set. Connect the Ethernet cable to the RJ45 socket of the Digital Audiolink / Audiolink converter available as accessory. To the other end of the convertor you connect the adaptor cable Audiolink / 30cm / 9pin + 5.1 Out + Center In. Connect the cinch connectors of the adaptor cable to the cinch connectors of the speakers / subwoofer.
The cinch connections of the adaptor cable are labelled:
R for Front right
SR for Surround right
L for Front left
SL for Surround left
C for Centre
SUB for Subwoofer
The connections for the adaptor cable are pre-amplifier outputs. Therefore, only active loudspeakers / active subwoofers may be connected directly to the adaptor cable.
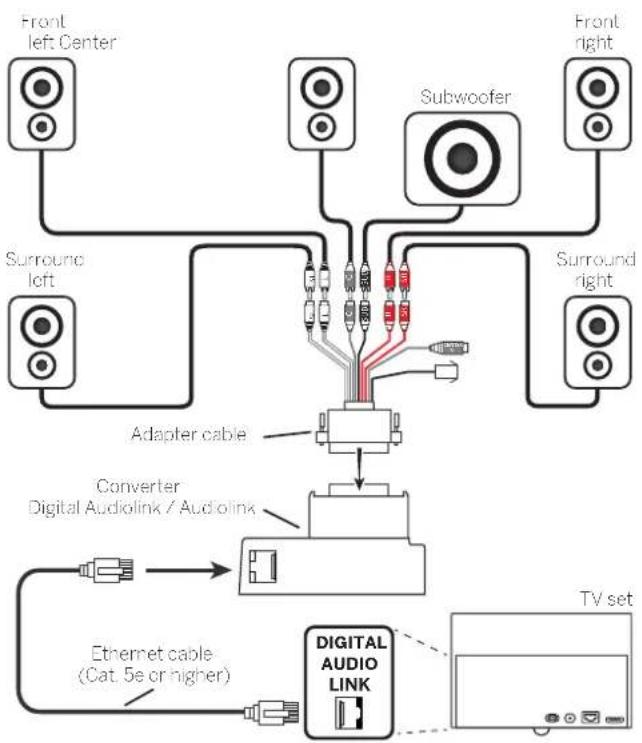
flowchart
graph TD
    A["Front left Center"] --> B["Adapter cable"]
    C["Subwoofer"] --> B
    D["Front right"] --> B
    E["Surround left"] --> B
    F["Surround right"] --> B
    G["Converter Digital Audiolink / Audiolink"] --> B
    H["Ethernet cable (Cat. 5e or higher)"] --> I["DIGITAL AUDIO LINK"]
    I --> J["TV set"]
Connection of active speakers to the TV set
Sound reproduction via the speaker system
The settings for sound reproduction via active speakers you find in the sound components wizard (see chapter System settings, section Connections – Sound components).
Connecting the HiFi/AV amplifier
Connecting digital HiFi/AV amplifiers
Connect the digital audio output of the TV set SPDIF OUT to the digital audio input of the amplifier via a cinch cable:
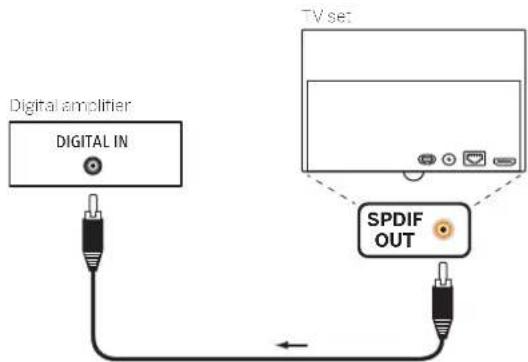
text_image
Digital amplifier DIGITAL IN TV set SPDIF OUTConnect digital audio (pre) amplifier via audio return channel (HDMI ARC)
Connect the HDMI1 socket of the TV using an HDMI cable with the HDMI socket of the ARC-compatible audio (pre) amplifier. It is not necessary to log-in the amplifier separately with the TV set.
Connecting analogue HiFi/AV amplifiers
Use a stereo cinch/jack adaptor cable to connect the analogue audio output AUDIO OUT to the analogue audio input of the amplifier:
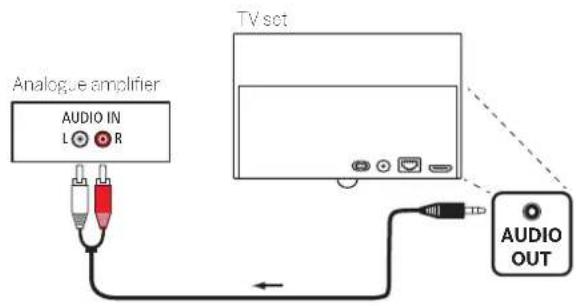
text_image
Analogue amplifier AUDIO IN L ● R TV set AUDIO OUTReproducing sound via an HiFi/AV amplifier
The sound reproduction via connected HiFi/AV amplifiers can be adjusted in the sound components wizard (see chapter System settings, section Connections – Sound components).
Loewe old
User handbook
External devices
Audio playback from external devices
Connect external AV devices (e.g., MP3 player) for sound reproduction to the AV inputs of the TV set.
Connecting an external appliance (e.g. MP3 player)
Connect the output (jack socket) of the MP3 player via the VGA adaptor ^1 to the AV socket of the TV set.
MP3 player TV set
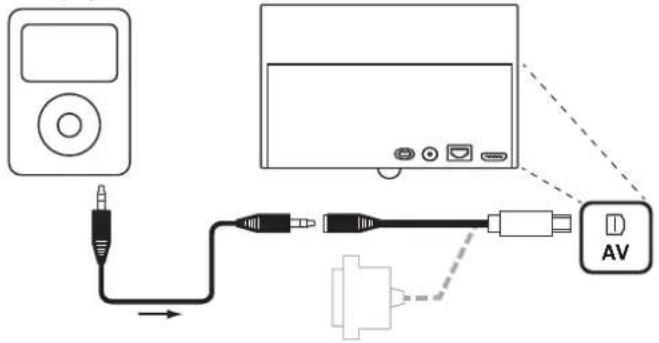
text_image
Diagram showing connections between an audio device, a monitor, and an AV component with labeled wiring.Connection example of an MP3 player
Select AV input
The selection of the AV input for a device at the AV socket (connection as described above) is describe here as an example. The procedure is similar to the selection of the other AV inputs.
→
Call Sources.
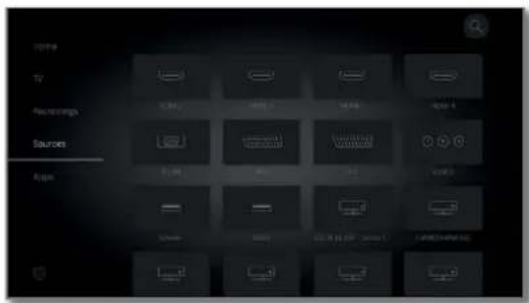
Mark desired AV source.
OK switch to AV source.
Start playback on the external device after selecting the AV input.
Only playback of the audio signal from the AV source (screen is off)
To play only the sound of a connected media player (e.g. MP3 player), the AV sources can be selected so that the screen goes blank.
1 Switching off the screen reduces the power consumption of the TV set.
1 Switching off the screen is possible for the AV sources HDMI1, HDMI2, HDMI3 and HDMI 4 ^② via the menu options.

Call up the AV list.
◀ ▶ ▲ ▼ Select desired connection.
OK press at least for two seconds.

Green key: Press the green key to switch the the screen on and off again.
IR-Link
The IR Link function allows the operation of concealed additional devices made by other manufacturers via the Loewe TV set.
The remote control commands are passed from the IR receiver of the TV set via an externally connected infrared transmitter to the additional device.
The code system for remote control commands that control the additional device is RC5.
The control of the additional device is only possible when the TV set is switched on.
The infrared transmitter required is available as an accessory from your dealer (see chapter Accessories).
Connecting the infrared transmitter to the TV set
Insert the connector plug of the infrared transmitter into the RS-232C socket of the TV set.
Lay the cable of the infrared transmitter to the front area of the additional device used.
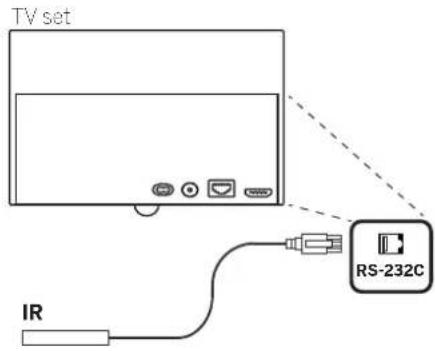
text_image
TV set IR RS-232CInstalling the infrared transmitter on the additional device
Find the right position on the desired device (optical connection between transmitter diode and IR receiver of the concealed device).
Remove the protective film from the adhesive surface of the infrared transmitter.
Attach the infrared transmitter at this position.
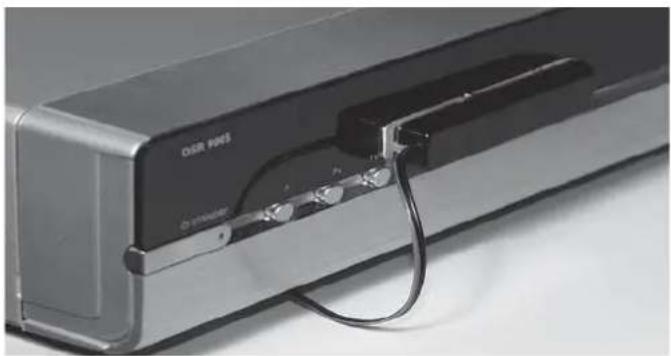
natural_image
Close-up of a USB flash drive with visible I/O ports and cable routing (no text or symbols)Serial interface RS-232C (RJ12)
You can connect a home network system of different manufacturers to your TV set via the RS-232C (RJ12) interface.
As to the configuration of the RS-232C (RJ12) interface and for further information on the various home networking systems contact your dealer please.
Loewe bild
User handbook
External devices
Setting the remote control
Using the remote control for the TV mode of the TV set

Press the TV key, the LED above it will light for approx. 5 seconds.
Using the remote control for a Loewe recorder

Press the STB key, the LED above it will light for approx. 5 seconds.
Using the remote control for a Loewe player

Press the VIDEO key, the LED above it will light for approx. 5 seconds.
Using the remote control for the radio mode of the TV set

Press the AUDIO key, the display above it will light for approx. 5 seconds.
As long as a key is pressed, the LED for the selected operating mode lights up (TV - STB - VIDEO - AUDIO). This allows you to check which operating mode the remote control is set to every time you press a button.
The factory setting of the keys is described above (see also table in right hand column). The assignment of the buttons can be changed to suit the existing accessory devices (see right hand column).
Set unit for sound control function on the remote control
The keys for the sound control functions Volume (10) and Sound on/off (1) are programmed ex-factory to interact with the TV set. The unit to be operated can be modified.
The device must first be placed on one of the device key of the remote control (see right column) before the tone-control functions can be changed to the appropriate device.


Press the TV key and the numerical key simultaneously for minimum 5 seconds. The LED above the selected TV key flashes twice.
| Function Buttons Unit | ||
| Audio Functions | TV + 3 Auro/AudioVision/MediaVision 3D | |
| TV + 4 Mediacenter | ||
| TV + 5 Loewe | TV | |
| TV + 6 Loewe | TV with sound projector without system connection | |
Setting the remote control for other Loewe devices
You can operate various Loewe devices with the remote control. The device keys STB - VIDEO - AUDIO can be reassigned to operate different Loewe devices.


Press the required device key and the STOP key simultaneously for 5 sec. until the corresponding LED display flashes twice.
Then enter the two-digit device code from the list below. The corresponding LED indicator light flashes twice.
| Unit Code Factory setting | ||
| Loewe ViewVision 8106 H 10 | ||
| Loewe Viewvision, Centros 21x2 12 | ||
| Loewe ViewVision DR+ DVB-T 13 | ||
| Locwe Auro 2216 PS/8116 DT 14 | ||
| Loewe BluTech Vision Interactive 15 | ||
| Loewe Sound Projector | 17 | |
| Sot-Top-Box (STB) data base | 18 | |
| Loewe TV - Digital radio | 19 | Audio |
| Loewe Mediacenter | 20 | |
| Loewe BluTech Vision 3D | 21 | VIDEO |
| HDMI CEC mode | 22 | |
| Loewe AudioVision | 24 | |
| Loewe Individual Sound Projector ID | 25 | |
| Apple IR codes | 26 | |
| Apple IR codes (Apple TV-2G) 27 | STB | |
| Loewe Soundbox | 28 | |
| Loewe SoundVision | 29 | |
| Loewe AirSpeaker | 30 | |
| Loewe Soundport | 31 | |
| Loewe MediaVision 3D | 35 | |
| Restore defaults | 99 |
The codes shown here only apply to direct operation of the auxiliary device device.
The available codes may vary depending on the status of the firmware in the remote control.
The factory setting of the device keys can vary depending on the firmware version of the remote control
Loewe old
User handbook
Teaching the remote control
Teaching the remote control
By means of key code 18 (Set-Top Box data base) your remote control Loewe assist may be taught for your Set-Top Box (e.g., decoder, external cable tuner). Thus, you spare yourself the use of several remote controls.
The following options are available for teach-in:
- Entering a 3-digit code number
- Read-out of the programmed Set-Top Box code
- Teaching individual keys
- Delete learned codes
In the following, the STB key is dealt with as an example. Code 18 may also be assigned to the VIDEO and AUDIO keys: the following description applies accordingly.
Programming with set button with button code 18
For the use of 2-digit key codes see chapter External devices, section Setting the remote control.


Press set button STB and at the same time STOP button for 5 seconds, until the corresponding LED indicator flashes twice.

Enter set code 18
The associated LED indicator flashes twice.
Entering a 3-digit code number
The STB key can be programmed directly by means of a device-dependent 3-digit code. You find a list of these codes in chapter Code page at the end of this user handbook.
The STB set button must be programmed with button code 18.


Keep the STB and OK keys depressed for five seconds. The LED above the STB key flashes twice.
Enter the 3-digit code from the list. The LED above the STB key lights up for 1 second.
OK end the programming mode. After a successful programming the LED flashes twice.
When entering a wrong code number, the LED lights up for 2 seconds. Do this programming once again.
Read-out of the programmed Set-Top Box code
The code of the currently programmed device on the STB key can be indicated by the remote control.
The STB set button must be programmed with button code 18.


Keep the STB and OK keys depressed for five seconds. The LED above the STB key flashes twice.

Press INFO key.
The LED above the STB key shows the programmed code by flashing. The figure "0" will be indicated by flashing 5 times.
Teaching individual keys
All keys (except the TV, STB, VIDEO and AUDIO device keys as well as the V+/- keys) and 100 be taught for the operation of units which are not contained in the integrated data base. The functions of the selected button are then completely or partially overwritten with the new codes.
1 Place the TV remote control and the remote control to be replaced in such a way that the infrared windows face each other at a distance of 1.5 cm (see sketch).

text_image
1-5 cmPreparation:
The STB set button must be programmed with button code 18.


Keep the STB and the red key simultaneously depressed for five seconds.
The LED above the STB key lights up permanently.
Learning function:
Press key to be taught on the TV remote control.
The LED above the STB key flashes.
On the original remote control press the button which is to be taught.
The LED above the selected STB key flashes twice.
If the code is not correctly recognised, the LED above the STB key flashes ten times. Then repeat your entry on the original remote control. If necessary correct the allocation of the two remote controls.
Continue with the other buttons as described above.
Terminate learning mode:
To end the teaching mode, press the STB key again.
i After 10 seconds without an entry the teaching mode is automatically terminated.
It is possible that not all remote control codes can be taught.
Loewe old
User handbook
Teaching the remote control
Deleting individual key functions
You can delete the taught function of an individual button.
The STB set button must be programmed with button code 18.


Press STB and green key simultaneously for five seconds. The LED above the STB key lights up permanently.

Press key to be deleted on the TV remote control.
The LED above the STB key flashes twice.
Continue with the deletion of other buttons as described above.

To end the deletion mode, press the STB key again.
The LED above the STB key flashes once.
Deleting all functions of the key for a device
You can delete all taught functions which you have set on the STB key.
The STB set button must be programmed with button code 18.


Press STB and yellow key simultaneously for five seconds. The LED above the STB key flashes twice.
Deleting all functions of the keys for all devices
You can delete all taught functions which you have set on the TV, STB, VIDEO or AUDIO buttons.
The STB set button must be programmed with button code 18.


Press STB and blue key simultaneously for five seconds. The LEDs above the keys for the devices flash twice.
Loewe bild
User handbook
Loowe app
Loewe app
The Loewe app replaces the two existing Smart Assist and Smart tv2move applications and combines the functionality of both apps. The Loewe app turns your tablet into a second TV. Completely independent of your TV set, you can use the app on your tablet to zap through the TV channels, to program recordings or to watch archive recordings from the DR + hard disk recorder. Or browse the electronic program guide (EPG) on your smartphone and find out about the duration and content of the current program. By clicking on the desired content, it will be displayed on your Loewe TV.
You are completely flexible in terms of space. Whether you are in the bedroom, in the kitchen or on the terrace - as long as you are connected to your home network via WLAN.
You can download the Loewe app for free in the Playstore or App Store and install it on your tablet and / or smartphone.
With Loewe Mobile Recording, you can now easily and comfortably program your desired broadcasts from the road in conjunction with the Loewe app. All you need is an Internet-enabled smartphone with the Loewe app.
The Smartphone can be used with the Loewe app as a remote control for the TV set.
You can download the Loewe app from the Playstore or App Store and install it on your tablet and / or smartphone.
Once the Loewe app has been linked to the TV set, the features EPG Search and Premium EPG (preview pictures) are available in the TV set (chapter TV, section Electronic Programme Guide).
Requirements:
1 Suitable for tablets and smartphones from Android 5 and Apple iOS 8.
On the TV side, a chassis from SL2xx with the latest software version is required.
A personal channel list must be available. If not, create personal channel list under:
System settings→ Channels → Channel lists TV → New personal list.
■ Open DR+ archive for other devices:
System settings → Control → more ... → DR+ → DR+ Streaming → Share DR+ archive with other devices → yes.
i Ensure that your tablet and the Loewe TV are registered in the same logical network.
System settings → Multimedia / Network → Network settings.
Select whether the TV is to be connected to the Internet via LAN (wired) or wireless.
We recommend to connect the TV via LAN to the router / switch. When connected via WLAN or Powerline, it can not always be ensured that a sufficiently large data rate is available for transmission.
The Loewe app provides a convenient means of entering addresses or search terms.
To show the keypad symbol in the app when an input line in the TV set is selected, the renderer in the TV set must have been switched on.
System settings → Multimedia / Network → Renderer → on.
Connect TV to app
- Start the Loewe app and agree to the data privacy protection.
• After you select your country, the language settings will be automatically transferred to your smartphone/tablet. - The application automatically searches for compatible TV sets in the home network. A list of the Loewe TV devices found in the home network appears
The name of the TV set can be set under System settings → Multimedia / Network → Network settings → Host name.
- Tap the desired list item to select the TV. Then you can select a personal channel list.
- After selecting the channel list, the charging process begins for all data (channel list, channel info and program data). This can take a few minutes. After the end of the charging process of all data, the app is fully operational.
Overview of the areas: Channel area
text_image
Deutschland Sender Live TV Guide One Stream One Code 2DF 2DF RTL Bos 1 Play Sanders n-tv Global video RTL 0In the first section you will find an overview of your channels from the respective selected channel list. With a tip on the desired program tile, your connected TV set switches to the respective channel.
Loewe bild
User handbook
Loewe app
Overview of the areas: Live area
In the middle section, the transmission information such as title and progress are available at a glance. It is also possible to switch to the respective program with a fingertip.
Switch channel and stream content
text_image
Deutschland Sender Live TV Guide Sedible Sed Blind 2DF RTL Set 1 n-tv Mater Sans RTL 0As soon as you tap on a tile and a TV set is selected, this switches to the respective program. Further information is available at the bottom of the screen.
Overview of the areas: TV Guide area
In the third part you will find the TV Guide. As integrated in the TV, it replaces your program magazine. In addition, the tiles can be opened in order to start the recording (local and on the way) as well as detailed information.
text_image
Deutschland Sender Live TV Guide 1 Din Orife 2 ZDF 3 RTL 4 ProSiehan 5 n-tv 6 Brisant 7 Din Orife 8 Din Orife 9 Din Orife 10 11:05 17:45 20:00You will receive details on the name and progress of the current program.
Loewe bild
User handbook
Loewe app
text_image
Deutschland Live on PDF 1.55 Sender Live TV Guide Swe Ester Swe Color 20F RTL Get-1 Prodidian n-tv RVT L Brisant Live On PDFWith a further touching of the displayed information, this increases and displays additional time information. Use the icon at the bottom right to start streaming this program onto your tablet or smartphone.
In addition to the detailed information, a recording button is available. To use the mobile recording function, it must be activated on the TV set and the corresponding device with an Internet connection is in standby mode.
Recording via TV Guide
To record a program or program a recording, select the respective tile of your desired program with a finger tip.
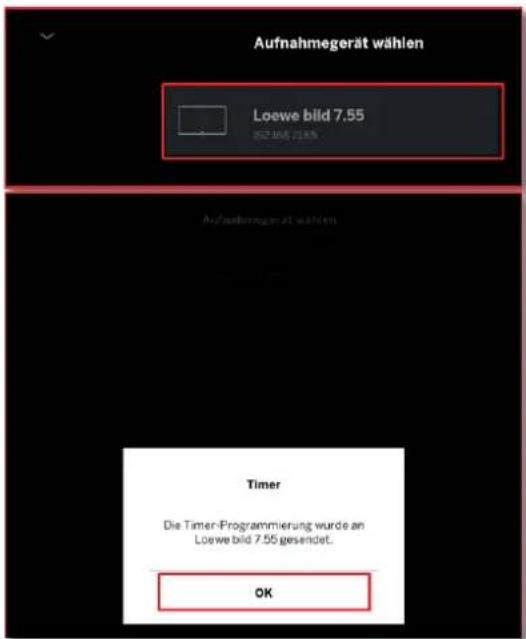
In the last step, you will be asked which TV set to use to start the recording. To close the timer information, tap OK.
Loewe bild
User handbook
Loewe app
DR + archive and source selection

Here you can find stored recordings from your integrated DR + archive. If you have several TV sets with DR + functionality, you can select the desired archive from the drop-down box. You can also find your folder structure in the app.
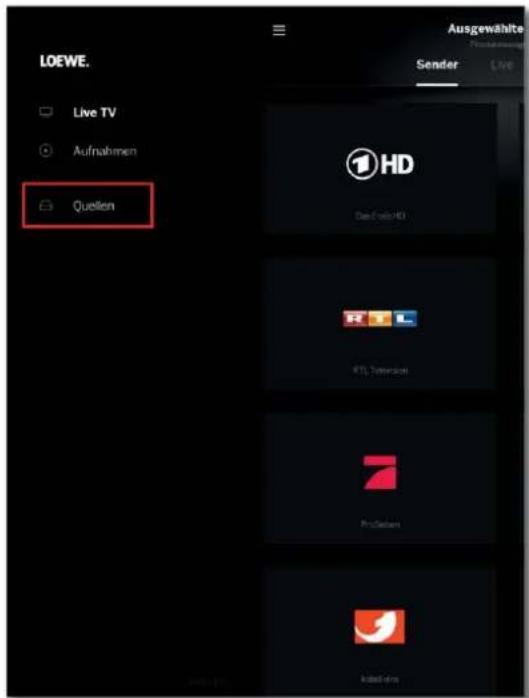
Under Sources are your available network drives. Here you have direct access to video files, which are stored on your server or NAS. You can watch them on the TV or your tablet / smartphone.
Connections rear side of the device (bild 9.65/bild 9.55)
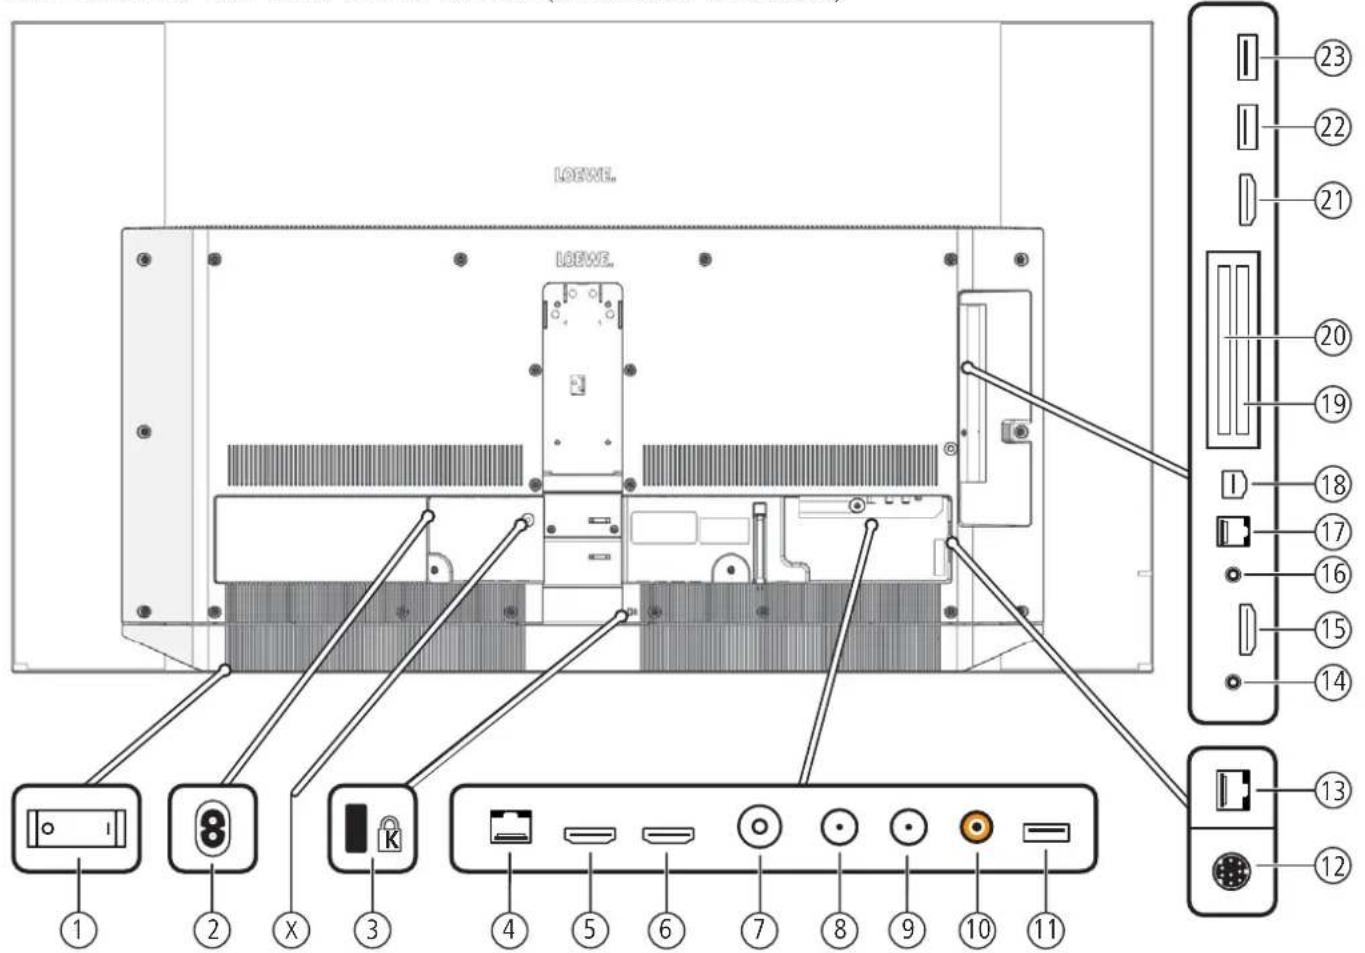
text_image
LOEXE LOEXE ① ② ③ ④ ⑤ ⑥ ⑦ ⑧ ⑨ ⑩ ⑪ ⑫ ⑬ ⑭ ⑮ ⑯ ⑰ ⑱ ⑲ ⑳ ㉑ ㉒ ㉓ ㉔ ㉕ ㉖ ㉗ ㉘ ㉙ ㉚ ㉛ ㉜ ㉝ ㉞ ㉟ ㉳ ㉴ ㉵ ㉶ ㉷ ㉸ ㉹ ㉺ ㉻ ㉼ ㉖ ㉗ ㉘ ㉙ ㉚ ㉛ ㉜ ㉝ ㉞ ㉟ ㉟a ㉟b ㉟c ㉟d ㉟e ㉟f ㉟g ㉟h ㉟i ㉟j ㉟k ㉟l ㉟m ㉟n ㉟o ㉟p ㉟q ㉟r ㉟s ㉟t ㉟u ㉟v ㉟w ㉟x ㉟y ㉟z ㉟a ㉟b ㉟c ㉟d ㉟e ㉟f ㉟g ㉟h ㉟i ㉟j ㉟k ㉟l① Mains switch
⑨AC IN - Mains connection Mains socket - 220-240 V - 50 / 60 Hz
☒ Transport lock for kinematics (please remove screw)
③ Slot for Kensington lock
④ LAN - Network connection RJ-45 - Ethernet / Fast Ethernet
⑤ HDMI 1 ARC - HDMI input 1 ^7 (with Audio Return Channel) HDMI - Digital Video IN/Audio IN/OUT
⑥ HDMI 2 - HDMI input 2 ^2 HDMI - Digital Video IN/Audio IN
⑦ ANT TV - Antenna/cable analogue /DVB-T/T2 /DVB-C IEC socket - 75 Ohm / 5 V / 80mA
⑧ ANT SAT 1 - Satellite antenna (Sat tuner 1) DVB-S/S2 F socket - 75 Ohm / 13/18 V / 500mA
⑨ ANT SAT 2 - Satellite antenna (Sat tuner 2) DVB-S/S2 F socket - 75 Ohm / 13/18 V / 500mA
⑩ SPDIF OUT - Audio output (digital) Cinch socket (orange)
⑪ USB 3.0 - USB connection USB type A - USB 3.0 (max. 900mA)
⑫ MOTOR UNIT - rotating stand control
⑬ DIGITAL AUDIO LINK - Surround audio outputs (digital) - (RJ45)
⑭ HEADPHONE - Headphone connection Jack 3.5 mm - Headphones 32-200 Ohm
⑮ HDMI 3 - HDMI input 3 ^(2) HDMI - Digital Video IN/Audio IN
⑯ AUDIO OUT - Audio output (analogue) L/R - (Jack 3.5 mm)
⑰ RS-232C - Serial interface ^1 - (RJ12)
⑱ AV - Micro AV socket ^1 Audio/Video IN with Scart adapter: Y/C (S-VHS/Hi 8) CVBS (VHS/8 mm) RGB
Audio/Video IN with VGA adapter: L/R Component PC/STB video signal (YPbPr) L/R
⑲ COMMON INTERFACE - CI slot 1 (standard V1.3)
20 COMMON INTERFACE - CI slot 2 (standard V1.3)
②1 HDMI 4 - HDMI input 4 ^2 HDMI - Digital Video IN/Audio IN
②2 USB - USB connection USB type A - USB 2.0 (max. 500mA)
②3 USB - USB connection USB type A - USB 2.0 (max. 500mA)
Loewe old
User handbook
Technical data
old 9
Changes of technical data and design of the equipment reserved.
| Loewe device type: | bild 9.65 bild 9.55 | ||
| Part number: 56441xxx 56440xxx | |||
| EU energy efficiency class: see enclosed energy label or under www.loewe.lv/int/support | |||
| Screen diagonal: 164 cm / 65 inch 139 cm / 55 inch | |||
| Power consumption On-Mode (max.) (Audio output 1/8 of the maximum value): 450 W 350 W | |||
| Power consumption On-Mode (home) ^1 : Annual energy consumption ^1 : | see enclosed energy label or under www.loewe.lv/int/support | ||
| Power consumption quick start mode: 80.0 W 80.0 W | |||
| Power consumption Standby Mode: Power consumption when set is switched off: | 0.49 W0 W | 0.49 W0 W | |
| Resolution / Picture format: Ultra HD 3840 x 2160 px / 15:9 | |||
| Display technology: OLED (WRGB Pixel) | |||
| Device dimensions without stand (W x H x D): | 145.2 x 83.7 ^34 / 86.5 ^35 x 5.2 cm | 123.0 x 71.4 ^34 / 74.1 ^35 x 5.2 cm | |
| Weight without stand (approximate): | 26.3 kg 23.8 kg | ||
| Ambient temperature: | 5°C - 35°C | ||
| Relative humidity (non-condensing): | 20 - 80% | ||
| Air pressure: | 800 - 1114 hPa (0 - 2000 m above sea level) | ||
| Chassis designation: | SL420 | ||
| Power supply: | 220 V - 240 V/50-60 Hz | ||
| Tuner: terr./cableSatellite: | VHF/Hyperband/UHF4 levels: 13/18V/22kHz / 16 levels: DiSEqC 1.0 / single-cable system: EN 50494 | ||
| Range: terr./cableSatellite: | Terr./cable: 45 MHz up to 860 MHzSatellite: 950 MHz up to 2150 MHz | ||
| Channel storage locations incl. AV and radio: | 6000 | ||
| TV standards: analogue digital: | B/C, I, L, D/K, M, NDVB-T/T2, DVB-C, DVB-S/S2 (UHD via DVB to max. 60 Hz) | ||
| Colour standards: | SECAM, PAL, NTSC, NTSC-V, PAL-V (60 Hz) | ||
| Sound standards: analogue (FM): analogue (NICAM): digital (MPEG): | Mono, Stereo, Dual channelMono, Stereo, Dual channelMono, Stereo, Dual channel, PCM, Dolby Digital, Dolby Digital Plus, Dolby Digital Pulse,Dolby Virtual Speaker, Dolby Pro Logic II, Dolby TrueHD, Dolby MS11 | ||
| Audio output power (sine / music): | 2 x 30W / 2 x 60W | ||
| Acoustic speaker concept: Soundbar | |||
| Teletext: | TOP / FLOF / HiText (Level 2.5) | ||
| Page memory: | 2000 | ||
| LAN: Standards supported: | 10 Mbit/sec Ethernet (10Base-T) / 100 Mbit/sec Fast Ethernet (100Base-T) | ||
| WLAN: Standards supported: Power / Frequency range: Types of encoding that are supported: | IEEE 802.11a/b/g/n, 802.11acPower <100 mW at 2400-2483.5 MHz and 5150-5725 MHzWEP 64 and 128 Bt (ASCII and HEX), WPA PSK, WPA2 AES | ||
| Bluetooth: Power / Frequency range: Bluetooth protocols: | Power <10 mW at 2.4 GHzA2DP SRC, A2DP SNK, HID | ||
| Home networking standard: | Universal Plug and Play Audio / Video (UPnP AV) | ||
| File formats supported ^12 : Pictures: Audio: Video: | JPEG, JPEG progressive (max. resolution 3840x2160), PNGMP3, M4A (AAC LC), WMA (without lossless), FLAC, WAV (PCM), Ogg VorbisAVI (MPEG-1/2, XviD, Dolby Digital, MP3), WMV (WMV9, VC-1, WMA9, WMA Pro),MP4 (XviD, H.264/MPEG-4 AVC, AAC LC), MOV (H.264/MPEG-4 AVC, AAC LC),MKV (H.265/HEVC, H.264/MPEG 4 AVC, Dolby Digital), FLV (H.264/MPEG 4 AVC, H.263,MP3, AAC LC), MPG (MPEG-1, MPEG Audio), TS/PS (MPEG-2, H.264/MPEG-4 AVC, MPEG2Audio, Dolby Digital), VOB (MPEG-2, MPEG2 Audio, Dolby Digital)H.264/MPEG-4 AVC upto Profil High (Level 4.2)H.264/H.265 compatible to Dolby Vision/HDR 10/HLG | ||
Loewe bild
User handbook
Technical data
old 9
Equipment features (bild 9.65/bild 9.55)
Changes to the equipment features and the set design reserved.
| Loewe set type: | bild 9.65 bild 9.55 | |
| Image+ (Image) | ||
| Ultra HD Super Resolution Scaling / Image + Active / 24 p motion picture display | ●/●/● | ●/●/● |
| 3D technology / Active Classes 3D | -/---/- | |
| Auto-Dimming Video (VDB+) / Auto-Dimming Raum (OPC) / Home Mode: | /●/● | /●/● |
| Digital+ (Television Standards) | ||
| DVB-T2 ^1 / DVB-C / DVB-S2 / Multistandard (analoguc) / Dual Channel | ●/●/●/●/● | ●/●/●/●/● |
| MPEG / MPEG2 / MPEG4 (H.264) / HEVC (H.265) / integrated HDTV reception? | ●/●/●/●/● | ●/●/●/●/● |
| DVB radio / Unicable (acc. EN 50494) | ●/● | ● |
| Sound+ (Audio) | ||
| Integrated 5.1 AV-Receiver / Digital audio link | ●/● | ● |
| Dolby Digital / Dolby Digital Plus / DTS | ●/●/- | ●/●/- |
| Individual bass and treble control / Loudness | ●/● | ● |
| Automatic Volume Control (AVC) | ● | ● |
| Audio out available: variable / fixed / Subwoofer | ●/●/● | ●/●/● |
| Assist* (Operation) | ||
| Loewe os / Home Screen (incl. favorites) | ●/● | ● |
| HDR (Dolby Vision / HDR 10 / ILG) | ●/●/● | ●/●/● |
| Electronic Program Guide (SI-data) | ● | ● |
| MediaText (HbbTV) / Video text (Level 2.5) | ●/● | ● |
| Menu languages ^13 / Context Related Help | ●/● | ● |
| Parental Lock / Automatic turn-off / Timer | ●/●/● | ●/●/● |
| Instant Channel Zapping / Quick Start Mode | ●/● | ● |
| Digital Link HD (CEC) | ● | ● |
| PIP (AV) ^14 / Full PIP / Split screen TV : Video text | ●/●/● | ●/●/● |
| MediaUpdate (via USB / Internet) | ●/● | ● |
| Hotel Mode | ● | ● |
| Media+ (Multimedia functions) | ||
| DR+ / storage capacity in GB / USB archive | ●/1.000/● | ●/1.000/● |
| DR+ Streaming server / client / Follow-Mc | ●/●/● | ●/●/● |
| Multi Recording / Mobile Recording | ●/● | ● |
| Multicom Streaming | ●● | |
| Photo player / Music player / Video player (via Home network and USB incl. Ultra HD) | ●/●/● | ●/●/● |
| Digital Media Renderer (incl. Ultra HD) / Bluetooth Music Player | ●/● | ● |
| Internet Apps (MediaNet) / Internet Browser / Internet Radio (incl. search function) | ●/●/● | ●/●/● |
| Connectivity+ (Connectors) | ||
| HDMI with HDCP 2.2 | 4 (1 x 2.0a, 1 x ARC) / (x 2.0a, 1 x ARC) | |
| LAN network connection / integrated WLAN | ●/● | ● |
| Common Interface / CI Plus 1.3 certified ^15 | 2/● 2/● | |
| Home Control Interface IP / Home Control Interface RS232 / IR-Link ^16 / Motor control | ●/●/●/● | ●/●/●/● |
| Digital Audiolink (DAL) ^17 / Digital Audio-Out (coaxial) | ●/● | ● |
| Analog Audio-Out (L/R) / Headphone (jack 3.5 mm) | ●/● | ● |
| Micro-AV ^18 (Component / Scart / VGA) | ●/●/● | ●/●/● |
| USB / Bluetooth Connection | 3 (1 x 3.0) / ● 3 (1 x 3.0) / ● | |
| VESA mounting points | ||
● = included/installed ○ = upgradeable/optional
- The reception of DVB-T2 programs is possible in selected countries.
^12 Reception of digital channels may be limited by individual regulations from the respective broadcaster/provider. UK models are Freeview HD compliant.
DGBF-E-NLOZ-GRPL-H-FIN-SLOSK-TR-S-DK-PRUS-N
^14 AV PIP is only available in combination with DVB T/C/S.
CI Plus is backwards compatible with CI. Functionality is dependent on module availability from the supplier.
- Only in conjunction with a corresponding adapter and selected devices (RC5. 36 kHz), to be ordered separately.
Loewe System 5.1 Out, Stereo Out, Subwoofer Out.
^6 Only in conjunction with a corresponding adapter, to be ordered separately.
Connections rear side of the device (bild 7.77/bild 7.65/bild 7.55)
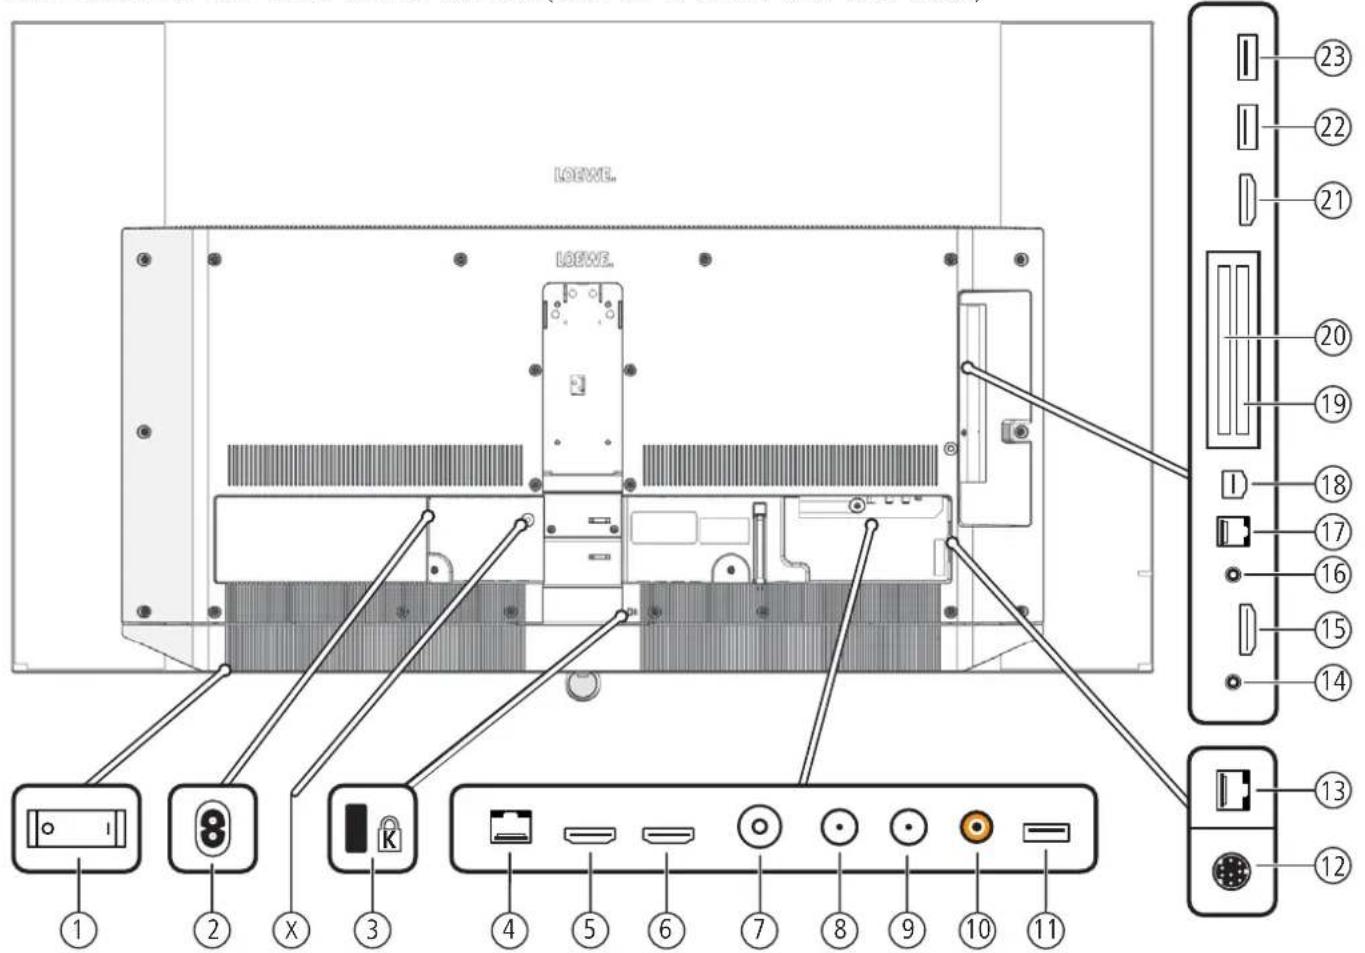
text_image
LOEWE. LOEWE. 1 2 X 3 4 5 6 7 8 9 10 11 23 22 21 20 19 18 17 16 15 14 13 12① Mains switch
AC IN - Mains connection Mains socket - 220-240 V - 50 / 60 Hz
☒ Transport lock for kinematics (please remove screw)
③ Slot for Kensington lock
④ LAN - Network connection RJ-45 - Ethernet / Fast Ethernet
⑤ HDMI 1 ARC - HDMI input 1 ^7 (with Audio Return Channel) HDMI - Digital Video IN/Audio IN/OUT
⑥ HDMI 2 - HDMI input 2 ^2 HDMI - Digital Video IN/Audio IN
⑦ ANT TV - Antenna/cable analogue /DVB-T/T2 / DVB-C IEC socket - 75 Ohm / 5 V / 80mA
⑧ ANT SAT 1 - Satellite antenna (Sat tuner 1) DVB-S/S2 F socket - 75 Ohm / 13/18 V / 500mA
⑨ ANT SAT 2 - Satellite antenna (Sat tuner 2) DVB-S/S2 F socket - 75 Ohm / 13/18 V / 500mA
⑩ SPDIF OUT - Audio output (digital) Cinch socket (orange)
⑪ USB 3.0 - USB connection USB type A - USB 3.0 (max. 900mA)
⑫ MOTOR UNIT - rotating stand control
⑬ DIGITAL AUDIO LINK - Surround audio outputs (digital) - (RJ45)
⑭ HEADPHONE - Headphone connection Jack 3.5 mm - Headphones 32-200 Ohm
⑮ HDMI 3 - HDMI input 3 ^(2) HDMI - Digital Video IN/Audio IN
⑯ AUDIO OUT - Audio output (analogue) L/R - (Jack 3.5 mm)
⑰ RS-232C - Serial interface ^1 - (RJ12)
⑱ AV - Micro AV socket ^1 Audio/Video IN with Scart adapter: Y/C (S-VHS/Hi 8) CVBS (VHS/8 mm) RGB
Audio/Video IN with VGA adapter: L/R Component PC/STB video signal (YPbPr) L/R
⑲ COMMON INTERFACE - CI slot 1 (standard V1.3)
20 COMMON INTERFACE - CI slot 2 (standard V1.3)
②1 HDMI 4 - HDMI input 4 ^2 HDMI - Digital Video IN/Audio IN
②2 USB - USB connection USB type A - USB 2.0 (max. 500mA)
②3 USB - USB connection USB type A - USB 2.0 (max. 500mA)
Loewe old
User handbook
Technical data
cild 7
Changes of technical data and design of the equipment reserved.
| Loewe device type: | bild 7.77 bild 7.65 bild 7.55 | |||
| Part number: 56437xxx 56436xxx 56435xxx | ||||
| EU energy efficiency class: see enclosed energy label or under www.loewe.tv/int/support | ||||
| Screen diagonal: 195 cm / 77 inch 164 cm / 65 inch 139 cm / 55 inch | ||||
| Power consumption On-Mode (max.) (Audio output 1/8 of the maximum value): 590 W 450 W 350 W | ||||
| Power consumption On-Mode (home)1: Annual energy consumption1: | see enclosed energy label or under www.loewe.tv/int/support | |||
| Power consumption quick start mode: | 85,0 W | 80,0 W | 80,0 W | |
| Power consumption Standby Mode: Power consumption when set is switched off: | 0,42 W0 W | 0,49 W0 W | 0,49 W0 W | |
| Resolution / Picture format: | Ultra HD 3840 x 2160 px / 16:9 | |||
| Display technology: | OLED (WRGB Pixel) | |||
| Device dimensions without stand (W x H x D): | 172.3 x 102.4 x 5.5 cm | 145.2 x 86.4 x 5.2 cm | 123.0 x 74.1 x 5.2 cm | |
| Weight without stand (approximate): | 37.0 kg | 26.3 kg 23.8 kg | ||
| Ambient temperature: | 5°C - 35°C | |||
| Relative humidity (non-condensing): | 20 - 80% | |||
| Air pressure: | 800 - 1114 hPa (0 - 2000 m above sea level) | |||
| Chassis designation: | SL420 | |||
| Power supply: | 220 V - 240 V/50-60 Hz | |||
| Tuner: terr./cable: Satellite: | VHF/Hyperband/UHF4 levels: 13/18V/22kHz / 16 levels: DiSEoC 1.0 / single-cable system: EN 50494 | |||
| Range: terr./cable: Satellite: | Terr./cable: 45 MHz up to 860 MHzSatellite: 950 MHz up to 2150 MHz | |||
| Channel storage locations incl. AV and radio: | 6000 | |||
| TV standards: analogue: digital: | B/C, I, L, D/K, M, NDVB-T/T2, DVB-C, DVB-S/S2 (UHD via DVB to max. 60 Hz) | |||
| Colour standards: | SECAM, PAL, NTSC, NTSC V, PAL V (60 Hz) | |||
| Sound standards: analogue (FM): analogue (NICAM): digital (MPEG): | Mono, Stereo, Dual channelMono, Stereo, Dual channelMono, Stereo, Dual channel, PCM, Dolby Digital, Dolby Digital Plus, Dolby Digital Pulse, Dolby Virtual Speaker, Dolby Pro Logic II, Dolby TrueHD, Dolby MSII | |||
| Audio output power (sino / music): | 2 x 30W / 2 x 60W | |||
| Acoustic speaker concept: Soundbar | ||||
| Teletext: | TOP / FLOF / HiText (Level 2.5) | |||
| Page memory: | 2000 | |||
| LAN: Standards supported: | 10 Mbit/sec Ethernet (10Base-T) / 100 Mbit/sec Fast Ethernet (100Base-T) | |||
| WLAN: Standards supported: Power / Frequency range: Types of encoding that are supported: | IEEE 802.11a/b/g/n. 802.11acPower <100 mW at 2400-2483.5 MHz and 5150-5725 MHzWEP 64 and 128 Bit (ASCII and HEX), WPA PSK, WPA2 AES | |||
| Bluetooth: Power / Frequency range: Bluetooth protocols: | Power <10 mW al 2.4 GHzA2DP SRC, A2DP SNK, HID | |||
| Home networking standard: | Universal Plug and Play Audio / Video (UPnP AV) | |||
| File formats supported2: Pictures: Audio: Video: | JPEG, JPEG progressive (max, resolution 3840x2160), PNGMP3, M4A (AAC LC), WMA (without lossless), FLAC, WAV (PCM), Ogg VorbisAVI (MPEG-1/2, XvD, Dolby Digital, MP3), WMV (WMV9, VC-1, WMA9, WMA Pro),MP4 (XviD, H.264/MPEG-4 AVC, AAC LC), MOV (H.264/MPEG-4 AVC, AAC LC),MKV (H.265/HEVC, H.264/MPEG-4 AVC, Dolby Digital), FLV (H.264/MPEG-4 AVC, H.263,MP3, AAC LC), MPG (MPEG-1, MPEG Audio), TS/PS (MPEG-2, H.264/MPEG-4 AVC, MPEG2Audio, Dolby Digital), VOB (MPEG-2, MPEG2 Audio, Dolby Digital),H.264/MPEG-4 AVC upto Profil High (Level 4.2)H.264/H.265 compatible to Dolby Vision/ HDR 10/HLG | |||
Loewe bild
User handbook
Technical data
cild 7
Equipment features (bild 7.77/bild 7.65/bild 7.55)
Changes to the equipment features and the set design reserved.
| Loewe set type: | bild 7.77 bild 7.65 | bild 7.55 | |
| Image* (Image) | |||
| Ultra HD Super Resolution Scaling / Image+ Active / 24 p motion picture display | ●/●/● | ●/●/● | ●/●/● |
| 3D technology / Active Classes 3D | -/-/-/-/-/- | ||
| Auto-Dimming Video (VDB+) / Auto-Dimming Raum (OPC) / Home Model | /●/● | /●/● | /●/● |
| Digital* (Television Standards) | |||
| DVB-T2 ^1 / DVB-C / DVB-S2 / Multistandard (analoguc) / Dual Channel | ●/●/●/●/● | ●/●/●/●/● | ●/●/●/●/● |
| MPEG / MPEG2 / MPEG4 (H.264) / HEVC (H.265) / integrated HDTV reception ^2 | ●/●/●/●/● | ●/●/●/●/● | ●/●/●/●/● |
| DVB radio / Unicable (acc. EN 50494) | ●/● | ●/● | ●/● |
| Sound* (Audio) | |||
| Integrated 5.1 AV-Receiver / Digital audio link | ●/● | ●/● | ●/● |
| Dolby Digital / Dolby Digital Plus / DTS | ●/●/- | ●/●/- | ●/●/- |
| Individual bass and treble control / Loudness | ●/● | ●/● | ●/● |
| Automatic Volume Control (AVC) | ● | ● | ● |
| Audio out available: variable / fixed / Subwoofer | ●/●/● | ●/●/● | ●/●/● |
| Assist* (Operation) | |||
| Loewe os / Home Screen (incl. favorites) | ●/● | ●/● | ●/● |
| HDR (Dolby Vision / HDR 10 / IILG) | ●/●/● | ●/●/● | ●/●/● |
| Electronic Program Guide (SI-data) | ● | ● | ● |
| MediaText (HbbTV) / Video text (Level 2.5) | ●/● | ●/● | ●/● |
| Menu languages ^13 / Context Related Help | ●/● | ●/● | ●/● |
| Parental Lock / Automatic turn-off / Timer | ●/●/● | ●/●/● | ●/●/● |
| Instant Channel Zapping / Quick Start Mode | ●/● | ●/● | ●/● |
| Digital Link HD (CEC) | ● | ● | ● |
| PIP (AV) ^14 / Full PIP / Split screen TV : Video text | ●/●/● | ●/●/● | ●/●/● |
| MediaUpdate (via USB / Internet) | ●/● | ●/● | ●/● |
| Hotel Mode | ● | ● | ● |
| Media* (Multimedia functions) | |||
| DR+ / storage capacity in GB / USB archive | ●/1.000/● | ●/1.000/● | ●/1.000/● |
| DR+ Streaming server / client / Follow-Mc | ●/●/● | ●/●/● | ●/●/● |
| Multi Recording / Mobile Recording | ●/● | ●/● | ●/● |
| Multiroom Streaming | ● | ● | ● |
| Photo player / Music player / Video player (via Home network and USB incl. Ultra HD) | ●/●/● | ●/●/● | ●/●/● |
| Digital Media Renderer (incl. Ultra HD) / Bluetooth Music Player | ●/● | ●/● | ●/● |
| Internet Apps (MediaNet) / Internet Browser / Internet Radio (incl. search function) | ●/●/● | ●/●/● | ●/●/● |
| Connectivity* (Connectors) | |||
| HDMI with HDCP 2.2 | 4 (1×2.0a, 1×ARC) 4 (1×2.0a, 1×ARC) 4 (1×2.0a, 1×ARC) | ||
| LAN network connection / Integrated WLAN | ●/● | ●/● | ●/● |
| Common Interface / CI Plus 1.3 certified ^15 | 2/● 2/● 2/● | ||
| Home Control Interface IP / Home Control Interface RS232 / IR-Link ^16 / Motor control | ●/●/●/● | ●/●/●/● | ●/●/●/● |
| Digital Audiolink (DAL) ^17 / Digital Audio-Out (coaxial) | ●/● | ●/● | ●/● |
| Analog Audio-Out (L/R) / Headphone (jack 3.5 mm) | ●/● | ●/● | ●/● |
| Micro-AV ^18 (Component / Scart / VGA) | ●/●/● | ●/●/● | ●/●/● |
| USB / Bluetooth Music Player | 3 (1×3.0)/● | 3 (1×3.0)/● | 3 (1×3.0)/● |
| VESA mounting points | |||
● = included/installed ○ = upgradeable/optional
- The reception of DVB-T2 programs is possible in selected countries.
^12 Reception of digital channels may be limited by individual regulations from the respective broadcaster/provider. UK models are Freeview HD compliant.
DGBFLENLOZGRPLHFINSLOSKTRSDKPRUSN
^14 AV PIP is only available in combination with DVB T/C/S.
CI Plus is backwards compatible with CI. Functionality is dependent on module availability from the supplier.
- Only in conjunction with a corresponding adaptor and selected devices (RC5, 36 kHz), to be ordered separately.
Loewe System 5.1 Out, Stereo Out, Subwoofer Out.
Only in conjunction with a corresponding adapter, to be ordered separately.
Connections rear side of the device (bild 5.65 oled/bild 5.55 oled)
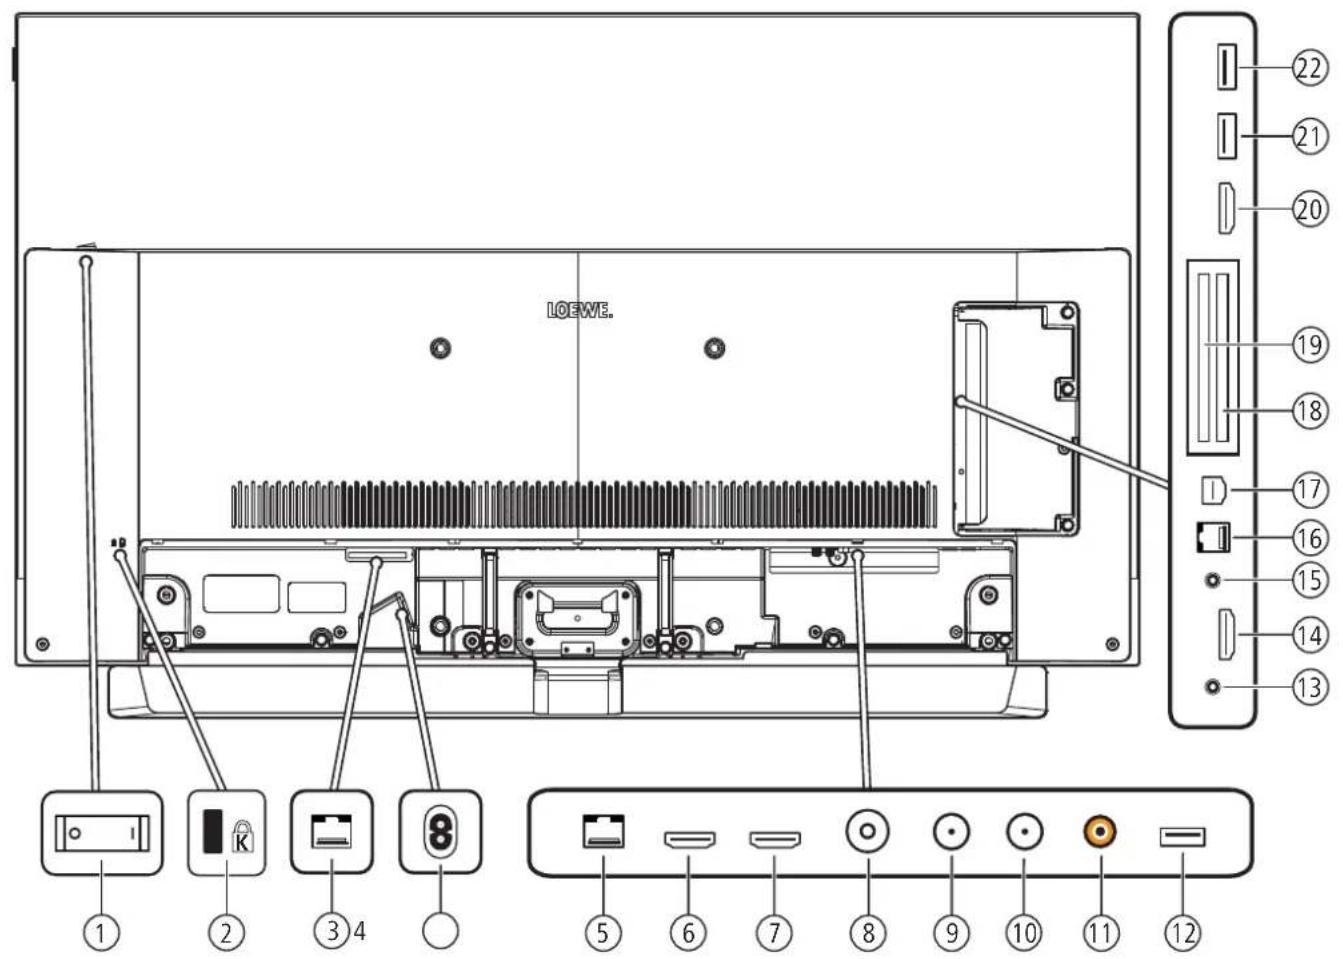
text_image
LOEWE. ① ② ③ 4 ⑧ ⑤ ⑥ ⑦ ⑧ ⑨ ⑩ ⑪ ⑫ ⑬ ⑭ ⑮ ⑯ ⑰ ⑱ ⑲ ⑳ ㉑ ㉒ ㉓ ㉔ ㉕ ㉖ ㉗ ㉘ ㉙ ㉚ ㉛ ㉜ ㉝ ㉞ ㉟ ㉳ ㉻ ㉒ ㉓ ㉔ ㉕ ㉖ ㉗ ㉘ ㉙ ㉚ ㉛ ㉜ ㉝ ㉟ ㉞ ㉟ ㉟① Mains switch
② Slot for Kensington lock
③ DIGITAL AUDIO LINK - Surround audio outputs (digital) - (RJ45)
④ AC IN - Mains connection
Mains socket - 220-240 V - 50 / 60 Hz
⑤ LAN - Network connection
RJ-45 - Ethernet / Fast Ethernet
⑥ HDMI 1 ARC - HDMI input 1 ^7 (with Audio Return Channel)
HDMI - Digital Video IN/Audio IN/OUT
⑦ HDMI 2 - HDMI input 2 ^12 HDMI - Digital Video IN/Audio IN
⑧ ANT TV - Antenna/cable analogue / DVB-T/T2 / DVB-C IEC socket - 75 Ohm / 5 V / 80mA
⑨ ANT SAT 1 - Satellite antenna (Sat tuner 1) DVB-S/S2 F socket - 75 Ohm / 13/18 V / 500mA
⑩ ANT SAT 2 - Satellite antenna (Sat tuner 2) DVB-S/S2 F socket - 75 Ohm / 13/18 V / 500mA
⑪ SPDIF OUT - Audio output (digital) Cinch socket (orange)
⑫ USB 3.0 - USB connection
USB type A - USB 3.0 (max. 900mA)
⑬ HEADPHONE - Headphone connection
Jack 3.5 mm - Headphones 32-200 Ohm
⑭ HDMI 3 - HDMI input 3 ^2 HDMI - Digital Video IN/Audio IN
⑮ AUDIO OUT - Audio output (analogue) L/R - (Jack 3.5 mm)
⑯ RS-232C - Serial Interface ^1 - (RJ12)
17 AV - Micro AV socket ^4 Audio/Video IN with Scart adapter: Y/C (S-VHS/Hi 8)
CVBS (VHS/8 mm)
RGB
L/R
Audio/Video IN with VGA adapter: PC/STB video signal
PC formats (RGB, H, V)
Component (YPbPr)
L/R
18 COMMON INTERFACE - CI slot 1 (standard V1.3)
⑲ COMMON INTERFACE - CI slot 2 (standard V1.3)
⑳ HDMI 4 - HDMI input 4 ^12 HDMI - Digital Video IN/Audio IN
21 USB - USB connection
USB type A - USB 2.0 (max. 500mA)
② USB - USB connection
USB type A - USB 2.0 (max. 500mA)
Loewe old
User handbook
Technical data
cild 5 oled
Technical data (bild 5.65 oled/bild 5.55 oled)
Changes of technical data and design of the equipment reserved.
| Loewe device type: | bild 5.65 set bild 5. | 55 set bild 5.65 oled | bild 5.55 oled | ||
| Part number: 57440x00 / x01 57441x00 / x01 57440x5 | 0 / x51 57441x50 / x5 | ||||
| EU energy efficiency class: see enclosed energy label or | under www.loewe.tv/int/support | ||||
| Screen diagonal: 164 cm / 65 inch 139 cm / 55 inch 164 | cm / 65 inch 139 cm / | 55 inch | |||
| Power consumption On-Mode (max.) (Audio output 1/8 of the maximum value): 450 W 350 W | 450 W 350 W | ||||
| Power consumption On-Mode (home) ^1 ; Annual energy consumption ^2 : | see enclosed energy label or under www.loewe.tv/int/support | ||||
| Power consumption quick start mode: | 80.0 W | 80.0 W | 80.0 W | 80.0 W | |
| Power consumption Standby Mode: Power consumption when set is switched off: | 0.49 W ^3a / 0.42 W ^3b 0 W | 0.49 W ^3a / 0.41 W ^3b 0 W | 0.49 W ^3c / 0.42 W ^3d 0 W | 0.49 W ^3c / 0.41 W ^3c 0 W | |
| Resolution / Picture format: | Ultra HD 3840 x 2160 px / 16:9 | ||||
| Display technology: | OLED (WRGB Pixel) | ||||
| Device dimensions without stand (W x H x D): | 145.3 x 88.5 x 6.4 cm ^3a 144.9 x 88.3 x 6.4 cm ^3d | 123.0 x 76.2 x 6.4 cm ^3a 122.8 x 75.9 x 6.4 cm ^3d | 145.3 x 86.5 x 5.6 cm ^3c 144.9 x 86.4 x 5.6 cm ^3c | 123.0 x 74.2 x 5.6 cm ^3c 122.8 x 74.0 x 5.6 cm ^3d | |
| Weight without stand (approximate): | 26.7 kg ^3a / 32.2 kg ^3b | 21.4 kg ^3a / 26.2 kg ^3b | 25.7 kg ^3c / 31.2 kg ^3d | 20.4 kg ^3c / 25.2 kg ^3d | |
| Ambient temperature: | 5°C - 35°C | ||||
| Relative humidity (non-condensing): | 20 - 80% | ||||
| Air pressure: | 800 - 1114 nPa (0 - 2000 m above sea level) | ||||
| Chassis designation: | SL420 | ||||
| Power supply: | 220 V - 240 V/50-60 Hz | ||||
| Tuner: | terr./cable: Satellite: | VHF/I hyperband/UHF 4 levels: 13/18V/22kHz / 16 levels: DiSEqC 1.0 / single cable system: EN 50494 | |||
| Range: | terr./cable: Satellite: | Terr./cable: 45 MHz up to 860 MHz Satellite: 950 MHz up to 2150 MHz | |||
| Channel storage locations incl. AV and radio: | 6000 | ||||
| TV standards: | analogue: digital: | B/C, I, L, D/K, M, N DVB-T/T2, DVB-C, DVB-S/S2 (UHD via DVB to max, 60 Hz) | |||
| Colour standards: | SECAM, PAL, NTSC, NTSC-V, PAL-V (60 Hz) | ||||
| Sound standards: | analogue (FM): analogue (NICAM): digital (MPEG): | Mono, Stereo, Dual channel Mono, Stereo, Dual channel Mono, Stereo, Dual channel, PCM, Dolby Digital, Dolby Digital Plus, Dolby Digital Pulse, Dolby Virtual Speaker, Dolby Pro Logo II, Dolby TrueHD, Dolby MS11 | |||
| Audio output power (sine / music): | 2 x 20W / 2 x40W | ||||
| Acoustic speaker concept: Soundbar | --- | --- | |||
| Telelexi: | TOP / FLOF / HiTextl (Level 2.5) | ||||
| Page memory: | 2000 | ||||
| LAN: | Standards supported: | 10 Mbit/sec Ethernet (10Base-T) / 100 Mbit/sec Fast Ethernet (100Base-T) | |||
| WLAN: | Standards supported: Frequency range used: Types of encoding that are supported: | IEEE 802.11a/b/g/n, 802.11ac Power <100 mW at 2400-2483.5 MHz and 5150-5725 MHz WEP 64 and 128 Bit (ASCII and HEX), WPA PSK, WPA2 AES | |||
| Bluetooth: | Power / Frequency range: Bluetooth protocols: | Power <10 mW at 2.4 GHz A2DP SRC, A2DP SNK, HID | |||
| Home networking standard: | Universal Plug and Play Audio / Video (UPnP AV) | ||||
| File formats supported ^2 : | Pictures: Audio: Video: | JPEG, JPEG progressive (max. resolution 3840x2160), PNG MP3, M/A (AAC LC), WMA (without lossless), FLAC, WAV (PCM), Ogg Vorbis AVI (MPEG-1/2, XviD, Dolby Digital, MP3), WMV (WMV9, VC-1, WMA9, WMA Pro), MP4 (XviD, H.264/MPEG-4 AVC, AAC LC), MOV (H.264/MPEG-4 AVC, AAC LC), MKV (H.265/HEVC, H.264/MPEG-4 AVC, Dolby Digital), FLV (H.264/MPEG-4 AVC, H.263, MP3, AAC LC), MPG (MPEG-1, MPEG Audio), TS/PS (MPEG-2, H.264/MPEG-4 AVC, MPEG2 Audio, Dolby Digital), VOB (MPEG-2, MPEG2 Audio, Dolby Digital) H.264/MPEG-4 AVC upto Profil High (Level 4.2) H.264/H.265 compatible to Dolby Vision/HDR 10/HLG | |||
Loewe bild
User handbook
Technical data
cild 5 oled
Equipment features (bild 5.65 oled/bild 5.55 oled)
Changes to the equipment features and the set design reserved.
| Loewe set type: | bild 5.65 oled bid | bild 5.55 oled |
| Image* (Image) | ||
| Ultra HD Super Resolution Scaling / Image+ Active / 24 p motion picture display | ●/●/● | ●/●/● |
| 3D technology / Active Classes 3D | -/---/- | |
| Auto-Dimming Video (VDB+) / Auto-Dimming Raum (OPC) / Home Mode: | /●/● | /●/● |
| Digital* (Television Standards) | ||
| DVB-T2 ^1 / DVB-C / DVB-S2 / Multistandard (analoguc) / Dual Channel | ●/●/●/●/● | ●/●/●/●/● |
| MPEG / MPEG2 / MPEG4 (H.264) / HEVC (H.265) / integrated HDTV reception? | ●/●/●/●/● | ●/●/●/●/● |
| DVB radio / Unicable (acc. EN 50494) | ●/● | ● |
| Sound* (Audio) | ||
| Integrated 5.1 AV-Receiver / Digital audio link | ●/● | ● |
| Dolby Digital / Dolby Digital Plus / DTS | ●/●/- | ●/●/- |
| Individual bass and treble control / Loudness | ●/● | ● |
| Automatic Volume Control (AVC) | ● | ● |
| Audio out available: variable / fixed / Subwoofer | ●/●/● | ●/●/● |
| Assist* (Operation) | ||
| Loewe os / Home Screen (incl. favorites) | ●/● | ● |
| HDR (Dolby Vision / HDR 10 / ILG) | ●/●/● | ●/●/● |
| Electronic Program Guide (SI-data) | ● | ● |
| MediaText (HbbTV) / Video text (Level 2.5) | ●/● | ● |
| Menu languages ^13 / Context Related Help | ●/● | ● |
| Parental Lock / Automatic Turn-off / Timer | ●/●/● | ●/●/● |
| Instant Channel Zapping / Quick Start Mode | ●/● | ● |
| Digital Link HD (CEC) | ● | ● |
| PIP (AV) ^14 / Full PIP / Split screen TV : Video text | ●/●/● | ●/●/● |
| MediaUpdate (via USB / Internet) | ●/● | ● |
| Hotel Mode | ● | ● |
| Media* (Multimedia functions) | ||
| DR+ / storage capacity in GB / USB archive | ●/1.000/● | ●/1.000/● |
| DR+ Streaming server / client / Follow-Mc | ●/●/● | ●/●/● |
| Multi Recording / Mobile Recording | ●/● | ● |
| Multicom Streaming | ● | ● |
| Photo player / Music player / Video player (via Home network and USB incl. Ultra HD) | ●/●/● | ●/●/● |
| Digital Media Renderer (incl. Ultra HD) / Bluetooth Music Player | ●/● | ● |
| Internet Apps (MediaNet) / Internet Browser / Internet Radio (incl. search function) | ●/●/● | ●/●/● |
| Connectivity* (Connectors) | ||
| HDMI with HDCP 2.2 | 4 (4x JHD, 1x ARC) 4 (4x JHD, 1x ARC) | |
| LAN network connection / integrated WLAN | ●/● | ● |
| Common Interface / CI Plus 1,3 certified ^15 | 2/● 2/● | |
| Home Control Interface IP / Home Control Interface RS232 / IR-Link ^16 / Motor control | ●/●/●/- | ●/●/●/- |
| Digital Audiolink (DAL) ^17 / Digital Audio-Out (coaxial) | ●/● | ● |
| Analog Audio-Out (L/R) / Headphone (jack 3.5 mm) | ●/● | ● |
| Micro-AV ^18 (Component / Scart / VGA) | ●/●/● | ●/●/● |
| USB / Bluetooth Connection | 3 (3×3.0)/● 3 (1×3.0)/● | |
| VESA mounting points | ● | ● |
● = included/installed ○ = upgradeable/optional
- The reception of DVB-T2 programs is possible in selected countries.
^12 Reception of digital channels may be limited by individual regulations from the respective broadcaster/provider. UK models are Freeview HD compliant.
DGBF-E-NLOZ-GRPL-H-FIN-SLOSK-TR-S-DK-PRUS-N
^14 AV PIP is only available in combination with DVB T/C/S.
CI Plus is backwards compatible with CI. Functionality is dependent on module availability from the supplier.
- Only in conjunction with a corresponding adapter and selected devices (RC5. 36 kHz), to be ordered separately.
Loewe System 5.1 Out, Stereo Out, Subwoofer Out.
^6 Only in conjunction with a corresponding adapter, to be ordered separately.
Connections rear side of the device (bild 5.55/bild 5.48/bild 5.40)
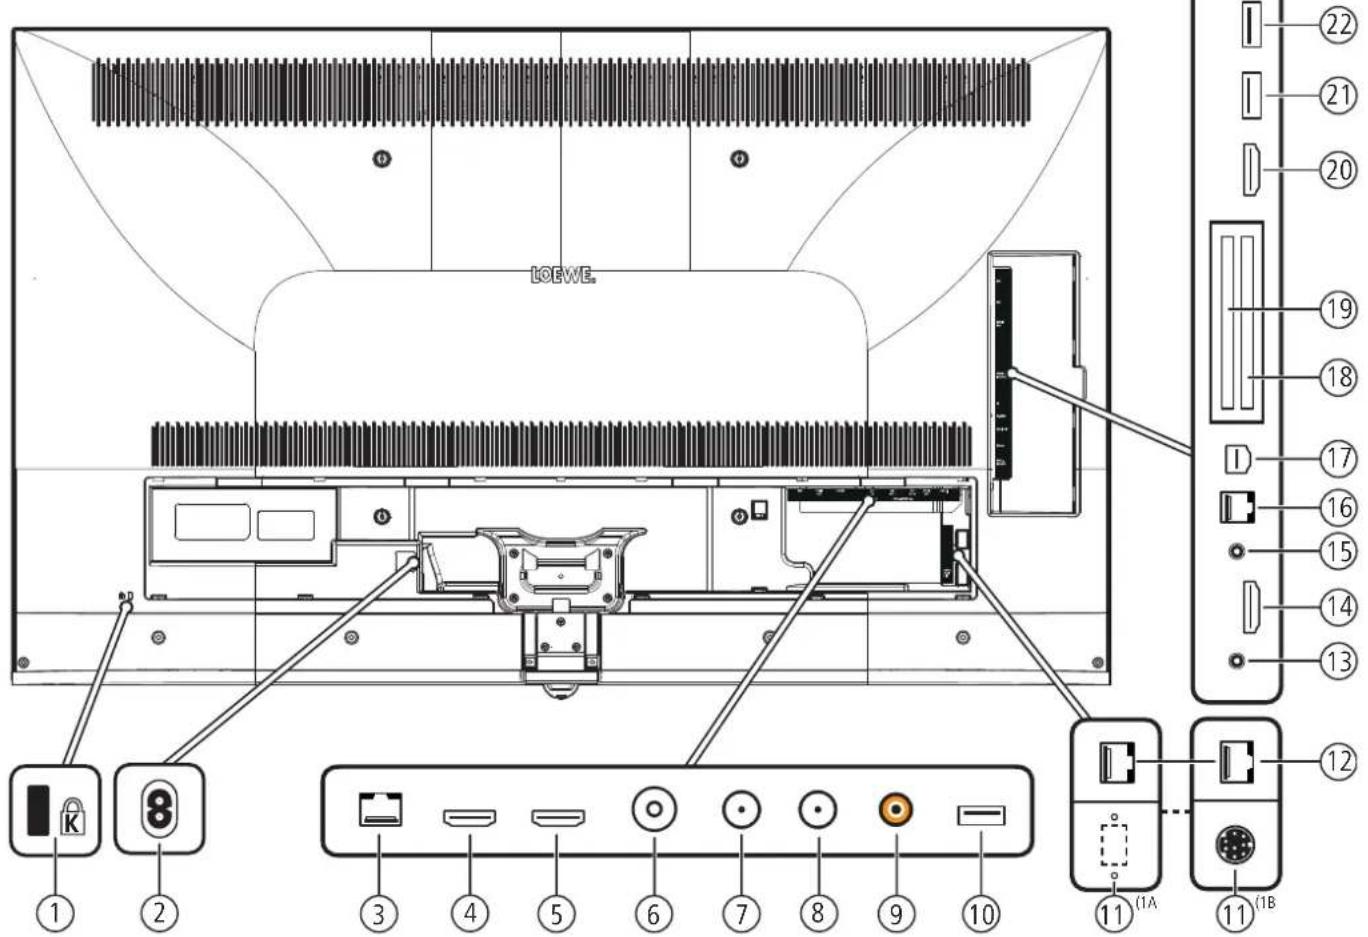
text_image
LOEWE. 1 2 3 4 5 6 7 8 9 10 11 (1A) 11 (1B) 12 13 14 15 16 17 18 19 20 21 22① Slot for Kensington lock
② AC IN - Mains connection
Mains socket - 220-240 V \~ 50 / 60 Hz
③ LAN - Network connection
RJ-45 - Ethernet / Fast Ethernet
④ HDMI 1 ARC - HDMI input 1 ^G (with Audio Return Channel)
HDMI - Digital Video IN/Audio IN/OUT
⑤ HDMI 2 - HDMI input 2 ^4
HDMI - Digital Video IN/Audio IN
⑥ ANT TV - Antenna/cable analogue /DVB-T/T2 / DVB-C
IEC socket - 75 Ohm / 5 V / 80mA
⑦ ANT SAT 1 - Satellite antenna (Sat tuner 1) DVB-S/S2
F socket - 75 Ohm / 13/18 V / 500mA
⑧ ANT SAT 2 Satellite antenna (Sat tuner 2) DVB-S/S2
F socket - 75 Ohm / 13/18 V / 500mA
⑨ SPDIF OUT - Audio output (digital)
Cinch socket (orange)
⑩ USB 3.0 - USB connection
USB type A - USB 3.0 (max. 900mA)
⑪ FEATURE KIT - optional CA
MOTOR UNIT - rotating stand control
⑫ DIGITAL AUDIO LINK - Surround audio outputs (digital) - (RJ45)
⑬ HEADPHONE - Headphone connection
Jack 3.5 mm - Headphones 32-200 Ohm
⑭ HDMI 3 - HDMI input 3 ^4
HDMI - Digital Video IN/Audio IN
⑮ AUDIO OUT - Audio output (analogue) L/R - (Jack 3.5 mm)
⑯ RS-232C - Serial interface ^12 - (RJ12)
⑰ AV - Micro AV socket ^2
Audio/Video IN with Scart adapter: Y/C (S-VHS/Hi 8)
CVBS (VHS/8 mm)
RGB
Audio/Video IN with VGA adapter: PC/STB video signal
Component (YPbPr)
L/R
⑱ COMMON INTERFACE - CI slot 1 (standard V1.3)
⑲ COMMON INTERFACE - CI slot 2 (standard V1.3)
⑳ HDMI 4 - HDMI input 4 ^3
HDMI - Digital Video IN/Audio IN
②1 USB - USB connection
USB type A - USB 2.0 (max. 500mA)
② USB - USB connection
USB type A - USB 2.0 (max. 500mA)
Connections rear side of the device (bild 5.32 dr+/bild 5.32)
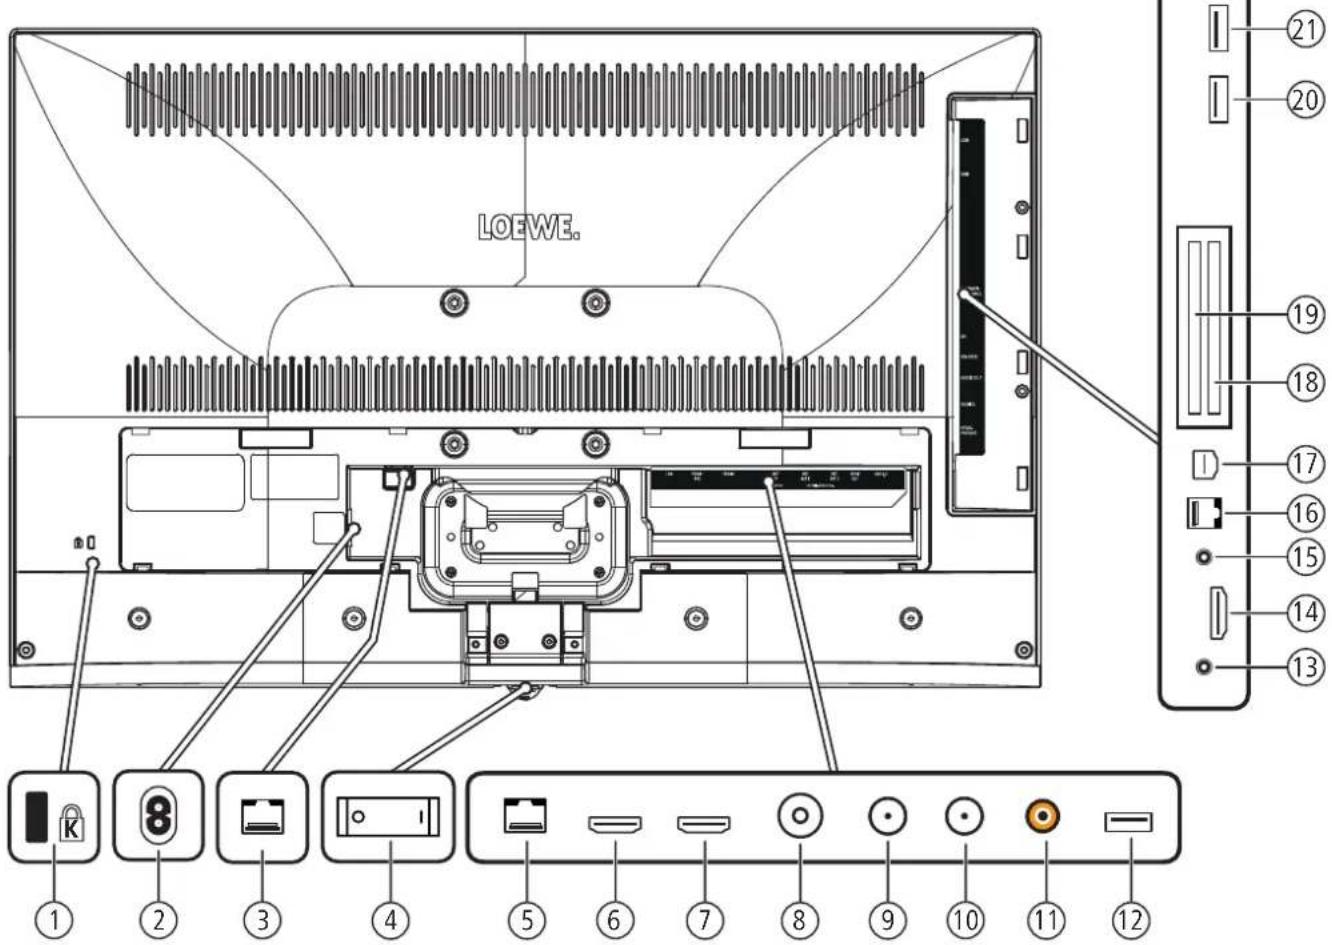
text_image
LOEWE. 1 2 3 4 5 6 7 8 9 10 11 12 13 14 15 16 17 18 19 20 21① Slot for Kensington lock
② AC IN - Mains connection
Mains socket - 220-240 V - 50 / 60 Hz
③ DIGITAL AUDIO LINK - Surround audio outputs (digital) - (RJ45)
④ Mains switch
⑤ LAN - Network connection
RJ-45 - Ethernet / Fast Ethernet
⑥ HDMI 1 ARC - HDMI input 1 ^9 (with Audio Return Channel)
HDMI - Digital Video IN/Audio IN/OUT
⑦ HDMI 2 - HDMI input 2 ^4
HDMI - Digital Video IN/Audio IN
⑧ ANT TV - Antenna/cable analogue /DVB-T/T2 / DVB-C
IEC socket - 75 Ohm / 5 V / 80mA
⑨ ANT SAT 1 - Satellite antenna (Sat tuner 1) DVB-S/S2
F socket - 75 Ohm / 13/18 V / 500mA
⑩ ANT SAT 2 - Satellite antenna (Sat tuner 2) DVB-S/S2
F socket - 75 Ohm / 13/18 V / 500mA
⑪ SPDIF OUT - Audio output (digital)
Cinch socket (orange)
⑫ USB 3.0 - USB connection
USB type A - USB 3.0 (max. 900mA)
⑬ HEADPHONE - Headphone connection
Jack 3,5 mm - Headphones 32-200 Ohm
⑭ HDMI 3 - HDMI input 3 ^4
HDMI - Digital Video IN/Audio IN
⑮ AUDIO OUT - Audio output (analogue) L/R - (Jack 3.5 mm)
⑯ RS-232C - Serial interface ^2 - (RJ12)
⑰ AV - Micro AV socket ^2
Audio/Video IN with Scart adapter: Y/C (S-VHS/Hi 8)
CVBS (VHS/8 mm)
RGB
L/R
Audio/Video IN with VGA adapter: PC/STB video signal
Component (YPbPr)
L/R
18 COMMON INTERFACE - CI slot 1 (standard V1.3)
⑲ COMMON INTERFACE - CI slot 2 (standard V1.3)
20 USB - USB connection
USB type A - USB 2.0 (max. 500mA)
21 USB - USB connection
USB type A - USB 2.0 (max. 500mA)
Loewe bild
User handbook
Technical data
cild 5
Changes of technical data and design of the equipment reserved.
| Loewe device type: | bild 5.55 bild 5.48 | bild 5.40 bild 5.32 | ||
| Part number: | 56428xxx 56430xxx | 56427xxx 56426xxx | ||
| EU energy efficiency class: | see enclosed energy label or under www.loewe.tv/int/support | |||
| Screen diagonal: | 140 cm / 55 inch 122 cm / 48 inch 102 cm / 40 inch 81 cm / 32 inch | |||
| Power consumption On-Mode (max.) (Audio output 1/8 of the maximum value):Power consumption On-Mode (home) ^a :Annual energy consumption ^b : | 228 W 164 W 125 W 75.0 W | ^4b / 73.0 W ^43 | ||
| see enclosed energy label or under www.loewe.tv/int/support | ||||
| Power consumption quick start mode: | 80.0 W 55.0 W | 55.0 W | 30.0 W ^0b / 25.0 W ^1d | |
| Power consumption Standby Mode:Power consumption when set is switched off: | 0.38 W0 W | 0.38 W0 W | 0.38 W0 W | 0.40 W0 W |
| Resolution: | Ultra HD 3840 x 2160 px | Full HD 1920 x 1080 px | ||
| Display technology / Picture format: | LCD with Edge-LED-Backlight / 16:9 | |||
| Device dimensions without stand (W x H x D):Device dimensions with stand ^c (W x H x D): | 122.9 x 75.1 x 5.5 cm122.9 x 75.1 x 6.8 cm | 107.8 x 66.8 x 5.5 cm107.8 x 69.9 x 25.7 cm | 90.9 x 57.4 x 5.5 cm90.9 x 60.4 x 25.7 cm | 72.9 x 47.7 x 5.3 cm72.9 x 50.8 x 21.3 cm |
| Weight without stand (approximate):Weight with stand ^d (approximate): | 27.6 kg29.1 kg | 18.8 kg21.3 kg | 15.5 kg18.1 kg | 9.7 kg11.7 kg |
| Ambient temperature: | 5°C - 35°C | |||
| Relative humidity (non-condensing): | 20 - 80% | |||
| Air pressure: | 800 - 1114 hPa (0 - 2000 m above sea level) | |||
| Chassis designation: | SL 420 | SL320F ^f,a /SL310F ^g,e | ||
| Power supply: | 220 V - 240 V/50-60 Hz | |||
| Tuner: terr./cableSatellite: | VI F/I hyperband/UIF4 levels: 13/18V/22kHz / 16 levels: DiSEqC 1.0 / single-cable system: EN 50494 | |||
| Range: terr./cableSatellite: | Terr./cable: 45 MHz up to 860 MHzSatellite: 950 MHz up to 2150 MHz | |||
| Channel storage locations incl. AV and radio: | 6000 | |||
| TV standards: analogue:digital: | B/G, L, L/D/K, M, NDVB-1/T2, DVB-C, DVB-S/S2 (UI ID via DVB to max. 60 Hz) | |||
| Colour standards: | SECAM, PAL, NTSC, NTSC-V, PAL-V (60 Hz) | |||
| Sound formats: analogue (TM):analogue (NICAM):digital (MPEG): | Mono, Stereo, Dual channelMono, Stereo, Dual channelMono, Stereo, Dual channel, PCM, Dolby Digital, Dolby Digital Plus, Dolby Pulse, Dolby MS11(Dolby Virtual Speaker, Dolby Pro Logic II, Dolby TrueHD) ^e | |||
| Audio output power (sine / music): | 2 x 20W / 2 x 40W | |||
| Acoustic speaker concept: | Speaker Box | |||
| Teletext: | TOP / FLOF / HiText (Level 2.5) | |||
| Page memory: | 2000 | |||
| LAN: Standards supported: | 10 Mbit/sec Ethernet (10Base T) / 100 Mbit/sec Fast Ethernet (100Base T) | |||
| WLAN: Standards supported:Power/Frequency rangeTypes of encoding that are supported: | IEEE 802.11a/b/g/n, 802.11acPower <100 mW at 2400-2483,5 MHz and 5150-5725 MHzWEP 64 and 128 Bit (ASCII and HEX), WPA PSK, WPA2 AES | |||
| Bluetooth: Power/Frequency range:Bluetooth protocols: | Power <10 mW at 2.4 GHzA2DP SRC, A2DP SNK, HID | |||
| Home networking standard: | Universal Plug and Play Audio / Video (UPnP AV) | |||
| File formals supported ^g : Pictures:Audio:Video: | JPEG, JPEG progressive (max, resolution 3840x2160), PNGMP3, M4A (AAC LC), WMA (without lossless), FLAC, WAV (PCM), Ogg VorbisAVI (MPEG-1/2, XvD, Dolby Digital, MP3), WMV (WMV9, VC-1, WMA9, WMA Pro),MP4 (XviD, H.264/MPEG-4 AVC, AAC LC), MOV (H.264/MPEG-4 AVC, AAC LC),MKV (H.265/HEVC, H.264/MPEG-4 AVC, Dolby Digital), FLV (H.264/MPEG-4 AVC, H.263,MP3, AAC LC), MPEG (MPEG-1, MPEG Audio), TS/PS (MPEG-2, H.264/MPEG-4 AVC, MPEG2 Audio,Dolby Digital), VOB (MPEG-2, MPEG2 Audio, Dolby Digital),H.264/MPEG-4 AVC upto Profil High (Level 4.2)H.264/H.265 compatible to HDR10/HLG for SL4xx TV sets | |||
- The energy consumption per year is calculated on the basis of a daily four-hour operation of 1 . For the playability of the individual formats no guarantee can be given.
the TV set on 365 days. The actual energy consumption will depend on the way the TV set is used. On-Vode (home) values less than 100 W must have decmar piaces (.0). ^4 A: Device type bild 5.32 DR+ (56246x55). B: Device type bild 5.32 (56246x85). ^6 Not available for bild 5.32 (56426x85)
Supplied mounting option WM67 (bild 5.55). Table Stand bild 5.40/48 (bild 5.40/48). Table Stand bild 5.32 (bild 5.32).
Loewe bild
User handbook
Technical data
cild 5
Equipment features (bild 5.55/bild 5.48/bild 5.40/bild 5.32)
Changes to the equipment features and the set design reserved.
| Loewe set type: | bild 5.55 bild | 5.48 bild 5.40 | bild 5.32 DR+ bld 5.32 | |
| Image* (Image) | ||||
| Ultra HD Super Resolution Scaling / Image+ Active / 24 p motion picture display | ●/●/● | ●/●/● | ●/●/● | -/-/●/● |
| 3D technology / Active Classes 3D | ●/○ | -/-/-/-/-/- | -/- | |
| Auto-Dimming Video (VDB+) / Auto-Dimming Raum (OPC) / Home Mode: | ●/●/● | ●/●/● | ●/●/● | /●/● |
| Digital* (Television Standards) | ||||
| DVB-T2# / DVB-C / DVB-S2 / Multistandard (analogue) / Dual Channel | ●/●/●/●/● | ●/●/●/●/● | ●/●/●/●/● | ●/●/●/●/● |
| PEG / MPEG2 / MPEG4 (H.264) / HEVC (H.265) / integrated HDTV reception2 | ●/●/●/●/● | ●/●/●/●/● | ●/●/●/●/● | ●/●/●/●/● |
| DVB radio / Unicable (acc. EN 50494) | ●/● | ●/● | ●/● | ●/● |
| Sound* (Audio) | ||||
| Integrated 5.1 AV-Receiver / Digital audio link | ●/● | ●/● | ●/● | ●/● |
| Dolby Digital / Dolby Digital Plus / DTS | ●/●/- | ●/●/- | ●/●/- | ●/-/- |
| Individual bass and treble control / Loudness | ●/● | ●/● | ●/● | ●/● |
| Automatic Volume Control (AVC) | ● | ● | ● | |
| Audio out available: variable / fixed / Subwoofer | ●/●/● | ●/●/● | ●/●/● | ●/●/● |
| Assist* (Operation) | ||||
| Loewe os / Home Screen (incl. favorites) | ●/● | ●/● | ●/● | ●/● |
| HDR (Dolby Vision / HDR 10 / HLG) | -/-/●/● | -/-/●/● | -/-/●/● | -/-/-/-/-/- |
| Electronic Program Guide (SI-data) | ● | ● | ● | |
| MediaTextl (HbbTV) / Video textl (Level 2.5) | ●/● | ●/● | ●/● | ●/● |
| Menu languages1/2 / Context Related Help | ●/● | ●/● | ●/● | ●/● |
| Parental Lock / Automatic turn-off / Timer | ●/●/● | ●/●/● | ●/●/● | ●/●/● |
| Instant Channel Zapping / Quick Start Mode | ●/● | ●/● | ●/● | ●/● |
| Digital Link HD (CEC) | ● | ● | ● | |
| PIP (AV)4 / Full PIP / Split screen TV : Video text | ●/●/● | ●/●/● | ●/●/● | ●/●/● |
| MediaUpdate (via USB / Internet) | ●/● | ●/● | ●/● | ●/● |
| Hotel Mode | ● | ● | ● | |
| Media* (Multimedia functions) | ||||
| DR+ / storage capacity in GB / USB recording (with DR+ : USB-Archivos) | ●/1000/● | ●/1000/● | ●/1000/● | ●/1000/● |
| DR+ Streaming server / client / Follow Me | ●/●/● | ●/●/● | ●/●/● | ●/●/● |
| Multi Recording9 / Mobile Recording9 | ●/● | ●/● | ●/● | ●/● |
| Multiroom Streaming9 | ○ | ○ | ○ | ○ |
| Photo player / Music player / Video player (via Home network and USB incl. Ultra HD) | ●/●/● | ●/●/● | ●/●/● | ●/●/● |
| Digital Media Renderer (incl. Ultra HD) / Bluetooth Music Player9 | ●/○ | ●/○ | ●/○ | ●/○ |
| Internet Apps (MediaNet) / Internet Browser / Internet Radio (incl. search function) | ●/●/● | ●/●/● | ●/●/● | ●/●/● |
| Connectivity* (Connectors) | ||||
| HDMI with HDCP 2.2 | 4(4xUID,1xARC) | 4(4xUID,1xARC) | 4(4xUID,1xARC) | 3(1xARC) |
| LAN network connection / Integrated WLAN | ●/● | ●/● | ●/● | ●/● |
| Common Interface / CI Plus 1.3 certified9 | 2/● | 2/● | 2/● | 2/● |
| Home Control Interface IP / Home Control Interface RS232 / IR-Link9 / Motor control | ●/●/●/● | ●/●/●/- | ●/●/●/- | ●/●/●/- |
| Digital Audiolink (DAL)7 / Digital Audio-Out (coaxial) | ●/● | ●/● | ●/● | -/-● |
| Analog Audio-Out (L/R) / Headphone (jack 3.5 mm) | ●/● | ●/● | ●/● | ●/● |
| Micro-AV8 (Component / Scart / VGA) | ●/●/● | ●/●/● | ●/●/● | ●/●/● |
| USB / Bluetooth Connection | 3(1x30)/● | 3(1x30)/● | 3(1x30)/● | 3(1x30)/● |
| VESA mounting points | ● | ● | ● | |
● = included/installed ○ = upgradeable/optional
- The reception of DVB-T2 programs is possible in selected countries.
^12 Reception of digital channels may be limited by individual regulations from the respective broadcaster/provider. UK models are Freeview HD compliant.
DGBFIE NLCZ GR PL H FIN SLO SK TR 5 DK P RUS N
^14 AV PIP is only available in combination with DVB T/C/S.
CI Plus is backwards compatible with CI. Functionality is dependent on module availability from the supplier.
- Only in conjunction with a corresponding adaptor and selected devices (RC5.36 kHz), to be ordered separately.
Loewe System 5.1 Out, Stereo Out, Subwoofer Out.
(5) Only in conjunction with a corresponding adapter to be ordered separately.
^19 Available via optional upgrade feature
Connections rear side of the device (bild 4.55)
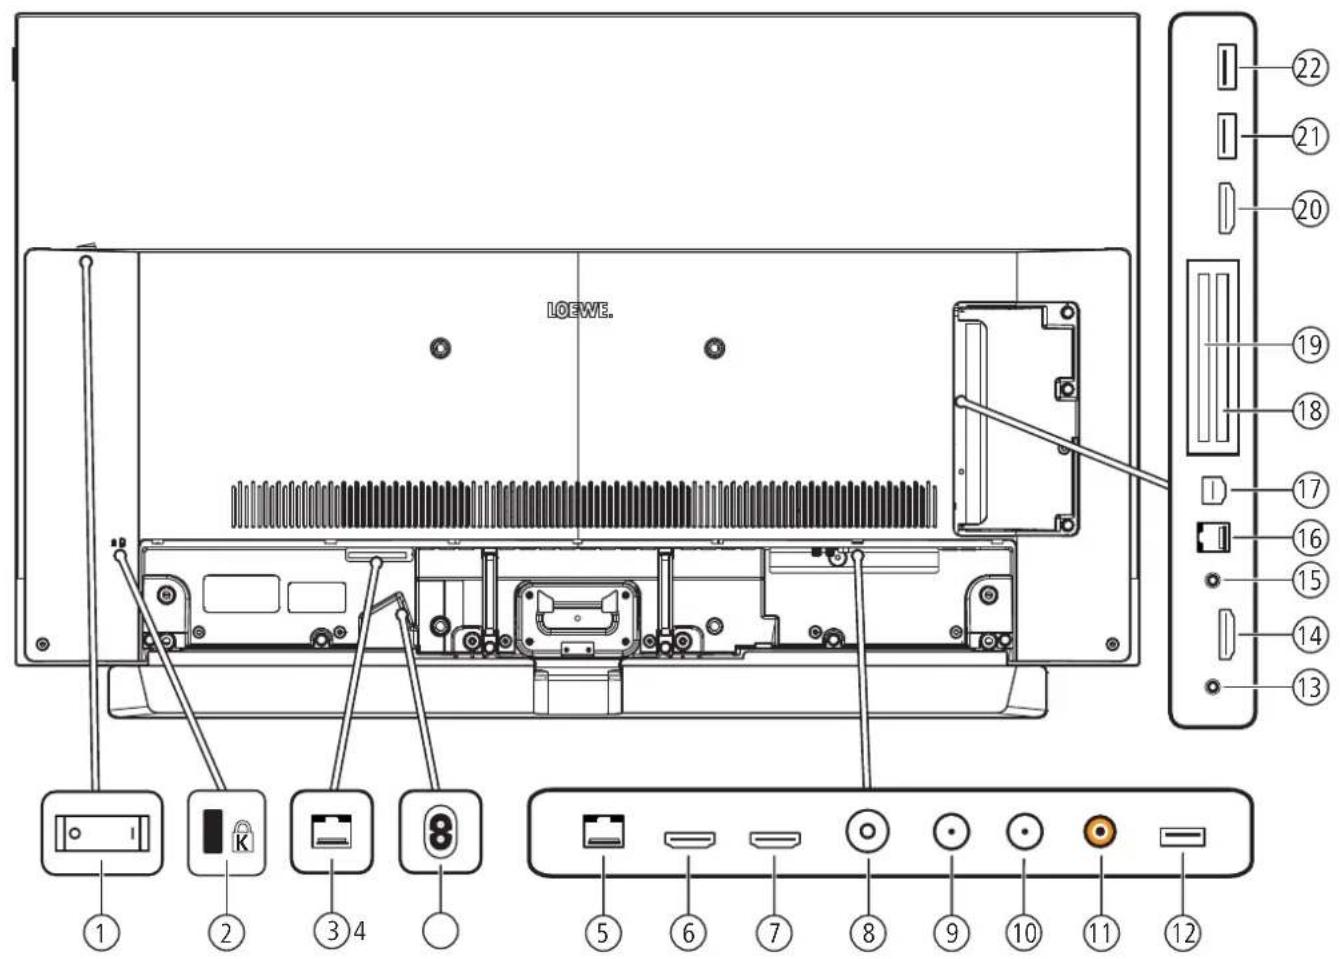
text_image
LOEWE. ① ② ③ 4 ⑧ ⑤ 6 7 8 9 10 11 12 ⑲ ⑳ ⑰ ⑱ ⑲ ⑳ ⑪ ⑫ ⑬ ⑭ ⑮ ⑯ ⑰ ⑱ ⑲ ⑳ ⑪ ㉑ ㉒ ㉓ ㉔ ㉕ ㉖ ㉗ ㉘ ㉙ ㉚ ㉛ ㉜ ㉝ ㉞ ㉟ ㉟a ㉟b ㉟c ㉟d ㉟e ㉟f ㉟g ㉟h ㉟i ㉟j ㉟k ㉟l ㉟m ㉟n ㉟o ㉟p ㉟q ㉟r ㉟s ㉟t ㉟u ㉟v ㉟w ㉟x ㉟y ㉟z① Mains switch
② Slot for Kensington lock
③ DIGITAL AUDIO LINK - Surround audio outputs (digital) - (RJ45)
④ AC IN - Mains connection
Mains socket - 220-240 V - 50 / 60 Hz
⑤ LAN - Network connection
RJ-45 - Ethernet / Fast Ethernet
⑥ HDMI 1 ARC - HDMI input 1 ^7 (with Audio Return Channel)
HDMI - Digital Video IN/Audio IN/OUT
⑦ HDMI 2 - HDMI input 2 ^12 HDMI - Digital Video IN/Audio IN
⑧ ANT TV - Antenna/cable analogue / DVB-T/T2 / DVB-C IEC socket - 75 Ohm / 5 V / 80mA
⑨ ANT SAT 1 - Satellite antenna (Sat tuner 1) DVB-S/S2 F socket - 75 Ohm / 13/18 V / 500mA
⑩ ANT SAT 2 - Satellite antenna (Sat tuner 2) DVB-S/S2 F socket - 75 Ohm / 13/18 V / 500mA
⑪ SPDIF OUT - Audio output (digital) Cinch socket (orange)
⑫ USB 3.0 - USB connection
USB type A - USB 3.0 (max. 900mA)
⑬ HEADPHONE - Headphone connection
Jack 3.5 mm - Headphones 32-200 Ohm
⑭ HDMI 3 - HDMI input 3 ^2 HDMI - Digital Video IN/Audio IN
⑮ AUDIO OUT - Audio output (analogue) L/R - (Jack 3.5 mm)
⑯ RS-232C - Serial Interface ^1 - (RJ12)
17 AV - Micro AV socket ^a Audio/Video IN with Scart adapter: Y/C (S-VHS/Hi 8)
CVBS (VHS/8 mm)
RGB
L/R
Audio/Video IN with VGA adapter: PC/STB video signal
PC formats (RGB)
Component (YFb)
L/R
18 COMMON INTERFACE - CI slot 1 (standard V1.3)
⑲ COMMON INTERFACE - CI slot 2 (standard V1.3)
⑳ HDMI 4 - HDMI input 4 ^2 HDMI - Digital Video IN/Audio IN
21 USB - USB connection
USB type A - USB 2.0 (max. 500mA)
②2 USB - USB connection
USB type A - USB 2.0 (max. 500mA)
Loewe old
User handbook
Technical data
cild
Changes of technical data and design of the equipment reserved.
| Loewe device type: | bild 4.55 bild 4.55 | |
| Part number: 57441W90 57441W91 | ||
| FU energy efficiency class: | see enclosed energy label or under www.loewe.lv/int/support | |
| Screen diagonal: 139 cm / 55 inch | ||
| Power consumption On-Mode (max.) (Audio output 1/8 of the maximum value): | 348 W | |
| Power consumption On-Mode (home)†: Annual energy consumption‡: | see enclosed energy label or under www.loewe.lv/int/support | |
| Power consumption quick start mode: | 80,0 W | |
| Power consumption Standby Mode: Power consumption when set is switched off: | 0.49 W0 W | |
| Resolution / Picture format: Ultra HD 3840 x 2160 px / 16:9 | ||
| Display technology: OLED (WRGB Pixel) | ||
| Device dimensions without stand (W x H x D): | 123.0 x 76.2 x 6.4 cm | 122.8 x 75.9 x 6.4 cm |
| Weight without stand (approximate): | 21.3 kg | 24.8 kg |
| Ambient temperature: 5°C - 35°C | ||
| Relative humidity (non-condensing): 20 - 80% | ||
| Air pressure: 800 - 1114 hPa (0 - 2000 m above sea level) | ||
| Chassis designation: SL415 | ||
| Power supply: 220 V - 240 V/50 - 60 Hz | ||
| Tuncr: terr./cable: Satellite: | VHF/Hyperband/UHF4 levels: 13/18V/22kl z / 16 levels: DiSfqC 1.0 / single-cable system: FN 50494 | |
| Range: terr./cable: Satellite: | Terr./cable: 45 MHz up to 860 MHzSatellite: 950 MHz up to 2150 MHz | |
| Channel storage locations incl. AV and radio: | 6000 | |
| TV standards: analogue: digital: | B/G, I, L, D/K, M, NDVB-T/T2, DVB-C, DVB-S/S2 (UHD via DVB to max. 60 Hz) | |
| Colour standards: | SECAM, PAL, NTSC, NTSC-V, PAL-V (60 Hz) | |
| Sound standards: analogue (FM): analogue (NICAM): digital (MPEG): | Mono, Stereo, Dual channelMono, Stereo, Dual channelMono, Stereo, Dual channel, PCM, Dolby Digital, Dolby Digital Plus, Dolby Digital Pulse, Dolby Virtual Speaker, Dolby Pro Logic II, Dolby True HD, Dolby MS11 | |
| Audio output power (sine / music): | 2 x 20W / 2 x40W | |
| Acoustic speaker concept: | Soundbar | |
| Telelexl: | TOP / FLOF / HiText (Level 2.5) | |
| Page memory: | 2000 | |
| LAN: Standards supported: | 10 Mbit/sec Ethernet (10Base-T) / 100 Mbit/sec Fast Ethernet (100Base-T) | |
| WLAN: Standards supported: Frequency range used: Types of encoding that are supported: | IEEE 802.11a/b/g/n, 802.11acPower <100 mW at 2400-2483.5 MHz and 5150-5725 MHzWEP 64 and 128 Bit (ASCII and HEX), WPA PSK, WPA2 AES | |
| Bluetooth: Power / Frequency range: Bluetooth protocols: | Power <10 mW at 2.4 GHzA2DP SRC, A2DP SNK, HID | |
| Home networking standard: | Universal Plug and Play Audio / Video (UPnP AV) | |
| File formats supported‡ Pictures: Audio: Video: | JPEG, JPEG progressive (max. resolution 3840x2160), PNGMP3, M4A (AAC LC), WMA (without lossless), FLAC, WAV (PCM), Cgg VorbisAVI (MPEG-1/2, XviD, Dolby Digital, MP3), WMV (WMV9, VC-1, WMA9, WMA Pro).MP4 (XviD, I1.264/MPEG-4 AVC, AAC LC), MOV (II.264/MPEG-4 AVC, AAC LC),MKV (H.265/HEVC, H.264/MPEG-4 AVC, Dolby Digital), FLV (H.264/MPEG-4 AVC, H.263,MP3, AAC LC), MPG (MPEG-1, MPEG Audio), TS/PS (MPEG-2, H.264/MPEG-4 AVC, MPEG2Audio, Dolby Digital), VOB (MPEG 2, MPEG2 Audio, Dolby Digital),H.264/MPEG-4 AVC upto Profil High (Level 4.2)H.264/H.265 compatible to Dolby Vision/HDR 10/HLG | |
The energy consumption per year is calculated on the basis of a daily four-hour operation of the TV set on 365 days. The actual energy consumption will depend on the way the TV set is used. On Mode (home) values less than 100 W must have decimal places (.0). For the playability of the individual formats no guarantee can be given.
Loewe bild
User handbook
Technical data
cild
Equipment features (bild 4.55)
Changes to the equipment features and the set design reserved.
| Loewe set type: | bild 4.55 |
| Image+ (Image) | |
| Ultra HD Super Resolution Scaling / Image + Active / 24 p motion picture display | ●/●/● |
| 3D technology / Active Classes 3D | -/- |
| Auto-Dimming Video (VDB+) / Auto-Dimming Raum (OPC) / Home Mode | /●/● |
| Digital+ (Television Standards) | |
| DVB-T2 ^1 / DVB-C / DVB-S2 / Multistandard (analoguc) / Dual Channel | ●/●/●/●/● |
| PEG / MPEG2 / MPEG4 (H.264) / HEVC (H.265) / integrated HDTV reception ^2 | ●/●/●/●/● |
| DVB radio / Unicable (acc. EN 50494) | ●/● |
| Sound+ (Audio) | |
| Integrated 5.1 AV-Receiver / Digital audio link | ●/● |
| Dolby Digital / Dolby Digital Plus / DTS | ●/●/- |
| Individual bass and treble control / Loudness | ●/● |
| Automatic Volume Control (AVC) | ● |
| Audio out available: variable / fixed / Subwoofer | ●/●/● |
| Assist+ (Operation) | |
| Loewe os / Home Screen (incl. favorites) | ●/● |
| HDR (Dolby Vision / HDR 10 / IILG) | ●/●/● |
| Electronic Program Guide (SI-data) | ● |
| MediaText (HbbTV) / Video text (Level 2.5) | ●/● |
| Menu languages ^3 / Context Related Help | ●/● |
| Parental Lock / Automatic turn-off / Timer | ●/●/● |
| Instant Channel Zapping / Quick Start Mode | ●/● |
| Digital Link HD (CEC) | ● |
| PIP (AV) ^4 / Full PIP / Split screen TV : Video text | ●/●/● |
| MediaUpdate (via USB / Internet) | ●/● |
| Hotel Mode | ● |
| Media+ (Multimedia functions) | |
| DR+ / storage capacity in GB / USB recording | / /● |
| DR+ Streaming server / client / Follow-Mc | -/+●/● |
| Multi Recording / Mobile Recording | ●/● |
| Multiroom Streaming | ● |
| Photo player / Music player / Video player (via Home network and USB incl. Ultra HD) | ●/●/● |
| Digital Media Renderer (incl. Ultra HD) / Bluetooth Music Player | ●/● |
| Internet Apps (MediaNet) / Internet Browser / Internet Radio (incl. search function) | ●/●/● |
| Connectivity+ (Connectors) | |
| HDMI with HDCP 2.2 | 4 (1×2.0x, 1×ARC) |
| LAN network connection / integrated WLAN | ●/● |
| Common Interface / CI Plus 1.3 certified ^5 | 2/● |
| Home Control Interface IP / Home Control Interface RS232 / IR-Link ^6 / Motor control | ●/●/●/- |
| Digital Audiolink (DAL) ^7 / Digital Audio-Out (coaxial) | ●/● |
| Analog Audio-Out (L/R) / Headphone (jack 3.5 mm) | ●/● |
| Micro-AV ^8 (Component / Scart / VGA) | ●/●/● |
| USB / Bluetooth Connection | 3 (1×3.0)/● |
| VESA mounting points | ● |
● = included/installed ○ = upgradeable/optional
- The reception of DVB-T2 programs is possible in selected countries.
^12 Reception of digital channels may be limited by individual regulations from the respective broadcaster/provider. UK models are Freeview HD compliant.
DGBF-E-NLOZ-GRPL-H-FIN-SLOSK-TR-S-DK-PRUS-N
^14 AV PIP is only available in combination with DVR T/C/S.
CI Plus is backwards compatible with CI. Functionality is dependent on module availability from the supplier.
- Only in conjunction with a corresponding adapter and selected devices (RC5. 36 kHz), to be ordered separately.
Loewe System 5.1 Out, Stereo Out, Subwoofer Out.
Only in conjunction with a corresponding adapter, to be ordered separately.
Connections rear side of the device (bild 3.65 oled/bild 3.55 oled)
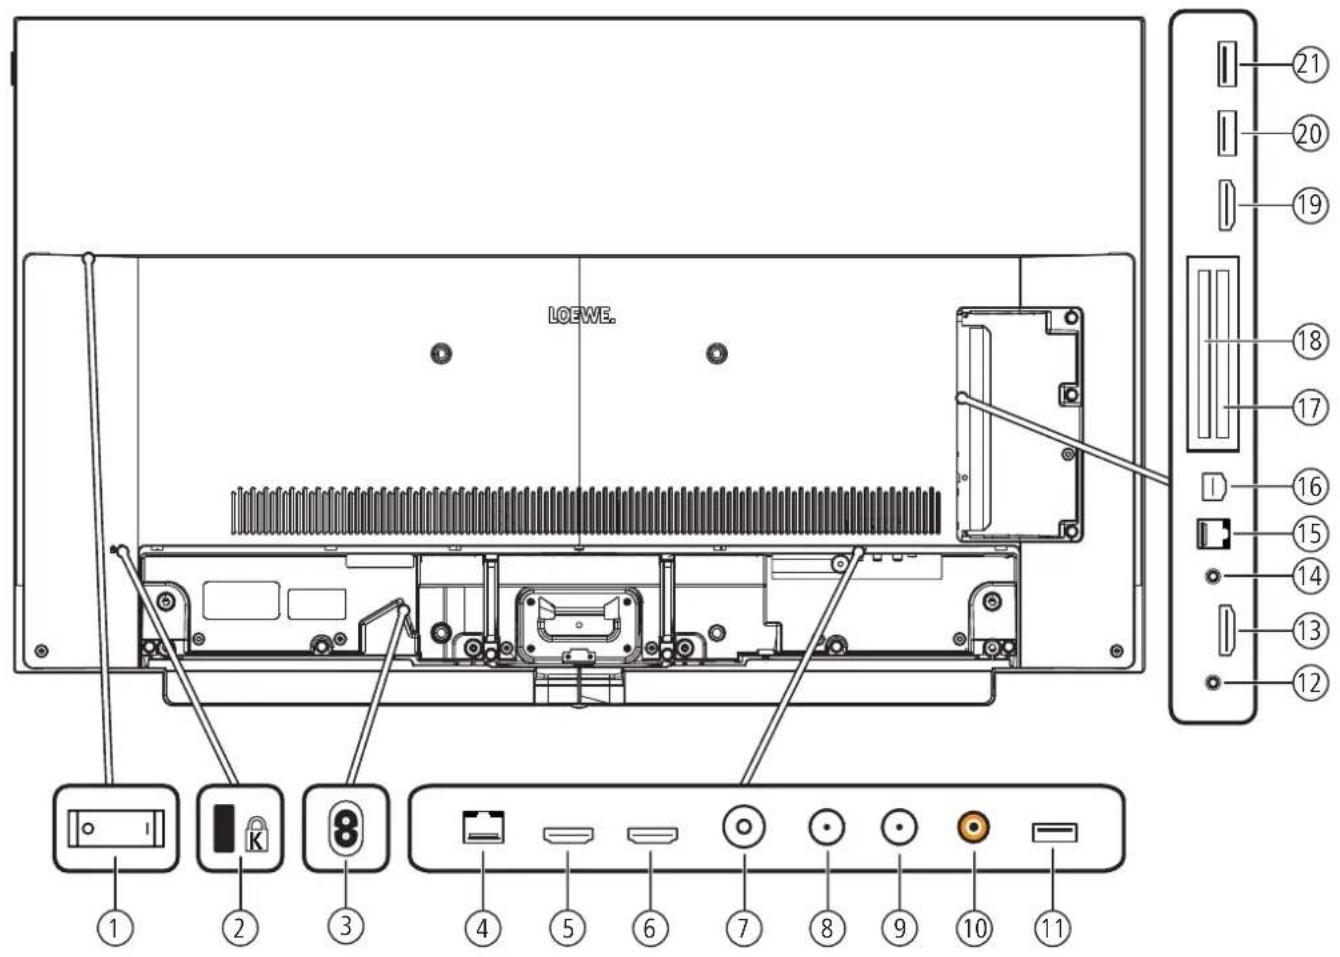
text_image
LOEWE. ① ② ③ ④ ⑤ ⑥ ⑦ ⑧ ⑨ ⑩ ⑪ ⑫ ⑬ ⑭ ⑮ ⑯ ⑰ ⑱ ⑲ ⑳ ㉑ ㉒ ㉓ ㉔ ㉕ ㉖ ㉗ ㉘ ㉙ ㉚ ㉛ ㉜ ㉝ ㉞ ㉟ ㉟o ㉟o1 ㉟o2 ㉟o3 ㉟o4 ㉟o5 ㉟o6 ㉟o7 ㉟o8 ㉟o9 ㉟o10 ㉟o11①Mains switch
②lot for Kensington lock
AC IN - Mains connection
Mains socket - 220-240 V - 50 / 60 Hz
④ LAN - Network connection
RJ-45 - Ethernet / Fast Ethernet
⑤ HDMI 1 ARC - HDMI input 1 ^2 (with Audio Return Channel)
HDMI - Digital Video IN/Audio IN/OUT
⑥ HDMI 2 - HDMI input 2 ^7
HDMI - Digital Video IN/Audio IN
⑦ ANT TV - Antenna/cable analogue / DVB-T/T2 / DVB-C
IEC socket - 75 Ohm / 5 V / 80mA
⑧ ANT SAT 1 - Satellite antenna (Sat tuner 1) DVB-S/S2
F socket - 75 Ohm / 13/18 V / 500mA
⑨ ANT SAT 2 - Satellite antenna (Sat tuner 2) DVB-S/S2
F socket - 75 Ohm / 13/18 V / 500mA
⑩ SPDIF OUT - Audio output (digital)
Cinch socket (orange)
⑪ USB 3.0 - USB connection
USB type A - USB 3.0 (max. 900mA)
⑫ HEADPHONE - Headphone connection
Jack 3,5 mm - Headphones 32-200 Ohm
⑬ HDMI 3 - HDMI input 3 ^2
HDMI - Digital Video IN/Audio IN
⑭ AUDIO OUT - Audio output (analogue) L/R - (Jack 3.5 mm)
⑮ RS-232C - Serial interface ^1 - (RJ12)
⑯ AV - Micro AV socket ^1
Audio/Video IN with Scart adapter: Y/C (S-VHS/Hi 8)
CVBS (VHS/8 mm)
RGB
Audio/Video IN with VGA adapter: PC/STB video signal
PC formats (RGB, H, V)
Component
L/R
PC/STB video signal
[Non-Text]
(YPbPr)
L/R
⑰ COMMON INTERFACE - CI slot 1 (standard V1.3)
⑱ COMMON INTERFACE - CI slot 2 (standard V1.3)
⑲ HDMI 4 - HDMI input 4 ^2
HDMI - Digital Video IN/Audio IN
20 USB - USB connection
USB type A - USB 2.0 (max. 500mA)
②1 USB - USB connection
USB type A - USB 2.0 (max. 500mA)
Connections rear side of the device (bild 3.49/bild 3.43)
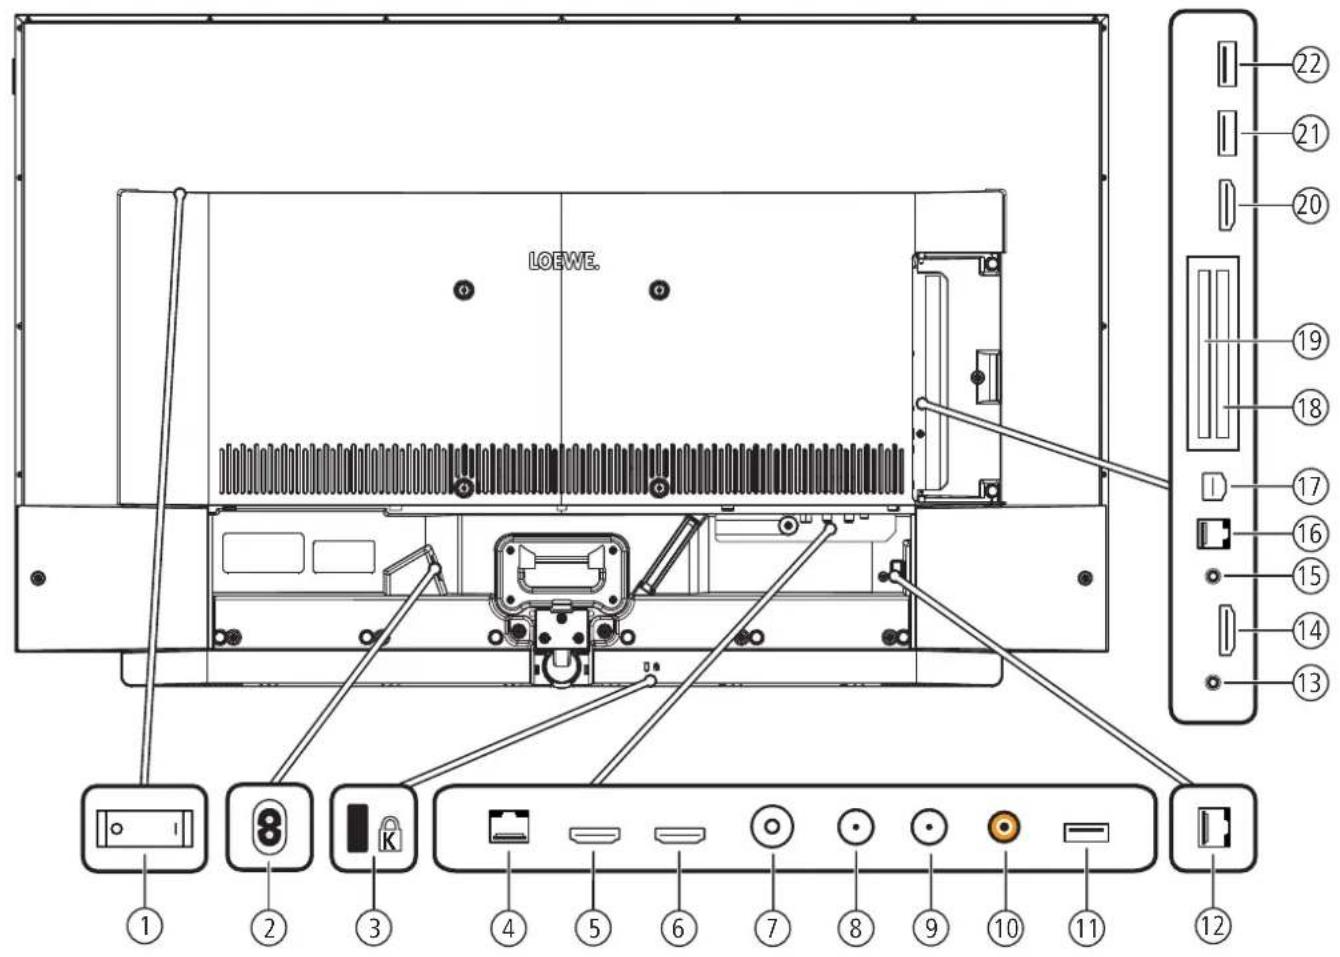
text_image
LOEWE. ① ② ③ ④ ⑤ ⑥ ⑦ ⑧ ⑨ ⑩ ⑪ ⑫ ⑬ ⑭ ⑮ ⑯ ⑰ ⑱ ⑲ ⑳ ㉑ ㉒ ㉓ ㉔ ㉕ ㉖ ㉗ ㉘ ㉙ ㉚ ㉛ ㉜ ㉝ ㉞ ㉟ ㉟o①Mains switch
AC IN - Mains connection
Mains socket - 220-240 V \~ 50 / 60 Hz
③lot for Kensington lock
④ LAN - Network connection
RJ-45 - Ethernet / Fast Ethernet
⑤ HDMI 1 ARC - HDMI Input 1 ^4 (with Audio Return Channel)
HDMI - Digital Video IN/Audio IN/OUT
⑥ HDMI 2 - HDMI input 2 ^4
HDMI - Digital Video IN/Audio IN
⑦ ANT TV - Antenna/cable analogue /DVB-T/T2 / DVB-C
IEC socket - 75 Ohm / 5 V / 80mA
⑧ ANT SAT 1 - Satellite antenna (Sat tuner 1) DVB-S/S2
F socket - 75 Ohm / 13/18 V / 500mA
⑨ ANT SAT 2 - Satellite antenna (Sat tuner 2) DVB-S/S2
F socket - 75 Ohm / 13/18 V / 500mA
⑩ SPDIF OUT - Audio output (digital)
Cinch socket (orange)
⑪ USB 3.0 - USB connection
USB type A - USB 3.0 (max. 900mA)
⑫ DIGITAL AUDIO LINK - Surround audio outputs (digital) - (RJ45)
⑬ HEADPHONE - Headphone connection
Jack 3,5 mm - Headphones 32-200 Ohm
⑭ HDMI 3 - HDMI input 3 ^4
HDMI - Digital Video IN/Audio IN
⑮ AUDIO OUT - Audio output (analogue) L/R - (Jack 3.5 mm)
⑯ RS-232C - Serial interface ^9 - (RJ12)
⑰ AV - Micro AV socket
Audio/Video IN with Scart adapter: Y/C (S-VHS/HI 8) CVBS (VHS/8 mm)
RGB
Audio/Video IN with VGA adapter: PC/STB video signal
PC formats (RGB, H, V)
Component
L/R
PC/STB video signal
(YPbPr)
L/R
⑱ COMMON INTERFACE - CI slot 1 (standard V1.3)
19 COMMON INTERFACE - CI slot 2 (standard V1.3)
⑳ HDMI 4 - HDMI input 4 ^10
HDMI - Digital Video IN/Audio IN
②1 USB - USB connection
USB type A - USB 2.0 (max. 500mA)
②2 USB - USB connection
USB type A - USB 2.0 (max. 500mA)
Loewe old
User handbook
Technical data
cild 3 (2017)
Technical data (bild 3.65 oled/bild 3.55 oled/bild 3.49/bild 3.43)
Changes of technical data and design of the equipment, reserved.
| Loewe device type: bild 3.65 oled bild 3.55 oled | bild 3.49 dr+ | bild 3.49 | bild 3.43 dr+ | bild 3.43 | ||
| Part number: 57460x81 | 57461x8057461x81 | 57419x5057419x51 | 57419x8057419x81 | 57420x5057420x51 | 57420x8057420x81 | |
| EU energy efficiency class: see enclosed energy label or under www.loewe.lv/int/support | ||||||
| Screen diagonal: 164 cm/65 inch 139 cm/55 inch 126 cm/49 inch 108 cm/43 inch | ||||||
| Power consumption On-Mode (max.) (Audio output 1/8 of the maximum value): | 448 W | 350 W ^5a 348 W ^5b | 175 W ^5c 187 W ^5d | 173 W ^5e 185 W ^5f | 144 W ^5c 151 W ^5d | 142 W ^5e 149 W ^5f |
| Power consumption On-Mode (home) ^1 : Annual energy consumption ^1 : | soc enclosed energy label or under www.loewe.tv/int/support | |||||
| Power consumption quick start mode: 80.0 W 70.0 W | 50.0 W ^bc 55.0 W ^5d | 50.0 W ^ba 55.0 W ^5f | 50.0 W ^bc 55.0 W ^5f | 50.0 W ^ba 55.0 W ^5f | ||
| Power consumption Standby Mode: 0.42 W | 0.49 W ^5a 0.41 W ^5b | 0.31 W | 0.31 W | 0.43 W ^5e 0.37 W ^5f | 0.43 W ^5e 0.37 W ^5f | |
| Power consumption when set is switched off: | 0 W | 0 W | 0 W | 0 W | 0 W | 0 W |
| Picture format / Resolution: | 16.9 / Ultra HD 3840 x 2160 px | |||||
| Display technology: | OLED (WRGB Pixel) | LCD with Edge-LED Backlight | ||||
| Device dimensions without stand (W ^6 x H x D): | 144.9 x 86.3 x 6.7 | 123.0 x 74.2 x 6.7 ^6a 122.8 x 73.9 x 6.7 ^6b | 111.9 x 68.1 x 7.3 cm | 96.3 x 59.4 x 7.3 cm | ||
| Device dimensions with stand ^2 (W ^6 x H x D): | 144.9 x 91.4 x 29.0 | 123.0 x 79.2 x 27.0 ^6a 122.8 x 78.9 x 27.0 ^6b | 111.9 x 70.4 x 25.0 cm | 96.3 x 61.7 x 25.0 cm | ||
| Weight without stand (approximate): | 30.8 kg | 20.6 kg ^5a 23.5 kg ^5b | 20.4 kg ^5e 20.8 kg ^5d | 20.2 kg ^5a 20.6 kg ^5b | 15.6 kg ^5e 15.8 kg ^5f | 15.4 kg ^5a 15.6 kg ^5f |
| Weight with stand ^3 (approximate): | 38.3 kg | 25.4 kg ^5a 28.2 kg ^5b | 23.6 kg ^5c 24.0 kg ^5d | 23.4 kg ^5a 23.8 kg ^5f | 18.8 kg ^5c 19.0 kg ^5f | 18.6 kg ^5a 18.8 kg ^5f |
| Ambient temperature: | 5°C - 35°C | |||||
| Relative humidity (non-condensing): | 20 - 80% | |||||
| Air pressure: | 800 - 1114 hPa (0 - 2000 m above sea level) | |||||
| Chassis designation: | SL410 | SL410 | SL420 | SL410 | SL420 | SL410 |
| Power supply: | 220 V - 240 V/50-60 Hz | |||||
| Tuner: terr./cable: VHF/Hyperband/UHFSatellite: 4 levels: 13/18V/22kHz / 16 levels: DiSEqC 1.0 / single-cable system EN 50/494 | ||||||
| Range: terr./cable: Terr./cable: 45 MHz up to 860 MHzSatellite: Satellite: 950 MHz up to 2150 MHz | ||||||
| Channel storage locations incl. AV and radio: | 6000 | |||||
| TV standards: analogue: digital: | B/G, I, L, D/K, M, NDVB-T/T2, DVB-C, DVB-S/S2 (UHD via DVB to max. 60 Hz) | |||||
| Colour standards: | SECAM, PAL, NTSC, NTSC-V, PAL-V (60 Hz) | |||||
| Sound formats: analogue (FM): analogue (NICAM): digital (MPEG): | Mono, Stereo, Dual channelMono, Stereo, Dual channelMono, Stereo, Dual channel, PCM, Dolby Digital, Dolby Digital Plus, Dolby Digital Pulse, Dolby MS11 (Dolby Virtual Speaker, Dolby Pro Logic II, Dolby True HD) ^2 | |||||
| Audio output power (sine / music): | 2 x 20W / 2 x 40W | |||||
| Acoustic speaker concept: | Speaker Box | |||||
| Telotext: | TOP / FLOF / HiText (Level 2.5) | |||||
| Page memory: | 2000 | |||||
| LAN: Standards supported: | 10 Mbit/sec Ethernet (10Base-T) / 100 Mbit/sec Fast Ethernet (100Base-T) | |||||
| WLAN: Standards supported: Power/Frequency range Types of encoding that are supported: | IEEE 802.11a/b/g/n, 802.11acMaximum power <100 mW at 2400-2483.5 MHz and 5150-5725 MHzWEP 64 and 128 Bit (ASCII and IHC), WPA PSK, WPA2 ACS | |||||
| Bluetooth: Power/Frequency range Bluetooth protocols: | Maximum power <10 mW at 2.4 GHzA2DP SRC, A2DP SNK, HID | |||||
| Home networking standard: | Universal Plug and Play Audio / Video (UPnP AV) | |||||
| File formals supported ^3 : Pictures: Audio: Video: | JPEG, JPEG progressive (max. resolution 3840x2160), PNGMP3, M4A (AAC LC), WMA (without lossless), FLAC, WAV (PCM), Ogg VorbisAVI (MPEG-1/2, XviD, Dolby Digital, MP3), WMV (WMV9, VC-1, WMA9, WMA Pro),MP4 (XviD, I1264/MPEG-4 AVC, AAC LC), MOV (I1264/MPEG-4 AVC, AAC LC),MKV (H.265/HEVC, H.264/MPEG-4 AVC, Dolby Digital), FLV (H.264/MPEG-4 AVC, H.263, MP3,AAC LC), MPG (MPEG-1, MPEG Audio), TS/PS (MPEG-2, H.264/MPEG-4 AVC, MPEG2 AudioDolbyDigital), VOB (MPEG 2, MPEG2 Audio, Dolby Digital)H.264/MPEG-4 AVC upto Profil High (Level 4.2)H.264/H.265 compatible to Dolby Vision/HDR10/HLG (bild 3.65 oled/bild 3.55 oled)H.264/H.265 compatible to HDR10/HLC (bild 3.49 DR+/bild 3.49/3.49/3.43 DR+/bild 3.43) | |||||
^1 The energy consumption per year is calculated on the basis of a daily four-hour operation of the 15-yr on 26-h days. The actual energy consumption will depend on the way to
of the TV set on 365 days. The actual energy consumption will depend on the way the TV set is used. On-Mode (home) values less than 100 W must have decimal places (.0).
^2 Supplied mounting option: Table Stand.
For the playability of the individual formats no guaranteed can be given.
^4 Only for device type bld3.49 DR-/bld3.43 DR-
^6 a: version x80; b: version x81; c: version x50; d: version x51.
^6 The width of the TV set can be increased by up to 4mm depending on the type of TV set in the area of the side-mounted Loewe clip.
Loewe bild
User handbook
Technical data
old 3 (2017)
Equipment features (bild 3.65 oled/bild 3.55 oled)
Changes to the equipment features and the set design reserved.
| Loewe set type: bild 3.65 oled bild 3.55 oled | ||
| Image* (Image) | ||
| Ultra HD Super Resolution Scaling / Image+ Active/24 p motion picture display | ●/●/● | ●/●/● |
| 3D technology / Active Glasses 3D | -/-/-/- | |
| Auto-Dimming Video (VDB+)/ Auto-Dimming Raum (OPC) / Home Mode: | /●/● | /●/● |
| Digital* (Television Standards) | ||
| DVB-T2 ^1 / DVB-C / DVB-S2/Multislandard (analogue) / Dual Channel | ●/●/●/●/● | ●/●/●/●/● |
| PEG / MPEG2 / MPEG4 (H.264) / HEVC (H.265) / integrated HDTV reception ^2 | ●/●/●/●/● | ●/●/●/●/● |
| DVB radio / Unicable (acc. EN 50494) | ●/● | ● |
| Sound* (Audio) | ||
| Integrated 5.1 AV-Rociver / Digital audio link | -/-/-/- | |
| Dolby Digital / Dolby Digital Plus / DTS | ●/--- | ●/--- |
| Individual bass and treble control / Loudness | ●/● | ● |
| Automatic Volume Control (AVC) | ● | ● |
| Audio out available: variable / fixed / Subwoofer | ●/●/● | ●/●/● |
| Assist* (Operation) | ||
| Loewe os / Home Screen (incl. favorites) | ●/● | ● |
| HDR (Dolby Vision / HDR 10 / HLC) | ●/●/● | ●/●/● |
| Electronic Program Guide (SI-dala) | ● | ● |
| MediaText (HbbTV) / Video text (Level 2.5) | ●/● | ● |
| Menu languages ^3 / Context Related Help | ●/● | ● |
| Parental Lock / Automatic turn-off / Timer | ●/●/● | ●/●/● |
| Instant Channel Zapping / Quick Start Mode | ●/● | ● |
| Digital Link HD (CEC) | ● | ● |
| PIP (AV) ^14 / Full PIP / Split screen TV : Video text | ●/●/● | ●/●/● |
| MediaUpdate (via USB / Internet) | ●/● | ● |
| Hotel Mode | ● | ● |
| Media* (Multimedia functions) | ||
| DR+/ Speicherkapazitat in CB / USB-Recording (bei DR+: USB Archive) | -/-/-● | -/-/-● |
| DR+ Streaming Server / Client / Follow-Me | /●/● | /●/● |
| Multi Recording / Mobile Recording / Multiroom-Streaming | ●/●/● | ●/●/● |
| Fotoplayer / Musikplayer / Videoplayer (über I emmelzwerk und USB, inkl. Ultra HD) | ●/●/● | ●/●/● |
| Digital Modia Ronderer (inkl. Ultra HD) / Bluetooth Music Player | ●/● | ● |
| Internetapps (MediaNet) / Internetbrowser / Internetradio (inkl. Suchfunktion) | ●/●/● | ●/●/● |
| Connectivity* (Connectors) | ||
| HDMI wth HDCP 2.2 | 4(1x2.0a.1x ARC) 4(1x2.0a.1x ARC) | |
| LAN network connection / Integrated WLAN | ●/● | ● |
| Common Interface / CI Plus 1.3 certified ^6 | 2/● 2/● | |
| Home Control Interface IP / Home Control Interface RS232 / IR Link ^5 / Motor control | ●/●/- | ●/●/- |
| Digital Audiolink (DAL) ^7 / Digital Audio-Out (coaxial) | -/-● | -/-● |
| Analog Audio-Out (L/R) / Headphone (jack 3.5 mm) | ●/● | ● |
| Micro-AV ^8 (Component / Scart / VGA) | ●/●/● | ●/●/● |
| USB / Bluetooth Connection | 3(1x3.0)/● 3(1x3.0)/● | |
| VESA mounting points | ● | ● |
- = included/installed
- = upgradeable/optional
- The reception of DVB-T2 programs is possible in selected countries.
^12 Reception of digital channels may be limited by individual regulations from the respective broadcaster/provider. UK models are Freeview HD compliant.
DGBF-E-NLOZ-GRPL-H-FIN-SLOSK-TR-S-DK-PRUS-N
^14 AV PIP is only available in combination with DVB T/C/S.
CI Plus is backwards compatible with CI. Functionality is dependent on module availability from the supplier.
- Only in conjunction with a corresponding adapter and selected devices (RC5, 36 kHz). To be ordered separately.
^7 Loewe System 5.1 Out, Stereo Out, Subwoofer Out.
^15 Only in conjunction with a corresponding adapter, to be ordered separately.
Loewe old
User handbook
Technical data
child 3 (2017)
Equipment features (bild 3.49/bild 3.43)
Changes to the equipment features and the set design reserved.
| Loewe set type: | bild 3.49 dr+ | bild 3.49 | bild 3.43 dr+ | bild 3.43 |
| Image* (Image) | ||||
| Ultra HD Super Resolution Scaling / Image+ Active /24 p motion picture display | ●/●/● | ●/●/● | ●/●/● | ●/●/● |
| 3D technology / Active Glasses 3D | -/-/-/-/-/-/-/- | - | ||
| Auto-Dimming Video (VDB+)/Auto-Dimming Raum (OPC)/Home Mode: | ●/●/● | ●/●/● | ●/●/● | ●/●/● |
| Digital* (Television Standards) | ||||
| DVB-T20/DVB-C/DVB-S2/Multistandard (analogue)/Dual Channel | ●/●/●/●/● | ●/●/●/●/● | ●/●/●/●/● | ●/●/●/●/● |
| PEG/MPEG2/MPEG4(H.264)/HEVC(H.265)/integrated HDTV reception2 | ●/●/●/●/● | ●/●/●/●/● | ●/●/●/●/● | ●/●/●/●/● |
| DVB radio / Unicable (acc. EN 50494) | ●/● | ●/● | ●/● | ●/● |
| Sound* (Audio) | ||||
| Integrated 5.1 AV-Receiver / Digital audio link | ●/● | -/- | ●/● | -/- |
| Dolby Digital / Dolby Digital Plus / DTS | ●/●/ | ●/ / | ●/●/ | ●/ / |
| Individual bass and treble control / Loudness | ●/● | ●/● | ●/● | ●/● |
| Automatic Volume Control (AVC) | ● | ● | ● | ● |
| Audio out available: variable / fixed / Subwoofer | ●/●/● | ●/●/● | ●/●/● | ●/●/● |
| Assist* (Operation) | ||||
| Loewe os / Home Screen (incl. favorites) | ●/● | ●/● | ●/● | ●/● |
| HDR (Dolby Vision / HDR 10 / HLG) | -/-/● | -/-/● | -/-/● | -/-/● |
| Electronic Program Guide (SI-data) | ● | ● | ● | ● |
| MediaText (HbbTV) / Video text (Level 2.5) | ●/● | ●/● | ●/● | ●/● |
| Menu languages3/ Context Related Help | ●/● | ●/● | ●/● | ●/● |
| Parental Lock / Automatic turn-off / Timer | ●/●/● | ●/●/● | ●/●/● | ●/●/● |
| Instant Channel Zapping / Quick Start Mode | ●/● | ●/● | ●/● | ●/● |
| Digital Link HD (CEC) | ● | ● | ● | ● |
| PIP (AV)4/ Full PIP / Split screen TV : Video text | ●/●/● | ●/●/● | ●/●/● | ●/●/● |
| MediaUpdate (via USB / Internet) | ●/● | ●/● | ●/● | ●/● |
| Hotel Mode | ● | ● | ● | ● |
| Media* (Multimedia functions) | ||||
| DR+/Speicherkapazität in GB / USB-Recording (bei DR+: USB-Archive) | ●/1.000/● | -/-/-/● | ● /1.000÷●-/-/● | |
| DR+ Streaming Server / Client / Follow-Me | ●/●/● | /●/● | ●/●/● | /●/● |
| Multi Recording / Mobile Recording / Multiroom-Streaming | ●/●/● | ●/●/● | ●/●/● | ●/●/● |
| Fotoplayer / Musikplayer / Videoplayer (über Holmnetzwerk undUSB, inkl. Ultra HD) | ●/●/● | ●/●/● | ●/●/● | ●/●/● |
| Digital Media Rendorer (inkl. Ultra HD) / Bluetooth Music Player | ●/● | ●/● | ●/● | ●/● |
| Internetapps (MediaNet) / Internetbrowser / Internetradio (inkl.Suchfunktion) | ●/●/● | ●/●/● | ●/●/● | ●/●/● |
| Connectivity* (Connectors) | ||||
| HDMI with HDCP 2.2 | 4(4×UID, 1×ARC) | 4(4×UID, 1×ARC) | 4(4×UID, 1×ARC) | 4(4×UID, 1×ARC) |
| LAN network connection / integrated WLAN | ●/● | ●/● | ●/● | ●/● |
| Common Interface / CI Plus 1.3 certified8 | 2/● | 2/● | 2/● | 2/● |
| Home Control Interface IP / Home Control Interface RS232 /IR-Link® / Motor control | ●/●/●/- | ●/●/●/- | ●/●/●/- | ●/●/●/- |
| Digital Audiolink (DAL)7 / Digital Audio-Out (coaxial) | ●/● | -/-/● | ● /●-/-/● | |
| Analog Audio-Out (L/R) / Headphone (jack 3.5 mm) | ●/● | ●/● | ●/● | ●/● |
| Micro-AV8 (Component / Scart / VGA) | ●/●/● | ●/●/● | ●/●/● | ●/●/● |
| USB / Bluetooth Connection | 3(1×3.0)/● | 3(1×3.0)/● | 5(1×3.0)/● | 3(1×3.0)/● |
| VESA mounting points | ● | ● | ● | ● |
● = included/installed ○ = upgradeable/optional
- The reception of DVB-T2 programs is possible in selected countries.
^12 Reception of digital channels may be limited by individual regulations from the respective broadcaster/provider. UK models are Freeview HD compliant.
DGBF-E-NLOZ-GRPL-H-FIN-SLOSK-TR-S-DK-PRUS-N
^14 AV PIP is only available in combination with DVB T/C/S.
CI Plus is backwards compatible with CI. Functionality is dependent on module availability from the supplier.
- Only in conjunction with a corresponding adapter and selected devices (RC5, 36 kHz), to be ordered separately
7 Loewe System 5.1 Out. Stereo Out, Supwooter Out.
^15 Only in conjunction with a corresponding adapter, to be ordered separately.
Connections rear side of the device (bild 3.55/bild 3.48/bild 3.40)
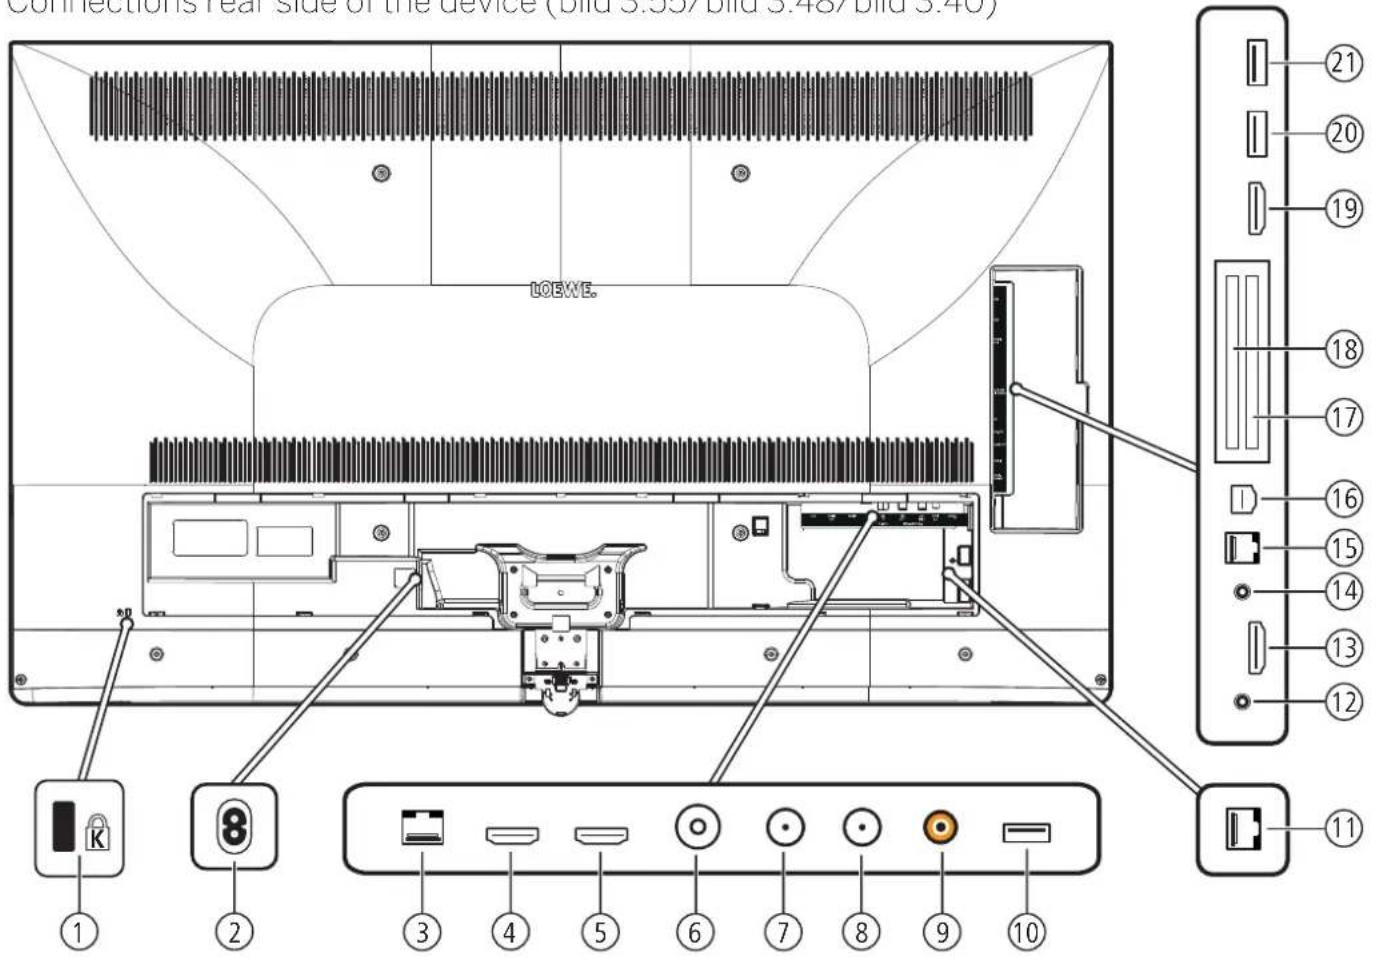
text_image
Connections rear side of the device (bid 3.55/ bid 3.48/ bid 3.40) LOEWE. ① ② ③ ④ ⑤ ⑥ ⑦ ⑧ ⑨ ⑩ ⑪ ⑫ ⑬ ⑭ ⑮ ⑯ ⑰ ⑱ ⑲ ⑳ ㉑ ㉒ ㉓ ㉔ ㉕ ㉖ ㉗ ㉘ ㉙ ㉚ ㉛ ㉜ ㉝ ㉞ ㉟ ㉟a ㉟b ㉟c ㉟d ㉟e ㉟f ㉟g ㉟h ㉟i ㉟j ㉟k ㉟l ㉟m ㉟n ㉟o ㉟p ㉟q ㉟r ㉟s ㉟t ㉟u ㉟v ㉟w ㉟x ㉟y ㉟z ㉟ac ㉟ac1 ㉟ac2 ㉟ac3 ㉟ac4 ㉟ac5 ㉟ac6 ㉟ac7 ㉟ac8 ㉟ac9 ㉟ac10① Slot for Kensington lock
② AC IN - Mains connection
Mains socket - 220-240 V \~ 50 / 60 Hz
③ LAN - Network connection
RJ-45 - Ethernet / Fast Ethernet
④ HDMI 1 ARC - HDMI input 1° (with Audio Return Channel)
HDMI - Digital Video IN, Audio IN/OUT
⑤ HDMI 2 - HDMI input 2 ^4
HDMI - Digital Video IN, Audio IN
⑥ ANT TV - Antenna/cable analogue /DVB-T/T2 /DVB-C
IEC socket - 75 Ohm / 5 V / 80mA
⑦ ANT SAT 1 Satellite antenna (Sat tuner 1) DVB-S/S2
F socket - 75 Ohm / 13/18 V / 500mA
⑧ ANT SAT 2 - Satellite antenna (Sat tuner 2) DVB-S/S2
F socket - 75 Ohm / 13/18 V / 500mA
⑨ SPDIF OUT - Audio output (digital)
Cinch socket (orange)
⑩ USB 3.0 - USB connection
USB type A - USB 3.0 (max. 900mA)
⑪ DIGITAL AUDIO LINK - Surround audio outputs (digital) - (RJ45)
⑫ HEADPHONE - Headphone connection
Jack 3,5 mm - Headphones 32-200 Ohm
⑬ HDMI 3 - HDMI input 3 ^13
HDMI - Digital Video IN, Audio IN
⑭ AUDIO OUT - Audio output (analogue) L/R - (Jack 3.5 mm)
⑮ RS-232C - Serial interface ^12 - (RJ12)
⑯ AV - Micro AV socket
Audio/Video IN with Scart adapter: Y/C (S-VHS/Hi 8)
CVBS (VHS/8 mm)
RGB
Audio/Video IN with VGA adapter: PC/STB video signal
Component (YPbPr)
L/R
⑰ COMMON INTERFACE - CI slot 1 (standard V1.3)
⑱ COMMON INTERFACE - CI slot 2 (standard V1.3)
⑲ HDMI 4 - HDMI Input 4 ^3
HDMI - Digital Video IN/Audio IN
⑳ USB - USB connection
USB type A - USB 2.0 (max. 500mA)
②1 USB - USB connection
USB type A - USB 2.0 (max. 500mA)
Loewe old
User handbook
Technical data
cild 3
Changes of technical data and design of the equipment reserved.
| Loewe device type: bild 3.55 bild 3.48 bild 3.40 | bild 3.40 | |||
| Part number: 56460xxx 56459xxx 56458xxx 56455xxx | ||||
| EU energy efficiency class: see enclosed energy label or under www.loewc.tv/int/support | ||||
| Screen diagonal: 140 cm / 55 inch 122 cm / 48 inch 102 cm / 40 inch 102 cm / 40 inch | ||||
| Power consumption On-Mode (max.) (Audio output 1/8 of the maximum value): 226 W 162 W | 123 W 102 W | |||
| Power consumption On-Mode (home)2: Annual energy consumption6: | ||||
| Power consumption quick start mode: | ||||
| Power consumption Standby Mode: Power consumption when set is switched off: | ||||
| Resolution: | Ultra HD 3840 x 2160 px | Full HD 1920 x 1080 px | ||
| Display technology / Picture format: | LCD with Edge-LCD-Backlight / 16:9 | |||
| Device dimensions without stand (W x H x D): Device dimensions with sland^2 (W x H x D): | 123,0 x 75,4 x 5,5 cm 123,0 x 78,1 x 32,0 cm | 107,8 x 67,0 x 5,5 cm 107,8 x 69,8 x 25,0 cm | 91,0 x 57,6 x 55 cm 91,0 x 60,4 x 25,0 cm | 91,0 x 57,4 x 5,5 cm 91,0 x 60,4 x 25,0 cm |
| Weight without stand (approximate): Weight with sland^2 (approximate): | 27,2 kg 30,6 kg | 19,0 kg 21,3 kg | 15,2 kg 17,5 kg | 15,1 kg 17,4 kg |
| Ambient temperature: | 5°C - 35°C | |||
| Relative humidity (non-condensing): | 20 - 80% | |||
| Air pressure: | 800 - 1114 hPa (0 - 2000 m above sea level) | |||
| Chassis designation: | SL410 / SL4154 | SL 310F | ||
| Power supply: | 220 V - 240 V/50-60 Hz | |||
| Tuner: terr./cable: Satellite: | VHIF/I hyperband/UHIF 4 levels: 13/18V/22kHz / 16 levels: DiSEqC 1.0 / single-cable system: EN 50494 | |||
| Range: terr./cable: Satellite: | Terr./cable: 45 MHz up to 860 MHz Satellite: 950 MHz up to 2150 MHz | |||
| Channel storage locations incl. AV and radio: | 6000 | |||
| TV standards: analogue: digital: | B/G, I, L, D/K, M, N DVB-T/T2, DVB-C, DVB-S/S2 (UHD via DVB to max. 60 Hz) | B/G, I, L, D/K, M, N DVB-T/T2/C/S/S2 | ||
| Colour standards: | SECAM, PAL, NTSC, NTSC-V, PAL-V (60 Hz) | |||
| Sound formats: analogue (TM): analogue (NICAM): digital (MPEG): | Mono, Stereo, Dual channel Mono, Stereo, Dual channel Mono, Stereo, Dual channel, PCM, Dolby Digital, Dolby Digital Plus, Dolby Digital Pulse, Dolby MS11 (Dolby Virtual Speaker, Dolby Pro Logic II, Dolby TrueHD)4 | |||
| Audio output power (sine / music): | 2 x 20W / 2 x 40W | 2 x 10W / 2 x 20W | ||
| Acoustic speaker concept: | Speaker Box | |||
| Teletext: | TCP / FLOF / HiText (Level 2.5) | |||
| Page memory: | 2000 | |||
| LAN: Standards supported: | 10 Mbit/sec Ethernet (10Base T) / 100 Mbit/sec Fast Ethernet (100Base T) | |||
| WLAN: Standards supported: Power/Frequency range: Types of encoding that are supported: | IEEE 802.11a/b/g/n, 802.11ac Maximum power <100 mW at 2400-2483.5 MHz and 5150-5725 MHz WEP 64 and 128 Bt (ASCII and HEX), WPA PSK, WPA2 AES | |||
| Bluetooth: Power/Frequency range: Bluetooth protocols | Maximum power <10 mW at 2,4 GHz A2DP SRC, A2DP SNK, HID | |||
| Home networking standard: | Universal Plug and Play Audio / Video (UPnP AV) | |||
| File formats supported: Pictures: Audio: Video: | JPEG, JPEG progressive (max. resolution 3840x2160), PNG MP3, M4A (AAC LC), WMA (without lossless), FLAC, WAV (PCM), Ogg Vorbis AVI (MPEG-1/2, XvD, Dolby Digital, MP3), WMV (WMV9, VC-1, WMA9, WMA Pro), MP4 (XvID, H.264/MPEG-4 AVC, AAC LC), MOV (H.264/MPEG-4 AVC, AAC LC), MKV (H.265/HEVC, H.264/MPEG-4 AVC, Dolby Digital), FLV (H.264/MPEG-4 AVC, H.263, MP3, AAC LC), MPG (MPEG-1, MPEG Audio), TS/PS (MPEG-2, H.264/MPEG-4 AVC, MPEG2 Audio, Dolby Digital), VCB (MPEG-2, MPEG2 Audio, Dolby Digital) H.264/MPEG-4 AVC upto Profil High (Level 4.2) H.264/H.265 compatible with HDR10/HLG for SL4xx TV sets | |||
^a The energy consumption per year is calculated on the basis of a daily four-hour operation of the TV set on 365 days. The actual energy consumption will depend on the way the TV set is used. On-Mode (home) values less than 100 W must have decimal places (.0).
^12 Supplied mounting option: Table Stand.
^6 For the playability of the individual formats no guarantee can be given.
^12 Only for ceve ce type bild 3.55 dal / bild 3.48 dal / bild 3.40 dal.
Loewe bild
User handbook
Technical data
cild 3
Equipment features (bild 3.55 dal/bild 3.48 dal/bild 3.40 dal)
Changes to the equipment features and the set design reserved.
| Loewe set type: bild 3.55 dal | bild 3.48 dal | bild 3.40 dal | |
| Image* (Image) | |||
| Ultra HD Super Resolution Scaling / Image+ Active /24 p motion picture display | ●/●/● | ●/●/● | ●/●/● |
| 3D technology / Active Glasses 3D | ●/○ | -/-/-/- | |
| Auto-Dimming Video (VDB+) / Auto-Dimming Raum (OPC) / Home Mode: | ●/●/● | ●/●/● | ●/●/● |
| Digital* (Television Standards) | |||
| DVB-T2 ^1 /DVB-C/DVB-S2/Multistandard(analogue)/Dual Channel | ●/●/●/●/● | ●/●/●/●/● | ●/●/●/●/● |
| PEG/MPEG2/MPEG4(H.264)/HEVC(H.265)/integrated HDTV reception ^2 | ●/●/●/●/● | ●/●/●/●/● | ●/●/●/●/● |
| DVB radio/Unicable(acc.EN 50494) | ●/● | ●/● | ●/● |
| Sound* (Audio) | |||
| Integrated 5.1 AV-Receiver / Digital audio link | ●/● | ●/● | ●/● |
| Dolby Digital/Dolby Digital Plus/DTS | ●/●/- | ●/●/- | ●/●/- |
| Individual bass and troble control/Loudness | ●/● | ●/● | ●/● |
| Automatic Volume Control (AVC) | ● | ● | ● |
| Audio out available: variable / fixed / Subwoofer | ●/●/● | ●/●/● | ●/●/● |
| Assist* (Operation) | |||
| Loewe os/I home Screen(incl favoriles) | ●/● | ●/● | ●/● |
| HDR(Dolby Vision/HDR 10/HLG) | -/-/● | -/-/● | -/-/● |
| Electronic Program Guide(SI data) | ● | ● | ● |
| MediaText(HbbTV)/Video text(Level 2.5) | ●/● | ●/● | ●/● |
| Menu languages ^13 /Context Related Help | ●/● | ●/● | ●/● |
| Parental Lock/Automatic turn-off/Timer | ●/●/● | ●/●/● | ●/●/● |
| Instant Channel Zapping/Quick Start Mode | ●/● | ●/● | ●/● |
| Digital Link HD(CEC) | ● | ● | ● |
| PIP(AV) ^14 /Full PIP/Split screen TV:Video text | ●/●/● | ●/●/● | ●/●/● |
| MediaUpdate(via USB/Internet) | ●/● | ●/● | ●/● |
| Hotel Mode | ● | ● | ● |
| Media* (Multimedia functions) | |||
| DR+/storage capacity in GB/USB recording | -/-/-● | -/-/-● | -/-/-● |
| DR+Streaming server/client/Follow-Me | -/-/● | -/-/● | -/-/● |
| Multi Recording ^19 /Mobile Recording ^19 | ○/○ | ○/○ | ○/○ |
| Multiroom Streaming ^19 | ○ | ○ | ○ |
| Photo player/Music player/Video player(via Home network and USB incl,Ultra HD) | ●/●/● | ●/●/● | ●/●/● |
| Digital Mocia Renderer(incl.Ultra HD)/Bluetooth Music Player ^19 | ●/○ | ●/○ | ●/○ |
| Internet Apps(MediaNet)/Internet Browser/Internet Radio(incl.searchfunction) | ●/●/● | ●/●/● | ●/●/● |
| Connectivity* (Connectors) | |||
| HDMI with HDCP 2.2 | 4(4xU ID,1x ARC)4(4xU ID,1x ARC)4(4xU ID,1x ARC) | ||
| LAN network connection/integrated WLAN | ●/● | ●/● | ●/● |
| Common Interface/CI Plus 1.3 certified ^15 | 2/●2/●2/● | ||
| Home Control Interface IP/Home Control Interface RS232/IR-Link ^16 /Motor control | ●/●/●/- | ●/●/●/- | ●/●/●/- |
| Digital Audiolink(DAL) ^17 /Digital Audio Cut(coaxial) | ●/● | ●/● | ●/● |
| Analog Audio-Out(L/R)/Headphone(jack 3.5 mm) | ●/● | ●/● | ●/● |
| Micro-AV ^18 (Component/Scart/VGA) | ●/●/● | ●/●/● | ●/●/● |
| USB/Bluetooth Connection | 3(1x30)/● | 3(1x30)/● | 3(1x30)/● |
| VESA mounting points | ● | ● | ● |
● = included/installed ○ = upgradeable/optional
- The reception of DVB-T2 programs is possible in selected countries.
^12 Reception of digital channels may be limited by individual regulations from the respective broadcaster/provider. UK models are Freeview HD compliant.
DGBFLENLOZGRPLHFINSLOSKTRSDKPRUSN
^14 AV PIP is only available in combination with DVB T/C/S.
CI Plus is backwards compatible with CI. Functionality is dependent on module availability from the supplier.
- Only in conjunction with a corresponding adapter and selected devices (RC5. 36 kHz), to be ordered separately.
Loewe System 5.1 Out, Stereo Out, Subwoofer Out.
^(5) Only in conjunction with a corresponding adapter, to be ordered separately.
^19 Available via optional upgrade feature
Loewe bild
User handbook
Technical data
cild 3
Equipment features (bild 3.55/bild 3.48/bild 3.40/bild 3.40 FHD)
Changes to the equipment features and the set design reserved.
| Loewe set type: bild 3.55 | bild 3.48 | bild 3.40 | bild 3.40 FHD | |
| Image* (Image) | ||||
| Ultra HD Super Resolution Scaling / Image+ Active / 24 p motion picture display | ●/●/● | ●/●/● | ●/●/● | -/-●/● |
| 3D technology / Active Glasses 3D | ●/○ | -/-/-/-/-/- | ||
| Auto-Dimming Video (VDB+)/ Auto-Dimming Raum (OPC)/ Home Mode: | ●/●/● | ●/●/● | ●/●/● | -/-●/● |
| Digital* (Television Standards) | ||||
| DVB T2 ^1 / DVB-C/DVB-S2/Multistandard (analogue)/ Dual Channel | ●/●/●/●/● | ●/●/●/●/● | ●/●/●/●/● | ●/●/●/●/● |
| PEG/MPEG2/MPEG4(H.264)/ HEVC(H.265)/ integrated HDTV reception ^2 | ●/●/●/●/● | ●/●/●/●/● | ●/●/●/●/● | ●/●/●/●/● |
| DVB radio / Unicable (acc. EN 50494) | ●/● | ●/● | ●/● | ●/● |
| Sound* (Audio) | ||||
| Integrated 5.1 AV-Receiver / Digital audio link | / - / / / | |||
| Dolby Digital / Dolby Digital Plus / DTS | ●/-/- | ●/-/- | ●/-/- | ●/-/- |
| Individual bass and treble control / Loudness | ●/● | ●/● | ●/● | ●/● |
| Automatic Volume Control (AVC) | ● | ● | ● | ● |
| Audio out available: variable / fixed / Subwoofer | ●/●/● | ●/●/● | ●/●/● | ●/●/● |
| Assist* (Operation) | ||||
| Locowe os / Home Screen (incl. favorites) | ●/● | ●/● | ●/● | ●/● |
| HDR (Dolby Vision / HDR 10 / HLC) | /●/● | /●/● | /●/● | / / |
| Electronic Program Guide (SI-data) | ● | ● | ● | ● |
| MediaTexl (IbbTV)/Video texl (Level 2.5) | ●/● | ●/● | ●/● | ●/● |
| Monu languages ^3 / Context Related Hop | ●/● | ●/● | ●/● | ●/● |
| Parental Lock / Automatic turn-off / Timer | ●/●/● | ●/●/● | ●/●/● | ●/●/● |
| Instant Channel Zapping / Quick Start Mode | ●/● | ●/● | ●/● | ●/● |
| Digital Link HD (CEC) | ● | ● | ● | ● |
| PIP (AV) ^3 / Full PIP / Split screen TV : Video texl | ●/●/● | ●/●/● | ●/●/● | ●/●/● |
| MediaUpdate (via USB / Internet) | ●/● | ●/● | ●/● | ●/● |
| Hotel Mode | ● | ● | ● | ● |
| Media* (Multimedia functions) | ||||
| DR+/ storage capacity in GB/USB recording | / /● | / /● | / /● | / /● |
| DR+ Streaming server / client / Follow-Mc | -/-●/● | -/-●/● | -/-●/● | -/-●/● |
| Multi Recording ^9 / Mobile Recording ^9 | ○/○ | ○/○ | ○/○ | ○/○ |
| Multicom Streaming ^9 | ○ | ○ | ○ | ○ |
| Photo player / Music player / Video player (via Home network and USB incl. Ultra HD) | ●/●/● | ●/●/● | ●/●/● | ●/●/● |
| Digital Media Renderer (incl. Ultra HD)/ Bluetooth Music Player ^9 | ●/○ | ●/○ | ●/○ | ●/○ |
| Internet Apps (MediaNot) / Internet Browser / Internet Radio | ●/●/● | ●/●/● | ●/●/● | ●/●/● |
| Connectivity* (Connectors) | ||||
| HDMI with HDCP 2.2 | 4(4x UID, 1x ARC) 4(4x U ID, 1x ARC) 4(4x U ID, 1x ARC) 3(1x ARC) | |||
| LAN network connection / integrated WLAN | ●/● | ●/● | ●/● | ●/● |
| Common Interface / CI Plus 1.3 certified ^13 | 2/● | 2/● | 2/● | 2/● |
| Home Control Interface IP / Home Control Interface RS232 / IR-Link ^13 / Motor control | ●/●/●/- | ●/●/●/- | ●/●/●/- | ●/●/●/- |
| Digital Audiolink (DAL) ^17 / Digital Audio-Out (coaxial) | -/-● | -/-● | -/-● | -/-● |
| Analog Audio-Out (L/R) / Headphone (jack 3.5 mm) | ●/● | ●/● | ●/● | ●/● |
| Micro-AV ^3 (Component / Scart / VGA) | ●/●/● | ●/●/● | ●/●/● | ●/●/● |
| USB / Bluetooth Connection | 3(1x3.0)/● | 3(1x3.0)/● | 3(1x3.0)/● | 3(1x3.0)/● |
| VESA mounting points | ● | ● | ● | ● |
● = included/installed ○ = upgradeable/optional
- The reception of DVB-T2 programs is possible in selected countries.
^12 Reception of digital channels may be limited by individual regulations from the respective broadcaster/provider. UK models are Freeview HD compliant.
DGBFLENLOZGRPLHFINSLOSKTRSDKPRUSN
^14 AV PIP is only available in combination with DVB T/C/S.
© CI Plus is backwards compatible with CI. Functionality is dependent on module availability from the supplier.
- Only in conjunction with a corresponding adapter and selected devices (RC5. 36 kHz), to be ordered separately.
Loewe System 5.1 Out, Stereo Out, Subwoofer Out.
(5) Only in conjunction with a corresponding adapter, to be ordered separately.
^19 Available via optional upgrade feature
Position and function of the connections (bild 2.55 oled)
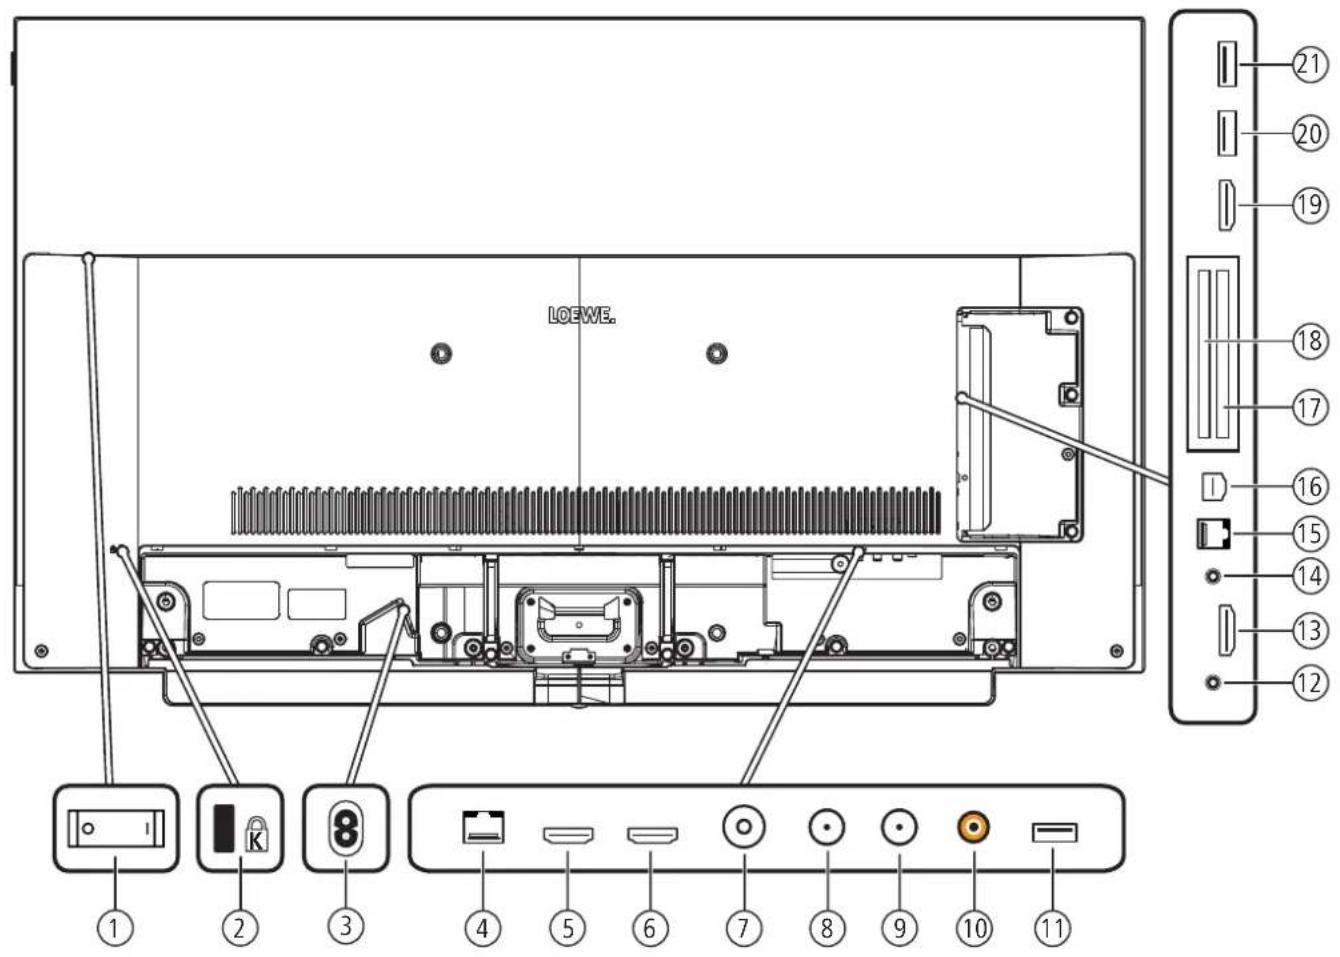
text_image
LOEWE. ① ② ③ ④ ⑤ ⑥ ⑦ ⑧ ⑨ ⑩ ⑪ ⑫ ⑬ ⑭ ⑮ ⑯ ⑰ ⑱ ⑲ ⑳ ㉑ ㉒ ㉓ ㉔ ㉕ ㉖ ㉗ ㉘ ㉙ ㉚ ㉛ ㉜ ㉝ ㉞ ㉟ ㉟o ㉟o1 ㉟o2 ㉟o3 ㉟o4 ㉟o5 ㉟o6 ㉟o7 ㉟o8 ㉟o9 ㉟o10 ㉟o11①Mains switch
②lot for Kensington lock
AC IN - Mains connection
Mains socket - 220-240 V - 50 / 60 Hz
④ LAN - Network connection
RJ-45 - Ethernet / Fast Ethernet
⑤ HDMI 1 ARC - HDMI input 1 ^2 (with Audio Return Channel)
HDMI - Digital Video IN/Audio IN/OUT
⑥ HDMI 2 - HDMI input 2 ^7
HDMI - Digital Video IN/Audio IN
⑦ ANT TV - Antenna/cable analogue /DVB-T/T2 / DVB-C
EC socket - 75 Ohm / 5 V / 80mA
⑧ ANT SAT1 - Satellite antenna (Sat tuner 1) DVB-S/S2
F socket - 75 Ohm / 13/18 V / 500mA
⑨ Without function
⑩ SPDIF OUT - Audio output (digital)
Cinch socket (orange)
⑪ USB 3.0 - USB connection
USB type A - USB 3.0 (max. 900mA)
⑫ HEADPHONE - Headphone connection
Jack 3.5 mm - Headphones 32-200 Ohm
⑬ HDMI 3 - HDMI input 3 ^2
HDMI - Digital Video IN/Audio IN
⑭ AUDIO OUT - Audio output (analogue) L/R - (Jack 3.5 mm)
⑮ RS-232C - Serial interface ^1 - (RJ12)
⑯ AV - Micro AV socket ^1
Audio/Video IN with Scart adapter: Y/C (S-VHS/Hi 8)
CVBS (VHS/8 mm)
RGB
L/R
Audio/Video IN with VGA adapter: PC/STB video signal
PC formats (RGB, H, V)
Component (YPbPr)
L/R
⑰ COMMON INTERFACE - Cl slot 1 (standard V1.3)
⑱ COMMON INTERFACE - CI slot 2 (standard V1.3)
⑲ HDMI 4 - HDMI input 4 ^2
HDMI - Digital Video IN/Audio IN
20 USB - USB connection
USB type A - USB 2.0 (max. 500mA)
②1 USB - USB connection
USB type A - USB 2.0 (max. 500mA)
Position and function of the connections (bild 2.49 / bild 2.43)
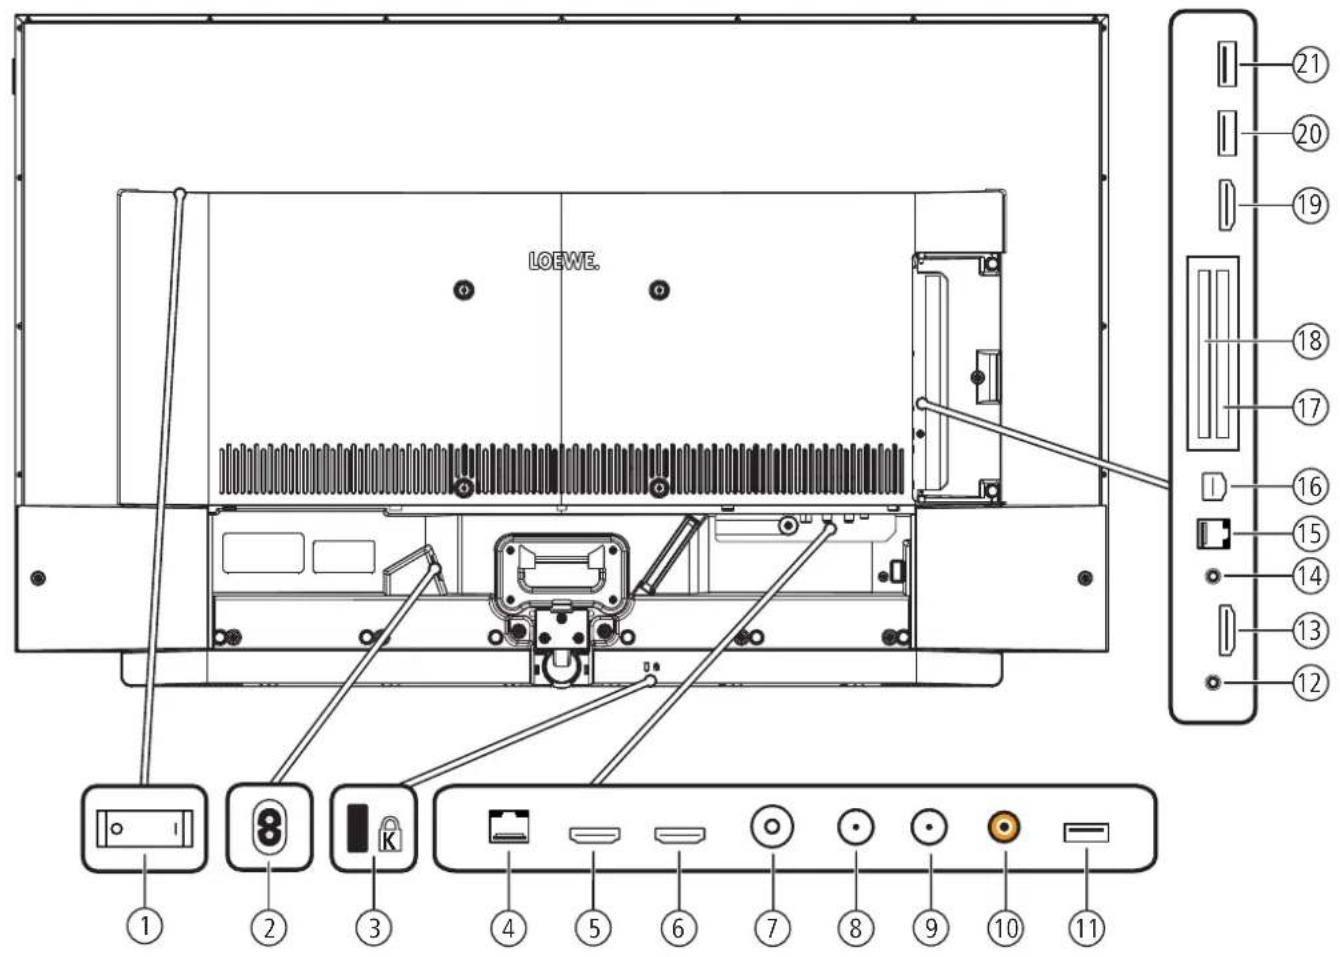
text_image
LOEWE. ① ② ③ ④ ⑤ ⑥ ⑦ ⑧ ⑨ ⑩ ⑪ ⑫ ⑬ ⑭ ⑮ ⑯ ⑰ ⑱ ⑲ ⑳ ㉑ ㉒ ㉓ ㉔ ㉕ ㉖ ㉗ ㉘ ㉙ ㉚ ㉛ ㉜ ㉝ ㉞ ㉟ ㉟o①Mains switch
AC IN - Mains connection
Mains socket - 220-240 V \~ 50 / 60 Hz
③lot for Kensington lock
④ LAN - Network connection
RJ-45 - Ethernet / Fast Ethernet
⑤ HDMI 1 ARC - HDMI Input 1 ^2 (with Audio Return Channel)
HDMI - Digital Video IN/Audio IN/OUT
⑥ HDMI 2 - HDMI input 2 ^2
HDMI - Digital Video IN/Audio IN
⑦ ANT TV - Antenna/cable analogue /DVB-T/T2 / DVB-C
TEC socket - 75 Ohm / 5 V / 80mA
⑧ ANT SAT 1 - Satellite antenna (Sat tuner 1) DVB-S/S2
F socket - 75 Ohm / 13/18 V / 500mA
⑨ Without function
⑩ SPDIF OUT - Audio output (digital)
Cinch socket (orange)
⑪ USB 3.0 - USB connection
USB type A - USB 3.0 (max. 900mA)
⑫ HEADPHONE - Headphone connection
Jack 3.5 mm - Headphones 32-200 Ohm
⑬ HDMI 3 - HDMI input 3 ^(2)
HDMI - Digital Video IN/Audio IN
⑭ AUDIO OUT - Audio output (analogue) L/R - (Jack 3,5 mm)
⑮ RS-232C - Serial interface ^1 - (RJ12)
⑯ AV - Micro AV socket ^1
Audio/Video IN with Scart adapter: Y/C (S-VHS/Hi 8)
CVBS (VHS/8 mm)
RGB
Audio/Video IN with VGA adapter: PC/STB video signal
PC formats (RGB, H, V)
Component
L/R
PC/STB video signal
(YPbPr)
L/R
⑰ COMMON INTERFACE - CI slot 1 (standard V1.3)
⑱ COMMON INTERFACE - CI slot 2 (standard V1.3)
⑲ HDMI 4 - HDMI input 4 ^12
HDMI - Digital Video IN/Audio IN
20 USB -USB connection
USB type A - USB 2.0 (max. 500mA)
②1 USB - USB connection
USB type A - USB 2.0 (max. 500mA)
Loewe old
User handbook
Technical data
old 2
Changes of technical data and design of the equipment, reserved.
| Loewe device type: bild 2.55 oled | bild 2.49 | bild 2.43 | |
| Part number: 57461x7157419x7157420x71 | |||
| EU energy efficiency class: see enclosed energy label or under www.loewe.tv/int/support | |||
| Screen diagonal: 139 cm/55 inch 126 cm/49 inch 108 cm/43 inch | |||
| Power consumption On-Mode (max.) (Audio output 1/8 of the maximum value): | 348 W 185 W 149 W | ||
| Power consumption On-Mode (home)1: Annual energy consumption4: | see enclosed energy label or under www.loewe.tv/int/support | ||
| Power consumption quick start mode: 70.0 W 55.0 W 55.0 W | |||
| Power consumption Standby Mode: | 0.41 W | 0.31 W | 0.37 W |
| Power consumption when set is switched off: | 0 W | 0 W | 0 W |
| Picture format / Resolution: | 16.9 / Ultra HD 3840 x 2160 px | ||
| Display technology: | OLED (WRGB Pixel) | LCD with Edge-LED-Backlight | |
| Device dimensions without stand (W4 x H x D): | 122.8 x 73.9 x 6.7 cm | 111.9 x 68.1 x 7.9 cm | 96.3 x 59.4 x 7.9 cm |
| Device dimensions with stand2 (W4 x H x D): | 122.8 x 78.8 x 27.0 cm | 111.9 x 70.4 x 25.0 cm | 96.3 x 61.6 x 25.0 cm |
| Weight without stand (approximate): | 23.2 kg | 20.5 kg | 15.5 kg |
| Weight with stand3 (approximale): | 27.9 kg 23.8 kg | 18.7 kg | |
| Ambient temperature: | 5°C - 35°C | ||
| Relative humidity (non-condensing): | 20 - 80% | ||
| Air pressure: | 800 - 1114 hPa (0 - 2000 m above sea level) | ||
| Chassis designation: | SL402 | SL402 | SL402 |
| Power supply: | 220 V - 240 V/50-60 Hz | ||
| Tuner: terr./cable: VHF/Hyperband/UHF Satellite: 4 levels: 13/18V/22kHz / 16 levels: DiSEqC 1.0 / single-cable system: EN 50494 | |||
| Range: terr./cable: Terr./cable: 45 MHz up to 860 MHz Satellite: 950 MHz up to 2150 MHz | |||
| Channel storage locations incl. AV and radio: | 6000 | ||
| TV standards: analogue: R/G, I, L, D/K, M, N digital: DVB-T/T2, DVB-C, DVB-S/S2 (UHD via DVB to max. 60 Hz) | |||
| Colour standards: | SECAM, PAL, NTSC, NTSC-V, PAL-V (60 Hz) | ||
| Sound formats: analogue (FM): analogue (NICAM): digital (MPEG): | Mono, Stereo, Dual channel Mono, Stereo, Dual channel Mono, Stereo, Dual channel, PCM, Dolby Digital, Dolby Digital Plus, Dolby Digital Pulse, Dolby MS11 | ||
| Audio output power (sine / music): | 2 x 10W / 2 x 20W | ||
| Acoustic speaker concept: Speaker Box | |||
| Telelexi: | TOP / FLOF / HiTexl (Level 2.5) | ||
| Page memory: | 2000 | ||
| LAN: Standards supported: | 10 Mbit/sec Ethernet (10Base T) / 100 Mbit/sec Fast Ethernet (100Base T) | ||
| WLAN: Standards supported: Power/Frequency range Types of encoding that are supported: | IEEE 802.11a/b/g/n, 802.11ac Maximum power <100 mW at 2400-2483.5 MHz and 5150-5725 MHz WEP 64 and 128 Bit (ASCII and HEX), WPA PSK, WPA2 AES | ||
| Bluetooth: Power/Frequency range Bluetooth protocols | Maximum power <10 mW at 2.4 GHz A2DP SRC, A2DP SNK, HID | ||
| Home networking standard: | Universal Plug and Play Audio / Video (UPnP AV) | ||
| File formats supported3: Pictures: JPEG, JPEG progressive (max. resolution 3840x2160), PNG Audio: MP3, M4A (AAC LC), WMA (without lossless), FLAC, WAV (PCM), Ogg Vorbis Video: AVI (MPEG-1/2, XviD, Dolby Digital, MP3), WMV (WMV9, VC-1, WMA9, WMA Pro), MP4 (XviD, H.264/MPEG-4 AVC, AAC LC), MOV (H.264/MPEG-4 AVC, AAC LC), MKV (H.265/H.EVC, H.264/MPEG-4 AVC, Dolby Digital), FLV (H.264/MPEG-4 AVC, H.263, MP3, AAC LC), MPG (MPEG-1, MPEG Audio), TS/PS (MPEG-2, H.264/MPEG-4 AVC, MPEG2 AudioDolby Digital), VOB (MPEG-2, MPEG2 Audio, Dolby Digital) H.264/MPEG-4 AVC upto Profil High (Level 4.2) H.264/H.265 compatible to Do by Vision/HDR10/HLG (bild 2.55 oled) H.264/H.265 compatible to HDR10/HLG (bild 2.49/bild 2.43) | |||
The energy consumption per year is calculated on the basis of a daily four-hour operation of the TV set on 365 days. The actual energy consumption will depend on the way the TV set is used. On Mode (home) values less than 100 W must have decimal places (.0).
Supplied mounting option: Table Stand.
For the playability of the individual formats no guarantee can be given.
The width of the TV set can be increased by up to 4mm depending on the type of TV set in the area of the side-mounted Loewe clip.
Loewe bild
User handbook
Technical data
old 2
Equipment features (bild 2.55 oled/bild 2.49/bild 2.43)
Changes to the equipment features and the set design reserved.
| Loewe set type: bild 2.55 oled bild 2.49 bild 2.43 | |||
| Image* (Image) | |||
| Ultra HD Super Resolution Scaling / Image+ Active/24 p motion picture display | ●/●/● | ●/●/● | ●/●/● |
| 3D technology / Active Glasses 3D | -/-/-/-/-/- | ||
| Auto-Dimming Video (VDB+)/ Auto-Dimming Raum (OPC) / Home Mode: | /●/● | ●/●/● | ●/●/● |
| Digital* (Television Standards) | |||
| DVB-T2 ^1 / DVB-C / DVB-S2/Multislandard (analogue) / Dual Channel | ●/●/●/●/- | ●/●/●/●/- | ●/●/●/●/- |
| PEG / MPEG2 / MPEG4 (H.264) / HEVC (H.265) / integrated HDTV reception ^2 | ●/●/●/●/● | ●/●/●/●/● | ●/●/●/●/● |
| DVB radio / Unicable (acc. EN 50494) | ●/● | ●/● | ●/● |
| Sound* (Audio) | |||
| Integrated 5.1 AV-Rociver / Digital audio link | -/-/-/-/-/- | ||
| Dolby Digital / Dolby Digital Plus / DTS | ●/-/- | ●/-/- | ●/-/- |
| Individual bass and treble control / Loudness | ●/● | ●/● | ●/● |
| Automatic Volume Control (AVC) | ● | ● | ● |
| Audio out available: variable / fixed / Subwoofer | ●/●/● | ●/●/● | ●/●/● |
| Assist* (Operation) | |||
| Loewe os / Home Screen (incl. favorites) | ●/● | ●/● | ●/● |
| HDR (Dolby Vision / HDR 10 / HLG) | ●/●/● | -/-/● | -/-/● |
| Electronic Program Guide (SI-dala) | ● | ● | ● |
| MediaText (HbbTV) / Video text (Level 2.5) | ●/● | ●/● | ●/● |
| Menu languages ^13 / Context Related Help | ●/● | ●/● | ●/● |
| Parental Lock / Automatic turn-off / Timer | ●/●/● | ●/●/● | ●/●/● |
| Instant Channel Zapping / Quick Start Mode | -/- | -/- | -/- |
| Digital Link HD (CEC) | ● | ● | ● |
| PIP (AV) ^14 / Full PIP / Split screen TV : Video text | ●/-/● | ● -/-/● / | ● -/-/● / |
| MediaUpdate (via USB / Internet) | ●/● | ●/● | ●/● |
| Hotel Mode | ● | ● | ● |
| Media* (Multimedia functions) | |||
| DR+ / Speicherkapazitat in CB / USB-Recording | -/-/-● | -/-/-● | -/-/-● |
| DR+ Streaming Server / Client / Follow-Me | /●/● | /●/● | /●/● |
| Multi Recording / Mobile Recording / Multiroom-Streaming | -/-/● | -/-/● | -/-/● |
| Fotoplayer / Musikplayer / Videoplayer (über I ermnetzwerk und USB, inkl. Ultra HD) | ●/●/● | ●/●/● | ●/●/● |
| Digital Modia Ronderer (inkl. Ultra HD) / Bluetooth Music Player | ●/● | ●/● | ●/● |
| Internetapps (MediaNet) / Internetbrowser / Internetradic (inkl. Suchfunktion) | ●/●/● | ●/●/● | ●/●/● |
| Connectivity* (Connectors) | |||
| HDMI wth HDCP 2.2 | 4 (1 x 2.0a, 1 x ARC) | 4 (4 x UHD, 1 x ARC) | 4 (4 x UHD, 1 x ARC) |
| LAN network connection / Integrated WLAN | ●/● | ●/● | ●/● |
| Common Interface / CI Plus 1.3 certified ^15 | 2/● 2/● 2/● | ||
| Home Control Interface IP / Home Control Interface RS232 / IR Link ^16 / Motor control | ●/●/●/- | ●/●/●/- | ●/●/●/- |
| Digital Audiolink (DAL) ^17 / Digital Audio-Out (coaxial) | -/- | -/- | -/- |
| Analog Audio-Out (L/R) / Headphone (jack 3.5 mm) | ●/● | ●/● | ●/● |
| Micro-AV ^18 (Component / Scart / VGA) | ●/●/● | ●/●/● | ●/●/● |
| USB / Bluetooth Connection | 3 (1 x 3.0) / ● | 3 (1 x 3.0) / ● | 3 (1 x 3.0) / ● |
| VESA mounting points | ● | ● | ● |
- = included/installed
- = upgradeable/optional
- The reception of DVB-T2 programs is possible in selected countries.
^12 Reception of digital channels may be limited by individual regulations from the respective broadcaster/provider, UK models are Freeview HD compliant.
DGBFLENLOZGRPLHFINSLOSKTRSDKPRUSN
^14 AV PIP is only available in combination with DVB T/C/S.
CIFius, s backwards compatible with CI. Functionality is dependent on module availability from the supplier.
- Only in conjunction with a corresponding adapter and selected devices (RC5, 36 kHz). To be ordered separately.
^7 I owe System 5.1 Out, Stereo Out, Subwoofer Out.
^15 Only in conjunction with a corresponding adapter, to be ordered separately.
Connections rear side of the device (bild 1.65/55)
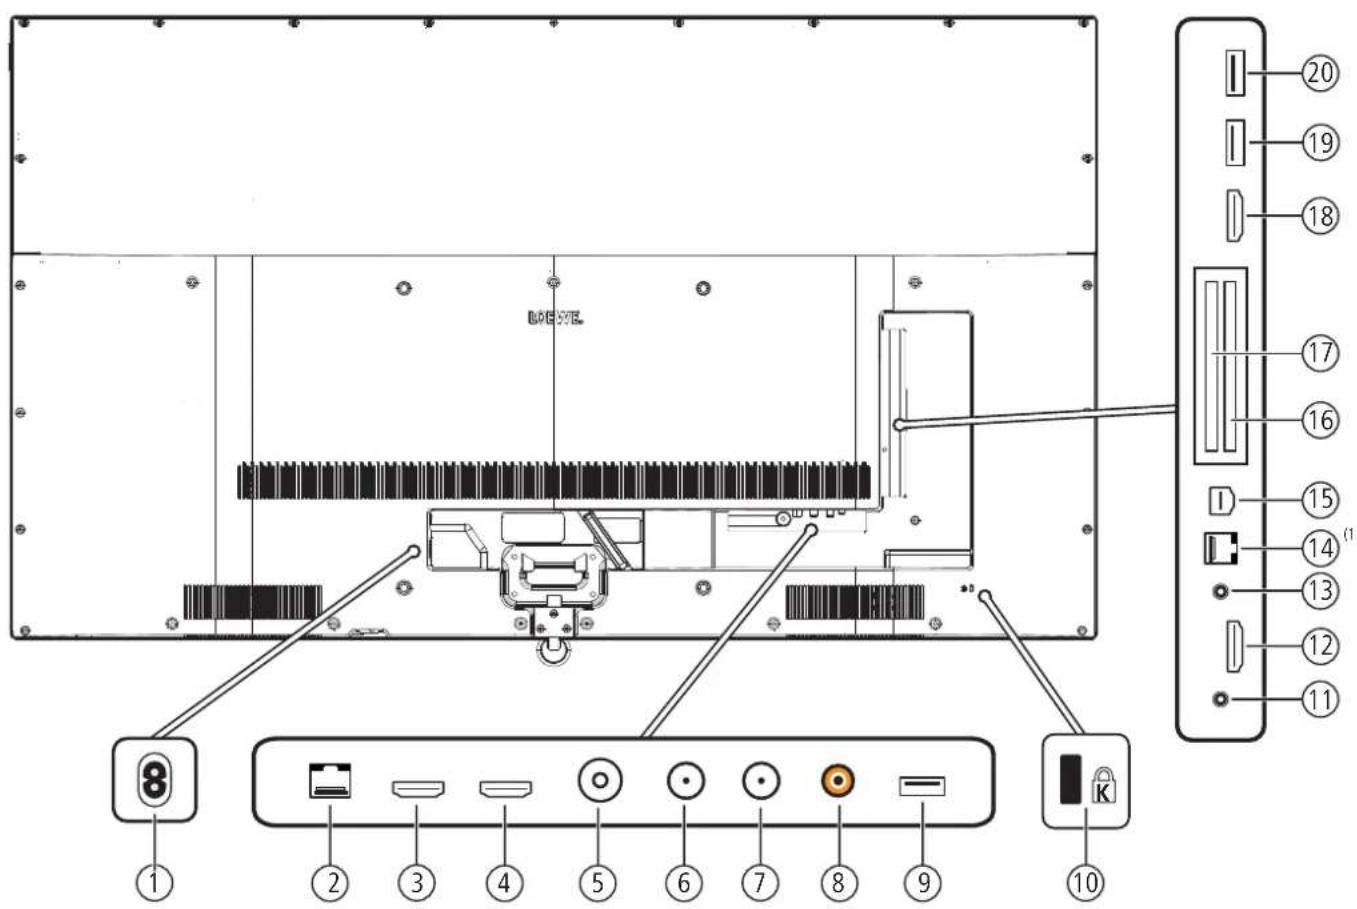
text_image
Technical diagram of an electronic device rear panel with labeled ports and connectors, including a 8-pin connector and internal components.① Mains connection
Power plug - 220-240 V - 50 / 60 Hz
② LAN - Network connection
RJ-45 - Ethernet / Fast Ethernet
③ HDMI 1 (ARC) - HDMI input 1 ^3 (with Audio Return Channel)
HDMI - Digital Video IN/Audio IN/OUT
④ HDMI 2 - HDMI Input 2 ^4
HDMI - Digital Video IN/Audio IN
⑤ ANT TV - Antenna/cable analogue / DVB-T/T2 / DVB-C IEC socket - 75 Ohm / 5 V / 80mA
⑥ ANT SAT 1 - Satellite antenna (Sat tuner 1) DVB-S/S2 F socket - 75 Ohm / 13/18 V / 500mA
⑦ ANT SAT 2 - Satellite antenna (Sat tuner 2) DVB-S/S2 F socket - 75 Ohm / 13/18 V / 500mA
⑧ SPDIF OUT - Audio output (digital)
Cinch socket (orange)
⑨ USB 3.0 - USB connection
USB type A - USB 3.0 (max. 1000mA)
⑩ Slot for Kensington lock
⑪ HEADPHONE - Headphone connection Jack 3.5 mm - Headphones 32-200 Ohm
⑫ HDMI 3 - HDMI input 3 ^4
HDMI - Digital Video IN/Audio IN
⑬ AUDIO OUT - Audio output (analogue) L/R - (Jack 3.5 mm)
⑭ RS-232C - Serial interface ^1(2) - (RJ12)
⑮ AV INPUT - Micro AV socket ^2
Audio/Video IN with Scart adapter: Y/C (S-VHS/Hi 8)
CVBS (VHS/8 mm)
RGB
Audio/Video IN with VGA adapter: L/R
Component PC/STB video signal (YPbPr)
L/R
16 COMMON INTERFACE - CI slot 1 (standard V1.3)
⑰ COMMON INTERFACE - Cl slot 2 (standard V1.3)
⑱ HDMI 4 - HDMI input 4 ^(3)
HDMI - Digital Video IN/Audio IN
⑲ USB - USB connection
USB type A - USB 2.0 (max. 500mA)
20 USB - USB connection
USB type A - USB 2.0 (max. 500mA)
Loewe bild
User handbook
Technical data
cild 1
Connections rear side of the device (bild 1.40/32)
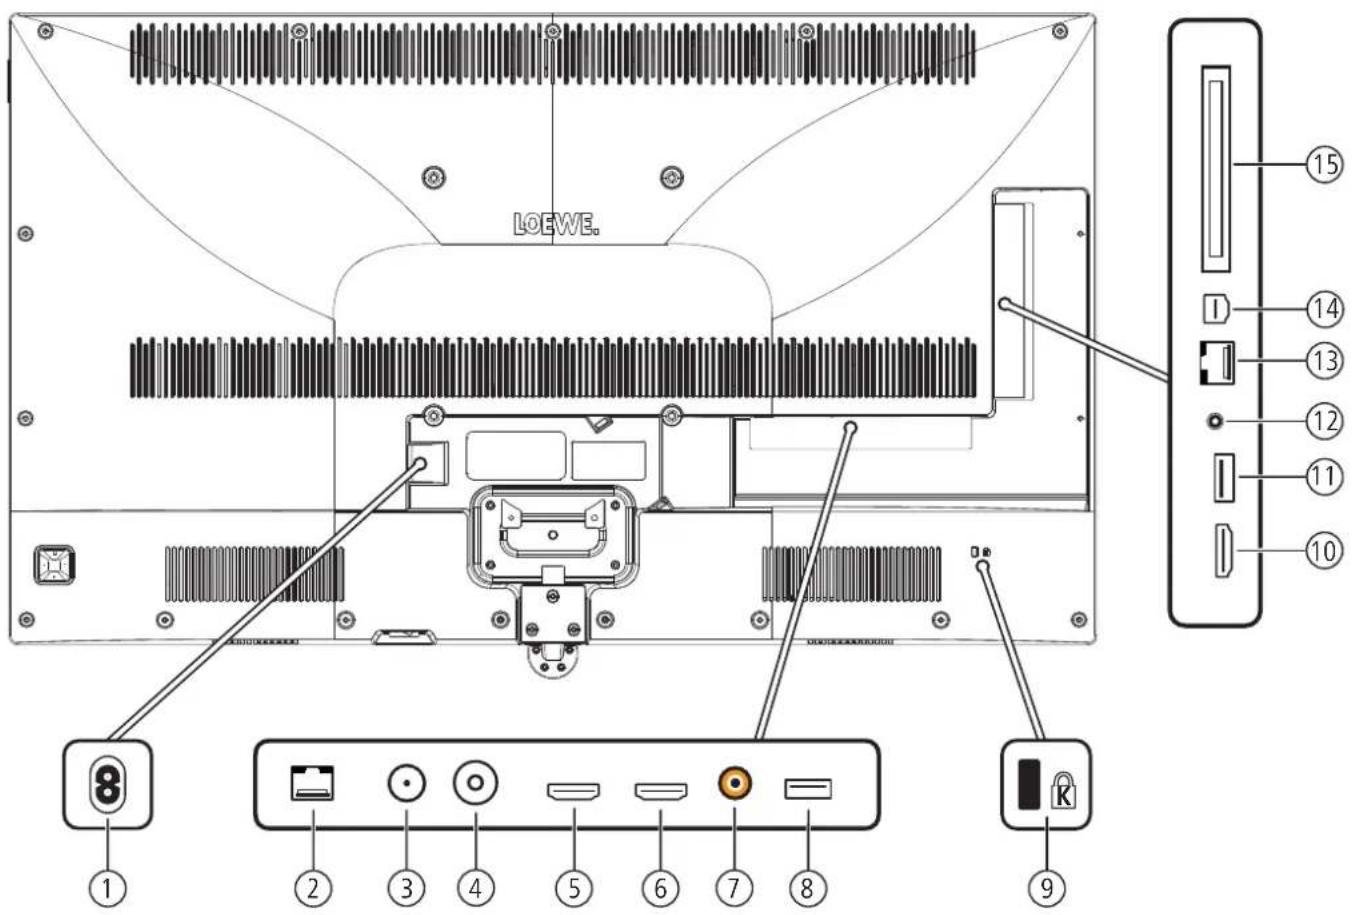
text_image
LOEWE. ① ② ③ ④ ⑤ ⑥ ⑦ ⑧ ⑨ ⑩ ⑪ ⑫ ⑬ ⑭ ⑮ ⑯ ⑰ ⑱ ⑲ ⑳ ㉑ ㉒ ㉓ ㉔ ㉕ ㉖ ㉗ ㉘ ㉙ ㉚ ㉛ ㉜ ㉝ ㉞ ㉟ ㉟o ㉟o1 ㉟o2 ㉟o3 ㉟o4 ㉟o5 ㉟o6 ㉟o7 ㉟o8 ㉟o9 ㉟o10 ㉟o11 ㉟o12 ㉟o13 ㉟o14 ㉟o15① AC IN - Mains connection
Mains socket - 220-240 V \~ 50 / 60 Hz
② LAN - Network connection
RJ-45 - Ethernet / Fast Ethernet
③ ANT SAT - Satellite antenna (Sat tuner) DVB-S
F socket - 75 Ohm / 13/18 V / 500mA
④ ANT TV - Antenna/cable analogue / DVB-T/T2 / DVB-C
IEC socket - 75 Ohm / 5 V / 80mA
⑤ HDMI 1 (ARC) - HDMI input 1 ^2 (with Audio Return Channel)
HDMI - Digital Video IN, Audio IN/OUT
⑥ HDMI 2 - HDMI input 2 ^12
HDMI - Digital Video IN, Audio IN
⑦ SPDIF OUT - Audio output (digital)
Cinch socket (orange)
⑧ USB - USB connection
USB type A - USB 2.0 (max. 500mA)
⑨ Slot for Kensington lock
⑩ HDMI 3 - HDMI input 3 ^2
HDMI - Digital Video IN, Audio IN
⑪ USB 3.0 - USB connection
USB type A - USB 3.0 (max. 1000mA)
⑫ AUDIO OUT - Audio output (analogue) L/R - (Jack 3.5 mm)
Headphone connection Jack 3,5 mm - Headphones 32-200 Ohm
⑬ RS-232C - Serial interface ^4 – (RJ12)
⑭ AV INPUT - Micro AV socket ^1
Audio/Video IN with Scart adapter: Y/C (S-VHS/HI 8)
CVBS (VHS/8 mm)
RGB
Audio/Video IN with VGA adapter: PC/STB video signal
Component (YPbPr)
L/R
PC/STB video signal
(YPbPr)
L/R
⑮ COMMON INTERFACE - CI slot (standard V1.3)
Loewe old
User handbook
Technical data
cild 1
Changes of technical data and design of the equipment reserved.
| Loewe device type: bild 1.65 bild 1.55 bild 1.40 bild 1.32 | ||||
| Part number: 56407xxx 56402xxx 56404xxx 56405xxx | ||||
| EU energy efficiency class: see enclosed energy label or under www.loewc.tv/int/support | ||||
| Screen diagonal: 165 cm / 65 inch 140 cm / 55 inch 102 | cm / 40 inch 81 cm / 32 inch | |||
| Power consumption On-Mode (max.) (Audio output 1/8 of the maximum value): 239W 200 W | 98 W | 69 W | ||
| Power consumption On-Mode (home)3: Annual energy consumption4: | see enclosed energy label or under www.loewe.tv/int/support | |||
| Power consumption quick start mode: | 70,0 W | 65.0 W | 25.0 W | |
| Power consumption Standby Mode: Power consumption when set is switched off: | 0.38 W0 W | 0.40 W0 W | 0.38 W0 W | |
| Resolution: | Ultra HD 3840 x 2160 px | Full HD 1920 x 1080 px | ||
| Display technology / Picture format: | LCD with Edge-LED-Backlight / 16:9 | |||
| Device dimensions without stand (W x H x D): Device dimensions with stand2 (W x H x D): | 145.1 x 87.0 x 6.4 cm145.1 x 88.6 x 29.0 cm | 123.5 x 74.5 x 4.9 cm123.5 x 75.4 x 27.0 cm | 91.4 x 56.5 x 5.4 cm91.4 x 57.5 x 25.0 cm | |
| Weight without stand (approximate): Weight with stand2 (approximate): | 32.4 kg40.3 kg | 23.6 kg28.5 kg | 12.9 kg16.4 kg | |
| Ambient temperature: 5°C - 35°C | ||||
| Relative humidity (non-condensing): | 20 - 80% | |||
| Air pressure: | 800 - 1114 hPa (0 - 2000 m above sea level) | |||
| Chassis designation: | SL410 | SL412 | SL302 | |
| Power supply: | 220 V - 240 V/50-60 Hz | |||
| Tuner: terr./cable Satellite: | VHF/Hyperband/UHF4 levels: 13/18V/22kHz / 16 levels: DiSeqC 1.0 / single-cable system: EN 50494 | |||
| Range: terr./cable Satellite: | Terr./cable: 45 MHz up to 860 MHzSatellite: 950 MHz up to 2150 MHz | |||
| Channel storage locations incl. AV and radio: | 6000 | |||
| TV standards: analogue digital: | B/G, I, L, D/K, M, NDVB-T/T2, DVB-C, DVB-S/S2(UHD via DVB to max. 60 Hz) | B/G, I, L, D/K, M, NDVB-T/T2, DVB-C, DVB-S | ||
| Colour standards: | SECAM, PAL, NTSC, NTSC-V, PAL-V (60 Hz) | |||
| Sound formats: analogue (FM): analogue (NICAM): digital (MPEG): | Mono, Stereo, Dual channelMono, Stereo, Dual channelMono, Stereo, Dual channel, PCM, Dolby Digital, Dolby Digital Plus, Dolby Pulse, Dolby MS11 | |||
| Audio output power (sine / music): | 2 x 10W / 2 x 20W | |||
| Acoustic speaker concept: 2-Way bass reflex | ||||
| Telctext: | TOP / FLOF / HiText (Level 2.5) | |||
| Page memory: | 2000 | |||
| LAN: Standards supported: | 10 Mbit/sec Ethernet (10Base-T) / 100 Mbit/sec Fast Ethernet (100Base-T) | |||
| WLAN: Standards supported: Power/Frequency range Types of encoding that are supported: | IEEE 802.11a/b/g/n, 802.11acMaximum power <100 mW at 2400-2483.5 MHz and 5150-5725 MHzWEP 64 and 128 Bit (ASCII and HEX), WPA PSK, WPA2 AES | |||
| Bluetooth: Power/Frequency range Bluetooth protocols | Maximum power <10 mW at 2.4 GHzA2DP SRC, A2DP SNK, IIID | |||
| File formats supported5: Pictures: Audio: Video: | JPEG, JPEG progressive (max. resolution 3840x2160), PNGMP3, M4A (AAC LC), WMA (without lossless), FLAC, WAV (PCM), Ogg VorbisAVI (MPEG-1/2, XviD, Dolby Digital, MP3), WMV (WMV9, VC-1, WMA9, WMA Pro),MP4 (XviD, H.264/MPEG-4 AVC, AAC LC), MOV (H.264/MPEG-4 AVC, AAC LC),MKV (H.265/HEVC, H.264/MPEG-4 AVC, Dolby Digital), FLV (H.264/MPEG-4 AVC, H.263,MP3, AAC LC), MPG (MPEG-1, MPEG Audio), TS/PS (MPEG-2, H.264/MPEG-4 AVC, MPEG2Audio, Dolby Digital), VOB (MPEG-2, MPEG2 Audio, Dolby Digital)H.264/MPEG-4 AVC upto Profil High (Level 4.2)H.264/H.265 compatible with HDR10/HLG for SL4xx TV sets | |||
^9 The energy consumption per year is calculated on the basis of a daily four-hour operation of the TV set on 365 days. The actual energy consumption will depend on the way the TV set is used. On-Mode (home) values less than 100 W must have decimal places (.0).
^2 Supplied mounting option: Table Stand bild 1.
^19 For the playability of the individual formats no guarantee can be given.
Loewe old
User handbook
Technical data
cild 1
Equipment features (bild 1.65/bild 1.55/bild 1.40/bild 1.32)
Changes to the equipment features and the set design reserved.
| Loewe set type: | bild 1.65 bild 1 | 55 bild 1.40 bild | 1.32 | |
| Image* (Image) | ||||
| Ultra HD Super Resolution Scaling / Image + Active / 24 pmotion picture display | ●/●/● | ●/●/● | -/-/●/● | -/-/●/● |
| 3D technology / Active Classes 3D | ●/○ | -/-/-/-/-/- | ||
| Auto-Dimming Video (VDB+) / Auto-Dimming Raum (OPC) / Home Mode: | ●/●/● | ● -/-/● / | -/-/●/● | -/-/●/● |
| Digital* (Television Standards) | ||||
| DVB T2d / DVB C / DVB S2 / Multistandard (analogue) / Dual Channel | ●/●/●/●/● | ●/●/●/●/● | ●/●/●/●/- | ●/●/●/●/- |
| MPEG / MPEG2 / MPEG4 (H.264) / HEVC (H.265) / integrated HDTV reception2 | ●/●/●/●/● | ●/●/●/●/● | ●/●/●/●/● | ●/●/●/●/● |
| DVB radio / Unicable (acc. EN 50494) | ●/● | ●/● | ●/● | ●/● |
| Sound* (Audio) | ||||
| Integrated 5.1 AV-Receiver / Digital audio link | -/-/-/-/-/-/-/- | - | ||
| Dolby Digital / Dolby Digital Plus / DTS | ●/ / | ●/ / | ●/ / | ●/ / |
| Individual bass and treble control / Loudness | ●/● | ●/● | ●/● | ●/● |
| Automatic Volume Control (AVC) | ● | ● | ● | ● |
| Audio out available: variable / fixed / Subwoofer | ●/●/● | ●/●/● | ●/●/● | ●/●/● |
| Assist* (Operation) | ||||
| Loewe os / lome Screen (incl. favorites) | ●/● | ●/● | ●/● | ●/● |
| HDR (Dolby Vision / HDR 10 / HLG) | -/-/-/- | -/-/-/- | -/-/-/- | -/-/-/- |
| Electronic Program Guide (SI data) | ● | ● | ● | ● |
| MediaText (HbbTV) / Video text (Level 2.5) | ●/● | ●/● | ●/● | ●/● |
| Menu languages12 / Context Related Help | ●/● | ●/● | ●/● | ●/● |
| Parental Lock / Automatic turn-off / Timer | ●/●/● | ●/●/● | ●/●/● | ●/●/● |
| Instant Channel Zapping / Quick Start Mode | ●/● | ● | ●/-/● | -/-/● |
| Digital Link HD (CEC) | ● | ● | ● | ● |
| PIP (AV)14 / Full PIP / Split screen TV : Video text | ●/●/● | ●/●/● | ●/-/● | ● -/-/● / |
| MediaUpdate (via USB / Internet) | ●/● | ●/● | ●/● | ●/● |
| Hotel Mode | ● | ● | ● | |
| Media* (Multimedia functions) | ||||
| DR+ / storage capacity in GB / USB recording | / /● | / /● | / /● | / /● |
| DR+ Streaming server / client / Follow-Me | -/-/●/● | -/-/●/● | -/-/●/● | -/-/●/● |
| Multi Recording15 / Mobile Recording16 | ○/○ | ○/○ | ○/○ | ○/○ |
| Multiroom Streaming19 | ○ | ○ | ○ | ○ |
| Photo player / Music player / Video player (via Home network and USB incl. Ultra HD) | ●/●/● | ●/●/● | ●/●/● | ●/●/● |
| Digital Media Renderer (incl. Ultra HD) / Bluetooth Music Player18 | ●/○ | ●/○ | ●/○ | ●/○ |
| Internet Apps (MediaNet) / Internet Browser / Internet Radio (incl. search function) | ●/●/● | ●/●/● | ●/●/● | ●/●/● |
| Connectivity* (Connectors) | ||||
| HDMI with HDCP 2.2 | 4(4x UI ID/1x ARC) | 4(4x UI ID/1x ARC) 3(x ARC) 3(1x ARC) | ||
| LAN network connection / Integrated WLAN | ●/● | ●/● | ●/● | ●/● |
| Common Interface / CI Plus 1.3 certified15 | 2/● | 2/● | 1/● | 1/● |
| Home Control Interface IP / Home Control Interface RS232 / IR-Link® / Motor control | ●/●/●/- | ●/-/-/-/- | ●/●/●/- | ●/●/●/- |
| Digital Audiolink (DAL)17 / Digital Audio-Out (coaxial) | /● | /● | /● | /● |
| Analog Audio-Out (L/R) / Headphone (jack 3.5 mm) | ●/● | ●/● | ●/ | ●/ |
| Micro-AV18 (Component / Scart / VGA) | ●/●/● | ●/●/● | ●/●/● | ●/●/● |
| USB / Bluetooth Connection | 3(1x3.0)/● | 3(1x3.0)/● | 2(1x3.0)/● | 2(1x3.0)/● |
| VESA mounting points | ● | ● | ● | ● |
● = included/installed ○ = upgradeable/optional
- The reception of DVB-T2 programs is possible in selected countries.
^12 Reception of digital channels may be limited by individual regulations from the respective broadcaster/provider. UK models are Freeview HD compliant.
DGBF-E-NLOZ-GRPL-H-FIN-SLOSK-TR-S-DK-PRUS-N
^14 AV PIP is only available in combination with DVB T/C/S.
© CI Plus is backwards compatible with CI. Functionality is dependent on module availability from the supplier.
- Only in conjunction with a corresponding adapter and selected devices (RC5. 36 kHz), to be ordered separately.
Loewe System 5.1 Out, Stereo Out, Subwoofer Out.
^6 Only in conjunction with a corresponding adapter, to be ordered separately.
^19 Available via optional upgrade feature
Loewe old
User handbook
Technical data
cild (across sets)
Signals via HDMI/AV (PC IN)
The following tables shows the compatible signals your TV set can display via the HDMI ports (HDMI1, HDMI2, HDMI3, HDMI4) or using an appropriate adapter in the AV (PC IN) port.
Configure the output signal of the device connected to the TV so that it matches one of the signals in the table.
Note that not all signals can be shown on each HDMI socket/AV (PC IN). On TV-set models with Full-HD-Display (1920x1080 Pixels), UHD-signals (3840x2160 Pixels) cannot be displayed.
In SL4xx-units, the compatible mode for the HDMI 1-3 port is enabled by default. In HDR-enabled TV-sets, the compatible mode must be switched off to use HDR (System settings - Connections - HDMI - Compatible mode), also see Chapter System settings. Section Connections - HDMI.
| HDMI 1 | LCD-TV-sets(Chassis SL3xx) | LCD-TV-sets(Chassis SL4xx) | OLED-TV-sets(Chassis SL4xx) | ||
| Resolution: Image frequency: | |||||
| 640x480 60Hz | ● | ● | ● | ||
| 720x480p 60Hz | ● | ● | ● | ||
| 720x576p 50Hz | ● | ● | ● | ||
| 1280x720p 50 / 60Hz | ● | ● | ● | ||
| 1920x1080i 25 / 30Hz | ● | ● | ● | ||
| 1920x1080p 24 / 25 / 30Hz | ● | ● | ● | ||
| 1920x1080p 50 / 60Hz | ● | ● | ● | ||
| 3840x2160p 24 / 25 / 30Hz ● | ○ | ● (2) | ● | ||
| 3840x2160p 50 / 60Hz ● | ○ | ● (2) | ● | ||
| Bandwidth: | 300Mhz | 450Mhz | 450Mhz | ||
| Resolution/ Image frequency: | Sampling rate: | Colour depth:(4) | Colour depth:(4) | Colour depth:(4) | |
| 3840x2160p @ 24 / 25 / 30Hz | 4:4:4 | 8bit | 8bit / 10bit / 12 bit | 8bit / 10bit / 12 bit | |
| 3840x2160p @ 24 / 25 / 30Hz | 4:2:2 | 8bit | 8bit | 8bit | |
| 3840x2160p @ 50 / 60Hz 4:4:4 | - | - | - | ||
| 3840x2160p @ 50 / 60Hz 4:2:2 | - | - | - | ||
| 3840x2160p @ 50 / 60Hz | 4:2:0 | 8bit | 8bit / 10bit / 12 bit | 8bit / 10bit / 12 bit | |
| HLG / HDR 10 / Dolby Vision: | -/-/- | ●(2)/●(3)/- | ●(3)/●(2)/- | ||
| ARC: | ● | ● | ● | ||
| HDMI 2 | LCD-TV-sets(Chassis SL3xx) | LCD-TV-sets(Chassis SL4xx) | OLED-TV-sets(Chassis SL4xx) | ||
| Resolution: Image frequency: | |||||
| 640x480 60Hz | ● | ● | ● | ||
| 720x480p 60Hz | ● | ● | ● | ||
| 720x576p 50Hz | ● | ● | ● | ||
| 1280x720p 50 / 60Hz | ● | ● | ● | ||
| 1920x1080i 25 / 30Hz | ● | ● | ● | ||
| 1920x1080p 24 / 25 / 30Hz | ● | ● | ● | ||
| 1920x1080p 50 / 60Hz | ● | ● | ● | ||
| 3840x2160p 24 / 25 / 30Hz ● | ○ | ●○ | ● | ||
| 3840x2160p 50 / 60Hz ● | ○ | ●○ | ● | ||
| Bandwidth: | 300Mhz | 450Mhz | 450Mhz | ||
| Resolution/ Image frequency: | Sampling rate: | Colour depth:4 | Colour depth:4 | Colour depth:4 | |
| 3840x2160p @ 24 / 25 / 30Hz | 4:4:4 | 8bit | 8bit / 10bit / 12 bit | 8bit / 10bit / 12 bit | |
| 3840x2160p @ 24 / 25 / 30Hz | 4:2:2 | 8bit | 8bit | 8bit | |
| 3840x2160p @ 50 / 60Hz 4:4:4 | - | - | - | ||
| 3840x2160p @ 50 / 60Hz 4:2:2 | - | - | - | ||
| 3840x2160p @ 50 / 60Hz | 4:2:0 | 8bit | 8bit / 10bit / 12 bit | 8bit / 10bit / 12 bit | |
| HLG / HDR 10 / Dolby Vision: | -/-/- | ●3/●3/- | ●3/●3/- | ||
| ARC: | |||||
Loewe bild
User handbook
Technical data
old (across sets)
| HDMI 3 | LCD-TV-sets(Chassis SL3xx) | LCD-TV-sets(Chassis SL4xx) | OLED-TV-sets(Chassis SL4xx) | ||
| Resolution: Image frequency: | |||||
| 640x480 60Hz | ● | ● | ● | ||
| 720x480p 60Hz | ● | ● | ● | ||
| 720x576p 50Hz | ● | ● | ● | ||
| 1280x720p 50 / 60Hz | ● | ● | ● | ||
| 1920x1080i 25 / 30Hz | ● | ● | ● | ||
| 1920x1080p 24 / 25 / 30Hz | ● | ● | ● | ||
| 1920x1080p 50 / 60Hz | ● | ● | ● | ||
| 3840x2160p 24 / 25 / 30Hz ● | (2) | ● (2) | ● | ||
| 3840x2160p 50 / 60Hz ● | (2) | ● (2) | ● | ||
| Bandwidth: 300Mhz 300Mhz 300Mhz | |||||
| Resolution/ Image frequency: Sampling rate: Colour depth: (1) | Colour depth: (1) | Colour depth: (1) | |||
| 3840x2160p @ 24 / 25 / 30Hz | 4:4:4 | 8bit | 8bit | 8bit | |
| 3840x2160p @ 24 / 25 / 30Hz | 4:2:2 | 8bit | 8bit | 8bit | |
| 3840x2160p @ 50 / 60Hz 4:4:4 | - | - | - | ||
| 3840x2160p @ 50 / 60Hz 4:2:2 | - | - | - | ||
| 3840x2160p @ 50 / 60Hz | 4:2:0 | 8bit | 8bit | 8bit | |
| HLG / HDR 10 / Dolby Vision: | - / - / - | - / - / - | - / - / - | ||
| ARC: | |||||
| HDMI 4 | LCD-TV-sets(Chassis SL3xx) | LCD-TV-sets(Chassis SL4xx) | OLED-TV-sets(Chassis SL4xx) | ||
| Resolution: Image frequency: | |||||
| 640x480 60Hz | ● | ● | ● | ||
| 720x480p 60Hz | ● | ● | ● | ||
| 720x576p 50Hz | ● | ● | ● | ||
| 1280x720p 50 / 60Hz | ● | ● | ● | ||
| 1920x1080i 25 / 30Hz | ● | ● | ● | ||
| 1920x1080p 24 / 25 / 30Hz | ● | ● | ● | ||
| 1920x1080p 50 / 60Hz | ● | ● | ● | ||
| 3840x2160p 24 / 25 / 30Hz ● | (2) | ● (2) | ● | ||
| 3840x2160p 50 / 60Hz ● | (2) | ● (2) | ● | ||
| Bandwidth: 300Mhz 300Mhz 600Mhz | |||||
| Resolution/ Image frequency: Sampling rate: Colour depth: (4) | Colour depth:(4) | Colour depth:(4) | |||
| 3840x2160p @ 24 / 25 / 30Hz | 4:4:4 | 8bit | 8bit | 8bit / 10bit / 12 bit | |
| 3840x2160p @ 24 / 25 / 30Hz | 4:2:2 | 8bit | 8bit | 8bit | |
| 3840x2160p @ 50 / 60Hz 4:4:4 | - | - | 8bit | ||
| 3840x2160p @ 50 / 60Hz 4:2:2 | 8bit | ||||
| 3840x2160p @ 50 / 60Hz | 4:2:0 | 8bit | 8bit | 8bit / 10bit / 12 bit | |
| HLG / HDR 10 / Dolby Vision: | / / | / / | ●3 / ●3 / ●3 | ||
| ARC: | - | - | - | ||
Loewe bild
User handbook
Technical data
old (across sets)
| HDMI 1-4 Compatible mode | LCD-TV-sets(Chassis SL3xx) | LCD-TV-sets(Chassis SL4xx) | OLED-TV-sets(Chassis SL4xx) | ||
| Resolution: Image frequency: | |||||
| 640x480 60Hz | - | ● | ● | ||
| 720x480p 60Hz | - | ● | ● | ||
| 720x576p 50Hz | - | ● | ● | ||
| 1280x720p 50 / 60Hz | - | ● | ● | ||
| 1920x1080i 25 / 30Hz | ● | ● | |||
| 1920x1080p 24 / 25 / 30Hz | ● | ● | |||
| 1920x1080p 50 / 60Hz | ● | ● | |||
| 3840x2160p 24 / 25 / 30Hz | ● ^12 | ● | |||
| 3840x2160p 50 / 60Hz | - | - | - | ||
| Bandwidth: | - | 300Mhz 300Mhz | |||
| Resolution/ Image frequency: Sampling rate: Colour depth: ^(1) | Colour depth: ^(1) | Colour depth: ^(1) | |||
| 3840x2160p @ 24 / 25 / 30Hz 4:4:4 | - | 8bit 8bit | |||
| 3840x2160p @ 24 / 25 / 30Hz 4:2:2 | 8bit 8bit | ||||
| 3840x2160p @ 50 / 60Hz 4:4:4 | - | - | - | ||
| 3840x2160p @ 50 / 60Hz 4:2:2 | - | - | - | ||
| 3840x2160p @ 50 / 60Hz 4:2:0 | - | - | - | ||
| HLG / HDR 10 / Dolby Vision: | -/-/- | -/-/- | -/-/- | ||
| AV (PC IN) ^(1) | LCD-TV-sets(Chassis SL3xx) | LCD-TV-sets(Chassis SL4xx) | OLED-TV-sets(Chassis SL4xx) | |
| Resolution: Image frequency: | ||||
| 640x480 60Hz | ● | ● | ● | |
| 800x600 | 60Hz | ● | ● | ● |
| 1024x768 | 60Hz | ● | ● | ● |
| 1280x1024 | 60Hz | ● | ● | ● |
| 720x480i | 60Hz | ● | ● | ● |
| 720x480p 60Hz | ● | ● | ● | |
| 720x576i 50Hz | ● | ● | ● | |
| 720x576p 50Hz | ● | ● | ● | |
| 1360x768p | 60Hz | ● | ● | ● |
| 1280x720p 50 / 60Hz | ● | ● | ● | |
| 1920x1080i 50 / 60Hz | ● | ● | ● | |
| 1920x1080p 24 / 25 / 30Hz | ● | ● | ● | |
| 1920x1080p 50 / 60Hz | ● | ● | ● | |
Loewe bild
User handbook
Technical data
bild (across sets)
Signal input groups
In your TV set the signals are sorted in various signal input groups according to their source. In addition to the source, the type of signal is also distinguished.
For each signal input group, there are individual values for the picture settings.
| Signal group name | Signal source/Signal type |
| SD Analog | Cable analogue, interfaces AV, AVS, PC IN ^1 (SD) |
| SD Digital | DVB (SD), DR+ (SD), MPEG-Encoder |
| SD Media Player | Full screen display of SD videos via USB, Network, VOD and media centre (incl. HbbTV media centre) |
| SD HDMI | Playback of SD video via HDMI, e.g., DVD player |
| HD Analog | PC IN ^1 (HD) |
| HD Digital | DVB (HD), DR+ (HD) |
| HD Media Player | Full screen display of HD videos via USB, Network, VOD and media centre (incl. HbbTV media centre) |
| HD HDMI | Playback of HD videos via HDMI, e.g., Blu-Ray player |
| 3D HD ^2 | 3D playback of HD videos (analogue or digital) |
| 3D SD ^2 | 3D playback of SD videos (analogue or digital) |
| 3D Media Player ^2 | Full screen display of 3D videos (SD/HD) via USB, Network, VOD and media centre (incl. HbbTV media centre) |
| 3D HDMI ^2 | Playback of 3D videos via HDMI, e.g., 3D Blu-Ray player |
| Photo Player | Playback of Photos via USB and network |
| Browser | Display of Web sites in the Browser (incl. Media apps) |
| VGA | PC IN ^4 (PC) or HDMI (PC) |
Loewe bild
User handbook
Accessories
Accessories
The following accessories are obtainable from your Loewe dealer.
Mounting options:
A variety of options for mounting your TV set on the floor, table, and wall are available.
An overview of the available placement options can be found in the chapter accessories, section placement options.
Loewe Sound systems:
You can perfectly combine your TV set with the Loewe sound components.
There are numerous loudspeaker combination options from subwoofer, floor-standing loudspeakers and satellite loudspeakers which are feasible.
By replacing the loudspeaker screen and the cover you can individualize your bild 7 device. The cover kits are available in different colors.
Loewe 3D glasses:
Loewe TV sets with 3D-technology ^® make it possible for you with the matching Loewe 3D glasses to have a pure enjoyment of 3D
According to set type ^® use either the Loewe 3D shutter glasses Active Glasses 3D (Item number 71133082) or the Passive Glasses 3D (Item number 71914081).
Loewe Vesa adapter bolts:
The mounting of a Loewe TV set with VESA mounting points ^1 to the holder according to VESA-Standard obliges the use of the Loewe Vesa adapter bolts.
The Loewe Vesa adapter bolts must also be used when mounting the TV set to the motorised Vogel's MotionMount wall mount.
If the Loewe Vesa adapter bolts are not used, the TV set may be damaged.
Please use the matching Vesa adapter bolts for your TV set:
M6x22 (Item number 90473938) Loewe bild 5.32, Loewe bild 1.32
M6x32 (Item number 90473988) all further Loewe bild sets with Vesa screw points
For further information, see chapter Accessories, section VESA standard.
Upgrade kits / conversion kits / cables
USB extension (part no. 70167080):
To ensure the accessibility of the USB connections or to be able to insert USB sticks with a large housing, a USB extension can be connected to the TV set. You can purchase the USB extension (length 50 cm) via your Locwe dealer.
Converter Digital Audiolink/Audiolink (part no. 71600080):
The digital Audiolink/Audiolink convertor allows you to connect your TV set to audio devices with a 25-pole AUDIO LINK socket.
To connect the convertor you require additionally an Ethernet cable with RJ45 plugs, category 5e or higher with a length of at least 1m and maximum 15m.
Adapter Micro-AV / 25cm / Scart (part no. 72150080) set of 3:
The Loewe scart adaptor allows you to extend your TV set by adding an AV socket to connect, e.g., DVD players or DVD recorders.
Adapter Micro-AV / 25cm / VGA (part no. 72155080) set of 3:
The VGA adaptor enables the connection of a PC monitor or a Set-top box.
Additionally to the video inputs, the adaptor for VGA is equipped with a 3.5 mm stereo jack socket for analogue sound.
Converter RJ12 / 5m / IR (part no. 70533082) set of 3:
Converter of RJ12 to an IR transmitter to operate concealed additional devices of other manufacturers via the Loewe TV set.
Adapter RJ12 / 2,5m / RS232 (part no. 70499082) set of 3:
RJ12 to 9-pin Sub-D connector adaptor cable for the integration of the TV set in professional home automation systems, such as GIRA, CRESTRON, AMX.
Feature Upgrade Stick SL3xx/SL4xx (part no. 72341080):
By means of the feature upgrade stick you can expand the functionality of your Loewe TV set. After any necessary software updates and plugging in the feature upgrade stick, the new features such as Bluetooth music player (audio streaming), Bluetooth keyboard, etc. are available.
DR+ Feature Disk (part no. 72462W00):
Like the Feature Upgrade Stick SL3xx/SL4xx the DR+ Feature Disk also expands the functionality of your Loewe TV set. After any necessary software updates and plugging in the DR+ Feature Disk, the new features are available.
The DR+ Feature Disk represents a recording medium for your TV set. Just quickly record and view.
Loewe bild
User handbook
Accessories
natural_image
Simple line drawing of a rectangular frame with corner brackets (no text or symbols)WM 9
bild9.65:72890x00
bild 9.55:72895x00
natural_image
Simple line drawing of a rectangular frame with a curved base and top edge (no text or symbols)TS 9
bild 9.65:72870x00
bild 9.55:72875x00
natural_image
Simple line drawing of a rectangular frame with a horizontal divider (no text or symbols)FS 9
bild 9.65:72880x00
bild 9.55:72885x00
Loewe bild
User handbook
Accessories
natural_image
Simple line drawing of a rectangular frame with a small circular mark at the bottom (no text or symbols)
natural_image
Simple line drawing of a rectangular frame with a small circular mark at the bottom (no text or symbols)Wall Mount: WM 7
bild 7.77: included in delivery
bild 7.65: included in delivery
bild / 35 included in delivery
Wall Mount: WMF 7
bild 7.77:72600W00
bld 7.65:72600W00
bld 7.55:72600W00
natural_image
Line drawing of a flat-screen monitor with a stand (no text or symbols)
natural_image
Line drawing of a flat-screen monitor with a stand (no text or symbols)TS 7
bile 7.65:72715D00
bilo 7.55:72710D00
TSM 7 (motor rotateable)
bild 7.77:72925D00
bild 7.65:72665D00
bild 7.55:72620D00
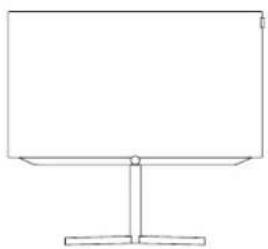
natural_image
Simple line drawing of a monitor with a stand (no text or symbols)FSM 7 (motor rotateable)
bilo 7.77:72655D00
oilc 7.65:72655D00
oilc 7.55:72630D00
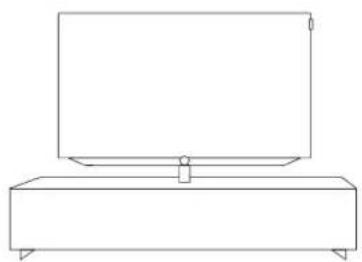
natural_image
Line drawing of a flat-screen TV mounted on a rectangular base (no text or symbols)Loewe Spectral Rack
Different versions, sizes and colours available to match locwe IV, sound system and equipment
Loewe bild
User handbook
Accessories
Mounting options (bild 5.65 oled/bild 5.55 oled)
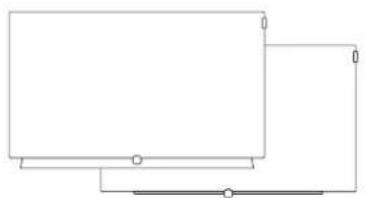
natural_image
Pure electrical circuit lines without any symbolsWall Mount Slim / Vesa Size 300
bild 5.65:71391T20
bild 5.55:71391T20
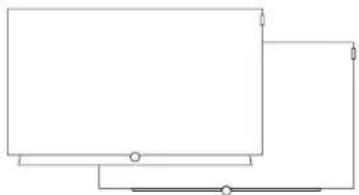
natural_image
Pure electrical circuit lines without any symbolsWall Mount WM 67
bild 5.65:72115W80
bild 5.55:72115W80
natural_image
Pure electrical circuit lines without any symbolsWall Mount Isoflex 32-55
bld 5.55:71363B00 ^4
natural_image
Line drawing of a two-panel computer monitor with no text or symbols on the screen or sideTS Plate
pild 5.65:72815D00
bold 5.55:72815D00
natural_image
Simple line drawing of a blank monitor with a stand and circular base (no text or symbols)FS Plate 55_65
bild 5.65:72660800
bild 5.55:72660S00
natural_image
Simple line drawing of a blank board with three legs (no text or symbols)FS 5.65 / FS 5.55
bild 5.65:72835W00
bild 5.65.72835H00
bild 5.55: 72855W00
bild 5.55: 72855H00
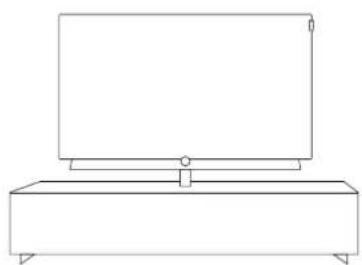
natural_image
Line drawing of a flat-screen TV mounted on a rectangular base (no text or symbols)Loewe Spectral Rack
Different versions, sizes and colours available to match Loewe TV, sound system and equipment
Loewe bild
User handbook
Accessories
natural_image
Simple line drawing of a rectangular monitor with a small circular button at the bottom (no text or symbols)Wall Mount Slim/
Vesa Size 100/200/300/400
bild 5.55: 71361T20 (Vesa Size 400) bild 5.48: 71391T20 (Vesa Size 300) bild 5.40: 71389T20 (Vesa Size 200) bild 5.32: 71388T20 (Vesa Size 100)
natural_image
Blank rectangular frame with a small circular mark at the bottom (no text or symbols)natural_image
Simple line drawing of a blank rectangular frame with a small circular mark at the bottom (no text or symbols)Wall Mount Isoflex 32-55
bld 5.55: 71363B00 ^2 bld 5.48: 71363B00 ^3 bld 5.40: 71363B00 ^2 bld 5.32: 71363B00 ^5
natural_image
Line drawing of a flat-screen monitor with a stand (no text or symbols)TS Connect 55
TS Connect 40/48 / TS Connect 32
bilo 5.55: 72111Q80 bilo 5.48: included in delivery bilo 5.40: included in delivery bilo 5.32: included in delivery
natural_image
Line drawing of a flat-screen monitor with a stand (no text or symbols)TS Art 55
TS Art 40/48
natural_image
Simple line drawing of a monitor with a circular base (no text or symbols)FS Plate 55_65
FS Plate 32_49
natural_image
Simple line drawing of a blank whiteboard with three legs and a stand (no text or symbols)FS 32_43
natural_image
Line drawing of a flat-screen TV mounted on a rectangular base (no text or symbols)Loewe Spectral Rack
Different versions, sizes and colours available to match I oewo IV, sound system and equipment
^a Only in conjunction with appropriate adaptor to be ordered separately. ^b Only in conjunction with VESA Size 400 adaptor. ^c Only in conjunction with VESA Size 300 adaptor. ^d Only in conjunction with VESA Size 200 adaptor. ^e Only in conjunction with VESA Size 100 adaptor. 196
Loewe bild
User handbook
Accessories
Mounting options (bild 4.55)
natural_image
Simple line drawing of a rectangular frame with a small circular mark at the bottom (no text or symbols)Wall Mount Slim / Vesa Size 300
bild 4.55:71391T20
natural_image
Simple line drawing of a rectangular panel with a small circular button at the bottom (no text or symbols)Wall Mount WM 67
bild 4.55:7215W80
natural_image
Simple line drawing of a rectangular panel or monitor with a small circular button at the bottom (no text or symbols)Wall Mount Isoflex 32-55
bld 4.55:71363BCO ^a
natural_image
Line drawing of a flat-screen monitor with a stand (no text or symbols)TS Plate
bilo 4.55: included in delivery (black)
oilc 4.55: 72815D00 (dark grey)
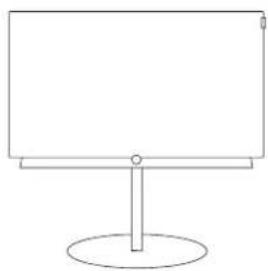
natural_image
Simple line drawing of a blank rectangular board with a circular base (no text or symbols)FS Plate 55_65
bilo 4.55 oled:72670S00
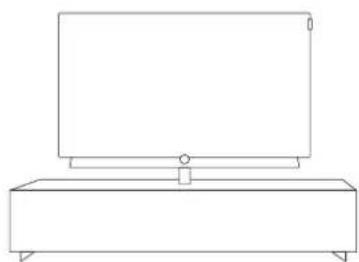
natural_image
Line drawing of a flat-screen TV mounted on a rectangular base (no text or symbols)Loewe Spectral Rack
Different versions, sizes and colours available to match location TV, sound system and equipment
Loewe bild
User handbook
Accessories
Mounting options (bild 3.65 oled/bild 3.55 oled/bild 3.49/bild 3.43)
natural_image
Simple line drawing of a blank rectangular frame with a small circular mark at the bottom (no text or symbols)
natural_image
Simple line drawing of a blank rectangular frame with a horizontal line at the bottom (no text or symbols)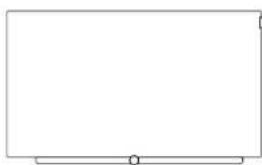
natural_image
Simple line drawing of a blank rectangular frame with a horizontal line at the bottom (no text or symbols)Wall Mount Slim/Vesa Size 200/300
bild 3.65 oled: 71391T20 (Vesa Size 300) bild 3.55 oled: 71391T20 (Vesa Size 300) bild 3.49 71389T20 (Vesa Size 200) bild 3.43 71389T20 (Vesa Size 200)
Wall Mount WM 67
natural_image
Line drawing of a flat-screen monitor with a stand (no text or symbols)TS Plate 3.65 oled/3.55 oled TS Plate 3.43/3.49
bile 3.65 oled; included in delivery bile 3.55 oled; included in delivery bile 3.49; included in delivery bile 3.43; included in delivery
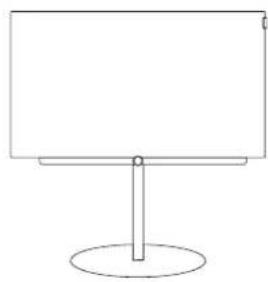
natural_image
Simple line drawing of a blank rectangular board with a vertical support and circular base (no text or symbols)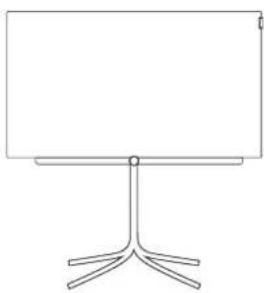
natural_image
Simple line drawing of a blank whiteboard with four vertical supports (no text or symbols)FS Plate 55_65 FS Plate 32_49
bile 3.55 oled: 72670S00 bile 3.55 oled: 72670S00 bile 3.49: 72660S00 bile 3.43: 72660S00
FS 32_43
bild 3.43:72435000
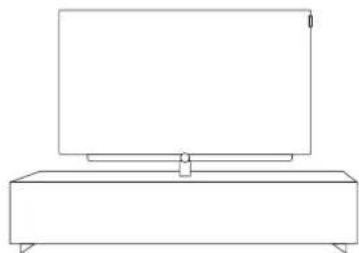
natural_image
Line drawing of a monitor mounted on a base with legs fixed (no text or symbols)Loewe Spectral Rack
Different versions, sizes and colours available to match locwe IV, sound system and equipment
^c Only in connection with VESA size 300 adaptor. ^d Only in connection with VESA size 200 adaptor.
Loewe bild
User handbook
Accessories
natural_image
Simple line drawing of a flat-screen monitor with a small screen top (no text or symbols)Wall Mount Slim/Vesa Size 200/300/400
natural_image
Simple line drawing of a flat-screen monitor with a blank screen (no text or symbols)Wall Mount WM 67
bld 3.55:72115W80
bld 3.48:72115W80
pld3.40:72115W80
natural_image
Simple line drawing of a flat-screen monitor with a small screen top (no text or symbols)Wall Mount Isoflex 32-55
bld 3.55:71363B00 ^4
bld 3.48:71363B00 ^2
bid3.40:71363BCO
natural_image
Line drawing of a flat-screen monitor with a stand (no text or symbols)Table Stand Art 55 Table Stand Art 40/48
bild 3.55: included in delivery
bild 3.48: included in delivery
bild 3.40: included in delivery
natural_image
Line drawing of a flat-screen monitor with a stand (no text or symbols)Table Stand Connect 55 Table Stand Connect 40/48
bld 3.55:72111080
bld 3.48:72101Q80
bild 3.40:72101Q80
natural_image
Simple line drawing of a computer monitor with a stand (no text or symbols)FS Plate 55_65
FS Plate 32_49
bild 3.55:72670S00
bild 3.48:72660S00
bild 3.40:72660S00
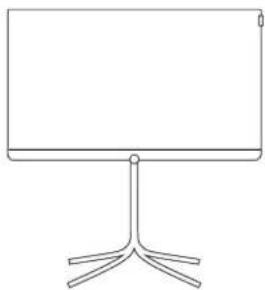
natural_image
Simple line drawing of a blank whiteboard on a stand with five legs (no text or symbols)FS 32_43
bld 3.40:72435Q00
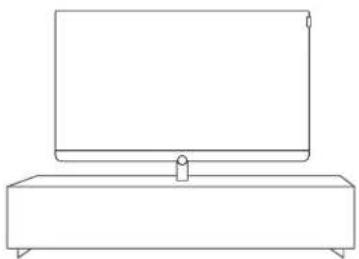
natural_image
Line drawing of a flat-screen TV mounted on a rectangular base (no text or symbols)Loewe Spectral Rack
Different versions, sizes and colours available to match Locwe TV, sound system and equipment
Only in conjunction with VESA Size 400 adapter.
^2 Only in conjunction with VESA Size 300 adapter.
© Only in conjunction with VESA Size 200 adapter.
Loewe bild
User handbook
Accessories
Mounting options (bild 2.55 oled/bild 2.49/bild 2.43)
natural_image
Simple line drawing of a blank rectangular frame with a small circular mark at the bottom (no text or symbols)
natural_image
Simple line drawing of a blank rectangular frame with a horizontal line at the bottom (no text or symbols)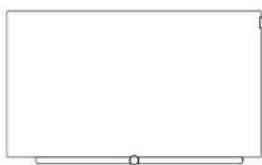
natural_image
Simple line drawing of a blank rectangular frame with a horizontal line at the bottom (no text or symbols)Wall Mount Slim/Vesa Size 200/300
bild 3.65 oled: 71391T20 (Vesa Size 300) bild 3.55 oled: 71391T20 (Vesa Size 300) bild 3.49: 71389T20 (Vesa Size 200) bild 3.43: 71389T20 (Vesa Size 200)
Wall Mount WM 67
natural_image
Line drawing of a flat-screen monitor with a stand (no text or symbols)TS Plate 3.65 oled/3.55 oled TS Plate 3.43/3.49
bile 3.65 oled; included in delivery bile 3.55 oled; included in delivery bile 3.49; included in delivery bile 3.43; included in delivery
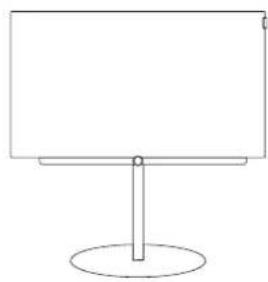
natural_image
Simple line drawing of a blank rectangular board with a vertical support and circular base (no text or symbols)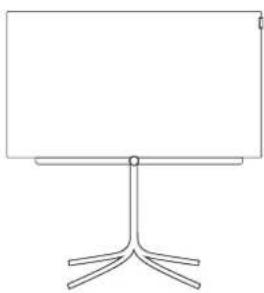
natural_image
Simple line drawing of a blank whiteboard with four vertical supports (no text or symbols)FS Plate 55\_65 FS Plate 32\_49
bile 3.55 oled: 72670S00 bile 3.55 oled: 72670S00 bile 3.49: 72660S00 bile 3.43: 72660S00
FS 32\_43
bild 3.43:72435000
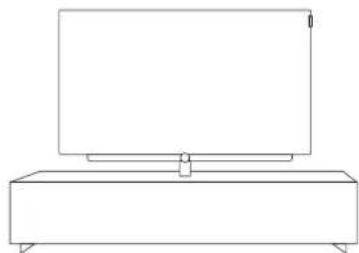
natural_image
Line drawing of a monitor mounted on a base with legs fixed (no text or symbols)Loewe Spectral Rack
Different versions, sizes and colours available to match locwe IV, sound system and equipment
^c Only in connection with VESA size 300 adaptor. ^d Only in connection with VESA size 200 adaptor.
Loewe bild
User handbook
Accessories
Mounting options (bild 1.65/bild 1.55/bild 1.40/bild 1.32)
natural_image
Empty rectangular frame with a small circular mark at the bottom center (no text or symbols)Wall Mount Slim/Vesa Size 200/400
natural_image
Simple rectangular outline with a small circle at the bottom center and a small right-angle mark at the top (no text or symbols)Wall Mount WM 67
Wall Mount WM 68
natural_image
Empty rectangular frame with a small circular mark at the bottom center (no text or symbols)Wall Mount Isoflex 32-55
bld 1.55:71363BCO ^2
bld1.40:71363B00 ^3
natural_image
Line drawing of a flat-screen monitor with a stand (no text or symbols)Table Stand bild
bild 1.65: included in delivery
bild 1.55: included in delivery
bild 1.40: included in delivery
bild 1.32: Included in delivery
natural_image
Simple line drawing of a blank rectangular board with a vertical pole and circular base (no text or symbols)FS Plate 55_65
FS Plate 32_49
bild.1.65:72670S00
bild 1.55:72670S00
bild 1.40:72660S00
bild 1.32:72660S00
natural_image
Simple line drawing of a blank board with four legs (no text or symbols)FS 32_43
bild 140:72435Q00
bld1.32:72435000
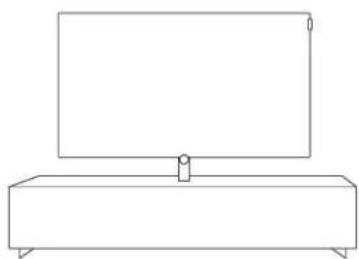
natural_image
Simple line drawing of a monitor mounted on a base (no text or symbols)Loewe Spectral Rack
Different versions, sizes and colours
available to match Loewe IV, sound system
and equipment
Only in conjunction with appropriate adaptor to be ordered separately.
^2 Only in conjunction with VESA Size 400 adapter.
- Only in conjunction with VESA Size 200 adapter.
Loewe bild
User handbook
Accessories
VESA standard ^(1)
Instructions on using third-party mounting options according to the VESA standard
Loewe flat screen TV sets are specified for Loewe accessories. When using third-party mounting options according to the VESA standard, the manufacturer's instructions on the mounting options must be observed.
Loewe accepts no liability for the use of mounting options from other manufacturers.
On the rear wall of the TV set, there are four points of screw connections to receive the VESA adapter bolts.
Mounting a Loewe flat screen TV set to a holder according to the VESA standard necessarily requires the use of Loewe VESA adaptor bolts. Otherwise, the TV set may be damaged.
Screw the Loewe VESA adapter bolts with a torque of approx. 4 Nm into the screwing points of the TV rear panel (see Fig. 1).
First, possibly existing screws in the four screwing points must be removed.
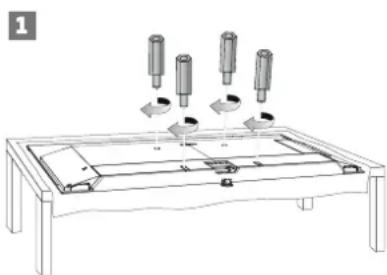
natural_image
Line drawing of a table with mechanical components and directional arrows (no text or symbols)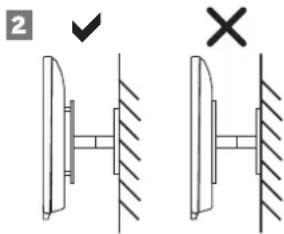
text_image
2 ✓ ×The Loewe VESA adaptor bolts are used to ensure stability and the necessary minimum distance of 5 mm between rear wall of the TV set and VESA holder (see Fig. 2). The VESA holder must not rest on the rear panel.
When mounting the TV set, always check that all four Loewe VESA adaptor bolts are used. For each mounting point, only one VESA adapter bolt may be used. It is inadmissible to screw several VESA adapter bolts or extend individual adapter bolts.
Measure the hole distance between the screwing points of your TV set. A hole distance of 400 x 400 mm on the rear of the TV set means VESA 400 standard.
Thus, a suitable mount bracket must also correspond to the VESA 400 standard. If the VESA standard of your TV set fits the standard of the desired bracket, the bracket has also to be approved for the weight and size of the TV set (for weight and TV set size refer to chapter
Technical Data).
Loewe is not responsible for the permissible load-carrying capacity and the professional fixing of the holder.
Please observe additionally and definitely the points described in the chapter on safety instructions.
If you use a Vesa mounting options from other manufacturers, you can order the Vesa adapter bolts M6x32 (No. 90473.988) at your authorized dealer of Loewe.
Loewe bild
User handbook
Environment / Legal information
Environmental
Power consumption
Your TV set is equipped with an eco-standby power supply. In the standby mode, the power consumption drops to low power (see chapter Technical data). If you want to save even more energy then switch the device off with the mains switch. Please also note that the EPG data (Electronic Programme Guide) is lost under certain circumstances and possibly programmed timer recordings cannot be carried out by the TV set.
The TV set will be completely separated from mains only when you unplug the mains cable.
The power consumed by the TV set during operation depends on the energy efficiency preset in the initial installation or on the setting in the system settings.
If you activate the automatic dimming, your TV picture will adapt to the ambient brightness. This reduces the power consumption of the TV set.
Automatic shutdown
If the TV is not operated for 4 hours (adjustment of volume, programme change, etc.) the TV will automatically switch to stand-by mode to save energy. A prompt to terminate this shutdown process appears one minute before expiry of the 4 hours.
By default, the automatic shut-off is active in the energy efficiency mode home mode/personal mode, premium mode.
Automatic shutdown does not occur when using the radio without screen display (screen off).
Disposal
You have chosen a very high-value and durable product.
Packaging and cardboard
The disposal of the packaging will be gladly handled for you by your specialist dealer. If you dispose of the packaging yourself, dispose of the packaging in sorted waste disposal and according to the local disposal regulations. Place cardboard and paper in the waste paper, foils and polystyrene in the recyclable waste collection.
The set
Your Loewe product is made with quality materials and components that are recyclable and reusable.
This symbol means that electrical and electronic equipment must be disposed of separately from household waste at the end of their service life.
You can return your old set for free at designated
recycling centres, or at your dealer, if you buy a similar new device. Additional details about returns (even for non-EU countries) are also available from your local government. They make an important contribution to the protection of our environment.
The batteries
The original equipment batteries do not contain harmful substances such as cadmium, lead or mercury.
Used batteries should not be disposed of in household waste. Dispose of used batteries free of charge in the collection containers set up at the dealer or at the public collection points.
Licences
Label 1:
text_image
DOLBY AUDIO C25.01.2004Dolby Audio and the double-D symbol are trademarks of Dolby Laboratories. Manufactured under license from Dolby Laboratories. Confidential unpublished works.
Copyright © 2003-2015 Dolby Laboratories. All rights reserved.
text_image
DOLBY AUDIO dts-4D For MPV standards, the 100% of MPV is used to use the product.Dolby Audio and the double-D symbol are trademarks of Dolby Laboratories. Manufactured under license from Dolby Laboratories. Confidential unpublished works.
Copyright © 2003-2015 Dolby Laboratories. All rights reserved.
bild 3.55 dal / bild 3.48 dal /bild 3.40 dal
text_image
DOLBY AUDIO DOLBY VISION dts-HD Dolby Audio, Dolby Audio and the model 20% of the models of Dolby Audio, Dolby Audio and the model 20% of the models of Dolby Audio, Dolby Audio and the model 20% of the models of Dolby Audio, Dolby Audio and the model 20% of the models of Dolby Audio, Dolby Audio and the model 20% of the models of Dolby Audio, Dolby Audio and the model 20% of the models of Dolby Audio, Dolby Audio and the model, Dolby Audio and the model 20% of the models of Dolby Audio, Dolby Audio and the model 20% of the models of Dolby Audio, Dolby Audio and the model 20% of the models of Dolby Audio, Dolby Audio and the model 20% of the models of Dolby Audio, Dolby Audio and the model 20% of the models of Dolby Audio, Dolby Audio and the model 2Dolby Audio, Dolby Vision, and the double-D symbol are trademarks of Dolby Laboratories. Manufactured under license from Dolby Laboratories. Confidential unpublished works.
Copyright © 2003-2015 Dolby Laboratories. All rights reserved.
Environment / Legal information
For DTS patents, see http://patents.dts.com. Manufactured under license from DTS Licensing Limited. DTS, DTS-HD, the Symbol, & DTS or DTS-HD and the Symbol together are registered trademarks of DTS, Inc.
© DTS, Inc. All Rights Reserved
This set contains a software which is partly based on the work of the Independent JPEG Group.
This product includes software developed by the OpenSSL Project for use in the OpenSSL Toolkit (http://www.openssl.org/).
This software is provided by the OpenSSL project "as is" and any expressed or implied warranties, including, but not limited to, the implied warranties of merchantability and fitness for a particular purpose are disclaimed. In no event shall the OpenSSL project or its contributors be liable for any direct, indirect, incidental, special, exemplary, or consequential damages (including, but not limited to, procurement of substitute goods or services; loss of use, data, or profits; or business interruption) however caused and on any theory of liability, whether in contract, strict liability, or tort (including negligence or otherwise) arising in any way out of the use of this software, even if advised of the possibility of such damage.
This product includes cryptographic software written by Eric Young (cay@cryptsoft.com).
This product includes software written by Tim Hudson (tjh@cryptsoft.com).
This product contains software which was developed by third parties and/or software which is subject to GNU General Public License (GPL) and/or GNU Lesser General Public License (LGPL). You can pass on and modify them in accordance with Version 2 of the GNU General Public License or optionally every later version which is published by the Free Software Foundation.
The publication of this programme by Loewe is carried out WITHOUT ANY GUARANTEE OR SUPPORT, particularly without an implicit guarantee concerning MARKET MATURITY or the USABILITY FOR A SPECIFIC PURPOSE. Details can be found in the GNU General Public License. You can obtain the software via the Loewe customer service department.
The GNU General Public License can be downloaded from: http://www.gnu.org/licenses/.
The explanations in the following FAQ list are based on the assumption that you have brought all devices in the current software version. This applies not only to the TV set but also to any peripheral devices or CA modules.
| Problem Possible Cause Remedy/notes | ||
| The TV set switches off automatically. | The automatic switch off switches off the TV set on energy saving grounds after 4 hours without operation, as soon as at least a signal input group on the Home Mode. Premium Mode or Personal Mode energy efficiency mode is set. | The use of the automatic switch-off is recommended for energy saving and safety reasons.From software version 4.3.x or higher, the automatic switch off can be deactivated in the menu (System settings → Control → Energy efficiency → 4h switch-off timer). |
| The TV set will turn off after about 5 minutes. | a) No input signal is present.b) In radio mode, the screen has been switched off and the sound volume has been reduced to 0 or muted because the sound is played back via an audio system. | a) If the input signal is missing, the TV set automatically switches off after 5 minutes for safety reasons.b) Report your audio system in the sound component wizard. This deactivates the TV speakers and the sound is reproduced through your audio system. |
| All menus appear in the wrong language. | The menu language was inadvertently set incorrectly. | Set menu language:Press HOME button. Select bottom left menu item (💡). In the following list, highlight the fourth point from the top and change to the right in the next column. With OK select first list point. Select language and confirm with OK. |
| Individual picture and sound settings are not saved after the set switched to standby. | The TV set has been put into operation in the Shop Mode energy efficiency mode. This mode is specifically designed for the presentation in the shop and therefore all settings are reset at restart. | Change the energy efficiency mode for all signal input groups to Home Mode or Premium Mode.In the menu under System settings → Control → Energy efficiency. |
| What do the different colours of the LED display mean? | The meaning of the different colours of the LED display is described in the chapter Operating controls on the TV set or Switching the TV set ON/OFF. | |
| The white LED on the TV set will always turn on and off (3 seconds on, 1 second off). | This blinking rhythm is an indication of a hardware defect. | Contact your specialist dealer. |
| The TV set does not respond to the remote control any more. | a) You may have accidentally pressed one of the "other" set buttons (STB, VIDEO, AUDIO).b) The remote control is blocked and no longer sends infra-red codes. | a) Press the TV button on the remote control. The red LED above the TV button lights up.b) Remove the batteries from the remote control and press a few buttons until the LED via the set button is no longer lit. Wait about 10 minutes and replace the batteries. Pay attention to the correct polarity of + and - when inserting the batteries. If this is not successful, contact your specialist dealer. |
| The buttons on the remote control do not function as usual or as described. | HbbTV of the respective station uses these buttons and blocks them. | Deactivate HbbTV mode or set the start-up behaviour of HbbTV to manual start (System settings → Control → HbbTV). |
| In the home view, some stations do not display a station logo but only the standard logo. | Depending on the features of your set, the station logos for Astra 19.2° and Hotbird are already pre-stored with sets with an integrated hard disk.With sets without an integrated hard disk, the station logos are only available for Astra 19.2° due to the lower memory space. For other networks, these must be downloaded from our service provider from the Gracenote company via the Internet. For the identification of a station, data is used in the DVB data stream, if these are not unique, the logging of the logos fails with Gracenote as well as when the internet connection fails. | Establish an Internet connection with the TV set to load missing station logosThe station logos are then loaded successively for the selected TV station list or stations, which are located as favourites on the homescreen.We recommend to permanently connect the set to the Internet as the logos are thus also updated at regular intervals. |
| No sound can be heard on the TV set. a) The | TV set has been muted or the sound volume turned down too far.b) A non-existing or deactivated audio device is registered under System settings → Connections → Sound components (for example HiFi/AV Amplifier). | a) Increase the sound volume by a long press of the V+ button on your remote control. This also eliminates any mute switching.b) Connect the audio device and switch it on. Change in Sound component wizard back to TV speakers. |
| During a feature film, some stations have too short sound drop-outs. | Some stations will change the transmitted sound format during the broadcast, for example, during an advertising break. | Due to the change in the sound format, short sound drop-outs occur shortly before the start and end of an advertising break. |
| In the case of a TV set, there are occasional picture and/or sound drop-outs. | Due to small errors at the reception, which the TV cannot compensate for, there may be picture drop-outs.These are, dependent on the strength of the disturbance, also accompanied by sound drop-outs.Occasionally, there is also an asynchrony between picture and sound, which can be corrected by a program change. | Interferences in reception are by far the most frequent cause of picture drop-outs. It is not always the reception itself is disturbed, such as, for example, in case of heavy rain in connection with satellite reception.Also interferences that can affect poorly shielded antenna cables or antenna sockets are also part of this.Also the reception of DVB-T/DVB-T2 contains many sources of interference.Your TV set provides a display of signal strength and signal quality.To do so, open the menu System settings → Stations → Manual search (incl. antenna status)There you find three-colour bars for the currently set station, which provide an indication of the signal quality for signal-to-noise ratio (C/N), level (level) and bit error rate (BER).The respective indicators should all be found in the green area in order to have sufficient reserves even in case of weather-related deterioration of the reception.Short-term disturbances are possibly not registered by these displays and nevertheless lead to visible effects. |
| In the case of TV sets with an integrated hard disk, this is sometimes not recognized when switched on | Data errors on the hard disk can lead to this being not recognized correctly when the TV set is started. As a rule, the TV performs a test of the internal hard disk itself.To prevent damage to the hard disk, always switch the TV set to standby first, before disconnecting it from the power supply with the mains switch or a switched socket strip. | The check of the hard disk can be started manually via the menu (System settings → Control → more... → Hard disks → Check integrated one.If this is not successful, you can via the menu item Format integrated one completely delete the internal hard disk.ATTENTION: Thus all data are lost. A data recovery is not possible in this case.Oserve the point of the data backup in the Chapter Recordings, section Digital Recorder – Delete manager. |
| General problems on connecting External devices via an AV Input. | The signal type is set incorrectly. | Set the signal type correctly (System settings → Connections → AV connecting settings → Signal type).If the Signal Type is set to “Automatic” this can lead to error recognitions in the case of non-standardised signals. Then the standard and signal must be adjusted according to the specifications in the manual of the external device. |
| With Teletext different characters are displayed incorrectly. | The wrong character set is set in the System settings. | Set the correct character set: System settings → Control → more ... → Standard Teletext → Character set → Standard or the corresponding character set. |
| There are errors on the operation of a CA module. | Switch the TV set off. Remove the CA module from the TV set. Wait a few seconds. Reinsert the CA module. Turn the TV set back on. | |
| The TV set does not accept CI + modules, although these are detected in another set. | Check whether in the menu System settings → Extras → Integrated features under the menu item Hardware, PRODUCTION is listed with CIPlus. | Contact your specialist dealer. |
| I have two CA modules in the set but nevertheless cannot simultaneously record and view another program. | The setting for the rights of both CA modules is incorrect. | Select for the CA modules in the menu System settings → Extras →Smartcard Rights the option Same Rights.The option must be selected for both CA modules. |
| When the set is switched on, a message from the CA module appears every time that it is authenticated. | CI+ modules must be authenticated in the TV set. Both sets thereby exchange the safety information.When using a CA module for the first time, this authentication may take some time depending on the module.A shorter version of the authentication is performed at each switch on. This is dependent on the module speed and is hidden by the start process of the TV device or possibly leads to a message which can not be prevented. | |
| My TV shows error messages on the use of CA modules | There are basically two different types of error messages when operating CA modules:1) Messages in the centre of the screen:These messages are determined by the CA module, the TV making available only one menu window. The content comes from the CA module itself and may even be displayed in a foreign language.With any questions regarding these messages, please contact the provider of the CA module or the network operator.2) Messages in the upper right corner of the screen:These messages are generated by the TV and generally refer to the reception, for example, signal quality at the antenna input or to the communication with the module.In the case of errors in the communication, a fault code is usually displayed which helps your specialist dealer in error identification. | |
| No sound external digital audio Audio-amplifier. | a) The external digital audio amplifier does not support the selected sound format (Dolby Digital, MPEG).b) TV set and external digital audio amplifier are not connected to each other.c) ARC does not work due to missing CEC communication, or a socket other than HDMI 1 is used. | a) Set PCM stereo in the sound selection on the DVD player. For DVB stations on the TV set, switch the Speech/sound to stereo.b) Connect SPDIF OUT from the TV set to a Digital input of the external digital audio amplifier and select on this the corresponding input.c) Ensure that CEC is activated on the external device and that the HDMI cable also supports CEC. Check in the menu System settings → Connections → Digital Link → Digital Link HD functionality whether this is also activated. ARC is fundamentally supported only on HDMI 1. |
| No sound via ARC from an external digital audio amplifier. | The external amplifier cannot handle the supplied sound format. | Change the setting to Stereo (PCM) in the menu System settings → Connections → HDMI → HDMI1-ARC Sound format. |
| A programmed Recording has not been executed. | The broadcast was erased by the provider from the EPG data, for example, on the basis of a program change.The station that has been recorded does not support Automatic time management (Accurate Recording). | Only the broadcasters are responsible for transmitting the data for the Automatic time management. The availability of the corresponding data cannot be guaranteed.Program recordings, in cases of doubt, without the automatic time management. |
| The beginning or end of a programmed recording is missing even though the Automatic time management (Accurate Recording) was used. | The broadcasting time of the broadcast has been shifted and the station from which it was recorded has not updated the data. | Only the broadcasters are responsible for transmitting the data for the Automatic time management. The availability of the corresponding data cannot be guaranteed. |
| The title of a recorded broadcast in the archive does not match the actual program. | The title of a broadcast is registered after the beginning of the broadcast. Relevant for this is the beginning of the recording. If the recording start is changed manually, the name of the previous broadcast for the archive is perhaps used. | If you want to make sure that the recording is complete, you can set in the menu System settings → Control → more ... → DR+ → Recording the desired Pre- and Post-run Times each in the range of 0 - 15 minutes. This time is automatically added before and after each recording in order to fully receive the broadcast. Thereby, the broadcast start (20:15) is retained and the title is transferred correctly in the archive. |
| The recordings are no longer displayed Recordings according to the CI+ standard can only be played on the sets on which they were recorded. If, for example, because of an error, the hard disk is no longer detected or is damaged, the recordings located on it are lost. A data recovery by specialist companies does not appear to be cost-effective for this data. | The data backup is the responsibility of the customer. A data recovery or a copy service is not offered by Locwe. Observe the point of the data backup in the Chapter Recordings, section Digital Recorder – Delete manager. | |
| Digital Link HD (CEC) does not work. The interfaces HDMI 1, 2 and 3 are set to | compatible mode In the delivery state ex works. Change the option of each HDMI connection according to the parameters of the external device (System settings → Connections → HDMI → Compatible Mode). | |
| An amplifier connected to HDMI does not switch on or off via CEC. | The HDMI cable used does not support CEC or is too long. | Use an alternative, possibly shorter HDMI cable. |
| An external source does not provide the expected picture quality to HDMI. | Use the HDMI 4 connector to connect HDR enabled players as this makes available the widest possible bandwidth for the HDMI signal. | |
| Device does not work on HDMI port or does not work properly. | Reset the settings for the HDMI connections in the menu (System settings → Extras → Reset to factory settings → HDMI). | |
| Your TV set does not, for the desired IP assignment type. Automatic assign an IP address or only a Link Local IP address | No DHCP server works in your network and the set assigns itself a randomly generated, so called, Zero ConfIP or Link Local IP address in the range 169.254.1.0 to 169.254.254.255. | Set up a DHCP server. Assign the IP addresses for the TV set Manual. |
| A displayed media file cannot be played. The format of the file is not supported (see also Restrictions in Chapter Technical data – File formats supported). | No remedial action. | |
| The WLAN key of the wireless router can be entered, but no connection can be established. | The set does not support all special characters for the WLAN key. | Change the WLAN key of the router and do not use country-specific special characters such as ä, ö, ü and β. |
| No device is found when searching for wireless routers. | a) The router is not ready for wireless communication.b) The SSID of the router is sent hidden. | a) Check your wireless router. Attempt the re-establishment of the connection a few minutes later.b) Change the setting on the router or enter the SSID of the bass station manually. |
| The connection of the TV set to the wireless router is established but the connection quality is poor. | Interferences on the WLAN connection may occur depending on the position of the router.. | Interferences of the WLAN can occur for different reasons but also external sources for this cannot be excluded.- Observe the instructions for positioning in the manual of the router.- Avoid other radio sources in the neighbourhood of the router, for example, DECT base stations. Microwave devices are also potential sources of interference for the WLAN.- Possibly the WLAN is braked by an older slower device, as it does not support at least the N-standard.Use a LAN cable or a Powerline adapter for testing if WLAN reception is problematic. |
| The streaming provider used does not provide the expected resolution/picture quality. | As a rule, providers of video streaming services use the "Adaptive Streaming" option. At the same time, a video is first viewed in a lower resolution and, in the case of a stable connection, with a sufficient data rate, is increased in resolution and possibly also in picture quality.The same applies, of course, to the reverse case when not enough bandwidth is available, reducing the resolution and/or quality. | The available bandwidth for video streaming is not determined solely by the bandwidth of the particular Internet connection.The specifications on the data rate are as a rule maximum specifications.Depending on the network load, the main end times can lead to lower data rates on your own Internet connection, or even through the provider.A detailed statement as to why at a certain time a lower resolution was available can only be made by the provider. |
| DR+ streaming with other devices or with the Loewe app does not function. | For TV sets with a built-in hard disk, the access to the DR+ archive is not enabled. | Activate in the menu System settings → Control→ more ... → DR+ → DR+ Streaming the option Share DR+ archive with other devices.Please note that LOEWE. is set as DR+ device group name and 17123 as IP port number (standard setting from factory). |
| No further program is possible with multi-recording. | With two simultaneous recordings, a further program from one of the two channels can also be viewed but this is subject to certain restrictions.Example combinations see Chapter Recordings Section Digital-Recorder - Multi-Recording. | |
| WLAN or Bluetooth not available. | In the menu System settings → Extras → Integrated features under the menu item Hardware you can see the integrated components.If a previously available equipment feature is not displayed, please contact your specialist dealer. | |
Loewe bild
User handbook
Troubleshooting
| Problem Possible Cause Remedy/notes | ||
| The TV set displays various error functions. All software parts were not correctly loaded during a software update. | Open the menuSystem settings → Extras → Integrated features and select the menu itemSoftware.The currently installed package software is displayed.If we see a * behind the software version, this indicates an incomplete update.Move the cursor down 1x down and pressOK.Now all detail software versions are displayed, the faulty software version being marked with an asterisk.Restart the software update, either via USB or Internet (System settings → Control → Software update). The device automatically loads the missing parts automatically.Please contact your specialist dealer If you still see an asterisk. | |
| The volume of the TV set can no longer be adjusted. | The operating level of the remote control was accidentally adjusted. | Press the TV key on the remote control and at the same time the numeric key 5 for at least 5 seconds.The LED over the TV key on the remote control blinks twice.Now the volume should be adjustable again. |
| Your TV set no longer operates with remote control in spite of the batteries being charged. | a) The operating level of the remote control was accidentally adjusted.b) The remote control is blocked and no longer sends infra-red codes. | a) Press the MUTE key on the remote control and at the same time the numeric key 0 for at least 5 seconds.The LED over the TV key on the remote control blinks twice.Now you should be able to operate your TV set.b) Remove the batteries from the remote control and press a few buttons until the LED via the set button is no longer lit.Wait about 10 minutes and replace the batteries. Pay attention to the correct polarity of + and - when inserting the batteries. Do not be guided by the battery contacts (springs), but by the illustration at the bottom of the battery compartment.If this is not successful, please contact your specialist dealer |
You can also find useful tips and hints in the Loewe Community at: www.loewe-friends.de
CA module error codes
In case of problems with a CA module, error codes are displayed by TV set. The following table from the CI specification shows the meaning of the error codes.
| Error Code + | Error condition | Error detected by | Host action CI Plus Module | Module Action Comments | |
| 00 | N/A None None | ||||
| 01 | CICAM CICAM goes to pass - through mode | 9. | |||
| 02 | CICAM - CICAM goes to pass through modea revocation notification message is displayed. | ||||
| 03 | CICAM/Host - If EMI>0 CICAM goes to pass-through mode, otherwise switches to DVB CI mode- a response error notification message is displayed. | The service operator and CAS may choose under what conditions to descramble when operating in DVB CI mode. | |||
| 04 | CICAM/Host - If EMI>0 CICAM goes to pass-through mode, otherwise switches to DVB CI mode- a response error notification message is displayed. | The service operator and CAS may choose under what conditions to descramble when operating in DVB CI mode. | |||
| 05 | CICAM None Recommended: | - CICAM retries the download 2 times- a response error notification message is displayed. | |||
| 06 | CICAM None Recommended: | - CICAM retries the download 2 times- a response error notification message is displayed. | |||
| 07 | CICAM None Recommended: | CICAM retries the download 2 times- a response error notification message is displayed. | |||
| 08 | CICAM None CICAM goes to pass - through mode | ||||
| 09 | CICAM/Host lost stops the CICAM. CICAM goes to pass - through mode | ||||
| 10 | CICAM/Host lost stops the CICAM. CICAM goes to pass - through mode | ||||
| 11 | CICAM/Host lost stops the CICAM. CICAM goes to pass - through mode | ||||
| 12 | CICAM/Host lost stops the CICAM. CICAM goes to pass - through mode | ||||
| 13 | Host Host stops the CICAM. None | ||||
| 14 | Host Host goes to DVB CI mode12. | None | |||
| 15 | Host Host stops the CICAM. None | ||||
| 16 | CICAM None - CICAM goes to pass- through mode- a response error notification message is displayed. | ||||
| 17 | CICAM None - CICAM goes to DVB CI mode | 3- a response error notification message is displayed. | |||
| 18 | CICAM None - CICAM goes to pass - through mode- a response error notification message is displayed. | ||||
| 19 | CICAM None - CICAM goes to DVB CI mode | 3- a response error notification message is displayed. | |||
| 20 | CICAM None - CICAM goes to DVB CI mode | 3- a response error notification message is displayed. | |||
| 21 | CICAM None - CICAM goes to DVB CI mode | 3- a response error notification message is displayed. | |||
| 22 | CICAM Requires Update | CICAM None - CICAM goes to pass- through mode- a response error notification message is displayed. | |||
| 23-127 | Reserved for CI Plus | CICAM None - a response error notification message is displayed. | |||
| 128-255 | Private Use for Service Operator | CICAM None - a response error notification message is displayed. | |||
0-9
24p motion picture display: Movies released on Blu-ray Disc support the 24p motion picture display. The Blu-ray player transfers the original film format to the television with 24 frames per second. The DMM (DigitalMovieMode) set in the factory calculates and inserts additional intermediate pictures, which suppress film jerking typical for the cinema, thereby providing for a smooth motion sequence.
A
Accurate Recording: See Automatic time control
Administrator: Person who administers the network, i.e. takes care of setting up and maintaining all components belonging to the network.
Active antenna: An antenna with its own power supply or amplification which can improve the reception in areas with a poor coverage.
ARC: Abbreviation for Audio Return Channel.
Audio Return Channel: The audio return channel which was introduced with the HDMI Standard 1.4 is used when an audio system with audio (pre) amplifier, e.g. Loewe MediaVision 3D, is connected to a TV set via HDMI. The digital audio signal of the TV set (e.g. the sound of the current TV program) can be transferred to the audio amplifier via the audio return channel of the HDMI cable. Thus the same cable which is normally responsible for transferring image data from a connected media player to the TV set transfers the audio data in the opposite direction. In this way, the audio return channel makes the cinch cable, which has previously been required in addition to the HDMI cable, redundant.
Automatic time control: Also called Accurate Recording. Similar to VPS for analogue stations the automatic time control monitors the start and end times of programmes from DVB stations. If these times deviate from the data programmed in the timer data, the running time of the recording is adapted automatically. The automatic time control is not supported by all DVB stations.
AV socket: Socket for audio and video signals.
AV sources: Audio/Video source.
AVI: Abbreviation for Audio Video Interleave, a video container file format developed by Microsoft. A single AVI video file can contain several audio, video and text data streams (thus the name container format).
B
Band: Name for a transmission range.
Blu-ray Disc: The follow-up format of DVD. The contents of about five DVDs fit onto one Blu-ray Disc (abbreviated BD). Therefore, the Blu-ray disc provides enough space for high-resolution images and multi-channel sound formats.
BMP: Abbreviation for Bitmap, a grid graphics format designed for Microsoft Windows and OS/2 that is wide spread and therefore supported by almost every popular graphics software package without any problems.
C
CA Module: The Conditional Access module contains the coding system and compares the transmitted code with the one on the Smart Card. If they match, the appropriate stations or programmes are decoded.
CEC: Abbreviation for Consumer Electronics Control. CEC provides universal component control functions for entertainment electronics devices (e.g. System standby, One Touch Play). CEC is referred to by Loewe as
Digital Link HD
Channel (WLAN): Devices that want to communicate with each other have to use the same WiFi channel. In Europe the WiFi frequency band is currently divided into 13 channels.
Cinch cable: Cable for transmitting sound or pictures.
CI slot: See Common Interface.
Client: Also called network client, describes an end device such as your TV set that is connected to the network and gets data from a (media) server to make it accessible to the user.
Common Interface: The Common Interface (CI slot) is a standardised interface. By inserting suitable decoding modules (CA modules) and a Smart Card coded digital programmes can be used.
Common Interface Plus: CI Plus is an advancement of the Common Interface standard. CI Plus slots are in principle downward compatible to the previous CI standard, i.e. CA modules and Smart Cards according to the past CI standard can continue to be used in CI Plus slots, as far as the programme provider permits this. Additionally, extended regulations apply however to CI Plus.
Component: See Component connection.
Component connection: Also referred to as Component. Connection where the video signal is transferred via three separate (Cinch) connections. It comprises the brightness signal Y as well as the colour difference signals Pb (blue component) and Pr (red component).
Conditional Access module: See CA module.
D
DAL: Abbreviation for Digital Audio Link Integrated, digital 5.1 audio decoder for the direct connection of Loewe klang products to the extension to the home entertainment system.
DHCP: Abbreviation for Dynamic Host Configuration Protocol. DHCP allows automatic assignment of IP addresses with the aid of a DHCP server.
DHCP server: Network service which takes care of automatic assignment of IP addresses to clients.
Digital Link HD: System for controlling units via the HDMI connection of the Loewe TV set when they have been set up in a covered position.
DMM: Abbreviation for Digital Movie Mode. Whether a studio recording, live broadcast, or feature film – the broadcast images are always displayed optimally. Still images are reproduced in all their sharpness and tranquillity. By creating intermediate images, DMM enables perfect studio quality, even with quick movements.
DNC: Abbreviation for "Digital Noise Control". Weak TV signals (analogue) can generate disruptive picture noise. DNC adjusts the effect of digital noise reduction to the picture contents.
DNS: Abbreviation for Domain Name System. Readable names (e.g. www.locwe-int.de) are assigned to numerical IP addresses. DNS servers are responsible for the resolution of readable addresses into the corresponding IP addresses.
Dolby Digital: Digital multi-channel sound. The digital standard for high quality home movie systems. The individual channels are broadcast separately in this standard. The three front channels right, left and centre, the two surround channels right and left and the external subwoofer channels are called a 5.1 signal.
Dolby Pro Logic: Analogue multi-channel sound. Converts a Dolby-coded stereo signal into a surround sound. This usually contains four channels (front left, centre, front right, surround channel). A special subwoofer channel is not generated in this method.
Dolby Pro Logic II: Analogue multi-channel sound. Dolby Pro Logic II is a further development of Dolby Pro Logic. This method generates a 6-channel spatial sound from a stereo or Pro-Logic signal (front left, centre, front right, surround left, surround right, subwoofer).
Dolby Surround: An analogue surround sound system which uses a matrix coding to fit four sound channels into two sound tracks.
Dolby Virtual Speaker: The Dolby Virtual Speaker technology simulates the surround playback of a real 5.1 channel playback with only two speakers.
Loewe bild
User handbook
Glossary
D (continued)
Dolby Vision: Dolby Vision is currently the most demanding format in the HDR area and guarantees particularly intense and high-contrast picture. By the processing of the dynamic metadata, the continuous optimization of the picture data is made possible - image by image by image. The intelligent algorithm calculates with the respective set data the best possible representation of the contents on the TV, as soon as Dolby Vision video formats are recognized.
DRM: Digital Rights Management. Processes to control copyright protected data. To be used correctly, DRM protected contents require not only a DRM capable device but also the possession of a license issued by the provider (to be paid for).
DTS: Digital Theatre Systems; Digital multi-channel audio.
DVB-C/-S/-T: Digital Video Broadcasting stands for digital television. Technical DVB is the standardised process for transmitting digital content (television, radio, multi-channel audio, room sound, EPG, Teletext, and other supplemental services) through digital technology. CST for terrestrial or antenna distribution.
DVD: Abbreviation for Digital Video Disc and later Digital Versatile Disc.
DVD preceiver: Combi device of DVD player and radio without integrated amplifier.
Dynamic contrast ratio: Here the light intensity of the display is adapted in case of a high black content in the picture. The so-called backlights are dimmed automatically and the contrast ratio increases temporarily, i.e. dynamically.
E
Electronic Programme Guide: See EPG.
EPG: Electronic Programme Guide is the electronic variant of a printed TV guide. Using the EPG you can watch the TV programme of the TV station, transfer the appropriate data. The list of programmes contains the title, beginning and end and duration of the programme. In addition, brief descriptions of the content of the programmes are also displayed.
Ethernet: Cable linked data net technology for local networks (LANs). Also covers standards for e.g. plug connectors and transfer speeds.
Euro AV socket: Interface for connecting video devices to a TV set. This socket is also referred to as Scart socket.
Exif: Standard format for additional data with modern digital cameras, e.g. date and time, aperture, light sensitivity, alignment of the camera (portrait/landscape).
F
FLOF: Full Level One Facilities. Teletext system in which names and numbers of the jump destinations are transmitted in the bottom line on every page. This guides the reader to related topics for example. An information about which pages exist and which pages have sub-pages is not available in FLOF.
G
Gateway: Transition to another network; in this case connection from the home network to the Internet.
The network device that establishes this connection is normally used as a standard gateway. As a rule, the DSL router also represents the Internet gateway.
H
HbbTV: HbbTV (Hybrid broadcast broadband television) is an industry standard that offers an open platform for technology that is not dependent on manufacturers. HbbTV combines TV programmes with online services seamlessly over broadband Internet (DSL).
HDCP: High-bandwidth Digital Content Protection. Coding system provided for the DVI and HDMI interfaces for secure transmission of audio and video data.
HDMI: High Definition Multimedia Interface, represents a newly developed interface for the fully digital transfer of audio and video data.
HDR: HDR is the abbreviation for High Dynamic Range. This means that HDR videos possess a larger dynamic / contrast range than standard videos (SDR).
HDR 10: HDR 10 is an HDR format that uses the static metadata for a complete video sequence. HDR 10 is also supported by UHD Blu-ray players.
HD Ready: A quality seal that is awarded to products that are capable of displaying high-definition television (HDTV).
HDTV (HD): High Definition Television is a collective term, designating a series of high-resolution television standards.
High and low band: Transmission ranges for satellites.
HLG: HLG is an HDR format that manages without metadata and thus saves transmission capacities. HLG is used for DVB transmissions on this basis.
Host: Computer that the server services are provided from, i.e. that makes data available. Refer also to media server.
I
ID3 tags: Additional information for MP3 and WMA audio files. Information about the singer, title, album and album cover can be saved here among other things. This data is then processed by the PC using an ID3 tag editor.
IP address: IP addresses (Internet Protocol Addresses) are used to identify devices in an Internet Protocol (IP) network. IP addresses are made up of four groups of numbers of three digits each.
IR-Link: The IR Link function allows the operation of accessory devices with concealed installation made by other manufacturers via the Loewe TV set. The infrared sensor required for this is available as an accessory and can be connected to the IR-Link connection of the TV set.
J
JPEG/JPG: Joint Photographic Experts Group is a committee, which has developed a standardised method for the compression of digital images. This method JPEG (JPG for short), named after the committee, is a commonly used graphic format for photos.
L
LAN: Abbreviation for Local Area Network. Mainly used as a name for networks with cabling (Ethernet).
LCD: Liquid Crystal Display.
LCN: Logical Channel Numbers. In stations with LCN, the channel location number belonging to the station is also transmitted by the provider. The stations are sorted according to these channel location numbers.
LNB/LNC: The crucial electronic component of a satellite antenna is referred to as an LNB (Low Noise Block Converter). It is mounted in the focal point of a parabolic antenna. The designation LNC (Low Noise Converter) indicates that conversion to a lower intermediate frequency takes place. The supplemental block in the LNB refers to the fact that a whole frequency range (a block) is converted in each case.
M
MAC address: Hardware address of a network adaptor, e.g., he network card in the PC. It is issued permanently by the manufacturer and is used to uniquely identify devices in networks.
Mbit/sec: Information about the transfer rate in networks in megabits, i.e. millions of characters per second. With WLAN the maximum speed is 11 (IEEE 802.11b), 54 (IEEE 802.11g), 300 (IEEE 802.11n) or 1300 (IEEE 802.11ac) Mbit/sec, in wired networks 10 Mbit/sec, 100 Mbit/sec (Fast Ethernet) or 1000-Mbit/s-Ethernet (Gigabit Ethernet).
Media Server: Stands for the device on which multimedia content is stored, but is also the name for the service provided by the device that makes this data available to the network.
Modulator: Transmitter in the video or DVD recorder so that the devices can receive signals via the tuner of the TV device.
Mono: Single channel sound.
MP3: Data format for compressed audio files.
MPEG: Digital compression method for video.
Multimedia content: Videos, music files and photos are grouped together under this term.
N
NAS: The term describes a hard disk which is independently linked to the network (i.e. without a PC).
Network ID: NID refers to the so-called programme ID number, also known as network ID – a number between 0 and 8191. This specification is necessary in specific cable networks of some countries. Then only DVB signals of this station network are searched for.
NICAM: Audio standard. Is used in Denmark, England, France, Sweden, and Spain.
NTSC: American colour standard, stands for National Television Standards Committee.
O
OLED: Abbreviation for Organic Light Emitting Diode, OLED is a further development of the light emitting diode (LED) for display technology. In contrast to LEDs, the coloured self-luminous OLEDs consist of organic semiconductors that emit light in an electric field.
P
Page Catching: For teletext, refers to marking and calling a page number.
PAL: European colour standard, stands for phase alternation line.
PCM: Pulse Code Modulation for digital sound.
Picture in Picture: See PIP.
PIP: Picture in Picture; a function which displays two pictures on the screen.
Pixel: Also called picture element or pel. Denotes both the smallest unit of a digital graphic grid and its display on a screen with grid control.
Pixel error: A pixel error is a defective pixel, usually on an LCD. Pixel errors may be caused by production errors. They are expressed for example by a constantly lit pixel or a constantly black pixel. Single defective pixels however are excluded from a guarantee.
PNG: Abbreviation for Portable Network Graphics, a freely available grid graphics format for loss-free compression.
Port: It allows assignment of data packages to various services which are running on one device under the same network address.
Powerline: Powerline designates a type of wired network connection in which data is transferred via the domestic electricity network using optionally available adaptors.
Progressive JPEG: Progressive JPEGs are built up gradually. The quality of the picture increases progressively during the loading process.
Proxy server: Proxy means authorized representative or deputy. Proxy servers provide indirect access to the network for systems that do not have direct access to the Internet.
ProScan/Progressive Scan: Progressive Scan (abbr. PS) or full picture method is a technique in the picture build-up of monitors, TV sets, beamers, and other display devices in which the output device is not sent line interlaced half pictures – unlike in the interlace technique – but real full pictures.
PSK: Clients that wish to connect to a wireless network secured with PSK must know this key.
R
RGB: Colour signals Red, Green and Blue.
Router: Device for connecting several networks, e.g., home network and Internet.
\$
Satellite tuner: Receiver for satellite programmes.
SDTV: Standard Definition TeleVision.
Set-top box: Set-top box (STB for short) refers to a device in entertainment electronics which is connected to another device, usually a TV set, and offers the user additional functional options.
Signal input group: Depending on the applied signal, the signal sources are divided into different groups.
Signal strength: Strength of the received antenna signal.
Signal quality: Quality of the incoming antenna signal.
Smart Card: The Smart Card is an electronic chip card issued by the respective programme provider or by the certification free Pay TV operators. It contains the code which is decoded by the CA module.
Static contrast ratio: Describes the relationship between the lightest and darkest image display.
Stereo: Dual channel sound.
Switch: Device for connecting several computers to a network.
Switching voltage: Video devices supply this voltage to switch the TV set to playback.
Symbol rate: Specifies the transmission speed for data transmission.
T
Terrestrial: In data transmission a wireless transmission that does not use satellites as intermediate station is referred to as terrestrial.
TFT: Thin Film Transistor. One widely distributed application is control of liquid crystal flat screens, for which a signal transistor is used for each pixel. This design of display is also referred to as active matrix, however it is frequently also referred to as TFT display.
Tuner: English for receiver. A tuner is a receiving component in TV sets or radios. Stations transmit TV or radio signals simultaneously but at different frequencies. The tuner is connected downstream of the antenna input and selected, that is, it filters out the desired signal.
U
Ultra HD: Ultra HD (abbr. for Ultra High Definition) is a digital high-definition video format, which is about four times the resolution of HDTV.
USB: Universal Serial Bus. Serial bus system for connecting external devices (USB card reader, USB stick).
UPnP AV Is used to control network devices from all manufacturers. Has become a widespread standard for home networking.
Loewe bild
User handbook
Glossary
V
VGA: PC interface for connecting a monitor.
W
Wake on LAN: Wake on LAN (WOL for short) is a standard released in 1995 by AMD in association with Hewlett-Packard to launch switched off devices which support this standard through the built-in network interface.
WEP: Abbreviation for Wired Equivalent Privacy. Former standard process in the WiFi encryption, now outdated.
Wired network: see LAN.
Wireless network: see WLAN.
WLAN: Abbreviation for Wireless Local Area Network. Also abbreviated as wireless network.
WMA: Abbreviation for Windows Media Audio, Microsoft own audio data format. As with MP3 files, the content is compressed here as well.
WMV: Abbreviation for Windows Media Video, proprietary Microsoft video data format.
WOL: Abbreviation for Wake on LAN
WPA: Abbreviation for Wi-Fi Protected Access. Replaced WEP as standard encryption for wireless networks.
Y
Ycc/Ypp: Colour standards for Set-top boxes.
YCbCr: Digital colour model, informally also incorrect designation for signals in standard resolution (SDTV). The YCbCr colour model, in which, e.g., DVDs are coded, has been developed from the YUV colour model used in analogue television technology. With YCbCr, the data is transferred via digital interfaces such as DVI or HDMI without being converted.
YPbPr: Analogue colour model, see also Component connection. The analogue YPbPr signal is generated from the YCbCr signal by a converter in the source player and then output at the 3 component outputs of the source player.
YUV: The YUV colour model is used for analogue television in accordance with the standards PAL and NTSC. YUV is often informally referred to when YPbPr (for analogue connections/cables) or YCbCr (in digital applications) is actually meant. YUV only occurs in quadrature modulation during PAL or NTSC transfer and is not otherwise used.
This equipment is in compliance with the essential requirements and other relevant provisions of Directive 2014/53/EU. In France and Italy it may only be used indoors.
Adding stations to personal list 99
Additional functions for DR+ archive playback 71
Adjusting the HiFi/AV amplifier 133
Adjusting the sound 89
Adjust size of the PIP image ....111
Allow switching voltage 134
Amazon Alexa login 84
Amazon Video 78
Antenna DVB 84,128,134
App Gallery 78
Apps 34,78
ARC 146
Archive recording 54
Asterisk key function 84
Audio commentary ....111
AUDIO key 148
Audio playback 74
Audio playback from external devices....147
Audio return channel 146
Auto dimming 84
Auto dimming - Room 85, 86
Auto dimming - Video (VBD+) 86
Automatic aspect ratio 85
Automatic HDMI hint 110
Automatic menu info 20,110
Automatic scan TV+Radio 84,94
Automatic time control 64
Auto speech detection 84
Auto volume 84
AV connecting settings 84,128,134
AV list 66
AV output signal 84
B
Balance 84,90
Beginning of daylight-saving time 110
Bluetooth 84,125
Blu-ray player 141
Bookmarks
Delete 72
Delete individual ones 72
Jump 71
Set 54,71
Brightness 84,85
Browser 80
C
Cable fixing 13
Camcorder 141
CA modul 139
Changeover summer time / winter time 110
Change title of an archive recording 57
Changing the station list 36
Channel lists Radio 84,94,98
Channel lists TV 84,94,98
Channels 84,94
Channel search 82
Character table 19
CI slot 139
Cleaning and care 8
Clear data base 102
Clock display 20
Code number 103
Coloured keys 46
Colour intensity 84,85
Colour temperature 84,85
Common Interface Plus 139
Compatible mode 135
Component connection 144
Connecting active loudspeakers 146
Connecting antennas 14
Connecting HiFi/AV amplifier 146
Connecting home network 14
Connecting the speaker system (AUDIO OUT) 145
Connecting the speaker system (DAL) 145
Connecting the TV set 14
Connections 84
Contrast 84,85
Control 84
Create new personal list 99
D
Data capture 102,110
Dealer mode 136,138
Dealer Mode 84
Deblocking filter 84,85
Deezer 78
Delete
Bookmarks 72
individual bookmarks 72
Recording 58
Delete manager 60
Set delete protection for timer recording 64
Setting/cancelling delete protection 60
Delete personal list 99
Deleting blocks 98
Deleting stations from the personal list 99
Device assignment 135
Devices on AV 143
Digital Link 84,128,135
Loewe bild
User handbook
Index
Digital Link HD 142
Digital Link HD functionality ....135
Digital Noise Control (DNC) 84, 85
Direct recording 54
Display kinematics 84,116
Display time 110
Disposal 203
Dolby PLII mode 89
DR+ 84
DR+archive 56
DR+Streaming 61,84,136
Notify started "Follow me" recording 113
DR+ Streaming settings 112
Also use other archives 113
DR+ device group name 113
IP port number 113
Share DR+ archive with other devices 113
DVB character set ....111
DVB radio 81
DVB radio recording 81
DVB radio time shift 81
DVB settings 84,111
DVD player 141
Dynamic SPDIF sync 84,90
E
Edit new personal list 99
Edit personal list 99
End of daylight-saving time 110
Energy efficiency 21,84,104
EPG 40,84
EPG search 34
Explanation of keys 20
Explanation of symbols 20
Export archive entries 59
Export log file 84,118
Extras 84,136
F
Favourites 35
Film quality improvement (DMM) 84,85
FLOF 46
Follow-me function 61,68
Functionality 111
Function of the connections .....12
Function of the TEXT key 114
G
Game console 135,141
Gaming mode 135
Gamma brightness correction 84,85
General information on menu operation 17
H
Hard disks 84,117
Checking 117
Formatting 117
HbbTV 48,84,114
HbbTV text 48
HDMI 128,135,141
HDMI1-ARC Sound format 135
HDMI CEC 142
Headphone volume 39
History 37
Home 34
Home Automation 123
Home networking systems 147
Home view 34
Host name 120
|
Image+ Active 84,85
Important information 9
Initial installation 21
Initial installation wizard 21
Installing the TV set 13
Instant Channel Zapping 36
Instant recording 54
Integrated features 84, 136, 137
Intensity 91
Internet radio 82
Interval functions 72
Displaying a hidden interval 72
Jumping to Bookmarks 71
K
Key explanation 110
Kinematics 9
L
Language 21,84,102,205
Legal matters 84,136
Licence agreement 21,138
LNC/LNB 27,29,30
Loewe App 151
Loewe TV for Smart Home skill 127
Loudness 84,89
Lumas 78
Loewe bild
User handbook
Index
M
Mains switch 11
Manage preferences 52
Manual scan TV 94
Manuell scan (incl. antenna status) 84
Maximum switch on volume 84
Maximum volume 84,90
MediaNet
Browse 79
Exit 78
Settings 79
Menu options 39
Mimi Defined ^TM 38, 78, 84, 89, 91
Mobile phone keyboard 19
Mobile Recording 84,124
Move block 98
Move picture up/down 84,85
Move stations in the personal list 99
Moving of archive entries 58
Multimedia / Network 84
Multimedia settings 84,123
Multi recording 55
Multiroom 62
Multi select 58
Music playback
End 75
Repeat 75
Shuffle playback 75
Winding 74
N
Netflix 78
Network selection 24, 25
Network selection (IPTV) 23
Network settings 84,120
New group 91
New person 91
„No Signal" notification 110
Notify hidden sections 112
Number of satellite antenna cables 26
Numerical keys 17,36
0
OLED 9
OLED calibration 9,84
OLED-Schutz 85
One touch recording 54
On/Off button 11
On-screen displays 84,110
P
Page selection 46
Parental lock 60,84,103
PC 143
PC IN - Display 85
Permanent clock display 20,110
Personal list 37
Add station 99
Create new list 99
Delete list 99
Delete station 99
Move station 99
Rename list 99
Photo
Exit 77
Full-screen mode 76
Rotate photo 76
Slide show 77
Picture 84
Picture adjustment 84, 85, 87
Picture format 84, 85, 88
4:3 88
16:9 88
PALplus 88
Panorama 88
Zoom 88
Picture settings 85
PIP 49,84
PIP functionality 49
Post-record time 112
Power switch 16
Pre-record time 112
Privacy Statement 138
Profile 91
Proxy server 120,122
Q
Quick start mode 84,104
R
Record conflict 64
Recording 43,112
Recording DVB radio 81
Recordings 34
Remote control 10,15,148
Remote TV switch on of the TV set 135
Renaming the HDMI port designation 141
Renaming the personal list 99
Renderer 84,123
Repeat initial installation 21,84,136
Reset to factory settings 84,136,137
Loewe bild
User handbook
Index
Restore stations 98
Rotate TV 84,115
Rotating the TV set 50
S
Safety 6
Satellite (DVB-S/S2) 134
Satellite selection 27,28,29,30
Satellite system 26
SAT>IP 134
Scrambled channels 24, 25, 31, 95, 140
Screen Mirroring 78,83
Search 39
Search for artists 82
Search mode 43
Select channel 36
using the numerical keys 36
via personal lists 37
with P+/P- 36
Selecting a channel out of the channel list 36
Serial interface RS-232C (RJ12) 147
Serial recording tolerance 112
Service 222
Set covers 13
Setting the volume 36
Set-top box 141
Sharpness 84,85
Shutdown of the ext. device via TV button 135
Side by side 86
signal type 134
Skin tone 84,85
Smart Card 139
Smart jump 69,112
Software 84
Software download 105
Software update
Automatic update via the internet 109
Manually via Antenna 107
Via Antenna 108
Via USB memory medium 106
Sorting 39
Sound 84,89
Sound adjustment 84,89
Sound components 84,128,129,145
Sound mode 84,89
Sound picture synchronisation 84,89
Sound via 84
Sources 34
Standard PIP 49,111
Standard Teletext 84
Standby mode 16
Start behaviour of HbbTV-stations 114
Status display 38
STB key 148
Stop recording early 55
Streaming server standby 84
Subtitle 55,73,111,112
Supply voltage 5V 134
Surround modus 89, 90
Switching off the TV set during recording 55
Switch off 16
Switch off curtain 110
Switch on 16
Switch-on volume 90
Switch to live picture 53
System settings 34,84
T
Teletext 46
Terms of use 138
Terrestrial (DVB-T/T2) 134
Tidal 78
Time and date 84,110
Time display 20
Timer 63
Timer Services 65
Timer data 63
Automatic time control 64
Beginning 63
Date 63
Delete protection 64
End 63
Favourite 64
Folder 63
Lock recording 64
Recording subtitles 64
Recording type 63
Station 63
Timer list 63
Timer Services 63
Time shift DVB radio operation 81
Time shift operation 53
Time zone 110
TOP 46
Top/bottom 86
Transfer all station lists 94
TV 34,36
TVkey 15,148
TV on when memorised 102
TV viewing with time shift 53,54
U
Update station list automatically 84,94
UPnP 14
Upper info display 110
USB stick 105
Loewe bild
User handbook
Index
V
Value-added service 10,48
VESA standard 202
VIDEO key 148
Video playback
Change picture format 71
Playback 68
Repeat 70
Selecting language/sound 70
Winding 70
Viewing a locked movie 60
Viewing another movie from the archive during archive recording. 5 4
Vogels Motion Mount 51
Volume adjustment 84,89
Volume display 110
W
Wake on LAN/WiFi 120
Watching other stations during archive recording 54
Y
YouTube 78
YPbPr 144
YUV 144
AUS
INDIMPORTS PTY LTD.
P.O. BOX 9184
Brighton
Victoria 3186
Australia
Tel +61394157037
E-Mail: info@indmports.com
B NL L
I cewe Opta Benelux NV/SA
U enoaan 84
No. 8 Jinghu Road, Xinya St, Huadu Reg
GZ, PRC
Tel: 186-020-22675744
Fax +86-(0)20-22675744
E-Mail:service@loewe-chr.com
CY
Hadjikyriakos & Sons Ltd.
121 Prodromos Str., P.O Box 21587
1511 Nicosia, Cyprus
Tel +35/-7777007
Fax+357-22663391
E-Mail: service@hadjikyriaxos.com.cy
CZ
ELVIA s.r.o
Poděbradská 188/51
198 00 Prague 9
Tel+420220311190
Fax+420220311195
E Mail: serv s@elv.a.c/
TS NOVA
Na Spoice 5
702 00 Ostrava
Tel +420 596 122 446
Customer Care Center
Industriestraße 11
E Mail loewe@maygap.com
F
Locwe France SAS
Rue du Dépôt
13 Parc del Europe. BP 10010
Exit Electronics Ltd.
47 Kiboutz Galuyot St.
Tel Av v 6655033
Israel
1cl +972 - 3 - 6826500
Fax +9/2 - 3 - 6826400
E-Mail: info@exit-trade.co.il
IND
Nonplus Ultra Home Automation Pvt Ltd
First Floor, No. 615, Second Main Road
Indiranagar Stage I, Indiranagar
Bangalore 560038
India
Tel +91 80 41114599
E-Mail: info@nplusultra.in
IR
Pars Royal Taramesh
LOEWE
No.166, between Ansari & Soltani St.,
Nelson Mandela Blvd.
PO Box: 1967736333
Tehran, Iran
Tel 1982196861717
Tel +98 21 26 20 83 75
F-Mail:info@tarameshgroup.com
JOR
LOEWE Gallery
Abdali Mall, B1
ACCU-TECH Solutions Co.
1-Kharija Al-Asnja'i Street
Jabal Al-We oceh
P.O. Box 9668
Amman 11191
Jordan
Tel +962-79 540-7870
Fax +962-6-465-0119
F Mail: info@accutech-solutions.net
KSA
LOEWE Snow Room
Olaya Street
Near Kingdom Center Riyadh,
Sauci Arabia
P.O Box 92831, Riyadh 11663
Tel +966-11-4640927
Fax +966-11-4640759
E-Mail: hagoo@sas-se.com
Mr. Hagop Julmekian
LV
Dominter or SIA
Brivibas gatve 332
Riga, LV-1006, Latvia
tel+3/16/31056/
E Mail: Maksims@dom332.lv
LT
A Cappella Ltd
Ausros Vartu 5, Pasazo skg.
01129 Vilnius, Lithuania
Tel 1370-52122296
Fax+370-52626681
Building 328 1st Floor Beirut, Lebanon
Tel-9611446777/1587446
Fax +9611582446
E Mail: info@icontrol leb.com
ROK
COSTEL Co.,LTD
COSTEL Blog 4F,
13 Sagirmakgol-ro 90 beon-kil, Jungwort-
gu
Sungnam-si. Cyeongg-do
South Korea (P.O.Box 13207)
Tel: +82-31-777-4540
Fax: +82 31 777 2033
F Mail: costelce@costel.com
RUS
Service Center Loewe
Aptekarsky per 4 podiezd 5A
105005 Moscow, Russia
Tel +7 -499 940 42 32 (ext. 454)
Fax +7 495 730 78 01
E-Mail: service@leowe-cis.ru
s
EET Europarts AB
Loewe Sweden
Bcx 4124
11 changi south street 3
03-01 builders centre
Singapore 486122
Tel-65 67452028
Fax +65-65467861
E-Mail: service@atlas-sv.com
SK
BIS audio. s.r.o.
Na Štepnici 9657/1, 960 01 Zvolen
Tel-455400703
F Mail: bisaudio@bisaudio.sk
E-Mail: servis@bisaudio.sk
www.bisaudio.sk
TR
ENKAY GROUP
SERVISPLUS MUSTER HIZMETLERİ
Alemdag Cac. Site Yolu No:18
Volco Enterprises Close Corporation
Unt8
7 on Mastiff (Road)
Longlake Ext 1, Lingbro Business Park
2165 Johannesburg
Tel-27116081228
Fax+27116081740
E-Mail: service@volco.co.za
STB
| ABSAT | 166, |
| AEGIR | 179 |
| AIWA | 141 |
| AKAI | 033, |
| ALBA 060, 017, 067, 104, 111, 126, 180, 201 |
| ALCATEL | 336 |
| ALDES 133, 168, 179, 201 |
| ALLSAT 033, 048, 059, 077, 201 |
| ALLSONIC 133, 168, 226 |
| ALLTECH 060, 137, 225 | |
| ALPHA | 033 |
| ALTAI | 047 |
| AMITRONICA | 060 |
| AMPERE 047, 186, 207 |
| AMSTRAD 060, 006, 047, 071, 097, 132, 165, 174, 175, 186, 212, 216, 217, 227, 228 |
| ANGLO | 060 |
| ANKARO 060, 051, 133, 161, 162, 168, 226 |
| ANTTRON 017, 077, 180 | |
| APOLLO | 017 |
| ARCON | 025, 051, 079, 132, 136, 161 |
| ARMSTRONG | 033, 175 |
| ARTHUR MARTIN | 130 |
| ASA | 009 |
| ASAT | 025, 033 |
| ASLF | 060 |
| AST | 127, 194 |
| ASTACOM | 171, 172 |
| ASTON | 032, |
| ASTRA | 013, 021, 025, 098, 099 |
| 164, 175, 178, 190, 222, 223 |
| ASTRO | 006, 091, 094, 176, |
| 177, 179, 180, 181 |
| AUDIOTON | 059, 180 |
| AUSTAR | 212, 332 |
| AVALON | 047 |
| AXIS | 054, 210, 223, 226 |
| BARCOM | 021, 051 |
| BEKO | 067 |
| BEST | 051, 226 |
| BIRMINGHAM CABLE | 343 |
| BLAUPUNKT | 090, 176 |
| BLUE SKY | 060, 217 |
| BOCA | 163, 169, 175, 186, 199, 207, 222 |
| BRAIN WAVE | 094, 161 |
| BRANDT | 069 |
| BRITISH SKY BROADCASTING | 050, 227 |
| BRITISH TELECOM | 341 |
| BROADCAST | 013 |
| BROCO | 060, 223 |
| BRUNS | 133 |
| BSKYB | 227 |
| BT | 104, 171, 172, 229, 335 |
| BT SATELLITE | 171 |
| BUBU SAT | 060 |
| BUSH | 048, 077, 106, 126 |
| BVV | 161 |
| CABLETIME | 308, 311, 312, 333, 334 |
| CAMBRIDGE | 006, 104, 199 |
| CANAL | 019 |
| CANAL DIGITAL 128 |
| CANAL PLUS | 128, 019, 320, 321 |
| CANAL SATELLITE | 128, 191, 211 |
| CANARY | 137 |
| CARAT.SOM | 054 |
| CHAPARRAL | 012, 134 |
| CHESS | 197 |
| CITYCOM | 135, 164, 203, 204, 230 |
| CLARK | 180 |
| CLATRONIC | 094 |
| CLEMENS KAMPHUS | 133, 210 |
| CLYDE CABLE VISION | 317 |
| CNT | 179 |
| COMCAST | 004 |
| COMCRYPT | 320, 321 |
| COMMANDER | 161, 162 |
| COMMLINK | 168 |
| COMMUNICADO | 054 |
| COMTEC | 054, 168 |
| CONDOR | 164, 226 |
| CONNEXIONS | 047, 096, 226, 231 |
| CONRAD | 006, 069, 164, 169, 226, 230 |
| CONTEC | 054, 135, 169 |
| COSAT | 059 |
| CROWN | 104 | 175 |
| CRYPTOVISION | 067, 315 |
| CYBERMAXX | 116 |
| CYRUS | 037 |
| DAERYUNG | 047 |
| DAEWOO 060, 017, 025 |
| DANSAT | 048, 077 |
| DAUMLING | 163 |
| D-BOX | 045, 214 |
| DECCA | 038 |
| DECSAT | 310 |
| DECSAT CANAL 310 |
| DELFA | 212 |