USER MANUAL Connect 40 3D LOEWE
Operating instructions

natural_image
Modern flat-screen TV with sleek silver and black screen, mounted on a stand (no visible text or symbols)
LOEWE.
Overview of the most important functions
Set operating mode

TV operation

Radio operation (standard assignment)
The assignment of the AUDIO button can be changed (see page 125).
On/Off of the television set

On/Off device in standby
(Main switch must be turned on)
Selecting stations

OK Call station overview and with
Select station with numeric buttons
Sound

V+/V- Volume up/down

Sound on/off
Colour key function during TV operation

Red button:
Freeze on/off.
Start HbbTV ^(1) or interactive data service, if this is available.
Green button: Teletext functions
Yellow button: Last selected station
Blue button: Programme information
Colour key function during radio operation


Red button:
On/Off screen
Yellow button: Last selecting station

Call MediaPortal,
select operating mode or function.
(e.g. Index)

with on-screen display: Info display,
info text appropriate to the content that can assist you further, should you have any questions about your TV device;
without on-screen display: Access status display, with status display open and repeatedly pressing programme information (if available)

Open DR archive/Video archive ^2 / Timer list
Press button twice in quick succession: Show / hide time permanently

Adjust picture format

On/Off PIP (picture in picture)

On/Off EPG (Electronic Programme Guide)

On/Off teletext/MediaText ^1

Call TV menu, carry out settings

With opened menu: Exit menu; Terminate inserts
Remote control – TV functions

For equipment with integrated hard disc (DR) or connected external hard disc., see the Digital Recorder chapter from page 82 onwards.
^12 The assignment of these keys can be changed (see page 125). The description refers to the standard setting.
a Depending on the corresponding settings (see page 80).
① Sound off/on....(page 32)
② LED display for current operating mode....(page 125)
③ Switch over to TV mode....(page 20; 125)
④ Switch over to operate recorder ^12 .....(page 125)
⑤ DR archive/Video archive ^1 / Timer list on/off .....(page 95)
⑥ Set picture format....(page 35)
⑦ Electronic Programme Guide on/off....(page 48)
⑧ Teletext/MediaText ^3 on/off.....(page 50)
⑨ Menu on/off....(page 12)
⑩ V+/V- Volume louder/quieter ......(page 32)
⑪ Station list on....(page 30)
in the menu: Confirm/call....(page 12)
⑫ Green button: Teletext functions....(page 38)
⑬ Red button: Freeze on/off / Start HbbTV or interactive data service ^3 ......(page 80)
⑭ Select station down / Jump ^1 / Rewind ^1 .....(page 87; 96)
⑮ Direct recording ^1 ......(page 89)
⑯ Still frame on/off / Interrupt timeshift television ^1 .....(page 87)
⑰ Still frame on / End timeshift ^1 ......(page 87)
⑱ Select station up / Jump ^1 / Fast forward ^1 .....(page 87; 96)
⑲ Still frame off / Continue timeshift television ^1 / Highlights ^1 ......(page 87; 88)
⑳ Blue button: Programme info on/off....(page 38)
②1 Yellow button: Previous station....(page 38)
②2 In the menu / Lists: Select/Set....(page 12)
②3 P+/P- Select Station up/down....(page 30)
24 Close all displays....(page 12)
⑲ Status display on/off / in the menu: context-relevant Info on/off......(page 40; 15)
②6 PIP on/off (picture in picture)....(page 46)
27 MediaPortal on/off....(page 14; 60)
28 AV selection....(page 31)
29 Select station directly; in the menu: Enter numbers or letters....(page 30)
③0 Set sound mode....(page 32)
③1 Switch over to operate DVD player ^2 (page 125)
③2 Switch over to radio mode ^12 ...... (page 21; 52; 125)
③3 Switch on/off – to standby mode......(page 21)
The key assignment displayed here is valid for the main menu level of the TV set. The key assignment may vary in certain operating modes (see the corresponding chapter in this operating manual).
Acknowledgements
Loewe Opta GmbH
Industriestraße 11
D-96317 Kronach
www.loewe.de
Printed in Germany
Date of issue 05/11-1.0 TB/FP
© Loewe Opta GmbH, Kronach
ID: 5.14.0
All rights including translation, technical modifications and errors reserved.

Contents
Overview of the most important functions 2
Remote control - TV functions 3
Acknowledgements....4
Welcome....7
Scope of delivery 7
About this operating manual 7
For your safety 8
Control unit front side of the device 10
Connections rear side of the device 11
Operating convenience 12
General information on menu operation 12
Operating convenience with wizards 13
Overview of wizards 13
MediaPortal....14
The index in the TV set 15
The info display 15
TV menu – Overview diagram 16
Radio menu – Overview diagram 17
Other menus—Overview diagram 17
Initial installation 18
Installing the TV set 18
Set covers 18
Connecting the TV Set 18
Bundling the Cables 20
Preparing the remote control unit 20
Turning the set on/off....21
First installation wizard 22
Positioning/aligning DVB-T antenna 29
Daily operation 30
Select station 30
Selecting Audio/Video Source 31
Adjusting the sound 32
Adjusting the picture 34
3D function 36
Daily operation (continued) 38
Button functions 38
Operation without remote control 39
Status display 40
Managing stations 42
TV stations 42
Put together / change favourites lists 45
Picture in Picture 46
Picture in Picture (PIP) 46
iPIP 46
Standard PIP 46
Configure Picture in Picture (PIP) mode 47
Electronic Programme Guide 48
Electronic Programme Guide – EPG 48
Configuring EPG 49
Teletext....50
Teletext....50
Teletext menu 51
Interactive data services 52
(Digital teletext/MHEG-5) 52
Digital radio 52
Radio mode (DVB radio) 52
EPG – Electronic Programme Guide (radio) 53
Radio mode (Internet radio) 54
Audio playback from external devices 55
Other settings 56
Parental lock 56
Timer functions 57
Language 57
On-screen displays 58
Time and date 58
Coded Stations 59
Conditional Access module (CA module) 59
Contents
General information on Media+ 60
Connecting the TV set to your network 60
MediaNet 60
Help for configuration problems 60
MediaUpdate - additional functions 60
Accessing your media 61
Media menu 62
MediaHome 66
MediaNet 70
Video podcasts....75
MediaMusic 76
MediaPhoto 77
MediaVideo....78
HbbTV / MediaTek....80
Digital Recorder 82
About the Digital Recorder system 82
Settings 85
TV viewing with time shift 87
Archive recording – Direct recording 89
Archive playback 95
DR+ Streaming 103
External devices 108
Connections menu 108
Gaming mode 109
Devices to the connections AV/AVS 110
Devices to the HDMI connections 112
Digital Link HD 113
Devices to the PC IN connection 114
Sound components wizard 115
Connecting Loewe sound system 116
Connecting active loudspeakers 117
Adjusting the speaker system 117
Connecting audio amplifiers 120
Assignment of the digital audio input 121
Audio connection in HDMI/DVI devices 121
Serial interface RS-232C (RJ12) 121
External devices (continued) 122
The direct way to record 122
Timer recording with external devices 124
Operating Loewe equipment 125
Software update 126
Basic information 126
USB stick 126
Download 126
Software update 126
USB keyboard 128
Button combinations 128
Character table 129
Tilting the TV set 130
Troubleshooting....131
Technical data 134
General data....134
Electrical data 135
Signals via PC IN / HDMI 135
Connections (max. equipment) 136
MediaHome 137
Accessories....138
Upgrade Kits / Conversion Kits / Cables 139
Equipment variants.... 140
TV set equipment 140
Setup possibilities Individual 141
Environment....142
Legal notes 143
Glossary....144
Index 151
Service 154
Welcome
Thank you
for choosing a Loewe TV set!
Loewe stands for the highest demands in technology, design and user friendliness. This applies equally for TV, video and accessories.
In addition to the elegant design and the many different possible colour combinations and installation possibilities, your Loewe TV set also offers many technological options.
Loewe Image ^+
State-of-the-art Full-HD-LCD-displays with LED-Backlight Technology. The advantage of the LED-Backlight is in the reduced energy consumption and high contrast values.
24p films played by a connected HDMI unit can be displayed optimally.
Loewe Sound+
Loewe Sound ^+ contains sound processors that are optimally calibrated to the TV set and boasts a closed coverage construction type for the integrated loudspeakers.
Many Loewe TV sets are fitted with a digital multi-channel audio decoder for impressive 5.1 surround sound.
You can reach the MediaPortal via the MEDIA button on your remote control, giving you access to all multimedia functions of your TV set.
Loewe DR+
If the hard disc recorder DR+ ^(1) is integrated into your TV set, you can record TV programmes simply at the press of a button. Programmes currently being watched can be interrupted, rewound and played back from the desired point if needed.
Scope of delivery
- LCD TV set
- Table mount (assembled)
- Mains cable
- Antenna cable
- Velcro cable ties
- Remote control Assist with two batteries
- TV quick guide
About this operating manual
For best results regarding safety and the longevity of the set, we recommend you read the chapter For your Safety (page 8) before switching it on for the first time.
The functions of the Loewe TV set are largely self-explanatory. However, should you have any questions, the integrated index and the info display (see page 15) can assist you further.
The index/glossary from page 144 onwards gives explanations of certain terms used in the TV set and the operating manual.
Paragraphs which begin with the symbol indicate important instructions, tips or conditions for the following settings.
Terms which you will find in the menus or printed on the remote control or TV set are written in bold type.
The necessary control elements are shown in the descriptions to the left of the text containing the instructions for action.
In addition to the remote control, a PC keyboard can be connected to one of the USB ports on your TV and then used to control your TV set (see also page 128).

In the operating manual, this symbol indicates places in which the use of a keyboard is particularly advantageous.
Depending on the connected accessory equipment the menus in the TV set can differ from those described here.
All the station names, programme contents, the illustrated photos, titles, albums and album covers in this operating manual are examples.
In some countries, the stations also transmit interactive data services with their programmes (see page 52, Digital Teletext/MHEG-5), whereby the functions of individual keys are not available or only so to a limited extent.
The symbol indicates which functions can differ for a loaded application.
The operating instructions for your TV set are updated at irregular intervals. We recommend checking now and then, especially after a software update.
For your safety
For your own safety and to prevent unnecessary damage to your device, read and comply with the following safety instructions:
Proper use and environmental conditions
This TV set is designed exclusively for reception and reproduction of video and audio signals and is designed for living rooms or office facilities, and should not be operated in rooms with high humidity, such as a bathroom, or sauna, or where there is a high concentration of dust (e.g. workshops). The manufacturer's warranty is only valid for use in the specified permissible environment.
If the set is used outdoors ensure that it is protected against moisture (rain, splashing water, or dew). High humidity and dust concentrations cause leak currents in the device, which can cause a shock hazard if the device is touched, or a fire.
If you have brought the set into a warm environment from the cold, then wait for about 1 hour before switching it on to avoid formation of condensation.
Do not place any objects filled with liquids on top of the appliance. Protect the appliance against dripping and splashing water.
Candles or naked flames must be kept away from the appliance at all times to prevent it from catching fire.

Never place the TV set in a position where it is exposed to vibrations. This can lead to material overload.
Transporting
Only transport the device in vertical position. Grasp the device on the upper and lower edges of the housing.
If the set has to be put down during packing/unpacking, place the TV set with the entire front surface lying flat on a soft underlay such as a blanket or the felt from the packing material.
The LCD screen is made of glass or plastic and can break if not handled properly.
Always wear rubber gloves to carry the TV set if the LCD screen is damaged and liquid crystal might be leaking out. In the case of skin contact immediately wash thoroughly with water.
Power supply
The wrong voltage can damage the set. This equipment must only be connected to a mains power supply which has the same voltage and frequency as that specified on the rating plate; use the mains cable provided. The mains plug of the TV set must be easily accessible so that the device can be disconnected from the mains at any time. When you unplug the mains plug, do not pull on the cable rather pull on the plug housing. The cable in the mains plug could be damaged and cause a short circuit the next time it is plugged in.
Lay out the mains cable in such a manner that it cannot be damaged. The mains cable must not be kinked or laid over sharp edges, stepped on or exposed to chemicals; The latter also applies for the entire equipment. A mains cable with damaged insulation can cause electrical shock and is a fire hazard.
Air circulation and high temperatures
The vent slots on the rear panel of the set must always be kept free. Please do not place newspapers or cloths on/over the TV.
Ensure that there is at least 10 cm free space on the sides and above the set for air circulation, if the set is placed in a cabinet or on a shelf.
Like any electronic device, your TV set requires air for cooling. Obstruction of the air circulation can cause fires.
The set is suitable for different installation solutions. See the

instructions for assembly for the different installation solutions. Stand the TV set with the table or floor stand only on a level, sturdy, horizontal base. Particularly ensure that the set does not protrude to the front when placed in or on pieces of furniture. The TV set may only be operated horizontally, the vertical tilt must not be more than 10 degrees maximum. The TV set must never be operated on edge, lying on the ground or hanging from the ceiling.
Set up the device where it is not exposed to direct sunlight and where it is not exposed to additional warming through heating elements.
Prevent metal items, needles, paper clips, liquids, wax, or similar items, from getting into the interior of the device through the vent slots in the rear panel. Such objects can cause short circuits in the set, which could possibly cause a fire.
If something should get into the interior of the set then immediately unplug the mains plug of the device and contact customer service for more information.
For your safety
TV sets with 3D function
Read the following safety instructions before using the 3D function of your TV set.
Please only use Loewe 3D glasses (see Accessories on page 138) in conjunction with Loewe 3D TV sets.
People that have a visual disorder may not be able to perceive 3D effects or may only be able to perceive them to a limited extent. People that are sensitive to flickering images (e.g. those with epilepsy) should only use this product after having consulted their doctor.
It might take some time for you to get used to the 3D glasses and before you can perceive the 3D effects properly.
Stop using the 3D devices immediately if you experience any feelings of nausea, dizziness or malaise when viewing 3D content.
Supervise children whilst they are viewing 3D content, as they can be particularly sensitive to it.
Allow more time for a break when viewing 3D films, so that you are able to relax. Failure to do this could result in headaches, fatigue, dizziness or malaise.
Position yourself comfortably in front of the 3D TV set and ensure that you are seated firmly. By doing this, you will avoid any injuries that may arise due to reacting to extreme 3D content.
Switch off any artificial light sources (e.g. energy saving lamp) between the TV set and the 3D glasses. These could impair the infrared reception or the TV picture may flicker as a result.
Repairs and accessories
Never remove the back of the TV set yourself. Only have your TV device repaired or serviced by authorised television technicians.
Only use original accessories such as Loewe stands if possible (see Accessories on page 138.
Supervision
Do not allow children to use the TV set without supervision or to play in the immediate vicinity of the TV set. The set could tip over, be pushed off or pulled down from the stand surface and injure someone.
Do not allow the switched-on TV set to run unattended.
Volume
Loud music can lead to ear damage. Avoid extreme volume especially over long periods and when using headphones.
Thunder storms
Pull out the mains plug and all connected antenna cables from the TV set in a thunderstorm. Overvoltage caused by lightning can damage the set via the antenna system, as well as via the mains. The mains plug and all connected antenna cables should also be pulled out during long periods of absence.
Note on the LCD screen
The TV set you have purchased with LCD screen satisfies the most rigorous quality requirements and has been inspected relative to pixel errors. Despite our thorough care when manufacturing the display, it cannot be 100% guaranteed that no subpixel defects will be present due to technical reasons. Please understand that these types of effects, as long as they are within the standard of specified limits, cannot be considered as a device defect in terms of the guarantee.
Avoid displaying still images for long periods of time. It is possible that a copy of the image may remain.
Cleaning and care
Switch off the TV set at the main switch before cleaning.
Clean the TV set, the screen, and the remote control unit with a soft, moist, and clean cloth only, without any aggressive or scouring cleaning agents.
Sets with glass screens may be cleaned with a conventional glass cleaner.
Control unit front side of the device

USB recording is only possible for devices without DR+ (integrated hard disc recorder).
^2 Only for devices with DR+ (integrated hard disc recorder).
Functions of the operating elements
① Mains switch:
The mains switch is located on the bottom of the set.
Always return the TV set to Standby mode before switching it off with the main switch.
Switch on from the standby mode
Switch off to the standby mode
③ Display:
red = Standby
green = Operation
orange = Operation without on-screen display
(Radio, EPG data capture, timer recording) or arch recording via USB ^(1) .
④ Display DR ^+ (2):
white= Digital Recorder inactive (no recording, no playback)
DR+ green = Digital Recorder active (offset TV viewing or archive playback)
DR+ red = Digital Recorder active (archive recording)
⑤ Infrared transmitter:
When showing 3D content, the 3D glasses Loewe Active Glasses 3D are controlled via the infrared sensor.
Call the menu
in the menu: up/down ▲ ▼
Radio on/off (back to TV mode)
Switch on the radio from the standby mode in the menu: down ▼
Station up
in the menu: to the right ▶
Station down
in the menu: to the left
Connections rear side of the device

① HDMI 1 - HDMI input 1
② HDMI 2 - HDMI input 2
③ PC IN - VGA/XGA input
④ AV - Euro-AV socket
⑤ LAN - Network connection
⑥ USB - USB connection
⑦ AUDIO IN - Audio input (analogue)
⑧ AUDIO DIGITAL OUT - Digital audio output
⑨ AUDIO DIGITAL IN - Digital audio input
⑩ CENTER IN - Centre audio input (analogue)
⑪ SERVICE - Service socket
⑫ ANT-TV - Antenna/cable analogue/digital ^(1)(2)
⑫ ANT SAT - Satellite antenna (Sat tuner 1) ^11
⑫ ANT SAT 2 - Satellite antenna (Sat tuner 2) ^11,12
⑬ AUDIO LINK - Surround audio outputs (analogue)
⑭ CI-COMMON INTERFACE - Common Interface 1 (CI slot 1)
⑮ CI-COMMON INTERFACE - Common Interface 2 (CI slot 2)
⑯ HDMI 3 - HDMI input 3
⑰ USB - USB connection
⑱ Headphones connection
⑲ AUDIO IN L - Audio in left (AVS)
⑳ AUDIO IN R - Audio in right (AVS)
②1 VIDEO IN - Video in (AVS)
22 AVS - S-Video connection (AVS)
23 220-240V\~50/60Hz - Mains connection
⑳ IR LINK - Infrared transmitter connection ^1
25 CONTROL - Rotating stand control
②6 RS-232C - Serial interface ^(1)
^1 Equipment and upgrade options, see page 140.
^17 The position of the aerial sockets depends on the tuner equipment.
Operating convenience
The operation can be divided basically into two areas: The operation of dropdown lists (e.g. station list, favourites list, EPG etc.) and the menu operation (TV menu etc.) for configuring your TV set.
If any questions arise during the operation of your TV set, an appropriate info screen can be accessed to help you by pressing the INFO button, see also info display on page 15.
Selection list (example: Station list)


▲▼◀▶ You move the cursor by pressing the ring (up, down, left, right).
P+/P- If more selection options are available than will fit on one screen page page ↓↑ is displayed. You can scroll the pages with P+/P-.
OK The OK button calls the selection or confirms the setting.

With the coloured buttons you can select different options depending on the application. The assignment of the coloured keys is shown at the bottom of the screen.

INFO: Additional information about the screen page.
END: Close/exit dropdown list.
Inputs with the numeric buttons
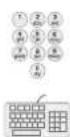
Letters have to be entered for specific functions. When using the remote control, press the numeric buttons just as on a mobile phone keypad (0-9) until the desired symbol is displayed. The available letters are printed on the individual numeric buttons.
See page 129 for a detailed overview of the available characters.
Menus for the individual modes (TV, Radio, PIP, EPG, Teletext, MediaPortal and DR archive/Video archive ^(1) ) are called with the MENU button.
The menus are displayed at the bottom of the screen. At the top you get additional information about the selected menu item (see info display on page 15).
In normal TV mode, without other displays.

MENU: Call TV menu.


SelectPicture,
▼ go to the menu line below.
Select Brightness,
▼ go to the menu line below.
◀ ▶ Set Brightness.
▲ Return to the Brightness menu line to make other picture settings.
◀ ▶ Select more ...
OK call more ... functions.
▶ Select Auto format,
go to the menu line below.
◀ ▶ Select on / off.

END: Conclude the settings.
You can find a diagram of the menu structure in the overview diagrams, page 16 and after.
^1 Only for TV sets that contain an integrated hard disc (DR+), a connected external hard disc (USB recording) or that have an archive available on the network (DR streaming).
Operating convenience
Operating convenience with wizards
For many settings your TV set has user guidance with wizards which guide you through the settings step by step.
Overview of wizards
Initial installation
The initial installation wizard helps you with the initial installation and connection of any existing equipment (see page 22).
Setting up the antenna
You enter in the antenna wizard which antenna signals are available to you. The antenna wizard is called in initial installation (see page 22). You can also call the antenna wizard in the TV menu under Connections → Antenna DVB → Antenna DVB-S ^(1) or Antenna DVB-T.
Search wizard
If you want to search for new stations after the initial installation, or if you have set up your antenna for the first time, then you can handle this task with the help of the search wizard (see page 42). You will find the search wizard in the TV menu under Settings → Stations → Search wizard.
Connecting sound components
The sound component wizard ensures that the components which reproduce the TV sound are correctly registered, connected and set. It is started automatically at the end of the initial installation wizard but can also be called separately (see page 115). You will find the sound components wizard in the TV menu under Connections → Sound components.
Programming and managing recordings
The recording wizard helps you when programming a recording using video, DVD or digital recorder (DR+ for devices with an integrated hard disc or USB recording for those without it) see page 122 onwards).
Software update
You can download the latest software for your TV set from the Loewe Service site and update using a USB stick (see page 126).
Operating convenience
The MediaPortal is the central overview page for your TV set's functions. From here you can gain access to TV channels, local and online media, digital radio and to the archive of the Digital Recorder ^1 .
MEDIA
MEDIA: Call MediaPortal.

The individual media and the various functions are displayed at the top of the MediaPortal.
The number of selectable items varies depending on the TV equipment, network connection, available media/media servers and connected appliances.
The lower part of the MediaPortal contains the selectable recommendations.

◀ ▶ ▲ ▼ Select menu item, OK call.
Description of the individual functions:
TV: Here you call the TV mode of your TV set. See page 30 for further information.
DVB radio: Use this to open the DVB radio mode of your TV set to listen to digital radio stations over DVB. See page 52 for further information.
Internet radio: Use this to open the Internet radio mode of your TV set to listen to digital radio stations over the Internet. The menu item only appears if an Internet connection is available. See page 54 for further information.
DR archive ^1 / Video archive: Using the DR archive, you have access to the recorded programmes on the integrated hard disc (for TV sets with DR ^+ ) or to the recordings on a storage device connected via USB. If the TV set does not have an integrated hard disc or a storage device connected via USB, the menu item Video archive will only appear if a network connection to a Loewe TV set with a shared DR archive is available.
See page 82 for further information.
DR+ Streaming ^41 : Here, you can switch off the TV set in the advanced standby mode for DR+ Streaming.
The menu item only appears if the TV set is with an integrated hard disc (DR+) and the DR archive is being shared with other TV sets.
See page 103 for further information.
MediaHome: Here you have access to your personal memory media, e.g. to all memory media connected via USB or to networks with which your TV set is connected. See page 60 onwards for further information.
MediaNet: Here you have access to multimedia content in the Internet as well as a high-quality web browser. See page 60 onwards for further information.
Video podcasts: Here you have access to video podcasts and Web TV from the Internet. The menu item only appears if an Internet connection is available.
See page 75 for further information.
Index: Here you have access to the index integrated in the TV set.
See page 15 for further information.
Operating convenience
The index in the TV set
The index explains the TV functions and the terms that you may be confronted with when operating the TV set. You can start all the assistants and many of the operating functions directly from here.
Alphabetic sorting is preceded by the items Menu language, Energy efficiency, Integrated features and Repeat initial installation.
Call index
MEDIA
MEDIA: Call MediaPortal.

◀ ▶ ▲ ▼ Select Index, OK call.
You will see an info text for the highlighted keyword in the info display.


If an OK symbol appears in the marked line, this function can be called directly with OK.
Selecting a keyword

Enter initial letters with the numeric buttons like with a mobile phone keypad (see page 12).
or go with:

◀ ▶ to the preceding / next letters,
▼ ▲ from line to line,

P+/P− scroll backwards or forwards in whole pages.
Example: You want to have the TV set switch off automatically at a specific time:
Select the keyword Switch off → Automatic, with OK you can activate the setting and with ← back again.
The info display
The info display provides an info text appropriate to the on-screen display that can assist you further with the operation of your TV set. Together with the index it makes for a comfortable operating system.
→ An on-screen display is faded in.
INFO
The factory setting is that the info display is shown automatically for each menu item. In this case you can temporarily hide the info texts with the INFO button.
The automatic info display can be hidden via a menu setting. Then it can be displayed temporarily by pressing the INFO button.

An INFO icon at the bottom right above the menu bar also tells you that an info text is available.

If an info text over several pages is available the number of available pages and P+P− Page ↓↑ is displayed in the Info window. You can scroll through the individual info pages with P+ and P−.
Permanently display or hide the automatic info display
Once you have become familiar with how to operate the TV set, you can switch off the automatic info display.
→ In normal TV mode, without other displays.
MENU

◀ ▶ Select Settings,
▼ go to the menu line below.
▶ Select Miscellaneous,
▼ go to the menu line below.
▶ Select On-screen displays,
▼ go to the menu line below.
▶ Select Automatic info,
▼ go to the menu line below: yes / no.
Operating convenience
TV menu – Overview diagram

flowchart
graph TD
    A["TV menu"] --> B["Picture Sound"]
    A --> C["Recording"]
    A --> D["Connections"]
    A --> E["Settings"]

    B --> B1["3D"]
    B --> B2["Picture adjustment"]
    B --> B3["Contrast"]
    B --> B4["Colour intensity"]
    B --> B5["Colour temperature"]
    B --> B6["Brightness"]
    B --> B7["Sharpness"]
    B --> B8["Digital Noise Control (DNC) more..."]

    C --> C1["Sound mode"]
    C --> C2["Dolby PLII mode¹"]
    C --> C3["Sound adjustment"]
    C --> C4["Audio commentary volume²"]
    C --> C5["Headphone volume"]
    C --> C6["Loudness"]
    C --> C7["Sound-picture synchronisation more..."]

    D --> D1["Recording wizard"]
    D --> D2["Antenna DVB"]
    D --> D3["AV connecting settings"]
    D --> D4["Miscellaneous"]
    D --> D5["Digital Link Plus"]
    D --> D6["Decoder stations⁴"]
    D --> D7["Remote TV switch on via Digital Link"]
    D --> D8["Assign digital audio input"]
    D --> D9["Gaming mode"]

    E --> E1["Stations"]
    E --> E2["Search wizard"]
    E --> E3["Manual adjustment"]
    E --> E4["Change stations"]
    E --> E5["Select/change favourites"]

    F["Parental lock"] --> F1["Timer functions"]
    F --> F2["Language"]
    F --> F3["Energy efficiency"]
    F --> F4["Miscellaneous"]

    G["Image+"] Active
Auto dimming - Room⁶
Auto dimming - Video (vBD+)
Film quality improvement (DMM)
Auto format
Picture format
Move picture up/down¹¹
PC IN display¹³] --> H["Loudspeaker sound¹¹<br>Headphone sound¹¹<br>Auto volume<br>AV output signal<br>Maximum volume<br>max. switch on volume<br>Volume adjustment for current station<br>Balance<br>Auto speech detection"]

    I["Menu items appear depending on the signal source currently selected (DVB or analogue) and/or at definite presettings in the relevant menus. For individual details, see the corresponding chapter of the operating instructions."]
    J["Menu item only appears if the audio commentary is activated and available (see page 41)."]
Menu items appear depending on the signal source currently selected (DVB or analogue) and/or at definite presettings in the relevant menus. For individual details, see the corresponding chapter of the operating instructions.
^12 Menu item only appears if the audio commentary is activated and available (see page 41).
^8 Menu item can only be selected if a valid signal is present at the PC IN input.
^4 Menu item only available if a Decoder has been selected as Device at connection AV (see page 108).
^15 Menu item only appears in sets with DR ^+ .
^16 Menu item not available if the TV set is showing 3D content.
Operating convenience
Radio menu – Overview diagram

flowchart
graph TD
    A["Radio menu"] --> B["Sound"]
    A --> C["Stations"]
    A --> D["Timer functions"]
    B --> E["Sound mode"]
    B --> F["Dolby PLII mode¹¹"]
    B --> G["Sound adjustment"]
    B --> H["Headphone volume"]
    B --> I["Loudness"]
    B --> J["more..."]
    C --> K["Search wizard"]
    C --> L["Manual adjustment"]
    C --> M["Change stations"]
    C --> N["Select/change favourites"]
    D --> O["Switch off once"]
    D --> P["Switch off daily"]
    D --> Q["One-time alarm"]
    D --> R["Wake up Mon-Fri"]
    D --> S["Wake up Sat"]
    D --> T["Wake up Sun"]
    D --> U["Wake up with"]
    D --> V["Wake up signal volume"]
    E --> W["Auto volume"]
    E --> X["Maximum volume"]
    E --> Y["max. switch on volume"]
    E --> Z["Volume adjustment for current station"]
    E --> AA["Balance"]
    E --> AB["Auto speech detection"]
Other menus— Overview diagram

flowchart
graph TD
    A["Media menu"] --> B["Network settings"]
    B --> C["Network access"]
    B --> D["Other"]
    A --> E["Photo settings"]
    A --> F["Music settings"]
    A --> G["Video settings"]

    H["EPG menu"] --> I["Station selection"]
    H --> J["Data capture"]
    J --> K["off"]
    J --> L(on (only for DVB)]
    J --> M(on (for DVB + analogue)]
    H --> N["Switch on TV when marked"]
    N --> O["no"]
    N --> P["yes"]
    H --> Q["Sorting"]
    Q --> R["corresponding to station list"]
    Q --> S["chronologically"]

    T["Teletext menu"] --> U["Station selection"]
    T --> V["Newsflash"]
    T --> W["Reveal"]
    T --> X["Recording wizard"]
    T --> Y["Settings"]
    Y --> Z["Preview pages"]
    Y --> AA["Sub-title pages"]
    Y --> AB["Personal text pages"]
    Y --> AC["Character set"]
Initial installation
Installing the TV set
Installation options
Your TV set is supplied equipped with a table stand. Further set-up solutions are available for purchase from your Loewe dealer. Only use Loewe installation solutions (e.g. wall mounts, floor stand) that are included in the Accessories – Setup possibilities chapter on page 141.
After selecting an installation option, read the appropriate assembly instructions.
Installation notes
Choose a place for installing your TV where no bright light or sunlight shines directly onto the screen. This could cause reflections which impair the picture.
3 times the screen diagonal can be taken as a guide value or the viewing distance (e.g. for 40-inch set approx. 3m for SD signal). The viewing distance can be reduced with an HD signal.
Set covers
Covers for rear and side connections
To remove the rear cable cover, pull the two recessed handles at the bottom and drop down the cover.
To fit the cover, insert the lugs at the top edge of the cover into the corresponding cut-outs in the rear panel and push up the cover until it snaps in.
The side cover of the TV set can also be completely removed. For this, open it as far as it will go and gently pull on the open cover.
The cover detaches from the holder and gives free access to the connection area. To replace the cover, simply push it until it latches back into place.

natural_image
Diagram of a mechanical or electrical component with directional arrows indicating movement or force (no text or symbols present)
Connecting the TV Set
Connecting to the mains
Remove the cover for the connections.
Connect the TV set to a 220-240V mains socket:
First plug the small plug of the power cable into the mains connection on the back of the TV and then the large mains plug into a mains socket.

Connecting antennas
Cable (analogue) / DVB-C / DVB-T antenna:
Plug the antenna cable of antenna, cable system or room antenna into the ANT TV socket.
If you want to use analogue cables / DVB-C connection and a DVB-T antenna together, use an external antenna switch (available from your dealer).
Satellite antenna DVB-S:
If the TV set is equipped with a Single or Twin satellite tuner (means of upgrade kit / conversion kit), the ANT-SAT and ANT-SAT2 sockets are available.
Depending on the used satellite system, connect a connecting cable from the multi-switch or directly from the LNC to the ANT-SAT and ANT-SAT2 sockets of the TV set respectively.
When connecting the TV set to a single cable community antenna, connect the ANT-SAT and ANT-SAT2 sockets directly to the appropriate SAT antenna socket. Ask your dealer if required.

Initial installation
Connecting the TV set to the Home network
You can connect your TV set to the home network by a wire connection (Ethernet, Powerline) or if available ^1 by a wireless radio connection (WLAN). Please contact your specialist dealer for more information on Powerline.
For the network adapter configuration, see page 63.
Under no circumstances may the TV set be wired and at the same time connected by a wireless connection to the same network, e.g. router. This may cause severe operational faults.
Example for a wire connection
Connect the LAN socket of your TV set to the LAN switch/router of your home network with a network cable (available from your dealer).

Example for a wireless connection ^(1)
You can connect the TV set to your home network by a wireless radio connection via the WLAN antenna inside the set.

^1 Equipment and upgrade options, see page 140.
Initial installation
Bundling the Cables
The cables connected to the TV set can be bundled and fixed to the back of the housing using the Velcro cable tie provided.
Then fit the cover for the connections (see page 18).

natural_image
Interior view of a computer monitor showing internal circuitry and ventilation slots (no text or symbols visible)
Preparing the remote control unit
Inserting or replacing batteries
Press on the embossed arrow whilst pushing the battery cover down. Only use leak-proof micro-cells of the LR 03 (AAA) Alkali-Manganese type. Do not use different types of batteries and old and new batteries together. Pay attention to the correct polarity of + and - when inserting the batteries.
If the batteries are too weak after longer use, the TV set prompts you to change the batteries.
Dispose of used batteries in an environmentally friendly way (see page 142). Push the cover back on from below after inserting the batteries.

natural_image
3D rendering of a remote control casing with a blue internal component labeled '4AA LFP03' and a small battery on the left (no text beyond label)
Adjusting the remote control for operating the TV set

Press the TV button.
See page 125 for how to operate other Loewe appliances and how to reprogramme the remote control buttons.
Initial installation
Turning the set on/off
Switching the TV set to standby mode
Press the power switch on the bottom of the set.
The display in the control panel on the front lights up first orange and then red. The set is now in standby mode.
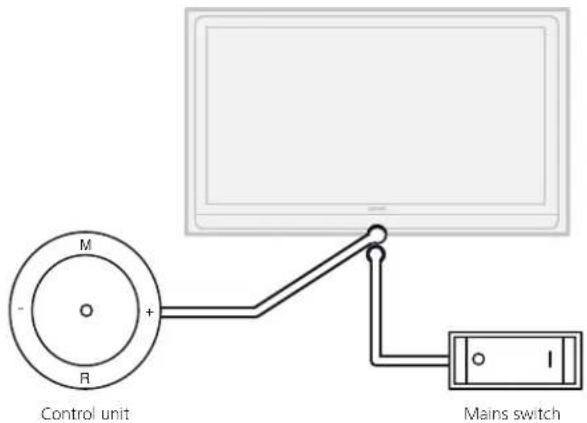
Switching the TV on/off on the control unit
To switch the TV set into Operating mode or switch it off into Standby mode, press the middle of the On/Off button for about 2 seconds.
Display

Meaning of the display colour of the LEDs in the On/Off button:
Red: Standby mode
Green: TV set is switched on
Orange: Radio mode, the device receives EPG data, timer recording is active or archive recording via USB is active ^1 .
Switching the set on with the remote control

Press the on/off button

or
numeric buttons

or TV button

or
OK button – station list is called

or
MEDIA button – MediaPortal is called.
Switching the set off with the remote control

Press the on/off button.
Before switching off the set with the mains switch, we recommend you to switch it to standby mode.
Switch on in Radio mode

Press R on the TV control unit.
or:
Press the AUDIO button on the remote control (radio mode, see page 52).
Initial installation
First installation wizard
Initial installation after switching on for the first time
This wizard starts automatically after the set is switched on for the first time, however it can also be called later manually in the TV index, see Repeat initial installation on page 15.
If at least one station is locked the access code must be entered before repeating initial installation (see Parental lock on page 56).
First installation wizard routine
The routine of the first installation wizard depend on the selected settings.
Language


▲▼◄► Select language.
Selecting the language of the user guidance is the wizard's first step. Then you simply follow the instructions on your TV screen.
OK Proceed.
Energy efficiency

▶ Select Energy efficiency.
Decide how energy efficiently you want to operate your TV set. The value for the contrast (and thus the brightness of the background lighting) is adapted and the automatic dimmer activated or deactivated (see page 34) depending on the presetting.
Energy
efficiency (continued)
Eco standard:
The emphasis for home use is on low energy consumption. The automatic dimmer is activated.
Premium mode:
This mode optimises the settings to a brighter environment at a higher energy consumption. The automatic dimmer is activated.
Shop mode:
The picture settings are aligned to operation in the presentation room. The automatic dimmer is deactivated. If the ambient brightness diminishes, the energy consumption is not reduced.
The presetting can be changed later in the TV menu under Picture → Picture adjustment → Presettings (see page 34) or under Settings → Energy efficiency.
OK proceed.

Location of TV set

▲▼◄► Select Location of TV set (national defaults are adopted).
OK Proceed

Selecting antennas
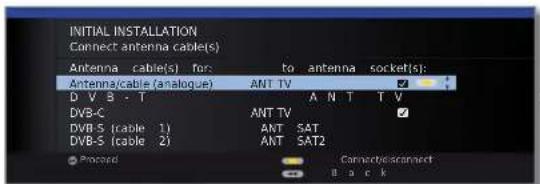
▲▼ Select antenna cable.


Yellow button: Connect/disconnect antenna cable.
Antenna/cable (analogue): analogue stations via cable/antenna
DVB-T: digital terrestrial stations
DVB-C: digital stations via cable
DVB-S (cable 1): digital stations via satellite
DVB-S (cable 2): digital stations via satellite
continued on next page →
Initial installation
Selecting antennas (continued)
The selection options for the aerials depend on the receiver units installed or upgraded at the factory (see also page 140).
Depending on which antenna(s) was (were) selected, the appropriate settings are called later during the routine.

Subtitle and audio languages (DVB)
OK proceed.
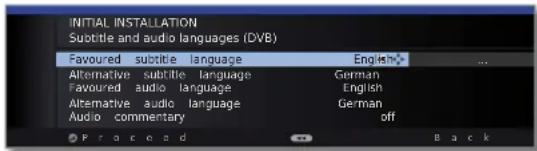
▲▼◄► Select desired languages and alternative languages for subtitles and audio for DVB programmes (see page 57).
Set up audio commentary for the visually impaired (see page 41).
OK Proceed.
Logical Channel Number

◀ ▶ Accept Logical Channel Number no / yes.
In various countries, digital stations (DVB-T, DVB-C, DVB-S) are transmitted with a preset channel number per station, known as "Logical Channel Numbers" – "LCN".
If you indicate yes here, the specified programme numbers will be adopted as station memory locations and the stations of the preferred signal sources sorted by LCN. There may be gaps in the numbering of the station list depending on the LCN.
OK Proceed.
Depending on which antennas (DVB-T, DVB-C, DVB-S) were selected, the appropriate settings appear below.
Setting options for DVB-T reception:
If you have not selected a DVB-T antenna in the antenna selection: Continue with setting options for DVB-C reception on page 24.
Settings


▲▼◄► Select and adapt settings for DVB-T reception.
Encrypted stations
You can state whether coded stations are to be searched for in the search/update. Select yes to save all found scrambled stations. However, these stations can only be received in connection with a CA module and the appropriate Smart Card. Handling of the CA module is described on page 59.
If a CA module with a SmartCard is already plugged in for the station search, all the stations which this module can descramble are also saved when no is preset.
Search method
If you want to run the station search independently of the channel grid, select frequency search for the search method.
OK Proceed.
Supply voltage


◀ ▶ Select supply voltage no / yes.
Use a DVB-T antenna that requires a supply voltage (active antenna) and which is not already supplied via a power adapter, then select yes (5V) for the antenna's power supply.
How to align your DVB-T antenna is described on page 29.
OK Proceed
Initial installation
Setting options for DVB-C reception:
If you have not selected a DVB-C antenna in the antenna selection: Continue with Setting options for DVB-S reception (see right hand column).
The normal DVB-C settings are derived from the selection of the location and do not need to be changed.
Settings


Encrypted stations
▲▼◄► Select and adapt settings for DVB-C reception.
You can state whether coded stations are to be searched for in the search/update. Select yes to save all found scrambled stations. However, these stations can only be received in connection with a CA module and the appropriate Smart Card. Handling of the CA module is described on page 59.
If a CA module with a SmartCard is already plugged in for the station search, all the stations which this module can descramble are also saved when no is preset.
Search method
If you want to run the station search independently of the channel grid, select frequency search for the search method.
Start frequency
The DVB stations are only searched for in the frequency range above the start frequency.
Network ID
Only change these defaults if you are familiar with other symbol rates and types of modulation or if you have to specify the network ID for your cable network. In the case of small cable networks fed directly from the satellite, the rate of 6900 might have to be replaced by 6111. Your cable provider has the information you need.
Symbol rate
QAM modulation

OK Proceed.
Setting options for DVB-S reception:
If you have not selected a DVB-S antenna in the antenna selection: Continue with Setting options for all types of reception on page 28.
The normal DVB-S settings are derived from the selection of the location and do not need to be changed in most cases.
Select satellite installation


▲▼ Selecting the satellite system.
Specify how you receive which satellite(s) (single satellite or type of satellite system). Ask your dealer if required.
Single satellite
Reception of a single satellite via a connected LNC (LNB). See page 25 for settings.
2 satellites on 22 kHz switchbox
Reception of two different satellites with two LNCs (LNBs) which are connected to the TV set by a 22 kHz switchbox. See page 25 for settings.
2 satellites on toneburst switch
Reception of two different satellites with two LNCs (LNBs) which are connected to the TV set by a toneburst switch. See page 25 for settings.
Max. 4 satellites on DiSEqC multiswitch
The TV set controls a DiSEqC multiswitch to which up to four LNCs (LNBs) for different satellites are connected. See page 26 for settings.
DiSEqC one cable communal system
Select setting if the TV set is connected to a DiSEqC single-cable system (according to EN 50494). Several Sat receivers can be connected to one Sat cable. See page 26 for settings.
other communal installation
Select setting if the TV set is connected to a single-cable system (without DiSEqC). Several Sat receivers can be connected to one Sat cable. Unlike a DiSEqC single-cable system there are restrictions in the range of certain reception frequencies in single-cable community systems. See page 27 for settings.

OK Proceed
(to the appropriate page of the satellite system).
Initial installation
Setting options for the satellite system (single satellite):
Select single satellite
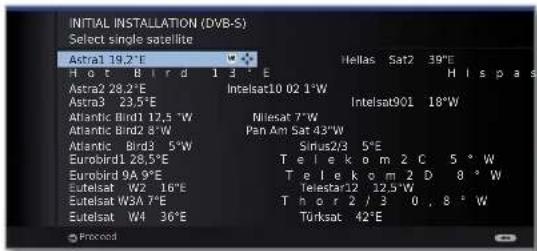

▲▼ Selectsatellite, OK Proceed.
High band


◀ ▶ Highbandno / yes.
Specify here whether the high band of the selected satellite is to be searched in addition to the low band.
OK Proceed.
LNB frequencies

Set LNB frequencies.
Normally, you do not need to change the values for high and low band, unless the LNC (LNB) of your satellite system uses a different oscillator frequency (important for the frequency display).
OK Proceed.
(with Setting options for DVB-S reception (continued) on page 27).
Setting options for the satellite system (2 satellites on 22 kHz switchbox / 2 satellites on toneburst switch):
Satellite selection


▲▼ Select Satellite 1 / Satellite 2,
▶ select satellites from list,
OK Proceed
LNB
frequencies
(22 kHz
switchbox)

LNB
frequencies
(toneburst
switch)


Set LNB frequencies.
Normally, you do not need to change the values for high and low band, unless the LNC (LNB) of your satellite system uses a different oscillator frequency (important for the frequency display).
OK Proceed
(with Setting options for DVB-S reception (continued) on page 27).
Initial installation
Setting options for the satellite system (max. 4 satellites on DiSEqC multiswitch):
Settings
DiSEqC
multiswitch

▲▼◄► Select and adapt settings for the DiSEqC multi-switch.

Repeat rate
The refresh rate determines how often a DiSEqC command is output. A refresh is only necessary with cascaded systems.
Control voltage
The control voltage controls the switching of the polarisation level (horizontal/vertical) in non-DiSEqC capable components (e.g. control of single LNBs via DiSEqC multiswitch).
22kHz signal
The 22kHz signal controls the switching between high and low band in the Band setting. The Position setting controls the selection of the satellites in non-DiSEqC capable components.
Toneburst
The Toneburst controls the selection of the satellites in non-DiSEqC but toneburst capable components with the Position and Option settings.
OK Proceed
Satellite selection
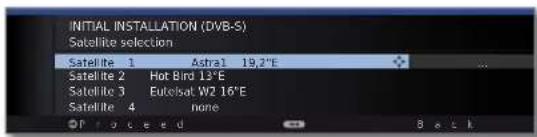
▲▼ Select Satellite 1 ... Satellite 4,
▶ select satellites from list,
OK Proceed

LNB
frequencies
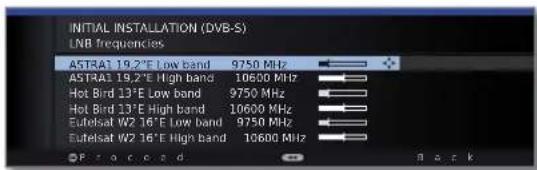
Set LNB frequencies.
You do not normally need to change the values.
OK Proceed
(with Setting options for DVB-S reception (continued) on page 27).
Setting options for the satellite system (DiSEqC one cable communal system):
DiSEqC one
cable
communal
system

▲▼ Select DiSEqC single cable communal installation.
OK Proceed.

Satellite
selection

▶ Select satellites from list,
OK Proceed

LNB
frequencies

Set LNB frequencies.
Normally, you do not need to change the values for high and low band, unless the LNC (LNB) of your satellite system uses a different oscillator frequency (important for the frequency display).
OK Proceed

Manual
registration
(for socket
ANT SAT)

▲▼◄► Select and adjust settings for the DiSEqC single cable communal installation.

Transmission Select the desired transmission channel and the corre-channel/frequency sponding transmission frequency.
PIN protection If your system is designed for it, it is possible to protect your used transmission data from use by other subscribers with a PIN.

OK Proceed
(wi Setting options for DVB-S reception (continued) in page 27).
Initial installation
Setting options for the satellite system (other communal installation):
Select single satellite
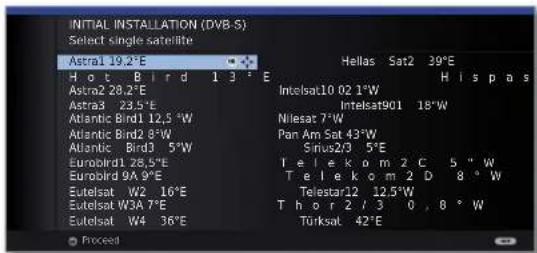

LNB
settings
▲▼ Selectsatellite, OK Proceed.


LNC frequency
▲▼◄► Select and adapt settings.
Normally, you do not need to change the values for high and low band, unless the LNC (LNB) of your satellite system uses a different oscillator frequency (important for the frequency display).
Supply voltage
If your set is connected to a single-cable system without external voltage supply, you can connect the antenna supply (13V or 18V / max. 450mA).

OK Proceed
(with Setting options for all types of reception on page 28).
Setting options for DVB-S reception (continued):
Test reception
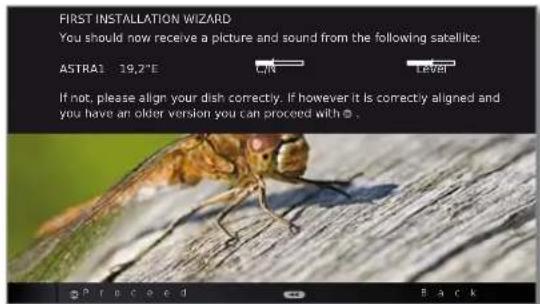
After you have made the previous settings, you should receive picture and sound of the selected satellites (only possible for Astra1 and HOTBIRD).
OK Proceed.

Settings

▲▼◄► Select and adapt settings.
If several satellites are received, the following settings must be made for every satellite. The scope of the settings may differ depending on the selected satellite.
Encrypted stations
You can state whether coded stations are to be searched for in the search/update. Select yes to save all found scrambled stations. However, these stations can only be received in connection with a CA module and the appropriate Smart Card. Handling of the CA module is described on page 59.
If a CA module with a SmartCard is already plugged in for the station search, all the stations which this module can descramble are also saved when no is preset.
Search method
If you want to run the station search independently of the channel grid, select frequency search for the search method.
Symbol rates
The symbol rates are specified by the satellite provider and do not normally need to be changed.

OK Proceed
Initial installation
Setting options for all types of reception:
Favoured signal source


▲▼ Select favoured signal source.
Select the signal source from a list, the station of which is to be at the top of your station list (starting with station slot 1).
The listed signal sources depend on the selected antennas and, if the set is equipped with a satellite tuner, the type of satellite system used and the received satellites.
OK Proceed.
Overview of settings for station search

You will see a list of the selected settings. You can go back in steps with the ◀ button to make any changes to the settings.


OK Start automatic search.
The set now searches for TV and radio stations.
The stations found in the automatic search are divided into the appropriate station blocks depending on the previously selected antenna cables (signal sources). Subsequently the stations can only be re-sorted within these blocks.
At the beginning of the station list you will find the block with the stations of the preferred signal source. Any mixed sorting of stations from different signal sources is only possible with the favourites list.
Info TV stations
FIRST INSTALLATION WIZARD
The automatic TV station search and sorting has ended.
966 new TV station(s) has (have) been found.

The number of found TV stations is displayed.
OK Proceed
Structure TV station list
FIRST INSTALLATION WIZARD: STRUCTURE OF TV STATION LIST
The TV stations found in the automatic search were divided into appropriate station blocks according to the previously selected antenna cables (signal sources). The stations can only be reorganised later within these blocks. The block with the stations of your favoured signal source is at the top of the station list.
Signal source
ASTRA1 19,2°E
DVB-C
DVB-T
Antenna/cable
Associated station numbers
1-900
901-1300
1301-1400
1401-1500

The structure of the TV station list is displayed.
OK Proceed
Info
radio stations
FIRST INSTALLATION WIZARD
The automatic radio station search and sorting has ended.
336 new radio station(s) has (have) been found

The number of found radio stations is displayed.
OK Proceed.
Structure radio station list
FIRST INSTALLATION WIZARD:
STRUCTURE OF RADIO STATION LIST
The radio stations found in the automatic search were divided into appropriate station blocks according to the previously selected antenna cables
(signal sources). The stations can only be reorganised later within these blocks.
The block with the stations of your favoured signal source is at the top of the
station list
Signal source(s)
ASTRA1 19.2°E
DVB-C
DVB-T
Antennaicable
s) Associated station numbers
1-300
301-500
501-700
701-900

The structure of the radio station list is displayed.
OK Proceed
Age-related lock


◀ ▶ SelectAge-related lock.
You can specify an age limit for your TV set here. DVB broadcasts which have an appropriate age identification are locked and can only be watched after entering the access code (see page 56).
OK Proceed.
Initial installation
Time and date


▲▼ Select time / date.
If no values or no correct values have been entered for the data and time, enter the correct values with the numeric buttons here.
OK Proceed.
Sound playback via ...


▲▼ Select sound components.
This selection indicates which sound components you want to use to hear your TV sound. Depending on the selection, the sound component wizard starts with which you can make further settings.
The sound component wizard is described from page 115 and can also be started at any time outside of first time operation (TV menu under Connections → Sound components).
OK Proceed.
Network configuration

◀ ▶ Select the option.
With the selection, specify whether you want to configure the available network adapter now. For Perform now see Media menu from page 62 onwards. For Do not perform or perform later:
OK End of wizard.
Positioning/aligning DVB-T antenna
If you are receiving one or more DVB-T stations with picture and sound interference then you should change the installation location and alignment of the antenna. Ask your dealer to tell you which channels are used to broadcast the DVB-T stations in your region.
In normal TV mode, without other displays. A DVB-T station is received and selected.

MENU: Call TV menu.
SelectSettings,
▼ go to the menu line below.
◀ ▶ SelectStations,
▼ go to the menu line below.
◀ ▶ SelectManual adjustment, OK call manual adjustment.

The signal source is already on DVB-T due to the station preselection.
Position and align the antenna in such a manner that maximum values for C/N and Level are obtained.

Blue button: Start search.
Search for DVB-T stations one after another and compare values for C/N and Level.
Then position/align the antenna to the weakest station so that maximum values for C/N and Level are obtained. The value for BER should be as low as possible.
Thereafter perform an automatic search for all DVB-T stations (see page 42).
Daily operation
Select station
Select station with P+ / P-

P+/P- Station up/down
The status display with station title, progress bar, time and sound identification signal is shown briefly (see page 40).
If Favourites are selected, you can change to the corresponding station in the Favorites list using P+/P− (see page 31).
The symbols for the sound identification are described on page 40.
If there are additional languages or DVB subtitles for DVB stations, then language and subtitle selection is shown below the station display.
See also page 41: Selection possibilities for DVB stations.

long
1-digit stations
Keep the numeric button pressed for one second, the station changes immediately.
or:
Press the numeric button briefly, the station changes after 2 seconds (changes immediately in case up to 9 stations are stored).

short short long
2-digit and 3-digit stations
Press first (and second) numeric button briefly.
Keep the last numeric button pressed for one second, the station changes immediately.
or:
Press all the numeric buttons briefly, the station changes after 2 seconds (changes immediately in case of up to 99 or 999 stored stations).

all short
4-digit stations
Press all four numeric buttons, the station changes immediately.
If Favorites are selected, you can change to the corresponding station in the Favorites list using the numeric keys (see page 31). Maximum two-digit station numbers are possible.
If you select an unoccupied station slot, the next available station is switched to.
Select station with the station list

In normal TV operation, without further displays, no favourites selected:
OK Call Station list.

Sorting numerically
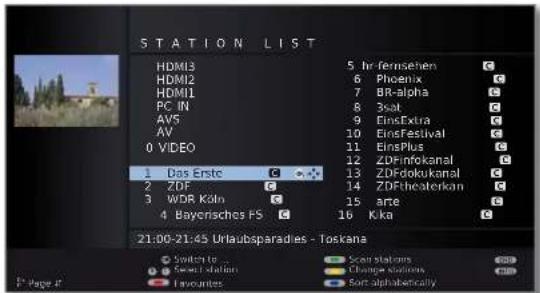
P+/P- Scroll in the pages of the station list.


◀◀ Jump to the next station block.

▲▼◄► Mark stations.

or:
Input the channel number.
The marked station is shown as a small picture .

OK The marked station is called.

Blue button: Changes the sorting between numerically and alphabetically.
Sorting alphabetically


Input the first letter (see also page 12).
The first station for the specified letters is marked.

▲▼◄► Mark stations.
OK The marked station is called..
Daily operation
Select station via favourites list
You can save and call your favourite stations in 6 favourites lists (e.g. for multiple users). Each favourites list can contain up to 99 stations. After initial installation, 10 stations from the station list are already stored in the first list. Change the favourites list to suit your requirements (see Put together / change favourites lists on page 45).
In normal TV mode, without other displays:
OK calls the station list.


Red button: Back to the station list.
Green button: Scan all stations of the currently selected favourites list.
Yellow button: Change the Favourites lists, see page 45.
Explanation of the favourites lists:
The selection made with the red button (favourites list) is retained until you switch back to the station list with the red button.
If favourites are selected, the name of the favourites list appears in the status display after the station name after changing stations.
Explanation of the icons following station names:
T DVB-T station (digital terrestrial via antenna)
C DVB-C station (digital via cable)
S DVB-S station (digital via satellite)
Coded station
CI Plus coded station
Locked station (see Parental lock on page 56)
Selecting Audio/Video Source
Select the AV source via the AV selection
→ In normal TV mode, without other displays:

Call AV selection


▲▼ Select desired connection, OK switch over.
If the selected AV source provides a signal (picture), it should be visible now.
For the VIDEO selection the set switches to programme place 0 (signal source antenna/cable (analogue), factory setting channel E36). The TV set shows the signal of a provider via antenna (see page 111). The channel can be changed as required (see page 43).
Select the AV source via station list
In normal TV mode, without other displays:

OK Call the station list.
If the favourites list is displayed, switch to the station list first.
The connections are always at the beginning of the list in numerical sorting.
The connections are sorted into the list in alphabetical order in alphabetic sorting.


▲▼◄► Select connection.
OK Switch over.
Daily operation
Adjusting the sound
Switchingsoundoff/on

Sound off.
Sound on: Press the button again or increase the volume using V+.
Settingthevolume

V+/V- Volume louder / quieter.
The volume bar will be shown briefly if no other menu is displayed.
Setting the Sound mode

Call Sound mode.

◀ ▶ Select the number of speakers you want to hear.
Additional sound settings

As long as you can still see the volume bar or the selection of speakers for sound mode:
▲ Call additional sound settings


◀ ▶ Select sound setting (right column),
▼ go to the menu line below.
◀ ▶ Makechanges.
In normal TV mode, without other displays.


◀ ▶ Select Sound,
▼ go to the menu line below.
◀ ▶ Select desired sound setting (right column),
▼ go to the menu line below.
◀ ▶ Makechanges.
Explanations of the sound settings:
Sound mode Select the number of speakers you want to hear. The selection depends on the connected sound components (from page 115) and on the transmitted audio signal.
If the number of speakers appears in brackets, the sound of missing speakers is transmitted by the existing speakers (virtual).
optimal The momentarily reproduced audio signal is output with the ideal number of speakers.
1 Play centre sound or mono (left/right).
2 Play front sound (L/R stereo).
3 Play front and centre sound.
4 Play front and surround sound.
5 Play front, surround and centre sound.
Amplifier ▶ Play via an external HiFi amplifier. Selection is only possible if an amplifier has been selected in the sound components wizard (see page 120).
Dolby PLII Here you can make Dolby Pro Logic II sound settings for mode movie and music. Menu item only appears with certain sound mode settings.
Sound Speech, Classical, Pop, Custom music, and Custom film adjustment sound.
Audio Set the volume of the audio commentary to be relative to commentary the volume of the programme being transmitted. Should negative values result (those in the area of -50... -1), the
audio commentary is quieter than the programme sound. Should positive values result (those in the area of +1... +50), the audio commentary is louder than the programme sound. If the value 0 results, then the audio commentary is at the exactly the same volume as the programme sound.
The menu item only appears if audio commentary is activated (see page 41) and is offered by the current station. Additionally, the Loudspeaker sound or Headphone sound must be set to normal + audio commentary must be switched on (see next page).
Headphone volume Adjust the headphones volume.
Loudness Proper boost of bass and treble tones at low volume.
Sound-picture If the sound does not exactly match the picture, you synchronisation can correct it here. If you move to the left in the bar you delay the sound in relation to the picture. If you move to the right you accelerate it in relation to the picture. The sound is adapted in time steps of 10ms each.
The Sound-picture synchronisation menu item only appears for DVB stations.
more ... Call with OK (see next page).
Daily operation
Explanations of the sound settings:
more ...
Loudspeaker/ For analogue stations: In the case of programmes with Headphone twin sound, you can select separately between Mono/ Stereo or Sound 1 or Sound 2 for the loudspeakers and the headphones.
For DVB channels: You can choose here if you wish to listen to a special soundtrack for the visually impaired over the speakers. This soundtrack uses an audio commentary to describe the action taking place on-screen. The menu item only appears if an audio commentary is offered by the current channel.
Auto Volume Reduces volume differences, e.g. for advertisements that are too loud.
AV output You can indicate here which sound is output via the AV signal socket for dual sound programmes: Sound 1 (e.g. main language), sound 2 (e.g. foreign language), or sound 1+2 (both simultaneously).
Maximum volume Determining the maximum volume that can be set.
max. switch on volume Specify the volume that is set when switching on the TV set with the mains switch.
If the volume is higher when switching the TV set to the standby mode than specified here, then it is reduced automatically to the fixed maximum switching on volume when it is turned on again.
Volume adjustment for current station The volume can differ according to the individual stations. If the sound is too loud or too quiet in relation to other stations, adjust the volume. When the menu is open, you can select the stations one after another with P+/P− and adjust every single station conveniently.
Balance Set stereo balance so that the volume impression is identical on the left and right.
Auto speech If the automatic speech detection is activated, the sound detection of the current programme is automatically output with optimum comprehensibility when speech is detected.
Daily operation
Adjusting the picture


◀ ▶ Select Picture,
▼ go to the menu line below.


◀ ▶ Select the desired picture function,
▼ go to the menu line below.
◀ ▶ Makechanges.
Explanations of the picture settings:
3D Select the settings for your TV set's 3D display (see page 36).
Picture You can switch between three fixed picture setting variations and the three personal picture values that you have set here (see page 35).
Contrast The contrast setting depends on the brightness of the room. The brighter the surroundings the higher the contrast should be set.
The power consumption of the TV set is directly dependent on the value set here (see also page 22).
Colour intensity Set the colour intensity to suit your personal taste. The colours should appear natural.
Colour Here, you can give the TV picture a warmer or colder hue temperature according to your personal taste.
Brightness Set the brightness so that the black areas of the picture only just appear black.
Sharpness Here you can adjust picture sharpness to obtain the best definition.
Digital Noise With active DNC (Digital Noise Control) you can eliminate Control (DNC) or reduce picture noise.
more ... Call with OK (see right hand column).
Explanations of the picture settings (continuation):
Image+ Active Picture improvement on/off and demo mode for Image+ Active.
Auto dimming If this auto dimming is active then the television picture - Room contrast is automatically reduced when the room brightness diminishes (Optical Power Control – OPC). This will also reduce the power consumption of the TV.
→ Owing to a reduction in the luminance in 3D mode for technical reasons, this function is deactivated when showing 3D content.
Auto dimming - Video (VBD+) If this automatic dimming ("Video compensating Backlight Dimming") is active then, dependant on the current video content, the background lighting is reduced and concurrently the video signal is enhanced resulting in improved contrast to your television picture. This will also reduce the power consumption of the TV.
Film quality DMM reduces jolt in rapid picture object movements and impr. (DMM) rolling text displays. This applies especially for movies.
Auto format Automatic detection and setting of the picture format for Cinemascope or widescreen movies.
Picture format Set picture format (see page 35).
Move picture up/down Move picture vertically (see page 35).
Daily operation
The picture format cannot be altered if an HbbTV application ^1 is active (see page 80) or if the TV set is in 3D mode (see page 37).

Press the Picture format button until the desired picture format is set or press


◀ ▶ to select the desired picture format.
The Panorama picture format can be set between proportionally correct and format filling display. Black bars are visible on the left and right of the picture in the proportionally correct display.

Switch: Keep the M button on the TV pressed, at the same time, press the Picture format button on the remote control briefly.
Reset: Press the same button combination again.
The setting options depend on the transmitted picture content.
16:9 Proportionally correct display of 16:9 broadcasts.
4:3 Proportionally correct display of 4:3 broadcasts.
Panorama Proportionally correct or format filling display (as-delivered state) of 4:3 broadcasts on the 16:9 screen. Station logo and subtitles remain visible.
See above for switching the Panorama mode.
Zoom Proportionally correct display. Maximum picture magnification.
PALplus Is a 4:3-compatible 16:9 picture broadcast supplied by the station which is detected automatically.
If a high resolution video signal is displayed on the TV set or fed in via the interfaces PC IN, HDMI1, HDMI2 or HDMI3, the picture formats 16:9 PC, 16:9 TV, 16:9 Zoom, 4:3 PC, 4:3 TV and 4:3 Zoom can be set.
In the PC formats, the complete picture content will be shown. In the TV formats a small part of the picture is cropped. This may be necessary to hide possible interference at the edge of the picture, which arises from the signal supplied.
Movepicturevertically


In normal TV mode without other displays.
▲▼ Move picture up/down.

To show subtitles or news tickers which have been cut off, the picture can be moved up or down in the picture formats Panorama and Zoom (not with high resolution signal) with the arrow buttons ▲▼.
Presettings / Personal settings for picture adjustment

MENU: Call TV menu.

▶ Select Picture,
▼ go to the menu line below.
▶ SelectPicture adjustment,
▼ go to the menu line below.


▶ Select Presettings or Personal settings.
For presettings, go to the menu line below.
◀ ▶ Select the desired presetting for the picture.
OK Confirm selection.
Explanations for Picture adjustment:
If you select Presettings, the picture settings for the signal input group currently active are set to predefined values. See Glossary for an explanation: Signal input groups.
Your own settings for contrast, colour intensity, colour temperature, brightness, sharpness and digital noise suppression are saved in the personal values. At the same time, you have your own personal values for each signal input group.
All picture and sound adjustments can be reset to the default values in one step for all signal input groups in the index of the TV set under Reset picture/sound or Factory settings picture/sound.
Daily operation
3D function
You can use the 3D functionality of your TV set to display 3D material transmitted by a channel or from an external player that is connected.
You require a pair of Loewe Active 3D Glasses to be able to use the 3D functionality in its entirety (see Accessories on page 138). Please read the operating instructions included with the 3D glasses.
3D settings
Using the 3D settings you can select the correct display format, should this not have been detected automatically. What's more, you can choose to view 3D material in 2D or "traditional" 2D material in 3D.
For 3D content that is being played back from an external HDMI player, the 3D display format is normally recognised correctly when the factory setting 3D mode → automatic is selected. You may need to set the 3D mode manually to view 3D content from broadcasters.
Owing to a reduction in the luminance in 3D mode for technical reasons, the Auto dimming - Room (see page 34) is deactivated when showing 3D content.
If the TV set is operated with the remote control during a 3D playback, flicker effects can occur in the 3D glasses during this.


◀ ▶ SelectPicture,
▼ go to the menu line below.
◀ ▶ Select3D,
▼ go to the menu line below.


◀ ▶ Select the desired function,
▼ go to the menu line below.
◀ ▶ Set the changes.
Explanations of the 3D settings:
2D->3D
on/off If you set 2D->3D to on, all 2D image material will be displayed in 3D. You will need to wear the 3D glasses to view it properly.
The 2D->3D conversion is not available for the Connect 32 3D.
3D mode
off Here you can deactivate the 3D mode of the TV set. The TV set shows the 2D/3D image material in the same way as it is provided by the station or external player.
automatic If the TV is set to this setting (factory setting), then the TV set automatically switches over to the correct 3D mode, if this is possible.
Only change the setting if the 3D content is not displayed correctly.
side by side To display 3D content in side by side format. When viewing 3D content with this setting, two almost identical images are displayed next to each other and put together correctly by the TV set.
The 3D mode is automatically reset the next time you switch on the TV set.
top/bottom To display 3D content in top/bottom format. When viewing 3D content with this option, two almost identical images are displayed one above the other and put together correctly by the TV set.
The 3D mode is automatically reset the next time you switch on the TV set.
Games To display 3D content in full picture format. When viewing 3D content with this option, two almost identical images are displayed as full pictures and put together correctly by the TV set.
The 3D mode is automatically reset the next time you switch on the TV set.
3D->2D
on/off If you set 3D->2D to on, the 3D material from both TV stations and from external players will be changed into 2D and played back. The three dimensional (3D) effect will disappear. You will not need to wear the 3D glasses to view it properly.
Daily operation
If 3D contents are recognised by the TV device, the picture format cannot be subsequently changed. The picture format when in 3D operation is always 16:9 PC.
The 3D mode can be changed using the Picture Format button.

Select the 3D mode.
Refer to page 36 for further explanations.
Instruction / Symbol
If 3D content is detected by the TV set, a corresponding message appears if Automatic info → yes is selected in the menu (TV menu → Settings→ Miscellaneous → On-screen displays → Automatic info).

If Automatic info → no is set, a symbol appears instead of the text instruction. The instruction and the symbol will disappear after the display time has elapsed (see also page 58).

natural_image
Close-up of a dragonfly perched on a tree bark, with green foliage in the background (no text or symbols visible)
The symbol can also be seen in the status display.

Daily operation
Every operating mode of the TV set (TV, Radio, MediaPortal, Teletext, EPG, PIP, and DR archive/Video archive ^(1) ) has its own menu and own functions for the coloured buttons.
The function of the coloured buttons is shown at the bottom of the menus and wizards. Below, some of the function are listed which you need in TV mode for the daily handling of your TV set.

In normal TV mode, without other displays.

Red button: Freeze on/off.
If an interactive data service is available (e.g. HbbTV see page 80 or MHEG-5 see page 52), the red button will load or start the corresponding application.

Green button: Open the Teletext functions menu ^2 .
You can select Subtitles and your Personal text pages via the Teletext functions menu. The operation of subtitles depends on the station selected.
Subtitles Subtitles analogue stations:


◀ ▶ SelectSubtitles,
▼ go to the menu line below.
◀ ▶ Select the size of the teletext subtitles,
OK show teletext subtitles
(display only if subtitles are available).

END: Teletext subtitles off or select off in menu.
Subtitles DVB stations:
If the DVB station does not provide any subtitles, the menu item Subtitles is greyed out and cannot be accessed with OK.
The DVB subtitles can also be selected via the status display (see page 41).


◀ ▶ SelectSubtitles, OK call.
▲▼ Select subtitle mode, OK show/hide subtitles.
^1 Only for TV sets that contain an integrated hard disc (DR+), a connected external hard disc (USB recording) or that have an archive available on the network (DR streaming).
^2 If the audio commentary is active, this button will have other functions, see page 41.

Green button: Open the Teletext functions menu


▶ SelectPersonal text pages,
OK call.
Personal text pages


▲▼ Select text page, OK view.
If only one text page is defined, no list will be shown and the Teletext page will be opened immediately. To define your personal text pages, see page 51.

Yellow button: Go to the last viewed station.
Use this button to quickly switch back and forth between two stations.

Blue button: Show programme info.
The programme info of the following programme is displayed additionally for DVB stations.

Explanation of the symbols in the programme information:
Programme in 16:9 picture format
Programme in high picture definition (HDTV)
Programme with Dolby-Digital sound
Broadcast of subtitles for the deaf and hard of hearing
Programme with youth protection (see Parental lock - Age-related lock on page 56).
The symbols may also appear in combinations.
Daily operation
Permanent display of time
C
Press twice in rapid succession: Time is shown/hidden permanently.

natural_image
Exterior view of a historic stone building with arched windows, surrounded by trees and shrubs under a clear blue sky (no signage or text visible)
The permanent display of the time can also be set in the TV menu under Settings → Miscellaneous → On-screen displays → Permanent clock display (see page 58).
The display position of the time depends on the selected setting in the On-screen displays menu (ex-factory: bottom). See page 58 for how to change the display position.
Operation without remote control
Changing the station on the TV set

+1 - Station up/down.
Switching radio on or off or switching to radio

R Radio on or switch between TV and Radio.

M Call Direct control on TV set menu,

- / + select function.
M or R Go to the menu line below,
- I + make changes.
M Move up one menu line,
- / + select other function.
Explanations of the settings:
Operating Switch between TV and radio operation. mode
AV selection Select AV interface.
Volume Set volume.
Brightness Set brightness.
Contrast Set contrast.
The power consumption of the TV set depends directly on the value set here (see also page 22).
Picture format Set picture format (see also page 35).
Station Select station +/-
Service The Service menu item is provided for service purposes by dealers only.
Daily operation
Status display
INFO
In normal TV mode, without other displays.
INFO: Show status display.

In the upper two lines, you will see the number and name of the station, the title and transmission time of the programme currently showing (if available) and the sound identification signal.
The bar (if available) indicates the progress of the current programme.
If information about the current programme is available, this can be called by pressing the INFO button again; in this case the button on the right is displayed.
A menu (see page 41), the time and, if activated, the alarm time and switch-off time appear at the bottom of the screen depending on the DVB station.
The status bar is also shown automatically every time you change channels.
The status bar is hidden automatically at the end of the display time (see page 58 for setting).
If you want to hide the status bar manually before the display time ends, you can only do this with the END button.
Explanations of the symbols in the status display:
General symbols:
3D Display in 3D mode (use Loewe Active 3D Glasses, see accessories on page 138).
HbbTV mode is on and HbbTV applications are available
Transmitted audio signal:
Mono Mono audio transmission analogue
2-sound Two-sound transmission (Sound1/Sound2) analogue
1+1 Two-sound transmission (Sound1/Sound2) digital
Stereo Stereo sound transmission analogue
Stereo (AAC+) Stereo sound transmission (HEAAC)
① Stereo sound transmission digital (PCM)
Digital Dolby Digital sound transmission (DD)
Digital+ Dolby Digital+ sound transmission (DD+)
Digital (AAC+) Dolby Digital AAC+ sound transmission (HEAAC)
dts dts sound transmission
MPEG MPEG sound transmission
PLII Dolby Pro Logic II sound transmission
☐☐ VS Ref Dolby Virtual Speaker Reference display
☐☐ VS Wide Dolby Virtual Speaker Wide display
Transmitted audio channels:
DD / dts 1.0 / mono
DD/dts/MPEG 2.0
DD / dts 3.0
DD / dts 4.0
DD / dts 5.0
DD / dts 2.1
DD / dts 3.1
DD / dts 4.1
DD / dts 5.1
Selected listening mode:
1 Play centre sound or mono (left/right).
2 Play front sound (L/R stereo).
3 Play front and centre sound.
4 Play front and surround sound.
5 Play front, surround and centre sound.
If the number of speakers appears in brackets, the sound of missing speakers is transmitted by the existing speakers (virtual). The Dolby Virtual speaker (VS mode) developed by Dolby is activated for the virtual sound reproduction.
Daily operation
Selection possibilities for DVB stations
In the status display additional selection possibilities can be offered for specific programmes depending on the DVB programme provider.
If during the status display you press one of the coloured buttons or the TEXT button then the associated selection menu will be displayed.
The selection line is also displayed automatically when a new broadcast with different options to the previous broadcast begins or when you switch stations.
The selection menus are only available as long as the status display is shown. However you can call them again by pressing the INFO button.

Red button: Channel selection for multi-channel providers
Other setting options for DVB stations
You can make general presettings for DVB stations under TV menu → Settings → Miscellaneous → DVB settings.
Subtitle mode Here you can preset whether a subtitle is always to be displayed as soon as it is offered by the station. A special subtitle for impaired hearing can also be selected.
Subtitles are not offered by all stations. Many stations only broadcast subtitles by teletext.
Audio You can activate a special sound for viewers with impaired commentary vision here (see below).
DVB character set Select the DVB character set so that the title of the broadcast of your favourite received station or the texts of your CA module are displayed correctly.
Green button: Language/sound
The sound formats on offer and designations depend on the programme being broadcast.
Yellow button: Time selection
Blue button: CA module selection
The CA module selection only appears when two CA module are plugged in, which are both able to descramble the encrypted station.
You can set the system here to always play an additional special soundtrack for the visually impaired whenever one is available. This soundtrack uses an audio commentary to describe the action taking place on-screen. The function can be activated and deactivated in the TV menu (see above) the first time that it is used (see page 23), or by holding down the green button for a few seconds.
see chapter Adjusting the sound on pages 32 and 33 for more information on how to configure the audio commentary.

TEXT: Subtitles
The subtitles available depend on programme being broadcast
Audio commentary is activated (see above).
A quick press of the green button will tell you if audio commentary is available.
If audio commentary is available:
You will see a corresponding message on the screen. You will also hear a beep lasting approximately 1.5 seconds.
If audio commentary is not available:
You will see a corresponding message on the screen. You will also hear three short beeps.
Managing stations
TV stations
Various options for managing stations are available via the TV menu. For example the description for TV stations. For radio stations the same applies, except that the Radio menu is called in Radio mode (see also page 52).
Station management is not possible if a programmed timer recording is still pending.
If at least one station is locked the access code must be entered before Search/Update (see Parental lock on page 56).
Search/update stations – Search wizard
In the search/update with the search wizard, new stations are searched for which have not yet been stored.
You have to repeat the initial installation (see page 22) and automatically search for new ones if you want to delete all the existing stations and automatically search for new ones.

▶ Select Settings,
▼ go to the menu line below.
◀ ▶ Select Stations,
▼ go to the menu line below.
▶ Select Search wizard,
▼ go to the menu line below.
In the upper info text the current search settings will now be displayed:
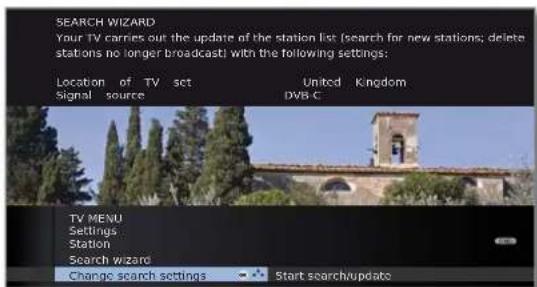
If you want to change these search settings:

▶ Select Change search settings,
OK wizard prompts search settings.
If you agree with these settings:
▶ Select Start search/update,
OK start search.

Red button: Abort current search/update.
Explanations of some search settings:
Set location Select the country for country-specific defaults and station sorting.
Signal source Select antenna/cable (analogue), DVB-T, DVB-C or DVB-S ^(1) here depending on which signal source you want to search for new stations.
A configuration of DVB-T and DVB-S ^(1) antennas can also be called by the green button (see also page 23 and 24).
Calling up the DVB antenna configuration causes the Change search settings dialogue to be quit. You must call up the dialogue again after finishing the configuration.
Antenna/cable: With selection of set location the conventional TV TV/colour standard/colour standard is the default. This should only standard be changed if stations with other standards are to be searched.
Encrypted stations You can state whether coded stations are to be searched for in the search/update. Select yes then coded stations are also searched for. However, these stations can only be received in connection with a CA module and the appropriate Smart Card. Ask your dealer which Smart Card you need to receive certain stations. Handling of the CA module is described on page 59.
DVB-T If you want to run the station search independently of Search method the channel grid, select frequency search for the search method.
DVB-C With the selection of set location the conventional settings will be preset. Only change this if you know other symbol rates and modulation types or if you have to specify the network ID for your cable network (information available from your cable network provider). If you want to run the station search independently of the channel grid, select frequency search for the search method.
DVB-S If you want to run the station search independently of Settings the channel grid, select frequency search for the search method.
The symbol rate is specified by the satellite provider and normally does not need to be adjusted.
"Equipment and upgrade options, see page 140.
Managing stations
Search for/update stations – handling of new and no longer found stations
The number of new stations found is displayed after the automatic search/update has been completed.

OK List of new stations found
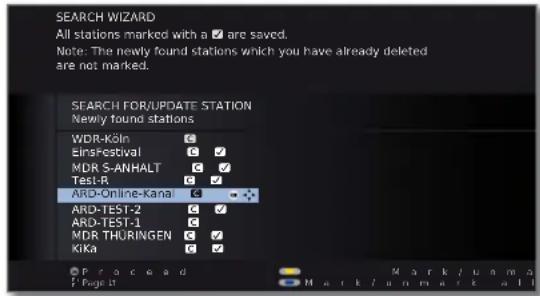
▲▼◄► Select station.
Yellow button: Mark / unmark station
Blue button: Mark / unmark all
OK saves the selected stations.
Afterwards, a list of the stations which are saved but which are temporarily not broadcasting or no longer exist is displayed, if available.
The number of the memory location used is displayed in front of the station. Please select the stations you really want to delete.


▲▼◄► Select station.
Yellow button: Mark / unmark station
Blue button: Mark / unmark all
OK deletes the selected station.

END: Exit the search wizard.
Search/update station – manual search / settings
If you want to adapt the parameters of an existing station, first select the appropriate station.

◀ ▶ Select Settings,
▼ go to the menu line below.
◀ ▶ Select Stations,
▼ go to the menu line below.
◀ ▶ Select Manual adjustment,
OK call input box.
You can enter or edit the station data in the following lines:
![MANUAL ADJUSTMENT Signal source Cable [analogue] Channel 521 Frequency 303.25 MHz Name K i K a TV standard BIG Col. standard Automatic Store Search](/content/2026/05/862265/images/39dbc3c1eef9101a408bf736a6d90f8263daae46ac20df922653faf58af3efde.jpg)
Or:
Blue button: Starts Search and searches for next station.
Red button: Stores station.
→ Only stations for the selected signal source can be saved which do not yet exist in the station list.
→ Stations which already exist in the station list for the selected signal source are displayed with their station numbers and names on a grey background. These stations can only be overwritten with the red button.
Explanations of some search settings:
Various settings are possible depending on the selected signal source. Some settings have already been explained in the initial installation (see page 22 onwards).
Signal source Selection of range in which you want to search for the station.
Channel Direct input of channel.
Frequency Direct input of station frequency.
TV stand. Input of station TV standard.
Ask your dealer in this regard.
Col. standard Input of the station colour standard.
Ask your dealer in this regard.
Managing stations
Change, delete, move, rename, restore station
Change station can also be called via the station list (page 30).
If at least one station is locked the access code must be entered before changing stations start-up (see Parental lock on page 56).
In some TV broadcasting networks (e.g. FreeView) you are not allowed to move or rename stations. Use Favourites instead.

◀ ▶ Select Settings,
▼ go to the menu line below.
◀ ▶ Select Stations,
▼ go to the menu line below.
▶ Select Change stations,
OK call list of stations.

In this menu you can delete, move, rename or restore stations.

◀ ▶ ▲ ▼ or numeric buttons:
Select the appropriate station.
Scroll with P+/P- if necessary.
Deletestation

Red button: Starts Delete station.
▲▼ Select several stations to be deleted if necessary,
OK to execute the delete.
Move station / Change order
→ Stations can only be resorted within the signal source block.

Yellow button: Starts Move station.
▲▼ Mark several stations if needed,
OK selection ended,
▲▼ Select insertion position from which the selected stations are to be inserted,
OK to execute the move.
Rename station
→ DVB stations for which the station name is also broadcast cannot be renamed. In this case, the Rename function is hidden.

Blue button: Starts Rename station.
Under the 1st letter of the name you will see a line indicating the current input position.

▶ Input position one character to the right (also for blanks).
Input position one character to the left.
Input the letters one after another. When using the remote control, press the numeric buttons just as on a telephone keypad until the desired symbol is displayed. The available letters are printed respectively on the buttons. See page 129 for a detailed overview of the available characters.

Green button: Switch upper/lower case letters.
Yellow button: Deletes the character before the input position.
Blue button: Cancel rename.

OK to save new name.
Restorestations
Stations which have been deleted from the station list can be restored.

Green button: Starts Restore stations.


▲▼◄► Select station,
OK station is restored.
The restored station is sorted in according to its signal source at the end of the respective signal block.
Managing stations
Put together / change favourites lists
Each favourites list can contain up to 99 stations. You can put together the favourites lists to suit your requirements (e.g. topic lists). Other persons using this TV set can create their own favourites lists.
The favourites lists also have the advantage that the stations of different signal sources can be stored in the order you wish.
Change favourites can also be called via the favourites list (page 31).


Select Settings,
▼ go to the menu line below.
◀ ▶ Select Stations,
▼ go to the menu line below.
MarkSelect/change favourites,
OK calls list of all stations and last active favourites list.


Green button: Select the next favourites list.
Rename favourites list
Favourites list (right column) must be selected. If not, change the list with ▶.


Enter new name (same procedure as for rename station, see page 44).

OK to save new name.
Add station to favourites list
All stations (left column) must be selected. If not, change the list with ◀.

P+/P− Scroll in the pages of the station list if necessary.
Mark station or select station with the numeric buttons (for alphabetical station sorting enter the initial letter) which is to be transferred as a favourite to the favourites list.

OK transfers the station to the favourites list.
The new station is inserted at the end of the favourites list. Proceed in the same manner with additional stations.
Delete station from favourites list
→ Favourites list (right column) must be selected. If not, change the list with ▶.

▲▼ Mark station to be deleted.
OK Removes the marked station from the favourites list. or:

Red button: Starts Clear favourite list.

OK confirms clear favourites list.
Move / change order of stations in the favourites list
→ Favourites list (right column) must be selected. If not, change the list with ▶.

▲▼ Mark station to be moved.
Yellow button: Starts Move station.
▲▼ Select insertion position at which the marked station is to be inserted.
The insertion position can also be selected with the numeric buttons.

OK to execute the move.
Picture in Picture
Picture in Picture (PIP)
The concurrent display of two different images is referred to as Picture in Picture.
Restrictions for the PIP mode:
The selection and combination options for main screen/PIP screen basically depend on the device variant (with/without DR+) and the number of receivers (tuners) of the TV set (see Equipment variants on page 140).
In the case of TV sets that are only equipped with one DVB-T/C single tuner, the PIP operation is restricted to AV-PIP (one DVB TV station and one AV source). If a satellite tuner is fitted subsequently in these devices, PIP operation is also possible from a digital satellite picture and picture via antenna/cable (analogue or DVB-T/C).
A concurrent representation of two MPEG4 coded HDTV signals is not possible.
A concurrent representation of two coded stations is not possible.
→ Simultaneous display of two analogue stations is not possible.
→ Picture change and station selection is restricted during recording.
PIP Mode is not accessible as long as an HbbTV application is active (see page 80).
The PIP operation distinguishes between two functionalities:
iPIP Only in sets with a TV picture is moved to the PIP picture when you start the iPIP mode. The station of the TV picture is now freely selectable. When you exit iPIP mode the PIP picture becomes the TV picture again and the PIP window is closed.
An orange frame around the PIP picture shows the iPIP functionality
Standard PIP Stations freely selectable and changeable for PIP and TV picture (coloured buttons have PIP-specific meaning, see right hand column).
A green frame around the PIP picture indicates that the station selection affects the PIP picture. A white frame means that the operation refers to the main picture. If the frame is blue, the station play is active in the PIP picture.
iPIP
Starting and ending iPIP mode

On pressing the PIP button the currently displayed TV picture becomes the PIP picture. You can select other stations for the TV picture and still keep an eye on the PIP picture. You can temporarily shift commercials or programme sections to the PIP picture in this way.

The PIP picture becomes the TV picture again (PIP off).
Standard PIP
Starting and ending standard PIP mode

Show/hide PIP.
Select the PIP picture
The frame is green, if not, press the green button.
Select the station as usual.
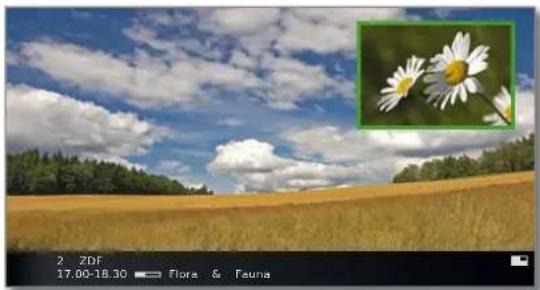
natural_image
Scenic landscape photo of a golden field with white flowers under a blue sky with scattered clouds; includes an inset image of daisies (no text or symbols)
Select the station for the main picture
The frame is white,
if not, press the green button.
Select the station as usual.
The frame is green, if not, press the green button.


Yellow button: Switches contents of TV picture and PIP picture.
Blue button: Start/stop PIP scan in the PIP picture.
Picture in Picture
You can set different parameters for the picture in picture mode in the PIP menu.
PIP mode started, if not, press PIP button.
In Standard PIP functionality: The frame is green, if not, press the green button.

MENU: Call PIP menu.
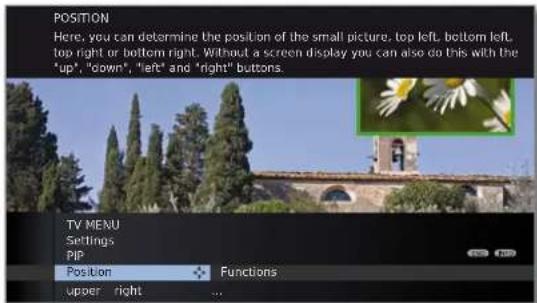
Note restrictions for the PIP mode (see page 46).
Position You can determine the position of the small picture here (upper left, bottom left, bottom right, upper right).
Without a screen display the position can also be changed with the menu control buttons (see right hand column).
Functions You can switch the PIP functionality between iPIP and Standard PIP (also see right hand column).
See page 46 for a more detailed explanation of the PIP functionality.
Change position of Small PIP
→ Other than the status line, which may possibly be displayed, no other display is shown on the screen:

▲▼◄►Move the PIP into a corner of the screen.
The position of the small picture can also be selected under Position in the PIP menu (see left hand column).
Switch PIP functionality (iPIP / Standard PIP)
PIP menu is opened.


◀ ▶ Select Functions,
▼ go to the menu line below.
▶ Select iPIP or Standard PIP.
Electronic Programme Guide
Electronic Programme Guide – EPG

EPG stands for Electronic Programme Guide and provides you with on-screen programme details. With the system, as with a printed programme guide, you can learn about the current programme. In addition programmes can be sorted according to certain topics, memorised, and also recordings can be programmed.
Starting and ending EPG

EPG: Switch EPG on / off.
→ EPG is only available for DVB stations.
The first time you start EPG, an assistant will guide you through the necessary presettings.

The display of the programme guide is divided into two branches. The specifications in the upper section limit the scope of the stations displayed in the lower section.

Blue button: Switches between the upper default lines Date, ..., Topics and the lower programme list.
Switching and memorizing with the programme list
→ You are in the lower programme list, if not, press the blue button.

▼ ▲ Selectstation.
OK View / Memorise.
View The programme is in progress. The TV set switches to the marked programme.
Memorise The programme has not started yet and is memorised. A √ will appear in front of the station title. The TV will ask at the beginning of a programme if it should change the channel or switch on from the stand-by mode if the corresponding option of the EPG menu is activated (see page 49).
Programmes can also be noted by the timer overview (see page 123).
Adjusting the programme list
The selection is at the top of the specifications, if not, press the blue button.

▼ ▲ Select Date, Time, Stations or Topics.
◀ ▶ Select defaults within the respective line.
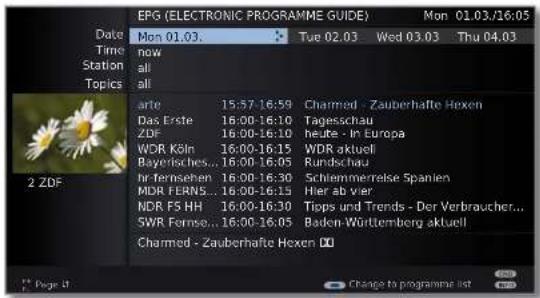
Example If you are searching for the next news, select
17:00 for example for the time, all for station and News for topics. Then you get a list of all news programmes from 17.00 h onwards in the programme list below it.
The type of list of programmes in the programme list depends on the setting of the sorting in the EPG menu (page 49).
Time entry If the line Time is selected, then you can enter the time after which the programmes will be displayed, via the numeric buttons of the remote control. The broadcasts are sorted according to the order of the station list within the selected time window.
Stations If a favourites list has been selected, only the programmes of stations from the favourites list are displayed in the programme list. A single station can be selected with “...”. The Select single station window is opened. After selection, only programmes of the selected single station are displayed.
Hint Before pressing the blue button to leave the upper selection lines, select one of the preceding lines. If you then switch back to the programme list, you can change this menu line with ◀▶, without having to leave the programme list. If you have marked Time, then you can enter the time, after which the programmes will be displayed, with the numeric buttons of the remote control.
Electronic Programme Guide
Paging through the programme list
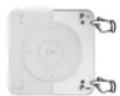
P+/P− Page backwards / forwards.
In the entries for Date and Time, you will see changes in time as well as in date when paging. Scrolling in the programme list is also possible when the selection is at the top of the specifications.
Brief information about many programmes is displayed below the programme list of the broadcasts.

You can call detailed information with the TEXT button if this function is offered by the TEXT icon in the lower left. The symbol explanations are described on page 38.
Programming a recording for a recorder
The selection is in the lower programme list, if not, press the blue button.
The displayed page of the programme list includes the desired programme, otherwise browse to it or suitably limit via the specifications in the lower section.
▼ ▲ Mark the desired programme.


RECORD button: Timer data is called up.
Change or confirm timer data if necessary (see page 122, "The direct way to record").
Then a red dot will be displayed in front of this programme as an identification.

RECORD button: Deletes the already programmed recording of the red marked programme from the timer. If the timer data have been transferred to an external recorder, then the timer must also be deleted there.
Configuring EPG
→ EPG mode is started, if not, press the EPG button.

EPG: Call the EPG menu.

Station In the station selection you can determine for which selection station in the programme guide information is to be displayed. Programme information is only displayed for stations with √ in the EPG list.
With the coloured buttons you can select or remove stations or only select the stations from the favourites lists. Because of the large number of receivable DVB-S ^1 stations you should restrict the station selection. This reduces the data entry time and increases the clarity in the EPG.
Marking the stations according to reception ranges:
T Digital terrestrial stations (DVB-T).
C Digital cable stations (DVB-C).
S Digital satellite stations (DVB-S) ^(1) .
Data capture Here you can switch the data entry for the electronic programme guide (EPG) on and off.
If the data entry is switched on, your TV set tries to update the database overnight (normally between 2 and 5 am) or if required two minutes after switching to stand-by mode. The TV set must be on stand-by for this and not switched off at the mains switch.
The indicator on the TV set lights orange during data entry in stand-by mode.
The data are also updated while you are watching the EPG station.
Switch on TV when marked When yes is set, the switched off TV switches on automatically from the standby mode at the beginning of a set programme. A screen message appears when switching on. If this is not confirmed within 5 minutes with the OK button, the TV switches back off automatically for safety reasons.
Sorting The programmes can be sorted either according to their start times (chronologically) or according to stations (corresponding to station list).
Teletext
Teletext

Your TV set supports the two operating systems TOP Text and FLOF. Up to 2,000 pages are stored so that you have quick access.
Starting and ending Teletext

Switch Teletext on / off.
If HbbTV is offered by the channel, then the MediaTek/HbbTV text ^1 opens up (see page 80).
In this case, pressing the TEXT button again opens the "standard" teletext/videotext.

Page selection with the coloured buttons

Red button: Back to the previously viewed page.
Green button: On to next page.
Yellow button: To next topic.
Blue button: To next range of topics.
The coloured bars (for TOP) or the coloured text (for FLOF) in the second last line indicate which coloured buttons you can use to page through topic areas and topics.
Teletext page displays

0 AV: Stop self changing pages.

9: Enlarge page (press several times).

PIP: Show / hide TV picture (full screen/split screen).
Additional page selection possibilities

1st possibility:
Call overview page 100.

2nd possibility:
Directly enter the page number.
3rd possibility:
The page includes 3-digit page numbers.
Mark desired page number.


The page consists of several sub-pages (indicated by the selection option on the last line).

◀ ▶ Page through sub-pages.
Call TOP table
The table can only be called for stations with the TOP operating system.
OK Call TOP table.

Programming timer recordings via Teletext
→ Teletext is started,
if not, press the TEXT button.

Call the programme pages of the current station.

Green button: Go to the appropriate page.

▼▲ Select the desired programme, OK to programme the recording.
Change the appropriate recording data in the following menu Timer data if necessary (see also page 122, "The direct way to record").
OK Confirm.
Changing teletext station
You can change the teletext provider independently of the DVB station you are watching.
The function is only available if two reception channels are available in the TV set (see Equipment variants on page 140). The teletext provider can only be changed if a DVB station was selected as a TV picture
→ Teletext is started, if not, press the TEXT button.
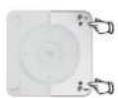
P+/P- Select next/previous station.
The TV set switches through all the stations in the Station list (see page 30) or the current Favourites list (see page 31) one after another.
Or:

◀ ▶ Select Station selection, OK call station.
◀ ▶ ▲ ▼ Select station as in the station list (page 30), OK call station.
In the Teletext menu you can activate messages, reveal pages and configure the teletext with the Settings menu function.
→ Teletext is started, if not, press the TEXT button.

MENU: Call the Teletext menu.
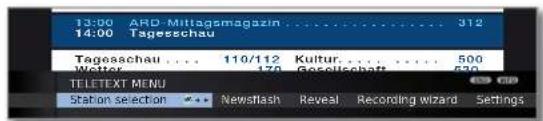
Station selection You can select the teletext of a different station here (see left hand column).
Newsflash The current page is hidden when you activate Newsflash. A symbol at the top left indicates that the function is active. If the contents of the message are updated and it is a small newsflash, this is displayed in the TV picture. If it is a full screen page, the symbol is displayed in blue and the page can be called with the OK button.
Reveal Shows concealed information, e.g. for quiz questions or VPS pages in the programme preview pages.
Recording wizard A wizard for recording via teletext helps to programme an external recorder or the integrated Digital Recorder, see also left column.
Settings Other Teletext menu functions:
Preview pages Input of the first teletext programme preview page if this deviates from the factory setting (page 301).
Sub-title Input of the teletext subtitle pages for every station if this pages deviates from the factory setting (page 150).
Personal text pages Define up to six teletext pages which can be opened later from a list in the menu Teletext functions → Personal text pages (in TV mode press green button, see page 38).
Character set Teletext character set can be switched to other languages (Russian, Greek, Polish and Turkish).
Digital radioTeletext
Interactive data services (Digital teletext/MHEG-5)
In some countries, the stations also transmit interactive data services with their programmes (e.g. Digital teletext/MHEG-5), whereby the functions of individual keys are not available or only so to a limited extent.
The symbol indicates which functions can differ for a application.
In the UK or Ireland, the teletext for DVB-T stations is transmitted as per the MHEG-5 standard. It contains text, graphics, functions and links.
→ Available in e.g., UK, Ireland, New Zealand.
→ Digital teletext is not available when DVB subtitles are being displayed.
The operation of these menus depends on the particular provider. Normally after a station is changed, the provider broadcasting the digital teletext makes an introductory offer for this service on the screen via menu selection. Follow these notes.
If no message appears telling you how to switch to digital teletext after switching to another station, press the TEXT key. If a selection for DVB subtitles is available, this item must be hidden before.
Depending on the provider's respective offer, you can use the ▲▼◀▶ buttons and the OK button, the coloured buttons, the END/TEXT button and sometimes even the numeric buttons.
If you want to close the digital teletext, just select a different station using the P+/P- buttons or follow the menu prompts on the screen.
Radio mode (DVB radio)

The TV set can receive digital radio stations over DVB or over the internet (see page 54).
In addition you can play the sound from an external device through the TV set via the audio/AV inputs of the TV set (see page 53).
The AUDIO button has been preset for radio operation in the factory. To change the configuration see page 125.
Radio mode on

Press AUDIO button on the remote control.
The radio mode that was last selected will be opened (DVB or internet radio).
Or:

MEDIA: Call MediaPortal.
◀ ▶ ▲ ▼ Select DVB radio, OK call.


Or:
R on the operating ring on the TV set.
You see and information window about the currently set station.
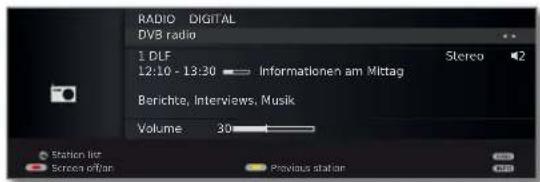

If a connection to the internet is already established:
▶ Change between DVB radio and Internet radio (see page 54).
Setting the volume

V+/V- Volume louder / quieter.
Other sound settings are the same as for the volume setting in TV mode (see page 32).
Sound mode

Call Sound mode
Other settings as for TV mode (see page 32).
Digital radio
Station switching (DVB radio)

The selection of the stations / favourites is the same as the procedure in TV mode (see pages 30 and 31).
Press P+/P− or the numeric buttons of the remote control.
Or:

+ / - on the TV set operating ring.
Or:

OK Call station list / favourites.
Switching the screen on/off

Red button: Switch off the screen.
Switching off the screen reduces the power consumption of the TV set.
The LED display on the TV set (see page 10) changes from green to orange.
Switch on the screen with the remote control:
Red button, AUDIO button or OK button (station list is opened).

Switch on the screen on the TV set: Press R on the TV set operating ring
In the Radio menu, you can set the sound, search for and store radio stations (automatically or manually), change stations and set switch off/alarm functions.
The settings are made as described in TV mode.
Radio mode switched on, if not, see page 52.

MENU: Call the Radio menu.

Switch off radio mode

Press TV button
Or:

END button on the remote control.

Or:
R on the operating ring on the TV set.
EPG – Electronic Programme Guide (radio)
You can also use an electronic programme guide for the DVB radio stations if the radio stations provide programme information.
Starting and ending EPG
Radio mode switched on, if not, see page 52.

EPG: Switch EPG on / off.

The EPG functions in radio mode are the same as in TV mode. Read from page 48 onwards for further information.
EPG configuration (radio)
The EPG settings in Radio mode correspond to those in TV mode (see page 49). If the EPG menu is called up in Radio mode, only radio stations will be included in the station selection.
As already indicated under EPG configuration in TV mode (see page 49), we recommend omitting all radio stations unimportant to you in the EPG station selection for Radio mode (do not highlight with ☑). This gives you a clearer overview in the EPG, as there are a large number of stations for the signal source DVB-S in particular.
The collection of EPG data can also be shorted significantly by this.
Digital radio
Radio mode (Internet radio)
The TV set can receive digital radio stations over DVB (see page 52) or over the internet.
In addition you can play the sound from an external device through the TV set via the audio/AV inputs of the TV set (see page 53).
The AUDIO button has been preset for radio operation in the factory. To change the configuration see page 125.
Internet radio is only accessible if a connection to the internet has been established.
Radio mode on

Press AUDIO button on the remote control.
The radio mode that was last selected will be opened (DVB or internet radio).

Or:

MEDIA: Call MediaPortal.
◀ ▶ ▲ ▼ Select Internet radio, OK call.

Or:
R on the operating ring on the TV set.
You see and information window about the currently set station. The station overview appears the first time you call up Internet radio (see right column).
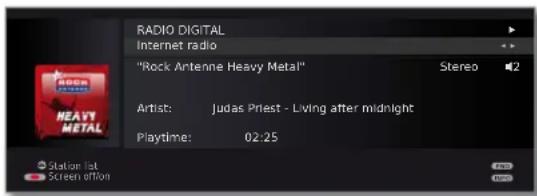

If a connection to the internet is already established:
▶ Change between DVB radio and Internet radio (see page 52).
Setting the volume

V+/V- Volume louder / quieter.
Other sound settings are the same as for the volume setting in TV mode (see page 32).
Station list (internet radio)

When playing Internet radio stations, the folder names specified by the provider vTuner are adopted for display on the TV.
For further operation, see General navigation in the media overview on page67.
Sound mode

Call Sound mode
Other settings as for TV mode (see page 32).
Switching the screen on/off

Red button: Switch off the screen.
Switching off the screen reduces the power consumption of the TV set.
The LED display on the TV set (see page 10) changes from green to orange.
Switch on the screen with the remote control:
Red button, AUDIO button or OK button (station list is opened).
Switch on the screen on the TV set: Press R on the TV set operating ring.

Switch off radio mode

Press TV button or

END button on the remote control.
Digital radio
Audio playback from external devices
You can play the sound of external AV devices (e.g. MP3 players, DVD players) in radio mode.
Connecting an external appliance (e.g. MP3 player)
Connect the output (jack) of the MP3 player to the cinch audio in sockets L/R (white/red) of the TV set.

Connection example of an MP3 player
Radio mode switched on, if not, see page 52.

OK Open station list.
The AV inputs are listed before the first radio station in a numerically sorted list.

The selection of the AV inputs is the same as in TV mode (see page 31).
Start playback on the external device after selecting the AV input.
Other settings
Parental lock
You can select and set various security options to prevent unauthorised use of the TV set and to protect your children from unsuitable programmes.
Defining the access code (PIN)


◀ ▶ SelectSettings,
▼ go to the menu line below.
▶ SelectParental lock,
▼ go to the menu line below.
Define a four digit access code (PIN) the first time you open it. The numbers appear in plain text. Note the access code (PIN) well.
OK Confirm the access code (PIN).
The Parental lock menu is opened.

The four-digit access code (PIN) must be entered when the parental lock is opened in future. It appears encrypted (****) when entering for security reasons.

Codenumber
The code number cancels all entered PINs. It can be used for example if you have forgotten your PIN. You will find a note about the code number on page 143. Remove this from the manual and keep it in a safe place.
Explanations of setting possibilities in the Parental lock menu:
| Lock all stations | The TV set is locked immediately the menu is exited. All programmes can then only be watched after entering the access code. The lock can be activated both Immediately and for a Daily defined period.The lock remains active until it is switched off in the menu. |
| Lock single stations | You can lock / unlock individual or all of the stations in the station list specifically.The lock remains active until it is switched off in the menu. |
| Age-related lock | Some DVB stations also broadcast an age classification.If the age set here is below the broadcast age limit, the programme can only be watched after entering the access code. |
| Change access code | You can change your access code at any time. Enter the new access code in place of the old one. |
| Deactivate | All set parental locks (locked stations, age-dependent locks, locked films in the DR archive/Video archive ^(1) ) are cancelled. The current secret code is deleted. When the parental lock is reactivated all the previous parental locks are set again automatically. |
| Reset | All currently set parental locks are finally cancelled. The secret code is deleted. |
Protection of minors for CI Plus programmes
Youth-protected broadcasts of programme providers with CI Plus encoding possibly require you to enter the secret number (PIN) of the CA module.
We recommend selecting the secret number of the TV set according to the secret number of the CA module, since the secret number of the CA module cannot be changed. This means that you must only remember one secret number.
Other settings
Timer functions
This menu offers you convenient alarm services. Programmed alarms are also active when the TV set has been switched off to standby. If the TV set switches on from the standby mode by alarm, a screen message appears. If this is not confirmed within 5 minutes with the OK button, the TV switches back off automatically for safety reasons.
The TV set can also be switched off automatically at certain times. A screen warning appears one minute before automatic switch off. The automatic switch off can be interrupted by pressing any button.
Call Timer functions


◀ ▶ SelectSettings,
▼ go to the menu line below.
◀ ▶ SelectTimer functions,
▼ go to the menu line below.


◀ ▶ Select the desired setting.
Switch off once The set switches to the standby mode automatically at the specified time.
If a time is specified which has already passed on the same day, the set switches off at this time the next day.
Switch off daily The set regularly switches to the standby mode automatically every day at the specified time.
One-time alarm The set alerts you once today at the specified time. If a time was specified which has already passed on the same day, the alarm is saved for the next day.
Wake up The set regularly alerts you from Monday to Friday at Mon-Fri the set time.
Wake up Sat The set alerts you regularly every Saturday at the specified time.
Wake up Sun The set alerts you regularly every Sunday at the specified time.
Wake up with Specify whether the TV set switches on in the event of an alarm from the standby mode in TV or radio mode with the respectively last active station.
Wake up signal volume Set the desired volume of the alarm tone. The alarm tone is emitted as a continuous tone as a guide during the setting.
Language
Specify the language for all menus in the TV set in the language menu. The language for the DVB subtitles and the film language can be set for DVB programmes.
Call language


◀ ▶ SelectSettings,
▼ go to the menu line below.
◀ ▶ SelectLanguage,
▼ go to the menu line below.

◀ ▶ Select the desired setting.
Menu You can change the menu language here. The menu language guage can be changed with the index (siehe Seite 15).
Subtitle (DVB) If subtitles are provided by the DVB station, you can set your desired language in advance here. If this is included in the range of languages of the station, it will be shown automatically.
You can also specify an alternative language under this menu item, in case your chosen language is not offered by the station
Audio (DVB) Specify your desired film language in advance here. If this is included in the range of languages of the station, it will be shown automatically.
You can also specify an alternative language under this menu item, in case your chosen language is not offered by the station.
Other settings
On-screen displays
You can select different settings in this menu which affect the on-screen displays.
Call On-screen displays


SelectSettings,
▼ go to the menu line below.
SelectMiscellaneous,
▼ go to the menu line below.
▶ Select On-screen displays,
▼ go to the menu line below.


Select the desired setting.
On-screen display time Here you set the duration of the display, e.g. for the volume or the station display when changing stations. The duration can be set between 2 and 9 seconds.
On-screen You can select between an upper and a lower display position display position so that other displays (subtitles) are not concealed.
Volume Here you set whether or not the change in the volume should also be displayed visually on the screen.
Automatic info Select yes here if you want to be able to see the additional help permanently in the upper part of the screen while navigating the menu. Also see page 15 for further information.
Permanent The time can be displayed permanently with this menu clock display item or by pressing the button twice in quick succession (see also page 39). It is always visible as long as no other display is made.
Automatic
If you switch to an HDMI programme place to which
hint after
switch to
HDMI
a Digital Link HD-capable device is connected (see also
page 113), a reference to the adapted function of the
remote control always appears when yes is set.
Time and date
If you receive a station with teletext after switching on the TV, the time and date are recorded automatically. The date may have to be entered manually for some stations.
Enter the time and date manually if you receive station without teletext.
Call Time and date


SelectSettings,
▼ go to the menu line below.
◀ ▶ SelectMiscellaneous,
▼ go to the menu line below.
▶ Select Time and date,
▼ go to the menu line below.
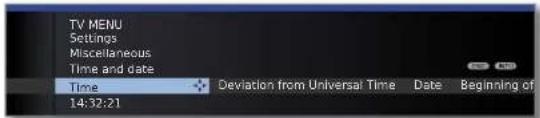

◀ ▶ Select the desired setting.
Explanations of setting possibilities in the Time and date menu:
If a definite time has been identified by the TV set (dependent on the channel), certain menu items may not be available.
Time Enter the time (00:00 to 23:59) with the numeric buttons of the remote control.
Deviation from Universal Time The current time at the Greenwich Meridian 0 is to be understood as world time. The time shift in relation to this time must be given in hours (-11 to +13) (with the buttons ◀ ▶ or the numeric buttons on the remote control). Summer time is ignored.
Date Enter the date (day.month.year) with the numeric buttons on the remote control.
Beginning of daylight-saving time Enter the date on which the time is switched over to summer time if it deviates from the automatically calculated date.
End of daylight-saving time Enter the date on which the summer time ends if it deviates from the automatically calculated date.
Coded Stations
Conditional Access module (CA module)
In order to receive coded digital stations, a Conditional Access module (CA module) and a Smart Card must be inserted in the CI slot of your TV set (see page 11).
The CA module and the Smart Card are not part of the TV set's scope of delivery. They are usually available from your dealer. Loewe does not provide any guarantee for the functioning of the CA module.
The TV set must first recognise and set up the CA module during initial operation. Therefore, it can take up to a minute until decoding starts during initial operation.
Inserting the Smart Card into the CA module
Push the Smart Card into the CA module as far as it goes so that the side with the gold coloured contact chip is facing the side of the CA module marked with the provider's logo. Note the direction of the arrow printed on the Smart Card.

Inserting the CA module in the CI slot
Switch off the TV set's mains switch.
Remove the cover from the rear of the set.
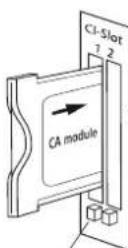
Ejector button
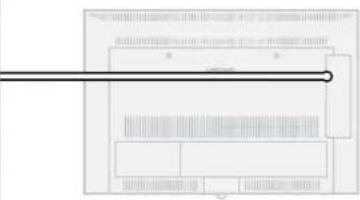
flowchart
graph TD
    A["开始"] --> B{是否需要审批}
    B -->|是| C["提交审批"]
    B -->|否| D["退回修改"]
    C --> E["归档"]
    D --> F["结束"]
Carefully insert the CA module in CI slot 1 or CI slot 2 with the contact side forward.
If you are standing in front of the TV set (display) then the logo on the CA module must be pointing to the rear. Do not use force. Make sure the module is not twisted in the process. If the CA module is correctly installed, the ejector button protrudes a little further.
Replace the cover.
Searching for encrypted stations
The search wizard must only be started if the setting option no has been selected during first installation in the search for encrypted stations and no CA-module was inserted.


Select Settings,
▼ go to the menu line below.
◀ ▶ Select Stations,
▼ go to the menu line below.
▶ Select Search wizard,
▼ go to the menu line below.
Select Change search settings,
OK wizard guides you through the search settings.
See page 42 for a description of the search settings.
This menu is only available for digital stations and when a CA module is plugged in.


◀ ▶ SelectCA module: xxx, OK call information.
The content of this menu depends on the provider of the CA module.
The CA module information can also be called up in the TV menu under Settings → Other → CA module: xxx (xxx corresponds to the CA module provider).
Removing the CA module
→ Switch off the TV set's mains switch.
Remove the cover from the rear of the set.
Press in the ejector button on the appropriate module drawer, the module is released.
Remove the module from the set.
Replace the cover.

MediaHome gives you access to photos, videos and music from your personal storage media, e.g. from storage media connected via USB and from media servers in your home network to which your TV set is connected. MediaNet delivers multimedia data from the Internet.
Please follow the information in the right column for the Internet functions.

Connecting the TV set to your network
To receive media via media servers in your home network or via the Internet, you have to integrate your TV set in your home network. You can connect your TV set both with a wired connection (Ethernet, PowerLine) or via a wireless radio connection (WLAN) ^1 . The TV set has an internal WLAN antenna ^1 . You can find connection examples for both cases on page 19.
The TV sets are provided with a standard network configuration ex works (automatic assignment of the IP address, WLAN deactivated ^1 ). The TV set can normally have a wired connection to your home network without any problems when using these default settings. For a wireless connection ^1 or for integration in special networks, please select the corresponding settings in the Media menu (see page 62).
Your Loewe TV set supports the UPnP AV standard for data playback in the home network. You can find more detailed information on this in the technical data on page 137 and in the glossary from page 144 onwards.
If you wish to use the internet functions, we recommend registering your TV set on our homepage.
http://support.loewe.tv (International),
http://support.loewe.tv/uk (United Kingdom and Republic of Ireland),
http://support.loewe.tv/au (Australia) or
http://support.loewe.tv/nz (New Zealand)
(under Register now).
Simply follow the steps in the registration process.
The MAC address of your TV set is required for the registration. You can find this in the index of the TV set under Integrated features – MAC address (TV).
Some of the Internet functions described below may not be available (see also MediaUpdate chapter below). The general availability and range of Internet functions are entirely dependent on the provider. Loewe has no influence over the long-term availability of individual offers.
The content shown in the Recommendations area may change from time to time without prior notice.
Help for configuration problems
Loewe cannot provide any support for PC hardware and software or network components owing to the diverse configuration options with home networks.
Please contact the administrator of your home network and/or specialist dealer for support when setting up and for maintenance of network connections, storage media, media server software and network devices, e.g. routers.
Additional functions in the MediaPortal are planned, particularly for Loewe Media+. You can update your TV set yourself. You will find new software versions on our internet page.
You can find notes on carrying out a software update on page 126.
MEDIA
MEDIA: Call MediaPortal.


◀ ▶ ▲ ▼ Mark desired function, OK call function.
MediaHome: see page 66.
MediaNet: see page 70.
Video podcasts: see page 75.
Playing music and videos, displaying images
The windows for playing music and videos and for displaying photos are comparable for all cases irrespective of the media source. The relevant players are therefore grouped together:
MediaMusic (including Internet radio): see page 76.
MediaPhoto: see page 77.
MediaVideo: see page 78.
MEDIA
Call MediaPortal and select other function (see left column).

AUDIO
Or:
Press TV or AUDIO button for changing to TV or radio mode ^(1) .
END
Oder:
Press END button in the MediaPortal main level to change to the last active operating mode (TV, radio).
The Media menu is used for making settings to your network adapter and the various types of media (photo, music, video).
MediaPortal is open.

MENU: Call / close Media menu.


▶ Select desired menu item,
▼ go to the menu line below.
◀ ▶ Select the desired setting, OK call.
Network settings: see right column.
Photo settings: see page 65.
Music settings: see page 65.
Video settings: see page 65.
Network You can activate or deactivate the network settings of access your TV set here.


◀ ▶ Select Network access,
▼ go to the menu line below.
◀ ▶ Select the type of access required.
off deactivates all existing network adapters of your TV set.
On, wired only: Access to the network only via a network cable. The wireless access is deactivated.
On, wireless only ^(1) : Access to the network only via WLAN. The access via a network cable is deactivated.
On, wireless + bridge function ^[1] : Both network adapters are activated. Wireless Internet access is possible (WLAN). Internet-enabled devices connected to the network socket (LAN) (e.g. Loewe MediaCenter, Loewe BluTechVision Interactive) can use the wireless connection of the TV set to access the Internet via the WLAN bridge function.
Under no circumstances may the TV set be wired and at the same time connected by a wireless connection to the same network, e.g. router. This may cause severe operational faults!

OK Adopt access type or change Current settings for the adapter.
Configuration of the built-in LAN adapter
You will see an overview of the current settings for the selected network adapter (for an explanation of the points, see page 64).

OK Change settings for the network adapter.


◀ ▶ Select type of IP configuration.
Manual: Enter your fixed static IP address manually (see below).
Automatic: Automatic configuration of the IP address via DHCP server or via multiple protocols according to UPnP specification (including DHCP).
OK Proceed.
If manual has been selected under IP configuration:
▲▼ Enter IP, Subnet mask, Gateway and DNS server addresses in succession with the numeric keys on the remote control.
OK Proceed.
You will now see an updated overview of the settings for the network adapter.
OK End of wizard.
Configuration of a wireless adapter (e.g. WLAN bridge adapter) ^1
You will see an overview of the current settings of the network adapter (see left column).

OK Change settings for the network adapter.

The TV set now searches for wireless routers.
Red button: Stop search.
After the end of the search:

▲▼ Select required base station from the options found. OK Proceed.
If the desired access point is not found:
Red button: Repeat the search. Or:

Yellow button: Specify base station manually, e.g. if the SSID of the access point is not transferred. Same procedure as for Rename station, see page 44.
If your wireless network has an encryption:

Numeric buttons: Enter WLAN password (procedure same as Rename stations, see page 44).

Green button: Switch from lower case to capital letters and vice versa.

Delete last character.
Contact your network administrator if you do not know the WLAN code.
For encryption types supported, see page 137.
For WEP encryption:
▲▼ Select the WEP index, OK Proceed.

▶ Select type of IP configuration (see left column).
You will now see an updated overview of the settings for the network adapter.
OK End of wizard.
Explanation of the adapter settings
IP The current assignment method for the IP address of configuration your TV set.
IP address Your current IP address.
Subnet mask Your current subnet-mask IP address.
Gateway (only for IP configuration → manual)
Your manually set gateway IP address.
DNS server 1 (only for IP configuration → manual)
Your manually set first DNS server IP address.
DNS server 2 (only for IP configuration → manual)
Your manually set second DNS server IP address.
Network SSID The name of your network.
MAC address Indicates the MAC address that is built into the hardware (TV) of your TV set's wired network adapter (LAN).
MAC address Indicates the MAC address that is built into the hardware (WLAN) of your TV set's wireless network adapter (WLAN).
Link status Gives you information about the current status of your wireless connection (save settings, connecting, login failed, access point not found, not connected, connection established).
Link quality Specifies the signal strength as a percentage.
Other This menu contains settings which have to be changed less frequently.


◀ ▶ Select Other,
OK call other network settings.
▲▼ Select desired setting,
◀ ▶ or numeric buttons: Perform changes.


Enter characters (procedure same as Rename stations, see page 44).
Host name: Give your TV set a name so that it can be uniquely identified in the network.
Use proxy server: Indicate whether your network access is to be direct or via a proxy server.
A proxy server is not necessary for most home networks.
Contact your home network administrator if you are unclear about the proxy server settings.
Proxy server name:
(only available if Use proxy server → yes)
Indicate the name or IP address of the proxy server used.
Proxy port number:
(only available if Use proxy server → yes)
Indicate the network port number.
Proxy server requires login:
(only available if Use proxy server → yes)
Specify whether your proxy server requires a special login.
User name and Password:
(only available if Proxy server requires login → yes)
Enter your login data for the proxy server.

MENU: Quit Other network settings menu.
The menu can only be opened when a photo is displayed (see page 77).
Go to ... Skip to a definite picture or to the start/end of the current folder.
Picture display Display pictures in optimal size or in original resolution.
Picture change Select how long each picture is to be shown during a slideshow
Picture Three picture transitions can be chosen for the picture crossovers change. You can have alternately running picture transitions.
Picture settings You can carry out the picture settings for the photo display here. The settings correspond to the picture settings in TV mode (see page 34).
The menu can only be opened when the Music Player is displayed (see page 76).
Sound settings You can carry out the audio settings for playing music here. The settings correspond to the audio settings in TV mode (see page 32).
The menu can only be opened when the Video Player is displayed (see page 78).
Picture settings You can make the picture settings for playing videos here. The settings correspond to the picture settings in TV mode (see page 34).
Sound settings You can carry out the audio settings for playing videos here. The settings correspond to the audio settings in TV mode (see page 32).
MediaHome includes both storage media directly connected to the TV set (e.g. USB sticks) as well as data provided in your home network (e.g. from a media server on a PC or a network hard drive).
MediaPortal is open.
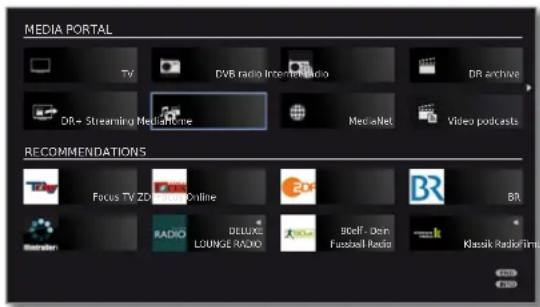

◀ ▶ ▲ ▼ Mark MediaHome,
OK activate.


◀ ▶ ▲ ▼ Mark desired media source.
OK Open highlighted media source. All available content will be shown.
The media sources shown here depend on the devices available/used.
MediaCenter A Loewe MediaCenter connected to your home network.
TwonkyMedia Examples with media servers in your home network. The WMP11 exact designation depends on the media server used.
USB USB storage media on the USB connections of your TV set. The exact designation depends on the relevant storage medium.
Please also observe the notes on page 126 regarding USB sticks!
You should unmount USB storage media properly after use before removing them from the TV set. This avoids a loss of data.
A USB storage medium is marked in MediaHome.

Green button: Unmount USB storage medium before removing it.
Once unmounted, the USB storage medium cannot be used again until it is reinserted!
The graphics on this page typically show a two-column list view. You can switch between the views as required (see page 68).

▲▼ Select desired folder.
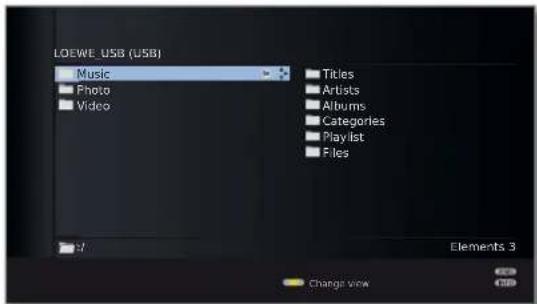

▶ Open marked folder. The content of the folder is displayed in the right window.
Go back a folder level if necessary.


Repeat procedure if necessary. The content of the selected folder is still displayed in the right window, the previous folder structure in the left window.


▲▼ Select media file (example below: music title).
OK Play/display selected media file.
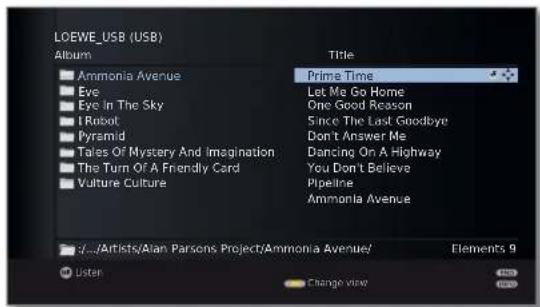
Playing music: see MediaMusic, page 76.
Displaying photos: see MediaPhoto, page 77.
Playing videos: see MediaVideo, page 78.
Changeview
You can change the view of the displayed files and folders.
In the Media Overview:

Yellow button: opens Change View, and:

Green button: Switches over to two-column list view (see sample figures on page 67).

Yellow button: Switches over to single-column list view (with picture for the element currently selected).

Single-column list - example with music titles

Blue button: Switches over to thumbnail view.

Thumbnails - example with photo overview
If a USB storage medium is selected as a source (see page 66), the following special features apply for actions and the media overview:
- The uppermost folder level is divided into three fixed categories:
Music
with the subfolders Titles, Artists, Albums, Categories, Playlists, Files (see below).
Photo
Video
- The original folder structure of the USB storage medium is retained in the media overview for Photo and Video. For playing Music, the available titles are prepared and offered in the above subfolders.
Subfolders in Music mode
Titles:
The music titles found on the USB storage model title name.
Artists:
The music titles found on the USB storage media by the respective artist.
Albums:
The music titles found on the USB storage med by album name.
Categories:
The music titles found on the USB storage medium are sorted by their respective musical categories (e.g. Jazz, Classical, Pop, Rock) and displayed correspondingly.
Playlists:
Display and play back any play lists that have been generated on the PC.
Files:
The music titles found on the USB storage m will be shown without being especially sorted (in order of file name).
Playing files from the home network
When using a media server in your home network as a source (see page 66), the names of the folders displayed are specified by the media server.
For further operation, see General navigation in the media overview on page 67.
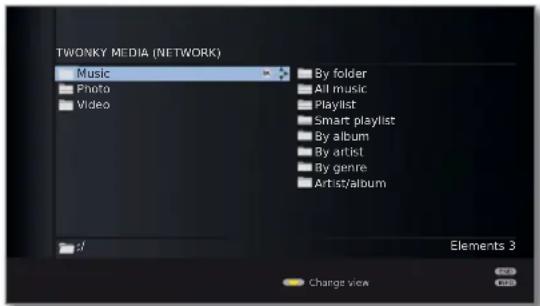
Example: Overview of a media server with the name Twonky Media
Under the menu item MediaNet you will find a continually expanding platform for interactive TV applications from the Internet. All applications are optimised for use on the TV. In addition, you can access Internet sites directly via the integrated Opera browser.
The web browser can also be used without an Internet connection. Thus you can access local devices which provide a web interface (e.g. router, home control, home network server).
MediaPortal is open.


◀ ▶ ▲ ▼ Select MediaNet, OK activate.

The upper section of the MediaNet basis dialog contains Loewe Recommendations. The middle section displays your own Favourites (Edit favourites, see page 73). Depending on the topic selected (see right column), all the available online content matching the topic is displayed in the lower section.

◀ ▶ ▲ ▼ Select the desired online content.
OK Display/play content.
Topicselection

▲▼ GotoTopics.
Select the desired topic.
OK Confirm topic.
The content associated with the selected topic is displayed in the lower section.

Red button:
Edit favourites
Media content from the topic can be
defined as personal Favourites and the Favourites can also be moved or deleted.
See page 73.
Green button: Internet
You can enter Internet addresses here and open the associated Internet sites.
See page 71.
Yellow button: Personal area
Using a definable access code, you can define favourites and call up websites in the personal section.
See page 72.
Blue button: Configure MediaNet settings.
See page 74.
Internet

Green button: Call Internet.


◀ ▶ ▲ ▼ Select the desired symbols/terms, OK adopt to input line.
▲▼ Go to the input line.
If necessary:

Yellow button: Delete characters to the left of the cursor.
When the Internet address (URL) is completely entered:

OK View the website.

The functions of the coloured buttons are enabled even without the status line being shown.
Navigation in websites

P+/P− Scroll the page vertically.

◀ ▶ ▲ ▼ Select link or text input field, OK open link or confirm text input.

Letters and numbers can be entered into input fields on Internet sites either using the numeric buttons or a USB keyboard.
Same procedure as for Rename station, see page 44.

END: Cancel text input and exit input field.

Yellow button: Zoom website.

Move picture section.

Yellow button: Re-display website at the original size.
Select other website / Quit Internet

TEXT: Return to URL input window.
Or:

Red button: Call History (previously visited websites). Delete history: see below.
Or:

Green button: Exit Internet and go back to the MediaNet base dialogue.
Delete history

The address input window is open (see left column).
◀ ▶ ▲ ▼ Select the trash symbol next to the History entry to be deleted.
OK Delete an entry or the entire history.
Personalarea
In the personal area protected with an access code, you can store websites as favourites. In addition, the history of websites visited by you is managed separately from the history in the general Internet section (see page 71).

Define a four digit access code (PIN) the first time you open it. The numbers appear in plain text. Note the access code (PIN) well.
The access code in the personal section and the PIN of the parental lock (page 56) are independent of each other.

The four-digit access code (PIN) must be entered when the parental lock is opened in future. It appears encrypted (****) when entering for security reasons.

◀ ▶ ▲ ▼ Select the desired symbols/terms, OK adopt to input line.
▲▼ Go to the input line.
If necessary:
Green button: Delete characters to the left of the cursor.

Blue button: Add the Internet address to favourites. For favourites, see right column.

When the Internet address (URL) is completely entered: OK View the website.
See page 71 for further operation.
Personal area - Favourites
You can save up to four favourite websites in the personal section. These are displayed in the right part of the user interface under Favourites.
Enter the desired Internet address (URL) (see left column).

▲▼ Go to the input line.
If necessary:

Green button: Delete characters to the left of the cursor.

Blue button: Add the Internet address to favourites.
The Internet address (URL) is added to the Favourites on the right side.

◀ ▶ ▲ ▼ Select Favourites entry,
OK transfer the Internet address to the input line.
OK View the website.
Delete favourites / history

◀ ▶ ▲ ▼ Select the trash symbol next to the Favourites or History entry to be deleted.
OK Delete entry or entire list.
Quit Personal area

TEXT: Return to URL input window.
Or:

Yellow button: Leave personal area and go back to the MediaNet base dialogue.
The middle section of the basic MediaNet dialogue contains the MediaNet favourites. You can define and delete these favourites or change their sequence as desired.
MediaNet is open (page 70).


Add entry to favourites


◀ ▶ Select the insertion position to which the selected favourite is to be moved.


Here, you can find more setting options for MediaNet.
MediaNet is open (page 70).

Blue button: Call Settings.


◀ ▶ ▲ ▼ Select the desired setting, OK call.
Access code
Here, you can define/change your MediaNet access code for the personal area. When changing, first enter the previous and then the new access code.
Personal area
Here, you can delete the entire personal section in a single step (favourites, history and access code). Press the red button to confirm the procedure.
Country selection
Select the countries whose online services you want to receive.
Favourites
You can delete here the Favourites in the MediaNet basis dialog (see page 73). Press the red button to confirm the procedure.
Factory settings
Reset MediaNet to status as at delivery (Favourites in MediaNet basis dialog, personal area, Internet history). Press the red button to confirm the procedure.
Blue button: Quit settings and go back to the basic MediaNet dialogue.
Video podcasts
MediaPortal is open.


◀ ▶ ▲ ▼ Select Video podcasts, OK activate.

The names of the folders in the Video Podcasts area are fixed by the provider vTuner and are adopted for display on the TV.
For further operation, see General navigation in the media overview on page 67.
Video podcasts by genre
The available video podcasts are sorted by genre and offered accordingly (see left column).
Video podcasts by country
The video podcasts that are available are sorted initially by region, then by country and are offered accordingly.

Web TV by genre
The available web TV videos are sorted by genre and offered accordingly.
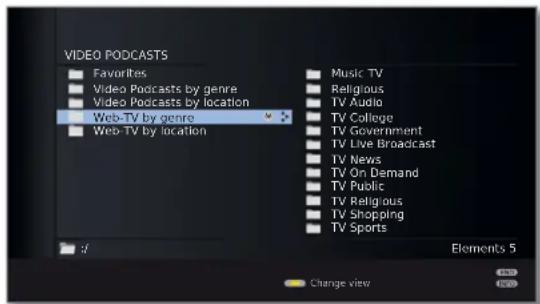
Web TV by country
The web TV videos that are available are sorted initially by region, then by country and are offered accordingly.

A music title is highlighted in the media overview.


OK Play highlighted music title (see right column).
Play music files
A music title is highlighted.
OK Play music title.

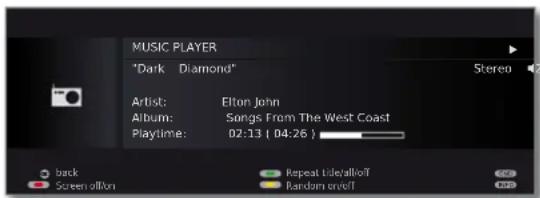

PAUSE button: Pause current playback.

PLAY button: If playback is paused:
Continue paused playback.
For playback in progress:
Play title from the beginning.


short: Playback previous / next title.
long: Rewind/fast forward.

OK Return to the overview without ending the current playback.

STOP button: End playback and return to overview.
Explanation of the symbols in the playback window
The symbols at the top right show you information about the current playback.
▶ Playback
II Pause
Rewind
Fast-forward
Replay current title
Replay all titles in the current folder
Random play activated
The bar behind the playtime shows you how far the music file has been played.

Red button: Switch screen off/on.
Green button: Repeat individual title/all titles/Repeat off.

Yellow button: For music files from local media
Random play of files in currently selected folder on / off.
for Internet radio:
Change to the last radio station listened to.
A picture is selected in the media overview.


OK View marked picture in full screen mode (see below).

PLAY button: Start slideshow (see right column).
Full-screenmode

A picture has been selected.
OK Opens full picture mode.
→ Portrait photos (with the corresponding entry in the Exif files) are automatically positioned correctly for viewing.


Show previous/next picture.

▲▼ Rotate picture by 90 degrees to the left/right.
OK Quit full-screen mode and return to overview.
Slideshow

PLAY button: Start slide show.
→ from photo overview: Start slide show with marked picture.
→ in full screen mode: Start slide show with displayed picture.
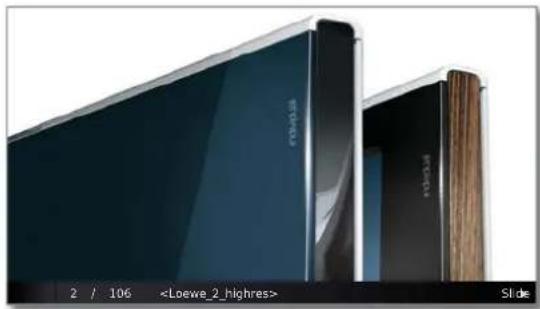
natural_image
Exterior view of two modern blue-framed electronic devices with visible internal components and a wooden cover (no text or symbols)

PAUSE button: Pause slide show.

PLAY button: Continue slide show.

STOP button: End slide show and return to overview.
A video is selected in the media overview.


OK Play highlighted video (see right column).
Due to technical limitations (e.g. interference, limited bandwidth), interruptions to playback up to and including complete termination of the playback may occur when playing high definition film material (HD films) on 720p format or above (1280 x 720 resolution or above).
High definition film material (HD films) from format 720p upwards (resolution 1280 x 720 or higher) should be played back via a wired connection. If there is a wireless connection, then technical limitations (e.g. fault liability, bandwidth limitations) can cause disruptions in the playback right up to a complete breakdown of the playback.
Playback
A video is selected.

OK Play highlighted video.

PAUSE button: Pause current playback.

PLAY button: Continue paused playback.

STOP button: Stop current playback and return to overview.
Video status bar
The video status bar provides you with further information about the current playback.

INFO: Display/hide status bar/file information/context information.
Pressing the INFO button the first time will show the video status bar. Pressing a second time shows the file information for the video. Pressing the INFO button again shows the context information with operating instructions. The displayed information is hidden again by pressing again.


END: Close displayed content.
Explanation of status bar symbols
The symbols (in the status bar top right) show you information about the current playback.
▶ Playback
II Pause
◀ Rewind (speed 2x, 5x, 10x, 20x)
▶ Fast-forward (speed 2x, 5x, 10x, 20x)
The bar behind the playtime shows you how far the video has been played.


Wind
You can fast-forward/rewind videos to search for desired scenes.

Rewind at double speed.
Speed 2x, 5x, 10x, 20x.

Fast-forward at double speed.
Speed 2x, 5x, 10x, 20x.

PLAY button: Continue playback.
In the case of Internet videos, please wait until these are buffered in the memory. This can take a few seconds, depending on the bit rate of the film and internet speed.
Jumping
You can jump to any point in the video by entering a time.

Yellow button: opens jump to .....


Enter the desired time with the numeric buttons.
OK jumps to the time entered.

Yellow button: cancels the jump.
Select language/sound
Video files can contain several audio tracks.


Red button: selects language/sound.


▲ ▼ Highlight the desired sound or language and OK selects the audio track.
END: Cancels audio track selection.
HbbTV ^1 (Hybrid broadcast broadband television) offers the user extensive multimedia content, e.g. media libraries or additional information on the programme that is currently playing (if these are available from the current channel).
MediaText helps you to use the next generation of teletext/videotext for HbbTV.
MediaText/HbbTV text can either be started directly or through an HbbTV application.
Open HbbTV application
If an HbbTV application is available for the chosen channel after changing channels, this will be loaded during the automatic start process (see page 81) and a red button symbol will appear. When starting manually, the application will only be loaded by pressing the red button.
HbbTV is offered by the selected channel.
Connection to the Internet.
HbbTV mode is set to on.

Red button: Load / display HbbTV application.

The appearance, key assignment and available functions of the HbbTV applications are dependent on the provider. Under certain circumstances, the recording and bookmarking functions of the applications may not be supported.
Loewe takes no responsibility for the accessibility, functionality or content of HbbTV applications.
Hide / close HbbTV

END: Hide / close HbbTV application.
Depending on the start behaviour set (see page 81), the HbbTV application will be hidden (automatically) or closed (manually). In the start behaviour automatically, you need to press the END button a second time for closure. You will see a screen message after closing.
Open HbbTV text directly
→ MediaTek/HbbTV text is offered by the selected channel.

TEXT: Open HbbTV text.
Pressing the TEXT button again opens the "standard" teletext/videotext (see page 50).

Navigation within the HbbTV text and how the coloured buttons are assigned can vary depending on the provider.
Leaving HbbTV mode/standard teletext

TEXT: Pressing the TEXT button again ends teletext.
HbbTV mode on/off
When the HbbTV mode is active (factory setting), additional services and further information (e.g. also from the Internet) can be viewed if these are offered by the current station.


SelectSettings,
▼ go to the menu line below.
◀ ▶ SelectMiscellaneous,
▼ go to the menu line below.
▶ Select HbbTV mode,
▼ go to the menu line below.


◀ ▶ Set the changes.
If the setting HbbTV mode → off has been selected, you can open the DR archive / video archive by pressing the red button.
Start behaviour of HbbTV-stations
If the setting HbbTV mode → on has been selected (see left column), you can specify if a available HbbTV application should be loaded automatically after the channel has been changed or if this should only occur manually after the red button has been pressed once. After loading the HbbTV application, an on screen instruction is displayed (depending on the channel that is being viewed).


SelectSettings,
▼ go to the menu line below.
▶ Select Miscellaneous,
▼ go to the menu line below.
▶ Select Start behaviour of HbbTV-stations, OK open.



Blue button: Change whole list / Change items individually.
Red button: Starts HbbTV on the selected channel Start automatically / Start all automatically.
Green button: Starts HbbTV on the selected channel Start manually / Start all manually.
Digital Recorder
About the Digital Recorder system
Using the Digital Recorder of your Loewe TV set you can record programmes onto the integrated hard disc (for TV sets with DR+), or onto an external hard disc connected via USB (USB Recording for TV sets without DR+).
The Digital Recorder can also process HDTV signals including the audio and auxiliary signals that they contain.
The various ways in which your Digital Recorder can be used are listed below.
The availability and operation of certain Digital Recorder functions are dependent on the type of equipment present (DR+ or USB Recording). Refer to the instructions on the individual pages for more information.
Overview of functions
| Digital Recorder function | Loewe TV sets with integrated hard disc (DR+) | Loewe TV sets without integrated hard disc (USB Recording) |
| Archive recording on the integrated hard disc | ● | - |
| Archive recording on the USB storage device (external hard disc) - | | ● |
| View other channels whilst the archive recording is taking place | ● | - |
| Archive playback from DR+ | ● | - |
| Archive playback from USB storage devices (external hard disc) | ● | ● |
| Delay TV in live play mode (timeshift) | ● | - |
| Subsequent archive recording | ● | - |
| Delay TV when archive recording is running | ● | ● |
| View other channels with delay TV whilst the archive recording is taking place | ● | - |
| Copy recorded programmes onto an external recorder | ● | ● |
| Copy recorded programmes from DR+ onto a USB storage device | ● | - |
| Copy recorded programmes from one USB storage device to another | ● | ● |
| Permit recorded programmes to be viewed on the network | ● | - |
| View programmes that have been permitted to be viewed over the network | ● | ● |
| DR archive view with cover pictures | ● | - |
| Highlight replay | ● | - |
| Set/delete manual bookmarks | ● | ● |
| Hide parts of a recording | ● | - |
● available
- not available
Digital Recorder
TV viewing with time shift
In the case of devices with an integrated hard disc, the Digital Recorder records the TV programme you are currently watching in the background if DR continuous mode is switched on in the Digital Recorder menu (factory setting).
Time-shifted operation is perhaps not possible or only to a limited extent for programmes of stations working with CI Plus encoding (see page 107).
- Time shift
You can stop a TV programme at any time and continue playing it later with a time shift. The maximum time shift is up to 3 hours. The recording starts again from the beginning and the old content is deleted every time you switch stations.
• Fast navigation by jumping
You can wind and rewind during a film at just the press of a button. The jump distance is adjustable.
The Smart Jump function also ensures that the jump width is halved each time the jump direction is changed or doubled after three jumps in the same direction (max. 8 minutes). This way you can quickly find a certain spot of the recording.
- Fast forward and rewind
You can fast forward and rewind at three different speeds in the programme you are viewing with time shift.
- Slow motion
You can play a programme which you are watching with a time offset at four different slow motion speeds.
- Subsequent archive recording (1)
When viewing a time-shift TV programme, you can archive the whole programme to the digital recorder's archive.
- Setting bookmarks
During a football match, for example, you can flag goals or exciting scenes. For this, the time shift recording is converted into an archive recording. At a later viewing you can replay bookmarked sections of a film as highlights. 30 seconds before and after the set bookmark are played.
- Replay function
When, for example, you are watching live football, you can, at the touch of a button, rewind by 40 seconds and replay a scene. You see the live picture at the same time in a PIP picture (not for HDTV broadcasts).
Digital Recorder archive
You can record movies you want to watch later in the Digital Recorder's archive.
Recordings of CI Plus encoded programmes are perhaps not possible or only to a limited extent (see page 107).
If EPG or teletext data are available, the Digital Recorder stores the title and additional information about each programme in the archive.
If additional languages are being transmitted for a DVB broadcast, these are also recorded. DVB subtitles or teletext subtitles are recorded if the recording of subtitles has been activated in the Digital Recorder settings. Display language selection and subtitles as in TV mode.
Start playback of your recordings from the archive.
If bookmarks were set in a recording, these entries are marked accordingly (▶). You can start playback so that the bookmarks are played as highlights (see page 100).
Comfortably select your favourite programme for recording from the EPG or teletext and watch the programmes later from the Digital Recorder's archive.
An automatic Delete Manager always ensures there is sufficient recording space for new movies (see page 94).
- Sort titles
You can have the broadcasts displayed according to time, alphabetically or by station name. You can therefore quickly find the recording you want to watch.
- Rename/edit titles
You can change the title of a programme in the archive, if necessary.
- Parental lock
Protect your archive against unauthorised access by using the parental lock feature.
- Delete protection
Set the delete protection for a movie to prevent it from being deleted automatically by the Delete Manager (see page 94).
- Copy
Using time control, copy films from the archive of the digital recorder to the external DVD recorder or onto external hard discs.
Digital Recorder
Archive recording
To record encoded programmes, please also read the instructions on pages 106 and 107.
You can watch another programme ^1 or playback a recorded programme ^1 from the archive when recording a TV programme into the archive. You can also play the same programme you are currently recording with a time shift.
Record interesting programmes directly into the DR archive with the RECORD button. When viewing time-shift broadcasts (see page 83) the current broadcast can be saved to the DR archive. The programme is recorded from the beginning to the end of the time offset recording or to the end of the set recording time.
• Timer-controlled recording
Comfortably select your favourite programme for recording, from the EPG or teletext. The timer overview has room for 50 entries. Watch the programmes later from the Digital Recorder's archive.
- Serial recording
You can conveniently programme series broadcast with alternating start times.
In some broadcast networks (like UK FreeView) you can even let the TV set record series and split events automatically depending on the information provided by the broadcaster. A conflict manager (see page 14) will also automatically try to find alternate instances of conflicting recordings if signalled by the broadcaster (e.g. UK FreePlay).
• Time shift viewing with archive recording
If you have programmed recording and come home before it is finished, you can watch the movie with a time shift while the rest is still being recorded.
Archive playback
All the recorded programmes can be selected in the archive and played. During archive playback, another programme can be recorded into the archive.
- Fast forward and rewind
There are three different speeds for winding and rewinding films.
- Fast navigation by jumping
You can fast forward and rewind during a film at the touch of a button. The jump width is adjustable (see page 85).
The Smart Jump function also ensures that the jump width is halved each time the jump direction is changed or doubled after three jumps in the same direction (max. 8 minutes). This way you can quickly find a certain spot of the recording.
- Slow motion
You can use playback at four different slow motion speeds.
- Bookmarks
To find interesting scenes in a movie later, you can manually set the bookmarks. In addition, there are also automatically set bookmarks every time a broadcast is changed. You can jump to each of the bookmarks in succession at the press of a button.
- Playing highlights
For recordings with manually set bookmarks you can limit the playback only to the highlights. You then see the scenes 30 seconds before and after each set bookmark. If there is more than one bookmark the highlights are played one after the other.
- Cut/Hide functions
Unwanted sections at the beginning and ending of a recording are easy to delete. Set hiding marks ^1 around uninteresting sections to watch a movie without interruptions or to archive it on DVD.
• Copying your recordings
You should burn recordings that you want to save permanently on DVD or copy them on an external USB hard disc. Afterwards, you can delete the recording from the archive.
- Copying recordings, which originate from a CI Plus encoded station, is perhaps not possible or only to a limited extent (see page 107).
Switching off the TV set with the mains switch during operation or an inadvertent disruption to the power supply (e.g. power failure) can cause damage to the hard disc file system and hence loss of the recorded broadcasts. Always first switch your TV set to standby mode (press On/Off button on the remote control or switch-off button in the middle of the operating eye on the TV set), before switching off at the mains switch. Do not disconnect the USB storage device ^12 from the TV set under any circumstances whilst it is being recorded onto or whilst it is being copied onto.
However, if unexpected problems occur when operating the hard disc, formatting the hard disc may rectify this. Refer to the instructions on page 105. Also follow the information for formatting on page 105 when using an external USB disc
^(1) only for TV sets with DR ^+ .
^12 only for TV sets without DR ^+ .
Digital Recorder
Settings
You can make a few settings in the Digital Recorder menu to adapt the Digital Recorder to your requirements.

Call DR archive / Video archive.


MENU: Call Digital Recorder menu.



◀ ▶ Choose a setting,
▼ switch to the menu line below.
◀ ▶ Set or enter using the numeric buttons of the remote control.
Explanation of the setting facilities
Select memory Select the storage medium whose accessible content is medium to be displayed in the archive.
The menu item only appears if several storage devices are available (for external hard discs and TV devices that are capable of permitting DR archive programmes to be viewed on the network, see page 103 onwards).
DR continuous If DR continuous mode is switched on, the programme operation ^(1) being watched is recorded permanently in the background.
Factory setting: on.
Recording Adjust the recording quality for recording analogue pro-quality programmes. This results in a change in the recording capacity. Factory setting: high.
Explanation of the setting facilities (continue)
DR archive Display DR archive entries with or without covers. view ^(1) For determining covers, see page 102.
Factory setting: With cover pictures.
If you watch the broadcast during recording (e.g. for direct recording), a cover will automatically be adopted. A broadcast whose recording is running completely in the background is initially saved without a cover.
Inform about If an entry has been hidden in an archive recording (see hidden page 97), you can be informed by a screen message sections when skipping a hidden area.
Factory setting: yes.
Jump distanceSet the standard jump width (in minutes) used for jumping forwards or backwards in the film by pressing ◀ or ▶. Use the numeric buttons on the remote control to enter the time (always two-digit for 01 to 15 min.). Factory setting: 04 min.
If Smart Jump is activated, the jump width can only be set between 1 and 4 minutes.
Smart Jump Activate or deactivate Smart Jump function (see page 87). Factory setting: yes.
Serial A broadcast programmed with the recording type Serial recording is recorded only if it begins within the programmed start tolerance time ± series recording tolerance. Use the numeric buttons on the remote control to enter the time (always two-digit for 01 to 60 min).
Factory setting: +-30 min.
Serial recording tolerance is ignored when recording a programme with auto time control (see page 93).
RecordSelect here whether subtitles are to be recorded in subtitles at DR continuous operation for DVB stations.
continuous Factory setting: no ^2 .
operation ^(1)
Descrambling at The TV set can possibly already record decoded pro-DR continuous programmes in DR-continuous operation that have been watched as time-shifted encoded programmes. Recording the programme directly into the DR archive saves you having to descramble it later.
Factory setting: no ^3 .
DR+ Streaming See page 86.
settings
^(1) only for TV sets with DR ^+ .
^12 for location of TV set DK, FIN, N or S: yes.
^3 for location of TV set NL: yes.
Digital Recorder
Setting the pre-record and post-record time
You can set a pre-record and post-record time for timer recordings made without VPS (analogue) or auto time control (DVB) (see also page 106). This minimizes the risk that a part of the broadcast is not recorded due to the broadcast starting earlier and/or finishing later.


◄ ► Choose Recording,
▼ switch to the menu line below.

◀ ▶ Set pre-record or post-record time,
▼ switch to the menu line below.
Enter the time using the numeric buttons (always 2-digit: 01 to 15 mins for pre-record time; 01 to 60 mins for post-record time). Factory setting: pre-record: 00 min, post-record: 05 min.

DR+ Streaming settings
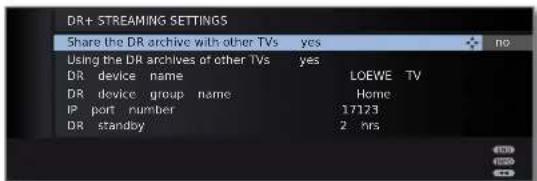
Share the DR Enter here whether recorded broadcasts within your TV archive with set's DR archive are to be accessible for viewing from other TVs ^1 other TV sets (server function).
Using the DR Setting yes enables you, via the archive, to also view archives of recordings from other TV sets that have accessible films other TVs within the home network (client function).
DR device Give your TV set a unique name for quick identification name ^1 in DR+Streaming.
DR device Give a name for your TV set group.
group name Using different group names enables you to group your TV sets as required. Only TV sets under the same group name can exchange data.
IP port IP port numbers are preset ex-factory. Under normal number circumstances they do not require amending.
DR standby ^1 Set here how long your TV set is to continue to give access to films after calling DR+ Streaming within the MediaPortal (refer also to the operating instructions of the TV set). This stand-by period is also activated as soon as data exchange to another TV set has been completed.
Digital Recorder
TV viewing with time shift
The Digital Recorder continuous operation (only for TV sets with DR+) is switched on as the factory default setting (see page 85). In this case, the TV broadcast that you wish to view is automatically recorded in the background. The maximum time shift is up to 3 hours.
Please also read the instructions on watching time-shifted television on page 83.
Programmes with copy protection (e.g. Macrovision) cannot be watched with a time shift for legal reasons.
Interrupt

Press PAUSE button.

The TV image becomes a freeze frame and the DR status display appears.
At the top you will see the number and name of the station if EPG or teletext data are available, in addition to the start and end of the current programme and the title of the programme.
On the left hand side of the bar you can see the start time for time shift recording. On the right hand side of the bar you can see the time at which the time shift recorder will be full (automatically extends by 30 minutes, up to a max. 3 hours). The bar shows the amount of available recording capacity already used. The time displayed inside the bar is the time at which the Pause button was pressed.
Continue ( time shift viewing)

Press PLAY button.

You can now watch the TV programme with a time shift from the time you pressed the PAUSE button. The Playback symbol ▶ appears in place of the Pause symbol II.
Jump to automatically set bookmarks
With time-shift television, and with the status display showing, you can skip to automatically set bookmarks or to the start or end of the current recording. White bookmarks mark the beginnings and endings of broadcasts.

Red button: Jump back
Blue button: Jump forwards
Switch to live picture

Press STOP button.
You see the station's live picture again.
Jumping
You can jump during time shift viewing by briefly pressing the buttons ◀ in the jump distance set; this enables you to skip uninteresting sections quickly.

▶ Jump forwards.


◀ Jump backwards

SmartJump
If Smart Jump is activated, the jump width is halved every time you change the jump direction. The jump width is doubled if you jump more than three times in the same direction (max. 8 min.).

: Jump width corresponds to the jump width preset in the Digital Recorder menu.
: Jump width is less than preset in the Digital Recorder menu (e.g. after changing the jump direction).
: Jump width is greater than preset in the Digital Recorder menu (e.g. after jumping three times in the same direction).
For example, you are searching for the beginning of a broadcast that has already started.

◀ Press repeatedly to jump back.
If you have jumped past the beginning of the programme, jump in the opposite direction:

This jump in the opposite direction is only carried out for half the jump distance. Jump forward using ▶.
If you have jumped past the start of the programme:
Jump back again. In the process, the jump distance is cut in half again.
By halving the jump distance when changing direction again you can find your way to a specific place.
Digital Recorder
Fast forward and rewind
During time shift viewing you can fast forward and rewind at three different speeds. Sound is not audible during winding.


Press ◀ or ▶ for a little longer.

By briefly pressing ◀ or ▶, the speed will increase until you switch back to the first speed.

Playback begins automatically upon reaching the end of the recording. You are then about 10 seconds behind the live picture or when rewinding at the beginning of the time shift recording.

Slowmotion
If Pause is active (freeze picture) you can play at four slow-motion speeds. Sound is not audible during slow motion. When viewing HDTV slow motion backwards is not possible.

Press PAUSE button


Press ◀ or ▶ briefly.

Increase speed:
Press ◀ or ▶ several times briefly.

The speed increases every time you press the button until eventually switching back to the initial speed.
Highlightfunction
You can mark interesting scenes in sports reports for example to watch these again specially at a later viewing.
You can set bookmarks in time-shift TV or during live viewing.

Press PLAY button for a little longer: Set bookmark.
The time shift recording that is already active in the background is converted into an archive recording. You will see a message on the screen. Every time the PLAY button is pressed down again a little longer, a new bookmark is set.
If there is no teletext or EPG programme information, the Recording duration menu will appear the first time you press the PLAY button. Select the desired recording duration and confirm using OK (see page 89).
Recordings which contain manual bookmarks can be replayed as highlights (see chapter Archive playback on pages 96 and 100).
Replayfunction
You can watch interesting scenes of sports reports again for example (only in live picture).

Press button

The set jumps back 40 seconds into time shift mode. The playback flag is yellow (Smart Jump active).
At the same time, the live image is shown as a PIP small picture (not with HD stations).

Button ▶: Skip forwards 20 seconds.

PIP button: Close PIP picture, without quitting the time-shift playback.

STOP button: End replay function and return to live picture.
Switch to a different station
The time offset recording is restarted when you change stations. The previous time offset recording is deleted.
Digital Recorder
Archive recording – Direct recording
For recording encrypted broadcasts, please also refer to the information on pages 106 and 107.

Press RECORD button briefly: Start direct recording. The Recording duration selection is called.


◀ ▶ Select desired recording time.
current programme: The broadcast being watched is adopted in the DR archive.
??? : Manually enter the recording duration with the numeric buttons of the remote control.
OK Confirm. Call Timer data.


Check the timer data, change if necessary and confirm with OK. The recording is started.
See page 93 for explanations of the setting options in the Timer data menu.
One Touch Recording
With One Touch Recording, the recording starts immediately at the press of a button. You only need to specify the recording time. There is no need to select the recorder (e.g. DVD recorder). The programme is always recorded onto the integrated hard disc. The programme is always recorded onto the integrated hard disc ^1 or onto the USB storage device ^2 .

Press RECORD button longer: Start One Touch Recording. The Recording duration selection is called.

▶ Select desired recording time, OK confirm.
When the start of the broadcast has been recorded, the broadcast will be adopted from the beginning (only when DR continuous operation is activated, see page 85). Otherwise, recording begins at the point from which viewing of the broadcast began.
With DR continuous mode activated (see page 85), you can also adopt a viewed and finished broadcast to the archive provided there has been no change of broadcast in between. Skip or wind to the desired broadcast and start the recording with current programme (see left column).
During the archive recording, the bar showing the recording progress is red and the REC message is shown for a current archive recording.
Scrambled programmes are recorded according to the presetting in the Digital Recorder menu → Descrambling at DR continuous operation. If yes is set, no other programme can be viewed during direct recording of a scrambled programme.
If the presetting in Descrambling at DR continuous operation is changed while you are watching a scrambled programme, the time offset recording is restarted. The previous recording is deleted.
D R
Setting bookmarks during archive recording
During immediate recording or a running timer recording, you can set bookmarks at interesting sections (press the PLAY button for a little longer). You will see a screen message. This enables you to find this part of the recording quickly during playback. You can set up to 15 bookmarks per recording.
Time shift viewing during archive recording

PAUSE button: Change to freeze frame.
The recording is continued in the background.

PLAY button: Continue playback.
You will now see the time-shift archive recording.
Skipping, rapid winding and rewinding and slow motion function as described in the chapter TV viewing with time shift (pages 87 and 88).

STOP button: End time shift and return to the live image.
Digital Recorder
Watching other stations during archive recording
After you have started the recording, you can switch to another station ^1 .
The second channel can be watched in delay TV whilst a recording is taking place (Timeshift during archive recording, see also delay TV on page 87).
If an encrypted programme is recorded with the option Descrambled recording → yes, the CA module required for decoding is used for the recording. In this case you cannot watch any other encrypted programme.
Viewing another movie from the archive during archive recording
After you have started the recording, you can also watch a programme you have already recorded.

Call DR archive.

Select
view film.
recording,
The recording process is continued in the background.
If an encrypted programme is recorded with the option Descrambled recording → yes, the CA module required for decoding is used for the recording. In this case you cannot watch any other encrypted programme from the archive.
Switching off the TV set during recording
You can switch off the TV to standby whilst recording. The recording is continued in the standby mode. The display on the set shows orange.
→ Never switch the TV set off at the mains and do not pull out the plug of the TV set out of the socket. Otherwise the recording will be lost!
Subtitles
If subtitles are transmitted, these are recorded.
The recording of subtitles in DR continuous mode must be switched on in the Digital Recorder menu (see page 85).
Call subtitles in later playback:
INFO: Show status display (see right column)
TEXT: Call subtitle selection.
▲▼ Select desired subtitles.
OK Show subtitles.
Stop recording early
You can end a current archive recording prematurely.

Press STOP button.


OK Stop recording.
The recording process is ended. The material recorded up to this point is saved on the hard disc and can be played back via the DR archive.
You can also end a running recording by deleting the entry in the timer overview or in the DR archive. See page 94 for further information.
Status display during time shift and archive recording

INFO: Show status display.
Display with time shift ^(1) :

Display with live picture during an archive recording:
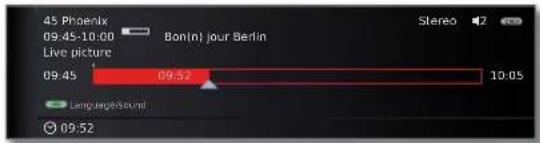
Display with time shift during an archive recording:

Digital Recorder
Archive recording – Timer recording
For recording encrypted broadcasts, please also refer to the information on pages 106 and 107.
You can programme timer recordings for the Digital Recorder conveniently using the EPG, teletext or manually. Up to 50 simultaneous timer entries are possible.
When you have programmed timer recordings, the TV set can only be switched off to the standby mode. Never switch the TV set off at the mains and do not pull out the plug of the TV set out of the socket. Otherwise no timer recordings can be made!
Programmed timers for the Digital Recorder are displayed in the timer overview.
The code DR→DR appears instead of the programme name in front of the entry for scrambled recordings still to be descrambled.
For an explanation of the symbols in the timer list see the chapter The direct way to record on page 122.
©
Call DR-archive.
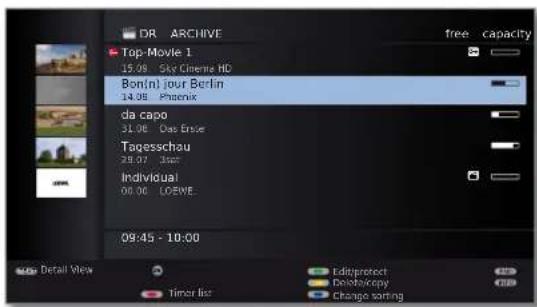

Red button: Call Timer list.

A red dot with a key symbol appears in front of the entry for scrambled recordings still to be descrambled.
Programming a timer recording with the EPG

Call EPG.

▲▼ Flag the broadcast to be recorded.


RECORD button: Programme the recording of a broadcast.
Timer data dialogue is opened.
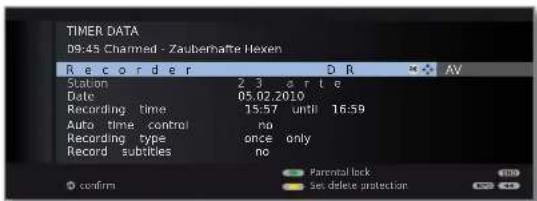


Check the timer data and change it if necessary.
OK Confirm timer data. The broadcast is entered into the timer overview.
See page 93 for explanations of the setting options in the Timer data menu.
In the EPG a red dot is set in front of the title of the programme. If a broadcast is already marked with a red dot, you can re-delete the programmed timer entry using the RECORD button. The red dot disappears.
Digital Recorder
Programming a timer recording via teletext
Call the station on which you want to make a timer recording.

TEXT: Call teletext.
If HbbTV is offered by the channel, then the MediaTek/HbbTV text opens up (see page 80).
In this case, pressing the TEXT button again opens the "standard" teletext/videotext.

RECORD button: Call first programme preview page.
If not possible, define the preview page in the Teletext menu → Settings → Preview page.

Green button: Select the programme preview page which contains the programme which you want to record.

▶▲ Flag the time at which the broadcast starts.
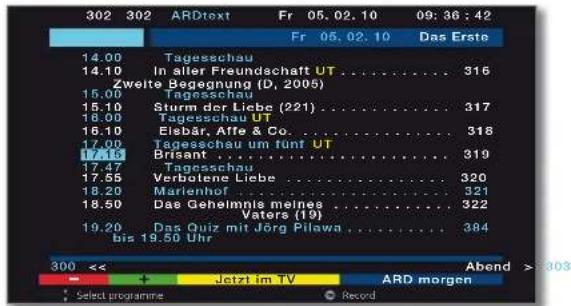
OK Programme the recording of a broadcast.


Check the timer data and change it if necessary.
Check the recording time and date for broadcasts which last past midnight or begin the following day. The data from the teletext may not be complete.

OK Confirm timer data. The broadcast is entered into the timer overview.
See page 93 for explanations of the setting options in the Timer data menu.
Programming a timer recording manually

Call DR-archive.


Red button: Call New entry.
SelectRecording
OK Call Recording wizard


SelectManual
OK Start programming.


▲▼◄► Select the station or connection socket to be recorded.
OK Accept.


Check the timer data. Enter the date and recording time in any case.
OK Confirm. The broadcast is entered into the timer overview.
Digital Recorder
If a DVD recorder was selected as a recording source, start playing the connected device manually from the beginning of the entered recording time.
For recording encrypted broadcasts, please also refer to the information on pages 106 and 107.
Explanations of the setting options in the Timer data menu
| Recorder | Select the recorder that is to be used. Select DR here to select the Digital Recorder. |
| Station | (only available when the selected station can be received via different signal sources, e.g. DVB-T and DVB-S)Select the signal source for the recording. |
| Date | Date of recording. |
| Recording time | Time of the recording. |
| VPS | (only available for some analogue stations, see also page 106).Use VPS data for analogue stations, yes / no. |
| Auto time control | (only available for some DVB stations and when recording via EPG, see also page 106).Use automatic time control, yes / no.⇨ Auto time control must be set to yes to use UK FreeView+ functionality. |
| Descrambled recording | When recording scrambled stations, you can define here whether the station is to be descrambled during the recording, if possible. If you select yes, you cannot watch another coded station during recording because the CA module is used for the recording.Hint: Select yes if you do not want to watch another coded station during recording. You are then saved a subsequent descrambling.⇨ For a direct recording (page 89) the presetting is taken from the Digital Recorder menu → Descrambling at DR continuous operation (page 85).⇨ When recording from CI Plus scrambled programmes the auto time control cannot be used due to technical reasons, if here yes is chosen. |
Explanations of the setting options in the Timer data menu (continued)
| Decoding overnight | (only with presetting Descrambled recording → no).If you choose the setting yes, the programme will be automatically decrypted at 02.00 the following day (CA module must be plugged in). Choose no if you would like the decryption to take place at another time. Enter the decryption time of your choosing with the remote control. |
| Programme provider PIN | (only for recording CI Plus protected broadcasts)Enter the CA module's parental-lock PIN. Refer also to page 107. |
| Recording type | Select once only, Mon-Fri, daily or weekly. For timer recordings via EPG Serial is available in addition. |
| Record subtitles | Select whether broadcast subtitles are to be recorded too. ➔ For a direct recording (page 89) the presetting is taken from the Digital Recorder menu → Record subtitles at DR continuous operation (page 85). |
| Lock movie | Only allow later playback of this recording after entering the PIN number (child lock). Press green button. ➔ If a PIN still hasn't been entered under TV menu → Settings → Parental lock, the Parental lock will at first be activated. |
| Set delete protection | Protect against automatic deletion by the Delete Manager. Press yellow button. |
Digital Recorder
Delete programmed timer entries
Use this function in the timer overview if you want to delete recordings already programmed or end a running timer recording.

Call DR-archive.


Red button: Call Timer list.

▲▼ Mark the timer to be deleted.
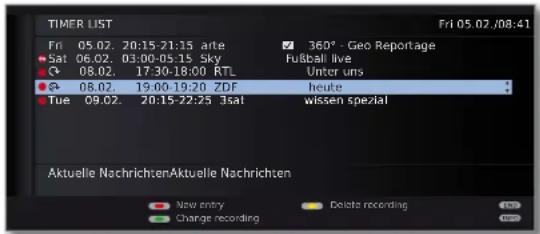
Yellow button: Delete timer entry.


OK Confirm.
The letters of a timer currently active are red. If you delete this timer, the recording is stopped.
The Delete Manager
The Delete Manager always makes sure there is enough memory space on the hard disc for new recordings.
When the capacity of the hard disc is almost exhausted the old recordings are deleted.
Recordings which have been protected with a delete protection (see page 102) are not deleted by the Delete Manager. However, you can still delete these recordings manually.
To avoid data loss, we recommend copying important recordings to a rewritable DVD.
Delete the recordings from the Digital Recorder after copying.
Loewe is not liable for data loss from the Digital Recorder's hard disc.
Record conflict
If you wish to programme a new recording which overlaps an timer recording already saved, the Recording conflict dialogue will open. Here you define whether only one or both recordings are to be made.
If you decide for both, you have to state which of the two programmes is to be recorded fully.
Other ways of solving this recording conflict:


Green button: Change the timer data of the individual programmes.

END: Reject new timer. The older timer entry is retained.
Digital Recorder
Archive playback

Call DR archive / Video archive.

The remaining free space on the storage device is shown at the top right-hand corner.
The specified free capacity is an estimated value. The exact remaining capacity of the hard disc depends on the broadcasts recorded in future and on the recording quality set in the case of analogue broadcasts (see page 85).
The progress bar shows you how much of the recording has been watched.
If other programme data is available from EPG or teletext these are shown below the archive list for the entry just flagged. Other information about the recording can be called with the TEXT button, if this is offered.
Blue button: Change sorting of the recordings.
Green button: Sort recordings by date.
Yellow button: Sort recordings alphabetically.
Blue button: Sort recordings by station.

Back to overview. The sorting last selected is retained.
Explanations of the symbols in the archive
00:17
Archive entry with active replay (page 98).
Archive entry with set parental lock (page 101).
Archive entry with set delete protection (page 102).
Archive entry with manually set bookmarks (see right column).
Coded archive entry.
CI+ CI Plus coded archive entry.
Archive entry is entered for transferring/copying in the timer overview (see page 98, Copying recordings to a connected recorder).
Archive entry is entered for descrambling in the timer overview (see page 99, Descramble scrambled recording).
Playing from the archive

▲▼ Select the recording.
OK Start playback.

The CA module with Smart Card must be plugged in when playing recordings which are still coded.
Settingbookmarks
While playing an archive recording, you can set bookmarks.

PLAY button (press for a little longer): Set bookmark.
You will see a screen message. The drive display is then faded in and you will see the set bookmark above the bar for the playback. You can set up to 15 bookmarks per recording.
DO:42

Automatically set bookmarks are white. Manually set bookmarks are blue.
Jumpingtobookmarks

INFO: Show status display.
Blue button: Skip to next bookmark.


Red button: Skip to previous bookmark.
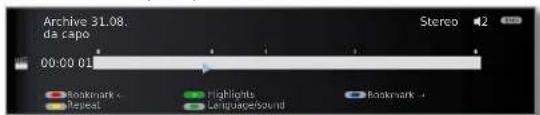
Deleteindividualbookmarks

Red or blue button: Jump to the manually set bookmark to be deleted.


Press PLAY button for a little longer: Delete bookmark.
Digital Recorder
When playing coded recordings, some of the following functions might only be possible with limitations.
Playinghighlights (1)
If there are manually set bookmarks in the current playback, they can be played as highlights. 30 seconds before and after the set bookmark are played. Highlights will be replayed sequentially according to the markings.

INFO: Show status display.


PLAY button: Replay Highlights

As long as the status display is shown:

Blue button: Jump to the next highlight.

Red button: Jump to the previous highlight.
PLAY button: Jump to the next highlight (also possible without status display).

STOP button: End highlight replay.
Further information concerning highlight playback can be found on page 100.
Jumping
By pressing button ◀ or ▶ you can skip through the broadcast.

▶ Jump forwards.


◀ Jump backwards.
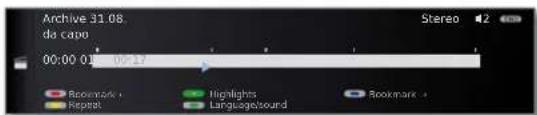
Setting the jump distance: see page 85.
^1 only for TV sets with DR+.
GB - 96
SmartJump
Smart Jump allows you to search quickly for certain scenes of a recording. You will find more about this on page 87.
Fast forward and rewind
During time shift viewing you can fast forward and rewind at three different speeds. Sound is not audible during winding. You will find more about this on page 88.
Pause (freeze picture)

PAUSE button: Switch to freeze picture.


PLAY button: Continue playback.
Slowmotion
At an active pause (freeze frame) you can select from four slow motion speeds (for wind/rewind). There is no sound during slow motion replay.

PAUSE button: Change to freeze frame



Press ▶ or ◀ briefly

Increase speed:
Press button several times briefly.

The speed increases every time you press the button until eventually switching back to the initial speed.
Digital Recorder
Deleting parts of the recording
You can delete sections of a recording from the current position within the film to the beginning or to the ending.

PAUSE button: During archive playback press at the point from which, to the start or to the end, the archive recording is to be deleted.


Yellow button: Call Delete/hide.


Red button: Select Delete from here to start.
Green button: Select Delete from here to end.


OK Confirm delete.

In this case, 11 min were deleted from the end of the broadcast so that the recording length is then just 52 min.
Or:

Red or green button: Abort delete.
Hiding sections of the recording
You can hide sections of an archive recording. The hidden parts are skipped in the future playback and when copying to a connected recorder.

Press the PAUSE button at the point of the archive play-back where the hide is to begin.



Yellow button: Set the start of the section to be hidden.


PLAY button: Continue playback or


◀◀ skip/wind to the point where the hide is to end.


The hidden area of the recording is shown hatched in the bar. It will be skipped in future during playing.
If in the settings in the Digital Recorder menu → Inform about hidden sections → yes is set, you will see a screen message, if the hidden area has been reached during the playback.

Blue button during the screen message: Show hidden area again permanently.
Digital Recorder
Deletingbookmarks
You can globally delete all manually set bookmarks.
→ Manually set bookmarks are blue, automatically set bookmarks are displayed in white.

PAUSE button: Change to freeze picture.


Yellow button: Call Delete/hide.


Blue button: Delete manually set bookmarks.

PLAY button: Continue playback.

Automatically set bookmarks are not deleted.
In addition, you have the option of deleting the bookmarks via DR archive → Delete/copy (see page 100).
Repeat playback of recording
You can repeat recorded broadcasts and hence play them in an infinite loop.

INFO: Show status display.

Yellow button: Repeat film.

You will see a circular arrow on the left of the status display and in the archive after the name of the broadcast (see page 95). The function remains set for this broadcast even if the playback is interrupted.

Yellow button: Switch off repeat function again.
Copying recordings to a connected recorder

Call archive.

▼▲ Flag the recording to be copied.

Yellow button: Call Delete/copy.
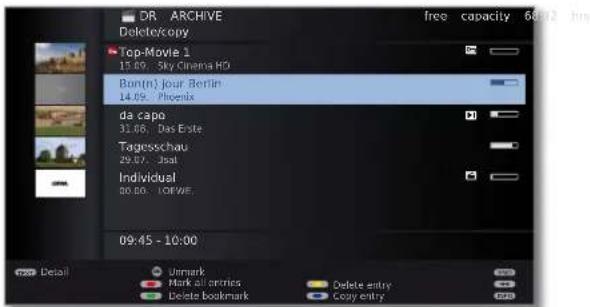

▼▲ Select others if necessary and OK mark entry.
Or:

Red button: Mark all entries.
→ Titles to be copied are displayed in blue.

Blue button: Call Copy entry
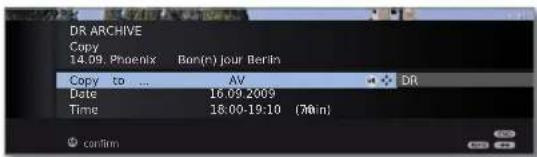

▶ SelectAV in the copy menu.
Should be copied over later, change date and time.
OK Confirm.
You will see the archive again. In front of the date of the recording(s) to be copied, you will now see a red point for the programmed copying.
The status of copying assignments in progress/pending can be seen in the timer overview
You cannot watch a DVB station whilst copying. The TV set can, however, be switched off to the standby mode. It is best to copy at night when the TV is not in use.
Digital Recorder
Copy recordings onto an external hard disc
You can also copy programmes onto a external hard disc, and archive them or make them available to other Loewe LCD TV sets (even those without DR+).

Call DR archive / Video archive.
Select titles that you want to transfer as described on page 98.

Blue button: Call Copy entry.


▶ SelectUSBx in the Copy menu.
OK Start copying.
- Copying to an external hard disc takes place in the background and at a significantly higher speed. Contrary to copying recordings to a connected recorder (see page 98), there are no selection restrictions here regarding the stations. You see a screen message, when copying has finished.
The status of copying assignments in progress can be seen in the timer overview.
The TV set must not be switched off with the mains switch during the copying!
Delete programmed descrambling
You can delete a programmed descrambling of scrambled recordings at any time.
DR archive is displayed.
▼▲ Mark the desired programme (red dot with key symbol).


The red dot with key symbol and the entry in the timer list are deleted.
Descramblescrambledrecording
You can start descrambling scrambled recordings manually at any time ^1 . The CA module with the smart card must be inserted at the time of descrambling. Descrambling should be done as soon as possible because the probability that the code may become invalid increases with the time between recording and descrambling.
Proceed similarly to copying from the archive:
DR archive is displayed.
▼▲ Mark recording to be descrambled.
→ Scrambled recordings are marked by Ⓞ in front of the bar.

Yellow button: Call Delete/copy.

Blue button: Call Descramble entry.
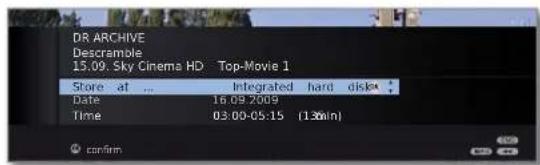

Select Integrated hard diskUSBx ^4
Determine date and time of the descrambling.
OK Confirm.
You see the DR archive again. You will see a red dot with key symbol for the programmed descrambling in front of the date.
No other DVB station can be watched during descrambling. But the TV set can be switched off to standby mode. It is best to descramble at night when the TV is not in use.
You will find the recording descrambled in the DR archive after successful descrambling (without a 📄 before the bar).
The time and date of the descrambling can be changed subsequently in the timer list (see page 91).
Digital Recorder
Viewing highlights from the archive

Call DR archive


▶ Highlight recording with manually set bookmarks.
Recordings with manually set bookmarks are highlighted with ▶1.

The highlights are played in sequence.
Deleting recordings from the archive

DR archive is displayed.
▼▲ Flag the recording to be deleted.

Yellow button: Call Delete/copy.
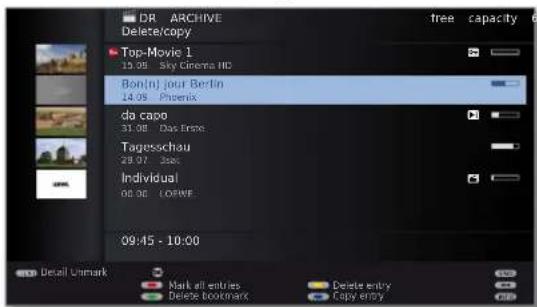

▼ ▲ Select others if necessary and OK confirm.

Titles to be deleted are displayed in blue.

Yellow button: Call Delete entry.

OK Confir rm delete.
The recording(s) is/are deleted.
The DR archive is displayed again.
Deletebookmarks

DR archive is displayed.
▼▲ Select the recording for which you want to delete the bookmarks.
→ Recordings with manually set bookmarks are flagged with ▶ in front of the bar.

Yellow button: Call delete/copy


▼ ▲ Select others if necessary and OK confirm.
Or:

Red button: Mark all entries.
The selected titles are displayed in blue.

All manually set bookmarks from the marked entries are deleted. Automatically set bookmarks are not deleted.
Digital Recorder
Changing the title of an archive

DR archive is displayed.
▼▲ Select the title to be changed.
Green button: Call Edit/protect.
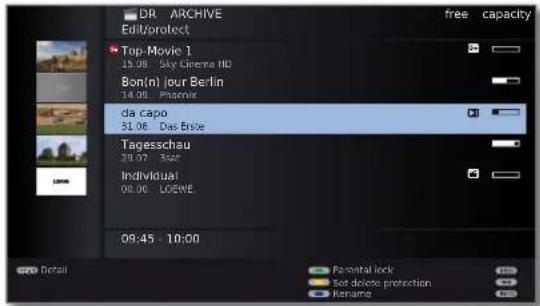

Press the blue button for Rename.
Underneath the first letter of the title, you will see a line which indicates the current input position for the letter.
▶ Input position to the right.
Input position to the left.

In put the characters one after another (if entering using the number buttons on the remote control, use it as if it were a telephone keypad; see page 129 for the exact assignment of the buttons).

Yellow button: Delete character to the left of the cursor.

Green button: Switch between capital letters and small letters.

OK Conclude the entry.
This saves the change permanently.
Locking/unlocking a movie (Parental lock)
You can lock movies that your children are not permitted to view, for instance. Viewing is then only possible if the PIN number has been entered beforehand.
DR archive is displayed.
Green button: Call Edit/protect.

▼ ▲ Mark the title that is to be locked.


Green button: Call Parental lock.


Enter your access code with the numeric buttons of the remote control. If you define an access code for the first time, remember it well. Confirm the new access code with OK. The DR archive opens again.
Green button: Lock movie.
▲▼ Select others if necessary.

Green button: Lock movie or Unlock movie again.

A lock symbol 🔒 will be displayed before the bar in the case of locked films.
Digital Recorder
Viewing a locked movie

Call DR archive


▼▲ Mark locked film, OK View film.
The covers of locked films cannot be read. The detailed information for the recording cannot be called up. The cover (for archive view with covers, see page 85) is replaced by a neutral image with a key symbol. In addition, the entry receives the symbol 🔒 at the end of the line.
The system requests you to enter your access code (PIN). After entering the access code the playback of the movie starts.
Determine cover picture ^1
You can display cover pictures for your recorded broadcasts in the DR archive (see page 85). The covers can be freely determined by you during an archive replay:


Jump / wind to the desired location in the recording.

PAUSE button: Switch to freeze picture.


Blue button: Adopt displayed freeze frame as cover picture.
The image will be displayed next to the broadcast in the DR archive in future (see also page 95).

PLAY button: Continue playback.
^1 only for TV sets with DR ^+ .
GB-102
Setting/cancellingdeleteprotection
You can provide films with a delete protection to prevent an automatic deletion by the delete manager (see page 94).
DR archive is displayed.


Green button: Call Edit/protect.

▼ ▲ Select the title for which you want to set/cancel a delete protection.


w button: Set/Cancel delete protection.

▼ ▲ Select others if necessary.


Yellow button: Set/Cancel delete protection.

The symbol 📋 appears in front of the bar when the delete protection is activated.
Digital Recorder
DR+ Streaming
You can make your DR archive entries accessible so that other Loewe TV sets can view them via the network. It is also possible to interrupt a current broadcast and "take it" to another TV set (Follow me function, see page 104).
To use DR+Streaming, at least two Loewe TV sets are required with SL 1xx chassis (at least one of which has an integrated Digital Recorder). The TV sets also need to be connected via a wireless connection (WLAN) or a cable connection (e.g. Ethernet, PowerLine).
DR Streaming must be activated in the DR+ Streaming settings (see below).
Archive entries can only be hosted or permitted to be viewed by TV sets with an integrated hard disc (DR+). Playback of archive entries that have been permitted to be viewed can take place on all TV sets with Chassis SL1xx (with or without DR+) on the network.
The following functions would require write access on the device that is permitting the programme to be viewed, and are therefore not available when viewing a DR archive entry over the network (see right column): child protection, delete protection, rename function, delete entry or bookmark, set bookmark, partial delete or hide of the recording.
DR+ Streaming settings
Prior to the first use of DR+ Streaming, a number of settings are required.
→ Digital Recorder menu is open (page 85).

◀ ▶ Select DR+ Streaming settings, OK open settings options.
For explanations of the settings see page 86.
Play DR archive entry via network

Call DR archive / Video archive.
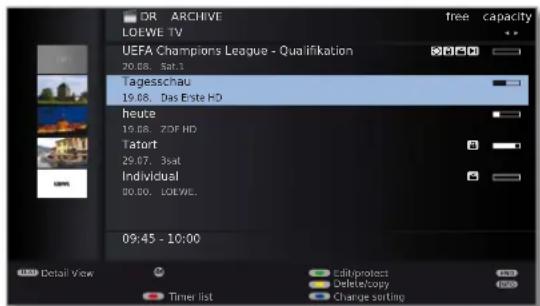

Select required TV set..
The name of the accessible TV set is shown in the second line (in this example: LOEWE TV).
▼ ▲ Mark the required archive entry, OK view archive entry.
See page 95 for further information.
Extended standby mode with DR+ Streaming access
Switching off the accessible TV set ends access to the DR archive. You can, however, place your TV set in an extended standby mode to enable access to the DR archive even when the TV set is switched off.

MEDIA: Open MediaPortal.


◀ ▶ ▲ ▼ Select DR+ Streaming, OK call.
You will see a message on the screen. After approximately 20 seconds the TV set will enter extended standby mode. The DR archive will then be accessible within the network for the period of time set in the DR+Streaming settings (see page 86).
Digital Recorder
Copy recordings from an accessible TV set
You can copy archive entries from an accessible TV set via a network to the integrated hard disc, or to a storage medium connected to the TV set's USB.
At the target TV set:
Call DR archive.

Select required accessible TV set.
Select titles to be copied as described on page 98.

Blue button: Call Copy entry.

If there are multiple storage mediums available, select the one required.
OK Start the copy procedure.
- Copying to the integrated or external hard disc takes place in the background and at a significantly higher speed. Contrary to copying recordings to a connected recorder (see page 98), there are no selection restrictions here regarding the stations. You see a screen message, when copying has finished.
The status of copying assignments in progress can be seen in the timer overview.
During copying, neither the accessible TV set nor the target TV set may be disconnected from the mains! Copying will otherwise be interrupted and the recording may then be unusable.
Follow me function
The Follow me function enables you to interrupt a current broadcast and to continue viewing at an alternative TV set from the point of interruption.
DR continuous operation is activated (page 85).
Share the DR archive with other TVs (see page 86) is activated.
Using the DR archives of other TVs (see page 86) is activated at the target TV set.

Press PAUSE button.

The TV image becomes a freeze frame and the DR status display appears.

Yellow button: Activate Follow me.
You will see a message on the screen. An archive recording starts in approximately 20 seconds. The broadcast is adopted into the DR archive. The set switches off automatically.
The recording TV set will make the broadcast available to the network from now. Open the DR archive / Video archive of the TV set on which you wish to view the broadcast. The broadcast appears in orange during the current recording.

To play accessible broadcasts on other TV sets, see page 103.
For further information on general operation see page 95.
Digital Recorder
Checking the hard disc
You can check the integrated hard disc of the TV set ^1 , e.g. if problems with the Digital Recorder function occur.


▶ Select Settings,
▼ switch to the menu line below.
Select Miscellaneous,
▼ switch to the menu line below.
▶ Select Check integrated hard disk, OK activate.


After the check, a message will appear on the screen showing the results of the check and tips on how to resolve any problems that are present, should there be any.
After the check, the TV set must be re-started.
Or:
END: Cancel the operation.

If problems were detected when the hard disc was being tested (see left column), re-formatting may be able to remedy the problem. Additionally, you can re-format the hard disc in order to quickly and easily delete all the data stored on it.
Attention!
Formatting of the hard disk deletes all the data saved on it!


Select Settings,
▼ switch to the menu line below.
▶ Select Miscellaneous,
▼ switch to the menu line below.
Select Format integrated hard disk ^(1) or Format external hard disk,
OK activate.


→ After the formatting, the TV set must be re-started.
Or:

END: Cancel the operation.
The TV set uses the hard disc file system FAT32. The file system NTFS is not supported. PCs with the operating system Microsoft Windows only support a total hard disc volume of 32GB when formatting on FAT32. Larger hard discs are automatically reduced in their capacity by this. Format external USB discs that you wish to use with the TV set as described above.
Digital Recorder
VPSandautomatictimecontrol
Your TV set can use the supporting technologies VPS (Video Programming System) and automatic time control for recording a broadcast.
VPS serves for monitoring the start and end time of the broadcast with analogue stations. The VPS time indication is compared by the digital recorder with the start time programmed by the user. If both times correspond the recording is started. However, VPS is not supported by all stations.
The automatic time control assumes the corresponding monitoring of the start and end time for DVB stations. The recording is started at the beginning of the broadcast and switched off at the end, even if the start and/or end time have been changed by the programme provider. Broadcast interruptions are also taken into account. However, the automatic time control is not supported by all stations.
DVB Common Interface standard (CI)
If a programme has been recorded coded, the decoding process is carried out automatically the next night in the standby mode (when timer data settings do not differ). Please note that the TV set may not be switched off at the mains overnight and that the CA module with SmartCard must be inserted in the CI slot of the TV set.
If the recording is not decoded fairly soon after decoding, it may not be possible to decode it at all. The longer the time between recording and decoding, the greater the probability that the code is no longer valid.
→ Scrambled hard disc recordings appear in the timer list until they are descrambled (page 91).
You can also start decoding manually (see page 99).
Your programme provider may not support later (time offset) descrambling.
You can have programmes from scrambled stations descrambled already in DR continuous mode. This saves you having to decode directly recorded scrambled programmes later. An appropriate CA module with SmartCard must be inserted in the TV set's CI slot for this.
The playback of encrypted programmes is strongly dependent on which CA module is used. The playback of encrypted recordings may sometimes not be possible, or only to a limited extent.
Hint: When possible, record unencrypted programmes or unencrypt them as soon as possible.
Selection possibilities in the CA module menu and performance capability of your CA module depend on the type of module used and the installed software. Consult the manufacturer of the module if you have any questions.
Digital Recorder
DVB Common Interface Plus standard (CI Plus)
CI Plus is an advanced development of the DVB Common Interface Standard. CI Plus slots are in principle downward compatible to the previous CI standard, i.e. CA modules and Smart Cards according to the past CI standard can continue to be used in CI Plus slots, as far as the programme provider permits this.
The regulations of the past standards (see page 27) likewise apply to CI Plus. There are however further additional regulations.
Programme providers, who use the CI Plus standard, can assign different rights for their broadcast programmes. For instance, the programme provider can restrict or completely prevent recording or later watching of an encoded programme. If there are such regulations, these also apply to time-shifted watching of television programmes.
A screen message informs you of this fact, if you would like to record such a programme. Recording is carried out in such a case (an appropriate entry is displayed in the DR archive), later watching of the programme is however not possible at all or only for a limited period (e.g. 10 days).
A possible time limitation of the playback will also appear in the corresponding entry in the DR archive.
The provider can also prohibit later decoding of a recorded encoded programme.
All restrictions mentioned here are the responsibilities of the broadcaster. The TV simply values the broadcaster set signalling as neutral.
Furthermore, the programme provider can prevent external copying of protected programmes, e.g. on a DVD recorder (also after possible decoding).
It could be necessary to enter the parental protection PIN of the CA module when programming the data, if you want to record a CI Plus protected programme, which has been protected against viewing by minors. The secret number of the TV set is required for watching the programme later.
The appearance of the CA module menu of CI Plus can deviate from the normal appearance of the TV menu.
Software update for CI Plus capable CA modules
Every now and then, there will be new system software for your CA module software. There are two software update types.
Recommended update:
Information on an available update is displayed. You can either run this or cancel the procedure. If you do not install the update, the information will reappear in regular intervals until the update has been installed.
Forced update:
Information on an available update is displayed. The module does not decode any more until the update has been successfully implemented.
Troubleshooting (CA module)
The following information can help, if problems should occur when running a CA module:
Switch the TV set off to the standby mode. Remove the CA module from the TV set. Switch the TV set off completely. Wait a few seconds. Reinsert the CA module. Switch the TV set on again.
If errors continue to occur, make a note of the displayed two-digit error code (only for CI Plus capable CA modules). Contact your technical customer service. You will find the service addresses on page 154.
External devices
Settings for the connection of external appliances are made in this menu.


SelectConnections,
▼ go to the menu line below.


Select the desired setting.
Sound components The sound components wizard helps you to configure the components which are used to reproduce the TV sound. You will find a description of the sound components wizard on page 115.
Antenna DVB Here you can set the parameters of the DVB-T and the DVB-S ^1 antenna with the antenna wizard. The setting options of the DVB antennas are described in the first time operation routine (from page 22).
AV connecting settings See right column for explanations.
Miscellaneous See page 109 for explanations.
AV connection settings
In the AV connection settings menu the parameters for the AV and AVS connection sockets can be adapted.
Calling AV connection settings


▶ SelectConnections,
▼ go to the menu line below.
▶ SelectAV connecting settings,
▼ go to the menu line below.

▶ Select the desired setting.
Device at Indicate here whether a set and, if yes, which one is con-connection AV nected to the AV socket.
AV standard You set the AV standard of the connected appliance to AV or AVS here.
Normally you leave the setting on Automatic. If the standard of the connected appliance is not detected automatically, select the right standard.
Ask your dealer or consult the operating manual of the connected appliance if necessary.
Signal type You set the signal type of the device connected to AV or AVS here. Normally, you should leave the setting at Automatic; otherwise select a suitable signal type. You can find out more from your dealer.
Allow switching voltage If this function is activated and you switch an AV device (not at AVS) that outputs a switching voltage to playback, its picture and sound will be played immediately on all TV station slots.
External devices
Connections – Miscellaneous
Various settings (e.g. Digital Link, Decoder etc.) in connection with external appliances are made in this menu.
Calling up other settings for connections


SelectConnections,
▼ go to the menu line below.
▶ SelectMiscellaneous,
▼ go to the menu line below.

▶ Select the desired setting.
Digital Link Plus
With this function the station data of the TV set can be transmitted to a connected Digital Link Plus capable recorder. Only the station data of analogue TV stations can be transmitted.
Decoder stations
Here you can identify analogue stations with encoded content as decoder stations and set the mode of the sound encoding of encoded audio signals, so that these are automatically decoded by a decoder connected to AV. Menu item only available if a Decoder has been selected as Device at connection AV (see page 108).
Remote TV switch on via Digital Link
Here you can select whether the TV set is to switch on automatically from Standby mode, if a tape/disc is to be played or a screen menu displayed from Digital Link HD or Digital Link Plus-enabled devices which are connected to HDMI or AV inputs (see also page 110 and 112).
Assign digital audio input
You can assign the digital audio input socket (AUDIO DIGITAL IN) to an AV input (AV, HDMI, PC IN etc.) here (see page 121).
Gaming mode
Here you can set a faster display of your activities on the screen for various inputs of the TV set, e.g. for games consoles (see right hand column).
Gaming mode
For the inputs of your TV set on which game consoles, PC applications or even Karaoke machines are operated, we recommend you to activate the Gaming mode. Your activities are then displayed quicker on the screen by reducing the complex picture improving techniques. This mode can be set separately for every input of your TV set.


SelectConnections,
▼ go to the menu line below.
Select Miscellaneous,
▼ go to the menu line below.
◀ ▶ Select Gaming mode, OK call.
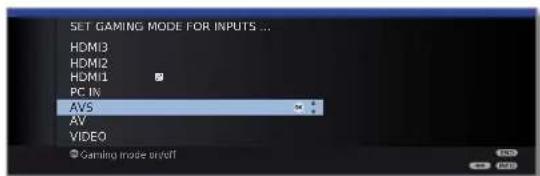

▲▼ Select socket,
OK Gaming mode for selected socket on/off.
You can recognise AV connections with set Gaming mode by the symbol ☑ after the connection name.
Switching Games mode on/off via the status display
You can also switch the Games mode for the selected AV input on and off via the status display.

Call AV selection.

▲▼ Select desired connection, OK switch over.

INFO: Call up status display (if this is no longer shown after switching to the AV connection).

Green button: Switch Gaming mode for selected connected on or off according to status.
External devices
Devices to the connections AV/AVS
An additional appliance such as a DVD player, VCR/DVD recorder etc. can be connected to the TV set at the Euro-AV socket AV (see page 11).
The AV input AVS (see page 11) offers the possibility of connecting a digital camera or a Camcorder for example.
The AV sockets can process different signal types. Which signal type your accessory device provides can be found in the operating manual of the appropriate device.
Owing to the large number of AV devices available on the market, we can only mention a few examples for the connection of accessory equipment to the AV sockets here.
If the sound of the device connected to an AV socket is to be transmitted digitally, a cinch cable must be plugged between the coaxial digital output of the accessory equipment and the AUDIO DIGITAL IN socket of the TV set. In addition, the digital audio input must be assigned to the appropriate AV socket.
The digital audio input can be assigned to the appropriate AV socket by the TV menu → Connections → Miscellaneous → Assign digital audio input (see page 121).
Remote TV switch on via Digital Link
You can select whether the TV set is to switch on automatically from Standby mode if a disc is played or a screen menu displayed on a Digital Link Plus-enabled device connected to AV.
You can find the settings in the TV Menu under Connections → Other → Remote TV switch on via Digital Link (see also page 109).
Connecting a DVD player to the TV set
A DVD player has been selected in the TV Menu under Connections → AV connecting settings → Device at connection AV (see also page 108).
Switch off all equipment before connecting.
Connect the Euro-AV output of the DVD player to the AV socket of the TV set.
Use a fully equipped Euro-AV cable (available from your dealer) for this.

Connection example of a DVD player
Playback from AV device
If the device at AV supports the Digital Link Plus functionality or if in the TV menu → Connections → AV connecting settings → Allow switching voltage → yes, the TV set will automatically switch to the corresponding AV input after starting the replay at the AV device.
The AV input can also be called manually, however.

Call AV selection.


▲▼ Select AV,
OK switch over.
Start playback on the connected device.
External devices
Connecting a DVD recorder to the TV set
A DVD recorder has been selected in the TV Menu under Connections → AV connecting settings → Device at connection AV (see also page 108). Switch off all equipment before connecting.
Connect the Euro-AV output of the DVD recorder to the AV socket of the TV set.
Use a fully equipped Euro-AV cable (available from your dealer) for this. If you want to receive and record analogue stations with the receiver (tuner) built into the recorder, the recorder must be looped into the aerial cable.
Connect the DVD recorder as shown in the connection example below.

Connection example of a DVD recorder
If you want to record DVB stations with an external recorder, the internal receiver of the TV set must be used (see Timer recording with external devices on page 124).
Playback from AV device

Call AV selection.


▲▼ Select AV, OK switch over.
Start playback on the connected device.
Connecting Camcorder/camera
Switch off all equipment before connecting.
Connect the AV output of the camcorder to the sound input sockets AUDIO IN L (white) and AUDIO IN R (red) and the AVS connection of the side AV sockets of the TV set.
Use the AV cable enclosed with the camcorder for this.
Some camcorders only supply an FBAS signal instead of an S-Video signal at the AV output. In this case use the VIDEO IN input (yellow).
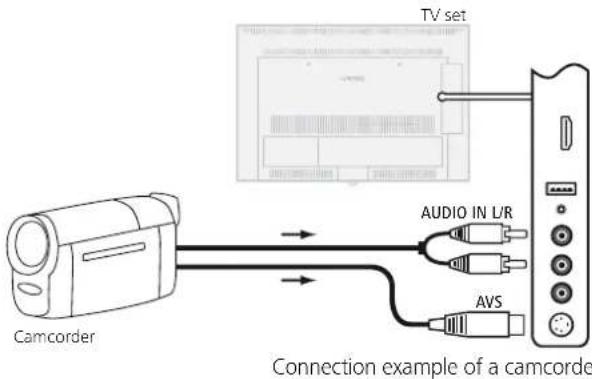
If your camcorder has an HDMI output, you can also connect the appliance via the HDMI socket HDMI3 on the side (see connections page 11 or Devices to the HDMI connections page 112).
Playback from AV device

Call AV selection.


▲▼ Select AVS, OK switch over.
Start playback on the connected device.
External devices
Devices to the HDMI connections
The HDMI connections (High Definition Multimedia Interface) allow the transmission of digital video and audio signals from a player (e.g. DVD player, DVD recorder, Blu-ray player, game console or Set-Top-Box) via a single cable.
The digital video and audio data are transmitted without data compression digitally and therefore lose none of their quality.
A maximum of five devices can be connected in cascade to every HDMI socket. The devices are arranged in the AV menu and in the station list below the appropriate HDMI socket. If the respective device sends its own device name, this appears in place of the connection name.
Your TV set can show 24p films, which are output from a connected HDMI player (e.g. Loewe BluTech Vision Interactive) optimally (see glossary, page 144).
Digital video signals from a DVI player can be also be reproduced by the HDMI connection using a DVI/HDMI adapter cable. The sound must be piped in additionally. However, the sound must then be supplied additionally. HDMI and DVI both use the same copy protection method HDCP.
Connecting the device
Switch off all equipment before connecting.
Connect the device by an HDMI cable (Type A, 19-pole) to one of the HDMI sockets of the TV set.
An HDMI device is connected to the side HDMI socket (e.g. camcorder) in the same way as shown in the figure.

Connection example of an HDMI device (e.g. Blu-ray Player)
If a DVI/HDMI adapter cable is used, the corresponding sound can be piped through the AUDIO IN (analogue) or AUDIO DIGITAL IN (digital) socket on the TV set (see also page 121).
Playback from the device
If the device at HDMI supports the Digital Link HD functionality, the TV set will automatically switch to the corresponding HDMI input after starting the replay at the HDMI device.
The HDMI input can also be called up manually:

Call AV selection.


▲▼ Select HDMI socket.
With Digital Link HD-capable devices the device name may possibly appear in place of the connection name.
OK Switch over.
Start playback on the connected HDMI device. The best possible format for the picture is detected and set automatically.
Remote TV switch on via Digital Link
You can select whether the TV set is to switch on automatically from Standby mode if a disc is played or a screen menu displayed on a Digital Link HD-enabled device connected to HDMI1 or HDMI2.
You can find the settings in the TV Menu under Connections → Other → Remote TV switch on via Digital Link (see also page 109).
External devices
Adjust Geometry (only possible with certain signals)
This allows you to shift the picture (horizontally and vertically) so that it fills the entire screen.
When connecting a PC to an HDMI socket of the TV set, set the output signal at your PC beforehand so that it corresponds to one of the signals in the table on page 135.


◀ ▶ SelectPicture,
▼ go to the menu line below.
◀ ▶ Selectmore ..., OK call.
◀ ▶ SelectPC IN display,
▼ go to the menu line below.


Select the desired setting,
▼ go to the menu line below.
Make settings.
Digital Link HD
Digital Link HD (HDMI CEC)
The Digital Link HD (HDMI CEC) system operation allows Loewe television sets to transmit the remote control signals via the HDMI connection of a TV set to compatible HDMI devices, such as e.g. Loewe AudioVision. You can therefore set up a concealed CEC capable HDMI device.
Concealed installation of HDMI devices
For this, first assign the HDMI CEC function with Code 22 to the required device button (REC, DVD or AUDIO) as described on page 125.
Now assign the Digital Link HD function to the used HDMI device.
Assign HDMI device
The CEC capable HDMI device is connected to one of the HDMI sockets of the TV set and switched on.
REC DVD AUDIO Press required button for 5 seconds.
A selection menu appears on the TV set.


▲▼ Select required device from the list.
OK Adopt.
From now on, the commands of the remote control are communicated from the TV set to the HDMI device, if the corresponding device button (REC, DVD or AUDIO) has been pressed previously.
External devices
Devices to the PC IN connection
You can connect a PC to the PC IN socket for example and thus use the TV screen as a monitor.
When connecting a PCs or accessory device to the PC IN socket of the TV set, set the output signal on your PC first so that it matches one of the signals in the table on page 135.
Connecting the device
Switch off all equipment before connecting.
Connect the device to the TV set's PC IN socket with a VGA cable.
Connect the analogue audio signal of the PC to the AUDIO IN jack on the TV set with a stereo cable.
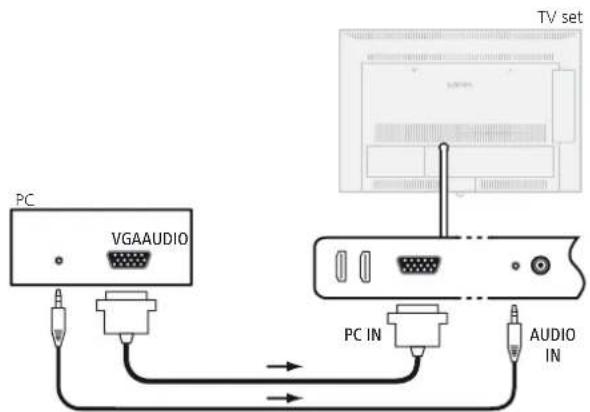
Connection example of a PC
Alternatively, connect the digital audio output of the PC or accessory equipment to the AUDIO DIGITAL IN socket of the TV set with a cinch cable.
The digital audio input can be assigned to the PC IN socket by TV menu → Connections → Miscellaneous → Assign digital audio input (see page 121).
If your PC has an HDMI interface, you can also connect the PC via the HDMI socket to your TV set (see page 112).
Depending on the version of the HDMI connection on the PC, the audio signal is also transmitted via the HDMI connection.
If this is not the case, connect the analogue or digital sound as described above. See the appropriate operating manual for further information about the version of the HDMI interface on your PC.
Playback from the device

Call AV selection.


▲▼ Select PC IN socket, OK switch over.
PC picture adjustment (only possible with certain signals)
In this menu you can set the position (vertical, horizontal) and the phase length of your PC.

MENU: Call TV menu.

▶ SelectPicture,
▶ go to the menu line below.
◀ ▶ Selectmore ..., OK call.
▶ SelectPC IN display,
▶ go to the menu line below.


◀ ▶ Select the desired setting,
▼ go to the menu line below.
◀ ▶ Make settings.
External devices
Sound components wizard
The sound components wizard helps you to configure the components that are used to reproduce the TV sound. For sound reproduction, you can configure the TV loudspeakers, active loudspeakers, loudspeaker systems, Loewe Individual Sound Projector SL ^1 as well as analogue and digital HiFi/AV amplifiers.
TV sets that are equipped with an integrated digital multi-channel audio decoder can output sound signals with up to six channels (5.1 surround sound) via the AUDIO LINK interface irrespective of whether the sound signal comes from an external device (DVD player, Blu-ray player) or from a DVB station.
For settings for loudspeaker systems and active speakers at the AUDIO LINK interface of the TV set, see page 116 onwards.
For sound formats supported by the digital audio decoder, see page 135.
Sound reproduction in TV sets with an integrated digital multi-channel audio decoder

TV speakers Sound reproduction via the built-in TV speakers (factory setting).
Speaker system Sound reproduction via a loudspeaker system or active loudspeakers (see page 116).
HiFi/AV Sound reproduction via an external analogue or digital amplifier audio amplifier (see page 120).
Sound Sound reproduction via a sound projector, e.g. Loewe projector ^(1) Individual Sound Projector SL. For further information, refer to the operating instructions of the sound projector.
HiFi/AV- Sound reproduction optionally via an external analogue amplifier or TV or digital audio amplifier (see page 120) or via the built-speakers in TV loudspeakers. The sound reproduction can be changed using the button ▶.
Sound projector or TV speakers (switchable) ^(1) Sound reproduction optionally via a sound projector or via the built-in TV loudspeakers. The sound reproduction can be changed using the button ▶.
^1 Only with retrofitted serial interface (RJ12) (see page 121 and equipment and upgrade possibilities on page 140).
External devices
Connecting Loewe sound system
Setup
The arrangement of speakers and TV set can look like the illustration below:
The front and surround speakers should be installed symmetrically to the TV set and to your sitting position.
You can place the subwoofer anywhere on the floor. We recommend placing it in front asymmetrically next to the TV set.
If a centre speaker is used, it should be placed centrally below the TV set.
For the settings in the sound components wizard enter the distances of the centre speaker, and the front and surround speakers to your sitting position. This guarantees a natural spatial image of the sound.
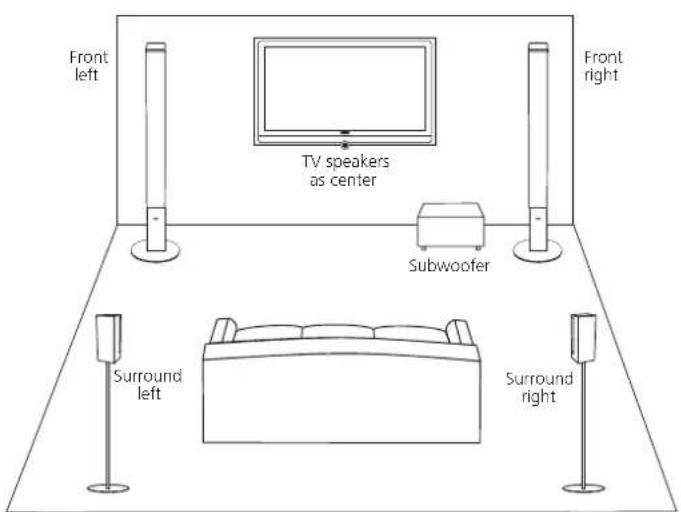
Installation example for a Loewe sound system
Connecting
Switch off all devices before connecting.
Subwoofer with AUDIO LINK interface (see connection diagram):
The subwoofer is connected to the TV set via the AUDIO LINK interface.
Use the AUDIO LINK cable provided with the subwoofer.

Connection Loewe sound system (Subwoofer) to the TV set
Subwoofer without AUDIO LINK interface (not illustrated):
Plug the adapter cable to the AUDIO LINK interface of the TV set. Connect the cinch connections of the adapter cable to the 6-pin cinch connections of the subwoofer.
The cubic plug cable connects the master connection on the subwoofer to the cubic plug of the adapter cable.
The adapter and cubic plug cable are available from your dealer (see Accessories, page 139).
External devices
Connecting active loudspeakers
If you want to use another similar speaker system or active speakers, you can connect these to the AUDIO LINK interface of the TV set with an adapter cable.
A comparable speaker system is connected in a similar way to that described above for "subwoofer without AUDIO LINK interface".
The adapter cable is available from your dealer (see Accessories, page 139).
Connecting active speakers
Switch off all devices before connecting.
Plug the adapter cable into the AUDIO LINK interface of the TV set. Connect the cinch connections of the adapter cable to the connections of the corresponding active speakers.
The cinch connections of the adapter cable are labelled:
R for Front right SR for Surround right
L for Front left SL for Surround left
C for Centre SUB for Subwoofer
The connections on the adapter cable are preamplifier outputs. Therefore, only active speakers may be connected directly to the adapter cable.

flowchart
graph TD
    A["Front left"] --> B["Adapter cable"]
    C["Centre"] --> B
    D["Subwoofer"] --> B
    E["Front right"] --> B
    F["Surround left"] --> B
    G["Surround right"] --> B
    H["TV set"] --> I["Adapter cable"]
    J["Adapter cable"] --> K["TV set"]
    style B fill:#f9f,stroke:#333
    style I fill:#ccf,stroke:#333
Connection of active speakers to the TV set
Adjusting the speaker system
Calling the sound components wizard
→ In normal TV mode, without other displays.

MENU: Call TV menu.

SelectConnections
▼ go to the menu line below.
▶ SelectSound components,
OK calls the sound components wizard.

Sound playback via ... speakers system
Enter here that you want to hear the TV sound over a speaker system. If you connect active speakers, please use the setting Speaker system.

▼ ▲ MarkSpeaker system,
OK to continue.

If nothing has been set yet, the factory settings or otherwise the last set values are displayed.
continued on the next page →
External devices

If you want to set up or change a speaker system:
▶ SelectConfiguration/modification, OK call selection.


▼ ▲ SelectComplete,
OK continue to connect and set the front speakers.


◀ ▶ Select External speakers or TV speakers,
▼ go to the menu line below and
set the lower limit frequency of the external front speakers in 10 Hz steps.

Select the start value of the frequency response of the speakers for the right setting (e.g. 50Hz for the specification "Frequency response 50-20.000Hz"). See the technical data of the speakers for the value.
→ You can replace the external front speakers by the TV speakers if necessary. In this case, select TV speakers. Then transmit the sound of the front speakers.

OK continue to connect and set the surround speakers.
▶ Select yes for external speakers.
If no surround speakers are connected, these can be simulated using the front and centre speakers.
- Go to the menu line below and
set the lower limit frequency of the surround speakers in 10 Hz steps.
→ Select the start value of the frequency response of the speakers for the right setting.

OK continue to connect and set the centre speaker.
Select whether the TV speakers or an External speaker is to reproduce the centre sound or no if no centre speaker is connected.
Select whether the TV speakers or an External speaker is to reproduce the centre sound or no if no centre speaker is connected.
If no centre speaker is connected, the front speakers also transmit the centre sound parts additionally.
for External speakers or TV speakers go to the menu line below and
set the lower limit frequency of the centre speaker in 10 Hz steps.
Select the start value of the frequency response of the speakers for the right setting.

OK continue to connect the Subwoofer.
◀ ▶ yes is the selection for subwoofer.
If no subwoofer is connected, the front speakers additionally transmit the sound parts intended for the subwoofer as far as possible.
External devices

OK continue to set the Distance to left front speaker.
Measure the distances from your listening position to the front, surround, and centre speakers respectively. The digital audio decoder calculates delay times from this for the loudspeaker signals, so that these reach the listener simultaneously.


Set the distance between the left front speaker and your listening position in 10 cm steps.
OK continue respectively to the other speakers and
◀ ▶ adjust the distance.
After setting the distance for the centre speaker ...

OK continue to Adjust speaker level.


▶ Adjust the volume for each speaker.
▼ ▲ Select speakers manually.
For balanced audio reproduction all speakers should be set at the same volume level. A noise signal will be reproduced automatically on each speaker in succession. Adjust every speaker to equal perceived volume from your listening position.

OK continue to Subwoofer phase.
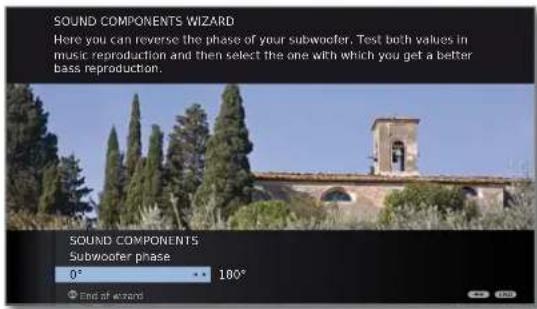
Switch to a station with music with P+/P− or start playback with music on a DVD player.
Test both values (0° and 180°) and select the one with which you get a clearer bass reproduction from your listening position.
OK to confirm the setting and exit the wizard.
This ends the sound components wizard for connecting and setting up a speakers system.
External devices
Connecting audio amplifiers
The sound components wizard permits configuration of different audio amplifiers (stereo amplifiers, surround amplifiers, analogue or digital) with different digital audio formats (Dolby Digital, dts, MPEG, and stereo/PCM). See the operating manual of the audio amplifier for more information.


Select Connections,
go to the menu line below.
Select Sound components.
OK calls the sound components wizard


▼▲ Mark the HiFi/AV amplifier.
OK Proceed.
Select whether the sound is to be transmitted digitally or analogue to the amplifier. Continue, depending on the amplifier, see right column.
Explanations of the setting possibilities:
Settings for the sound projector: See operating manual of the sound projector.
HiFi/AV Select setting when an amplifier is connected and the TV amplifier speakers are not used.
HiFi/AV Select setting when an amplifier is connected and the TV amplifier or TV speakers are used. The sound can be switched between the amplifier and the TV speakers in the listen mode (switchable) selection.
Sound Specify sound formats which can be decoded with the digital formats amplifier (see operating manual of the used amplifier).
Type of Select either stereo or surround amplifier. amplifier
TV loudsp. as centre speaker For every connected surround amplifier, select whether the TV loudspeakers are to be used as centre speaker. If so, establish a connection between the centre output of the amplifier and the centre input of the TV set CENTER IN with a cinch cable.
Attention: Do not use the centre speaker connection of the amplifier, use the centre pre-amp output instead!
Connecting digital audio amplifiers
Continuation of the left column above ...
For digital audio transmission: Select yes.
Connect the digital audio output of the TV set AUDIO DIGITAL OUT with the digital audio input of the amplifier via a cinch cable:

Sound formats, amplifier type and other settings, see explanations of the setting possibilities (left hand column).
Connecting analogue audio amplifiers
Continuation of the left column above ...
For digital audio transmission: Select no.
Connect the analogue audio output of the TV set to the analogue audio input of the amplifier with a stereo cinch cable with the AUDIO LINK adapter cable (see accessories on page 139):

For selecting the amplifier type and making other settings, see explanations of the setting possibilities (left hand column).
External devices
In order to be able to hear the digital sound of an external device connected to an AV input, an AV input can be assigned to the digital audio input socket AUDIO DIGITAL IN. By switching to this AV input, the digital audio signal at the AUDIO DIGITAL IN input is communicated to the integral digital multi-channel audio decoder and the digital audio output socket AUDIO DIGITAL OUT. You will then hear the digital sound of the assigned AV input instead of the analogue sound if available.
For the digital audio playback from an external device, e.g. the DVD player, you have to feed the digital audio signal to the TV set.
The external digital audio signal can be reproduced via the digital multi-channel audio decoder integrated in the TV set, via an externally connected digital audio amplifier or via a Loewe Individual Sound Projector SL ^[1] .
If an external audio amplifier or Loewe Individual Sound Projector is used, this must be registered in the sound components wizard (see page 120).
Select Connections,
▼ go to the menu line below.
Select Miscellaneous,
▼ go to the menu line below.
◀ ▶ Select Assign digital audio input,
▼ go to the menu line below.
◀ ▶ Select AV input.
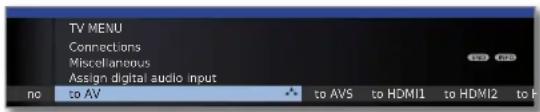
To connect a DVD player to the digital audio input of the TV set for example, connect the digital output socket of the DVD player (DIGITAL OUT) via a cinch cable to the AUDIO DIGITAL IN socket on the TV set.
Connection example for a DVD player, see right hand column.
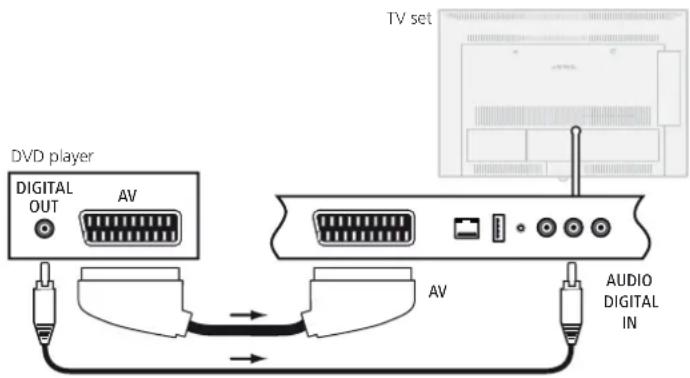
Audio connection in HDMI/DVI devices
External devices with DVI connection
If an external device with DVI interface is connected via a HDMI/DVI adapter to one of the HDMI sockets of the TV set, you can connect the digital sound of the external device to the digital audio input socket AUDIO DIGITAL IN.
The assignment of the digital audio input to the corresponding HDMI socket of the TV set takes place as described in the column on the left. If you want to use the analogue sound of the external device, connect it to the AUDIO IN socket.
External devices with HDMI connection
If external devices with an HDMI interface are connected to one of the HDMI sockets of the TV set, no assignment of the audio input is necessary because the digital transmission of picture and sound takes place via a single connection in HDMI.
Serial interface RS-232C (RJ12)
You can connect either the Loewe Individual Sound Projector SL or a home network system of different manufacturers (e.g. AMX, Crestron) to your TV set via the upgradable RS-232C (RJ12) interface.
Please consult your dealer for configuration of the RS-232C (RJ12) interface and further information about the different home networking systems.
External devices
The direct way to record
You can programme timer recordings via the integrated Digital Recorder (if installed) or connected recorders on the TV set. The recording wizard is integrated at several places for programming a recording. You will find further information on recording with the digital recorder from page 89 onwards.
Programming a timer recording with the EPG
You are in EPG mode; if not, press the EPG button.


▼ ▲ Mark the desired broadcast.
RECORD button: Call Timer data (see right hand column).
Programming a timer recording via teletext
You are using the teletext mode; or if not, press the TEXT button. If HbbTV text opens instead of the standard teletext (see page 80), press the TEXT button again.

RECORD button: Call the programme pages of the current station.
Green button: Go to the appropriate page.

▼▲ Select desired broadcast,
OK calls Timer data (see right hand column).
Entering the Timer data
After selecting the station you wish to record, timer data will be displayed.
The setting options for the timer data differ depending on the recorder selection, whether an analogue or DVB station is to be recorded or via which route (EPG, Teletext) the recording has been programmed.


▲▼◄► Change Timer data if required or, OK confirm.
Recorder Selection of the recorder used (AV, DR ^3 ).
Date Day of recording.
Recording time Time of recording.
VPS Use VPS data for analogue stations, yes/no ^(1) .
Descrambled If recording encoded stations ^3 you can define here whether recording the station is to be encoded during the recording, if possible.
Decoding If you choose the setting yes, the programme will be overnight automatically decrypted at 02.00 the following day ^① (CA module must be plugged in).
Programme Here you can indicate the PIN of the programme provider provider PIN for your CI plus CA module in order to enable decrypted recording ^3 of a station protected with parental control.
Auto time Use automatic time control, yes/no ^2 .
control The recording is performed precisely at the time, even if the beginning/end time of the programme provider has changed.
Recording type Select once only, Mo–Fri, daily, weekly or Serial ^(2)(3) .
Record Select whether broadcast subtitles are to be recorded ^(3) . subtitles
^1 only available with some analogue stations.
^12 only available when recording via EPG.
^13 only for devices with an integrated hard disc (DR+) or a connected external hard disc (USB recording), see page 89 onwards.
External devices
Programming the timer with the timer overview
All programmed recordings, marked programmes and copy orders ^1 are listed in the timer overview. You can also programme new recordings, mark other programmes and copy ^1 pre-recorded programmes from the DR archive to an external recorder with the timer overview.

Green button: Change recording.
Yellow button: Delete recording.
Blue button: Delete memo.
Explanation of the symbols in the timer list:

Record
Repeated recording (daily, weekly or Mon-Fri)
Serial recording
Decoding order (later decoding of an encrypted recorded programme ^(1) )
√ Marked programme (see page 48)
only for devices with an integrated hard disc (DR+) or a connected external hard disc (USB recording), see page 89 onwards..
New entry: Programme timer recording manually
→ Timer list is opened.

OK Call Station selection.
◀ ▶ ▲ ▼ Select station.
OK Call Timer data.
Entry of the timer data see page 122.
After confirming the timer data the new recording is transferred to the timer overview.
New entry: Memorize programme using the timer overview
→ Timer list is opened.
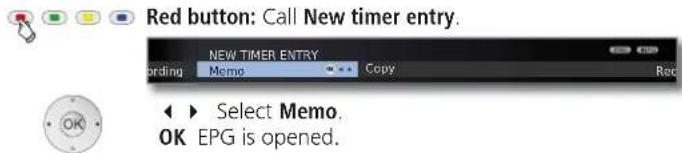
Note desired programme as described in Switching and memorizing with the programme list (Seite 48).
New entry: Copying DR archive entries ^(1)
Timer list is opened.
→ An external recorder is registered.

See the chapter Copying recordings in the operating instructions of the Digital Recorder for further steps.
External devices
Timer recording with external devices
The recording of HDTV stations with external devices is only possible to a limited degree. The HD transmission is scaled down to SD quality and output at the AV output for the recording.
Recorder with Digital Link Plus
If you use an externally connected recorder with Digital Link Plus or a similar system, the TV set and connected recorder exchange data (e.g. compare station lists TV set/recorder or timer data of analogue stations). Please consult the operating manual of your recorder to find out of your recorder is Digital Link Plus compatible. In addition use only Euro-AV cables for the connection between TV set and recorder.
Analogue stations
The timer data are transmitted automatically from the TV set to the recorder after programming is complete. (For DVD recorders in addition the recording quality SQ or EQ is also transmitted.) The recording is then controlled by the recorder and the recorder tuner is used for reception of the programme.
The recording data are not saved in the timer overview of the TV set. Consequently if you want to change or delete the timer data then you must do so on the recorder.
Digital stations
If you want to record digital stations with an externally connected recorder, then the DVB tuner is used and the TV device takes over control of the recorder. Then the station on the TV set is locked during the timer recording.
It is not possible to switch over to another DVB station.
If using devices with DVB-T/C Twin-Tuner (Equipment variants see page 140), analogue stations can be viewed on the TV set parallel to the recording with the external device.
Copyprotection
Copy-protected programmes will not be output on the EURO AV sockets for legal reasons.
External devices
Operating Loewe equipment
Using the remote control for the TV mode of the TV set
Press the TV button, the display above it will light for approx. 5 seconds.
Using the remote control for a Loewe recorder
REC Press the REC button, the display above it will light for approx. 5 seconds.
Using the remote control for a Loewe player
Press the DVD button, the display above it will light for approx. 5 seconds.
Using the remote control for the radio mode of the TV set
AudiO Press the AUDIO button, the display above it will light for approx. 5 seconds.
As long as a button is pressed, the display of the selected operating mode lights up (TV - REC - DVD - AUDIO). This allows you to check which operating mode the remote control is set to every time you press a button.
The factory setting of the buttons is described above (see also table in right hand column). The assignment of the buttons can be changed to suit the existing accessory devices (see right hand column).
Setting the remote control for other Loewe devices
You can operate various Loewe devices with the remote control. The device keys REC - DVD - AUDIO can be reassigned to operate various Loewe devices.


Press the required device buttons and the Stop button simultaneously for 5 sec. until the corresponding LED display flashes twice.
Then enter the two-digit device code from the list below.
| Device Code Factory setting | | |
| Loewe ViewVision 8106 H 10 | | |
| Loewe Viewvision, Centros 21x2 12 | | |
| Loewe ViewVision DR+ DVB-T 13 REC | | |
| Loewe Auro 2216 PS/8116 DT 14 | | |
| Loewe BluTech Vision | 15 | |
| Loewe Soundprojector | 17 | |
| Loewe TV - Digital radio | 19 | AUDIO |
| Loewe Mediacenter | 20 | |
| Loewe BluTech Vision Interactive | 21 | DVD |
| HDMI CEC mode | 22 | |
| Loewe AudioVision | 24 | |
| Loewe Individual Sound Projector SL | 25 | |
| Apple IR codes | 26 | |
| Apple IR codes (Apple TV-2G) | 27 | |
| Resetting to factory setting | 99 | |
The associated LED display flashes twice.
The codes shown here only apply for direct operation of the accessory device.
For operation of the connected accessory device via the TV set, e.g. with concealed installation (Code 22), see page 113. The remote control's signal is transmitted from the TV set to the accessory device with concealed installation.
Software update
It is possible to update the software on your TV set. Current software versions can be downloaded from the Loewe Internet site and installed on your set using a USB stick.
USB stick
Requirements of USB stick
USB sticks tested by Loewe and compatible in type and format can be ordered from the Loewe dealer using the article no. 90456.900.
If you would like to use your own USB stick, please follow these tips/conditions:
- Formatting in FAT32.
- Only 1 partition.
- Do not use encrypted USB sticks.
- Do not use USB sticks which simulate a CD ROM drive.
• There may be no hidden files on the device.
- For some types of device, the construction of the USB stick is significant. Maximum dimensions in mm: 70x20x10.
- If in doubt, the USB stick should be formatted as "FAT32" without "extended attributes".
Download
Software download from the Loewe Internet site
You can download new software for your TV set from our homepage. To do this register on our homepage
http://support.loewe.tv (International),
http://support.loewe.tv/uk (United Kingdom and Republic of Ireland),
http://support.loewe.tv/au (Australia) or
http://support.loewe.tv/nz (New Zealand)
(under Register now).
Simply follow the steps in the registration process.
After the successful registration process and subsequent login to the homepage you have to register your set (have the article number and serial number ready – both are mentioned on the sticker on the rear side of the set or under Integrated features in the index of the TV set, see page 15).
Then you will get a list of downloadable contents for your TV set including the software for your TV set. Download the data and unpack all the files in this ZIP archive into the main directory of your USB stick.
Then carry out the software update as described below.
Software update
In the software update (package update) all the software releases in the TV are scanned and updated as required.
To do this, insert the USB stick with the downloaded software into a free USB port on the TV set (see connections page 11).
Calling Software update


SelectSettings,
▼ go to the menu line below.
Select Miscellaneous,
▼ go to the menu line below.
SelectSoftware update,
OK Call Software update Wizard.
The versions of the current software package are displayed.


OK Proceed
The TV set searches for a new software package on the USB stick.
If a new software version is available after the search, the following on-screen message appears (see page 127). If several different software packages are found on the USB stick, the latest software package is always used.
If no new software package was found in the search:
OK Exit wizard

Software update
New software package found


OK Proceed.
OK Start loading software.

END: Exit wizard.
Load new software package

A bar shows you the progress of the download. This process can take up to 50 min. Do not turn your set off during this time!
You will be informed at the end of the update.
After finishing loading:
Switch the TV off and back on at the mains switch.
USB keyboard
You can connect a USB keyboard to one of the USB ports of your TV set and use it in place of a remote control. With it, you can type internet addresses more comfortably into the browser and you can type characters more easily when changing the names of channels or inputting lists of favourites.
The keyboard can completely replace the remote control. An overview of the button assignment is on the right hand side of the table.
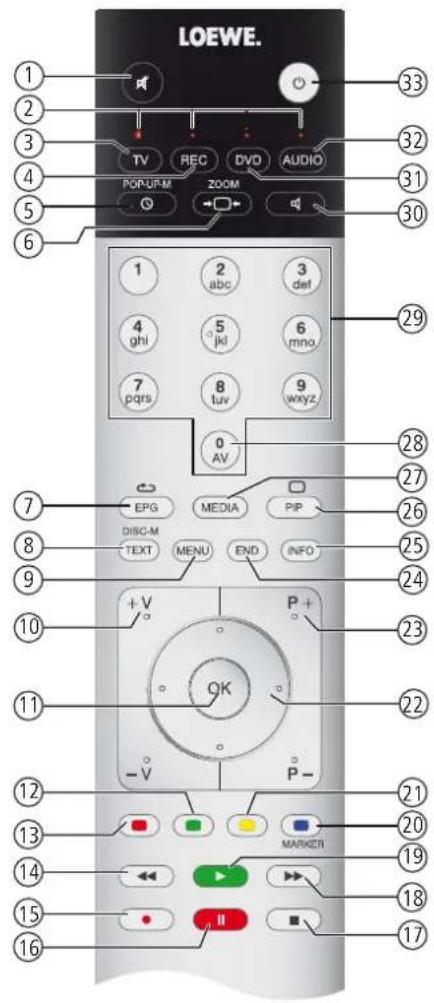
Button combinations
| Keyboard Remote control No. | |
| Left and right switching button | Keyboard layout between Standard (Latin) and Greek or Russian (only for the menu languages Greek and Russian) | - |
| F1 Red button 13 | |
| F2 Green button 12 | |
| F3 Yellow button 21 | |
| F4 Blue button 20 | |
| F5 RECORD button 15 | |
| F6 PAUSE button 16 | |
| F7 STOP button 17 | |
| F8 PLAY button 19 | |
| F9 Button | ← 14 | |
| F10 Button | → 18 | |
| Alt + ESC END button 24 | |
| Ctrl + End | In the browser: Stop input, leave input field | - |
| Enter | OK button | 11 |
| 0 ... 9 | Number buttons | 28, 29 |
| Pg ↑ / ↓ | P+ / P- buttons | 23 |
| Alt + + / - | V+ / V- buttons | 10 |
| Alt + F | TV button | 3 |
| Alt + R | AUDIO button | 32 |
| Alt + P | PIP button | 26 |
| Alt + T | TEXT button | 8 |
| Alt + O | Place the TV set into standby mode | 33 |
| Alt + A | MEDIA button | 27 |
| Alt + I | INFO button | 25 |
| Alt + M | MENU button | 9 |
| Alt + E | EPG button | 7 |
| Alt + S | Sound off/on | 1 |
| Alt + W | TIMER button 5 | |
| Alt + D | One Touch Recording | 15 |
| Alt + Z | Picture format button | 6 |
| Alt + H | Sound mode / Sound adjustment | 30 |
| Arrow button | Directional keys ← ▶ ▶ ▶ | 22 |
Character table
Key assignment for text input via the remote control
For certain functions the input of letters or characters is required. As with a cell phone press the numeric button (0-9) repeatedly until the desired character appears.
The characters available are language dependent.
Here the key assignment is for the menu language English.
| Key Character (uppercase - lowercase) |
| 1 | 1 |
| 2 ABC2 - abc2 | c 2 |
| 3 DEF3 - def3 | 3 |
| 4 GHI4 - ghi4 | i 4 |
| 5 JKL5 - jkl5 | 5 |
| 6 MNO6 - mno6 | 6 |
| 7 PQRS7 - pqrs7 | 7 |
| 8 TUV8 - tuv8 | 8 |
| 9 WXYZ9 - wxyz9 | 9 |
| 0 0 [space] ./\- | +_,;:?!=& # %~@ $ * ' | () |
Tilting the TV set
Tilting the TV set
You can set the tilt angle of your TV set on the table stand to 0^ or 2.5^ .
Tools required: Torx screwdriver T 20
Allen key 5 mm
First, loosen the topmost of the three retaining screws of the table stand to get to the adjustment screw for the tilt angle (see illustration).
Then put the Allen key into the adjustment opening.
By screwing in the adjustment screw, you can adjust the tilt angle of the TV set (turned to the left as far as it will go: 2.5°, to the right as far as it will go: 0°).
When adjusting the tilt angle, position the TV set in the desired tilting direction.
Please only use the tilt angle 0^ or 2.5^ . Intermediate positions are not permitted and could damage the TV set.

natural_image
Close-up of a mechanical press or clamping device with three bolts and a central knob, no visible text or symbols.
The table stand is delivered set at an angle of 2.5^ .
To adjust the tilt angle (turned to the left as far as it will go: 2.5°, to the right as far as it will go: 0°), turn the screw with the Allen key approx. 1.5 times.
Do not overtighten the adjustment screw. This could damage the TV set!
Screw the retaining screw back in again. Tighten it with a torque of approx. 2 Nm (hand-tight).
Troubleshooting
| Problem Possible cause Remedy | | |
| All menus are displayed in the wrong language. | The menu language was set incorrectly. Set the | menu language:Press the MEDIA button in TV mode. In the MediaPortal, highlight the last menu item (Index) in the upper half and call up with OK. Mark the first key word and call it with OK. Then select the language and confirm it with OK. |
| In the TV menu, Connections cannot be called (displayed in grey). | A timer recording is in progress. Wait until the timer recording ends or delete the timer recording (page 123). |
| The control functions of the Loewe Recorder and the Timer are not working or are not working properly | a) The Digital Link function is not activated or not possible in the recorder.b) EURO-AV cable is not connected. | a) Activate Digital Link in the recorder (see operating instructions of the recorder).b) Connect EURO-AV cable (page 111). |
| General problems when connecting external devices via an AV input. | a) The AV standard is set incorrectly.b) The signal type is set incorrectly. | a) Set the correct standard (page 108).b) Set the correct signal type (page 108).If AV standard or AV signal is set to “Automatic” then this can cause errors to be detected with signals that do not comply with standards. In this case standard and signal must be set according to the information in the operating manual of the external device. |
| The connection of a decoder does not function or does not function properly. | a) The signal is not decoded because the correct decoder stations are not selected in the menu.b) The sound is missing in decoder mode because the wrong decoder sound is assigned in the menu. | a) Select the right decoder stations in the menu (TV menu → Connections → Miscellaneous → Decoder stations → Select decoder station(s) (see page 109).b) Select the right sound code (always, never, automatic) in the menu (TV menu → Connections → Miscellaneous → Decoder stations → Sound encodig), see also decoder instructions. |
| Digital Link Plus does not work. a) EURO-AV cable is not fully wired (pin 10 not wired).b) Some recorders can only adopt stations during the initial installation of the TV set. | a) Replace the EURO-AV cable.b) Restore the recorder to the as-delivered state (see recorder's operating manual). |
| With Teletext various characters are displayed incorrectly. | The wrong character set has been set in the Teletext menu. | Set the right character set: Select Teletext menu → Settings → Character set → Standard or the appropriate character set. |
| Errors occurred when running a CA module. | | Switch the TV set off. Remove the CA-module from the TV set. Wait a few seconds. Reinsert the CA-module. Switch the TV set on again. |
Troubleshooting
| Problem Possible cause Remedy | | |
| No sound via the external digital audio amplifier. | a) The external digital audio amplifier does not support the selected sound format (Dolby Digital, dts, MPEG).b) TV set and external digital audio amplifier are not connected with each other. | a) Set PCM stereo on the DVD player in the sound selection. For DVB stations on the TV set switch to stereo in the Status display (INFO) – Language/sound (green button).b) Connect AUDIO DIGITAL OUT from the TV set to a digital input of the external digital audio amplifier and select the appropriate input to this. |
| A programmed recording was not made. | Recording of analogue stations with VPS data: The programme to be recorded was not (no longer) in the programmes offered by the station via VPS.Recording of DVB stations with automatic time control:The provider deleted the programme from the EPG data, for example due to a programme change. | The stations are exclusively responsible for the transmission of VPS data (for analogue stations) or for the use of the automatic time control (for DVB or MHEG-5 stations). The availability of the appropriate data cannot be guaranteed. |
| The picture format cannot be adjusted. A HbbTV application is loaded but is not active (not displayed). | End the HbbTV application with the END button (see page 80). |
| When the Picture format button is pressed, the 3D mode selection appears instead of the Picture format selection. | The TV set is displaying picture material in 3D. | Whilst 3D material is being displayed, the picture format cannot be changed (see page 37). |
| The free capacity of the external hard disc is essentially indicated smaller than expected in the OSD. | The hard disc has been formatted on FAT32 on a PC with Microsoft Windows (see also page 105). | Format external hard disc on TV set again via TV menu → Settings → Miscellaneous → Format external hard disk. |
| | |
Troubleshooting
| Problem Possible cause Remedy | | |
| If a desired IP address has been specified then no IP address will be automatically issued to your TV set. | No DHCP server is working on your network. Set up a DHCP server.Assign the IP addresses for the TV set manually. |
| Despite video or music file being played back, no sound can be heard. | a) The TV set is set to mute or the volume has been turned down too far.b) An audio device that does not exist or that is not connected is registered in the TV menu under Connections → Sound components (e.g. HiFi/AV amplifier). | a) Increase the volume by pressing the V+ button on the remote control for longer. This will also cancel any mute setting.b) Connect up the audio device and switch it on.In the Sound components wizard change back to TV speakers. |
| Although the file is visible on the media server, it is not displayed in the MediaPortal. | The file is not made available by your media server. | Change to your media server. For this, read the section Media server software on page 137. |
| A media file that is displayed can not be played back. | The format of the file is not supported (see also limitations in section File formats supported on page 137). | No remedy. |
| Characters received in the WLAN code of the wireless router cannot be entered for the network configuration at the TV set. | The device does not support all special characters. | Change the WLAN key of the router. |
| When searching for wireless routers, no device is found. | The router is not ready for wireless communication. | Check your wireless router.Try to make the connection again a few minutes later. |
If with wireless operation there should be any interference such as disruptions during playback or slow reactions by devices to commands, you could try the following:
- Keep at least three metres distance from microwave ovens, bluetooth devices, mobile telephones and Wi-Fi compatible devices such as printers and PDAs.
- Change the active channel on the WLAN router.
Technical data
General data
| Type Connect 40 3D Connect 32 3D | HD TV 1080p | HD TV 1080p |
| Article number 51409xxx 51408xxx | | |
| Dimensions for device without stand (W x H x D) in cm | 100,2 x 63,9 x 6,6 | 81,4 x 53,4 x 6,1 |
| Dimensions for device with stand (W x H x D) in cm | 100,2 x 66,6 x 26,0 | 81,4 x 56,0 x 26,0 |
| Weight for device without stand (approx.) in kg | 22,4 | 17,3 |
| Weight for device with stand (approx.) in kg | 24,7 | 19,6 |
| Display technology Full-HD LCD mit Edge-LED backlight | |
| Screen diagonal (in cm) / Picture format 101 / 16:9 80 / 16:9 | | |
| Resolution (in pixels) / Motion Response 1920 x 1080 / 200 Hz | 1920 x 1080 / 100 Hz | |
| Contrast (static / dynamic) 5.000 : 1 / 5.000.000 : 1 | |
| Viewing angle (horizontal / vertical) 178° / 178° | |
| Power consumption On-Mode max. (W) (Audio output 1/8 of the maximum value) without / with DR+ | 112 / 116 | 74 / 81 |
| Power consumption On-Mode Home (W) without / with DR+ | 92 / 96 | 59 / 65 |
| Power consumption in Standby Mode (W) | 0,37 | 0,35 |
| Power consumption when set is switched off (W) | 0 | 0 |
| Ambient temperature (Celsius) 5° – 35° | |
| Relative humidity (non-condensing) 20 – 80% | |
| Air pressure 800 – 1114 hPa (0 – 2000 m über NN) | |
Technical data
Electrical data
| Chassis designation: SL 150 / SL 151 |
| Power supply: 220 V – 240 V/50–60 Hz |
| Tuner: terr./cable: | satellite(1): | VHF/hyperband/UHF4 levels: 13/18V/22kHz16 levels: DiSEqC 1.0Single cable system: EN 50494 |
| Range: terr./cable: | satellite(1): | 45 MHz to 860 MHz950 MHz to 2150 MHz |
| Station storage locationsincl. AV and radio: | | 5000 |
| TV standards: analogue: | digital: | B/G, I, L, D/K, M, NDVB-T/T2(1), DVB-CDVB-S(1)/ S2(1) |
| Colour standards: SECAM, PAL, NTSC, | | NTSC-V, PAL-V (60 Hz) |
| Sound standards: analogue: | mono, stereo, dual-channel |
| BG, DK, MN: | FM-A2 |
| BG, I, DK: | FM-Nicam |
| L, L1: | AM-Nicam |
| digital: | mono, stereo, dual-channel, PCM |
| Dolby Digital |
| Dolby Digital Plus |
| Dolby Virtual Speaker |
| DTS |
| Dolby Digital AAC+ |
| Audio output power(music/sine): | | 2 x 40W / 2 x 20W |
| Teletext: TOP/FLOF Level 2.5 |
| Page memory: 2000 |
Signals via PC IN / HDMI
The following table lists the compatible signals which your TV set can show via the PC IN connection and the HDMI connections (HDMI1, HDMI2, HDMI3).
Set the output signal on your PC, HDMI or DVI device so that it matches one of the signals in the table.
| Format | Horizontal | x | Vertical | Image frequency | Connection |
| 480i60 | 720 | x | 480i | 60Hz | PC IN, HDMI |
| 576i50 | 720 | x | 576i | 50Hz | PC IN, HDMI |
| 480p60 | 720 | x | 480p | 60Hz | PC IN, HDMI |
| 576p50 | 720 | x | 576p | 50Hz | PC IN, HDMI |
| 1440 | x | 480p | 60Hz | HDMI |
| 1440 | x | 576p | 50Hz | HDMI |
| 720p50 | 1280 | x | 720p | 50Hz | PC IN, HDMI |
| 720p60 | 1280 | x | 720p | 60Hz | PC IN, HDMI |
| 1080i50 | 1920 | x | 1080i | 50Hz | PC IN, HDMI |
| 1080i60 | 1920 | x | 1080i | 60Hz | PC IN, HDMI |
| 1080p24 1920 | x | 1080p 24Hz | PC IN, HDMI | |
| 1080p25 1920 | x | 1080p 25Hz | PC IN, HDMI | |
| 1080p30 1920 | x | 1080p 30Hz | PC IN, HDMI | |
| 1080p50 1920 | x | 1080p 50Hz | HDMI | |
| 1080p60 1920 | x | 1080p 60Hz | HDMI | |
| VGA | 640 | x | 480 | 60Hz | PC IN, HDMI |
| SVGA | 800 | x | 600 | 60Hz | PC IN, HDMI |
| XGA | 1024 | x | 768 | 60Hz | PC IN, HDMI |
| WXGA | 1360 | x | 768 | 60Hz | PC IN, HDMI |
| SXGA | 1280 | x | 1024 | 60Hz | PC IN, HDMI |
Technical data
Connections (max. equipment)
| Designation Type Function / Signal |
| 220-240V~50/60 Hz | Mains socket 220-240V ~ 50/60 Hz Supply voltage |
| HDMI1 HDMI2 HDMI3 | HDMI type A (3x) Digital Video/Audio IN: Digital video | ^7 and audio |
| PC IN | D-SUB 15-pole Video IN: PC/STB video signal | ^2 |
| | Video IN: | Y/C (S-VHS/Hi 8)CVBS (VHS/8 mm)RGB |
| AV | EURO-AV | Video OUT: | CVBS (VHS/8 mm)Y/C (S-VHS/Hi 8)L/R |
| Audio IN:Audio OUT: | L/R |
| LAN | RJ-45 Ethernet: Network interface |
| USB | USB type A (2x) USB 2.0: Multimedia files/software update |
| AUDIO IN | Jack 3,5 mm Audio IN: L/R |
| OUT AUDIO DIGITAL | Cinch (yellow) | Digital Audio OUT (SPDIF): | Digital audio |
| IN AUDIO DIGITAL | Cinch (red) | Digital Audio IN (SPDIF): | Digital audio |
| CENTER IN | Cinch (white) Audio IN: max. 2Vrms: | Centre |
| SERVICE | Mini-DIN | Service/L-Link |
| ANT TV 5 V=80 mA | IEC socket | 75 Ohm / 5 V / 80 mA: | Antenna/cable/DVB-T/C |
| ANT SAT 13/18V=350 mA max.ANT SAT2 13/18V=350 mA max | F socket (2x) ^1 | 75 Ohm 13/18 V / 450 mA: | ANT-SAT DVB-S/S2 |
| AUDIO LINK | D-SUB 26-pole Audio OUT: | Multi-sound |
| RS-232C | RJ12 ^1 | Data I/O: | serial interface |
| CONTROL | Mini-DIN ^1 | | Rotating stand control (Positioning accuracy 1.5°) |
| IR LINK | Jack 3,5 mm ^1 | | Connection for IR station |
| CI-COMMON INTERFACE | CI slot (2x) | Common Interface: | Slot for CA module |
| Jack 3,5 mm | | Headphones 32-2000 Ohm |
| AUDIO IN L AUDIO IN R | Cinch (white/red) | Audio IN: L (white) / R (red) | |
| VIDEO IN | Cinch (yellow) | Video IN: | CVBS (VHS/8 mm) |
| AVS | Mini-DIN | Video IN: | Y/C (S-VHS/Hi 8)CVBS (VHS/8 mm) |
"Equipment and upgrade options, see page 140.
^2 For compatible picture signals, see table on page 135.
Technical data
File formats supported
Pictures: JPG, PNG, GIF
Audio: MP3, M4A (AAC LC), WMA (without lossless), FLAC, WAV (PCM)
Video: AVI (MPEG-1/2, DivX, XviD, AC3, MP3), WMV (WMV9, VC-1, WMA9, WMA Pro), MP4 (DivX, XviD, H.264/MPEG-4 AVC, AAC LC), MOV (H.264/MPEG-4 AVC, AAC LC), MKV (H.264/MPEG-4 AVC, AC3), FLV (H.264/MPEG-4 AVC, H.263, MP3, AAC LC), MPG (MPEG-1, MPEG Audio), TS/PS (MPEG-2, H.264/MPEG-4 AVC, MPEG2 Audio, AC3), VOB (MPEG-2, MPEG2 Audio, AC3)
DivX up to a resolution of 720p
H.264/MPEG-4 AVC up to Profile High (Level 4.2)
Ethernet (wired network)
Standards supported: 10 Mbit/sec Ethernet (10Base-T), 100 Mbit/sec Fast Ethernet (100Base-T)
WLAN (wireless network)
Standards supported:
IEEE 802.11b/q/n
Frequency range used:
2400-2483.5 MHz and 5180-5730 MHz
Types of encoding that are supported:
WEP 64 and 128 Bit (ASCII and HEX), WPA PSK, WPA2 AES
Supported home network standard
Universal Plug and Play Audio / Video (UPnP AV)
To play multimedia contents from devices in your home network, you require media server software which makes the relevant files available to you. Handling of individual files depends on the technical properties and also on the media server software used.
You can download a test version of the TwonkyMedia Mediaserver from our homepage. With your TV set, you have also acquired the option of obtaining a free licence for the currently available version of the Twonky media server. Alternatively, you can also use other media servers, e.g. the
For communication with your PC, certain port addresses of the network connection are required. They may not be blocked by a firewall if there is one, otherwise this could cause serious connection errors.
Windows Media Player 11 requires the port addresses 1900 and the block of 10280 up to and including 10284 (all for UDP) as well as 2869 and 10243 (both for TCP). For TwonkyMedia the port addresses 1030, 1900 and 9080 (all for UDP) and 9000 (for TCP) must be available.
Other ports to be kept free depend on the operating system you are using.
Contact your network administrator about configuring the firewall.
Accessories
Accessories
The following accessories are obtainable from your Loewe dealer.
Installation options:
A large range of options for floor, table or wall installation are available for your TV set.
An overview of the available options can be found on page 141.
Loewe Individual Sound Projector SL:
With the Loewe Individual Sound Projector SL you can enjoy digital Surround Sound without expensive installation and connection of several speakers. The Sound Projector is easy to set and operate.
Loewe Individual Sound:
The TV sets can be perfectly enhanced with the Individual Sound speaker system. Numerous options for loudspeaker combinations can be realised with floor-standing loudspeakers, satellite loudspeakers and a subwoofer. Individual housing and trim colour designs are possible here too.
With the Loewe Mediacenter you can play all radio sources, DVDs, CDs and audio data from the network, USB or NAS. You can connect an iPod or an iPhone via an integrated interface. The Mediacenter can be integrated into the home network via LAN, Powerline or WLAN. It forms the heart of the Loewe Multiroom systems.
Loewe DVD recorder:
The DVD recorders from Loewe are characterised by form and colour, which match Loewe TV sets, adapted user guidance and technology. Combined these devices form a system that offers many advantages.
Loewe Blu-ray player:
With the Loewe Blu-ray player BluTech Vision Interactive you are ideally equipped for the successor format to DVD. With the Loewe system integration you control BluTech Vision Interactive and your Loewe TV set simultaneously with the Assist remote control.
Loewe 3D Blu-ray player:
With the Loewe Blu-ray player BluTech Vision Interactive 3D you're fully kitted out to watch Blu-ray discs with 2D and 3D material. With the Loewe system integration you control BluTech Vision Interactive 3D and your Loewe TV set simultaneously using the Assist remote control.
Loewe 3D glasses:
The Loewe 3D shutter Active 3D Glasses give you clear 3D enjoyment and are compatible with all Loewe 3D flat TVs.
Loewe Audiovision:
Audiovision with integral 5.1 decoder creates impressive surround sound, even for televisions without a surround sound decoder.
As well as FM radio and CD/DVD player, Audiovision offers a connection for your iPod or your iPhone. Plus, thanks to video upscaling 1080p, you can also experience DVDs in full HD resolution.
Loewe Vesa adapter bolts:
You can purchase adapter bolts for wall holders in line with the VESA standard from your dealer or the Technical Customer Service (see service addresses on page 154). Four items are required.
Spacer bolts (1 item) Loewe order no. 70873.001.
Subject to availability.
Accessories
Upgrade kits / conversion kits / cables
Module DVB-S2 Single (Art.No. 70622.080):
You can receive digital satellite and HDTV stations with the upgrade kit. The tuner is integrated in the TV set and is operated with the remote control/menu control.
The retrofit possibilities for your set can be found in the table on page 140.
Module DVB-S2 Twin (Art.No. 70286.080):
You can have two digital satellite tuners installed in sets with Digital Recorder. This enables reception of digital satellite and HDTV stations and extends the display of PIP and the recording possibilities of Digital Recorder for two digital satellite stations.
The retrofit possibilities for your set can be found in the table on page 140.
Module WLAN SL 150 (Art.No. 70830.082):
With the upgrade kit you add the WLAN function to the connection possibilities of your TV set with the home network.
The retrofit possibilities for your set can be found in the table on page 140.
Module RJ12 / Motor Unit / IR-Link (Art.No. 70493.080):
The TV set can be connected to a home network system via the RS-232C (RJ12) interface.
The infrared function enables pieces of auxiliary equipment of other manufacturers to be operated, even if they are covered up. You operate the auxiliary equipment with its respective remote control via the Loewe TV set.
The retrofit possibilities for your set can be found in the table on page 140.
Module DVB-T2/C Single (Art.No. 70913.080):
With the DVB-T2/C Single conversion kit you add the Standard DVB-T2 to the reception possibilities of your TV set.
The Standard DVB-T2 is not available in all countries at the moment
The retrofit possibilities for your set can be found in the table on page 140.
Module DVB-T2/C Twin (Art.No 70914.080):
For sets with a Digital Recorder (DVB-T/C Twin) you add the Standard DVB-T2 to the reception possibilities of your TV set with the DVB-T2/C Twin conversion kit.
The Standard DVB-T2 is not available in all countries at the moment
The retrofit possibilities for your set can be found in the table on page 140.
Adapter and Cables:
AUDIO LINK adapter cable 0,25 m Loewe Art.No. 89954.001
AUDIO LINK cable 1,5 m Loewe Art.No. 89952.001
AUDIO LINK cable 6 m Loewe Art. No. 89952.002
AUDIO LINK cable 10 m Loewe Art.No. 89952.003
Cubic connector cable 6 m Loewe Art. No. 90418.930
USB extension (Art.No. 70167.080):
To ensure easy accessibility of the USB connection or enable USB sticks to be inserted with a large casing, the TV set can be connected to a USB extension.
This upgrade kit is available from your Technical Customer Service (see service addresses on page 154).
Accessories
Equipment variants
The equipment of the individual set variants and their upgrade/conversion possibilities is listed in the table below.
| Set variants Connect 40 3D DR | + | Connect 40 3D Connect 32 3D DR | + | Connect 32 3D |
| DR+ | ● | - | ● | - |
| USB Recording - | | ● | - | ● |
| DVB-T/C Single - | | ● | - | ● |
| DVB-T/C Twin | ● | - | ● | - |
| Digital audio decoder | ● | ● | ● | ● |
| HbbbTV | ● | ● | ● | ● |
| DVB-T2/C SingleArt.No. 70913.080 | - | □ | □ | □ |
| DVB-T2/C TwinArt.No. 70914.080 | □ | - | □ | - |
| DVB-S2 SingleArt.No. 70622.080 | - | ○ | - | ○ |
| DVB-S2 TwinArt.No. 70286.080 | ○ | - | □ | - |
| RJ12 / MU / IR-LinkArt.No. 70493.080 | ○ | ○ | ○ | ○ |
| WLAN SL 150Art.No. 70830.082 | ● | ○ | ● | ○ |
ex factory
○ optionally available as an upgrade kit
□ optionally available as a conversion kit
- not available
TV set equipment
See the rating plate on the rear of the set for the precise product designation. The precise features are listed in the Integrated features item in the index of the TV set (see page 15).
Accessories
Setup possibilities Individual
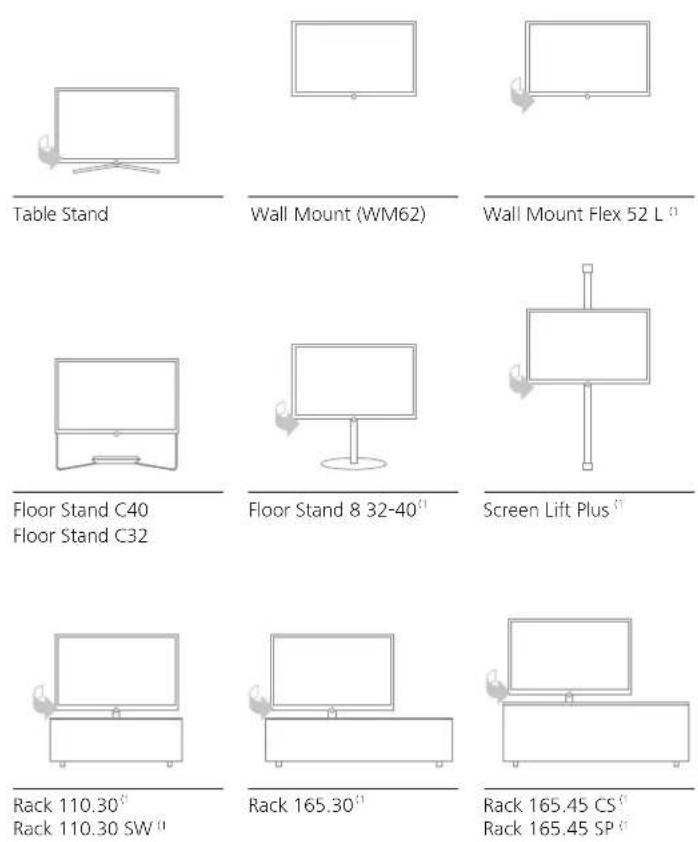
Connect 40 3D
• Table Stand (scope of delivery)
- Wall Mount WM62
- Wall Mount Flex 52 L ^(1)
• Floor Stand C40 (Equipment Board optionally available)
- Floor Stand 8 32-40 ^1
- Screen Lift Plus ^(1)
- Rack 110.30 ^1
- Rack 110.30 SW ^1
- Rack 165.30 ^1
- Rack 165.45 CS ^(1)
- Rack 165.45 SP ^(1)
Connect 32 3D
• Table Stand (scope of delivery)
- Wall Mount WM62
• Floor Stand C32 (Equipment Board optionally available)
- Floor Stand 8 32-40 ^1
- Screen Lift Plus ^(1)
- Rack 110.30 ^1
- Rack 110.30 SW ^1
- Rack 165.30 ^1
- Rack 165.45 CS ^(1)
- Rack 165.45 SP ^(1)
Environment
Environmental protection
Energy consumption
Your TV set is equipped with an eco-standby power supply. In the standby mode, the power consumption drops to low power (see Technical data on page 134). If you want to save even more energy then switch the device off with the mains switch. Please also note that the EPG data (Electronic Programme Guide) is lost under certain circumstances and possibly programmed timer recordings cannot be carried out via the TV set.
The power consumed by the TV set during operation depends on the energy efficiency preset in the initial installation (see page 22) or the setting in the TV menu (see page 34).
If you activate the automatic dimming (see page 34), your TV picture will adapt to the ambient brightness. This reduces the power consumption of the TV set.
Packaging and box
You have made a decision to purchase a high-quality technical product with a long service life. For disposal of the packaging, in accordance with national legislation we have paid a fee to a commissioned recycler to pick up the packaging from the dealer.
The set

The EU directive 2002/96/EC regulates the proper way to recycle, handle and utilise used electronic devices. Old electronic devices consequently must be disposed of separately. Please do not dispose of this device in normal household trash!
You may return your used set free of charge at designated recycling centres or at your specialist dealer whenever you purchase a new, comparable set. Additional details about return (also for non EU countries) are available from your local municipal authorities.
Batteries

The batteries supplied as initial equipment do not contain any pollutants such as cadmium, lead, or mercury. Used batteries should no longer be disposed of in the domestic waste according to the Battery Ordinance. Dispo se of your batteries at no charge in the collection containers which are set up for this purpose in retail stores.
Legal notes
Trademarks
Manufactured under licence from Dolby Laboratories. "Dolby", "Pro Logic" and the double-D symbol are trademarks of Dolby Laboratories.
Manufactured under license under U.S. Patent #'s: 5,451,942; 5,956,674; 5,974,380; 5,978,762; 6,487,535 & other U.S. and worldwide patents issued & pending. DTS and DTS Digital Surround are registered trademarks and the DTS logos and Symbol are trademarks of DTS, Inc. © 1996-2007 DTS, Inc. All Rights Reserved.
DOLBY.
DIGITAL PLUS
PRO LOGIC II
VIRTUAL SPEAKER

dts
Digital Surround
The screen font "LoeweL2700" is based on the "Tavmjong Bah Arev (tavmjong.free.fr)" font, which in turn is based on "Bitstream Vera". Bitstream Vera is a trademark of Bitstream Inc.
This set contains a software which is based partly on the work of the Independent JPEG Group.
DivX and the corresponding DivX logos are registered trademarks of DivX, Inc.
This product includes software developed by the OpenSSL Project for use in the OpenSSL Toolkit (http://www.openssl.org/).
This software is provided by the OpenSSL project "as is" and any expressed or implied warranties, including, but not limited to, the implied warranties of merchantability and fitness for a particular purpose are disclaimed. In no event shall the OpenSSL project or its contributors be liable for any direct, indirect, incidental, special, exemplary, or consequential damages (including, but not limited to, procurement of substitute goods or services; loss of use, data, or profits; or business interruption) however caused and on any theory of liability, whether in contract, strict liability, or tort (including negligence or otherwise) arising in any way out of the use of this software, even if advised of the possibility of such damage.
This product includes cryptographic software written by Eric Young (eay@cryptsoft.com).
This product includes software written by Tim Hudson (tjh@cryptsoft.com).
This product contains software which was developed by third parties and / or software which is subject to GNU General Public License (GPL) and/or GNU Lesser General Public License (LGPL). You can pass on and modify them in accordance with Version 2 of the GNU General Public License or optionally every later version which is published by the Free Software Foundation.
Loewe publishes this programme WITHOUT ANY GUARANTEE OR SUPPORT especially without an implicit guarantee of MARKET MATURITY or APPLICABILITY FOR A CERTAIN PURPOSE. Details can be found in the GNU General Public License. You can order the software from Loewe Customer Service.
You can download the GNU General Public License here: http://www.gnu.org/licenses/.
Glossary
0-9
24p movie display: Films released on Blu-ray Disc support presentation of 24p cinema films. The Blu-ray player transfers the original film format to the television with 24 frames per second. The DMM (DigitalMovieMode) set in the factory calculates and inserts additional intermediate pictures, which suppress film jerking typical for the cinema, thereby providing for a smooth motion sequence.
A
Active antenna: An antenna with its own power supply or amplification which can improve the reception is areas with a poor coverage.
Administrator: Person who administers the network, i.e. takes care of setting up and maintaining all components belonging to the network.
Automatic time control: Similar to VPS for analogue stations the automatic time control monitors the start and end times of programmes from DVB stations. If these times deviate from the data programmed in the timer data the running time of the recording is adapted automatically. The automatic time control is not supported by all DVB stations.
AVI: Abbreviation for Audio Video Interleave, a video container file format developed by Microsoft. A single AVI video file can contain several audio, video and text data streams (thus the name container format).
AV socket: Socket for audio and video signals.
AV sources: Audio/video source.
AVS: Audio/video sockets on the side of the TV set (cinch and mini-DIN).
B
Band: Name for a transmission range.
Blu-ray Disc: The follow-up format of DVD. The contents of about five DVDs fit onto one Blu-ray Disc (abbreviated BD). Therefore, the Blu-ray disc provides enough space for high-resolution images and multi-channel sound formats.
BMP: Abbreviation for Bitmap, a grid graphics format designed for Microsoft Windows and OS/2 that is wide spread and therefore supported by almost every popular graphics software package without any problems.
C
CA module: The Conditional Access module contains the coding system and compares the transmitted code with the one on the Smart Card. If they match, the appropriate stations or programmes are decoded.
CEC: Abbreviation for Consumer Electronics Control. CEC provides universal component control functions for entertainment electronics devices (e.g. System standby, One Touch Play). CEC is also known as Digital Link HD at Loewe.
Channel (WLAN): The channel is a certain part of the WLAN frequency band. Devices that want to communicate with each other have to use the same WLAN channel. In Europe the WLAN frequency band is currently divided into 13 channels.
Cinch cable: Cable for transmitting audio or video.
CI slot: See Common Interface.
Client: Also referred to as network client; describes an end device such as your TV set that is connected to the network and gets data from a (media) server to make it accessible to the user.
Common Interface: The Common Interface (CI slot) is a standardised interface. By inserting suitable decoding modules (CA modules) and a Smart Card coded digital programmes can be used.
Common Interface Plus: CI Plus is an advanced development of the Common Interface standard. CI Plus slots are in principle downward compatible to the previous CI standard, i.e. CA modules and Smart Cards according to the past CI standard can continue to be used in CI Plus slots, as far as the programme provider permits this. Additionally, extended regulations apply however to CI Plus.
Component IN: Connection in which the video signal is transmitted via three separate cinch connections. It is made up of the brightness signal "Y" and the colour difference signals "Pb" and "Pr". YPbPr is the original analogue version of the digital YCbCr in which video data saved on the DVD as well as transmitted via satellite, cable or antenna in DVB are colour coded.
Conditional Access module: See CA module.
D
Decoder: Analogue, coded TV signals are passed through a decoder and made visible again.
DHCP: Abbreviation for Dynamic Host Configuration Protocol. DHCP allows automatic assignment of IP addresses with the aid of a DHCP server.
DHCP server: Network service which takes care of automatic assignment of IP addresses to clients.
Digital Link: System for controlling recorders (for video and DVD recorders from Loewe) via the Euro AV sockets of the Loewe TV set with concealed setup. Controlling the recorder for timer recordings.
Digital Link HD: System for controlling devices via the HDMI connection of the Loewe TV set in the case of concealed installation.
Digital Link Plus: System for controlling recorders according to protocol 50. For analogue stations the station and timer data are transmitted via the EURO-AV socket to the recorder. The timer recording is executed exclusively by the recorder. There is a different designation with different manufacturers.
DivX: Video Codec which allows even large files to be relatively highly compressed in their file size without having to tolerate important quality losses.
Glossary
DNS: Abbreviation of Domain Name System. Readable names (e.g. www.loewe-int.de) are assigned to numerical IP addresses. DNS servers are responsible for the resolution of readable addresses into the corresponding IP addresses.
Dolby Digital: Digital multi-channel audio. The digital standard for high quality home movie systems. The individual channels are broadcast separately in this standard. The three front channels right, left and centre, the two surround channels right and left and the external subwoofer channels are called a 5:1 signal.
Dolby Pro Logic: Analogue multi-channel audio. Converts a Dolby-coded stereo signal into a surround sound. This usually contains four channels (front left, centre, front right, surround channel). A special subwoofer channel is not generated in this method.
Dolby Pro Logic II: Analogue multi-channel audio. Dolby Pro Logic II is a further development of Dolby Pro Logic. This method generates a 6-channel spatial sound from a stereo or Pro-Logic signal (front left, centre, front right, surround left, surround right, subwoofer).
Dolby Surround: Analogue multi-channel audio system that brings four audio channels down to two audio tracks with the aid of a matrix coding.
Dolby Virtual Speaker: The Dolby Virtual Speaker technology simulates the surround playback of a real 5.1-channel playback with only two speakers.
DRM: Digital Rights Management. Processes to control copyright protected data. To be used correctly, DRM protected contents require not only a DRM capable device but also the possession of a license issued by the provider (to be paid for).
DTS: Digital Theater Systems; Digital multi-channel audio.
DVB-C/-S/-T: Digital Video Broadcasting stands for digital television. Technical DVB is the standardised process for transmitting digital content (television, radio, multi-channel audio, room sound, EPG, Teletext, and other supplemental services) through digital technology. C stands for transmission via cable, S for distribution via satellite and T for terrestrial or antenna distribution.
DVD: Abbreviation of Digital Video Disc and later Digital Versatile Disc.
DVD preceiver: Combi-device of DVD player and radio without integrated amplifier.
DVI: Digital Visual Interface, is an interface for transmitting digital video and graphic data (without audio).
Dynamic contrast ratio: Here the light intensity of the display is adapted in case of a high black portion in the picture. The so-called backlights are dimmed automatically and the contrast ratio increases temporarily, i.e. dynamically.
Electronic Programme Guide: See EPG.
EPG: Electronic Programme Guide is the electronic variant of a printed TV guide. Using the EPG you can watch the TV programme of the TV station, transfer the appropriate data. The list of programmes contains the title, beginning and end and duration of the programme. In addition brief descriptions of the content of the programmes is also displayed.
Ethernet: Cable linked data net technology for local networks (LANs). Also covers standards for e.g. plug connectors and transfer speeds.
Euro AV socket: Interface for connecting video devices to a TV set. This socket is also referred to as Scart socket.
F
FLOF: Full Level One Facilities. Teletext system in which names and numbers of the jump destinations are transmitted in the bottom line on every page. This guides the reader to related topics for example. An information about which pages exist and which pages have sub-pages is not available in FLOF.
G
Gateway: Transfer into another network; in this case connection from home network to internet.
The network device is usually used as the standard gateway which produces this connection. The DSL router generally also represents the internet gateway.
H
HbbTV: HbbTV (Hybrid broadcast broadband television) is an industry standard that offers an open platform for technology that is not dependent on manufacturers. HbbTV combines TV programmes with online services seamlessly over broadband internet (DSL).
HDCP: High-bandwidth Digital Content Protection. Coding system provided for the DVI and HDMI interfaces for secure transmission of audio and video data.
HDMI: High Definition Multimedia Interface is a newly developed interface for full digital transmission of audio and video data.
HDTV: High Definition Television is an umbrella term that covers a number of high resolution television standards.
HD-Ready: A quality seal that is awarded to products that are capable of displaying high-definition television (HDTV).
High band and Low band: Transmission ranges for satellites.
Host: Computer that the server services are provided from, i.e. that makes data available. Refer also to media server.
Glossary
ID3 tags: Additional information for MP3 and WMA audio files. Information about the singer, title, album and album cover can be saved here among other things. These data are edited on the PC by an ID3 tag editor.
IP address: IP addresses (Internet Protocol Addresses) are used to identify devices in an Internet Protocol (IP) network. IP addresses are made up of four groups of numbers of three digits each.
IR-Link: The IR-Link function allows the operation of accessory devices with concealed installation made by other manufacturers via the Loewe TV set. The infrared sensor required for this is available as an accessory and can be connected to the IR-Link connection of the TV set.
J
JPEG/JPG: Joint Photographic Experts Group is a committee which has developed a standard method for the compression of digital photos. This method JPEG (JPG for short), named after the committee, is a commonly used graphic format for photos.
1
LAN: Abbreviation for Local Area Network. Mainly used as a designation for networks with wiring (Ethernet).
LCD: Liquid Crystal Display.
LCN: Logical Channel Numbers. In stations with LCN, the channel location number belonging to the station is also transmitted by the provider. The stations are sorted according to these channel location numbers.
L-Link: Intelligent system connection between Loewe devices for the automatic exchange of information. Makes the operation of TV and Loewe system components even more convenient.
LNB/LNC: The crucial electronic component of a satellite antenna is referred to as an LNB (Low Noise Block Converter). It is mounted in the focal point of a parabolic antenna. The designation LNC (Low Noise Converter) indicates that conversion to lower intermediate frequency takes place. The supplemental block in the LNB refers to the fact that a whole frequency range (a block) is converted in each case.
M
MAC address: Hardware address of a network adapter, e.g. the network card in the PC. It is permanently assigned by the manufacturer and is used to uniquely identify devices in networks.
Mbit/sec: Information about the transfer rate in networks in megabits, i.e. millions of characters per second. With WLAN the maximum speed is 11 (IEEE 802.11b), 54 (IEEE 802.11g) or 300 (IEEE 802.11n) Mbit/sec, in wired networks 10 Mbit/sec or 100 Mbit/sec (Fast Ethernet).
Media server: Stands for the device which multimedia contents are stored on, but is also the name for the service provided by the device that makes this data available to the network.
MHEG-5: Digital teletext standard of the Multimedia and Hypermedia Expert Group. At the moment only available in United Kingdom and Ireland.
Modulator: Transmitter in the video or DVD recorder so that the devices can receive signals via the tuner of the TV device.
Mono: Single-channel audio.
MPEG: Digital compression process for video.
MP3: Data format for compressed audio files.
Multimedia contents: Videos, music files and photos are grouped together under this term.
N
NAS: Abbreviation for Network Attached Storage. The term describes a hard disc which is independently linked to the network (i.e. without a PC).
Network ID: NID refers to the so-called programme ID number, also known as network ID – a number between 0 and 8191. This specification is necessary in specific cable networks of some countries. Then only DVB signals of this station network are searched for.
NICAM: Audio standard. Is used in Denmark, England, France, Sweden, and Spain.
NTSC: American colour standard.
P
Page Catching: For teletext, refers to going to and calling a page number.
PAL: European standard.
PCM: Pulse Code Modulation for digital sound.
Picture in Picture: See PIP.
PIP: Picture in Picture; a function which displays two pictures on the screen.
Pixel: Denotes both the smallest unit of a digital graphic grid and its display on a screen with grid control.
Pixel error: A pixel error is a defective pixel, usually on an LCD. Pixel errors may be caused by production errors. They are expressed for example by a constantly lit pixel or a constantly black pixel. Single defective pixels however are excluded from a guarantee.
PNG: Abbreviation for Portable Network Graphics, a freely available grid graphics format for loss-free compression.
Port: A port is part of a network address (or also IP address). It allows assignment of data packages to various services which are running on one device under the same network address.
Powerline: Powerline refers to a type of wired network connection in which data can be transmitted via the domestic power supply using the optionally available adapters.
Glossary
Progressive JPEG: Progressive JPEGs are built up gradually. The quality of the picture increases progressively during the loading process.
ProScan/Progressive Scan: Progressive Scan (abbr. PS) or full picture method is a technique in the picture build-up of monitors, TV sets, beamers, and other display devices in which the output device is not sent line interlaced half pictures – unlike in the interlace technique – but real full pictures.
PSK: Stands in connection with WLAN encoding for Pre-Shared Key. Clients, who want to connect up to a wireless network secured with PSK have to know this key.
R
RGB: Colour signals red, green and blue.
Router: Device for connecting up several networks, e.g. home network and internet.
S
Satellite tuner: Receiver for satellite programmes.
SDTV: Standard Definition TeleVision.
SECAM: French colour standard.
Set-Top-Box: Set-Top-Box (STB for short) refers to a device in entertainment electronics which is connected to another device, usually a TV set, and offers the user additional functional options.
Signal input groups: Depending on the applied signal, the signal sources are divided into different groups. All signal input groups with their corresponding signal types and the possible inputs are listed below.
TV analogue:
Signal type: FBAS, YC, RGB-SD (480i/576i), Component-SD (480i/576i)
Input: Tuner analogue, AV, AVS
TV digital:
Signal type: DVB-SD, HDMI-SD (480i/576i)
Input: Tuner digital, HDMI1, HDMI2, HDMI3
HD analogue:
Signal type: RGB-HD (video mode: e.g.1920x1080, 1280x720), Component-HD (video modes: e.g. 1920x1080, 1280x720)
Input: PC IN
HD digital:
Signal type: DVB-HD, HDMI-HD
Input: Tuner digital, HDMI1, HDMI2, HDMI3
PC:
Signal type: RGB
(PC modes: e.g. 800x600, 1024x768, 1280x1024, 1360x768)
Input: PC IN
PhotoViewer:
Input: USB
Signal strength: Strength of the received antenna signal.
Signal quality: Quality of the incoming antenna signal.
Smart Card: The Smart Card is an electronic chip card issued by the respective programme provider or by the certification-free Pay-TV operators. It contains the code which is decoded by the CA module.
Static contrast ratio: Describes the difference between the brightest and darkest picture display.
Stereo: Dual-channel audio.
Switch: Device for connecting several computers to a network.
Switch voltage: Video devices specify this voltage to switch the TV device to playback.
Symbol rate: Describes the transmission speed for data transmission.
T
Terrestrial: In data transmission a wireless transmission that does not use satellites as intermediate station is referred to as terrestrial.
TFT: Thin Film Transistor. One widely distributed application is control of liquid crystal flat screens, for which a signal transistor is used for each pixel. This design of display is also referred to as active matrix, however it is frequently also referred to as TFT display.
TOP: Table of Pages. Teletext system in which the individual pages are divided into topics. The blocks stand for a higher hierarchy level (e.g. News, Sport, Programmes) and the groups for the level below (e.g. Home/Abroad, Football/Tennis). Abbreviations can be assigned to the pages which are displayed in colour on the bottom line and can be selected with the four coloured buttons on the remote control. Information is also transmitted about which pages exist and which of them have sub-pages.
Tuner: Another term for receiver.
U
UPnP AV: Abbreviation for Universal Plug and Play Audio / Video. Is used to control network devices from all manufacturers. Has become a wide spread standard for home networking.
USB: Universal Serial Bus. Serial bus system for connecting external devices (USB card reader, USB stick).
Glossary
V
VGA: PC interface for connecting a monitor.
VPS: The Video Programming System (VPS) is a signal which some (but not all) analogue TV stations transmit in the blanking gap. The signal is used by video and DVD recorders when recording programmes to react to delays in start time, programme changes and excesses of the planned programme time.
W
WEP: Abbreviation for Wired Equivalent Privacy. Former standard process in the WLAN encryption, now outdated.
Wired network: see LAN.
Wireless network: see WLAN.
WLAN: Abbreviation for Wireless Local Area Network. Also referred to in brief as wireless network.
WMA: Abbreviation for Windows Media Audio, Microsoft's own audio data format. The contents are compressed as in MP3 files.
WMV: Abbreviation for Windows Media Video, Microsoft own video data format.
WPA: Abbreviation for Wi-Fi Protected Access. Replaced WEP as standard encryption for wireless networks.
Y
Ycc/Ypp: Colour standards for Set-Top-Boxes.
YCbCr: Digital colour model, see COMPONENT IN.
YPbPr: Analogue colour model, see COMPONENT IN.
BG
This equipment is in compliance with the essential requirements and other relevant provisions of Directive 1999/5/EC. It may be operated in all countries in the EU and also in Iceland, Norway and Switzerland. In France and Italy it may only be used indoors.
GR
The designated product conforms to the provisions of the following European directives:
2006/95/EG
Electrical equipment designed for use within certain voltages limits - LV-Directive.
2004/108/EG
Radio equipment and Telecommunications Terminal Equipment and the Mutual Recognition of their Conformity
2005/32/EG
Establishing a framework for the setting of ecodesign requirements for energy-using products and amending
Council Directive 92/42/EEC an Directives 96/57/EC and 2000/55/EC of the European Parliament and of the Council.
Affixing of the CE marking

The conformity of the designated product with the provisions of Directives is proved by full compliance with the following standards:
Richtlinie / Directive 2006/95/EG
X EN 60065 2002 + A1 2006, A11 2008
Richtlinie / Directive 2004/108/EG
| X | EN 55013 | 2001 | + A1 2003, A2 2006 | X | EN 55024 | 1998 | + A1 2001, A2 2003 |
| X | EN 55020 | 2007 | | X | EN 61000-3-2 | 2006 | |
| X | EN 55022 | 2006 | + A1 2007 | X | EN 61000-3-3 | 2008 | |
Richtlinie / Directive 1999/5/EG
| X | EN 62311 | 2008 | X | EN 301489-17 | V2.1.1 |
| X | EN 301489-1 | V1.8.1 | X | EN 300328 | V1.7.1 |
| X | EN 301893 | V1.5.1 | | | |
Adjusting the picture 34
Adjusting the sound 32
Alarm 57
Allow switching voltage 108
Antenna DVB 108
Archive playback 95
Assign digital audio input 109
Audio amplifiers....120
AUDIO button 21, 125
Audio commentary 23, 32, 33
Audio commentary volume ....32
Auto dimming - Room 34, 36
Auto dimming - Video (VBD+) 34
Auto format 34
Automatic speech detection 33
Automatic time control 106
AV audio signal 33
AV standard 108
B
Balance....33
Batteries 20
Blu-ray player 112
Bookmarks
Delete all 98,100
Delete individual 95
Jumping to 95
Setting 95
Brightness....34
Bundling the Cables 20
Button combinations 128
Button functions ......38
C
Call Digital Recorder menu 85
Camcorder....110
CA module 59
CA module selection 41
Change favourites lists 45
Add station 45
Delete station 45
Move station 45
Rename list 45
Change station 44
Delete station 44
Move station 44
Rename station 44
Restore station 44
Changing the title of a recording .....101
Character Table 129
Checking the hard disc 105
CI slot 59
Cleaning and care 9
Code number 56
Coloured buttons 38, 41, 50
Colour intensity 34
Colour temperature....34
Common Interface Plus 106, 107
Connecting antennas 18
Connecting the TV Set 18
Connections 11
Contrast....34
Control unit 10
Copy protection 124
Copy recordings
from an accessible TV set 104
to a connected recorder .....98
D
Data capture 49
Decoder....109
Decoder stations 109
Delete Manager 94
Set delete protection in the Timer data
menu 93
Setting/cancelling delete protection .....102
Delete programmed descrambling .....99
Deleting....97
All bookmarks 98, 100
Individual bookmarks....95
Parts of the recording 97
Recording....100
Deleting timer entries 94
Descramble scrambled recording .....99
Descrambling at DR continuous operation ..85
Device at connection AV 108
Digital audio input 121
Digital camera 110
Digital Link HD (HDMI CEC) 113
Digital Link Plus 109, 124
Digital Noise Control 34
Digital teletext 52
Direct recording 89
One Touch Recording 89
Display....21
DR archive view 85
DR continuous operation ....85
DR+ Streaming 103
Copy from accessible TV set ....104
Extended standby mode 103
Follow me 104
Play via network 103
DR+ Streaming settings 86
DR device group name 86
DR device name 86
DR standby after switch-off ....86
IP port number 86
Share the DR archive with other TVs .....86
Using the DR archives of other TVs .....86
DVB character set ....41
DVB subtitles 38
DVD button 125
DVD player 112
DVD recorder 112
DVI/HDMI 112
E
Encrypted stations ...... 23, 24, 27, 42, 59
Energy efficiency 15, 22
Environmental protection 142
EPG 48
F
Factory settings picture/sound 35
Fast forward and rewind 88, 96
Favourites 31
Film quality impr. (DMM) 34
First installation wizard 22
FLOF 50
Formatting the hard disc 105
G
Game console 109, 112
Gaming mode 109
Index
H
HbbTV 80
HDMI....112
HDMI CEC 113
Headphone volume....32
Help 15
Hiding sections 97
HiFi/AV amplifier 115, 120
Highlight function 88
|
Index in the TV set 15
Info display 15
Inform about hidden sections....85
Installing the TV set 18
Interactive data services ....52
Internal WLAN antenna 60
iPIP 46
J
Jump distance 85
Jumping....87, 96
Jumping to bookmarks 95
Jump to automatically set bookmarks .....87
L
Language 22,57,131
Language/sound 41
Last station 38
LNC/LNB 25, 26, 27
Locking/unlocking a movie 101
Logical Channel Number 23
Loudness 32
M
Mains switch.... 10, 21
Manual station search 43
Maximum volume 33
Max. switch on volume 33
Access....61
Overview....61
Quit 61
MediaHome....66
Media menu 62
MediaMusic....76
MediaNet 70
Favourites....70, 73
Internet....71
Personal area 72
Recommendations 70
Settings....74
Topic selection 70
MediaPhoto....77
Full-screen mode 77
Rotate picture 77
Slide show 77
MediaPortal 14
MediaText....80
MediaUpdate....60
MediaVideo 78
Jumping 79
Playback....78
Select language/sound 79
Wind....79
Memorise 48
Menu language 15
Menu operation 12
Mobile phone keypad 12
Move picture vertically 35
Muting 32
N
Numeric buttons 12, 15, 30
0
On/Off button 10
On-screen displays 58
OPC 34
Overview diagram 16
P
Page selection 50
Parental lock 56, 101
PC IN 114
Personal text pages 38, 51
Picture 34
Picture adjustment 34, 35
Picture format 34, 35
PALplus 35
Panorama....35
Zoom 35
Picture in Picture 46
PIN 56
PIP 46
Playing highlights 96
Programme info 38
R
Radio menu 17,53
Radio mode 21, 52, 54
REC button 125
Record conflict....94
Recording 122
Recording capacity 85
Recording quality 85
Recording subtitles 85
Recording wizard 92, 122
Remote control 3, 20, 125
Remote TV switch on via Digital Link .....109
Repeat initial installation 22
Replay function 88
Reset picture/sound 35
RS-232C interface 121
S
Safety 8,9
Scope of delivery 7
Search wizard 42
Selecting Audio/Video Source 31
Select memory medium 85
Select satellite installation 24
Select station 30
via favourites lists ....31
with P+/P- 30
with the numeric buttons ....30
with the station list 30
Serial interface 121
Serial recording tolerance 85
Service....154
Set Covers 18
Setting pre-record time and post record time .86
Set-Top-Box 112
Sharpness 34
Side by side 36
Signal type 108
Slow motion 88, 96
Smart Card....59
Smart Jump....85, 87, 96
Software download 126
Software update 126
Sound....32
Sound components wizard 115
Index
Sound mode 32
Sound off 32
Sound-picture synchronisation ....32
Sound system 116
Standard PIP 46
Standby mode 21
Station list 30
Station search/update 42
Status display 40, 90
Stop recording early 90
Subtitles....38, 41
Switching off 21
Switching off the TV set during recording ...90
Switching on 21
Switch on TV when marked 49
Switch to live picture 87
T
Teletext....50
Teletext functions 38
Teletext subtitles 38
Tilting the TV set 130
Time 39
Time and date 58
Timer data 93, 122
Automatic time control....122
Auto time control 93
Date....93, 122
Decoding overnight 93, 122
Descrambled recording 93, 122
Lock movie 93
Programme provider PIN 93, 122
Recorder 93, 122
Recording time 93, 122
Recording type 93, 122
Record subtitles 93, 122
Set delete protection 93
Station 93
VPS 93,122
Timer functions 57
Timer overview 91, 92, 94, 123
Timer recording....91
manually 92
via EPG 91
via teletext 92
Timer recordings ....122
TOP 50
Top/bottom....36
TOP table 50
TV button 20,125
TV menu 16
TV set equipment 140
TV viewing with time shift 87, 89
U
UPnP....60
USB keyboard 128
USB stick 126
V
Video podcast
Video podcasts by country ....75
Video podcasts by genre ....75
Video podcasts ....75
Videotext subtitles ....51
Viewing a locked movie 102
Viewing another movie from the archive during archive recording .....90
Viewing highlights from the archive .....100
Volume 32
Volume adjustment 33
VPS....106
VPS times 51
W
Watching other stations during archive recording 90
Wired connection 60
Wireless radio connection 60
Service
A Logwe Austria GmbH
Parkring 12
Audio Products Group Pty Ltd
67 O'Riordan St
Alexandria NSW 2015, Australia
Tel +61 - 2 9669 3477
Fax +61 - 2 9578 0140
E-mail: help@audioproducts.com.au
B NL L
Loewe Opta Benelux NV/SA
Uilenbaan 84
Customer Care Center
Industriestraße 11
Century Court, Riverside Way
Riverside Business Park, Irvine, Ayrshire
KA11 5DJ, UK
Tel +44 - 1294 315 000
Fax +44 - 1294 315 001
E-mail: enquiries@loewe-uk.com
IL Clear electronic entertainment Ltd
13 Noah Mozes St.
Agish Ravad Building
Tel Aviv 67442, Israel
Tel +972 - 3 - 6091100
Fax +972 - 3 - 6092200
E-mail: info@loewe.co.il
KSA Salem Agencies & Services Co.
Hamad Al Haqueel Street, Rawdah,
Jeddah 21413
Kingdom of Saudi Arabia
Tel +966 (2) 665 4616
Fax +966 (2) 660 7864
E-mail: hkurkjian@aol.com
LT A Cappella Ltd
Ausros Vartu 5, Pasazo skq.
01129 Vilnius, Lithuania
Tel +370 - 52 12 22 96
Fax +370 - 52 62 66 81
E-mail: info@loewe.it
LV Loewe, service center
Brivibas gatve 332,
Riga, Latvia, LV-1006
Tel +371 673 105 68
E-mail: dom332@dom332.lv
M Doneo Co. Li
34/36 Danny Cremona Street
Hamrun, HMR1514, Malta
Tel +356 - 21 - 22 53 81
Fax +356 - 21 - 23 07 35
E-mail: service@doneo.com.mt
MA Somara S.A.
- Rue Mustapha El Maani
20000 Casablanca, Morocco
Tel +212 - 22 22 03 08
Fax +212 - 22 26 00 06
E-mail: somara@somara.ma
N Pce, Premium Consumer
Electronics as
Ostre Kullerod 5
105005 Moscow, Russia
Tel +7 - 495 730 78 00
Fax +7 - 495 730 78 01
E-mail: service@loewe-cis.ru
S Kjaerulff 1 AB
Ridbanegatan 4, Box 9076
UAE Dubai Audio Center
P.O. Box 32836, Sheikh Zayed Road
Dubai, UAE
Tel +971 - 4 343 14 41
Fax +971 - 4 343 77 48
E-mail: service@dubiaudio.com
ZA The Soundlab (Pty) Ltd
P.O. Box 31952, Kyalami 1684
Gauteng, Republic of South Africa
Tel +27 - 1 14 66 47 00
Fax +27 - 1 14 66 42 85
E-mail: loewe@mad.co.za
LOEWE.