
AntiVir Professional - Logiciel photo / vidéo AVIRA - Free user manual and instructions
Find the device manual for free AntiVir Professional AVIRA in PDF.


User questions about AntiVir Professional AVIRA
0 question about this device. Answer the ones you know or ask your own.
Ask a new question about this device
Download the instructions for your Logiciel photo / vidéo in PDF format for free! Find your manual AntiVir Professional - AVIRA and take your electronic device back in hand. On this page are published all the documents necessary for the use of your device. AntiVir Professional by AVIRA.
USER MANUAL AntiVir Professional AVIRA
Avira AntiVir Professional
User Manual
Trademarks and Copyright
Trademarks
AntiVir is a registered trademark of Avira GmbH.
Windows is a registered trademark of the Microsoft Corporation in the United States and other countries.
All other brand and product names are trademarks or registered trademarks of their respective owners.
Protected trademarks are not marked as such in this manual. This does not mean, however that they may be used freely.
Copyright information
Code provided by third party providers was used for Avira AntiVir Professional. We thank the copyright owners for making the code available to us. For detailed information on copyright, please refer to Third Party Licenses in the Program Help of Avira AntiVir Professional.
Table of Contents
1 Introduction .... 1
2 Icons and emphases....2
3 Product information .... 3
3.1 Delivery scope....3
3.2 System requirements....4
3.3 Licensing and Upgrade....4
3.3.1 License Manager ....5
4 Installation and uninstallation....6
4.1 Installation....6
4.2 Change installation 10
4.3 Installation modules.... 10
4.4 Uninstallation....11
4.5 Installation and uninstallation on the network.... 12
4.5.1 Installation on the network.... 13
4.5.2 Uninstallation on the network 13
4.5.3 Command line parameter for the setup program.... 13
4.5.4 Parameter of the file setup.inf....14
5 Overview of AntiVir Professional 18
5.1 User interface and operation.... 18
5.1.1 Control Center 18
5.1.2 Configuration.... 20
5.1.3 Tray icon....24
5.2 How to...? 25
5.2.1 Activate license.... 25
5.2.2 Perform automatic updates 25
5.2.3 Start a manual update.... 27
5.2.4 On-demand scan: Using a scan profile to scan for viruses and malware ..... 27
5.2.5 On-demand scan: Scan for viruses and malware using Dragamp;Drop...... 29
5.2.6 On-demand scan: Scan for viruses and malware via the context menu.... 29
5.2.7 On-demand scan: Automatically scan for viruses and malware.... 29
5.2.8 On-demand scan: Targeted scan for Rootkits and active malware 31
5.2.9 React to detected viruses and malware.... 31
5.2.10 Quarantine: Handling quarantined files (*.qua).... 35
5.2.11 Quarantine: Restore the files in quarantine.... 37
5.2.12 Quarantine: Move suspicious files to quarantine.... 38
5.2.13 Scan profile: Amend or delete file type in a scan profile 38
5.2.14 Scan profile: Create desktop shortcut for scan profile 38
5.2.15 Events: Filter events 39
5.2.16 MailGuard: Exclude email addresses from scan 39
5.2.17 FireWall: Select the security level for the FireWall.... 40
6 Scanner 42
7 Updates....43
8 Avira FireWall :: Overview 45
9 FAQ, Tips 46
9.1 Help in case of a problem 46
9.2 Shortcuts 50
9.2.1 In dialog boxes 50
9.2.2 In the help 51
9.2.3 In the Control Center....51
9.3 Windows Security Center.... 53
9.3.1 General 53
9.3.2 The Windows Security Center and your AntiVir program 53
10 Viruses and more....56
10.1 Extended threat categories 56
10.2 Viruses and other malware.... 58
11 Info and Service 62
11.1 Contact address 62
11.2 Technical support 62
11.3 Suspicious file....62
11.4 Reporting false positives....63
11.5 Your feedback for more security 63
12 Reference: Configuration options....64
12.1 Scanner....64
12.1.1 Scan 64
12.1.1.1. Action on detection....67
12.1.1.2. Further actions....69
12.1.1.3. Exceptions....71
12.1.1.4. Heuristics 72
12.1.2 Report....72
12.2 Guard....73
12.2.1 Scan 73
12.2.1.1. Action on detection.... 75
12.2.1.2. Further actions.... 78
12.2.1.3. Exceptions 79
12.2.1.4. Heuristics 82
12.2.2 ProActiv....83
12.2.2.1. Application filter: Applications to be blocked.... 84
12.2.2.2. Application filter: Permitted applications 85
12.2.3 Report....86
12.3 MailGuard....87
12.3.1 Scan 87
12.3.1.1. Action on detection....88
12.3.1.2. Other actions....90
12.3.1.3. Heuristics 90
12.3.2 General....91
12.3.2.1. Exceptions 91
12.3.2.2. Cache 92
12.3.2.3. Footer 92
12.3.3 Report....93
12.4 Firewall 93
12.4.1 Adapter rules....94
12.4.1.1. Incoming Rules....96
12.4.1.2. Outgoing Rules.... 103
12.4.2 Application rules 104
12.4.3 Trusted providers.... 106
12.4.4 Settings.... 107
12.4.5 Popup settings....108
12.5 Firewall under SMC 110
12.5.1 General settings 110
12.5.2 General adapter rules.... 111
12.5.2.1. Incoming Rules.... 113
12.5.2.2. Outgoing Rules.... 120
12.5.3 Application list 121
12.5.4 Trusted providers.... 122
12.5.5 Additional settings.... 122
12.5.6 Display settings.... 123
12.6 WebGuard.... 125
12.6.1 Scan 125
12.6.1.1. Action on detection.... 125
12.6.1.2. Locked requests.... 127
12.6.1.3. Exceptions 128
12.6.1.4. Heuristics 131
12.6.2 Report.... 132
12.7 Update 133
12.7.1 Start product update.... 133
12.7.2 Restart settings.... 134
12.7.3 File server 135
12.8 General.... 137
12.8.1 Email....137
12.8.2 Threat categories.... 138
12.8.3 Password 139
12.8.4 Security.... 140
12.8.5 WMI.... 141
12.8.6 Directories.... 142
12.8.7 Proxy 143
12.8.8 Warnings 144
12.8.8.1. Network.... 144
12.8.8.2. Email.... 146
12.8.8.3. Acoustic alerts 151
12.8.8.4. Warnings 152
12.8.9 Events.... 153
12.8.10 Limit reports 153
1 Introduction
Your AntiVir program protects your computer against viruses, worms, Trojans, adware and spyware and other risks. In this manual these are referred to as viruses or malware (harmful software) and unwanted programs.
The manual describes the program installation and operation.
For further options and information, please visit our website:
http://www.avira.com
The Avira website lets you.....
- access information on other AntiVir desktop programs
– download the latest AntiVir desktop programs
– download the latest product manuals in PDF format
– download free support and repair tools - access our comprehensive knowledge database and FAQs for troubleshooting
- access country-specific support addresses.
Your Avira Team
2 Icons and emphases
The following icons are used:
| Icon / designation | Explanation |
| √ | Placed before a condition which must be fulfilled prior to execution of an action. |
| ▶ | Placed before an action step that you perform. |
| → | Placed before an event that follows the previous action. |
| Warning | Placed before a warning of the danger of critical data loss. |
| Note | Placed before a link to particularly important information or a tip which makes your AntiVir program easier to use. |
The following emphases are used:
| Emphasis | Explanation |
| Cursive | File name or path data. |
| Displayed software interface elements (e.g. window heading, window field or options box). | |
| Bold | Clicked software interface elements (e.g. menu item, section or button). |
3 Product information
This chapter contains all information relevant to the purchase and use of your AntiVir product:
– see Chapter: Delivery scope
– see Chapter: System requirements
– see Chapter: Licensing
- see Chapter:
AntiVir programs are comprehensive and flexible tools you can rely on to protect your computer from viruses, malware, unwanted programs and other dangers.
▶ Please note the following information:
Note
Loss of valuable data usually has dramatic consequences. Even the best virus protection program cannot provide one hundred percent protection from data loss. Make regular copies (Backups) of your data for security purposes.
Note
A program can only provide reliable and effective protection from viruses, malware, unwanted programs and other dangers if it is up-to-date. Make sure your AntiVir program is up-to-date with automatic updates. Configure the program accordingly.
3.1 Delivery scope
Your AntiVir program has the following functions:
– Control Center for monitoring, managing and controlling the entire program
- Central configuration with user-friendly standard and advanced options and context-sensitive help
- Scanner (on-demand scan) with profile-controlled and configurable scan for all known types of virus and malware
- Integration into the Windows Vista User Account Control allows you to carry out tasks requiring administrator rights.
– Guard (on-access scan) for continuous monitoring of all file access attempts
- ProActiv component for the permanent monitoring of program actions (for 32-bit system only, not available under Windows 2000)
- MailGuard (POP3 Scanner, IMAP Scanner and SMTP Scanner) for the permanent checking of emails for viruses and malware. Checking of email attachments is included
- WebGuard for monitoring data and files transferred from the Internet using the HTTP protocol (monitoring of ports 80, 8080, 3128)
- Integrated quarantine management to isolate and process suspicious files
- Rootkit protection for detecting hidden malware installed in your computer system (rootkits)
(Not available under Windows XP 64 bit) - Direct access to detailed information on the detected viruses and malware via the Internet
- Simple and quick updates to the program, virus definitions, and search engine through Single File Update and incremental VDF updates via a web server on the Internet or an intranet
– User-friendly licensing in License Manager - Integrated Scheduler for planning one-off or recurring jobs such as updates or scans
- Extremely high virus and malware detection via innovative scanning technology (scan engine) including heuristic scanning method
- Detection of all conventional archive types including detection of nested archives and smart extension detection
– High-performance multithreading function (simultaneous high-speed scanning of multiple files) - Avira FireWall for protecting your computer from unauthorized access from the Internet or another network and from unauthorized access to the Internet/network by unauthorized users
3.2 System requirements
The system requirements are as follows:
- Computer Pentium or later, at least 266 MHz
- Operating system
- Windows XP, SP2 (32 or 64 bit) or
- Windows Vista (32 or 64 bit, SP 1)
- Windows 7 (32 or 64 bit)
- At least 150 MB of free hard disk memory space (more if using quarantine for temporary storage)
- At least 256 MB RAM under Windows XP
- At least 1024 MB RAM under Windows Vista, Windows 7
- For the program installation: Administrator rights
- For all installations: Windows Internet Explorer 6.0 or higher
- Internet connection where appropriate (see Installation)
3.3 Licensing and Upgrade
In order to be able to use your AntiVir product, you require a license. You thereby accept the license terms.
The license is issued via a digital license code in the form of the file hbedv.key. This digital license code is the key to your personal license. It contains exact details of which programs are licensed to you and for what period of time. A digital license code can therefore also contain the license for more than one product.
If you purchased your AntiVir program on the Internet, or via a program CD/DVD, the digital license code is sent to you by email. You can load the license key during installation of the program or install it later in License Manager.
3.3.1 License Manager
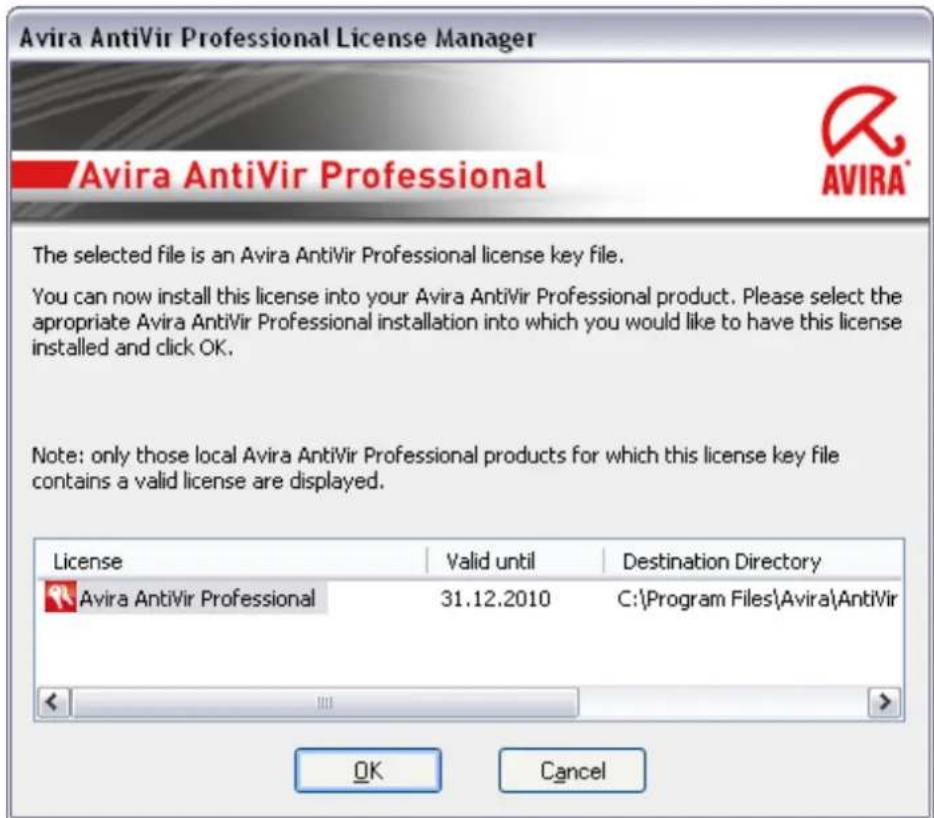
The Avira AntiVir Professional License Manager enables very simple installation of the Avira AntiVir Professional license.
Avira AntiVir Professional License Manager
text_image
Avira AntiVir Professional License Manager Avira AntiVir Professional The selected file is an Avira AntiVir Professional license key file. You can now install this license into your Avira AntiVir Professional product. Please select the appropriate Avira AntiVir Professional installation into which you would like to have this license installed and click OK. Note: only those local Avira AntiVir Professional products for which this license key file contains a valid license are displayed. License Valid until Destination Directory Avira AntiVir Professional 31.12.2010 C:\Program Files\Avira\AntiVir OK CancelYou can install the license by selecting the license file in your file manager or in the activation email with a double click and following the relevant instructions on the screen.
Note
The Avira AntiVir Professional License Manager automatically copies the corresponding license in the relevant product folder. If a license already exists, a note appears as to whether the existing license file is to be replaced. In this case the existing file is overwritten by the new license file.
4 Installation and uninstallation
This chapter contains information relating to the installation and uninstallation of your AntiVir program.
– see Chapter Installation: Conditions, Installation types, Install
– see Chapter Installation modules
– see Chapter Modification installation
- Installation and uninstallation on the network
– see Chapter Uninstallation: Uninstall
4.1 Installation
Before installation, check whether your computer fulfils all the minimum system requirements. If your computer satisfies all requirements, you can install the AntiVir program.
Note
During the installation process you have the option of creating a restore point. A purpose of a restore point is to reset the operating system to its pre-installation status. If you want to use this option, ensure that the operating system permits the creation of a restore point:
Windows XP: System properties -> System restore: Disable the option Disable system restore.
Windows Vista/Windows 7: System properties -> Computer protection: In the Protection settings area, highlight the drive on which the system is installed and click the Configure button. In the System protection window, enable the option System settings and restore previous file versions.
Installation types
During installation you can select a setup type in the installation wizard:
Express
- Not all program components are installed. The following components are not installed:
Avira AntiVir ProActiv
Avira FireWall
- The program files are installed into a specified default folder under C:\Program Files.
- Your AntiVir program is installed with default settings. You have the option of defining custom settings using the configuration wizard.
User-defined
- You can choose to install individual program components (see Chapter Installation and uninstallation::Installation modules).
- A target folder can be selected for the program files to be installed.
- You can disable Create a desktop icon and program group in the Start menu.
- Using the configuration wizard, you can define custom settings for your AntiVir program and initiate a short system scan that is performed automatically after installation.
Before starting installation
▶ Close your email program. It is also recommended to end all running applications.
▶ Make sure that no other virus protection solutions are installed. The automatic protection functions of various security solutions may interfere with each other.
▶ Establish an Internet connection: The Internet connection is necessary for performing the following installation steps:
▶ Downloading the current program file and scan engine as well as the latest virus definition files via the installation program (for Internet-based installation)
▶ Where appropriate, carrying out a update after completed installation
▶ Save the license file hbedv.key on your computer system if you want to activate your AntiVir program.
Note
Internet-based installation:
For the Internet-based installation of the program, an installation program is provided that loads the current program file prior to installation by the Avira GmbH web servers. This process ensures that your AntiVir program is installed with the latest virus definition file.
Installation with an installation package:
The installation package contains both the installation program and all necessary program files. No language selection for your AntiVir program is available for installation with an installation package. We recommend that you carry out an update of the virus definition file after installation.
Install
The installation program runs in self-explanatory dialog mode. Every window contains a certain selection of buttons to control the installation process.
The most important buttons are assigned the following functions:
- OK: Confirm action.
- Abort: Abort action.
- Next: Go to next step.
- Back: Go to previous step.
Installing your AntiVir program:
Note
The following actions for disabling the Windows FireWall only apply to the Windows XP operating system.
▶ Start the installation program by double-clicking the installation file you have downloaded from the Internet or insert the program CD.
Internet-based installation
The dialog box Welcome... appears.
▶ Click Next to continue with the installation.
The dialog box Language selection appears.
▶ Select the language you want to use to install your AntiVir program and confirm your language selection by clicking Next.
The dialog box Download appears. All files necessary for installation are downloaded from the Avira GmbH web servers. The Download window closes after conclusion of the download.
Installation with an installation package
The installation wizard opens with the dialog box Avira AntiVir Professional.
▶ Click Accept to begin the installation.
The installation file is extracted. The installation routine is started.
The dialog box Welcome... appears.
▶ Click Next.
Continuing Internet-based installation and installation with an installation package
The dialog box with the license agreement appears.
▶ Confirm that you accept the license agreement and click Next.
The dialog box Generate serial number appears.
▶ Where appropriate, confirm that a random serial number has been generated and transmitted during update, and click Next.
The dialog box Select installation type appears.
▶ Enable the option Express or User-defined. If you want to create a restore point, enable the Creating system restore point option. Click Next to confirm your settings.
User-defined installation
The dialog box Select destination directory appears.
▶ Confirm the specified destination directory by clicking Next.
- OR -
Use the Browse button to select a different destination directory and confirm by clicking Next.
The dialog box Install components appears:
▶ Enable or disable the required components and confirm by clicking Next.
If you have chosen to install the ProActiv component, the AntiVir ProActiv Community window appears. You have the option of confirming participation in the Avira AntiVir ProActiv Community: If this option is enabled, Avira AntiVir ProActiv sends data on suspicious programs detected by the ProActiv component to the Avira Malware Research Center. The data is used only for an advanced online scan and to expand and refine detection technology. You can use the further information link to obtain more details on the expanded online scan.
▶ Enable or disable participation in the AntiVir ProActiv Community and confirm by clicking Next.
In the following dialog box you can decide whether to create a desktop shortcut and/or a program group in the Start menu.
▶ Click Next.
Resume: Express installation und user-defined installation
The dialog box Install license appears:
▶ Go to the directory in which you have saved the license file, read the message in the dialog box and confirm by clicking Next.
The license file is copied and the components are installed and started.
In the following dialog box you can choose whether to open the Readme file after installation is completed and whether to restart your computer.
▶ Agree where appropriate and complete the installation by clicking Finish.
The installation wizard is closed.
Resume: User-defined installation
Configuration wizard
If you choose user-defined installation, the configuration wizard is opened in the following step. The configuration wizard enables you to define custom settings for your AntiVir program.
- Click Next in the welcome window of the configuration wizard to begin configuration of the program.
The Configure AHeAD dialog box enables you to select a detection level for the AHeAD technology. The detection level selected is used for the Scanner (On-demand scan) and Guard (On-access scan) AHeAD technology settings.
▶ Select a detection level and continue the installation by clicking Next.
In the following dialog box Select extended threat categories, you can adapt the protective functions of your AntiVir program to the threat categories specified.
▶ Where appropriate, activate further threat categories and continue the installation by clicking Next.
If you have selected the AntiVir FireWall installation module, the FireWall security level dialog box appears. You can define whether the Avira FireWall should permit external access to enabled resources as well as network access by applications of trusted companies.
▶ Enable the required options and continue the configuration by clicking Next.
If you have selected the AntiVir Guard installation module, the Guard start mode dialog box appears. You can stipulate the Guard start time. At each computer reboot, the Guard will be started in the start mode specified.
Note
The specified Guard start mode is saved in the registry and cannot be changed via the Configuration.
▶ Enable the required option and continue the configuration by clicking Next.
In the following Select email settings dialog box, you can define the Server settings for sending emails. Your AntiVir program uses SMPT to send emails send email alerts.
▶ Where appropriate, make the necessary adjustments to the server settings and continue the configuration by clicking Next.
In the following System scan dialog box, a short system scan can be enabled or disabled. The short system scan is performed after the configuration has been completed and before the computer is rebooted, and scans running programs and the most important system files for viruses and malware.
▶ Enable or disable the Short system scan option and continue the configuration by clicking Next.
In the following dialog box, you can complete the configuration by clicking Finish
▶ Click Finish to complete the configuration.
The specified and selected settings are accepted.
If you have enabled the Short system scan option, the Luke Filewalker window opens. The Scanner performs a short system scan.
Resume: Express installation und user-defined installation
If you selected the Restart computer option in the final installation wizard, the computer reboots.
After the computer restart the Readme file is displayed if you selected the Show Readme.txt option in the installation wizard.
After a successful installation, we recommend that you check the program is up-to-date in the Control Center under Overview::Status.
▶ Where appropriate, perform an update to ensure the virus definition file is up-to-date.
▶ Then perform a complete system scan.
4.2 Change installation
You have the option of adding or removing individual program components of the current AntiVir program installation (see Chapter Installation and uninstallation::Installation modules)
If you wish to add or remove modules of the current installation, you can use the option Add or Remove Programs in the Windows control panel to Change/Remove programs.
Select your AntiVir program and click Change. In the welcome dialog of the program, select the option Modify. You will be guided through the installation changes.
4.3 Installation modules
In a user-defined installation or a change installation, the following installation modules can be selected, added or removed.
- AntiVir Professional
This module contains all components required for successful installation of your AntiVir program.
- AntiVir Guard
The AntiVir Guard runs in the background. It monitors and repairs, if possible, files during operations such as open, write and copy in on-access mode.
Whenever a user carries out a file operation (e.g. load document, execute, copy), the AntiVir program automatically scans the file. Renaming a file does not trigger a scan by AntiVir Guard.
- AntiVir ProActiv
The ProActiv component monitors application actions and alerts users to suspicious application behavior. This behavior-based recognition enables you to protect yourself against unknown malware. The ProActiv component is integrated into AntiVir Guard.
- AntiVir MailGuard
MailGuard is the interface between your computer and the email server from which your email program (email client) downloads emails. MailGuard is connected as a so-called proxy between the email program and the email server. All incoming emails are routed through this proxy, scanned for viruses and unwanted programs and forwarded to your email program. Depending on the configuration, the program processes the affected emails automatically or asks the user for a certain action.
- AntiVir WebGuard
When surfing the Internet, you are using your web browser to request data from a web server. The data transferred from the web server (HTML files, script and image files, Flash files, video and music streams, etc.) will normally be moved directly into the browser cache for display in the web browser, meaning that an on-access scan as performed by AntiVir Guard is not possible. This could allow viruses and unwanted programs to access your computer system. WebGuard is what is known as an HTTP proxy which monitors the ports used for data transfer (80, 8080, 3128) and scans the transferred data for viruses and unwanted programs. Depending on the configuration, the program may process the affected files automatically or prompt the user for a specific action.
- Avira FireWall:
Avira FireWall controls communication to and from your computer. It permits or denies communications based on security policies.
- AntiVir Rootkit Protection
AntiVir Rootkit Protection checks whether software is already installed on your computer that can no longer be detected with conventional methods of malware protection after penetrating the computer system.
- Shell Extension
The Shell Extension generates an entry 'Scan selected files with AntiVir' in the context menu of the Windows Explorer (right-hand mouse button). With this entry you can directly scan files or directories.
4.4 Uninstallation
If you wish to remove the AntiVir program from your computer, you can use the option Add or Remove Programs to Change/Remove programs in the Windows Control Panel.
To uninstall your AntiVir program (e.g. in Windows XP and Windows Vista):
▶ Open the Control Panel via the Windows Start menu.
▶ Double click on Programs (Windows XP: Software).
▶ Select your AntiVir program in the list and click Remove.
You will be asked if you really want to remove the program.
▶ Click Yes to confirm.
You will be asked if you want to re-enable Windows FireWall (the Avira FireWall is disabled).
▶ Click Yes to confirm.
All components of the program are removed.
▶ Click on Finish to complete uninstallation.
Where appropriate, a dialog box appears recommending that your computer be restarted.
▶ Click Yes to confirm.
The AntiVir program is uninstalled and all directories, files and registry entries for the program are deleted when your computer is restarted.
4.5 Installation and uninstallation on the network
To simplify installation of AntiVir programs on a network of multiple client computers for the system administrator, your AntiVir program has a special procedure for the initial installation and the change installation.
For automatic installation, the setup program works with the control file setup.inf. The setup program (presetup.exe) is contained in the program's installation package. Installation is started with a script or batch file and all necessary information is obtained from the control file. The script commands therefore replace the usual manual inputs during installation.
Note
Please note that a license file is obligatory for initial installation on the network.
Note
Please note that an installation package for the AntiVir program is required for installation via a network. An installation file for Internet-based installation cannot be used.
AntiVir programs can be easily shared on the network with a server login script or via SMS.
For information on installation and uninstallation on the network:
- see Chapter: Command line parameter for the setup program
– see Chapter: Parameter of the file setup.inf
– see Chapter: Installation on the network
– see Chapter: Uninstallation on the network
Note
The AntiVir Security Management Center provides another easy option for the installation and uninstallation of AntiVir programs on the network. The AntiVir Security Management Center enables the remote installation and maintenance of AntiVir products on the network. For further information, please refer to our website. http://www.avira.com
4.5.1 Installation on the network
The installation can be script-controlled in batch mode.
The setup is suitable for the following installations:
- Initial installation via the network (unattended setup)
- Installation on single-user computers
▶ Change installation and update
Note
We recommend that you test automatic installation before the installation routine is implemented on the network.
To install AntiVir programs on the network automatically:
You must have administrator rights (also required in batch mode)
▶ Configure the parameter of the file setup.inf and save the file.
▶ Begin installation with the parameter /inf or integrate the parameter into the login script of the server.
- Examples: presetup.exe /inf="c:\temp\setup.inf"
The installation starts automatically.
4.5.2 Uninstallation on the network
To uninstall AntiVir programs on the network automatically:
You must have administrator rights (also required in batch mode)
▶ Start the uninstallation of with the parameter/remsilent or /remsilentaskreboot or integrate the parameter into the login script of the server.
You can also specify the parameter for the uninstallation log.
- Examples:preetup.exe /remsilent /unsetuplog="c:\logfiles\unsetup.log"
The uninstallation starts automatically.
Note
The uninstallation setup program should be started on the PC on which the AntiVir program is to be uninstalled; do not start the setup program from a network drive.
4.5.3 Command line parameter for the setup program
All path or file data must be placed in "..."
The following parameter is possible for installation:
- /inf
The setup program starts with the script mentioned and retrieves all parameters required.
Example: presetup.exe /inf="c:\temp\setup.inf"
The following parameters are possible for the uninstallation:
- /remove
The setup program uninstalls the AntiVir program.
Example: presetup.exe /remove
- /remsilent
The setup program uninstalls the AntiVir program without displaying dialogs. The computer is restarted after uninstallation.
Example: presetup.exe /remsilent
- /remsilentaskreboot
The setup program uninstalls the AntiVir program without displaying dialogs and requests a computer restart after uninstallation.
Example: presetup.exe /remsilentaskreboot
The following parameter is available as an option for the uninstallation log:
- /unsetuplog
All actions during uninstallation are logged.
Example: presetup.exe /remsilent
/unsetuplog="c:\logfiles\unsetup.log"
4.5.4 Parameter of the file setup.inf
In the control file setup.inf, you can set the following parameters in the [DATA] field for the automatic installation of the AntiVir program. The sequence of the parameters is unimportant. If a parameter setting is missing or wrong, the setup routine is aborted and an error message is displayed.
- DestinationPath
Destination path in which the program is installed. It has to be included to the script. Please note that the setup includes company name and product name automatically. Environment variables can be used.
Example: DestinationPath=%PROGRAMFILES%
produces the installation path C:\Programme\Avira\AntiVir Desktop
- ProgramGroup
Creates a program group for all users of the computer in the Windows Start menu.
1: Create program group
0: Do not create program group
Example: ProgramGroup=1
- DesktopIcon
Creates a shortcut desktop icon for all users of the computer on the desktop.
1: Create desktop icon
0: Do not create desktop icon
Example: DesktopIcon=1
- ShellExtension
Registers the shell extension in the registry. With the shell extension, files or directories can be scanned for viruses and malware via the context menu of the right-hand mouse button.
1: Register shell extension
0: Do not register shell extension
Example: ShellExtension=1
- Guard
Installs the AntiVir Guard (on-access Scanner).
1: Install AntiVir Guard
0: Do not install AntiVir Guard
Example: Guard=1
- MailScanner
Installs the AntiVir MailGuard.
1: Install AntiVir MailGuard
0: Do not install MailGuard
Example: MailScanner=1
- KeyFile
Specify the path for the license file that is copied during installation. For initial installation: obligatory. The file name must be specified completely (fully qualified). (For a change installation: optional.)
Example: KeyFile=D:\inst\license\hbedv.key
- ShowReadMe
Displays the readme.txt file after installation.
1: Display file
0: Do not display file
Example: ShowReadMe=1
- RestartWindows
Restarts the computer after installation. This entry has a higher priority than ShowRestartMessage.
1: Restart computer
0: Do not restart computer
Example: RestartWindows=1
- ShowRestartMessage
Displays information during the setup before carrying out an automatic restart.
0: Do not display information
1: Display information
Example: ShowRestartMessage=1
- SetupMode
Not required for initial installation. The setup program knows if an initial installation has been performed. Specify the type of installation. If an installation is available already, it has to be indicated in the SetupMode whether this installation is an update only or a change installation (reconfiguration) or an uninstallation.
Update: Updates an existing installation. In this case configuration parameters, for example Guard, are ignored.
Modify: Modifies (reconfigures) an existing installation. In the process no files are copied into the destination path.
Remove: Uninstall your AntiVir program from the system.
Example: SetupMode=Update
- AVWinIni (optional)
Specifies the destination path for the configuration file that may be copied during installation. The file name must be specified completely (fully qualified).
Example: AVWinIni=d:\inst\config\avwin.ini
- Password
This option assigns the password that was set for the (modification) installation and uninstallation to the setup routine. The entry is only scanned by the setup routine when a password has been set. If a password has been set and the password parameter is missing or wrong, the setup routine is aborted.
Example: Password=Password123
- WebGuard
Installs the AntiVir WebGuard.
1: Install AntiVir WebGuard
0: Do not install AntiVir WebGuard
Example: WebGuard=1
- RootKit
Installs the AntiVir rootkit protection module. Without AntiVir rootkit protection the Scanner will not be able to scan for rootkits on the system!
1: Install AntiVir Rootkit Protection
0: Do not install AntiVir Rootkit Protection
Example: RootKit=1
- HIPS
Installs the AntiVir ProActiv component. AntiVir ProActiv is a pattern-based detection technology that enables as yet unknown malware to be detected.
1: Install ProActiv
0: Do not install ProActiv
Example: HIPS=1
- FireWall
Installs the Avira FireWall component. Avira FireWall monitors and controls the incoming and outgoing data traffic on your computer system and protects your computers from threats originating from the Internet or other network environments.
1: Install firewall
0: Do not install firewall
Example: FireWall=1
5 Overview of AntiVir Professional
This chapter contains an overview of the functionality and operation of your AntiVir program.
– see Chapter Interface and operation
- see Chapter How to...?
5.1 User interface and operation
You operate your AntiVir program via three program interface elements:
– Control Center: monitoring and controlling the AntiVir program
- Configuration: Configuring the AntiVir program
- Tray Icon in the system tray of the taskbar: Opening the Control Center and other functions
5.1.1 Control Center
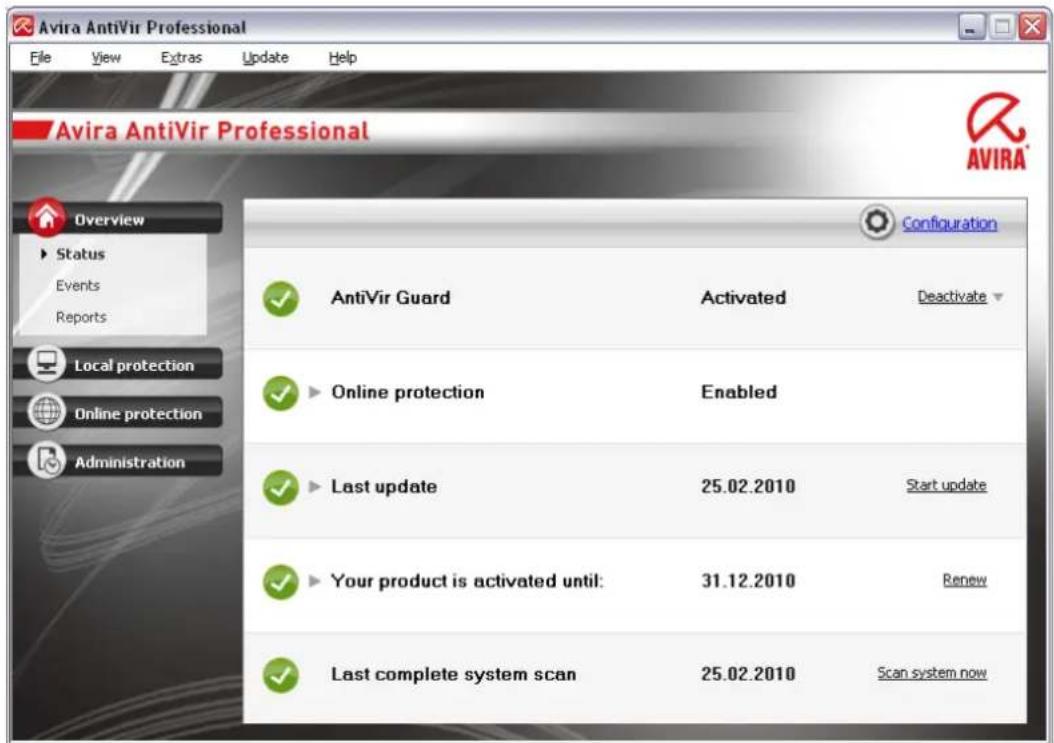
The Control Center is designed to monitor the protection status of your computer systems and control and operate the protection components and functions of your AntiVir program.
text_image
Avira AntiVir Professional File View Extras Update Help Avira AntiVir Professional AVIRA® Overview ► Status Events Reports Local protection Online protection Administration Configuration AntiVir Guard Activated Deactivate ► Online protection Enabled ► Last update 25.02.2010 Start update ► Your product is activated until: 31.12.2010 Renew ► Last complete system scan 25.02.2010.Scan system nowThe Control Center window is divided into three areas: The Menu bar, the Navigation bar and the detail window View:
- Menu bar: In the Control Center menu bar, you can access general program functions and information on the program.
- Navigation area: In the navigation area, you can easily swap between the individual sections of the Control Center. The individual sections contain information and functions of the program components and are arranged in the navigation bar according to activity. Example: Activity Overview - Section Status.
- View: This window shows the section selected in the navigation area. Depending on the section, you will find buttons to execute functions and actions in the upper bar of the detail window. Data or data objects are displayed in lists in the individual sections. You can sort the lists by clicking in the box defining how you wish to sort the list.
Starting and closing of Control Center
To start the Control Center the following options are available:
- Double-click the program icon on your desktop
- Via the program entry in the Start | Programs menu.
– Via the Tray Icon of your AntiVir program.
Close the Control Center via the menu command Close in the menu File or by clicking on the close tab in the Control Center.
Operate Control Center
To navigate in the Control Center
▶ Select an activity in the navigation bar.
The activity opens and other sections appear. The first section of the activity is selected and displayed in the view.
▶ If necessary, click another section to display this in the detail window.
- OR -
▶ Select a section via the View menu.
Note
You can activate the keyboard navigation in the menu bar with the help of the [ALT] key. If navigation is activated, you can move within the menu with the arrow keys. With the Return key you activate the active menu item.
To open or close menus in the Control Center, or to navigate within the menus, you can also use the following key combinations: [Alt] + underlined letter in the menu or menu command. Hold down the [Alt] key if you want to access a menu, a menu command or a submenu.
To process data or objects displayed in the detail window:
▶ highlight the data or object you wish to edit.
To highlight multiple elements (elements in columns), hold down the control key or the shift key while selecting the elements.
▶ Click the appropriate button in the upper bar of the detail window to edit the object.
Control Center overview
- Overview: In Overview you will find all sections with which you can monitor the functioning of your AntiVir program.
- The Status section lets you see at a glance which program modules are active and provides information on the last update performed. You can also see whether you own a valid license.
- The Events section enables you to view events generated by certain program modules.
• Die Reports section enables you to view the results of actions performed.
- Local protection: InLocal protection you will find the components for checking the files on your computer system for viruses and malware.
- The Scan section enables you to easily configure and start an on-demand scan. Predefined profiles enable you to run a scan with already adapted standard options. In the same way it is possible to adapt the scan for viruses and unwanted programs to your personal requirements with the help of manual selection (not saved) or by creating user-defined profiles.
- The Guard section displays information on scanned files, as well as other statistical data, which can be reset at any time, and enables access to the report file. More detailed information on the last virus or unwanted program detected can be obtained practically "at the push of a button".
- Online protection: In Online protection you will find the components to protect your computer system against viruses and malware from the Internet, and against unauthorized network access.
- The MailGuard section shows you all the emails scanned by MailGuard, their properties and other statistical data.
- The WebGuard section displays information on scanned URLs and detected viruses, as well as other statistical data, which can be reset at any time and enables access to the report file. More detailed information on the last virus or unwanted program detected can be obtained practically "at the push of a button".
- The FireWall section enables you to configure the basic settings for the Avira FireWall. In addition, the current data transfer rate and all active applications using a network connection are displayed.
- Management: In Management you will find tools for isolating and managing suspicious or infected files, and for planning recurring tasks.
- The Quarantine section contains the so-called quarantine manager. This is the central point for files already placed in quarantine or for suspect files that you would like to place in quarantine. It is also possible to send a selected file to the Avira Malware Research Center by email.
- The Scheduler section enables you to configure scheduled scanning and update jobs and to adapt or delete existing jobs.
5.1.2 Configuration
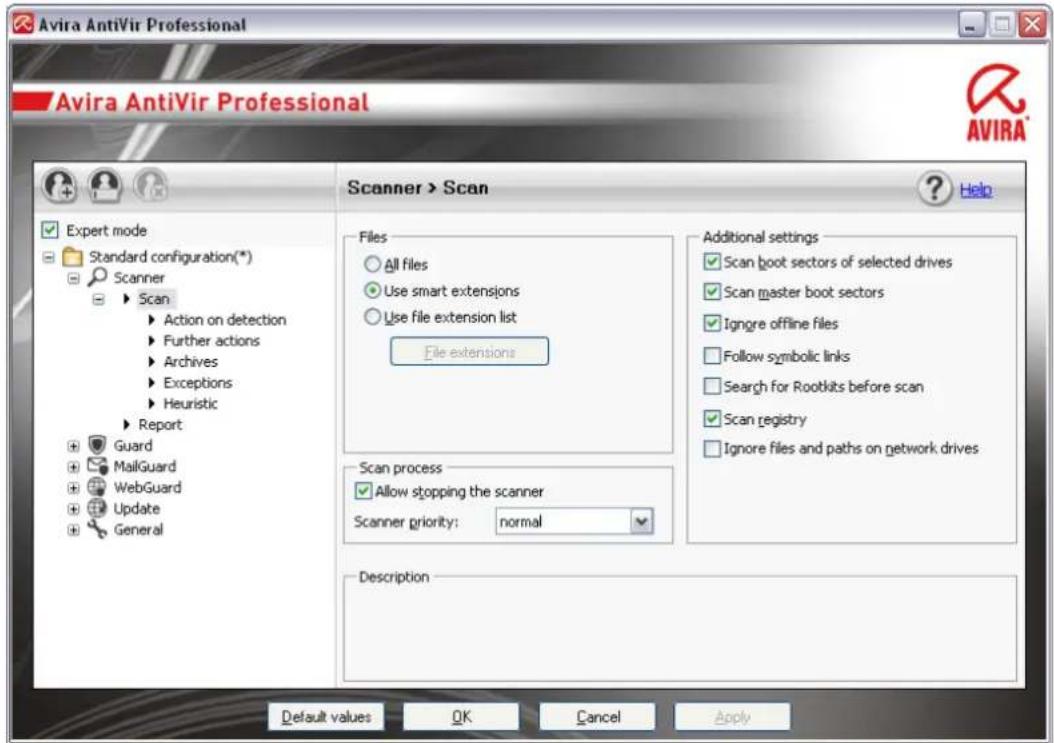
You can define settings for your AntiVir program in the Configuration. After installation, your AntiVir program is configured with standard settings, ensuring optimal protection for your computer system. However, your computer system or your specific requirements for your AntiVir program may mean you need to adapt the protective components of the program.
text_image
Avira AntiVir Professional Avira AntiVir Professional AVIRA® Expert mode Standard configuration(*) Scanner ► Scan ► Action on detection ► Further actions ► Archives ► Exceptions ► Heuristic ► Report Guard MailGuard WebGuard Update General Scanner > Scan Files All files Use smart extensions Use file extension list File extensions Scan process Allow stopping the scanner Scanner priority: normal Description Additional settings Scan boot sectors of selected drives Scan master boot sectors Igngre offline files Follow symbolic links Search for Rootkits before scan Scan registry Ignore files and paths on network drives Default values OK Cancel ApplyThe Configuration opens a dialog box: You can save your configuration settings via the OK or Apply buttons, delete your settings by clicking the Cancel button or restore your default configuration settings using the Default values button. You can select individual configuration sections in the left-hand navigation bar.
Accessing the Configuration
You have several options for accessing the configuration:
- via the Windows control panel.
- via the Windows Security Center - from Windows XP Service Pack 2.
– Via the Tray Icon of your AntiVir program. - in the Control Center via the menu item Extras | Configuration.
- in the Control Center via the Configuration button.
Note
If you are accessing configuration via the Configuration button in the Control Center, go to the Configuration register of the section which is active in the Control Center. Expert mode must be activated to select individual configuration registers. In this case, a dialog appears asking you to activate expert mode.
Configuration operation
Navigate in the configuration window as you would in Windows Explorer:
▶ Click an entry in the tree structure to display this configuration section in the detail window.
▶ Click the plus symbol in front of an entry to expand the configuration section and display configuration subsections in the tree structure.
▶ To hide configuration subsections, click on the minus symbol in front of the expanded configuration section.
Note
To enable or disable Configuration options and use the buttons, you can also use the following key combinations: [Alt] + underlined letter in the option name or button description.
Note
All configuration sections are only displayed in expert mode. Activate expert mode to view all configuration sections. Expert mode can be protected by a password that must be defined during activation.
If you want to confirm your Configuration settings:
▶ Click OK.
The configuration window is closed and the settings are accepted.
- OR -
▶ Click Accept.
The settings are applied. The configuration window remains open.
If you want to finish configuration without confirming your settings:
▶ Click Cancel.
The configuration window is closed and the settings are discarded.
If you want to restore all configuration settings to default values:
All settings of the configuration are restored to default values. All amendments and custom entries are lost when default settings are restored.
Configuration profiles
You have the option of saving your configuration settings as configuration profiles. In the configuration profile, i.e. of a configuration, all configuration options are saved in a group. The configuration is displayed in the navigation bar as a node. You can add other configurations to the default configuration. You also have the option of defining rules for switching to a specific configuration:
When switching configuration using a rule-based procedure, the configuration can be linked to the use of a LAN or Internet connection (identification via default gateway). In this way, configuration profiles can be created for different laptop usage scenarios:
– Use on company networks: Update via intranet server, WebGuard disabled
- Use at home: Update via default Avira GmbH web server, WebGuard enabled
If no switching rules have been defined, you can switch to a configuration manually in the context menu of the tray icon. You can add, rename, delete, copy or restore configurations and define rules for switching configurations using the buttons in the navigation bar, or using commands from the context menu in the configuration section.
Note
Automatic switching to another configuration is not supported in Windows 2000. No rules for switching configurations can be defined in Windows 2000.
Overview of configuration options
The following configuration options are available:
- Scanner: Configuration of on-demand scan
Scan options
Action on detection
File scan options
On-demand scan exceptions
On-demand scan heuristics
Report function setting
– Guard: Configuration of on-access scan
Scan options
Action on detection
On-access scan exceptions
On-access scan heuristics
Report function setting
- MailGuard: Configuration of MailGuard
Scan options: Enable the monitoring of POP3 accounts, IMAP accounts, outgoing emails (SMTP)
Actions on malware
MailGuard scan heuristics
MailGuard scan exceptions
Configuration of cache, empty cache
Configuration of a footer in sent emails
Report function setting
- WebGuard: Configuration of WebGuard
Scan options, enabling and disabling the WebGuard
Action on detection
Blocked access: Unwanted file types and MIME types, Web filter for known unwanted URLs (malware, phishing, etc.)
WebGuard scan exceptions: URLs, file types, MIME types
WebGuard heuristics
Report function setting
- FireWall: Configuration of the FireWall
Adapter rule setting
User-defined application rule settings
List of trusted providers (exceptions for network access by applications)
Expanded settings: Timeout for rules, lock Windows host file, stop Windows FireWall, notifications
Popup settings (alerts for network access by applications)
- General:
Configuration of email using SMTP
Extended risk categories for on-demand and on-access scan
Password protection for access to the Control Center and the Configuration
Security: Update status display, complete system scan status display, product protection
WMI: Enable WMI support
Event log configuration
Configuration of report functions
Setting of directories used
Update: Configuration of connection to download server, download via Web server or fileserver), set-up of product updates
Alerts: Configuration of email alerts for component(s):
Scanner
Guard
Updater
Configuration of network alerts for the component(s) Scanner, Guard
Configuration of acoustic alerts when malware is detected
5.1.3 Tray icon
After installation, you will see the tray icon of your AntiVir program in the system tray of the taskbar:
Icon Description

AntiVir Guard is enabled and the FireWall is enabled

AntiVir Guard is disabled and the FireWall is disabled
The tray icon displays the status of the Guard and the FireWall service.
Central functions of your AntiVir program can be quickly accessed via the context menu of the tray icon. To open the context menu, click the tray icon with the right-hand mouse button.
Entries in the context menu
- Activate AntiVir Guard: Enables or disables the AntiVir Guard.
- Enable AntiVir MailGuard:. Enables or disables the AntiVir MailGuard.
- Enable AntiVir WebGuard: Enables or disables the AntiVir WebGuard.
-
FireWall:
-
Enable FireWall: Enables or disables the FireWall
- Block all traffic: Enabled: Blocks all data transfers except transfers to the host computer system (Local Host/IP 127.0.0.1).
- Enable game mode: Enables or disables the mode: Enabled: When activated, all defined adapter and application rules apply. Applications for which no rule is defined are permitted network access and no pop-up window is opened.
-
Start AntiVir: Opens the Control Center.
-
Configure AntiVir: Opens the Configuration
- Start update Starts an update.
- Select configuration: Opens a submenu with the available configuration profiles. Click on a configuration to activate this configuration. The menu command is disabled if you have already defined rules for automatic switching to a configuration.
– Help: opens the Online Help. - About AntiVir Professional: Opens a dialog box with information on your AntiVir program: Product information, Version information, License information.
- Avira on the Internet: Opens the Avira web portal on the Internet. The condition for this is that you have an active connection to the Internet.
5.2 How to...?
5.2.1 Activate license
To activate your AntiVir program's license:
Activate your license for your AntiVir product with the license file hbedv.key. You can obtain the license file by email from Avira GmbH. The license file contains the license for all products that you have ordered in one order process.
If you have not yet installed your AntiVir program:
▶ Save the license file to a local directory on your computer.
▶ Install your AntiVir program.
▶ During installation, enter the save location of the license file.
If you have already installed your AntiVir program:
▶ Double-click the license file in File Manager or in the activation email and follow the on-screen instructions when License Manager opens.
- OR -
In your AntiVir program's Control Center, select the menu item Help / Load license file...
Note
In Windows Vista the User Account Control dialog box appears. Log in as administrator if appropriate. Click Continue.
▶ Highlight the license file and click Open.
A message appears.
▶ Click OK to confirm.
The license is activated.
▶ If necessary, restart your system.
5.2.2 Perform automatic updates
To create a job with the AntiVir Scheduler to update your AntiVir program automatically:
▶ In the Control Center, select the section Management :: Scheduler.
▶ Click the 📊️ Create new job with the wizard icon.
The dialog box Name and description of job appears.
▶ Give the job a name and, where appropriate, a description.
▶ Click Next. The dialog box Type of job is displayed.
▶ Select Update job from the list.
▶ Click Next. The dialog box Time of job appears.
▶ Select a time for the update:
- Immediately
• Daily
• Weekly - Interval
- Single
- Login
Note
We recommend regular and frequent updates. The recommended update interval is: 60 minutes.
▶ Where appropriate, specify a date according to the selection.
▶ Where appropriate, select additional options (availability depends on type of job):
• Also start job when Internet connection is established
In addition to the defined frequency, the job is performed when an Internet connection is set up.
- Repeat job if the time has already expired
Past jobs are performed that could not be performed at the required time, for example because the computer was switched off.
▶ Click Next.
The dialog box Select display mode appears.
▶ Select the display mode of the job window:
- Minimize: progress bar only
- Maximize: Entire job window
- Hide: No job window
▶ Click Finish.
Your newly created job appears on the start page of the Manager :: Scan section with the status activated (check mark).
▶ Where appropriate, deactivate jobs that are not to be performed.
Use the following icons to further define your jobs:

View properties of a job

Modify job

Delete job

Start job

Stop job
5.2.3 Start a manual update
You have various options for starting an update manually: When an update is started manually, the virus definition file and scan engine are always updated. A product update can only take place if you have activated the option Download and automatically install product updates in the configuration under General :: Update
To start an update of your AntiVir program manually:
▶ With the right-hand mouse button, click the AntiVir tray icon in the taskbar.
A context menu appears.
▶ Select Start update.
The Updater dialog box appears.
- OR -
▶ In the Control Center, select the section Overview :: Status.
▶ In the Last update field, click on the Start update link.
The Updater dialog box appears.
- OR -
In the Control Center, in the Update menu, select the menu command Start update.
The Updater dialog box appears.
Note
We recommend regular automatic updates. The recommended update interval is: 60 minutes.
Note
You can also carry out a manual update directly via the Windows security center.
5.2.4 On-demand scan: Using a scan profile to scan for viruses and malware
A scan profile is a set of drives and directories to be scanned.
The following options are available for scanning via a scan profile:
- Use predefined scan profile
if the predefined scan profile corresponds to your requirements.
- Customize and apply scan profile (manual selection)
if you want to scan with a customized scan profile.
- Create and apply new scan profile
if you want to create your own scan profile.
Depending on the operating system, various icons are available for starting a scan profile:
- In Windows XP and 2000:

This icon starts the scan via a scan profile.
- In Windows Vista:
In Microsoft Windows Vista, the Control Center only has limited rights at the moment, e.g. for access to directories and files. Certain actions and file accesses can only be performed in the Control Center with extended administrator rights. These extended administrator rights must be granted at the start of each scan via a scan profile.

This icon starts a limited scan via a scan profile. Only directories and files that dows Vista has granted access rights to are scanned.

This icon starts the scan with extended administrator rights. After confirmation, all directories and files in the selected scan profile are scanned.
To scan for viruses and malware with a scan profile:
▶ Go to Control Center and select the section Local protection::Scan.
Predefined scan profiles appear.
▶ Select one of the predefined scan profiles.
-OR-
▶ Adapt the scan profile Manual selection.
-OR-
▶ Create a new scan profile
▶ Click the icon (Windows XP: 📋 or Windows Vista:
The Luke Filewalker window appears and an on-demand scan is started.
When the scan is completed, the results are displayed.
If you want to adapt a scan profile:
In the scan profile, expand Manual Selection the file tree so that all the drives and directories you want to scan are open.
- Click the + icon: The next directory level is displayed.
- Click the - icon: The next directory level is hidden.
▶ Highlight the nodes and directories you want to scan by clicking on the relevantbox of the appropriate directory level.
The following options are available for selecting directories:
- Directory, including sub-directories (black check mark)
- Directory excluding sub-directories (green check mark)
- Sub-directories of one directory only (grey check mark, sub-directories have black check marks)
- No directory (no check mark)
If you want to create a new scan profile:
▶ Click the icon 📁️ Create new profile.
The profile New profile appears below the profiles previously created.
▶ Where appropriate, rename the scan profile by clicking on the icon 📄.
▶ Highlight the nodes and directories to be saved by clicking the check box of the respective directory level.
The following options are available for selecting directories:
- Directory, including sub-directories (black check mark)
- Directory excluding sub-directories (green check mark)
- Sub-directories of one directory only (grey check mark, sub-directories have black check marks)
- No directory (no check mark)
5.2.5 On-demand scan: Scan for viruses and malware using Dragamp; Drop
To scan for viruses and malware systematically using Drag&Drop:
The Control Center of your AntiVir program has been opened.
▶ Highlight the file or directory you want to scan.
▶ Use the left-hand mouse button to drag the highlighted file or directory into the Control Center.
The Luke Filewalker window appears and an on-demand scan is started.
When the scan is completed, the results are displayed.
5.2.6 On-demand scan: Scan for viruses and malware via the context menu
To scan for viruses and malware systematically via the context menu:
▶ Click with the right-hand mouse button (e.g. in Windows Explorer, on the desktop or in an open Windows directory) on the file or directory you want to scan.
The Windows Explorer context menu appears.
▶ Select Scan selected files with AntiVir in the context menu.
The Luke Filewalker window appears and an on-demand scan is started.
When the scan is completed, the results are displayed.
5.2.7 On-demand scan: Automatically scan for viruses and malware
Note
After installation, the scan job Full system scan is created in the Scheduler: A complete system scan is automatically performed at a recommended interval.
To create a job to automatically scan for viruses and malware:
▶ In the Control Center, select the section Management:: Scheduler.
▶ Click the icon
The dialog box Name and description of job appears.
▶ Give the job a name and, where appropriate, a description.
▶ Click Next.
The dialog box Type of job appears.
▶ Select Scan job.
▶ Click Next.
The dialog box Select profile appears.
▶ Select the profile to be scanned.
▶ Click Next.
The dialog box Time of job appears.
▶ Select a time for the scan:
- Immediately
• Daily
• Weekly - Interval
- Single
- Login
▶ Where appropriate, specify a date according to the selection.
▶ Where appropriate, select the following additional options (availability depends on job type):
- Repeat job if the time has already expired
Past jobs are performed that could not be performed at the required time, for example because the computer was switched off.
▶ Click Next.
The dialog box Select display mode appears.
▶ Select the display mode of the job window:
- Minimize: progress bar only
- Maximize: Entire job window
- Hide: No job window
▶ Select the Shut down computer option if you want the computer to shut down automatically when the scan is finished. This option is only available if the display mode is set to minimized or maximized.
▶ Click Finish.
Your newly created job appears on the start page of the Manager :: Scheduler section with the status activated (check mark).
▶ Where appropriate, deactivate jobs that are not to be performed.
Use the following icons to further define your jobs:

View properties of a job

Modify job

Delete job

Start job

Stop job
5.2.8 On-demand scan: Targeted scan for Rootkits and active malware
To scan for active rootkits, use the predefined scan profile Scan for Rootkits and active malware.
To scan for active rootkits systematically:
▶ Go to Control Center and select the section Local protection:: Scanner.
Predefined scan profiles appear.
▶ Select the predefined scan profile Scan for Rootkits and active malware.
▶ Where appropriate, highlight other nodes and directories to be scanned by clicking the check box of the directory level.
▶ Click the icon (Windows XP: or Windows Vista: ).
The Luke Filewalker window appears and an on-demand scan is started.
When the scan is completed, the results are displayed.
5.2.9 React to detected viruses and malware
For the individual protection components of your AntiVir program, you can define how your AntiVir program reacts to a detected virus or unwanted program in the Configuration under the section Action on detection.
No configurable action options are available for the ProActiv component of the Guard: Notification of a detection is always given in the Guard: Suspicious application behavior window.
Action options for the Scanner:
- Interactive
In interactive action mode, the results of the Scanner scan are displayed in a dialog box. This option is enabled as the default setting.
In the case of Scanner scan, you will receive an alert with a list of the affected files when the scan is complete. You can use the content-sensitive menu to select an action to be executed for the various infected files. You can execute the standard actions for all infected files or cancel the Scanner.
- Automatic
In automatic action mode, when a virus or unwanted program is detected the action you selected in this area is executed automatically. If you enable the option Display alert, you will receive an alert whenever a virus is detected, indicating the action performed.
Action options for the Guard:
- Interactive
In interactive action mode, data access is denied and a desktop notification is displayed. In the desktop notification you can remove the malware detected or transfer the malware to the Scanner component using the Details button for further virus management. The Scanner opens a window containing notification of the detection, which gives you various options for managing the affected file via a context menu (see Detection::Scanner):
- Automatic
In automatic action mode, when a virus or unwanted program is detected, the action you selected in this area is executed automatically. If you enable the option Display alert, you will receive a desktop notification whenever a virus is detected.
Action options for MailGuard, WebGuard:
- Interactive
In interactive action mode, if a virus or unwanted program is detected, a dialog box appears in which you can select what to do with the infected object. This option is enabled as the default setting.
- Automatic
In automatic action mode, when a virus or unwanted program is detected the action you selected in this area is executed automatically. If you enable the Display alert option, you will receive an alert when a virus is detected. The alert will allow you to confirm the action to be performed.
In interactive action mode, you can react to detected viruses and unwanted programs by selecting an action for the infected object in the alert and executing the selected action by clicking Confirm.
The following actions for handling infected objects are available for selection:
Note
Which actions are available for selection depends on the operating system, the protection components (AntiVir Guard, AntiVir Scanner, AntiVir MailGuard, AntiVir WebGuard) reporting the detection, and the type of malware detected.
Actions of the Scanner and the Guard (not ProActiv detections):
- Repair
The file is repaired.
This option is only available if the infected file can be repaired.
- Move to quarantine
The file is packaged into a special format (*.qua) and moved to the Quarantine directory INFECTED on your hard disk, so that direct access is no longer possible. Files in this directory can be repaired in Quarantine at a later data or, if necessary, sent to Avira GmbH.
- Delete
The file will be deleted. This process is much quicker than overwrite and delete. If a boot sector virus is detected, this can be deleted by deleting the boot sector. A new boot sector is written.
- Overwrite and delete
The file is overwritten with a default template and then deleted. It cannot be restored.
- Rename
The file is renamed with a *.vir extension. Direct access to these files (e.g. with double-click) is therefore no longer possible. Files can be repaired and given their original name at a later time.
- Ignore
No further action is taken. The infected file remains active on your computer.
Warning
This could result in loss of data and damage to the operating system! Only select the Ignore option in exceptional cases.
- Always ignore
Action option for Guard detections: No further action is taken by Guard. Access to the file is permitted. All further access to this file is permitted and no further notifications will be provided until the computer is restarted or the virus definition file is updated.
- Copy to quarantine
Action option for a rootkit detection: The detection is copied to quarantine.
- Repair boot sector | Download repair tool
Action options when infected boot sectors are detected: A number of options are available for repairing infected diskette drives. If your AntiVir program is unable to perform the repair, you can download a special tool for detecting and removing boot sector viruses.
Note
If you carry out actions on running processes, the processes in question are terminated before the actions are performed.
Actions of the Guard for detections made by the ProActiv component (notification of suspicious actions of an application):
- Trusted program
The application continues to run. The program is added to the list of permitted applications and is excluded from monitoring by the ProActiv component. When adding to the list of permitted applications, the monitoring type is set to Content. This means that the application is only excluded from monitoring by the ProActiv component if the content remains unchanged (see
Configuration::Guard::ProActiv::Application filter: Permitted applications).
- Block program once
The application is blocked, i.e. the application is terminated. The actions of the application continue to be monitored by the ProActiv component.
- Always block this program
The application is blocked, i.e. the application is terminated. The program is added to list of blocked applications and can no longer be run (see
Configuration::Guard::ProActiv::Application filter: Applications to be blocked).
- Ignore
The application continues to run. The actions of the application continue to be monitored by the ProActiv component.
MailGuard actions: Incoming emails
- Move to quarantine
The email including all attachments is moved to quarantine. The affected email is deleted. The body of the text and any attachments of the email are replaced by a default text.
- Delete
The affected email is deleted. The body of the text and any attachments of the email are replaced by a default text.
- Delete attachment
The infected attachment is replaced by a default text. If the body of the email is affected, it is deleted and also replaced by a default text. The email itself is delivered.
- Move attachment to quarantine
The infected attachment is placed in quarantine and then deleted (replaced by a default text). The body of the email is delivered. The affected attachment can later be delivered via the quarantine manager.
- Ignore
The affected email is delivered.
Warning
This could allow viruses and unwanted programs to access your computer system. Only select the Ignore option in exceptional cases. Disable the preview in your mail client, never open any attachments with a double click!
MailGuard actions: Outgoing emails
- Move mail to quarantine (do not send)
The email, together with all attachments, is copied to Quarantine and is not sent. The email remains in the outbox of your email client. You receive an error message in your email program. All other emails sent from your email account will be scanned for malware.
- Block sending of mails (do not send)
The email is not sent and remains in the outbox of your email client. You receive an error message in your email program. All other emails sent from your email account will be scanned for malware.
- Ignore
The affected email is sent.
Warning
Viruses and unwanted programs can penetrate the computer system of the email recipient in this way.
WebGuard actions:
- Deny access
The website requested from the web server and/or any data or files transferred are not sent to your web browser. An error message to notify you that access has been denied is displayed in the web browser.
- Move to quarantine
The website requested from the web server and/or any data or files transferred are moved to quarantine. The affected file can be recovered from quarantine manager if it has an informative value or - if necessary - sent to the Avira Malware Research Center.
- Ignore
The website requested from the web server and/or the data and files that were transferred are forwarded on by WebGuard to your web browser.
Warning
This could allow viruses and unwanted programs to access your computer system. Only select the Ignore option in exceptional cases.
Note
We recommend that you move any suspicious file that cannot be repaired to quarantine.
Note
You can also send files reported by the heuristic to us for analysis.
For example, you can upload these files to our website:http://www.avira.com/sample-upload
You can identify files reported by the heuristic from the designation HEUR/ or HEURISTIC/ that prefixes the file name, e.g.: HEUR/testfile.*.
5.2.10 Quarantine: Handling quarantined files (\*.qua)
To handle quarantined files:
In the Control Center, select the section Management :: Quarantine section.
▶ Check which files are involved, so that, if necessary, you can reload the original back onto your computer from another location.
If you want to see more information on a file:
▶ Highlight the file and click on

The dialog box Properties appears with more information on the file.
If you want to rescan a file:
Scanning a file is recommended if the virus definition file of your AntiVir program has been updated and a false positive report is suspected. This enables you to confirm a false positive with a rescan and restore the file.
▶ Highlight the file and click on

The file is scanned for viruses and malware using the on-demand scan settings.
After the scan, the dialog Scan statistics appears which displays statistics on the status of the file before and after the rescan.
To delete a file:
▶ Highlight the file and click on

If you want to upload the file to a Avira Malware Research Center web server for analysis:
▶ Highlight the file you want to upload.
▶ Click on

A dialog opens with a form for inputting your contact data.
▶ Enter all the required data.
▶ Select a type: Suspicious file or False positive.
▶ Click OK.
The file is uploaded to a Avira Malware Research Center web server in compressed form.
Note
In the following cases, analysis by the Avira Malware Research Center is recommended:
Heuristic hits (Suspicious file): During a scan, a file has been classified as suspicious by your AntiVir program and moved to quarantine: Analysis of the file by the Avira Malware Research Center has been recommended in the virus detection dialog box or in the report file generated by the scan.
Suspicious file: You consider a file to be suspicious and have therefore moved this file to quarantine, but a scan of the file for viruses and malware is negative.
False positive: You assume that a virus detection is a false positive: Your AntiVir program reports a detection in a file, which is very unlikely to have been infected by malware.
Note
The size of the files you upload is limited to 20 MB uncompressed or 8 MB compressed.
Note
You can upload several files at once by selecting all the files you want to upload and then clicking the Send Object button.
If you want to copy a quarantined object from quarantine to another directory:
▶ Highlight the quarantined object and click on

A scan dialog opens from which you can select a directory.
▶ Select a directory where you want to save a copy of the quarantined object and confirm your selection.
The selected quarantined object is saved to the selected directory.
Note
The quarantined object is not identical to the restored file. The quarantined object is encrypted and cannot be executed or read in its original format.
If you want to export the properties of a quarantined object to a text file:
▶ Highlight the quarantined object and click on

A text file opens containing the data from the selected quarantined object.
▶ Save the text file.
You can also restore the files in quarantine:
– see Chapter: Quarantine: Restoring files in quarantine
5.2.11 Quarantine: Restore the files in quarantine
Different icons control the restore procedure, depending on the operating system:
- In Windows XP and 2000:

This icon restores the files to their original directory.

This icon restores the files to a directory of your choice.
- In Windows Vista:
In Microsoft Windows Vista, the Control Center only has limited rights at the moment, e.g. for access to directories and files. Certain actions and file accesses can only be performed in the Control Center with extended administrator rights. These extended administrator rights must be granted at the start of each scan via a scan profile.

This icon restores the files to a directory of your choice.

This icon restores the files to their original directory. If extended administrator keys are necessary to access this directory, a corresponding request appears.
To restore files in quarantine:
Warning
This could result in loss of data and damage to the operating system of the computer! Only use the function Restore selected object in exceptional cases. Only restore files that could be repaired by a new scan.
File rescanned and repaired.
In the Control Center, select the section Management :: Quarantine section.
Note
Emails and email attachments can only be restored using the option if the file extension is *.eml.
To restore a file to its original location:
▶ Highlight the file and click the icon (Windows 2000/XP: , Windows Vista This option is not available for emails.
Note
Emails and email attachments can only be restored using the option if the file extension is *.eml.
A message appears asking if you want to restore the file.
▶ Click Yes.
The file is restored to the directory it was in before it was moved to quarantine. To restore a file to a specified directory:
▶ Highlight the file and click on

A message appears asking if you want to restore the file.
▶ Click Yes.
The Windows default window for selecting the directory appears.
▶ Select the directory to restore the file to and confirm.
The file is restored to the selected directory.
5.2.12 Quarantine: Move suspicious files to quarantine
To move a suspect file to quarantine manually:
▶ In the Control Center, select the section Management :: Quarantine section.
▶ Click on ☐.
The Windows default window for selecting a file appears.
▶ Select the file and confirm.
The file is moved to quarantine.
You can scan files in quarantine with the AntiVir Scanner:
• see Chapter: Quarantine: Handling quarantined files (*.qua)
5.2.13 Scan profile: Amend or delete file type in a scan profile
To stipulate additional file types to be scanned or exclude specific file types from the scan in a scan profile (only possible for manual selection and customized scan profiles):
In the Control Center, go to the Local protection:: Scan section.
▶ With the right-hand mouse button, click on the scan profile you want to edit.
A context menu appears.
▶ Select File filter.
▶ Expand the context menu further by clicking on the small triangle on the right-hand side of the context menu.
The entries Default, Scan all files and User-defined appear.
▶ Select User-defined.
The File extensions dialog box appears with a list of all file types to be scanned with the scan profile.
If you want to exclude a file type from the scan:
▶ Highlight the file type and click Delete.
If you want to add a file type to the scan:
▶ Highlight the file type.
▶ Click Add and enter the file extension of file type into the input box.
Use a maximum of 10 characters and do not enter the leading dot. Wildcards (* and ?) are allowed as replacements.
5.2.14 Scan profile: Create desktop shortcut for scan profile
You can start an on-demand scan directly from your desktop via a desktop shortcut to a scan profile without accessing your AntiVir program's Control Center.
To create a desktop shortcut to the scan profile:
In the Control Center, go to the Local protection:: Scan section.
▶ Select the scan profile for which you want to create a shortcut.
▶ Click the icon
The desktop shortcut is created.
5.2.15 Events: Filter events
Events that have been generated by program components of your AntiVir program are displayed in the Control Center under Overview::Events (analogous to the event display of your Windows operating system). The program components are:
- Updater
- Scheduler
- Guard
- MailGuard
- Scanner
- FireWall
- WebGuard
– Helper Service - ProActiv
The following event types are displayed:
- Information
- Warning
- Error
- Detection
To filter displayed events:
▶ In the Control Center, select the section Overview :: Events.
▶ Check the box of the program components to display the events of the activated components.
- OR -
Uncheck the box of the program components to hide the events of the deactivated components.
▶ Check the event type box to display these events.
- OR -
Uncheck the event type box to hide these events.
5.2.16 MailGuard: Exclude email addresses from scan
To define which email addresses (senders) are excluded from the MailGuard scan (white listing):
▶ Go to Control Center and select the section Online protection :: MailGuard.
The list shows incoming emails.
▶ Highlight the email you want to exclude from the MailGuard scan.
▶ Click the appropriate icon to exclude the email from the MailGuard scan:

In future, the selected email address will no longer be scanned for viruses and unwanted programs.
The email sender address is included in the exclusion list and no longer scanned for viruses, malware.
Warning
Only exclude email addresses from the MailGuard scan if the senders are completely trustworthy.
Note
In the Configuration, under MailGuard :: General :: Exceptions, you can add other email addresses to the exclusion list or remove email addresses from the exclusion list.
5.2.17 FireWall: Select the security level for the FireWall
There are various security levels to choose from. Depending on which you choose, you have different adapter rule configuration options.
The following security levels are available:
- Low
- Flooding and port scan are detected.
- Medium
- Suspicious TCP and UDP packages are discarded.
- Flooding and port scan are prevented.
- High
• Computer is not visible on the network. - Connections from outside are blocked.
- Flooding and port scan are prevented.
- User
- User-defined rules: If this security level is selected, the program automatically recognizes that the adapter rules have been modified.
Note
The default security level setting for all predefined rules of the Avira FireWall is High
To define the security level for the FireWall:
▶ Go to the Control Center and select the section Online protection :: FireWall.
▶ Move the slider to the required security level.
The selected security level is applied immediately.
6 Scanner
With the Scanner component, you can carry out targeted scans (on-demand scans) for viruses and unwanted programs. The following options are available for scanning for infected files:
- On-demand scan via context menu
The on-demand-scan via the context menu (right-hand mouse button - entry Scan selected files with AntiVir) is recommended if, for example, you wish to scan individual files and directories. Another advantage is that it is not necessary to first start the Control Center for an on-demand scan via the context menu.
- On-demand scan via drag & drop
When a file or directory is dragged into the program window of the Control Center, the Scanner scans the file or directory and all sub-directories it contains. This procedure is recommended if you wish to scan individual files and directories that you have saved, for example, on your desktop.
- On-demand scan via profiles
This procedure is recommended if you wish to regularly scan certain directories and drives (e.g. your work directory or drives on which you regularly store new files). You do not then need to select these directories and drives again for every new scan, you simply select using the relevant profile.
- On-demand scan via the Scheduler
The Scheduler enables you to carry out time-controlled scans.
Special processes are required when scanning for rootkits, boot sector viruses, and when scanning active processes. The following options are available:
- Scan for rootkits via the scan profile Scan for Rootkits and active malware
- Scan active processes via the scan profile Active processes
- Scan for boot sector viruses via the menu command Scan for boot sector viruses in the Extras menu
7 Updates
The effectiveness of anti-virus software depends on how up-to-date the program is, in particular the virus definition file and the scan engine. To carry out regular updates, the Updater component is integrated into your AntiVir. The Updater ensures that your AntiVir program is always up-to-date and able to deal with the new viruses that appear every day. Updater updates the following components:
- Virus definition file:
The virus definition file contains the virus patterns of the harmful programs which are used by your AntiVir program to scan for viruses and malware and repair infected objects.
- Scan engine:
The scan engine contains the methods used by your AntiVir program to scan for viruses and malware.
– Program files (product update):
Update packages for product updates make extra functions available to the individual program components.
An update checks whether the virus definition file and scan engine are up-to-date and if necessary implements an update. Depending on the settings in the configuration, the Updater also carries out a product update or informs you of the product updates available. After a product update, you may have to restart your computer system. If only the virus definition file and scan engine are updated, the computer does not have to be restarted.
Note
For security reasons, the Updater checks whether the Windows hosts file of your computer was altered, whether the Update URL, for example, was manipulated by malware and is diverting the Updater to unwanted download sites. If the Windows hosts file has been manipulated, this is shown in the Updater report file.
An update is automatically performed in the following interval: 60 minutes. You can edit or disable the automatic update through the configuration (Configuration::Update).
In the Control Center under Scheduler, you can create additional update jobs that are performed by Updater at the specified intervals. You also have the option to start an update manually:
– In the Control Center: in the Update menu and in the Status section
- via the context menu of the tray icon
Updates can be obtained from the Internet via a proprietary web server or via a web or file server on an intranet which downloads the update files from the Internet and makes them available to other computers on the network. This is useful if you want to update AntiVir programs on more than one computer in a network. A download server on an intranet can be used to ensure AntiVir programs are up-to-date on the protected computers using a minimum of resources. To set up a functioning download server on an intranet, you need a server that is compatible with the update structure of your AntiVir program.
Note
You can use AntiVir Internet Update Manager (file server or web server in Windows) as a web server or file server in the intranet. AntiVir Internet Update Manager mirrors the download servers of Avira AntiVir products and can be obtained from the Avira website on the Internet.
http://www.avira.com
When a web server is used, the HTTP protocol is used for the download. When using a file server, access to the update file is provided via the network. You can configure the connection to the web server or file server in the Configuration under General :: Update. The default configuration uses the existing Internet connection as the connection to the Avira GmbH web servers.
8 Avira FireWall :: Overview
Avira FireWall monitors and regulates incoming and outgoing data traffic on your computer system and protects you from a wide range of attacks and threats from the Internet: Incoming or outgoing data traffic or listening to ports will be allowed or denied based on security guidelines. You will receive a desktop notification if Avira FireWall denies network activity and thus blocks network connections. The following options are available for Avira FireWall settings:
– by setting a security level in the Control Center
You can define a security level in the Control Center. The low, medium and high security levels each contain several complementary security rules based on packet filters. These security rules are saved as predefined adapter rules in the Configuration under FireWall::Adapter rules.
- by saving actions in the Network event window
When an application first tries to create a network or Internet connection, the Network Event popup window appears. The Network Event window allows the user to choose whether the network activity of the application is allowed or denied. If the Save Action for this application option is enabled, the action is created as an application rule and is saved in the configuration under FireWall::Application Rules. Saving the actions in the Network event window gives you a set of rules for the network activities of applications.
Note
For applications from trusted providers, network access is allowed by default unless an adapter rule prohibits network access. You have the option of removing providers from the list of trusted providers.
- by creating adapter and application rules in the Configuration
You can alter predefined adapter rules or create new adapter rules in the Configuration. The security level of the FireWall is automatically set to the value User if you add or change adapter rules.
Application rules allow you to define monitoring rules specified for applications: You can use simple application rules to define whether all network activities of a software application are to be denied or allowed or whether they are to be handled by means of the Network Event popup window.
In the advanced configuration of the Application rules setting you can define different packet filters for an application, which are executed as specified application rules.
Note
There are two different modes for application rules: Privileged and Filtered. For application rules in filtered mode, the relevant adapter rules are prioritized, i.e. relevant adapter rules are executed after the application rule. It is therefore possible that network access may be denied due to a high security level or corresponding adapter rules. For application rules in privileged mode, adapter rules are ignored. If applications are allowed in privileged mode, the application is always granted network access.
9 FAQ, Tips
This chapter contains important information on troubleshooting and further tips on using your AntiVir program.
see Chapter Troubleshooting
see Chapter Keyboard commands
see Chapter Windows Security Center
9.1 Help in case of a problem
Here you will find information on causes and solutions of possible problems.
- The error message The license file cannot be opened appears.
- AntiVir MailGuard does not work.
- There is no network connection available in a virtual machine (e.g. VMWare, Virtual PC, ...) if Avira FireWall is installed on the host machine and the security level of Avira FireWall is set to medium or high.
- Virtual Private Network (VPN) Connection is blocked, if the security level of Avira FireWall is set to medium or high.
- An email sent via a TSL connection has been blocked by MailGuard.
- Webchat is not operational: Chat messages will not be displayed
The error message The license file cannot be opened appears.
Reason: The file is encrypted.
▶ To activate the license, you do not need to open the file, but rather you save it in the program directory. See also ChapterLicense Manager.
The error message Connection failed while downloading the file ... appears when attempting to start an update.
Reason: Your Internet connection is inactive. No connection to the web server on the Internet can therefore be established.
Test whether other Internet services such as WWW or email work. If not, re-establish the Internet connection.
Reason: The proxy server cannot be reached.
▶ Check whether the login for the proxy server has changed and adapt it to your configuration if necessary.
Reason: The update.exe file is not fully approved by your personal firewall.
▶ Ensure that the update.exe file is fully approved by your personal firewall.
Otherwise:
▶ Check your settings in the Configuration (expert mode) under General::UpdateYour settings.
Viruses and malware cannot be moved or deleted.
Reason: The file was loaded by windows and is active.
▶ Update your AntiVir product.
If you use the Windows XP operating system, deactivate System Restore.
▶ Start the computer in Safe Mode.
▶ Start the AntiVir program and the Configuration (expert mode).
Select Scanner::Scan::Files::All files and confirm the window with OK.
▶ Start a scan of all local drives.
▶ Start the computer in Normal Mode.
▶ Carry out a scan in Normal Mode.
If no other viruses or malware have been found, activate System Restore if it is available and to be used.
The status of the tray icon is disabled.
Reason: AntiVir Guard is disabled.
In the Control Center in the section Overview::Status in the AntiVir Guard area, click on the Enable link.
Reason: AntiVir Guard is blocked by a firewall.
▶ Define a general approval for AntiVir Guard in the configuration of your firewall. AntiVir Guard only works with the address 127.0.0.1 (localhost). An Internet connection is not established. The same applies to AntiVir MailGuard.
Otherwise:
▶ Check the startup type of the AntiVir Guard service. If necessary, enable the service: In the taskbar, select "Start | Settings | Control Panel". Start the configuration panel "Services" with a double-click (under Windows 2000 and Windows XP the services applet is located in the sub-directory "Administrative Tools"). Find the entry Avira AntiVir Guard. "Automatic" must be entered as the startup type and "Started" as the status. If necessary, start the service manually by selecting the relevant line and the button "Start". If an error message appears, please check the event display.
The computer is extremely slow when I perform a data back-up.
Reason: During the backup procedure, AntiVir Guard scans all files being used by the backup procedure.
▶ Select Guard::Scan::Exceptions in the Configuration (expert mode) and enter the process names of the back-up software.
My firewall reports AntiVir Guard and AntiVir MailGuard immediately after activation.
Reason: Communication with AntiVir Guard and AntiVir MailGuard occurs via the TCP/IP Internet protocol. A firewall monitors all connections via this protocol.
▶ Define a general approval for AntiVir Guard and AntiVir MailGuard. AntiVir Guard only works with the address 127.0.0.1 (localhost). An Internet connection is not established. The same applies to AntiVir MailGuard.
AntiVir MailGuard does not work.
Please check correct functioning of AntiVir MailGuard with the aid of the following checklists if problems occur with AntiVir MailGuard.
Checklist
▶ Check whether your mail client logs in on the server via Kerberos, APOP or RPA. These verification methods are currently not supported.
▶ Check whether your mail client reports to the server through SSL (also often called TSL – Transport Layer Security). AntiVir MailGuard does not support SSL and therefore terminates any encrypted SSL connections. If you want to use encrypted SSL connections without having them protected by MailGuard, you will have to use a port that is not monitored by MailGuard for the connection. The ports monitored by MailGuard can be configured in the configuration under MailGuard::Scan.
▶ Is the AntiVir MailGuard service active? If necessary, enable the service: In the taskbar, select "Start | Settings | Control Panel". Start the configuration panel "Services" with a double-click (under Windows 2000 and Windows XP the services applet is located in the sub-directory "Administrative Tools"). Find the entry Avira AntiVir MailGuard. "Automatic" must be entered as the startup type and "Started" as the status. If necessary, start the service manually by selecting the relevant line and the button "Start". If an error message appears, please check the event display. If this is not successful, you may have to completely uninstall the AntiVir program via "Start | Settings | Control Panel | Add or Remove Programs", restart the computer and then reinstall your AntiVir program.
General
▶ POP3 connections encrypted via SSL (Secure Sockets Layer, also frequently referred to as TLS (Transport Layer Security)) cannot currently be protected and are ignored.
Verification to the mail server is currently only supported via "passwords". "Kerberos" and "RPA" are not currently supported.
▶ Your AntiVir program does not check outgoing emails for viruses and unwanted programs.
Note
We recommend regularly installing Microsoft updates to close any gaps in security.
There is no network connection available in a virtual machine (e.g. VMWare, Virtual PC, ...) if Avira FireWall is installed on the host machine and the security level of Avira FireWall is set to medium or high.
If Avira FireWall is installed on a computer on which a virtual machine (for example VMWare, virtual PC, etc.) is also running, the firewall will block all network connections for the virtual machine when the security level of the Avira FireWall is set to medium or high. If the security level is set to low, the FireWall works as expected.
Reason: The virtual machine emulates a network card by means of software. This emulation encapsulates the data packages of the guest system in special packages (UDP packages) and routes them via the external gateway back to the host system. Avira FireWall rejects these packages coming from outside, starting from security level medium.
To avoid this behavior do the following:
Go to Control Center and select the section Online protection :: FireWall.
Click the Configuration link.
The Configuration dialog box is displayed. You are in the configuration section Application rules.
▶ Activate the Expert mode option.
Select the configuration section Adapter rules.
▶ Click add rule.
▶ Select UDP in the section Incoming rules.
▶ Type the name of the rule in the Section Name of the rule.
▶ Click OK.
▶ Check if the rule is directly above the rule Deny all IP packets.
Warning
This rule is potentially dangerous because it will allow UDP packets without any filtering! After working with the virtual machine change to your previous security level.
Virtual Private Network (VPN) Connection is blocked, if the security level of Avira FireWall is set to medium or high.
Reason: This problem is caused by the last rule Deny all IP packets which discards all packets that do not comply with any of the rules above it. The type of packages dispatched by the VPN software (so-called GRE packets) do not fit into the other categories and therefore they are filtered by this rule.
Replace the rule Deny all IP packets with two new rules which will deny the TCP and UPD packets. In this way there is the possibility to allow packets of other protocols.
An email sent via a TSL connection has been blocked by MailGuard.
Reason: Transport Layer Security (TLS: encryption protocol for data transfers on the Internet) is not supported by MailGuard at this time. The following options are available for sending the email:
▶ Use a different port from port 25, which is used by SMTP. This will bypass monitoring by MailGuard.
▶ Turn off the TSL encrypted connection and disable TSL support in your email client.
▶ Disable (temporarily) monitoring of outgoing emails by MailGuard in the configuration under MailGuard::Scan.
Webchat is not operational: Chat messages are not displayed; data are being loaded in the browser.
This phenomenon may occur during chats, which are based on the HTTP protocol with 'transfer-encoding= chunked'.
Reason: WebGuard checks the data sent completely for viruses and undesired programs first of all, before the data are loaded into the web browser. During a data transfer with 'transfer-encoding= chunked', WebGuard cannot determine the message length or the data volume.
▶ Enter the configuration of the URL of the web chats as an exception (see Configuration: WebGuard::Exceptions).
9.2 Shortcuts
Keyboard commands - also called shortcuts - offer a fast possibility to navigate through the program, to retrieve individual modules and to start actions.
Below we provide you with an overview of the available keyboard commands. Please find further indications regarding the functionality in the corresponding chapter of the help.
9.2.1 In dialog boxes
| Shortcut Description | |
| Ctrl + TabCtrl + Page down | Navigation in the Control CenterGo to next section. |
| Ctrl + Shift + TabCtrl + Page up | Navigation in the Control CenterGo to previous section. |
| ←↑→↓ | Navigation in the configuration sectionsFirst, use the mouse to set the focus on a configuration section. |
| Tab | Change to the next option or options group. |
| Shift + Tab Change to the previous option or options group. | |
| ←↑→↓ | Change between the options in a marked drop-down list or between several options in a group of options. |
| Space | Activate or deactivate a check box, if the active option is a check box. |
| Alt + underlined letter | Select option or start command. |
| Alt + ↓F4 | Open selected drop-down list. |
| Esc | Close selected drop-down list.Cancel command and close dialog. |
Enter Start command for the active option or button.
9.2.2 In the help
| Shortcut Description | |
| Alt + Space | Display system menu. |
| Alt + Tab | Shift between the help and the other opened windows. |
| Alt + F4 Close help. | |
| Shift + F10 | Display context menu of the help. |
| Ctrl + Tab | Go to next section in the navigation window. |
| Ctrl + Shift + Tab | Go to previous section in the navigation window. |
| Page up | Change to the subject, which is displayed above in the contents, in the index or in the list of the search results. |
| Page down Change to the subject, which is displayed below the current subject in the contents, in the index or in the list of the search results. | |
| Page up Page down | Browse through a subject. |
9.2.3 In the Control Center
General
| Shortcut Description |
| F1 Display help |
| Alt + F4 Close Control Center |
| F5 Refresh |
| F8 Open configuration |
| F9 Start update |
Scan section
| Shortcut Description | |
| F2 Rename selected profile | |
| F3 | Start scan with the selected profile |
| F4 | Create desktop link for the selected profile |
| Ins Create new profile | |
| Del | Delete selected profile |
FireWall section
Shortcut Description
Return Properties
Quarantine section
Shortcut Description
F2 Rescan object
F3 Restore object
F4 Send object
F6 Restore object to...
Return Properties
Ins Add file
Del Delete object
Scheduler section
Shortcut Description
F2 Edit job
Return Properties
Ins Insert new job
Del Delete job
Reports section
Shortcut Description
F3 Display report file
F4 Print report file
Return Display report
Del Delete report(s)
Events section
Shortcut Description
F3 Export event(s)
Return Show event
Del Delete event(s)
9.3 Windows Security Center
- Windows XP Service Pack 2 or higher -
9.3.1 General
The Windows Security Center checks the status of a computer for important security aspects.
If a problem is detected with one of these important points (e.g. an outdated anti-virus program), the Security Center issues an alert and gives recommendations on how to protect your computer better.
9.3.2 The Windows Security Center and your AntiVir program
FireWall
You may receive the following information from the Security Center with regard to your firewall:
- FireWall ACTIVE / FireWall on
- FireWall INACTIVE / FireWall off
FireWall ACTIVE / FireWall off
After installing your AntiVir program and turning off Windows Firewall, you will receive the following message:
text_image
Firewall Avira FireWall is currently ON. A firewall helps protect your computer against viruses and other security threats. How does a firewall help protect my computer?FireWall INACTIVE / FireWall off
You will receive the following message as soon as you disable the Avira FireWall:
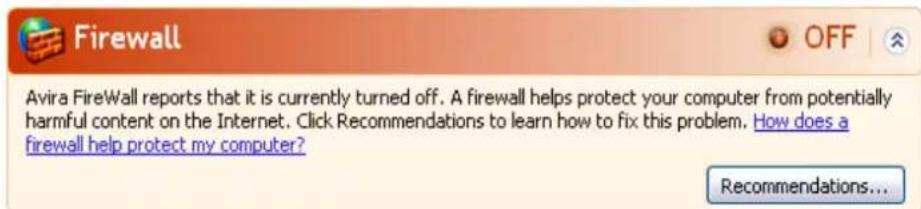
text_image
Firewall Avira FireWall reports that it is currently turned off. A firewall helps protect your computer from potentially harmful content on the Internet. Click Recommendations to learn how to fix this problem. How does a firewall help protect my computer? Recommendations...Note
You can enable or disable the Avira FireWall via the Status tab in the Control Center.
Warning
If you turn the Avira FireWall off, your computer is no longer prevented by unauthorized users from gaining access to it through a network or the Internet.
Virus protection software / Protection against malicious software
You may receive the following information from the Windows Security Center with regard to your virus protection:
Virus protection NOT FOUND
Virus protection OUT OF DATE
Virus protection ON
Virus protection OFF
Virus protection NOT MONITORED
Virus protection NOT FOUND
This information of the Windows Security Center appears when the Windows Security Center has not found any anti-virus software on your computer.

Virus Protection

NOT FOUND

Windows did not find antivirus software on this computer. Antivirus software helps protect your computer against viruses and other security threats. Click Recommendations for suggested actions you can take. How does antivirus software help protect my computer?
Note: Windows does not detect all antivirus programs.
Recommendations...
Note
Install your AntiVir program on your computer to protect it against viruses and other unwanted programs!
Virus protection OUT OF DATE
If you have already installed Windows XP Service Pack 2 or Windows Vista and then install your AntiVir program or you install Windows XP Service Pack 2 or Windows Vista on a system on which your AntiVir program has already been installed, you will receive the following message:

Virus Protection

OUT OF DATE

AntiVir Desktop reports that it might be out of date. Click Recommendations for suggested actions you can take. How does antivirus software help protect my computer?
Note: Windows does not detect all antivirus programs.
Recommendations...
Note
In order for the Windows Security Center to recognize your AntiVir program as up-to-date, an update must be performed after installation. Update your system by carrying out an update.
Virus protection ON
After installation of your AntiVir program and a subsequent update, you will receive the following message:

Virus Protection

ON

AntiVir Desktop reports that it is up to date and virus scanning is on. Antivirus software helps protect your computer against viruses and other security threats. How does antivirus software help protect my computer?
Your AntiVir program is now up-to-date and the AntiVir Guard is enabled.
Virus protection OFF
You receive the following message if you disable the AntiVir Guard or stop the Guard service.

Virus Protection

OFF

AntiVir Desktop reports that it is turned off. Antivirus software helps protect your computer against viruses and other security threats. Click Recommendations for suggested actions you can take. How does antivirus software help protect my computer?
Note: Windows does not detect all antivirus programs.
Recommendations...
Note
You can enable or disabled AntiVir Guard in the Overview::Status section of the Control Center. You can also see that the AntiVir Guard is enabled if the red umbrella in your taskbar is open.
Virus protection NOT MONITORED
If you receive the following message from the Windows Security Center, you have decided that you want to monitor your anti-virus software yourself.
Note
This function is not supported by Windows Vista.

Virus Protection

NOT MONITORED

You've told us you're using antivirus software that you will monitor yourself. To help protect your computer against viruses and other security threats, make sure that your antivirus software is turned on and is up to date. How does antivirus software help protect my computer?
Recommendations...
Note
The Windows Security Center is supported by your AntiVir program. You can enable this option at any time via the "Recommendations..." button.
Note
Even if you have installed Windows XP Service Pack 2 or Windows Vista, you still require a virus protection solution. Although Windows XP Service Pack 2 monitors your anti-virus software, it does not contain any anti-virus functions itself. Therefore you would not be protected against viruses and other malware without an additional anti-virus solution!
10 Viruses and more
10.1 Extended threat categories
Dialer (DIALER)
Certain services available in the Internet have to be paid for. They are invoiced in Germany via dialers with 0190/0900 numbers (or via 09x0 numbers in Austria and Switzerland; in Germany, the number is set to change to 09x0 in the medium term). Once installed on the computer, these programs guarantee a connection via a suitable premium rate number whose scale of charges can vary widely.
The marketing of online content via your telephone bill is legal and can be of advantage to the user. Genuine dialers leave no room for doubt that they are used deliberately and intentionally by the user. They are only installed on the user's computer subject to the user's consent, which must be given via a completely unambiguous and clearly visible labeling or request. The dial-up process of genuine dialers is clearly displayed. Moreover, genuine dialers tell you the incurred costs exactly and unmistakably.
Unfortunately there are also dialers which install themselves on computers unnoticed, by dubious means or even with deceptive intent. For example they replace the Internet user's default data communication link to the ISP (Internet Service Provider) and dial a cost-incurring and often horrendously expensive 0190/0900 number every time a connection is made. The affected user will probably not notice until his next phone bill that an unwanted 0190/0900 dialer program on his computer has dialed a premium rate number with every connection, resulting in dramatically increased costs.
We recommend that you ask your telephone provider to block this number range directly for immediate protection against undesired dialers (0190/0900 dialers).
Your AntiVir program can detect the familiar dialers by default.
If the option Dialers is enabled with a check mark in the configuration under Extended threat categories, you receive a corresponding alert if a dialer is detected. You can now simply delete the potentially unwanted 0190/0900 dialer. However, if it is a wanted dial-up program, you can declare it an exceptional file and this file is then no longer scanned in future.
Games (GAMES)
There is a place for computer games - but it is not necessarily at work (except perhaps in the lunch hour). Nevertheless, with the wealth of games downloadable from the Internet, a fair bit of mine sweeping and Patience playing goes on among company employees and civil servants. You can download a whole array of games via the Internet. Email games have also become more popular: numerous variants are circulating, ranging from simple chess to "fleet exercises" (including torpedo combats): The corresponding moves are sent to partners via email programs, who answer them.
Studies have shown that the number of working hours devoted to computer games has long reached economically significant proportions. It is therefore not surprising that more and more companies are considering ways of banning computer games from workplace computers.
Your AntiVir program recognizes computer games. If the Games option is enabled with a check mark in the configuration under Threat categories, you receive a corresponding alert if your AntiVir program detects a game. The game is now over in the truest sense of the word, because you can simply delete it.
Jokes (JOKES)
Jokes are merely intended to give someone a fright or provide general amusement without causing harm or reproducing. When a joke program is loaded, the computer will usually start at some point to play a tune or display something unusual on the screen. Examples of jokes are the washing machine in the disk drive (DRAIN.COM) or the screen eater (BUGSRES.COM).
But beware! All symptoms of joke programs may also originate from a virus or Trojan. At the very least users will get quite a shock or be thrown into such a panic that they themselves may cause real damage.
Thanks to the extension of its scanning and identification routines, your AntiVir program is able to detect joke programs and eliminate them as unwanted programs if required. If the option Jokes is enabled with a check mark in the configuration under Threat categories, a corresponding alert is issued if a joke program is detected.
Security Privacy Risk (SPR)
Software that may be able to compromise the security of your system, initiate unwanted program activities, damage your privacy or spy on your user behavior and could therefore be unwanted.
Your AntiVir program detects "Security Privacy Risk" software. If the option Security Privacy Risk is enabled with a check mark in the configuration under Extended threat categories, you receive a corresponding alert if your AntiVir program detects such software.
Backdoor Clients (BDC)
In order to steal data or manipulate computers, a backdoor server program is smuggled in unknown to the user. This program can be controlled by a third party using backdoor control software (client) via the Internet or a network.
Your AntiVir program recognizes "Backdoor control software". If the Backdoor control software (BDC) option is enabled with a check mark in the configuration under Extended threat categories, you receive a corresponding alert if your AntiVir program detects such software.
Adware/Spyware (ADSPY)
Software that displays advertising or software that sends the user's personal data to a third party, often without their knowledge or consent, and for this reason may be unwanted.
Your AntiVir program recognizes "Adware/Spyware". If the option Adware/Spyware (ADSPY) is enabled with a check mark in the configuration under Extended threat categories, you receive a corresponding alert if your AntiVir program detects adware or spyware.
Unusual Runtime Packers (PCK)
Files that have been compressed with an unusual runtime packer and that can therefore be classified as potentially suspicious.
Your AntiVir program recognizes "Unusual runtime packers". If the option Unusual runtime packers is enabled with a check mark in the configuration under Extended threat categories, you receive a corresponding alert if your AntiVir program detects such packers.
Double Extension Files (HEUR-DBLEXT)
Executable files that hide their real file extension in a suspicious way. This camouflage method is often used by malware.
Your AntiVir program recognizes "Double Extension Files". If the option Double Extension files (HEUR-DBLEXT) is enabled with a check mark in the configuration under Extended threat categories, you receive a corresponding alert if your AntiVir program detects such files.
Phishing
Phishing, also known as brand spoofing is a clever form of data theft aimed at customers or potential customers of Internet service providers, banks, online banking services, registration authorities.
When submitting your email address on the Internet, filling in online forms, accessing newsgroups or websites, your data can be stolen by "Internet crawling spiders" and then used without your permission to commit fraud or other crimes.
Your AntiVir program recognizes "Phishing". If the option Phishing is enabled with a check mark in the configuration under Extended threat categories, you receive a corresponding alert if your AntiVir program detects such behavior.
Application (APPL)
The term APPL refers to an application which may involve a risk when used or is of dubious origin.
Your AntiVir program recognizes "Application (APPL)". If the option Application (APPL) is enabled with a check mark in the configuration under Extended threat categories, you receive a corresponding alert if your AntiVir program detects such behavior.
10.2 Viruses and other malware
Adware
Adware is software that presents banner ads or in pop-up windows through a bar that appears on a computer screen. These advertisements usually cannot be removed and are consequently always visible. The connection data allow many conclusions on the usage behavior and are problematic in terms of data security.
Backdoors
A backdoor can gain access to a computer by bypassing the computer access security mechanisms.
A program that is being executed in the background generally enables the attacker almost unlimited rights. User's personal data can be spied with the backdoor's help.. But are mainly used to install further computer viruses or worms on the relevant system.
Boot viruses
The boot or master boot sector of hard disks is mainly infected by boot sector viruses. They overwrite important information necessary for the system execution. One of the awkward consequences: the computer system cannot be loaded any more...
Bot-Net
A bot-net is defined as a remote network of PCs (on the Internet) that is composed of bots that communicate with each other. A bot-net can comprise a collection of cracked machines running programs (usually referred to as worms, Trojans) under a common command and control infrastructure. Bot-nets serve various purposes, including denial-of-service attacks etc., usually without the affected PC user's knowledge. The main potential of bot-nets is that the networks can achieve grow to thousands of computers and their total bandwidth exceeds most conventional Internet accesses.
Exploit
An exploit (security gap) is a computer program or script that takes advantage of a bug, glitch or vulnerability leading to privilege escalation or denial of service on a computer system. One form of exploitation for example is an attack from the Internet with the help of manipulated data packages. Programs can be infiltrated in order to obtain higher access.
Hoaxes
For several years, Internet and other network users have received alerts about viruses that are purportedly spread via email. These alerts are spread via email with the request that they should be sent to the highest possible number of colleagues and to other users, in order to warn everyone against the "danger".
Honeypot
A honeypot is a service (program or server) installed in a network. Its function is to monitor a network and log attacks. This service is unknown to the legitimate user - because of this reason he is never addressed. If an attacker examines a network for the weak points and uses the services which are offered by a honeypot, it is logged and an alert is triggered.
Macro viruses
Macroviruses are small programs that are written in the macro language of an application (e.g. WordBasic under WinWord 6.0) and that can normally only spread within documents of this application. Because of this, they are also called document viruses. In order to be active, they need that the corresponding applications are activated and that one of the infected macros has been executed. Unlike "normal" viruses, macro viruses consequently do not attack executable files but they do attack the documents of the corresponding host application.
Pharming
Pharming is a manipulation of the host file of web browsers to divert enquiries to spoofed websites. This is a further development of classic phishing. Pharming fraudsters operate their own large server farms on which fake websites are stored. Pharming has established itself as an umbrella term for various types of DNS attacks. In the case of a manipulation of the host file, a specific manipulation of a system is carried out with the aid of a Trojan or virus. The result is that the system can now only access fake websites, even if the correct web address is entered.
Phishing
Phishing means angling for personal details of the Internet user. Phishers generally send their victims apparently official letters such as emails that are intended to induce them to reveal confidential information to the culprits in good faith, in particular user names and passwords or PINs and TANs of online banking accounts. With the stolen access details, the phishers can assume the identities of the victims and carry out transactions in their name. What is clear is that: banks and insurance companies never ask for credit card numbers, PINs, TANs or other access details by email, SMS or telephone.
Polymorph viruses
Polymorph viruses are the real masters of disguise. They change their own programming codes - and are therefore very hard to detect.
Program viruses
A computer virus is a program that is capable of attaching itself to other programs after being executed and cause an infection. Viruses multiply themselves unlike logic bombs and Trojans. In contrast to a worm, a virus always requires a program as host, where the virus deposits its virulent code. The program execution of the host itself is not changed as a rule.
Rootkit
A rootkit is a collection of software tools that are installed after a computer system has been infiltrated to conceal logins of the infiltrator, hide processes and record data - generally speaking: to make themselves invisible. They attempt to update already installed spy programs and reinstall deleted spyware.
Script viruses and worms
Such viruses are extremely easy to program and they can spread - if the required technology is on hand - within a few hours via email round the globe.
Script viruses and worms use one of the script languages, such as Javascript, VBScript etc., to insert themselves in other, new scripts or to spread themselves by calling operating system functions. This frequently happens via email or through the exchange of files (documents).
A worm is a program that multiplies itself but that does not infect the host. Worms cannot consequently form part of other program sequences. Worms are often the only possibility to infiltrate any kind of damaging programs on systems with restrictive security measures.
Spyware
Spyware are so called spy programs that intercept or take partial control of a computer's operation without the user's informed consent. Spyware is designed to exploit infected computers for commercial gain.
Trojan horses (short Trojans)
Trojans are pretty common nowadays. Trojans include programs that pretend to have a particular function, but that show their real image after execution and carry out a different function that, in most cases, is destructive. Trojan horses cannot multiply themselves, which differentiates them from viruses and worms. Most of them have an interesting name (SEX.EXE or STARTME.EXE) with the intention to induce the user to start the Trojan. Immediately after execution they become active and can, for example, format the hard disk. A dropper is a special form of Trojan that 'drops' viruses, i.e. embeds viruses on the computer system.
Zombie
A zombie PC is a computer that is infected with malware programs and that enables hackers to abuse computers via remote control for criminal purposes. On command, the affected PC starts denial-of-service (DoS) attacks, for example, or sends spam and phishing emails.
11 Info and Service
This chapter contains information on how to contact us.
see Chapter Contact address
see Chapter Technical support
see Chapter Suspicious files
see Chapter Report false positives
see Chapter Your feedback for more security
11.1 Contact address
If you have any questions or requests concerning the AntiVir product range, we will be pleased to help you. For our contact addresses, please refer to the Control Center under Help :: About Avira AntiVir Professional.
11.2 Technical support
Avira support provides reliable assistance in answering your questions or solving a technical problem.
All necessary information on our comprehensive support service can be obtained from our website:
http://www.avira.com/professional-support
So that we can provide you with fast, reliable help, you should have the following information ready:
- License information. You can find the program interface under the menu item Help :: About Avira AntiVir Professional :: License information
- Version information. You can find the program interface under the menu item Help :: About Avira AntiVir Professional:: Version information.
- Operating system version and any Service Packs installed.
- Installed software packages, e.g. anti-virus software of other vendors.
- Exact messages of the program or of the report file.
11.3 Suspicious file
Viruses that may not yet be detected or removed by our products or suspect files can be sent to us. We provide you with several ways of doing this.
- Identify the file in the quarantine manager of the Control Center and select the item Send file via the context menu or the corresponding button.
- Send the required file packed (WinZIP, PKZip, Arj etc.) in the attachment of an email to the following address:
virus-professional@avira.com
As some email gateways work with anti-virus software, you should also provide the file(s) with a password (please remember to tell us the password).
You can also send us the suspicious file via our website: http://www.avira.com/sample-upload
11.4 Reporting false positives
If you believe that your AntiVir program is reporting a detection in a file that is most likely "clean", send the relevant file packed (WinZIP, PKZip, Arj etc.) as an email attachment to the following address:
- virus-professional@avira.com
As some email gateways work with anti-virus software, you should also provide the file(s) with a password (please remember to tell us the password).
11.5 Your feedback for more security
At Avira, our customers' security is paramount. For this reason, we don't just have an in-house expert team that tests the quality and security of every Avira GmbH solution before the product is released. We also attach great importance to the indications regarding security relevant gaps that could develop and we treat those seriously.
If you think you have detected a security gap in one of our products, please send us an email to the following address:
vulnerabilities-professional@avira.com
12 Reference: Configuration options
The configuration reference documents all available configuration options.
12.1 Scanner
The Scanner section of the Configuration is responsible for the configuration of the on-demand scan.
12.1.1 Scan
Here you define the basic behavior of the scan routine for an on-demand scan. If you select certain directories to be scanned with an on-demand scan, depending on the configuration the Scanner scans:
- with a certain scanning power (priority),
- also boot sectors and main memory,
- certain or all boot sectors and the main memory,
– all or selected files in the directory.
Files
The Scanner can use a filter to scan only those files with a certain extension (type).
All files
If this option is enabled, all files are scanned for viruses or unwanted programs, irrespective of their content and file extension. The filter is not used.
Note
If All files is enabled, the button File extensions cannot be selected.
Smart Extensions
If this option is enabled, the selection of the files scanned for viruses or unwanted programs is automatically chosen by the program. This means that your AntiVir program decides whether the files are scanned or not based on their content. This procedure is somewhat slower than Use file extension list, but more secure, since not only on the basis of the file extension is scanned. This option is enabled as the default setting and is recommended.
Note
If Smart Extensions is enabled, the button File extensions cannot be selected.
Use file extension list
If this option is enabled, only files with a specified extension are scanned. All file types that may contain viruses and unwanted programs are preset. The list can be edited manually via the button "File extension".
Note
If this option is enabled and you have deleted all entries from the list with file extensions, this is indicated with the text "No file extensions" under the button File extensions.
File extensions
With the aid of this button, a dialog box is opened in which all file extensions are displayed that are scanned in "Use file extension list" mode. Default entries are set for the extensions, but entries can be added or deleted.
Note
Please note that the default list may vary from version to version.
Additional settings
Scan boot sectors of selected drives
If this option is enabled, the Scanner scans the boot sectors of the drives selected for the on-demand scan. This option is enabled as the default setting.
Scan master boot sectors
If this option is enabled, the Scanner scans the master boot sectors of the hard disk(s) used in the system.
Ignore offline files
If this option is enabled, the direct scan ignores so-called offline files completely during a scan. This means that these files are not scanned for viruses and unwanted programs.
Offline files are files that were physically moved by a so-called Hierarchical Storage
Management System (HSMS) from the hard disk onto a tape, for example. This option is enabled as the default setting.
Integrity checking of system files
When this option is enabled, the most important Windows system files are subjected to a particularly secure check for changes by malware during every on-demand scan. If an amended file is detected, this is reported as suspect. This function uses a lot of computer capacity. That is why the option is disabled as the default setting.
Important
This option is only available with Windows Vista and higher. The option is not available if you are managing the AntiVir program under SMC.
Note
This option should not be used if you are using third-party tools that modify system files and adapt the boot or start screen to your own requirements. Examples of such tools are skinpacks, TuneUp utilities or Vista Customization.
Optimized scan
When the option is enabled, the processor capacity is optimally utilized during a Scanner scan. For performance reasons, an optimized scan is only logged on standard level.
Note
This option is only available on multi-processor systems. If your AntiVir program is managed with SMC, the option is always displayed and can be enabled: If the managed system does not have more than one processor, the Scanner option is not used.
Follow symbolic links
If this option is enabled, Scanner performs a scan that follows all symbolic links in the scan profile or selected directory and scans the linked files for viruses and malware. This option is not supported by Windows 2000 and has been deactivated.
Important
The option does not include any shortcuts, but refers exclusively to symbolic links (generated by mklink.exe) or Junction Points (generated by junction.exe) that are transparent in the file system.
Search for Rootkits before scan
If this option is enabled and a scan is started, the Scanner scans the Windows system directory for active rootkits in a so-called shortcut. This process does not scan your computer for active rootkits as comprehensively as the scan profile "Scan for rootkits", but it is significantly quicker to perform.
Important
The rootkit scan is not available for Windows XP 64 bit!
Scan Registry
If this option is enabled, the Registry is scanned for references to malware.
Do not scan files and paths on network drives
If this option is enabled, network drives connected to the computer are excluded from the on-demand scan. This option is recommended when the servers or other workstations are themselves protected with anti-virus software. This option is disabled as the default setting.
Scan process
Allow stopping the Scanner
If this option is enabled, the scan for viruses or unwanted programs can be terminated at any time with the button "Stop" in the "Luke Filewalker" window. If you have disabled this setting, the Stop button in the "Luke Filewalker" window has a gray background. Premature ending of a scan process is thus not possible! This option is enabled as the default setting.
Scanner priority
With the on-demand scan, the Scanner distinguishes between priority levels. This is only effective if several processes are running simultaneously on the workstation. The selection affects the scanning speed.
Low
The Scanner is only allocated processor time by the operating system if no other process requires computation time, i.e. as long as only the Scanner is running, the speed is maximum. All in all, work with other programs is optimal: The computer responds more quickly if other programs require computation time while the Scanner continues running in the background. This option is enabled as the default setting and is recommended.
Medium
The Scanner is executed with normal priority. All processes are allocated the same amount of processor time by the operating system. Under certain circumstances, work with other applications may be affected.
High
The Scanner has the highest priority. Simultaneous work with other applications is almost impossible. However, the Scanner completes its scan at maximum speed.
12.1.1.1. Action on detection
Action on detection
You can define the actions to be performed by Scanner when a virus or unwanted program is detected.
Interactive
If this option is enabled, the results of the Scanner scan are displayed in a dialog box. When carrying out a scan with the Scanner, you will receive an alert with a list of the affected files at the end of the scan. You can use the content-sensitive menu to select an action to be executed for the various infected files. You can execute the standard actions for all infected files or cancel the Scanner.
Note
In the Scanner dialog, the action 'Move to quarantine' is displayed as the default action.
Permitted actions
In this box actions can be specified, which can be selected in individual or expert notification mode in case of a virus detection. You must activate the corresponding options for this.
Repair
The Scanner repairs the infected file if possible.
rename
The Scanner renames the file. Direct access to these files (e.g. with double-click) is therefore no longer possible. The file can be repaired at a later time and renamed again.
Quarantine
The Scanner moves the file to Quarantine. The file can be recovered from quarantine manager if it has an informative value or - if necessary - sent to the Avira Malware Research Center. Depending on the file, further selection options are available in the quarantine manager.
delete
The file will be deleted. This process is much faster than "overwrite and delete".
Ignore
The file is to be ignored.
overwrite and delete
The Scanner overwrites the file with a default pattern and then deletes it. It cannot be restored.
Default
The button is used to define a default action by the Scanner to handle the files encountered. Highlight an action and click the "Default" button. Only the selected default action for the relevant files can be executed in combined notification mode. The selected default action for the relevant files is preselected in individual and expert notification mode.
Note
The action repair cannot be selected as the default action.
Note
If you have selected Delete or Overwrite and Delete as the default action and wish to set the notification mode to combined, please note the following: In the case of heuristic hits, the affected files are not deleted, but are instead moved to quarantine.
Click here for more information.
Automatic
If this option is enabled, no dialog box in case of a virus detection appears. The Scanner reacts according to the settings you predefine in this section as primary and secondary action.
Backup to quarantine
If this option is enabled, the Scanner creates a backup copy before carrying out the requested primary or secondary action. The back-up copy is saved in Quarantine, where the file can be restored if it is of informative value. You can also send the backup copy to the Avira Malware Research Center for further investigation.
Display detection alerts
If this option is activated, then for each detection of a virus or unwanted program an alert appears showing the actions being executed.
Primary action
Primary action is the action performed when the Scanner finds a virus or an unwanted program. If the option "repair" is selected but the affected file cannot be repaired, the action selected under "Secondary action" is performed.
Note
The option Secondary action can only be selected if the setting repair was selected under Primary action.
Repair
If this option is enabled, the Scanner repairs affected files automatically. If the Scanner cannot repair an affected file, it carries out the action selected under Secondary action.
Note
An automatic repair is recommended, but means that the Scanner modifies files on the workstation.
delete
If this option is enabled, the file is deleted. This process is much faster than "overwrite and delete".
overwrite and delete
If this option is enabled, the Scanner overwrites the file with a default pattern and then deletes it. It cannot be restored.
rename
If this option is enabled, the Scanner renames the file. Direct access to these files (e.g. with double-click) is therefore no longer possible. Files can later be repaired and given their original names again.
Ignore
If this option is enabled, access to the file is allowed and the file is left as it is.
Warning
The affected file remains active on your workstation! It may cause serious damage on your workstation!
Quarantine
If this option is enabled, the Scanner moves the file to the quarantine. These files can later be repaired or - if necessary - sent to the Avira Malware Research Center.
Secondary action
The option "Secondary action" can only be selected if the setting repair was selected under "Primary action". With this option it can now be decided what is to be done with the affected file if it cannot be repaired.
delete
If this option is enabled, the file is deleted. This process is much faster than "overwrite and delete".
overwrite and delete
If this option is enabled, the Scanner overwrites the file with a default pattern and then deletes (wipes) it. It cannot be restored.
rename
If this option is enabled, the Scanner renames the file. Direct access to these files (e.g. with double-click) is therefore no longer possible. Files can later be repaired and given their original names again.
Ignore
If this option is enabled, access to the file is allowed and the file is left as it is.
Warning
The affected file remains active on your workstation! It may cause serious damage on your workstation!
Quarantine
If this option is enabled, the Scanner moves the file to Quarantine. These files can later be repaired or - if necessary - sent to the Avira Malware Research Center.
Note
If you have selected Delete or Overwrite and Delete as the primary or secondary action, you should note the following: In the case of heuristic hits, the affected files are not deleted, but are instead moved to quarantine.
12.1.1.2. Further actions
Launch program following detection
After the on-demand scan, the Scanner can open a file of your choice (for example a program) if at least one virus or unwanted program has been detected, for example an email program, so that you can inform other users or the administrator.
Note
For security reasons it is only possible to start a program after a detection when a user is logged on the computer. The file is then opened with the rights that apply to the logged on user. If no user is logged on, this option is not performed.
Program name
In this input box you can enter the name and the relevant path of the program that the Scanner should start after a detection.

This button opens a window in which you can select the desired program with the aid of the file selection dialog.
Arguments
In this input box you can enter command line parameters for the program to be started if necessary.
Event log
Use event log
If this option is enabled, an event report with the results of the scan is transferred to the Windows Event Log after a Scanner scan has been completed. The events can be called up in the Windows Event Viewer. The option is disabled as the default setting.
When scanning archives, the Scanner uses a recursive scan: Archives in archives are also unpacked and scanned for viruses and unwanted programs. The files are scanned, decompressed and scanned again.
Scan archives
If this option is enabled, the selected archives in the archive list are scanned. This option is enabled as the default setting.
All archive types
If this option is enabled, all archive types in the archive list are selected and scanned.
Smart Extensions
If this option is enabled, the Scanner detects whether a file is a packed file format (archive), even if the file extension differs from the usual extensions, and scans the archive. However every file must be opened for this, which reduces the scanning speed. Example: If a *.zip archive has the file extension *.xyz, the Scanner also unpacks this archive and scans it. This option is enabled as the default setting.
Note
Only those archive types marked in the archive list are supported.
Recursion depth
Unpacking and scanning recursive archives can require a great deal of computer time and resources. If this option is enabled, you limit the depth of the scan in multi-packed archives to a certain number of packing levels (maximum recursion depth). This saves time and computer resources.
Note
In order to find a virus or an unwanted program in an archive, the Scanner must scan up to the recursion level in which the virus or the unwanted program is located.
Maximum recursion depth
In order to enter the maximum recursion depth, the option Limit recursion depth must be enabled.
You can either enter the requested recursion depth directly or by means of the right arrow key on the entry field. The permitted values are 1 to 99. The standard value is 20 which is recommended.
Default values
The button restores the pre-defined values for scanning archives.
Archives
In this display area you can set which archives the Scanner should scan. For this, you must select the relevant entries.
12.1.1.3. Exceptions
File objects to be omitted for the Scanner
The list in this window contains files and paths that should not be included by the Scanner in the scan for viruses or unwanted programs.
Please enter as few exceptions as possible here and really only files that, for whatever reason, should not be included in a normal scan. We recommend that you always scan these files for viruses or unwanted programs before they are included in this list!
Note
The entries in the list must not result in more than 6000 characters in total.
Warning
These files are not included in a scan!
Note
The files included in this list are recorded in the report file. Please check the report file from time to time for unscanned files, as perhaps the reason you excluded a file here no longer exists. In this case you should remove the name of this file from this list again.
Input box
In this input box you can enter the name of the file object that is not included in the on-demand scan. No file object is entered as the default setting.

The button opens a window in which you can select the required file or the required path.
When you have entered a file name with its complete path, only this file is not scanned for infection. If you have entered a file name without a path, all files with this name (irrespective of the path or drive) are not scanned.
Add
With this button, you can add the file object entered in the input box to the display window.
Delete
The button deletes a selected entry from the list. This button is inactive if no entry is selected.
Note
If you add a complete partition to the list of the file objects, only those files that are saved directly under the partition will be excluded from the scan, which does not apply to files in sub-directories on the corresponding partition:
Example: File object to be skipped: D:\ = D:\file.txt will be excluded from the scan of the Scanner, D:\folder\file.txt will not be excluded from the scan.
Note
If you are managing the AntiVir program in SMC, you can use variables in the path details for file exceptions. You can find a list of variables you can use under Variables: Guard und Scanner Exceptions.
12.1.1.4. Heuristics
This configuration section contains the settings for the heuristic of the scan engine.
AntiVir products contain very powerful heuristics that can proactively uncover unknown malware, i.e. before a special virus signature to combat the damaging element has been created and before a virus guard update has been sent. Virus detection involves an extensive analysis and investigation of the affected codes for functions typical of malware. If the code being scanned exhibits these characteristic features, it is reported as being suspicious. This does not necessarily mean that the code is in fact malware. False positives do sometimes occur. The decision on how to handle affected code is to be made by the user, e.g. based on his or her knowledge of whether the source of the code is trustworthy or not.
Macrovirus heuristics
Macrovirus heuristics
Your AntiVir product contains a highly powerful macrovirus heuristic. If this option is enabled, all macros in the relevant document are deleted in the event of a repair, alternatively suspect documents are only reported, i.e. you receive an alert. This option is enabled as the default setting and is recommended.
Advanced Heuristic Analysis and Detection (AHeAD)
enable AHeAD
Your AntiVir program contains a very powerful heuristic in the form of AntiVir AHeAD technology, which can also detect unknown (new) malware. If this option is enabled, you can define how "aggressive" this heuristic should be. This option is enabled as the default setting.
Low detection level
If this option is enabled, slightly less unknown malware is detected, the risk of false alerts is low in this case.
Medium detection level
This option is enabled as the default setting if you have selected the use of this heuristic. High detection level
If this option is enabled, significantly more unknown malware is detected, but there are also likely to be false positives.
12.1.2 Report
The Scanner has a comprehensive reporting function. You thus obtain precise information on the results of an on-demand scan. The report file contains all entries of the system as well as alerts and messages of the on-demand scan.
Note
To enable you to establish what actions the Scanner has performed when viruses or unwanted programs have been detected, a report file should always be created.
Reporting
Off
If this option is enabled, the Scanner does not report the actions and results of the on-demand scan.
Default
When this option is activated, the Scanner logs the names of the files concerned with their path. In addition, the configuration for the current scan, version information and information on the licensee is written in the report file.
Advanced
When this option is activated, the Scanner logs alerts and tips in addition to the default information.
Complete
When this option is activated, the Scanner also logs all scanned files. In addition, all files involved as well as alerts and tips are included in the report file.
Note
If you have to send us a report file at any time (for troubleshooting), please create this report file in this mode.
12.2 Guard
The Guard section of the configuration is responsible for the configuration of the on-access scan.
12.2.1 Scan
You will normally want to monitor your system constantly. To this end, use the Guard (= on-access Scanner). You can thus scan all files that are copied or opened on the computer "on the fly", for viruses and unwanted programs.
Scan mode
Here the time for scanning of a file is defined.
Scan when reading
If this option is enabled, the Guard scans the files before they are read or executed by the application or the operating system.
Scan when writing
If this option is enabled, the Guard scans a file when writing. You can only access the file again after this process has been completed.
Scan when reading and writing
If this option is enabled, the Guard scans files before opening, reading and executing and after writing. This option is enabled as the default setting and is recommended.
Files
The Guard can use a filter to scan only those files with a certain extension (type).
All files
If this option is enabled, all files are scanned for viruses or unwanted programs, irrespective of their content and their file extension.
Note
If All files is enabled, the File extensions button cannot be selected.
Smart Extensions
If this option is enabled, the selection of the files scanned for viruses or unwanted programs is automatically chosen by the program. This means that the program decides whether the files are scanned or not based on their content. This procedure is somewhat slower than Use file extension list, but more secure, since not only on the basis of the file extension is scanned.
Note
If Smart Extensions is enabled, the File extensions button cannot be selected.
Use file extension list
If this option is enabled, only files with a specified extension are scanned. All file types that may contain viruses and unwanted programs are preset. The list can be edited manually via the "File extensions" button. This option is enabled as the default setting and is recommended.
Note
If this option is enabled and you have deleted all entries from the list with file extensions, this is indicated with the text "No file extensions" under the File extensions button.
File extensions
With the aid of this button, a dialog box is opened in which all file extensions are displayed that are scanned in "Use file extension list" mode. Default entries are set for the extensions, but entries can be added or deleted.
Note
Please note that the file extension list may vary from version to version.
Archives
Scan archives
If this option is enabled, then archives will be scanned. Compressed files are scanned, then decompressed and scanned again. This option is deactivated by default. The archive scan is restricted by the recursion depth, the number of files to be scanned and the archive size. You can set the maximum recursion depth, the number of files to be scanned and the maximum archive size.
Note
This option is deactivated by default, since the process puts heavy demands on the computer's performance. It is generally recommended that archives be checked using an on-demand scan.
Maximum recursion depth
When scanning archives, the Guard uses a recursive scan: Archives in archives are also unpacked and scanned for viruses and unwanted programs. You can define the recursion depth. The default value for the recursion depth is 1 and is recommended: all archives that are directly located in the main archive are scanned.
Maximum number of files
When scanning archives, you can restrict the scan to a maximum number of files in the archive. The default value for the maximum number of files to be scanned is 10 and is recommended.
Maximum size (KB)
When scanning archives, you can restrict the scan to a maximum archive size to be unpacked. The standard value of 1000 KB is recommended.
Drives
Network drives
If this option is enabled, files on network drives (mapped drives) such as server volumes, peer drives etc., are scanned.
Note
In order not to reduce the performance of your computer too much, the option Network drives should only be enabled in exceptional cases.
Warning
If this option is disabled, the network drives are not monitored. You are no longer protected against viruses or unwanted programs!
Note
When files are executed on network drives, they are scanned by the Guard irrespective of the setting for the Network Drives option. In some cases files on network drives are scanned while being opened, even though the Network Drives option is disabled. Reason: These files are accessed with 'Execute File' rights. If you want to exclude these files or even executed files on network drives from scanning by the Guard, enter the files in the list of file objects to be excluded (see: Guard::Scan::Exceptions).
Enable caching
If this option is enabled, monitored files on network drives will be made available in the Guard's cache. Monitoring of network drives without the caching function is more secure, but does not perform as well as the monitoring of network drives with caching.
12.2.1.1. Action on detection
Action on detection
You can define the actions to be performed by Guard when a virus or unwanted program is detected.
Interactive
If this option is enabled, a desktop notification appears when Guard detects a virus or unwanted program. You have the option of removing the detected malware or accessing other possible virus treatment actions via the 'Details' button. The actions are displayed in a dialog box. The actions will be displayed in a dialog box. This option is enabled as the default setting.
Permitted actions
In this display box you can specify the virus management actions that should be available as further actions in the dialog box. You must activate the corresponding options for this.
repair
Guard repairs the infected file if possible.
rename
Guard renames the file. Direct access to these files (e.g. with double-click) is therefore no longer possible. The file can be repaired at a later time and renamed again.
Quarantine
Guard moves the file to Quarantine. The file can be recovered from quarantine manager if it has an informative value or - if necessary - sent to the Avira Malware Research Center. Depending on the file, further selection options are available in the quarantine manager.
delete
The file will be deleted. This process is much faster than "overwrite and delete".
Ignore
Access to the file is permitted and the file is ignored.
overwrite and delete
Guard overwrites the file with a default pattern before deleting it. It cannot be restored.
Default
This button allows you to select an action that is activated in the dialog box by default when a virus is detected. Select the action that should be activated by default and click on the "Default" button.
Note
The action repair cannot be selected as the default action.
Click here for more information.
Automatic
If this option is enabled, no dialog box in case of a virus detection appears. Guard reacts according to the settings you predefine in this section as primary and secondary action.
Backup to quarantine
If this option is enabled, the Guard creates a backup copy before carrying out the requested primary or secondary action. The backup copy is saved in quarantine. It can be restored via the quarantine manager if it is of informative value. You can also send the backup copy to the Avira Malware Research Center. Depending on the object, more selection options are available in the quarantine manager.
Display detection alerts
If this option is enabled, then for each detection of a virus or unwanted program an alert appears.
Primary action
Primary action is the action performed when the Guard finds a virus or an unwanted program. If the "repair" option is selected but the affected file cannot be repaired, the action selected under "Secondary action" is performed.
Note
The Secondary action option can only be selected if the repair setting was selected under Primary action.
repair
If this option is enabled, the Guard repairs affected files automatically. If the Guard cannot repair an affected file, it carries out the action selected under Secondary action.
Note
An automatic repair is recommended, but means that the Guard modifies files on the workstation.
delete
If this option is enabled, the file is deleted. This process is much faster than "overwrite and delete".
overwrite and delete
If this option is enabled, the Guard overwrites the file with a default pattern and then deletes it. It cannot be restored.
rename
If this option is enabled, the Guard renames the file. Direct access to these files (e.g. with double-click) is therefore no longer possible. Files can later be repaired and given their original names again.
Ignore
If this option is enabled, access to the file is allowed and the file is left as it is.
Warning
The affected file remains active on your workstation! It may cause serious damage on your workstation!
Deny access
If this option is enabled, the Guard only enters the detection in the report file if the report function is enabled. In addition, the Guard writes an entry in the Event log, if this option is enabled.
Quarantine
If this option is enabled, the Guard moves the file to Quarantine. The files in this directory can later be repaired or - if necessary - sent to the Avira Malware Research Center.
Secondary action
The option "Secondary action" can only be selected if the "Repair" option was selected under "Primary action". With this option it can now be decided what is to be done with the affected file if it cannot be repaired.
delete
If this option is enabled, the file is deleted. This process is much faster than "overwrite and delete".
overwrite and delete
If this option is enabled, the Guard overwrites the file with a default pattern and then deletes it. It cannot be restored.
rename
If this option is enabled, the Guard renames the file. Direct access to these files (e.g. with double-click) is therefore no longer possible. Files can later be repaired and given their original names again.
Ignore
If this option is enabled, access to the file is allowed and the file is left as it is.
Warning
The affected file remains active on your workstation! It may cause serious damage on your workstation!
Deny access
If this option is enabled, the Guard only enters the detection in the report file if the report function is enabled. In addition, the Guard writes an entry in the Event log, if this option is enabled.
Quarantine
If this option is enabled, the Guard moves the file to Quarantine. The files can later be repaired or - if necessary - sent to the Avira Malware Research Center.
Note
If you have selected Delete or Overwrite and Delete as the primary or secondary action, please note the following: In the case of heuristic hits, the affected files are not deleted, but are instead moved to quarantine.
12.2.1.2. Further actions
Notifications
Event log
Use event log
If this option is enabled, an entry is added to the Windows event log for every detection. The events can be called up in the Windows event viewer. This option is enabled as the default setting.
Autostart
Block autostart function
When this option is enabled, the execution of the Windows Autostart function is blocked on all connected drives, including USB sticks, CD and DVD drives and network drives. With the Windows Autostart function, files on data media or network drives are read immediately on loading or connection, and files can therefore be started and copied automatically. This functionality carries with it a high security risk, however, as malware and unwanted programs can be installed with the automatic start. The Autostart function is especially critical for USB sticks as data on a stick can be changed at any time.
Exclude CDs and DVDs
When this option is enabled, the Autostart function is permitted on CD and DVD drives.
Warning
Only disable the Autostart function for CD and DVD drives if you are sure you are only using trusted data media.
12.2.1.3. Exceptions
With these options you can configure exception objects for the Guard (on-access scan). The relevant objects are then not included in the on-access scan. The Guard can ignore file accesses to these objects during the on-access scan via the list of processes to be omitted. This is useful, for example, with databases or backup solutions.
Please note the following when specifying processes and file objects to be omitted: The list is processed from top to bottom. The longer the list is, the more processor time is required for processing the list for each access. Therefore, keep the list as short as possible.
Processes to be omitted by the Guard
All file accesses of processes in this list are excluded from monitoring by Guard.
Input box
In this field, enter the name of the process that is to be ignored by the real-time scan. No process is entered as the default setting.
Note
You can enter up to 128 processes.
Note
When entering the process, Unicode symbols are accepted. You can therefore enter process or directory names containing special symbols.
Note
You have the option of excluding processes from monitoring by the Guard without full path details.
application.exe
This however only applies to processes where the executable files are located on hard disk drives.
Full path details are required for processes where the executable files are located on connected drives, e.g. network drives. Please note the general information on the notation of Exceptions on connected network drives.
Do not specify any exceptions for processes where the executable files are located on dynamic drives. Dynamic drives are used for removable disks, such as CDs, DVDs or USB sticks.
Note
Drive information must be entered as follows: [Drive letter]:\
The colon symbol (:) is only used to specify drives.
Note
When specifying the process, you can use the wildcards* (any number of characters) and ?? (a single character).
C:\Program Files Iraq application application.exe
C:\Program Files\Application\application?.exe
C:\Program Files\Application\applic*.exe
C:\Program Files\Application*.exe
To avoid the process being excluded globally from monitoring by Guard, specifications exclusively comprising the following characters are invalid: * (asterisk), ? (question mark), / (forward slash), \ (backslash), . (dot), : (colon).
Note
The specified path and file name of the process should contain a maximum of 255 characters. The entries in the list must not result in more than 6000 characters in total.
Warning
Please note that all file accesses by processes recorded in the list are excluded from the scan for viruses and unwanted programs! The Windows Explorer and the operating system itself cannot be excluded. A corresponding entry in the list is ignored.

The button opens a window in which you can select an executable file.
Processes
The "Processes" button opens the "Process selection" window in which the running processes are displayed.
Add
With this button, you can add the process entered in the input box to the display window.
Delete
With this button you can delete a selected process from the display window.
File objects to be omitted by the Guard
All file accesses to objects in this list are excluded from monitoring by the Guard.
Input box
In this box you can enter the name of the file object that is not included in the on-access scan. No file object is entered as the default setting.
Note
When specifying file objects to be omitted, you can use the wildcards* (any number of characters) and ?? (a single character): Individual file extensions can also be excluded (including wildcards):
C:\Directory*.mdb
*.mdb
*.md?
*.xls*
C:\Directory*.log
Note
Directory names must end with a backslash \, otherwise a file name is assumed.
Note
The entries in the list must have no more than 6000 characters in total.
Note
If a directory is excluded, all its sub-directories are automatically also excluded.
Note
For each drive you can specify a maximum of 20 exceptions by entering the complete path (starting with the drive letter).
For example: C:\Program Files\Application\Name.log
The maximum number of exceptions without a complete path is 64.
For example: *.log
\computer1\C\directory1
Note
In case of dynamic drives that are mounted as a directory on another drive, the alias of the operating system for the integrated drive in the list of the exceptions has to be used: e.g. \Device\HarddiskDmVolumes\PhysicalDmVolumes\BlockVolume1\
If you use the mount point itself, for example, C:\DynDrive, the dynamic drive will be scanned nonetheless. You can determine the alias of the operating system to be used from the Guard report file.

The button opens a window in which you can select the file object to be excluded.
Add
With this button, you can add the file object entered in the input box to the display window.
Delete
With this button you can delete a selected file object from the display window.
Please note the further information when specifying exceptions:
Note
In order to also exclude objects when they are accessed with short DOS file names (DOS name convention 8.3), the relevant short file name must also be entered in the list.
Note
A file name that contains wildcards may not be terminated with a backslash.
For example:
C:\Program Files\Application\applic*.exe\
This entry is not valid and not treated as an exception!
Note
Please note the following with regard to exceptions on connected network drives: If you use the drive letter of the connected network drive, the files and folders specified are NOT excluded from the Guard scan. If the UNC path in the list of exceptions differs from the UNC path used to connect to the network drive (IP address specification in the list of exceptions – specification of computer name for connection to network drive), the specified folders and files are NOT excluded by the Guard scan. Locate the relevant UNC path in the Guard report file:
\
Note
You can locate the path Guard uses to scan for infected files in the Guard report file. Indicate exactly the same path in the list of exceptions. Proceed as follows: Set the protocol function of the Guard to Complete in the configuration under Guard::Report. Now access the files, folders, mounted drives or connected network drives with the activated Guard. You can now read the path to be used from the Guard report file. The report file can be accessed in the Control Center under Local protection::Guard.
Note
If you are managing the AntiVir program in SMC, you can use variables in the path details for process and file exceptions. You can find a list of variables you can use under Variables: Guard and Scanner Exceptions.
Examples for processes to be excluded:
- application.exe
The application.exe process is excluded from the Guard scan, irrespective of which hard disk drive it is located on and which directory it is in.
- C:\Program Files1\Application.exe
The process for the file application.exe, which is located under the path C:\Program Files1, is excluded from the Guard scan.
- C:\Program Files1*.exe
All processes for executable files located under the path C:\Program Files1 are excluded from the Guard scan.
Examples for files to be excluded:
- *.mdb
All files with the extension 'mdb' are excluded from the Guard scan
- *.xls*
All files with a file extension beginning 'xls' are excluded from the Guard scan, e.g. files with the extensions .xls and .xlsx.
- C:\Directory*.log
All log files with the extension 'log', located under the path C:\Directory, are excluded from the Guard scan.
- \Computer name\Shared1\
All files are excluded from the Guard scan accessed via a connection '\Computer name1\Shared1'. This is generally a connected network drive which accesses another computer with a shared folder via the computer name 'Computer name1' and the shared name 'Shared1'.
- \1.0.0.0\Shared1*.mdb
All files with the extension 'mdb' are excluded from the Guard scan accessed via a connection '\1.0.0.\Shared1'. This is generally a connected network drive which accesses another computer with a shared folder via the IP address '1.0.0.0' and the shared name 'Shared1'.
12.2.1.4. Heuristics
This configuration section contains the settings for the heuristic of the scan engine. AntiVir products contain very powerful heuristics that can proactively uncover unknown malware, i.e. before a special virus signature to combat the damaging element has been created and before a virus guard update has been sent. Virus detection involves an extensive analysis and investigation of the affected codes for functions typical of malware. If the code being scanned exhibits these characteristic features, it is reported as being suspicious. This does not necessarily mean that the code is in fact malware. False positives do sometimes occur. The decision on how to handle affected code is to be made by the user, e.g. based on his or her knowledge of whether the source of the code is trustworthy or not.
Macrovirus heuristics
Macrovirus heuristics
Your AntiVir product contains a highly powerful macrovirus heuristic. If this option is enabled, all macros in the relevant document are deleted in the event of a repair, alternatively suspect documents are only reported, i.e. you receive an alert. This option is enabled as the default setting and is recommended.
Advanced Heuristic Analysis and Detection (AHeAD)
enable AHeAD
Your AntiVir program contains a very powerful heuristic in the form of AntiVir AHeAD technology, which can also detect unknown (new) malware. If this option is enabled, you can define how "aggressive" this heuristic should be. This option is enabled as the default setting.
Low detection level
If this option is enabled, slightly less unknown malware is detected, the risk of false alerts is low in this case.
Medium detection level
This option is enabled as the default setting if you have selected the use of this heuristic.
High detection level
If this option is enabled, significantly more unknown malware is detected, but there are also likely to be false positives.
12.2.2 ProActiv
Avira AntiVir ProActiv protects you from new and unknown threats for which there are not yet any virus definitions or heuristics available. ProActiv technology is integrated into the Guard component and observes and analyzes the program actions performed. The behavior of the program is checked against typical malware action patterns: Type of action and action sequences. If a program exhibits behavior typical of malware, this is treated as a virus detection : You have the option of blocking the program or ignoring the notification and continuing to use the program. You can classify the program as trusted and add it to the application filter for permitted programs. You have the option of adding the program to the application filter for blocked programs using the Always block command.
The ProActiv component uses rule sets developed by the Avira Malware Research Center to identify suspicious behavior. The rule sets are supplied by Avira GmbH databases. Avira AntiVir ProActiv sends information on any suspicious programs detected to the Avira databases for logging. You have the option of disabling data transmission to the Avira databases
Note
ProActiv technology is not yet available for 64 bit systems! Windows 2000 does not support ProActiv components.
General
Enabling Avira AntiVir ProActiv
If this option is enabled, programs on your computer system are monitored and checked for suspicious actions. You will receive a message if typical malware behavior is detected. You can block the program or select "Ignore" to continue to use the program. The monitoring process excludes: Programs classified as trusted, trusted and signed programs included by default in the permitted applications filter, and all programs which you have added to the application filter for permitted programs.
Participating in the AntiVir ProActiv Community enhances your computer's security.
If this option is enabled, Avira AntiVir ProActiv sends data on suspicious programs and, in certain cases, suspicious program files (executable files) to the Avira Malware Research Center for advanced online scanning. After evaluation, these data are added to the ProActiv behavioral analysis rule sets. In this way, you become part of the Avira ProActiv community and contribute to the continuous improvement and refinement of the ProActiv security technology. No data are sent if this option is disabled. This has no effect on ProActiv functionality.
Click here for further information
With this link you can access an Internet page where you can obtain detailed information on the advanced online scan. All data transmitted during an advanced online scan is included on the Internet page.
12.2.2.1. Application filter: Applications to be blocked
Under Application filter: Applications to be blocked you can enter applications which you classify as harmful and which you want Avira AntiVir ProActiv to block by default. The applications added cannot be executed on your computer system. You can also add programs to the application filter for blocking via Guard notifications of suspicious program behavior, by selecting the Always block this program option.
Applications to be blocked
Applications
The list contains all applications which you have classified as harmful which you have entered via the configuration or by notifying the ProActiv component. The applications on the list are blocked by Avira AntiVir ProActiv and cannot be executed on your computer system. An operating system message appears when a blocked program starts up. The applications to be blocked are identified by Avira AntVir ProActiv on the basis of the path specified and the file name, and are blocked irrespective of their content.
Input box
Enter the application you want to block in this box. To identify the application, the full path, file name and file extension must be specified. The path must either show the drive on which the application is located or start with an environment variable.

The button opens a window in which you can select the application to be blocked.
Add
With the "Add" button you can transfer the application specified in the input box to the list of applications to be blocked.
Note
Applications required for the proper operation of the operating system cannot be added.
Delete
The "Delete" button lets you remove a highlighted application from the list of applications to be blocked.
12.2.2.2. Application filter: Permitted applications
The section Application filter: Permitted applications lists the applications excluded from monitoring by the ProActiv component: signed programs classified as trusted and included in list by default, all applications classified as trusted and added to the application filter: You can add permitted applications to the list in Configuration. You also have the option of adding applications to suspicious program behavior via Guard notifications by using the Trusted program option in the Guard notification.
Applications to be skipped
Applications
The list contains applications excluded from monitoring by the ProActiv component. In the default installation settings, the list contains signed applications from trusted producers. You have the option of adding applications that you consider to be trustworthy via the configuration or via Guard notifications. The ProActiv component identifies applications using the path, the file name and the content. We recommend checking the content as malware can be added to a program through changes such as updates. You can determine whether a contents check should be performed from the type specified: For the "Contents" type, the applications specified by path and file name are checked for changes to the file content before they are excluded from monitoring by the ProActiv component. If the file contents have been modified, the application is again monitored by the ProActiv component. For the "Path" type, no contents check is performed before the application is excluded from monitoring by the Guard. To change the exclusion type, click on the type displayed.
Warning
Only use the Path type in exceptional cases. Malcode can be added to an application through an update. The originally harmless application is now malware.
Note
Some trusted applications, including for example all application components of your AntiVir program, are by default excluded from monitoring by the ProActiv component even though they are not included in the list.
Input box
In this box you enter the application to be excluded from monitoring by the ProActiv component. To identify the application, the full path, file name and file extension must be specified. The path must either show the drive on which the application is located or start with an environment variable.

The button opens a window in which you can select the application to be excluded.
Add
With the "Add" button you can transfer the application specified in the input box to the list of applications to be excluded.
Delete
The "Delete" button lets you remove a highlighted application from the list of applications to be excluded.
12.2.3 Report
Guard includes an extensive logging function to provide the user or administrator with exact notes about the type and manner of a detection.
Reporting
This group allows for the content of the report file to be determined.
Off
If this option is enabled, then Guard does not create a log.
It is recommended that you should turn off the logging function only in exceptional cases, such as if you are executing trials with multiple viruses or unwanted programs.
Default
If this option is enabled, Guard records important information (concerning detections, alerts and errors) in the report file, with less important information ignored for improved clarity. This option is enabled as the default setting.
Advanced
If this option is enabled, Guard logs less important information to the report file as well.
Complete
If this option is enabled, Guard logs all available information in the report file, including file size, file type, date, etc.
Limit report file
Limit size to n MB
If this option is enabled, the report file can be limited to a certain size; possible values: Permitted values are between 1 and 100 MB. Around 50 kilobytes of extra space are allowed when limiting the size of the report file to minimize the use of system resources. If the size of the log file exceeds the indicated size by more than 50 kilobytes, then old entries are deleted until the indicated size minus 50 kilobytes is reached.
Backup report file before shortening
If this option is enabled, the report file is backed up before shortening. For the save location see Configuration :: General :: Directories :: Report directory.
Write configuration in report file
If this option is enabled, the configuration of the on-access scan is recorded in the report file.
Note
If you have not specified any report file restriction, a new report file is automatically created when the report file reaches 100MB. A backup of the old report file is created. Up to three backups of old report files are saved. The oldest backups are deleted first.
12.3 MailGuard
The MailGuard section of the Configuration is responsible for the configuration of the MailGuard.
12.3.1 Scan
Use MailGuard to scan incoming emails for viruses and malware. Outgoing emails can be scanned for viruses and malware by MailGuard.
Scan
Turn on MailGuard
If this option is enabled, email traffic is monitored by MailGuard. MailGuard is a proxy server which checks data traffic between the email server you use and the email client program on your computer system: incoming emails are scanned for malware by default. If this option is disabled, the MailGuard service is still started, but monitoring by MailGuard is disabled.
Scan incoming emails
If this option is enabled, incoming emails are scanned for viruses and malware. MailGuard supports POP3 and IMAP protocols. Enable the inbox account used by your email client to receive emails for monitoring by MailGuard.
Monitor POP3 accounts
If this option is enabled, the POP3 accounts are monitored on the specified ports.
Monitored ports
In this field you should enter the port to be used as the inbox by the POP3 protocol. Multiple ports are separated by commas.
Default
This button resets the specified port to the default POP3 port.
Monitor IMAP accounts
If this option is enabled, the IMAP accounts are monitored on the specified ports.
Monitored ports
In this field you should enter the port to be used as the inbox by the IMAP protocol. Multiple ports are separated by commas.
Default
This button resets the specified port to the default IMAP port.
Scan outgoing emails (SMTP)
If this option is enabled, outgoing emails are scanned for viruses and malware.
Monitored ports
In this field you should enter the port to be used as the outbox by the SMTP protocol. Multiple ports are separated by commas.
Default
This button resets the specified port to the default SMTP port.
Note
To verify the protocols and ports used, call up the properties of your email accounts in your email client program. Default ports are mostly used.
12.3.1.1. Action on detection
This configuration section contains settings for actions performed when MailGuard finds a virus or unwanted program in an email or in an attachment.
Note
These actions are performed both when a virus is detected in incoming emails and when a virus is detected in outgoing emails.
Action on detection
Interactive
If this option is enabled, a dialog box appears when a virus or unwanted program is detected in an email or attachment in which you can choose what is to be done with the email or attachment concerned. This option is enabled as the default setting.
Permitted actions
In this box actions can be specified, which can be selected to be displayed in case of a virus detection. You must activate the corresponding options for this.
Move to quarantine
When this option has been activated, the email including all attachments is moved to quarantine. It can be later be delivered via the quarantine manager. The affected email is deleted. The body of the text and any attachments of the email are replaced by a default text.
Delete
If this option is enabled, the affected email is deleted when a virus or unwanted program is detected. The body of the text and any attachments of the email are replaced by a default text.
Delete attachment
If this option has been activated, the affected attachment is replaced by a default text. If the body of the email is affected, it will be erased and also replaced by a default text. The email itself is delivered.
Move attachment to quarantine
If this option has been activated, the affected attachment is moved to quarantine and then deleted (replaced by a default text). The body of the email is delivered. The affected attachment can later be delivered via the quarantine manager.
Ignore
If this option is enabled, an affected email is delivered despite detection of a virus or unwanted program.
Default
This button allows you to select an action that is activated in the dialog box by default when a virus is detected. Select the action that should be activated by default and click on the Default button.
Show progress bar
If this option is enabled, the MailGuard shows a progress bar during downloading of emails. This option can only be enabled if the option Interactive has been selected.
Automatic
If this option is enabled, you are no longer notified when a virus or unwanted program is found. MailGuard reacts according to the settings you define in this section.
Primary action
The Primary action is the action performed when the MailGuard finds a virus or an unwanted program in an email. If the option "Ignore email" is selected, it is also possible, under "Affected attachments", to select the process for dealing with a virus or unwanted program detected in an attachment.
Delete email
If this option is enabled, the affected email is automatically deleted if a virus or unwanted program is found. The body of the email is replaced by the default text given below. The same applies to all attachments included; these are also replaced by a default text.
Isolate email
If this option is enabled, the complete email including all attachments is placed in Quarantine if a virus or unwanted program is found. If required, it can later be restored. The affected email itself is deleted. The body of the email is replaced by the default text given below. The same applies to all attachments included; these are also replaced by a default text.
Ignore email
If this option is enabled, the affected email is ignored despite detection of a virus or unwanted program. However, you can decide what is to be done with the affected attachment:
Affected attachments
The option "Affected attachments" can only be selected if the setting "Ignore email" has been selected under "Primary action". With this option it is now possible to decide what is to be done if a virus or unwanted program is found in an attachment.
delete
If this option is enabled, the affected attachment is deleted if a virus or unwanted program is found and replaced by a default text.
Isolate
If this option is enabled, the affected attachment is placed in Quarantine and then deleted (replaced by a default text). If required, the affected attachment(s) can later be restored.
Ignore
If this option is enabled, the attachment is ignored despite detection of a virus or unwanted program and delivered.
Warning
If you select this option, you have no protection against viruses and unwanted programs by the MailGuard. Only select this item if you are certain you know what you are doing. Disable the preview in your email program, never open attachments by double-clicking!
12.3.1.2. Other actions
This configuration section contains other settings for actions performed when MailGuard finds a virus or unwanted program in an email or in an attachment.
Note
These actions are performed exclusively when a virus is detected in incoming emails.
Default text for deleted and moved emails
The text in this box is inserted in the email as a message instead of the affected email. You can edit this message. A text may contain a maximum of 500 characters.
You can use the following key combination for formatting:
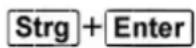
inserts a line break.
Default
The button inserts a pre-defined default text in the edit box.
Default text for deleted and moved attachments
The text in this box is inserted in the email as a message instead of the affected attachment. You can edit this message. A text may contain a maximum of 500 characters.
You can use the following key combination for formatting:
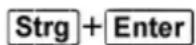
inserts a line break.
Default
The button inserts a pre-defined default text in the edit box.
12.3.1.3. Heuristics
This configuration section contains the settings for the heuristic of the scan engine.
AntiVir products contain very powerful heuristics that can proactively uncover unknown malware, i.e. before a special virus signature to combat the damaging element has been created and before a virus guard update has been sent. Virus detection involves an extensive analysis and investigation of the affected codes for functions typical of malware. If the code being scanned exhibits these characteristic features, it is reported as being suspicious. This does not necessarily mean that the code is in fact malware. False positives do sometimes occur. The decision on how to handle affected code is to be made by the user, e.g. based on his or her knowledge of whether the source of the code is trustworthy or not.
Macrovirus heuristics
Activate macrovirus heuristics
Your AntiVir product contains a highly powerful macrovirus heuristic. If this option is enabled, all macros in the relevant document are deleted in the event of a repair, alternatively suspect documents are only reported, i.e. you receive an alert. This option is enabled as the default setting and is recommended.
Advanced Heuristic Analysis and Detection (AHeAD)
enable AHeAD
Your AntiVir program contains a very powerful heuristic in the form of AntiVir AHeAD technology, which can also detect unknown (new) malware. If this option is enabled, you can define how "aggressive" this heuristic should be. This option is enabled as the default setting.
Low detection level
If this option is enabled, slightly less unknown malware is detected, the risk of false alerts is low in this case.
Medium detection level
This option is enabled as the default setting if you have selected use of this heuristic.
This option is enabled as the default setting and is recommended.
High detection level
If this option is enabled, significantly more unknown malware is detected, but there are also likely to be false positives.
12.3.2 General
12.3.2.1. Exceptions
Scanning exceptions
This table shows you the list of email addresses excluded from scanning by AntiVir MailGuard (white list).
Note
The list of exceptions is used exclusively by MailGuard with regard to incoming emails.
Status
Icon Description

This email address will no longer be scanned for malware.
Email address
Email that is no longer to be scanned.
Malware
When this option is enabled, the email address is no longer scanned for malware.
Up
You can use this button to move a highlighted email address to a higher position. If no entry is highlighted or the highlighted address is at the first position in the list, this button is not enabled.
Down
You can use this button to move a highlighted email address to a lower position. If no entry is highlighted or the highlighted address is at the last position in the list, this button is not enabled.
Input box
In this box you enter the email address that you want to add to the list of email addresses not to be scanned. Depending on your settings, the email address will no longer be scanned in future by the MailGuard.
Add
With this button you can add the email address entered in the input box to the list of email addresses not to be scanned.
Delete
This button deletes a highlighted email address from the list.
12.3.2.2. Cache
Cache
The MailGuard cache contains data regarding the scanned emails that is displayed as statistical data in the Control Center under MailGuard.
Maximum number of emails to be stored in the cache
This field is used to set the maximum number of emails that are stored by MailGuard in the cache. Emails are deleted oldest first.
Maximum storage period of an email in days
The maximum storage period of an email in days is entered in this box. After this time, the email is removed from the cache.
Empty Cache
Click on this button to delete the emails stored in the cache.
12.3.2.3. Footer
Under Footer you can configure an email footer which is displayed in the emails you send. This function requires activation of the MailGuard scan of outgoing emails (see option Scan outgoing emails (SMTP) under Configuration::MailGuard::Scan). You can use the defined AntiVir MailGuard footer to confirm the sent email has been scanned by a virus protection program. You also have the option of inserting text yourself for a user-defined footer. If you use both footer options, the user-defined text is preceded by the AntiVir MailGuard footer.
Footer for emails to be sent
Attach AntiVir MailGuard footer
If this option is enabled, the AntiVir MailGuard footer is displayed beneath the message text of the sent email. The AntiVir MailGuard footer confirms that the sent email has been scanned for viruses and unwanted programs by AntiVir MailGuard. The AntiVir MailGuard footer contains the following text: "Scanned with AntiVir MailGuard [product version] [initials and version number of search engine] [initials and version number of virus definition file]".
Attach this footer
If this option is enabled, the text which you insert into the input box is displayed as a footer in sent emails.
Input box
In this input box, you can insert a text which is displayed as a footer in sent emails.
12.3.3 Report
MailGuard includes an extensive logging function to provide the user or administrator with exact notes about the type and manner of a detection.
Reporting
This group allows for the content of the report file to be determined.
Off
If this option is enabled, then MailGuard does not create a log.
It is recommended that you should turn off the logging function only in exceptional cases, such as if you are executing trials with multiple viruses or unwanted programs.
Default
If this option is enabled, MailGuard records important information (concerning detections, alerts and errors) in the report file, with less important information ignored for improved clarity. This option is enabled as the default setting.
Advanced
If this option is enabled, MailGuard logs less important information to the report file as well.
Complete
If this option is enabled, MailGuard logs all information to the report file.
Limit report file
Limit size to n MB
If this option is enabled, the report file can be limited to a certain size; possible values: Permitted values are between 1 and 100 MB. Around 50 kilobytes of extra space are allowed when limiting the size of the report file to minimize the use of system resources. If the size of the log file exceeds the indicated size by more than 50 kilobytes, then old entries are deleted until the indicated size minus 50 kilobytes is reached.
Backup report file before shortening
If this option is enabled, the report file is backed up before shortening. For the save location see Configuration :: General :: Directories :: Report directory.
Write configuration in report file
If this option is enabled, the MailGuard configuration is recorded in the report file.
Note
If you have not specified any report file restriction, a new report file is automatically created when the report file reaches 100MB. A backup of the old report file is created. Up to three backups of old report files are saved. The oldest backups are deleted first.
12.4 Firewall
The FireWall section of Configuration is responsible for configuration of the Avira FireWall.
12.4.1 Adapter rules
In the Avira FireWall, an adapter represents a software simulated hardware device (e.g. miniport, bridge connection, etc.) or a real hardware device (e.g. network card).
The Avira FireWall displays the adapter rules of all existing adapters on your computer for which a driver was installed.
A predefined adapter rule depends on the security level. You can change the security level in the Online protection :: You can change the FireWall settings in the Control Center or define your own adapter rules. If you have defined your own adapter rules, in the FireWall section of the Control Center, the security level is set to custom.
Note
The default security level setting for all predefined rules of the Avira FireWall is Medium.
ICMP protocol
The Internet Control Message Protocol (ICMP) is used to exchange error and information messages on networks. The protocol is also used for status messages with ping or tracer.
With this rule, you can define the incoming and outgoing blocked message types, the behavior in case of flooding and the reaction to fragmented ICMP packets. This rule serves for preventing so-called ICMP flood attacks, which results in an increase of the CPU load of the attacked machine as it responds to every packet.
Predefined rules for the ICMP protocol
| Setting: Low Setting: | Medium | Setting: High |
| Incoming blocked types: no type. | Same rule as for the low level. | Incoming blocked types: several types |
| Outgoing blocked types: no type. | Outgoing blocked types: several types | |
| Assume flooding if delay between packets is less than 50 ms. | Assume flooding if delay between packets is less than 50 ms. | |
| Reject fragmented ICMP packets. | Reject fragmented ICMP packets. |
Incoming blocked types: no types/several types
With a mouse click on the link a list of ICMP packet types is displayed. From this list you can specify the desired incoming ICMP message types you want to block.
Outgoing blocked types: no types/several types
With a mouse click on the link a list of ICMP packet types is displayed. From this list you can select the desired outgoing ICMP message types you want to block.
Flooding
With a mouse click on the link, a dialog box is displayed where you can enter the maximum allowed ICMPA delay.
Fragmented ICMP packets
With a mouse click on the link, you have the choice to reject or not to reject fragmented ICMP packets.
TCP port scan
With this rule, you can define when a TCP port scan is assumed by the FireWall and what should be done in this case. This rule serves for preventing so-called TCP port scan attacks that result in a detection of open TCP ports on your computer. This kind of attack is used to search a computer for weak spots and is often followed by more dangerous attack types.
Predefined rules for the TCP port scan
| Setting: Low | Setting: Medium | Setting: High |
| Assume a TCP port scan if 50 or more ports were scanned in 5,000 milliseconds.When detected, log attacker's IP and don't add rule to block the attack. | Assume a TCP port scan if 50 or more ports were scanned in 5,000 milliseconds.When detected, log attacker's IP and add rule to block the attack. | Same rule as for medium level. |
Ports
With a mouse click on the link a dialog box appears in which you can enter the number of ports that must have been scanned so that a TCP port scan is assumed.
Port scan time window
With a mouse click on this link a dialog box appears in which you can enter the time span for a certain number of port scans, so that a TCP port scan is assumed.
Report file
With a mouse click on the link you have the choice to log or not to log the attacker's IP address.
Rule
With a mouse click on the link you have the choice to add or not to add the rule to block the TCP port scan attack.
UDP port scan
With this rule, you can define when a UDP port scan is assumed by the FireWall and what should be done in this case. This rule prevents so-called UDP port scan attacks that result in a detection of open UDP ports on your computer. This kind of attack is used to search a computer for weak spots and is often followed by more dangerous attack types.
Predefined rules for the UDP port scan
| Setting: Low | Setting: Medium | Setting: High |
| Assume a UDP port scan if 50 or more ports were scanned in 5,000 milliseconds.When detected,log attacker's IP and don't add rule to block the attack. | Assume a UDP port scan if 50 or more ports were scanned in 5,000 milliseconds.When detected, log attacker's IP and add rule to block the attack. | Same rule as for medium level. |
Ports
With a mouse click on the link a dialog box appears in which you can enter the number of ports that must have been scanned so that a UDP port scan is assumed.
Port scan time window
With a mouse click on this link a dialog box appears in which you can enter the time span for a certain number of port scans, so that a UDP port scan is assumed.
Report file
With a mouse click on the link you have the choice to log or not to log the attacker's IP address.
Rule
With a mouse click on the link you have the choice to add or not to add the rule to block the UDP port scan attack.
12.4.1.1. Incoming Rules
Incoming rules are defined to control incoming data traffic by the Avira FireWall.
Note
When a packet is filtered the corresponding rules are applied successively, therefore the rule order is very important. Change the rule order only if you are completely aware of what you are doing.
Predefined rules for the TCP data traffic data monitor
| Setting: Low | Setting: Medium | Setting: High |
| No incoming data traffic is blocked by the Avira FireWall. | - Allow established TCP connections on 135 | - Monitor established TCP data traffic |
| Allow TCP packets from address 0.0.0.0 with mask 0.0.0.0 if local ports in {135} and remote ports in {0-65535}. Apply for packets of existingconnections.Don't log whenpacket matchesrule.Advanced:Discard packets that have following byteswith maskat offset 0.- Deny TCP packets on 135Deny TCPPackets from address 0.0.0.0 with mask 0.0.0.0 if local ports in {135} and remote ports in {0-65535}.Apply for allpackets.Don't log when packet matches rule.Advanced:Discard packets that have following byteswith maskat offset 0.- Monitor TCP healthy data trafficAllow TCP packets from address 0.0.0.0 with mask 0.0.0.0 if local ports in {0-65535} and remote ports in {0-65535}.Apply for connection | Allow TCP packets from address 0.0.0.0 with mask 0.0.0.0 if local ports in {0-65535} and remote ports in {0-65535}. Apply for packetsof existing connections.Don't log when packet matches rule.Advanced:Discard packets that have following byteswith maskat offset 0. |
initiation and existing connection packets.
Don't log when packet matches rule.
Advanced:
Discard packets that have following bytes
- Deny all TCP packets
Deny TCP packetsfrom address 0.0.0.0 with mask 0.0.0.0 if local ports are in range {0-65535} and the remote port is in range {0-65535}.
Apply for all packets.
Don't log when packet matches rule.
Advanced:
Discard packets that have following bytes
Accept / reject TCP packets
With a mouse click on the link you have the choice to allow or deny special defined incoming TCP packets.
IP address
By clicking on this link with the mouse, a dialog box opens in which you can enter the required IP address.
IP mask
By clicking on this link with the mouse, a dialog box opens in which you can enter the required IP mask.
Local ports
With a mouse click on this link a dialog box appears in which you can define the local port number(s) or complete port ranges.
Remote ports
With a mouse click on this link a dialog box appears in which you can define the remote port number(s) or complete port ranges.
Application method
With a mouse click on this link you have the choice to apply the rule for connection initiation and existing connection packets or only for packets of existing connections or for all packets.
Report file
By clicking on the link with the mouse you can decide whether to write to a report file or not if the package complies with the rule.
The advanced feature enables content filtering. For example packets can be rejected if they contain some specific data at a certain offset. If you do not want to use this option do not select a file or choose an empty file.
Filtered content: Data
With a mouse click on the link a dialog box appears in which you can select a file that contains the specific buffer.
Filtered content: Mask
With a mouse click on the link a dialog box appears in which you can select the specific mask.
Filtered content: Offset
With a mouse click on the link a dialog box appears in which you can define the filtered content offset. The offset is computed from where TCP header ends.
Predefined rules for the UDP data traffic monitor
| Setting: Low | Setting: Medium | Setting: High |
| - | – Monitor UDPaccepted datatrafficAllow UDPpackets fromaddress0.0.0.0with mask0.0.0.0if local port is in{0-66535} andremote port is in{0-66535}.Apply rule toopenports.Don't logwhenpacket matchesrule.Advanced: Discard packets that have following byteswith maskat offset 0. | Monitor establishedUDPtrafficAllow UDP packetsfrom address0.0.0.0with mask0.0.0.0if the local port is in range{0-65535} and theremote port is in range{53, 67, 68, 123}.Apply rule toopenports.Don't logwhen packetmatches rule.Advanced: Discardpackets that have following byteswith maskat offset 0. |
| - Deny all UDP packetsDeny UDP packetsfrom address 0.0.0.0 with mask 0.0.0.0 if local ports are in range {0-65535} and the remote port is in range {0-65535}.Apply for all ports.Don't log when packet matches rule.Advanced: Discard packets that have following byteswith maskat offset 0. |
Accept / reject UDP packets
With a mouse click on the link you have the choice to allow or deny special defined incoming UDP packets.
IP address
By clicking on this link with the mouse, a dialog box opens in which you can enter the required IP address.
IP mask
By clicking on this link with the mouse, a dialog box opens in which you can enter the required IP mask.
Local ports
With a mouse click on this link a dialog box appears in which you can define the local port number(s) or complete port ranges.
Remote ports
With a mouse click on this link a dialog box appears in which you can define the remote port number(s) or complete port ranges.
Application method
With a mouse click on this link you have the choice to apply this rule to all ports or only to all opened ports.
Report file
By clicking on the link with the mouse you can decide whether to write to a report file or not if the package complies with the rule.
The advanced feature enables content filtering. For example packets can be rejected if they contain some specific data at a certain offset. If you do not want to use this option do not select a file or choose an empty file.
Filtered content: Data
With a mouse click on the link a dialog box appears in which you can select a file that contains the specific buffer.
Filtered content: Mask
With a mouse click on the link a dialog box appears in which you can select the specific mask.
Filtered content: Offset
With a mouse click on the link a dialog box appears in which you can define the filtered content offset. The offset is computed from where UDP header ends.
Predefined rules for the ICMP data traffic monitor
| Setting: Low | Setting: Medium | Setting: High |
| - | - Do not discard ICMP based on IP addressAllow ICMP packets from address 0.0.0.0 with mask0.0.0.0.Don't log when packet matches rule.Advanced:Discard packets that have following byteswith maskat offset 0. | Same rule as for medium level. |
Accept / reject ICMP packets
With a mouse click on the link you have the choice to allow or deny special defined incoming ICMP packets.
IP address
By clicking on this link with the mouse, a dialog box opens in which you can enter the required IP address.
IP mask
By clicking on this link with the mouse, a dialog box opens in which you can enter the required IP mask.
Report file
By clicking on the link with the mouse you can decide whether to write to a report file or not if the package complies with the rule.
The advanced feature enables content filtering. For example packets can be rejected if they contain some specific data at a certain offset. If you do not want to use this option do not select a file or choose an empty file.
Filtered content: Data
With a mouse click on the link a dialog box appears in which you can select a file that contains the specific buffer.
Filtered content: Mask
With a mouse click on the link a dialog box appears in which you can select the specific mask.
Filtered content: Offset
With a mouse click on the link a dialog box appears in which you can define the filtered content offset. The offset is computed from where ICMP header ends.
Predefined rules for IP packets
| Setting: Low | Setting: Medium | Setting: High |
| - - Deny all IP packets | Deny IP packets from address 0.0.0.0 with mask 0.0.0.0.Don't log when packet matches rule. |
Accept / deny IP packets
By clicking on the link with the mouse, you can decide whether you want to accept or reject specially defined IP packages.
IP address
By clicking on this link with the mouse, a dialog box opens in which you can enter the required IP address.
IP mask
By clicking on this link with the mouse, a dialog box opens in which you can enter the required IP mask.
Report file
By clicking on the link with the mouse you can decide whether to write to a report file or not if the package complies with the rule.
Possible rules for monitoring IP packages based on IP protocols
IP packages
By clicking on the link with the mouse, you can decide whether you want to accept or reject specially defined IP packages.
IP address
By clicking on this link with the mouse, a dialog box opens in which you can enter the required IP address.
IP mask
By clicking on this link with the mouse, a dialog box opens in which you can enter the required IP mask.
Protocol
By clicking on this link with the mouse, a dialog box opens in which you can enter the required IP protocol.
Report file
By clicking on the link with the mouse you can decide whether to write to a report file or not if the package complies with the rule.
12.4.1.2. Outgoing Rules
Outgoing rules are defined to control outgoing data traffic by the Avira FireWall. You can define an outgoing rule for one of the following protocols: IP, ICMP, UDP and TCP.
Note
When a packet is filtered the corresponding rules are applied successively, therefore the rule order is very important. Change the rule order only if you are completely aware of what you are doing.
Buttons
| Button Description | |
| Add | Allows you to create a new rule. If you press this button, the "Add new rule dialog box is opened". In this dialog box you can select new rules. |
| Remove | Removes the selected rule. |
| Rule down | Moves the selected rule down one line, i.e. reduces the rule priority. |
| Rule up | Moves the selected rule up one line, i.e. increases the rule priority. |
| Rename | Allows you to give the selected rule another name. |
Note
You can add new rules for individual adapters or for all adapters present on the computer. To add an adapter rule for all adapters, select Computer from the adapter hierarchy that is displayed and click on the Add button.
Note
To change the position of a rule you can also use the mouse to drag the rule to the required position.
12.4.2 Application rules
Application rules for user
This list contains all users in the system. If you are logged in as an administrator, you can select the user to whom you want to apply the rules. If you are not a privileged user, you can see only the user currently logged on.
Application list
This table shows the list of applications for which rules are defined. The application list contains the settings of each application that was executed and had a rule saved since the Avira FireWall was installed.
Normal view
| Description | |
| Application | Name of the application. |
| Mode | Displays the selected application rule mode : In filtered mode, adapter rules are checked and executed after execution of the application rule. In privileged mode, adapter rules are ignored. Click the link to switch to a different mode. |
| Action | Shows the action that the Avira FireWall will automatically take when the application is using the network, whatever the network usage type is. With a mouse click on the link you can switch to another action type. The action types are Ask, Allow or Deny. Ask is the default action. |
Extended configuration
If the network accesses of an application require individual rules, you can create the application rules based on packet filters in the same way as you created the adapter rules. To change to the extended configuration of the application rules, first activate expert mode. Then change the applications rules setting in the FireWall::Settings section: Enable the Extended Settings option and save the setting by clicking Accept or OK. In the firewall configuration, select the FireWall::Application rules section: An additional column with the heading Filtering with the entry Simple is displayed in the list of application rules. You now have an additional Filtering: Advanced - Action: rules option, which enables you to select the extended configuration.
| Description | |
| Application | Name of the application. |
| Mode | Displays the selected application rule mode : In filtered mode, adapter rules are checked and executed after execution of the application rule. In privileged mode, adapter rules are ignored. Click the link to switch to a different mode. |
| Action | Shows the action that the Avira FireWall will automatically take when the application is using the network, whatever the network usage type is.If you chooseFiltering-Simple, you can click the link to select another action type. The values areAsk, Allow, DenyorExtended.If you chooseFiltering-Advanced, theRulesaction type is displayed. TheRuleslink opens theApplication ruleswindow, in which you can enter specific rules for the application. |
| Filtering | Shows the type of filtering. You can select another type of filtering by clicking the link.Simple: In the case of simple filtering, the specified action is carried out on all network activities performed by the software application.Advanced: With this type of filtering, the rules that were added to the extended configuration are applied. |
If you want to create specific rules for an application, select the Advanced entry under Filtering. The Rules entry is then displayed in the Action column. Click on Rules to open the window for creating specific application rules.
Specified application rules in the extended configuration
Specified application rules allow you to allow or deny specified data traffic for the application or allow or deny passive listening to individual ports. The following options are available:
Allow or deny code injection
Code injection is a technique for introducing code into the address space of another process to execute actions, forcing this process to load a dynamic link library (DLL). Code injection is used by malware, amongst other things, to execute code under cover of another program. In this way, access to the Internet in front of the FireWall can be hidden. In default mode, code injection is enabled for all signed applications.
Allow or deny passive listening to the application of ports
Allow or deny data traffic
Allow or deny incoming and/or outgoing IP packets
Allow or deny incoming and/or outgoing TCP packets
Allow or deny incoming and/or outgoing UDP packets
You can create as many application rules as you like for each application. The application rules are executed in the sequence shown (You will find more information).
Note
If you change the Advanced filtering of an application rule, the already existing application rules in the extended configuration are simply deactivated, not irretrievably deleted. If you select Advanced filtering again, the already existing application rules will be reactivated and displayed in the extended configuration for application rules window.
Application details
In this box you can see details of the application selected in the application list box.
Description
Name Name of the application.
| Path | Full path to the executable file. |
Buttons
| Button Description | |
| Add application | Allows you to create a new application rule. If you press this button, a dialog box is opened. Here you can select the required application for creating a new rule. |
| Remove rule | Removes the selected application rule. |
| Reload | Reloads the list of applications and simultaneously discards the changes just made to the application rules just made. |
12.4.3 Trusted providers
A list of trusted software producers is displayed under Trusted providers. You can add / remove producers to / from the list using the Always trust this provider option in the Network Event popup window. You can allow network access from applications that are signed by the listed providers by default, by enabling the Automatically allow applications from trusted providers option.
Trusted vendors for user
This list contains all users in the system. If you are logged in as an administrator, you can select the user whose list of trusted providers you want to view or update. If you are not a privileged user, you can see only the current user logged on.
Automatically allow applications created by trusted vendors
If this option is enabled, the application provided with the signature of a known and trusted provider is automatically permitted access to the network. The option is enabled as the default setting.
Vendors
The list shows all providers classified as trusted.
Buttons
| Button Description | |
| Remove | The highlighted entry is removed from the list of trusted providers. To permanently remove the selected provider from the list, click Accept or OK in the configuration window. |
| Reload | The changes made are reversed. The last list saved is loaded. |
Note
If you remove providers from the list and then select Apply the providers will be permanently removed from the list. The change cannot be reversed with Reload.
However, you can use the Always trust this provider option in the Network Event popup window to add a provider to the list of trusted providers again.
Note
The FireWall prioritizes application rules before making entries in the list of trusted providers: If you have created an application rule and the application provider is listed in the list of trusted providers, the application rule will be executed.
12.4.4 Settings
Advanced options
Enable FireWall
If the option is activated, the Avira FireWall is enabled and protects your computer from risks originating from the Internet and other networks.
Stop Windows Firewall on startup
If this option is enabled, the Windows Firewall is deactivated when the computer is rebooted. This option is enabled as the default setting.
Windows hosts file is not locked/locked
If this option is set to LOCKED, the windows hosts file is write protected. Manipulation is no longer possible. For example, malware is not able to redirect you to undesired websites. The state of this option is NOT LOCKED as the default setting.
Automatic rule timeout
Block forever
If this option is enabled, a rule that was automatically created, for example, during a port scan is retained.
Remove rule after n seconds
If this option is enabled, a rule that was automatically created for example during a port scan, is removed again after the time you have defined. This option is enabled as the default setting.
Notifications
Notifications define the events under which you wish to receive a desktop notification from the FireWall.
Port scan
If the option is activated, you will receive a desktop notification if a port scan has been detected by the FireWall.
Flooding
If the option is activated, you will receive a desktop notification if a flooding attack has been detected by the FireWall.
Applications blocked
If the option is activated, you will receive a desktop notification if the FireWall has denied, i.e. blocked, network activity by an application.
IP blocked
If the option is activated, you will receive a desktop notification if the FireWall has denied, i.e. blocked, data traffic from an IP address.
Application rules
The application rules options are used to set the configuration options for application rules in the FireWall::Application rules section.
Advanced options
If this option is enabled, you can regulate different network accesses of an application on an individual basis.
Basic settings
If this option is enabled, only one action can be set for different network accesses of the application.
12.4.5 Popup settings
Popup settings
Inspect process launch stack
If this option is enabled, the process stack inspection allows a more accurate control. The FireWall will assume that any of the untrustworthy processes in the stack may actually be the one accessing the network through its child process. Therefore a different popup window will be opened for each untrustworthy process in the process stack. This option is disabled as the default setting.
Allow multiple popups per process
If this option is enabled, every time an application is making a network connection, a popup is triggered. Alternatively you will be informed only on the first connection attempt. This option is disabled as the default setting.
Automatically disable popup notification in game mode
When this option is enabled, Avira FireWall game mode is automatically activated when an application is executed in full-screen mode on your computer system. In game mode, all defined adapter and application rules apply. Applications for which no rules are defined with the "Allow" or "Deny" actions are temporarily allowed to access the network, so that no popup windows appear with questions about the network event.
Remember the action for this application
Always enabled
When this option is enabled, the option "Remember action for this application" of the dialog box "Network event" is enabled as the default setting. This option is enabled as the default setting.
Always disabled
When this option is enabled, the option "Remember action for this application" of the dialog box "Network event" is disabled as the default setting.
Allow signed application
When this option is enabled, the option "Remember action for this application" of the dialog box "Network event" is automatically enabled during network access by signed applications. The manufacturers are: Microsoft, Mozilla, Opera, Yahoo, Google, Hewlet Packard, Sun, Skype, Adobe, Lexmark, Creative Labs, ATI, nVidia.
Remember last used state
When this option is enabled, the option "Remember action for this application" in the dialog box "Network event" is enabled in the same way as for the last network event. If the option "Remember action for this application" was enabled, this option is enabled for the following network event. If the option "Remember action for this application" was disabled for the last network event, this option is also disabled for the following network event.
Show details
In this group of configuration options, you can setup the display of detailed information in the Network event window.
Show details on demand
If this option is enabled, the detailed information is only displayed in the "Network event" window on request, i.e. the detailed information is displayed by clicking on the "Show details" button in the "Network event" window.
Always show details
If this option is enabled, detailed information is always displayed in the "Network event" window.
Remember last used state
If this option is enabled, the display of detailed information is managed in the same way as for the previous network event. If detailed information was displayed or accessed during the last network event, detailed information is displayed for the following network event. If detailed information was hidden and not displayed during the last network event, detailed information is not displayed for the following network event.
Allow privileged
In this group of configuration options, you can define the status of the Allow privileged option in the Network event window.
Always enabled
If this option is enabled, the "Allow privileged" option is enabled as the default setting in the "Network event" window.
Always disabled
If this option is enabled, the "Allow privileged" option is disabled as the default setting in the "Network event" window.
Remember last used state
If this option is enabled, the status of the "Allow privileged" option is handled in the same way as for the previous network event in the "Network event" window: If the option "Allow privileged" was enabled for execution of the last network event, the option is enabled by default for the following network event. If the option "Allow privileged" was disabled for execution of the last network event, the option is disabled as the default setting for the following network event.
12.5 Firewall under SMC
The FireWall is configured to meet the specific requirements of an administration through the Avira Security Management Center. Extended options and restrictions exist for individual configuration options:
- The FireWall settings apply to all users of the client computer
- Adapter rules: Security levels for individual adapters can be set using context menus
- Application rules: Network access by applications can be allowed or denied. There is no way of creating specific application rules.
If your AntiVir program is managed by the Avira Security Management Center, the following FireWall setting options in the Control Center are deactivated on client computers:
- Setting of the FireWall security levels
- Setting of adapter and application rules
12.5.1 General settings
Advanced options
Lock Windows hosts file
If the option is enabled, the Windows hosts file is write protected. Manipulation is no longer possible. For example, malware is not able to redirect you to undesired websites.
Game Mode enable
When this option is enabled, Avira FireWall game mode is automatically activated when an application is executed in full-screen mode on your computer system. In game mode, all defined adapter and application rules apply. Applications for which no rules are defined with the "Allow" or "Deny" actions are temporarily allowed to access the network, so that no popup windows appear with questions about the network event.
Stop Windows FireWall on startup
If this option is enabled, the Windows FireWall is deactivated when the computer is rebooted. This option is enabled as the default setting.
Enable FireWall
If the option is activated, the Avira FireWall is enabled and protects your computer from risks originating from the Internet and other networks.
Automatic rule timeout
Block forever
If this option is enabled, a rule that was automatically created, for example, during a port scan is retained.
Remove rule after n seconds
If this option is enabled, a rule that was automatically created for example during a port scan, is removed again after the time you have defined. This option is enabled as the default setting.
12.5.2 General adapter rules
Network connections that have been set up are designated adapters. Adapter rules can be drawn up for the following Client network connections:
– Default adapter: LAN or high-speed Internet
- Wireless
- Dial-up connection
Form the adapter's context menu you can specify predefined adapter rules for every available adapter:
- Security level - High
– Security level - Medium - Security level - Low
You also have the option of modifying individual adapter rules to suit your own particular requirements.
Note
The default security level setting for all predefined rules of the Avira FireWall is Medium.
ICMP protocol
The Internet Control Message Protocol (ICMP) is used to exchange error and information messages on networks. The protocol is also used for status messages with ping or tracer.
With this rule, you can define the incoming and outgoing blocked message types, the behavior in case of flooding and the reaction to fragmented ICMP packets. This rule serves for preventing so-called ICMP flood attacks, which results in an increase of the CPU load of the attacked machine as it responds to every packet.
Predefined rules for the ICMP protocol
| Setting: Low Setting: | Medium | Setting: High |
| Incoming blocked types: no type. | Same rule as for the low level. | Incoming blocked types: several types |
| Outgoing blocked types: no type. | Outgoing blocked types: several types | |
| Assume flooding if delay between packets is less than | Assume flooding if delay between packets is less than | |
| 50 ms.Reject fragmented ICMP packets. | 50 ms.Reject fragmented ICMP packets. |
Incoming blocked types: no types/several types
With a mouse click on the link a list of ICMP packet types is displayed. From this list you can specify the desired incoming ICMP message types you want to block.
Outgoing blocked types: no types/several types
With a mouse click on the link a list of ICMP packet types is displayed. From this list you can select the desired outgoing ICMP message types you want to block.
Flooding
With a mouse click on the link, a dialog box is displayed where you can enter the maximum allowed ICMPA delay.
Fragmented ICMP packets
With a mouse click on the link, you have the choice to reject or not to reject fragmented ICMP packets.
TCP port scan
With this rule, you can define when a TCP port scan is assumed by the FireWall and what should be done in this case. This rule serves for preventing so-called TCP port scan attacks that result in a detection of open TCP ports on your computer. This kind of attack is used to search a computer for weak spots and is often followed by more dangerous attack types.
Predefined rules for the TCP port scan
| Setting: Low | Setting: Medium | Setting: High |
| Assume a TCP port scan if 50 or more ports were scanned in 5,000 milliseconds.When detected, log attacker's IP and don't add rule to block the attack. | Assume a TCP port scan if 50 or more ports were scanned in 5,000 milliseconds.When detected, log attacker's IP and add rule to block the attack. | Same rule as for medium level. |
Ports
With a mouse click on the link a dialog box appears in which you can enter the number of ports that must have been scanned so that a TCP port scan is assumed.
Port scan time window
With a mouse click on this link a dialog box appears in which you can enter the time span for a certain number of port scans, so that a TCP port scan is assumed.
Report file
With a mouse click on the link you have the choice to log or not to log the attacker's IP address.
Rule
With a mouse click on the link you have the choice to add or not to add the rule to block the TCP port scan attack.
UDP port scan
With this rule, you can define when a UDP port scan is assumed by the FireWall and what should be done in this case. This rule prevents so-called UDP port scan attacks that result in a detection of open UDP ports on your computer. This kind of attack is used to search a computer for weak spots and is often followed by more dangerous attack types.
Predefined rules for the UDP port scan
| Setting: Low | Setting: Medium | Setting: High |
| Assume a UDP port scan if 50 or more ports were scanned in 5,000 milliseconds.When detected,log attacker's IP and don't add rule to block the attack. | Assume a UDP port scan if 50 or more ports were scanned in 5,000 milliseconds.When detected, log attacker's IP and add rule to block the attack. | Same rule as for medium level. |
Ports
With a mouse click on the link a dialog box appears in which you can enter the number of ports that must have been scanned so that a UDP port scan is assumed.
Port scan time window
With a mouse click on this link a dialog box appears in which you can enter the time span for a certain number of port scans, so that a UDP port scan is assumed.
Report file
With a mouse click on the link you have the choice to log or not to log the attacker's IP address.
Rule
With a mouse click on the link you have the choice to add or not to add the rule to block the UDP port scan attack.
12.5.2.1. Incoming Rules
Incoming rules are defined to control incoming data traffic by the Avira FireWall.
Note
When a packet is filtered the corresponding rules are applied successively, therefore the rule order is very important. Change the rule order only if you are completely aware of what you are doing.
Predefined rules for the TCP data traffic data monitor
| Setting: Low | Setting: Medium | Setting: High |
| No incoming data traffic is blocked by the Avira FireWall. | - Allow established TCP connections on 135 | - Monitor established TCP data traffic |
Allow TCP
packets from address 0.0.0.0
with mask
0.0.0.0 if local
ports in {135}
and remote ports in {0-65535}.
Apply forpackets
of existing
connections.
Don't log when packet matches rule.
Advanced:
Discard packets
that have
following bytes
mask
- Deny TCP packets on 135
Deny TCP
packets from
address 0.0.0.0
with mask
0.0.0.0 if local
ports in {135}
and remote ports
in {0-65535}.
Apply for all
packets.
Don't log when
packet matches rule.
Advanced:
Discard packets
that have
following bytes
mask
offset 0.
– Monitor TCP healthy data traffic
Allow TCP
packets from
address 0.0.0.0
with mask
0.0.0.0 if local
ports in {0-
65535} and
remote ports in
{0-65535}.
Apply forpackets
of existing
connections.
Don't log when
packet matches rule.
Advanced:
Discard packets
that have
following bytes
mask
offset 0.
Allow TCP
packets from
address 0.0.0.0
with mask
0.0.0.0 if local
ports in {0-
65535} and
remote ports in
{0-65535}.
Apply for
connection
initiation and
existing
connection
packets.
Don't log when
packet matches rule.
Advanced:
Discard packets
that have
following bytes
mask
offset 0.
- Deny all TCP
packets
Deny TCP
packetsfrom
address 0.0.0.0
with mask
0.0.0.0 if local
ports are in range
{0-65535} and
the remote port is
in range {0-
65535}.
Apply for all
packets.
Don't log when
packet matches
rule.
Advanced:
Discard packets
that have
following bytes
mask
offset 0.
Accept / reject TCP packets
With a mouse click on the link you have the choice to allow or deny special defined incoming TCP packets.
IP address
By clicking on this link with the mouse, a dialog box opens in which you can enter the required IP address.
IP mask
By clicking on this link with the mouse, a dialog box opens in which you can enter the required IP mask.
Local ports
With a mouse click on this link a dialog box appears in which you can define the local port number(s) or complete port ranges.
Remote ports
With a mouse click on this link a dialog box appears in which you can define the remote port number(s) or complete port ranges.
Application method
With a mouse click on this link you have the choice to apply the rule for connection initiation and existing connection packets or only for packets of existing connections or for all packets.
Report file
By clicking on the link with the mouse you can decide whether to write to a report file or not if the package complies with the rule.
The advanced feature enables content filtering. For example packets can be rejected if they contain some specific data at a certain offset. If you do not want to use this option do not select a file or choose an empty file.
Filtered content: Data
With a mouse click on the link a dialog box appears in which you can select a file that contains the specific buffer.
Filtered content: Mask
With a mouse click on the link a dialog box appears in which you can select the specific mask.
Filtered content: Offset
With a mouse click on the link a dialog box appears in which you can define the filtered content offset. The offset is computed from where TCP header ends.
Predefined rules for the UDP traffic data monitor
| Setting: Low | Setting: Medium | Setting: High |
| - | - Monitor UDPaccepted datatrafficAllow UDPpackets from address0.0.0.0with mask0.0.0.0if local port is in{0-66535} and remote port is in{0-66535}.Apply rule to open ports.Don't log when packet matches rule.Advanced: Discard packets that have following byteswith maskat offset 0.- Deny all UDP packetsDeny UDP packetsfrom address0.0.0.0with mask0.0.0.0if local ports are in range{0-65535}and the remote port is in range{0-65535}.Apply for all ports.Don't log when packet matches rule.Advanced: Discard packets that have following byteswith maskat offset 0. | Monitor establishedUDPtrafficAllow UDP packetsfrom address0.0.0.0with mask0.0.0.0 if the local port is in range{0-65535} and the remote port is in range{53, 67, 68, 123}.Apply rule to open ports.Don't log when packet matches rule.Advanced: Discard packets that have following byteswith maskat offset 0. |
Accept / reject UDP packets
With a mouse click on the link you have the choice to allow or deny special defined incoming UDP packets.
IP address
By clicking on this link with the mouse, a dialog box opens in which you can enter the required IP address.
IP mask
By clicking on this link with the mouse, a dialog box opens in which you can enter the required IP mask.
Local ports
With a mouse click on this link a dialog box appears in which you can define the local port number(s) or complete port ranges.
Remote ports
With a mouse click on this link a dialog box appears in which you can define the remote port number(s) or complete port ranges.
Application method
With a mouse click on this link you have the choice to apply this rule to all ports or only to all opened ports.
Report file
By clicking on the link with the mouse you can decide whether to write to a report file or not if the package complies with the rule.
The advanced feature enables content filtering. For example packets can be rejected if they contain some specific data at a certain offset. If you do not want to use this option do not select a file or choose an empty file.
Filtered content: Data
With a mouse click on the link a dialog box appears in which you can select a file that contains the specific buffer.
Filtered content: Mask
With a mouse click on the link a dialog box appears in which you can select the specific mask.
Filtered content: Offset
With a mouse click on the link a dialog box appears in which you can define the filtered content offset. The offset is computed from where UDP header ends.
Predefined rules for the ICMP traffic data monitor
| Setting: Low | Setting: Medium | Setting: High |
| - | - Do not discard ICMP based on IP addressAllow ICMP packets from address 0.0.0.0 with mask 0.0.0.0.Don't log when packet matches rule.Advanced:Discard packets that have following byteswith | Same rule as for medium level. |
mask
Accept / reject ICMP packets
With a mouse click on the link you have the choice to allow or deny special defined incoming ICMP packets.
IP address
By clicking on this link with the mouse, a dialog box opens in which you can enter the required IP address.
IP mask
By clicking on this link with the mouse, a dialog box opens in which you can enter the required IP mask.
Report file
By clicking on the link with the mouse you can decide whether to write to a report file or not if the package complies with the rule.
The advanced feature enables content filtering. For example packets can be rejected if they contain some specific data at a certain offset. If you do not want to use this option do not select a file or choose an empty file.
Filtered content: Data
With a mouse click on the link a dialog box appears in which you can select a file that contains the specific buffer.
Filtered content: Mask
With a mouse click on the link a dialog box appears in which you can select the specific mask.
Filtered content: Offset
With a mouse click on the link a dialog box appears in which you can define the filtered content offset. The offset is computed from where ICMP header ends.
Predefined rules for IP packets
| Setting: Low | Setting: Medium | Setting: High |
| - - Deny all IP packets | Deny IP packets from address 0.0.0.0 with mask 0.0.0.0.Don't log when packet matches rule. |
Accept / deny IP packets
By clicking on the link with the mouse, you can decide whether you want to accept or reject specially defined IP packages.
IP address
By clicking on this link with the mouse, a dialog box opens in which you can enter the required IP address.
IP mask
By clicking on this link with the mouse, a dialog box opens in which you can enter the required IP mask.
Report file
By clicking on the link with the mouse you can decide whether to write to a report file or not if the package complies with the rule.
Possible rules for monitoring IP packages based on IP protocols
IP packages
By clicking on the link with the mouse, you can decide whether you want to accept or reject specially defined IP packages.
IP address
By clicking on this link with the mouse, a dialog box opens in which you can enter the required IP address.
IP mask
By clicking on this link with the mouse, a dialog box opens in which you can enter the required IP mask.
Protocol
By clicking on this link with the mouse, a dialog box opens in which you can enter the required IP protocol.
Report file
By clicking on the link with the mouse you can decide whether to write to a report file or not if the package complies with the rule.
12.5.2.2. Outgoing Rules
Outgoing rules are defined to control outgoing data traffic by the Avira FireWall. You can define an outgoing rule for one of the following protocols: IP, ICMP, UDP and TCP.
Note
When a packet is filtered the corresponding rules are applied successively, therefore the rule order is very important. Change the rule order only if you are completely aware of what you are doing.
Buttons
| Button Description | |
| Add | Allows you to create a new rule. If you press this button, the "Add new rule dialog box is opened". In this dialog box you can select new rules. |
| Remove | Removes the selected rule. |
| Rule down | Moves the selected rule down one line, i.e. reduces the rule priority. |
| Rule up | Moves the selected rule up one line, i.e. increases the rule priority. |
Rename Allows you to give the selected rule another name.
Note
You can add new rules for individual adapters or for all adapters present on the computer. To add an adapter rule for all adapters, select Computer from the adapter hierarchy that is displayed and click on the Add button.
Note
To change the position of a rule you can also use the mouse to drag the rule to the required position.
12.5.3 Application list
You can use the application list to create rules specifying how applications access networks. You can add applications to lists and set the Allow and Block rules for the selected application using a context menu:
- Access to networks by applications with the Allow rule is permitted.
- Access to networks by applications with the Block rule is denied.
When applications are added, the Allow rule is set.
Application list
This table shows the list of applications for which rules are defined. The symbols indicate whether network access by the applications is allowed or denied. The rules for the applications can be changed using a context menu.
Buttons
| Button Description | |
| Add using path | This button opens a dialog box in which you can select applications. The application is added to the application list with the rule "Allow network access". If you use the option "Add using path" the added FireWall application are identified by path and file name. Rules for an application remain valid and will be used by the FireWall, even if the content of an added executable file has been changed, e.g. by an update. |
| Add using MD5 | This button opens a dialog box in which you can select applications. The application is added to the application list with the rule "Allow network access". If you use the option ""Add using MD5" all added applications are uniquely identified using the MD5 checksum. This allows the FireWall to identify changes to the file content. If an application changes following an update, for example, the application with the rule in question is automatically removed from the application list. Following a change, the application must be added to the list again and the desired rule reapplied. |
| Add group | This button opens a dialog box in which you can select a directory. All applications in the selected path are added to the application listwith the rule "Allow network access". |
| Remove | The selected application rule is removed. |
| Remove all | All application rules are removed. |
12.5.4 Trusted providers
A list of trusted software producers is displayed under Trusted providers. Applications from the listed software manufacturers will be granted access to the network. You can add and remove manufacturers from the list.
Vendors
The list shows all providers classified as trusted.
Buttons
| Button Description | |
| Add | This button opens a dialog box in which you can select applications. The manufacturer of the application is established and added to the list of trusted providers. |
| Add group | This button opens a dialog box in which you can select a directory. The manufacturers of all the applications in the selected path are established and added to the list of trusted providers. |
| Remove | The highlighted entry is removed from the list of trusted providers. To permanently remove the selected provider from the list, click "Accept" or "OK" in the configuration window. |
| Remove all | All entries are removed from the list of trusted providers. |
| Reload | The changes made are reversed. The last list saved is loaded. |
Note
If you remove providers from the list and then select Apply the providers will be permanently removed from the list. The change cannot be reversed with Reload.
Note
The FireWall prioritizes application rules before making entries in the list of trusted providers: If you have created an application rule and the application provider is listed in the list of trusted providers, the application rule will be executed.
12.5.5 Additional settings
Notifications
Notifications define the events under which you wish to receive a desktop notification from the FireWall.
Port scan
If the option is activated, you will receive a desktop notification if a port scan has been detected by the FireWall.
Flooding
If the option is activated, you will receive a desktop notification if a flooding attack has been detected by the FireWall.
Applications blocked
If the option is activated, you will receive a desktop notification if the FireWall has denied, i.e. blocked, network activity by an application.
IP blocked
If the option is activated, you will receive a desktop notification if the FireWall has denied, i.e. blocked, data traffic from an IP address.
Popup settings
Inspect process launch stack
If this option is enabled, the process stack inspection allows a more accurate control. The FireWall will assume that any of the untrustworthy processes in the stack may actually be the one accessing the network through its child process. Therefore a different popup window will be opened for each untrustworthy process in the process stack. This option is disabled as the default setting.
Allow multiple popups per process
If this option is enabled, every time an application is making a network connection, a popup is triggered. Alternatively you will be informed only on the first connection attempt. This option is disabled as the default setting.
Automatically disable popup notification in game mode
When this option is enabled, Avira FireWall game mode is automatically activated when an application is executed in full-screen mode on your computer system. In game mode, all defined adapter and application rules apply. Applications for which no rules are defined with the "Allow" or "Deny" actions are temporarily allowed to access the network, so that no popup windows appear with questions about the network event.
12.5.6 Display settings
Remember the action for this application
Always enabled
When this option is enabled, the option "Remember action for this application" of the dialog box "Network event" is enabled as the default setting. This option is enabled as the default setting.
Always disabled
When this option is enabled, the option "Remember action for this application" of the dialog box "Network event" is disabled as the default setting.
Allow signed application
When this option is enabled, the option "Remember action for this application" of the dialog box "Network event" is automatically enabled during network access by signed applications. The manufacturers are: Microsoft, Mozilla, Opera, Yahoo, Google, Hewlet Packard, Sun, Skype, Adobe, Lexmark, Creative Labs, ATI, nVidia.
Remember last used state
When this option is enabled, the option "Remember action for this application" in the dialog box "Network event" is enabled in the same way as for the last network event. If the option "Remember action for this application" was enabled, this option is enabled for the following network event. If the option "Remember action for this application" was disabled for the last network event, this option is also disabled for the following network event.
Show details
In this group of configuration options, you can setup the display of detailed information in the Network event window.
Show details on demand
If this option is enabled, the detailed information is only displayed in the "Network event" window on request, i.e. the detailed information is displayed by clicking on the "Show details" button in the "Network event" window.
Always show details
If this option is enabled, detailed information is always displayed in the "Network event" window.
Remember last used state
If this option is enabled, the display of detailed information is managed in the same way as for the previous network event. If detailed information was displayed or accessed during the last network event, detailed information is displayed for the following network event. If detailed information was hidden and not displayed during the last network event, detailed information is not displayed for the following network event.
Allow privileged
In this group of configuration options, you can define the status of the Allow privileged option in the Network event window.
Always enabled
If this option is enabled, the "Allow privileged" option is enabled as the default setting in the "Network event" window.
Always disabled
If this option is enabled, the "Allow privileged" option is disabled as the default setting in the "Network event" window.
Remember last used state
If this option is enabled, the status of the "Allow privileged" option is handled in the same way as for the previous network event in the "Network event" window: If the option Allow privileged was enabled for execution of the last network event, the option is enabled by default for the following network event. If the option Allow privileged was disabled for execution of the last network event, the option is disabled as the default setting for the following network event.
12.6 WebGuard
The WebGuard section of the Configuration is responsible for the configuration of the WebGuard.
12.6.1 Scan
WebGuard protects you against viruses or malware that reaches your computer from web pages that you load on your web browser from the Internet. The Scan heading can be used to set the behavior of the WebGuard component.
Scan
Enable WebGuard
If this option is enabled, the web pages you request using an Internet browser are scanned for viruses and malware. WebGuard monitors the data transferred from the Internet using the HTTP protocol at ports 80, 8080, 3128. If any affected web pages are detected, the loading of the web pages is blocked. If this option is disabled, the WebGuard service is still started, but the scan for viruses and malware is disabled.
Drive-by protection
Drive-by protection allows you to make settings to block I-Frames, also known as inline frames. I-Frames are HTML elements, i.e. elements of Internet pages that delimit an area of a web page. I-Frames can be used to load and display different web content - usually other URLs - as independent documents in a sub-window of the browser. I-Frames are mostly used for banner advertising. In some cases, I-Frames are used to conceal malware. In these cases the area of the I-Frame is mostly invisible or almost invisible in the browser. The Block Suspect I-Frames option allows you to check and block the loading of I-Frames.
Block suspicious l-frames
If this option is enabled, I-Frames on the web pages you request are scanned according to certain criteria. If there are suspect I-Frames on a requested web page, the I-Frame is blocked. An error message is displayed in the I-Frame window.
Default
If this option is enabled, I-Frames with suspect content is blocked.
Advanced
If this option is enabled, I-Frames with suspect content and I-Frames used in a suspicious way are blocked. The use of I-Frames is considered suspect if the I-Frame is very small and is therefore invisible or almost invisible in the browser of if the I-Frame is placed in an unusual position on the web page.
12.6.1.1. Action on detection
Action on detection
You can define the actions to be performed by WebGuard when a virus or unwanted program is detected.
Interactive
If this option is enabled, a dialog box appears when a virus or unwanted program is detected during an on-demand scan, in which you can choose what is to be done with the affected file. This option is enabled as the default setting.
Permitted actions
In this box actions can be specified, which can be selected to be displayed in case of a virus detection. You must activate the corresponding options for this.
Deny access
The website requested from the web server and/or any data or files transferred are not sent to your web browser. An error message to notify you that access has been denied is displayed in the web browser. WebGuard logs the detection to the report file if the report function is activated.
Quarantine
In the event of a virus or malware being detected, the website requested from the web server and/or the transferred data and files are moved into quarantine. The affected file can be recovered from the quarantine manager if it has any informative value or - if necessary - sent to the Avira Malware Research Center.
Ignore
The website requested from the web server and/or the data and files that were transferred are forwarded on by WebGuard to your web browser.
Default
This button allows you to select an action that is activated in the dialog box by default when a virus is detected. Select the action that is to be activated by default and click on the "Default" button.
Click here for more information.
Show progress bar
If this option is enabled, a desktop notification appears with a download progress bar if a download of website content exceeds a 20 second timeout. This desktop notification is designed in particular for downloading websites with larger data volumes: If you are surfing with WebGuard, website contents are not downloaded incrementally in the Internet browser, as they are scanned for viruses and malware before being displayed in the Internet browser. This option is disabled as the default setting.
Automatic
If this option is enabled, no dialog box in case of a virus detection appears. WebGuard reacts according to the settings you predefine in this section as primary and secondary action.
Display detection alerts
If this option is activated, then for each detection of a virus or unwanted program an alert appears showing the actions being executed.
Primary action
The primary action is the action performed when WebGuard finds a virus or an unwanted program.
Deny access
The website requested from the web server and/or any data or files transferred are not sent to your web browser. An error message to notify you that access has been denied is displayed in the web browser. WebGuard logs the detection to the report file if the report function is activated.
Isolate
In the event of a virus or malware being detected, the website requested from the web server and/or the transferred data and files are moved into quarantine. The affected file can be recovered from the quarantine manager if it has any informative value or - if necessary - sent to the Avira Malware Research Center.
Ignore
The website requested from the web server and/or the data and files that were transferred are forwarded on by WebGuard to your web browser. Access to the file is permitted and the file is ignored.
Warning
The affected file remains active on your workstation! It may cause serious damage on your workstation!
12.6.1.2. Locked requests
In Locked requests you can specify the file types and MIME types (content types for the transferred data) to be blocked by WebGuard. The Web filter lets you block known phishing and malware URLs. WebGuard prevents the transfer of data from the Internet to your computer system.
File types / MIME types to be blocked by WebGuard (user-defined)
All file types and MIME types (content types for the transferred data) in the list are blocked by WebGuard.
Input box
In this box, enter the names of the MIME types and file types you want WebGuard to block. For file types, enter the file extension, e.g. .htm. For MIME types, indicate the media type and, where applicable, sub-type. The two statements are separated from one another by a single slash, e.g. video/mpeg or audio/x-wav.
Note
Files which are already stored on your computer system as temporary Internet files and blocked by WebGuard can, however, be downloaded locally from the Internet by your computer's Internet browser. Temporary Internet files are files saved on your computer by the Internet browser so that websites can be accessed more quickly.
Note
The list of blocked file and MIME types is ignored if they are entered in the list of excluded file and MIME types under WebGuard::Scan::Exceptions.
Note
No wildcards (* for any number of characters or ? for a single character) can be used when entering file types and MIME types.
MIME types: Examples for media types:
- text = for text files
- image = for graphics files
- video = for video files
- audio = for sound files
- application = for files linked to a particular program
Examples: Excluded file and MIME types
- application/octet-stream = application/octet-stream MIME type files (executable files *.bin, *.exe, *.com, *dll, *.class) are blocked by WebGuard.
- application/olescript = application/olescript MIME type files (ActiveX script-files *.axs) are blocked by WebGuard.
- .exe = All files with the extension .exe (executable files) are blocked by WebGuard.
- .msi = All files with the extension .msi (Windows Installer files) are blocked by WebGuard.
Add
The button allows you to copy MIME and file types from the input field into the display window.
Delete
The button deletes a selected entry from the list. This button is inactive if no entry is selected.
Web Filter
The web filter is based on an internal database, updated daily, that classifies URLs according to content.
Activate web filter
When the option is enabled, all URLs matching the selected categories in the Web filter list are blocked.
Web filter list
In the Web filter list you can select the content categories whose URLs are to be blocked by WebGuard.
Note
The Web filter is ignored for entries in the list of excluded URLs under WebGuard::Scan::Exceptions.
Note
Spam URLs are URLs sent with spam emails. The Fraud and Deception category covers web pages with “Subscription Expires” and other offers of services whose costs are hidden by the provider.
12.6.1.3. Exceptions
These options allow you to set exceptions based on MIME types (content types for the transferred data) and file types for URLs (Internet addresses) for scanning by WebGuard. The MIME types and URLs specified are ignored by WebGuard, i.e. that data is not scanned for viruses and malware when it is transferred to your computer system.
MIME types skipped by WebGuard
In this field you can select the MIME types (content types for the transferred data) to be ignored by WebGuard during scanning.
File types/MIME types skipped by WebGuard (user-defined)
All MIME types (content types for the transferred data) in the list are ignored by WebGuard during scanning.
Input box
In this box you can input the name of the MIME types and file types to be ignored by WebGuard during scanning. For file types, enter the file extension, e.g. .htm. For MIME types, indicate the media type and, where applicable, sub-type. The two statements are separated from one another by a single slash, e.g. video/mpeg or audio/x-wav.
Note
No wildcards (* for any number of characters or ? for a single character) can be used when entering file types and MIME types.
Warning
All file types and content types on the exclusion list are downloaded into the Internet browser without further scanning of the blocked access (List of file and MIME types to be blocked in WebGuard::Scan::Blocked access) or by WebGuard: For all entries on the exclusion list, the entries on the list of file and MIME types to be blocked are ignored. No scan for viruses and malware is performed.
MIME types: Examples for media types:
- text = for text files
- image = for graphics files
- video = for video files
- audio = for sound files
- application = for files linked to a particular program
Examples: Excluded file and MIME types
- audio/ = All audio media type files are excluded from WebGuard scans
- video/quicktime = All Quicktime sub-type video files (*.qt, *.mov) are excluded from WebGuard scans
-.pdf = All Adobe PDF files are excluded from WebGuard scans.
Add
The button allows you to copy MIME and file types from the input field into the display window.
Delete
The button deletes a selected entry from the list. This button is inactive if no entry is selected.
URLs skipped by WebGuard
All URLs in this list are excluded from WebGuard scans.
Input box
In this box you can input URLs (Internet addresses) to be excluded from WebGuard scans, e.g. www.domainname.com. You can specify parts of the URL, using leading or following dots to indicate the domain level: .domainname.com for all pages and all subdomains of the domain. Indicate websites with any top-level domain (.com or .net) with a following dot: domainname.. If you indicate a string without a leading or concluding dot, the string is interpreted as a top-level domain, e.g. net for all NET domains (www.domain.net).
Note
You can also use the wildcard * for any number of characters when specifying URLs. You can also use leading or following dots in combination with wildcards to indicate the domain level:
.domainname.*
*.domainname.com
.*name*.com (valid but not recommended)
Specifications without dots, like *name*, are interpreted as part of a top-level domain and are not advisable.
Warning
All websites on the list of excluded URLs are downloaded into the Internet browser without further scanning by the web filter or WebGuard: For all entries in the list of excluded URLs, the entries in the web filter (see WebGuard::Scan::Blocked access) are ignored. No scan for viruses and malware is performed. Only trusted URLs should therefore be excluded from WebGuard scans.
Add
The button allows you to copy the URL entered in the input field (Internet address) to the viewer window.
Delete
The button deletes a selected entry from the list. This button is inactive if no entry is selected.
Examples: Skipped URLs
- www.avira.com -OR- www.avira.com/*
= All URLs with the domain 'www.avira.com' are excluded from WebGuard scans: www.avira.com/en/pages/index.php, www.avira.com/en/support/index.html, www.avira.com/en/download/index.html, etc.
URLs with the domain 'www.avira.de' are not excluded from WebGuard scans.
- avira.com -OR- *.avira.com = All URLs with the second and top-level domain 'avira.com' are excluded from WebGuard scans: The specification implies all existing subdomains for '.avira.com': www.avira.com, forum.avira.com, etc.
- avira.-OR- *.avira.*
= All URLs with the second-level domain 'avira' are excluded from WebGuard scans: The specification implies all existing top-level domains or subdomains for '.avira': www.avira.com, www.avira.de, forum.avira.com, etc.
- .*domain*.*
All URLs containing a second-level domain with the string 'domain' are excluded from WebGuard scans: www.domain.com, www.new-domain.de, www.sample-domain1.de, ...
- net -OR- *.net
= All URLs with the top-level domain 'net' are excluded from WebGuard scans: www.name1.net, www.name2.net, etc.
Warning
Enter the URLs you want to exclude from the WebGuard scan as precisely as possible. Avoid specifying an entire top-level domain or parts of a second-level domain because there is a risk that Internet pages that distribute malware and undesirable programs will be excluded from the WebGuard scan through global specifications under exclusions. You are recommended to specify at least the complete second-level domain and the top-level domain: domainname.com
12.6.1.4. Heuristics
This configuration section contains the settings for the heuristic of the scan engine. AntiVir products contain very powerful heuristics that can proactively uncover unknown malware, i.e. before a special virus signature to combat the damaging element has been created and before a virus guard update has been sent. Virus detection involves an extensive analysis and investigation of the affected codes for functions typical of malware. If the code being scanned exhibits these characteristic features, it is reported as being suspicious. This does not necessarily mean that the code is in fact malware. False positives do sometimes occur. The decision on how to handle affected code is to be made by the user, e.g. based on his or her knowledge of whether the source of the code is trustworthy or not.
Macrovirus heuristics
Macrovirus heuristics
Your AntiVir product contains a highly powerful macrovirus heuristic. If this option is enabled, all macros in the relevant document are deleted in the event of a repair, alternatively suspect documents are only reported, i.e. you receive an alert. This option is enabled as the default setting and is recommended.
Advanced Heuristic Analysis and Detection (AHeAD)
enable AHeAD
Your AntiVir program contains a very powerful heuristic in the form of AntiVir AHeAD technology, which can also detect unknown (new) malware. If this option is enabled, you can define how "aggressive" this heuristic should be. This option is enabled as the default setting.
Low detection level
If this option is enabled, slightly less unknown malware is detected, the risk of false alerts is low in this case.
Medium detection level
This option is enabled as the default setting if you have selected the use of this heuristic.
High detection level
If this option is enabled, significantly more unknown malware is detected, but there are also likely to be false positives.
12.6.2 Report
The WebGuard includes an extensive logging function to provide the user or administrator with exact notes about the type and manner of a detection.
Reporting
This group allows for the content of the report file to be determined.
Off
If this option is enabled, then WebGuard does not create a log.
It is recommended that you should turn off the logging function only in exceptional cases, such as if you are executing trials with multiple viruses or unwanted programs.
Default
If this option is enabled, WebGuard records important information (concerning detections, alerts and errors) in the report file, with less important information ignored for improved clarity. This option is enabled as the default setting.
Advanced
If this option is enabled, WebGuard logs less important information to the report file as well.
Complete
If this option is enabled, WebGuard logs all available information in the report file, including file size, file type, date, etc.
Limit report file
Limit size to n MB
If this option is enabled, the report file can be limited to a certain size; possible values: Permitted values are between 1 and 100 MB. Around 50 kilobytes of extra space are allowed when limiting the size of the report file to minimize the use of system resources. If the size of the log file exceeds the indicated size by more than 50 kilobytes, old entries are then deleted until the indicated size has been reduced by 20%.
Backup report file before shortening
If this option is enabled, the report file is backed up before shortening. For the save location see Configuration :: General :: Directories :: Report directory.
Write configuration in report file
If this option is enabled, the configuration of the on-access scan is recorded in the report file.
Note
If you have not specified any report file restriction, older entries are automatically deleted when the report file reaches 100MB. Entries are deleted until the size of the report file reaches 80 MB.
12.7 Update
In the Update section you can configure the automatic receiving of updates and the connection to the download servers. You can specify various update intervals and activate or deactivate automatic updating.
Note
If you configure your AntiVir program in the AntiVir Security Management Center, automatic updates are not available.
Automatic update
Activate
If this option is enabled, automatic updates are performed for the enabled events at the specified interval.
Automatic update every n days / hours / minutes
In this box you can specify the interval at which the automatic update is performed. To change the update interval, highlight one of the time options in the box and change it using the arrow key to the right of the input box.
Start job while connecting to the Internet (dial-up)
If this option is enabled, in addition to the specified update interval, the update job is performed every time an Internet connection is established.
Repeat job if the time has already expired
If this option is enabled, past update jobs are performed that could not be performed at the time specified, for example because the computer was switched off.
Download
via web server
The update is performed via a web server using an HTTP connection. You can use a proprietary web server on the Internet or a web server on an intranet, which obtains the update files from a proprietary download server on the Internet.
Note
You can access further settings for updating via a web server under: Configuration :: General :: Update :: Web server.
via file server / shared folders
The update is performed via a file server on an intranet which obtains the update files from a proprietary download server on the Internet.
Note
You can access further settings for updating via a file server under: Configuration :: General :: Update :: File server.
12.7.1 Start product update
Under Product update, configure how product updates or the notification of available product updates are handled.
Product updates
Download and automatically install product updates
If this option is enabled, product updates are downloaded and automatically installed by the Update component as soon as they become available. Updates to the virus definition file and scan engine are performed independently of this setting. The conditions for this option are: complete configuration of the update and an open connection to a download server.
Download product updates. If a restart is necessary, install the update after the system restart, otherwise install it immediately.
If this option is enabled, product updates will be downloaded as soon as they become available. If no restart is necessary, the update is installed automatically after the update file is downloaded. If a product update requires you to restart your computer, it will be executed at the next user-controlled system reboot and not immediately after the download of the update file. This has the advantage that the restart is not performed while users are working at their computers. Updates to the virus definition file and scan engine are performed independently of this setting. The conditions for this option are: complete configuration of the update and an open connection to a download server.
Notification when new product updates are available
If this option is enabled, you will be notified by email when new product updates become available. Updates to the virus definition file and scan engine are performed independently of this setting. The conditions for this option are: complete configuration of the update and an open connection to a download server. You will receive notifications via a desktop popup window and via an alert from the Updater in the Control Centre under Overview::Events.
Notify again after n day(s)
If the product update was not installed after the initial notification, enter in this box the number of days that are to elapse before you are again notified that product updates are available.
Do not download product updates
If this option is enabled, no automatic product updates or notifications of available product updates by the Updater are performed. Updates to the virus definition file and search engine are performed independently of this setting.
Important
An update of the virus definition file and of the search engine is performed during every update process independent of the settings for the product update (see Chapter Updates).
Note
If you have enabled an option for an automatic product update, you can configure further restart notification and cancellation options under Restart settings.
12.7.2 Restart settings
When a product update for your AntiVir program is performed, you may have to restart your computer system. If you have selected automatic product updates under General::Update::Product update, you can choose between the different restart notification and restart cancellation options under Restart settings.
Note
Note that your restart settings allow you to choose between two options for executing a product update requiring a computer restart in the configuration under General::Update::Product update.
Automatic execution of the product update with the required computer restart when update is available: The update and the restart are performed while users are working on their computers. If you have enabled this option, it may be useful to select restart routines with a cancel option or reminder function.
Execution of the product update where a computer restart is required after the next system reboot: the update and the restart are performed after users have started up their computers and logged in. Automatic restart routines are recommended for this option.
Restart settings
Restart the computer after n seconds
If this option is enabled, the restart which is necessary after a product update has been executed is performed automatically at the specified interval. A countdown message appears with no option for canceling the computer restart..
Reminder message for restart every n seconds
If this option is enabled, the restart which is necessary after a product update has been executed is not performed automatically. At the specified interval, you will receive restart notifications without cancel options. These notifications let you confirm the computer restart or select the "Remind me again" option.
Query whether computer should be restarted
If this option is enabled, the restart which is necessary after a product update has been executed is not performed automatically. You will receive only one message, which offers the option to perform a restart directly or cancel the restart routine.
Restart computer without query
If this option is enabled, the restart which is necessary after a product update has been executed is performed automatically. You will not receive any notification.
12.7.3 File server
In the case of more than one workstation on a network, your AntiVir program can download an update from a file server in the intranet, which in turn obtains the update files from a proprietary download server on the Internet. This ensures that the AntiVir program is up-to-date on all workstations.
Note
The Configuration heading is only enabled if under Configuration :: General :: Product update the via File Server / Shared folders option has been selected.
Download
Enter the name of the file server on which the update files for your AntiVir program and the required directories '/release/update/' are located. The following must be specified: file://

The button opens a window in which you can select the required download directory.
Server login
Login name
Enter a user name to log in on the server. Use a user account with access rights to the used shared folders on the server.
Login password
Enter the password for the user account. The characters entered are masked with *.
Note
If you do not specify any data in the Server login section, no authentication will be performed when accessing the file server. In this case the user must have sufficient rights for the file server.
The update can be performed directly via a web server on the Internet or the intranet.
Web server connection
Use existing connection (network)
This setting is displayed if your connection is used via a network.
Use the following connection:
This setting is displayed if you define your connection individually.
The Updater automatically detects which connection options are available. Connection options that are not available are grayed out and cannot be activated. A dial-up connection can be established manually via a phone book entry in Windows, for example.
- User: Enter the user name of the selected account.
- Password: Enter the password for this account. For security reasons, the actual characters you type in this space are replaced by asterisks (*).
Note
If you have forgotten an existing Internet account name or password, contact your Internet Service Provider.
Note
The automatic dial-up of the updater through so-called dial-up tools (e.g. SmartSurfer, Oleco, etc.) is currently not yet available.
Terminate a dial-up connection that was set up for the update
If this option is enabled, the RDT connection made for the update is automatically interrupted again as soon as the download has been successfully performed.
Note
This option is not available under Vista. Under Vista the dial-up connection opened for the update is always terminated as soon as the download has been performed.
Download
Standard-Server
Enter the addresses (URL) of the web servers from which the updates and the required update directory 'update' are to be loaded. The format for the address of the web server is as follows: http://
[:Port]/update. If you do not specify a port, port 80 will be used. By default, the accessible Avira GmbH web servers are specified for updating. You can, however, use your own web servers on the company intranet. If a number of web servers are specified, separate each one by a comma.Default
The button restores the predefined addresses.
Priority server
In this field, enter the update directory and URL of the web server that will first be requested to provide the update. If this server cannot be reached, the standard servers indicated will be used. The format for the address of the web server is as follows: http://
[:Port]/update. If you do not specify a port, port 80 will be used.12.8 General
12.8.1 Email
With certain events, the AntiVir program can send alerts and messages via email to one or more recipients. This is done with the Simple Message Transfer Protocol (SMTP).
The messages can be triggered by various events. The following components support email sending:
– Guard: Sending notifications
- Scanner: Sending notifications
- Updater: Sending notifications
Note
Please note that ESMTP is not supported. In addition, an encrypted transfer via TLS (Transport Layer Security) or SSL (Secure Sockets Layer) is currently not possible.
Email messages
SMTP server
Enter the name of the host to be used here - either its IP address or the direct host name. The maximum possible length of the host name is 127 characters.
For example:
192.168.1.100 or mail.samplecompany.com.
Sender address
In this input box, enter the email address of the sender. The maximum length of the sender's address is 127 characters.
Authentication
Some mail servers expect a program to verify itself to the server (log in) before an email is sent. Alerts can be transmitted with authentication to an SMTP server via email.
Use authentication
If this option is enabled, a user name and a password can be entered in the relevant boxes for login (authentication).
- User name: Enter your user name here.
- Password: Enter the relevant password here. The password is saved in encrypted form. For security reasons, the actual characters you type in this space are replaced by asterisks (*).
Send test email
When you click on the button, the program attempts to send a test email to the sender address to check the data entered.
12.8.2 Threat categories
Selection of threat categories
Your AntiVir product protects you against computer viruses.
In addition, you can scan according to the following extended threat categories.
- Backdoor Clients (BDC)
- Dialer (DIALER)
- Games (GAMES)
- Jokes (JOKES)
– Security Privacy Risk (SPR) - Adware/Spyware (ADSPY)
– Unusual runtime packers (PCK) - Double Extension Files (HEUR-DBLEXT)
- Phishing
- Application (APPL)
By clicking on the relevant box, the selected type is enabled (check mark set) or disabled (no check mark).
Select all
If this option is enabled, all types are enabled.
Default values
This button restores the predefined default values.
Note
If a type is disabled, files recognized as being of the relevant program type are no longer indicated. No entry is made in the report file.
12.8.3 Password
You can protect your AntiVir program in different areas with a password. If a password has been issued, you will be asked for this password every time you want to open the protected area.
Password
Enter password
Enter your required password here. For security reasons, the actual characters you type in this space are replaced by asterisks (*). The password can only have a maximum of 20 chars. Once the password has been issued, the program refuses access if an incorrect password is entered. An empty box means "No password".
Confirm password
Confirm the password entered above by entering again here. For security reasons, the actual characters you type in this space are replaced by asterisks (*).
Note
The password is case-sensitive!
Areas protected by password
Your AntiVir program can protect individual areas with a password. By clicking the relevant box, the password request can be disabled or re-enabled for individual areas as required.
| Password-protected area | Function |
| Control Center | If this option is enabled, the pre-defined password is required to start the Control Center. |
| Activate / deactivate Guard | If this option is enabled, the pre-defined password is required to enable or disable AntiVir Guard. |
| Activate / deactivate MailGuard | If this option is enabled, the pre-defined password is required to enable/disable MailGuard. |
| Activate / deactivate FireWall | If this option is enabled, the pre-defined password is required to enable/disable the FireWall. |
| Activate / deactivate WebGuard | If this option is enabled, the pre-defined password is required to enable/disable WebGuard. |
| Download rescue CD from the Internet | If this option is enabled, the pre-defined password is required to start the Avira Rescue CD download. |
| Quarantine | If this option is enabled, all areas of the quarantine manager protected by a password are enabled. By clicking on the relevant box, the password enquiry can be disabledor enabled again on request for individual areas. |
| Restore affected objects | If this option is enabled, the pre-defined password is required to restore an object. |
| Rescan affected objects | If this option is enabled, the pre-defined password is required to rescan an object. |
| Affected object properties | If this option is enabled, the pre-defined password is required to display the properties of an object. |
| Delete affected objects | If this option is enabled, the pre-defined password is required to delete an object. |
| Send email to Avira | If this option is enabled, the pre-defined password is required to send an object to the Avira Malware Research Center for examination. |
| Copying affected objects | If this option is enabled, the pre-defined password is required to copy the affected object. |
| Add and modify jobs | If this option is enabled, the pre-defined password is required to add and modify jobs in the Scheduler. |
| Start product updates | If this option is enabled, the pre-defined password is required to start the product updates in the Update menu. |
| Configuration | If this option is enabled, configuration of the program is only possible after entering the pre-defined password. |
| Manually switch configuration | If this option is enabled, the pre-defined password is required to manually switch to a different configuration profile . |
| Enable expert mode | If this option is enabled, the pre-defined password is required to enable expert mode. |
| Installation / Uninstallation | If this option is enabled, the pre-defined password is required for installation or uninstallation of the program. |
12.8.4 Security
Update
Alert if last update older than n day(s)
In this box, you can enter the maximum number of days allowed to have passed since the last update. If this number of days has passed, a red icon is displayed for the update status under Status in the Control Center.
Show notice if the virus definition file is out of date
If this option is enabled, you will obtain an alert if the virus definition file is not up-to-date. With the help of the alert option, you can configure the temporal interval for an alert if the last update is older than n day(s).
Product protection
Note
The product protection options are not available if the Guard has not been installed using the user-defined installation option.
Protect processes from unwanted termination
If this option is enabled, all processes of the program are protected against unwanted termination by viruses and malware or against 'uncontrolled' termination by a user, e.g. via Task-Manager. This option is enabled as the default setting.
Advanced process protection
If this option is enabled, all processes of the program are protected with advanced options against unwanted termination. Advanced process protection requires considerably more computer resources than simple protection. The option is enabled as the default setting. To disable this option, you have to restart your computer.
Important
Password protection is not available for Windows XP 64 bit!
Warning
If process protection is enabled, interaction problems can occur with other software products. Disable process protection in these cases.
Protect files and registry entries from manipulation
If this option is enabled, all registry entries of the program and all program files (binary and configuration files) are protected from manipulation. Protection against manipulation entails preventing write, delete and, in some cases, read access to the registry entries or program files by users or external programs. To enable this option, you have to restart your computer.
Warning
Please note that, if this option is disabled, the repair of computers infected with specific types of malware may fail.
Note
When this option is activated, changes can only be made to the configuration, including changes to scan or update requests, by means of the user interface.
Important
Protection for files and registration entries is not available for Windows XP 64 bit!
12.8.5 WMI
Support for Windows Management Instrumentation
Windows Management Instrumentation is a basic Windows management technique that uses script and programming languages to allow read and write access, both local and remote, to settings on Windows systems. Your AntiVir program supports WMI and provides data (status information, statistical data, reports, planned requests, etc.) as well as events and methods (stopping and starting processes) via an interface. WMI gives you the option of downloading operating data from the program and controlling the program. You can request a complete reference guide to the WMI interface from the manufacturer. The reference file is available in PDF format when you sign a confidentiality agreement.
Enable WMI support
When this option is enabled, you can download operating data from the program via WMI.
Allow enabling/disabling of services
When this option is enabled, you can enable and disable program services via WMI.
12.8.6 Directories
Temporary path
In this input box, enter the path where the program will store its temporary files.
Use default system settings
If this option is enabled, the settings of the system are used for handling temporary files.
Note
You can see where your system saves temporary files - for example with Windows XP - under: Start/Settings/Control Panel/System/Index card "Advanced"/Button "Environment Variables". The temporary variables (TEMP, TMP) for the currently registered user and for system variables (TEMP, TMP) are shown here with their relevant values.
Use following directory
If this option is enabled, the path displayed in the input box is used.

The button opens a window in which you can select the required temporary path.
Default
The button restores the pre-defined directory for the temporary path.
Report directory
This input box contains the path to the report directory.

The button opens a window in which you can select the required directory.
Default
The button restores the pre-defined path to the report directory.
Quarantine directory
This box contains the path to the quarantine directory.

The button opens a window in which you can select the required directory.
Default
The button restores the predefined path to the quarantine directory.
12.8.7 Proxy
Proxy server
Do not use a proxy server
If this option is enabled, your connection to the web server is not established via a proxy server.
Use Windows system settings
When the option is enabled, the current Windows system settings are used for the connection to the web server via a proxy server. Configure the Windows system settings to use a proxy server under Control panel::Internet options::Connections::LAN settings. You can also access the Internet options in the Extras menu in Internet Explorer.
Warning
If you are using a proxy server which requires authentication, enter all the required data under the option Use this proxy server. The Use Windows system settings option can only be used for proxy servers without authentication.
Use this proxy server
If your web server connection is set up via a proxy server, you can enter the relevant information here.
Address
Enter the computer name or IP address of the proxy server you want to use to connect to the web server.
Port
Please enter the port number of the proxy server you want to use to connect to the web server.
Login name
Enter a user name to log in on the proxy server.
Login password
Enter the relevant password for logging in on the proxy server here. For security reasons, the actual characters you type in this space are replaced by asterisks (*).
Examples:
Address: proxy.domain.com Port: 8080
Address: 192.168.1.100 Port: 3128
12.8.8 Warnings
12.8.8.1. Network
You can send individually configurable alerts from the Scanner or from the Guard to any workstations in your network.
Note
Please check whether the "Message service" has been started. You will find the service (i.e. in Windows XP, for example) under "Start/Settings/System control/Administration/Services".
Note
An alert is always sent to computers, NOT to a certain user.
Warning
This functionality is no longer supported by the following operating systems: Windows Server 2008 and higher Windows Vista and higher
Send message to
The list in this window shows names of computers that receive a message when a virus or unwanted program is found.
Note
A computer can always be entered only once in this list.
Insert
With this button you can add a further computer. A window is opened in which you can enter the names of new computers. A computer name can be a maximum of 15 characters long.

The button opens a window in which you can alternatively select a computer directly from your computer environment.
Delete
With this button you can delete the currently selected entry from the list.
Guard
Network alerts
If this option is enabled, network alerts are sent. This option is disabled as the default setting.
Note
To be able to activate this option, at least one recipient must be entered under General :: Alerts :: Network.
Message to be sent
The window shows the message sent to the selected workstation when a virus or unwanted program is detected. You can edit this message. A text may contain a maximum of 500 characters.
You can use the following key combinations for formatting the message:
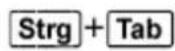
Inserts a tab. The current line is indented by several characters to the right.
inserts a line break.
The message can include wildcards for information found during the search. These wildcards are replaced by the actual text when sent.
The following wildcards can be used:
| %VIRUS% | contains the name of the detected virus or of the unwanted program |
| %FILE% | contains the path and file name of the affected file |
| %COMPUTER% | contains the name of the computer on which the Guard is running |
| %NAME% | contains the name of the user who accessed the affected file |
| %ACTION% | contains the action performed after the detection of the virus |
| %MACADDR% | contains the MAC address of the computer on which the Guard is running |
Default
The button restores the predefined default text for an alert.
Scanner
Enable network alerts
If this option is enabled, network alerts are sent. This option is disabled as the default setting.
Note
To be able to activate this option, at least one recipient must be entered under General :: Alerts :: Network.
Message to be sent
The window shows the message sent to the selected workstation when a virus or unwanted program is detected. You can edit this message. A text may contain a maximum of 500 characters.
You can use the following key combinations for formatting the message:
Inserts a tab. The current line is indented by several characters to the right.
inserts a line break.
The message can include wildcards for information found during the search. These wildcards are replaced by the actual text when sent.
The following wildcards can be used:
%VIRUS% contains the name of the detected virus or of the unwanted
program
%NAME% contains the name of the logged in user using the Scanner
Default
The button restores the predefined default text for an alert.
12.8.8.2. Email
With certain events, the AntiVir program can send alerts and messages via email to one or more recipients. This is done with the Simple Message Transfer Protocol (SMTP).
The messages can be triggered by various events. The following components support email sending:
– Guard: Sending notifications
- Scanner: Sending notifications
- Updater: Sending notifications
Note
Please note that ESMTP is not supported. In addition, an encrypted transfer via TLS (Transport Layer Security) or SSL (Secure Sockets Layer) is currently not possible.
Email messages
SMTP server
Enter the name of the host to be used here - either its IP address or the direct host name. The maximum possible length of the host name is 127 characters.
For example:
192.168.1.100 or mail.samplecompany.com.
Sender address
In this input box, enter the email address of the sender. The maximum length of the sender's address is 127 characters.
Authentication
Some mail servers expect a program to verify itself to the server (log in) before an email is sent. Alerts can be transmitted with authentication to an SMTP server via email.
Use authentication
If this option is enabled, a user name and a password can be entered in the relevant boxes for login (authentication).
- User name: Enter your user name here.
- Password: Enter the relevant password here. The password is saved in encrypted form. For security reasons, the actual characters you type in this space are replaced by asterisks (*).
Send test email
When you click on the button, the program attempts to send a test email to the sender address to check the data entered.
Guard
AntiVir Guard can send alerts by email to one or more recipients for certain events.
Guard
Email alerts
If this option is enabled, AntiVir Guard sends email messages with the most important information when a certain event occurs. This option is disabled as the default setting.
Email messages for the following events
The on-access scan detected a virus or unwanted program.
If this option is enabled, you always receive an email with the name of the virus or unwanted program and the affected file when the on-access scan detects a virus or an unwanted program.
Edit
The "Edit" button opens the "Email template" window in which you can configure the notification for an "On-access detection" event. You have the option of inserting text for the subject line and body of the email. You can use variables for this purpose (see Configuration::General::Email::Alerts::Email Template).
A critical error occurred in Guard.
If this option is enabled, you will receive an email whenever an internal critical error is detected.
Note
In this case, please inform our technical support and include the data given in the email. The specified file should also be sent for examination.
Edit
The "Edit" button opens the "Email template" window in which you can configure the notification for a "Critical error in Guard" event. You have the option of inserting text for the subject line and body of the email. You can use variables for this purpose (see Configuration::General::Email::Alerts::Email Template).
Recipient(s)
Enter the email address(es) of the recipient(s) in this box. The individual addresses are separated by commas. The maximum length of all addresses together (i.e. the total character string) is 260 characters.
Scanner
With certain events, the on-demand scan can send alerts and messages via email to one or more recipients.
Scanner
Enable email alerts
If this option is enabled, the program sends email messages with the most important information when a certain event occurs. This option is disabled as the default setting.
Email messages for the following events
The on-demand scan detected a virus or unwanted program.
If this option is enabled, you receive an email with the name of the virus or unwanted program and the affected file whenever the on-demand scan detects a virus or an unwanted program.
Edit
The "Edit" button opens the "Email template" window in which you can configure the notification for an "Scan detection" event. You have the option of inserting text for the subject line and body of the email. You can use variables for this purpose (see Configuration::General::Email::Alerts::Email Template).
End of scheduled scan.
When the option is activated, an email is sent when a scan job has been performed. The email contains data on the point and duration of the scan job, on the folders and files scanned as well as on the viruses found and warnings.
Edit
The "Edit" button opens the "Email template" window in which you can configure the notification for the "End of scan" event. You have the option of inserting text for the subject line and body of the email. You can use variables for this purpose (see Configuration::General::Email::Alerts::Email Template).
Add report file as attachment
If this option is enabled, the current report file of the Scanner component is added to the email as an attachment when sending Scanner notifications.
Recipient address(es)
Enter the email address(es) of the recipient(s) in this box. The individual addresses are separated by commas. The maximum length of all addresses together (i.e. the total character string) is 260 characters.
Updater
The Updater component can send notifications by email to one or more recipients for specific events.
Updater
Email alerts
If this option is enabled, the Update component sends email messages with the most important data when a specific event occurs. This option is disabled as the default setting.
Email messages for the following events
No update necessary. Your program is up-to-date.
If this option is enabled, an email is sent if the Updater has successfully made a connection to the download server but there are no new files available on the server. This means that your AntiVir program is up to date.
Edit
The "Edit" button opens the "Email template" window in which you can configure the notification for a "No update necessary" event. You have the option of inserting text for the subject line and body of the email. You can use variables for this purpose (see Configuration::General::Email::Alerts::Email Template).
Update finished successfully. New files have been installed.
If this option is enabled, an email is sent for all updates performed: This may be a product update or an update of the virus definition file or of the scanning engine.
Edit
The "Edit" button opens the "Email template" window in which you can configure the notification for an "Update successful – new files installed" event. You have the option of inserting text for the subject line and body of the email. You can use variables for this purpose (see Configuration::General::Email::Alerts::Email Template).
Update finished successfully. A new product update is available.
If this option is enabled, an email is only sent if an update of the scanning engine or virus definition file was performed without a product update, but a product update is available.
Edit
The "Edit" button opens the "Email template" window in which you can configure the notification for an "Update successful – product update available" event. You have the option of inserting text for the subject line and body of the email. You can use variables for this purpose (see Configuration::General::Email::Alerts::Email Template).
Update failed.
If this option is enabled, an email is sent if the update has failed due to an error.
Edit
The "Edit" button opens the "Email template" window in which you can configure the notification for an "Update failed" event. You have the option of inserting text for the subject line and body of the email. You can use variables for this purpose (see Configuration::General::Email::Alerts::Email Template).
Add report file as attachment
If this option is enabled, the current report file of the Updater component is added to the email as an attachment when sending Updater notifications.
Recipient(s)
Enter the email address(es) of the recipient(s) in this box. The individual addresses are separated by commas. The maximum length of all addresses together (i.e. the total character string) is 260 characters.
Note
Alerts are always sent by email for the following events if an SMTP server and a recipient address have been configured for Updater notifications:
A product update is required for every further update of the program.
An update of the scanning engine or of the virus definition file could not be performed as a product update is necessary.
These alerts are sent irrespective of your email warning settings for the Update component.
Email template
In theEmail template window you can configure the email notifications for the individual components to the enabled events. You can insert text of up to a maximum of 128 characters in the subject line and up to a maximum of 1024 characters in the message field.
The following variables can be used in the email subject and email message:
Globally acceptable variables
| Variable Value | |
| Windows environment variables | The email notifications component supports all Windows environment variables. |
| %SYSTEM_IP% | IP address of the computer |
| %FQDN% | Fully qualified domain name |
| %TIMESTAMP% Event time stamp: Time and date format as per the language settings of the operating system | |
| %COMPUTERNAME% | NetBIOS computer name |
| %USERNAME% | Name of user accessing the component |
| %PRODUCTVER% Product version | |
| %PRODUCTNAME% Product name | |
| %MODULENAME% | Name of the component sending the email |
| %MODULEVER% | Version of the component sending the email |
Specific component variables
| Variable | Value | Component emails |
| %ENGINEVER% Version of scan engine used | Guard Scanner | |
| %VDFVER% Version of virus definition file used | Guard Scanner | |
| %SOURCE% | Fully qualified file name | Guard |
| %VIRUSNAME% | Name of the virus or unwanted program | Guard |
| %ACTION% | Action performed after the detection | Guard |
| %MACADDR% | MAC address of the first registered network card | Guard |
| %UPDFILESLIST% | List of updated files | Updater |
| %UPDATETYPE% | Update type: Update of scan engine and virus definition file, or product update withupdate of scan engine and virus definition file | Updater |
| %UPDATEURL% URL of | download server used for update | Updater |
| %UPDATE_ERROR% | Update error in words | Updater |
| %DIRCOUNT% Number of | scanned directories | Scanner |
| %FILECOUNT% | Number of files scanned | Scanner |
| %MALWARECOUNT% Number of viruses or unwanted programs detected | Scanner | |
| %REPAIREDCOUNT% Number of infected files repaired | Scanner | |
| %RENAMEDCOUNT% Number of infected files renamed | Scanner | |
| %DELETEDCOUNT% | Number of infected files deleted | Scanner |
| %WIPECOUNT% Number of infected files overwritten and deleted | Scanner | |
| %MOVEDCOUNT% Number of infected files moved to quarantine | Scanner | |
| %WARNINGCOUNT% | Number of warnings | Scanner |
| %ENDTYPE% | Status of scan: Terminated/Successfully completed | Scanner |
| %START_TIME% | Start time of the scan: Start time of the update | Scanner Updater |
| %END_TIME% | End of the scan End of the update | Scanner Updater |
| %TIME_TAKEN% | Duration of scan in minutes Duration of the update in minutes | Scanner Updater |
| %LOGFILEPATH% | Path and file name of the report file | Scanner Updater |
12.8.8.3. Acoustic alerts
Acoustic alert
When a virus or malware is detected by the Scanner or Guard, an acoustic alert is sounded in interactive action mode. You can now choose to activate or deactivate the acoustic alert and select an alternative Wave file for the alert.
Note
The action mode of the Scanner is set in the configuration under Scanner::Scan::Action on detection. The action mode of the Guard is set in the configuration under Guard::Scan::Action on detection.
No warning
When this option is enabled, there is no acoustic alert when a virus is detected by the Scanner or Guard.
Use PC speakers (only in interactive mode)
If this option is enabled, there is an acoustic alert with the default signal when a virus is detected by the Scanner or Guard. The acoustic alert is sounded on the PC's internal speaker.
Use the following Wave file (interactive mode only)
If this option is enabled, there is an acoustic alert with the selected Wave file when a virus is detected by the Scanner or Guard. The selected Wave file is played over a connected external speaker.
Wave file
In this input box you can enter the name and the associated path of an audio file of your choice. The program's default acoustic signal is entered as standard.

The button opens a window in which you can select the required file with the aid of the file explorer.
Test
This button is used to test the selected wave file.
12.8.8.4. Warnings
Your AntiVir program generates so-called slide-ups, desktop notifications for specific events, which give information on successful or failed program sequences such as updates. In Warnings you can enable or disable the notifications for specific events..
With desktop notifications, you have the option of disabling the notification directly in the slide-up. You can reverse the disabling of the notification in Warnings.
Warnings
on dial-up connections used
If this option is enabled, you will receive a desktop notification alert if a dialer creates a dial-up connection on your computer via the telephone or ISDN network. There is a danger that the connection may have been created by an unknown and unwanted dialer and that the connection may be chargeable. (see Viruses and more::Threat categories: Dialer).
on successfully updated files
If this option is enabled, you will receive a desktop notification whenever an update has been successfully performed and files updated.
on failed update
If this option is enabled, you will receive a desktop notification whenever an update fails: No connection to the download server could be created or the update files could not be installed.
that no update is necessary
If this option is enabled, you will receive a desktop notification whenever an update is started but installation of the files is not necessary as your program is up to date.
12.8.9 Events
Limit size of event database
Limit maximum number of events to n entries
If this option is enabled, the maximum number of events listed in the event database can be limited to a certain size; possible values: 100 to 10000 entries. If the number of entered entries is exceeded, the oldest entries are deleted.
Delete events older than n day(s)
If this option is enabled, events listed in the event database are deleted after a certain period of time; possible values: 1 to 90 days. This option is enabled as the default setting, with a value of 30 days.
Do not limit size of event database (delete events manually)
When this option has been activated, the size of the event database is not limited. However, a maximum of 20,000 entries are displayed in the program interface under Events.
12.8.10 Limit reports
Limit number of reports
Limit the number to n units
When this option is enabled, the maximum number of reports can be limited to a specific amount. Values between 1 and 300 are permissible. If the specified number is exceeded, then the oldest report at that time is deleted.
Delete all reports more than n day(s) old
If this option is enabled, reports are automatically deleted after a specific number of days. Permissible values are: 1 to 90 days. This option is enabled as the default setting, with a value of 30 days.
Do not limit number of reports (manually delete reports)
If this option is enabled, the number of reports is not restricted.
This manual was created with great care. However, errors in design and contents cannot be excluded. The reproduction of this publication or parts thereof in any form is prohibited without previous written consent from Avira Operations GmbH & Co. KG.
Issued Q2-2011
Brand and product names are trademarks or registered trademarks of their respective owners. Protected trademarks are not marked as such in this manual. However, this does not mean that they may be used freely.
AVIRA
live free.