
AGP-V7100 T (16M) - Graphic card ASUS - Free user manual and instructions
Find the device manual for free AGP-V7100 T (16M) ASUS in PDF.


| Product Type | Graphics Card |
| Brand | ASUS |
| Model | AGP-V7100 T (16M) |
| GPU | NVIDIA GeForce2 MX |
| Video Memory | 16MB SDRAM |
| Memory Bandwidth | Up to 2.7GB/sec |
| Bus Interface | AGP 4X/2X with Fast Writes and Execute Mode |
| RAMDAC | Integrated 350MHz |
| Max Resolution | 2048x1536 true color |
| Outputs | VGA, TV-Out (S-Video and Composite) |
| TwinView Support | Yes (simultaneous dual-display) |
| Fill Rate | Up to 700 Mtexels/sec |
| Triangle Rate | Up to 20 million triangles/sec |
| DirectX Support | DirectX 7 |
| OpenGL Support | OpenGL 1.2 |
| TV Standard | NTSC or PAL (selectable via jumper) |
| Power Source | Via AGP slot (no external power required) |
| Cooling | Heatsink on GPU |
| Operating Systems Supported | Windows 98, Windows 2000, Windows NT 4.0 |
| Installation Requirement | AGP slot on motherboard |
| Accessories Included | User manual, driver CD, optional VR-100 upgrade kit (sold separately) |
| Cleaning | Use a dry cloth; avoid solvents |
| Safety Precautions | Unplug power before installation; use anti-static wrist strap |
Frequently Asked Questions - AGP-V7100 T (16M) ASUS
User questions about AGP-V7100 T (16M) ASUS
0 question about this device. Answer the ones you know or ask your own.
Ask a new question about this device
Download the instructions for your Graphic card in PDF format for free! Find your manual AGP-V7100 T (16M) - ASUS and take your electronic device back in hand. On this page are published all the documents necessary for the use of your device. AGP-V7100 T (16M) by ASUS.
USER MANUAL AGP-V7100 T (16M) ASUS
No part of this manual, including the products and software described in it, may be reproduced, transmitted, transcribed, stored in a retrieval system, or translated into any language in any form or by any means, except documentation kept by the purchaser for backup purposes, without the express written permission of ASUSTeK COMPUTER INC. ("ASUS").
ASUS PROVIDES THIS MANUAL "AS IS" WITHOUT WARRANTY OF ANY KIND, EITHER EXPRESS OR IMPLIED, INCLUDING BUT NOT LIMITED TO THE IMPLIED WARRANTIES OR CONDITIONS OF MERCHANTABILITY OR FITNESS FOR A PARTICULAR PURPOSE. IN NO EVENT SHALL ASUS, ITS DIRECTORS, OFFICERS, EMPLOYEES OR AGENTS BE LIABLE FOR ANY INDIRECT, SPECIAL, INCIDENTAL, OR CONSEQUENTIAL DAMAGES (INCLUDING DAMAGES FOR LOSS OF PROFITS, LOSS OF BUSINESS, LOSS OF USE OR DATA, INTERRUPTION OF BUSINESS AND THE LIKE), EVEN IF ASUS HAS BEEN ADVISED OF THE POSSIBILITY OF SUCH DAMAGES ARISING FROM ANY DEFECT OR ERROR IN THIS MANUAL OR PRODUCT.
Product warranty or service will not be extended if: (1) the product is repaired, modified or altered, unless such repair, modification of alteration is authorized in writing by ASUS; or (2) the serial number of the product is defaced or missing.
Products and corporate names appearing in this manual may or may not be registered trademarks or copyrights of their respective companies, and are used only for identification or explanation and to the owners' benefit, without intent to infringe.
NVIDIA, GeForce2 MX, and combinations thereof are trademarks of NVIDIA Corporation. Windows, MS-DOS, and DirectX are registered trademarks of Microsoft Corporation. Adobe and Acrobat are registered trademarks of Adobe Systems Incorporated.
The product name and revision number are both printed on the product itself. Manual revisions are released for each product design represented by the digit before and after the period of the manual revision number. Manual updates are represented by the third digit in the manual revision number.
For previous or updated manuals, BIOS, drivers, or product release information, contact ASUS at http://www.asus.com.tw or through any of the means indicated on the following page.
SPECIFICATIONS AND INFORMATION CONTAINED IN THIS MANUAL ARE FURNISHED FOR INFORMATIONAL USE ONLY, AND ARE SUBJECT TO CHANGE AT ANY TIME WITHOUT NOTICE, AND SHOULD NOT BE CONSTRUED AS A COMMITMENT BY ASUS. ASUS ASSUMES NO RESPONSIBILITY OR LIABILITY FOR ANY ERRORS OR INACCURACIES THAT MAY APPEAR IN THIS MANUAL, INCLUDING THE PRODUCTS AND SOFTWARE DESCRIBED IN IT.
Copyright © 2000 ASUSTeK COMPUTER INC. All Rights Reserved.
Product Name: ASUS V7100 Series
Manual Revision: 1.01 E653
Release Date: November 2000
ASUSTeK COMPUTER INC. (Asia-Pacific)
Marketing
Address: 150 Li-Te Road, Peitou, Taipei, Taiwan 112
Telephone: +886-2-2894-3447
Fax: +886-2-2894-3449
Address: 6737 Mowry Avenue, Mowry Business Center, Building 2
Newark, CA 94560, USA
Fax: +1-510-608-4555
Email: tmd1@asus.com
Technical Support
Fax: +1-510-608-4555
Email: tsd@asus.com
WWW: www.asus.com
FTP: ftp.asus.com/Pub/ASUS
ASUS COMPUTER GmbH (Europe)
Marketing
Address: Harkortstr. 25, 40880 Ratingen, BRD, Germany
Fax: +49-2102-442066
Email: sales@asuscom.de (for marketing requests only)
Technical Support
Hotline: MB/Others: +49-2102-9599-0 Notebook: +49-2102-9599-10
Fax: +49-2102-9599-11
Support (Email): www.asuscom.de/de/support (for online support)
WWW: www.asuscom.de
FTP: ftp.asuscom.de/pub/ASUSCOM
I. Introduction ......7
Highlights 7
Available Models 7
ASUS AGP-V7100 / Deluxe Combo 7
ASUS AGP-V7100 / 2V1D 7
ASUS AGP-V7100 / DVI / 32M or 16M 7
ASUS AGP-V7100 / T / 32M or 16M 7
ASUS AGP-V7100 / Pure / 32M or 16M .... 7
Features 8
2. Hardware Setup....9
ASUS AGP-V7100 / Deluxe Combo Layout....9
ASUS AGP-V7100 / 2V1D Layout 10
ASUS AGP-V7100 / DVI Layout 11
ASUS AGP-V7100 / T Layout.... 12
ASUS AGP-V7100 / T Layout.... 12
ASUS AGP-V7100 / Pure Layout.... 13
ASUS AGP-V7100 (Pure VGA) Layout.... 13
ASUS VR-100 Optional Upgrade Kit 15
Installation Procedures 16
New Systems.... 16
Systems with Existing VGA Card.... 16
3. Software Setup ....17
Operating System Requirements 17
Windows 98 17
Display Driver Installation 18
Windows 98 18
Method 1: ASUS Quick Setup Program 18
Method 2: Display Property Page 19
Method 3: Plug and Play 20
Windows 2000 21
Method 1: ASUS Quick Setup Program 21
Method 2: Plug and Play 22
Windows NT 4.0 24
Method 1: Display Property Page 24
Drivers 25
Install Display Driver.... 25
Install DirectX.... 26
Install GART Driver 27
Install ASUS TWAIN Driver 29
Uninstall Display Driver 30
Windows 98 30
Method 1: Using the Autorun Screen 30
Method 2: Using Control Panel 30
Windows 2000 .... 31
Method 1: Using the Autorun Screen 31
Method 2: Using Control Panel 31
Windows NT 4.0 31
Method 1: Using Control Panel 31
Run ASUS VGA Live Update.... 32
Install Video for Windows Capture Driver 33
Utilities 34
Install ASUS Tweak Utility 34
Install SmartDoctor 35
Install VideoSecurity 36
Install ASUS Live Utility.... 37
Install ASUS Digital VCR 38
4. Software Reference ....39
ASUS Control Panel 39
Refresh Rate.... 39
More Resolution 40
Information 40
Color 41
Display 44
Advanced 49
Direct3D VR 49
Direct3D 53
OpenGL VR 56
OpenGL 58
TwinView 60
Other 61
Using the Utilities 65
ASUS Tweak Utility 65
ASUS VideoSecurity 67
ASUS Live Video 71
ASUS Digital VCR 81
Using the Other Utilities 95
ASUS TWAIN Interface 95
ASUS VR PictureViewer 97
ASUS StereoTV....99
5. Resolution Table....101
Maximum Refresh Rate 101
6. Troubleshooting ....103
Description 103
Recommended Action 103
Federal Communications Commission Statement
This device complies with FCC Rules Part 15. Operation is subject to the following two conditions:
• This device may not cause harmful interference, and • This device must accept any interference received, including interference that may cause undesired operation.
This equipment has been tested and found to comply with the limits for a Class B digital device, pursuant to Part 15 of the FCC Rules. These limits are designed to provide reasonable protection against harmful interference in a residential installation. This equipment generates, uses and can radiate radio frequency energy and, if not installed and used in accordance with manufacturer's instructions, may cause harmful interference to radio communications. However, there is no guarantee that interference will not occur in a particular installation. If this equipment does cause harmful interference to radio or television reception, which can be determined by turning the equipment off and on, the user is encouraged to try to correct the interference by one or more of the following measures:
- Reorient or relocate the receiving antenna.
- Increase the separation between the equipment and receiver.
- Connect the equipment to an outlet on a circuit different from that to which the receiver is connected.
- Consult the dealer or an experienced radio/TV technician for help.
WARNING! The use of shielded cables for connection of the monitor to the graphics card is required to assure compliance with FCC regulations. Changes or modifications to this unit not expressly approved by the party responsible for compliance could void the user's authority to operate this equipment.
Canadian Department of Communications Statement
This digital apparatus does not exceed the Class B limits for radio noise emissions from digital apparatus set out in the Radio Interference Regulations of the Canadian Department of Communications.
This Class B digital apparatus complies with Canadian ICES-003.
This product incorporates copyright protection technology that is protected by method claims of certain U.S. patents and other intellectual property rights owned by Macrovision Corporation and other rights owners. Use of this copyright protection technology must be authorized by Macrovision Corporation, and is intended for home and other limited viewing uses only unless otherwise authorized by Macrovision Corporation. Reverse engineering or disassembly is prohibited.
Thank you for purchasing an ASUS AGP-V7100 TwinView™ GPU Graphics Card. With this purchase, you join a legion of mainstream graphics enthusiasts.
Powered by the NVIDIA GeForce2 MX graphics processing unit (GPU), the ASUS AGP-V7100 delivers not only breakthrough leading-edge graphics performance but also ergonomically pleasing image fidelity regardless of the CPU (central processing unit) your computer system is using.
With the ASUS AGP-V7100, you will not only see but also experience stunning, dynamic, realistic 3D worlds and characters.
Highlights
- Powered by the World's Newest Graphics Processing Unit (GPU) • Built-in 32/16MB video memory with up to 2.7GB/sec bandwidth
- TwinView true dual-display support (TV-out/DVI models only)
- Dual-texture pixel-fill capacities with two new hypertexel pipelines
- 700 Mtexel fill rate, 20 Mtriangles/sec through T&L/Setting
- Optimized for DirectX 7 and OpenGL Features
NVIDIA GeForce2 MX
Provides more resolutions and color depths
Brings more productivity
Sets a new milestone for realism
Performs up to 1.5x improvement over GeForce
Ensures broad application support
Available Models
ASUS AGP-V7100 / Deluxe Combo
- 32MB Frame Buffer + VGA + TV Tuner Module + TV-Out + AV Adapter + 3D Glasses (ASUS VR-100G Bundled Free)
ASUS AGP-V7100 / 2V1D
• 32MB Frame Buffer + VGA1 + VGA2 + DVI
ASUS AGP-V7100 / DVI / 32M or 16M
• 32/16MB Frame Buffer + VGA + DVI
ASUS AGP-V7100 / T / 32M or 16M
• 32/16MB Frame Buffer + VGA + TV-Out
ASUS AGP-V7100 / Pure / 32M or 16M
• 32/16MB Frame Buffer + VGA
Features
• AGP 4X/2X with Fast Writes and Execute Mode - Two new Hypertextel pipelines process two textures per pixel, in true color, at full speed up to 700 million fill rate • Built-in 32/16MB high speed video memory with up to 2.7GB/sec bandwidth - Four texture mapped, filtered, lit pixels per clock cycle • Second generation Transform and Lighting (T&L) Engine - Up to 20 million triangles per second at peak rates - Optimized for Direct3D acceleration with complete support for DirectX 7 features, such as multi-texturing, bump mapping, light maps, reflection maps, full scene anti-aliasing, trilinear and 8-tap anisotropic filtering (better than trilinear mipmapping) - Fully 1.2 compliant OpenGL support • 32-bit colors, Z/stencil buffer - Multi-buffering (double, triple, quad buffering) for smooth animation and video playback - TwinView™ Architecture (for models with TV-out/DVI models only) with simultaneous and independent dual-display control and dual-video output - Multiple video windows with hardware color space conversion and filtering (YUV 4:2:2 and 4:2:0) - Integrated 350MHz RAMDAC supporting from 640x480 up to 2048x1536 in true color • BRDF (Bidirectional Reflectance Distribution Function) support • Video acceleration for Direct Show and MPEG-1, MPEG-2, and Indeo
ASUS AGP-V7100 / Deluxe Combo Layout
32MB Frame Buffer![graph TD A["ASUS AV Adapter"] --> B["CATV"] C["Antenna"] --> D["3D Glasses (ASUS VR 100G)"] E["Monitor"] --> F["VGA Output"] G["Projector"] --> F B --> H["AV Input (8pin)"] D --> I["Cable/ Antenna Connector (Coaxial)"] D --> J["AV/SVHS/TV Output (8pin)"] F --> K["VGA Monitor Output (15pin) (Standard…](/content/2026/05/792075/images/afe33dd3d1887c82135dd046c2918a9f0fbd141406b07112fec9174de603ff0a.jpg)
Item Checklist
ASUS AV Adapter
ASUS AGP-V7100 / Deluxe Combo Graphics Card ASUS AV Adapter ASUS VR-100G This User's Manual ASUS V7100 Series Driver & Utility CD Disc
- H/W Setup Deluxe Combo
ASUS AGP-V7100 / 2V1D Layout 32MB Frame Buffer
The PanelLink® transmitter takes a digital stream from a graphics source, converts it to DVI-compliant digital output, and transmits that output to a receiver in a display.
The VIP (Video Interface Port) Connector is used for third-party add-on modules, such as video capture cards or television tuners.
The DVI Dual-Link output accepts either a 12- or 24-pin DVI plug connector or a new type of analog plug connector that uses four additional pins, plus a ground plane plug to maintain constant impedance for the analog RGB signals.
![graph TD A["DVI-I Dual-Link Input to VGA Monitor Output Adapter"] --> B["VGA Output"] C["Projector"] --> B D["Projector"] --> B E["Projector"] --> B B --> F["DVI-I Dual-Link output (24pins)"] B --> G["VGA Monitor output (15pins) (standard)"] H["ASUS"] --> I["VIP Connector A 26 25"] H --> J["PanelLin…](/content/2026/05/792075/images/cd9c8bbd6301599535dbe11cad5665a088dc4e9768fe99a8c3f9f00848430dd7.jpg)
Item Checklist
ASUS AGP-V7100 / 2V1D Graphics Card DVI-Dual-Link Input to VGA Monitor Output Adapter This User's Manual
☑ ASUS V7100 Series Driver & Utility CD Disc
ASUS AGP-V7100 / DVI Layout
32/16MB Frame Buffer
Item Checklist ASUS AGP-V7100 / DVI Graphics Card This User's Manual ASUS V7100 Series Driver & Utility CD Disc
| ✓ | ASUS AGP-V7100 / DVI Graphics Card |

2. H/W Setup DVI

ASUS AGP-V7100 / T Layout
32/16MB Frame Buffer![graph TD A["Video Interface Port"] --> B["Composite (RCA) Output"] A --> C["S-Video Output"] A --> D["VGA Output"] B --> E["Composite/TV output (RCA)"] C --> F["SVHS/TV output (7pin)"] D --> G["VGA Monitor output (15pin) (standard)"] H["JP1"] --> I["NVIDIA™ GeForce2 MX™ GPU Chip (Graphics Processing…](/content/2026/05/792075/images/e90a2c3d5989dccb62b5a3811baf87a44369089696aa0d5d7a80b7c5c68788fb.jpg)
Item Checklist ASUS AGP-V7100 / T Graphics Card (PAL or NTSC) This User's Manual ASUS V7100 Series Driver & Utility CD Disc - Use the same TV standard for all devices.
Notes
ASUS AGP-V7100 / Pure Layout
32/16MB Frame Buffer![graph LR A["Projector"] --> B["VGA Output"] B --> C["VGA Monitor output (15pin) (standard)"] C --> D["The VIP (Video Interface Port) Connector is used for third party add-on modules, such as video capture cards or television tuners."] D --> E["ASUS"] D --> F["NVIDIA™ GeForce2 MX™ GPU Chip (Graphics…](/content/2026/05/792075/images/e9f311b61a294f78b0733d5fefec4336ee9619f63717d76ddbbe047d36e16474.jpg)
Item Checklist ASUS AGP-V7100 / Pure Graphics Card This User's Manual ASUS V7100 Series Driver & Utility CD Disc √ ASUS AGP-V7100 / Pure Graphics Card √ This User's Manual √ ASUS V7100 Series Driver & Utility CD Disc
- H/W Setup
Pure
2. Hardware Setup
(This page was intentionally left blank.)
2. Hardware Setup
ASUS VR-100 Optional Upgrade Kit
The ASUS VR-100 Optional Upgrade Kit enables the ASUS VR-100G 3D Glasses to be used with Pure models of the V7100 Series cards. See your dealer for more information on the ASUS VR-100 Optional Upgrade Kit.
The monitor cable that came with your kit may be of the Y- or standard type. Connect your cable accordingly.
Y-Type Connection
When using a Y-type cable, you do not need to connect the VGA Input of the VR-100 to your VGA card's monitor output (see diagram above).
Standard Connection![graph TD A["To VGA Card's Monitor Output VGA Input"] --> B["VGA Output"] C["Projector"] --> B D["3D Glasses (ASUS VR-100G)"] --> B B --> E["Stereo Glasses Output"] E --> F["ASUS VR-100"] G["VGA Input"] --> H["VR Glasses Output"] H --> I["(Reserved)"] J["VGA Monitor output (15pin) (standard)"] --> H…](/content/2026/05/792075/images/c8c2c04c1d8f07d52112efd56fa0ab8cdd7f7268b1eeb4dac56c57659f95b9f1.jpg)
You must anchor the ASUS VR-100's mounting bracket with a screw to a free expansion slot in your computer chassis.
2. Hardware Setup
NOTE: This graphics card series can only be installed in motherboards with an AGP slot.
WARNING! Computer boards and components contain very delicate Integrated Circuit (IC) chips. To protect the computer board and other components against damage from static electricity, you must follow some precautions.
- Make sure that you unplug your power supply when adding or removing expansion cards or other system components. Failure to do so may cause severe damage to both your motherboard and expansion cards.
- Keep all components such as the host adapter in its antistatic bag until you are ready to install it.
- Use a grounded wrist strap before handling computer components. If you do not have one, touch both of your hands to a safely grounded object or to a metal object, such as the power supply case. Hold components by the edges and try not to touch the IC chips, leads, or circuitry.
- Place components on a grounded antistatic pad or on the bag that came with the component whenever the components are separated from the system.
Installation Procedures
New Systems
- Unplug all electrical cords on your computer.
- Remove the system unit cover.
- Locate the AGP bus expansion slot. Make sure this slot is unobstructed.
- Remove the corresponding expansion slot cover from the computer chassis.
- Ground yourself to an antistatic mat or other grounded source.
- Pick up the board (still in its sleeve) by grasping the edge bracket with one hand and then remove the plastic sleeve.
- Position the card directly over the AGP slot and insert one end of the board in the slot first. Firmly but gently press the bus connector on the bottom of the card down into the slot. Be sure the metal contacts on the bottom of the host adapter are securely seated in the slot.
- Anchor the board's mounting bracket to the computer chassis using the screw from the slot cover that you set aside previously.
- Replace the cover on the system unit.
- Connect your analog monitor's 15-pin VGA connector to the card and fasten the retaining screws (if any).
- Connect other cables and devices if available. You are now ready to install the software drivers and utilities.
Systems with Existing VGA Card
- Change your display driver to Standard VGA.
- Shut down your computer and unplug all electrical cords.
- Replace the existing VGA card with your graphics card.
- Restart your computer.
- Install the ASUS V7100 series display driver.
Operating System Requirements
NOTE: This graphics card requires a motherboard with an AGP slot.
Windows 98 supports full Direct3D and AGP features. If you are still using the beta version of Windows 98 and you want to fully take advantage of the Direct3D and AGP features, you must upgrade it to the release version before installing the AGP display driver.
Windows 98 supports full Direct3D and AGP features. If you are still using the beta version of Windows 98 and you want to fully take advantage of the Direct3D and AGP features, you must upgrade it to the release version before installing the AGP display driver.
Windows 98 includes VGARTD for the major chipsets, but it is recommended that you install VGARTD from the ASUS AGP-V7100 Series CD to make sure that you have the latest version of VGARTD (see 3. Software Setup | Install GART Driver).
NOTES
- VGARTD stands for Virtual Graphics Address Remapping Table Driver, which is necessary to use the DIME feature of AGP. DIME means Direct Memory Execute, which is accessed directly by most AGP chips (when VGARTD is installed) for complex texture-mapping operations.
- For other notes or release information, see the README files in the installation CD disc.
- This manual assumes that your CD-ROM disc drive is drive D: and that Windows is in C:\WINDOWS. Replace either with the actual location, if necessary.
IMPORTANT!
- To avoid damage to your graphics card, unplug your computer's power supply before inserting your graphics card into the AGP slot.
- Make sure that the power supply of your motherboard can provide enough electrical current on the 3.3V lead to maintain normal operation.
- The ASUS VR-100 Optional Upgrade Kit must be installed to enable the ASUS VR-100G 3D glasses to be used with the Pure models.
- Windows 98 and VIA Systems: If your motherboard has a VIA-based chipset, the VIA VGARTD must be installed in normal mode.
3. Software Setup
Display Driver Installation
You can use one of the recommended methods to install the display drivers for your graphics card, depending on your operating system.
NOTE: The screen displays in this manual may not reflect exactly the screen contents displayed on your screen. The contents of the support CD are subject to change at any time without notice.
Windows 98
Method 2 and Method 3 will not install the appropriate AGP GART driver if your motherboard does not use the Intel AGPset. Installing the AGP GART driver will ensure that the AGPset's AGP functions are available. Method 2 and Method 3 will not install the DirectX runtime libraries either. DirectX must be installed so that your video player can take advantage of hardware acceleration. See 3. Software Setup | Install GART Driver and 3. Software Setup | Install DirectX later in this manual for the setup steps.
Method 1: ASUS Quick Setup Program
NOTE: See 3. Software Setup | Drivers | Install Display Driver for more information.
- Start Windows.
- Switch display to Windows' Standard Display Adapter (VGA) mode and then restart Windows.
- Insert the CD installation disc into your CD-ROM drive.
- The Install Shell appears. Click Drivers and then click Install Display Driver on the Drivers dialog box.


- Follow the onscreen instructions to complete the setup.
- When Setup has finished installing all the necessary files on your computer, it will prompt you to restart your computer. Click Yes... and then Finish to restart your computer and to complete Setup.
Method 2: Display Property Page
- Start Windows.
- Switch display to Windows' Standard Display Adapter (VGA) mode and then restart Windows.
- Right-click the Windows desktop and click Properties.
- Click the Settings tab and then click Advanced. The Standard Display Adapter (VGA) Properties dialog box appears.
- Click Change on the Adapter tab. The Update Device Driver Wizard dialog box appears. Click Next, click Display a list of all the drivers... and then click Next.
- Click Show all hardware and then click Have Disk....When the Install From Disk dialog box appears, type the

location of the ASUSNV9X.INF file (WIN9X folder) and then proceed to step 9. Otherwise, proceed to the next step.
- Click Browse to search the CD-ROM drive. In the Drives box of the Open dialog box, select your CD-ROM drive and then click OK.
- In the Folders box, double-click the WIN9x folder and then select ASUSNV9X.INF in the File name box.
- Click OK. A list of video cards appears. Select your VGA card type for your operating system and then click OK.
- The Update Driver Warning box appears. Click Yes to confirm the setting up of the ASUS enhanced display drivers and then follow the onscreen instructions to start the setup.
- Setup will prompt you when it has finished installing all the necessary files on your computer. Click Finish to close Setup.
- When you are returned to the Standard Display Adapter (VGA) Properties box, click Close. The Display Properties box appears. Click Close.
- The system will prompt you to restart your computer. Click Yes to restart your computer and to complete Setup.
3. Software Setup
Method 3: Plug and Play
NOTE: Before proceeding with these steps, replace first your old VGA card with an ASUS AGP-V7100 series graphics card.
- Start Windows.
- When Windows detects your ASUS AGP-V7100 series graphics card, the New Hardware Found dialog box appears.
- Click Driver from disk provided by hardware manufacturer.
- When Setup prompts you for the location of the driver, type D:\WIN9x to direct Setup to the INF file and the

- When Setup has finished installing all the necessary files on your computer, it will prompt you to restart your computer. Click Yes to restart your computer and to complete Setup.
3. Software Setup
Windows 2000
Method 1: ASUS Quick Setup Program
- Start Windows.
- When Windows detects your ASUS graphics card, the Found New Hardware Wizard dialog box appears.
- Click Cancel to enter the Windows desktop.
- Insert the CD installation disc into your CD-ROM drive.
- The ASUS Windows 2000 Install

Shell appears. Click Drivers and then click Install Display Driver on the Driver dialog box.
- Follow the onscreen instructions to complete the setup.
- When Setup has finished installing all the necessary files on your computer, it will prompt you to restart your computer. Click Yes to restart your computer and to complete Setup
3. Software Setup
Method 2: Plug and Play
- Start Windows.
- When Windows detects your ASUS graphics card, the Found New Hardware Wizard dialog box appears.

- Click Next.
- When the next Found New Hardware Wizard dialog box appears, select Search for a suitable driver for my device (recommended) and then click Next.
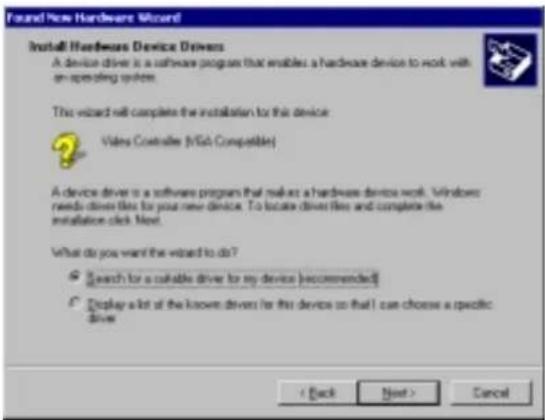
- Insert the CD installation disc into your CD-ROM drive to bring up the Locate Driver Files item of the Found New Hardware Wizard dialog box.
- Check CD-ROM drives, uncheck all other options and then click Next to search for the drivers of your graphics card.

3. Software Setup
- When the wizard has finished searching for driver files for your graphics card, select Install one of the other drivers and then click Next from the Driver Files Search Results item of the Found New Hardware Wizard dialog box.

- When prompted to select the display driver to install in your system, select the one that is located in the D:\WIN2K and then click Next.
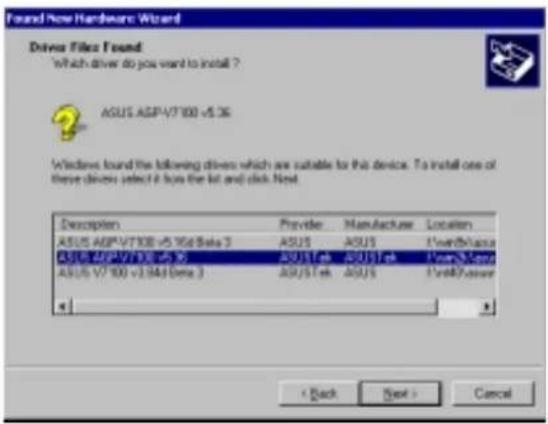
- Follow the onscreen instructions to complete the setup.
- When Setup has finished installing all the necessary files on your computer, it will prompt you to restart your computer.
Click OK to restart your computer and to complete Setup.
Windows NT 4.0
Method 1: Display Property Page
WARNING! Before installing the display driver in Windows NT 4.0, make sure that you have installed Windows NT 4.0 Service Pack 3 or later, to take full advantage of the AGP features of your card. (You may download service packs at http://www.microsoft.com/ntworkstation/downloads.)
NOTE: The following steps assume your CD-ROM drive letter is D.
- Start Windows NT, switch display properties to VGA mode (16 colors, 640 x 480 pixels), then restart your computer to make the change.
- After your computer restarts, right-click the desktop and click Properties.
- Click the Settings tab.
- Select Change Display Type.
- Select Adapter Type and click Change.
- Click Have Disk.
- Insert the CD installation disc.
- Type D:\NT40 or click Browse to select the path of the display driver for Windows NT. Click OK.
- Select ASUS V7100 and then click OK.
- Windows NT will once again prompt for confirmation. All appropriate files are then copied to the hard disk. When all files are copied, go back to the Display Properties box by clicking Close. Click Apply.
- The System Settings Change dialog box is displayed. Click Yes to restart Windows.
- Windows NT will restart with the default settings. The Display applet will appear to allow for mode selection.
3. Software Setup
Drivers
NOTES: 1) The screen displays in this manual may not reflect exactly the screen contents displayed on your screen. The contents of the support CD are subject to change at any time without notice. 2) Unless otherwise indicated, the procedures under Drivers apply to all the operating systems supported, namely, Windows 98, Windows 2000, and Windows NT 4.0.
Install Display Driver
- Insert the CD installation disc into your CD-ROM drive or double click the CD drive icon in My Computer to bring up the autorun screen or run Setup.exe in the root directory of your CD-ROM drive.
Click Drivers.
- Windows 98: The Drivers box appears. Click Install Display Driver to install all the drivers and utilities into your computer. Setup will install the drivers in the following order: Display Driver (Direct3D and OpenGL Drivers), DirectX runtime libraries, and VGART driver. Just follow the on-screen instructions to complete the installation.
Windows 2000: Setup will only copy the display drivers.
Windows NT 4.0: SETUP.TXT will appear. Follow the instructions to install the display driver. You may refer to the installation procedures earlier in 3. Software Setup | Windows NT 4.0 | Method 1: Display Property Page.


If you prefer to install the drivers individually, follow the steps on the following pages.
3. Software Setup
Install DirectX
Windows 98 Only
Microsoft DirectX allows 3D hardware acceleration support in Windows 98. For Software MPEG support in Windows 98, you must first install Microsoft DirectX, and then an MPEG-compliant video player.
- Insert the CD installation disc into your CD-ROM drive or double click the CD drive icon in My Computer to bring up the autorun screen or run Setup.exe in the root directory of your CD-ROM drive.
Click Drivers.

- The Drivers box appears. Click Install DirectX to select the DirectX version you want to install.
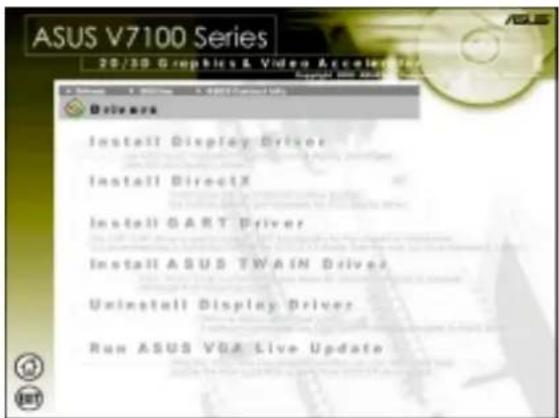
- The installation program will automatically install the DirectX 7 runtime libraries into your system.
![Installing Microsoft[R] DirectX[R] Searching for updated DirectX Runtime Components and updating as necessary. This may take a few minutes...](/content/2026/05/792075/images/cde5528919b986ef029588c4f95f1bbefe2bd938956e1aab88a5105a356b4ecc.jpg)
- Setup will prompt when it has finished copying all the files to your computer. Click OK to finish the installation.

WARNING! Some games written for older DirectX versions may not work properly under DirectX 7. Make sure that your applications or games support DirectX 7 before installing the DirectX 7 runtime libraries. DirectX 7 currently cannot be uninstalled by regular means, such as outlined in 3. Software Setup | Uninstall Display Driver.
3. Software Setup
Install GART Driver
Windows 98/Windows 2000
The AGP GART Driver is used to support AGP functionality for the chipset on your PC's motherboard. It is recommended to install the GART driver if it is newer than the one you have installed in your system. The GART driver is only necessary for an AGP graphics card.
NOTE: Installation dialogs are slightly different for each chipset. Follow the on-screen instructions to finish the GART driver installation. The succeeding steps assume that you are installing for an Intel chipset.
- Insert the CD installation disc into your CD-ROM drive or double click the CD drive icon in My Computer to bring up the autorun screen or run Setup.exe in the root directory of your CD-ROM drive.
Click Drivers.

- The Drivers box appears. Click Install GART Driver to install AGP support for motherboards with Intel, AMD, VIA, SiS, or ALi chipsets.

- The AGP VGARTD Driver Detection box appears with the chipset detected on your motherboard. Click OK to install the appropriate driver for your AGPset.

3. Software Setup
- If you selected No..., on the previous screen before clicking OK, you will be presented with a selection of other drivers. Make your driver selection and click Install.

- When the Welcome screen appears, click Next to continue.

- Once the driver installation is finished, click Finish.


3. Software Setup
Install ASUS TWAIN Driver
Only with Deluxe Combo/Windows 98
ASUS TWAIN Driver is a frame capture driver for Adobe Photoshop®, an image editing software. With this driver, you can capture still images through Photoshop using the video input port of your card (Deluxe Combo/Windows 98 only).
- Insert the CD installation disc into your CD-ROM drive or double click the CD drive icon in My Computer to bring up the autorun screen or run Setup.exe in the root directory of your CD-ROM drive.
Click Drivers.

- The Drivers box appears. Click Install ASUS TWAIN Driver.

- When the Welcome box appears, click Next to start copying the files. Setup automatically starts copying the necessary files to the default folder.
To complete the installation, simply follow the on-screen instructions or prompts.

3. Software Setup
Uninstall Display Driver
If you want to update your display drivers or if you no longer need the display drivers for your card, you can use one of the following procedures to completely uninstall the drivers from your system to save disk space.
Windows 98
Method 1: Using the Autorun Screen
- Insert the CD installation disc into your CD-ROM drive or double click the CD drive icon in My Computer to bring up the autorun screen or run Setup.exe in the root directory of your CD-ROM drive.
Click Drivers.
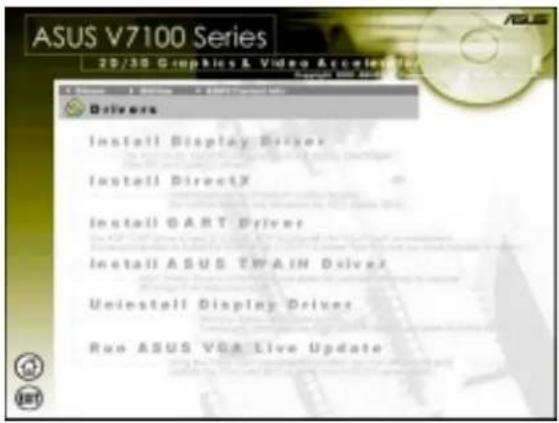
- Click Uninstall Display Driver and follow the on-screen directions.
Method 2: Using Control Panel
- Click Start, and then point to Settings.
- Click Control Panel.
- Double-click the Add/Remove Programs icon.
- Click the Install/Uninstall tab.
- Click ASUS Display Drivers from the list.
- Click Add/Remove.
- The system will prompt you to restart your computer. Click Yes to restart.

3. Software Setup
Windows 2000
Method 1: Using the Autorun Screen
See Windows 98 | Method 1: Using the Autorun Screen earlier in this section for the procedures.
Method 2: Using Control Panel
- Click Start, and then point to Settings.
- Click Control Panel.
- Double-click the Add/Remove Programs icon.
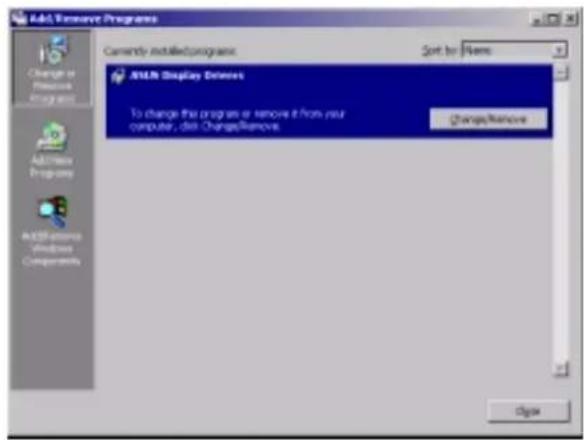
- Click the Change/Remove Programs icon.
- Click ASUS Display Drivers from the list.
- Click Change/Remove.
- The system will prompt you to re-start your computer. Click Yes to restart.
Windows NT 4.0
Method 1: Using Control Panel
- Click Start, and then point to Settings.
- Click Control Panel.
- Double-click the Add/Remove Programs icon.
- Click the Install/Uninstall tab.
- Click ASUS Display Drivers from the list.
- Click Add/Remove.
- The system will prompt you to restart your computer. Click Yes to restart.
3. Software Setup
Run ASUS VGA Live Update
Windows 98 Only
The ASUS VGA Live Update is a utility that allows you to update your VGA card's BIOS and drivers. The use of this utility assumes that you are properly connected to the Internet through an Internet Service Provider (ISP).
- Insert the CD installation disc into your CD-ROM drive or double click the CD drive icon in My Computer to bring up the autorun screen or run Setup.exe in the root directory of your CD-ROM drive.
Click Drivers and when the Drivers box appears, click Run ASUS VGA LiveUpdate.

- Select an update method from the drop-down list box and then click Next.
- Update BIOS/Driver from the Internet lets you update the BIOS or driver from the Internet. The updating (running the flash utility or the installation program) will be done automatically.
- Download BIOS/Driver from the Internet lets you download the BIOS or driver to a folder in your computer.

- After you have selected your preferred update method, you will need to select an Internet site. Choose the site that is closest to you and then click Next or click Auto Select.
Follow any on-screen instructions or prompts to complete setup.

If you selected Download BIOS/Driver from the Internet, you will be prompted for a destination folder. Create or select an existing folder to save the file or files that you selected.
3. Software Setup
Install Video for Windows Capture Driver
Windows 2000/NT 4.0 Only
The Video for Windows Capture Driver must be installed to use ASUS Live Video (see 4. Software Reference | ASUS Live Video). This driver conforms to the Microsoft Video for Windows standard.
- Insert the CD installation disc into your CD-ROM drive, or double-click the CD drive icon in My Computer to bring up the autorun screen, or run Setup.exe in the root directory of your CD-ROM drive.
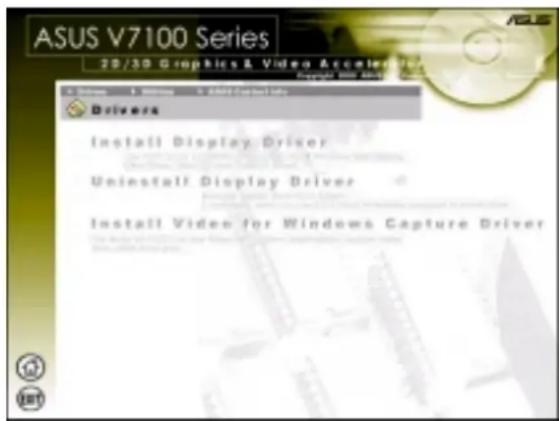
Click Drivers, and when the Drivers box appears, click Install Video for Windows Capture Driver.
To complete the installation, simply follow the on-screen instructions or prompts.
NOTE: Under Windows 98, the Video for Windows capture driver is installed during the installation of the display drivers.
3. Software Setup
Utilities
Install ASUS Tweak Utility
The ASUS Tweak Utility lets you control the core clock speed and the memory interface speed of your graphics card.
WARNING! Use this option with caution. Using this inappropriately may damage your card and cause your system to be unstable.
- Insert the CD installation disc into your CD-ROM drive, or double-click the CD drive icon in My Computer to bring up the autorun screen, or run Setup.exe in the root directory of your CD-ROM drive.
Click Utilities.

- The Utilities box appears. Click Install ASUS Tweak Utility.
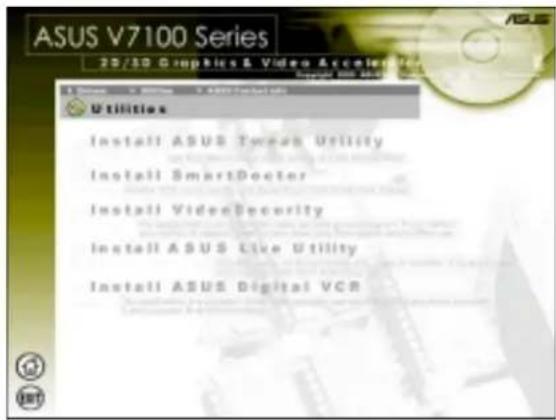
- When the Welcome box appears, click Next.

To complete the installation, simply follow the on-screen instructions or prompts.
Install SmartDoctor
SmartDoctor is a utility that monitors the card's graphic chip state, alerting users about abnormal events, such as a fan malfunction or chip overheat. Likewise, the utility “cools” down the graphic chip temperature when it is idle or returns it to its maximum capability when necessary.
The ASUS V7100 Series graphics cards do not require this utility. DO NOT install.
3. Software Setup
Install VideoSecurity
Windows 98 Only
VideoSecurity is a powerful video stream comparison and detection utility that helps in detecting potential errors or intrusions at a specific time interval by using a video capture device, such as a digital camera.
- Insert the CD installation disc into your CD-ROM drive or double click the CD drive icon in My Computer to bring up the autorun screen or run Setup.exe in the root directory of your CD-ROM drive.
Click Utilities.
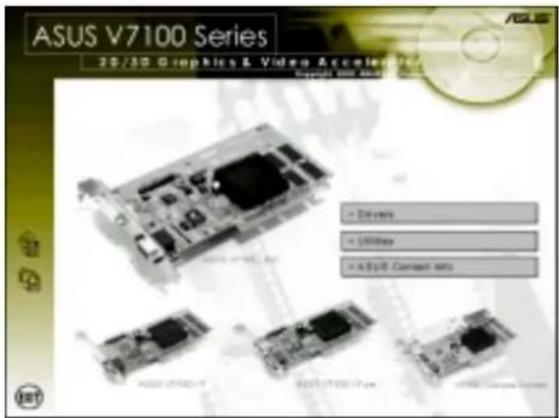
- The Utilities box appears. Click Install VideoSecurity.

- When the Welcome box appears, click Next to start the installation.

To complete the installation, simply follow the on-screen instructions or prompts.
3. Software Setup
Install ASUS Live Utility
The ASUS Live utility lets you view and capture video images from the card's video input port.
NOTE: Make sure that you have an ASUS graphics card with VIDEO-IN connector before attempting to install the utility.
- Insert the CD installation disc into your CD-ROM drive, or double-click the CD drive icon in My Computer to bring up the autorun screen, or run Setup.exe in the root directory of your CD-ROM drive.
Click Utilities.

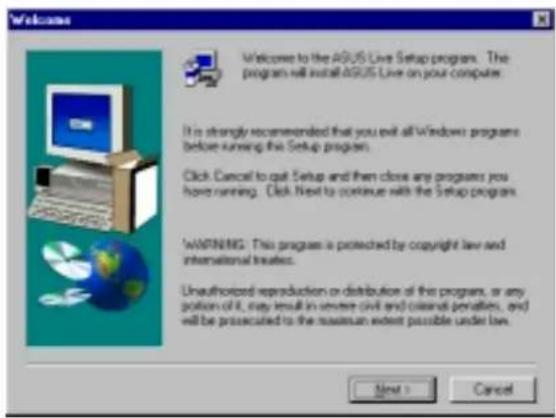
- The Utilities box appears. Click Install ASUS Live Utility.

- When the Welcome box appears, click Next to start copying the files. Setup automatically starts copying the necessary files to the default folder.
To complete the installation, simply follow the on-screen instructions or prompts.
3. Software Setup
Install ASUS Digital VCR
ASUS DigitalVCR, like the ASUS Live utility, lets you view and capture video images from the card's video input port. Digital VCR, however, provides extra functions, such as a playback module and TimeShifting™.
NOTE: Make sure that you have an ASUS graphics card with VIDEO-IN connector before attempting to install the utility.
- Insert the CD installation disc into your CD-ROM drive, or double-click the CD drive icon in My Computer to bring up the autorun screen, or run Setup.exe in the root directory of your CD-ROM drive.
Click Utilities.

- The Utilities box appears. Click Install ASUS Digital VCR.
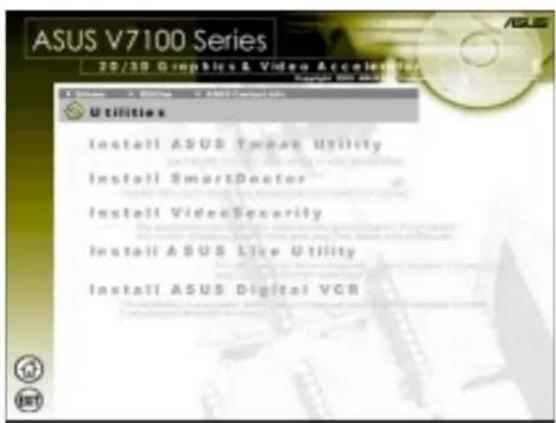
- When the Welcome box appears, click Next to start copying the files. Setup automatically starts copying the necessary files to the default folder.
To complete the installation, simply follow the on-screen instructions or prompts.

4. Software Reference
ASUS Control Panel
After installation of the display drivers, you will find an ASUS icon on the taskbar's status area. Clicking or right-clicking this icon opens the ASUS Control Panel, showing a menu composed of shortcuts of the graphics board's enhanced and other functions.
NOTE: Instead of clicking the ASUS Control Panel icon, you may right-click the Windows desktop, click Properties, and then click Settings. Under Windows 98/2000, click Advanced after clicking Settings. Click the appropriate tab to change your display settings.

Refresh Rate
Refresh Rate lets you change the refresh rate of your current screen resolution.
WARNING! Be sure that the refresh rate that you select is supported by your monitor. Selecting a refresh rate that is beyond your monitor's specification may damage it. Press ESC to restore your original settings in case of problems.
- Click/right-click the ASUS Control Panel icon, point to Refresh Rate, and then click the desired refresh rate.

- The system will prompt you whether you want to keep the setting you just selected. Click OK to keep the setting, otherwise, click Cancel or press ESC.

4. Software Reference
More Resolution
More Resolution lets you change the screen resolution of your monitor.
- Click/right-click the ASUS Control Panel icon, point to More Resolution, and then click the desired screen resolution. The system will automatically set the resolution selected without restarting your computer.

WINDOWS95 USERS: You will be prompted to restart your computer if you select a screen resolution with a different color depth, for example, from 800x600 HiColor to 800x600 TrueColor. Click OK to restart your computer to make the change.

Information
Information lists the relevant information about your card. Aside from this, it has links to the ASUSTeK COMPUTER, INC. web site for updated information about the graphics board, latest drivers, and other information.

4. Software Reference

Color
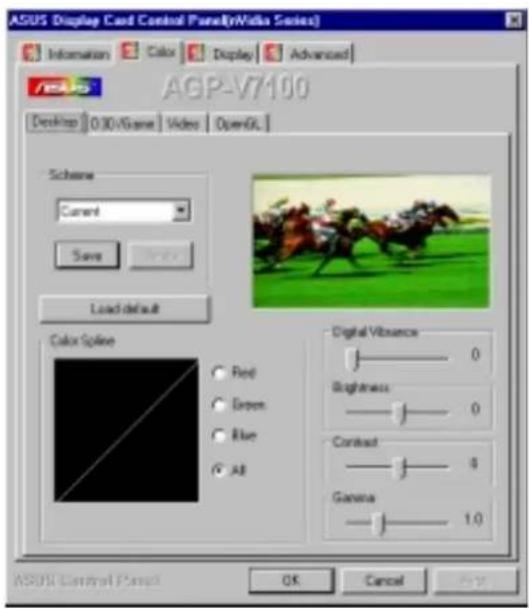
Color allows you to make color adjustments, such as brightness, contrast, and gamma values for each or all of the RGB colors. These adjustments can be made for Desktop, D3D/Game, Video, and OpenGL. The color settings of Desktop, D3D/Game, and OpenGL are not adjustable under 8-bit color depth.
Desktop
Desktop lets you adjust the color of your Windows desktop.
Video
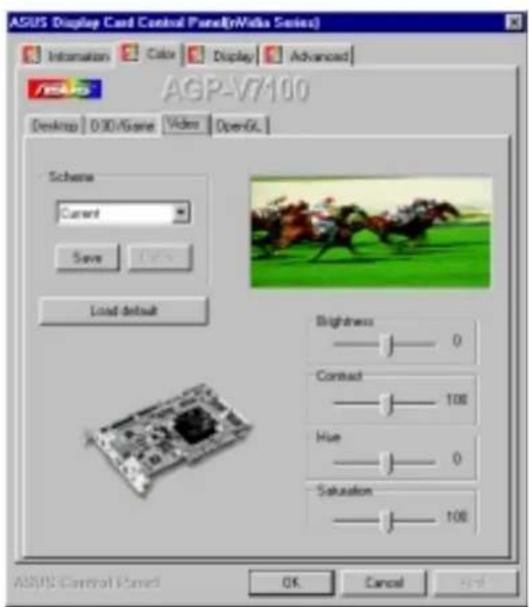
Video lets you make your favorite color settings for videos.
D3D/Game
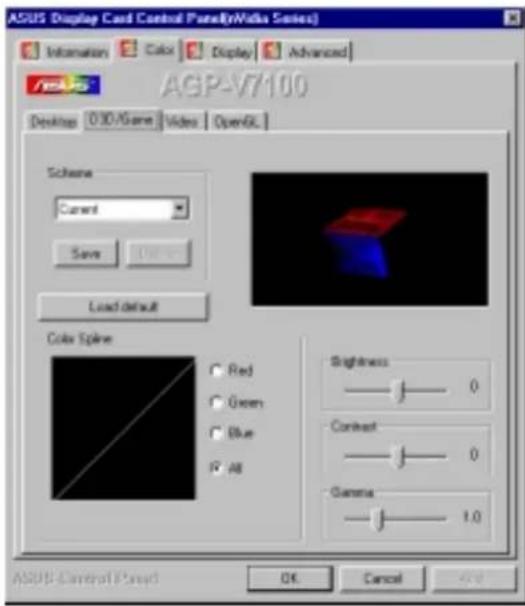
D3D/Game lets you make your favorite color settings for D3D games.
OpenGL
OpenGL lets you make your favorite color settings for OpenGL applications.

General Functions
Brightness / Contrast / Gamma
Brightness / Contrast / Gamma sliders let you calibrate the brightness, contrast, and gamma output of your display card.
Desktop
Changes to your color settings are shown immediately on your monitor. You may change the preview picture by clicking Load from the Desktop box.
D3D/Game / OpenGL
Changes to your color settings are shown immediately on your monitor.
Brightness / Contrast / Hue / Saturation
Brightness / Contrast / Hue / Saturation sliders let you calibrate the brightness, contrast, hue, and saturation output of your display card.
Video
Changes to your settings can be viewed on the displayed picture (shown as race horses).

Dragging a slider to the left decreases the level and to the right increases it. The number at the right of each slider displays the brightness (value range: -128 to +128, default: 0), contrast (-30 to 30, default: 0), or gamma value (0.2 to 3.0, default: 1.0).
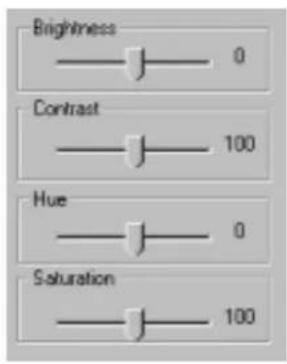
Dragging a slider to the left decreases the level and to the right increases it. The number at the right of each slider displays the brightness (value range: -100 to 100, default: 0), contrast (0 to 200, default: 100), hue (-180 to 180, default: 0), or saturation value (0 to 200, default: 100).
Color Spline
Color Spline shows how each (R, G, or B) or all channels are distributed when you move the Brightness, Contrast, or Gamma slider to make your adjustments. You can adjust all channels at once (All) or individual channels (R, G, or B).

Scheme
Scheme lists schemes that you can use to change the appearance of many screen elements simultaneously. You can use existing schemes, or create and save your own scheme by saving your current settings, or delete unwanted schemes. You may want to save a scheme that you created for some special situations, such as when you want to use the same settings when playing a certain game or a movie.

Desktop
Digital Vibrance
Digital Vibrance lets you control color separation and intensity of your Windows desktop.

Dragging a slider to the left increases the level and to the right decreases it (value range: 0 to 3). Increasing the levels may result in bold, dynamic visuals with sharp and balanced colors.
Important Notes
D3D/Game
The color settings of D3D/Game take effect only when you are playing a full-screen DirectDraw/Direct3D game.
Video
Only one overlay is allowed at a time with ASUS AGP-V7100. That is, when you click Video first and then run your favorite video player, you can only see the adjustments you made to the settings in the preview window because the video player cannot use the hardware acceleration function (overlay). On the other hand, if you run your video player first before opening Video, the preview window will show a warning message. The message may also appear when you click Video and the dialog box is on the wrong monitor in a Windows 98/2000 multiple display environment.

Display
Display lets you make monitor adjustments, such as position, size, and refresh rate.
WARNING! Adjusting position or size, especially refresh rate is a highly dangerous operation. Selecting a value that is beyond your monitor's specification may damage it. Press ESC to restore your original settings in case of problems.
VGA
Adjustment
Position sets the screen position
Size sets the screen size
Synchronization
Adjusts the synchronization polarity settings
Disable Monitor Check
Lets you disable the specification check of your monitor. That is, you may select all the resolutions and refresh rates that the VGA card can support.
Note: Choosing a resolution or refresh rate beyond the monitor specifications may damage your monitor.

Change current refresh rate (Windows 98 only)
Displays the Change current refresh rate box to let you customize a new refresh rate.
To change the current refresh rate
- Click Change current refresh rate.
- In the Refresh rate list under Change current refresh rate, click the nearest default refresh rate and then adjust the Edit refresh rate slider to the rate you want, click Test and then click YES when prompted to add the new refresh rate into the list. Otherwise, the original refresh rate will be restored.


Load default
Restores the settings to their defaults.
4. Software Reference
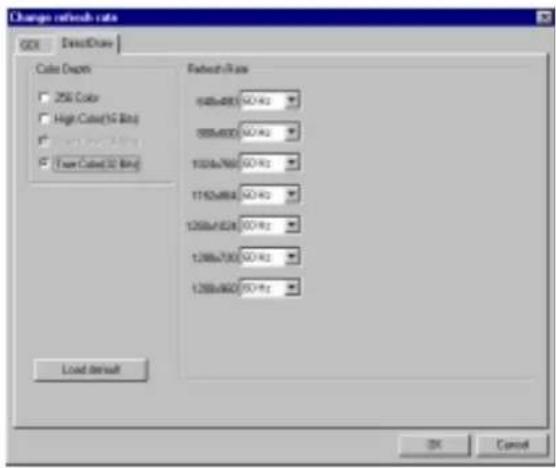
Change refresh rate
Displays the Change refresh rate box to let you change the refresh rate of any screen resolution.
GDI
(Windows 98 only)
GDI lets you change the refresh rate of the Windows desktop.
To change the refresh rate
- Click Change refresh rate.
- In the Refresh Rate list under the GDI tab, select the refresh rate you want to use. A Test button appears to let you test the selected refresh rate and resolution combination. Click YES when prompted whether to keep the new refresh rate. Otherwise, the original refresh rate will be restored.
DirectDraw
DirectDraw lets you change the refresh rate of DirectDraw. It is most useful when you are playing a full-screen game.
To change the refresh rate
- Click Change refresh rate.
- In the Refresh Rate list under the DirectDraw tab, select the refresh rate you want to use.
Monitor Timing
Displays the Monitor Timing box to let you select the proper timing mode of your monitor.
Auto-Detect
(Lets Windows determine the proper mode)
This option allows Windows to receive the proper timing information directly from the monitor itself. This is the default setting.
NOTE: Some older monitors may not support this feature.
General Timing Formula (GTF)
GTF is a standard used by most new hardware.
Discrete Monitor Timings (DMT)
DMT is an older standard still in use on some hardware. Select this option if your hardware requires DMT.


4. Software Reference
Special Notes (Clone mode)
These icons on the Display tab appear only under Clone mode.
Click to make monitor adjustments to the primary display device in Clone mode.
Click to make monitor adjustments to the secondary display device in Clone mode.
For example, if your secondary display device is TV, click the TV tab to adjust, among others, Contrast or Position of the TV display (see 4. Software Reference | TV later in this section).

Change Resolution
Secondary Display Device in Clone/Windows 98 only
Change Resolution displays the Change Resolution box to let you customize a new resolution and refresh rate of the secondary display device in Clone.
NOTE: The following descriptions apply only to the secondary display device under Clone mode.
To customize a resolution or refresh rate or both
- Click


- Click the Change Resolution pop-up button when it appears.

- In the Change Resolution box, change the settings according to your preference and then click OK.

4. Software Reference
TV
NOTE: This tab will not be available if your card is a pure model (cards without a TV Out connector).
Switch Device
Lets you assign hot keys to switch between devices.
Scheme
Scheme lists schemes that you can use to change the appearance of many screen elements simultaneously. You can use existing schemes, or create and save your own scheme by saving your current settings, or delete unwanted schemes. You may want to save a scheme that you created for some special situations, such as when you want to use the same settings when playing a certain movie.
Standard
Sets the TV signal format, for example, PAL or NTSC.
Black Level
Sets the brightness of the TV display.
Contrast
Sets the contrast of the TV display.
Flicker Filter
Sets the anti-flicker effect.
Position
Sets the screen position.

Output type
Displays the connection status of composite and S-Video.
Scan Type
Sets the scan type of the TV display. Overscan (default) bleeds the image off the edges of the picture tube of your TV. Underscan lets you compensate for overscanning TVs. Use Position to position or center the image in the TV screen.
Digital Flat Panel
NOTE: This tab will not be available if your card is a pure model (cards without a DVI connector).
The following options let you determine the placement of the image on your flat panel display when running at resolutions lower than the maximum resolution supported.
Use display adapter scaling
Lets your adapter do the scaling (default)

Centered output
Lets you center the image on your flat panel and does not do any scaling.

User monitor scaling
Lets your monitor do the scaling. If your flat panel does not support this function, the image will be placed at the top left.


4. Software Reference
(This page was intentionally left blank.)
4. Software Reference

Advanced
Advanced provides some advanced settings for TwinView™, ASUS VR-100G 3D Glasses (setting is available only on models with the ASUS VR-100 Optional Upgrade Kit) and Direct3D and OpenGL, which are software interfaces for your graphics cards.
Direct3D VR
VR Effect
Lists all parameters to fine tune the stereoscopic effects for your Direct 3D games.
Enable Stereoscopic Mode
When selected, this enables you to use the stereoscopic mode when playing games or watching 3D videos. This mode is available only on models with the ASUS VR-100 Optional Upgrade Kit.
NOTE: You must quit all running DirectDraw/ Direct3D applications and then restart them for this option to take effect.
Load Default
Restores the settings to their defaults.
Depth
Adjust this to add more depth to the scene. When set to a too high value, eye discomfort/fatigue may occur.
Embossment
Adjust this to add more to the illusion of objects being pulled or popping out of the screen. See On Screen Display later in this section for details. When set to a too high value, eye discomfort/fatigue may occur.
Direction
Move the slider to the left when adjusting Embossment does not give the expected effects (e.g., some objects being pulled or popping out of the screen and other objects being pulled into the screen) to some games. This should not be a concern because only a few games require the default "+" setting to be changed, that is setting it to “−”.

Foreground
Foreground is set in conjunction with Background to extend or stretch the histogram chart on the D3D OSD box to scale the depth of 3D objects. Some games require only a little range of Z to make bad stereoscopic effect. On the D3D OSD box, move the Foreground slider to the left to adjust Foreground to the Z value of objects stretched toward 0.0. On the Advanced dialog box (see above), several current games set their Foreground to 60.

Background
Background is set in conjunction with Foreground to extend or stretch the histogram chart on the D3D OSD box to scale the depth of 3D objects. On the D3D OSD box, move the Foreground slider to the left to adjust Foreground to the Z value of objects toward 1.0. On the Advanced dialog box (see above), several current games set their Background to 100.
Blind
Lets you discard "garbage" or crop the unwanted areas of your leftmost/rightmost display. Setting this to 0 will not discard any of the display area while setting it to a higher value will clear them.
Tips
- Make sure that the 3D objects of your games do not appear extremely separated between the scenes of two eyes, especially near objects.
- Make some objects appear outside your screen and other objects inside the screen. A ratio of 1:3 to 1:5 of objects outside and inside is recommended.
- For car racing games, you can use Embossment to make just your car appear outside the screen.
- For first-person shooting games, you can use Embossment to make just your hand/weapon appear outside the screen.
IMPORTANT: Before enabling stereoscopic mode and using your stereoscopic or 3D glasses (ASUS VR-100G), make sure that your monitor can support the selected refresh rate (interlaced mode) under the following display modes:
16 bits: 640 x 480, 800 x 600, 960 x 720, 1024 x 768, 1152 x 864
32 bits: 640 x 480, 800 x 600
WARNING! To prevent discomfort and eye fatigue when using your stereoscopic or 3D glasses, DO NOT try to use your 3D glasses for an extended period of time. Take frequent short breaks to give your muscles and eyes a chance to rest by taking off your 3D glasses and then looking up and focusing on distant objects.
Mode
Line Interleave
Select for better compatibility with most monitors, particularly monitors with less bandwidth or less range of horizontal/vertical frequency. Stereoscopic visual quality, however, will be poor because only half the number of vertical lines are generated with this mode.
Page Flipping
Select for the best stereoscopic visual quality. Page Flipping provides double vertical resolution compared with Line Interleave. Your monitor must be able to support the high frequency (at least 100Hz) necessary for this mode.
Refresh Rate
To prevent eye discomfort and fatigue, high refresh rates are preferred. Some monitors, however, may not be able to support a high refresh rate. Make sure that your monitor supports a selected refresh rate; otherwise, your monitor may become unstable, for example, a blank screen may occur.
Scheme
Scheme lists schemes that you can use to change the appearance of many screen elements simultaneously. You can use existing schemes, or create and save your own scheme by saving your current settings, or delete unwanted schemes. You may want to save a scheme that you created for some special situations, such as when you want to use the same settings when playing a certain game or a movie.
On Screen Display
Enable OSD
When selected, this lets you open the D3D On Screen Display (you may use the defined Hotkey) and then adjust onscreen the settings of your 3D glasses and display card when playing Direct 3D games.
Advanced
This lets you open the Advanced box.
Hotkey
This lets you assign hot keys to enable onscreen display or OSD. To use this function, select Enable OSD. You may want to change the default hot key (CTRL + ALT + O) when it conflicts with hot keys of certain games, video players, or Windows programs.
To change the default hot keys
- With your mouse cursor in the Hotkey box, press the hot key combination of your choice (you can only define CTRL+ALT key combinations). Hot keys automatically include CTRL+ALT. Press any valid key (you cannot use ESC, ENTER, TAB, SPACEBAR, PRINT SCREEN, or BACKSPACE) you want to add to this combination. For example, to define the hot key combination CTRL+ALT+D, press D.
NOTE: The hot keys will be available only if you selected the Enable OSD check box.
4. Software Reference
OSD Settings

Beetle Crazy Cup™ is copyright © 2000 by INFORGRAMES Original idea and development by XPIRAL™ (Efecto Caos S.L.)
The OSD settings include Depth, Embossment, Direction, Background, Foreground, Blind, Brightness, Contrast, and Gamma. See 4. Software Reference | Advanced for a description of the 3D glasses settings and 4. Software Reference | Color for a description of the display settings.
When selected, this lets you adjust onscreen the settings of your 3D glasses and display card when playing games or watching 3D videos. These settings include Eyes, Distance, Embossment, Background, Foreground, Blind, Brightness, Contrast, and Gamma. See 4. Software Reference | Advanced for a description of the 3D glasses settings and 4. Software Reference | Color for a description of the display settings.
Use the UP or DOWN arrow keys on your keyboard to select a setting that you want to change or adjust and the PLUS or MINUS keys to move or drag the slider.
To restore the settings to their defaults, press the HOME key.
To close the onscreen display, press the END key.
OSD Histogram Chart

The OSD Histogram Chart lets you determine at which Z range 3D objects are located and how they gather. For example, if this chart (simulated) was displayed on a car racing game, the vertices to the left of the E line could be the model of your car and to the right of the E line could be the road, houses, other cars or trees in front of your car.
So, with this information, you could
- Adjust Embossment by moving the E line.
- Adjust Foreground/Background, thus stretching the histogram to make objects more evenly distributed.
NOTE: Using the histogram chart requires games using Direct3D 6.0 or earlier.
Known Issues on Specific Games
See the included support CD for the latest information (D3DVR.TXT in the WIN9X folder).
All registered and unregistered trademarks are the property of their respective owners. No intended endorsement of these products or games by ASUSTeK COMPUTER INC. and its subsidiaries is intended or implied.
4. Software Reference
(This page was intentionally left blank.)
4. Software Reference
Direct3D
Windows 98 Only

Performance and Compatibility Options
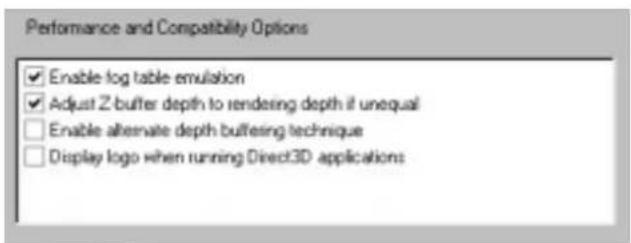
Enable fog table emulation
Some old games do not correctly query the D3D hardware capabilities and expect table fog support. Choosing this option will ensure that such games will run properly.
Adjust Z-buffer depth to rendering depth if unequal
This option forces the hardware to automatically adjust the depth of its Z-buffer to the depth that the application requests. Normally, you will want to keep this option enabled, unless your work absolutely requires a specific Z-buffer depth.
Enable alternate depth buffering technique
This option lets the hardware use a different mechanism for depth buffering in 16-bit applications. Enabling this setting can produce higher quality rendering of 3D images.
Display logo when running Direct3D applications
This option lets you display the Nvidia logo in the lower corner of the screen while running Direct3D applications.
4. Software Reference
Mipmapping Options

Mipmap detail level
This option lets you adjust the level of detail bias for mipmaps. A lower bias will increase the application performance.
Command Buffer Location

Command Buffer Location lets you choose the location of the command buffer. Default setting is Strict AGP.
Strict AGP
This option forces all the command buffer into the AGP memory. Choose for best performance.
PCI
This option forces the command buffer to be created into the PCI memory. If you are experiencing stability problems with your system (especially with some Socket 7 motherboards), choose this option for better compatibility.
PCI with reduced heap
This option forces the command buffer to be created into the PCI memory. This, however, also reduces the AGP heap size by an amount equal to the size of the command buffer. If you are experiencing stability problems with your system (especially with some Socket 7 motherboards), choose this option for best compatibility. Performance is, however, poorer using this option compared with the PCI option.
4. Software Reference
More Options

Texel Alignment
Changing these values will change where the texel origin is defined. The default values conform to the Direct3D specifications. Some software may expect the texel origin to be defined elsewhere. The image quality of such applications will improve if the texel origin is redefined.

Dragging the slider to the left positions the texel origin toward the upper left corner and to the right positions it toward the center (range: 0 to 7, default: 3).
PCI Texture Memory Size
NOTE: This setting applies only to PCI display adapters or to AGP display adapters running in PCI compatibility mode.
PCI Texture Memory Size lets you set the amount of system memory for texture storage.

Clicking the up arrow increases the memory size while clicking the down arrow decreases the size of system memory for textures. The maximum amount of system memory for texture storage depends on the physical memory installed on your system.
Vertical sync
Vertical sync lets you select how an image should be rendered to the screen. Always off lets an image
be immediately rendered to the screen without waiting to be synchronized with the vertical retrace of the monitor. This option allows for frame rates higher than the refresh rate of your monitor. This may, however, produce visual artifacts and tearing, resulting in reduced image quality. If this occurs, select Always on. Auto-select (default) selects the best rendering technique depending on your monitor.

Pre-Rendering
Maximum pre-render frames allows you to limit the number of frames the CPU can prepare before they are processed by the graphics chip when vertical sync is turned off. Reduce this value if you experience, while playing games, a noticeable delay in the response of the input devices connected to your computer.

Hardware Antialiasing Control
Hardware Antialiasing Control lets you determine the amount of antialiasing to be applied in a particular D3D application. Antialiasing is a technique used to minimize rendering artifacts, such as the "staircase" or jagged effect seen along the edges of 3D objects. Select Force antialiasing in all applications to force antialiasing in applications that do not directly support it. Note that some applications that do not explicitly support antialiasing may not display properly or may render irregular images. Use this option with care.

4. Software Reference
OpenGL VR
VR Effect
Enable Stereoscopic Mode
When selected, this enables you to use the stereoscopic mode when running OpenGL 3D applications and games. This mode is available only with the ASUS Deluxe models or a Deluxe/TVR model—models with Video-In/TV-Out—or models with the ASUS VR-100 Optional Upgrade Kit.
Eyes
Distance between both eyes. Adjust this to bring objects into focus. Default: 0.
View Angle
The angle by which your two viewing directions intersect. Adjust this to add more depth to the scene. When set to a too high value, eye discomfort/fatigue may occur.
![ASUS Display Card Control Panel [InValo Series] Information Color Display Advanced AGP-V7100 DirectCD VR DirectCD OpenGL VR OpenGL DoubleView Other VR Effect Enable Stereoscopic Mode Load default Eyes 0 View Angle 30 Embossment 30 Scheme Current Save On Screen Display Enable O50 Advanced Mode Line I…](/content/2026/05/792075/images/359ab59a1252f03f4f158d0cd819a158a726b1dcef6faa612f6fb059f7b87ac1.jpg)
Embossment
Adjust this to add more to the illusion of objects being pulled or popping out of the screen. See On Screen Display later in this section for details. When set to a too high value, eye discomfort/fatigue may occur. To achieve a better stereoscopic visual quality, set Embossment in conjunction with View Angle.
Mode
Line Interleave
Select for better compatibility with most monitors, particularly monitors with less specifications. Stereoscopic visual quality, however, will be poor because only half the number of vertical lines are generated with this mode.
Page Flipping
Select for the best stereoscopic visual quality. Page Flipping provides double vertical resolution compared with Line Interleave. Your monitor must be able to support the high frequency (at least 100Hz) necessary for this mode.
Refresh Rate
To prevent eye discomfort and fatigue, high refresh rates are preferred. Some monitors, however, may not be able to support a high refresh rate. Make sure that your monitor supports a selected refresh rate; otherwise, your monitor may become unstable, for example, a blank screen may occur.
Scheme
Scheme lists schemes that you can use to change the appearance of many screen elements simultaneously. You can use existing schemes, or create and save your own scheme by saving your current settings, or delete unwanted schemes. You may want to save a scheme that you created for some special situations, such as when you want to use the same settings when playing a certain game or a movie.
IMPORTANT: Before enabling OpenGL stereoscopic mode and using your stereoscopic or 3D glasses (ASUS VR-100G), make sure that you select a high resolution. The equivalent Stereo Mode resolution of a particular resolution is lower, thus:
16 bits: 2048x1536 → 1024x768 Stereo Mode
32 bits: 1280x960 → 640x480 Stereo Mode, 1280x1024 → 640x480 Stereo Mode, 1600x900 → 800x600 Stereo Mode, 1600x1200 → 800x600 Stereo Mode
WARNING! To prevent discomfort and eye fatigue when using your stereoscopic or 3D glasses, DO NOT try to use your 3D glasses for an extended period of time. Take frequent short breaks to give your muscles and eyes a chance to rest by taking off your 3D glasses and then looking up and focusing on distant objects.
4. Software Reference
On Screen Display
Enable OSD
When selected, this lets you open the D3D On Screen Display (you may use the defined Hotkey) and then adjust onscreen the settings of your 3D glasses and display card when playing games or watching 3D videos.
Advanced
This lets you open the Advanced box.
Hotkey
This lets you assign hot keys to enable onscreen display or OSD. To use this function, select Enable OSD. You may want to change the default hot key (CTRL + ALT + O) when it conflicts with hot keys of certain games, video players, or Windows programs.
To change the default hot keys
- With your mouse cursor in the Hotkey box, press the hot key combination of your choice (you can only define CTRL+ALT key combinations). Hot keys automatically include CTRL+ALT. Press any valid key (you cannot use ESC, ENTER, TAB, SPACEBAR, PRINT SCREEN, or BACKSPACE) you want to add to this combination. For example, to define the hot key combination CTRL+ALT+D, press D.
NOTE: The hot keys will be available only if you selected the Enable OSD check box.
OSD Settings
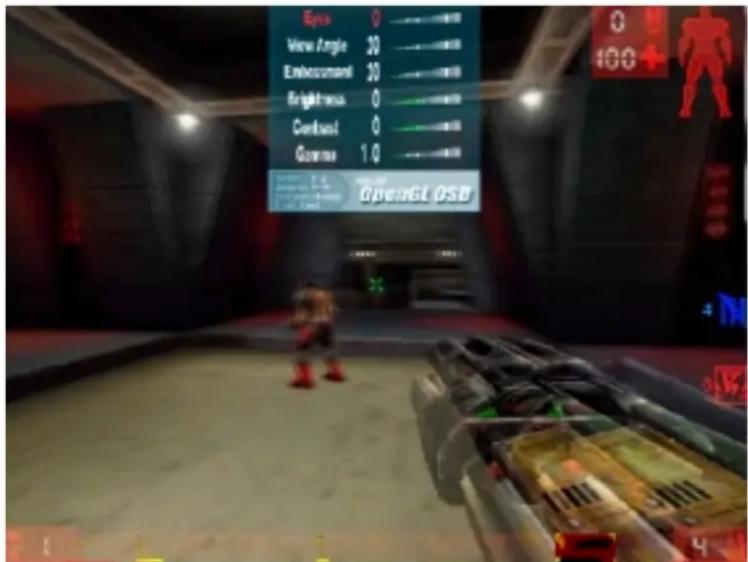
When selected, this lets you to adjust onscreen the settings of your 3D glasses and display card when playing games or watching 3D videos. These settings include Eyes, View Angle, Embossment, Brightness, Contrast, and Gamma. See 4. Software Reference | Advanced for a description of the 3D glasses settings and 4. Software Reference | Color for a description of the display settings.
Use the UP or DOWN arrow keys on your keyboard to select a setting that you want to change or adjust and the PLUS or MINUS keys to move or drag the slider.
To restore the settings to their defaults, press the HOME key.
To close the onscreen display, press the END key.
Known Issues on Selected Games/Applications
See the included support CD for the latest information (OPENGLVR.TXT in the WIN9X folder).
All registered and unregistered trademarks are the property of their respective users. No intended endorsement of these products or games by ASUSTeK COMPUTER INC. and its subsidiaries is intended or implied.
4. Software Reference
OpenGL
Windows 98 Only
![ASUS Display Card Control Panel [OSV6a Series] Information Color Display Advanced ASUS AGP-V7100 Class: CD VR Direct: CD OpenGL VR OpenGL TouchView Other Performance and Compatibility Options Enable buffer region extension Allow the dual plane extension to use local video memory Use fast linear mipm…](/content/2026/05/792075/images/c82f1d422414b0d329105795cdf2c21a527aa626dbf0fef98c2ad087039884df.jpg)
Performance and Compatibility Options

Enable buffer region extension
This option allows the drivers to use the OpenGL extension GL_KTX_buffer_region.
Allow the dual planes extension to use local video memory
This option allows the use of local video memory when the GL_KTX_buffer_region extension is enabled.
Use fast linear-mipmap-linear filtering
This option allows increased application performance at the expense of some image quality loss. In many cases, the loss of image quality may not be noticeable.
Enable anisotropic filtering
This option allows OpenGL to use anisotropic filtering for improved image quality.
Enable alternate depth buffering technique
This option lets the hardware use a different mechanism for depth buffering in 16-bit applications. Enabling this setting produces higher quality rendering of 3D images.
Disable support for enhanced CPU instruction sets
This option disables driver support for enhanced 3D instruction sets by certain CPUs.
4. Software Reference
Default color depth for textures

Default color depth for textures determines whether textures of a specific color depth should be used by default in OpenGL applications. Options are Use desktop color depth (default), Always use 16 bpp, and Always use 32 bpp.
Buffer flipping mode

Buffer flipping mode determines the buffer flipping mode for full-screen OpenGL applications. Options are Auto-select (default), Use block transfer, and Use page flip.
Vertical sync

Vertical sync lets you specify how vertical sync is handled in OpenGL. Options are Always off (default), Off by default, On by default.
Full scene antialising method

Full scene antialiasing method lets you control the method that OpenGL will use for full scene antialiasing. Options are No antialiasing (default), 1.5 x 1.5 (lowest quality antialiasing), 2 x 2 (LOD bias), and 2 x 2 (highest quality).
Maximum system memory (MB) for textures in PCI mode

Maximum system memory (MB) for textures in PCI mode lets you set the amount of system memory for texture storage.
NOTE: This setting applies only to PCI display adapters or to AGP display adapters running in PCI compatibility mode.
Clicking the up arrow increases the memory size while clicking the down arrow decreases the size of system memory for textures. The maximum amount of system memory for texture storage depends on the physical memory installed on your system.
4. Software Reference
TwinView
TwinView lets you connect two separate display devices (analog monitor, digital flat panel, or TV) to your graphics card.
Standard
When selected (default), the TwinView function of the card is disabled.

Extended Desktop
When selected, this enables your
desktop area to be spread across two displays. Extended Desktop is not supported under Windows 95.

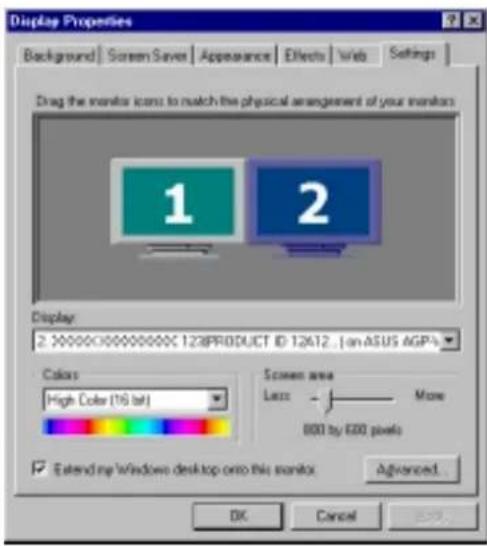
IMPORTANT! If this is your first time to enable Extended Desktop on the secondary display device, make sure to click the secondary display device icon on the Display Properties dialog box at the Settings tab of Windows, select Extend my Windows desktop onto this monitor and then restart Windows.
To open the Display Properties dialog box at the Settings tab of Windows, click Start, point to Settings, click Control Panel, then double-click Display, and then click Settings or you may simply point and click the Windows Display Properties shortcut on the ASUS Control Panel (see 4. Software Reference | ASUS Control Panel) and then click the Settings tab.
![ASUS Display Card Control Panel [eVISA Series] Information Color Display Advanced AGP-V7100 DirectCD VR DirectCD OpenGL VR OpenGL TextView Other TextView allows you to connect two separate output devices (analog monitor, digital flat panel or TV) to a single graphics board. Standard (TextView disabl…](/content/2026/05/792075/images/3937ea3769f4e992e82da70ed3bc20f74d6e153e0452581df8de5c8a56ba79b6.jpg)
Clone
When selected, this enables your desktop area or the same image to be displayed in the two displays. Under this mode, you can configure each display device individually by clicking the appropriate monitor image shown on the Display tab (see 4. Software Reference | Display | VGA (Clone mode)).
Virtual Desktop
Virtual Desktop is automatically enabled under Clone mode when the resolution of the secondary display is less than that of the primary display device. The secondary display device functions as a subset of the primary display to support Virtual Desktop and the Viewport lock feature.
Disable auto-panning on clone device (viewport lock), when selected, lets you lock the display position of the secondary display.

4. Software Reference
Other
![ASUS Display Card Control Panel [OSVidia Series] Information Colors Display Advanced ASUS AGP-V7100 DirectCD VR DirectCD OpenGL VR OpenGL Transfer Other Display Manager Enable Display Manager Display Manager Properties Open Full Screen Video Control Center ASUS Control Panel OK Cancel](/content/2026/05/792075/images/1b704bb6e5be559e8959e0b5a0c222d42179019e4d1a74039200e43c31c12ad0.jpg)
Display Manager
Display Manager lets you run one or more programs on one or both monitors or desktops. Among others, it also allows you to undertake program-management features, such as restoring application windows to their last-used position.
NOTE: Display Manager only works under Extended Desktop.
Display Manager Properties
To set Display Manager properties, click the Display Manager Properties button. The Display Manager dialog box opens.
NOTE: Make sure that Enable Display Manager is selected before running Display Manager Properties.
Application Management
Application Management lets you add a program to Display Manager.
- Click the Add button on the Application Management tab.
IMPORTANT! Make sure that the programs you want to run using Desktop Manager are already open.

4. Software Reference
- Your open programs will appear in the New Application box.
- Select the program you want to add, then click OK. The program appears in the Application Management window.
Repeat this step for each program that you want to add to Display Manager.


In the Application Management tab, you can set a variety of Display Manager settings.
Always start this application on screen number lets you select the display or monitor to use when starting the program.
Start this application at its last position and size lets you start the program at the last position and size it was when you closed it.
To display the Desktop Manager menu from any program that has been added in Display Manager, right-click the title bar of the open program. (The title bar is the horizontal bar at the top of a window that shows the name of the document or program.)

Hot Keys
Hot Keys lets you enter different key combinations and assign them to actions such as moving active windows to another monitor or desktop, or moving windows to a separate monitor.
The default key combinations for each action are:
Move the active window to another monitor: ALT + 1
Move all windows to another monitor: ALT + 2
Gather all windows to one monitor: ALT + 3

4. Software Reference
Global Settings
Global Settings lets you specify settings that will apply to all applications running under Display Manager.

Zoom
Zoom lets you enable a magnified or "zoomed" view of a region of the screen under and around the mouse cursor. The zoomed view appears on the monitor on which the mouse is not pointing.
Enable zoom feature lets you turn on or off the zoom feature (default: selected or enabled).
Hot keys to control zoom features lets you specify hot key combinations other than the defaults. Press any valid key, including function keys, (you cannot use ESC, ENTER, TAB, SPACEBAR, PRINT SCREEN, or BACKSPACE) you want to add.
Zoom update frequency (updates per second) lets you set the update or "refresh" frequency of the magnified view in number of times per seconds (default: 8; can be set from 1 to 100 times per second). Normally, the magnified view is updated whenever the mouse cursor is moved and is updated at a fixed interval when the mouse cursor is still.
Delay before switching zoom monitor (msec) lets you set the time delay in milliseconds (default: 500; can be set from 0 to 1000 milliseconds) before the zoomed view switches monitors when you move your mouse cursor from one monitor to the other. Set to 0 for instant switching of the zoom window.
![NVIDIA Desktop Display Manager Application Management | Hot Key | Global Settings | Zoom Enable zoom features [The zoom feature displays a magnified portion of the screen under your mouse cursor, and it is only available in TwoView horizontal and vertical spanning modes.] Hot keys to control zoom fe…](/content/2026/05/792075/images/7b8f2887dd651e59887e70383632524fc268e956164be6277171bc2ce040b261.jpg)
4. Software Reference
Open Full Screen Video Control Center
Open Full Screen Video Control Center lets you display the Video Mirror control panel.
Video Mirror is a TwinView feature that lets a video or DVD program to mirror its playback in full-screen mode on any one of the connected display devices. That is, Video Mirror lets video data that is displayed on a hardware overlay to be displayed at full-screen on a secondary display.
NOTE: Video Mirror is available under Clone or Extended Desktop.
Video Mirror Properties
To set Video Mirror properties, click the Open Full Screen Video Control Center button on the TwinView tab under Advanced. The Full Screen Video Mirror Control dialog box opens.
NOTE: Make sure that the TwinView panel is set to one of the supported modes, for example, Clone or Extended Desktop.
Enable Video Mirror Zoom lets zooming to a quadrant of the video data on the full-screen mirror. Select screen region to zoom lets you select the quadrant to zoom. Move the slider to zoom in and out.
Enable Video Overlay Zoom lets zooming to a quadrant of the video data on the overlay. This option does not require a TwinView device. Select screen region to zoom lets you select the quadrant to zoom. Move the slider to zoom in and out.
NOTE (when enabling either mirror or overlay zoom): Video players that are not able to detect the presence of Video Mirror may not update the zoom factor immediately while displaying a still frame.

Full Screen Device lets you enable or disable the Full Screen Device function. Disable disables Video Mirror; Auto creates the full-screen mirror on the display device on which there is no Overlay. This implies that if the video play is dragged to the other display, the full screen mirror will automatically switch displays; Display 1 or Display 2 forces Full Screen Device in Display 1 or Display 2. In Clone mode, selecting Auto is equivalent to selecting Display 2 because Overlay only appears in Display 1 under Clone mode.
NOTE: After selecting your Full Screen Device settings, you may need to exit and restart your video application for the settings to take effect.
Aspect Ratio lets you change the aspect ratio of the video displays on the Video Mirror. Track Overlay Aspect (default; recommended setting) lets the aspect ratio of the Video Mirror track the aspect ratio of the overlay. Source Aspect means that the aspect ratio of the Video Mirror is equal to the aspect of the source video, assuming square pixels. Full Screen means that the video is stretched to the boundaries of the Video Mirror device. TV 4:3 forces the Video Mirror aspect ratio to 4:3 (width:height). Anamorphic 16:9 forces the Video Mirror aspect ratio to 16:9 (width:height).
Allow driver to select the full screen mode, when enabled (default), the Video Mirror driver selects the optimal display mode for the full screen device. When disabled, the Video Mirror uses the desktop mode that is currently set on the display device.
Track overlay zoom, when enabled, the Video Mirror Zoom settings become disabled. That is, enabling Track overlay zoom causes the Video Mirror settings to become dependent on the Video Overlay Zoom settings. Normally these two settings are independent.
Apply: when changing the Full Screen Device options, click Apply for the changes to take effect. The changes automatically take effect for all other options.
Using the Utilities

ASUS Tweak Utility
WARNING! Use the ASUS Tweak Utility with extreme caution and only if you are well acquainted with your display card. Using this inappropriately may damage your card, its components, and your system.
To run the ASUS Tweak Utility, click Start and point to Programs, Asus, Tweaking Utilities, and then click Tweak.
Timing Adjustment
Timing Adjustment lets you adjust the working frequency of the graphic engine and video memory.
Use tweak settings on next startup
Selecting this allows you to use your settings when Windows starts.
Graphics Speed
Engine
Lets you adjust the working frequency of the graphic engine
Memory
Lets you adjust the working frequency of the video memory.
Load default
Restores the settings to their defaults.
2D Test
Lets you test your settings.

4. Software Reference
Tweak Safe Mode Recovery
Timing Adjustment (Safe Mode) lets you restore the working frequency of the graphic engine and video memory to their factory default settings. This mode is used when you encounter problems when starting or restarting Windows using your customized tweak settings.
Using Tweak Safe Mode Recovery
- Restart Windows in safe mode. To start Windows in safe mode, hold the F8 key until the Windows Startup Menu appears. For some machines and Windows 98, you can use CTRL to bring up the Startup Menu. Enter the number for Safe mode and then press ENTER.
- In Windows, click Start and point to Programs, Asus, Tweak Utility, and then click Tweak Safe Mode Recovery.
- The ASUS Tweak Safe Mode Properties box appears. Click the appropriate settings.
Timing Adjustment (Safe Mode)
Select the Clear tweak settings and use factory default box to change back the timing adjustment settings to their factory defaults and then click OK to restart Windows properly.


ASUS VideoSecurity
Windows 98 Only
NOTE: The ASUS VideoSecurity utility can only be used with models with Video-In/TV-Out.
ASUS VideoSecurity lets you detect intruders into your system and environmental changes and monitor a specified location or any incoming visitor. If VideoSecurity detects any deviation from the norm that you set, it may give an error message or not. Regardless of any messages, VideoSecurity will record:
- Any information about the monitored activity and then store these to an event log file. If you have already installed Microsoft Access 97 or later, you may use these event log data and export it as an Access database for further data management and processing.
- The last two detected snapshot image files from the video captured stream (stored as bitmap format). Any image processing or editing software can then be used to view, modify, or distribute them.
Limitations
Because of differences in hardware sensitivity, VideoSecurity may not completely detect all possible errors. Before you execute VideoSecurity, there are some limitations you have to understand so that you can appropriately use it.
- Due to changing temperatures, the captured image of some CCDs will be twisted, which may give a wrong detection.
- If the features (e.g., color, luminance) of the object are similar to that of background, the object may not be detected clearly.
- The CCD cannot capture the object smoothly and immediately when an object moves too fast.
VideoSecurity is designed for the widest environments possible and error conditions, therefore it is necessary to tune the parameters in VideoSecurity Setup Wizard to get the best detection results.
Setup Wizard
Setup Wizard guides you through setting up the VideoSecurity features.
- To open Setup Wizard, click the Start button, and then point to Programs, ASUS Video Security, and then click Setup Wizard. The Video Security Setup Wizard dialog box appears.

4. Software Reference
NOTE: The following descriptions are only for selected features of the ASUS VideoSecurity utility. For a full description of the features described in this manual and other features, refer to the ASUS VideoSecurity Online Help (HTML) format included with your support CD. You may also click the Help button to open the online help file.
Main Window
VideoSecurity Running Style
- Normal Window is the default style, that is, VideoSecurity will function as a standard Windows program.
- Always on Top is like a Normal Window except that the main window and control panel is shown always on top of other programs or utilities. You may right click to enable or disable this function at the main window anytime.
- Minimize on Tray lets you hide the main VideoSecurity window. This is useful when you don't want anyone to know you are monitoring. When this option is selected, the VideoSecurity icon will appear on the taskbar in the lower-right corner of your screen. Whenever VideoSecurity detects a problem, it will run. You may also run VideoSecurity by clicking the icon.
VideoSecurity Working Directory
The VideoSecurity Working Directory is the folder where the utility stores its temporary working and log files. Default is C:\VIDEOSEC. The directory is user-configurable. When VideoSecurity is ran, a sub-directory will automatically be created under the main directory, using the current date and time as the folder name, for example, “1999.11.30_12.30.20” means that VideoSecurity was started on 30 November 1999 at 12:30:20 PM.
IMPORTANT: Do not change the working folder's name while VideoSecurity is running. Otherwise, a fatal runtime error will occur.
VideoSecurity Detecting Region
Detects all visible area when watchdog function is on
This sets the scan rate. Default is 2 frames/sec. The higher the scan rate, the more accurate is the detection. Higher rates, however, entails a higher CPU usage. Do not use a high rate when you plan to use VideoSecurity while using other applications.
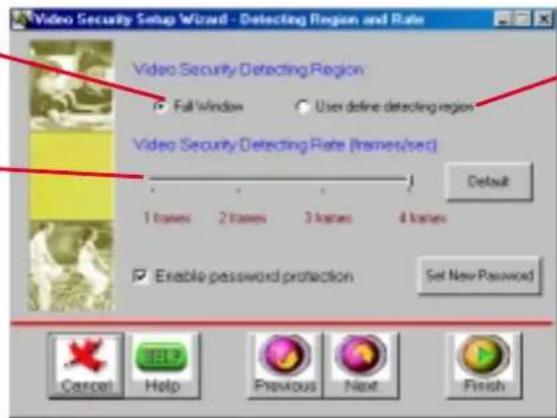
Detects only the area defined by the user when watchdog function is on. Feature will take effect only when VideoSecurity runs the next time
4. Software Reference
Sensitivity
Currently, only one option is available to set the image format.

This is an important parameter when setting up VideoSecurity. Your environment may change often, but VideoSecurity is concerned only when there is a change in the environment. Make sure that you select a suitable sensitivity for your environment.
Define Tracing Procedure
VideoSecurity not only detects errors or problems in your card but also monitors or detects an intrusion.


Error Processing Procedure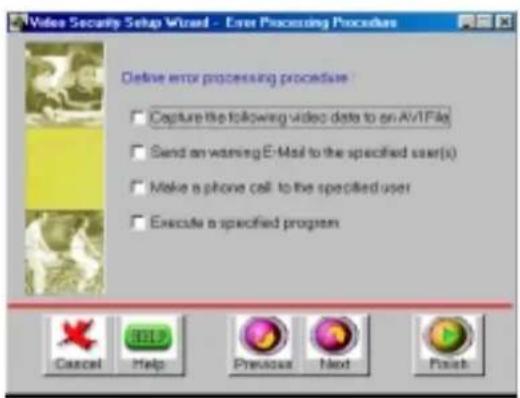
Stop Detecting Setting
4. Software Reference
Running ASUS VideoSecurity
Shortcut Keys
ESC Exits VideoSecurity
F1 Opens Online help F2 Toggles VideoSecurity / Stop Watchdog function F3 Opens Setup menu F4 Shows error log box

ASUS Live Video
NOTES
- ASUS Live Video can only be used with models with a Video Decoder (Deluxe Combo) and monitors or monitor drivers that are designed for I2C bus control.
- ASUS Live Video supports Windows 9x/ME, Windows NT 4.0, and Windows 2000. For Windows NT/2000, however, the ASUS capture driver for NT/2000 must be installed first before opening ASUS Live Video (see Install Video for Windows Capture Driver earlier in 3. Software Setup).
- With a Deluxe Combo graphics card, ASUS Live Video only supports Extended Desktop mode if TwinView is enabled.
ASUS Live Video can be used to:
- View images using your monitor as screen from traditional consumer devices, such as videocassette players, camcorders, digital cameras, and laser disc players through the onboard RCA or SVHS VIDEO-IN connectors.
- Capture live motion video up to 30 frames/second (minimum system requirement: Pentium II/266).
NOTE: You should already have installed DirectX 7 or later to use ASUS Live (see 3. Software Setup | Install DirectX)
Running ASUS Live Video
To run the utility, click Start and point to Programs and then ASUS Live and then click ASUS Live.
You may also run ASUS Live by clicking or right-clicking the ASUS Control Panel icon (see 4. Software Reference | ASUS Control Panel) on the taskbar's status area to display the ASUS Control Panel, pointing to ASUS Live Video, and then clicking it.
Uninstalling ASUS Live Video
To uninstall the software, click Start and point to Programs and then ASUS Live and then click Uninstall. You may also uninstall the software using the Add/Remove Programs Properties dialog box at the Windows Setup tab. See Windows online help for more information on removing a Windows component.
4. Software Reference
ASUS Live Control Panel
Live Mode (Click Capture to switch to Capture Mode)
Click the preferred video connection (Composite, S-Video, TV Tuner) to change a current connection.
Click here to open the ASUS Live Pre-Recording Setting dialog box.
Shows/hides the Video Source Option (F9) (see next page)
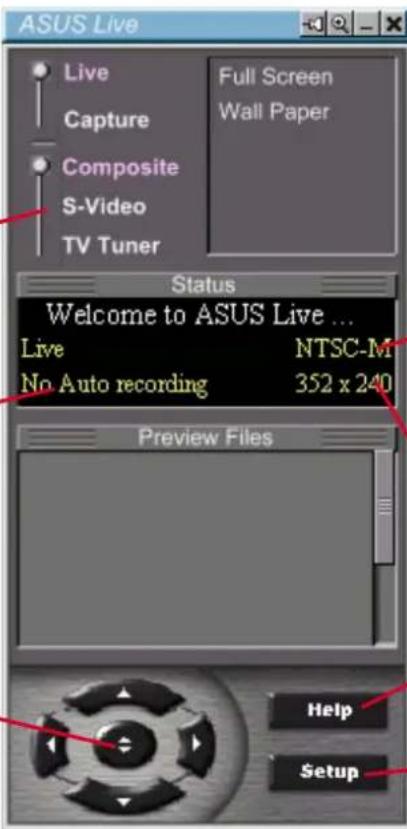

Click here to change the video standard (NTSC-M, NTSC-N, NTSC-4.43, PAL-BGHI, PAL-4.43, PAL-M, PAL-N or SECAM)
Click here to change the window size for viewing [160 x 120, 176 x 120, 340 x 240, 352 x 240 (default), 640 x 480, 720 x 480 or Full Screen].
Opens the About ASUS Live (ASUS Live and Capture Driver version number) window
Opens a drop-down box to let you set Video Format, Video Source, Tuner Setting, and Tuner Edit
Capture Mode (Click Live to switch to Live Mode)
Click the preferred video connection (Composite, S-Video, TV Tuner) to change a current connection.
Click here to open the ASUS Live Pre-Recording Setting dialog box.
Click an image to view it with the associated image viewer or application (a pop-up window opens to show the path and filename of the selected image). Right-click an image to View, Save As, and Delete that image.

Click here to change the video standard (NTSC-M, NTSC-N, NTSC-4.43, PAL-BGHI, PAL-4.43, PAL-M, PAL-N or SECAM)
Opens the ASUS Video Format dialog box to change the capture Image Dimensions [88 x 60, 176 x 120, 352 x 240 (default), 704 x 240, 704 x 480, 160 x 120, 320 x 240, 640 x 240, 640 x 480 or Full Screen], Image Format [8 bit Palettized, 16 bit RGB, 24 bit RGB, UYVY, and ASUS Video 2.0 (default)], and/or ASV2 Settings (Quality Level) [0 - Best Compression, 1, 2, 3 (default), 4, 5 - Normal Quality, 6, 7, 8, 9 - Best Quality].
Opens a drop-down box to let you set capture format size, video compression, pre-recording settings, among others
4. Software Reference
Always On Top

The Always On Top option is provided for users who may wish to continue watching VCD/DVD/TV programs or want to have the display screen visible while doing other tasks, such as when downloading files from the Internet or word processing. To keep your display screen always on top of other programs, right-click the display screen and then click Always On Top. Position the screen where it will not interfere with your other tasks.
Video Source Option
When first using ASUS Live, you must set up the video source. By clicking the Video Source Option (F9) button (hotkey: F9) on the ASUS Live Control Panel, you can show or hide the video source setup screen.

Use your mouse/pointing device or the Up or Down Buttons on the ASUS Live Control Panel or the UP and DOWN arrow keys on your keyboard to select Video Connector and then the Left and Right Buttons or the LEFT and RIGHT arrow keys to set your video connection (Composite, S-Video, or Tuner) or video standard [NTSC-M, NTSC-N (not supported under Windows 2000/NT 4.0), NTSC-4.43, PAL-BGHI, PAL-M, PAL-N, PAL-4.43 or SECAM]. Click or select Reset to set the settings back to its default. Click or select Exit to close the Video Source Option window.
4. Software Reference
NOTES
- Users of the PAL D/K models should select PAL-BGHI for the Video Standard.
- NTSC-N is not supported under Windows 2000/NT 4.0.
If desired, you may adjust the Brightness, Contrast, Saturation, and Hue of your display by using the video source setup screen. Use the Up or Down Buttons on the ASUS Live Control Panel or the UP and DOWN arrow keys on your keyboard to select the desired option and then the Left and Right Buttons or the LEFT and RIGHT arrow keys to make the desired adjustments.
Click again the Video Source Option (F9) button on the ASUS Live Control Panel to exit from the video source option screen.
ASUS Live Video Modes
ASUS Live Mode has two execution modes, namely, Live Mode and Capture Mode.
Live Mode
Live Mode lets you view live video. Under this mode, you may adjust the display screen size with your mouse, or view in full-screen mode, or set live video as wallpaper to display it.

To change video source settings, click the Setup button on the ASUS Live Control Panel.

NOTES
- Currently, Live Mode does not work under Windows NT 4.0. Live Mode requires at least Direct Draw 6, which Windows NT 4.0 does not support.
- Before using the Wall Paper option, make sure that the View as Web Page option of the Active Desktop setting is not selected (see Start - Settings - Active Desktop - View as Web Page).
Capture Mode
Capture Mode lets you capture and store images into your computer. It has three capture options: SnapShot, Frame Recording, and Video Recording. Video Recording adds an auto-timer recording function that allows you to schedule your video recording (see Auto Video Recording Setting later in this section).
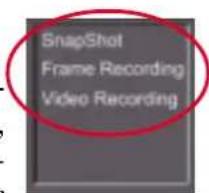
Captured images are shown on the Preview Files window of the ASUS Live Control Panel. Click an image to view it with the associated image viewer or application (a pop-up window opens to show the path and filename of the selected image). Right-click an image to View, Save As, and Delete that image.

To change video capture settings, click the Setup button on the ASUS Live Control Panel.
Video Capture
IMPORTANT: It is the intent of ASUS that this product be used in full compliance with the copyright laws of your respective and other countries and that prior permission be obtained from copyright owners whenever necessary.
Windows 98
When you install the Windows 98 Driver of your ASUS graphics card (only models with the VIDEO-IN connector), the video capture driver will automatically be installed on your system. This video capture driver follows Microsoft Video for Windows standard and can open up to a capture window size of 704 x 480. It can be used with some applications that use video capture as an option, such as video conferencing, net meeting, or digital video authoring applications.
IMPORTANT: You must enable the DMA transfer mode of your hard disk (EIDE HD) to get the maximum data transfer capability (704 x 480, 30 frames/second) during the video capture process. Otherwise, your system may become unstable.
Windows 2000/NT 4.0
The video capture driver for Windows 2000/NT 4.0 is not automatically installed when you install the display drivers of your ASUS graphics card.
To install, insert the CD installation disc into your CD-ROM drive, click Drivers, and then click Install Video for Windows Capture Driver (see 3. Software Setup | Install Video for Windows Capture Driver).
Enabling DMA Transfer Mode
NOTE: The How to Get Maximum Capture Performance dialog box will tell you how to enable your hard disk's DMA transfer mode to get the best capture performance. Simply follow the on-screen instructions to enable DMA mode. Otherwise, do the following:
- Click Start, point to Settings, and then click Control Panel.
- Double-click the System icon. The System Properties dialog box appears.
- Click the Device Manager tab and then click the plus sign next to Disk drives, and then double-click your hard disk. The hard disk's Properties box appears.
- Click the Settings tab and then select the DMA check box under Options.

4. Software Reference
Capturing Images
You must be in capture mode to capture images. To do this, click the Capture Mode button on the ASUS Main Panel.
NOTE: ASUS Live will automatically detect and warn you if the capture driver installed in your system is not compatible with ASUS Live.
Video/Capture Setting
- Click Setup and point to and then click Capture Basic Setting to adjust the basic video capture settings, such as Capture Image Dimension and Format, Capture CODEC selection, and Capture Audio Format and Attribute.

Under Capture Image Dimension and Format, select the Image Dimensions, Image Format, and ASV2 Settings of your choice.
NOTE: Windows 2000/NT 4.0 supports only the UYVY image format.

Under Capture CODEC selection, select the video compression of your choice for your captures.

Under Capture Audio Format and Attribute, select the audio Format and audio Attributes setting of your choice. This setting depends on whether you have audio set on your system.
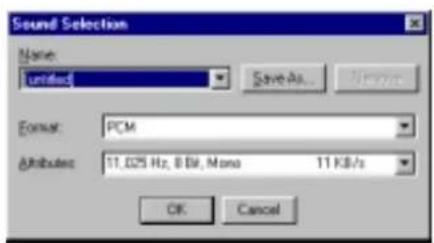
4. Software Reference
Preallocate disk space: If you have limited space on your hard disk, you may want to limit the capture file size to a certain size. To do this, click Preallocate disk space and enter the desired maximum file size.
Don't ask before starting capture: This lets you start capture without the dialog box prompt.
You are now ready to capture video images.
Capture Tip: See Enabling DMA Transfer Mode
Adjust Source: This lets you select the video connection and video standard to use in the capture. It also lets you adjust the Brightness, Contrast, Saturation, and Hue of your images.
SnapShot Setting
1 Click Setup and point to and then click Video SnapShot to select your Capture Picture Format (default: 24 bit), Image Setting and other settings.
Under Image Setting, you may set the desired Image File name and path (default: C:\CAPTURE.BMP) and for the filename to be consecutively numbered (Store image use consecutive numbered filename).

You are now ready to capture video images.
Manual Video Recording Setting
- Click Setup and point to and then click Manual Recording to select the video recording settings, such as the Frame Rate (fps) (default: 30), Maximum Capture Time (default: 10 seconds) and File name and path (default: C:\CAPTURE.AVI).

You are now ready to capture video images.
Scheduled Recording Setting (Windows 98/ME only)
NOTE: For Windows NT/2000, refer to 4. Software Reference | Auto Recording.
- Click Setup and point to and then click Scheduled Recording to select the live pre-recording settings.

These settings include the Start Time (Year | Month | Day | Hour | Minute | Second), Stop Time (Year | Month | Day | Hour | Minute | Second), Channel Number, Capture Frame Rate, and options to Add Audio to the recording, View Auto Recording Log, and to Delete one or Delete All the pre-recording settings.
- Click Add to add your pre-recording setting/s.
The video recording will start at the designated date and time.
NOTE: The video recording settings assume that you have a video device connected to your ASUS graphics card and that the device is turned on and running.
Snapshot
Snapshot (hotkey: F5) lets you capture video stream data as single images and then show these images on your desktop almost simultaneously through the default image viewer. It supports any plug-in picture viewer/image processing program to view the captured images (see ASUS Live Control Panel earlier in this section).
To begin capturing, do the following:
- Click Snapshot on the ASUS Live Control Panel or press the F5 key to capture the desired image on ASUS Live Video's display screen.
The screen will freeze momentarily and the captured image (saved as a BMP file, using consecutive numbers) will be previewed in the Preview Files window.
You may click an image to view that captured image.
- Repeat Step 1 as necessary.


4. Software Reference
Frame Recording
Frame Recording (hotkey: F6) lets you capture video stream data as consecutive images and then show these images on your desktop through your default movie player. Frame Recording is useful in animation.
To begin capturing, do the following:
- Click Frame Recording on the ASUS Live Control Panel or press the F6 key to open the Capture Frames box.
- Click Capture to begin capturing the desired frame or frames on ASUS Live Video's display screen and then click Done when the desired end frame is reached. The initial frame of the captured video (saved as an AVI file) will immediately be displayed on your movie player.

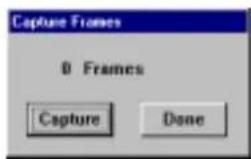
Video Recording
Video Recording (hotkey: F7) lets you capture video stream data continuously and then show these images on your desktop through your default movie player.
To begin capturing, do the following:
- Click Video Recording on the ASUS Live Control Panel or press the F7 key.
- Follow the on-screen instructions to begin and then stop video recording.

NOTES
- Windows 2000/NT4.0: The capture performance quality under Windows 2000/NT 4.0 is not as good as that under Windows 98.
- Windows NT 4.0: To run ASUS Live Video, Windows NT 4.0 Service Pack 3 or later must be installed on your computer. You may download service packs at http://www.microsoft.com/ntworkstation/downloads.
- Windows 2000/NT 4.0: To enhance capture performance, select UYVY as the capture format size and ASUS ASV2 as capture CODEC.
4. Software Reference
(This page was intentionally left blank.)

ASUS Digital VCR
NOTES
- The following can only be used as a general reference and may not be an exact reflection of the software version you are using. The contents are subject to change at any time without notice.
- ASUS Digital VCR can only be used with the TVR model (models with a Video Decoder) and monitors or monitor drivers that are designed for I2C bus control.
- ASUS Digital VCR currently only supports Windows 9x/ME.
ASUS Digital VCR can be used to:
- View images using your monitor as screen from traditional consumer devices, such as videocassette players, camcorders, digital cameras, and laser disc players through the onboard RCA or SVHS VIDEO-IN connectors.
- Capture live motion video up to 30 frames/second (minimum system requirement: Pentium II/266). For TimeShifting™ recording at MPEG-II format (704x480, 30 frames/second), minimum system requirement is Pentium III/600 (recommended: Pentium III/700 or higher).
NOTE: You should already have installed DirectX 7 or later to use ASUS Digital VCR (see 3. Software Setup | Install DirectX)
Running ASUS Digital VCR
To run the utility, click Start and point to Programs and then ASUS Digital VCR and then click ASUS Digital VCR.
You may also run ASUS Digital VCR by clicking or right-clicking the ASUS Control Panel icon (see 4. Software Reference | ASUS Control Panel) on the taskbar's status area to display the ASUS Control Panel, pointing to ASUS Digital VCR, and then clicking it.
Uninstalling ASUS Digital VCR
To uninstall the software, click Start and point to Programs and then ASUS Digital VCR and then click Uninstall. You may also uninstall the software using the Add/Remove Programs Properties dialog box at the Windows Setup tab. See Windows online help for more information on removing a Windows component.
4. Software Reference
Using ASUS Digital VCR
ASUS Digital VCR has been designed as a standard Windows program. That is, functions can be accessed by means of the main menu bar or by clicking the toolbar buttons on the program window. It has three operational modes: Live Mode, Capture Mode, and Playback Mode.

NOTES: Users of PAL D/K models of the graphics card should select PAL-BGHI for the Video Standard.
Monitor Toolbox

4. Software Reference
Enable Always on Top

The Enable Always on Top option is provided for users who may wish to continue watching VCD/DVD/TV programs or want to have the ASUS Digital VCR monitor visible while doing other tasks, such as when downloading files from the Internet or word processing. To keep the monitor always on top of other programs, click the Enable Always on Top button or select the Always on Top On command from the Window(W) menu. Position the monitor where it will not interfere with your other tasks.
To disable the Always on Top option, click 📄 or select the Always on Top Off command from the Window(W) menu.
OSD Setup

When first using ASUS Digital VCR, you must set up the video source. Use the OSD Setup button on the ASUS Digital VCR Control Panel to show or hide the video source setup screen on the monitor.

Use your mouse/pointing device or the UP and DOWN arrow keys on your keyboard to select options (Brightness, Contrast, Saturation, Hue, Connector) and then the LEFT (select to the left or to decrease) or RIGHT (select to the right or to increase) arrow keys to change an option. You may also use your mouse/pointing device to change an option by clicking the appropriate item or slider.
To set the settings back to its default, click ☐ (or use the F9 hot key or select Video Source on the Setup(S) menu) and then click Reset Video in the Video Source tab. Click OK to close the Video Source tab.
4. Software Reference
Live Mode


The default mode when you open ASUS Digital VCR is Live Mode, which lets you view live video. Under this mode, the VCR monitor can be resized (default size: 352x240) by dragging either of the four window corners (see preceding illustration on the ASUS Digital VCR monitor). Live video can also be viewed in full screen mode or set as desktop wallpaper.
To switch to Live Mode from Capture Mode, click □ or press F2.
Enable full screen display
To Enable full screen display, click 📄 or use CTRL+S.
To disable full screen display, double-click the display and then click 📄. You may also use CTRL+S or ESC to disable full screen display. The display will then revert to its previous size.
Enable wallpaper display
NOTE: Before using the Enable wallpaper display option, make sure that the View as Web Page option of the Active Desktop setting is not selected (see Start – Settings – Active Desktop – View as Web Page).
To Enable wallpaper display, click 📄 or use CTRL+W.
To disable the desktop wallpaper, double-click anywhere on the display and then click. You may also use CTRL+W to disable the desktop wallpaper.
Setup
To set up Video Source, click
Video Source
Video Source lets you set the display video method, video scan option, video standard, brightness/contrast, saturation/hue, and other options.
To use Video Source, click ☐ (or use the F9 hot key or select Video Source on the Setup(S) menu).
4. Software Reference

Display Video Method
Display Video Method lets you select ways to display video on your monitor: BOB (default) or WEAVE. These methods are simple ways of correcting interlaced display. ASUS Digital VCR by default will use the bob method for correcting interlaced display. If your video contains no motion, weave would be the best choice. For more information, visit www.microsoft.com/hwdev/devdes/vpe.htm#Interleaved.
Video Scan Option
Video Scan Option lets you select the scanning method to use: Normal (default), Skip Odd Field, and Skip Even Field. Use this option to reduce the strobing effect that results from fast moving objects when rendering to video. Normal uses both fields to render the video output. For PAL output, use Skip Odd Field and for NTSC output, use Skip Even Field.
Video Standard
Video Standard lets you select the video standard to use for display: NTSC-M (default), NTSC-N, NTSC-4.43, PAL-BGHI, PAL-M, PAL-N, PAL-4.43, or SECAM.
NOTE: Users of the PAL D/K models should select PAL-BGHI for the Video Standard.
If desired, you may adjust the Brightness, Contrast, Saturation, and Hue of the VCR monitor. Use your mouse/pointing device to make the necessary adjustments.
Click again the Video Source Option (F9) button on the ASUS Live Control Panel to exit from the video source option screen.
Use Hardware Pre-filtering function
Use Hardware Pre-Filtering function (default: disabled) lets you use your graphics card for pre-filtering (pre-smoothing the image before compression encoding).
4. Software Reference
Capture Mode


Capture Mode lets you capture and store images into your computer. It has three capture options: Video Snapshot, Capture Frames, and Capture Video. Video Recording adds an auto-timer recording function that allows you schedule your video recording (see Auto Recording later in this section).
To switch to Capture Mode from Live Mode, click or press F3.
Captured images are shown on the Preview Library. Double-click an image to play it back or view it with the associated image viewer or application (the path and file name of the selected image is shown below the image). You may also right-click an image or select an image and then click the appropriate button to Playback (or view), Save As (a new file), or Delete that image.
Setup
To set up Video Capture, click
Video Capture
Video Capture lets you set the snapshot and video capture settings.
To use Video Capture, click ☐ (or use the F9 hot key or select Capture Mode on the Setup(S) menu).
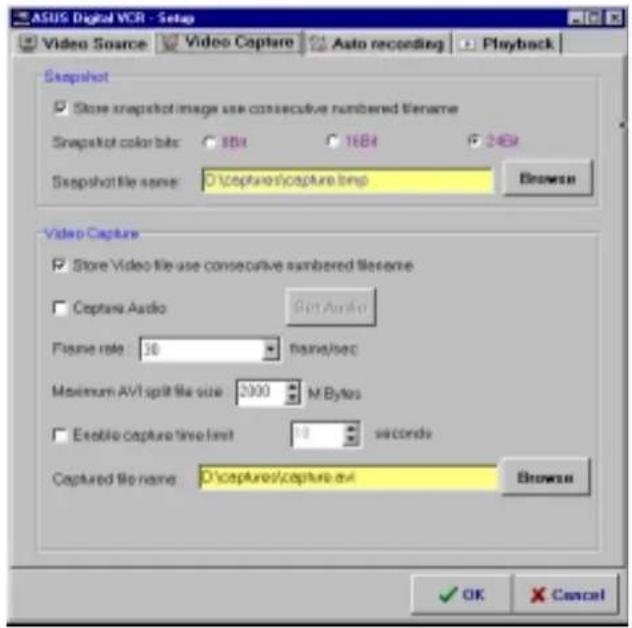
IMPORTANT: It is the intent of ASUS that this product be used in full compliance with the copyright laws of your respective and other countries and that prior permission be obtained from copyright owners whenever necessary.
Windows 98
When you install the Windows 98 Driver of your ASUS graphics card (only models with the VIDEO-IN connector), the video capture driver will automatically be installed on your system. This video capture driver follows Microsoft Video for Windows standard and can open up to a capture window size of 704 x 480. It can be used with some applications that use video capture as an option, such as video conferencing, net meeting, or digital video authoring applications.
IMPORTANT: You must enable the DMA transfer mode of your hard disk (EIDE HD) to get the maximum data transfer capability (704 x 480, 30 frames/second) during the video capture process. Otherwise, your system may become unstable.
Setting Up for Capturing Images
You must be in capture mode to capture images. To do this, click on the ASUS Digital VCR toolbar.
NOTE: ASUS Digital VCR will automatically detect and warn you if the capture driver installed in your system is not compatible with ASUS Digital VCR.
SnapShot

Store image use consecutive numbered filename: Select preferred file naming convention (default: selected)
Snapshot color bits: Select preferred color bits (default: 24Bit)
Snapshot file name: Type preferred path and file name (default: C:\CAPTURE.BMP).
You are now ready to capture video snapshots (F5).
Video Capture
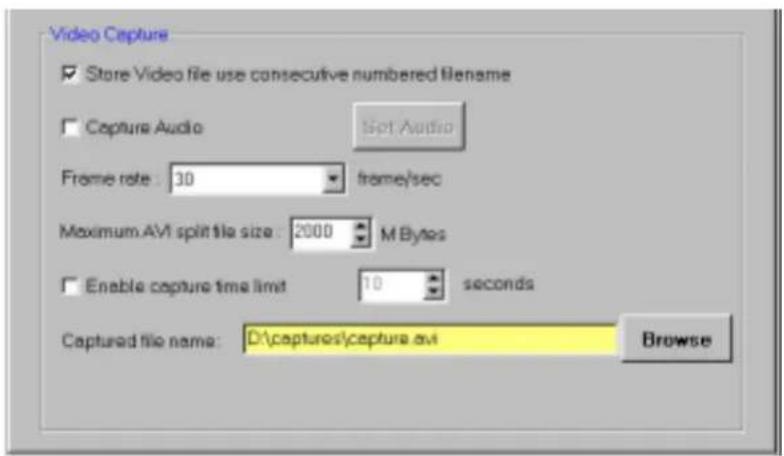
Store Video file use consecutive numbered filename: Select preferred file naming convention (default: selected)
Capture Audio: Select if you prefer to include audio when capturing video (default: not selected). When selected, the Set Audio option becomes available.
4. Software Reference
Set Audio displays the Sound Selection dialog box, which lets you save a scheme for your audio setting or select from a list, select the audio format type and audio format attributes of the video to be captured.

(PCM, which means Pulse Coded Modulation or uncompressed audio data, is currently the only available selection)
Selecting a lower quality format, for example, *,000 Hz, 8 Bit, Mono 11KB/s, will make your video file size smaller while a higher quality format, for example, 44,100 Hz, 16 Bit, Stereo 172 KB/s, can make the sound quality of your video file better, but your video file size will be larger.
Frame rate lets you select the preferred video data rate for the images to be captured (default: 30 frame/sec, which is full motion).
Maximum AVI split file size lets you set the maximum size for each video capture (default: 2000 M Bytes).
Enable capture time limit lets you limit the capture time (default: 10 seconds).
NOTE: Make sure that you have enough space on your hard disk drive. A 640x480 pixel video size, full-color (24-bit), full-motion (30 frames /sec) video capture requires about 27MB/sec (before compression).
Captured file name lets you set the path and file name of the images to be captured (default: C:\CAPTURE.AVI).
You are now ready to capture video images.
4. Software Reference
Auto Recording
Auto recording adds an auto-timer recording function that allows you to schedule your video recording.
To use Auto recording, click 📄 (or use the F9 hot key) and then click the Auto recording tab or simply click 🎨 on the toolbar or select Auto-Recording Setup on the Setup(S) menu.

Auto recording includes the Current time (Hour:Minute:Second), Start Time (Year | Month | Day | Hour | Minute | Second), End Time (Year | Month | Day | Hour | Minute | Second), Frame Rate, Channel, and options to Capture Audio to the recording, View Log (of auto recorded events), and to Delete one or Delete All the pre-recording settings.
Add lets you add while Clear lets you clear your pre-recording setting/s.
The video recording will start at the designated date and time.
NOTE: The video recording settings assume that you have a video device connected to your ASUS graphics card and that the device is turned on and running.
4. Software Reference
Playback
Playback lets you set the options when playing back video files.
To use Playback, click ☐ (or use the F9 hot key) and then click the Playback tab or simply select Playback on the Setup(S) menu.

Capturing Images
Video Snapshot F5
Video Snapshot (hotkey: F5) lets you capture video stream data as single images and then show these images on your desktop almost simultaneously through the default image viewer. It supports any plug-in picture viewer/image processing program to view the captured images.
To begin capturing, do the following:
- Click 📄 on the ASUS Digital VCR toolbar or press the F5 key to capture the desired image from the ASUS Digital VCR monitor.
The screen will freeze momentarily and the captured image (saved as a BMP file, using consecutive numbers) will be previewed in the Preview Library window.

You may click an image to view that captured image.
- Repeat Step 1 as necessary.
4. Software Reference
Capture Frames F6
Capture Frames (hotkey: F6) lets you capture video stream data as consecutive images and then show these images on your desktop through your default movie player. Capture Frames is useful in animation.
To begin capturing, do the following:
- Click 📄 on the ASUS Digital VCR toolbar or press the F6 key to open the Capture Frames box.
- Click Capture to begin capturing the desired frame or frames on ASUS Digital VCR monitor and then click Stop when the desired end frame is reached. The initial frame of the captured video (saved as an AVI file) will immediately be displayed on your movie player.

Capture Video F7
Capture Video (hotkey: F7) lets you capture video stream data continuously and then show these images on your desktop through your default movie player.
To begin capturing, do the following:
- Click 📋 on the ASUS Digital VCR toolbar or press the F7 key.
- The Video Capture Setup dialog box opens. Set the different options as desired and then click Start. Click Stop when the desired end frame is reached. The initial frame of the captured video (saved as an AVI file) will immediately be played back.
NOTE
- With the new TimeShifting™ technology from ASUS, you can start playing back the captured video anytime (see TimeShifting™ later in this section), even while recording!
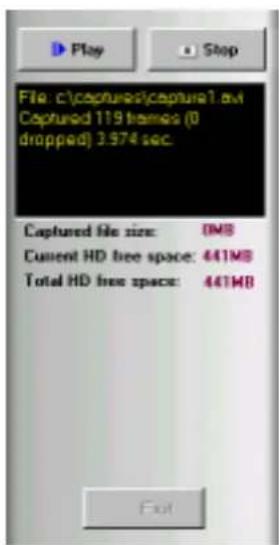
4. Software Reference
TimeShifting™
The innovative TimeShifting™ feature of the ASUS Digital VCR lets you record incoming video feeds into a buffer. So if you're watching your favorite TV show on your computer and you had to leave but you don't want to miss the rest of the show, all you need is to record it with ASUS TimeShifting™. When you come back, you don't have to wait (unlike traditional recorders) for the recording to finish to be able to watch what's been recorded. Just click Play and playback will start immediately (this while recording still continuing in the background)!
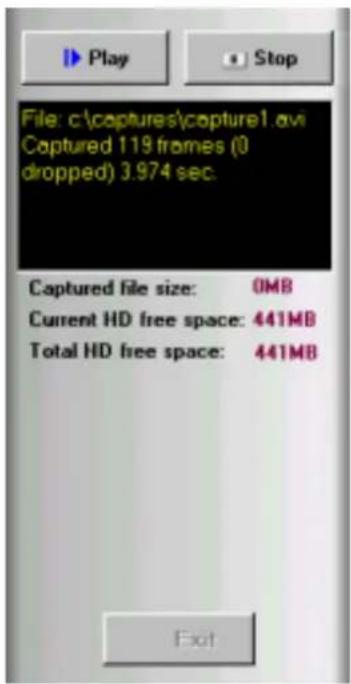
4. Software Reference
Playback Mode


Playback (hotkey: F4) lets you play back captured video stream data using ASUS Digital VCR.
To begin playback, do the following:
- Click on the ASUS Digital VCR toolbar or press the F4 key.
- The Open (video file) dialog box opens. Double-click the video file you want to open. You may need to locate the drive or folder that contains the file.
- Playback immediately begins. A progress indicator will show the elapsed time.

Progress Indicator
NOTES
During playback,
- You may apply some filters to create effects on your video. Simply click Filters to apply a filter to the video file.
- You may apply Fast Motion, Slow Motion, and other effects. Simply select any of the effects on the Play(P) menu or click any of the buttons on the Playback toolbar.

4. Software Reference
Using the Other Utilities

ASUS TWAIN Interface
Windows 98 Only
TWAIN is a cross-platform interface for acquiring images captured by scanners, digital cameras, and frame grabbers. The ASUS TWAIN Driver is currently supported only when used with Adobe Photoshop® (see www.adobe.com for details). If you already have Photoshop installed and you chose to install the ASUS TWAIN Driver, you can use Photoshop to import a still image using the ASUS TWAIN interface installed.
NOTE: The following steps assume that you are already running Photoshop and that you have already connected a compatible and working capture device, such as a web cam, to your system.
Using the ASUS TWAIN Interface for the First Time
- From the File menu, click Import and then Select TWAIN_32 Source to specify the capture option.
Select ASUS Frame Capture Source.

NOTE: You do not need to repeat this step for subsequent uses of the ASUS TWAIN module. If more than one TWAIN device is installed in your system and you want to switch devices, use Select TWAIN_32 Source command.
Importing an Image Using the ASUS TWAIN Interface
- From the File menu, click Import and then TWAIN_32.
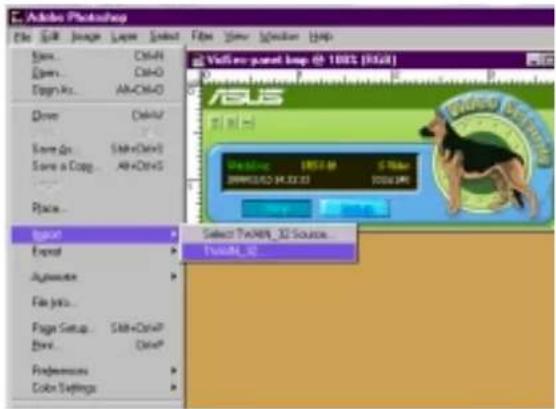
4. Software Reference
- When the ASUS TWAIN Driver utility appears, click Options and then Video Format.

- In the Image Format list of the ASUS Video Format dialog box, click 24 bit RGB.

- Click Options and then Video Format to select your video source. If desired or necessary, you may adjust the Brightness, Contrast, Saturation, and Hue of your image.
You are now ready to capture.

- To capture, click the capture button Single Frame.
or click the Capture menu and then
Other Options
Preferences Menu: Click to adjust the background color of your image and other options.

Toggle preview video: Click the button or click the Options menu and then Preview to toggle between the preview video options. A pressed button (or a checked Preview command) indicates that the preview is on and vice-versa.
Toggle overlay video: Click the button or click the Options menu and then Overlay to toggle between the overlay video options. A pressed button (or a checked overlay command) indicates that the overlay preview is on and vice-versa.
4. Software Reference

ASUS VR PictureViewer
Optional
ASUS VR PictureViewer lets you view stereo images, size your stereo image, set the VR effect of your 3D glasses (ASUS VR-100G), and test your 3D glasses' functionality.
To run ASUS VR PictureViewer, click or right-click the ASUS Control Panel icon (see 4. Software Reference | ASUS Control Panel) on the taskbar's status area to display the ASUS Control Panel, point to VR PictureViewer, and then click it.
Opening or Displaying a Stereoscopic or 3D File
- Click the VR Effect menu and then click VR On to enable stereoscopic display.

4. Software Reference
- Click the File menu and then click Open to select a file. Select the file from the Open dialog box or select another folder and then click Open. The 3D image appears on the VrViewer main window (see preceding page for an opened 3D image file. Note that the 3D effect is not shown in this picture).
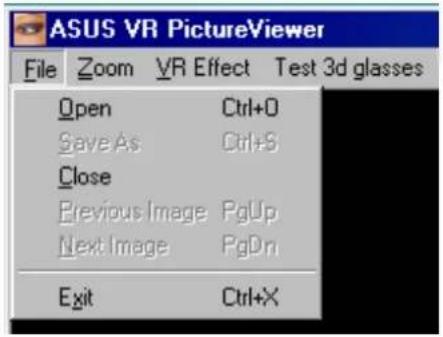
Changing the View
- Click the Zoom menu and then click the desired zoom percentage.

Testing the 3D Glasses
- Click the Test 3D glasses and then follow the onscreen instructions.

4. Software Reference

ASUS StereoTV
Optional
Windows 98 Only
NOTE: The ASUS StereoTV utility can only be used with the Deluxe Combo.
It can be used to view stereo video images with the optional 3D glasses (ASUS VR-100G) using your monitor or TV as screen from traditional consumer devices, such as videocassette players, camcorders, digital cameras, and laser disc players through the onboard RCA or SVHS VIDEO-IN connectors.
NOTE: You should already have installed DirectX 7 or higher to use ASUS StereoTV (see 3. Software Setup | Install DirectX)
To run StereoTV, right-click the ASUS Control Panel icon on the taskbar's status area to display the ASUS Control Panel, point to StereoTV, and then click it.

ASUS VR MoviePlayer

Buttons and Functions
Channel Buttons
Clicking the up arrow selects the next higher channel while pressing the down arrow selects the next lower channel.
Volume Buttons
Clicking + increases the volume while pressing - decreases the volume.
Window Size Buttons
Clicking + increases the window size while pressing - decreases the window size.
Stereo Setting
Use this button to toggle between non-stereoscopic and stereoscopic mode.
Image Setting
Use this button to view correctly a stereoscopic image. For example, with a space inverted pseudoscopic spatial image, where the background appears in front and the foreground in the back. (Hotkey: R).
Channel Setting
Use this button to select an appropriate cable standard for your video system.
IMPORTANT! Be sure that the system and standard of the country where you will be installing your card is set appropriately. For example, you should have the NTSC model if you plan to use your card in countries with NTSC systems, PAL-BGHI model in countries with PAL-BGHI systems, or PAL-4.43 model in countries with PAL-4.43 systems.
Video Setting

Use this button to select the video format (Options: NTSC, PAL-BGHI, PAL-4.43) and video source (Options: Composite, Video).
Minimize Button
Clicking this button minimizes the ASUS VR MoviePlayer.
Exit Button
Clicking this button closes StereoTV.
5. Resolution Table
Maximum Refresh Rate
| Resolution Color Depth | ||
| 8bpp = 16bpp = 32bpp = 256 colors 65K colors 16.7M colors Standard High Color True Color | ||
| 640 x 480 240 240 240 | ||
| 800 x 600 240 240 240 | ||
| 1024 x 768 240 240 240 | ||
| 1152 x 864 200 200 170 | ||
| 1280 x 960 170 170 150 | ||
| 1280 x1204 | 170 170 170 | |
| 1600 x 900 150 150 120 | ||
| 1600 x 1200 | 120 120 100 | |
| 1920 x 1080 | 100 100 | 85 |
| 1920 x 1200 | 100 100 | 85 |
| 1920 x 1440 85 | 85 | 75 |
| 2048 x 1536 75 | 75 | 75 |
- Resolution
Max Refresh Rate
5. Resolution Table
(This page was intentionally left blank.)
6. Troubleshooting
Description Recommended Action
After installation and re-starting, Windows 95/98 informs me that the display setting is still incorrect.
My monitor is not capable of high resolution or refresh rate.
DirectX or the other applications report no AGP memory available.
Games or applications report “No 3D acceleration hardware found.”
I cannot enable AGP memory or run I-Base test.
My MPEG player displays bad quality video clips.
I can't use VideoSecurity with my USB CCD or IEEE 1394 CCD.
I am using Video Security and it seems my hard disk space is almost exhausted.
- Make sure the “Assign IRQ to VGA” option is enabled in the BIOS.
- Check if there is enough IRQ for VGA.
- Uninstall the driver, restart, and reinstall the driver.
- It depends on the display characteristics of your monitor. Consult your monitor documentation for the proper configuration.
- Windows 95 is not OSR2.1 or later.
- DirectX version is not 6.0 or later.
- You have not installed appropriate drivers for the AGP chipset. (e.g. VGARTD.VXD for Intel 440LX).
- Incorrect BIOS setting. BIOS must support at least 64MB for AGP aperture size.
- 3D works only in 16- or 32-bit color depth. Switch your color depth display mode to 16-bit (high color) or 32-bit (true color).
- Check necessary libraries, such as DirectX or OpenGL.
- Try to switch to a lower resolution.
- You may be using a motherboard with an Aladdin IV AGPset. To get the best compatibility, the display card uses AGP Bus Master mode instead of AGP execute mode for motherboards using this AGPset.
- You must install DirectX 6 or later so that your player can take advantage of the hardware acceleration mode (DirectDraw).
- Try to switch to a lower resolution, color depth, or refresh rate. Switching to a lower mode allows your player to use hardware acceleration mode.
- Switch dual view mode to VGA or TV mode.
- VideoSecurity currently only supports S-Video or Composite CCDs. Any device used must be connected to an ASUS video card.
- This is a very important issue when you decide to use VideoSecurity with the “never stop” option. You must be aware of the free space of your hard disk—it must be enough for storing temporary files in the current working directory. If disk space is exhausted, VideoSecurity will not store any information and give you a warning message.
6. Troubleshooting
I am using VideoSecurity and I set the password option. I have forgotten my password, though. Is there a way to recover my password?
- The only way to remove password protection is to recall the original password that you assigned. The password protection is still active even when you uninstall VideoSecurity and install a new copy. Make sure that the password that you assigned can be easily remembered. You may write down your password and store it in a safe place.



- ASUSTEK COMPUTER INC. (ASIA-PACIFIC)
- MARKETING
- TECHNICAL SUPPORT
- ASUS COMPUTER GMBH (EUROPE)
- INTRODUCTION
- HARDWARE SETUP
- SOFTWARE SETUP
- SOFTWARE REFERENCE
- RESOLUTION TABLE
- TROUBLESHOOTING
- FEDERAL COMMUNICATIONS COMMISSION STATEMENT
- CANADIAN DEPARTMENT OF COMMUNICATIONS STATEMENT
- HIGHLIGHTS
- AVAILABLE MODELS
- FEATURES
- ASUS AGP-V7100 / 2V1D LAYOUT 32MB FRAME BUFFER
- ITEM CHECKLIST
- ASUS VR-100 OPTIONAL UPGRADE KIT
- INSTALLATION PROCEDURES
- NEW SYSTEMS
- SYSTEMS WITH EXISTING VGA CARD
- OPERATING SYSTEM REQUIREMENTS
- WINDOWS 98 SUPPORTS FULL DIRECT3D AND AGP FEATURES. IF YOU ARE STILL USING THE BETA VERSION OF WINDOWS 98 AND YOU WANT TO FULLY TAKE ADVANTAGE OF THE DIRECT3D AND AGP FEATURES, YOU MUST UPGRADE IT TO THE RELEASE VERSION BEFORE INSTALLING THE AGP DISPLAY DRIVER
- NOTES
- IMPORTANT
- DISPLAY DRIVER INSTALLATION
- WINDOWS
- METHOD 1: ASUS QUICK SETUP PROGRAM
- METHOD 2: DISPLAY PROPERTY PAGE
- METHOD 3: PLUG AND PLAY
- METHOD 2: PLUG AND PLAY
- WINDOWS NT
- METHOD 1: DISPLAY PROPERTY PAGE
- DRIVERS
- INSTALL DISPLAY DRIVER
- INSTALL DIRECTX
- INSTALL GART DRIVER
- INSTALL ASUS TWAIN DRIVER
- UNINSTALL DISPLAY DRIVER
- METHOD 2: USING CONTROL PANEL
- RUN ASUS VGA LIVE UPDATE
- INSTALL VIDEO FOR WINDOWS CAPTURE DRIVER
- UTILITIES
- INSTALL ASUS TWEAK UTILITY
- INSTALL SMARTDOCTOR
- INSTALL VIDEOSECURITY
- INSTALL ASUS LIVE UTILITY
- INSTALL ASUS DIGITAL VCR
- ASUS CONTROL PANEL
- REFRESH RATE
- MORE RESOLUTION
- INFORMATION
- COLOR
- DESKTOP
- VIDEO
- D3D/GAME
- OPENGL
- GENERAL FUNCTIONS
- D3D/GAME / OPENGL
- COLOR SPLINE
- SCHEME
- IMPORTANT NOTES
- DISPLAY
- VGA
- ADJUSTMENT
- SYNCHRONIZATION
- DISABLE MONITOR CHECK
- CHANGE CURRENT REFRESH RATE (WINDOWS 98 ONLY)
- TO CHANGE THE CURRENT REFRESH RATE
- LOAD DEFAULT
- CHANGE REFRESH RATE
- GDI
- TO CHANGE THE REFRESH RATE
- DIRECTDRAW
- MONITOR TIMING
- AUTO-DETECT
- (LETS WINDOWS DETERMINE THE PROPER MODE)
- GENERAL TIMING FORMULA (GTF)
- DISCRETE MONITOR TIMINGS (DMT)
- SPECIAL NOTES (CLONE MODE)
- CHANGE RESOLUTION
- TO CUSTOMIZE A RESOLUTION OR REFRESH RATE OR BOTH
- TV
- SWITCH DEVICE
- STANDARD
- BLACK LEVEL
- CONTRAST
- FLICKER FILTER
- POSITION
- OUTPUT TYPE
- SCAN TYPE
- DIGITAL FLAT PANEL
- USE DISPLAY ADAPTER SCALING
- CENTERED OUTPUT
- USER MONITOR SCALING
- ADVANCED
- DIRECT3D VR
- VR EFFECT
- ENABLE STEREOSCOPIC MODE
- DEPTH
- EMBOSSMENT
- DIRECTION
- FOREGROUND
- BACKGROUND
- BLIND
- TIPS
- MODE
- LINE INTERLEAVE
- PAGE FLIPPING
- ON SCREEN DISPLAY
- ENABLE OSD
- HOTKEY
- TO CHANGE THE DEFAULT HOT KEYS
- OSD SETTINGS
- OSD HISTOGRAM CHART
- KNOWN ISSUES ON SPECIFIC GAMES
- DIRECT3D
- PERFORMANCE AND COMPATIBILITY OPTIONS
- ENABLE FOG TABLE EMULATION
- ADJUST Z-BUFFER DEPTH TO RENDERING DEPTH IF UNEQUAL
- ENABLE ALTERNATE DEPTH BUFFERING TECHNIQUE
- DISPLAY LOGO WHEN RUNNING DIRECT3D APPLICATIONS
- MIPMAPPING OPTIONS
- MIPMAP DETAIL LEVEL
- COMMAND BUFFER LOCATION
- STRICT AGP
- PCI
- PCI WITH REDUCED HEAP
- MORE OPTIONS
- TEXEL ALIGNMENT
- PCI TEXTURE MEMORY SIZE
- VERTICAL SYNC
- PRE-RENDERING
- HARDWARE ANTIALIASING CONTROL
- OPENGL VR
- EYES
- VIEW ANGLE
- KNOWN ISSUES ON SELECTED GAMES/APPLICATIONS
- ENABLE BUFFER REGION EXTENSION
- ALLOW THE DUAL PLANES EXTENSION TO USE LOCAL VIDEO MEMORY
- USE FAST LINEAR-MIPMAP-LINEAR FILTERING
- ENABLE ANISOTROPIC FILTERING
- DISABLE SUPPORT FOR ENHANCED CPU INSTRUCTION SETS
- TWINVIEW
- EXTENDED DESKTOP
- CLONE
- VIRTUAL DESKTOP
- OTHER
- DISPLAY MANAGER
- APPLICATION MANAGEMENT
- HOT KEYS
- GLOBAL SETTINGS
- ZOOM
- OPEN FULL SCREEN VIDEO CONTROL CENTER
- USING THE UTILITIES
- ASUS TWEAK UTILITY
- TIMING ADJUSTMENT
- USE TWEAK SETTINGS ON NEXT STARTUP
- GRAPHICS SPEED
- ENGINE
- MEMORY
- D TEST
- TWEAK SAFE MODE RECOVERY
- USING TWEAK SAFE MODE RECOVERY
- TIMING ADJUSTMENT (SAFE MODE)
- ASUS VIDEOSECURITY
- LIMITATIONS
- SETUP WIZARD
- MAIN WINDOW
- VIDEOSECURITY RUNNING STYLE
- VIDEOSECURITY WORKING DIRECTORY
- VIDEOSECURITY DETECTING REGION
- SENSITIVITY
- DEFINE TRACING PROCEDURE
- SHORTCUT KEYS
- ASUS LIVE VIDEO
- RUNNING ASUS LIVE VIDEO
- UNINSTALLING ASUS LIVE VIDEO
- ASUS LIVE CONTROL PANEL
- ALWAYS ON TOP
- VIDEO SOURCE OPTION
- ASUS LIVE VIDEO MODES
- LIVE MODE
- CAPTURE MODE
- VIDEO CAPTURE
- WINDOWS 2000/NT
- ENABLING DMA TRANSFER MODE
- CAPTURING IMAGES
- VIDEO/CAPTURE SETTING
- CAPTURE TIP: SEE ENABLING DMA TRANSFER MODE
- SNAPSHOT SETTING
- MANUAL VIDEO RECORDING SETTING
- SNAPSHOT
- FRAME RECORDING
- VIDEO RECORDING
- ASUS DIGITAL VCR
- RUNNING ASUS DIGITAL VCR
- UNINSTALLING ASUS DIGITAL VCR
- USING ASUS DIGITAL VCR
- MONITOR TOOLBOX
- ENABLE ALWAYS ON TOP
- OSD SETUP
- ENABLE FULL SCREEN DISPLAY
- ENABLE WALLPAPER DISPLAY
- SETUP
- VIDEO SOURCE
- DISPLAY VIDEO METHOD
- VIDEO SCAN OPTION
- VIDEO STANDARD
- USE HARDWARE PRE-FILTERING FUNCTION
- PLAYBACK
- VIDEO SNAPSHOT F
- CAPTURE FRAMES F
- CAPTURE VIDEO F
- NOTE
- TIMESHIFTING™
- PLAYBACK MODE
- USING THE OTHER UTILITIES
- ASUS TWAIN INTERFACE
- USING THE ASUS TWAIN INTERFACE FOR THE FIRST TIME
- IMPORTING AN IMAGE USING THE ASUS TWAIN INTERFACE
- OTHER OPTIONS
- ASUS VR PICTUREVIEWER
- OPENING OR DISPLAYING A STEREOSCOPIC OR 3D FILE
- CHANGING THE VIEW
- TESTING THE 3D GLASSES
- ASUS STEREOTV
- ASUS VR MOVIEPLAYER
- BUTTONS AND FUNCTIONS
- CHANNEL BUTTONS
- VOLUME BUTTONS
- WINDOW SIZE BUTTONS
- STEREO SETTING
- IMAGE SETTING
- CHANNEL SETTING
- VIDEO SETTING
- MINIMIZE BUTTON
- EXIT BUTTON
- DESCRIPTION RECOMMENDED ACTION
Brand : ASUS
Model : AGP-V7100 T (16M)
Category : Graphic card